To my other TR6 pages
April 10, 2015
Dash Switches & Indicators
[Click the pics for larger view]
The re-veneered dash looks nice, but it really won't come into its own until it's populated with all its assorted gadgets and doodads. The speedo, tach, and other instruments are done, but there are the various switches and indicators to attend to.
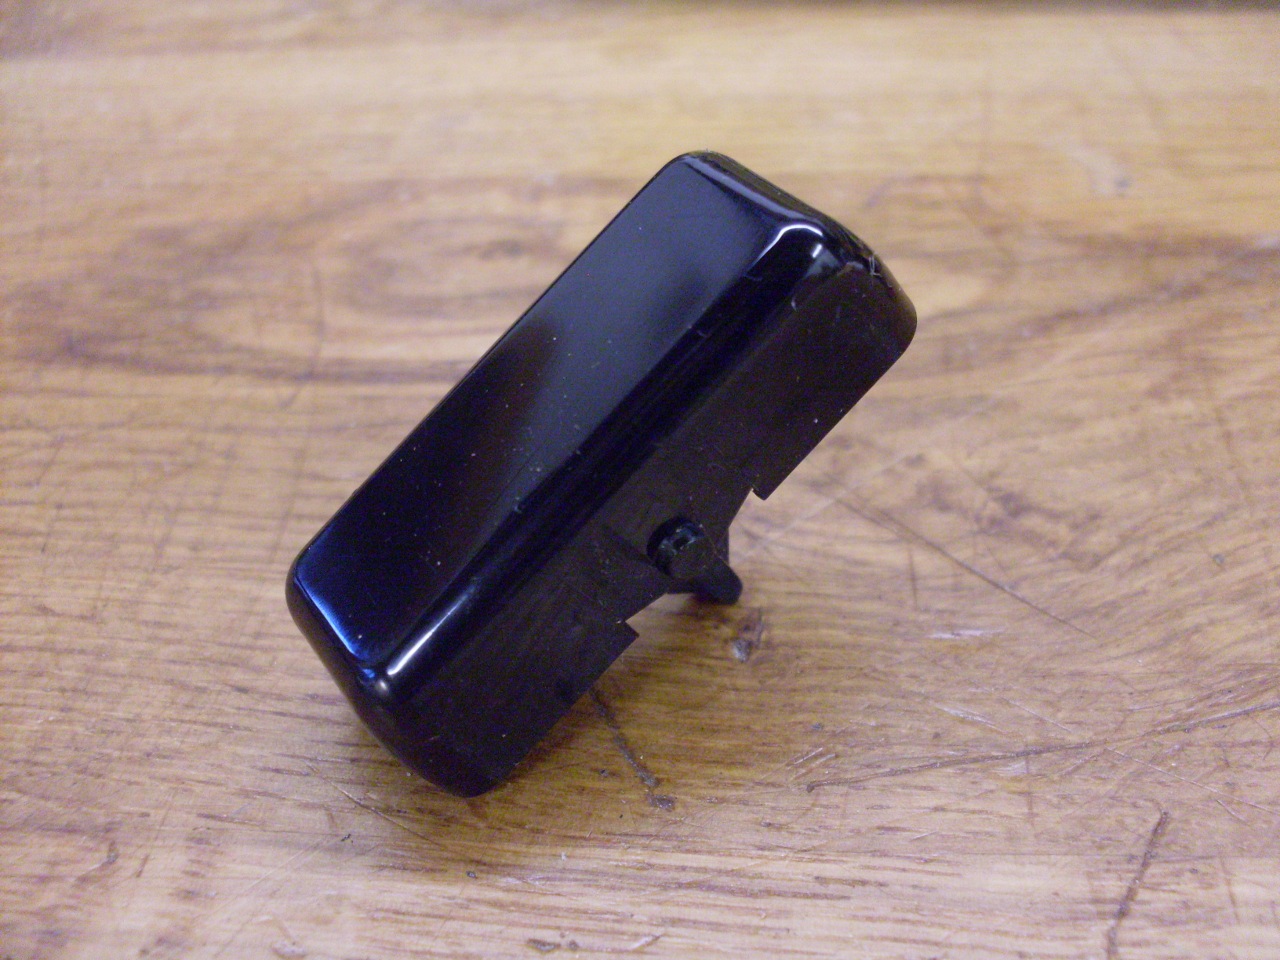
The
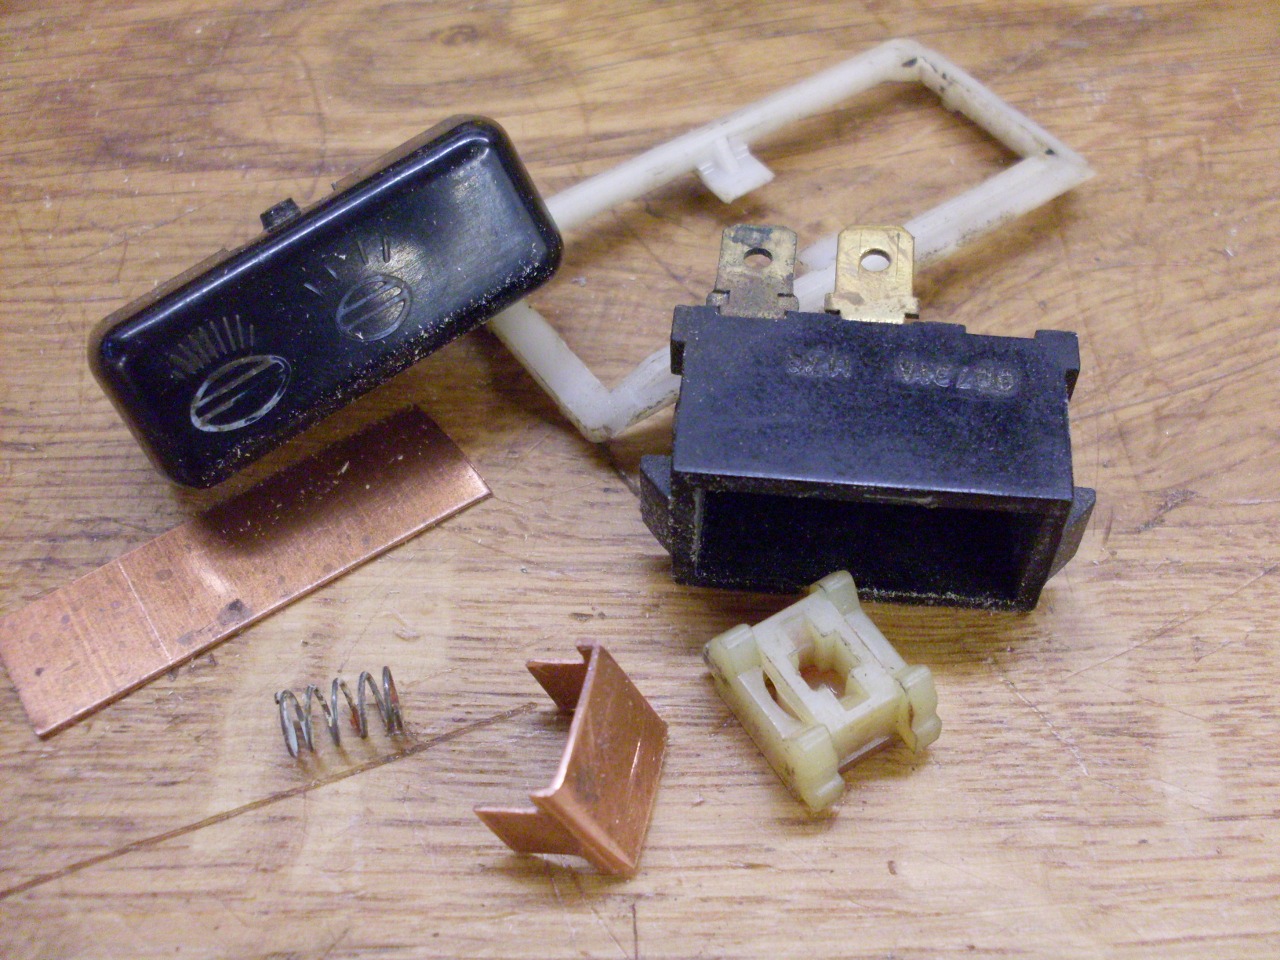
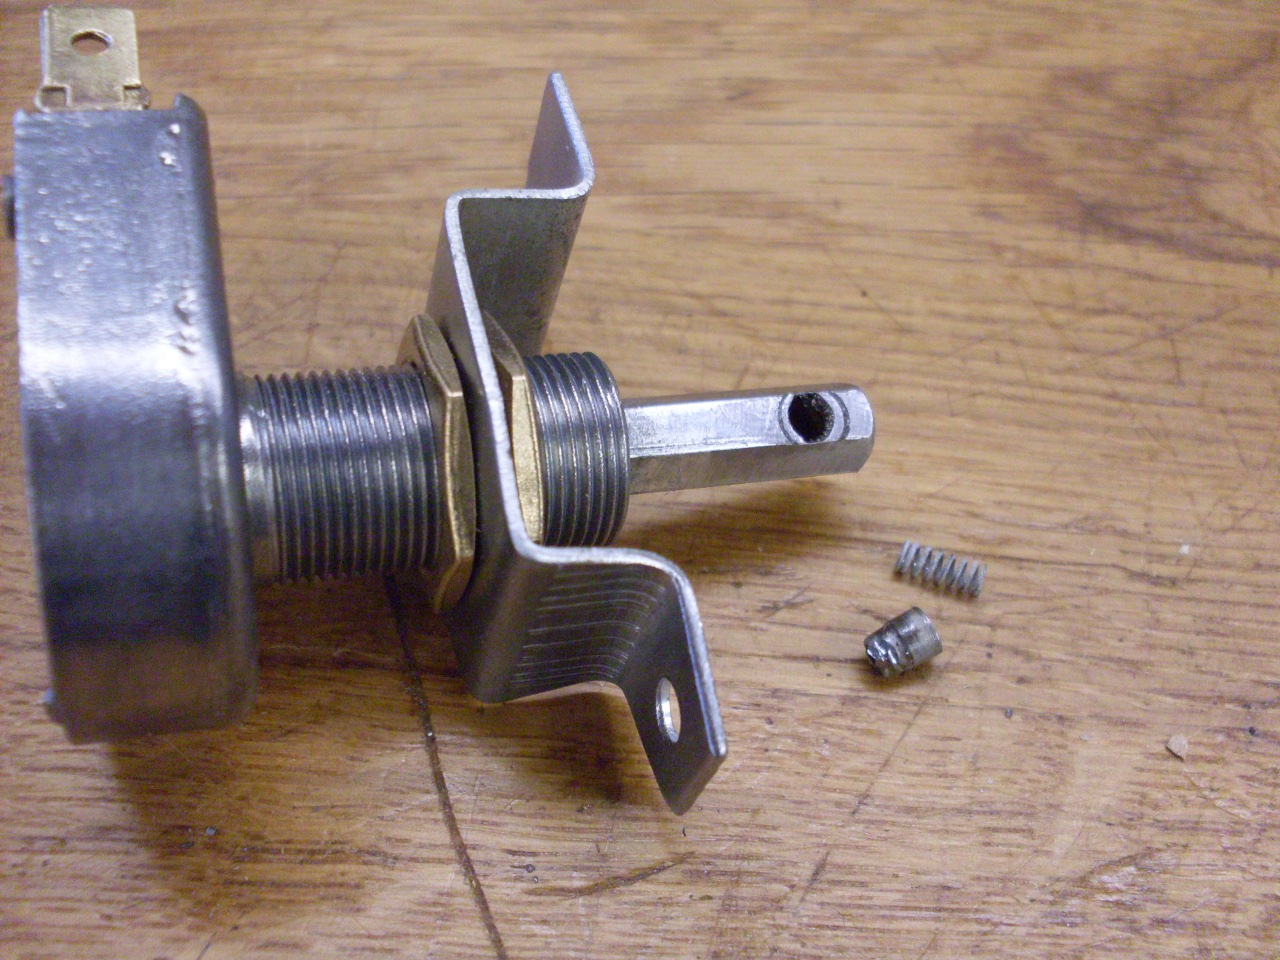
first item I picked out of the box was the main lighting switch.
I must have had trouble with the switch somewhere along the line,
since it was in pieces in a bag.
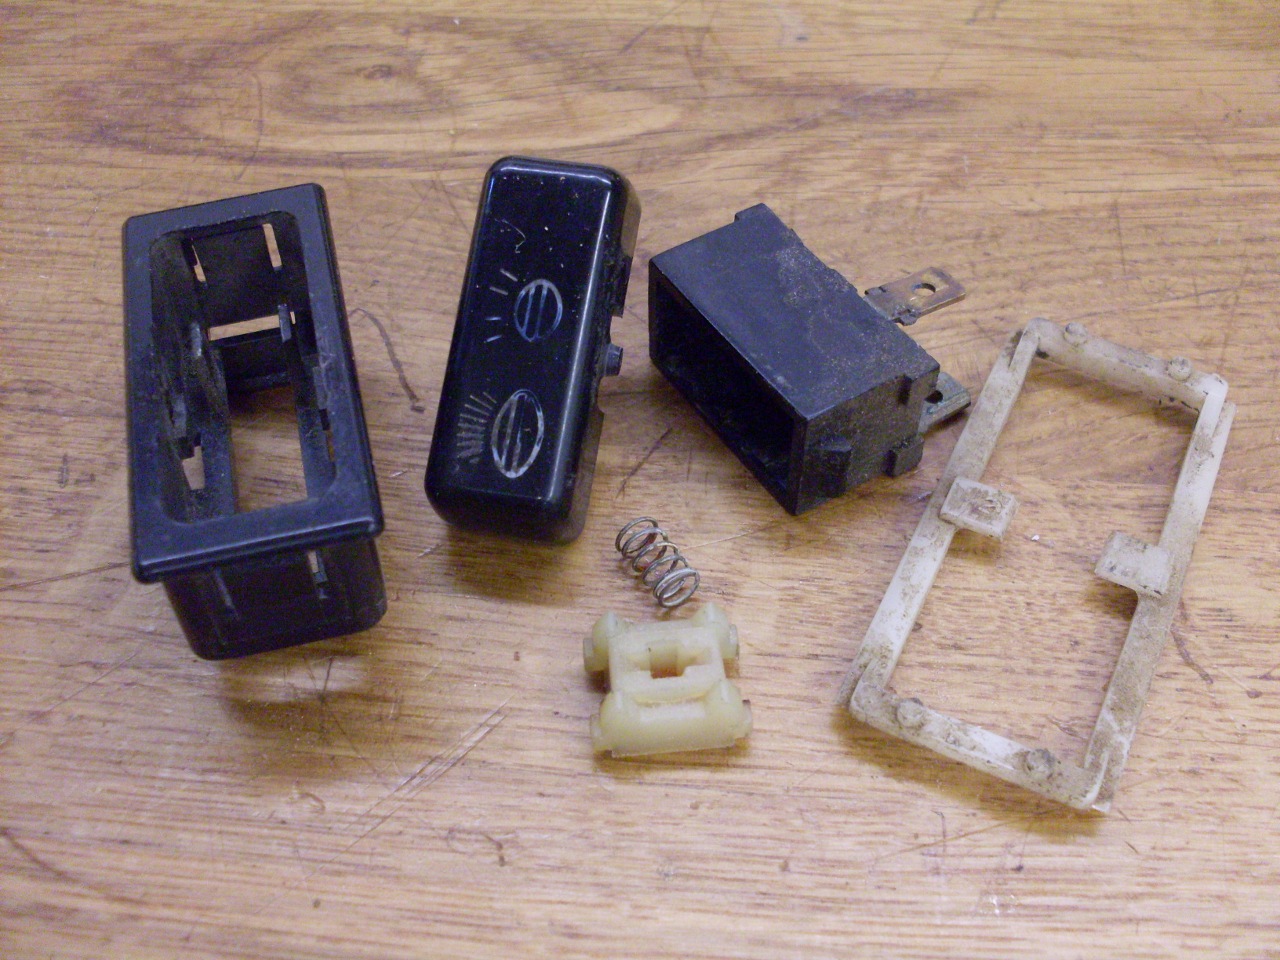
Besides
the outer bezel, there was the actuating rocker, and the actual
switch part with the contacts. There was a little nylon piece
that slid inside the switch, and a small spring. I could infer
how it was supposed to go together, but there was obviously a piece
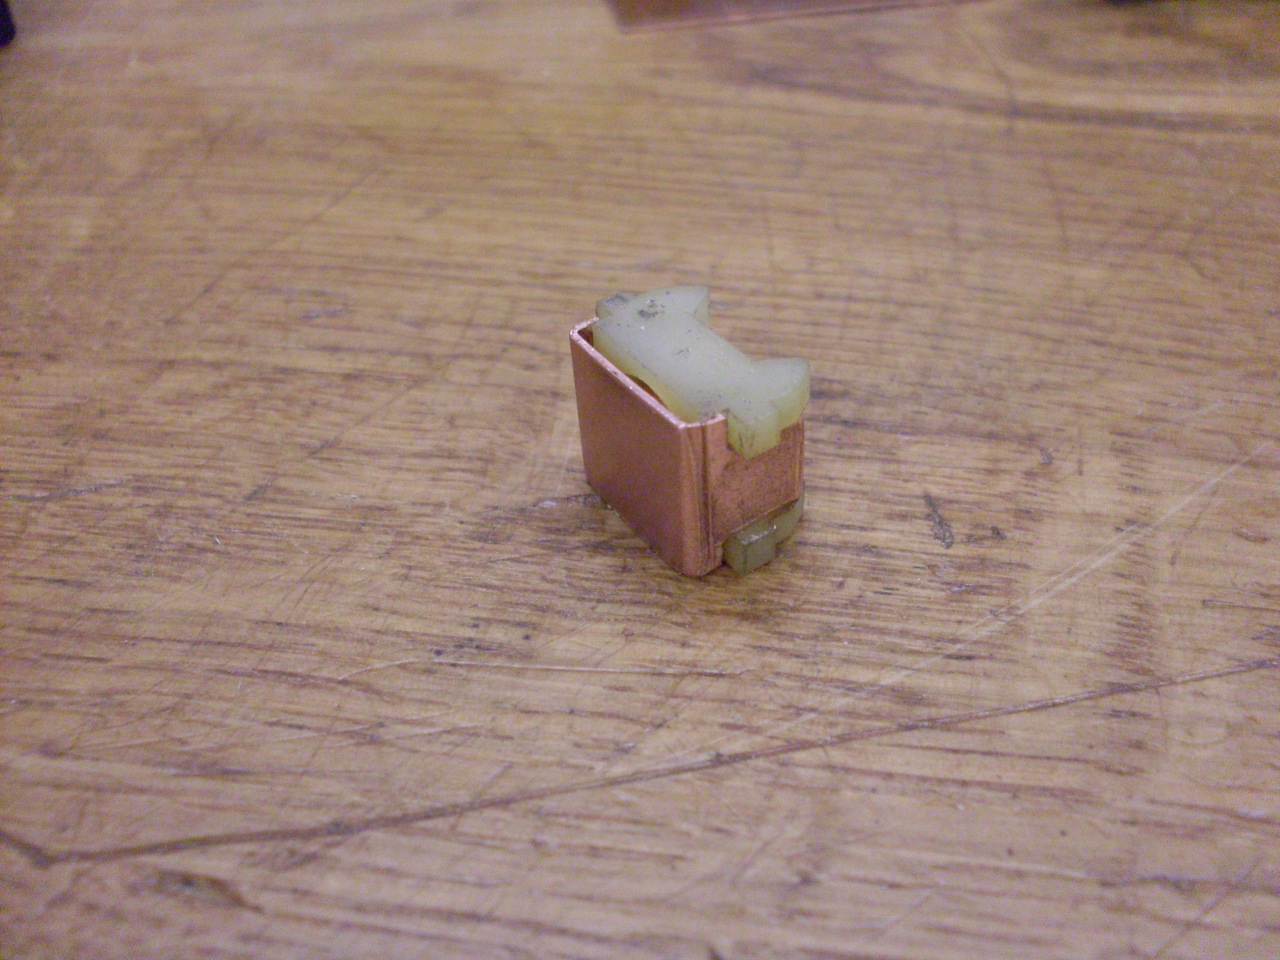
missing--there had to be a piece of copper or brass that fit on the
bottom of the nylon slider to bridge the contacts in
the switch. My theory was confirmed by a nice web site
that showed a switch being refurbished. All I needed was that
little piece of copper. Without much hope of sourcing it, it was
pretty simple to make.

The
only other thing wrong with the switch was the legend on the rocker.
Luckily, water-slide decals are available. None of the ones
I found were a perfect match to my switch, but the one I got was
pretty close. The rocker has to be flattened to receive the
decal, since the original legened appeared to be heat-embossed.
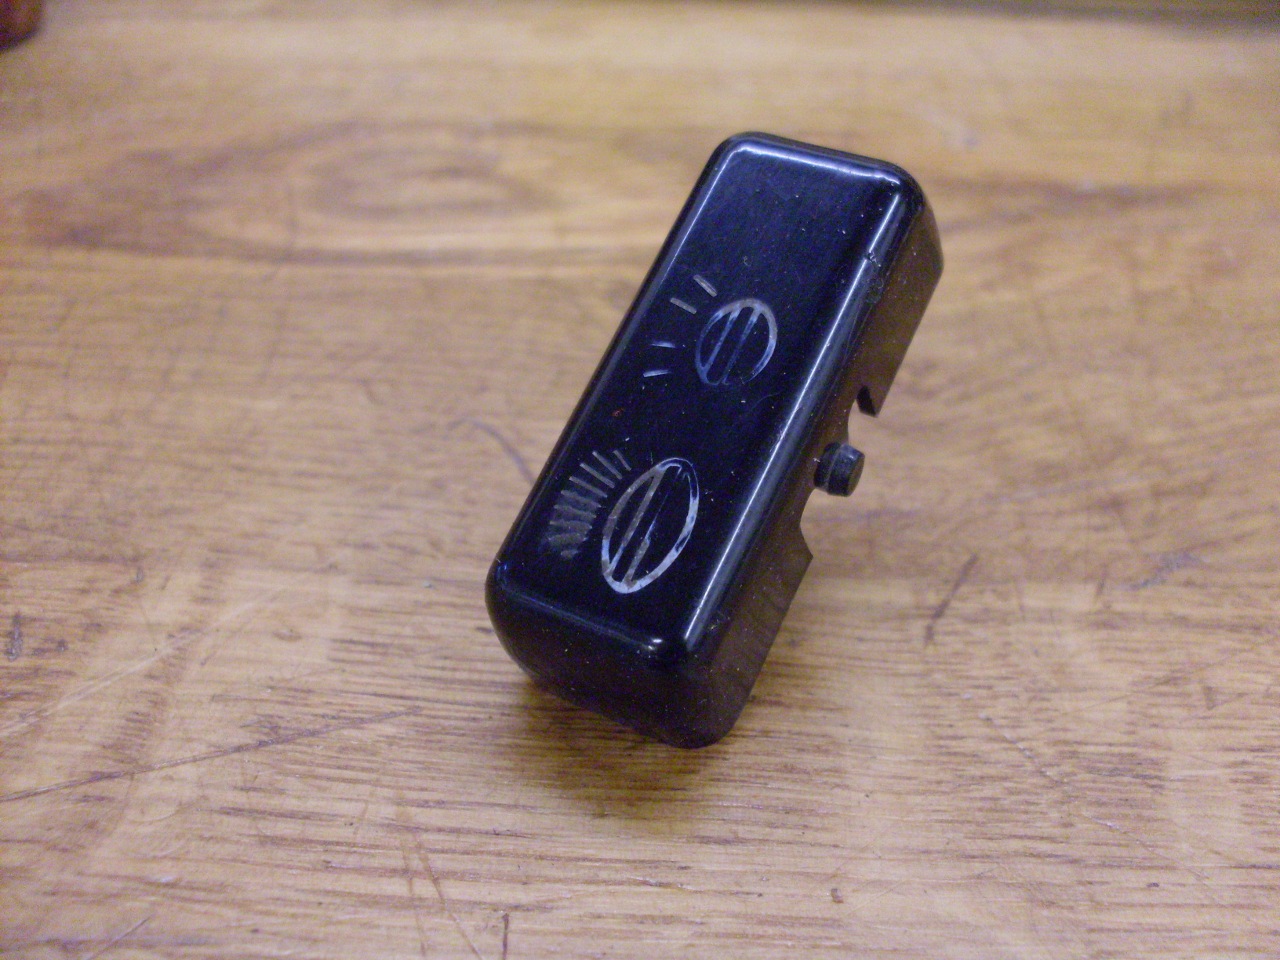
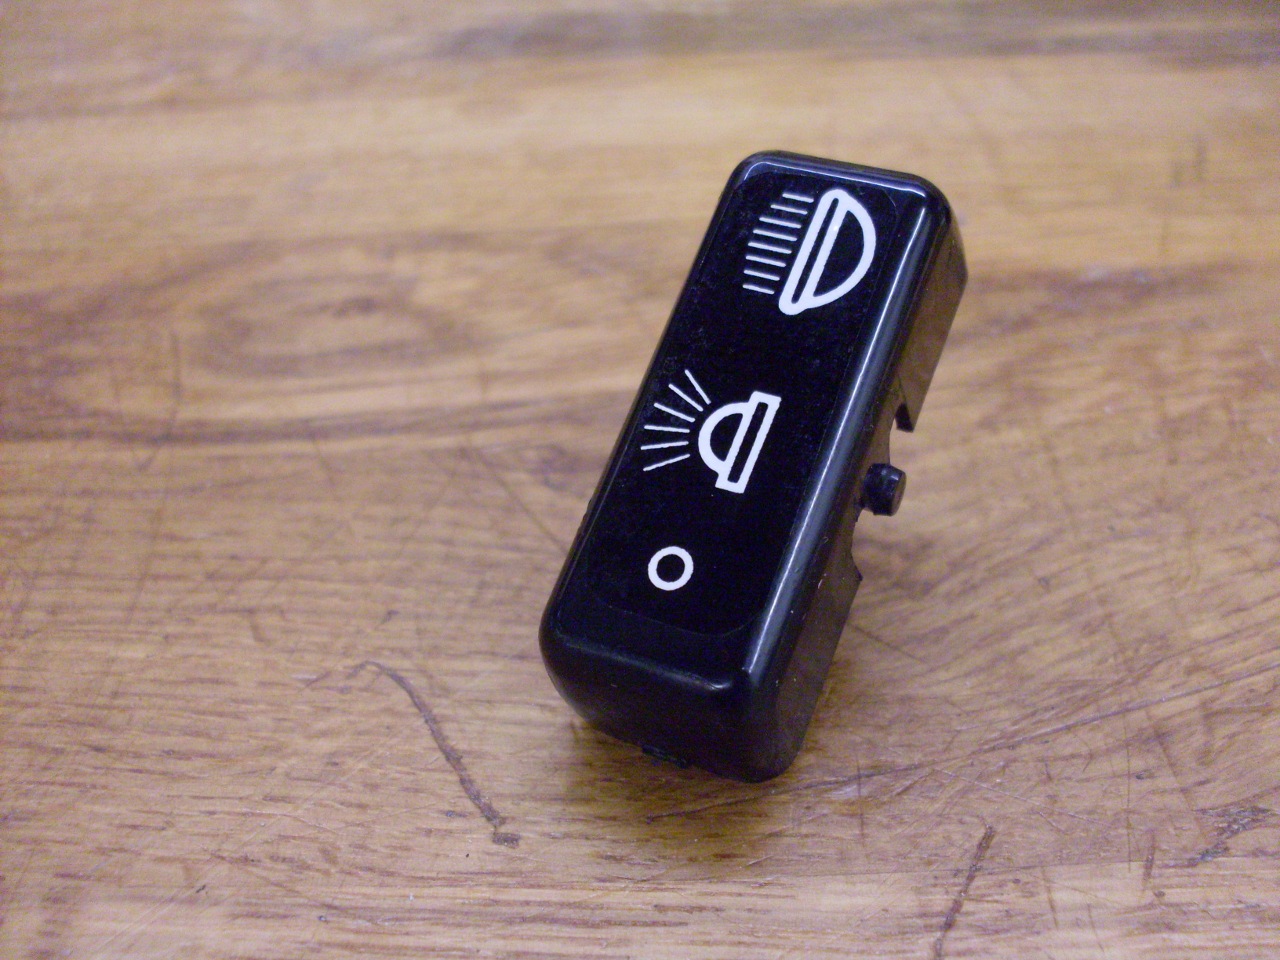
Some
dielectric compound to protect the contacts, a little grease for the
other moving parts, and this switch is ready for another 40 years.

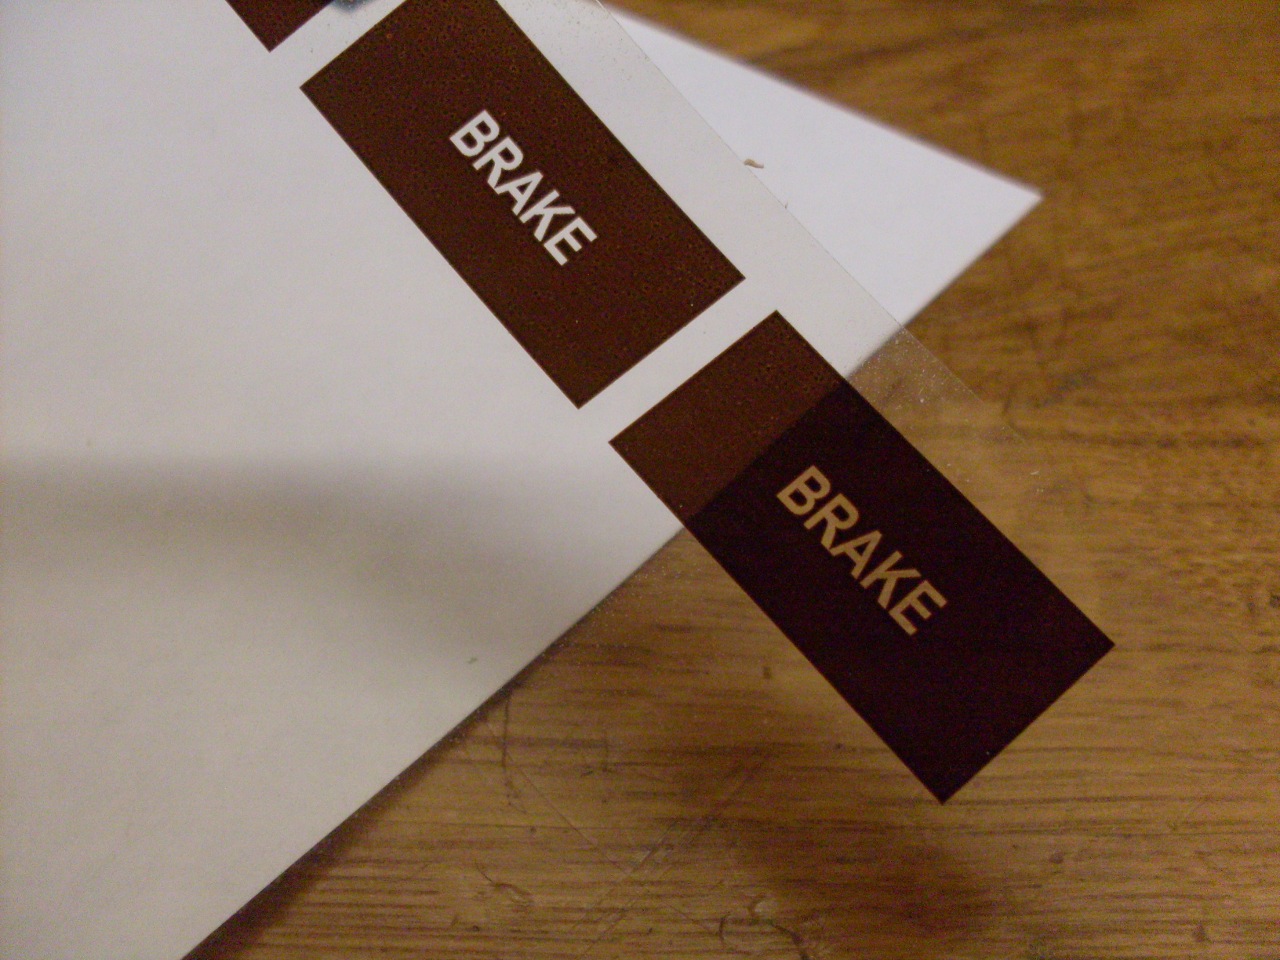
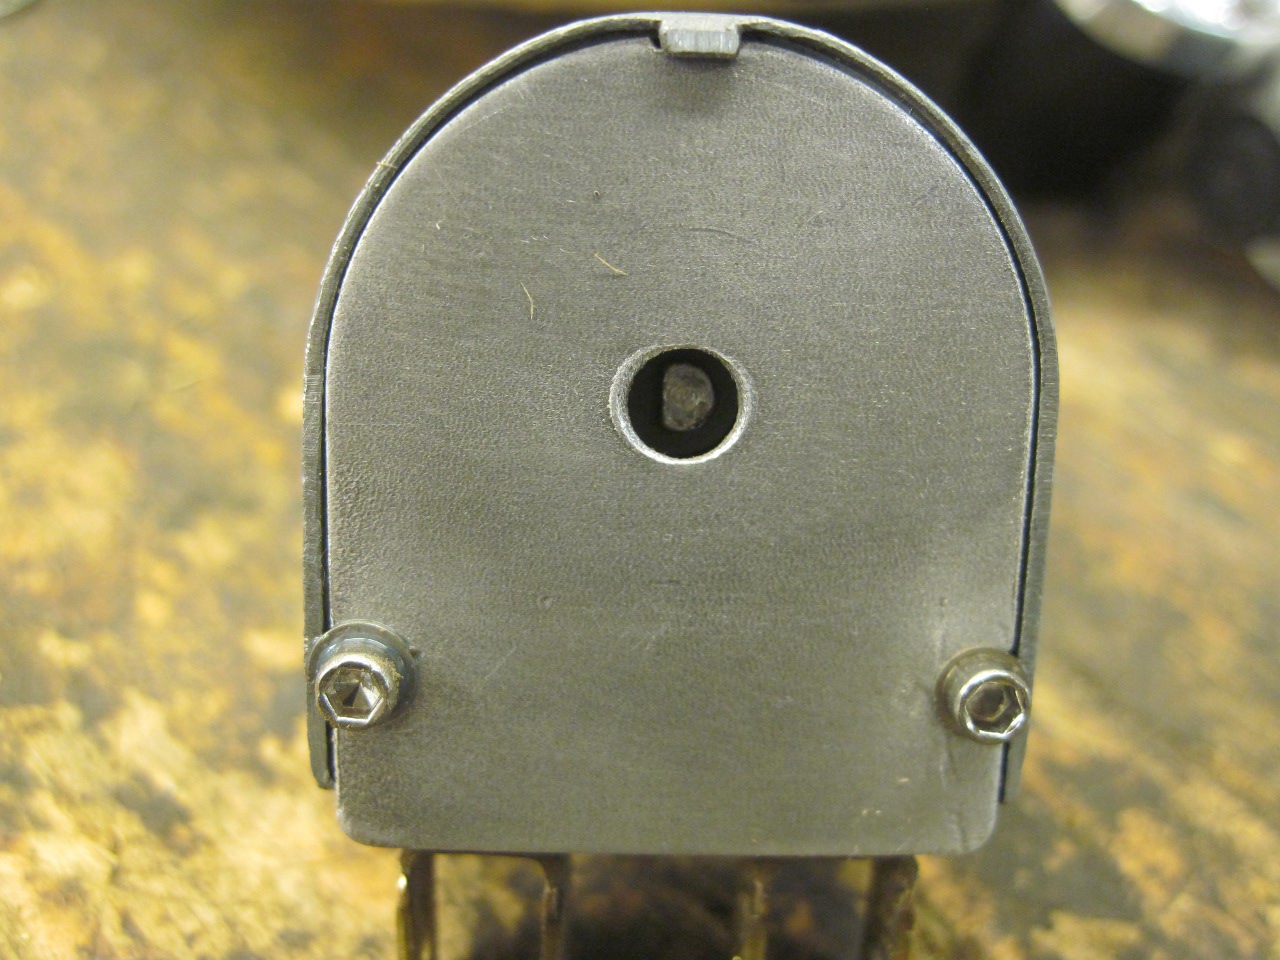
Next up was the "BRAKE" warning indicator light. Something had gone wrong with the legend.
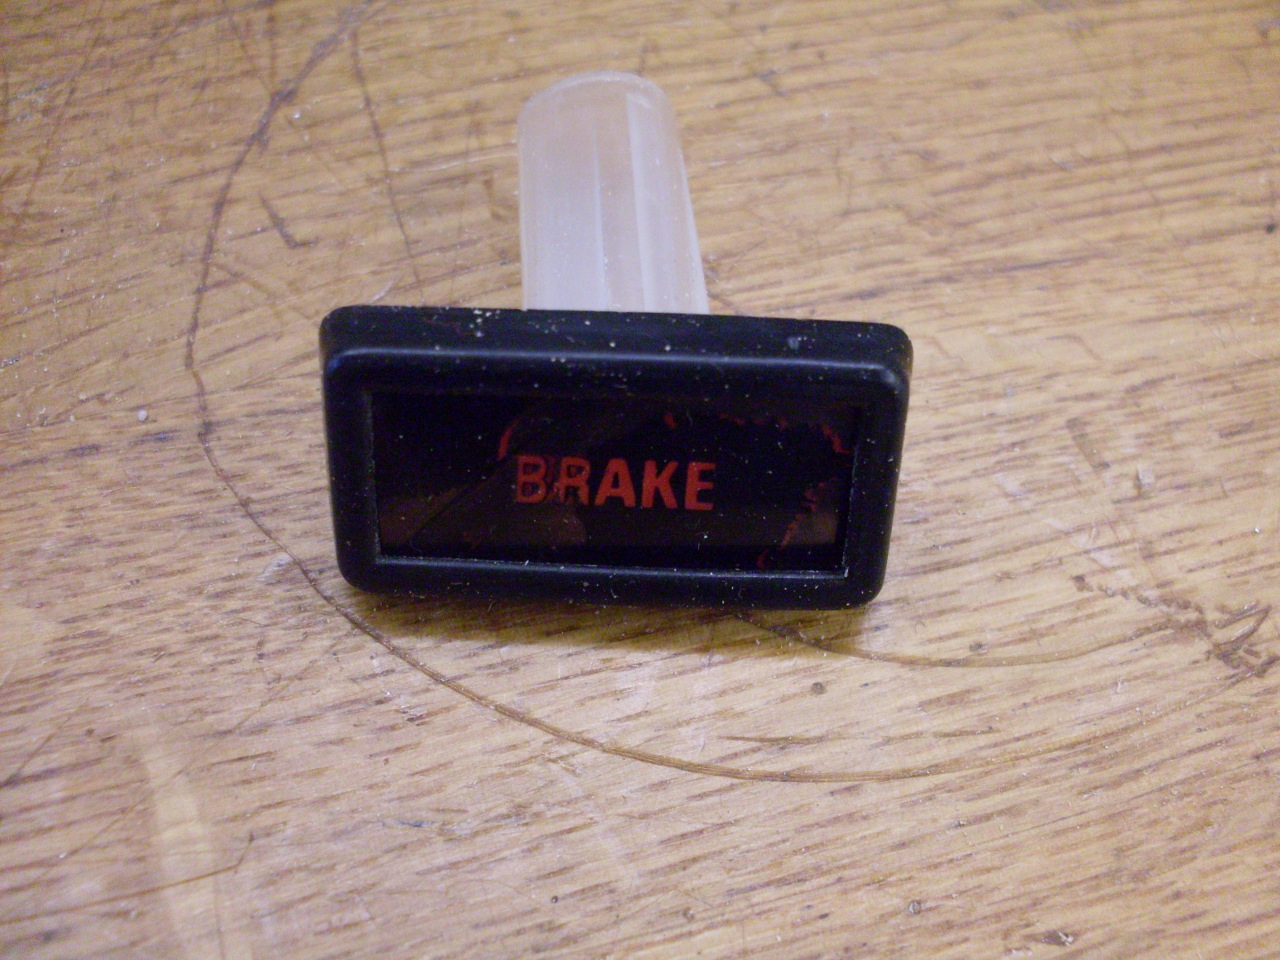
Taking
it apart, I saw that the legend was just a piece of film in front of a
red diffuser. I thought I could just print a new legend on some
transparency material and be good to go.

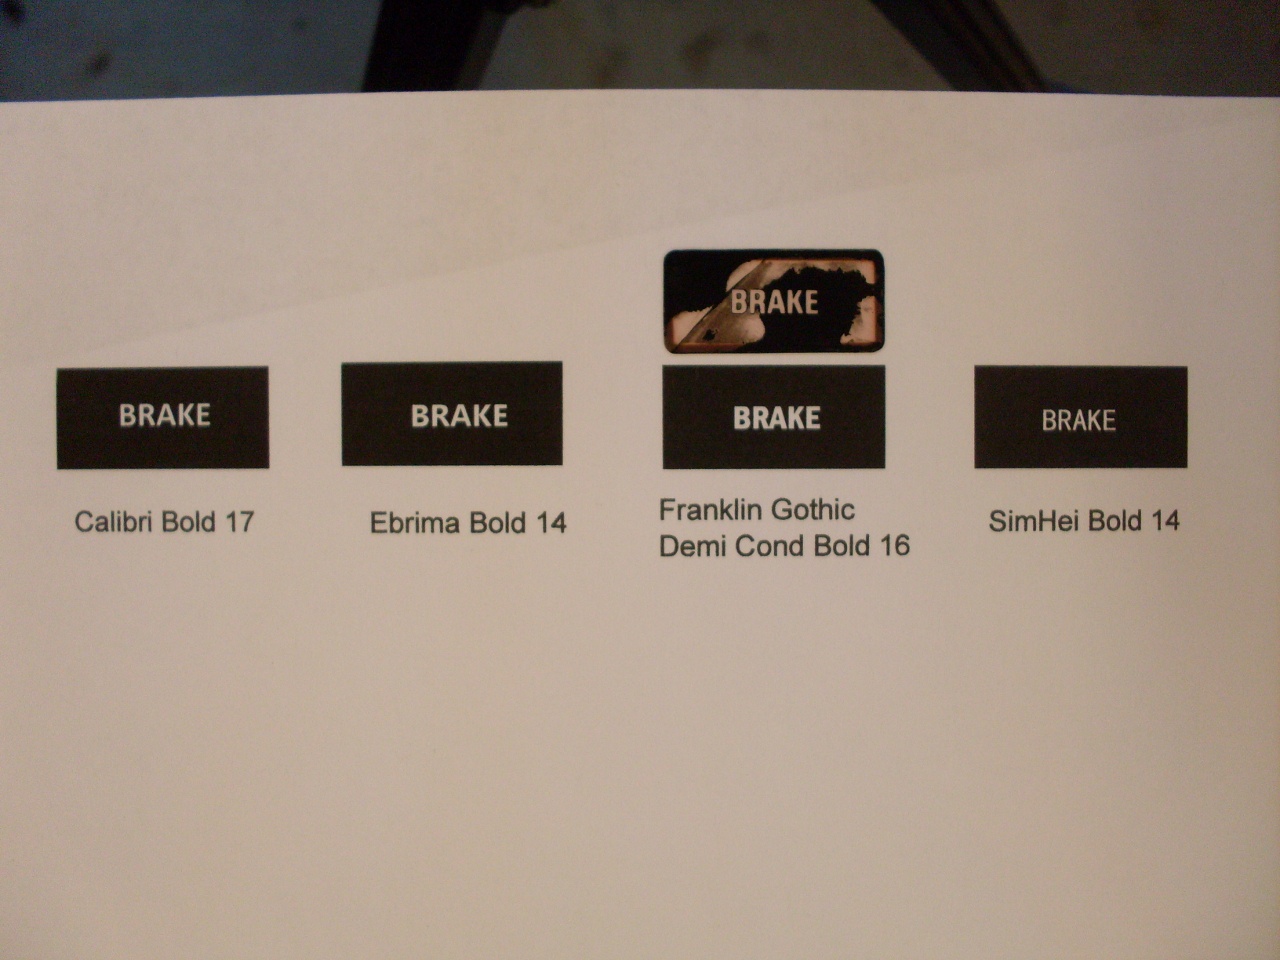
I
wasn't able to make an exact match on the font, but found a few that
were pretty close. None of them duplicate the original "R" very
well.
It
turns out that my inkjet printer won't print the black quite dense
enough to black out the back light. A laser printer at the local
OfficeMax did the job.
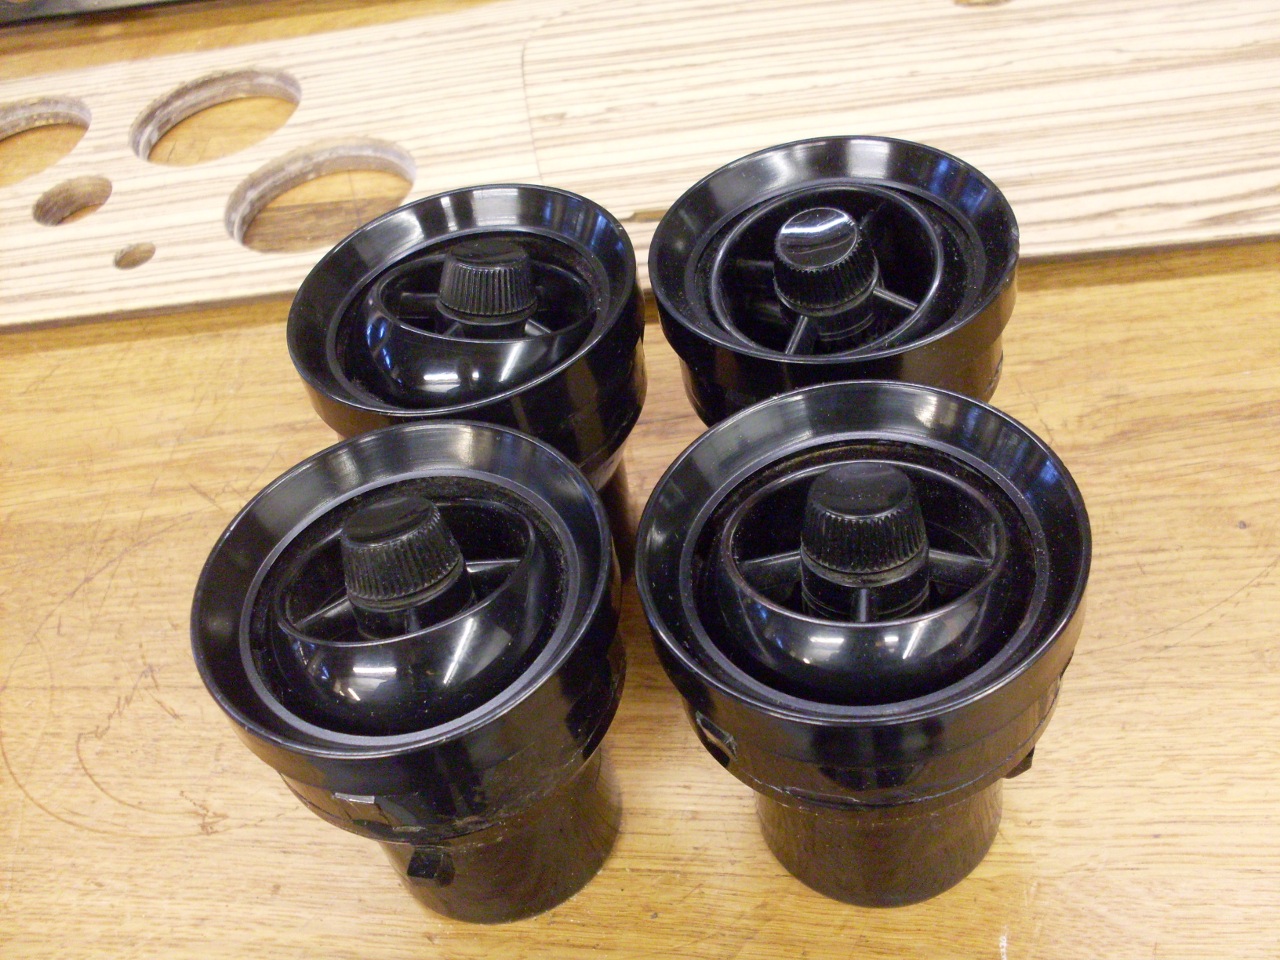
Putting the indicator back together, it compares pretty well with the other red lamp, even though the font is not a great match.
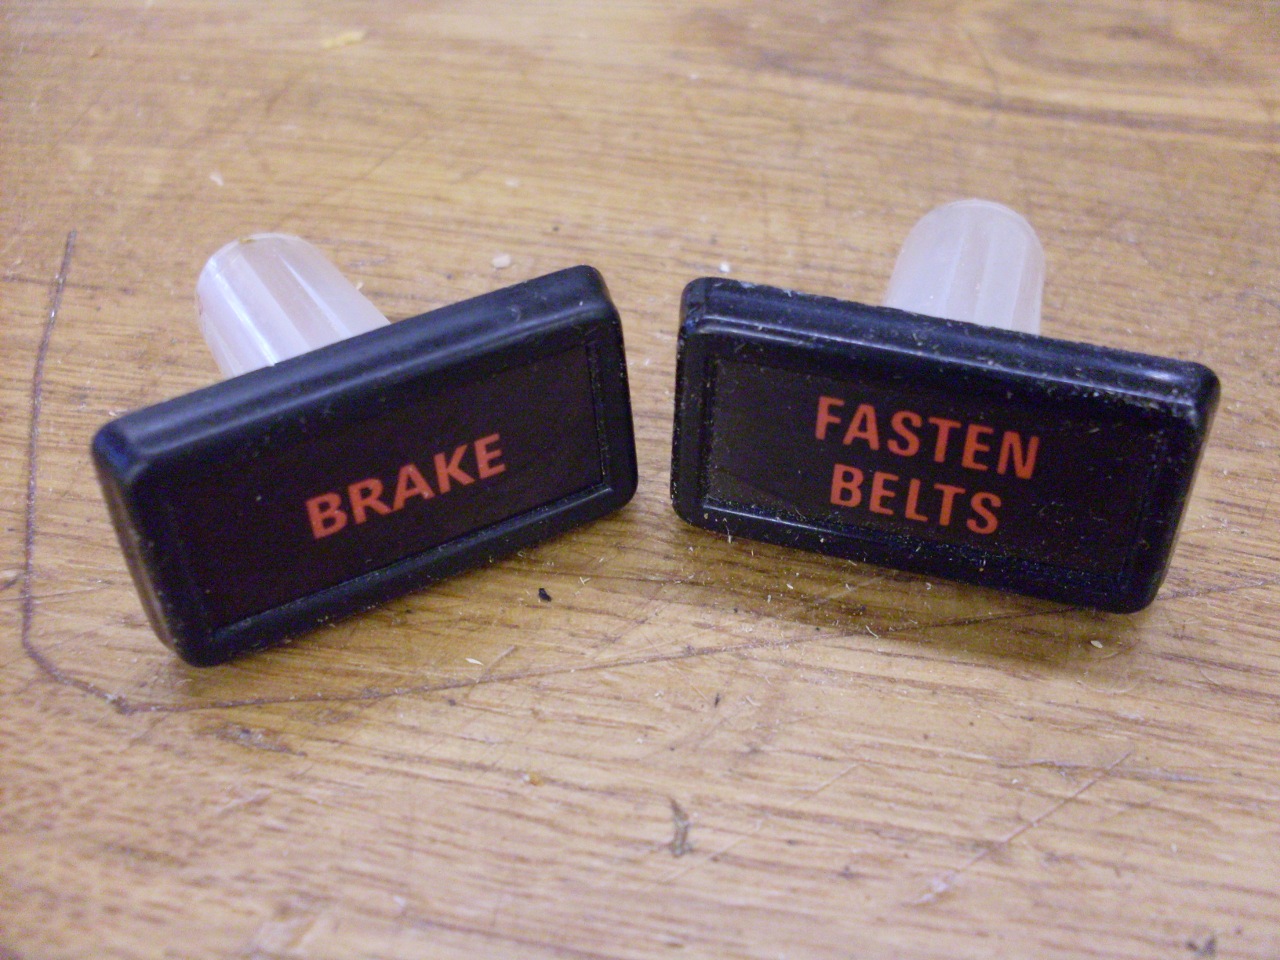
Doing
the comparison got me thinking about that "FASTEN BELTS" message.
I remembered how annoying that light and its companion buzzer
were on this car and others of the era. Since the "Seatbelt
Module" on the car had failed decades ago, and I don't plan to replace
it, the indicator would be about as useful as a bicycle to a fish.
This opened up a train of thought on how to repurpose the lamp.
It would be a simple matter of changing the legend, and providing
the wiring to match.
Well, at least changing the legend was easy. If I think of something better to use it for, it will be easy to change.
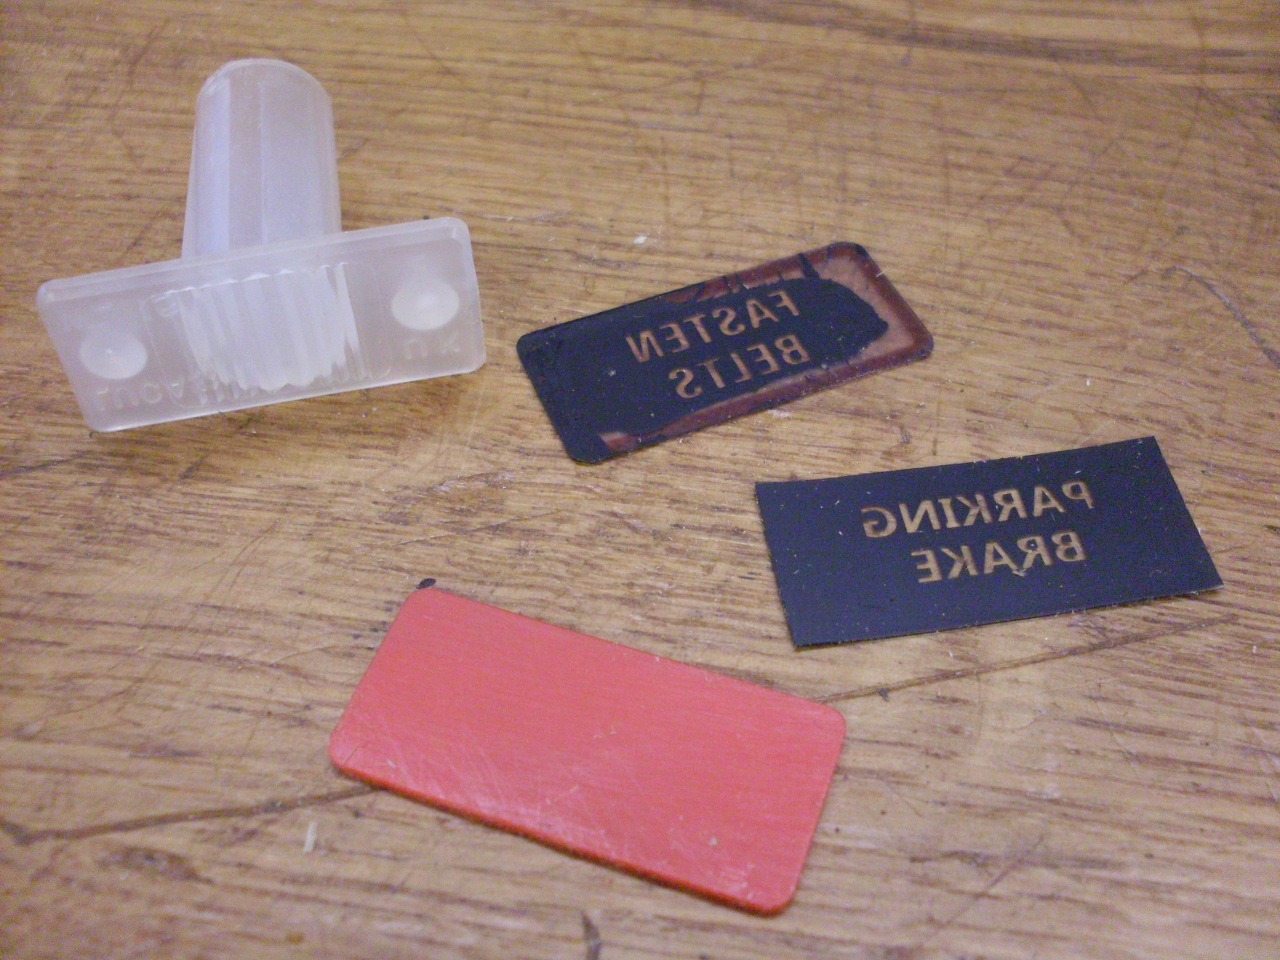
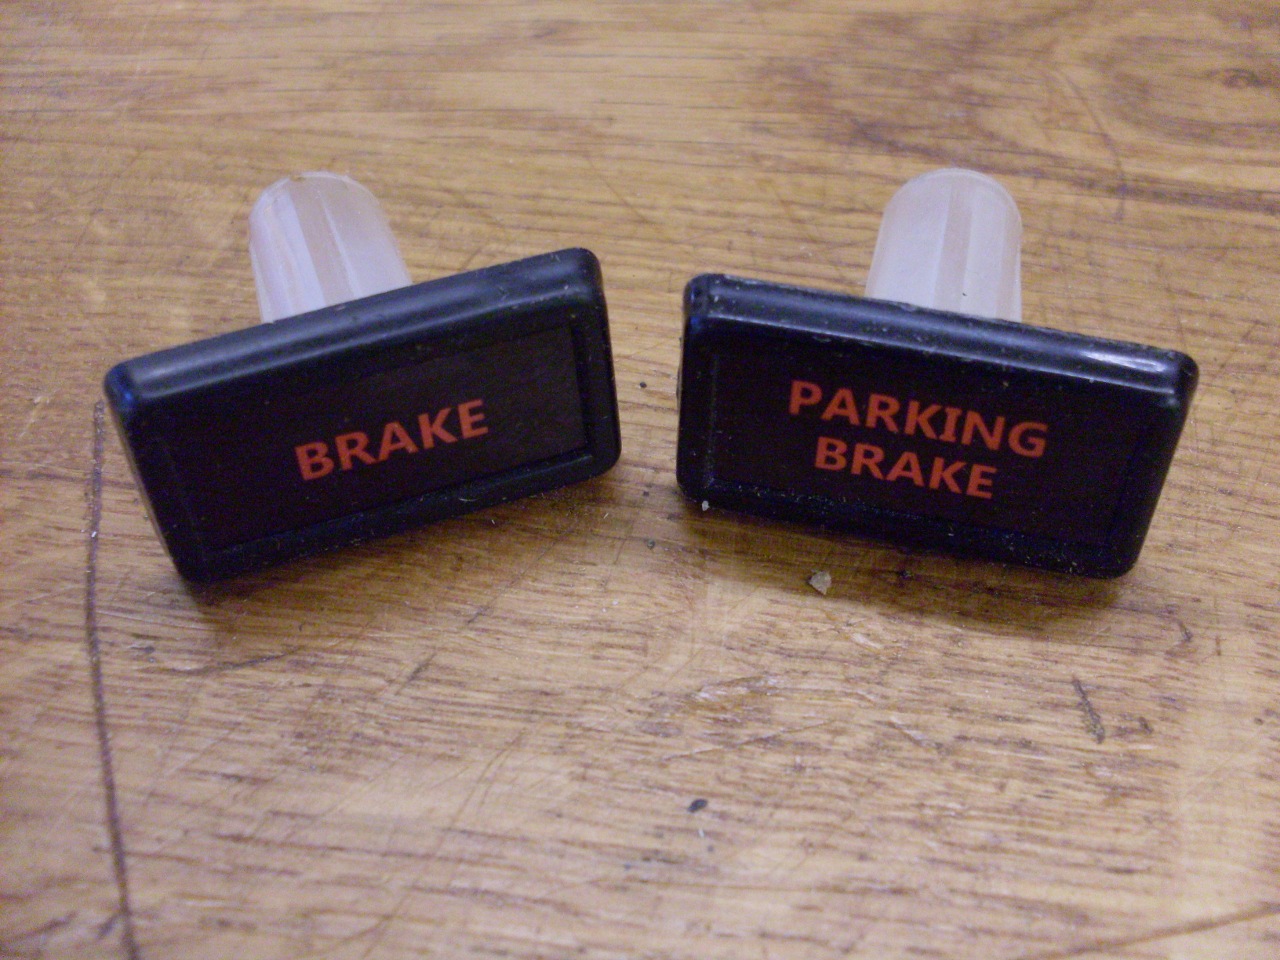
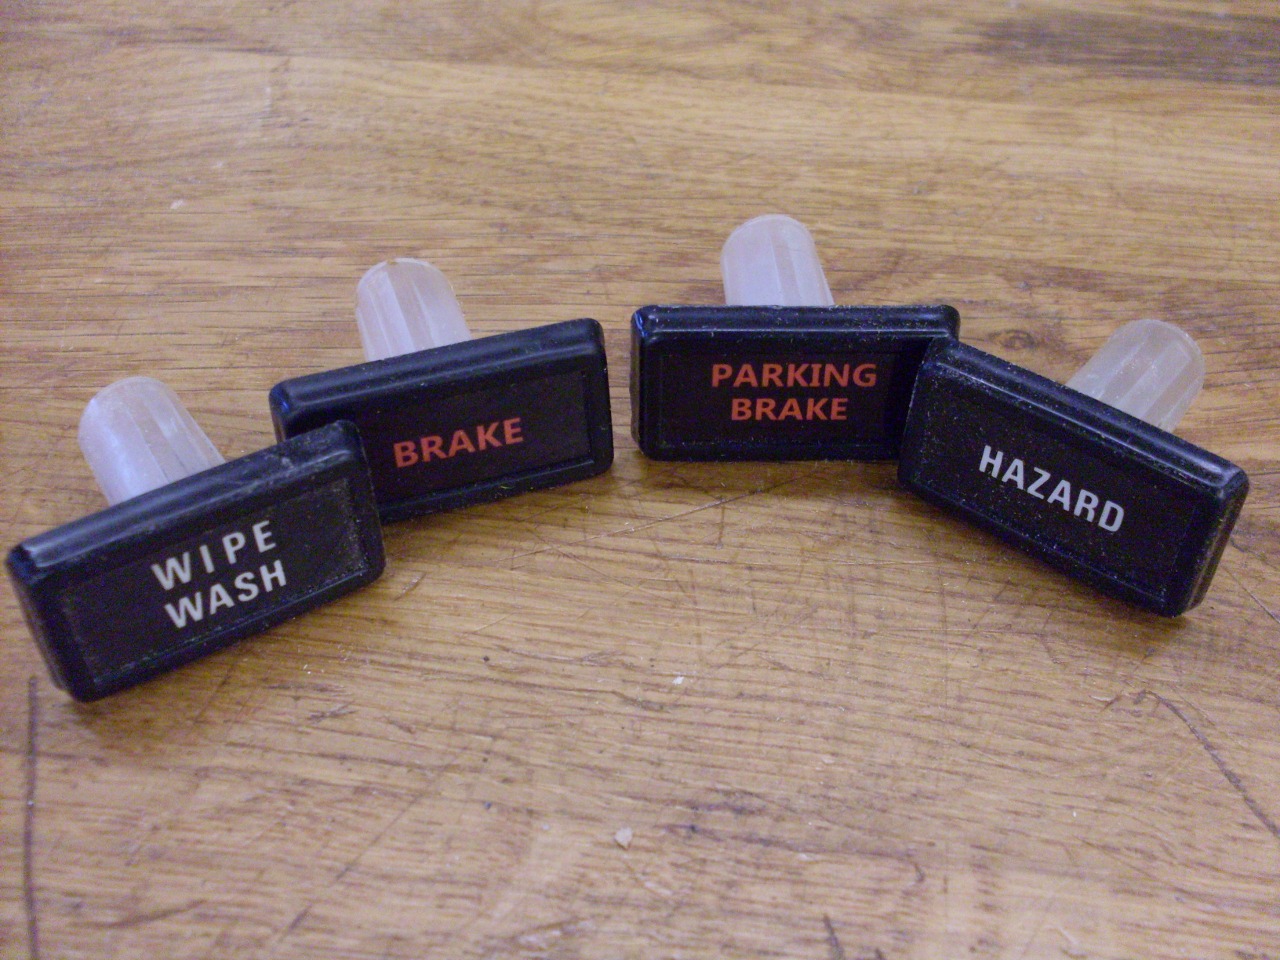
So here are the four indicators. The slightly different font is much less of an issue for me now.
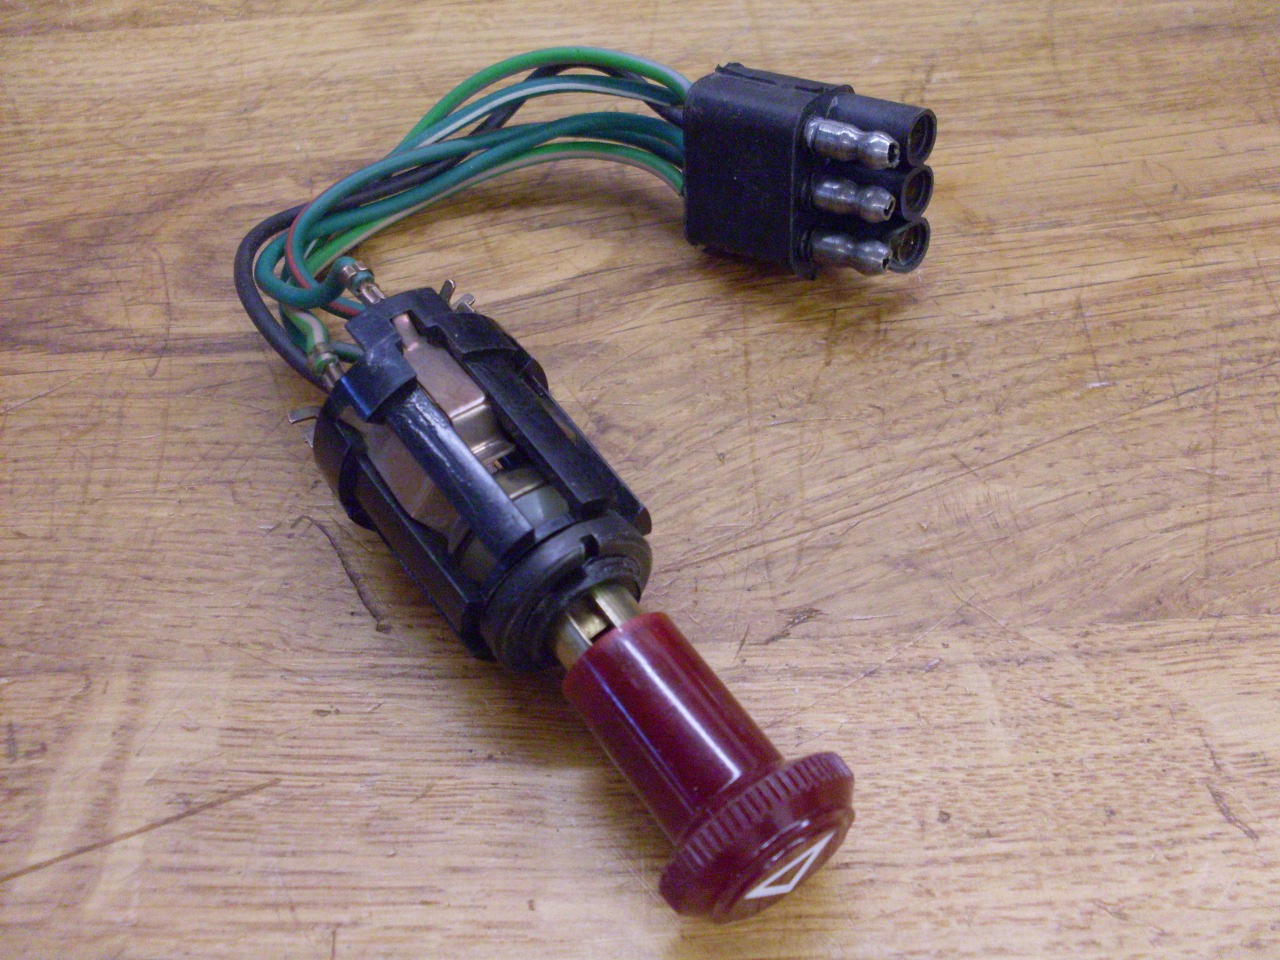
The
hazard switch is a pretty robust item, and was in beautiful shape.
I did no more than brush the dirt off and test it. A squirt
of contact cleaner and some dielectric compound should keep it healthy.

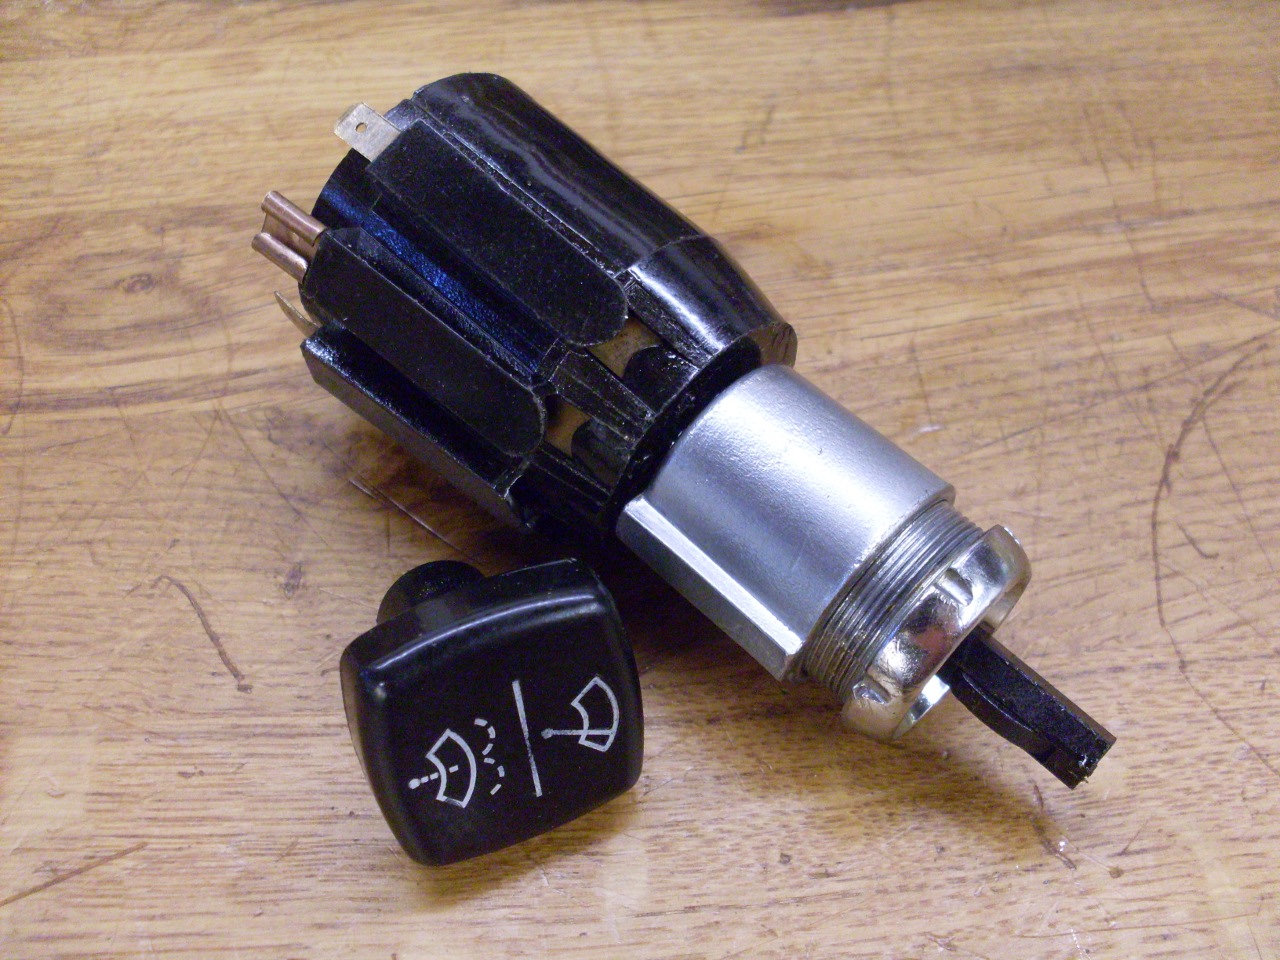
By
comparison, the wiper switch feels a little cheesy. Its plastic
shaft that torques noticably in normal operation doesn't give a feeling
of solid construction. On the other hand, the device was intact,
and tested fine. The little knob keeper had lost most of its
spring, but I'm not going to do anything about it.
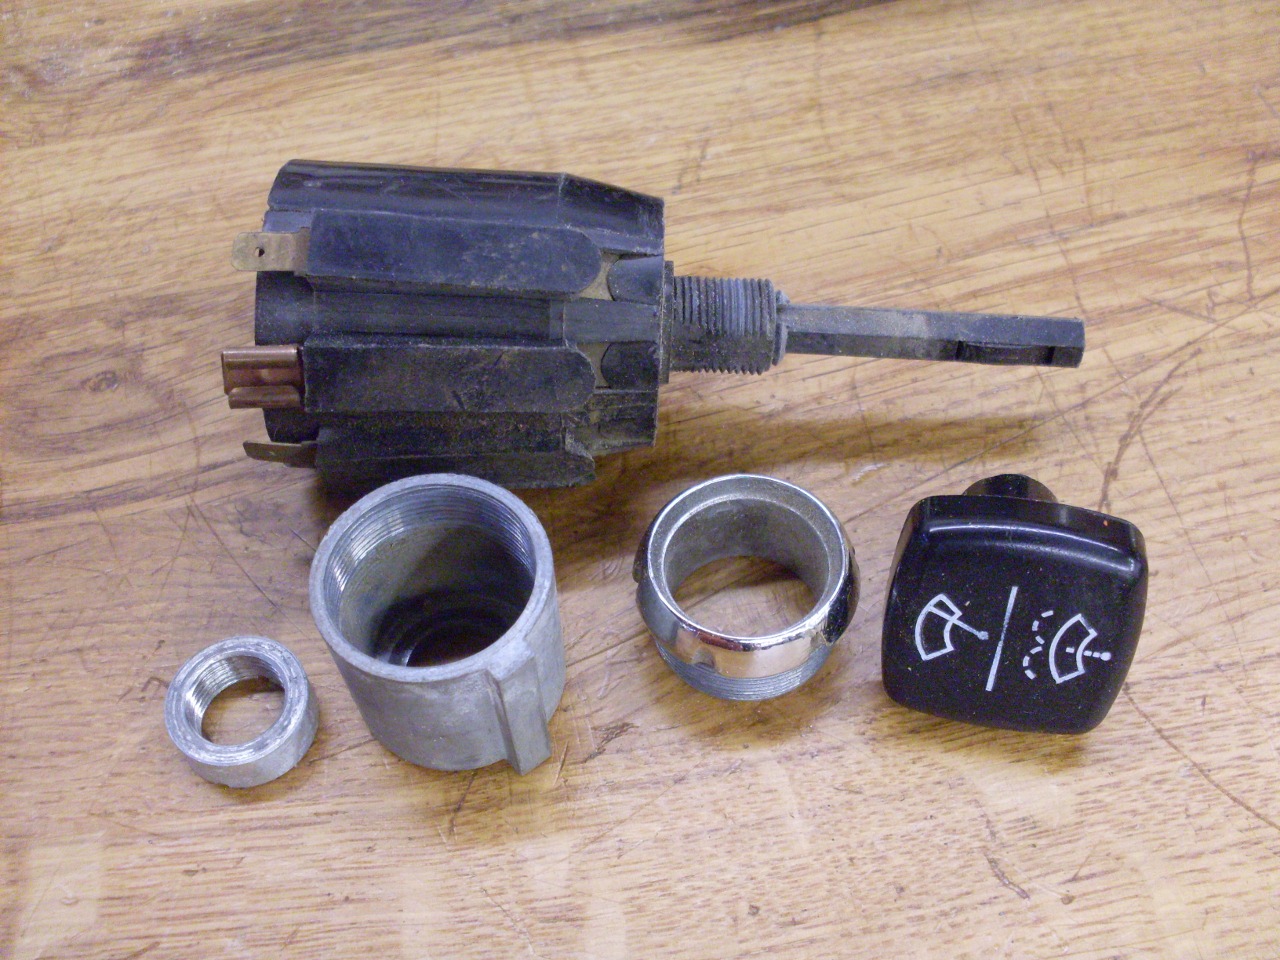
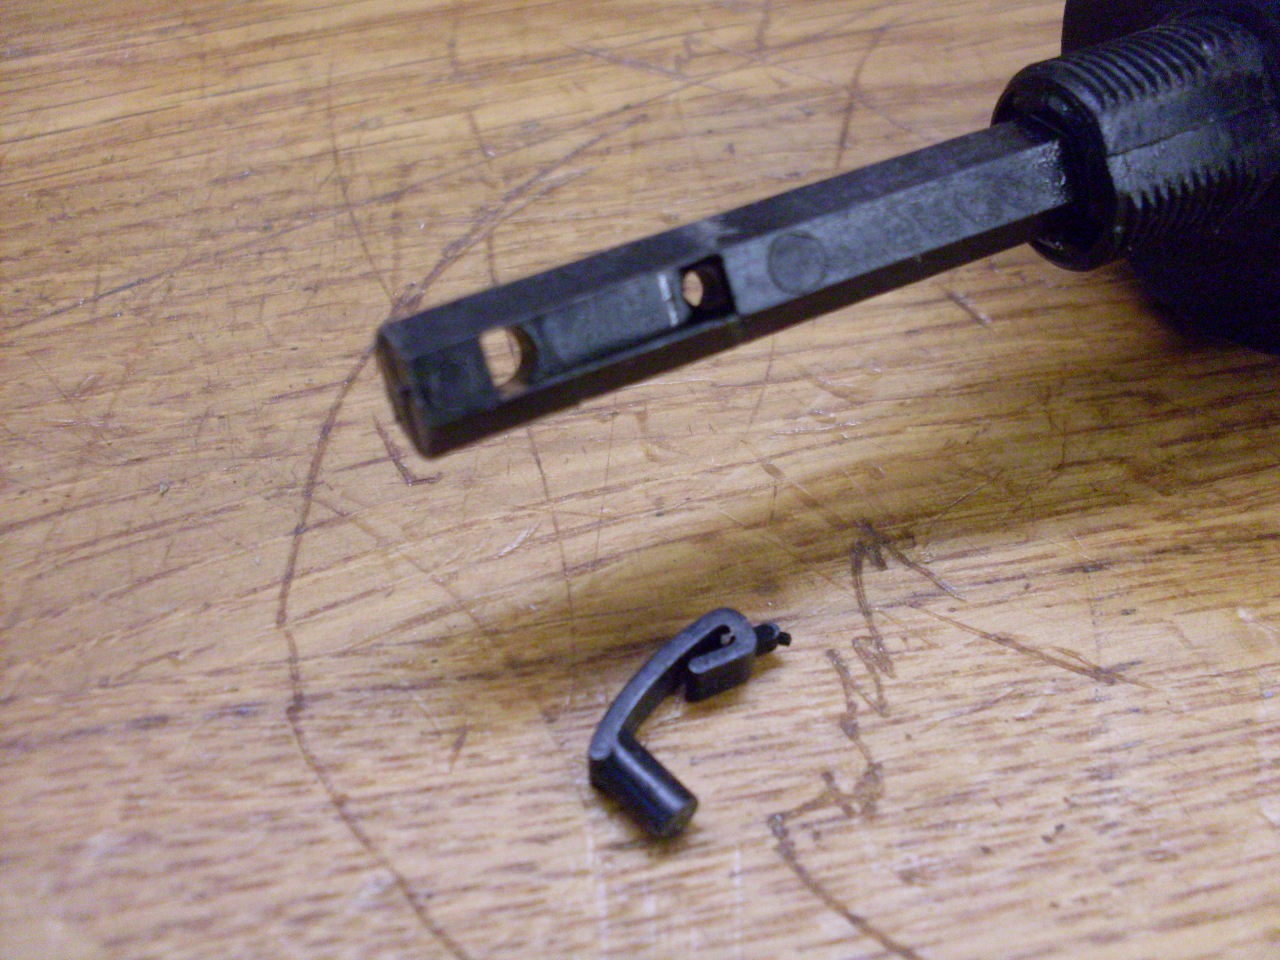
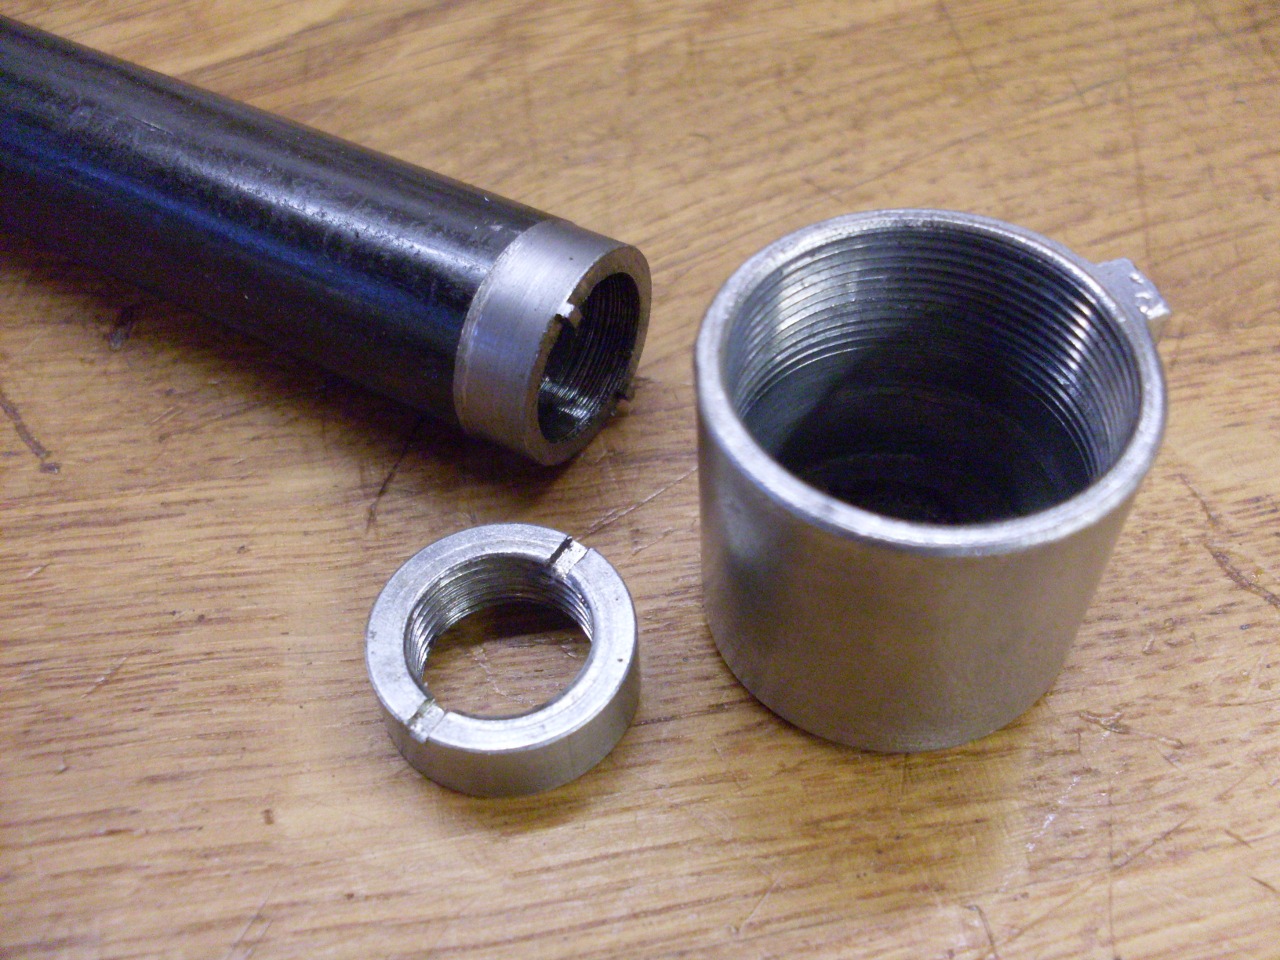
Standard
cleanup made it look better. Has anyone ever seen a tool that
fits the little nut that goes deep inside the barrel? Me neither.
Easy to make one, though.

The
dash light dimmer rheostat appeared to be intact and undamaged. Though this device is a good candidate for replacement
with a more modern solid state design, and I have the skills to build
one, I'm going to resist the urge right now. At present, I plan
to stick with the stock incandescent lighting for the instruments.
If I feel the calling to go to LEDs in the future, I'll revisit
the dimmer question.
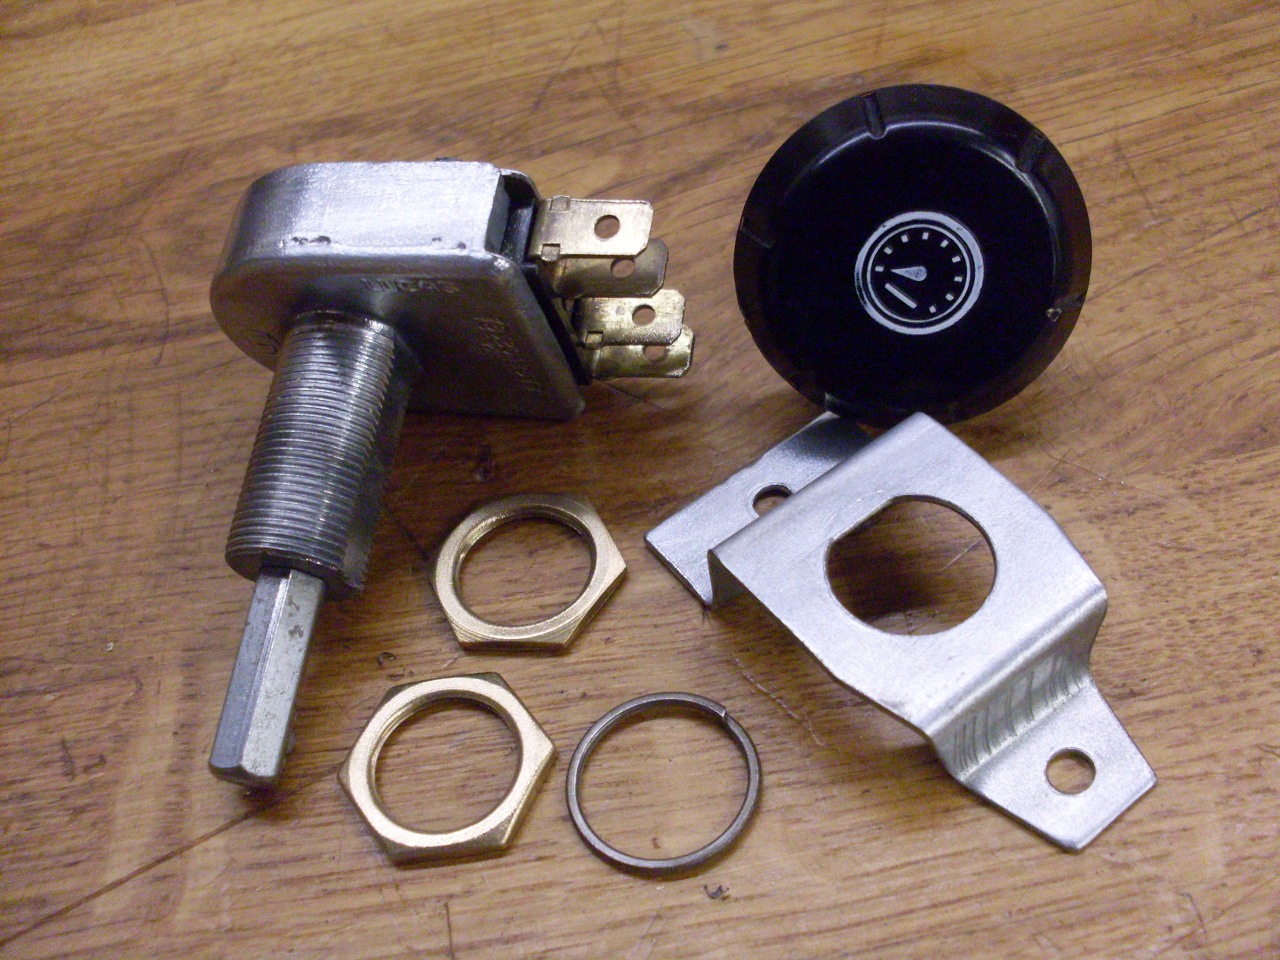
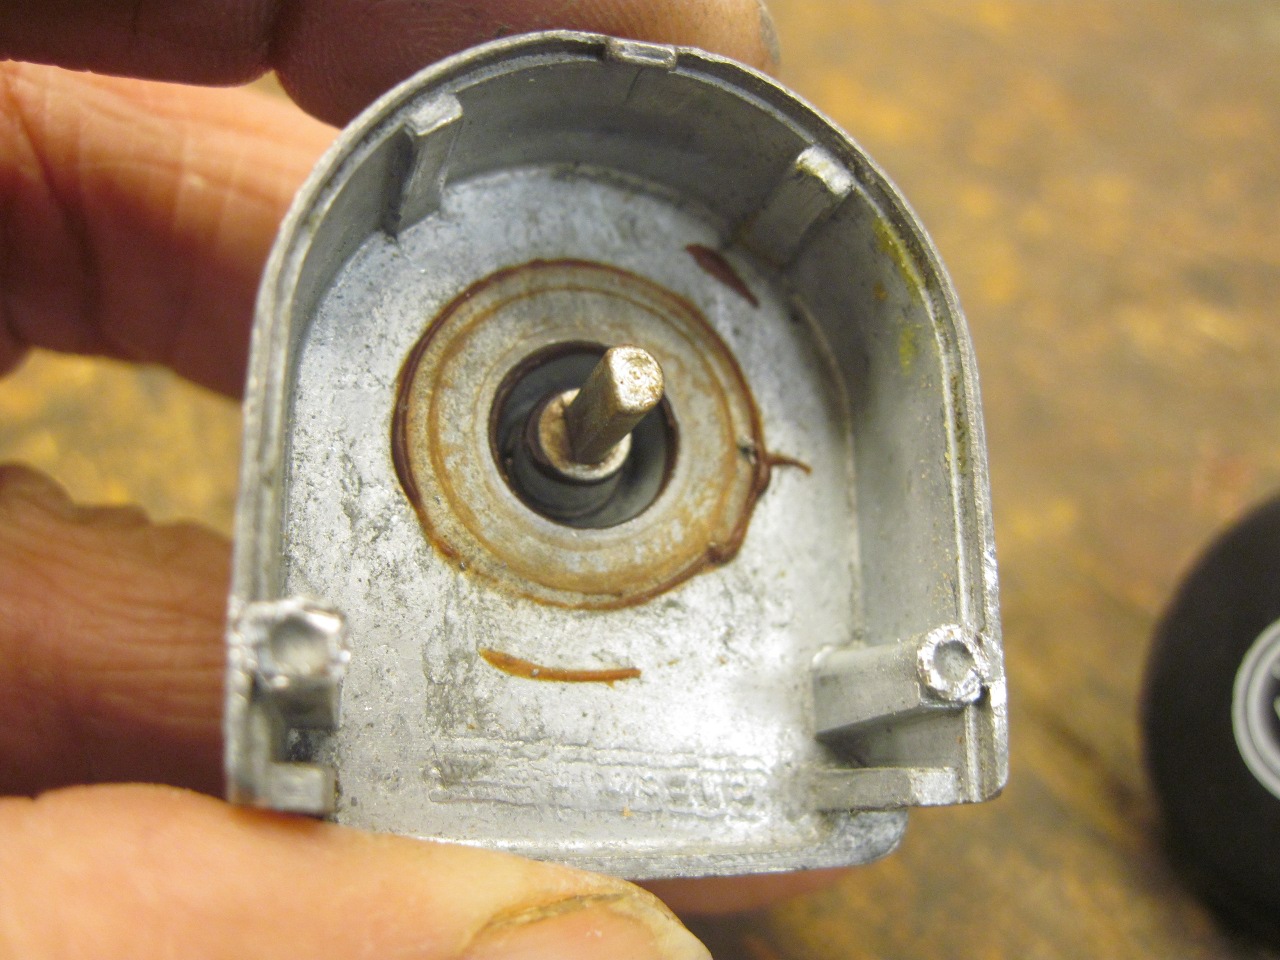
On
testing the dimmer with an ohmmeter, its operation seemed erratic.
Unsure whether this might be caused by some internal damage, or
just accumulated crud, I ground off the two little stakes on the back
and removed the back cover.
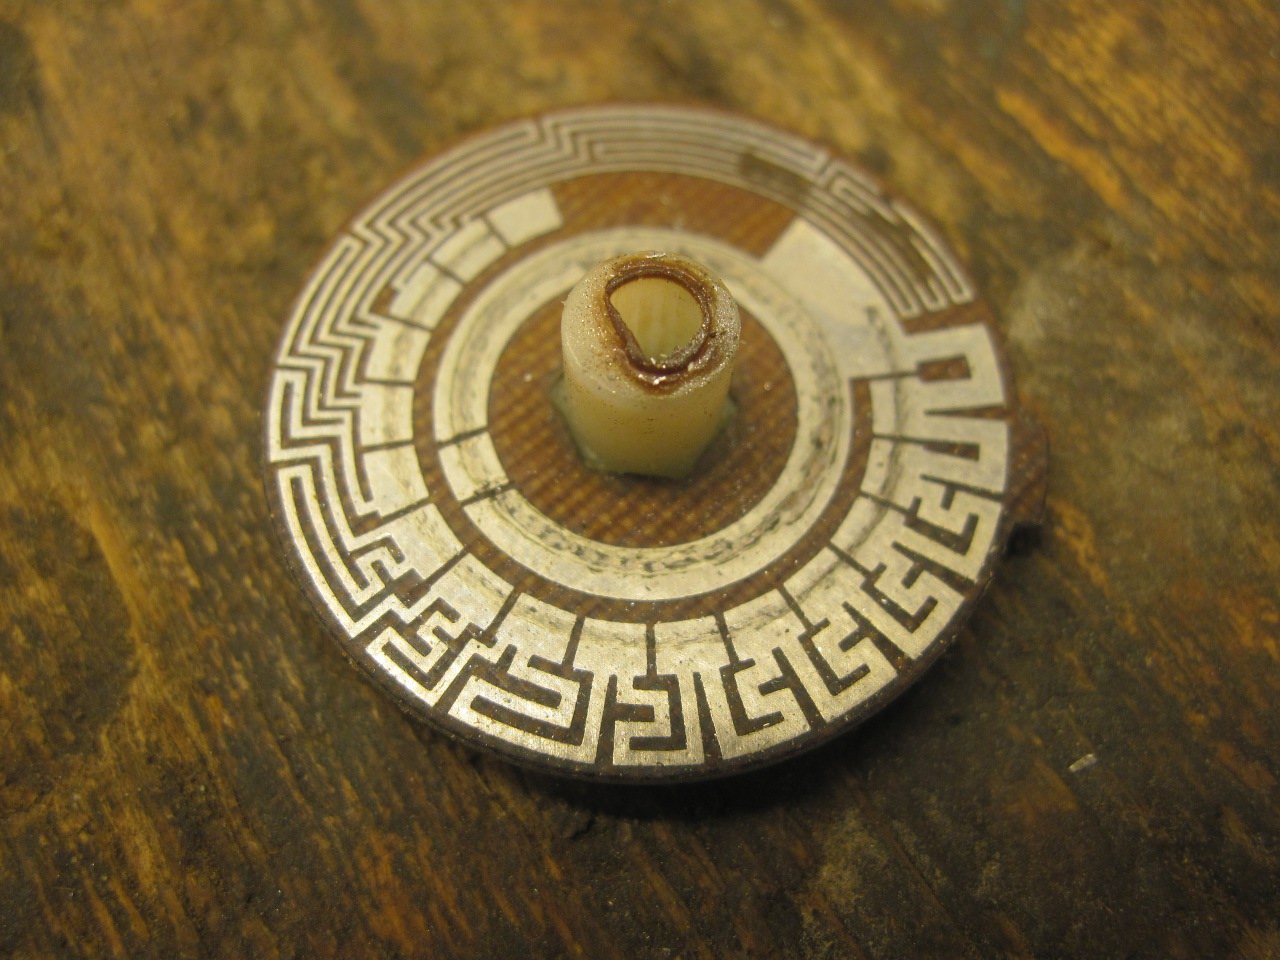
The
back plate actually had a PC trace resistor on it. The legend
"6.35" apparently refers to the resistance of the metal trace from end
to end. An internal wheel, also with metal traces on it, rotates
with the knob shaft. The traces on the wheel form a series of
resistances with 15 taps points, and an inner ring that serves as a
common contact. Between the fixed back plate and the rotating
wheel, there are three spring fingers. that touch both the inner
wheel and the back plate resistance. As the wheel is turned, the
resistance between two of the fingers changes in 15 steps. The
back plate resistor is in parallel with the stepped resistance, and
serves to set the resistance range of the dimmer for different
applications. One very nice page outlining a dimmer rebuild shows a back plate with a 4 ohm resistance.
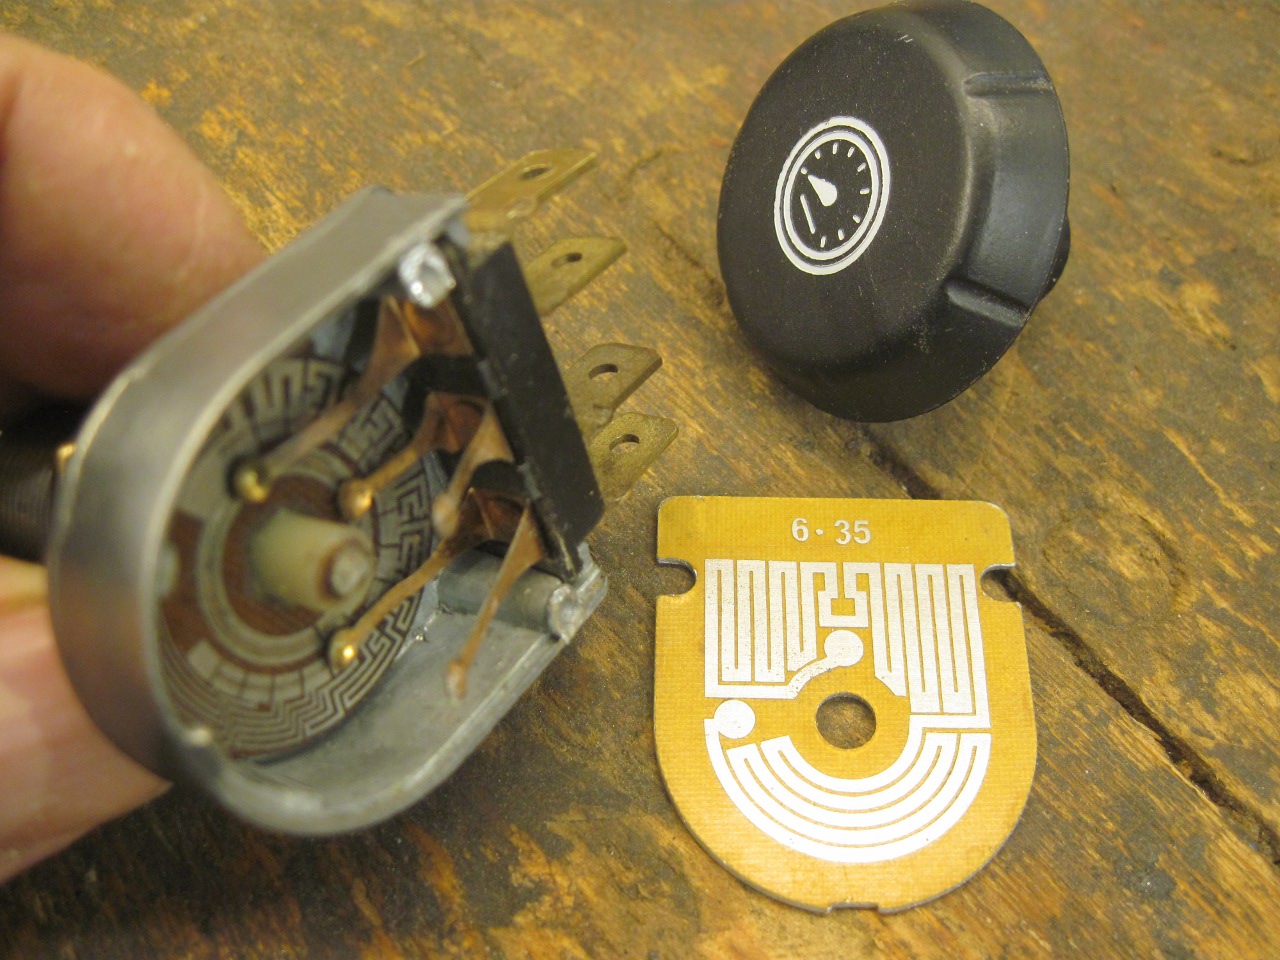
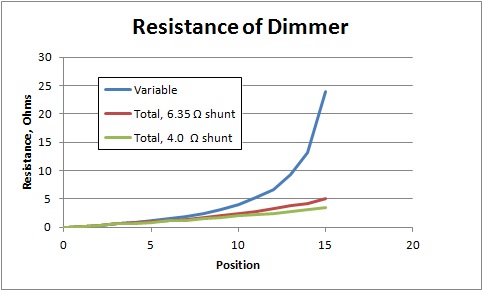
Here is a graph of the resistance of the variable part of the resistance, and the effect of the back plate shunt resistor.
The
contact surfaces for the spring fingers looked OK, but were dirty.
I cleaned them up, along with the finger contact points, and
cleaned and lubricated the case and shaft bearing. I also drilled and tapped the case for some tiny 2-56 screws to replace the original stakes.

Then
I coated the contact surfaces with some dielectric grease, and put the
device back together. Testing again with an ohmmeter showed a lot
better results.
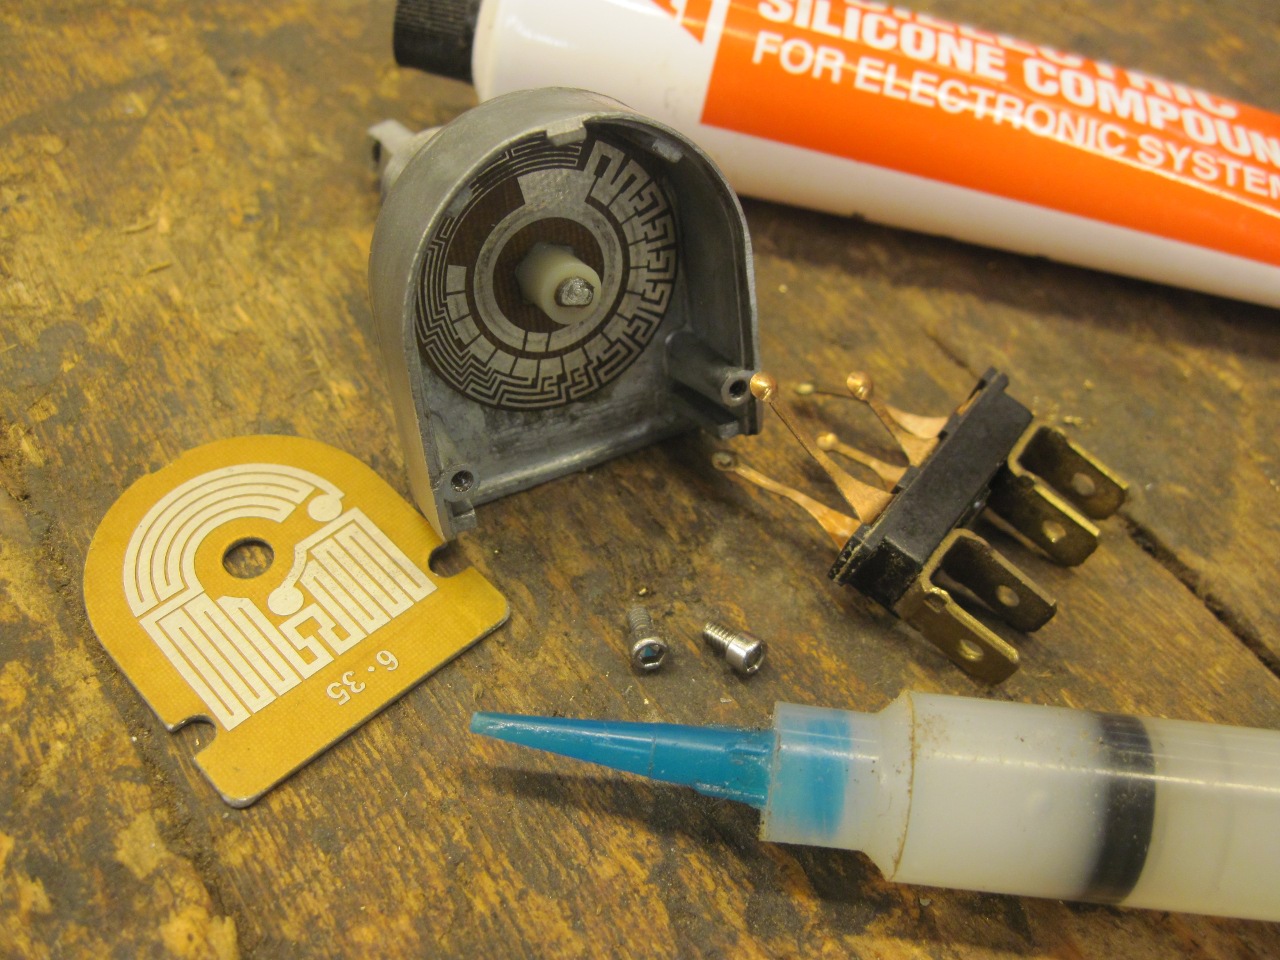
One
other thing on the dimmer--since its knob has no hole for a keeper
pin (and you couldn't get to it if it did), it seems that the spring
loaded pin on the dimmer shaft can't contribute anything but trouble,
so I removed it. I also cleaned up the hex shaft where the metal
was upset to retain the pin. This distortion was probably part of
the reason the knob was so hard to remove.
Not
actually an indicator or switch, but still an accessory to the dash, I
fished the air vents out of the box of parts. The inner spherical
eyeballs on these vents are supposed to swivel freely in felt bearings.
Mine were essentially seized, and were very hard to move. I
found that by just cleaning the ball and polishing them a little, I
could restore smooth motion. On one vent, the ball caught the
felt strip and dislodged it. It took me forever to get it back in
place, but all four vents work well now.

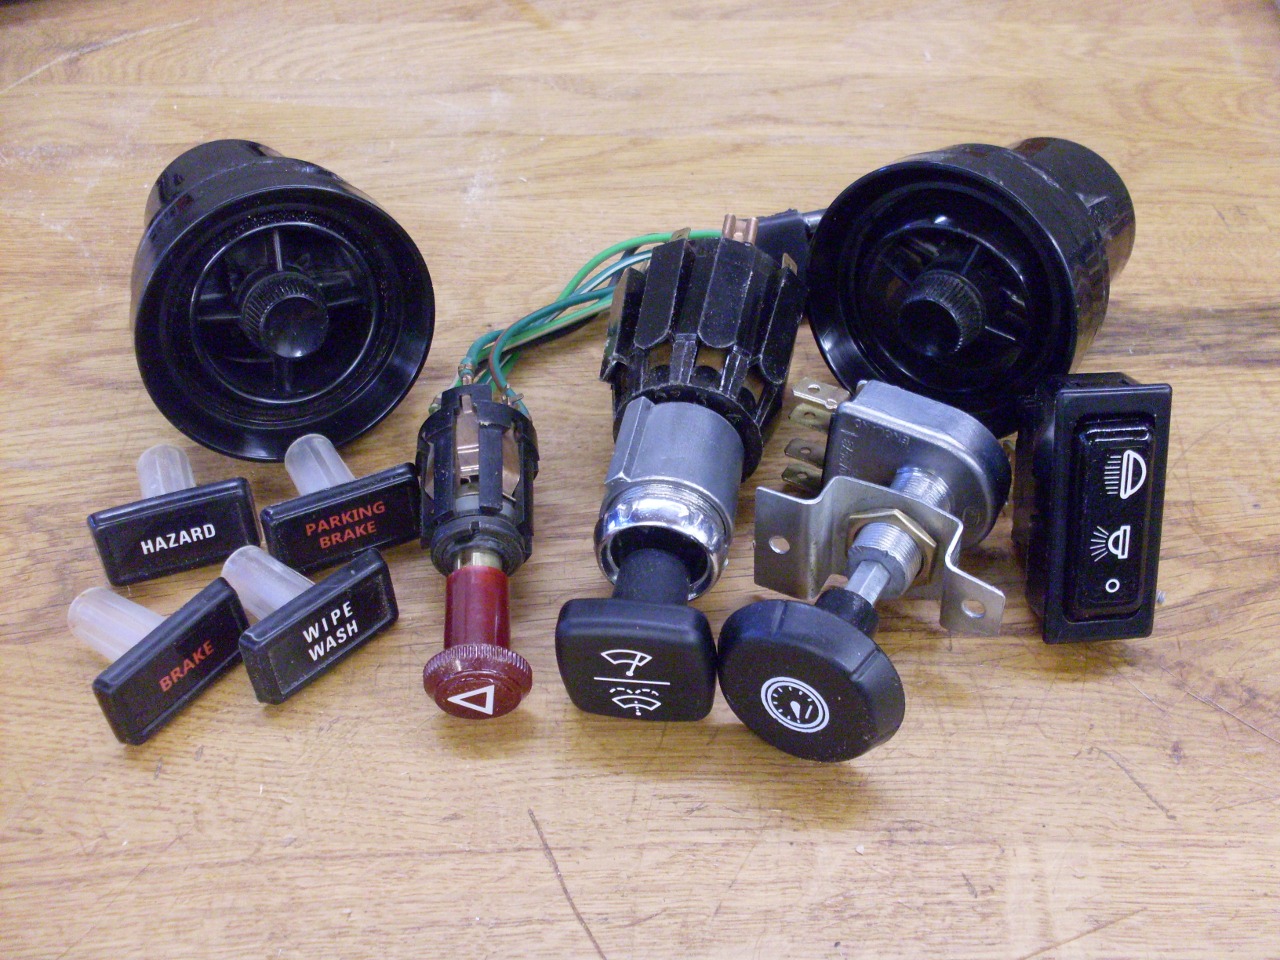
So
here are all the bits and pieces, other than the instruments, that
fit on the dash, including brand new knobs for the wiper and dimmer
controls.
This
was a sort of nitpicky set of projects, but I think it will pay off in
reassembling the dash when the time comes. The only out of pocket
cost was the two knobs and $0.54 for the transparency printing at
OfficeMax.
Comments to Ed at elhollin1@yahoo.com
To my other TR6 pages