To my other TR6 pages.
March 28, 2015
Dashboard
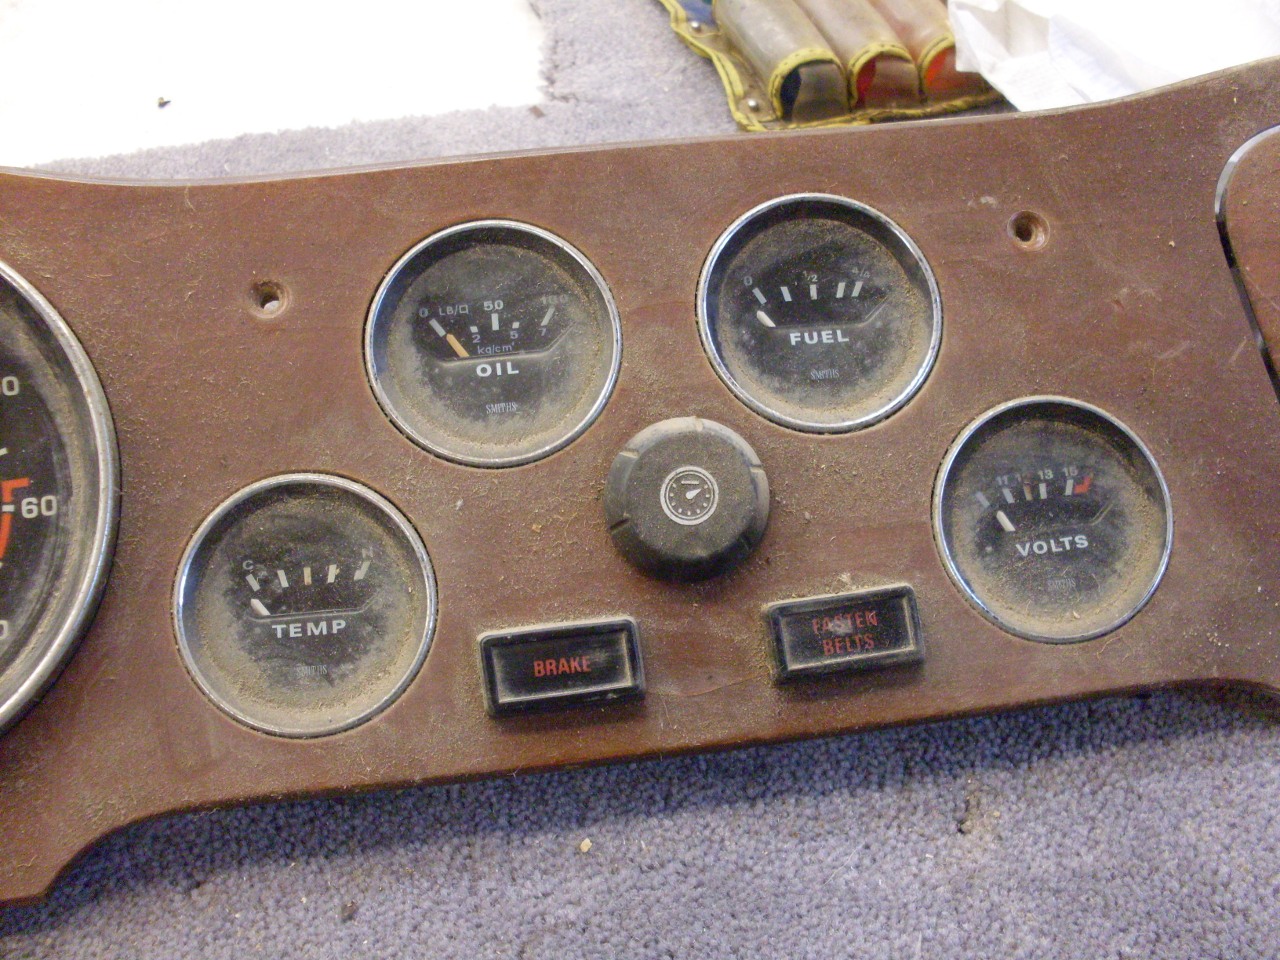
One
of the coolest things about the TR6 and some of the other British cars
of the era was their fully instrumented wood grain dashboards.
Never mind the marginal practicality of this in a roadster with
the top down most of the time, it was an important style statement that
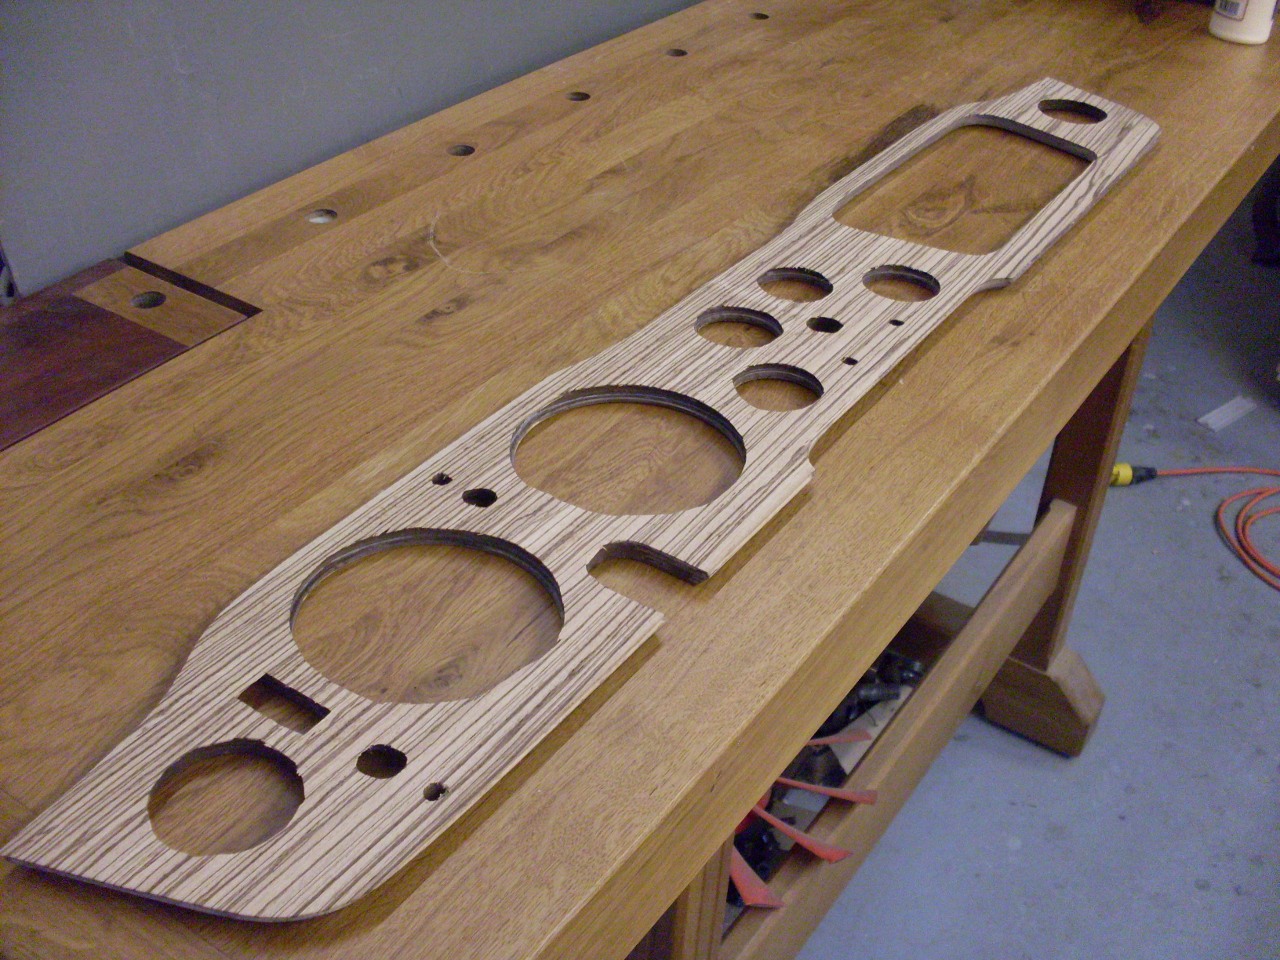
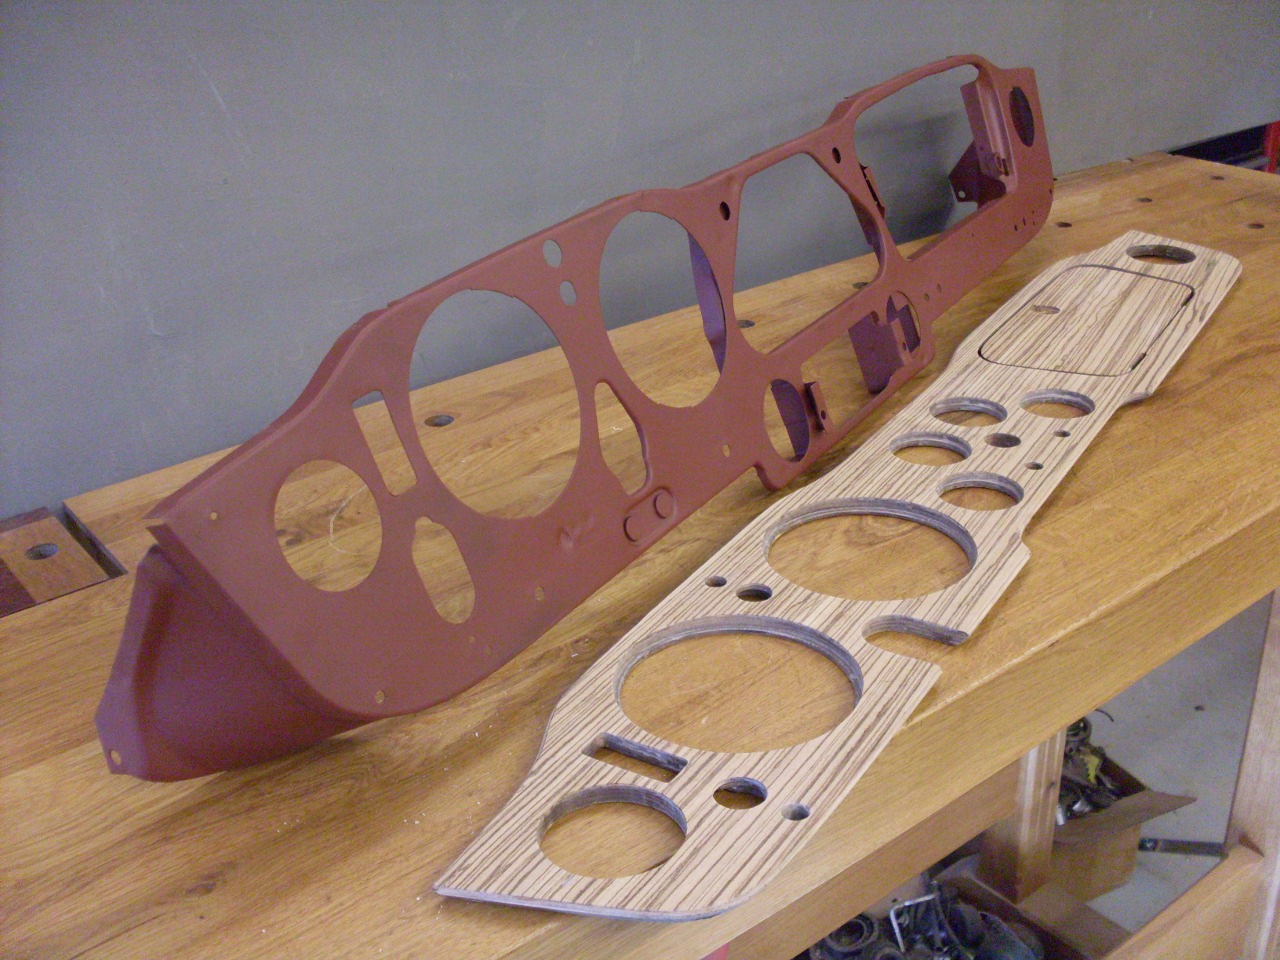
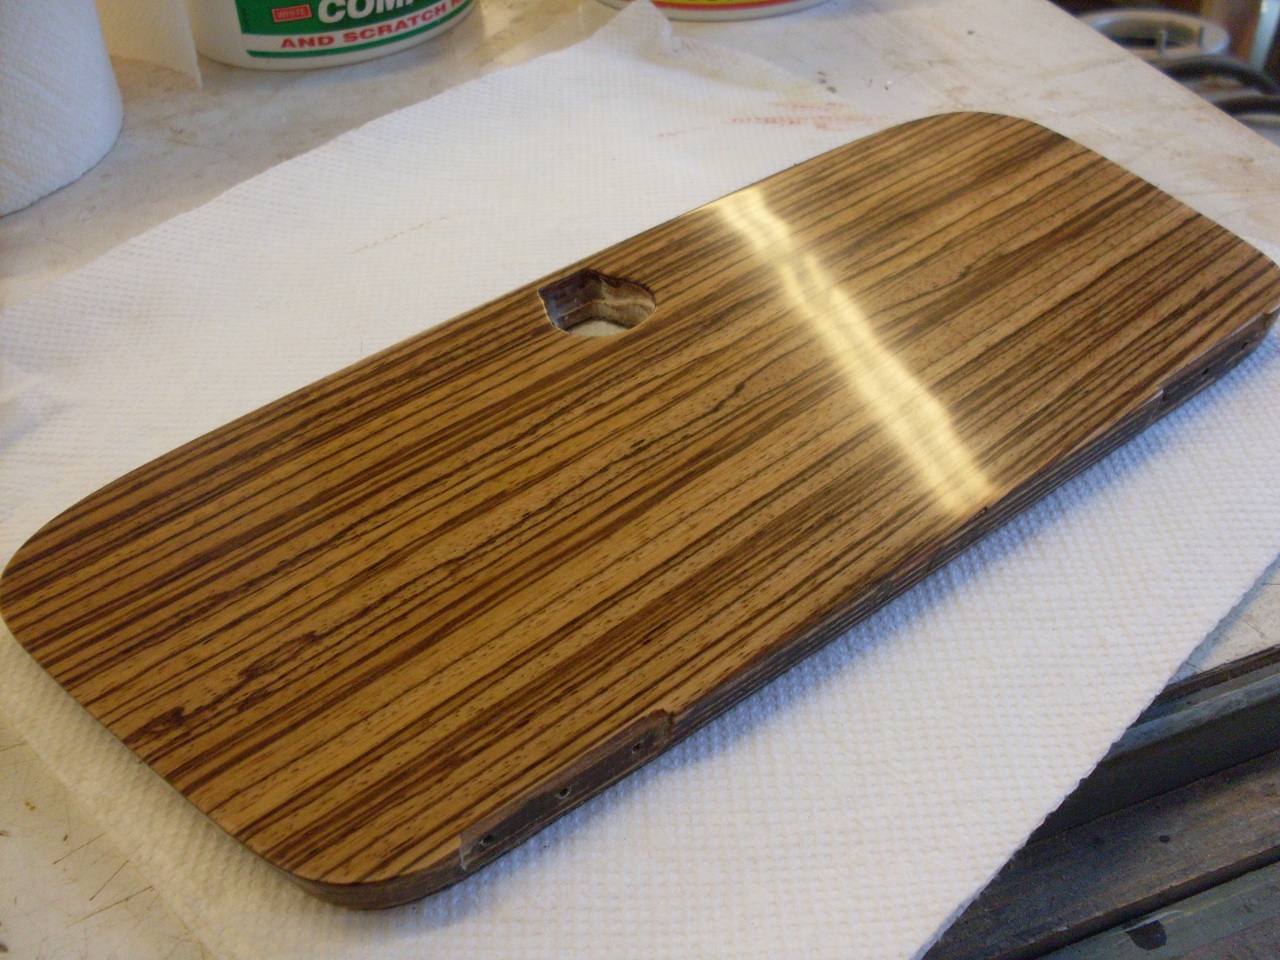
became part of the mystique of the marque. The TR6 outer dash is
a plywood base veneered with what appears to me to be walnut or
something close to it.
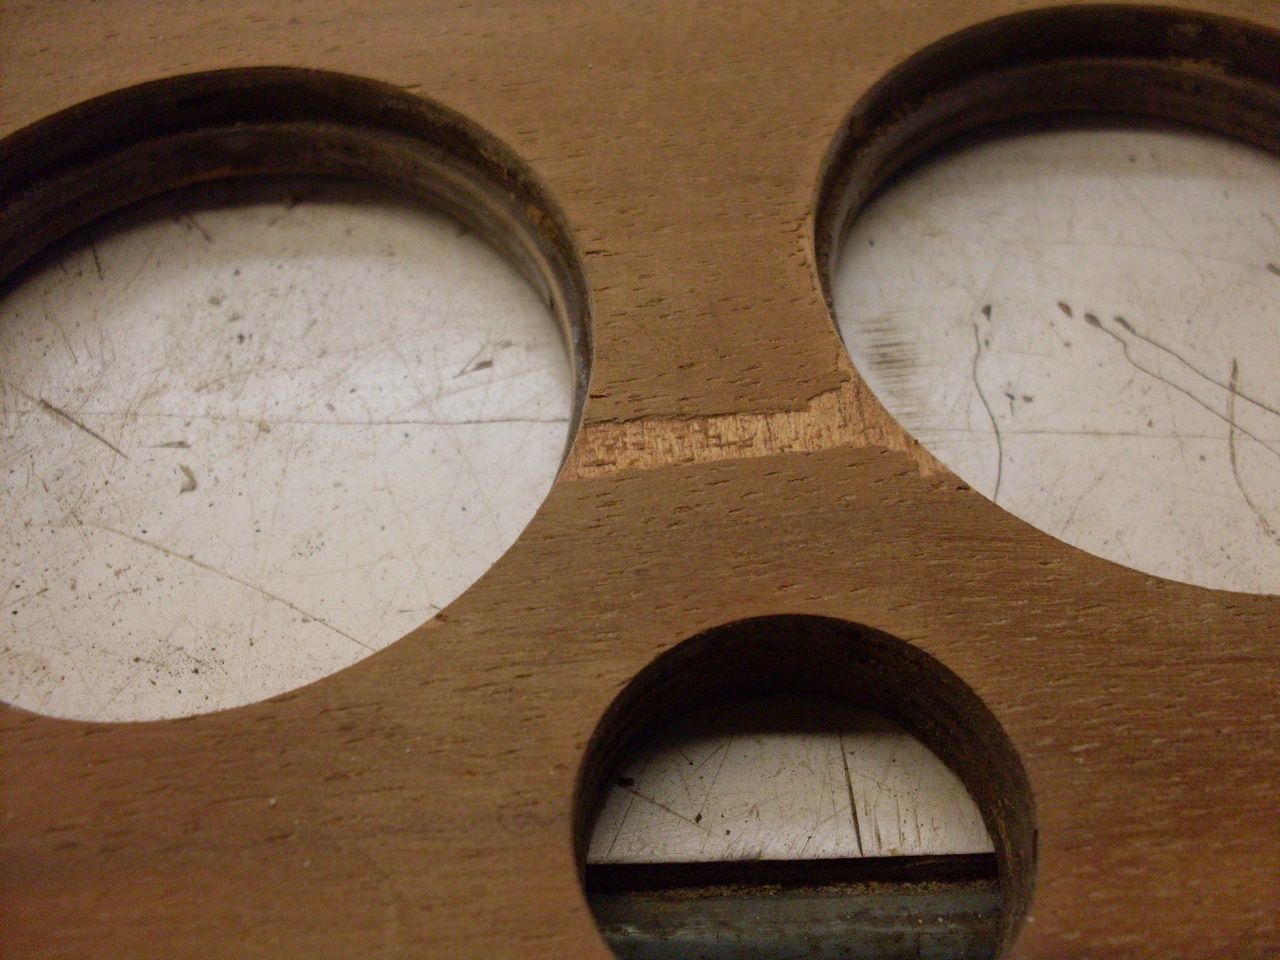
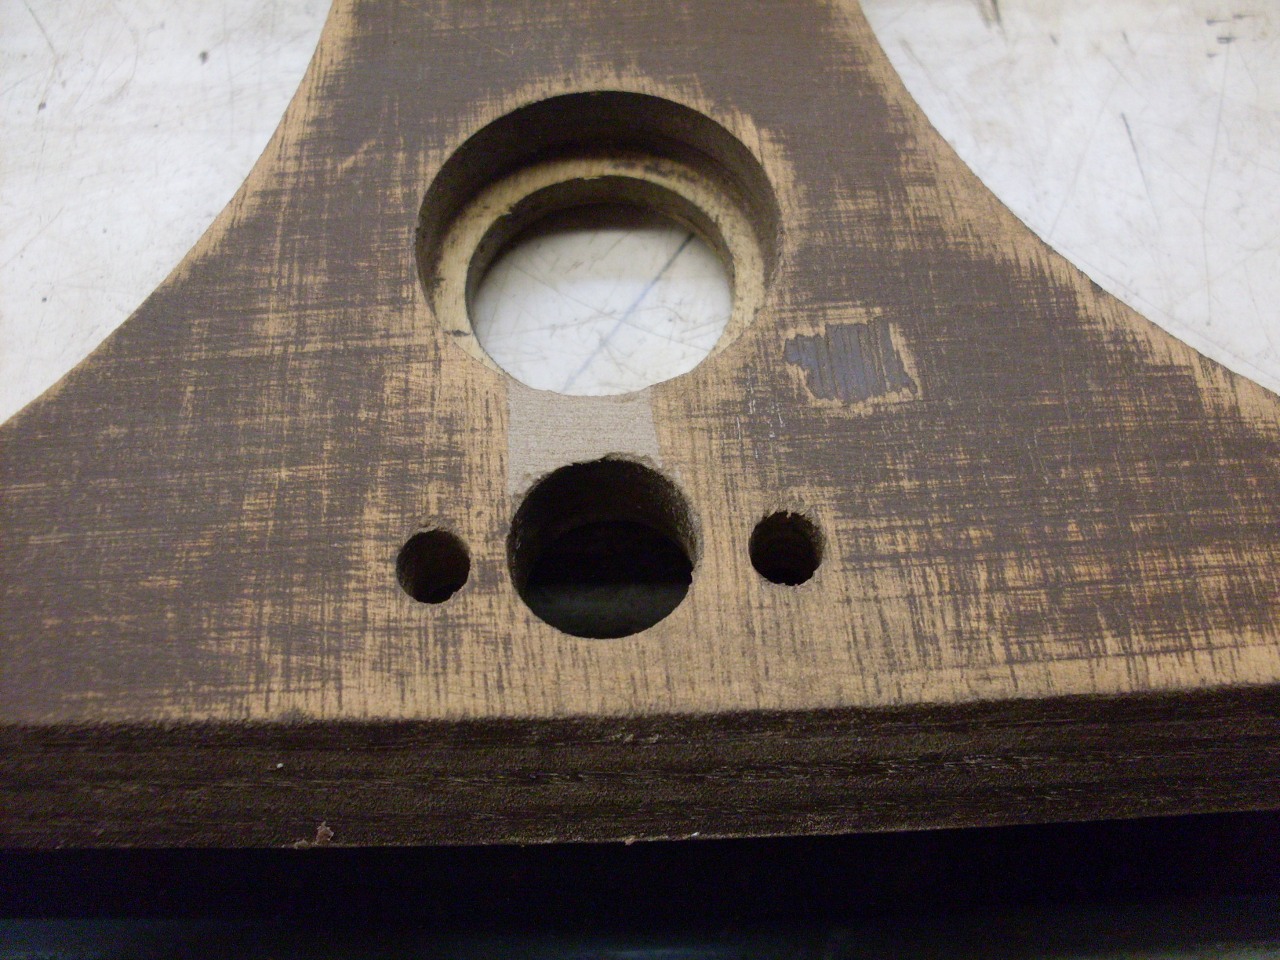
My dash, other than being grimy,
was in pretty sound condition, althought the finish was not. It
was cracked and crazed from four decades of temperature and humidity
extremes, not to mention frequent strong doses of UV radiation and the
occasional dowsing from an unexpected shower.
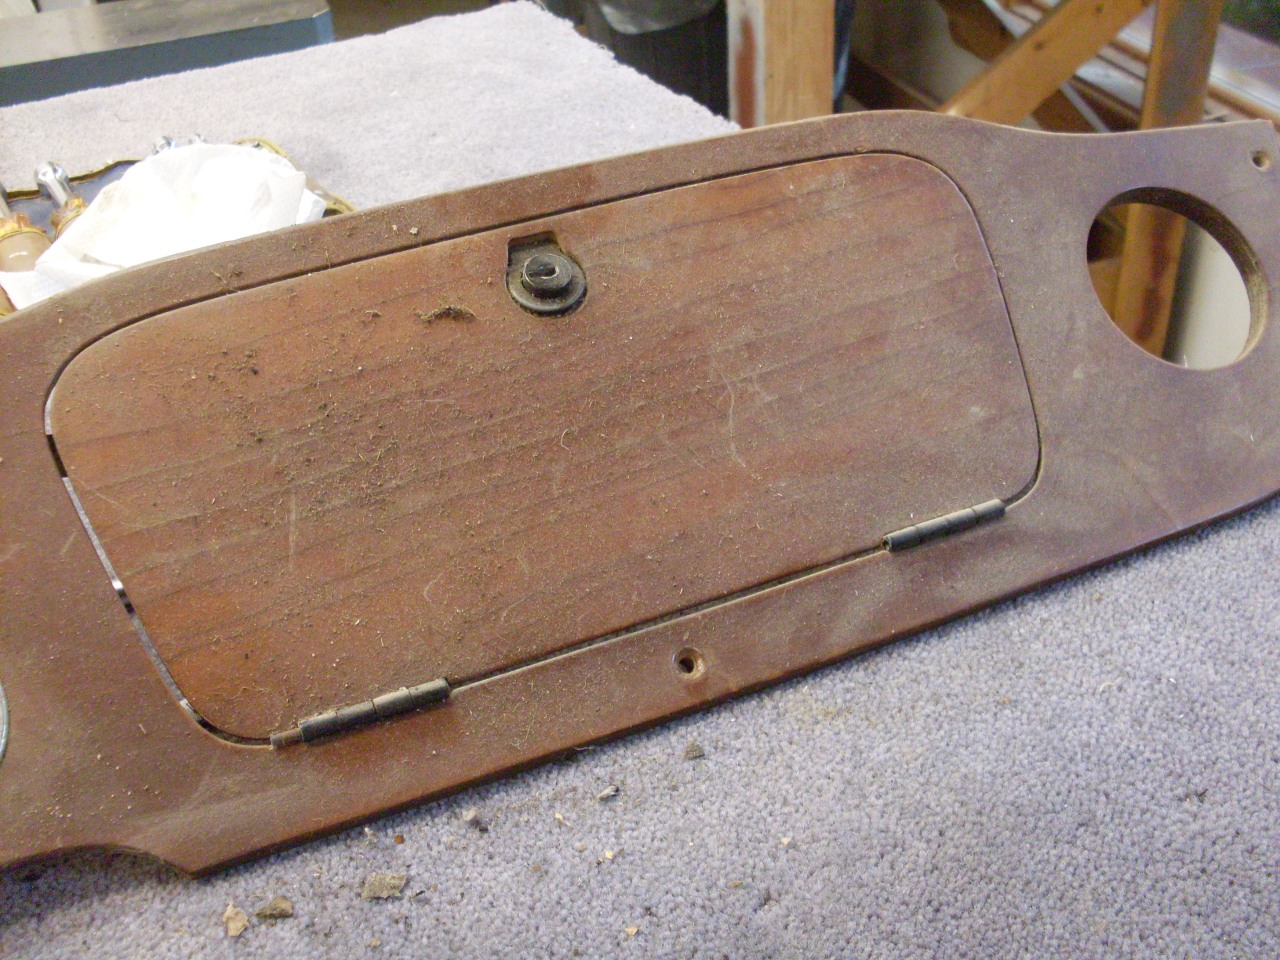
On
close inspection of the dash from all sides, I determined that I could
easily save the dash, but the finish had to go. This is where I
began to consider the range of options for either rebuilding or
replacing the dash.. Many have commented on the difficulty of
removing the factory finish, and I wasn't sure I could remove it
without doing some unintended violence to the thin veneer. In
pressing on, I too was struck by the tenacity of the finish.
Wimpy strippers don't faze it. A good strong methylene
chloride stripper will remove it, but it's a slow, iterative process.
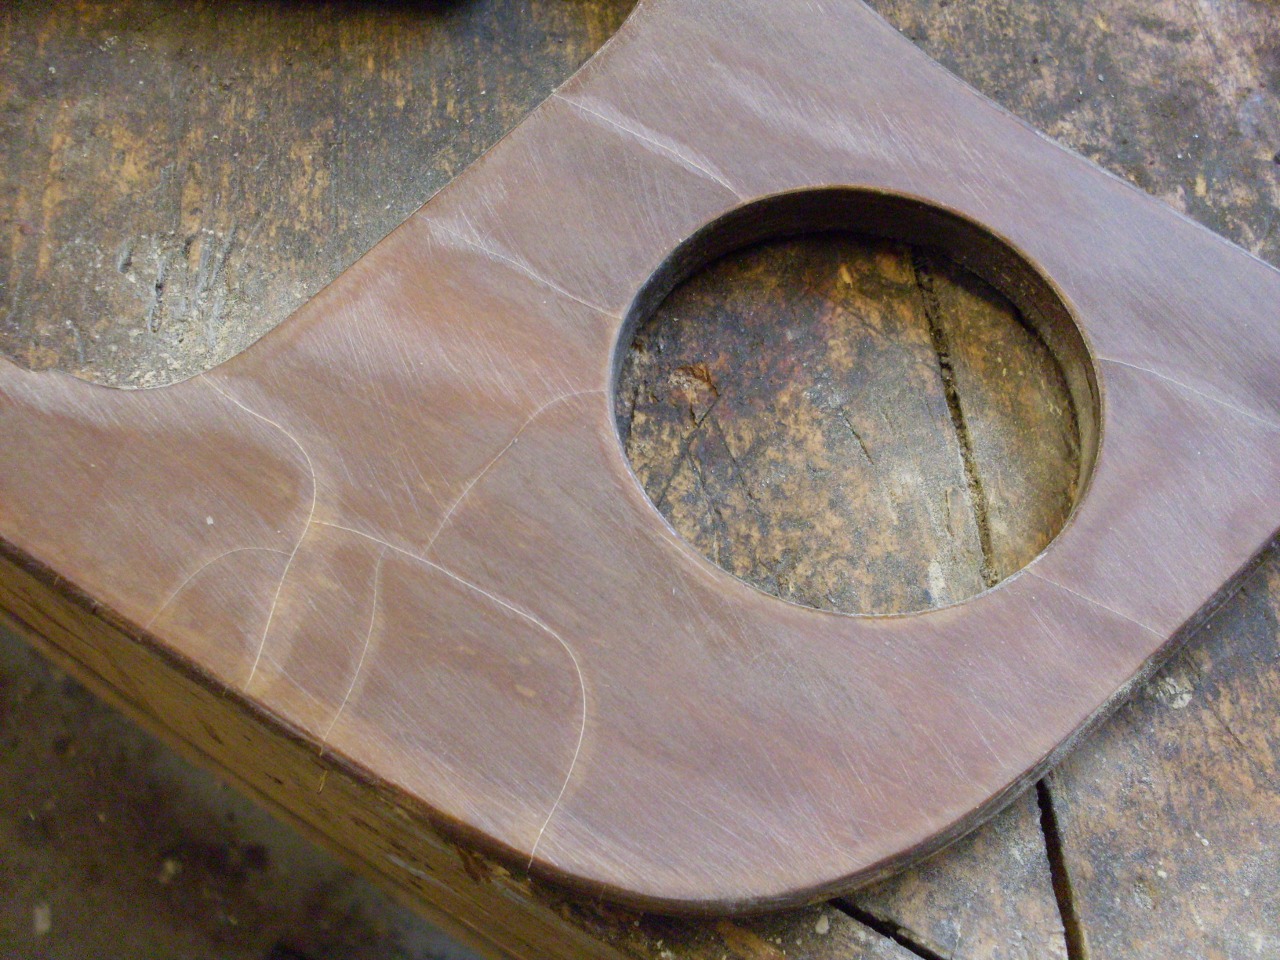
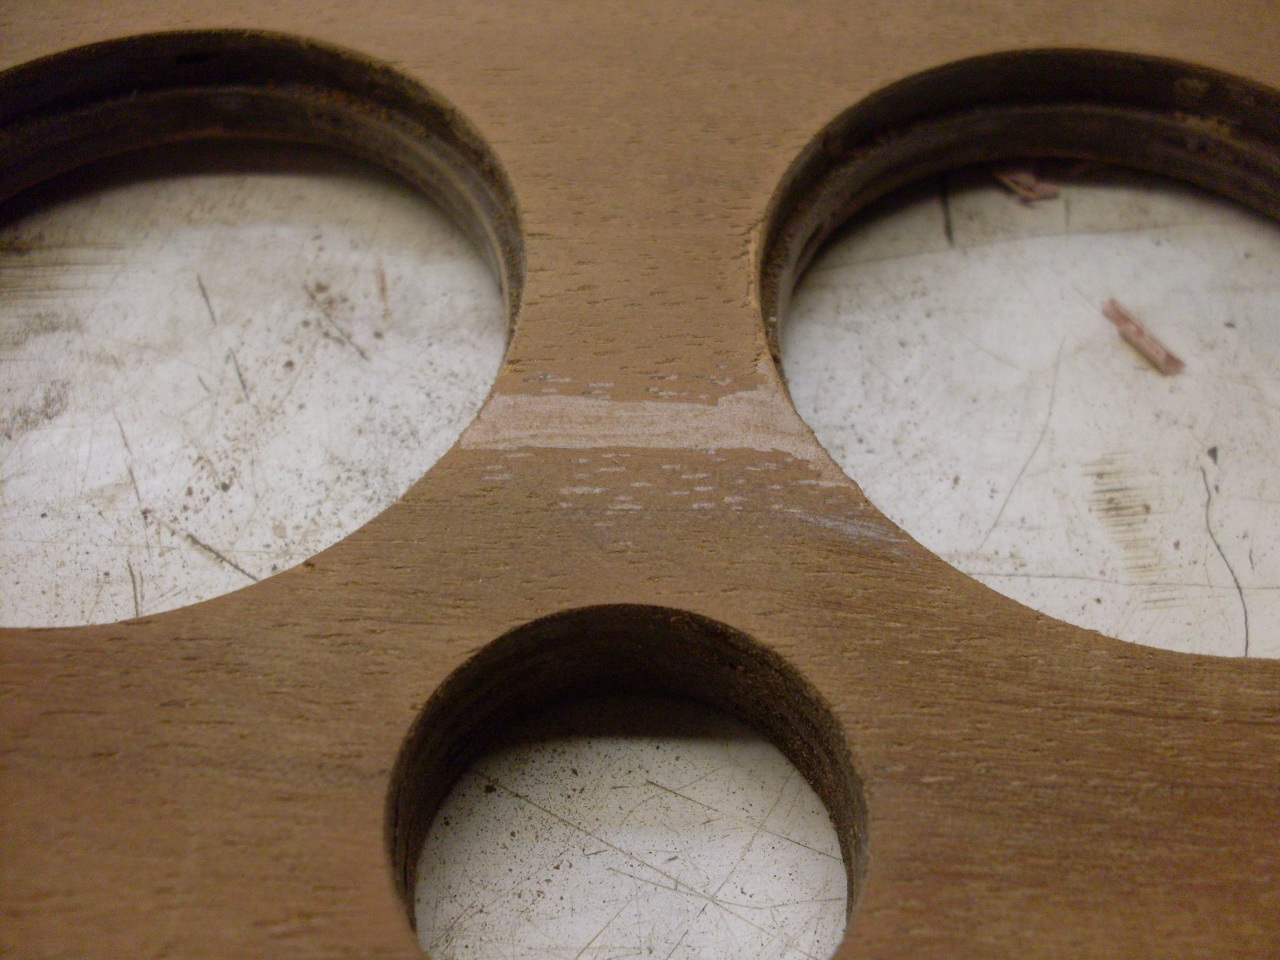
In
the scraping required by the stripping process, I did indeed damage the
original veneer in a few places. It's very thin, and is very
vulnerable in places where there is short grain between two edges.

Considering
the damage, I deemed the dash unusable in that condition.
This started me running through the options. There are
aftermarket replacement dashes in many different veneers. Some of
the ones I've seen are beautiful, but expensive, and since my dash was physically
sound, I didn't even consider buying a new one. All I needed was
to restore mine cosmetically. All I needed was new veneer.
Once
I got on the path to new veneer, I realized how wide the range of
possibilities was. Broadly speaking, a veneer surface doesn't
have to be wood, but to my mind, using some non-wood finish would violate the spirit of the car. Even limited to wood, the
possibilities are many. There are hundreds of types of wood
veneer, domestic, exotic, and specialty. I gave it a lot of
thought.
Now I've been a hobby woodworker for decades, so I have
at least a passing familiarity with quite a few kinds of wood.
When thinking of a dashboard wood, the first thing that will come
to mind for many people is walnut burl. It's almost a cliché for
very upscale cars, and is widely cheaply imitated in lower class
wanna-be cars. I find walnut burl very beautiful, but a little
too obvious, a little too pretentious, and also a little overdone.
I considered quite
a few kinds of wood, mostly exotics. I've worked with padouk and
purpleheart. They are gorgeous when freshly finished with
strikingly rich colors. The colors don't last well, though,
tending eventually toward brown. I considered several kinds of
mahoganies and rosewoods. Some of the rosewoods had such bold
grain that it seemed too overpowering.
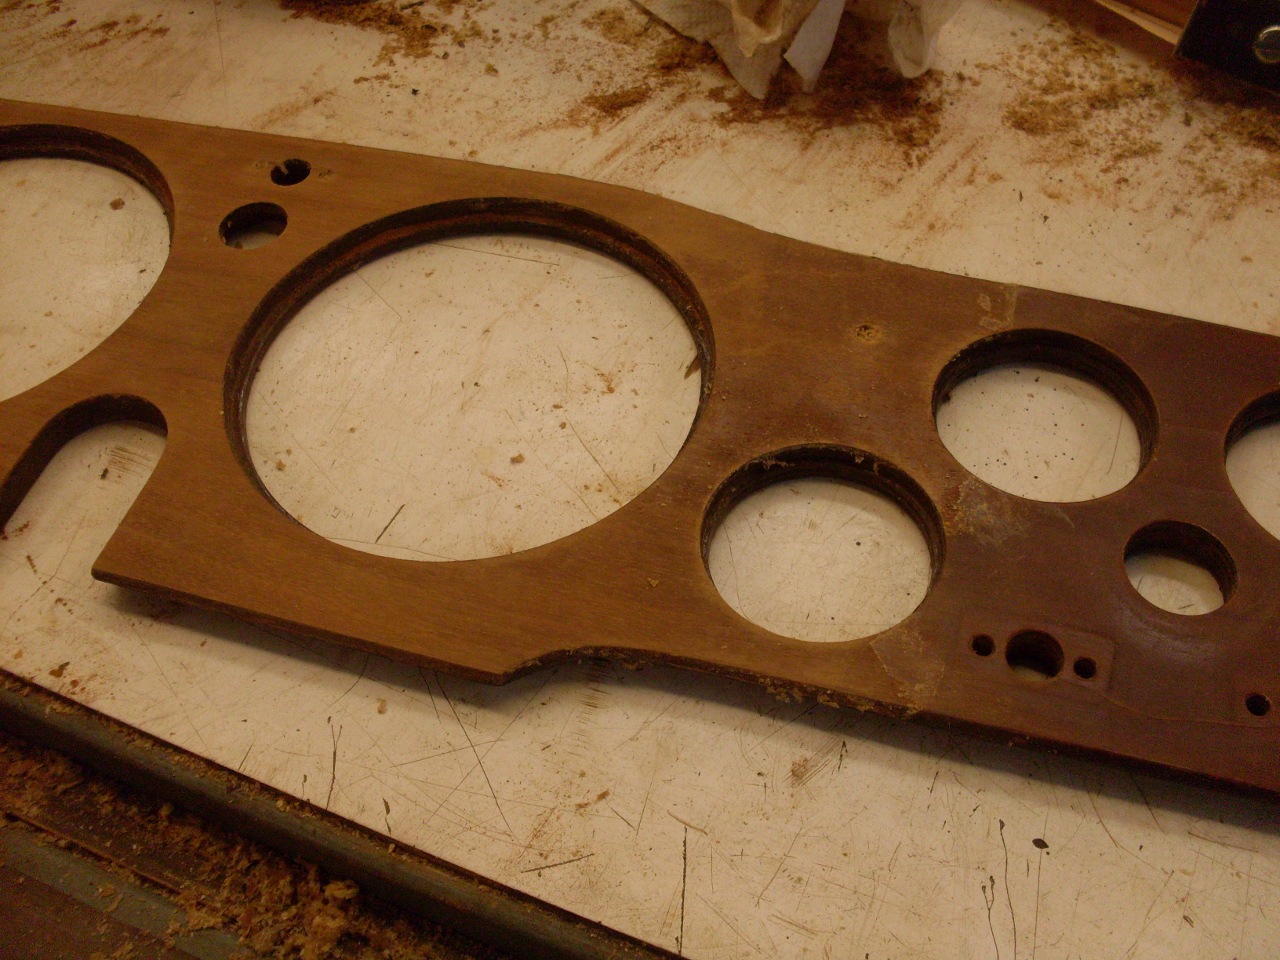
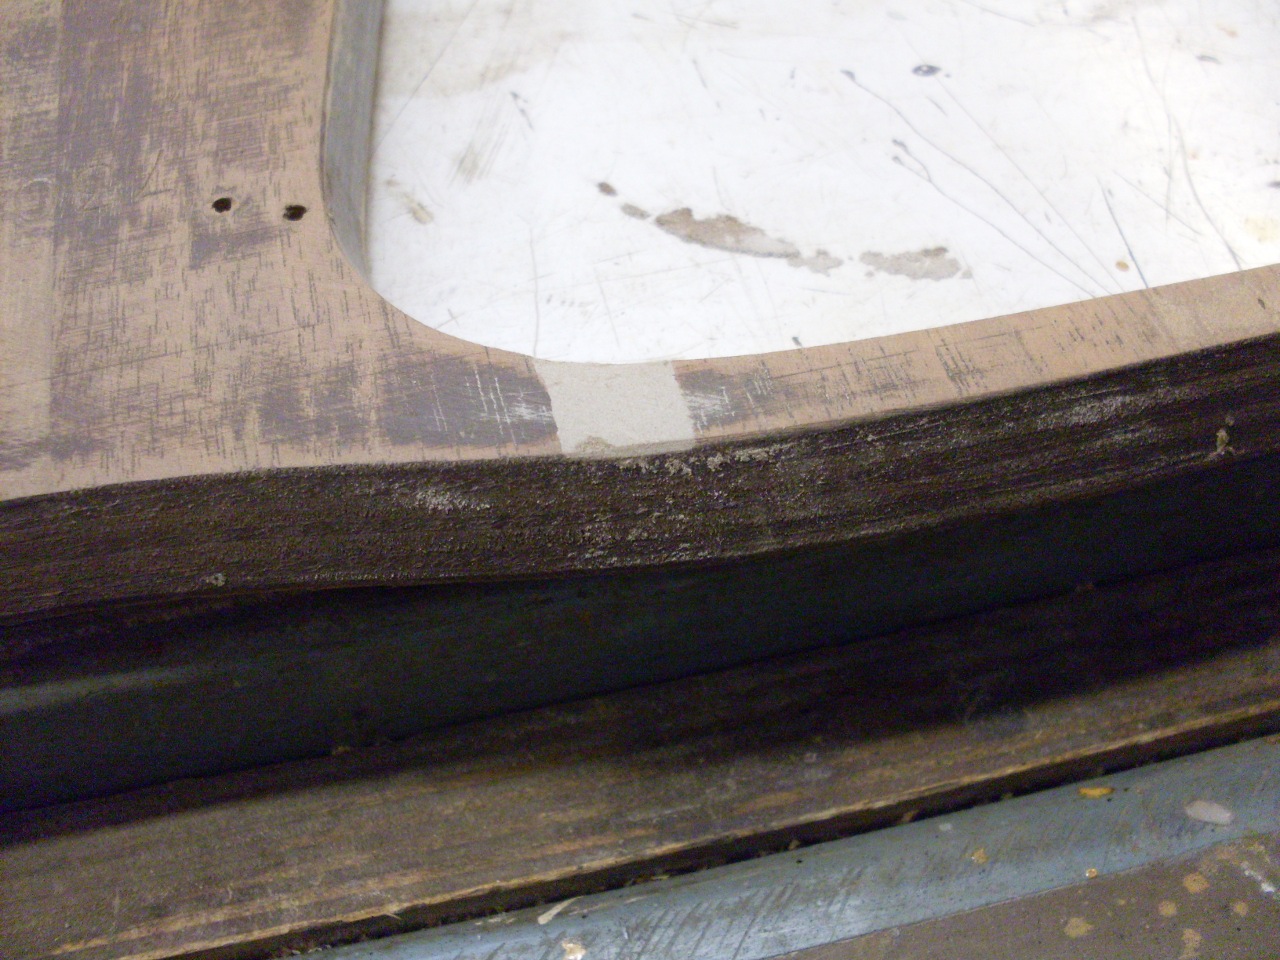
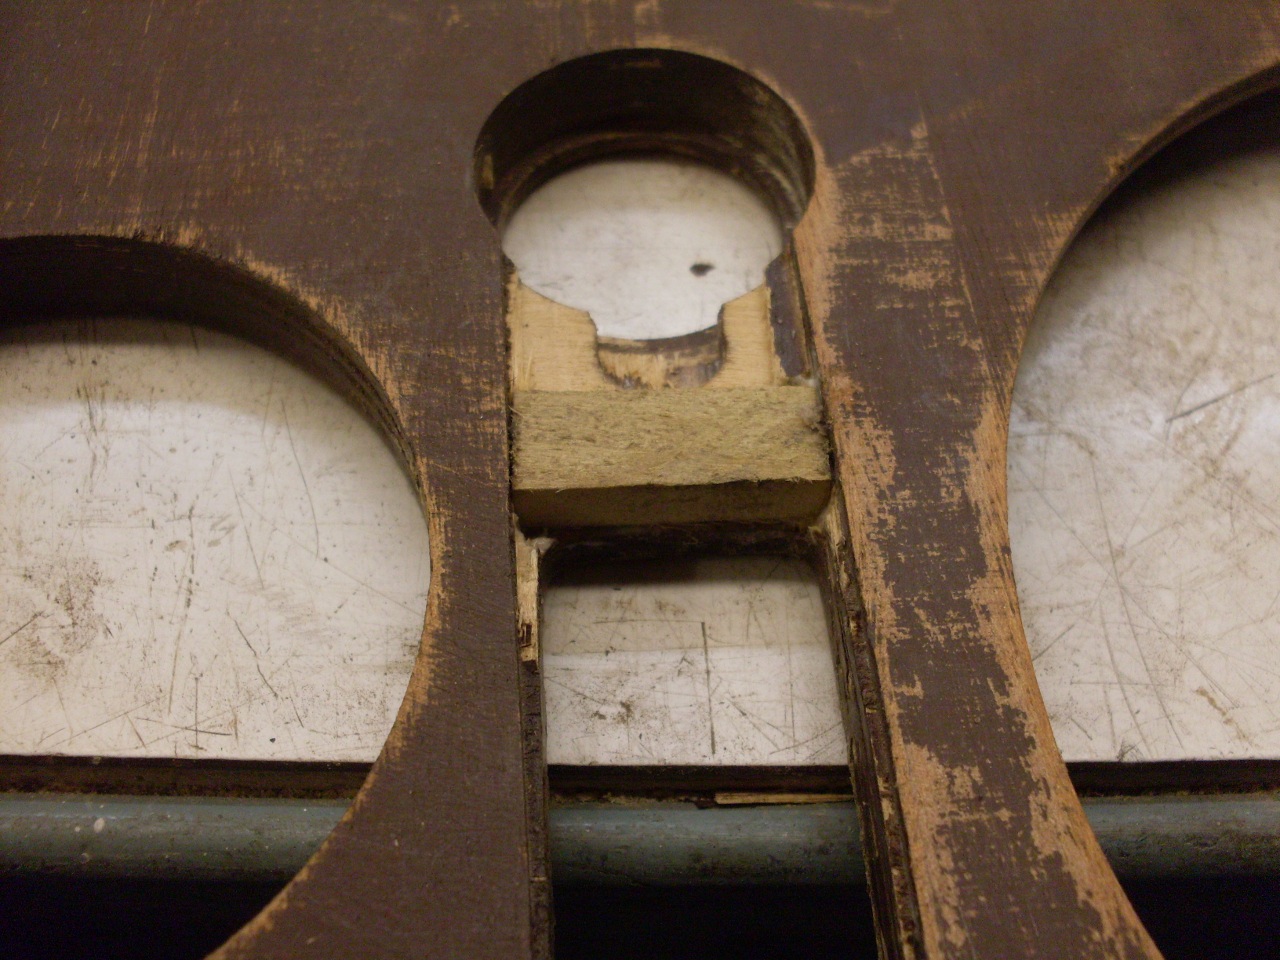
While I struggled with
the veneer decision, I prepared the dash for whatever I finally decided
on. Mainly, this involved sanding the surface smooth and flat,
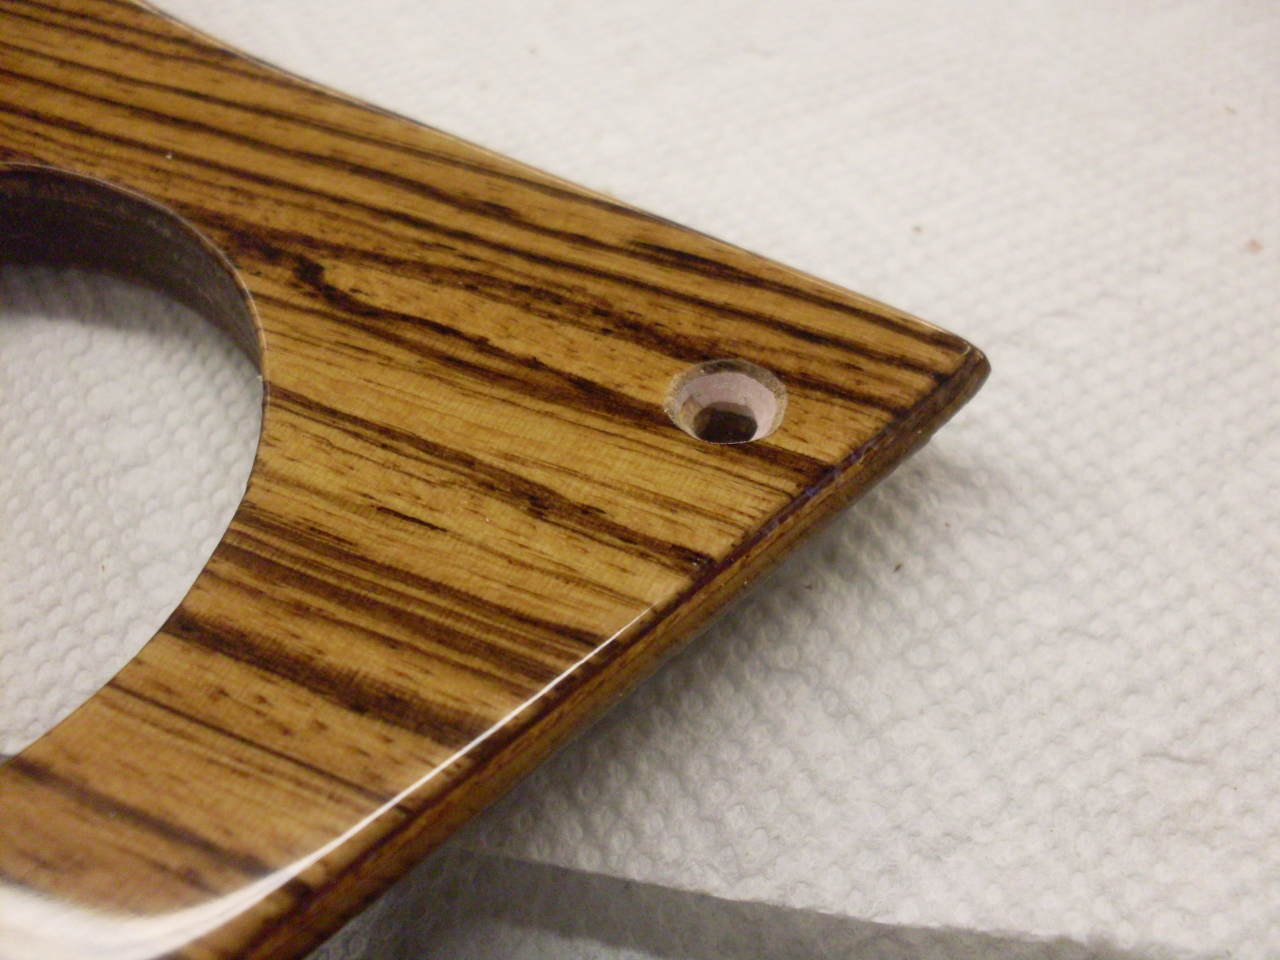
and repairing the few voids in the old veneer. I also filled in
the five countersunk dash mounting holes. The countersinks looked
to be kind of hogged out, so I'll redrill and countersink after the
final finish is on.
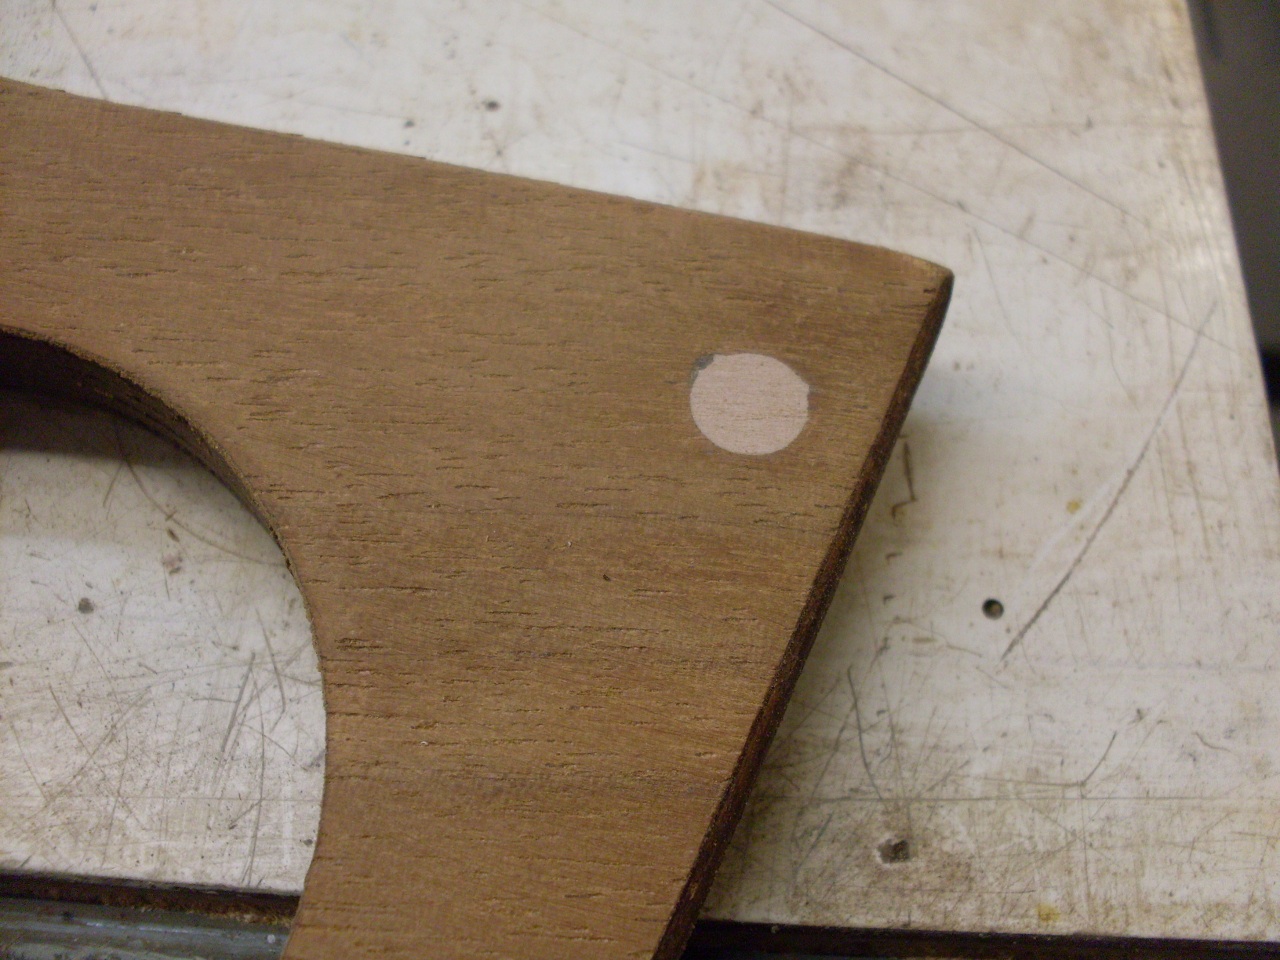
Also filled some voids and fixed a few stripped holes on the backside.
Enough
stalling. It was time for a decision. In the end, I came
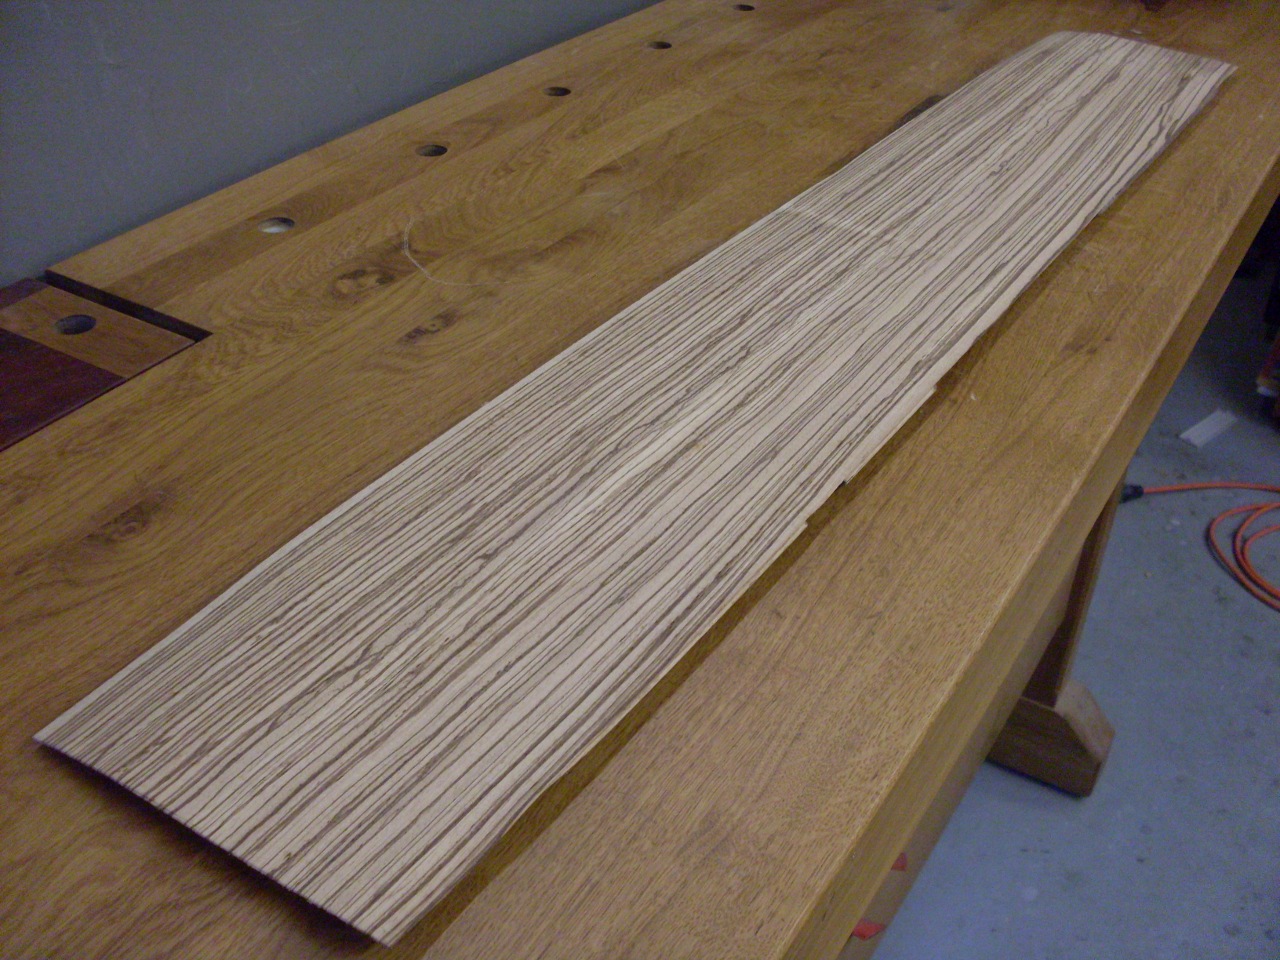
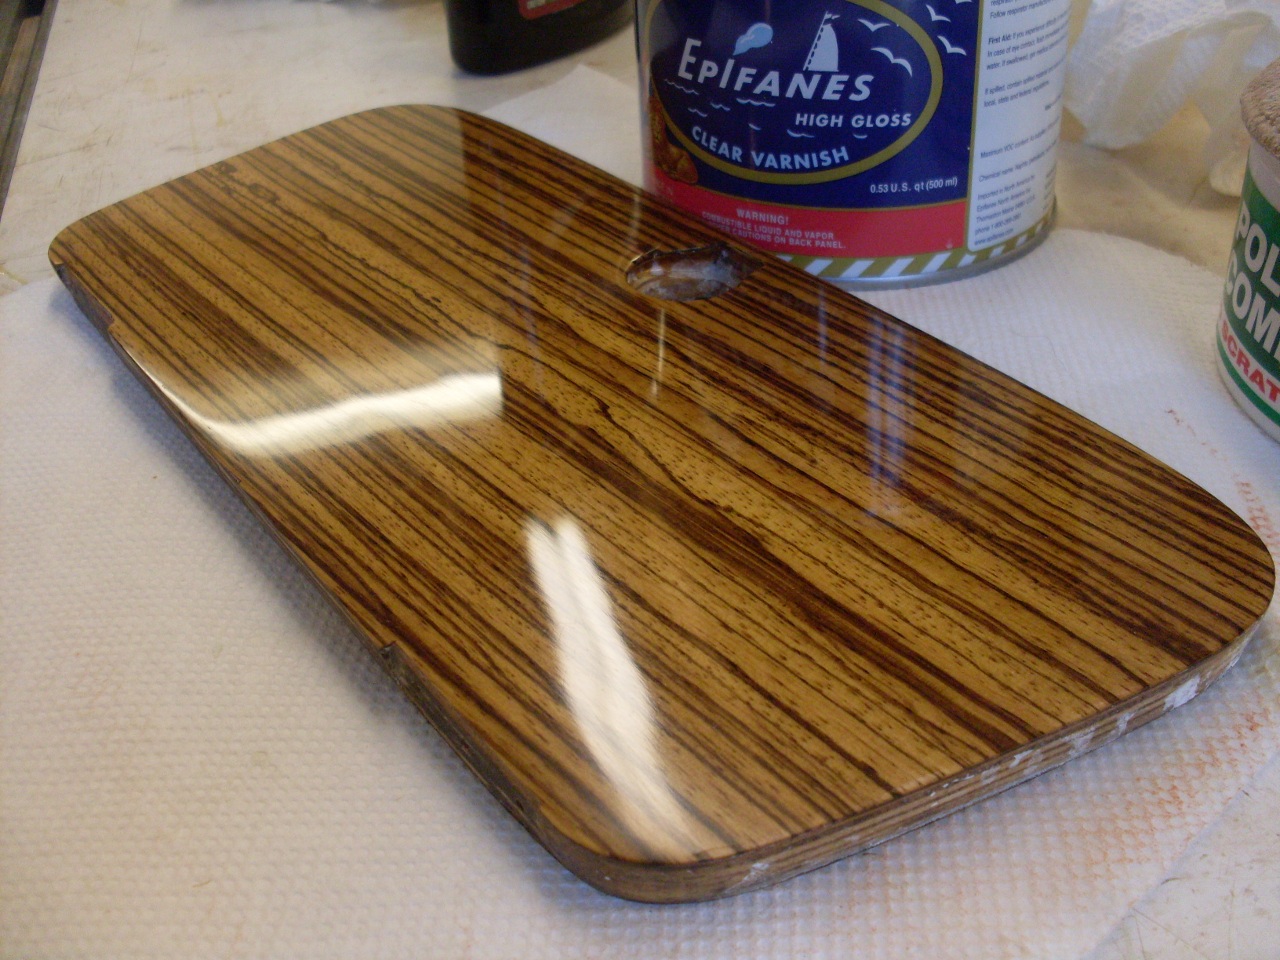
back to one of my all time favorite woods--zebrano, or zebrawood.
When zebrawood is quartersawn (cut on a line that goes nearly
through the center of the tree), it has a striking grain consisting of
more or less straight lines of alternating tan and dark brown.
The dark brown is close to the color I plan for the interior.
I'm not totally sure how it will look in the car, so it's a bit
of a leap of faith.
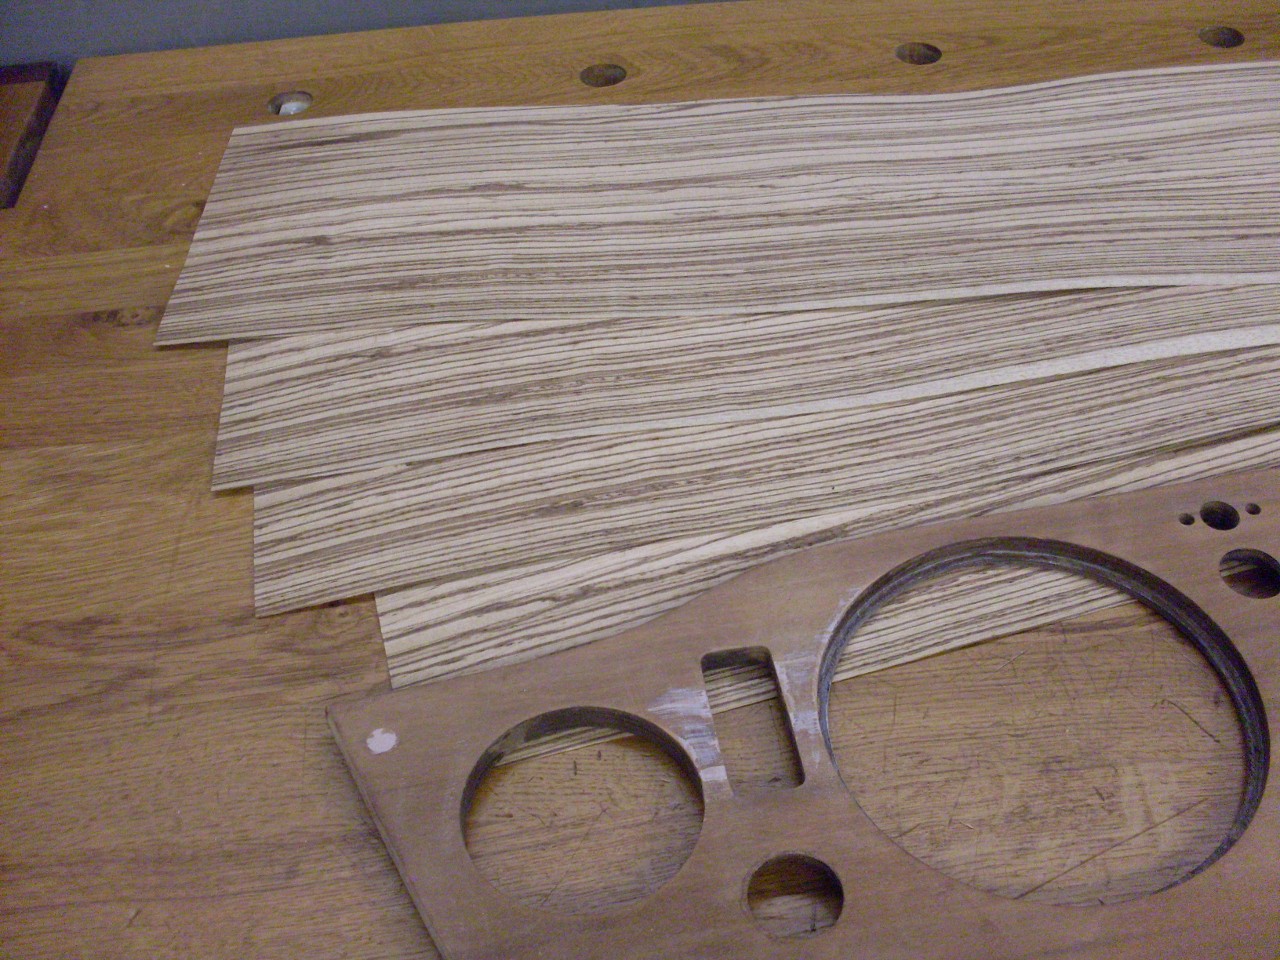
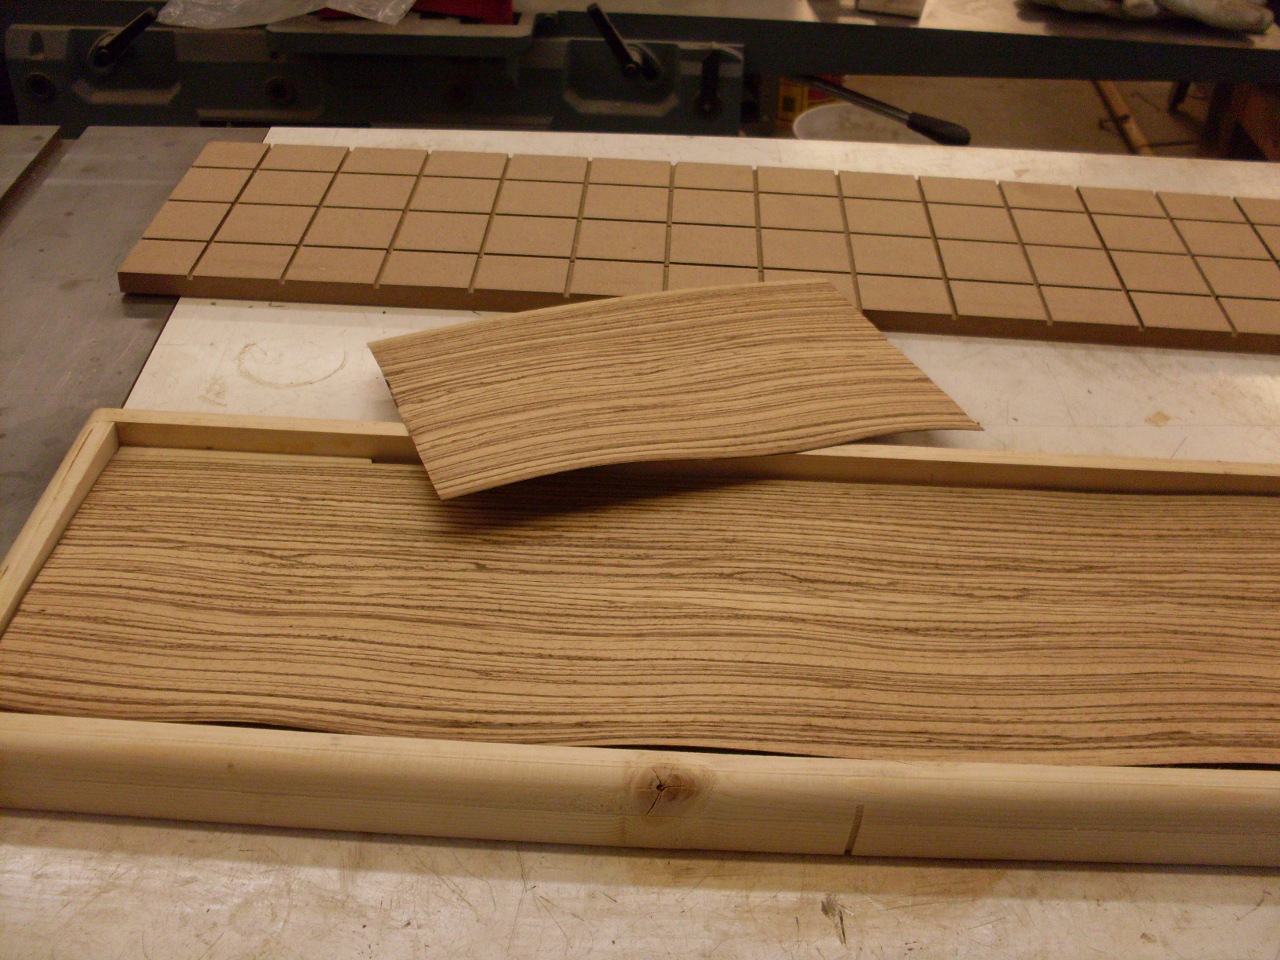
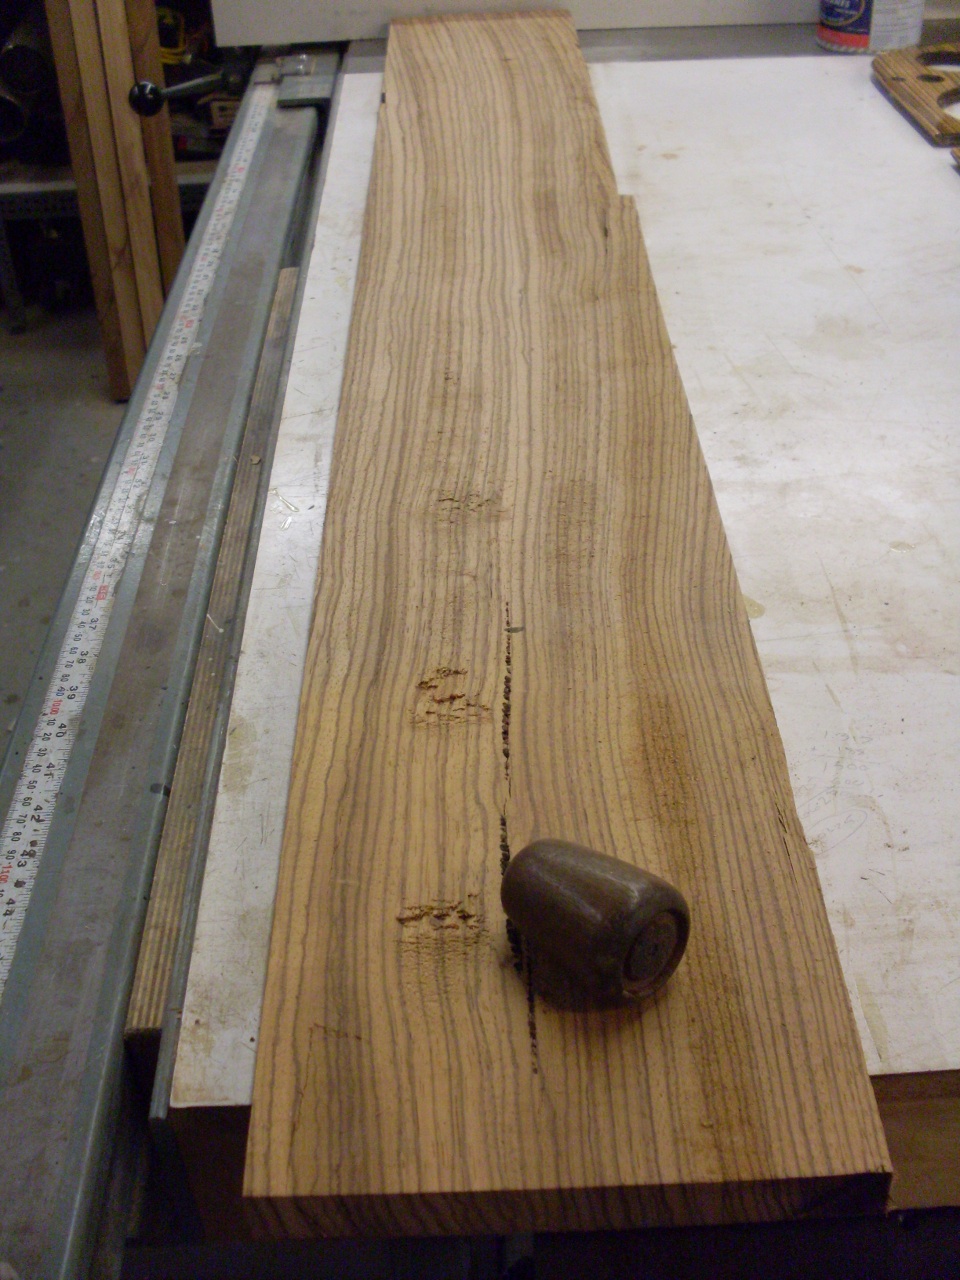
Raw veneer is commonly sold by the lot.
A lot consists of a number of consecutive sheets of veneer,
meaning that they would have been adjacent to each other in the tree.
Sheets in a lot will not only have consistent color, but the
grain pattern of adjacent sheets will be nearly identical, with only
subtle differences. I went on a website that posted photos of the
lots they had in stock, so I could pick the one with the grain pattern
I liked. The lot I bought had four sheets, but any one of them
was big enough to do the dash.

While
there are a number of methods to attach raw veneer to a wood substrate,
most of the better ones involve some serious clamping. Just
stacking weight on top of the veneer is often not practical since the
10-12 pounds per square inch needed for a good bond can add up to
thousands of pounds for something the size of a dashboard.
Luckily, there is an easy way to provide this pressure that
doesn't involve lifting heavy weights. A vacuum press uses normal
barometric air pressure to apply clamping force. It does this by
evacuating the air out of a sealed bag that contains the items to be
clamped. With little air pressure inside the bag, normal room air
pressure provides the clamping pressure.
I fabricatred a bag out
of heavy vinyl sheet (like what our rear windows are made from) that
was big enough for the dash. I did build a vacuum pump, but only
because I can use it for other things. A much simpler pump would
have worked as well. People have even used shop vacs.
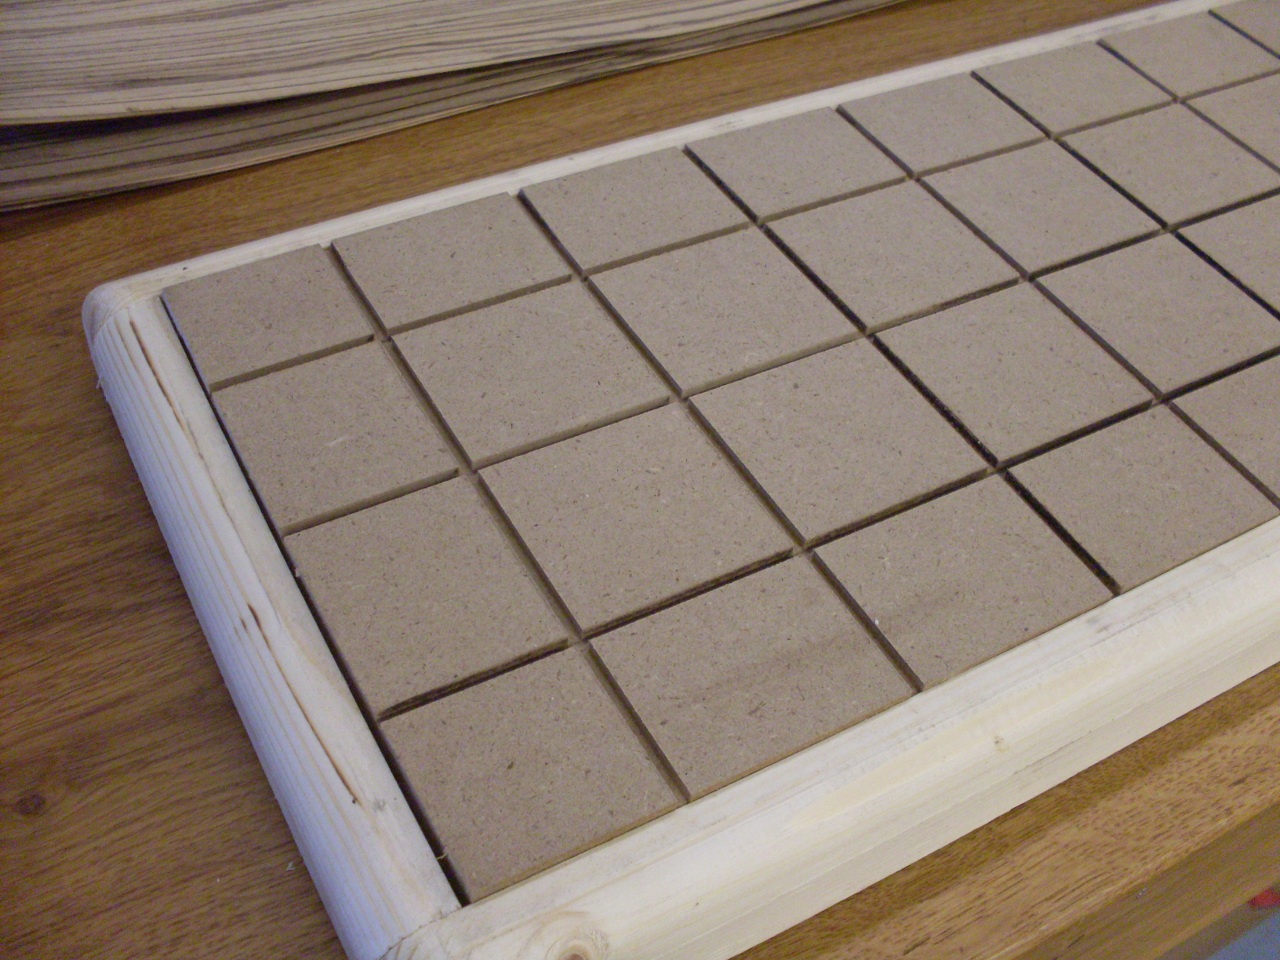
I
built a shallow frame to hold the dash
and veneer. On top of the veneer goes a flat panel that applies
the pressure to the veneer. The panel has grooves cut in it so no
air can get trapped in cavities in the bag. I decided to veneer
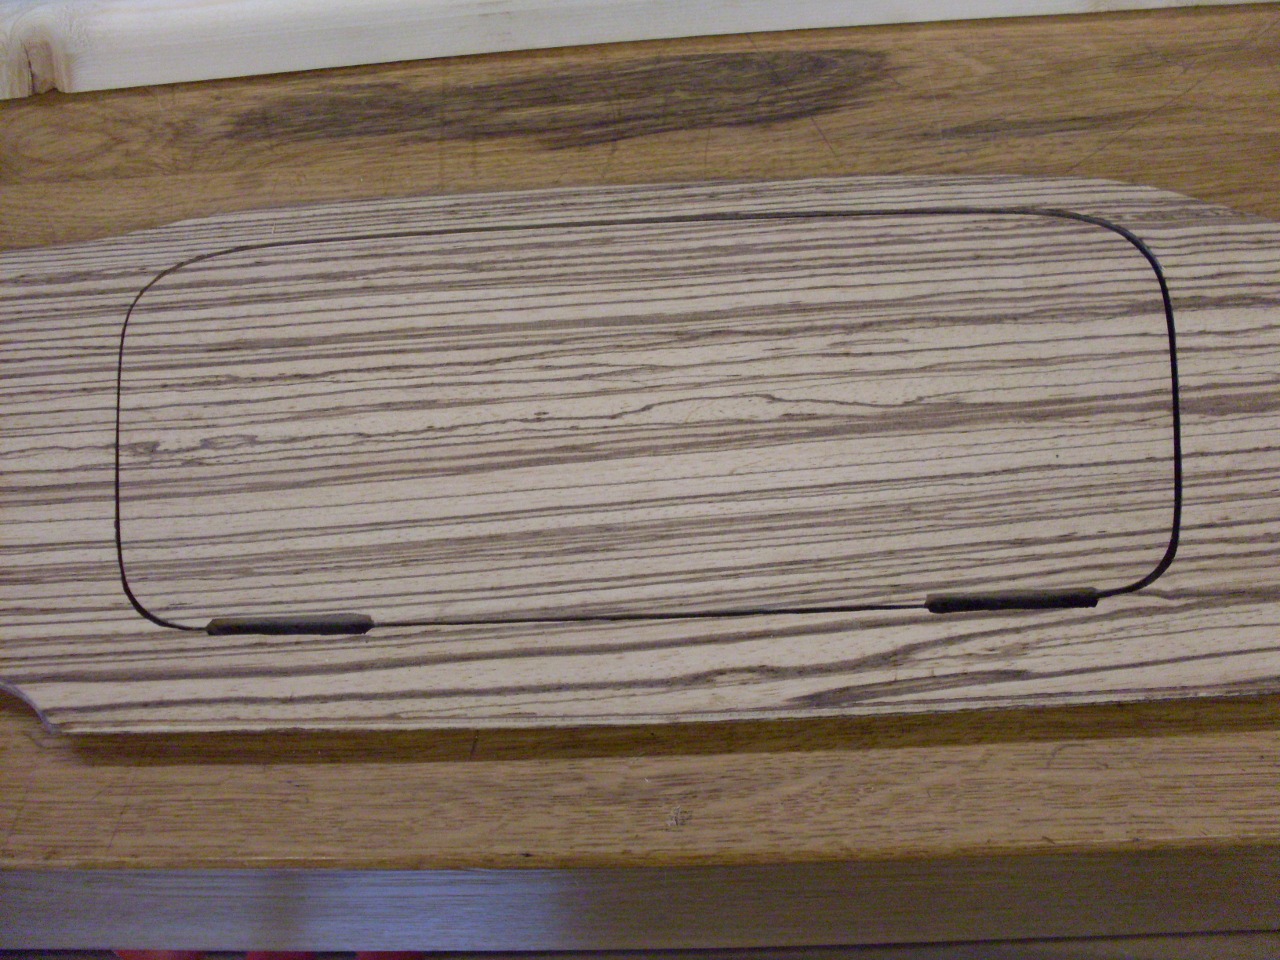
the glove box door at the same time as the rest of the dash, so I taped
it on the backside to keep it registered with the surrounding dash.
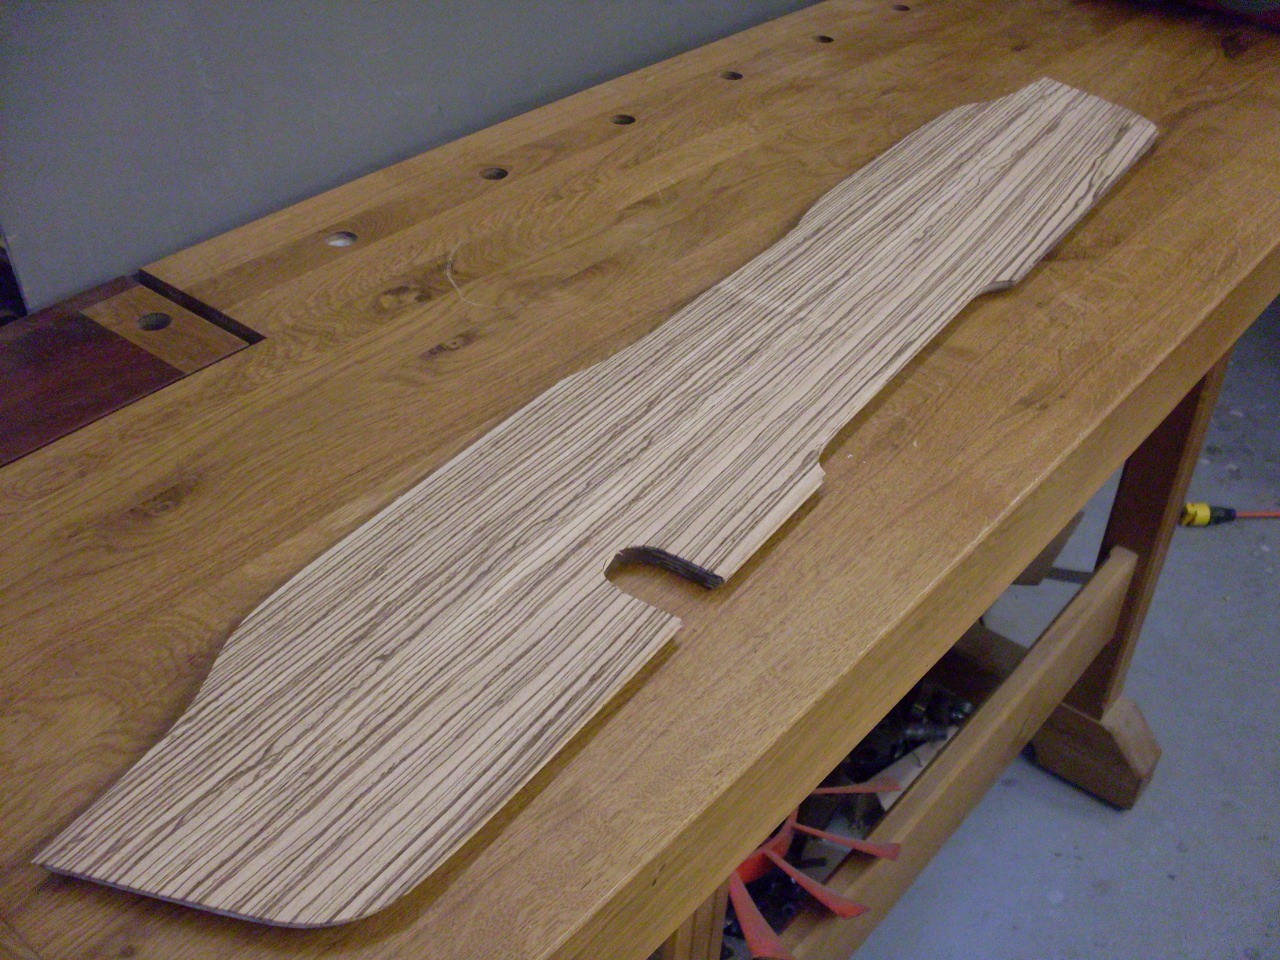
This
guarantees that the grain will be continuous across the door, but would make
cutting the door out a little more tedious and risky.

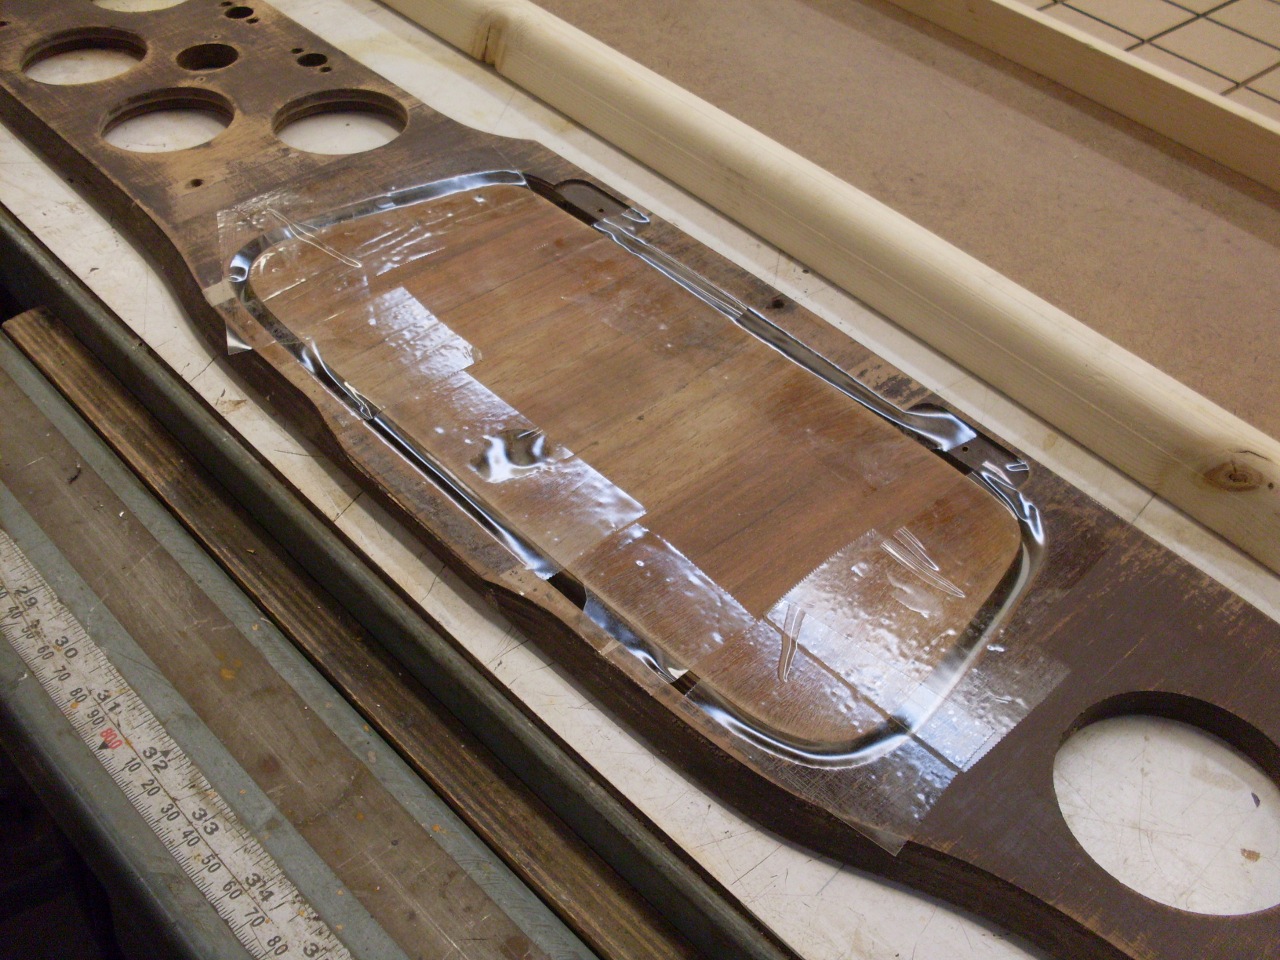
Then in the bag under vacuum for an hour or so.

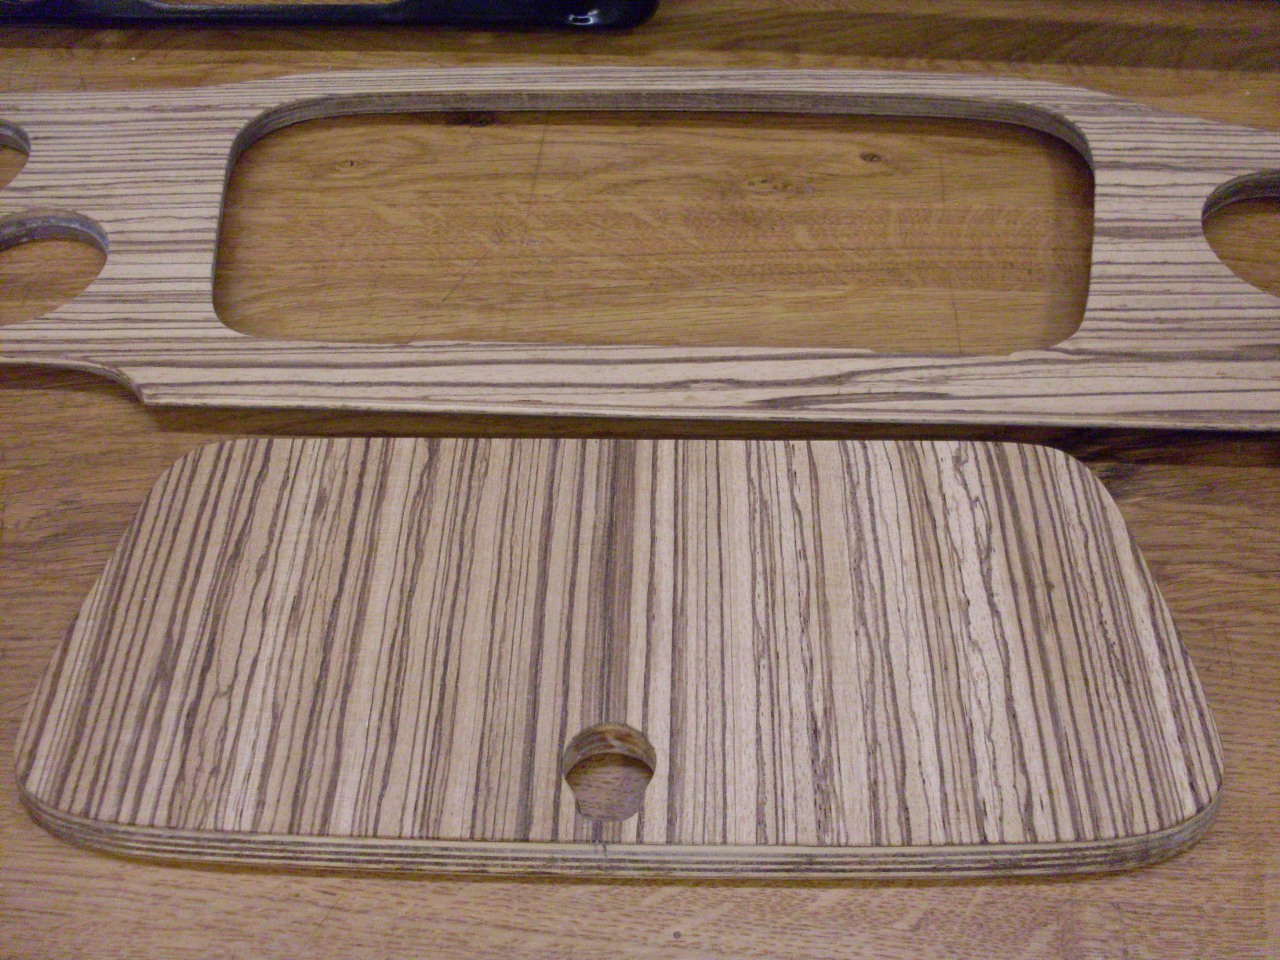
Another
couple of hours to finish curing, and I started trimming. A very
sharp Exacto knife worked pretty well, which of course meant that one
of the biggest risks became blood stains on the veneer.
After
sanding the edges flush. The glove box door seemed to fit nicely.
All the exposed edges of the dash will be painted brown
eventually.

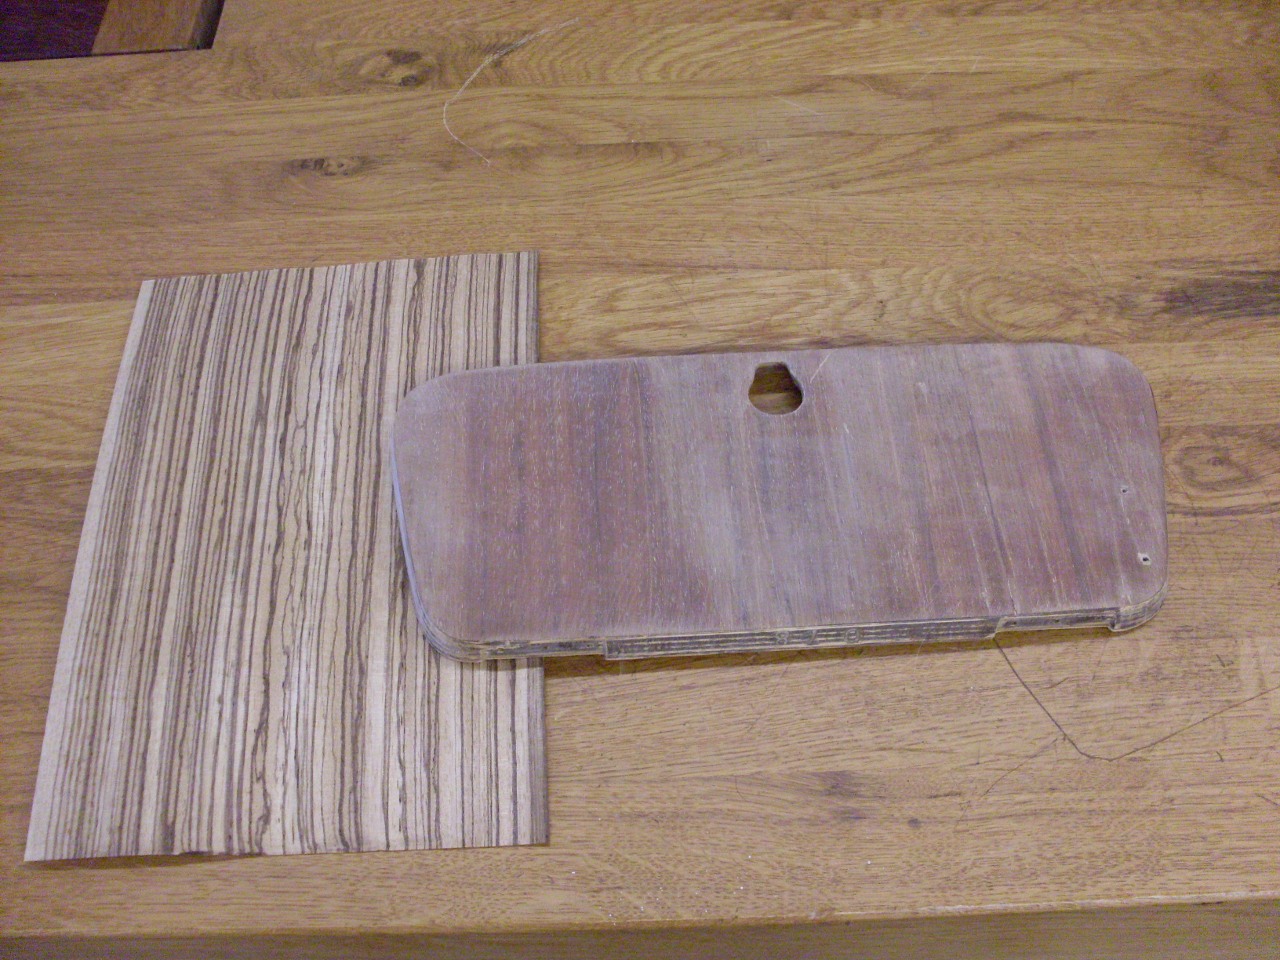
The
glovebox door gets veneered on its backside, too. The factory
appied the veneer vertically on the back, so I did too. I was
able to use a scrap from the dash and cut it in half so the door
backside veneer is bookmatched, or mirrored.

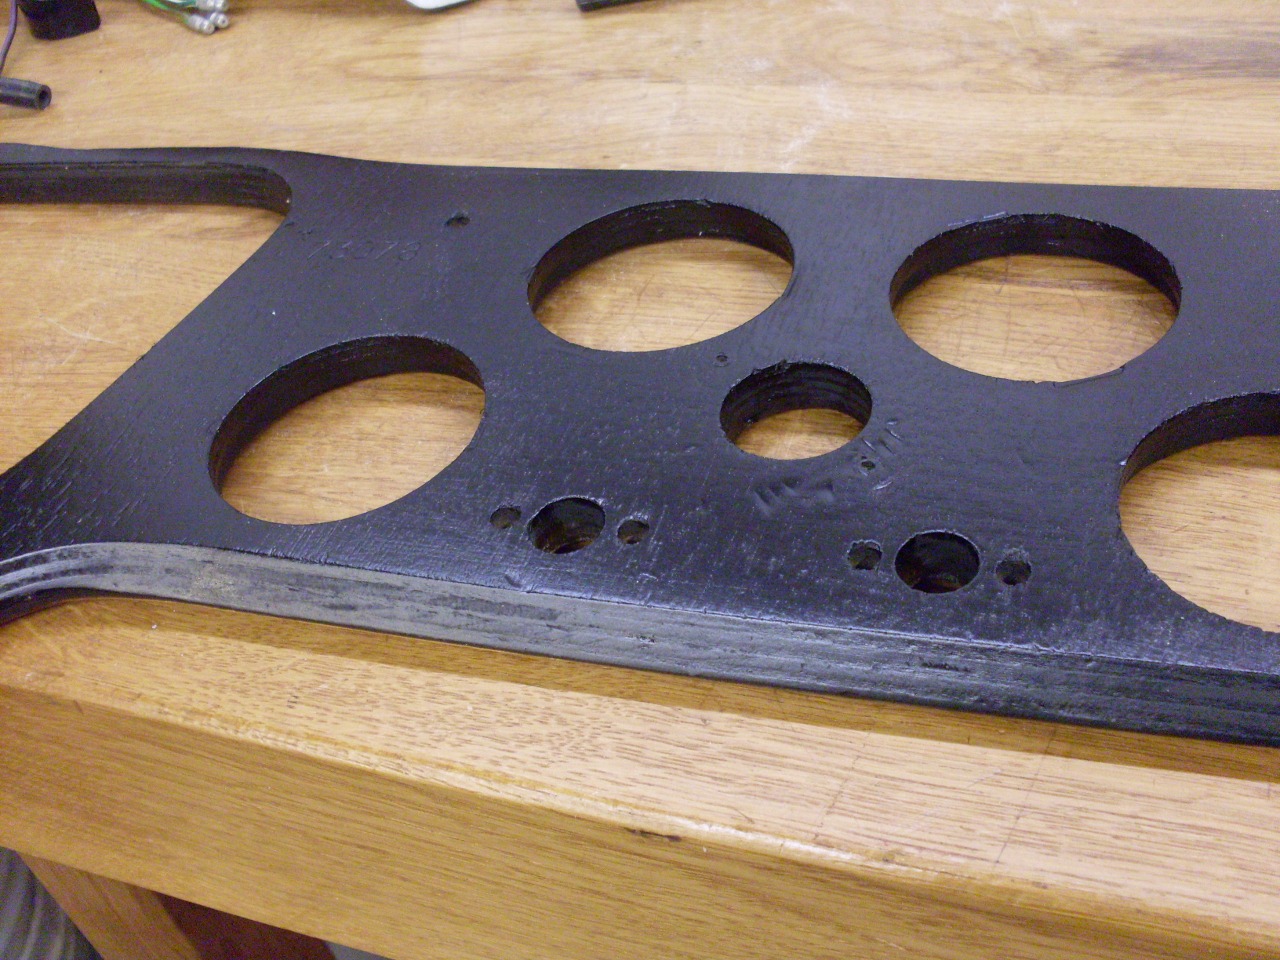
While trying to decide what kind of finish to apply, I cleaned up and primed the metal sub dash.
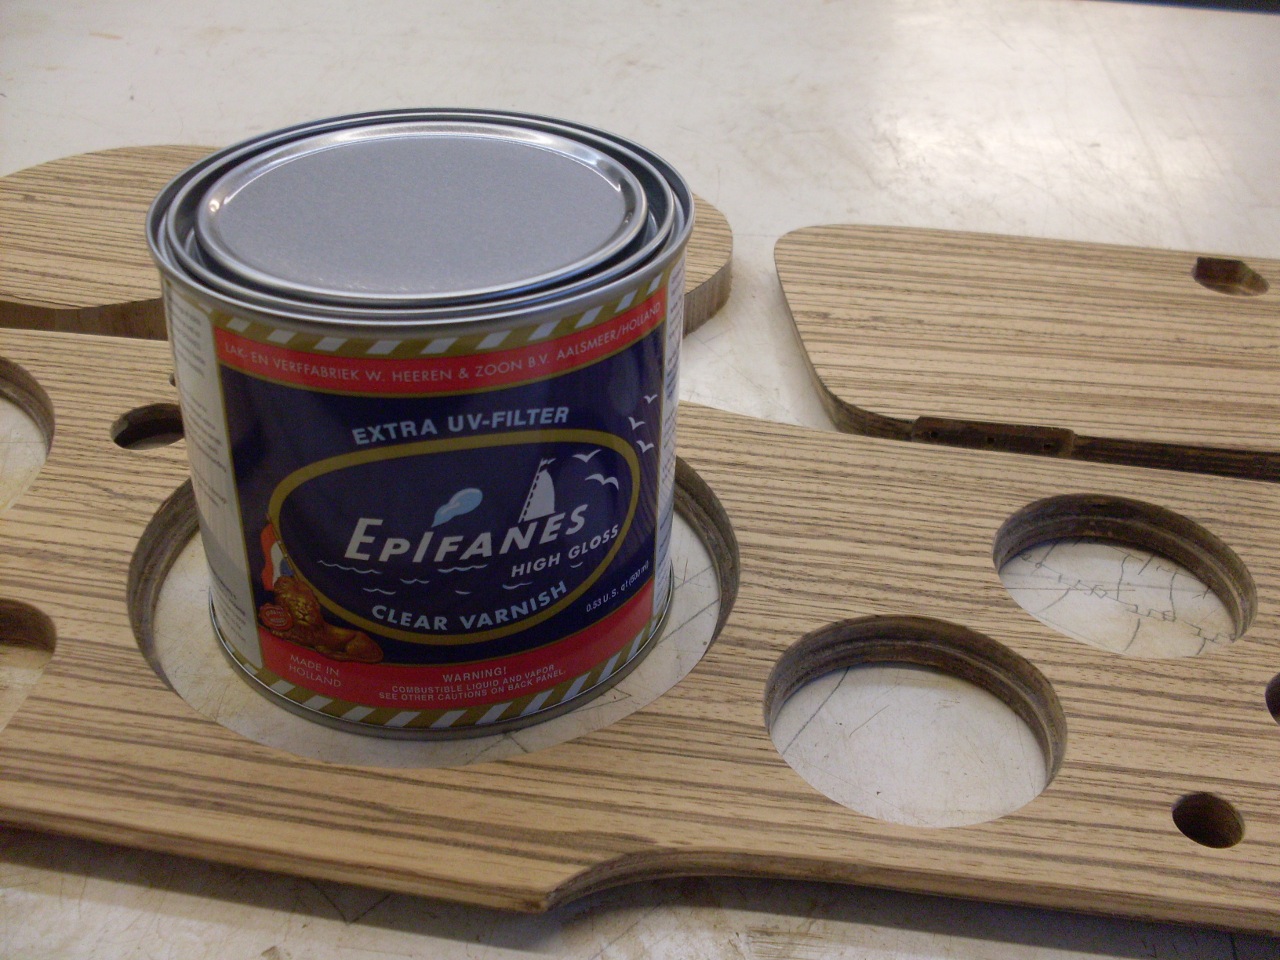
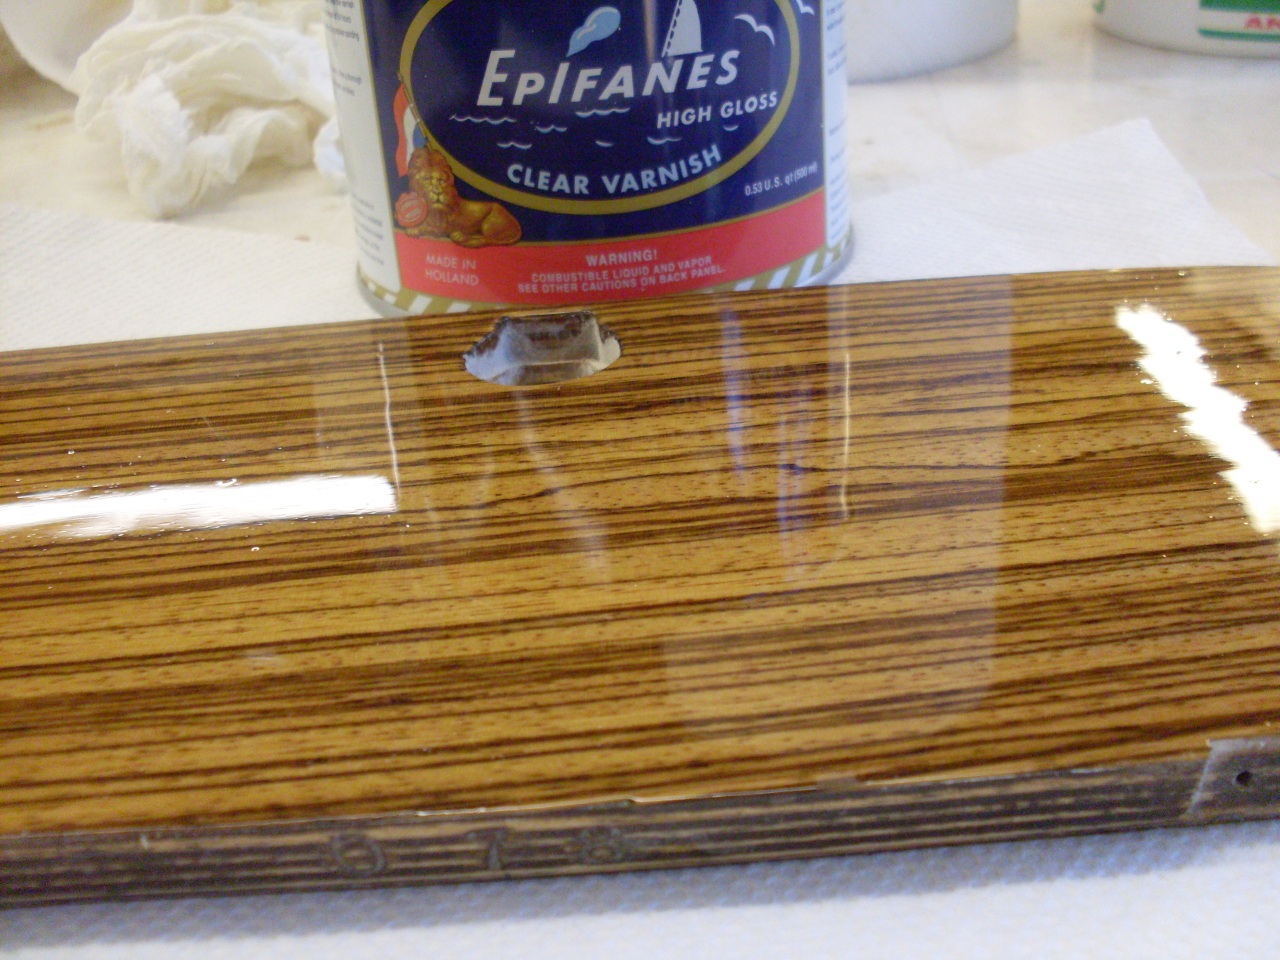
For
the finish, I obviously wanted something good looking, but also
durable. The environment for the dash is essentially outdoors,
with wide swings in temperature and humidity, and strong doses of
ultraviolet light. I've used many of the products available to
the mass market through big box stores, and most of them worked OK, but
I felt there were probably better products available. I
researched true marine varnishes, and finally chose a European varnish
popular with the higher end boat crowd. It isn't cheap, but I was
able to get a half-liter can which was plenty for the project.
Staying
fairly close to the recommended application schedule on the can, I
applied a few thinned coats, which tended to soak into the wood.
I followed this with unthinned applications for a total of nine
coats, sanding between coats to level any imperfections.
I don't
have a dedicated finishing room, so I expected the usual dust nibs in
the finish. This isn't a big problem since I planned to cut back
the gloss anyway, a process that will remove those kinds of
imperfections.
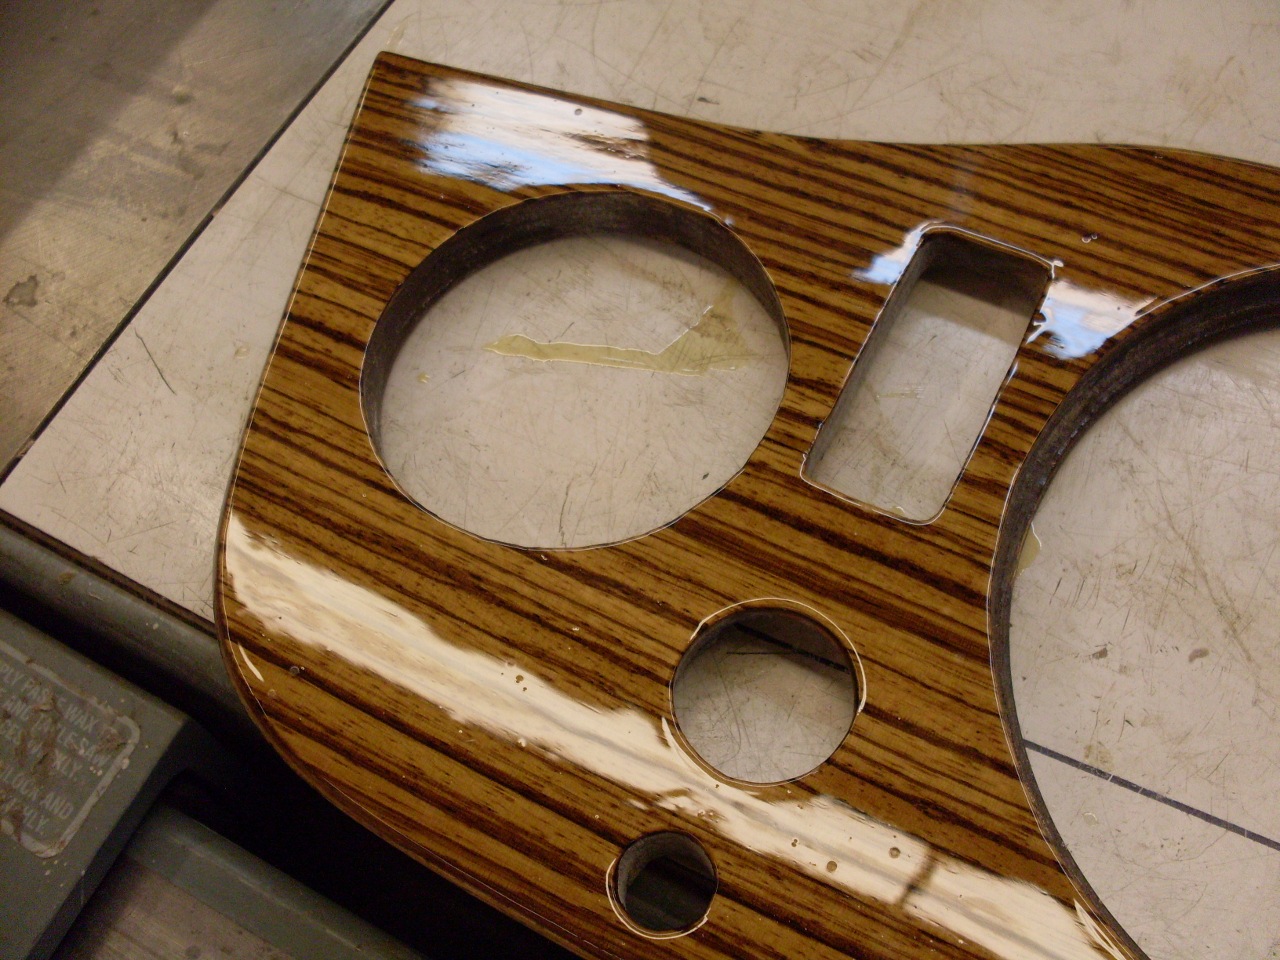
Here
is the dash after the final coat was dry, but before any final leveling
or adjustment of the sheen. A good varnish finish suitable for
outdoors takes time. After nine
days of one coat per day, the finish is dry to the touch, but is still
soft. It can take another week or more to get the finish hard
enough
to sand. I waited until a finger pressed hard onto the finish
would not
leave an impression. It was about another ten days of leaving it
on a window sill in direct sun.
I
glued the speedo and tach veneer cutouts to a substrate with the idea
of testing finishing techniques on them first, before applying them to
the dash itrself. It gave me a chance to try various rubbing
products and see various sheens before I committed myself to the dash.
I wasn't totally sure what level of gloss I wanted, or even how
to get it. One advantage of using a high gloss varnish is that it
can be rubbed to just about any level of sheen from matte to high
gloss. Even if I wanted a very high gloss, the rubbing steps are
necessary to get rid of the surface imperfections of the raw varnish
film.
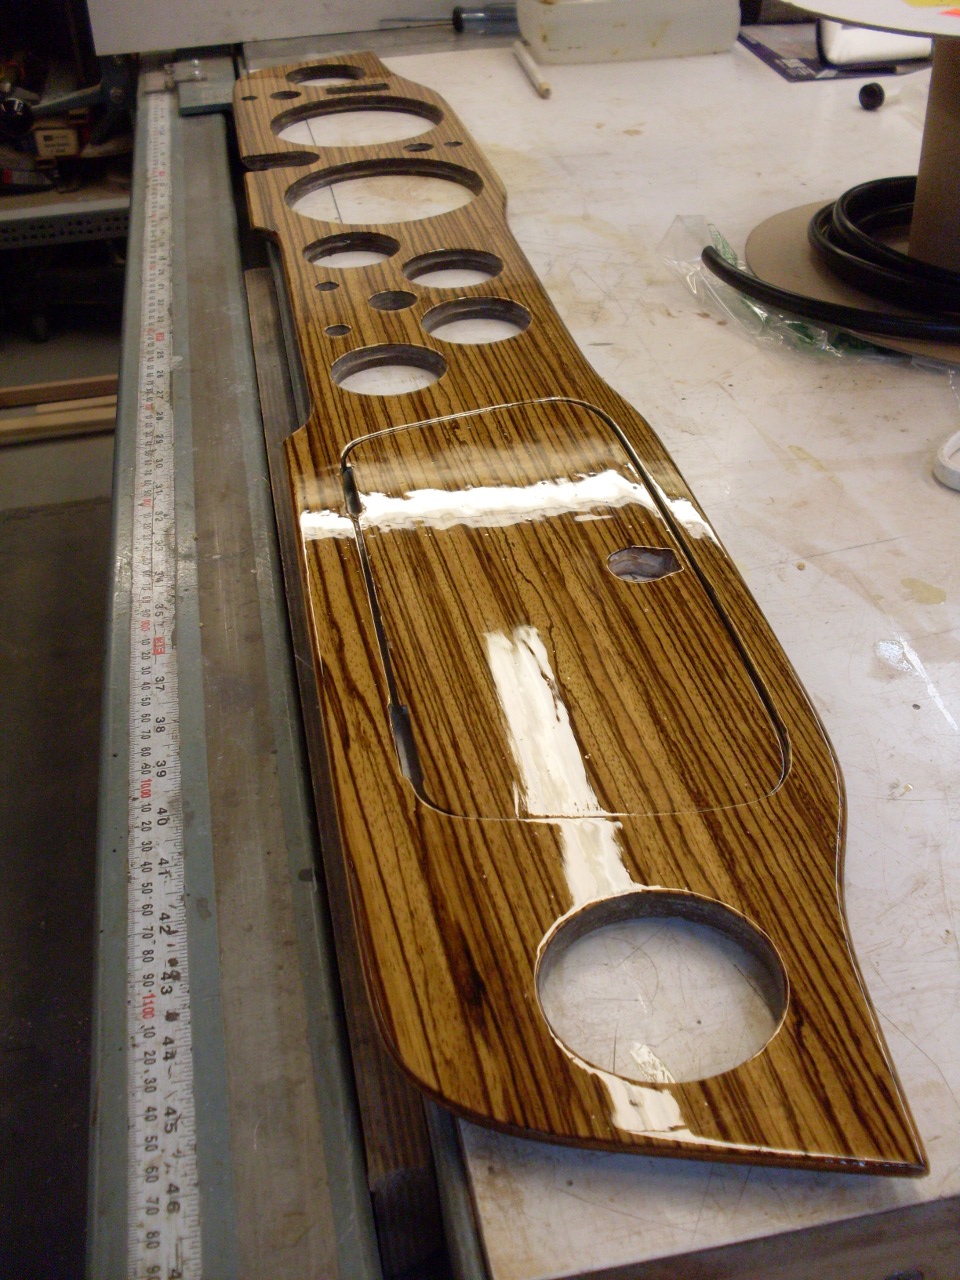
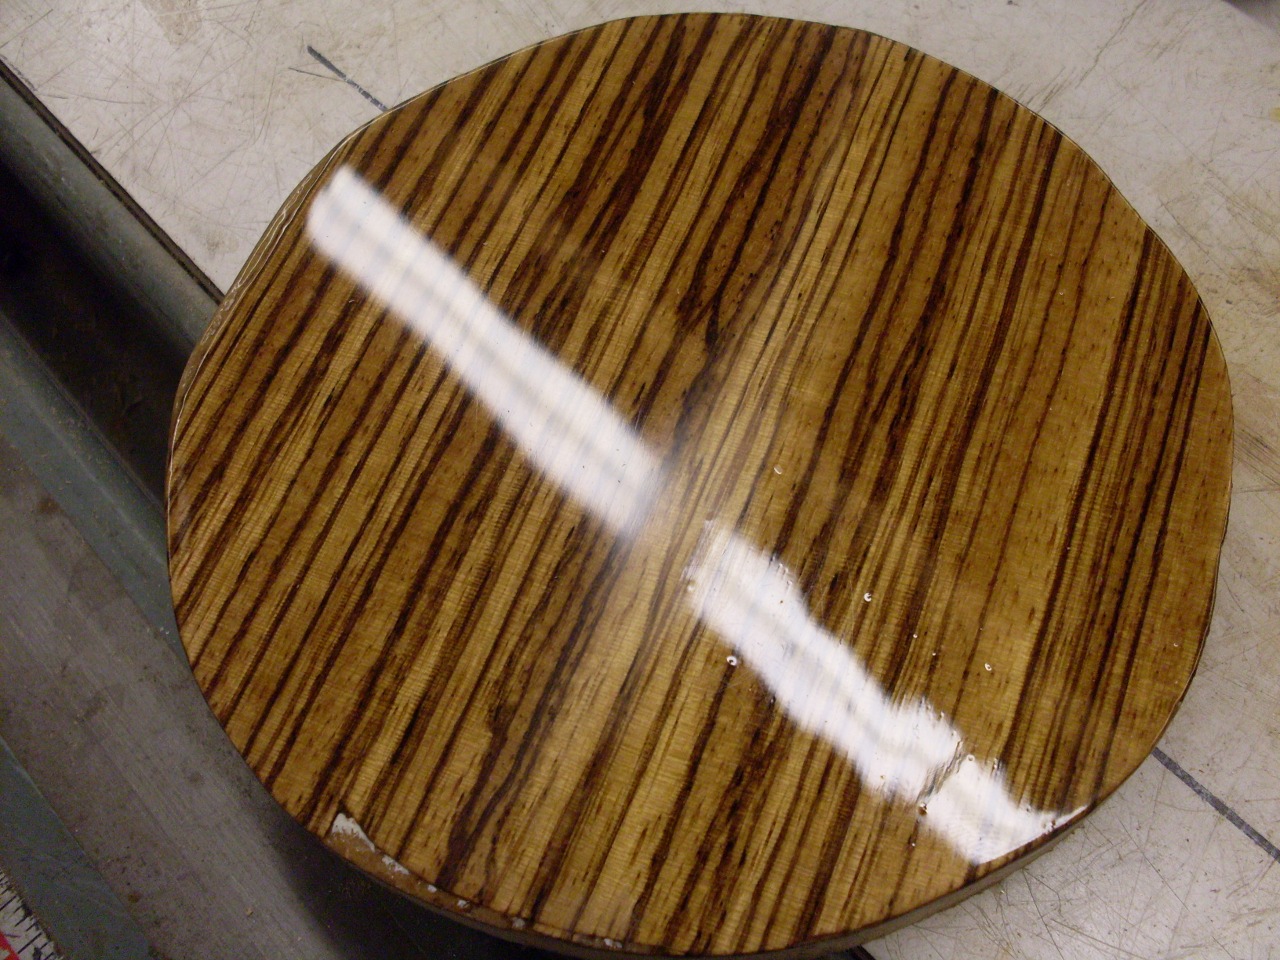
The
pic below shows one of the test panels with the right half untouched
after varnishing, and the left after a regimen of fine wet
sandpapers and a series of hand rubbing steps. That was about the
maximum gloss I was interested in, and I knew how to get there. I
could stop short of that level for a little more of a satin look.
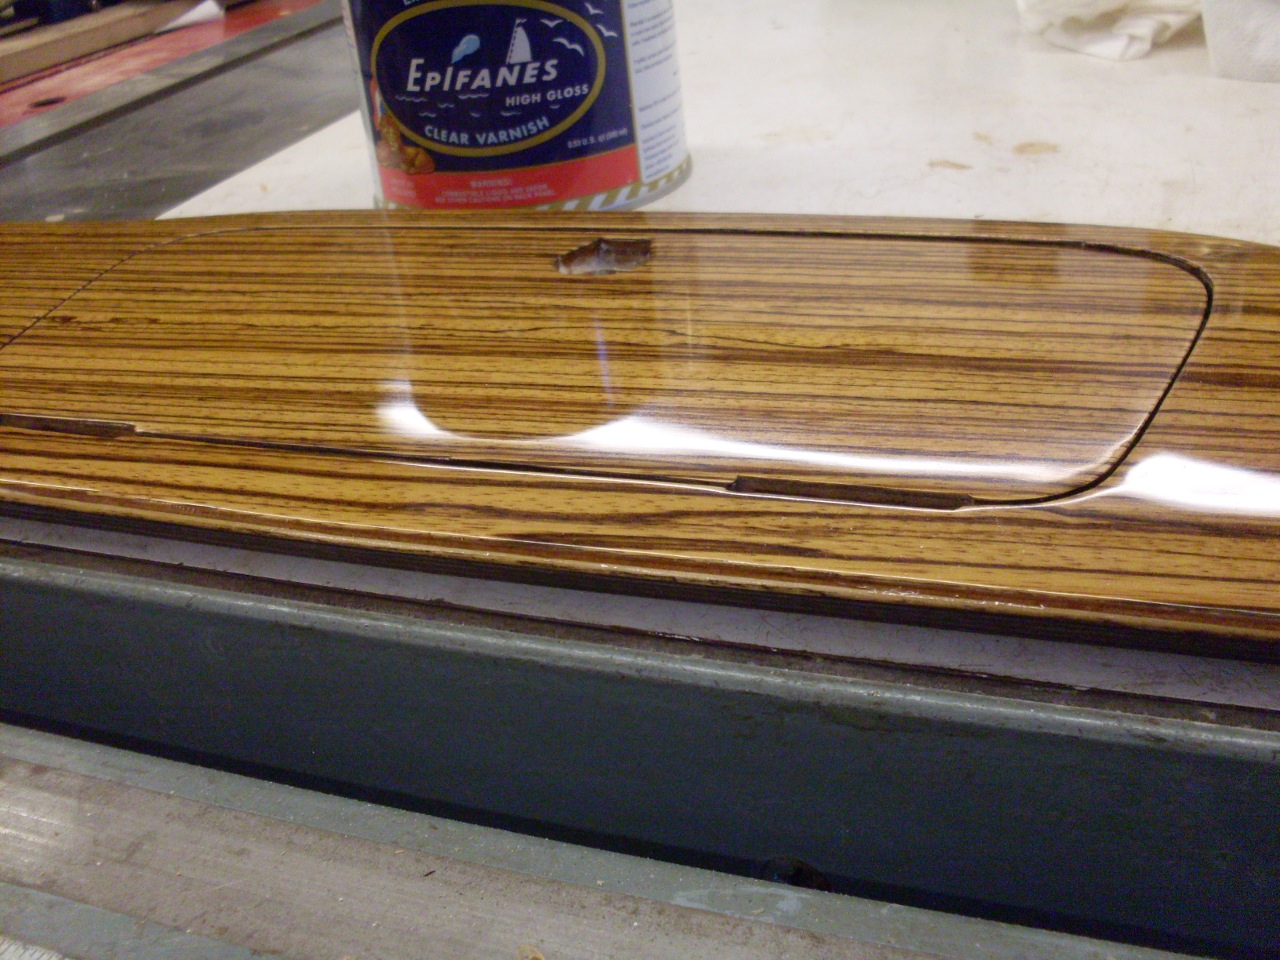
Here is a section of the dash part way through the process. I really like this look, but went on for a little more shine.
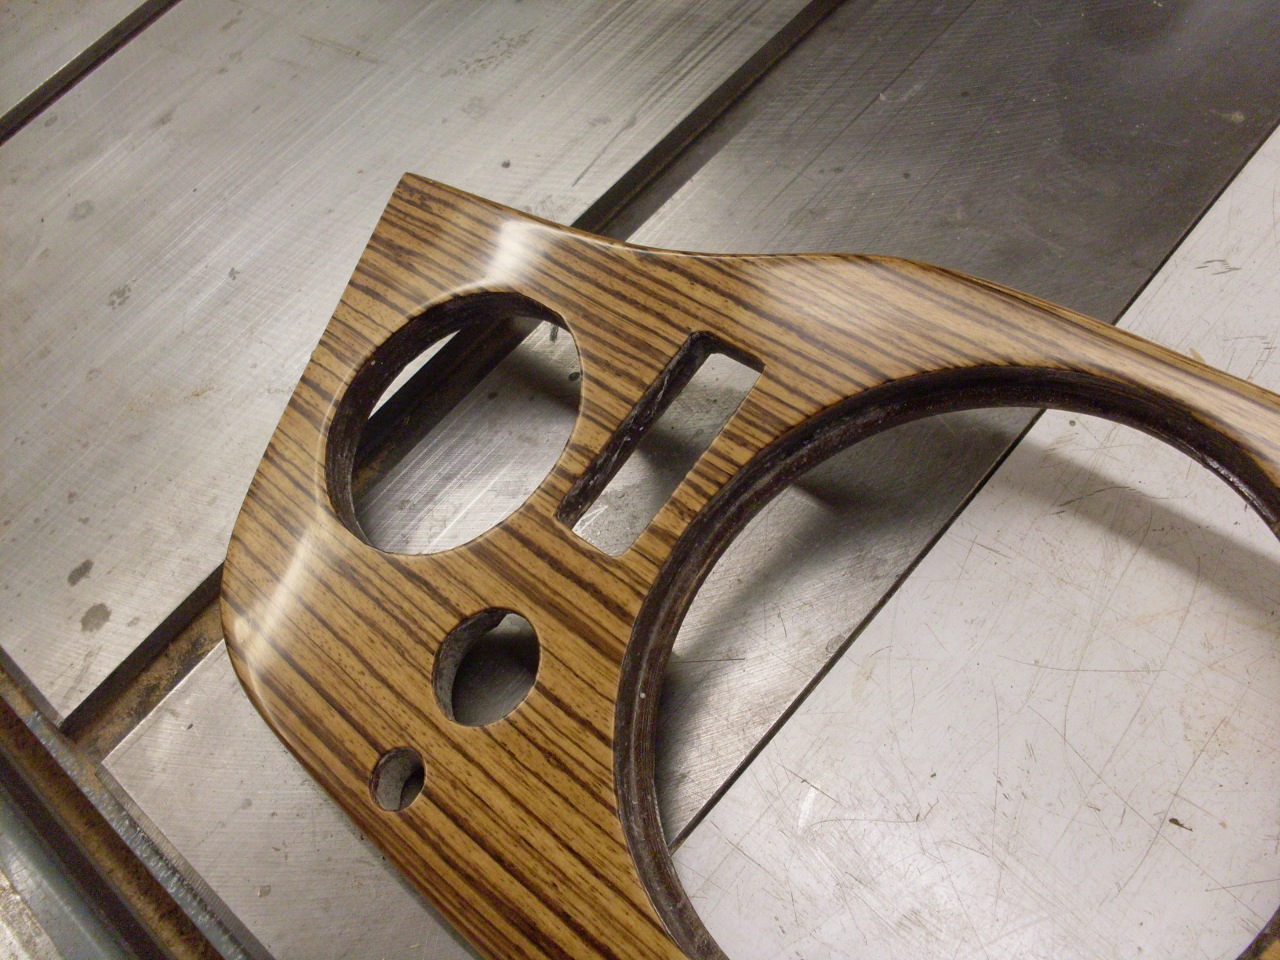
After a little more work, I had this. I decided to back off on the sheen just a little from here.
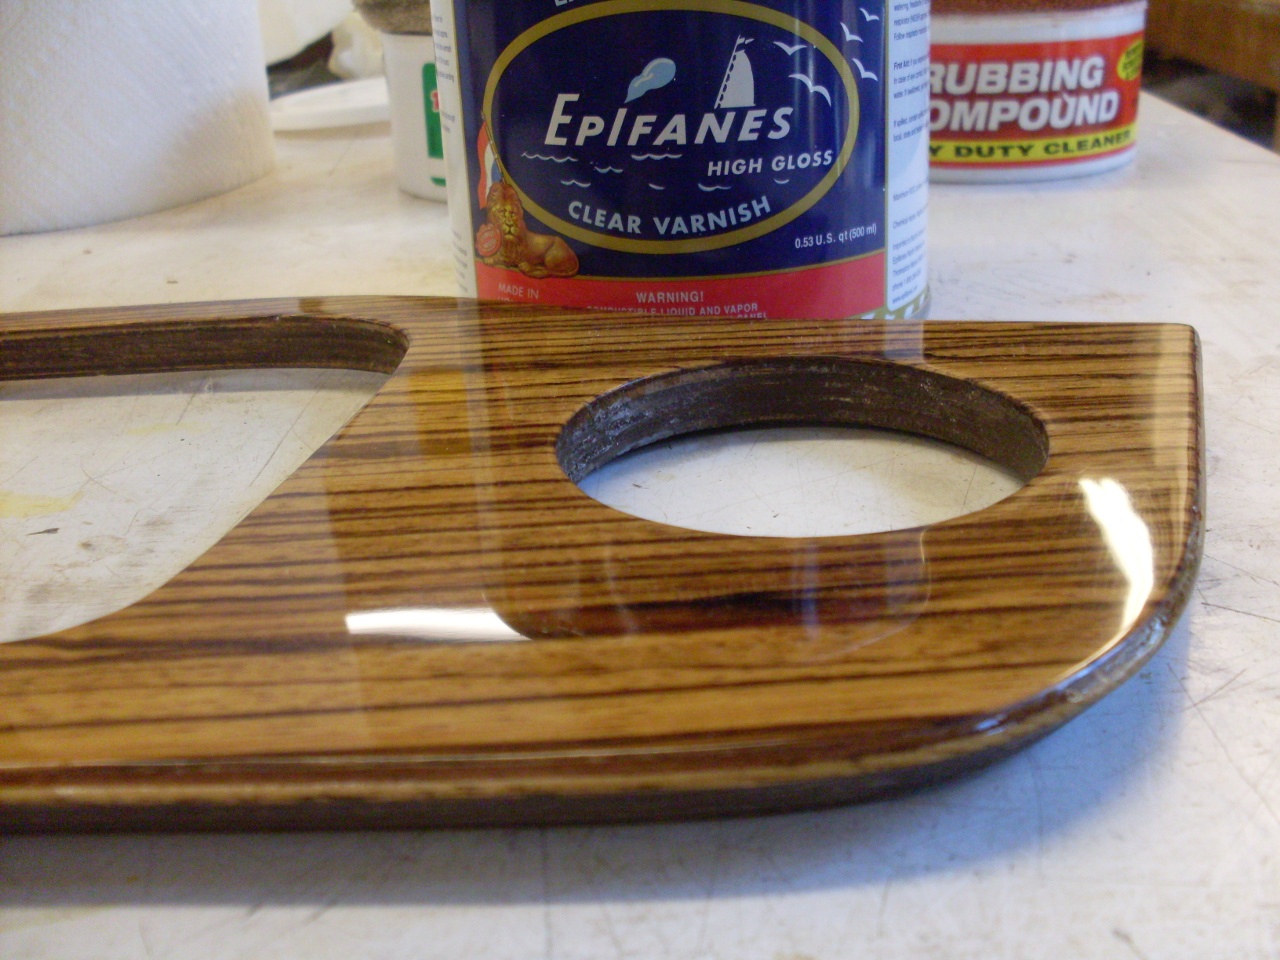
Here are a few more photos of the glove box door raw, at sort of a semi gloss stage, and nearly full gloss.
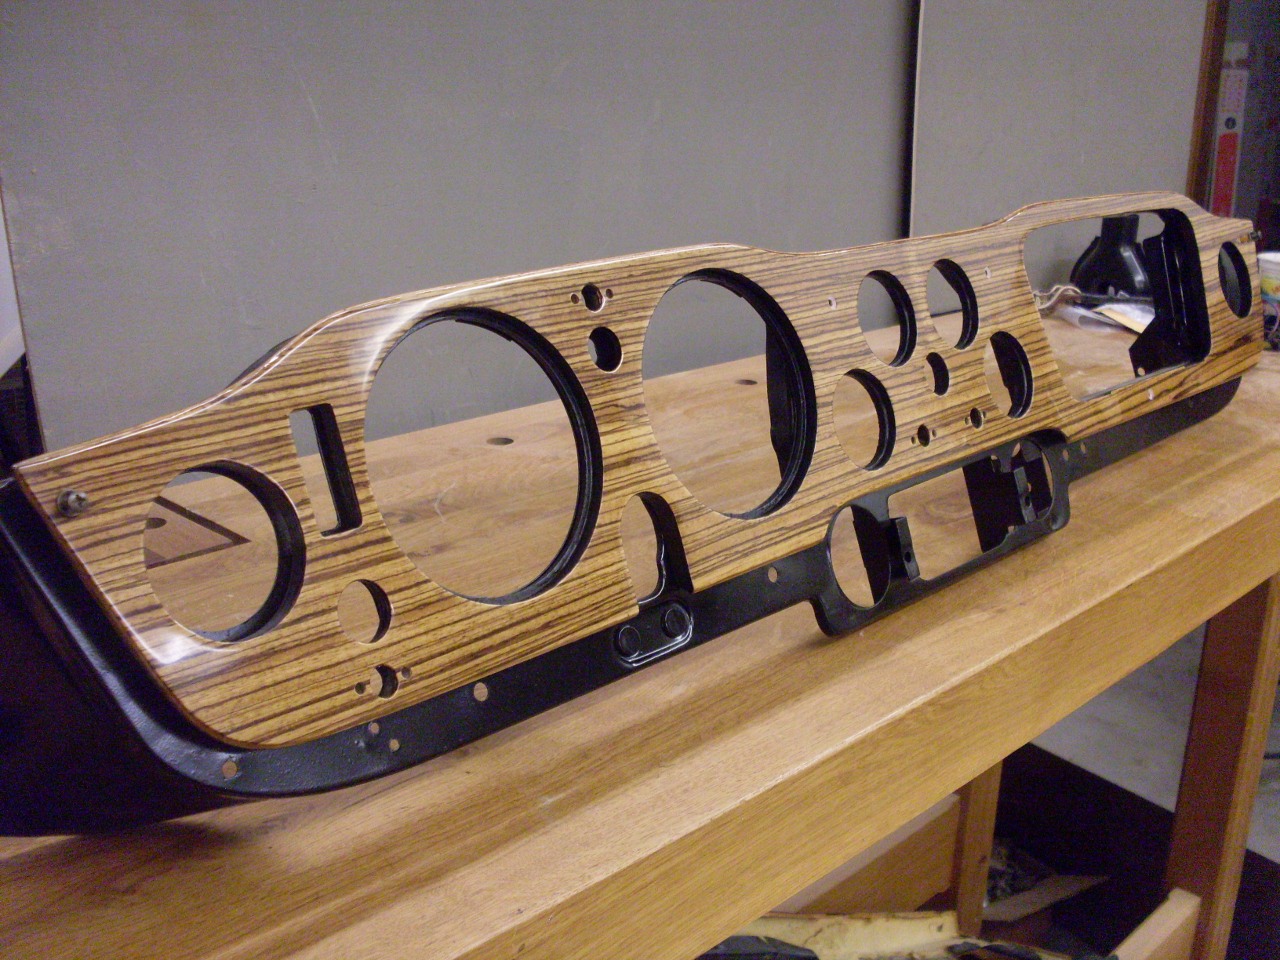
Here is a view of the parts together. I think I'll leave it at this level.
I then had to redrill and countersink the holes for the dash mounting screws.
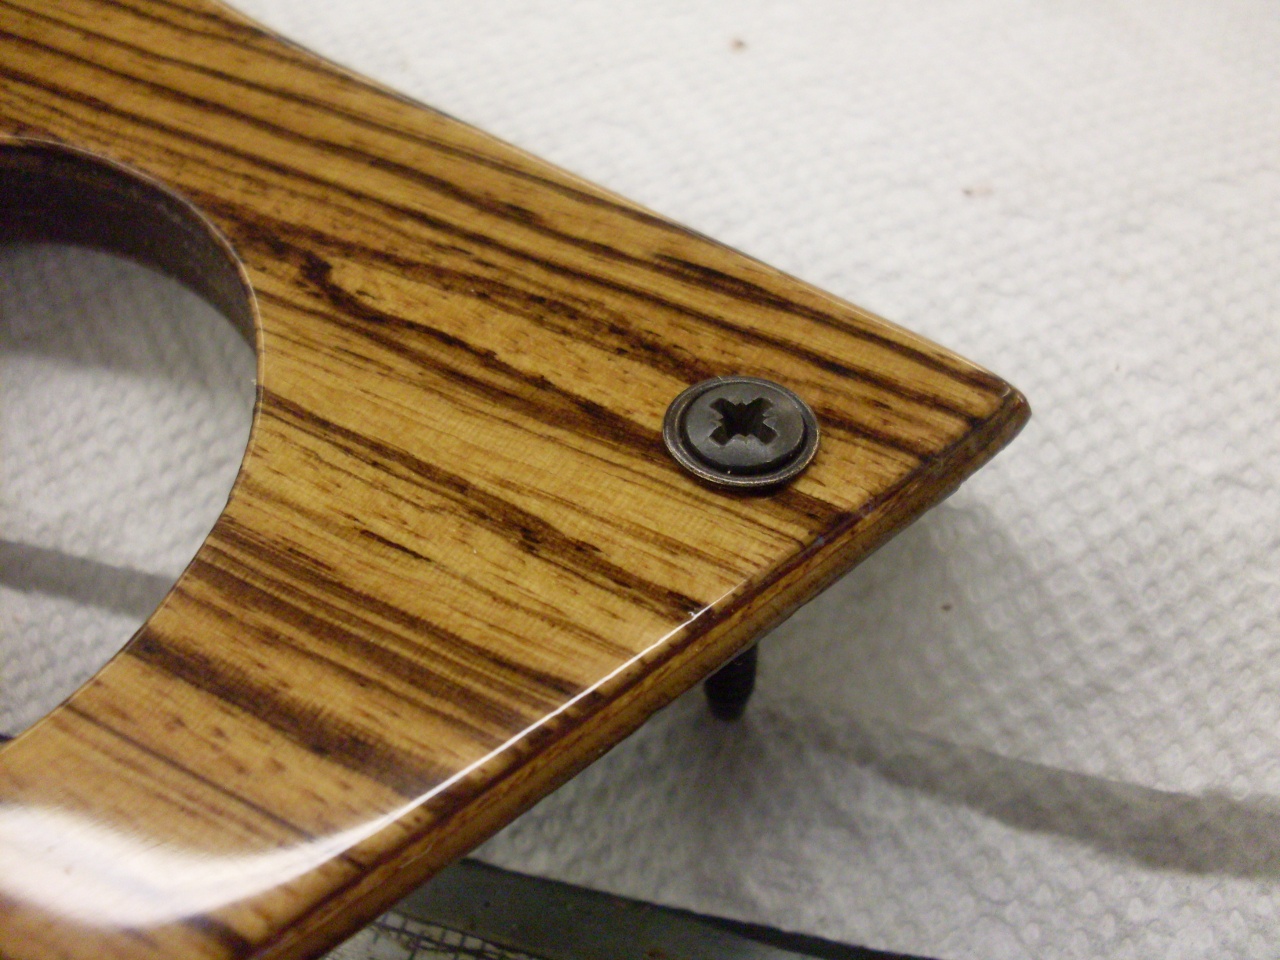
Painted the backside and the instrument holes black just for a more finished look.

This puppy is done!
Postscript
The
dash looks nice, but we can't really have a fancy zebrawood dash
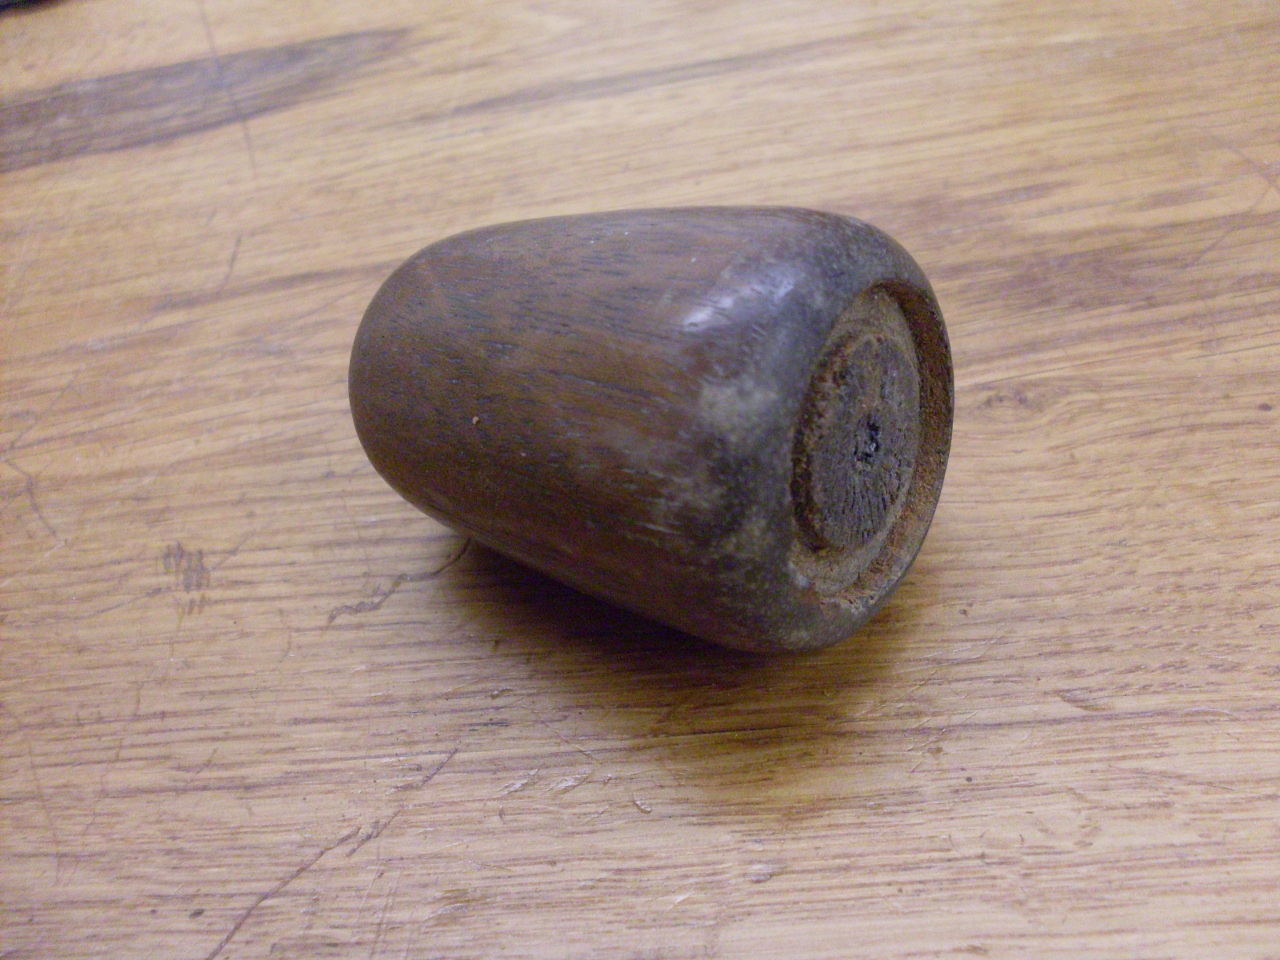
without a matching fancy zebrawood gearshift knob, now can we?
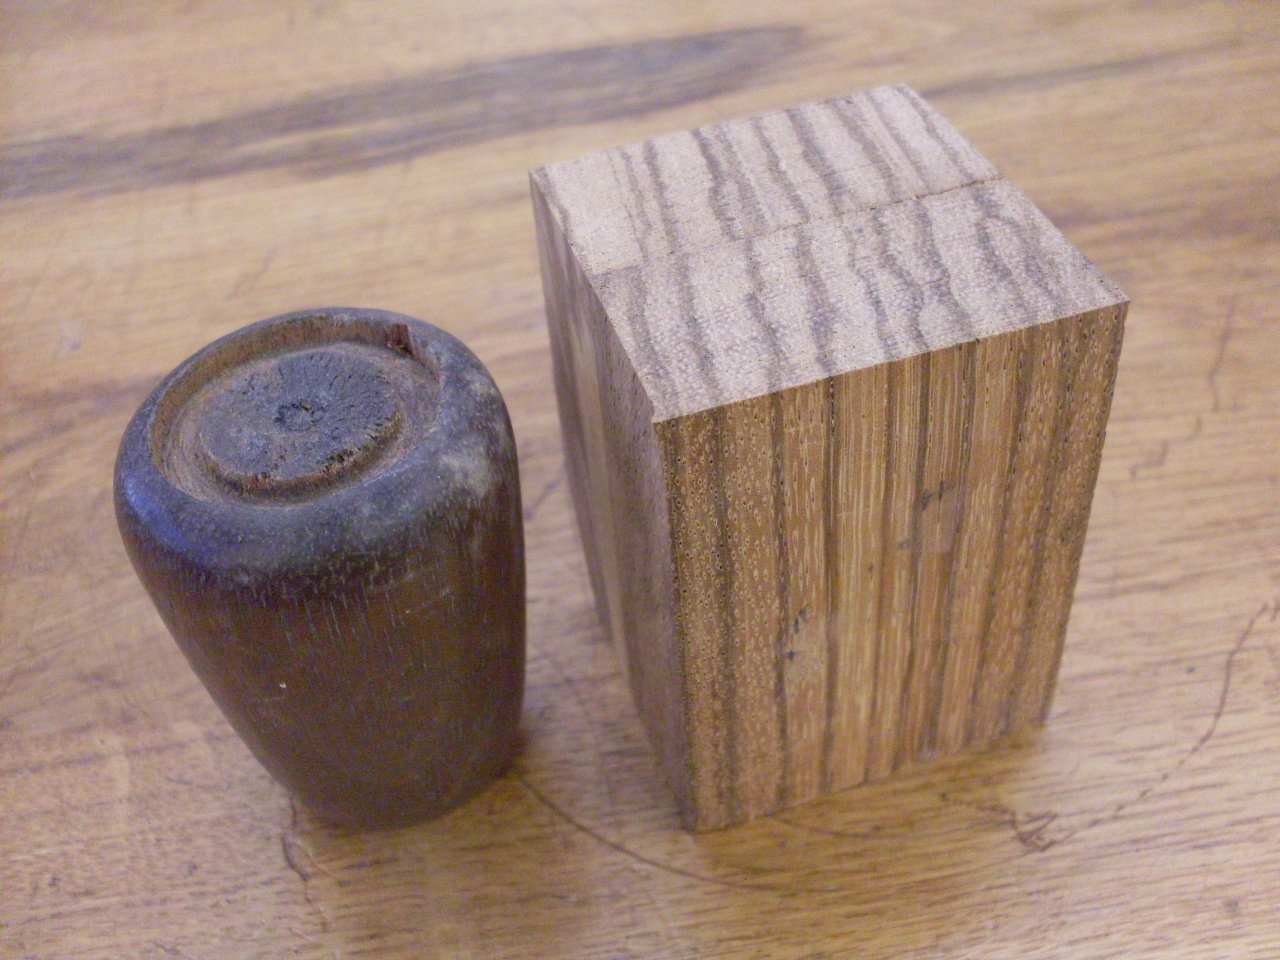
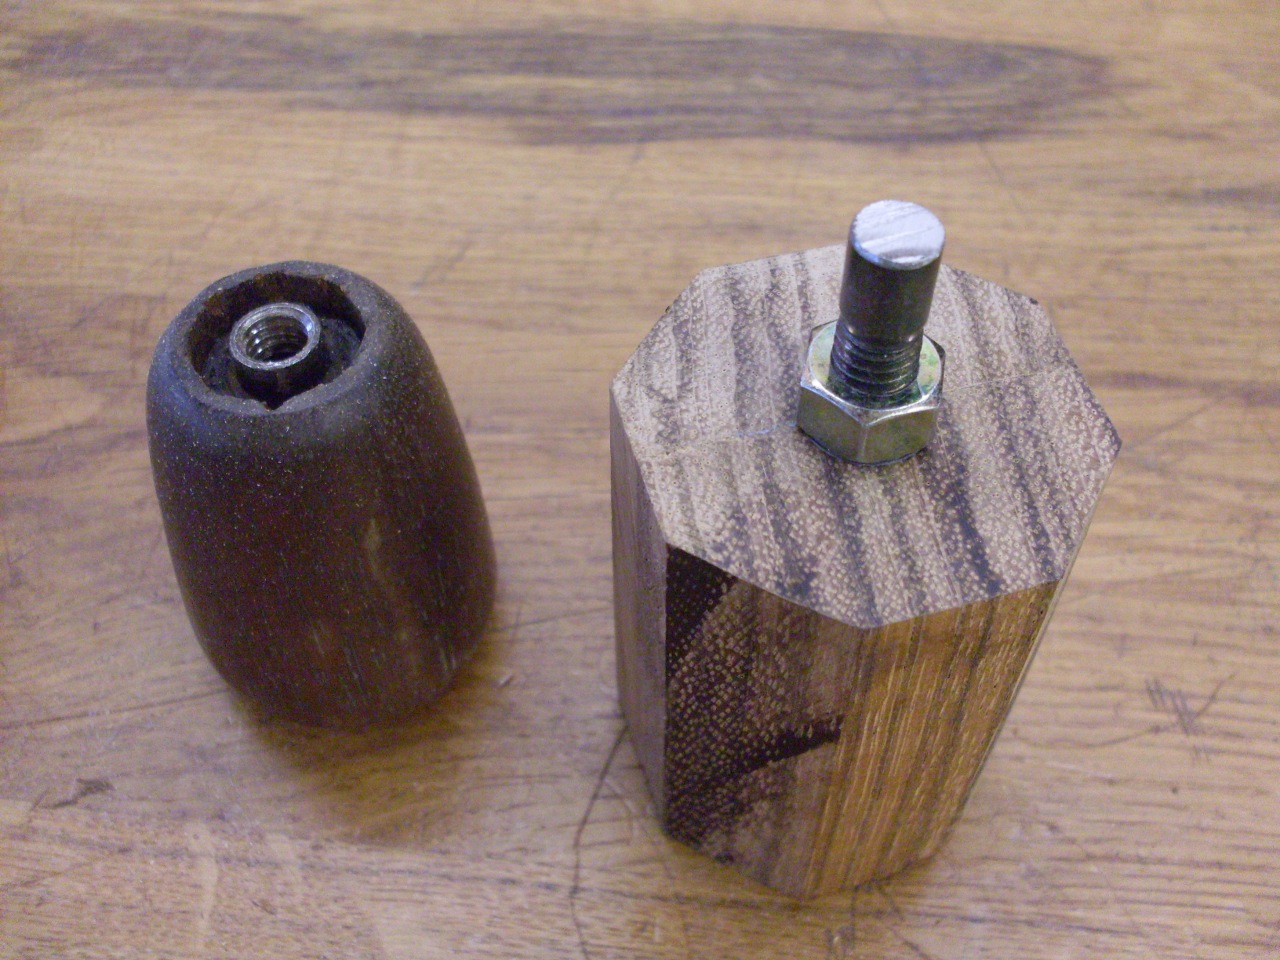
I believe this is the original shift knob. I think it's walnut. It lost its emblem decades ago.
I happen to have a chunk of zebrawood. I cut a couple of little pieces off and glued them together.
I
took a hardware store threaded coupler and cut some grooves in the
outside for better grip, and epoxied it into a hole in the center of
the zebrawood block, then sawed off the corners of the block to make it
a little closer to round.

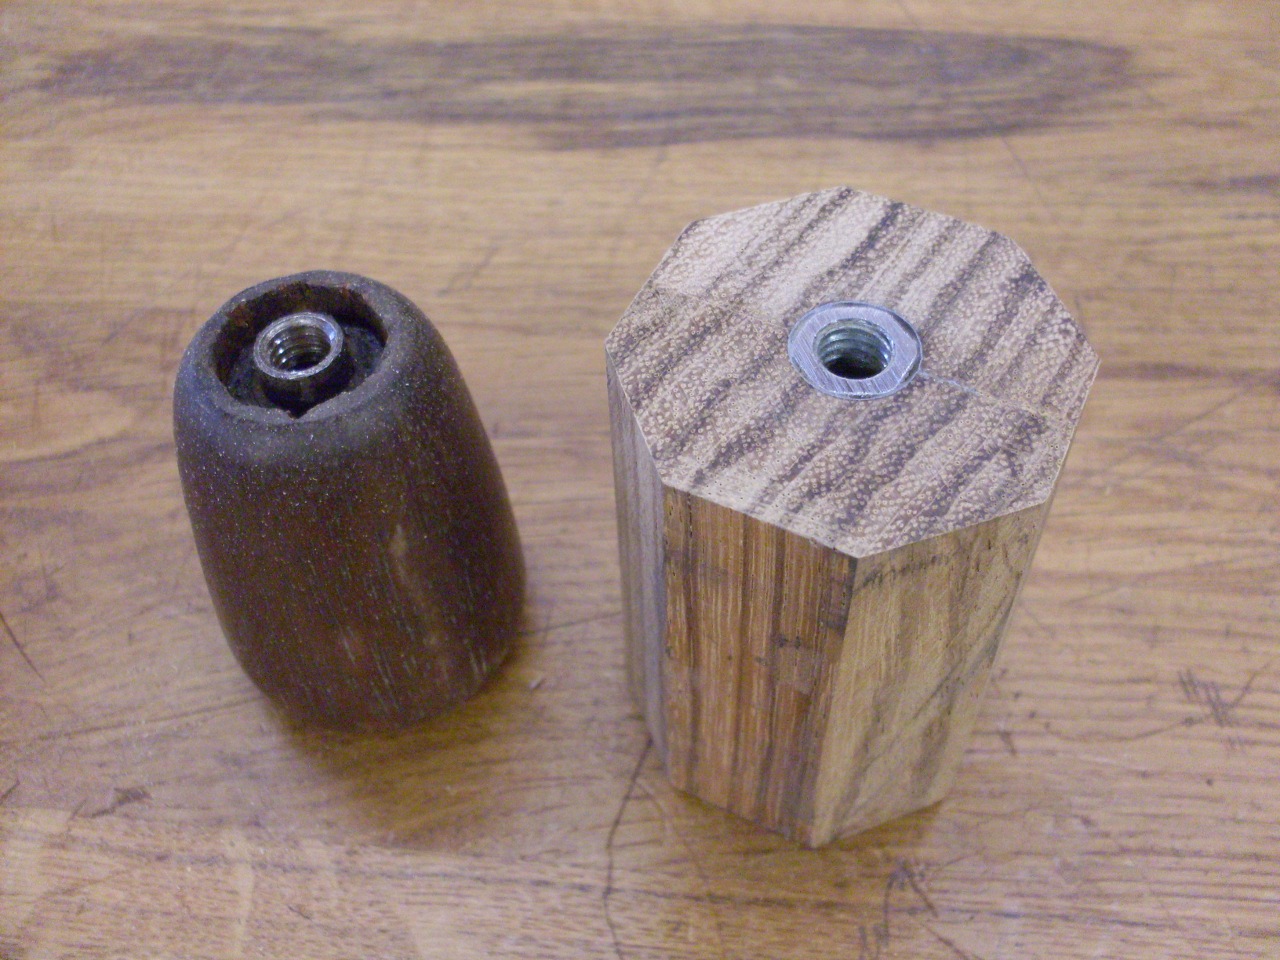
OK, still needs some work.
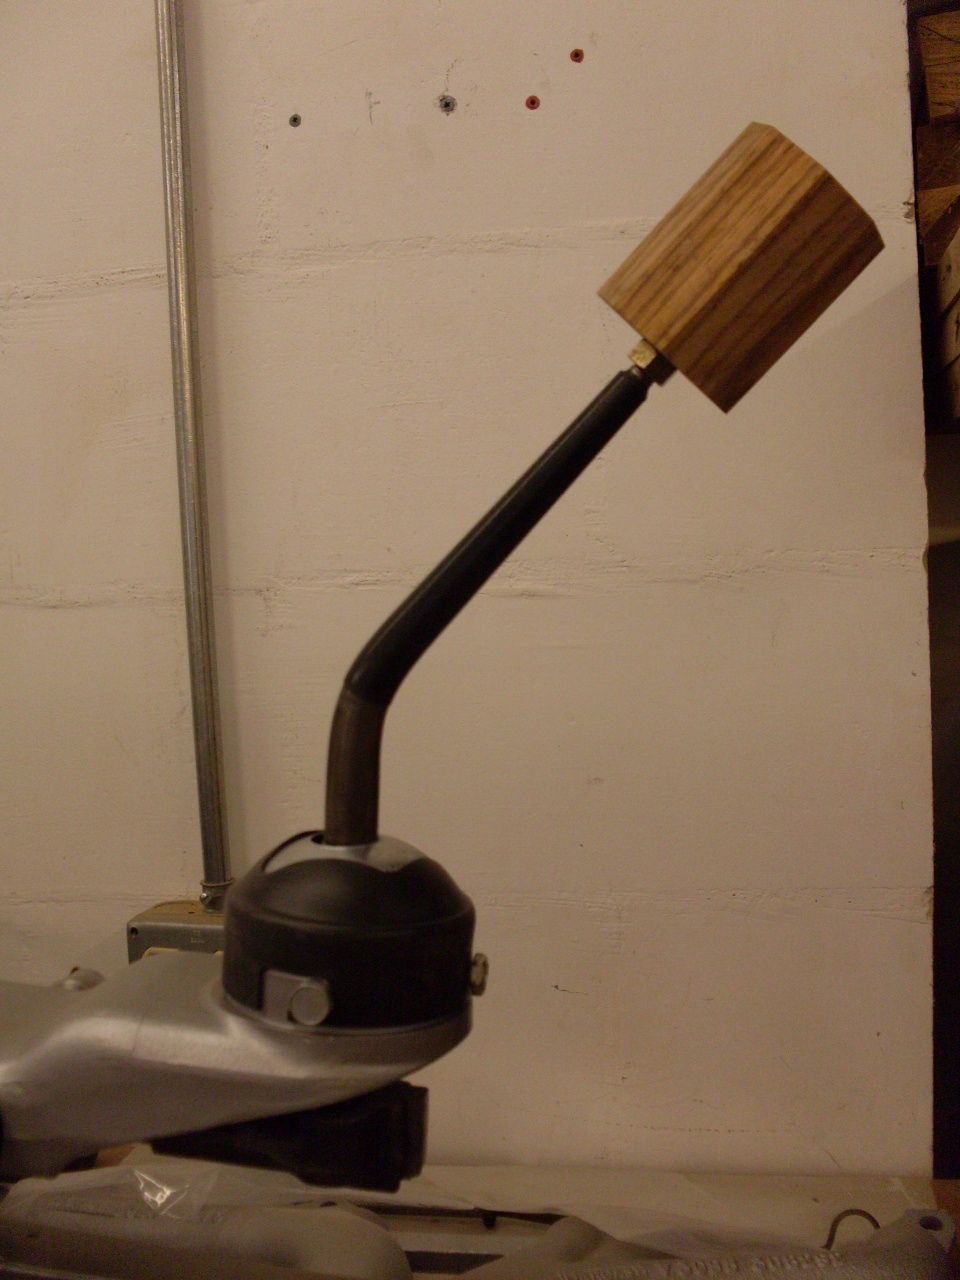
Put a cutoff bolt mandrel in, and put it in the lathe.

This looks better. The badge is actually a tie tack I bought off the Internet. The stock knob always felt sort of delicate to me. The new one is a little fatter.


I
resisted the urge to pot the whole thing in plastic, as is pretty
common. I didn't even use the same varnish as for the dash.
Instead, I used a simple oil finish, which I think feels better
in the hand.

I
didn't realize until this was almost done that the original knob had a
rubber isolator inside, presumably to transmit less transmission
vibration to the knob. If I had known earlier, I might have tried
to duplicate it. Oh, well, live and learn.
Please send comments to Ed at: elhollin1@yahoo.com
To my other TR6 pages.