To my other TR6 pages
September 7, 2018
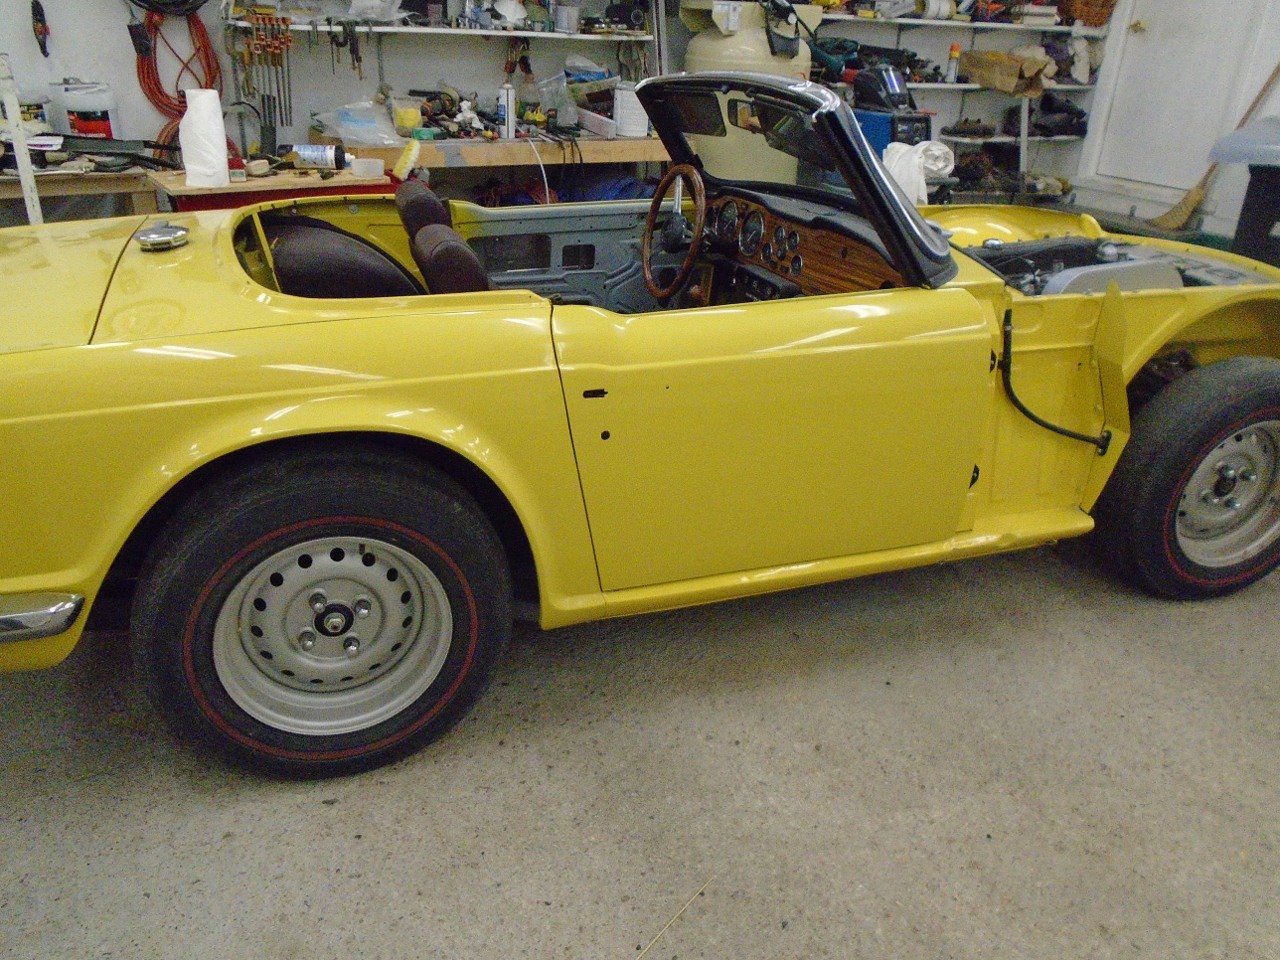
Doors
The
doors on the TR6 are fairly complex as things on this car go. The
door assembly includes adjustable hinges, a two-stage safety latch with
provision for unlatching from both inside and outside of the car,
a latch lock, again with provision to operate from both inside and
outside, a spring assisted window regulator mechanism, and a cushioned
limit strap that allows the door to remain at full open position, but
also prevents over-opening. The doors weigh nearly 50 pounds
each, but with all the machinery removed, the shells are only about
half that.
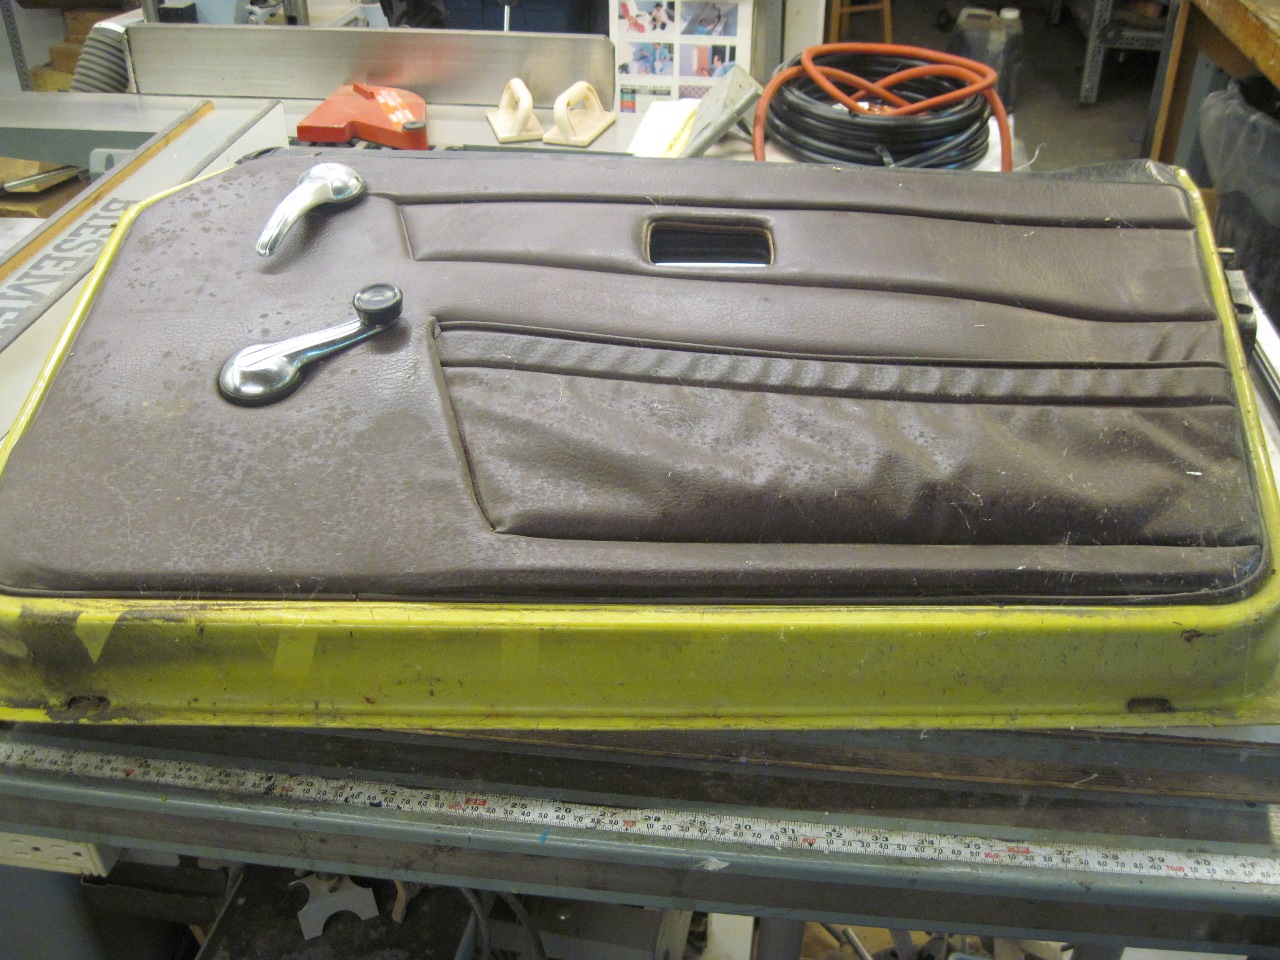
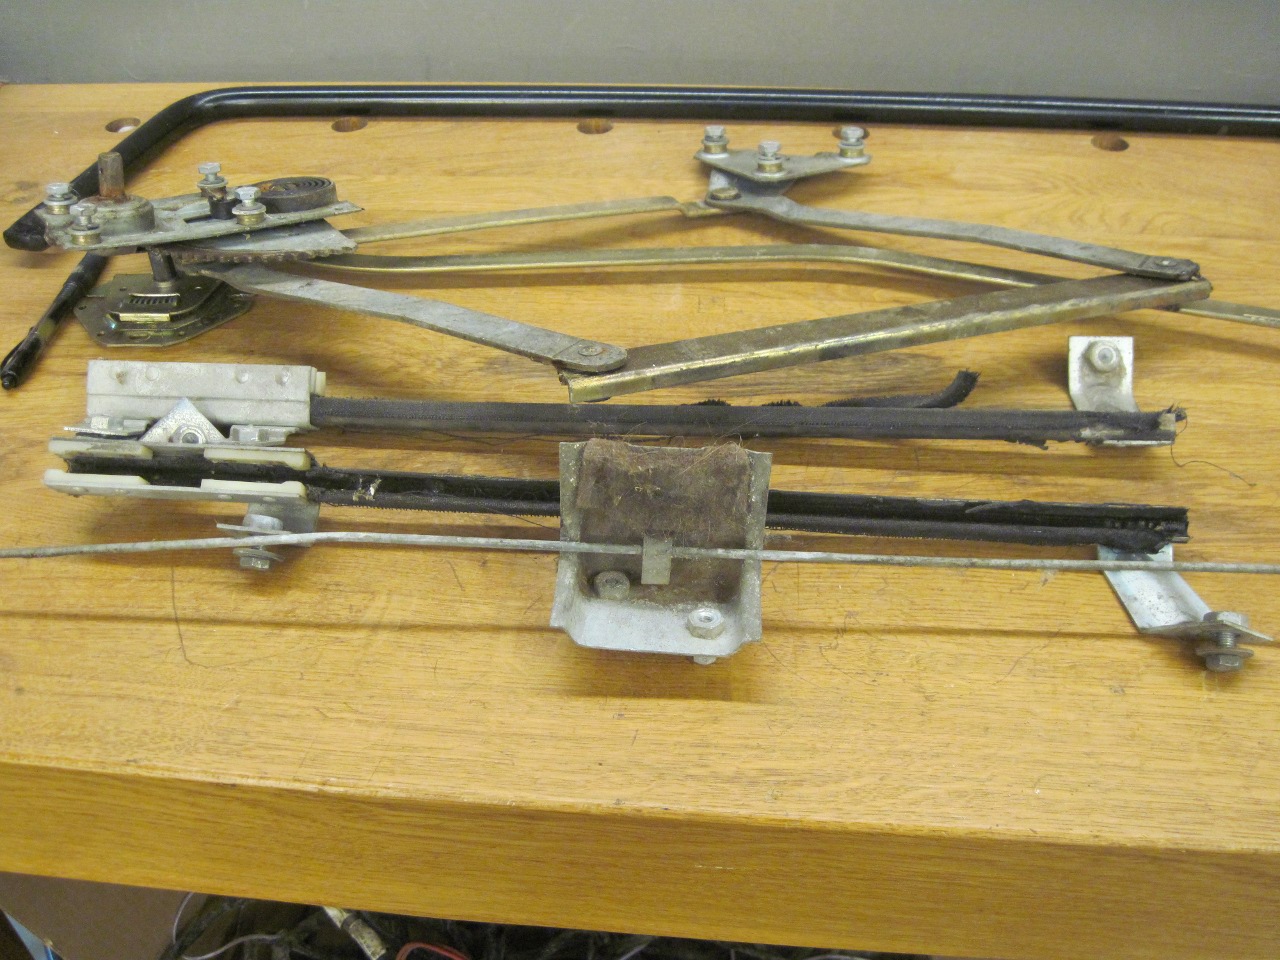
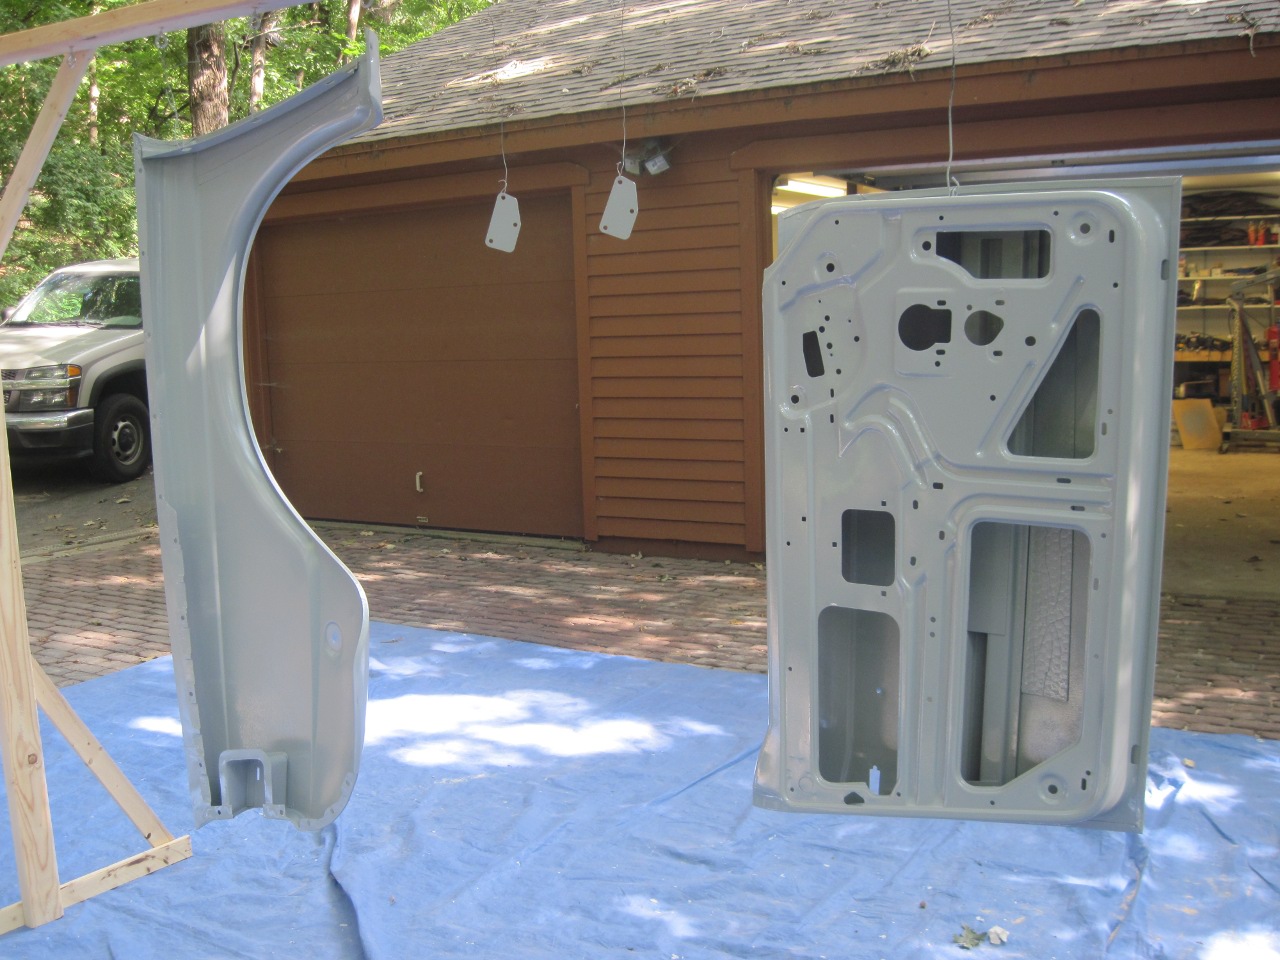
Both of my doors were apparently in pretty good shape
for their age. Removing the inside door card reveals the door's
guts. All of it came out. The plastic sheet is a rain
curtain to keep the cardboard door card dry. It won't be replaced.
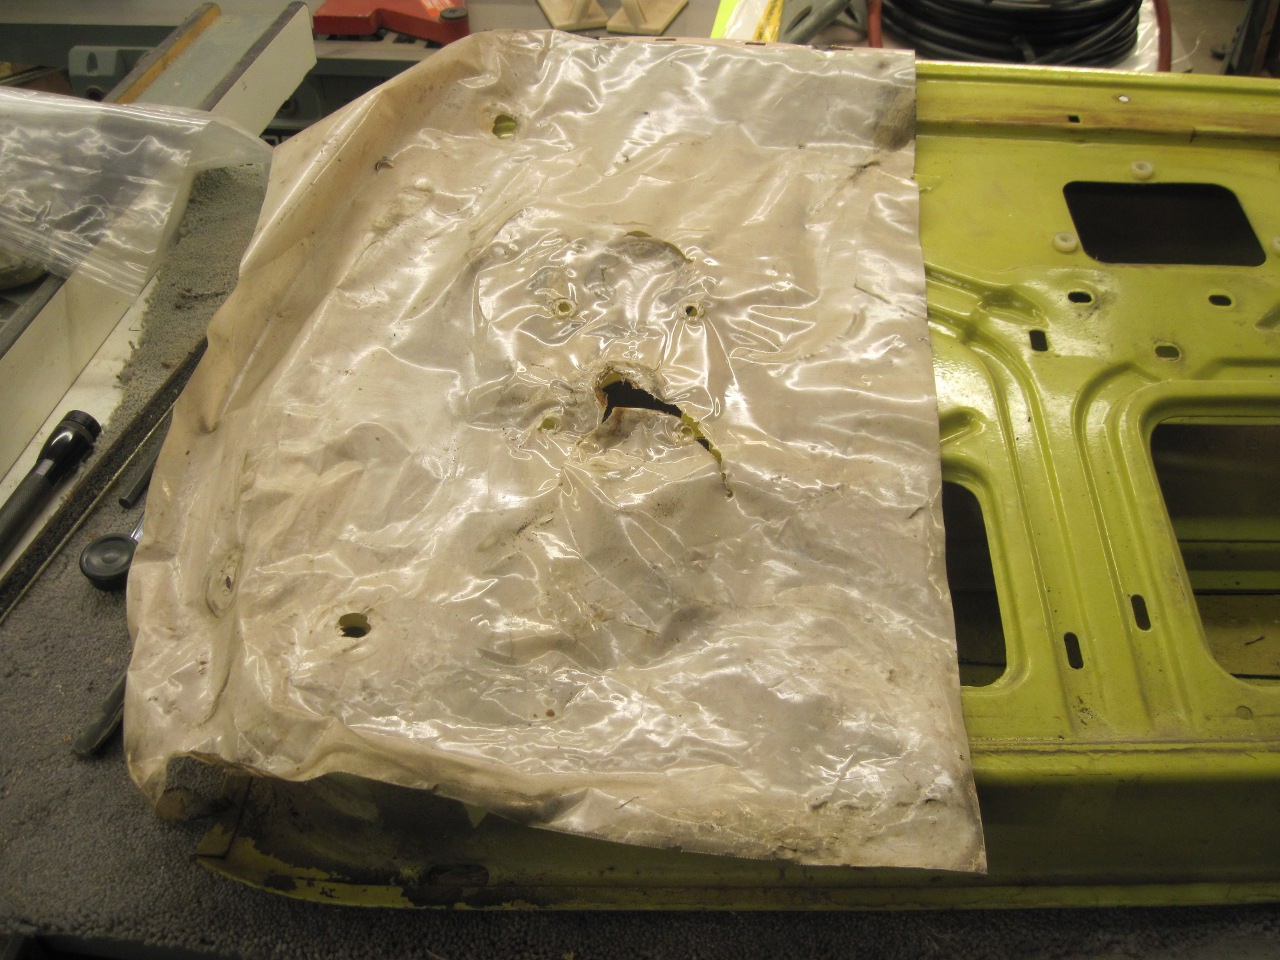
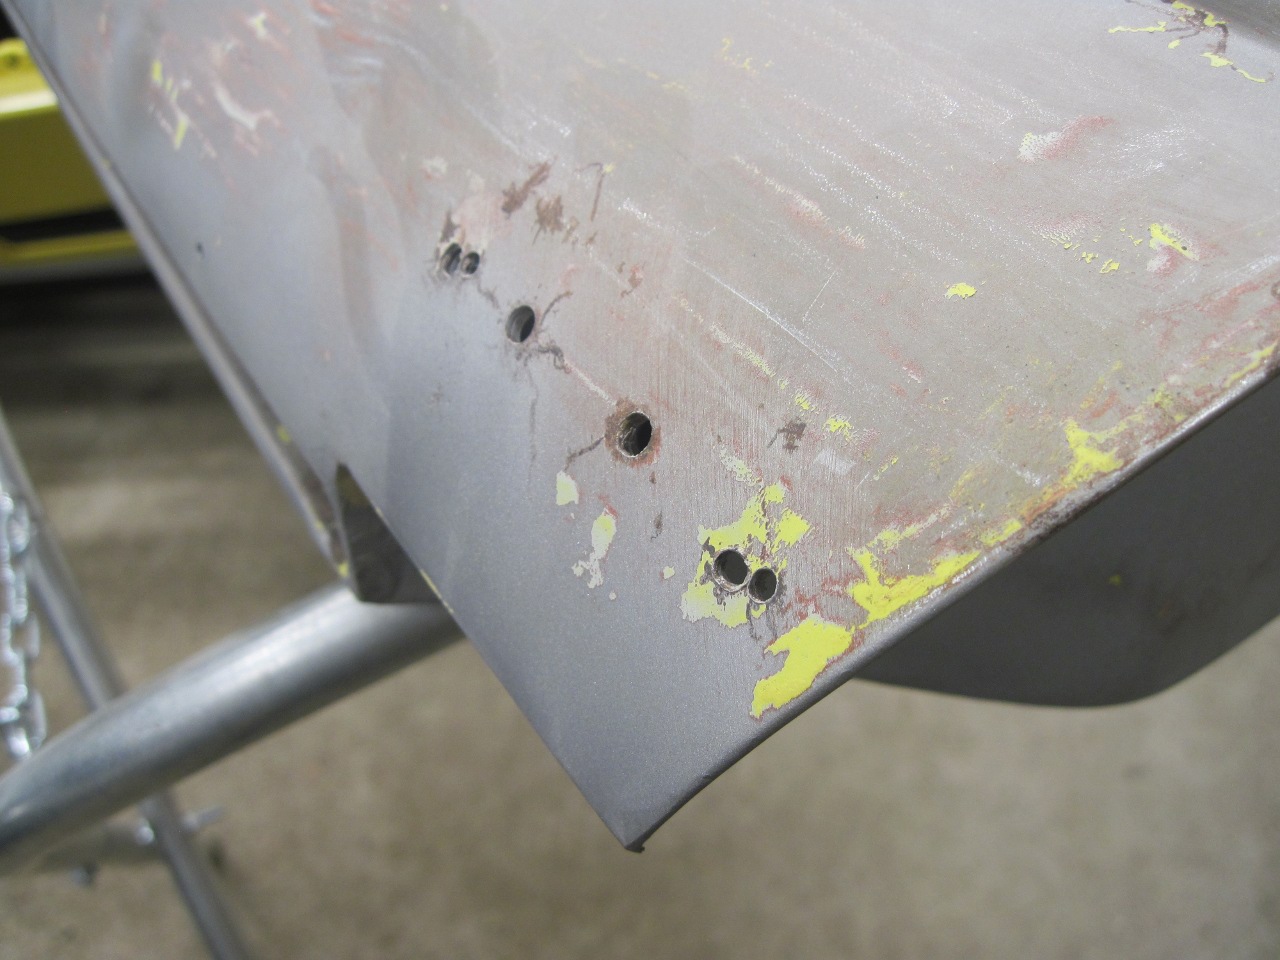
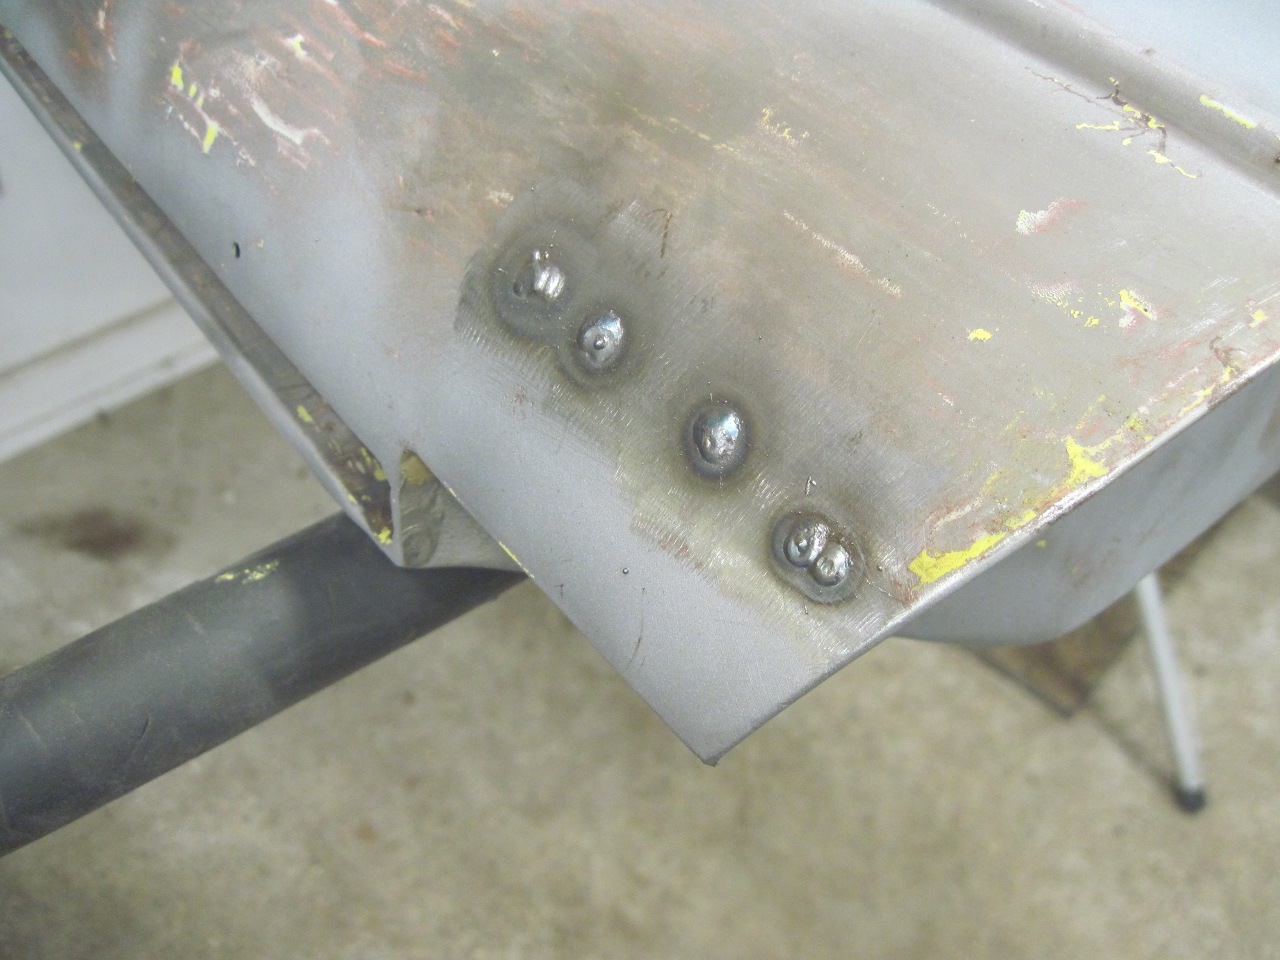
The
bulk of the original paint was removed chemically, then a few weld
repairs. These holes were apparently from a series of rear view
mirrors.
The
doors were lightly sand blasted to remove the remaining paint and give
a good "tooth" to the surface, then given a coat of DTM (Direct To
Metal) epoxy primer. This locks the metal against corrosion from
our wonderful summer humidity.
Then
some block sanding to see how straight the surface is. The doors
weren't terrible, but there were some obvious highs and lows. A
little filler took care of the lows.

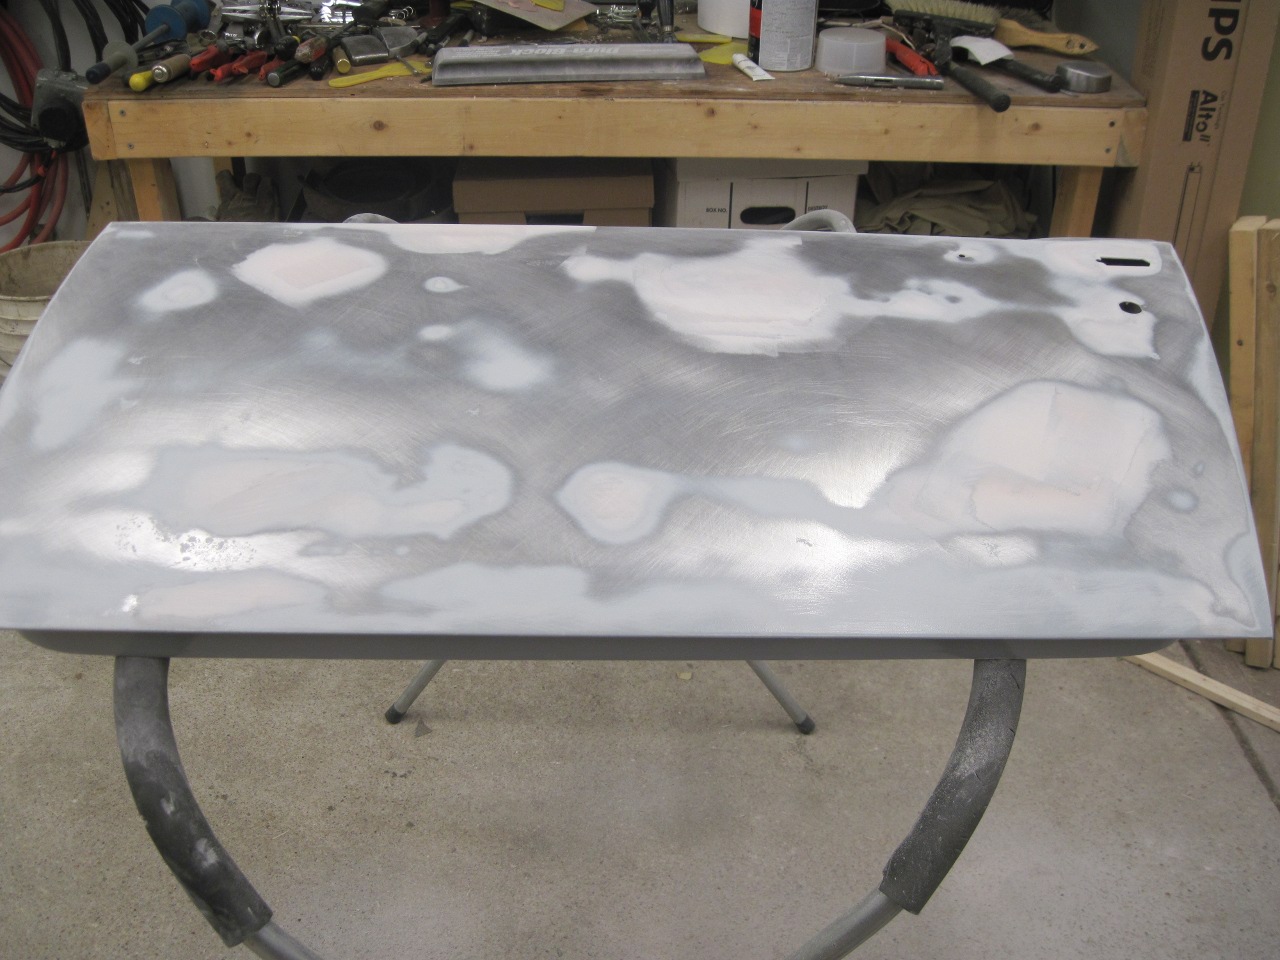
After
this gross leveling, another coat of epoxy, followed by two or three
rounds of a high build polyester primer and block sanding. When
the block sanding stops revealing low areas, we're ready for paint.
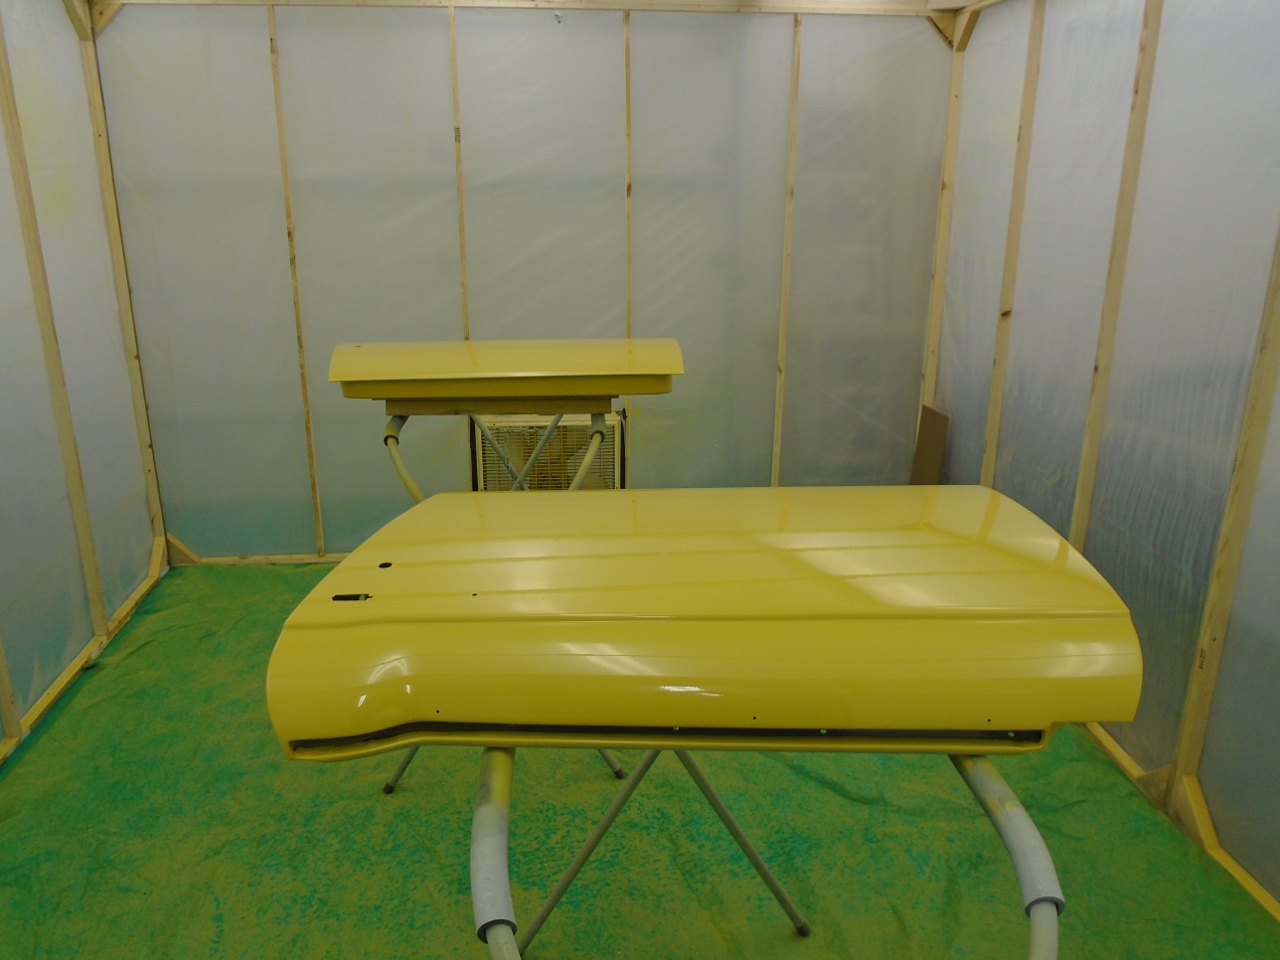
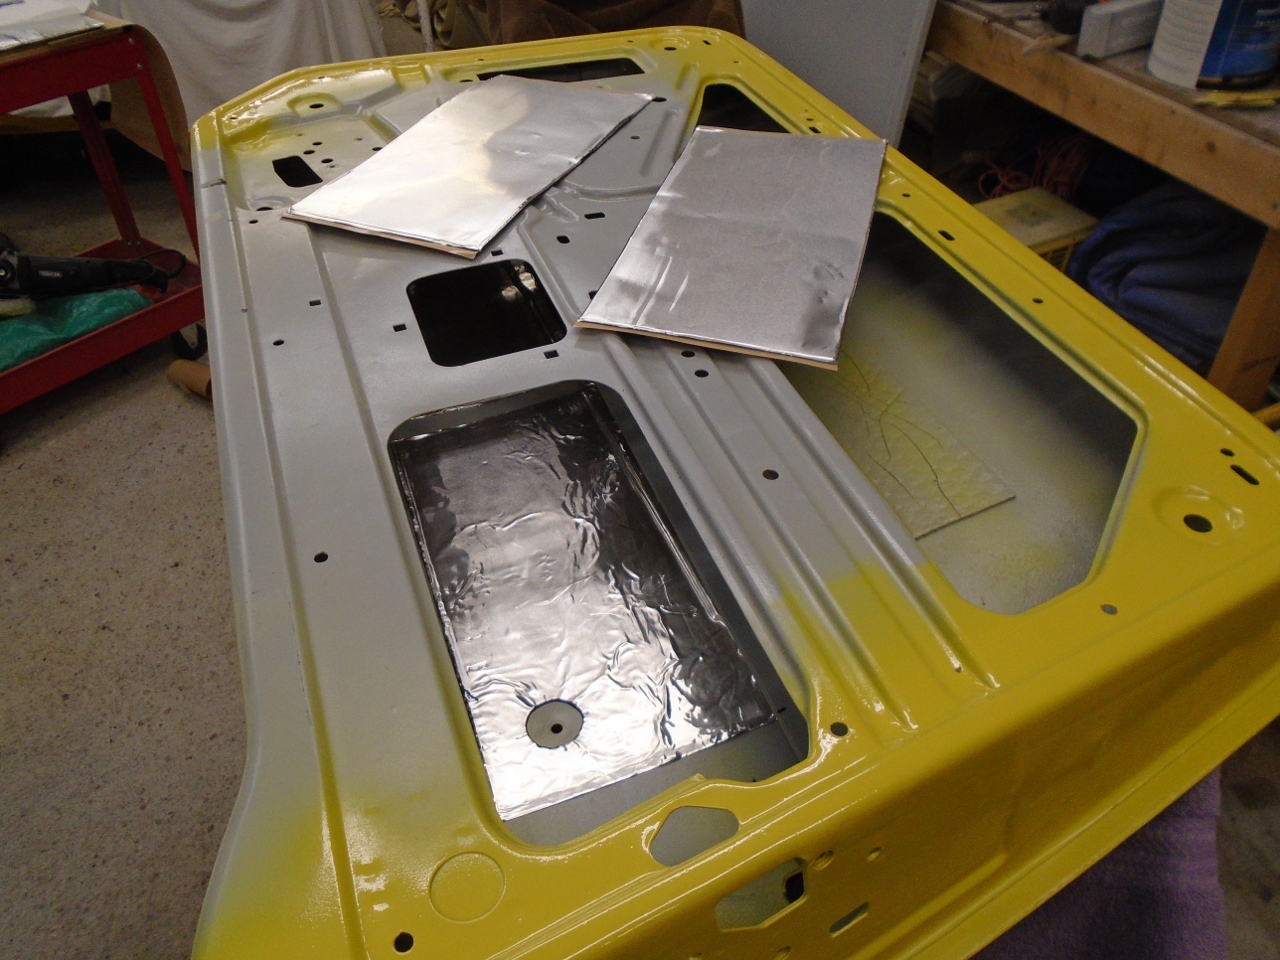
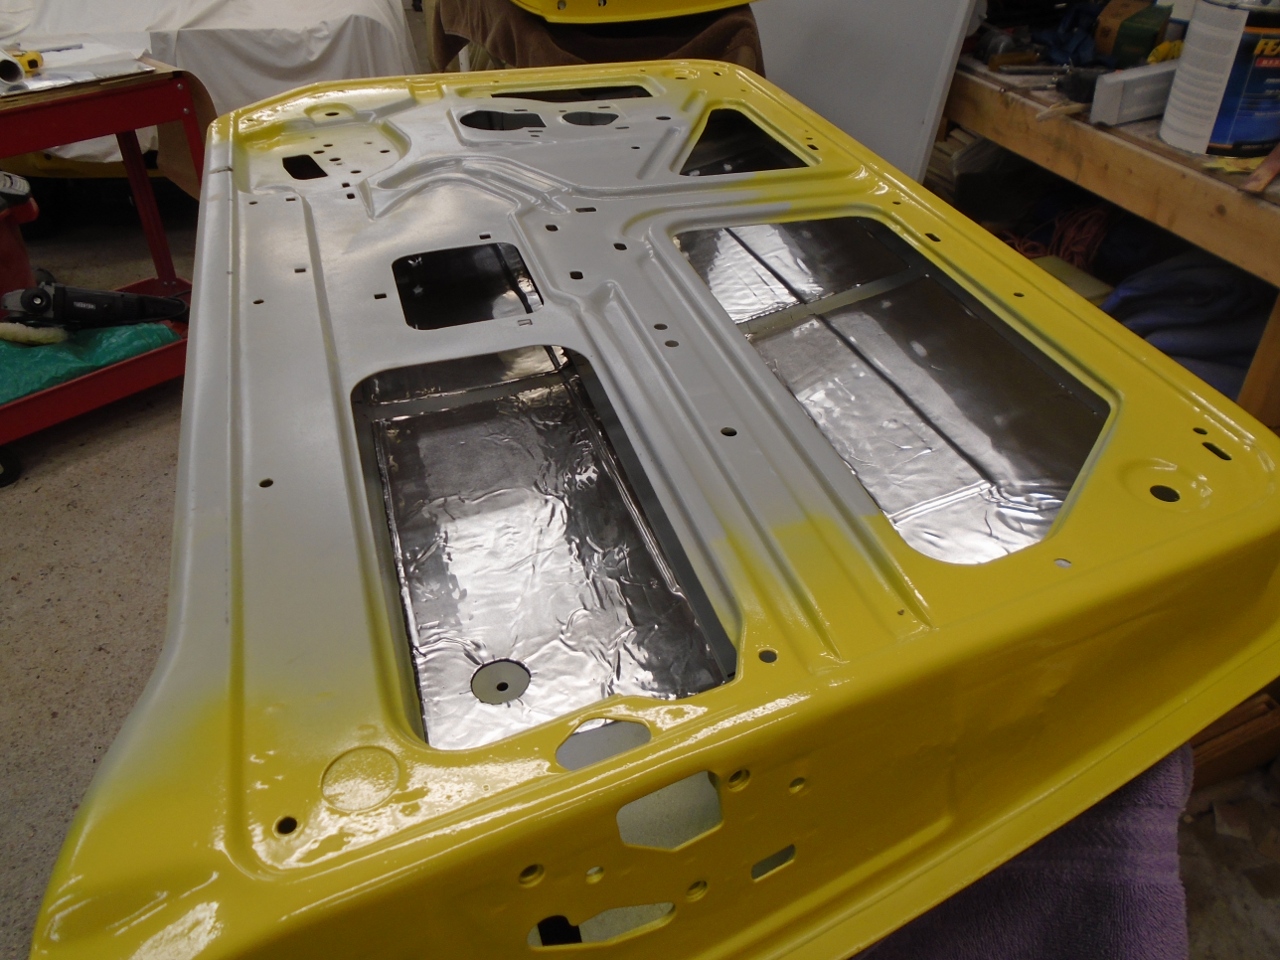
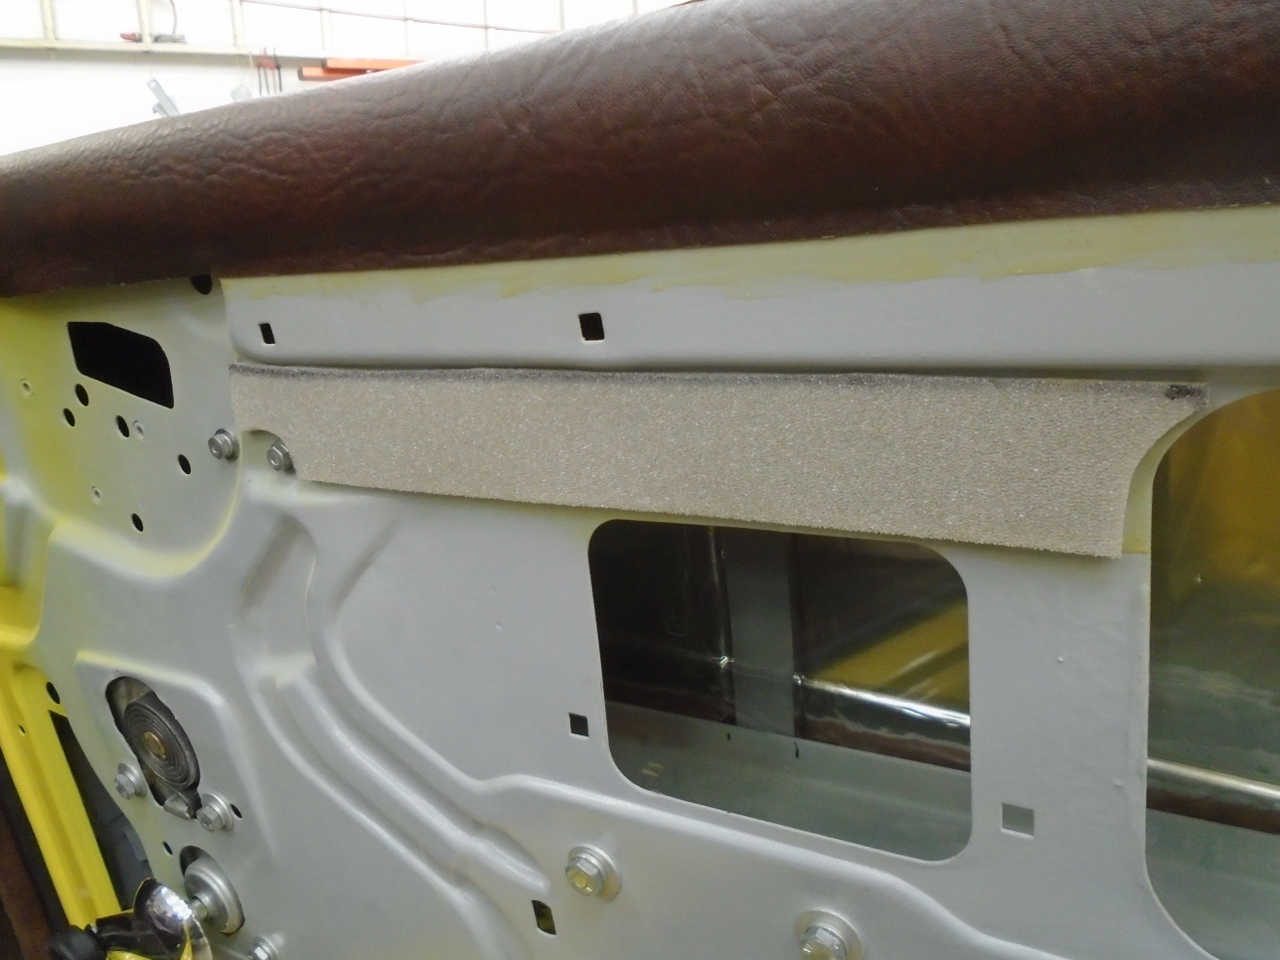
This
was a good time to apply some CLD sheets to the inside of the door skin
for sound and vibration damping. This is Hushmat.
Then some wet sanding of the paint and some buffing. Final buffing will be after all panels are mounted on the car.

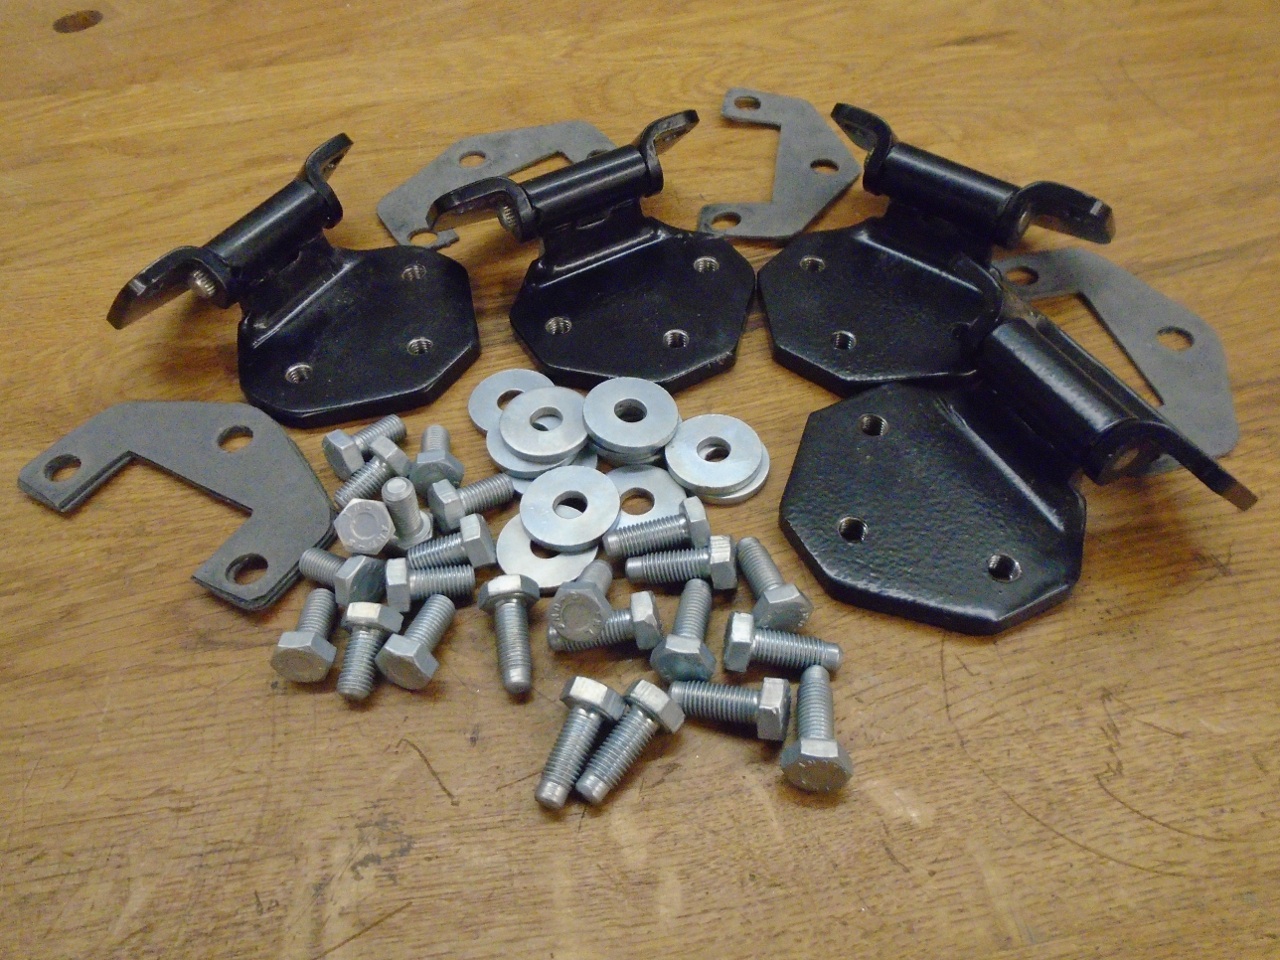
Then, to mount the door, I gathered up the rebuilt hinges
and their hardware. I like to use original hardware when I can,
but especially for things like hinges. The bullet points on the
screws make finding hidden holes easier. New bullet point
hardware is hard to find. I forgot to paint the hinges body
color, but I think I actually like it like this.

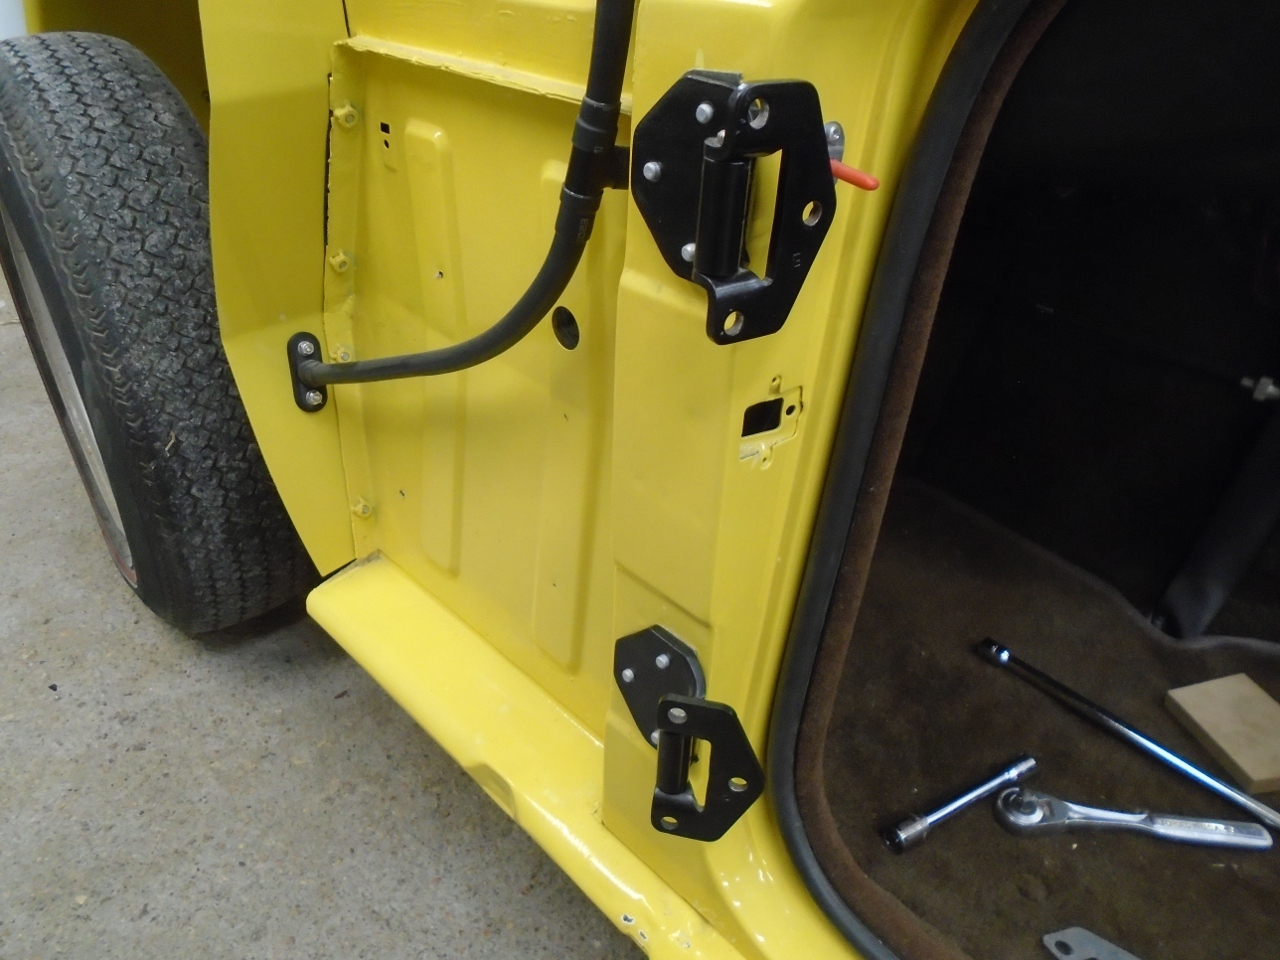
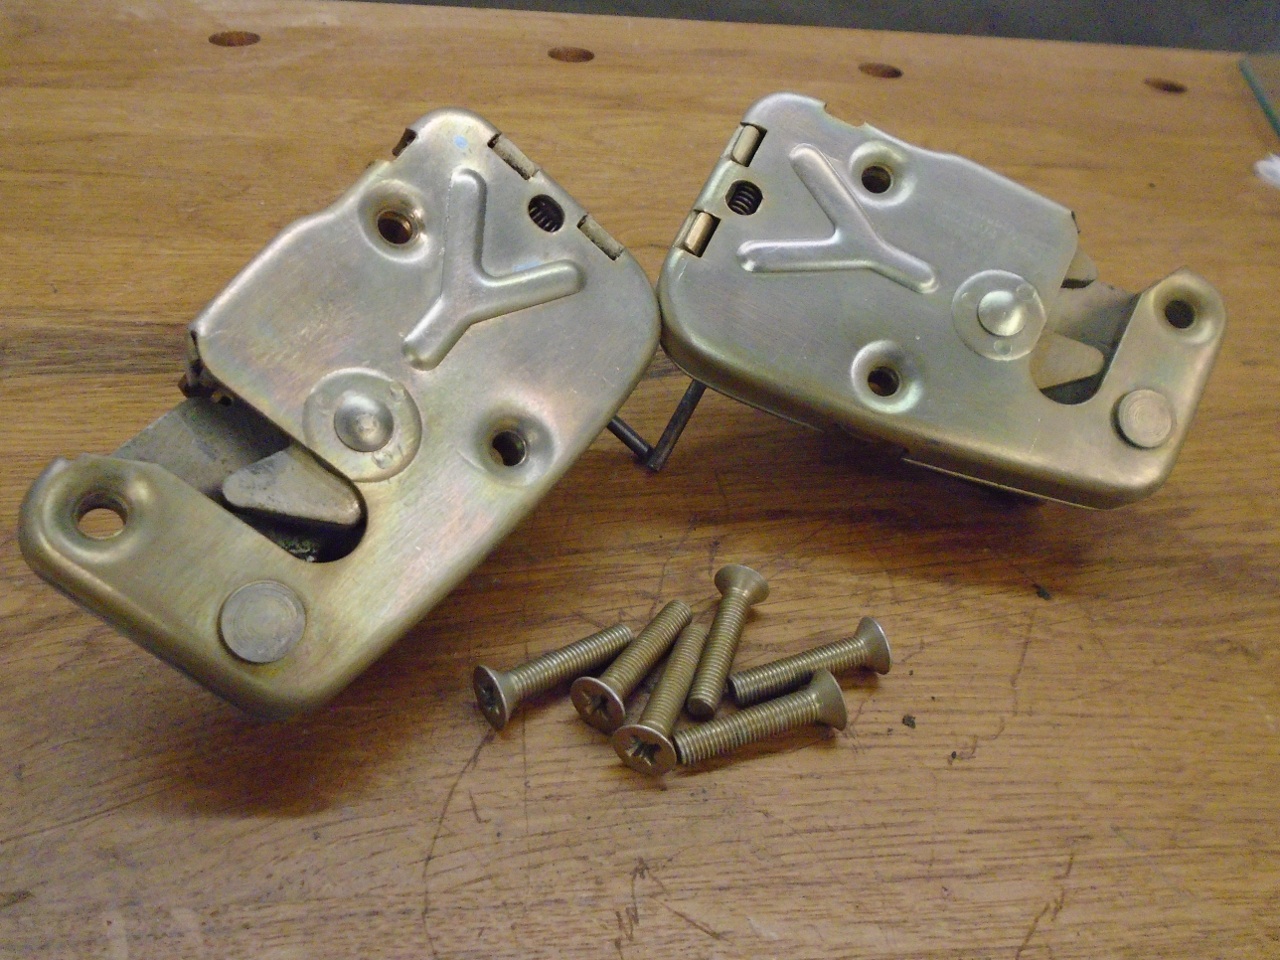
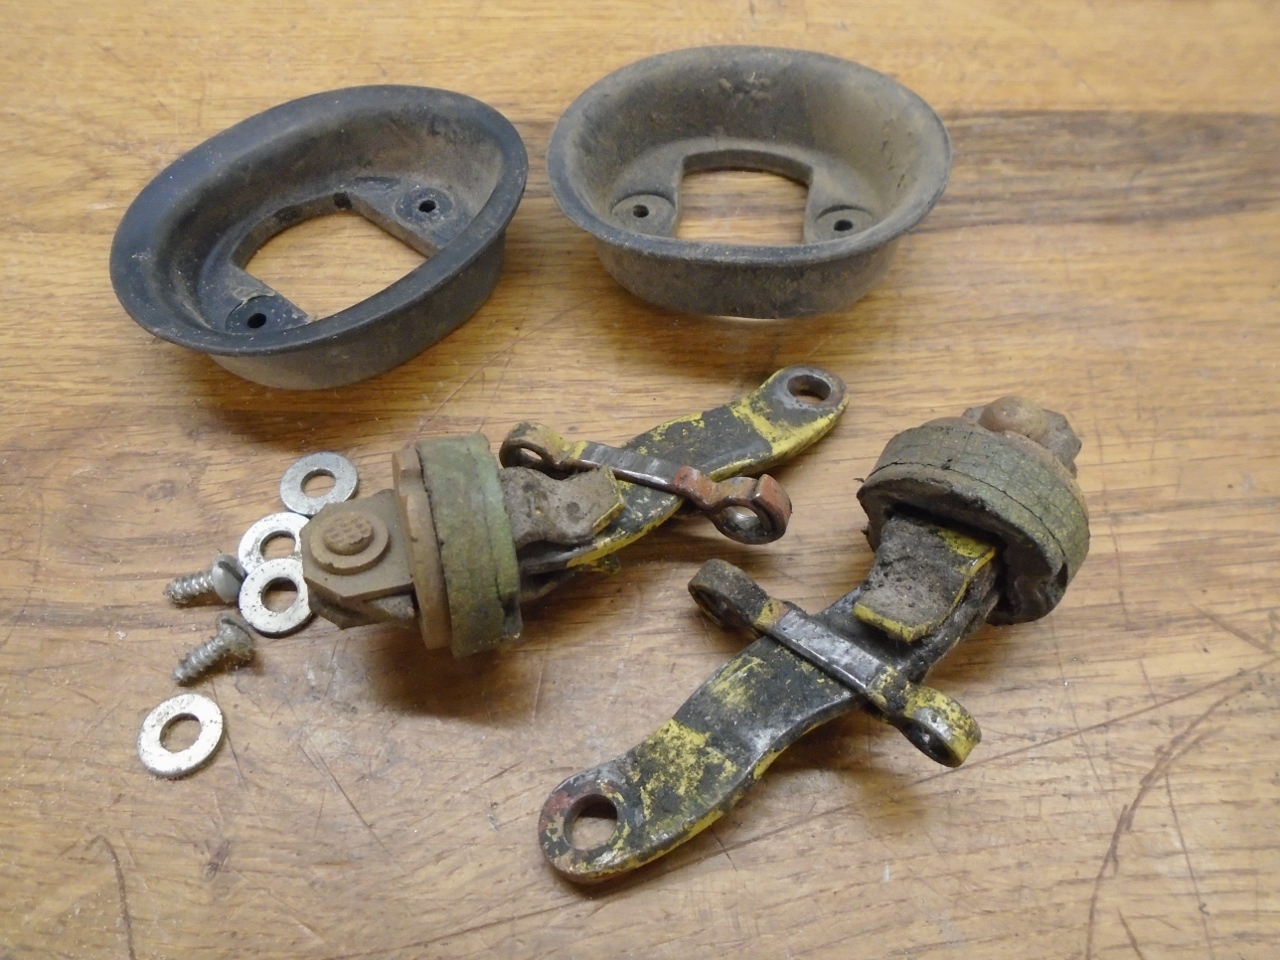
My
"dovetails" (latch mechanisms) were in fine working order, but had the
typical cosmetic surface corrosion on the visible surfaces. With
some experimantation, I was able to clean off the corrosion and apply
new chromate, so they look almost new. I use a clear chromate on
most parts on the car, but yellow seemed more appropriate here. I
believe it is what was on the dovetails originally, and it looks good
with the Mimosa paint.
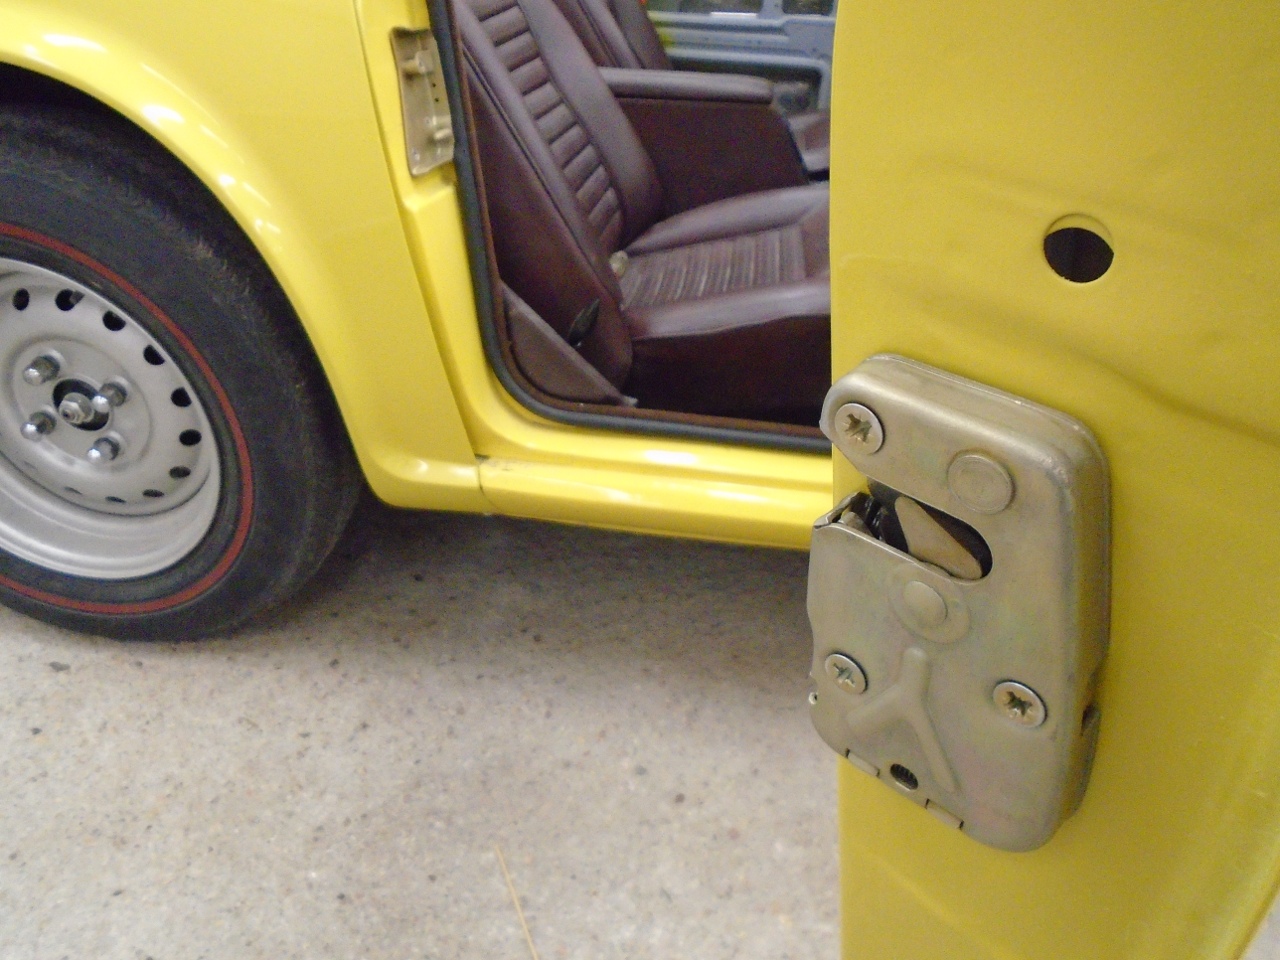
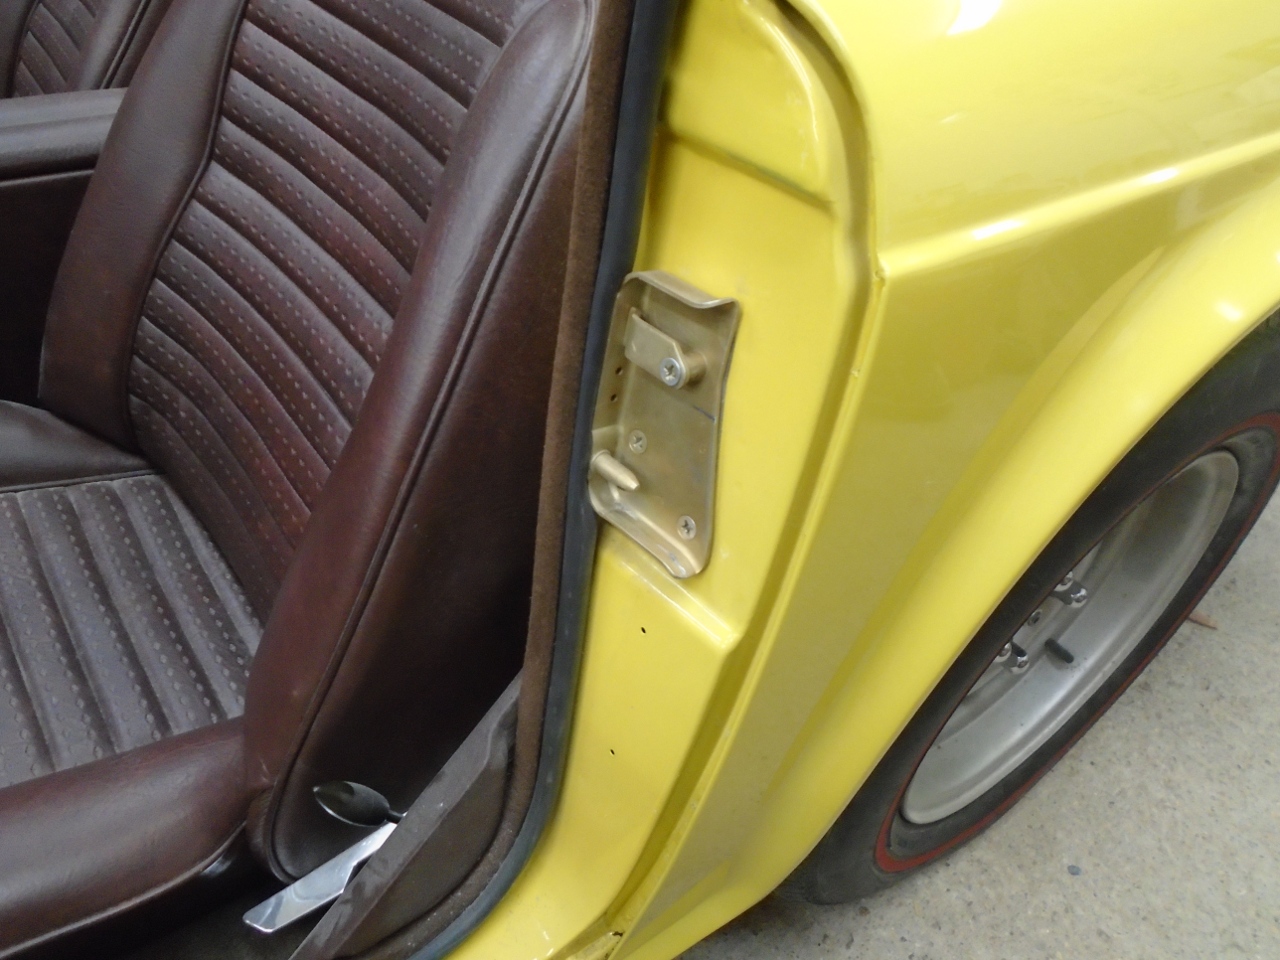
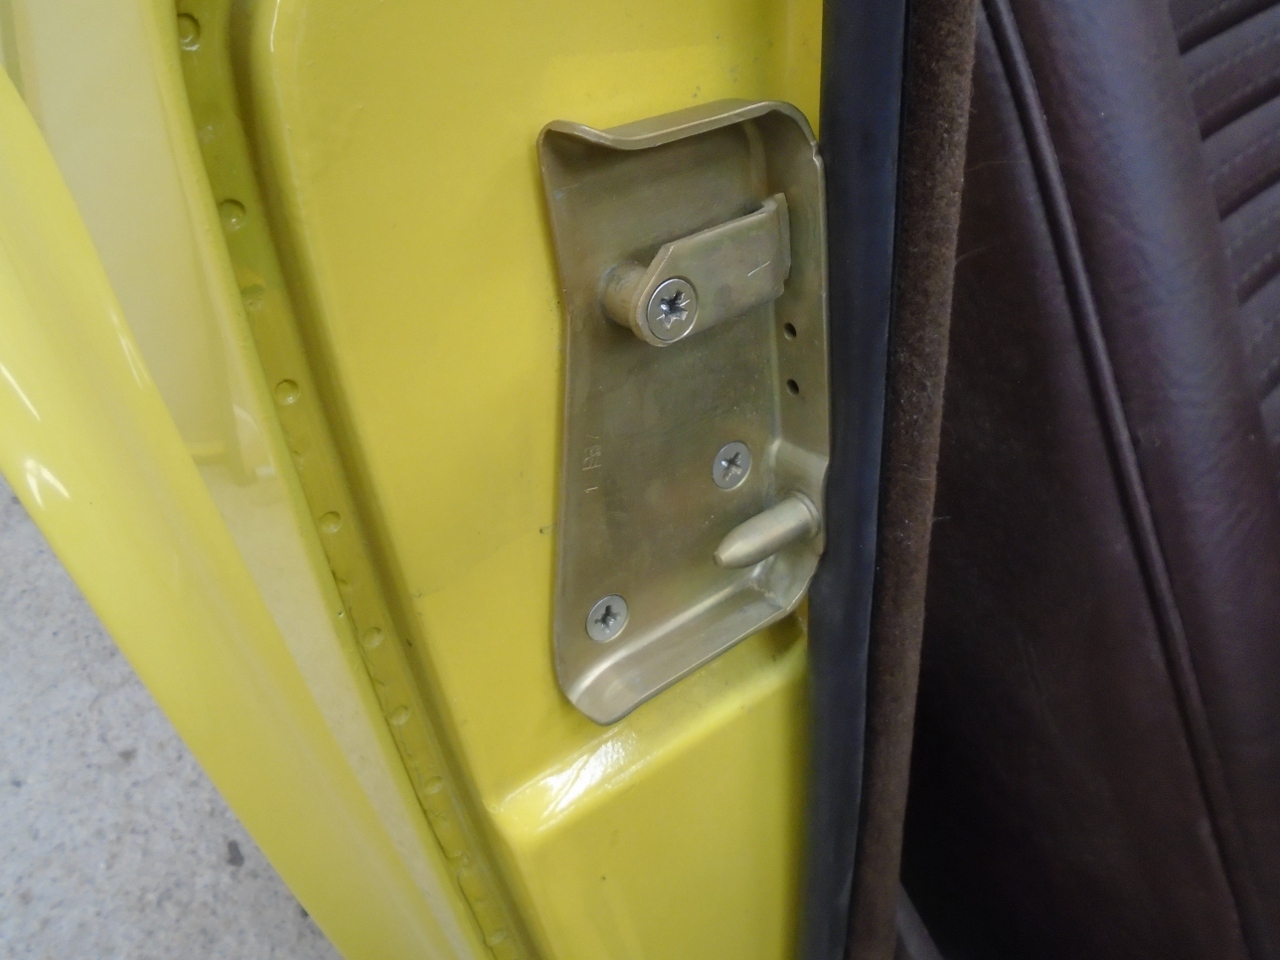
After an hour or so of fiddling, the rear gaps looks good.
Ideally, the door should close without the male part of the
dovetail contacting either the top or the bottom of the female side.
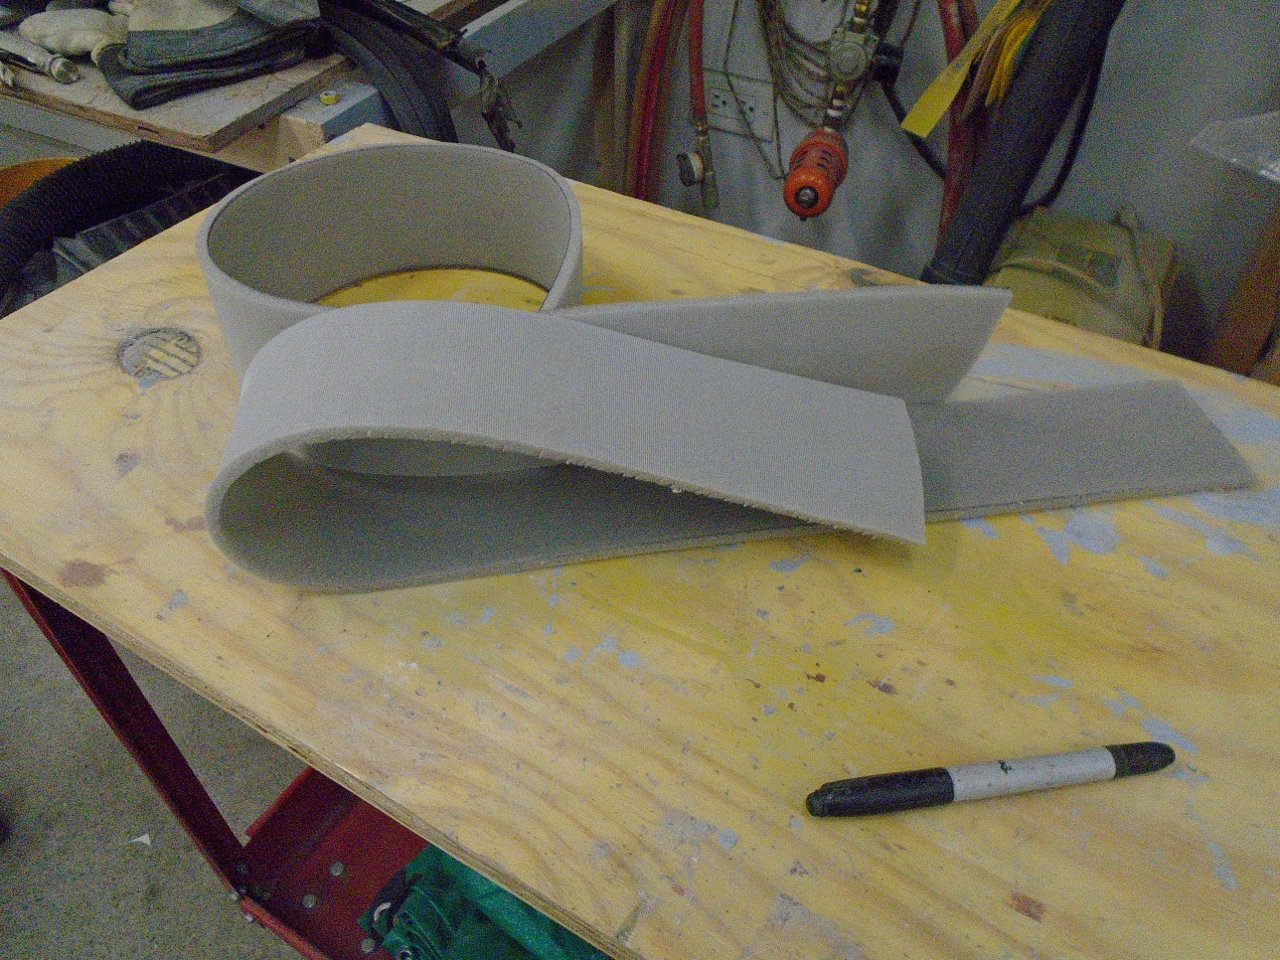
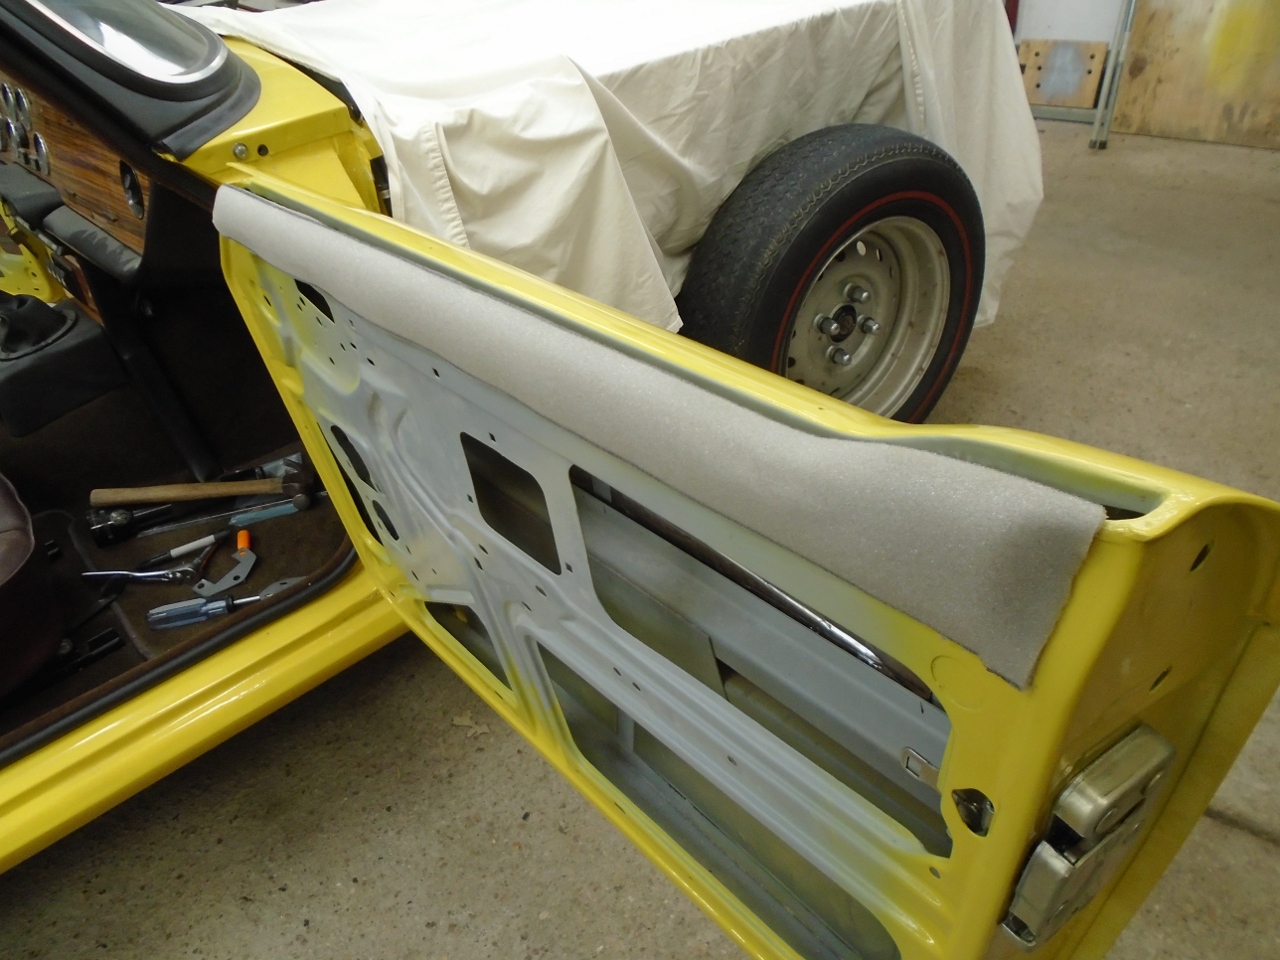
Originally, the inside top cap of the door had a thin black vinyl covering glued on.

I
thougt it would look better to have the cap match the vinyl on the door
cards. I decided to apply some padding under the vinyl, too.
This is 1/4" foam.
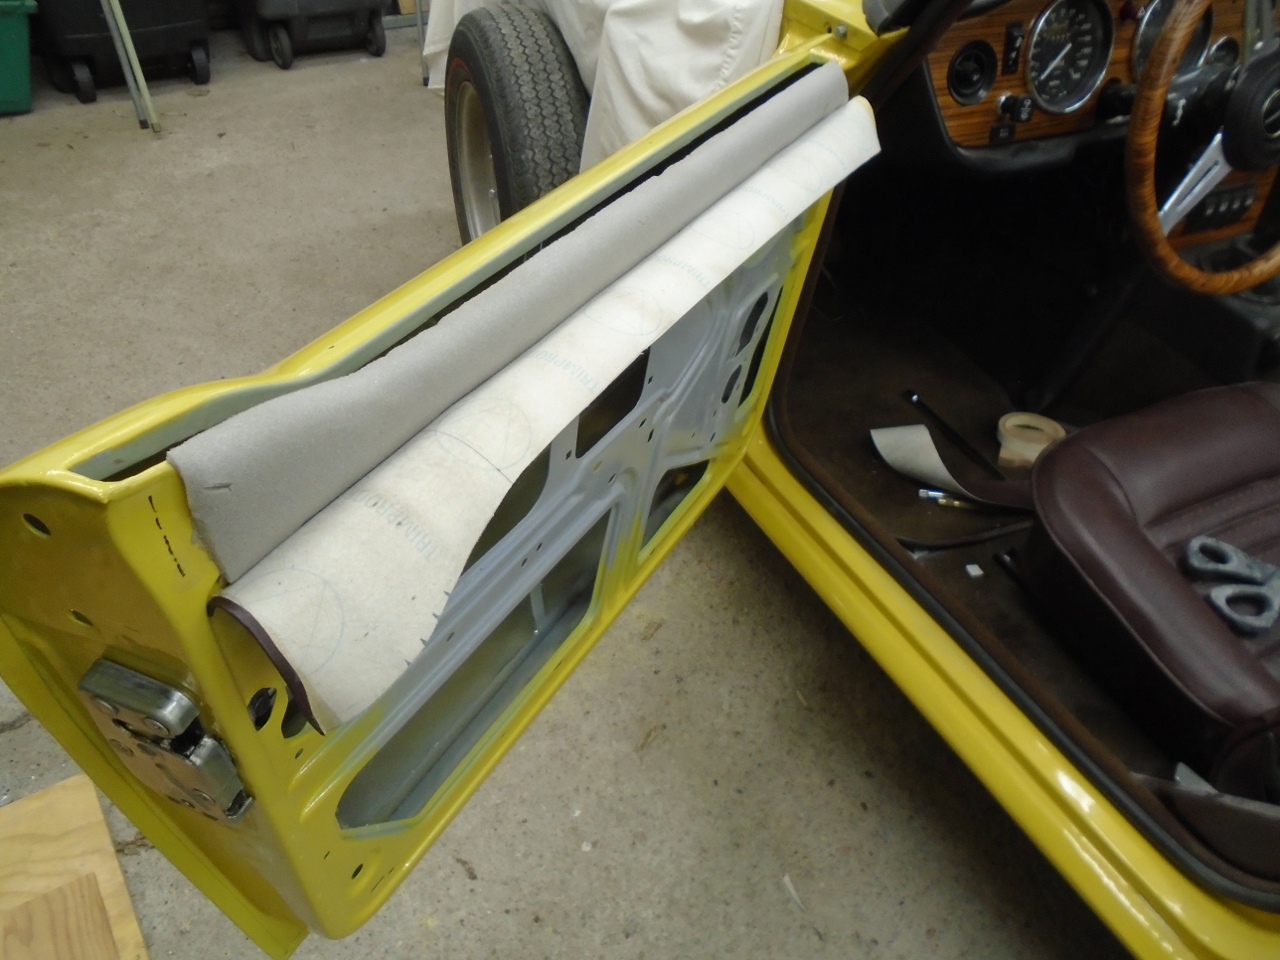
I flattened out one of the original vinyl pieces to make a pattern for the new vinyl.


Then glued it in place.

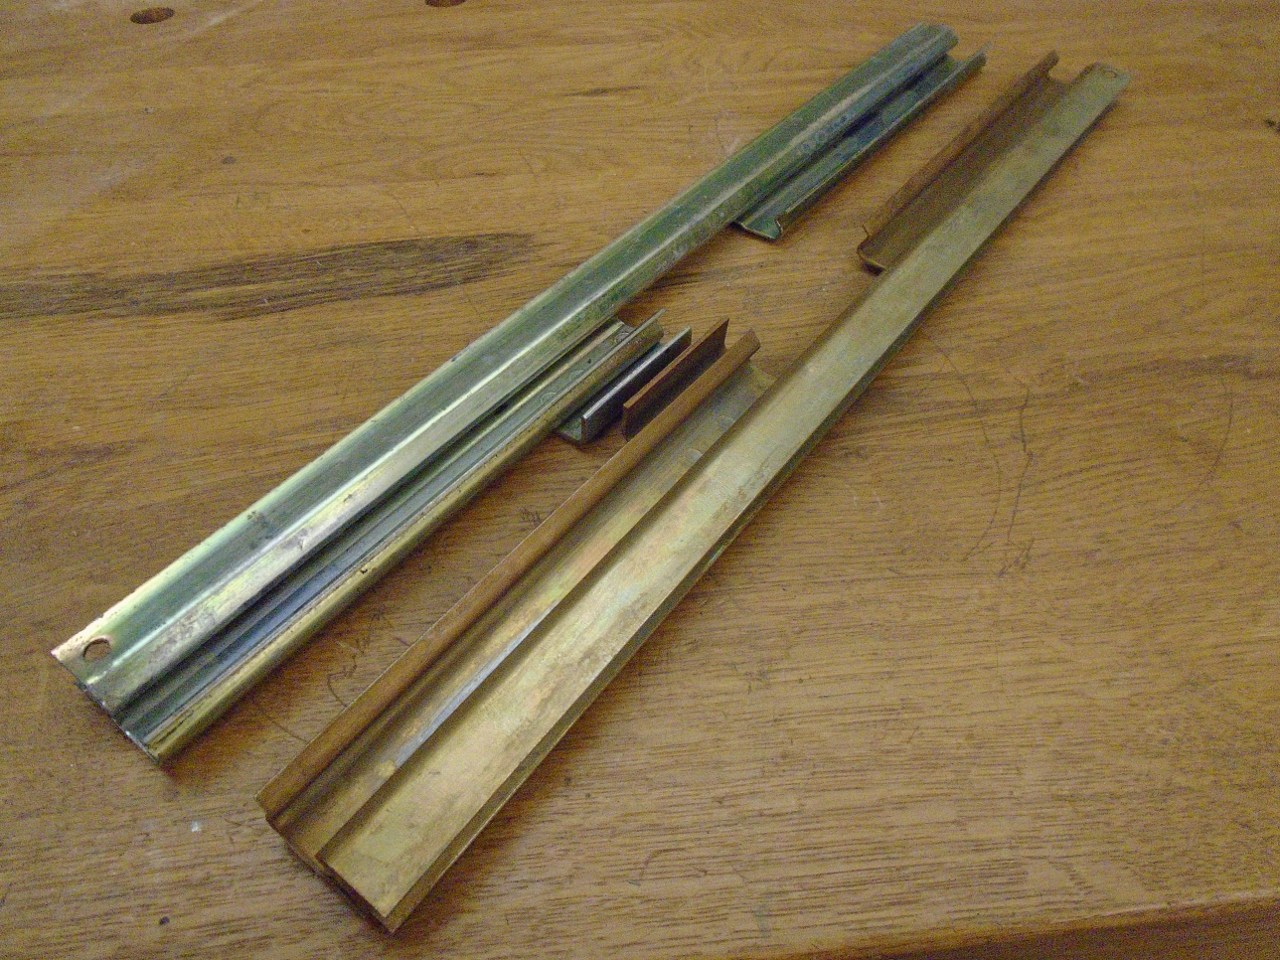
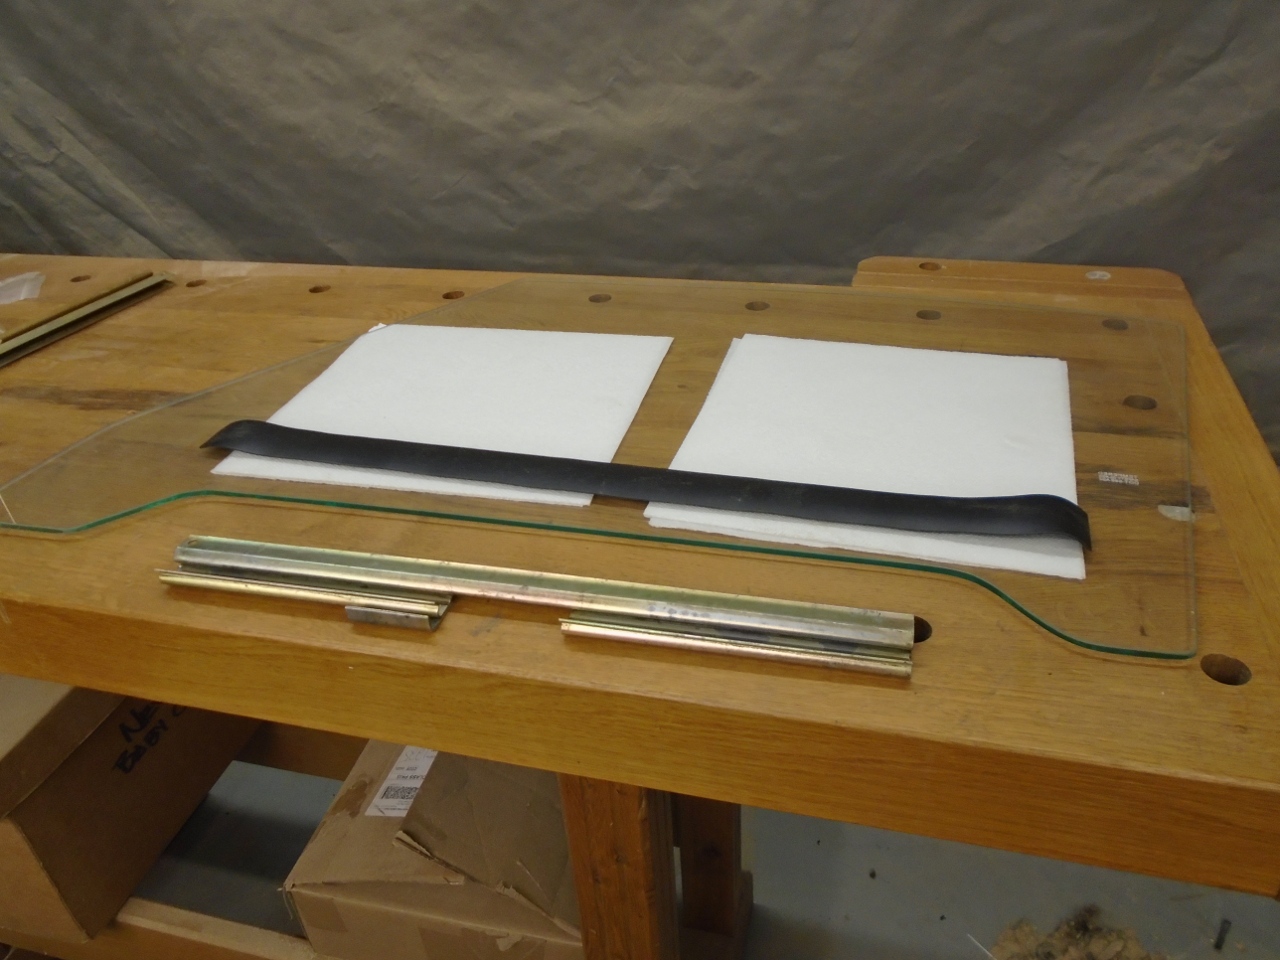
Now
it was time for glass. The glass panes on these cars are captured
in a steel channel along their bottom edge. Since I had new
glass, this meant that I had to transfer the channels from the old
glass to the new. The channels are a press fit over a rubber
gasket that is wrapped around the bottom edge of the pane. The
channels can be removed with some careful soft hammer work.
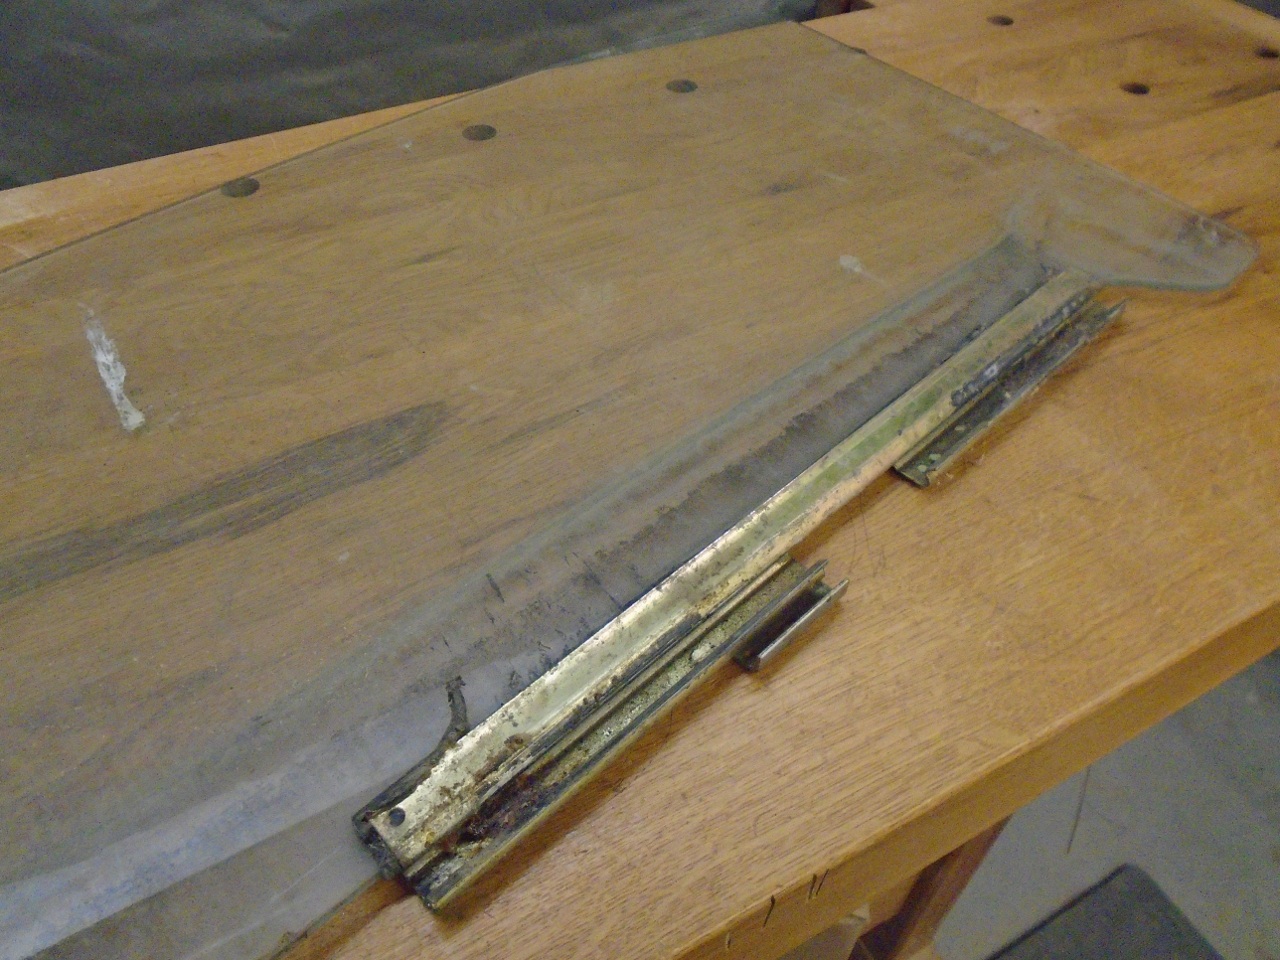
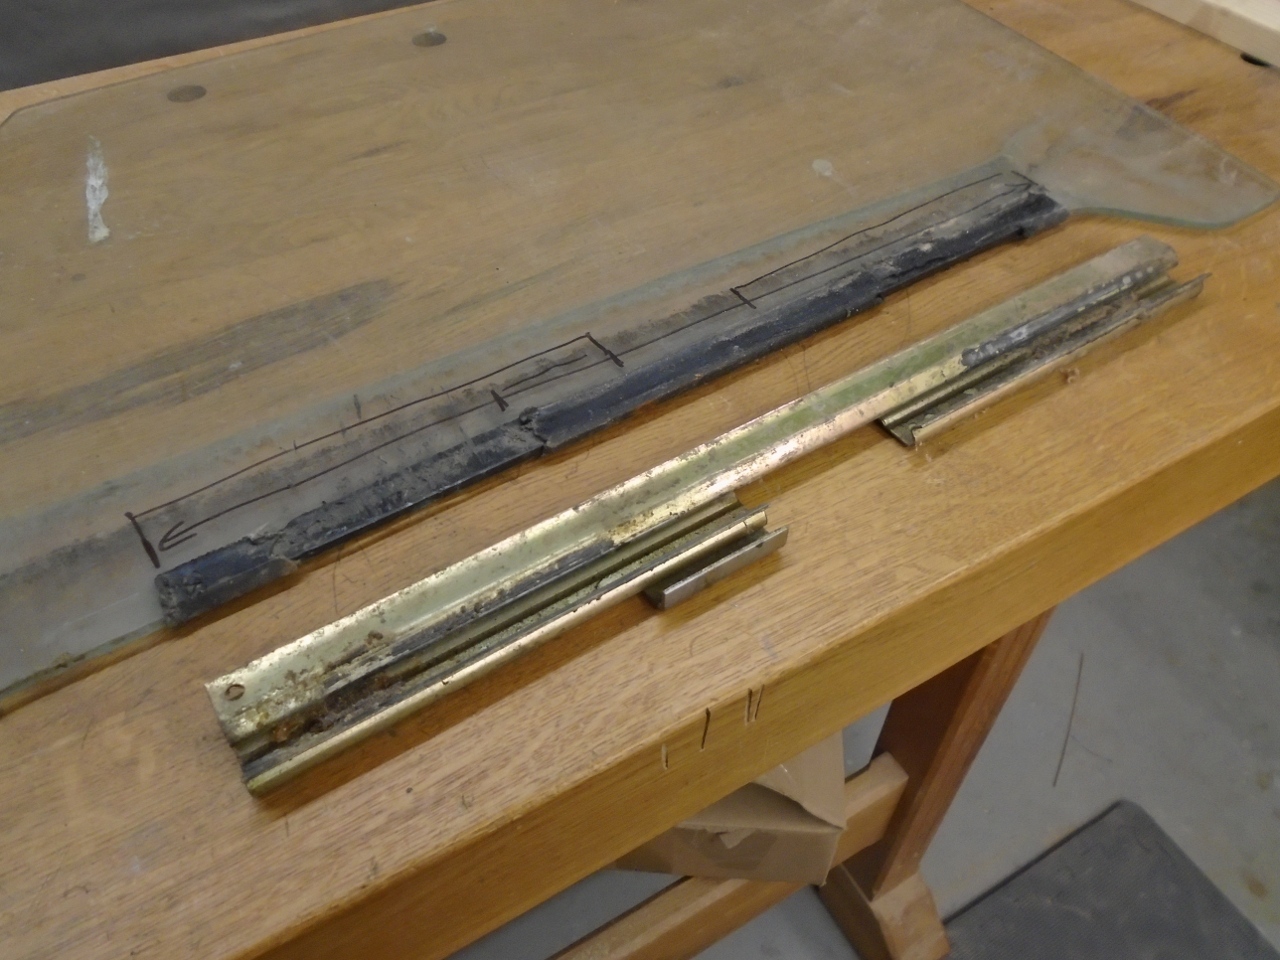
Pictured
above is the better of my two channels. The other one was heavily
rusted inside the channel recess where the glass goes. With some
heroic measures, I was able to remove the rust and replate inside the
channel to give the piece another life.
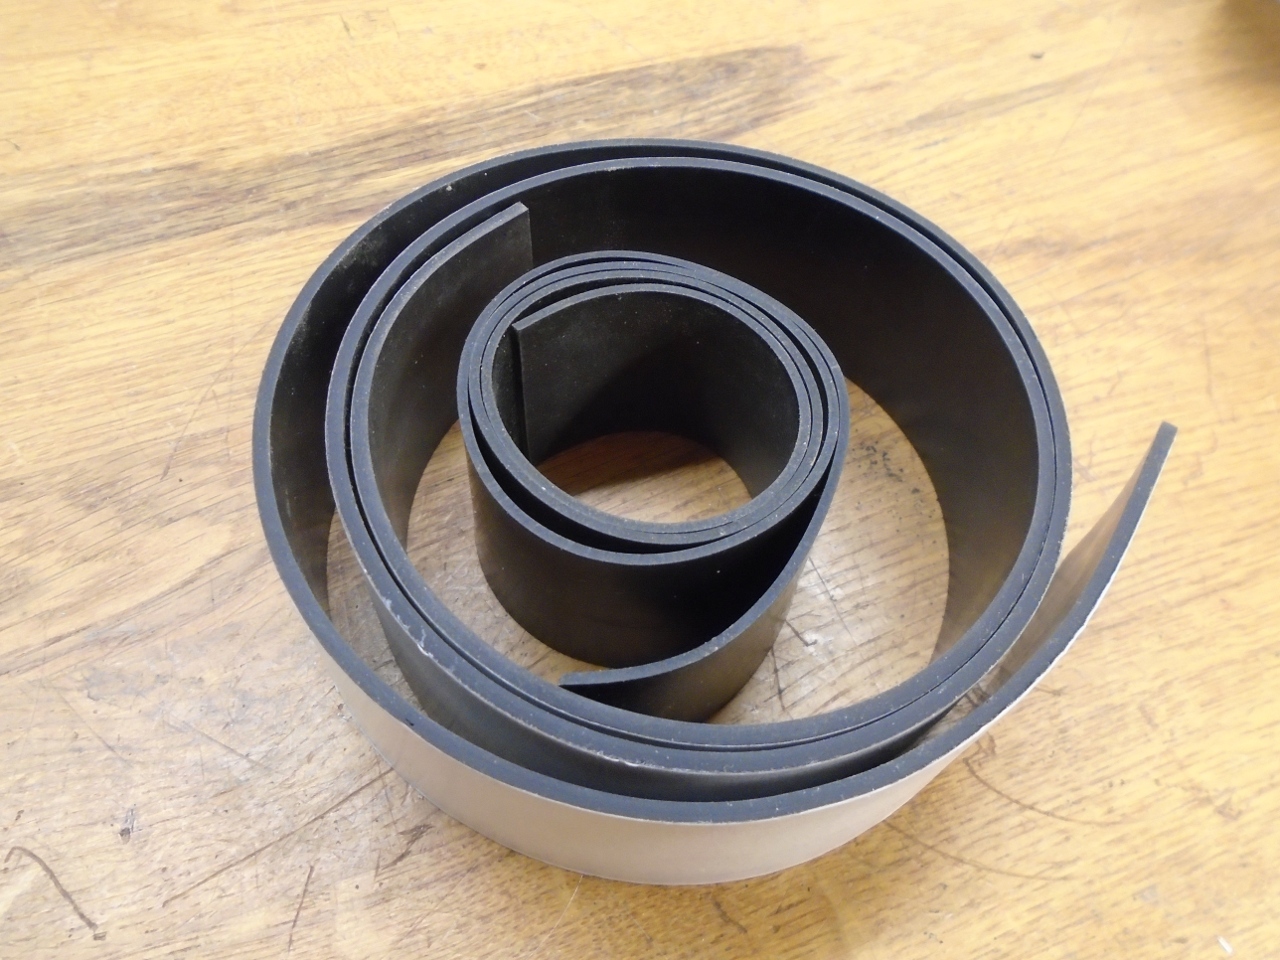
I
ordered a pair of new rubber channel gaskets and set out to apply the
channels to my new glass. That's when the trouble started.
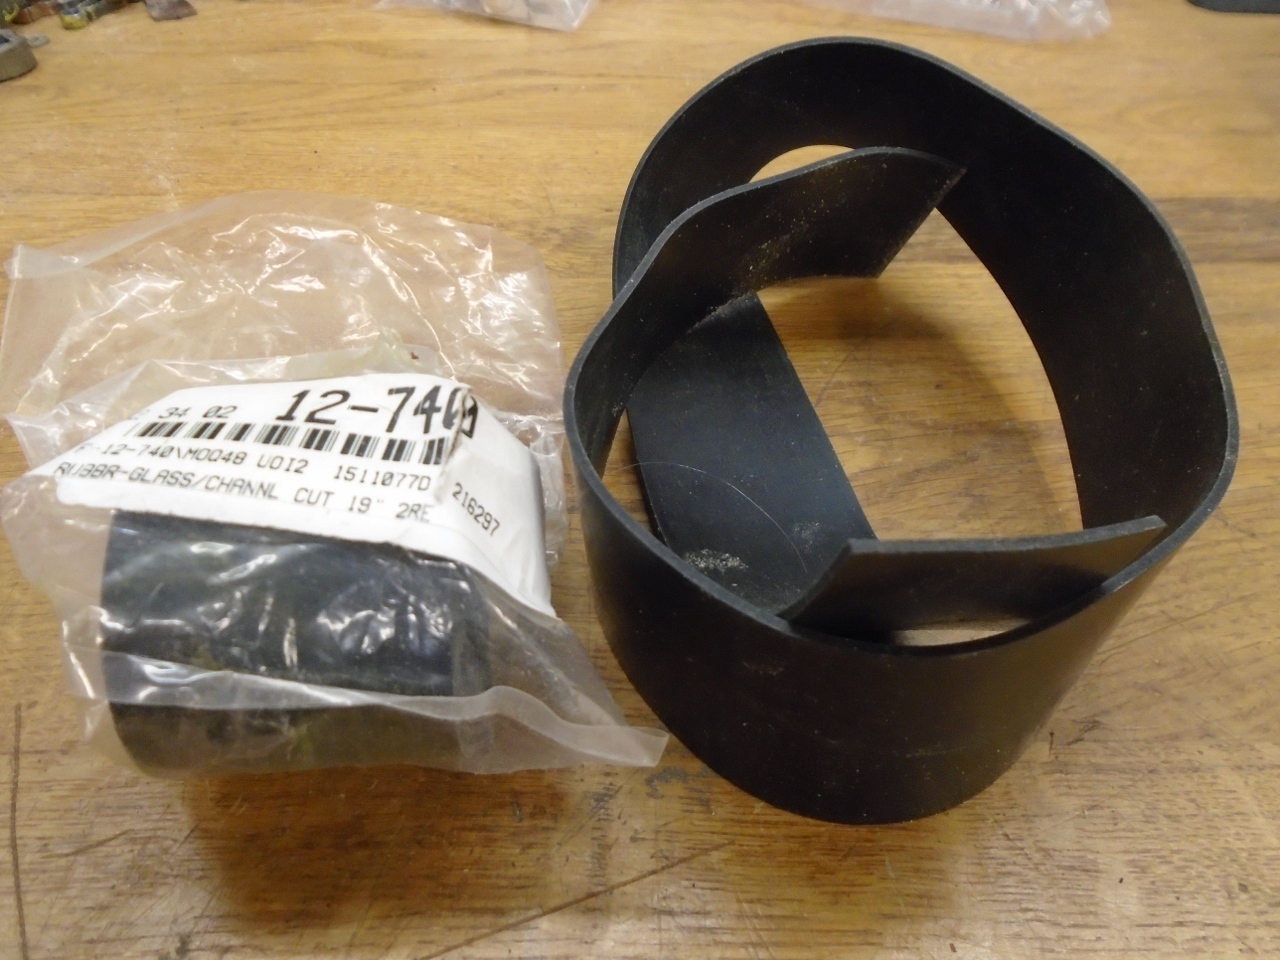
It
was obvious right away that the gasket material was way too thin.
The channels easily slid into place over the rubber, and then
would just fall off. Comparing the nw rubber to the remnants of
the old gaskets, it was clear that the new rubber was the wrong
thickness. It was a nominal 1/16", and needed to be about 3/32".

This
was of course irritating, but sadly, I'm getting sort of used to it.
I've usually not found it that productive to talk to the vendors
about this kind of thing. Certainly, they would offer to
send me another gasket or refund my money, but those options wouldn't
be all that helpful to be at that point. I went to my standby
industrial supplier and ordered a length of 3/32" strip rubber
material. I ordered it with adhesive on one side. It was wider than the original, but it was easy to trim.
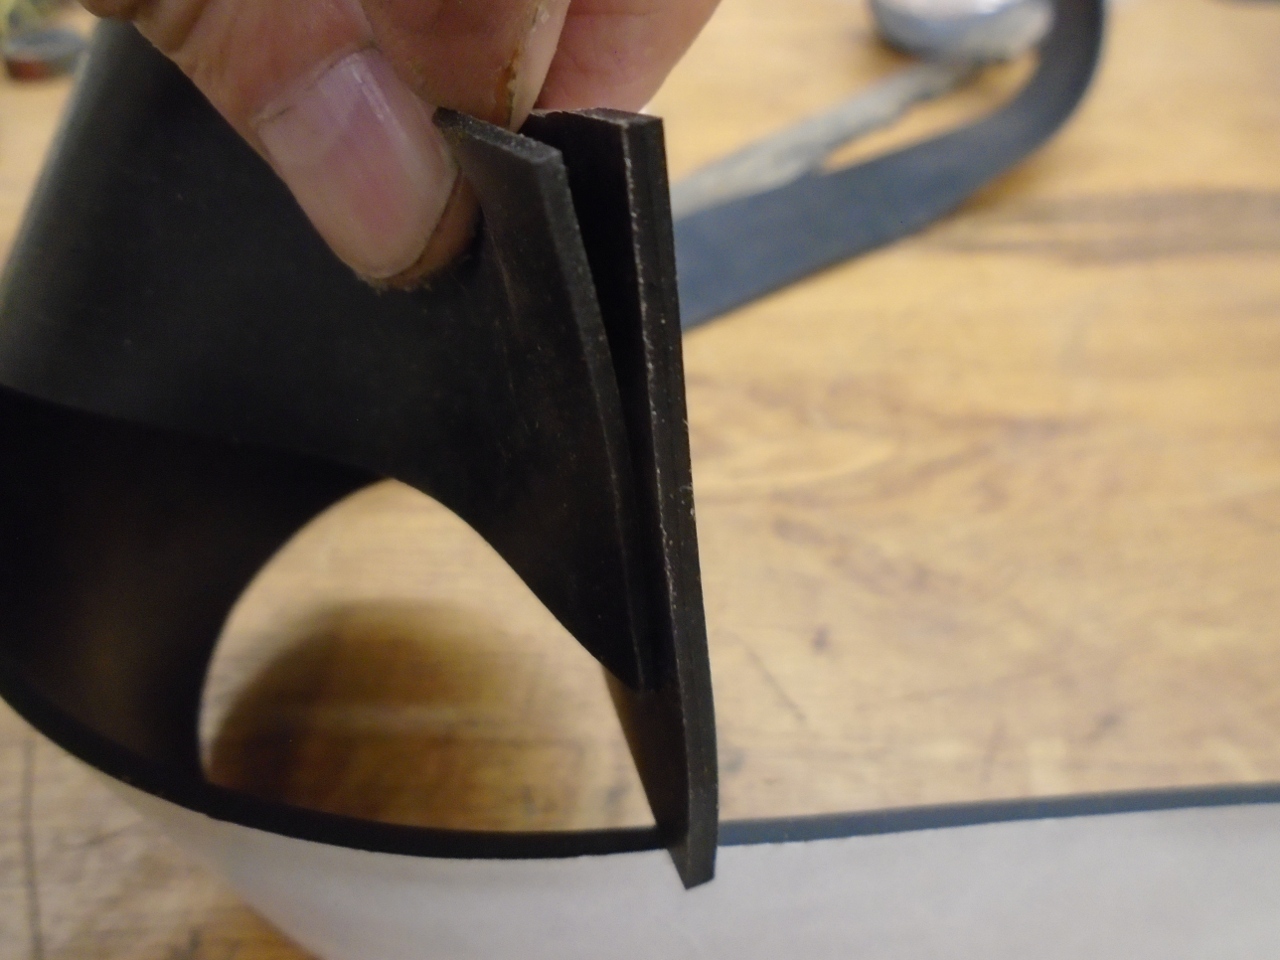
The
adhesive was not to keep the channel in place, but it was handy to keep
the rubber on the glass while the channel was driven on. It
worked perfectly. It took a satisfying amount of force from a
soft dead-blow hammer to seat the channel.
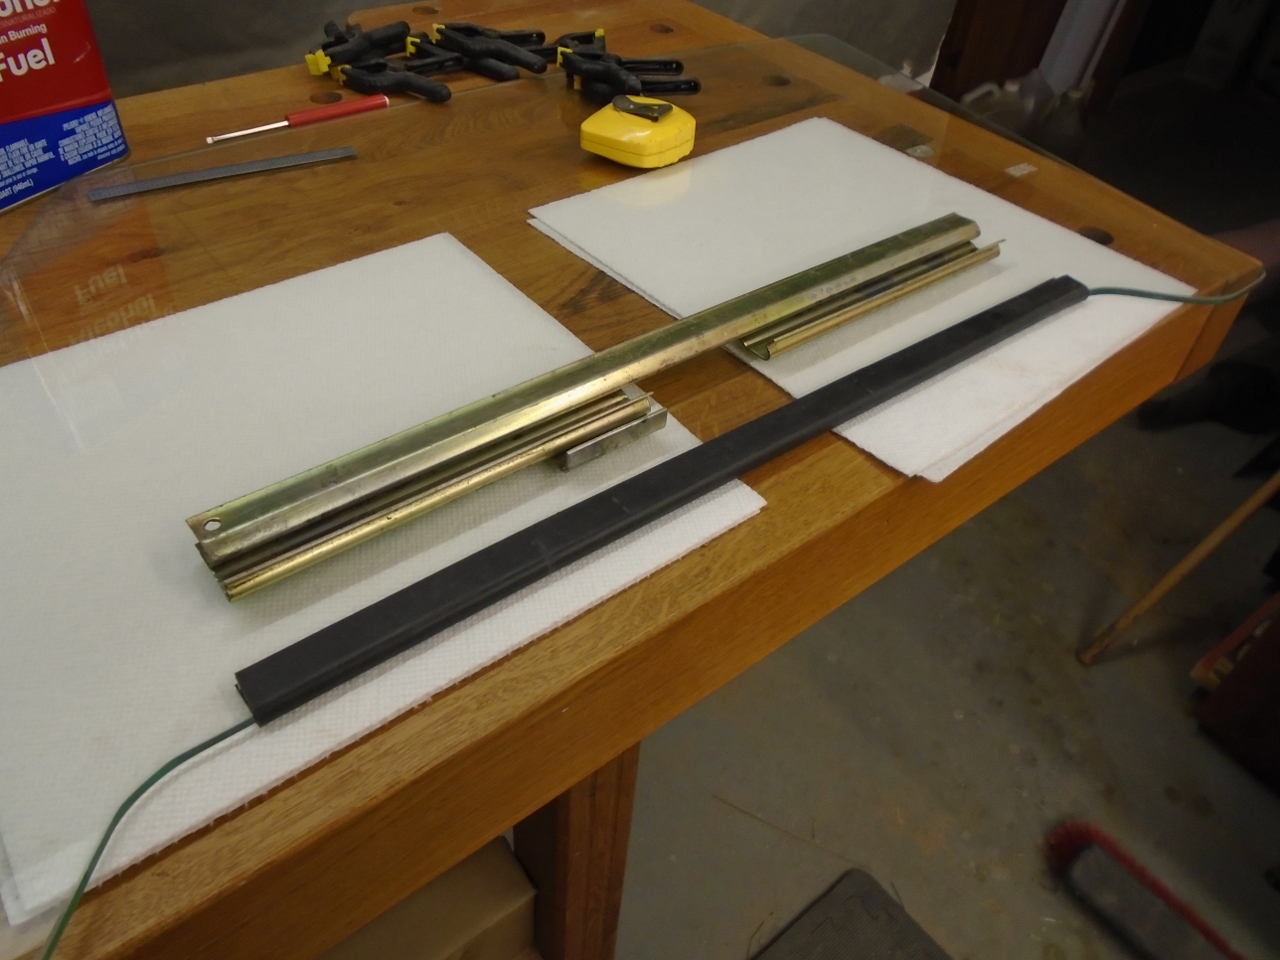

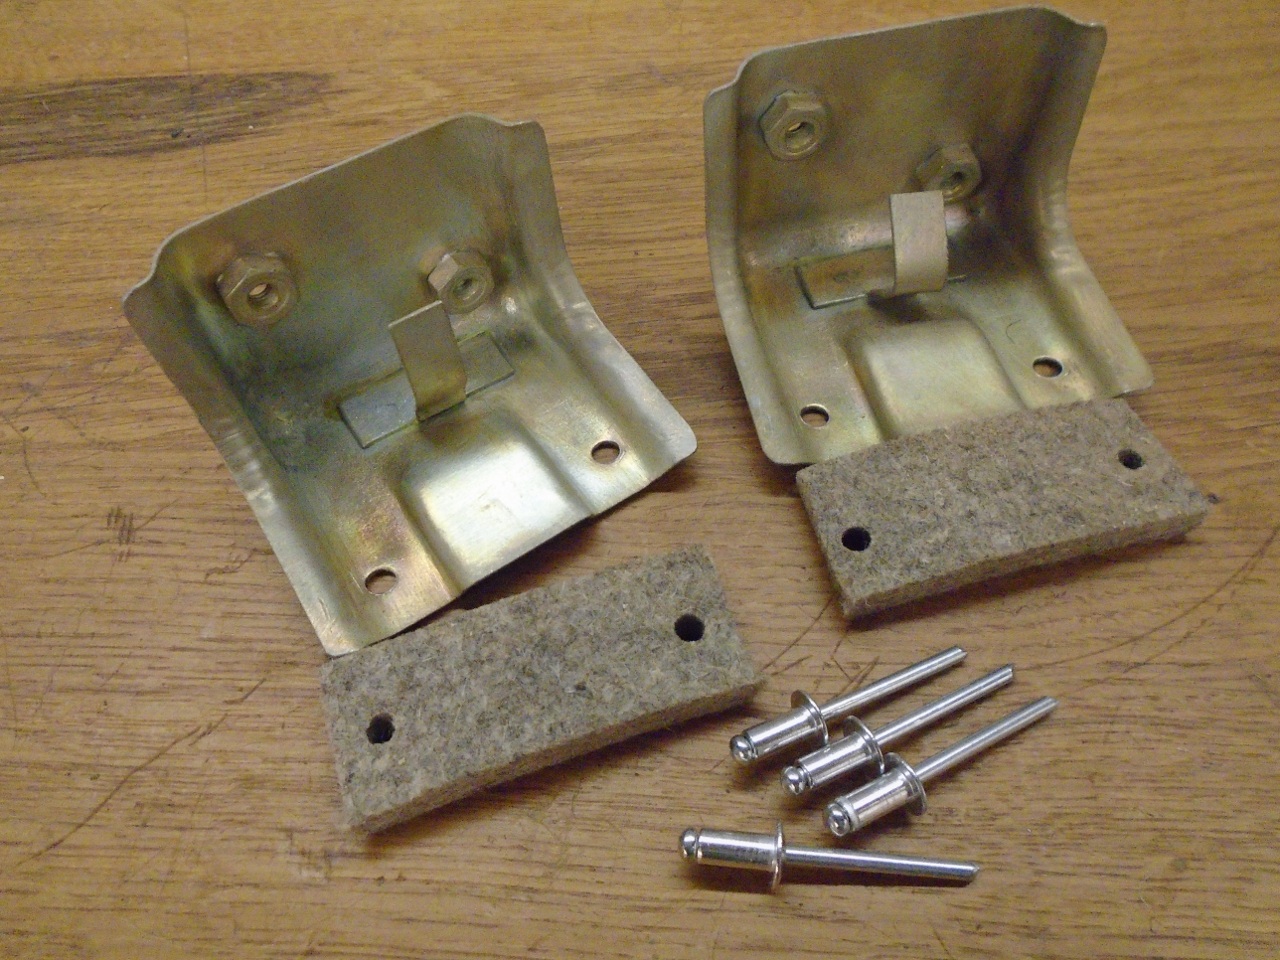
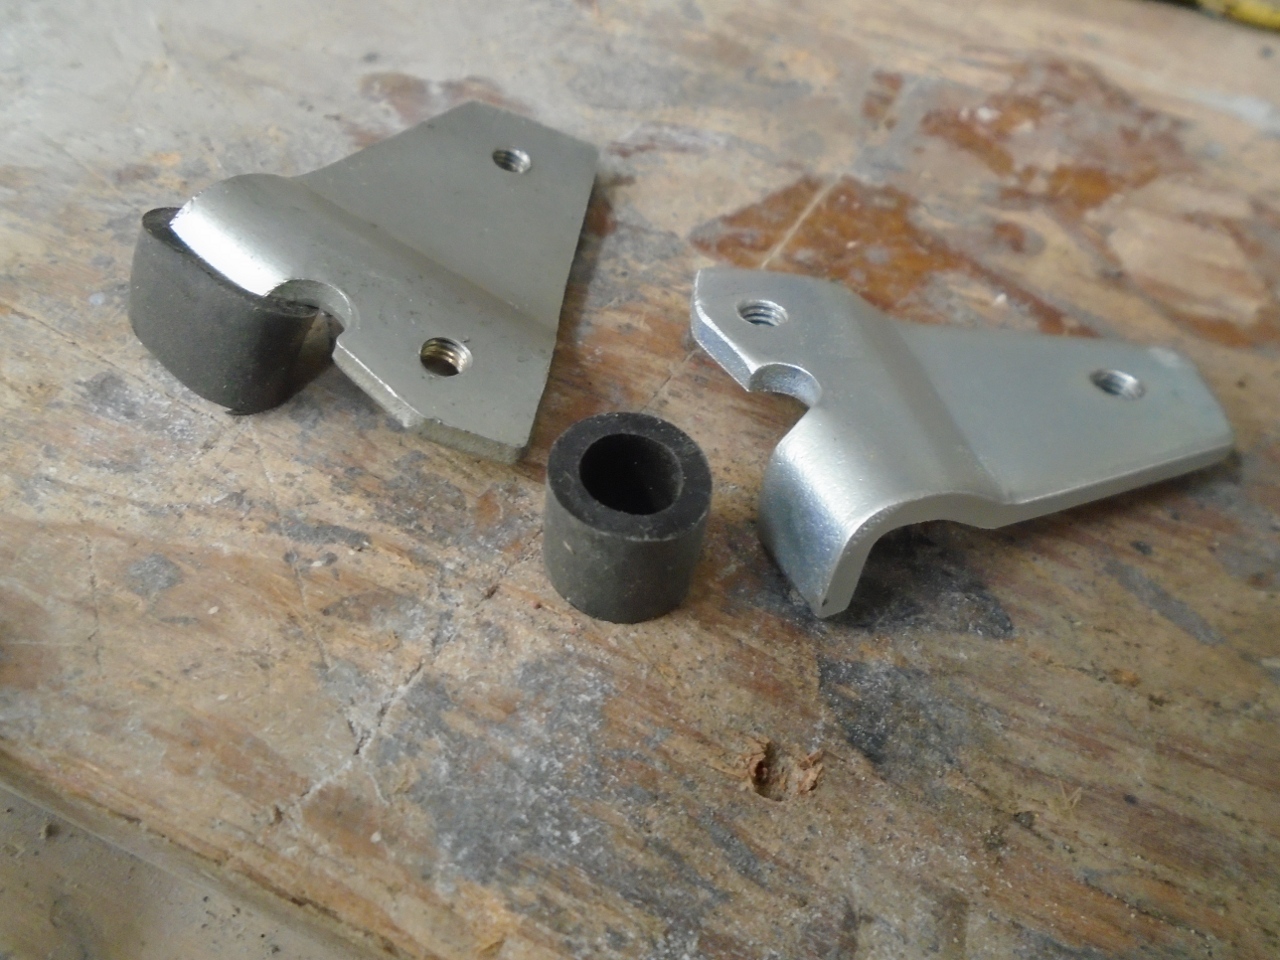
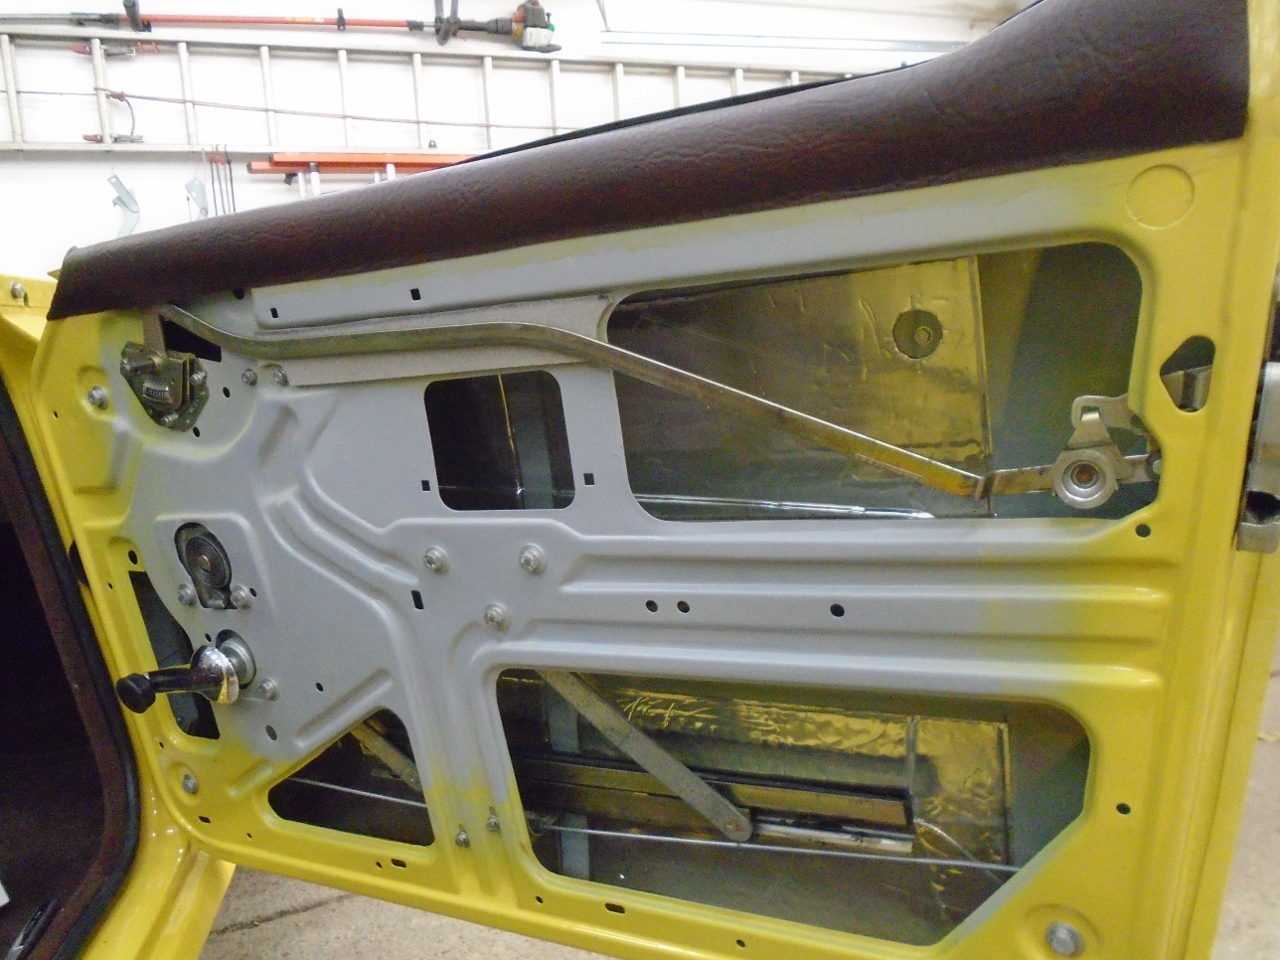
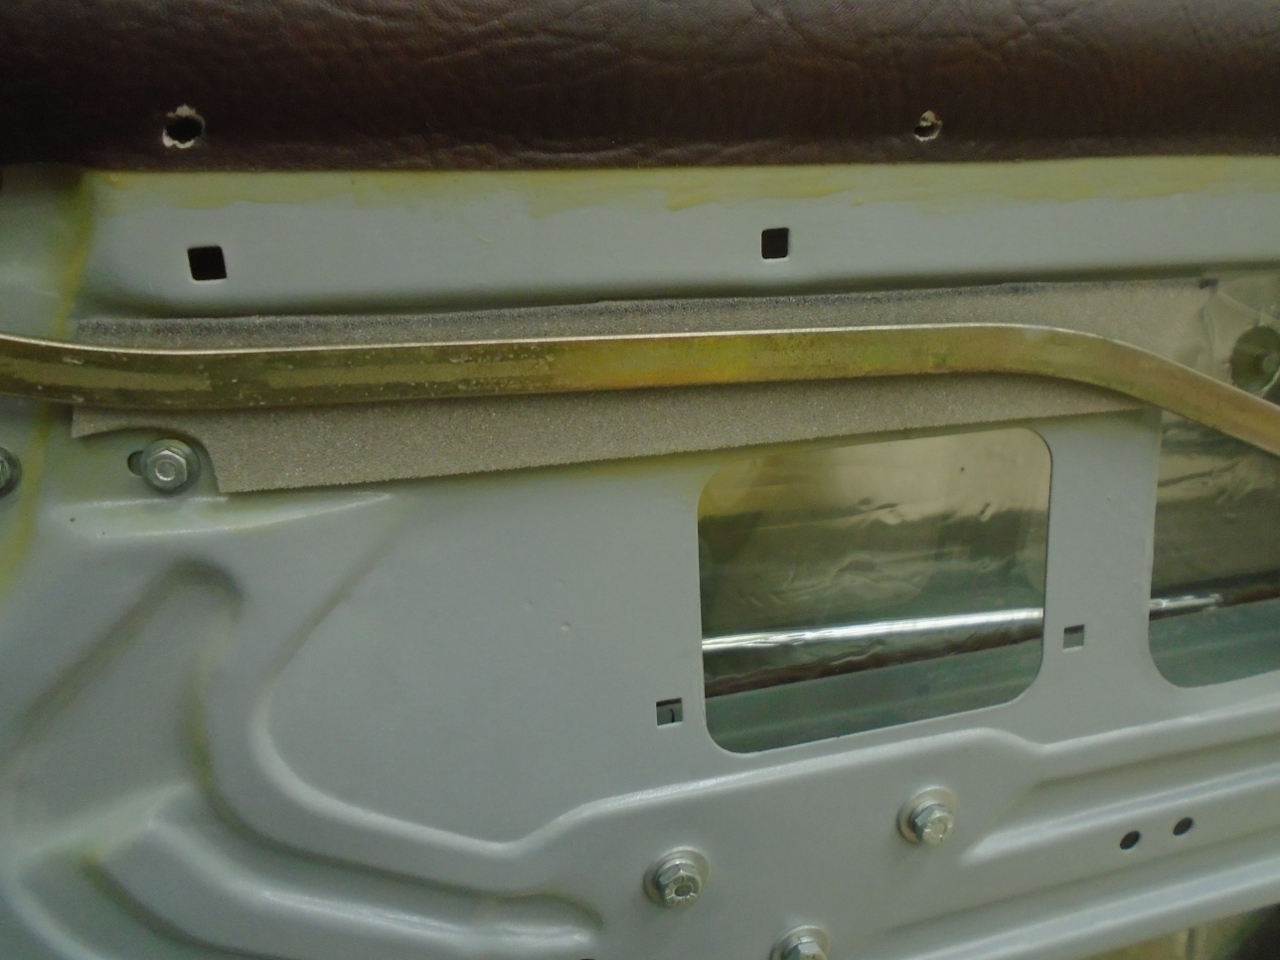
There
are a few other pieces and parts related to the window. This is
the lower window stop. The felt was mashed and the brackets were
rusty.
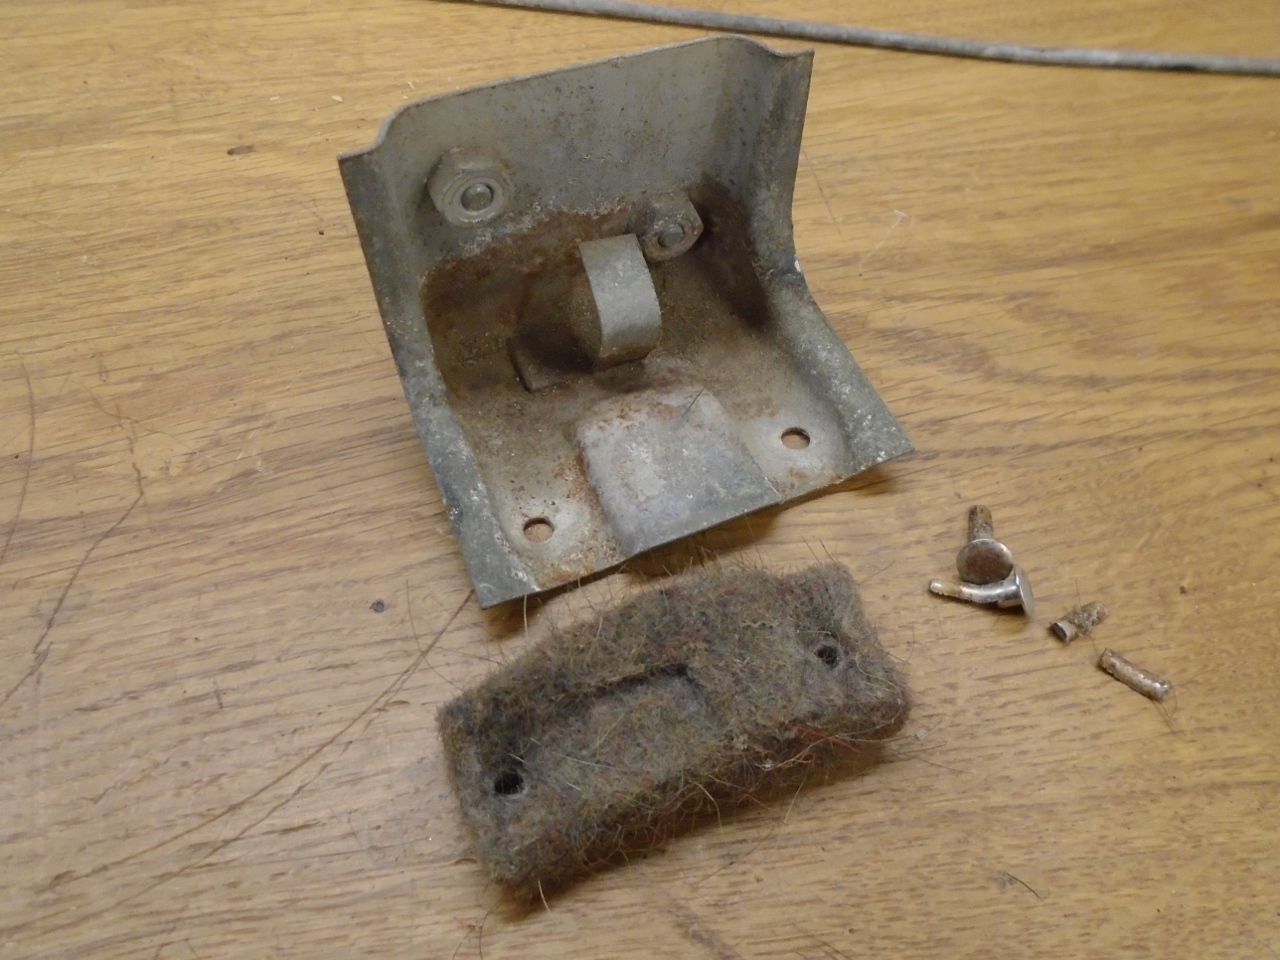
But they cleaned up OK.
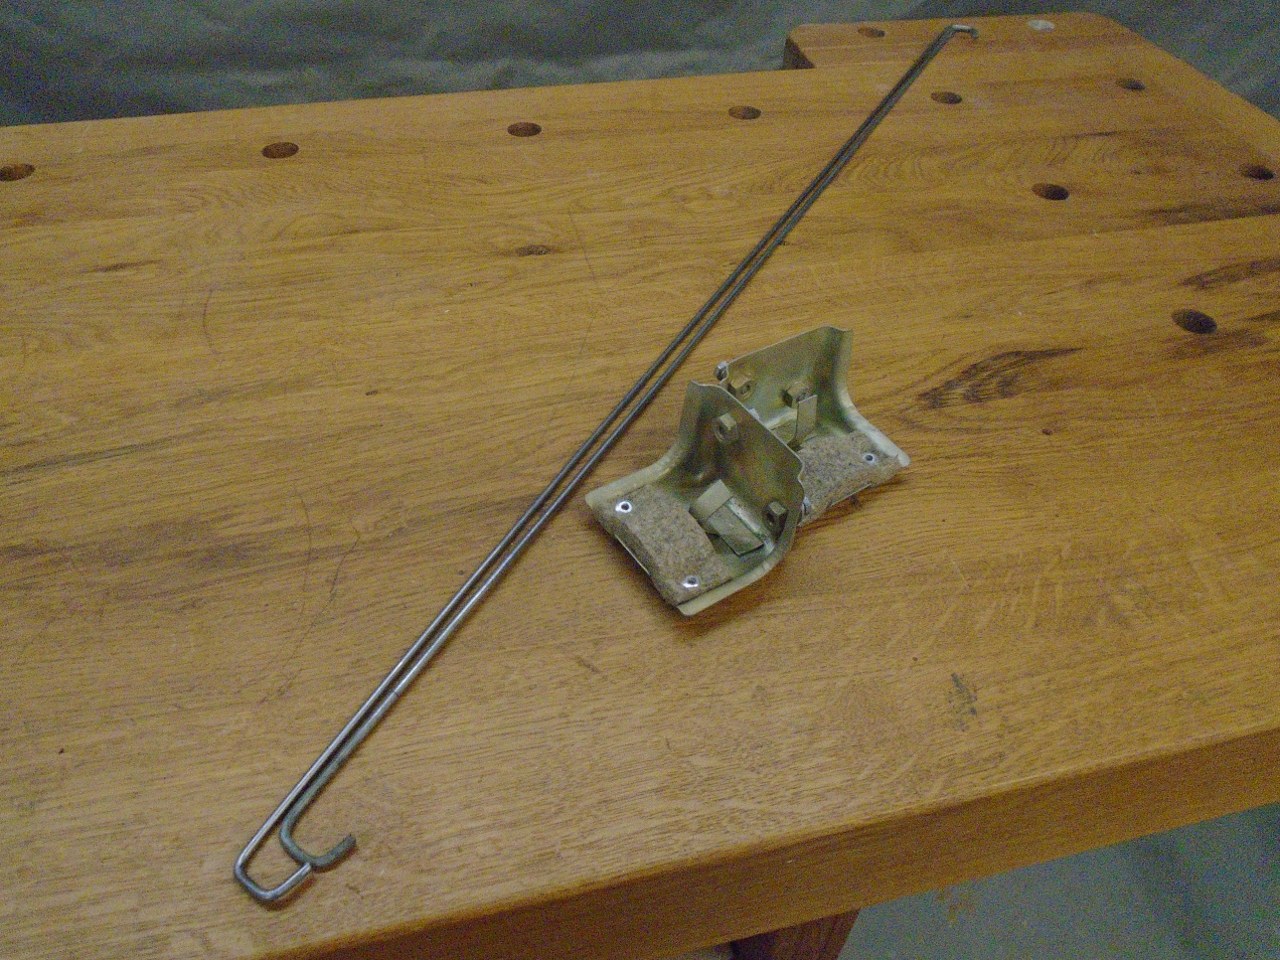
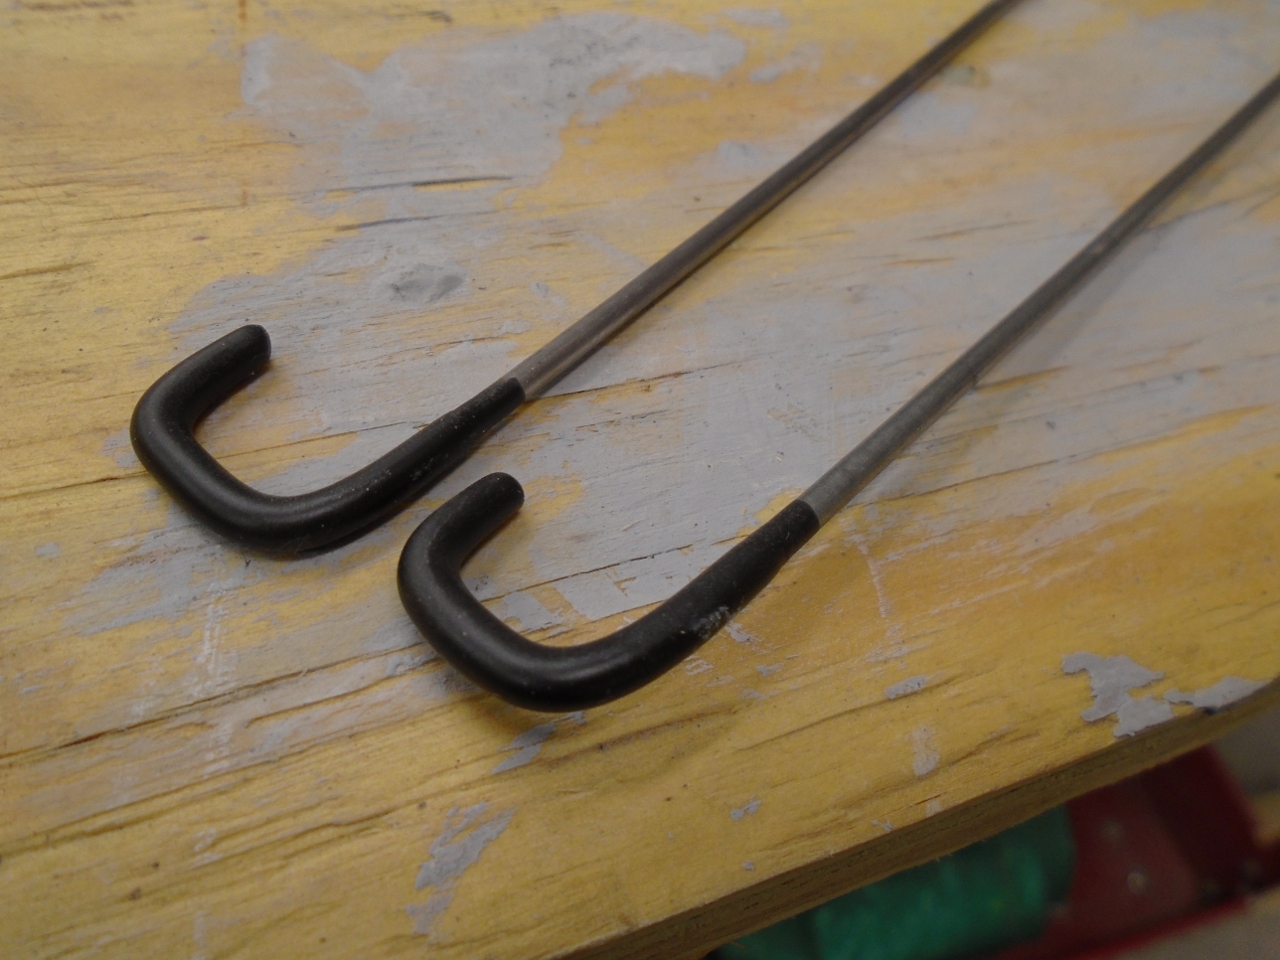
These
"tie rods" hook around and span between the window guides, and are held
by the lower window stop. I can see no earthly purpose for these
rods, but who am I to second guess Triumph Engineers? One of my
rods was actually missing, so I made one to match.
So here are some of the things that have to go in before the window glass. The fore and aft window guides were refurbed previously.

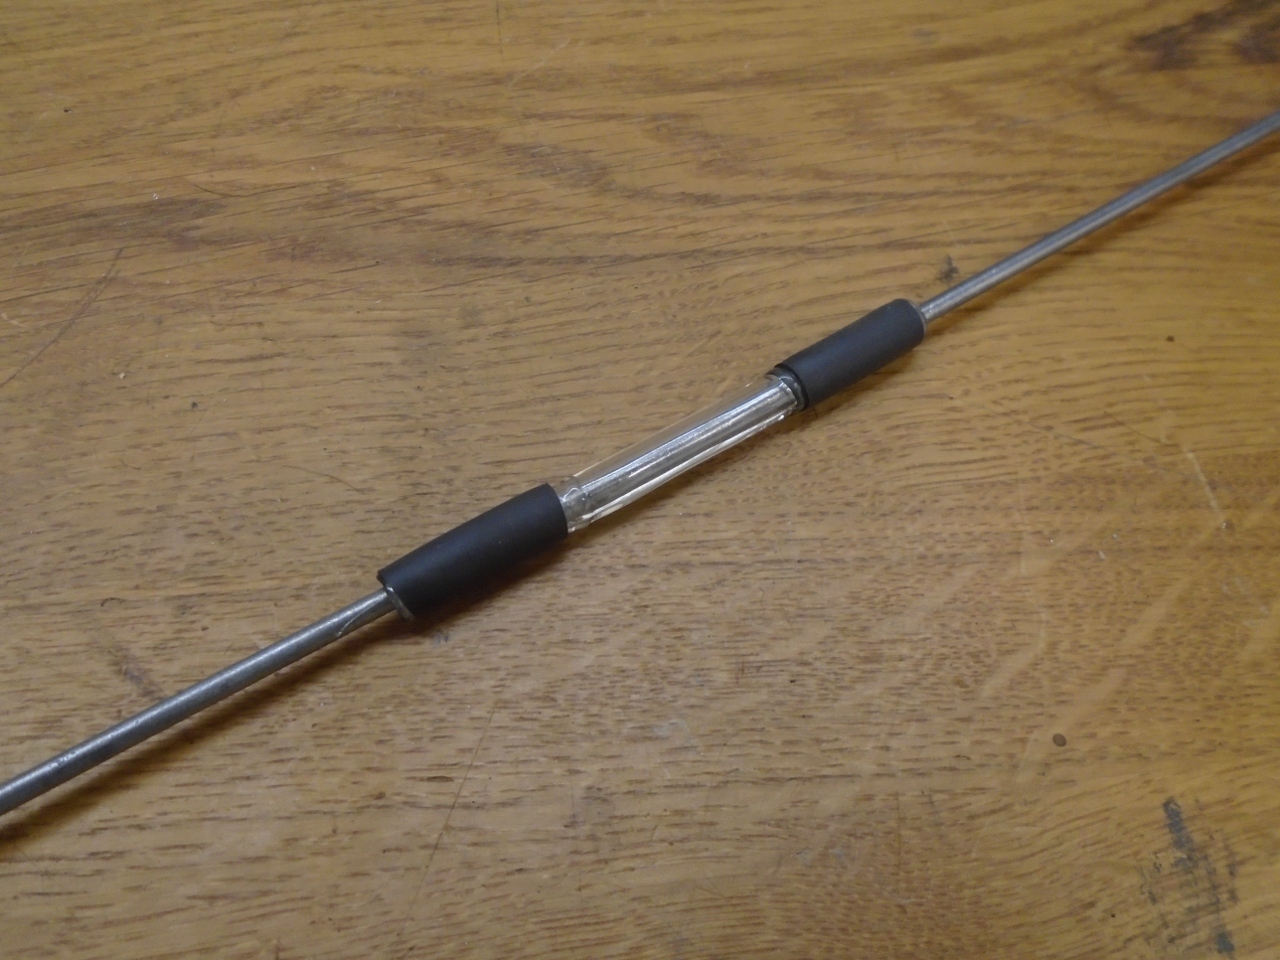
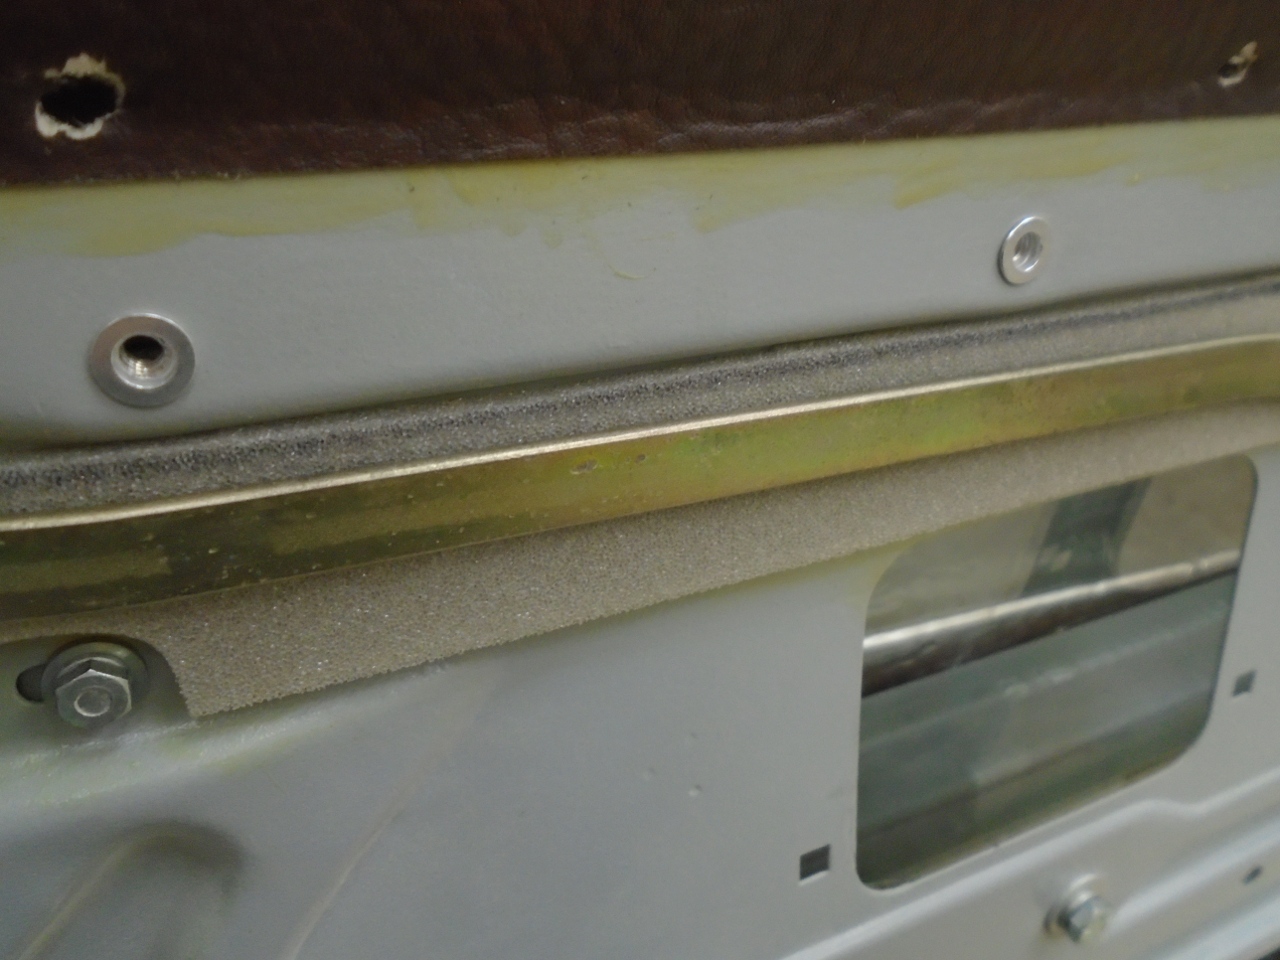
The
mysterious "tie rods", in addition to being enigmatic, appeared to be a
potential source of rattles, so I took a few steps to minimize that.
There is a piece of plastic tubing on the rod where the lower
stop holds it. and aome PlastiDip coating on the ends that hook around
the window guides.
Here's
one more trivial little nicety. This is the upper window stop.
It limits how far the window will raise. That little piece
or rubber tubing will cushion the regulator arm at its limit,
emitting a dull thud rather than a metallic clank. Like I
said--trivial.
At
this point, I decided to add some more HushMat to the rear of the
door's inside panel. I installed two or three pieces to each door
where they would fit. A subjective thump test told me that it
helped the door sound more solid.

It
was at about this point that I installed the window regulator
mechanisms and the window glass. I don't really have any pictures
of it and I can't really explain how to do it. As I recall, the
process on each side was different, but both involved just fumbling
with the parts until they went together. Swearing seemed to help
a little, but I can't be sure.
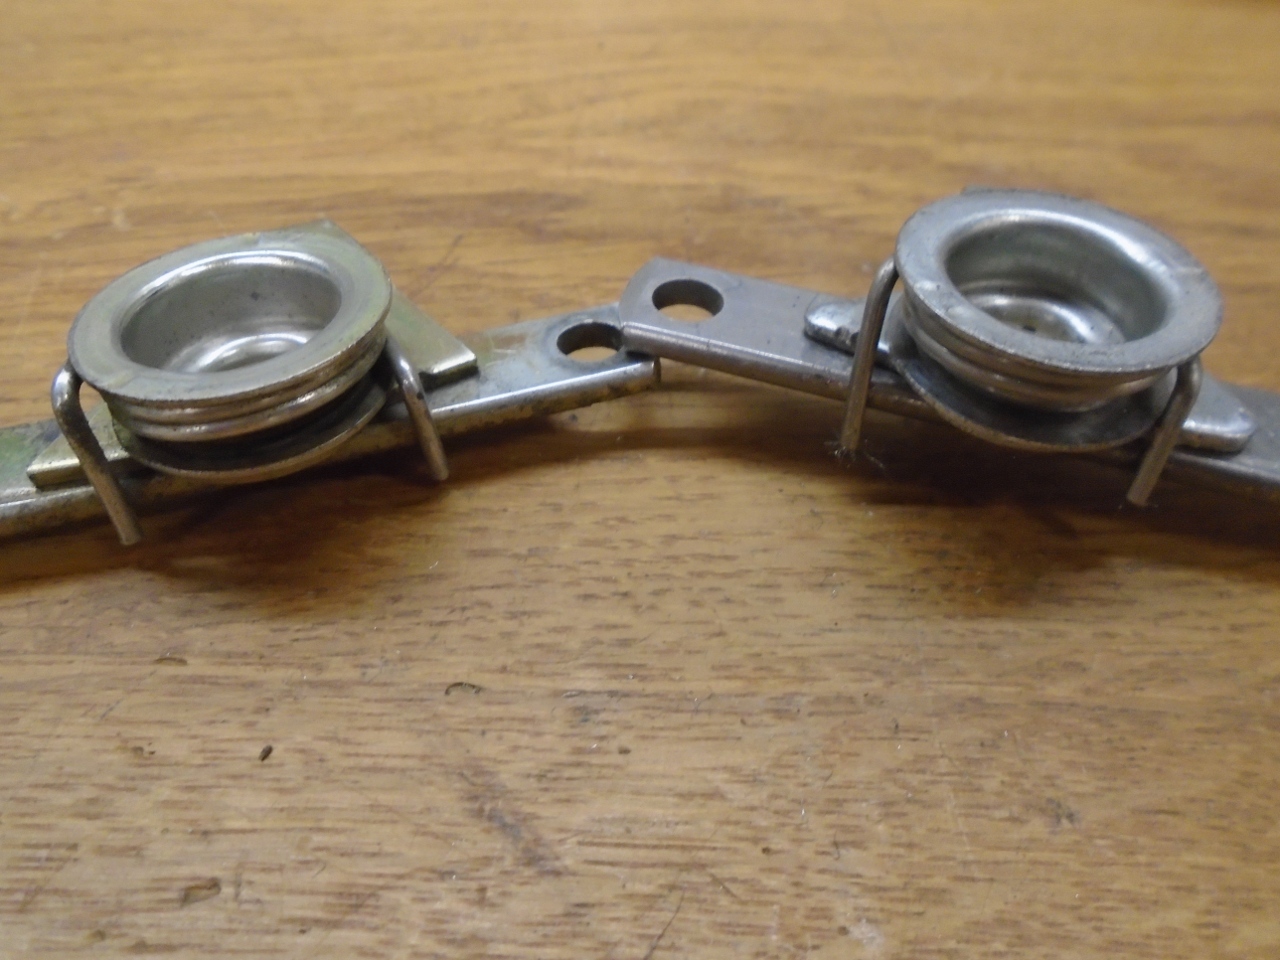
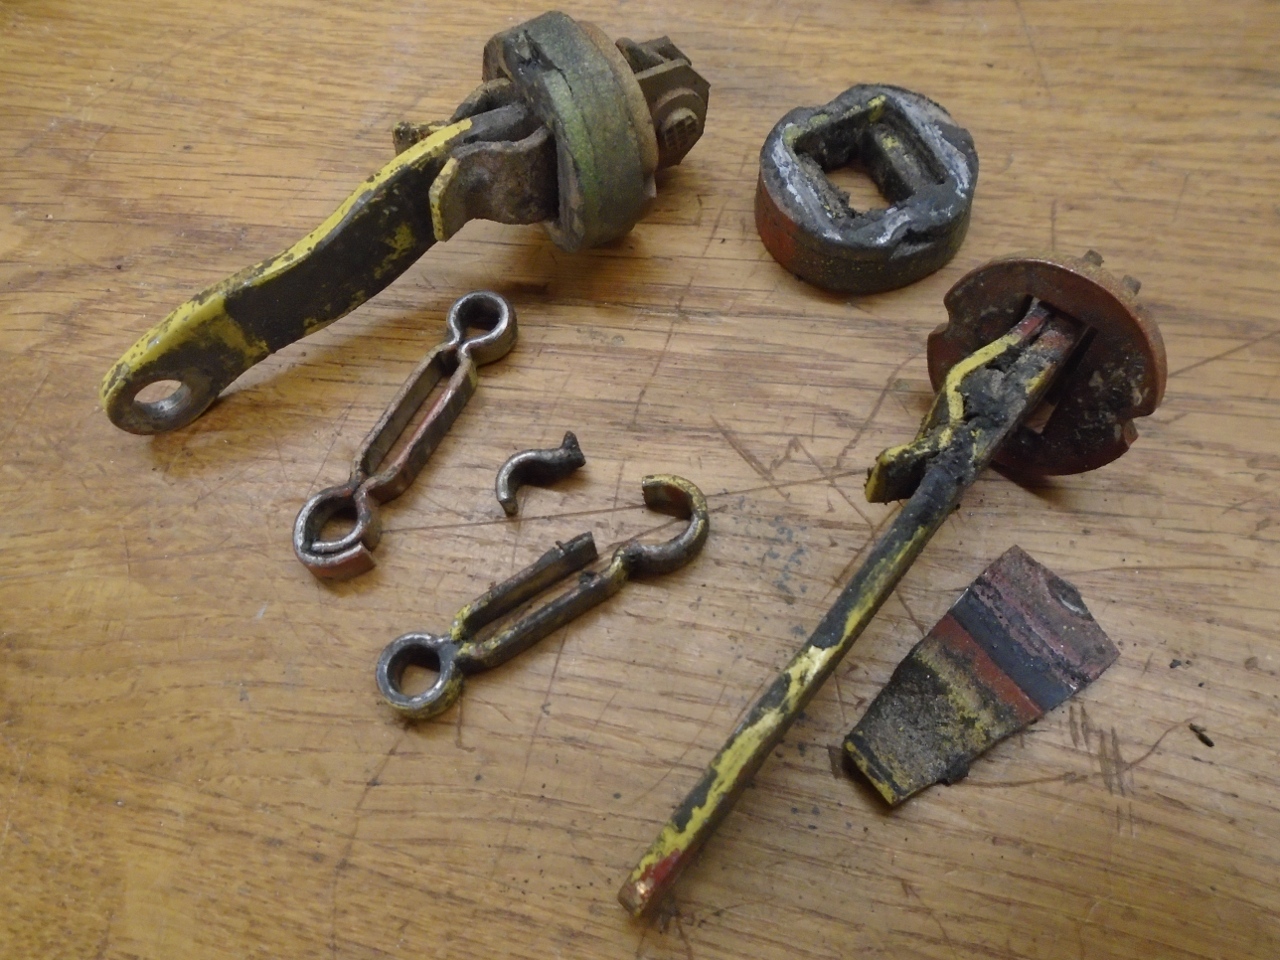
These are the remote control arms
for the door latch and lock. They allow manipulating the latch
and lock from the forward part of the door.
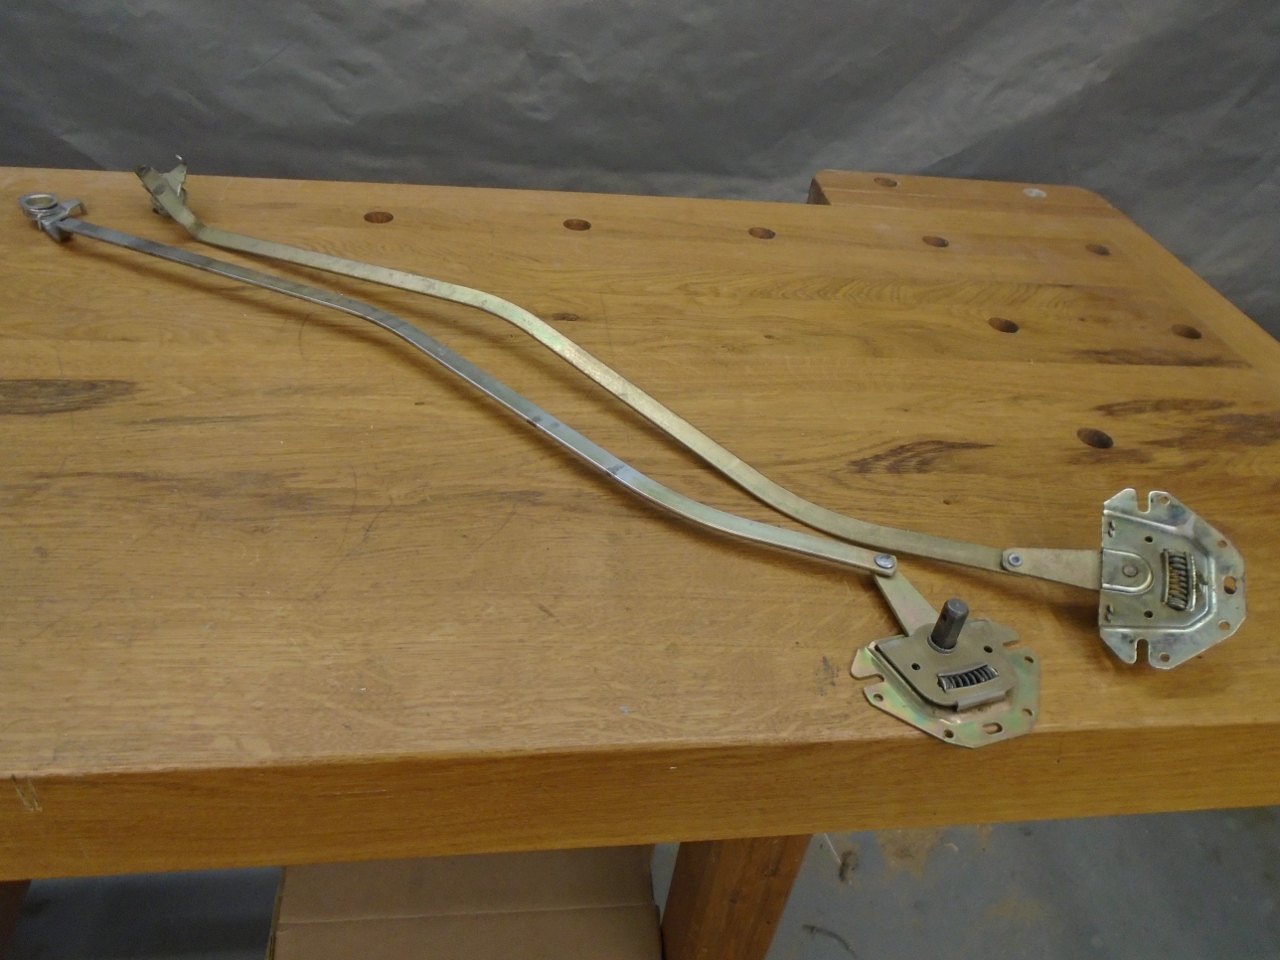
They
looked to be in great shape until I looked a little closer. The
aft end of each arm has a spring loaded over-travel arrangement.
The over-travel improves the "feel" of the control by giving
a soft stop to travel. It isn't uncommon for the spring to break,
causing s sloppy feel to the control. Well, that spring had
broken on one of my arms, and some DPO had fixed it by cutting off one
of the coils of the spring and reshaping what was left to resemble
the original spring end. I'm pretty sure the DPO was me.
Resolving to do it right this time, I took the assembly appart so I could get to the spring, and ordered some spring wire.
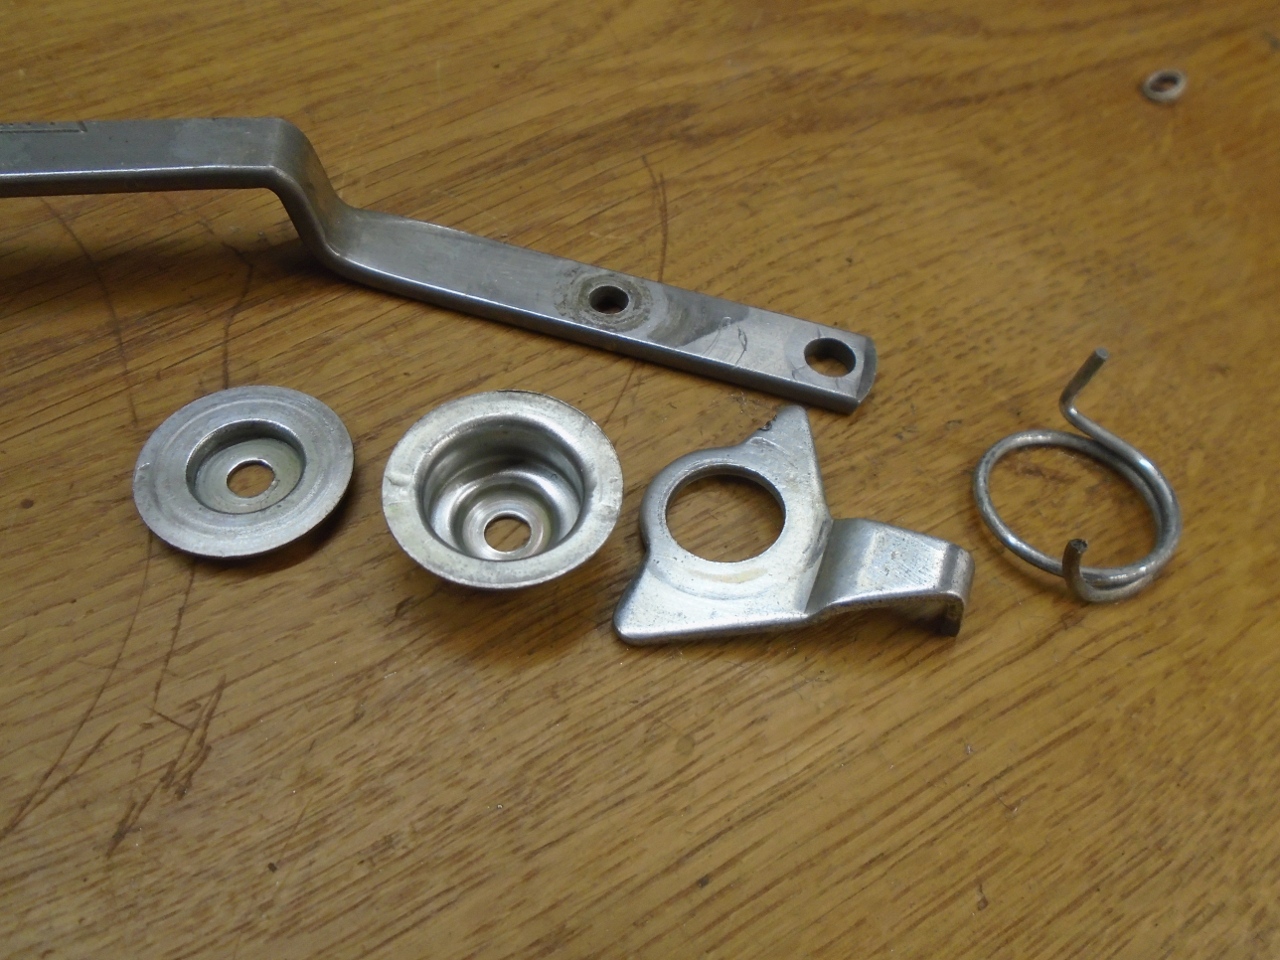

I actually did this in one take, though I was prepared for more.

Originally, the door had some foam strips to keep the control arm from rattling.
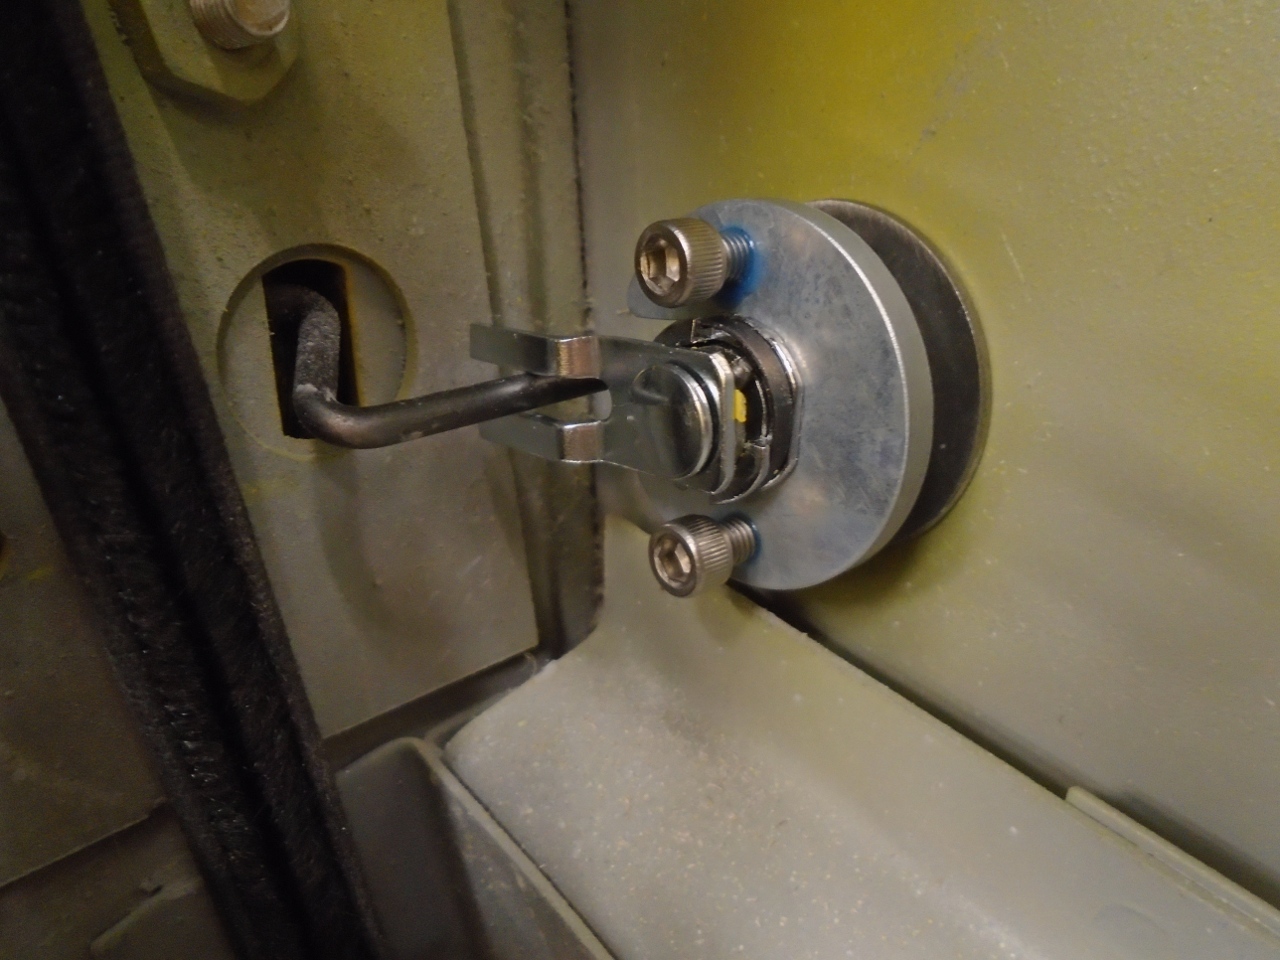
The door check straps just looked dirty until I looked closer.
I
hemmed and hawwed for a while, but ended up just ordering new ones.
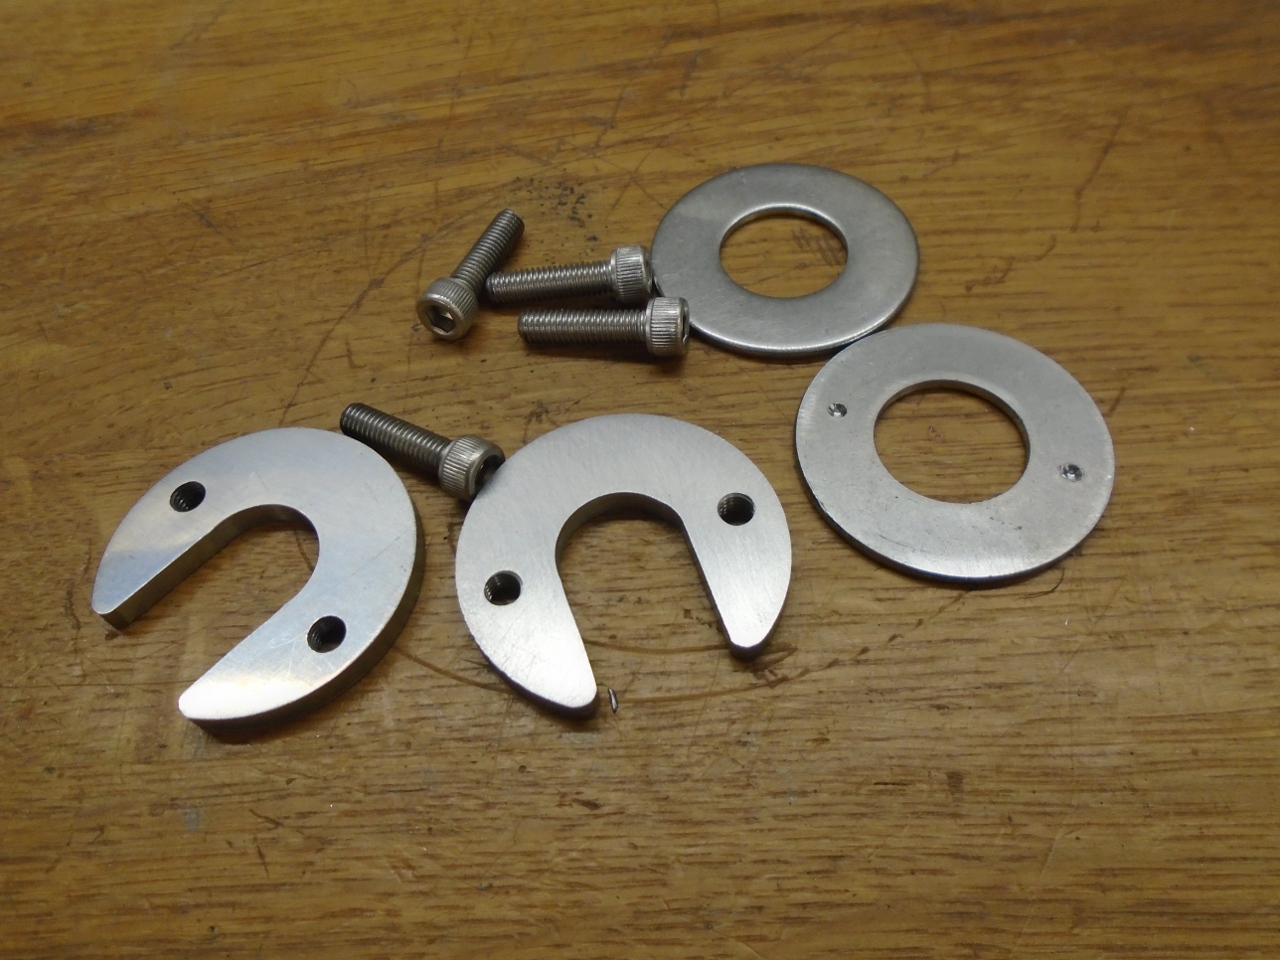
The little "spring clip" bridges the check strap opening in the A
pillar. It was originally riveted in place. I didn't see a
good way to use rivets, so I just used machine screws with lock nuts.
The check strap has two spring arms that slide over the spring
clip to hold the door at maximum opening. To make the transition
from just open to max open a little more graceful, I shaped the spring
clip so the arms could slide over it easier. Hopefully, this will
temper the loud CLICK the strap emits when going to or from max open
position.

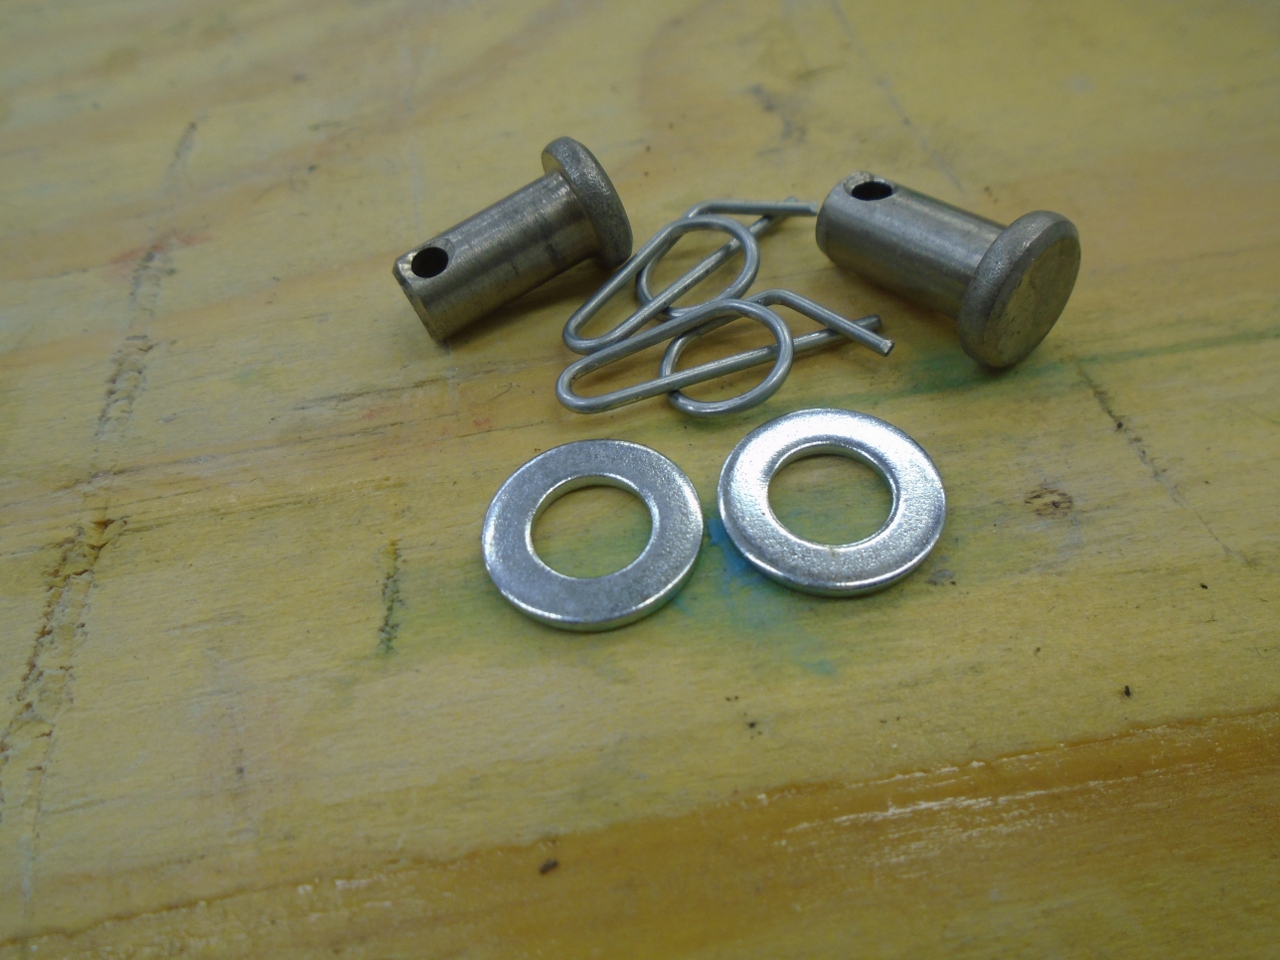
The attachment of the check strap to the door was originally a solid rivet. I thought a clevis pin made more sense.
I
gave some thought to closing up the key lock holes in the doors.
I consider door locks on a convertible a little bit of a joke.
What determined thief would be detered by a locked door when he
could more easily just go through the vinyl top? In the end, I
decided against it. For originality, I suppose.
Anyway, one of my original locks was frozen solid. I fussed with it for a while, but eventually just ordered new locks.

I
remember the trouble I had removing the old locks. Each lock had
a spring clip that held it to the door panel. The clips are
notoriously difficult to use.
Luckily, someone came up with an
alternative way to hold the locks in place. Commercial kits are
available, but here is my home brew version.


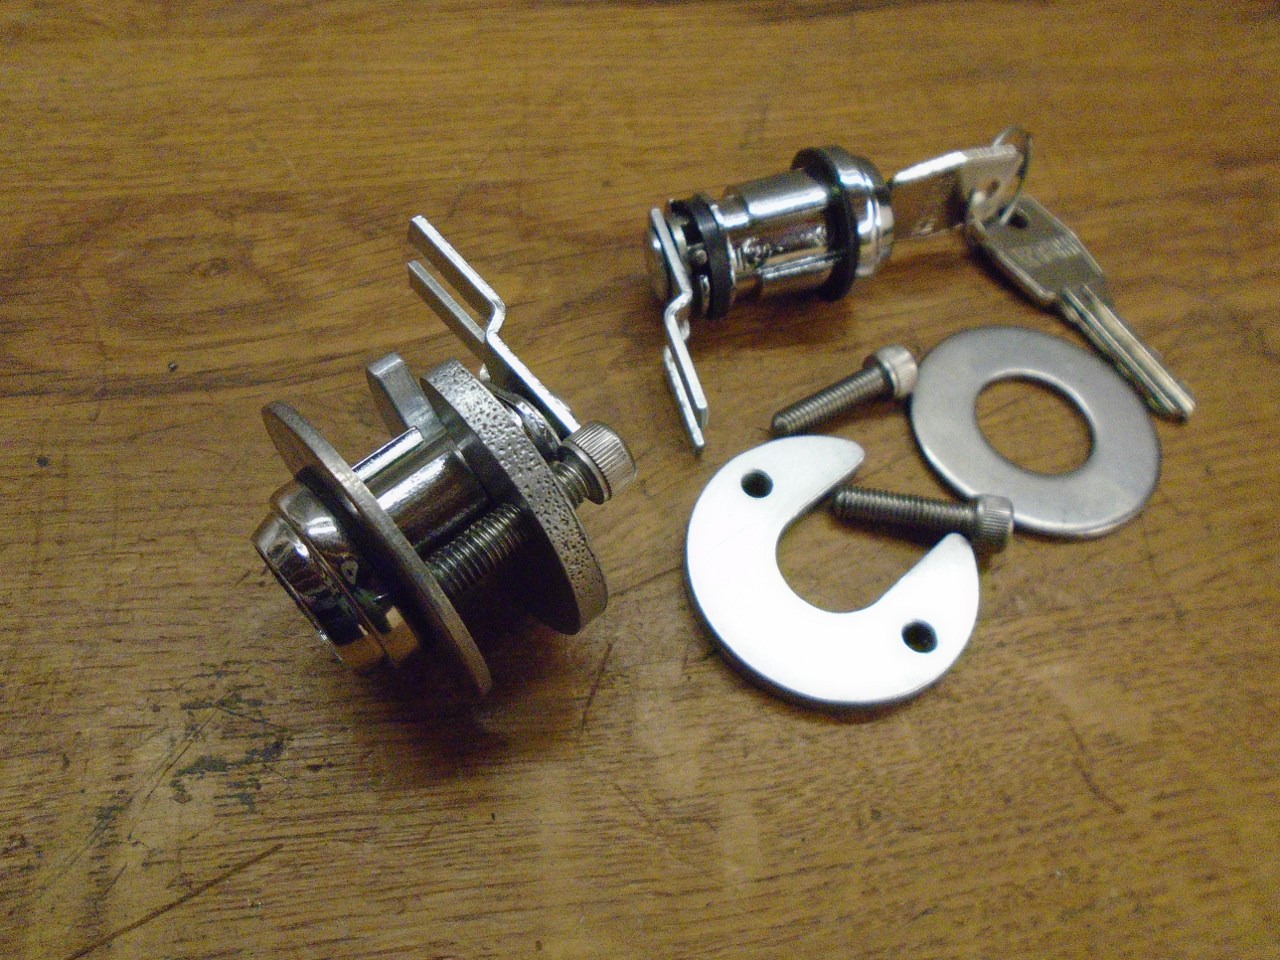
I
found that the new locks were just about identical to the old ones,
except for the little keeper spring at the rear. It was a
different shape than the original, and would not allow the new locks to
go through the hole in the door. I had to modify the keeper.
Finally in place. I didn't want to cinch the screws too tight, so I used blue Locktite to keep them from backing out.
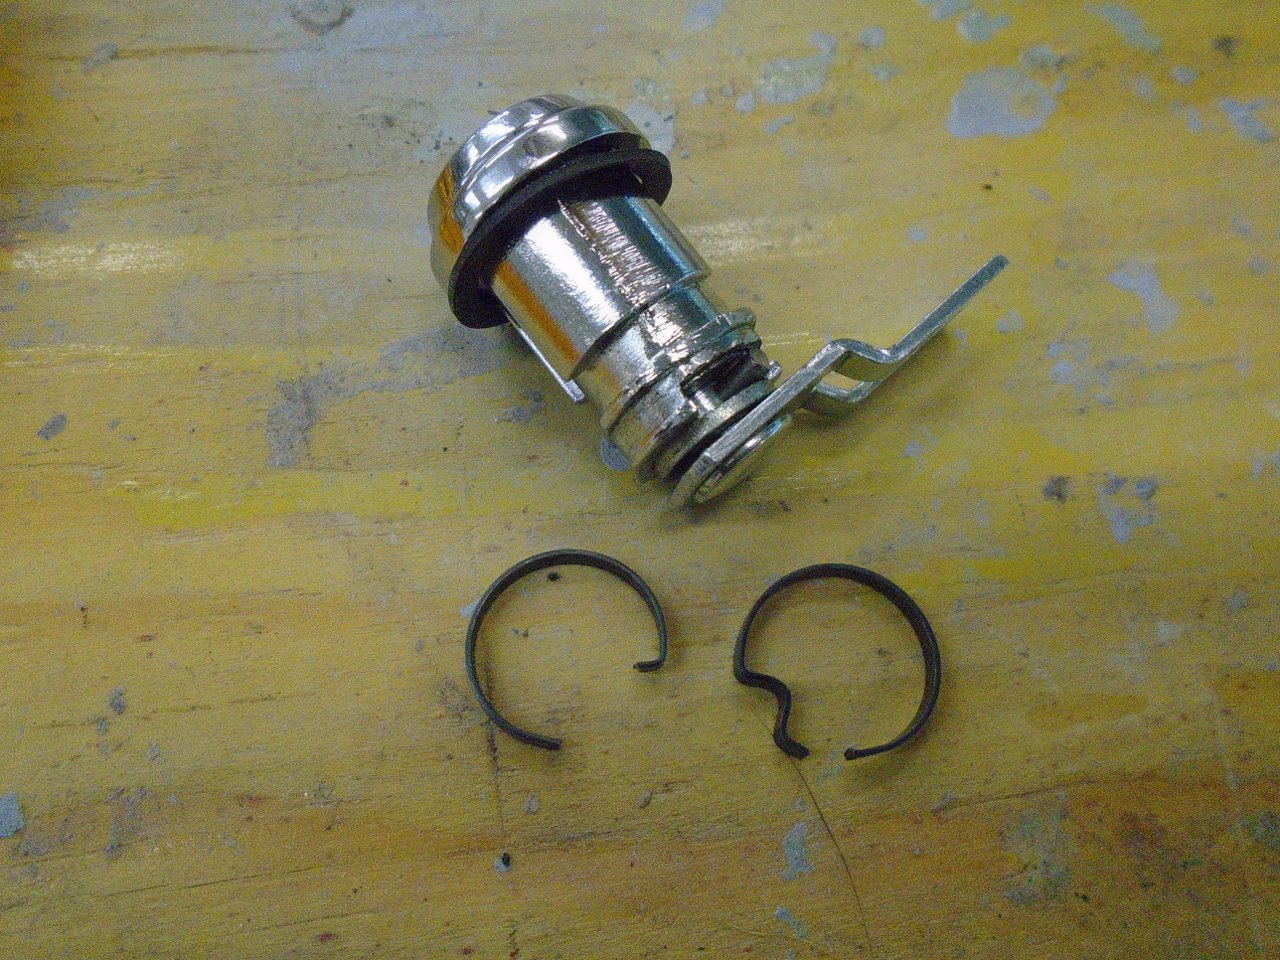
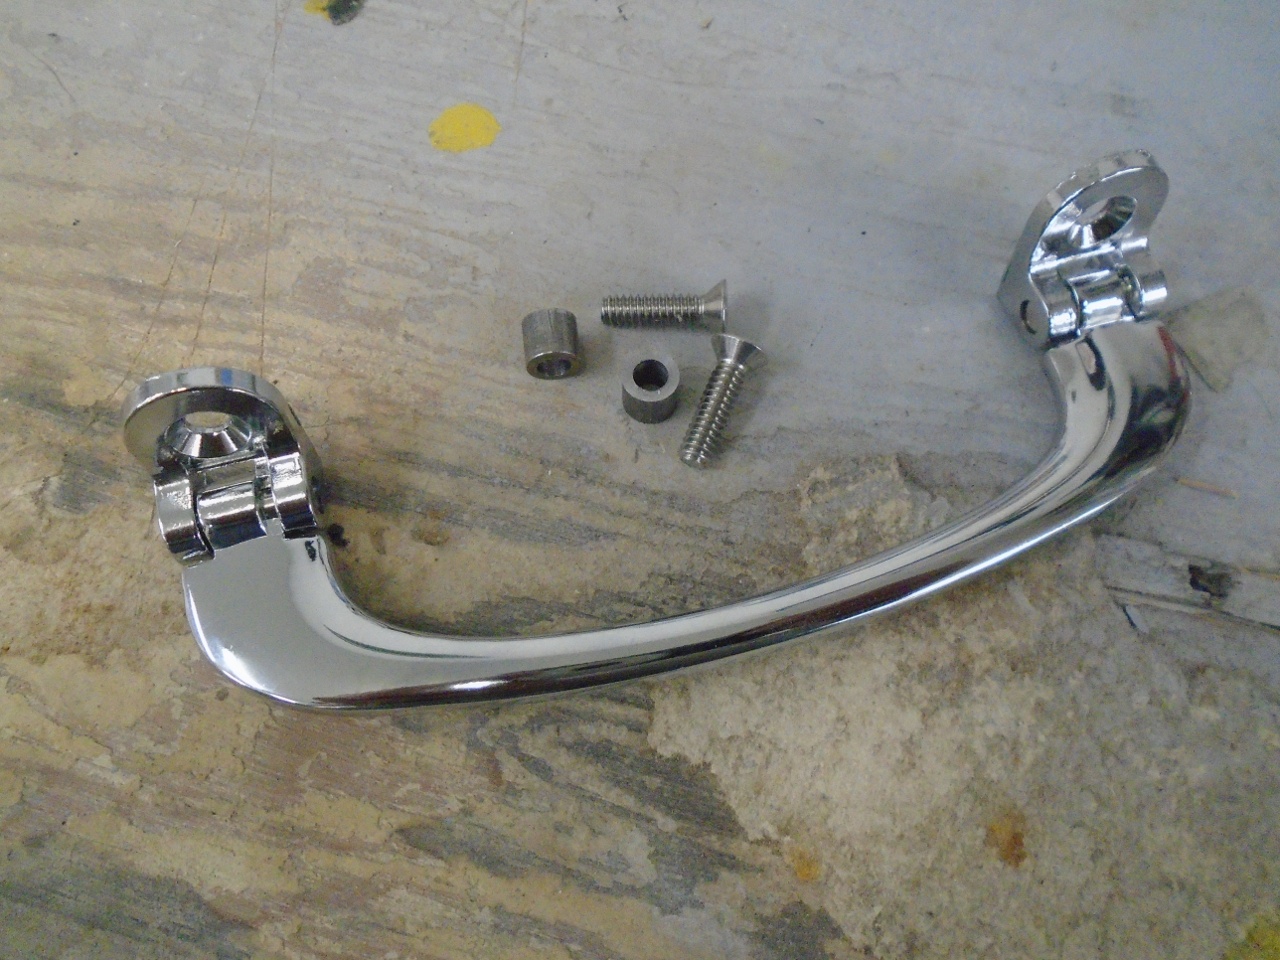
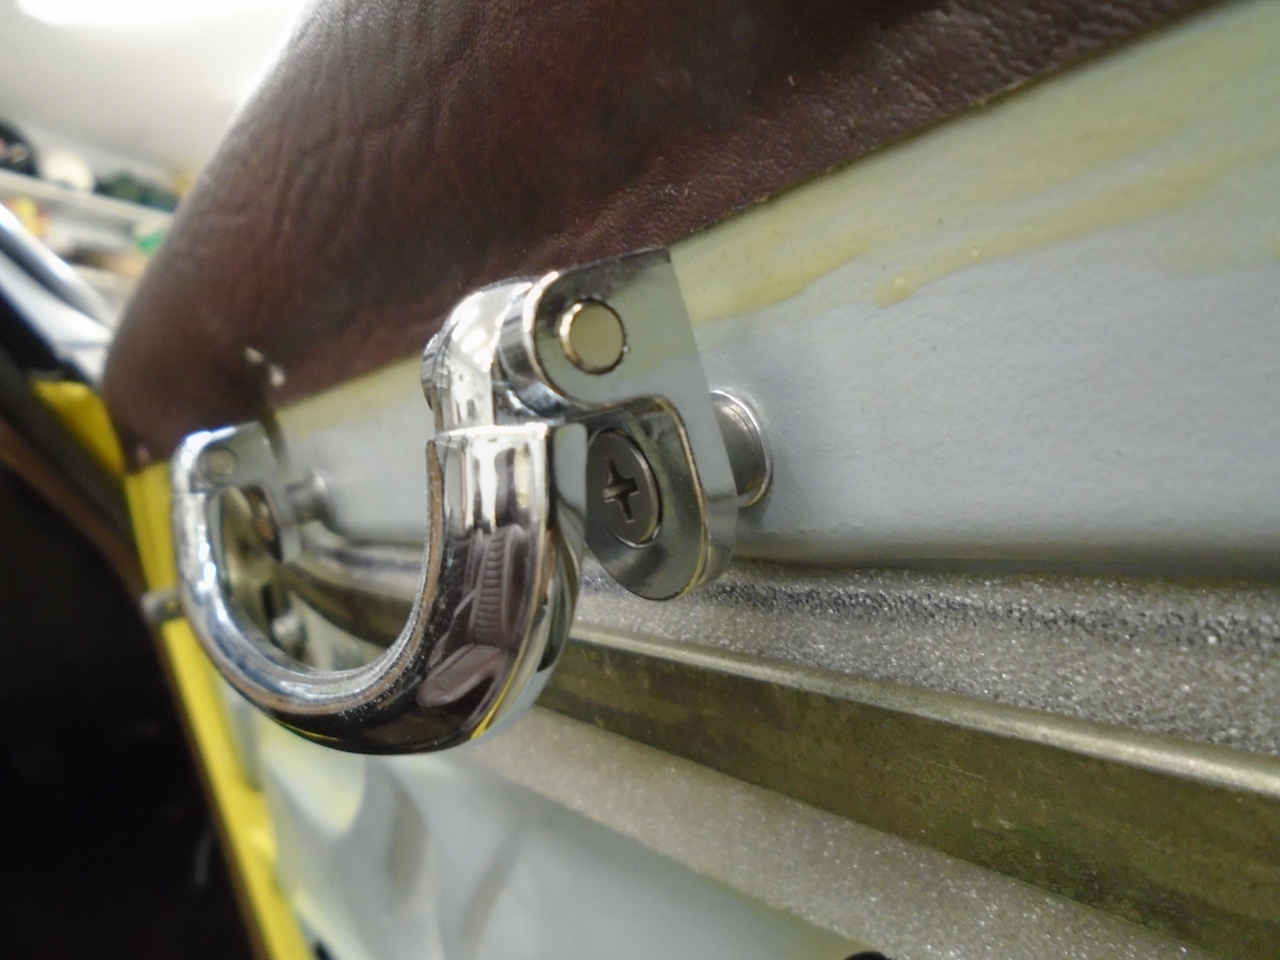
This
are the original door pull parts from my car. I decided to revert
to the earlier door pull, so ordered a pair from a TR4.


The
door has holes for either door pull arrangement. They are those
square holes that accept the little plastic captive nuts. I had
planned to just use some of the original plastic nuts for the new
pulls, but that doesn't work. The holes for the rectangular pull
and for the pull handle are on offset surfaces. The plastic nuts
for the rectangular pull would sit too proud if inserted in the holes
for the pull handle and would keep the door card from seating.
Instead, I just installed some rivet nuts.
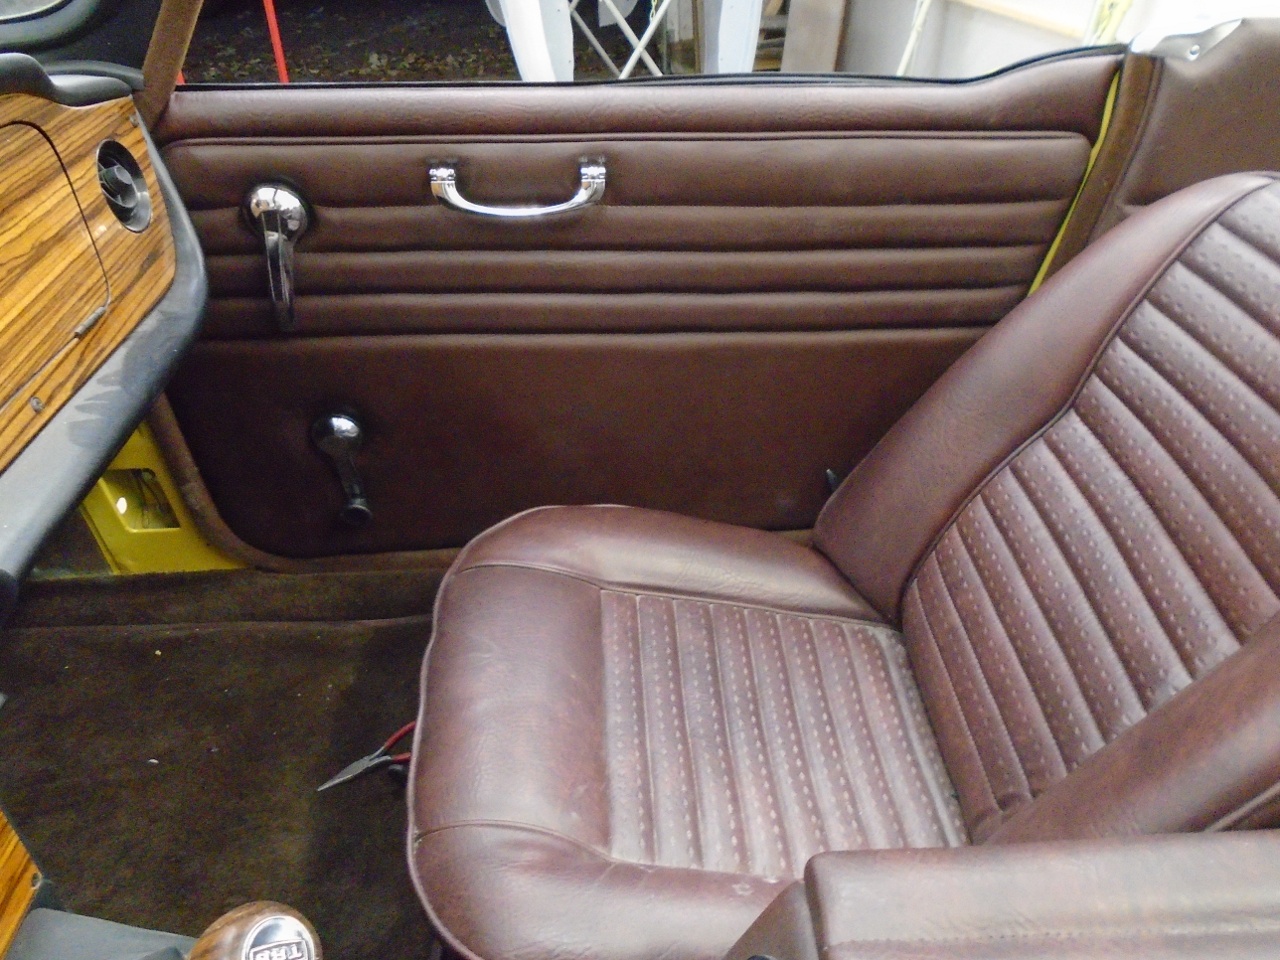
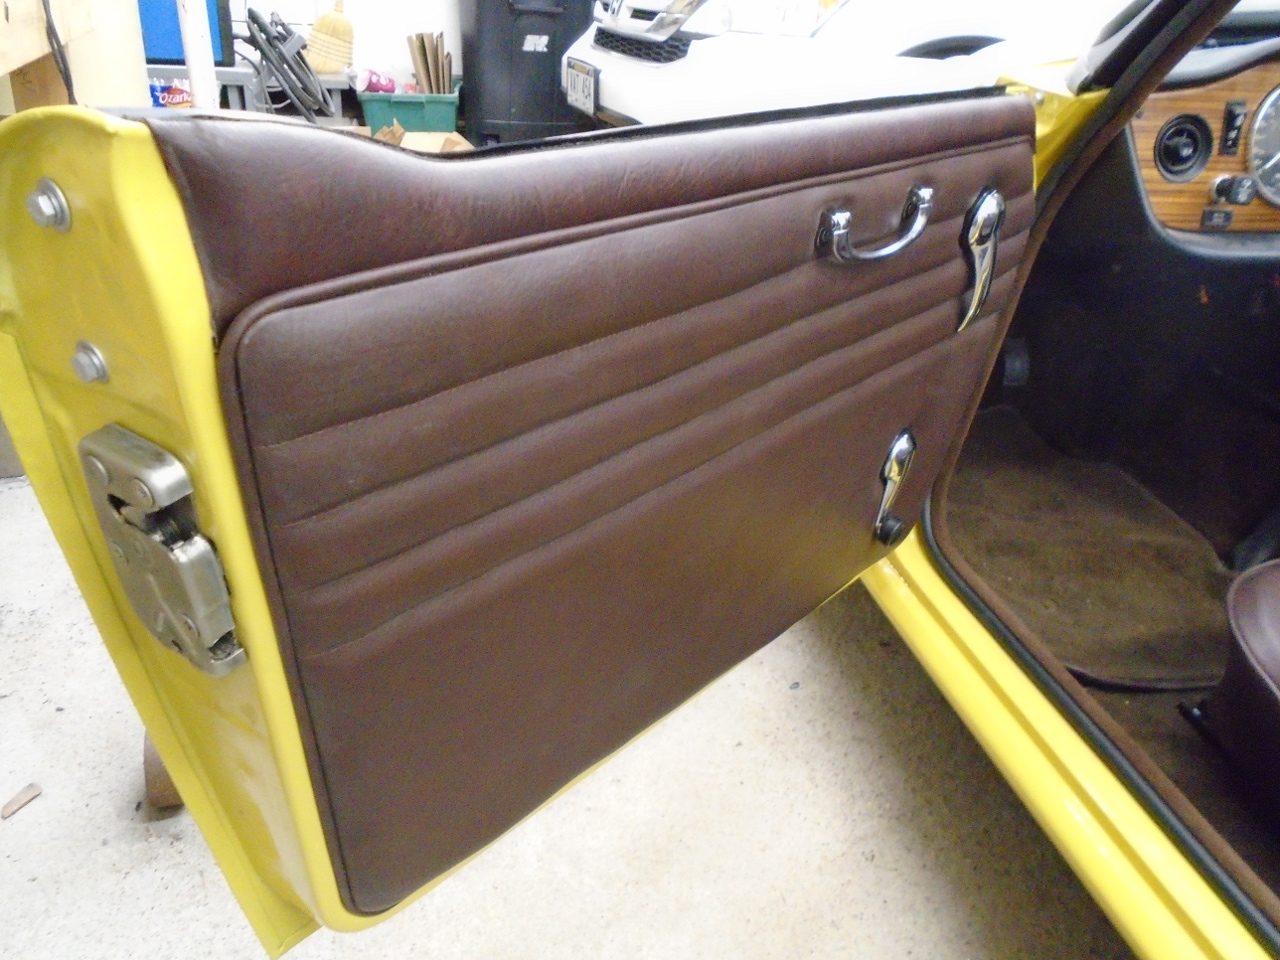
Finally! The door cards!
Poked the holes for the handles, hopefully in the right places.
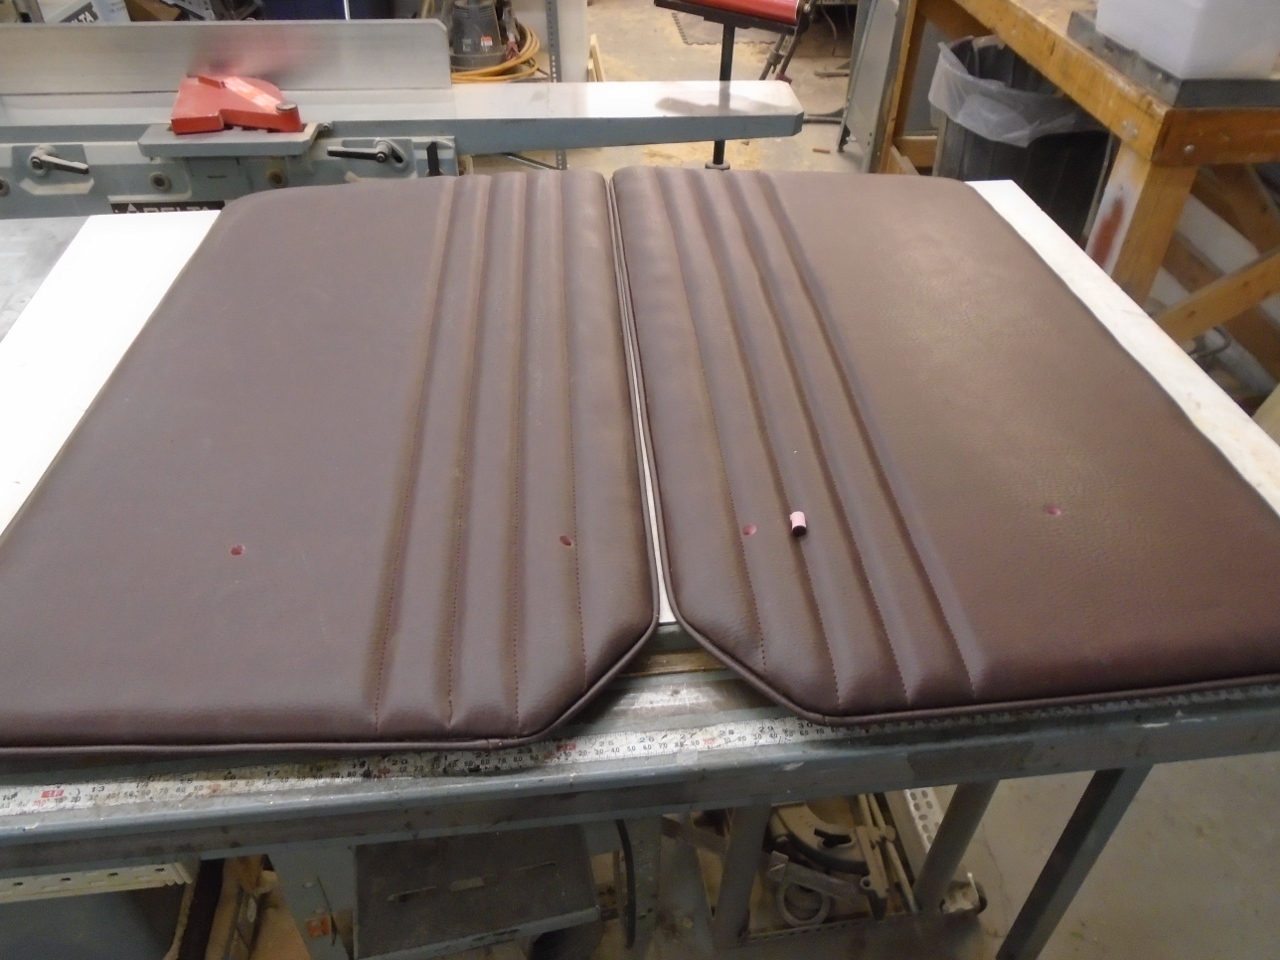

The handles themselves cleaned up really well.
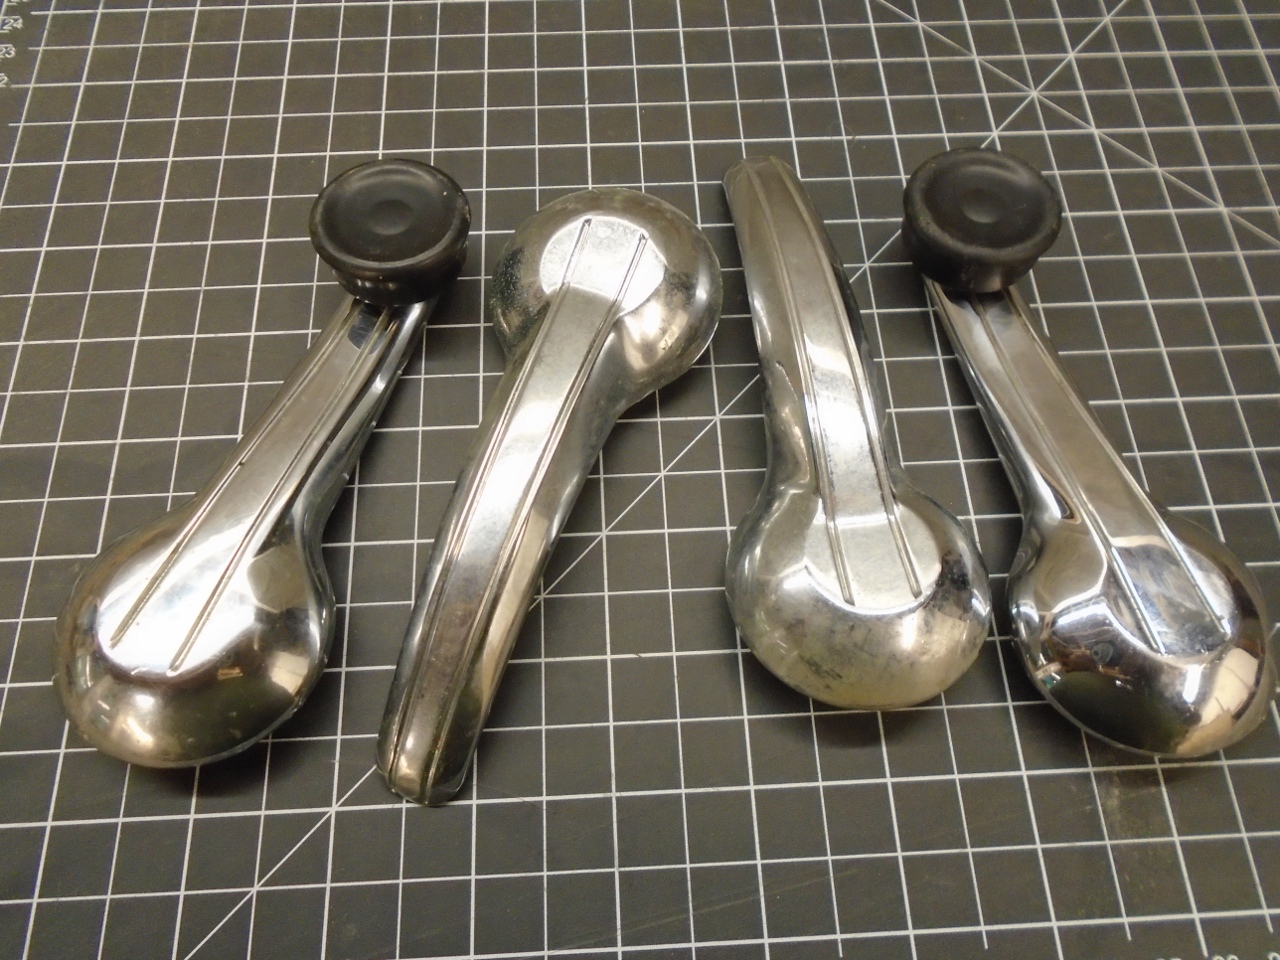
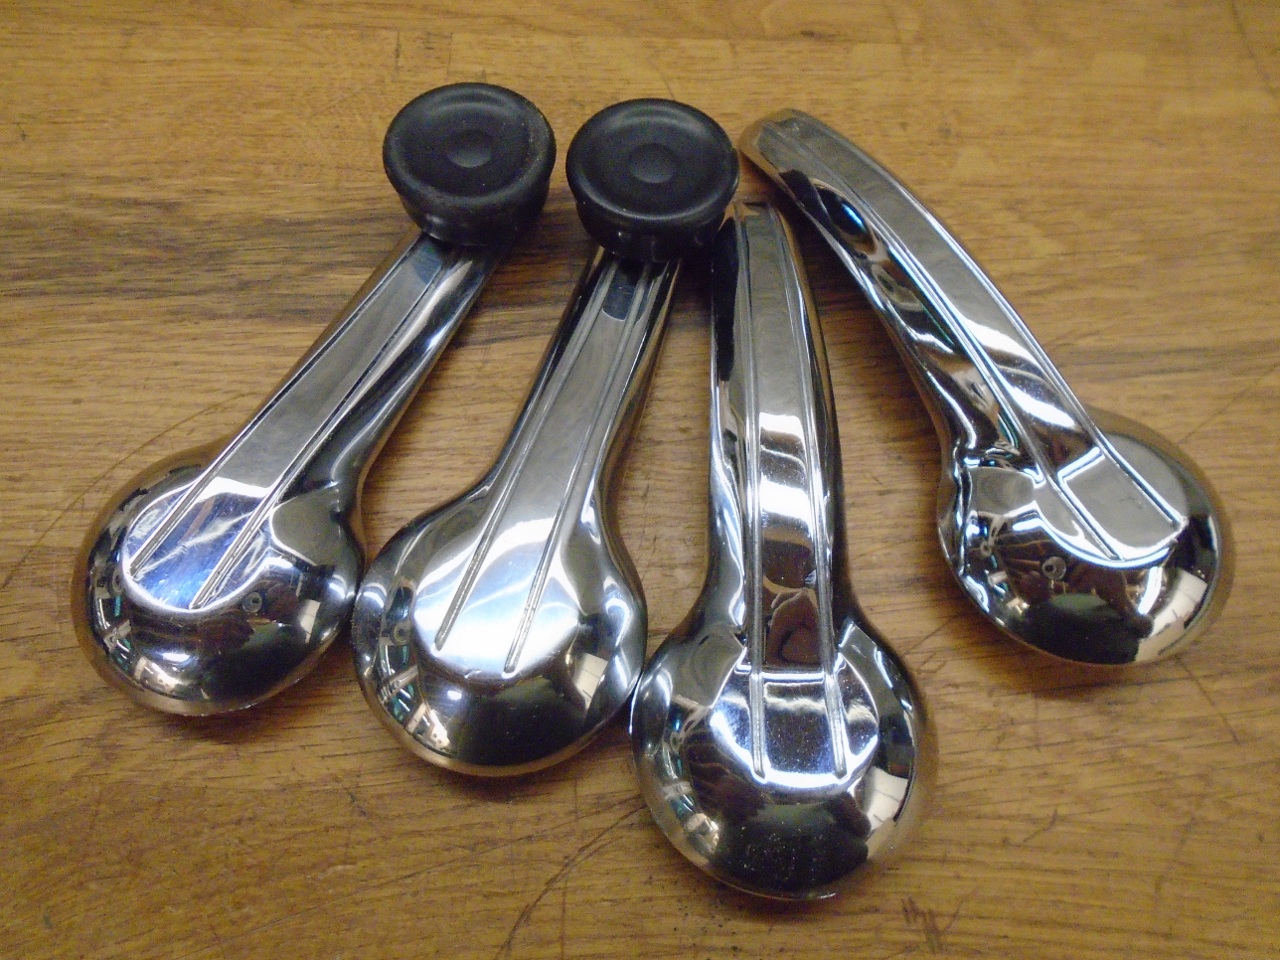
New escutcheons and springs.

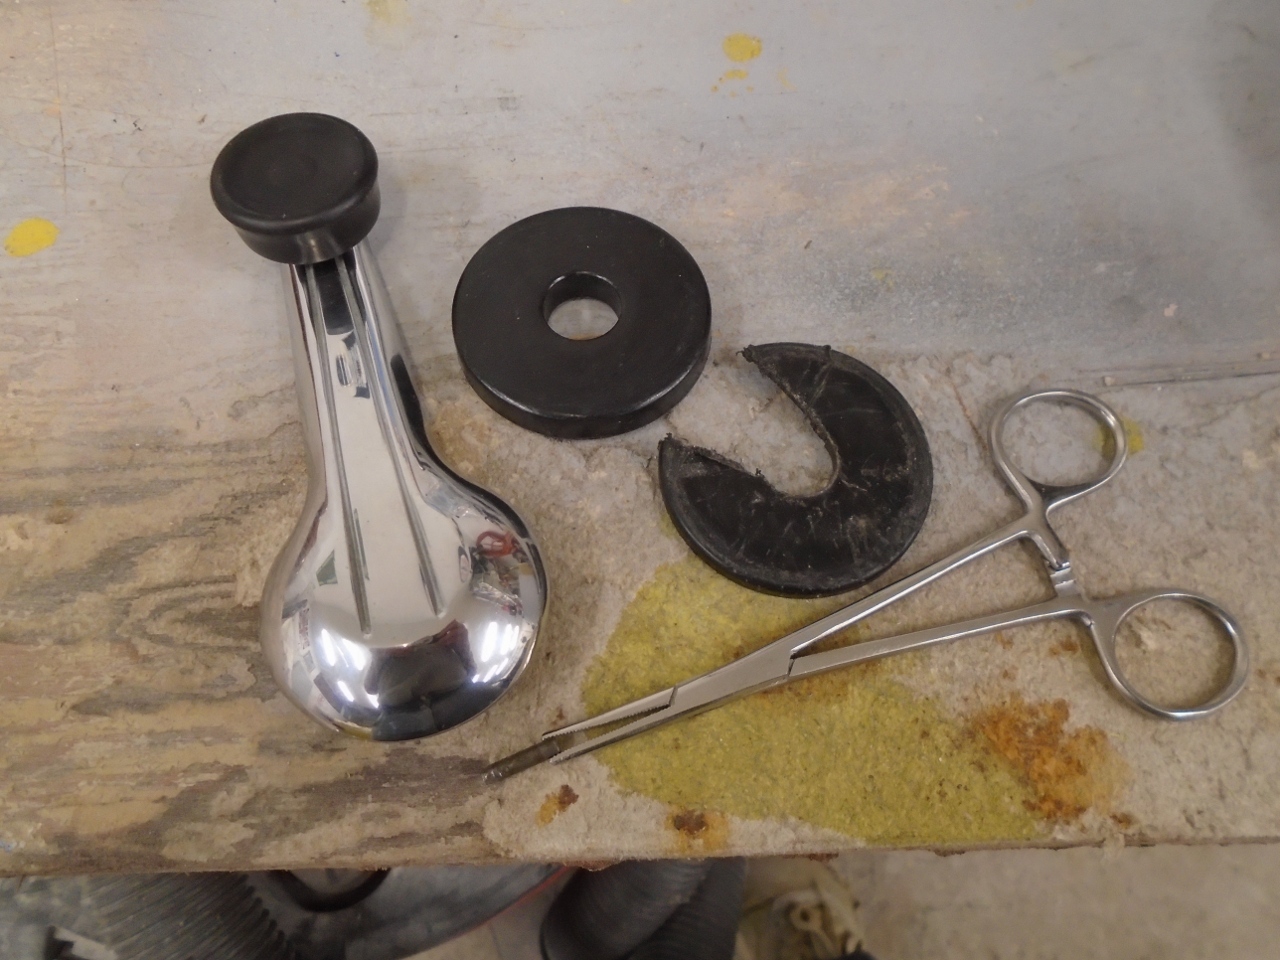
I
use an old escutcheon with a segment cut out as a spacer to give
clearance for the clamp to insert the pin. Originally, there were
two different escutcheons on these cars. A thicker one for the
door handle, and a thinner one for the window crank. Most
suppliers only carry the thicker one these days. I had no trouble
with the door handles, but the window crank handles would not go on.
I finally turned the escutcheons for the cranks down to about
0.200" thick, and they worked fine.
I
have found that the thicker foam on my door cards causes problems here
and there. If I screw down the new door pull, it wrinkles the
vinyl pretty badly. My solution was to add 9/32" spacers behind
the pull brackets so that they don't pull all the way down to the door
surface.
Doors'r done.
One
other issue with the thick door cards is that the window crank drags on
the vinyl. It will probaably leave a mark eventually. I'm
researching shaft extensions. They are made for some cars, but I
may have to make something custom.

I'm glad this project is fiinished. It seemed to drag on forever.
Comments to Ed at elhollin1@yahoo.com
To my other TR6 pages