To my other GT6 pages
June 20, 2022
Bonnet, Doors, & Gaps
Last Fall, I painted the body shell and the bonnet. I painted them separately, on different days, and while the body came out pretty good, I wasn't happy with the bonnet. It
had dozens of little fisheye-like divots, some going down to the
primer. Fisheye defects in paint are often blamed on silicone
contamination, but I think in this case it was more likely due to
condensed water droplets. It was pretty humid that day, and while
do use a desiccator for the air, I think the media was a little too
water logged. So, I resolved to paint the bonnet again.
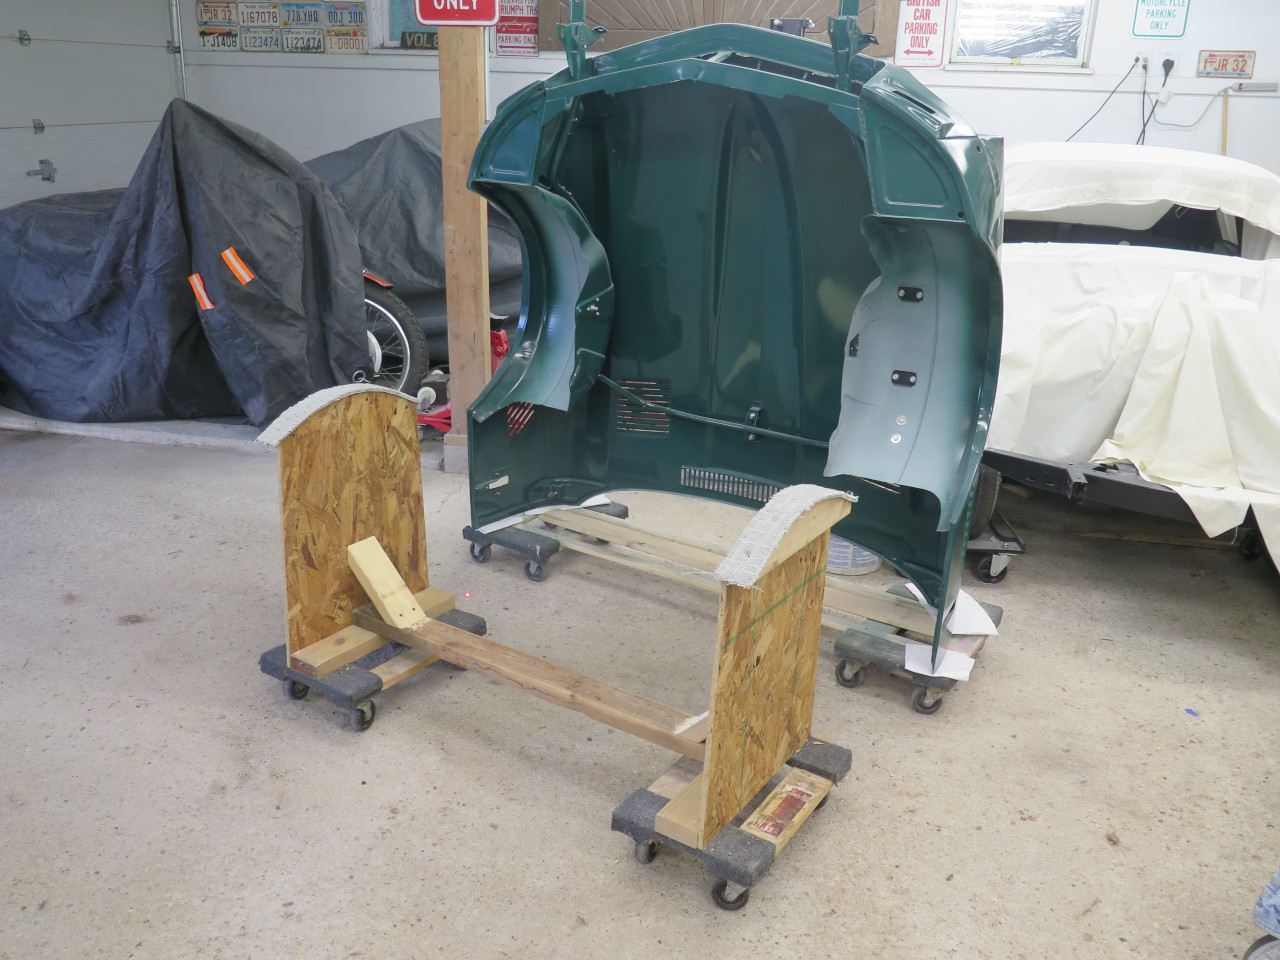
This time, I made a little wheeled cradle for the bonnet. The
padded supports go into the wheel wells, and hold the bonnet at a nice
height for sanding and painting.
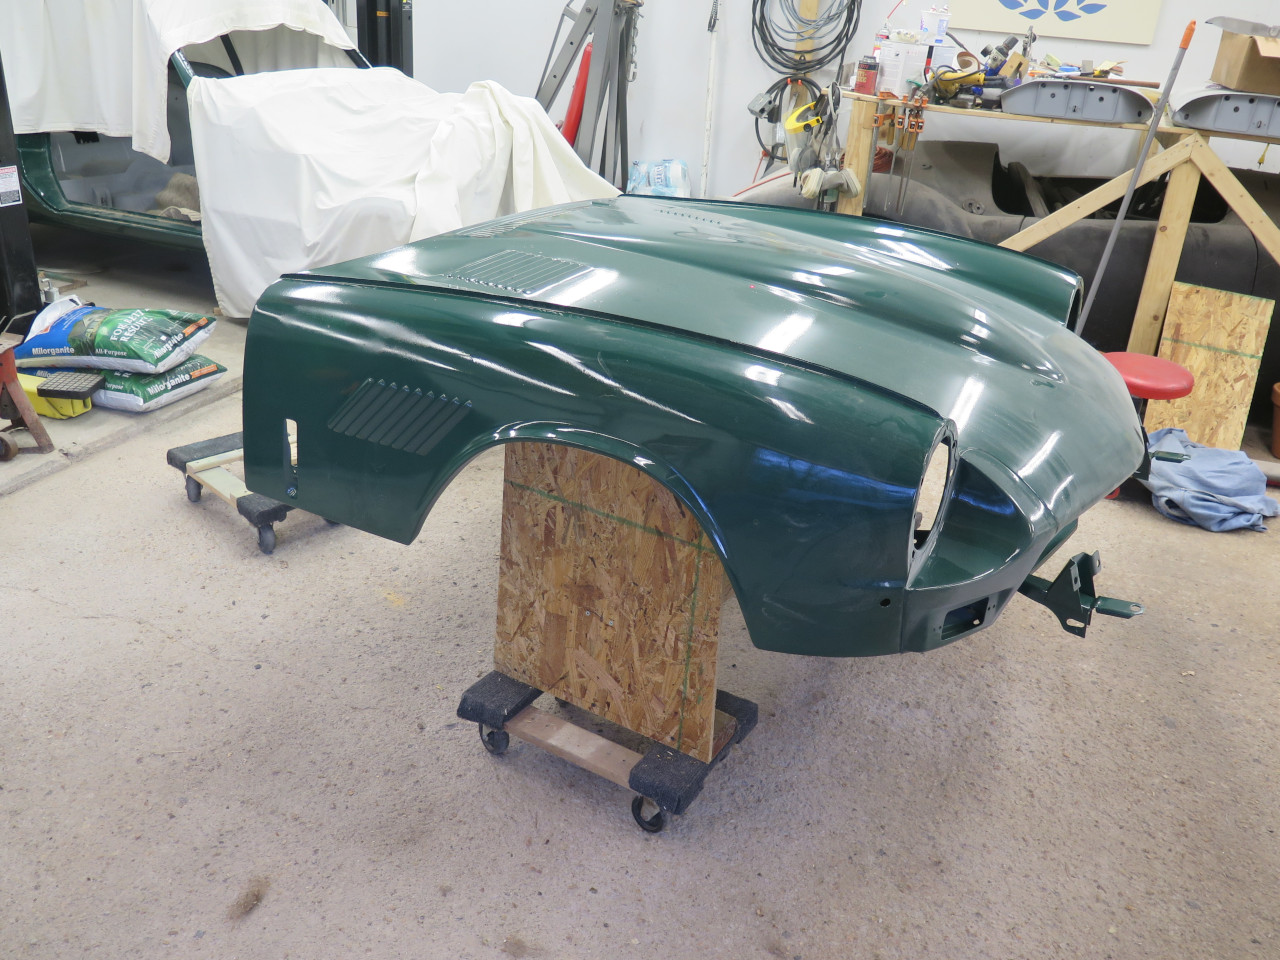
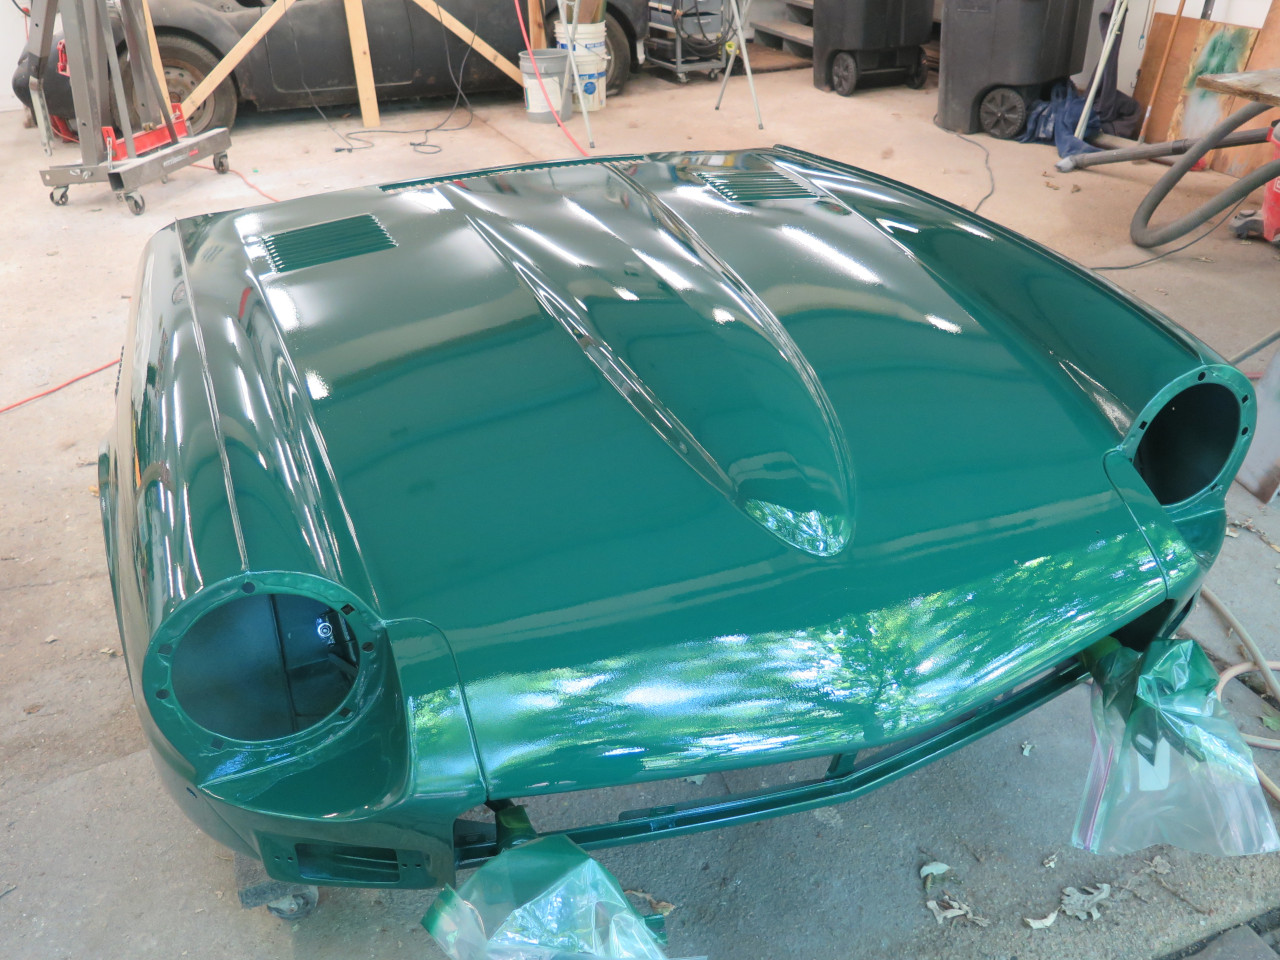
So I spent maybe half a day wet sanding the paint with 400 grit
paper. The cradle allows the bonnet to be tipped forward or
backward, which helped a lot.
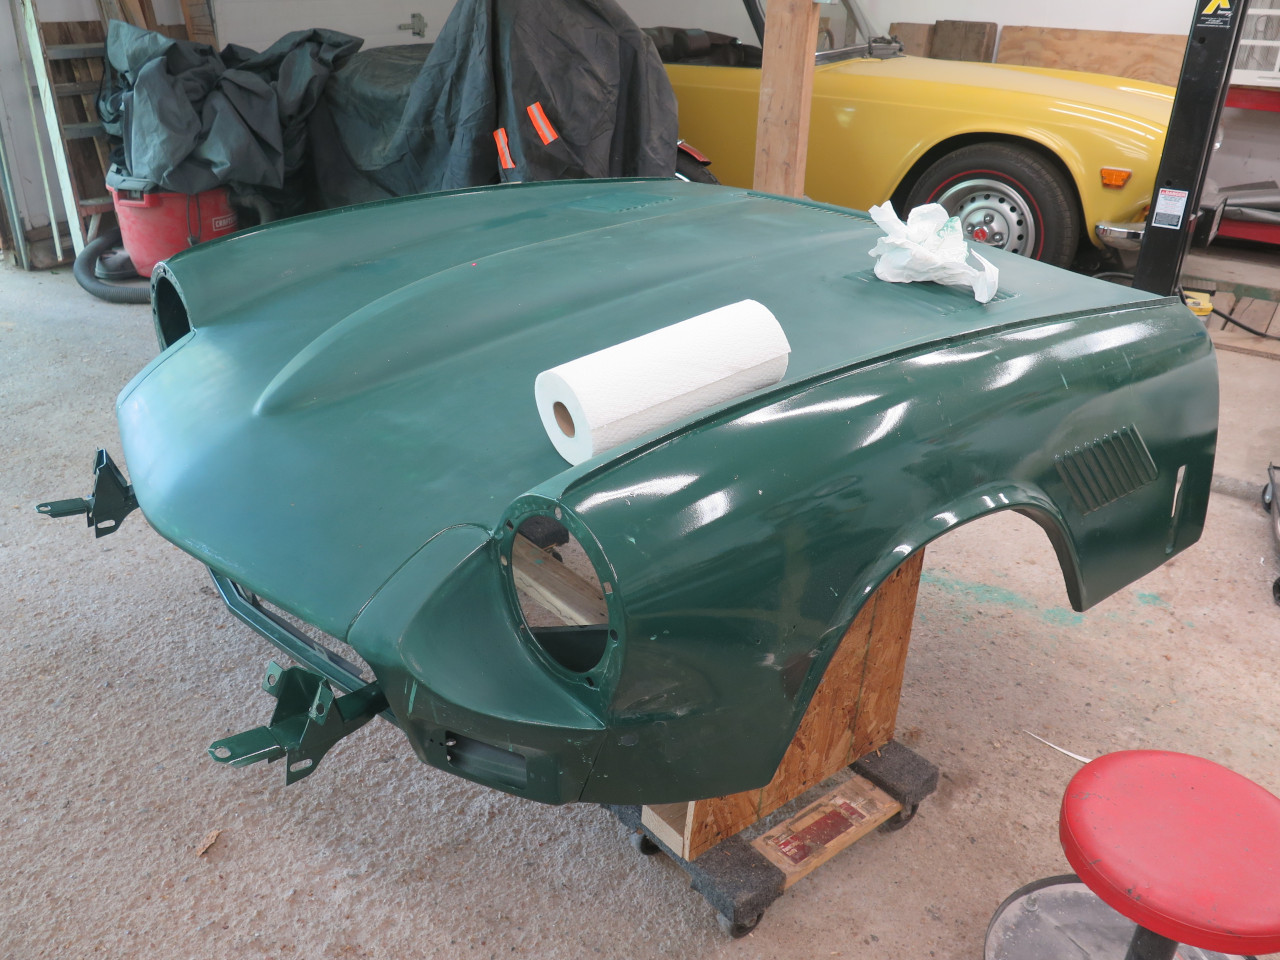
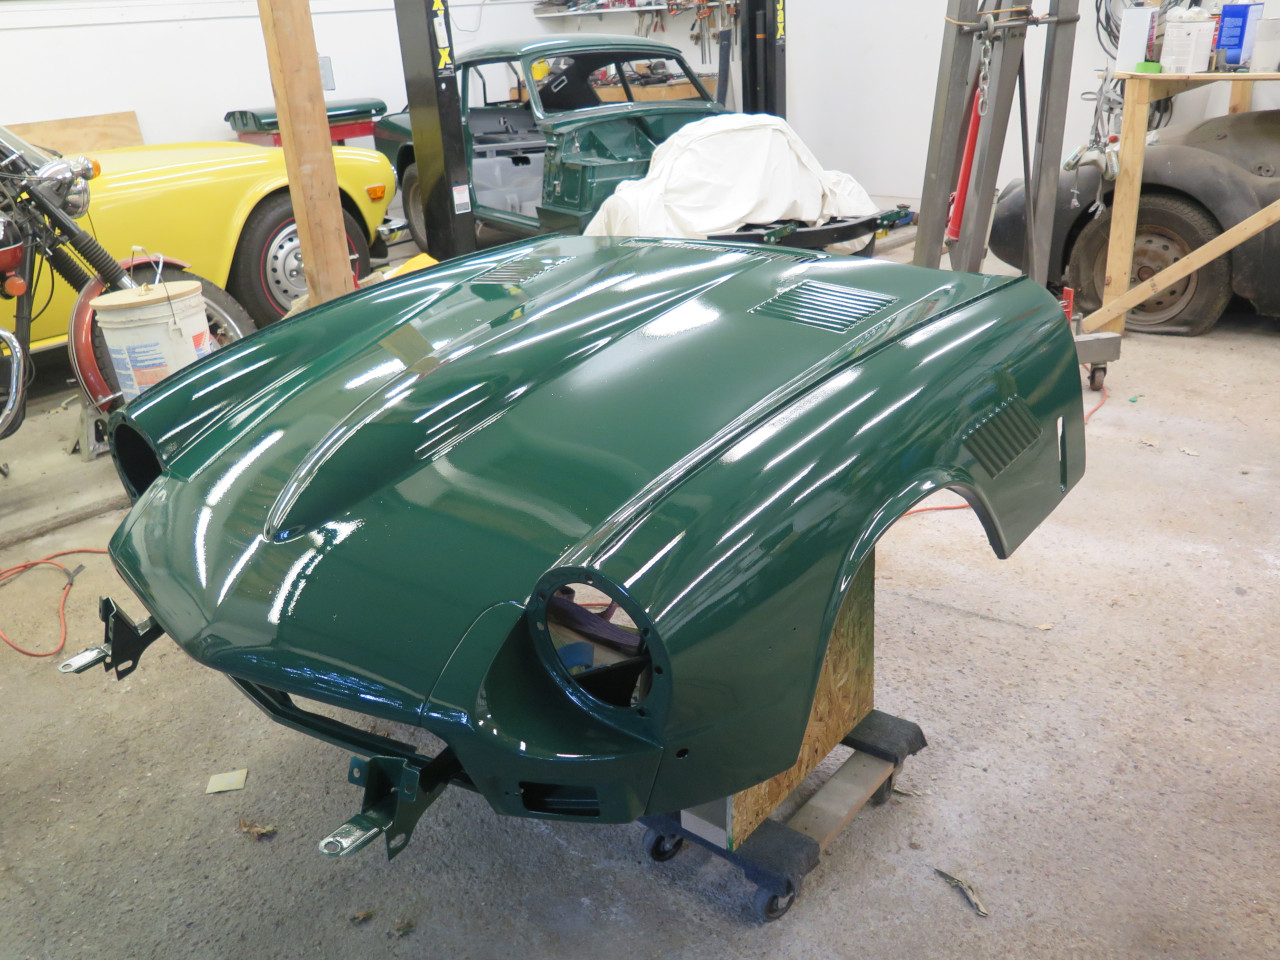
It came out much better this time. In the past, I've set up a
"tactical" paint booth in the garage, but I don't find it worth the
trouble now. I'm not a good enough painter to expect a perfect
finish out of the gun, so I just plan to cut and buff everything.
This means that a little dust, dirt, and even the occasional small
insect in the paint isn't a crisis.
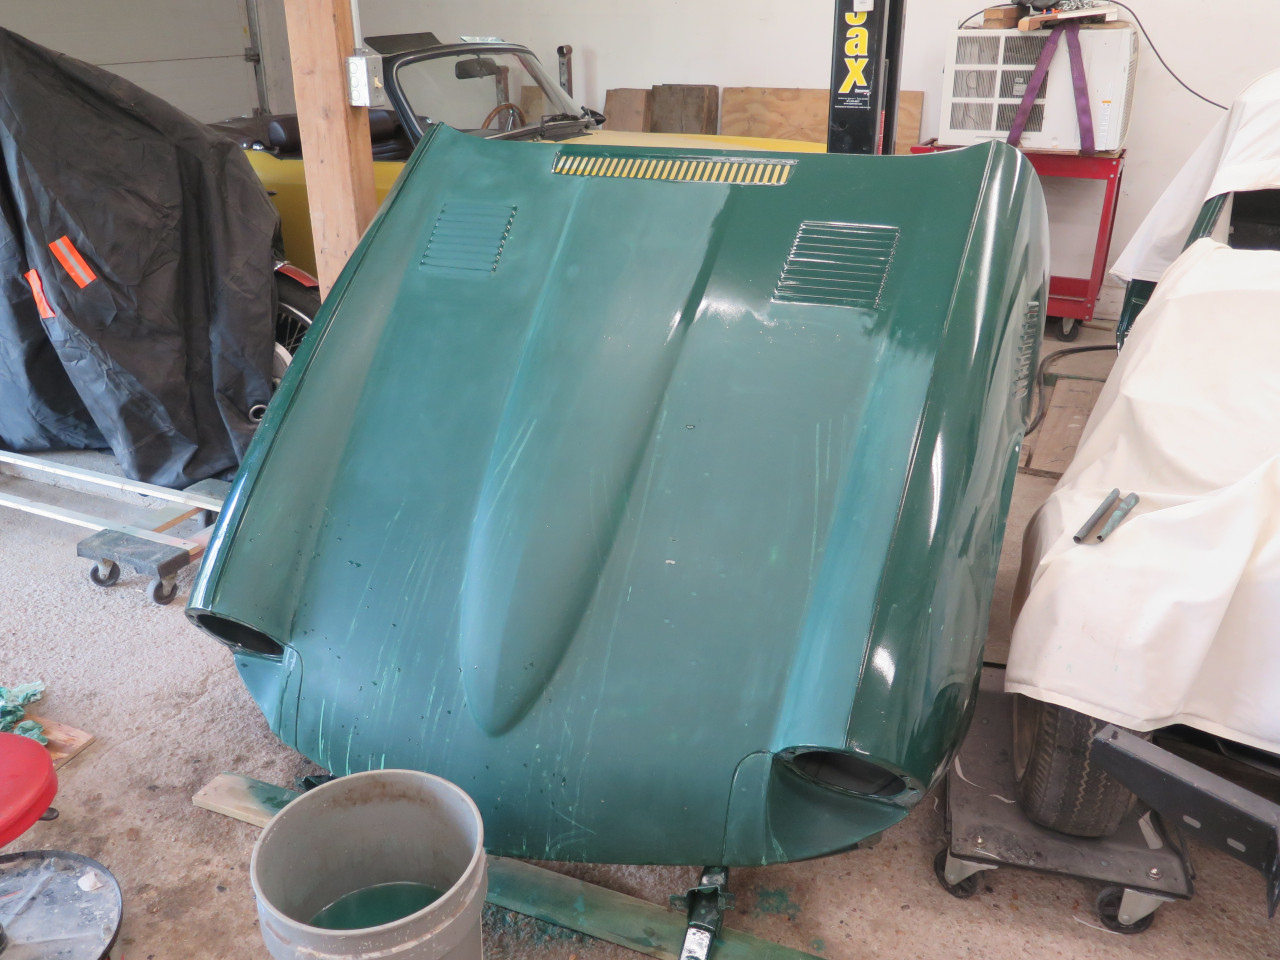
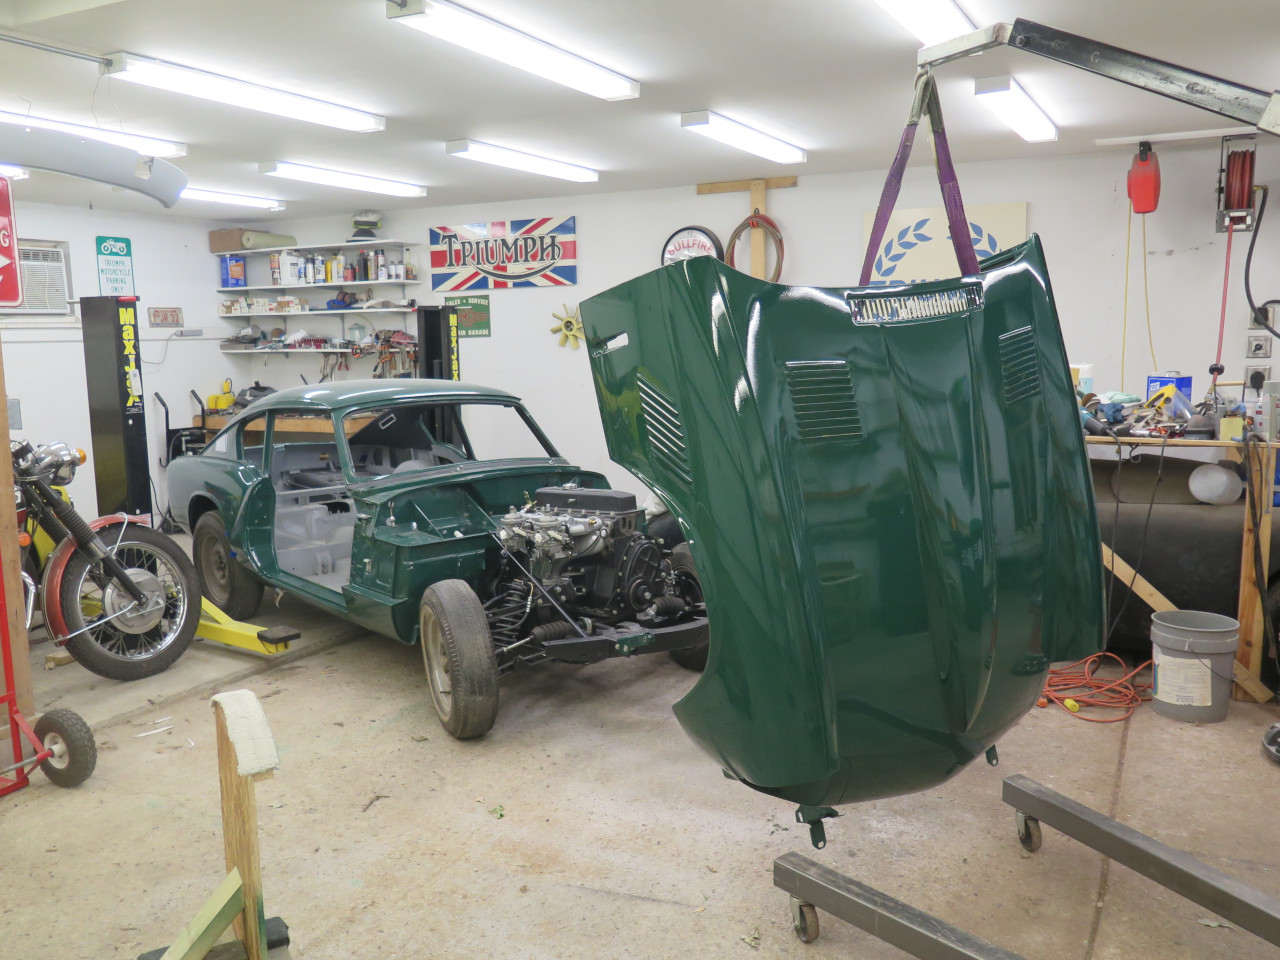
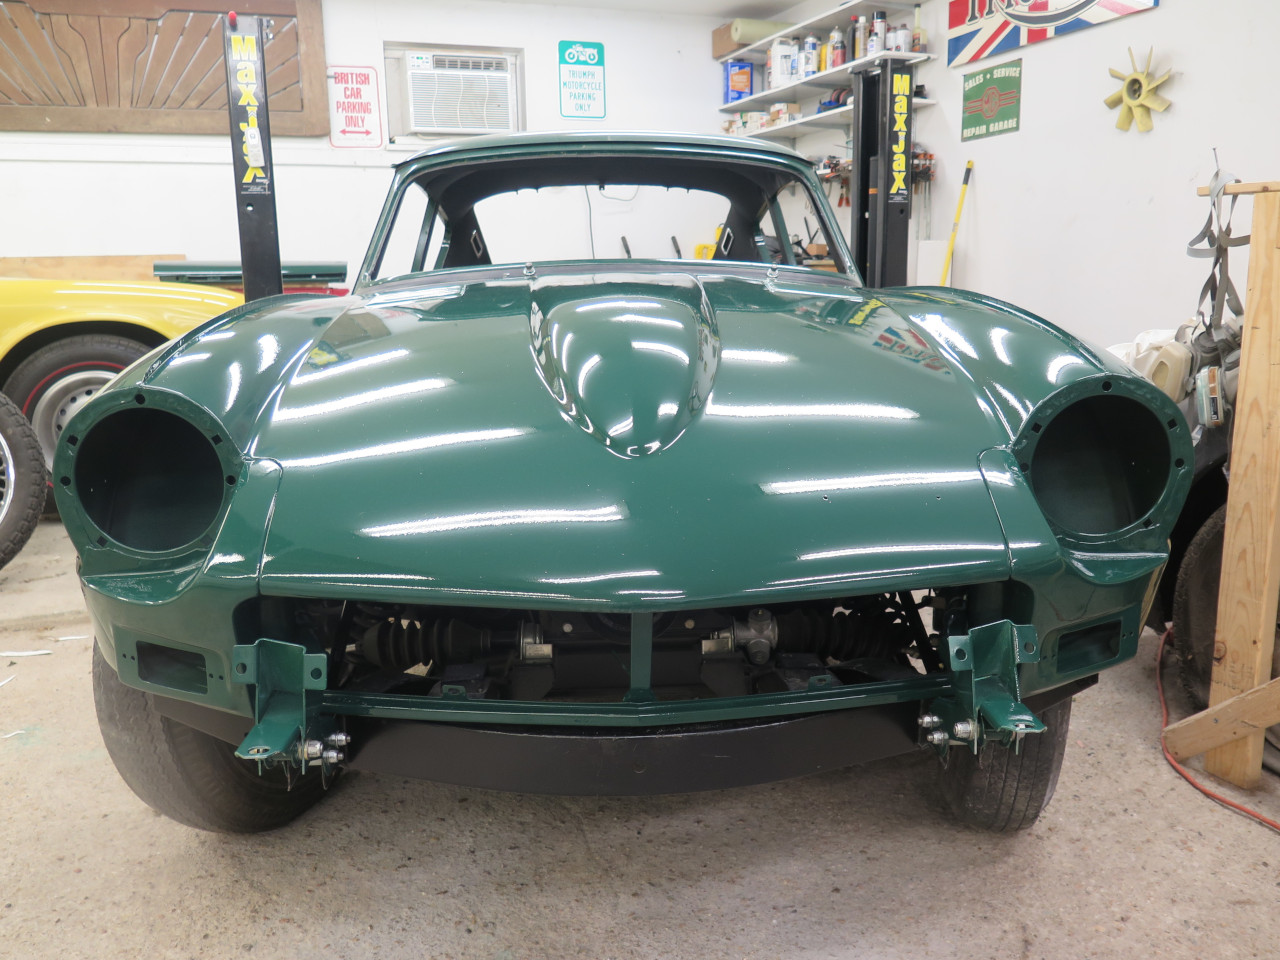
After a respectable waiting period, I wedded the bonnet to the body. Since I'm a solo act, I regularly use sky hooks.
Shortly after that success, I turned to the doors. The doors
had already had quite a bit of rust repair, and one had been
reskinned. Before final paint prep, There was one other job to
do.. The reskinned door had no cut out for the door handle. I
took measurements from the other door, and laid out for the holes.

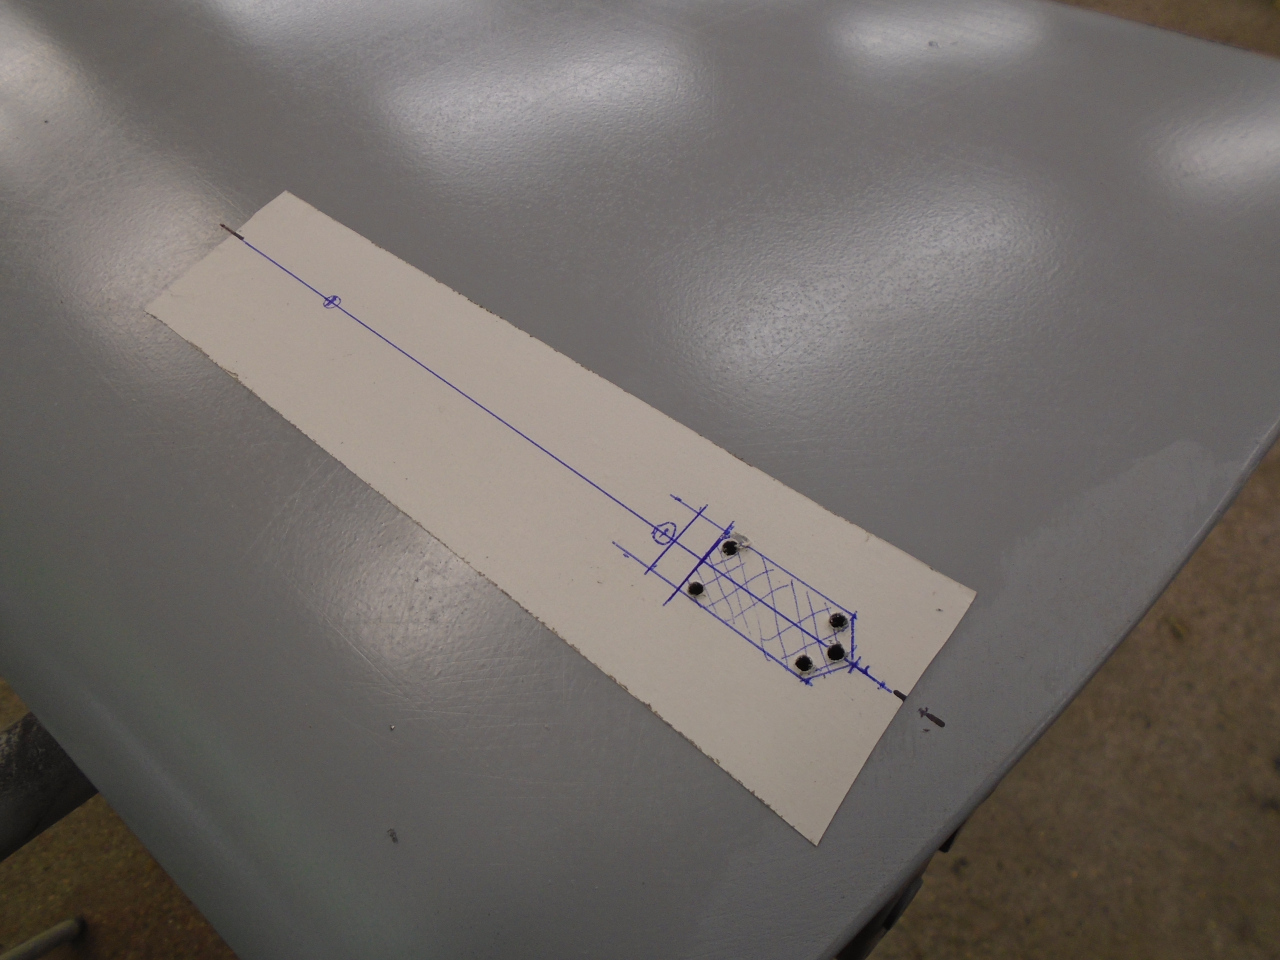
I thought the original hole was unnecessarily big, so my new one is more of a bespoke fit for the handles.
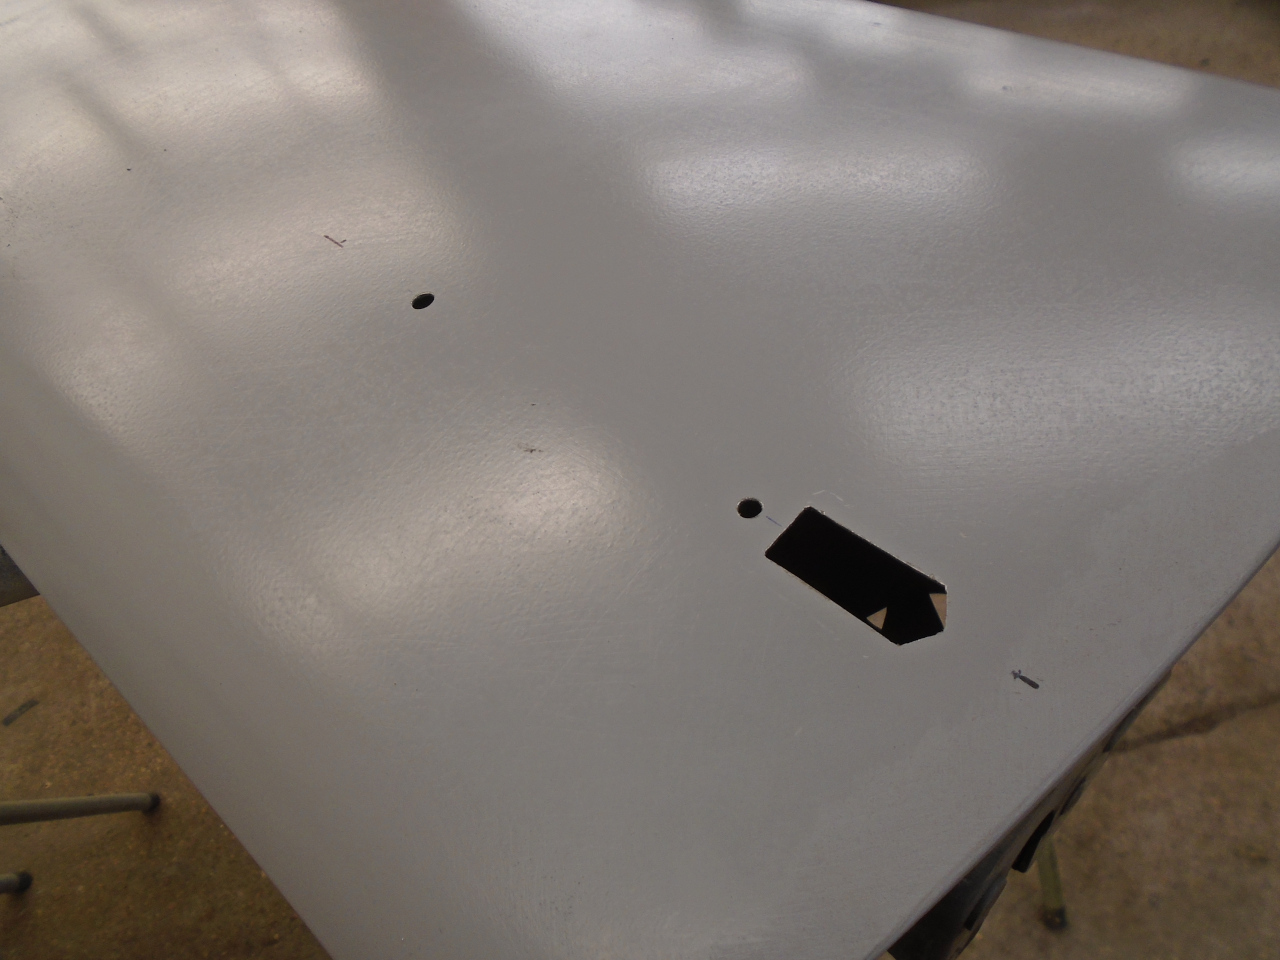

I think mine is stronger. The re-skinned door is on the passenger
side, and I've decided to not put an exterior key lock on that side.

A few rounds of primer-filler and block sanding, and shot them with color.

While waiting for the door paint to cure, I turned to some of the door attachments necessary to mount them.
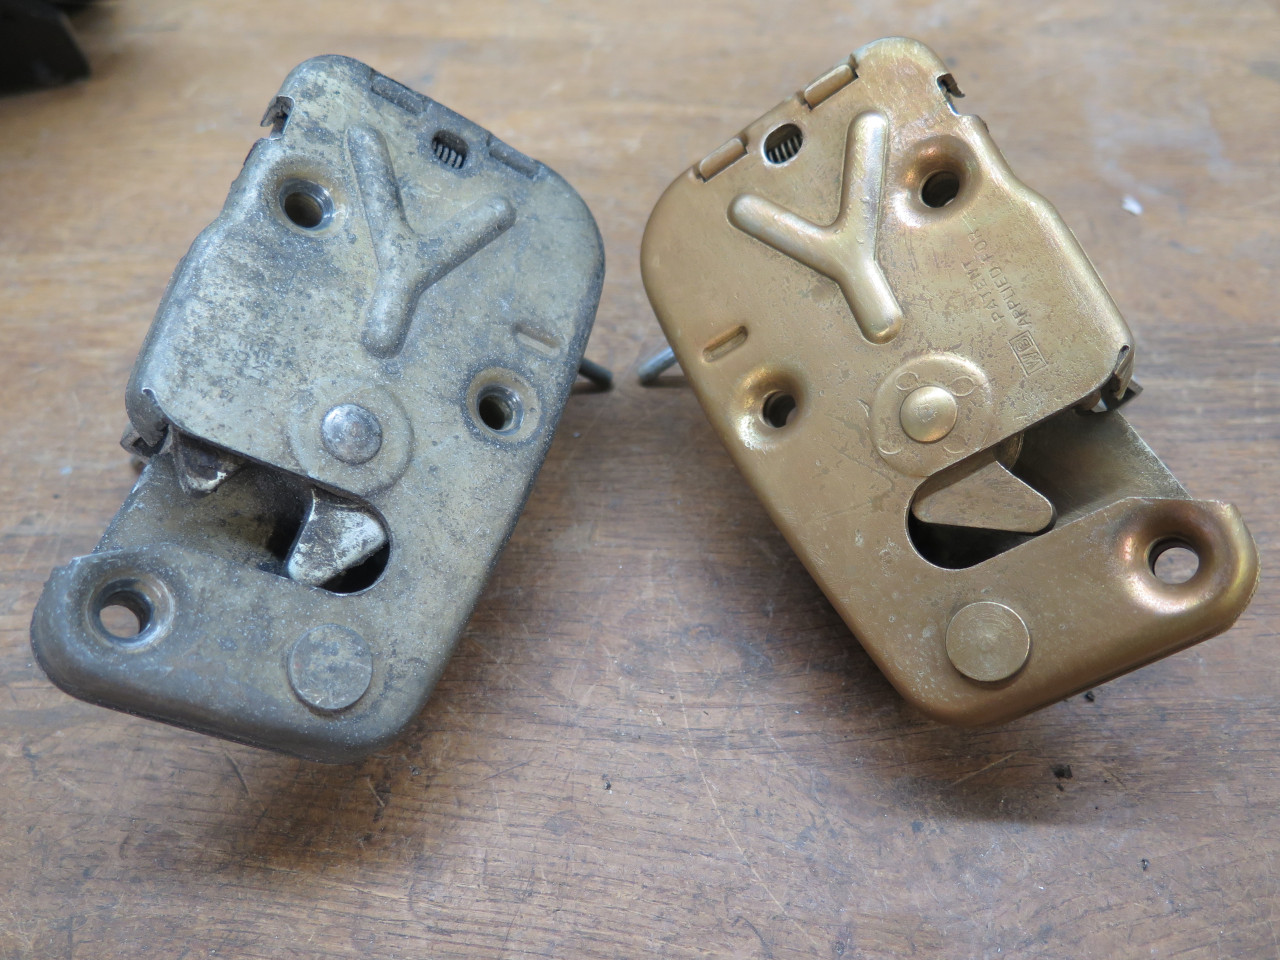
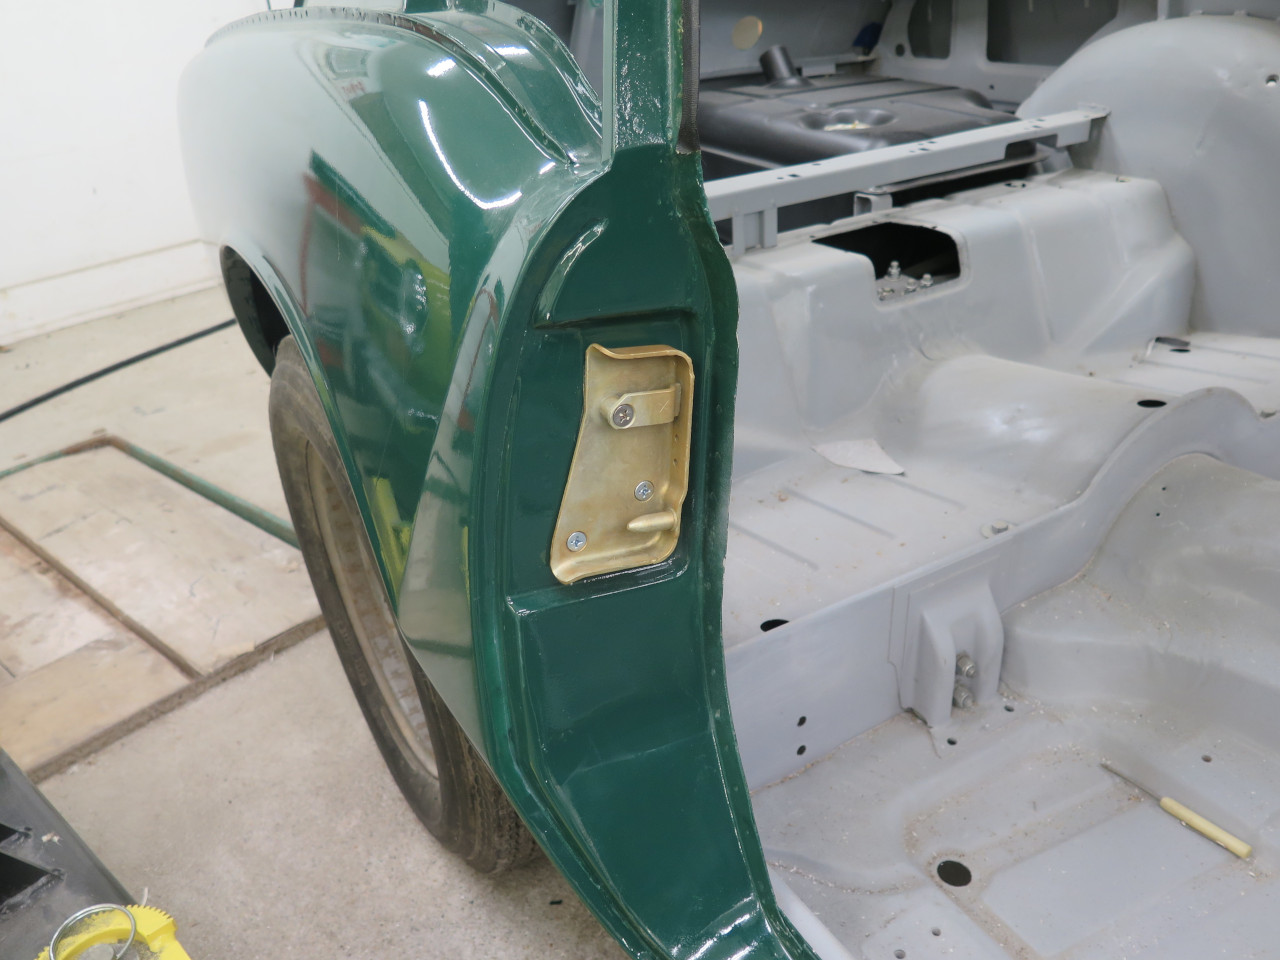
Found first in the box were the strike plates. They had patches of
rust, and some scuff marks where the latches rubbed, but they appearedd
to be serviceable.
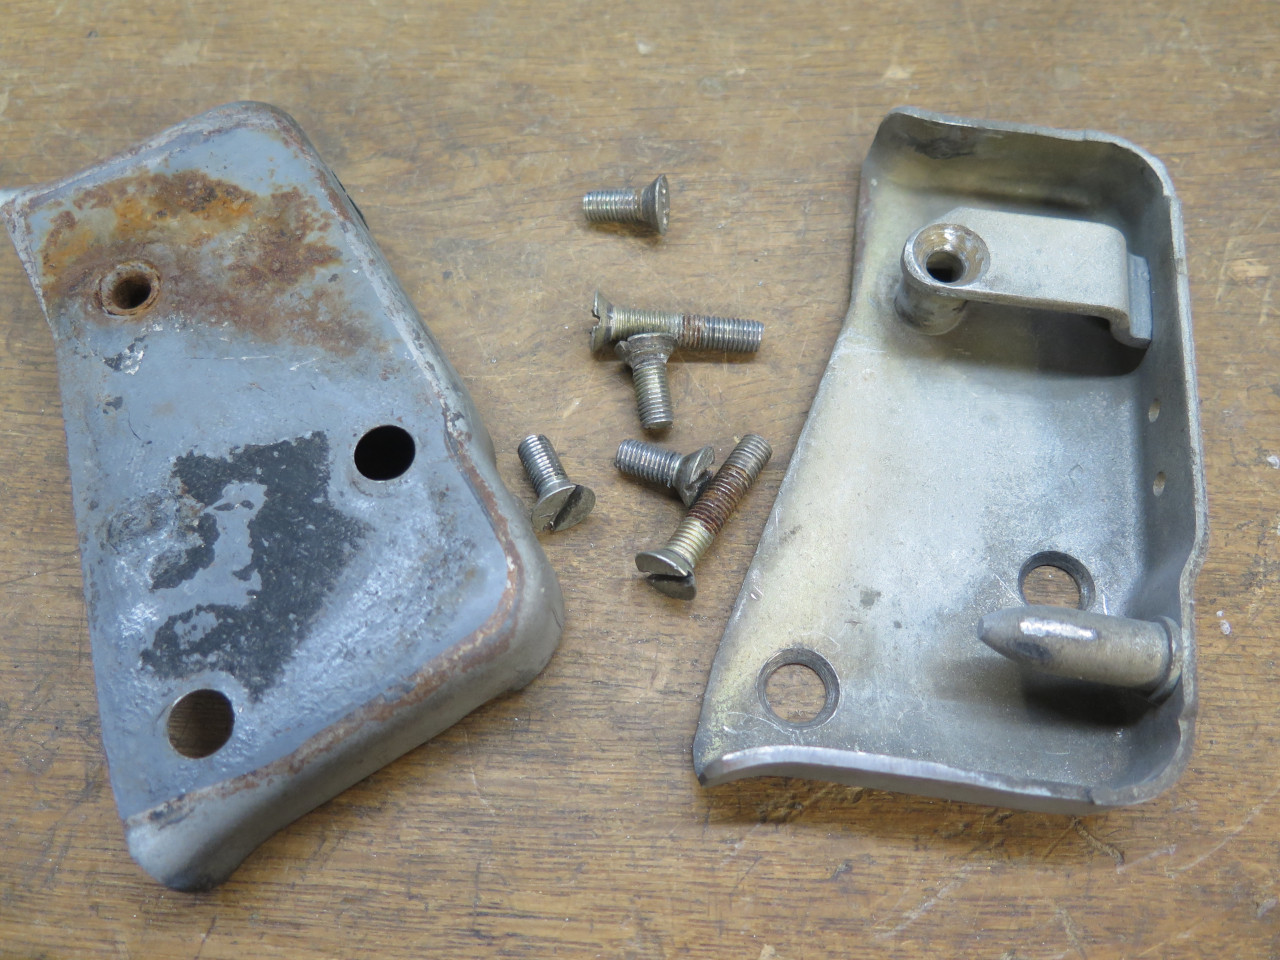
Most of the zinc plating was intact, so I used a zinc-friendly chemical
to remove the rust. This left some visible pitting where the rust
was, but nothing that would impair performance. A fresh layer of
zinc was applied to cover the pitted and scuffed areas.

Then a dip in a chromate bath to protect the zinc, and to give the parts that iridescent yellow color the original parts had.

Then there were the lock/latches themselves. They seemed to sort of work, but were kind of balky.

I resisted my inborn urge to open them up, and just rinsed them with
some solvent, which freed them up pretty well. I believe the
crusty surface appearance of parts like this is usually just dirty zinc
and zinc oxide, so a quick dip in something that eats those two things
brightens them up quite a bit.
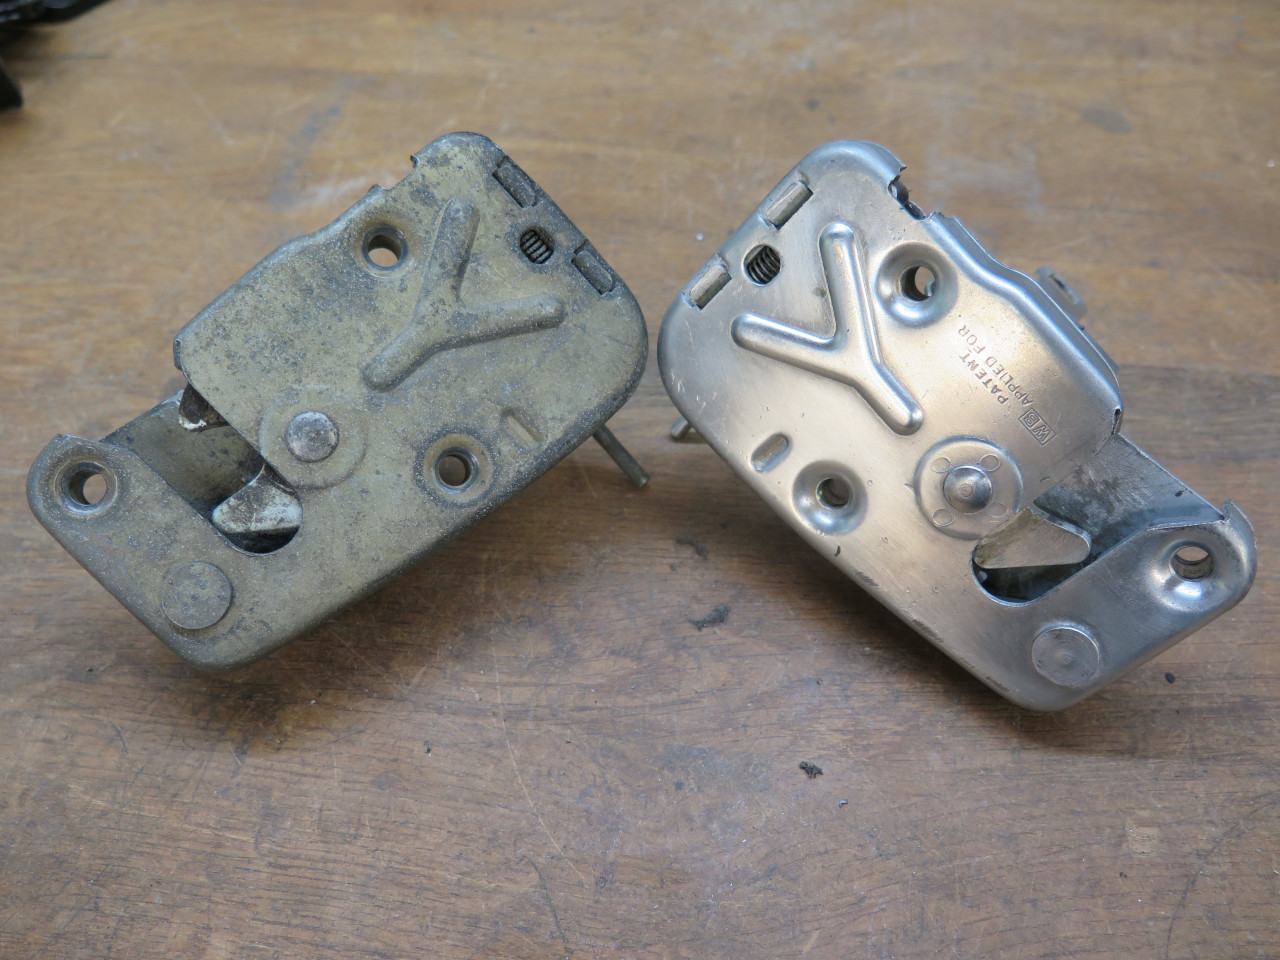
Then a chromate dip. The chromating process is very sensitive to
the amount of time in the bath, and I left these a little too long, so
the color on the latches is a little stronger than I really wanted, but
I'll live with it.

At this point, I had everything I needed to mount the doors. I neglected to order the pads for the hinges or the strikers, so these are home made from thick gasket material.

Bolting things up...


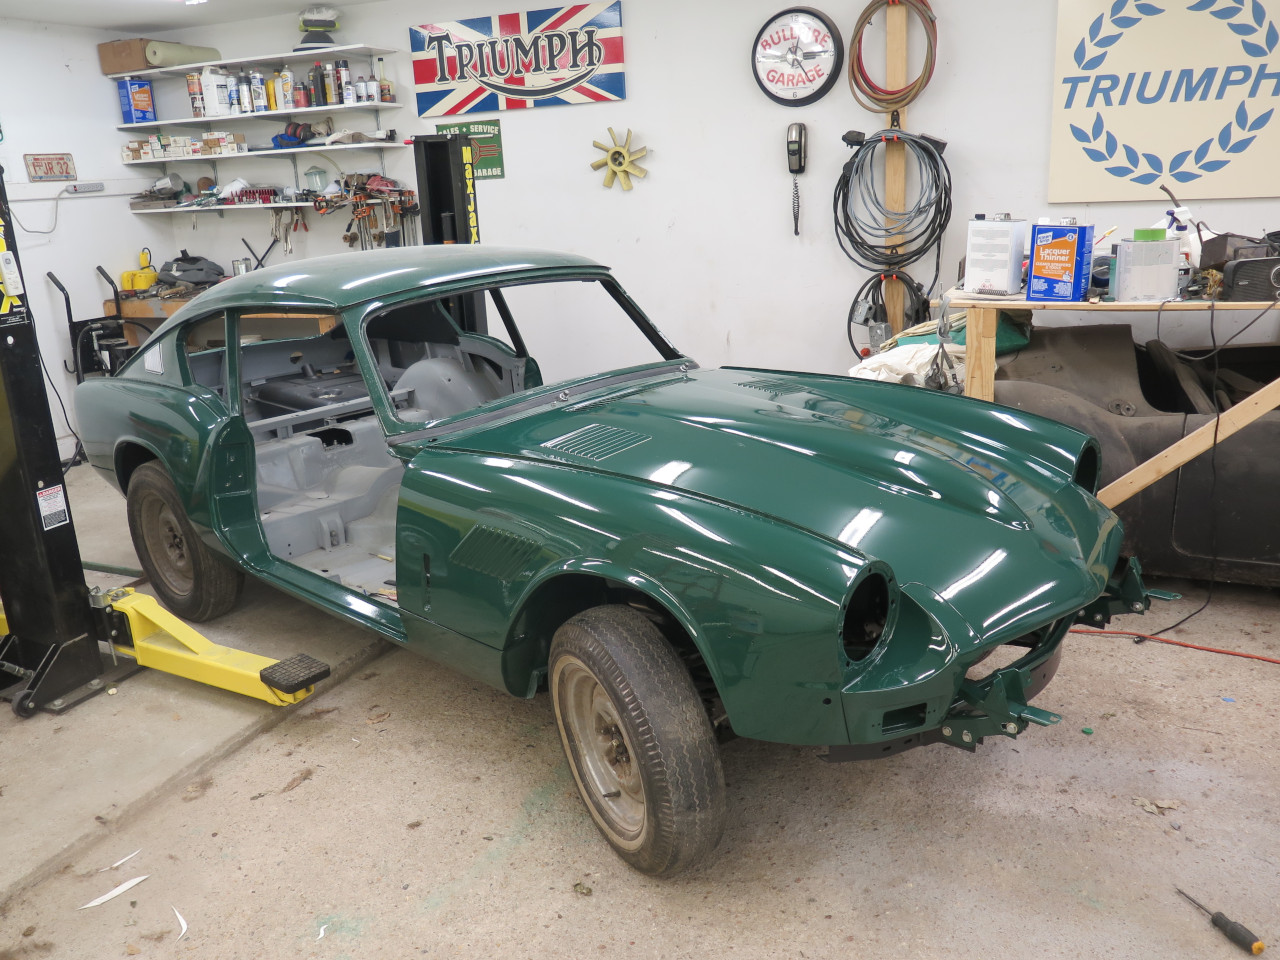
Looking more and more like a proper motorcar.

While futzing around with the door gaps, I realized that the door
handles would really be helpful,. so I paused that operation to see to
the handles. They were dirty but functional.
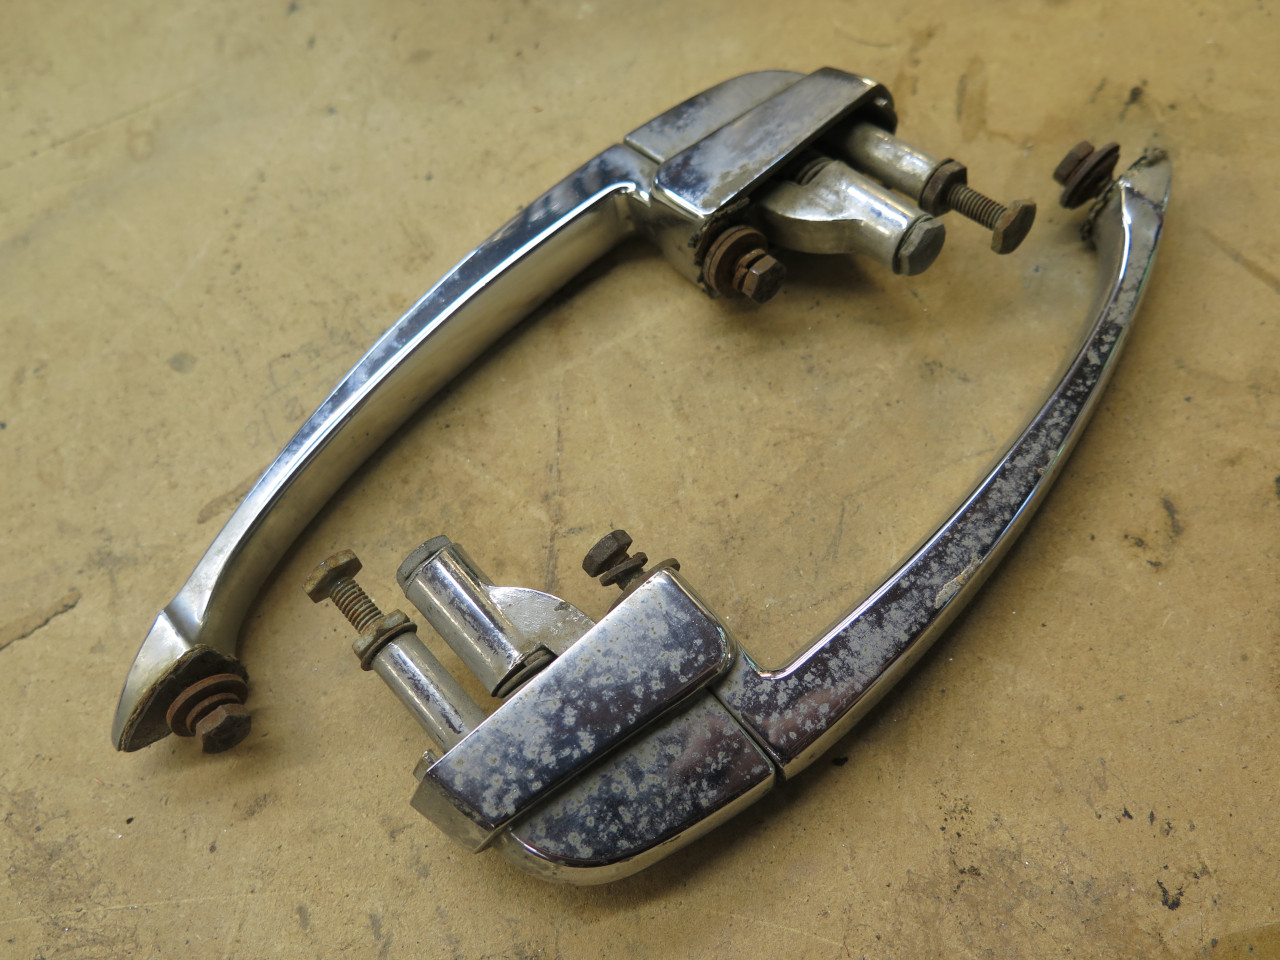
Took them apart, cleaned everything up, replated the fasteners and
replaced the washers. I usually only do one side at a time, in
case there is any question about how it goes back together.
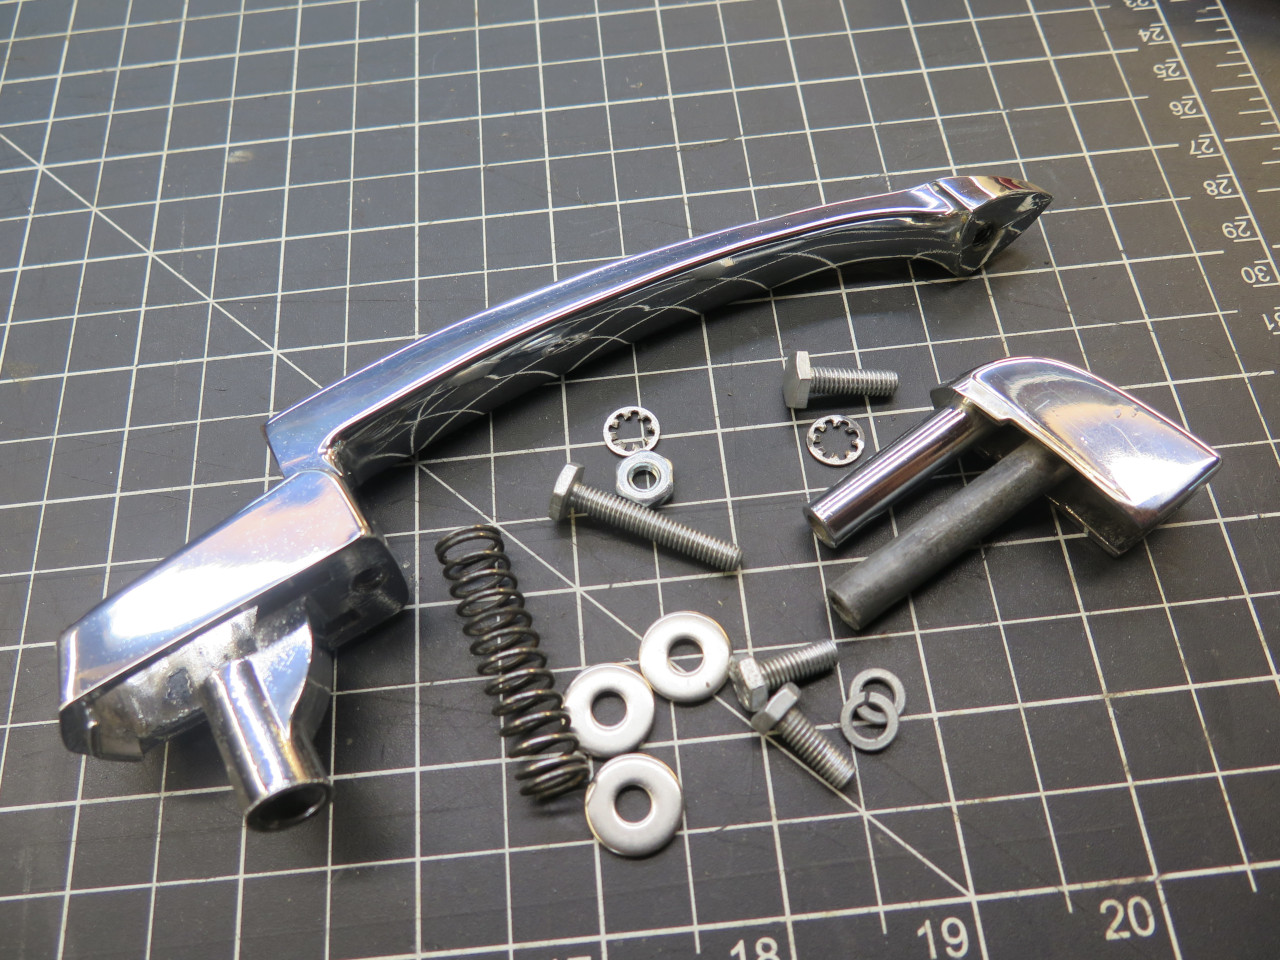

Ready for install, except I then realized that there were a couple of
gaskets for each handle to go between the handle and the painted
doors. I didn't want to wait a week for an order to arrive, but I
also didn't want to scratch up my new paint. I also wasn't too
sure what they actually looked like, bit I could imagine how I wanted
them to look. It was a quandary. But, 3D printer to the
rescue!
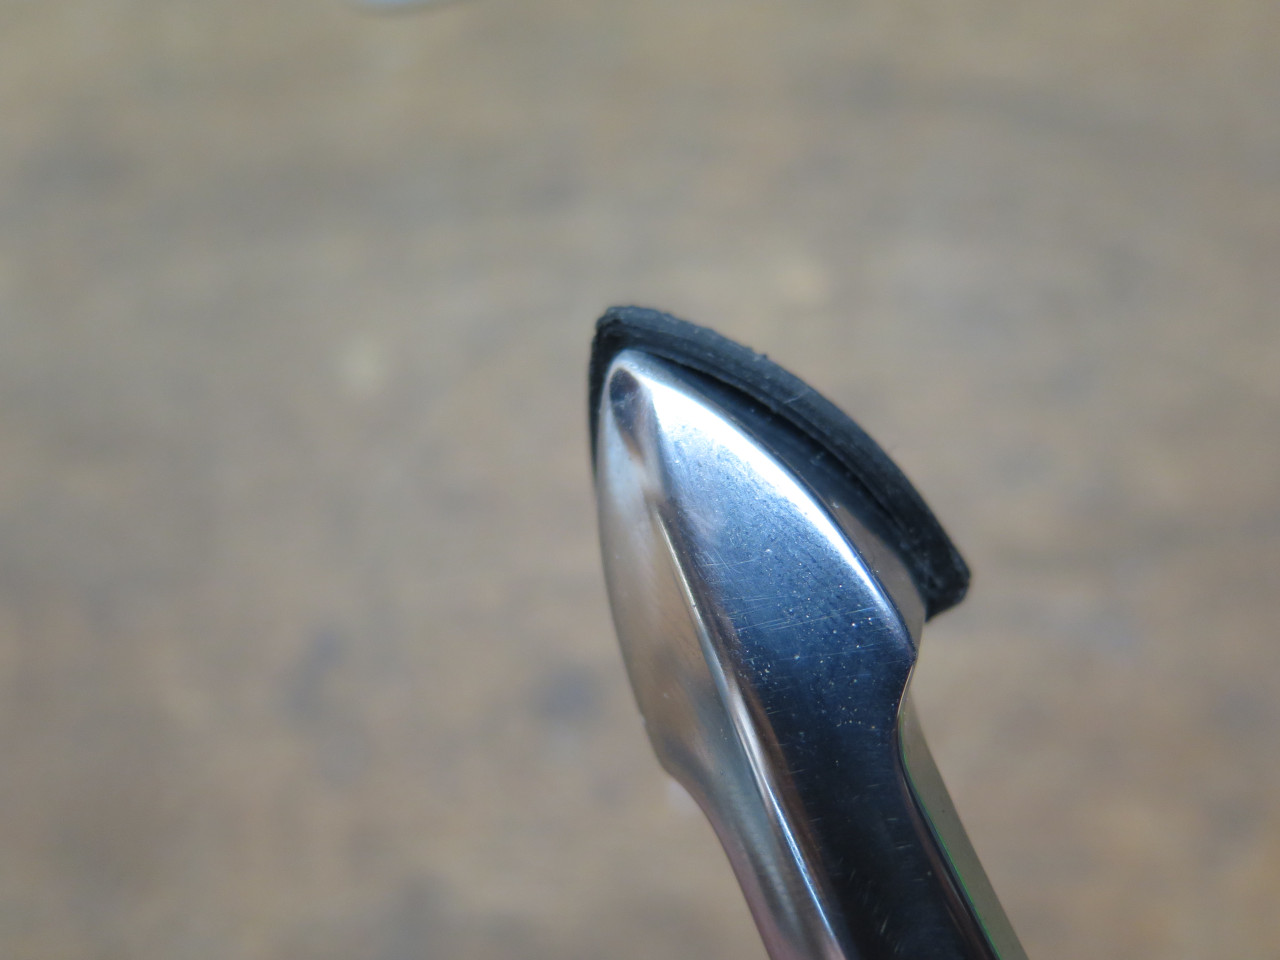
I drew up a couple of gaskets that had shallow little pockets for the
chrome handle to seat in. This gave a little lip around the
chrome. I'm not sure if the factory gaskets were made that
way. It took a few iterations with gray PLA, because it's easier
to print, then the final pieces in black ABS. I considered using a
softer, rubbery material, but was afraid it might just extrude out of
the joint under pressure. With these thin sections, the ABS is
actually pretty flexible and resilient.

They should do the job.

Gaps look OK, but I'm still fiddling with them.
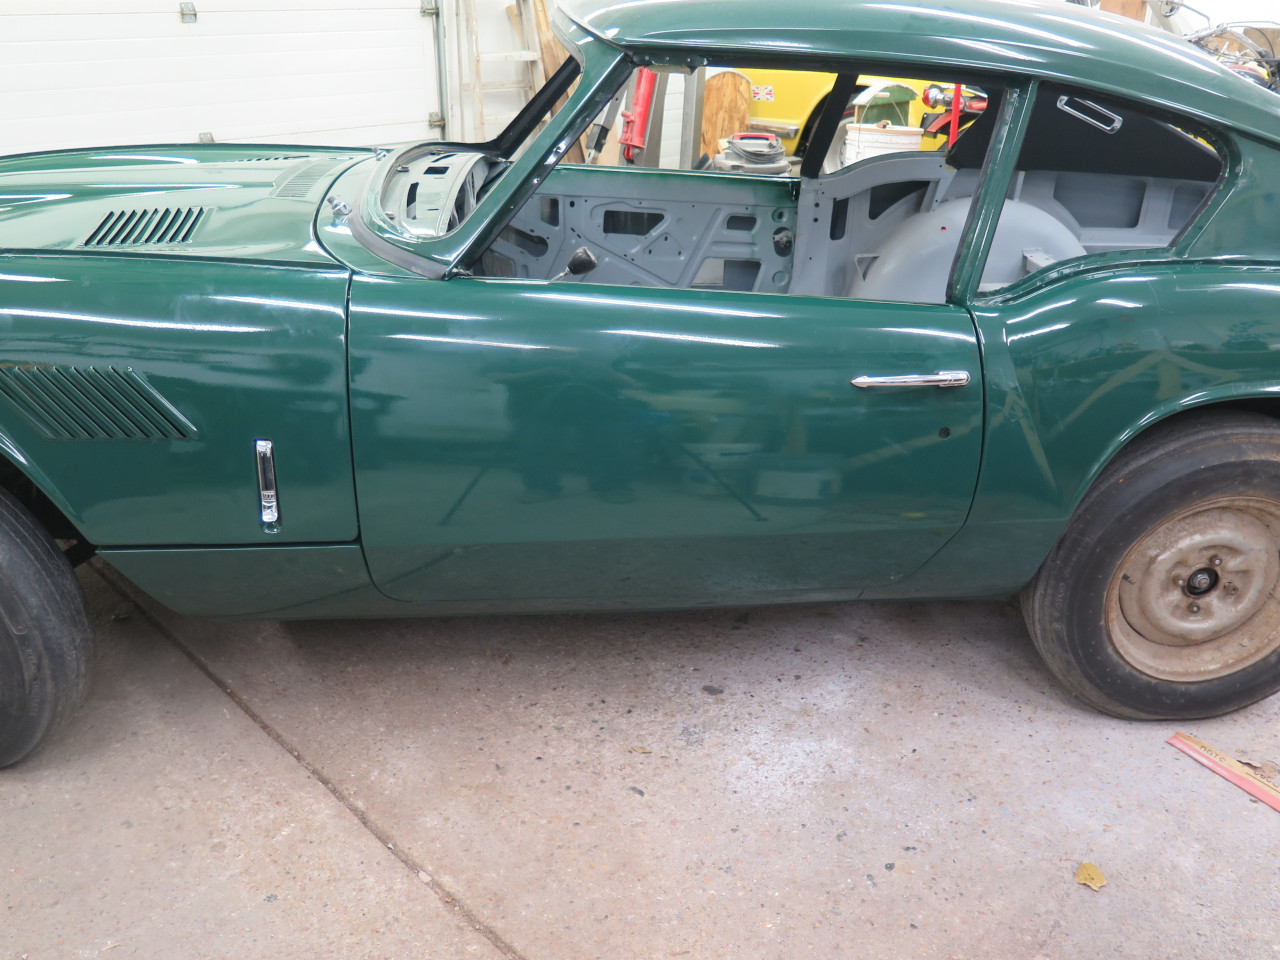
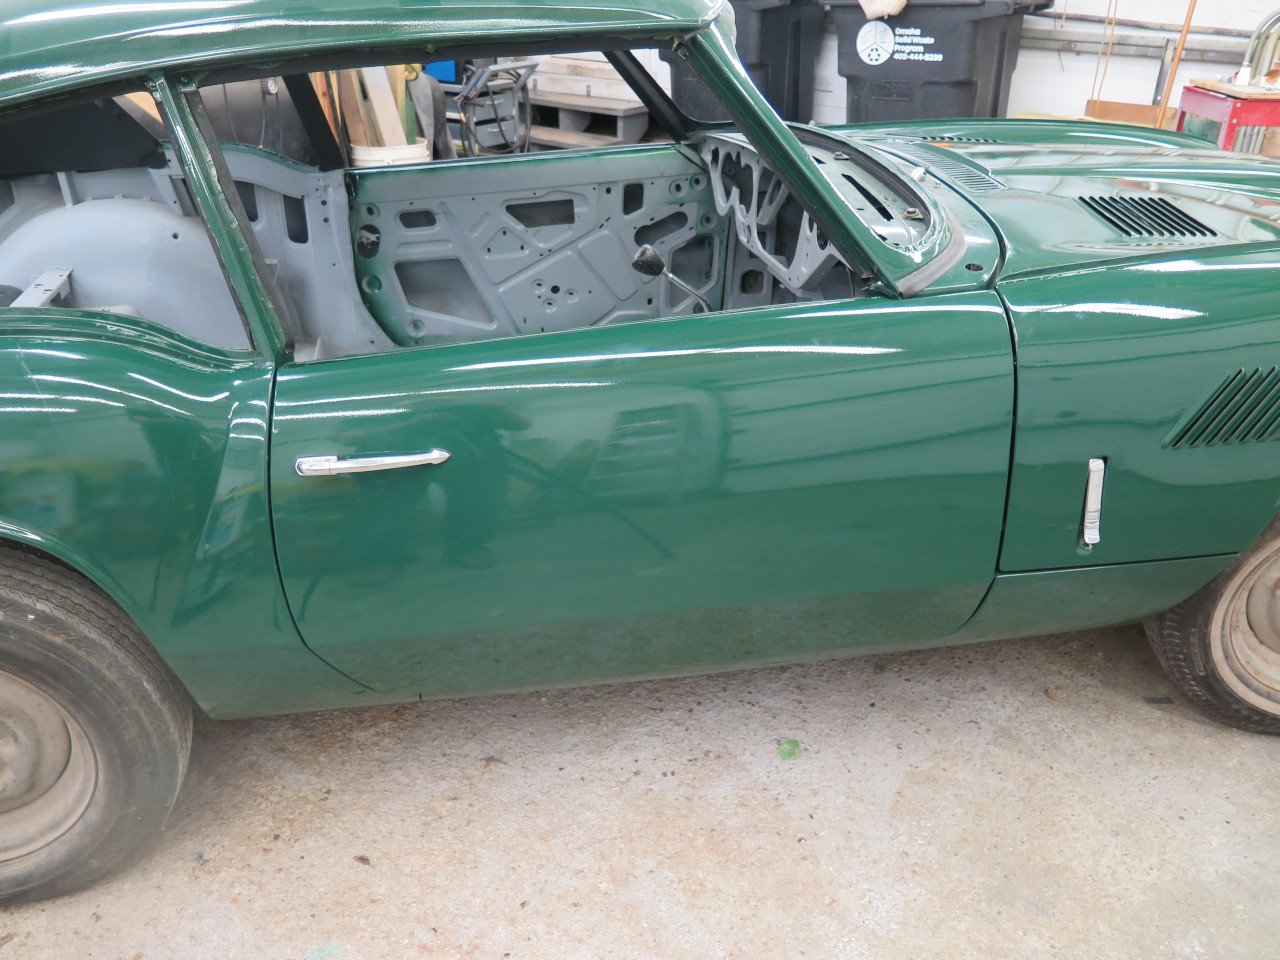
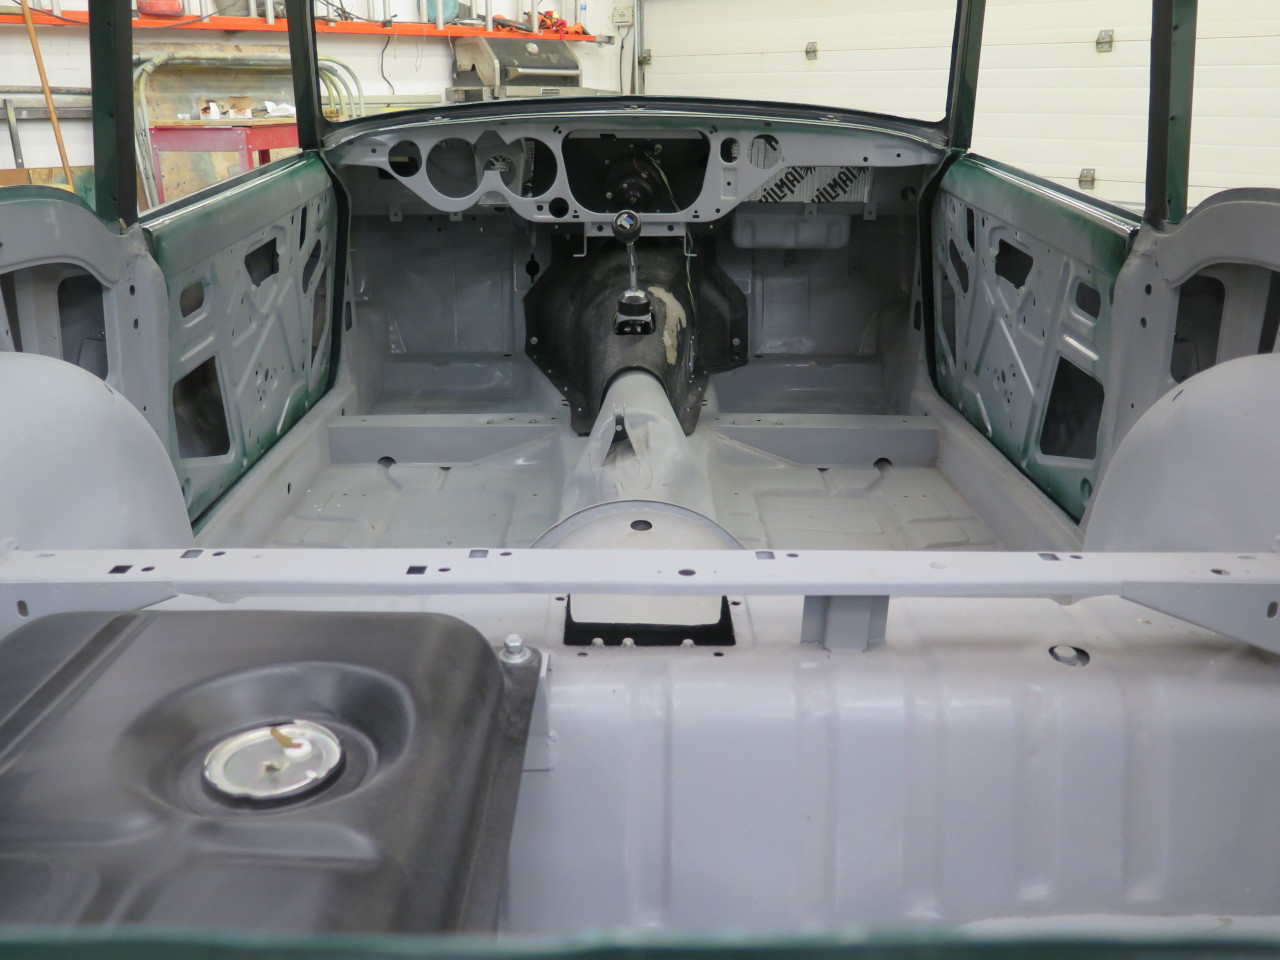
This feels like another milestone, but pretty soon, I have to begin to tackle this vast expanse.
For the first time in a while, this car is only consuming a single
car-sized space in my garage. There is finally some room to move
around.
All of this work was fiddly and took some time, but other than the paint, there wasn't much cost.
Comments to Ed at elhollin1@yahoo.com
To my other GT6 pages