To my other GT6 pages.
September 24, 2021
Exhaust
Everyone has their favorite little pet peeves. You know, things
that are personally annoying, but that few others really care
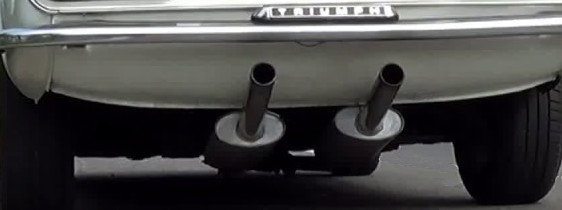
about. I have my share, but as far as automotive peeves go, one of
them is seeing mufflers at the rear of a car. A muffler is not a
style element. It's a piece of utilitarian hardware that needs to
do it's job well, but be tucked out of sight. I can abide by
tasteful exhaust tips, but the mufflers themselves are not attractive to
me. When they hang down below the valence, they look like a
tacked-on, dangling hack.
Many modern cars have a much more refined approach to exhaust. The
tips are blended into the body lines. They look like they belong there,
but the muffler is totally out of sight.
So I was pondering this as I sat down to choose an exhaust system for
the GT6. I didn't find anything I really liked the looks of, but
feeling some pressure to do something, I ordered one of the
stainless steel "sport" exhaust systems. While waiting for it's
arrival, I played the "what-if" game. What if I could modify the
system to tuck the mufflers up higher, so they would be at least
partially hidden by the step behind the rear valance? There seemed to
be some room there below the boot floor. The problem with that is
that the tail pipes would then have to jog below the bottom valance lip.
"Well, what if you carved out some notches in the valance for the pipes
to come straight out?" I heard my inner Engineer say, almost
off-handedly.
"What? You mean like the old hot rodders used to do when they
would recess things into the body? Sounds like a lot of work", I
protested.
"Yeah. They called it Frenching or scalloping or something like that. How hard could it be?"
I really hate it when he says that. He knows those are magic words. The game was on.
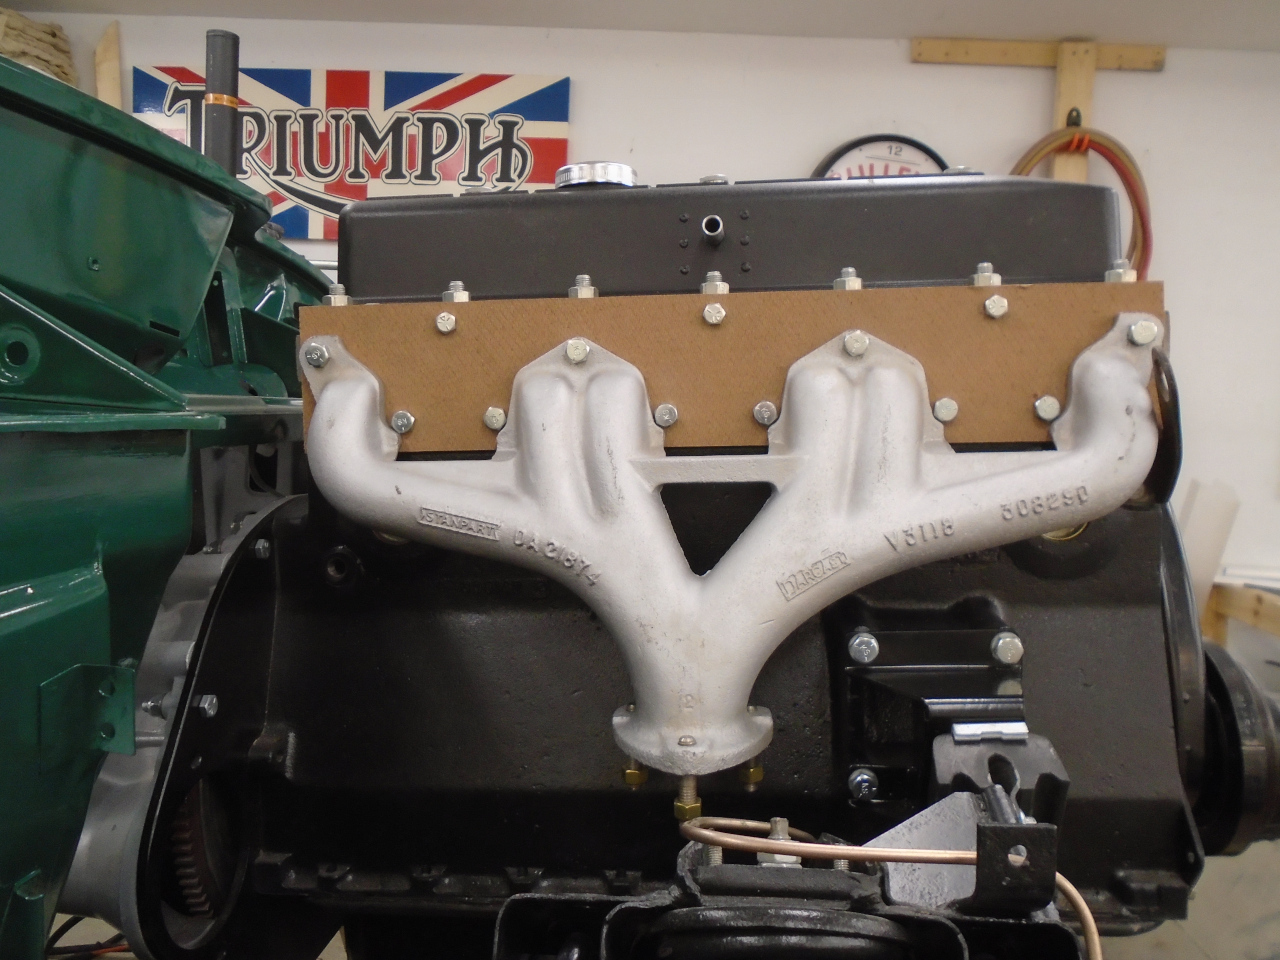
When the exhaust system arrived, I found that it was a Bell system,
which was fine. I began to install it to see what my options
were. First, the exhaust manifold, then the stainless downpipe from Bell.
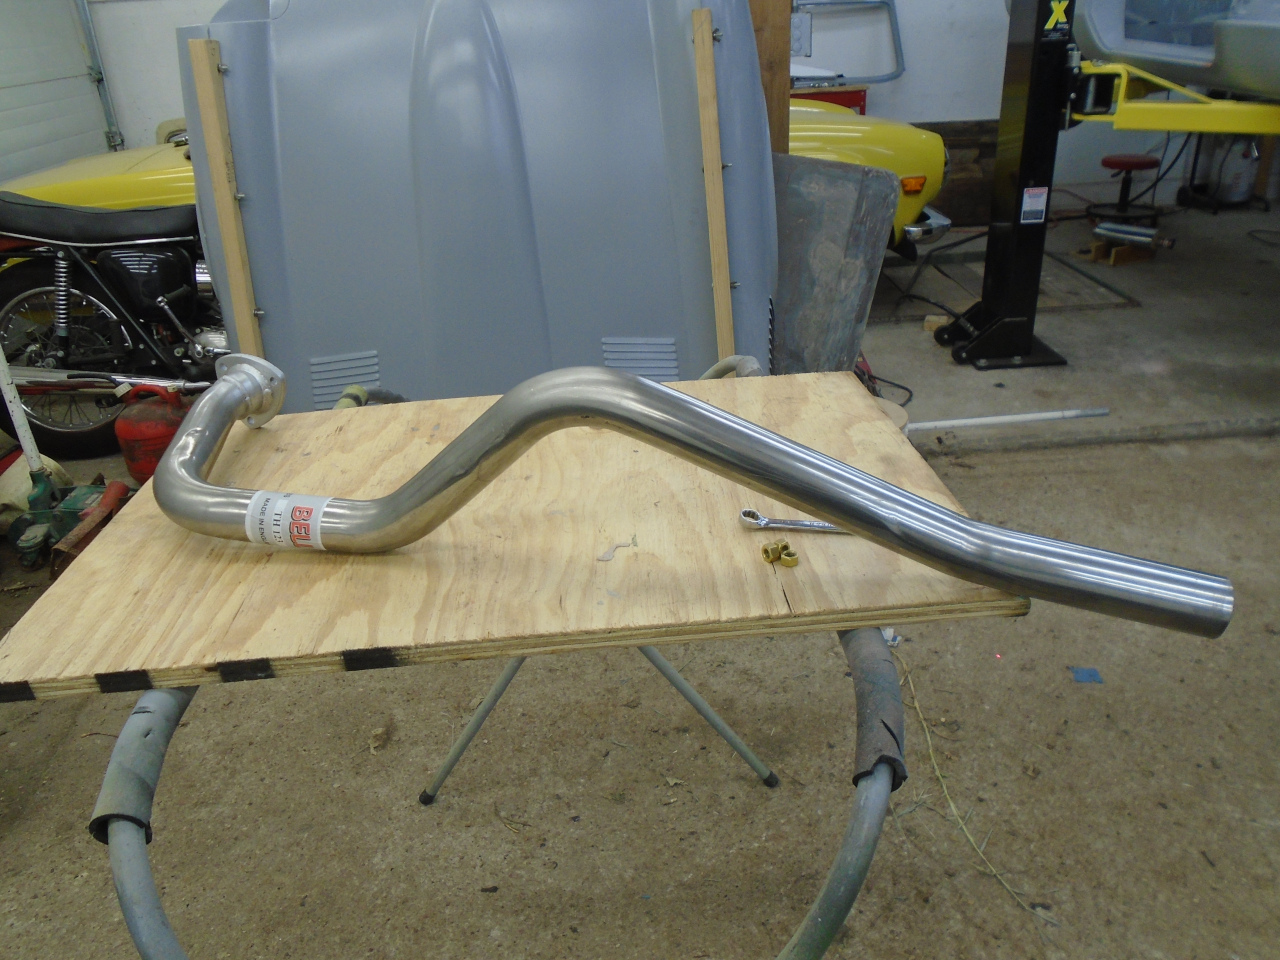
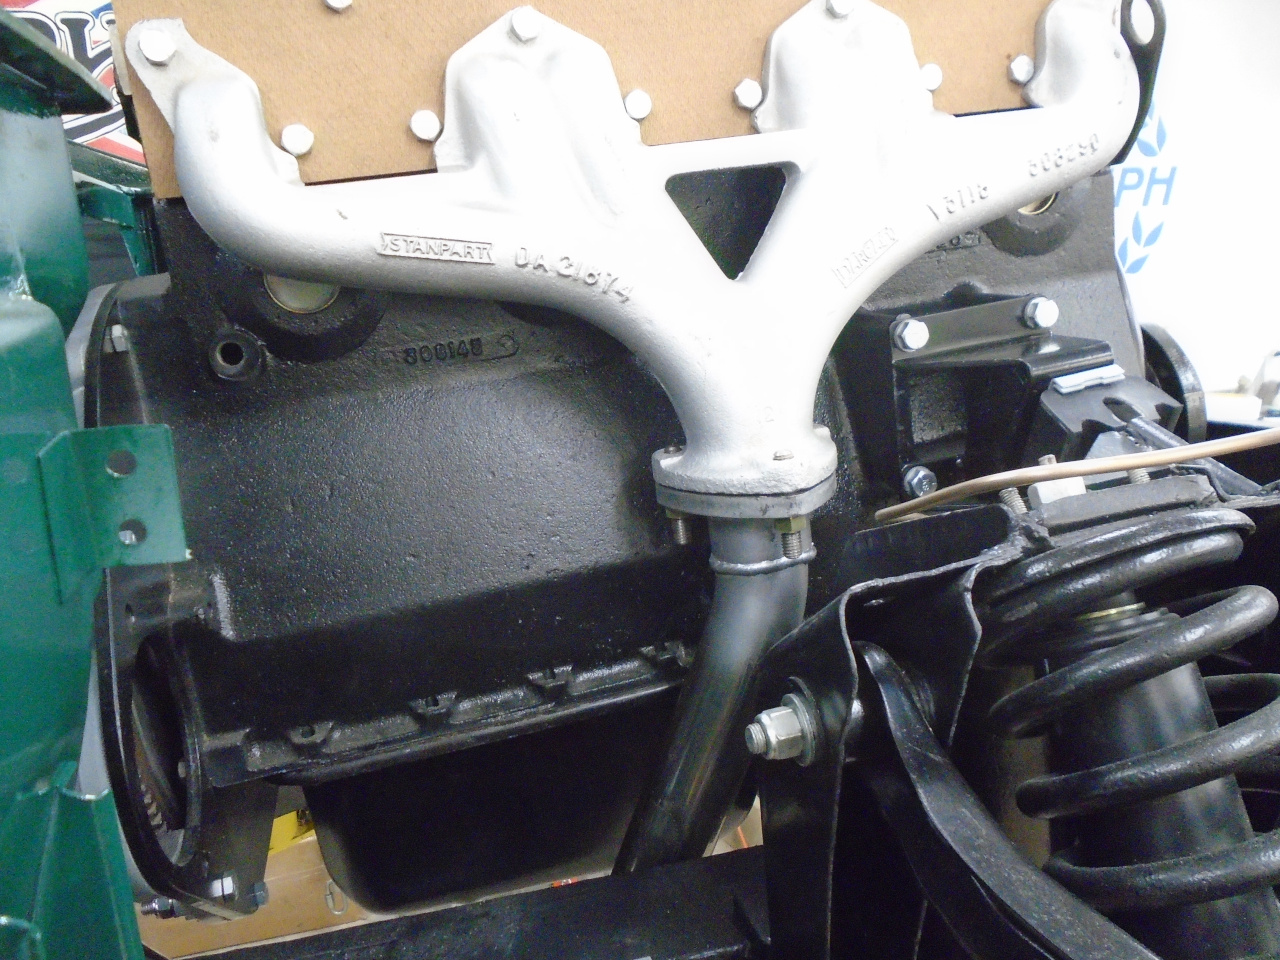
Next was the "Y" pipe. It slides onto the downpipe, and is fixed
by a pair resilient hangers mounted to the front differential
carrier. Since I'd also bought the Bell exhaust system mounting
kit, I opened the bag to find the hangers, which appeared to be about
twice too long. The instructions in the bag included a note for
the hangers: "THESE HOLES MAY NEED REPOSITIONING". Well, there is
no "may" about it. The hangers will not work on a 69 GT6 as
supplied. The kit is obviously made for a range of cars. Beyond
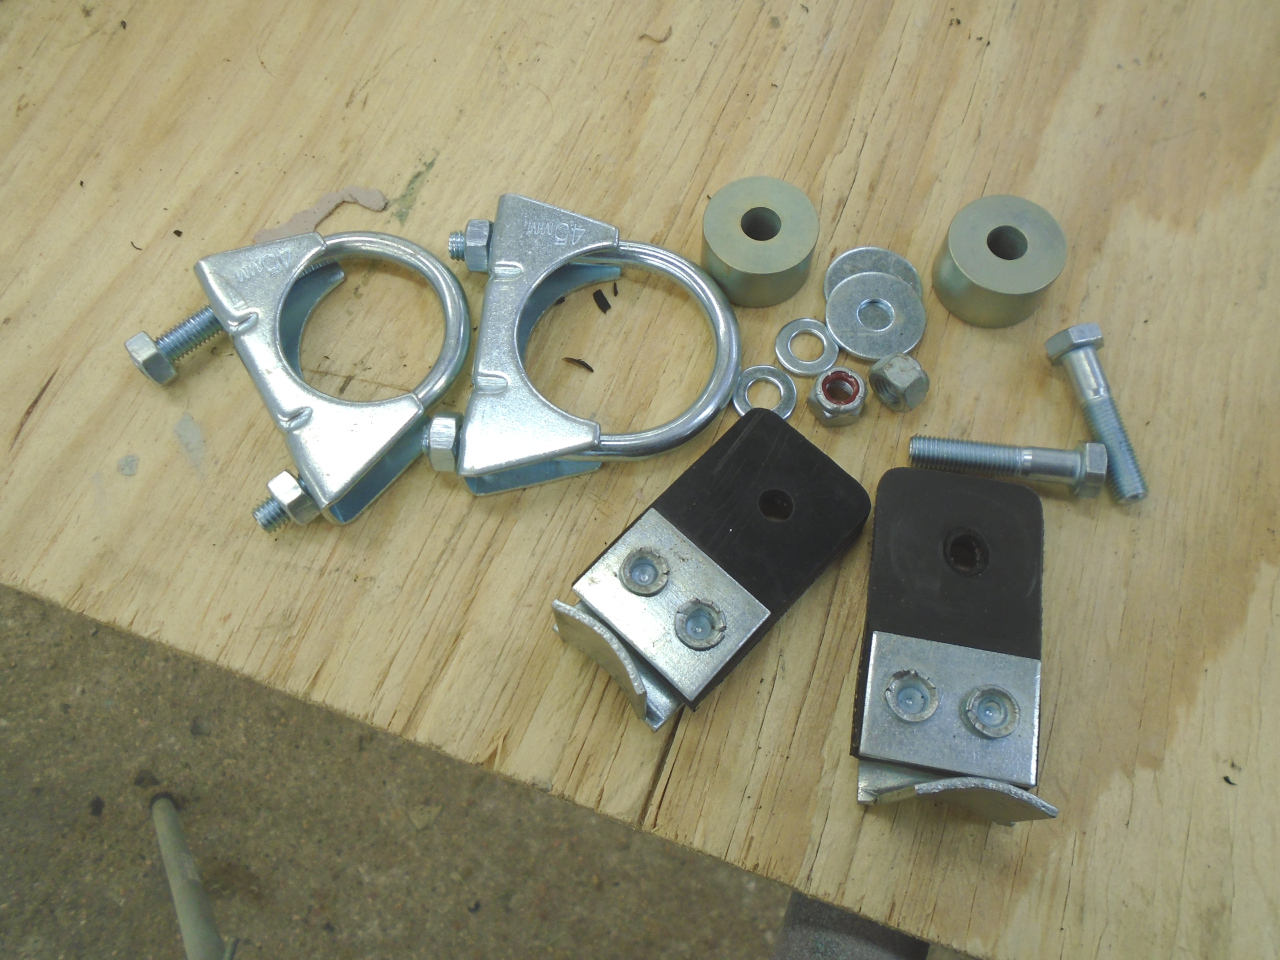
that, the metal part of the much shorter hanger then interfered with the
differential carrier, offering some great opportunities for
rattles. A couple of shop made steel spacers moved the hanger away
from the carrier.
Finally, the Y pipe got mounted.
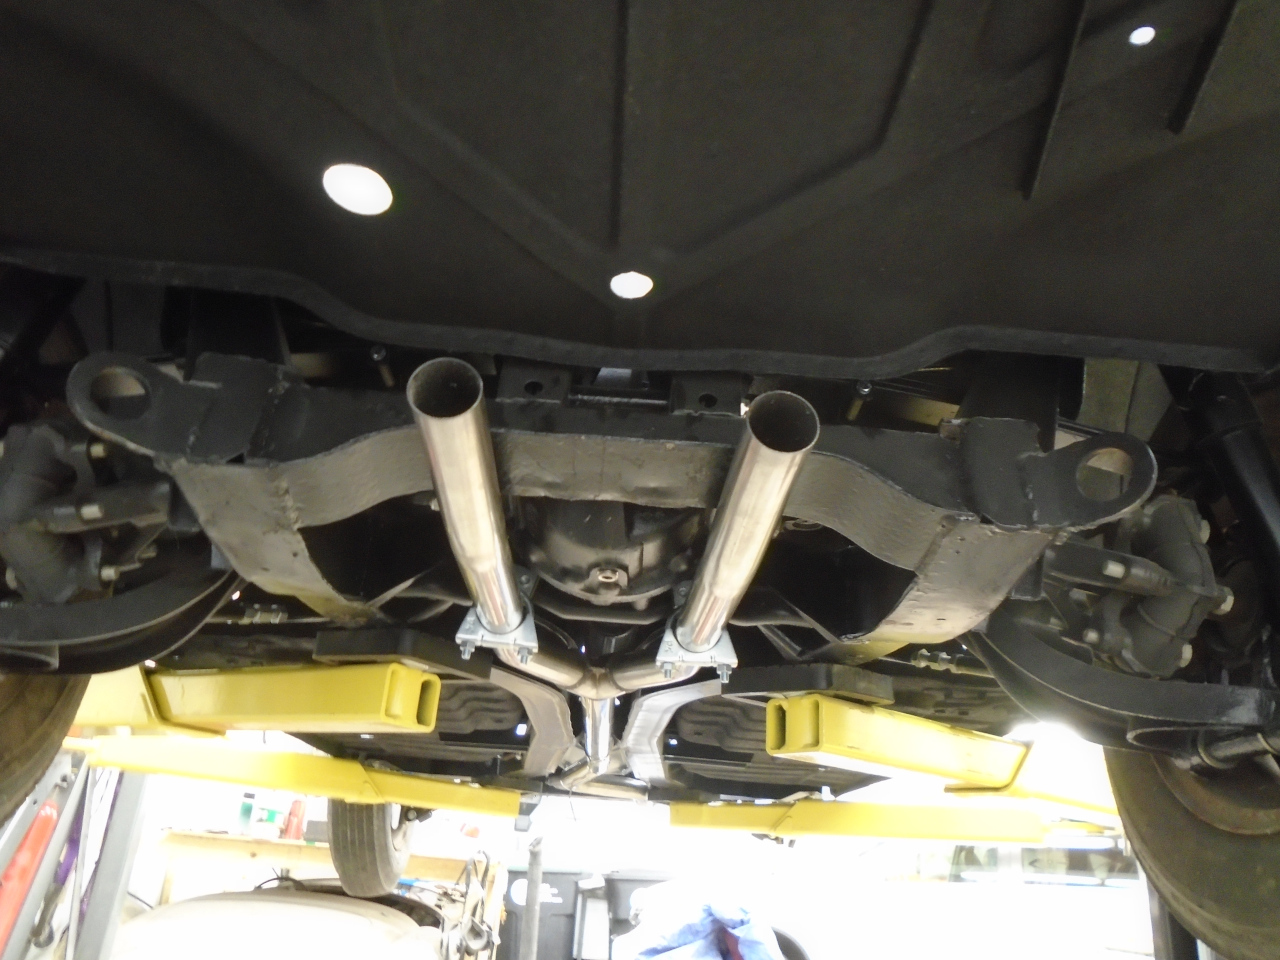
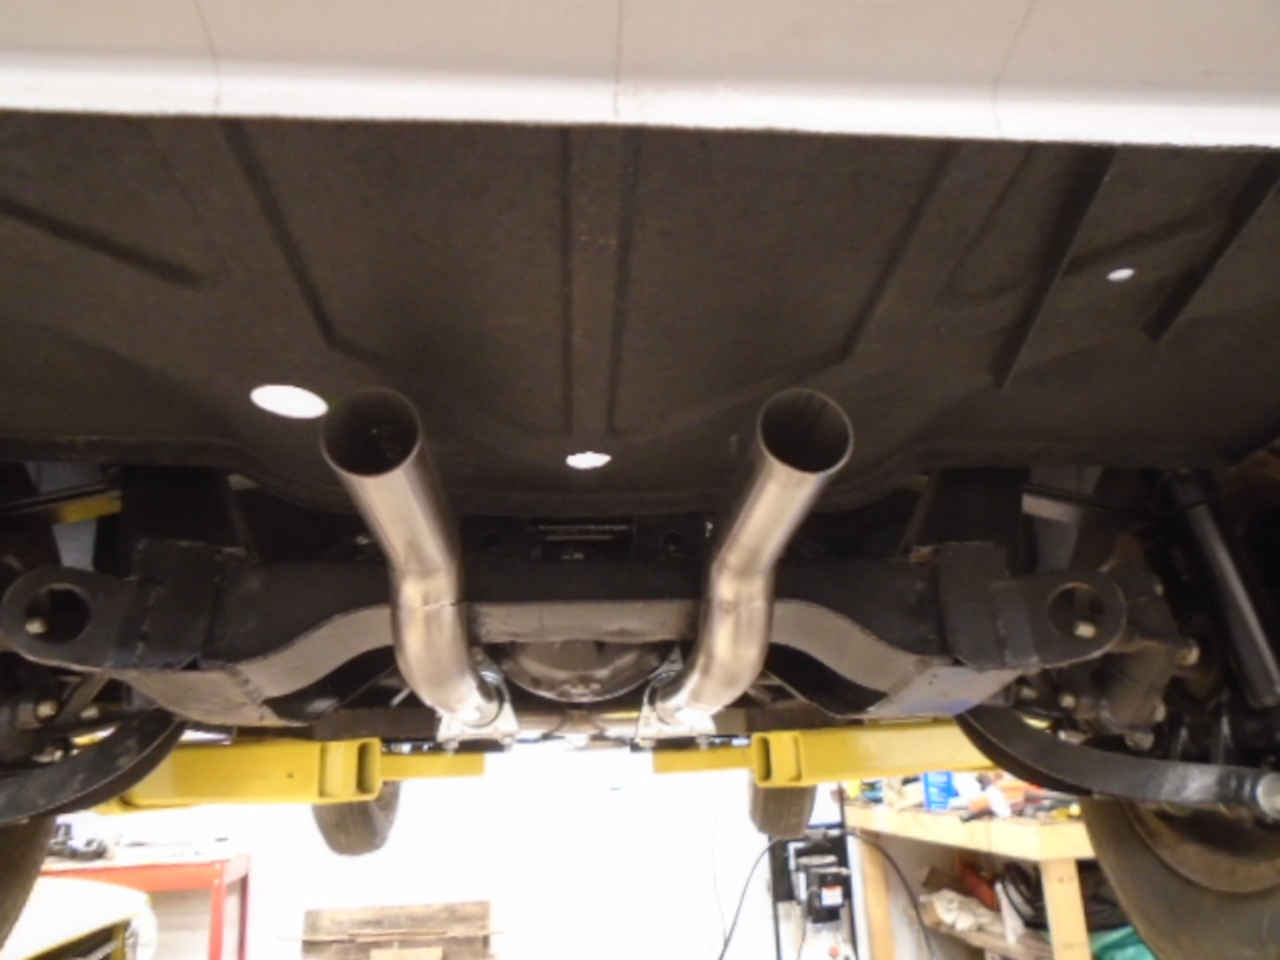
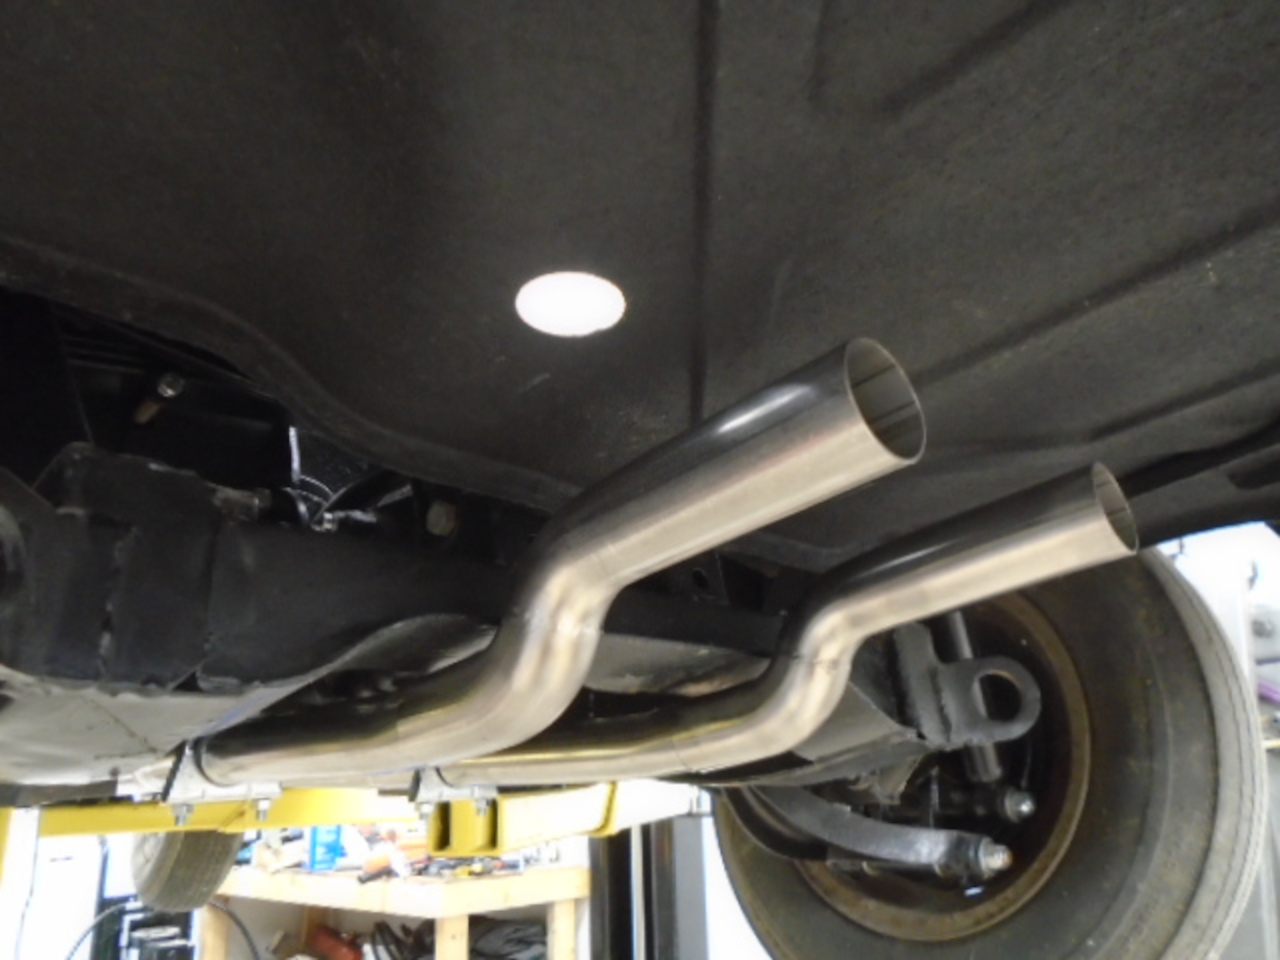
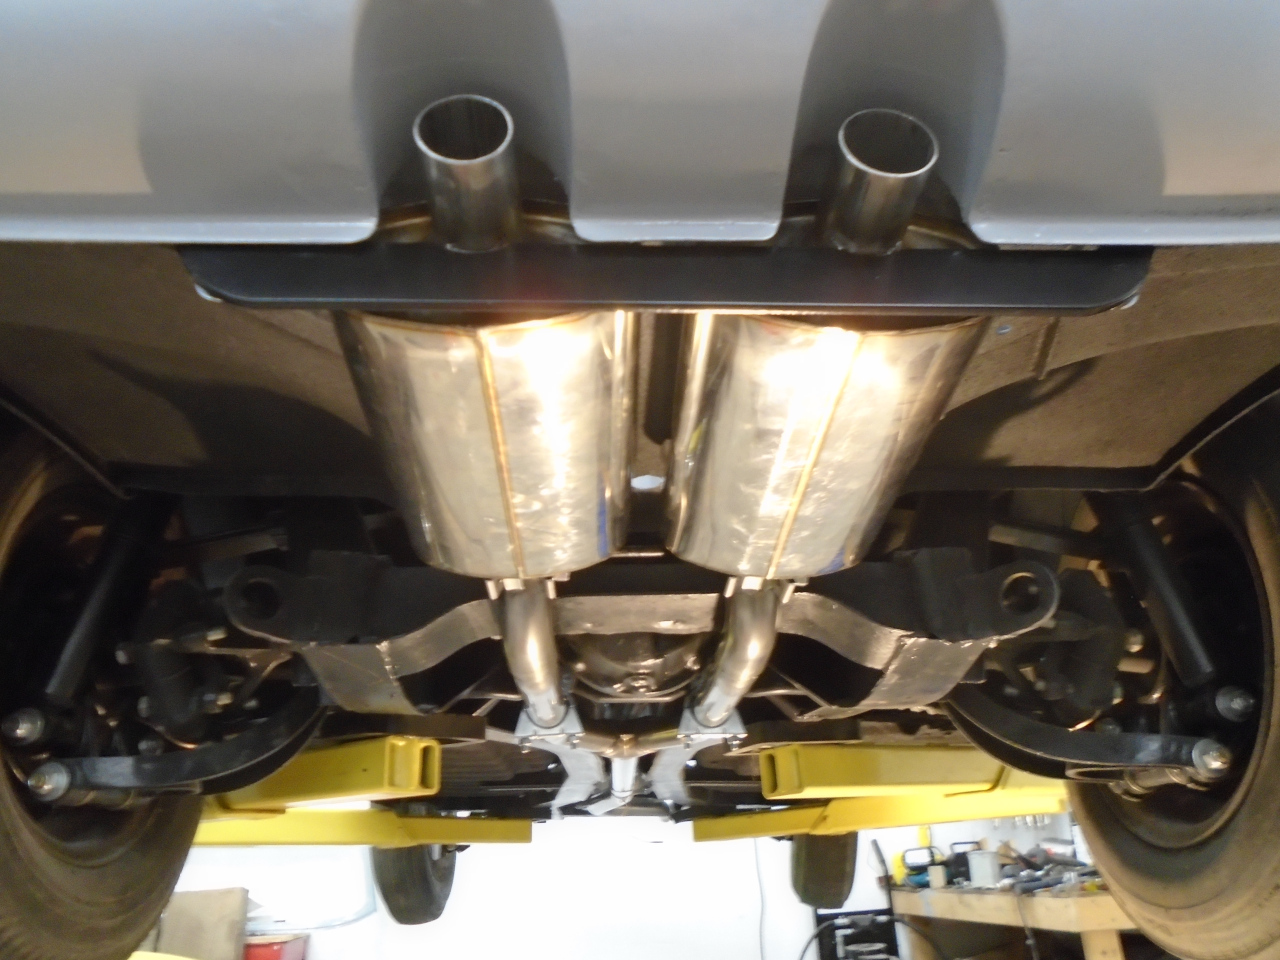
There appeared to be enough room between the rear frame cross member and
the rear valance to fit the mufflers, but to tuck them up closer to the
boot floor, the ends of the Y pipes would have to jog up about two
inches. This would allow the mufflers to be installed parallel to the boot floor, with a little air space between.
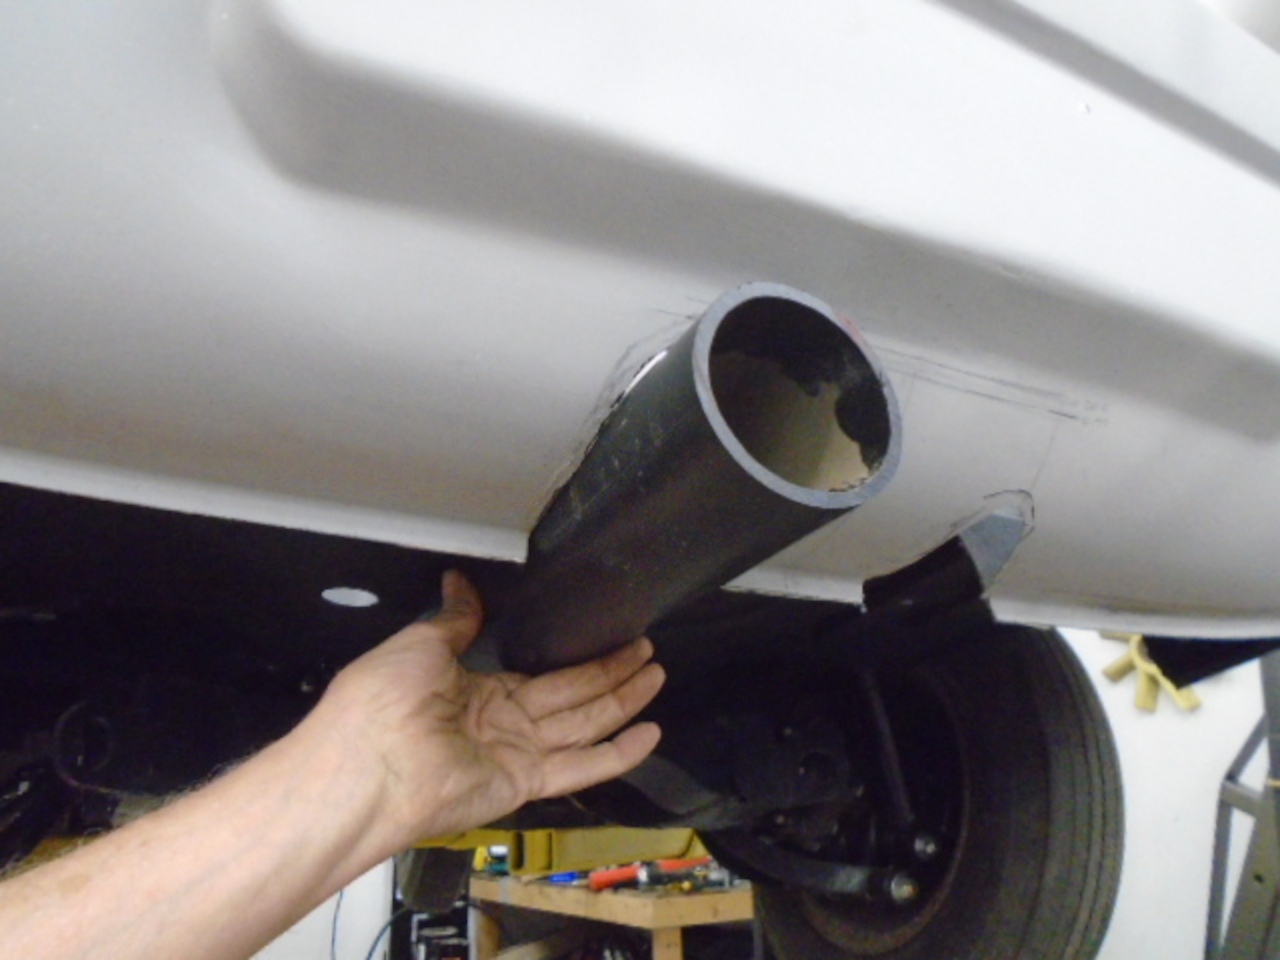
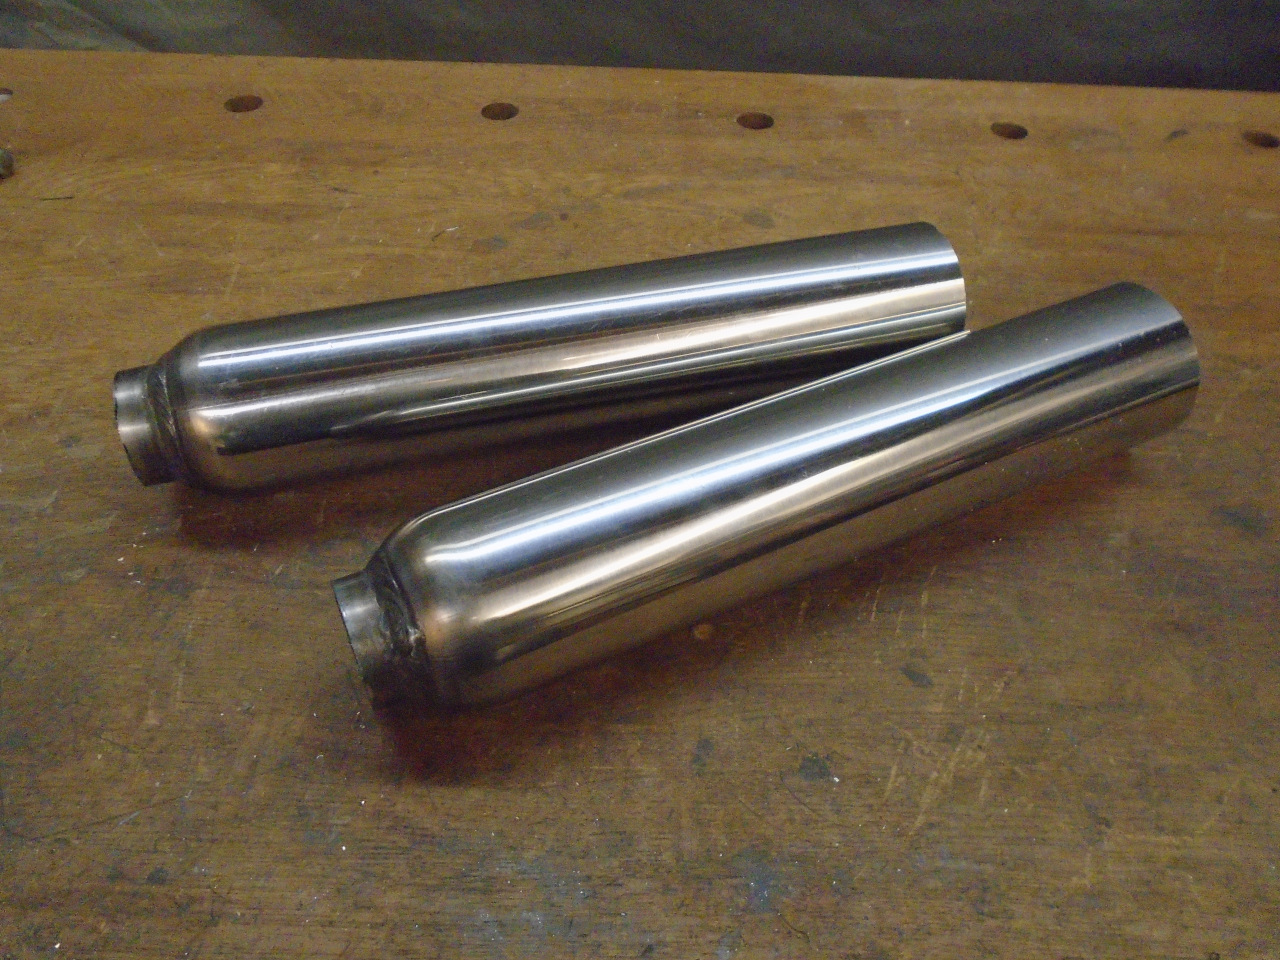
To mock this up to be sure about the measurements, I really needed to
have a muffler to work with. The Bell units came with the tail
pipes attached, and they were fairly heavy and awkward to handle.
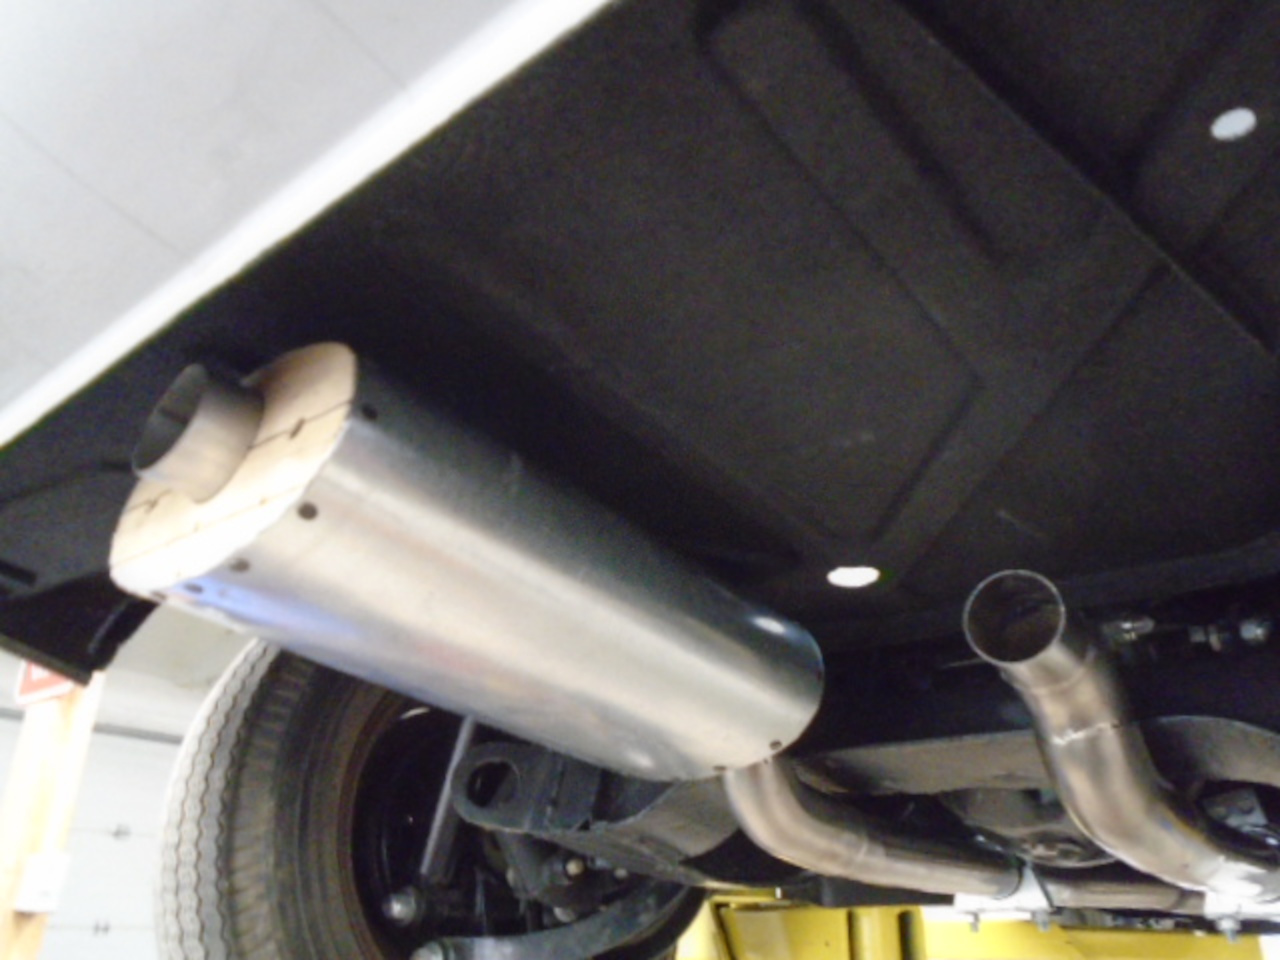
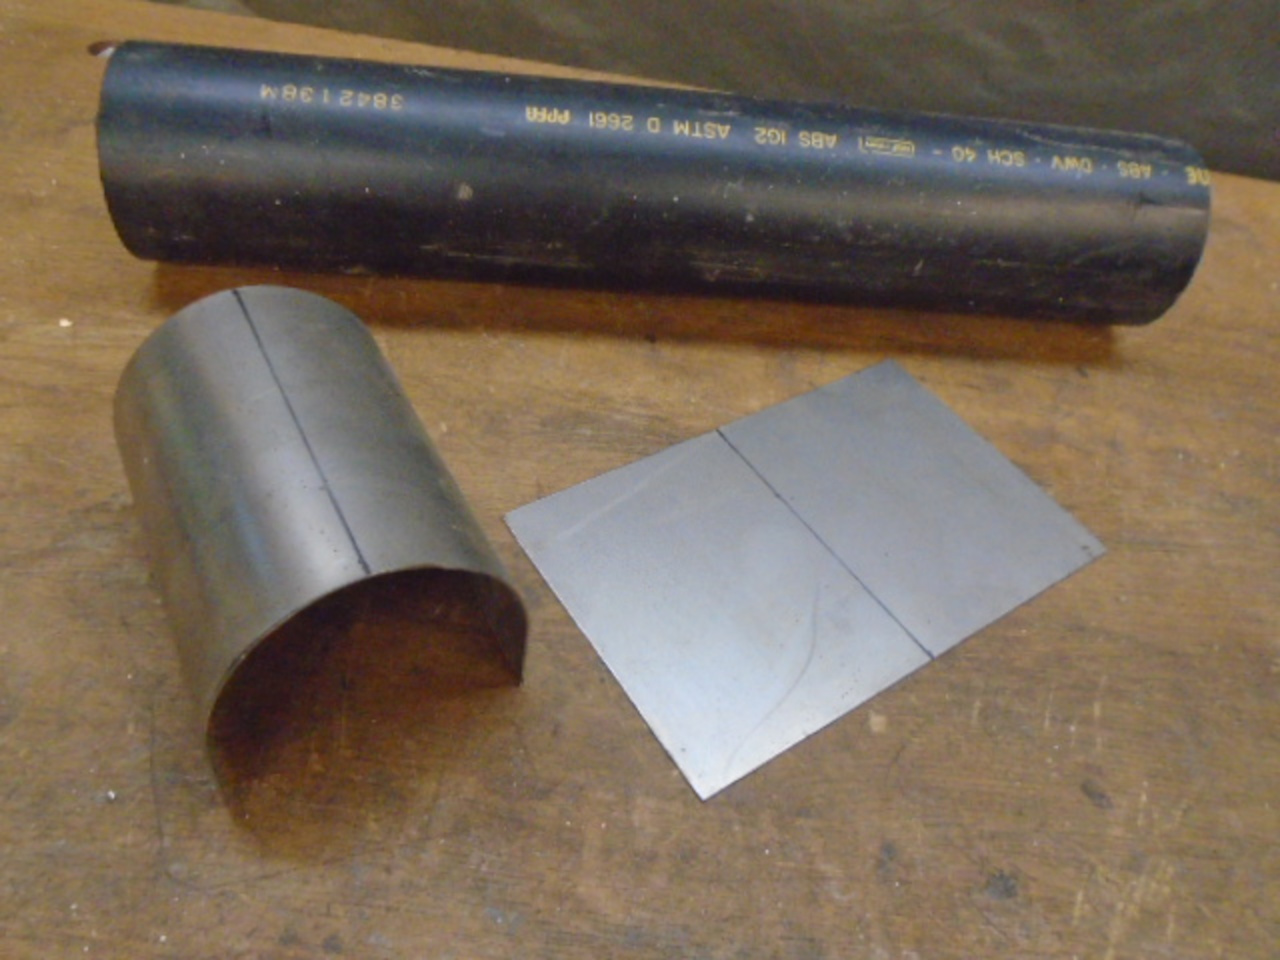
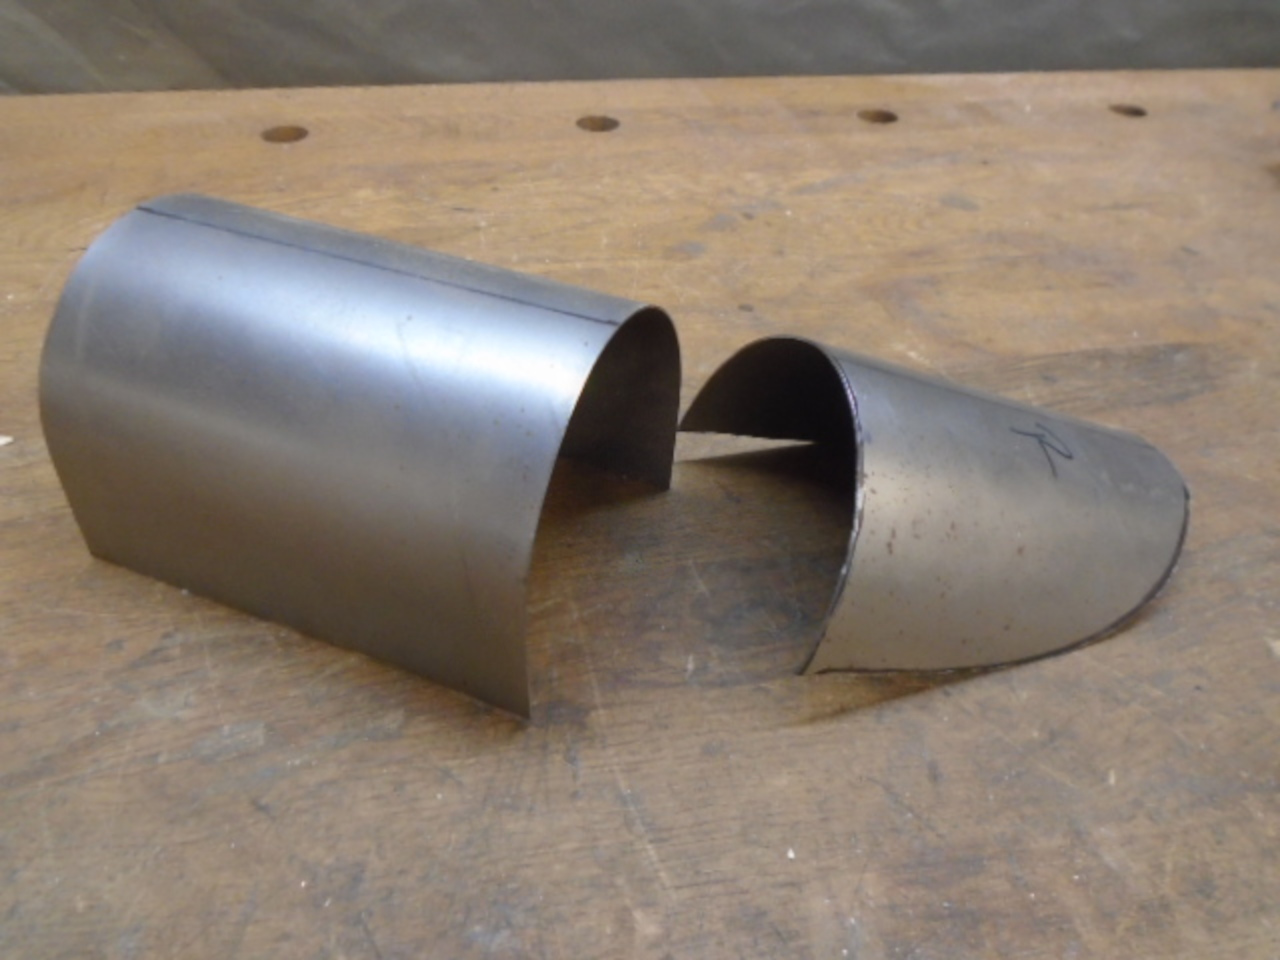
To solve this, I made a lightweight dummy muffler the same size and
shape as the Bell.


The stand-in muffler worked well to show me that it would fit, but that
the two inch jog would have to be very compact, and take up as little
horizontal distance as possible. I took a bit of a sidetrack to
figure out the optimum way to make the jog. Those with an
unwholesome interest in the math can look here.
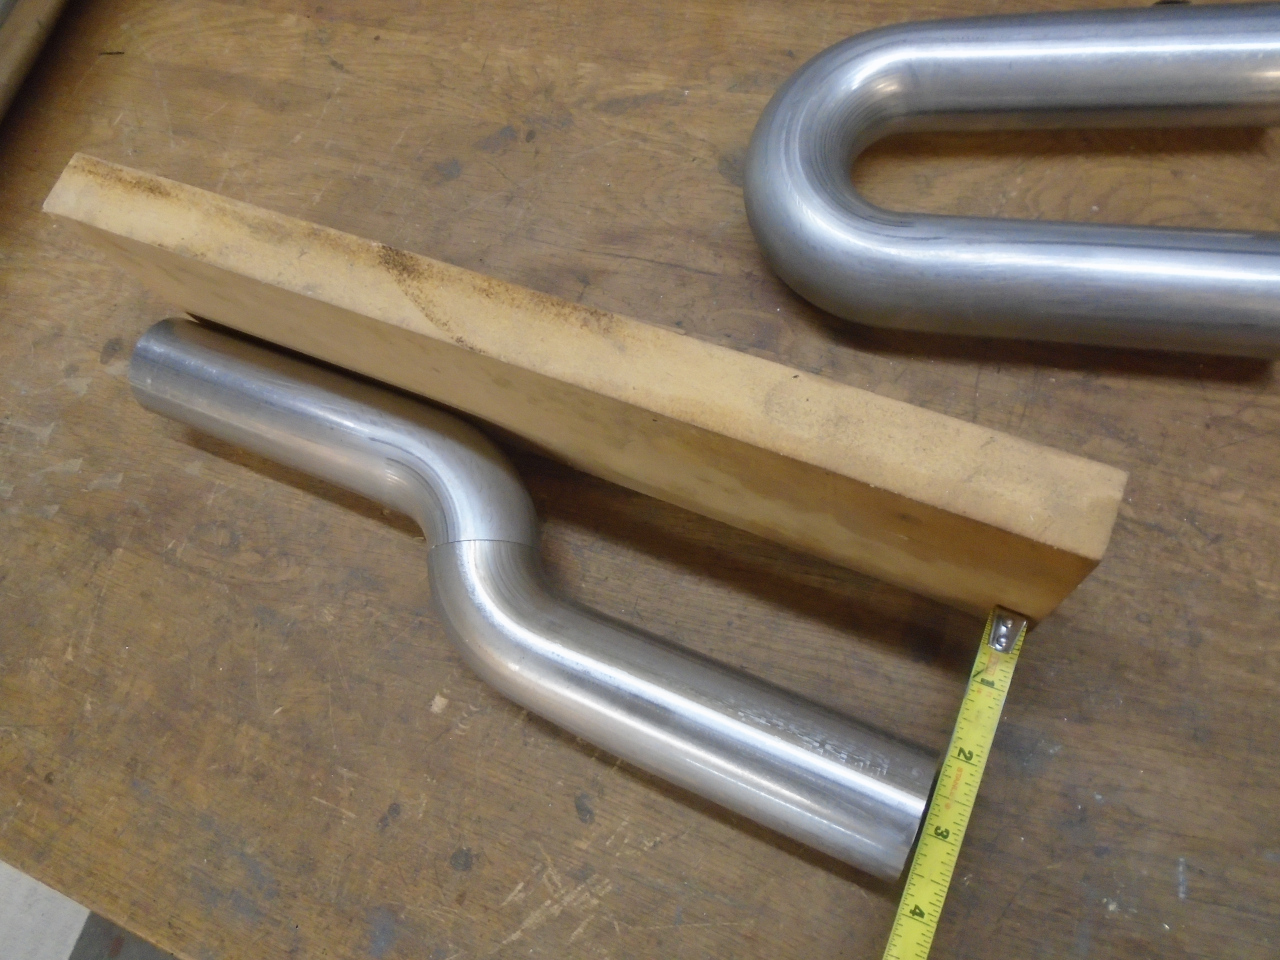
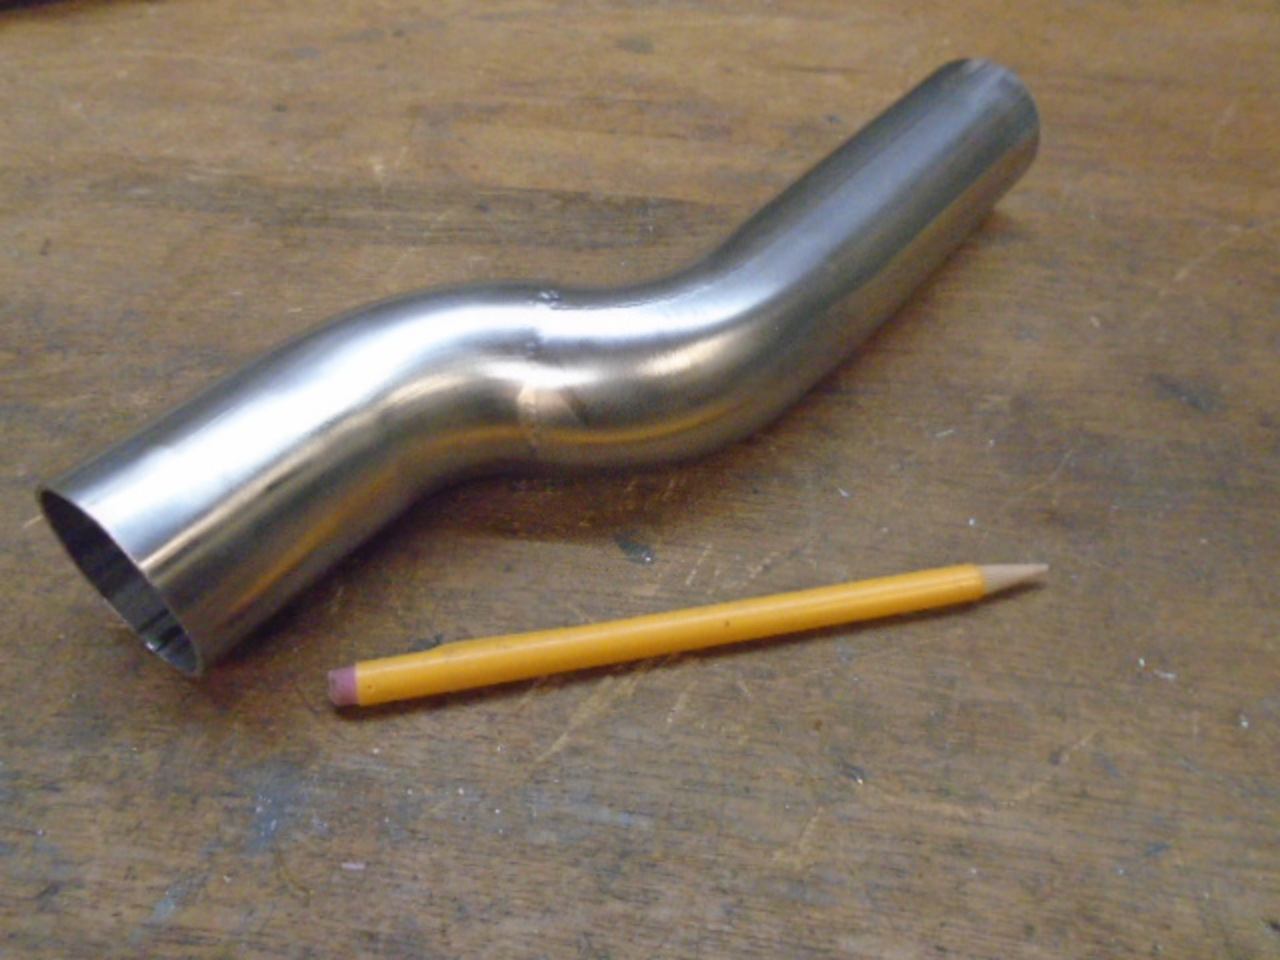
Based on my calculations, I bought a couple of 1.75" radius stainless steel mandrel U bends in 1.75" exhaust tubing.
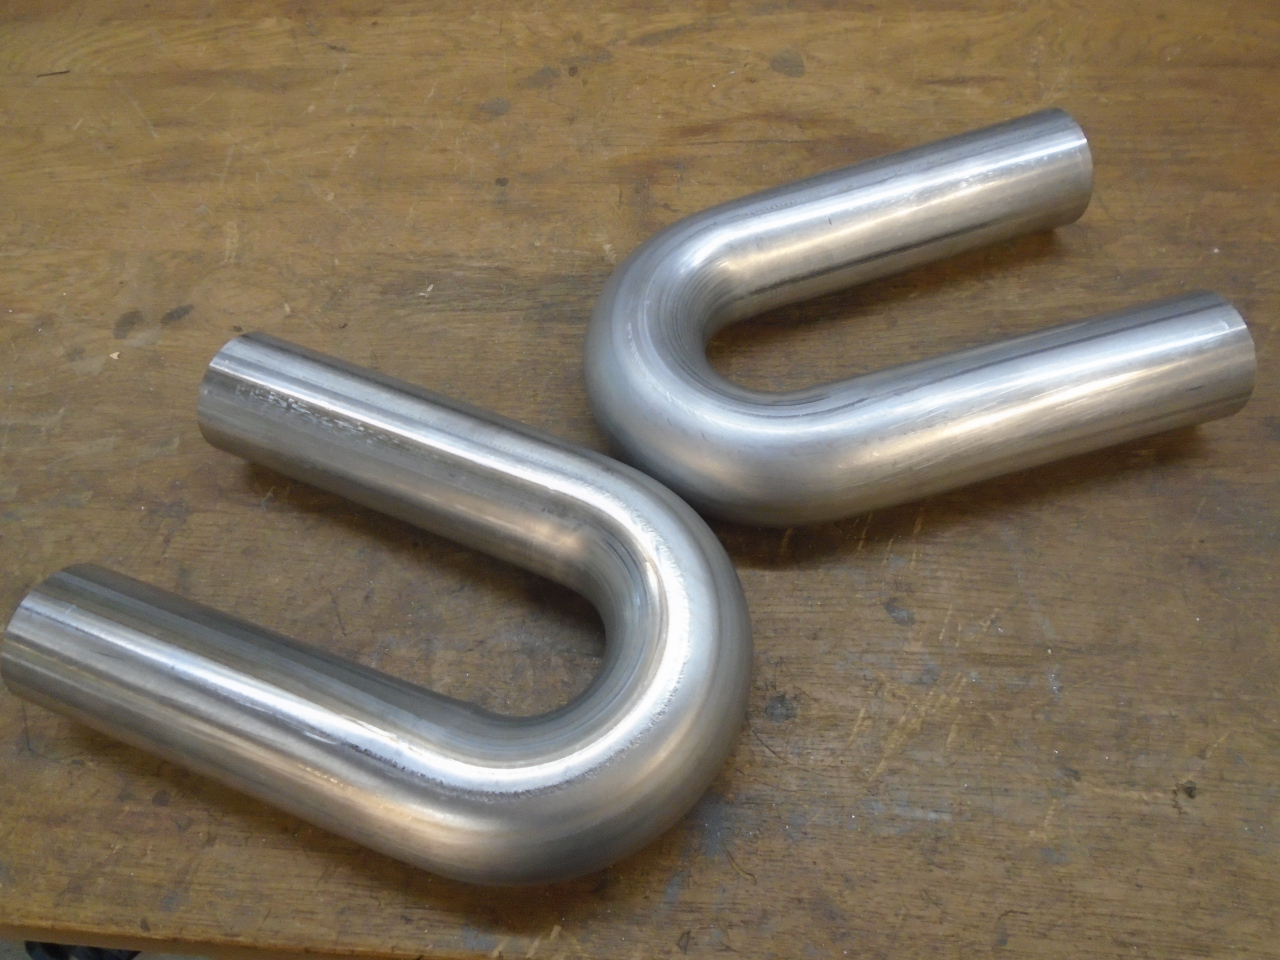
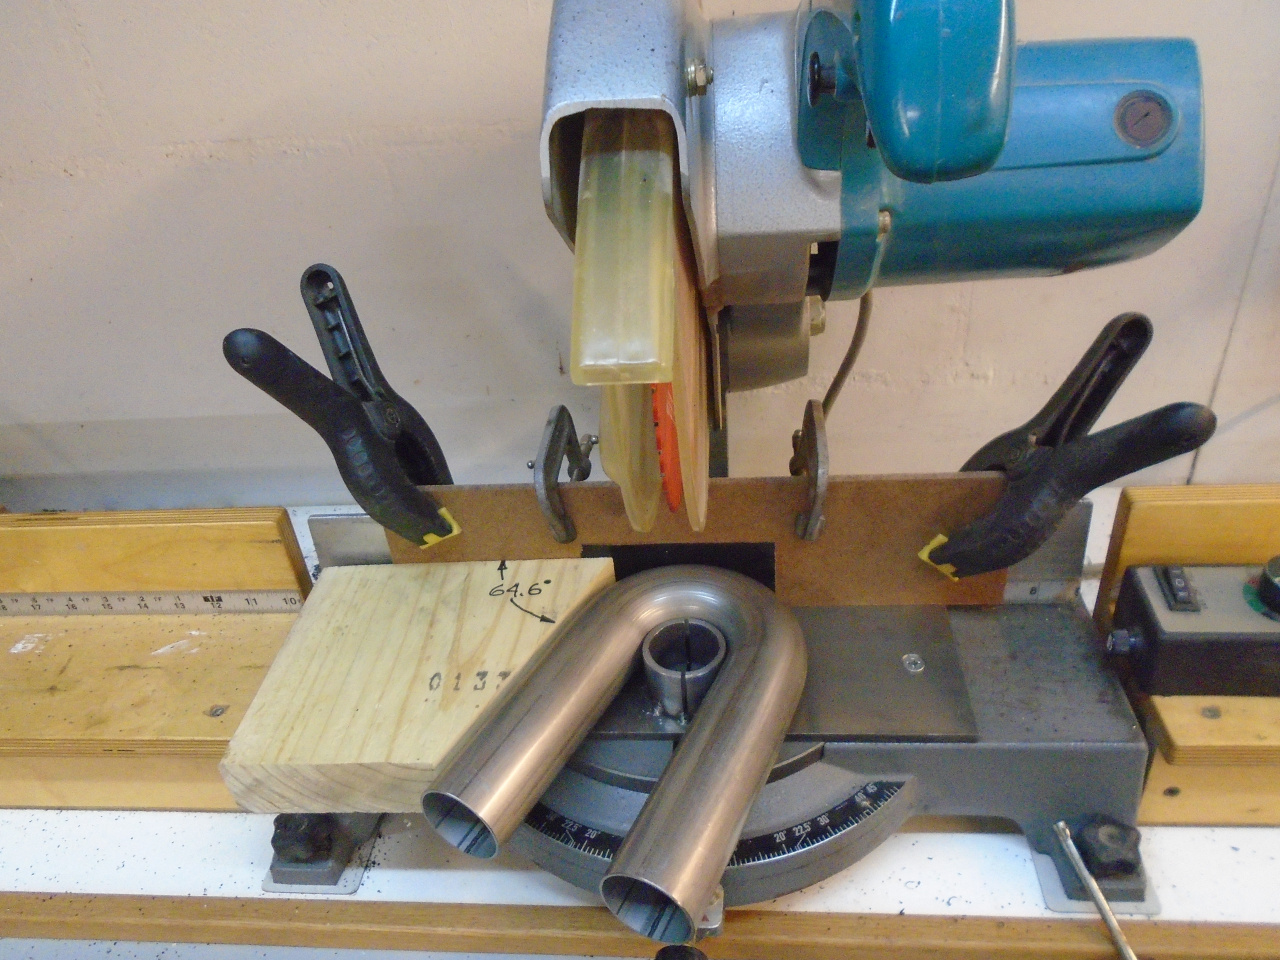
From each U, I had to get two pieces, each with an arc sweep of 64.6 degrees.
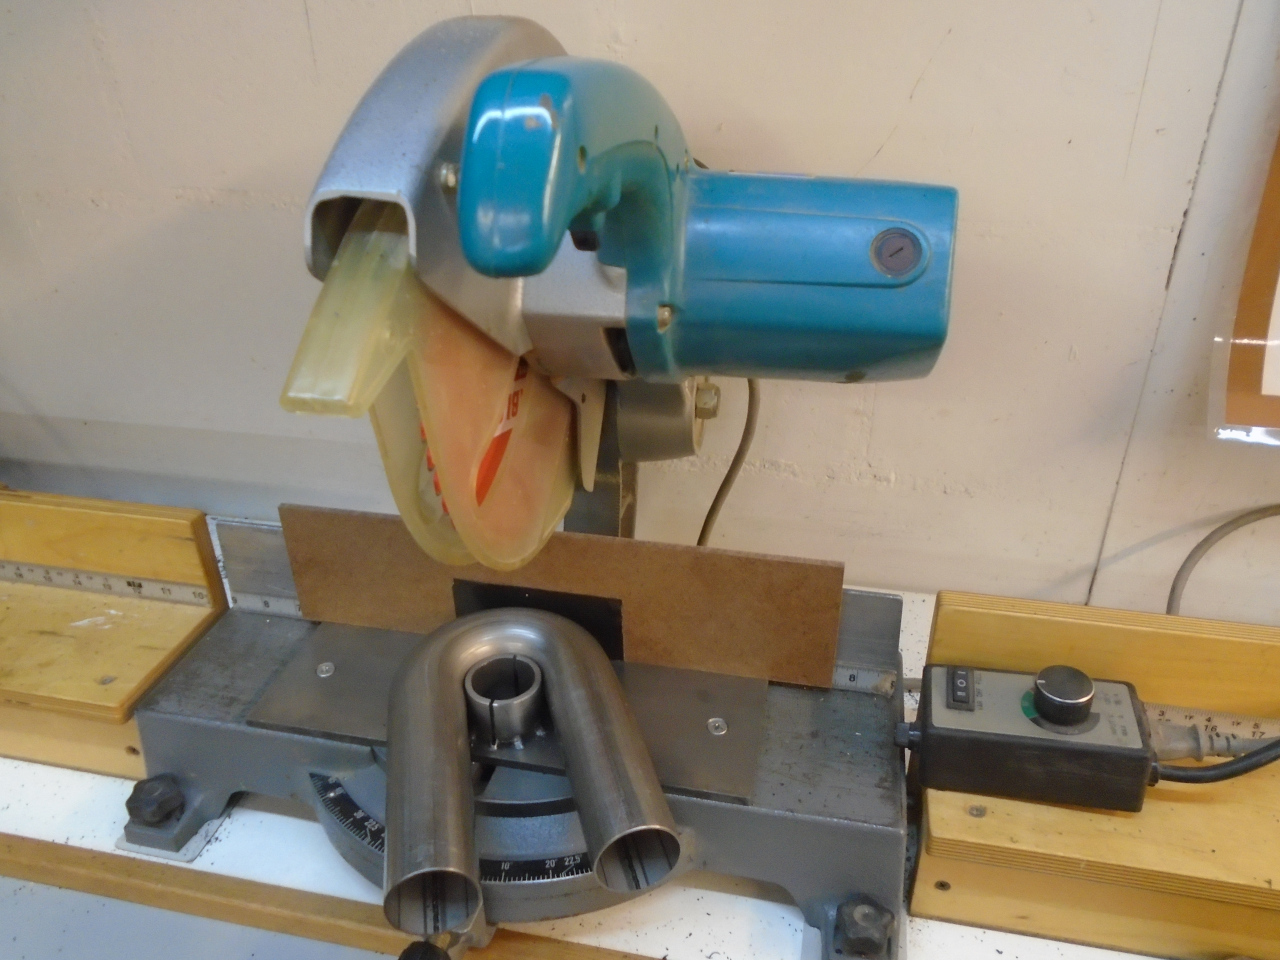
As serendipity would have it, while pondering the best way to make those
cuts, I came across a YouTube of a couple of guys doing something
similar to a GT6: https://www.youtube.com/watch?v=d1BZjYI9bGM. Based partly on their cutting jig, I made an attachment for my ancient Makita chop saw.

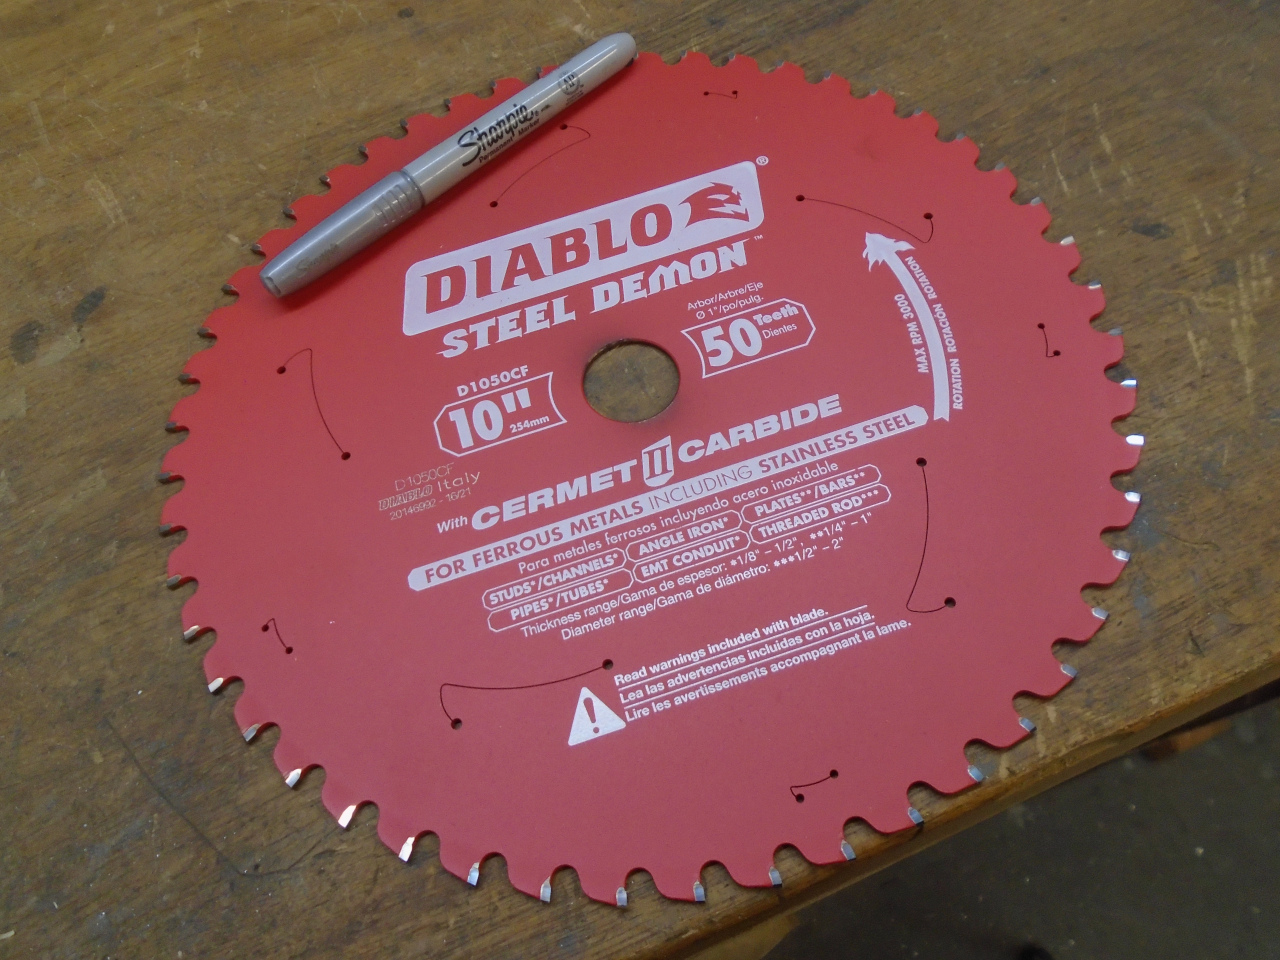
I got one of those ferrous cutting circular saws, which worked
great. I wish I'd tried them sooner. They do have a limited
speed, though, so I had to put a speed control on the Makita to reduce
it to 3000 RPM.
This worked great: accurate, dead square cuts.


Since the jogs had to hug the rear frame cross member to save space, the ends of the Y pipe had to be cut off.
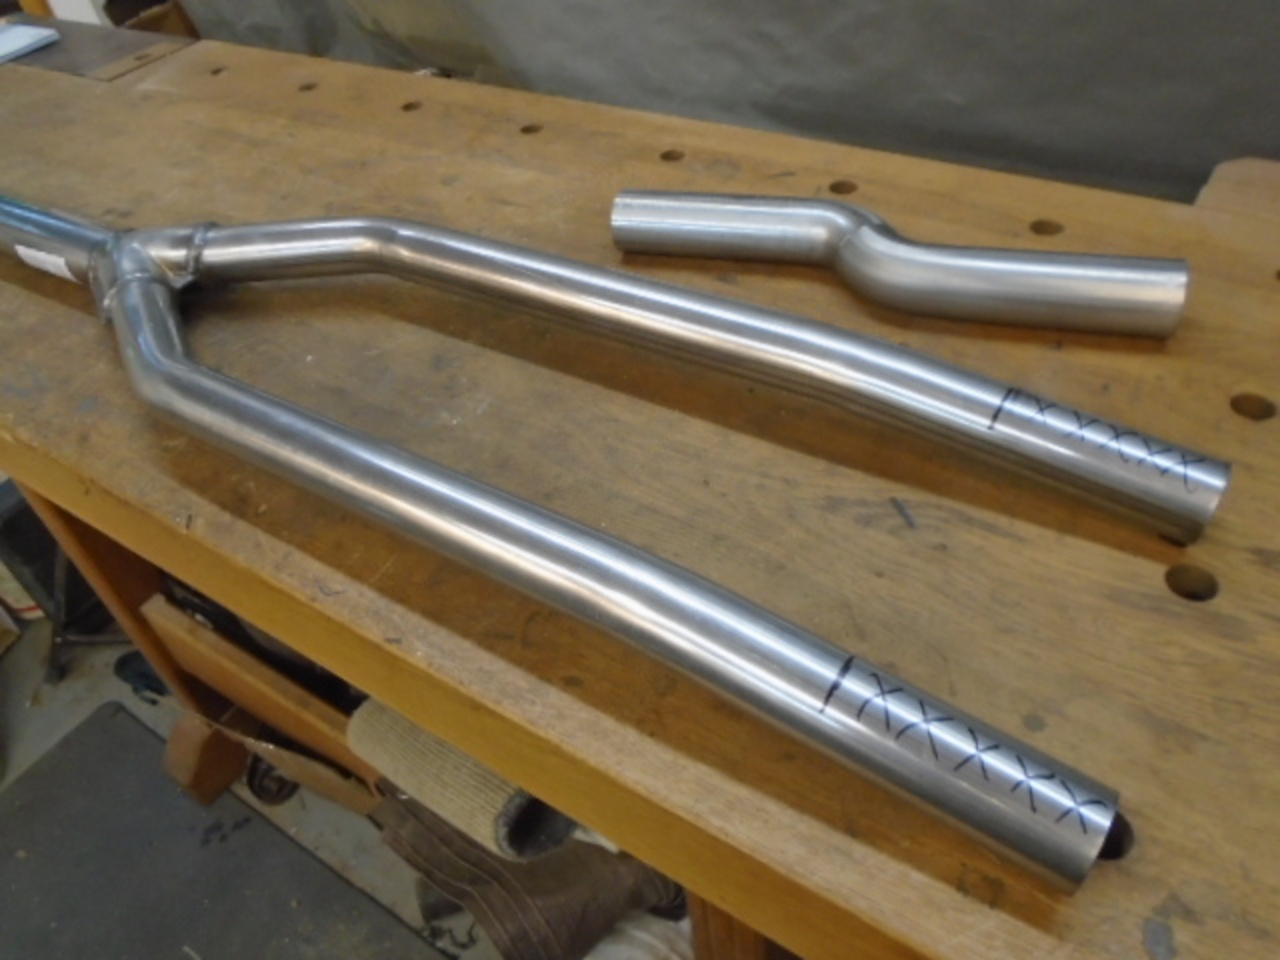
Then, it was welding time. I bought a TIG welder a couple of months ago for my rocker cover mod project,
but I ended up not using it because my skill level wasn't advancing
fast enough. So I resolved to try to salvage that fail by giving
it a go on this project. I'm happy to report that I'm pretty OK
with the results. TIG welding stainless is way easier than
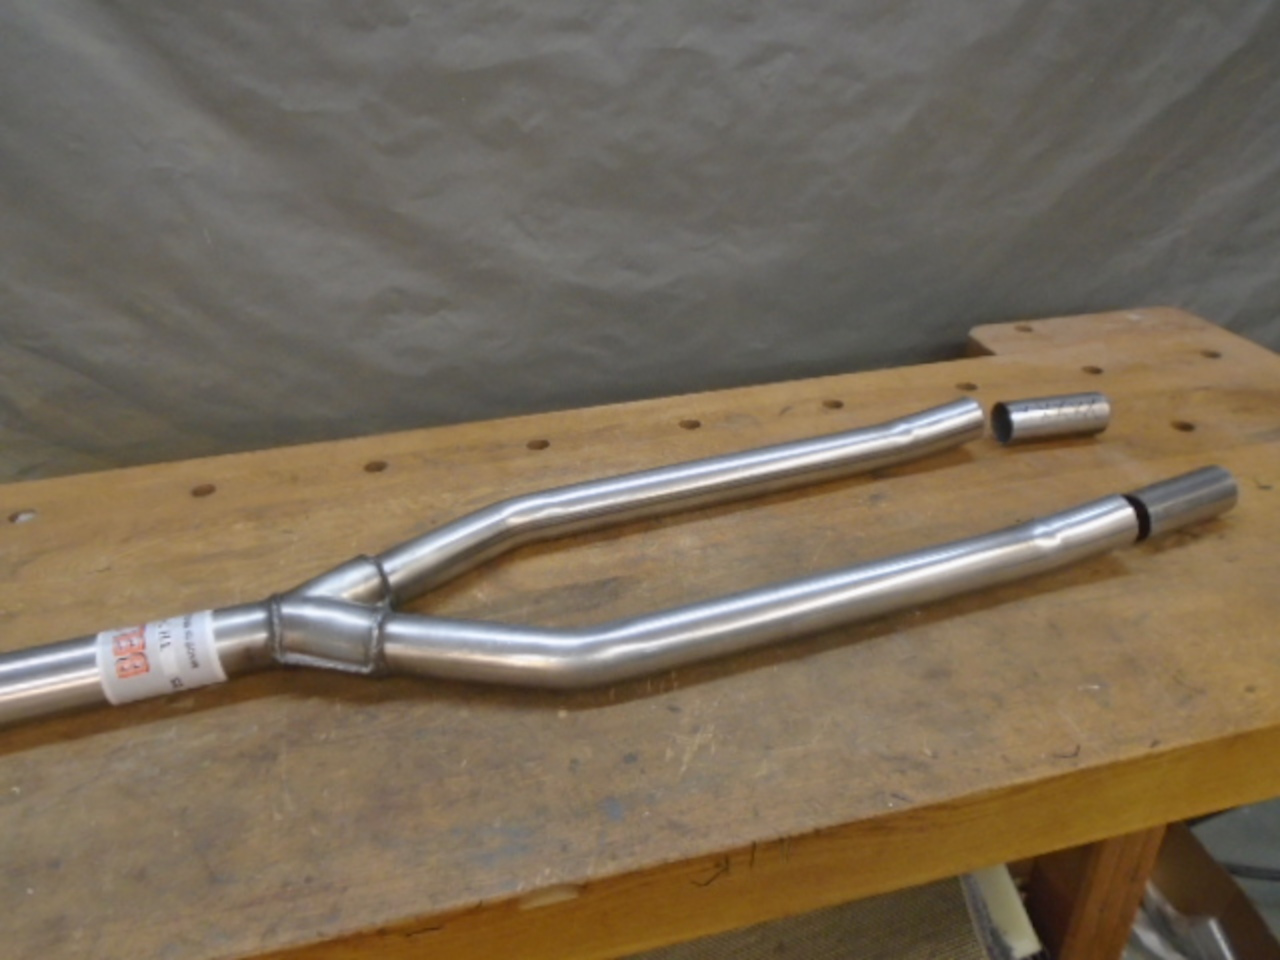
aluminum. After some practice, this is my first real
stainless TIG weld. It is a fusion weld (no filler rod used), which was
possible because the joints fit so tight. A good fusion weld can
be almost invisible.

Welding stainless has one other complication. Unless the weld is
protected from the air, the high heat can change the chemical makeup of
the surface, which in turn makes the surface less resistant to
corrosion. In TIG and MIG welding this is prevented on the weld
side by an inert gas coming from the welding torch. But with thin
metal, the backside of the joint is also vulnerable to the effect.
Worse, the weld will be weak without protection. One common way
to protect the backside of a weld is with so-called "back purging" where
the backside of the weld is flooded with an inert gas.
Backpurging isn't difficult, but it does require some equipment.
The alternative that I used was a flux designed for the purpose.
It is composed of mainly silicon dioxide, so the welding heat melts it
to a glass that coats the hot or molten metal and protects it from the
air.

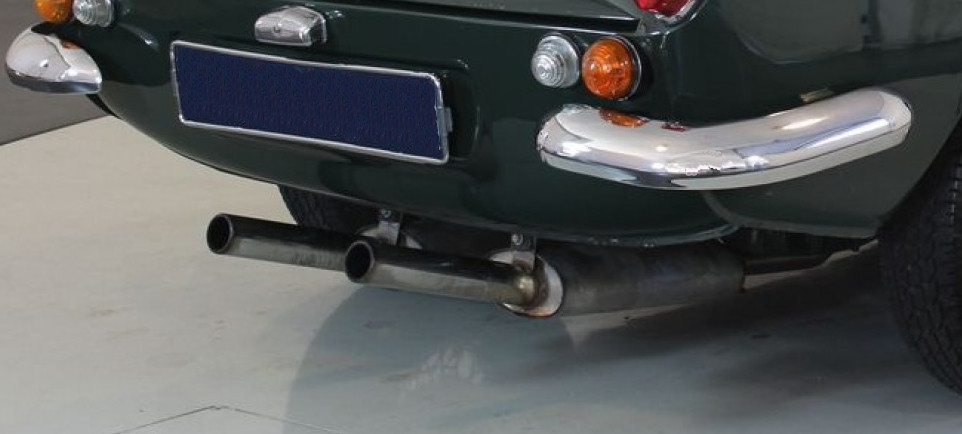
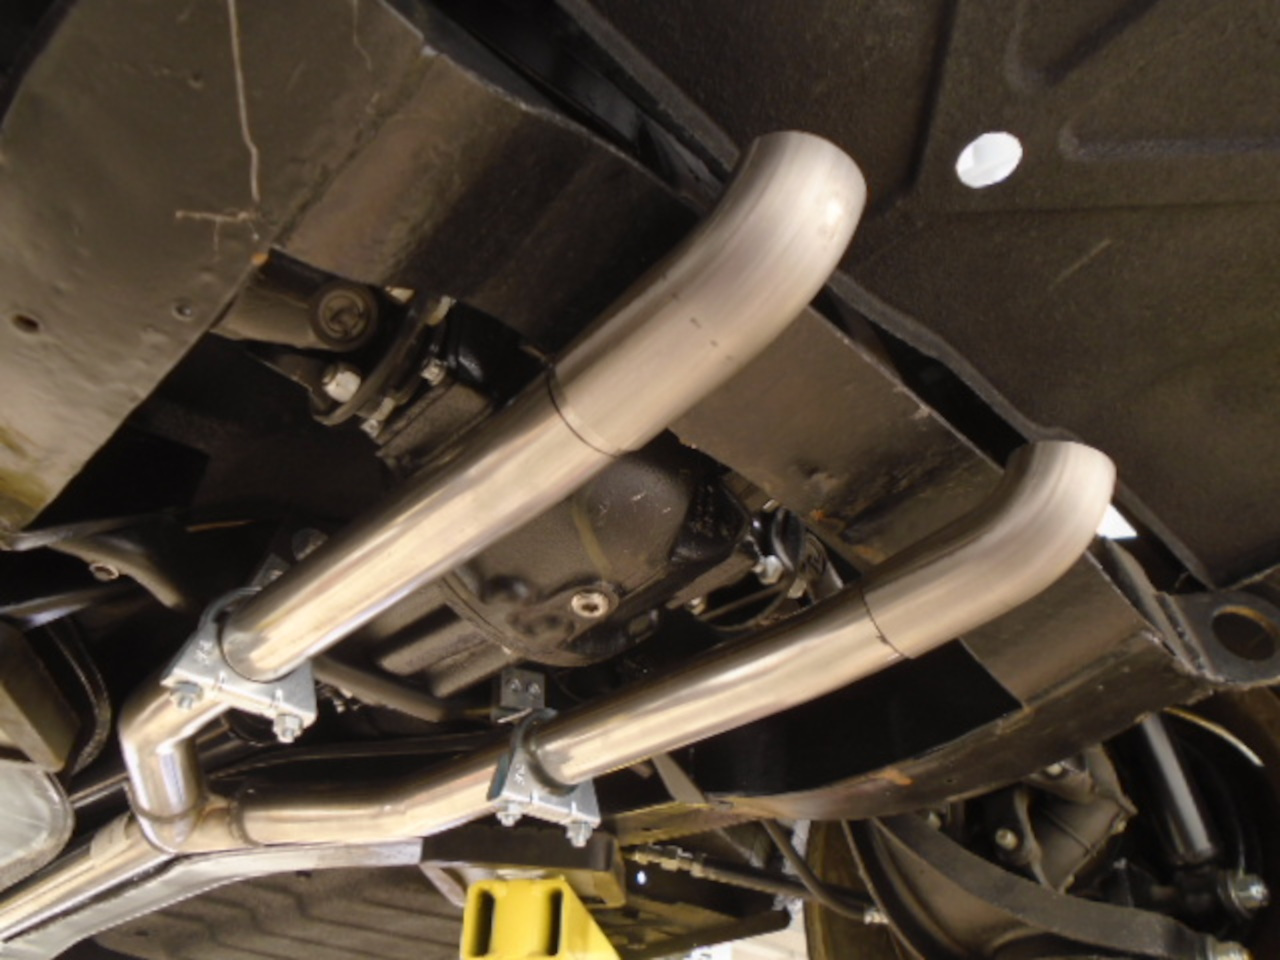
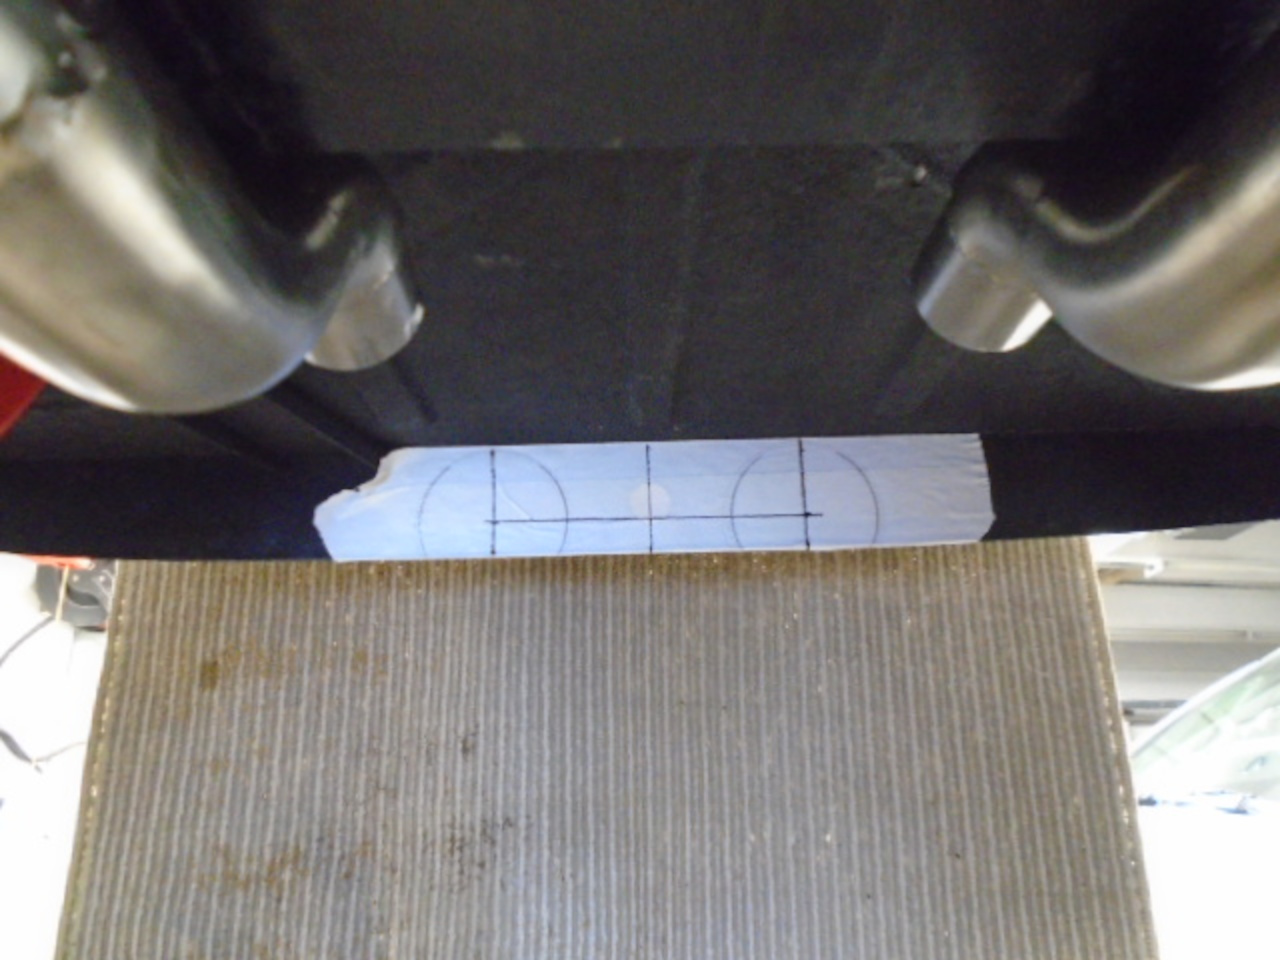
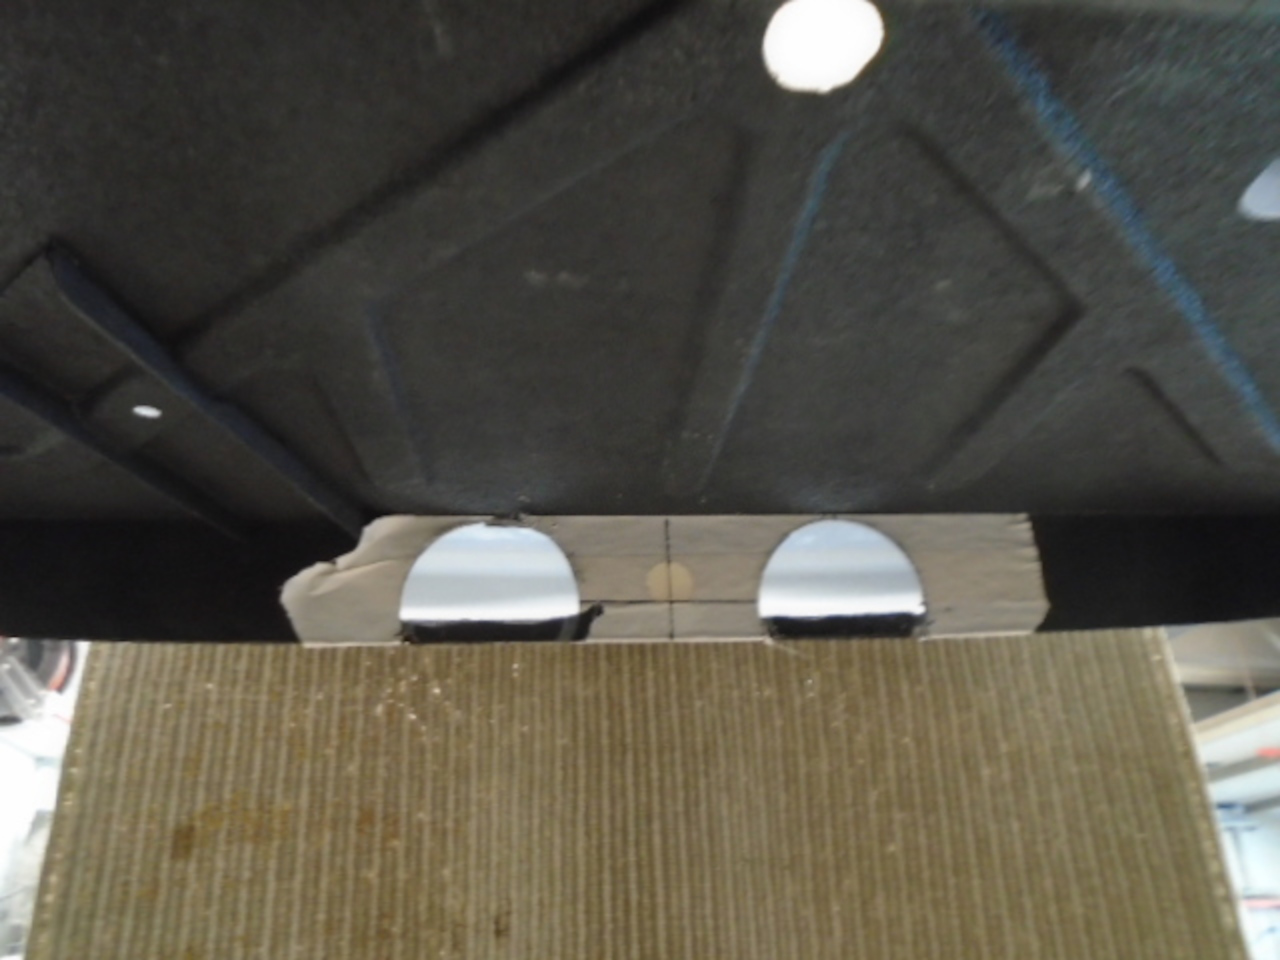
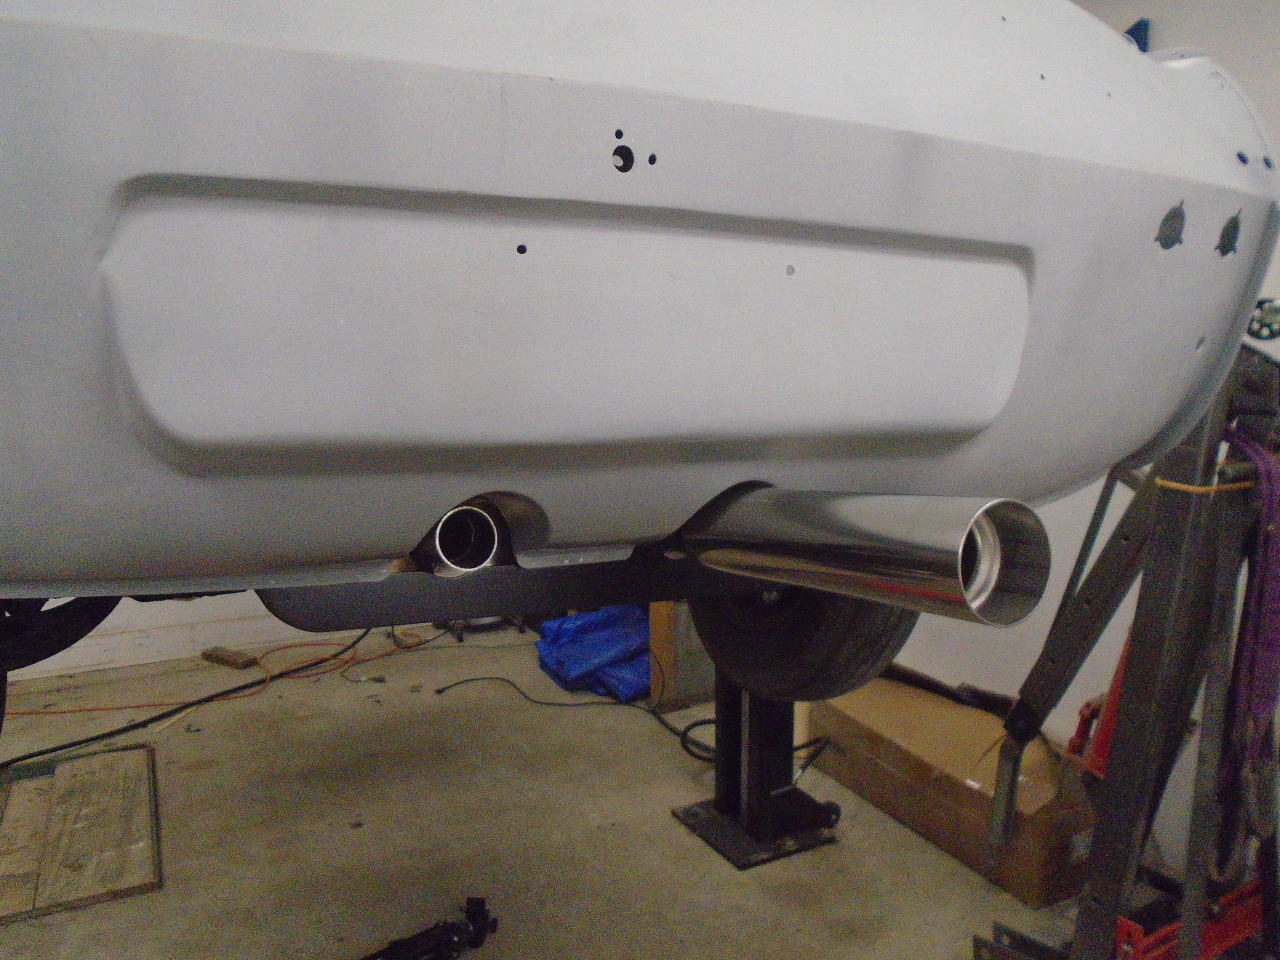
A test fit on the car.
And with the proxy muffler.
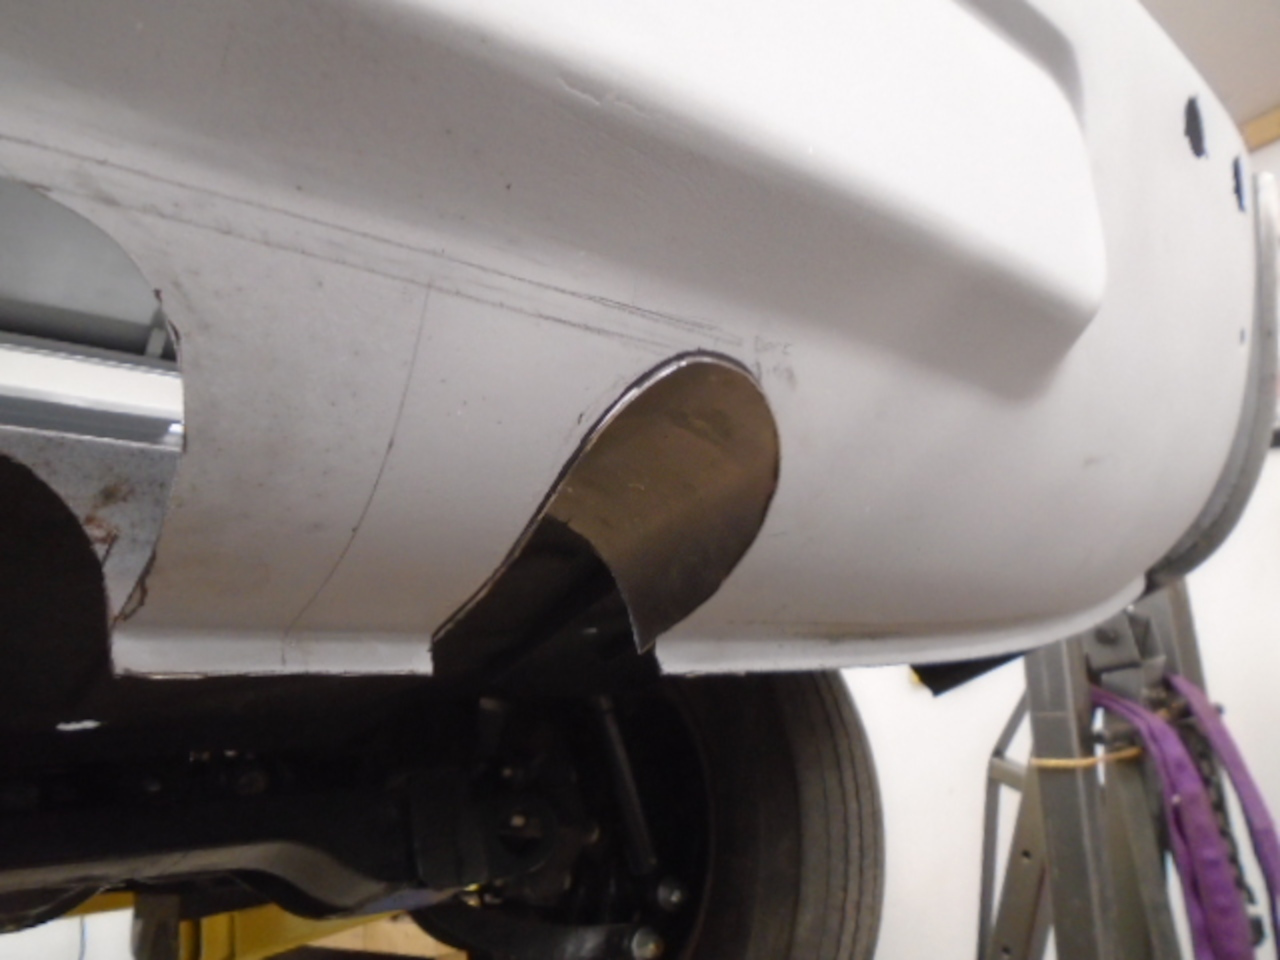
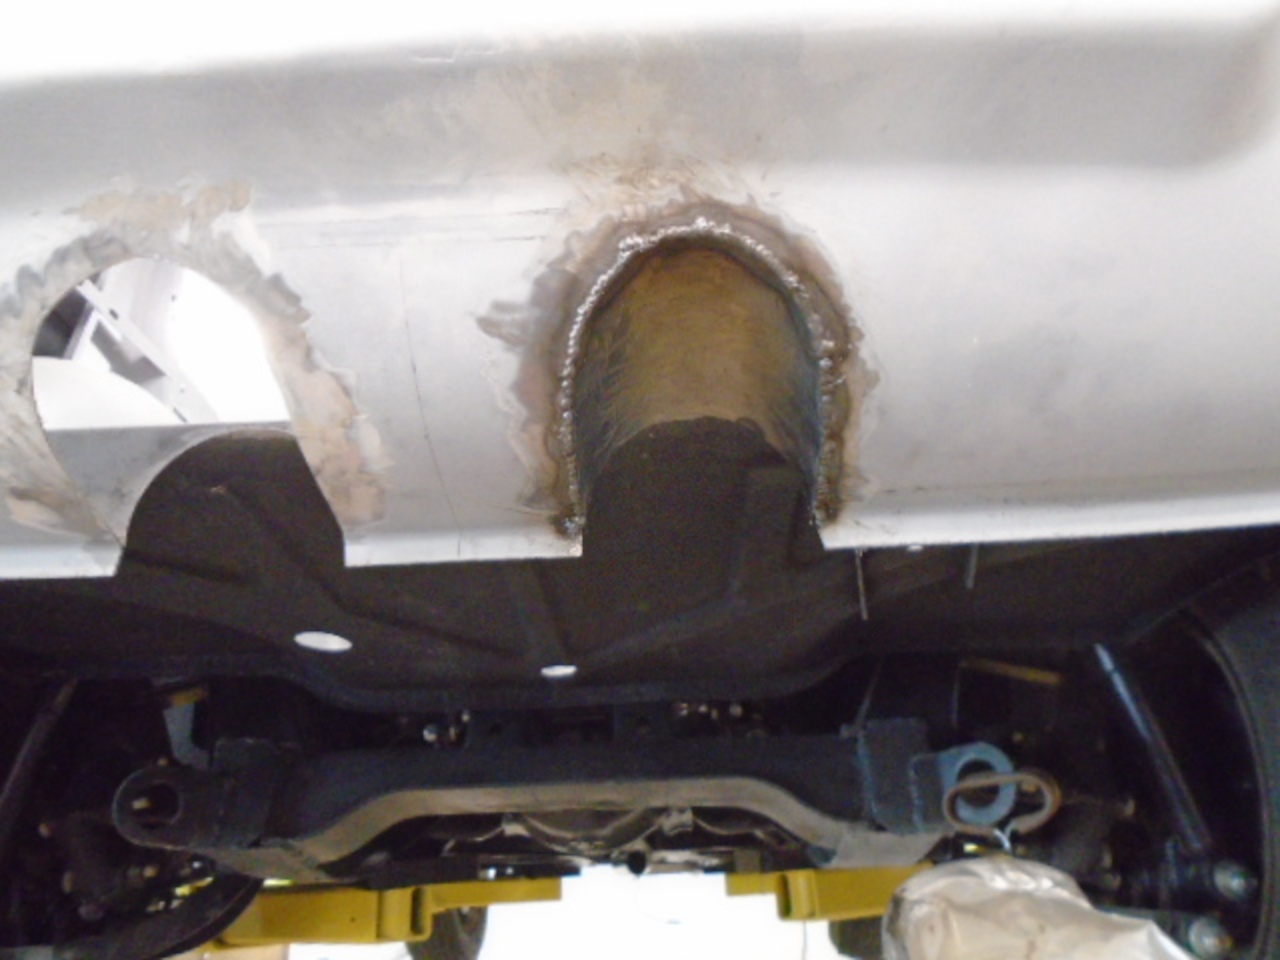
Next task was to cut through the rear valance. I started from the underside.
The outer surface of the valance was trickier. A piece of pipe of the right diameter helped to get the right contour.
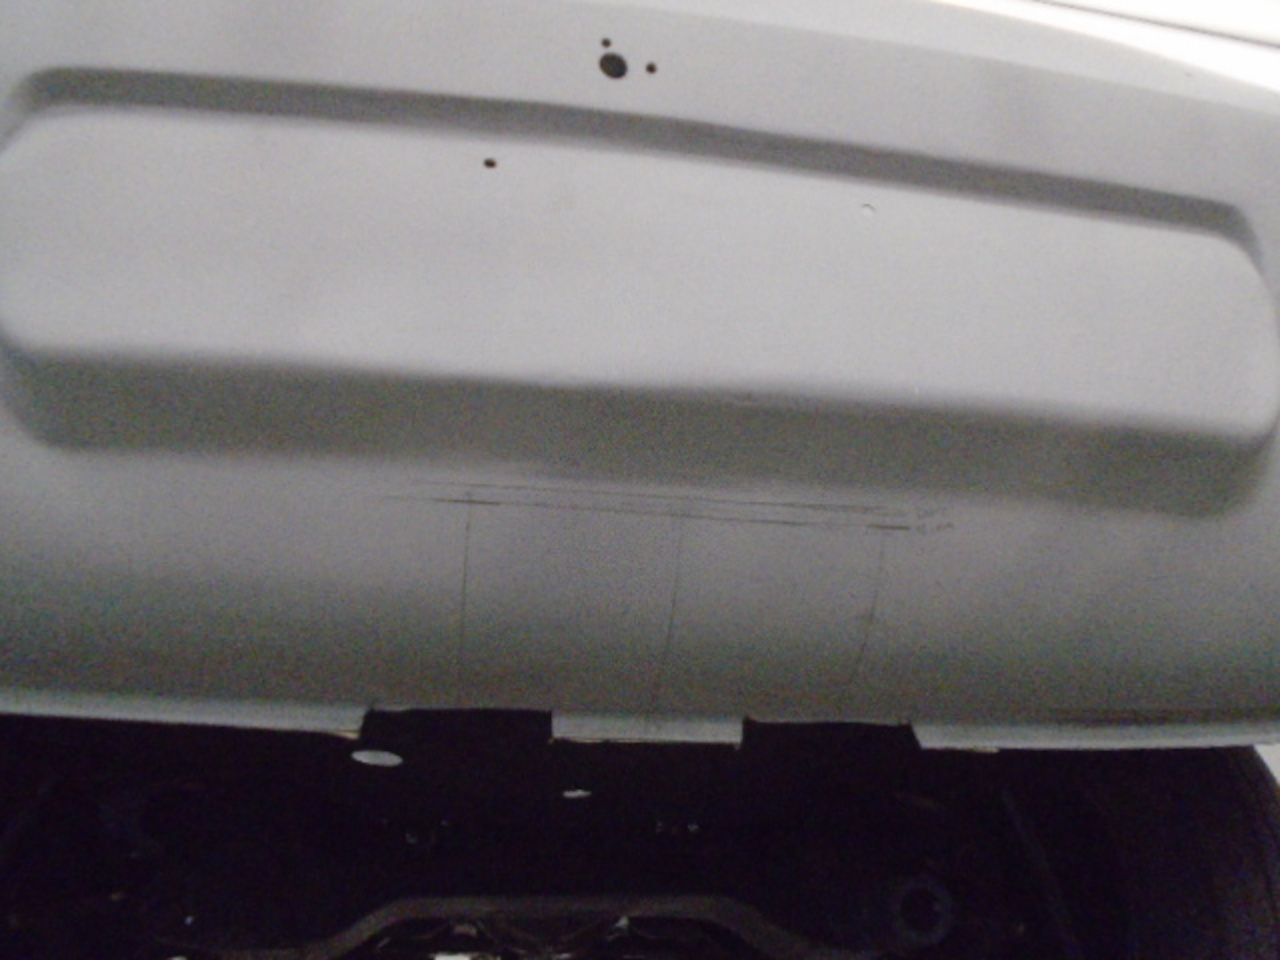
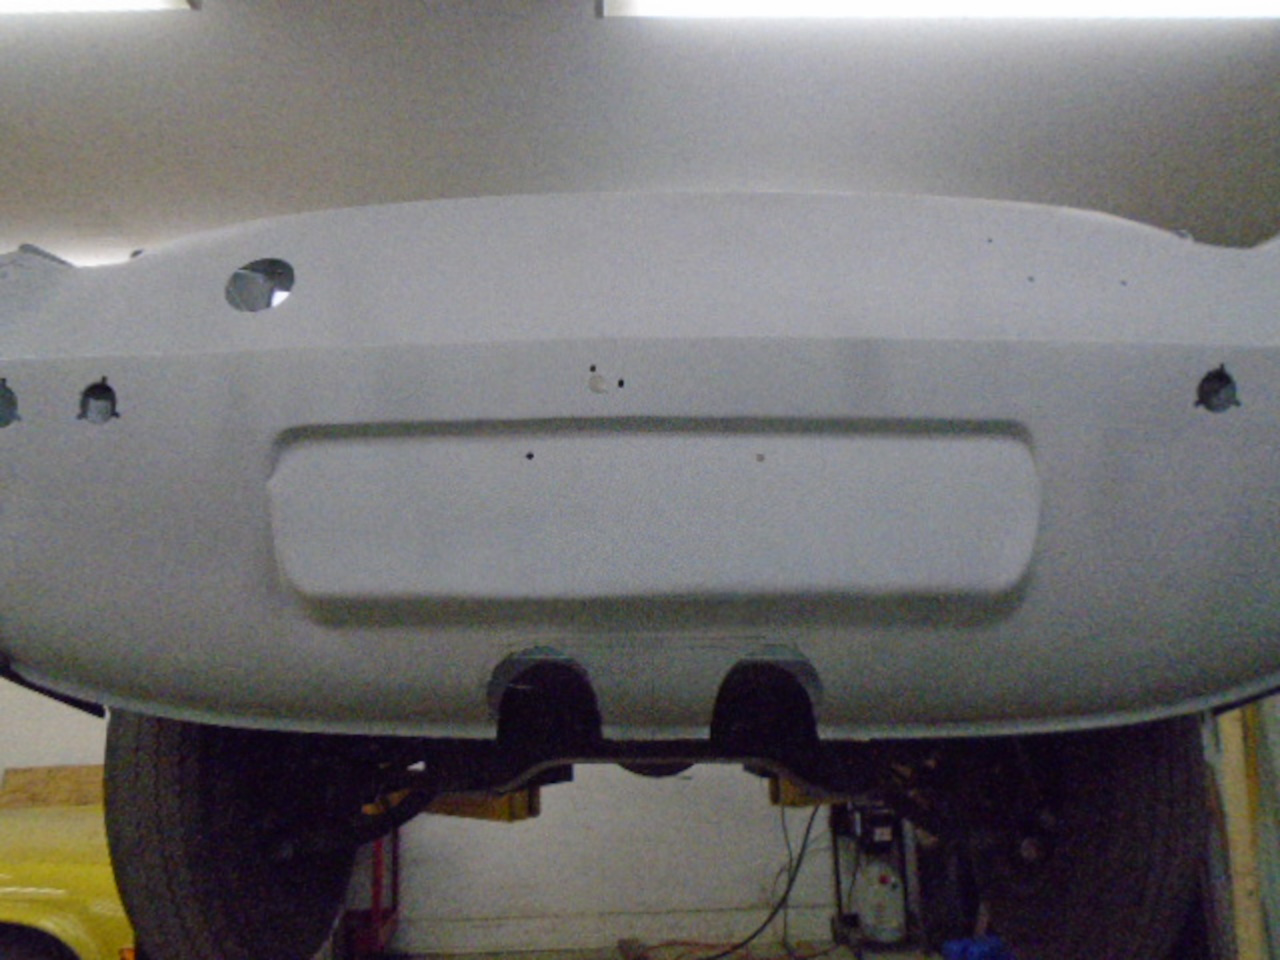
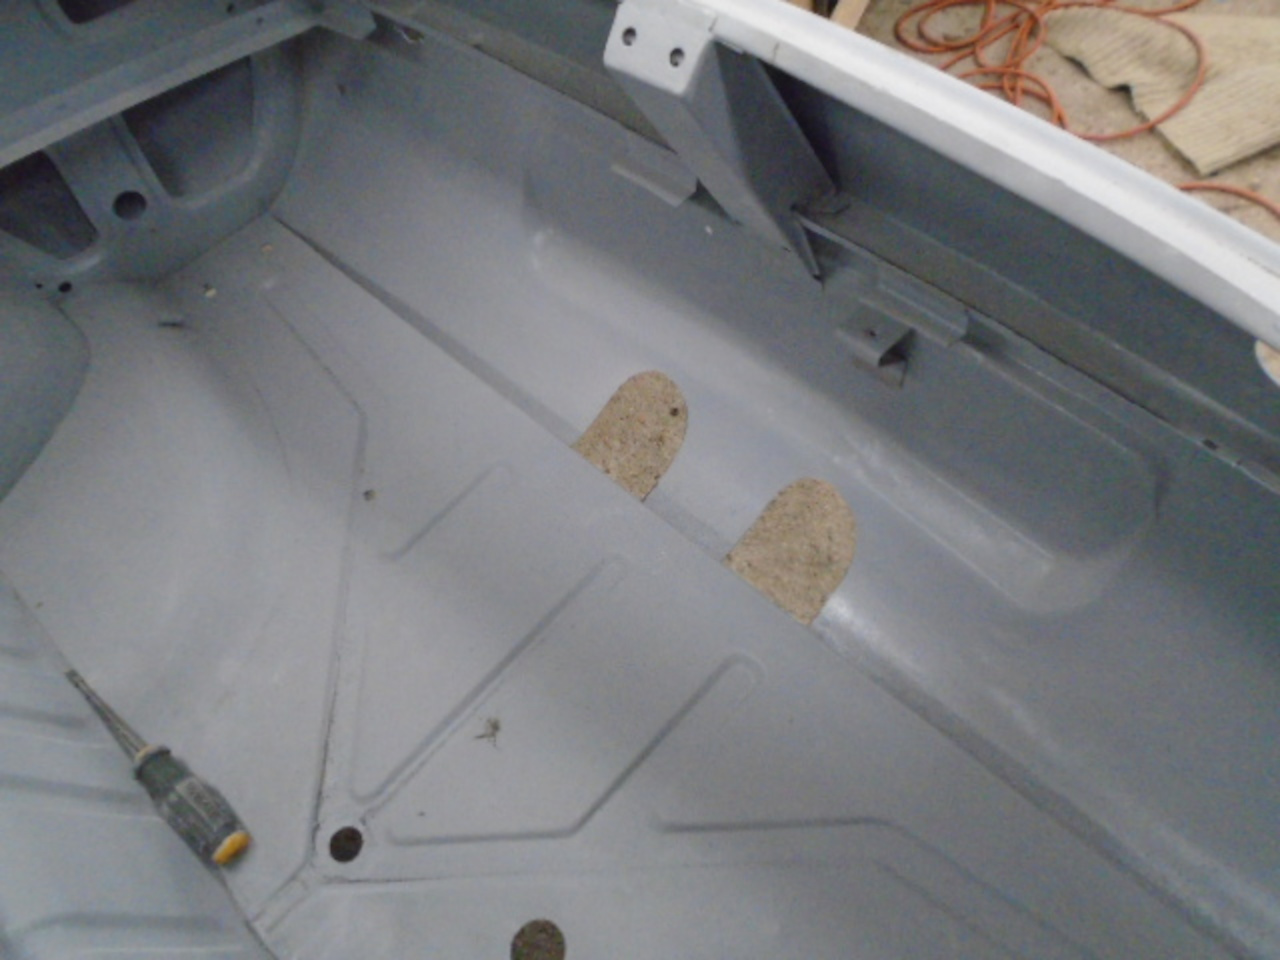
Then, to close up the hole.
From inside the boot.

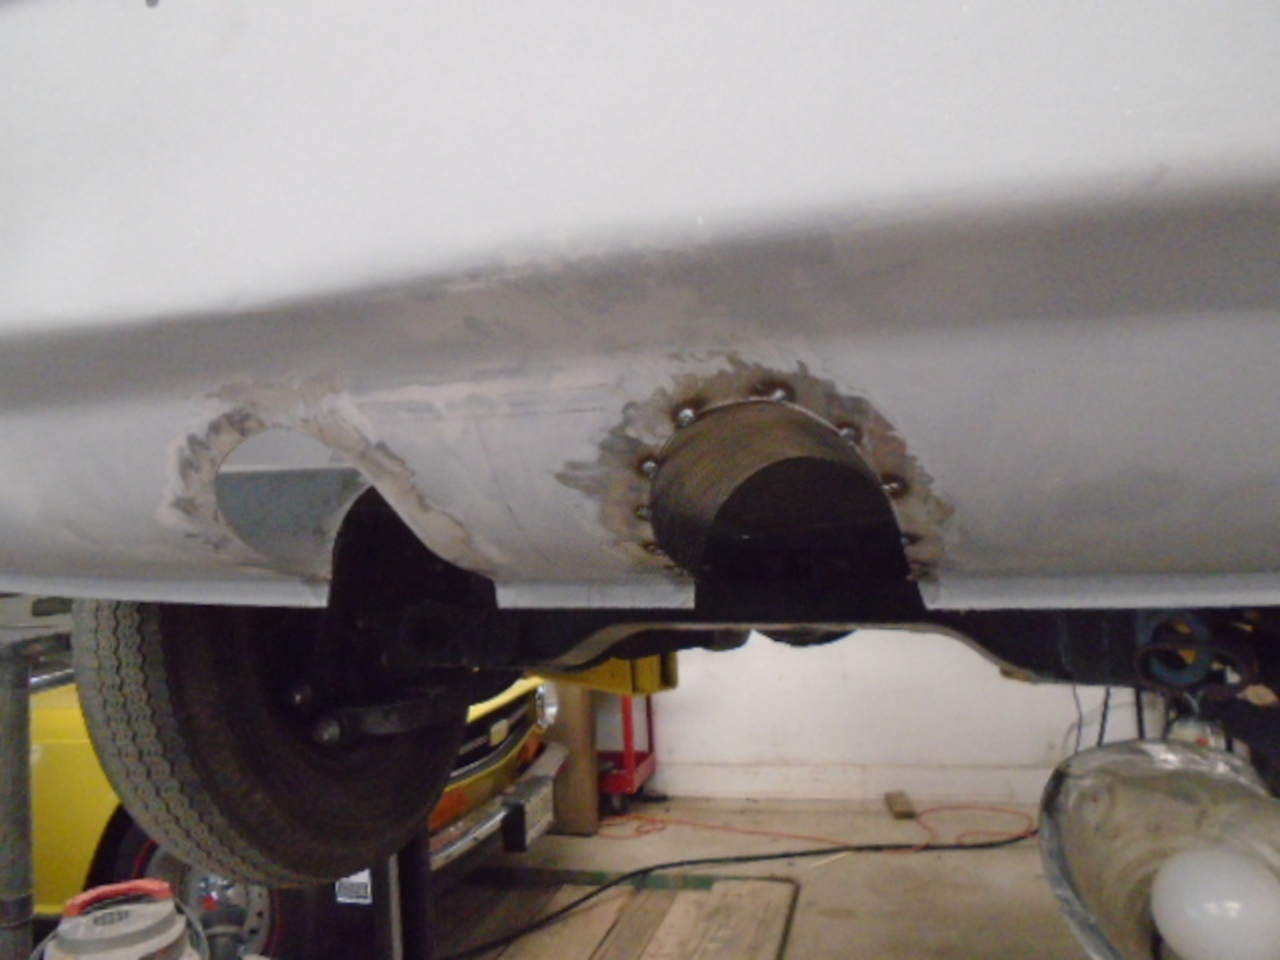
Welding it up (MIG this time). Some of the tight inside areas were awkward to get to.
I put generous weld fillets on the backside of the valance so that I
could radius the edges of the cutout without risking breaking through.

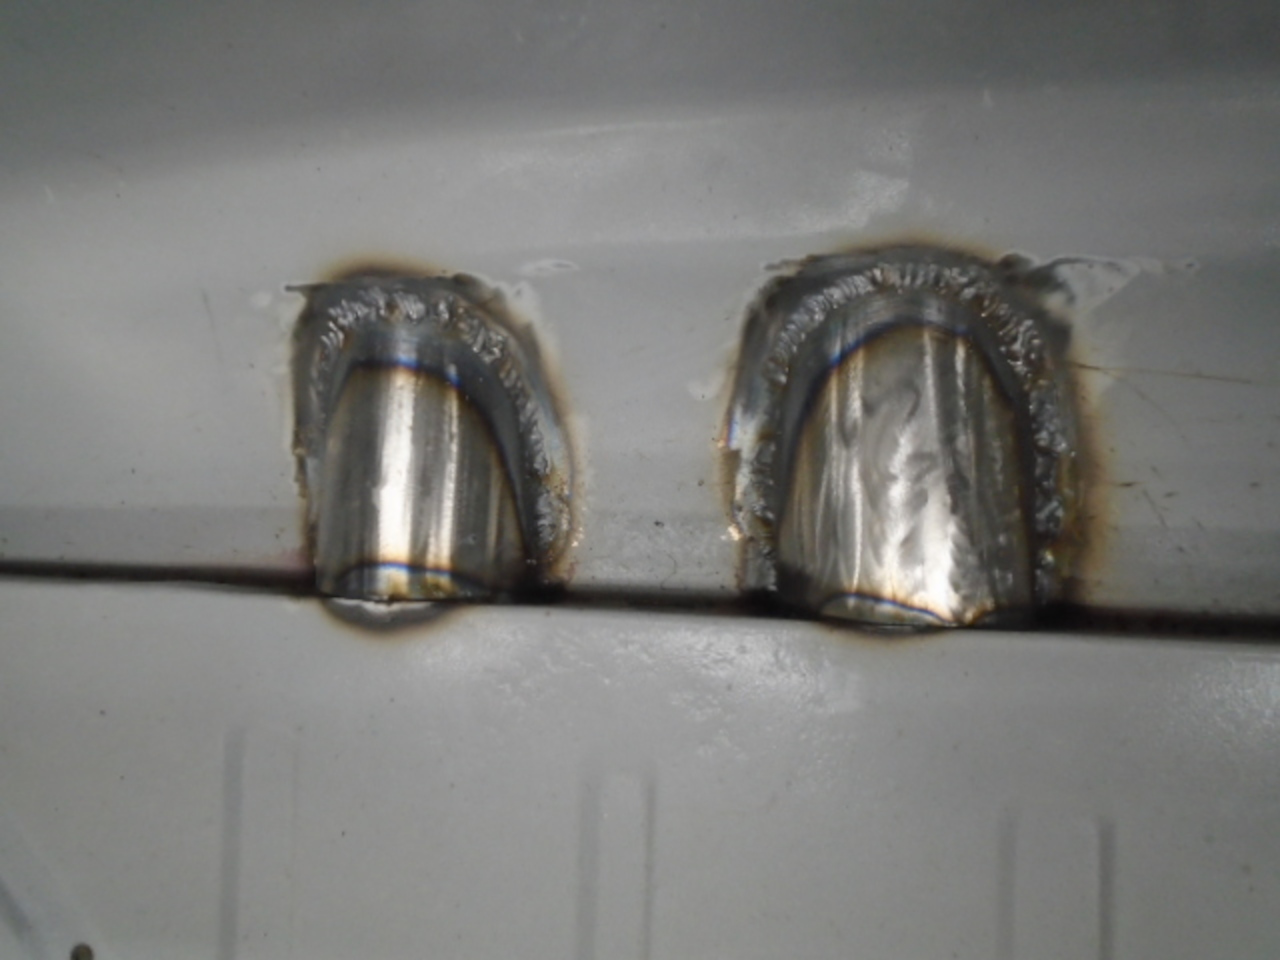
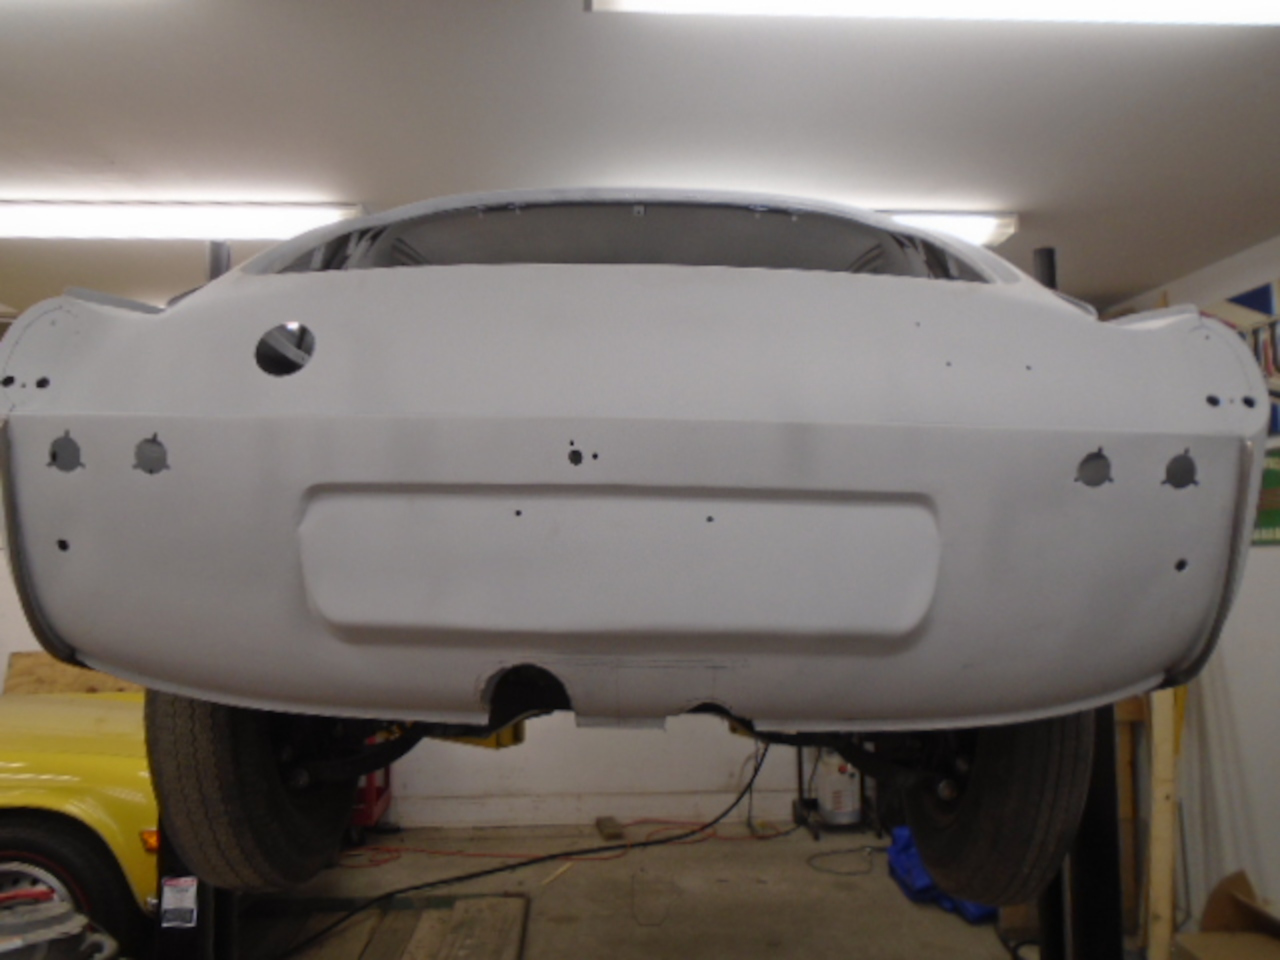
Clean up the exterior welds, and a little epoxy primer.
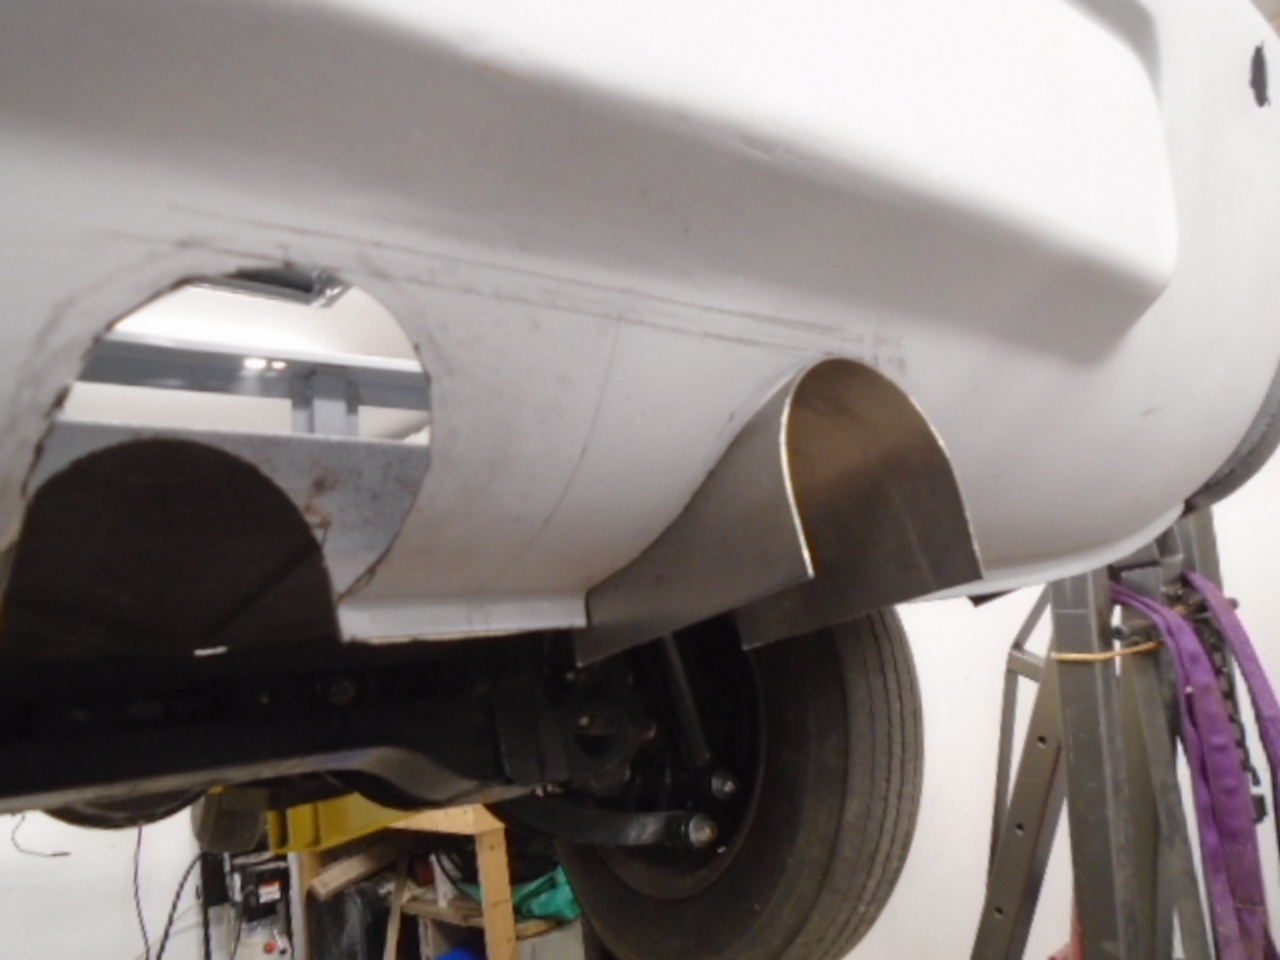
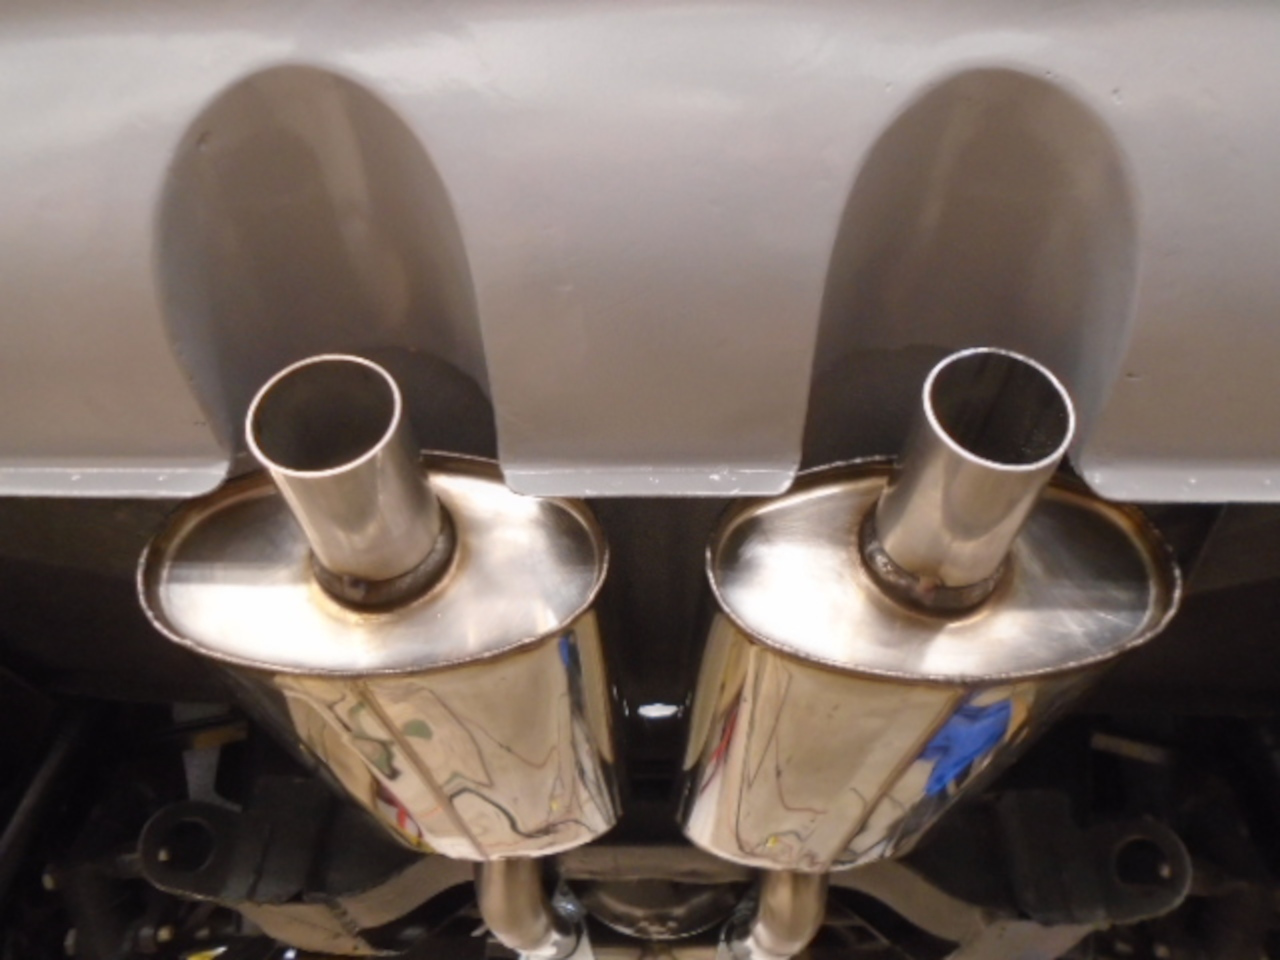
At this point, I really wanted to slip in the mufflers. The
problem was that the tailpipes came out at an angle, and would hamper
the fit. So, off came the tailpipes.


Slide the mufflers in. At this point, there is no rear hanger, so they are drooping.
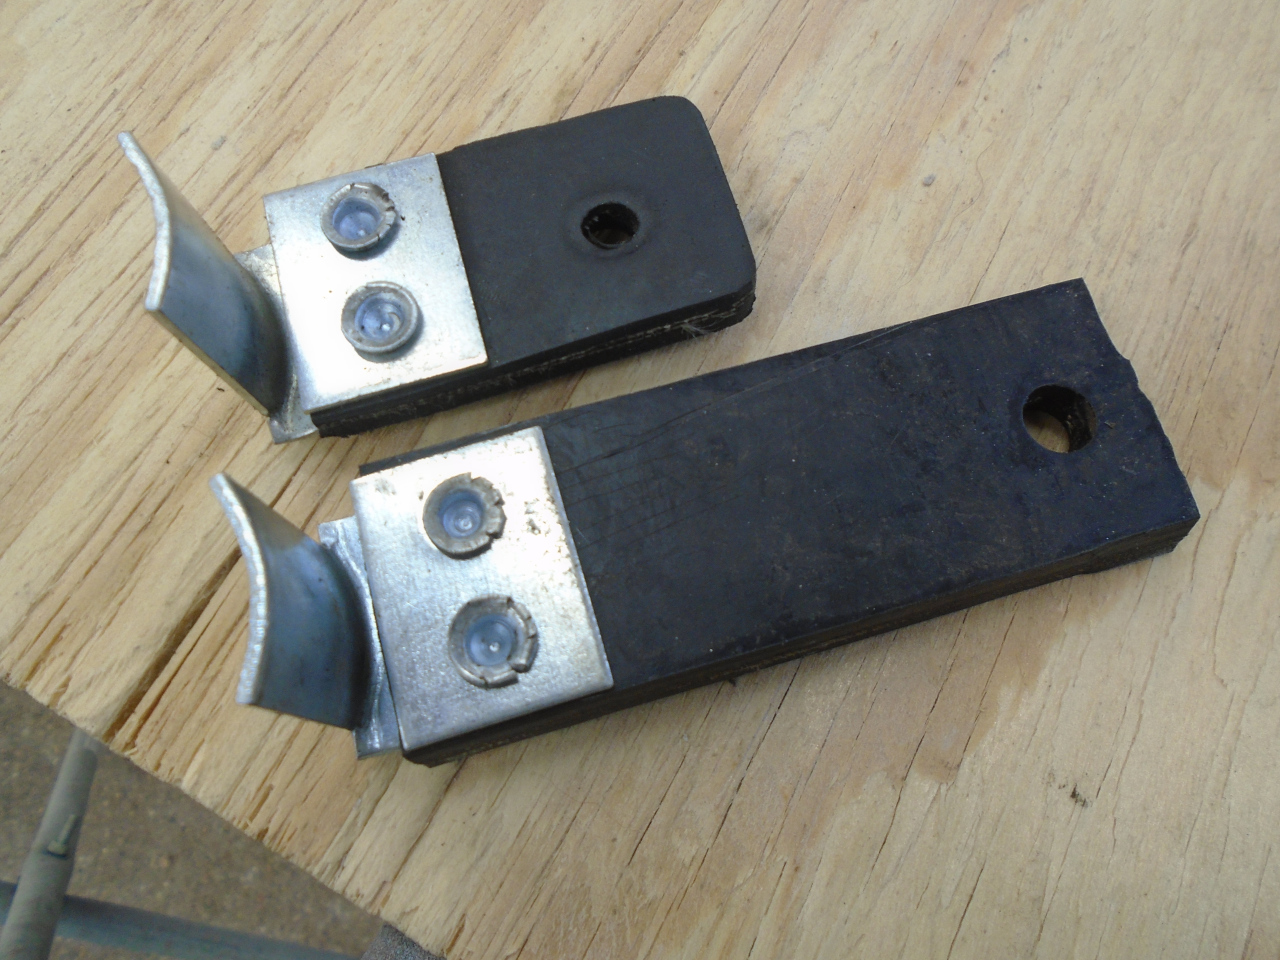
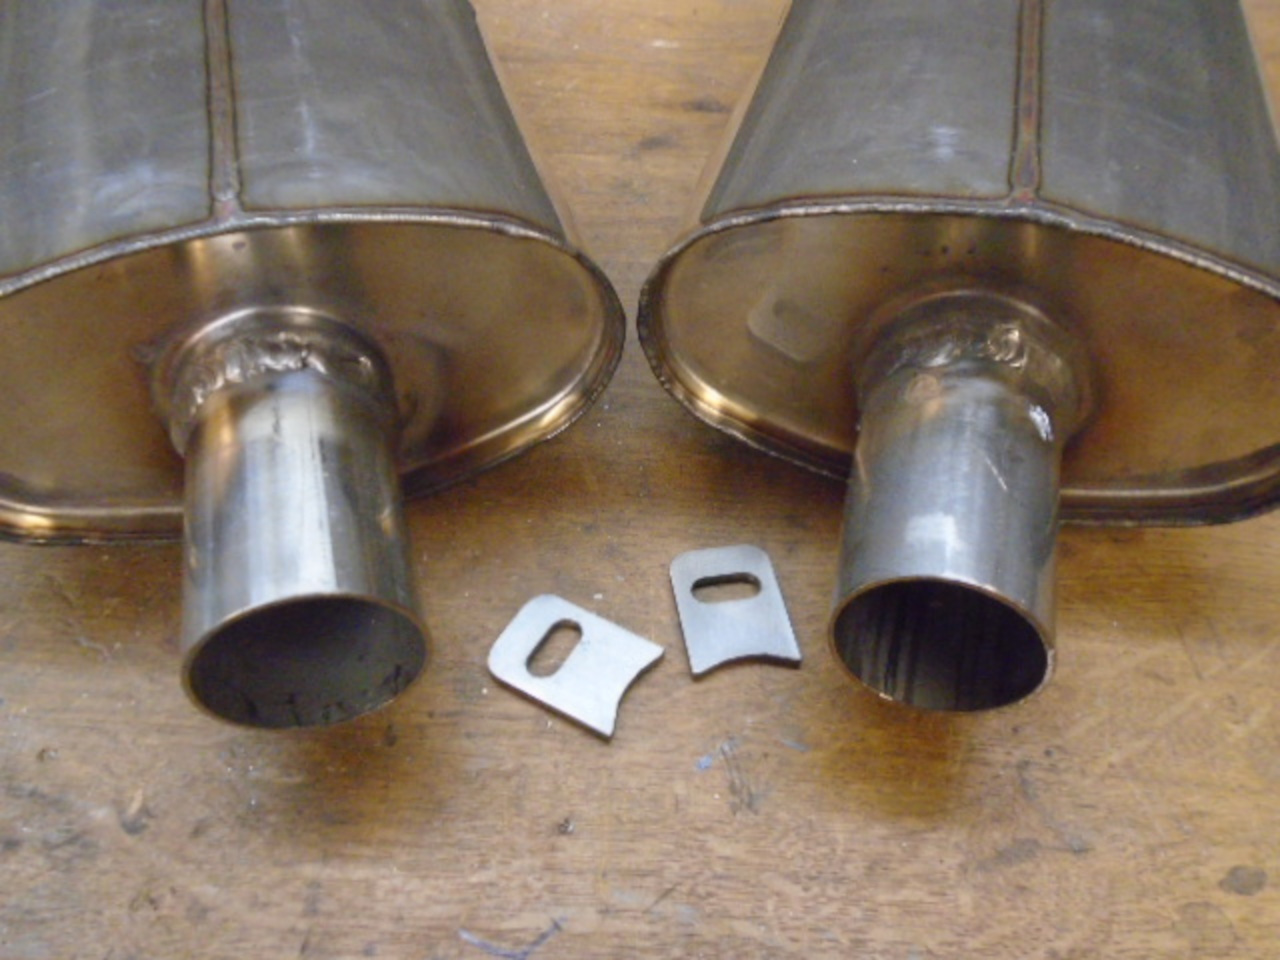
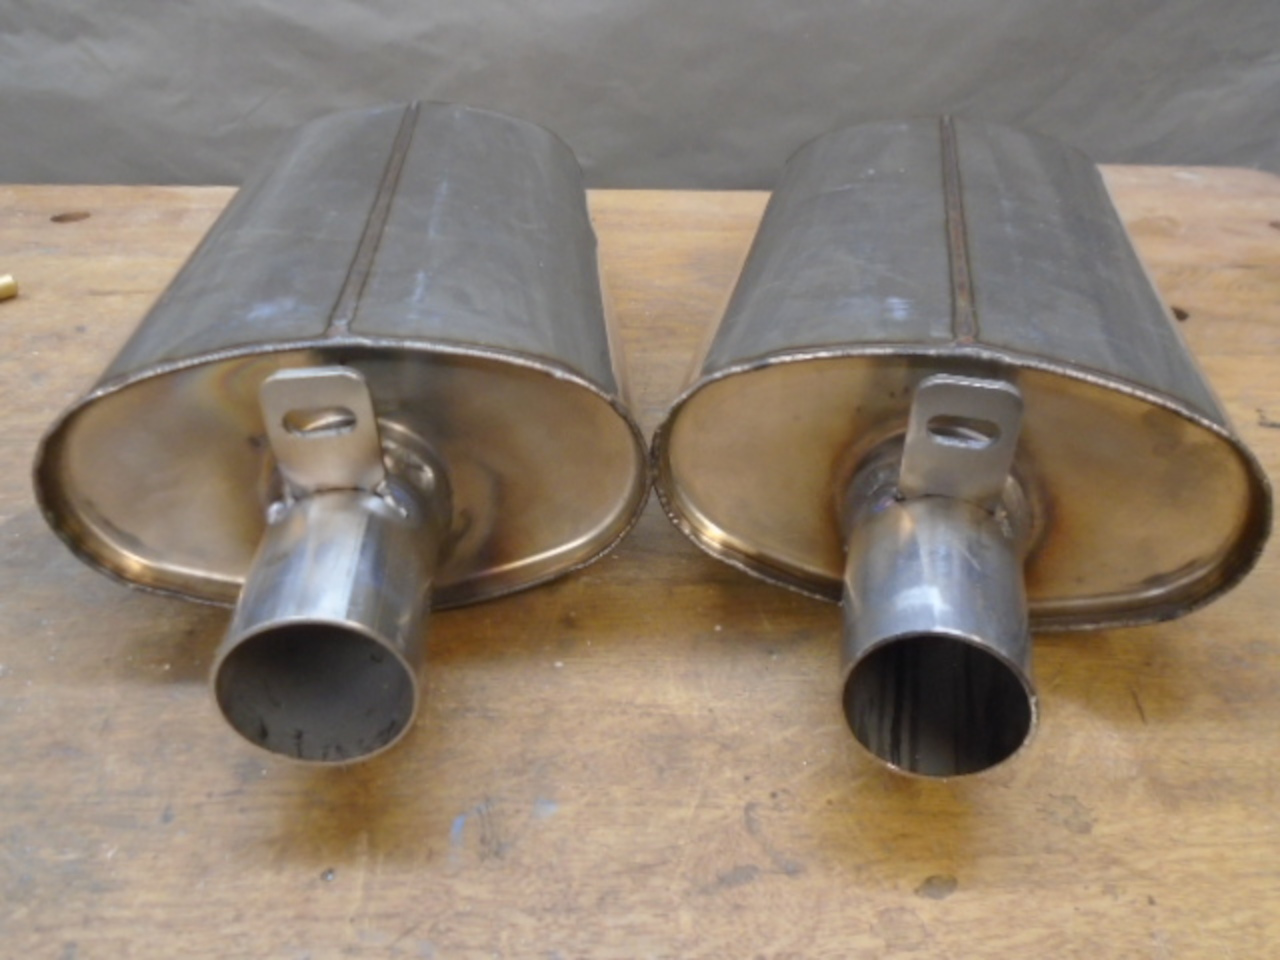
Made some little stainless hanger tabs. The slots will allow a
little sideways movement to get spacing right. The mufflers are
hung upside down from the way intended. This raised the tailpipe
as much as possible while leaving some clearance between the muffler and
boot floor.

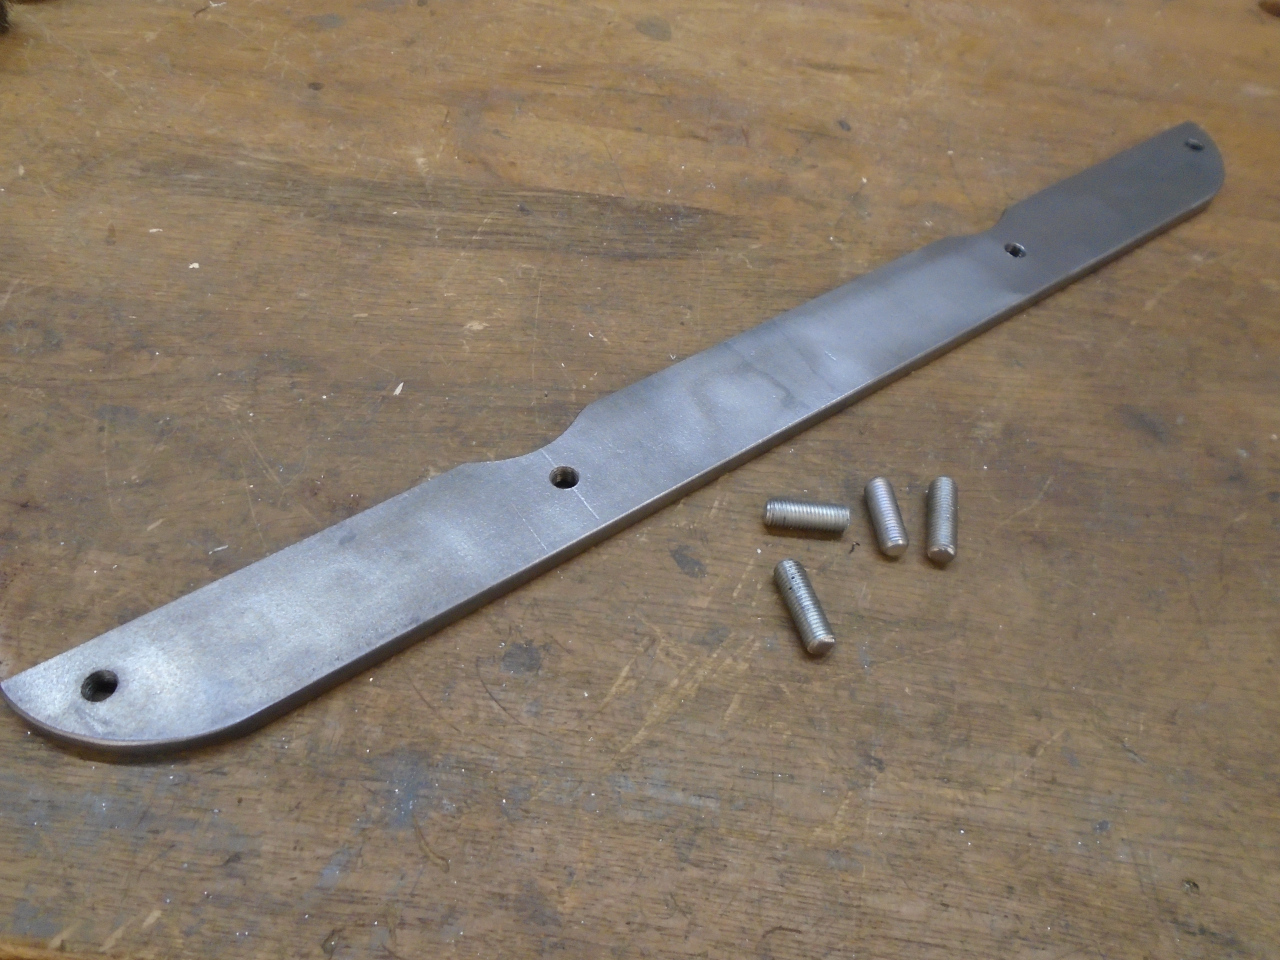
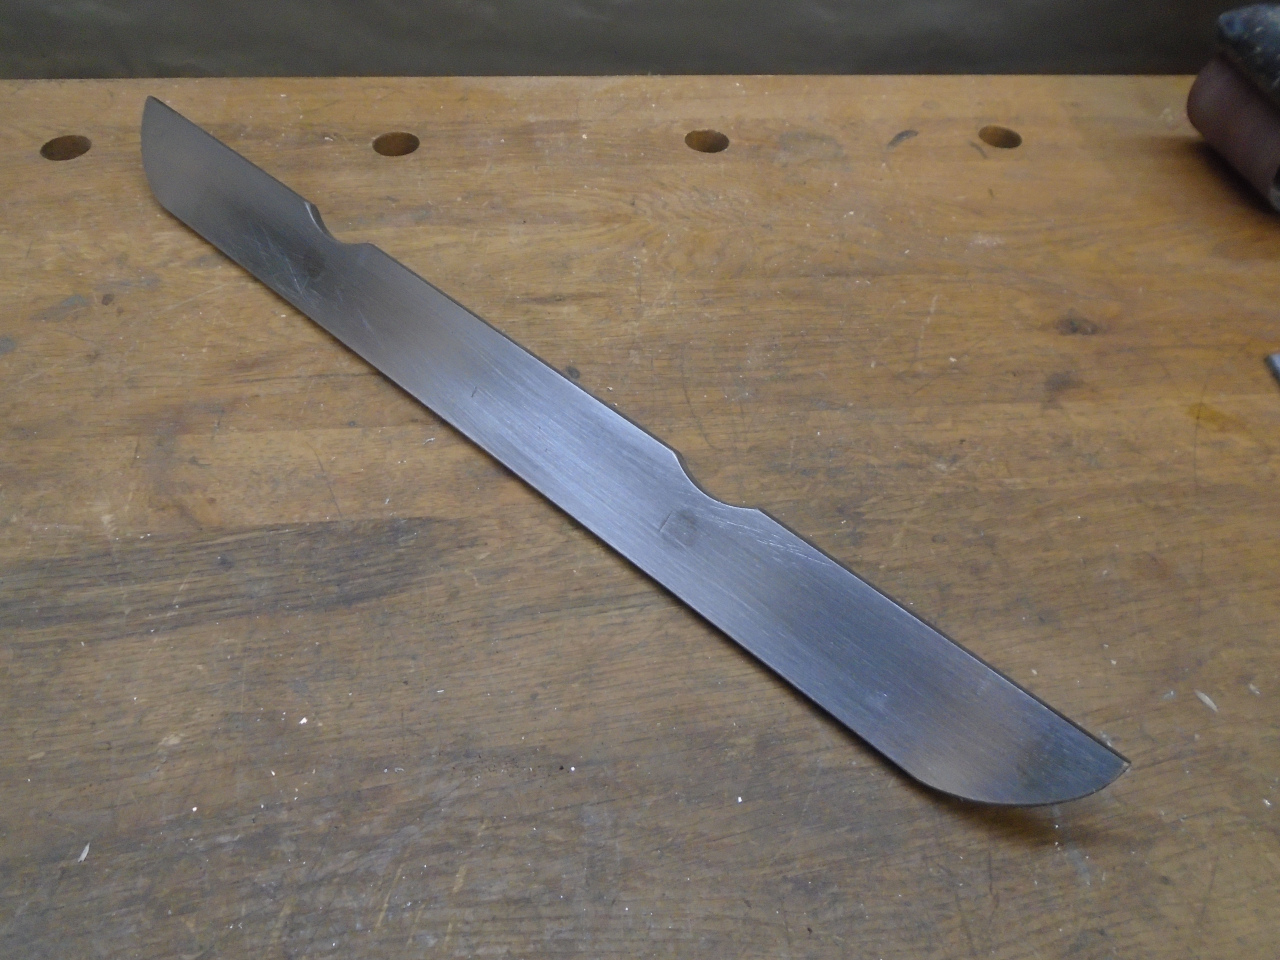
A steel bar connects rigidly to the hanger tabs on the mufflers.
The bar is then suspended by resilient straps at its ends.

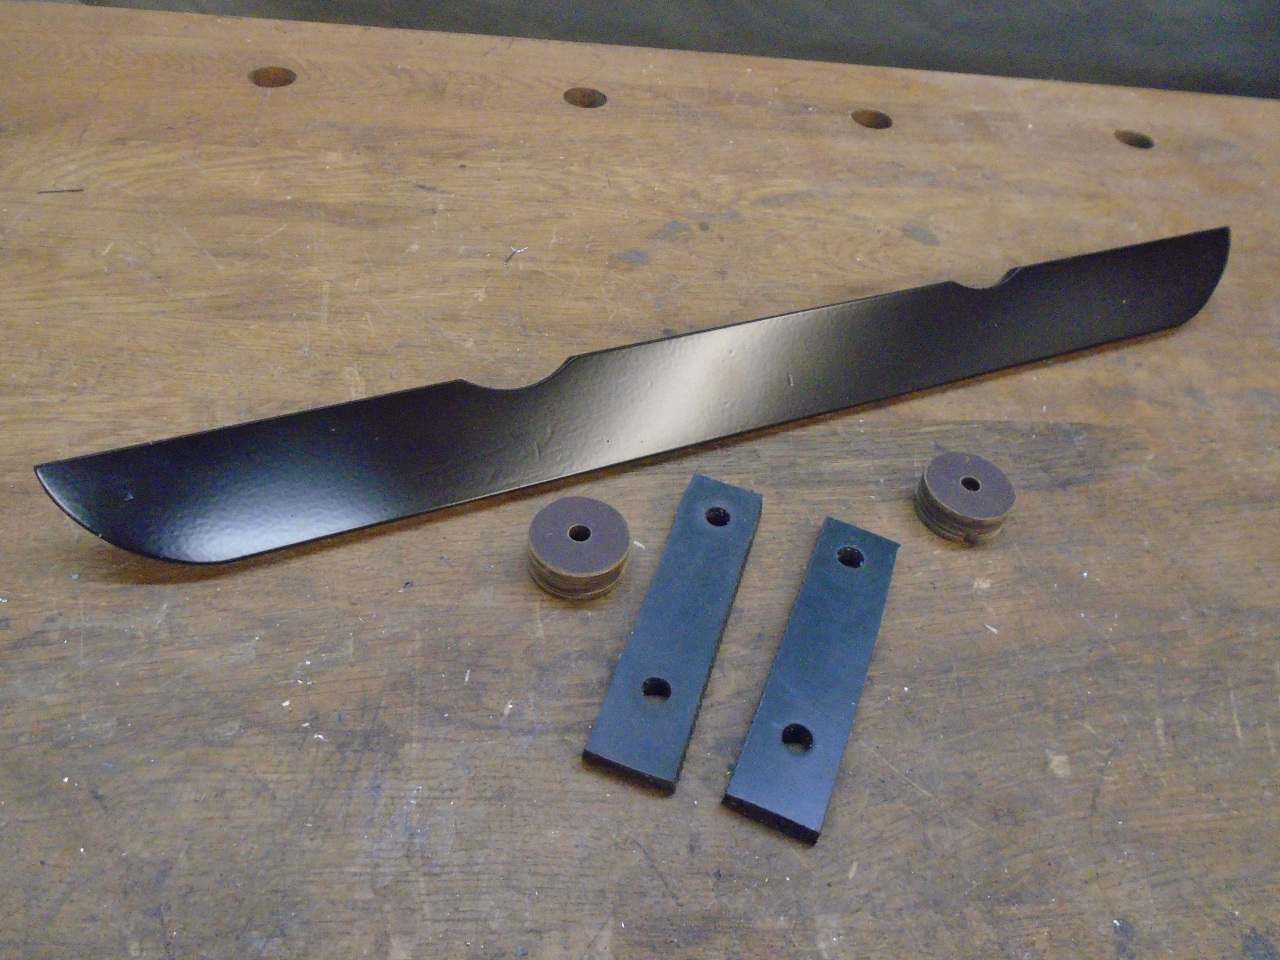
So that the bar doesn't have any fasteners visible, I welded in studs for the muffler tabs and the hanger straps.
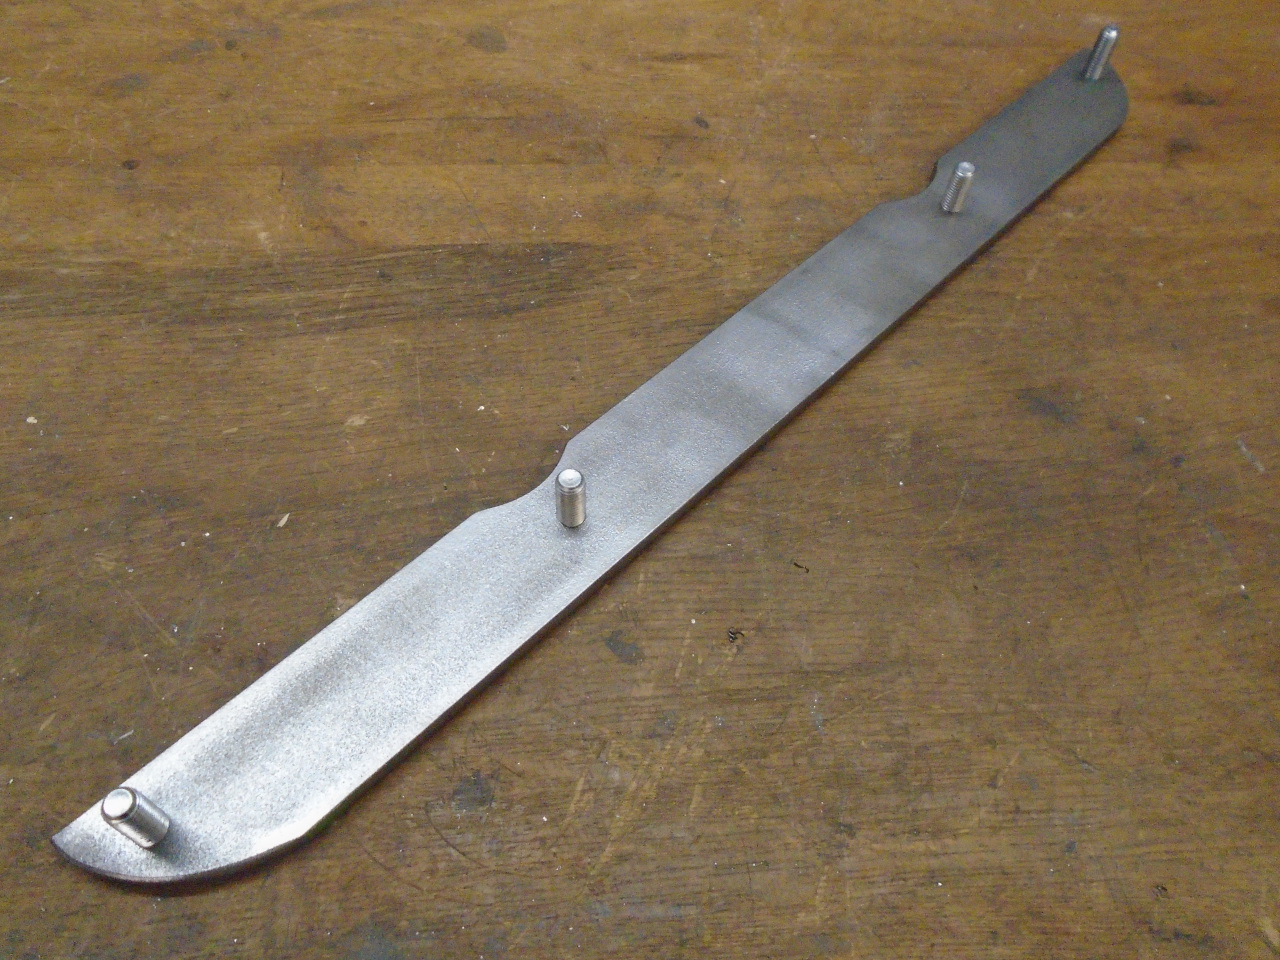
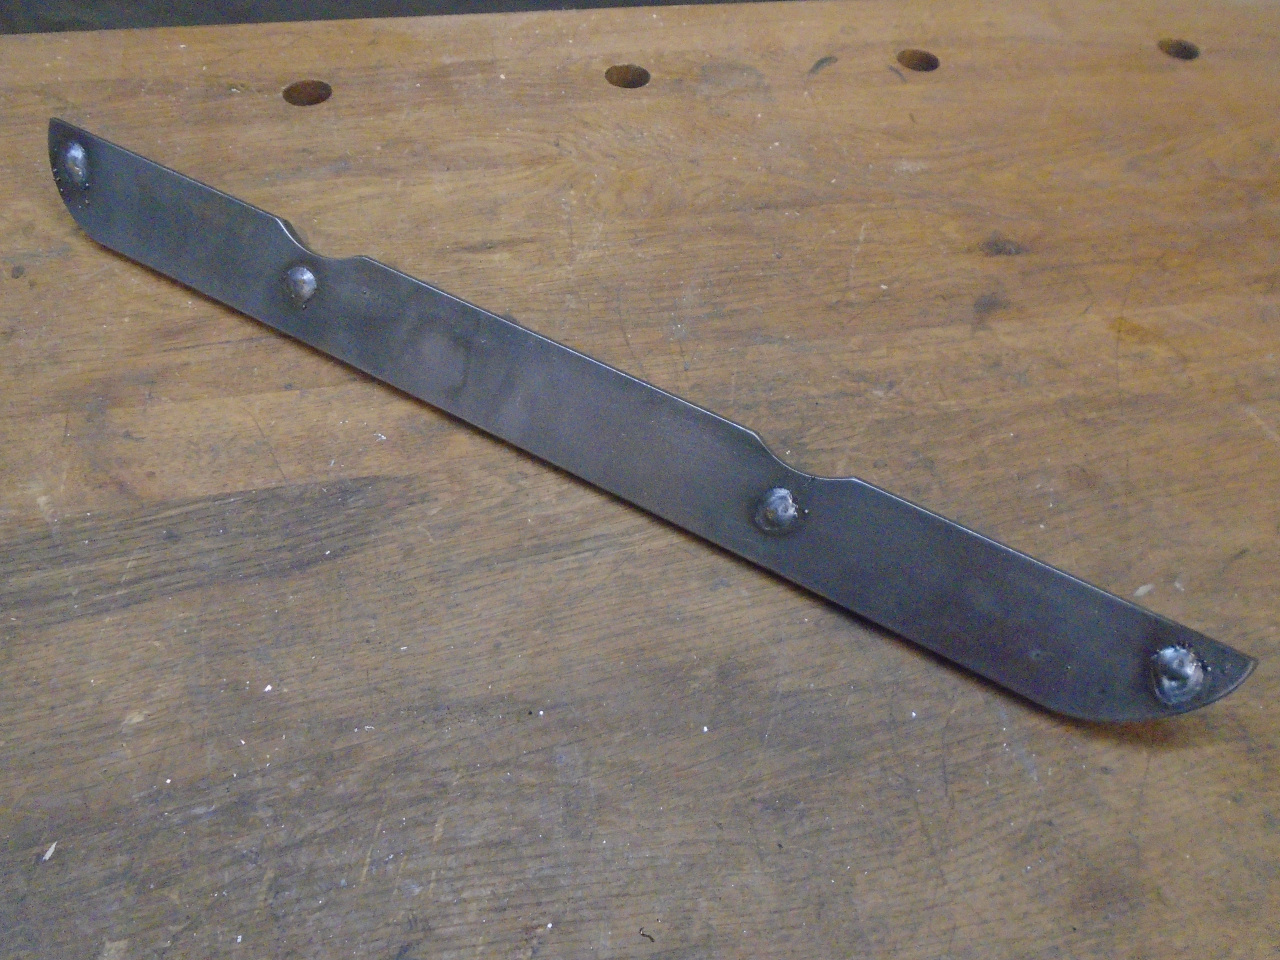
Then powder coated it. The two spacers hold the straps away from
the body metal so the support bar is a little bit in front of the lower
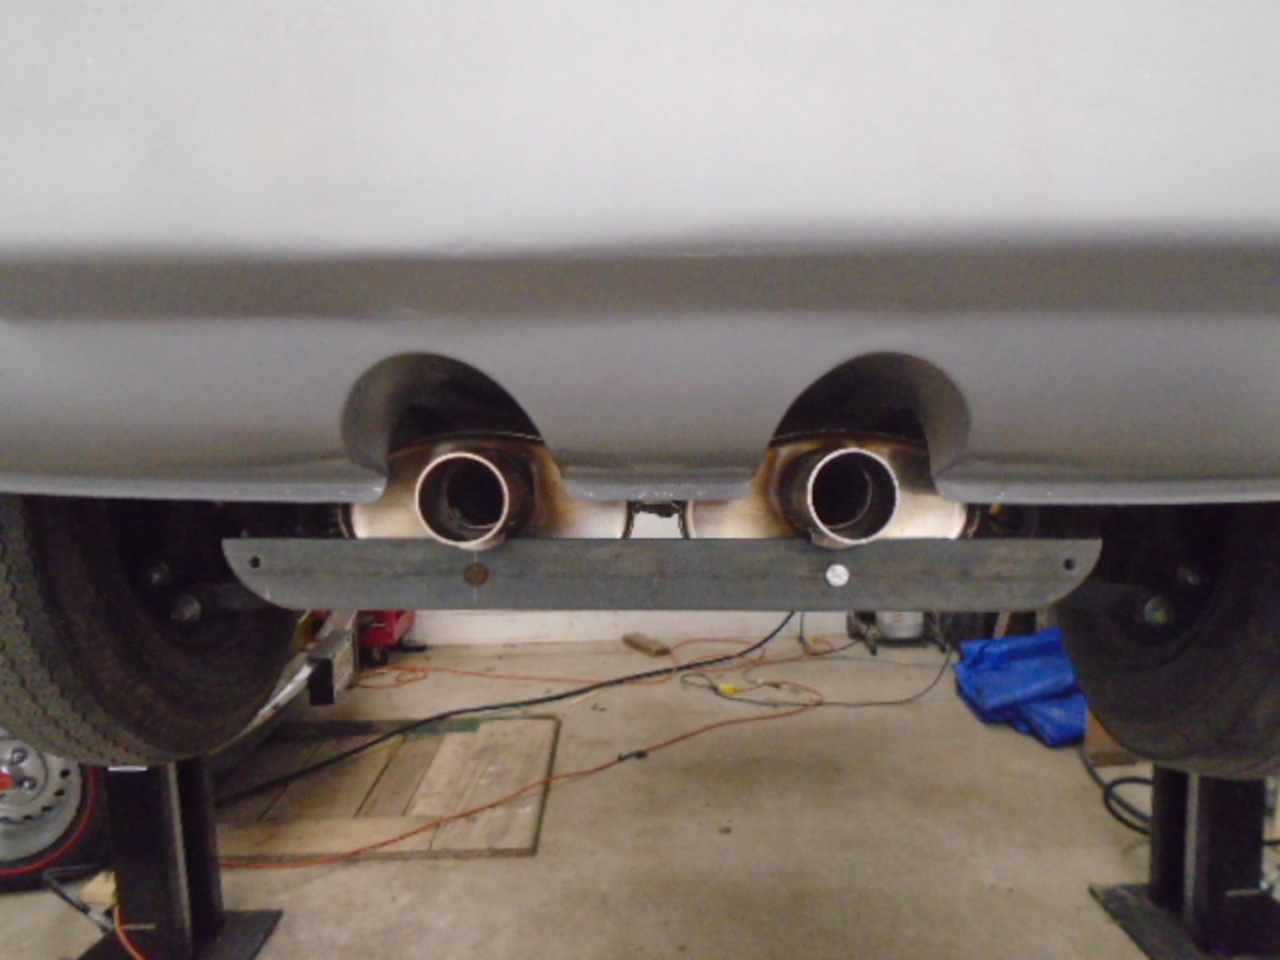
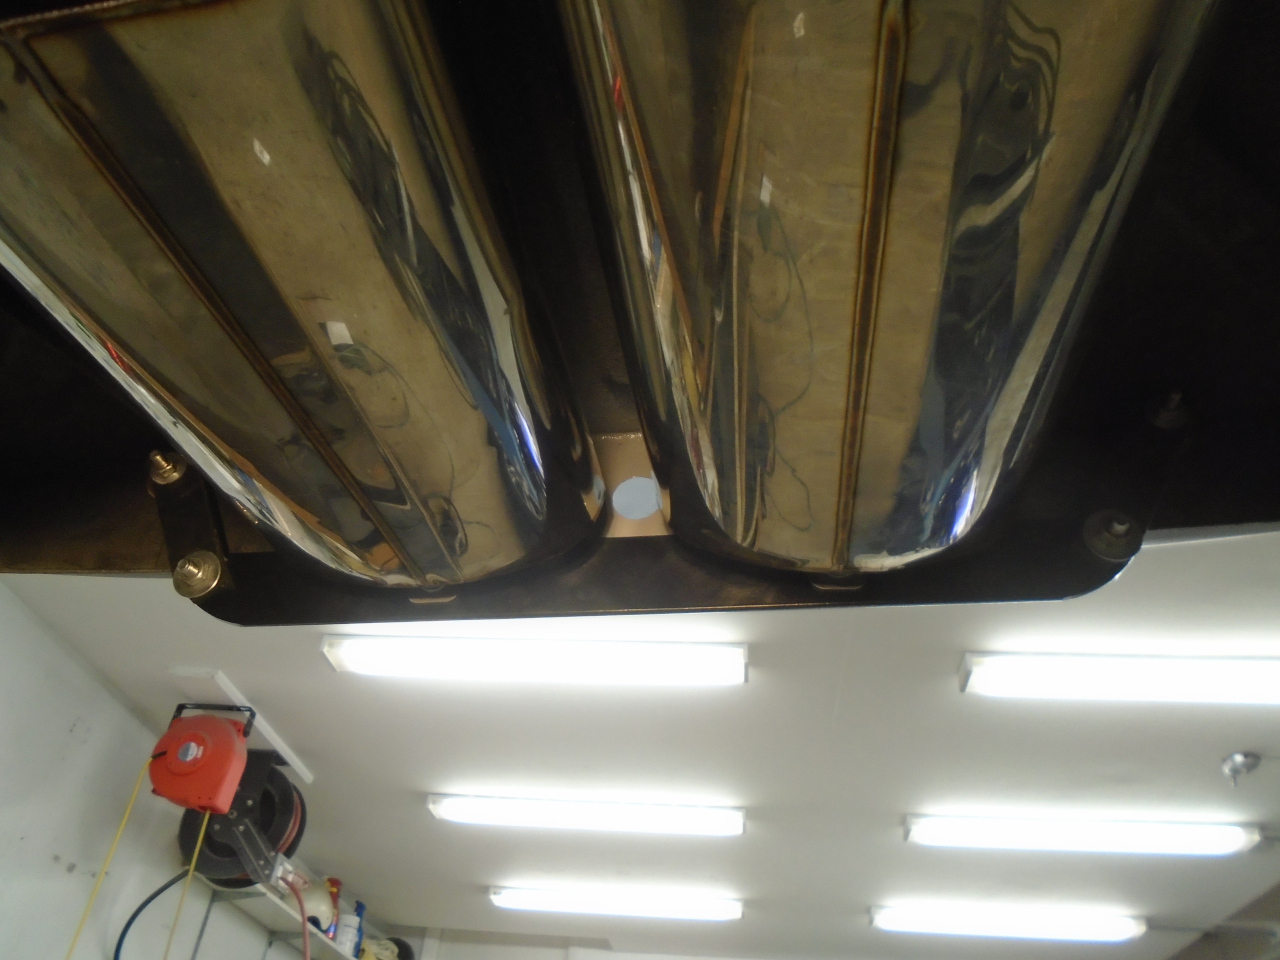
valance lip.
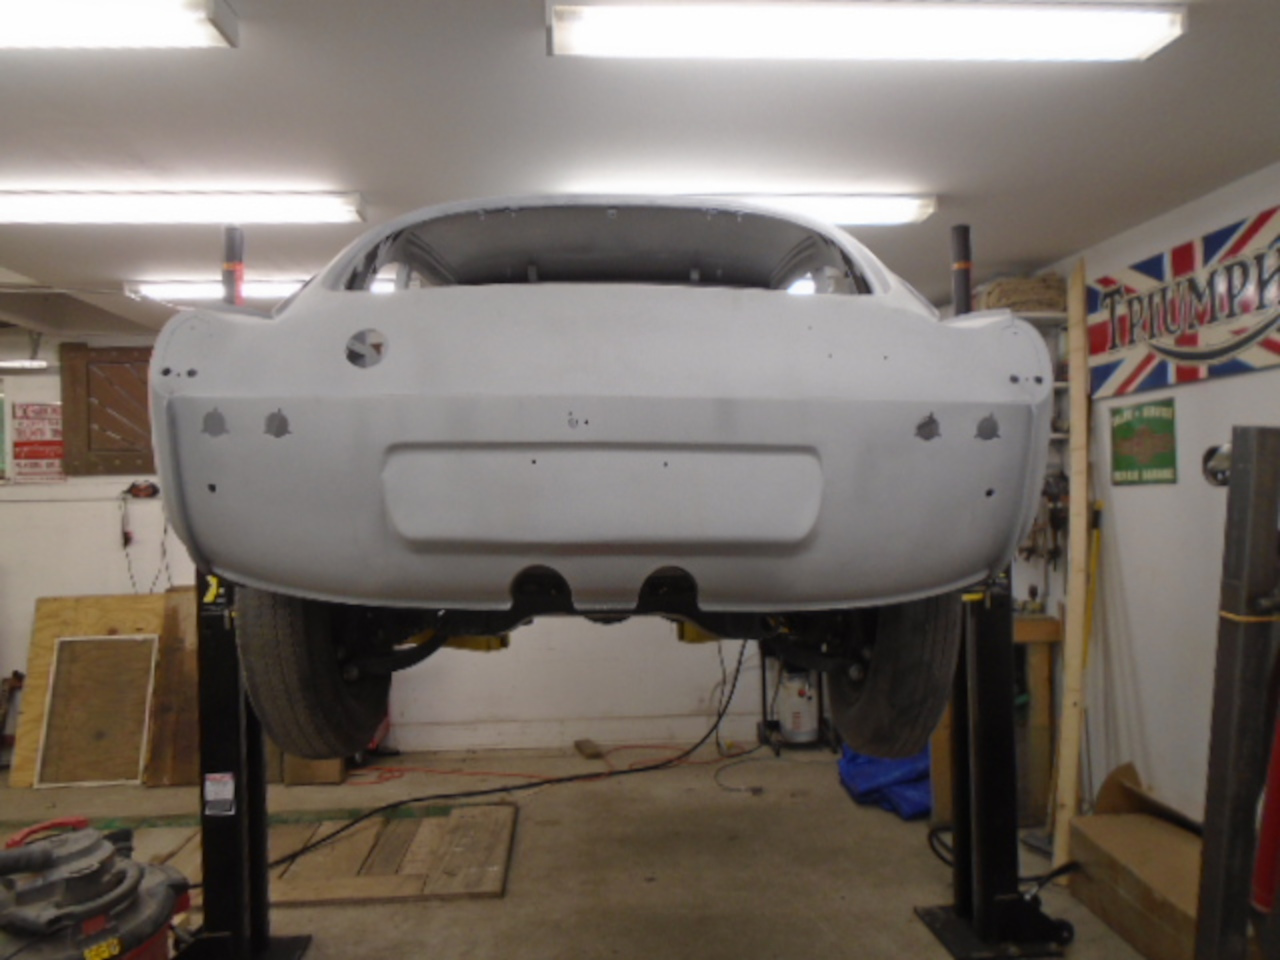
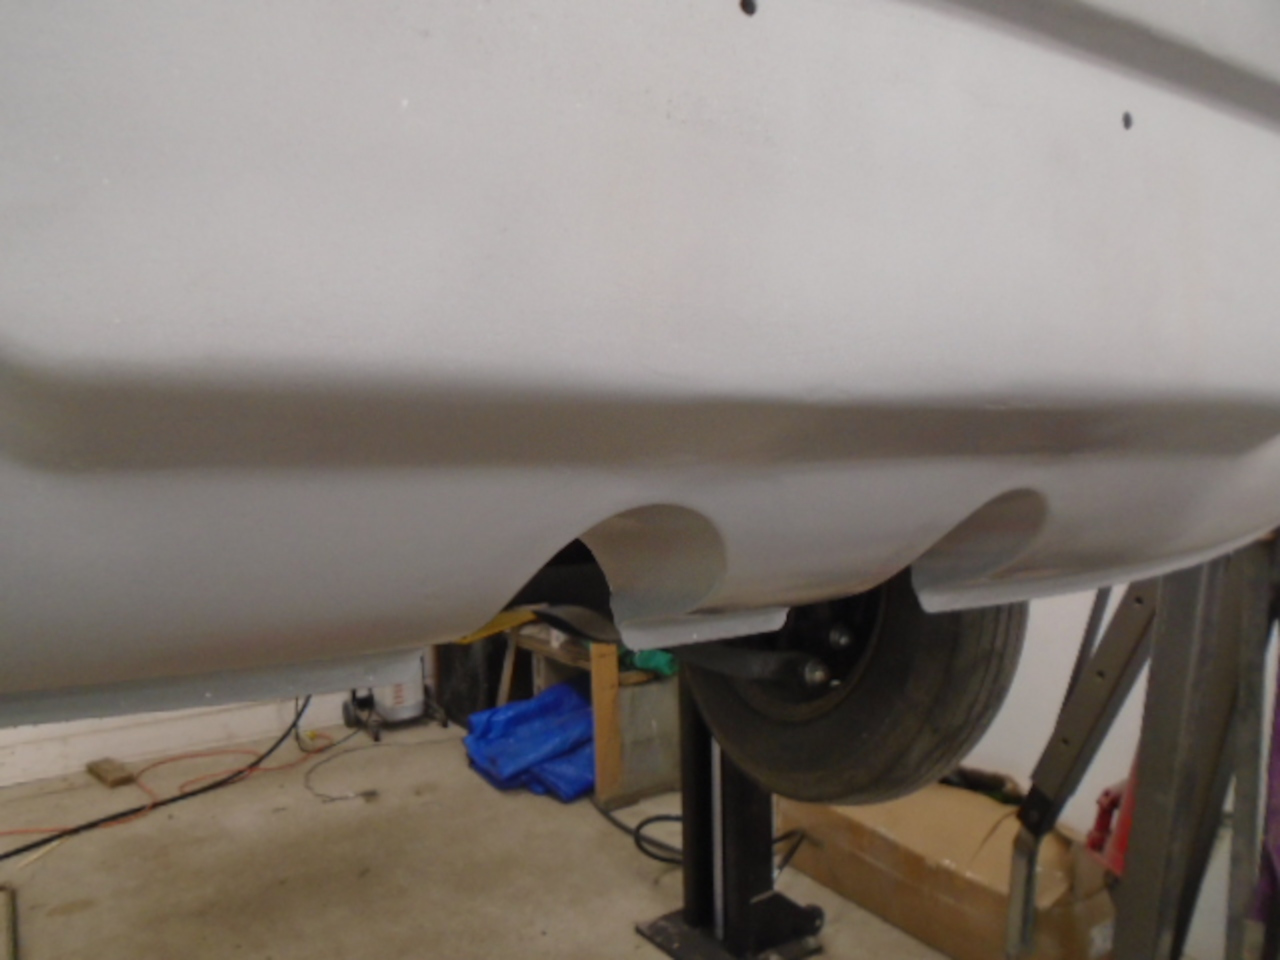
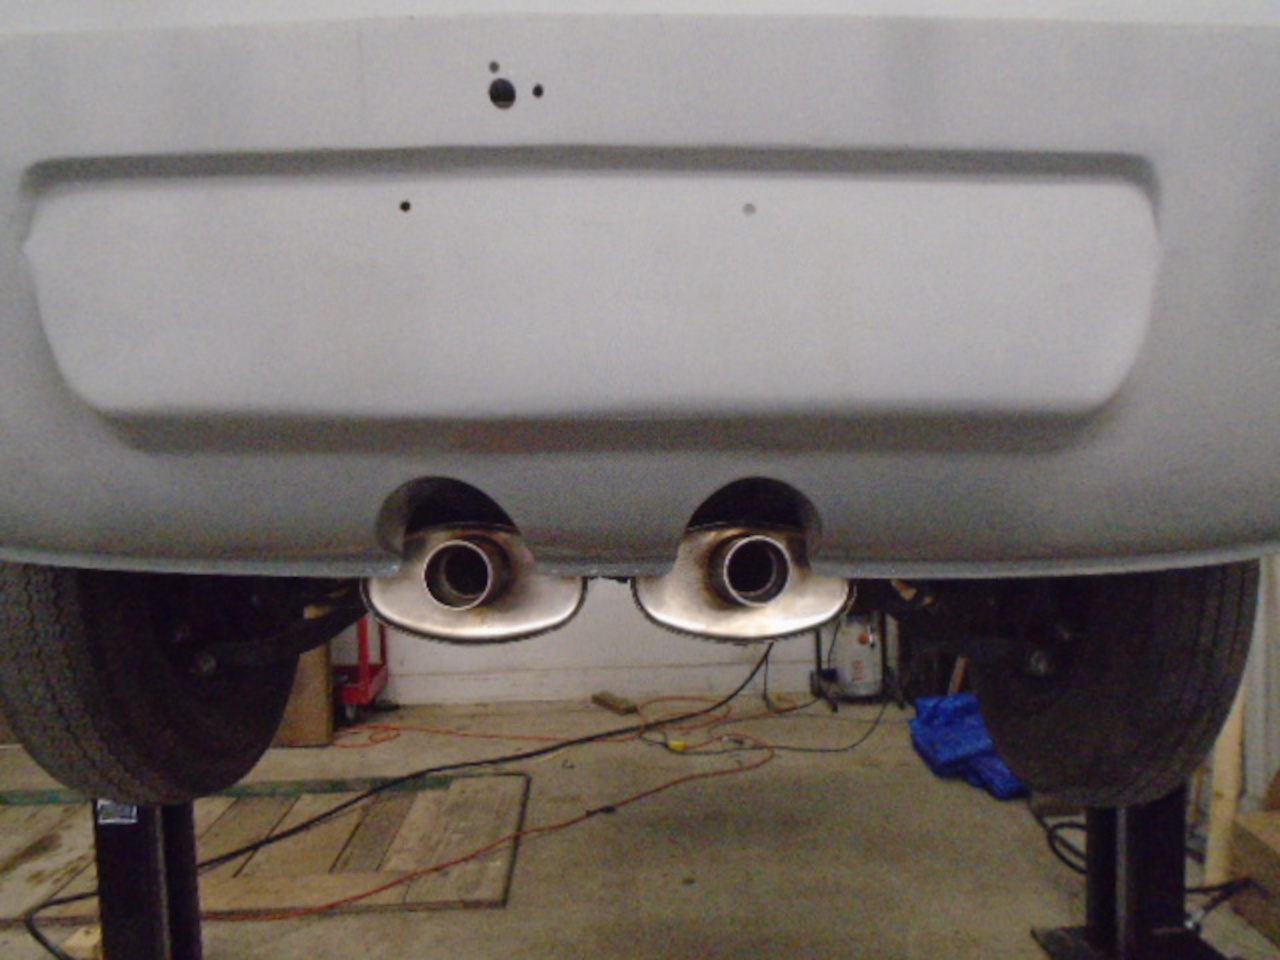
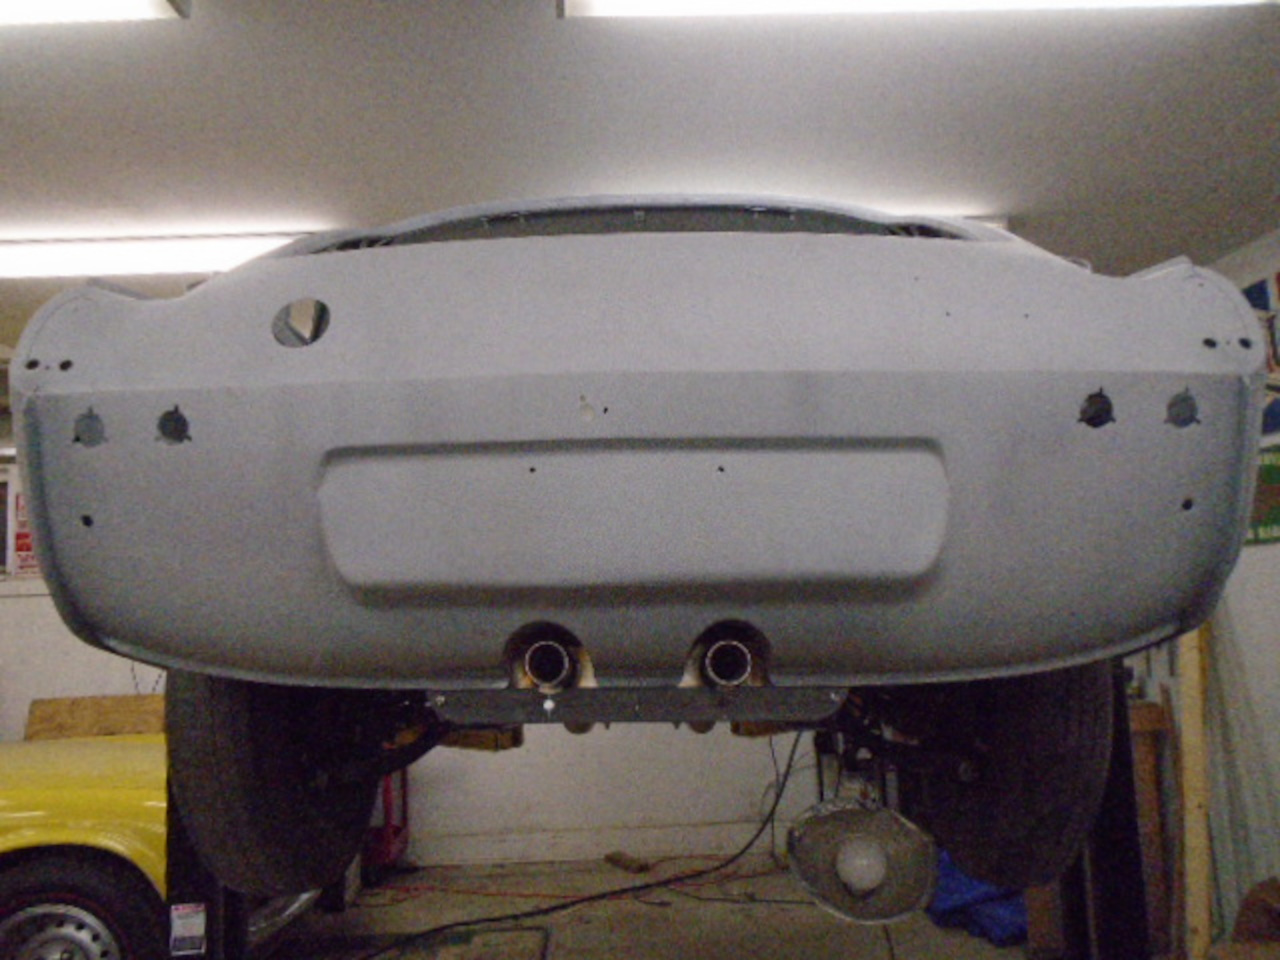
The bar not only locates and supports the mufflers, but hides the small part of them that hangs below the valance.

This is it, except for the exhaust tips, which I want some time to think
about. I'd originally planned to just cut down the Bell tips, and
I still might. They are a little long the way they are.
This was a long and laborious project, and it's always a little
stressful to take a cutting wheel to some brand new, expensive
part. There's around $500 in materials here, and weeks of work.
Comments to Ed at elhollin1@yahoo.com
To my other GT6 pages.