To my other GT6 pages.
August 18, 2021
Rocker Cover-Bonnet Interference
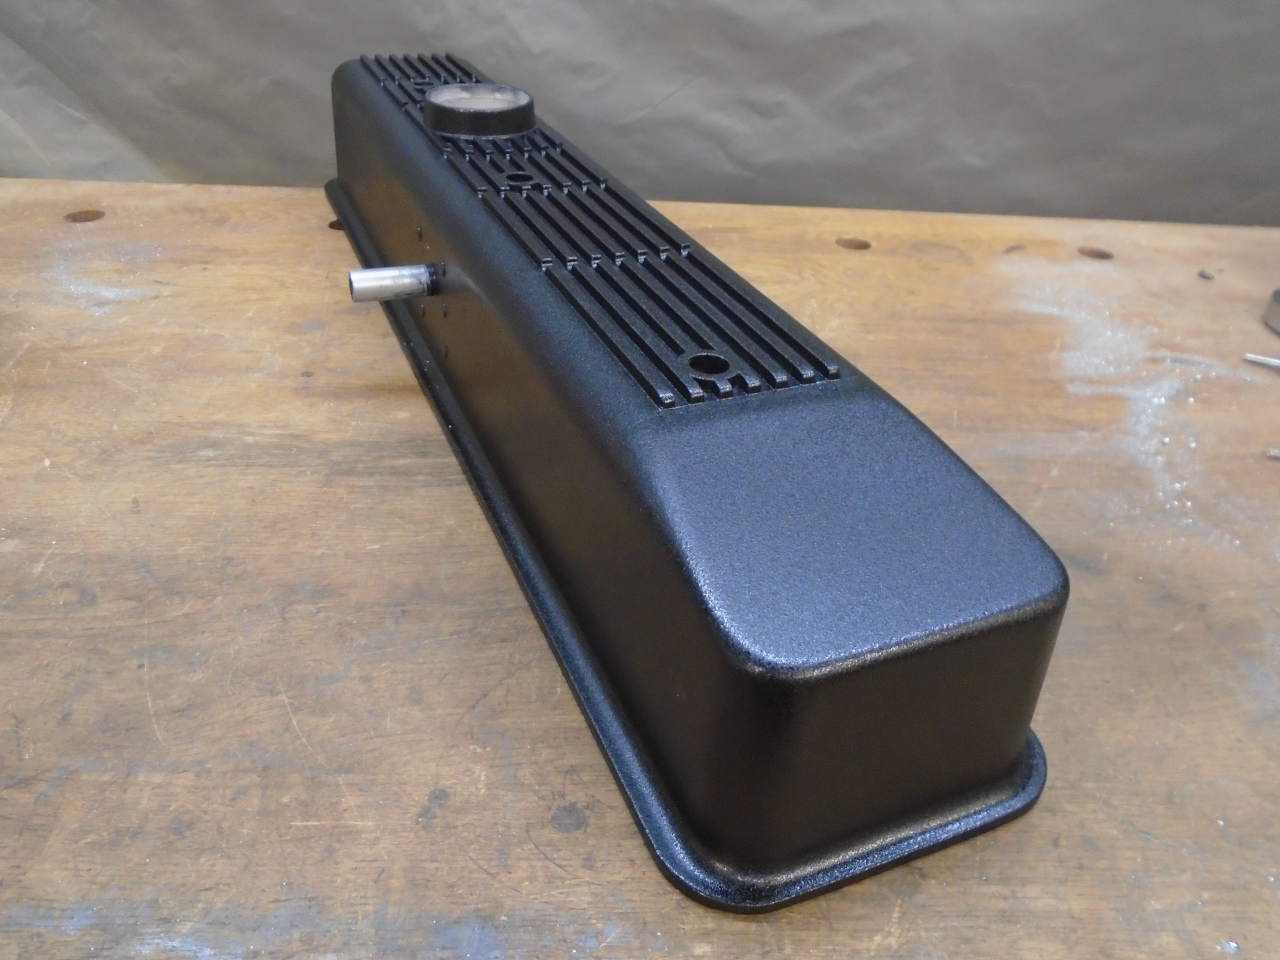
I really like those aftermarket finned, cast aluminum rocker covers for
these cars. Compared to the stock pressed sheet metal covers, they
seem to lend an air of--I don't know--gravitas, I guess. It's now
hard for me to imagine my TR6 without it.
So I bought one for the GT6. I'm pretty sure it's exactly the same
part. I buy the covers in bare metal because they are a little
cheaper, and paint them myself.

As I was preparing the cover to mount to the engine, I made a mental
note to check the bonnet clearance before closing it the first
time. What prompted this is that I know that the GT6 bonnet's
"power bulge" is there for a reason, and that even so, the stock
clearances are close. Add to this that the new cover is at least a
half an inch taller than the stock cover.

So, when it came time to install the bonnet for the first time with the
rebuilt engine in place, I was careful. I adjusted the bonnet
hinge attachment so that the bonnet was as high as possible, and
carefully lowered it to its home position without incident. Then,
crawling part way under the front end, I tried to check the clearance
between the rocker cover and the bonnet underside. Well, there
wasn't any clearance. The bonnet was touching the cover right at
the forward end of the leftmost fin. (This is because, I know now,
the rocker cover is not centered in the power bulge, but is an inch or
so to the left. Think about it, and you'll realize why.)
I also checked the panel gaps I so carefully set a few weeks
before. The gap between the bonnet ant the front sill was now way
too wide. The bonnet needed to come down at least half an inch at
the rear.
I, of course, am not the first one to face this situation. Though
some people claim to use this rocker cover without problems, plenty of
others have seen the problem I was seeing.
I weighed the options. Go back to the stock cover? Well, I
could, but that would be admitting defeat. Could I lower the
engine? Not really. The sump has a cutout to clear the
steering rack under it, and that clearance was already pretty
small. Use a thinner cover gasket? Yes, that would help, but
wouldn't be enough.
In the end, I decided to resort to what some others have resorted to--shaving off the front of the rocker cover.
I did some measurements of the angle between the rocker cover and the
bonnet in the area of the interference. The bonnet was sloping down at
almost six degrees at that point, while the engine was tilted back by
about four and a half.


I figured an angle of about 10.3 degrees would make the top of the valve
cover roughly parallel to the bonnet surface in that area. At
this point, I still could have turned back.
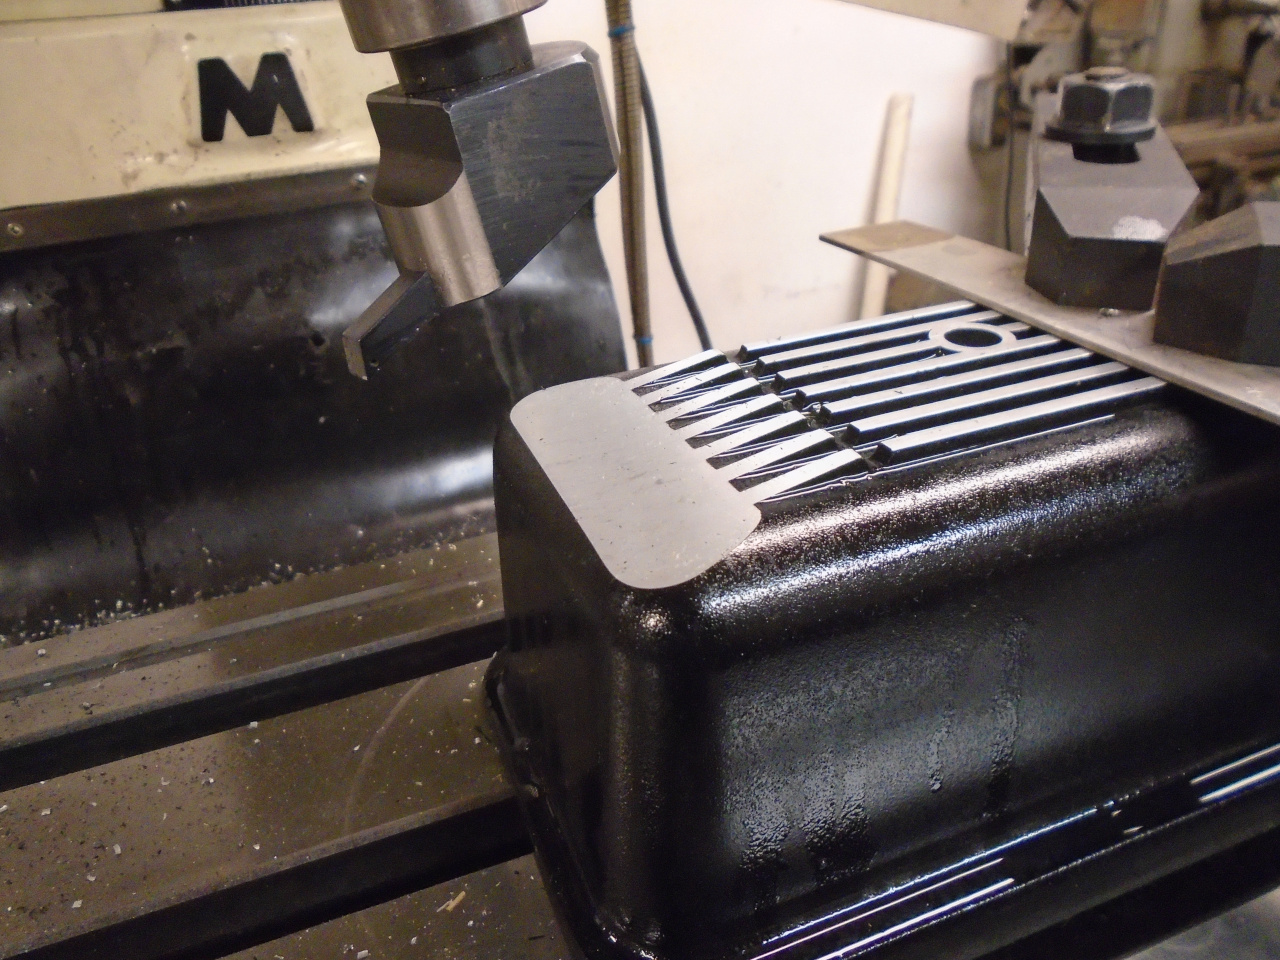
A few minutes later, I was sort of committed.

This was only about half the amount of metal I'd have to remove, but I
cleaned up the rough edge, and did a sanity check to make sure I wasn't
going to get into trouble with the front rocker fouling the lowered
roof. It looked like I had plenty of room.
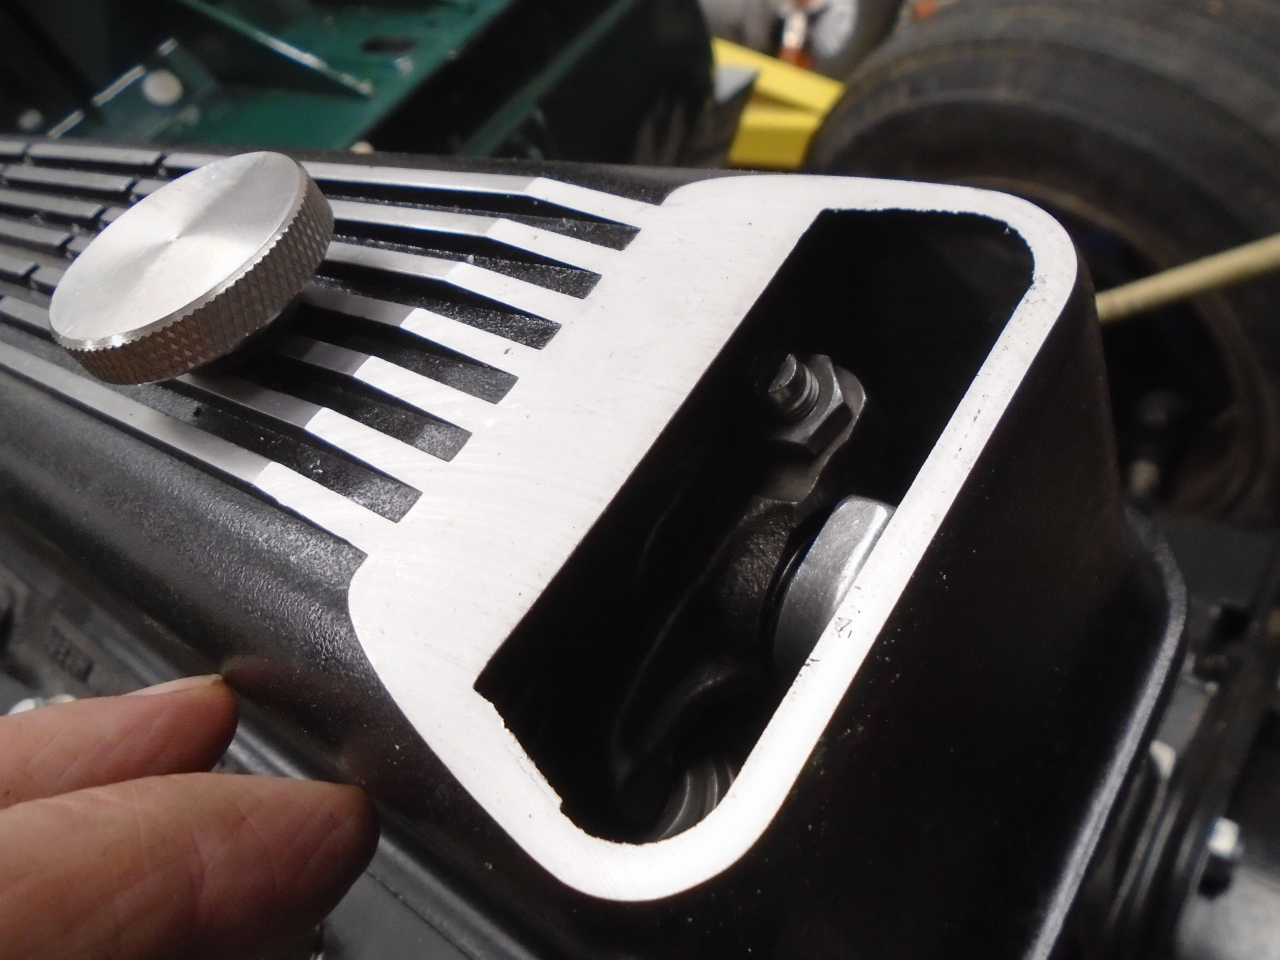
This was about as far as I could go without getting into the front fastener hole.
Rotating the engine so the number one valve was fully open, and putting a
straight edge across the opening showed that the clearance was still
fine.

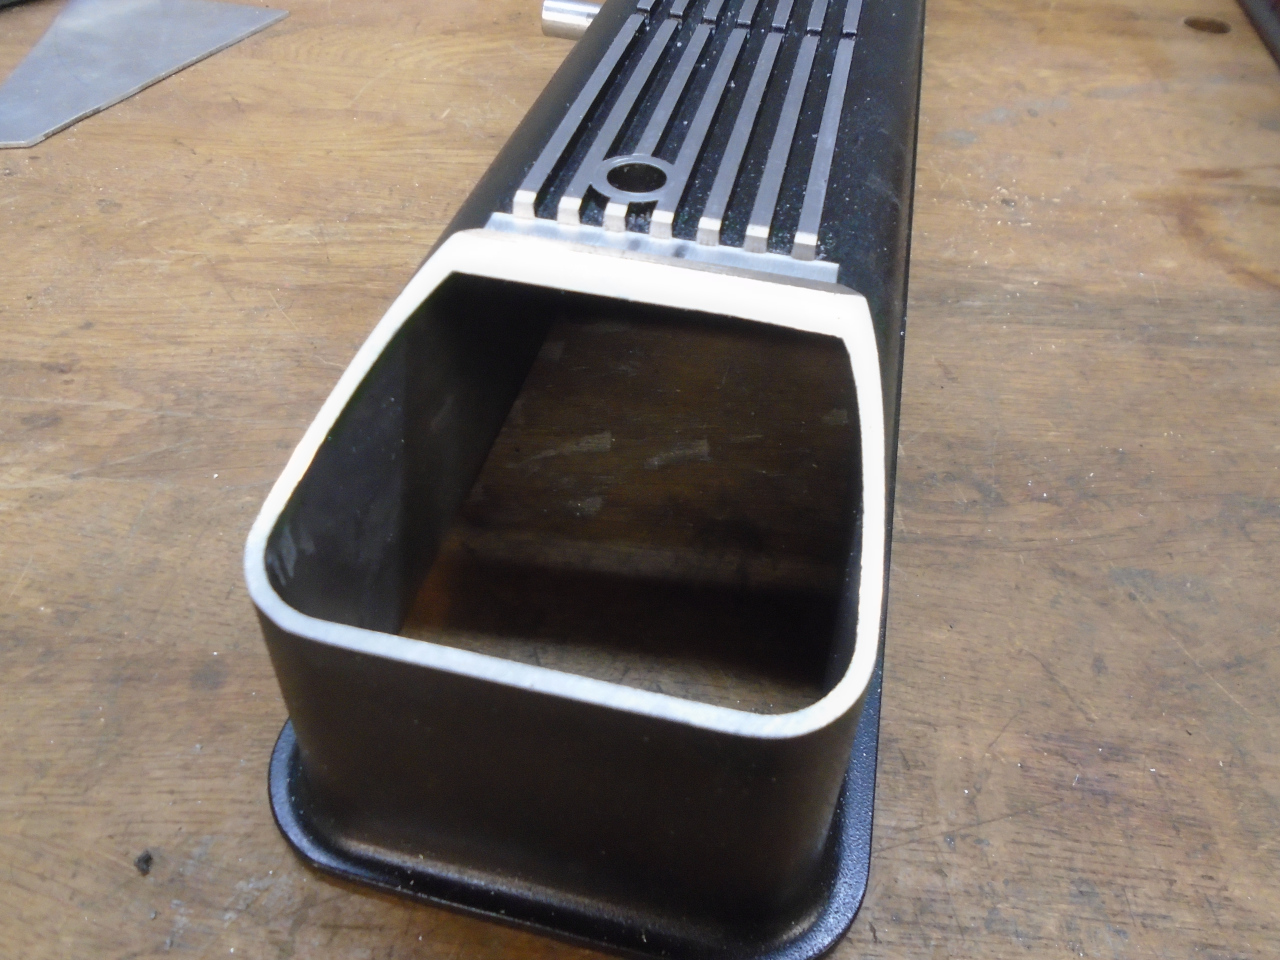
I cut a piece of 0.075" aluminum to close up the hole, and blasted the cover clean in preparation for welding.

About the welding. I'm a self taught hack MIG weldor on
steel. Aluminum is way different from steel, though. I've
done one MIG welding job on aluminum using a spool gun, and I considered
the whole process a barely controlled disaster. Aluminum sheds
heat so quickly that the machine has to be set to very high amperage,
and high wire speed. This means that the weld travel is way faster
than I was comfortable with. The rocker cover material less than
1/8" thick, and the cover plate was less. I worried about burning
through the thin sections.
On the other hand, I've always wanted to try TIG welding, and always
thought that if I came upon a job that really needed to be TIGed, I'd
buy a TIG machine. Well, I thought this was that job, so I bought a
TIG machine and started to practice. And watch Youtube
videos. And practice some more. After a couple of days of
practice and videos, I could occasionally make good TIG beads in
aluminum, but mostly not. A couple more days, and I was still
nowhere near confident enough in my skill to move to something I could
easily ruin.
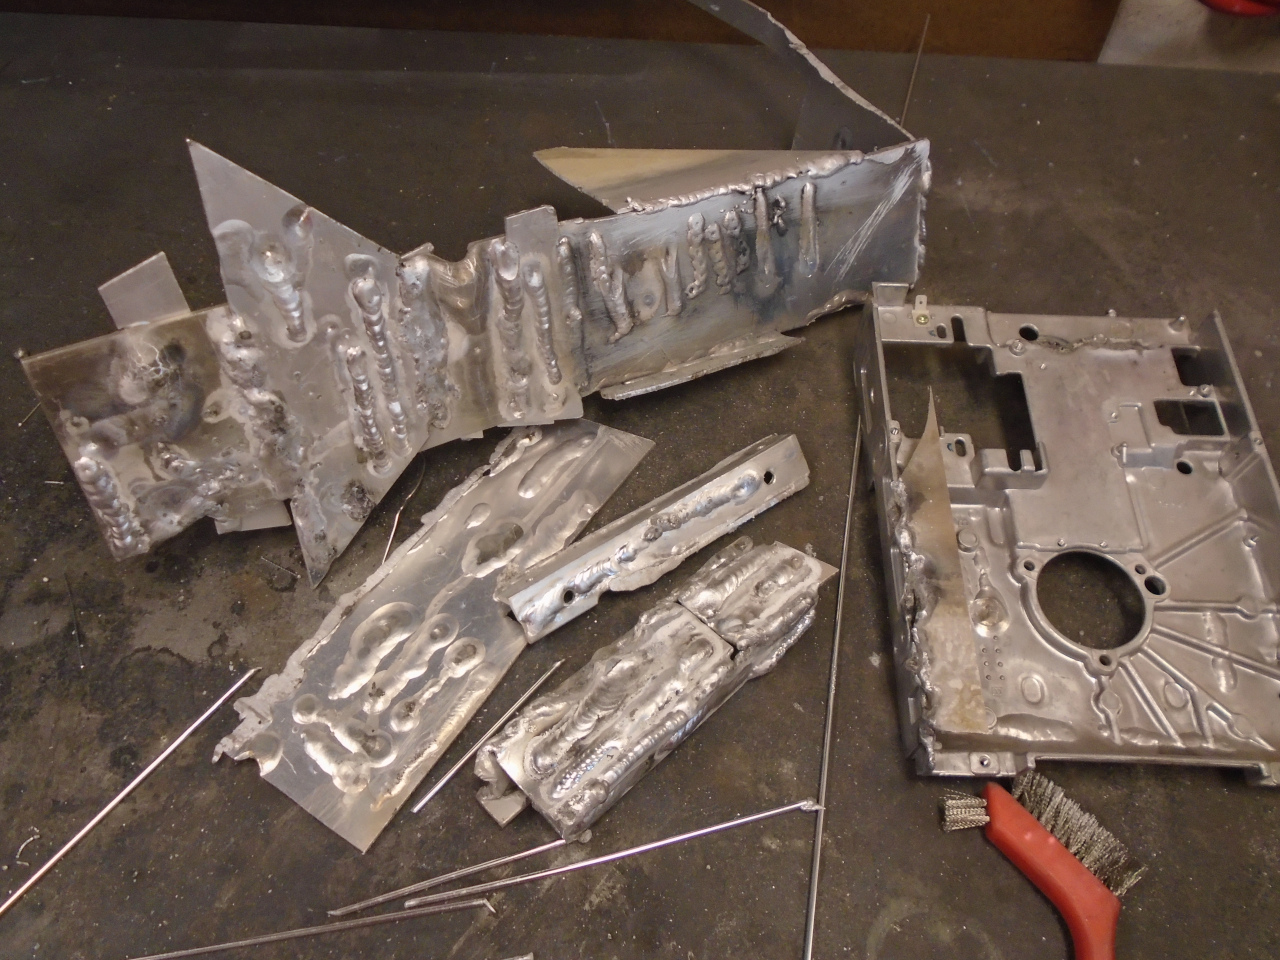
I got frustrated and impatient. This was taking too long. In
the end, I revisited the MIG. I practiced, and the progress was
faster than the TIG. I figured out a couple of tricks that
helped. I'm sill not a good aluminum MIG weldor, but I came to the
point where I thought I could fake my way through this job.
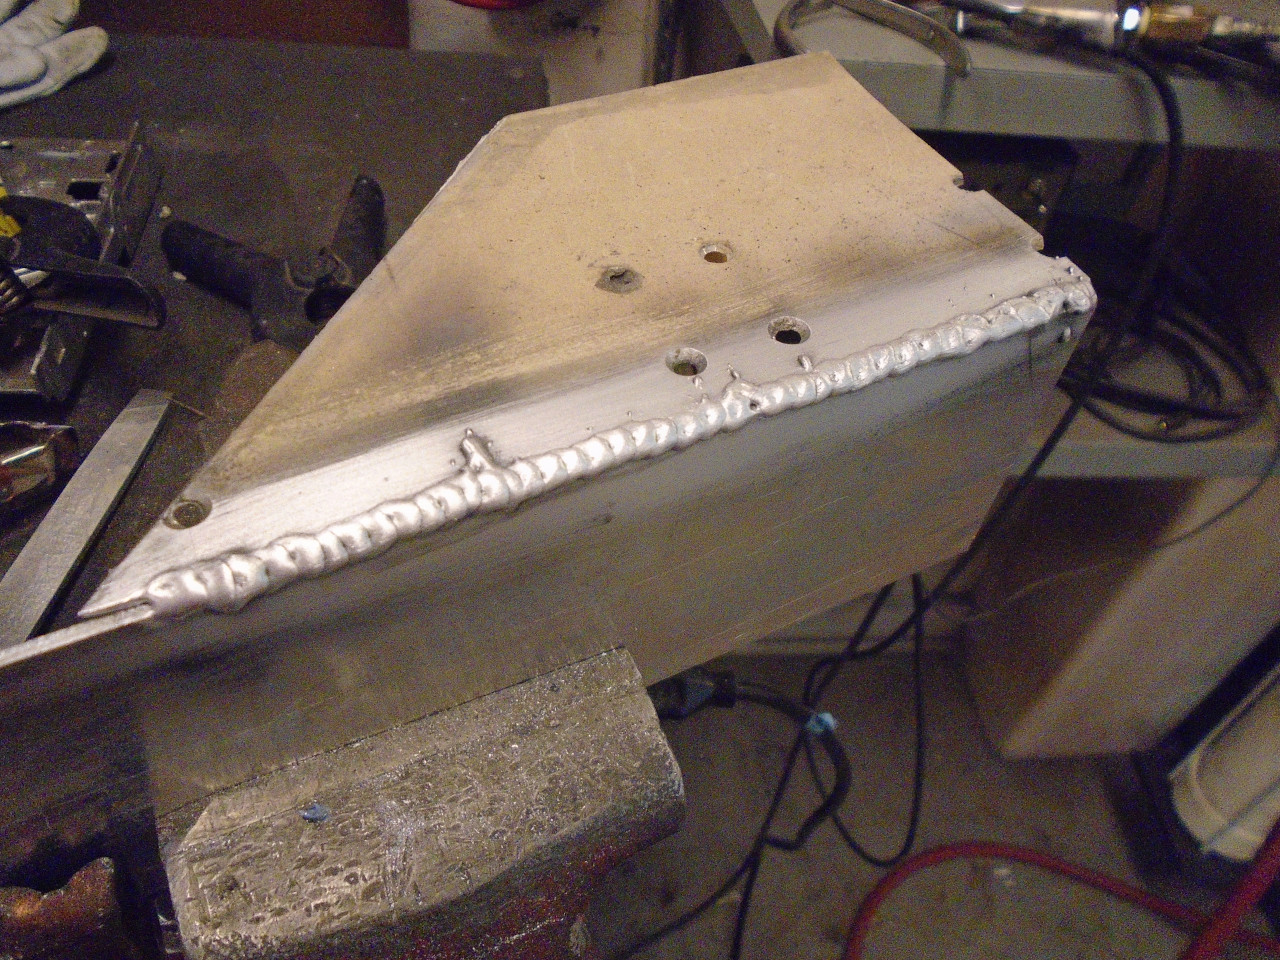
Setup, tack, and let 'er rip!


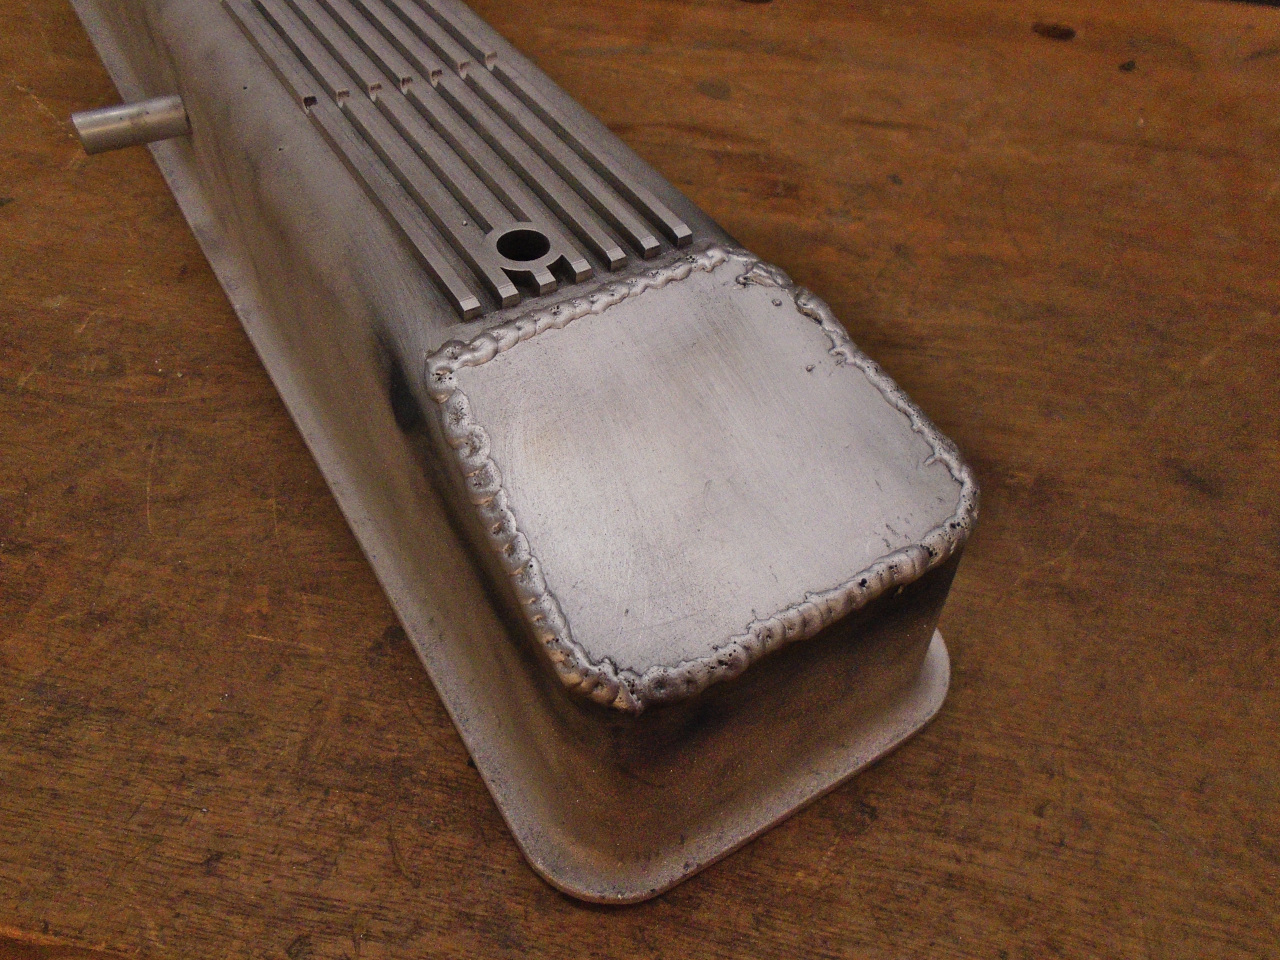
Luckily, the welds do clean up.

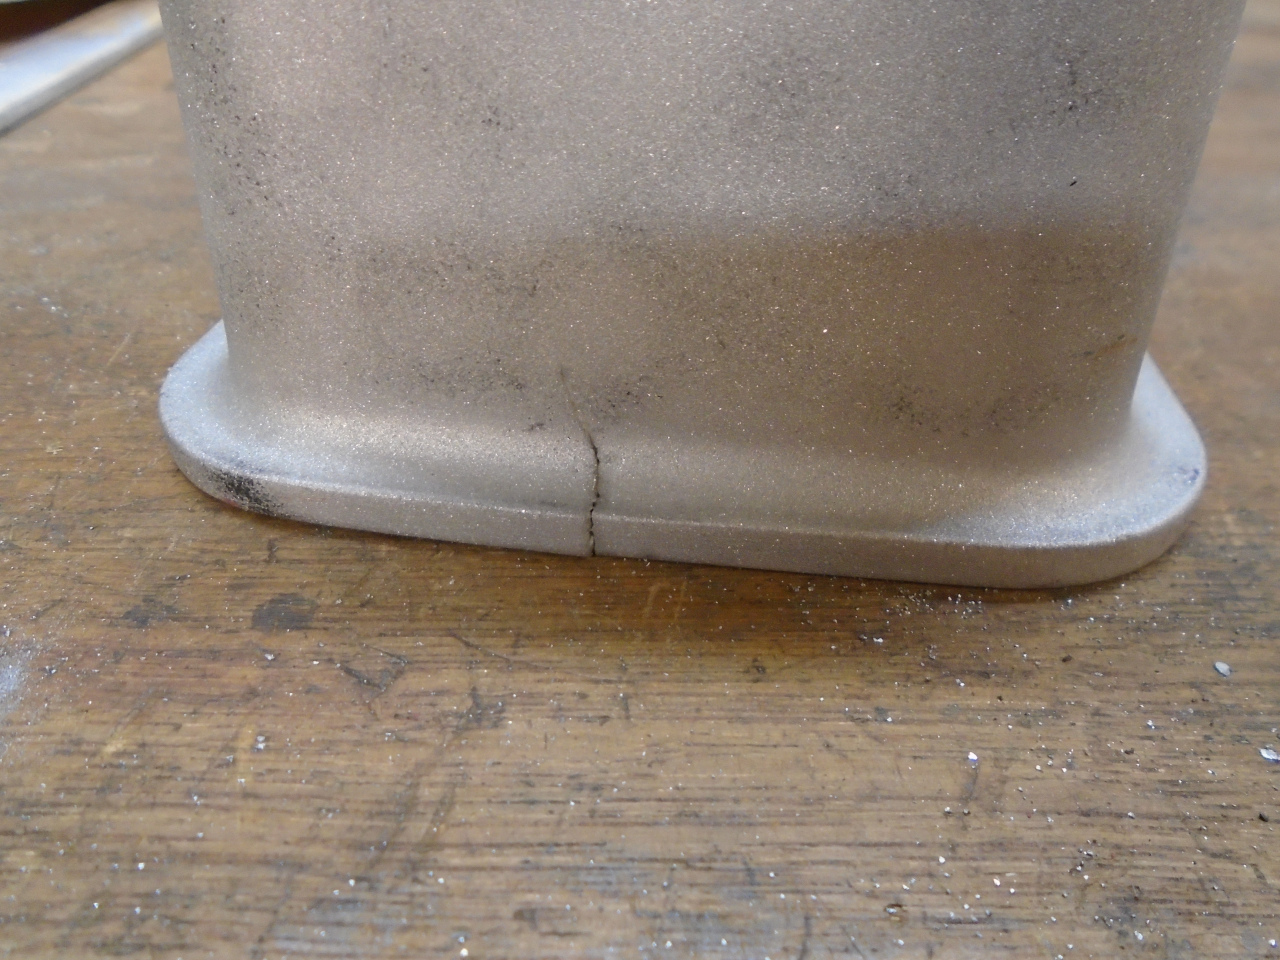
I discovered this little crack during the process. This cover has
never been in service, and never been dropped while in my possession, so
I think it came this way. With my newfound confidence, I fixed
it.
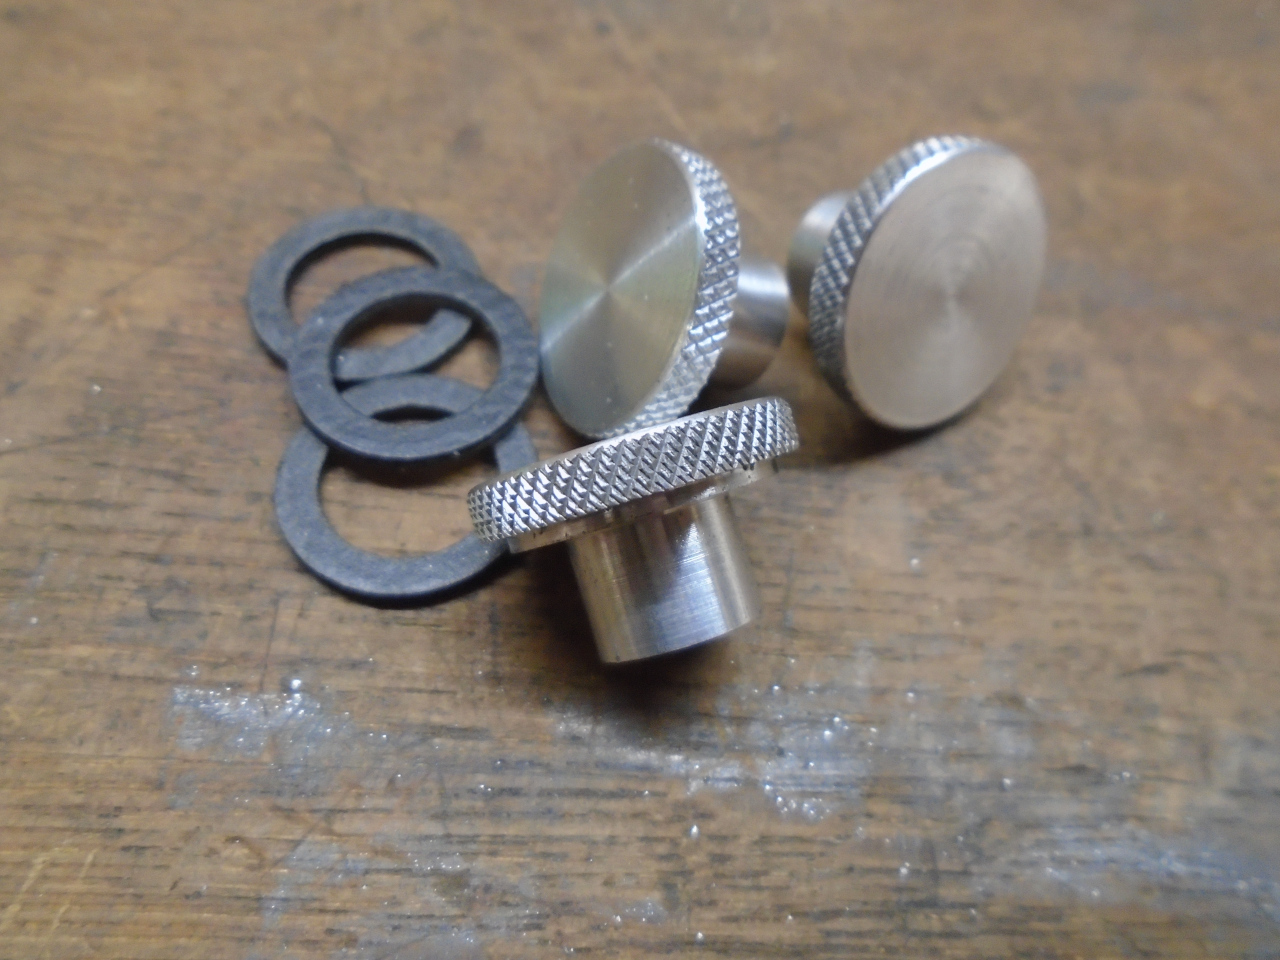
I also realized during this process that the front cover fastener also
had a very tight clearance. Neither the fasteners that came with
the cover, nor the trick ones I bought would work. I made these
little low profile thumb fasteners. I'm not sure if I'll be able
to torque these sufficiently by hand, so they might not be the final
answer.
Repainted the reshaped cover. I first tried to use a high temp
"wrinkle paint", but couldn't get the wrinkle to be consistent. So
I stripped it off and used a textured "truck bed" paint. It looks
great, but is only rated to abut 200 degrees F. On the other
hand, I've had it on my TR6 for a couple of years, and it's held up
fine.
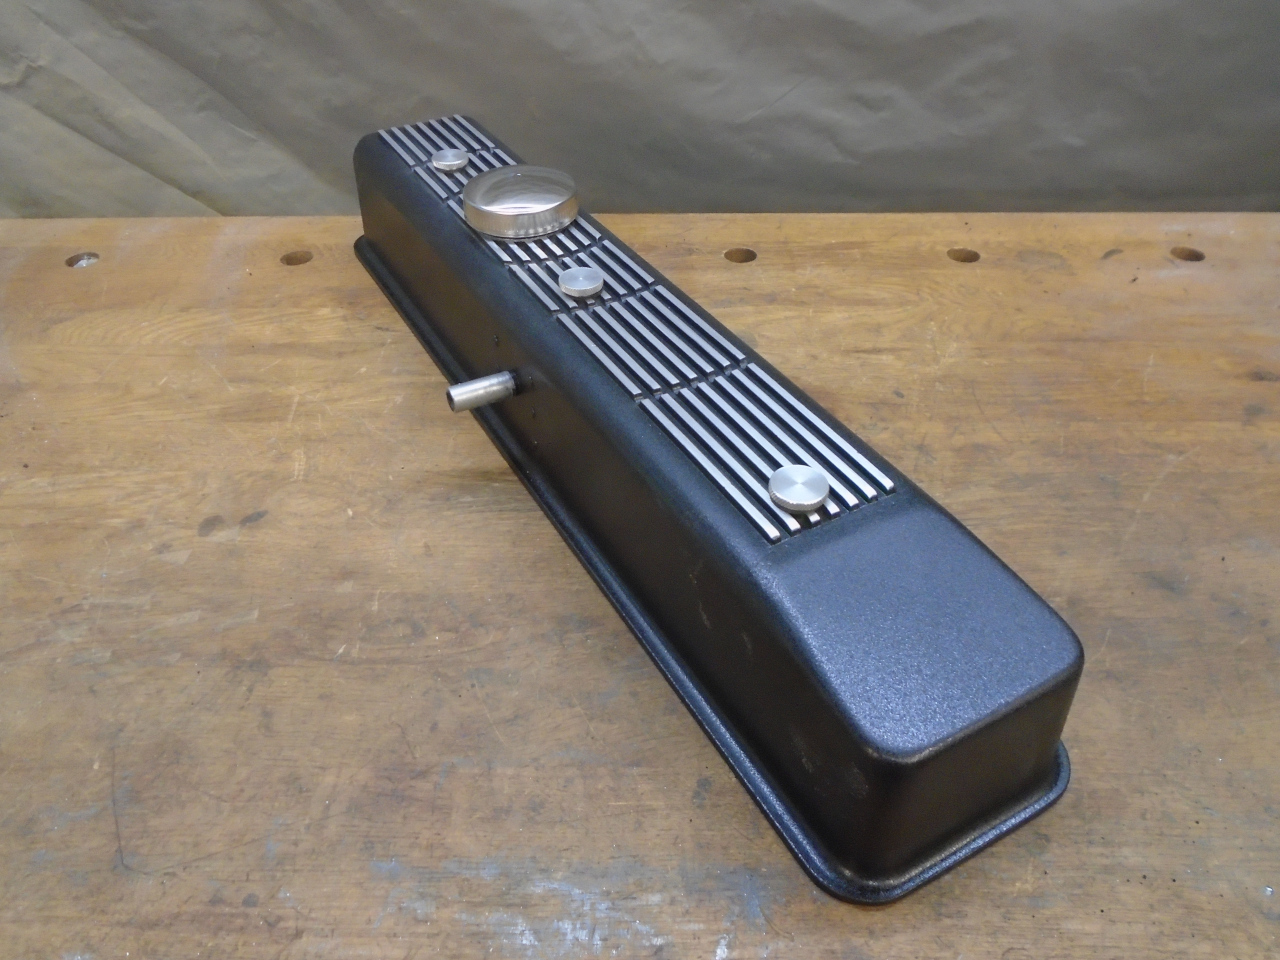
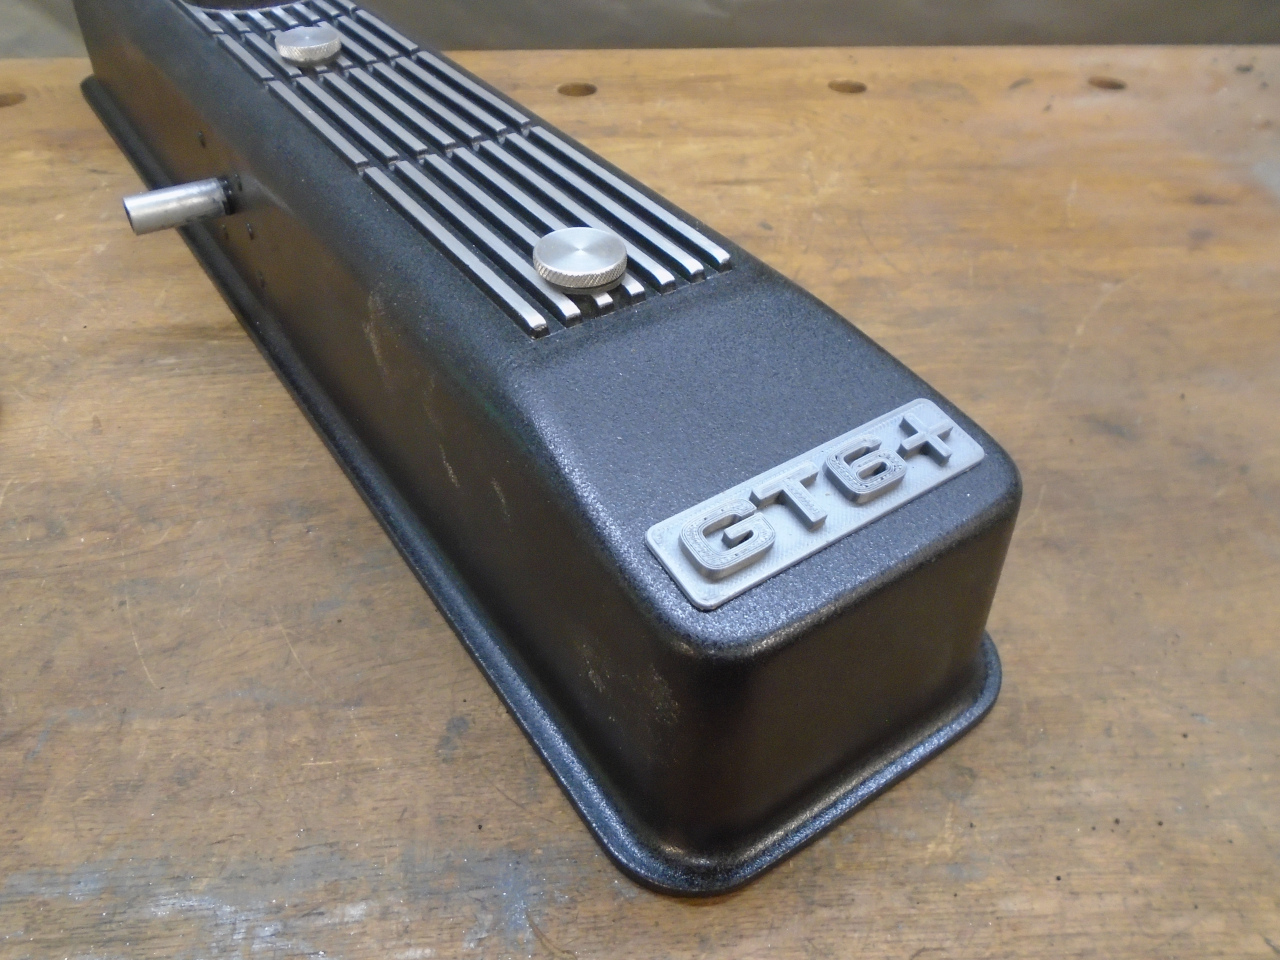
Aesthetically, to me, that broad flat space at the front of the cover
just begs for something. I don't know what, but I played around
with a couple of 3D printed badges. These aren't it, but I'll keep
looking.

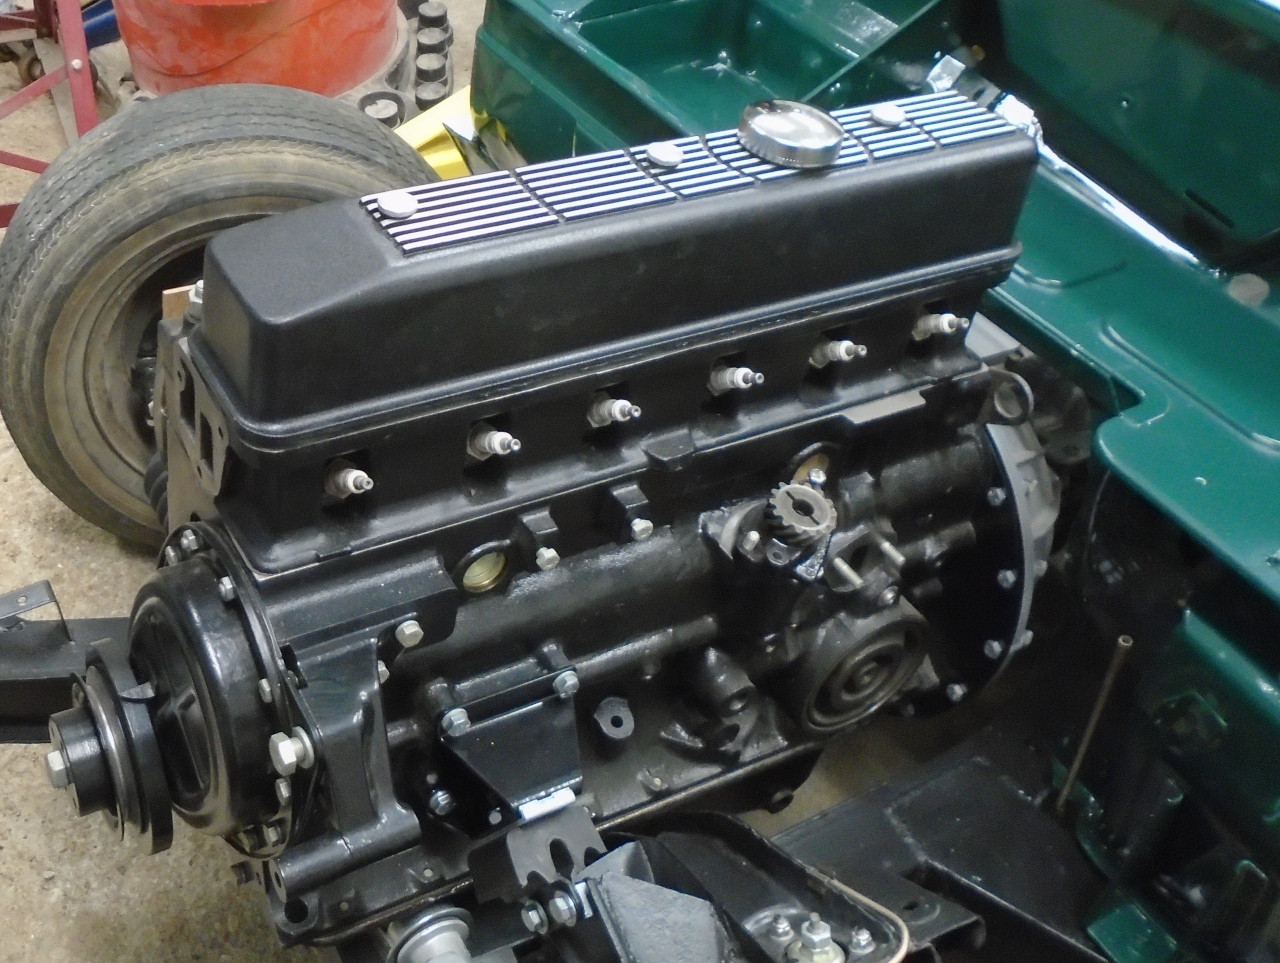
On the engine. Bonnet adjusted as low as it will go at the hinges,
and I have a scant 1/8" clearance. Mission accomplished.

This was sort of a harrowing project. And it took way too
long. Cost was almost zero (except for the TIG welder, that is).
Comments to Ed at elhollin1@yahoo.com
To my other GT6 pages.