To my other GT6 pages
April 25, 2023
Finishing the Boot
For no particular reason, I decided to finish off the boot area of the car next.
This is sort of a long one, so here are some "jump ahead" links:
Bumper Brackets
Fuel Tank
Wheel Well Carpet
Insulating Pads (Bags o' Wool)
Conduit
Leather Trim
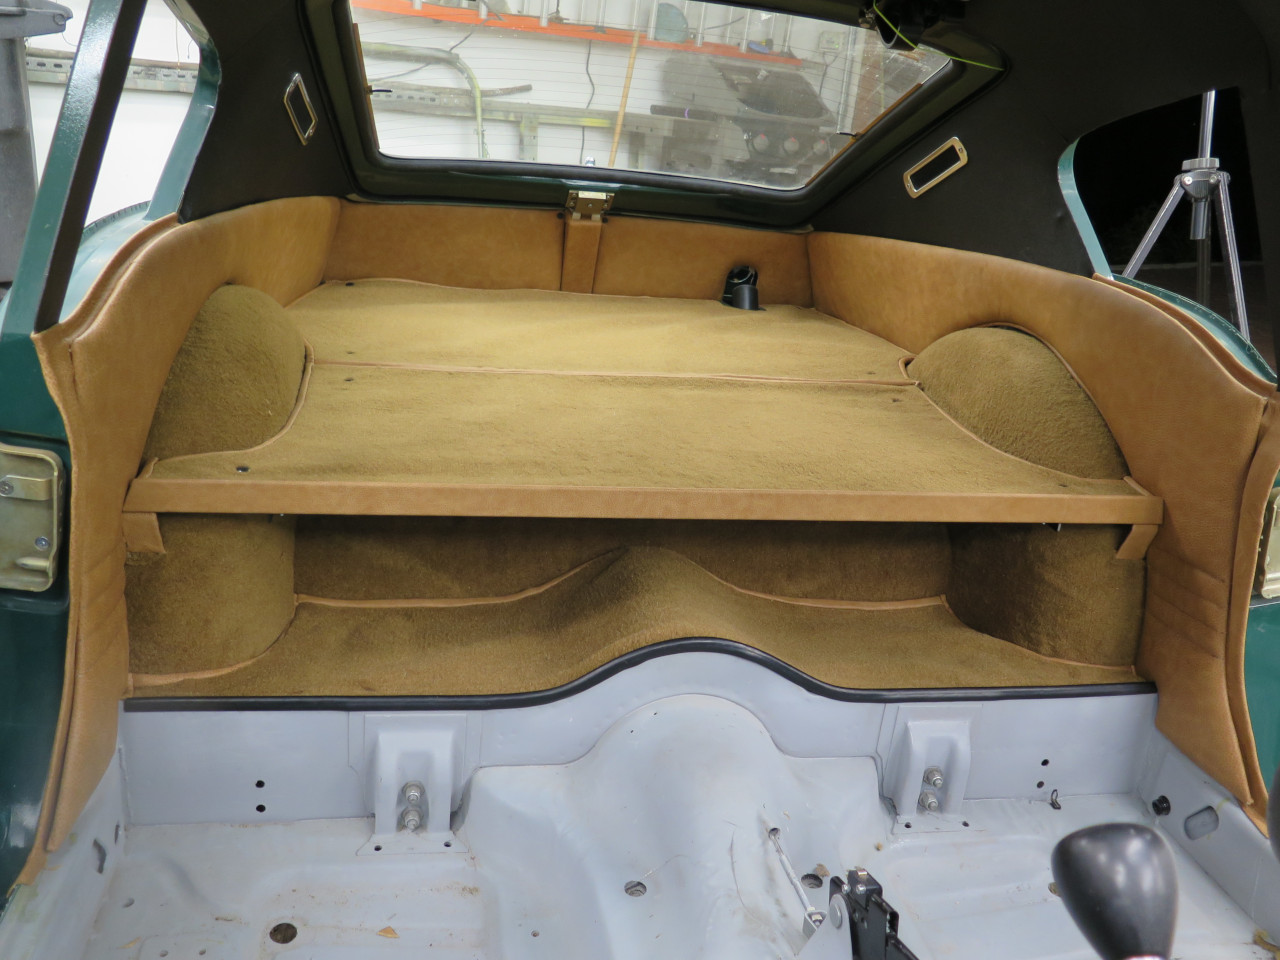
Rear Panels
Wheel Arch Panels
Spare Tire
Luggage Floor
Rear Tunnel
Rear Carpet
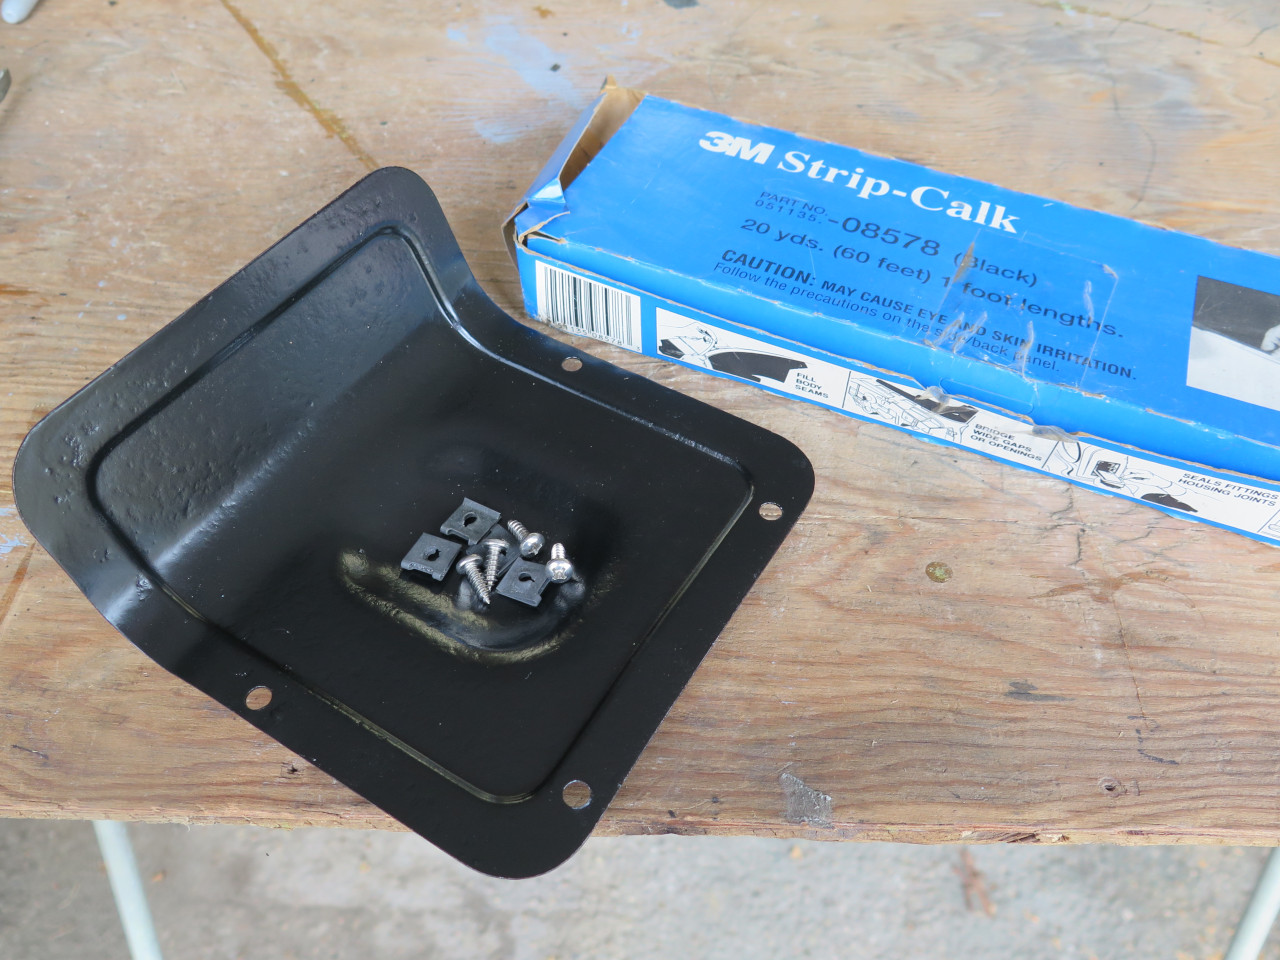
Fuel Filler Bezel
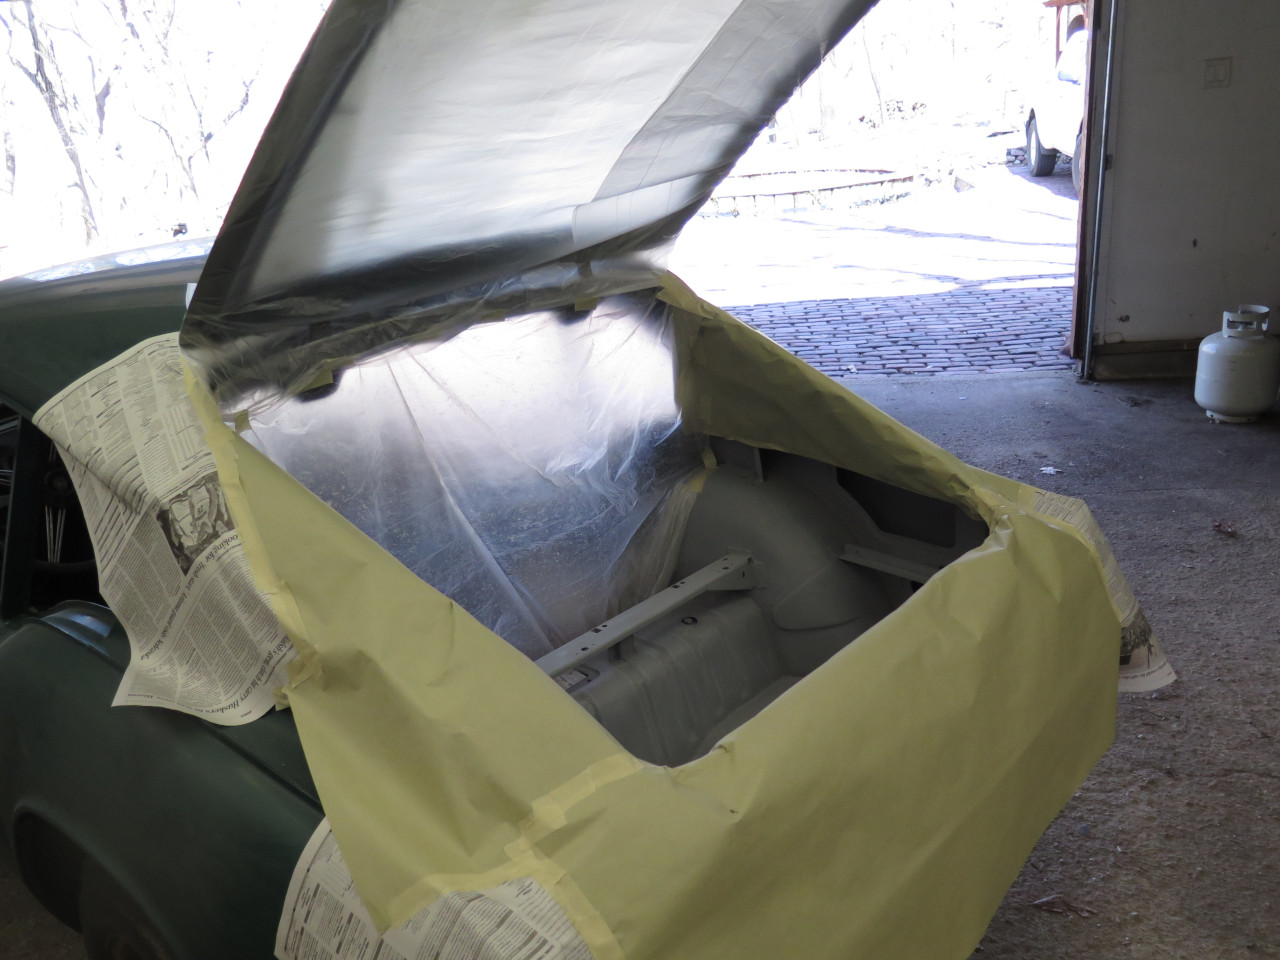
I had decided early on that I wouldn't paint the interior of the
car. I reconsidered on the boot, though. The entire interior
of the car will be covered with finish trim except for the spare tire
well. Even though this is sort of a "utility area", it still
seemed to me that it should be body color. It of course would have
been much easier to do this with the rest of the body, but this is
where I was.
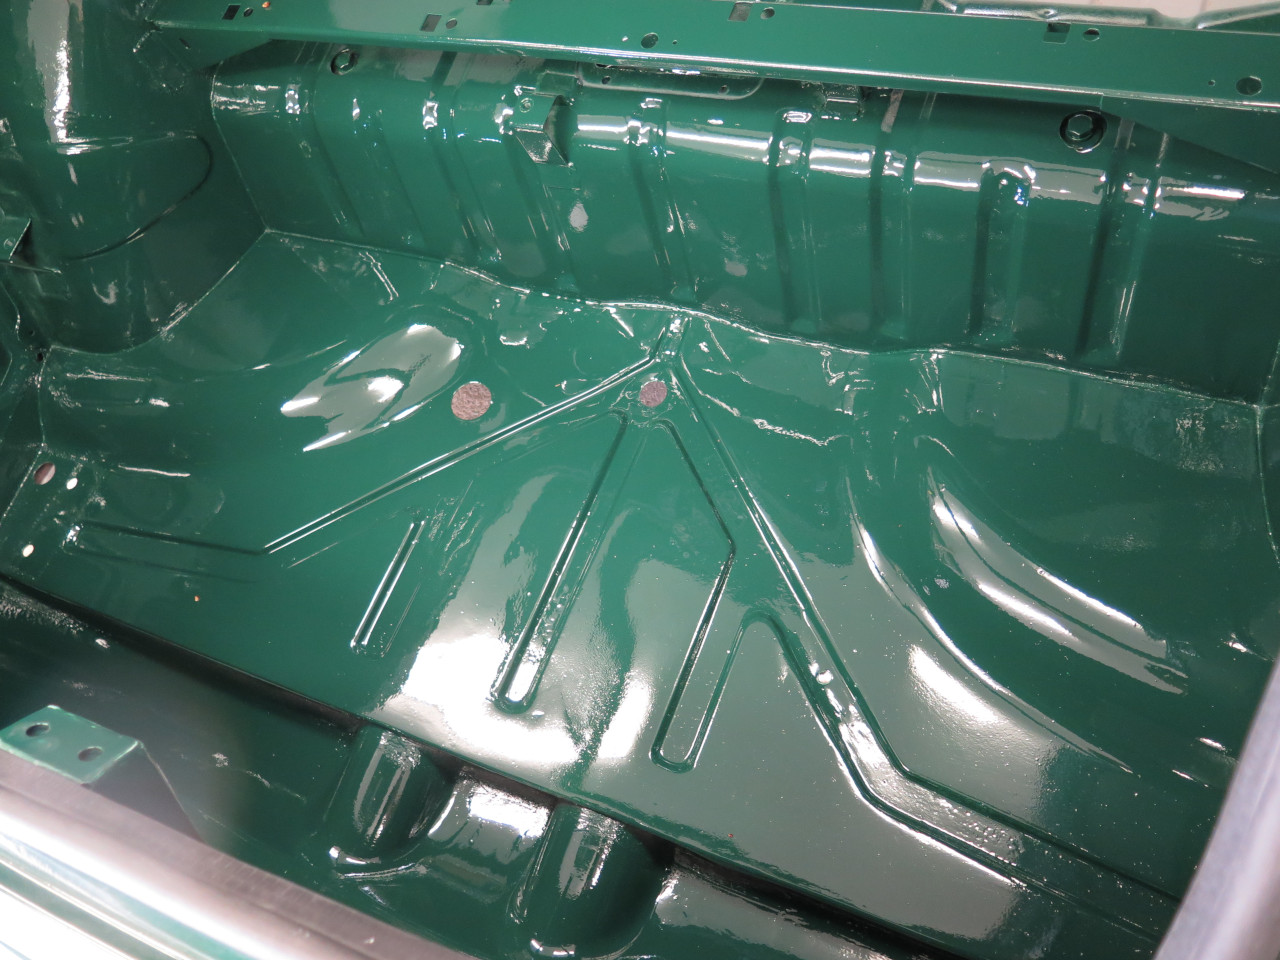
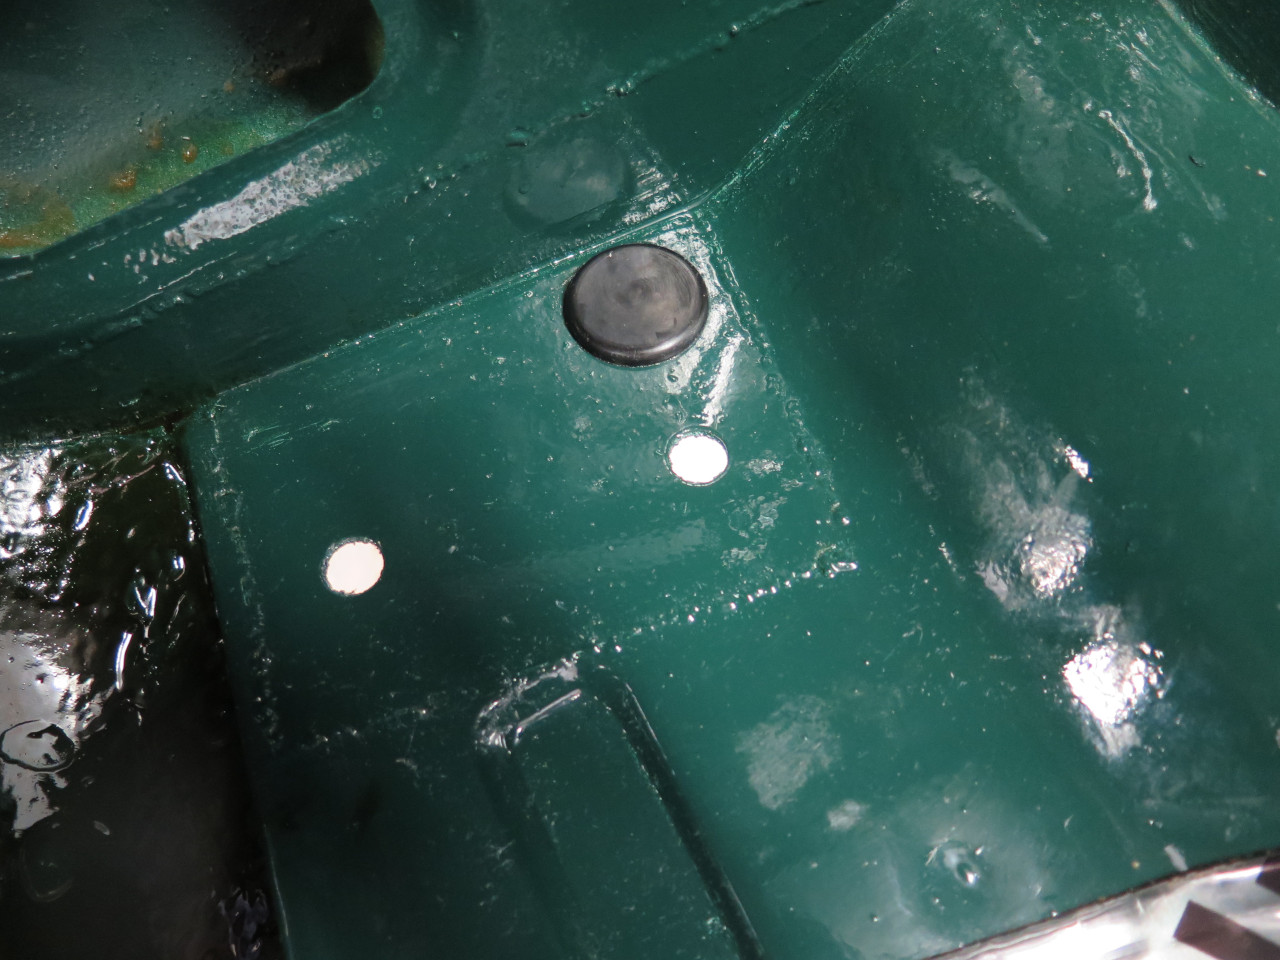
A little body work around the exhaust tunnels and the floor pan, which still showed some wrinkles from a long-past rear-end collision, then masking.
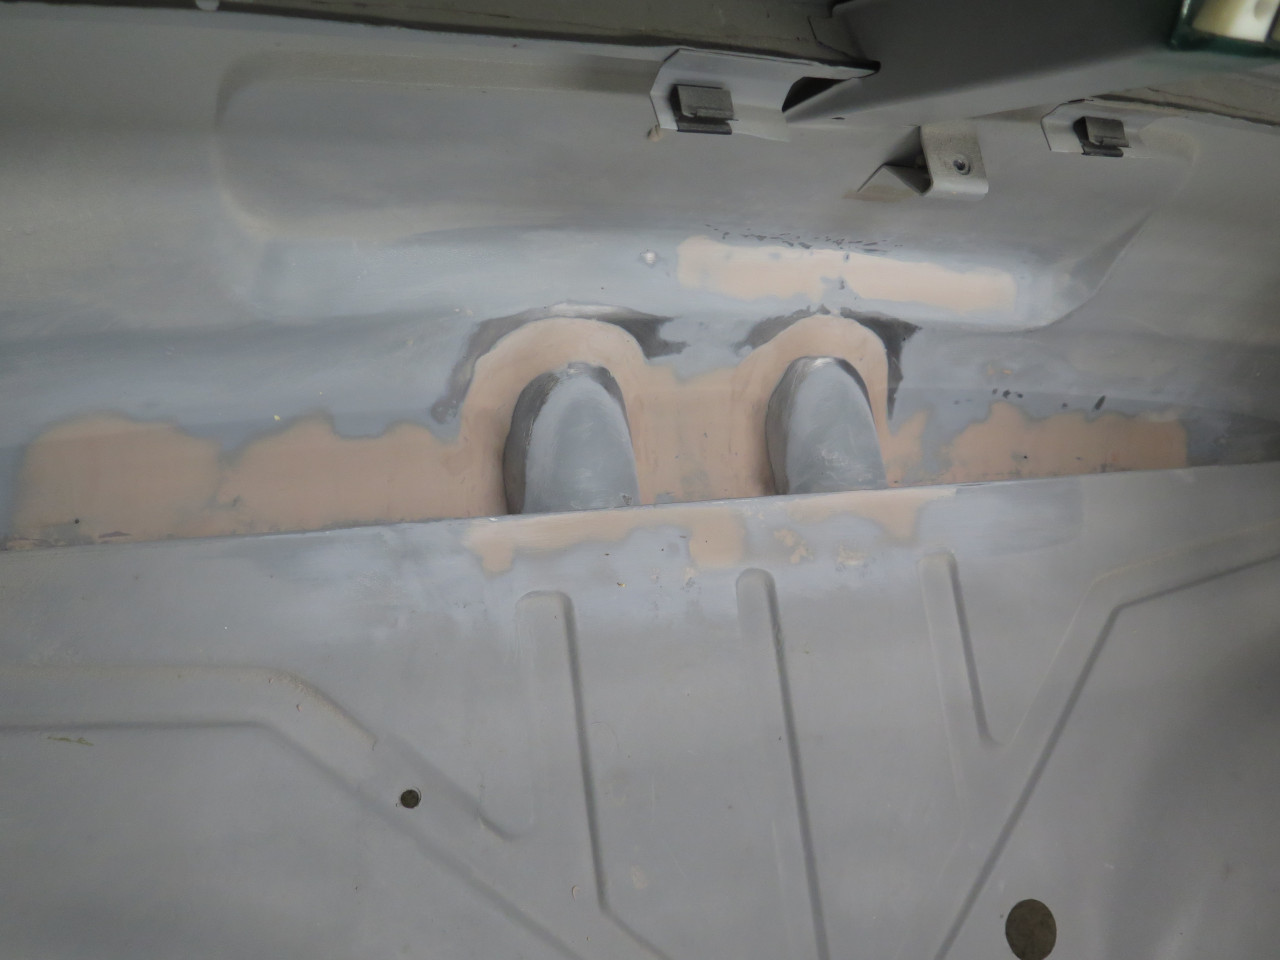
A final coat of epoxy, and then a good application of seam sealer to the
lowermost joint. Water and debris tend to collect there.
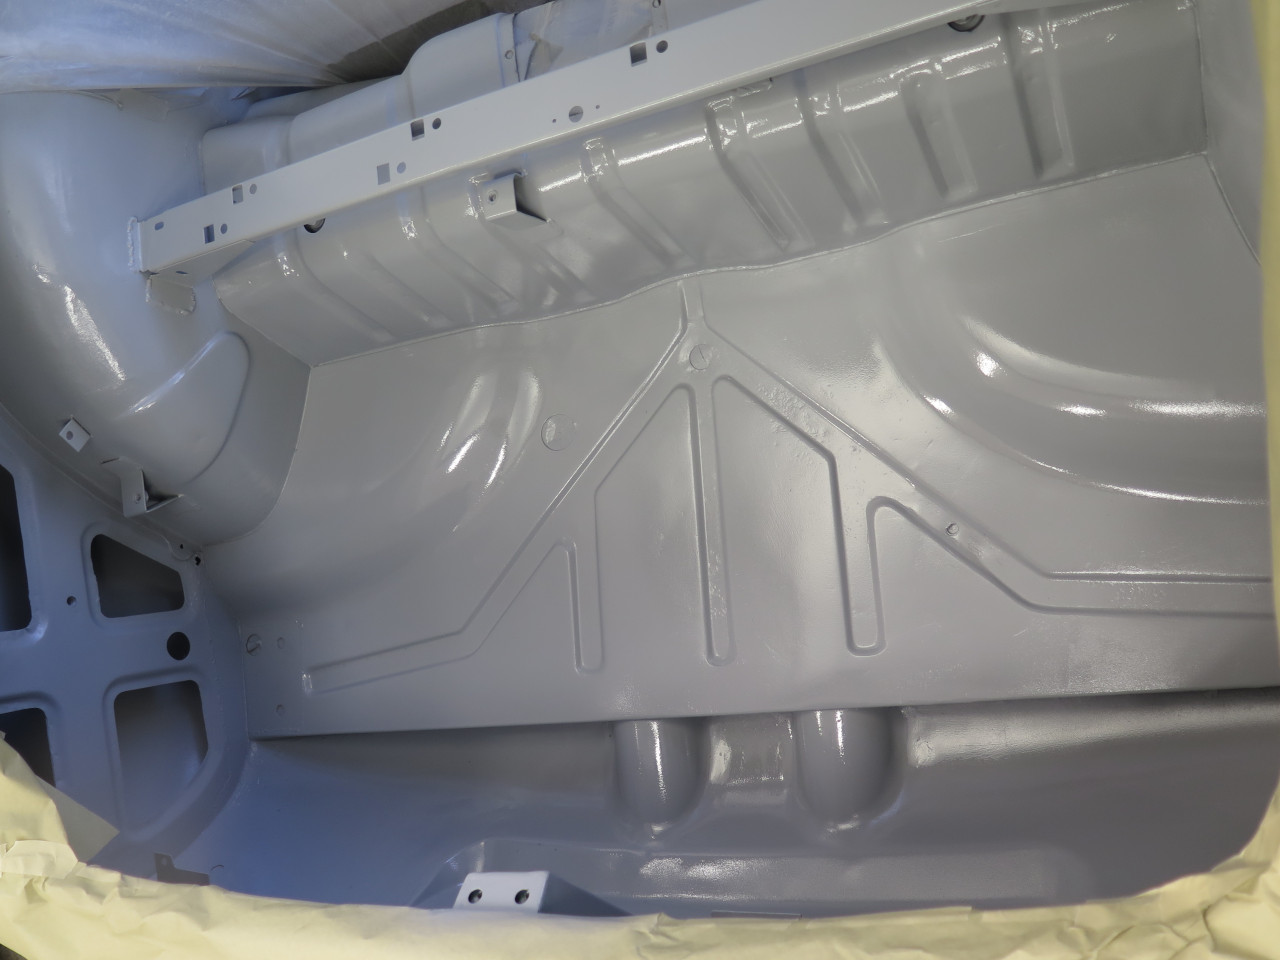
Then, some color.
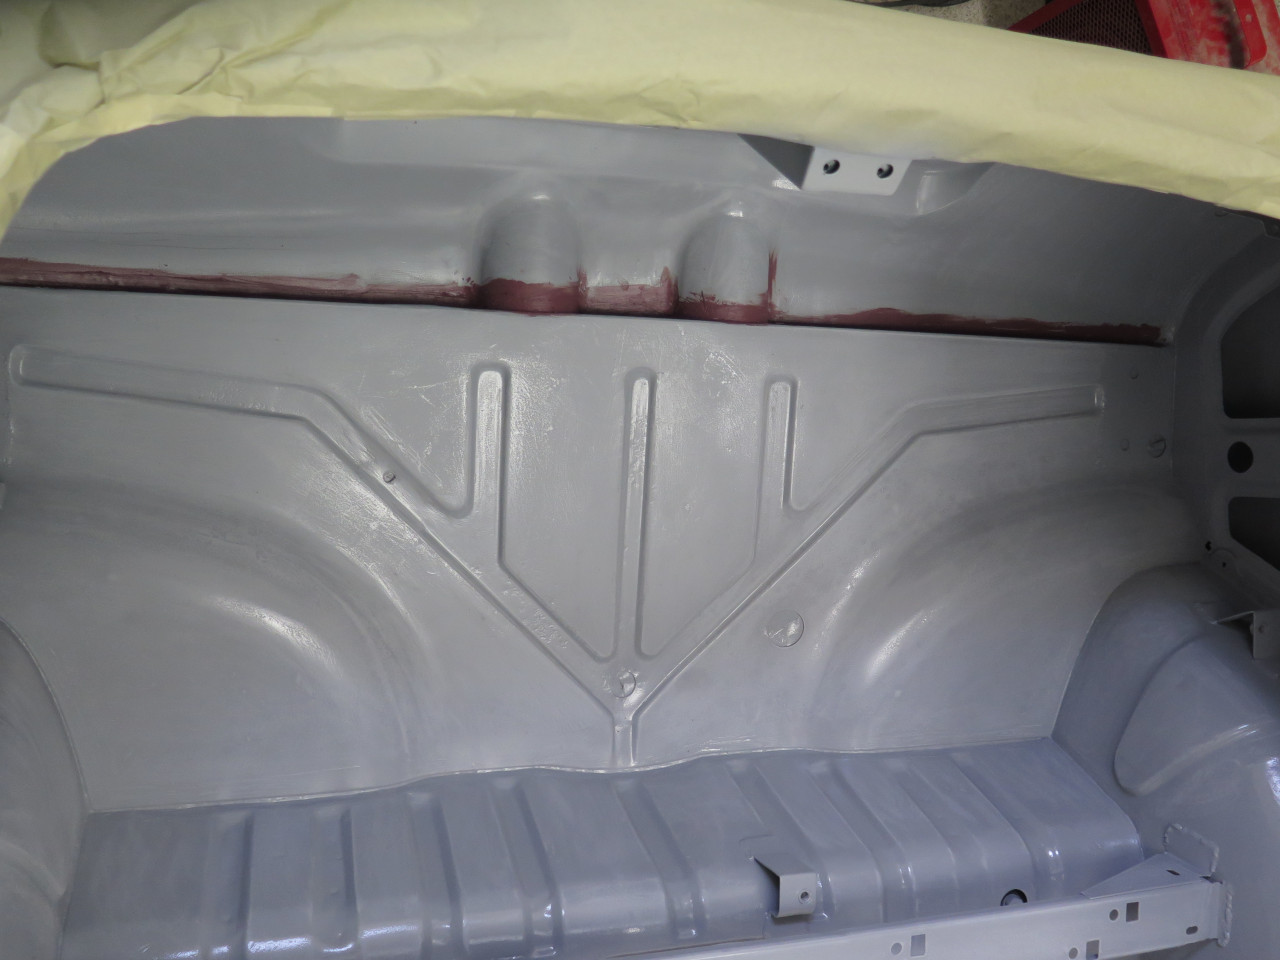
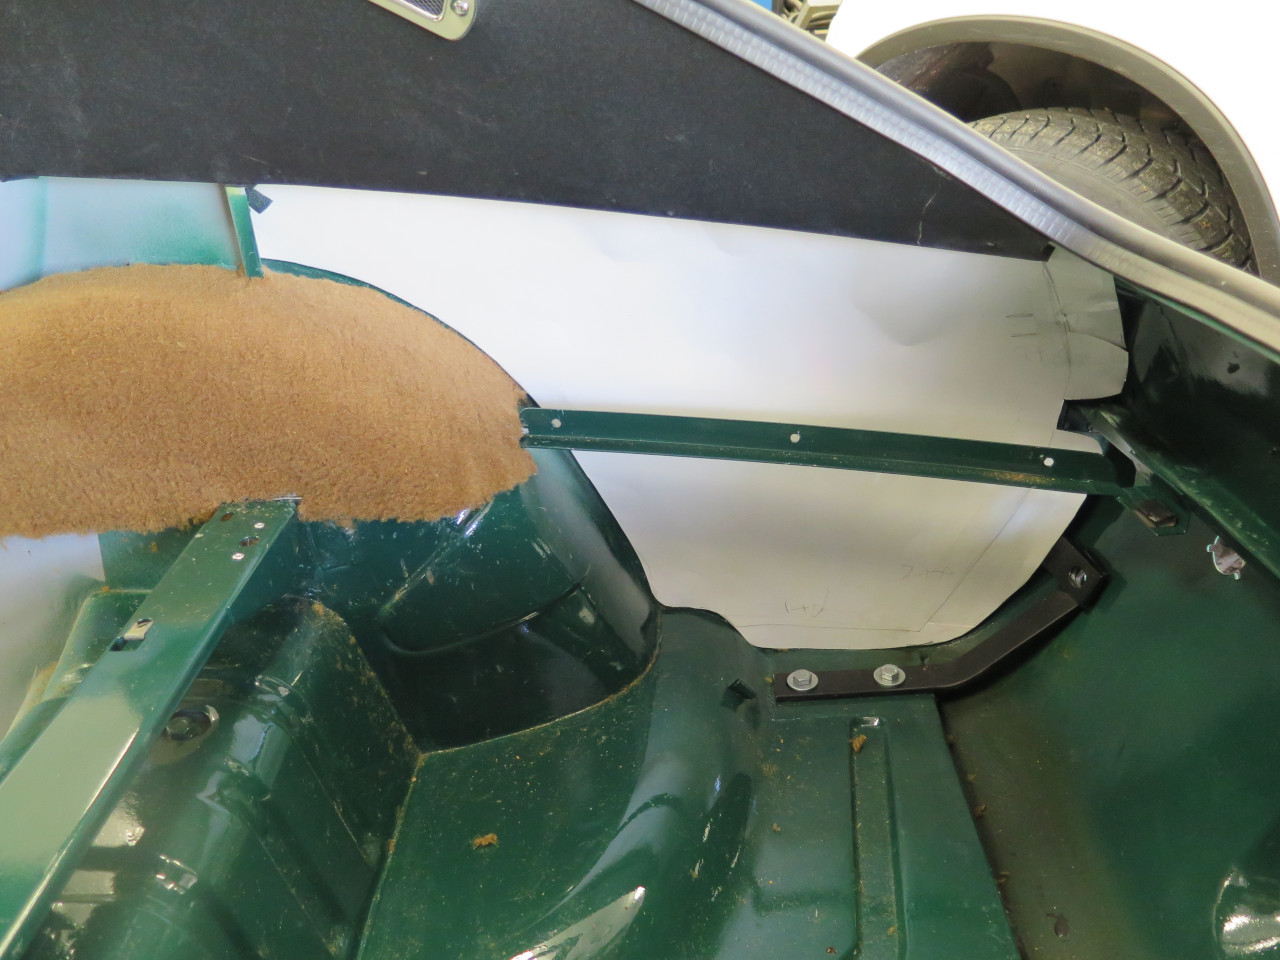
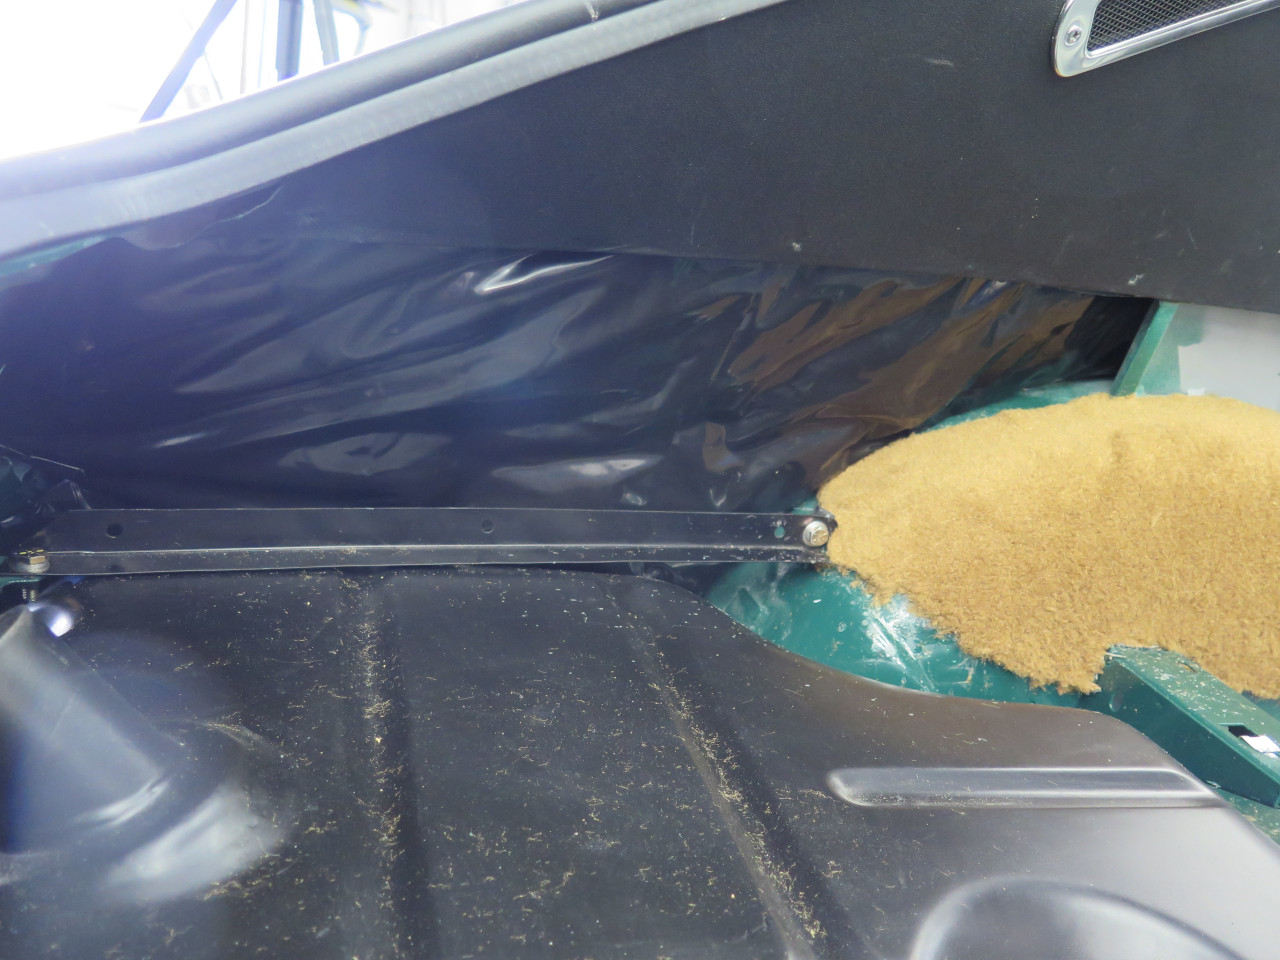
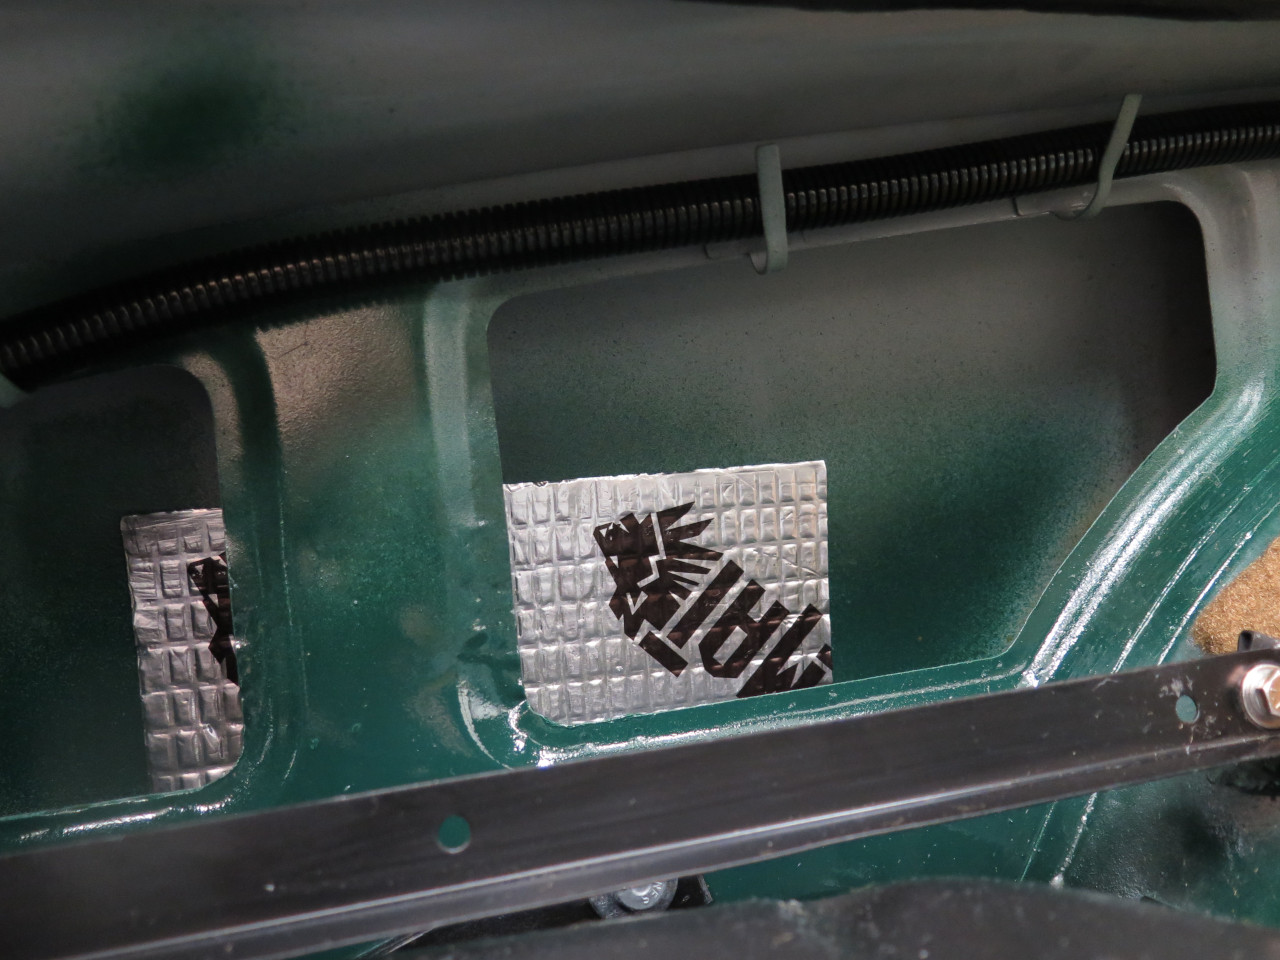
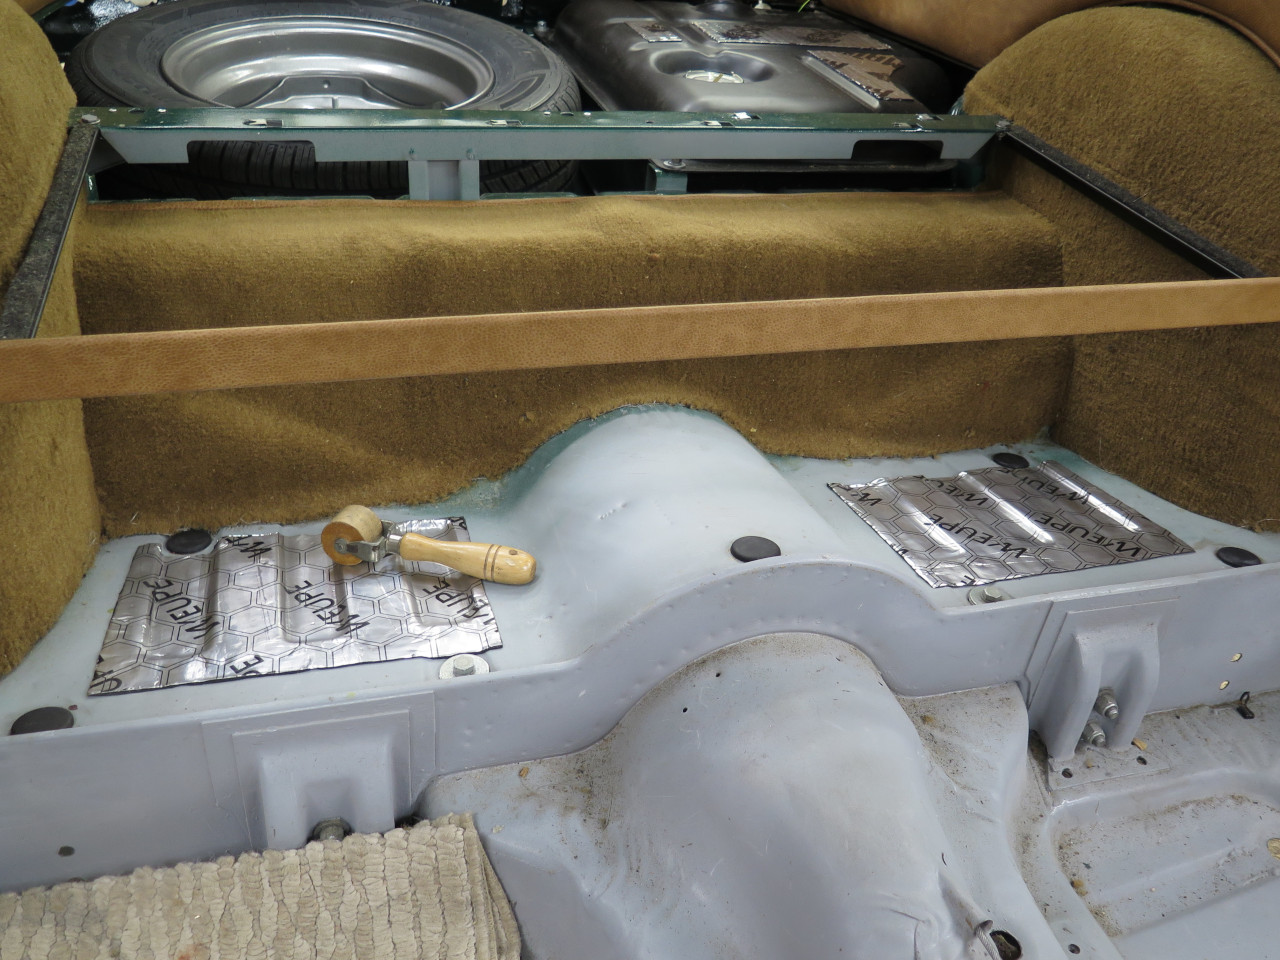
I applied a little CLD mat to the inside of the rear wings since it
would be harder to access them later. A before and after thump
test showed improvement, though they were pretty good to start with.

Also put a CLD mat under the fuel tank. The tank hovers above the
floor, so the largish, flattish panel can be prone to vibration.
Thump test showed that this helped a lot. Spare tire side probably
doesn't need this treatment because cinching down the spare should
constrain the panel from vibration.
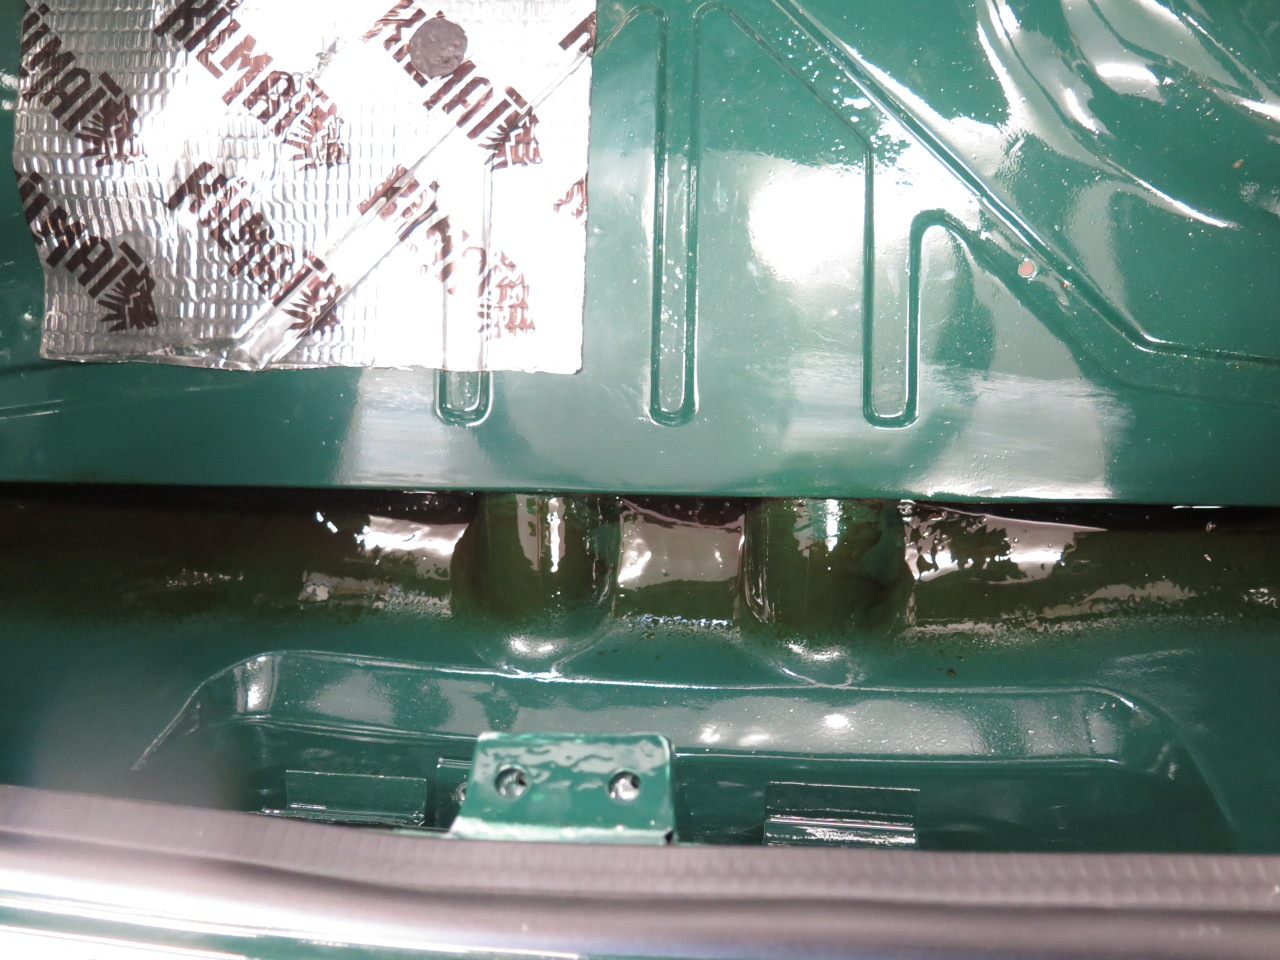
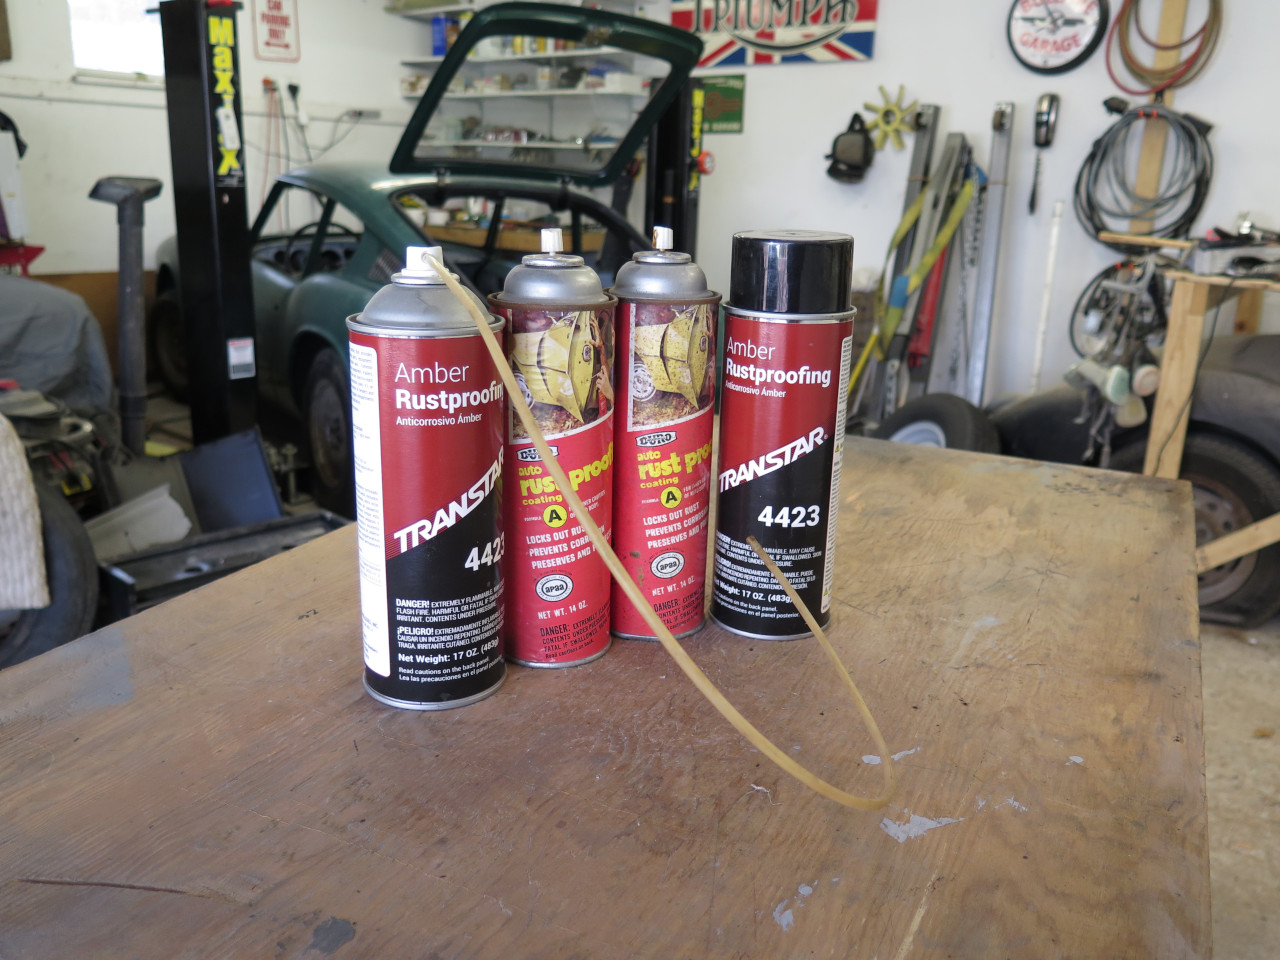
The brownish stuff in the "sump" is a rustproofing compound. It
stays sort of waxy, and looks, smells, and feels the same as what
Ziebart uses. It got sprayed into the lowest interior cavity of
the wings, too.
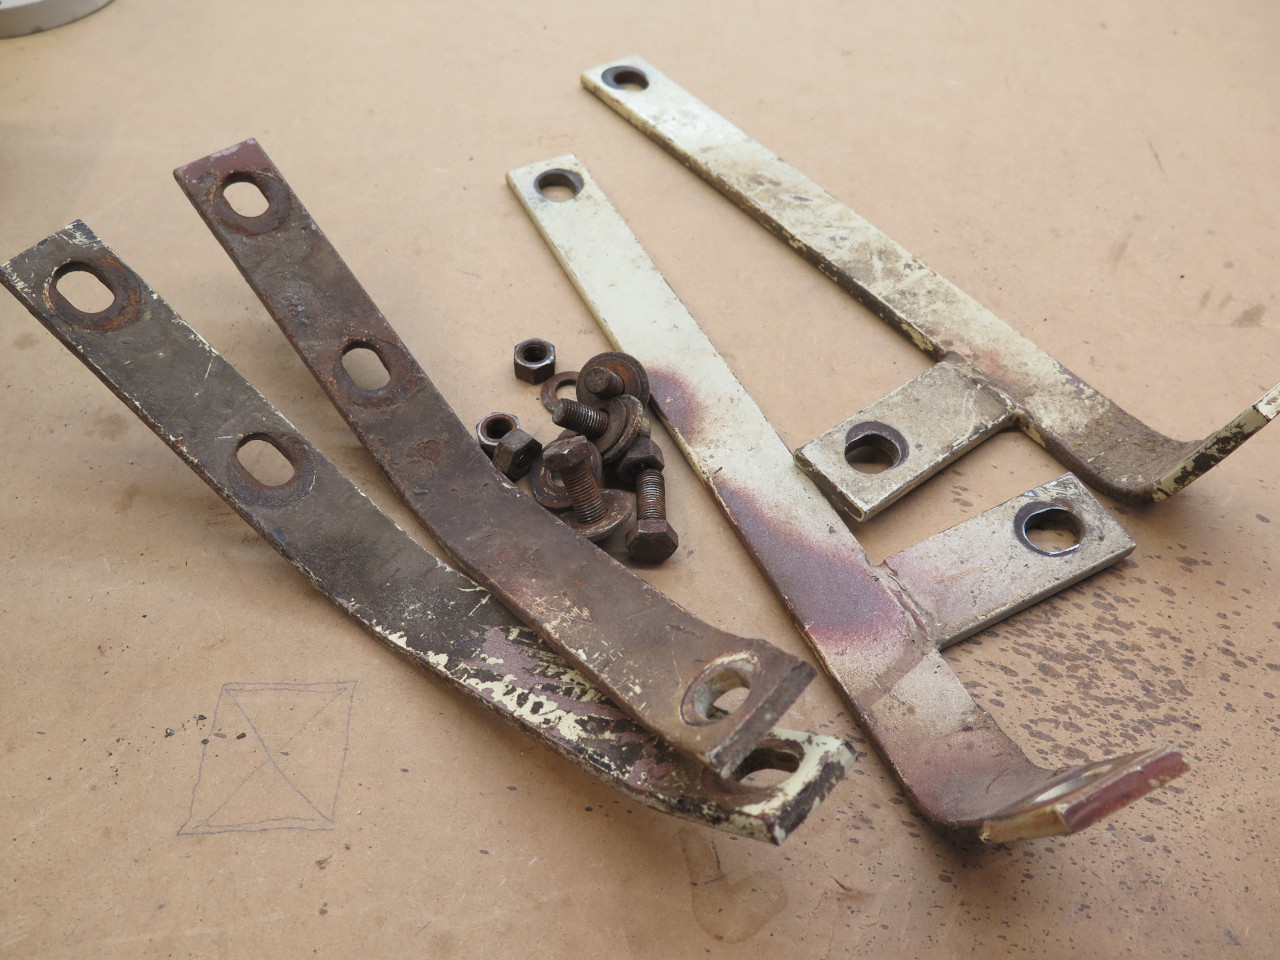
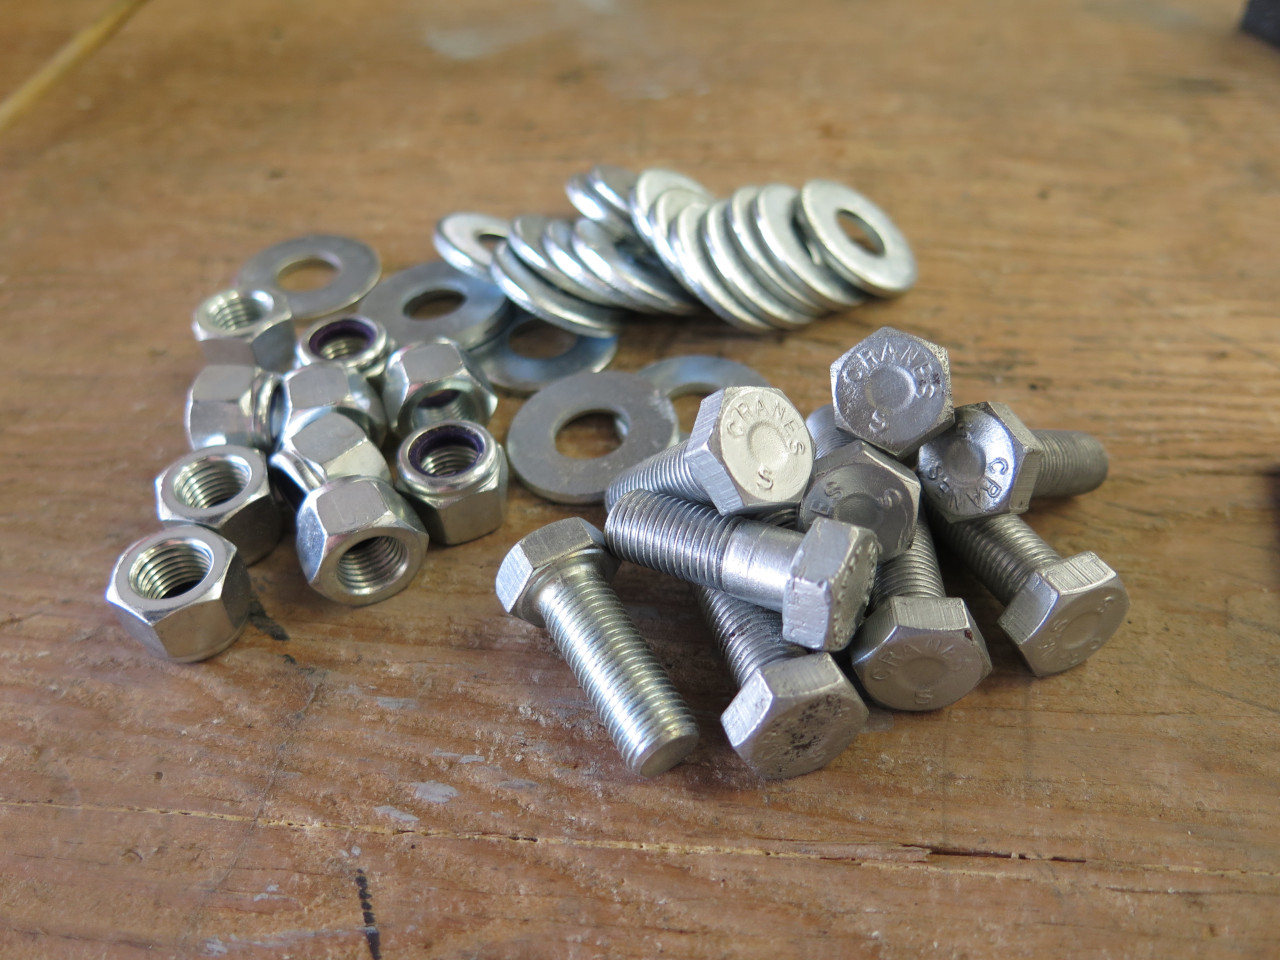
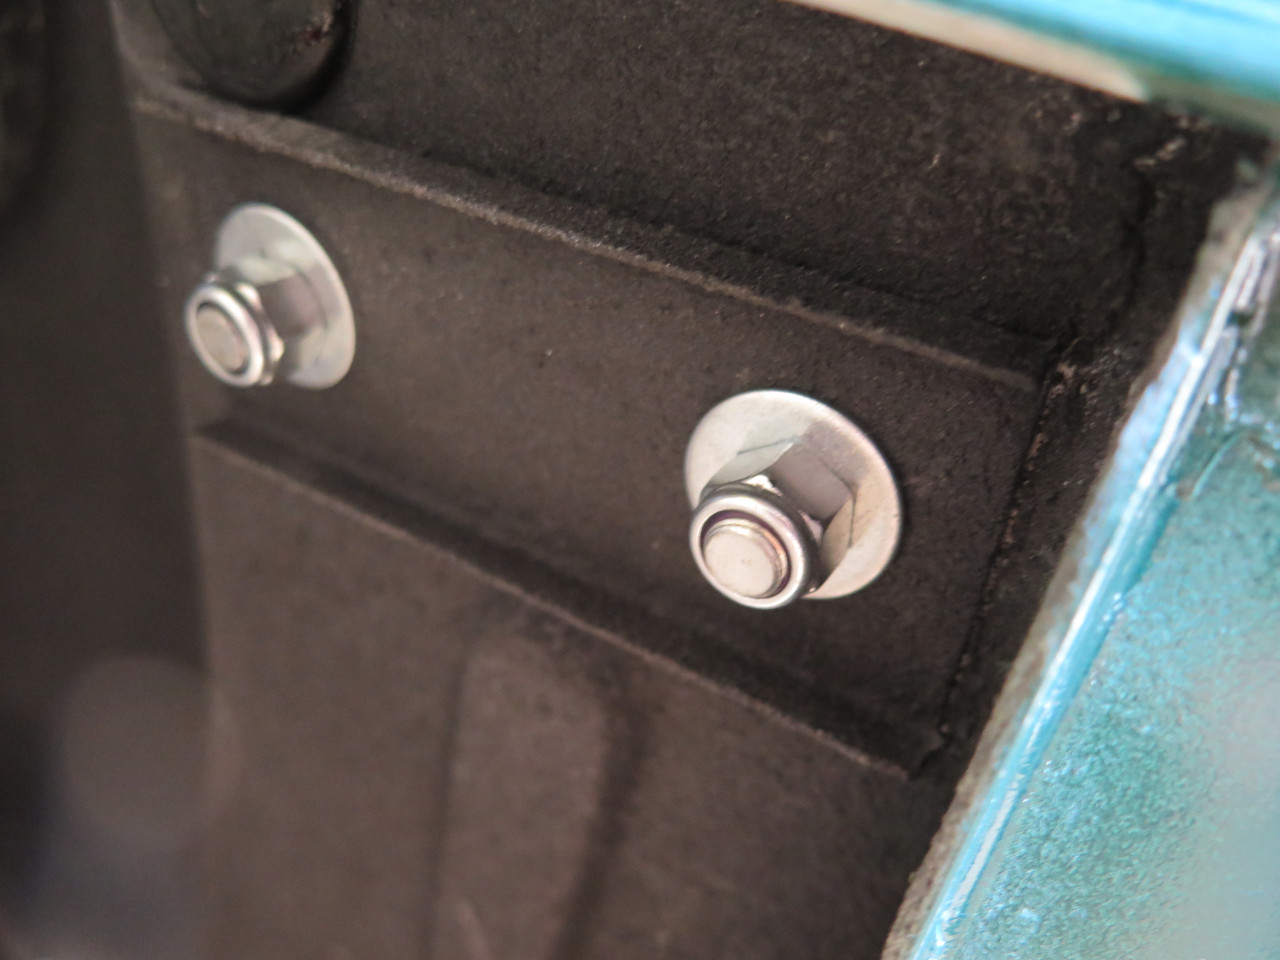
Next up were the bumper brackets. Blasted, powder coated, and most
of the bolts replated. I used new flat washers, and lock nuts in
place of the standard nuts and lock washers. Not sure if I'm going
to run stock bumpers or not.
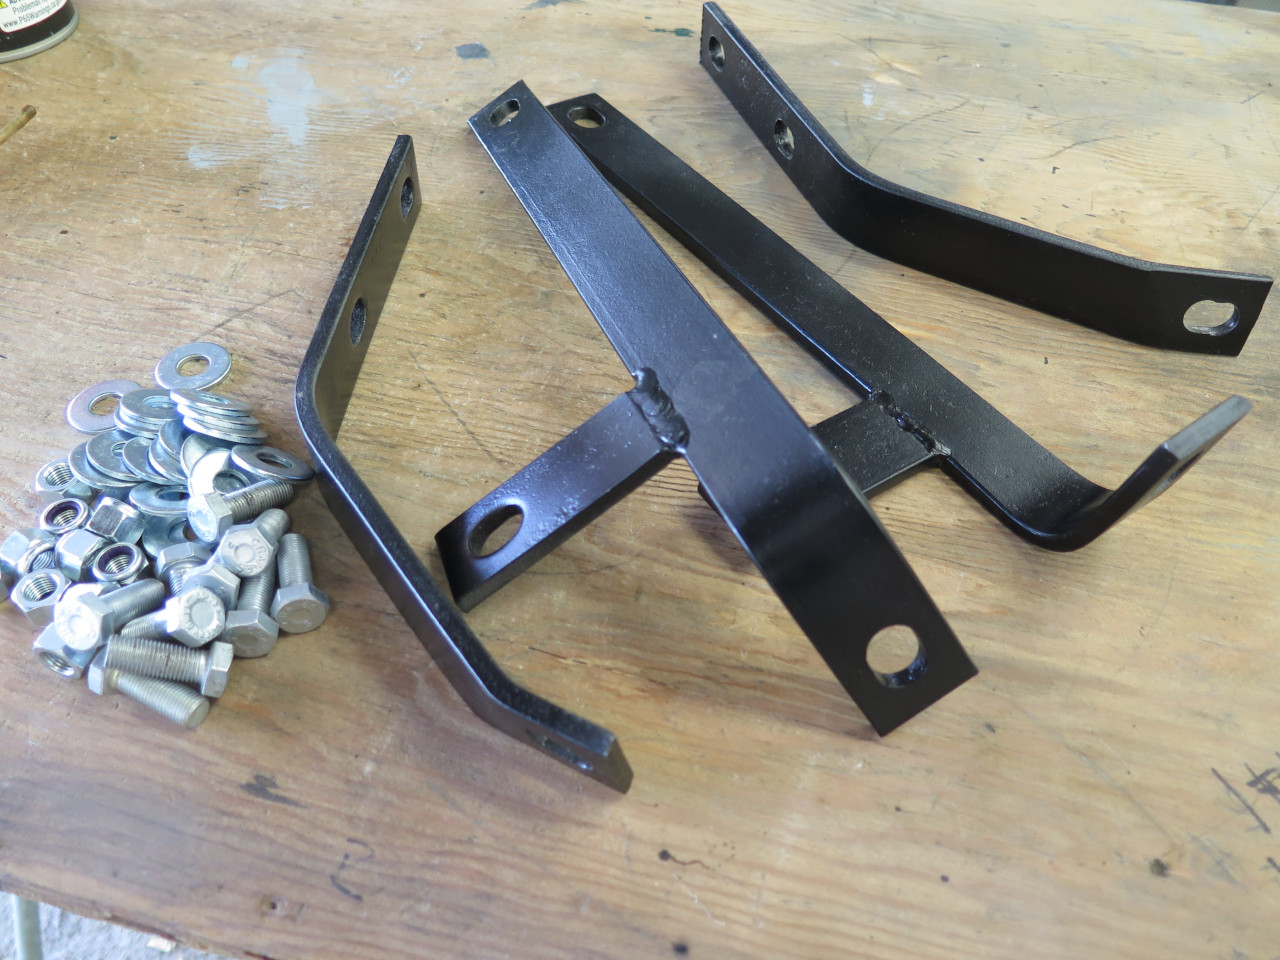
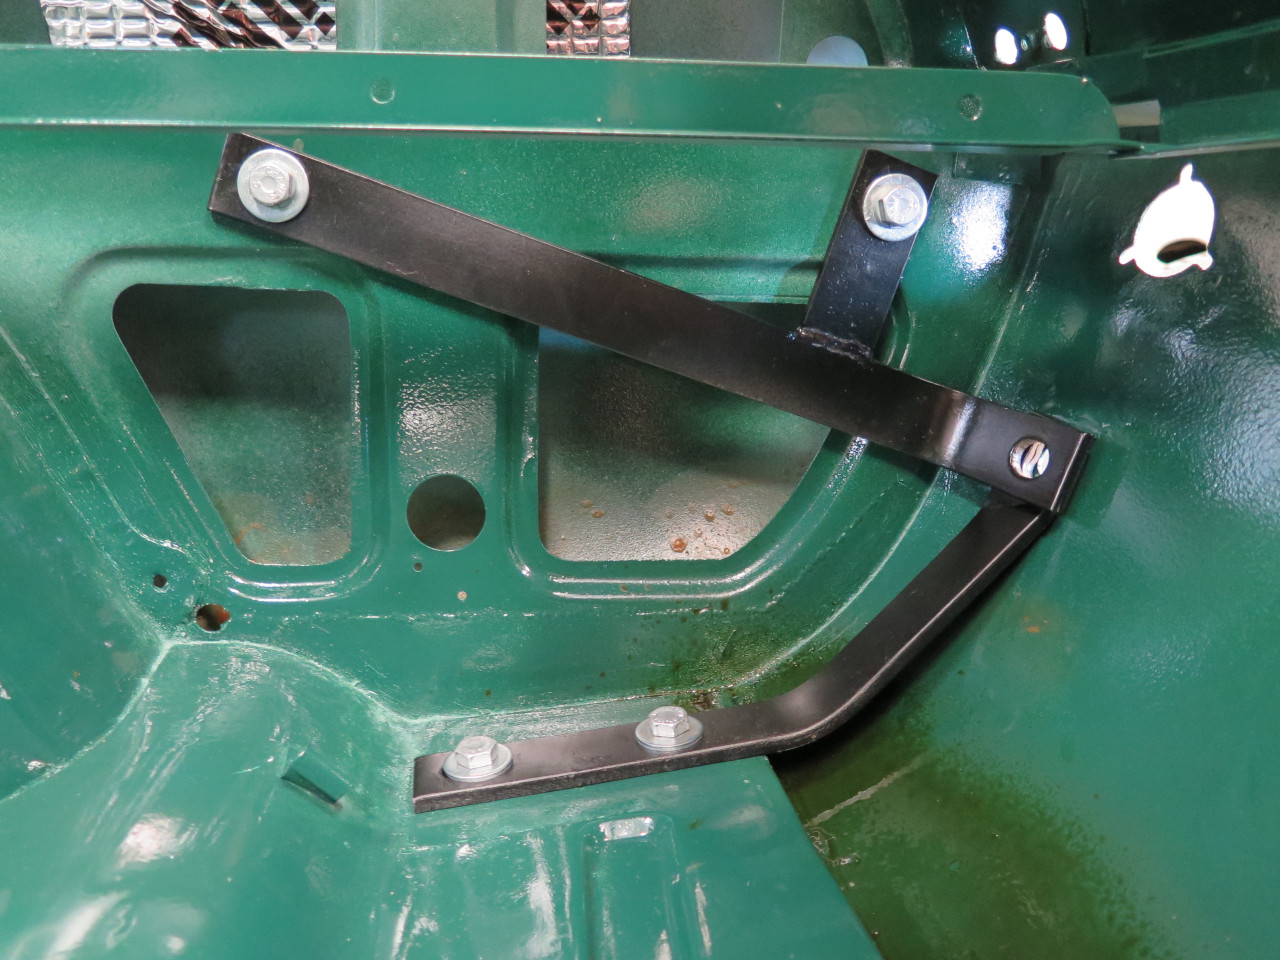
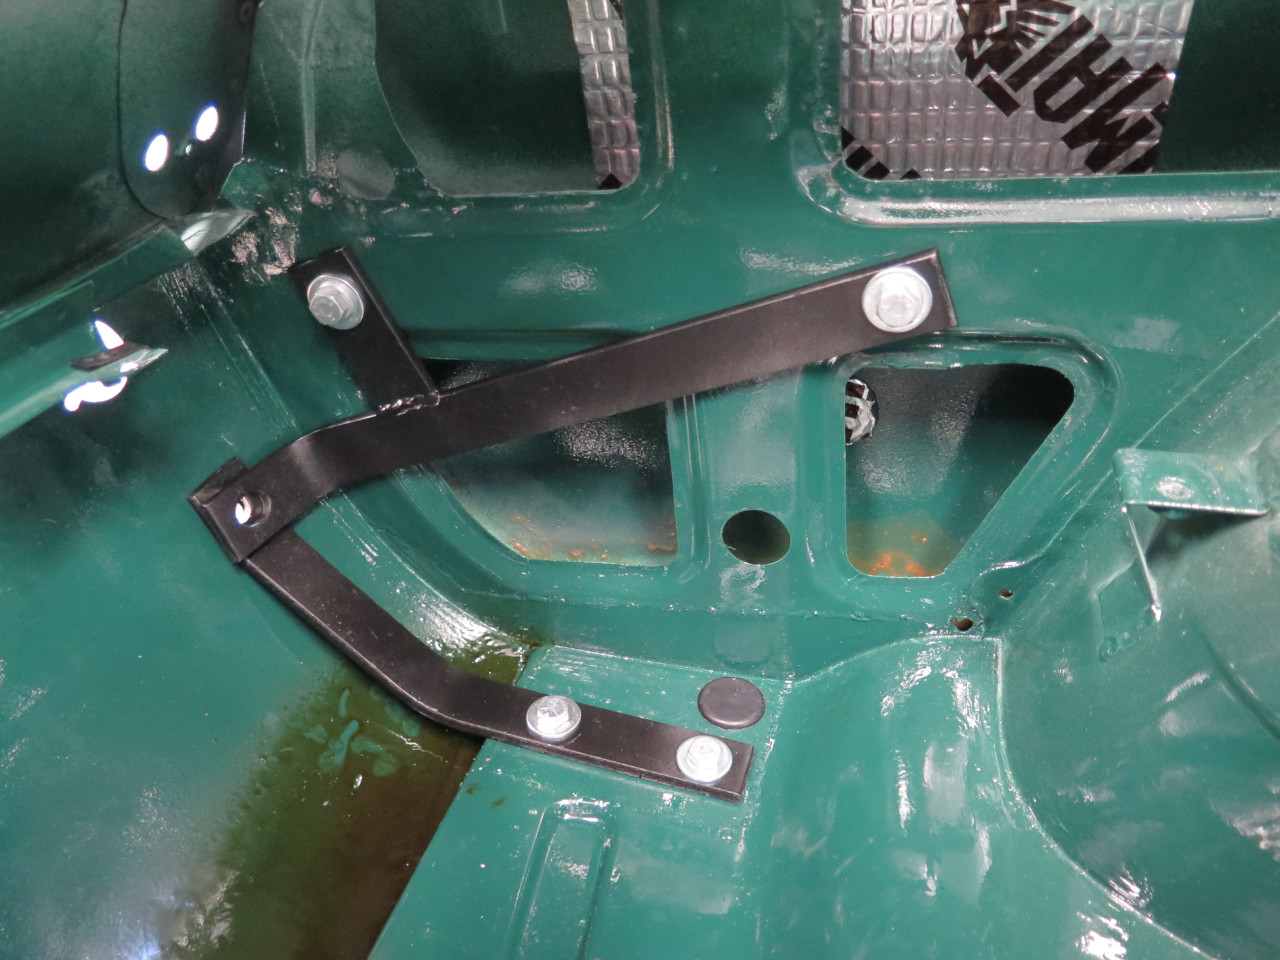
Interestingly, the bumper brackets don't connect to the frame at all, just to the body.
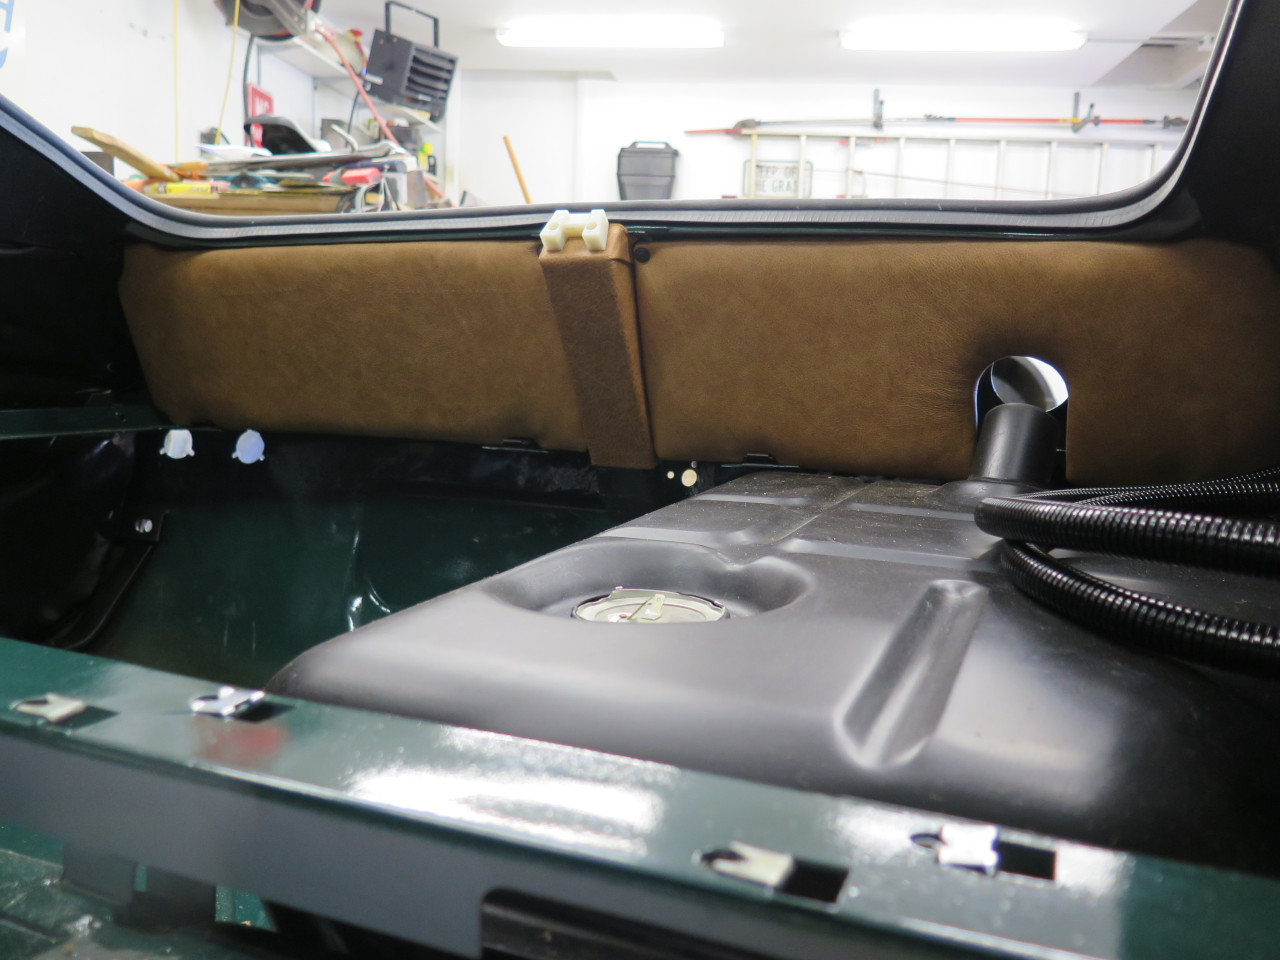
Then, the fuel tank. There is a foam seal where the supply line
goes through the floor. I'm not sure if it is available anywhere,
but this is just some generic closed cell neoprene foam.
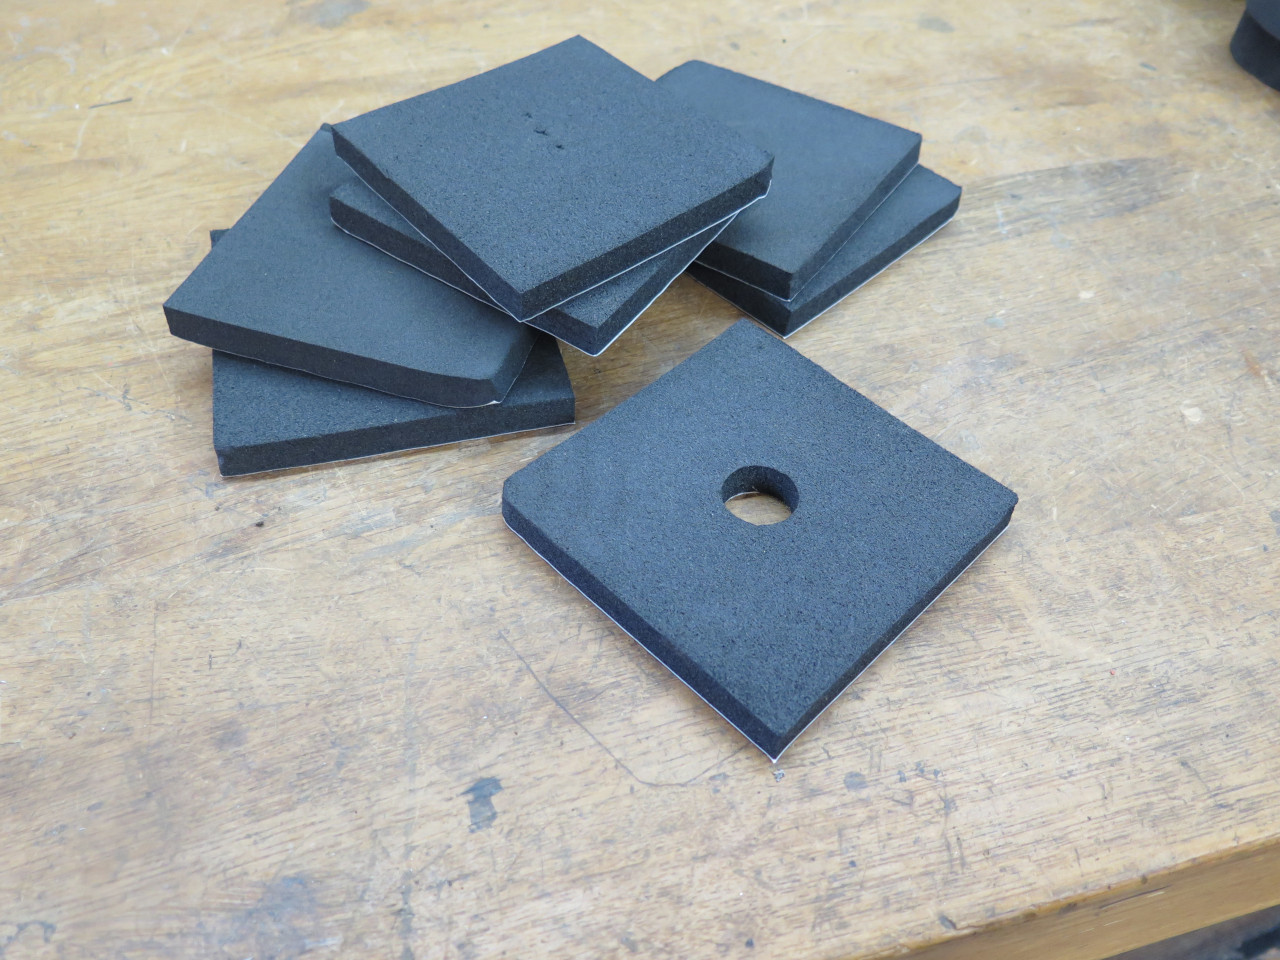
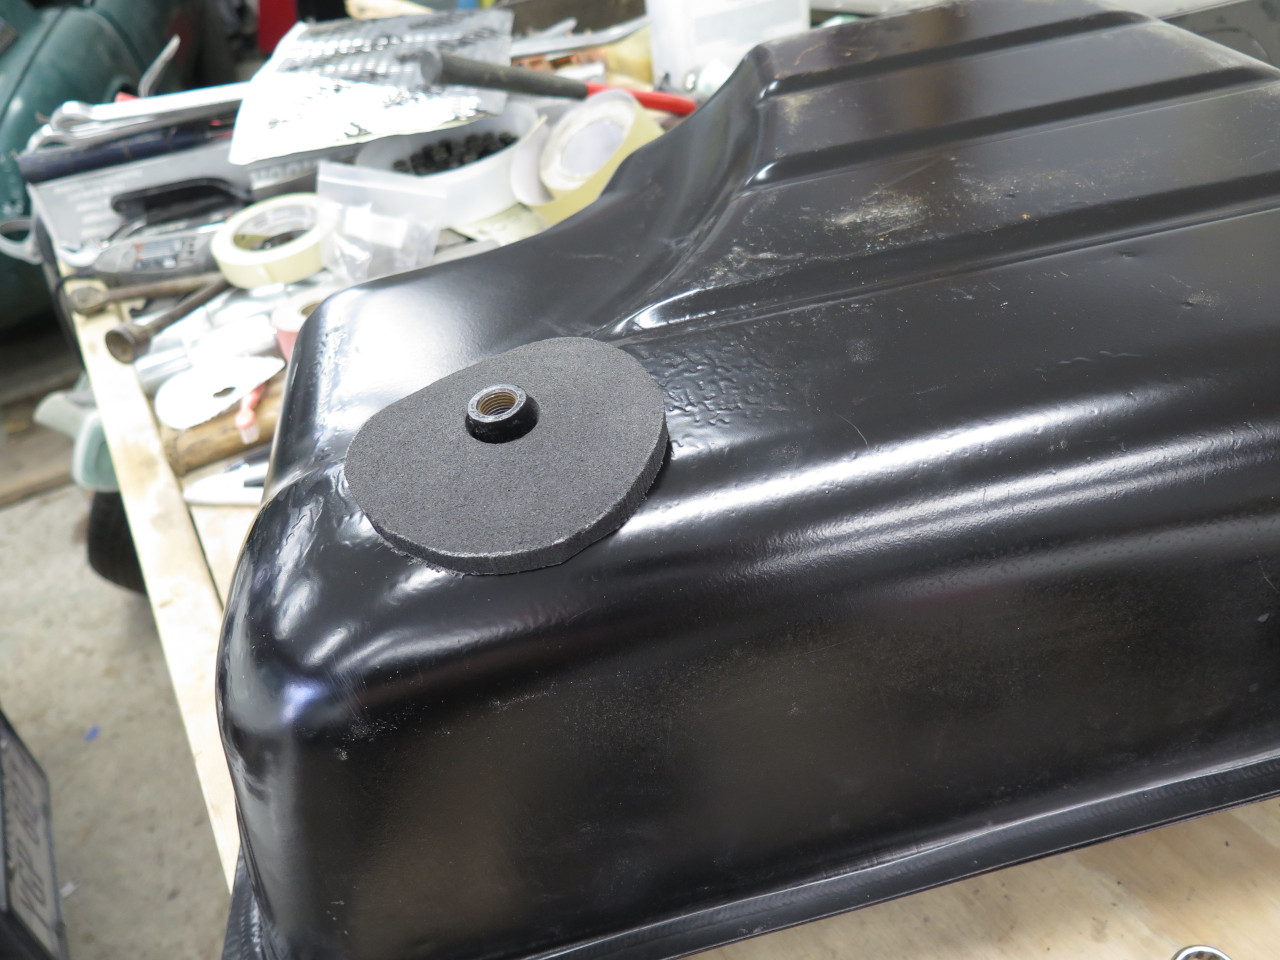
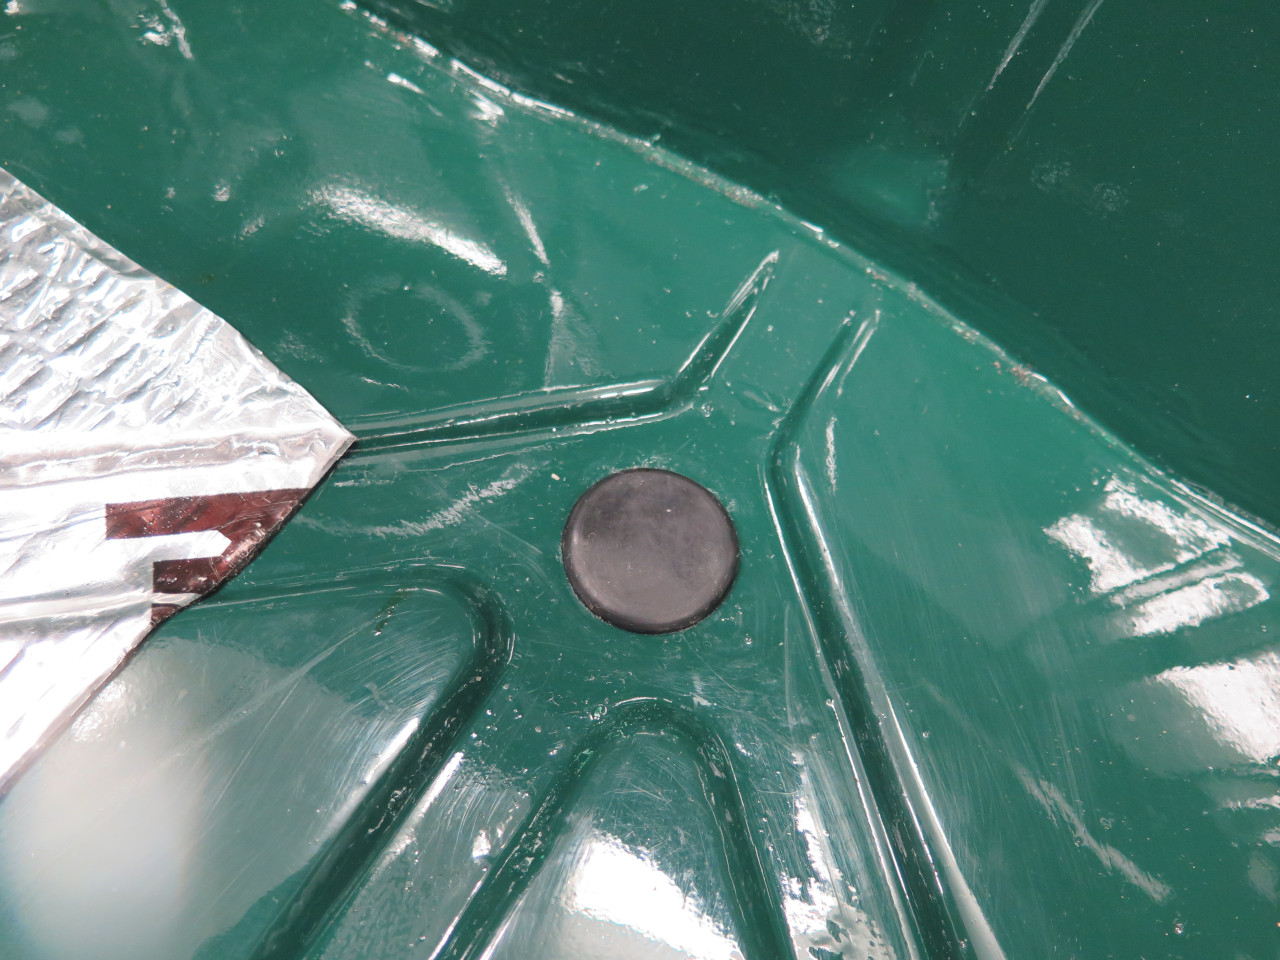
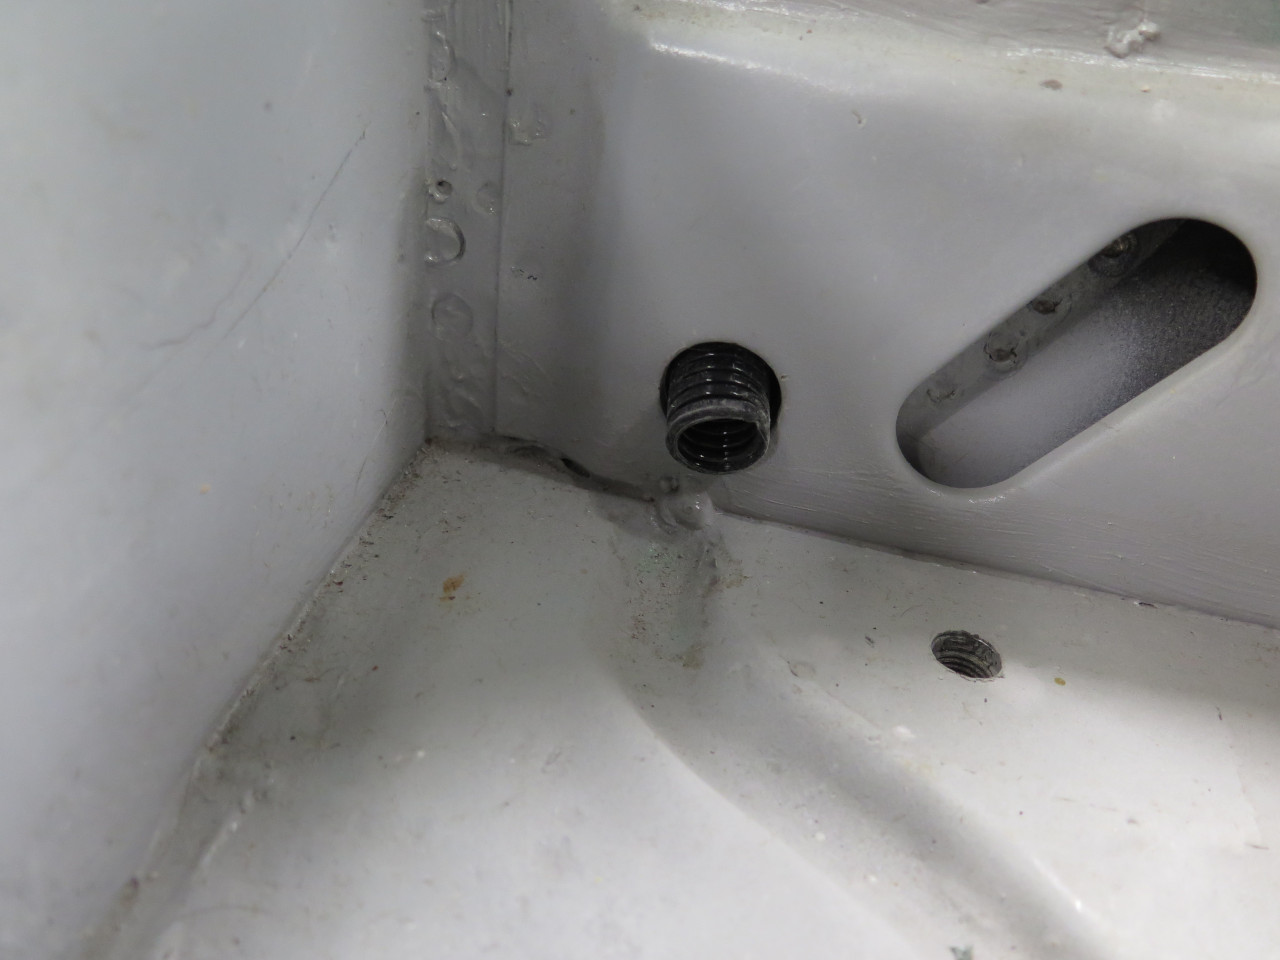
Rubber plugs in some of the many one inch holes in the boot floor.
And the tank goes home.

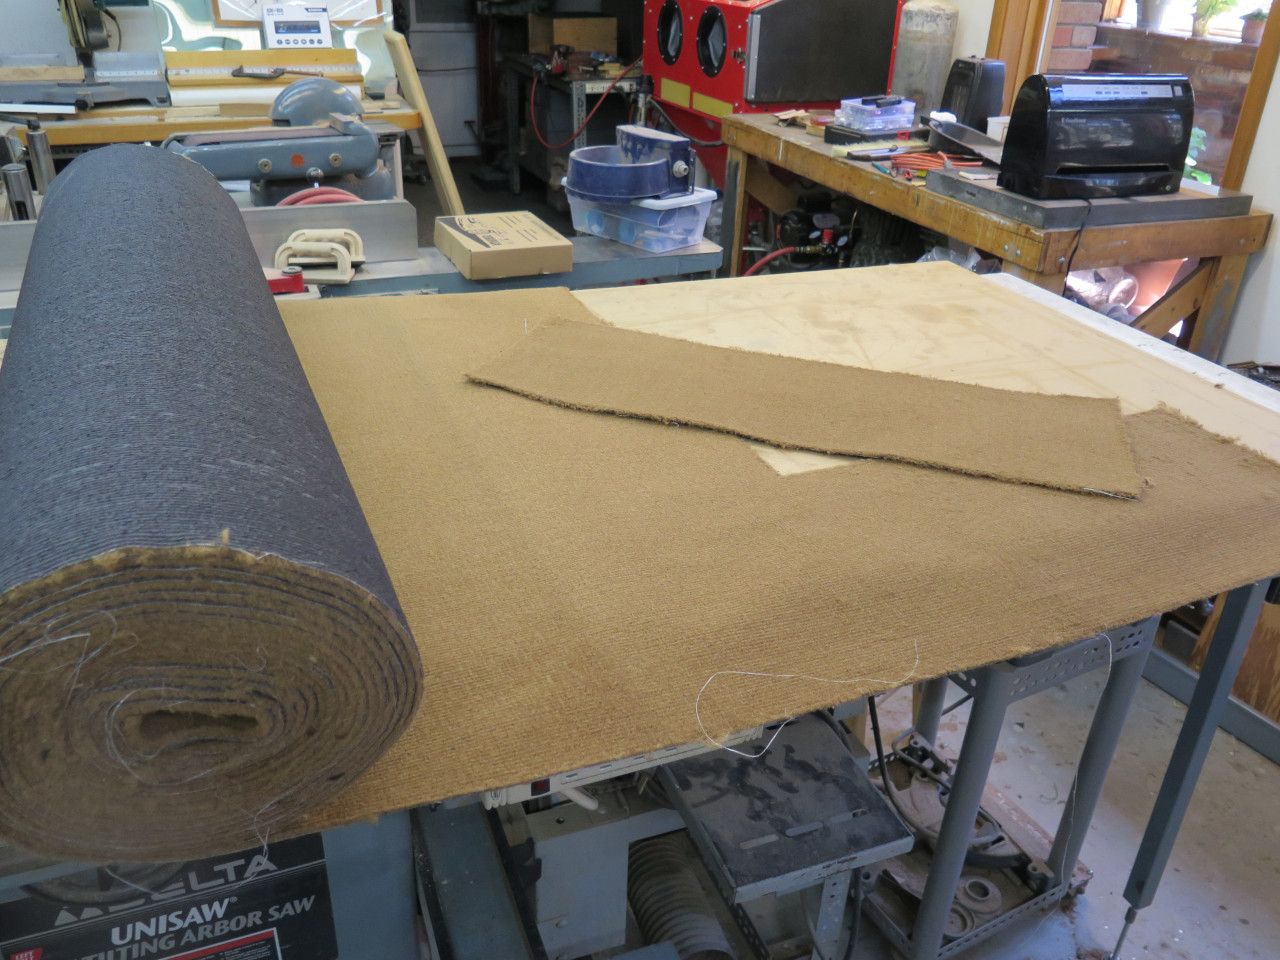
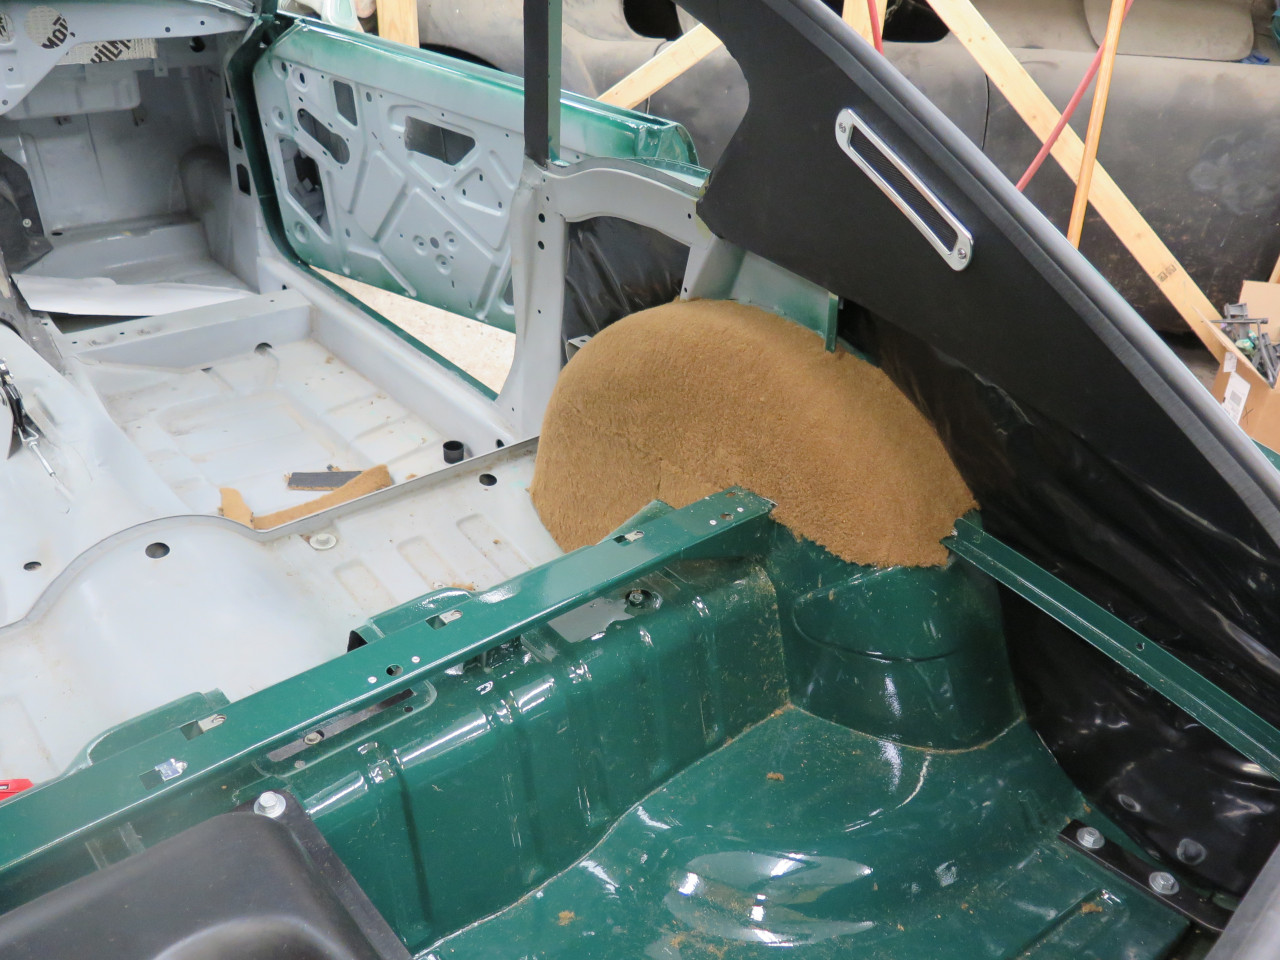
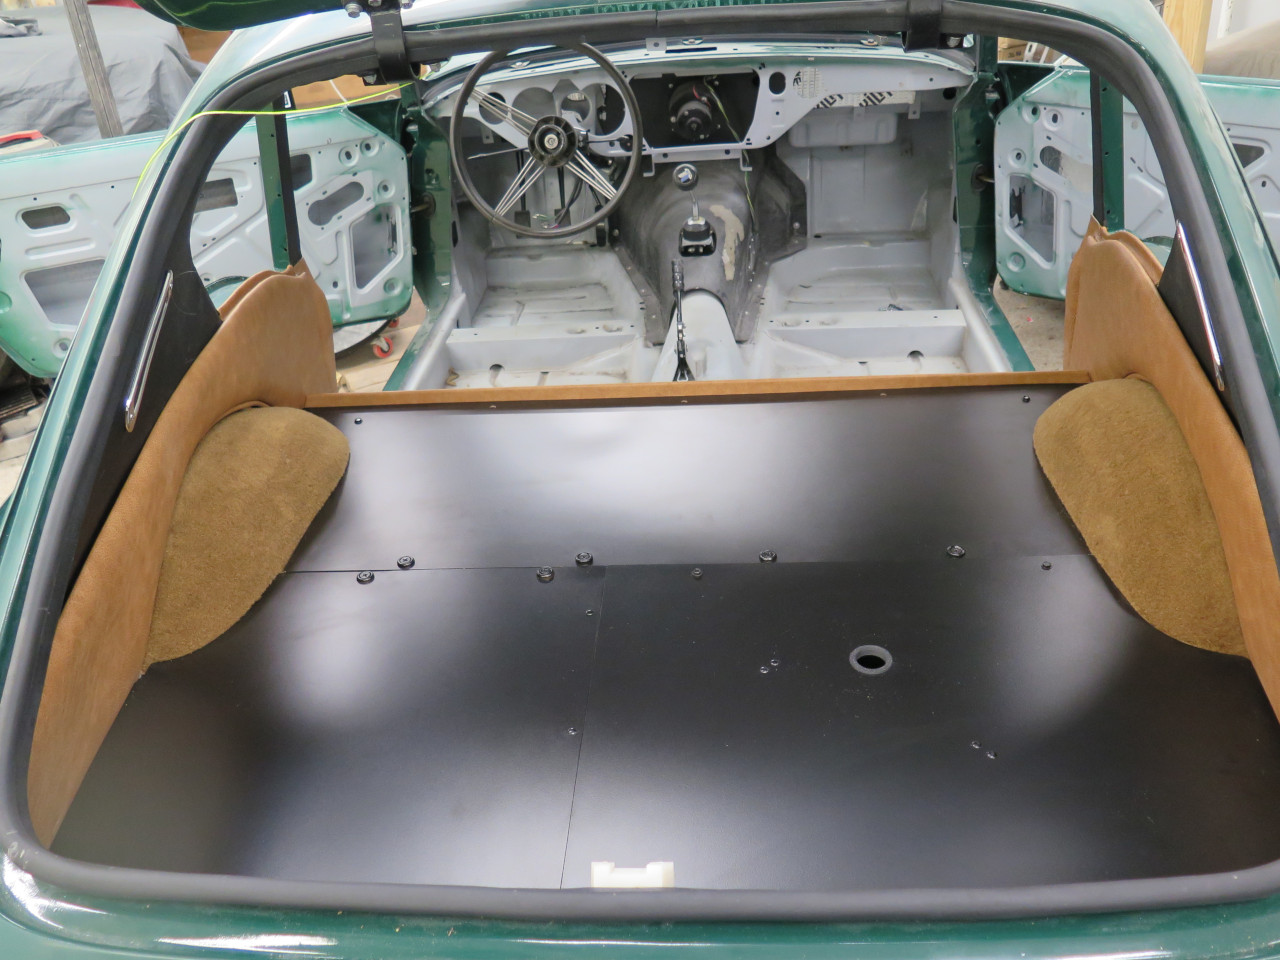
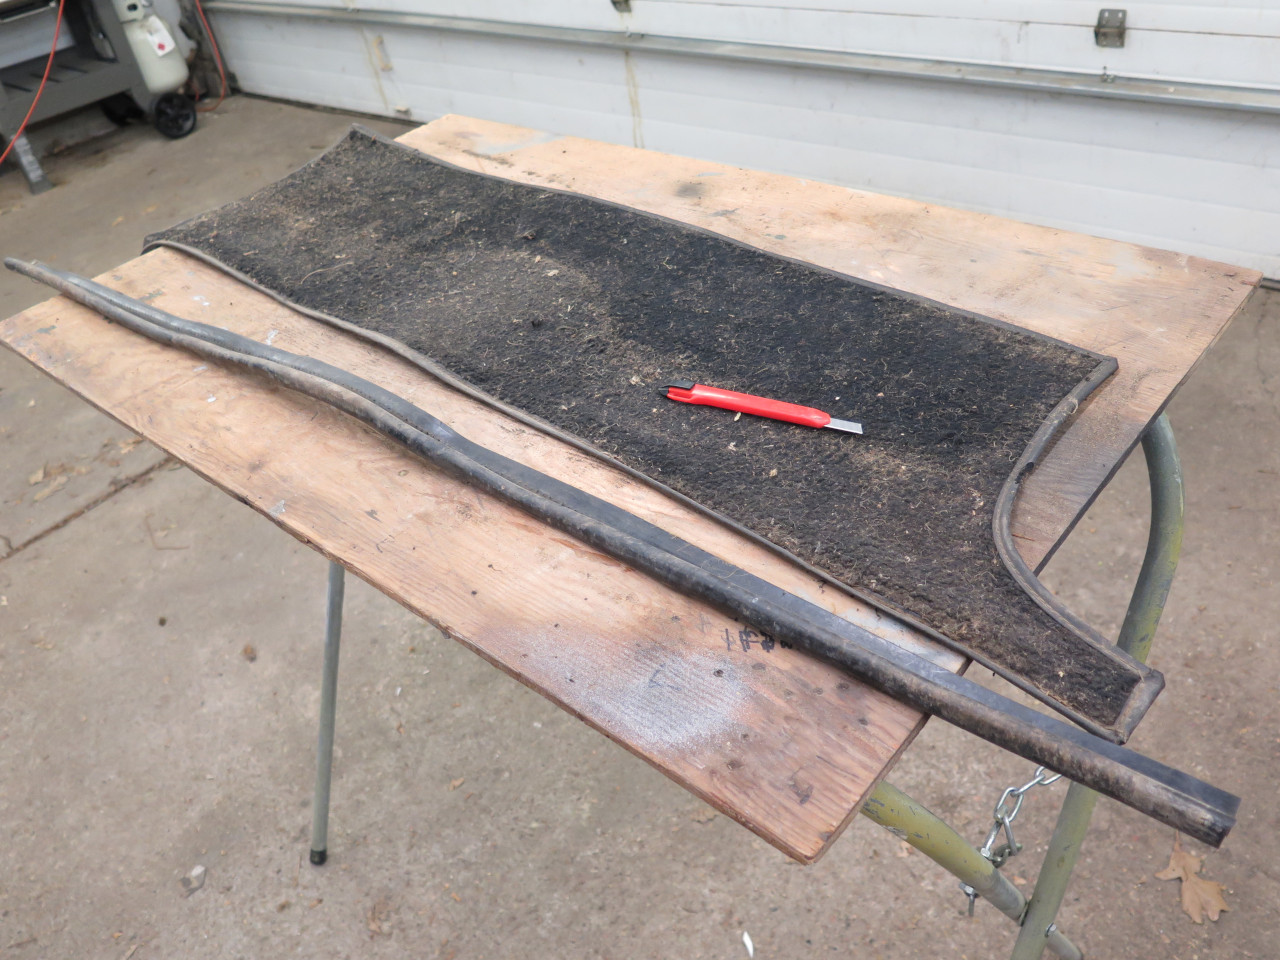
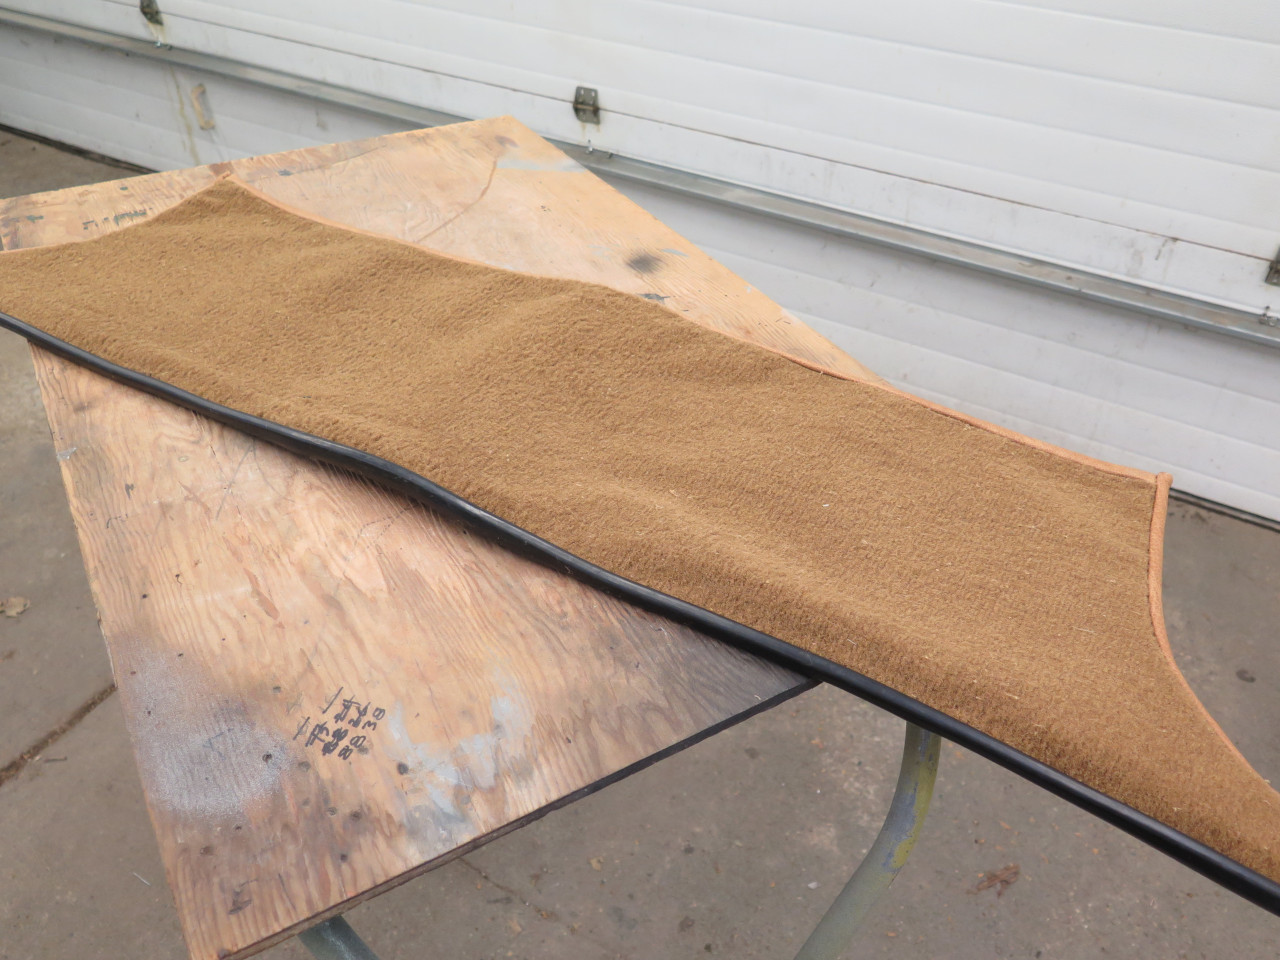
Then it was time to focus on trim. One of the first things to
address was the wheel wells. The top part of the wheel wells are
exposed above the "luggage floor", and need to be covered with
something. I considered leather, but I believe the original car
used shaped carpet. I didn't think I had the skill to shape the
carpet for the entire wheel well, so I decided to just do the top
exposed part. The heat gun helped a lot.
When researching the trim for the boot area, I noticed several arcane
references to "insulation pads" (5 and 6 in the screenshot form Canley
Classics).
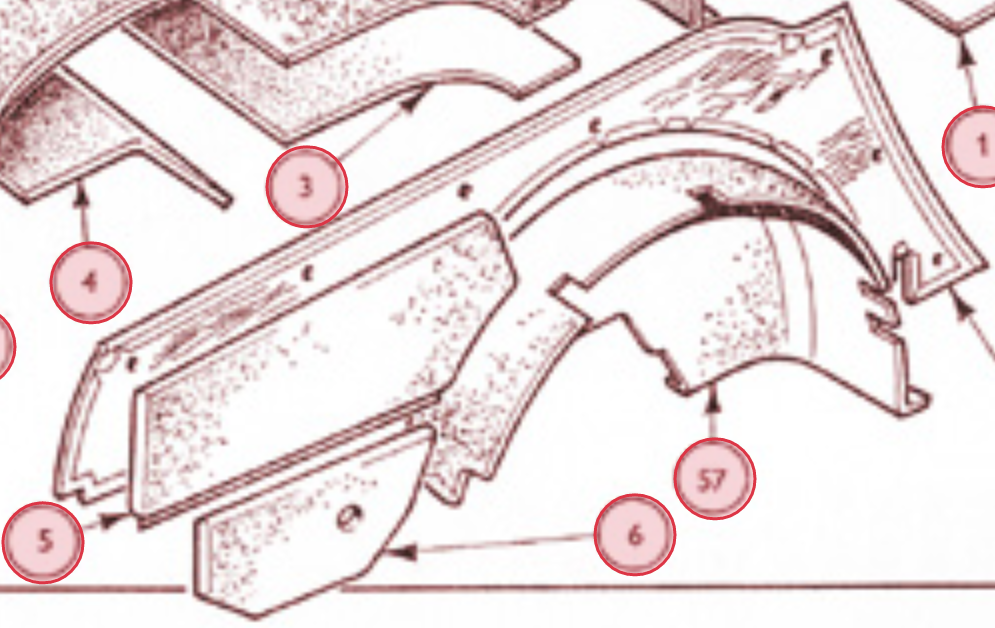
My car had no sign of these, and when I asked about them on one of the
GT6 forums, several folks claimed to have seen them, and one even had a
picture. The insulation pads were basically just bags of some
wool-like material, just like those found under the transmission tunnel
and above the headliner.
Well, I assumed that this insulation was for temperature isolation or
for outside noise mitigation, or both, and if it was good enough for the
Triumph designers, it's good enough for me, so I set out to make some
bags o' wool.
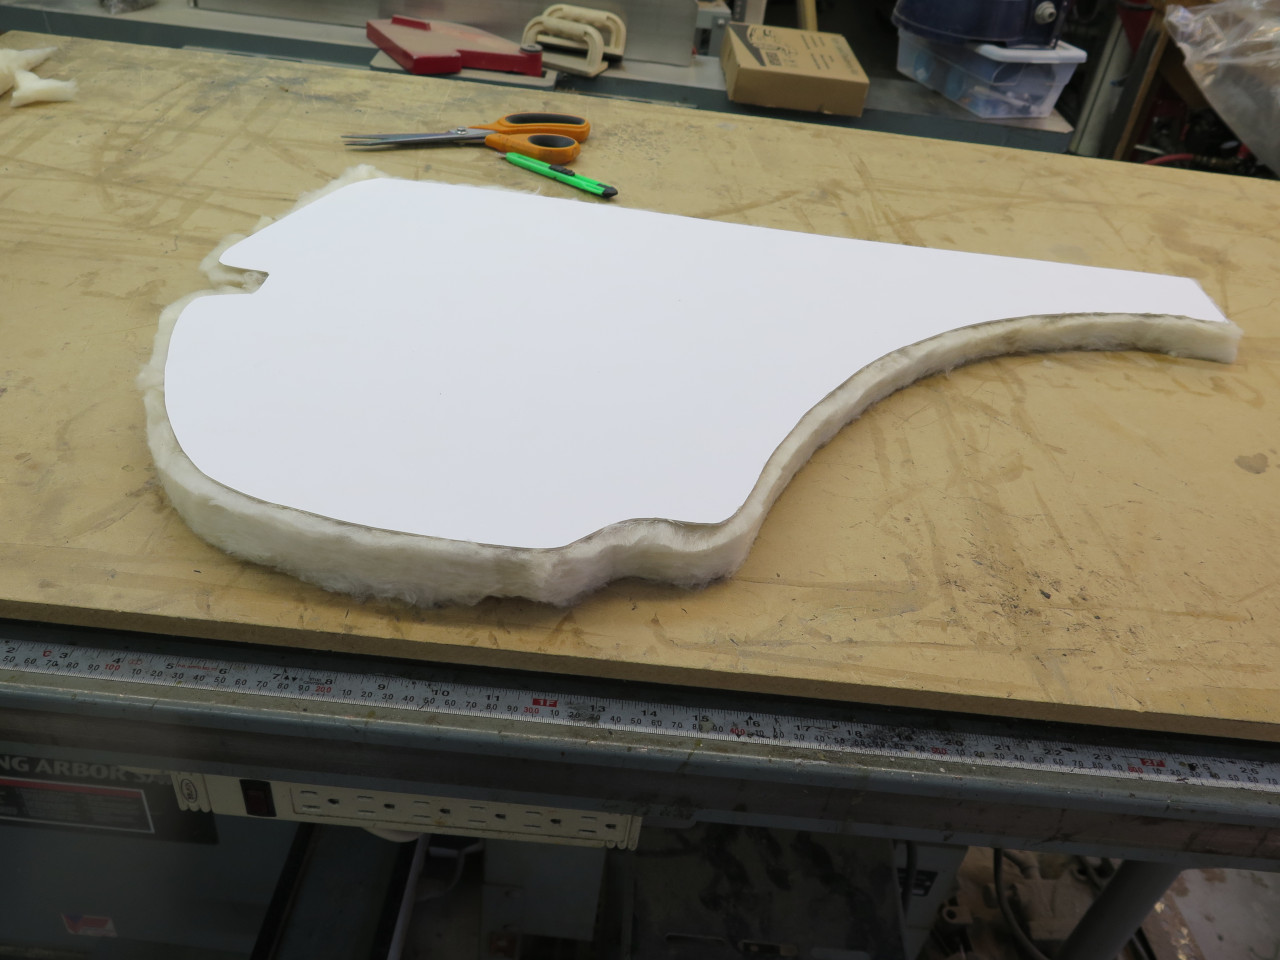
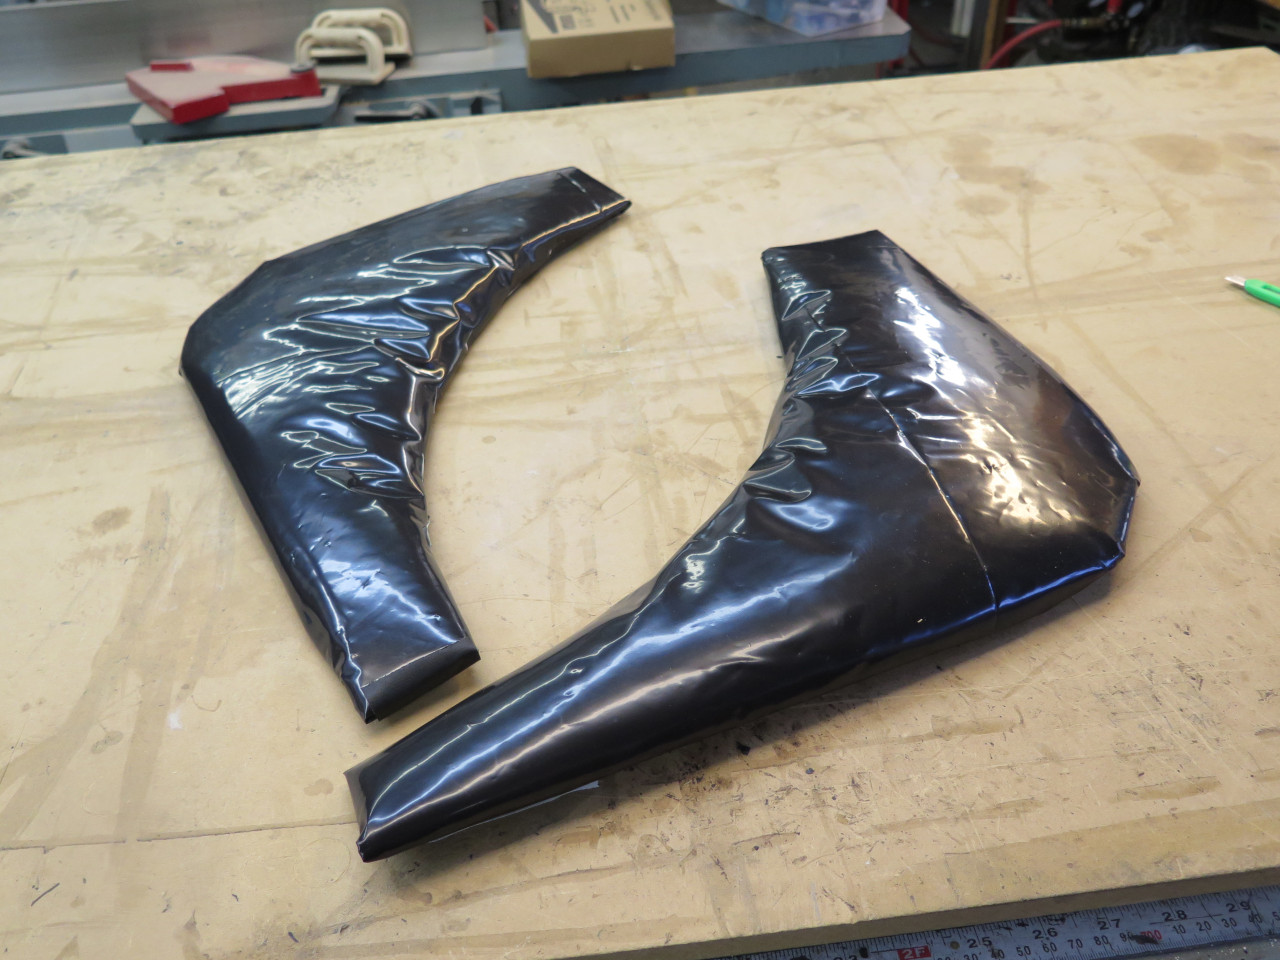
Started with a heavy paper template. I decided to combine the two pads into a single one on each side.
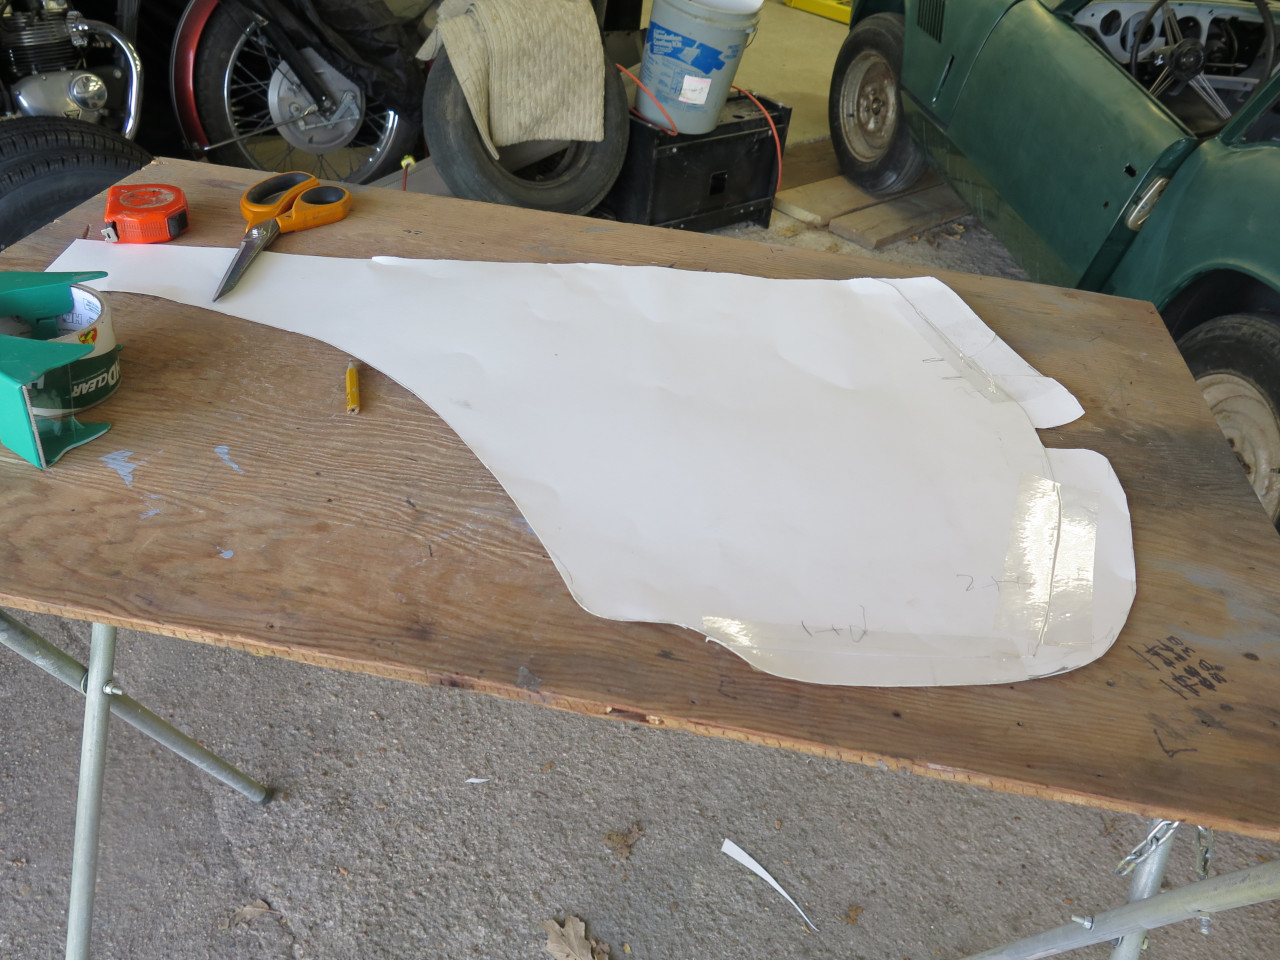
I cut the pad shape out of some "semi-rigid" fiberglass
insulation. This seems to be just regular fiberglass with maybe
extra binders in it. It is a bit stiffer than house insulation.
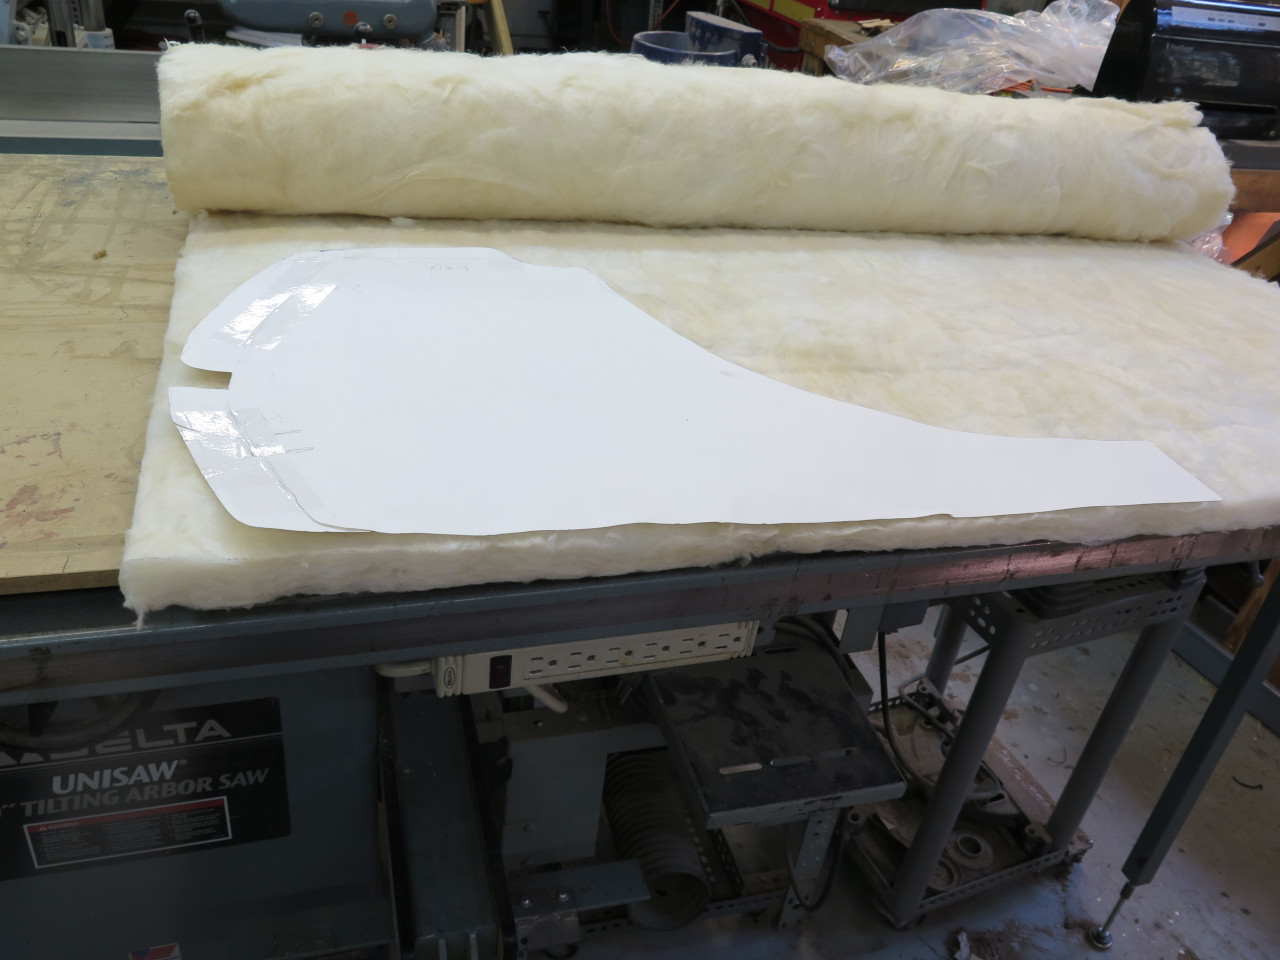
Then cut some 1 mm card stock just a little smaller and glued it to the insulation.
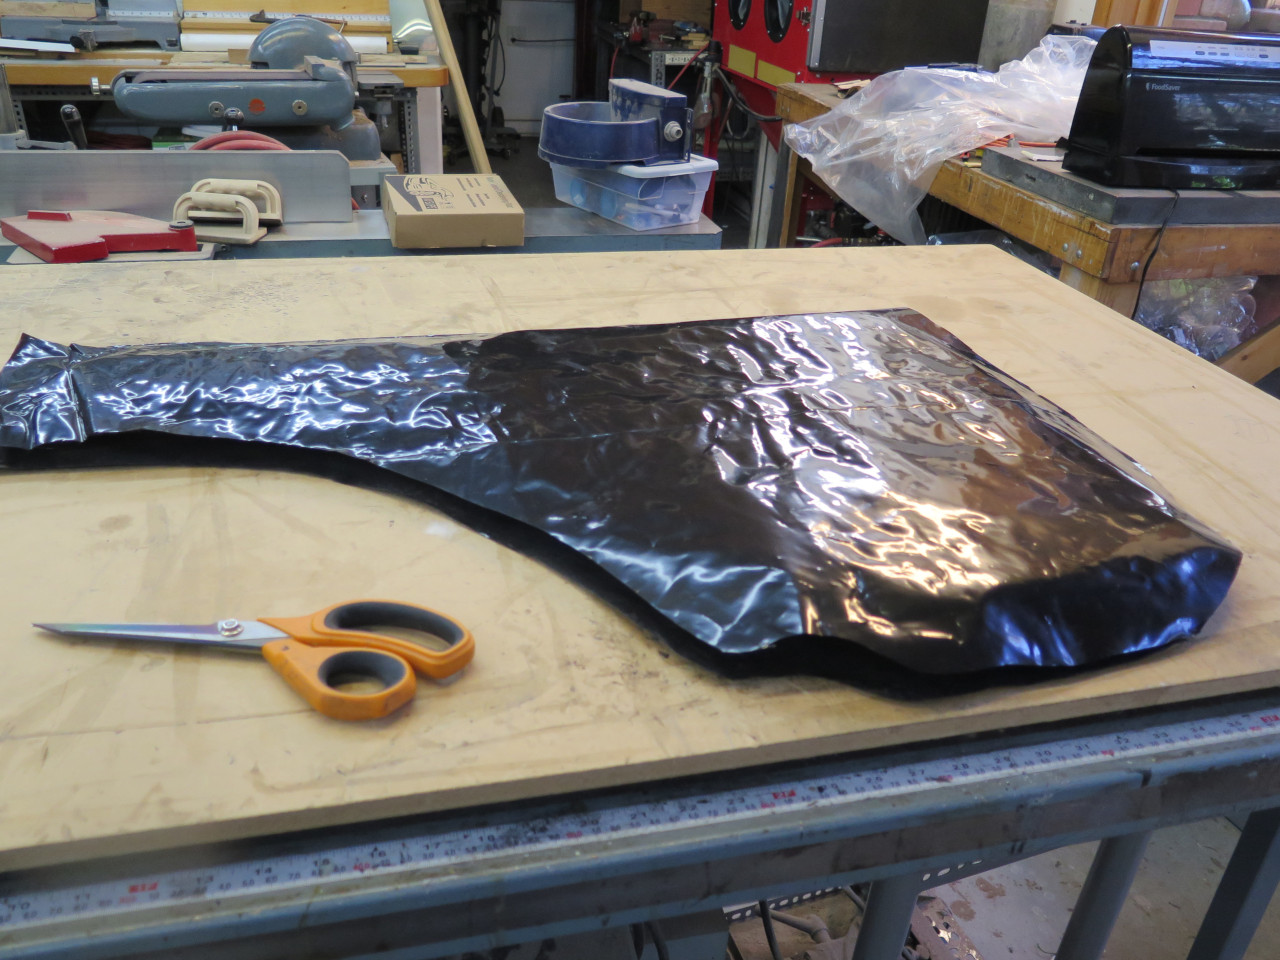
Then an oversized piece of polyethylene film top and bottom. The
film was joined with double sided tape, then folded over to the card
stock side and taped down. This is my rendition of the "bag o'
wool".
The card stock maintains the shape of the bag and keeps the insulation
from settling, yet is pliable enough to manipulate into place.
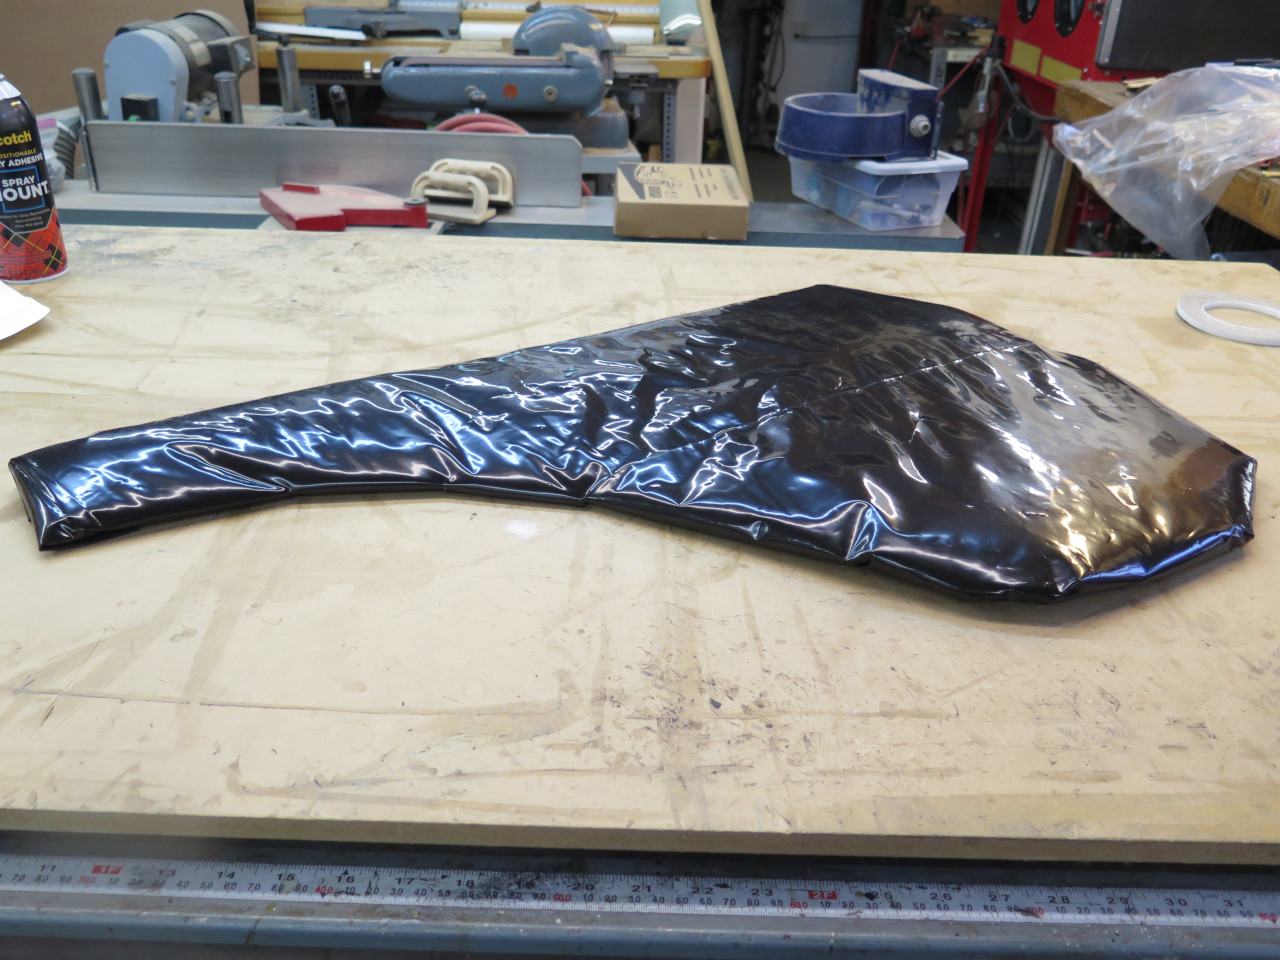
I had so much fun doing this that I made a couple more gratuitous bags
o' wool for the forward side of the wheel wells because, you
know--upgrade!
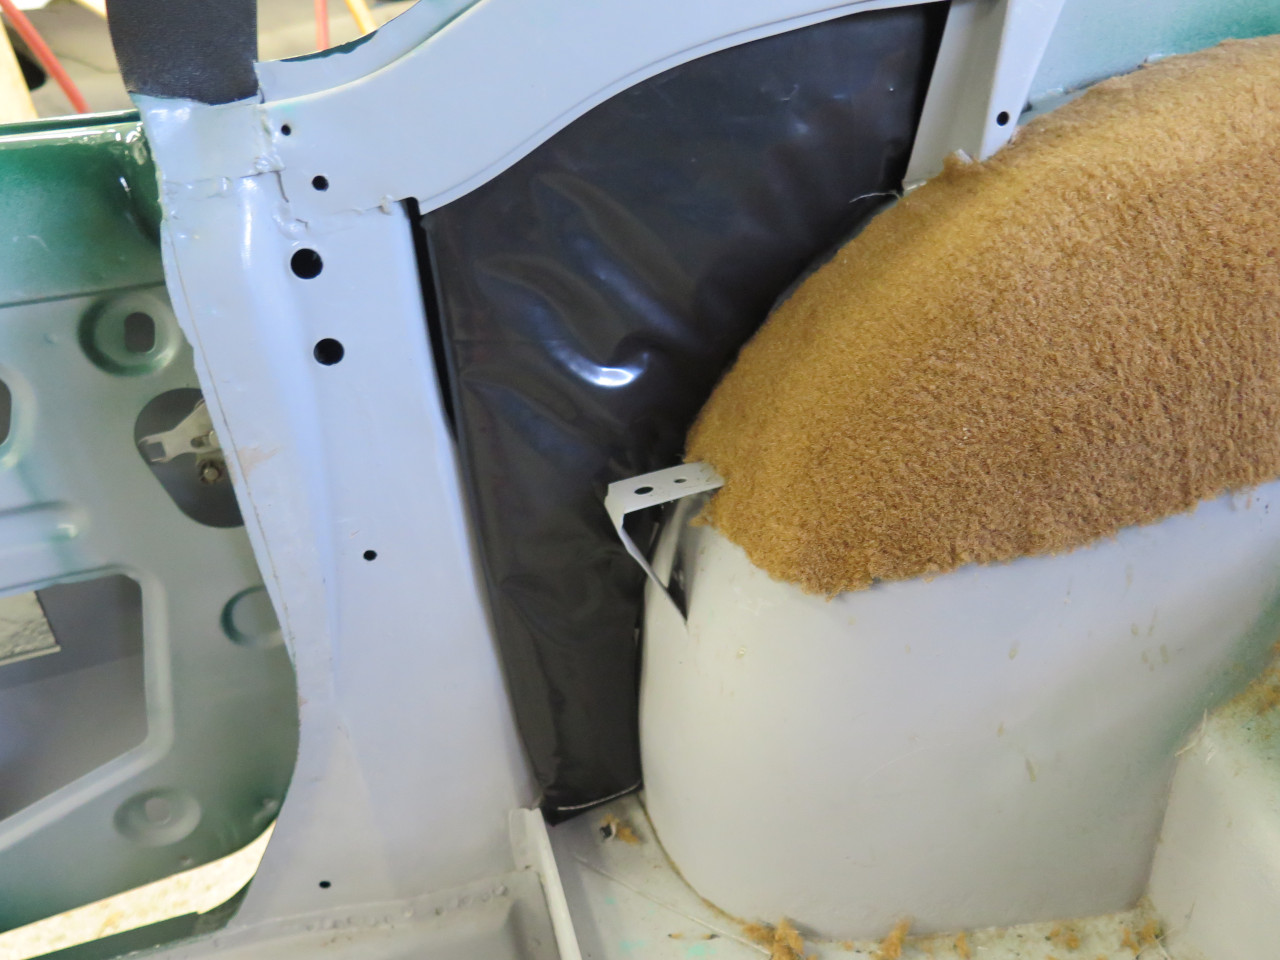
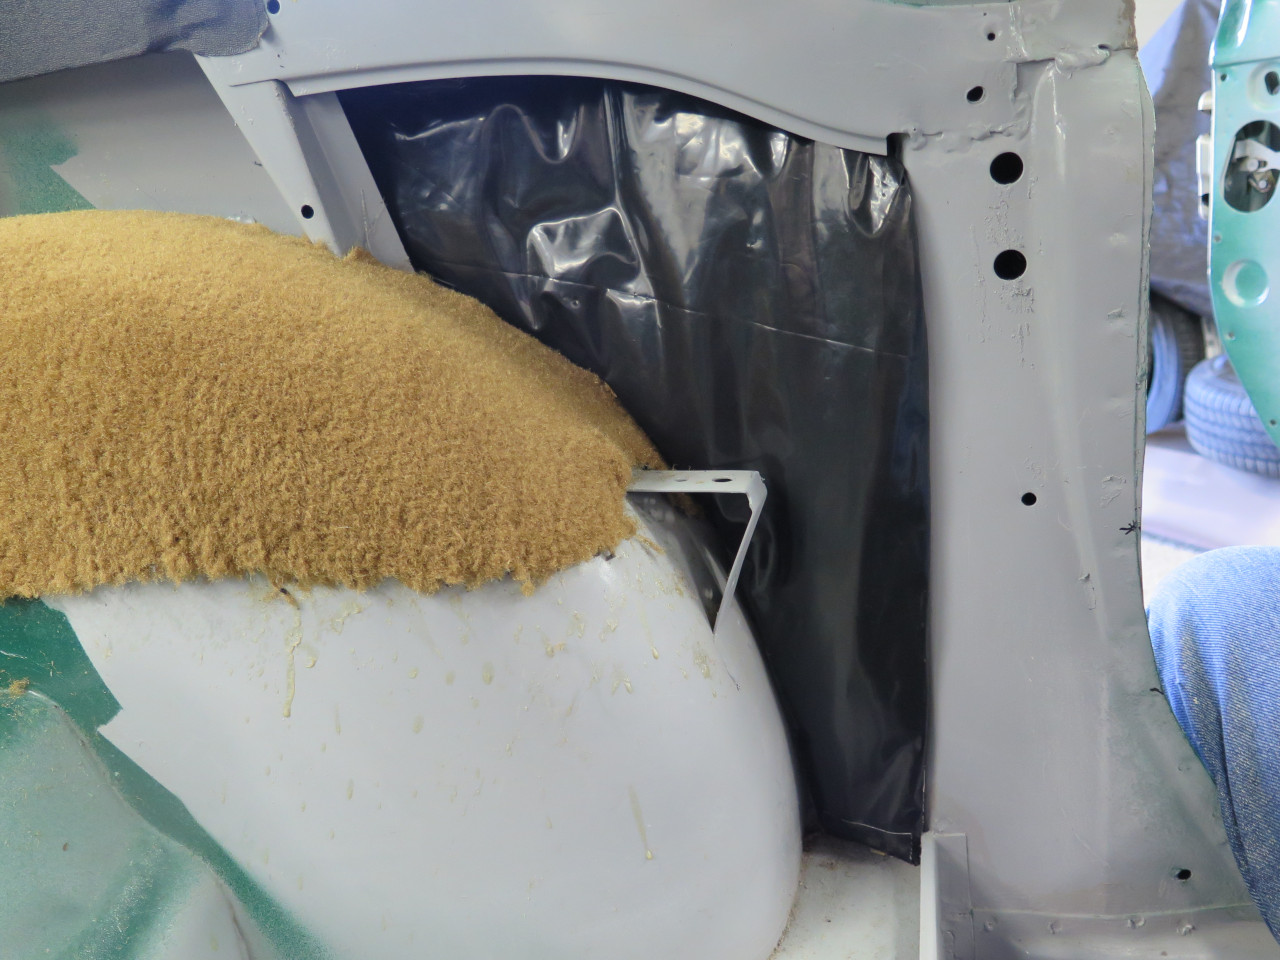
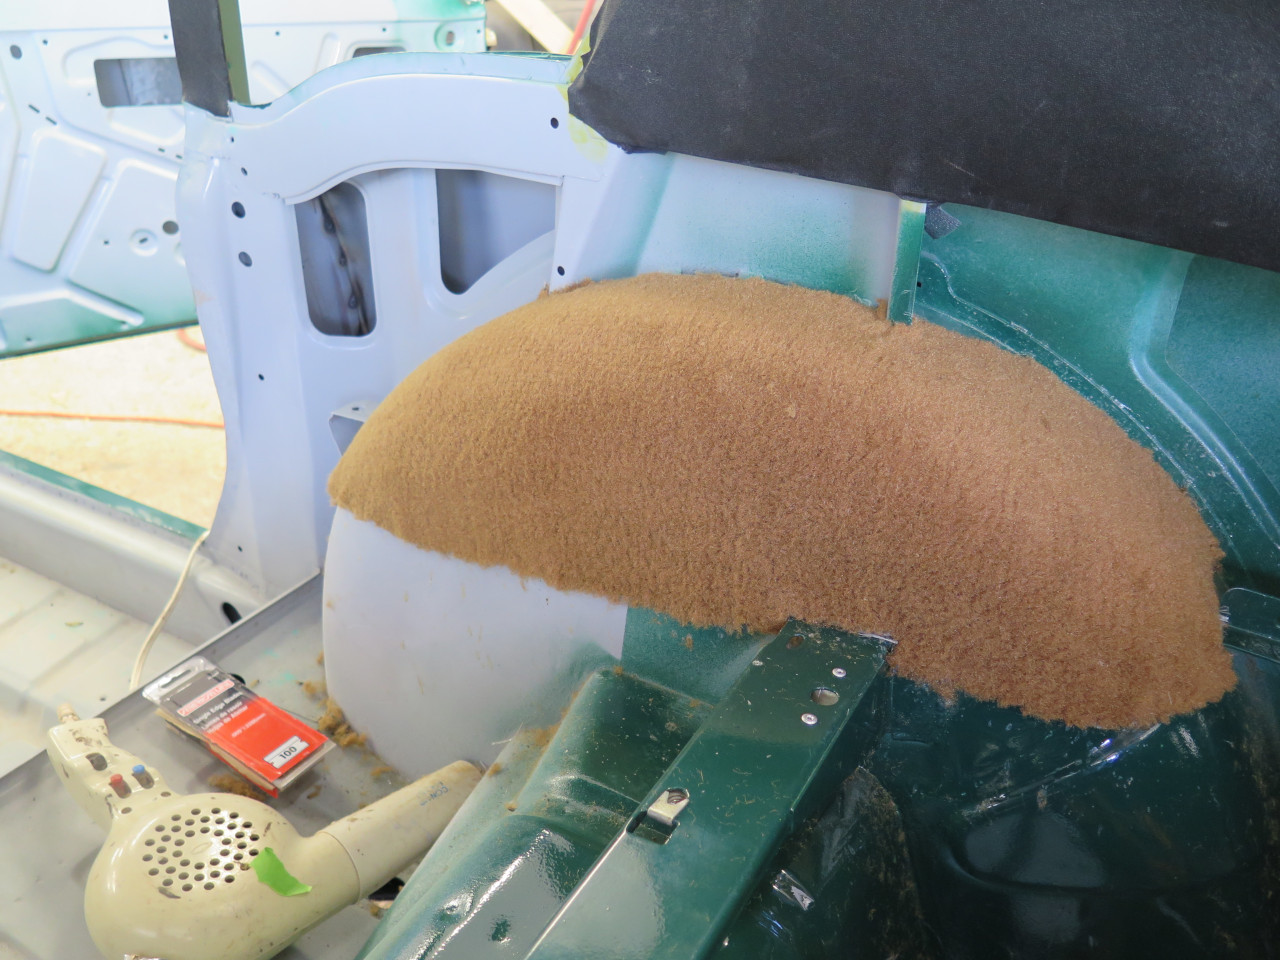
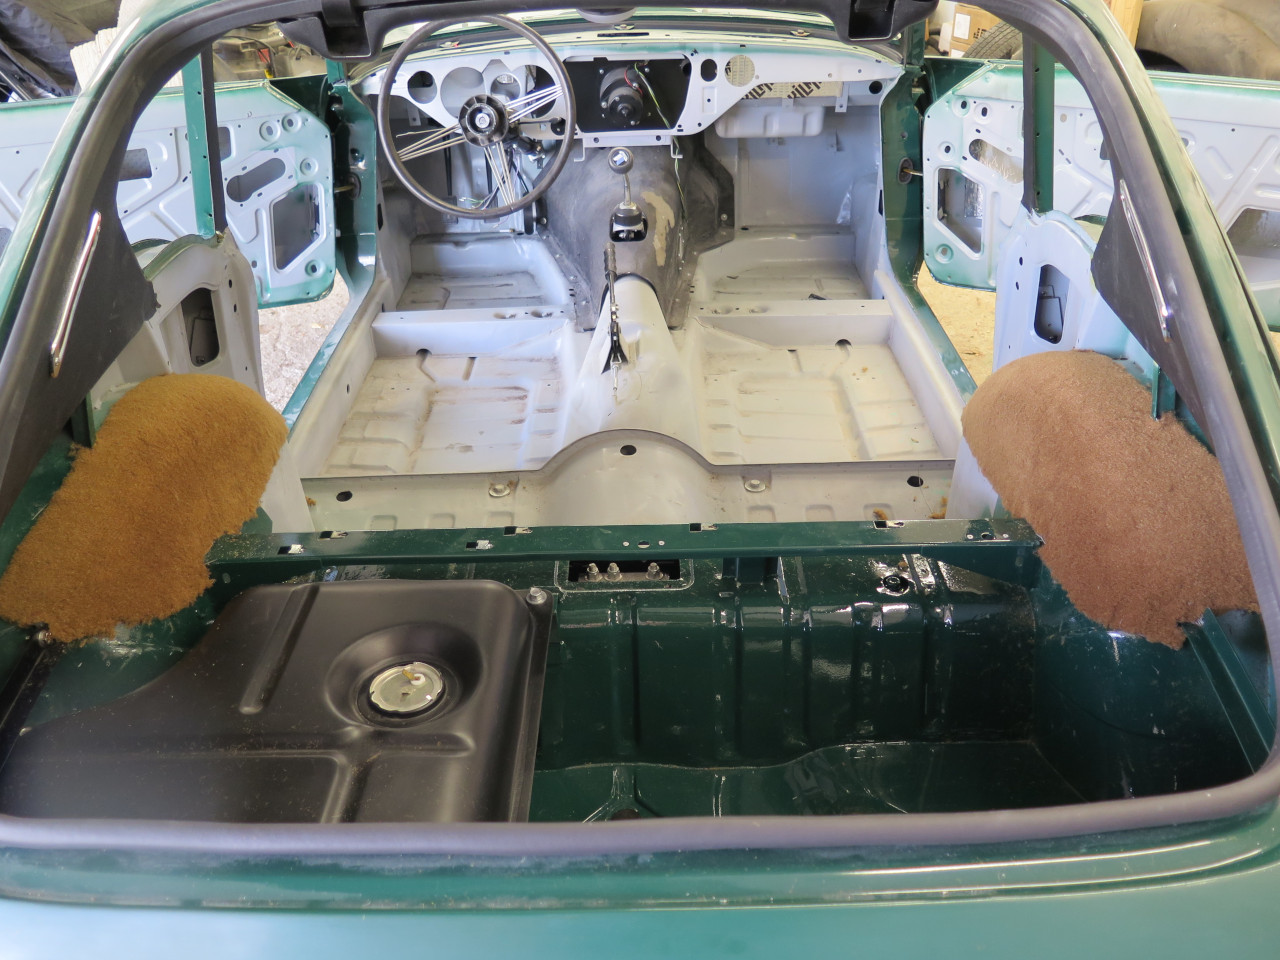
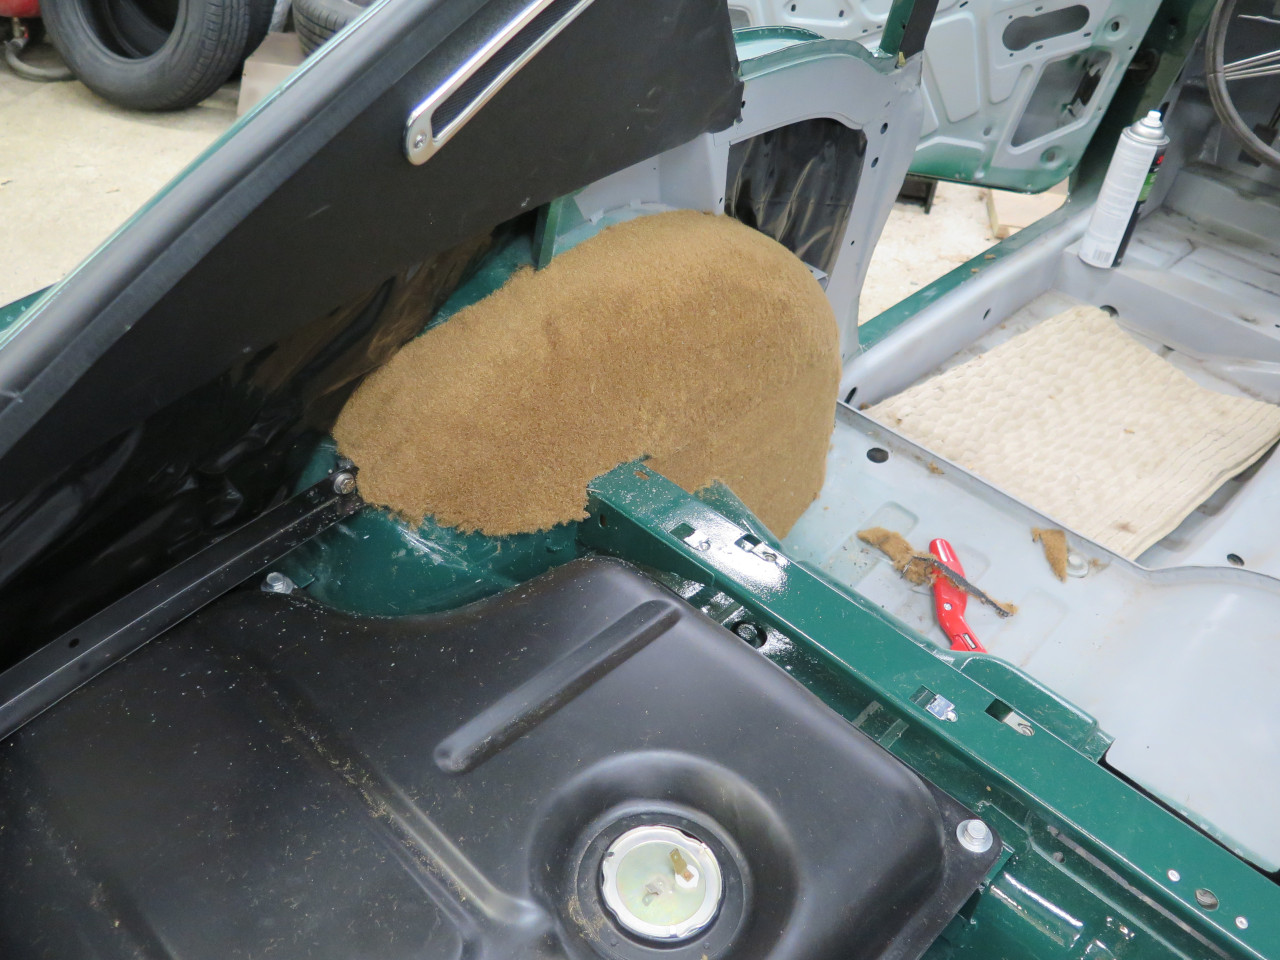
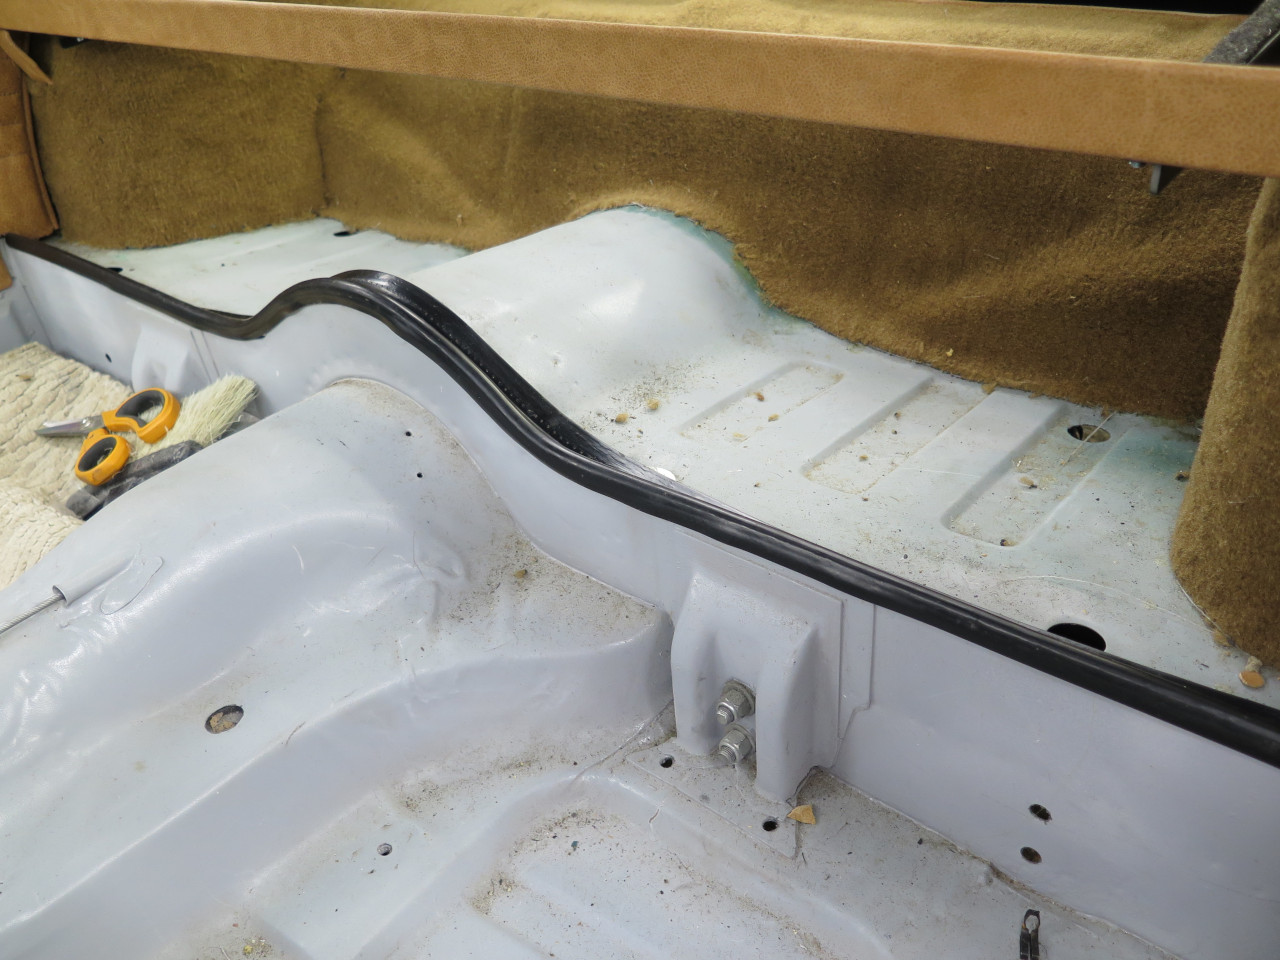
With that little diversion out of the way, I forged on to finish the
carpeting of the wheel wells, the forward parts of which will be visible
behind the seats.
I'm no carpet man, so there is a visible seam, but is is placed just
below the luggage floor, so should be difficult to see even if I wanted
to.
Had I thought more seriously about order of operations, I'd probably be
doing wiring right now, but I seemed to be on a path to closing up body
cavities that wires will have to pass through. Since I was on a
roll with the boot, and didn't want to shift gears to wiring, I tried to
think of ways the future wiring could be done without ripping out trim
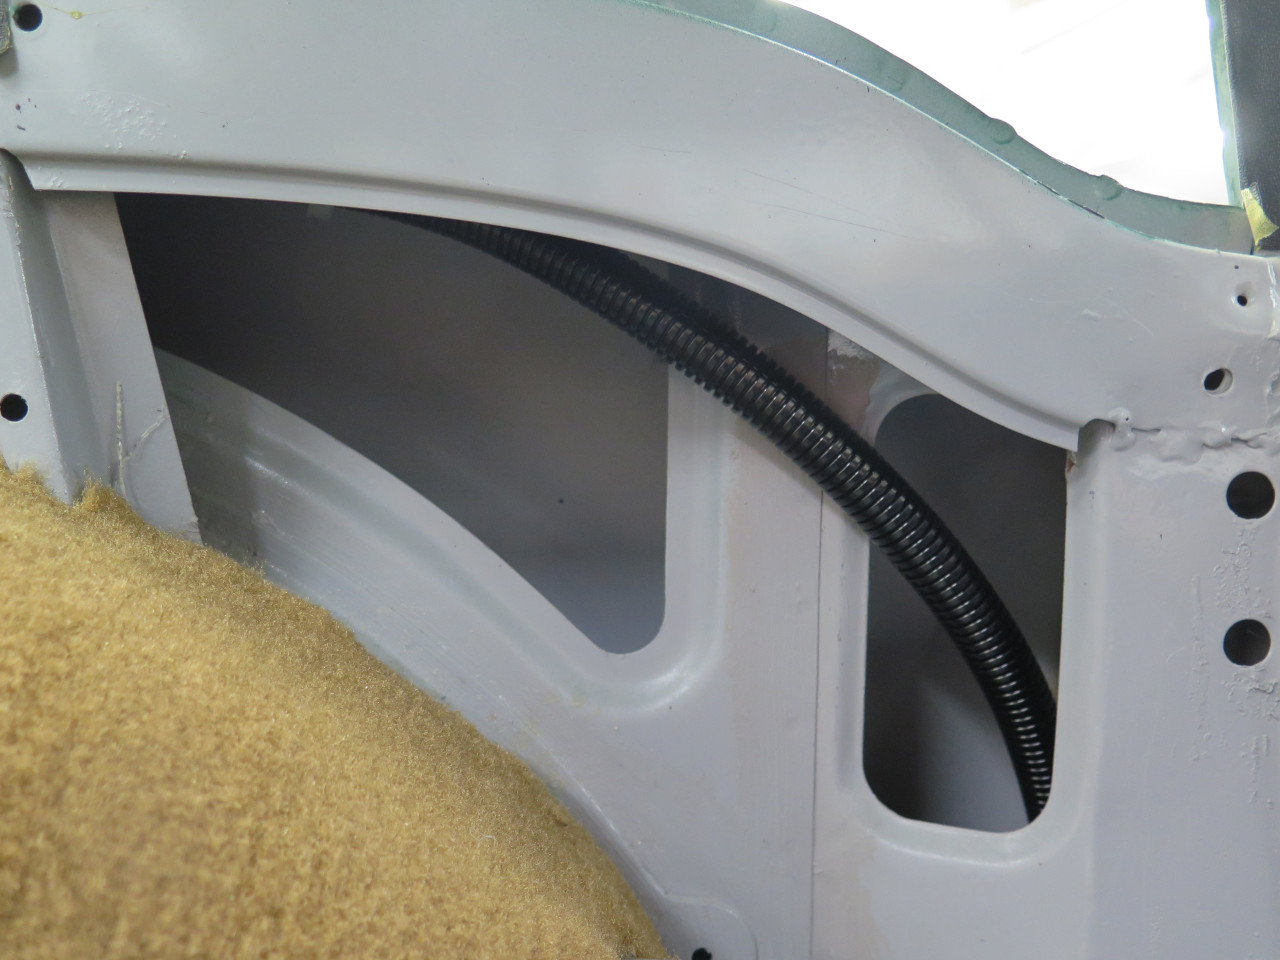
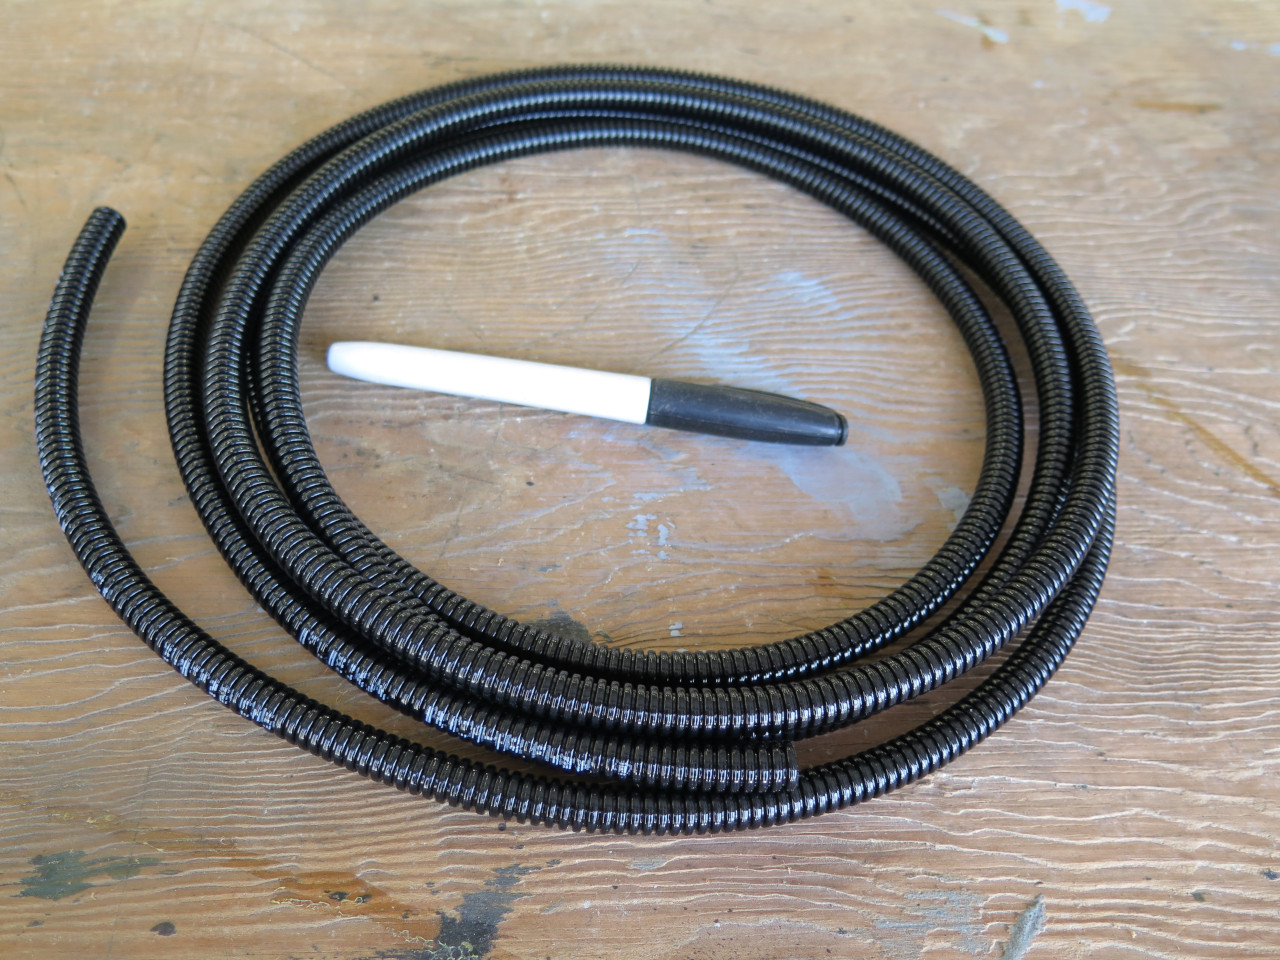
panels. The solution was flexible plastic conduit.
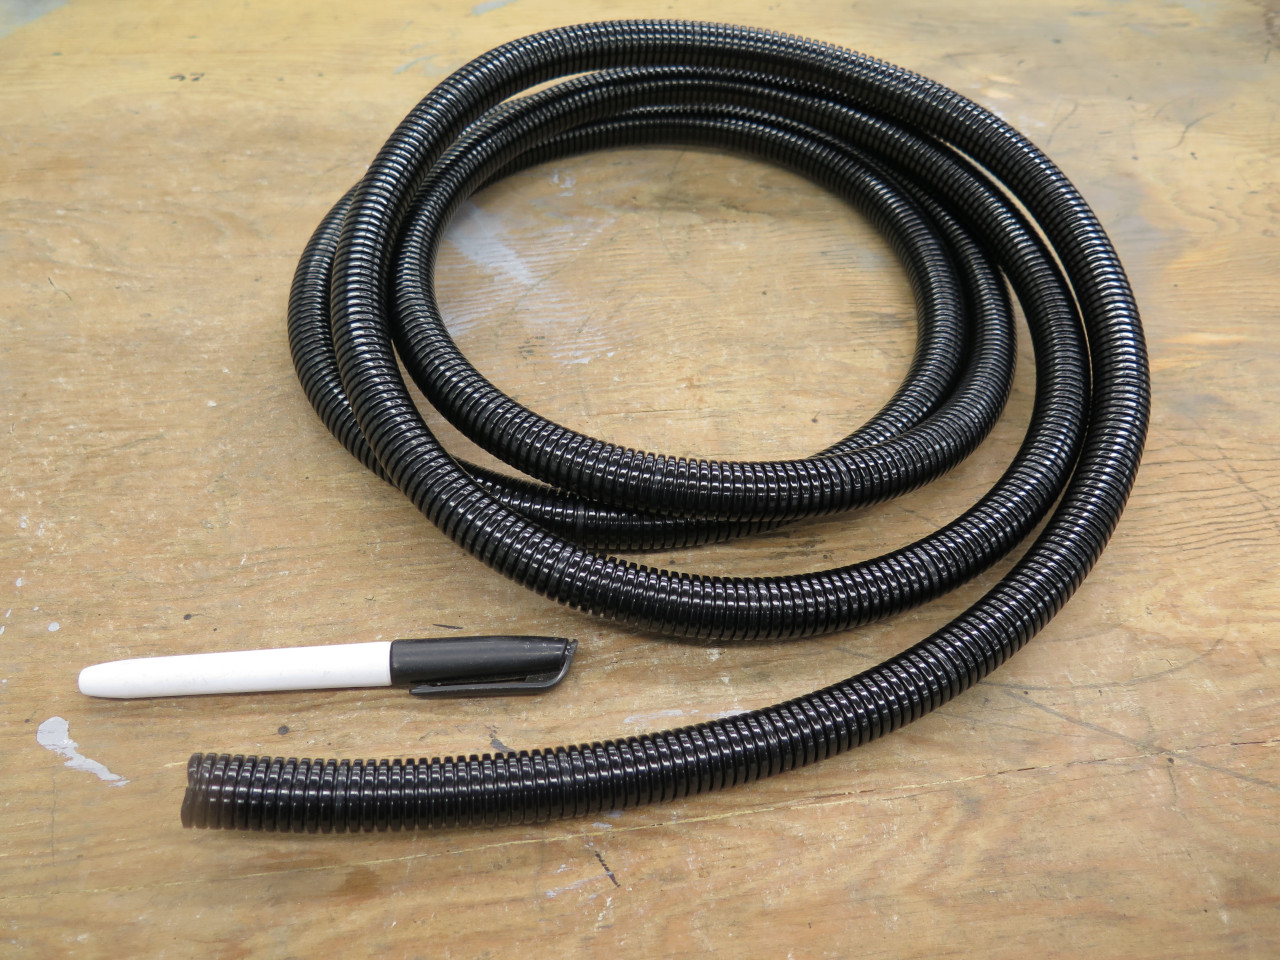
I ran a length of conduit from the access hole at the base of the B post
up over the wheel arch, and terminated it near the left tail
light. It uses the same path and hangers as the stock cable.
In reality, the conduit idea was as much about providing ease of future wiring mods as it was about a lack of project planning.
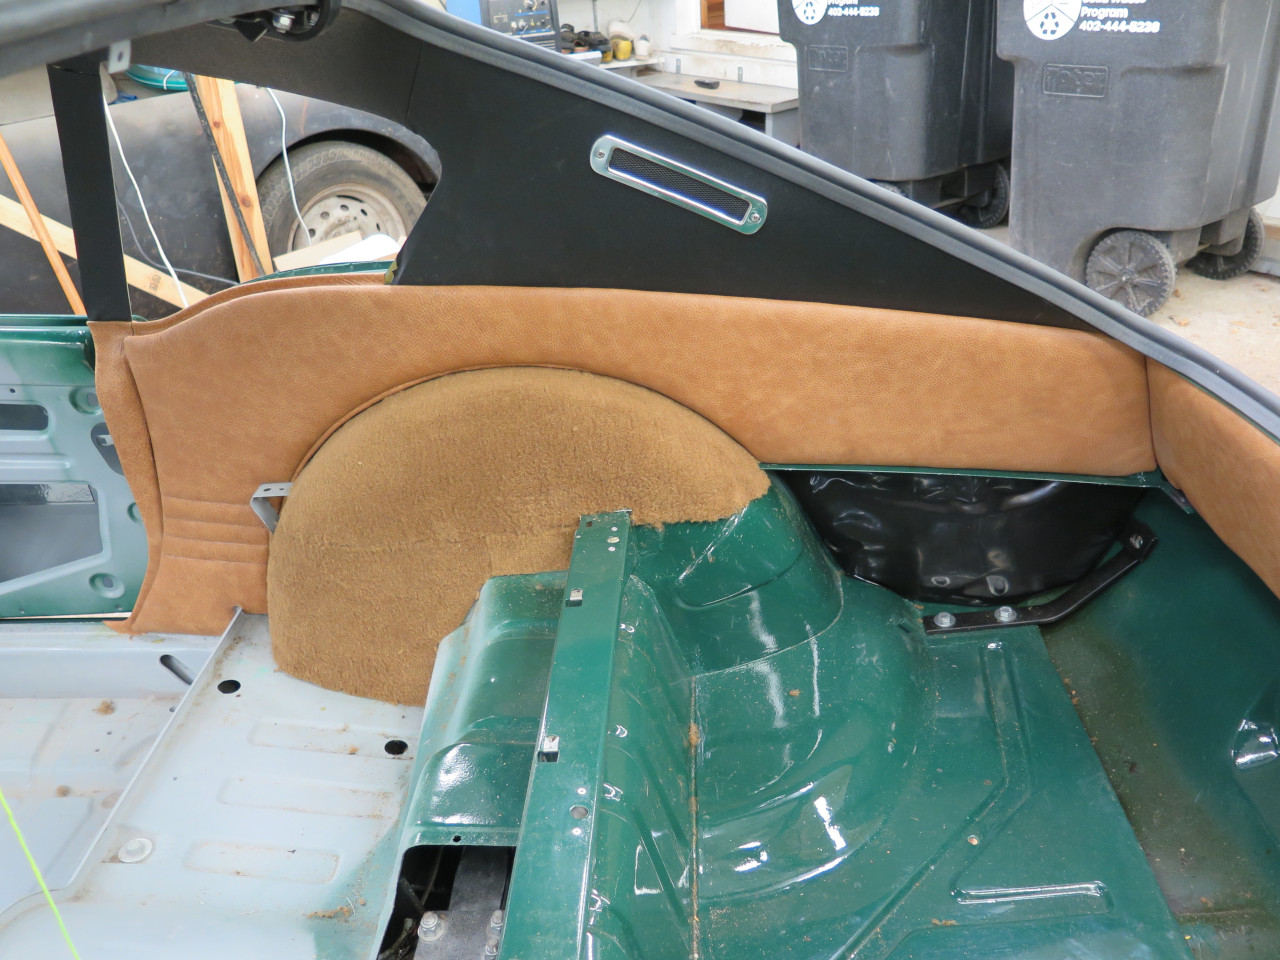
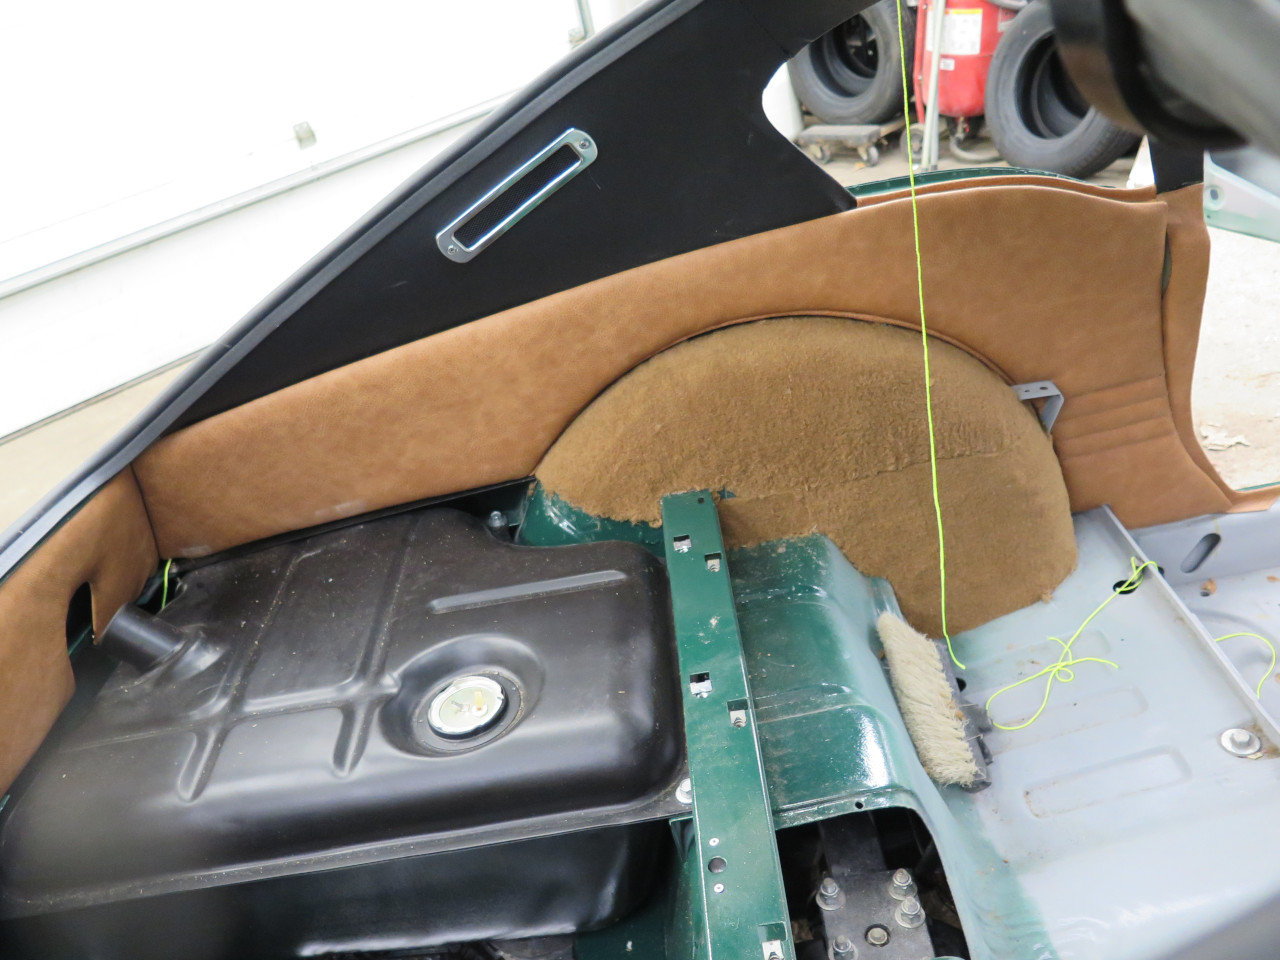
In preparation for finally mounting the wheel arch trim panels,
There were some niggly details. There were a couple of small body
areas that had to be covered in upholstery material for a more finished,
put-together look. As is my habit, I tried to keep all of the
original trim pieces for reference. These are what I had for
forensics.
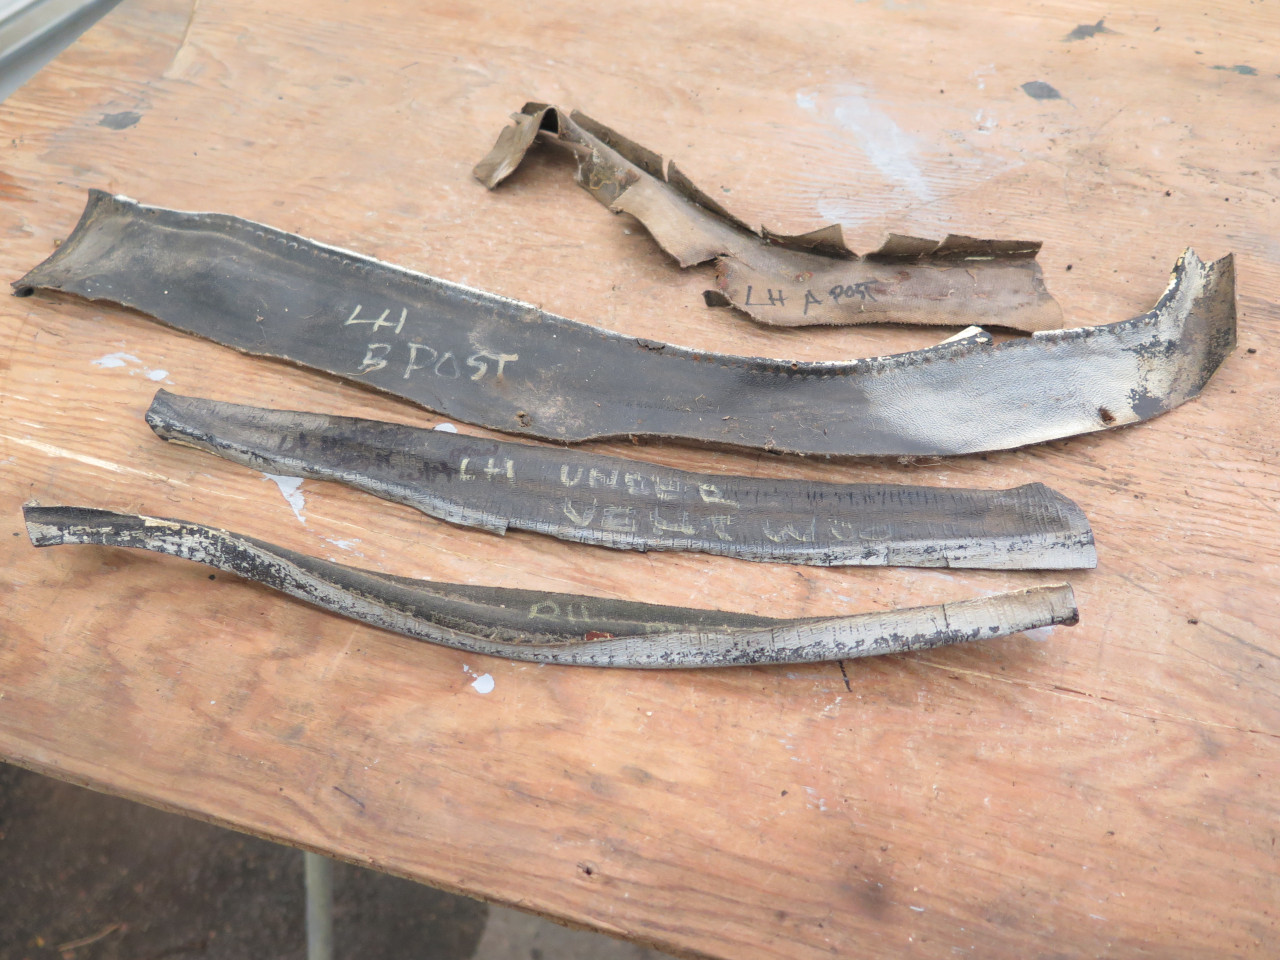
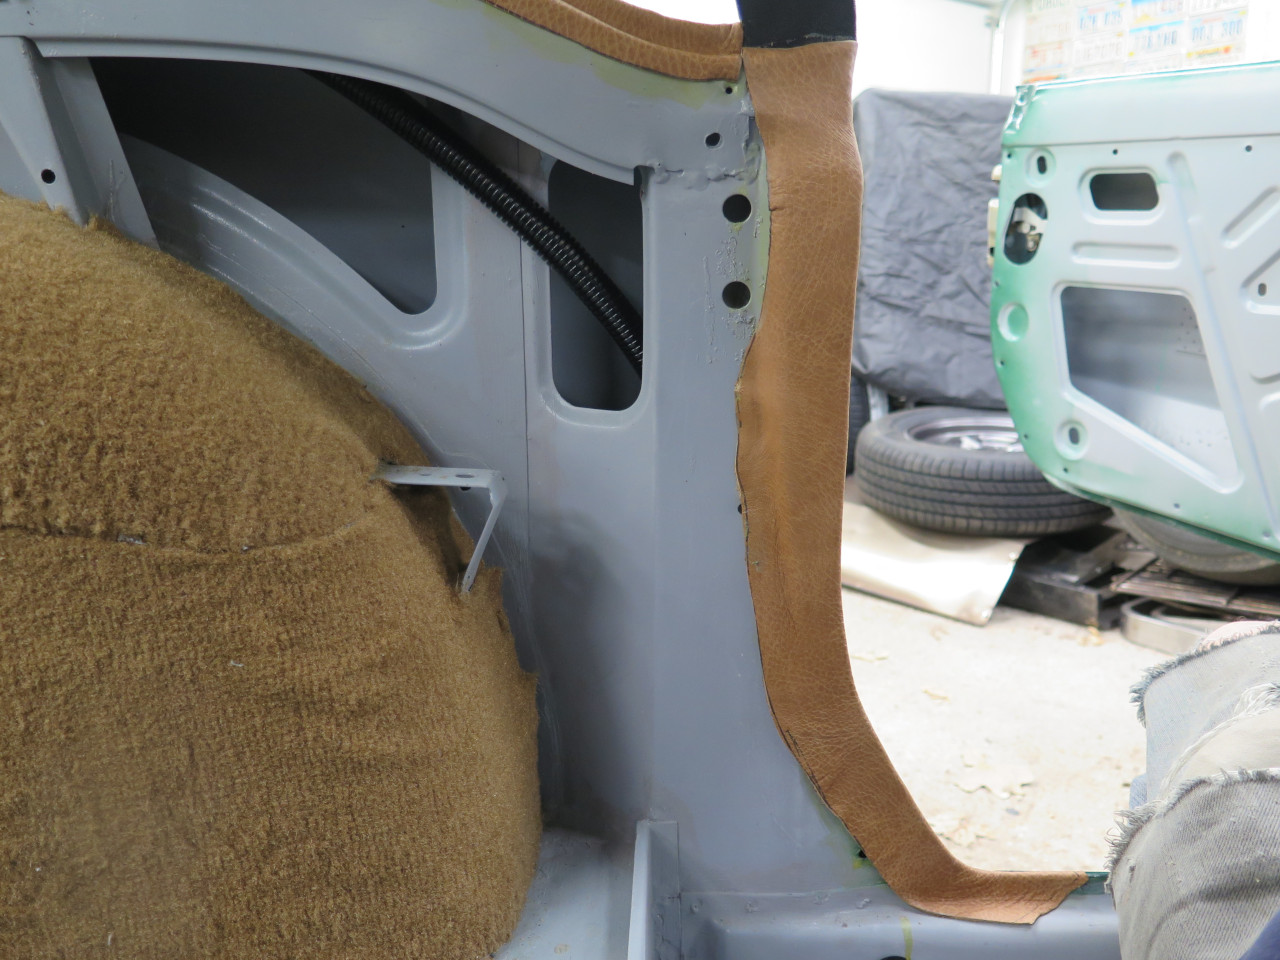
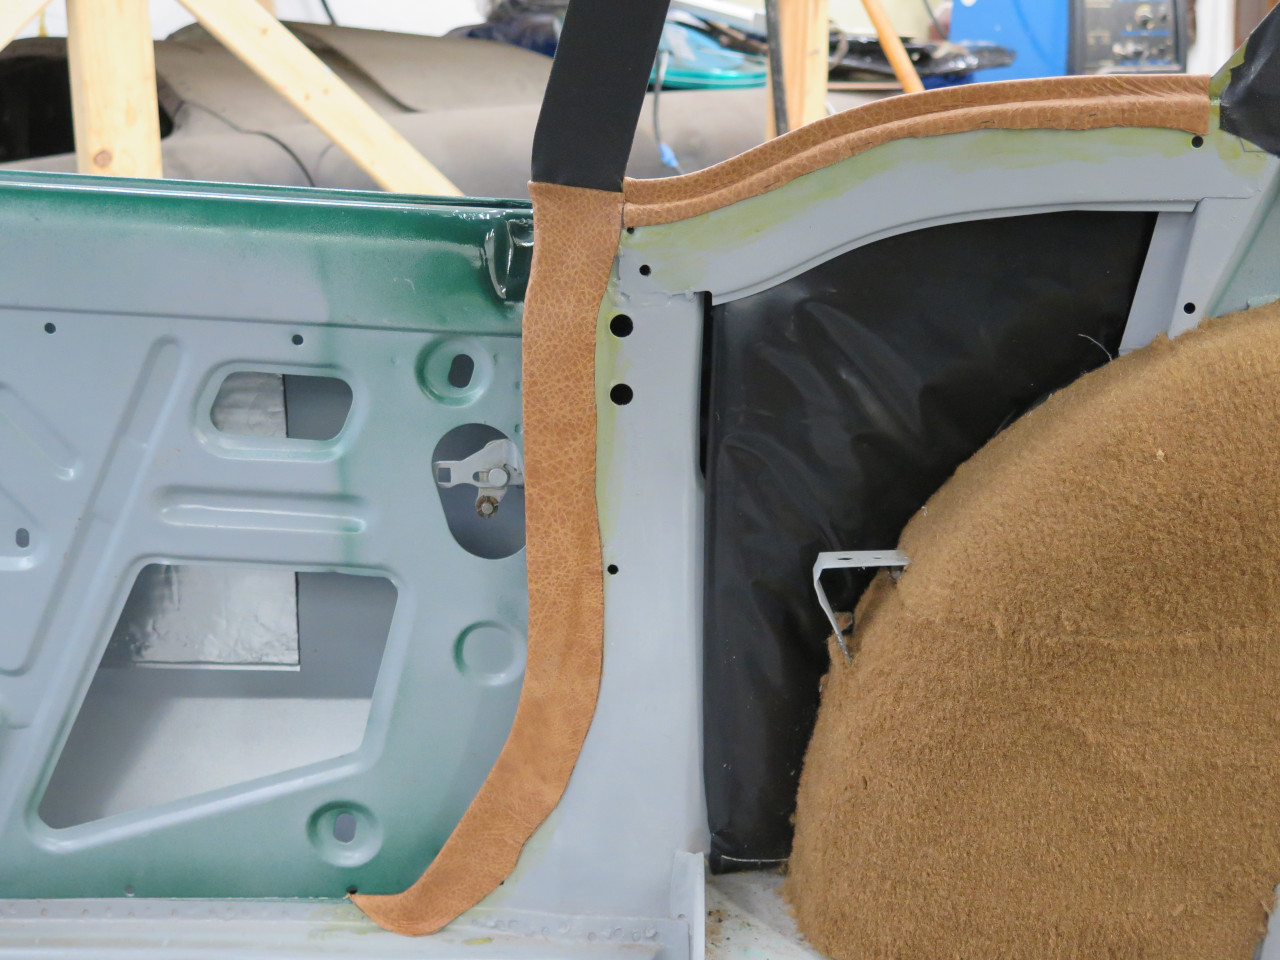
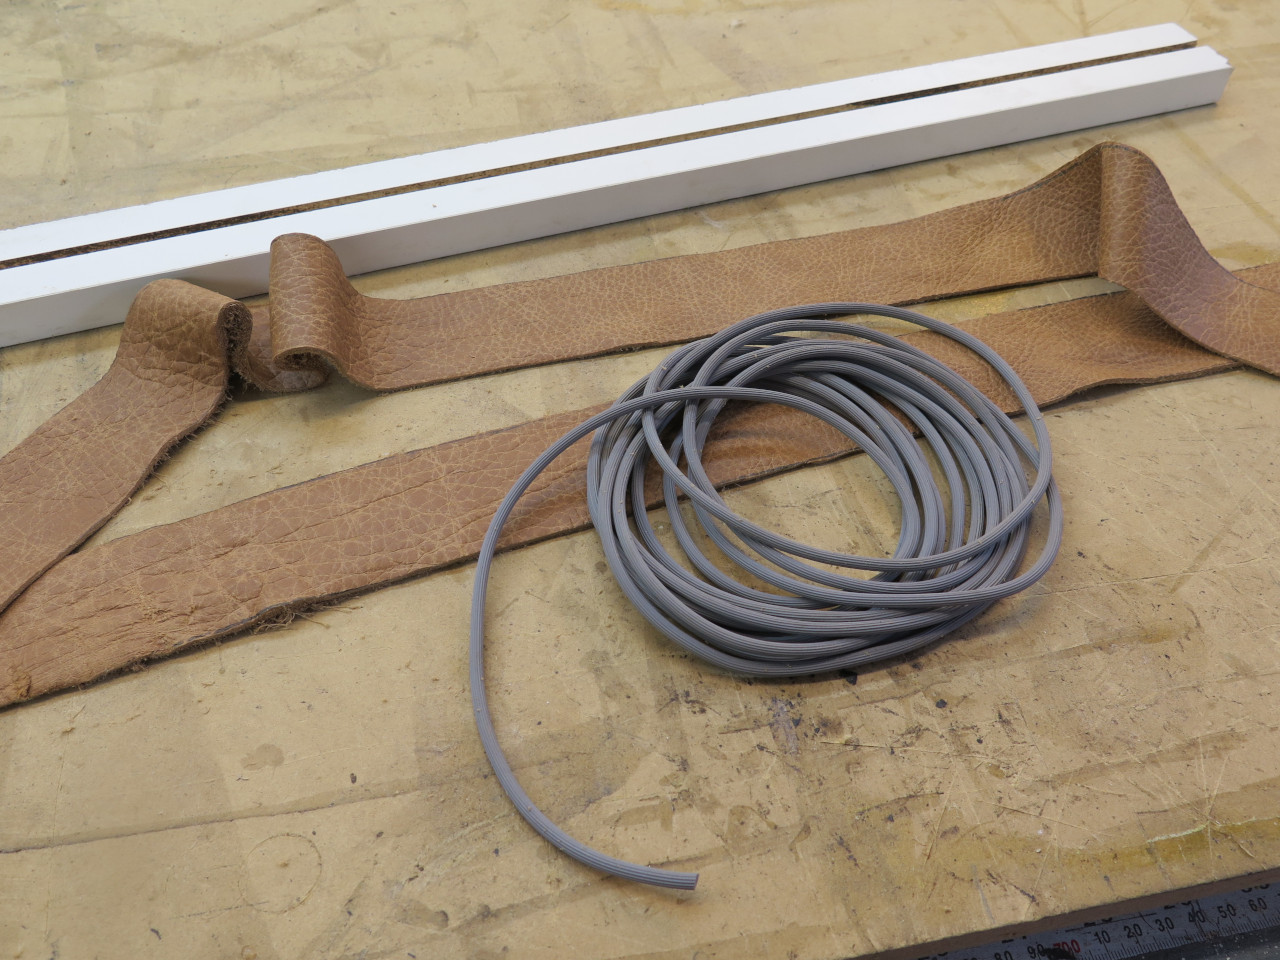
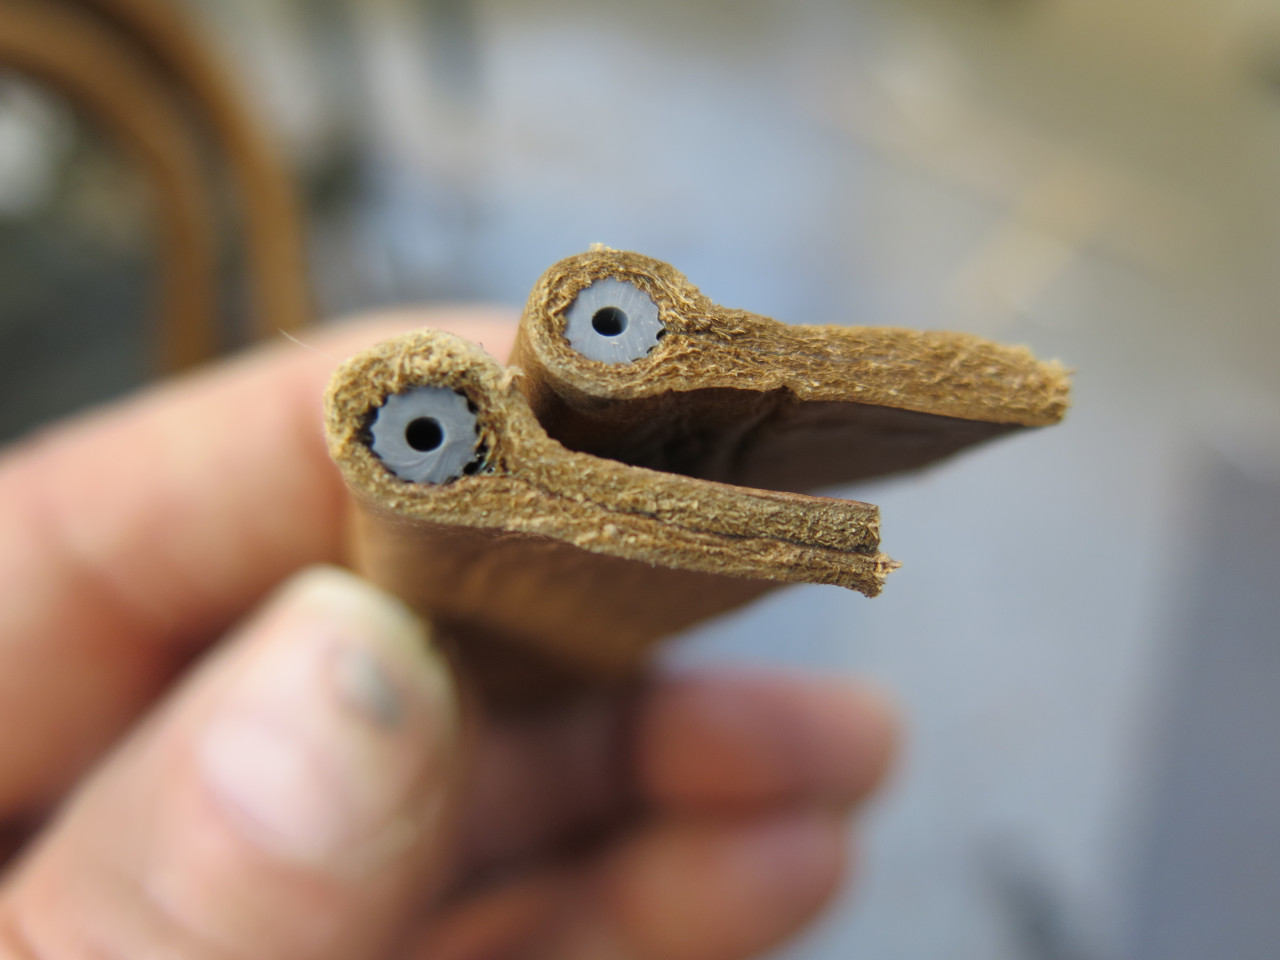
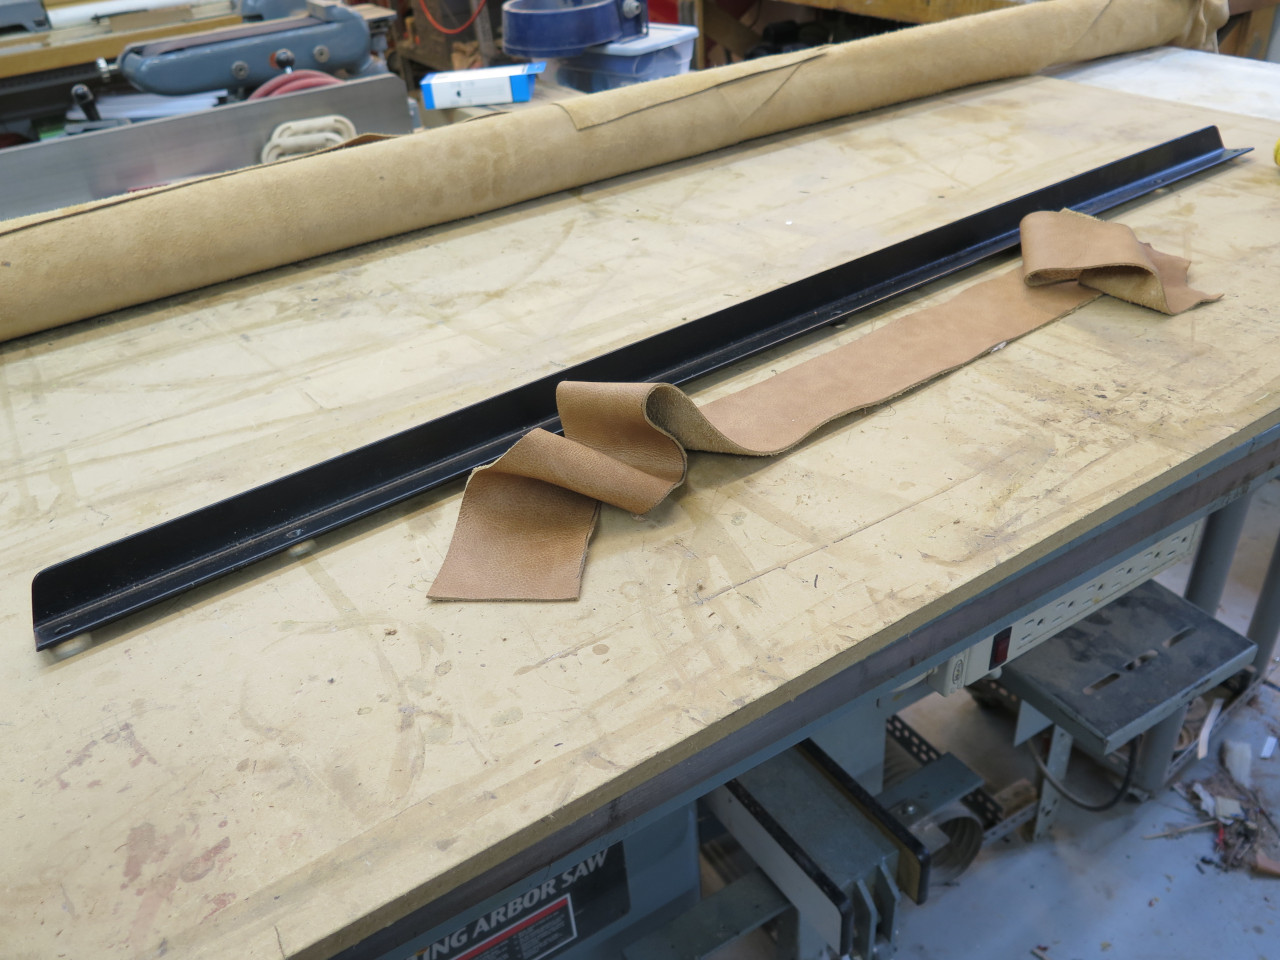
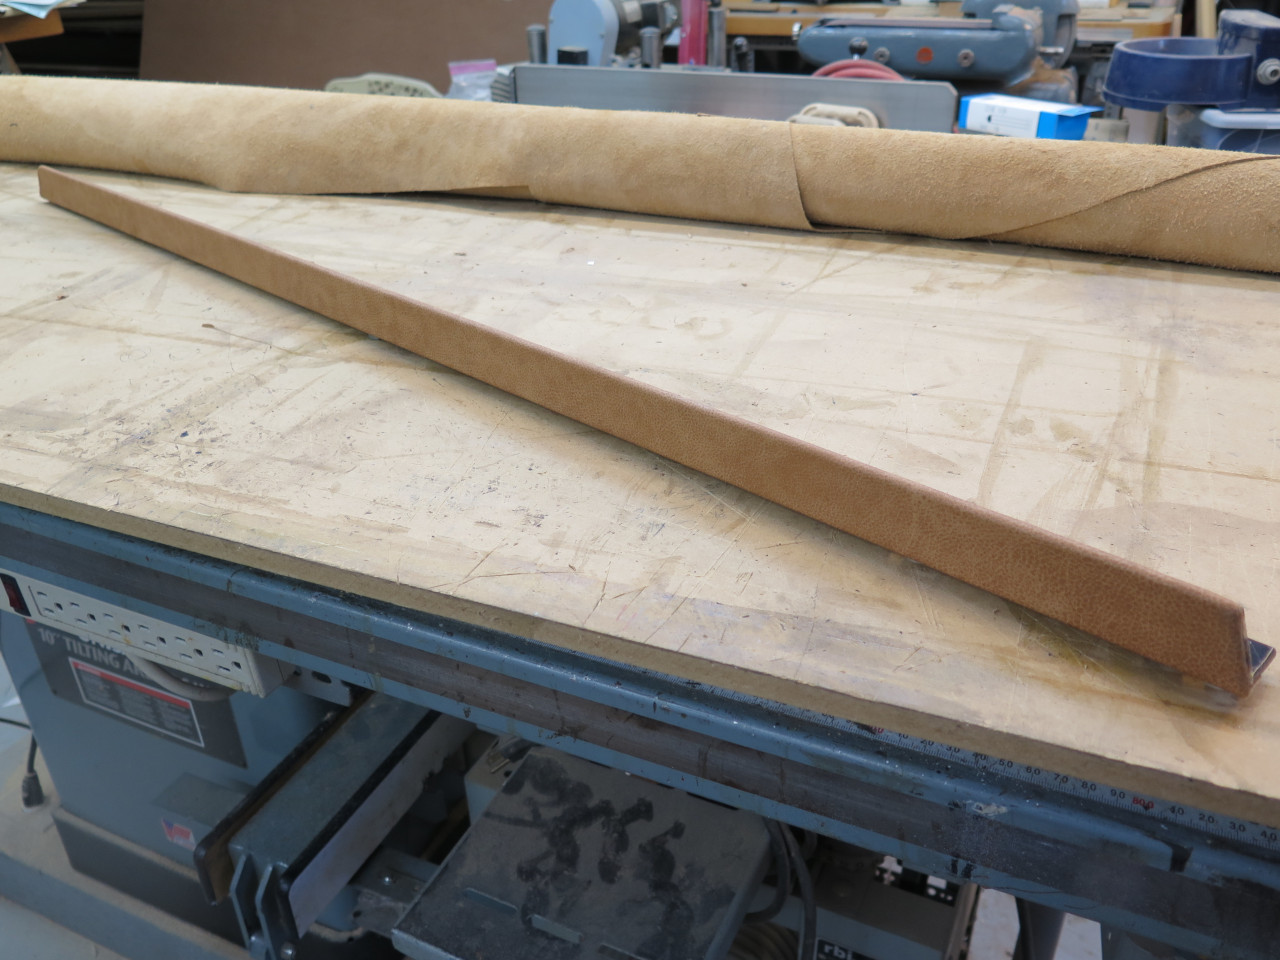
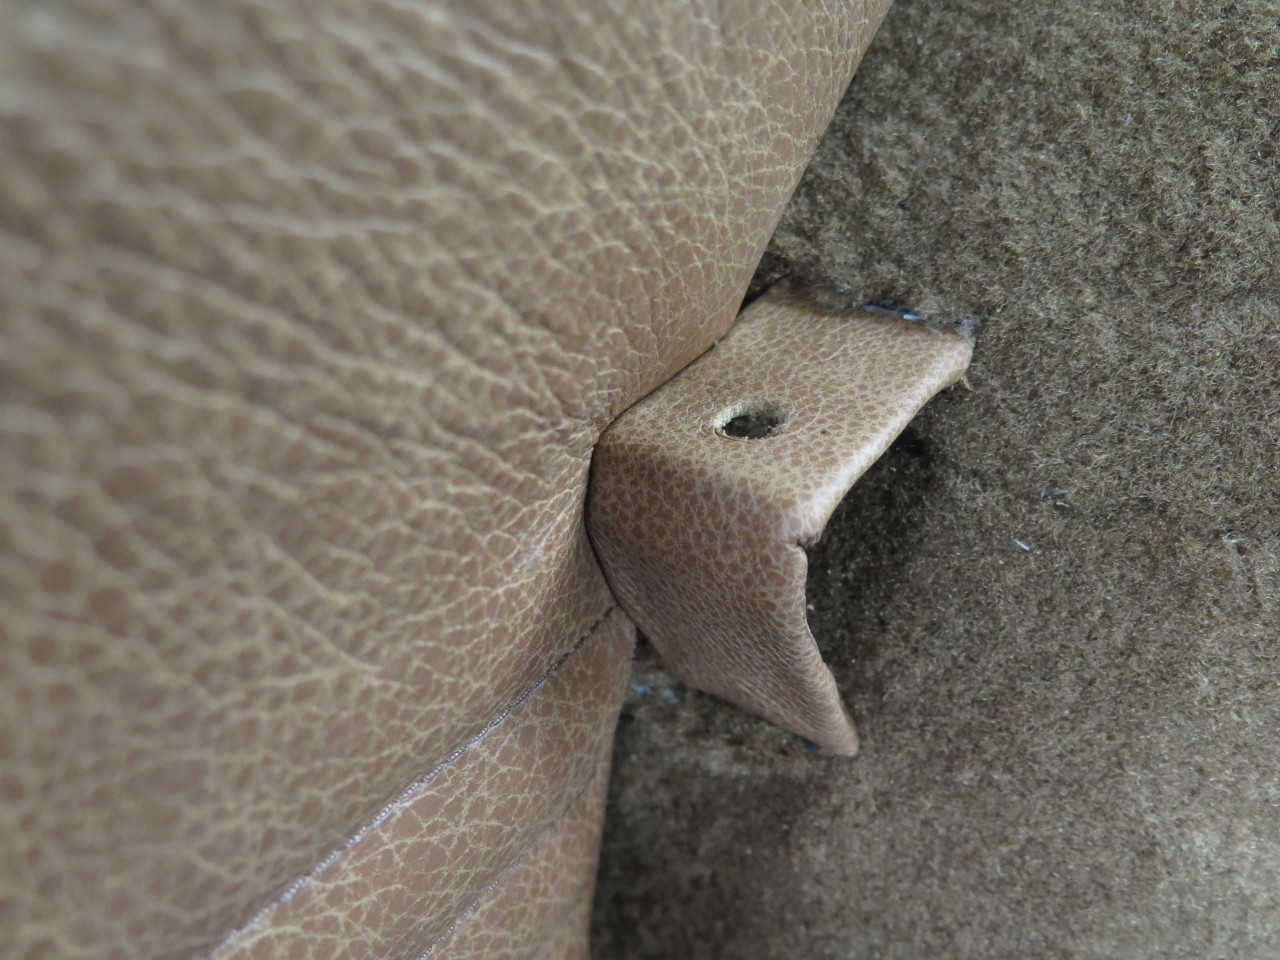
There is a strip of material (leather on this car) along the top of the
rear wing just under the quarter light. This keeps body color (or
primer) from showing.
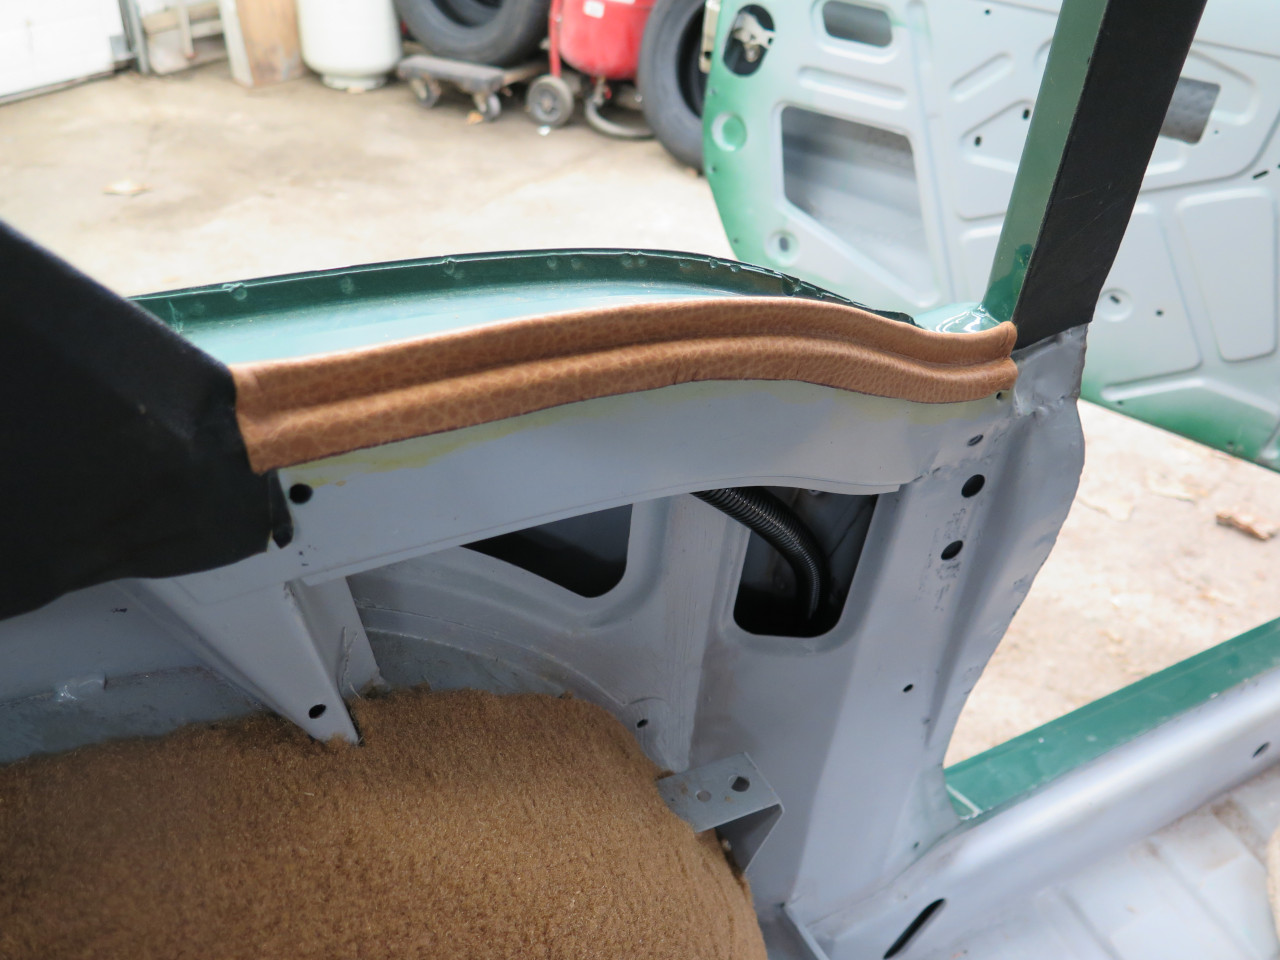

Another strip covers the leading edge of the B post. I later had
to peel back and re-position the upper part of these strips more
rearward.
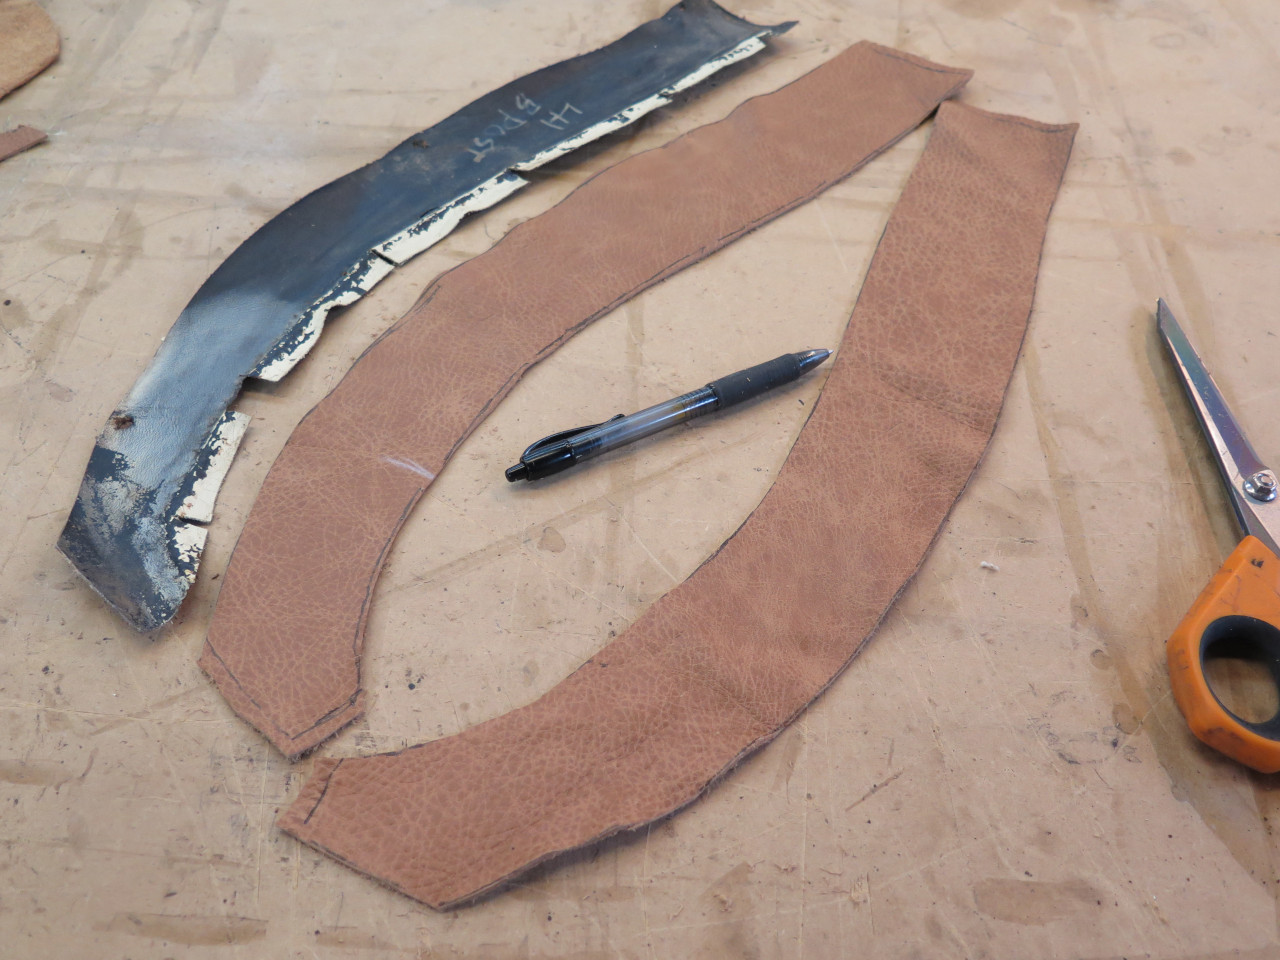
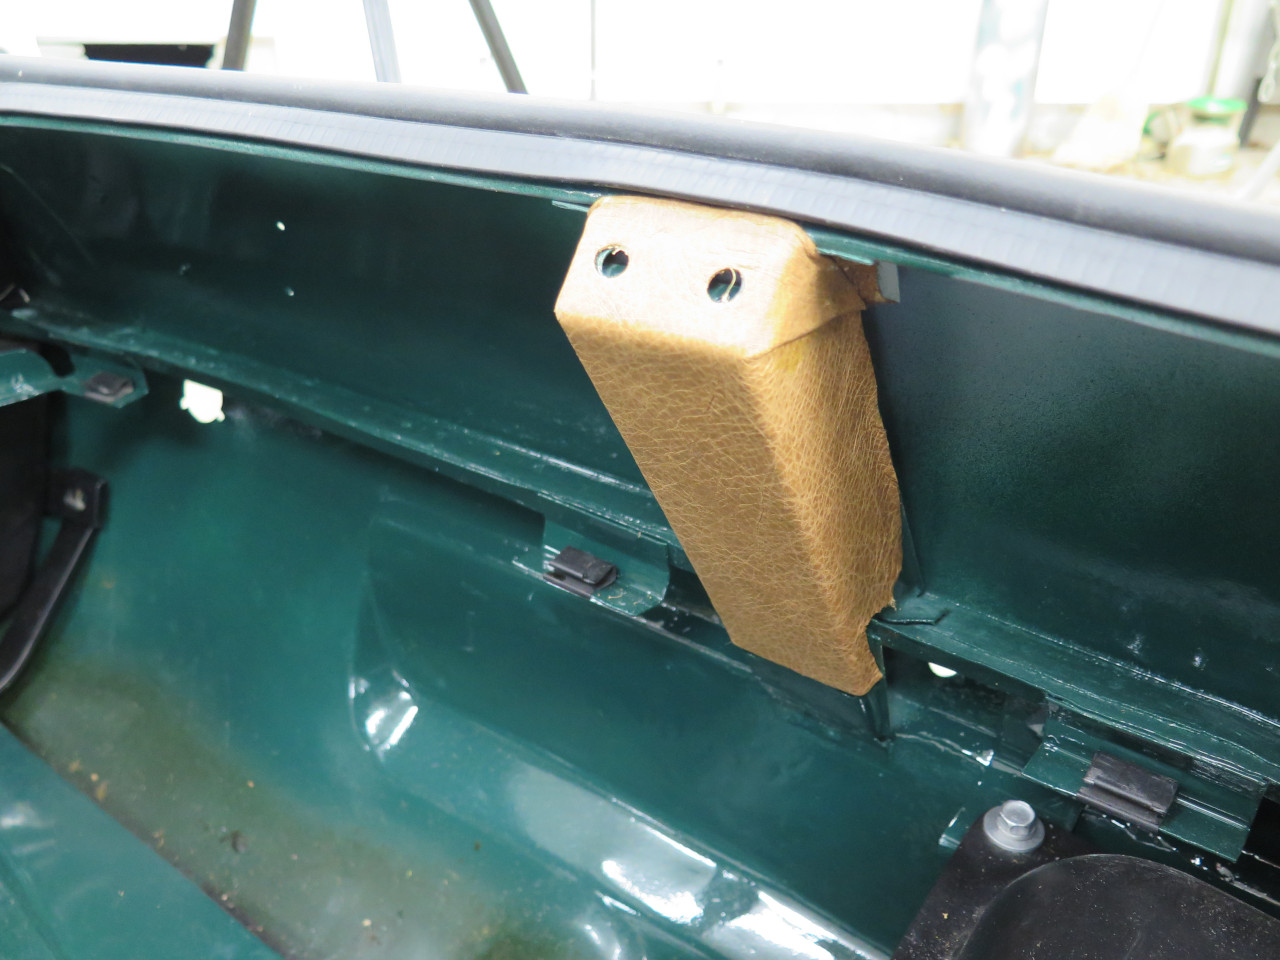
Finally, the bracket at the rear that holds the hatchback striker gets a leather jacket.
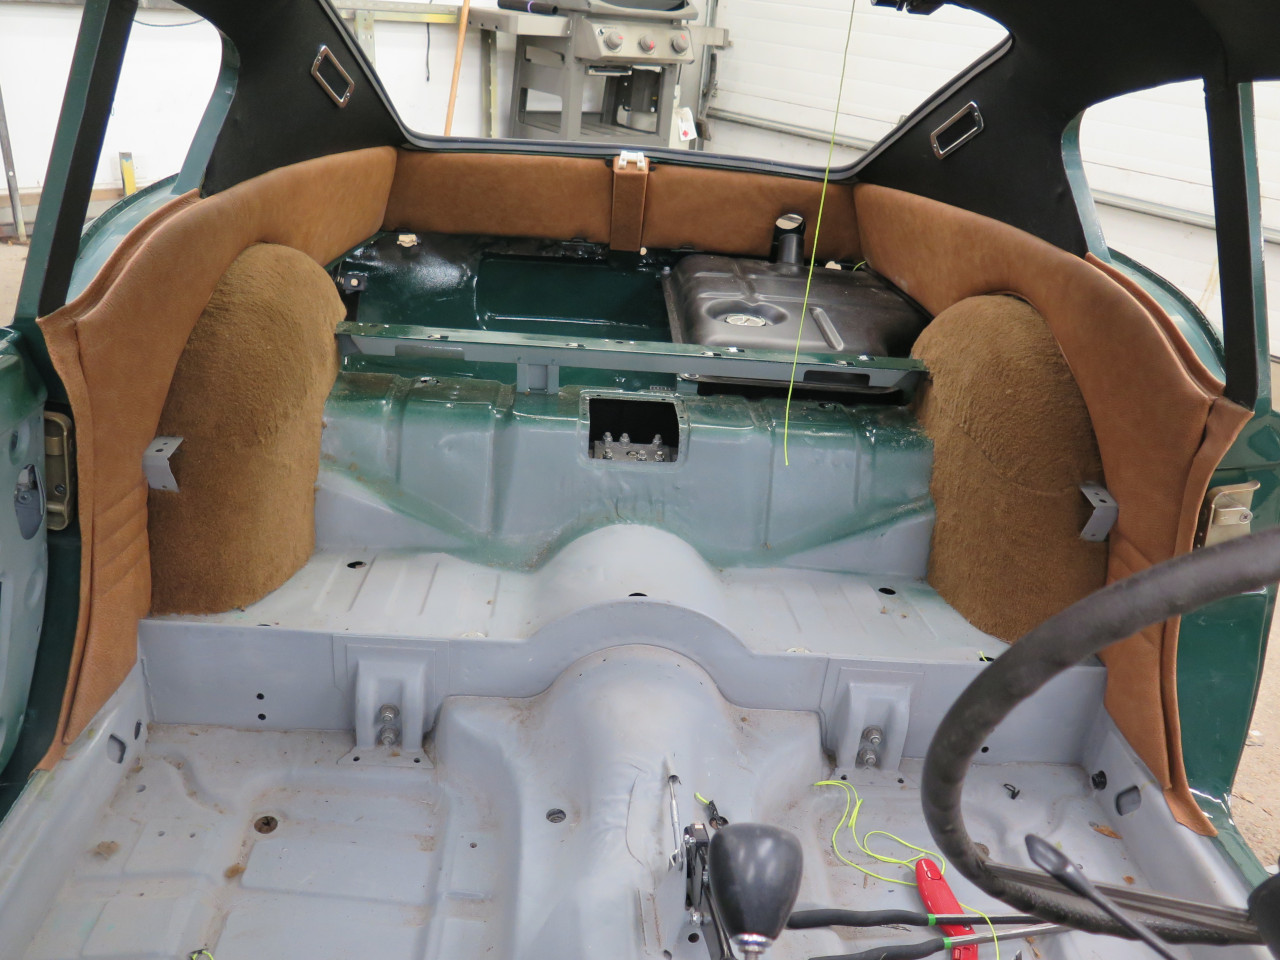
I decided to also do the rearmost trim panels before the side
panels. These are the originals. I'm pretty sure I added the
speaker.
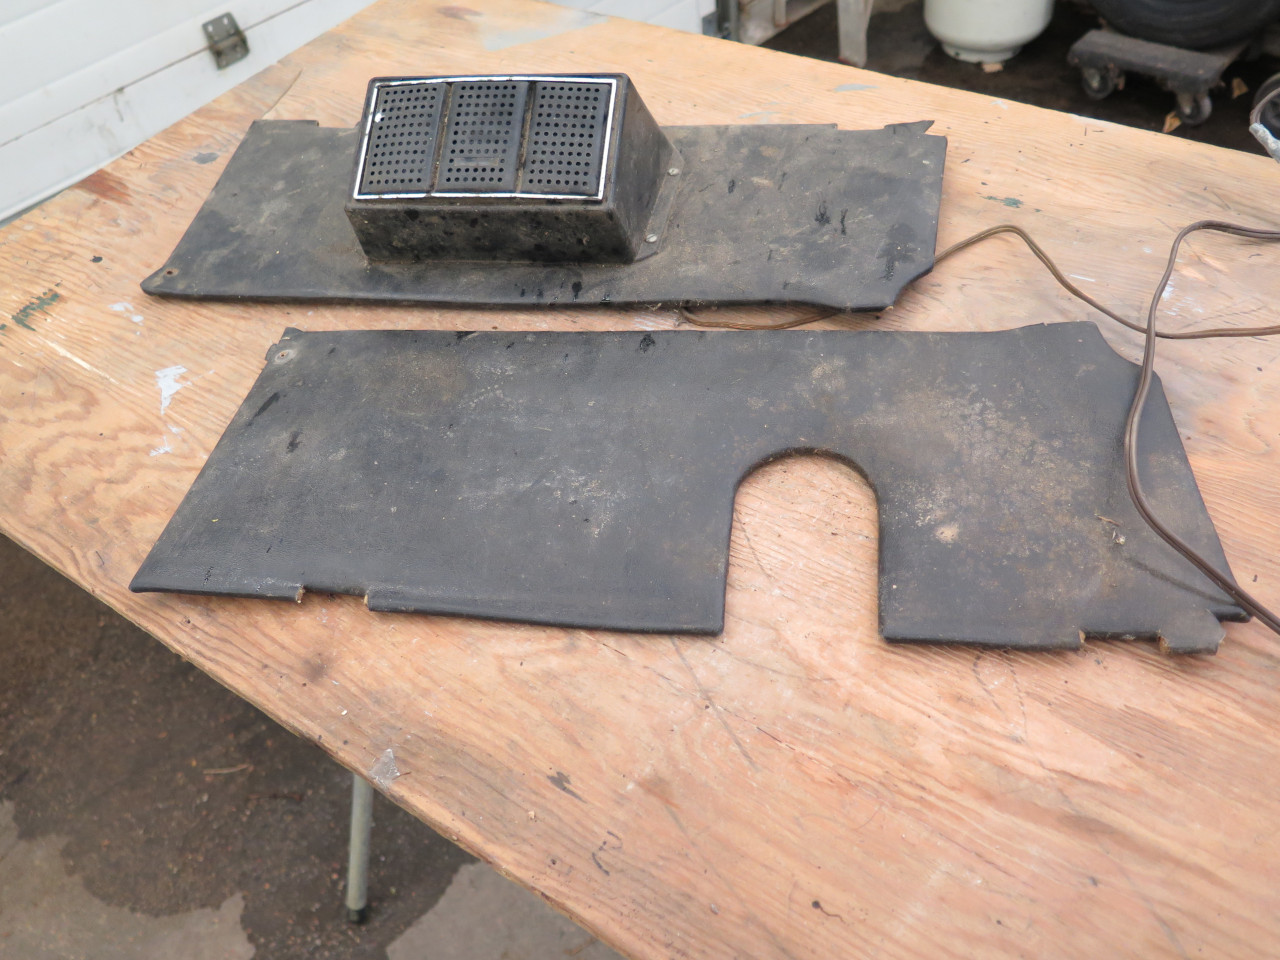
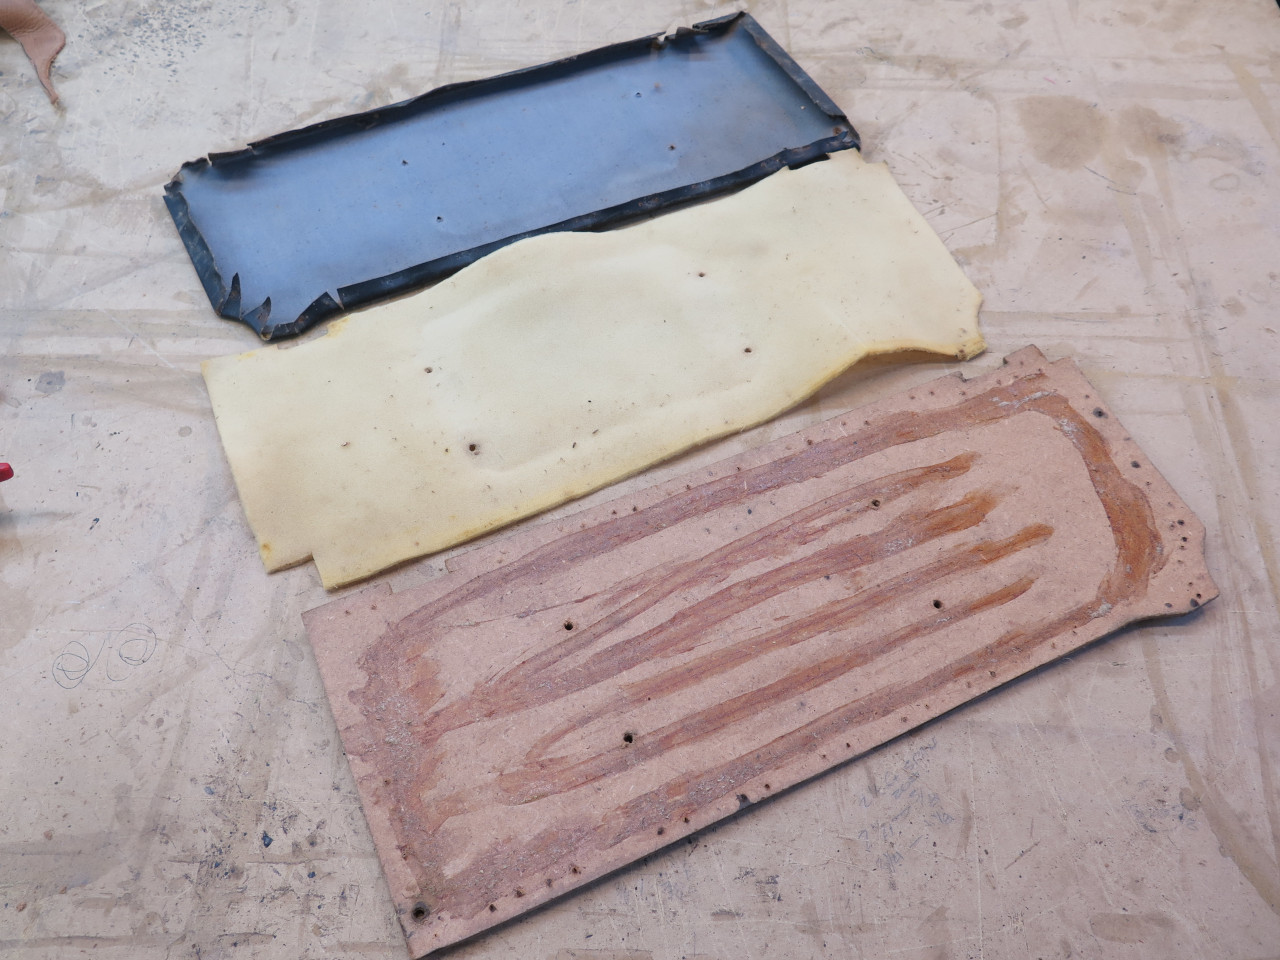
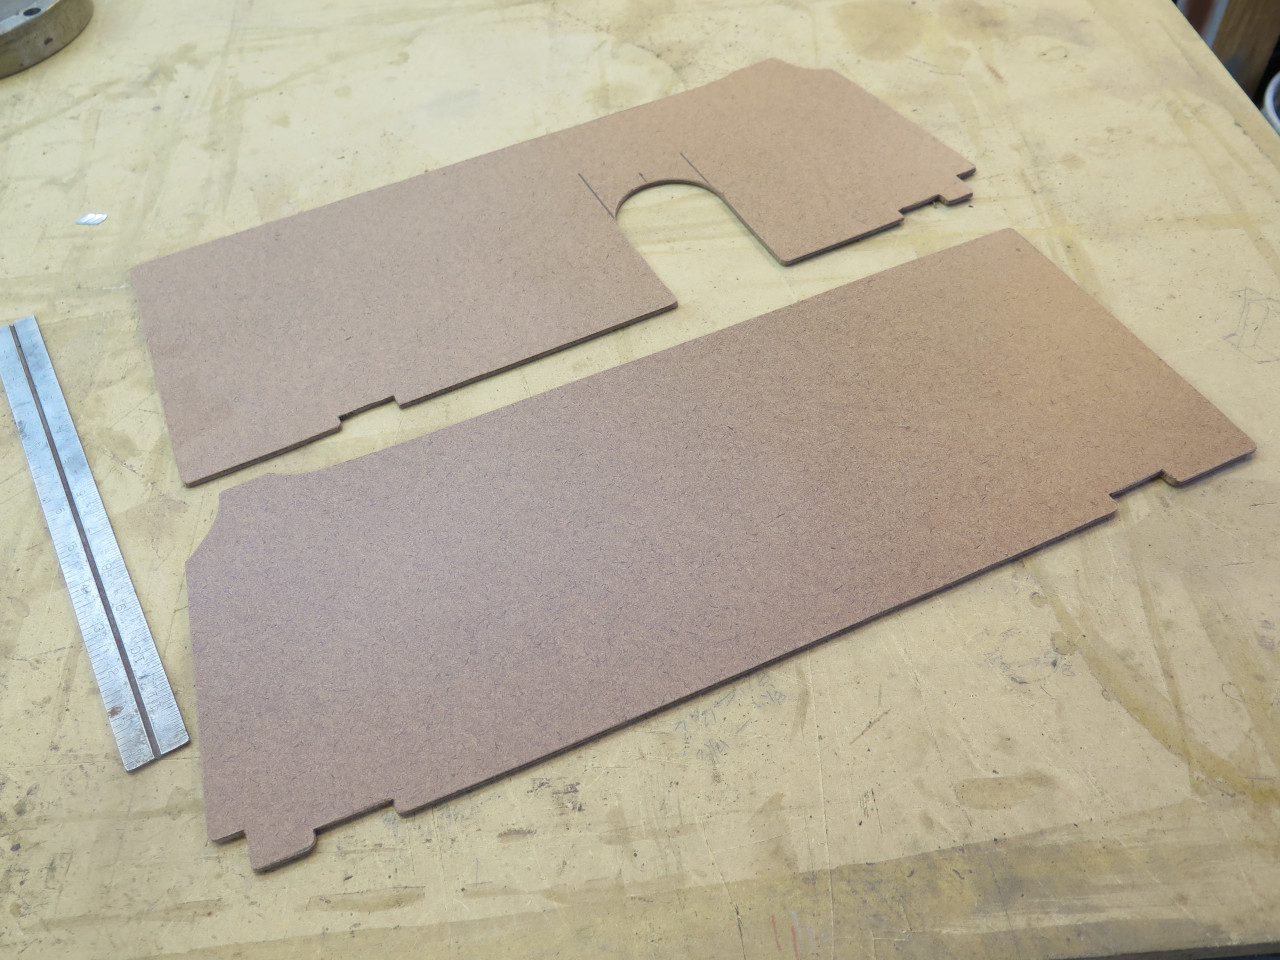
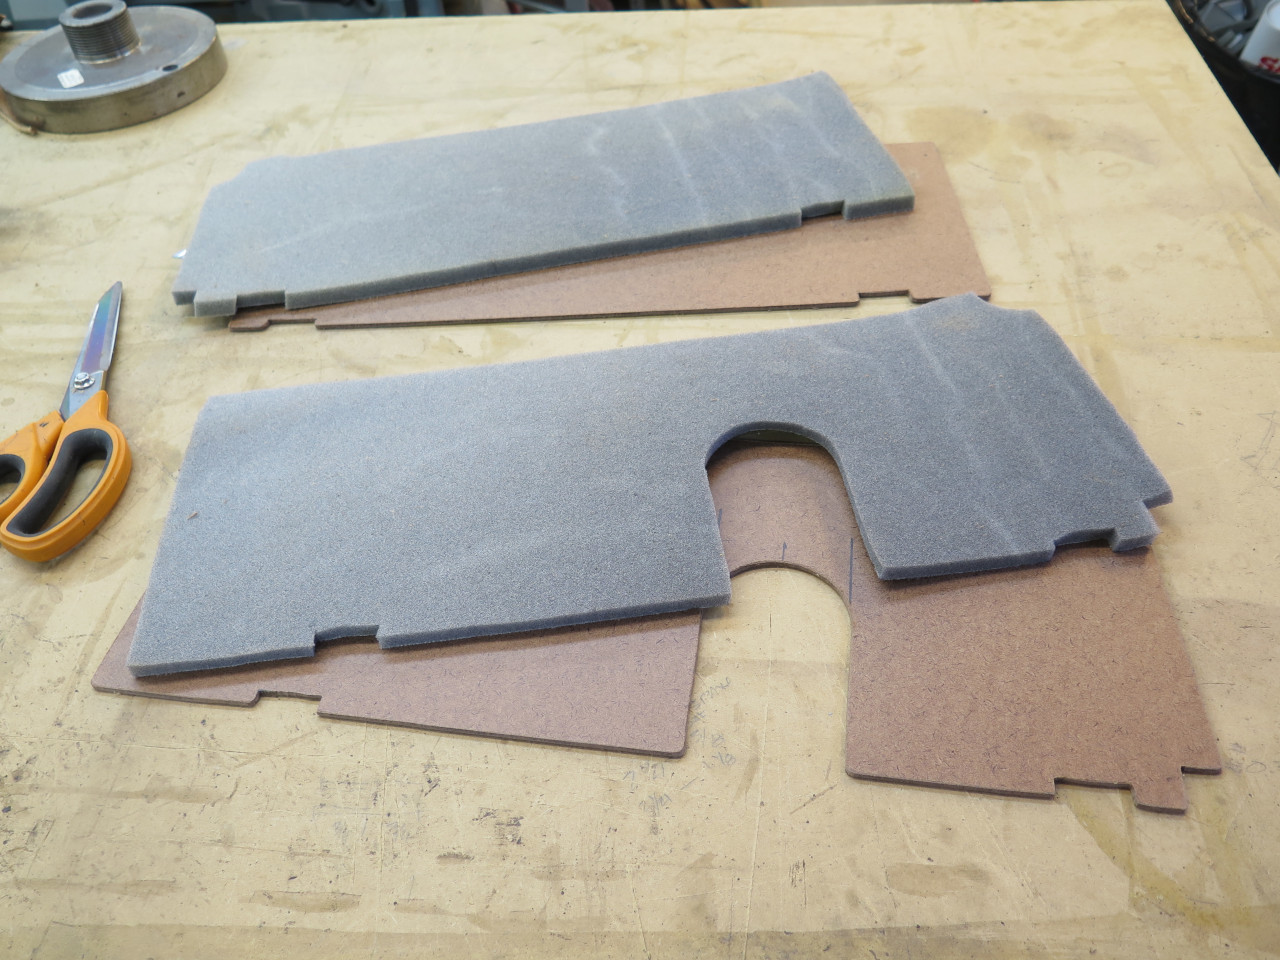
I made new base panels from hardboard. The original panels had
light weight 1/4" foam padding. I went with 3/8" to add a little
extra plush.
The rear panels are held in place along their bottom edges by the
luggage floor panels, and on their outboard edges by the wheel arch
panels. The only fasteners they have are at the extreme upper
inboard corners.
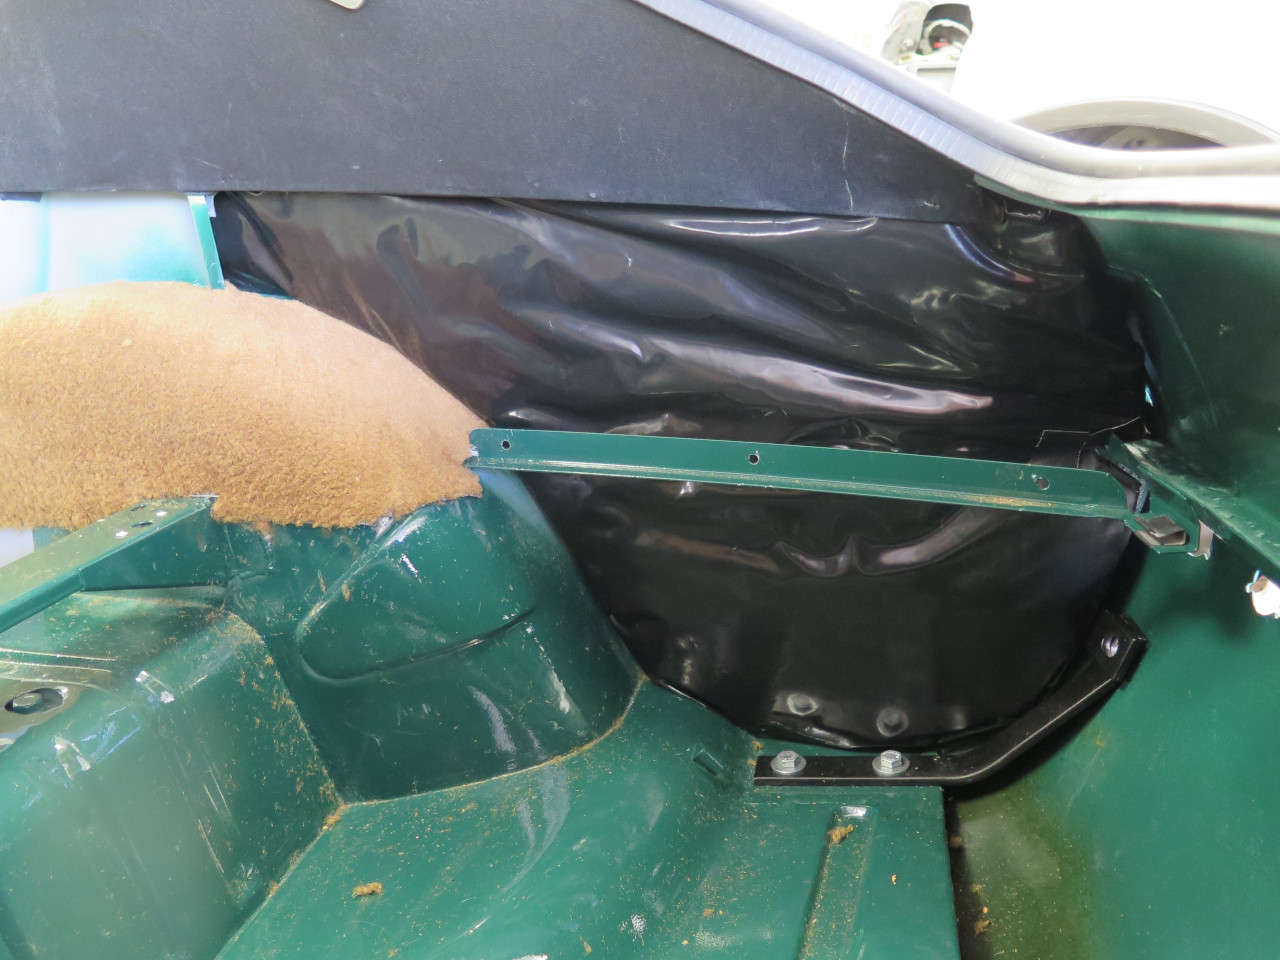
And of course we can't forget another pair of bespoke bags o' wool!
Back panels in place.
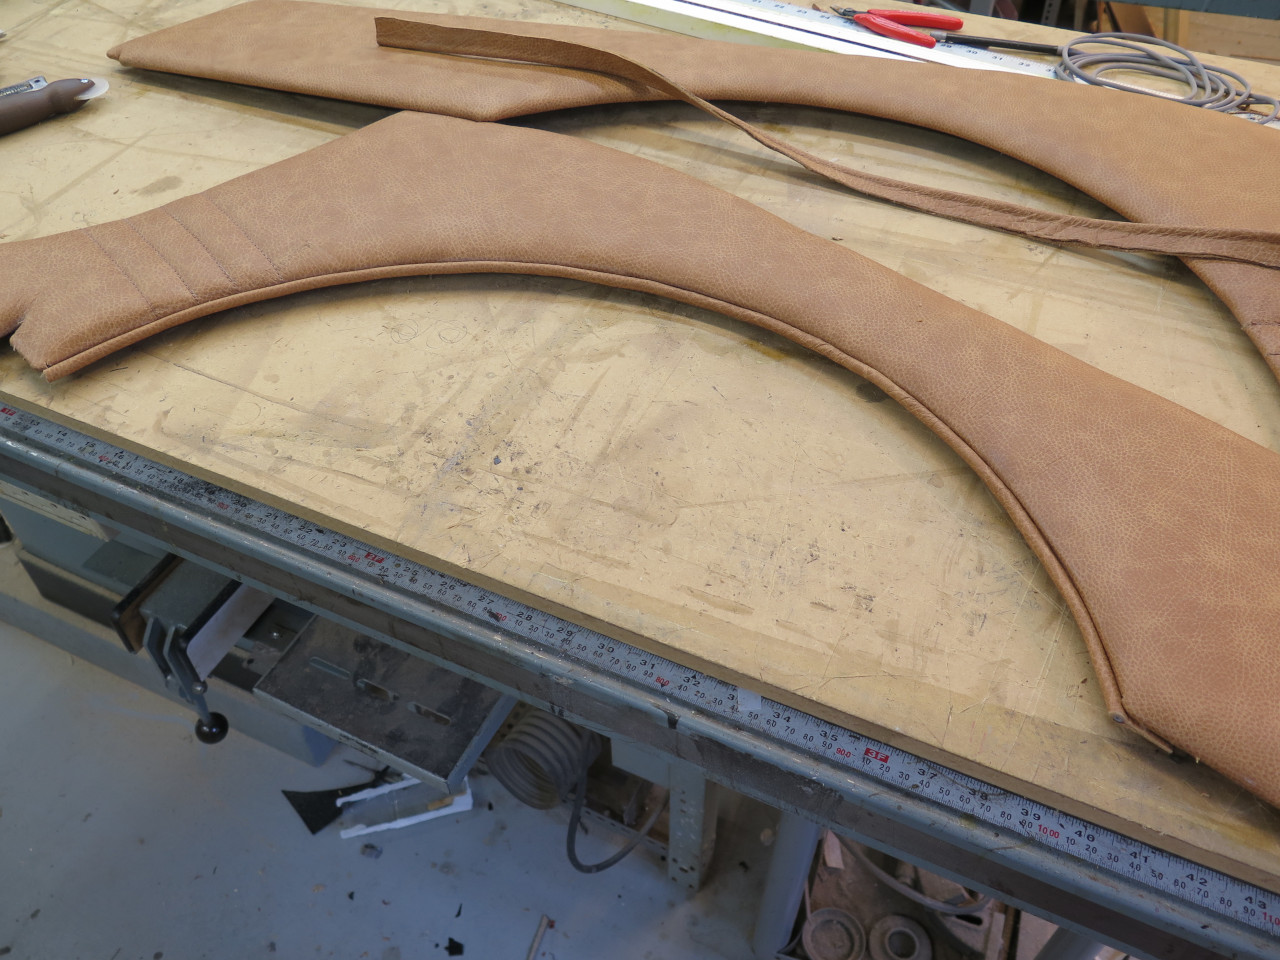
Finally time for the wheel arch panels
I made a few months ago. I don't seem to have a picture of it,
but when I first installed the panels I was disappointed to see a
largish gap between the panel and the wheel well. I cursed myself
for using the original panels as patterns instead of making custom
templates. I toyed with the idea of making them again. In
the end, I patched up the mistake by making some piping strips to
(mostly) fill the gap. The center of the piping is the cord used
to secure window screens in their frames.
One final realization before the side panels--I'd installed the
headliner before running the wires to the dome light. I fumbled
around trying to fish a wire down to the B post, but I just couldn't get
it done. Finally, by peeling back part of teh headliner above the
quarter light, I could just run a smaller plastic flex conduit from the
hatch hinge cover down to the left rear of the car near where my other
conduit terminates. This should allow running the necessary wires
from the front of the car to the dome light.

OK, no more stalling. Just install the damn side trim! The
yellow string is the messenger line in the conduit to the dome light.
It's easy to say "install the side panels" and show a few pics, but
there was actually considerable blood, sweat, tears, and foul language
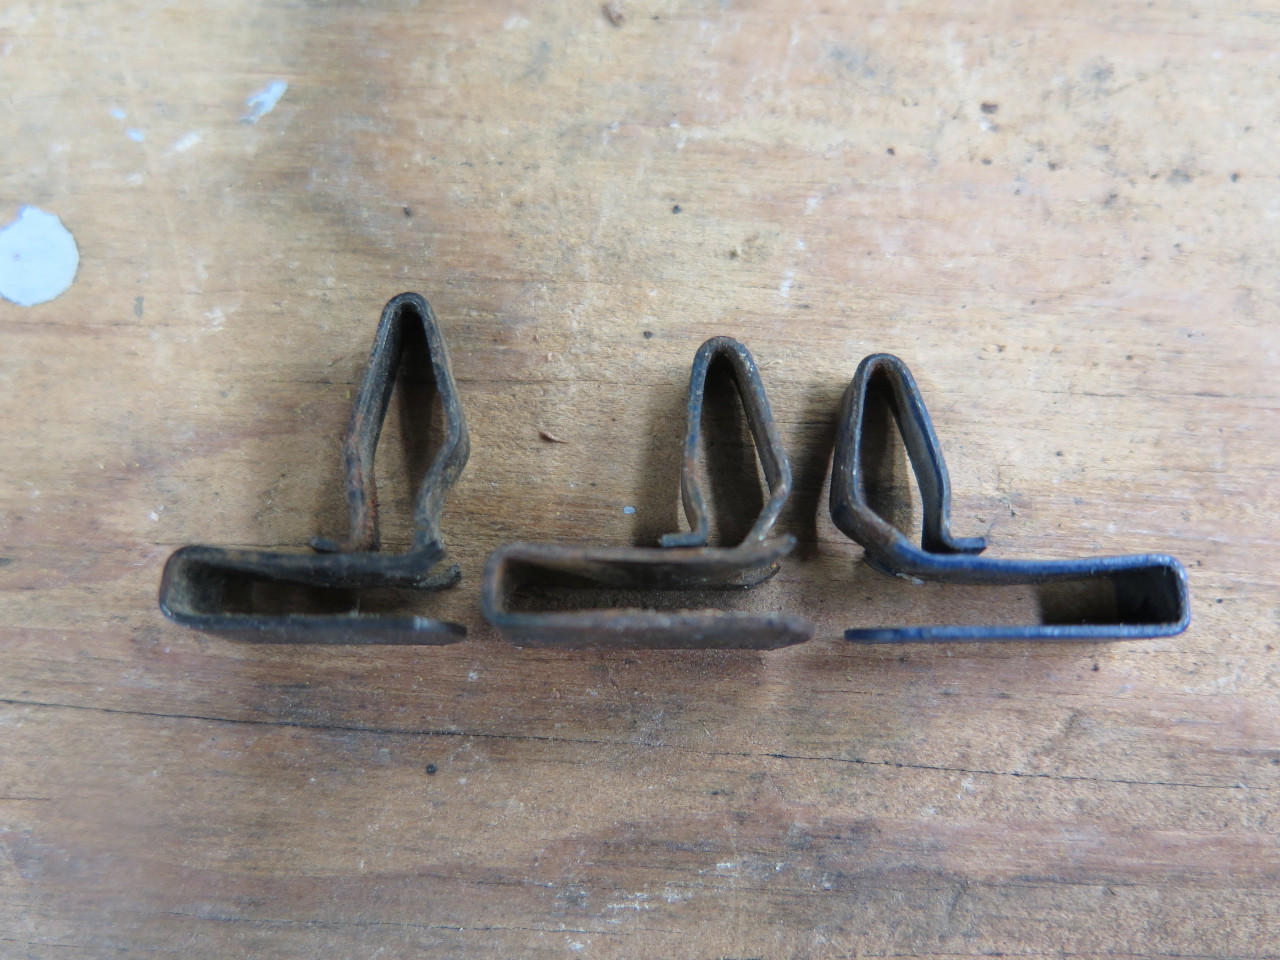
involved. One revelation was that there are at lest two different
sized clips for these panels. The longer ones are used at some
points along the top edge where they have to pass through the hardboard
sail panels to reach their mating holes in the body.
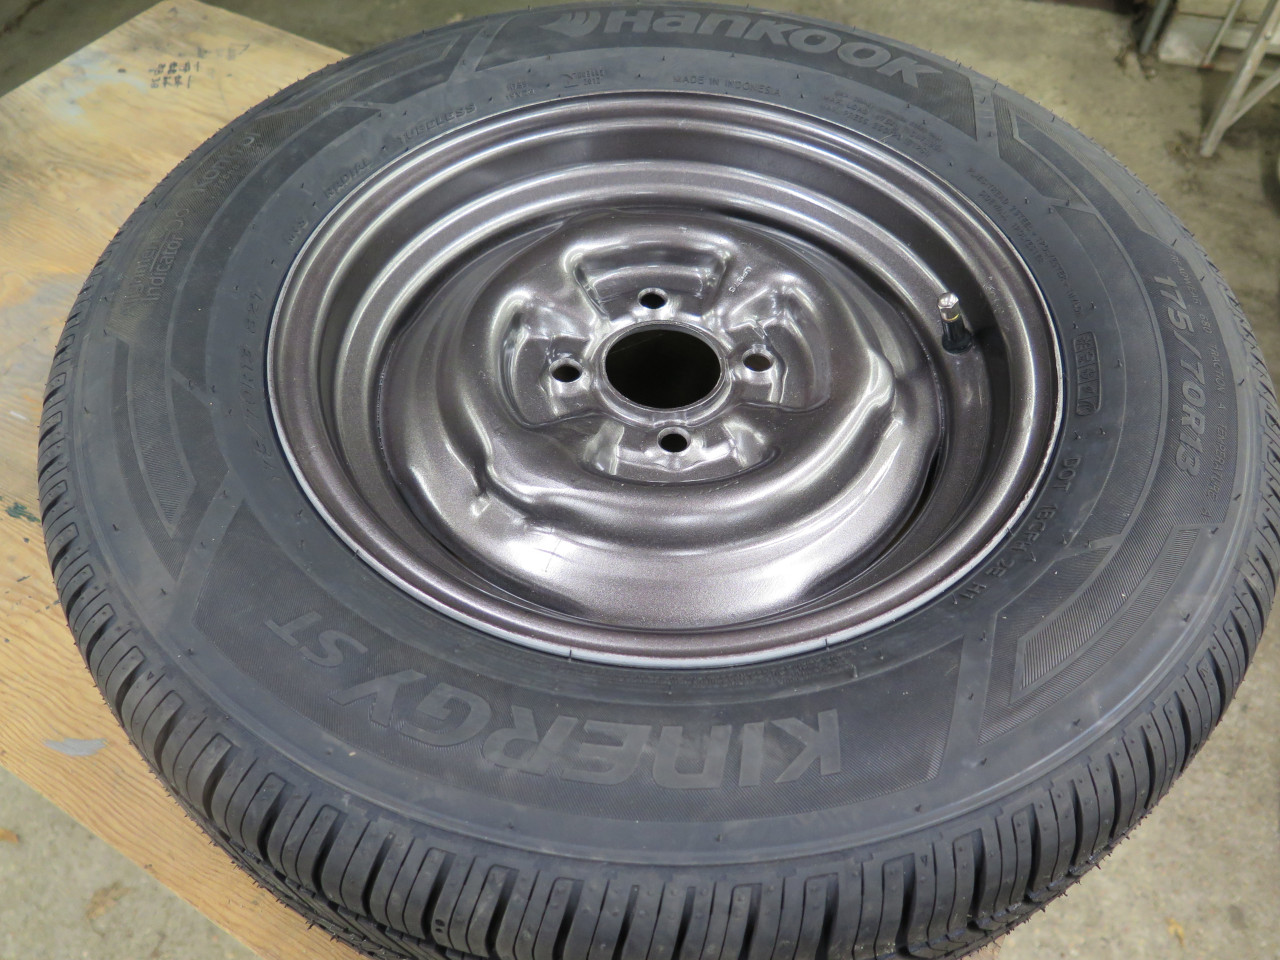
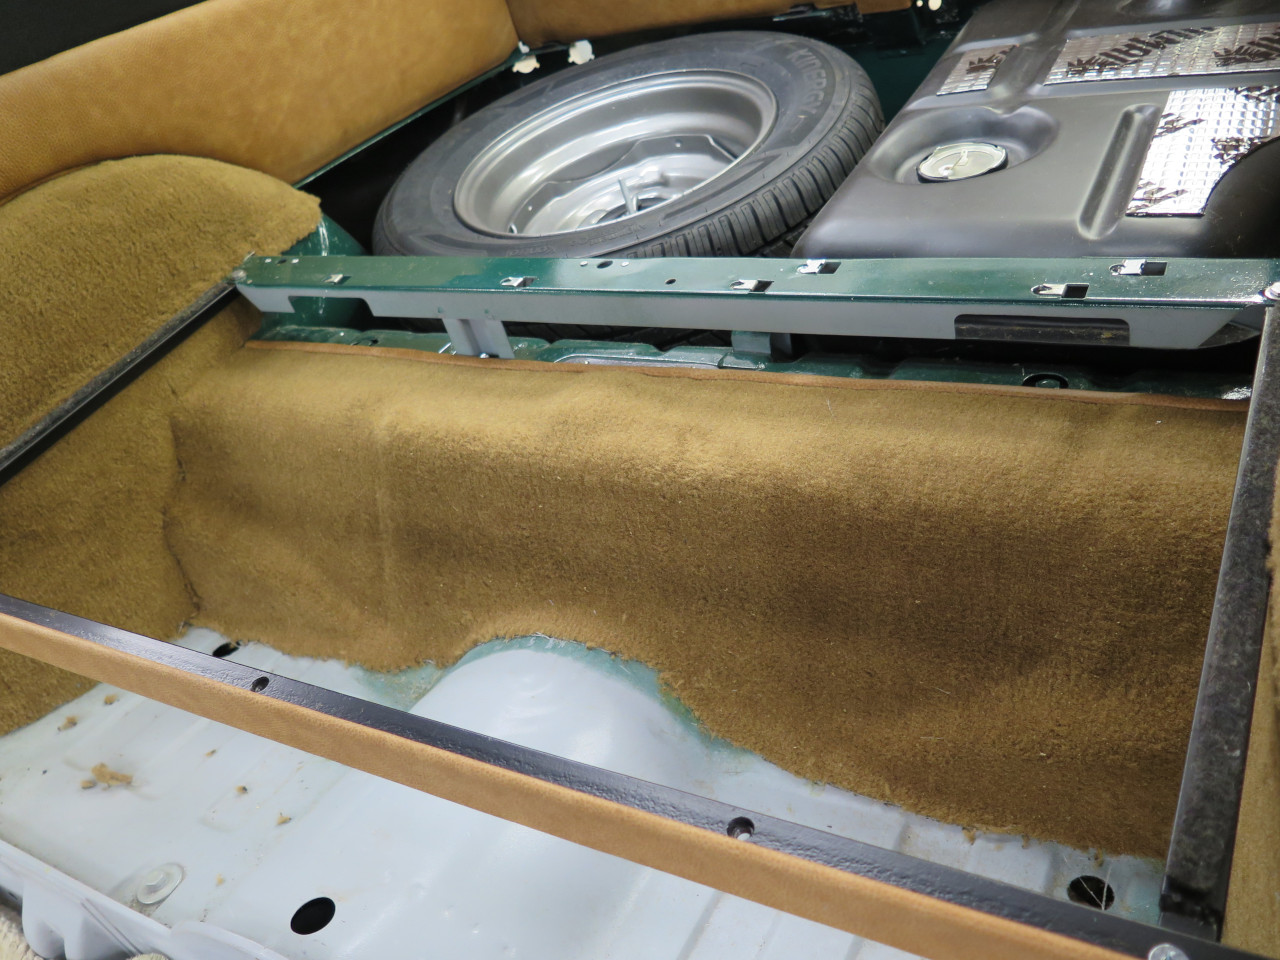
Now to something easier--the spare tire stuff. I picked the best of my five wheels to be the spare, and blasted it clean.
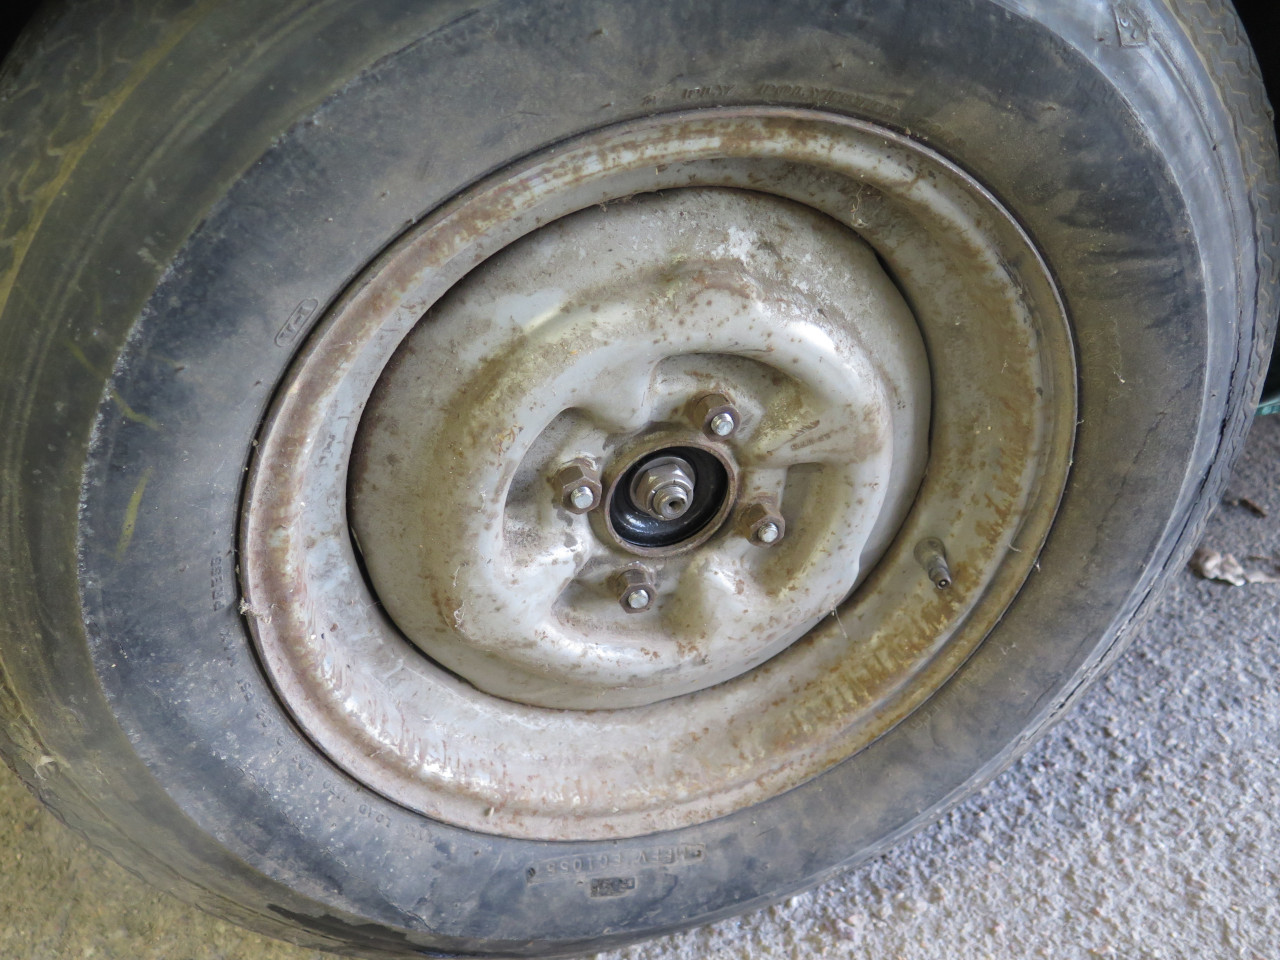
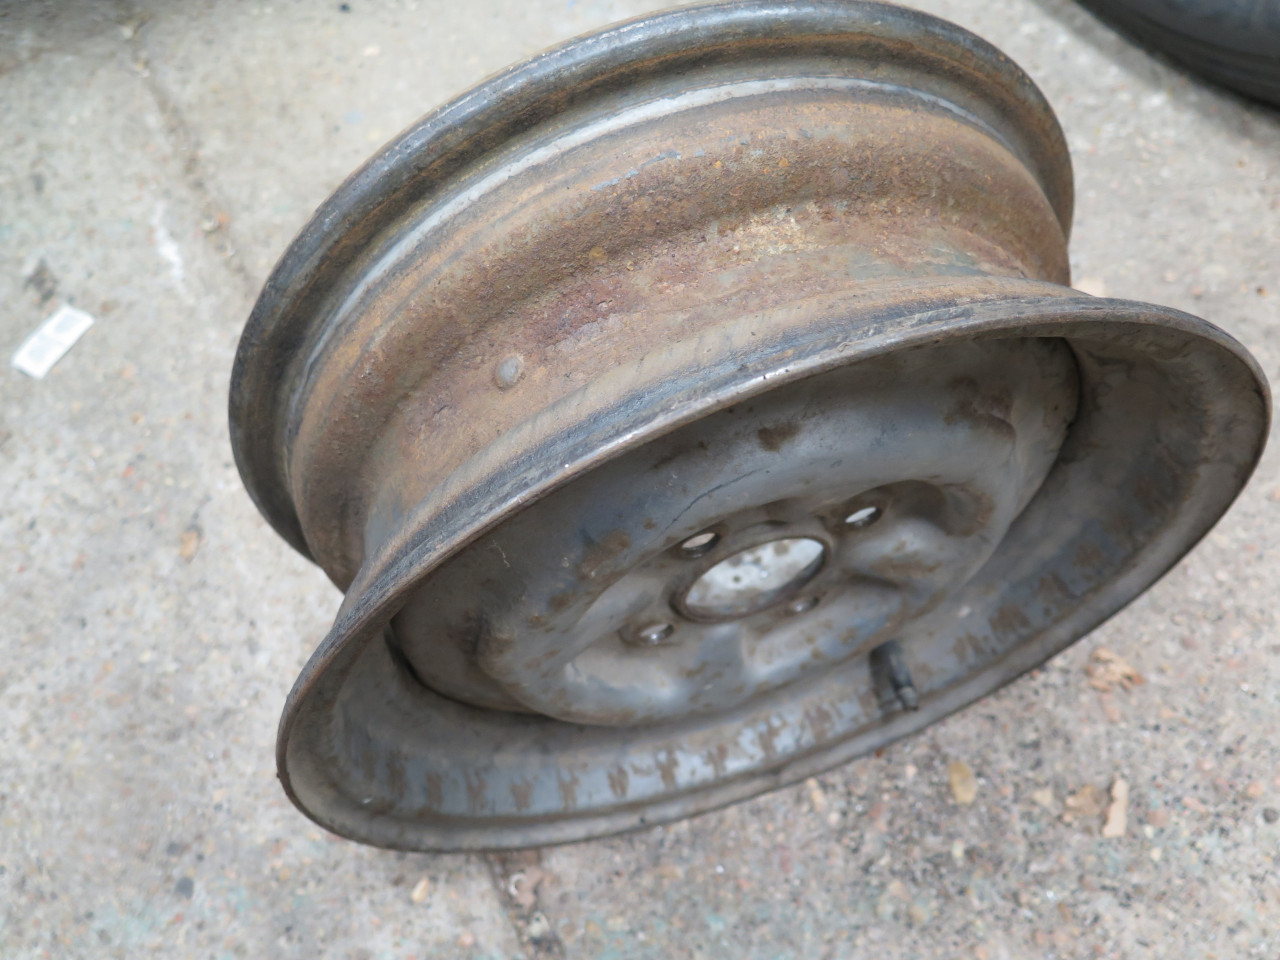
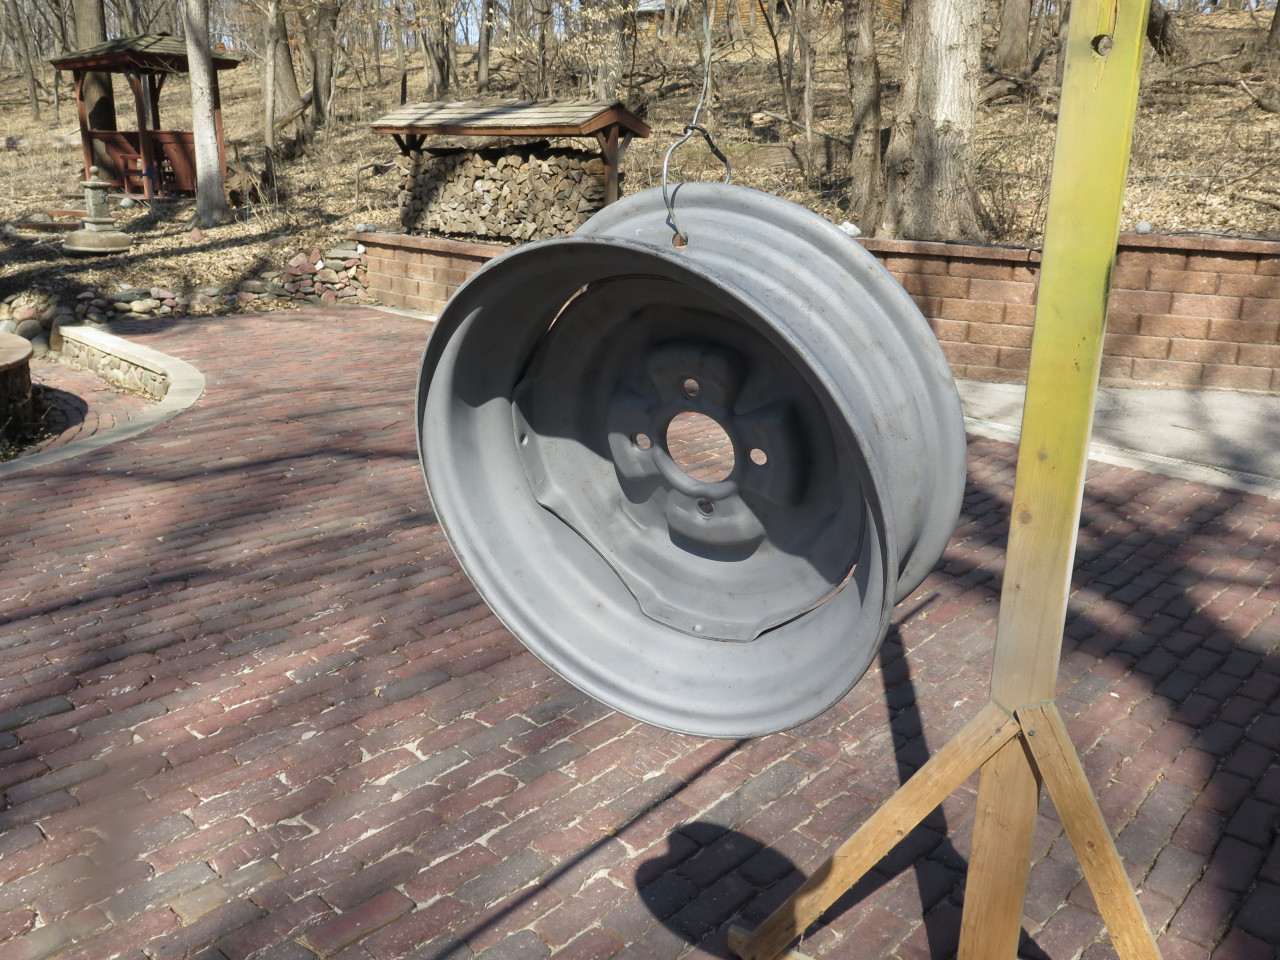
Then epoxy primer, and a top coat that I imagined might be close to the gunmetal wheels I bought.
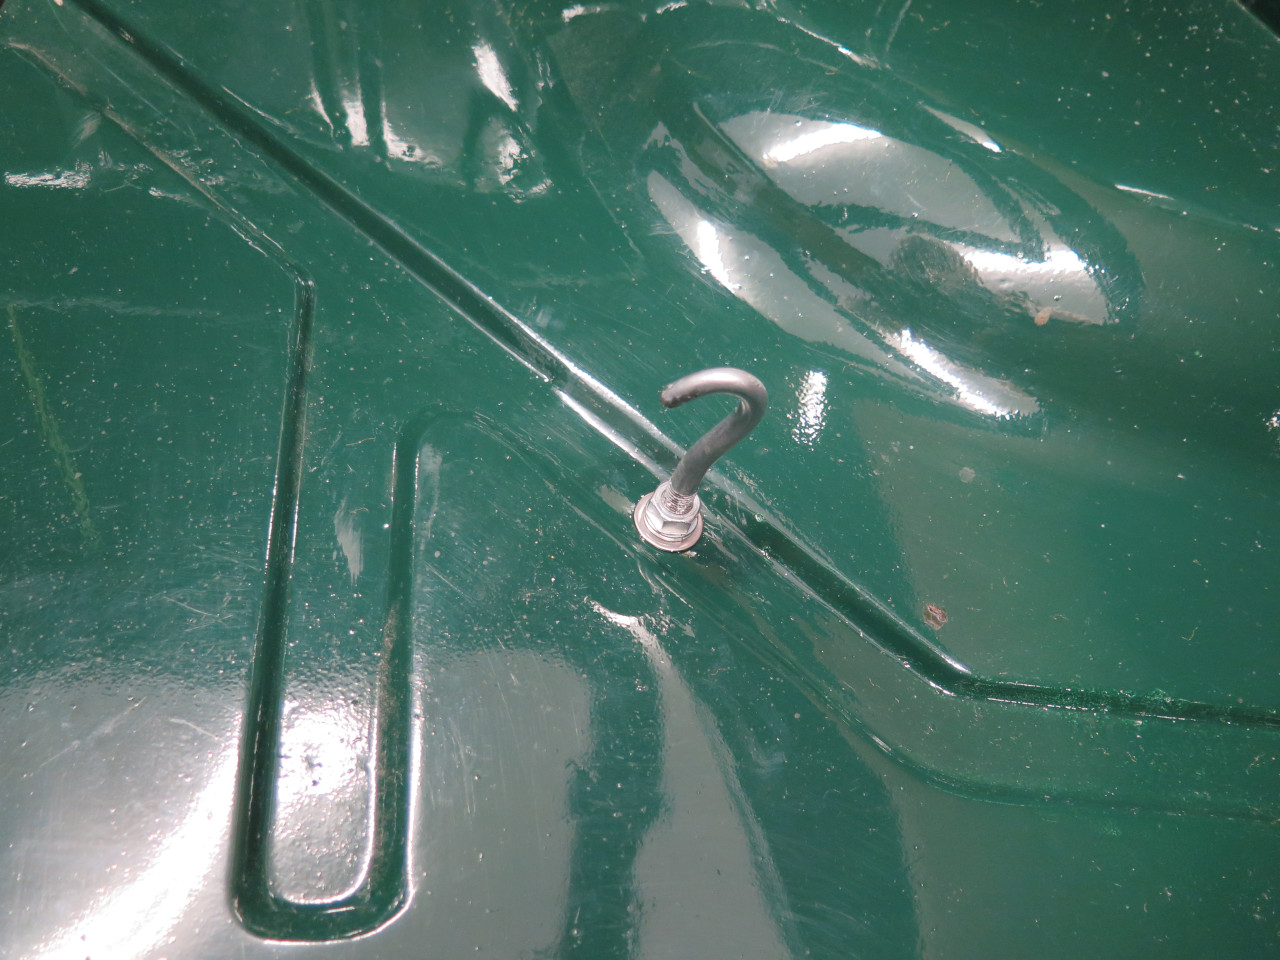
Triumph used several spare hold-down gizmos, but mine consisted of a
hook mounted to the boot floor. Another hook would grab it from
above, and hold the spare down by tightening a wing nut down on a
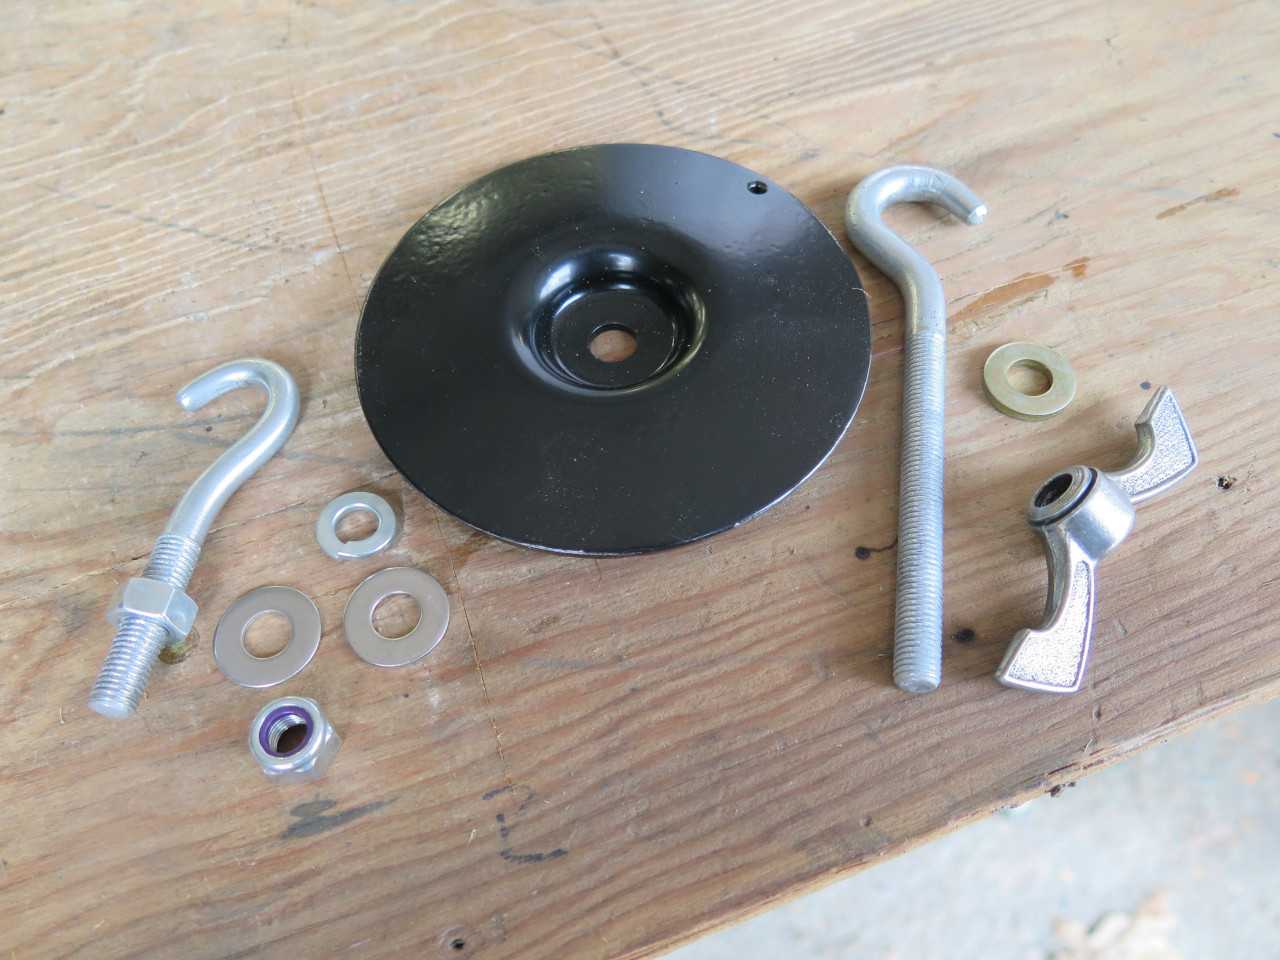
retainer plate. I had all of the important pieces except for the
bottom hook, which perished in the violence of disassembly.
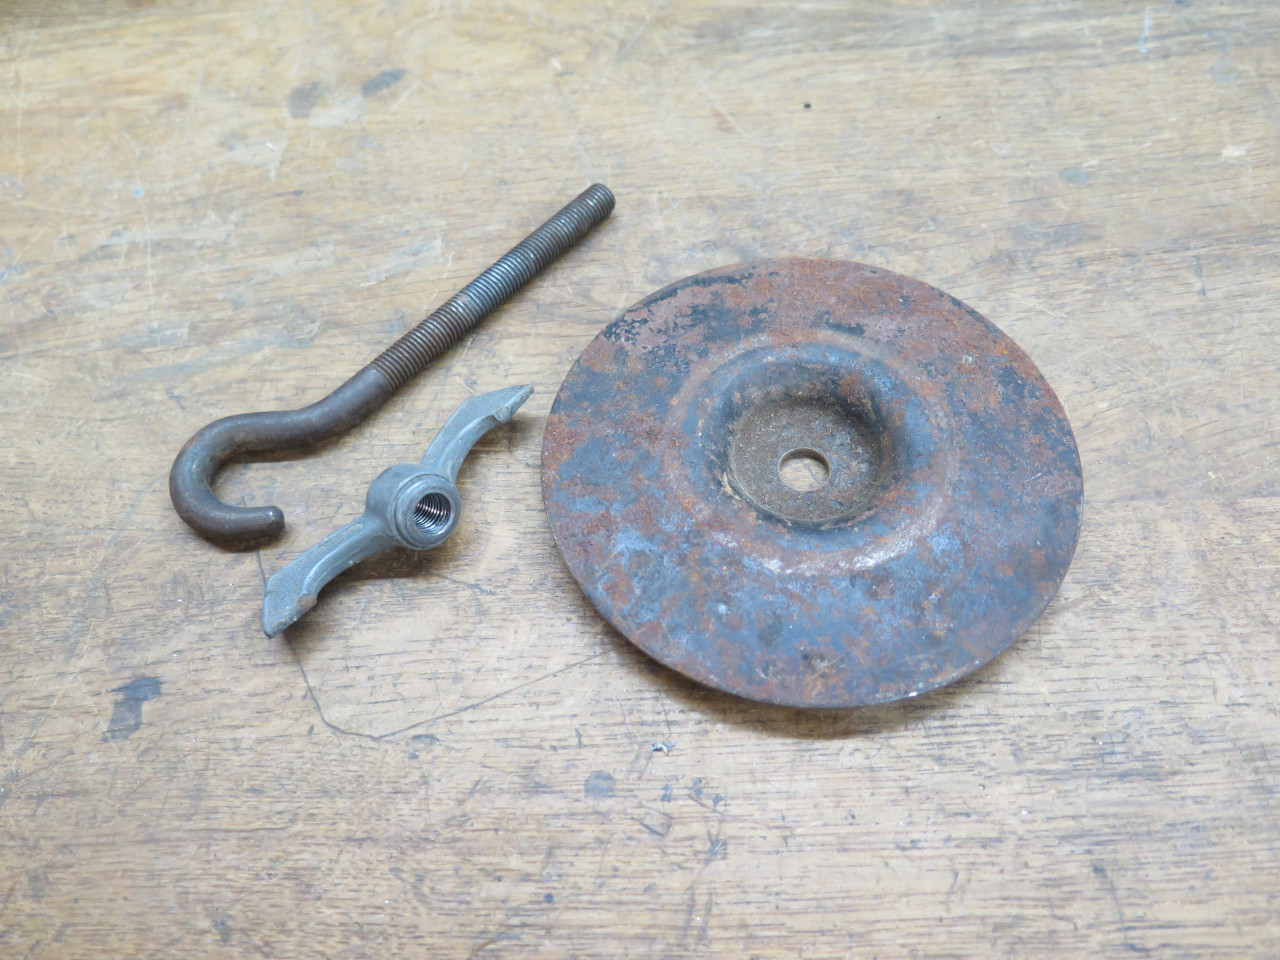
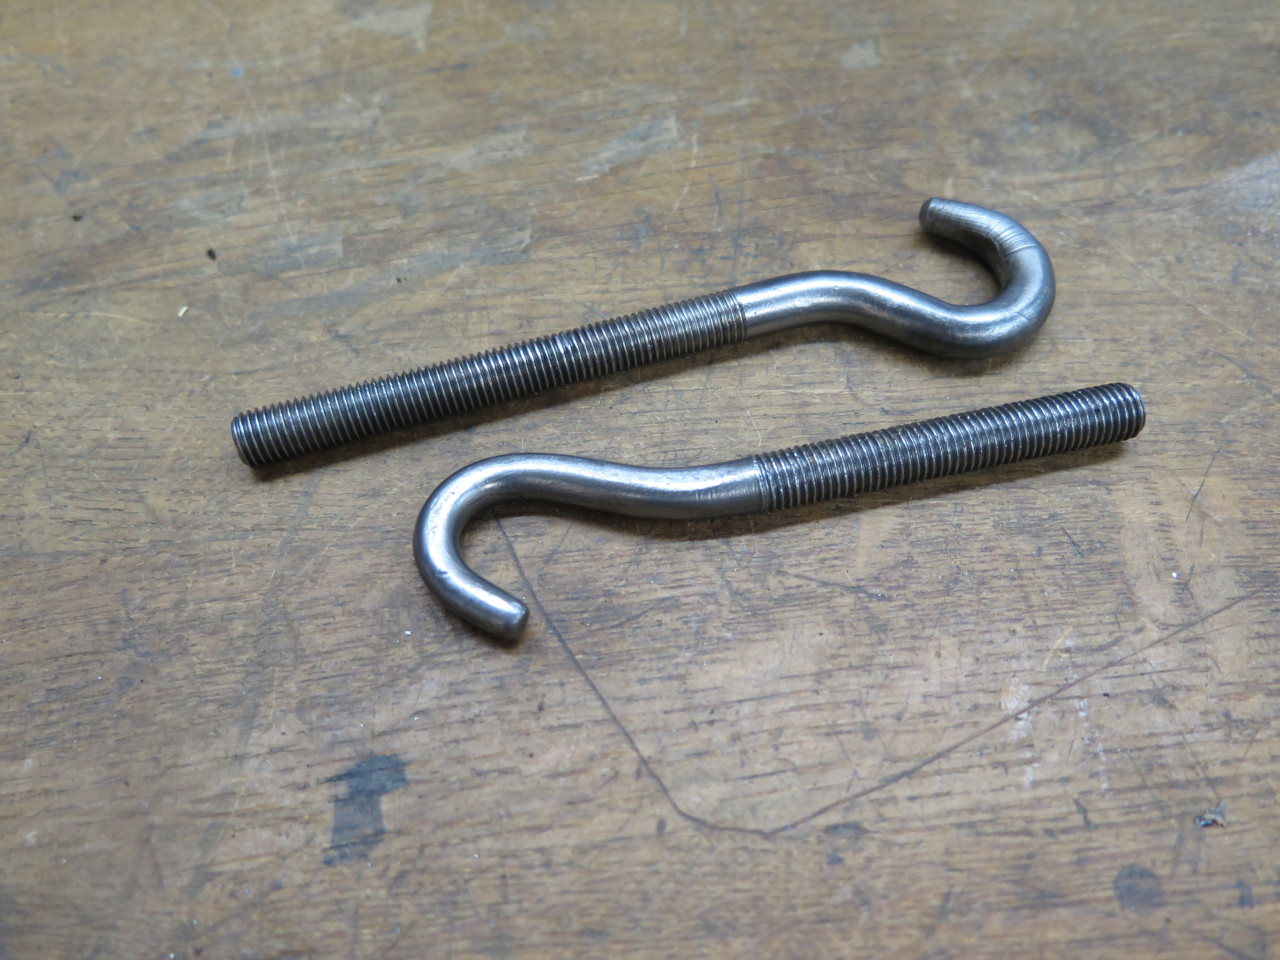
Not to worry, a new hook soon appeared.

Ready to go...
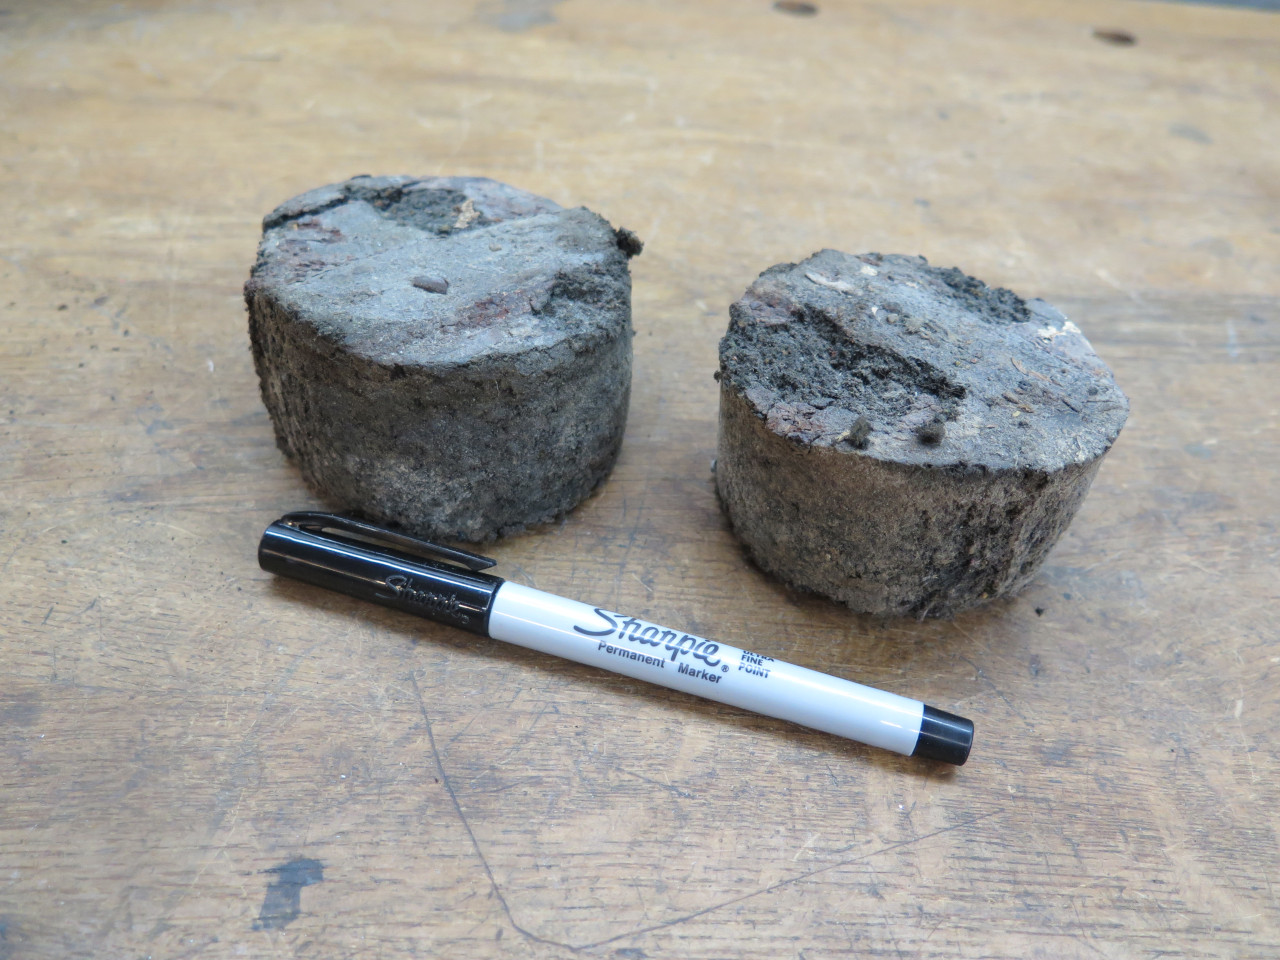
Then there were the pucks. One corner of the spare wheel well is
raised, so if the tire is to be level, some kind of spacers are needed
for the rest of the tire. Original spacers were some kind of
coarse foam that didn't age well.
This is a solid block of EVA closed cell foam. It feels roughly
the same stiffness as the remnants of the original pucks, but has a much
finer texture. It is apparently sold as some sort of Yoga
appliance that I can't imagine.
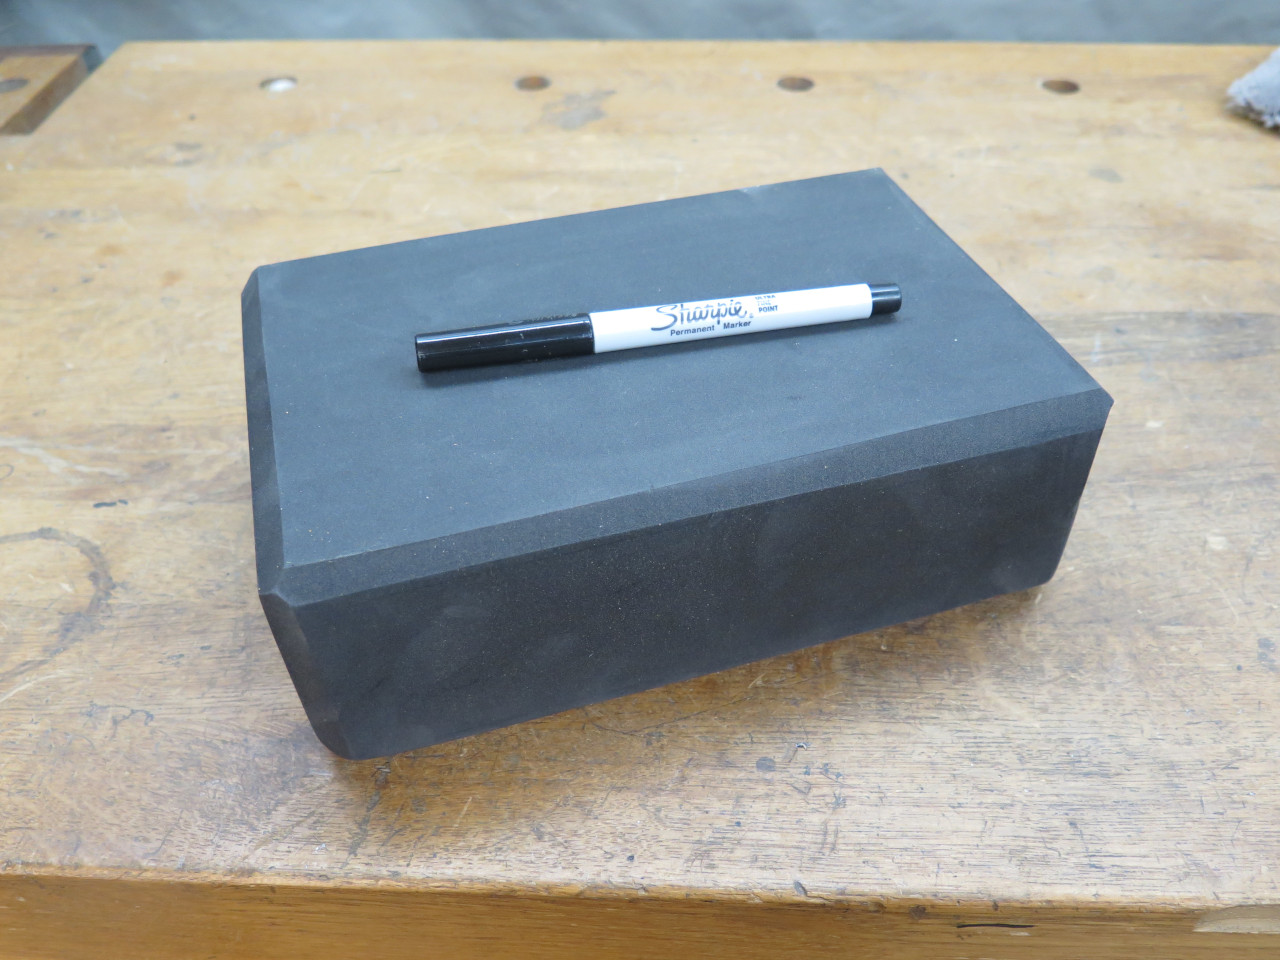
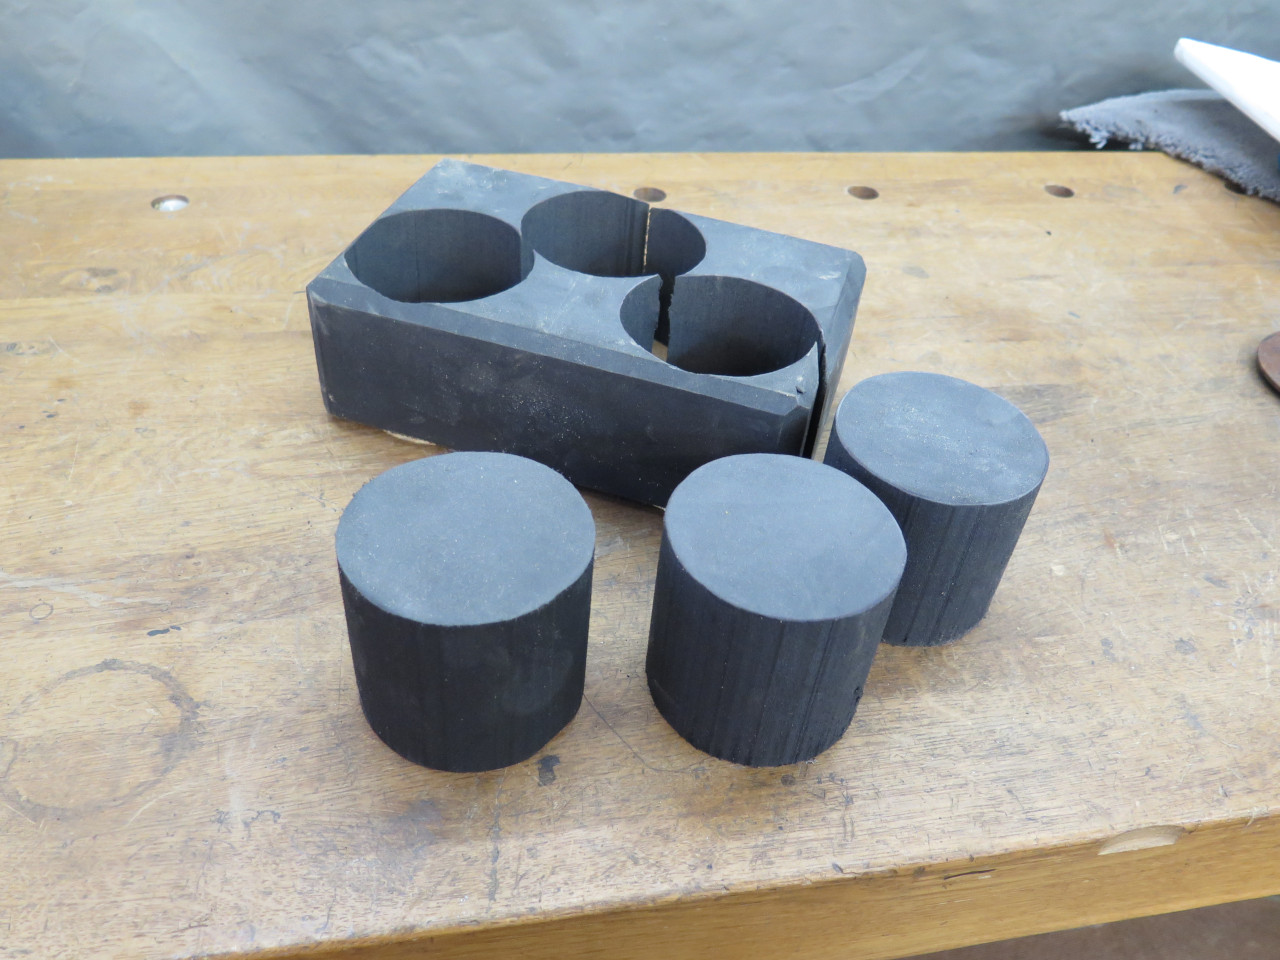
The foam block just yielded three pucks, which were then trimmed to an
appropriate length of around two inches, and then glued to the boot
floor a measured distance from the center hook.
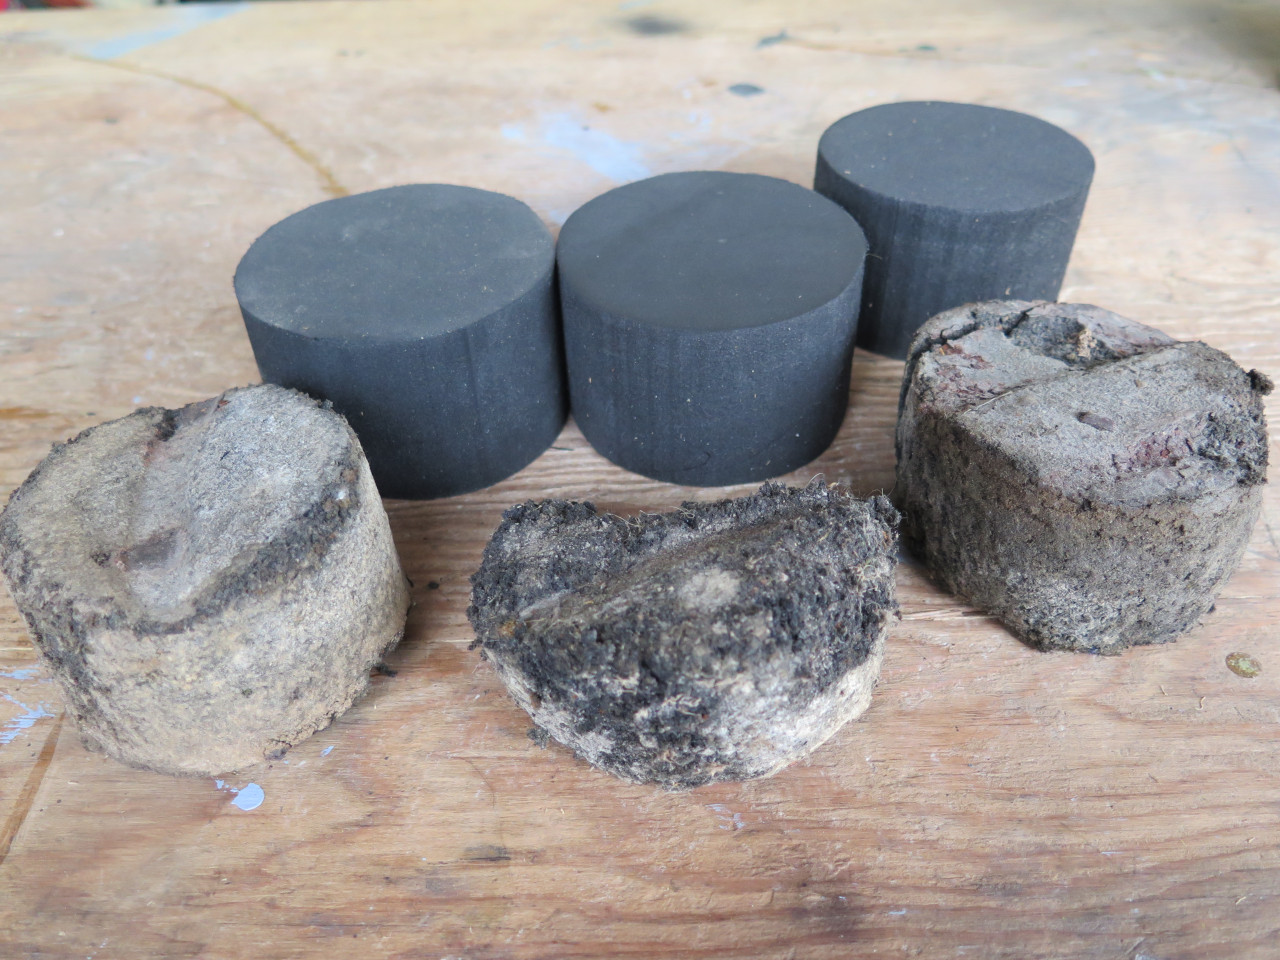
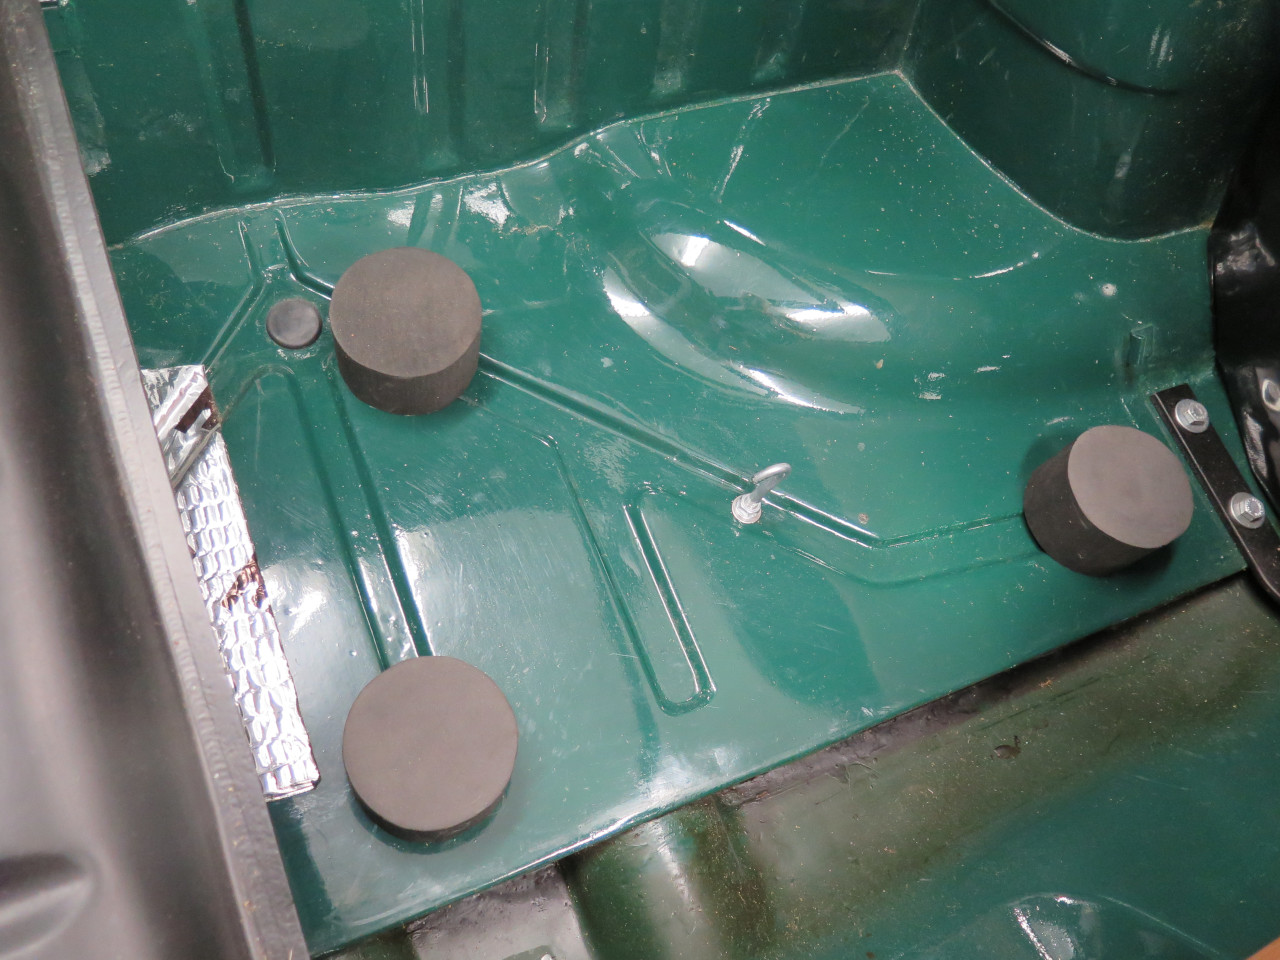
Test fit the tire. It's snug, but it goes.

From that last picture, it appears that I had installed the access cover on the rear tunnel.
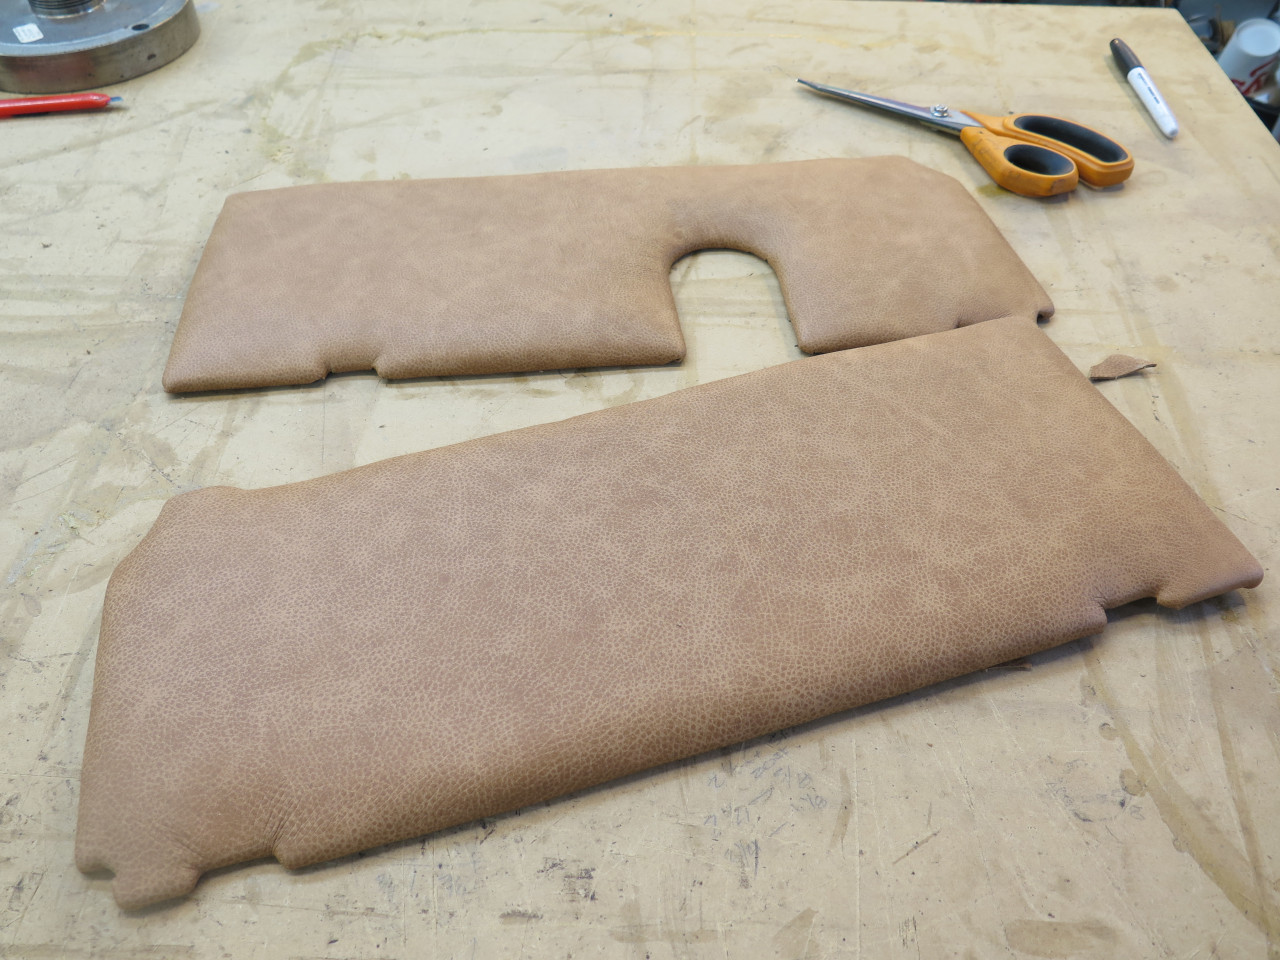
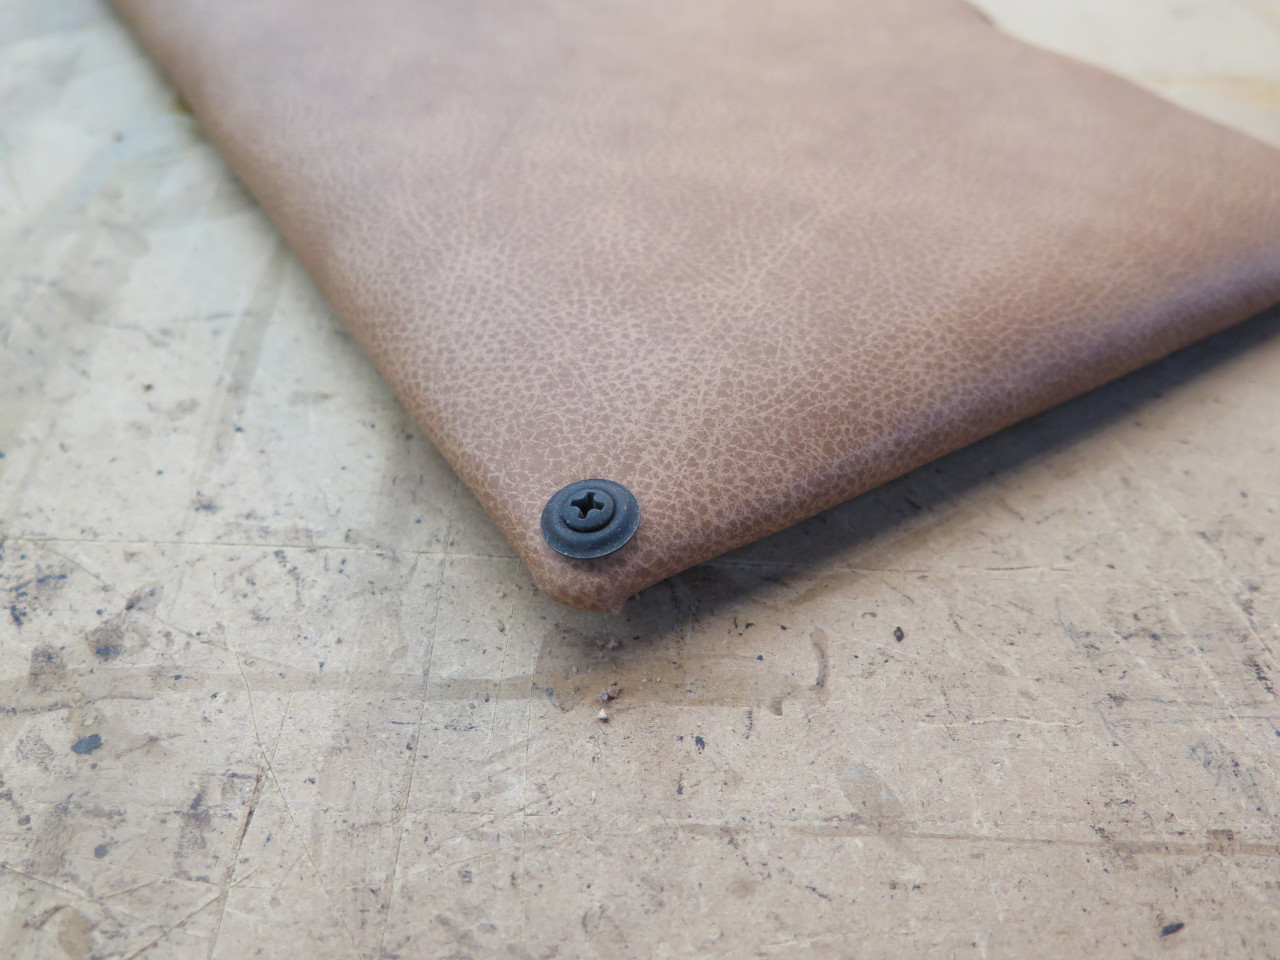
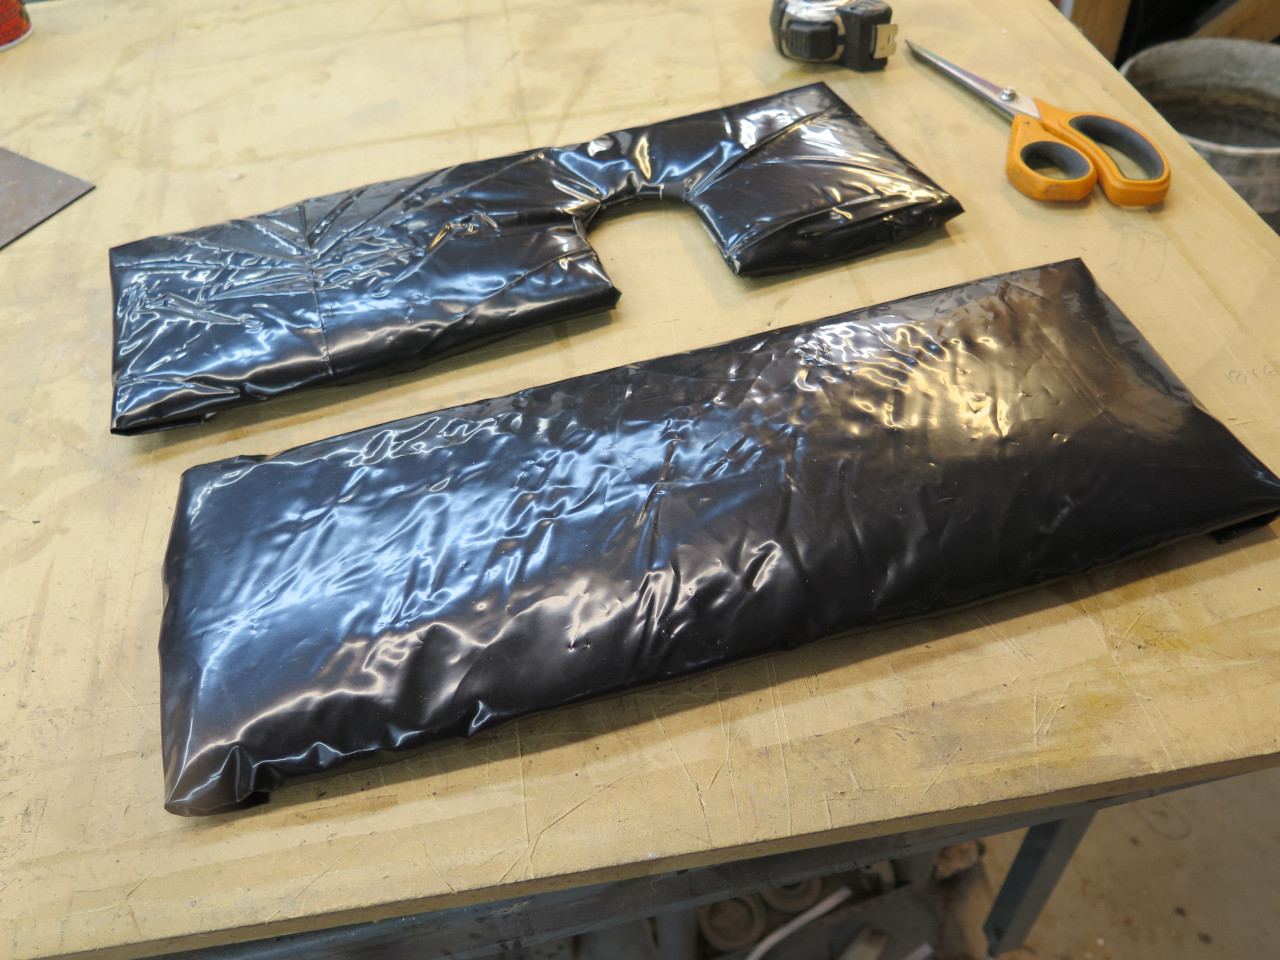
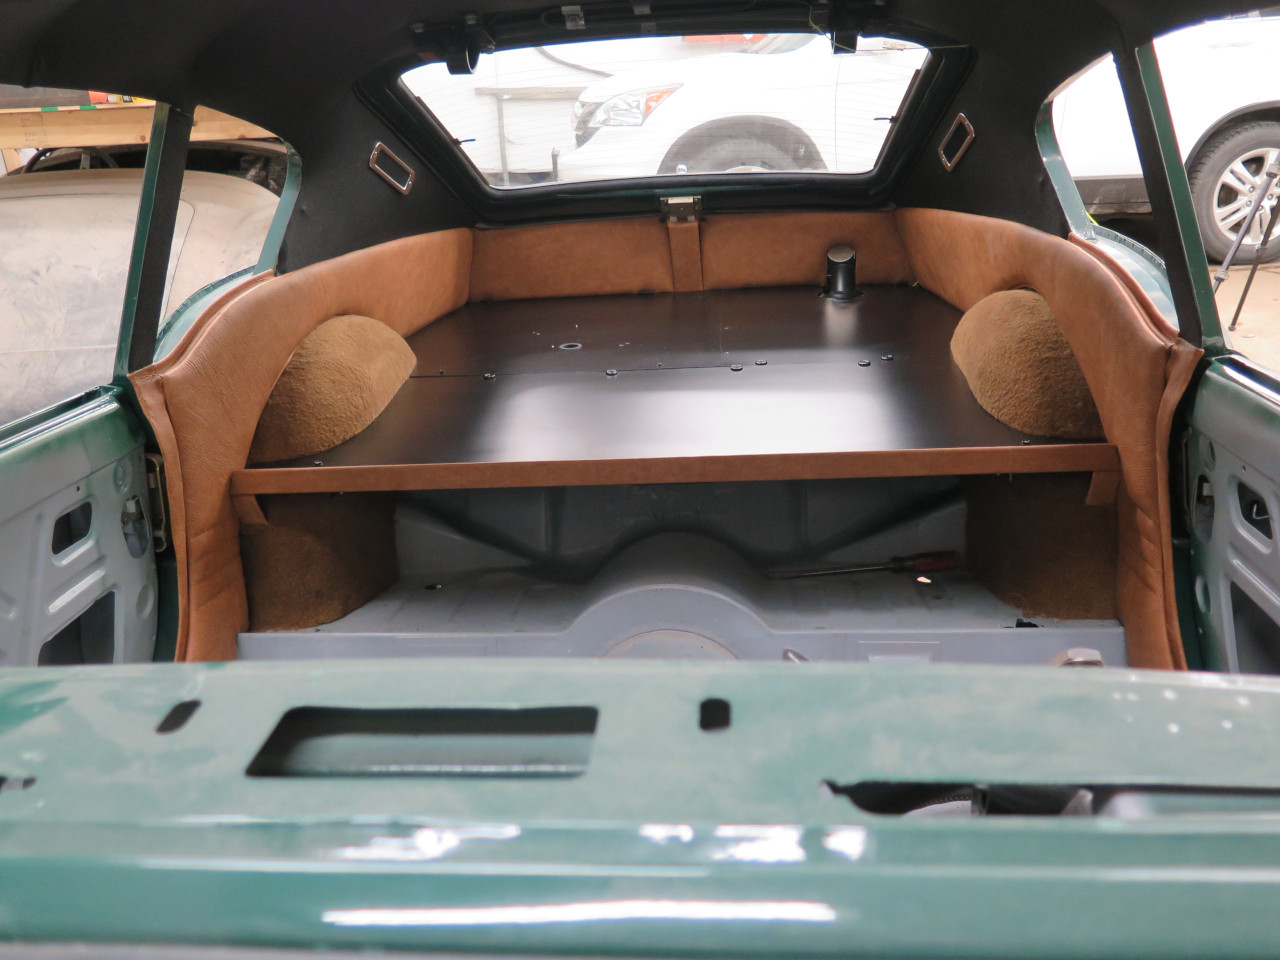
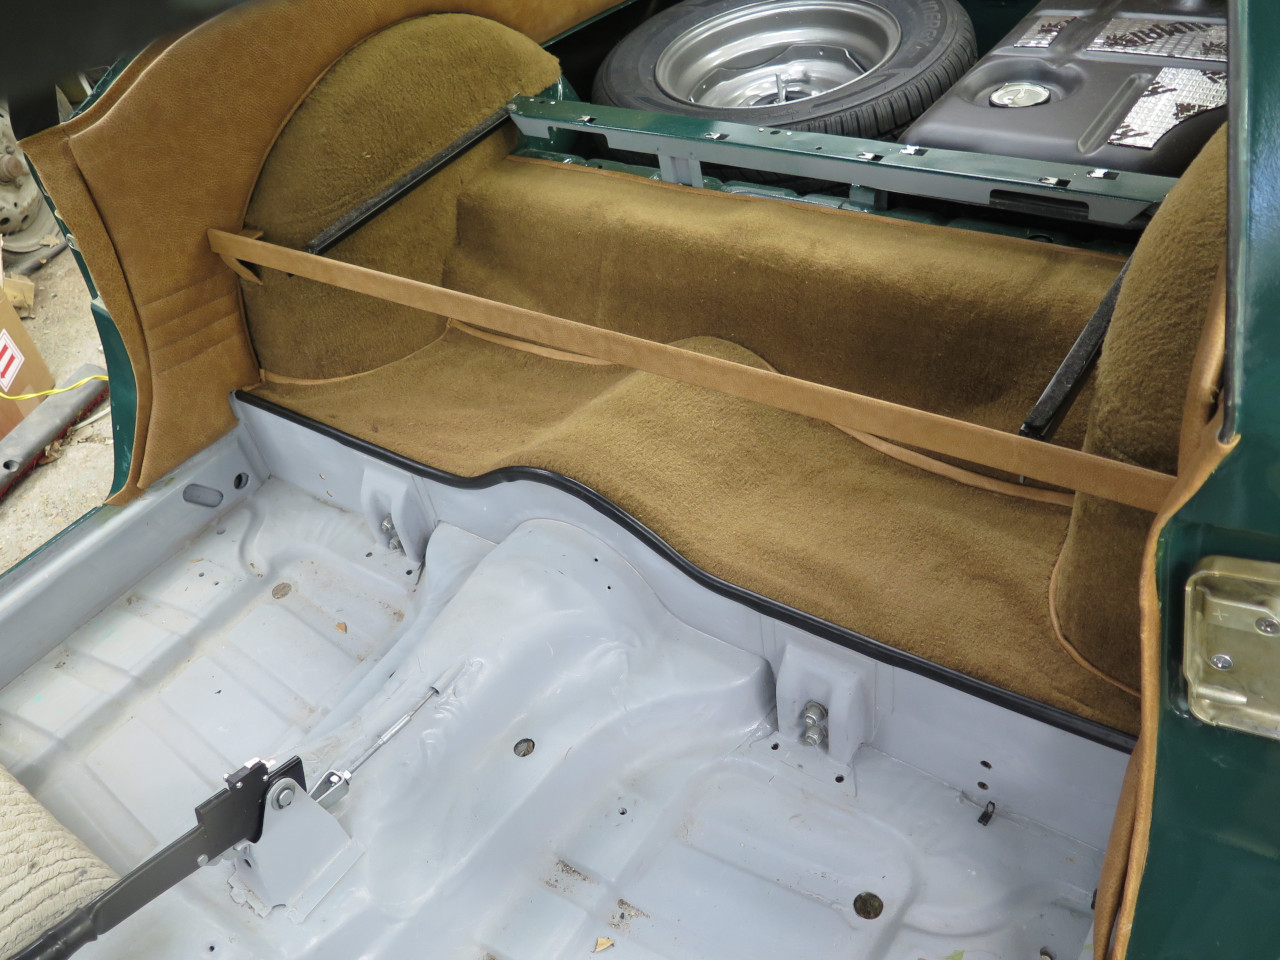
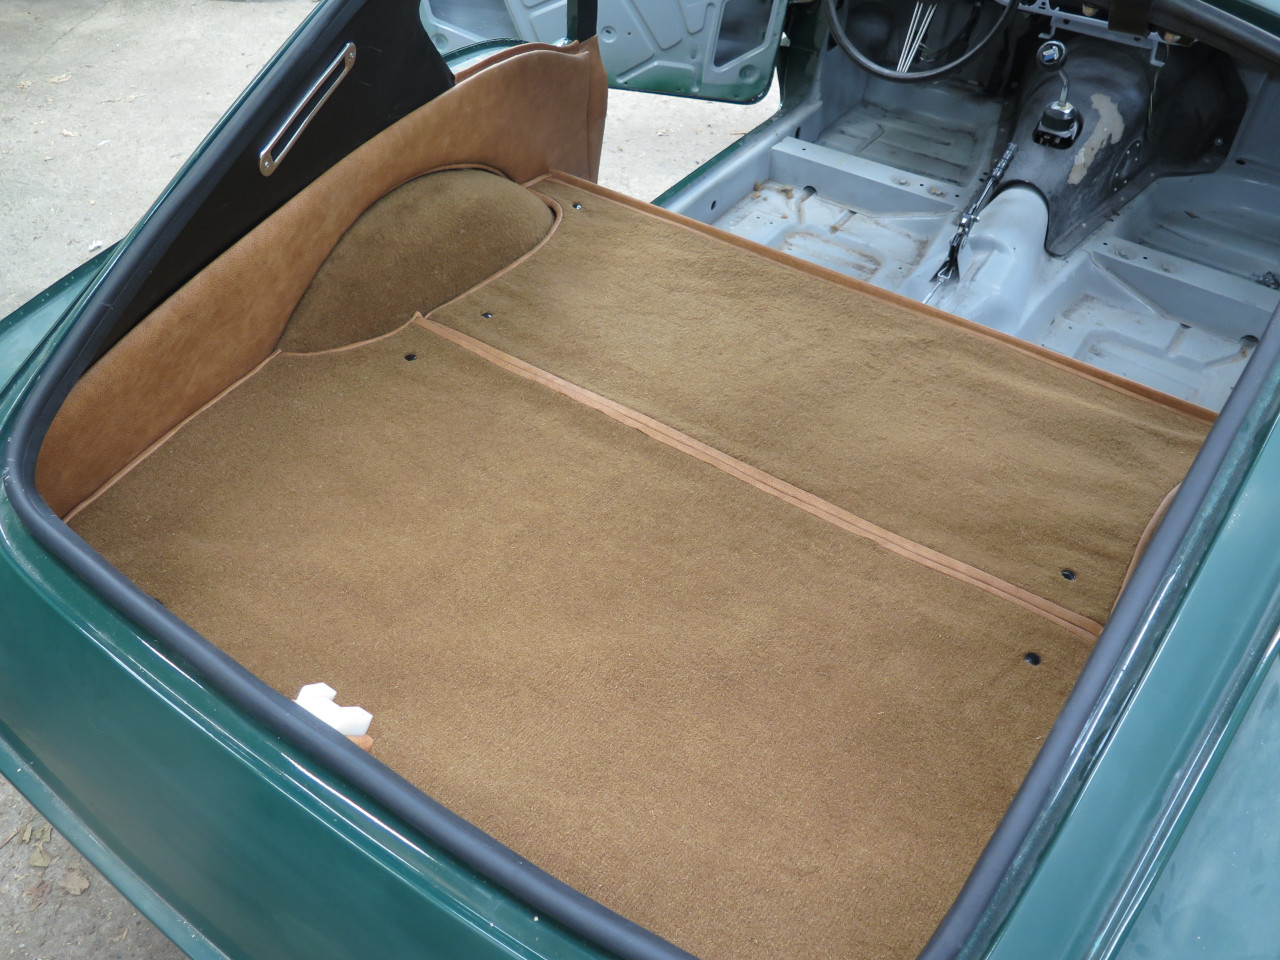
Now we're ready for the "luggage floor" panels. Here are the rear pair. They both had to be reshaped slightly to account for the new trim thicknesses.
The crossmember for the front panel got dressed up with leather...
...and the little brackets that it rests on, too.
And the front panel gets trimmed and placed.
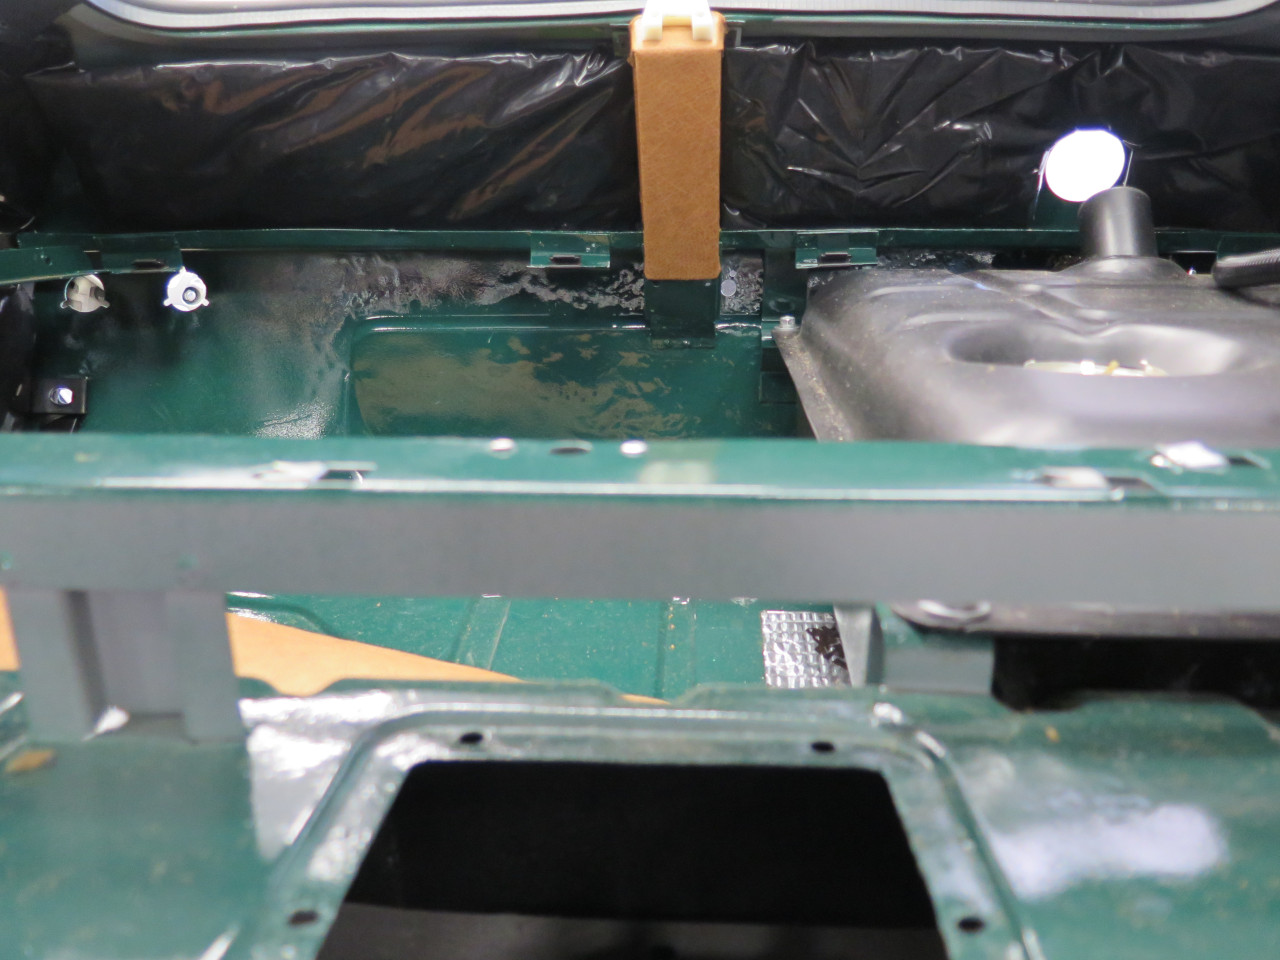
Then the front panel comes back off to address the area
underneath. The vertical wall of the rear tunnel just gets carpet
lightly glued on.
The shelf is more complicated. I dug out the original carpet
piece, and it had a molded rubber strip that fit over the lip of the
shelf. I was able to remove the strip.
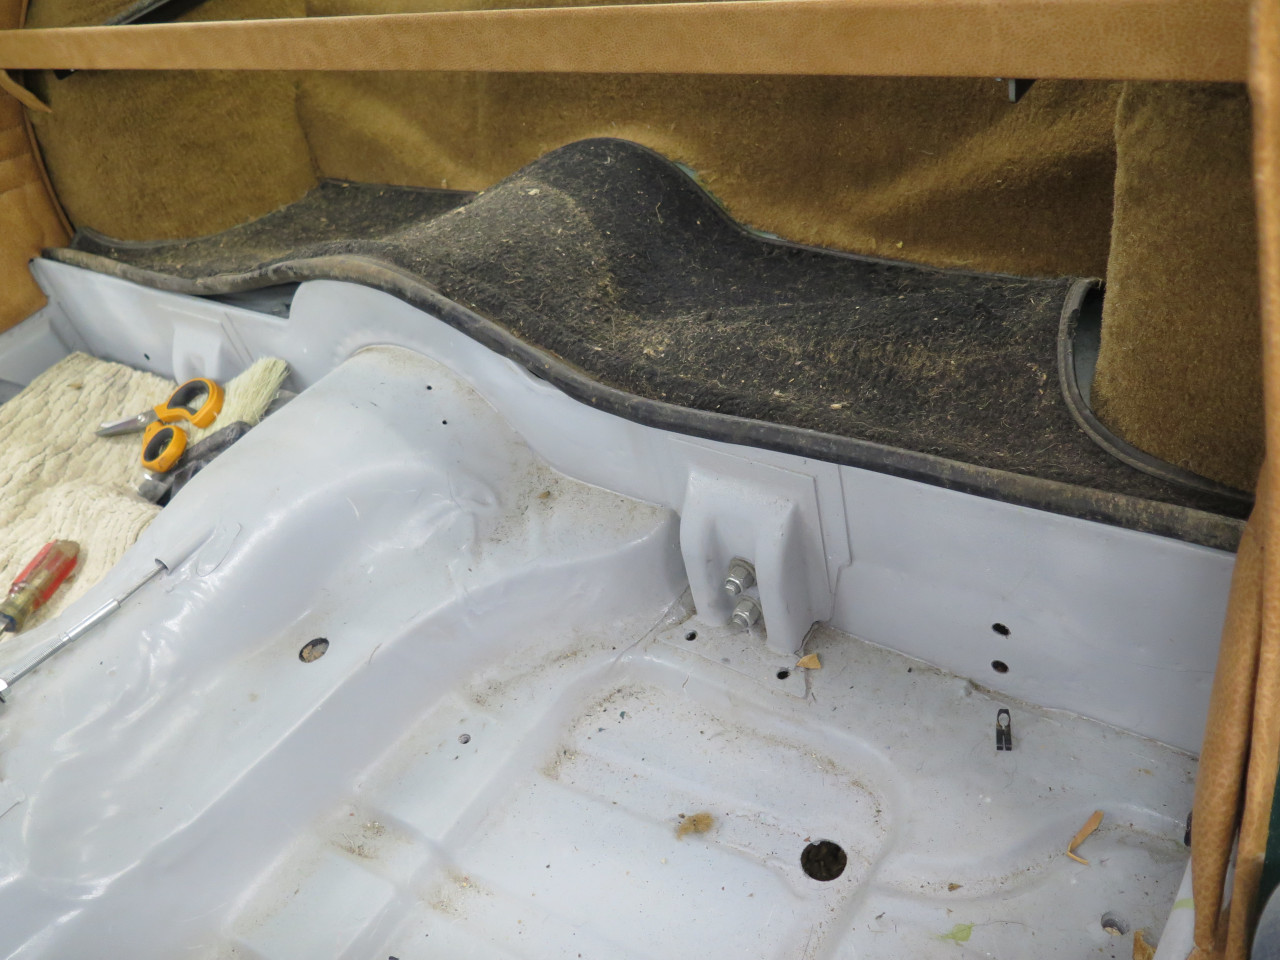
It cleaned up well enough to use.
A couple of CLD pads gave a marginal improvement in vibration. The
shelf was already pretty dead due to stuff welded to it from
below. Then some felt carpet padding.

Using the original carpet as a template, I cut a piece of new carpet and
attached the rubber molding to it. I'm not wild about the
fit. If it were in a more visible place, I'd redo it. I'll
probably redo it anyway if I have enough carpet.
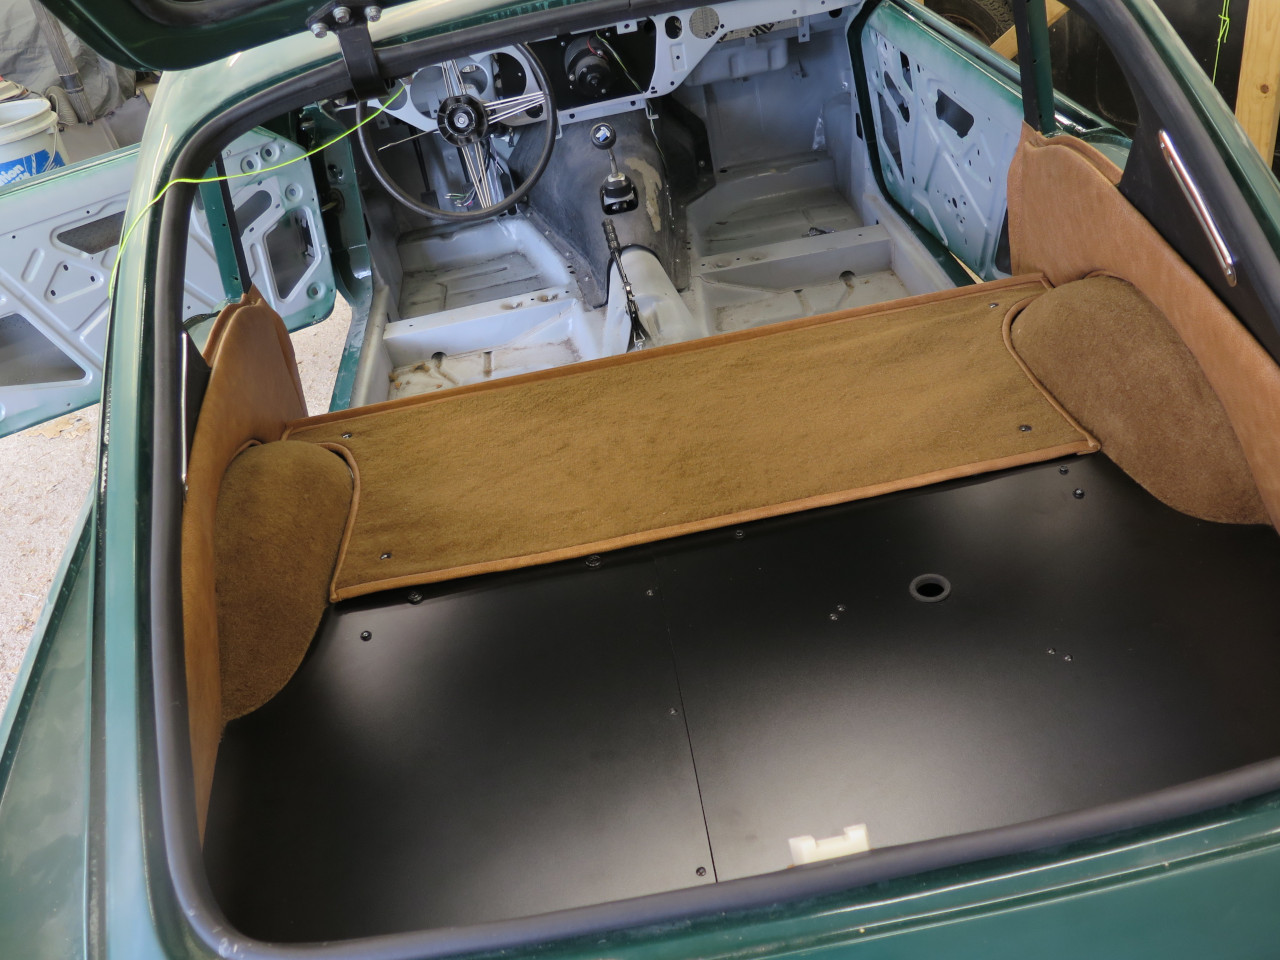
With the luggage floor back together, I moved on to carpet for that
area. It's a fairly big area, and I was frustrated to realize that
my carpet wasn't wide enough to do it in one piece. I reluctantly
opted to make a piece to fit the forward panel, and another to fit the
two rear panels. This makes sense in a way, since only the rear
piece will need to be removed to get to the spare.
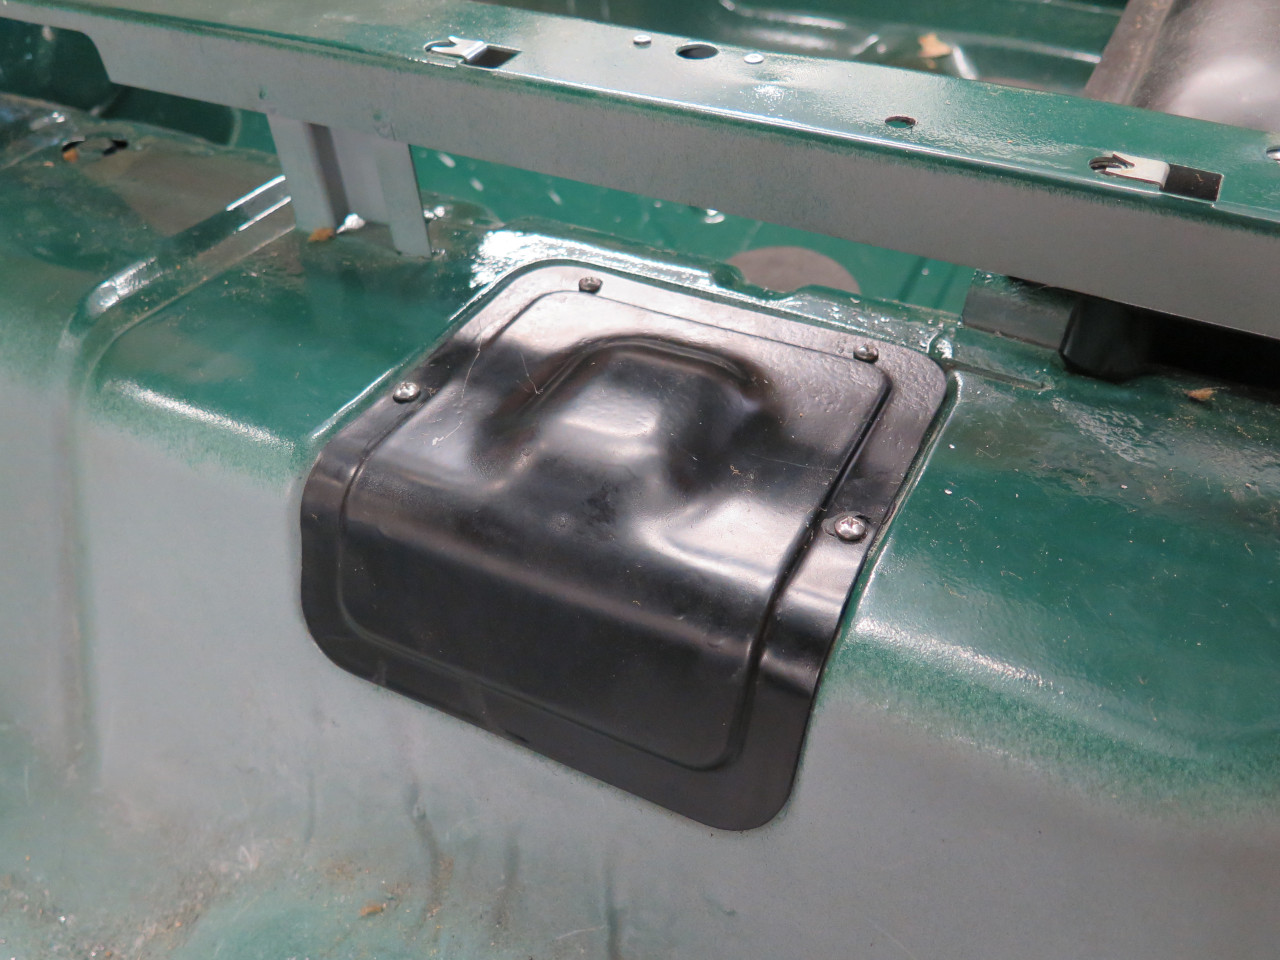
The rear panel is complicated by the fuel tank filler neck that
encroaches on the space. I think the original carpet just had a
molded bump to cover that neck. I wasn't confident that I could
stretch my carpet that much, so I want a different direction. I
drew up a sort of "bezel" for a 3D printed cutout in the carpet that
would clear the filler neck. The first 2-piece design had little
studs on the top piece that would pass through he carpet and be heat
staked to holes in the back piece. This didn't work at all--the
studs were way too weak, and broke off during assembly.
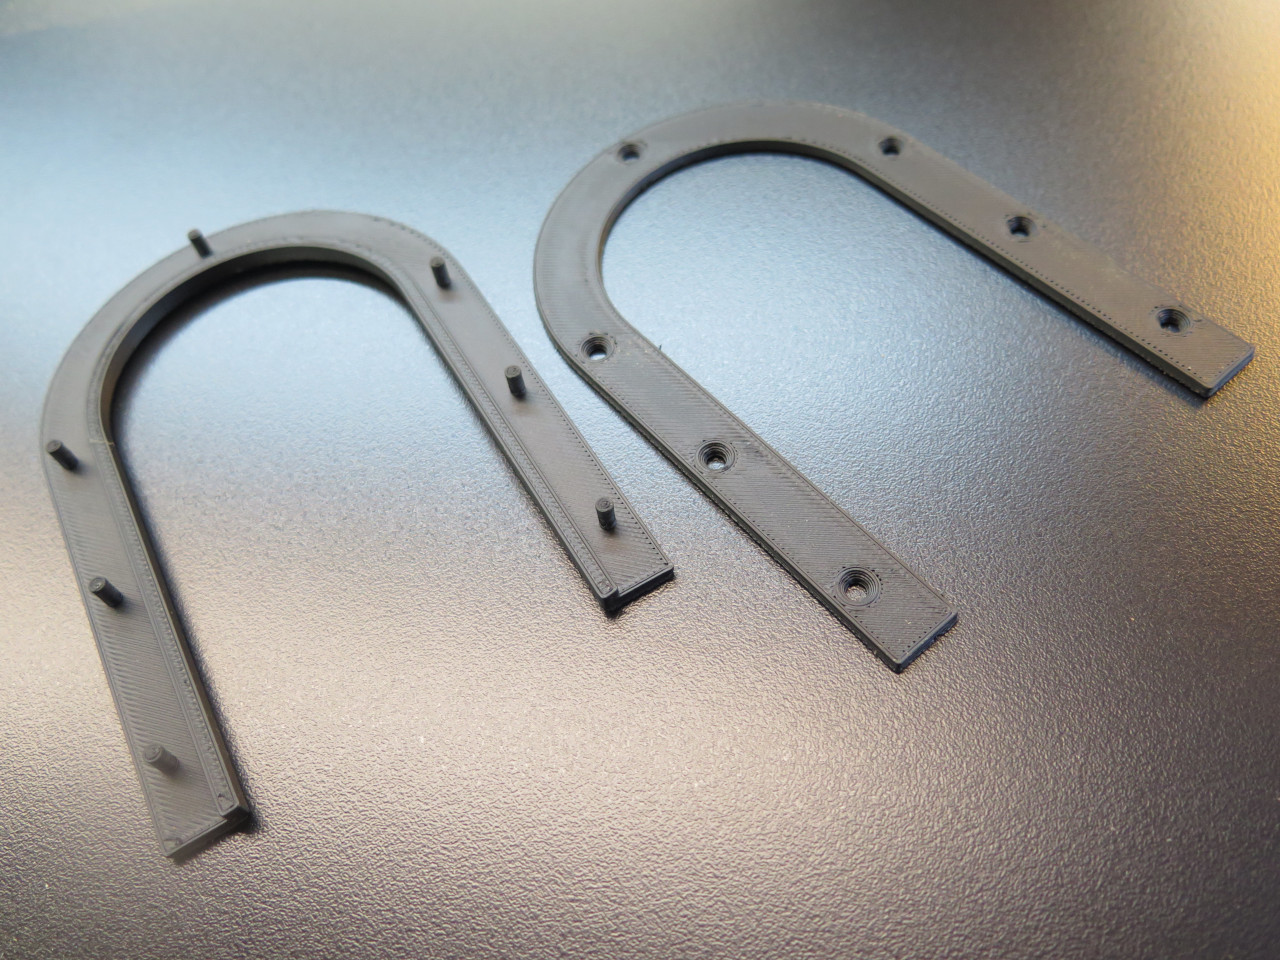
Plan B was to lose the studs, but still make two parts that would be
glued together, forming a slot all around for the carpet to fit
into. A couple of iterations, and this finally worked.
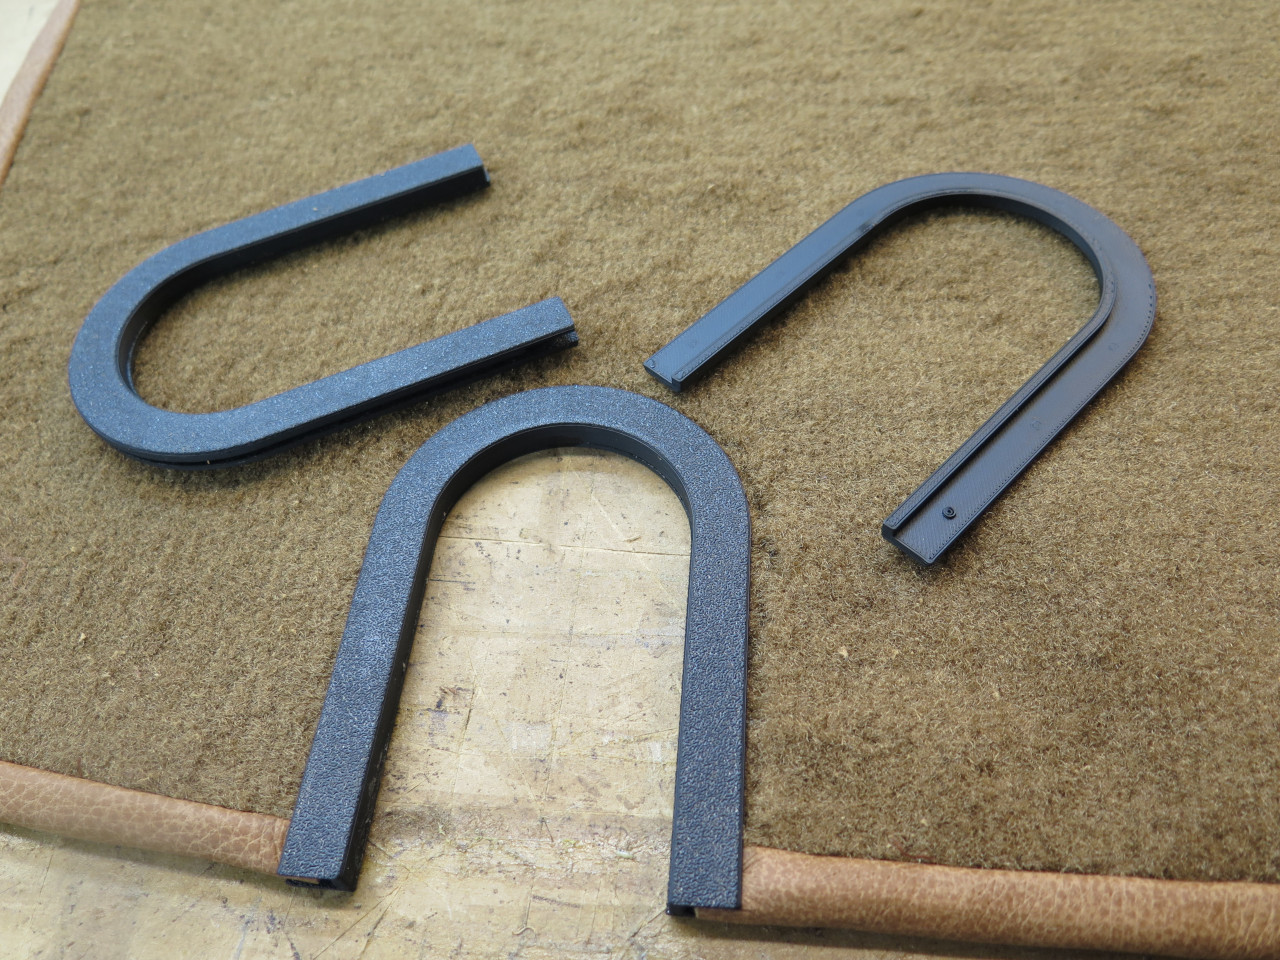
I looked a number of ways to finish the raw edges of the removable
carpet pieces. DIY "bindings" are available, but color matching
proved a big problem. What I ended up with is just sewing a strip
of leather face to face to the carpet, then wrapping it around the edge,
and gluing it on the backside. Automatic color coordination.
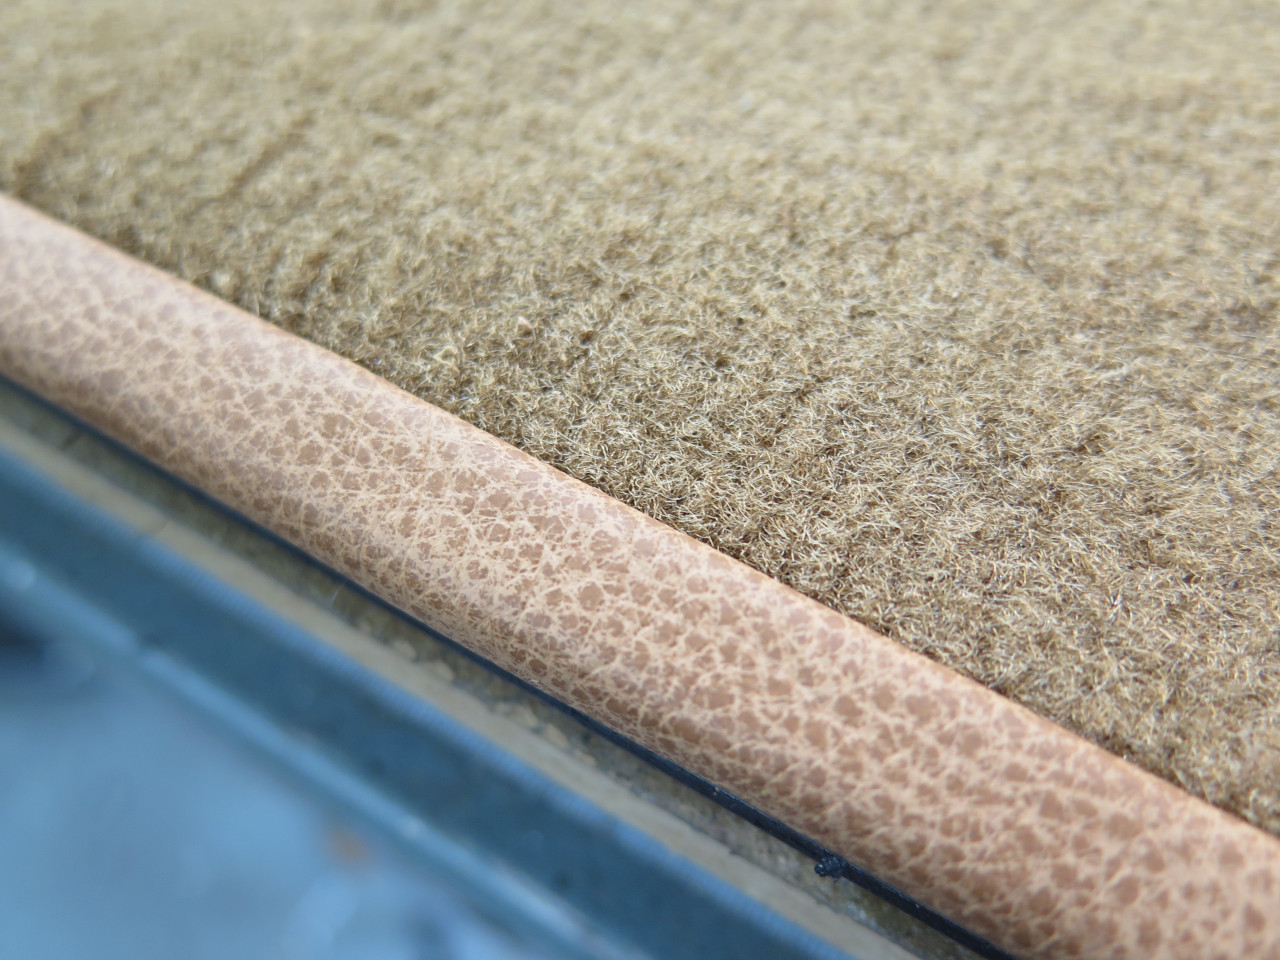
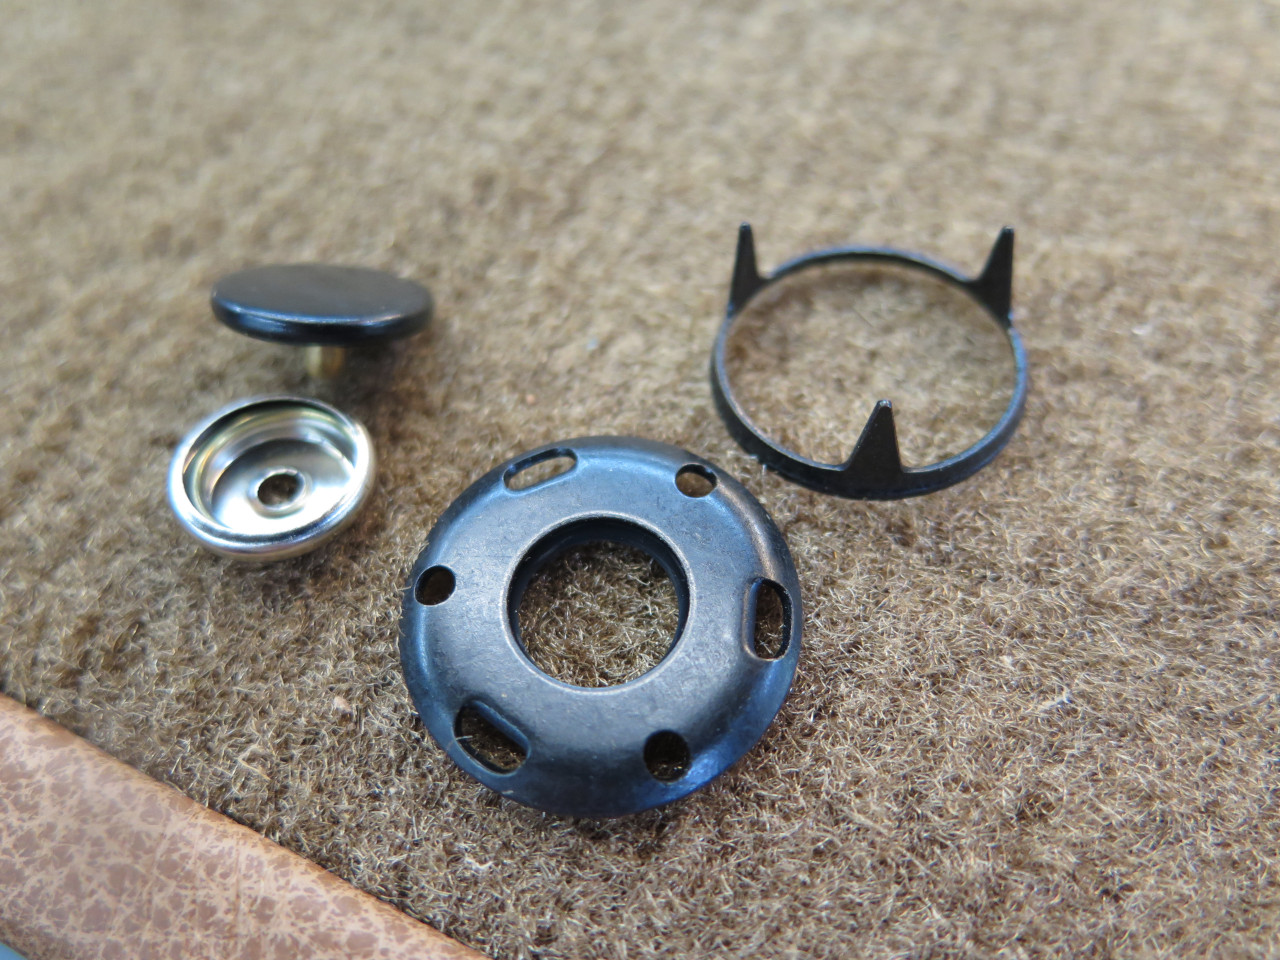
I also looked at a couple of ways to fix the removable carpets in
place. The snap on the right has the feature that the topside
virtually disappears in the pile of the carpet. I chose the snap
on the left for that reason.
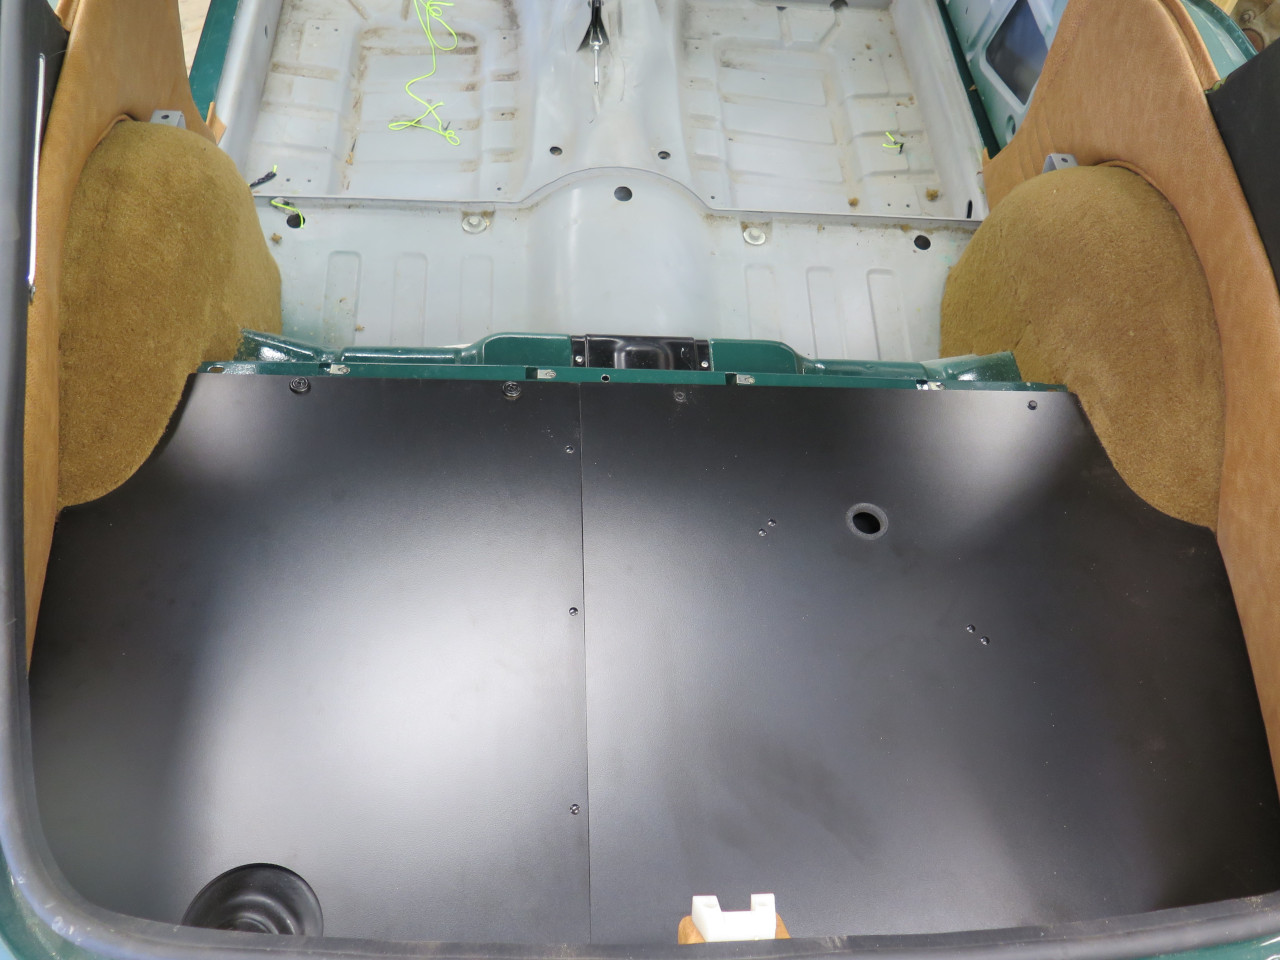
So, here is the luggage floor with their removable carpets. I have
to say, I'm not that happy with the fit and finish here. The
carpet seems a little stiffer than the original, and doesn't want to lay
flat in some areas. Maybe time will help. Maybe some summer
heat will help. We'll see.
I now realize at least one way that the factory handling of the filler
neck area is better than mine: small parts rolling around ion the
back could find their way into the gap, and end up under the fuel
tank. I can think of a few ways to fix it, though. (The
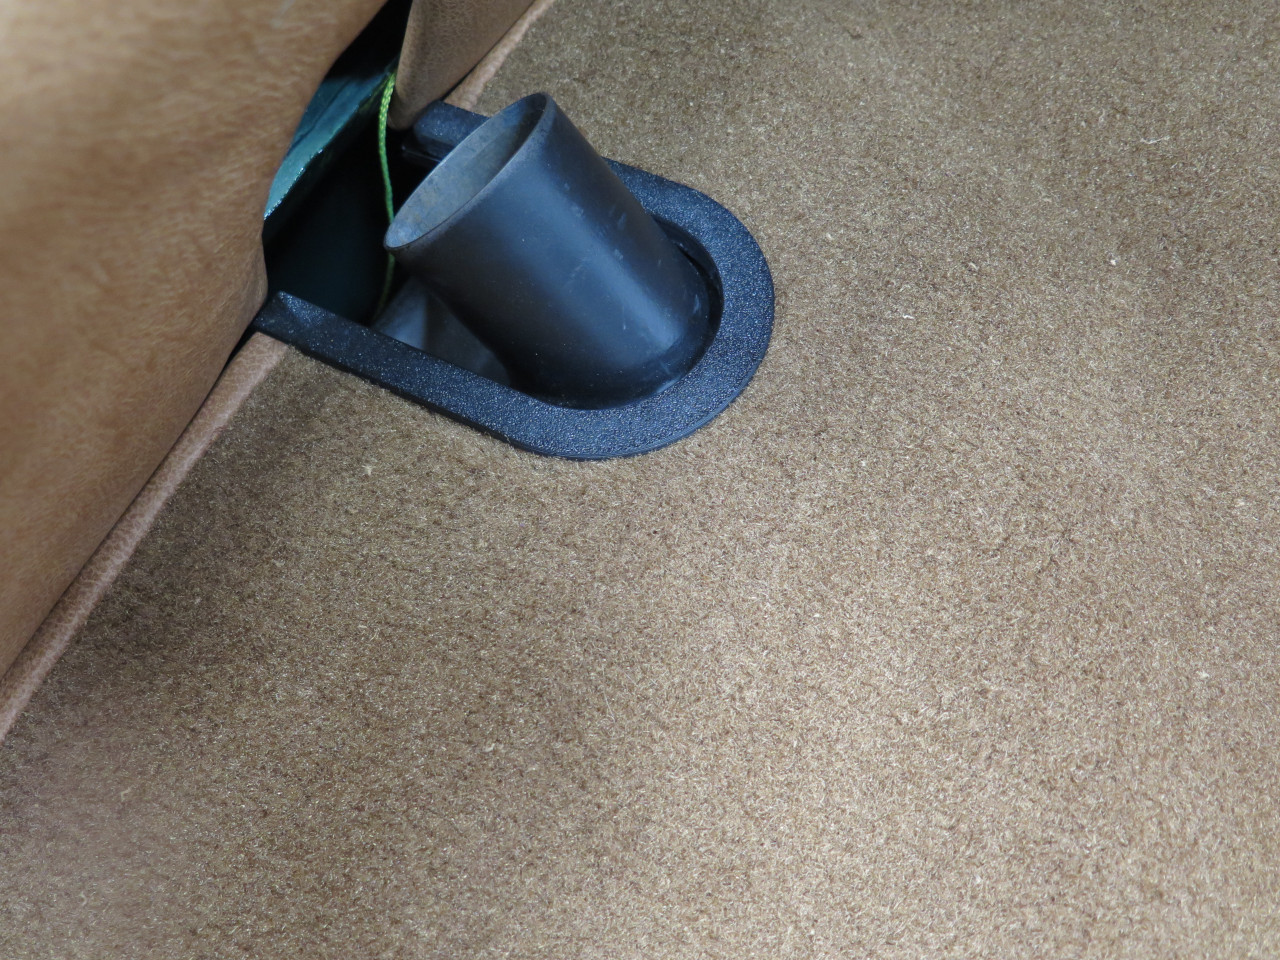
yellow string is the messenger line in the conduit that goes up to the
dome light. I didn't want to lose it.)
This was a pretty long slog, which makes it extra frustrating to not be
totally happy with the result. Some distance will help, so I'll
move on to something else.
Comments to Ed at elhollin1@yahoo.com
To my other GT6 pages