To my other GT6 Pages
October 18, 2022
Clutch Plumbing
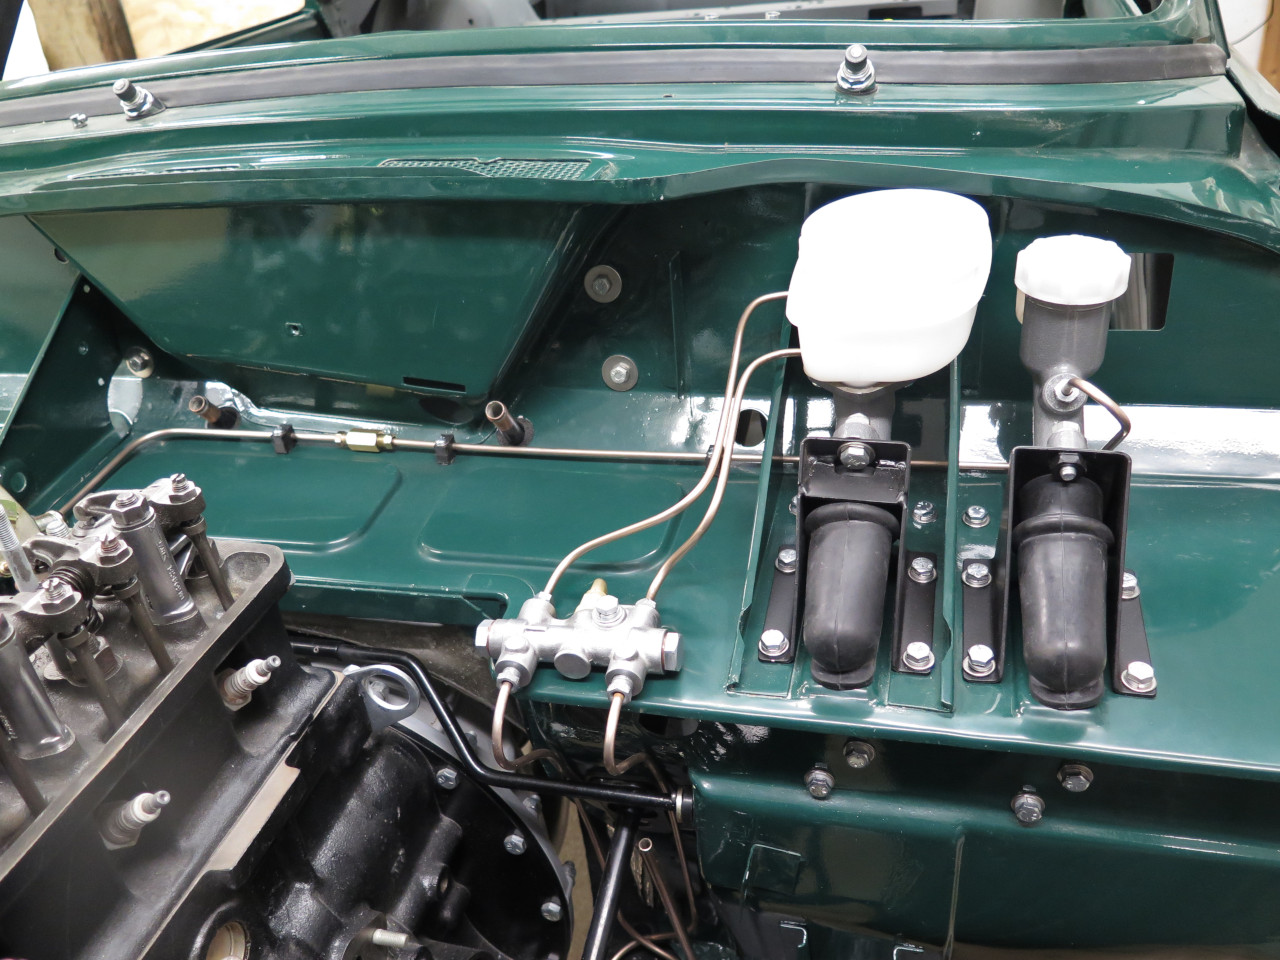
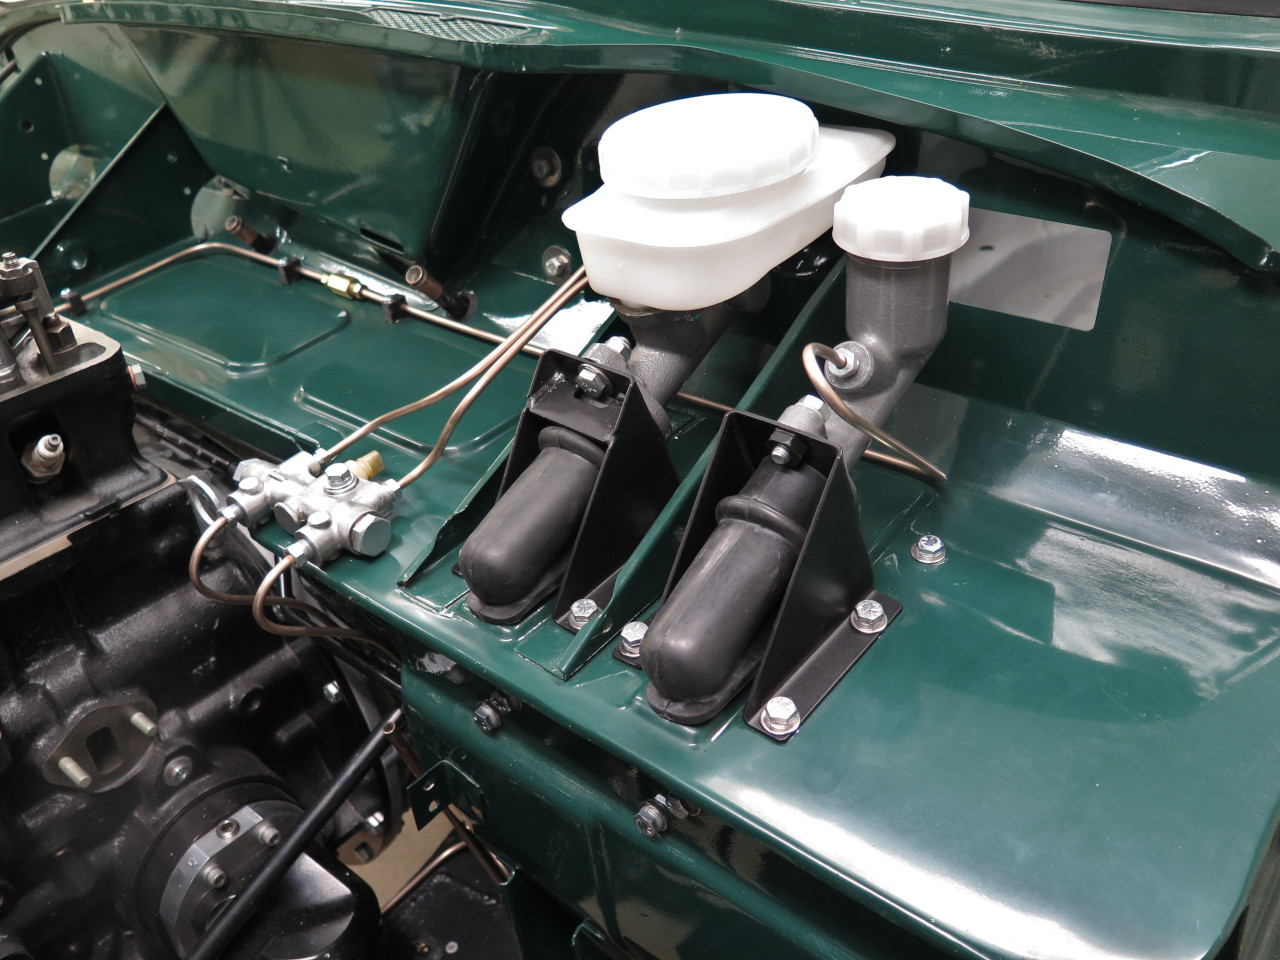
I was looking for a simple, quick job. After installing the brake master cylinder, PDWA, and associated plumbing recently, it seemed logical to finish off all of the hydraulics by doing the clutch plumbing.
The clutch master cylinder and pedal assembly was already done, waiting on the shelf.
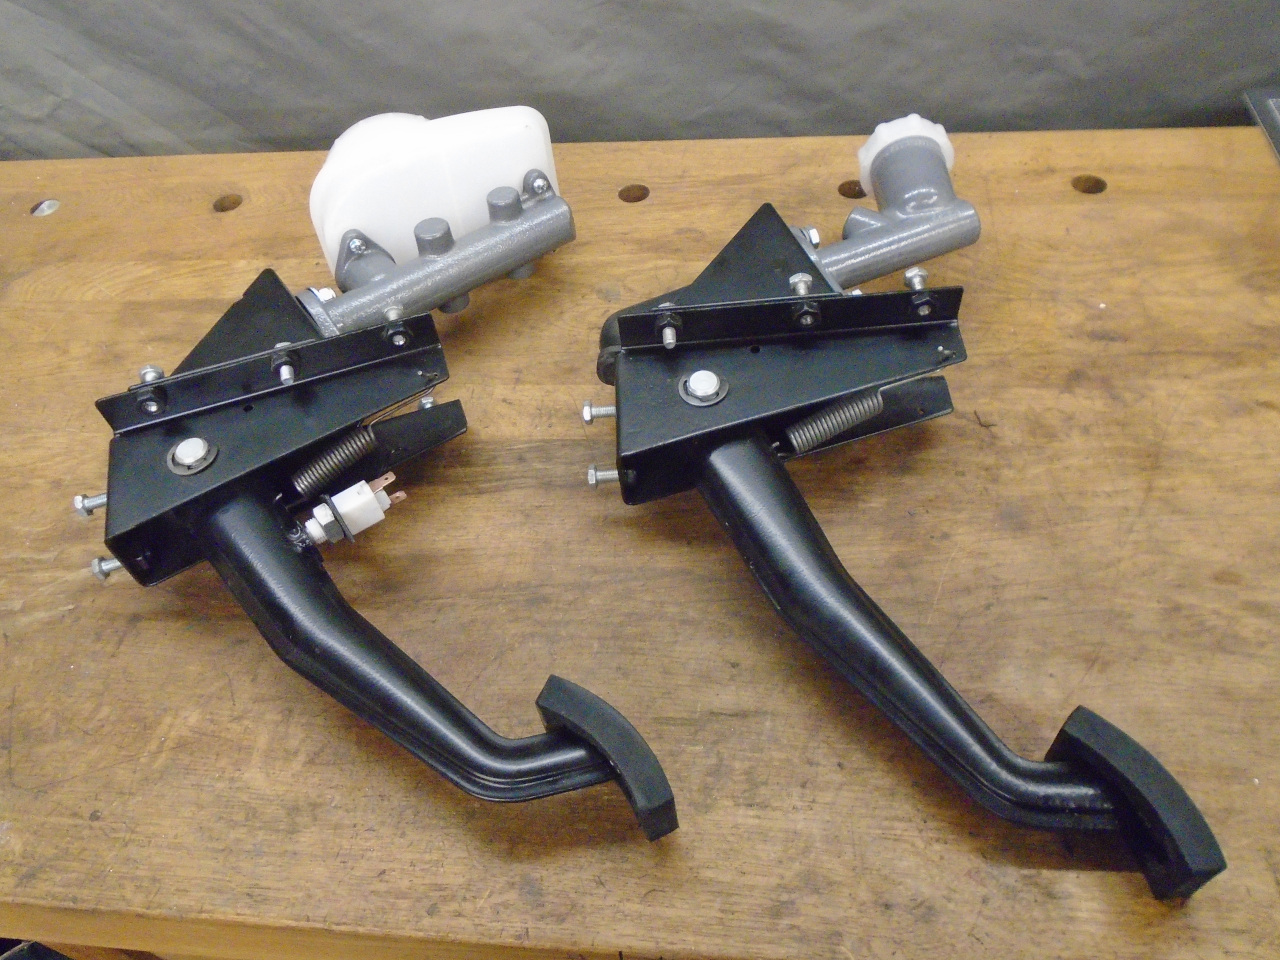
It installed without incident, and the only thing left to do was the
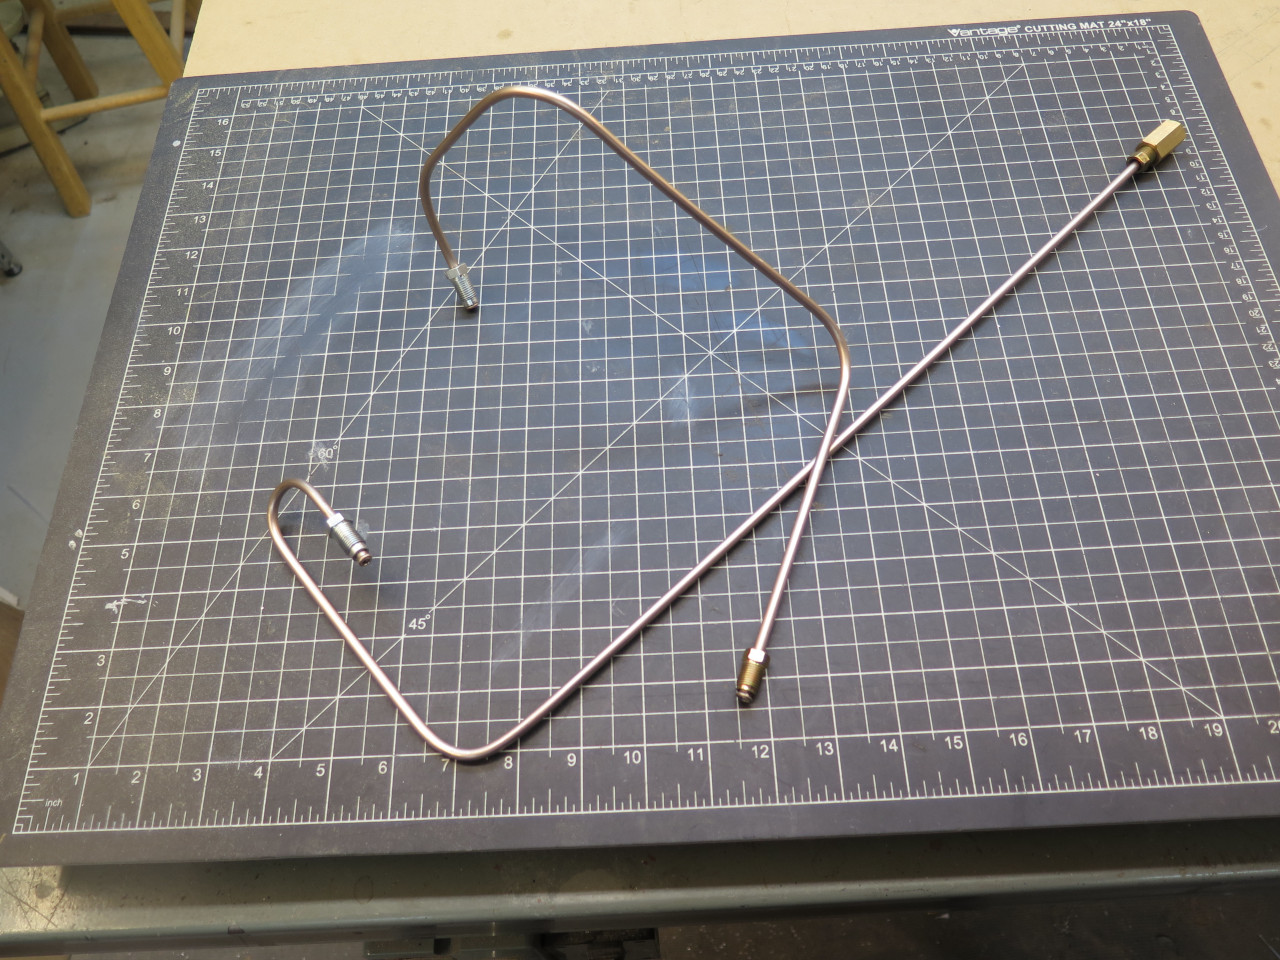
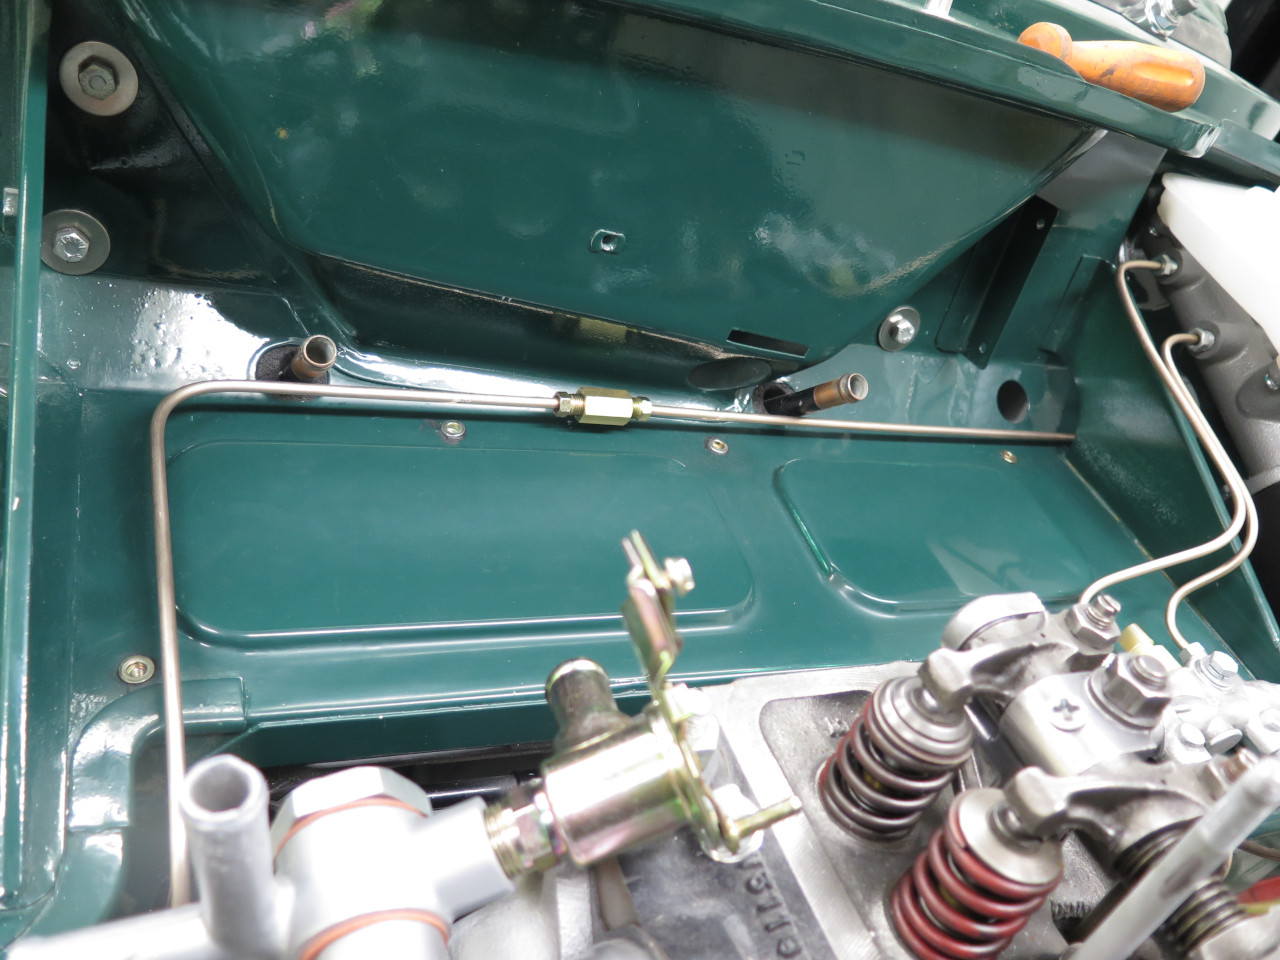
simple 3/16" tube connection between the master and slave
cylinders. I use a copper-nickel tube, and had enough on hand.
I had the old tube, but it was pretty bent up, and I didn't think it was
telling me much about the original routing. I looked at images
online, and most of them showed the tube leaving the master cylinder
pretty much straight out, and then taking a right hand turn in mid air
and running across and down to the slave cylinder. This seemed a
little haphazard to me, and a little--I don't know--untidy, I
guess. My usually latent OCD level ratcheted up a few
notches. I thought I could improve the route, or improve it's
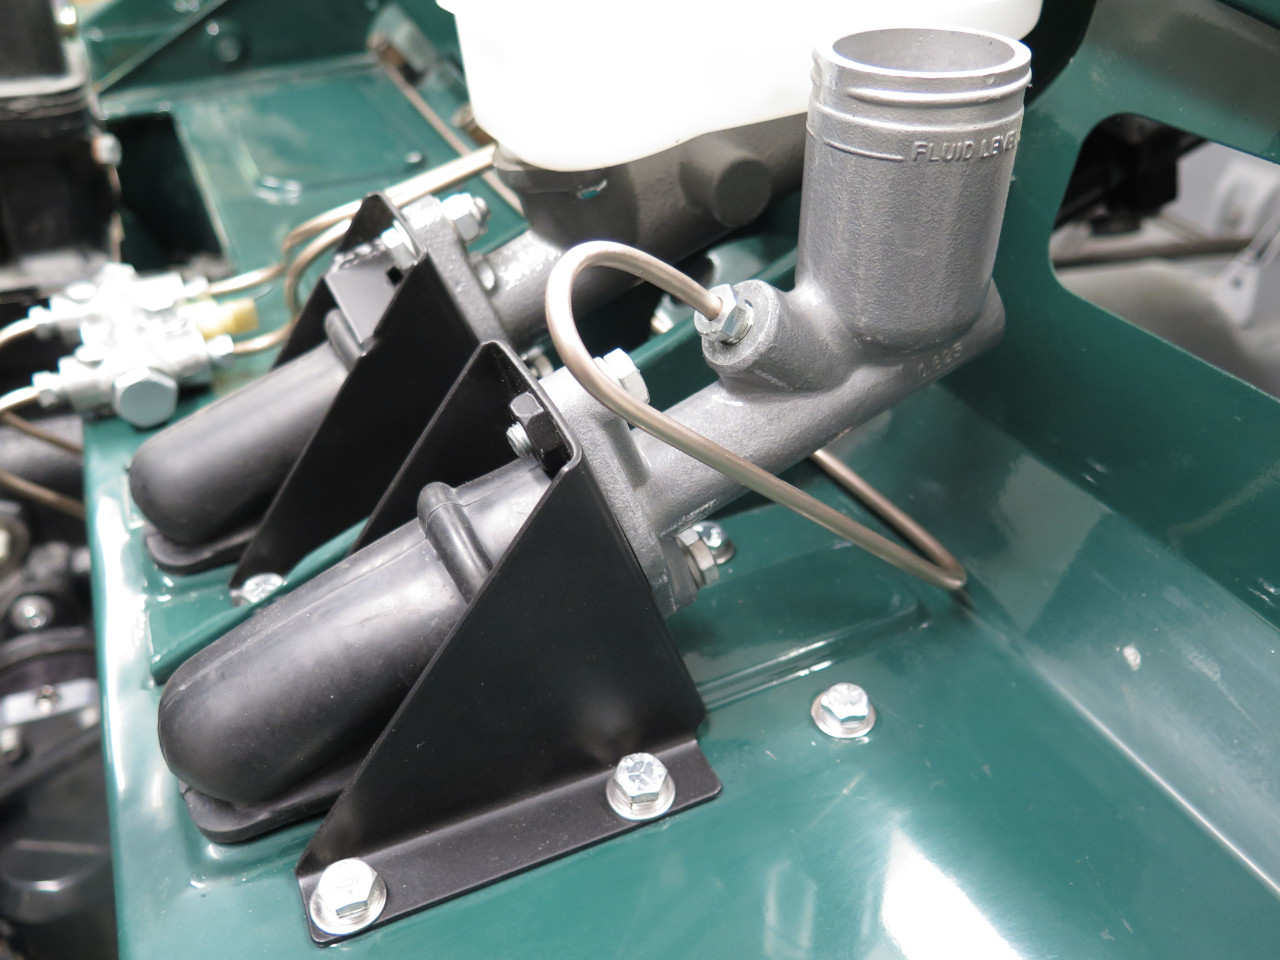
looks, anyway. It looked to me like I could run the tube behind
the master cylinders. There were even nice cutouts in the gusset
brackets that would allow a clear path. I mocked it up with some
wire, and didn't see any big problems.
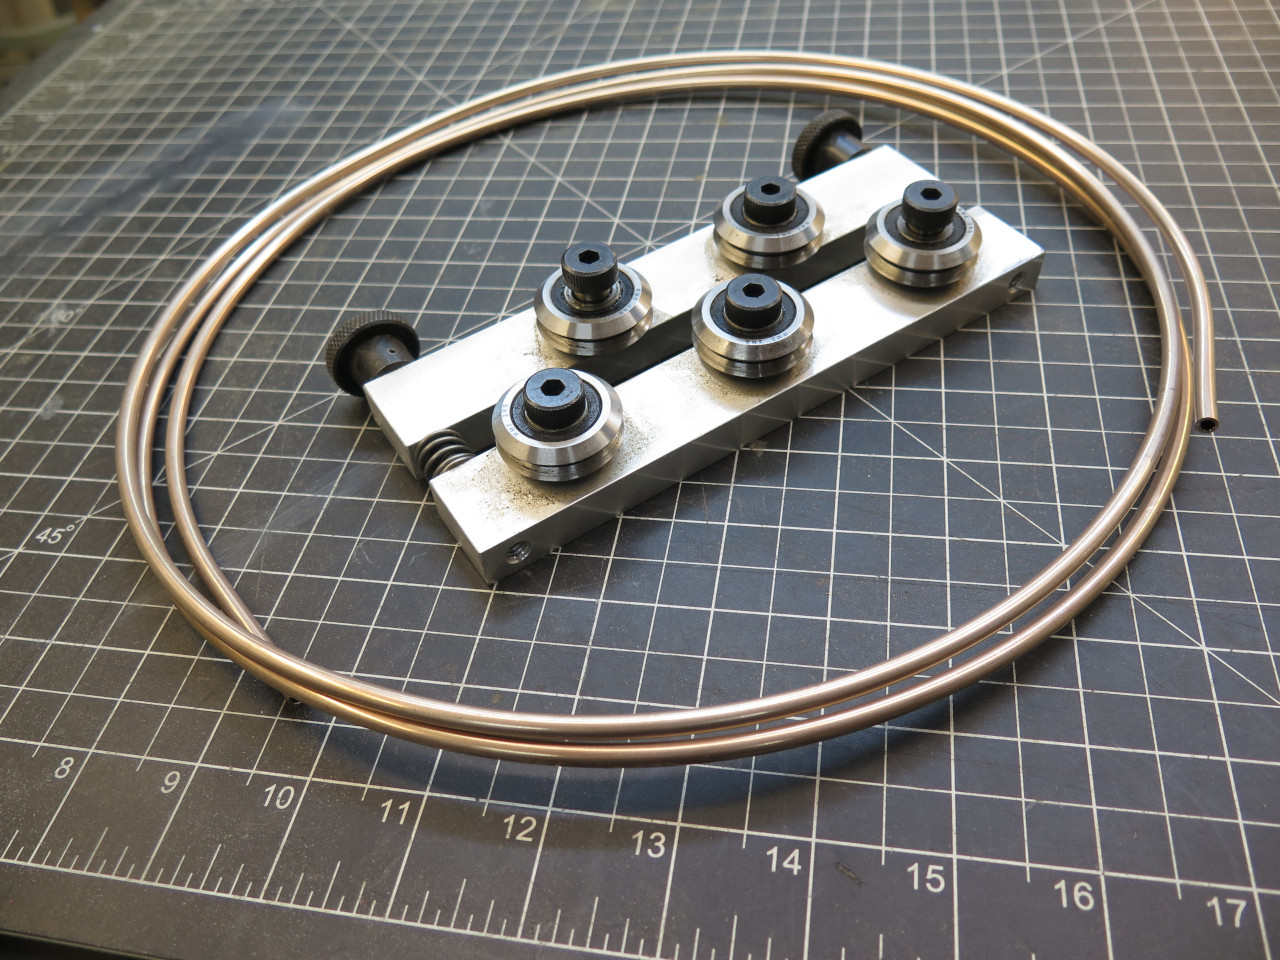
I find it easier to shape this tubing starting out with it straight, rather than curved from the coil.
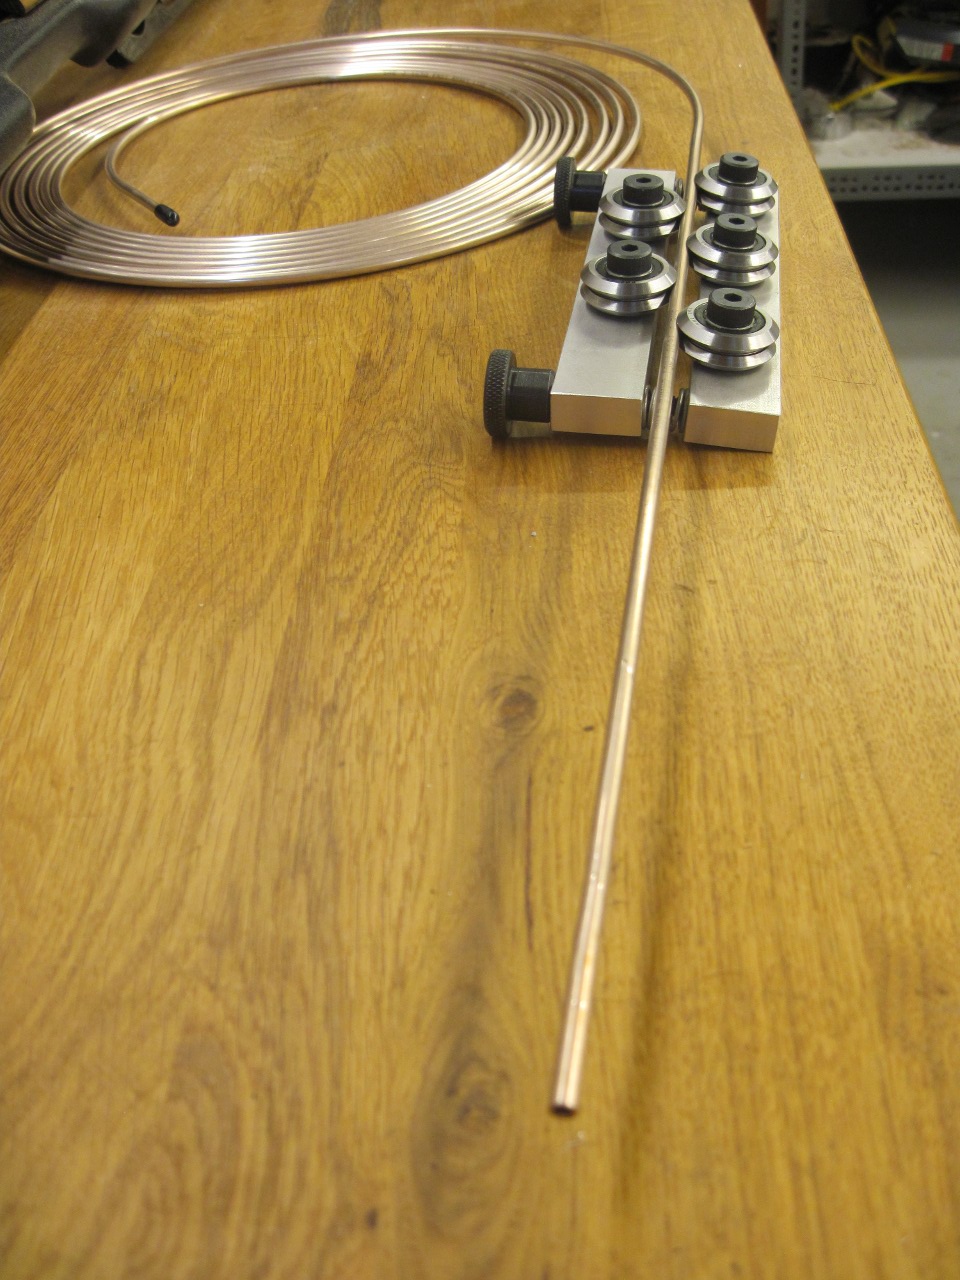
I made a pretty tight bend right out of the master cylinder in order not
to encroach on the clear area to the left of the master. I have
plans for that space.
It was about this time that I realized that it was going to be difficult
to do this tube in one piece, so I planned to use a coupling at roughly
the mid point. This hugely simplified the bending and the
install. Fittings were a mix of new and re-plated originals.
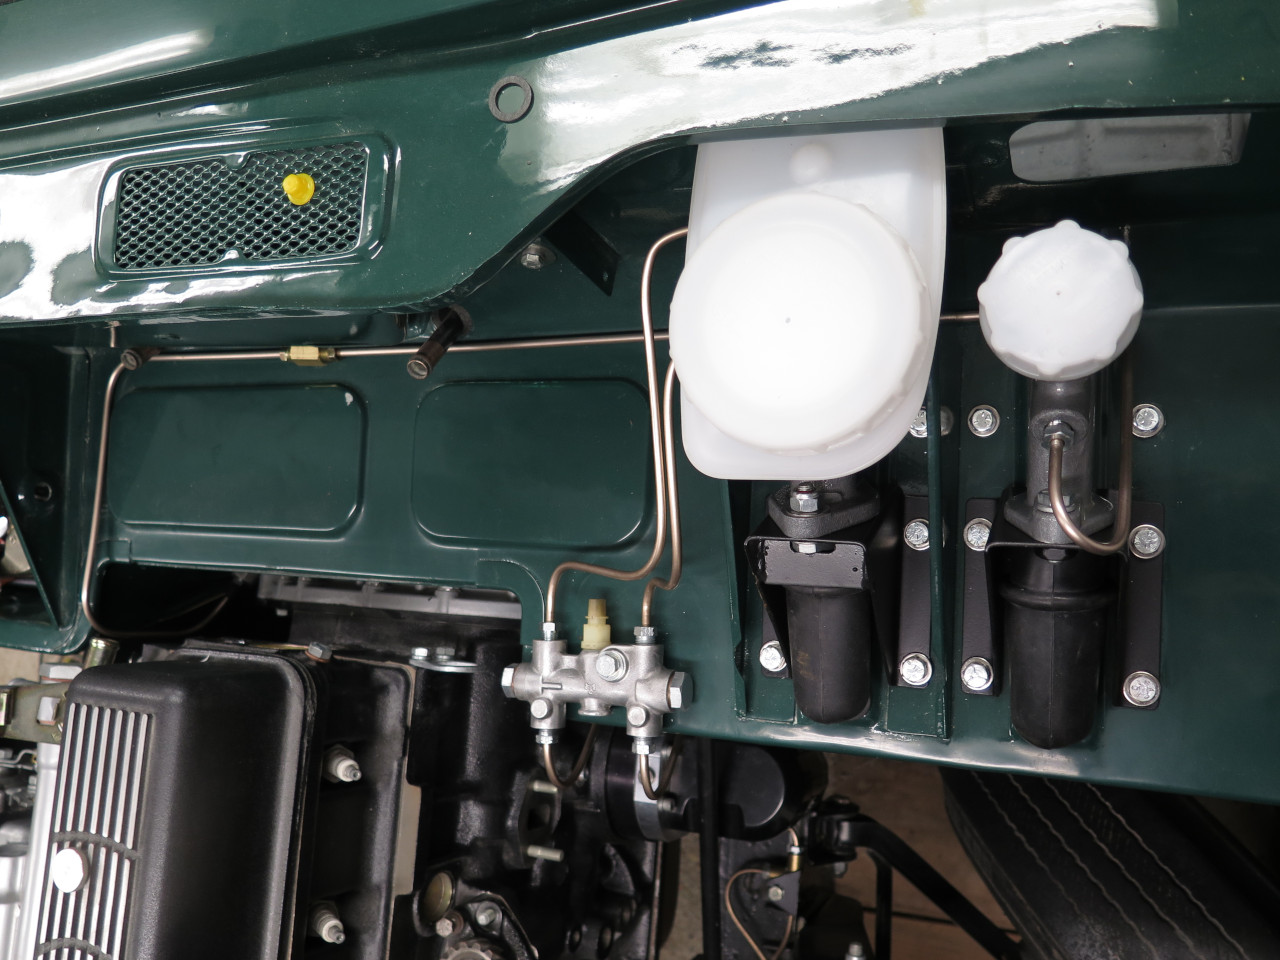
The tube runs along the back corner of the horizontal firewall
deck. It is naturally suspended maybe 1/4 inch above the deck, but
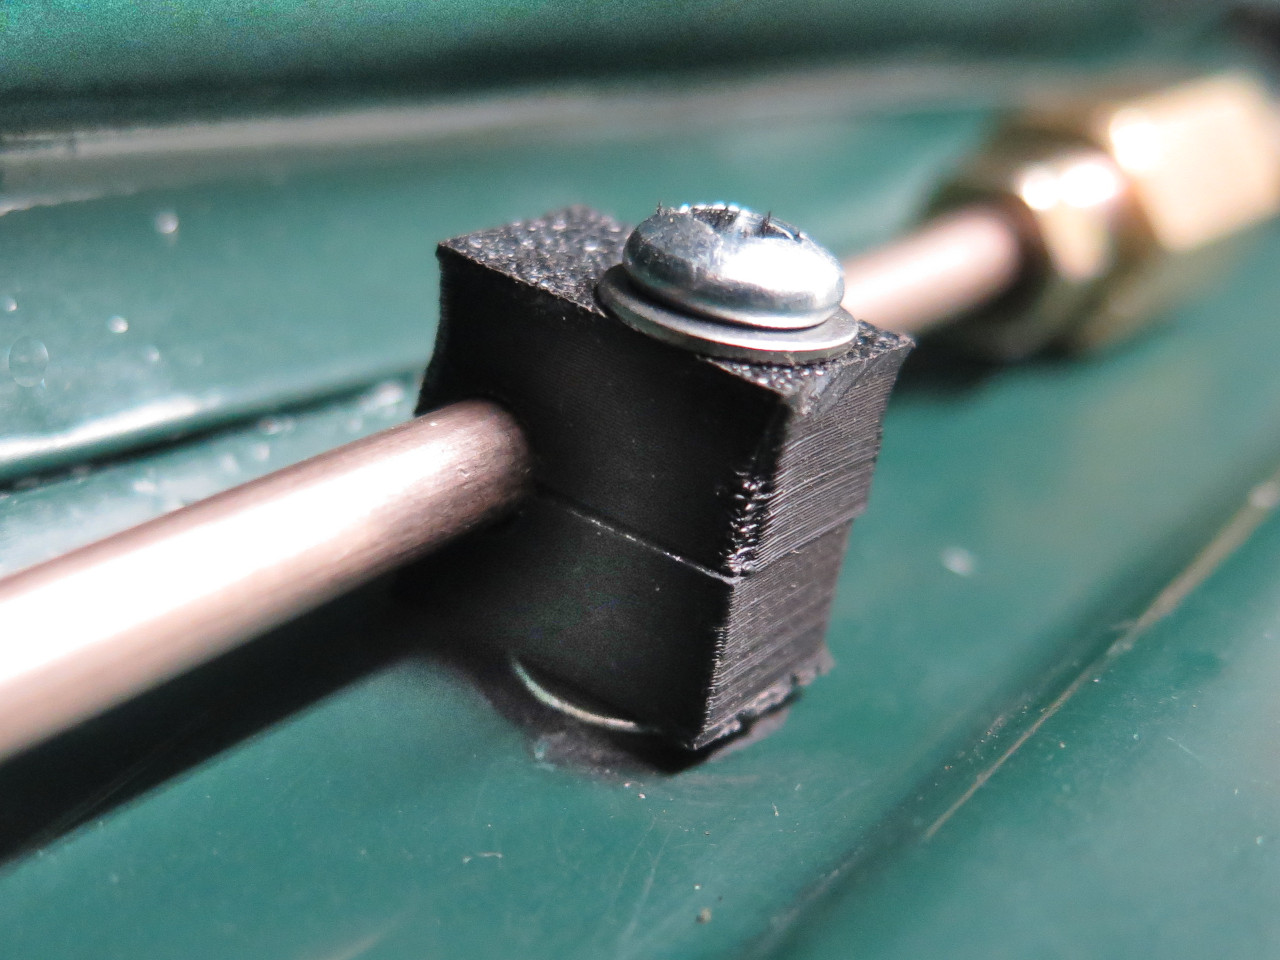
is sort of springy, so I was concerned about rattles. These are
some 3D printed 3/16" tube clamps. Each clamp uses a pair of
identical "half-clamps".
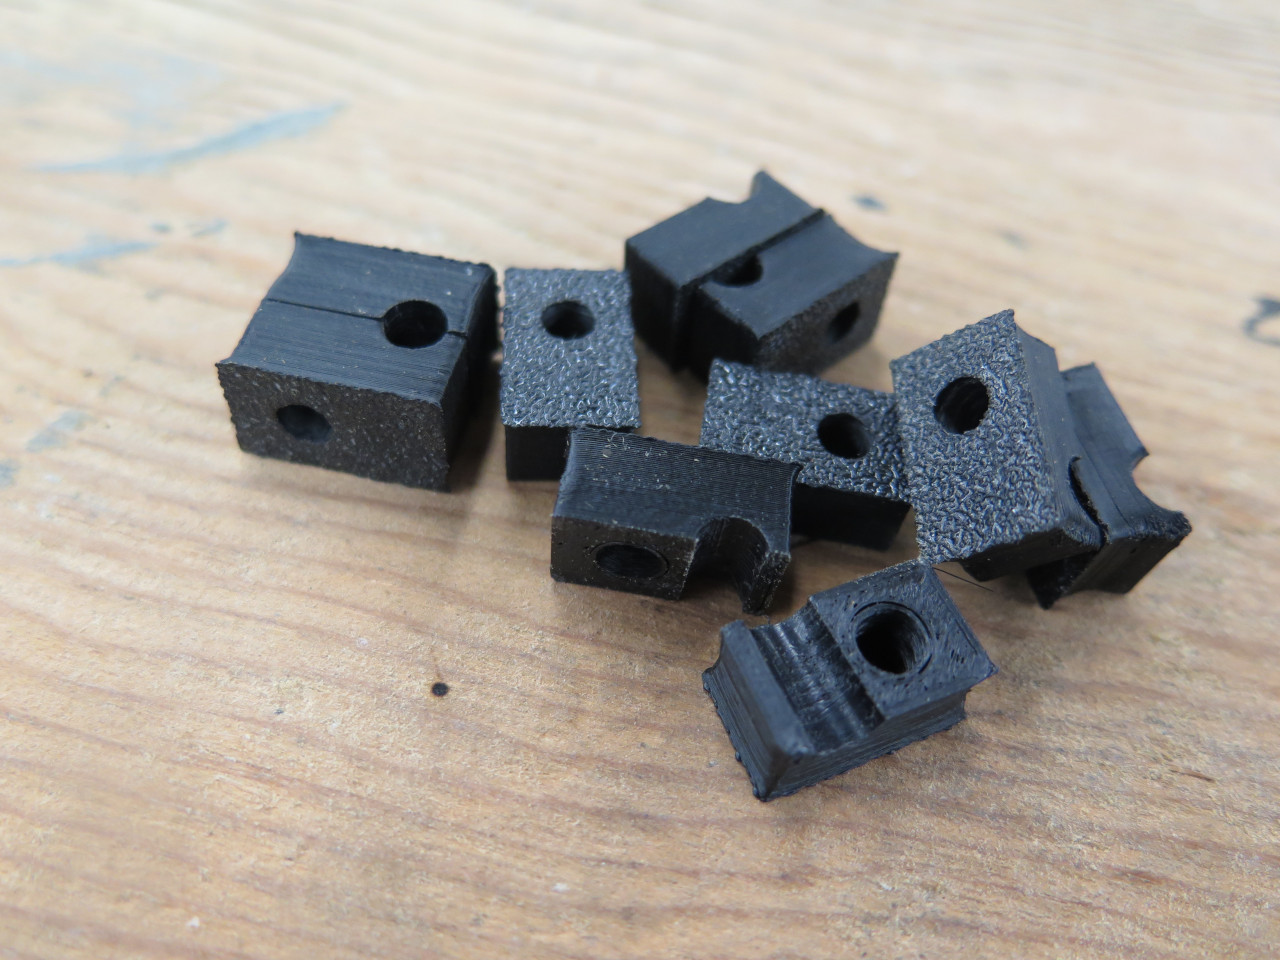
Each clamp is both fastened and closed with a single #8 machine
screw. I installed Rivnuts to mount the clamps. This was
complicated by the fact that the two middle Rivnuts were under the
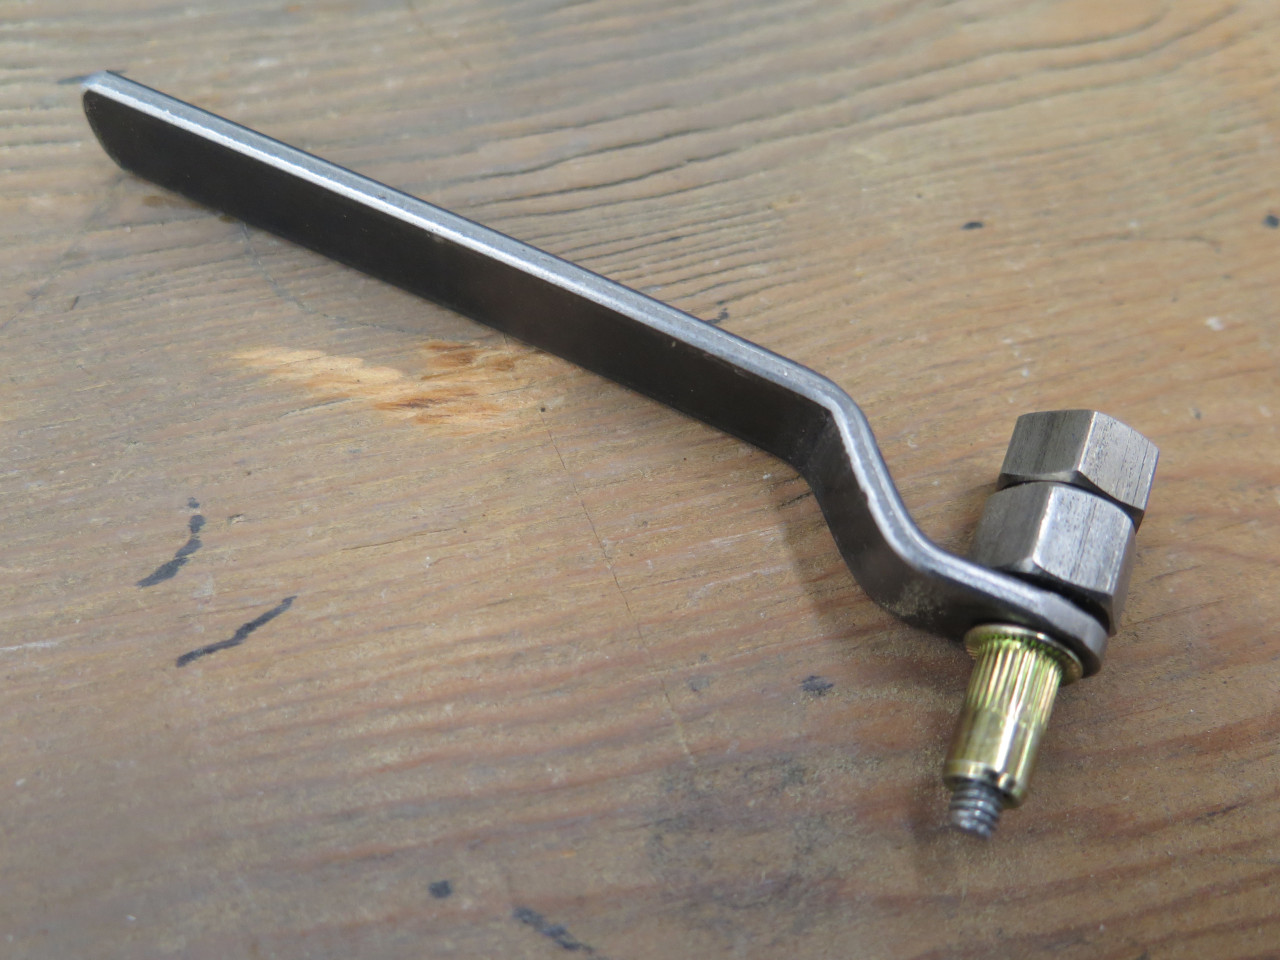
overhang of the fresh air cowl, so even my smaller Rivnut tool wouldn't
fit. Serendipitously, I ran across a post on one of the
forums about making a very small Rivnut install tool, so I made a
version of that. It worked great. I applied a little sealant
putty around the Rivnuts before install.
Looks clean to me.
This is the end of the hydraulics, and another nice check mark on my
long to-do list. Cost was maybe around $20 for the tubing and some
fittings.
Comments to Ed at elhollin1@yahoo.com.
To my other GT6 Pages