To my other TR6 pages
October 24, 2017
Dash Install
[Click the pics for a larger view]
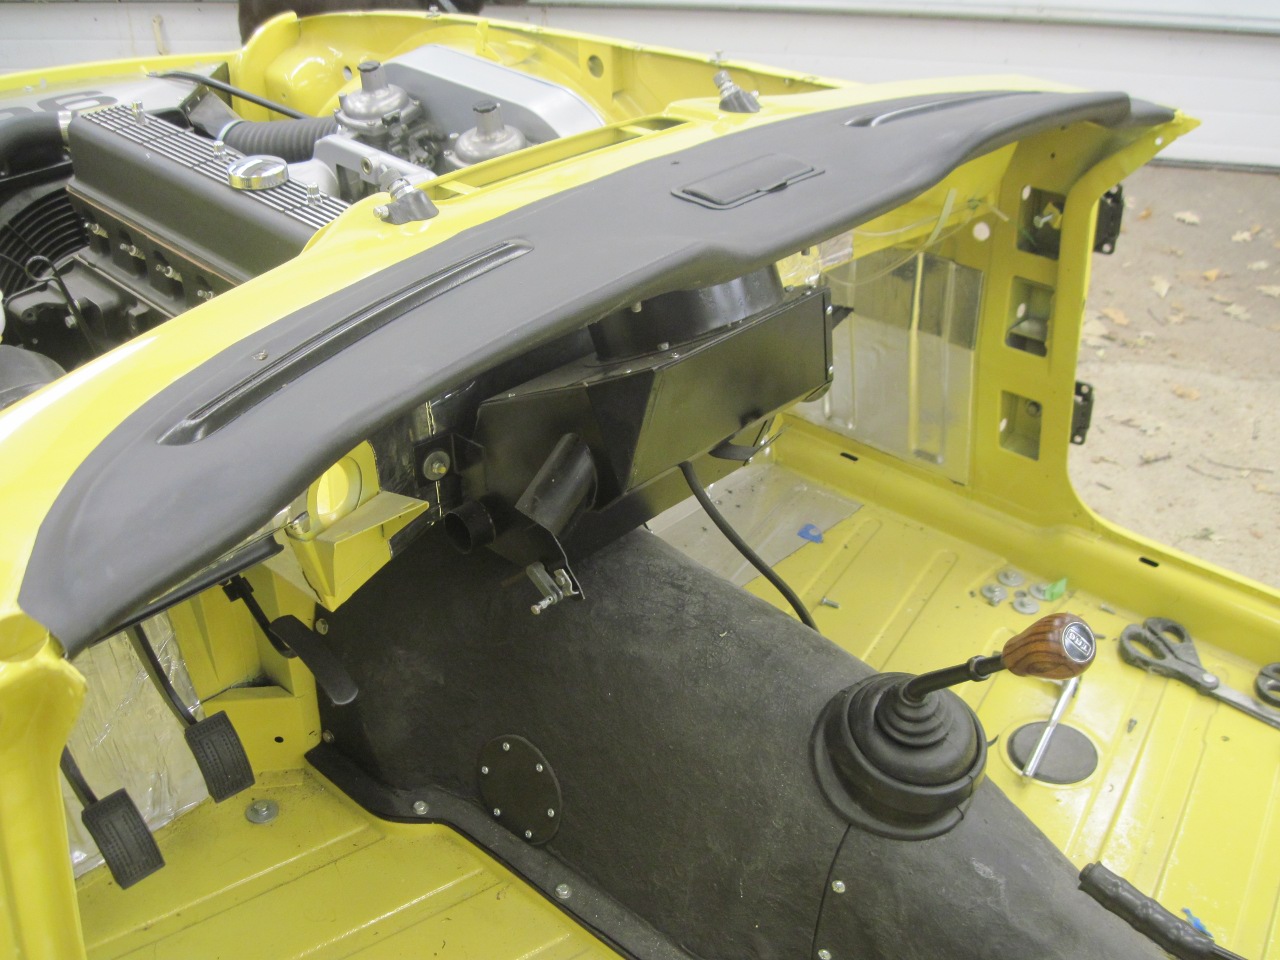
In
preparation to begin wiring the car, I needed to install the dashboard
and dash support, which contained all the controls for the electrical
devices. Before this, I had to install the top crash pad.
Since I had recovered the original crash pad,
I was pretty sure the fit would be OK. I had left plenty of
excess vinyl on the aft part of the pad to wrap under the cowl edge.
Some people report problems installing replacement pads that
don't include the excess vinyl flaps. Even though the metal dash
captures the flap, I glued it to the underside of the cowl edge.
I also glued the pad along its leading edge. The de-mister
bezels and the ash tray hold down the middle part of the pad.
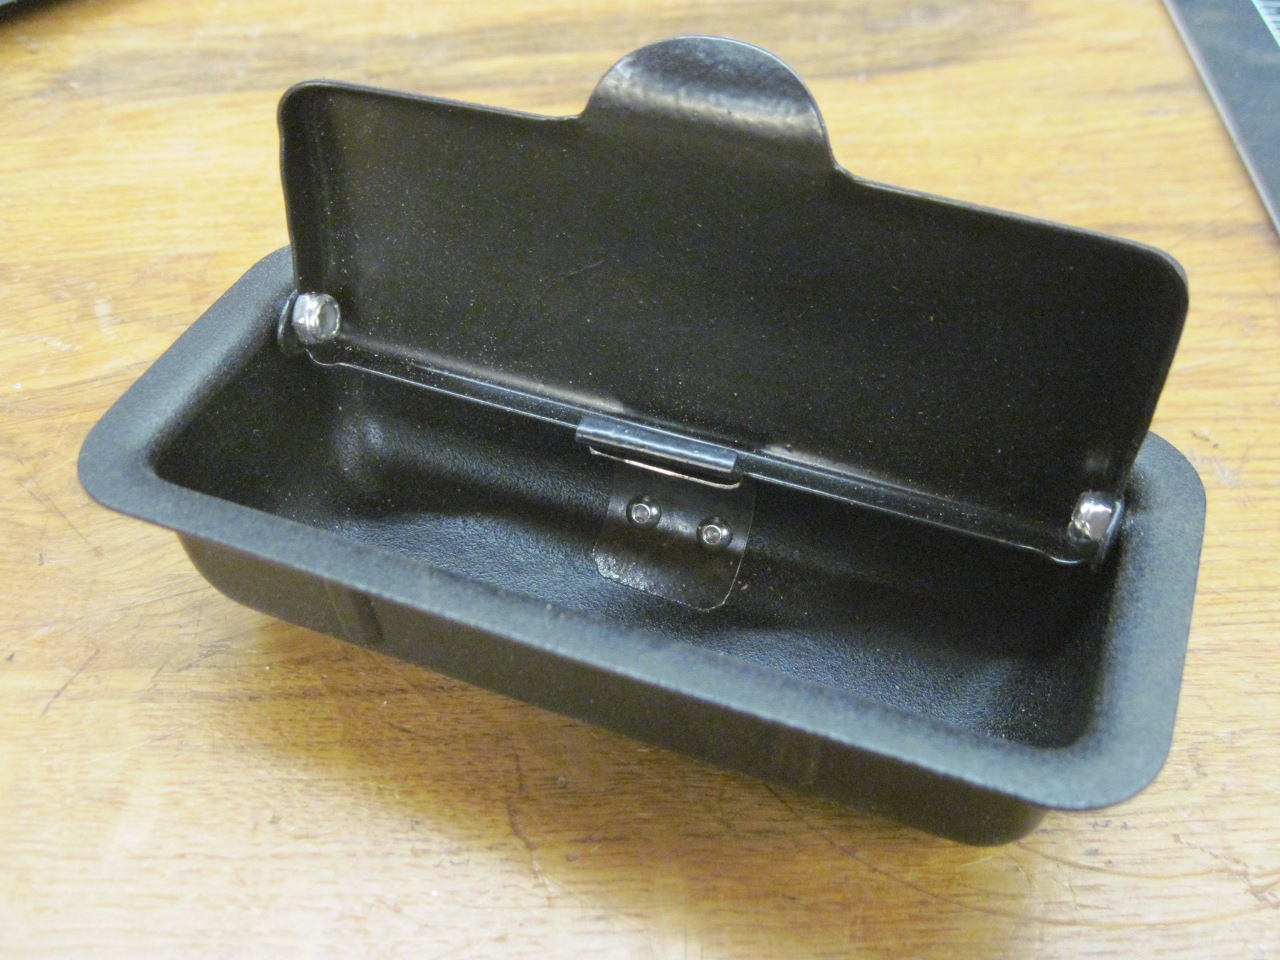
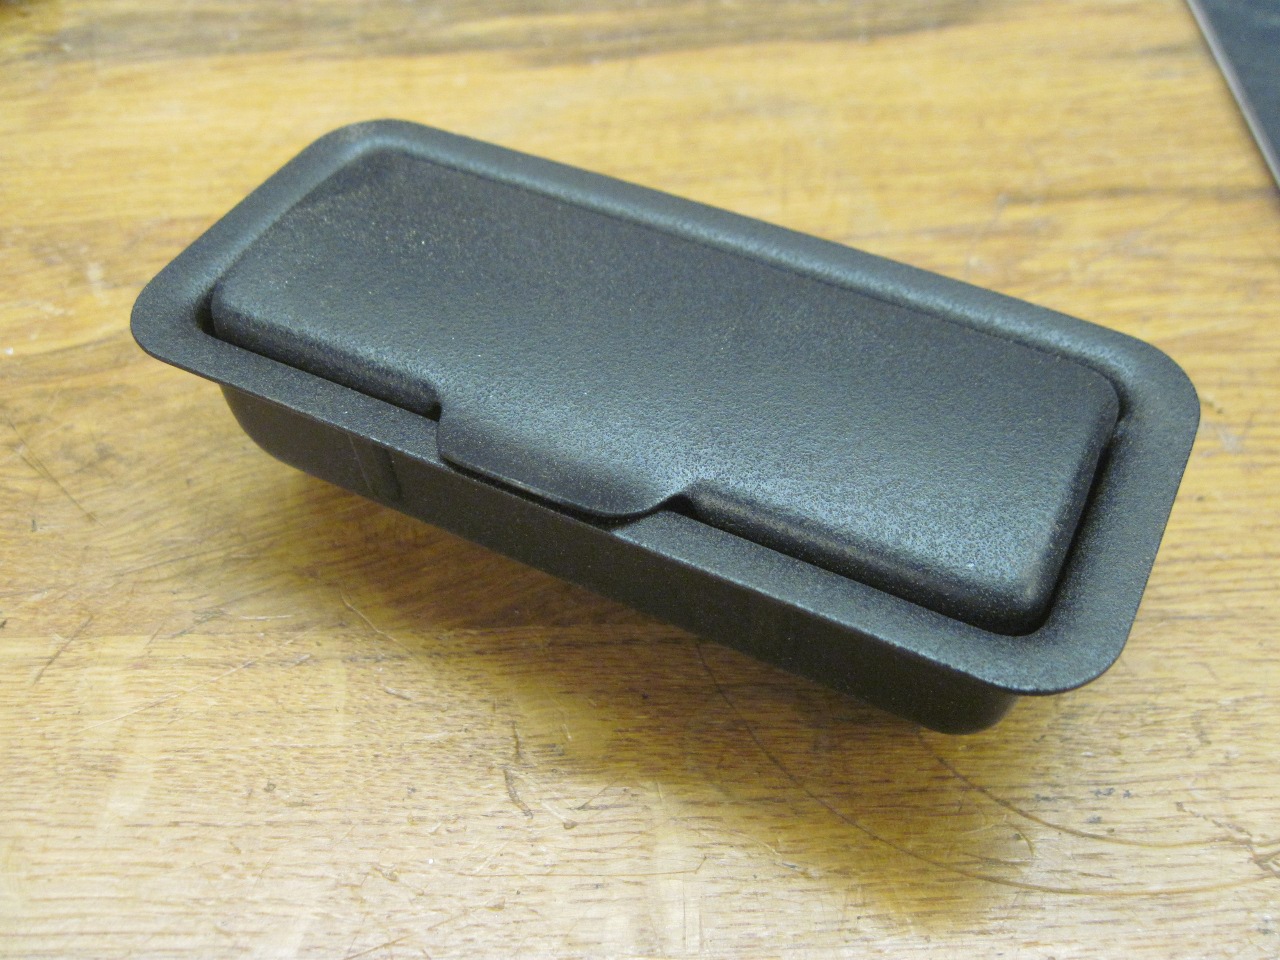
Speaking
of the ash tray, no one will be smoking in this car, but I didn't see a
good way of eliminating it. I know some have repurposed the ash
tray to hoId auxilliary power outlets, which I think is brilliant, but
I already had placed the outlets elsewhere. In the end, I just
cleaned it up and modified it a little. The central metal tab
that apparently was used to extinguish cigarrettes also served as the
detent spring for the lid, so it can't be removed completely. I
cut the tab off so the spring function still worked, but it wasn't
really visible any more. The cleaning and painting required
removing the lid rivets, but I replaced them with tiny screws with
lock nuts. I guess I'll just call it a coin tray now.
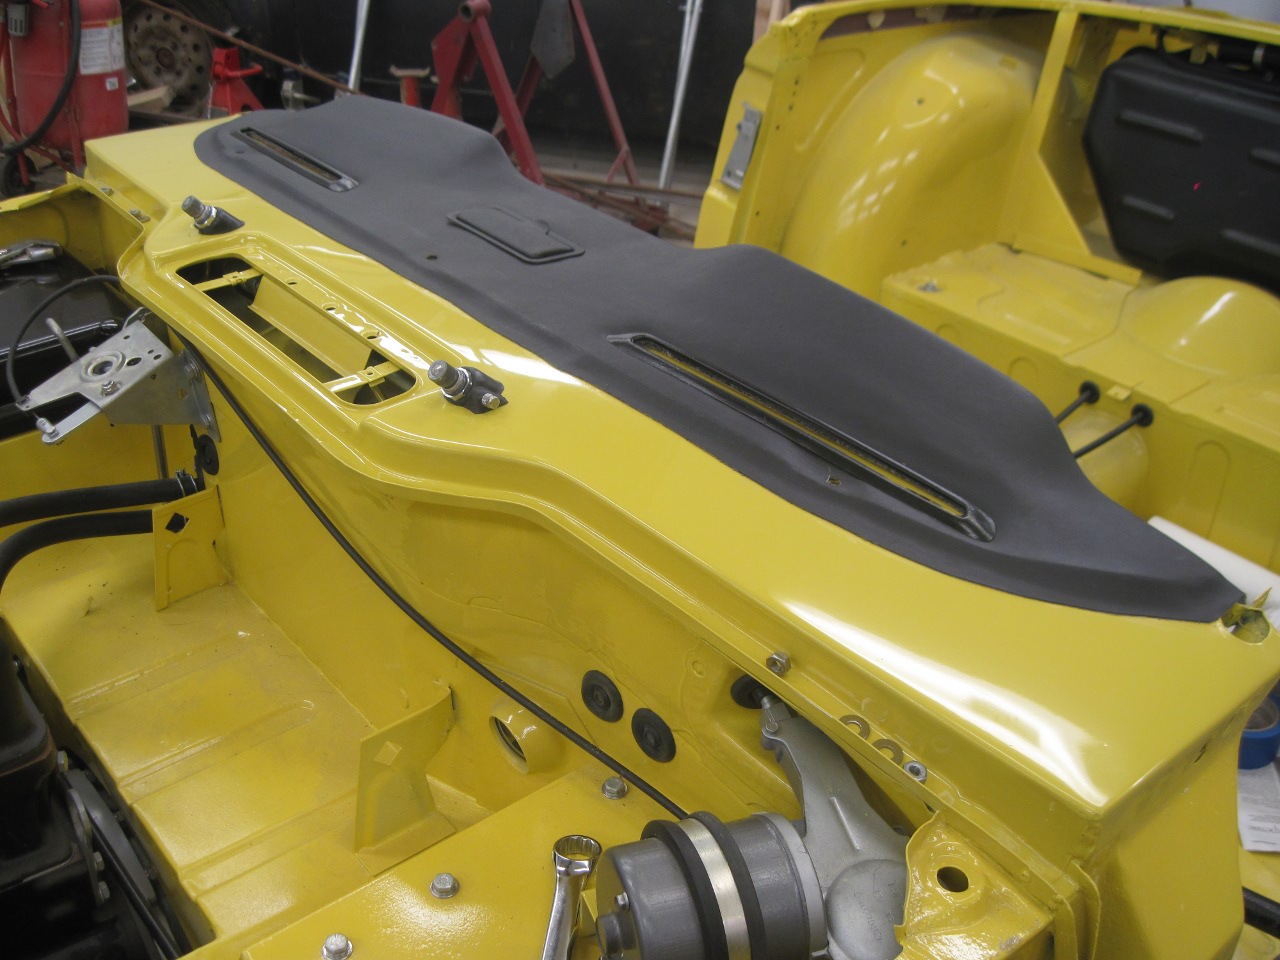
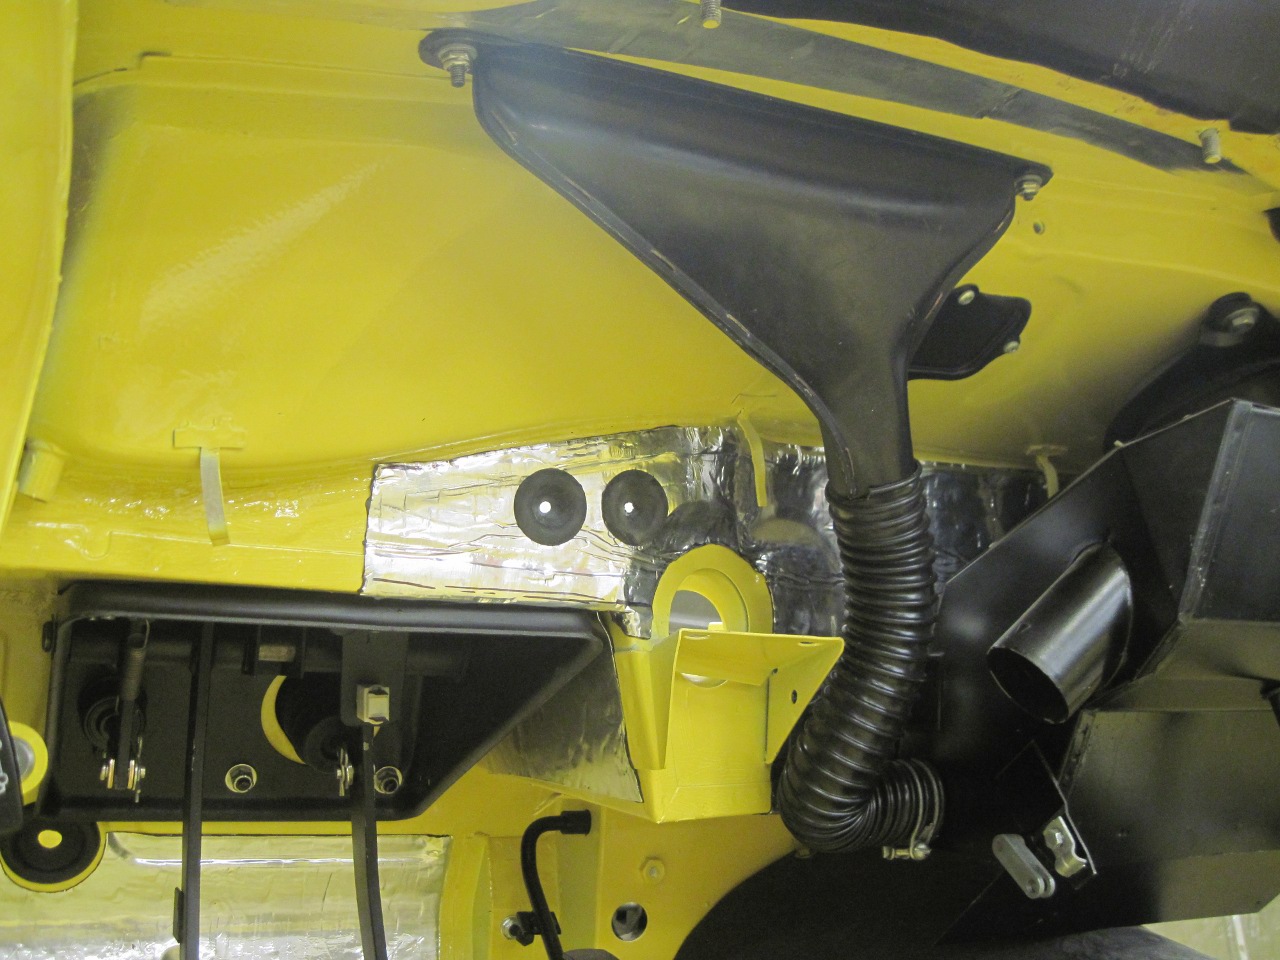
In
a flash of forethought, I saw that a few things would be much easier to
install now before the dash was in place. Here are the demister
hoses.

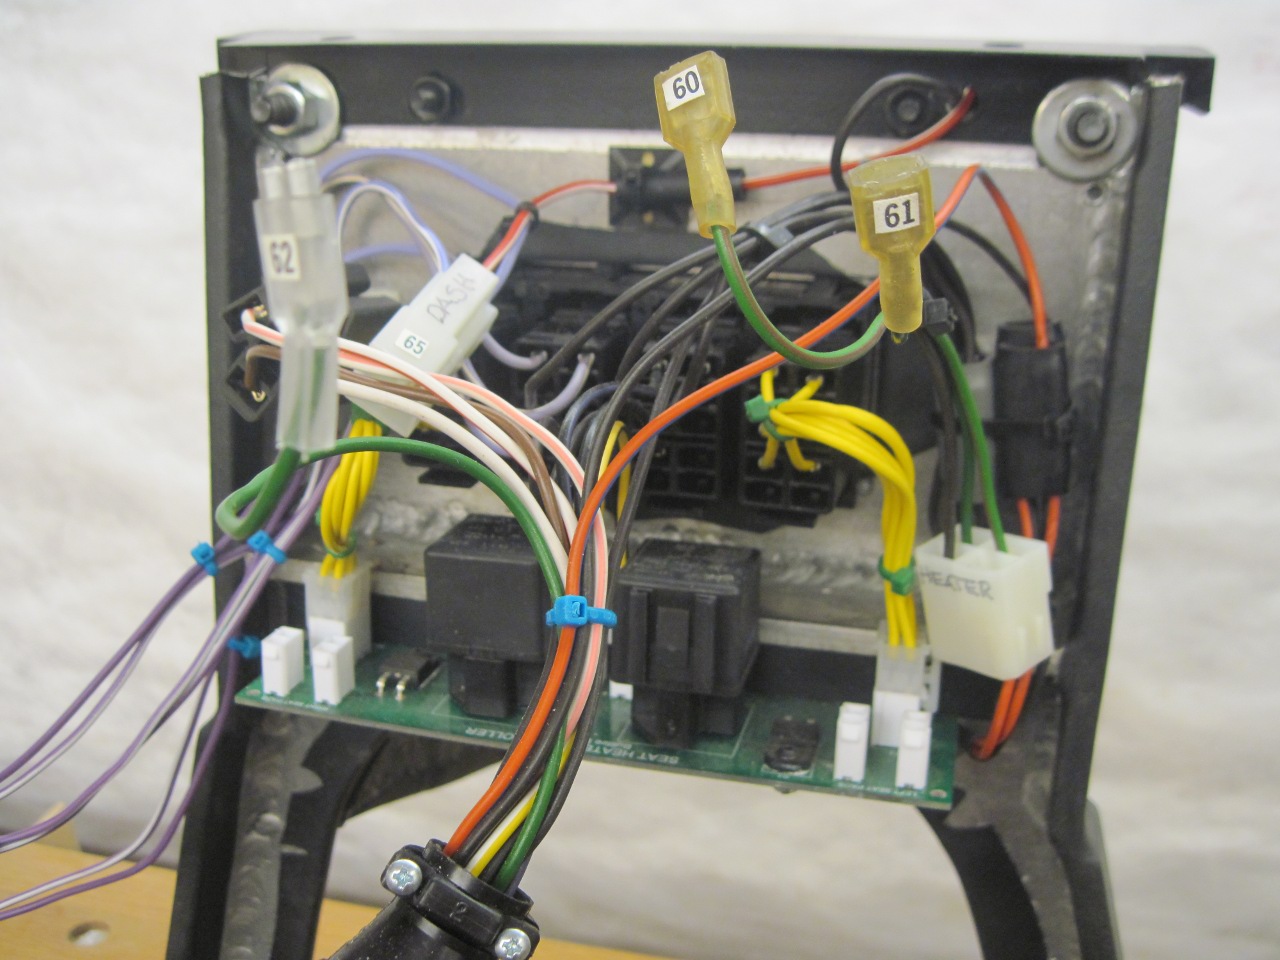
In
the spirit of doing as much pre-wiring as I could, I wired up the
switches on the dash support to a circular connector. The circuit
board is the controller for the seat heaters. The heaters came
with a harness that included a relay, fuse, and switch. That
seemed kind of kludgy to me, and besides, my switch worked a little
different than theirs, so I would have had to rewire the harness
anyway. The relay isn't there for the usual reasons--it is part
of the logic that can put a seat's lower and upper heat pads either in
parallel or in series. This is how the two levels of heat are
achieved.
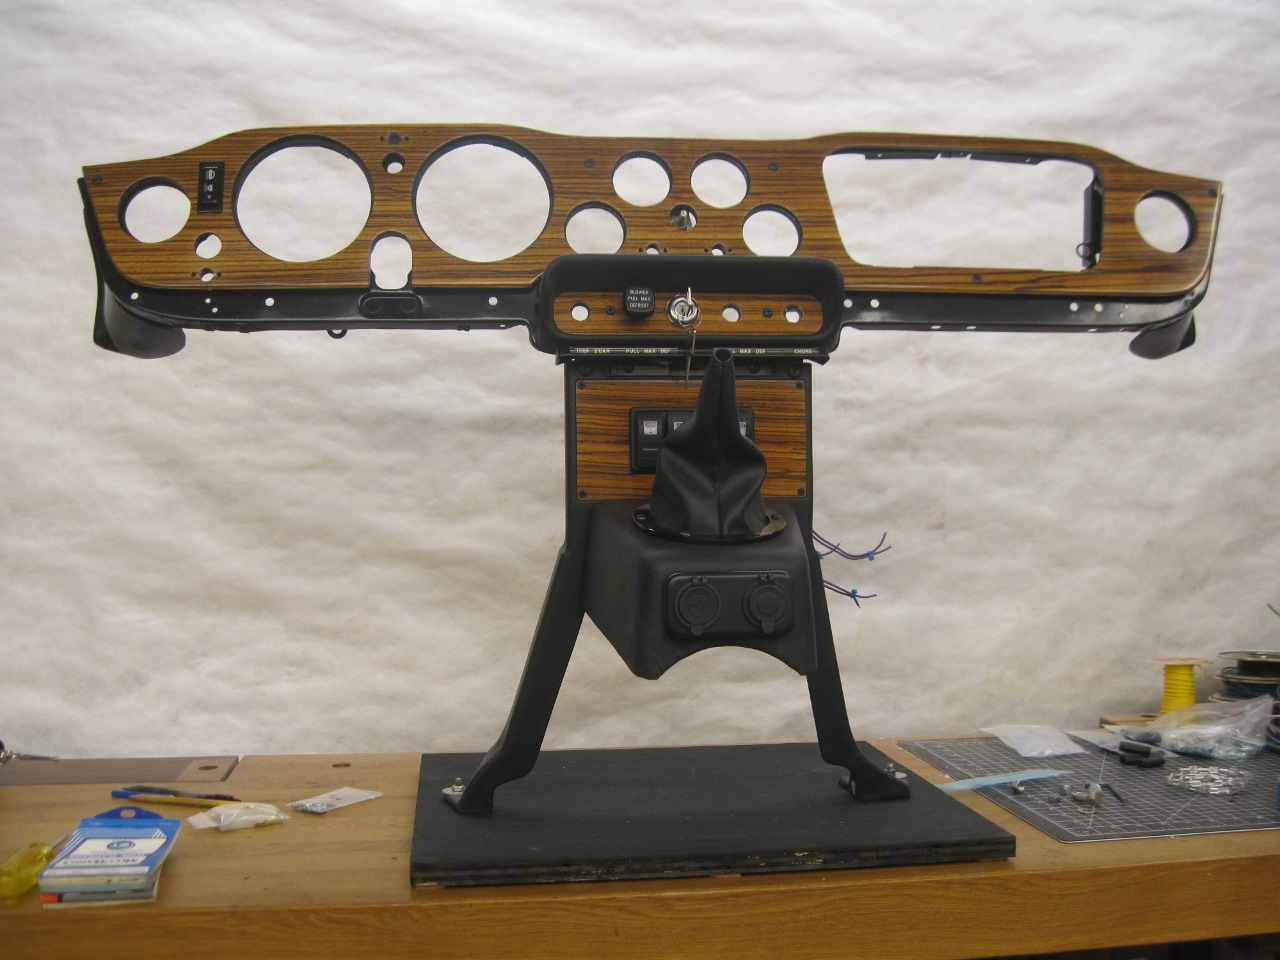
To
stage everything, I mounted the dash, plinth, and dash support together
on a base. This allowed me to get the wire lengths right without
crawling under the dash in the car.

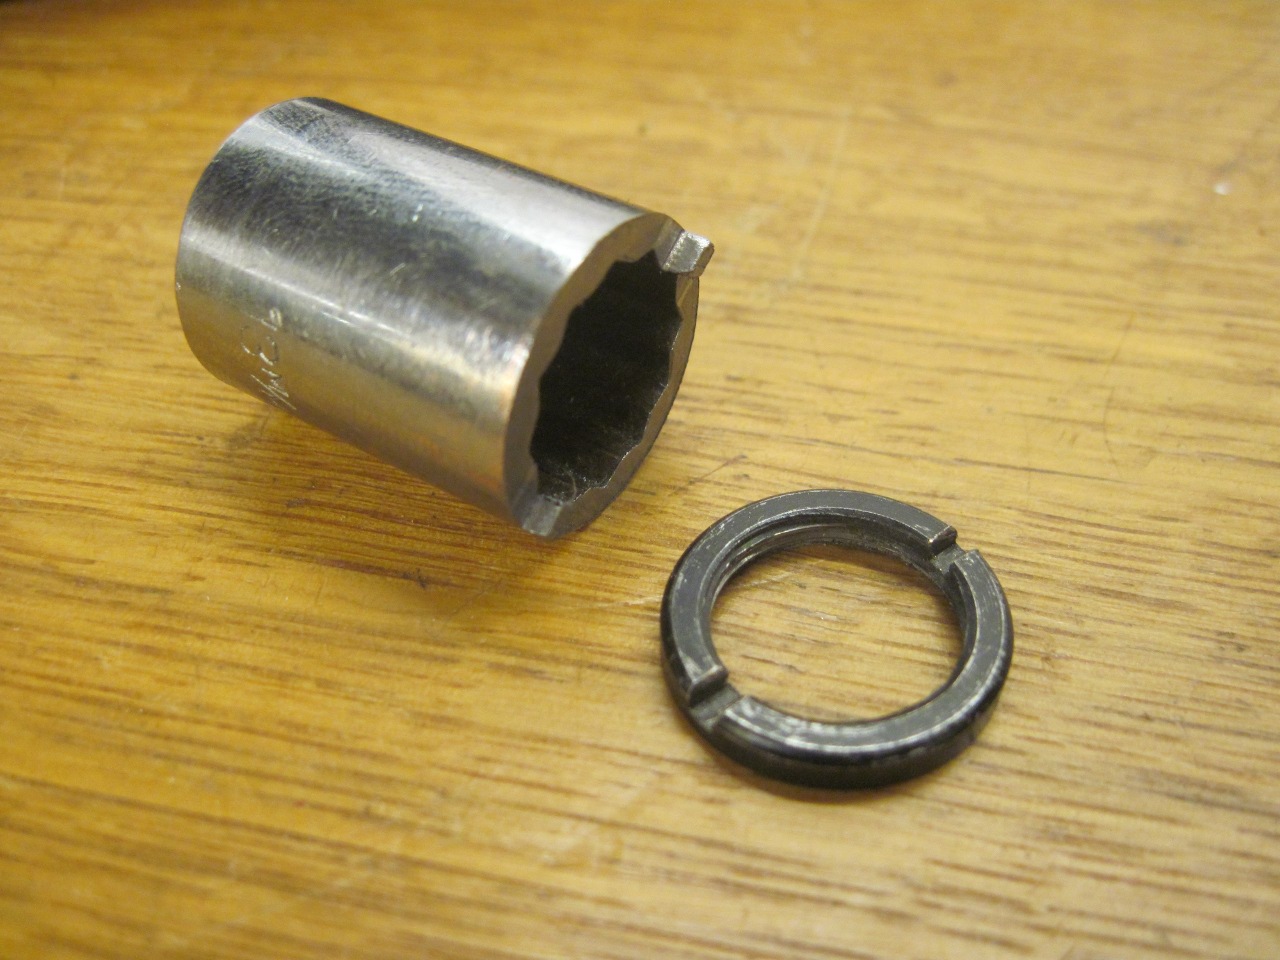
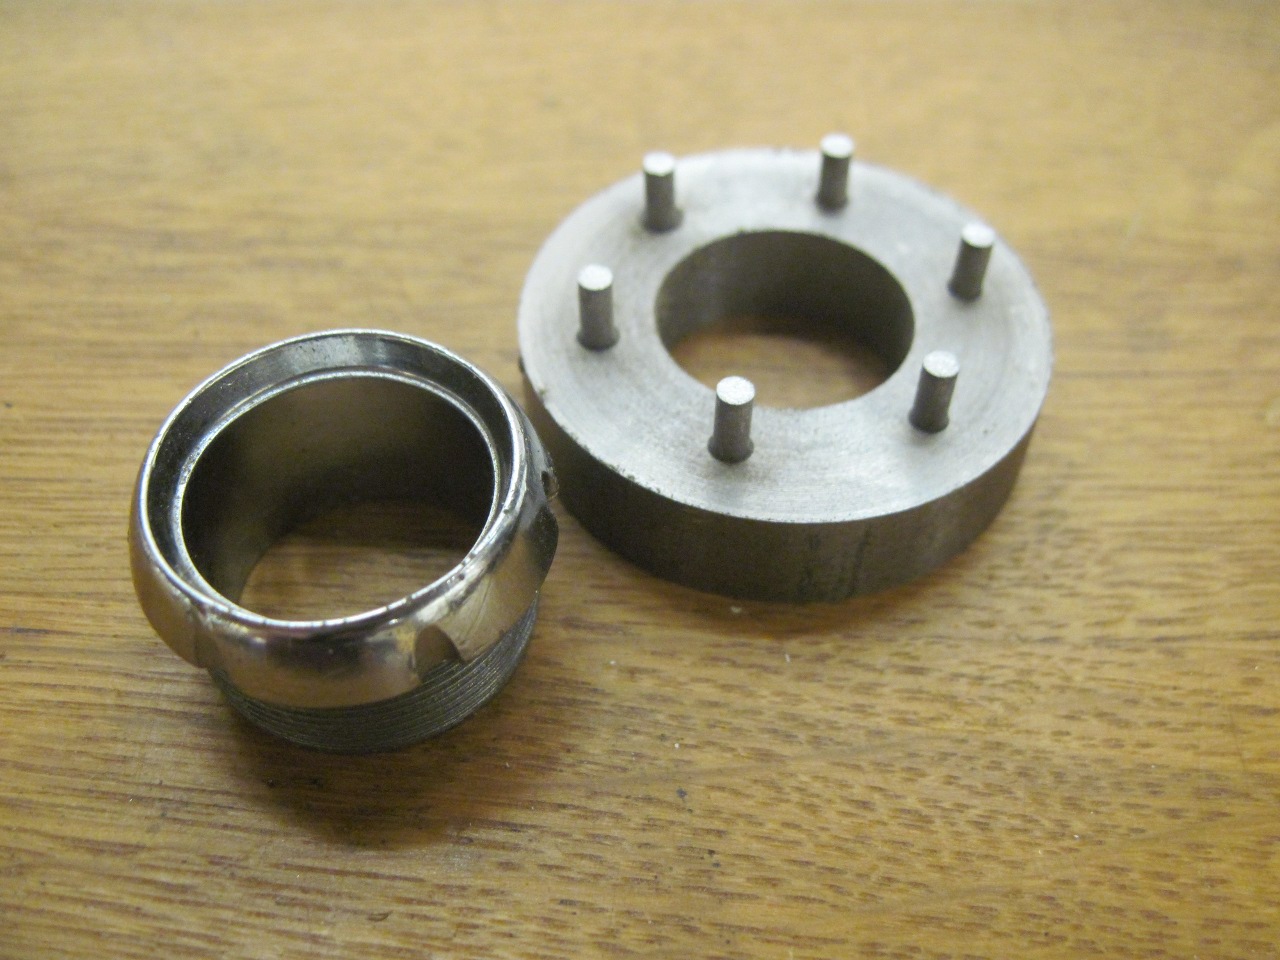
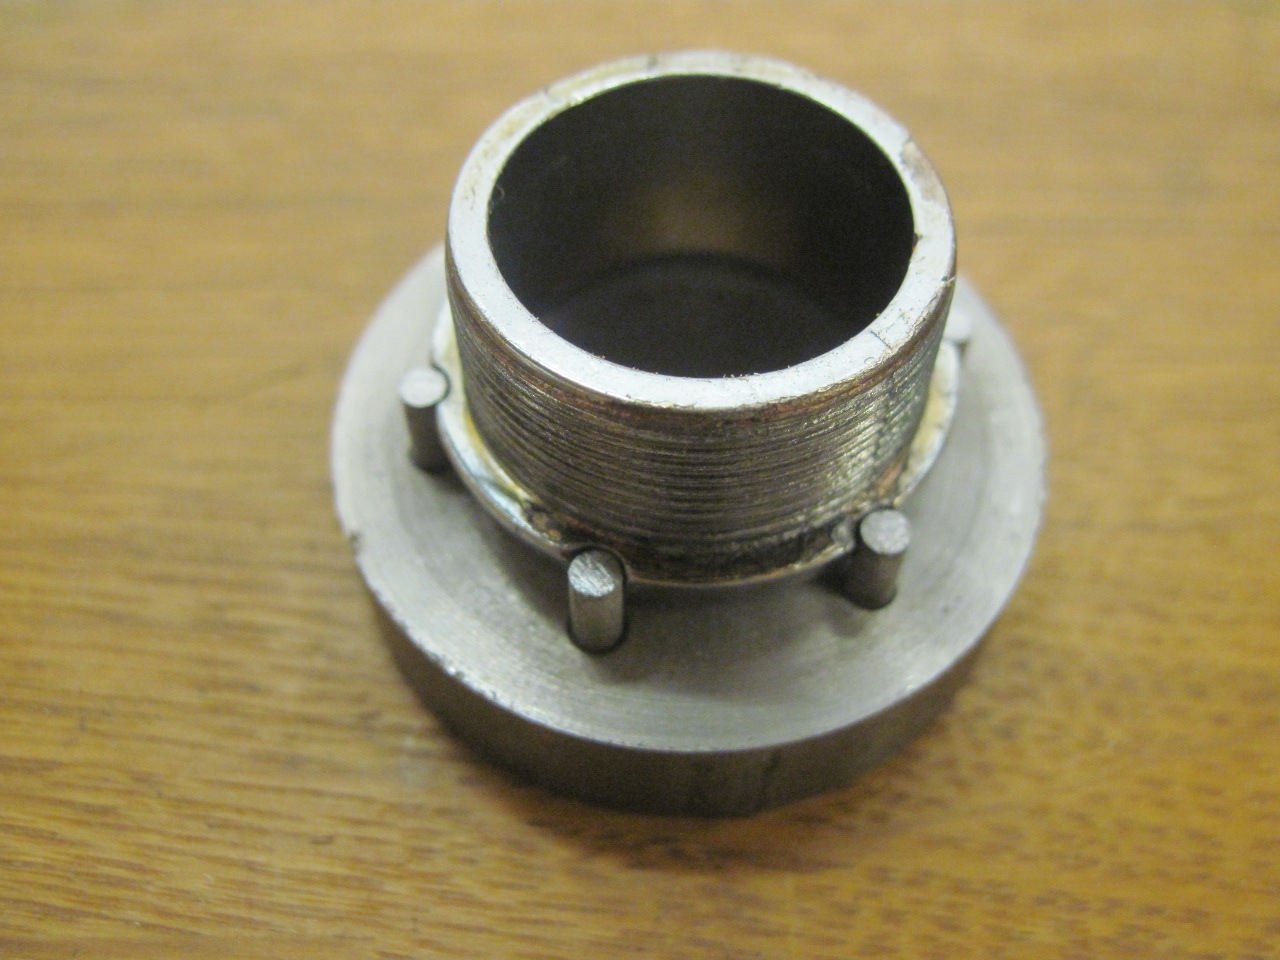
In
mounting the controls on the dash, I ran into the usual hassle of
tightening some of the bezel nuts. I think you can buy special
gizmos to fit them, but out of frustration, I took a time out to make a
couple.
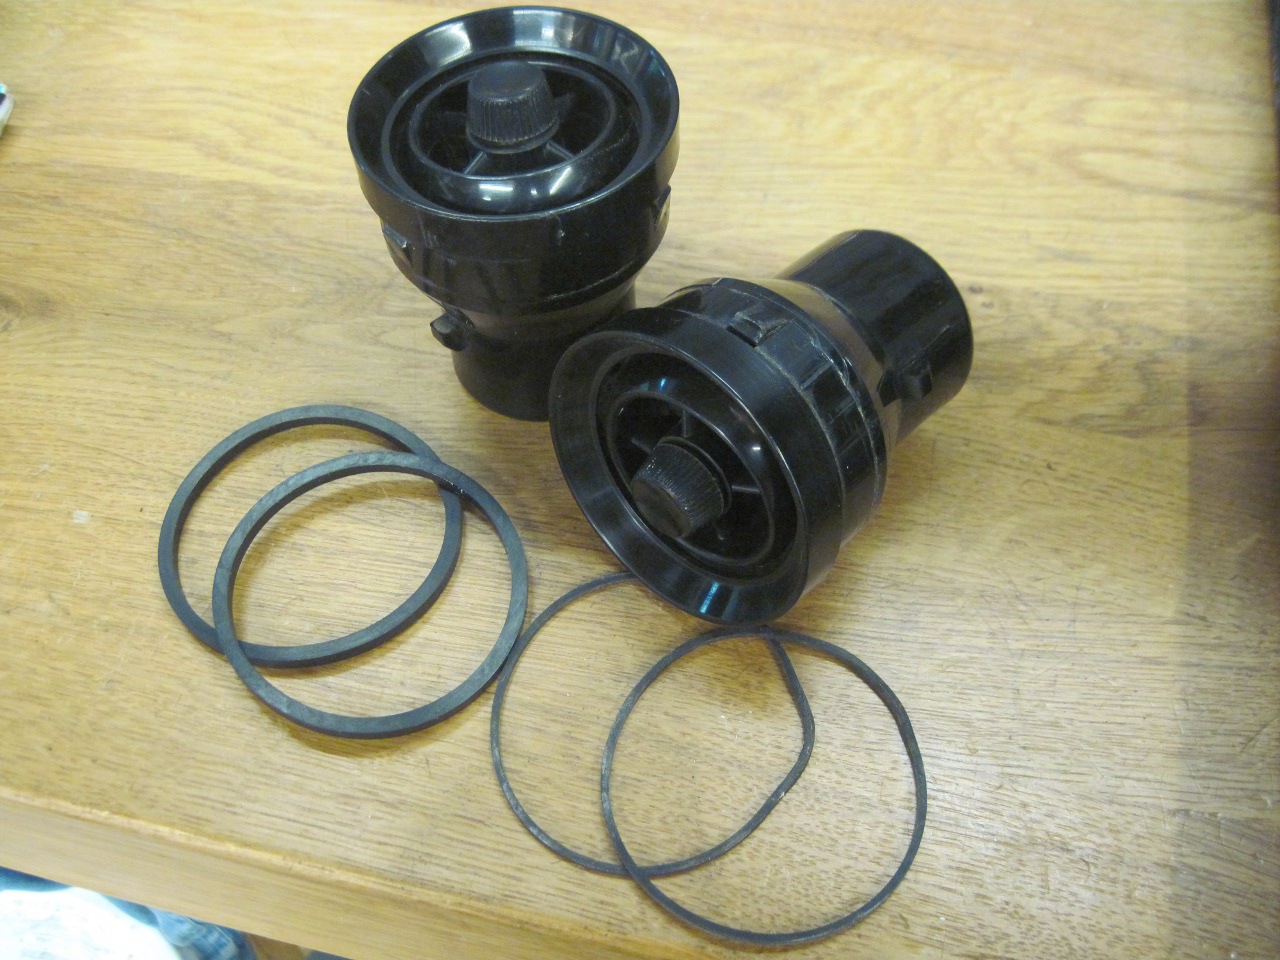
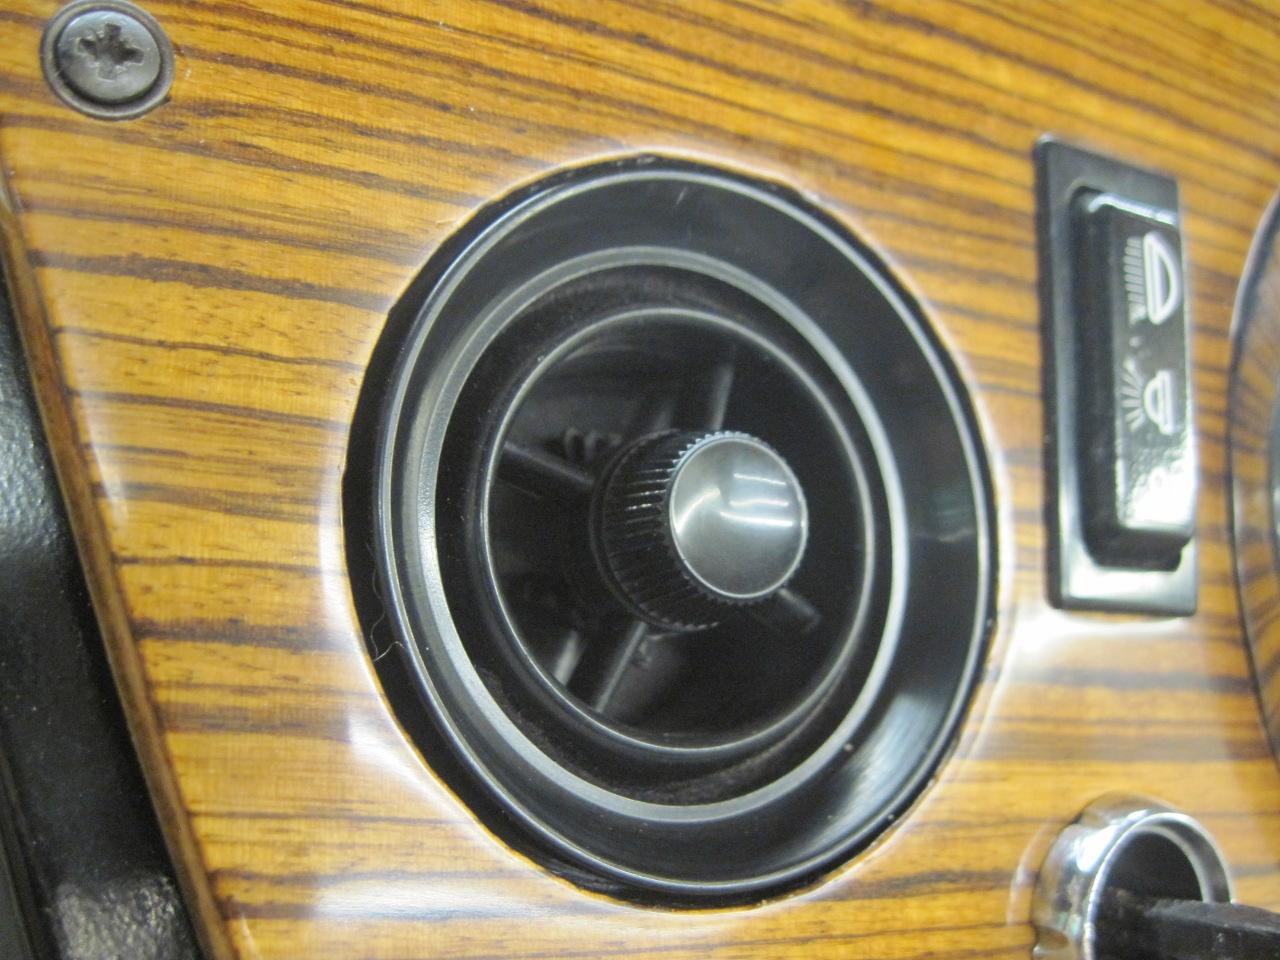
Another
little sidetrack. The air vents are captured in the metal dash,
and are cushioned with thin O rings. Well on my dash, the vents
would rattle in their holes, even with two of those little O ring
gaskets. My solution was to get thicker square section O rings
(size -229). These worked great, though they had to be shaved a
bit to fit through the hole in the wood dash.
Then
the metal dash/wood dash assembly was installed in the car. It
was much easier to get the nuts on the cowl studs with the tach and
speedo removed.
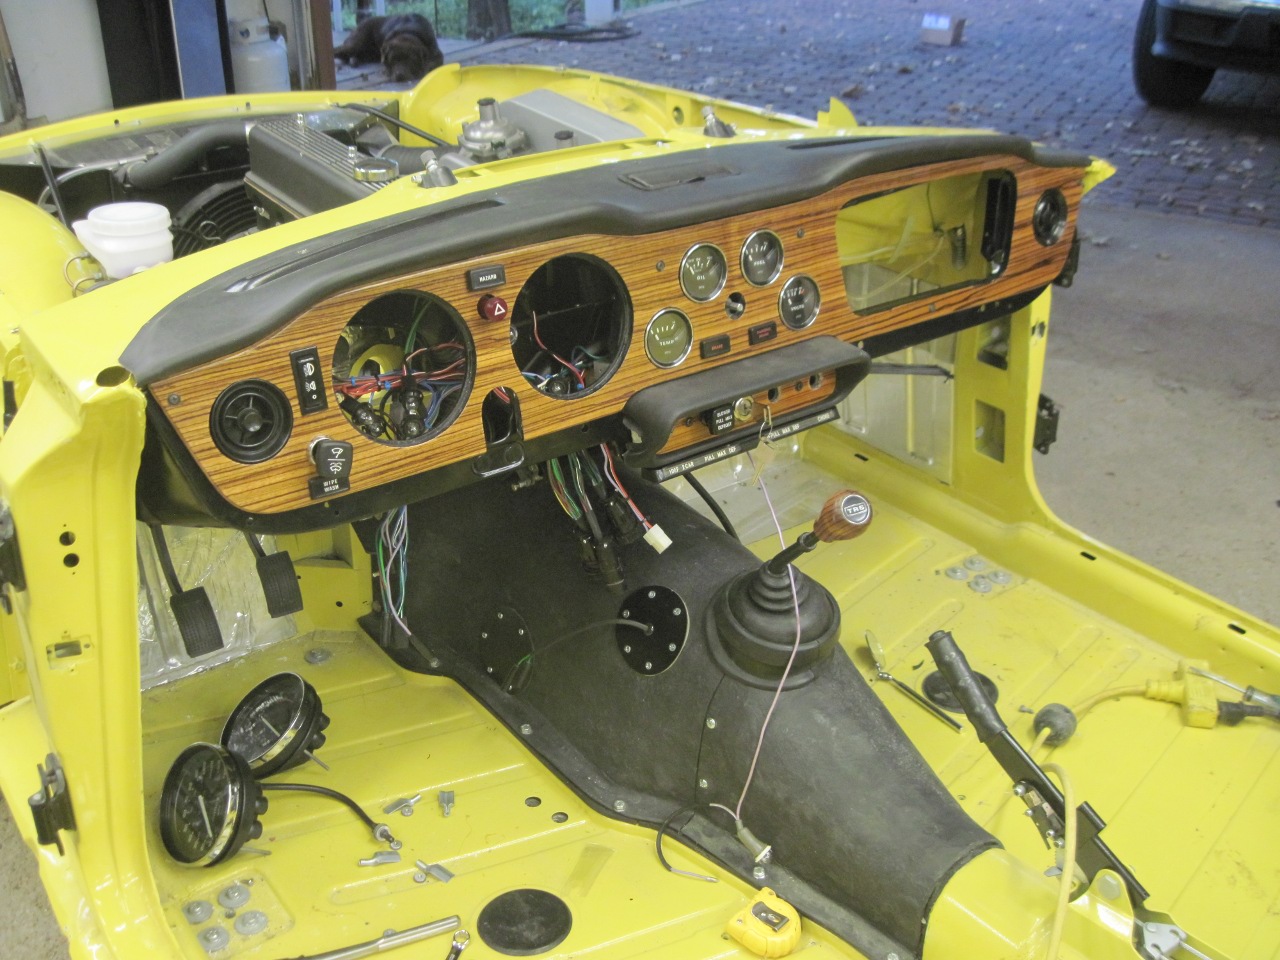
Tach and speedo back in place.

Then
the dash support. I'm not sure if I will have trouble installing
the steering column with the wood dash in place. If so, it may
have to come apart again.

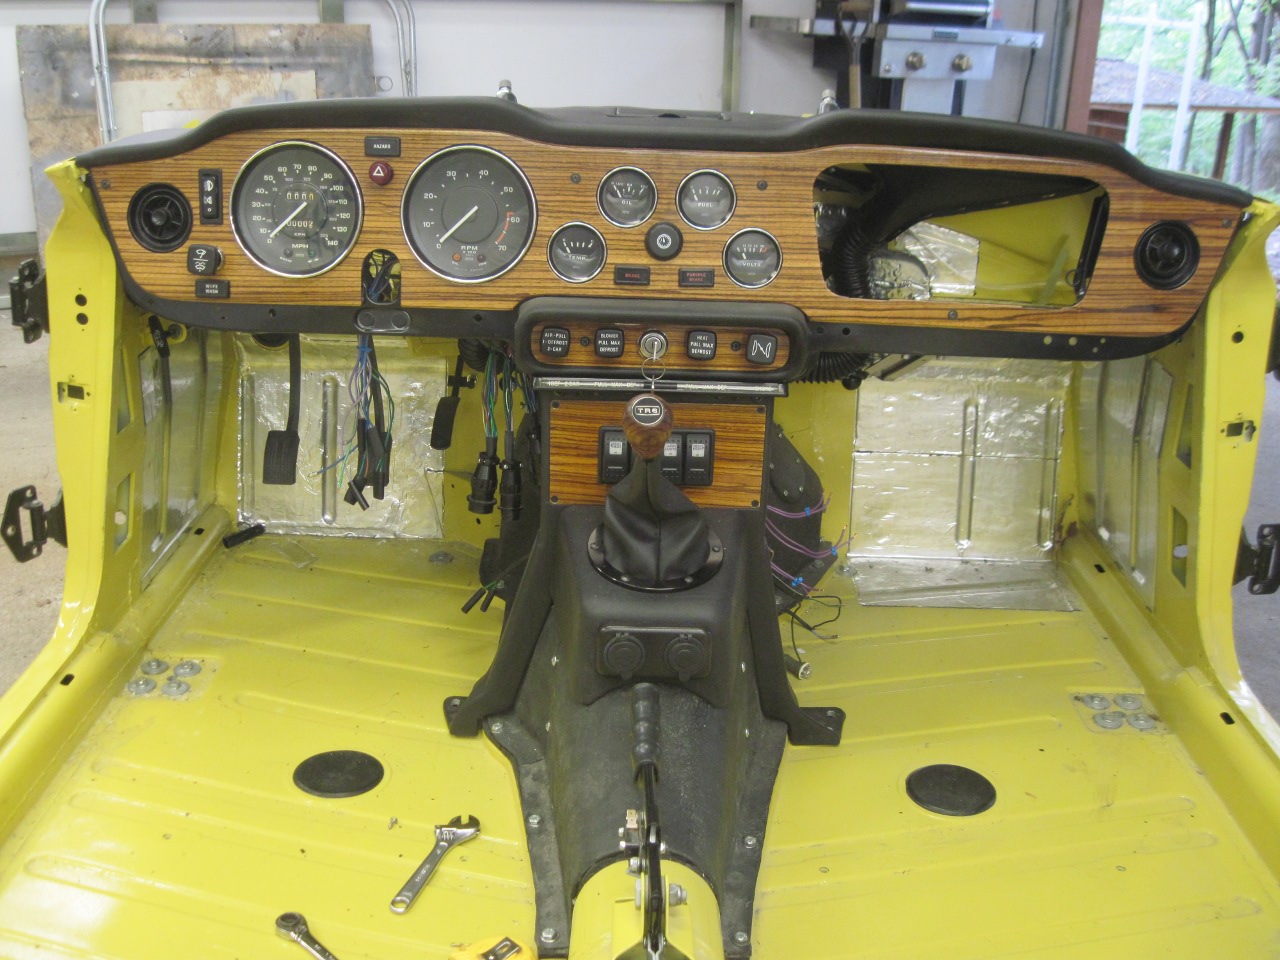
This was a very satisfying step. I live it when I can actually see a difference in the car.
Commnets to Ed at elhollin1@yahoo.com
To my other TR6 pages