To my other TR6 pages
October 27. 2016
Wiper/Washer Install
Well,
it's time to start bolting things onto the tub. I figured the
windshield wipers should be first up since they are tucked far up
behind the dashboard inside the cowl, and trying to do the install with
anything else in the way is just silly.
So
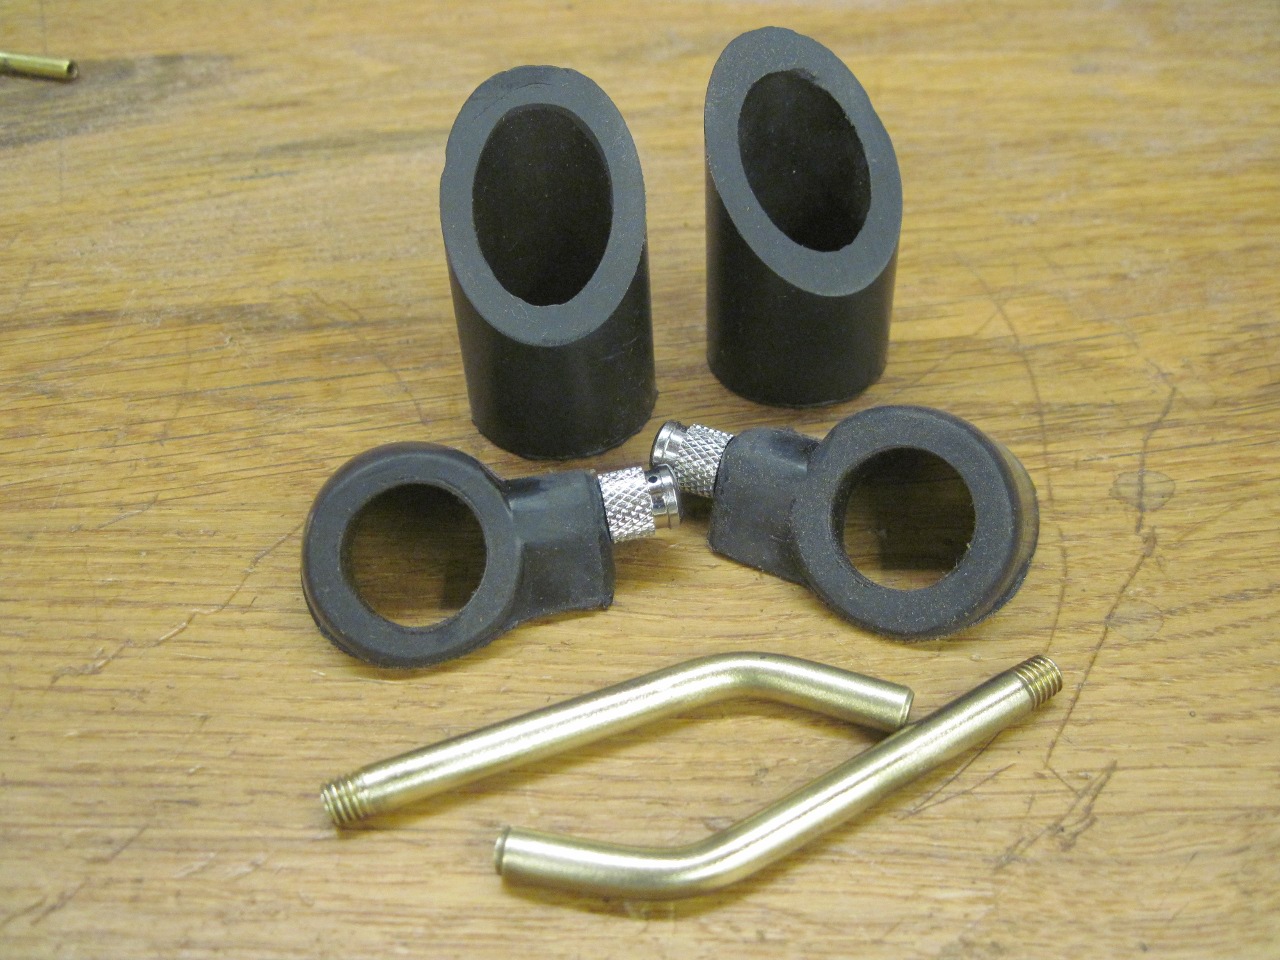
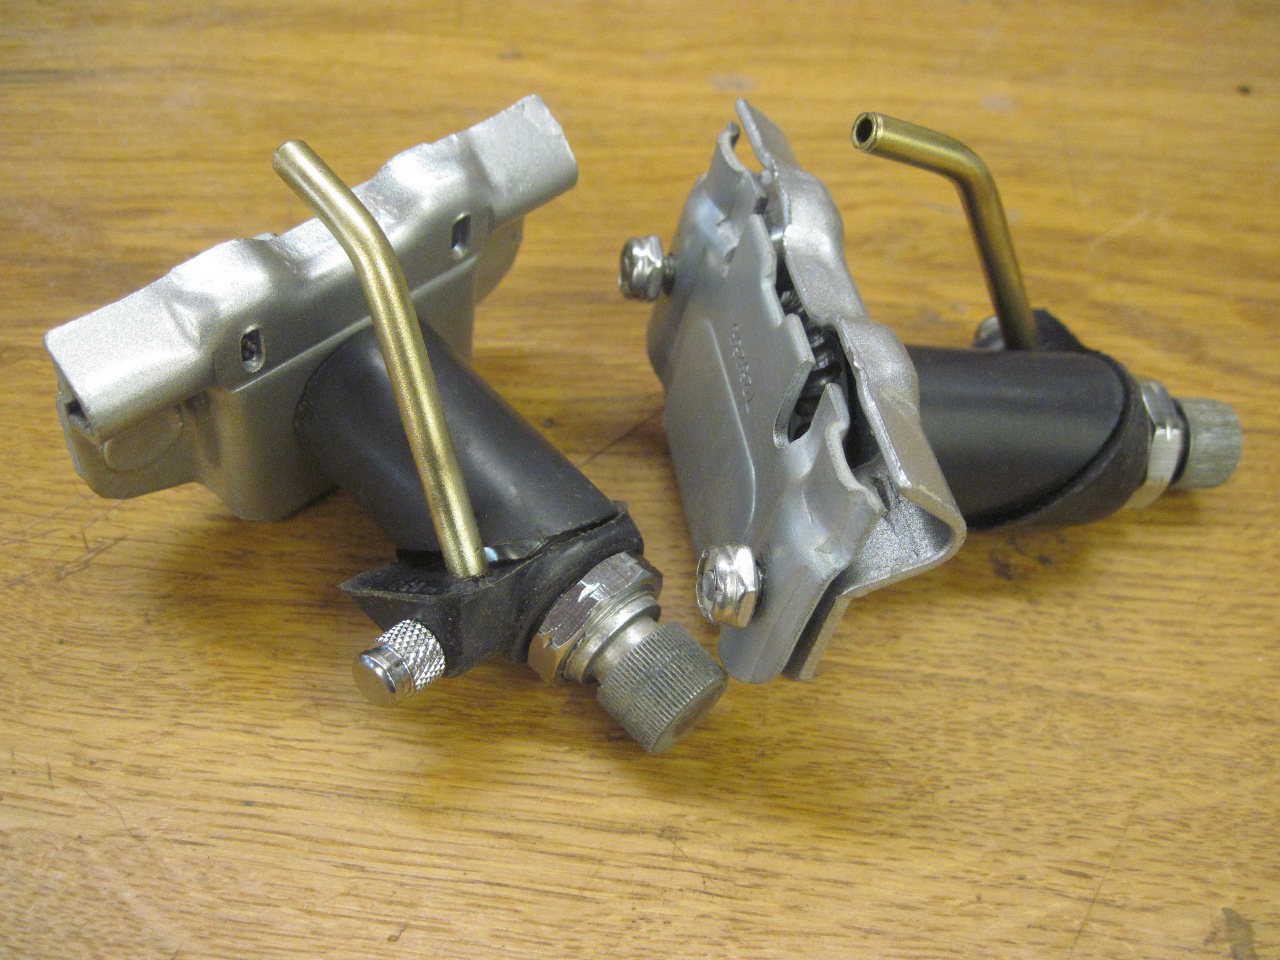
I pulled out the box with all the wiper gear in it and began to put a
plan together. The original hard rubber wiper bezels were in
rough shape--one was broken and the other was crumbling.

I
knew this previously, and had ordered a replacement set of bezels.
The new bezels were a bit of a disappointment. The rubber
parts had a lot of casting flash on them and some of the surfaces were
wavy.


But
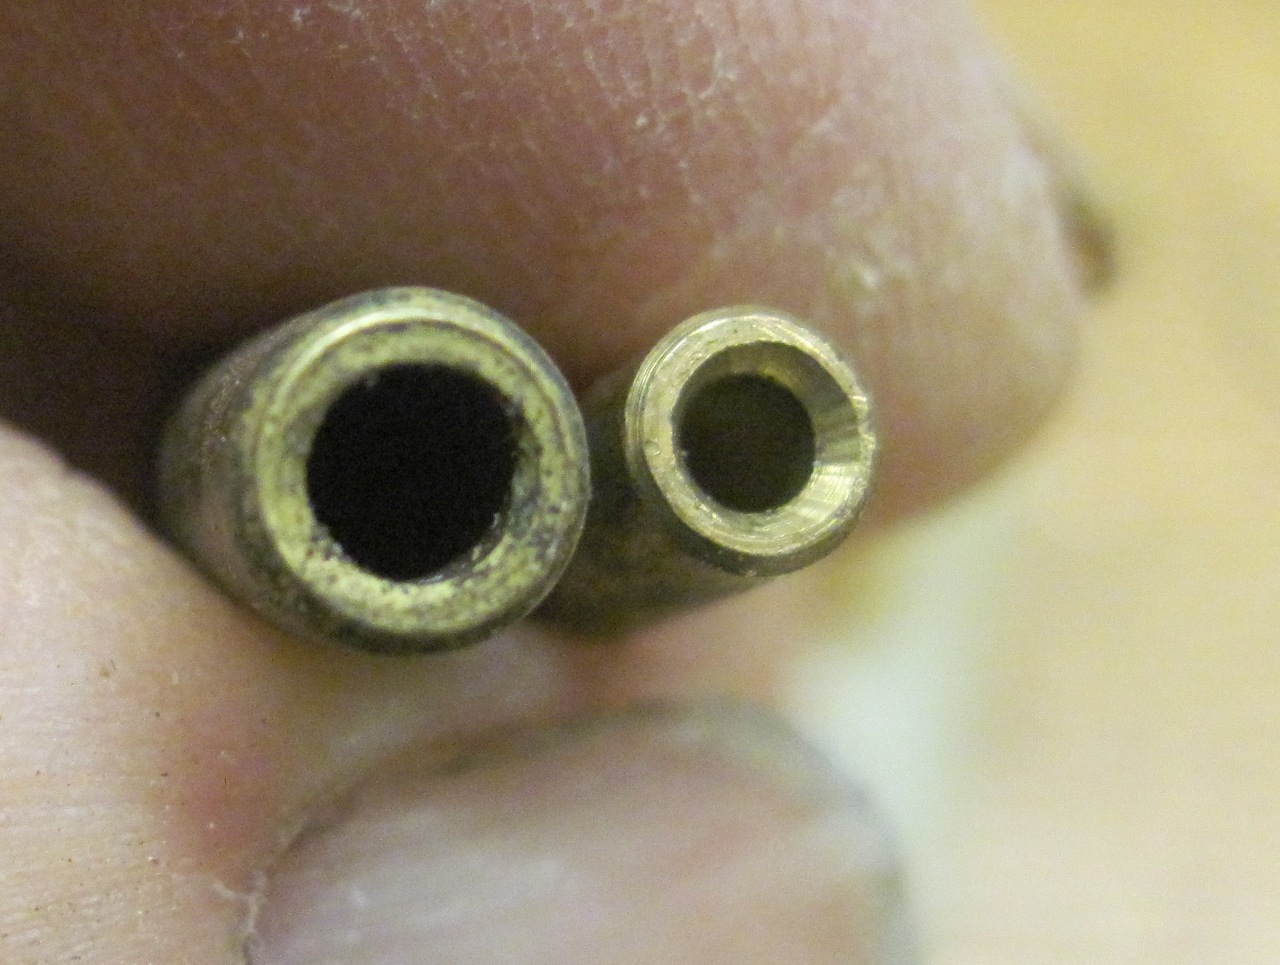
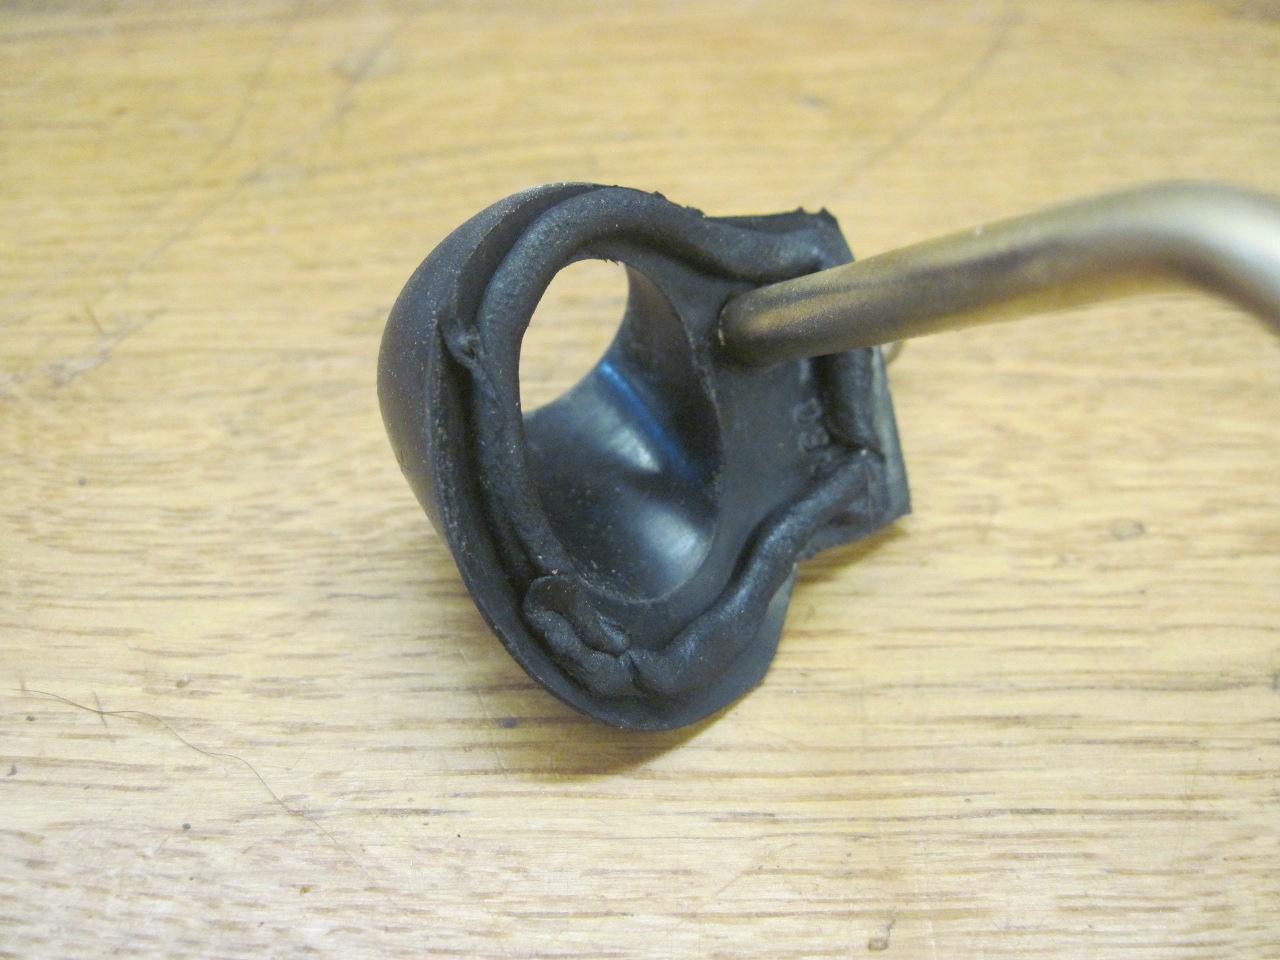
the main irritation with the kit was the brass tubes that the washer
tubing connects. The tubing is a nominal 3/16" ID, and is a good
stretch fit on the original brass tubes. The new tubes were quite
a bit smaller at about 0.155" (probably nominal 4mm). They slid
into the washer tubing loosely, and I was concerned that they would
leak.
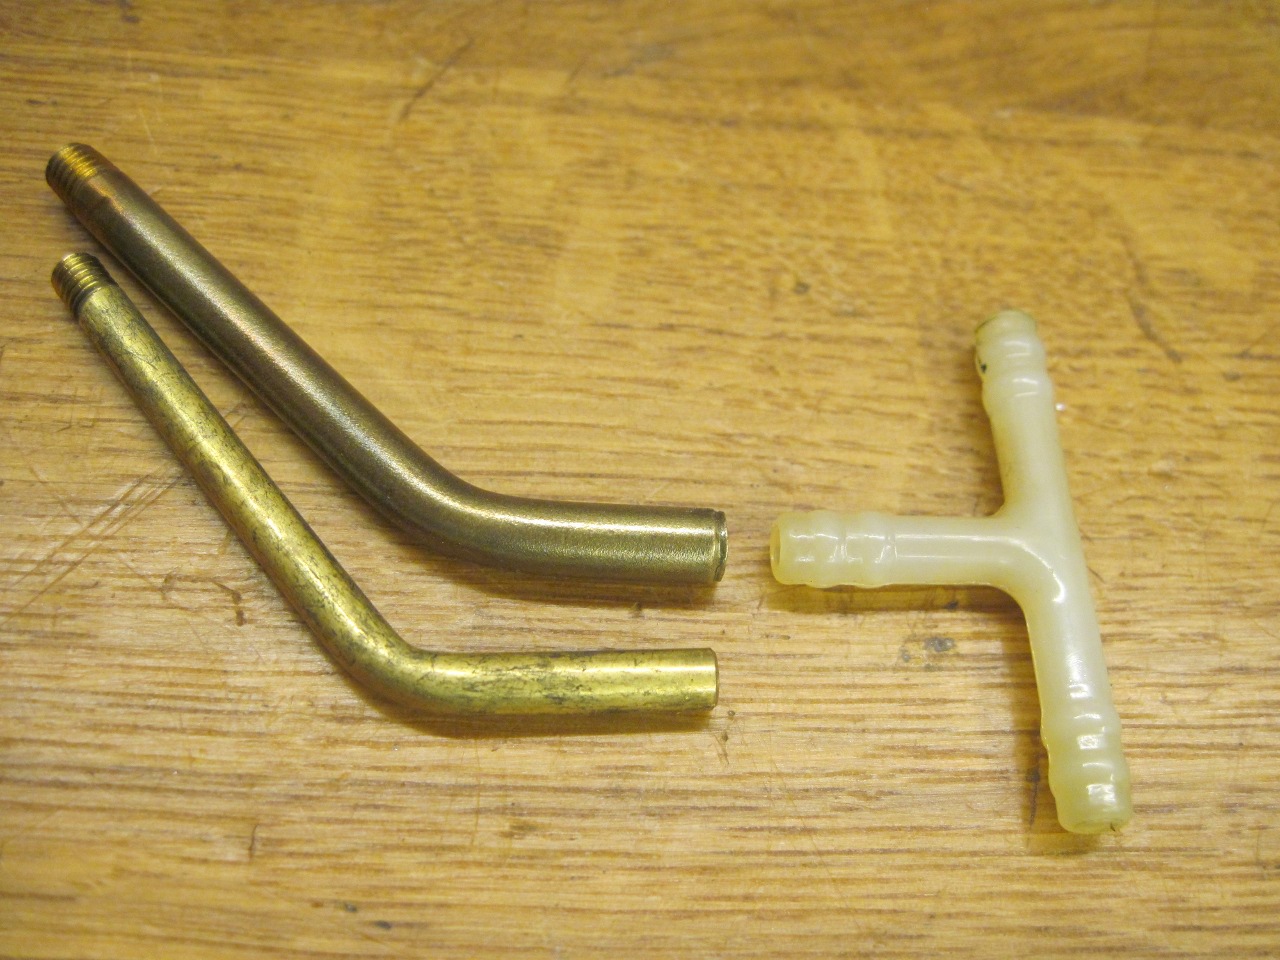
The
solution was a familiar one. I used a mix of new and old parts to
come up with something that would work. I cleaned up the flash on
the new bezels, but installed the original brass tubes into them.
For the bottom parts of the bezels that go under the cowl panel,
I used the originals, since they just looked and felt better than the
new ones.

I pulled out the rebuilt wheel boxes and test fitted the bezels.
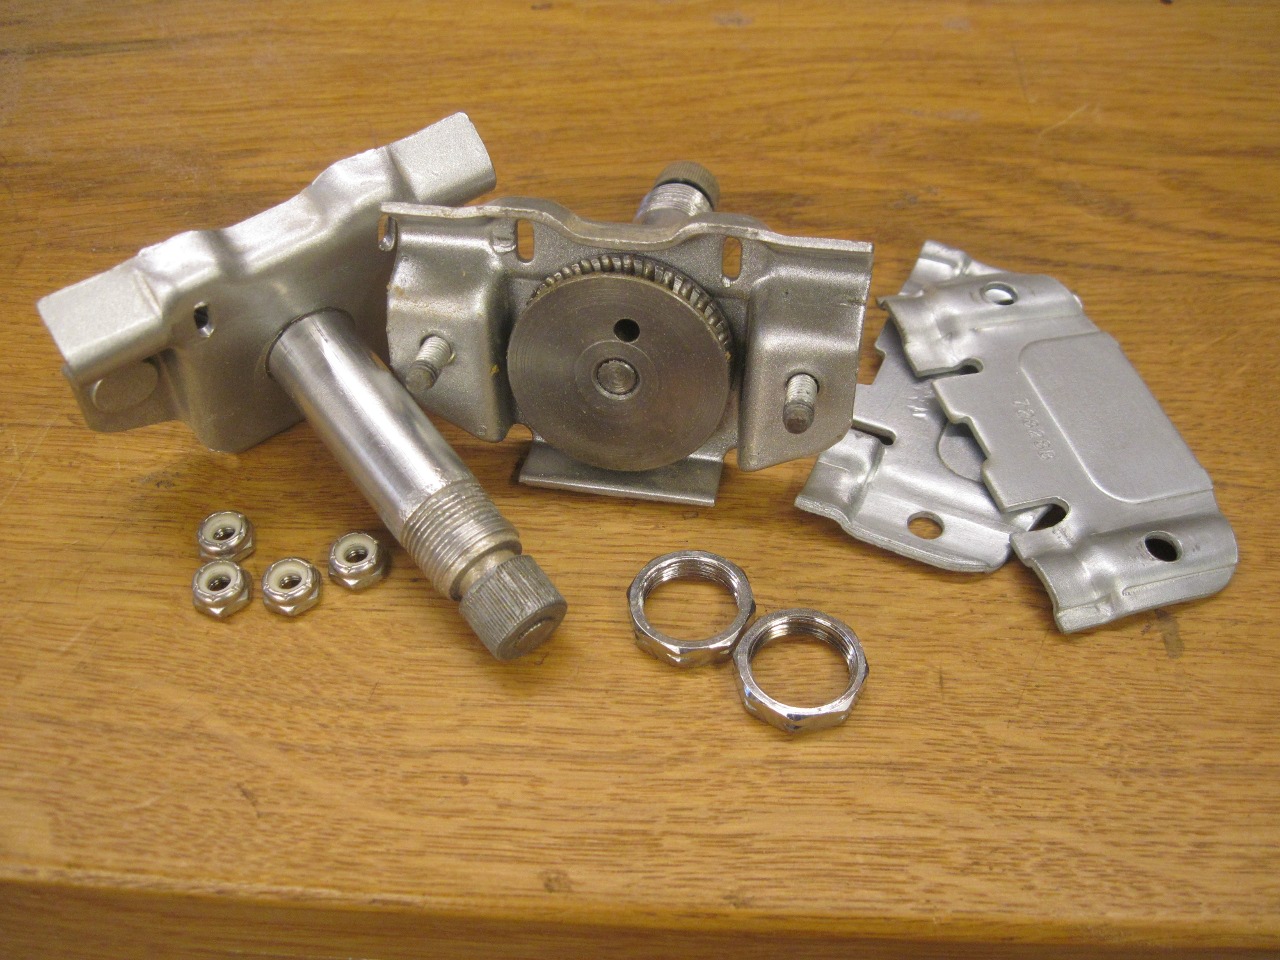
Before
I installed the wheel boxes, I put a small ring of strip caulk under
the top of each bezel since I didn't really trust the seal of the
bezel.
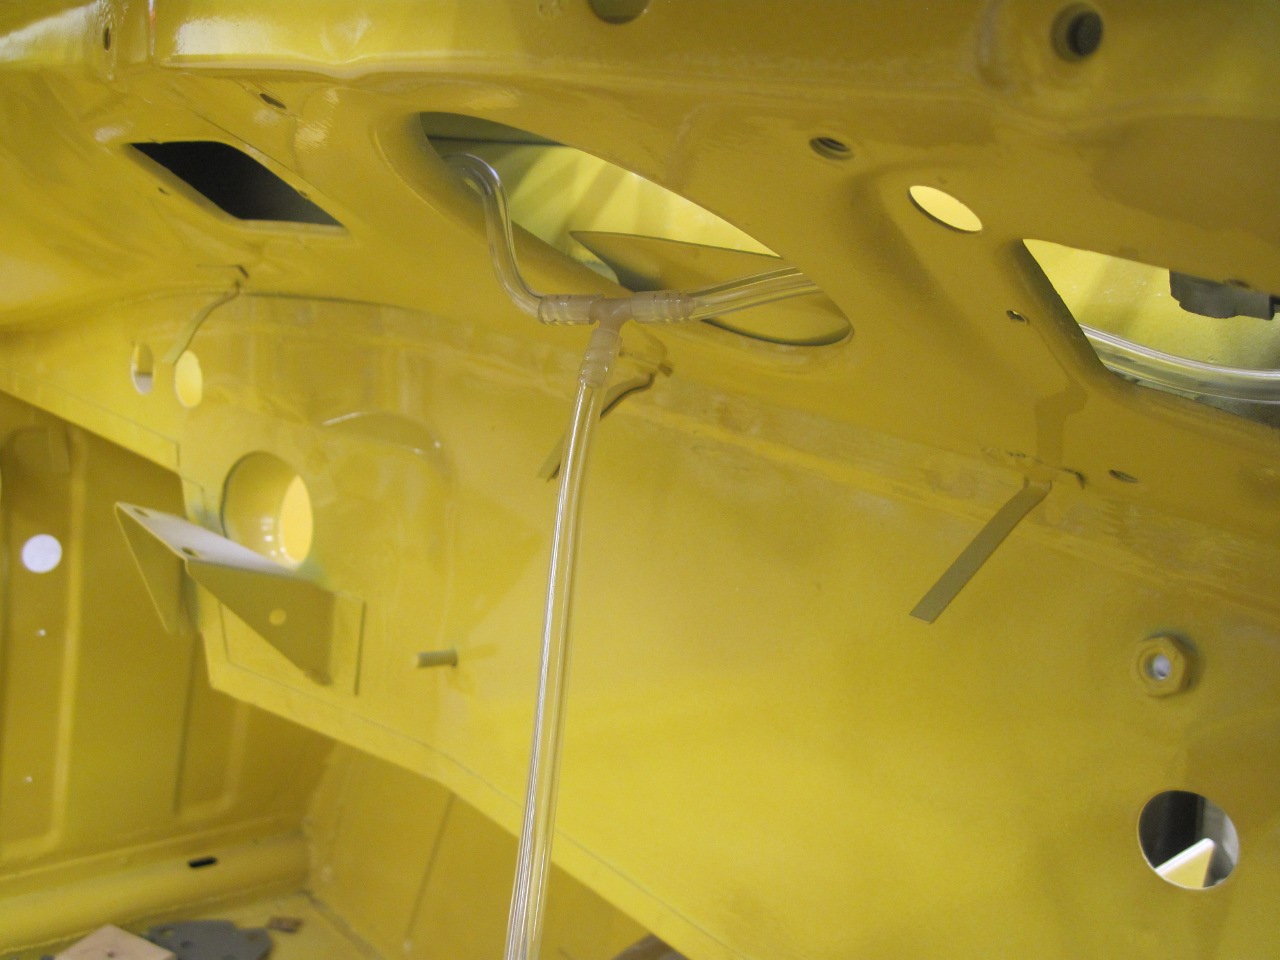
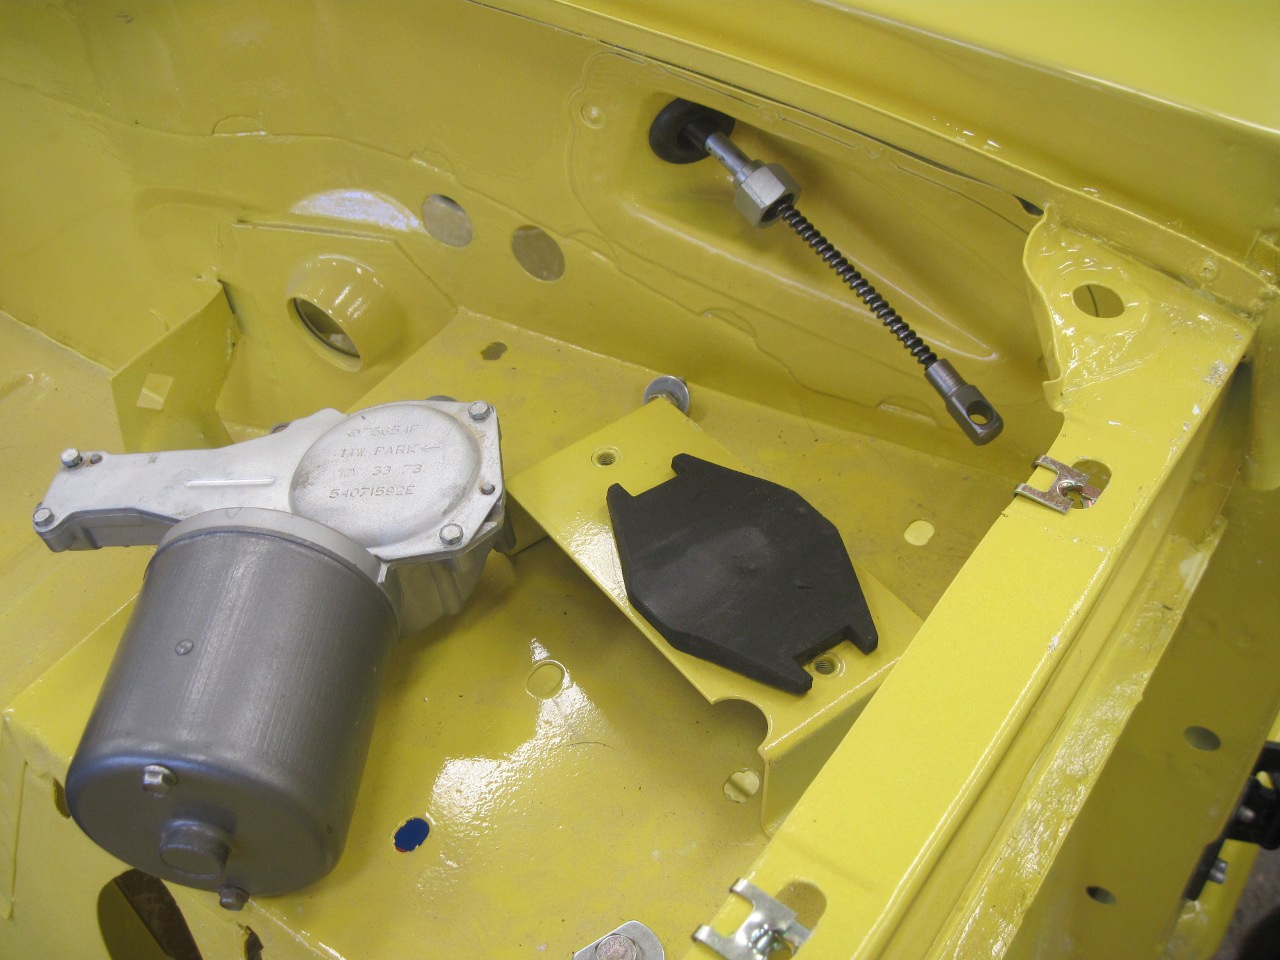
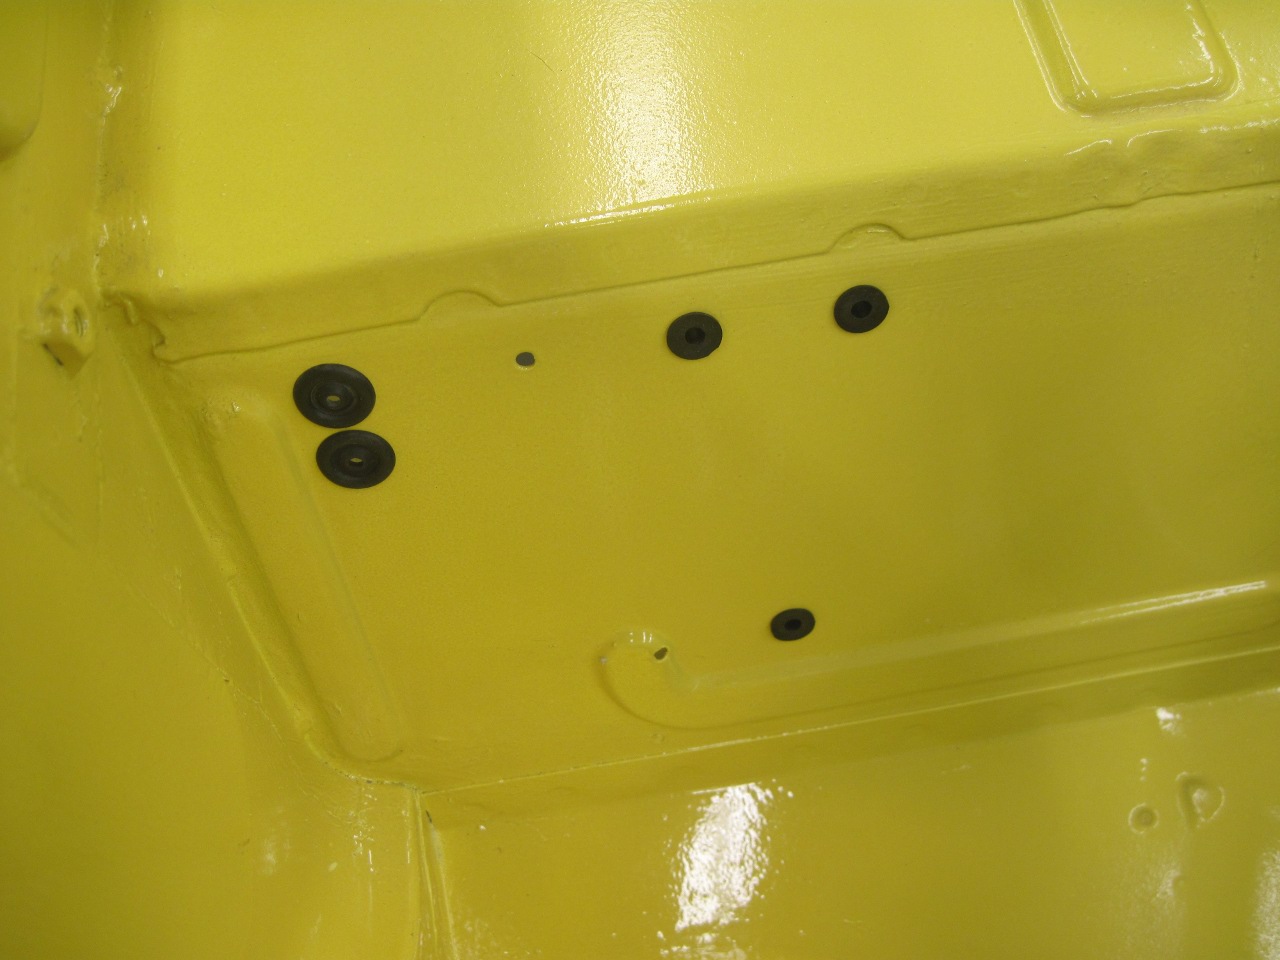
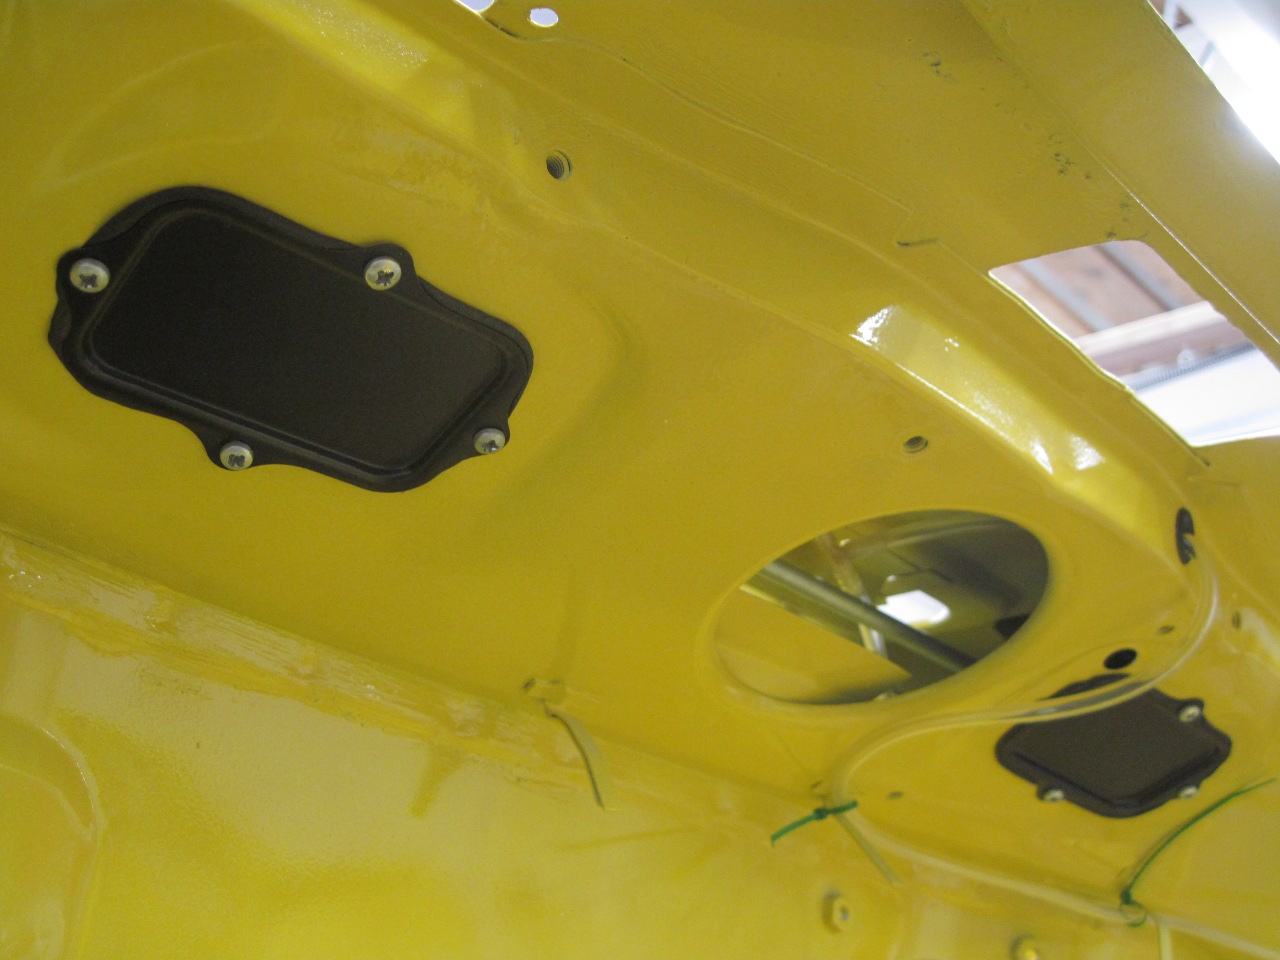
The wheel boxes get installed through small access openings on the underside of the cowl.

The
washer tubing really needs to be hooked up to the brass bezel tubes
before the bezels are inserted into the cowl. Trying to do it
through that tiny opening would be near impossible. Washer tubing
from each bezel goes to a T fitting that stays in the cowl.
Next
up was the guide tubes for the wiper cable. These all mainly go
inside the cowl, so there isn't a good way to get a good picture of
them. It's a fiddly job, all done through the small access ports.
The tubes were all new, so the one that connects to the wiper
motor had to be carefully bent to the right curve. That was good
for an hour or so of trial and error. Any kinks in the curved
tube or elsewhere will drag on the cable, and the system has to be
aligned such that the force to push or pull the cable through the tubes
and wheel boxes doesn't exceed six pounds. Any more could stall
the motor. It's tough to get a scale in place to measure the pull
force, but I finally got the force down to a little under five pounds.
But it wasn't easy.
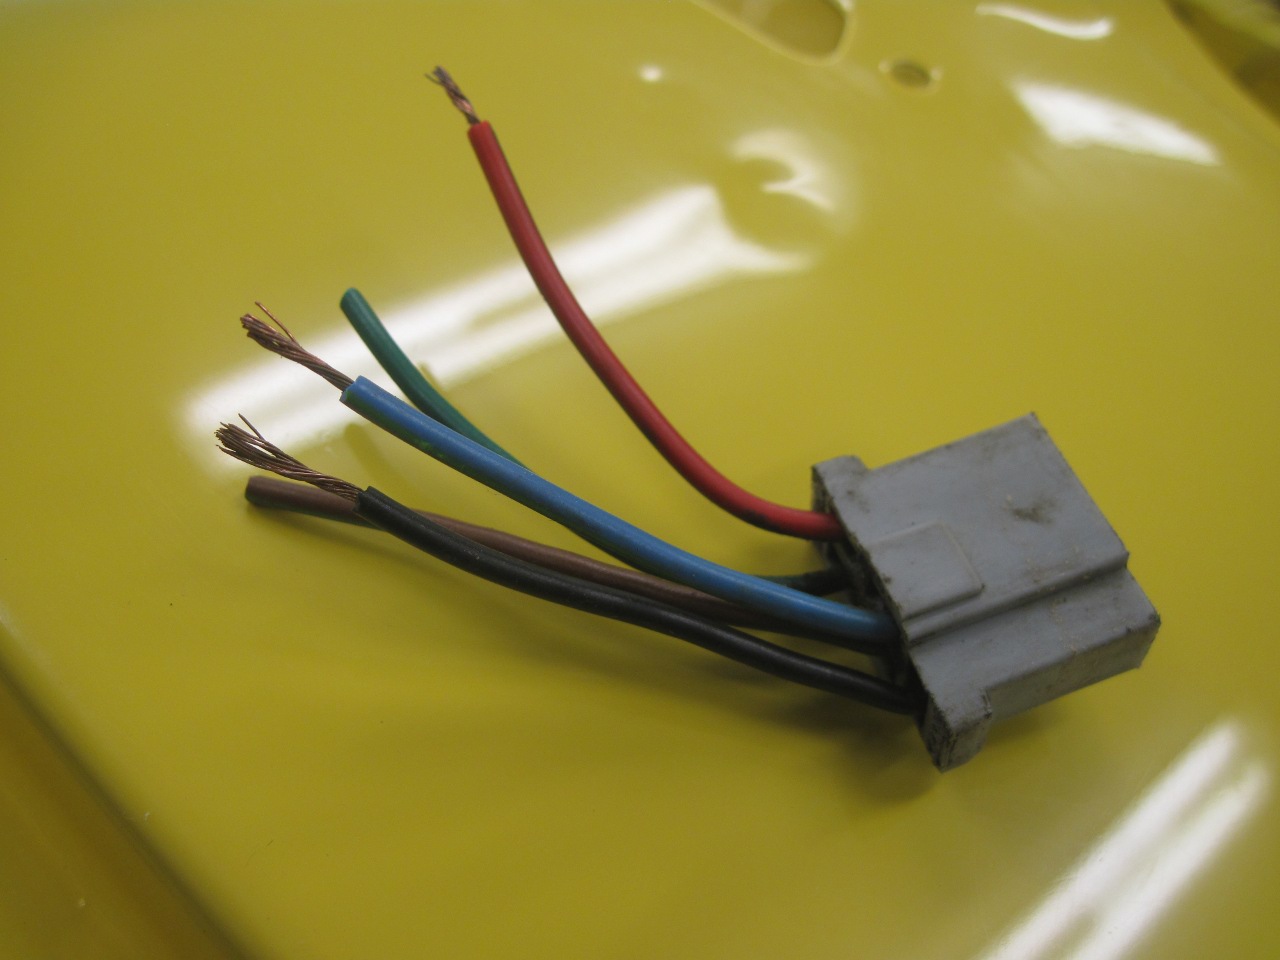
I retrieved the rebuilt wiper motor
and connected the mechanical cable to it. To test the system, I
hacked the connector from the wiring harness and bared the leads for
the high and low speed operation. I jumped the leads to a 12 volt
battery charger and exhaled a sigh of relief when the wiper stubs began
to oscillate in good wiper fashion.
It was a milestone to be sure, but I didn't really want to button up the cowl until the washer stuff was wrapped up.
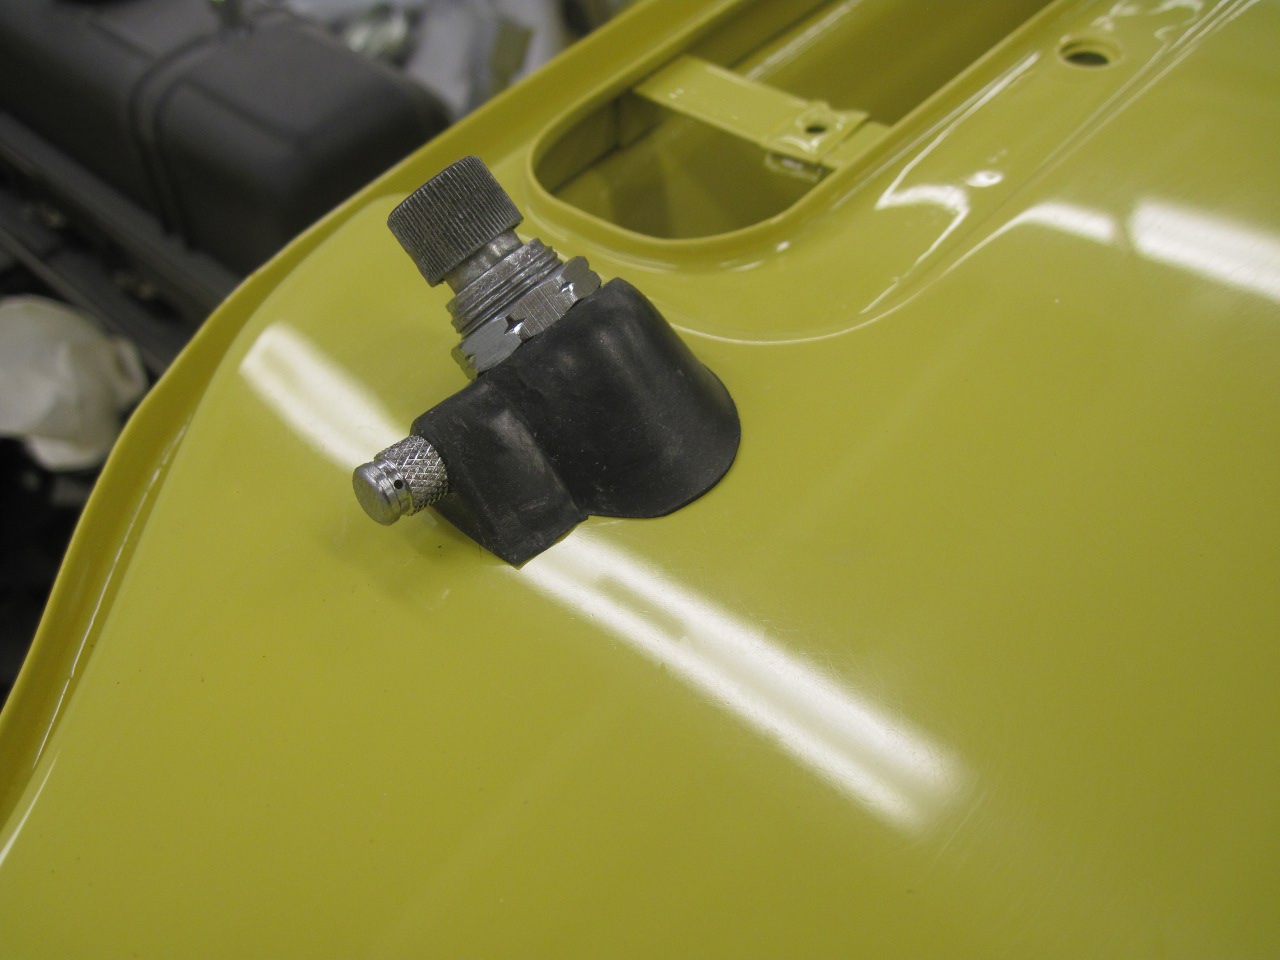
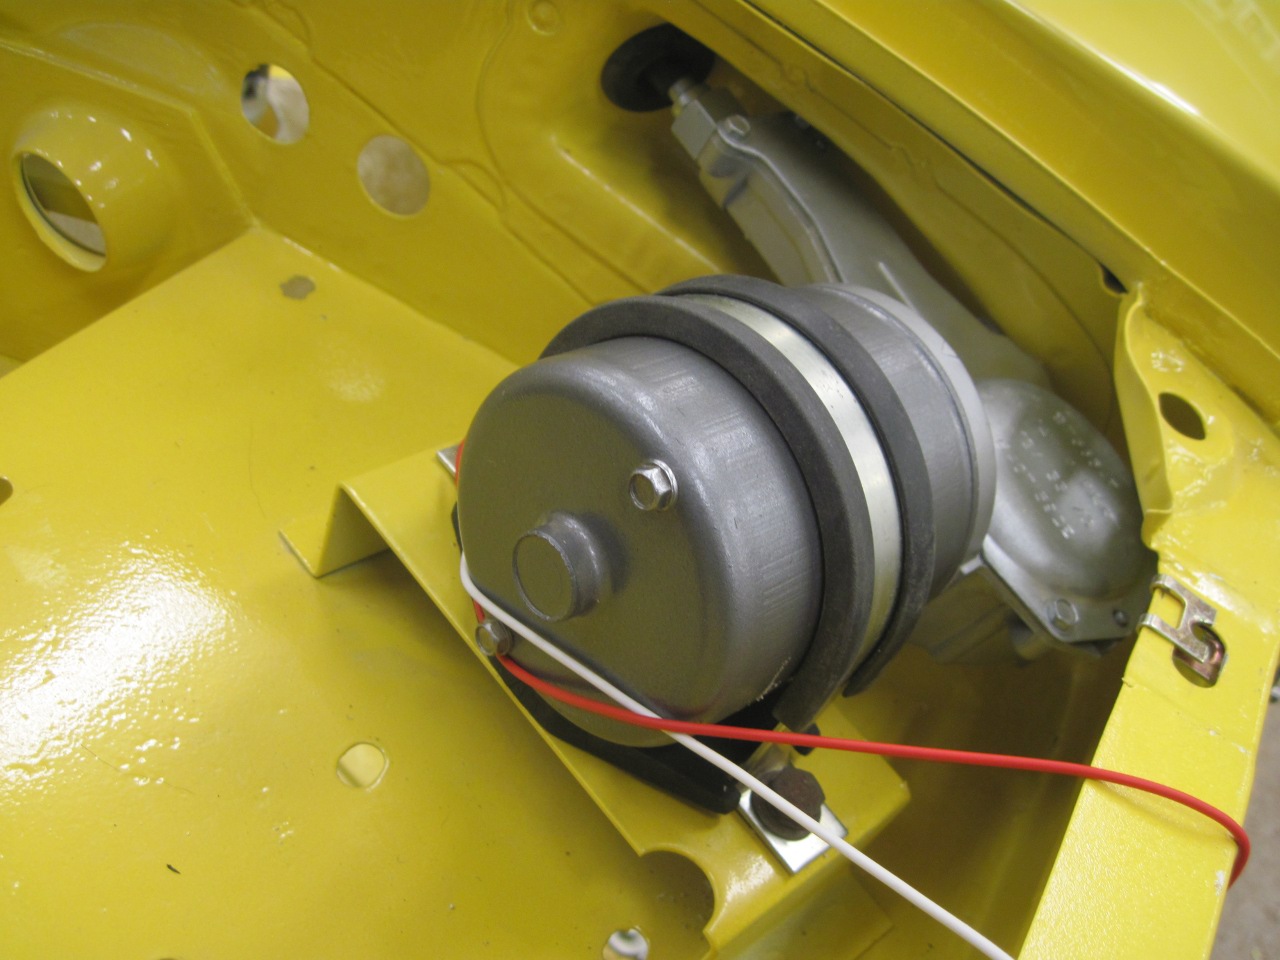
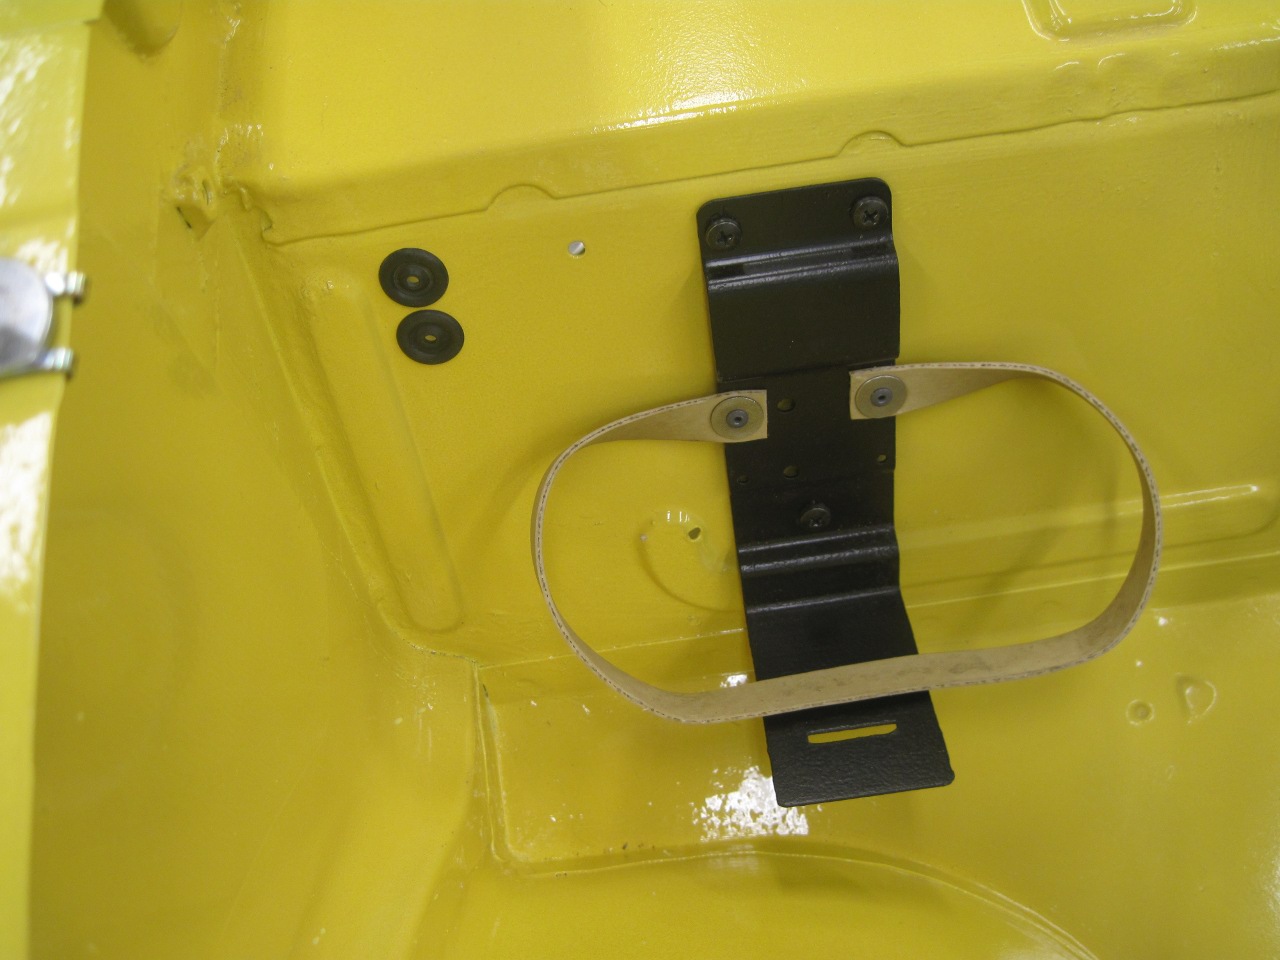
The washer bottle and pump goes on the right side of the car (for LHD models).
The
bottle bracket is fixed to the tub with three little resilient
fasteners called Rawl screws. The hard rubber part is inserted
into the panel hole, and when the screw is tightened down, the rubber
mushrooms on the backside of the panel, fixing the fastener in place.
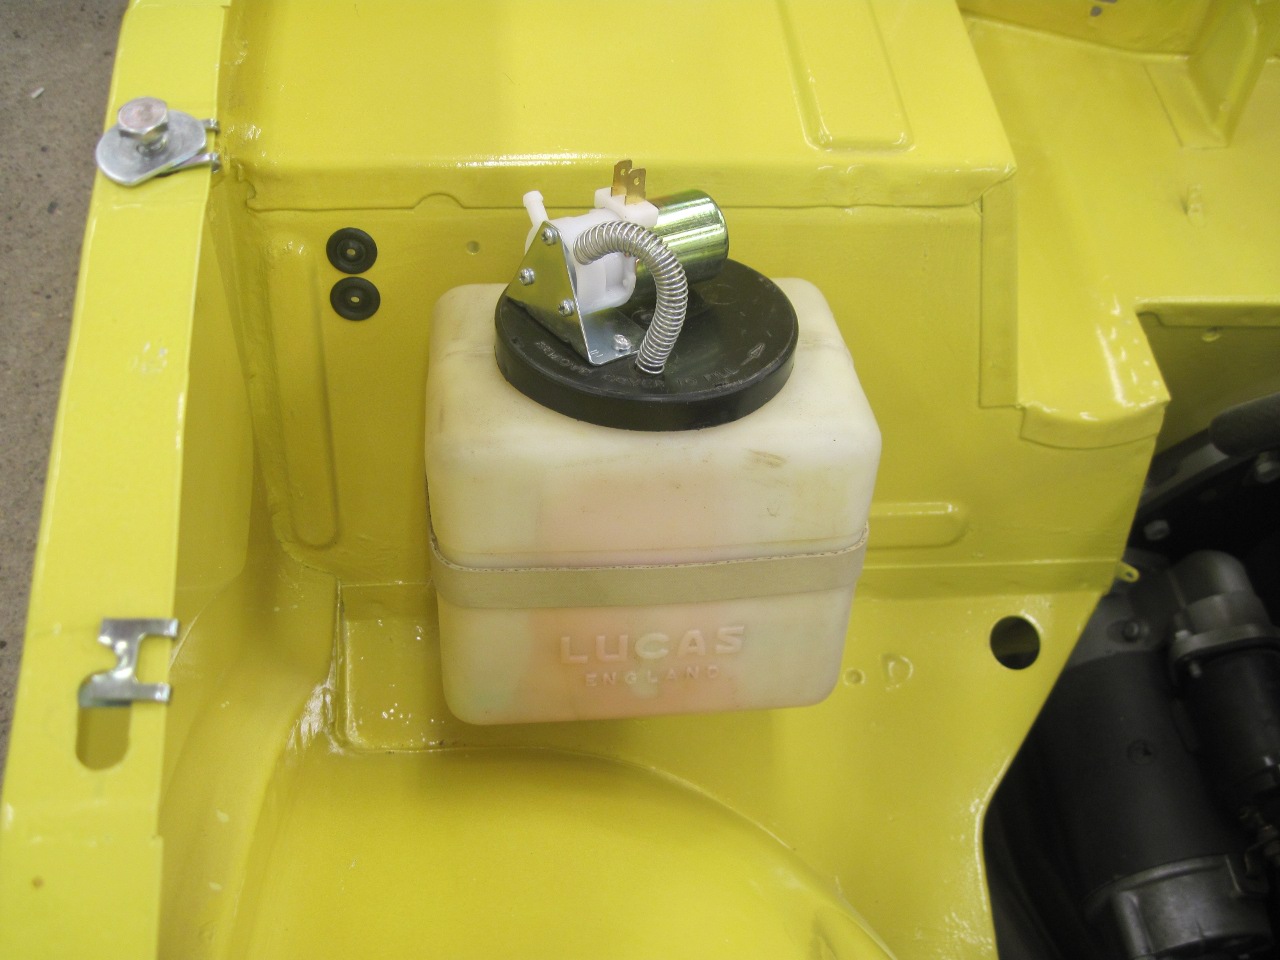
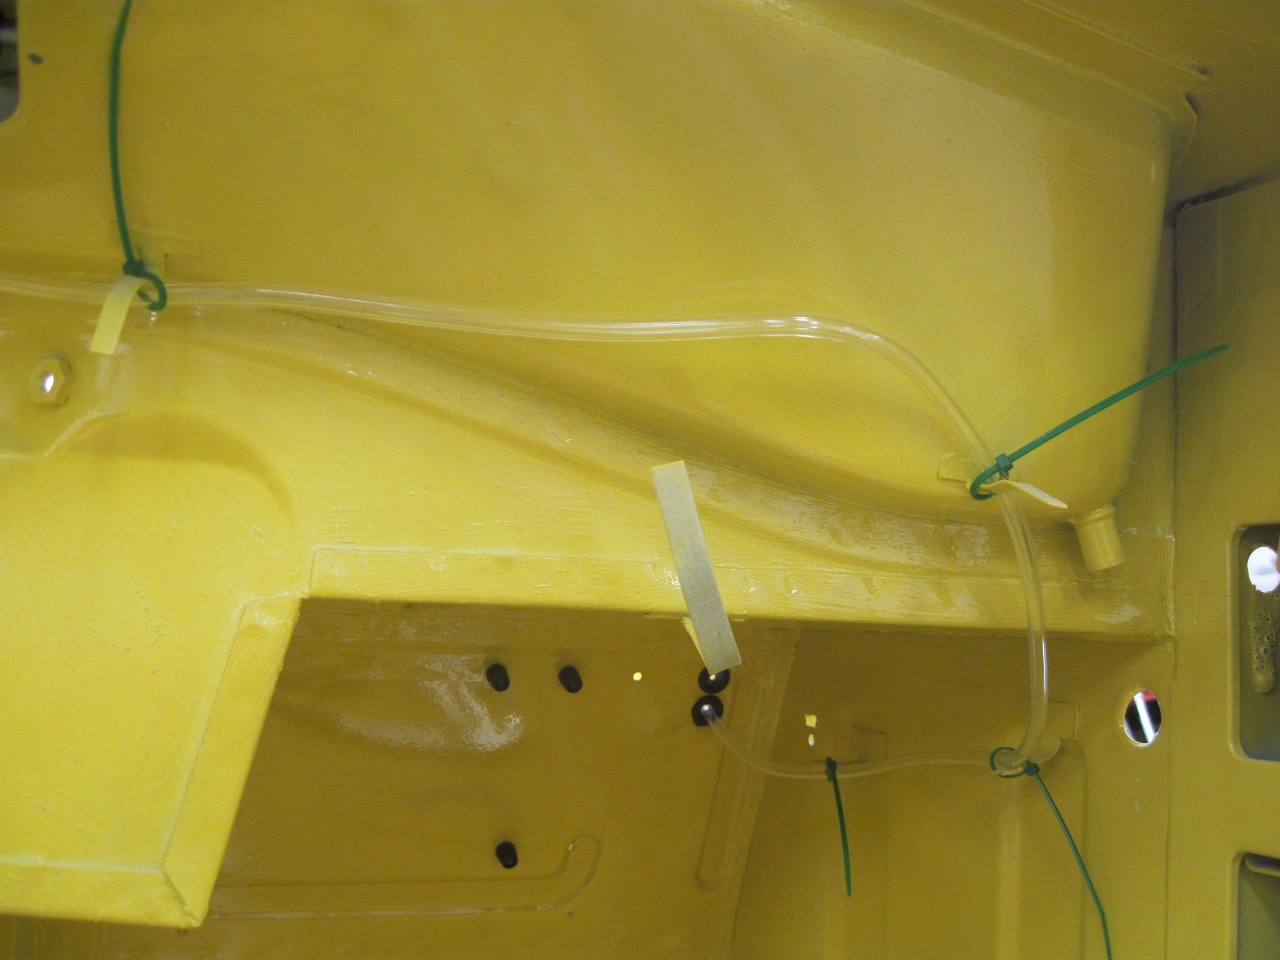
The washer tube was then routed through a hole in the cowl, along the firewall, and finally through a grommet to the pump.


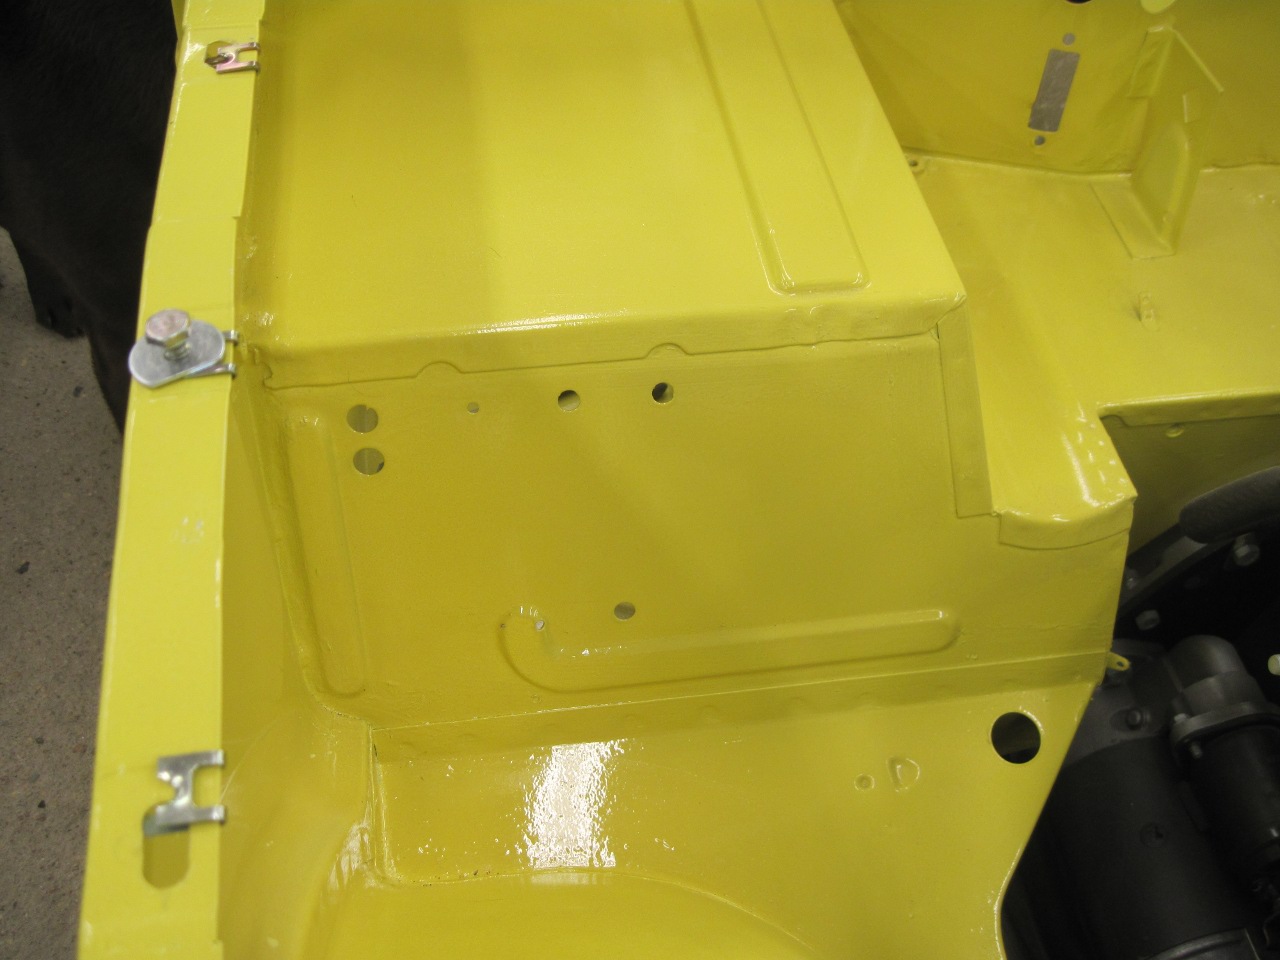
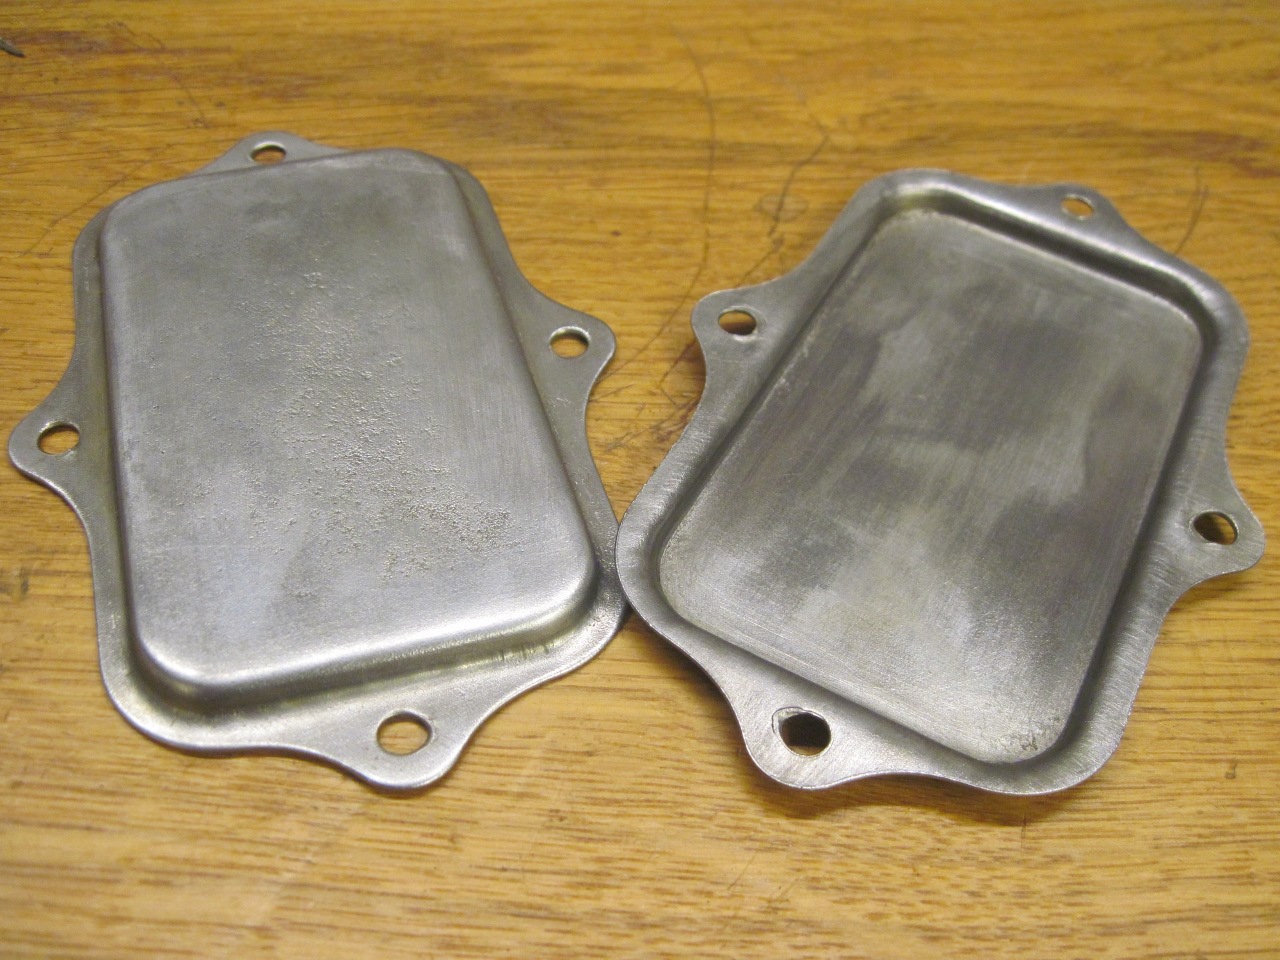
The
only thing left to do was to install the covers over the cowl access
openings. They were pretty rusty, and had hardened sealant around
the edges.

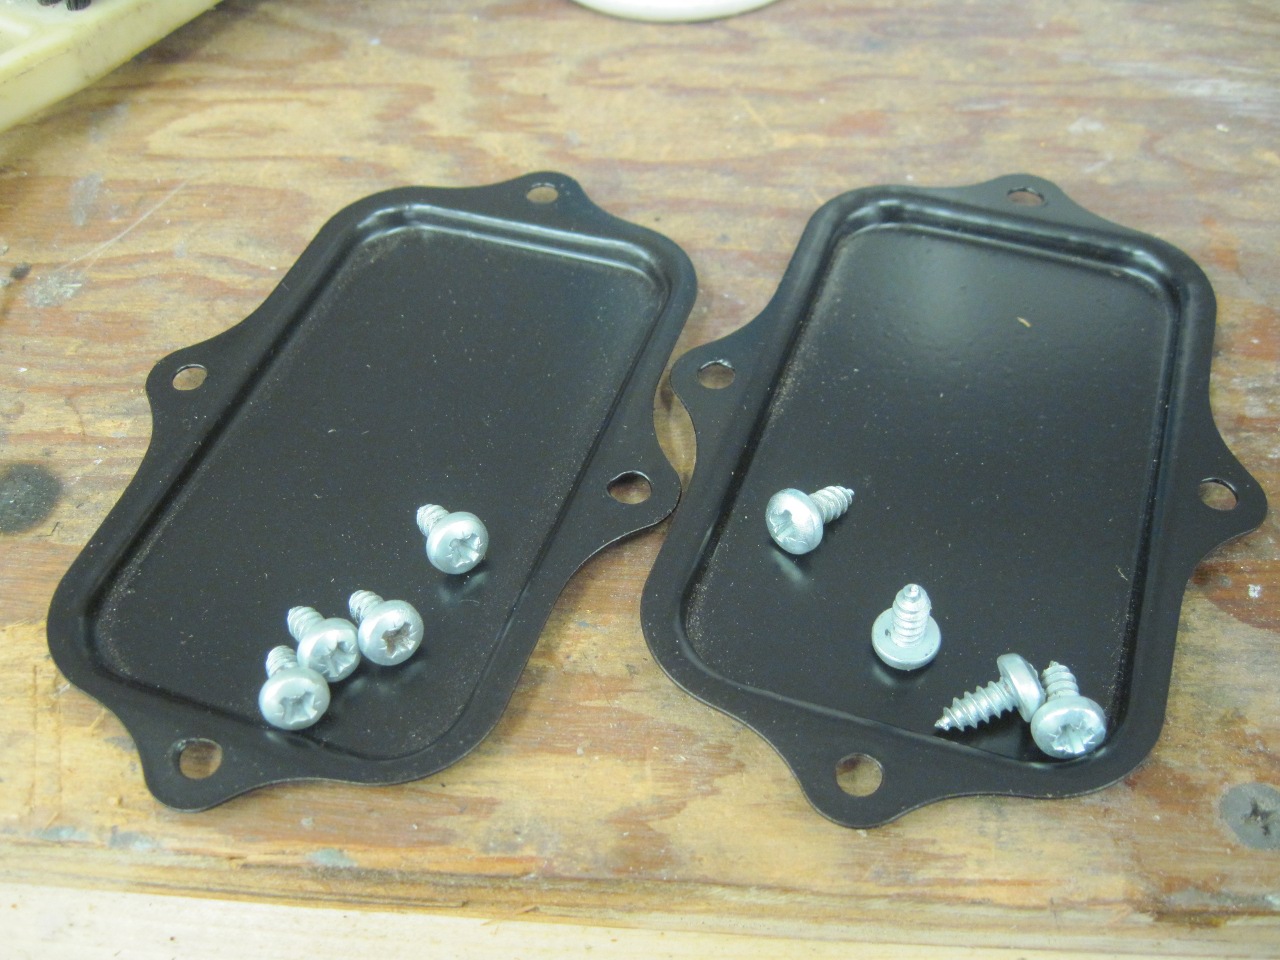
They
cleaned up well, and got powder coated. I like to reuse sheet
metal screws like these if I can. New screws may have a finer or
coarser thread, which increases the liklihood of stripped holes.
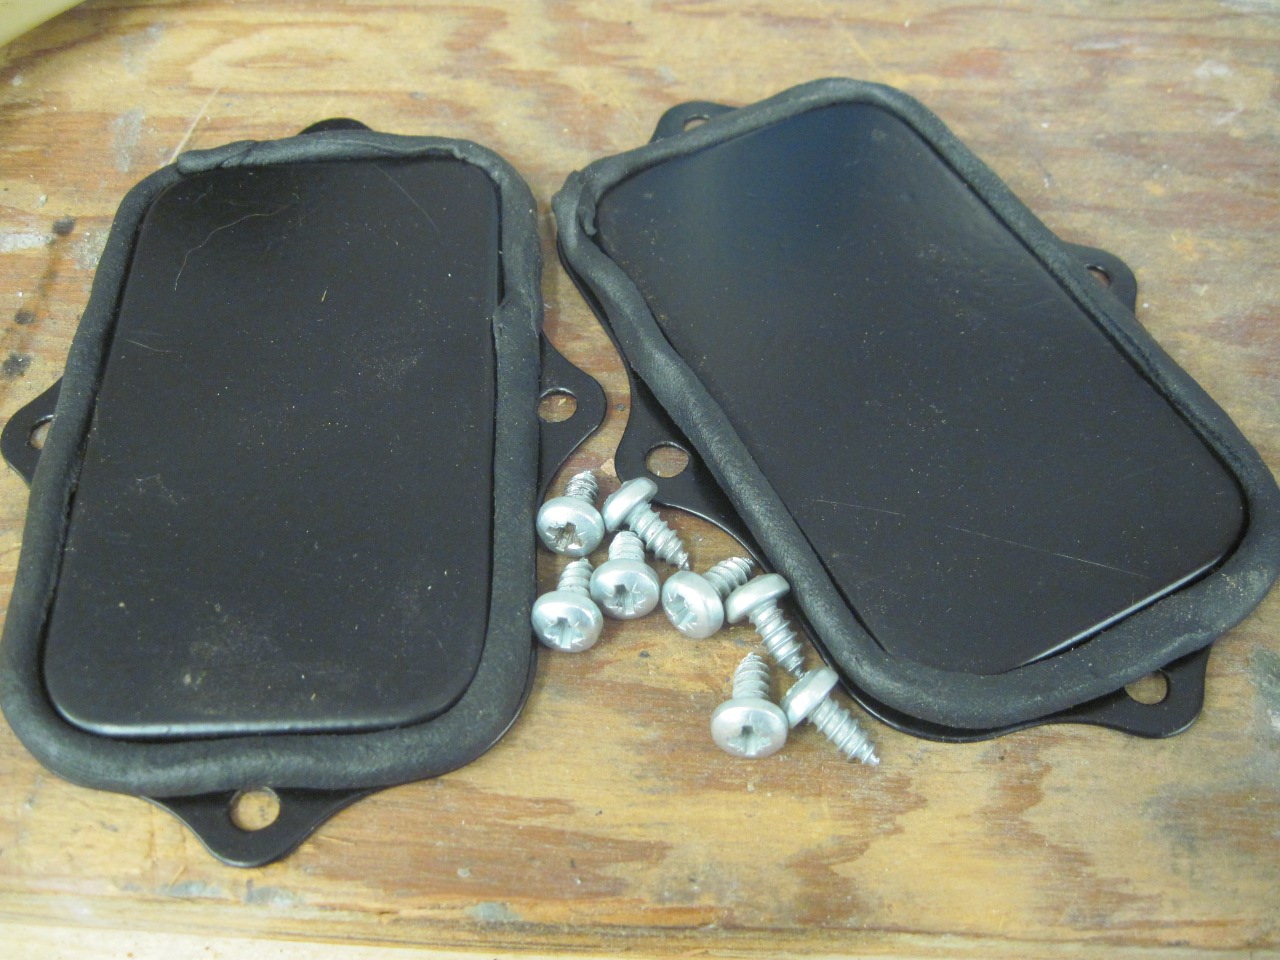
These were derusted and replated. Strip caulk was applied
around the flanges.
Working
on the wipers has got to be one of the more unpleasant jobs on this
project. The parts are finicky, access is very limited, and I
think the motor is barely powerful enough for a system in good working
order. One good thing about unpleasant jobs, though--the feeling
is that much better when you're finished!
Comments to Ed at elhollin1@yahoo.com
To my other TR6 pages