To my other TR6 pages
March 23, 2019
Wheel Alignment
Even
though the TR6, like any other car, is basically just a four wheel cart
with front wheels that turn, the actual geometry of the wheel
suspension is really a little more complex. To maintain safe
handling. especially at high speeds, and provide good tire life, the
alignment if the wheels in all dimensions is critical. Though
there are several more things that can be measured, there are only two
things on the TR6 suspension that can be easily adjusted--the toe-in
and the camber. This is true for both the front and rear wheels.
For
a pair of wheels (front pair or rear pair), toe-in specifies how much
closer the front of the wheels are than the rear of the wheels.
Camber specifies how much a wheel is leaning in towards the
center of the car (negative camber), or away from it (positive camber).
Toe-in is normally measured in fractions of an inch, while camber
is in degrees of angle.
Like many similar things, commercial
outfits that do wheel alignments would have us believe that this work
is well beyond what an ordinary human can comprehend, and that it takes
expensive and sophisticated equipment. This of course is the
Profit Motive talking. These organizations do use costly
equipment, but I'm convinced that it's mainly so that they can use
lower-skilled operators who may not necessarily understand the geometry
of what they are doing, and still get consistent results. The
fancy equipment also can surely make the job go quicker, which falls
right to the bottom line.
On the other hand, making these
measurements and adjustments is not, as they say, rocket science.
With some basic understanding of geometry, a little research and
some thought, it's easy to understand what's going on. One caveat
on that research part, though. While YouTube and other Internet
resources can be invaluable, they are also loaded with lousy
information--misleading at best, dead wrong at worst. I found a
number of YouTube videos with really bad information, and dozens of
comments saying so, yet the videos remain available. I pity the
seekers who watch these and neglect to read the comments.
Before
I started the alighment procedure, I checked the runout on each of the
45-year old wheels. Since some of the measurements will be to the
rim of the wheel, any significant runout could skew the results.
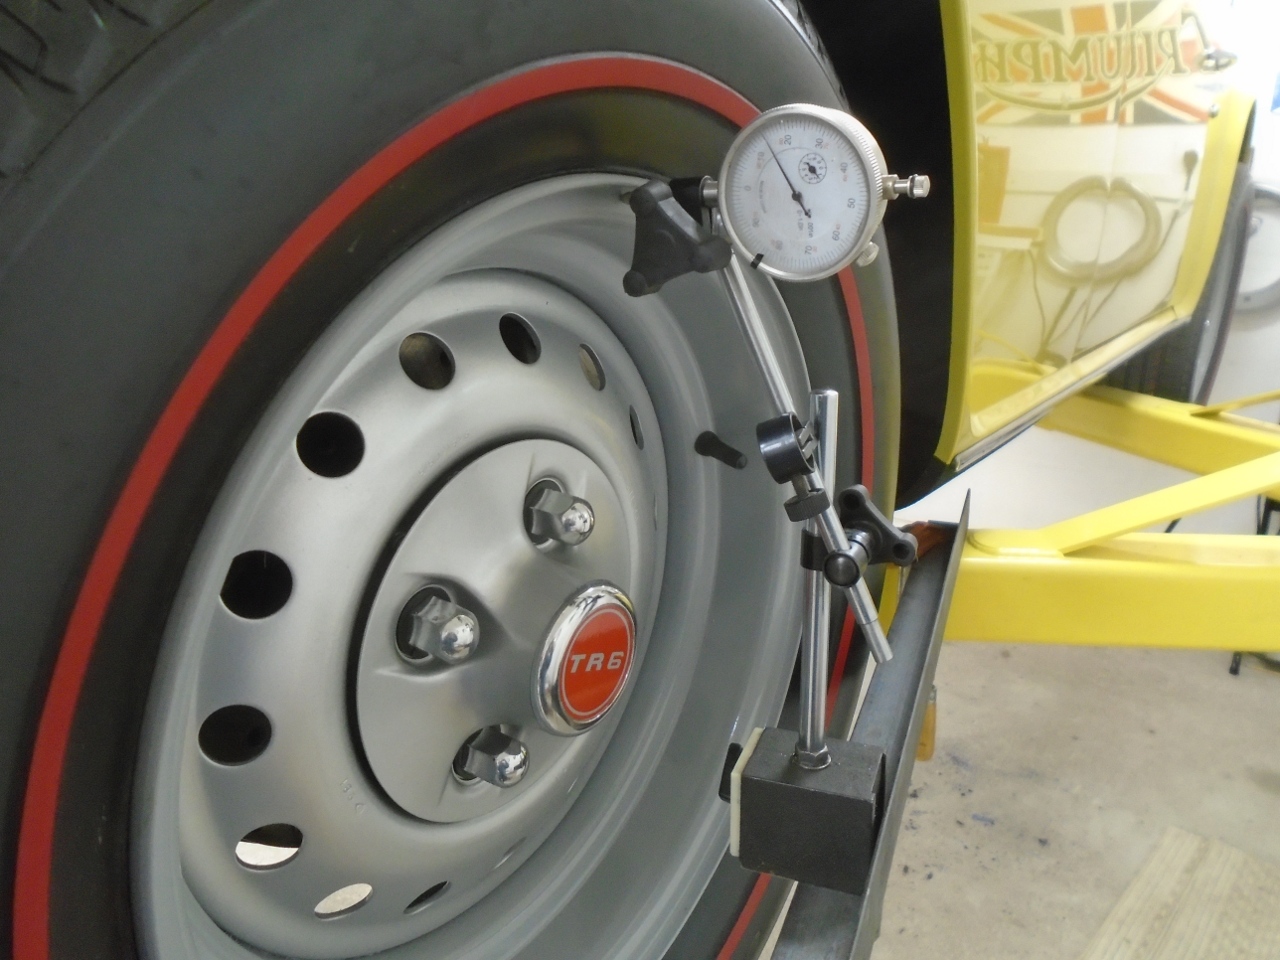
Four
of the five wheels had runouts in the neighborhood of 0.030" or
less. Since this is smaller than the tolerence allowed in the
alignmant settings, it should not be a big factor. The fifth
wheel had a runout almost triple that, maybe due to some violence in
its past, so I determined that this wheel would be for the spare.
Unfortunately, I already had one of my new tires mounted on it,
so it had to be swapped out. On all of the wheels, I marked the
high and low runout locations.
So, with four pretty round and flat wheels, it was time to press on.
There
are several approaches to a DIY alignment, but they all start
by establishing some kind of measuring reference line(s).
The commercial folks might use lasers fot this. I used a
taut stringline on each side of the car at axle height. The lines
were set parallel to each other and to the centerline of the car by
measuring at the front and rear.
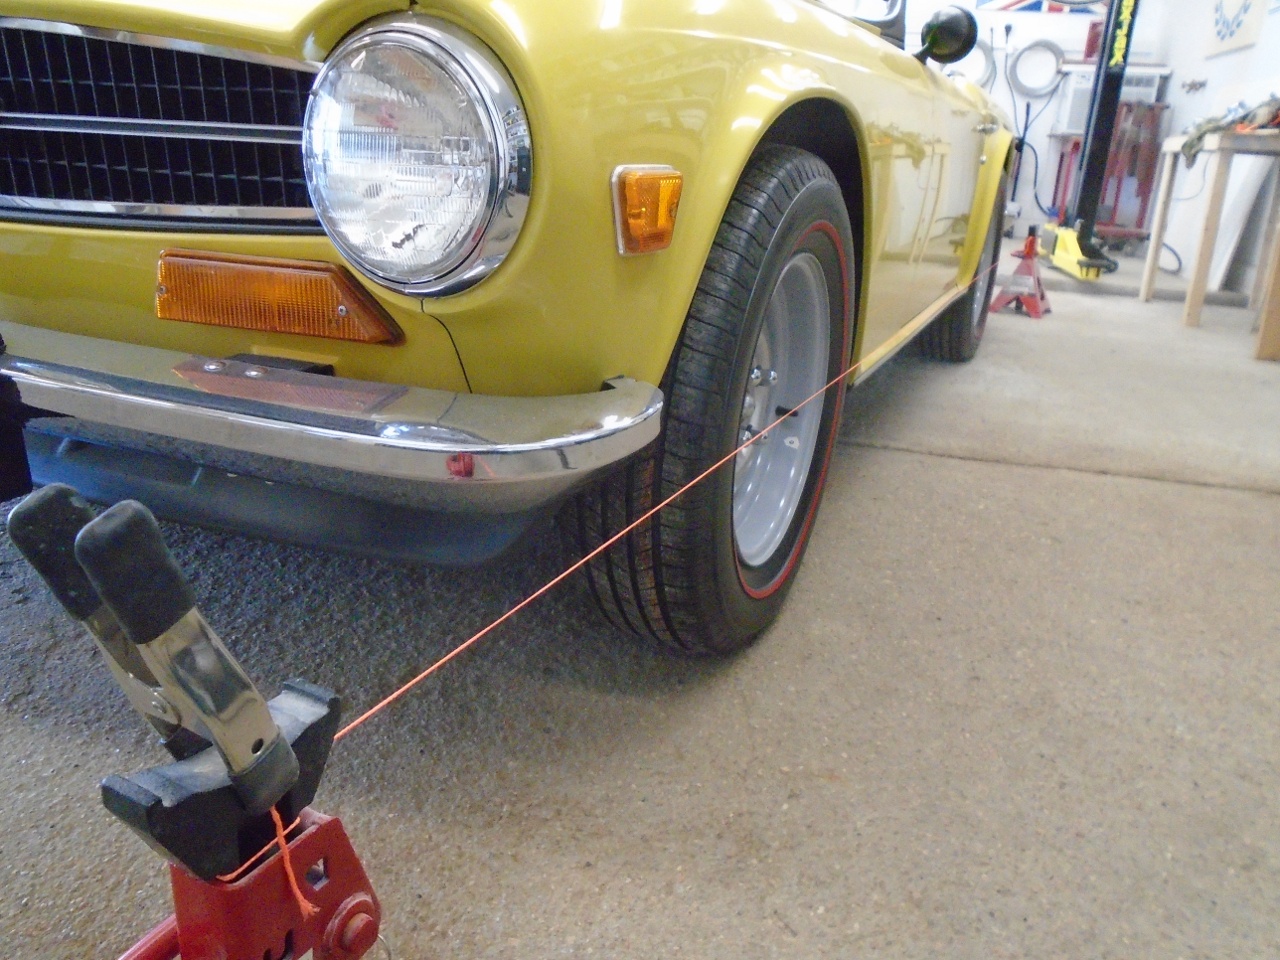
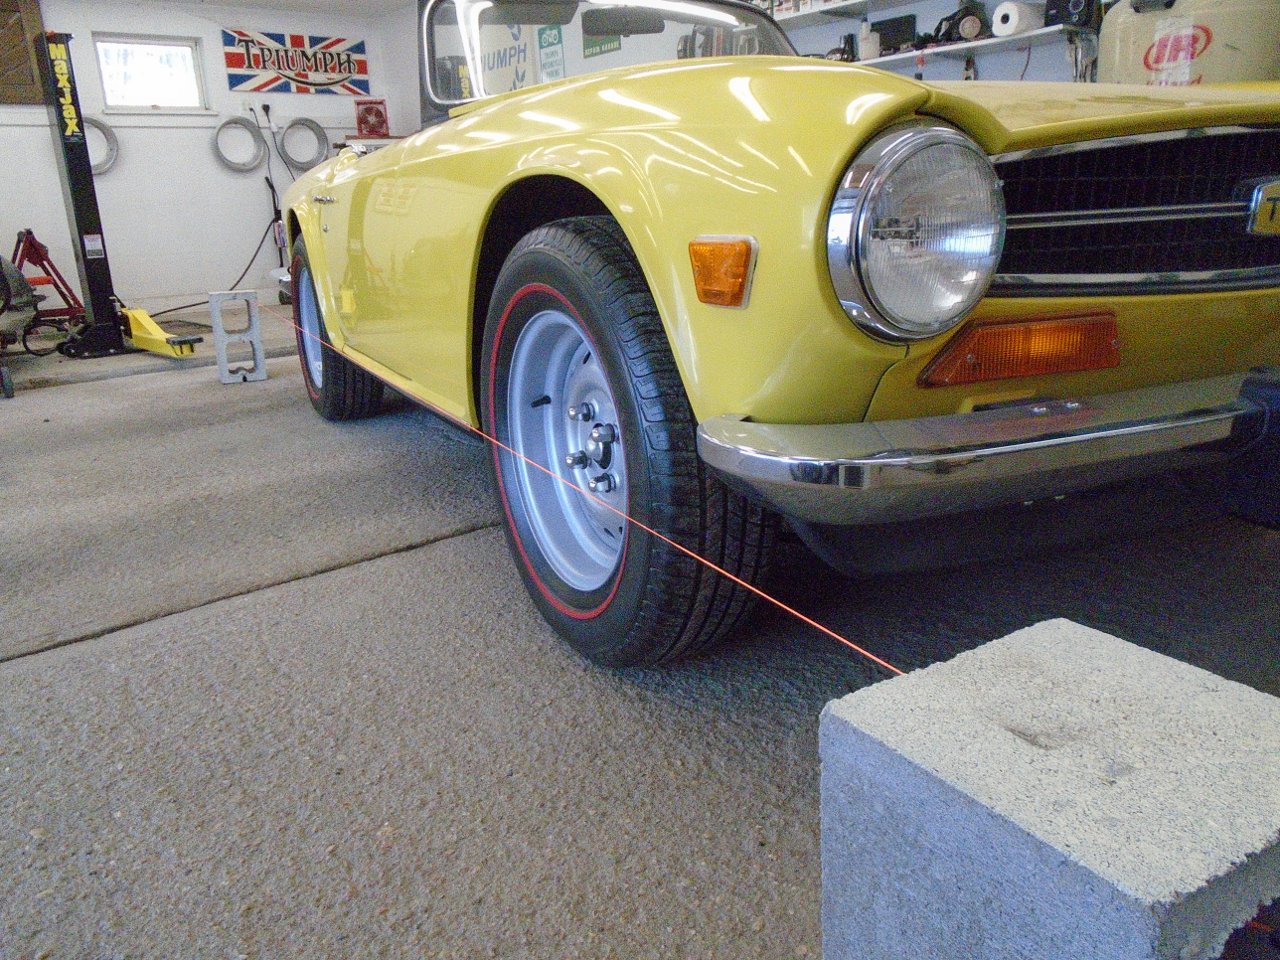
I
measured from the reference lines to the outer edge of the steel wheels
at axle level, and with a little arithmetic, was able to calculate the
distance between the leading edges of the wheels and the trailing
edges. The difference is an indication of toe-in (or toe-out).
I say "indication of" because toe in is normally specified at the
tire circumference. Since I had measured the toe-in closer to the
center of the wheel, my result had to be adjusted by a factor of about
1.5.
My rear wheels came out within tolerance (between 0 and
1/16" of toe-in). This was a little surprising considering all
the work that had been done to the frame and suspension, but I was
pretty careful to replace the trailing arm frame members in exactly the
same place as the originals, and to shim the mounts by the same amounts
as original.
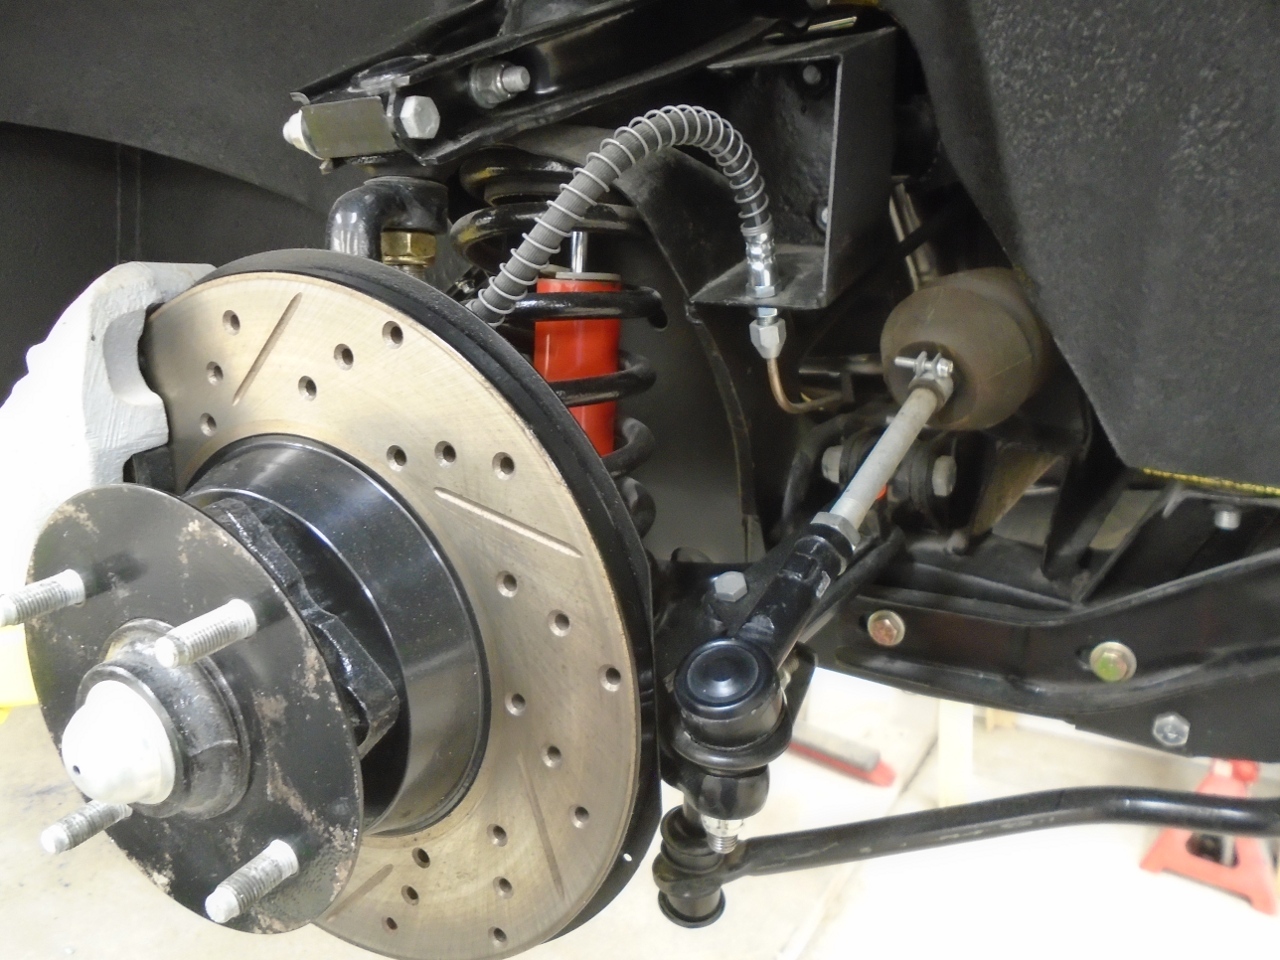
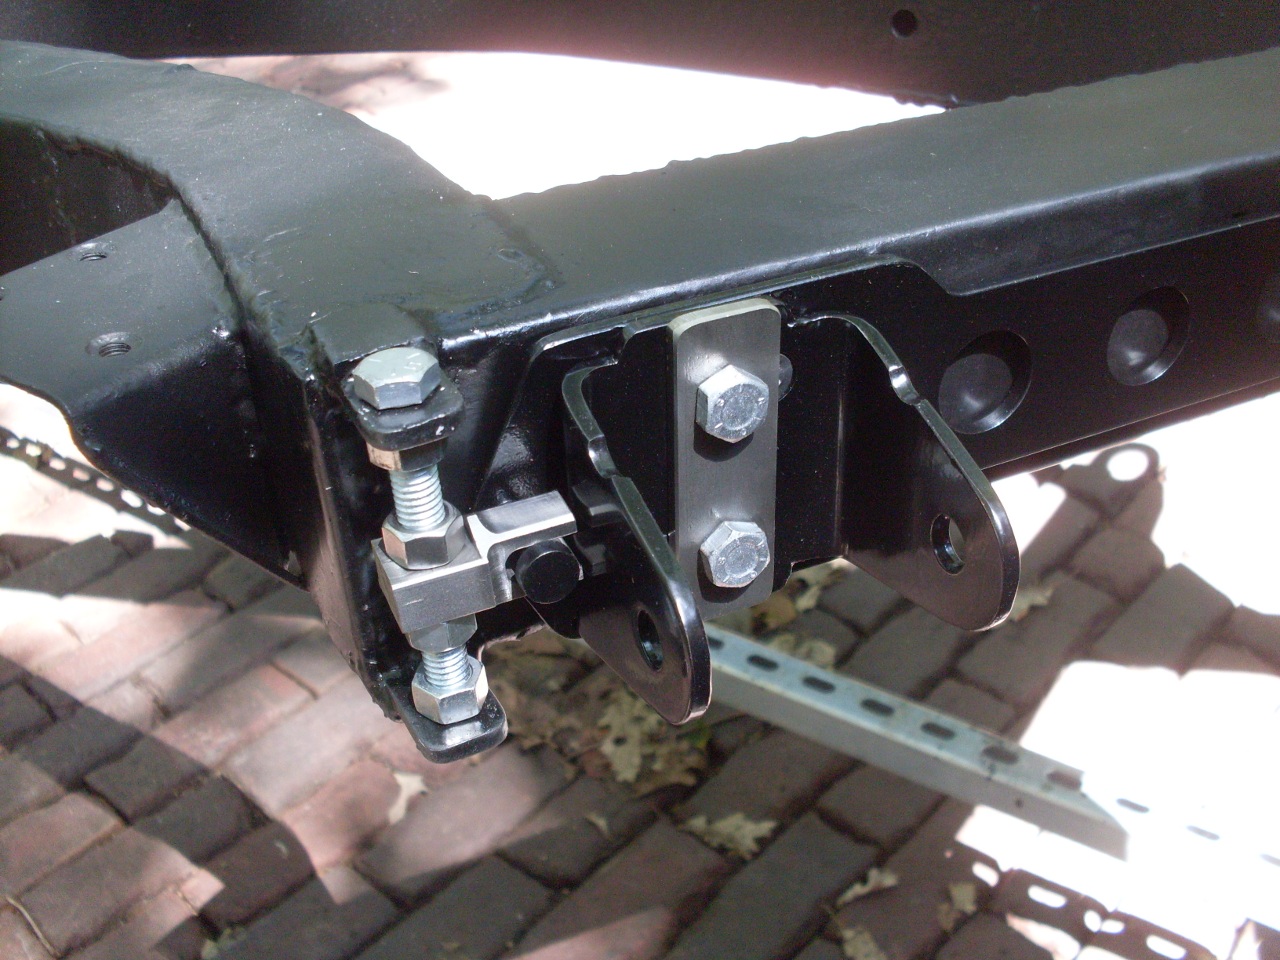
The front had to have some adjustment to the tie-rod ends to bring it within spec, though.
The
camber measurement is actually a little easier. I made this
"camber-meter" with just a length of steel angle, a couple of rare
earth magnets, and a digital angle gauge.
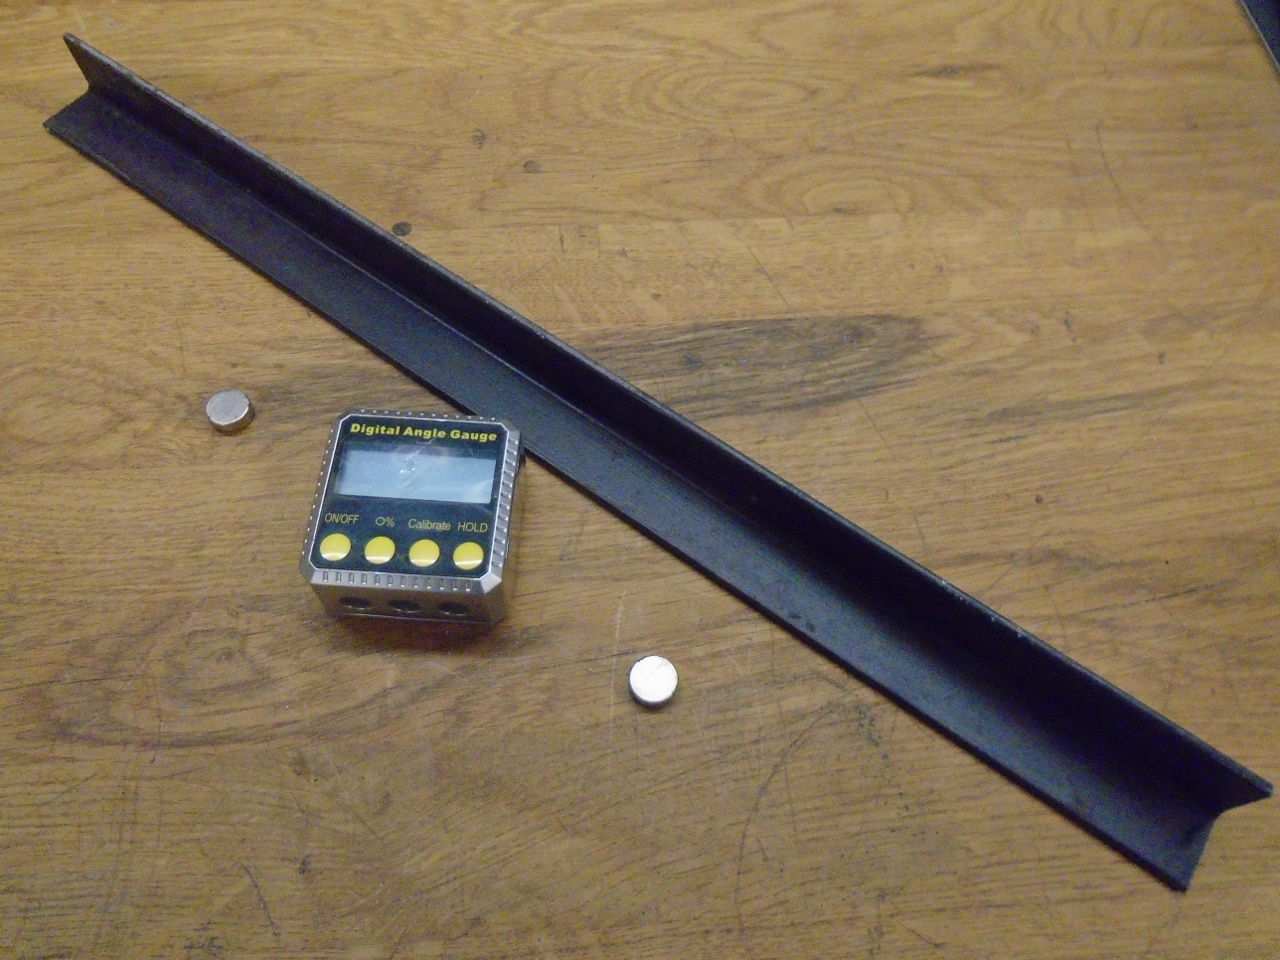
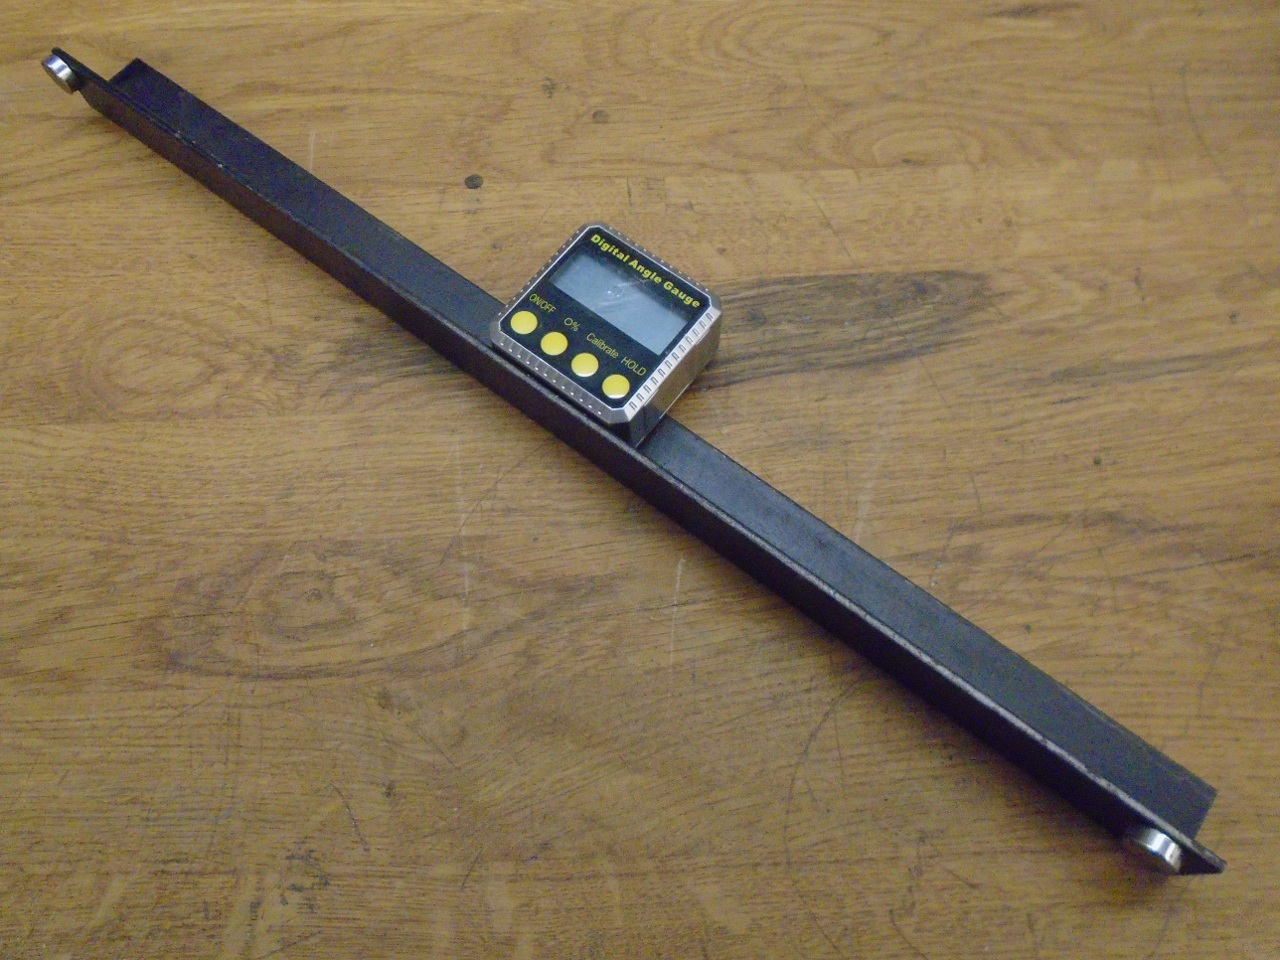
I calibrated the camber meter on a known vertical steel surface (checked with a level).

Then attached it to one of the wheels in a vertical position.
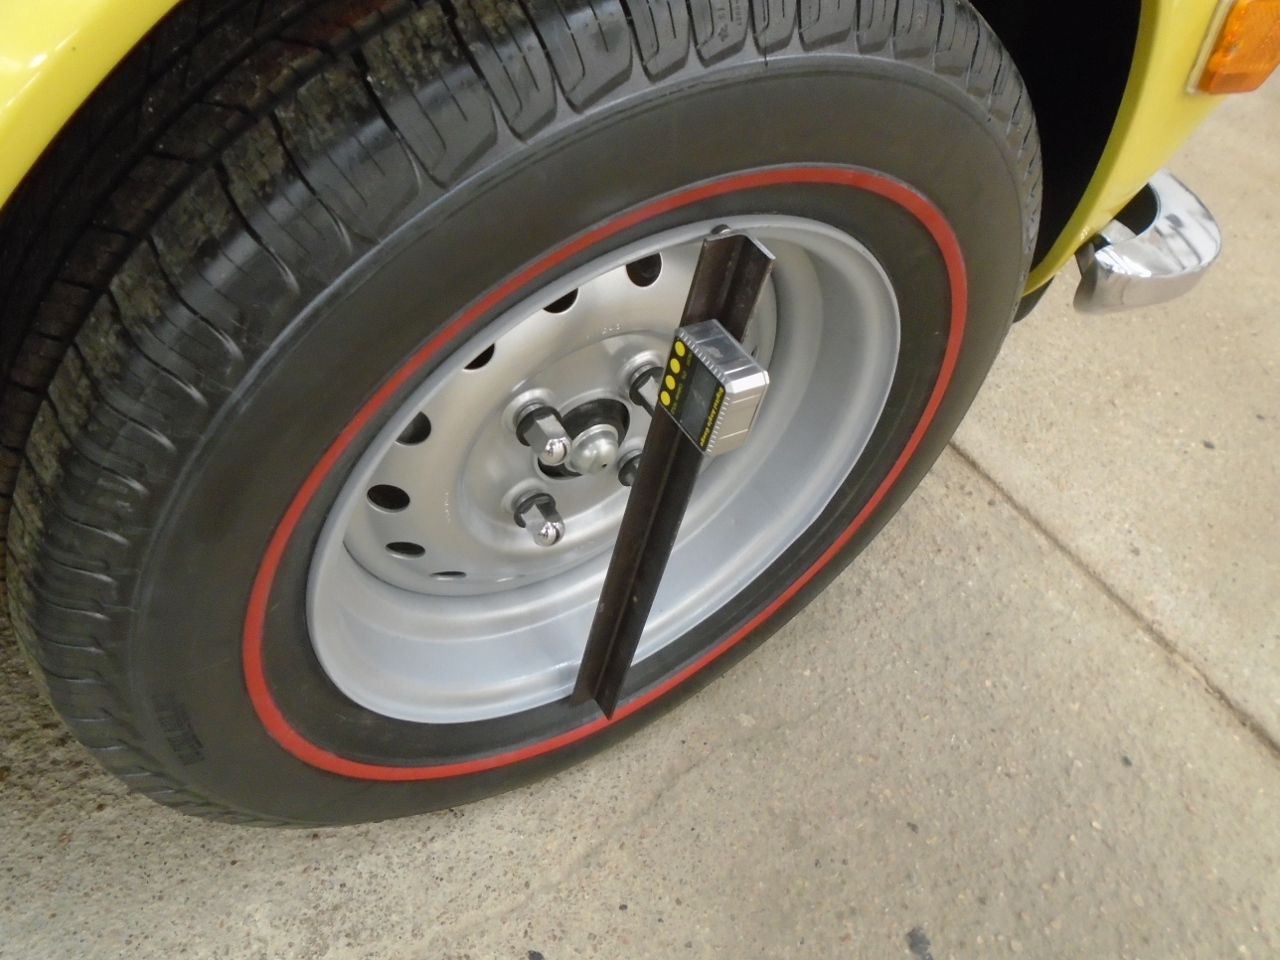
To
reduce any effect of the runout or other errors, I took eight
measurements on each wheel after rolling forward 1/8 turn each time,
and averaged them.
Again to my surprise, three of the four
wheels came out within spec (-0.75° to +0.25° for the front, -1.5° to
-0.5° for the rear). The right front measured about -1.25°, so it
was too negative. I removed one shim from the front and back
lower A-arm mounts. That reduced the negative camber by about 3/4
of a degree to put it in spec.

I
was a little disappointed that since the rear camber came out within
spec, that I didn't get to use my trick experimental rear camber
adjustment (about halfway down the page: http://bullfire.net/TR6/TR6-35/TR6-35.html). It still remains to be seen if it can hold the adjustment.

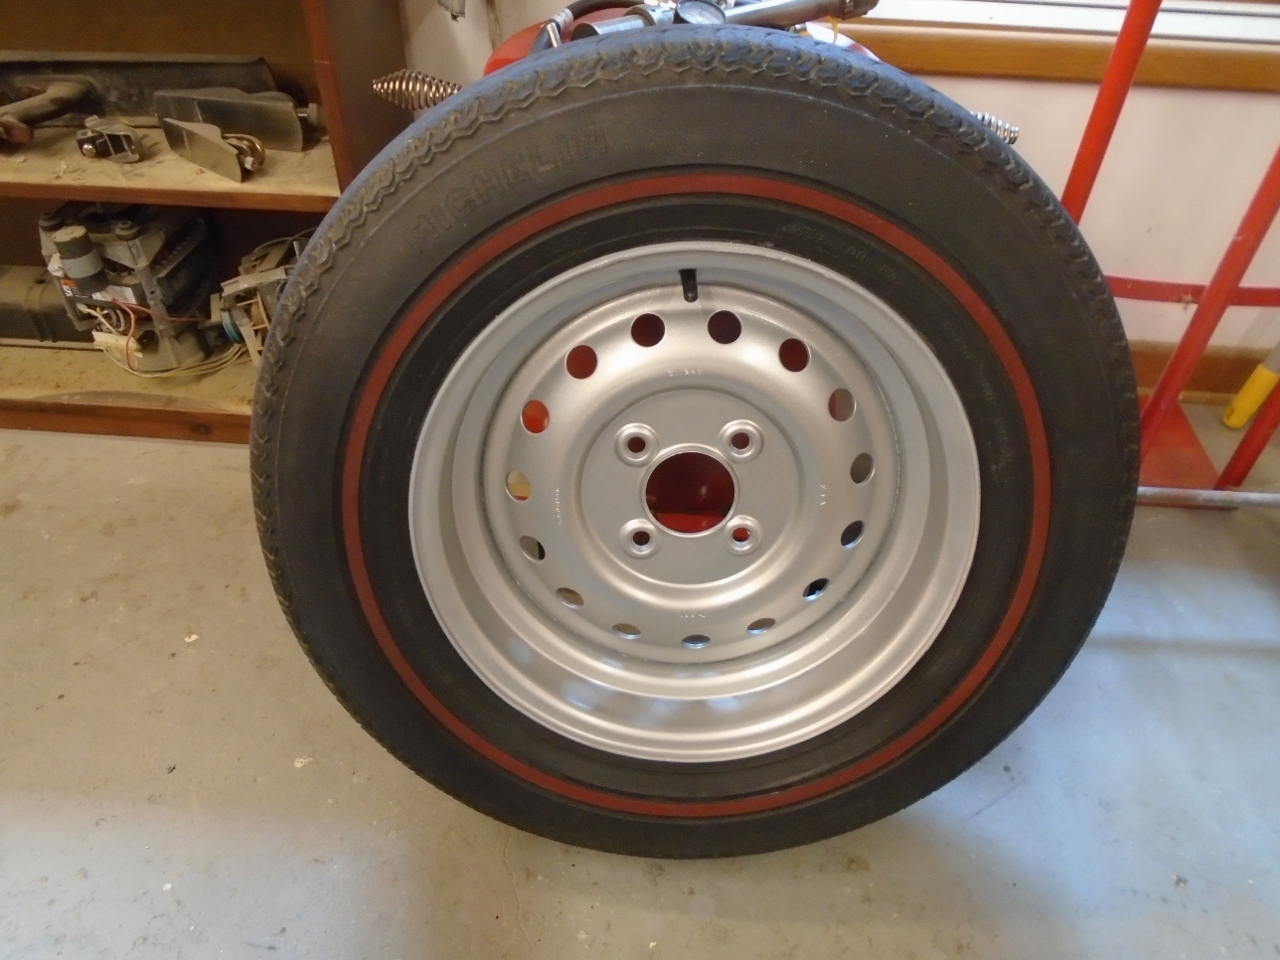
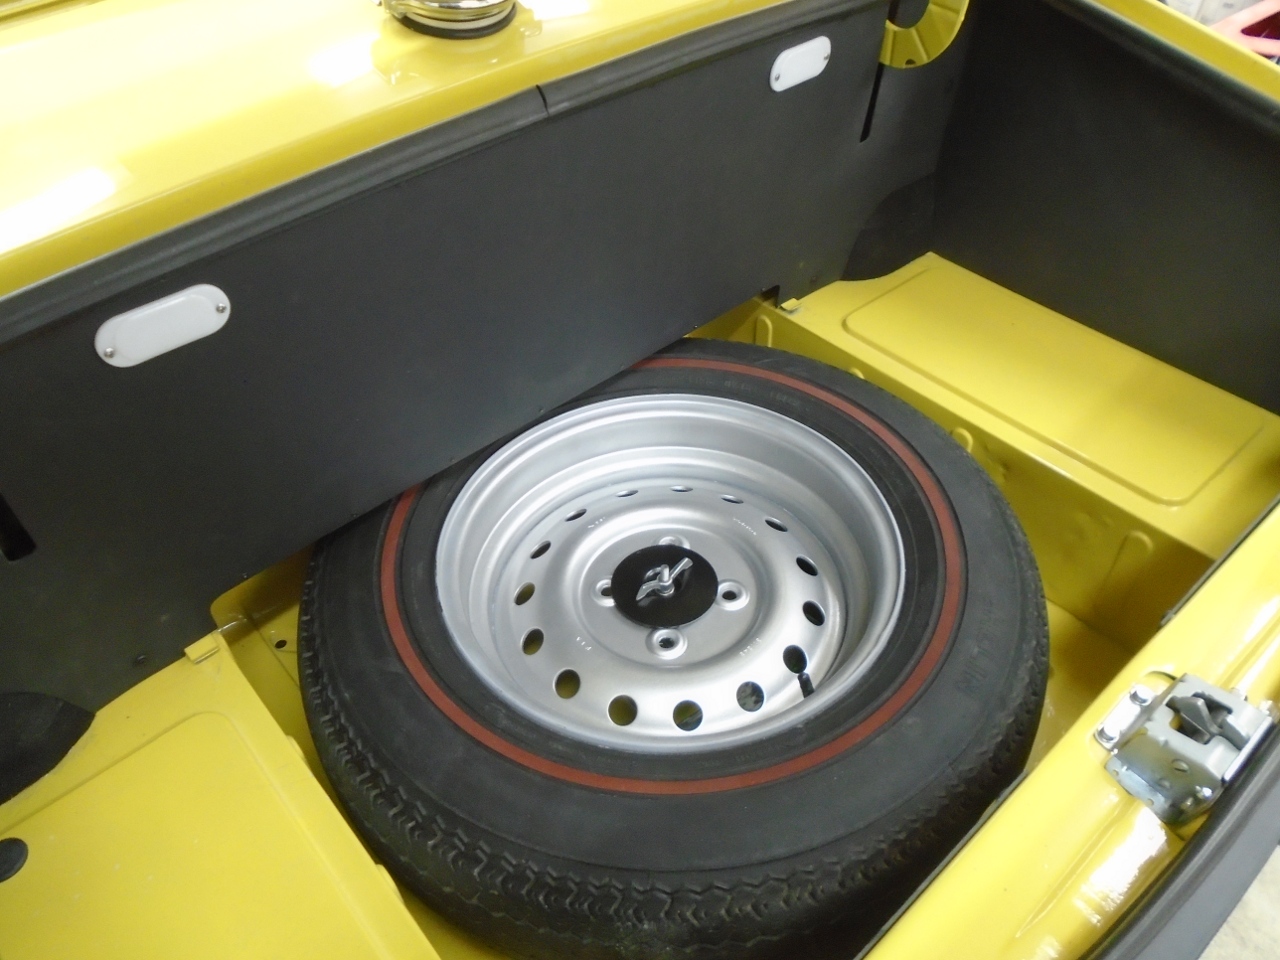
So,
with all four wheels now balanced and aligned, it's just the spare left
to attend to. I saved the best of the original tires to use as a
spare. It is 45 years old, and so well out of it's prime, but it
is still intact with decent tread left. I would never trust it to
go much distance, but as a limp-home spare, I think it will work.
Besides, it is a tube-type tire, so the tire itself doesn't even really
need to hold air.
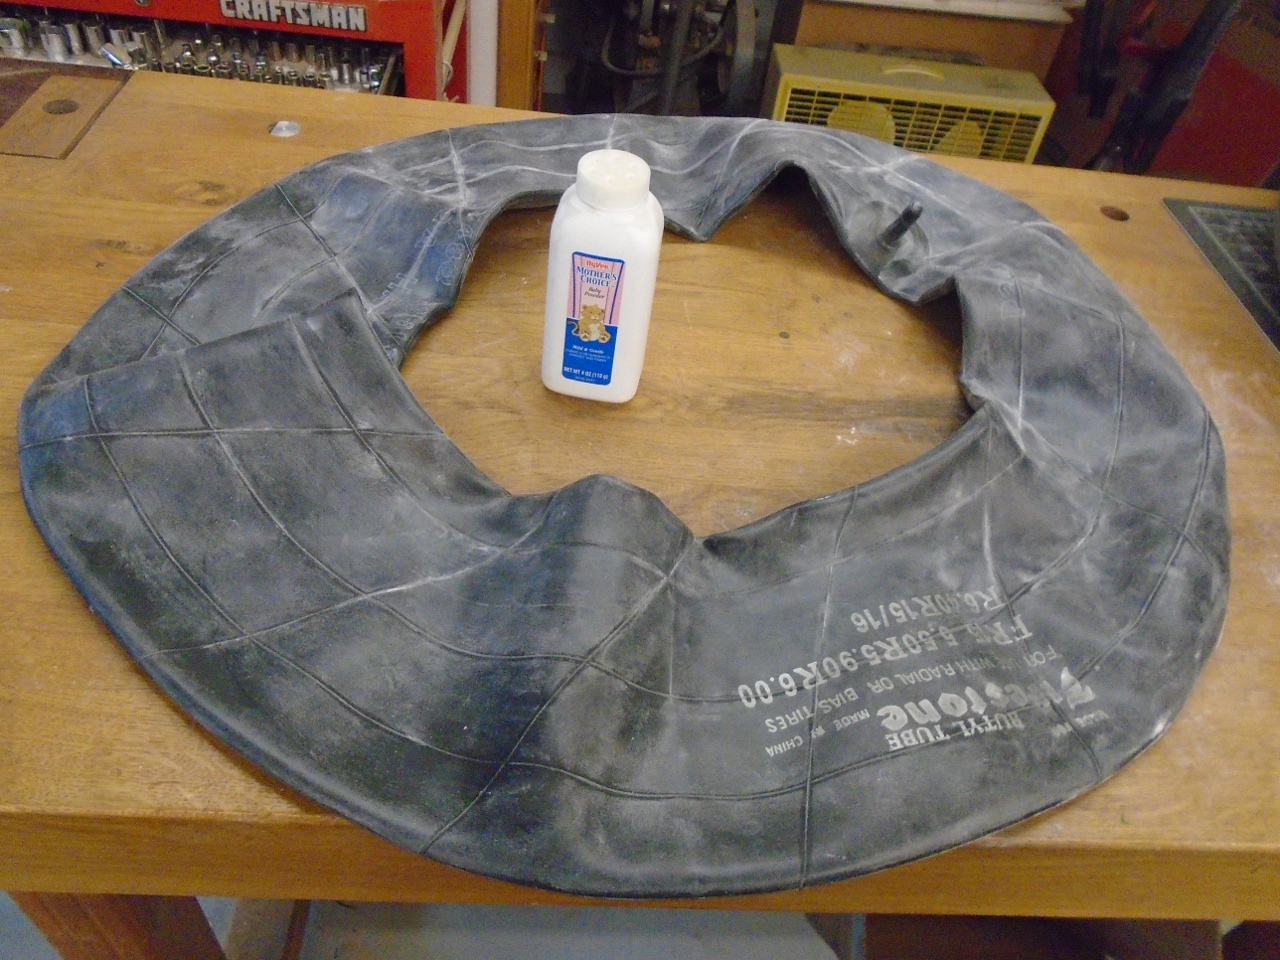
I managed to pinch through the tube when
mounting the tire, so I got a new tube, which was probably the right
move, anyway. I didn't realize how hard it would be to find a
passenger car inner tube locally. I finally had to order one.
The baby powder helps the tube to position itself inside the tire.
.
Hope I never have to use it.
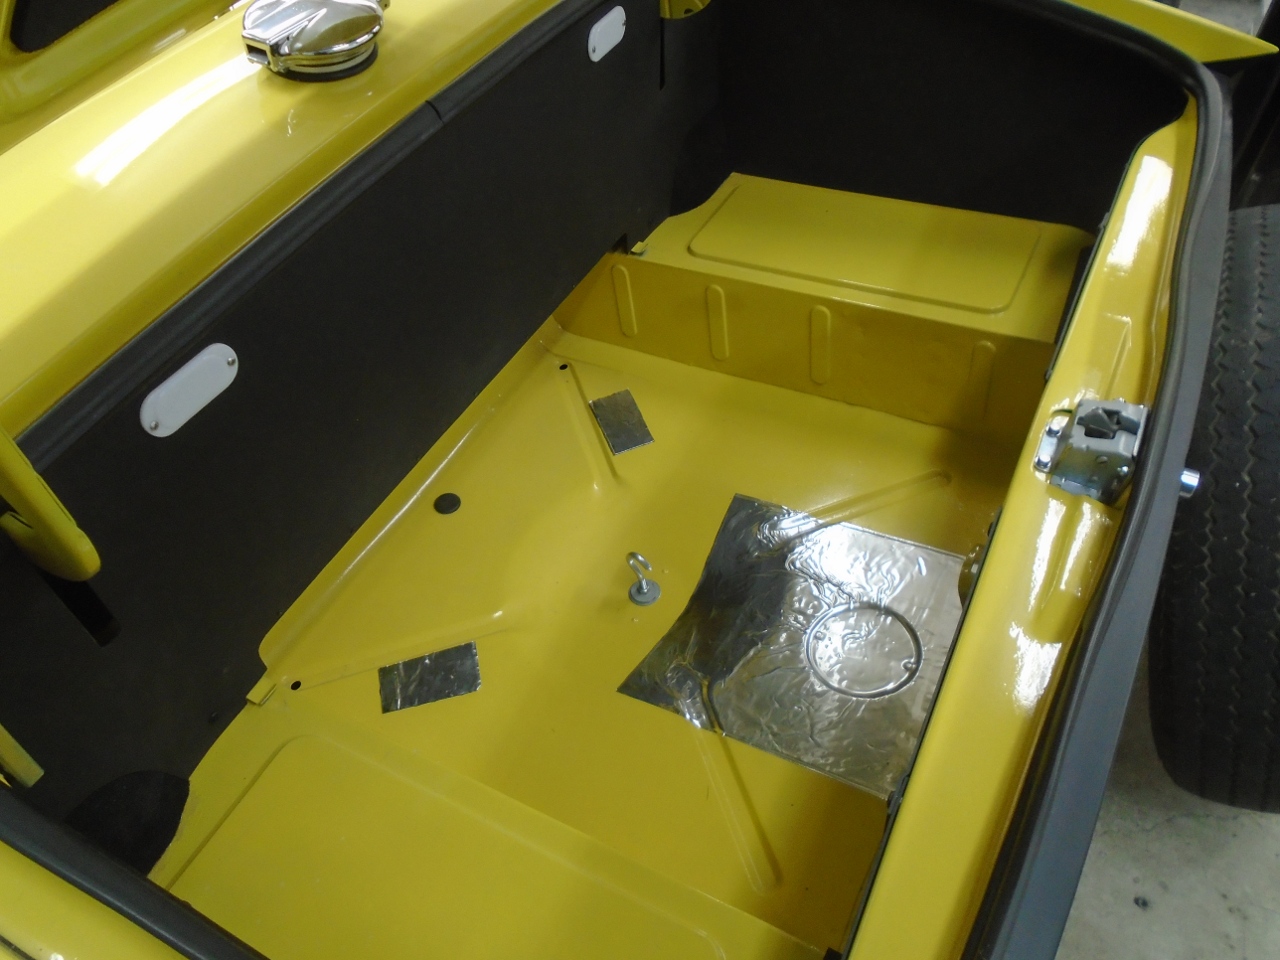
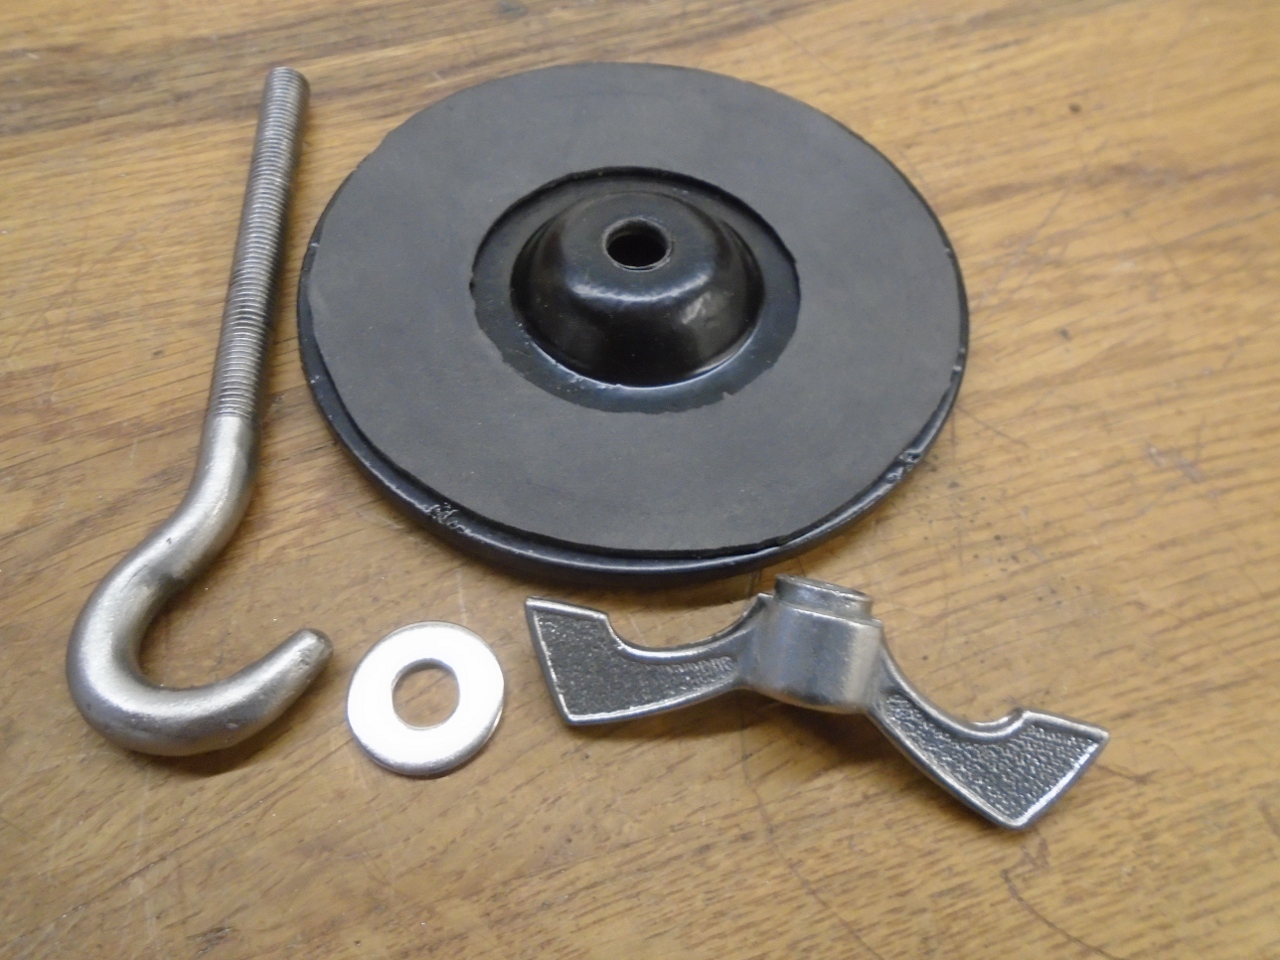
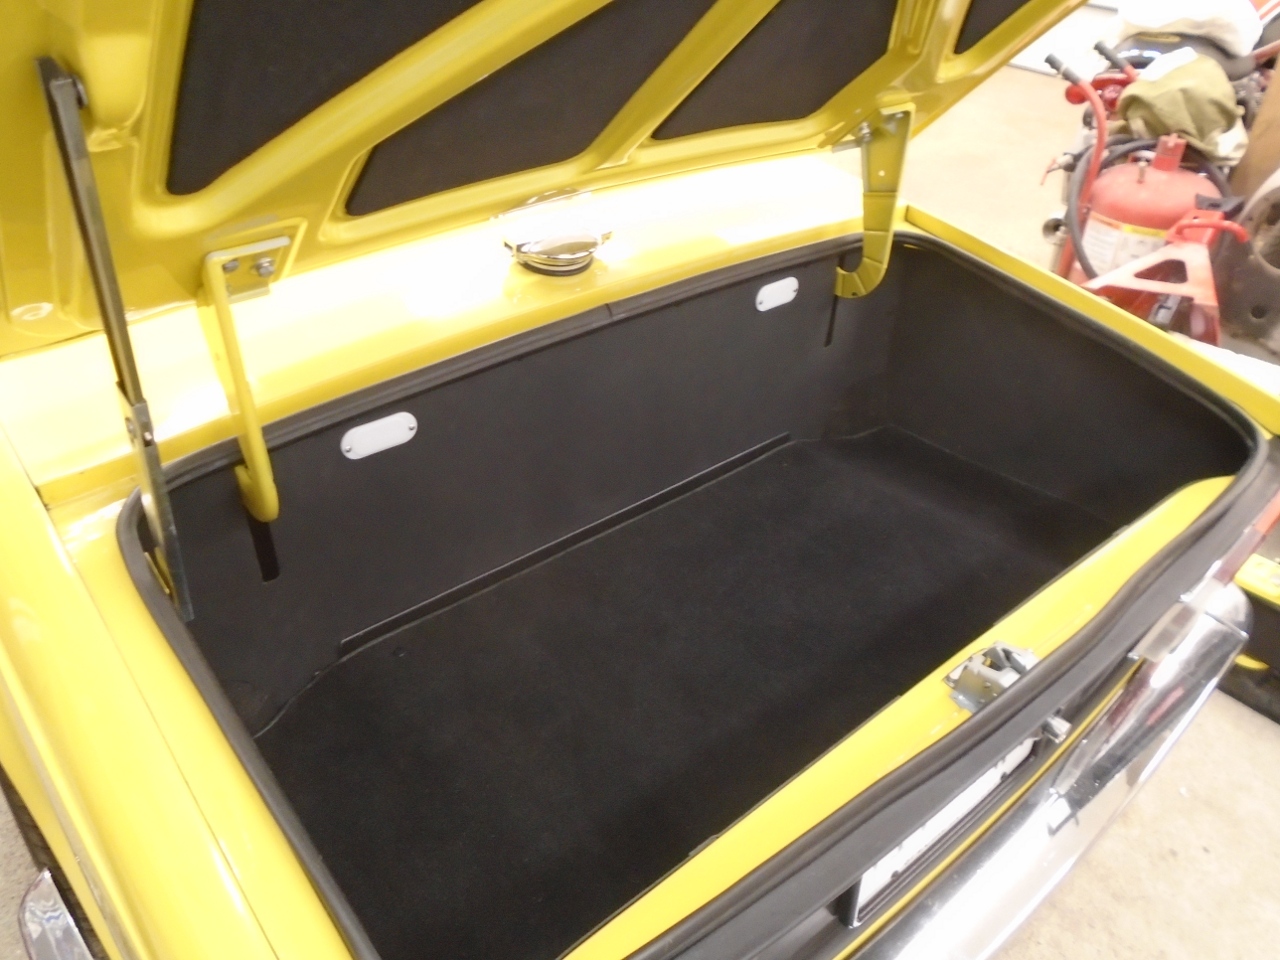
Prepped the spare's home with a little Hushmat to keep it off the paint.
Cleaned up the tie-down parts. I put a rubber pad on the part of the disc that bears on the wheel.
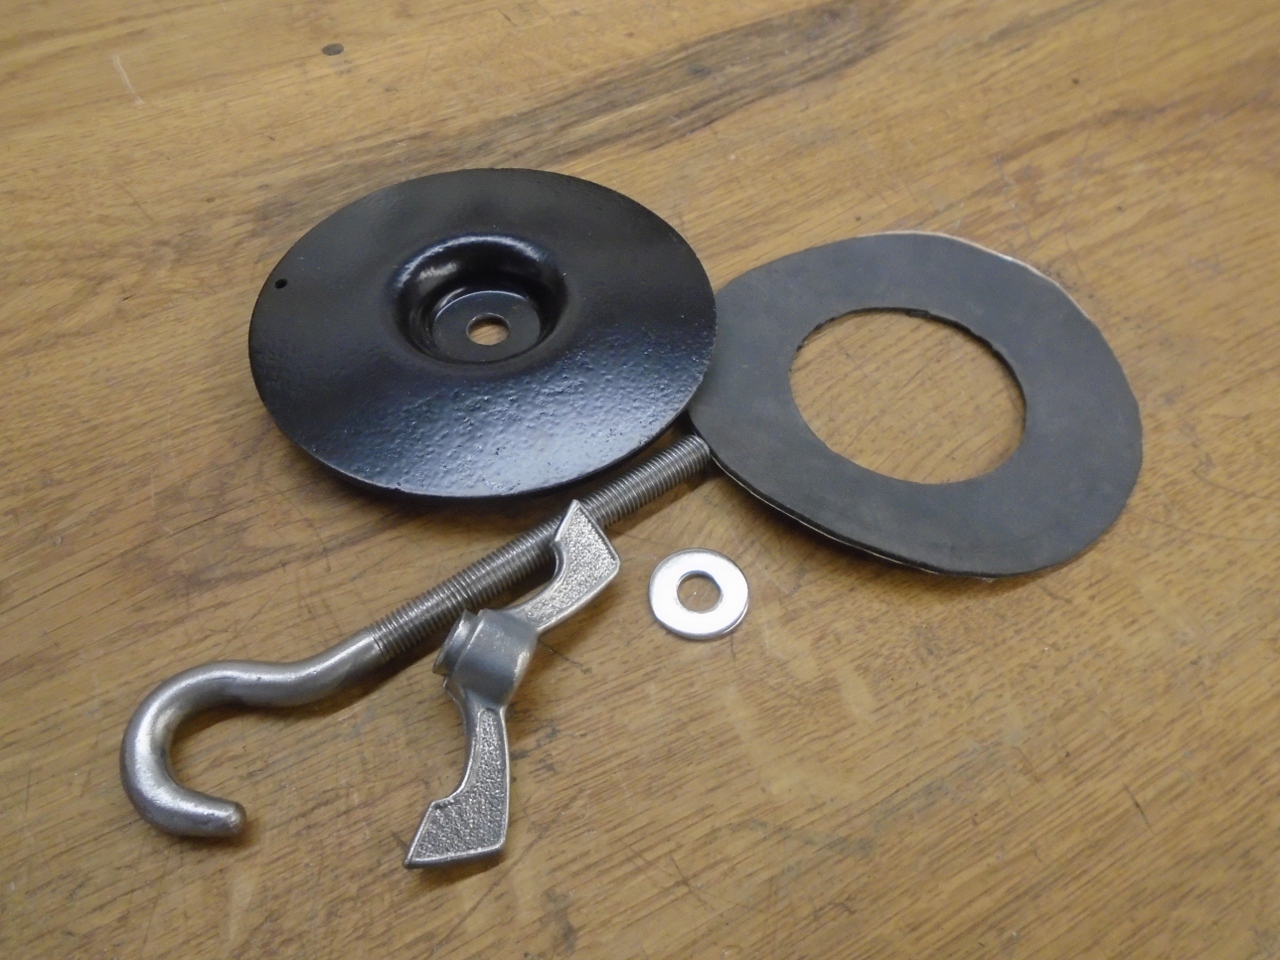
I actually hope I never see it again.
I'd
never done an alignment before, but I'd feel comfortable doing it
again. It took most of a day in this case, but didn't really cost
anything.
Comments to Ed at elhollin1@yahoo.com
To my other TR6 pages