To my other GT6 pages.
April 16, 2022
Carb Heat Shield
We love these old cars largely because of their many endearing
qualities, like leaks, rattles and squeaks, odors, and sometimes just
plain finickyness. It seems that hot weather tends to bring out
and accentuate some of these qualities, especially the
finickyness. Iffy starting or re-starting in the heat is almost a
hallmark of many classic cars. Maybe it's the modern fuels, maybe
it's marginal cooling system designs, or maybe it's just decades of
gradual, accumulated wear and tear. Starting or re-starting
problems are often attributed to "percolation" or "vapor lock".
Many folks make a distinction between these two, but most just use them
pretty much interchangeably. They mean that fuel has gotten hot
enough to turn to vapor where it shouldn't. Riskiest scenarios
seem to be long idling periods, or heat soak after shutting
down.
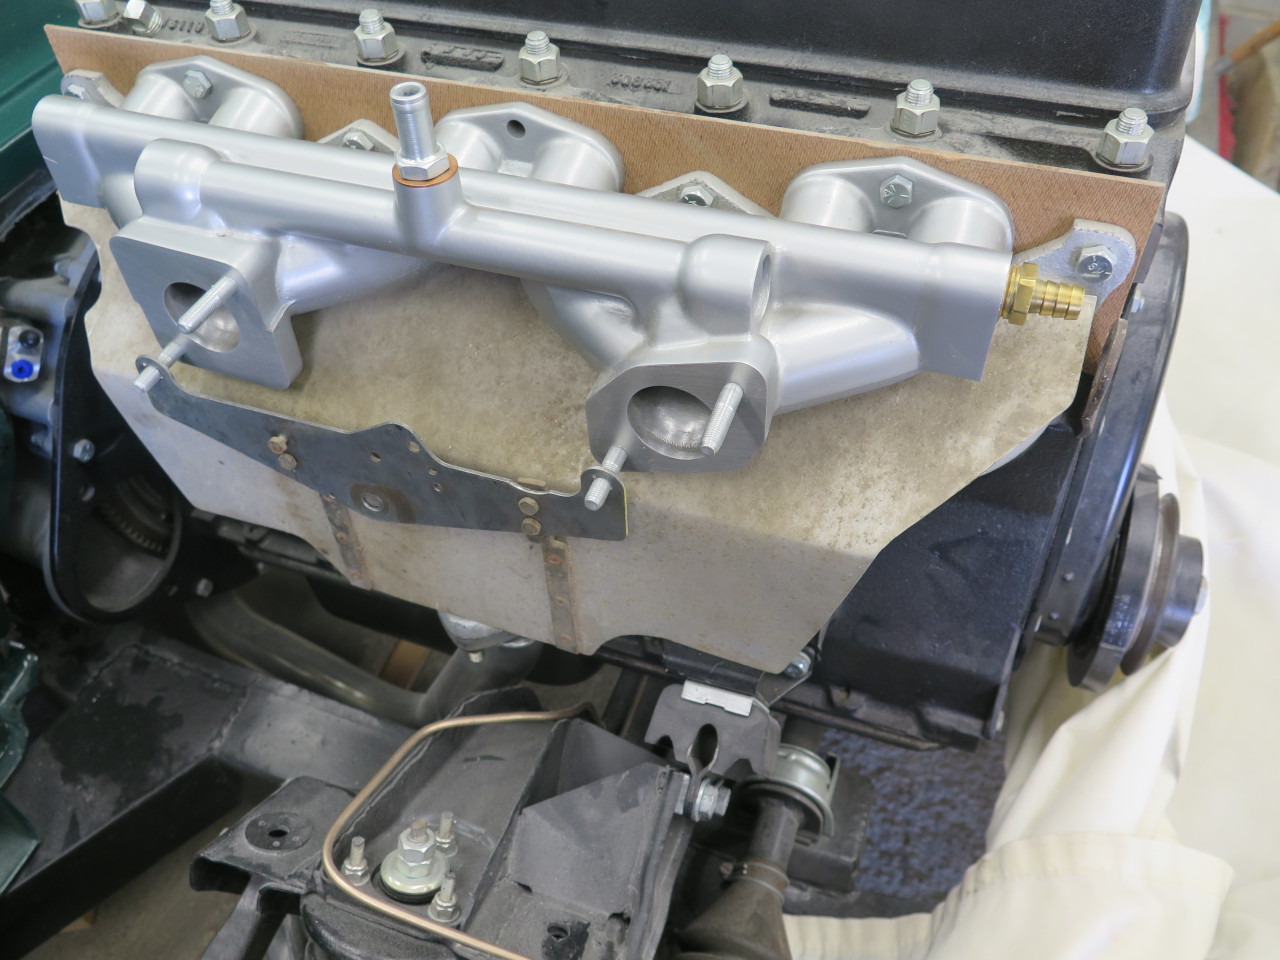
Most of us who tolerate our LBCs have to resign ourselves to the fact
that our engines do not have cross-flow heads. That is, the intake
and exhaust manifolds are both on the same side of the head. This
presents a significant design challenge: keep the fuel in or on
the way to the carburetors from getting hot enough to boil. This
is tricky, since the carbs and their fuel supply lines are in plain view
of the very hot exhaust manifold.
A common defense tactic for this problem is to install a heat shield
between the exhaust manifold and the carbs. I don't believe the
GT6 cars came with any kind of heat shield, but many owners have
fashioned their own, or bought one of the commercial offerings.
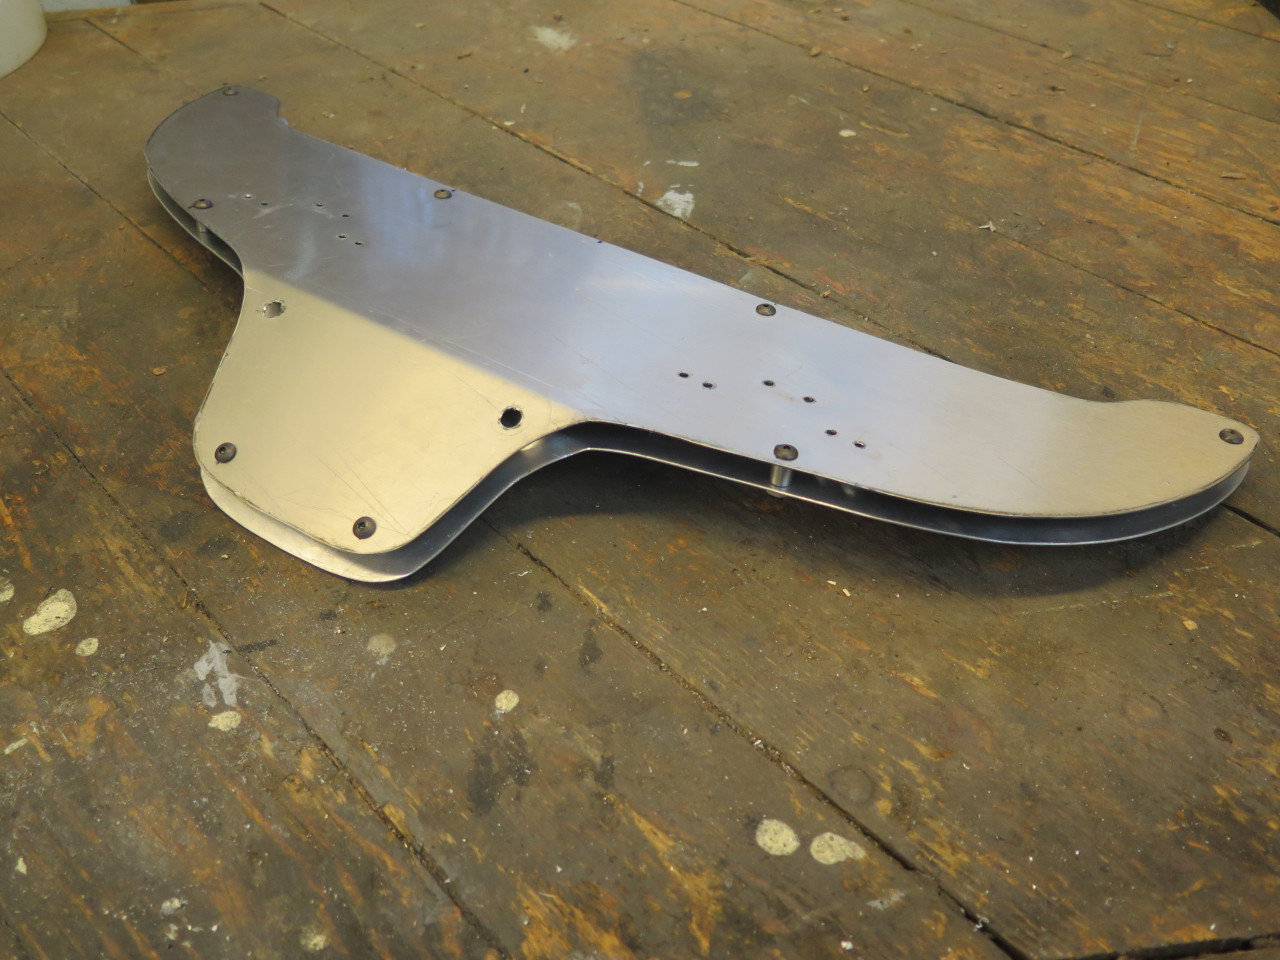
I made a heat shield for this car back in the 80s. I had forgotten
all about it, but there it was. It was a single sheet of shaped
aluminum held by some brackets attached to the throttle linkage plate.

I was considering re-using it, so I put it on the engine for a look-see.

It must of worked fine, because when I think back to all of the problems
I had with the car back then, vapor lock or percolation wasn't among them.
But still. it seemed like a fun challenge to try to improve on it. I started doing some mockups.
These put the shield itself between the carbs and the manifold.
I fiddled with those for a while, but in the end, decided to use the same approach I used for my TR6 a few years ago: http://bullfire.net/TR6/TR6-54/TR6-54.html
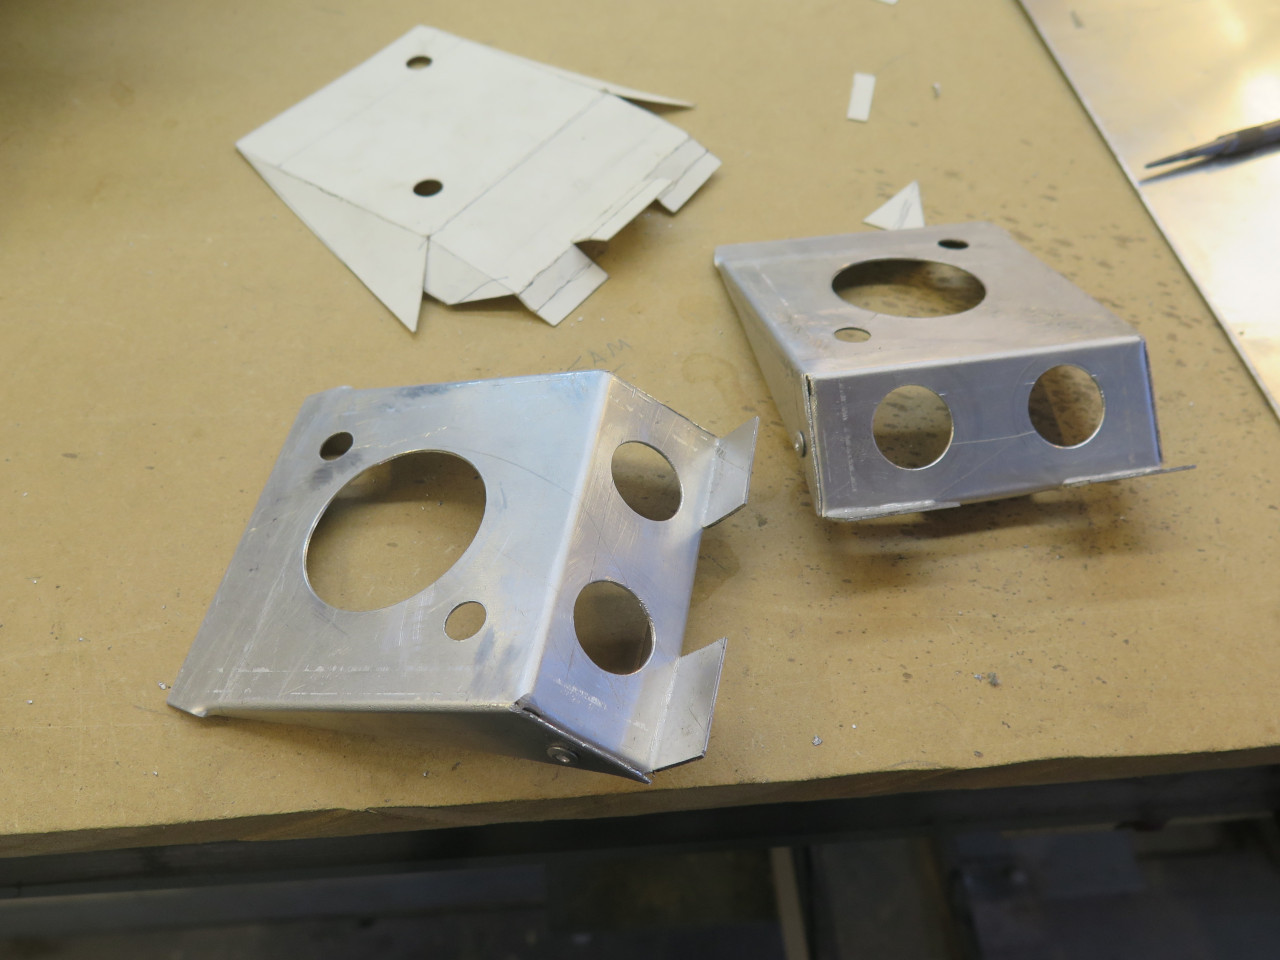
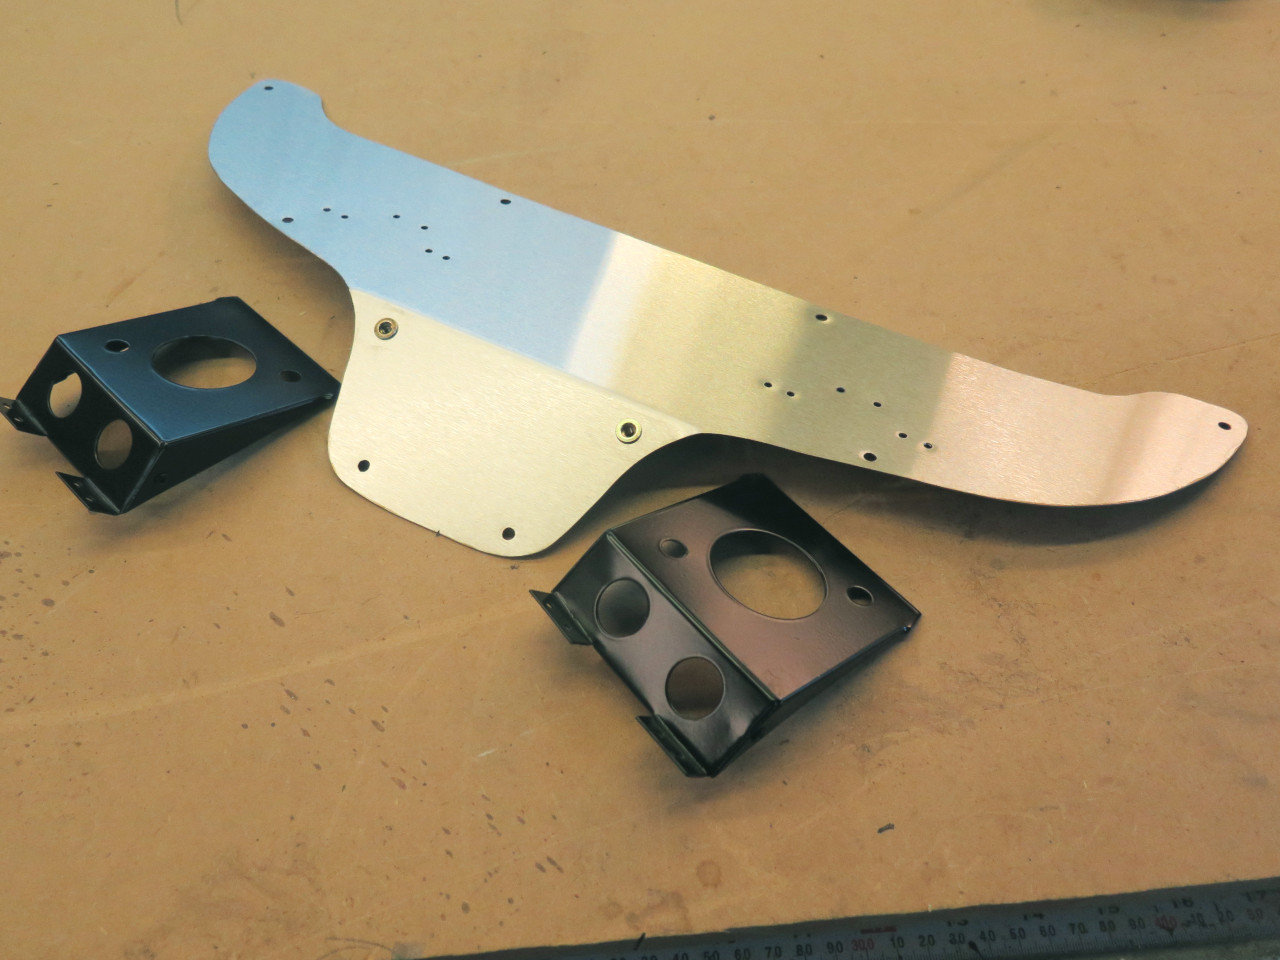
This design uses a bracket on each manifold inlet, and the brackets hold the actual shield.
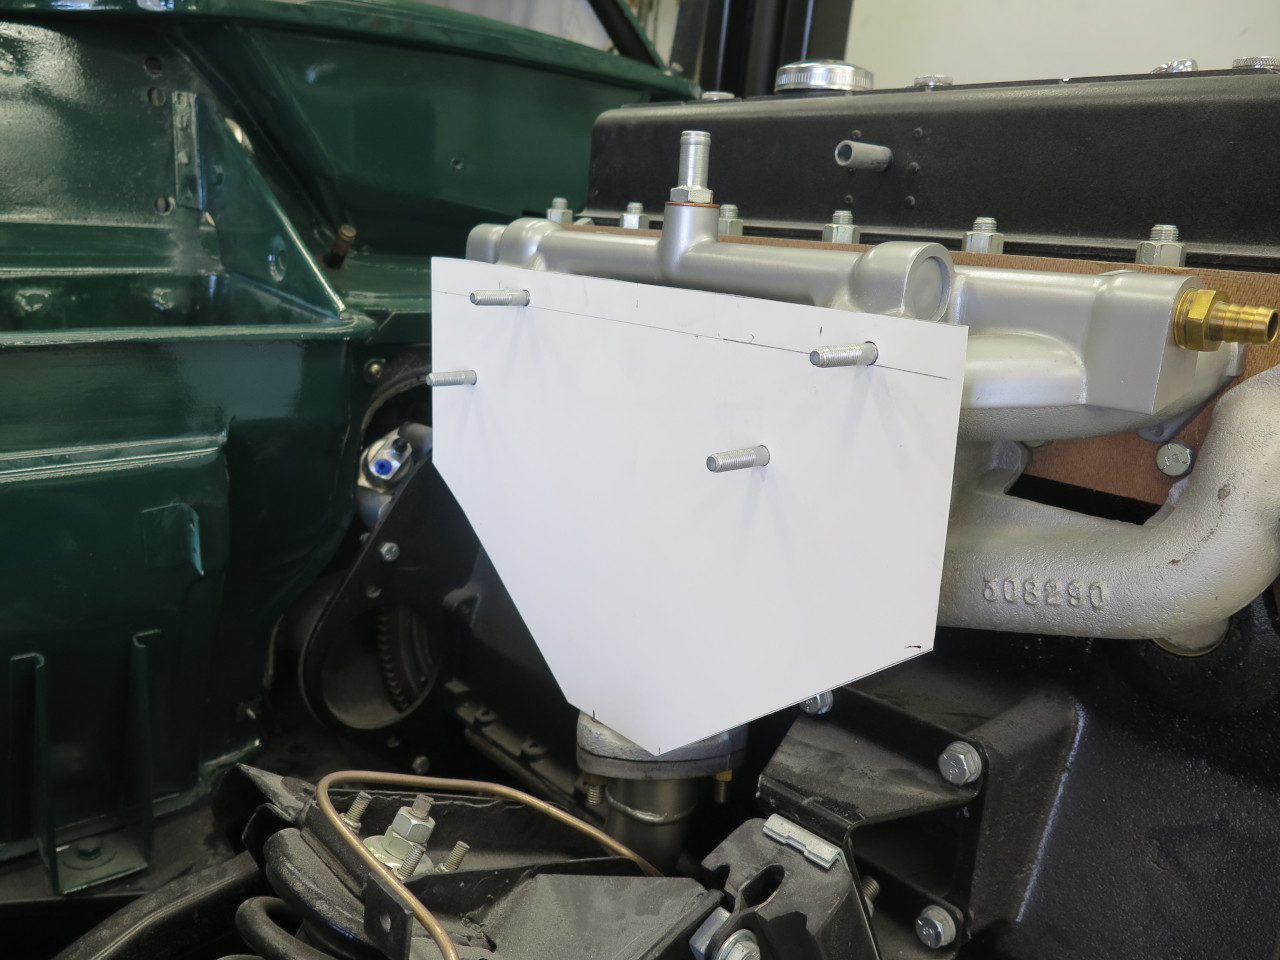
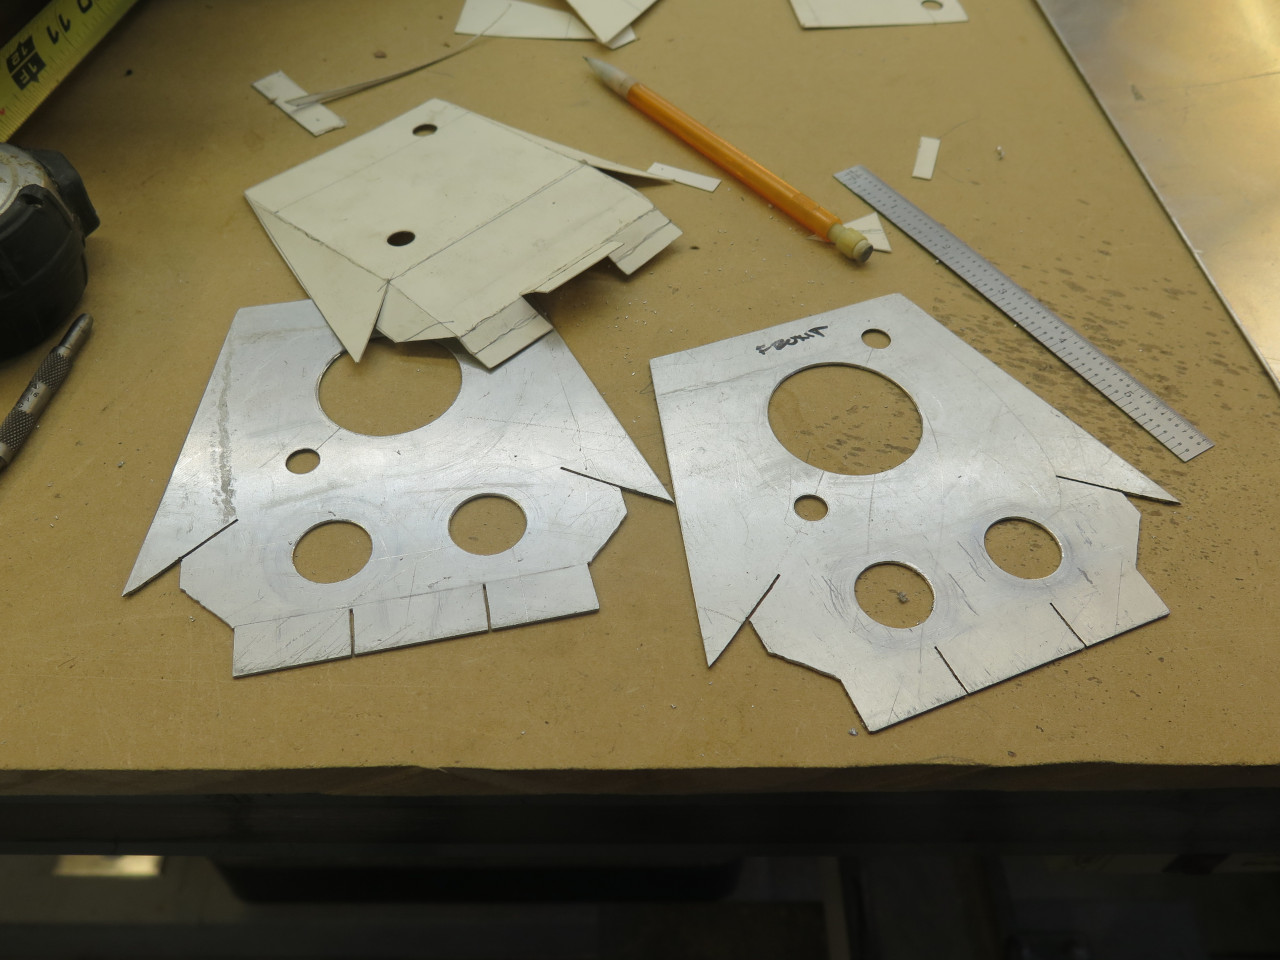
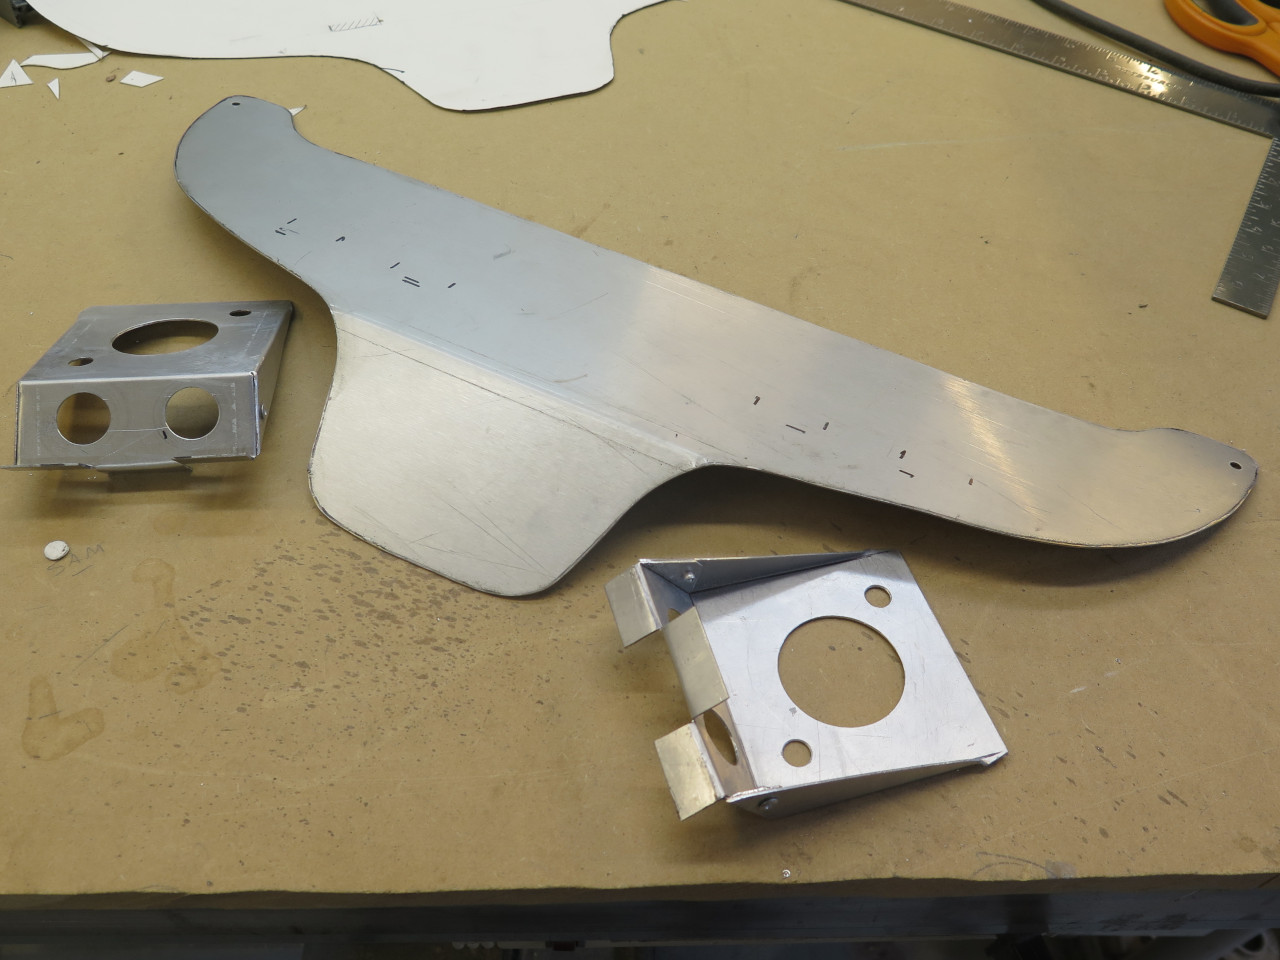
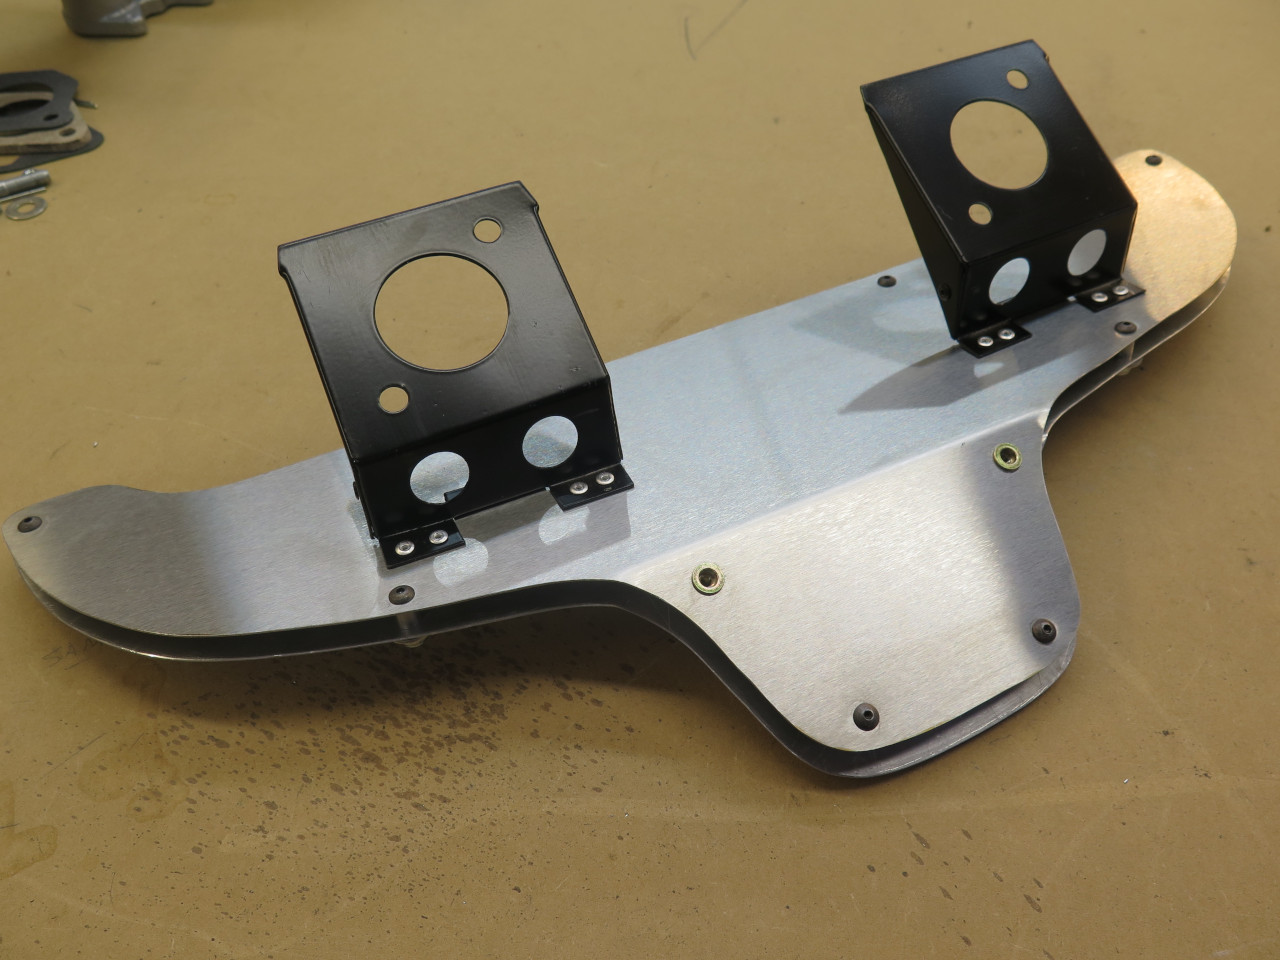
A few measurements, and a first pass bracket design.
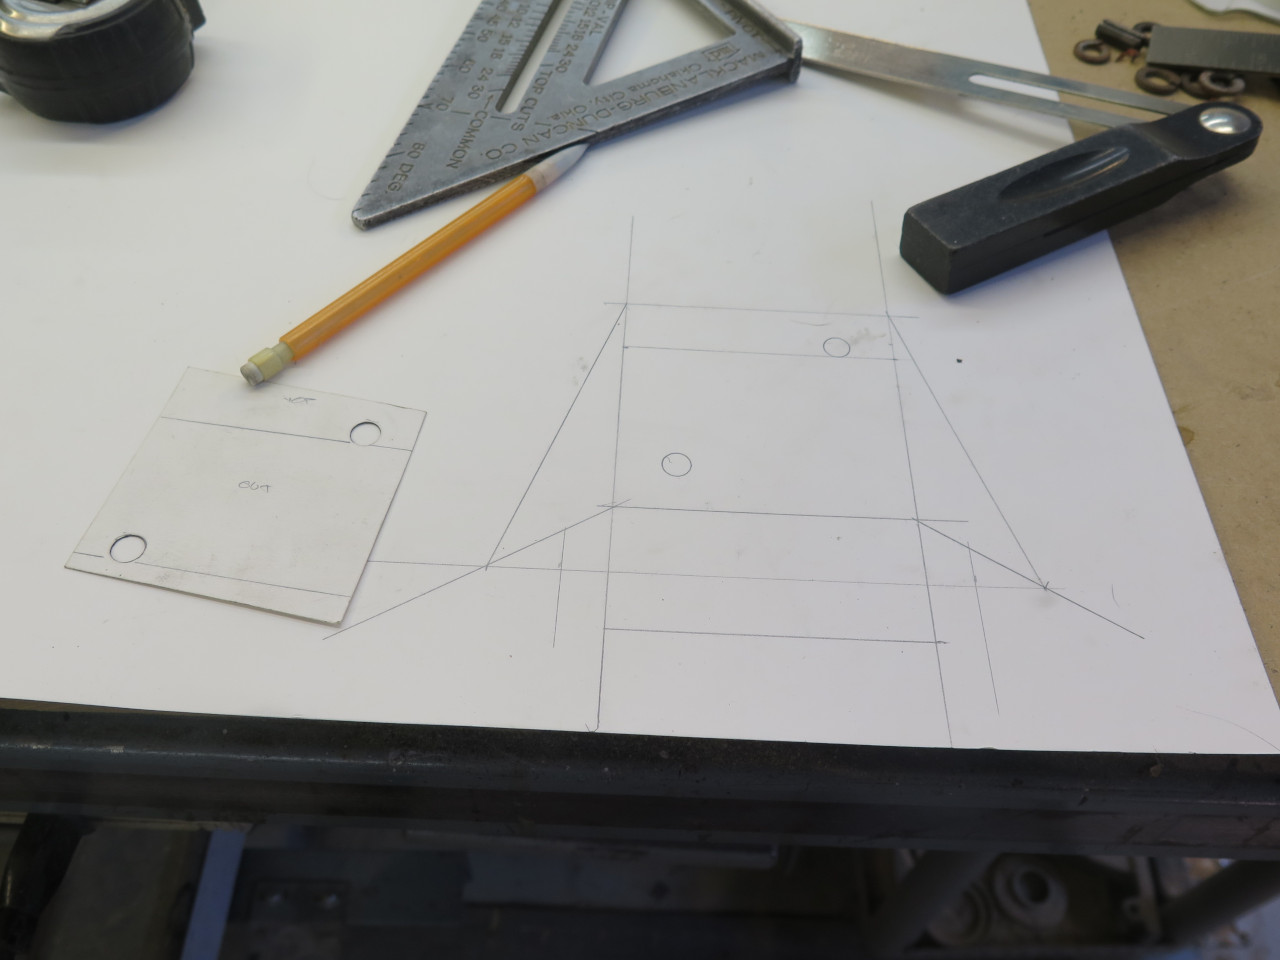
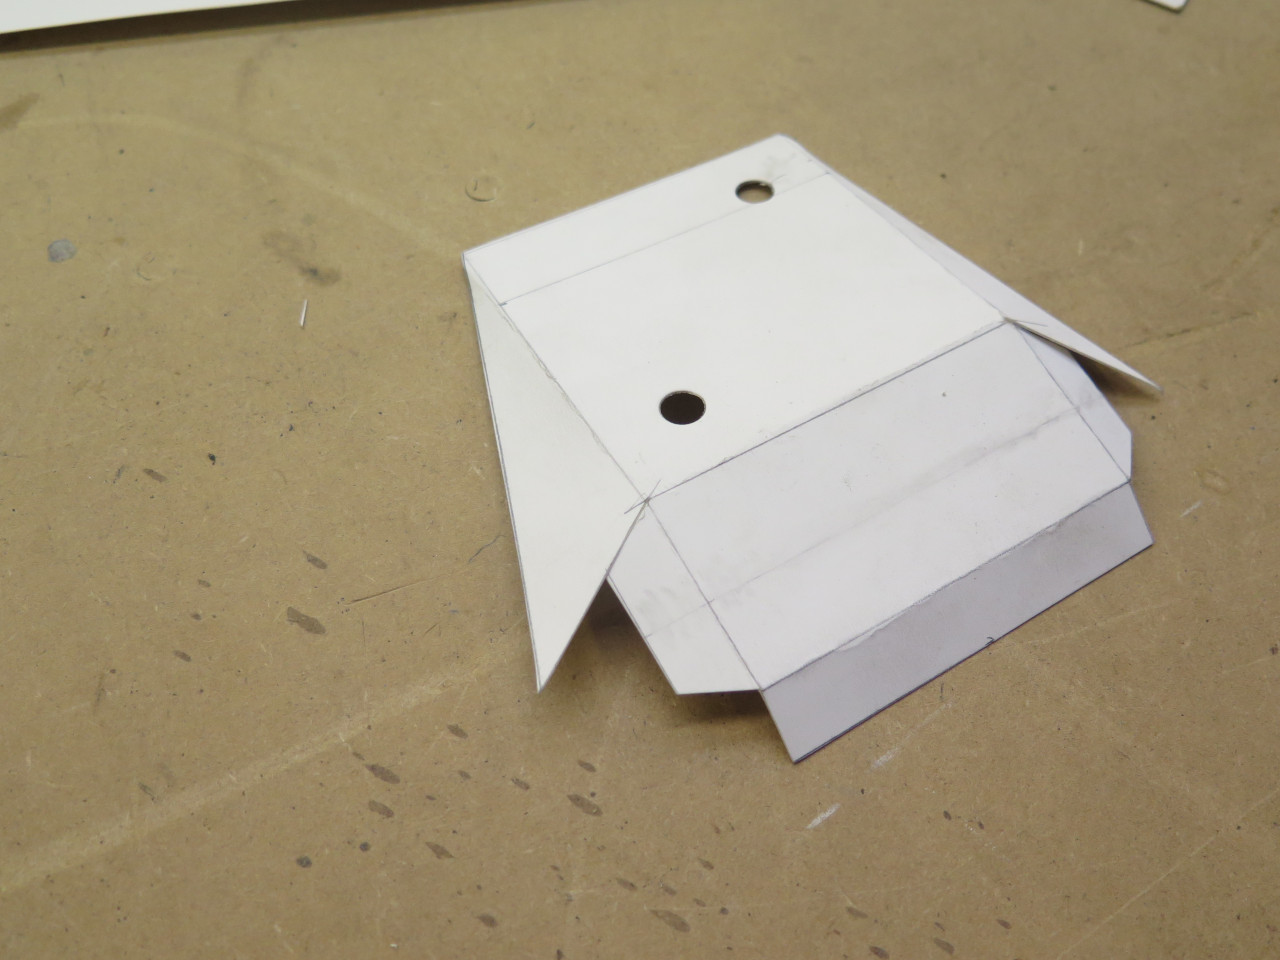
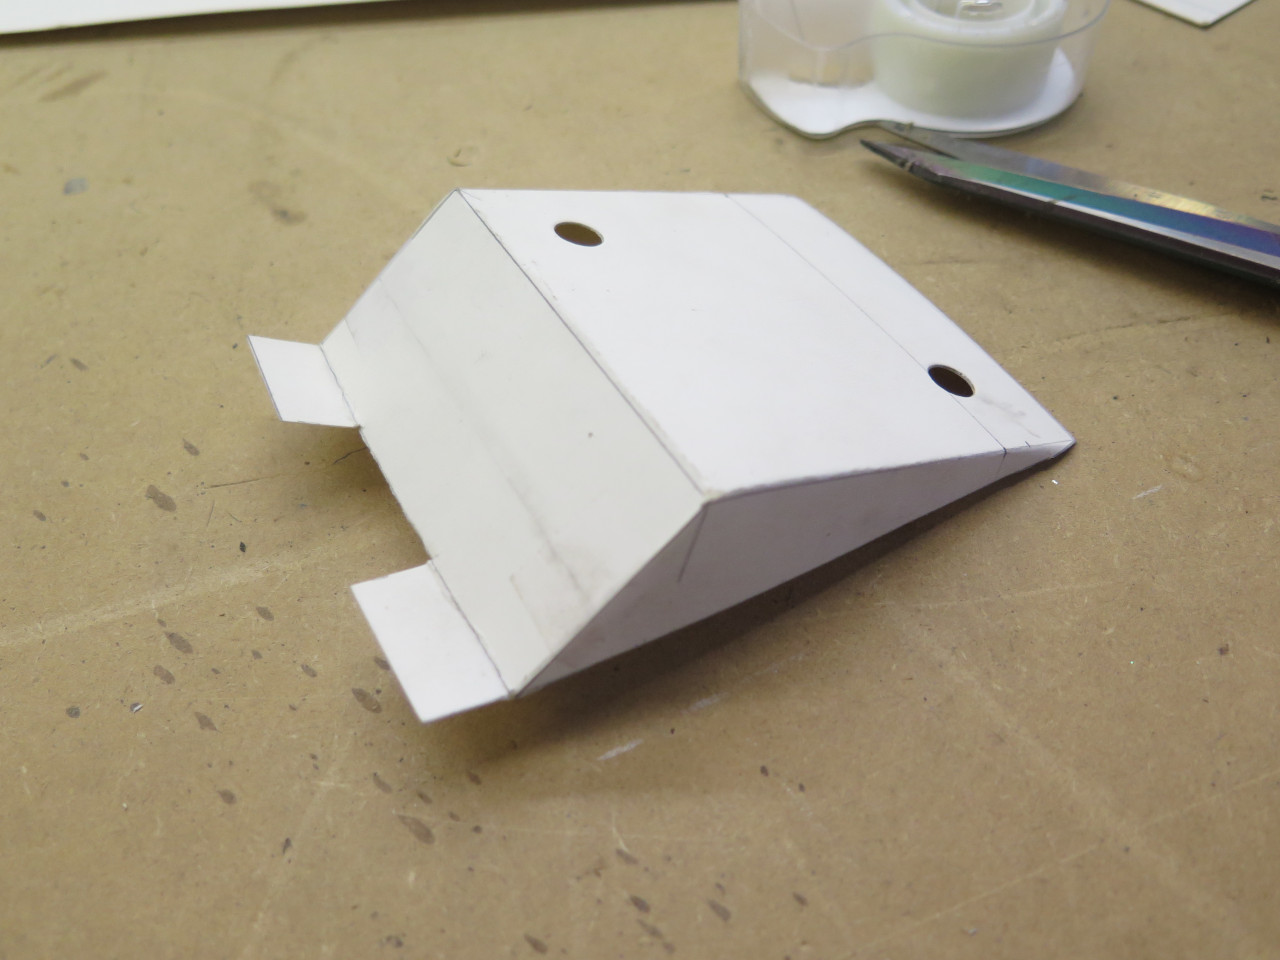
A few tweaks, and on to metal.
Then, the shield itself...

I used brushed stainless for the shield. The stainless comes with
a plastic film on it so it doesn't get dinged up so much during
fabrication.
Now, here is where the "improvement" part comes in.
A simple shield like this works primarily by blocking radiated heat from
the manifold. It reflects much of the radiant heat back toward
the manifold, but also absorbs some of it. This heats up the
shield, which then becomes a heat source facing the carbs. The
shield would never get nearly as hot as the exhaust manifold, so this is
a benefit, but I thought I could do better. Adding a second
shield should improve things even more.
A double shield provides an air gap between the two shields, and there
actually isn't a much better insulator than air. Double or triple
pane windows, called "insulating glass" is an example. (The
windows may use something like Argon instead of air, but this is mainly
for its inertness.) Even foams and fiber based insulations get
most of their insulating properties from trapped or confined air.
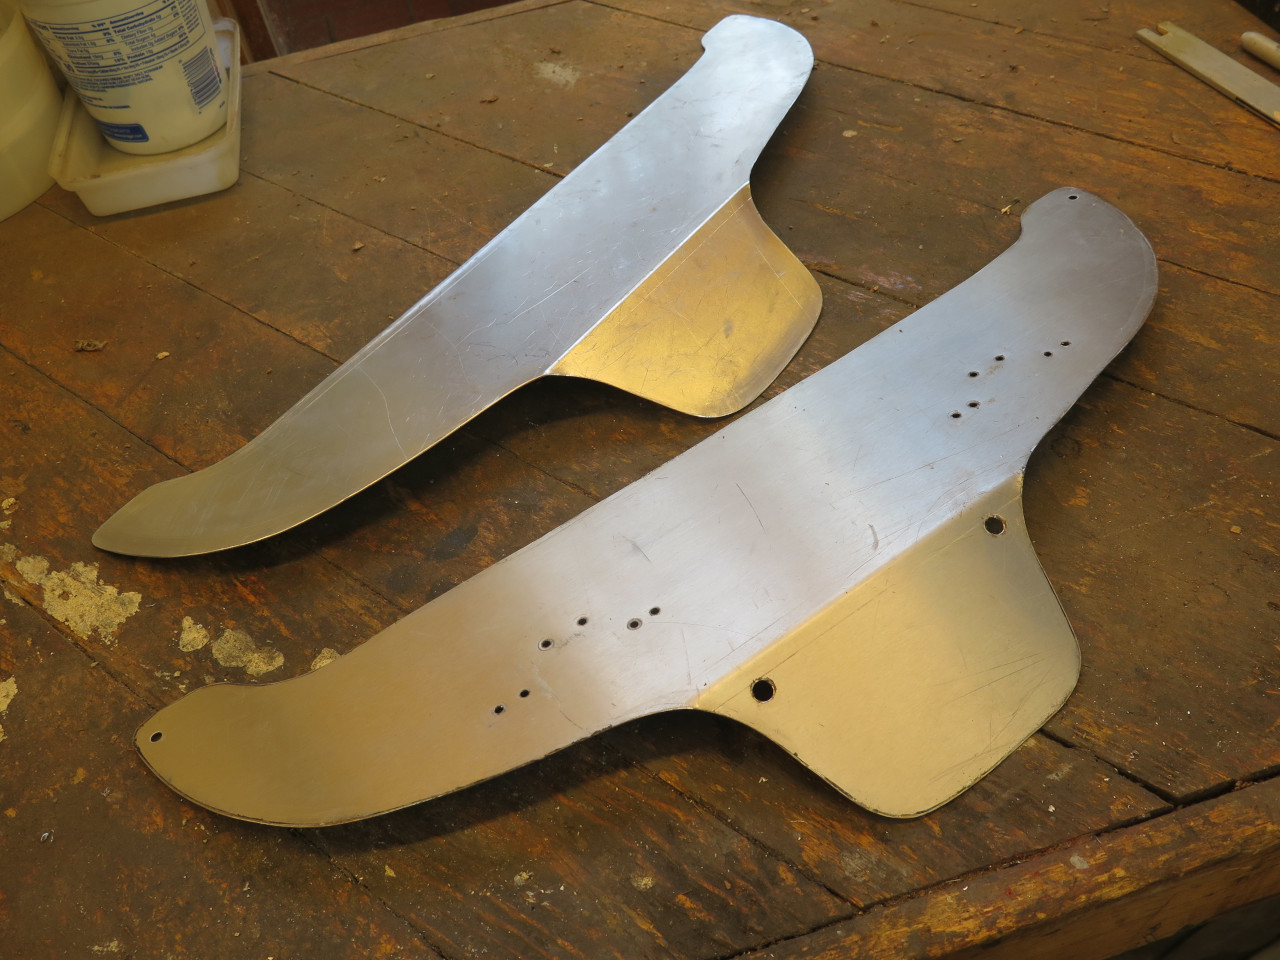
So, I made another shield, aluminum this time, and sandwiched them with 3/8" spacers.
To test the hypothesis that a double shield reduces radiated heat better
than a single one, I did some science. I mounted the double
shield vertically on my bench. To simulate the exhaust manifold
heat source, I used a 500 watt halogen work light about 6" from the
shield. I put thermocouples on the hot side and the cold side of
the double shield, turned on the light, and took a reading every minute
until the temperatures weren't changing any more. At the end of
the test, the hot side panel was painful to touch, while the cold side
just felt warm.
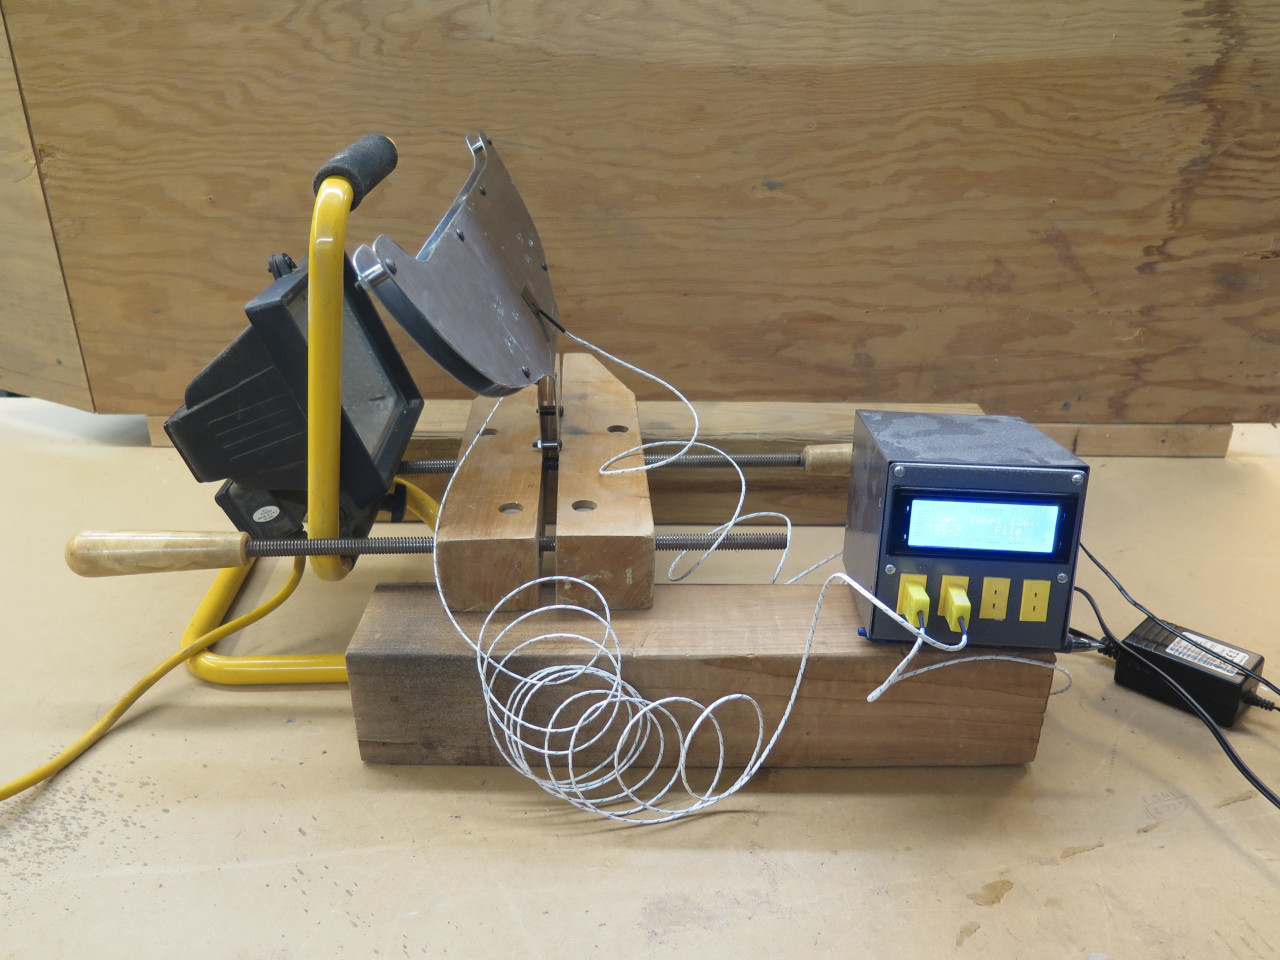
Here is a graph of the results:
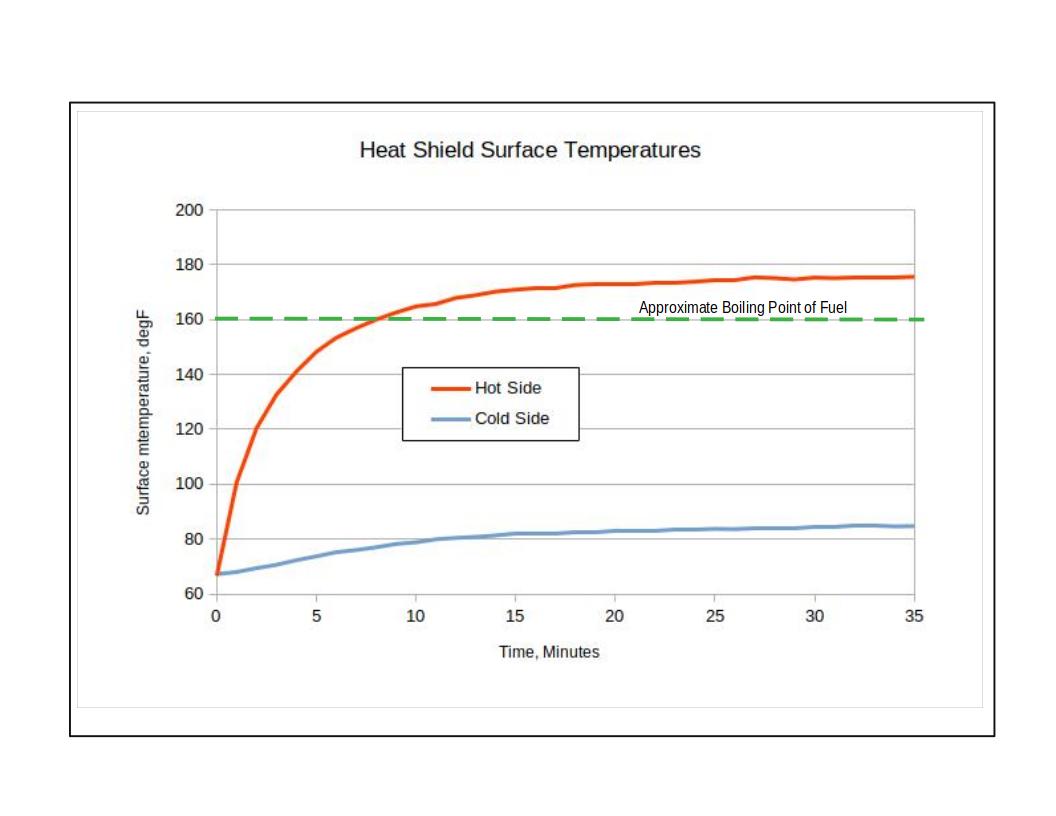
For the single shield case, I reasoned that since the thermocouples
would really just be on both sides of the same panel, the cold side
temperature would have to be fairly close to the hot side. This
means that the hot side curve above would be a pretty good proxy for the
single shield scenario. In this sense, the test was really just
about the effect of the second shield.
Now, I can think of a dozen things that make this test setup different
from the situation under the bonnet of a car. Ambient temperature
is lower. Way less air turbulence. A halogen light isn't an
exhaust manifold. Etc, etc, etc. Higher ambient
temperature would tent to shift the curves up, while air movement may
tend to shift them down. Even so, I was satisfied enough with the
results to go ahead and use the double shield, because, you know,
upgrade!
So I stripped off the protective plastic on the stainless panel and
powder coated the brackets. I also installed a couple of rivnuts
on the panel for some additional braces.
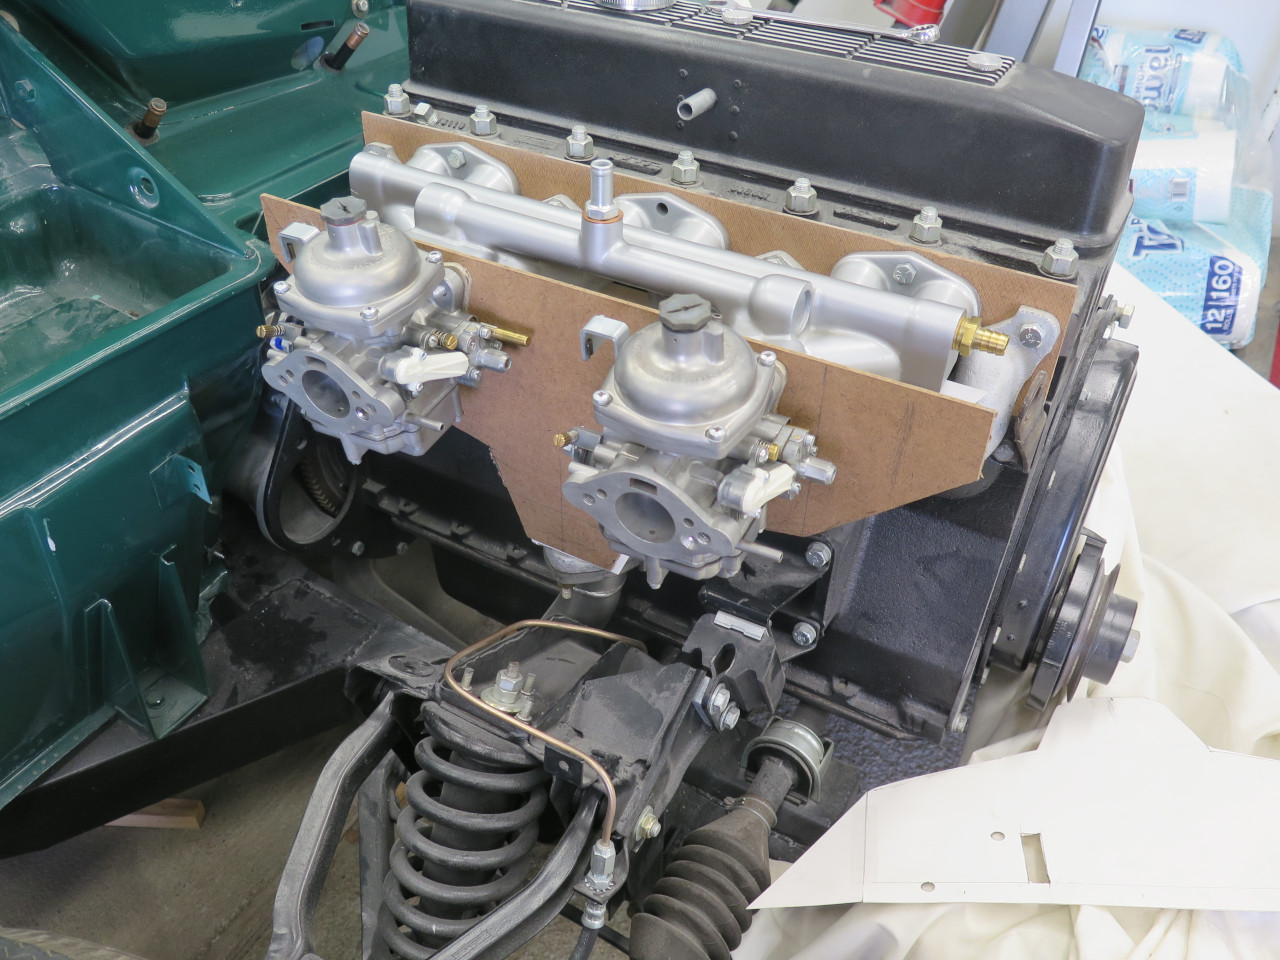
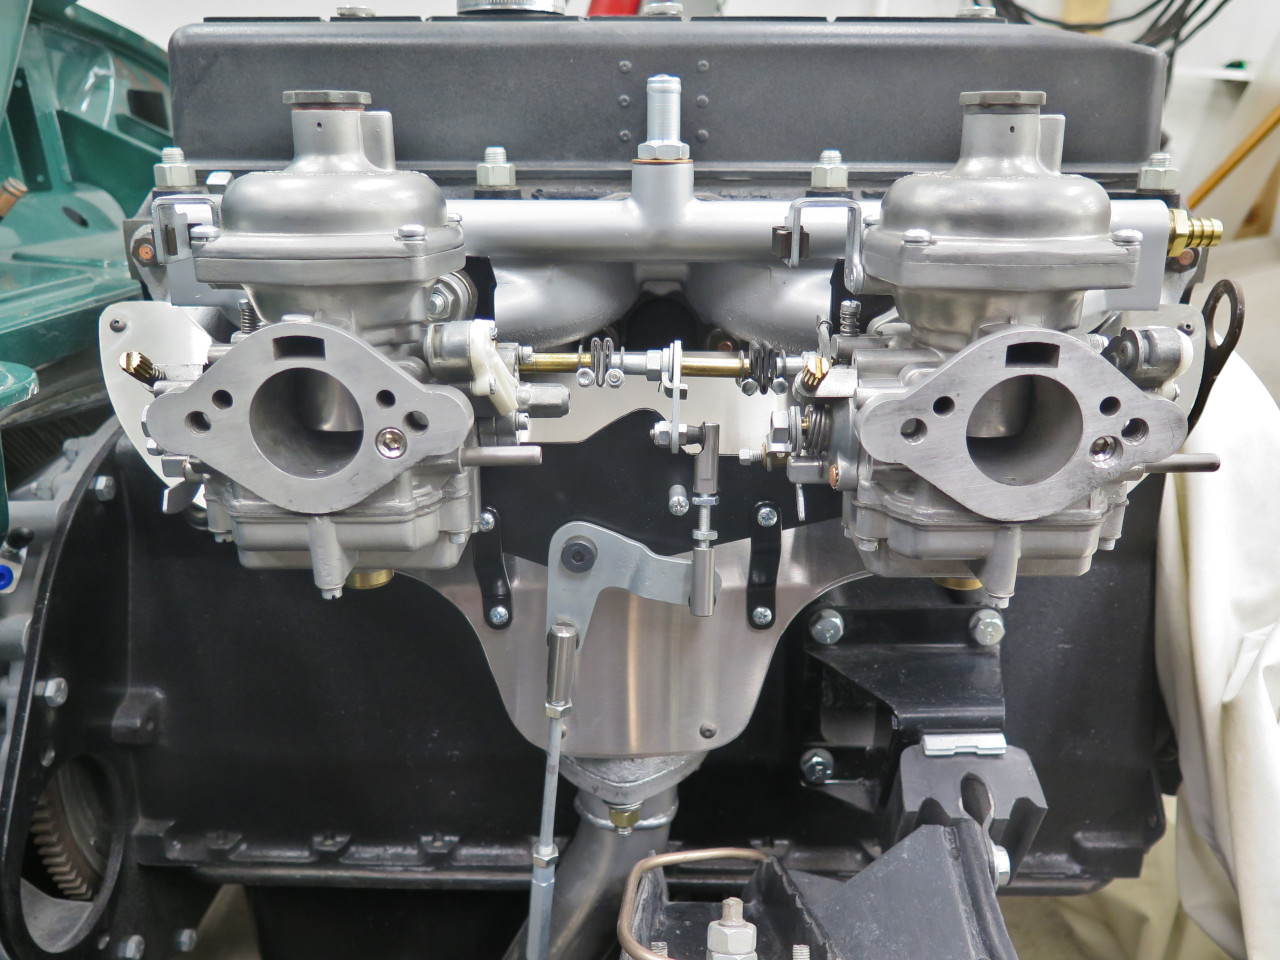
And put it together.

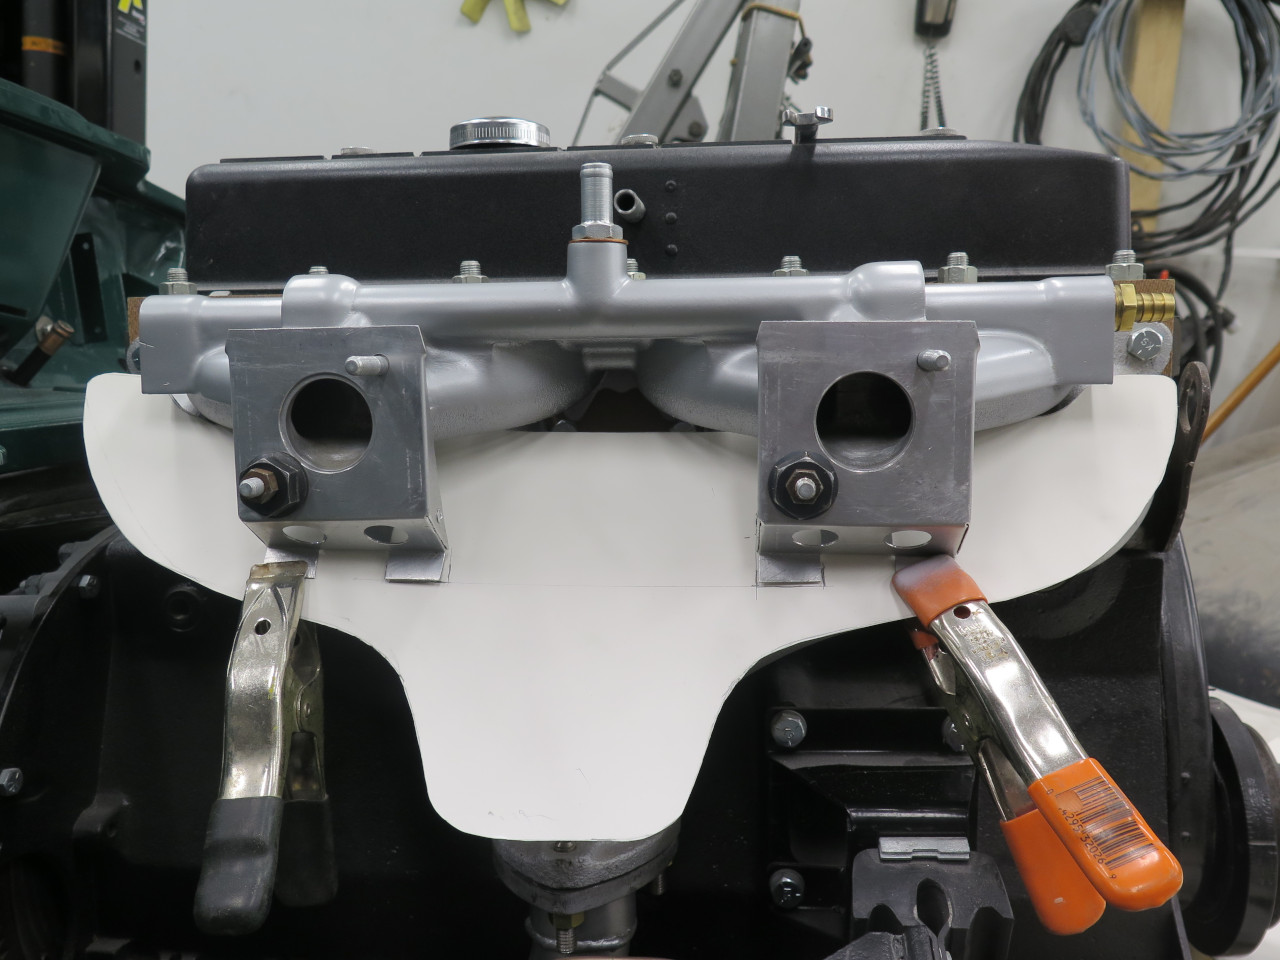
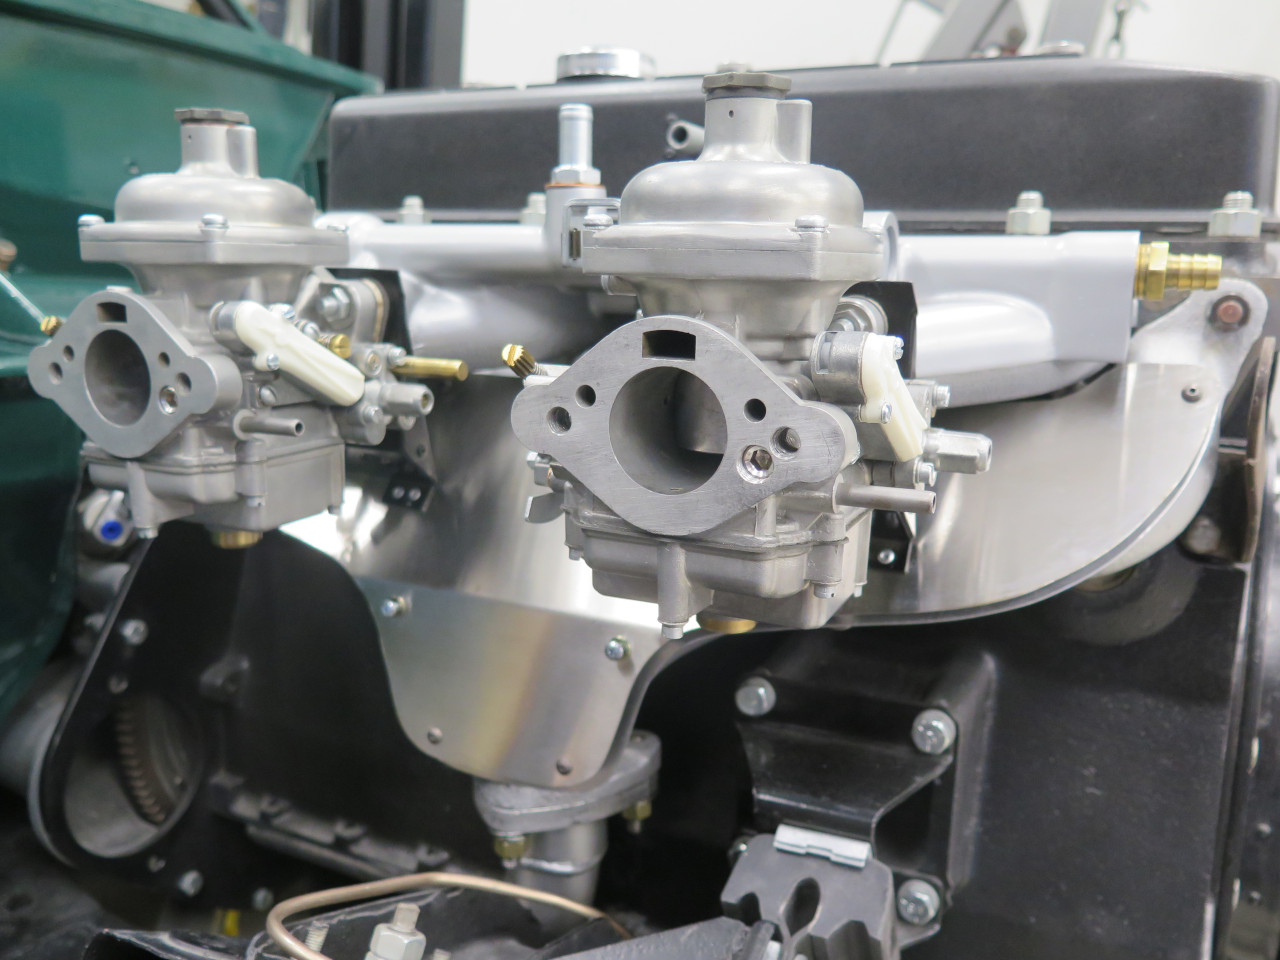
Tested the fit on the manifold.
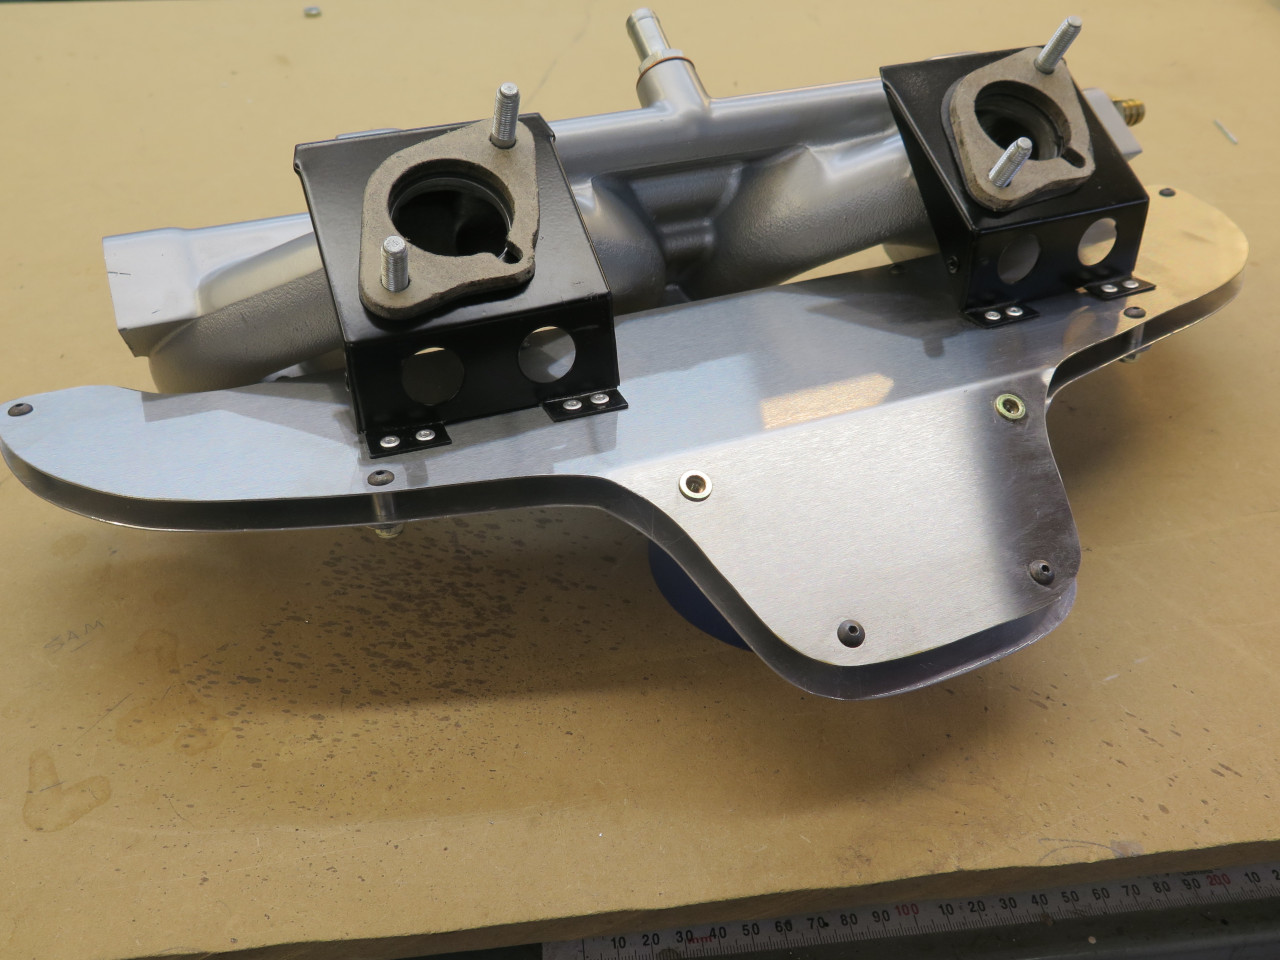
The extra braces on the lower part of the shield connect to a couple of rivnuts on my refurbed throttle linkage plate.
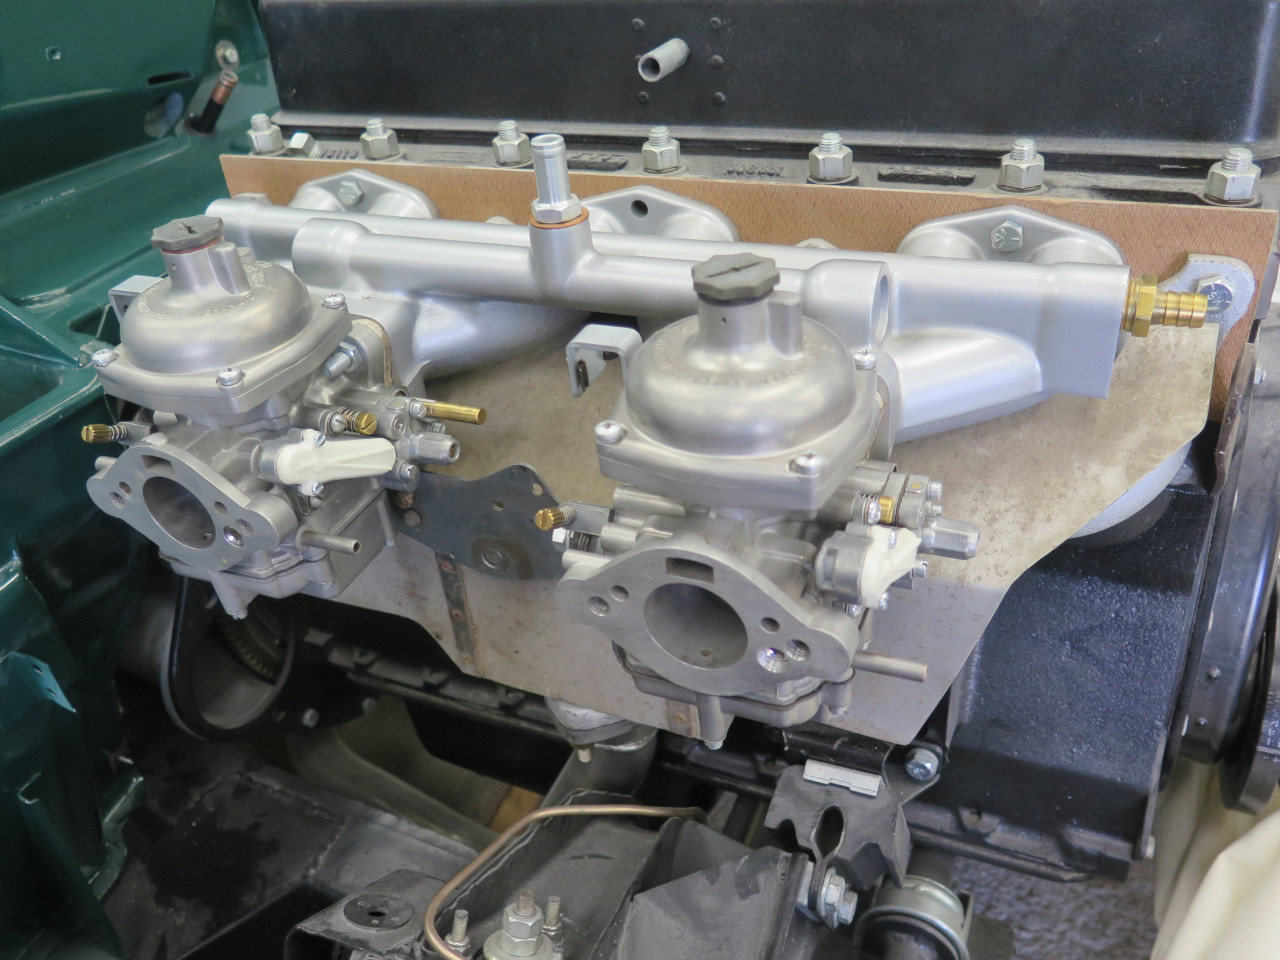
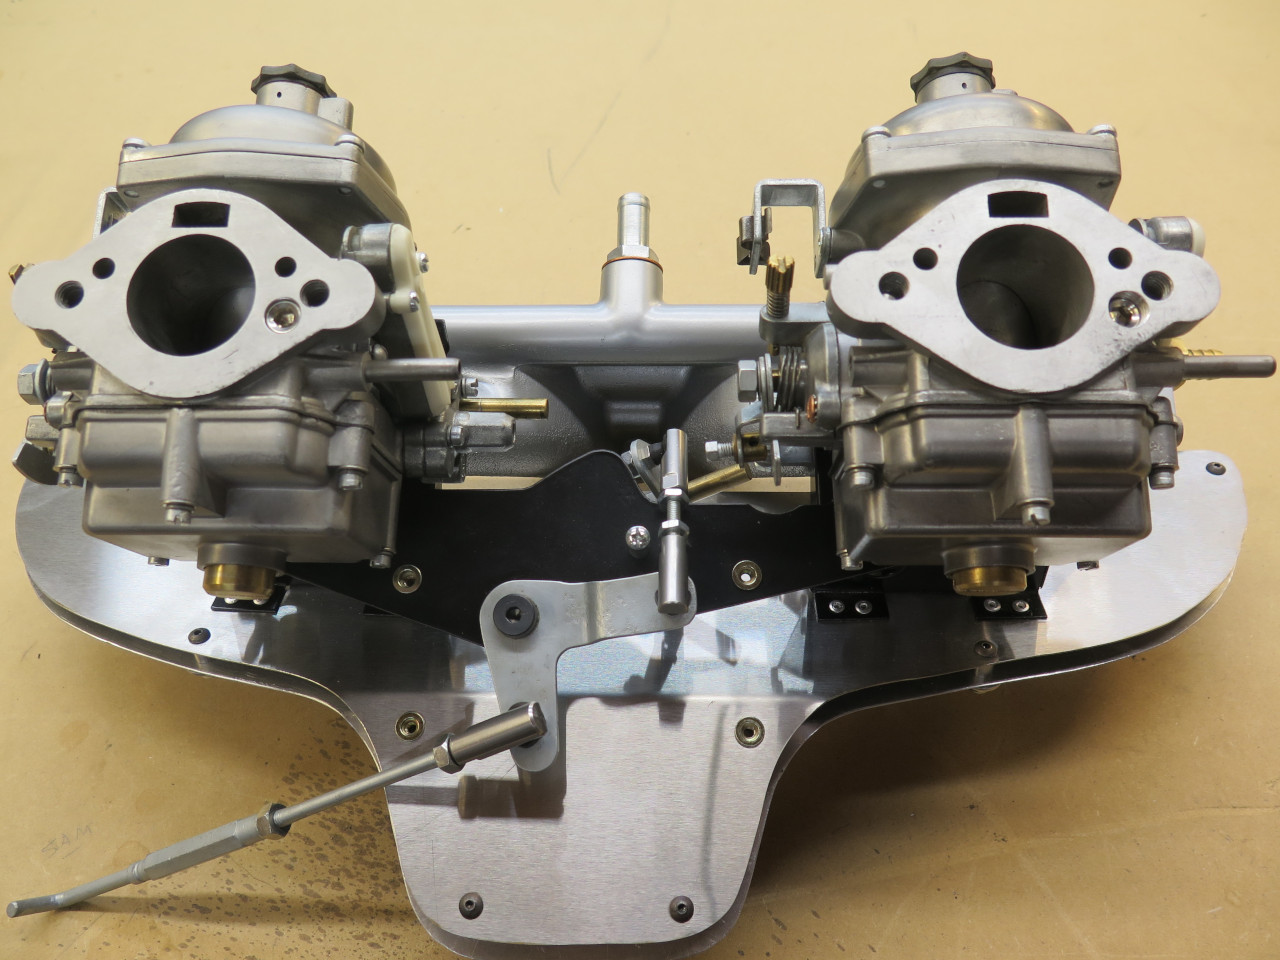
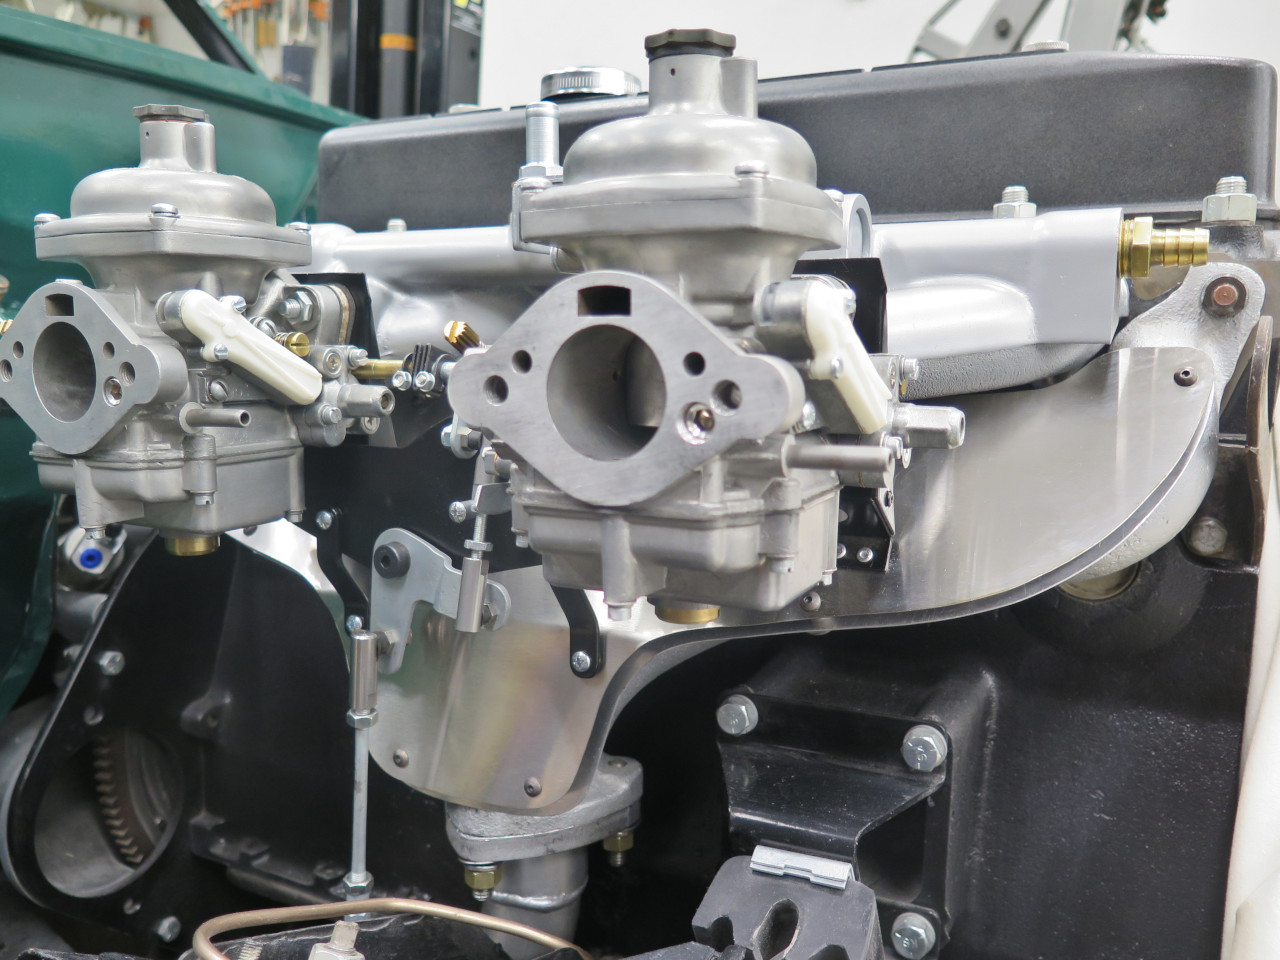
Carbs mounted.
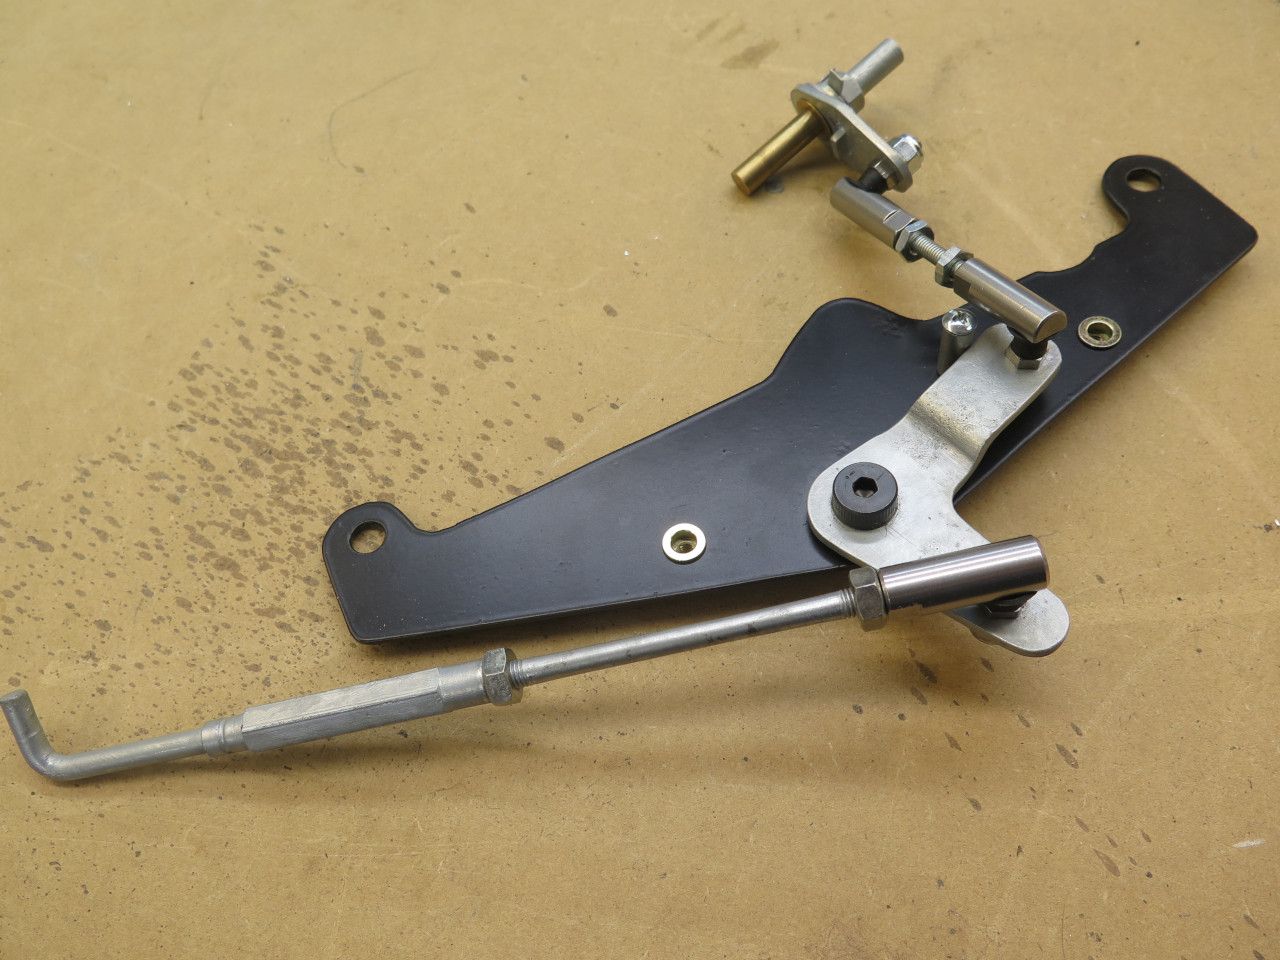
The braces. They keep the shield from vibrating.


Gathered up all of the manifolds and mounting hardware, and headed for the garage.
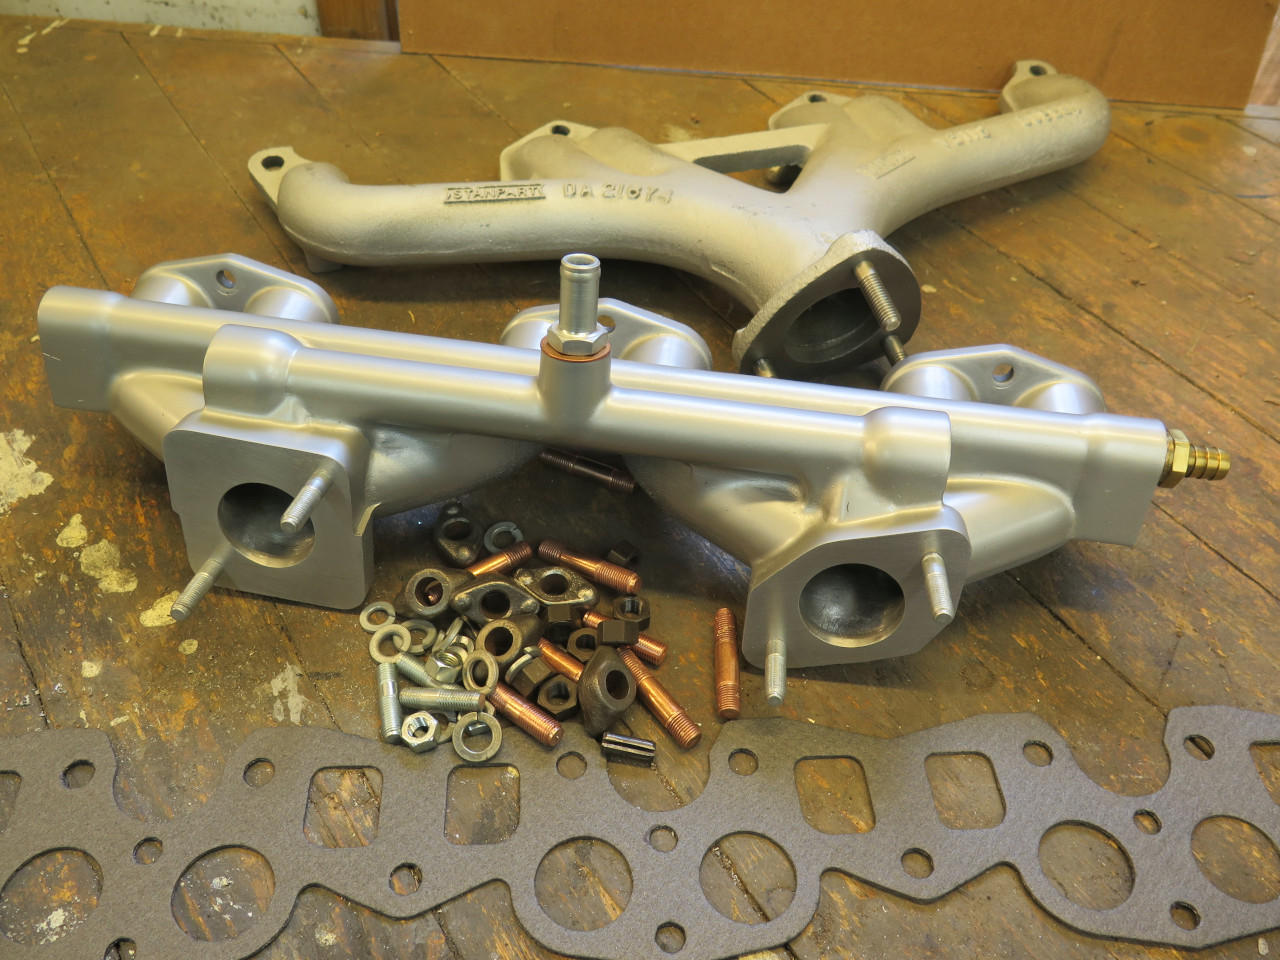
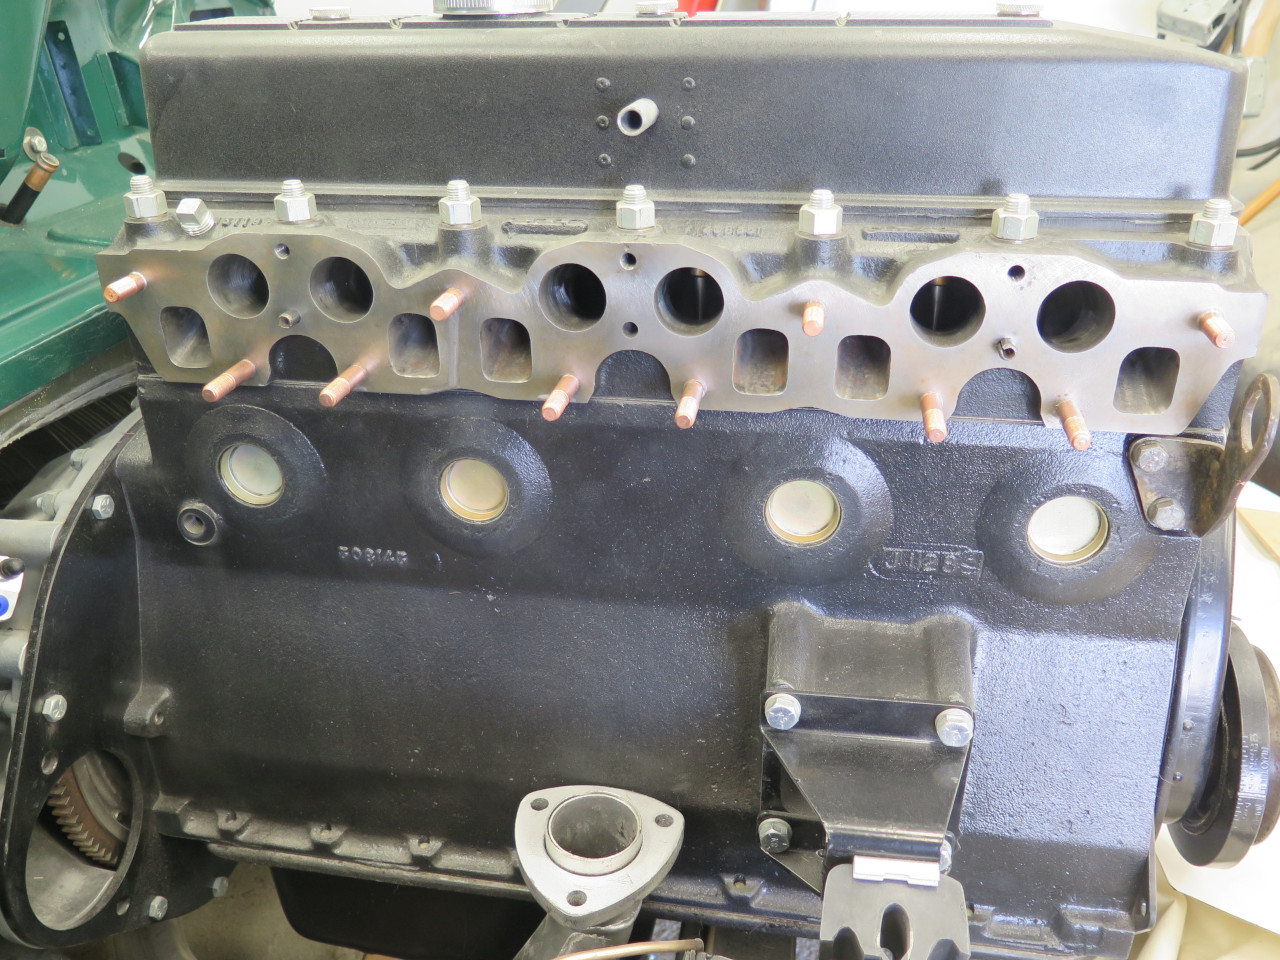
Manifolds first, then the shield.
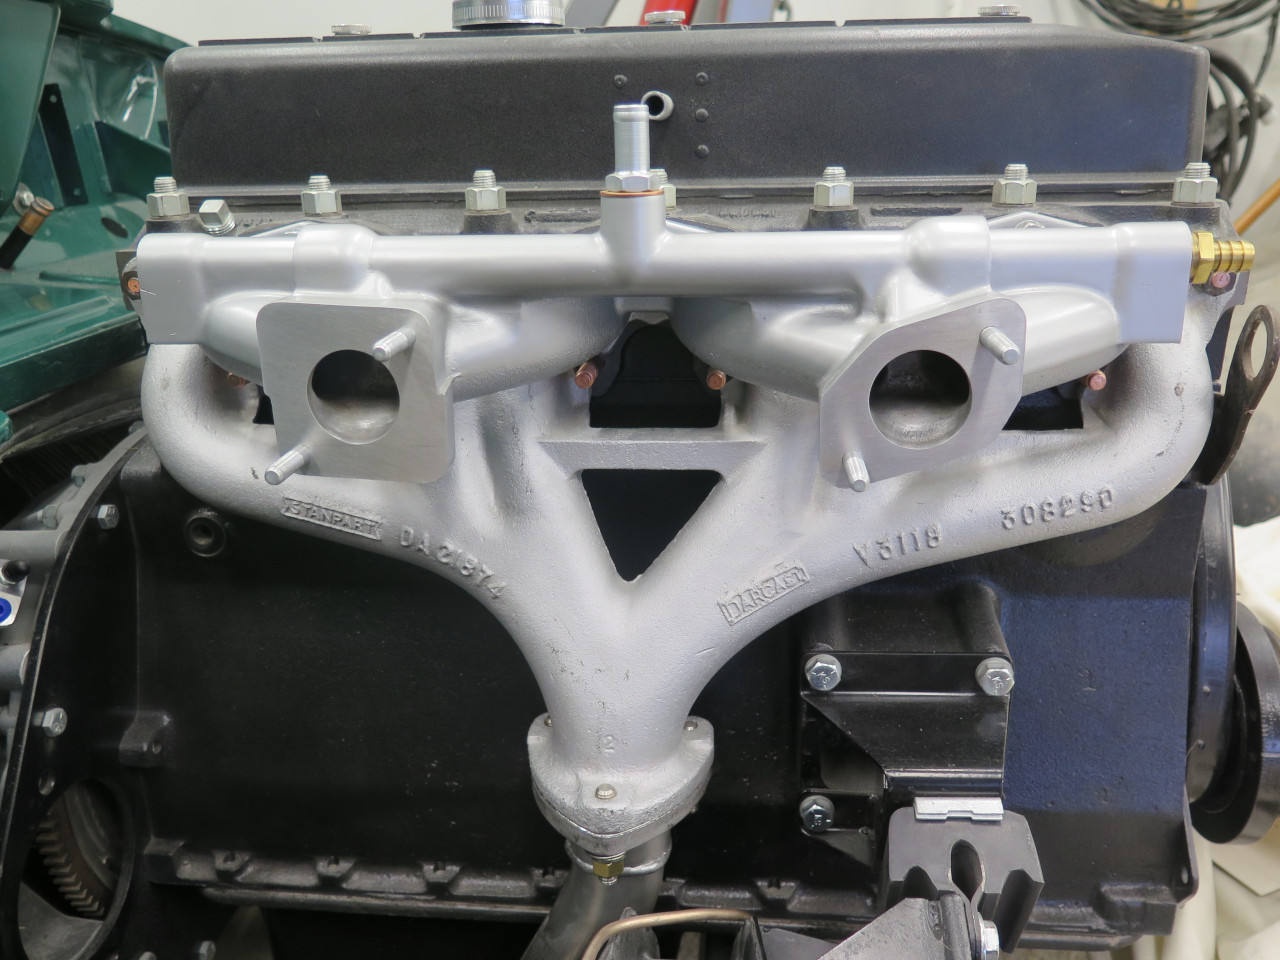
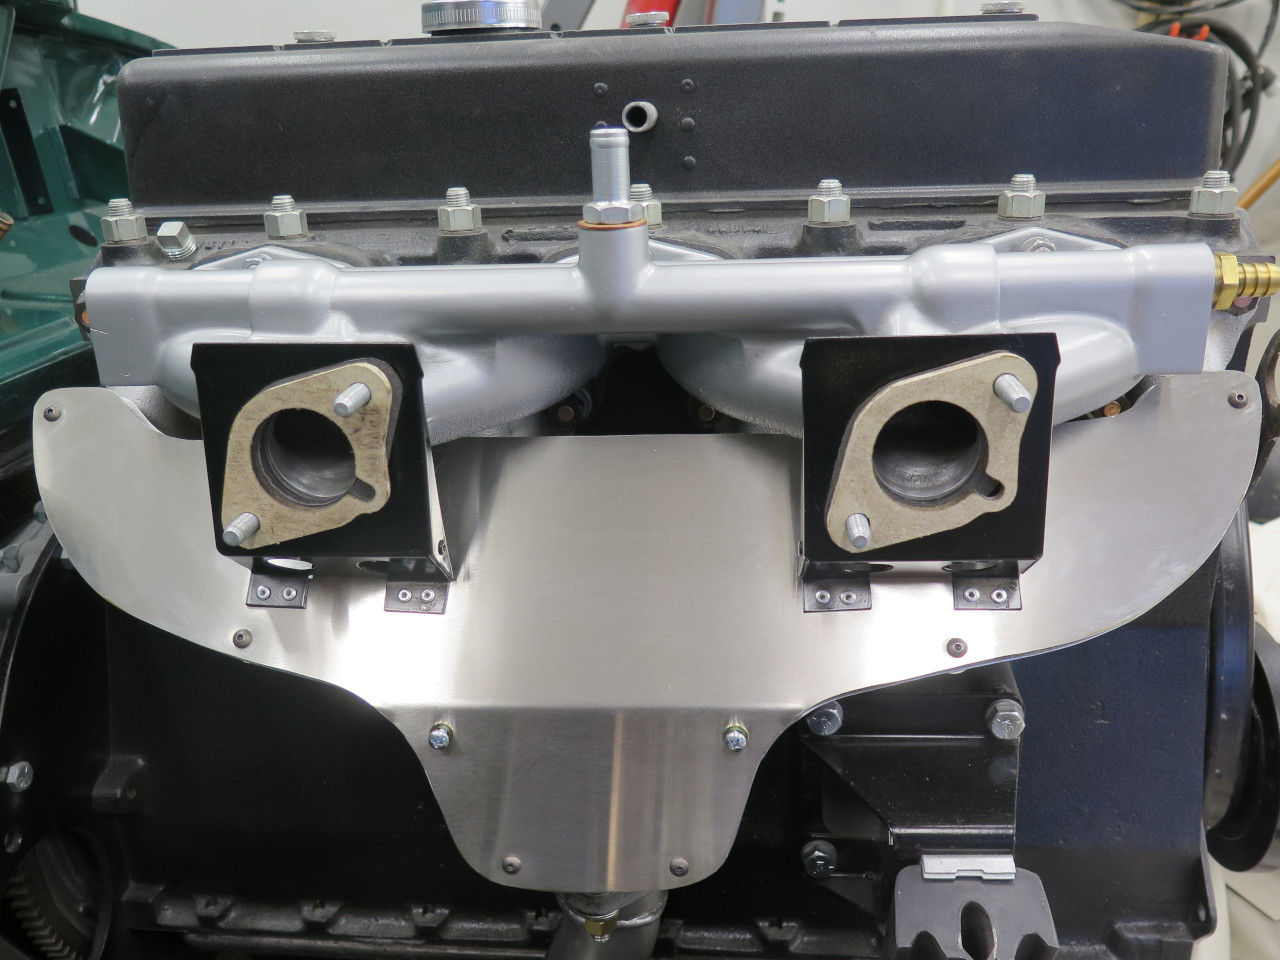
Then the carbs.
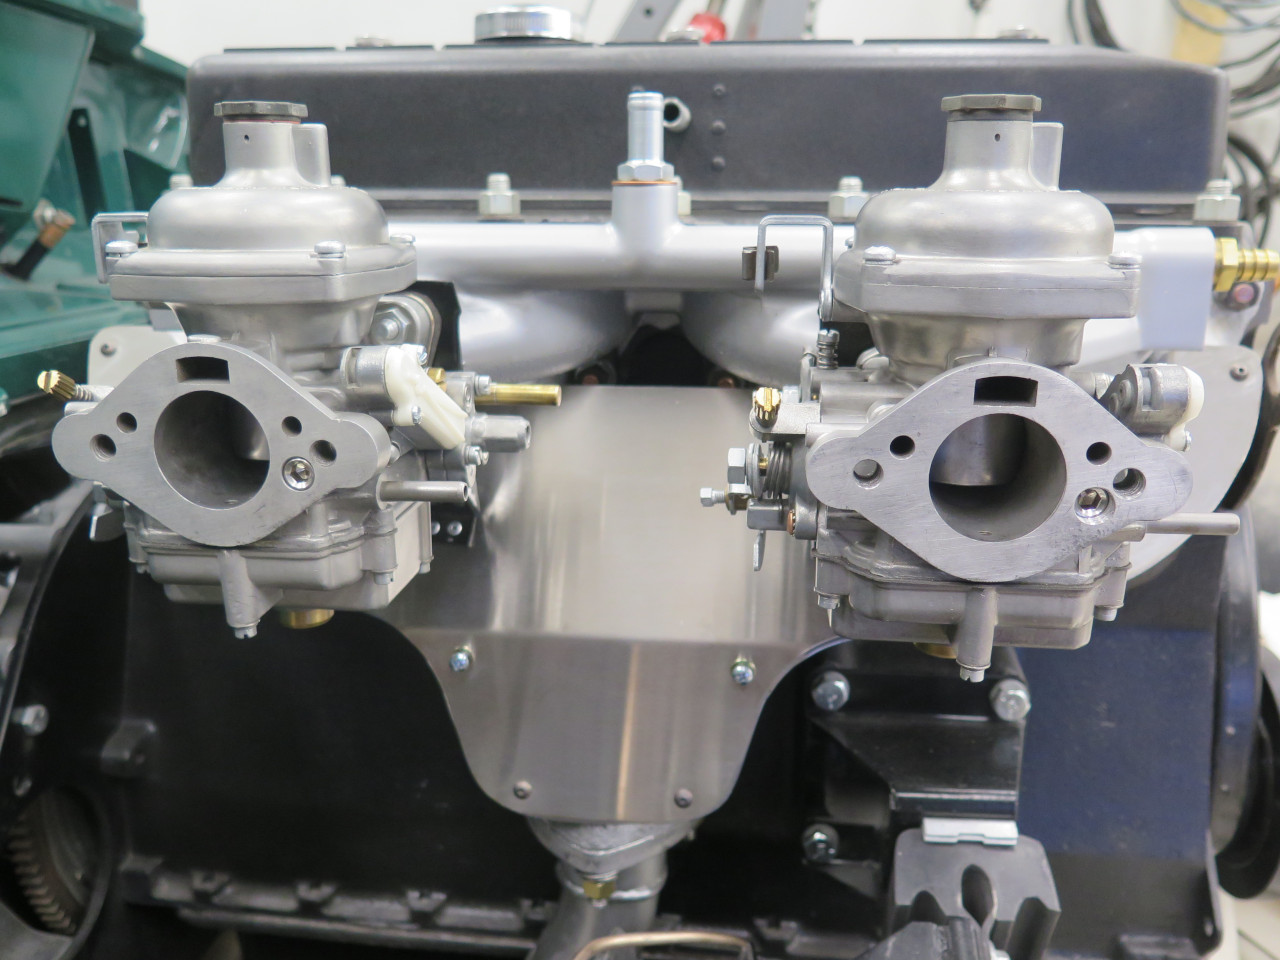
And finally the throttle linkage and braces.
This was a sort of fun one. I had the experience from the TR6
shield to fall back on, which made it go a little quicker. Cost
was around $20 for the stainless, plus some consumables.
Comments to Ed at elhollin1@yahoo.com
To my other GT6 pages.