To my other GT6
pages
February 14, 2020
Throttle Linkage
One of the things that contributes to the
experience of driving a car is how the controls feel. One
thing that most people expect from a sports car is controls that
are quick and responsive. To a large extent the feel of a
control is influenced by the linkage between the cabin control
and the ultimate device it controls. A sloppy linkage
feels like a sloppy control.
Some people consider the throttle linkage arrangement on GT6
cars (also TR6) as a little Rube Goldberg-ish, especially on
left-drive cars. There are more than half a dozen joints
in the linkage train that can get worn and loose, leading to
slop in the pedal response.
One popular solution to this situation is to install a throttle
cable kit that effectively eliminates some of the joints.
This is apparently effective, and not very expensive, but really
just trades issues with articulated joints for those of
cables. Even though there are a lot of joints in the stock
design, there is no reason they can't be tightened up and maybe
even improved upon.
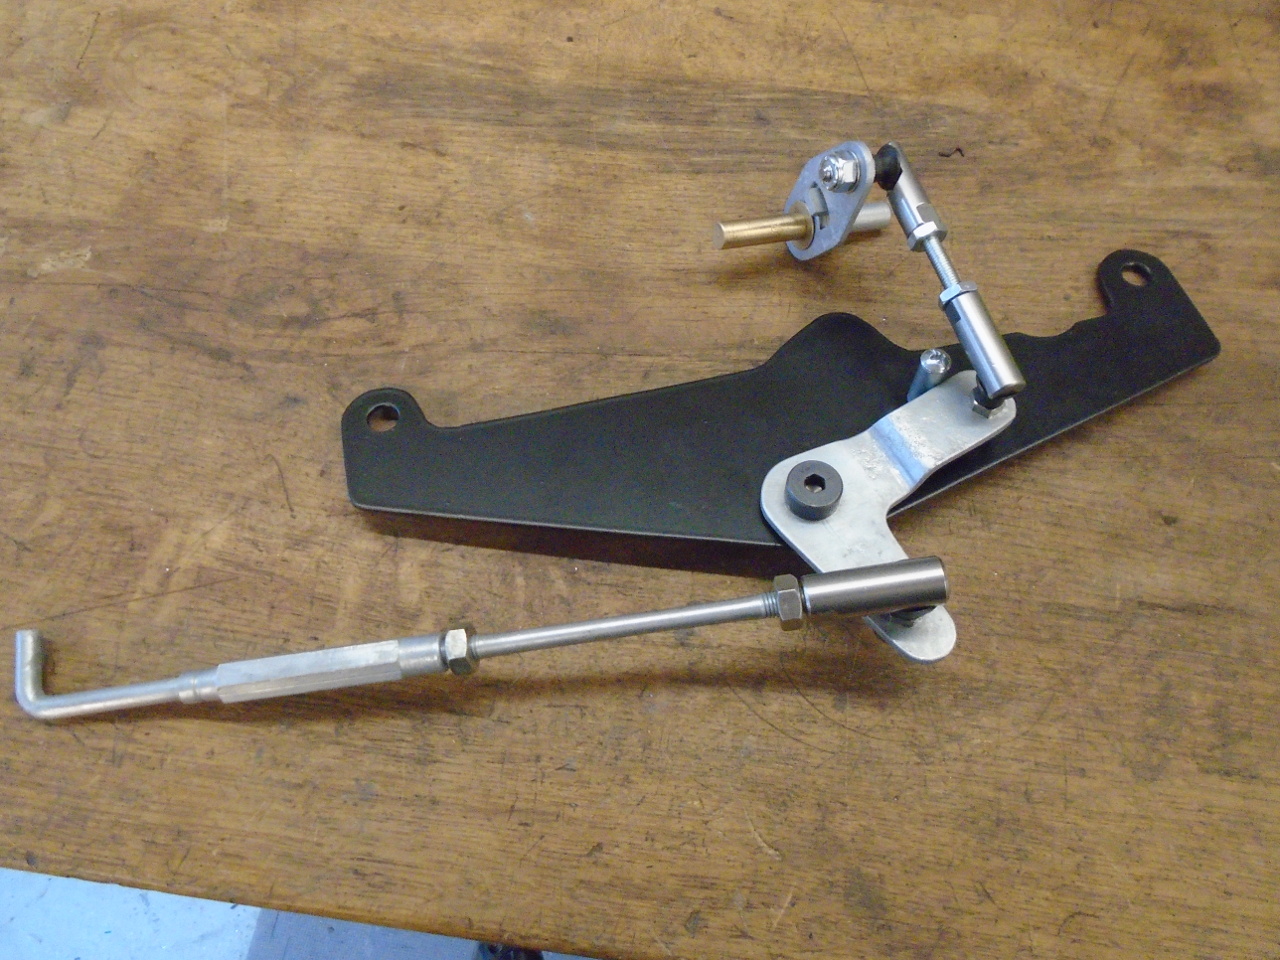
I'm only focusing here on the part of the linkage that lives
under the carburetors. It consists of a horizontal link
that transmits linear motion from the throttle shaft behind the
engine, a bell crank that converts the horizontal motion to
vertical, and an arm that converts the vertical motion to rotary
motion for the carb throttle shafts.
My assembly was dirty, crusty, and what wasn't loose was
frozen. The vertical link was missing altogether. I
think it fell apart in disassembly.
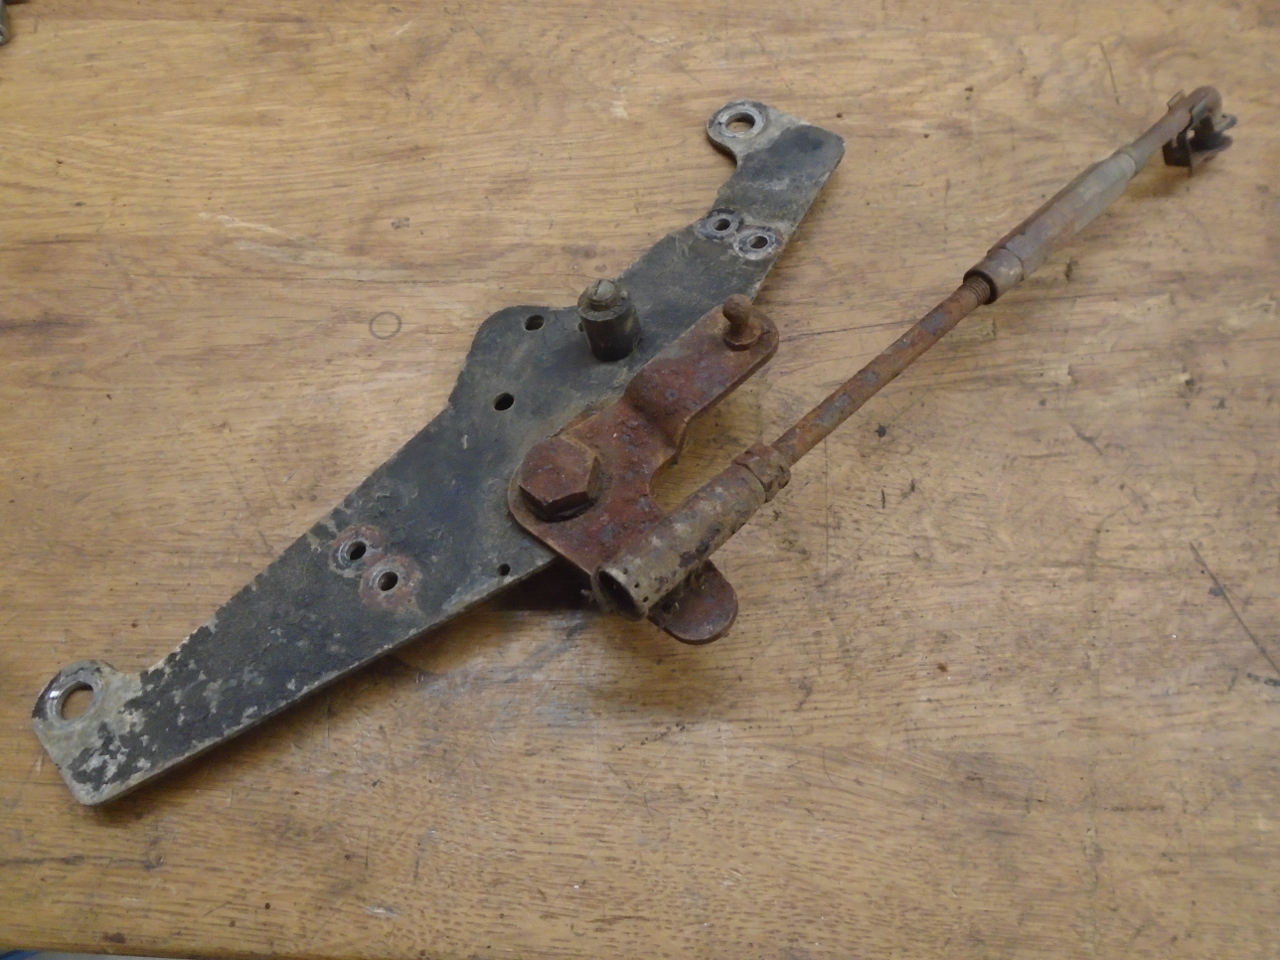
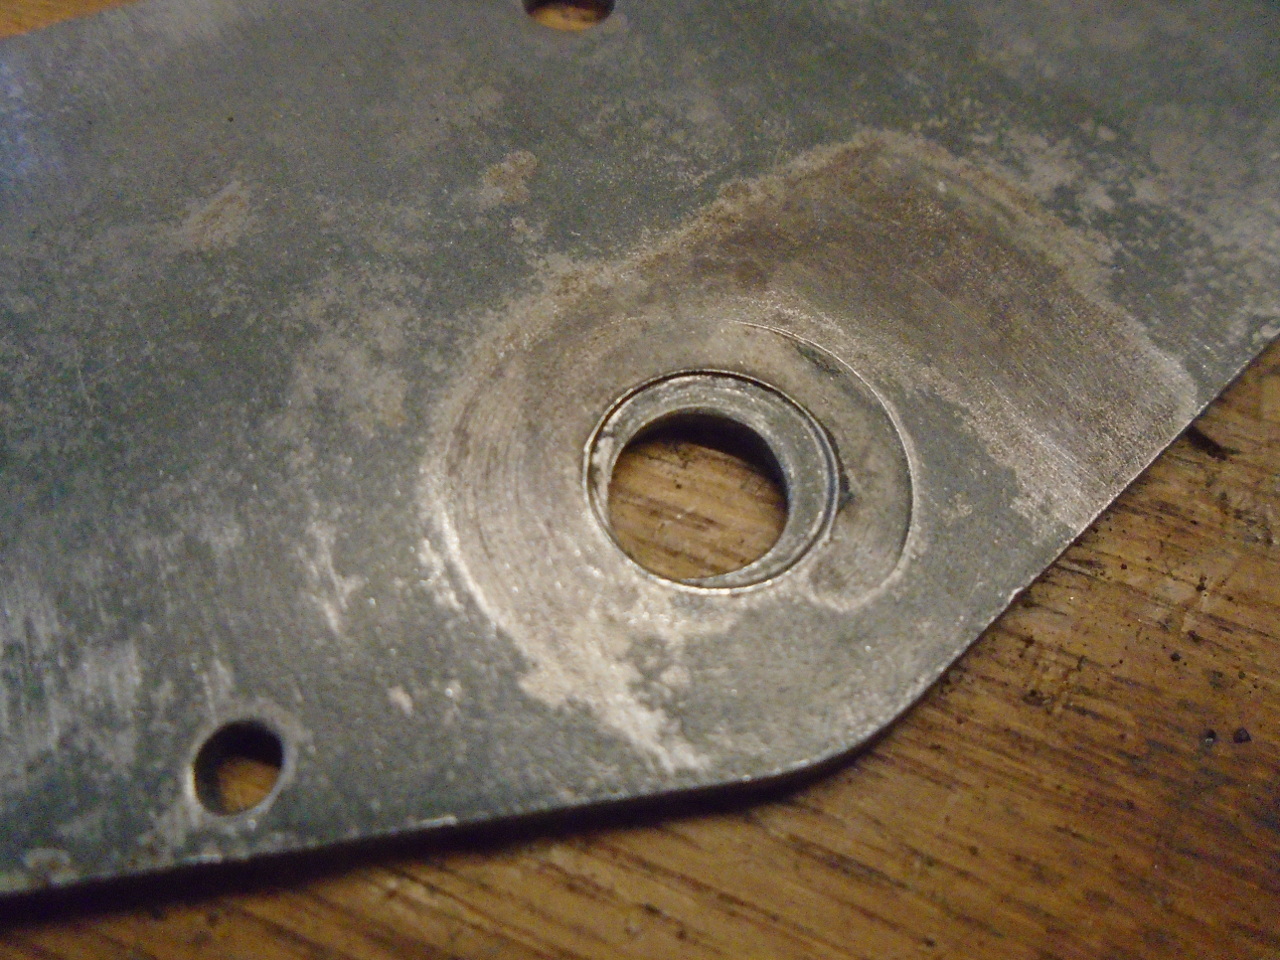
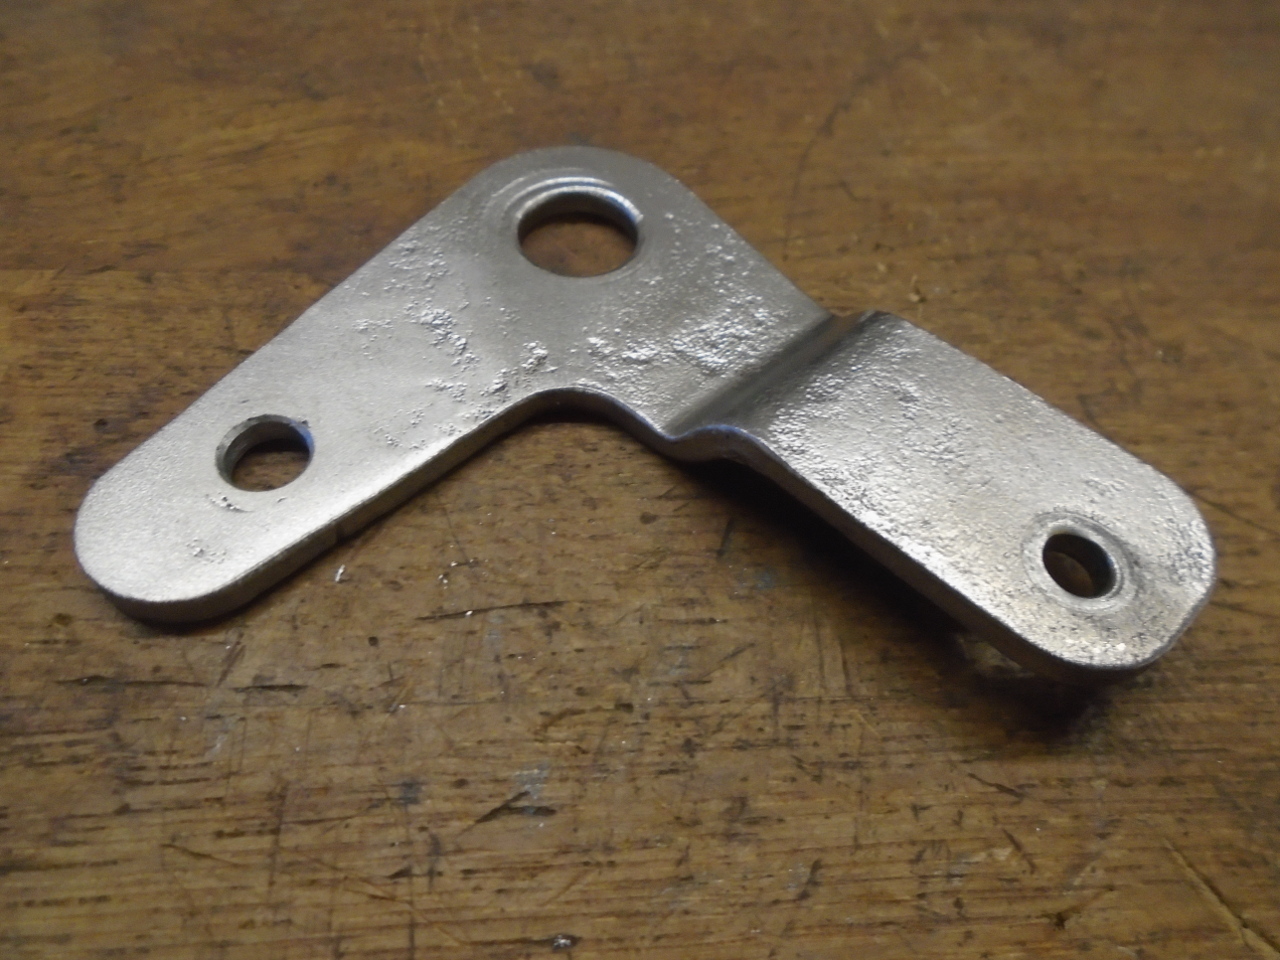
The bracket that spans the carbs and holds the bell crank was in
pretty bad shape. It had deep wear marks from the crank,
and seemed to have a lot of holes that weren't used. It
was pretty simple to just make a new one. It's 14 gauge
steel, like the original.

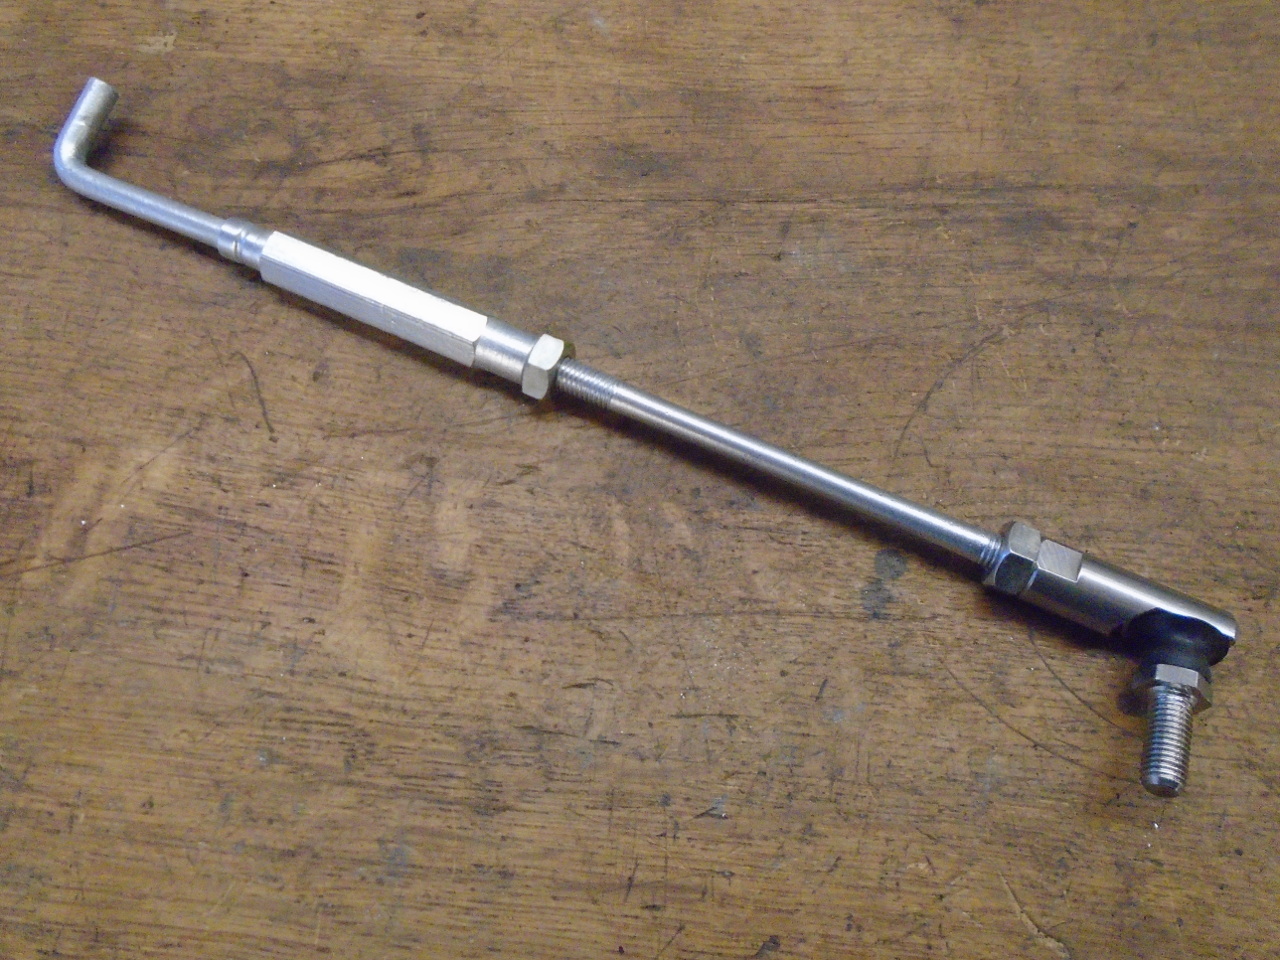
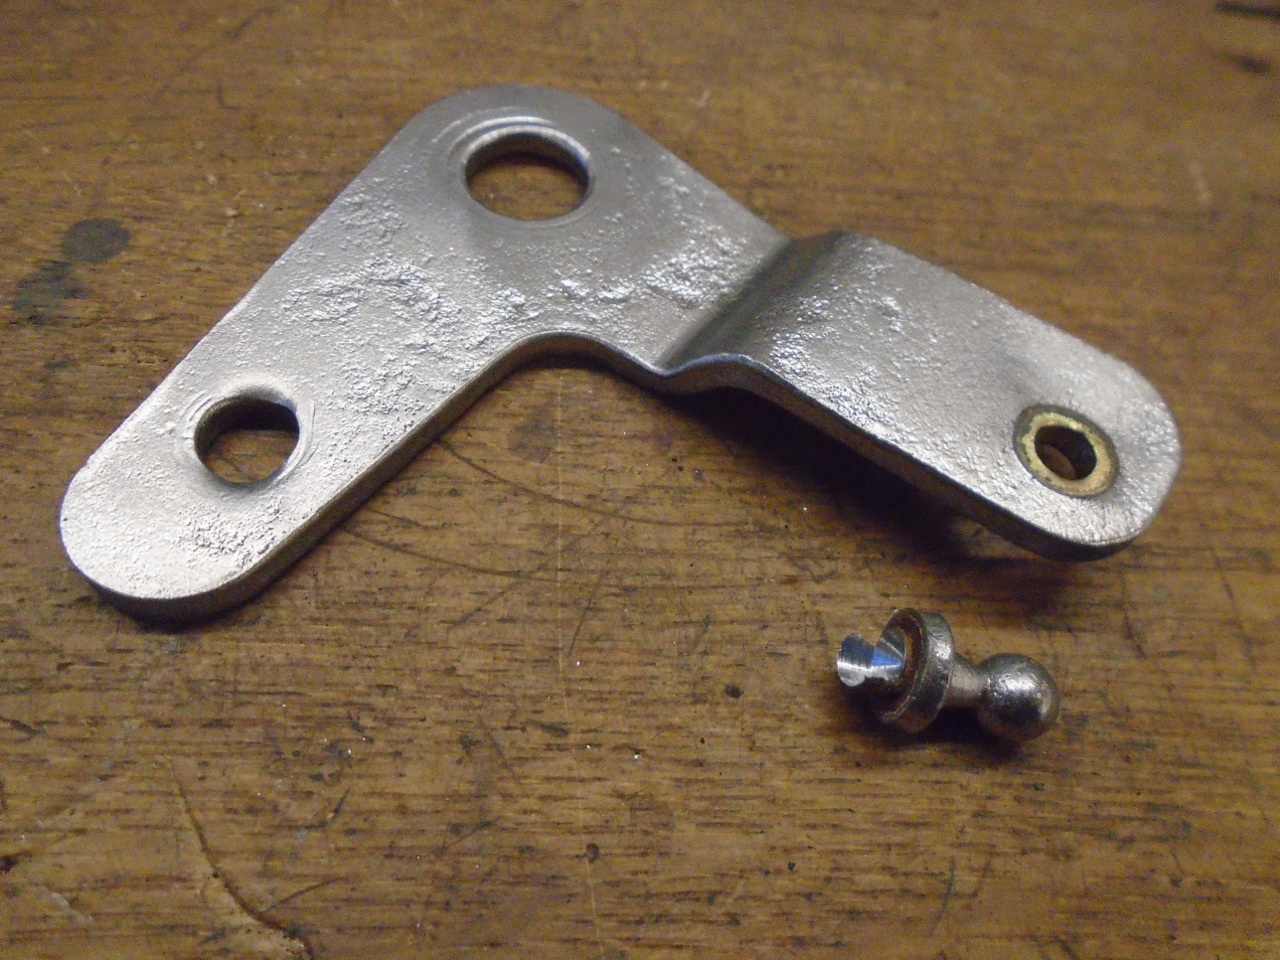
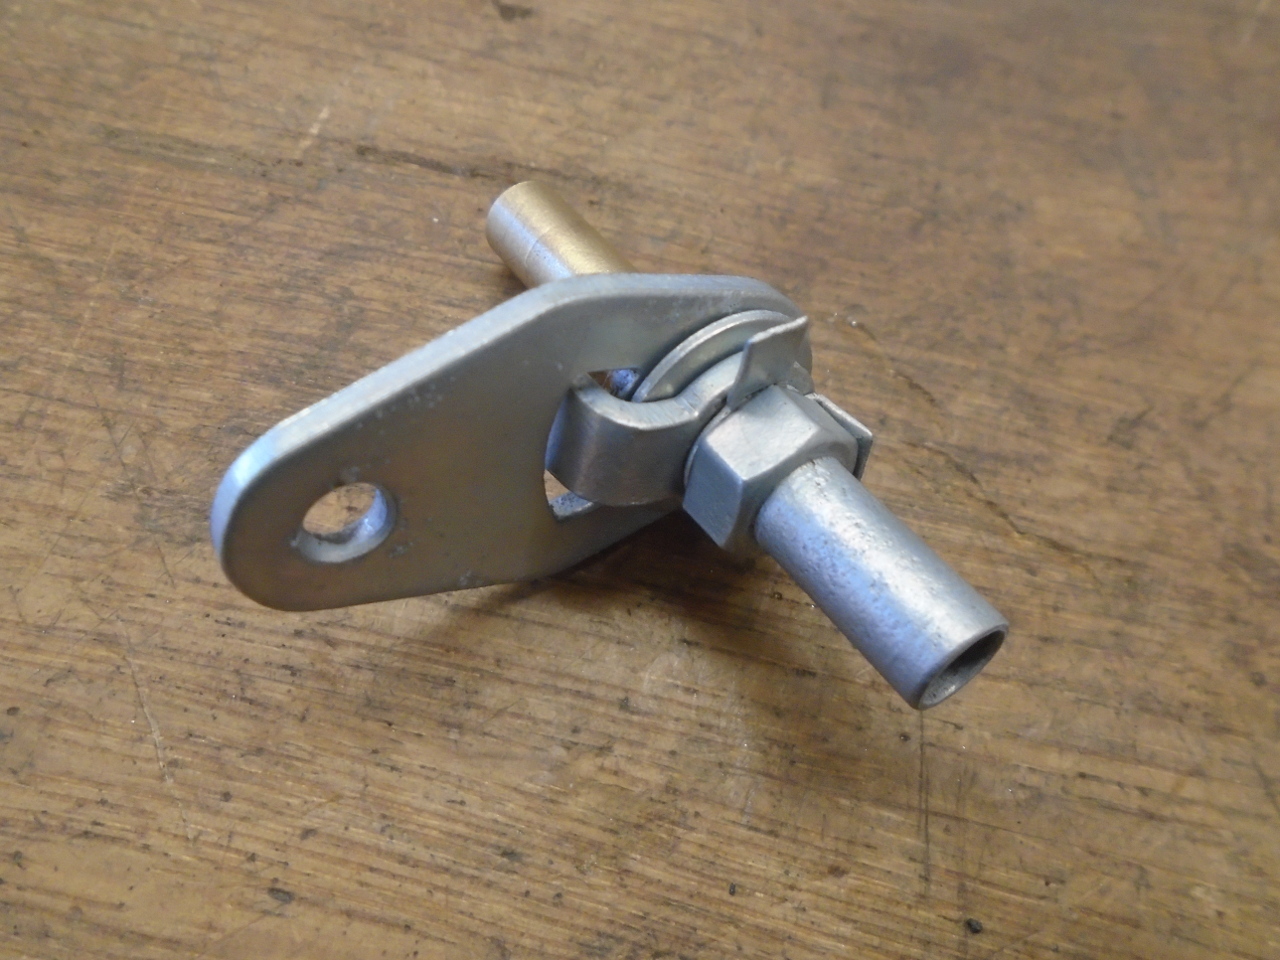
Next, I looked at the horizontal link. It is adjustable
length, and has a ball joint on the bell crank end. The
ball joint was a little loose, and though there is a provision
for tightening it up, that adjustment was frozen. I ended
up damaging the joint trying to free it up.
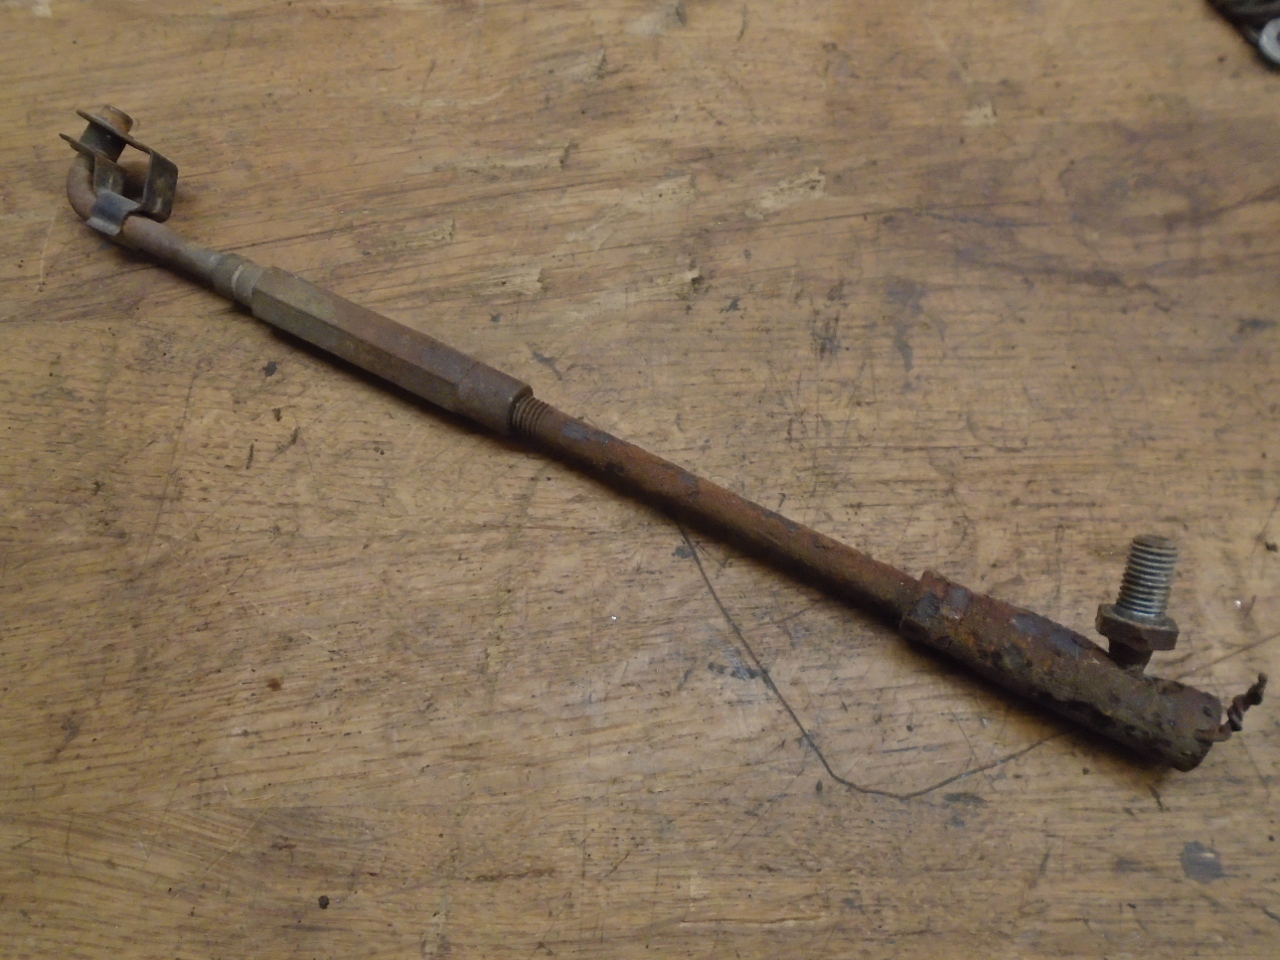
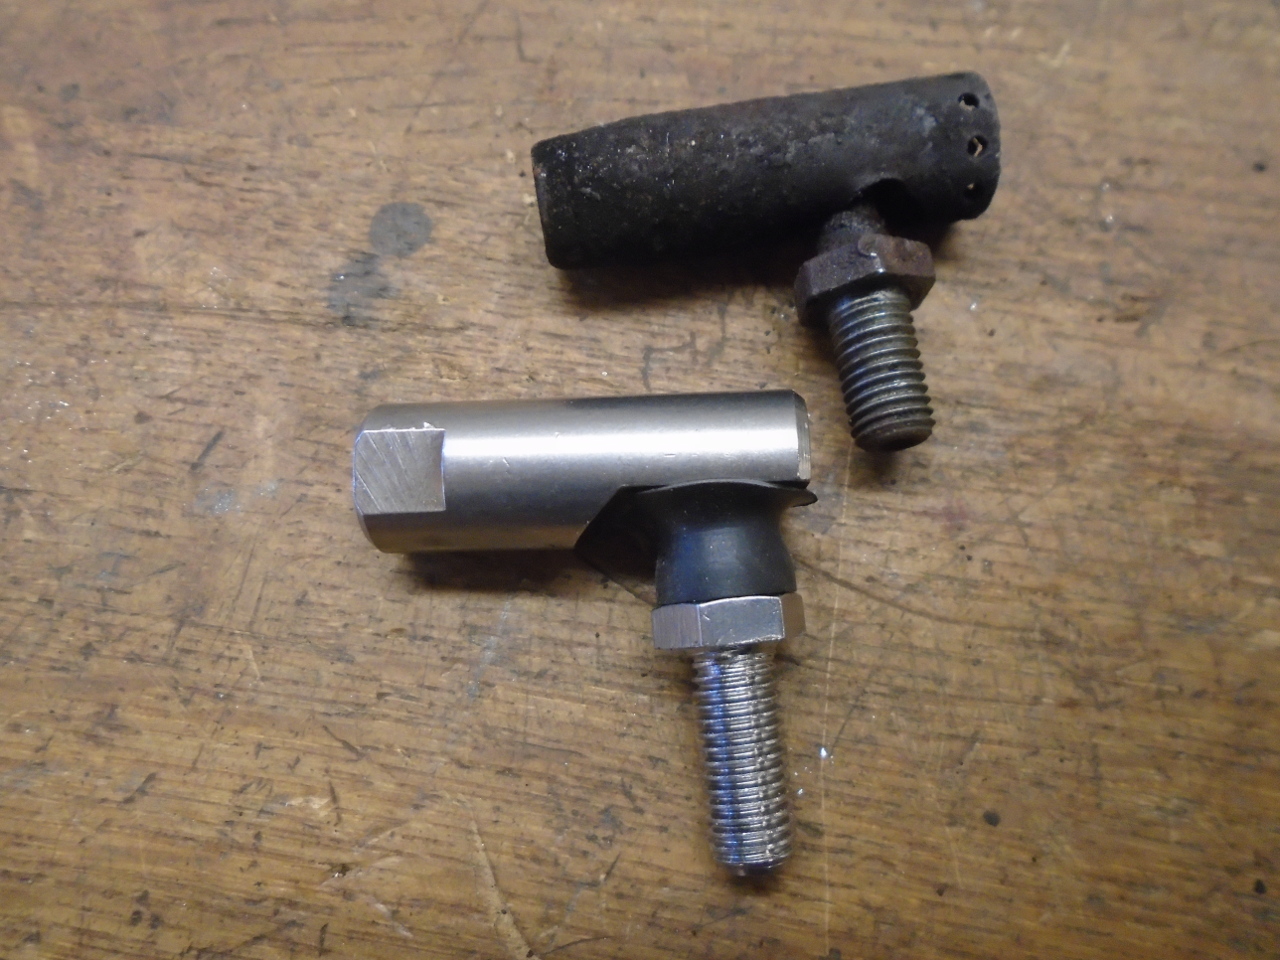
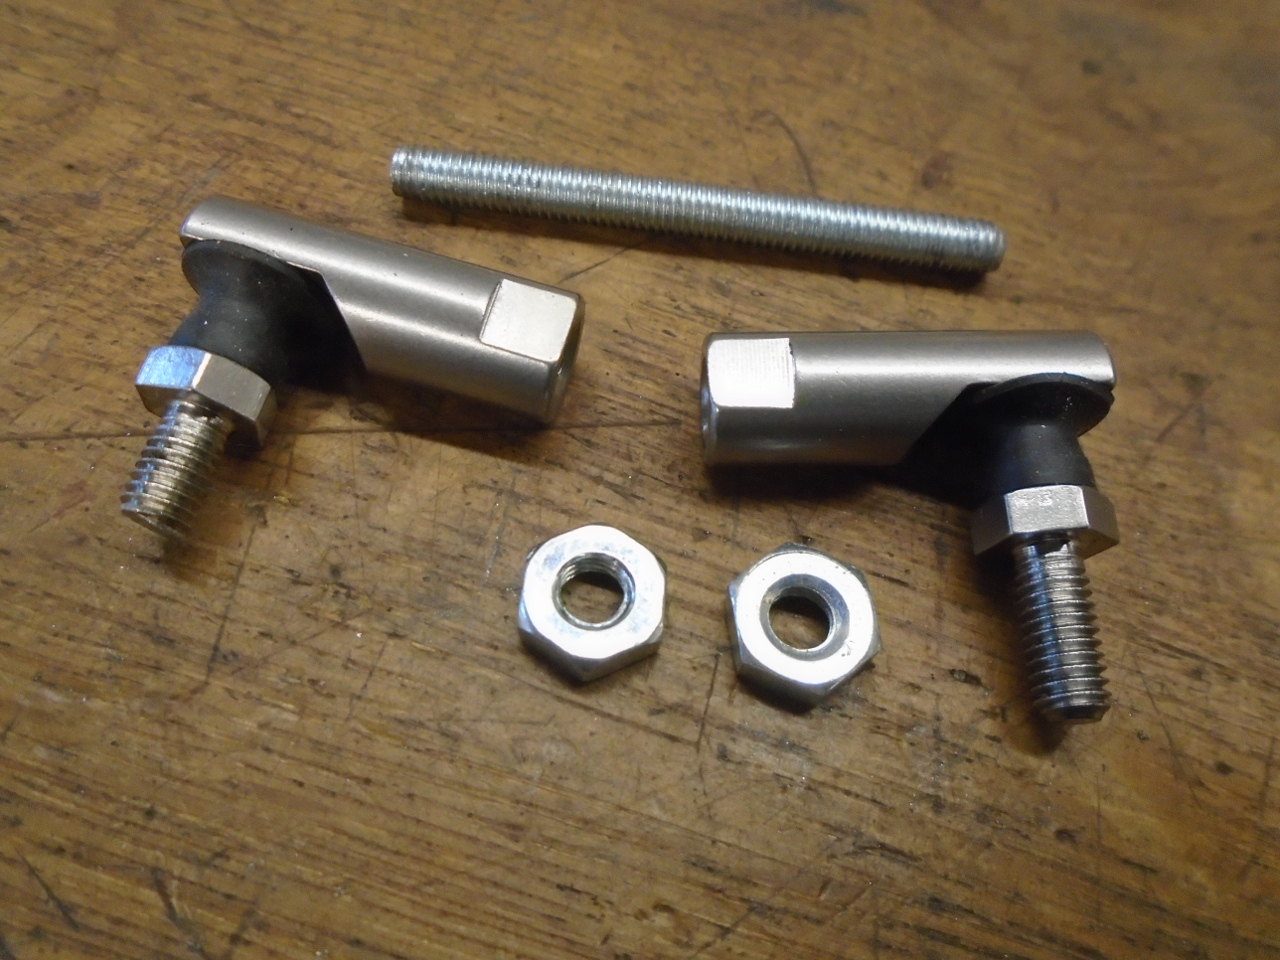
I believe at least one vendor may sell a reproduction of the
original ball joint, but I found a pretty good modern
replacement for it. It is not adjustable, but is all
stainless steel, and has a rubber boot to help keep the joint
clean.
I cleaned up, de-rusted, and re-plated the parts of the link.
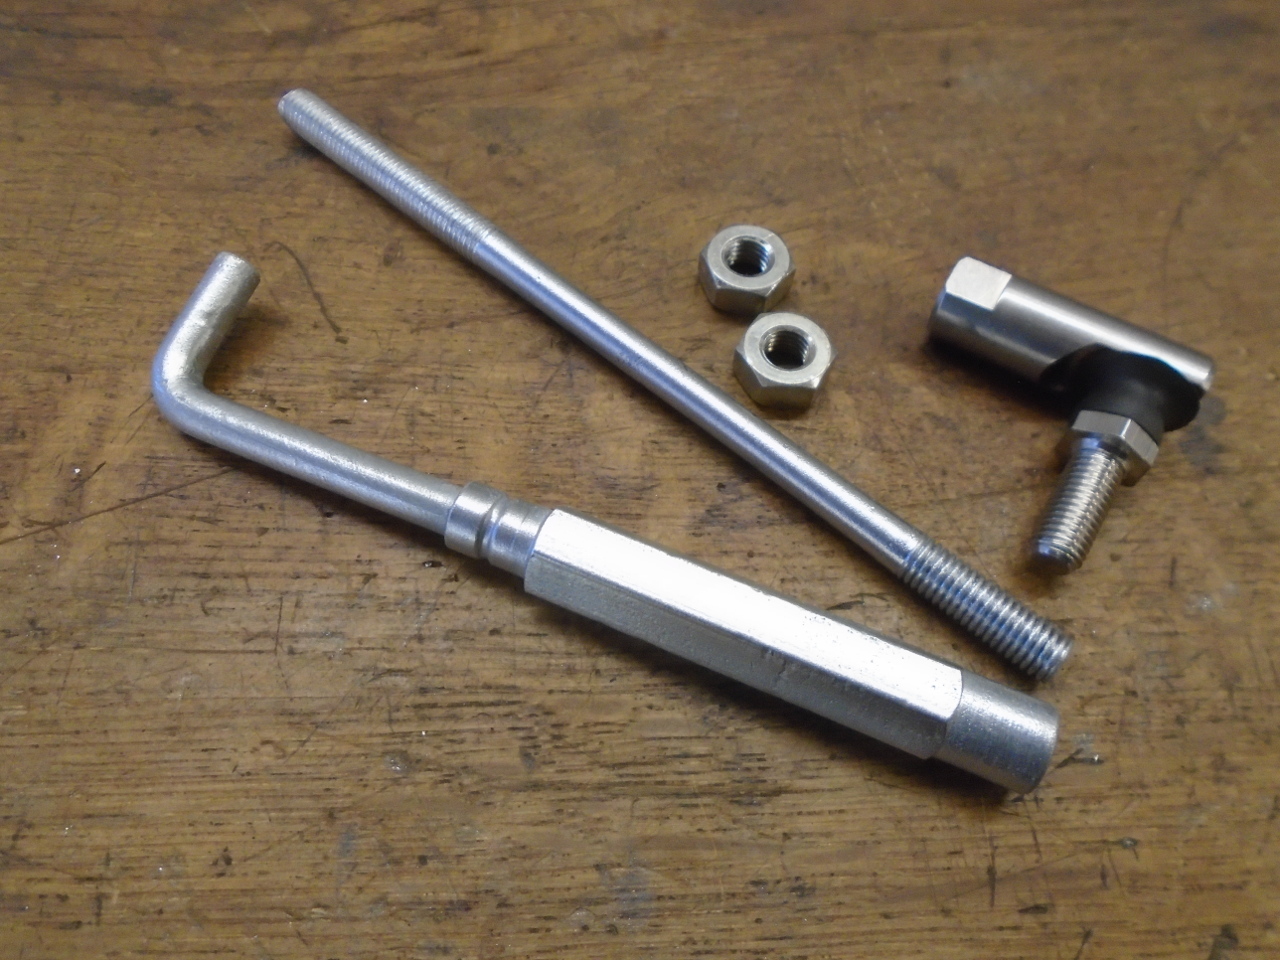
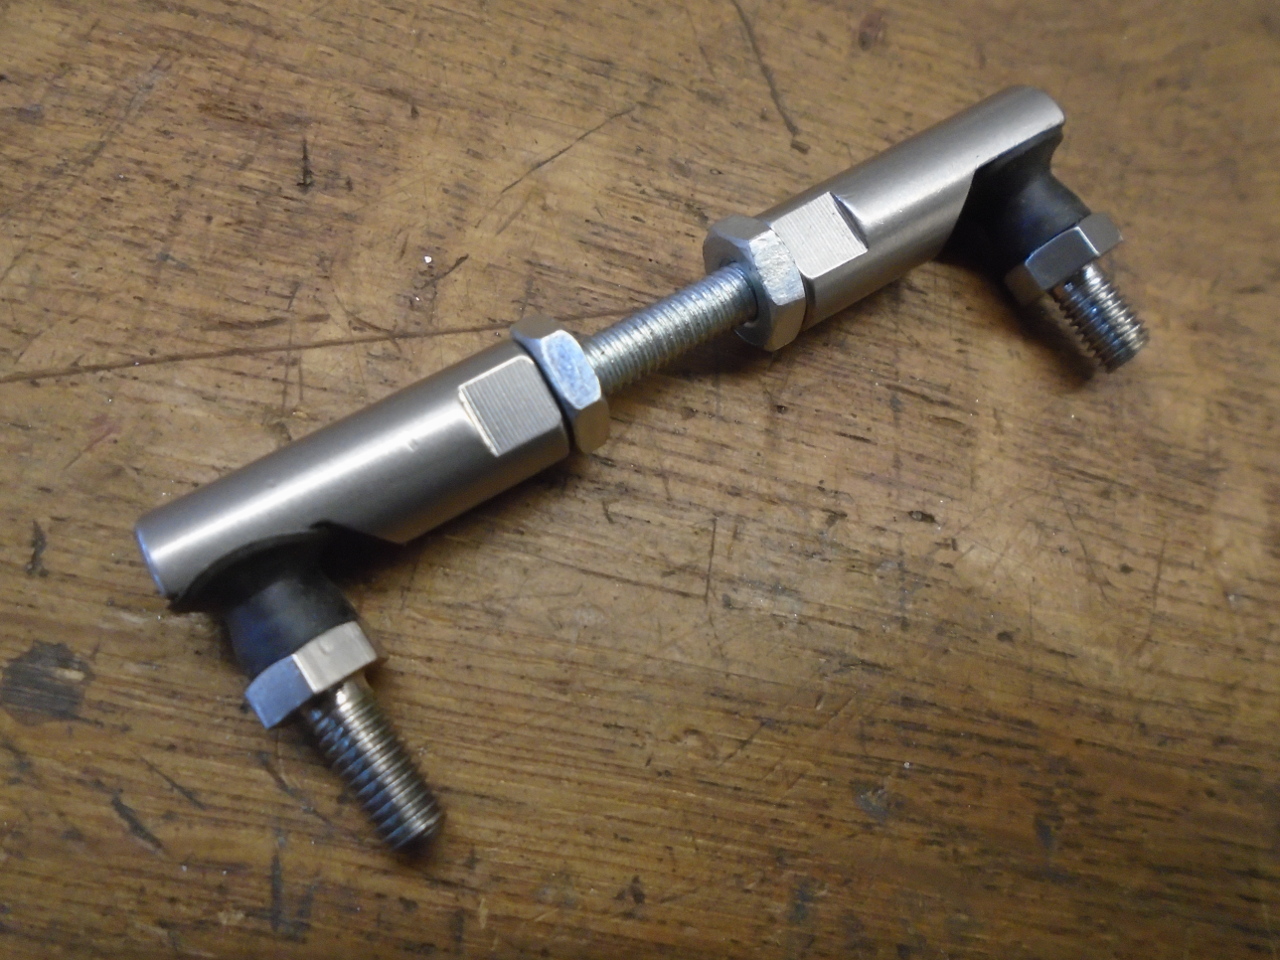
I liked that new ball joint so much that I ordered a couple more
in the next smaller size to make a new vertical link.
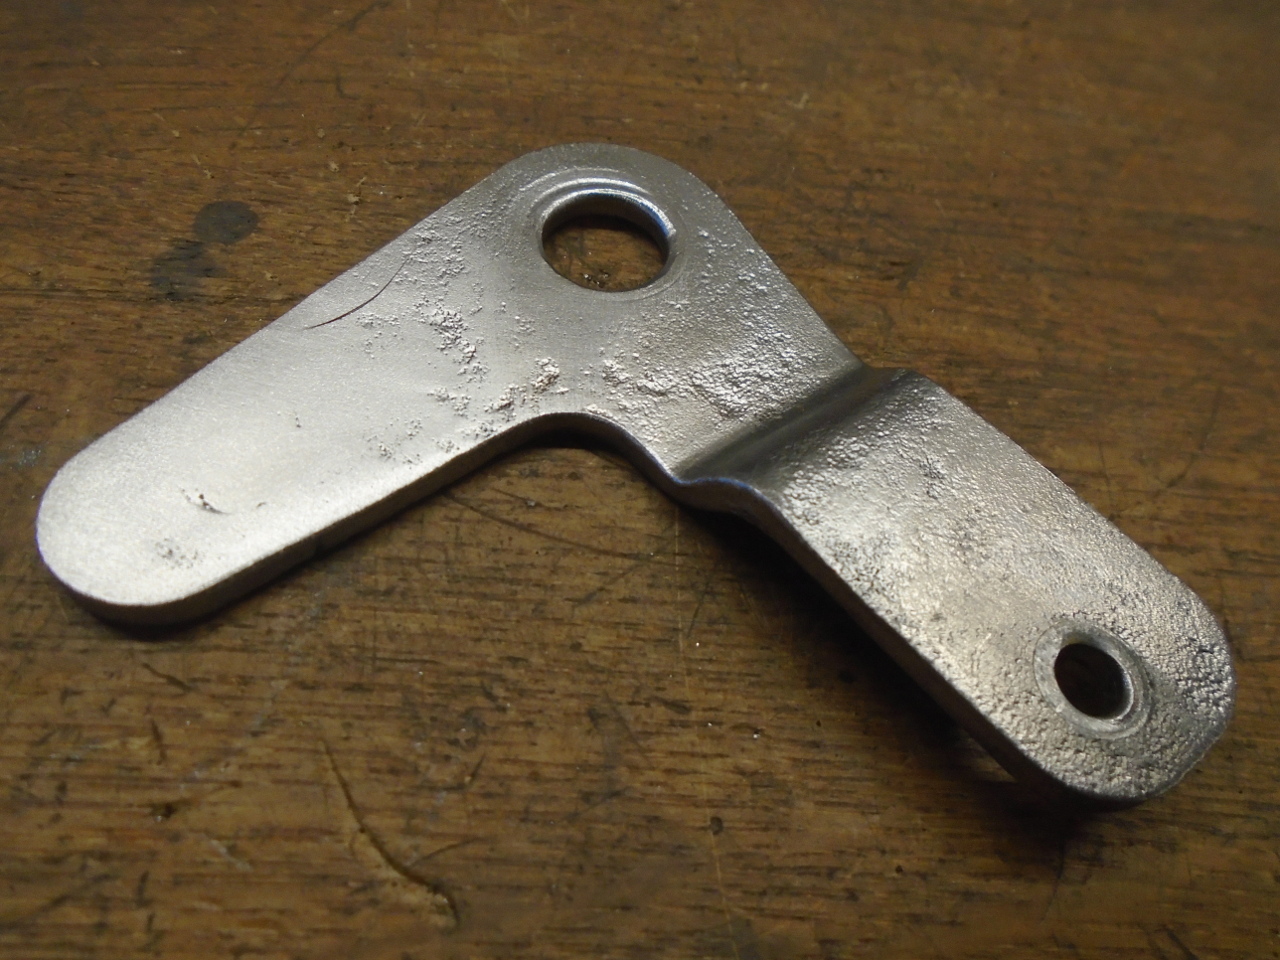
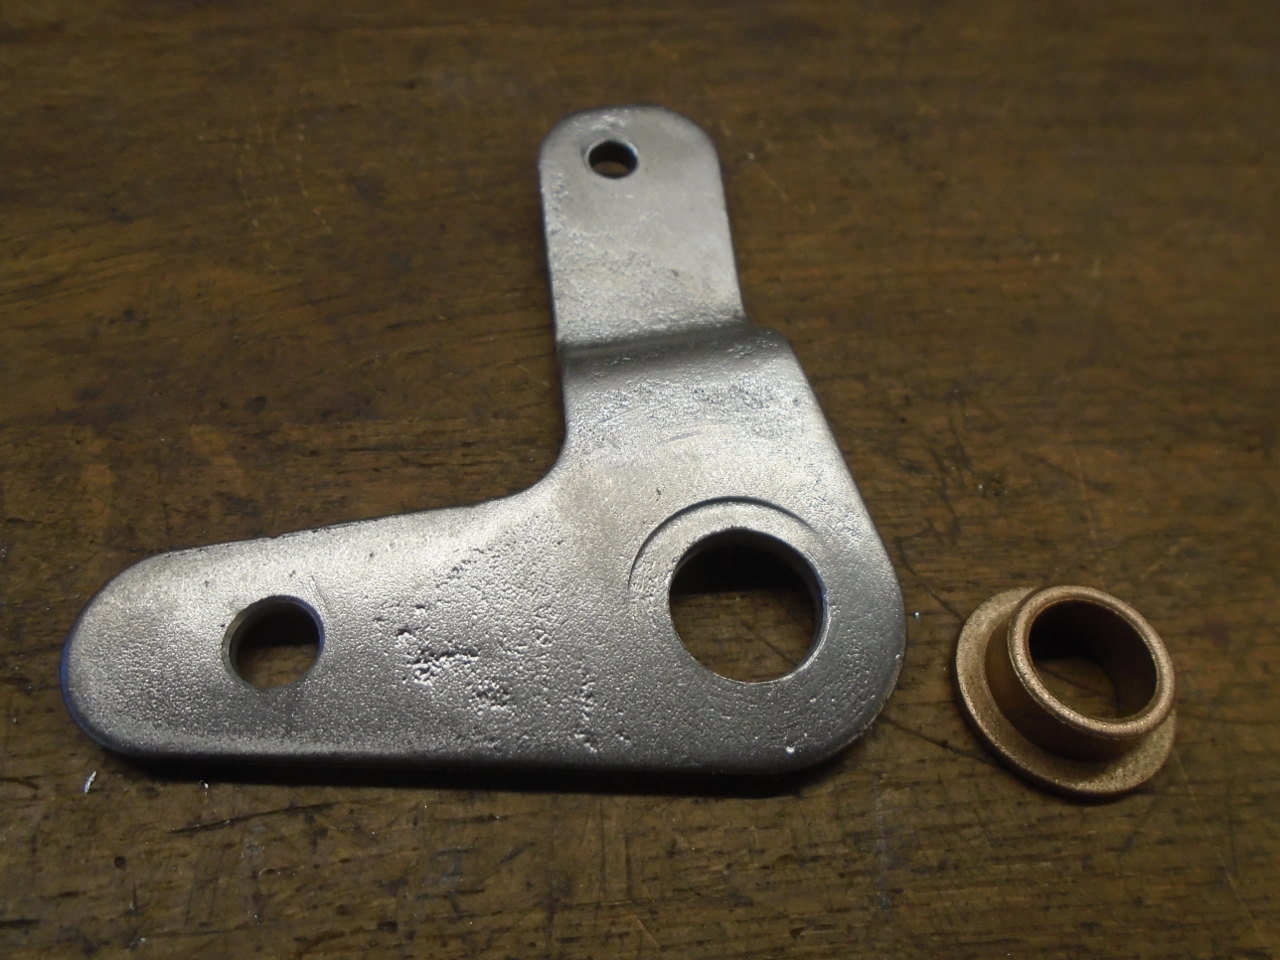
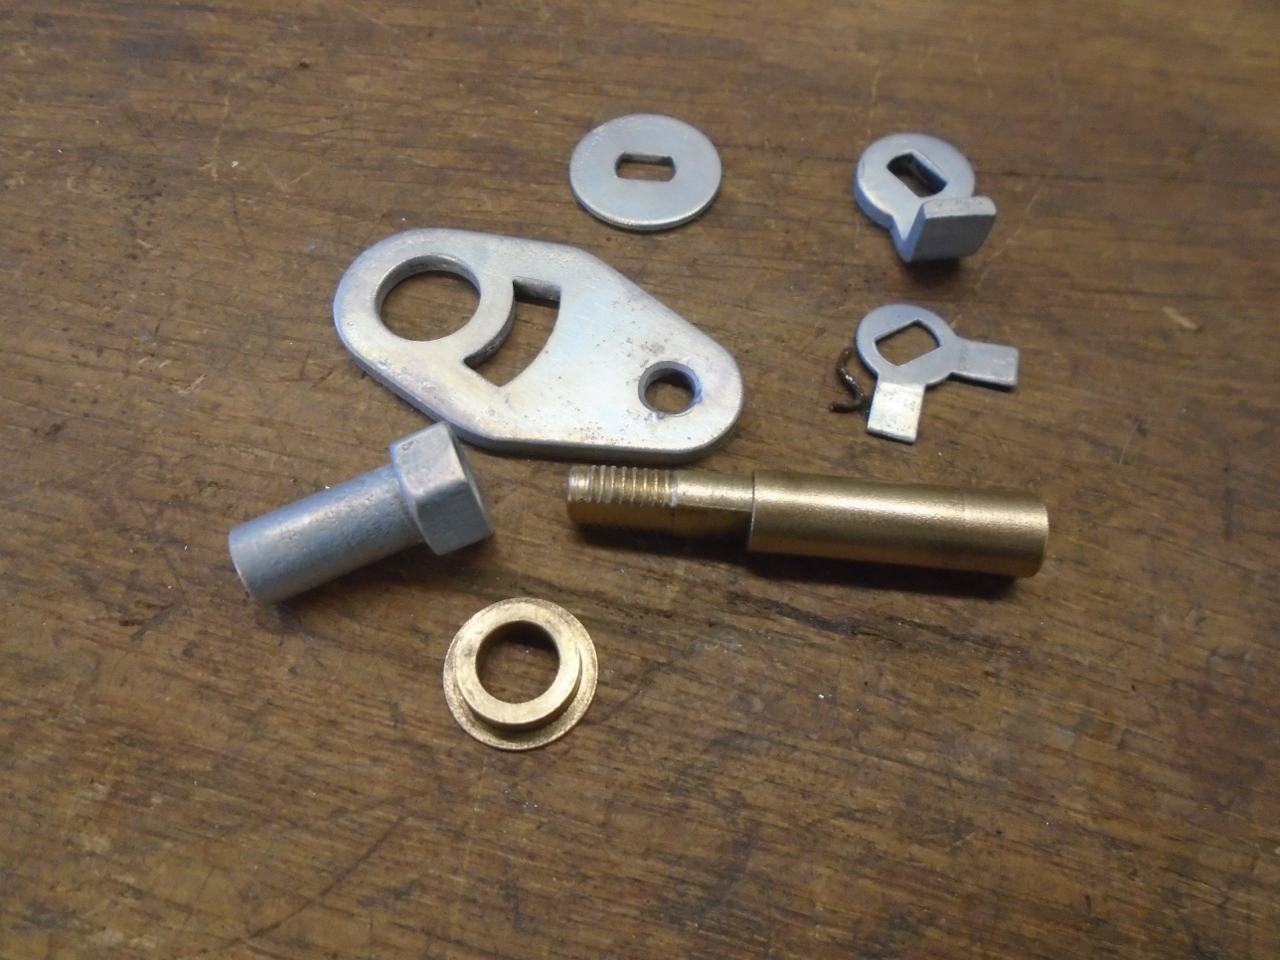
Then, on to the bell crank. The pivot hole of the bell
crank was loose on its shoulder bolt, and was the source of a
lot of the slop in the linkage.
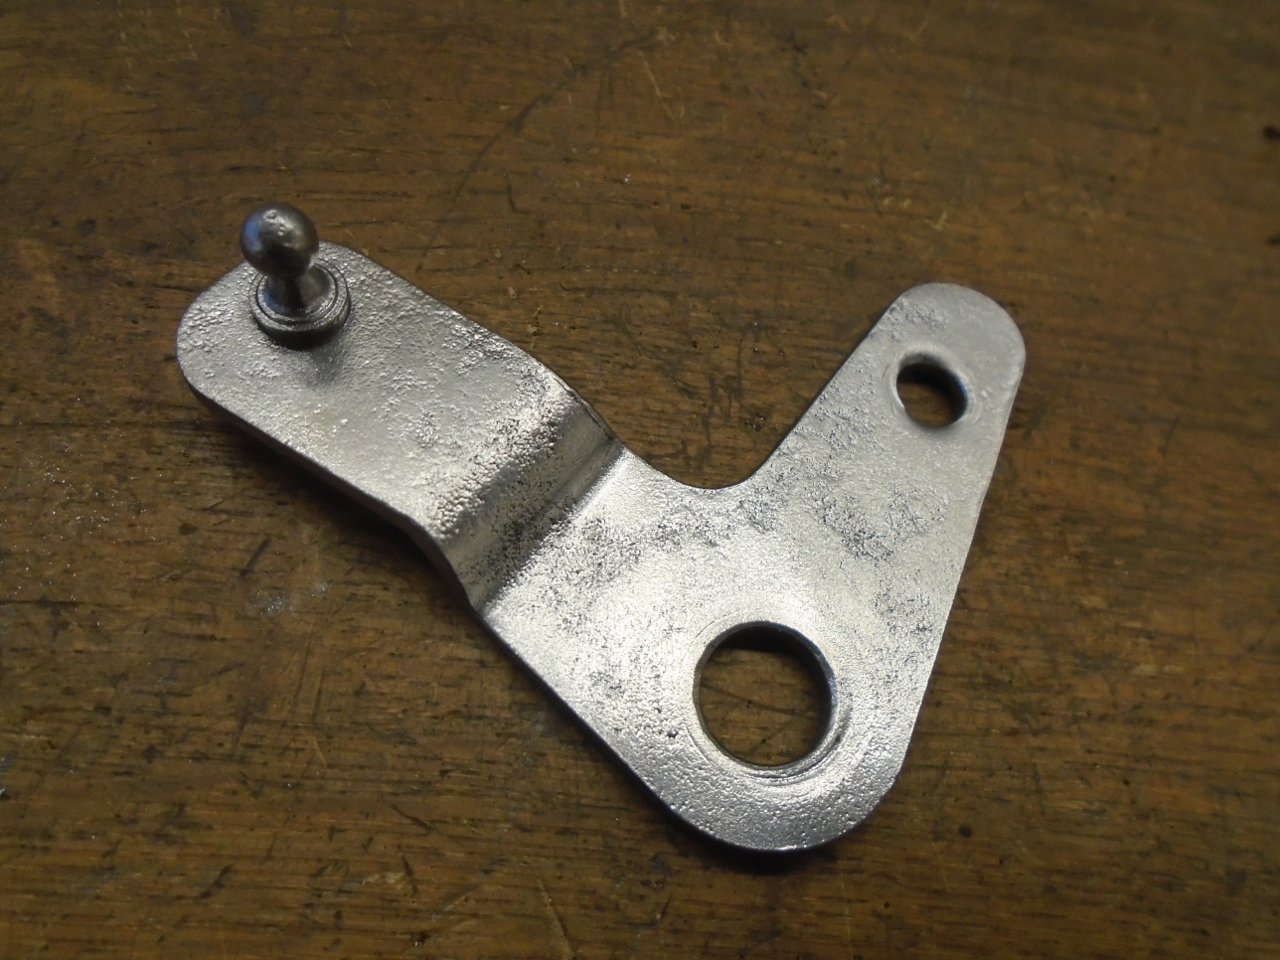
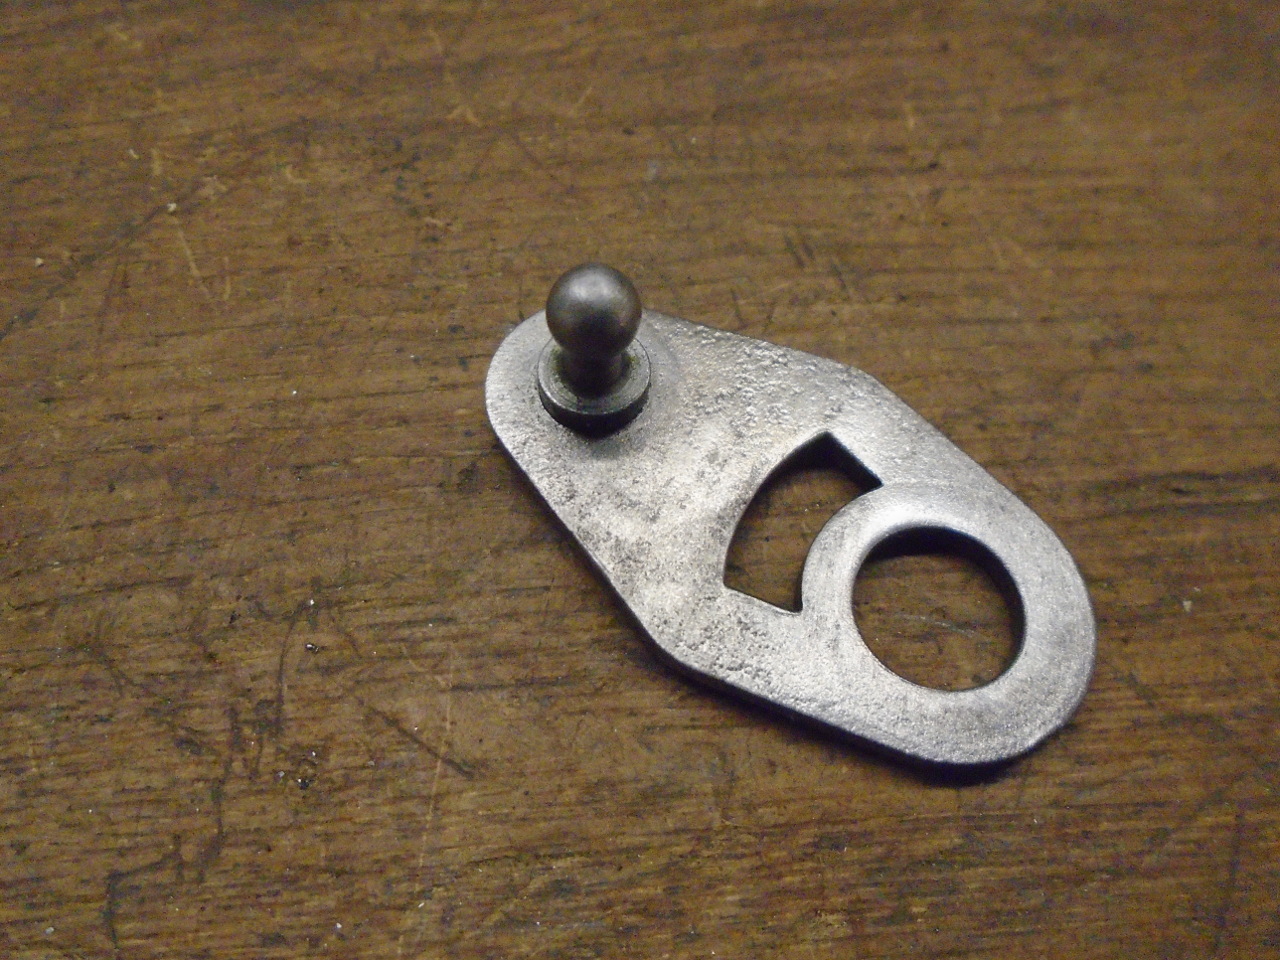
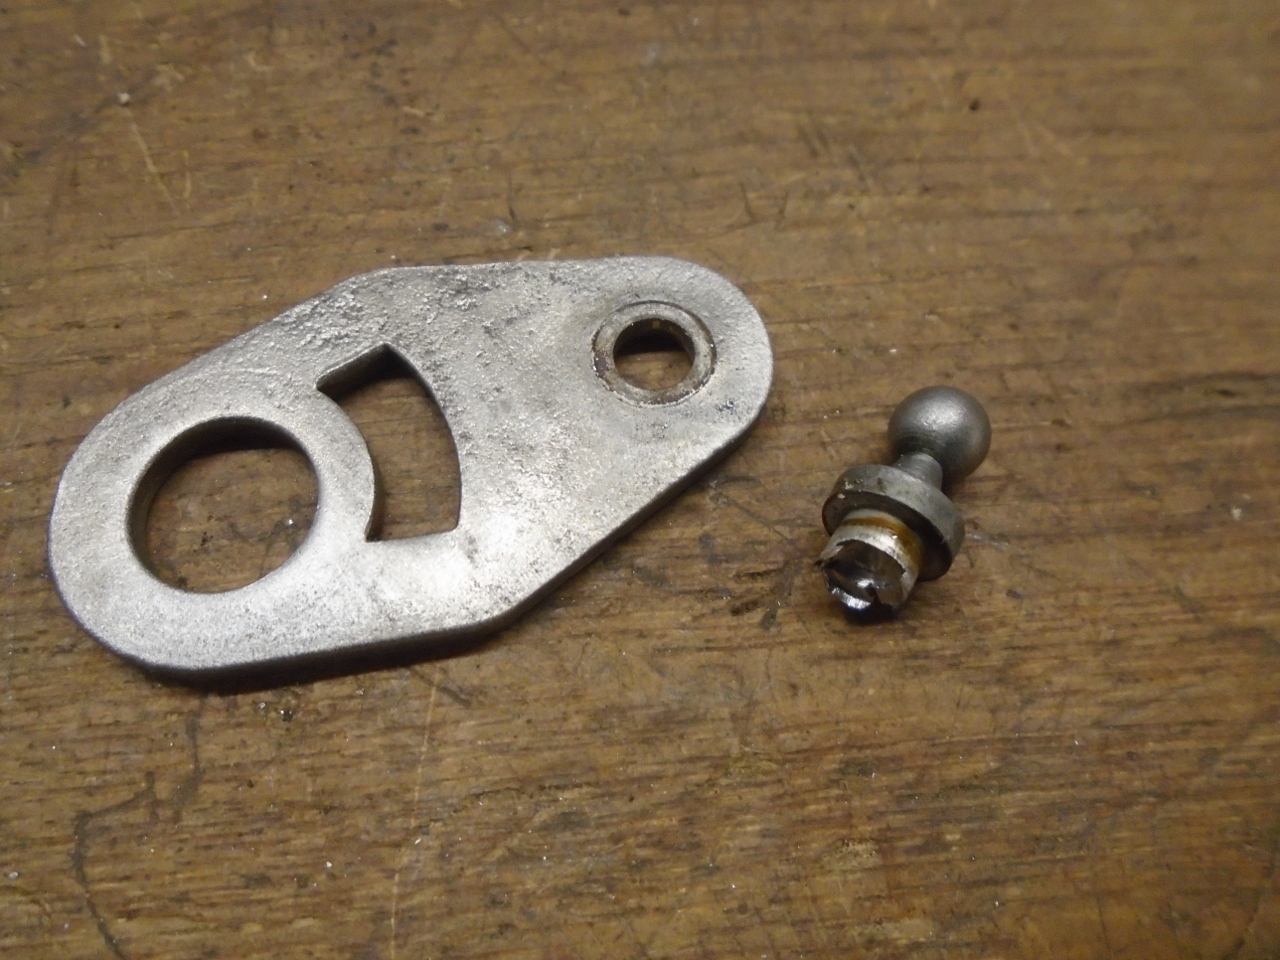
The first mod to the crank was to remove that staked ball.
The original vertical link just had a plastic ball socket that
would snap onto that ball. Those plastic pieces didn't age
well.
I had also noticed that the hole where the horizontal link
connected was wallowed out, so I welded it closed and redrilled
it for a snugger fit.
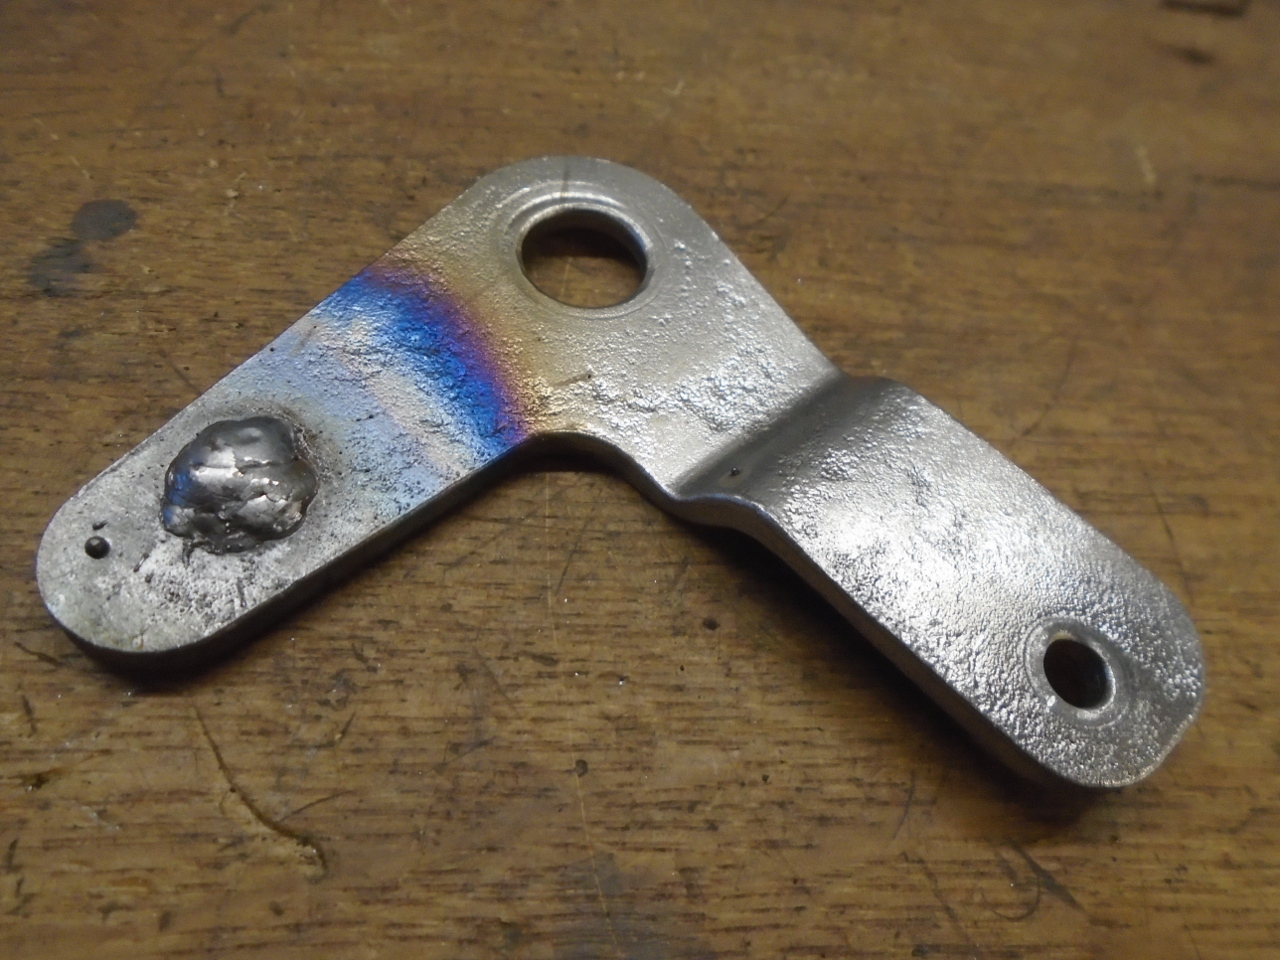
Then, to address the pivot hole, and to even improve the design
a little, I bored the hole for a pressed-in flanged Oilite
bushing. The flange will bear against the mounting bracket
so the crank can't rub.
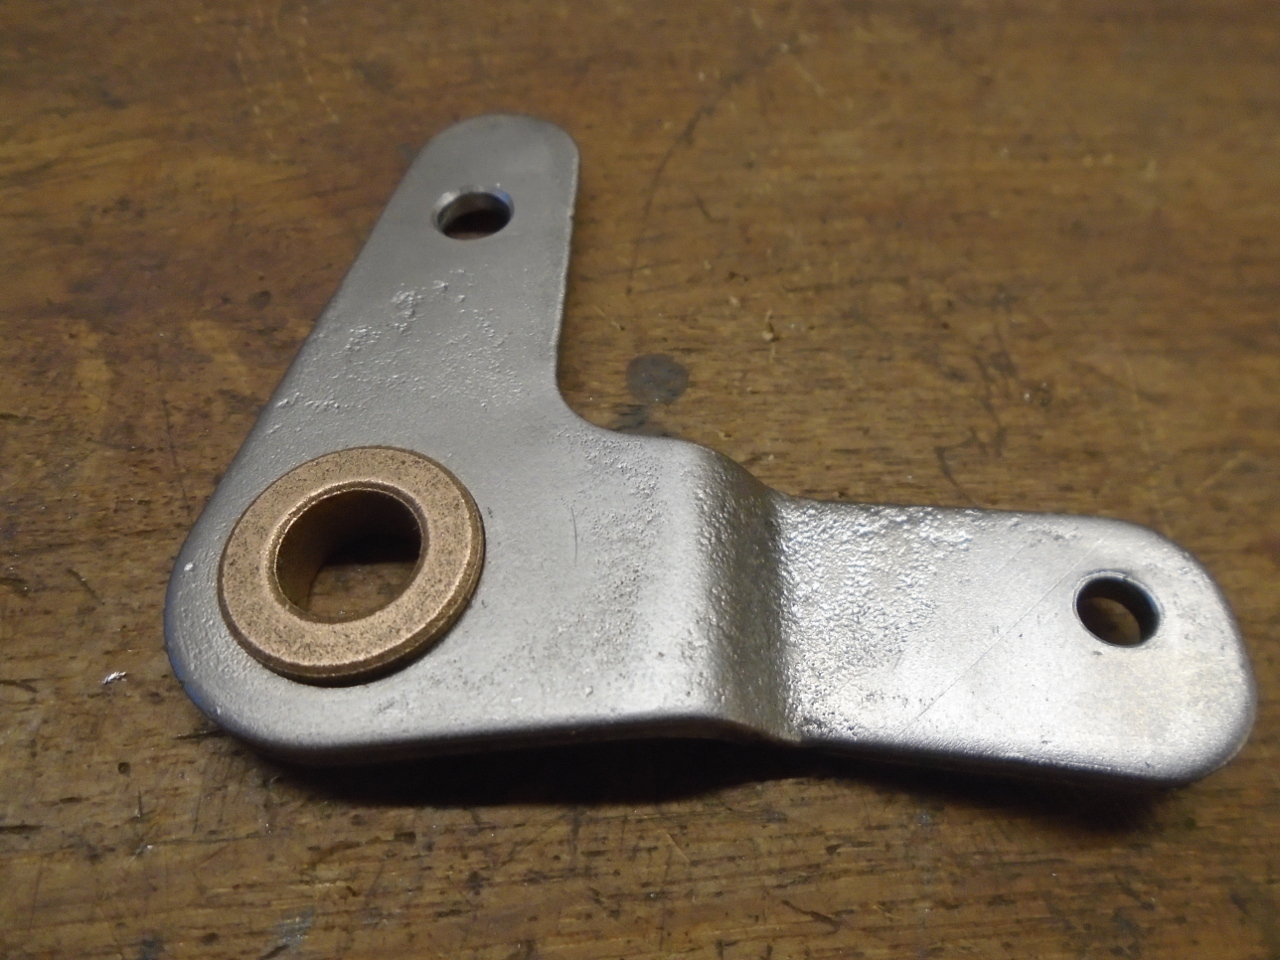
Then I could mount the bell crank with a new shoulder
bolt. I thought the bracket looked better black.
It's powder coated.
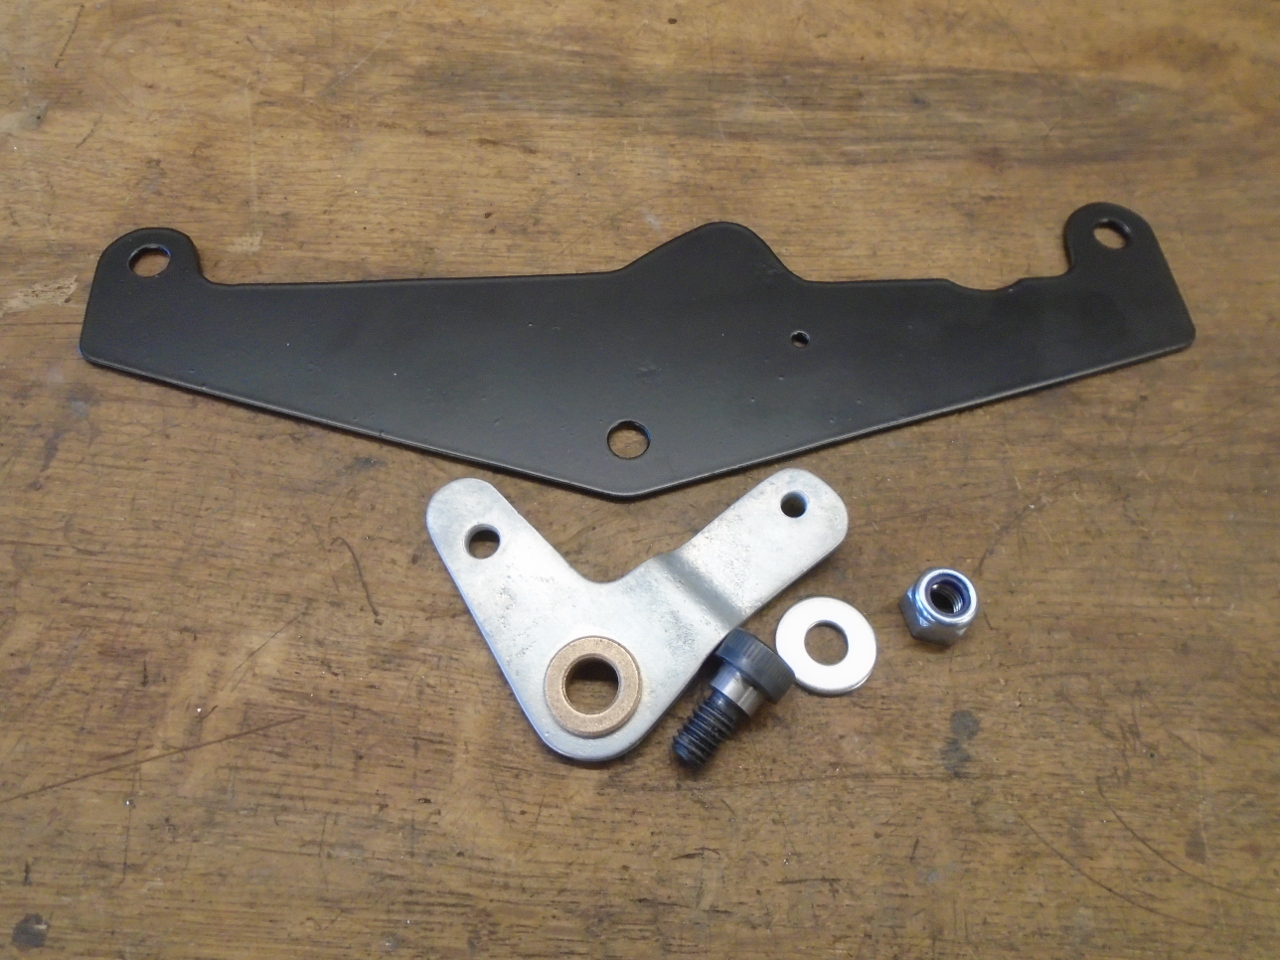
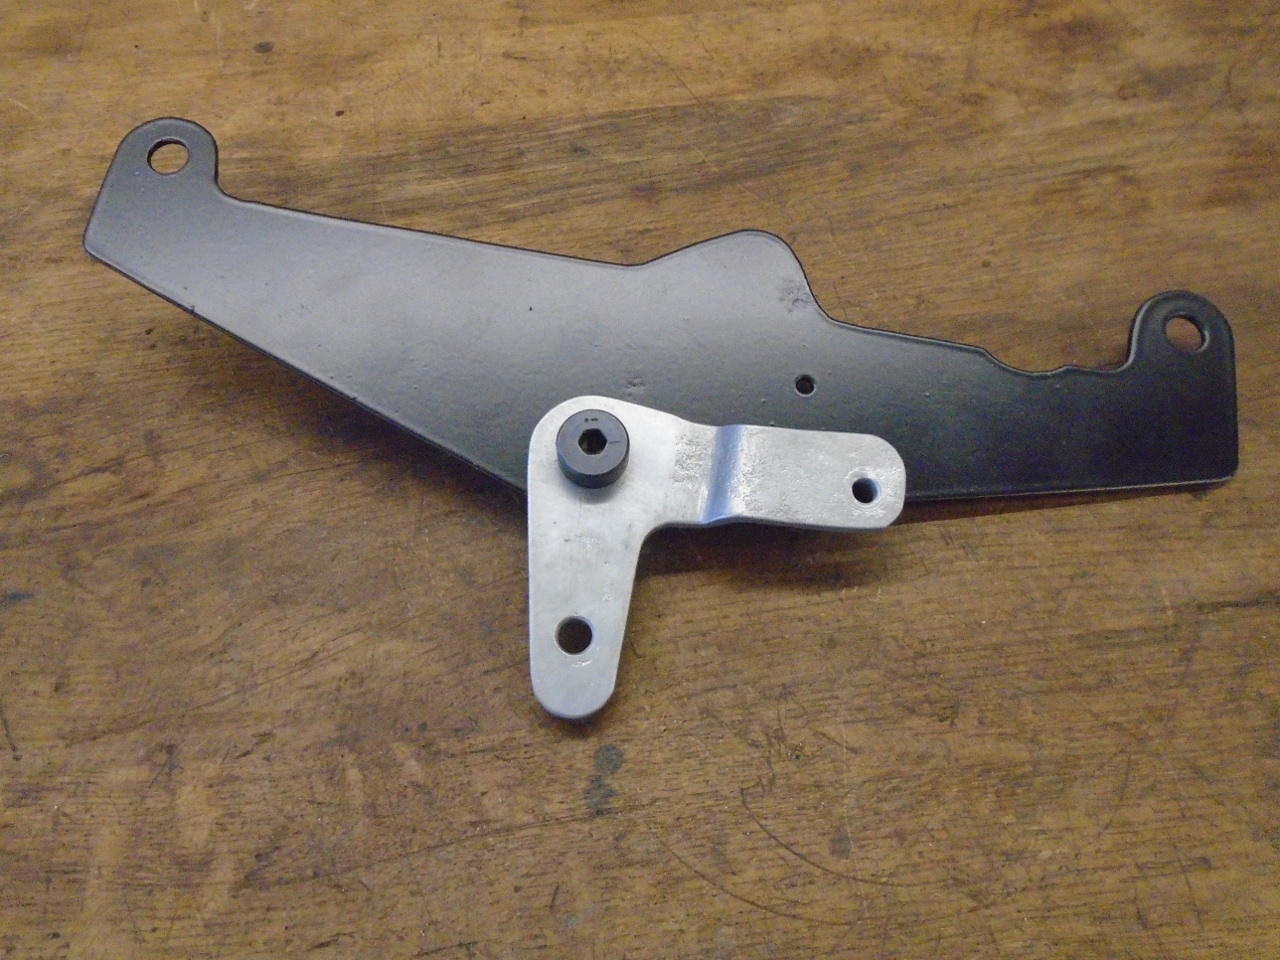
Then added the stop. It limits how far the bell crank can
rotate.

The last assembly was the lever arm for the carb throttle
shafts. It includes a lost motion arrangement. In
any linkage system like this, it is often wise to provide for a
small, controlled amount of slop, euphemistically called "lost
motion". This ensures that the linkage is not bound tight,
and makes sure that the carb throttle shafts can fully rest on
their stops at idle.
The lever arm also had to have it's ball removed to make way for
the new vertical shaft ball joint stud.
The steel parts were re-plated, with a chromate treatment.
Putting everything together. The whole mechanism is tight
and smooth (if that makes sense).
This seems like such an insignificant thing, but I really think
it will contribute to a good driving experience.
It really only took a few hours of hands-on time, and I think
the cost was around $20 for the ball joints and bushing.
Comments to Ed at mailto:elhollin1@yahoo.com
To my other GT6
pages