To my other TR6 pages
December 10, 2015
Carburettor Heat Shield
TR6
cars for the US market came with dual 1-3/4 inch Zenith Stromberg
Carburettors. I remember during the time I drove the car many
years ago, I considered the carbs sort of finicky, but in hindsight,
this was probably mostly due to them being in need of rebuilding.
One other annoyance with the carbs was their apparent sensitivity
to heat. We in Nebraska commonly see temperatures over 100
degrees F in the summer, and in slow traffic, the car would sometimes
begin to run rough, and be difficult to start after stopping when hot.
These are classic symptoms of vapor lock or fuel percolation.
It is caused by the fuel boiling in the carb and disrupting carb
function. In the TR6 as with many other cars with intake and
exhaust ports on the same side of the head, a major source of heat is
the exhaust manifold. The very hot manifold radiates a lot of
heat, and the carb float bowls are in direct line of sight.
Especially without flowing air to cool the carbs, they can reach
temperatures high enough to boil the fuel.
Because
it is a mixture of compounds, each with its own boiling point, gasoline
doesn't have a precise boiling temperature. It doesn't even have
a common composition across vendors, geography, or seasons.
However, as a data point, boiling typically can start
to become a problem if the temperature of the fuel gets up to
the 160° F range or higher.
It's
a pretty common practice on TR6 and many other cars to install a shield
to protect the carburettors from radiant heat from the exhaust system.
There are a number of commercial offerings specifically for the
TR6. Most of the ones I saw in my research mount on the air
cleaner side of the carb, and wrap under the float bowl. While I
expect these help, I thought I might be able to come up with a more
effective design.
I
played around with a few mounting possibilities, and ended up on one
that mounts on the manifold side of the carb. This puts it back
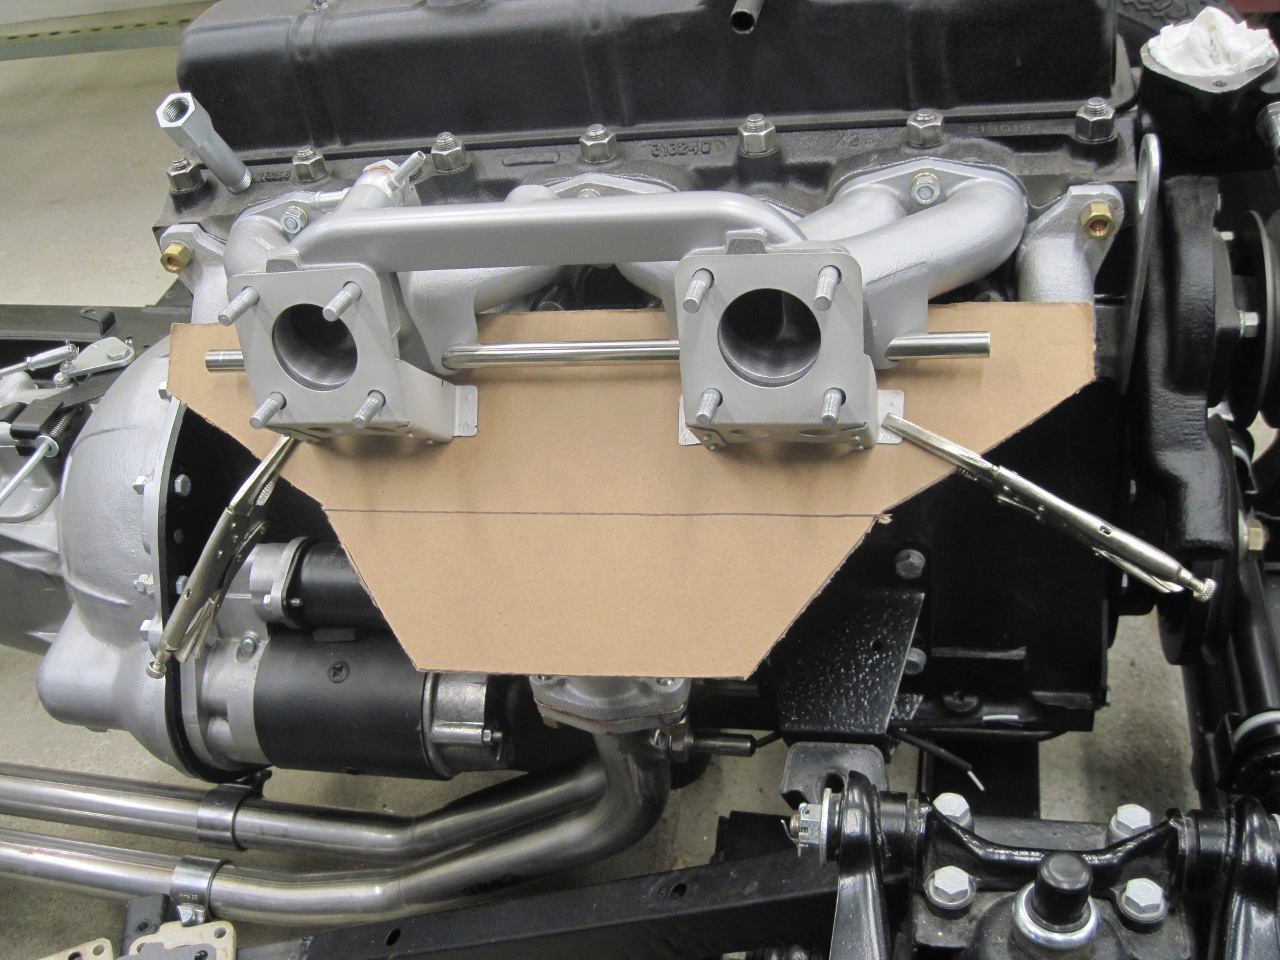
nearer the problem area. I started with a folded up cardboard
pattern to get the fit right, and then made two brackets out of
aluminum and powder coated them.

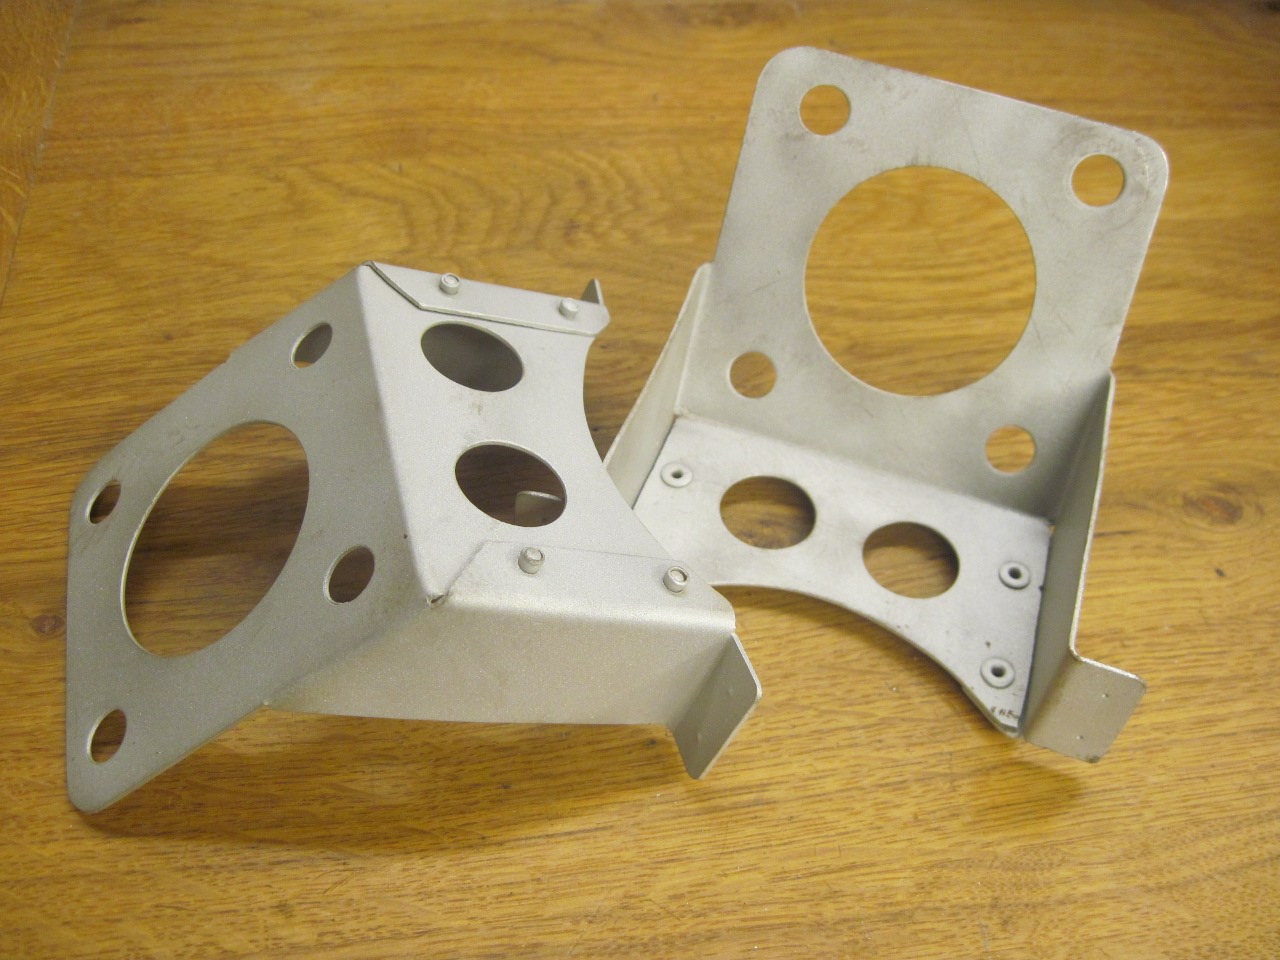
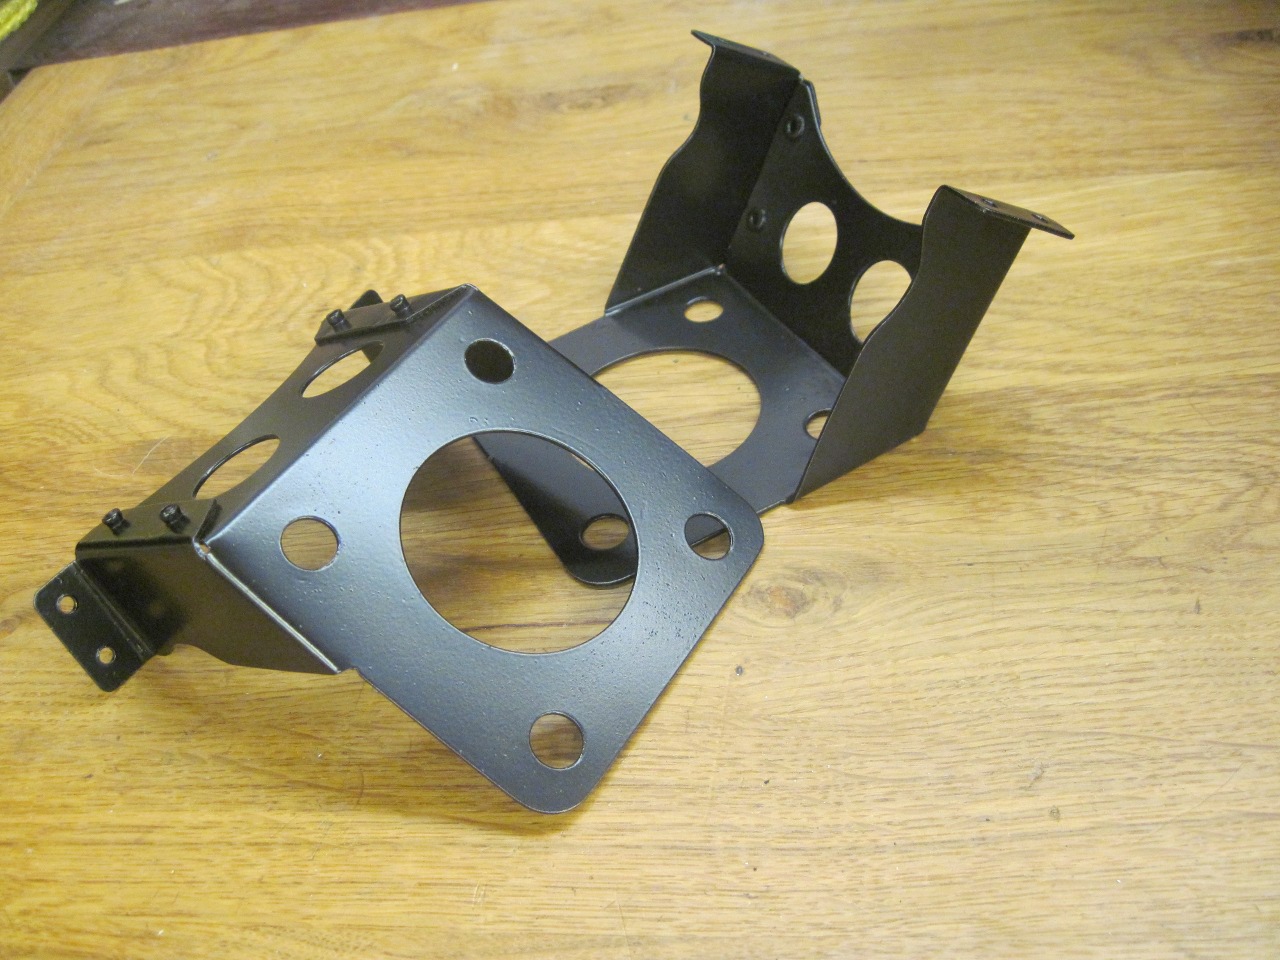
The
brackets would support a shield panel that would go between the exhaust
manifold and the carbs. I did a few mockups for the panel. I
basically wanted to block all line of sight paths between the exhaut
manifold and the carbs. I finally landed on the more angular
design shown in the last pic. It seemed to fit the husky style of
the TR better.
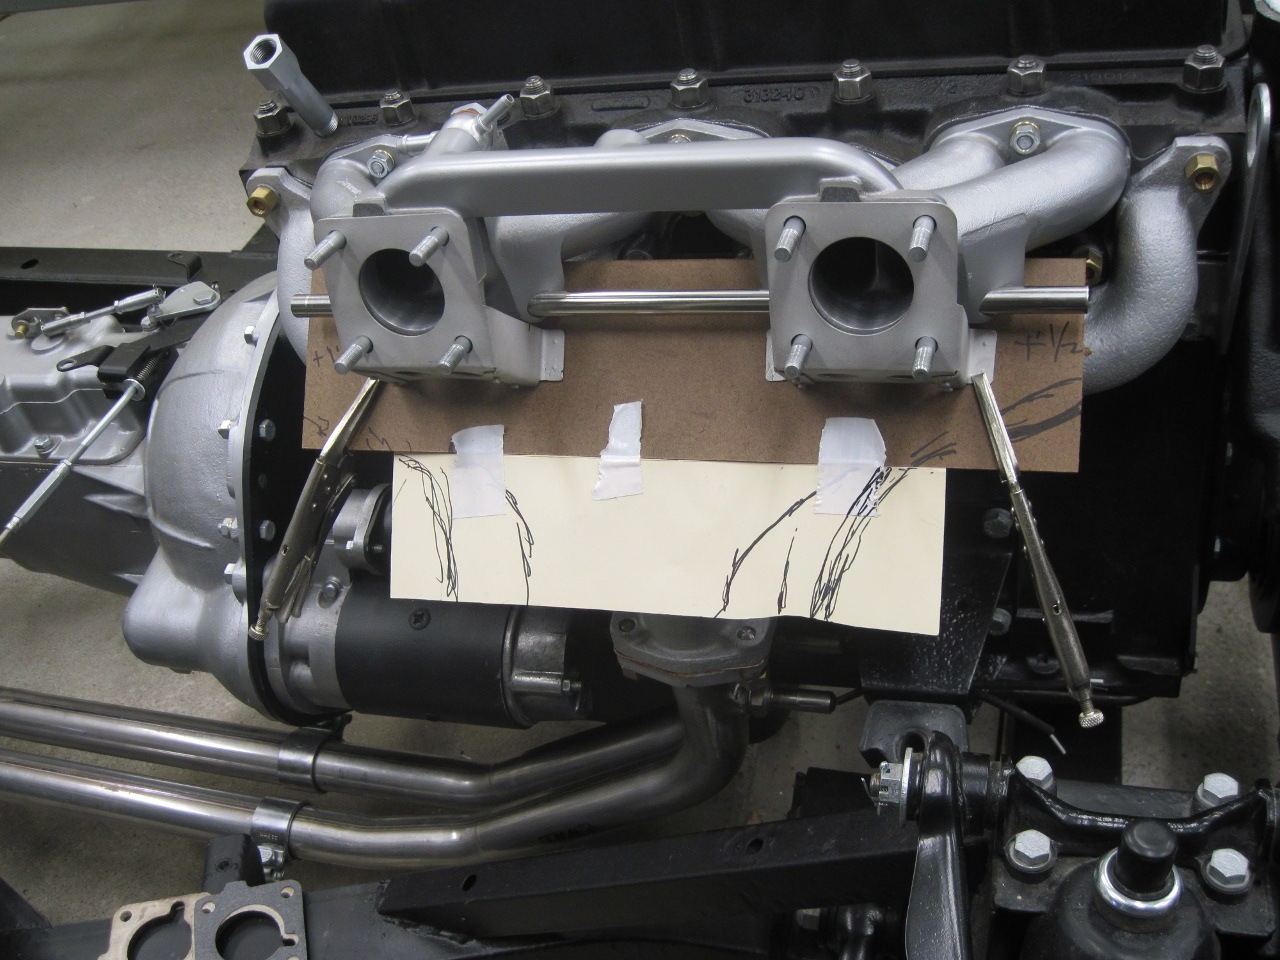
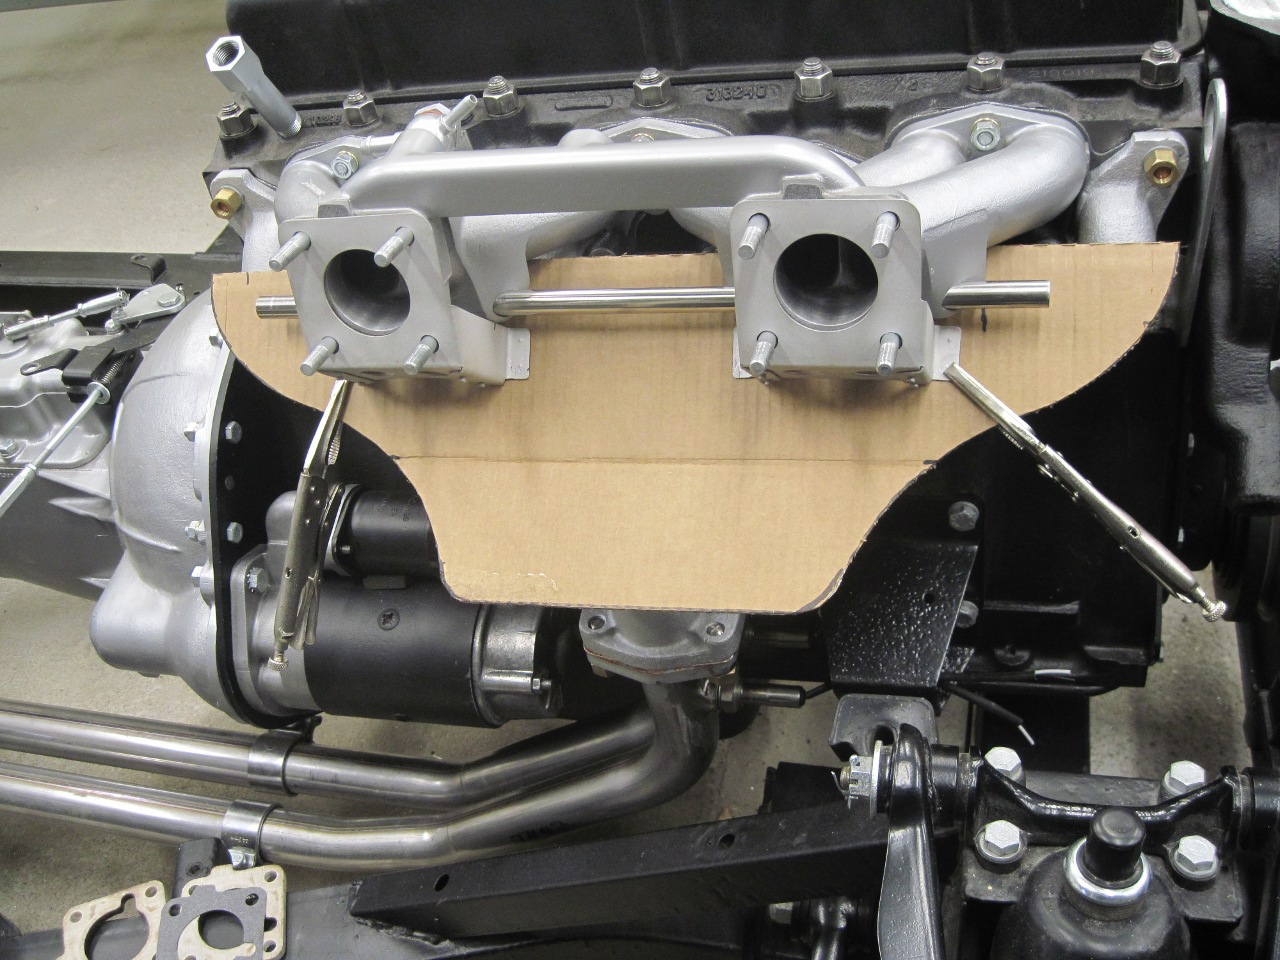
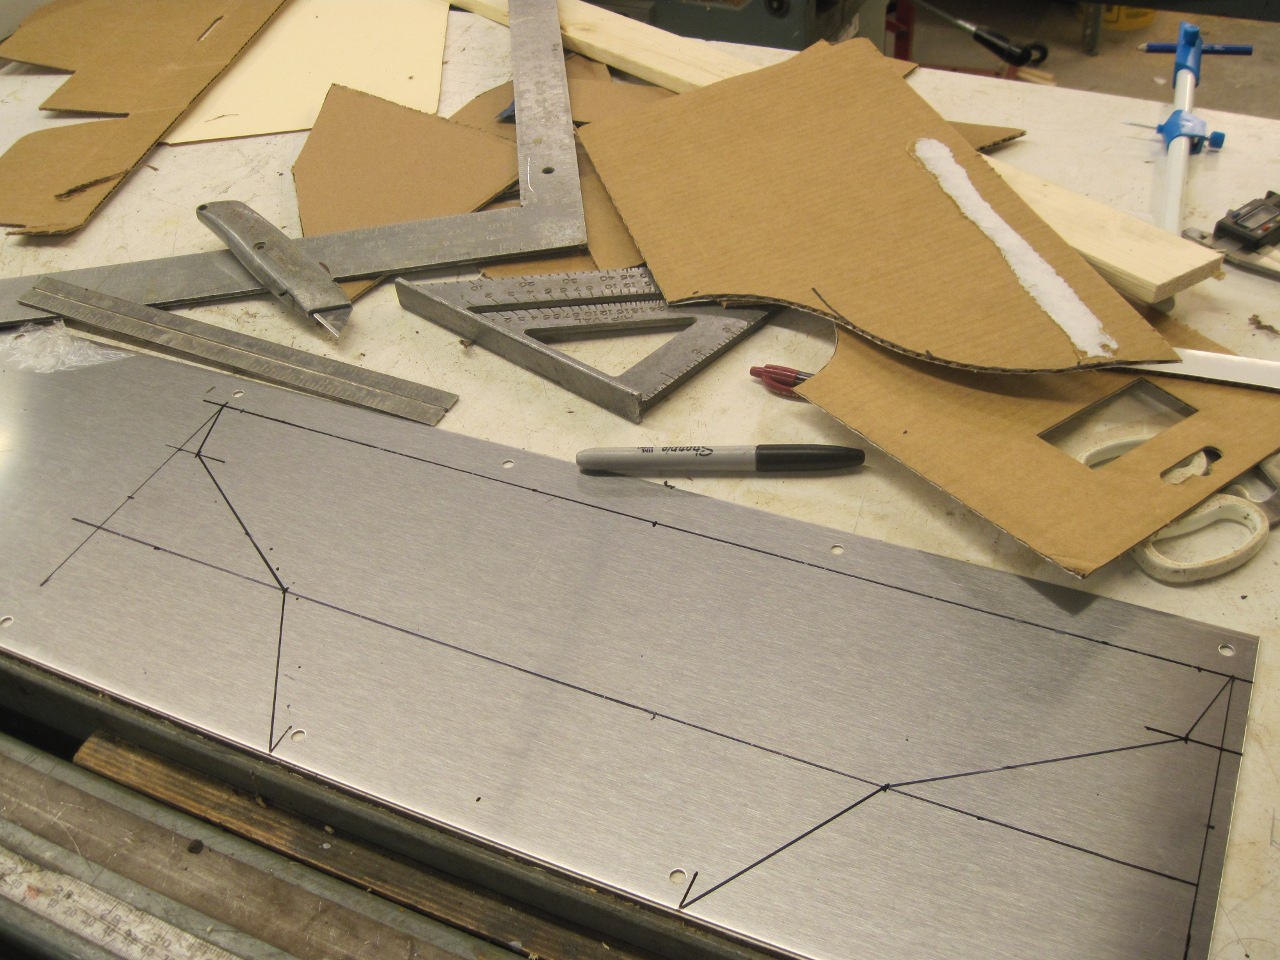
Then
cut the panel out of 18 gauge stainless steel. This was on a
weekend, and my steel supplier was closed, so this is made from about
half of a brushed stainless door kickplate from Menards.
Although
a simple one piece shield would certainly help, I decided to go another
step or two. Ideally, a shield for radiant heat reflects all the
heat energy that falls on it. But in practice, reflection is
never 100%, and the shield will absorb some of the heat and its
temperature will rise. The shield then itself becomes a heat
source. As the shield oxidizes or gets dirty, it reflects less
energy, and gets hotter.
I
decided to make the panel into an insulating panel so that heat on the
manifold side is impeded somewhat from traveling to the carb side.
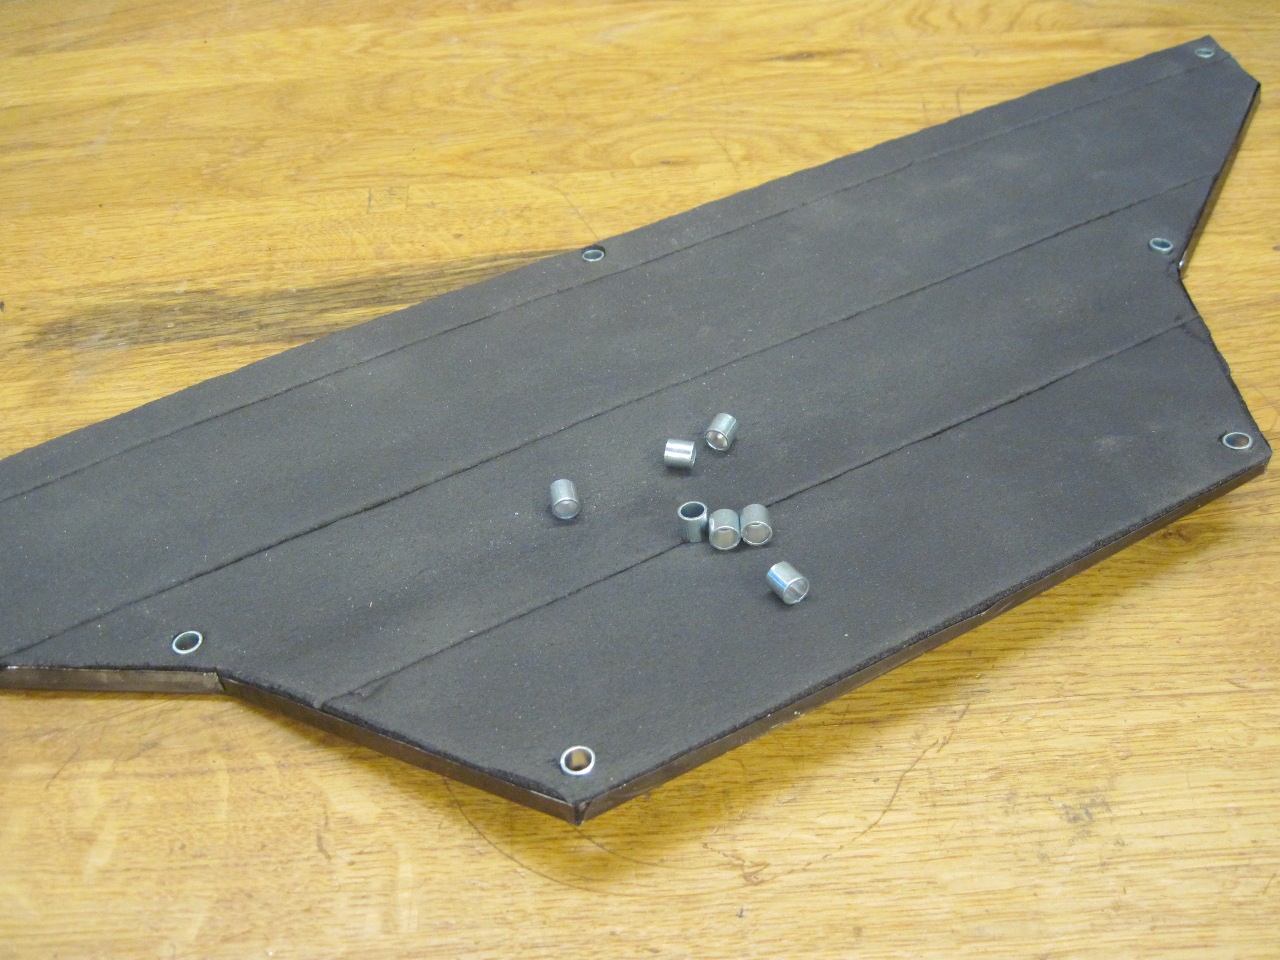
I made a shallow pan panel from thin galvanized steel that
matched the contour of the stainless panel. The pan is 1/4" deep,
and I filled it with strips of foam insulation material. I
drilled a few attachment holes around the perimeter pf the panels, and
inserted little 1/4" spacers in the insulation around the holes so that
two panels could be cinched together in a sandwich.
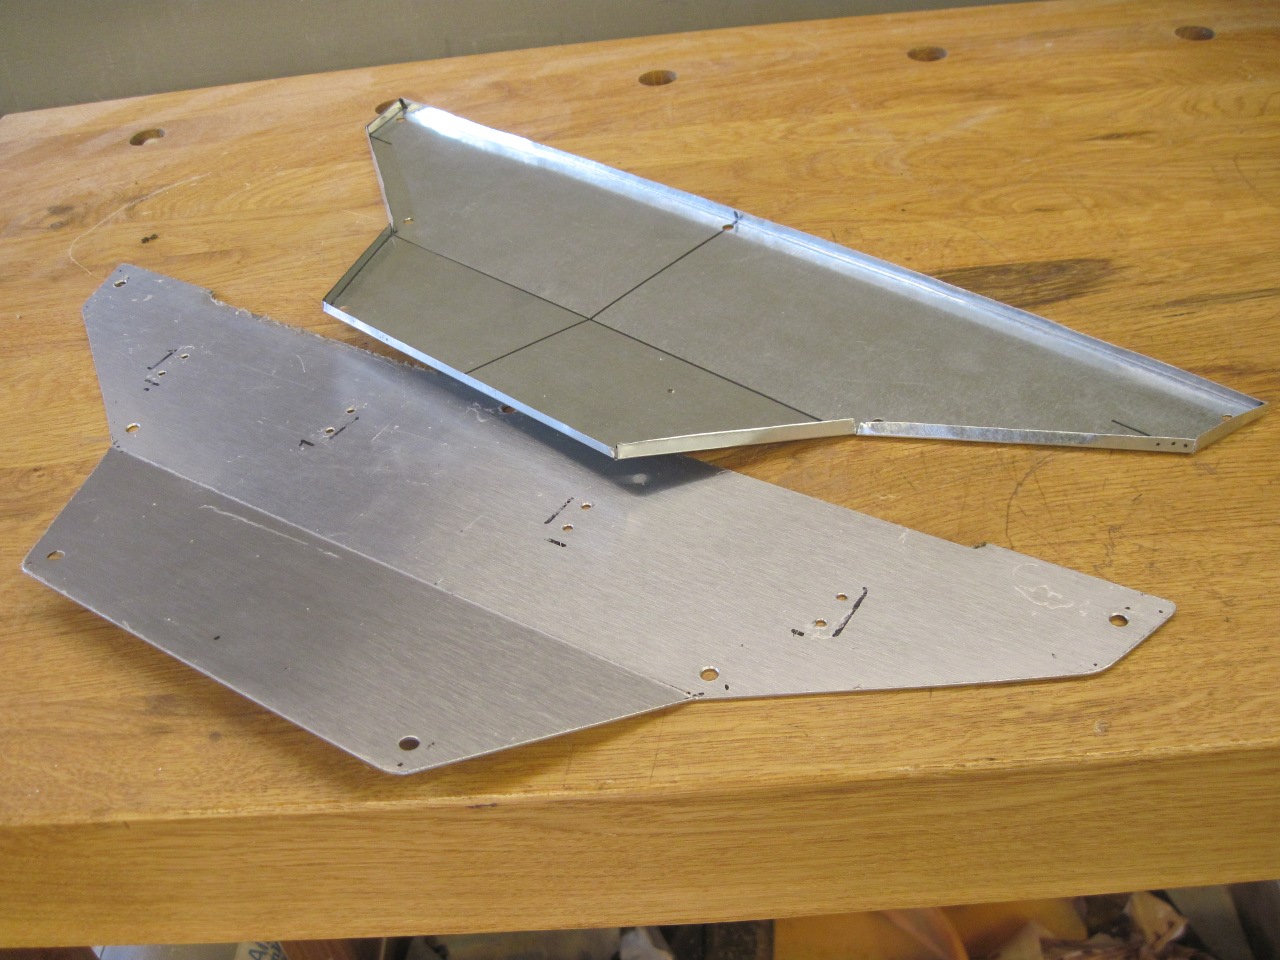
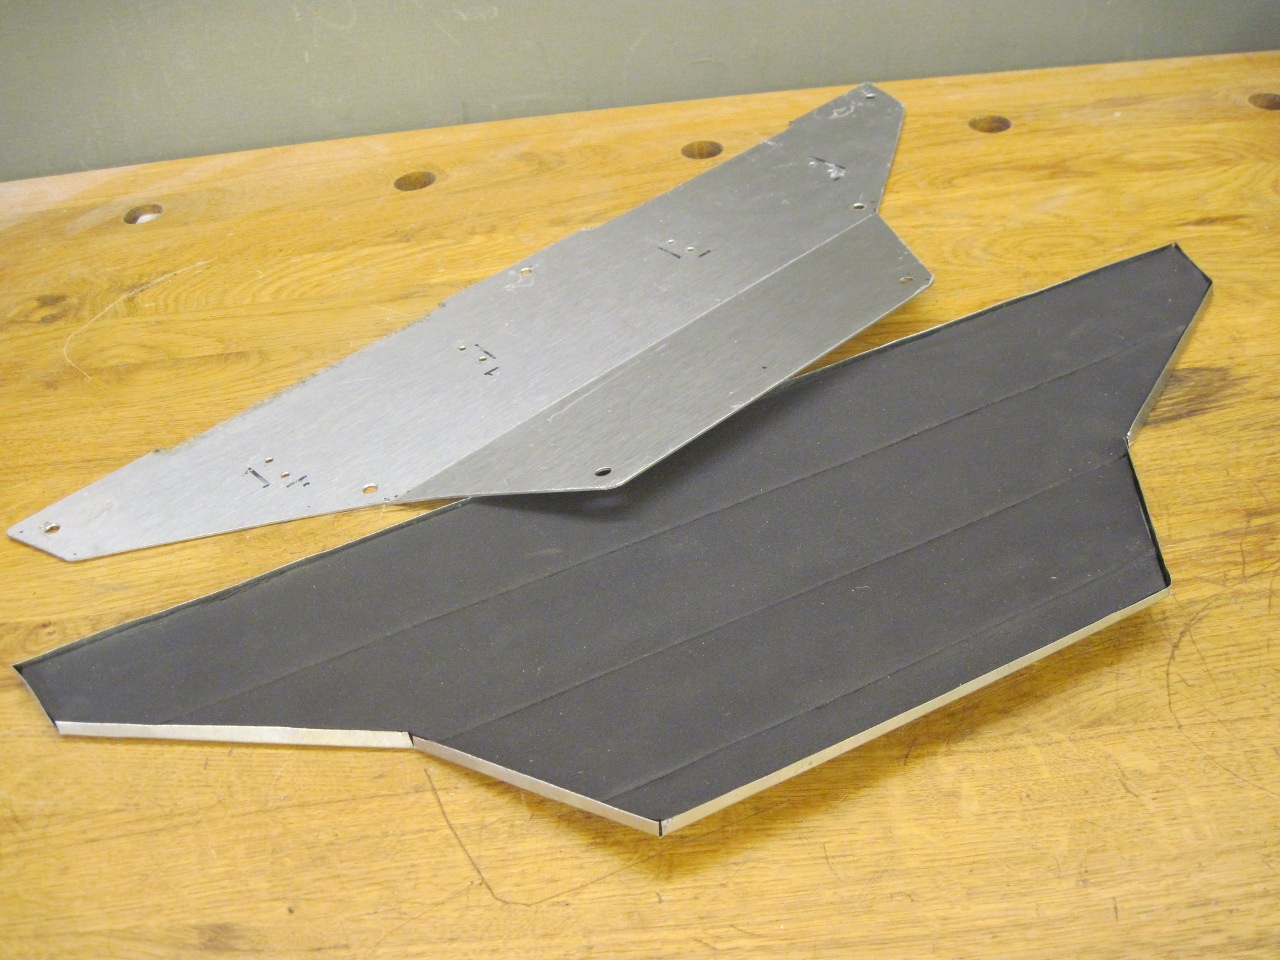
Finally,
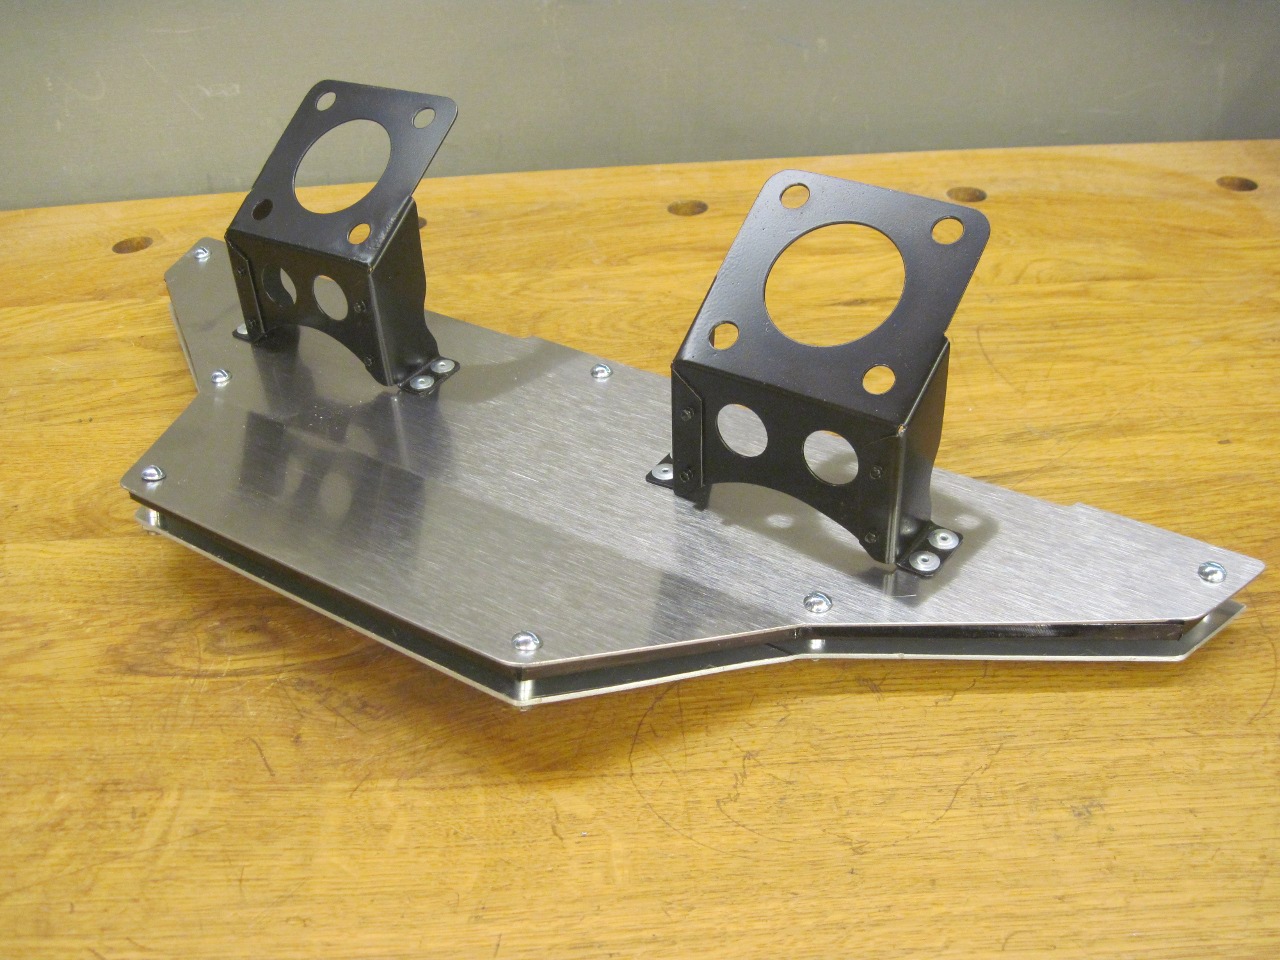
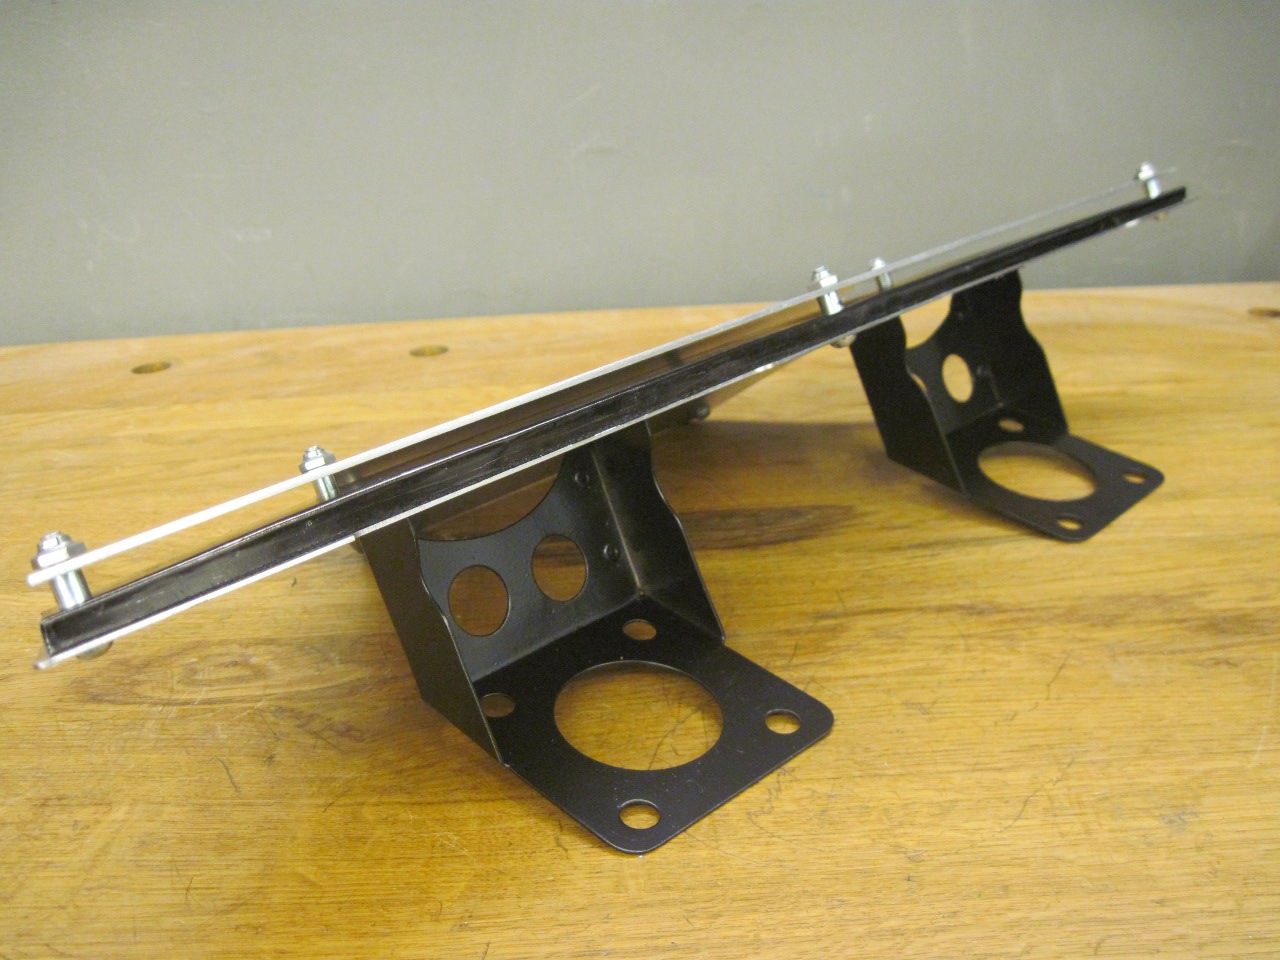
I made one more matching panel from 0.080" aluminum. This panel
will be attached to the back of the sandwich on more 1/4" spacers.
This makes the aluminum panel the primary radiation shield.
On it's other side, the 1/4" air space not only adds some
insulating value, but also a way for any heat to convect out of the
assembly. The insulation is the last line of defense against
heat transfer. The stainless is mainly for looks.

So
does it work to stop radiant energy? To test this, I set it up
vertically on the bench, and put a 500-watt halogen work light about
eight inches from the back (aluminum) surface. These work lights run
very hot. Certainly the filament is much hotter than an exhaust
manifold will ever get. I'm not sure how the total heat output
compares with a manifold, but I believe it will regardless show if the
shield is effective or not.

I
used a non-contact infrared thermometer to measure both sides of the
shield over time. Since these thermometers sometimes have trouble
measuring from shiny metallic surfaces accurately, I put a small patch
of black tape in the center of each side as a measuring point.
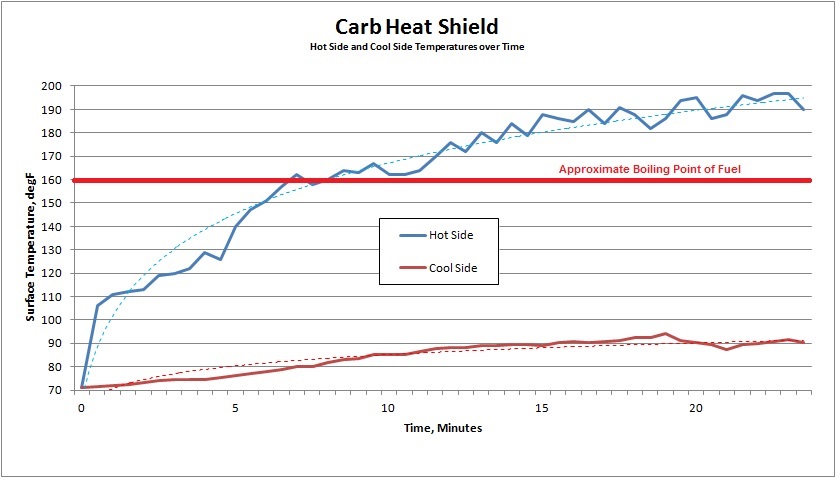
Here is a graph of the hot side and cool side temperatures over a period of about 24 minutes, starting at room temperature.
The
dotted lines are logarithmic curve fits. I appears that if the
test had been run longer, the hot side would have gone over 200
degrees, but the cool side had just about topped out at a little over
90. It was painful to touch the hot side, but the cool side just
felt slightly warm. This test was done in my shop with an ambient
temoperature at about 70 degrees. Under the hood of a car where
the ambient air could be much higher, these curves would certainly
shift upwards, but I am convinced that the shield will significantly
reduce the radiant heat input to the carbs.
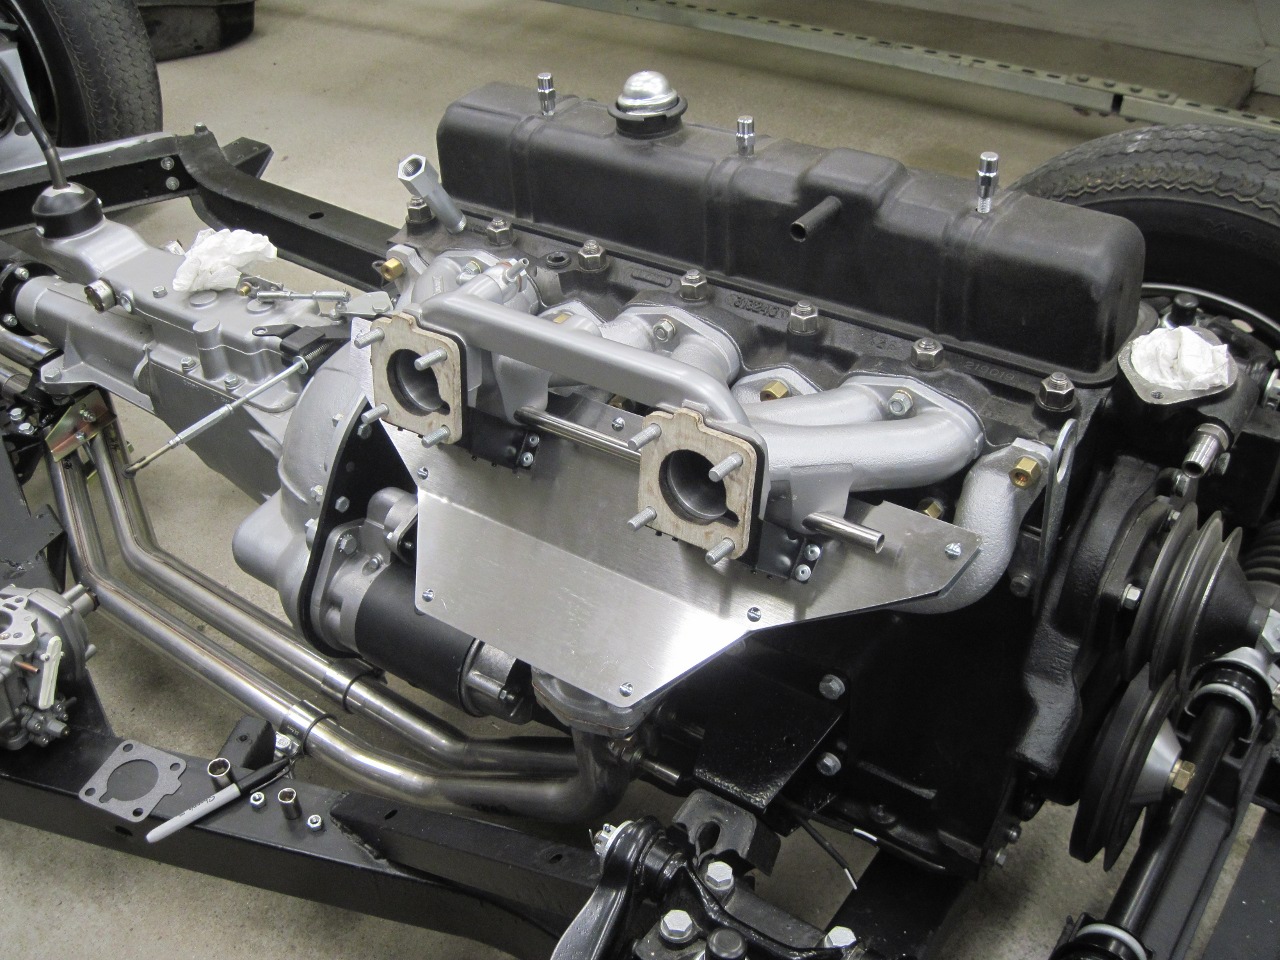
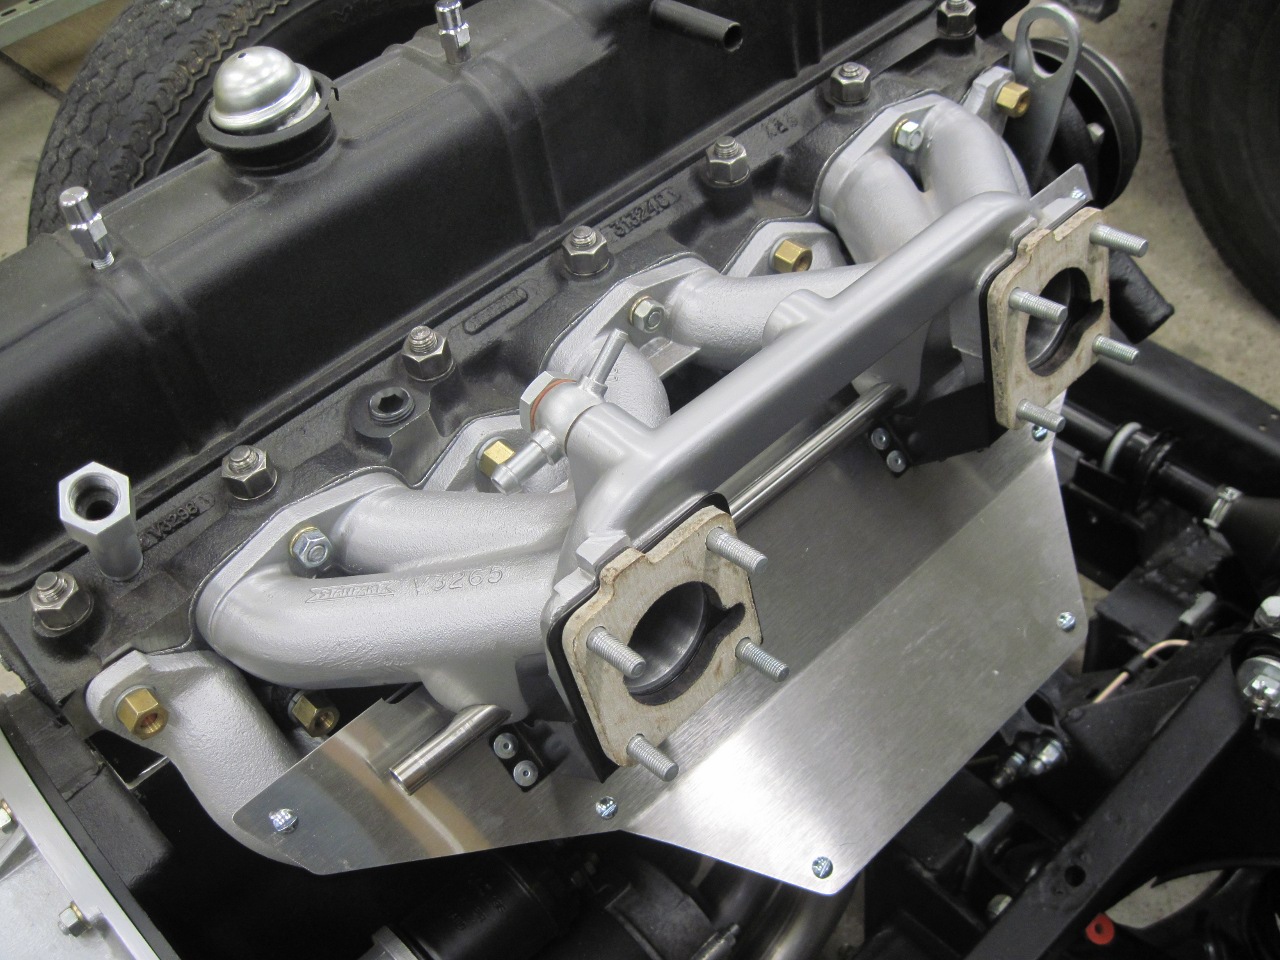
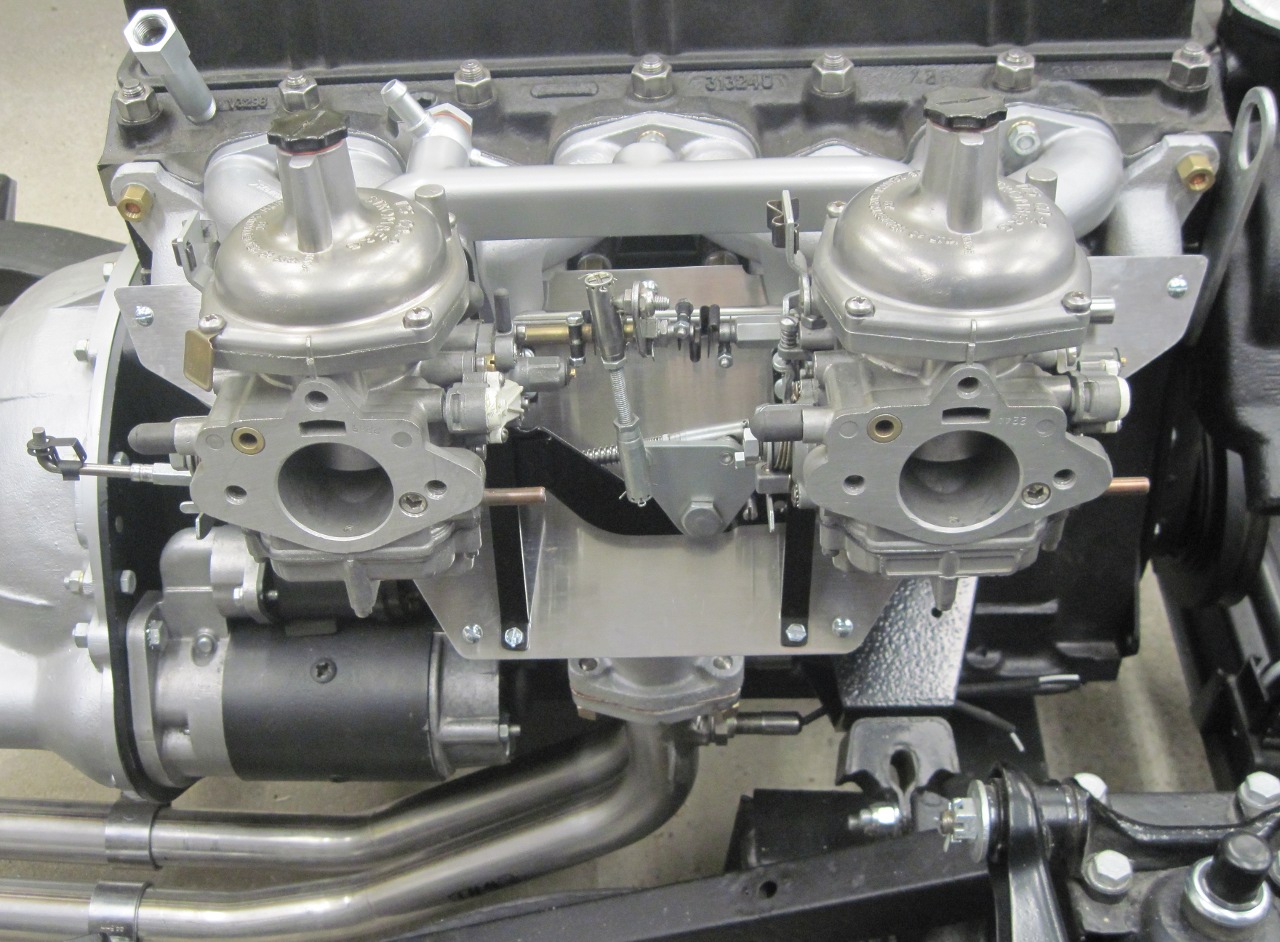
Since
I'd trial fitted all the parts many times, installation only took
a few minutes. In these pics, it looks like there is a mismatch
to the manifold bore. The shield assembly is actually hanging
such that there is a gap between the shield bracket and the manifold at
the bottom of the bore. The match is really pretty good.
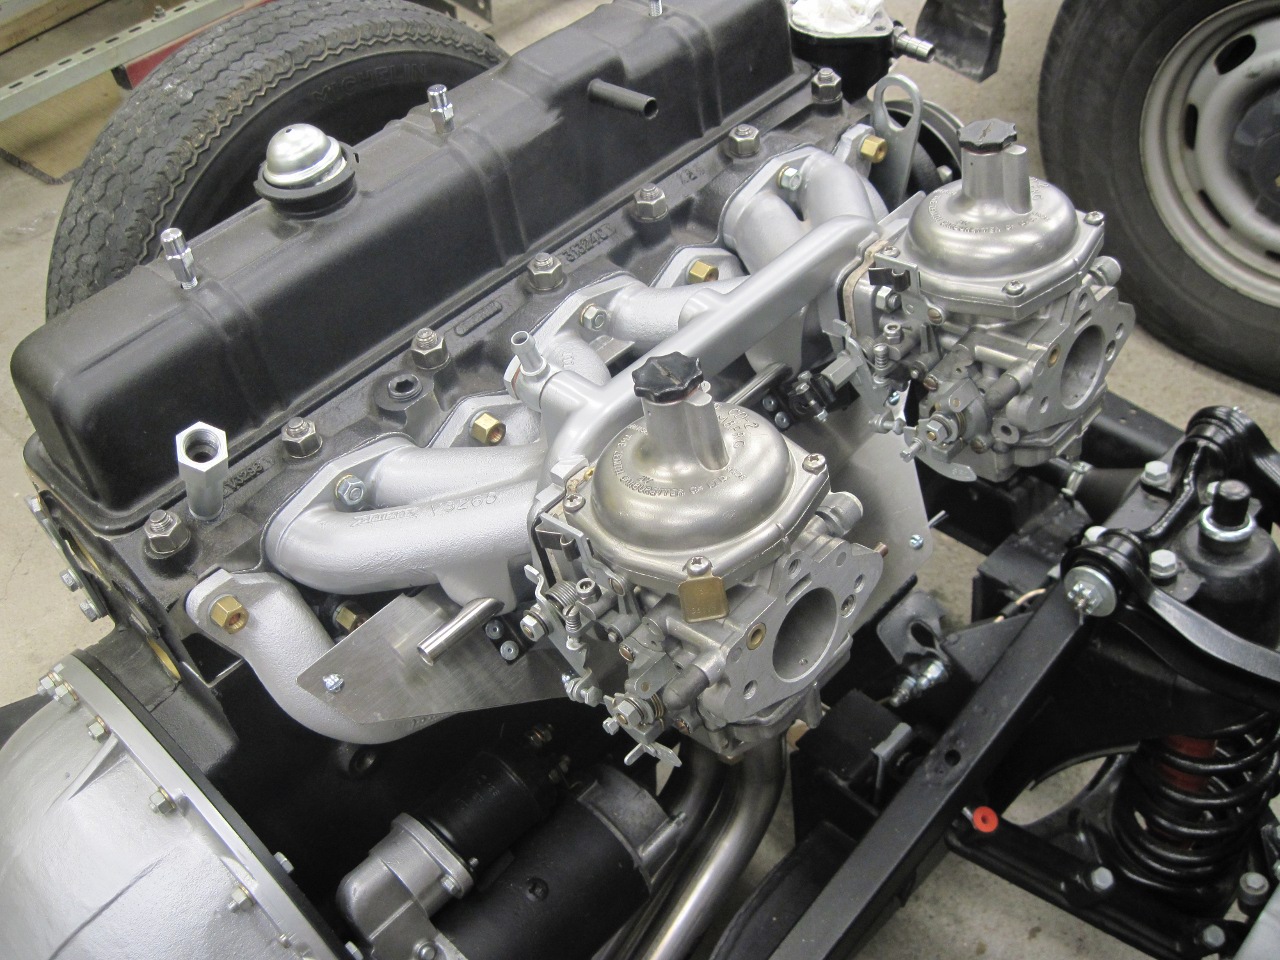
Adding the carbs...

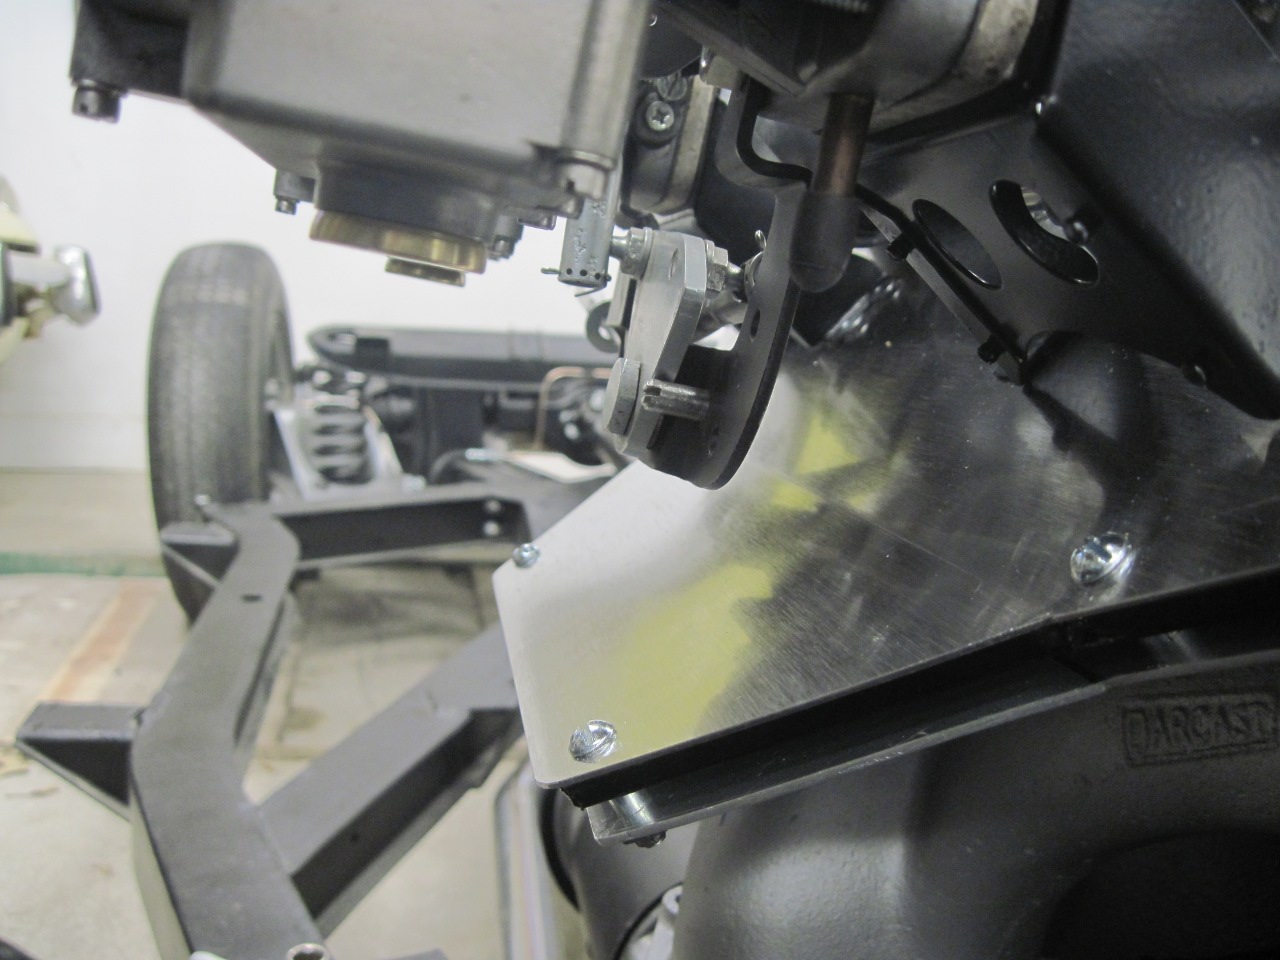
Ths stock throttle linkage clears the shield with room to spare.
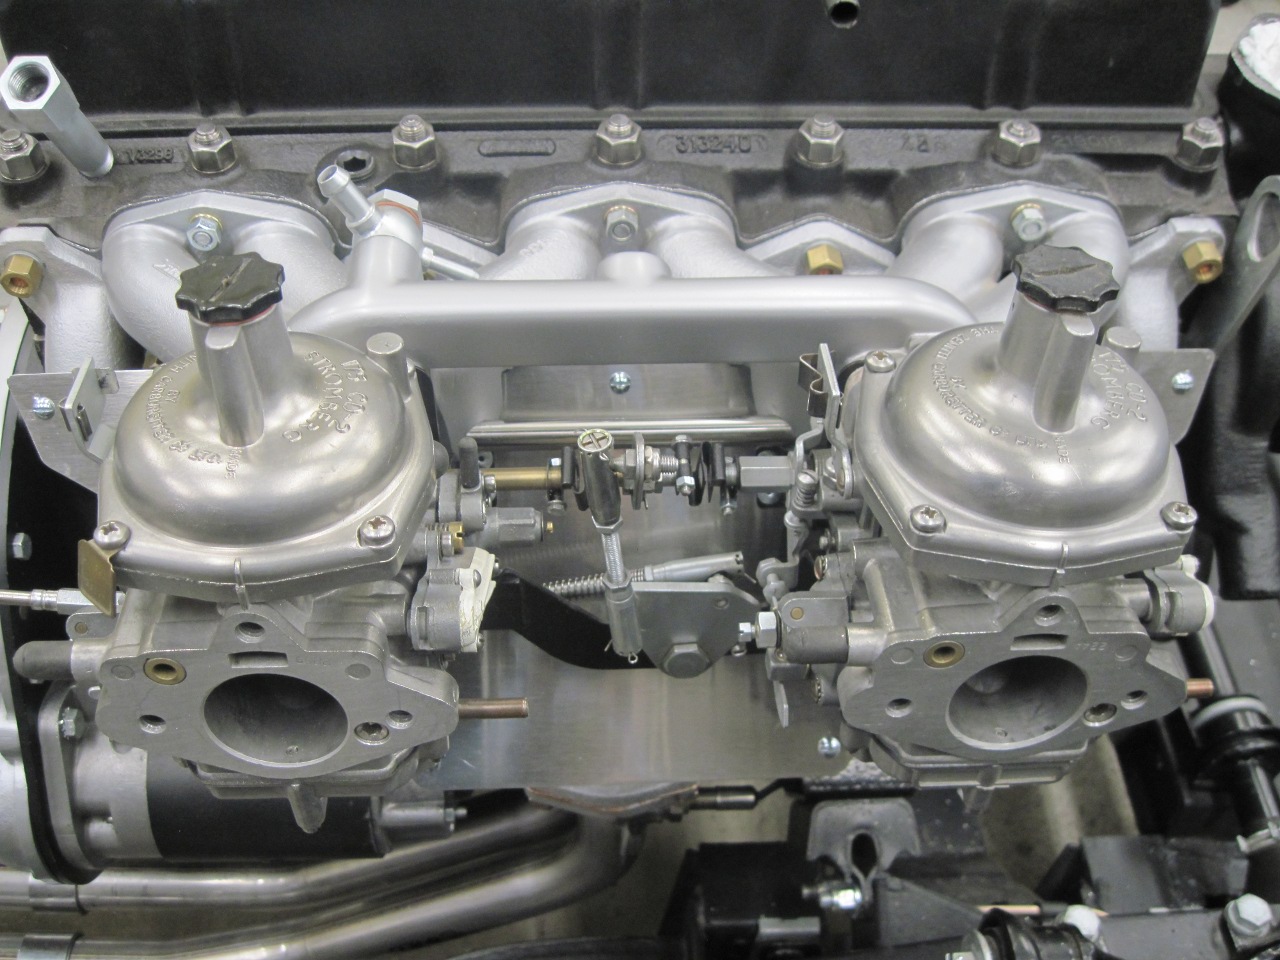
This was a fun project. I probably only have maybe $30 in it, mostly for the stainless.
I'm
considering adding braces from the carb brackets to the bottom
edge of the shield in case vibration of the shield might fatigue the
brackets.
UPDATE, December 13
As
I thought more about the bracing, I decided that it really was
necessary. The lower part of the shield hangs quite a ways out
from the support brackets, and I was concerned that it might resonate
with some natural engine frequency, possibly resulting in strong
vibration that could stress the brackets.
I
looked around for a place to attach the braces, and finally chose the
throttle linkage bracket. It attaches to the bottom inside
mounting studs of each carb, and would provide a solid fixing point.
Unfortunately, there wasn't a good place on the bracket to bolt
the braces.
My solution was to weld a strap across the void between the bracket's mounting tabs.
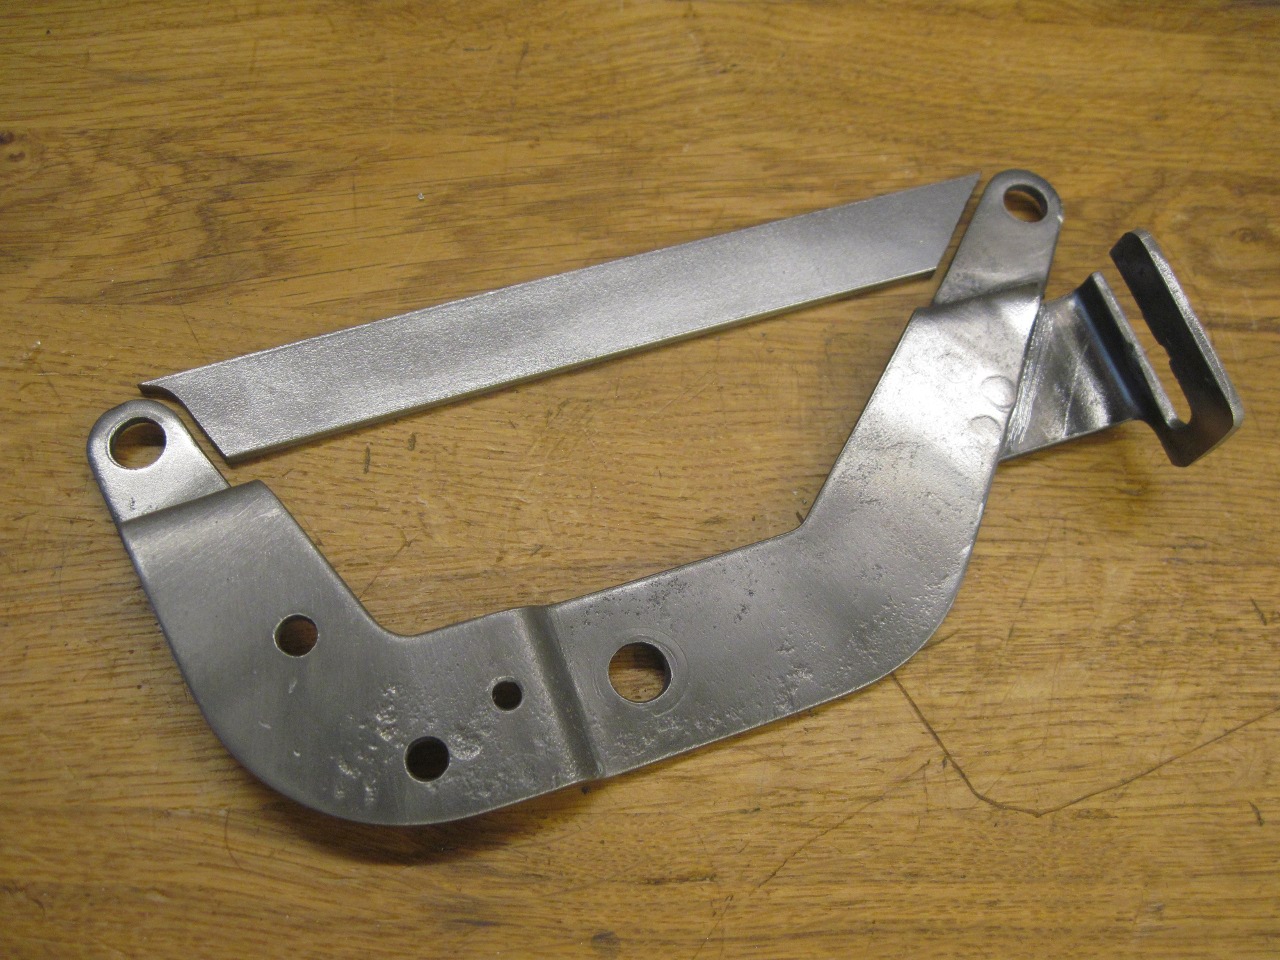

While
this would give a lot of flexibility in attaching the braces, I
neglected to see that it would foul the throttle linkage. I
solved this by cutting away most of the new strap, just leaving a tab
at each end for mounting the braces.

Then powder coated the modified bracket.

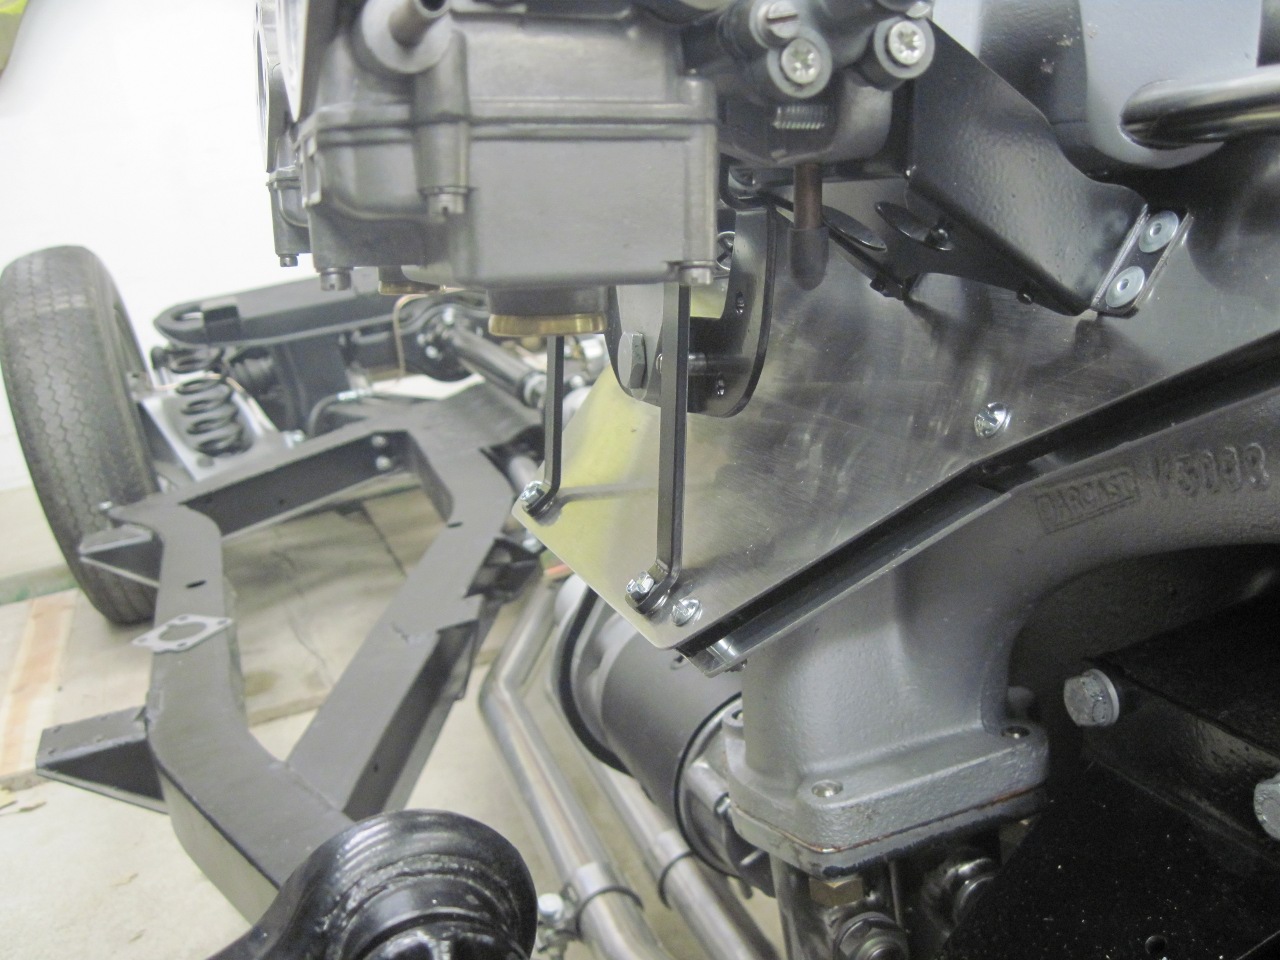
A
couple of simple straps bolt to the bracket and extend down tot he
bottom edge of the shield where they attach via some rivet nuts.
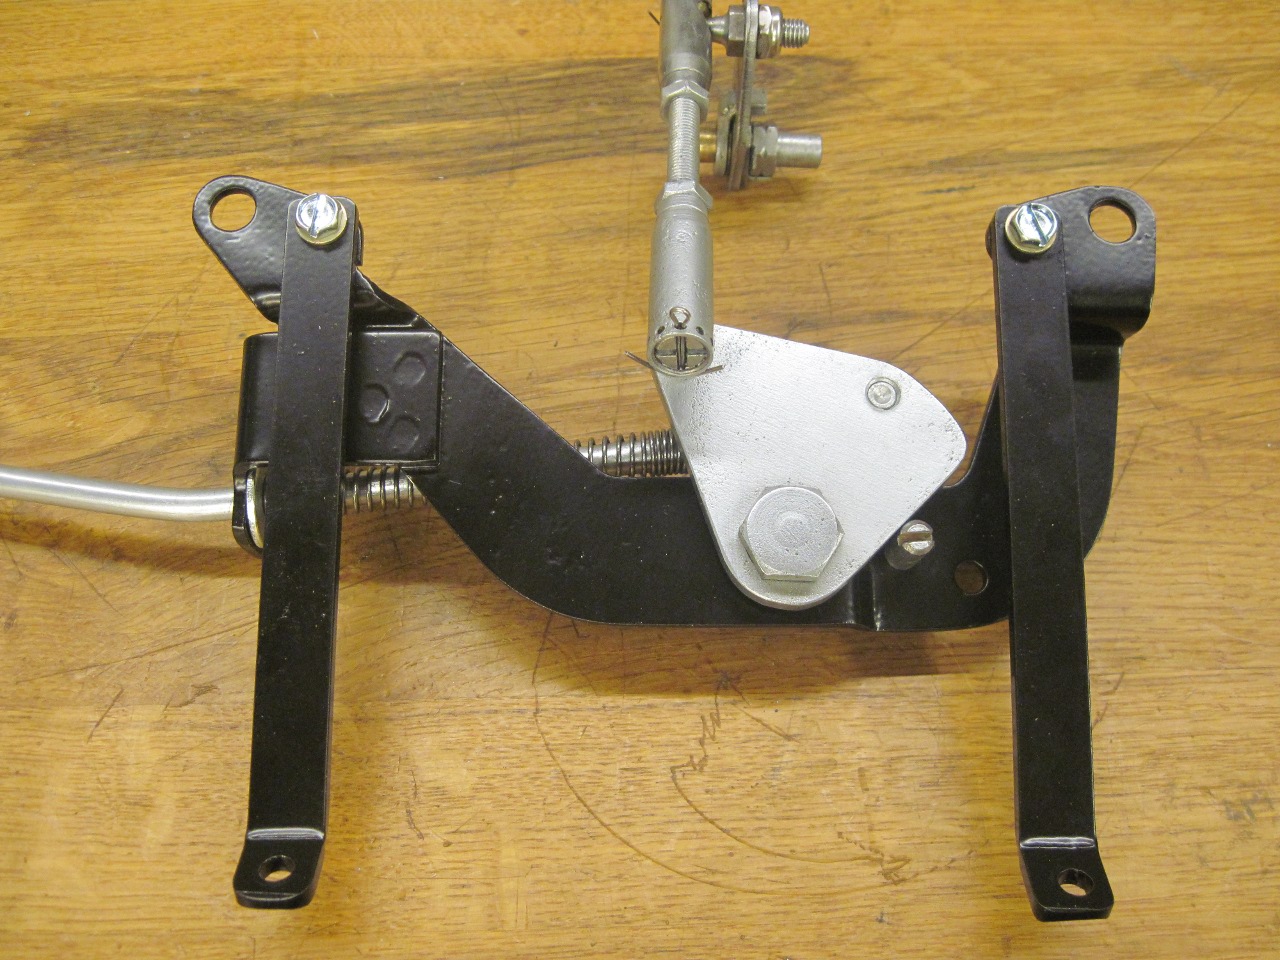
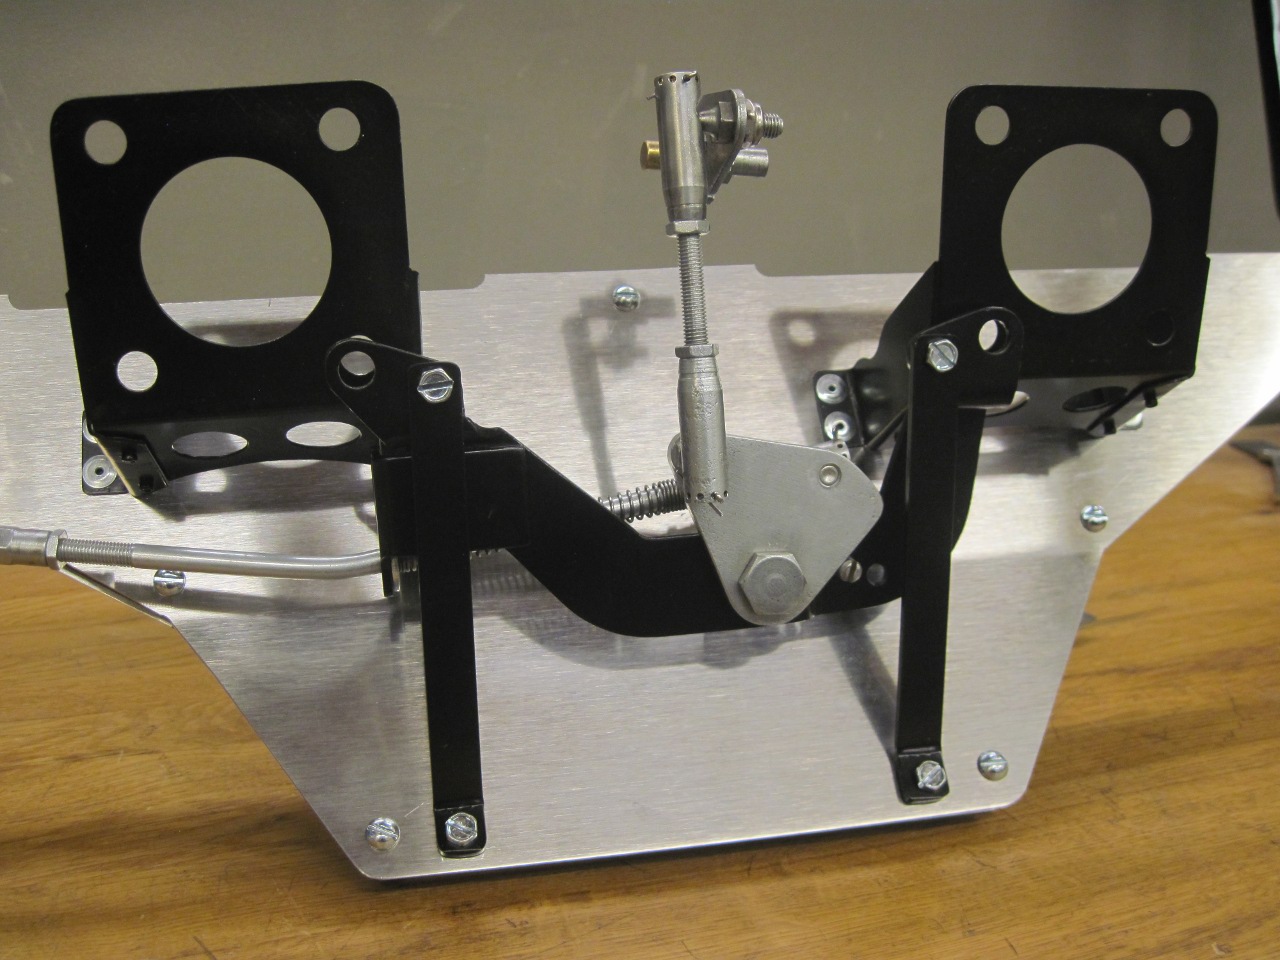
The shield is now a lot more solid with the braces.
Comments to elhollin1@yahoo.com
To my other TR6 pages
