To my other GT6 pages
July 24, 2019
Frame
Unlike
some other cars of the era, the GT6 still retained distinct body and
frame assemblies. In many ways, this simplifies restoration,
since these major components can be worked on separately.
After removing the body, off came the front suspension, and then the rear suspension and the remaining running gear.
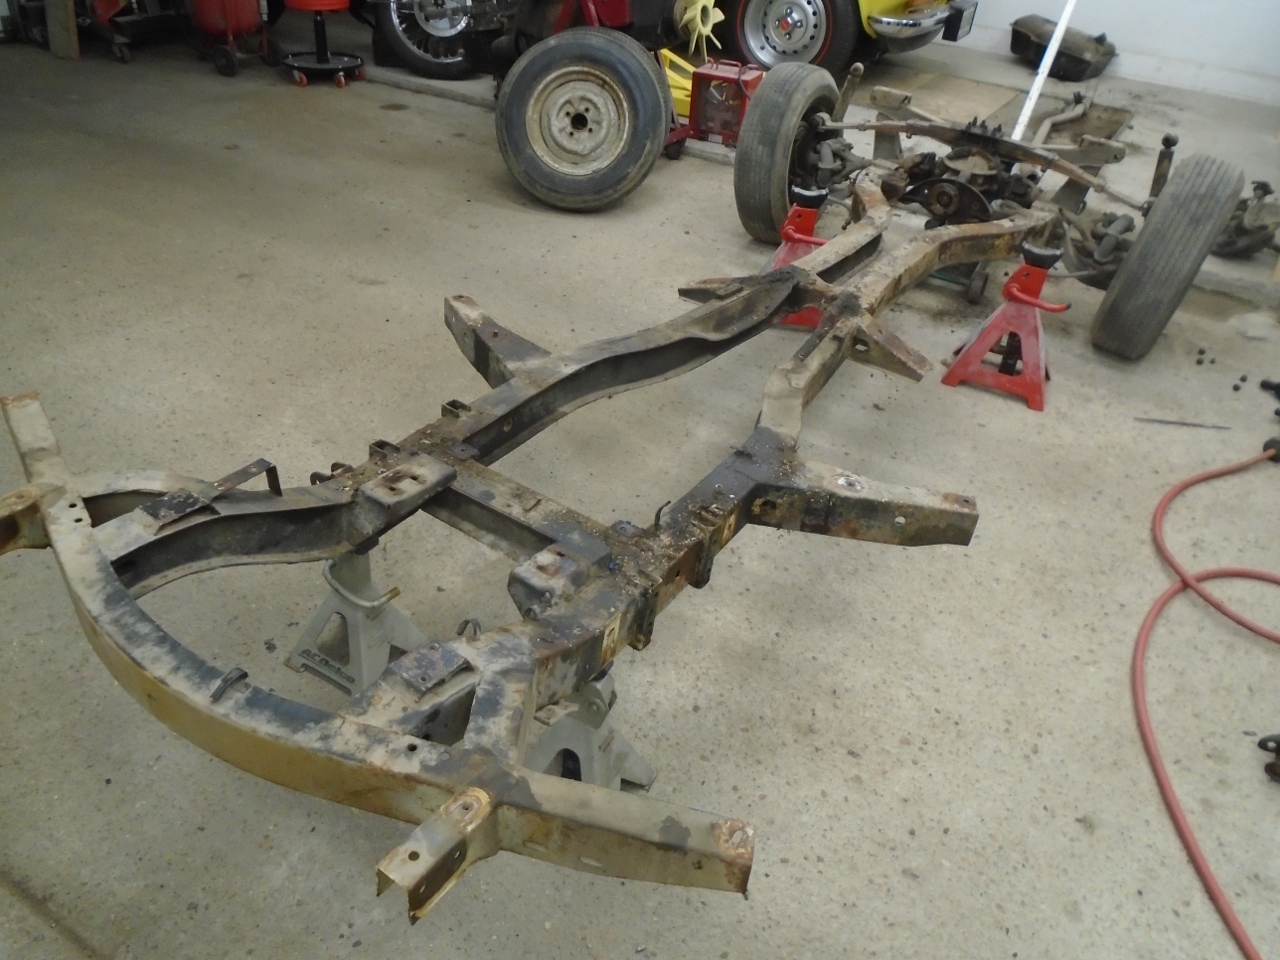
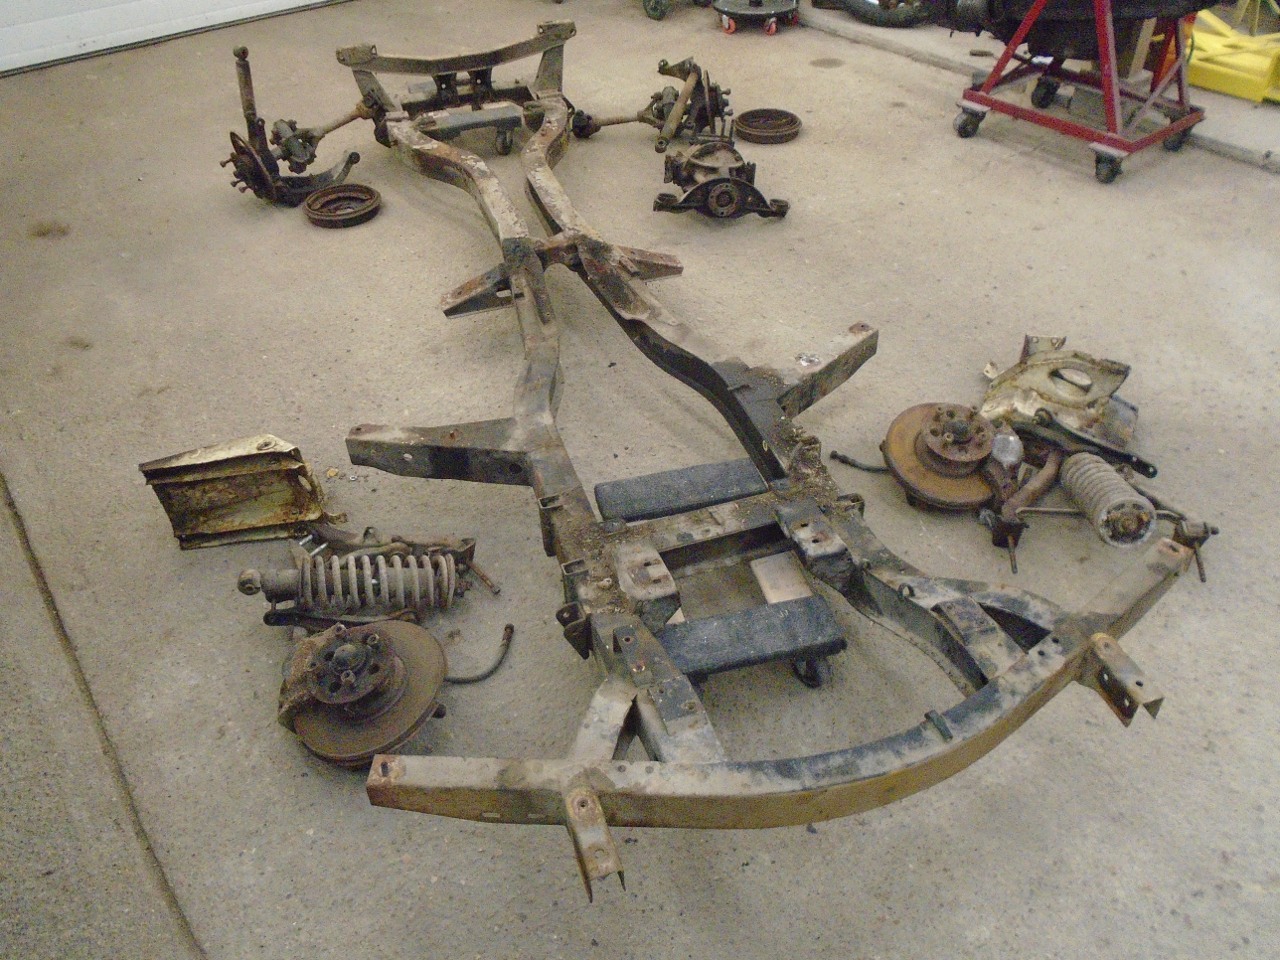
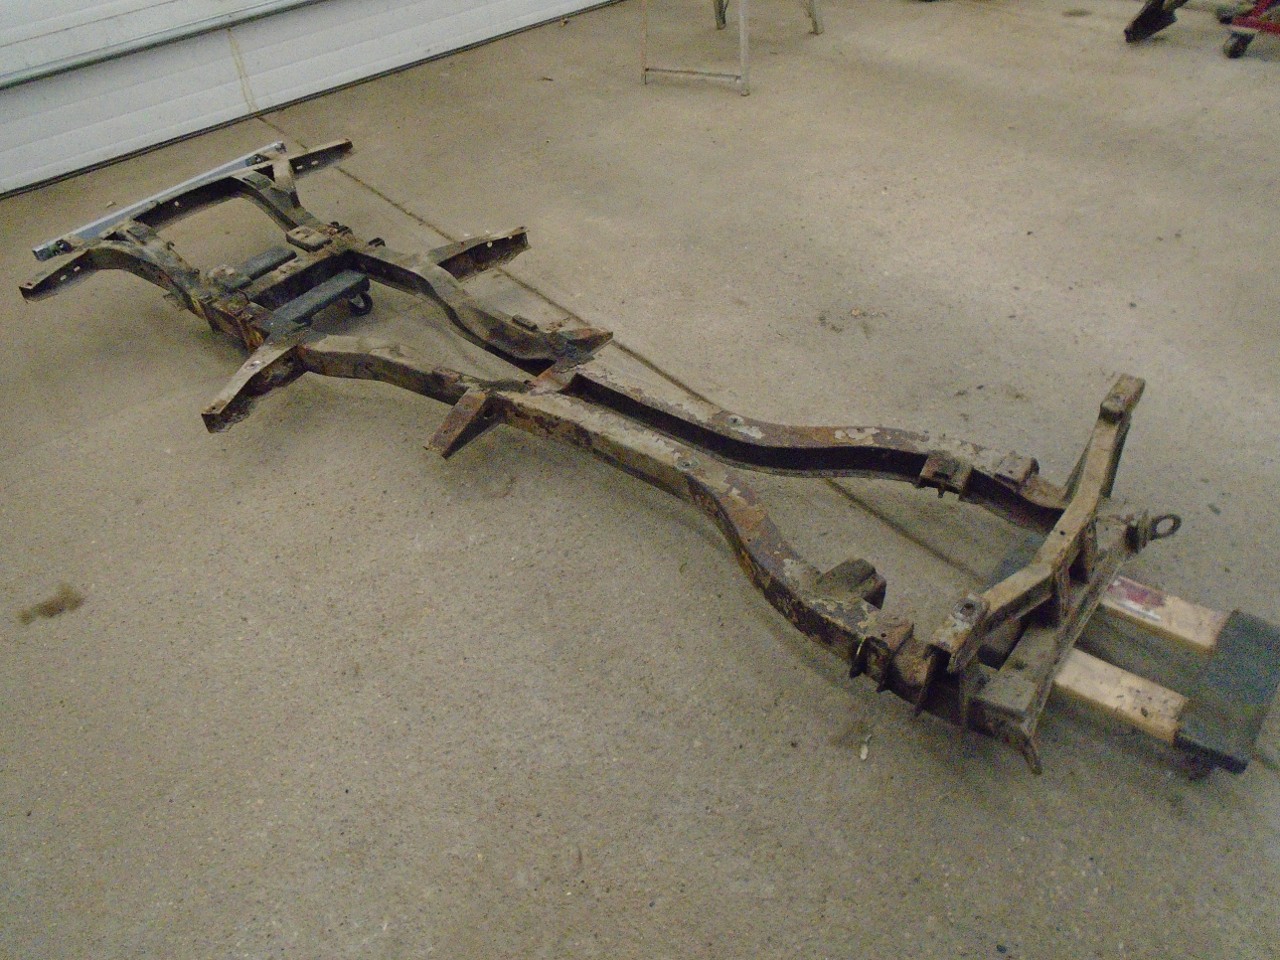
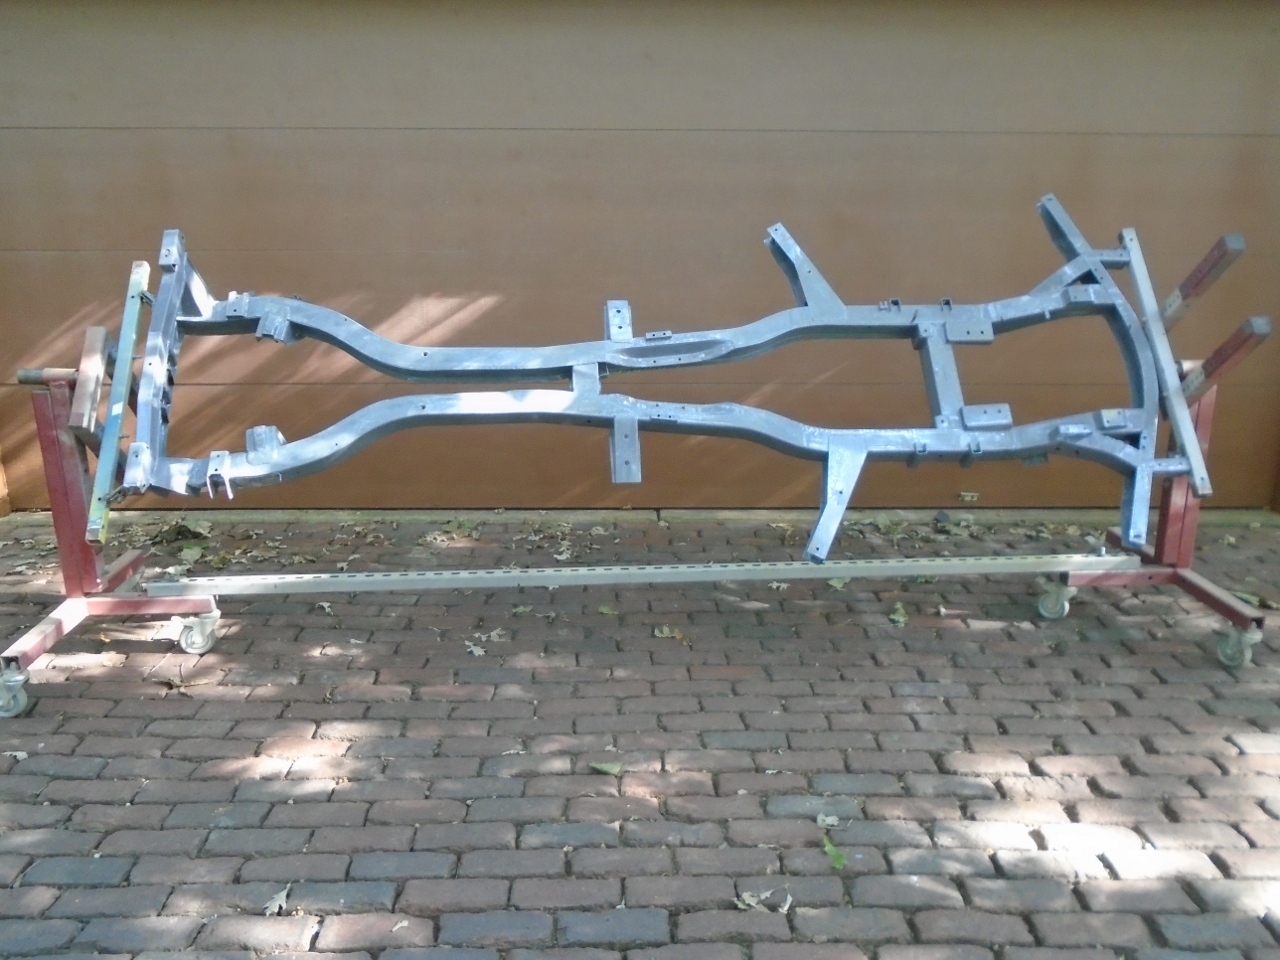
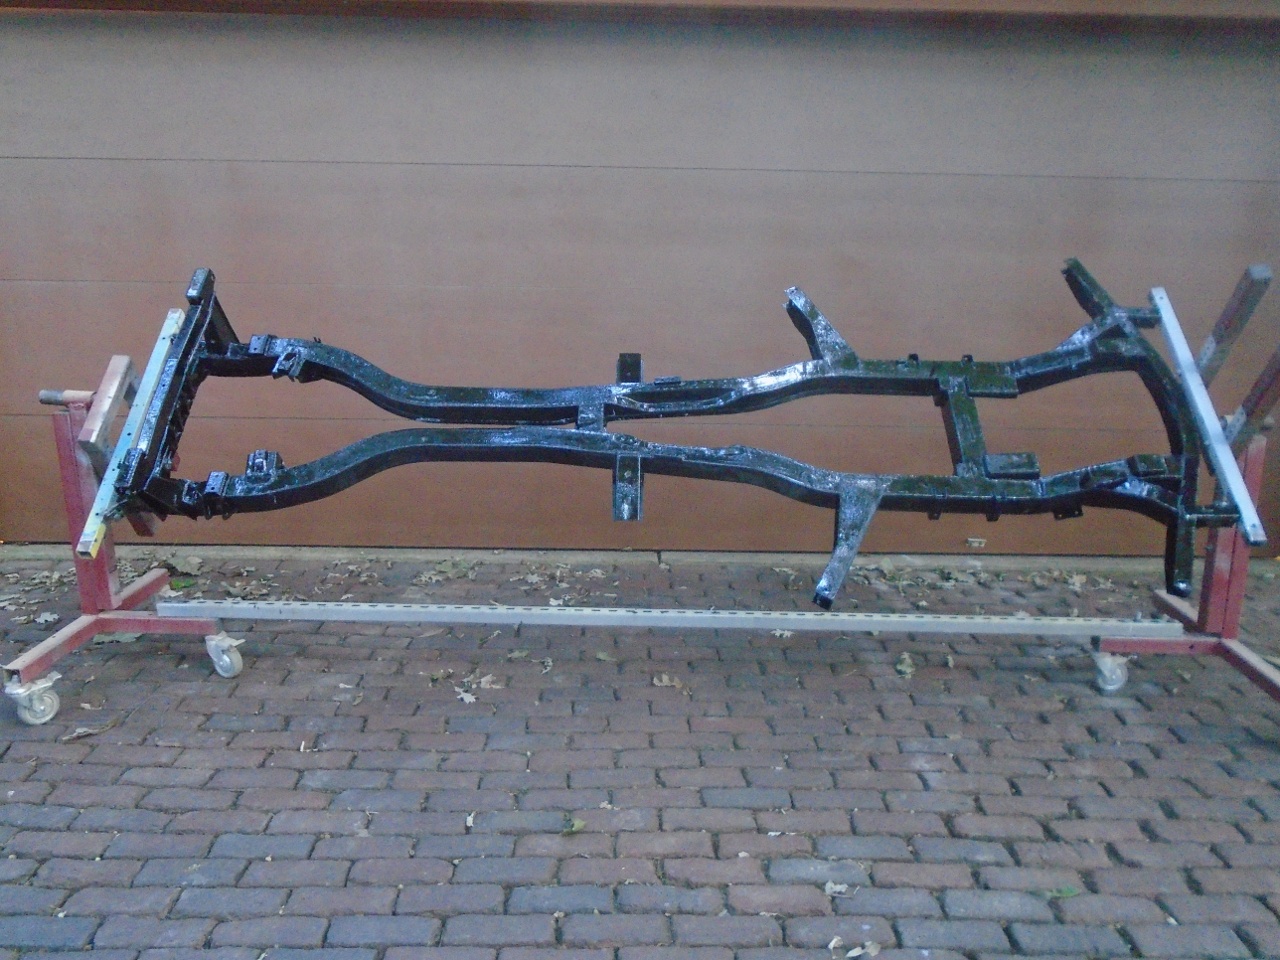
This
leaves the bare GT6 frame, essentially the same as the Spitfire frame.
The frame is a double backbone, with each rail formed from nested
"C" sections. Two pairs of outrigger members help to support the
body in the midsection.
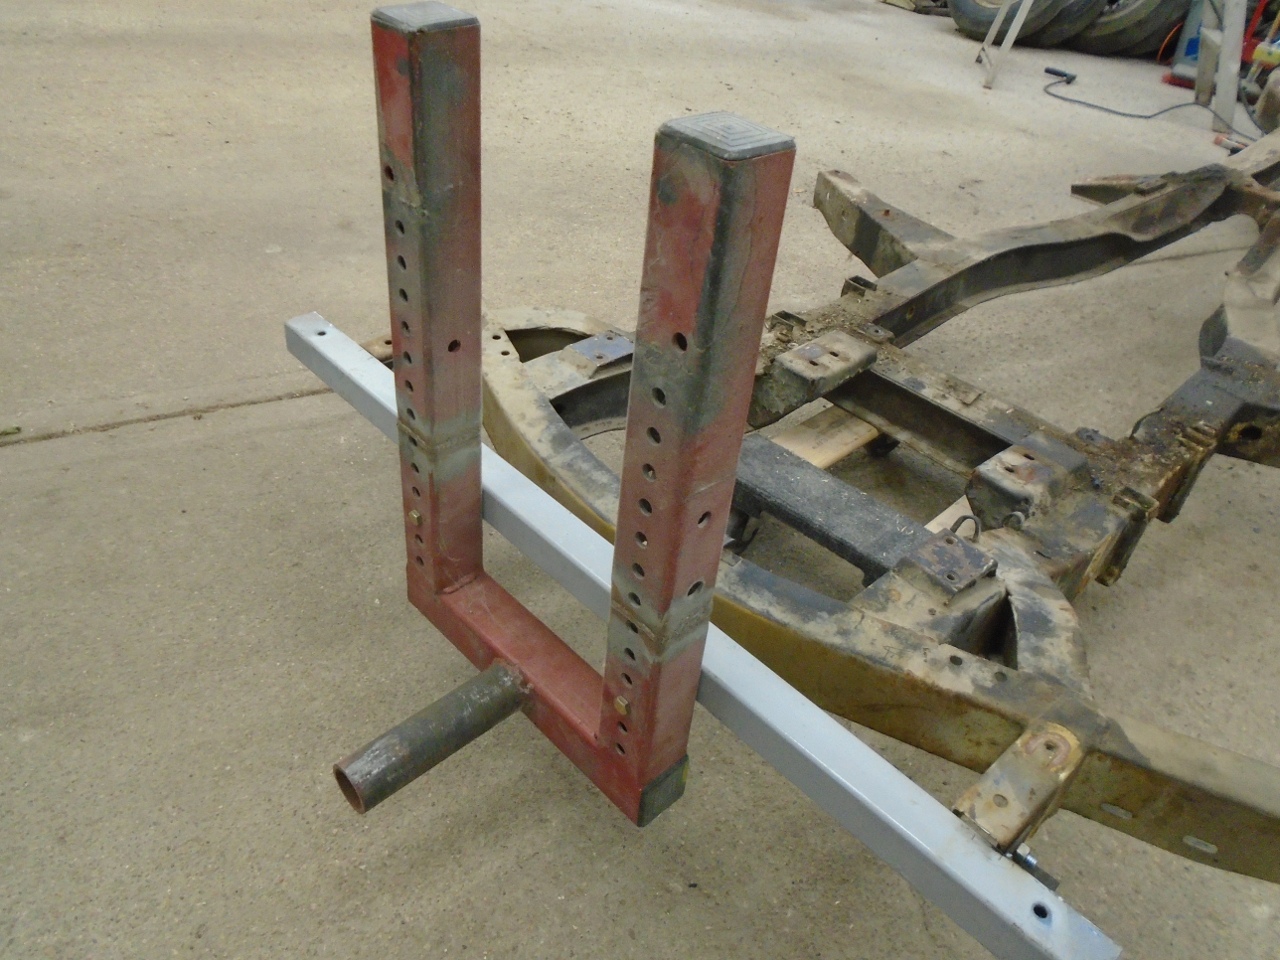
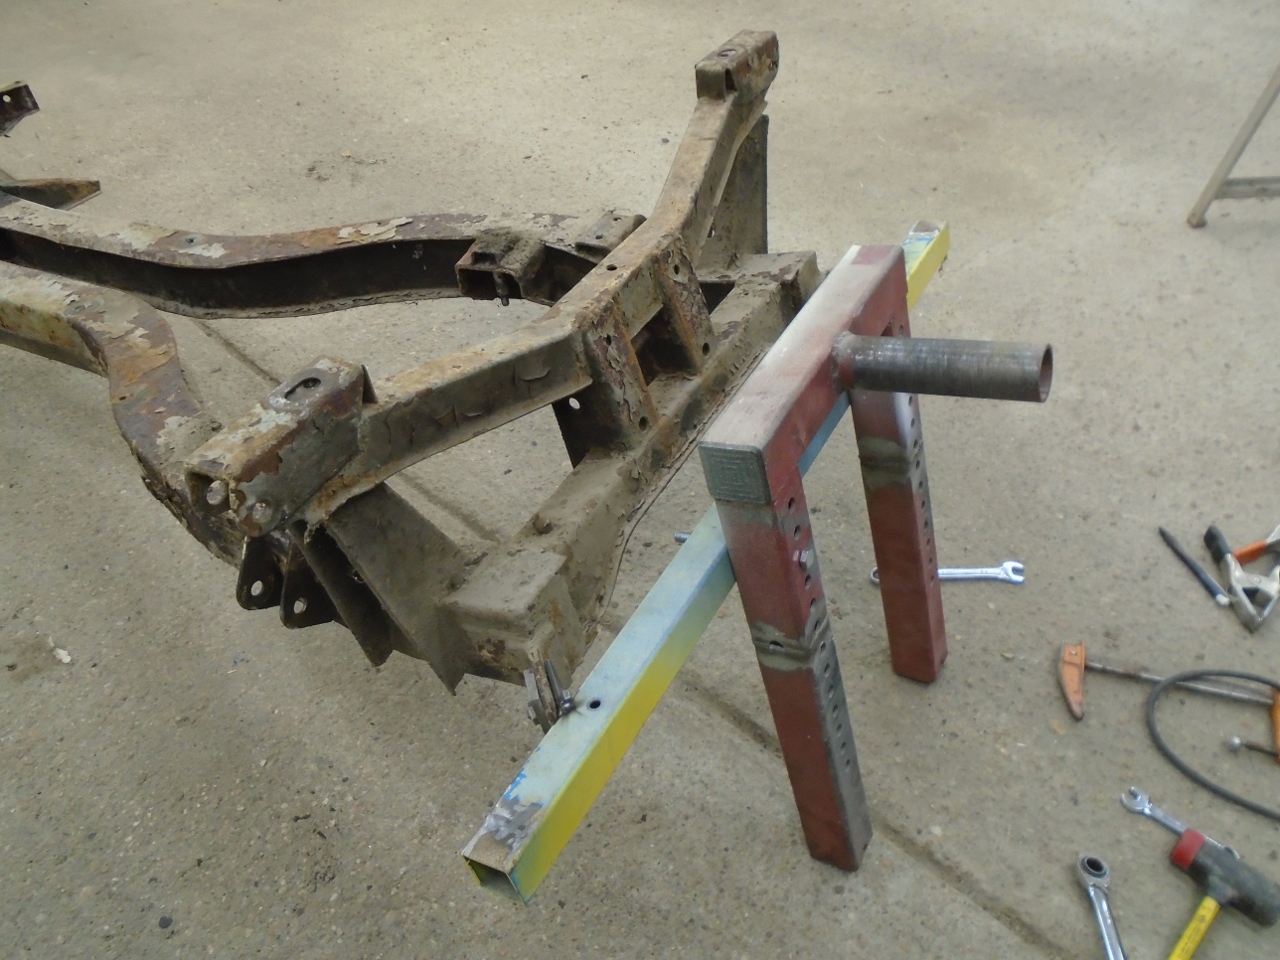
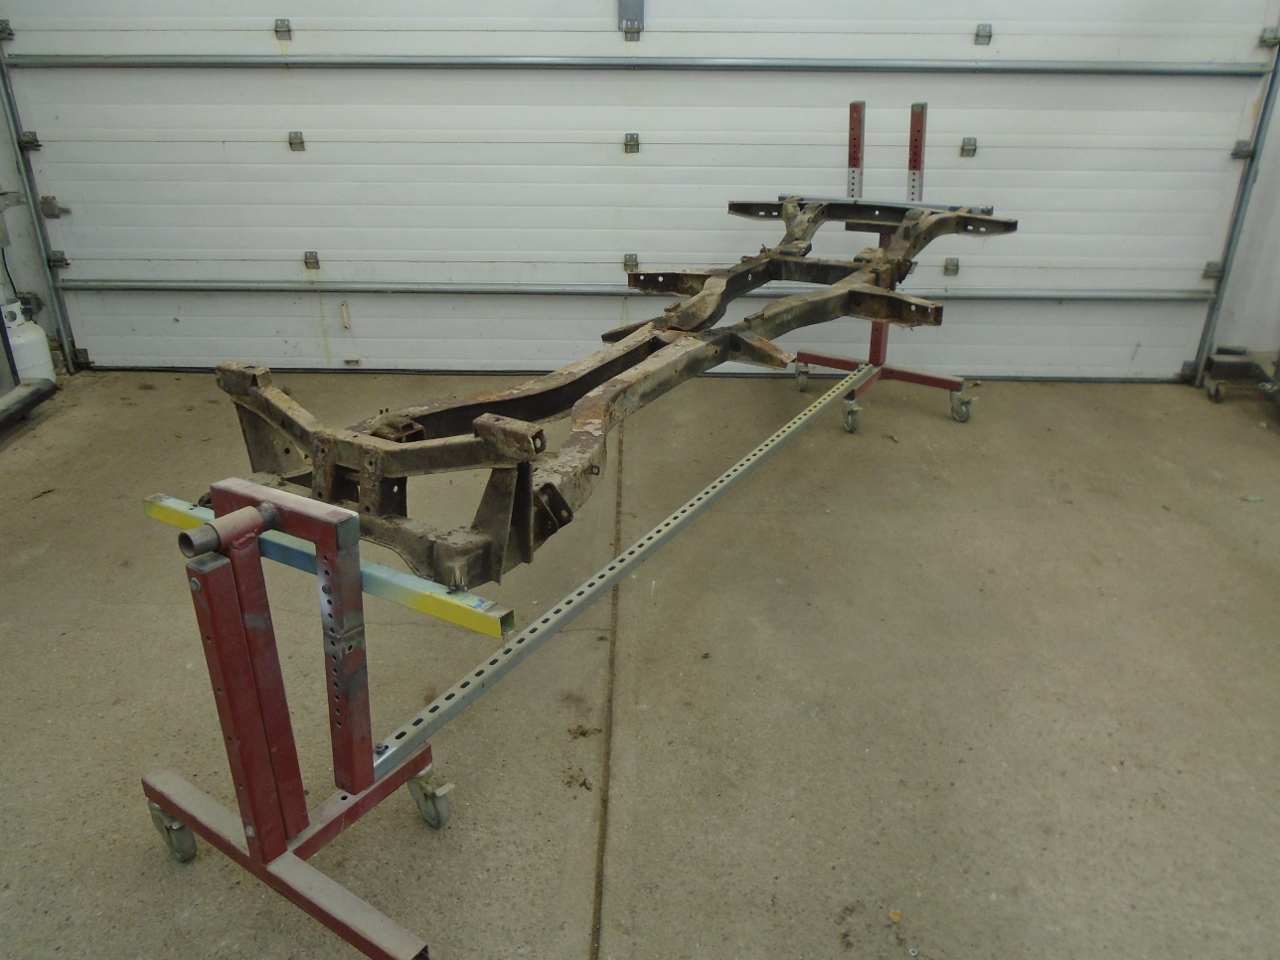
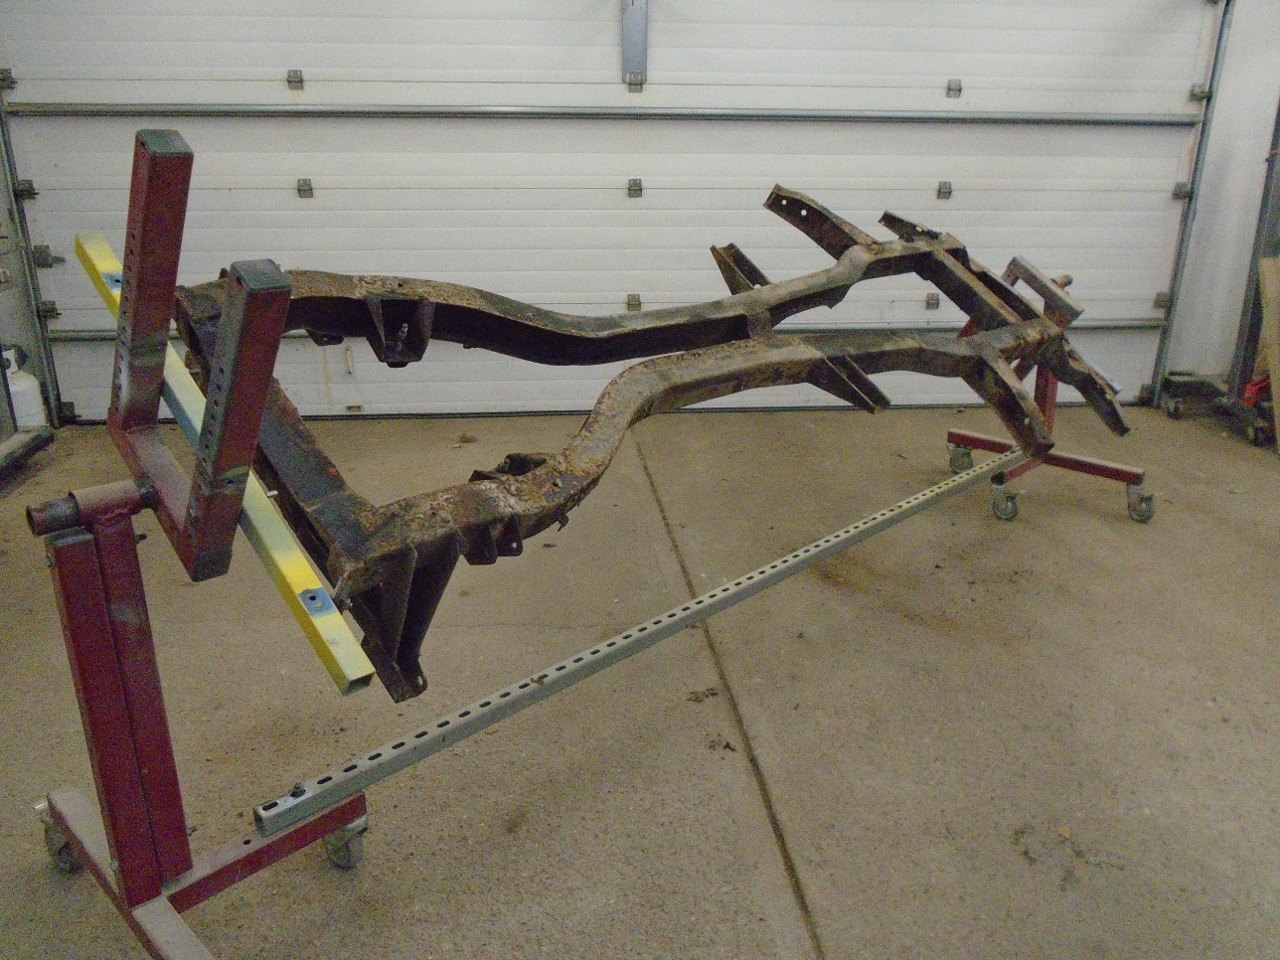
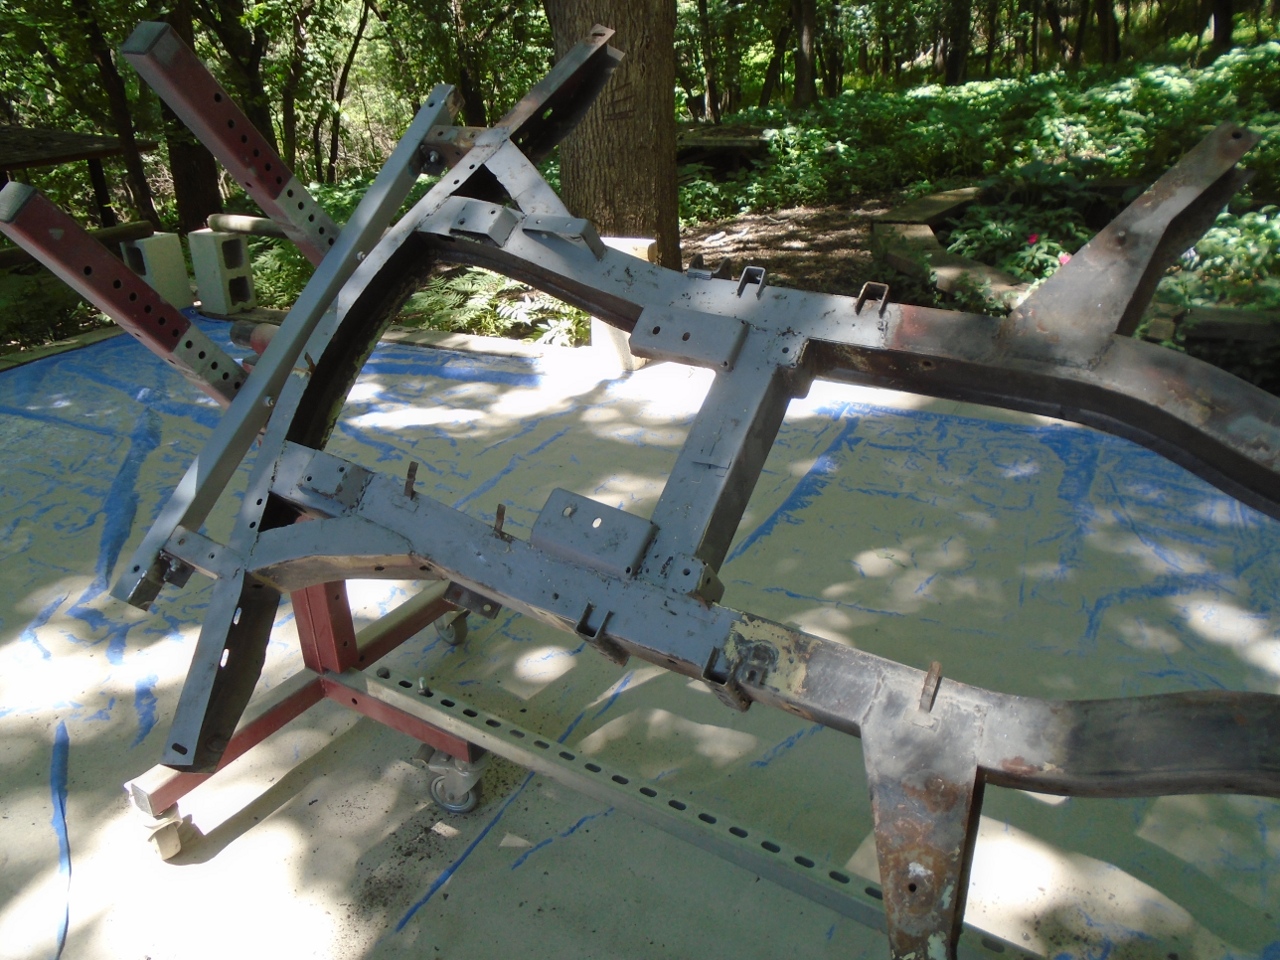
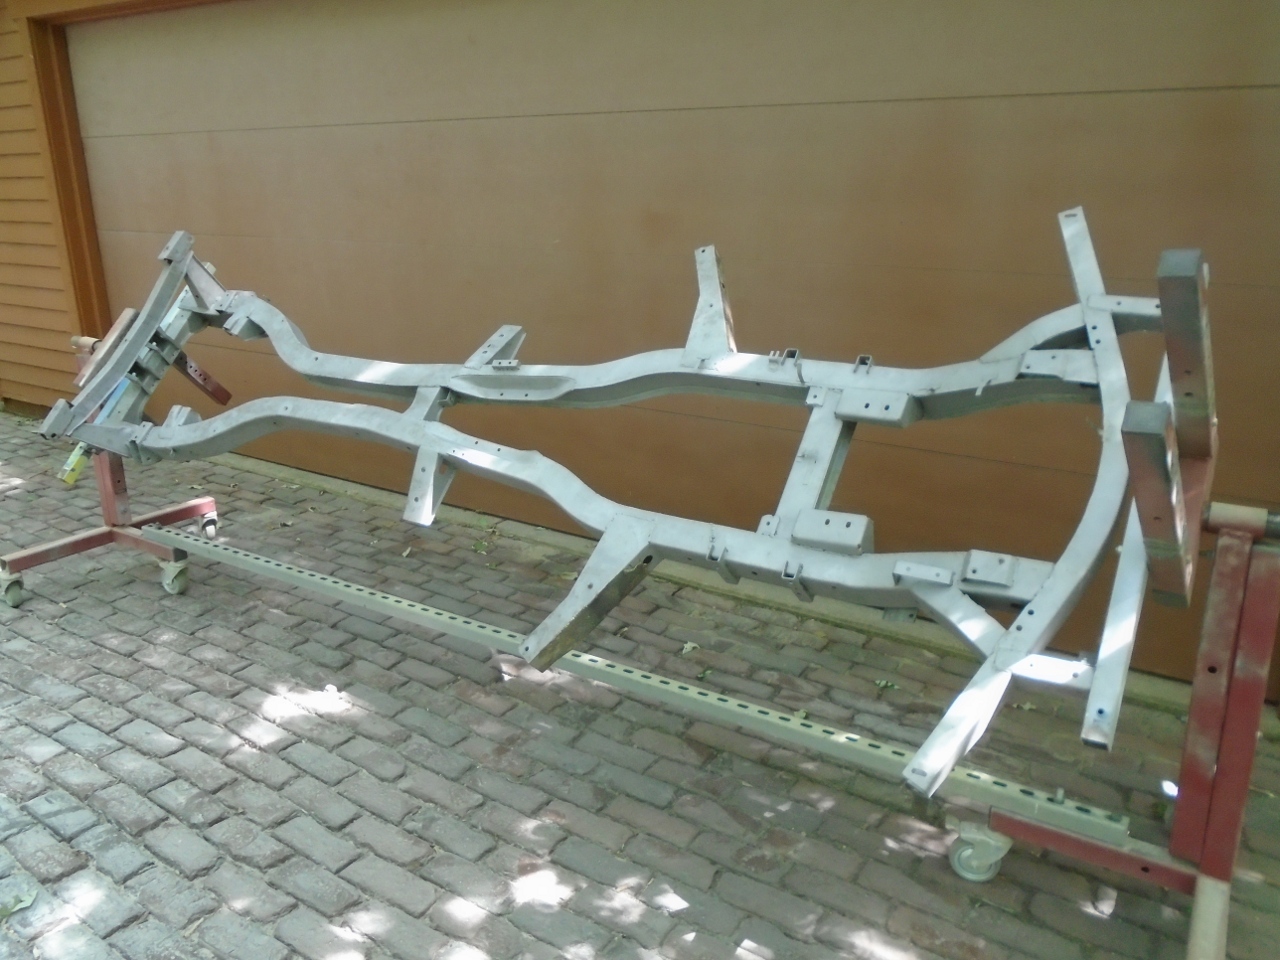
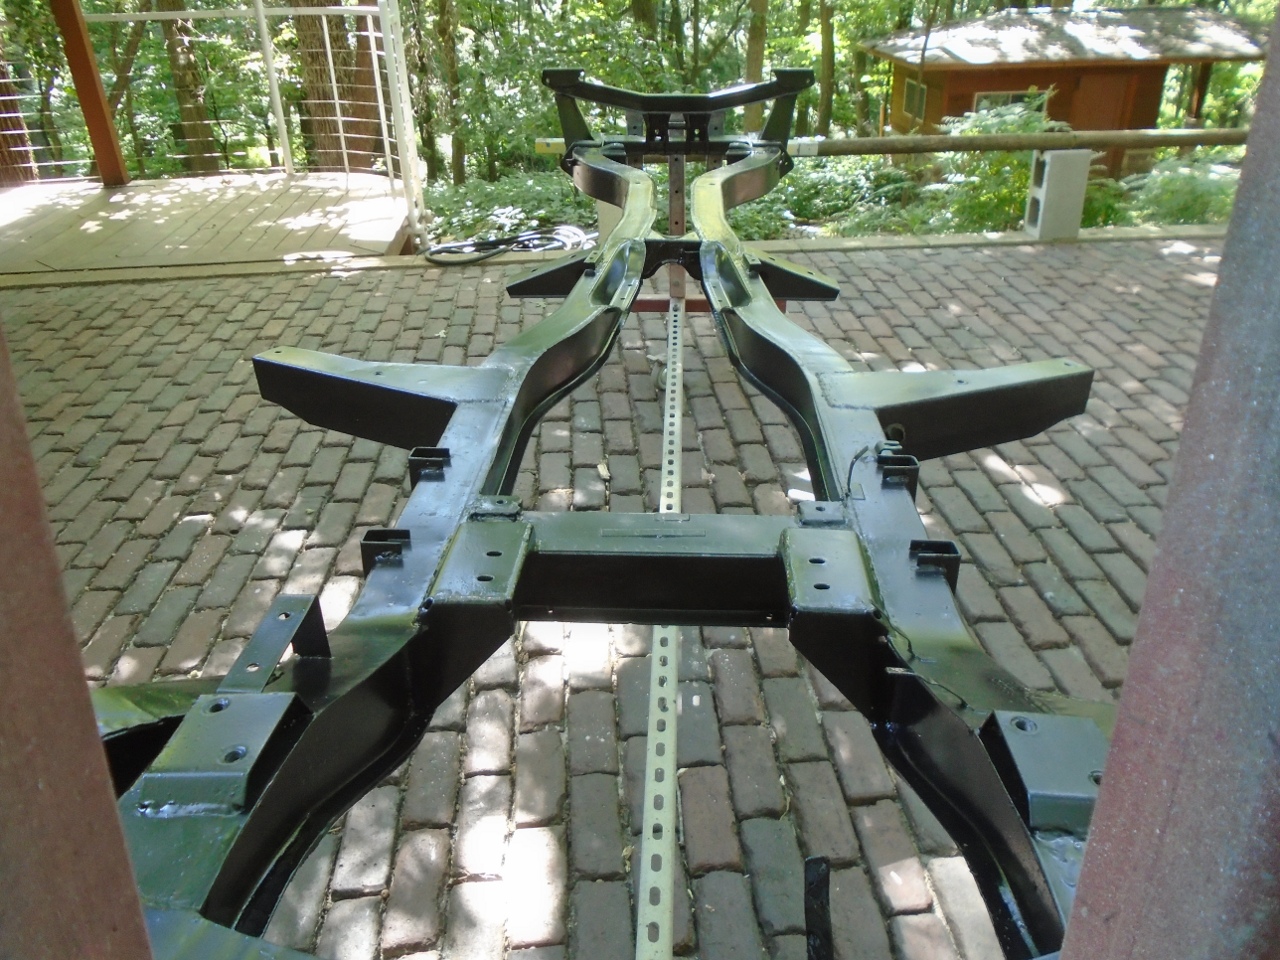
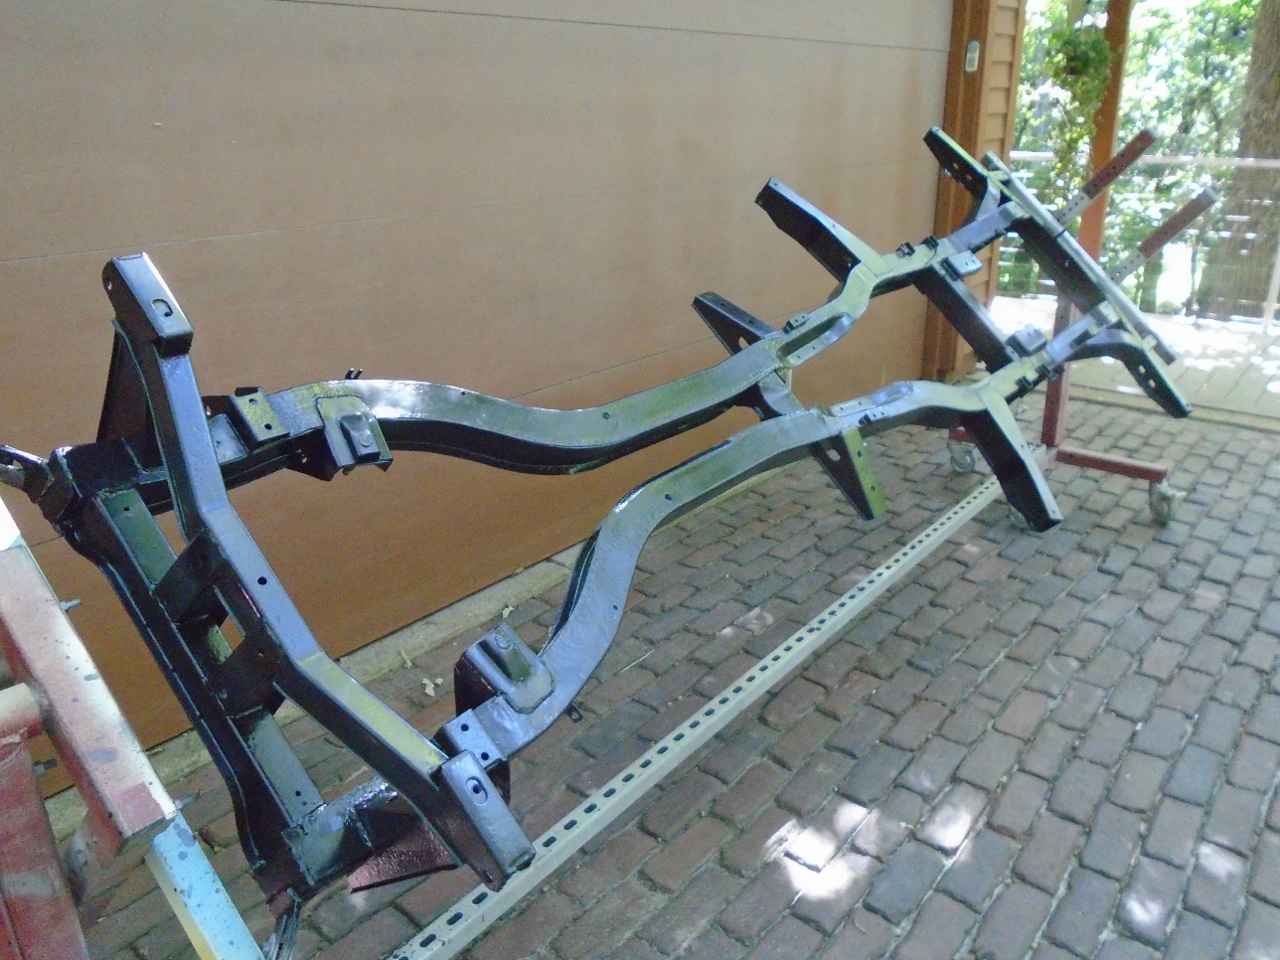
For
cleaning, inspection, and any necessary repairs, I mounted the frame on
a rotisserie. My days of working on the floor are long gone.
This is the same rotisserie I used for hte TR6 frame and body.
I just had to make adaptors to fit the GT6 frame ends.
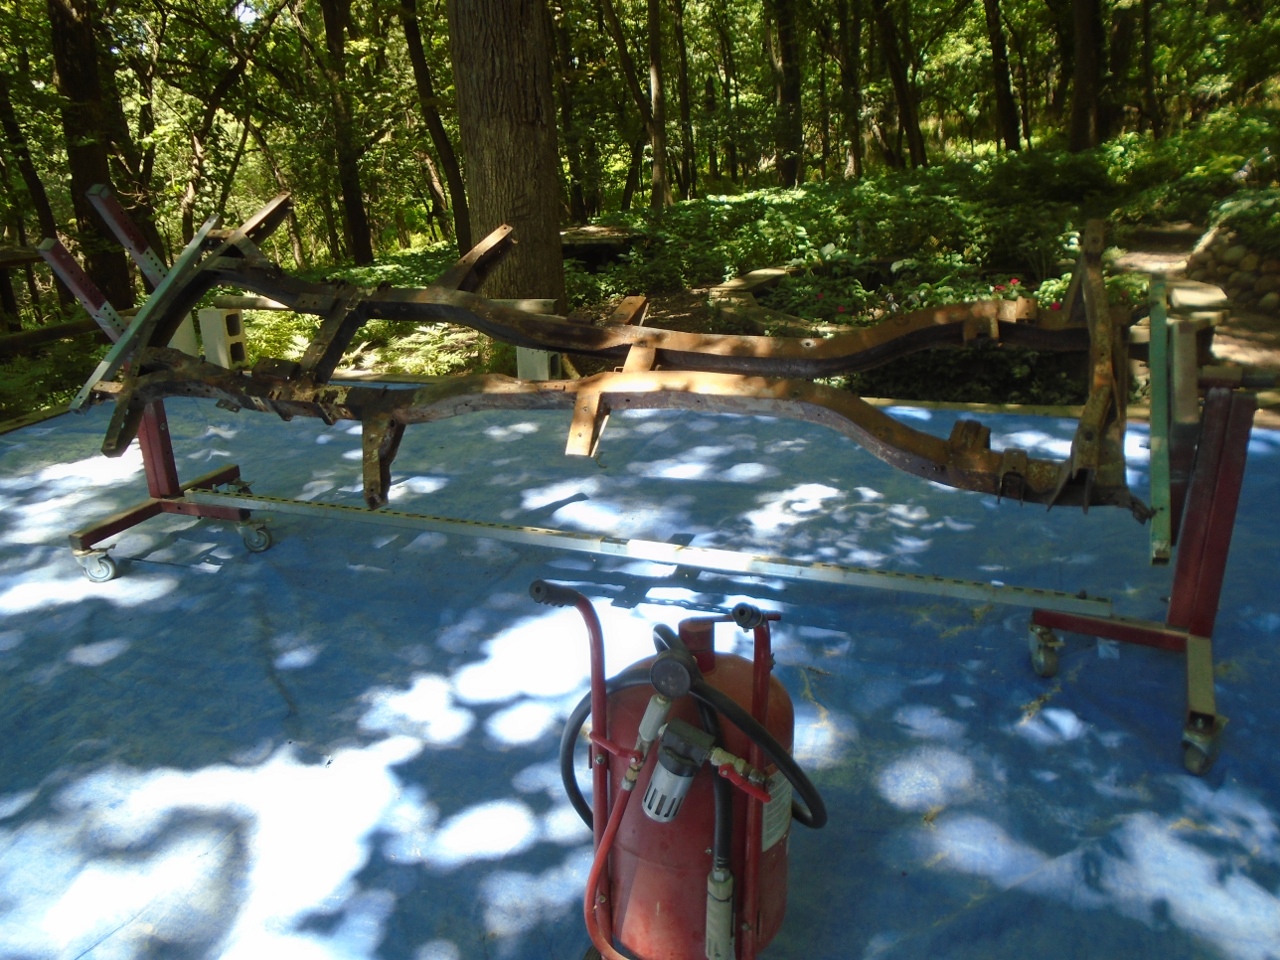
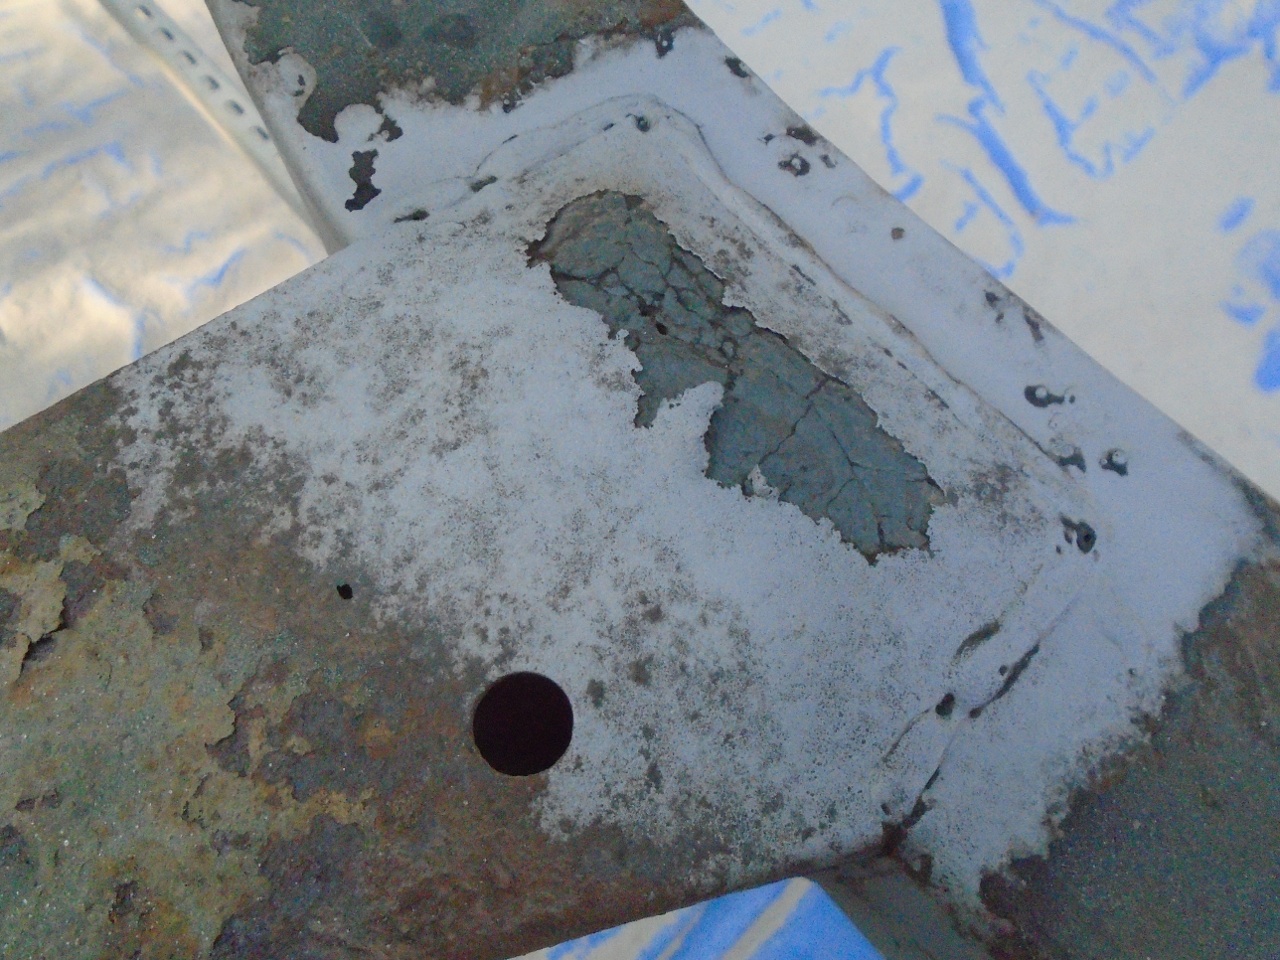
To
really see what's going on with the frame, the considerable rust and
any remaining paint must be removed. I don't know of a faster and
more effective way to do this than sand blasting. I use common
contractors' sand, and do the blasting on a large tarp so I can capture
and re-use most of the sand. When things are going well, it moves
along pretty quickly. The second picture is after about 10 or 15
minutes of blasting.
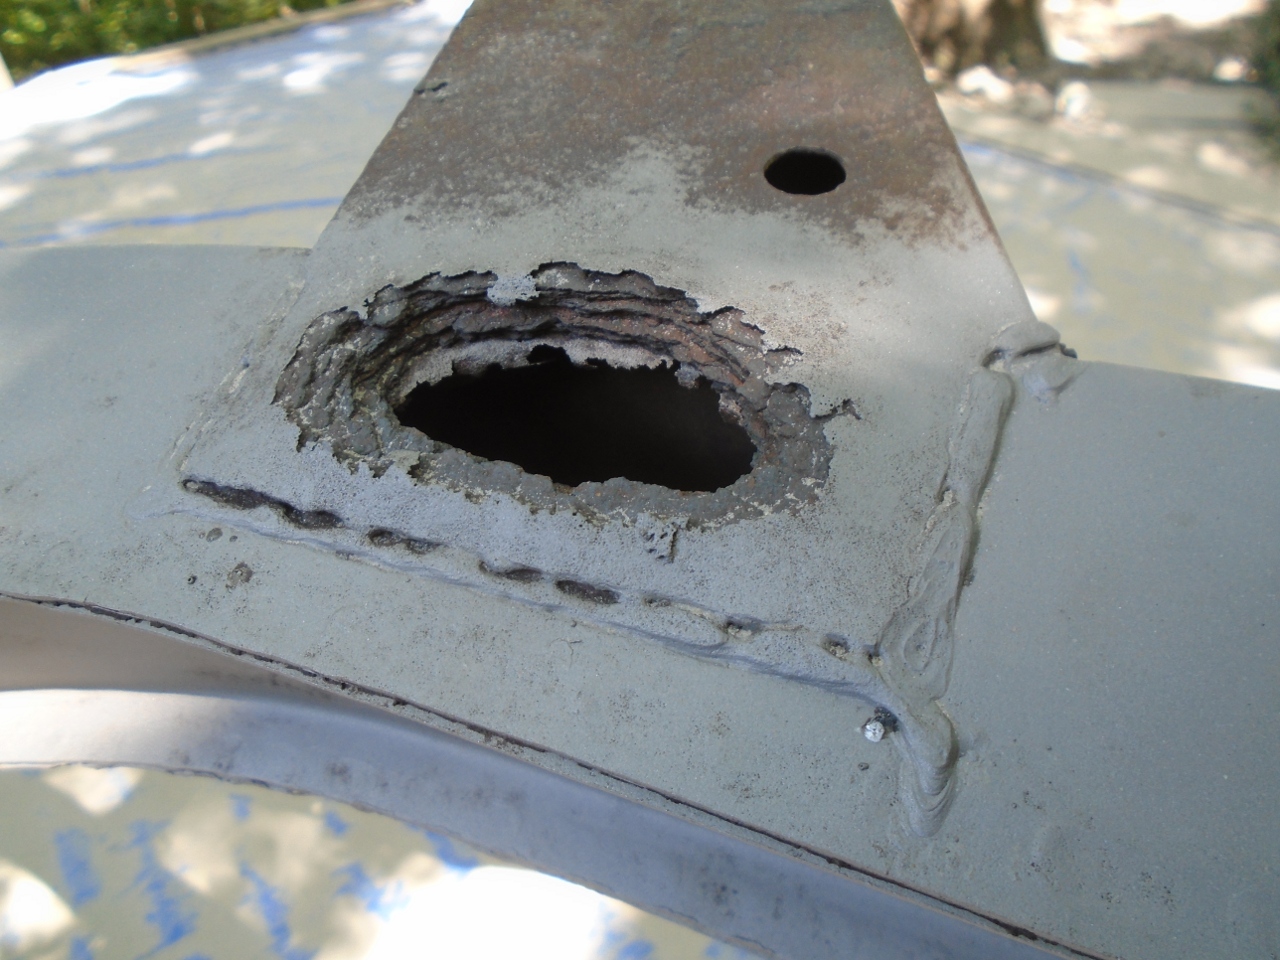
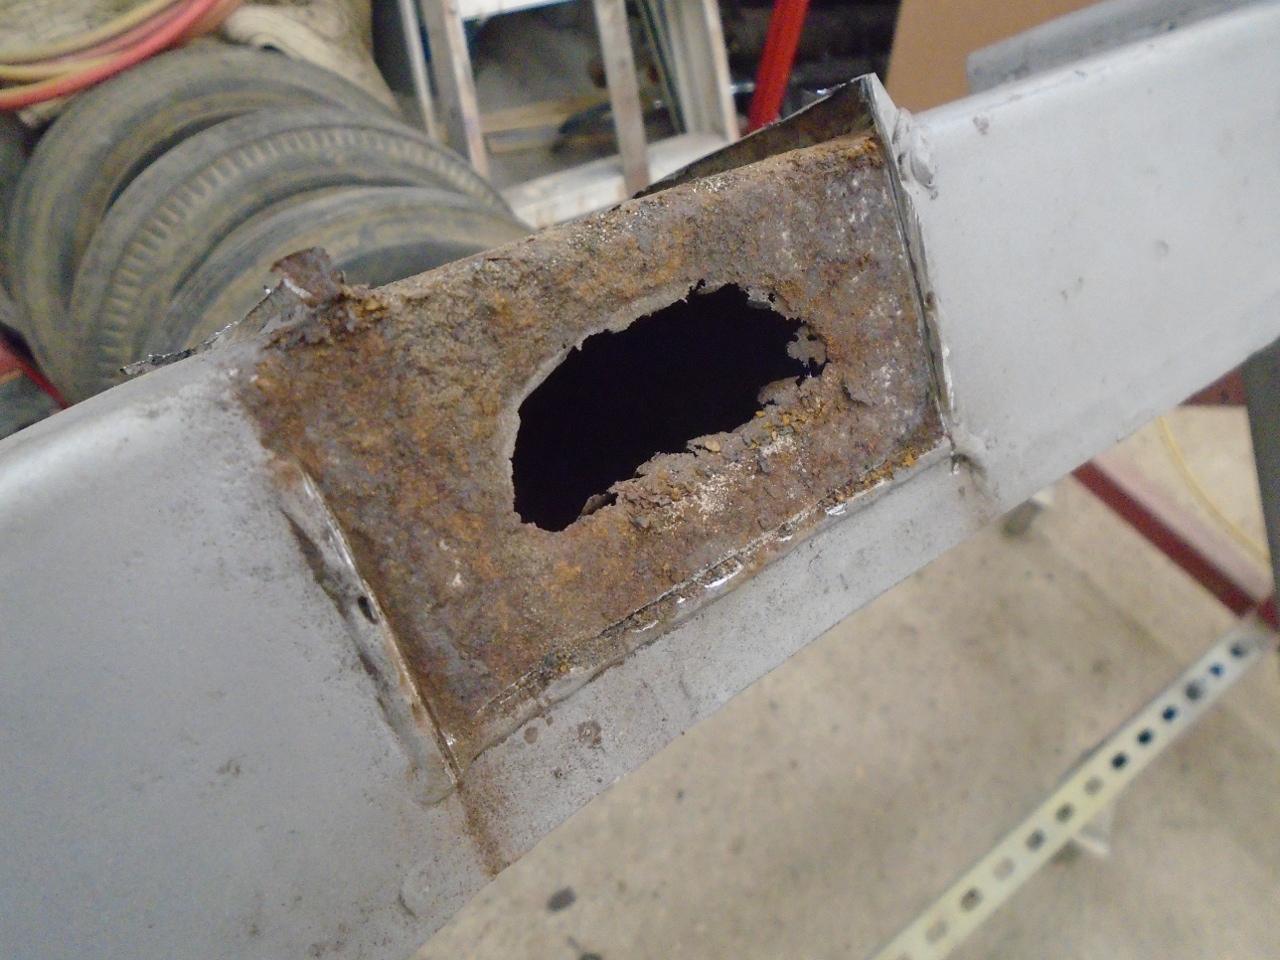
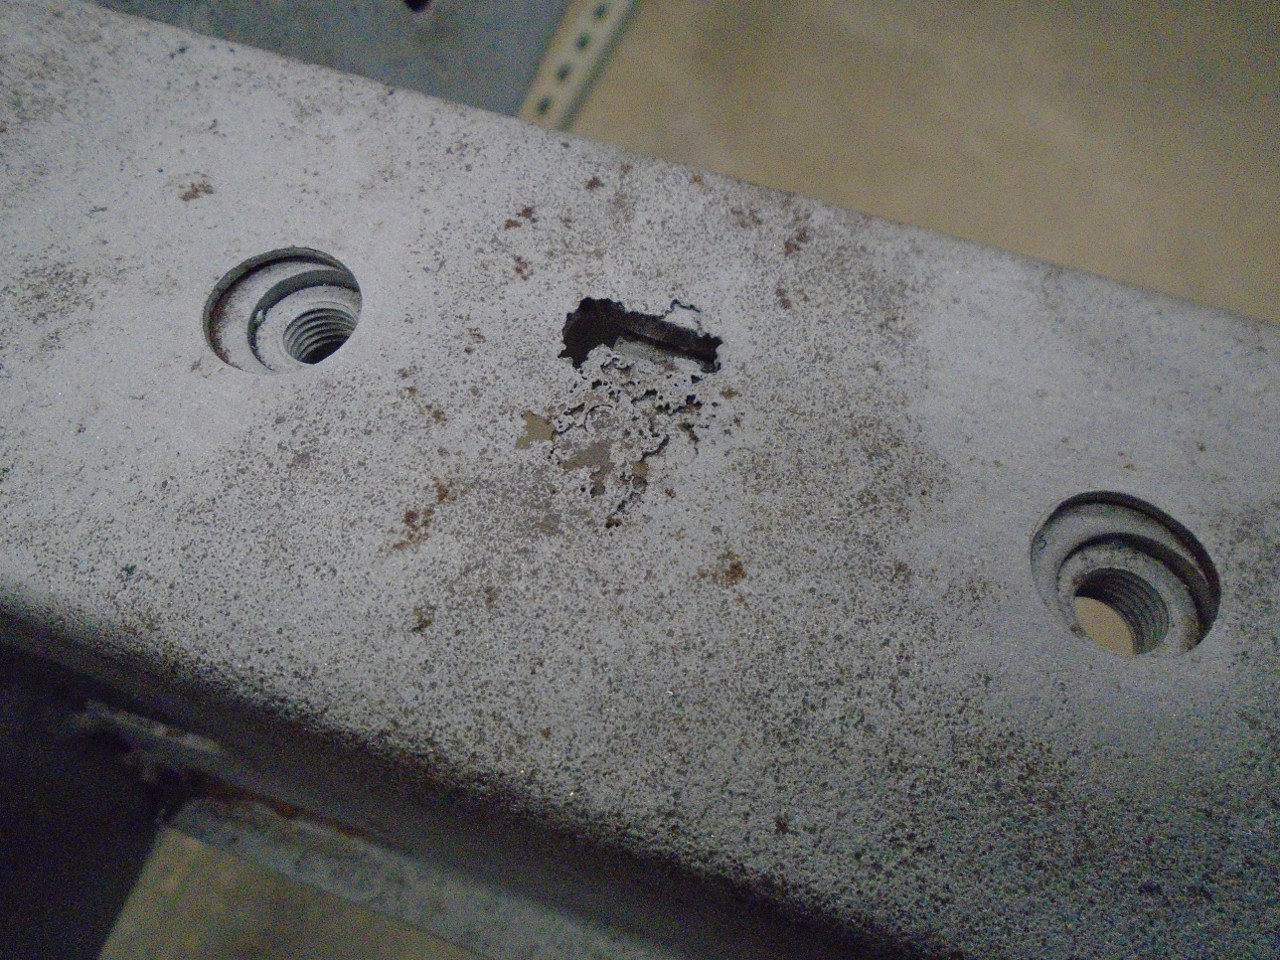
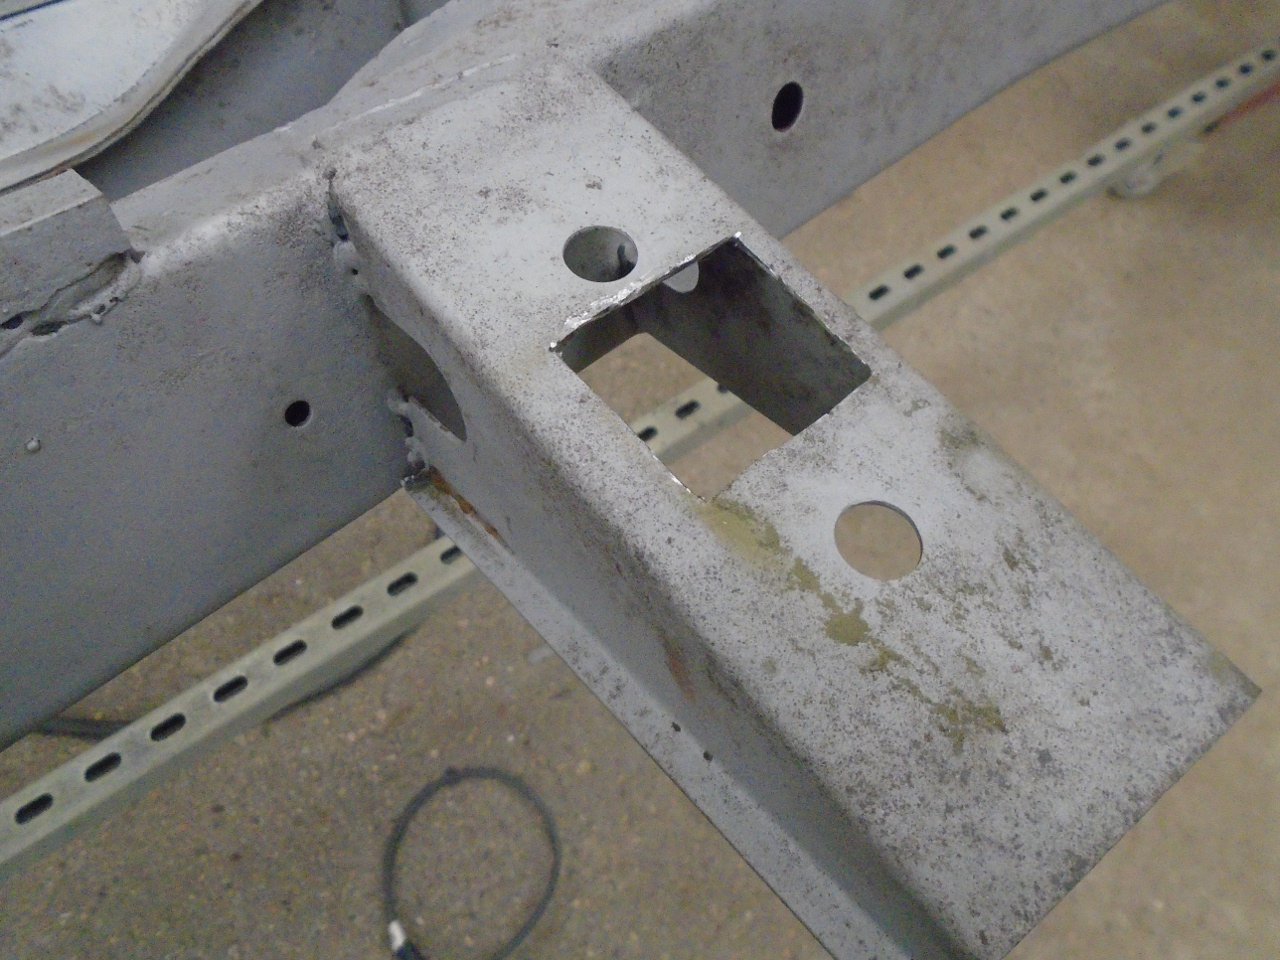
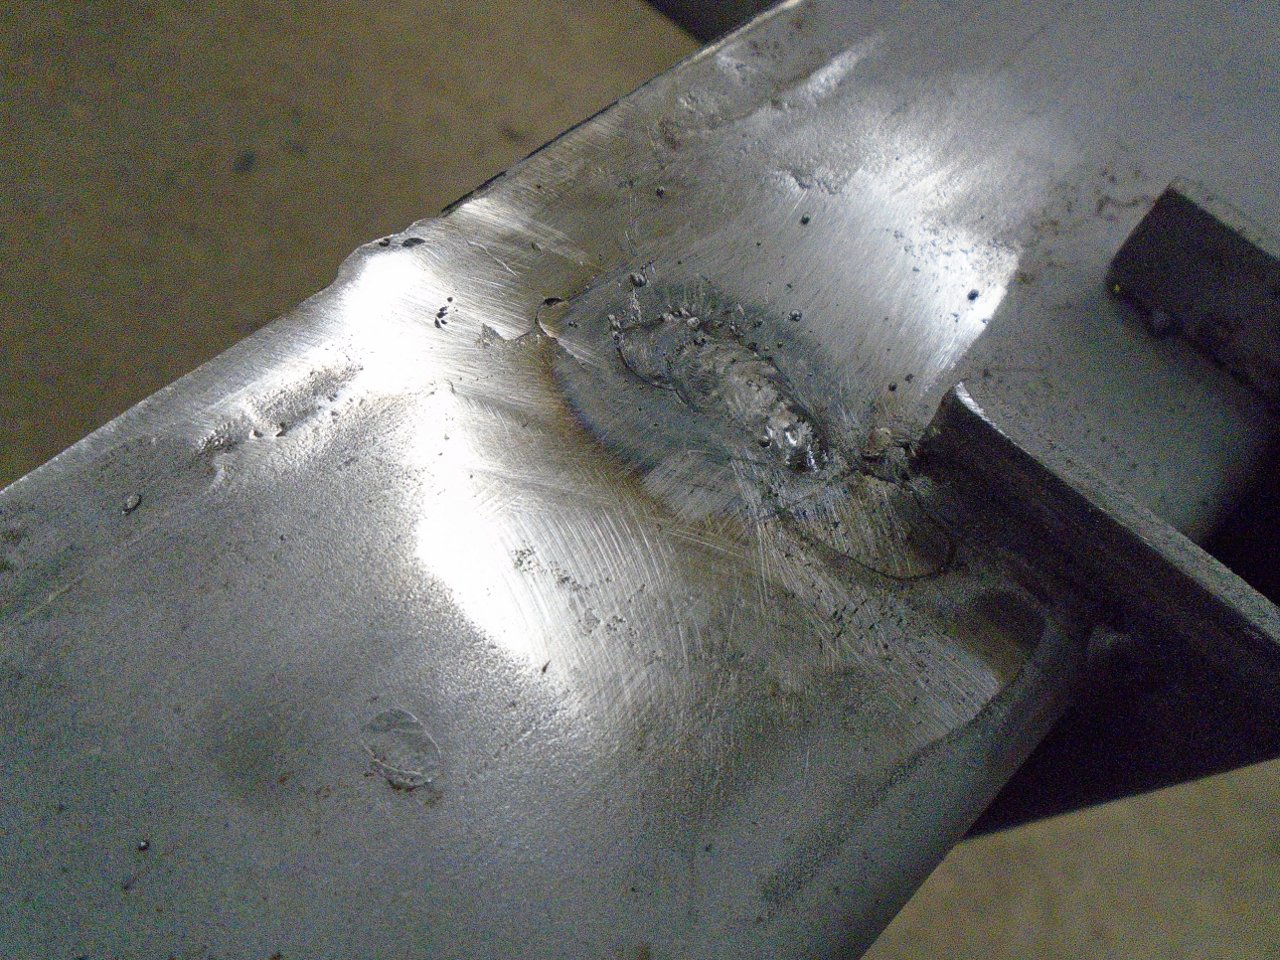
Part
way through the blasting, I found the worst problems on the frame.
The underside of the joints where the front outriggers join the
backbone had considerable rust damage.
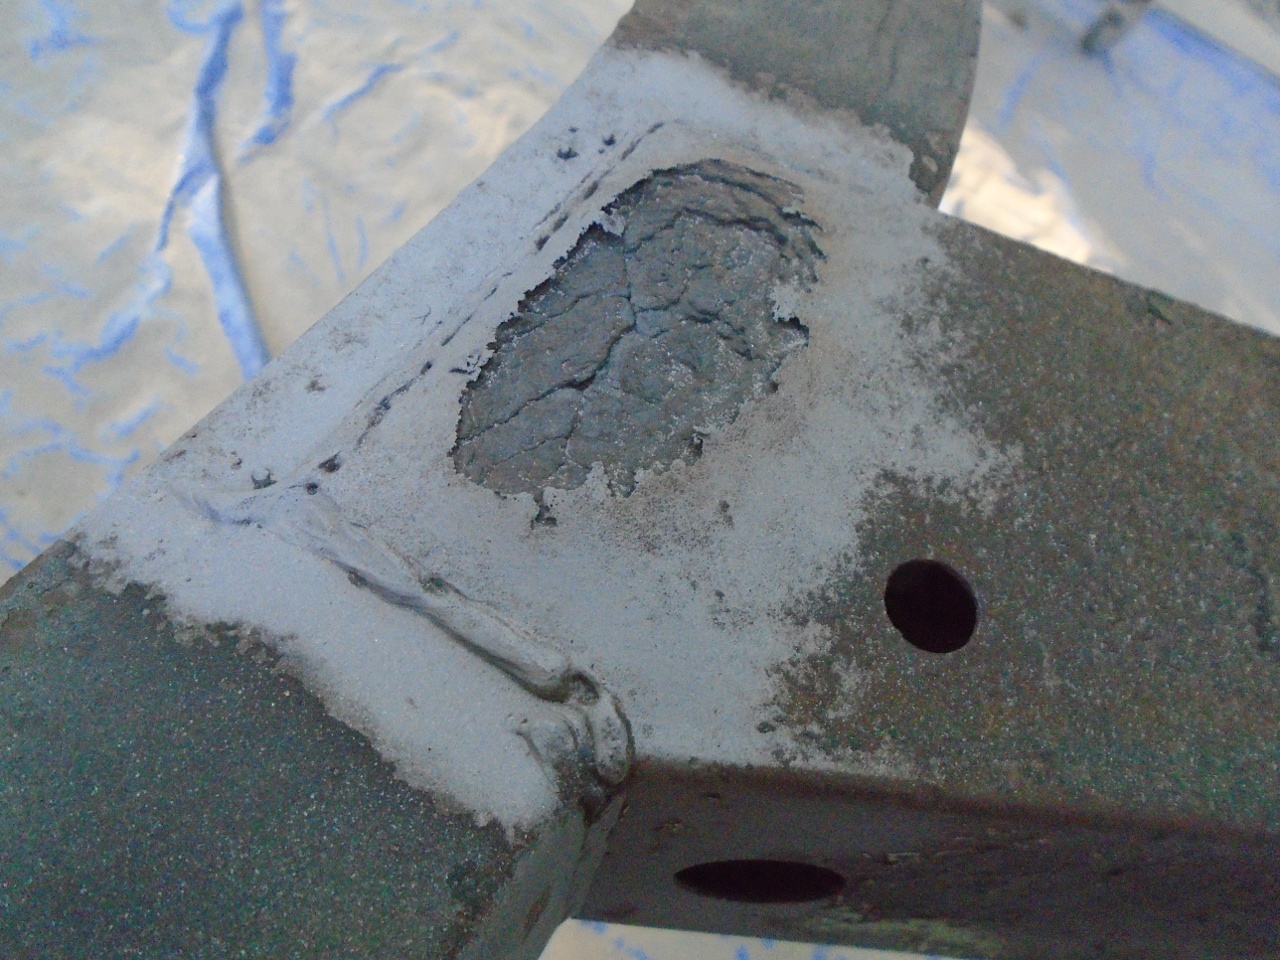
A
little tapping with a pick revealed that is was even worst than it
first appeared. Water had apparently gotten into the space
between the frame and overlapping outrigger members. A closer
look showed even more rust damage to the outriggers.
The rest of the blasting revealed only a few other less dramatic flaws. I used only about 100 pounds of sand, but used it multiple times.
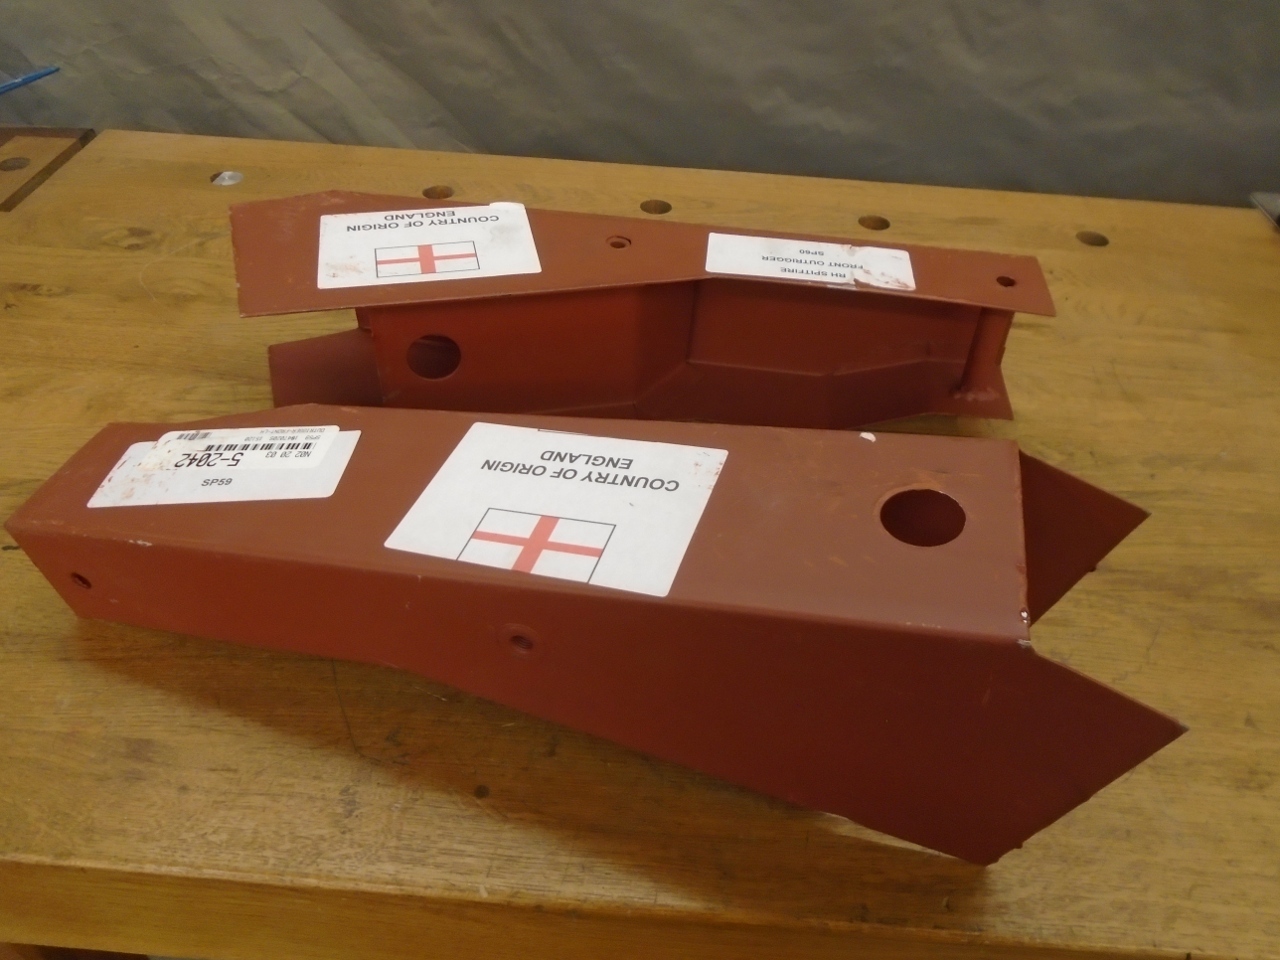
The outrigger problem must not be unheard of, since the front outriggers are available from multiple sources.
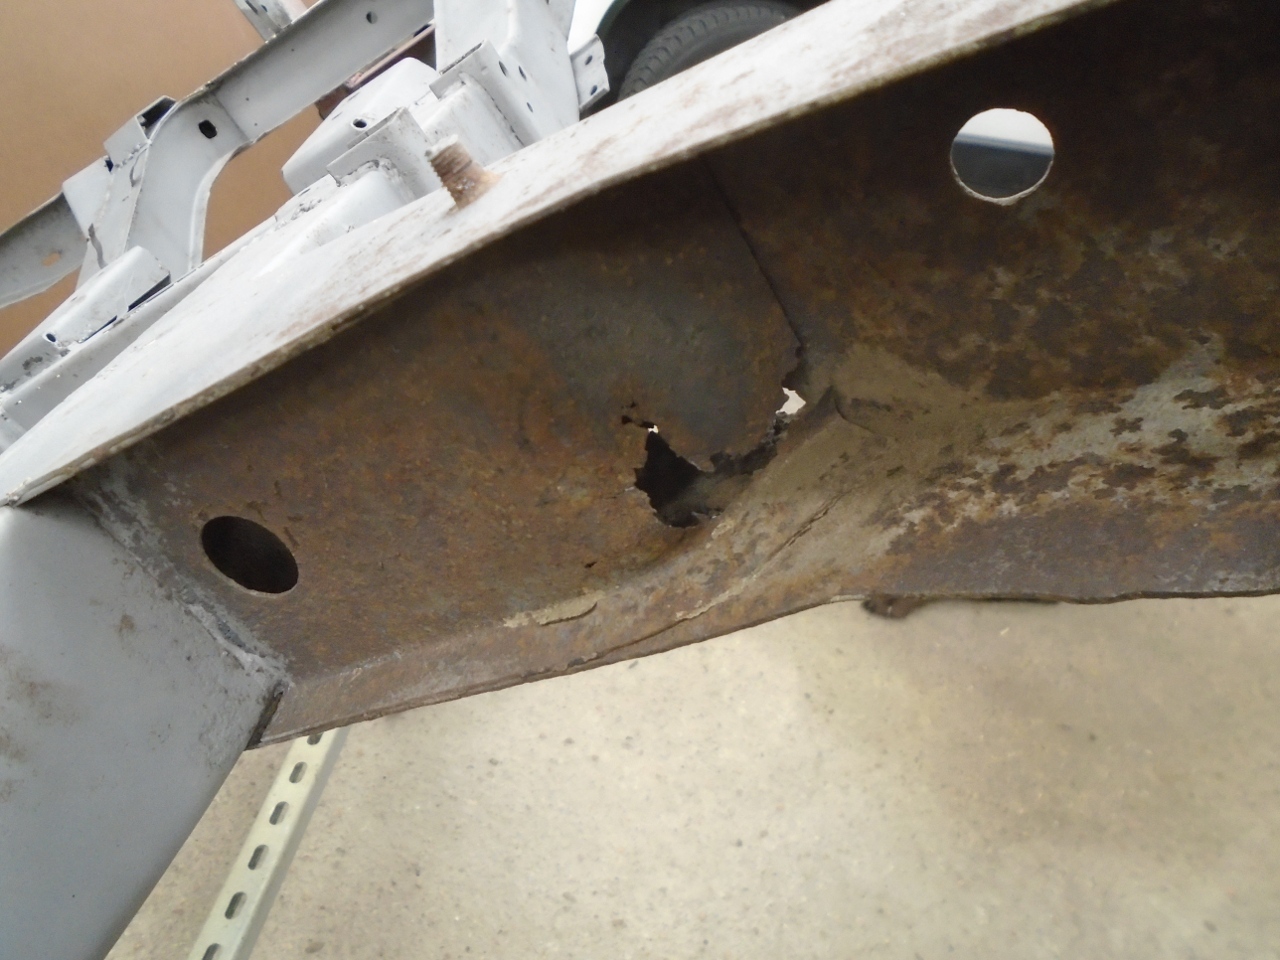
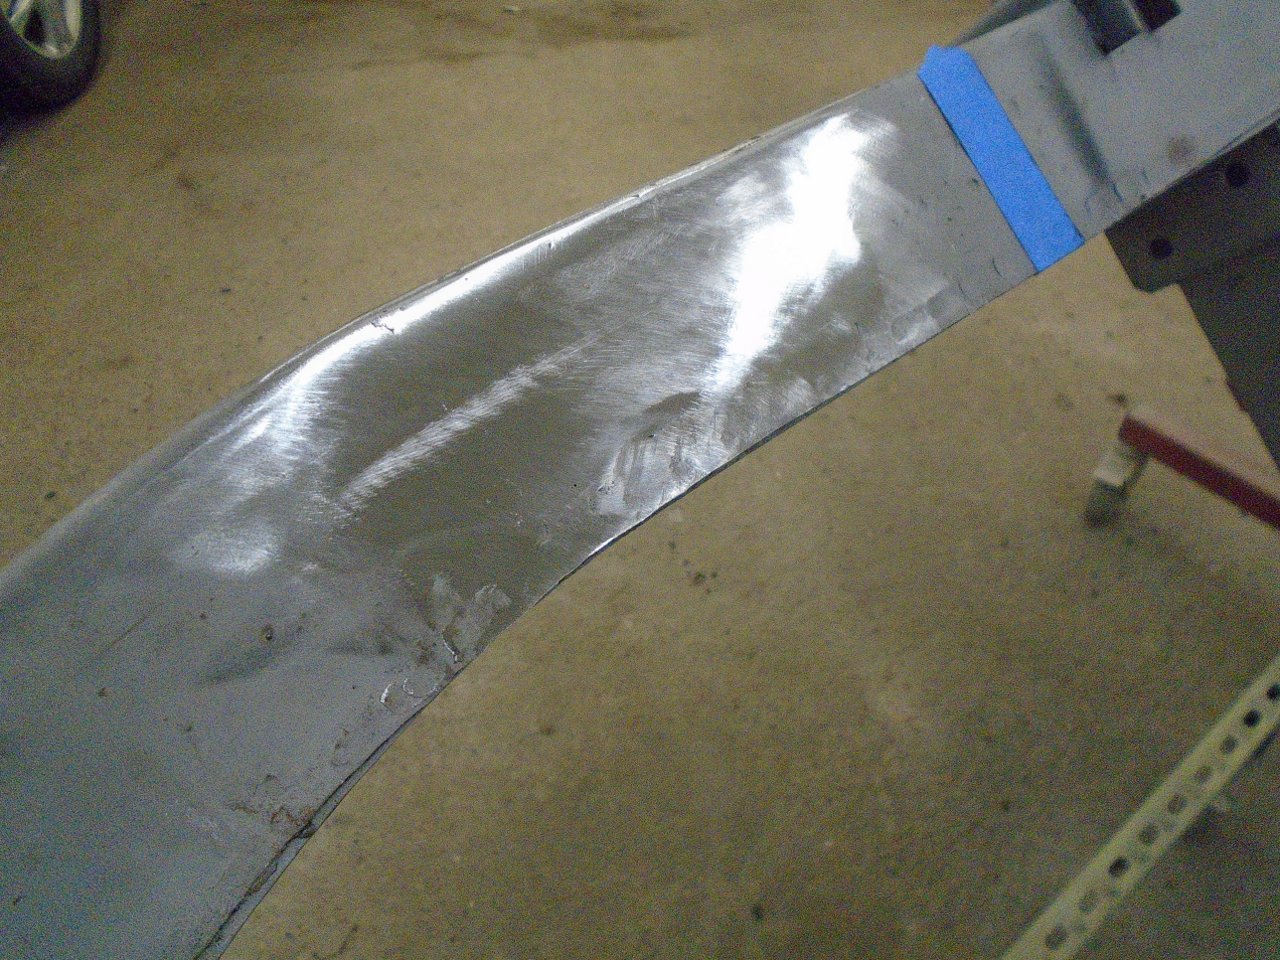
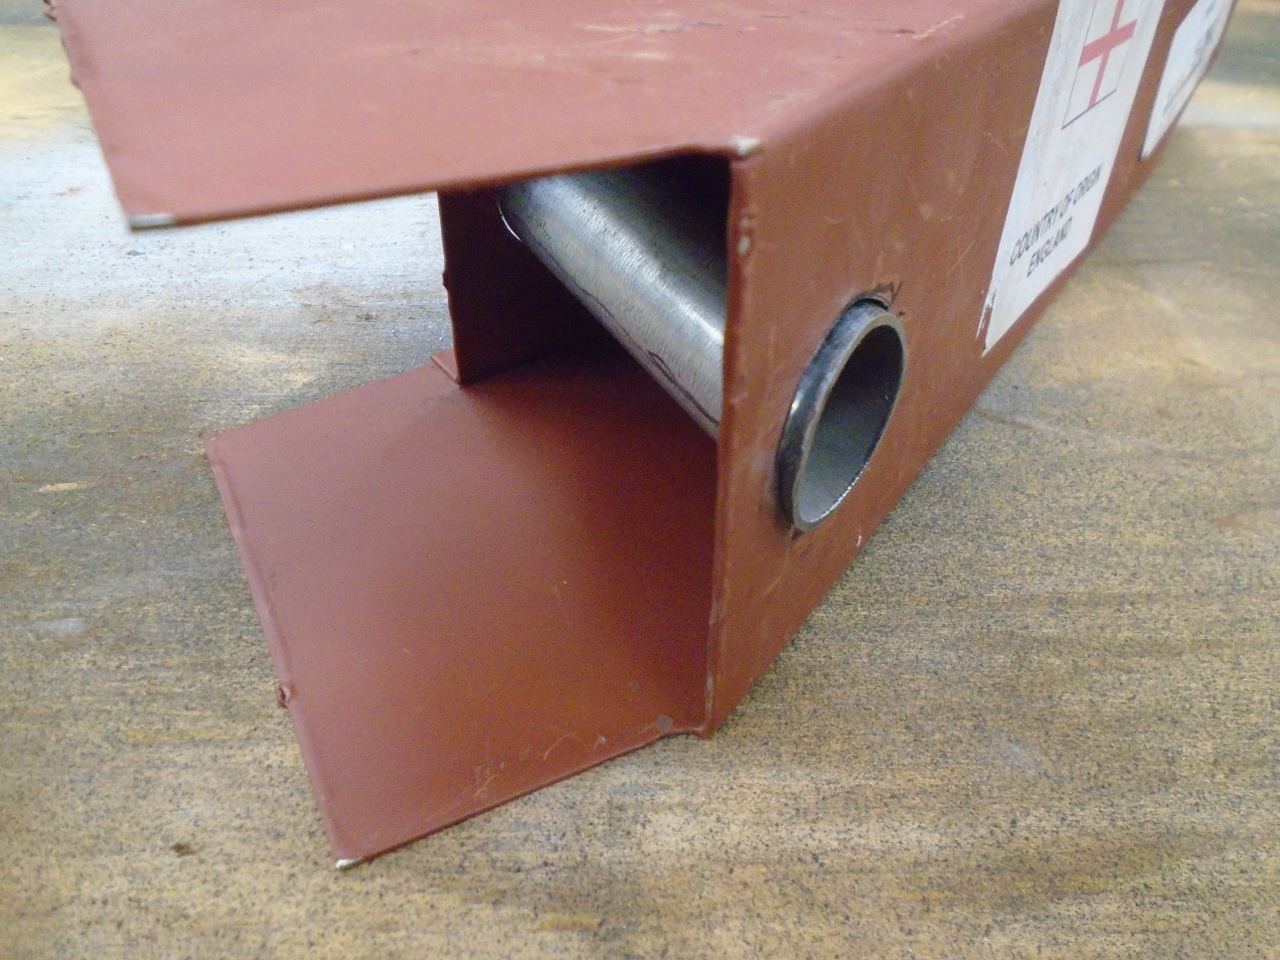
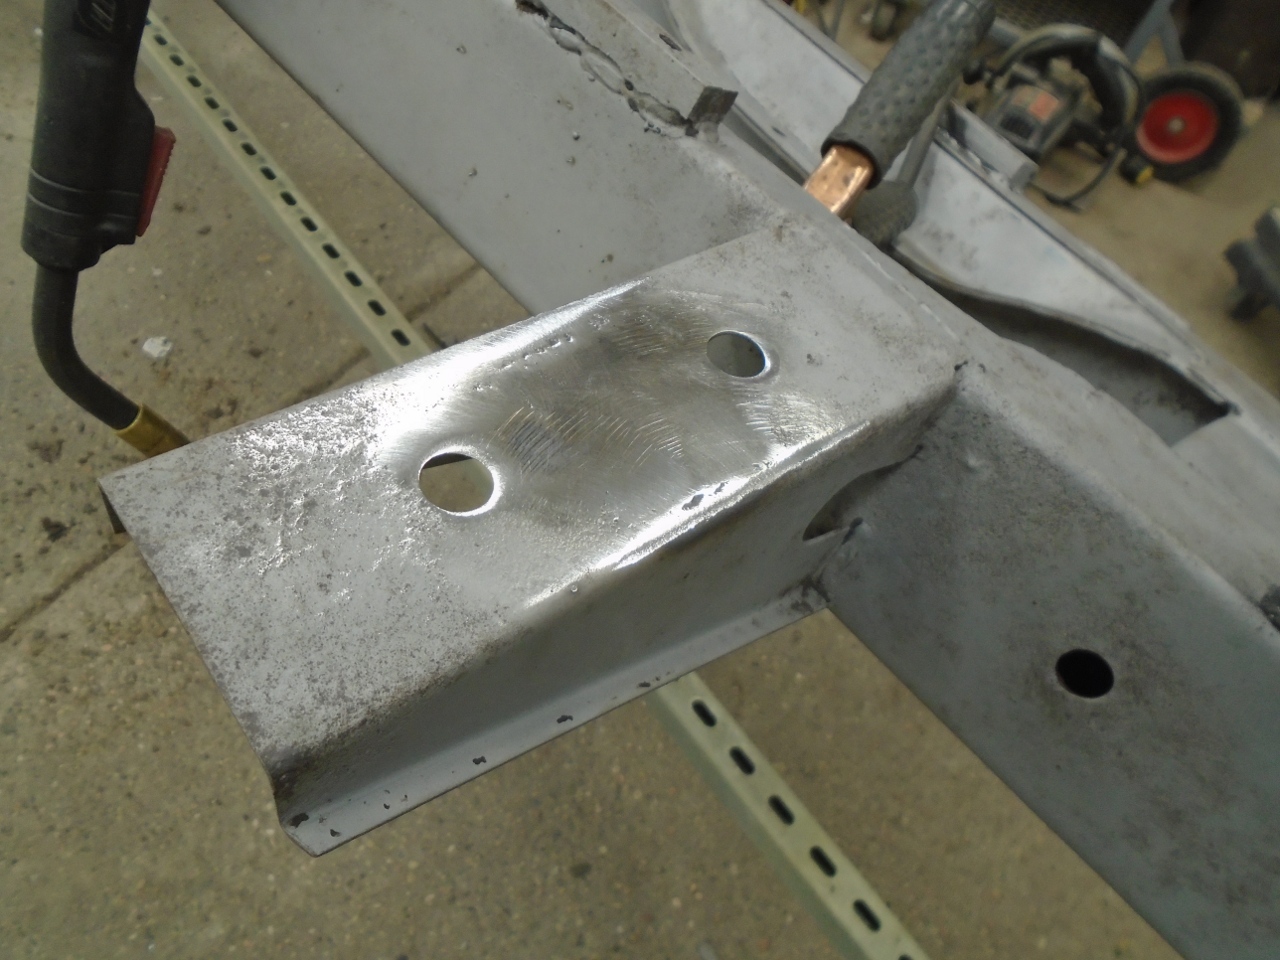
I
removed the outriggers, and cut away the rusted area on the frame rail.
I was happy to see how good the inside of the frame rails looked.
Notice in
the second picture, looking through the cutout in the bottom of the
backbone rail, that the inside of the upper surface of the rail
looks brand new. It still has original mill scale on it.
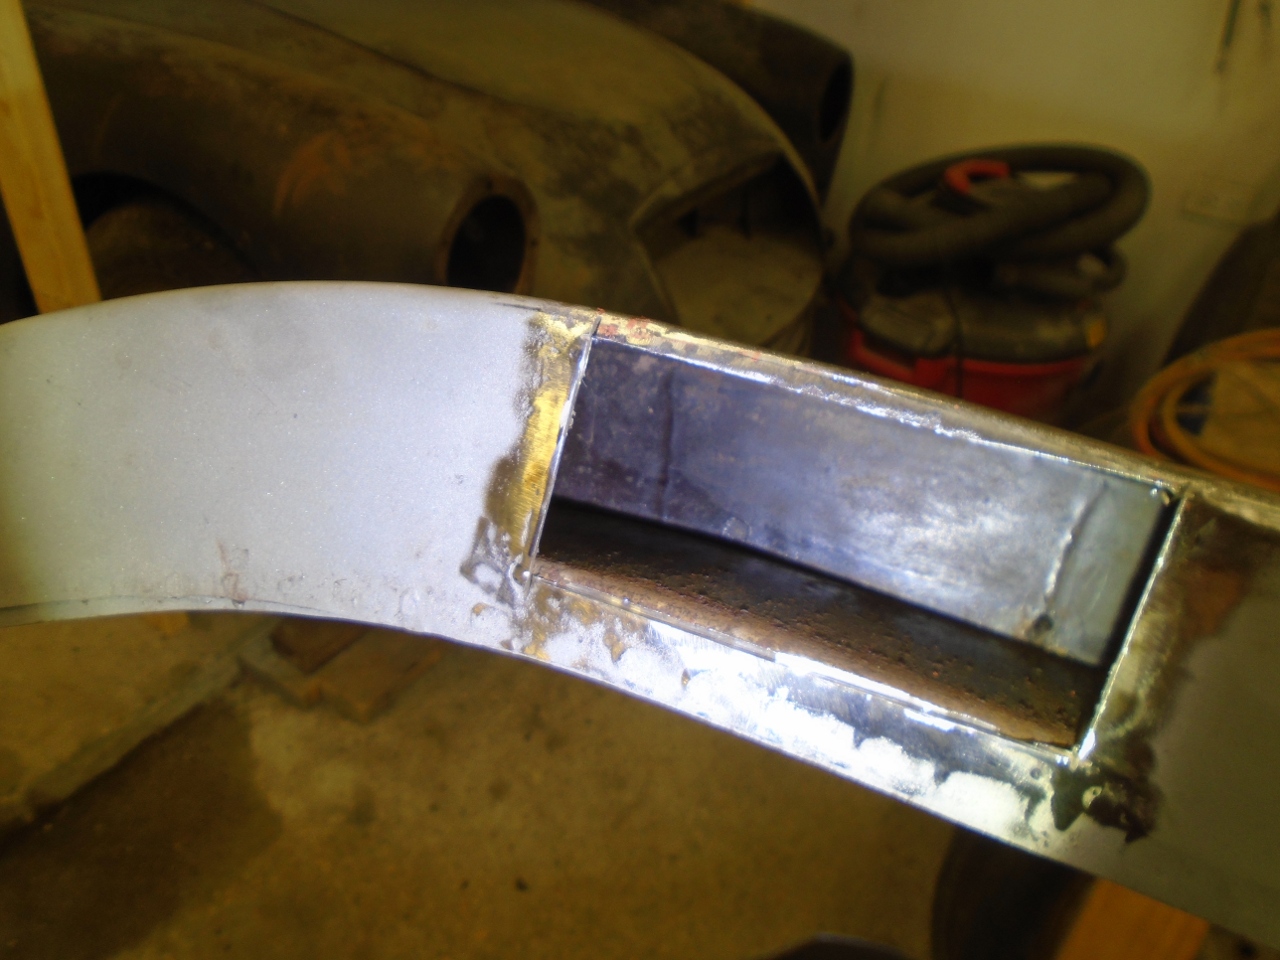
Then made a patch to fit the hole.
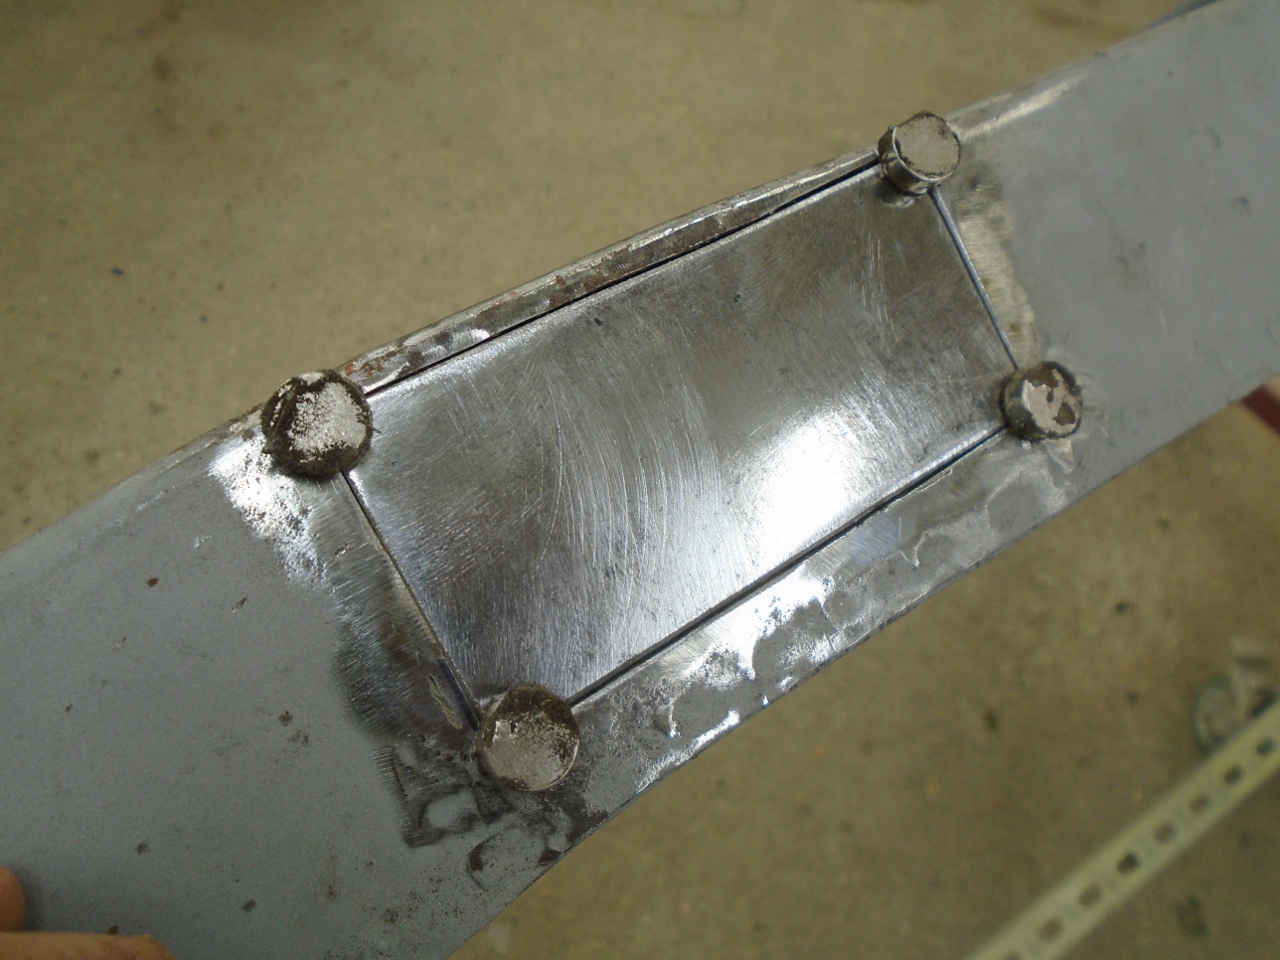
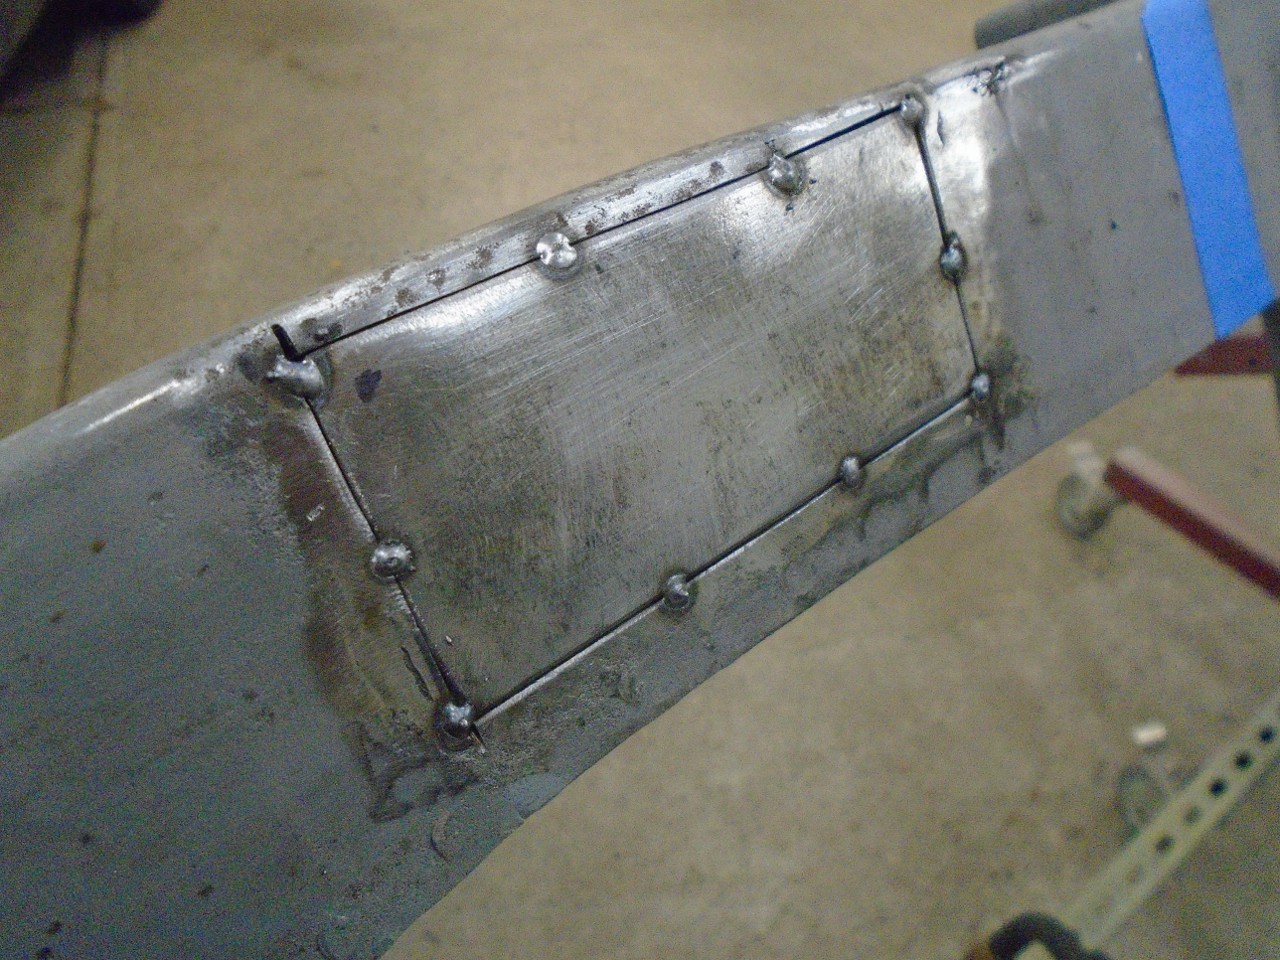
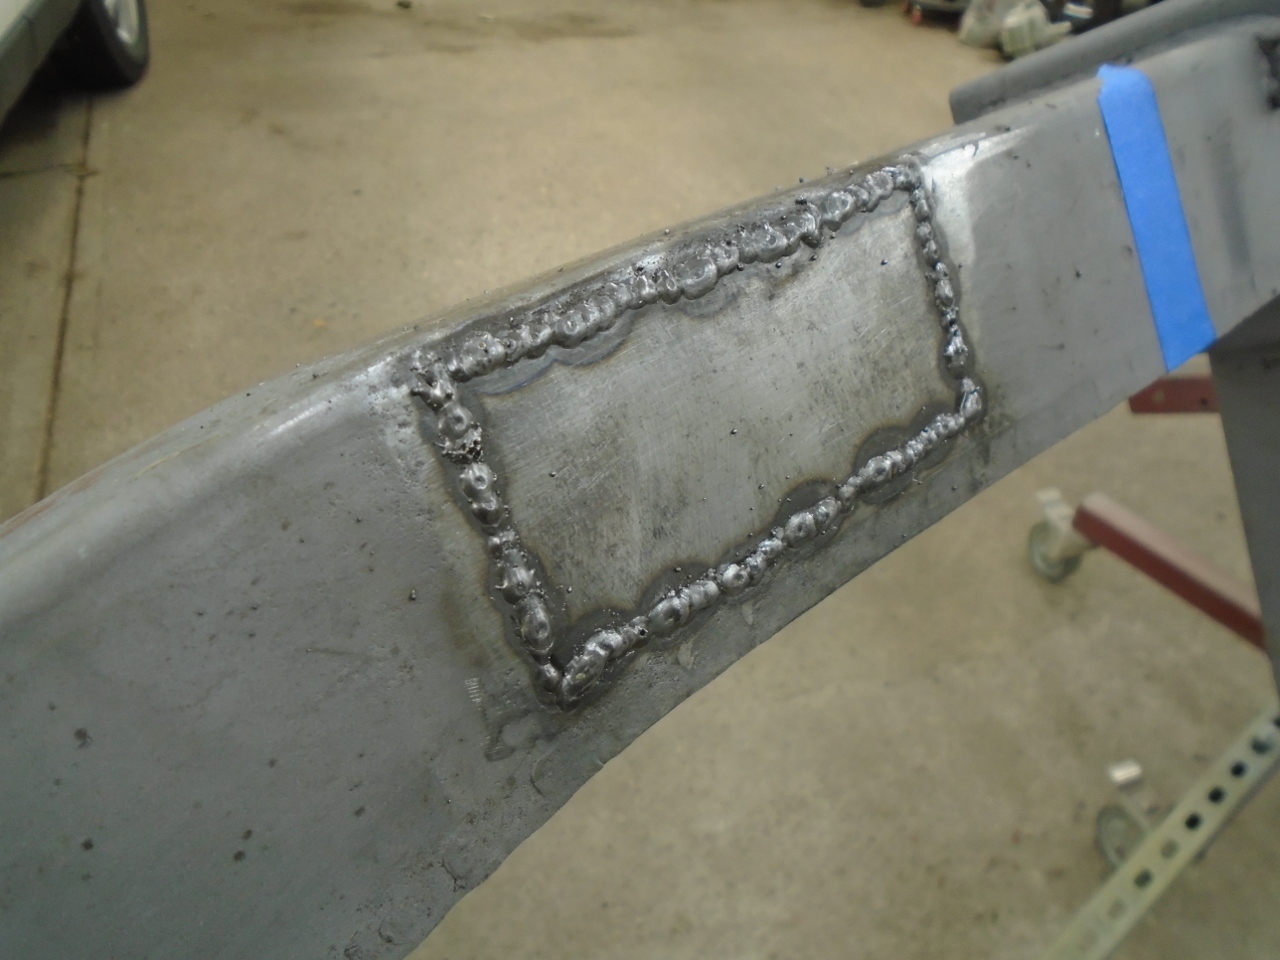
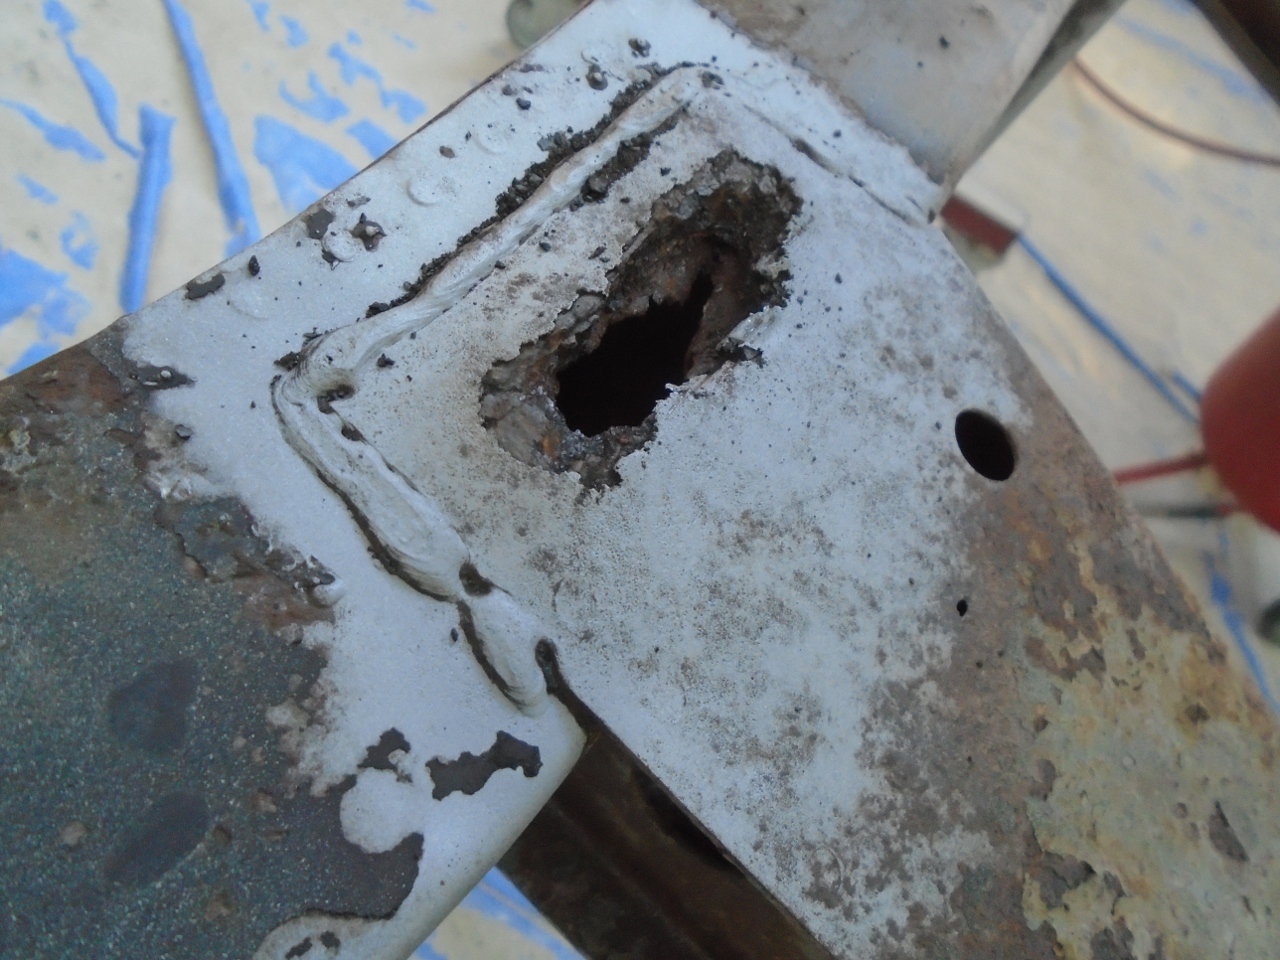
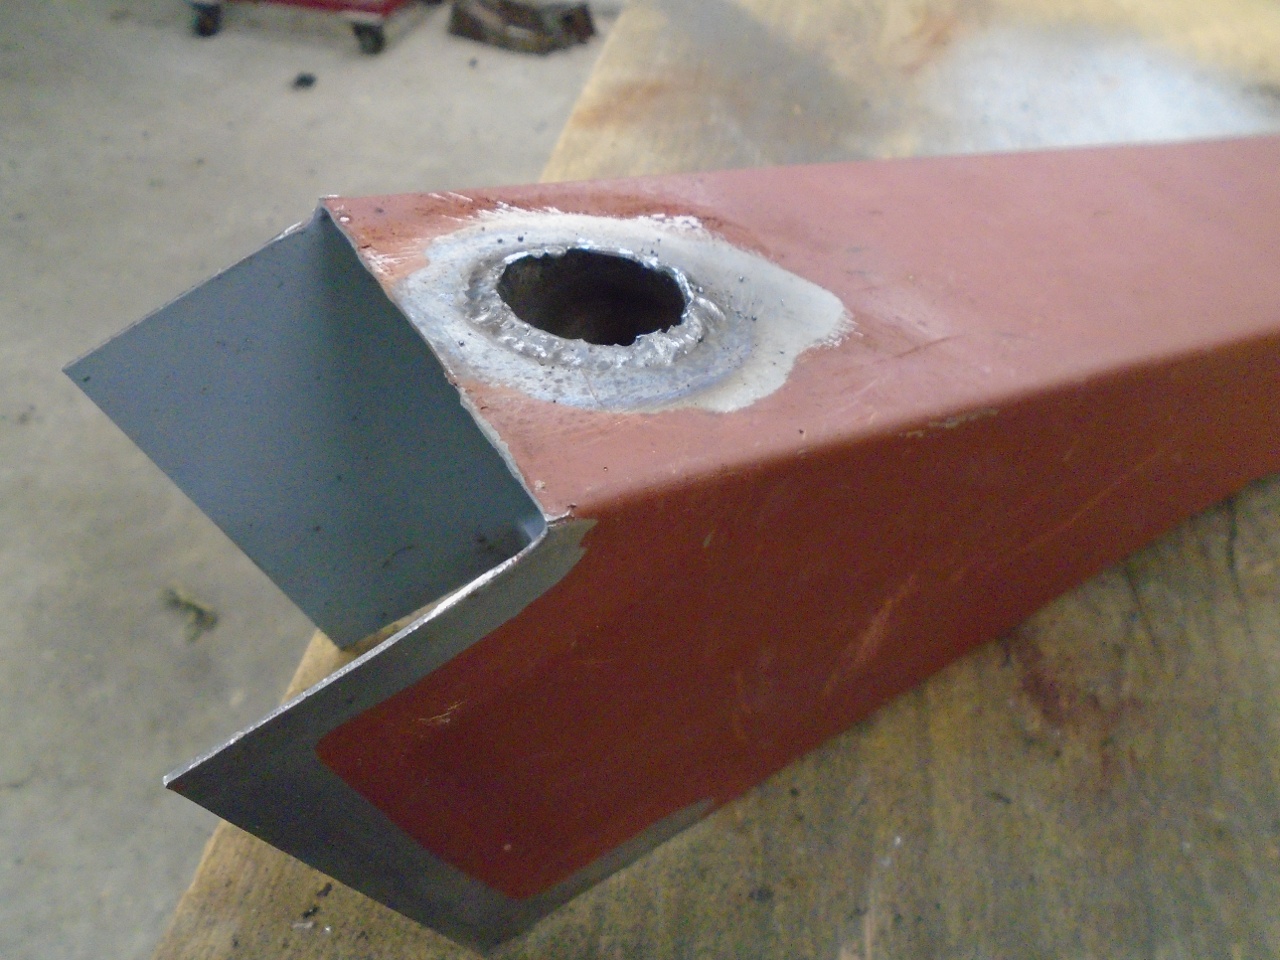
It
was obvious to me that the rust started in the space between the
backbone rail and the overlying flap of the outrigger. The rust
expanded into a blister that eventually perforated both the rail and
the outrigger flap. The perforations on either side of the car
were both on the bottom side of the frame, but the same thing was going
on in the similar joint on the top sides. There was bulging, but
no perforation. To satisfy my latent OCD tencencies, I patched
the top sides of the rails, too.
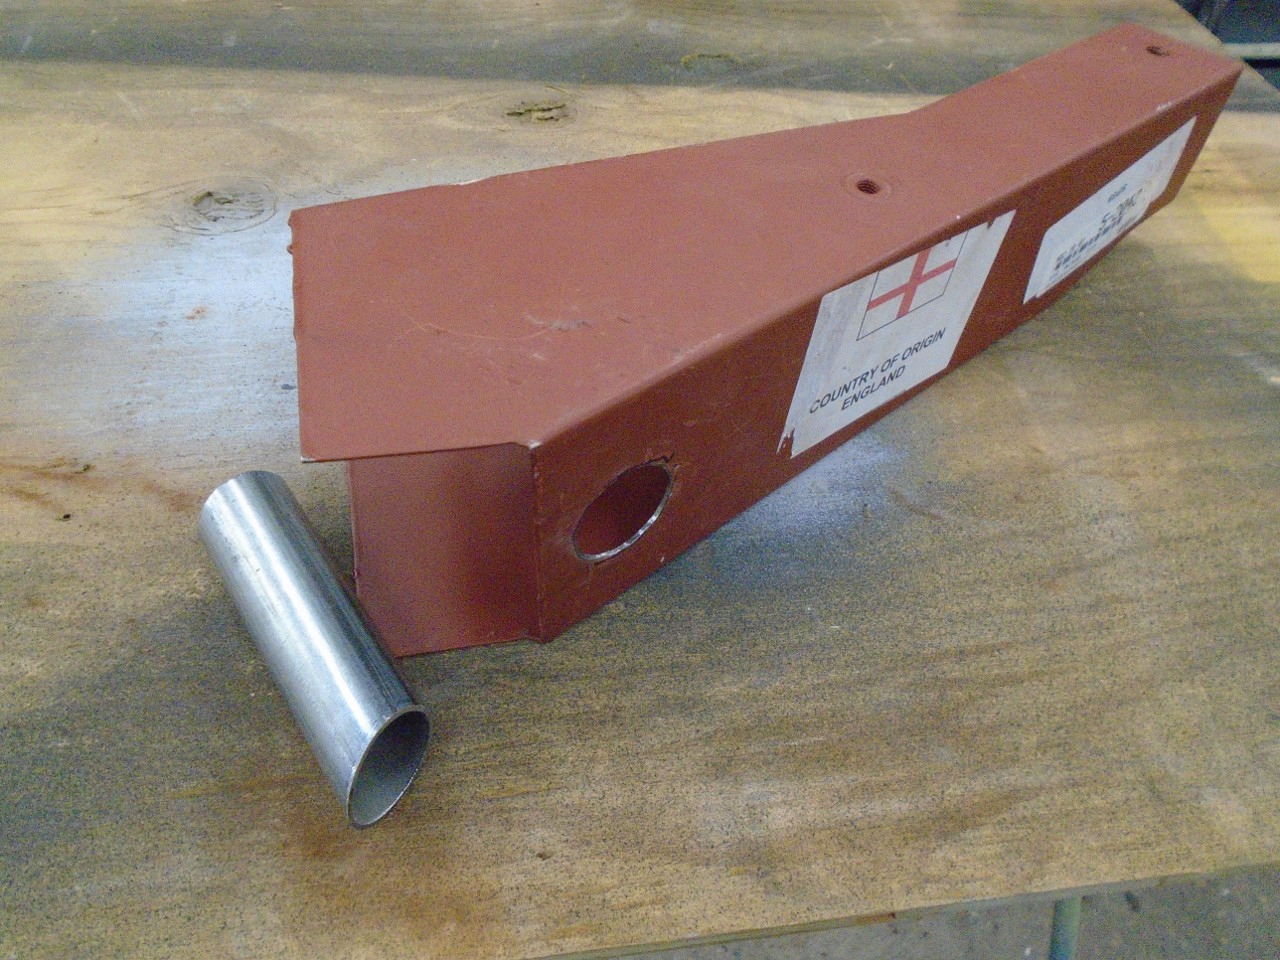
Test fitting of the new outriggers was fine. They were a very nice fit.
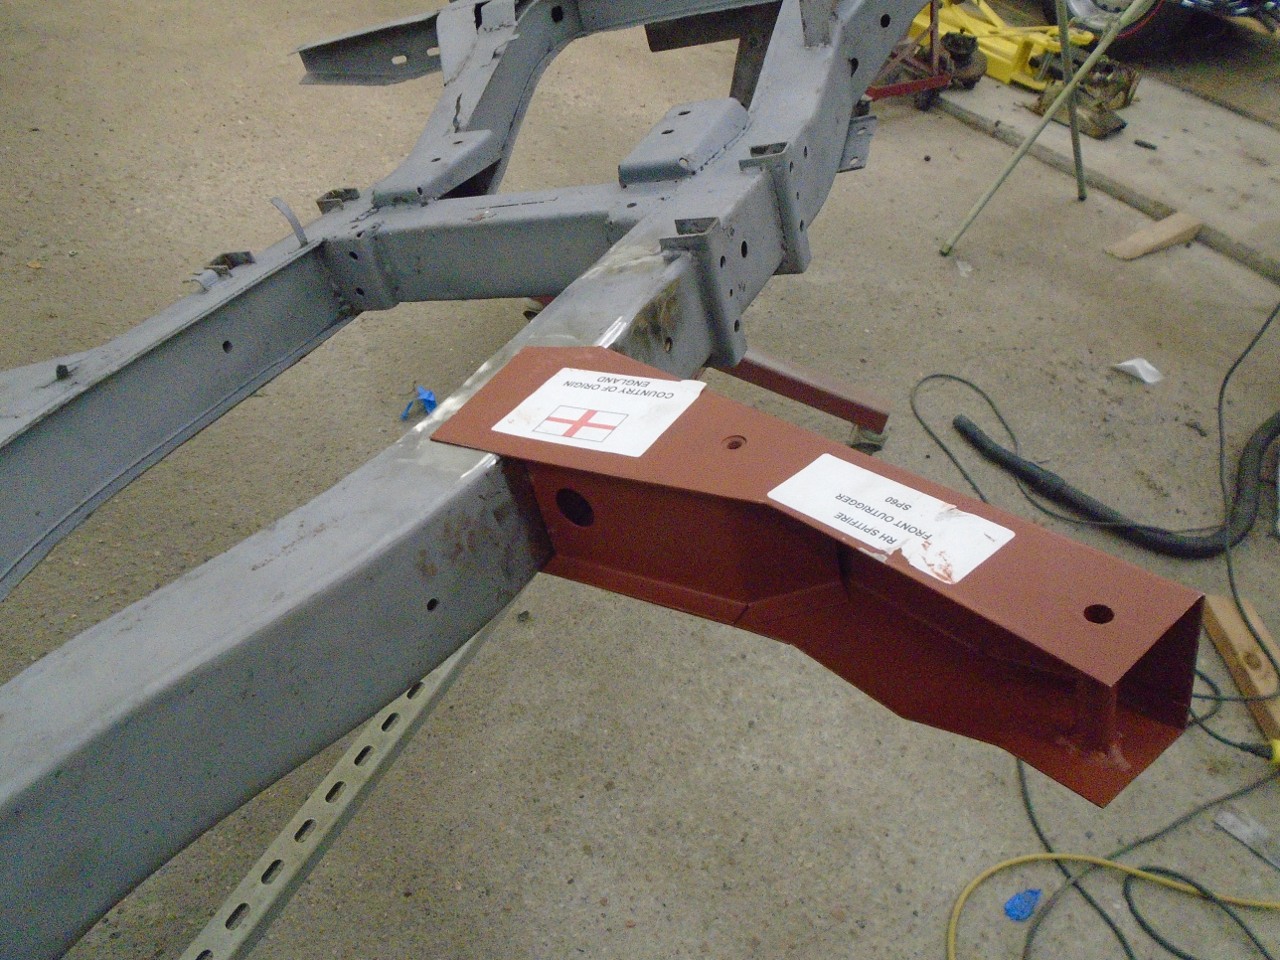
I
did have some pause on the outriggers, though. It seemed to me
that the joint rust might be due to a small design flaw on the
outriggers. The outriggers have a large hole on both their front
and rear faces, near where thy join with the main rails. On
the left side of the car, this hole allows the fuel and brake lines to
pass through the outrigger. There isn't a similar purpose for the
holes on the right side. It seemed to me that the front hole is
all but an invitation for road splash to enter the outrigger,
where it will have easy access to the skinny space between the
outrigger flap and the frame rail.
On the right side, the solution is obvious: just plug the holes.
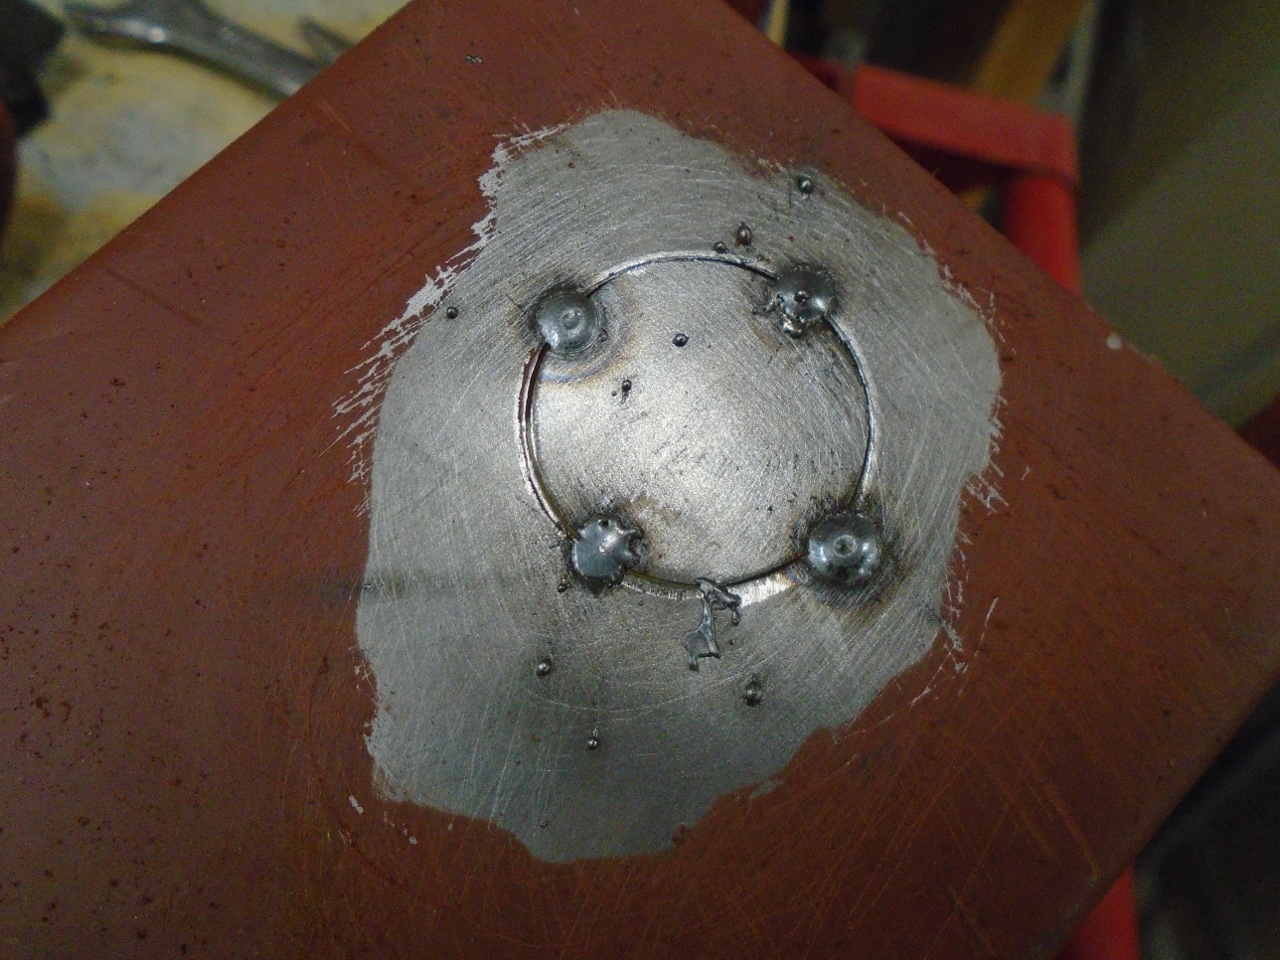
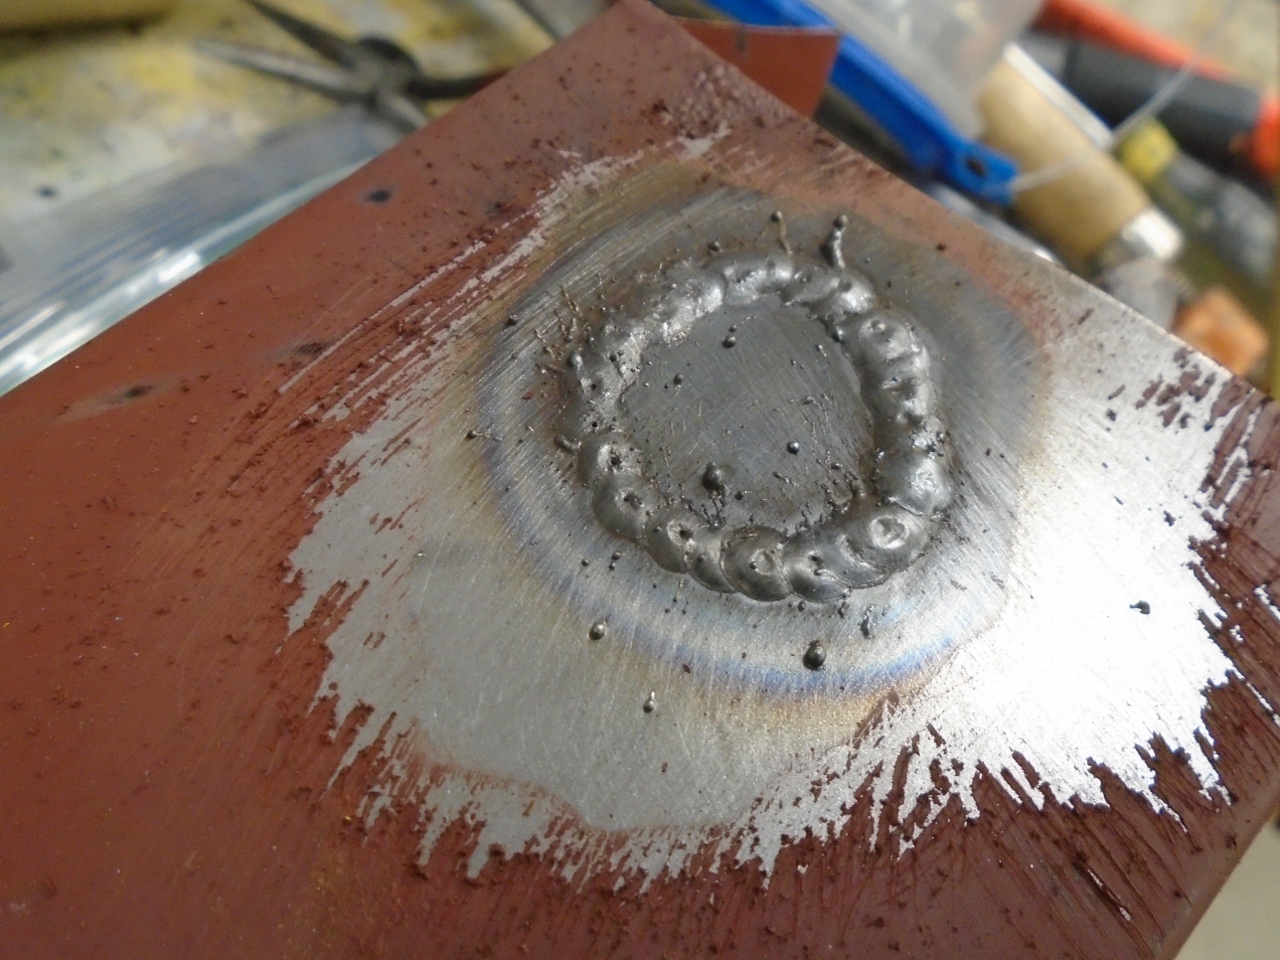
What
I ended up doing on the left side, where the fuel and brake lines must
still be accommodated, was not my original idea. I saw it on the
Internet, but now can't find it to give proper credit.
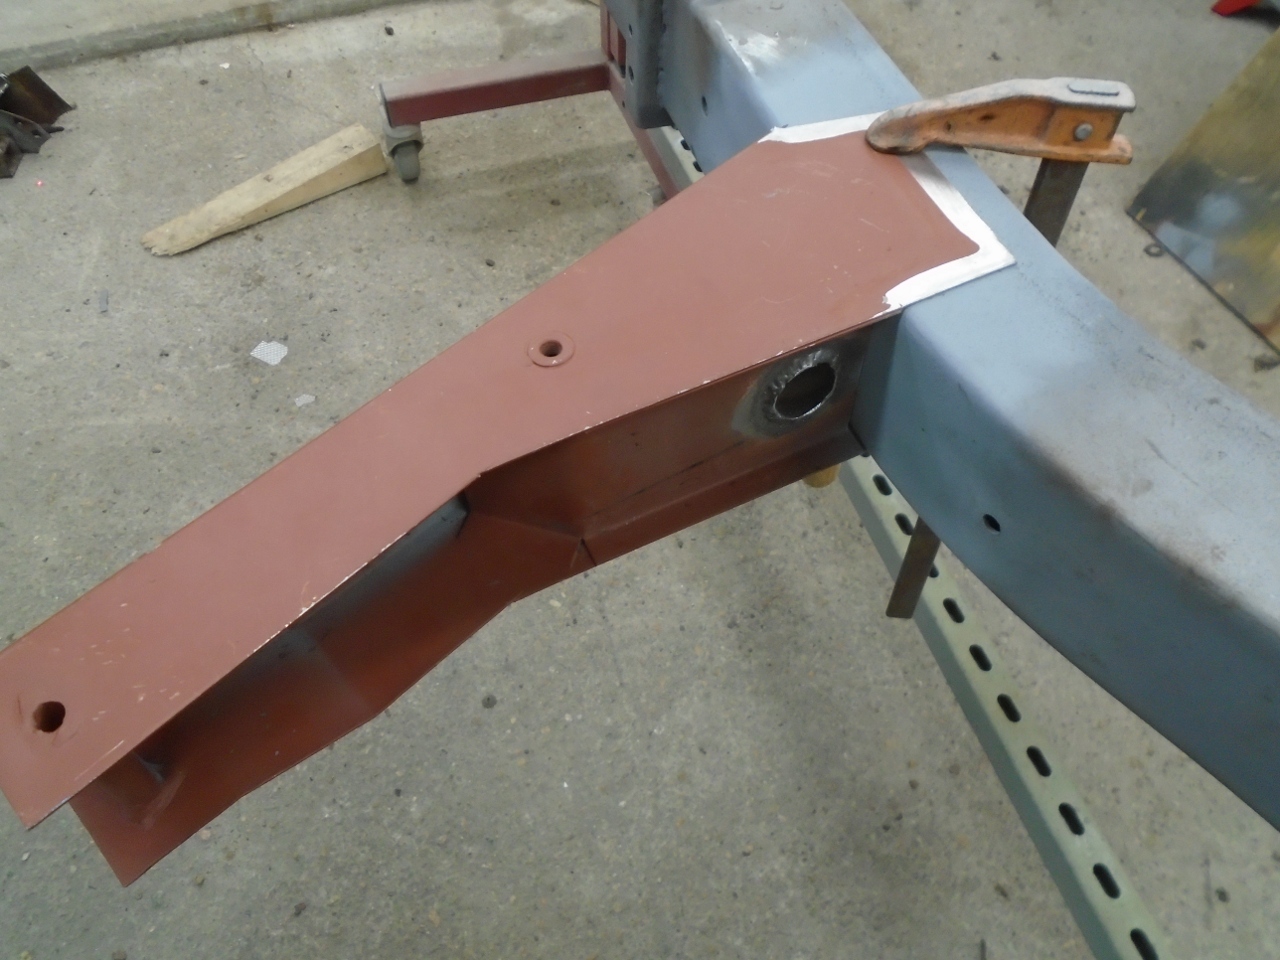
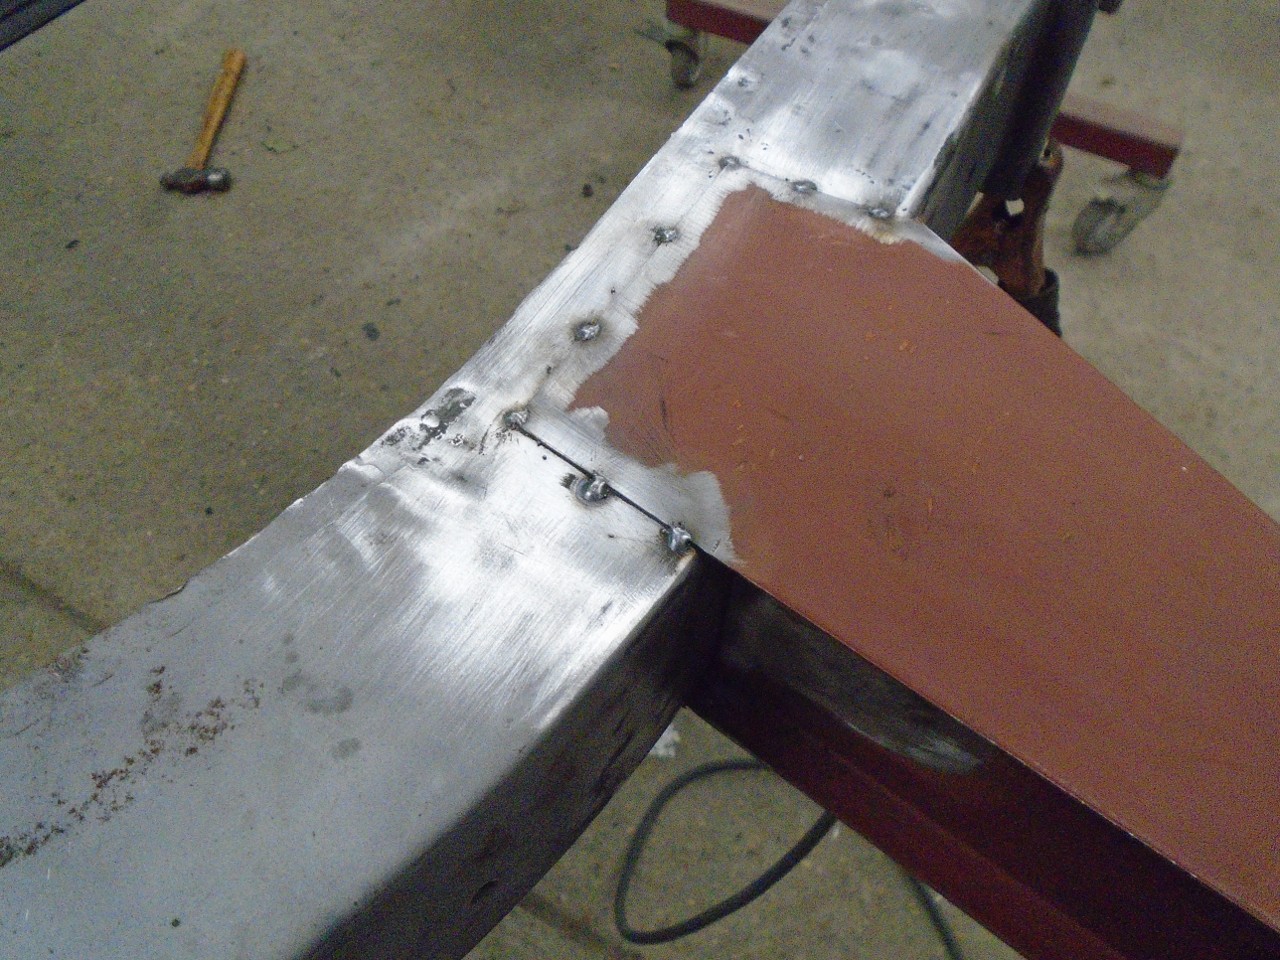
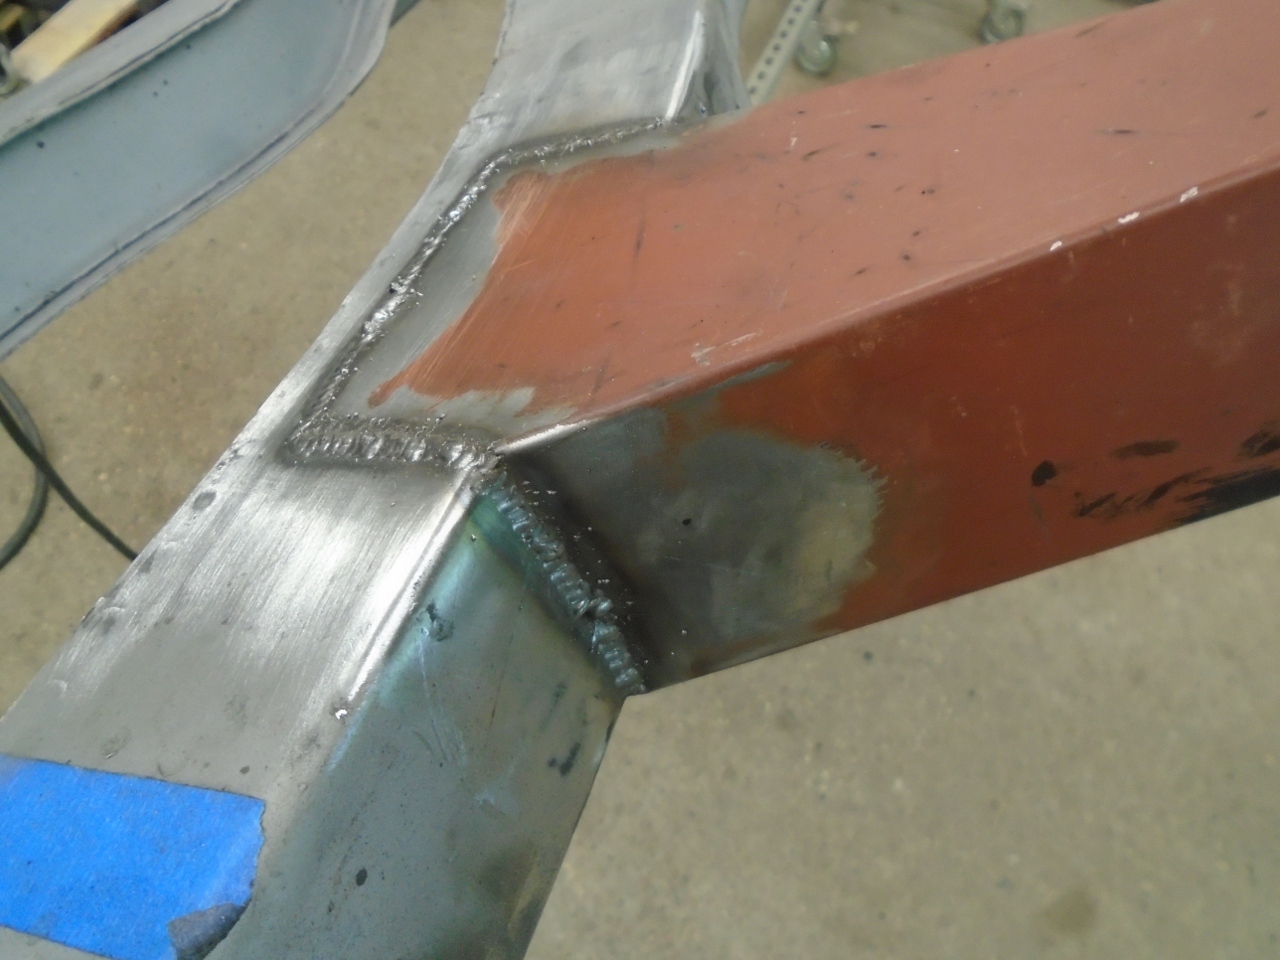
Then
mounted the outriggers. I took a few measurements before removing
anything so I could be sure to get the body mounting holes in the same
place as the originals. The pictures don't show it, but I applied
weld through primer to the surfaces that would be inaccessible with the
outriggers mounted. I don't think the factory applied anything in
there.
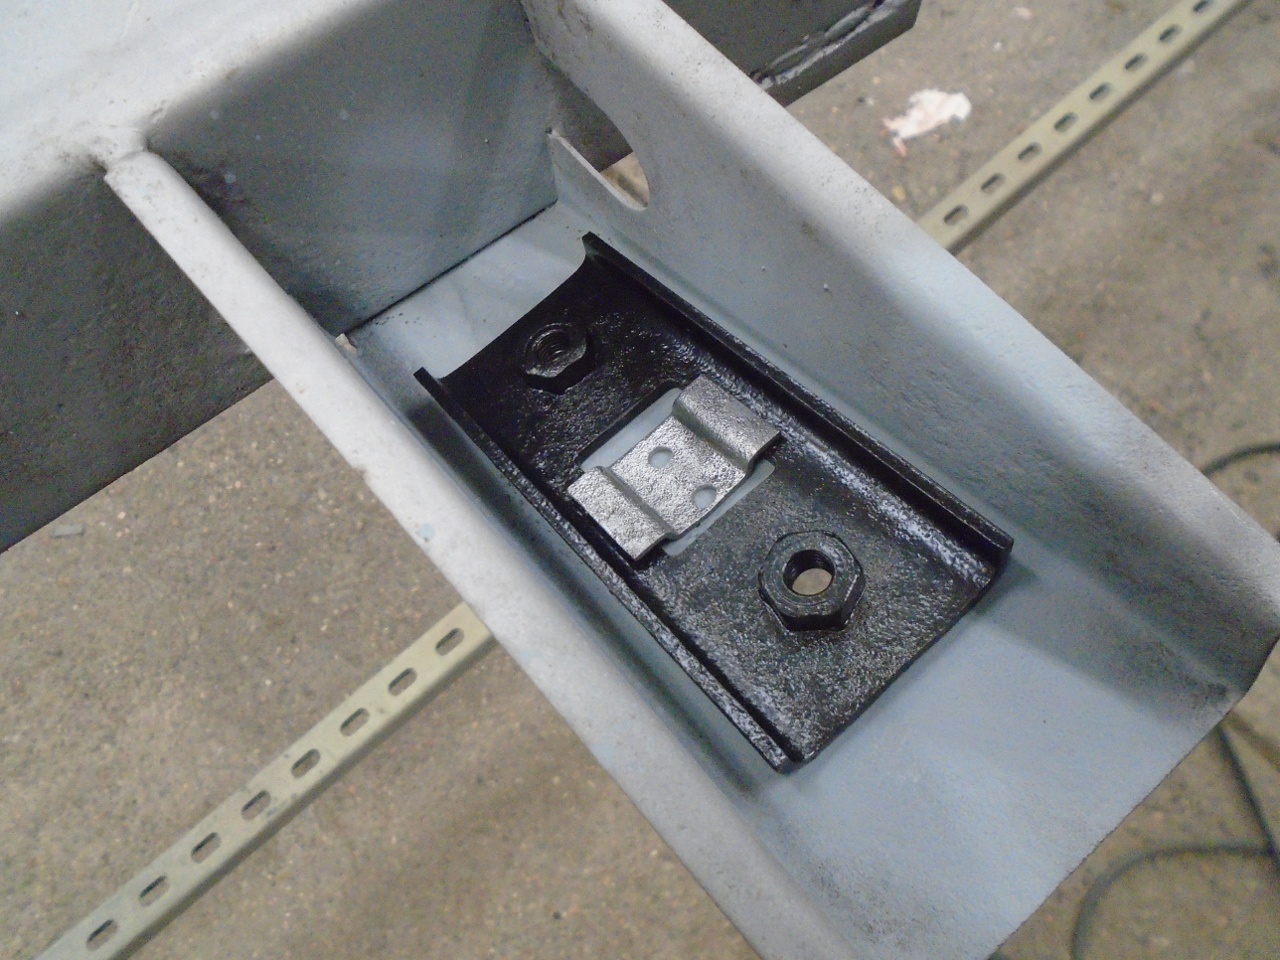
One
other problem was with one of thesmaller rear outriggers.
There is a movable nut plate on the bottom side which captured by
a little spot welded bracket. There was a rust perforation where
the bracket attached. I just patched the outrigger and reattached
the bracket.
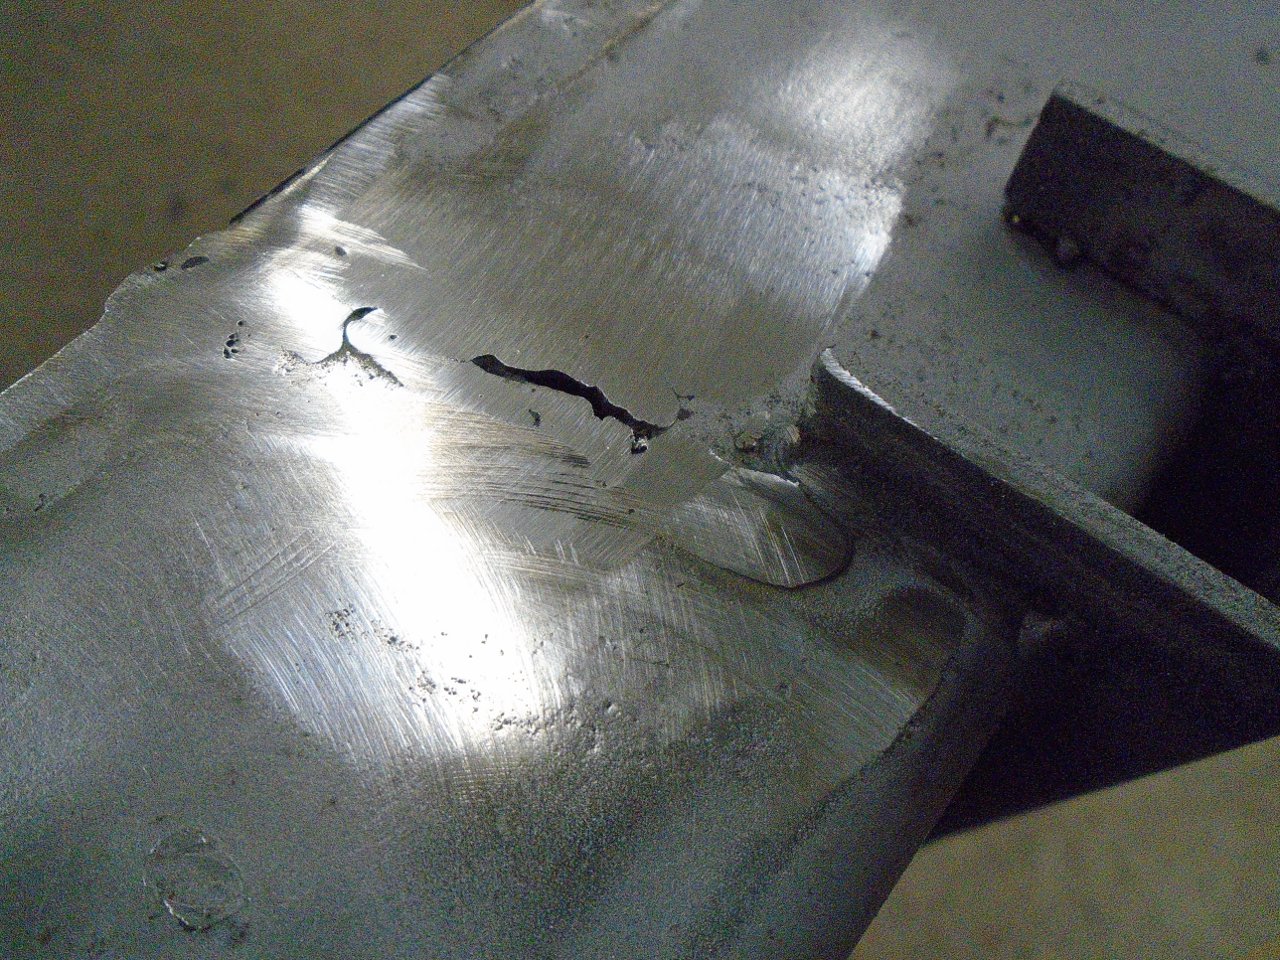
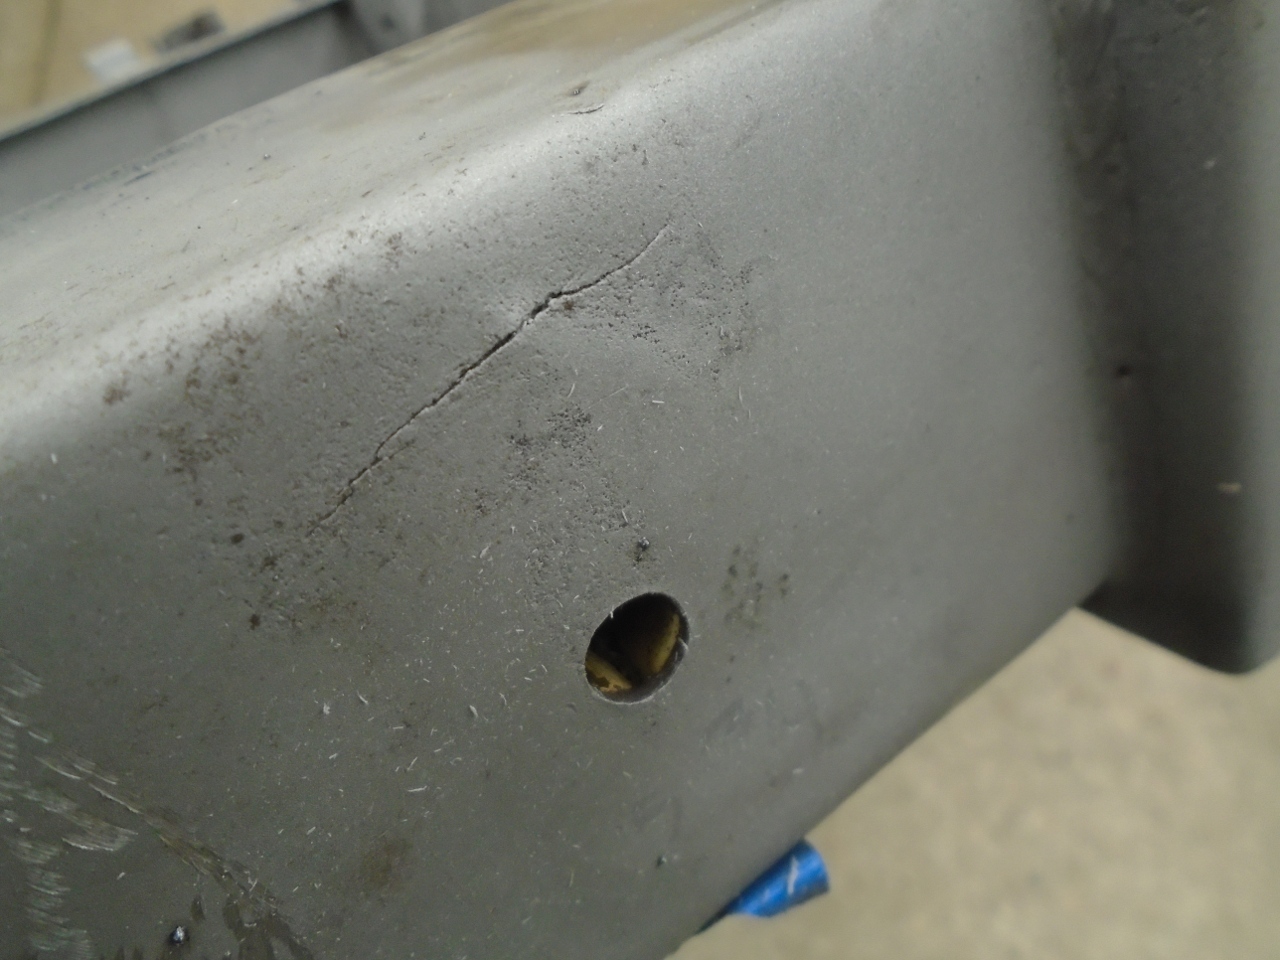
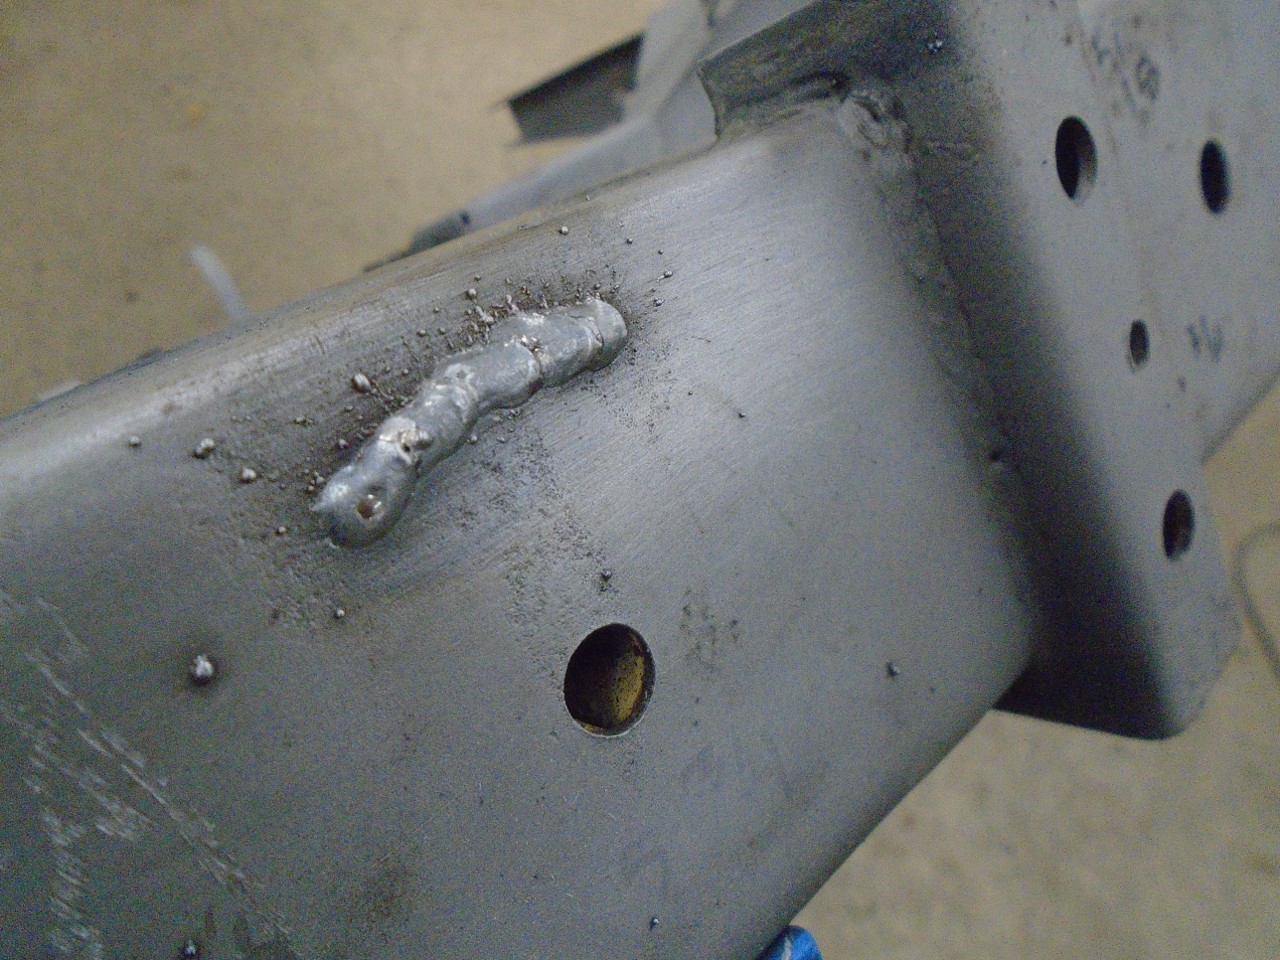
There
were only two other small defects in the frame. One appeared when
I ground away an unsightly blob of weld. Well, the blob was
apparently an attempt to fix a crack, but it actually only hid it. That little fissure went all the way through the metal.
The other defect was a stress crack near a mounting hole. I don't properly know what mounts there, but it's fixed now.
Well,
at this point, there was nothing left to do but paint her. My
first choice for coating a frame would be a good two part epoxy paint.
However, most of these paints are formulated to spray, and this
frame just has too many hard to access nooks and crannies to get into
with a spray gun--even a detail gun. I fell back to the same
approach I used for the TR6 frame--brushed POR-15. I understand
that POR-15 has some detractors, but my experience with it is very
good. I used it as a base coat on a metal deck railing that has
now been outdoors for going on 15 years with no paint problems.
POR-15
does have its downsides. It's relatively expensive, especially
when you figure that keeping leftover material is iffy. If it
doesn't weld its can shut, exposure to moisture really shortens its
shelf life. Once set, it can be very difficult to remove, like on
hands. Also, it is not UV stable.
So, a coat of gray...
...followed closely with a coat of black.
Then, to provide UV resistance, a tasteful semi-gloss topcoat.
I
do know that GT6 cars had their frames painted body color. The
issue here is that I don't yet know what the body color will be on this
car, and I don't want to be cornered into making that decision right
now. I plan to build the car with a black frame, as God intended.
If I hate it, removing the front suspension and steering to paint
the exposed front end is not that big a project.
I consider this frame project really pretty easy, especially compared to what I faced on my TR6 frame. The TR6 took weeks, the GT6 only a few days.
Comments to Ed at elhollin1@yahoo.com