June 19, 2014
To my other TR6 pages
Frame Rehab and Improvement
Click the pics for a larger view.
So,
after extracting the frame from the car and cleaning it up, I decided
that, while not in as good a shape that I'd hoped, it was better than I
feared, and that I could probably bring it back to servicable
condition, and maybe even upgrade it a little.
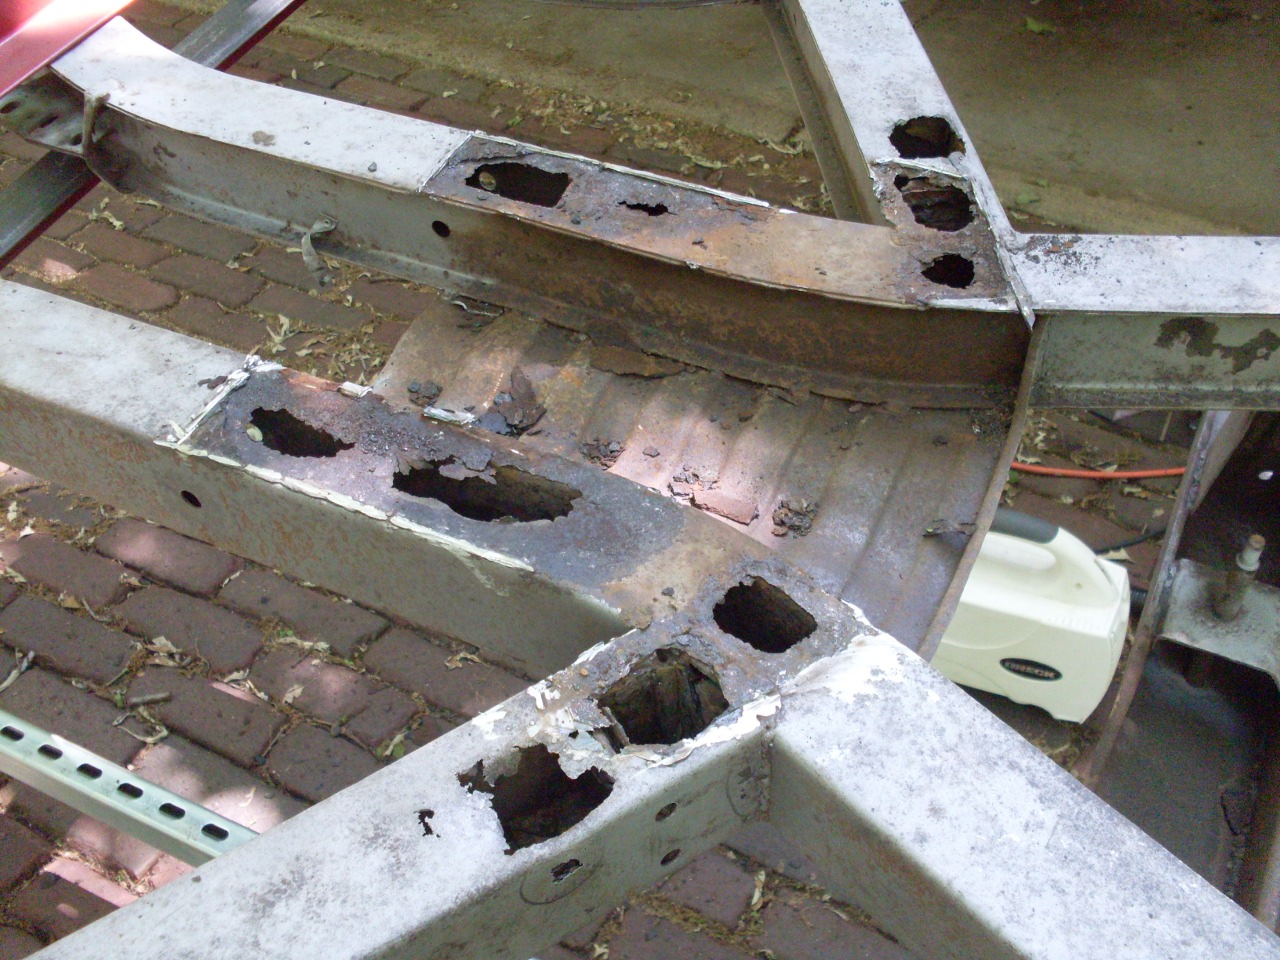
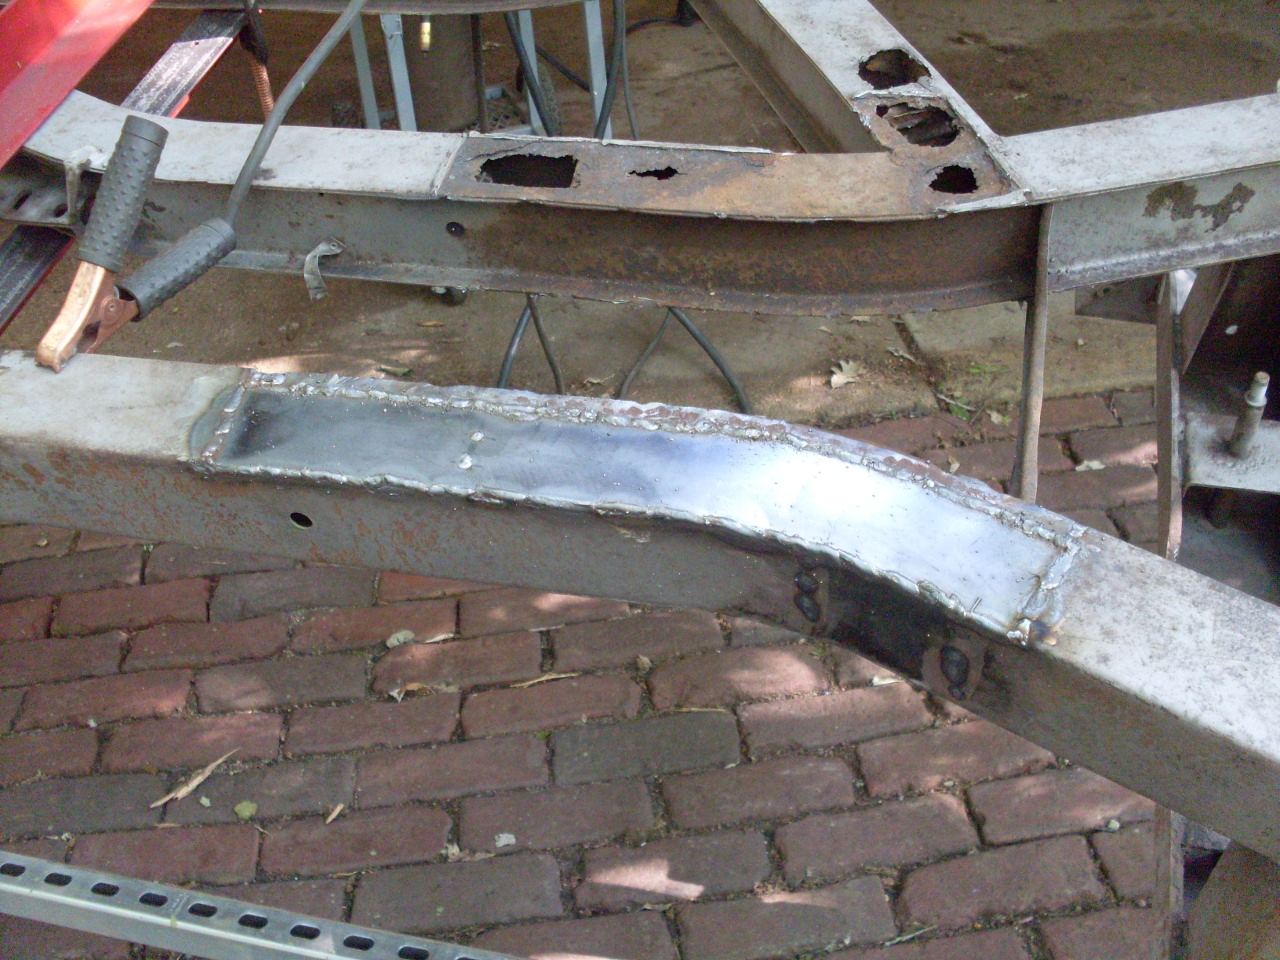
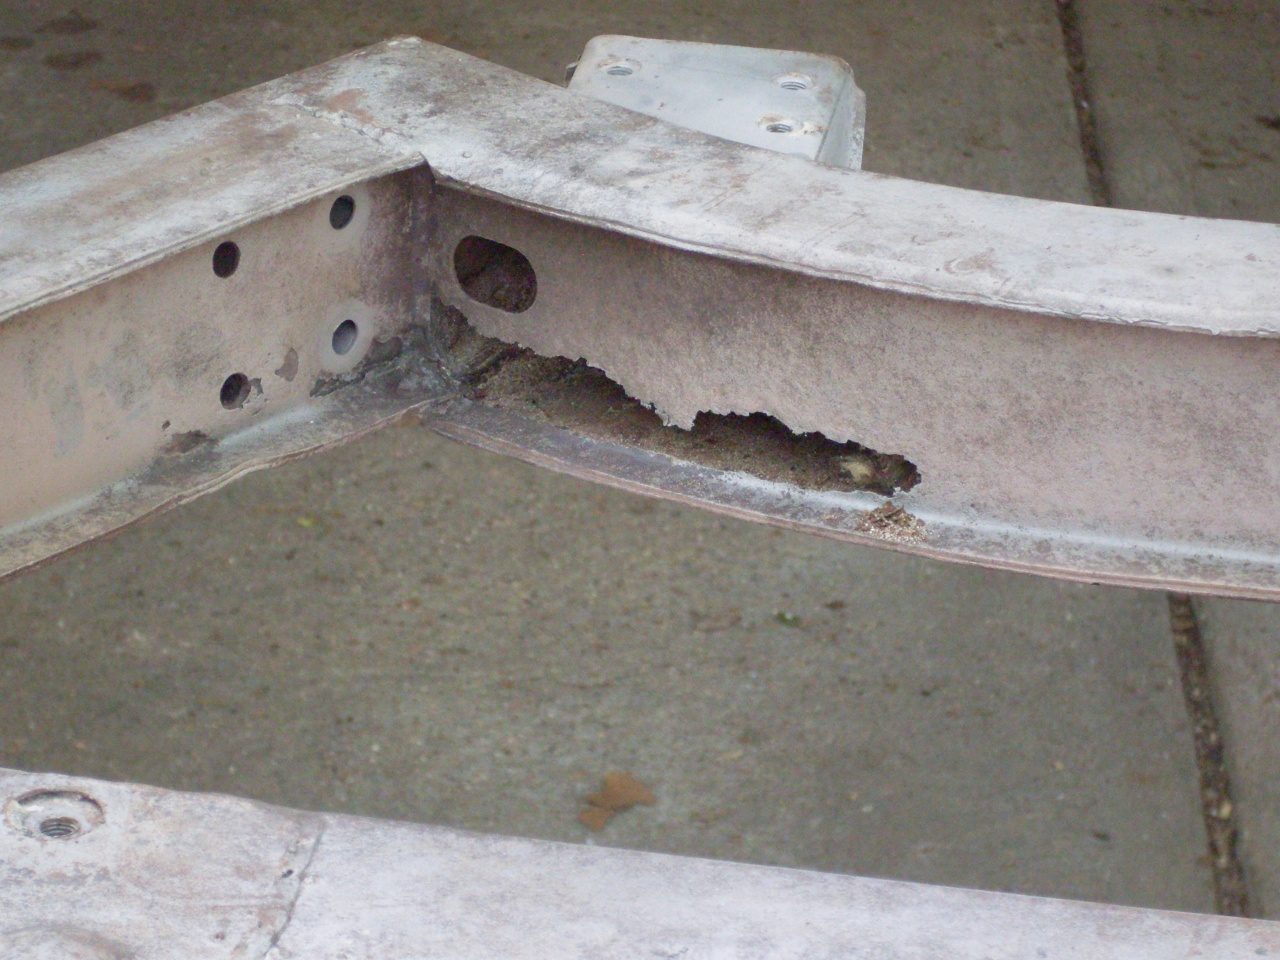
All of the
rust through issues were on the back end of the frame--from the
cruciate plates rearward. There was the expected deterioration of
the trailing arm mounting members, but on the left side, the outboard
frame rail was pretty rotted, too.
I decided to start at the tail end of the frame and work forward.
Both rear horns had rust through on their bottom surfaces., and I found a ton of flaked off rust and critters' nests inside.

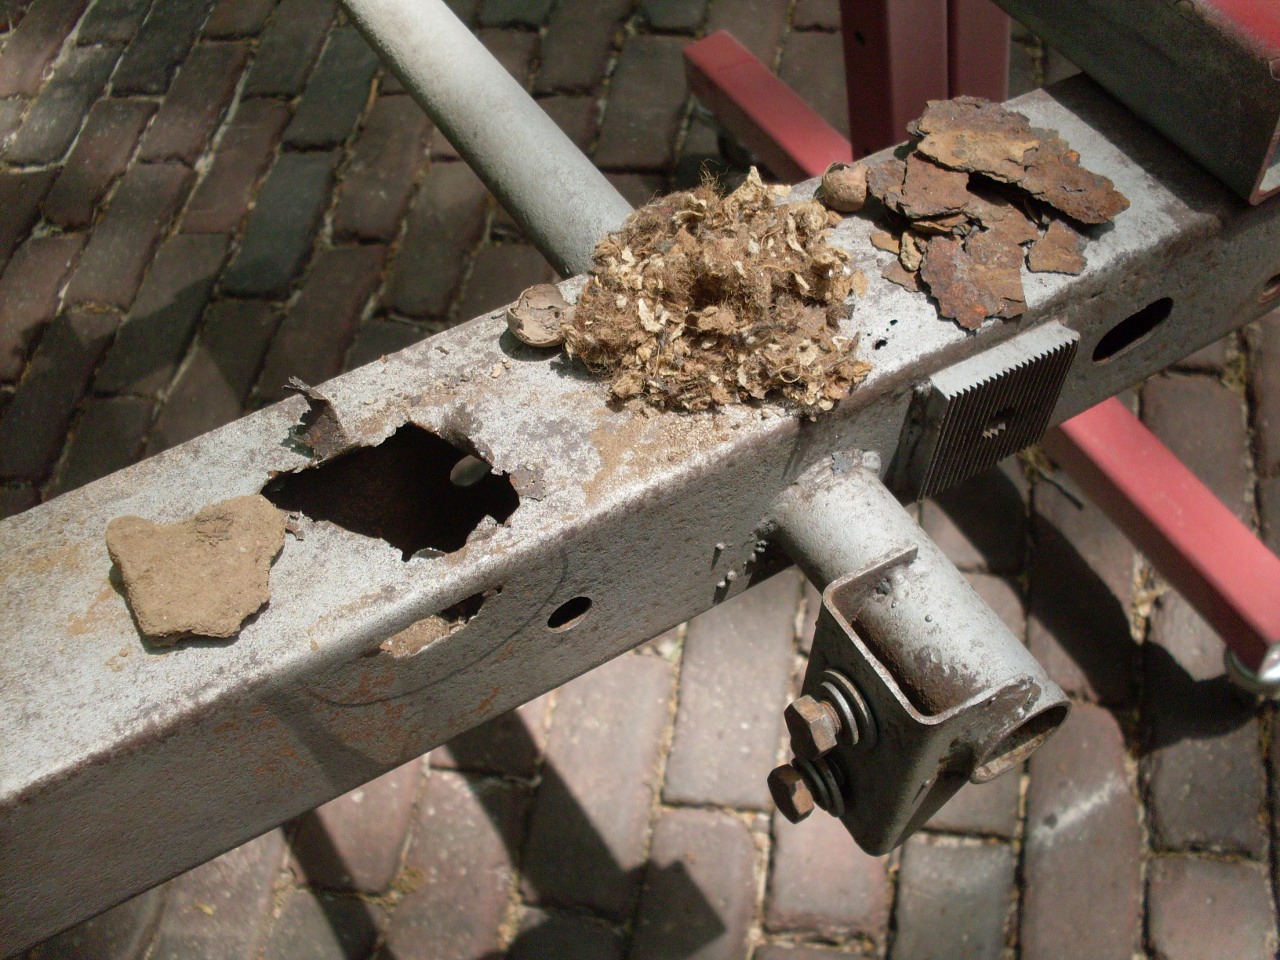
I
cut away the bottom surface of the rails, and part of the sides where
necessary. It's interesting that just a few inches away from a
total rust-through, the frame material can be rusted, but still measure
almost full original thickness. The little spreader pieces behind
the bumper bracket mounting points were pretty much gone, so I made new
ones.

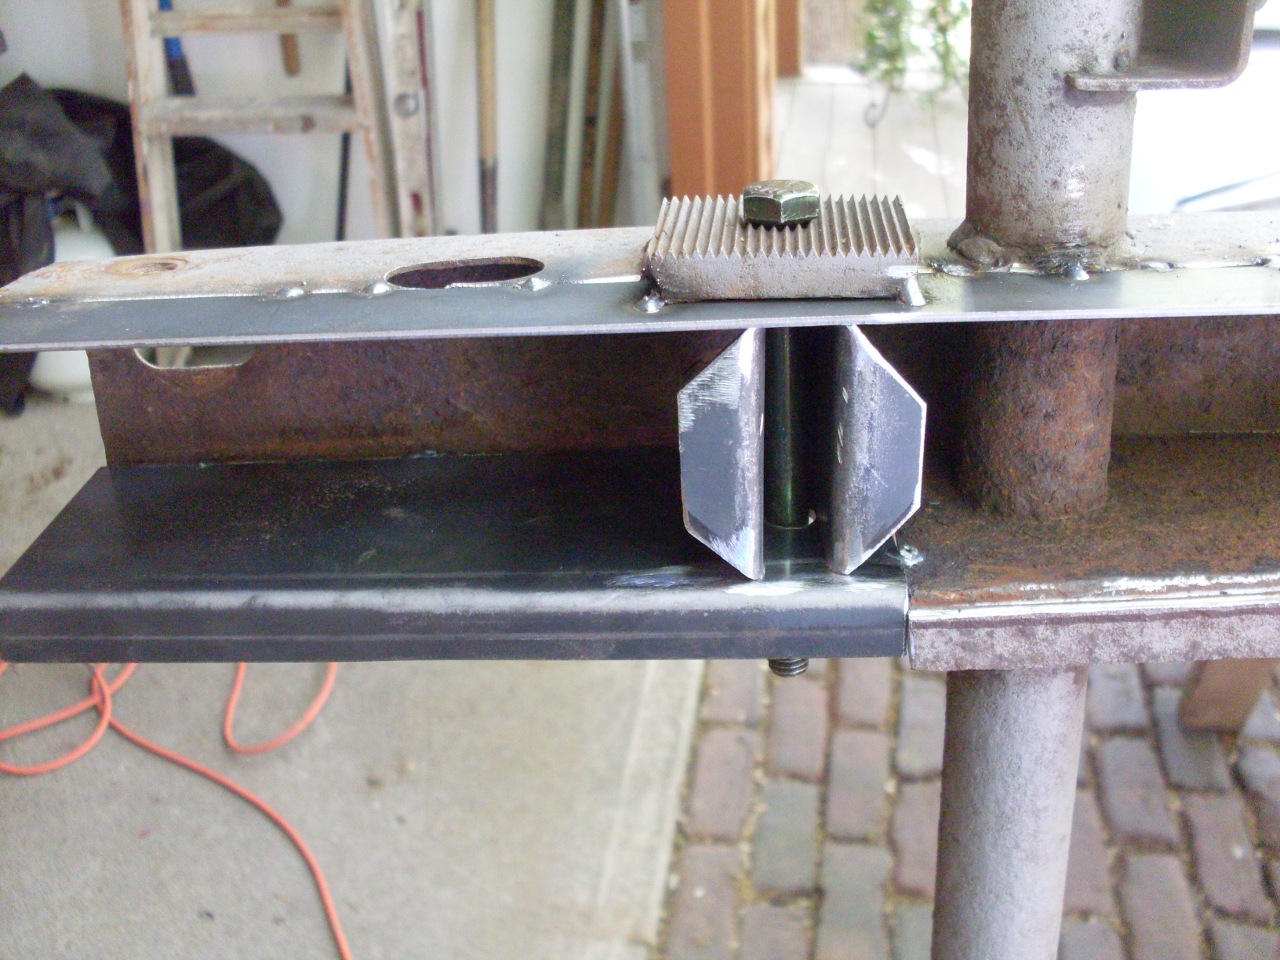
I welded in new pieces of 14 gage steel to replace the removed sections. The
serrated bumper mounting pad appeared to be attached at a slight angle,
and I was able to apply a patch under it without removing it.

I
had to do similar surgery on both rear horns. Also, there was a
patch necessary near the rear differential mount on the left side.
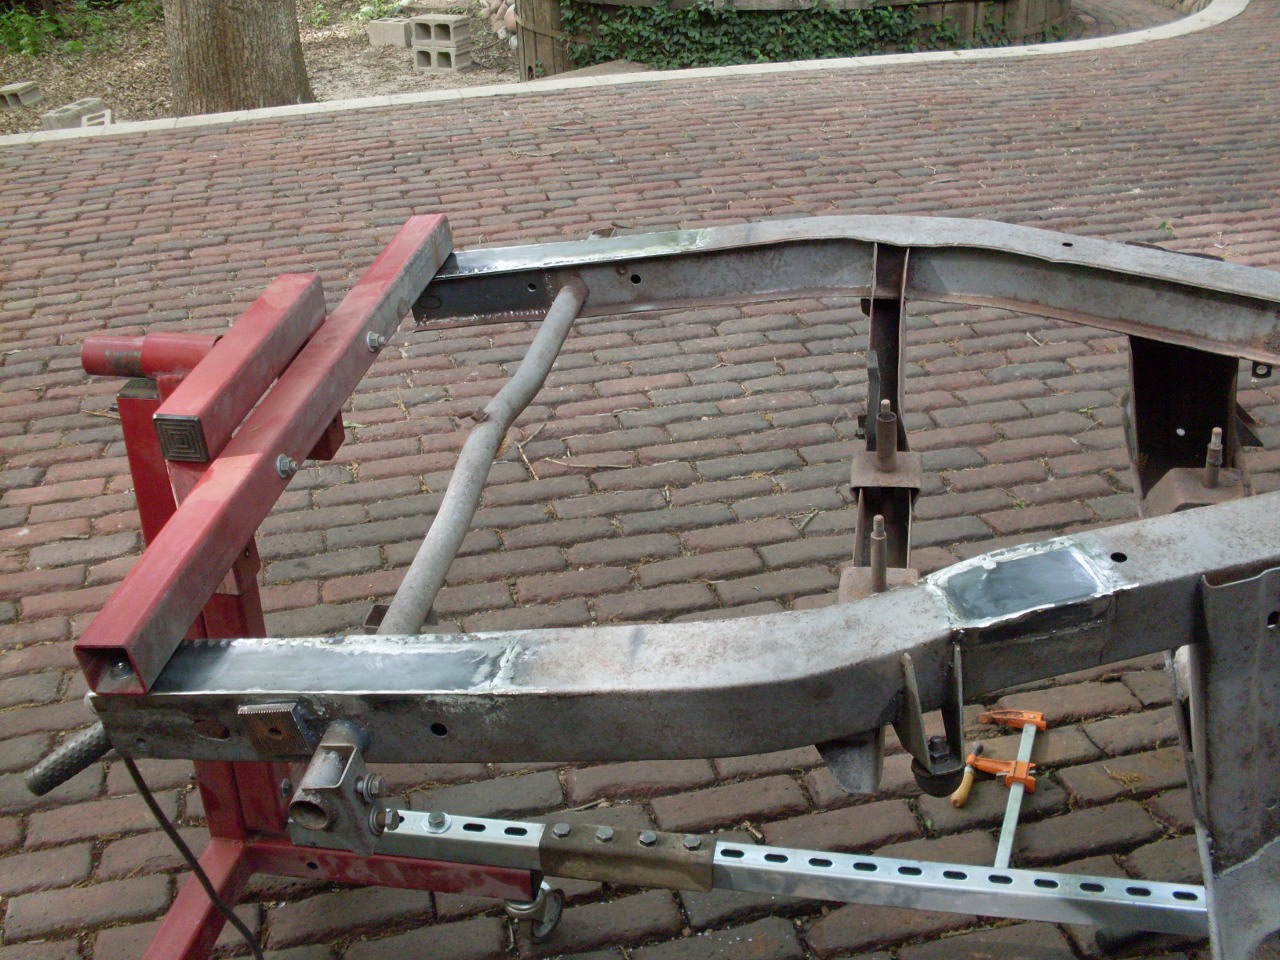
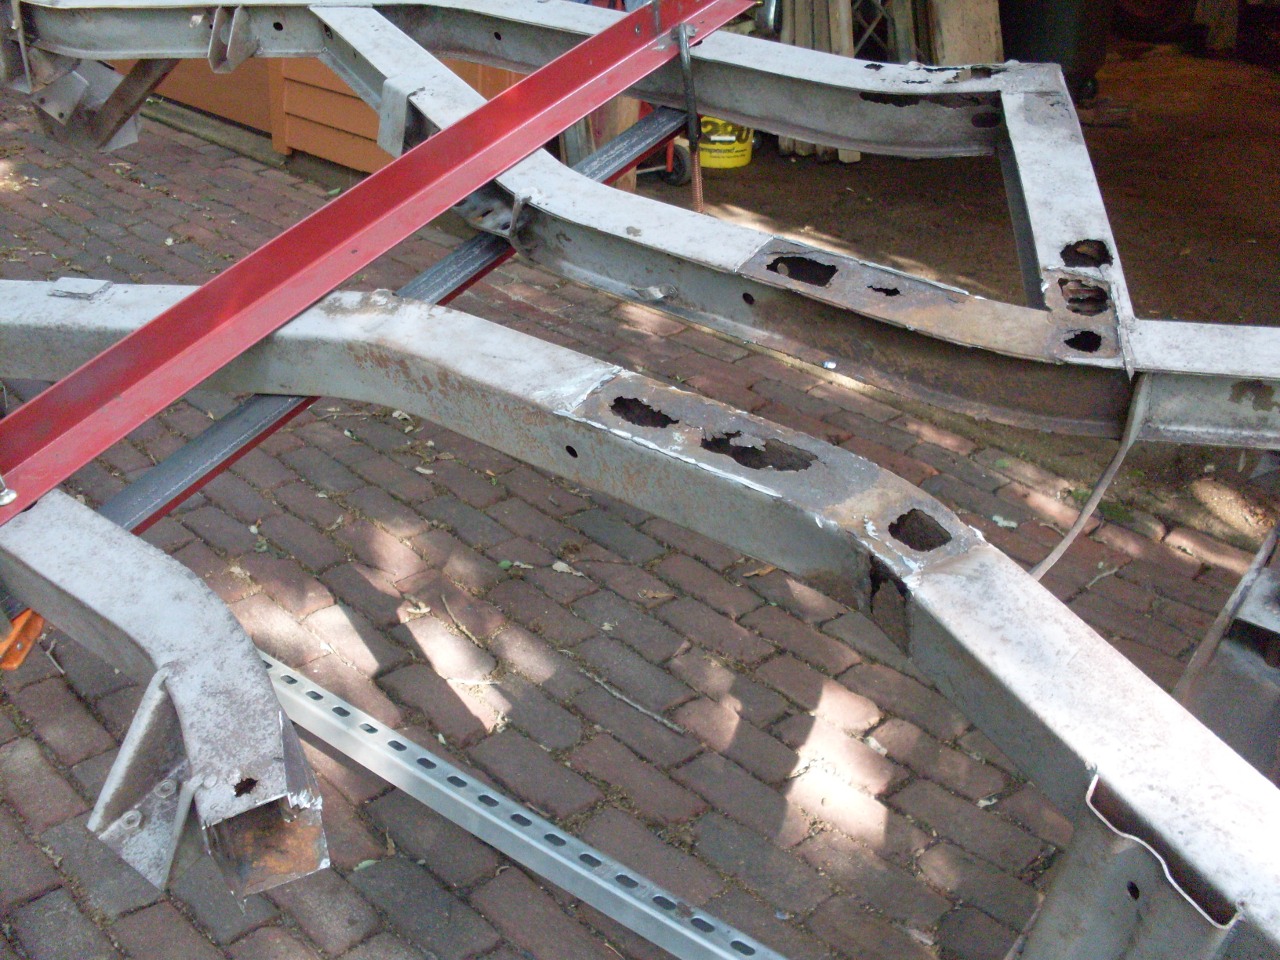
With
a little practice under my belt, I moved on to the more ambitious
challenge of the trailing arms and cruciate plates. First, I
securely clamped strongbacks to each side of the frame just in front of
the damaged areas so that frame members would stay in place and aligned
when significant stiffening elements were removed.
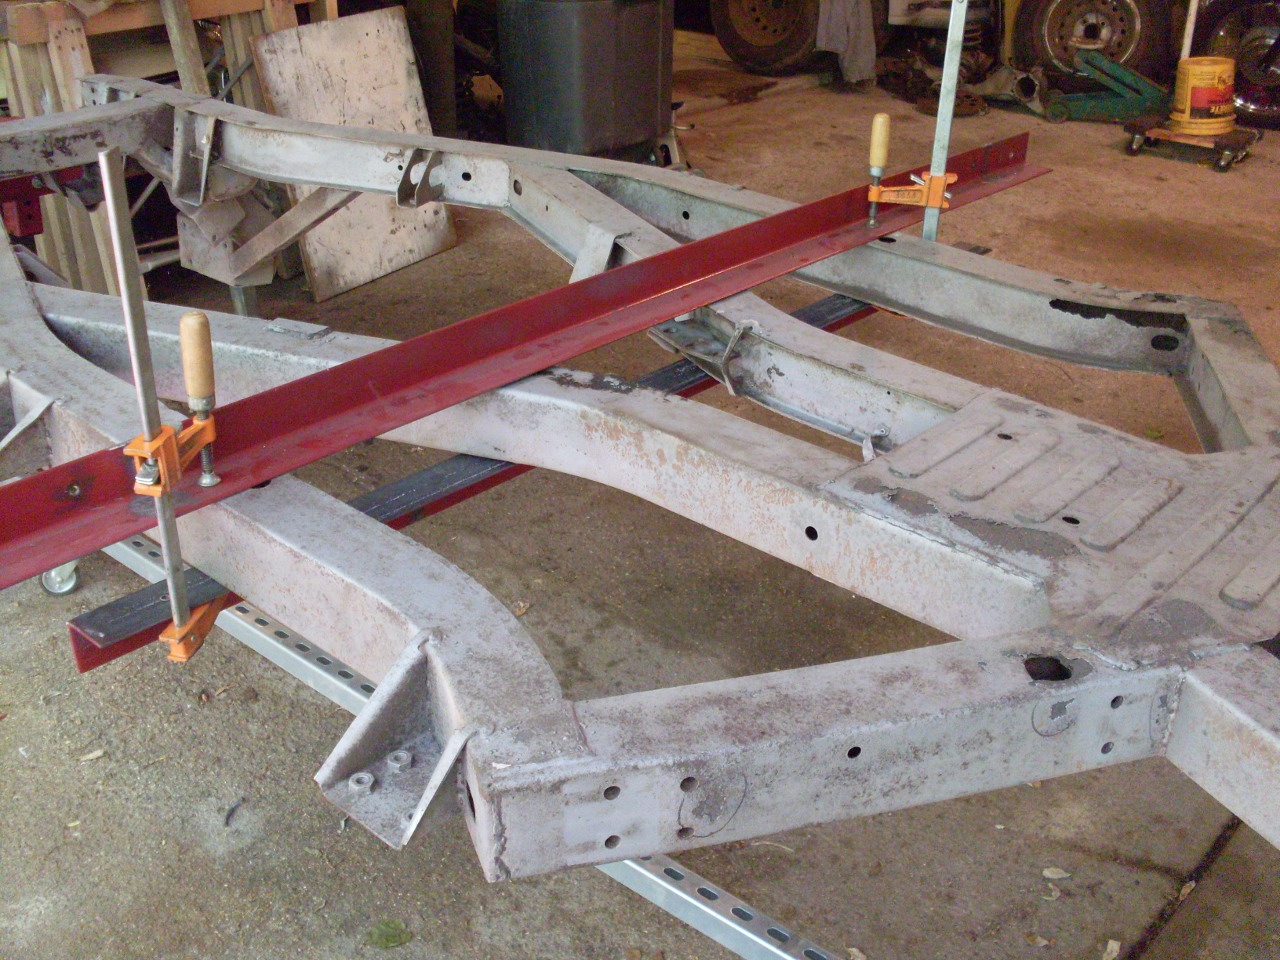
Then
cut off the cruciate plates. While the condition of the frame
under the top plate wasn't too bad, popping off the bottom plate
revealed a really ugly sight.
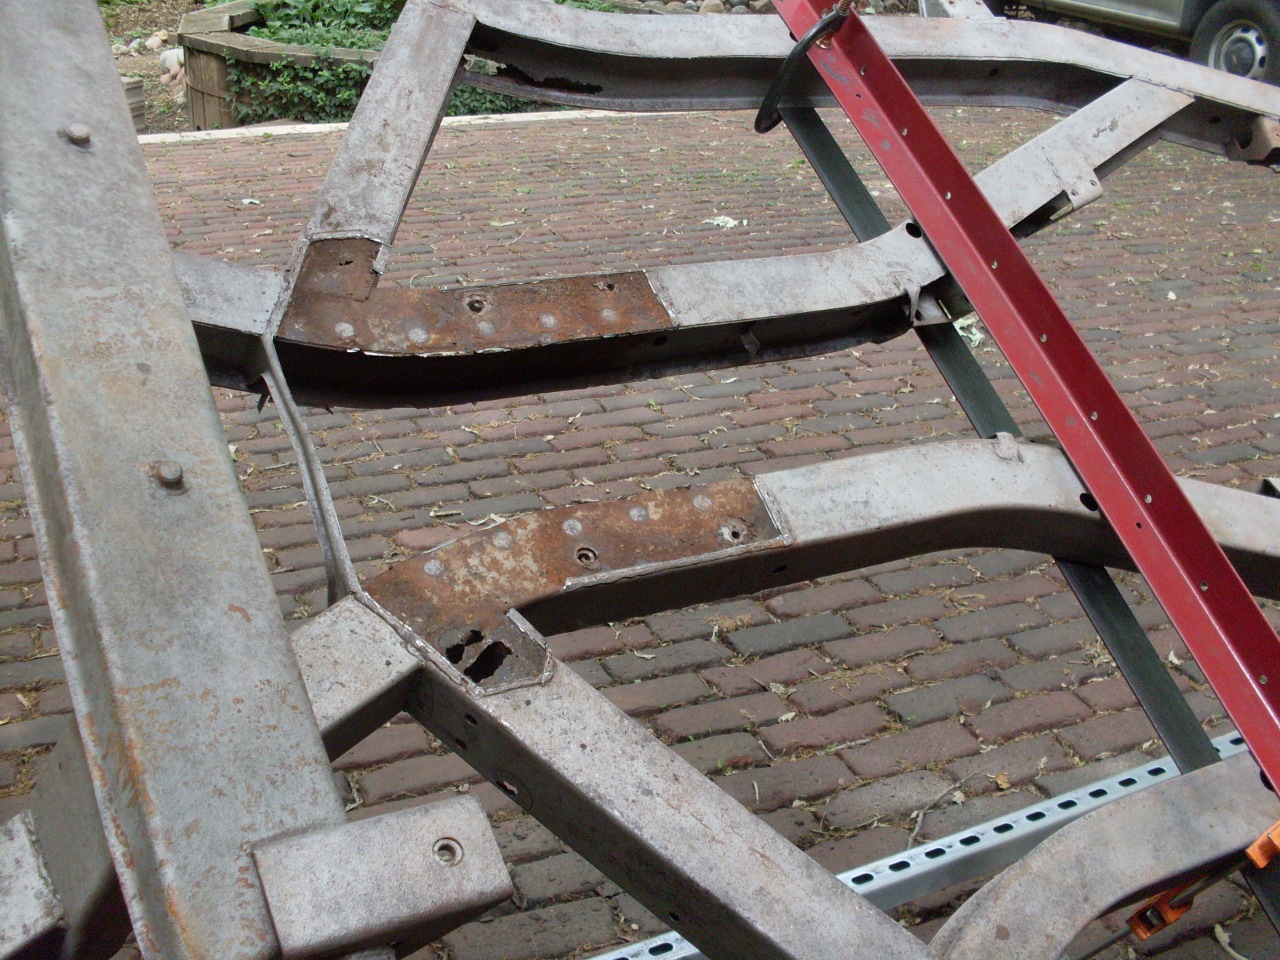
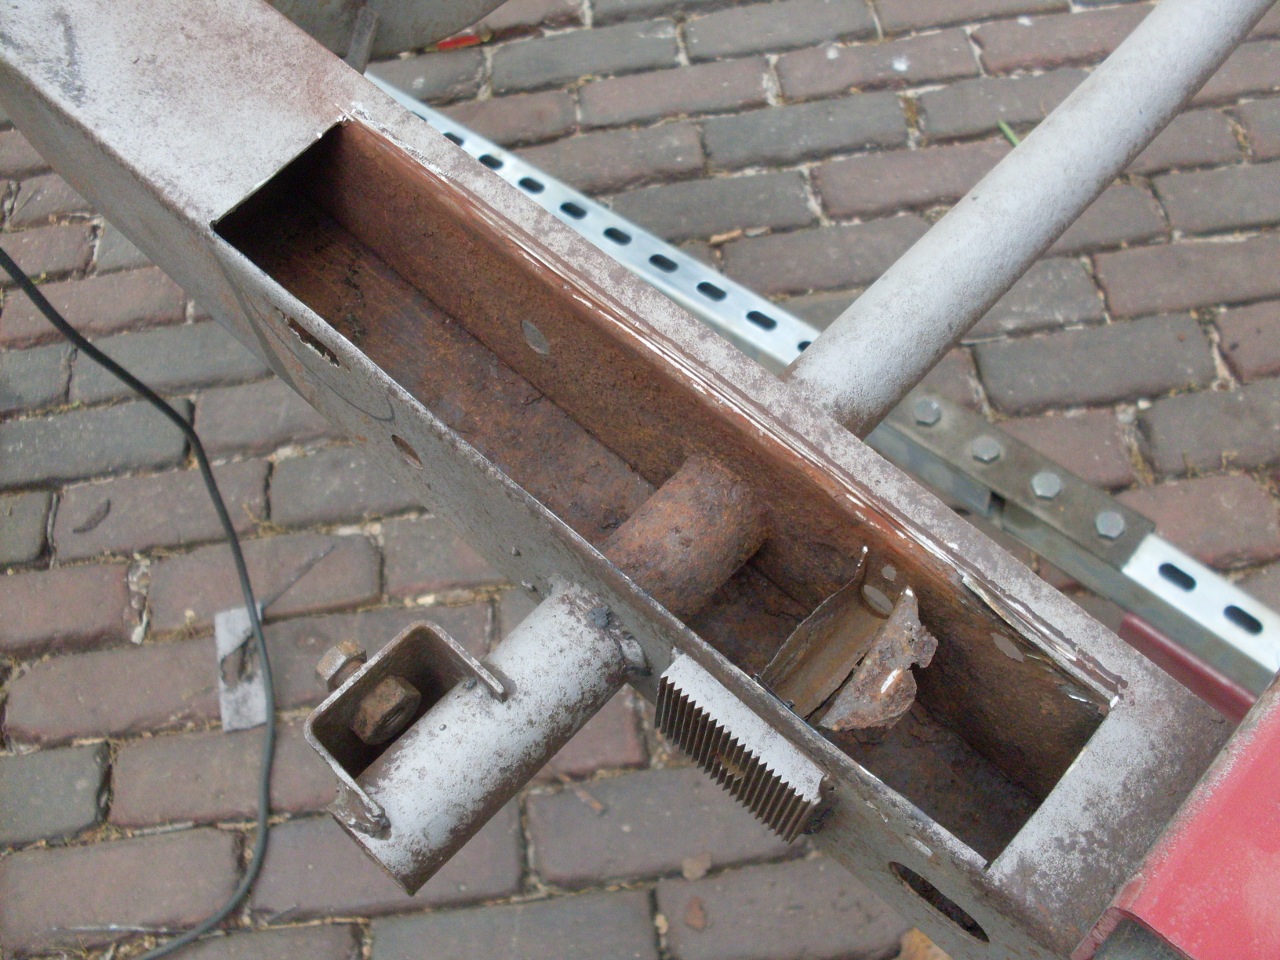
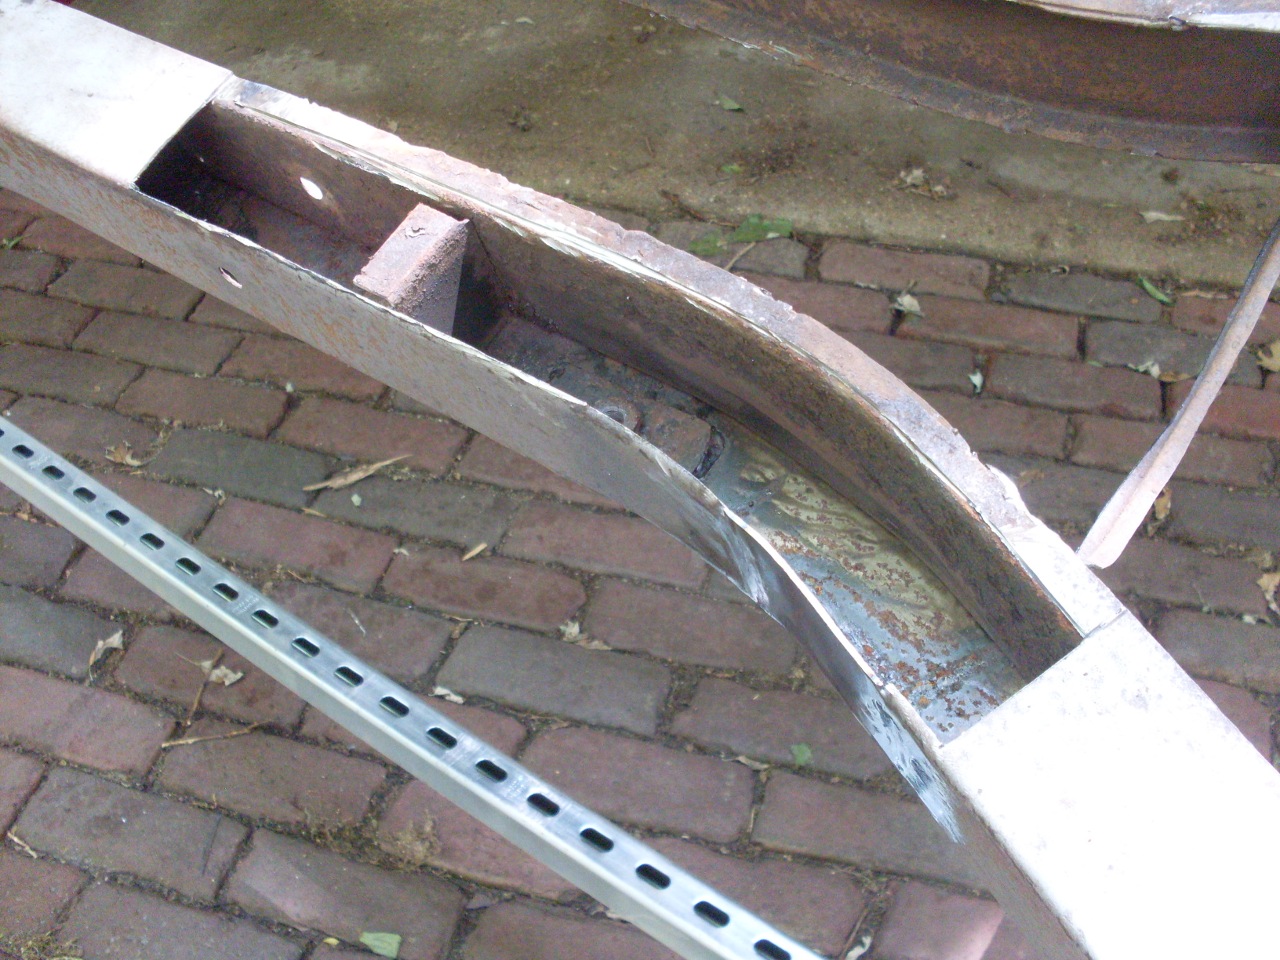
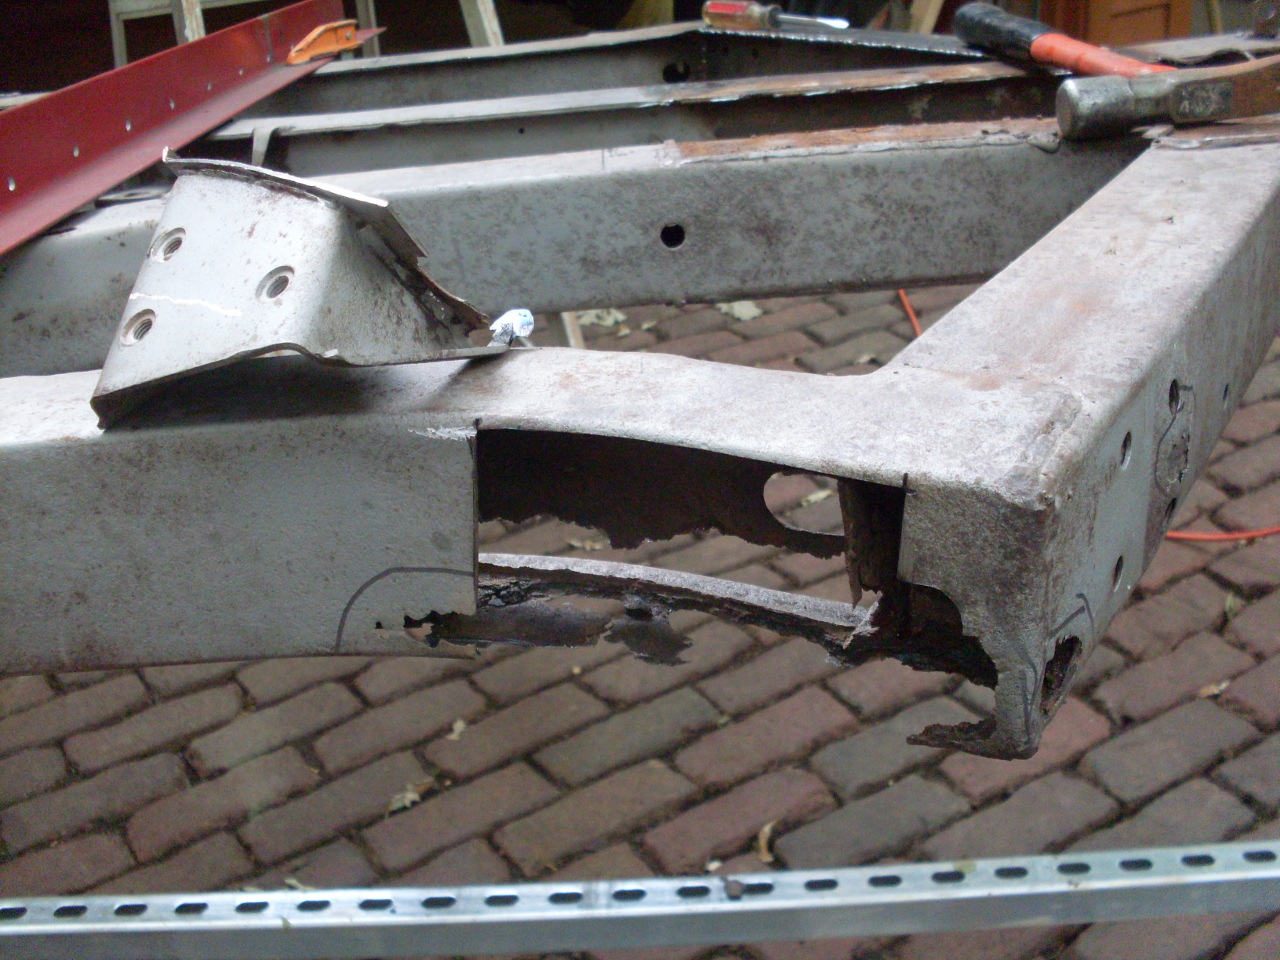
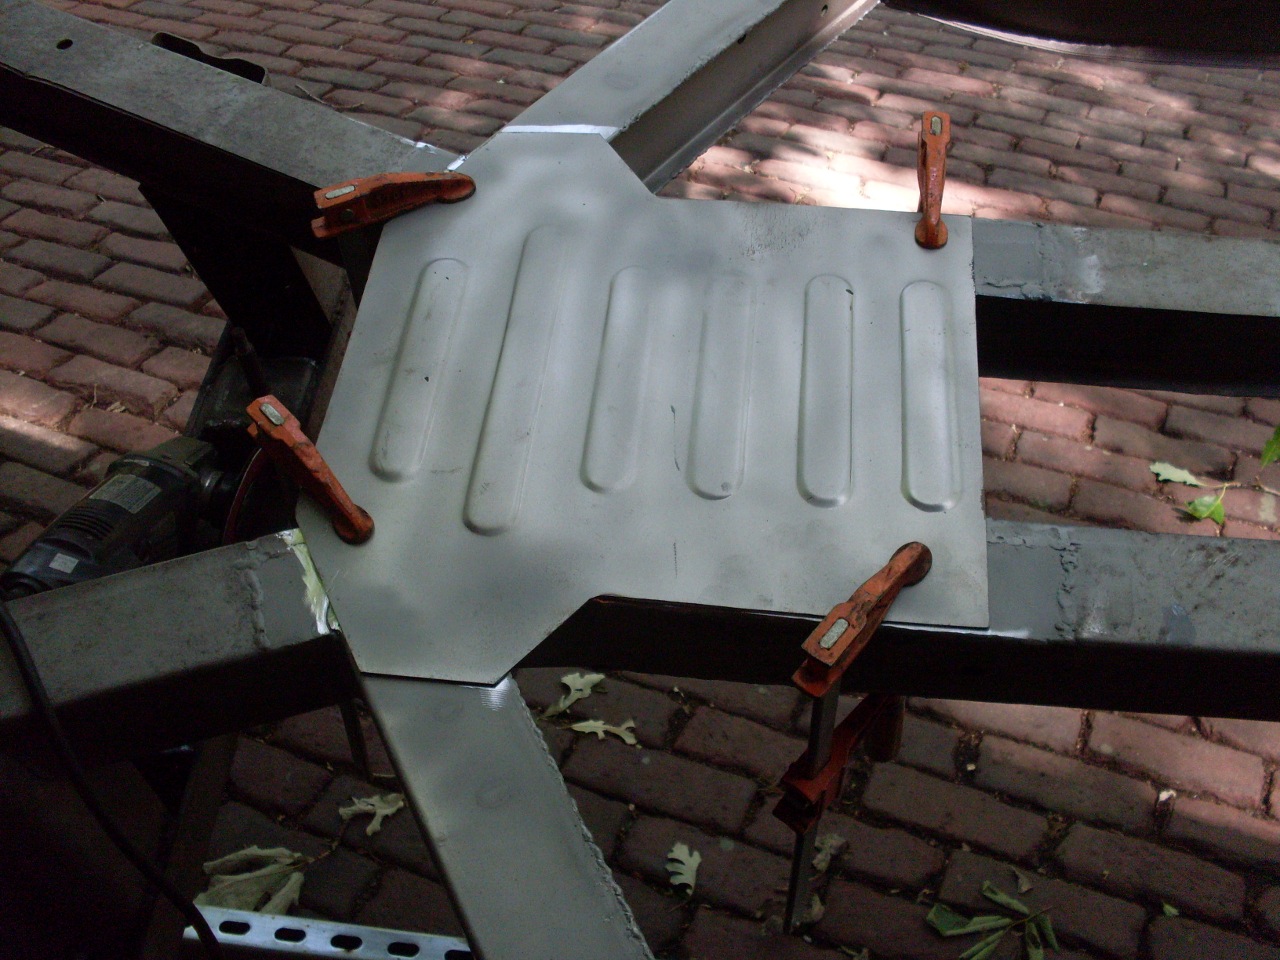
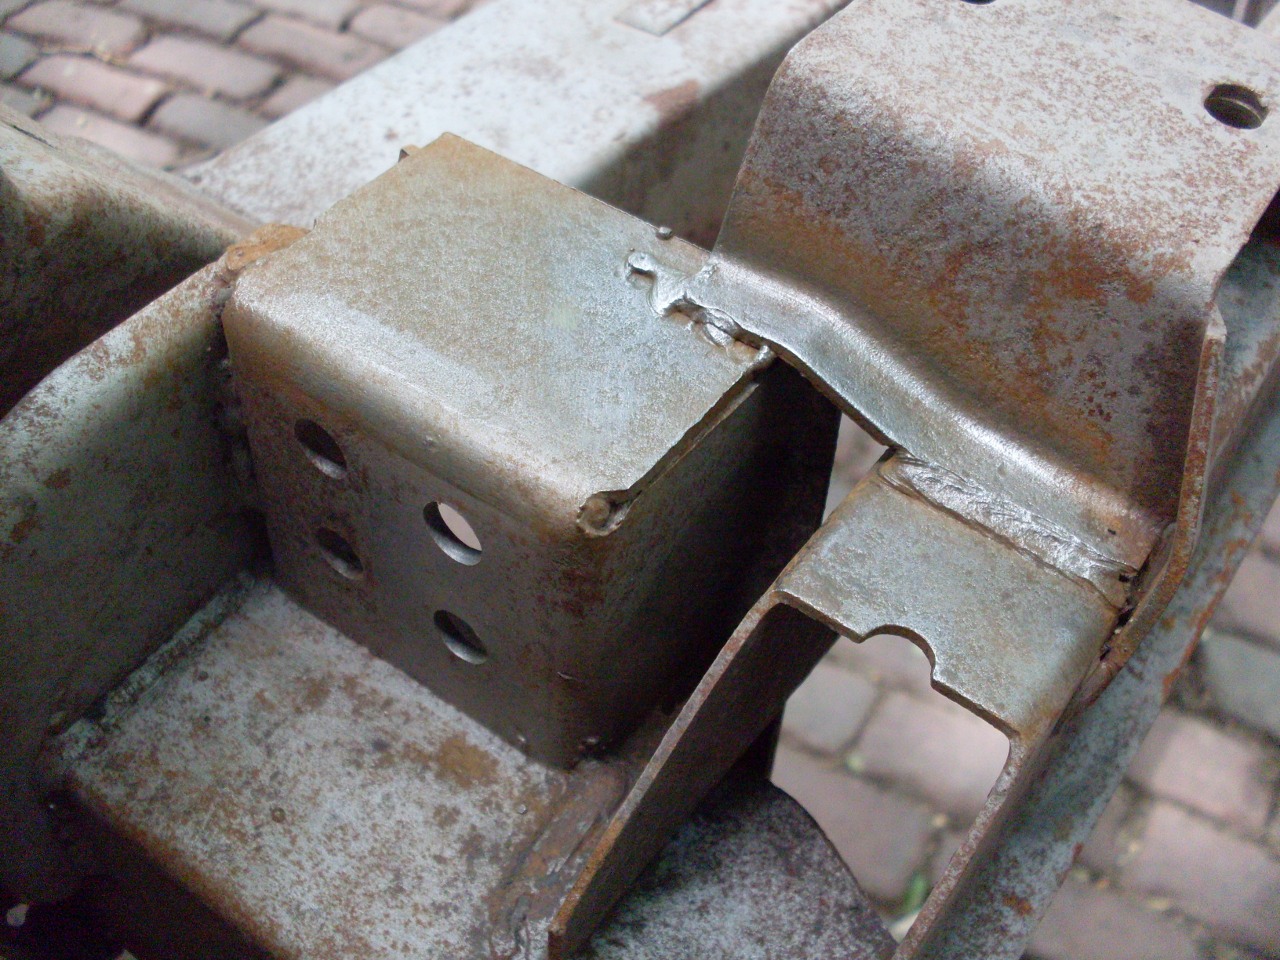
Starting
on the right side (the side in better condition), I cut out the
trailing arm mounting member, which revealed more damage to the central
frame rail where the removed member attached.

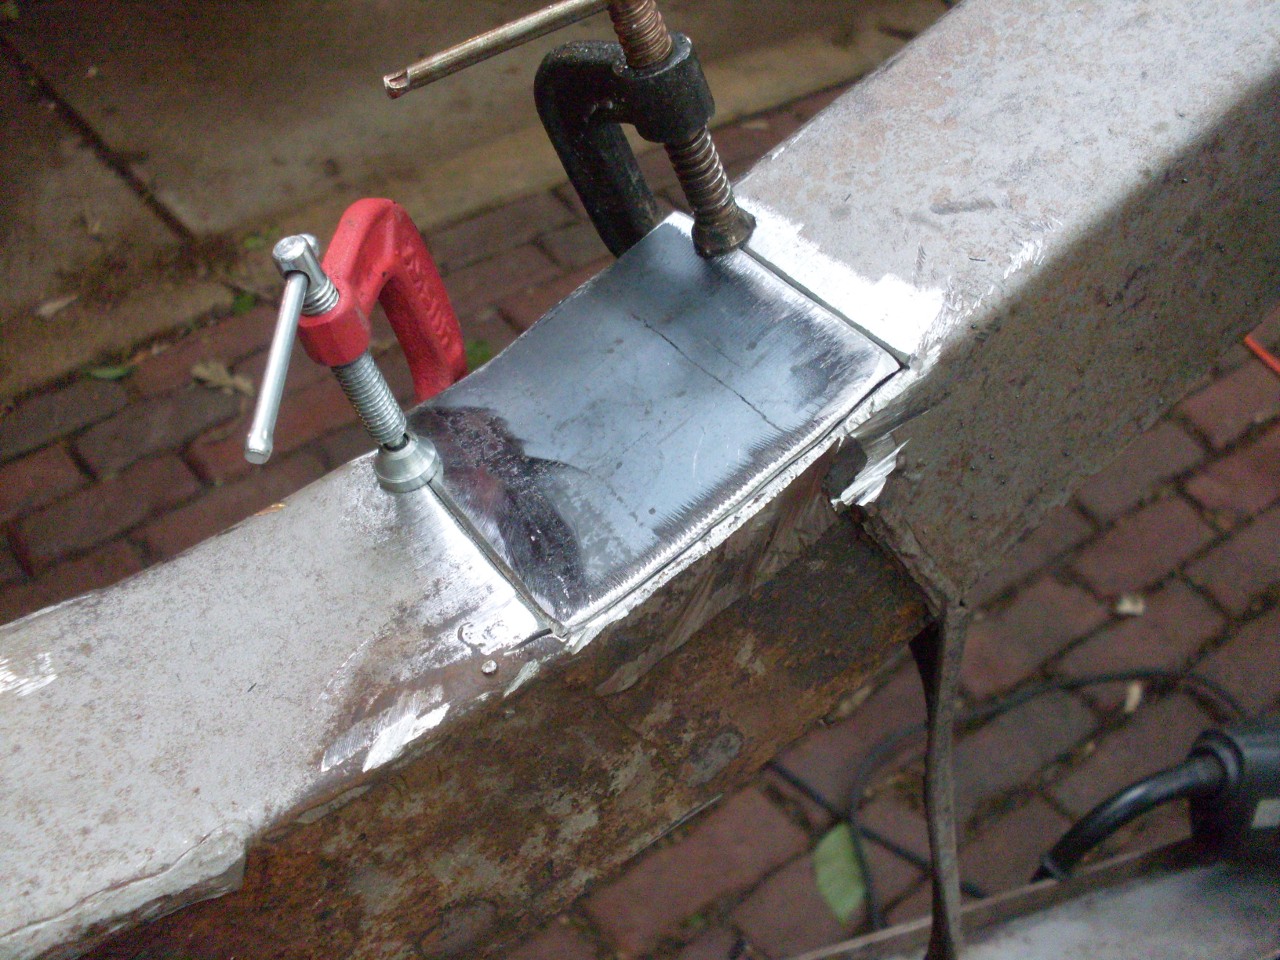
That
area seemed like a good place to start, so I cut back to sound metal,
and welded in a patch. It was a little tricky, since this area is
slightly curved. I'm not a great weldor, but I can usually make
things stick OK. In this case, I could weld the inside, too.


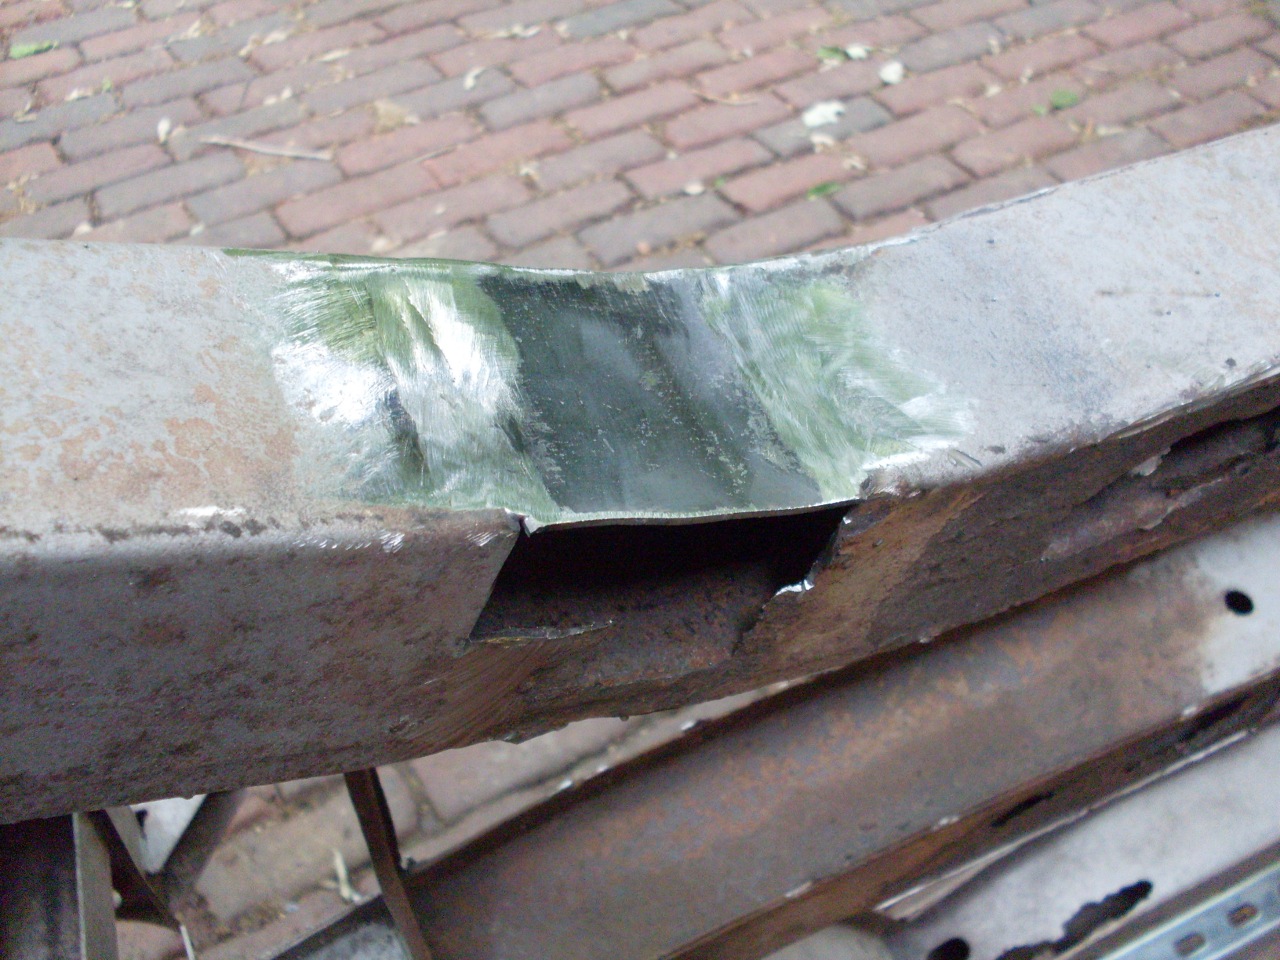
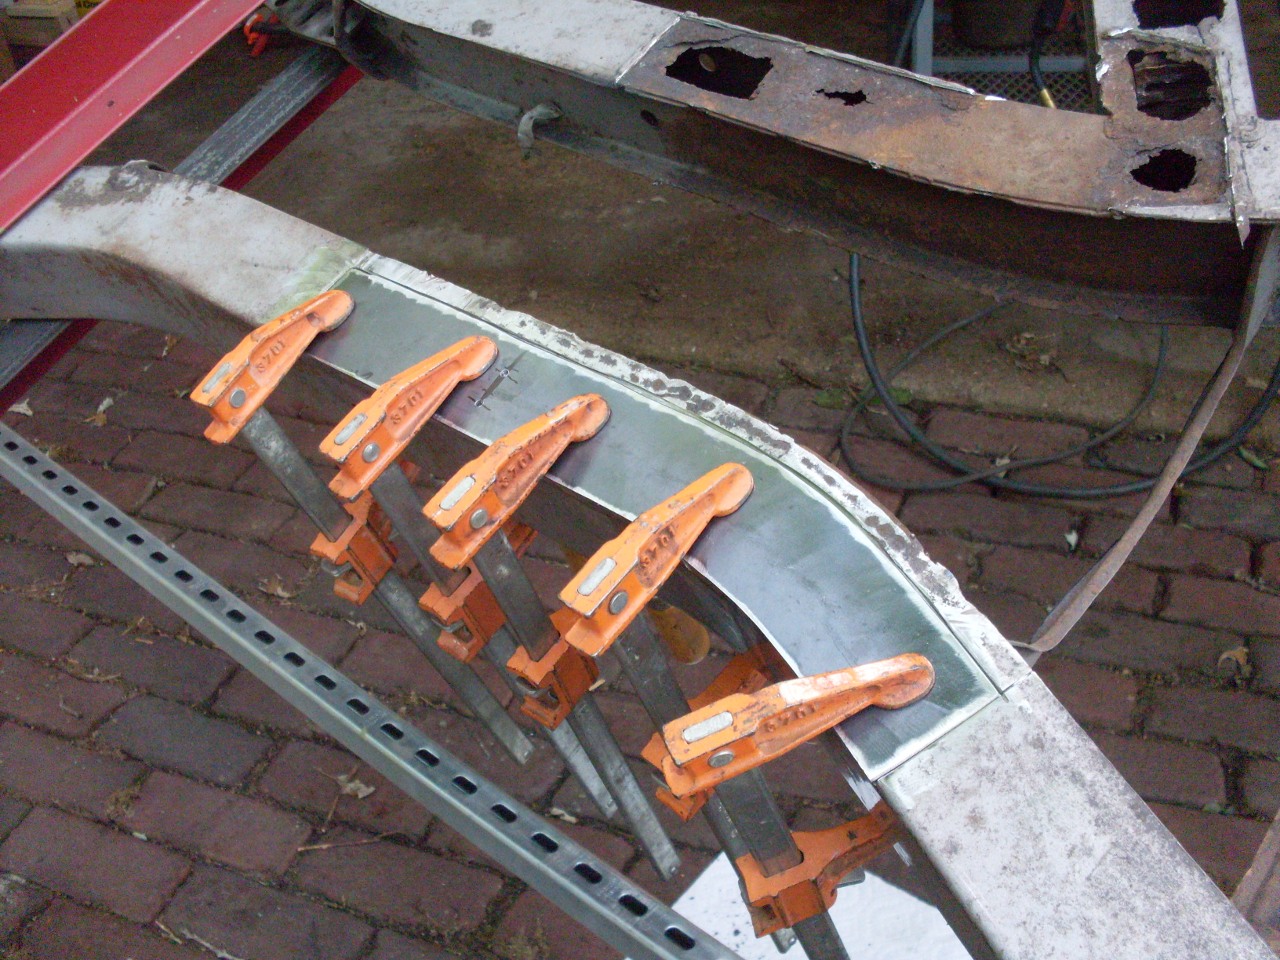
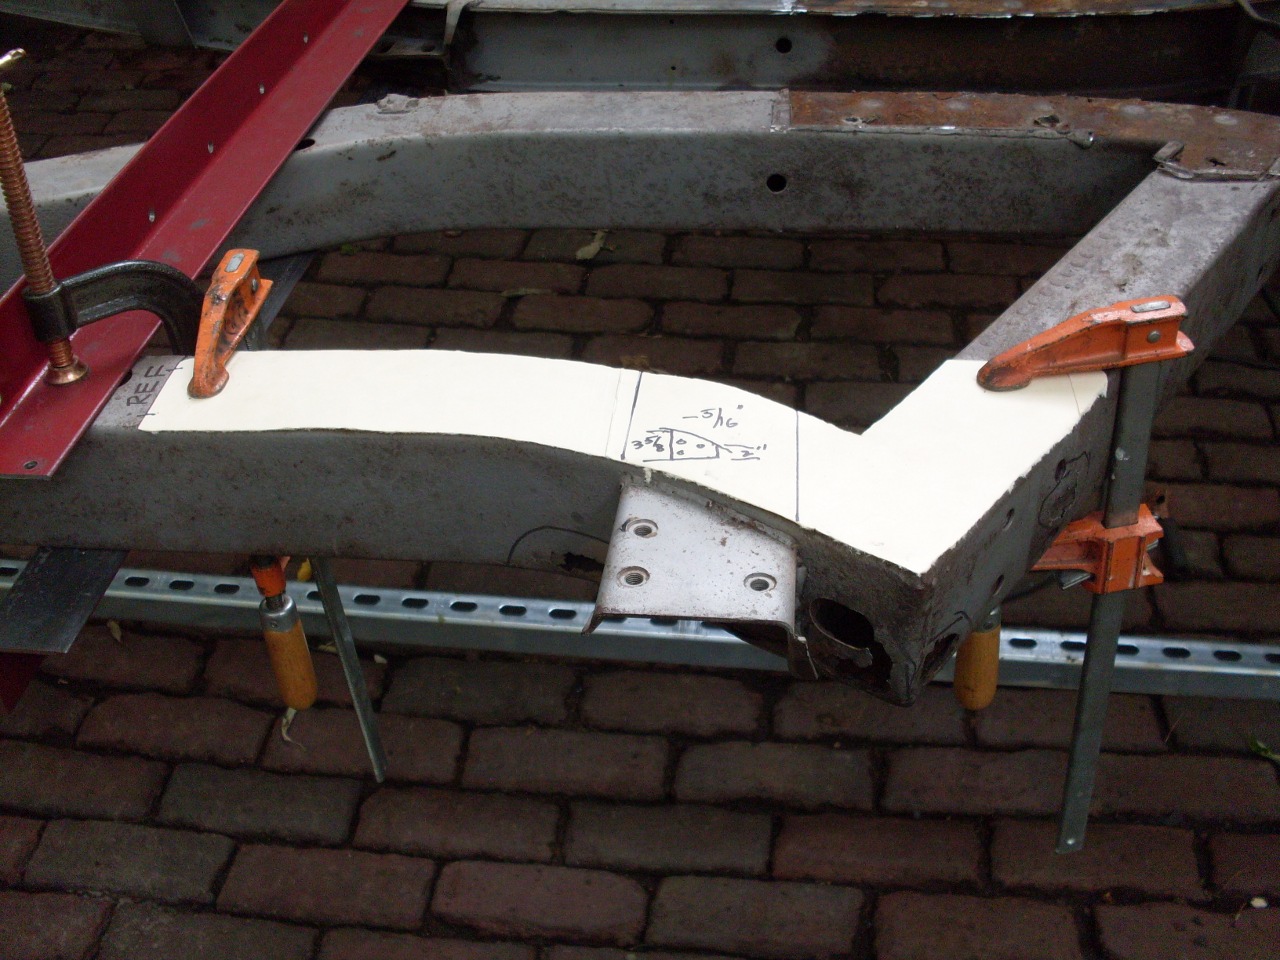
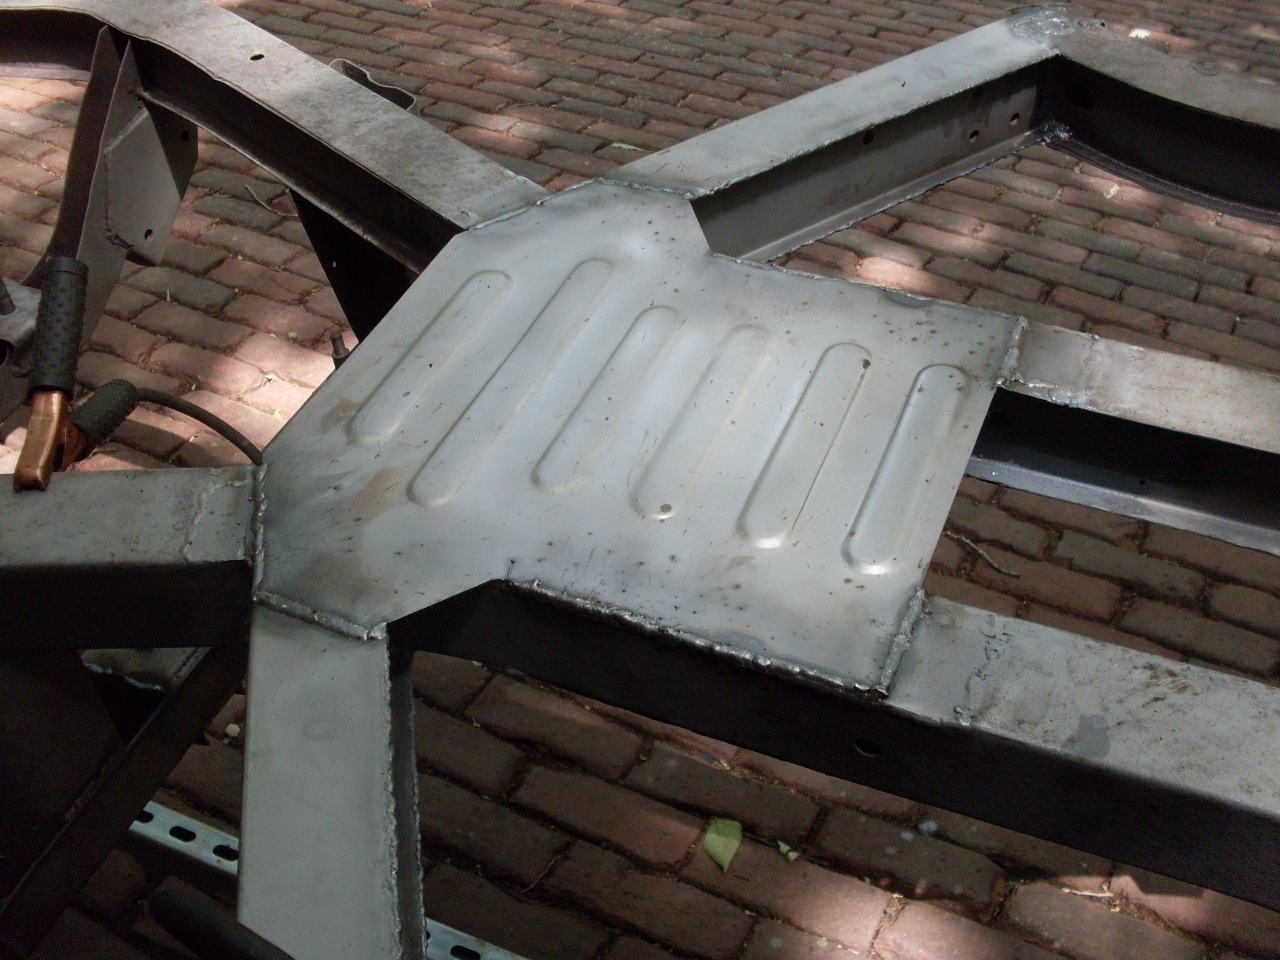
Next
was the bottom surface of the inside rail that was under the cruciate
plate. I cut out a foot or more of metal back to sound material,
then, since this section was curved, made a cardboard pattern to
transfer to my sheet of 14 gage steel. Notice that the inside of
the top surface still shows bright original metal with hit-and-miss paint but little rust.

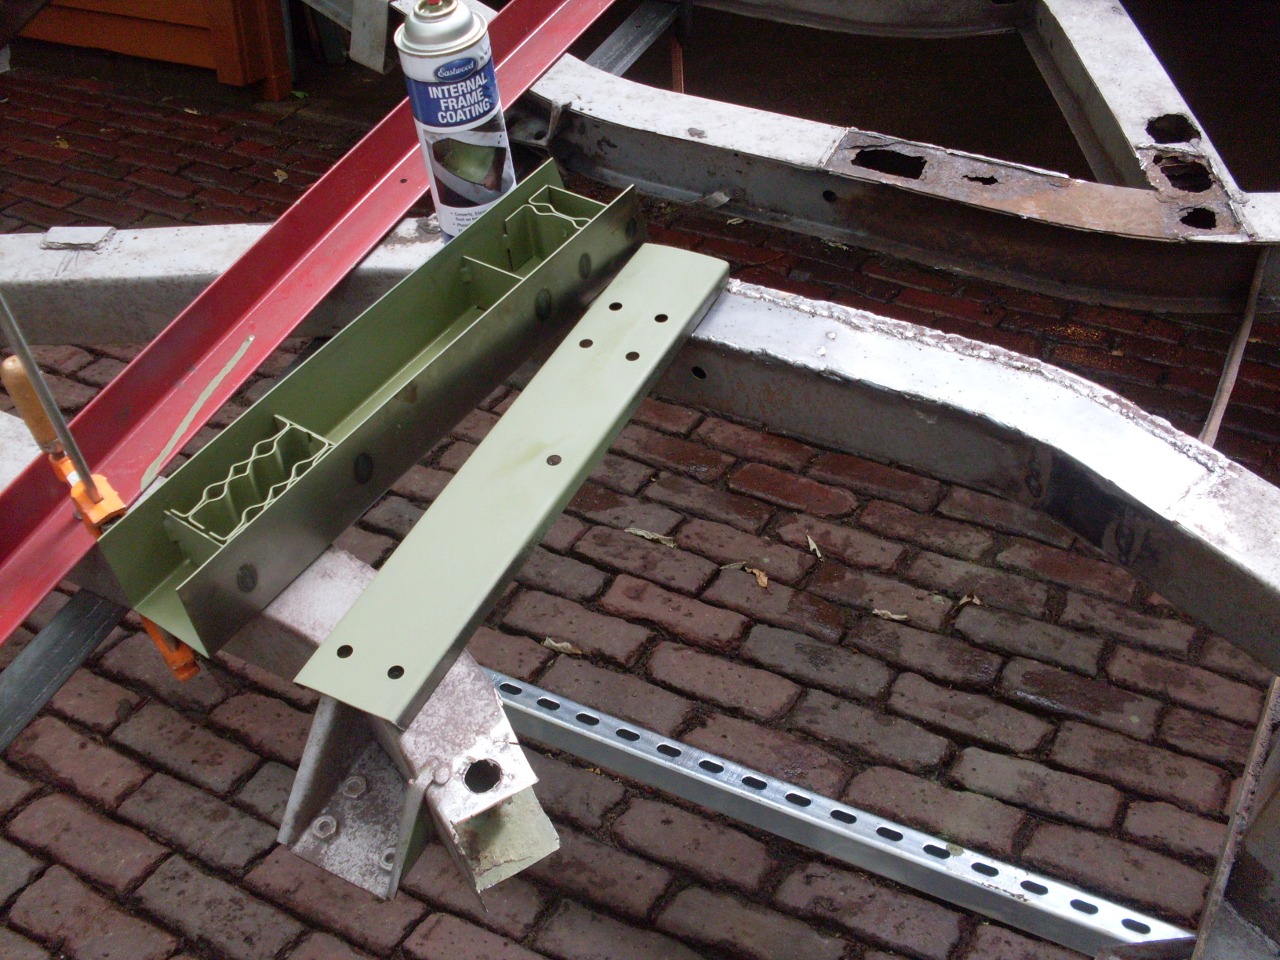
Before
closing in the rail, I shot the inside of the open area with some
"Internal Frame Coating" from Eastwood. I'm generally a little
skeptical about these kinds of products, but I didn't see how it could
do any harm, and it might just surprise me and work. It comes
with a tube and a remote spray head that sprays in multiple directions
at once. I sprayed it into the frame channel both directions as
far as the tube would reach.
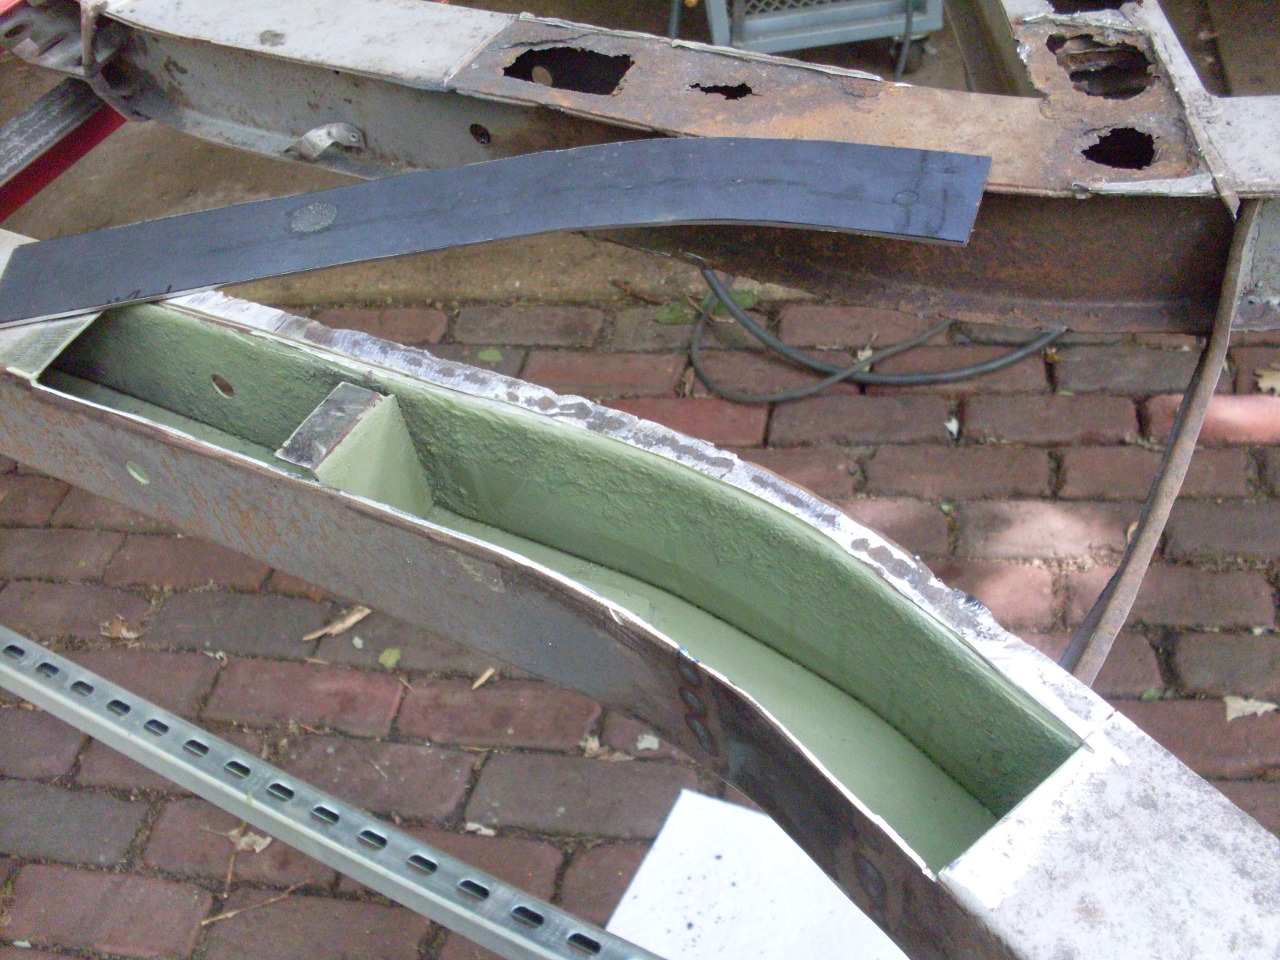
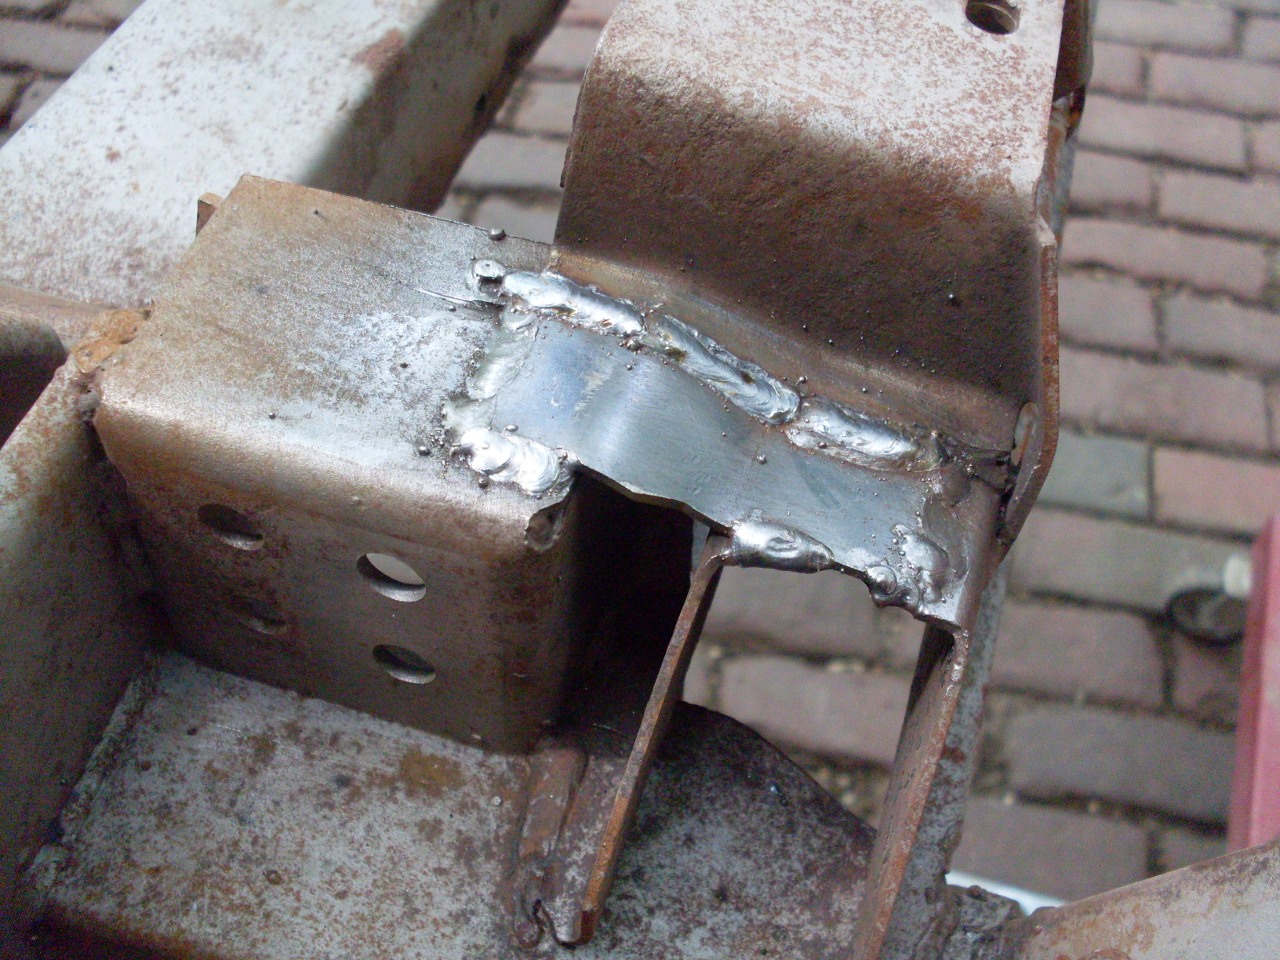
I then placed the fitted patch, tacked it, and welded it in place.
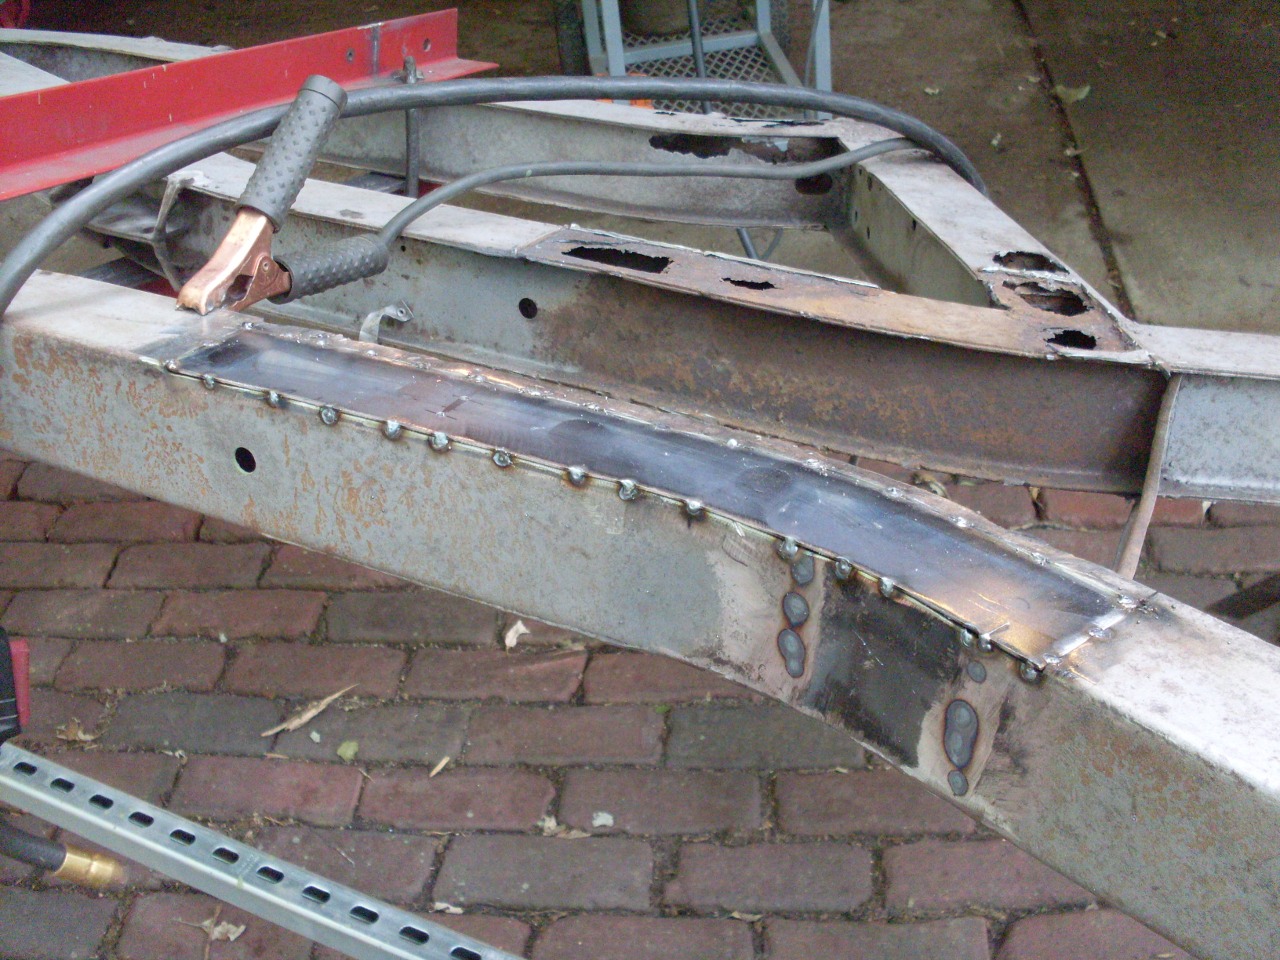
This
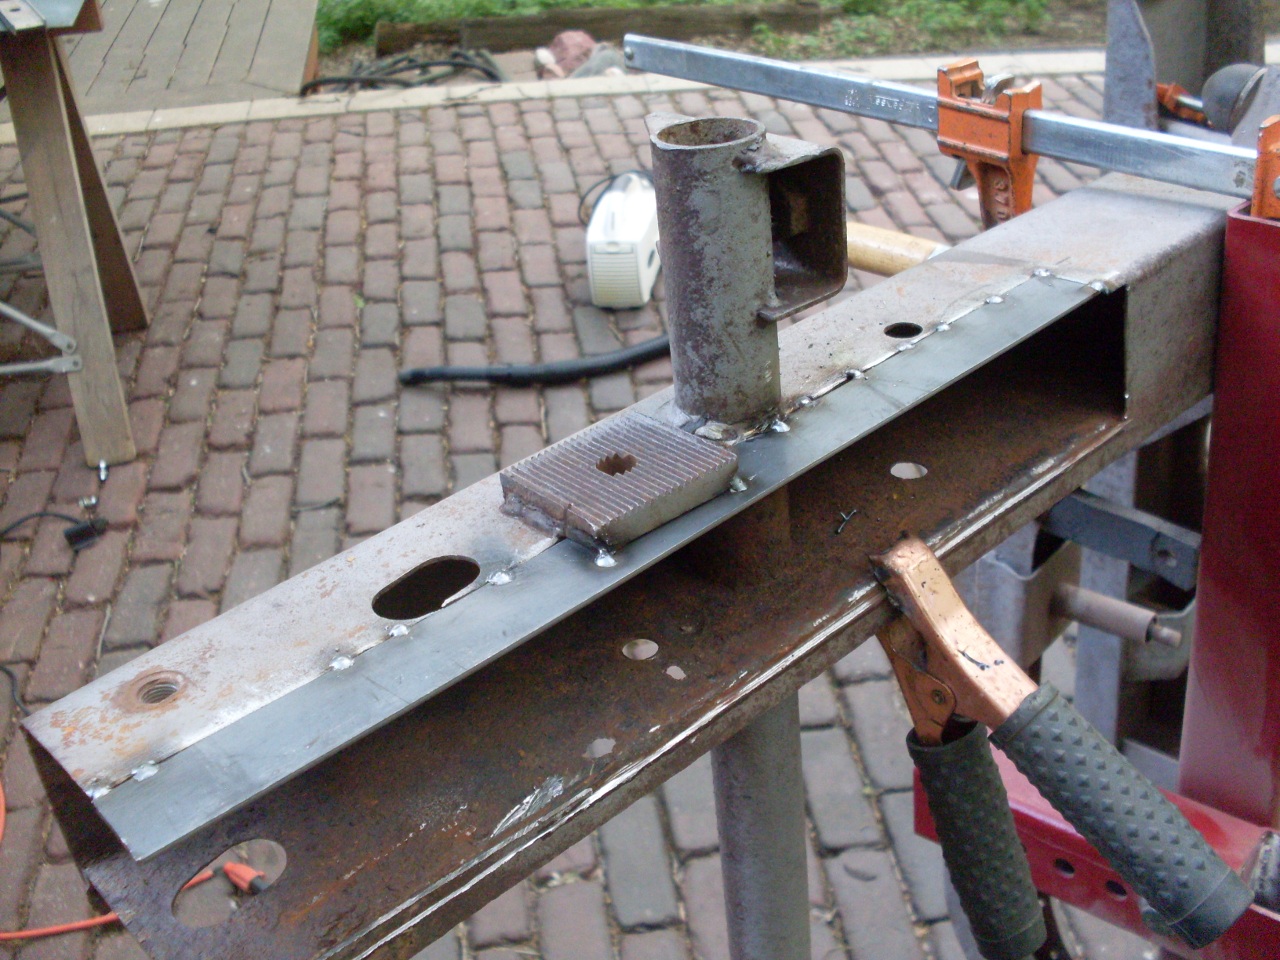
made a nice clean surface for the new trailing arm member to attach to.
I was originally planning to make the trailing arm members myself, but
quickly realized how hard it is to bend 18 inches of 14 gage steel.
I have a small sheet metal brake, but it wasn't near man enough
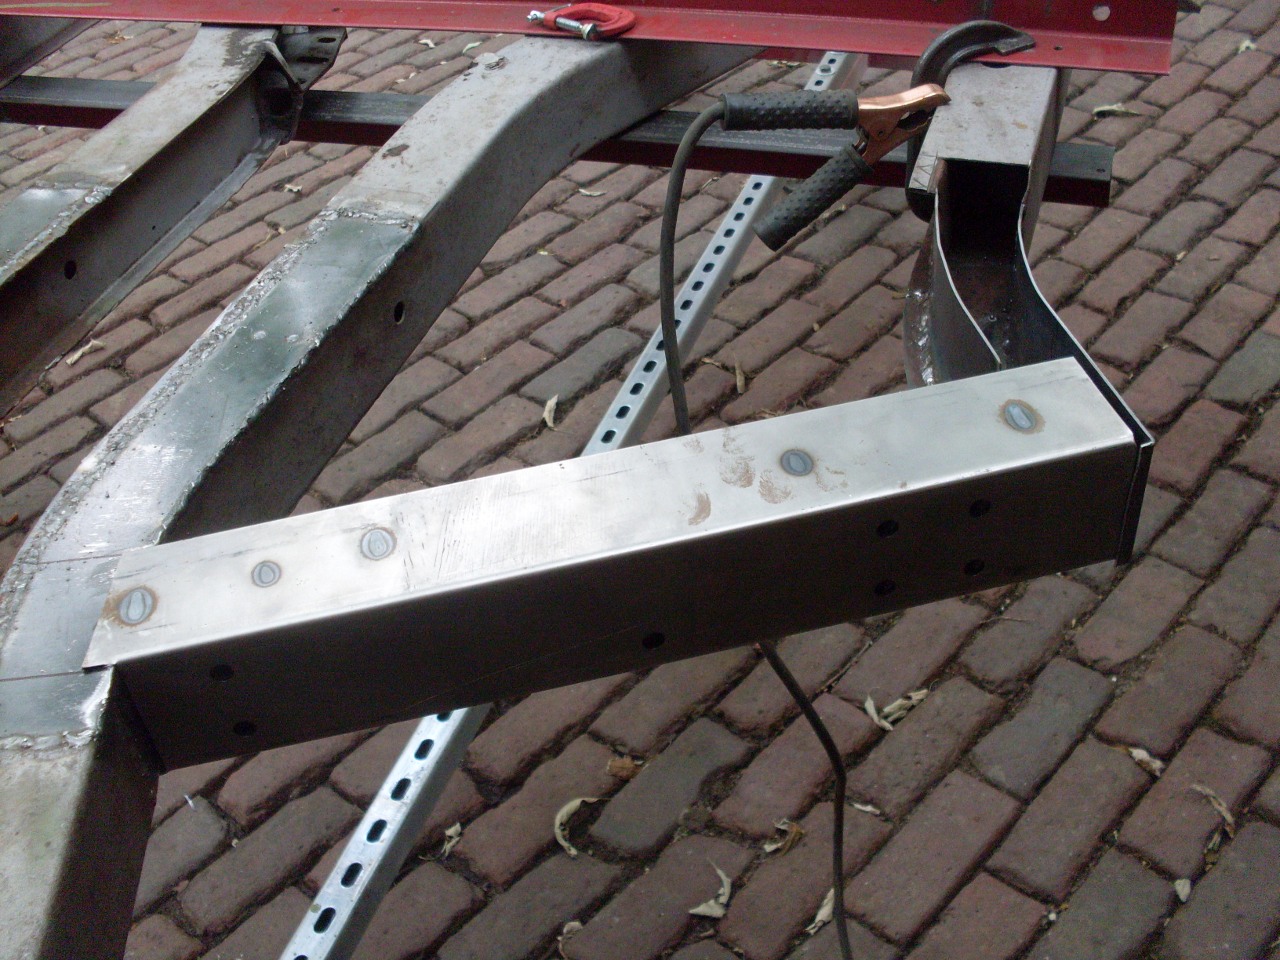
for the job. So these are store-bought members. I was
pretty satisfied with the construction and quality. They fit well
with a minimum of trimming. I squirted the inside of the member
with the Eastwood Internal Frame Coating.
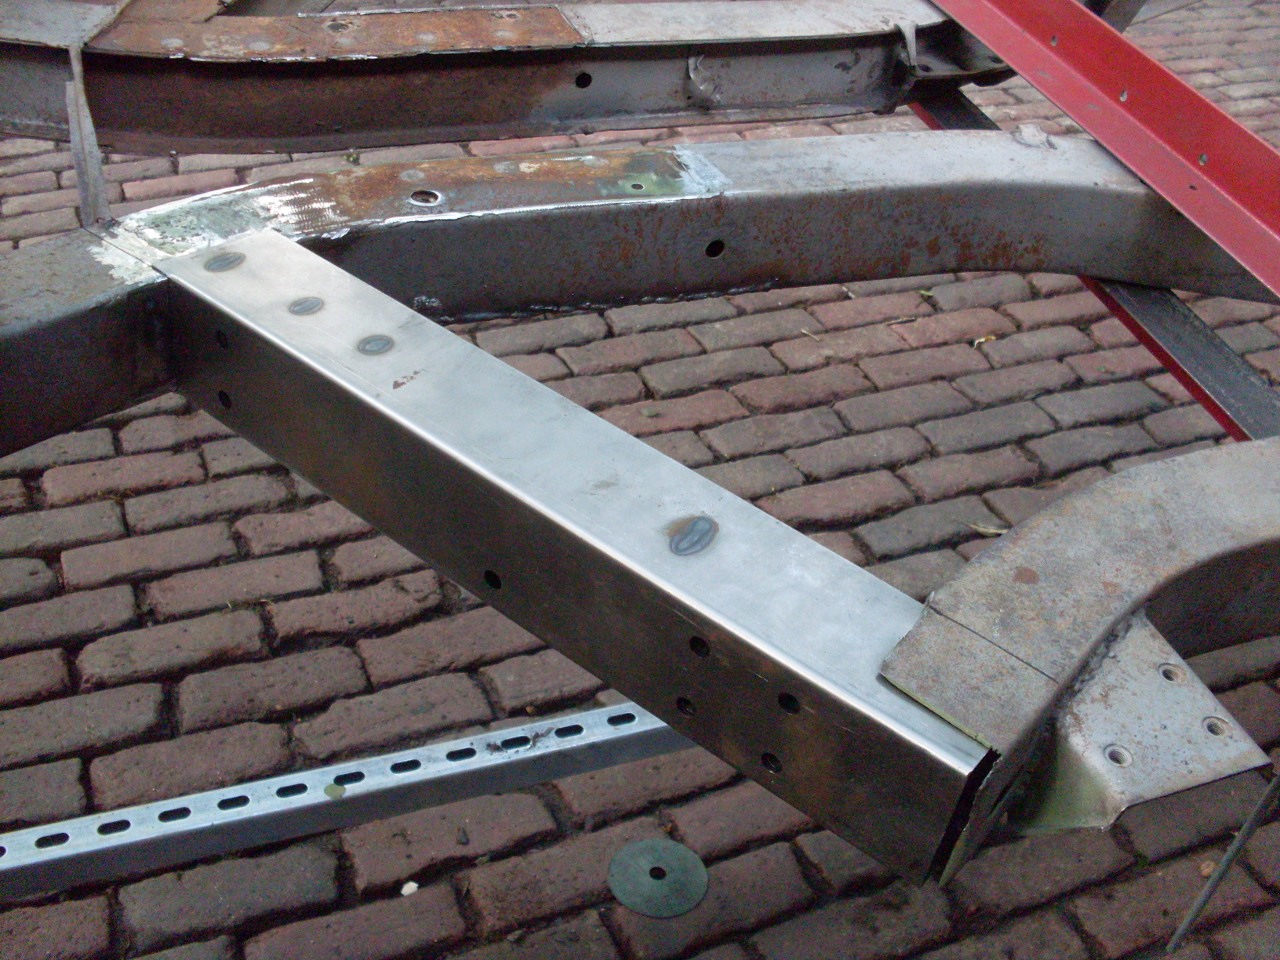

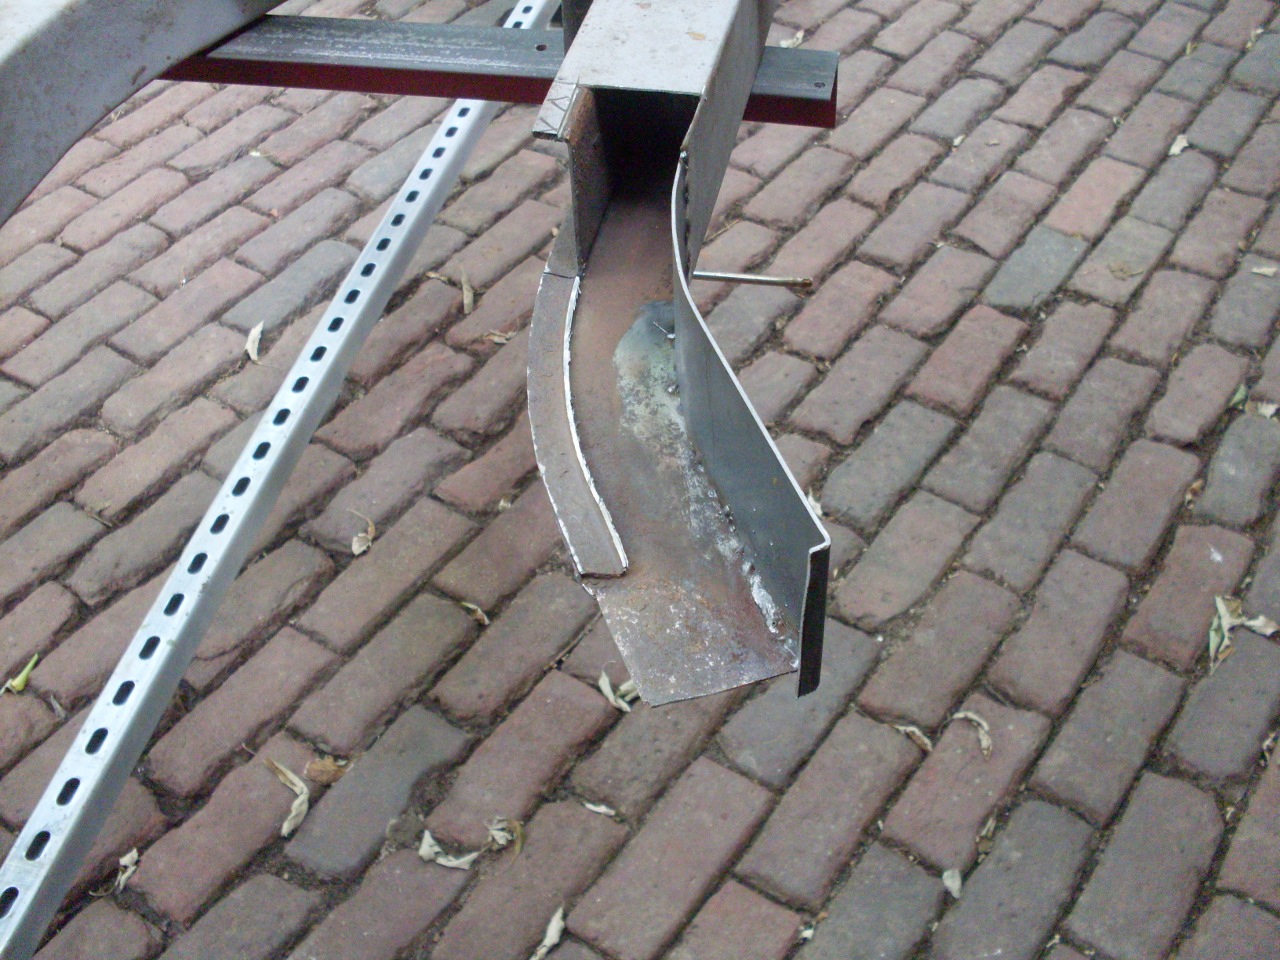
The
other side of the frame was handled identically, except for the extra
work in fixing the area where the outboard frame rail connects to the
trailing arm member.


I
first made a pattern so I could reproduce the joint exactly, especially
the location of the body mounting bracket, which I'd have to remove.
I also took some measurements so I could double check the
location of the body mounting holes on the bracket relative to a few
other features on the frame.
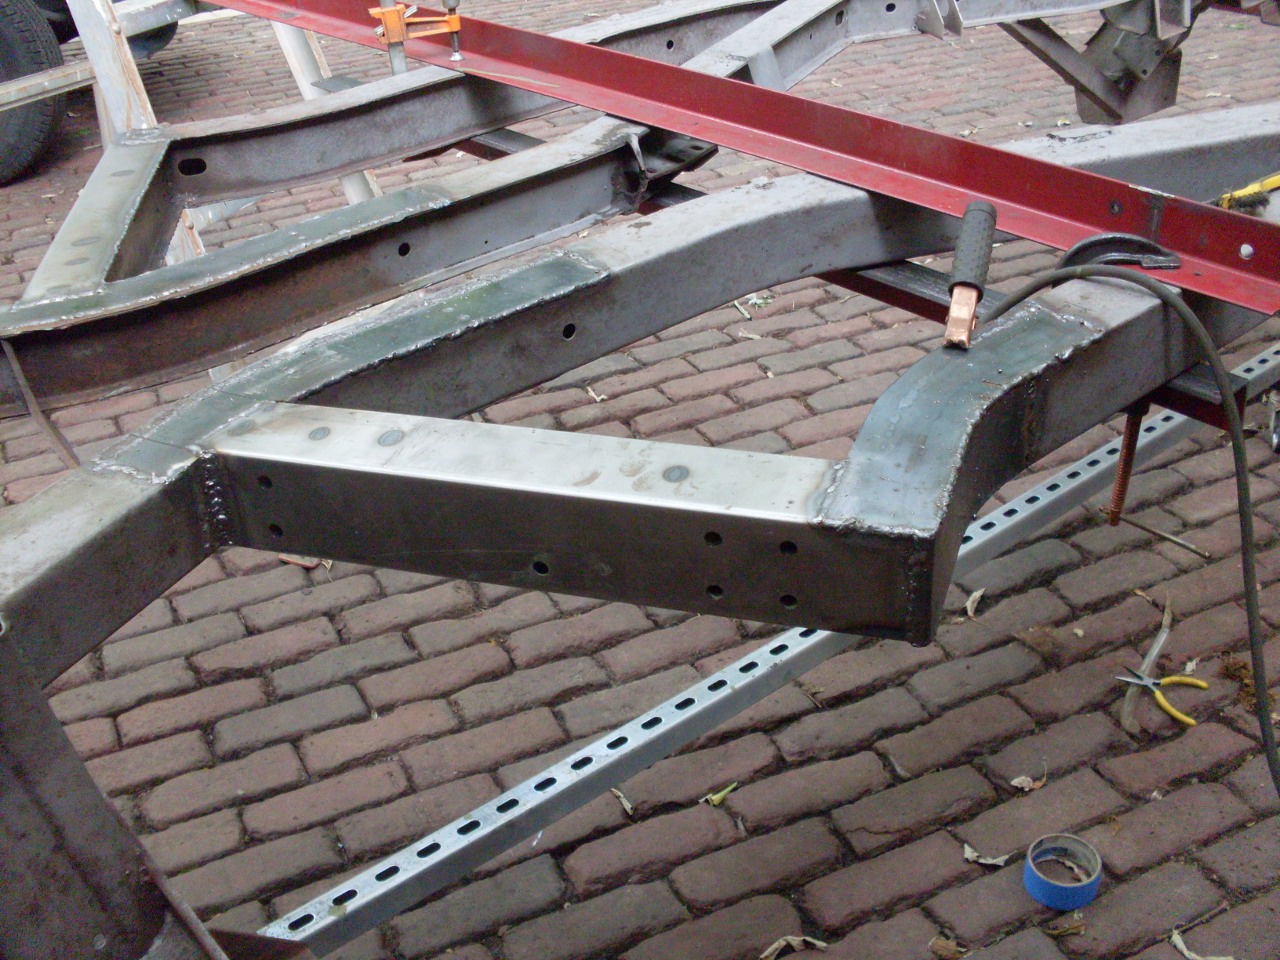
Then
after removing the bracket, I started cutting away bad metal. The
top surface of the rail was the only survivor--the rest would have to
be reconstructed.
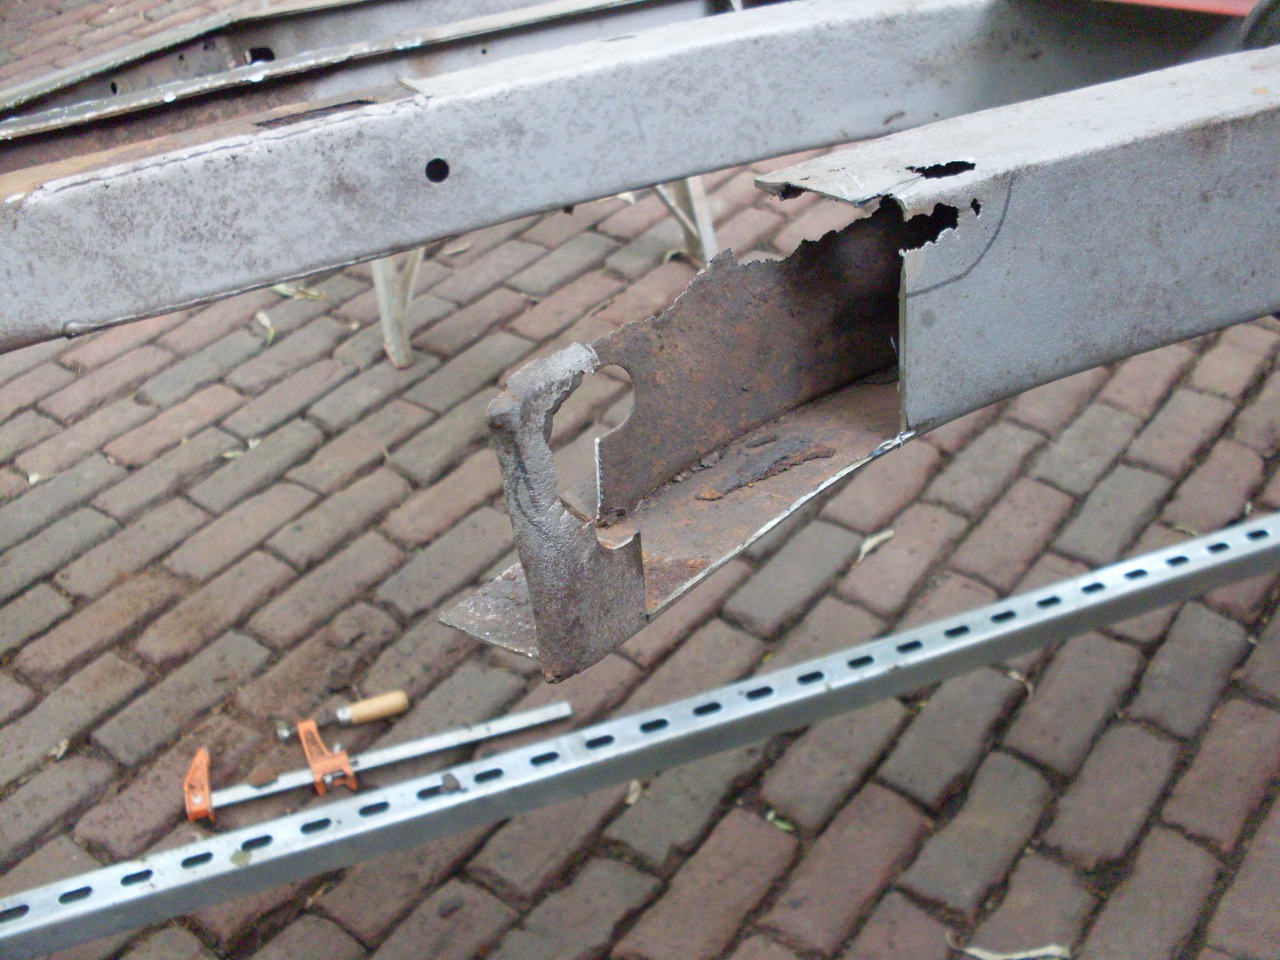

The rail end was rebuild one piece at a time. The fact that all the pieces were curved made it a bit fiddly.


Before
welding on hte new cruciform plates, I wanted to try to offer at least
a little protection to the area under the plates that rusted so badly.
I plan to coat the frame with POR15 paint, so I decided to
pretreat these areas before attaching the plates. First, I
sandblasted the area so the new metal would have a good "tooth".
Then
applied a couple of coats of POR15 to the areas that would be covered
by the plates, but also to the entire "tunnel" area between the plates
that would be harder to paint later.

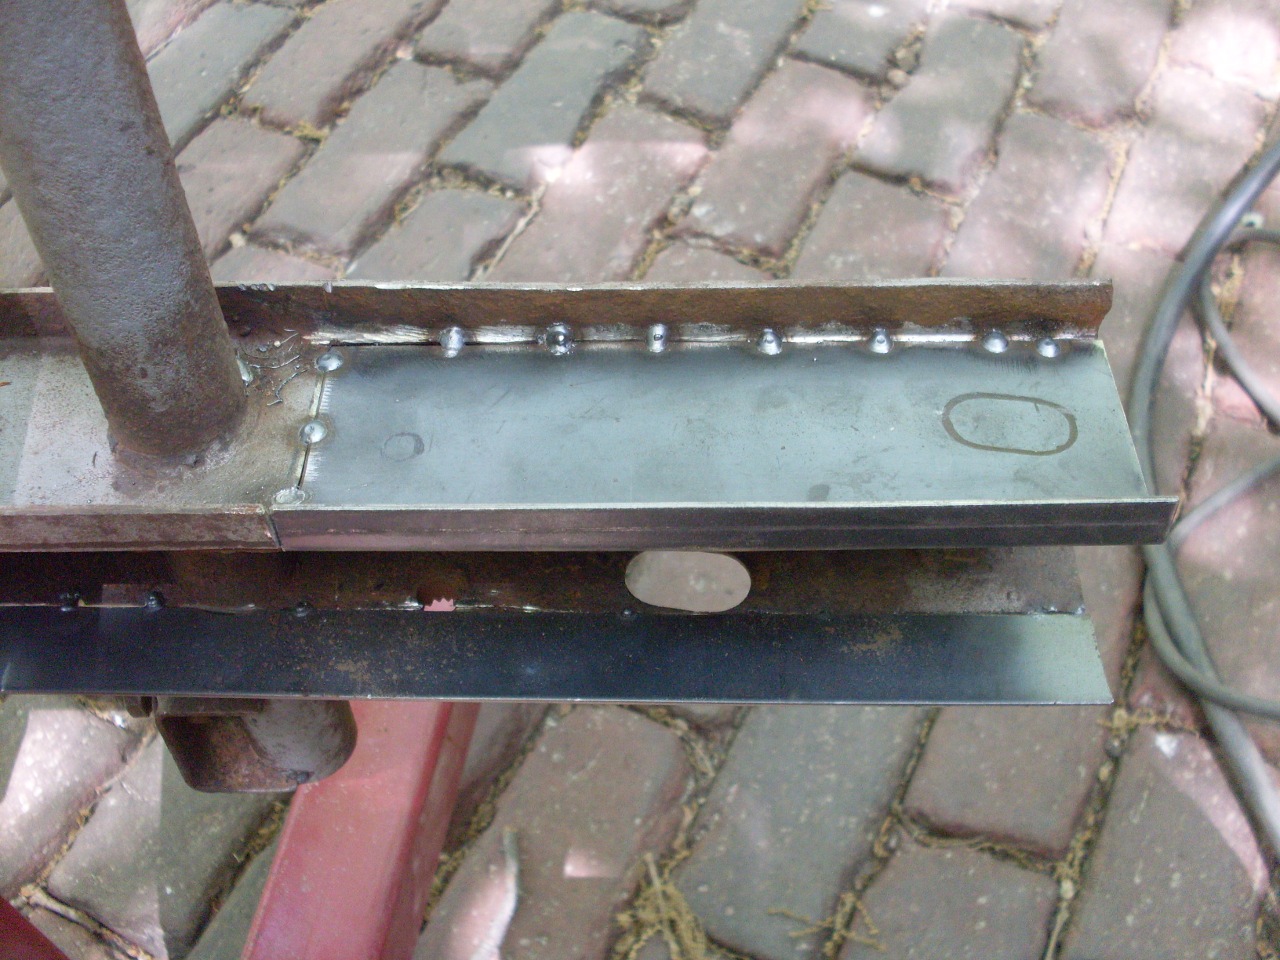
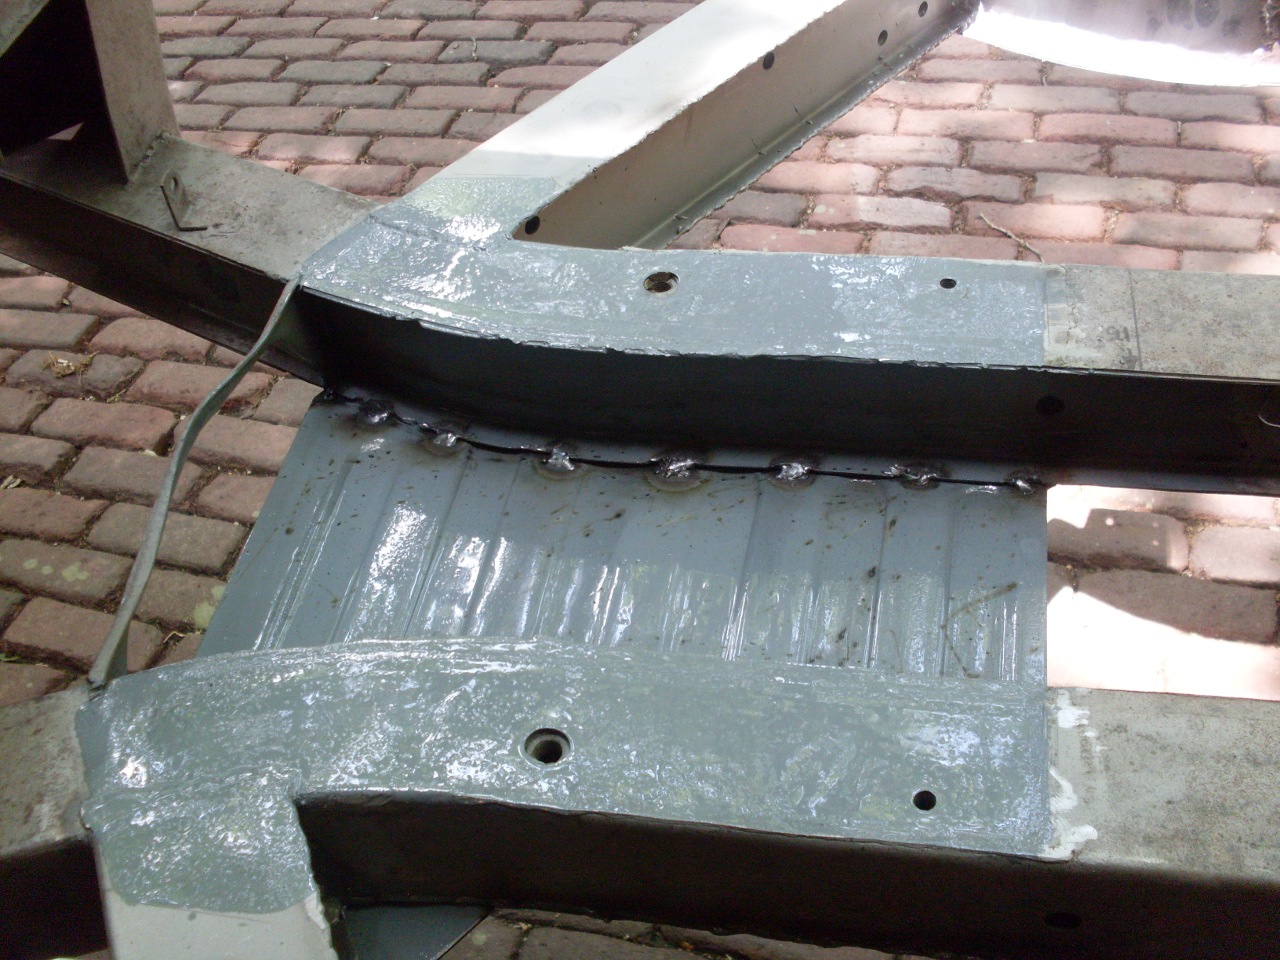
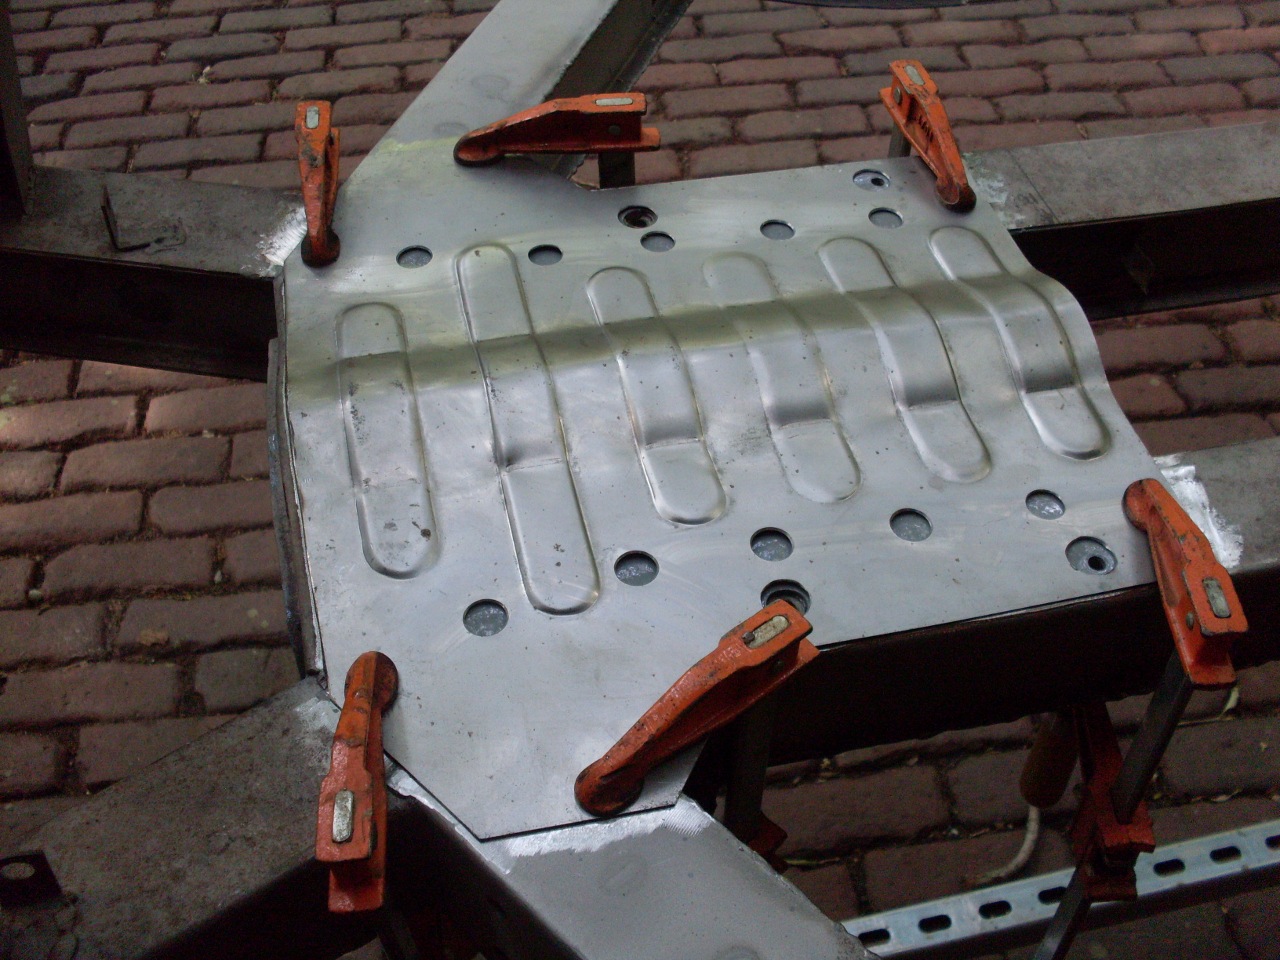
Then
placed, tacked, and welded the bottom plate first. I "stitch"
welded the plates to try to control or at least spread out the heat
stresses, and then came back and filled in the gaps in several passes.
I also added a few welds to the top side of the bottom plate.
I don't think the factory did this. I know the welding
will locally compromise the paint, but I still feel the extra step is
worth it.

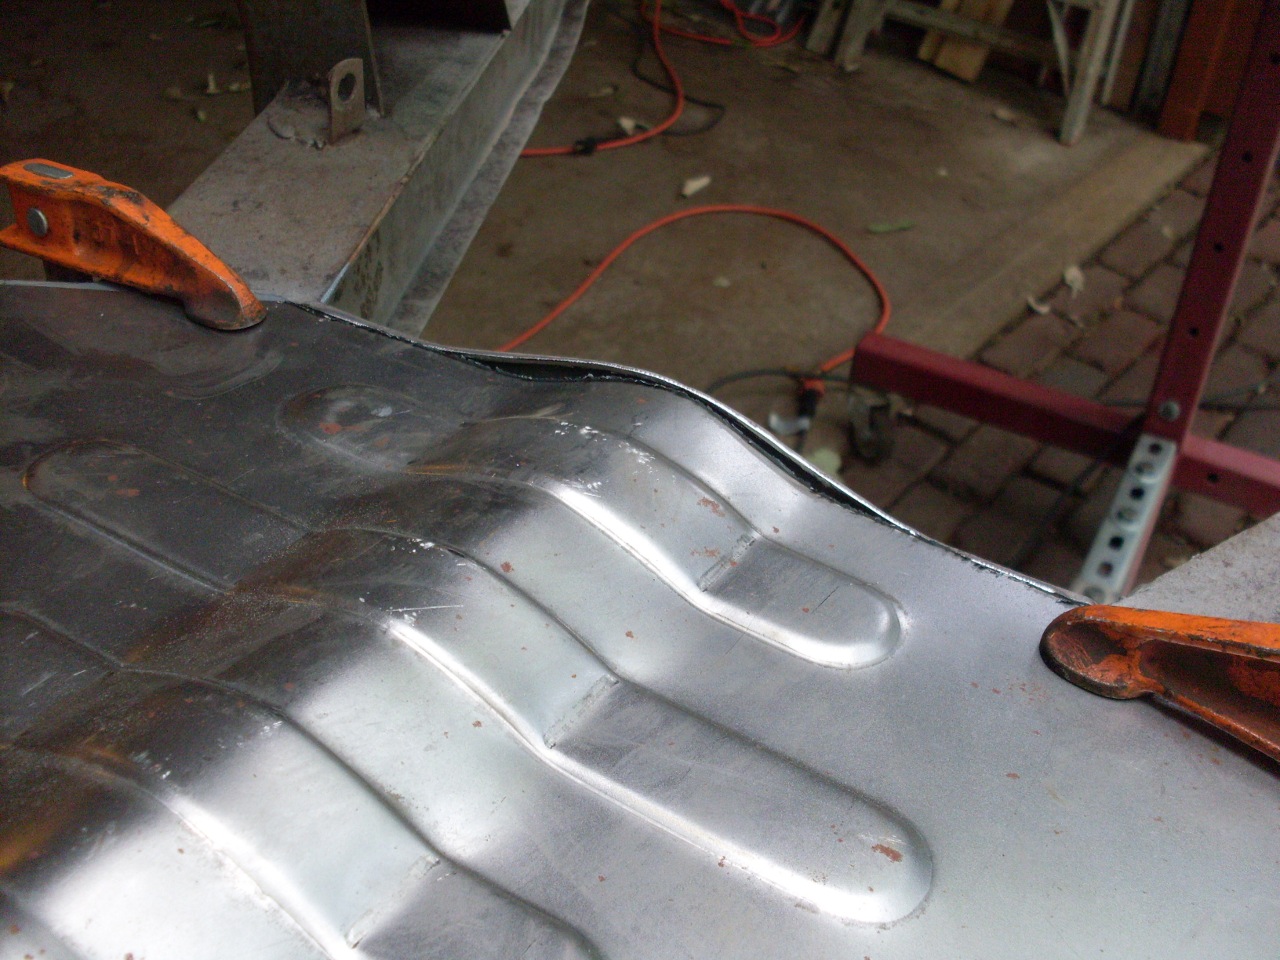
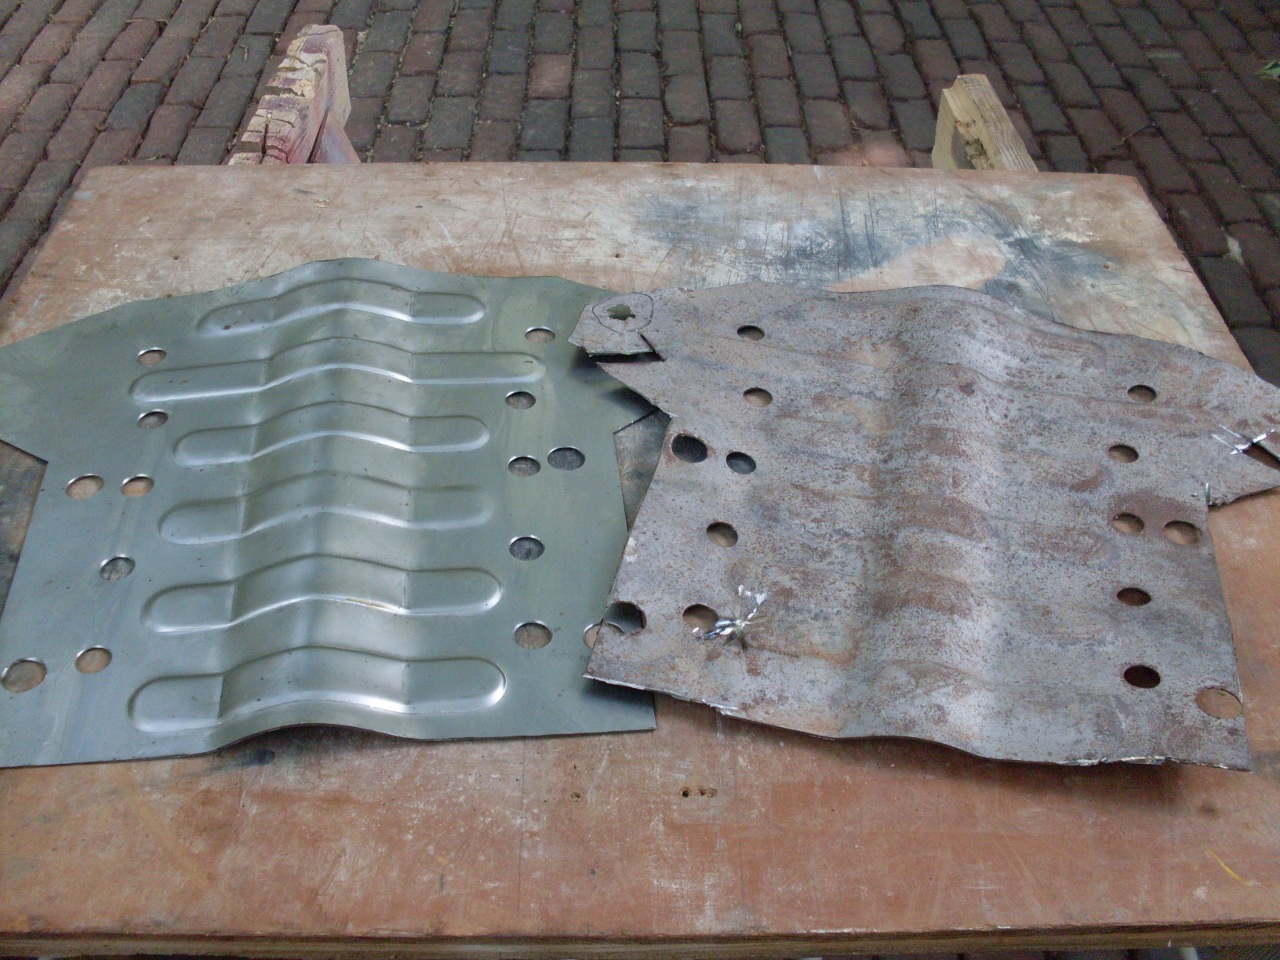
While
the bottom plate seemed to be a decent product, the top plate was a
little shoddy compared to the original. There were kinks in the
plate from the arch-formimg process, but the real significant
difference was that the original plate had a formed flange at the front
edge while the reproduction plate had none. Luckily, I had the
repro plate before I cut out the old one, so I knew this, and preserved
the front flange of the old plate. The main trouble with this was
that the shape of the arch on the replacement plate was not a good
match to the original flange, and took a bit of metal mashing to get it
to line up.
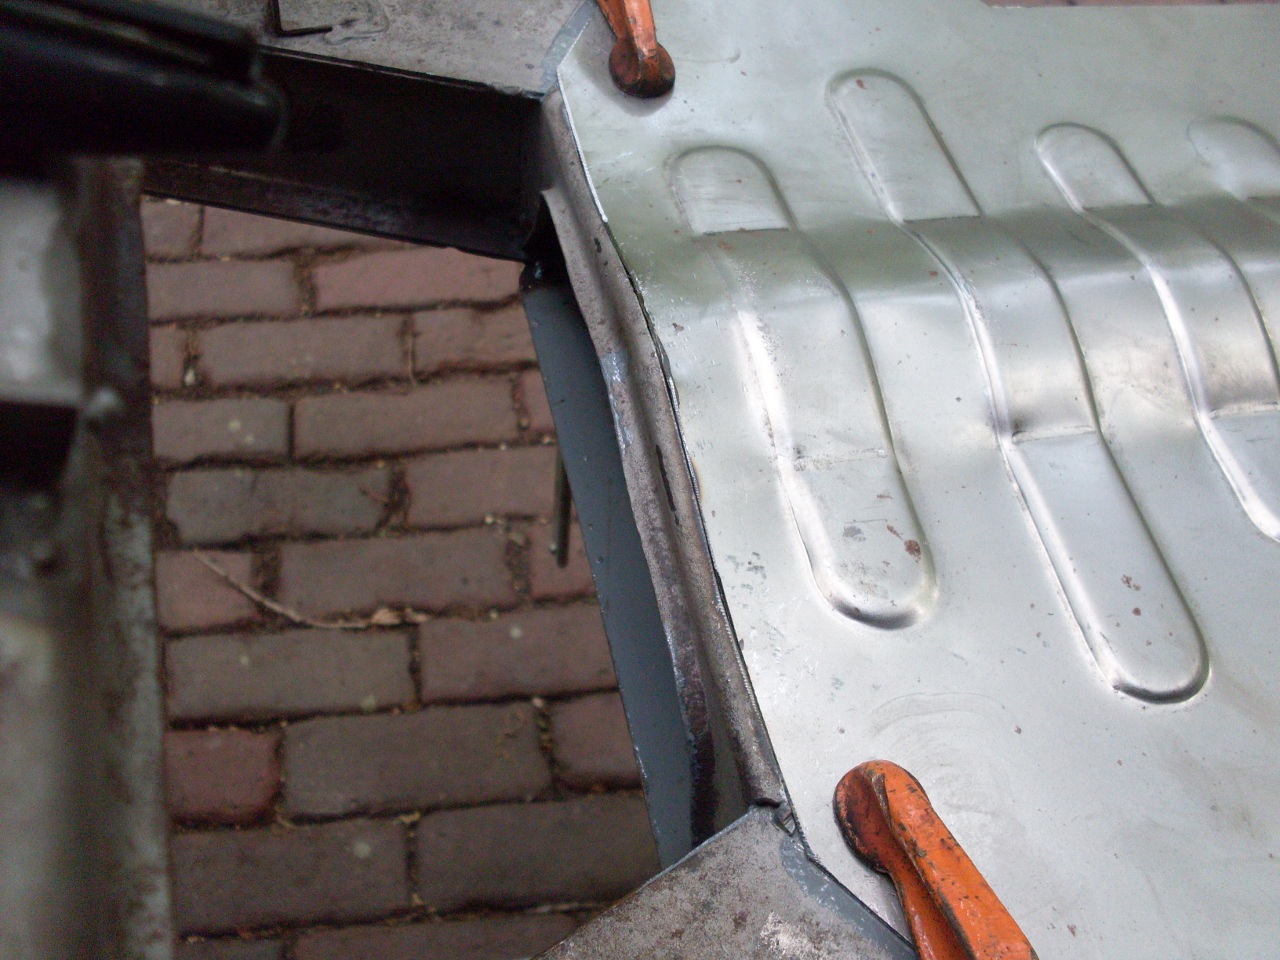
Then
there were the holes. There has to be holes in the top plate for
some body mounting fasteners, and the new plate didn't have them.
The original plate also had another row of holes down each side.
I don't know what these are for, but I added them at the same
time as the body mounting holes.

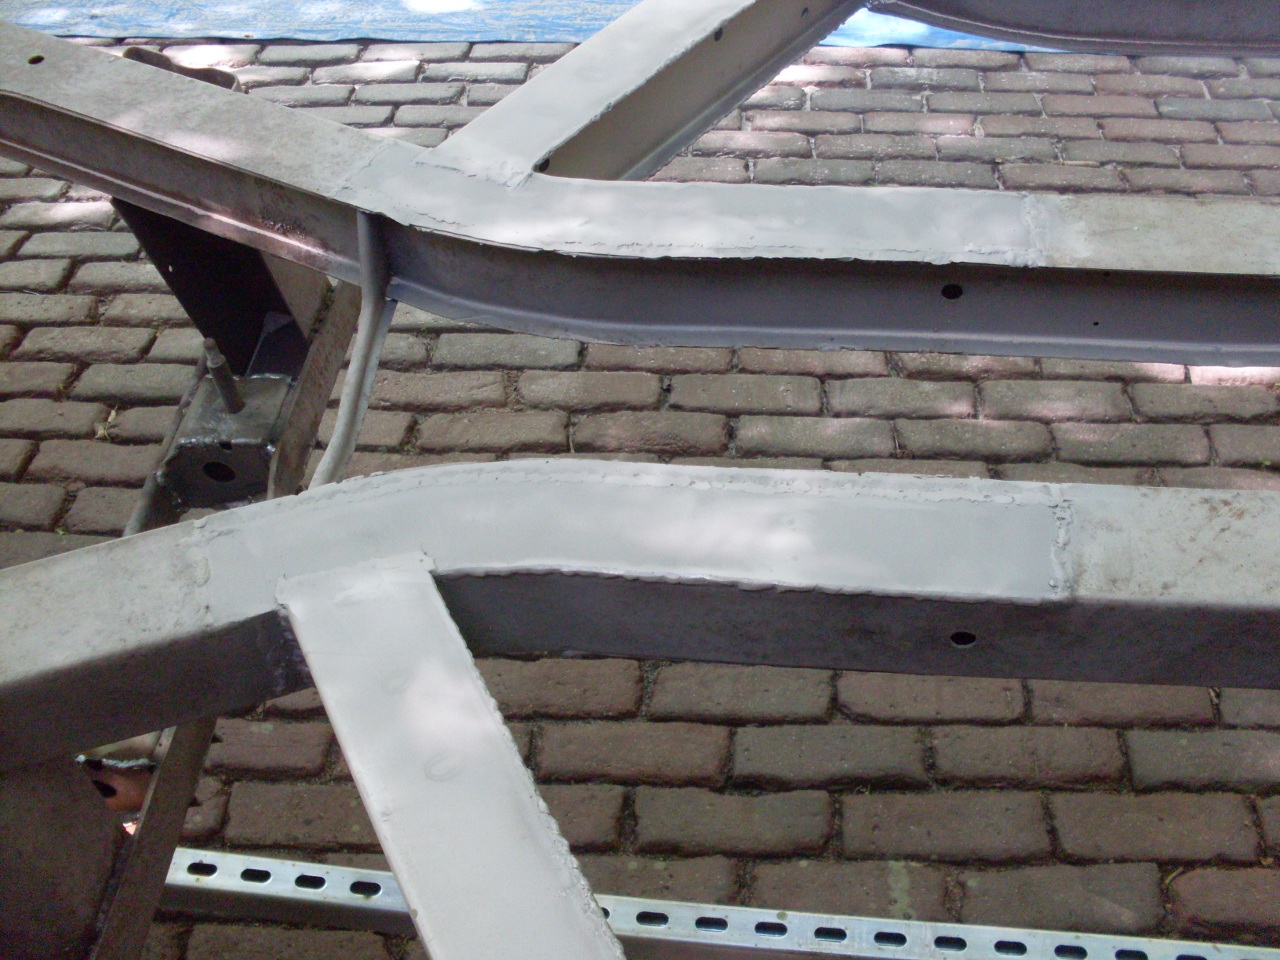
Finally, after adding another coat of paint to the lower plate to cover the welds, I attached the top plate.
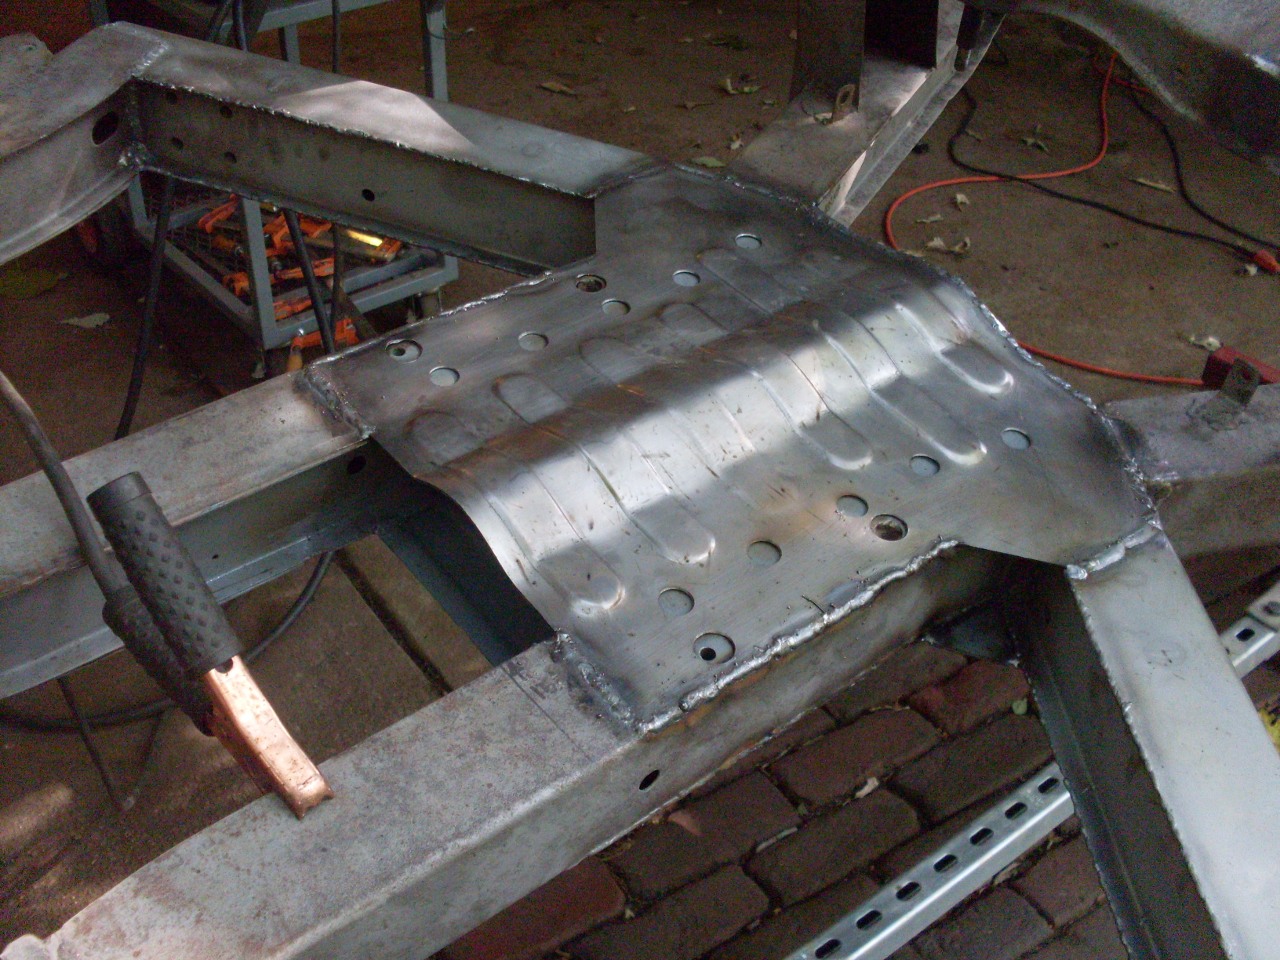

That
was the end of the rust related repairs to the frame. I then
moved on to fix a few other little boo-boos, and to apply some pretty
well-known upgrades to the chassis.
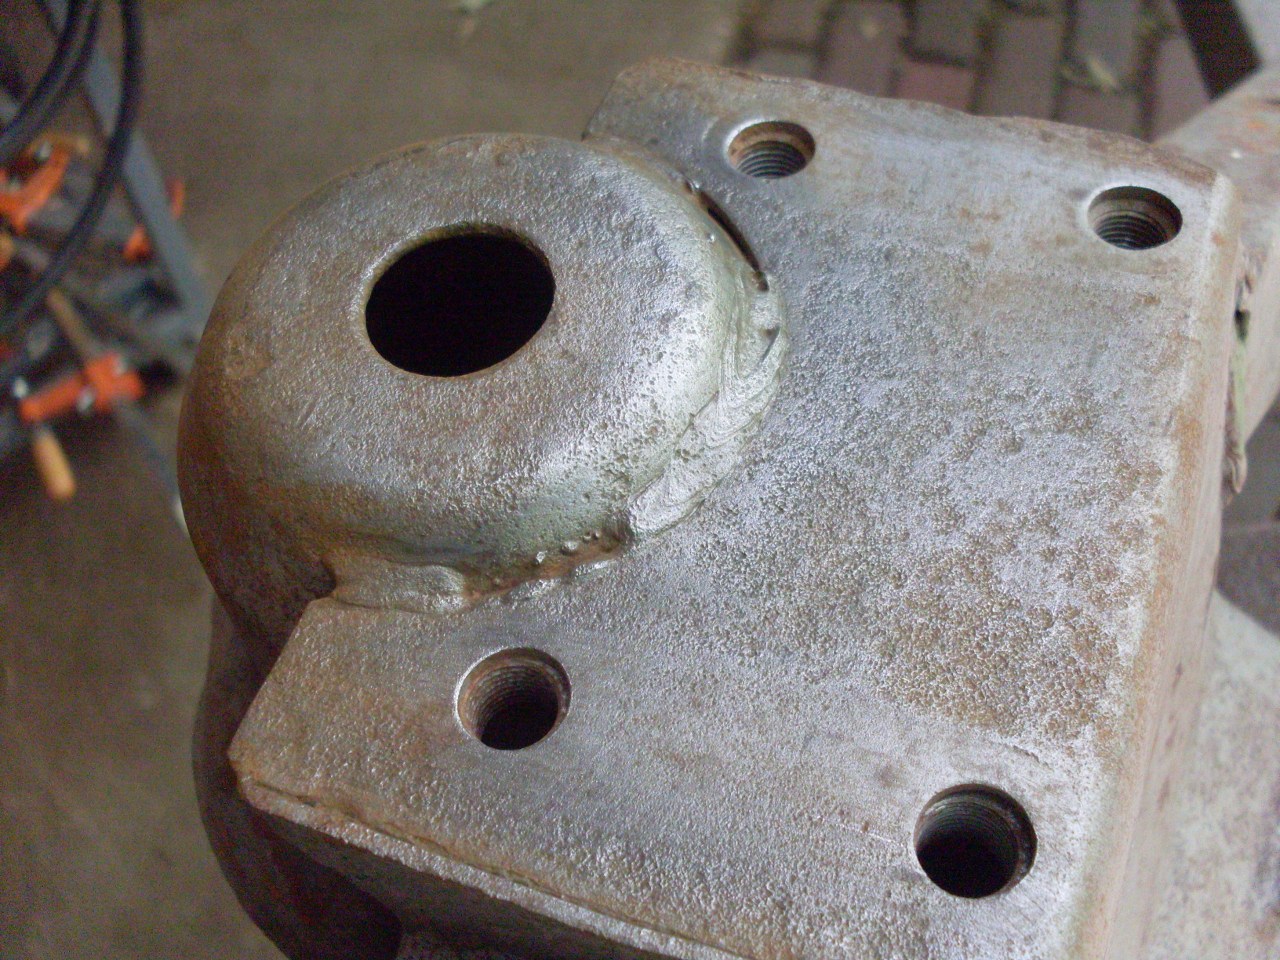
First up area for frame
improvement is the differential mounts. These are generally
regarded as weak points in the chassis design. The most likely
candidate for failure is the right side front mount, since it takes the
brunt of acceleration torque. Sure enough, after blasting the
area, I could see a crack near the mounting stud.
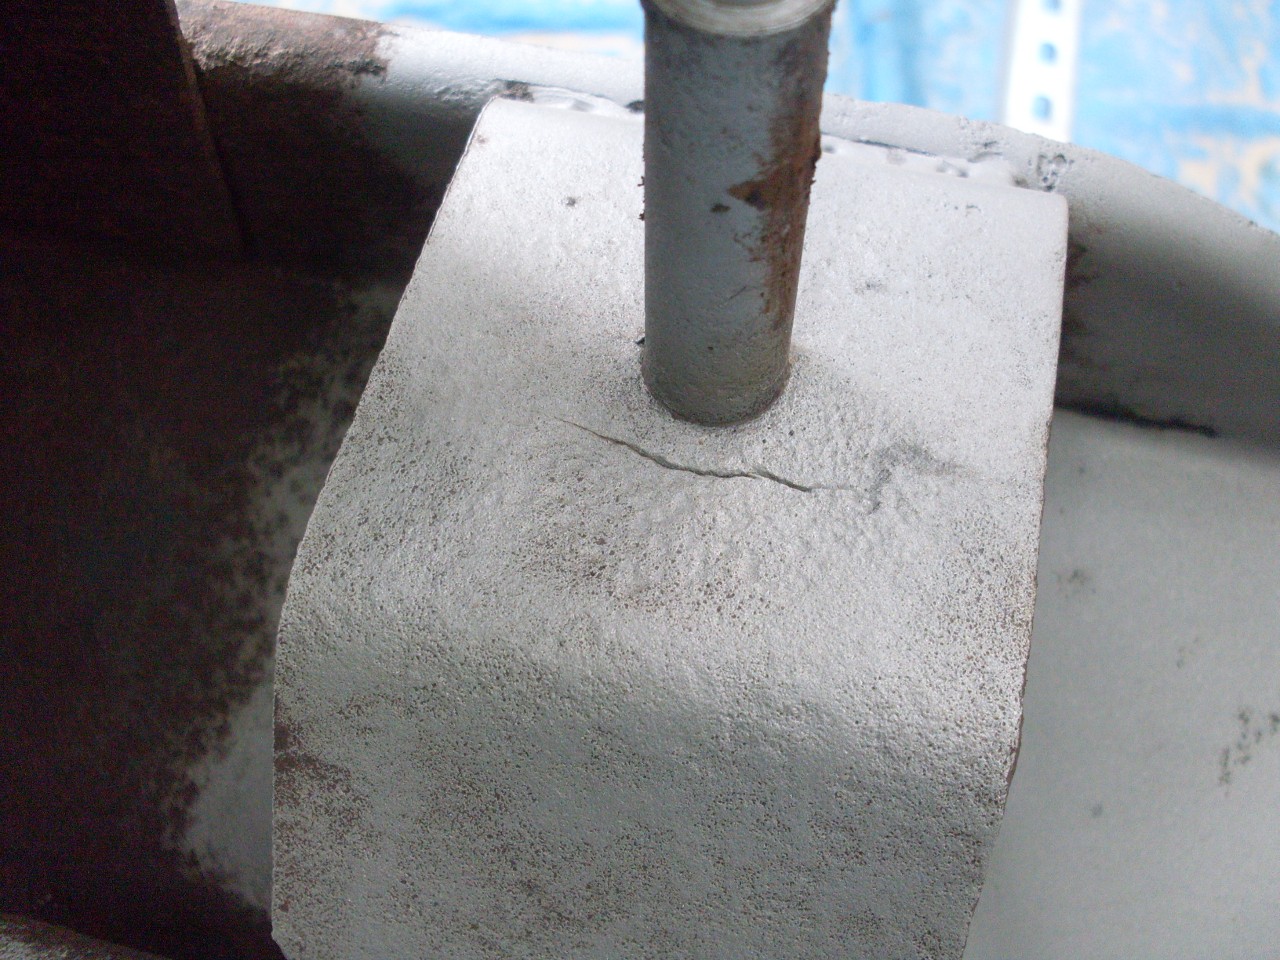
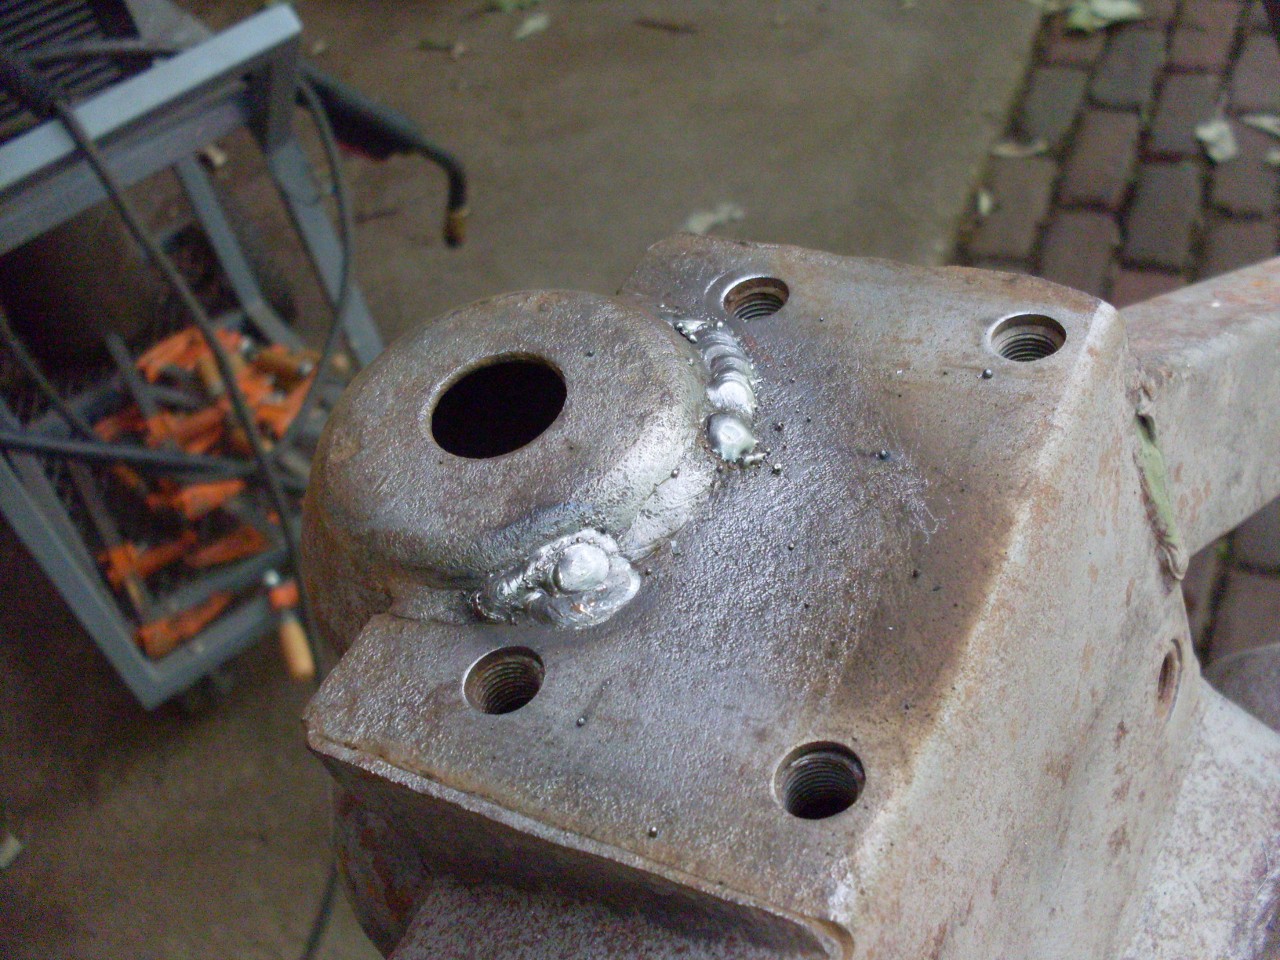
Since
there was not any significant deformation of the mount, I felt I could
repair the crack in situ by drilling a hole at each end to stop
the propagation, gouging out metal along the crack to half or
more of the metal thickness, and welding.

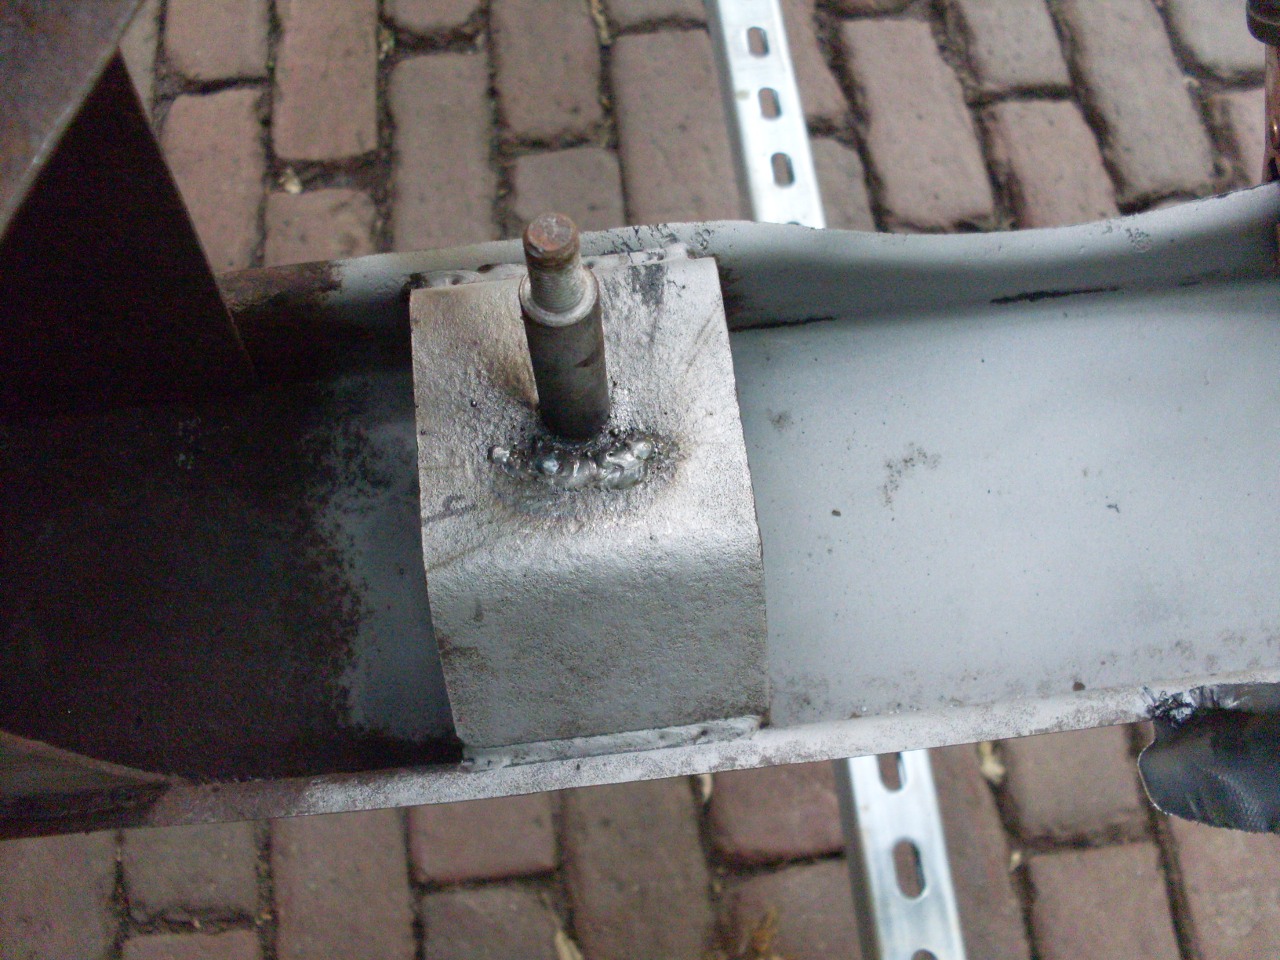
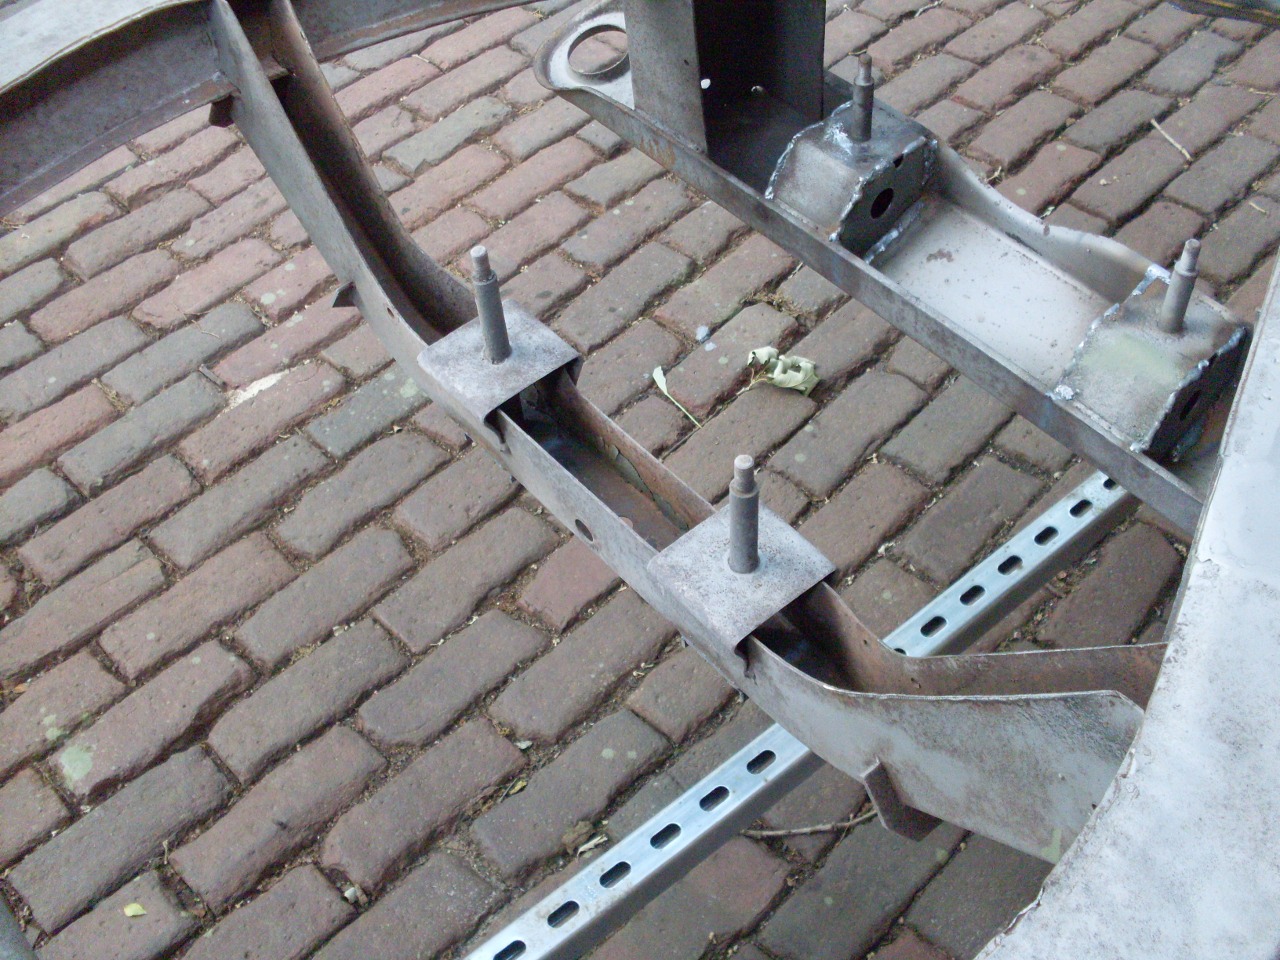
Then
applied the usual strengthening measure of "boxing" the front mounting
brackets. The pieces are simple to make, and mine have a drain
hole at the bottom. and a larger central hole for ventillation.
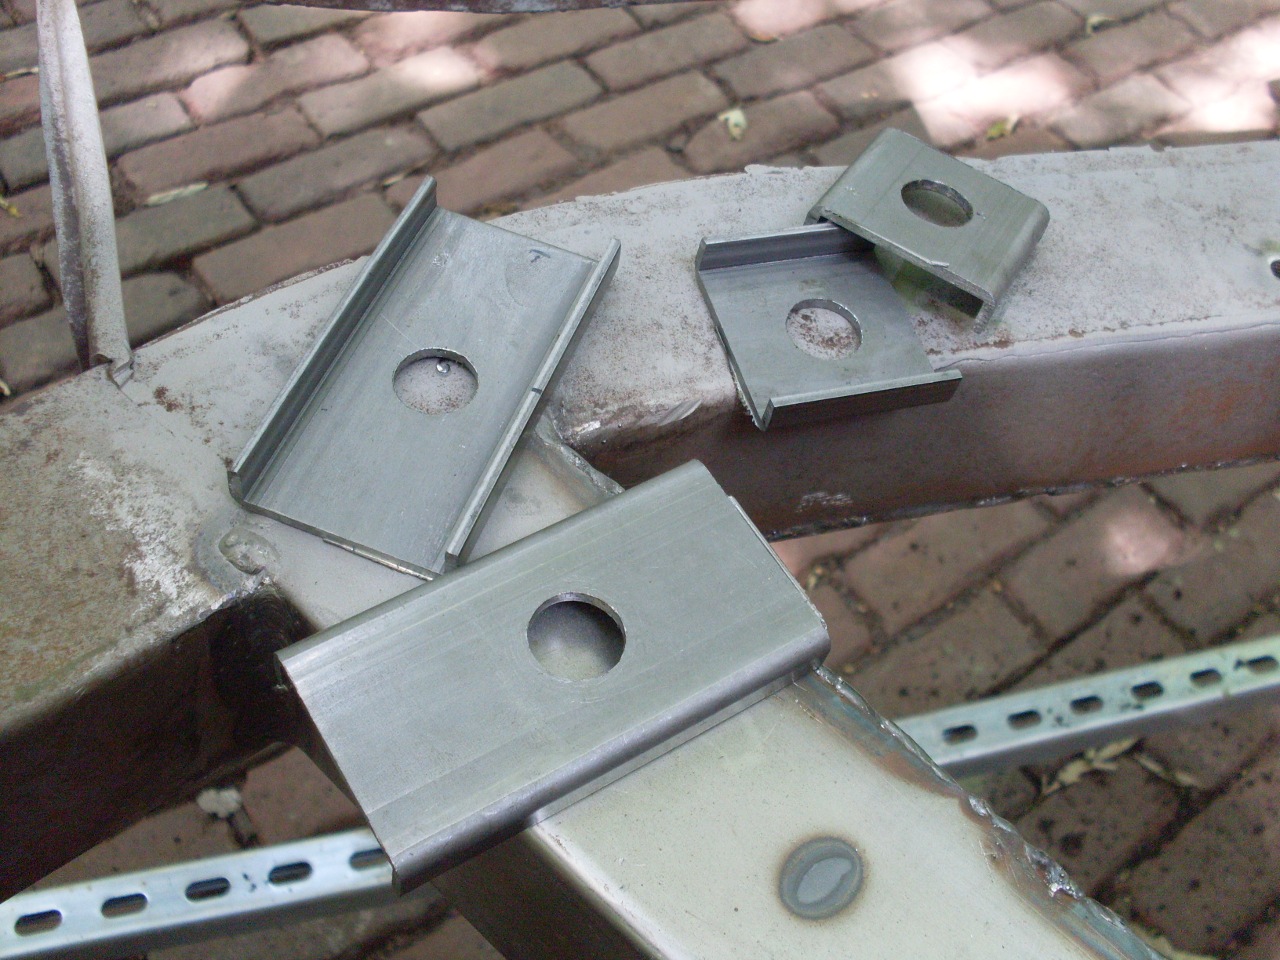
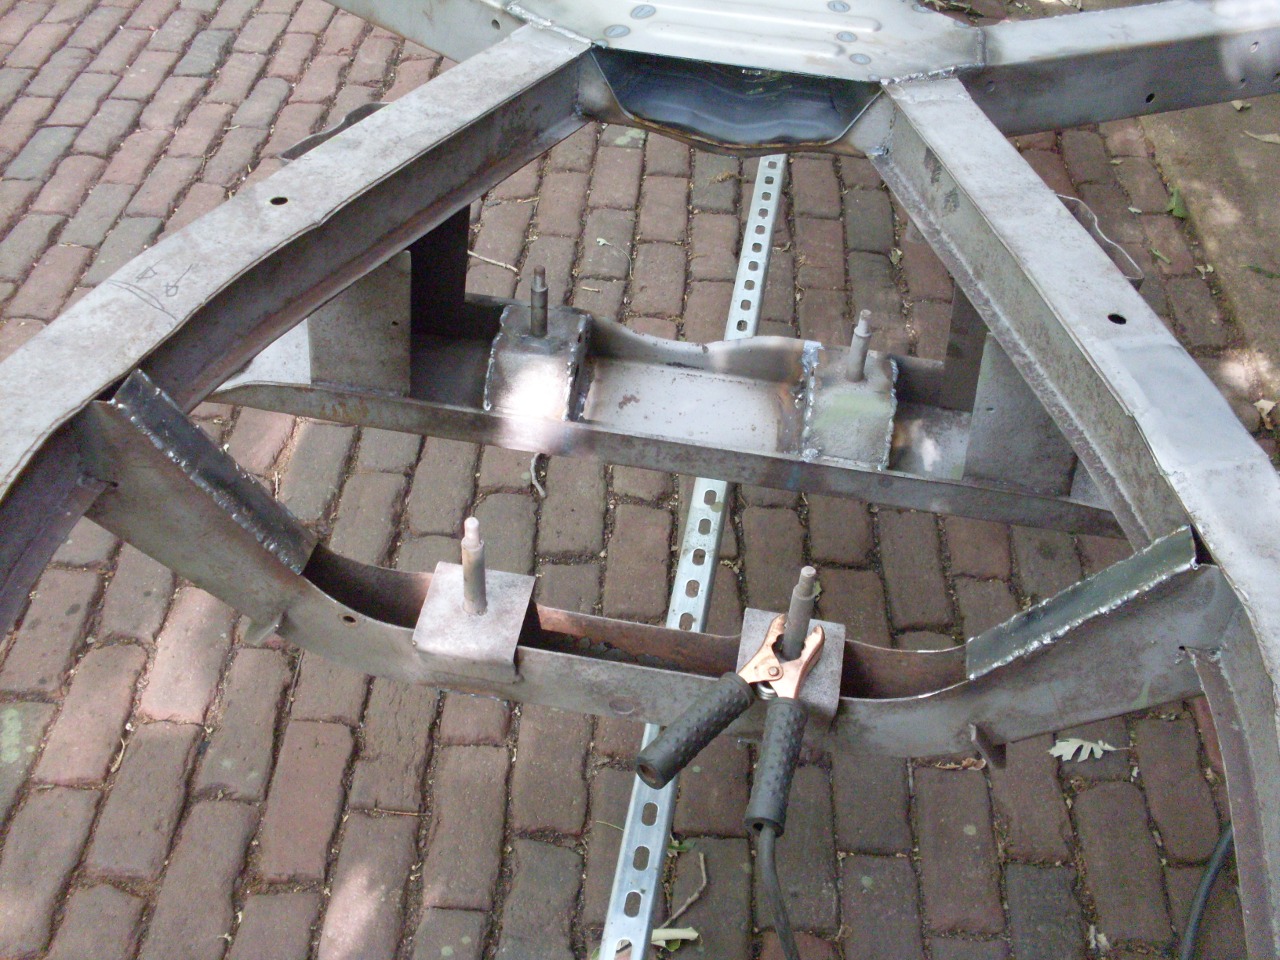
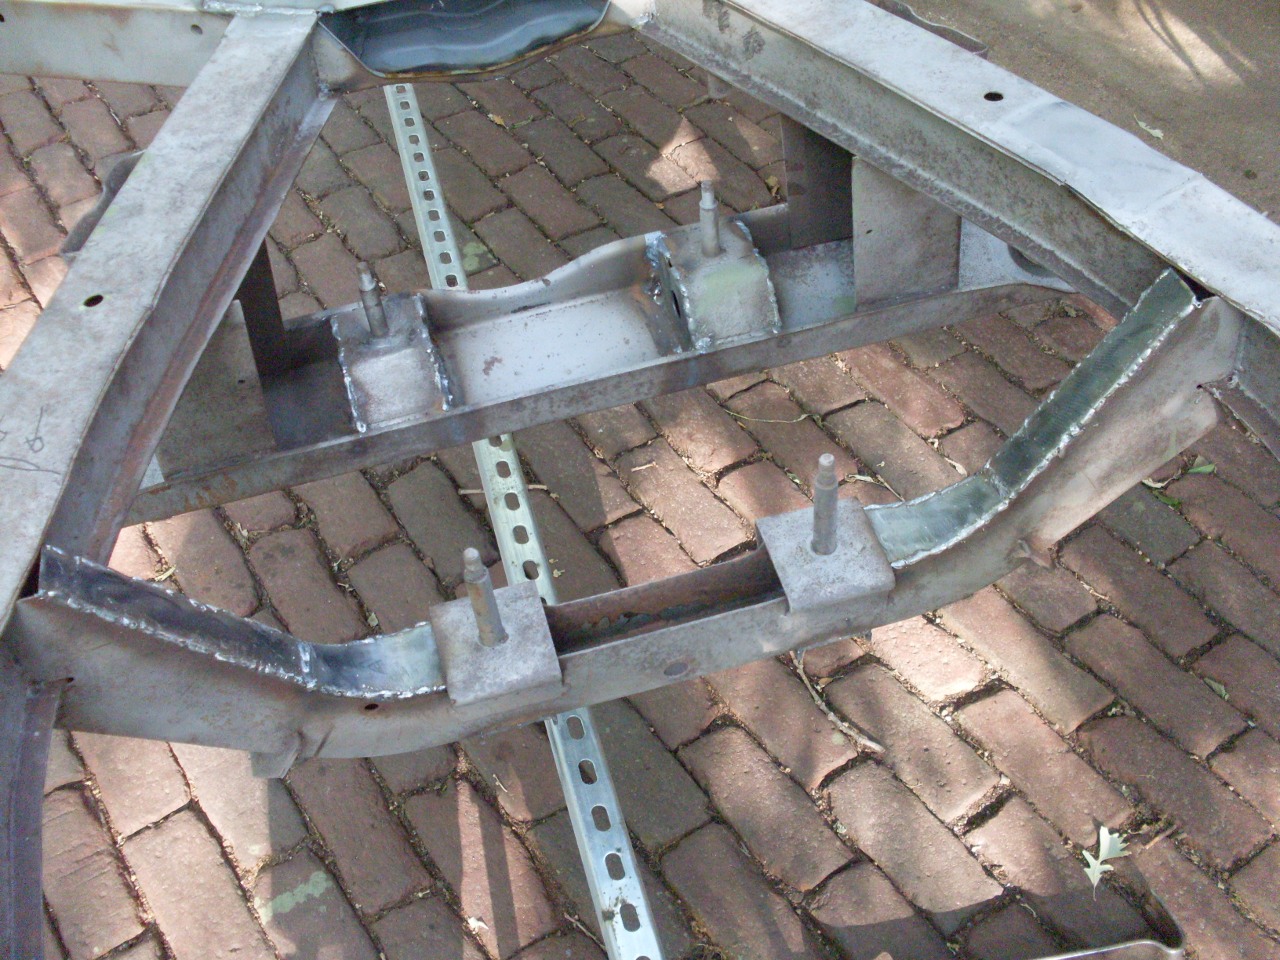
The
other common improvement for the differential mounts is to strengthen
the points at which the four mounting studs penetrate the top surface
of the differentail support bridges. I chose to do this with
shallow channel sections, which should give a bit more rigidity than
flat plates or washers.


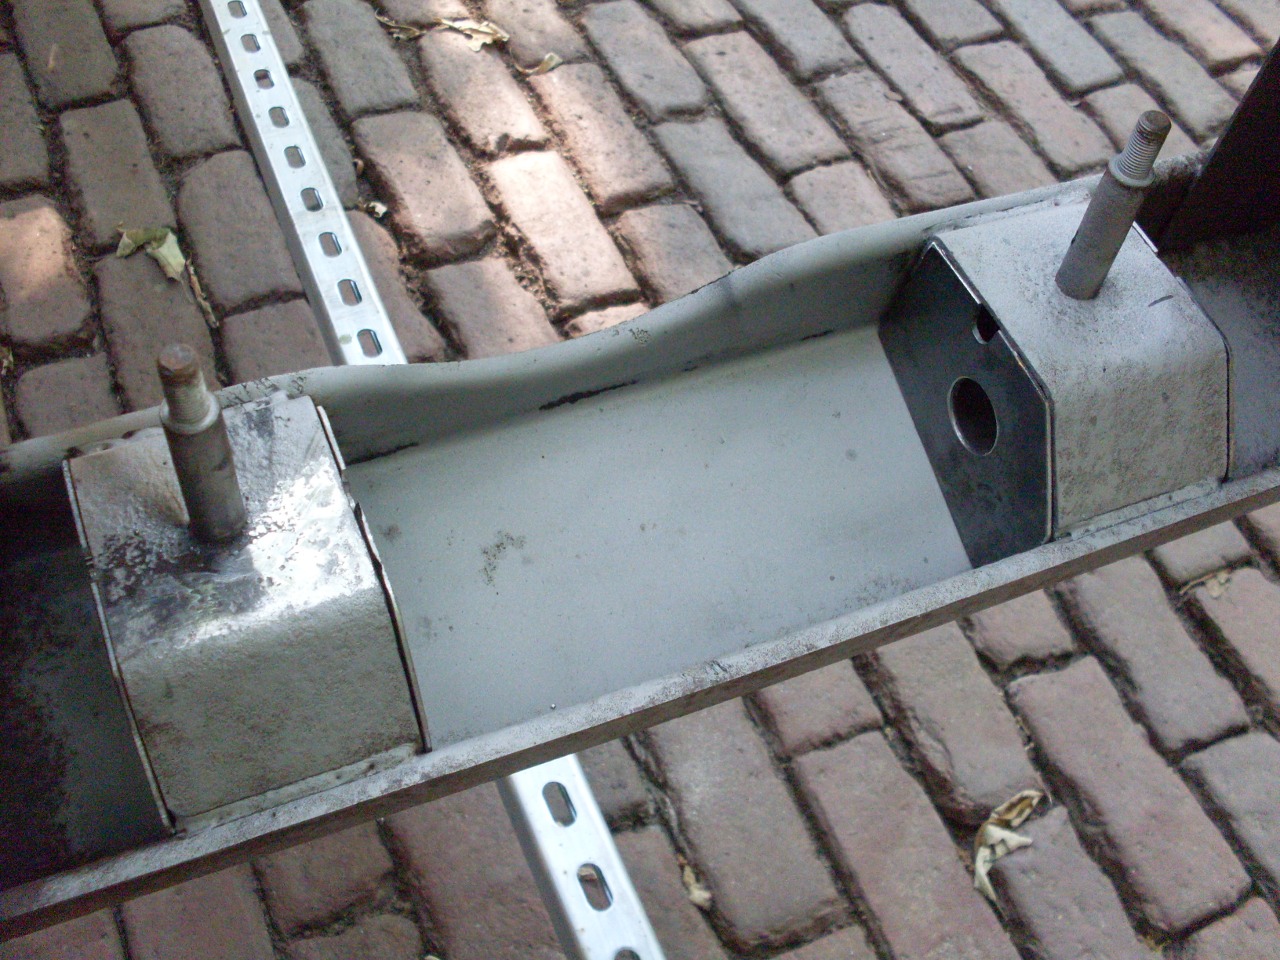
While
loitering around the differential mounts, I found myself considering
the rear mount bridge. Now I have no doubt that the Triumph
Engineers did a totally adequate job of designing this item, and I'm
sure that mathematically, it's up to its task. On the other hand,
it raises flags in my eyeball test. From beneath, its sheetmetal
construction looks thin and flimsy.
So,
in a move that I'll admit may be as much about aesthetics as strength,
I boxed in the bridge member. It was done with five separate
pieces of 14 gage, so that none of them had an overly complicated shape.
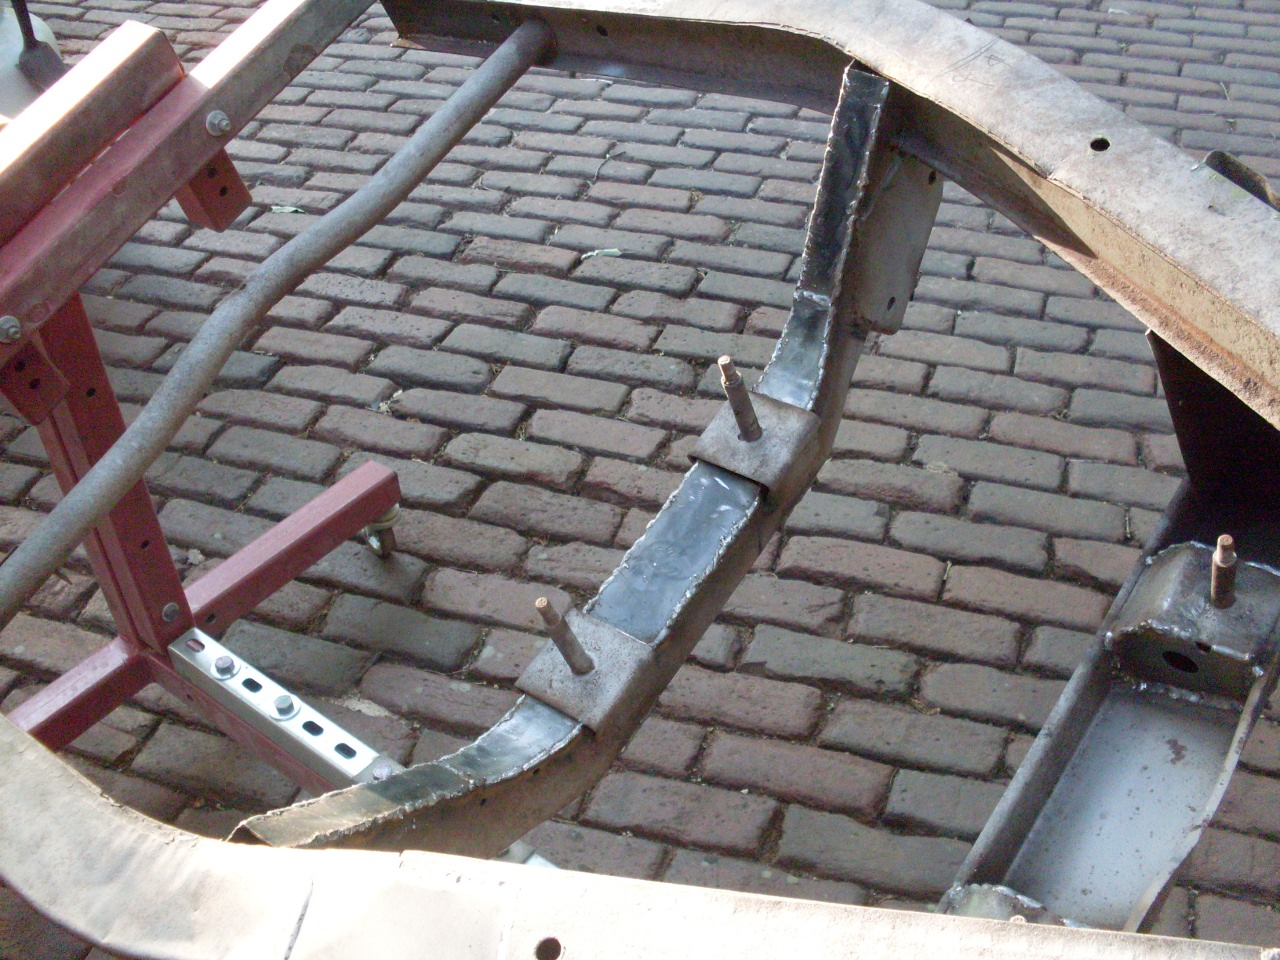
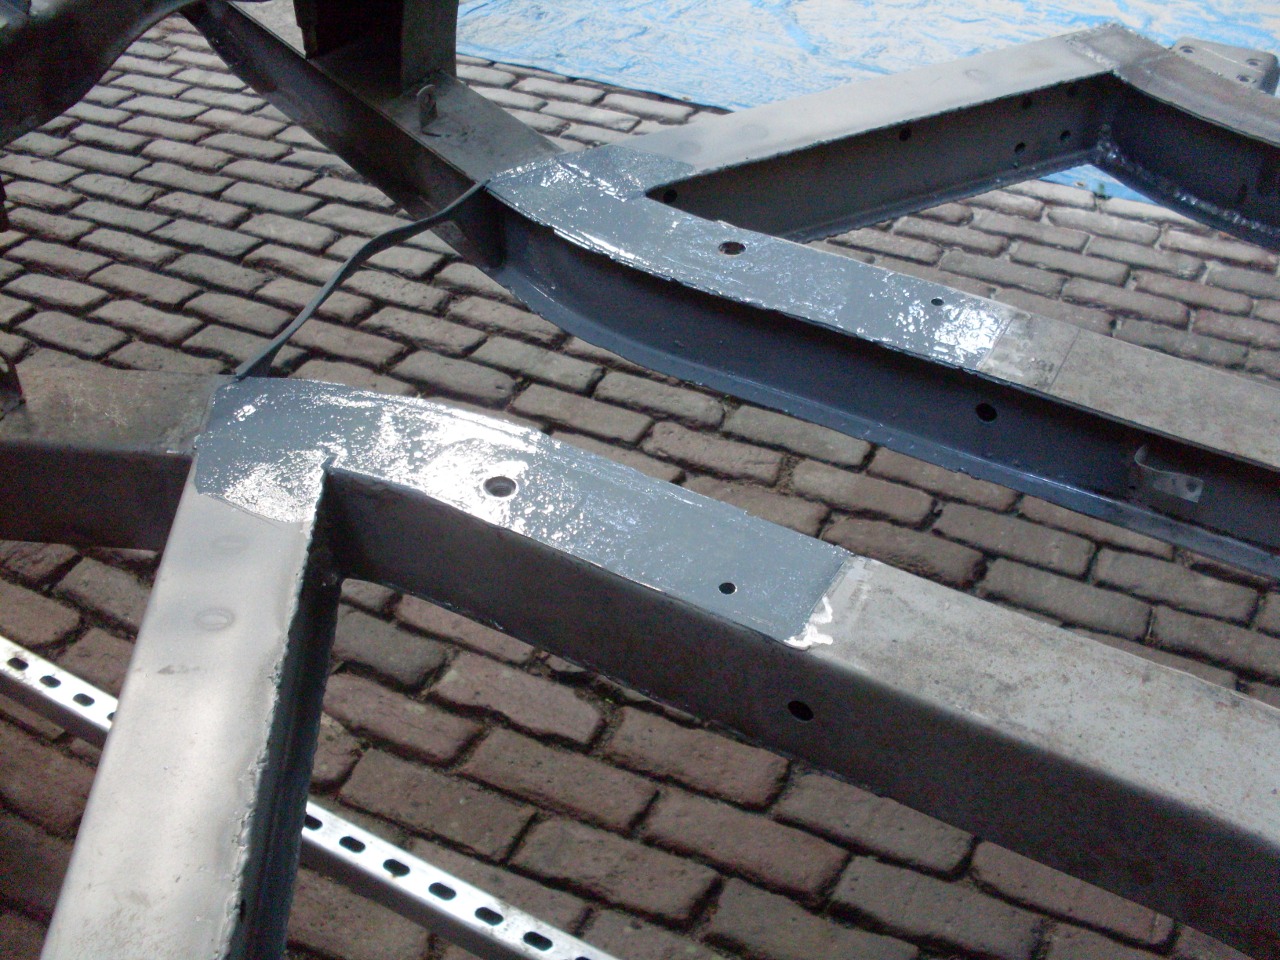
Moving
to the front of the frame, one area that often gets attention is the
lower suspension wishbone mounts. My car is of an age where the
mount brackets already had the factory designed stiffeners applied.
The stiffeners brace both sides of the rear bracket, but only the
aft side of the front one. This leaves the front side of the
front bracket held only by a small, rather anemic looking weld to the
steering rack bracket.
I've
heard if this fix before, and I couldn't think of a better one, so I
just welded a small metal piece to augment the connection that was
already there.
After
that, I just went around the frame, touching up questionable looking
welds, of which there were plenty. One thing that many people do
is to complete the intermittent weld at the top of the front spring
towers.
When I couldn't see anything else I could tamper with on the frame, I did a final wipedown in preparation for paint.
POR15
is a specialized moisture cure urethane paint formulated to bond to
metal, including rusted metal, and to protect metal from further rust.
Though the marketing copy contains its share of bombast, the
product does have a very good reputation for good performance.
I've used it or similar competitors on a number of outdoor,
non-automotive projects, and had very good results. A metal deck
railing has been exposed to the elements for going on ten years now
with not a hint of rust.
The
technical data for POR15 says that it actually bonds better to rust
than it does to new, virgin metal. New metal needs some
preparation like sand blasting or chemical etching. Even so,
POR15 nor any other product is going to perform well on loose, flaky
rust. Any rust has to be sound, stable, and well attached to the
metal. When I sandblasted my frame, I didn't necessarily try to
remove every speck of rust, but I did try to get all of the loose dirt
and rust. I also sandblasted all the patches I applied.
POR15
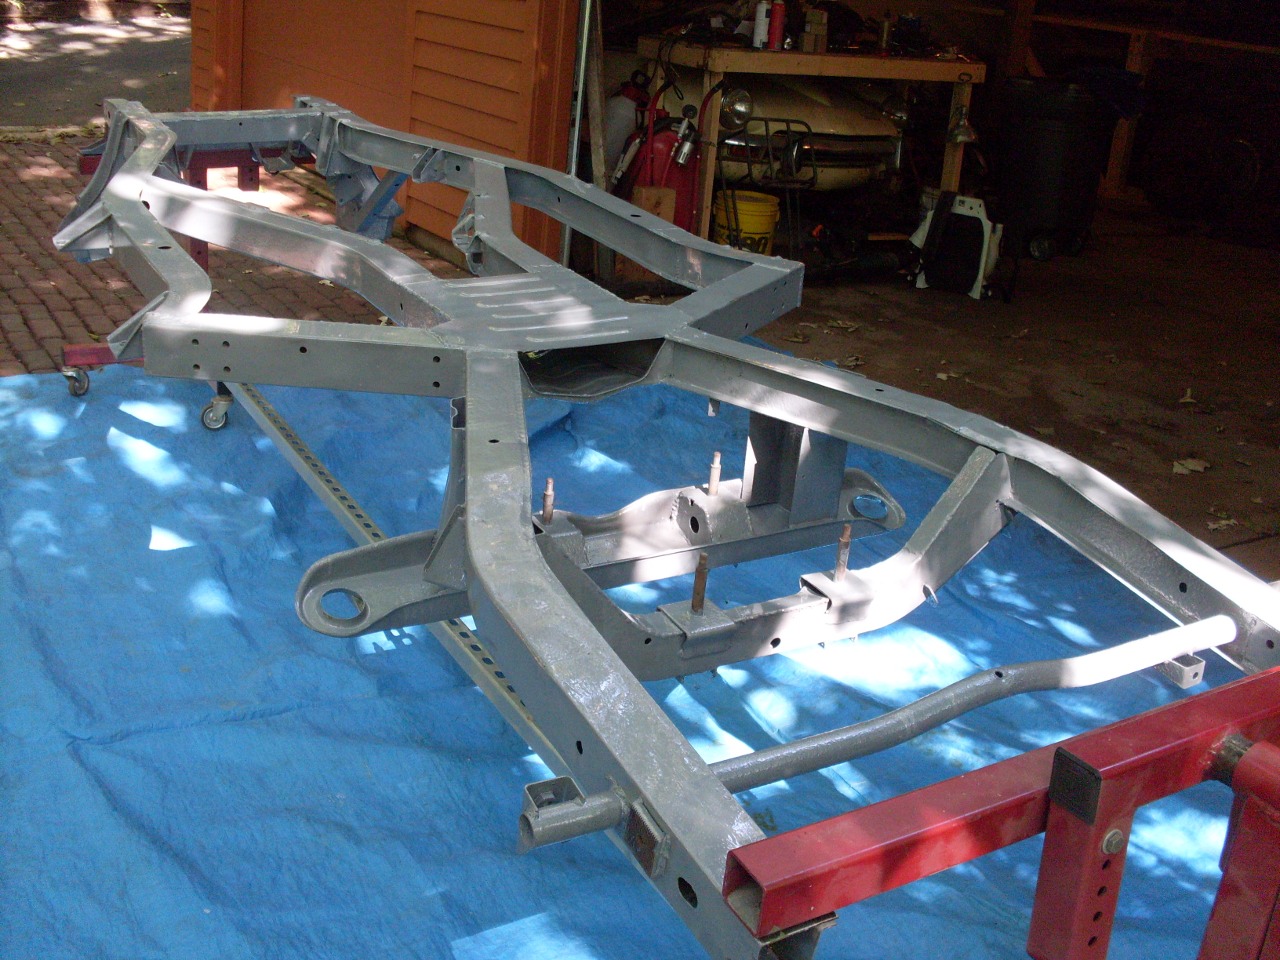
instructions recommend two coats, so I started with a gray coat, and
finished with black. The contrast helped ensure that I wouldn't
miss any spots. There are a lot of nooks and crannies on the
frame, especially in the front. If the second coat is applied in
the window where the first coat is dry to the touch, but with a slight
"finger drag", scuffing the first coat isn't necessary.
Adequately cuffing the first coat would be essentially impossible
in many parts of the frame.
While
I sprayed the paint on other projects, there are too many cavities and
hollows on the frame to spray it. So it was an old-fashioned
brush. POR 15 goes on like any other paint, but there are a few
gotchas: First, if POR15 dries anywhere on your body, you are
going to be wearing it for a few days. Second, if paint gets into
the sealing groove of the lid, the lid becomes a permanent part of the
can. The metal will tear before the bond lets go. I've
tested this. Third, if any water gets into the can, like a drop
of rain or of sweat, it reportedly ruins the whole can.
Here is the frame after the first gray coat, and after the final black coat. I used a semigloss black, but the picture was taken when it was srtill pretty tacky, so it looks glossy.
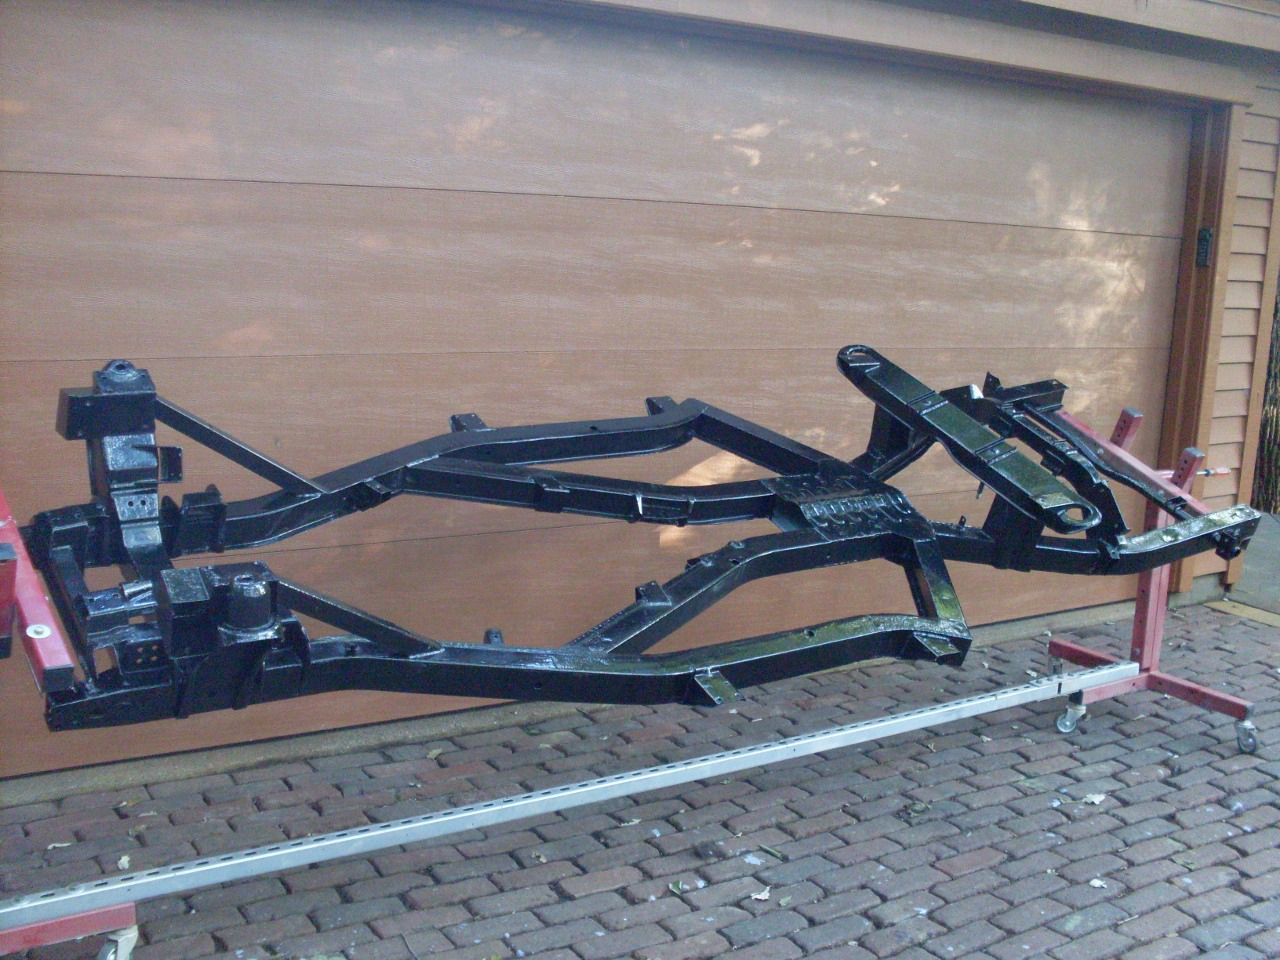
Final step after the paint dries is to chase all the bazillion threaded holes.
Send comments to: elhollin1@yahoo.com
To my other TR6 pages