To my other TR6 pages.
June 11, 2015
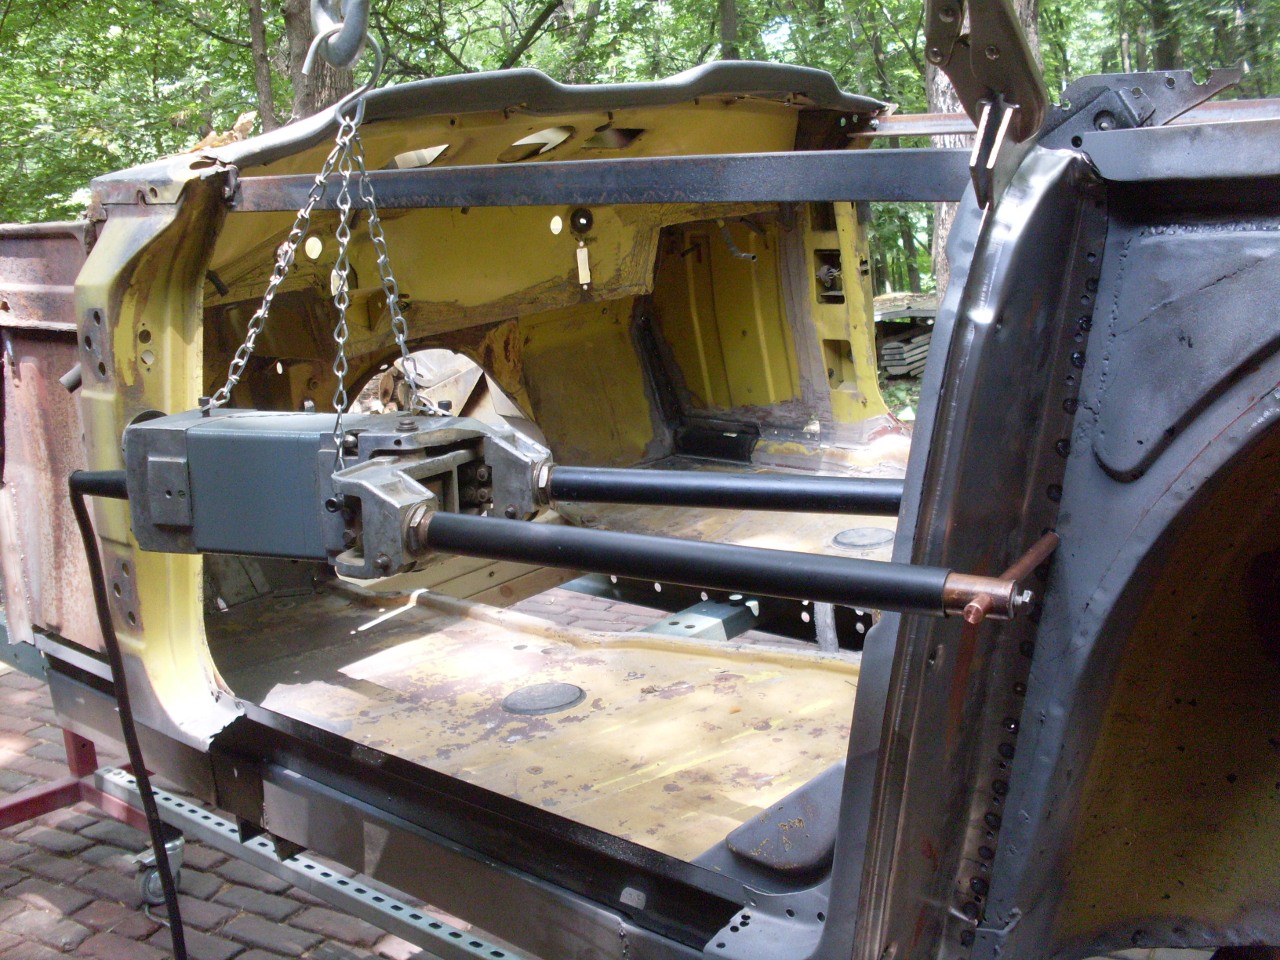
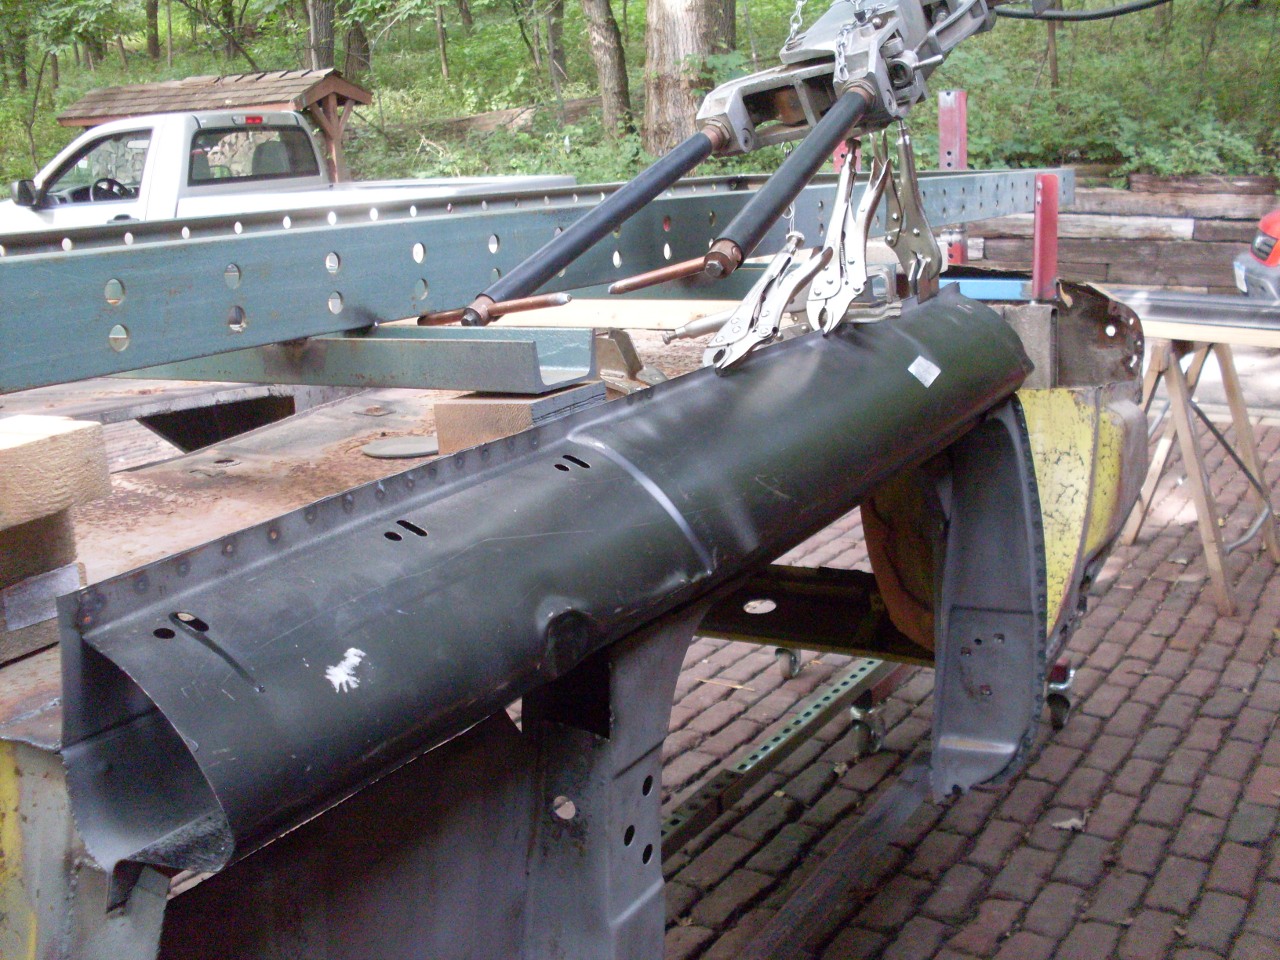
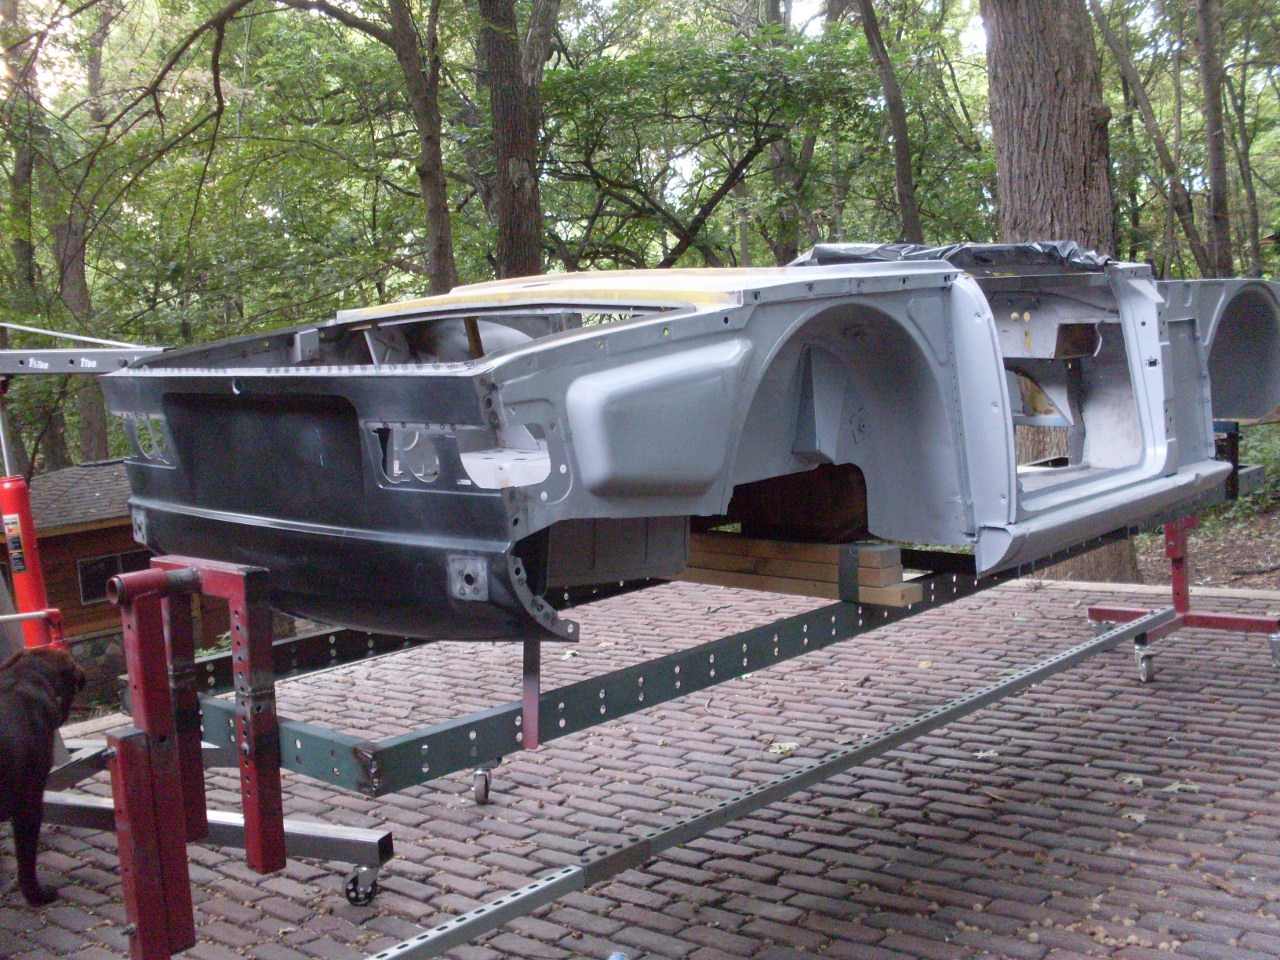
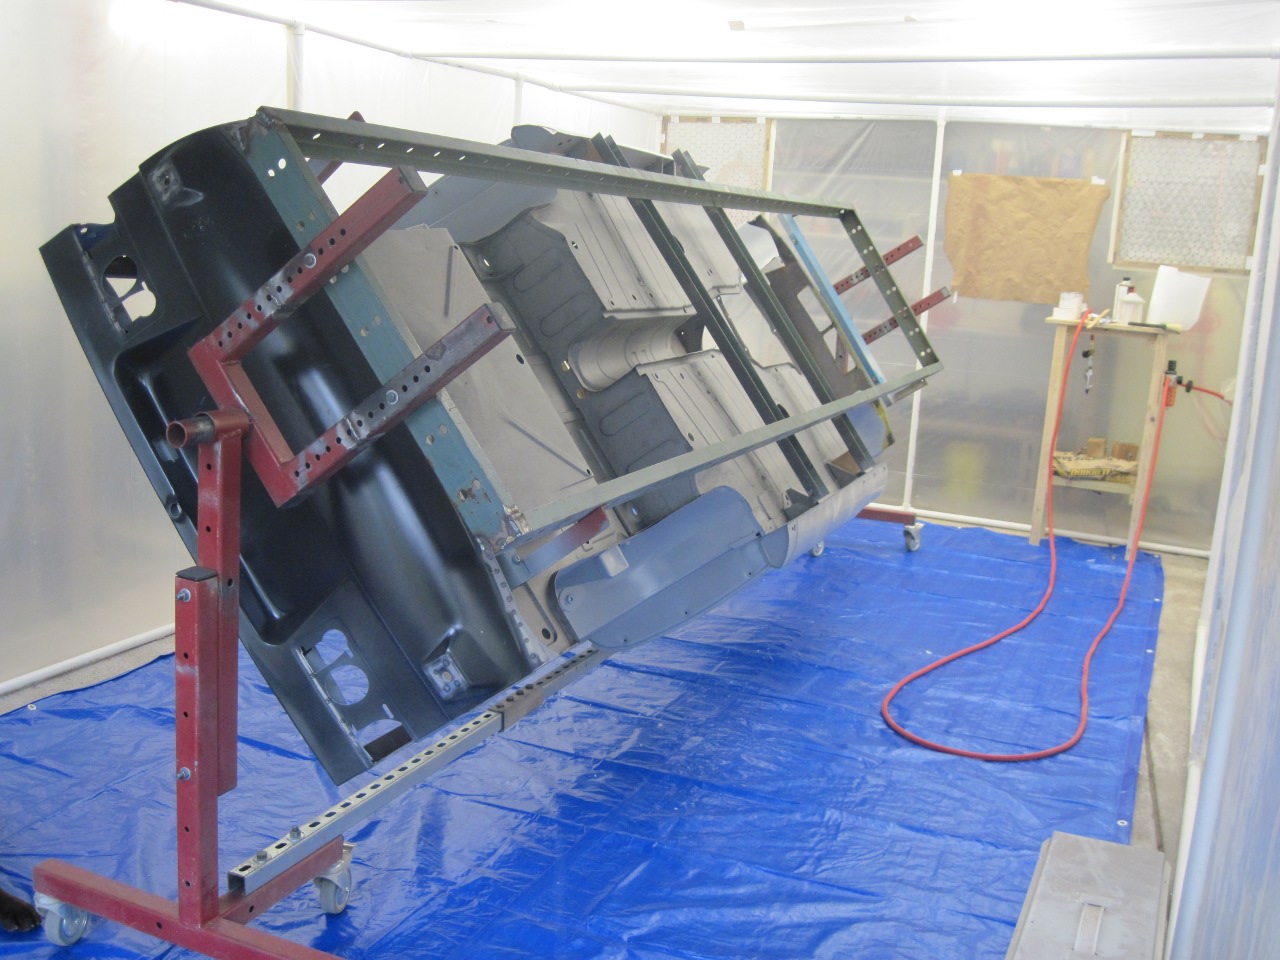
Body tub repair
[Click the pics for a better view]
I
knew even before I touched the first bolt in taking this car apart that
repairing the body would be the most involved part of the project.
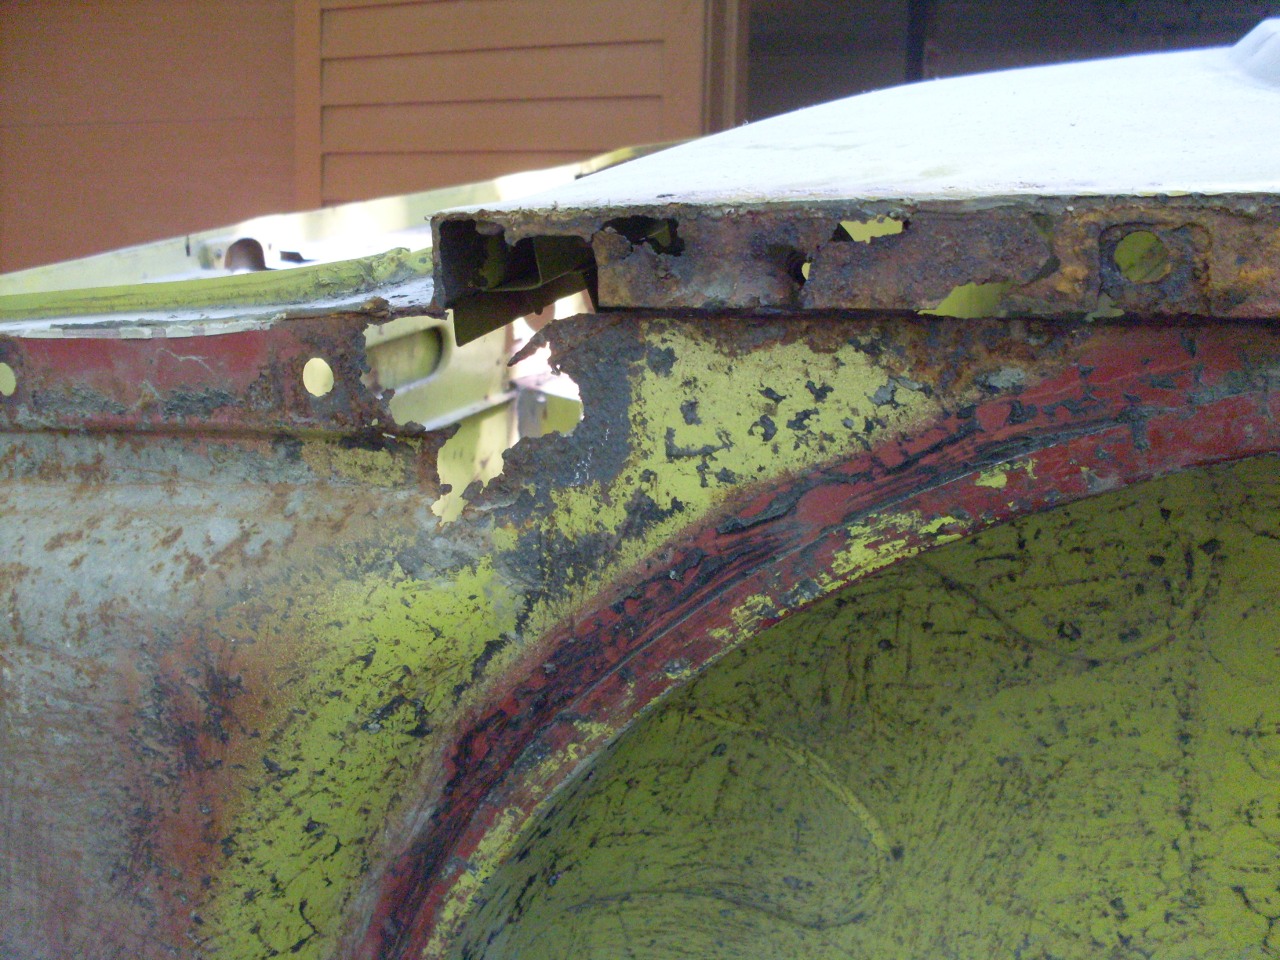
There was a lot of visible rust, and I knew there was even more
invisible, hidden under a thin veneer of paint. In fact, I'm sure
many would say that it was not worth fixing. And I fully agree
that if I was to farm the work out, it probably would not be
economically feasible. On the other hand, the economics of
a DIY hobby project don't necessarily follow the same rules as for
other kinds of projects.
So
here are some pictures of the work in progress. I expect it
to take most of the summer to finish the tub, but so far, I'm really
enjoying it.
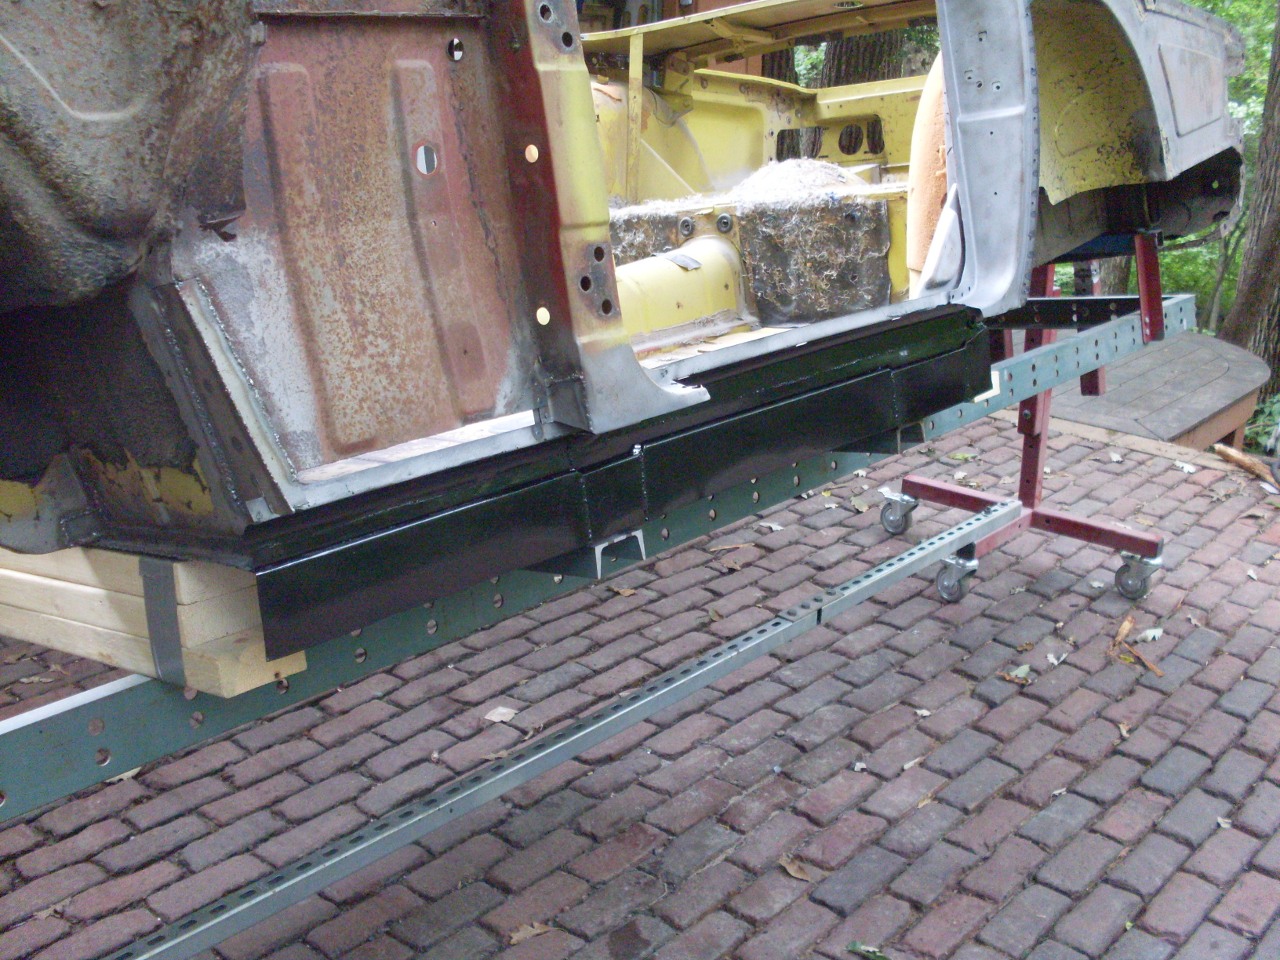
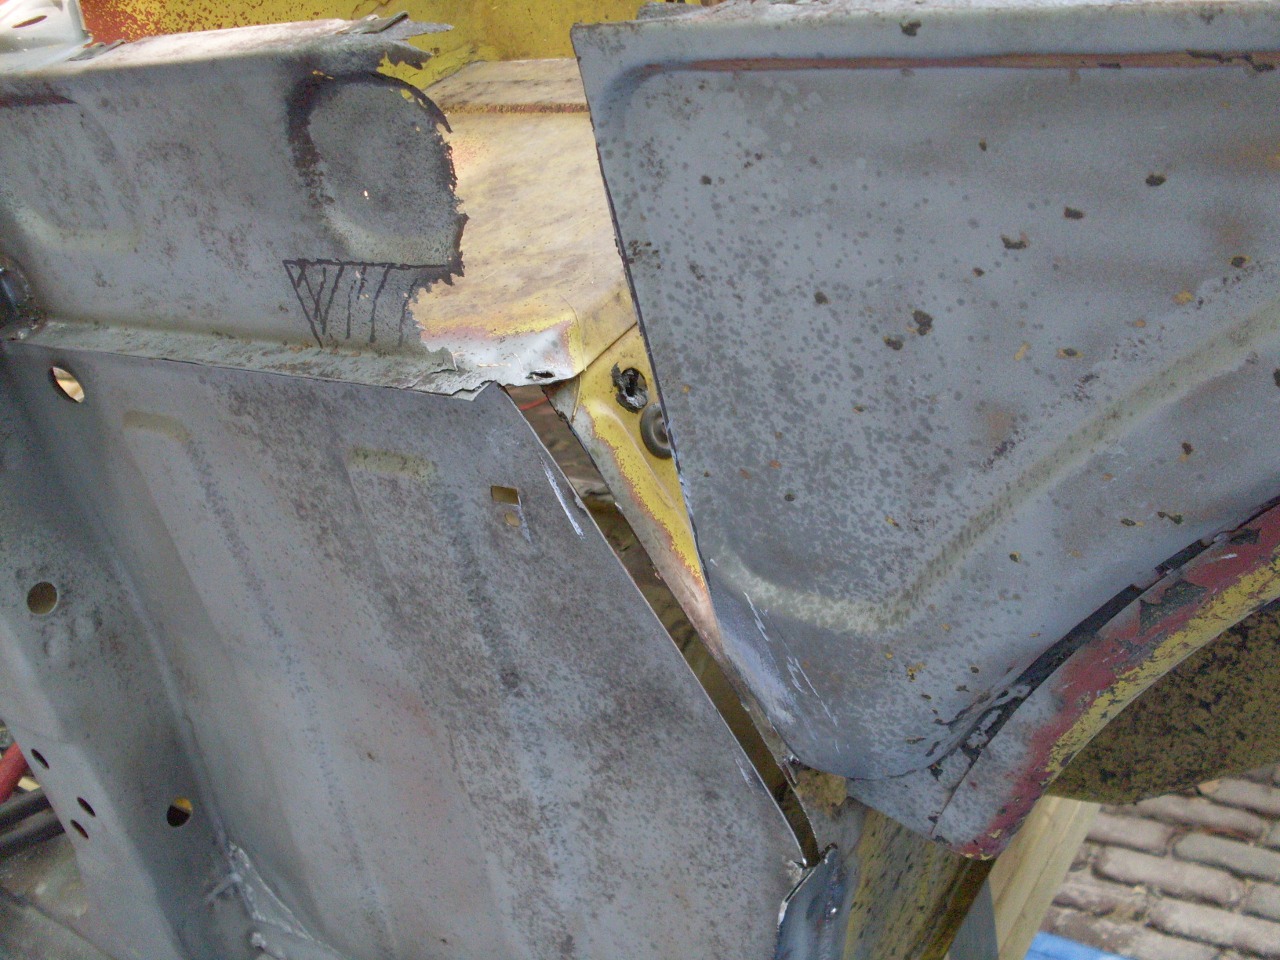
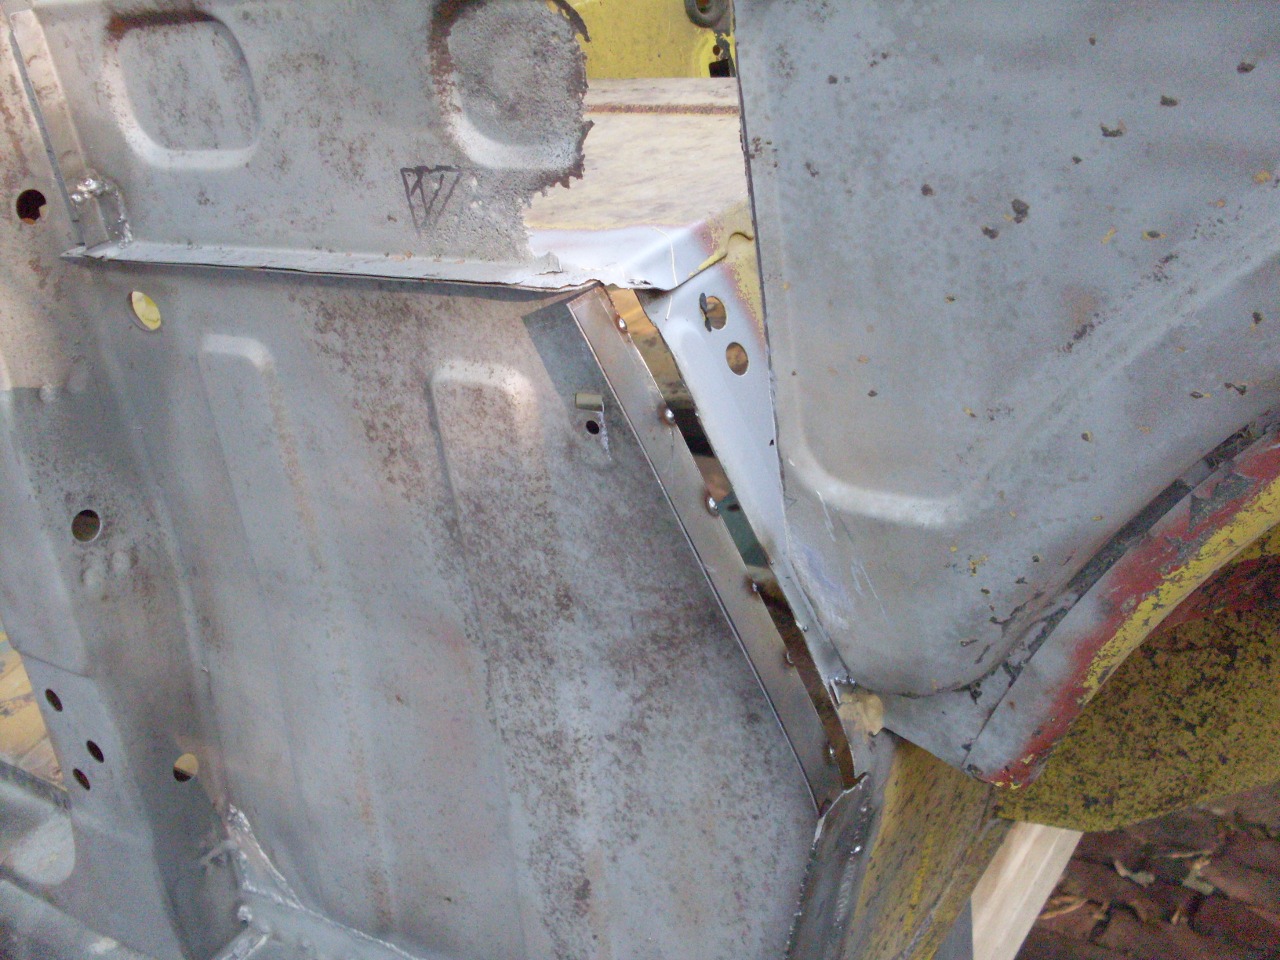
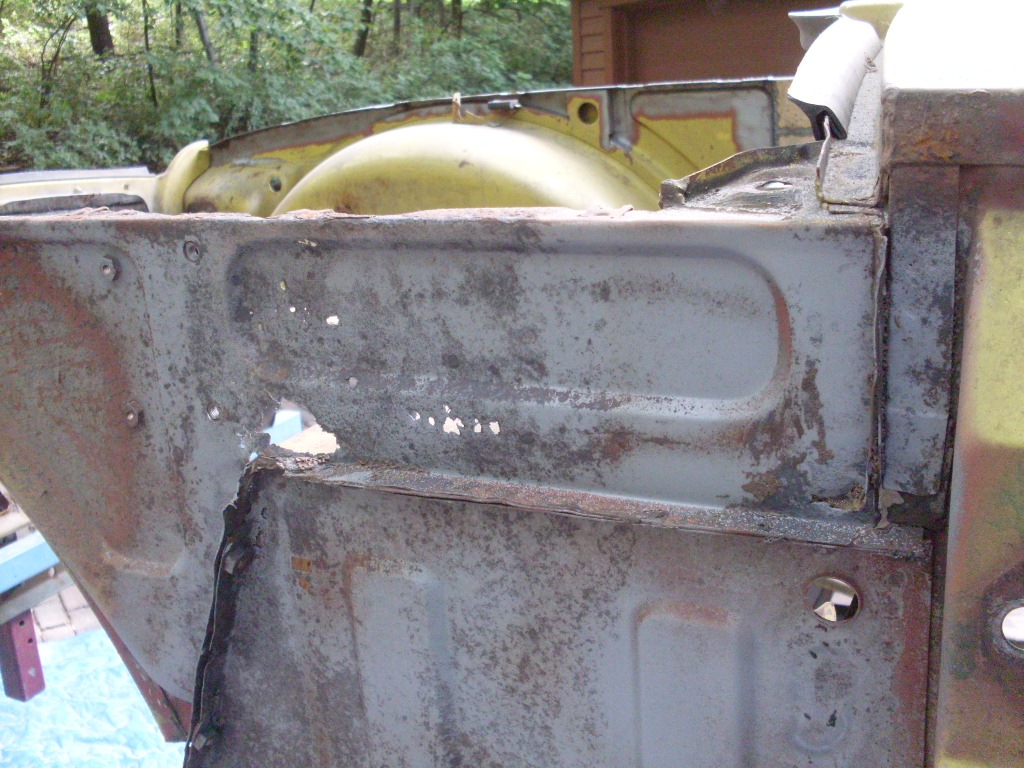
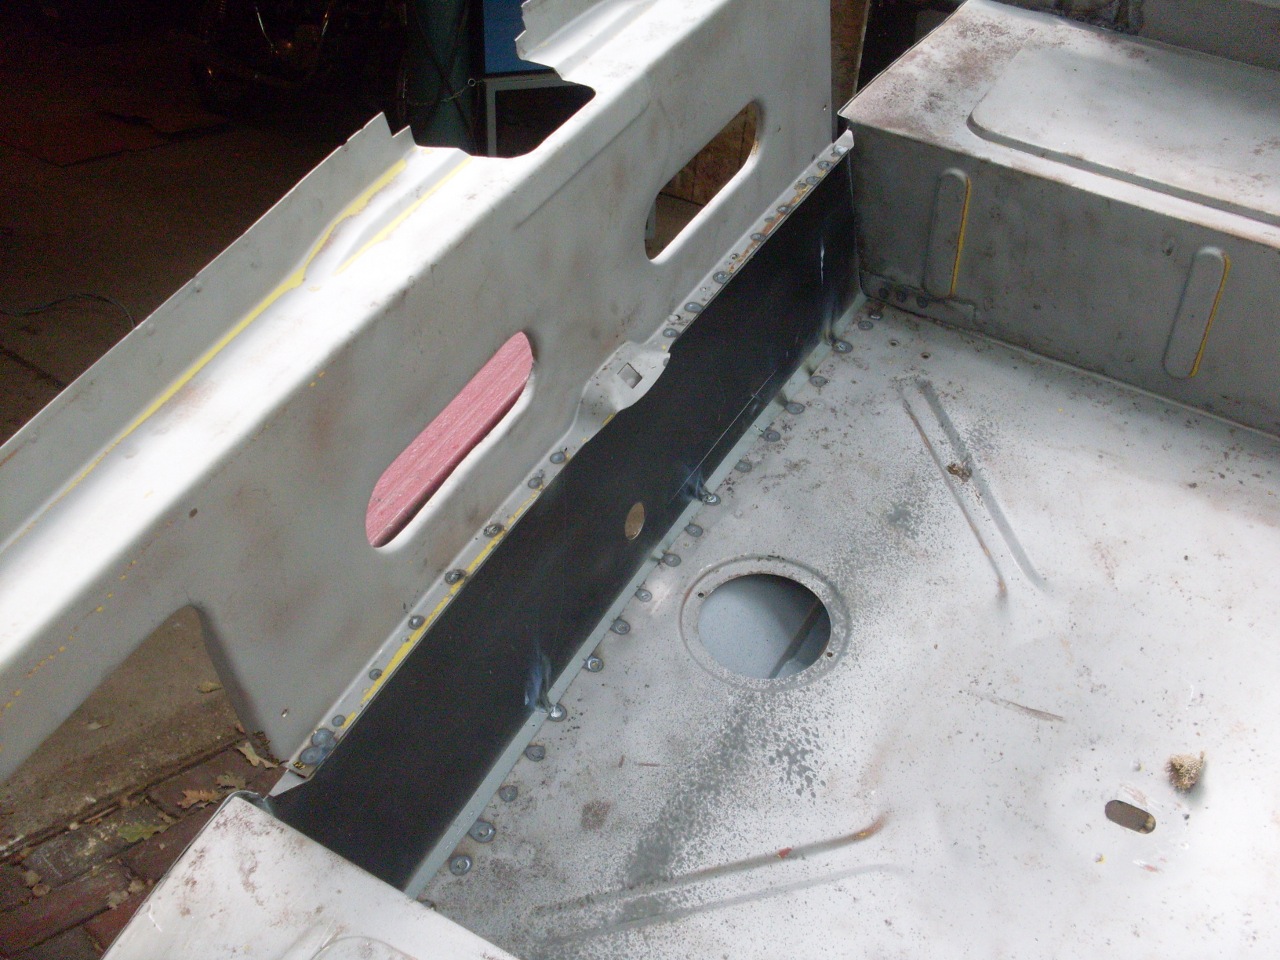
Both rocker panels were essentially absent.
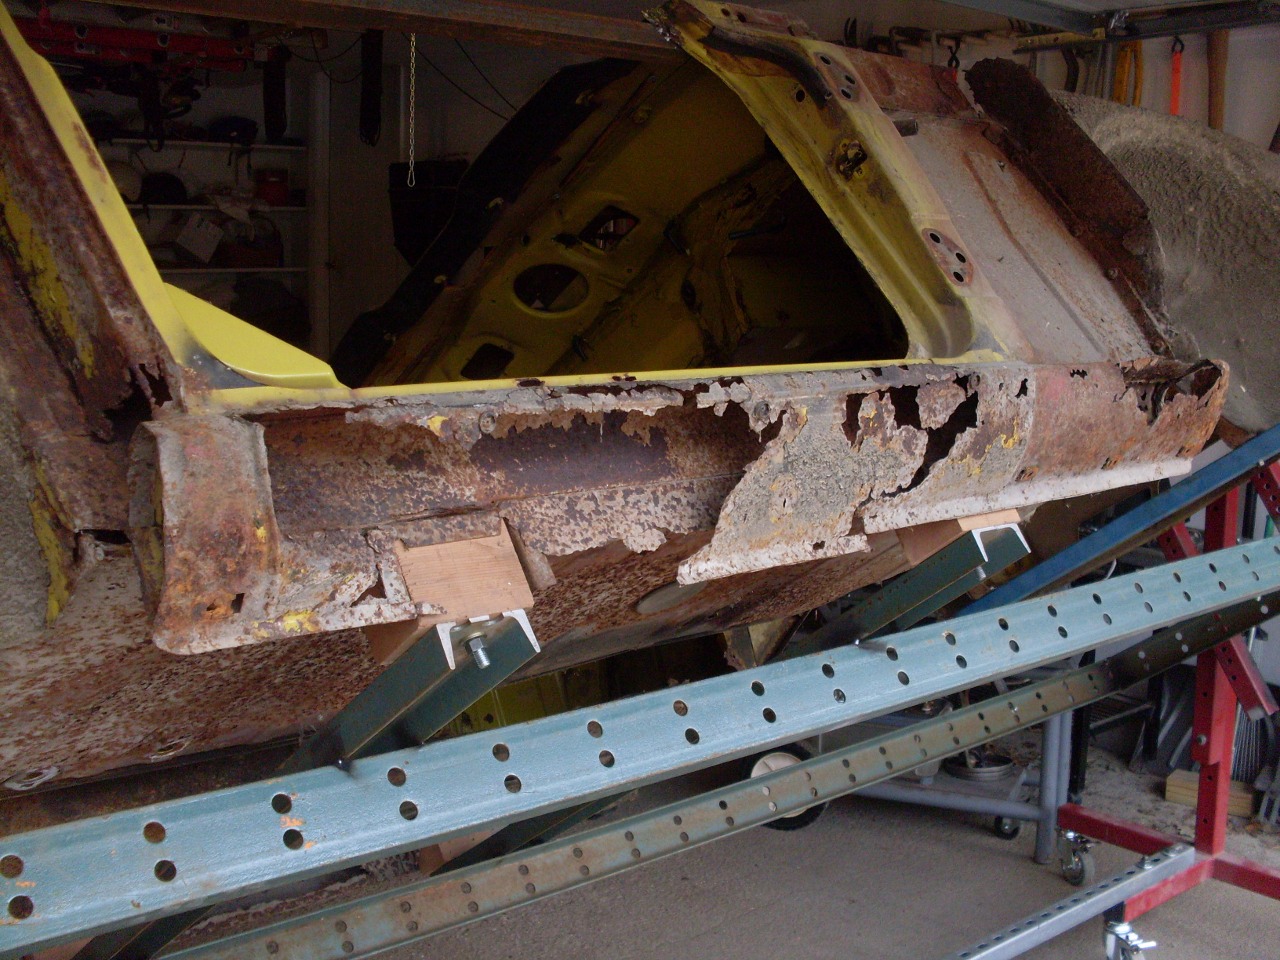
Rust seemed to tend to start in corners and seams, and radiate outward.
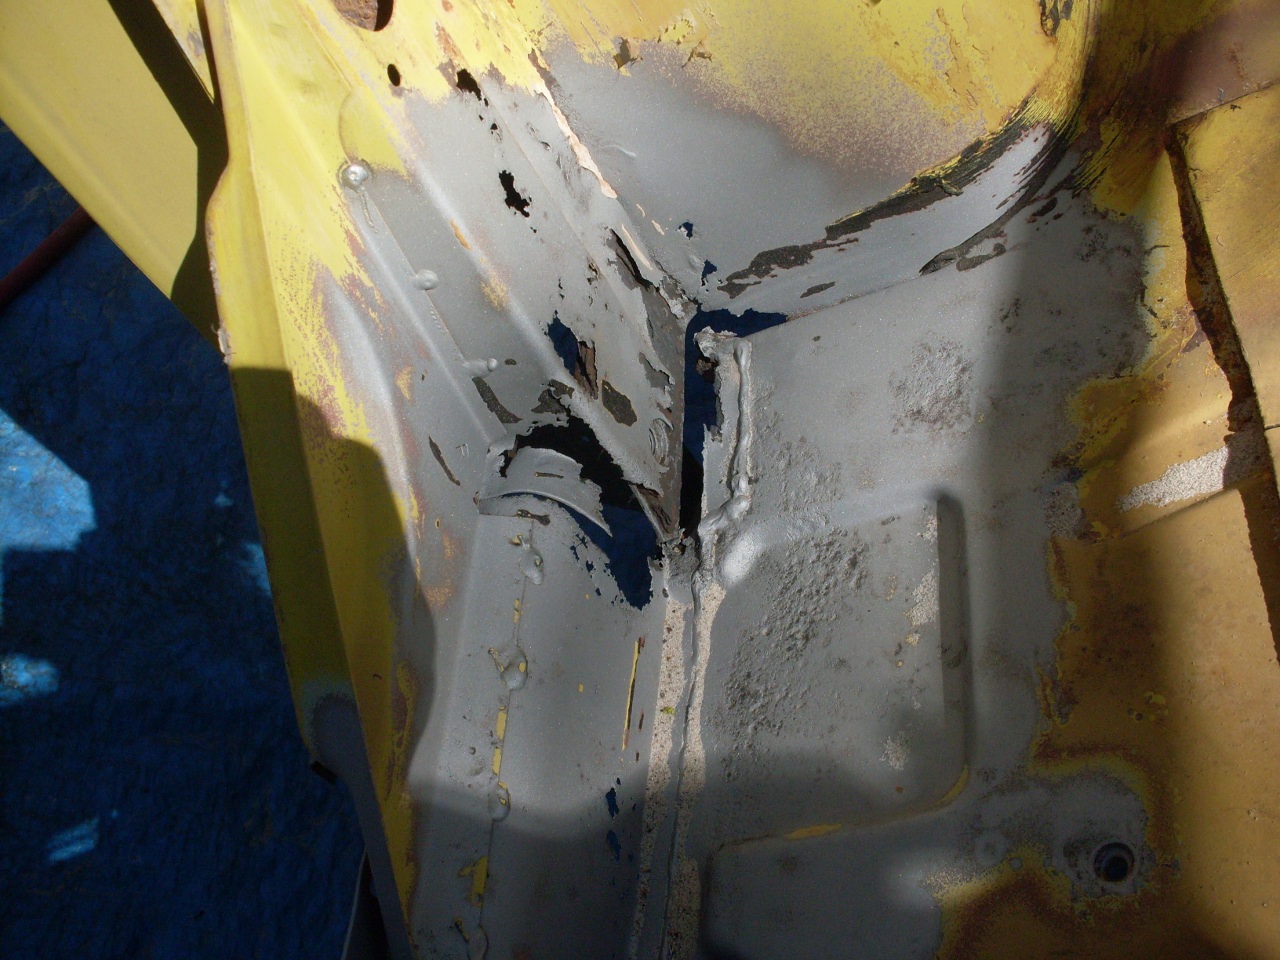
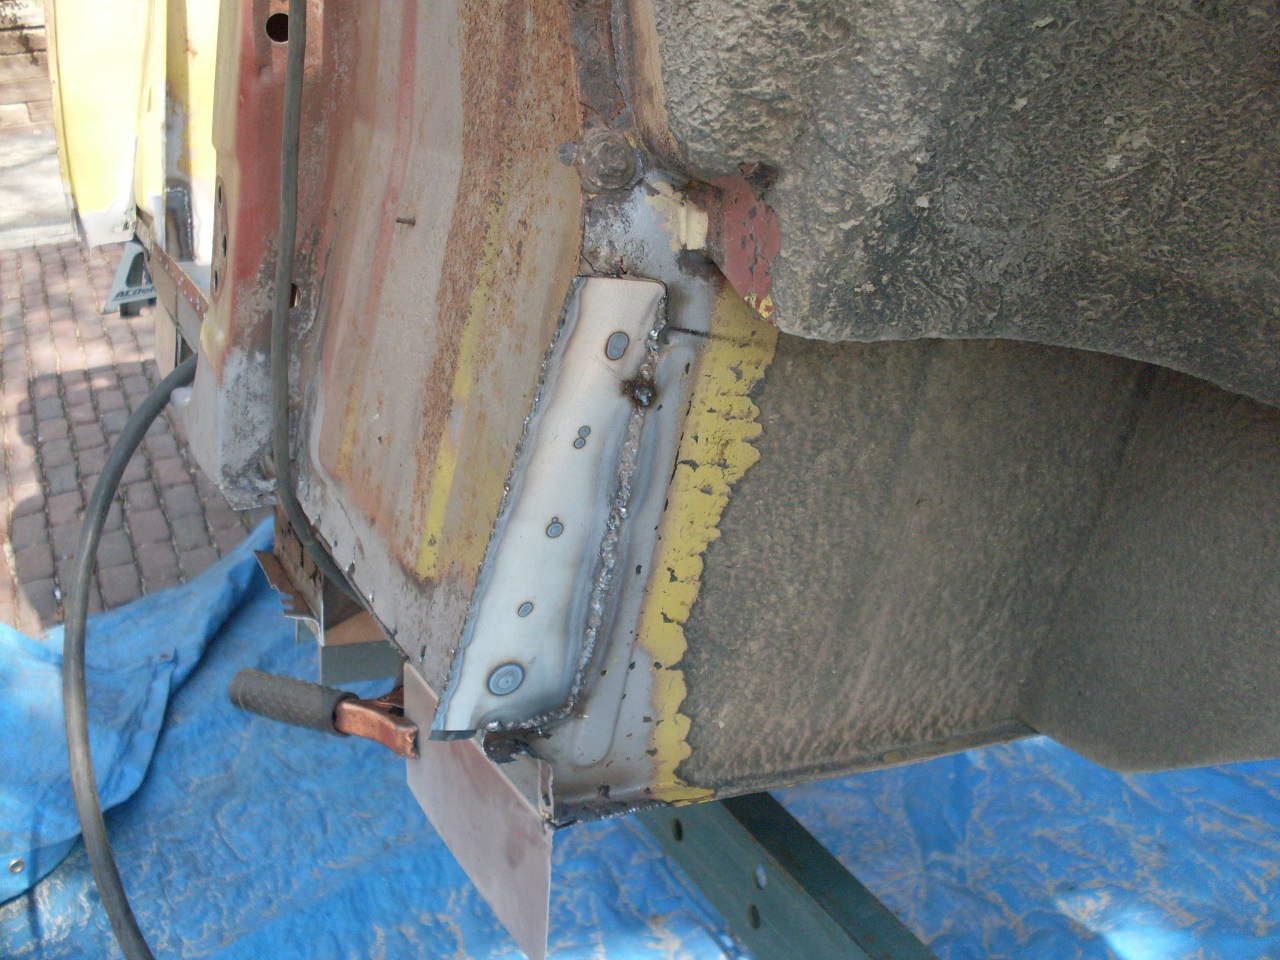
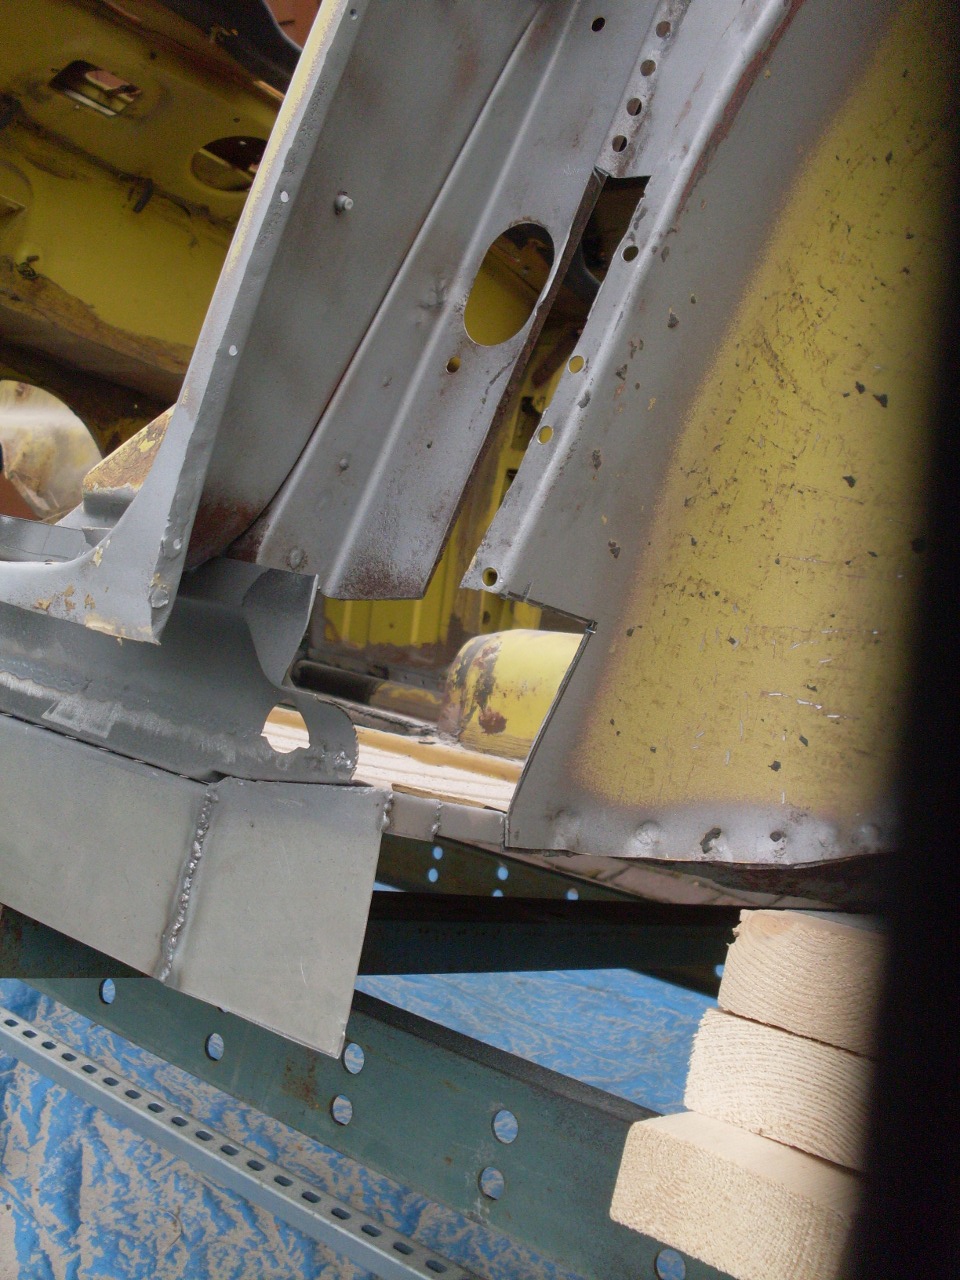
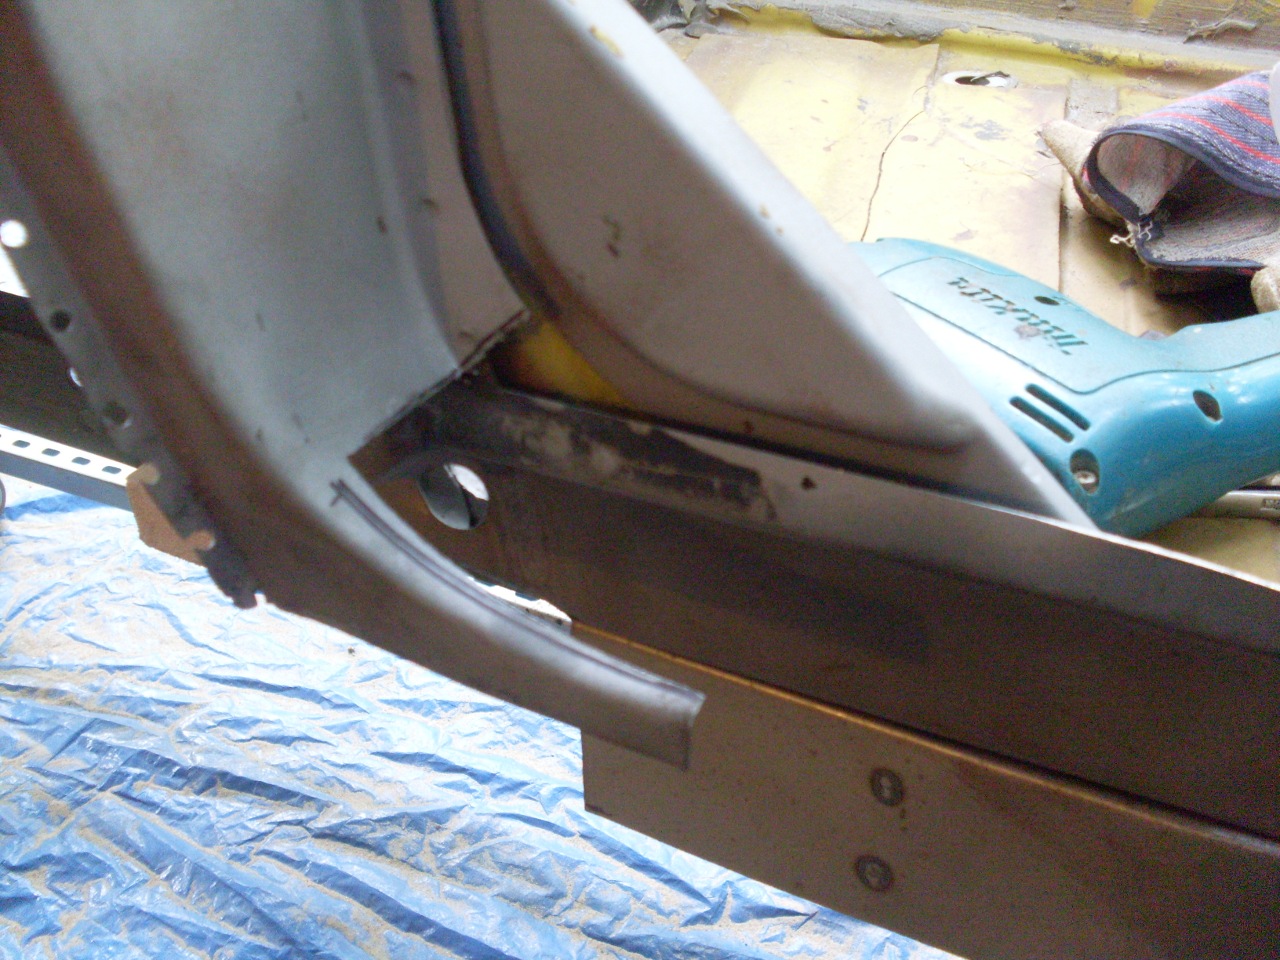
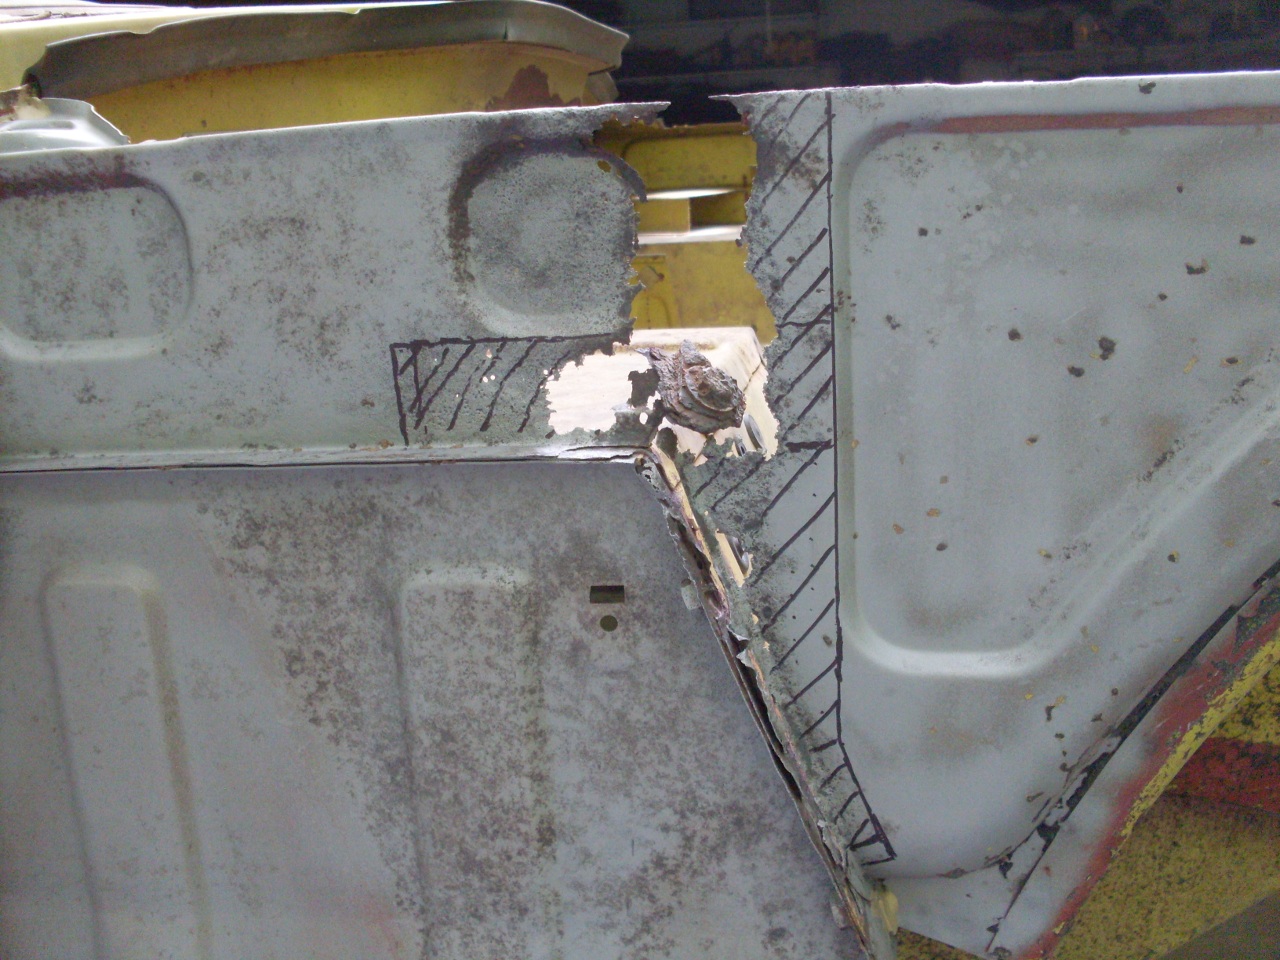
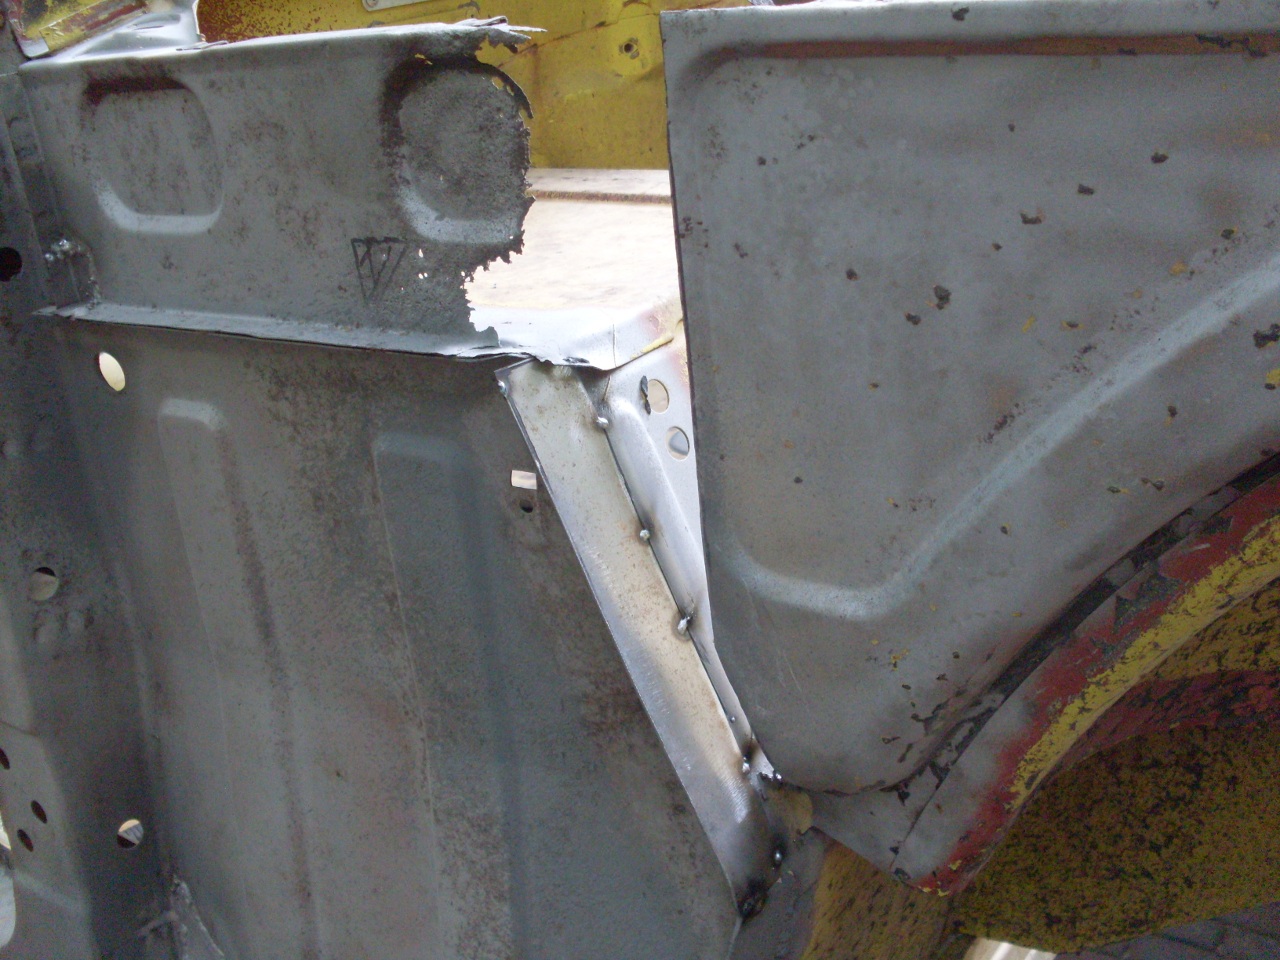
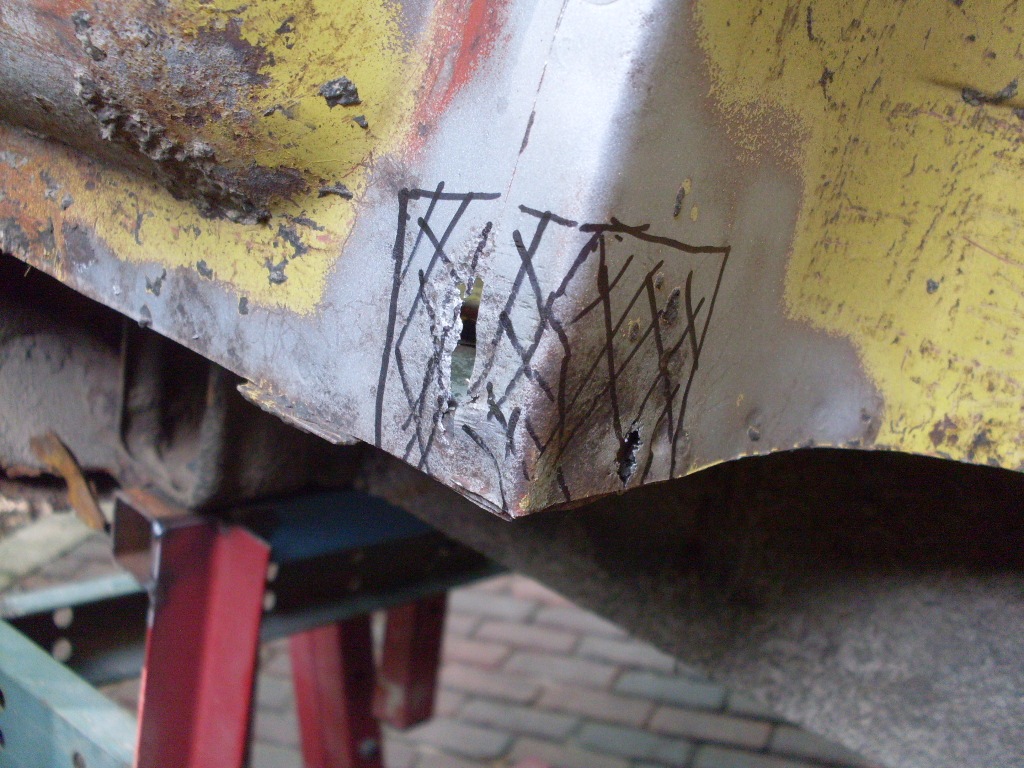
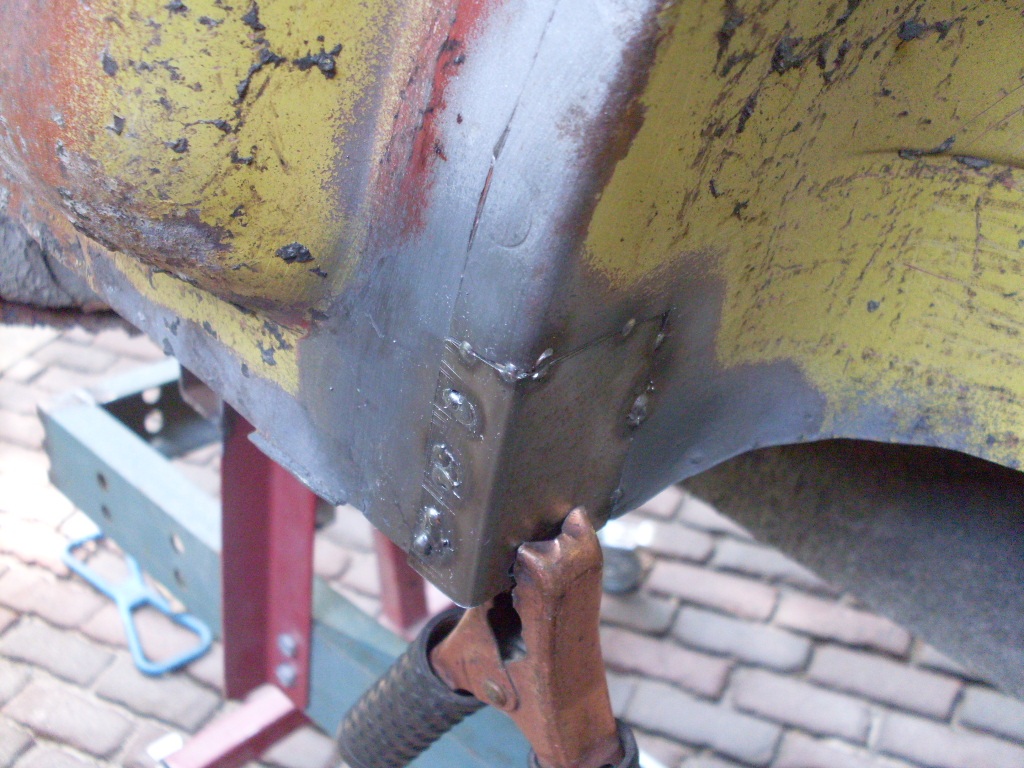
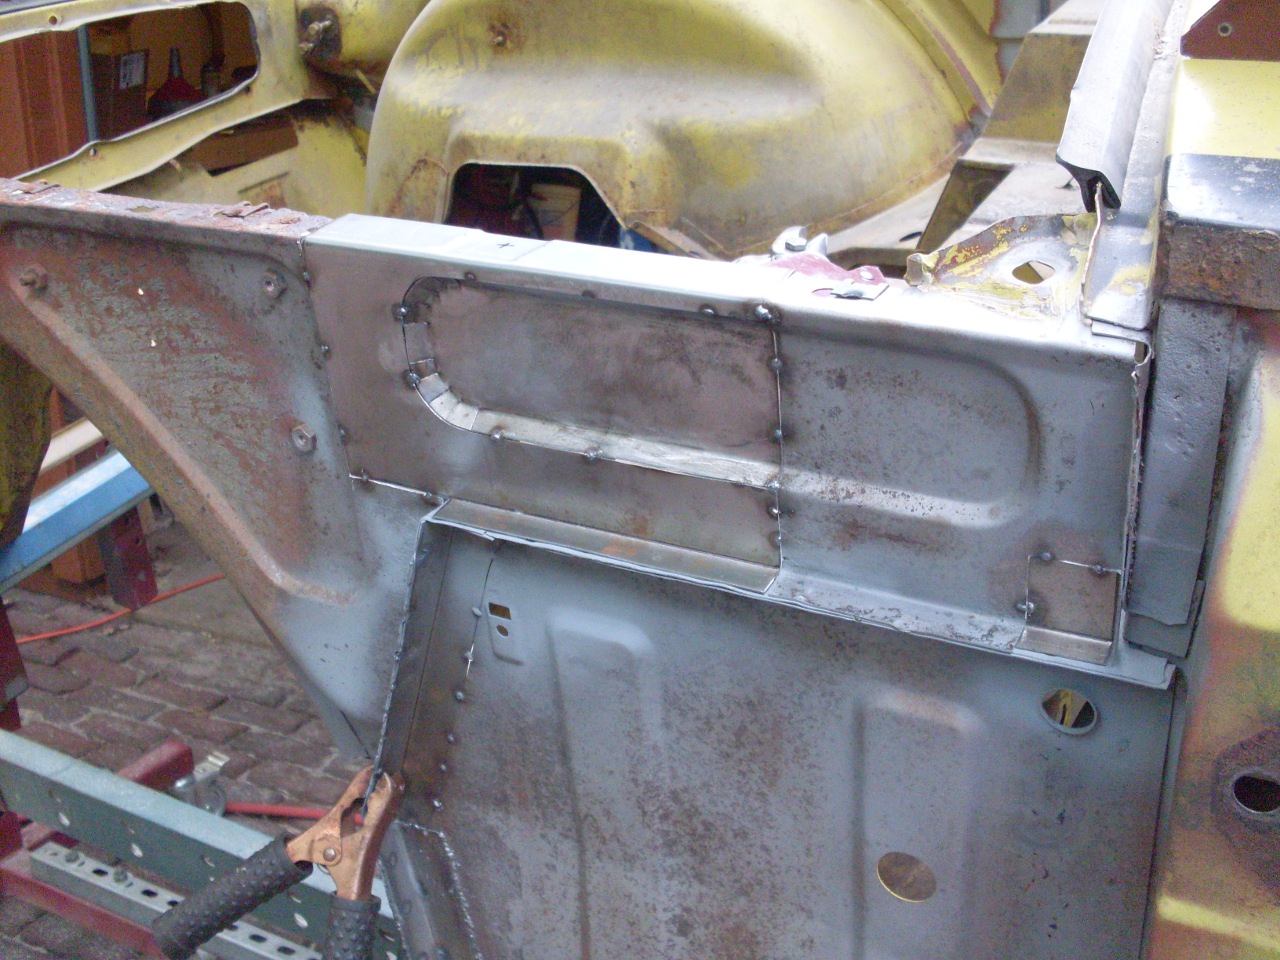
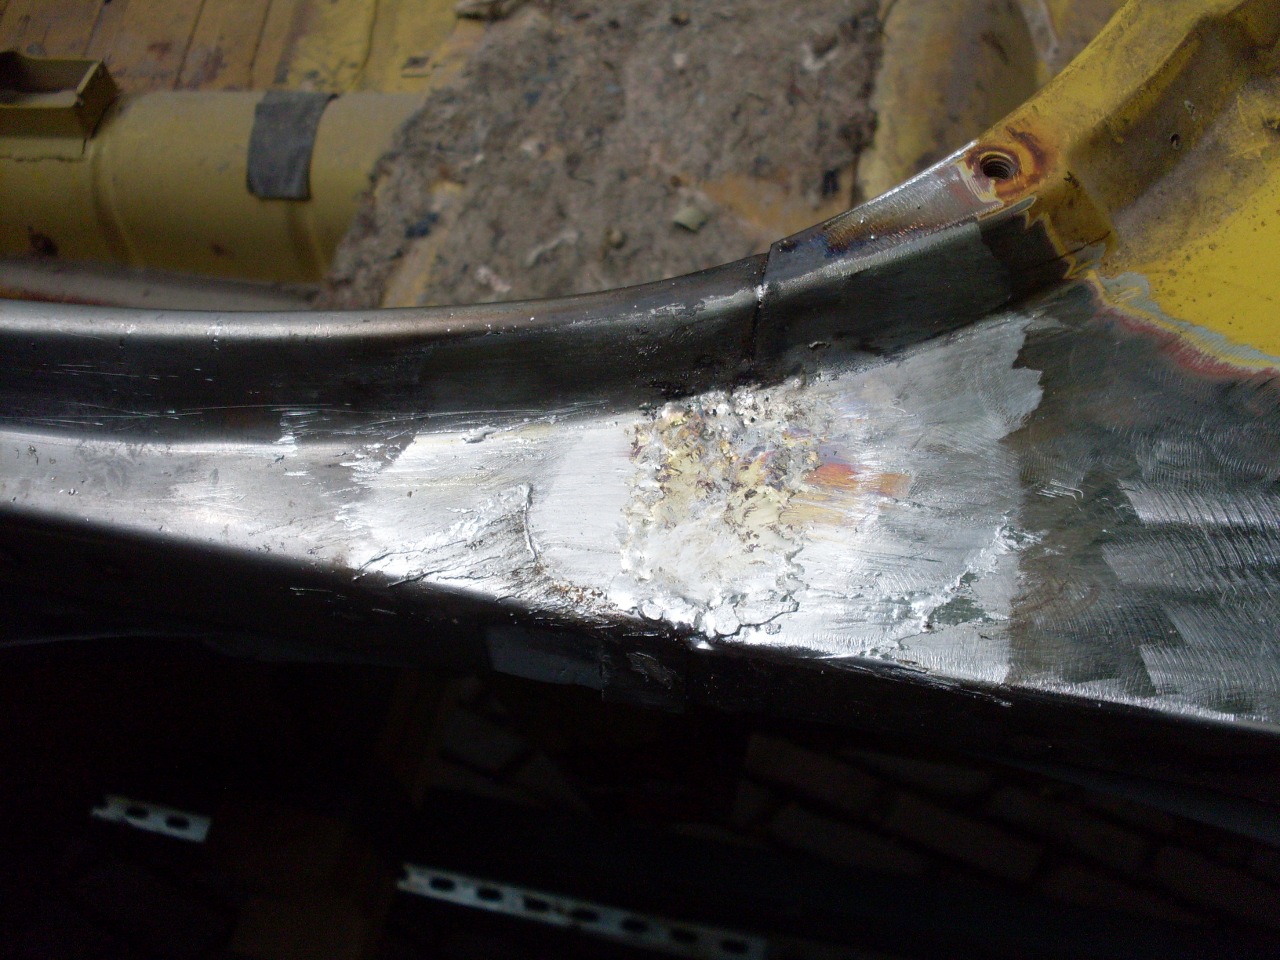
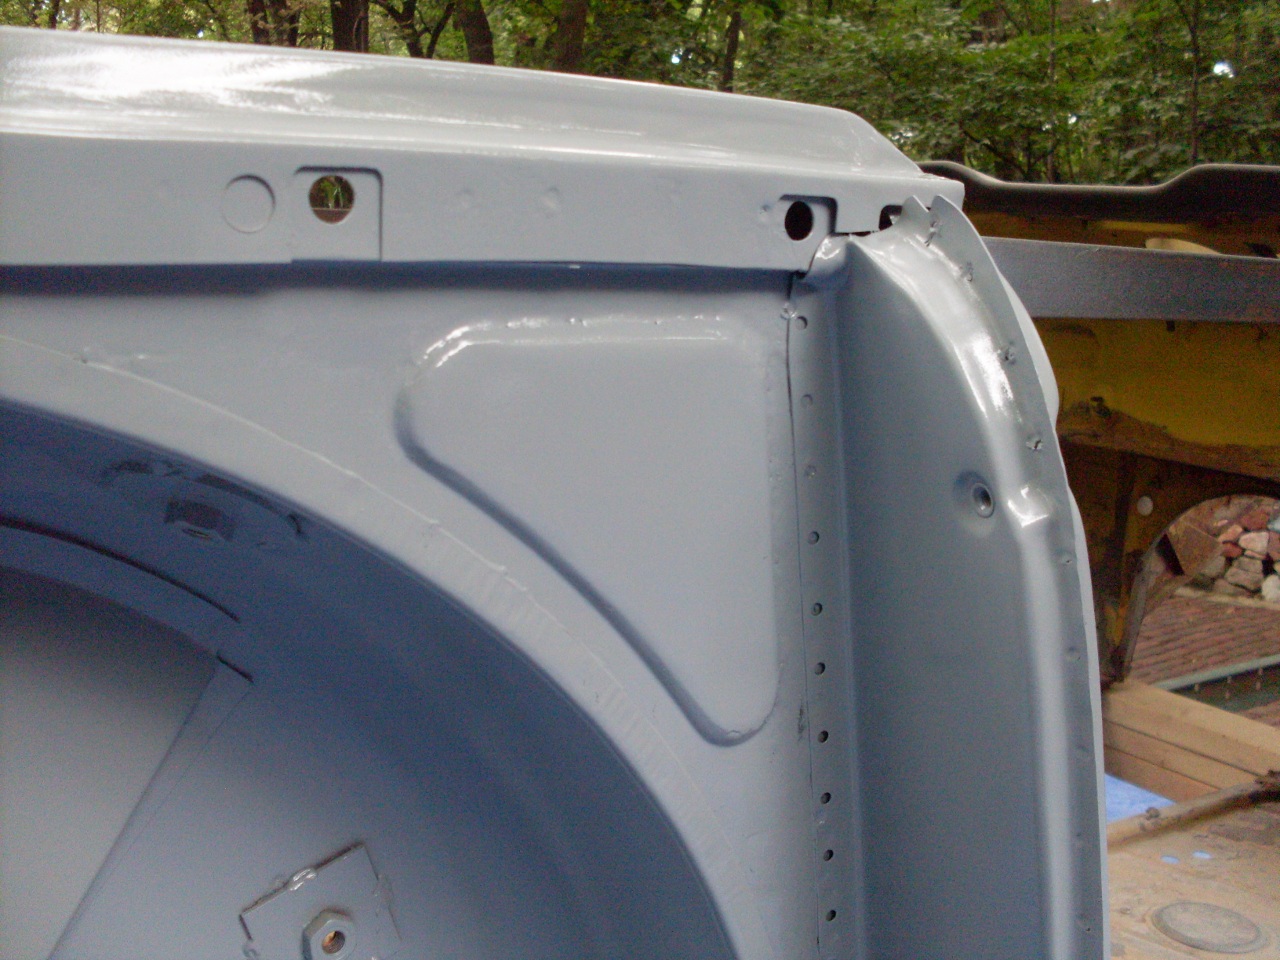
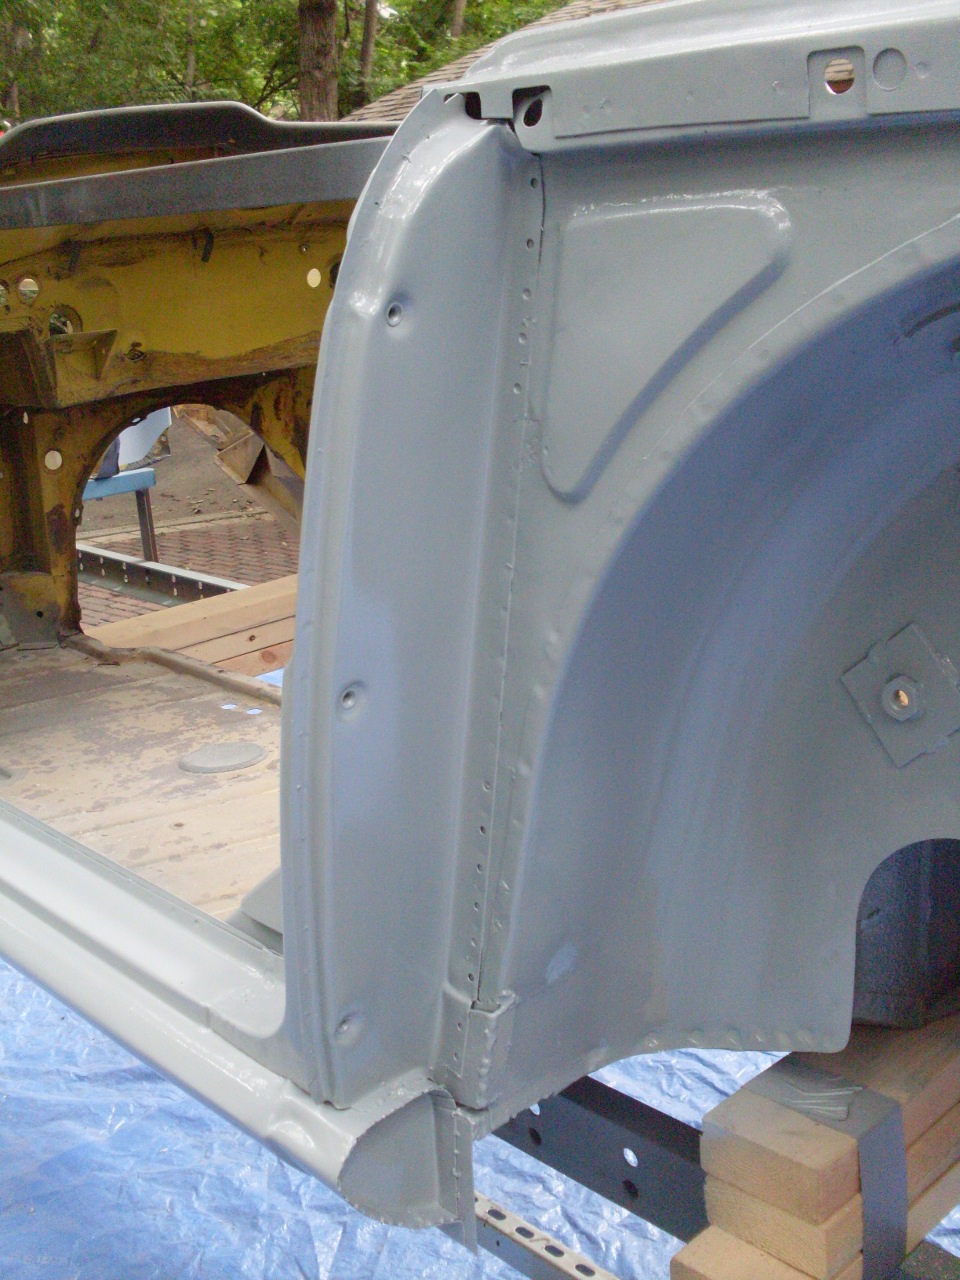
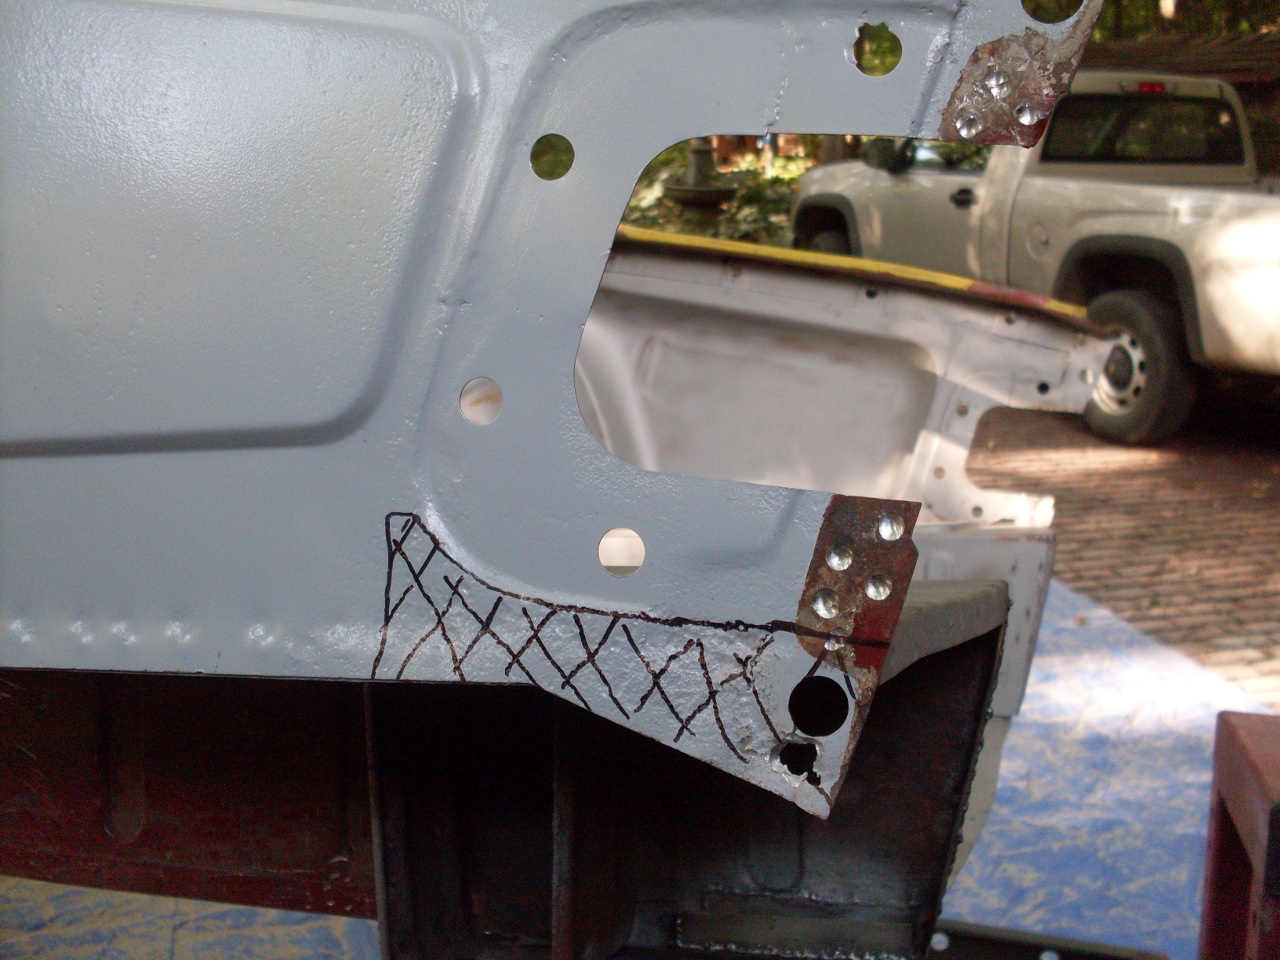
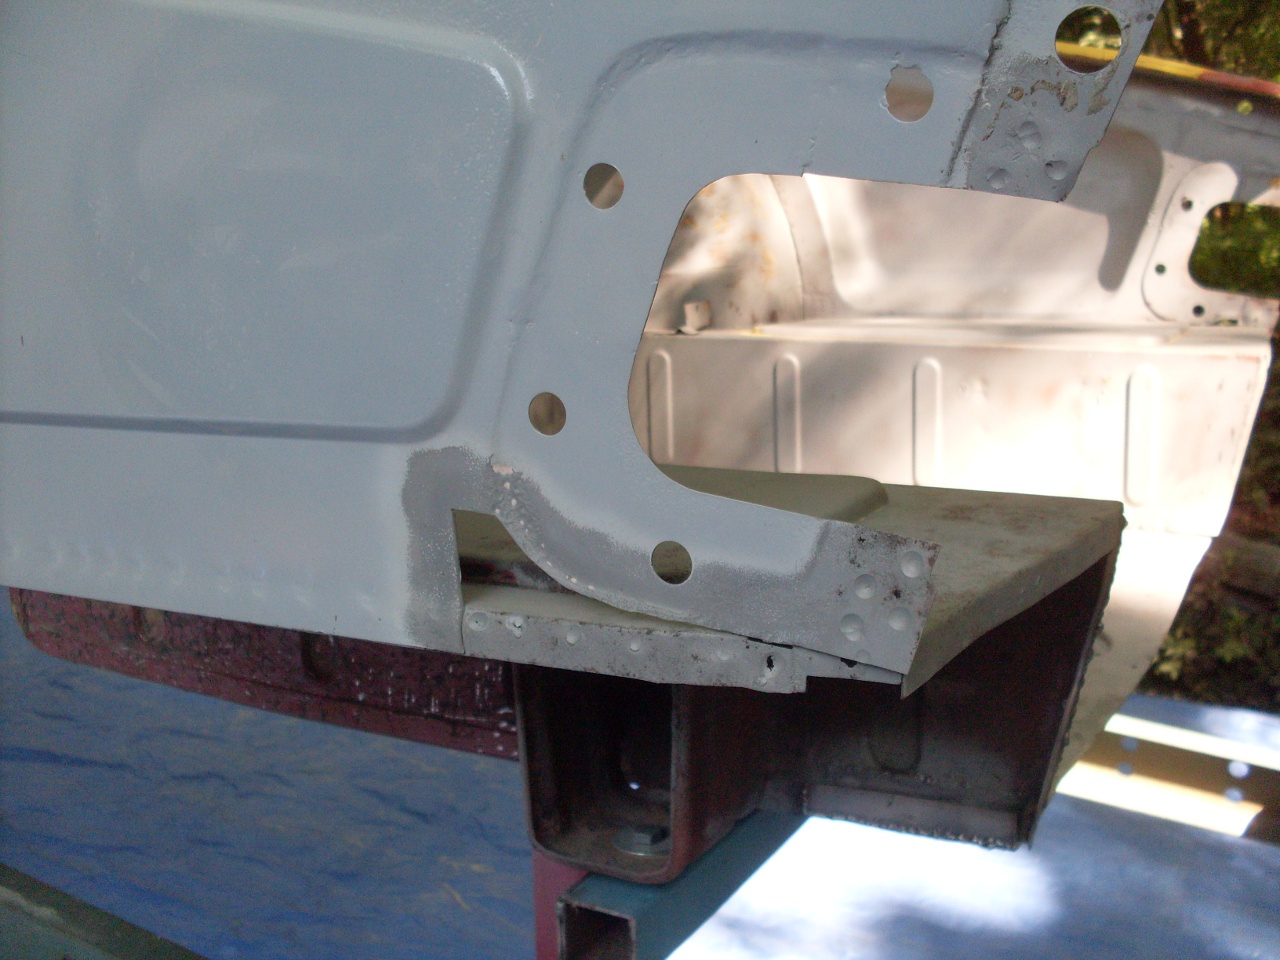
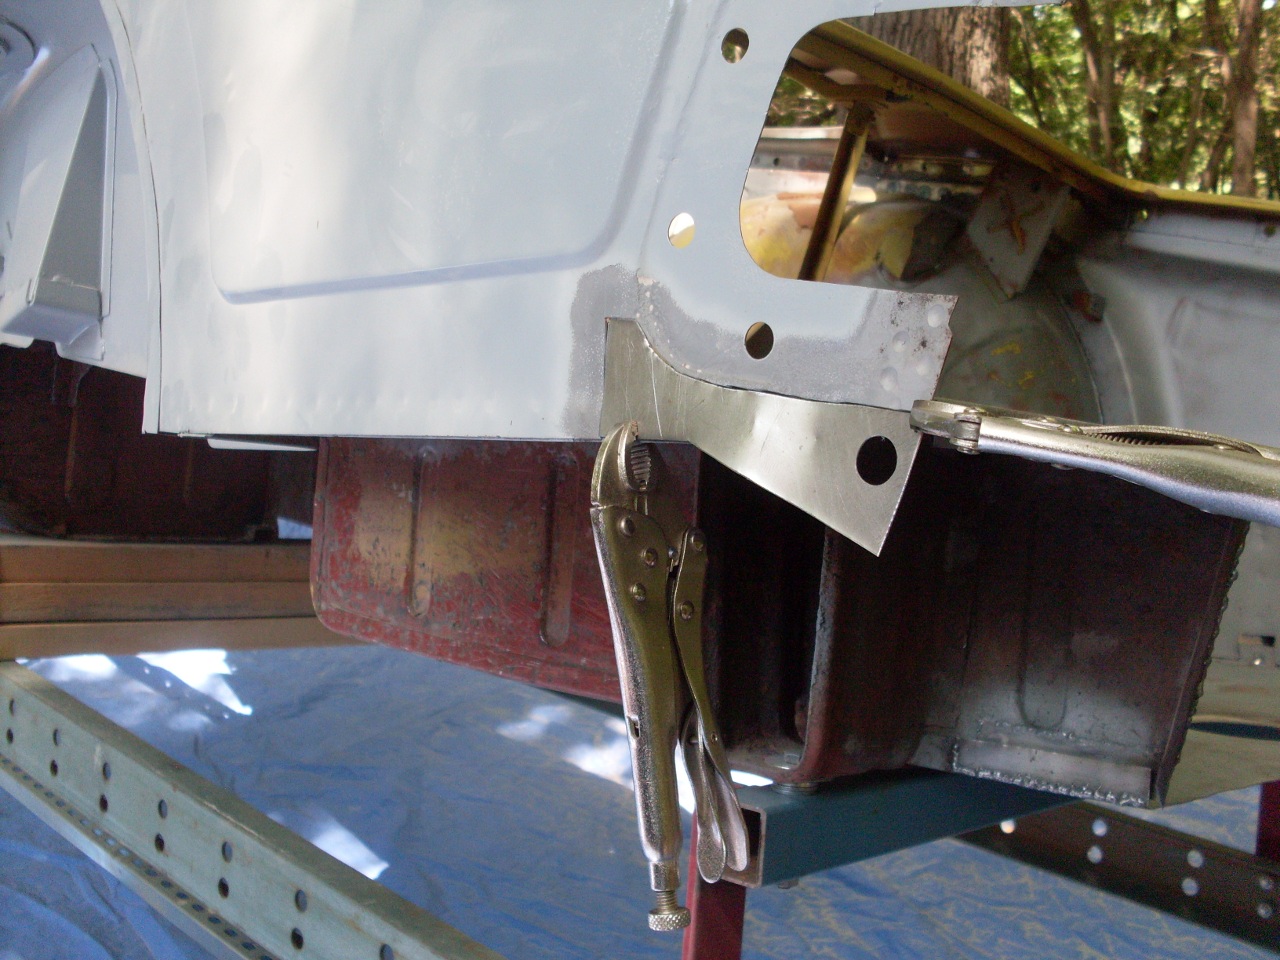
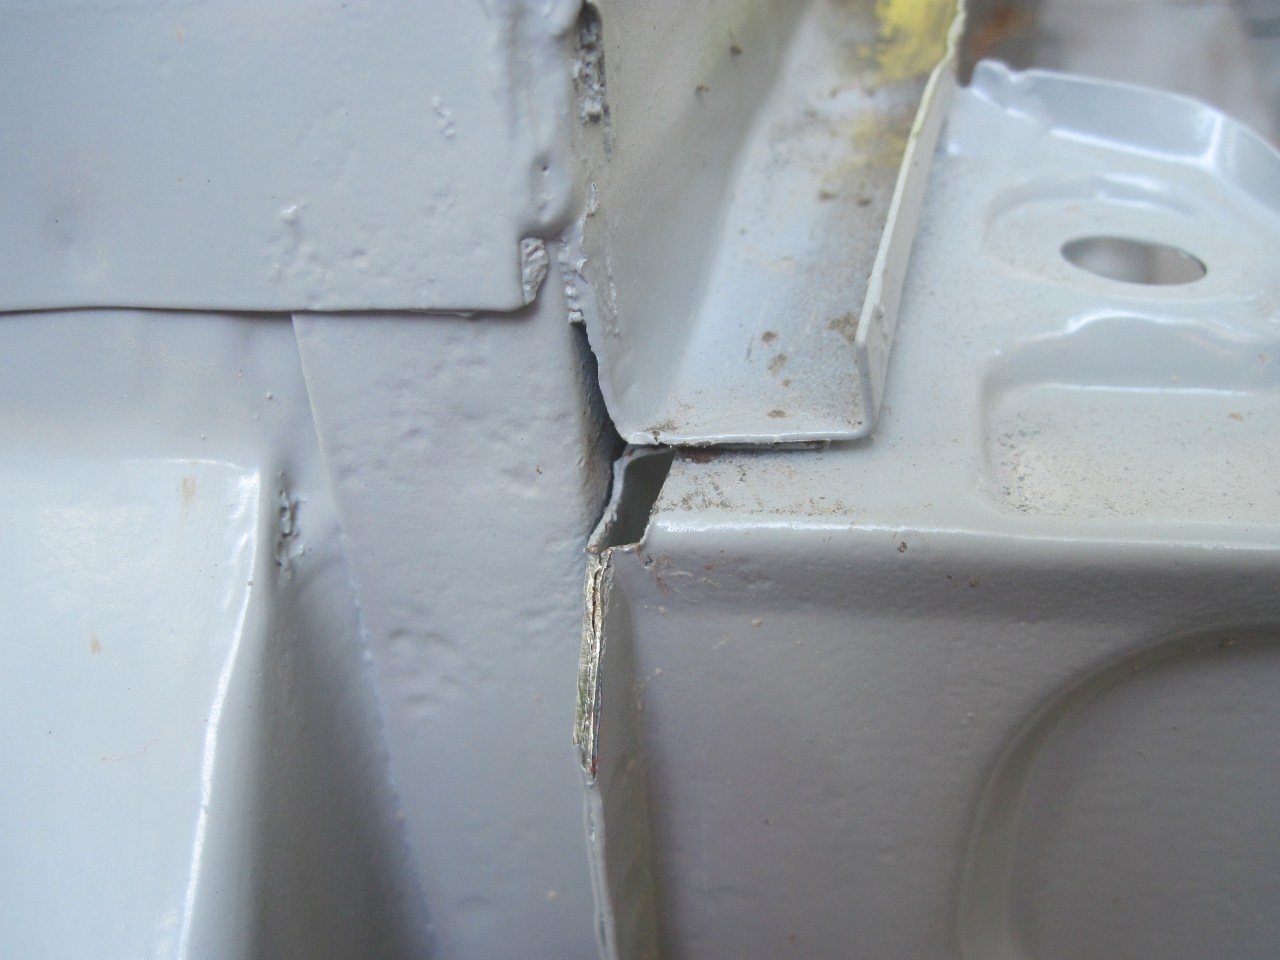
Here's
a fix for the flange behind the front wheel well that the fender bolts
to. The upper part of the flange will also need to be rebuilt.
I've
decided to retain both floor pans--they are pitted in a few places, but
are basically sound with no perforations--except for the
downturned flanges on the outboard edges. These flanges form the back
side of the rocker panel assembly, and were mostly toast. On the
right side of the car, there was enough sound metal right near the bend
to weld in a new flange. I bought a new "inner rocker" panels
(the piece that forms the little step in the cabin right under the
door), but on this side only used the fore and aft ends of it.
The center part of the original was still in good shape, and
would have been a pain to remove.
On
the left side, the area of the floor pan-flange bend was too far gone,
so I had to take about an inch of the pan itself and weld in a flange
with the bend in it. Also, on this side, the entire inner rocker
was suspect, so had to come out. The new panel didn't fit very
well, probably due to the fact that the original pan had a little dip
right next to the bend for the inner rocker to seat in. I didn't
include that dip, so the rocker was a little high. I fixed this
by cutting the panel lengthwise, removing about 3/16 of an inch of
metal, and welding it back together. It fit like a glove after
that.
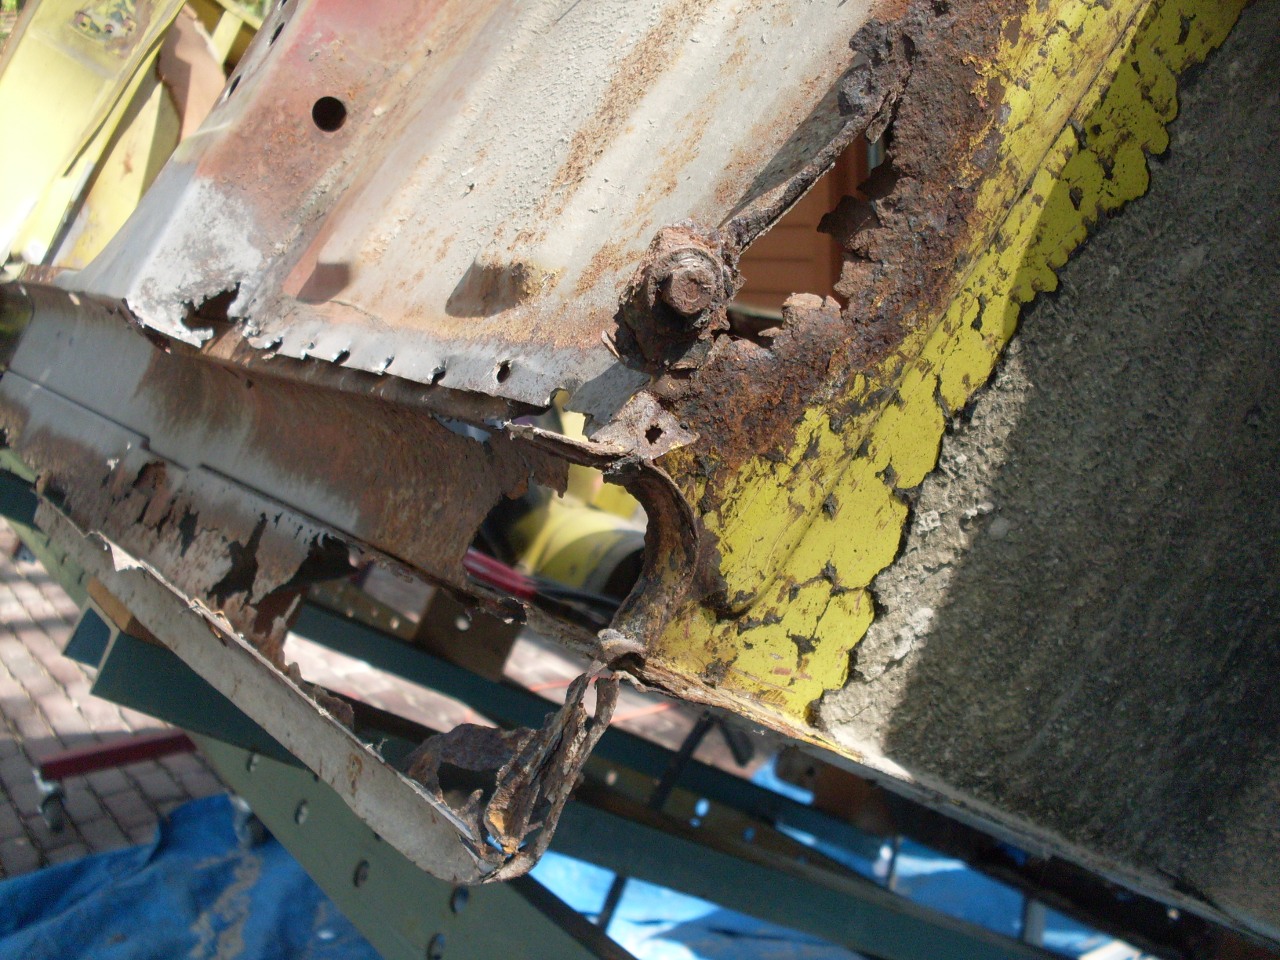
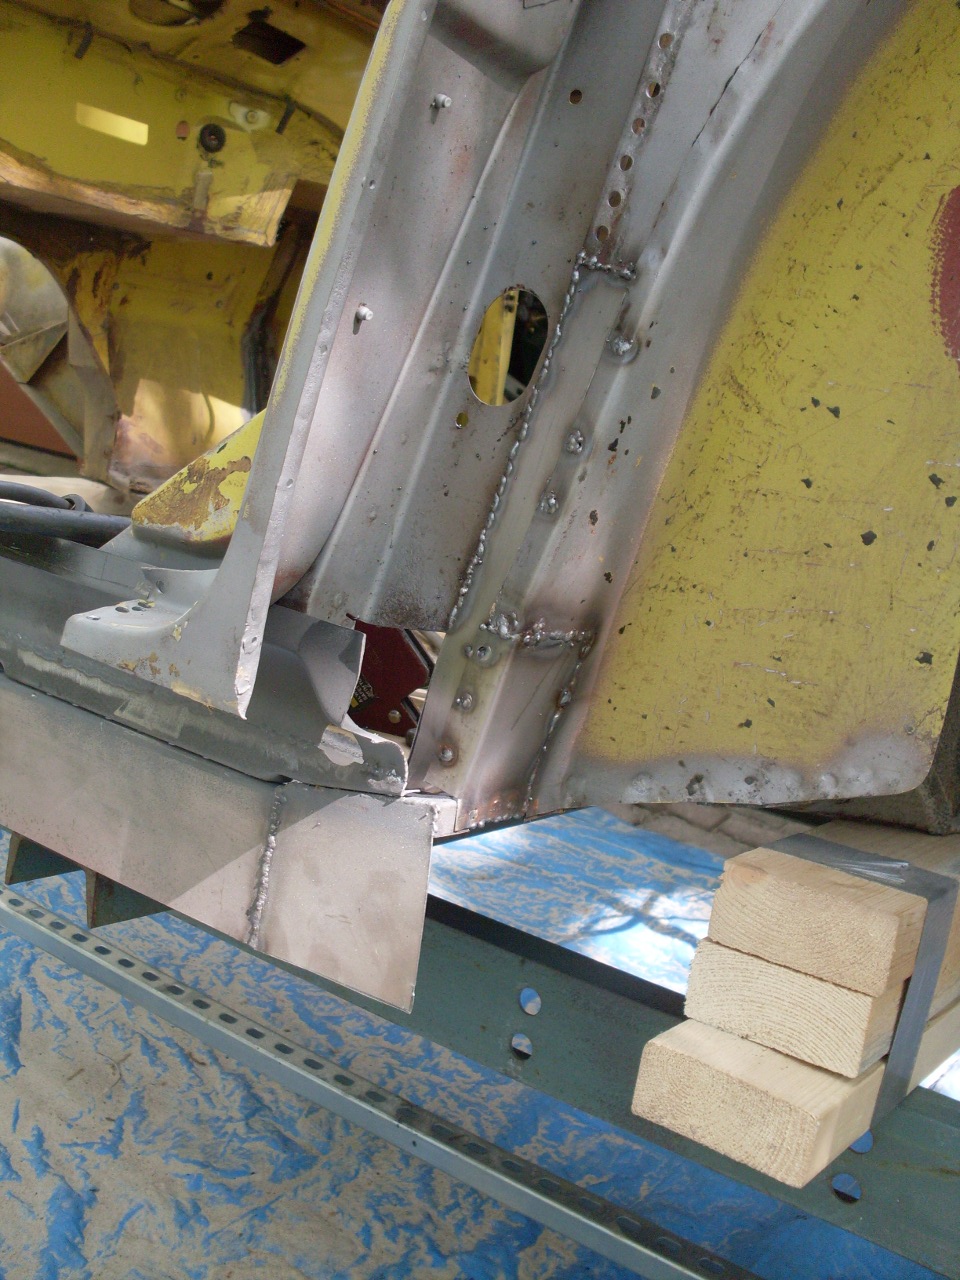
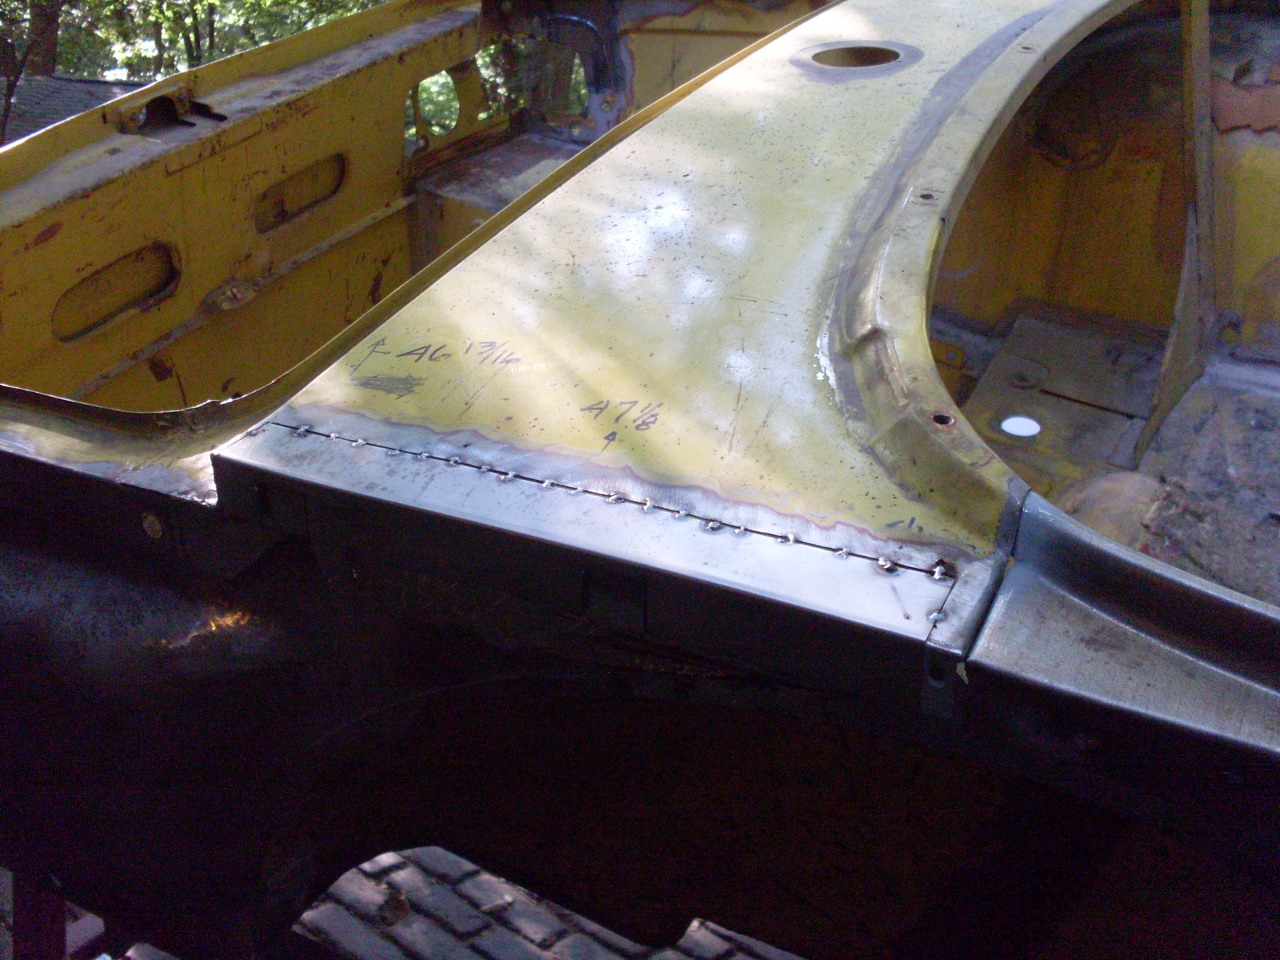
Another
area that had to be fixed on both sides--right at the front of the rear
wheel wells. I decided to remove and replace the backside panels
of both B posts, which cost more, but saved a lot of fiddly welding.
Welding sheet metal is an acquired skill, and whatever meagre
skill I have was gained on this project.
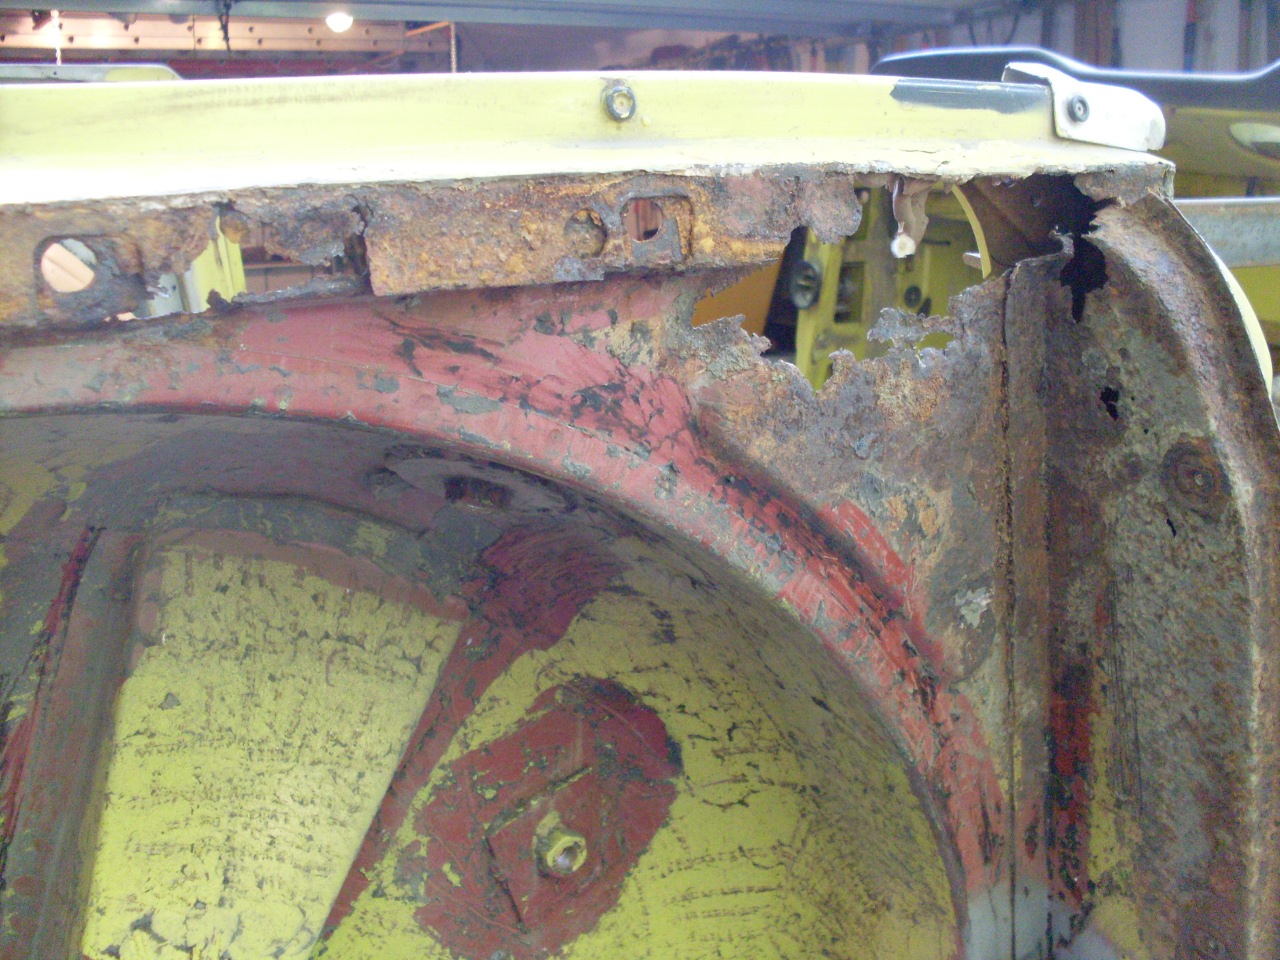
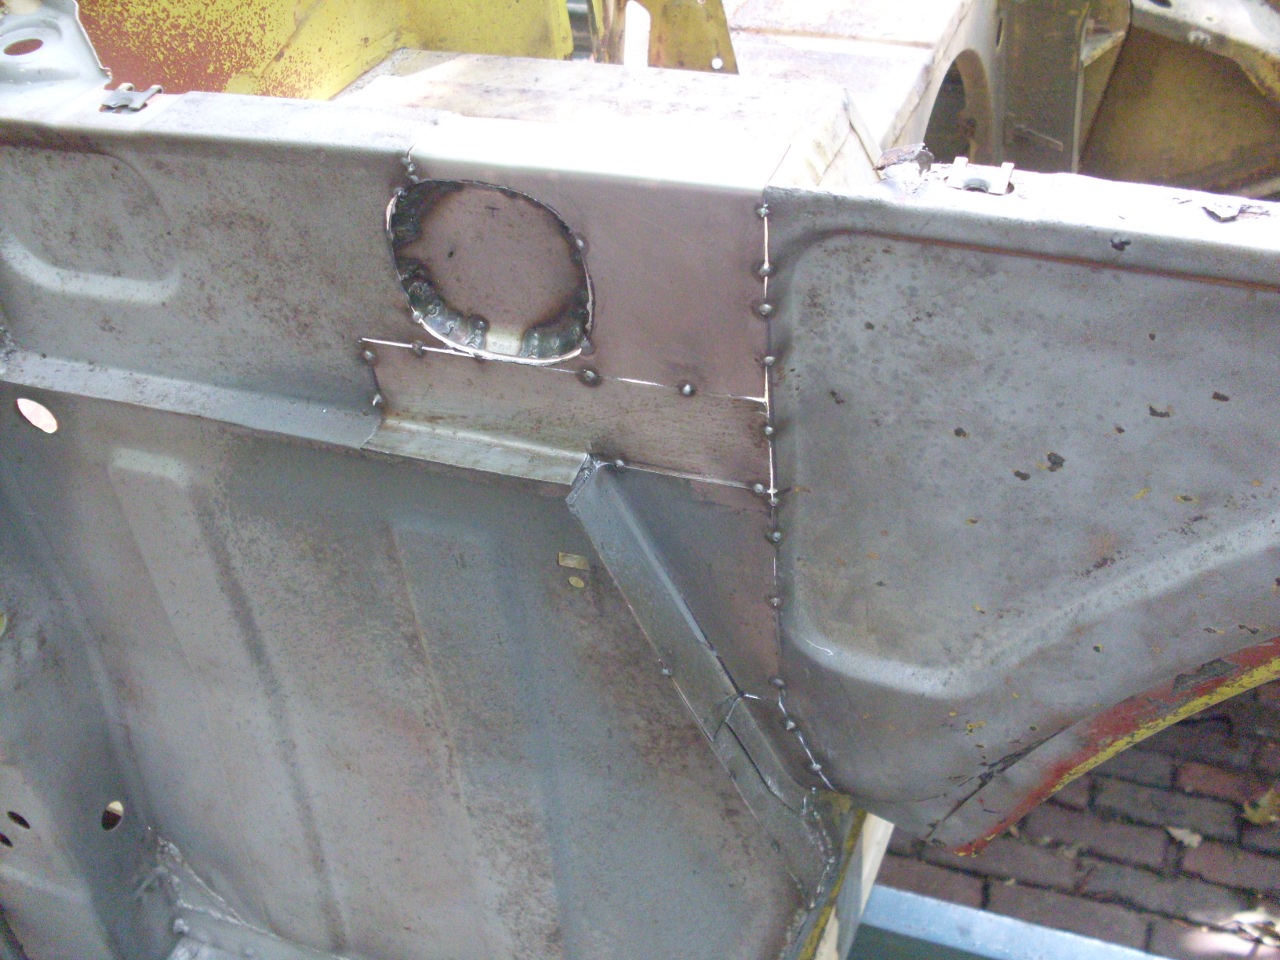
The areas right behind the upper B posts were also a problem. On
the right side, the entire kidney-esque stiffener feature was mostly
rusted through, so I cut it out, along with the portions of the inner
wing in front of and above it. The rear deck extension was also
toast, so out it came, too. Before all the carnage, I'd made a paper
pattern for the stiffener panel.
I cut a patch and rounded the edges in the right places., and tacked it in place.
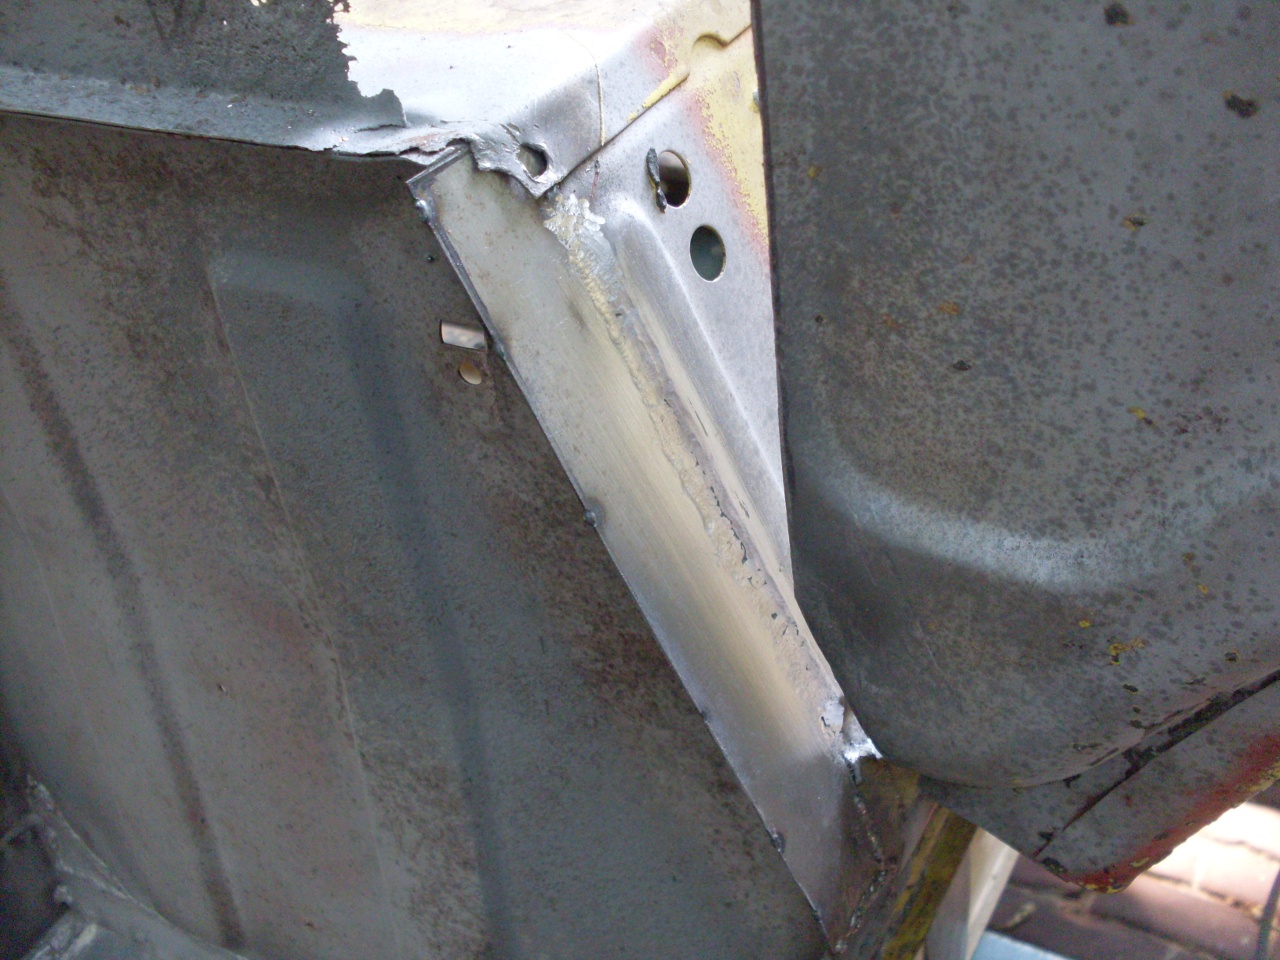
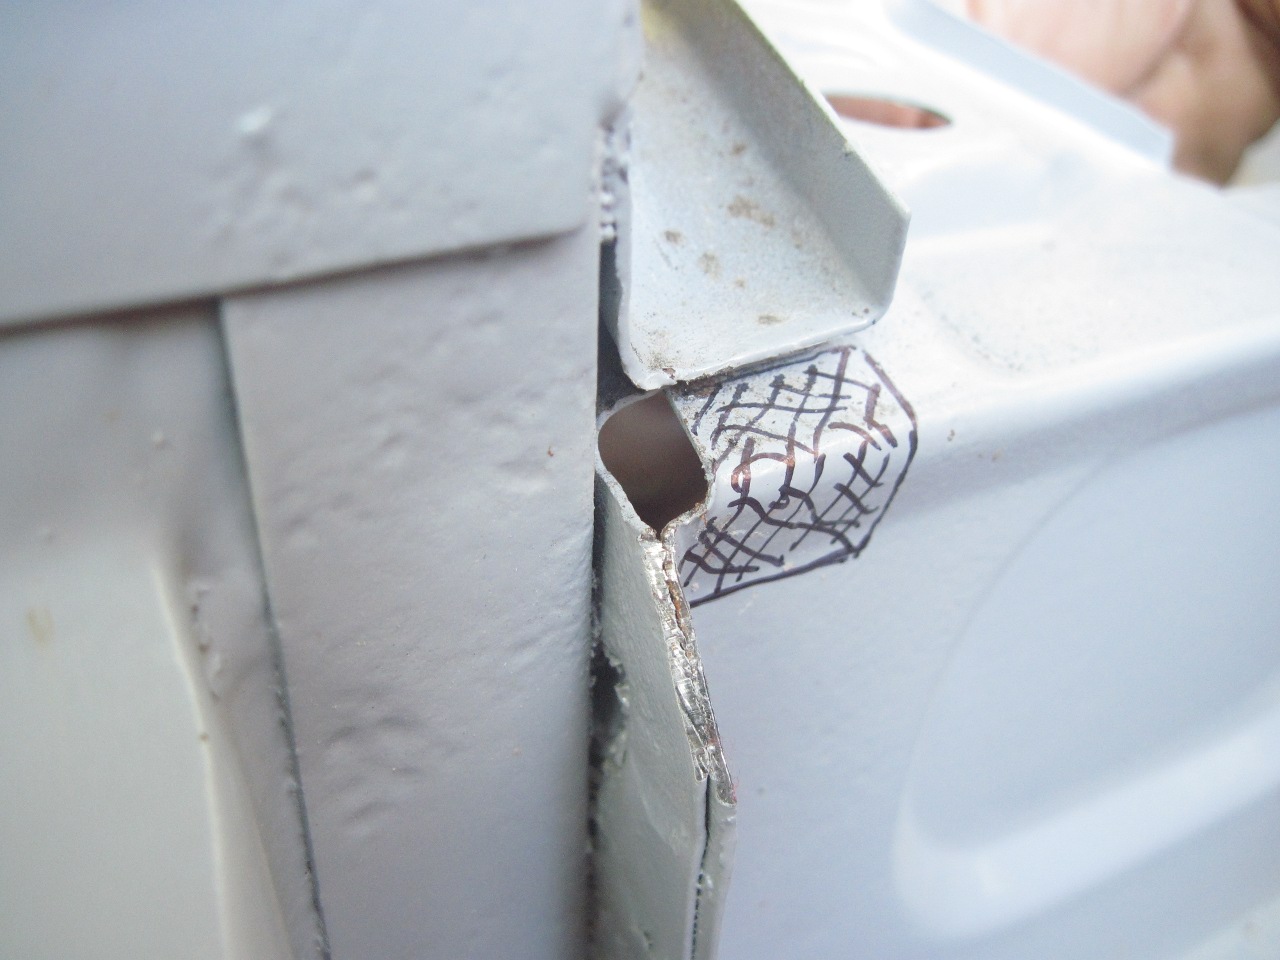
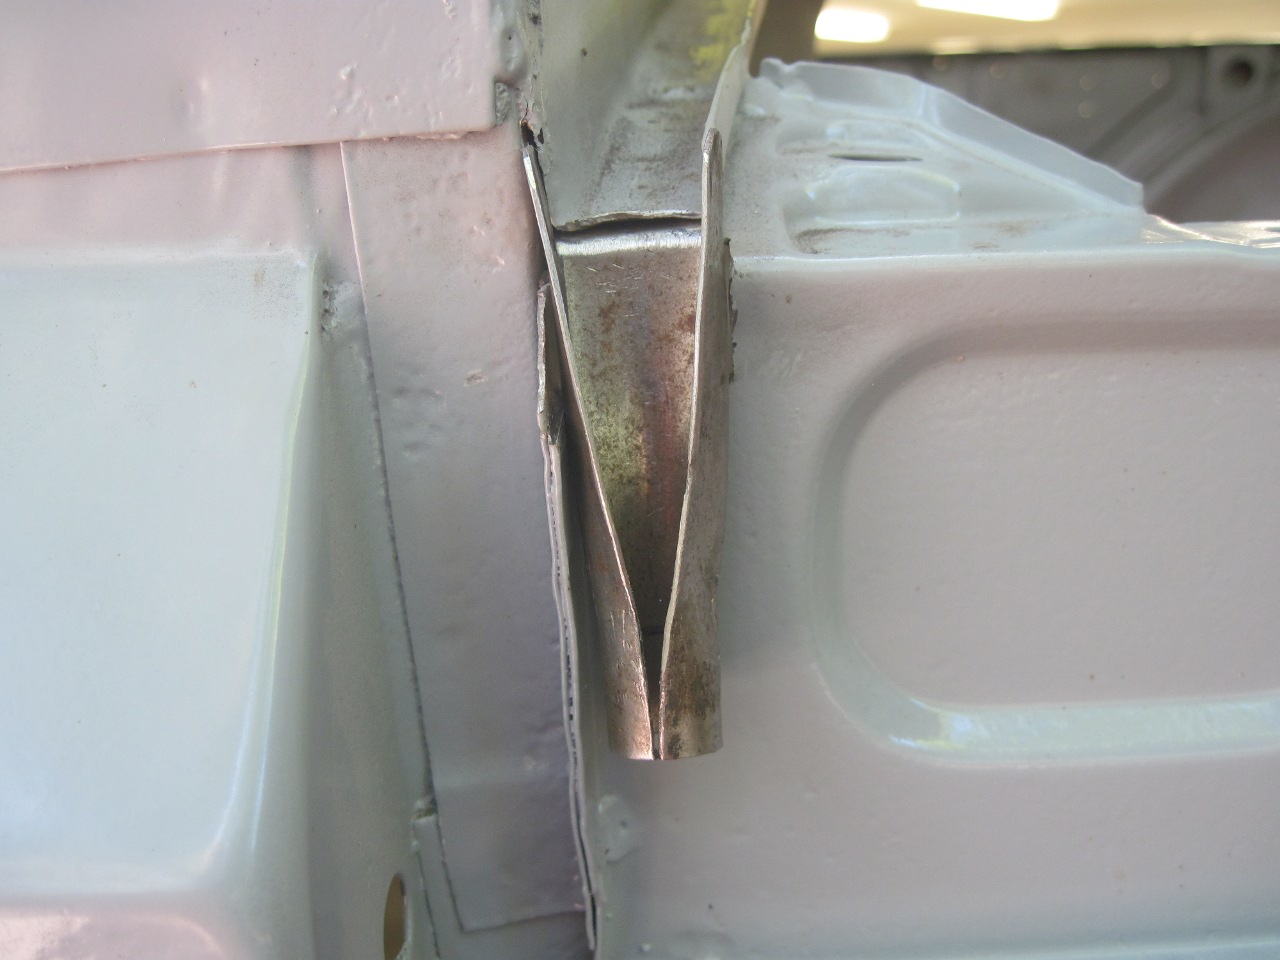
Next
up was a small rust through area at the base of the B post where it
meets the rocker panel. This a tricky patch because of the flange
and the tight curve.
I
was planning to fix this in two pieces when my Harbor Freight flyer
arrived and announced that their sheet metal stretcher/shrinker was on
sale. Well, this seemed just too serendipidous to ignore, so I
bought the set. In a leap of faith, I cut out the perished area.
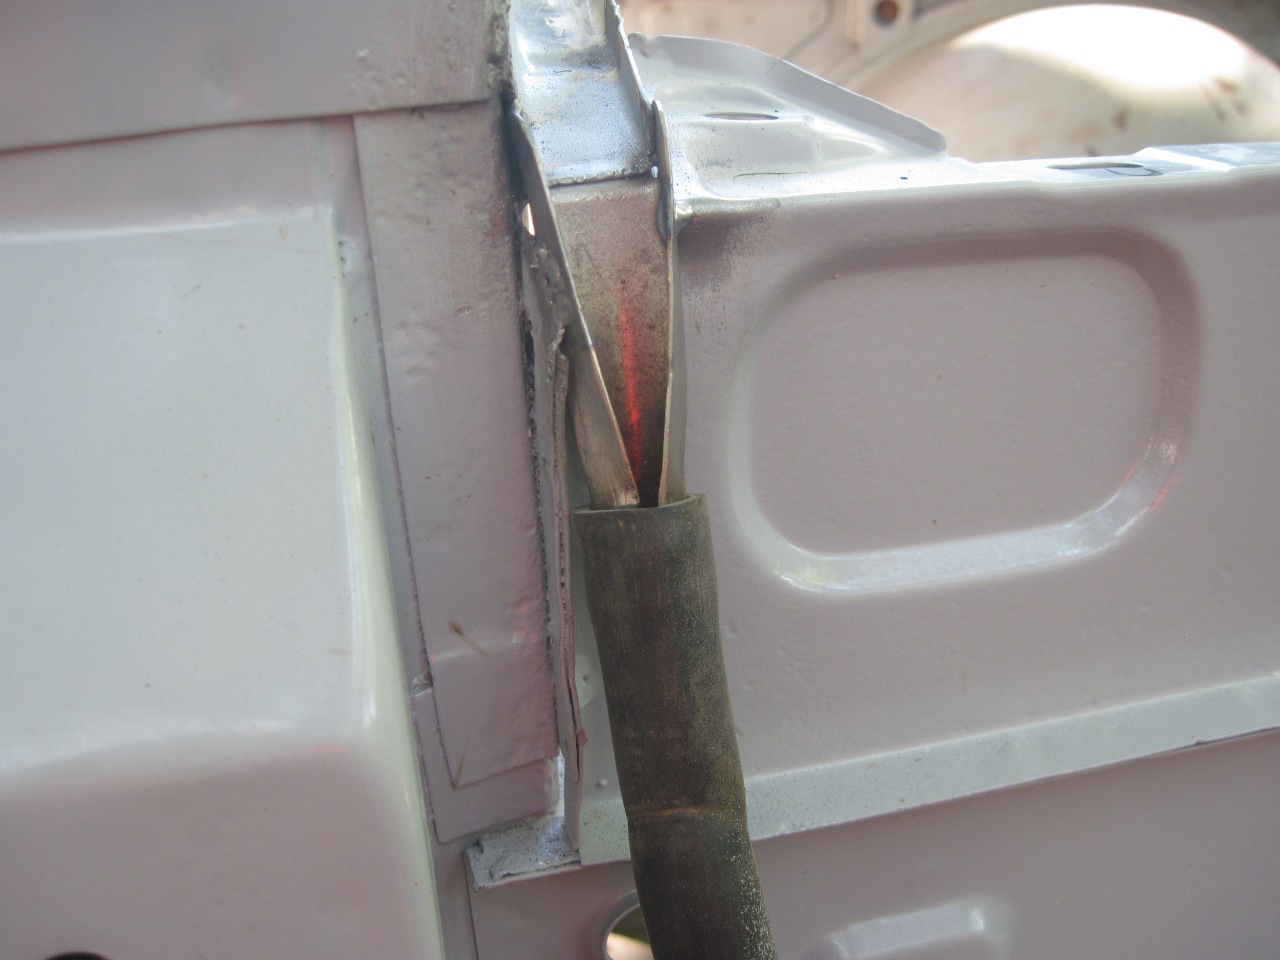
My
first attempts with the shrinker were a learning experience.
Though they loosely resembled the piece I needed, neither one fit
very well. This was coupled with the fact that the tools didn't
come with a stand, and these devices can't really be used at all
without some way to rigidly support them. I ended up bolting the
shrinker to one end of a flat piece of steel, and parking my truck on
the other end. A little hillbilly, but it worked.
Finally,
after a little OJT, I made a part that fit pretty well. There are
a few little pits on the weld lines, but they'll fill nicely before
painting.

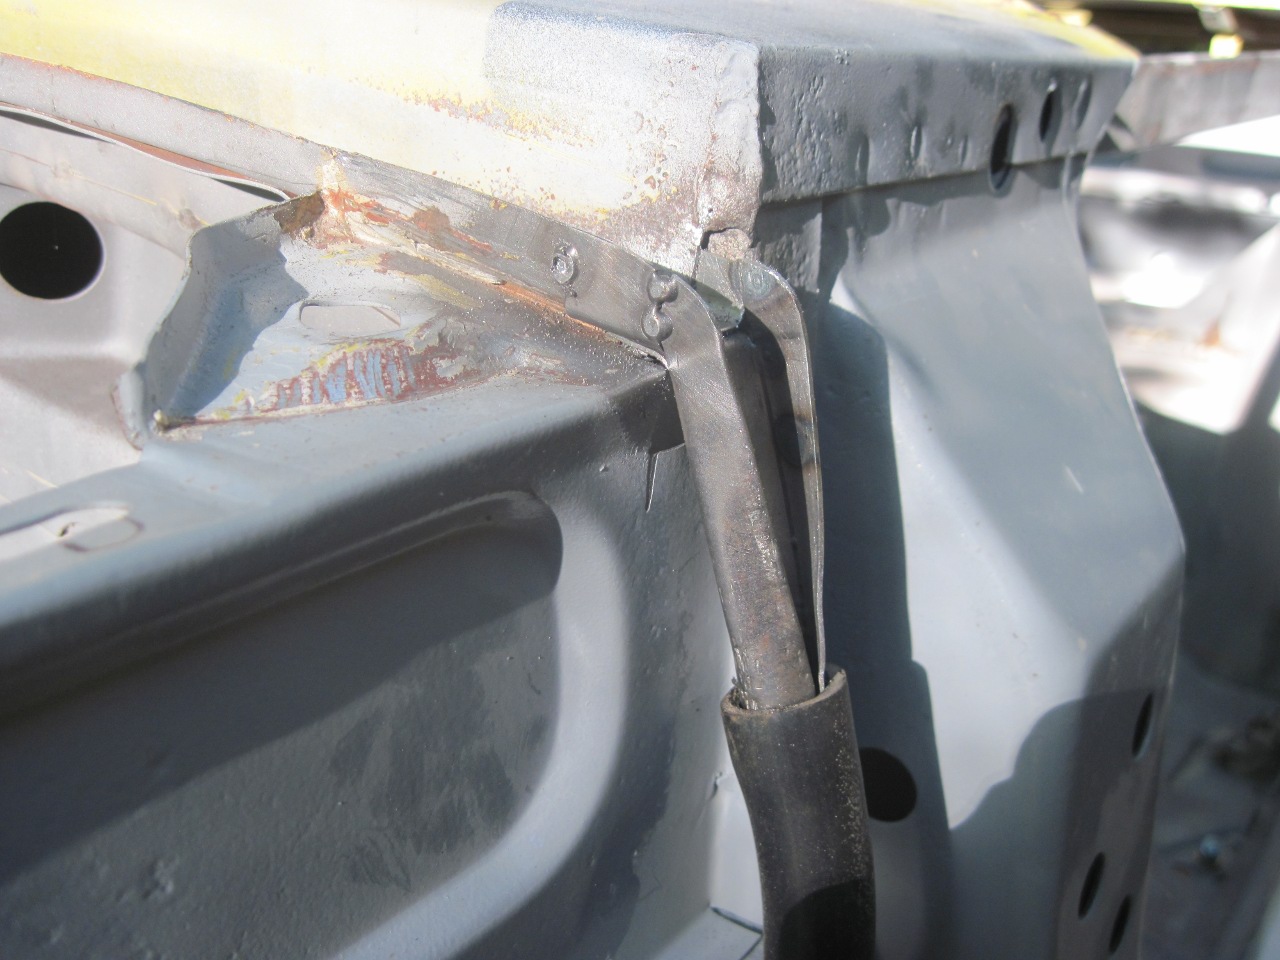
Now,
with all the work done around the B posts, the new B post back panels
were ready to go on. First, and something I almost forgot, I had
to install new seat belt anchor brackets. These are 1/8" thick L
brackets that get welded to the base of the rear wheel wells.
They carry a welded on 7/16 nut that the seat belts attach to.
First, I had to cut the access holes in the base of the B post,
since that was new metal.
The original brackets were a mess, so I made new ones.

Before
welding in the brackets, I painted the interior surfaces of the B post
with two coats of POR-15. I don't believe these areas were even
primed from the factory. I kept the POR-15 away from the areas
that will be welded, and instead used a zinc rich weld through primer.
Then installed the seat belt anchors.
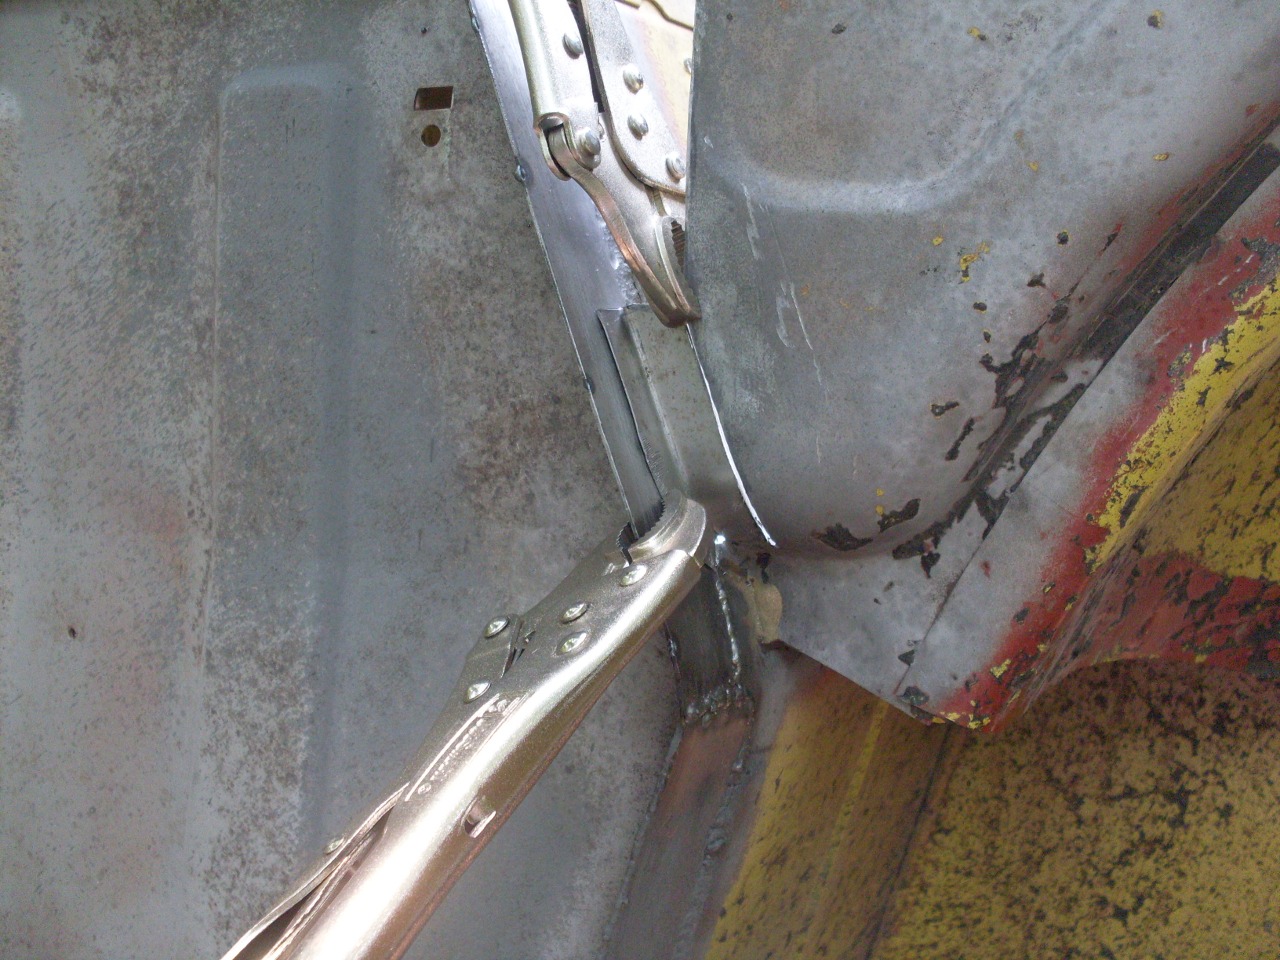
Test fit of the B post back panels was OK, but required a little trimming and hammer work to get it to fit well enough.
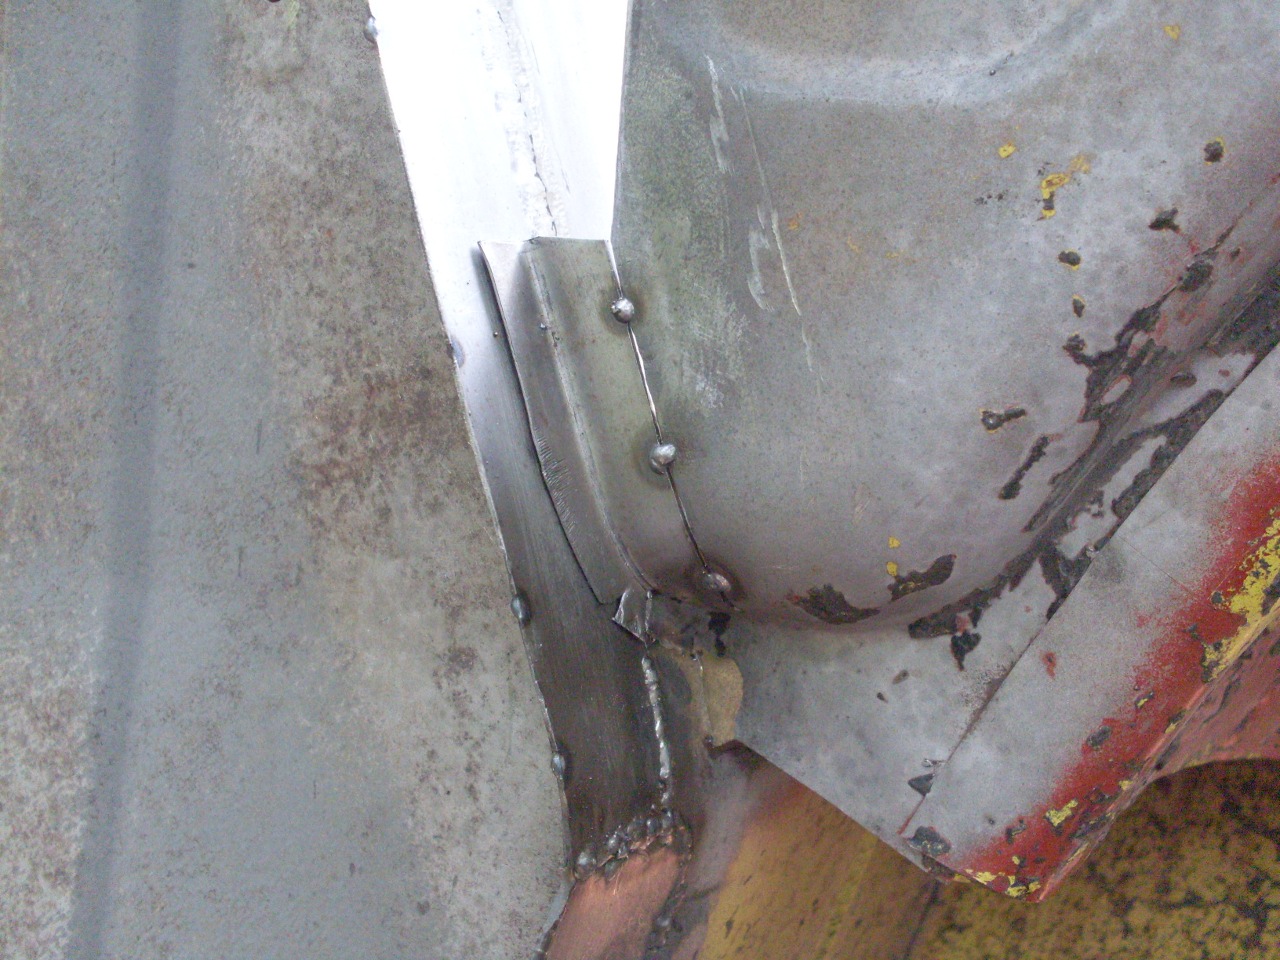
The
pic above shows a row of 3/16 holes I punched in the back panel flange
for plug welding. Being a mediocre welder at best, I was sort of
dreading the plug welding. Plug welding in sheet metal when the
fit isn't perfect can turn into a mess very quickly.
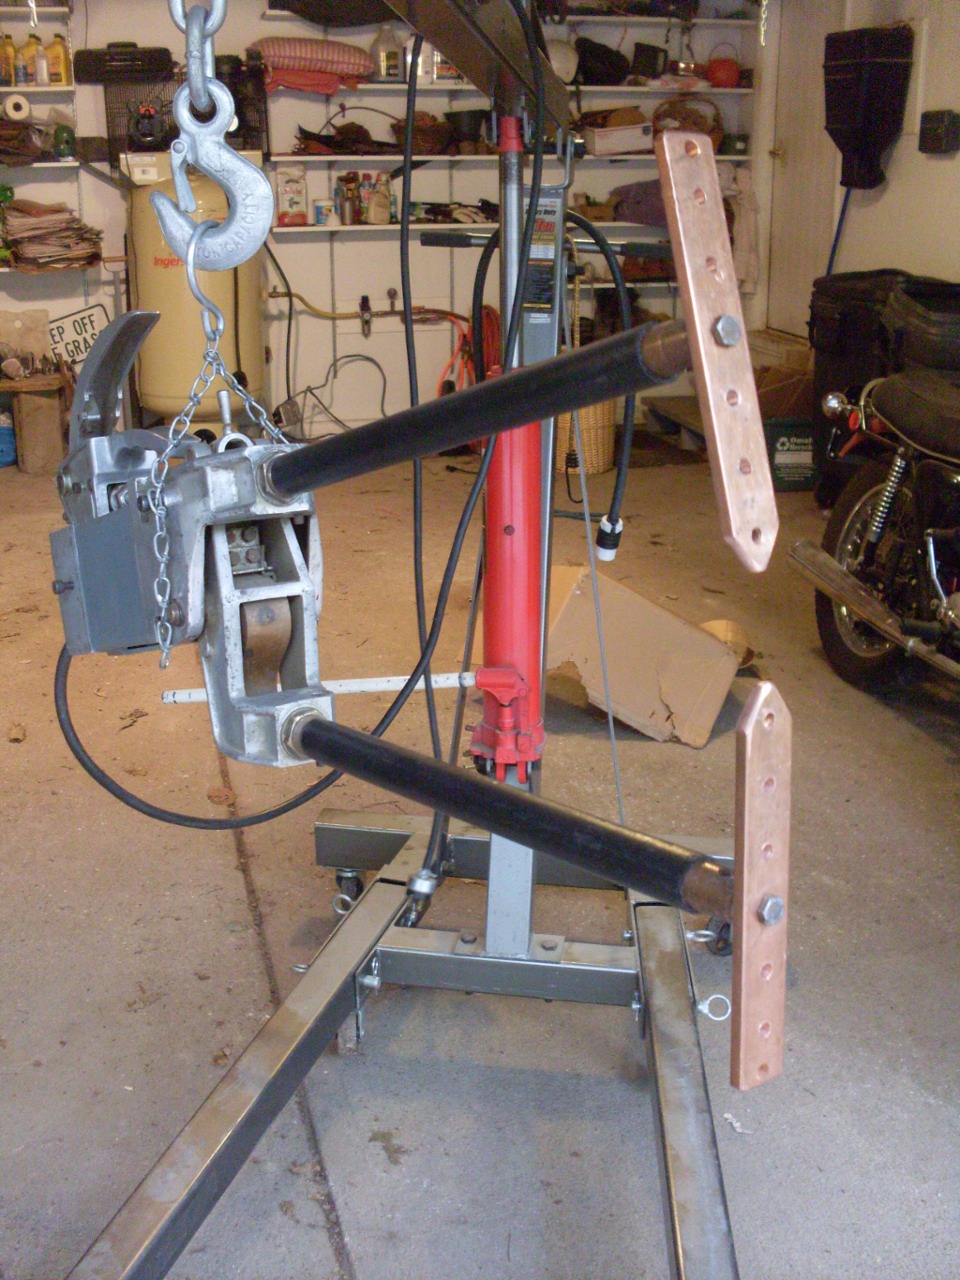
I
have a spot welder that I bought at a bankruptcy sale at a
manufacturing plant decades ago. I've used it a few times, but
it's very heavy, and I had determined that it didn't have the throat
capacity to do the B post. Being really spooked about the plug
welds, I drug the spot welder out for a closer look. By making
longer copper electrodes, I could just barely make the throat big
enough. The thing weighs about 50 pounds, though, I didn't think
I could support it and maintain the clearances I needed.
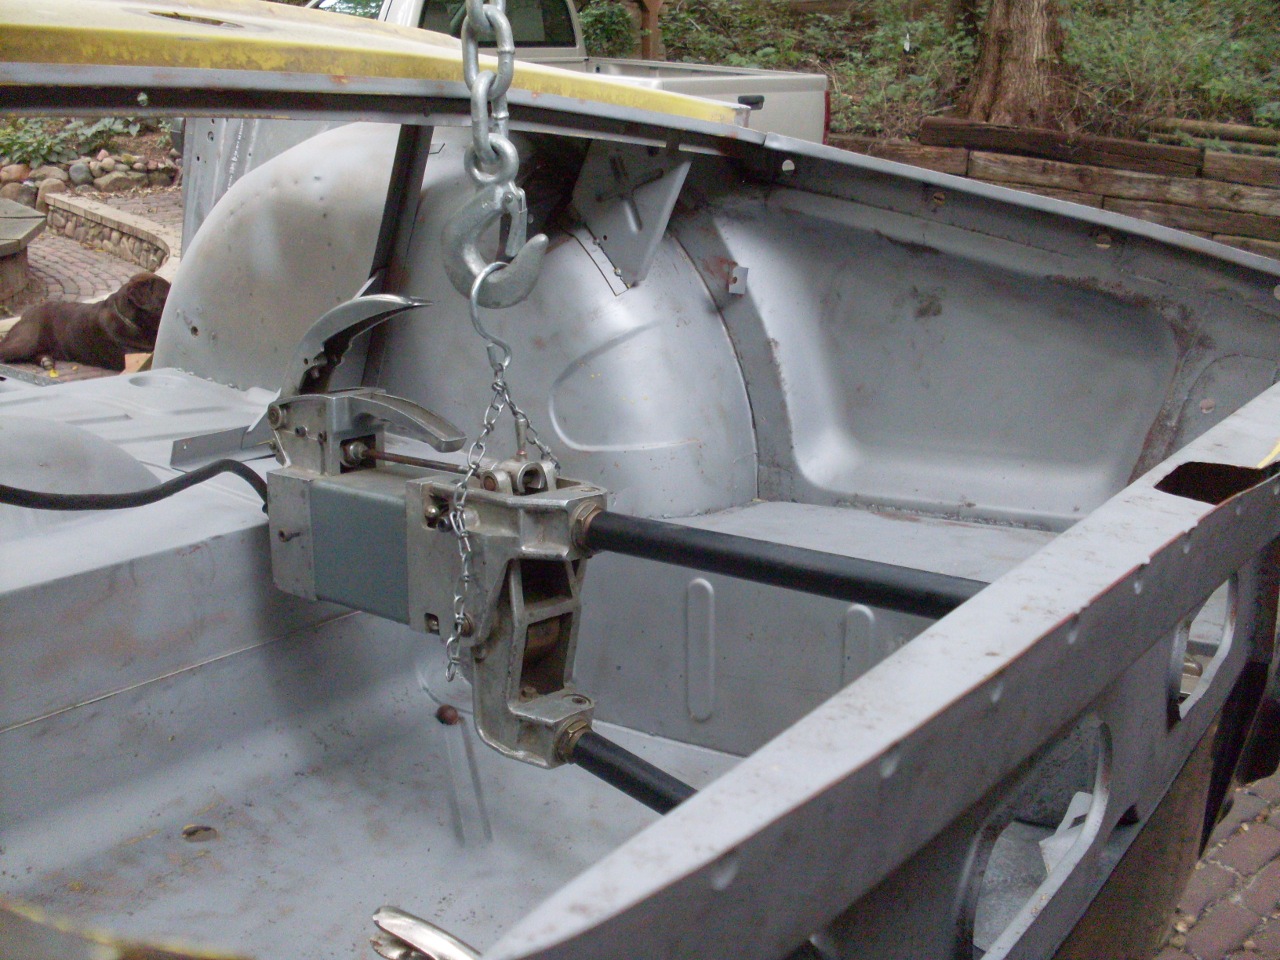
My
final solution was to use the engine hoist as a skyhook, and suspend
the spot welder from it. That way I could position it without
having to support it. Worked great. I wish I'd figured it
out before I punched all those plug weld holes.

This feels like a milestone, and I'm glad it's done.
July Update--
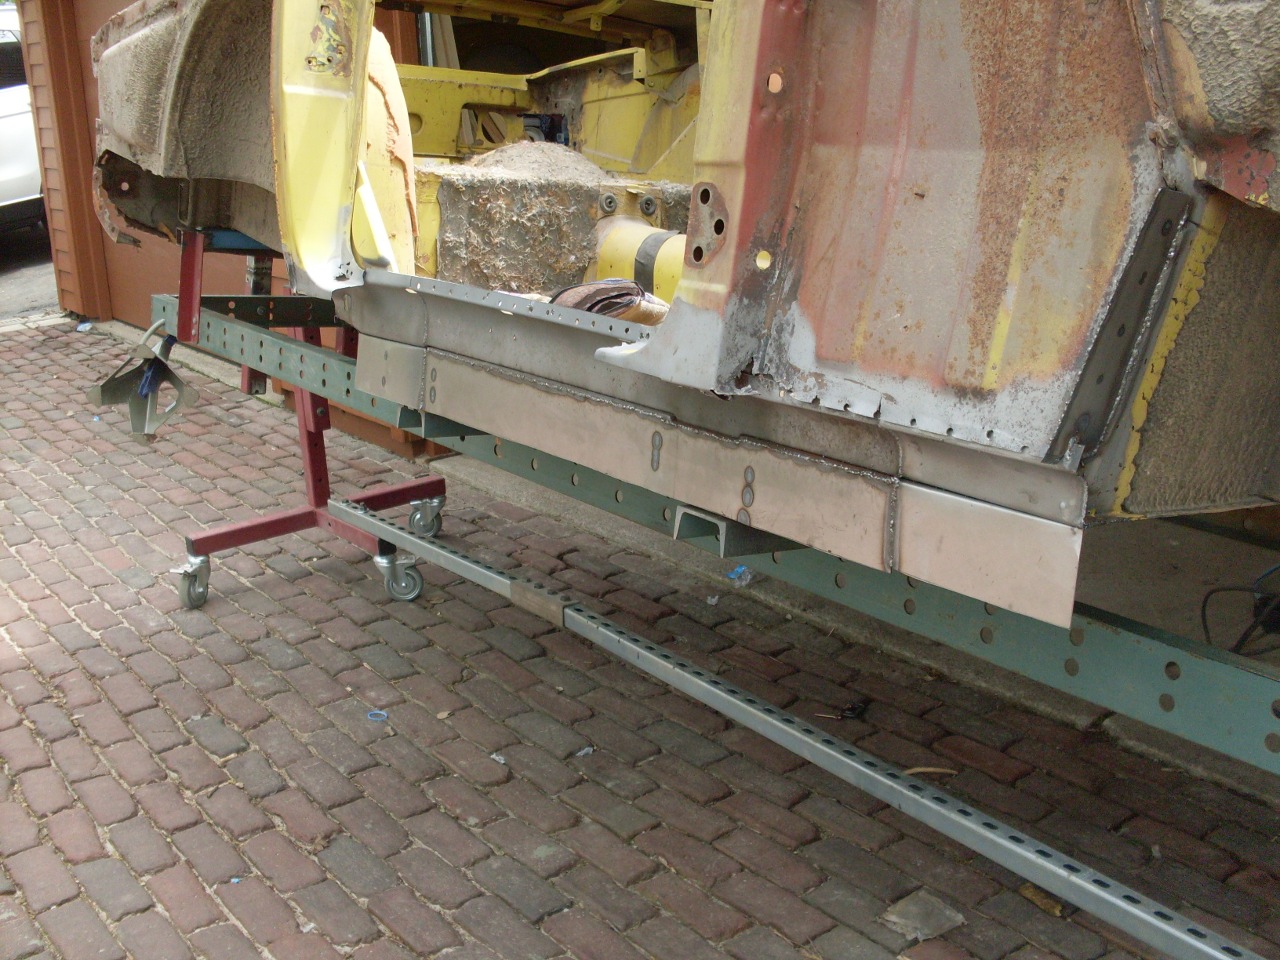
With
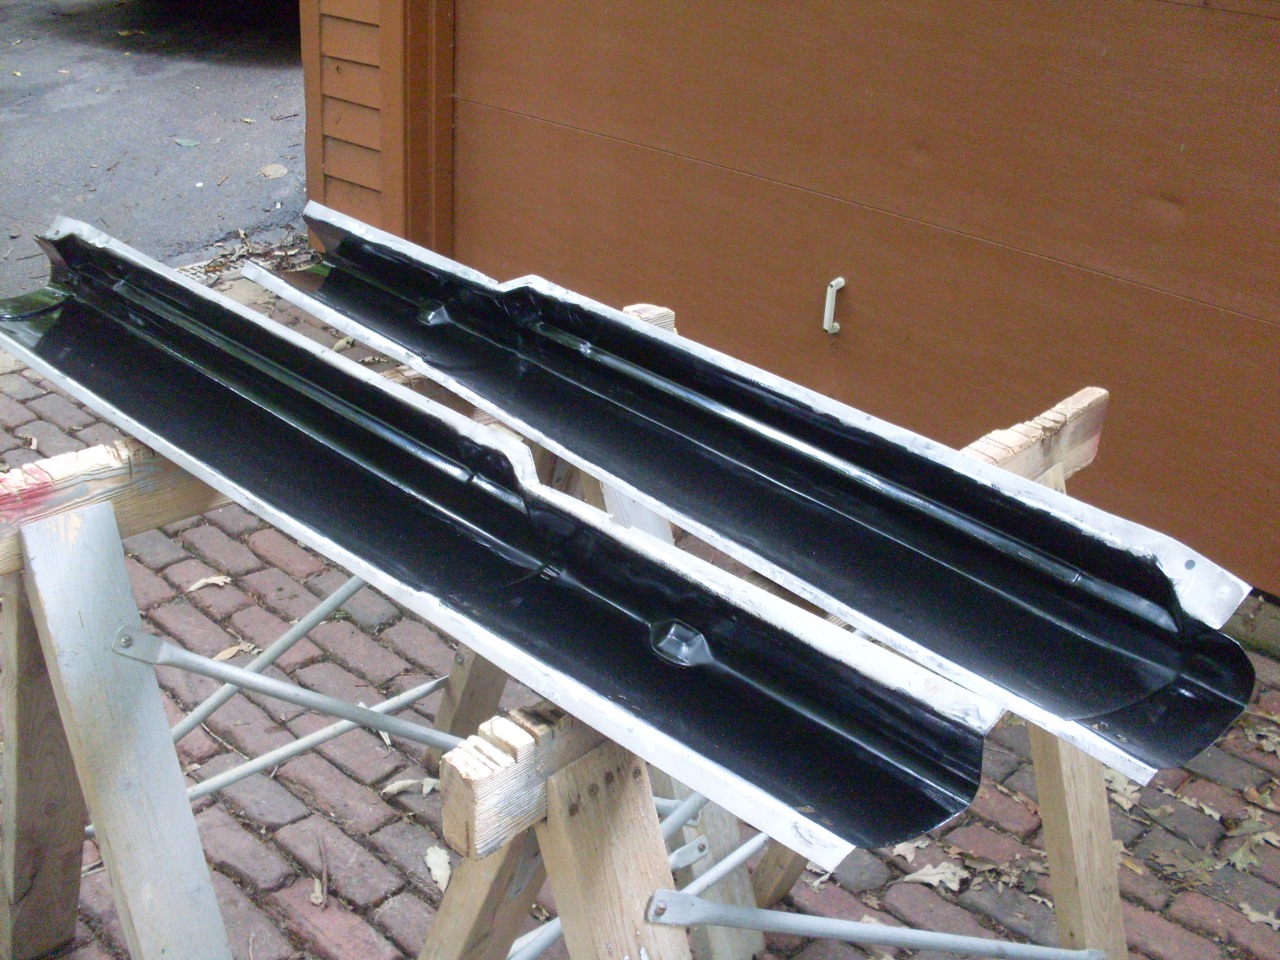
the B posts solid again, I trial fitted the new rockers. Most new
panels on this car so far have taken a little fiddling to get them to
fit, but the rockers weren't too bad.
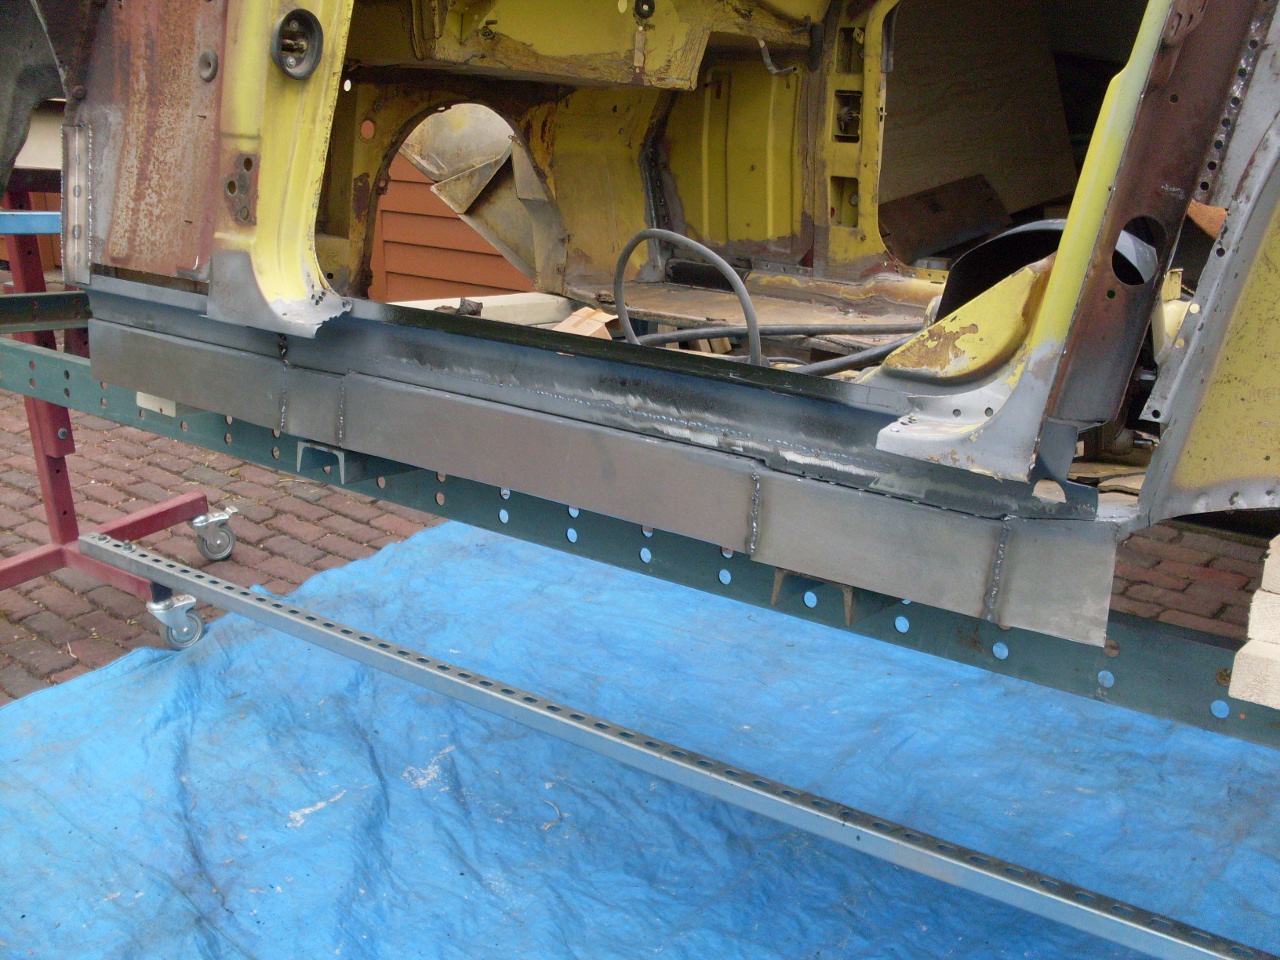
When
I was finally OK with the fit, I painted what will be the inside of the
rockers with POR 15, except for the parts that will be spot welded.
These got a couple of coats of a weld through zinc primer.
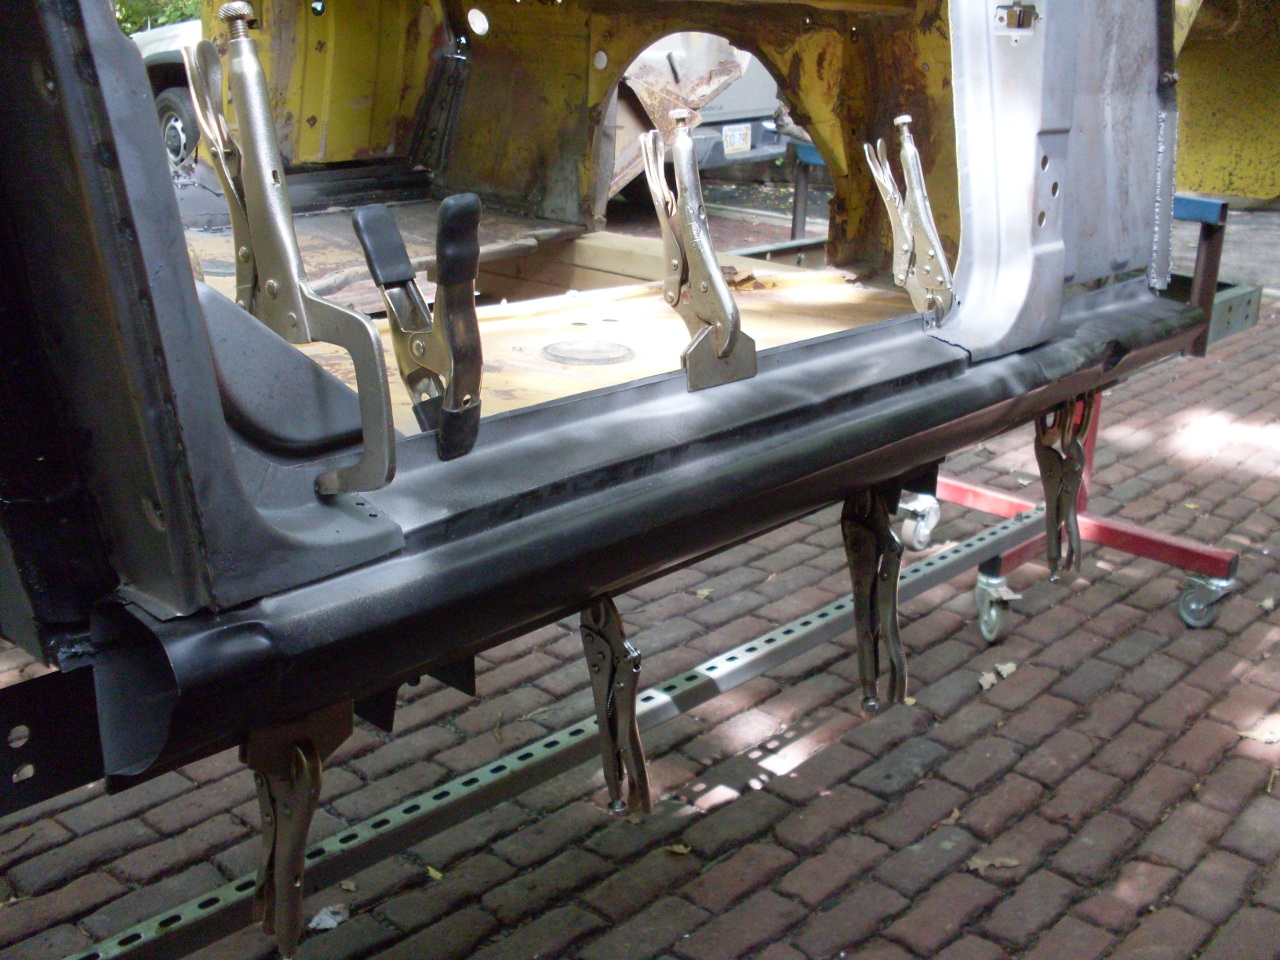
Also put a sealer on the seam between the inner sill and the
floor pan flange.
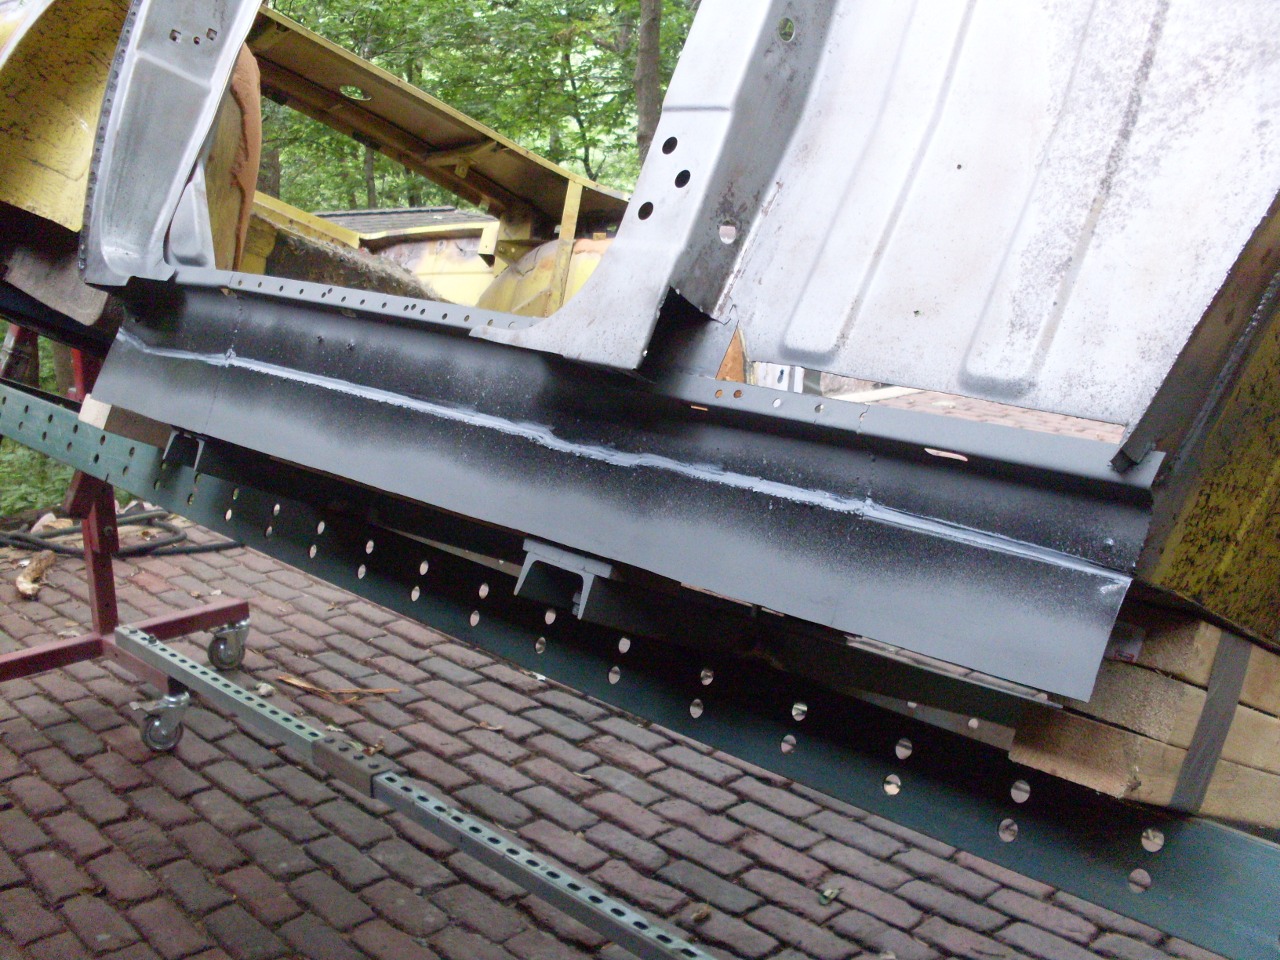
Lined everything up, and spot welded it.
Though
feeling I'd made a real milestone, there was still a lot to do.
There were maybe a dozen areas on the inner wing panels
with rust through, some pretty small, some pretty serious.
Rather than covering all of them, I'll just cover one of the more
involved areas and describe the process in some detail.
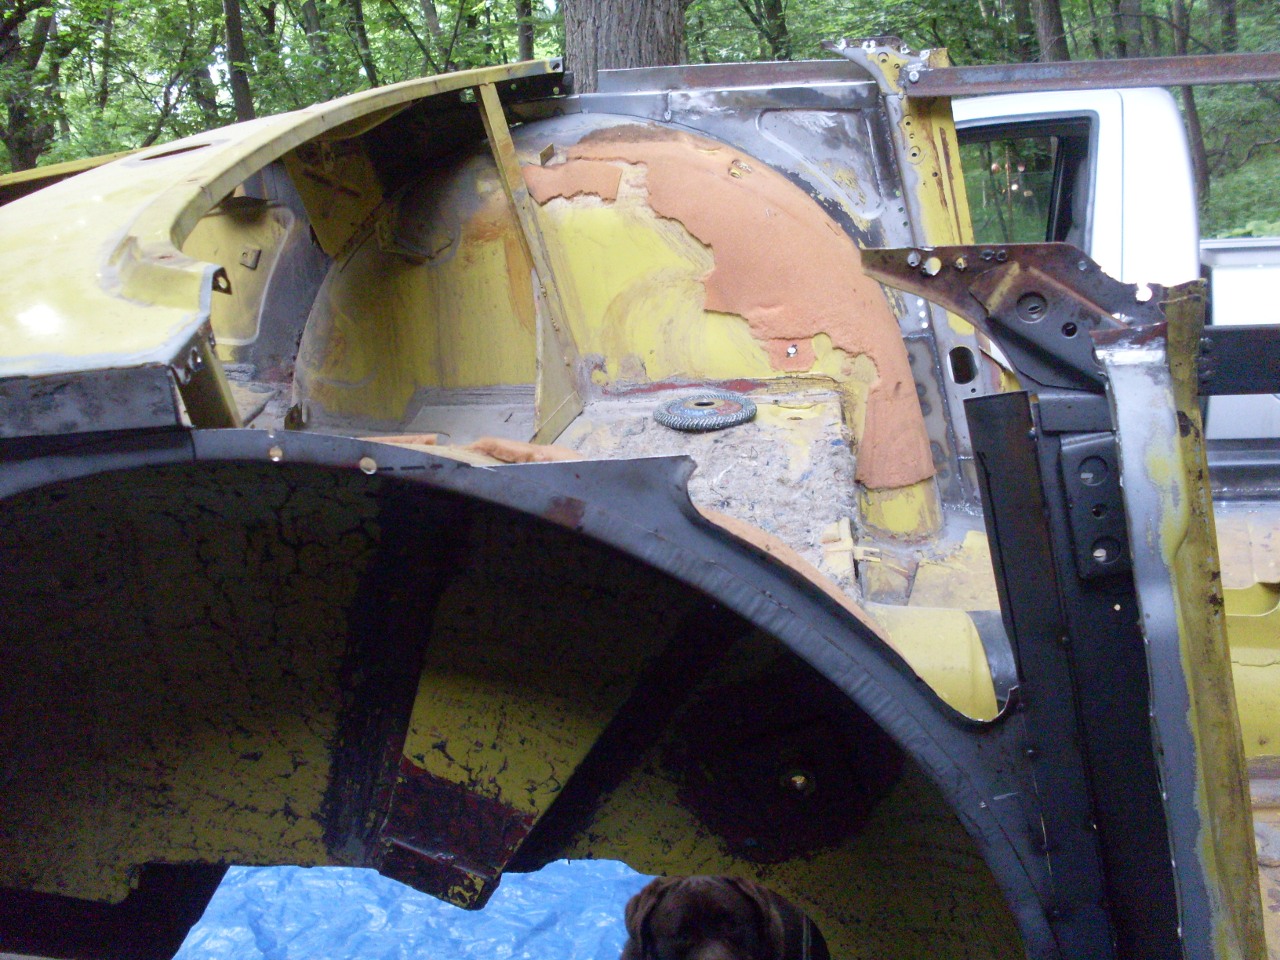
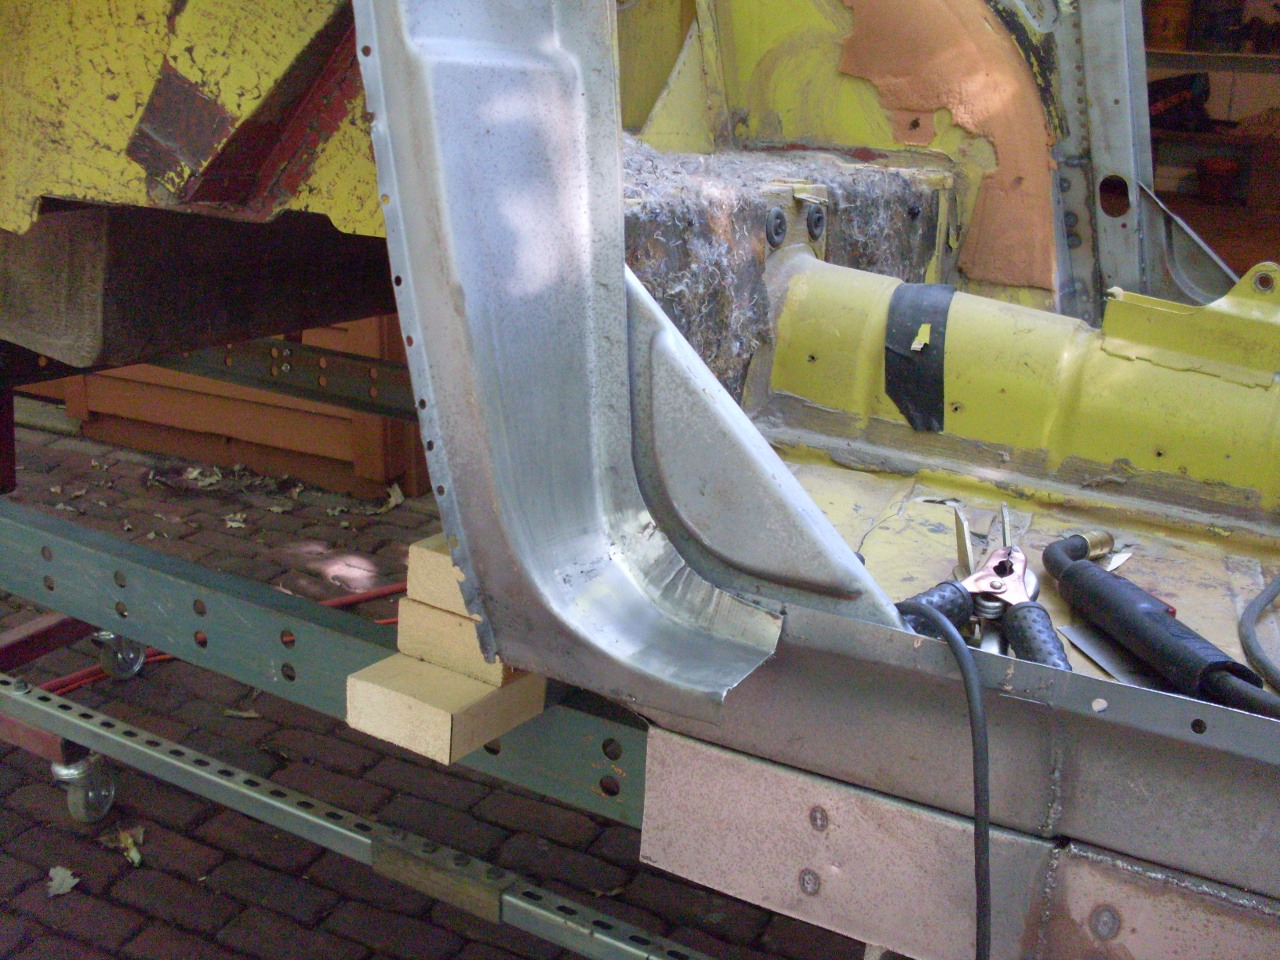
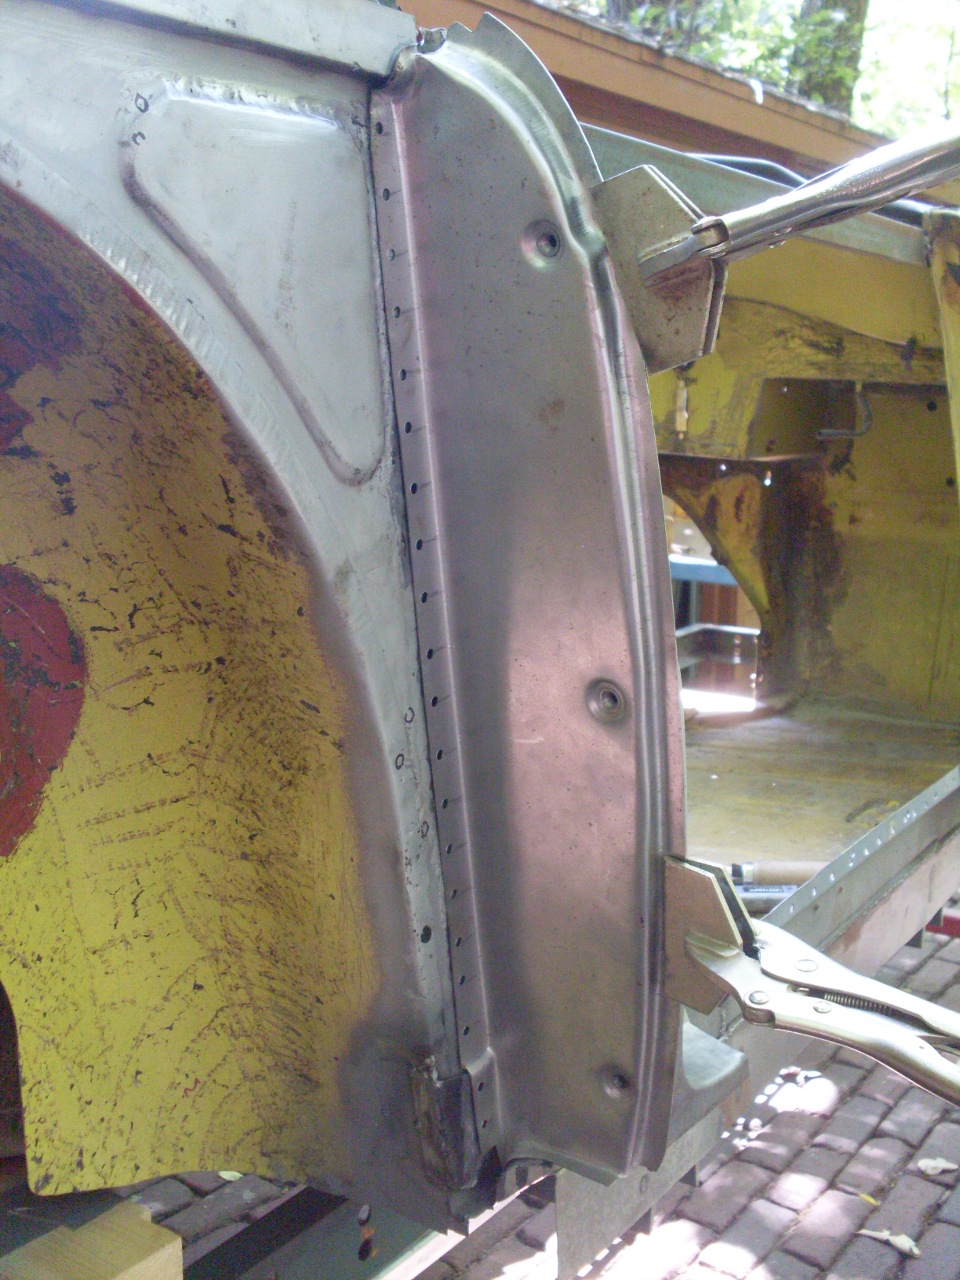
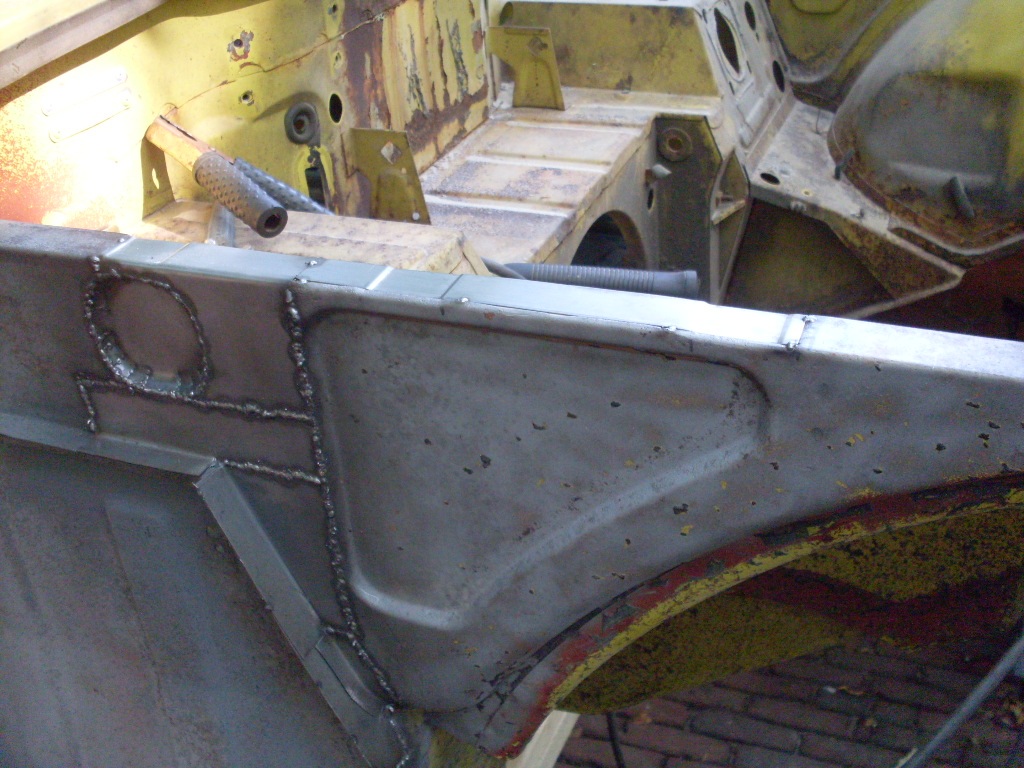
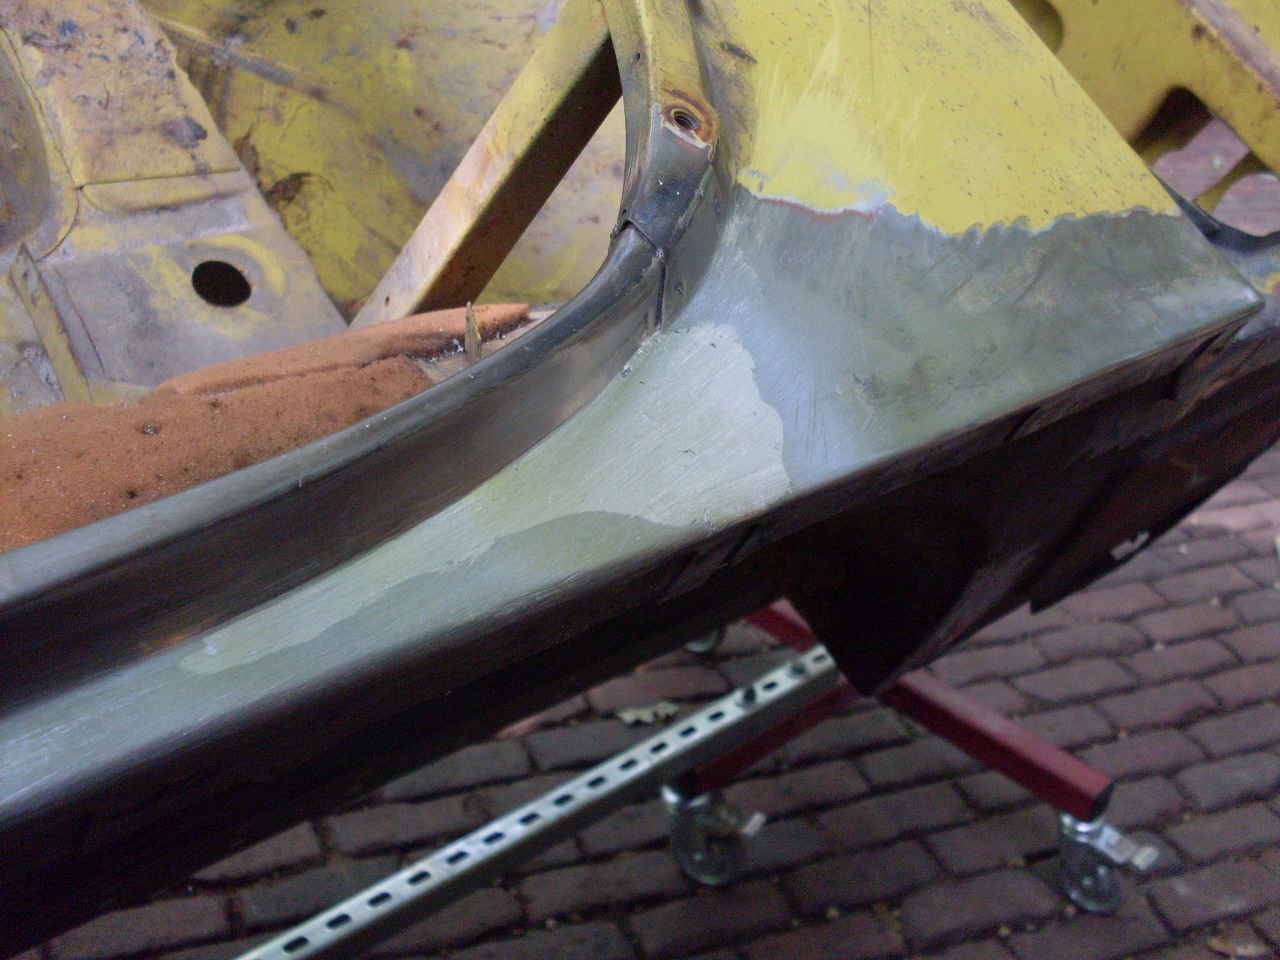
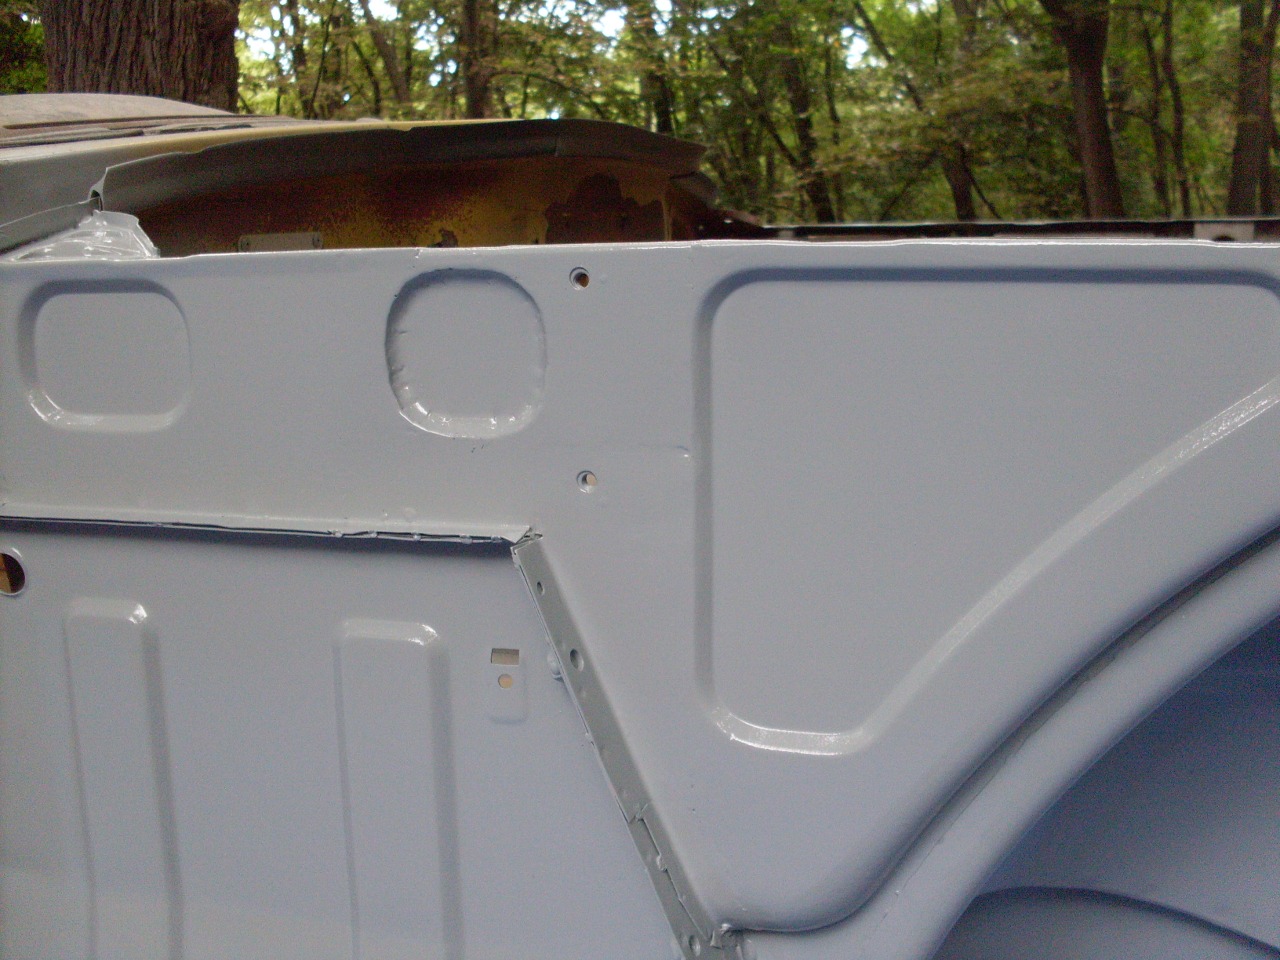
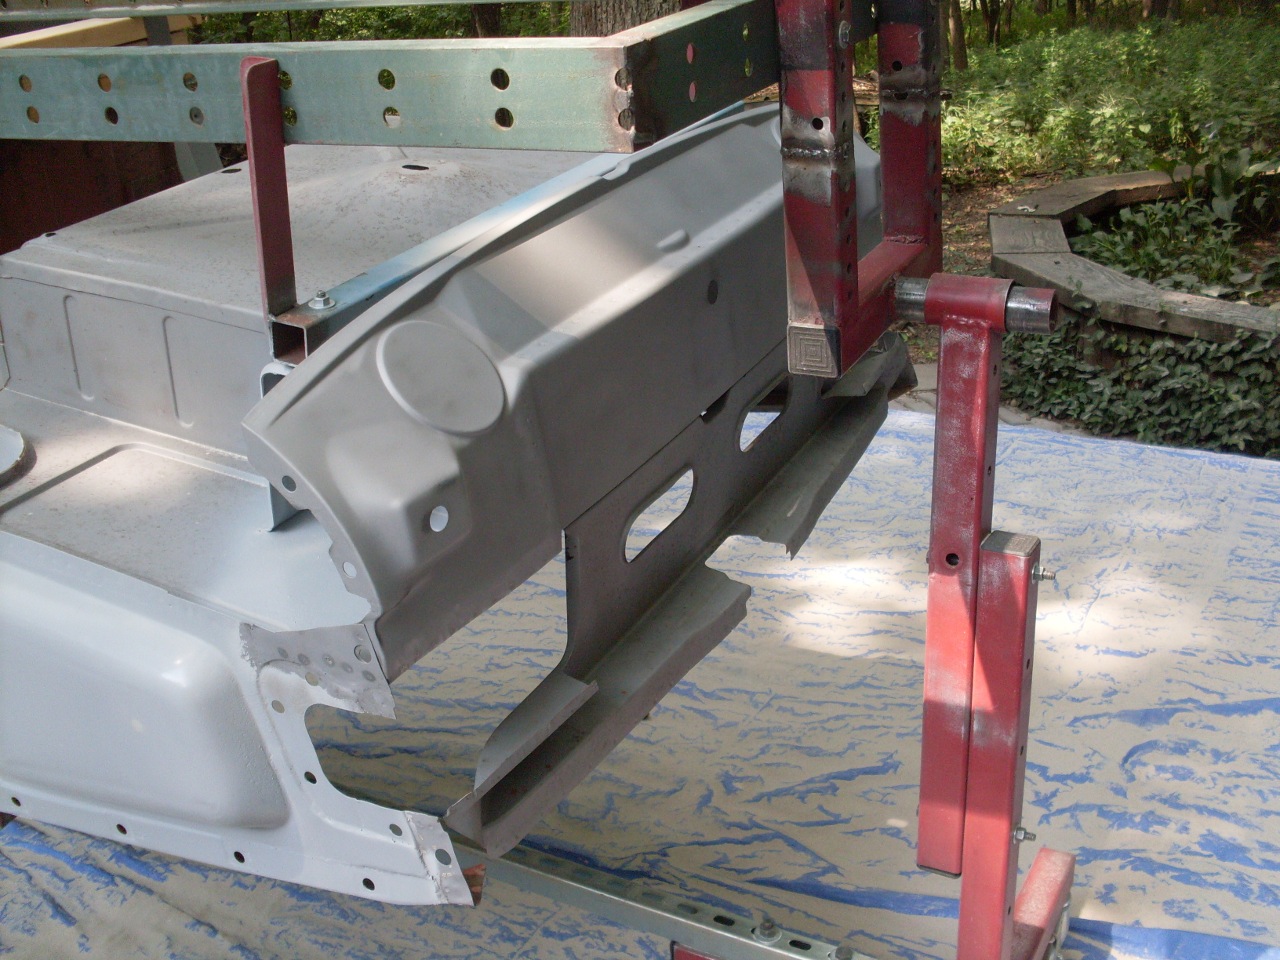
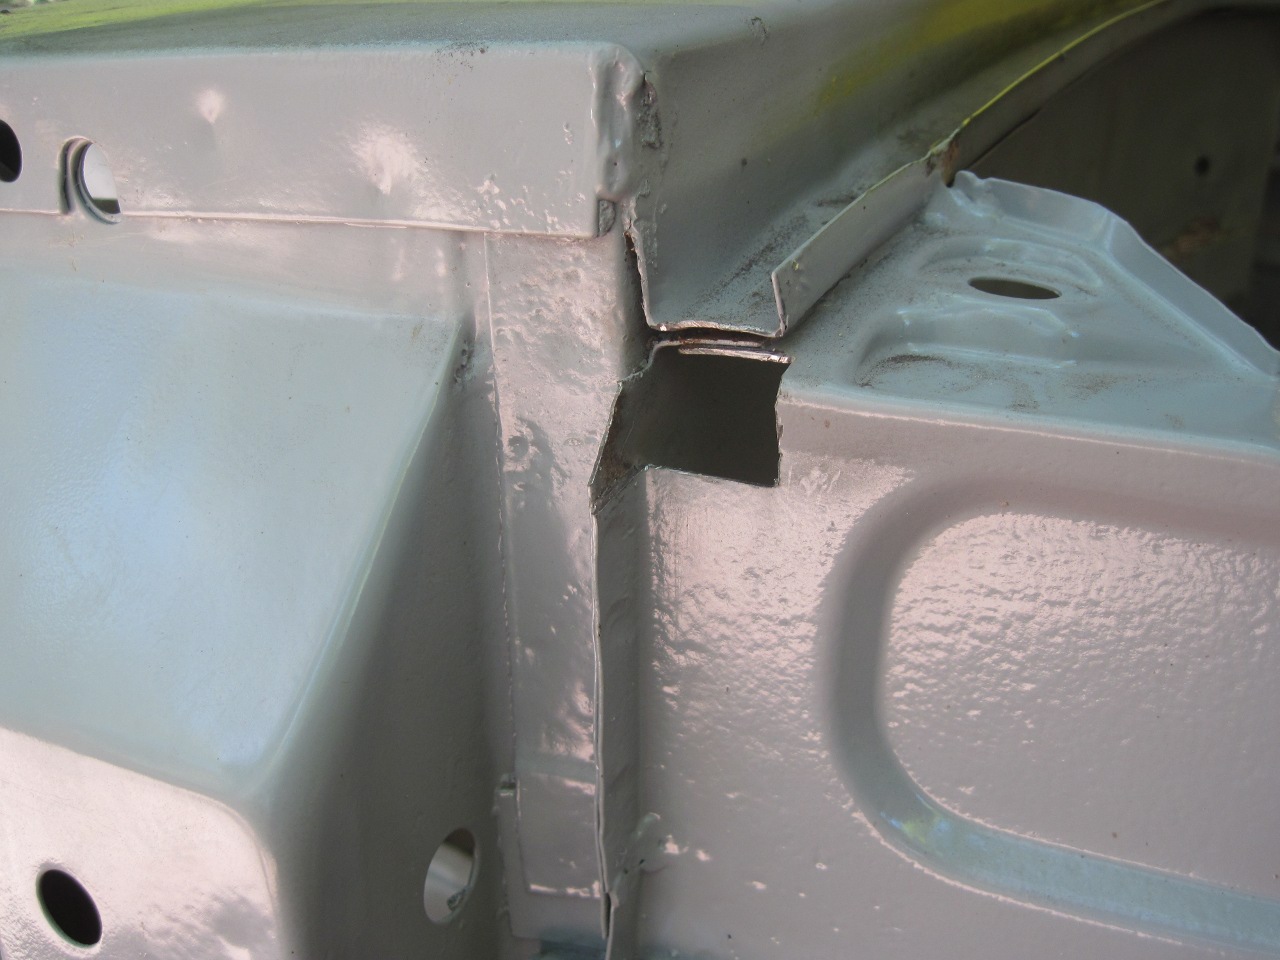
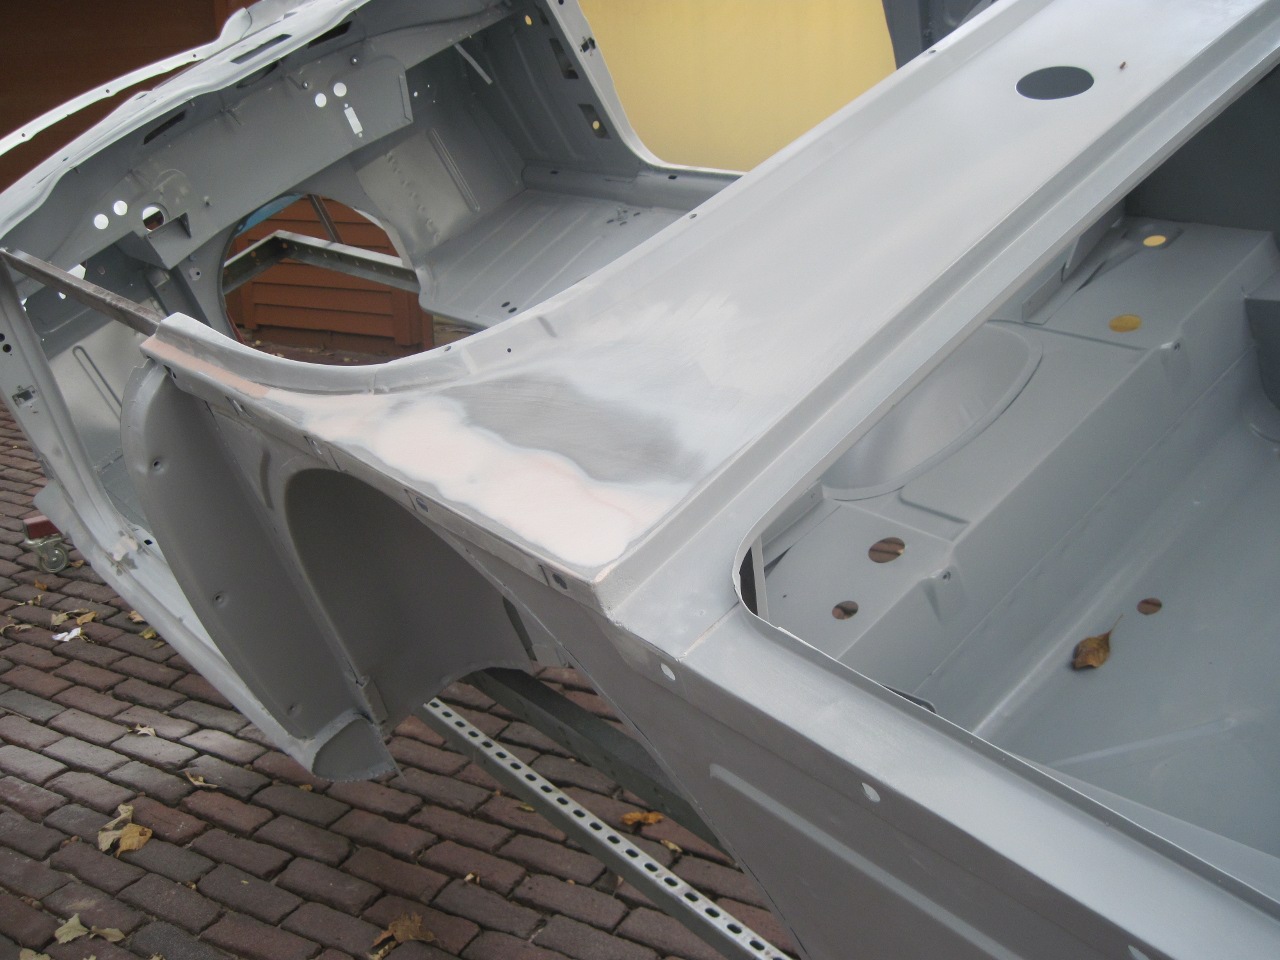
This
is part of the right front inner wing just behind the wheel well.
There was rust through all the way from the top where the front
fender mounts, all the way down to the wheel well. I've marked
out the first areas of metal to remove.
I had to take the flange from the side panel, and a small part of the firewall out, too.
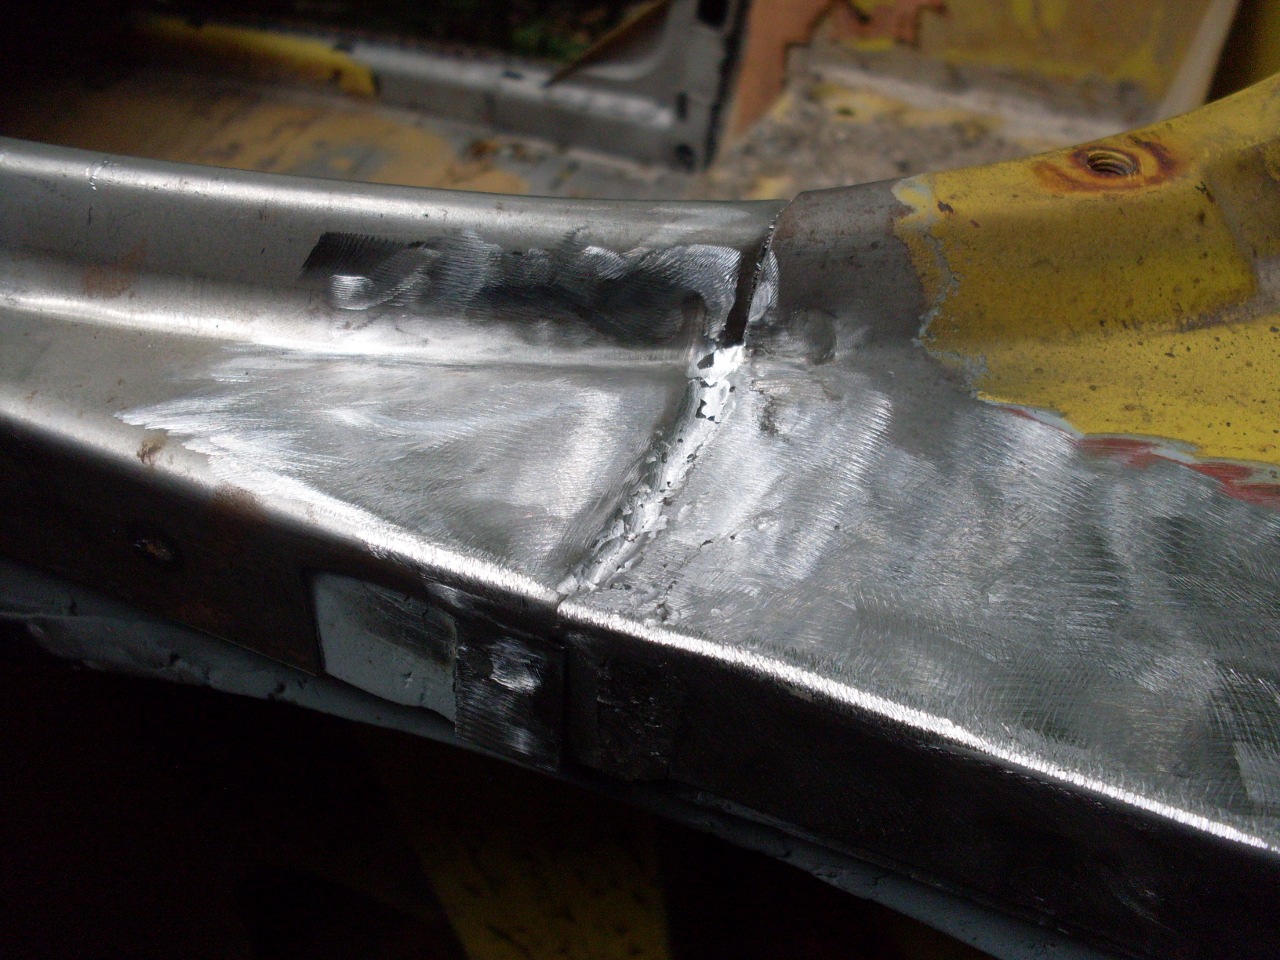
A new side panel flange, and the section of firewall are tacked in, then the welded and the welds dressed.
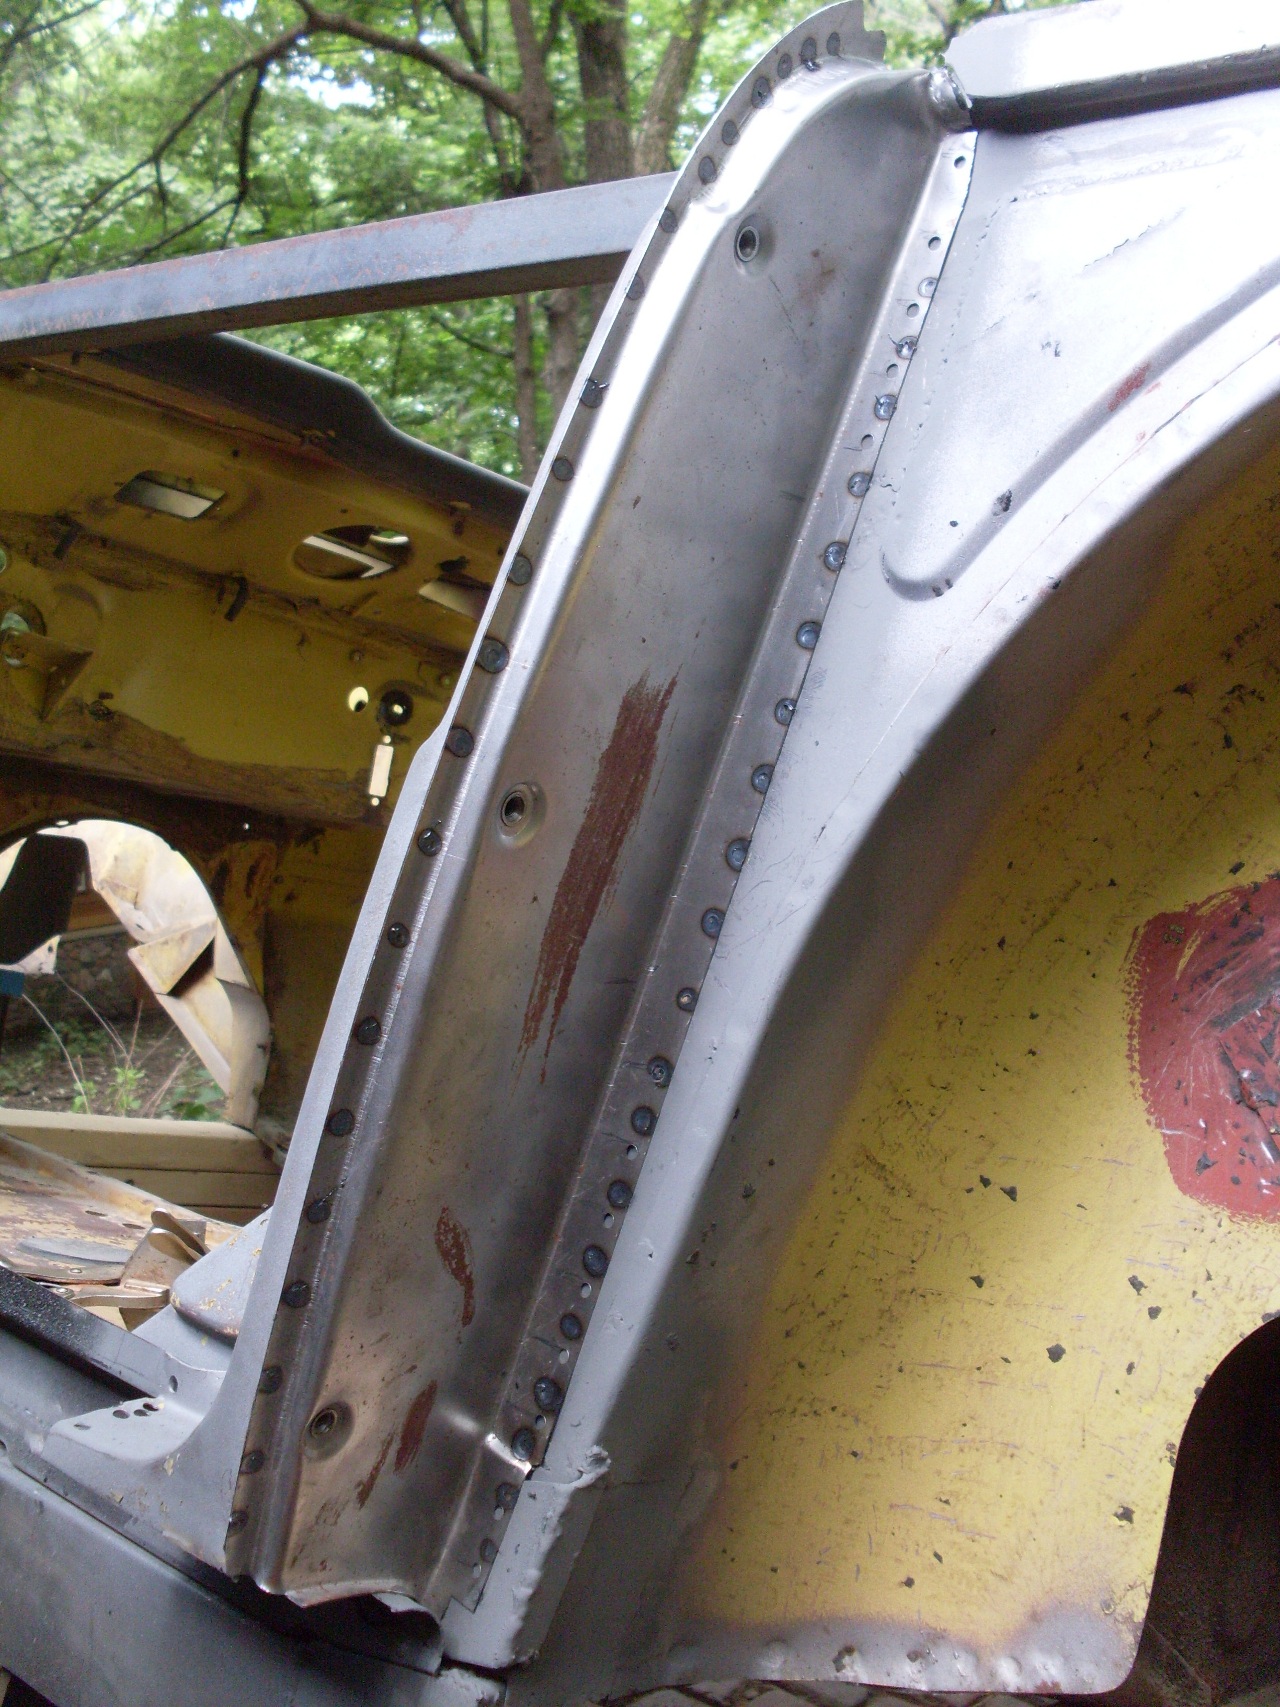
Then the little curved piece down near the wheel well, and the piece above it.
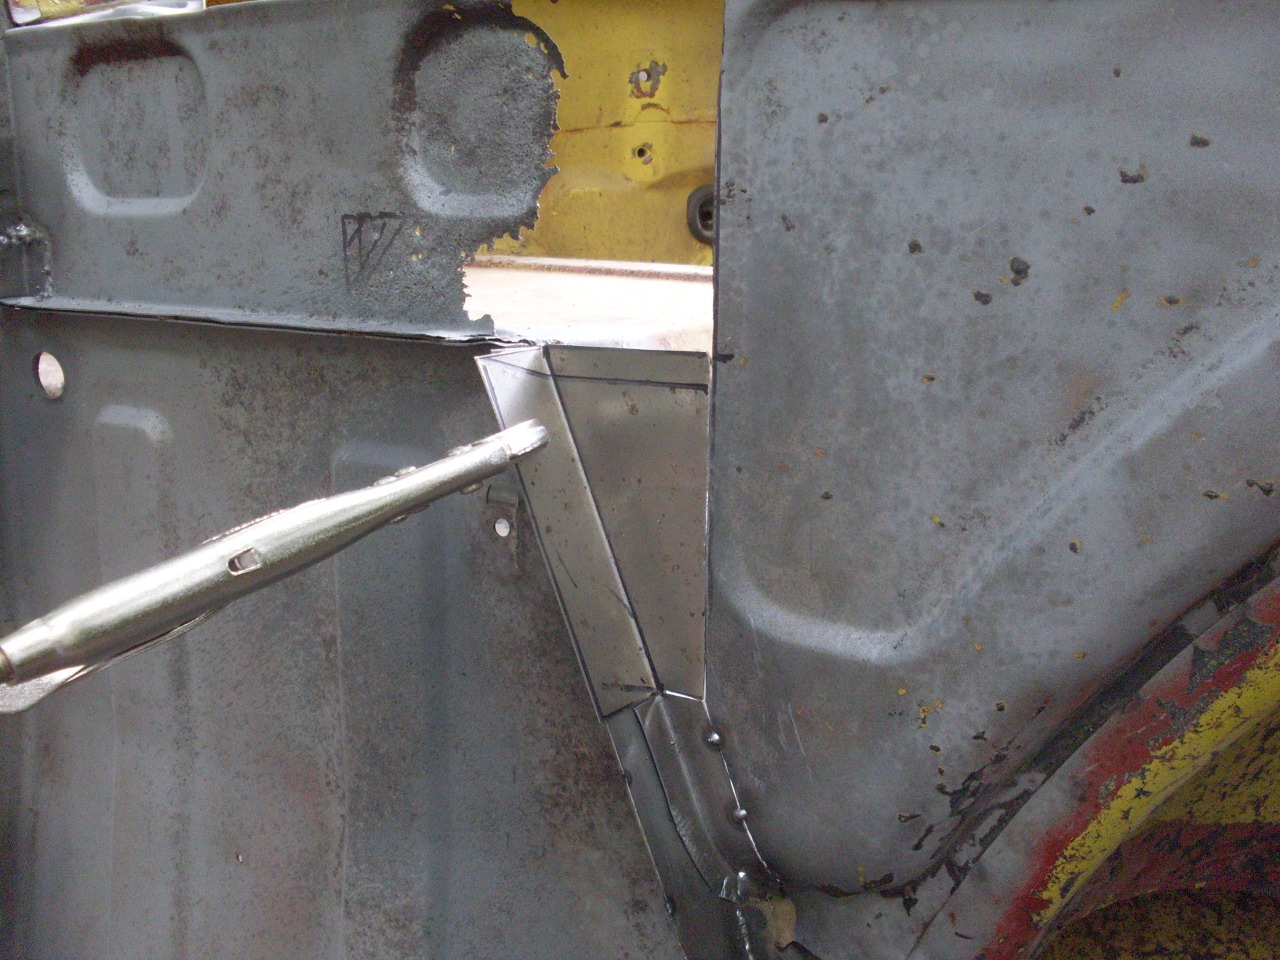
One
more piece on top of that. If I'd had more conficdence in my
sheet metal fabrication skills, I might have tried to do this fix with
fewer pieces.
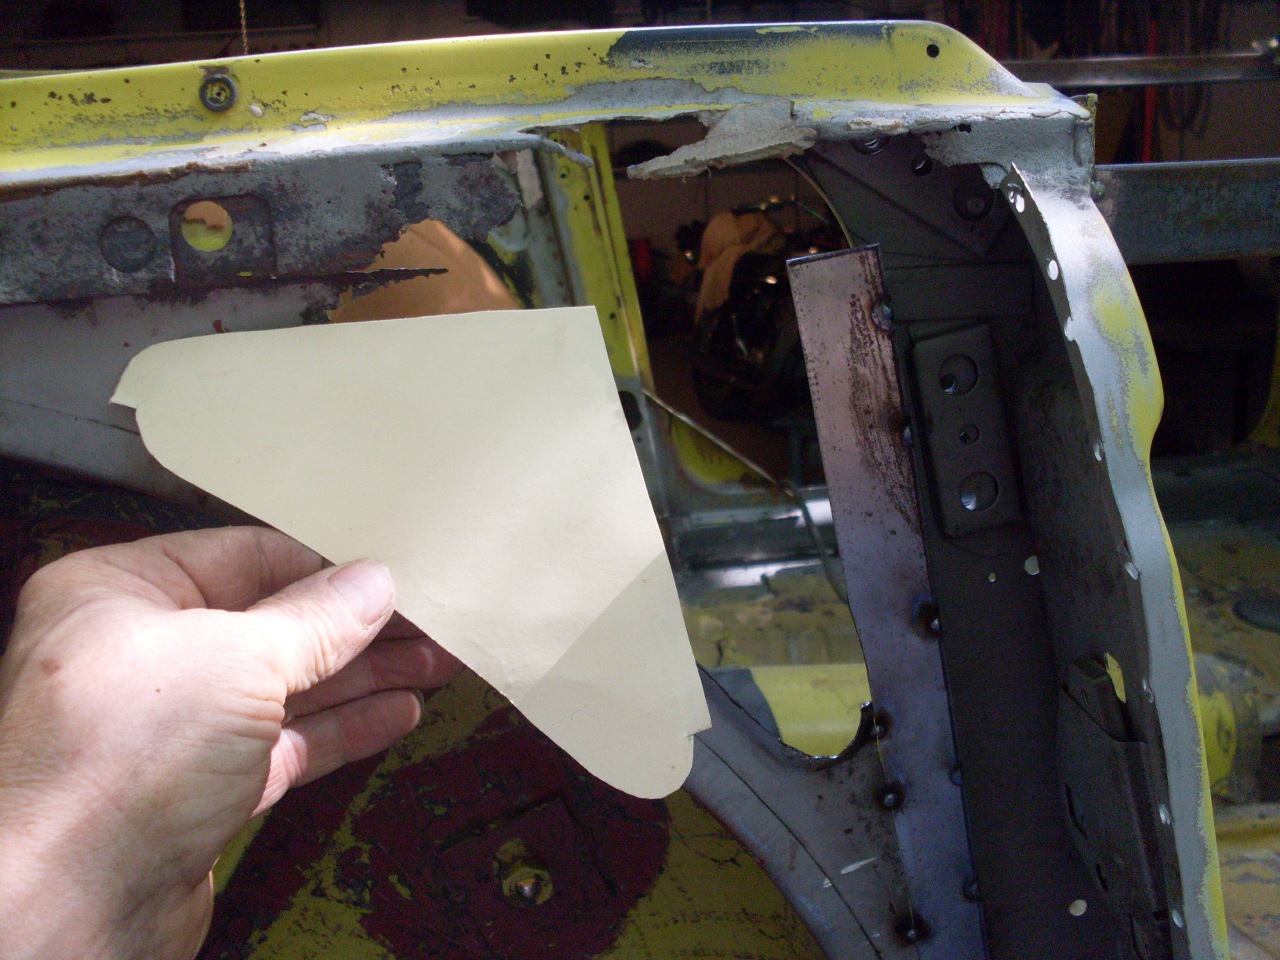
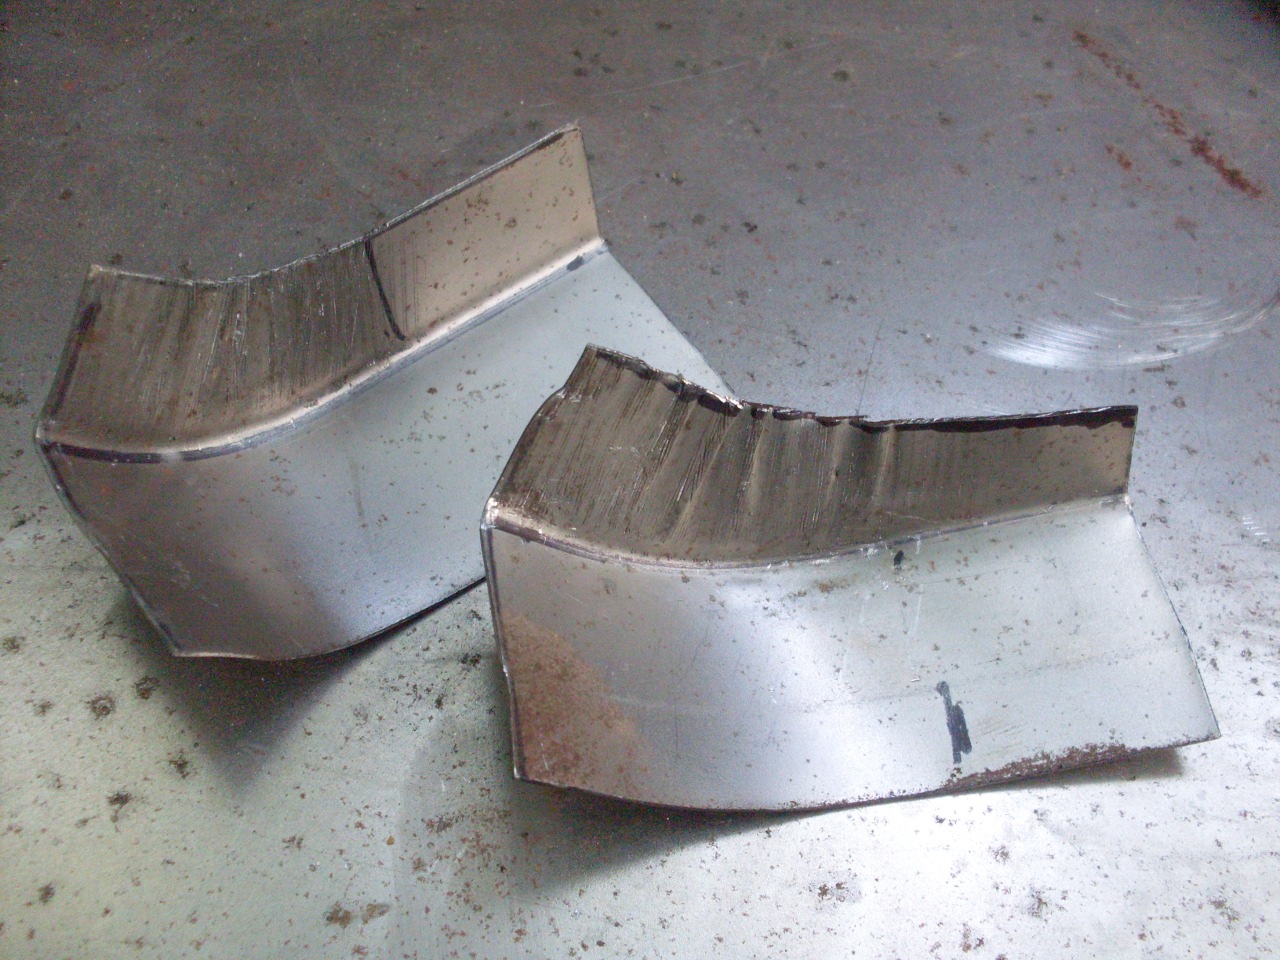
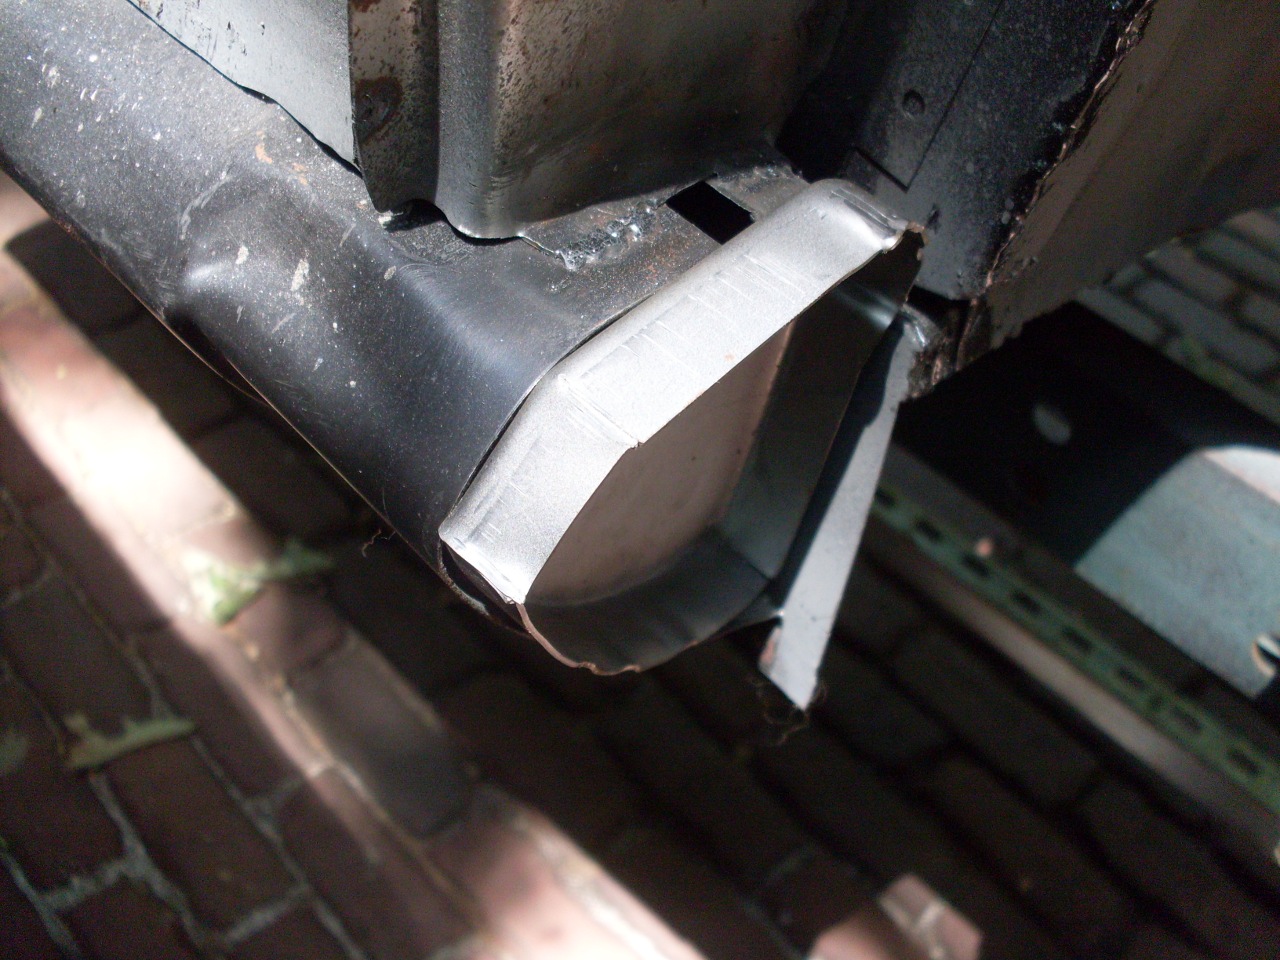
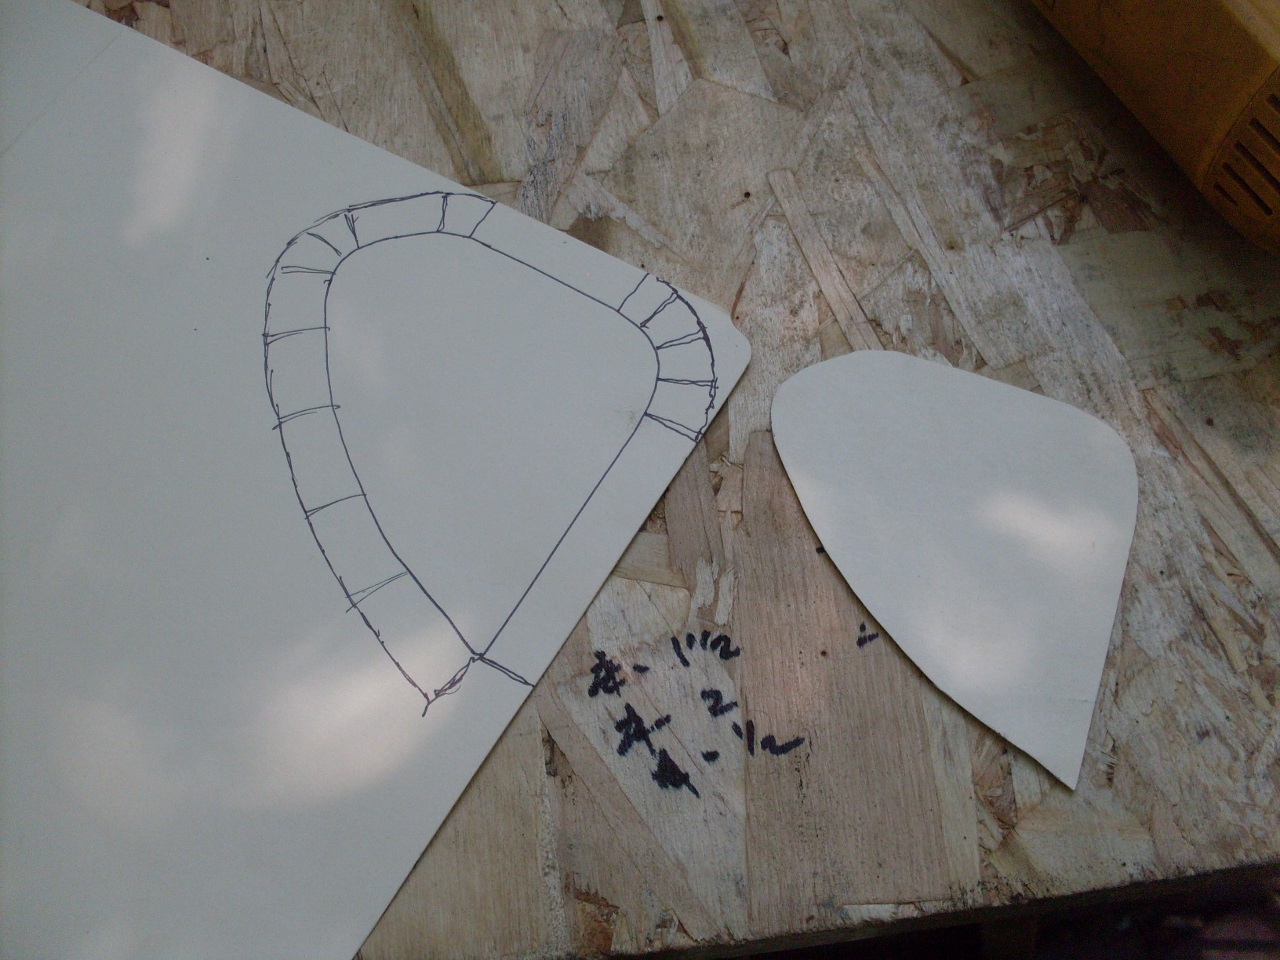
Here's
the tricky part. I really wanted to reproduce that little dished
oval stiffening feature, so first I made the piece that included the
top fender flange. It has a little recessed area in the flange to
accommodate the speed nut fasteners for the fender. To do the
recess, I made a little two piece die gizmo that I put on the flange
and pressed with vice grips.
Then made the oval piece.

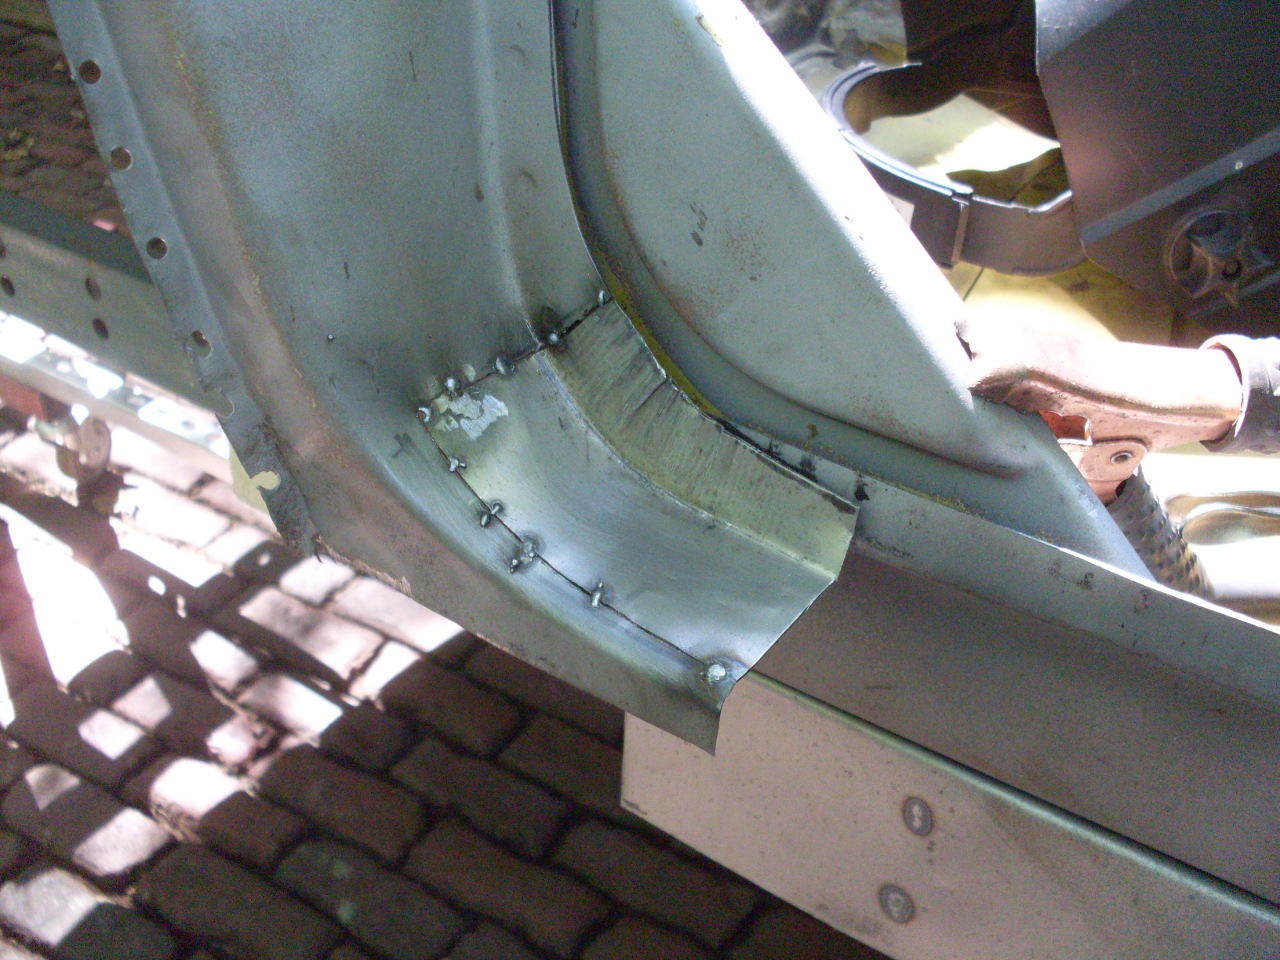
Used
the oval to mark the cutout, and welded the oval in place. The
backside shows reasonable penetration. Welds will be cleaned up
later.
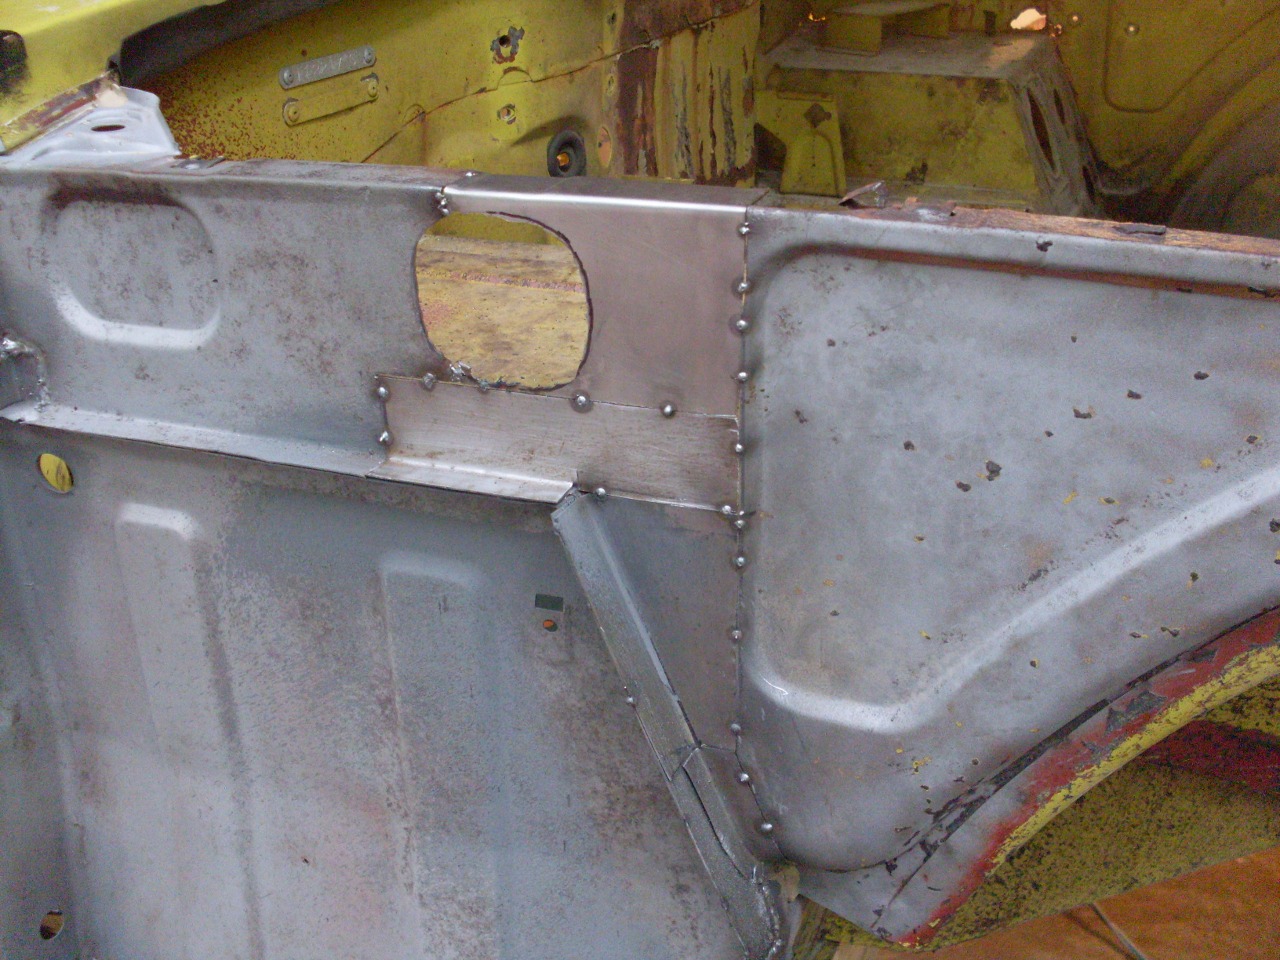
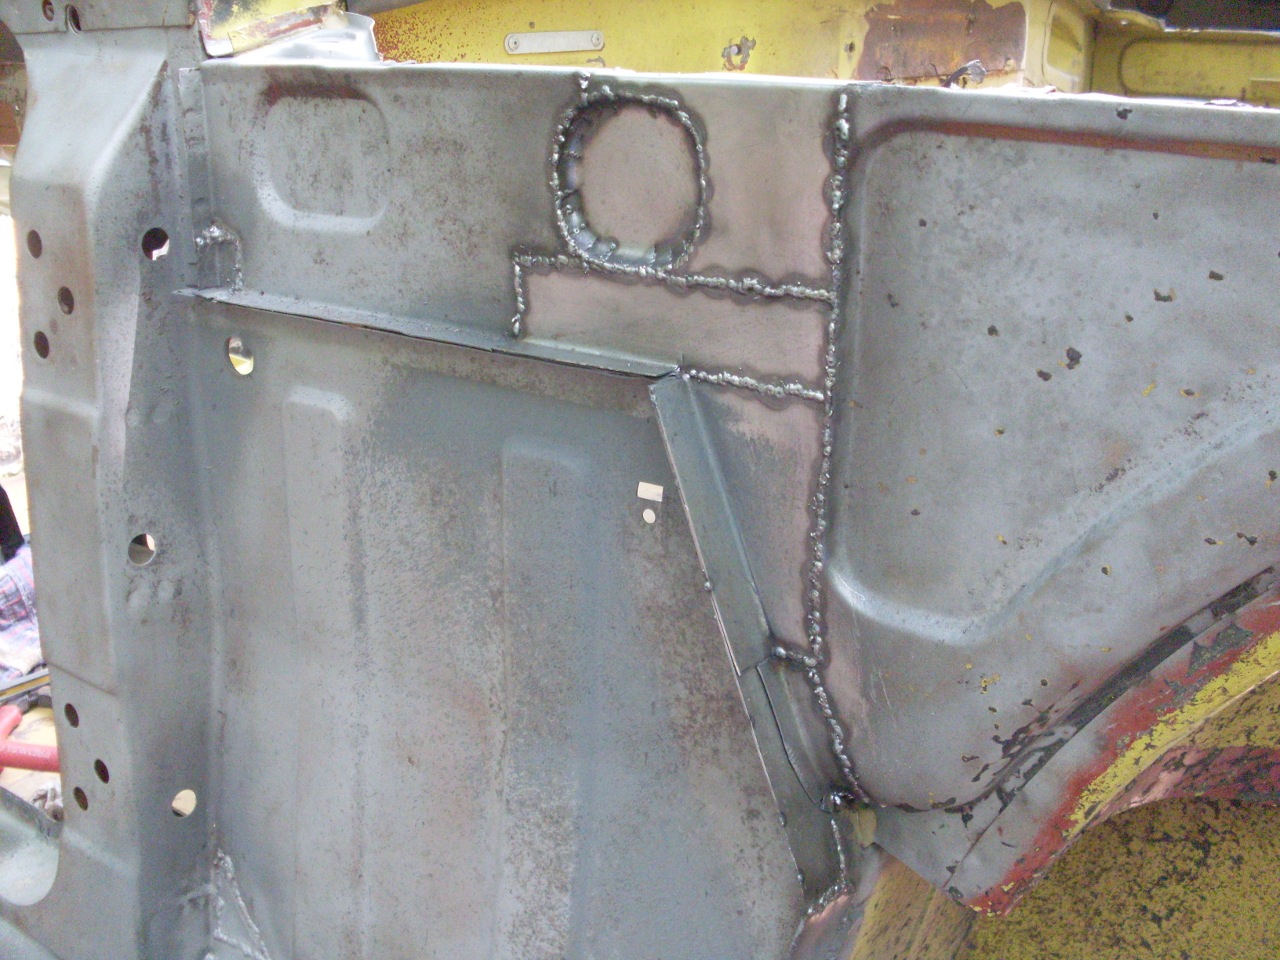
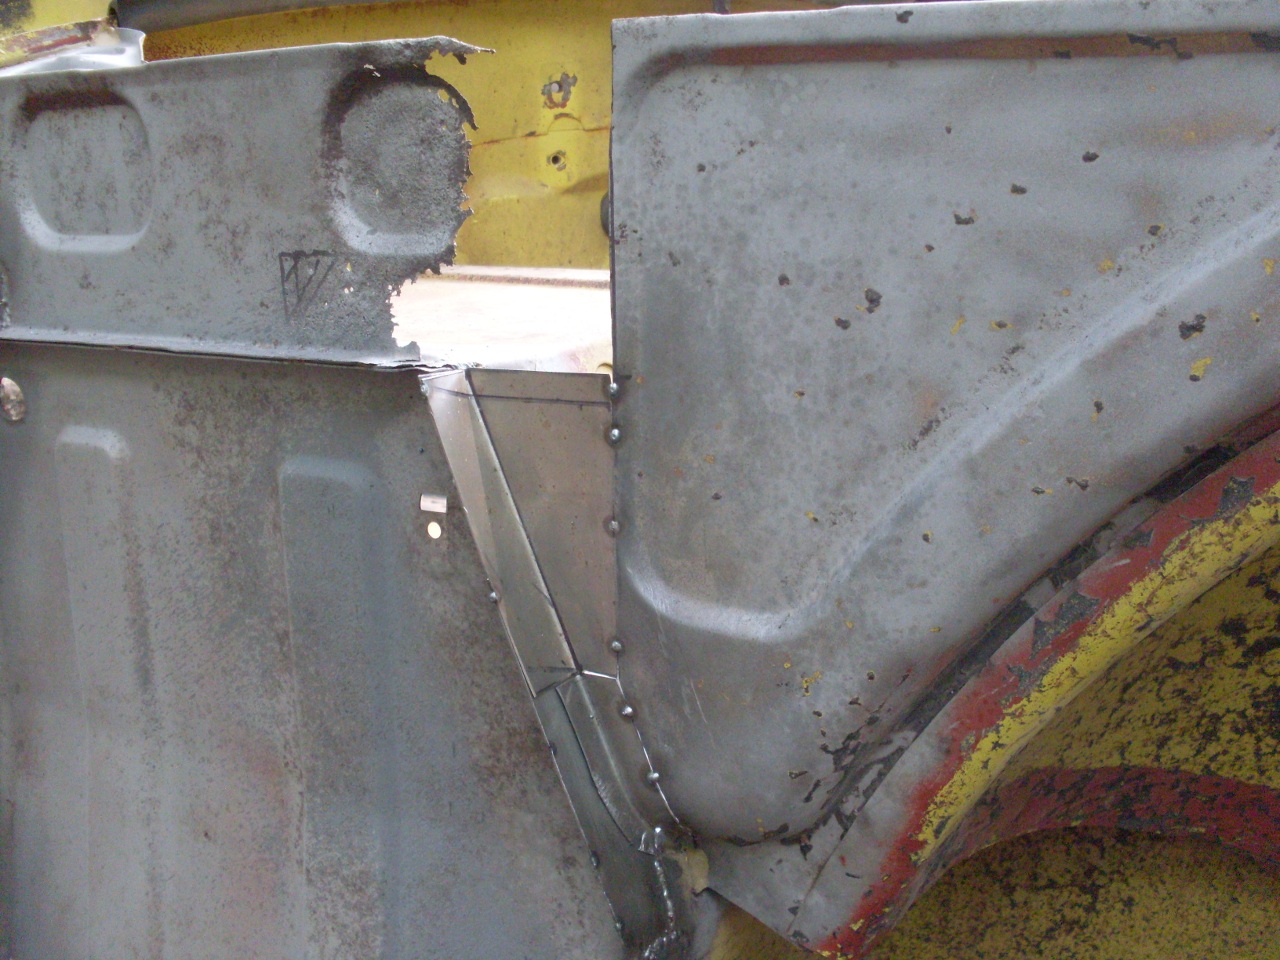
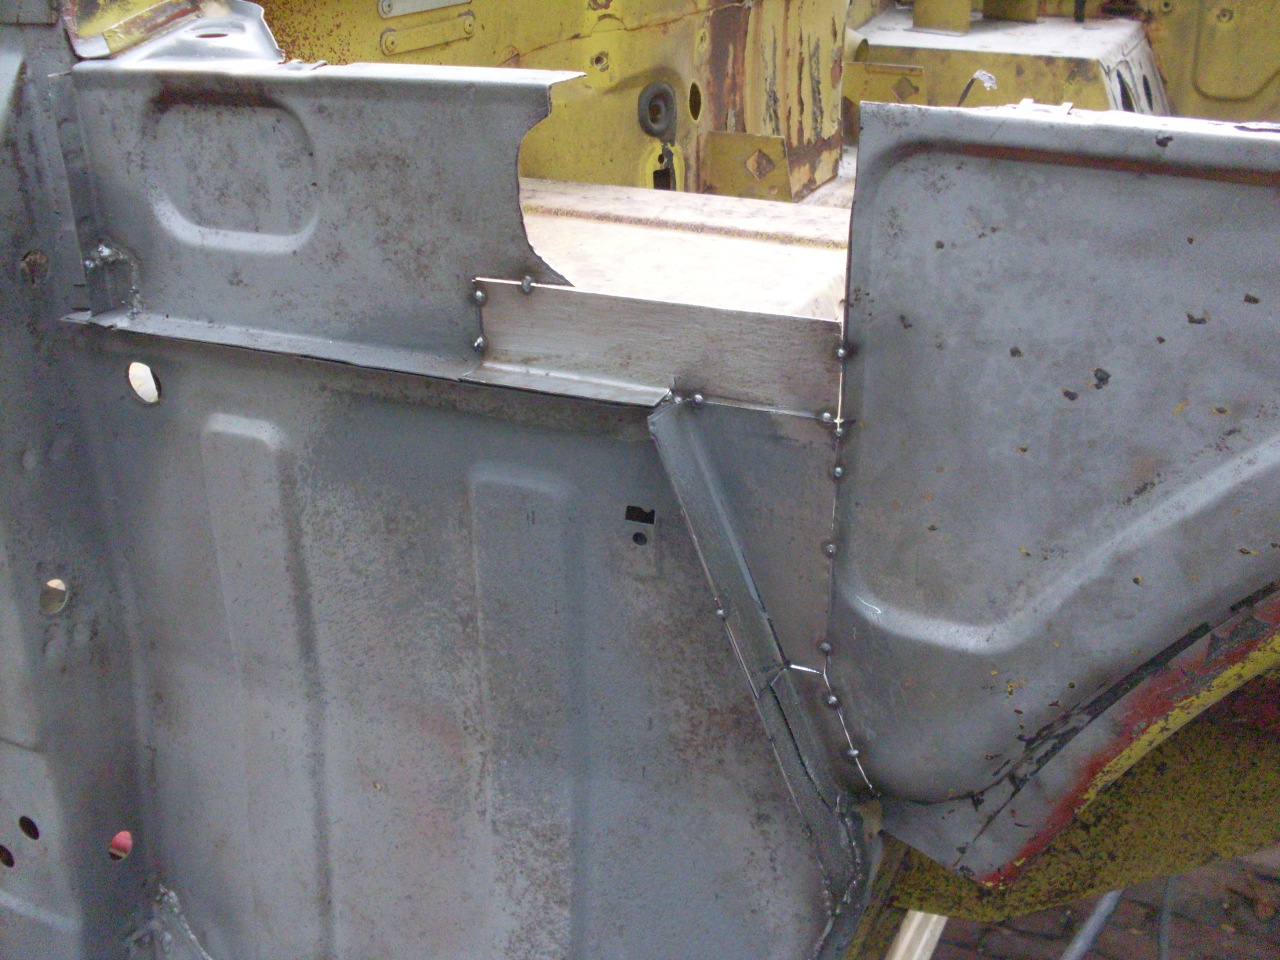
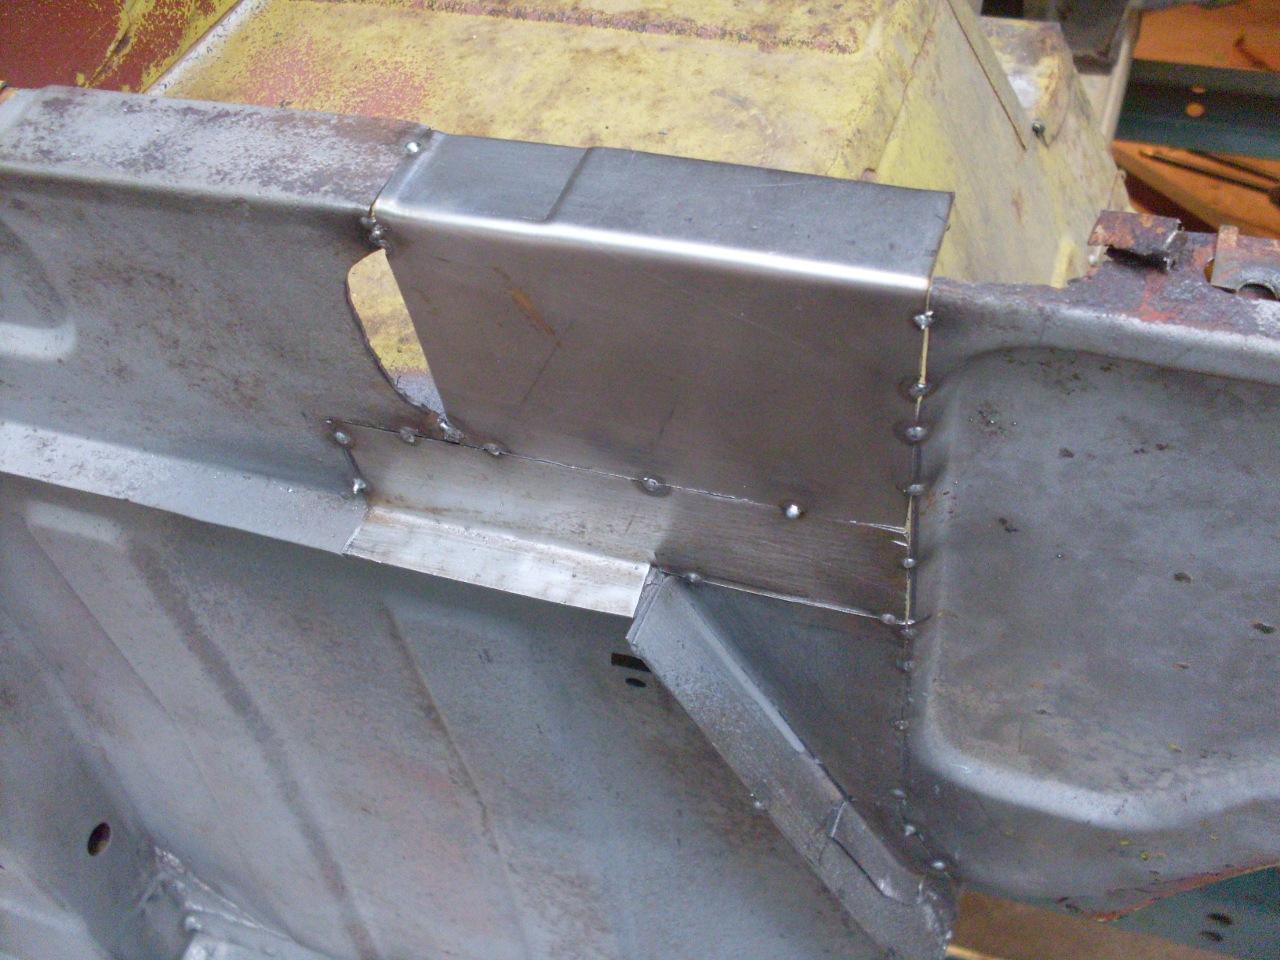
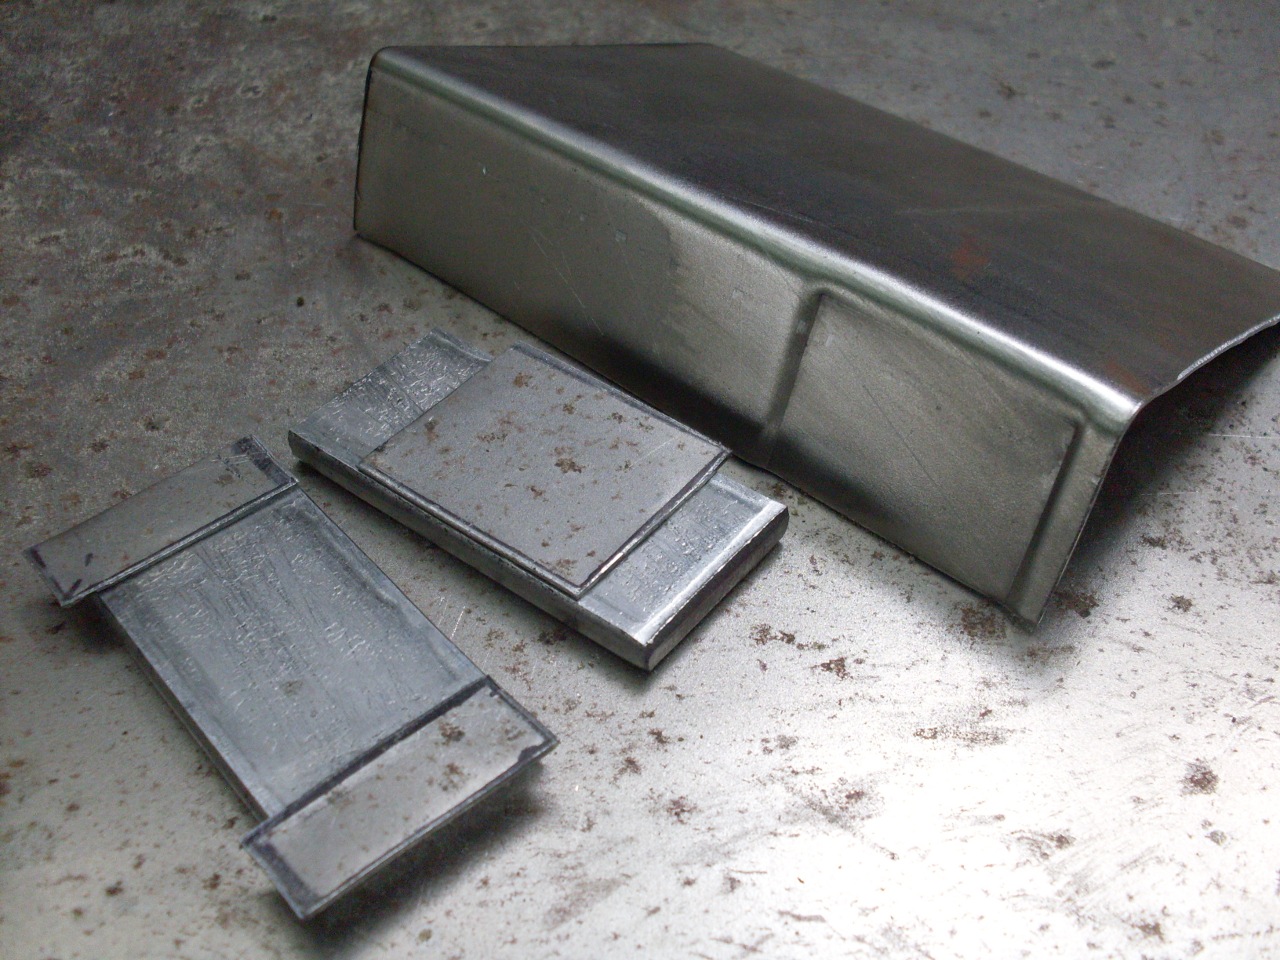
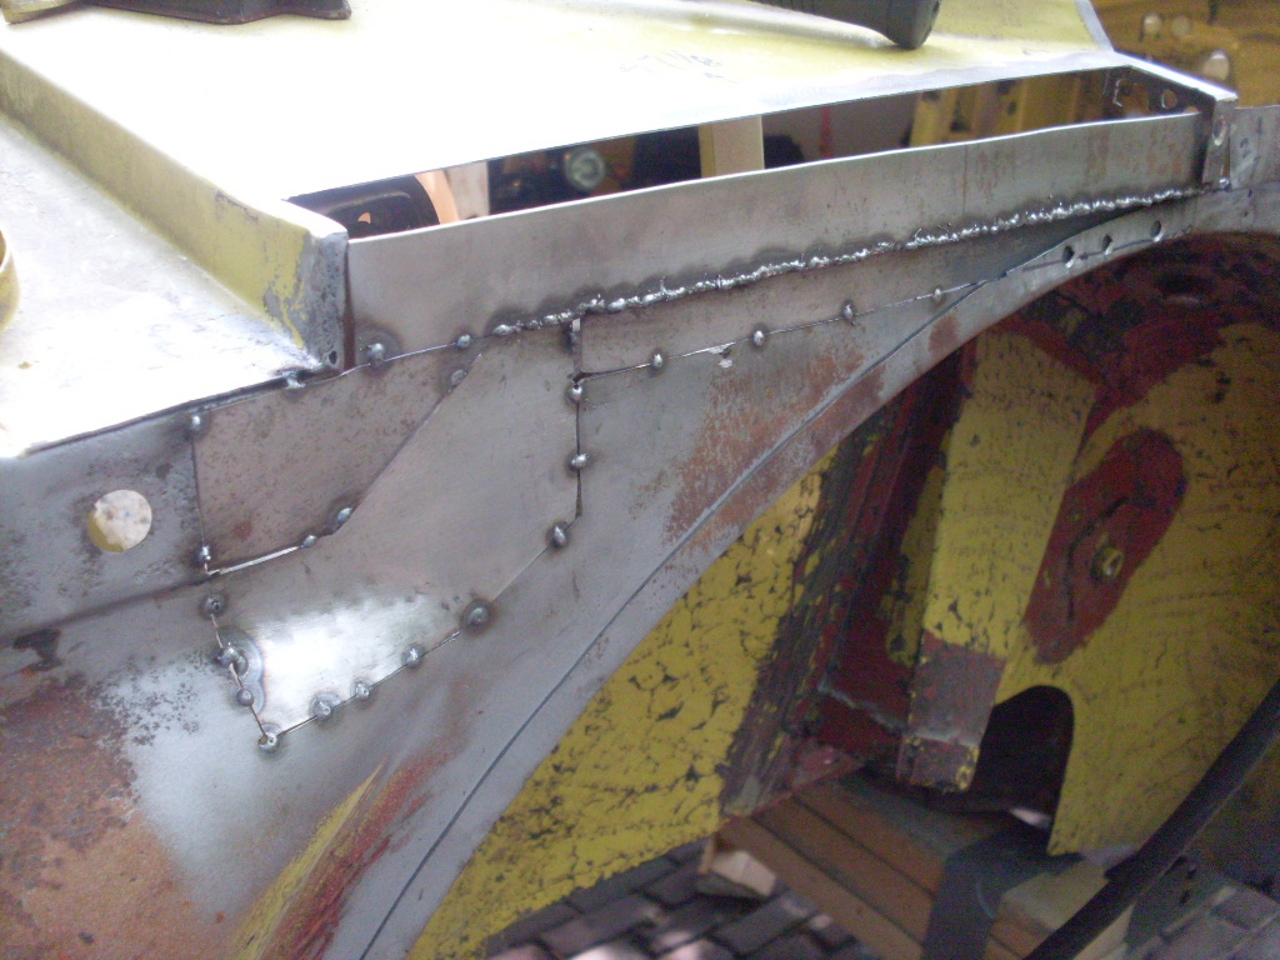
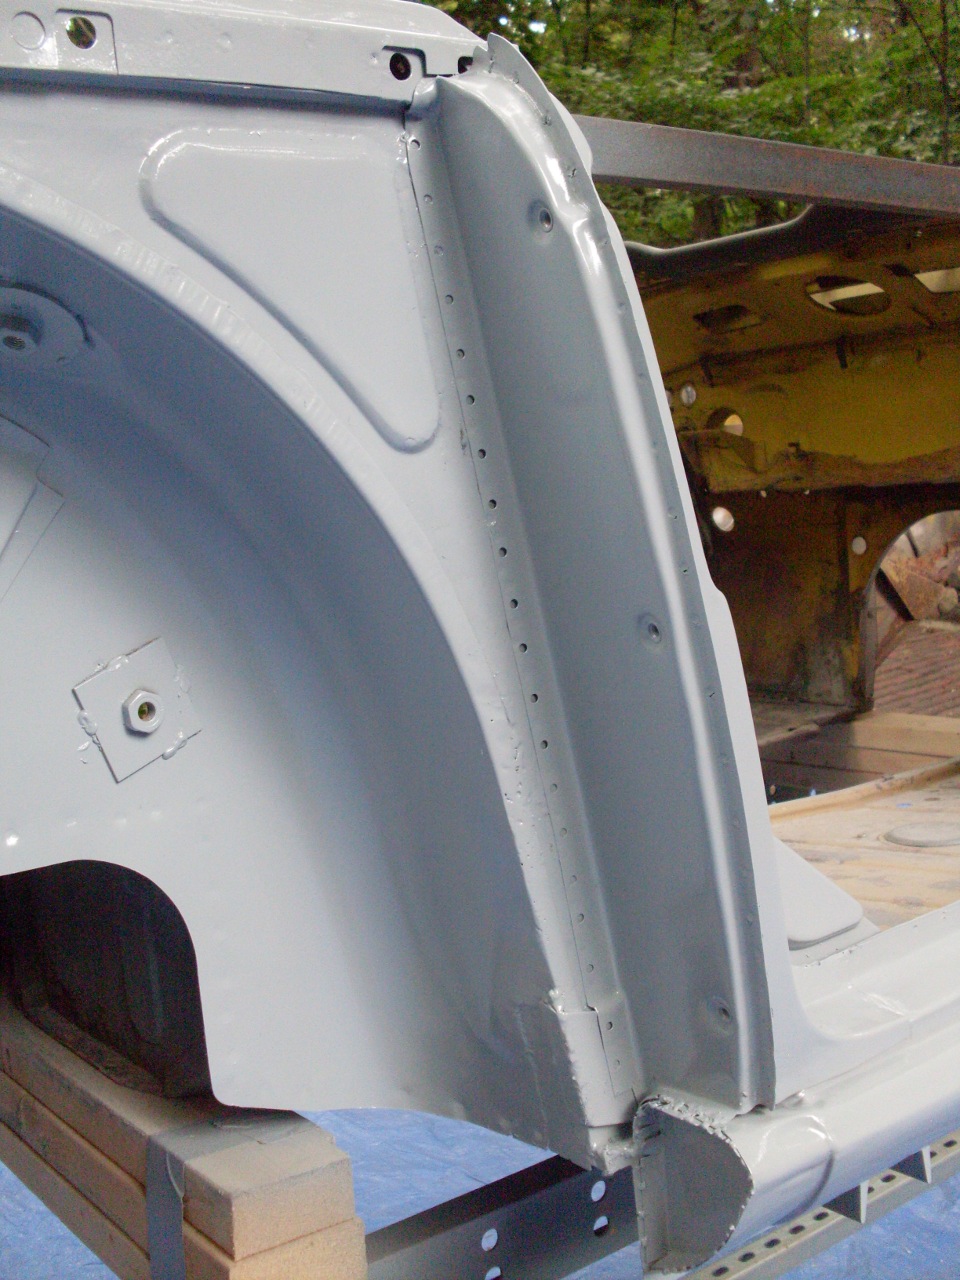
Replaced more of the damaged flange, and this fix is pretty much done.
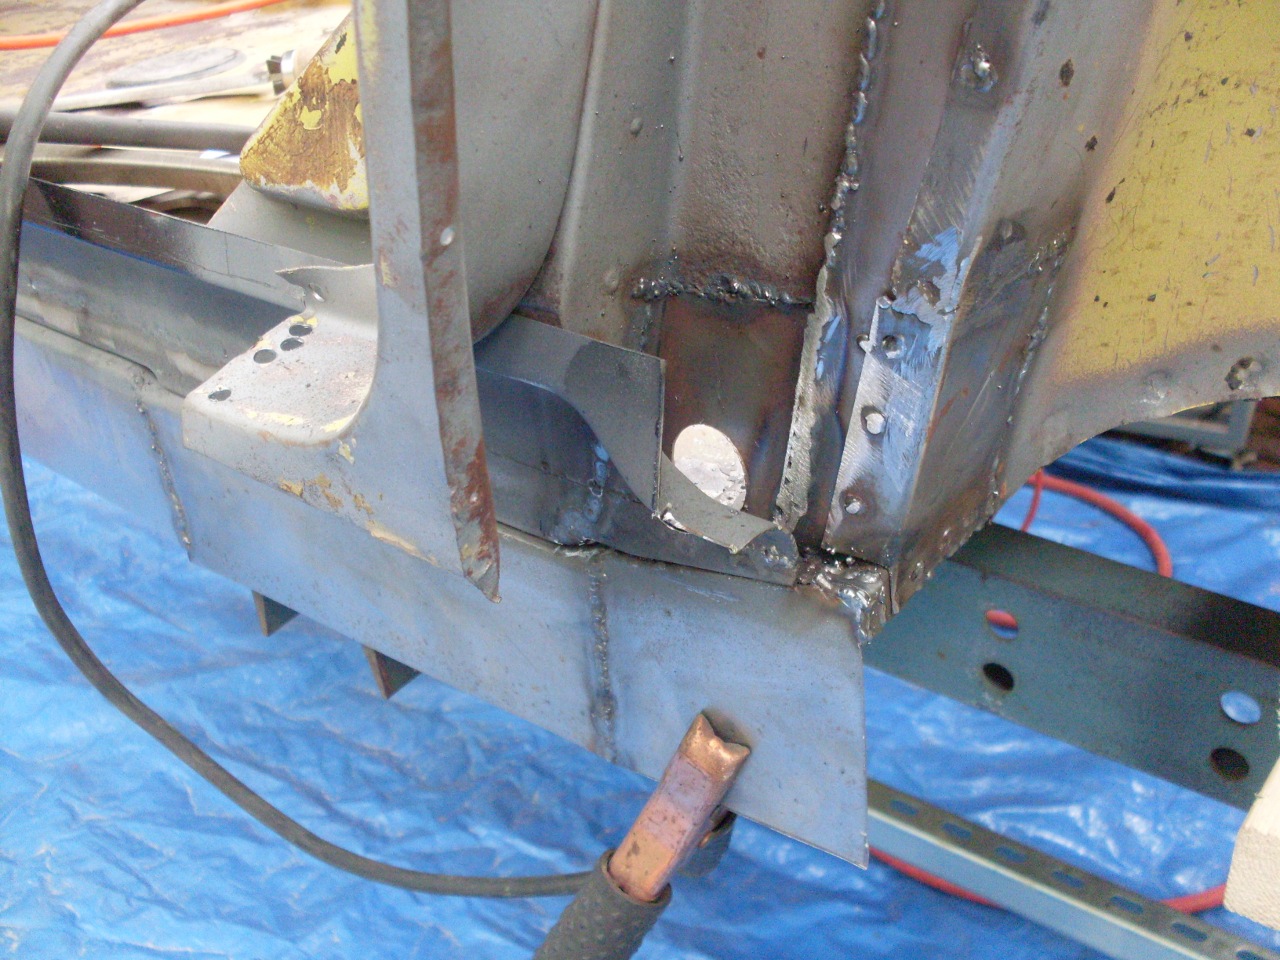
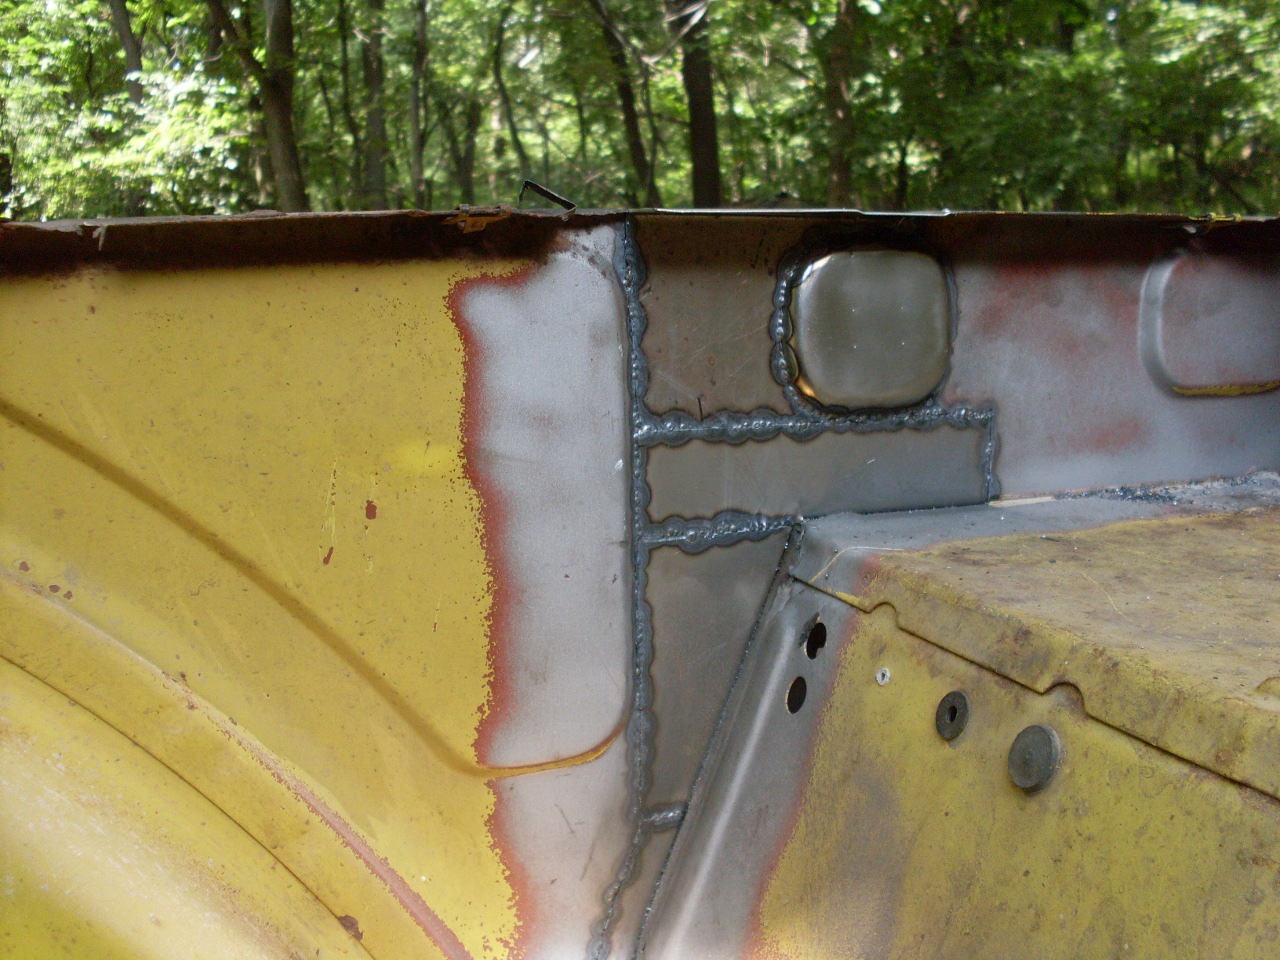
A few more rust repairs:
Rear inner wing near the rear deck.
Trailing edge of rear wheel well.
Aft end of rear inner wing:
Left front inner wing:
Outer edge of rear deck. I had to do this to both sides.
Speaking
of the rear deck, I replaced the rear deck extensions. These were
one of the most ill-fitting parts I had to deal with. Once I got
them to fit, I pondered that seam between the the deck and the
extension. This joint on a horizontal surface seems to be begging
for water intrusion, and I never really liked the looks of it anyway.
I decided to fill the seam, but to do it right, with lead.
"Lead" is actually solder, and it makes a much more permanent and
durable fill. Some cars came from the factory with leaded
joints--including some older MGs, I think.
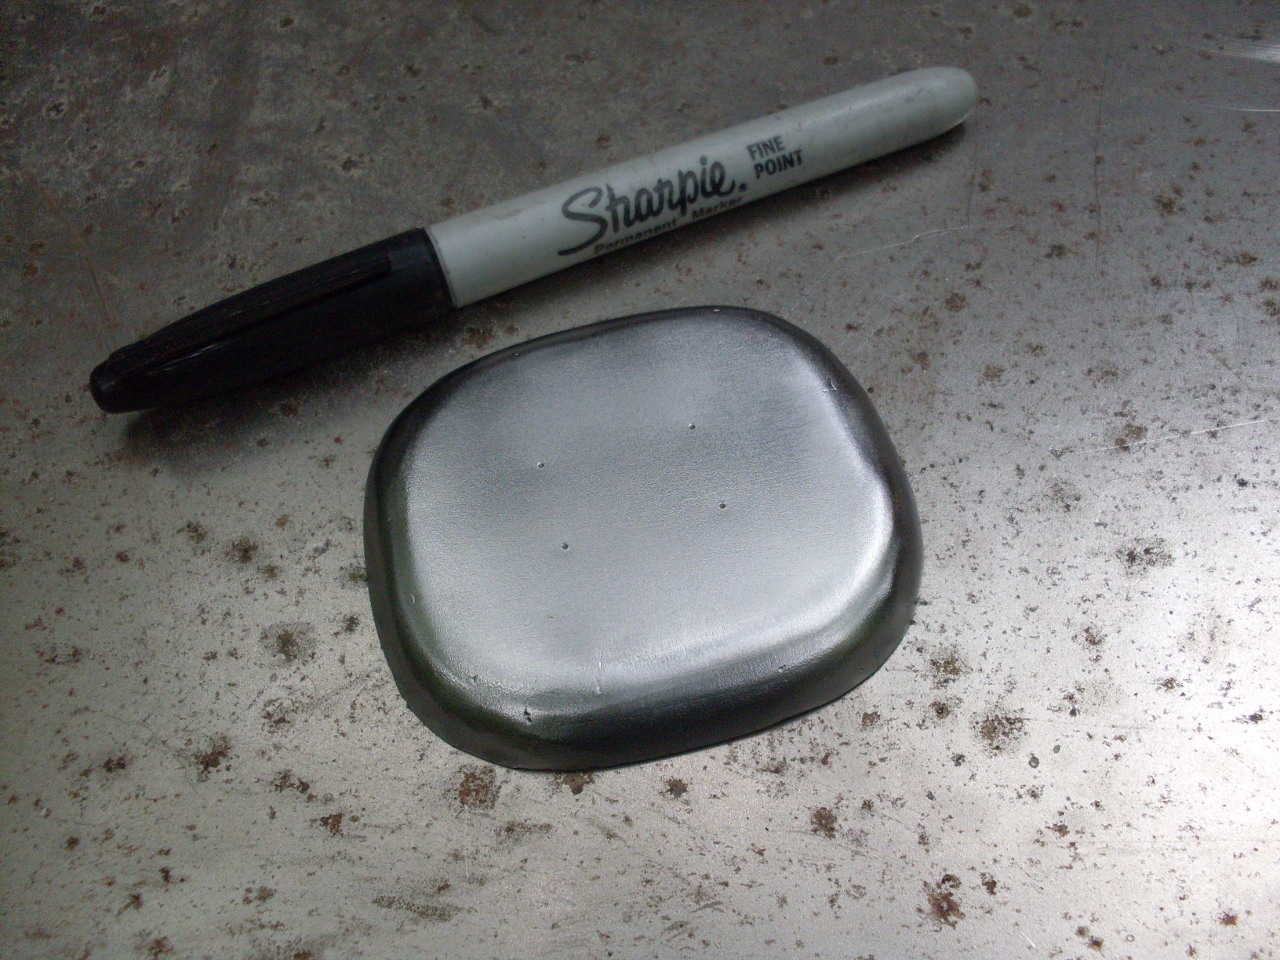
First,
I welded the joint and dressed the weld to below the surface.
Then filled with solder and finished. It was my first lead
joint, but after some trial and error, it came out OK.
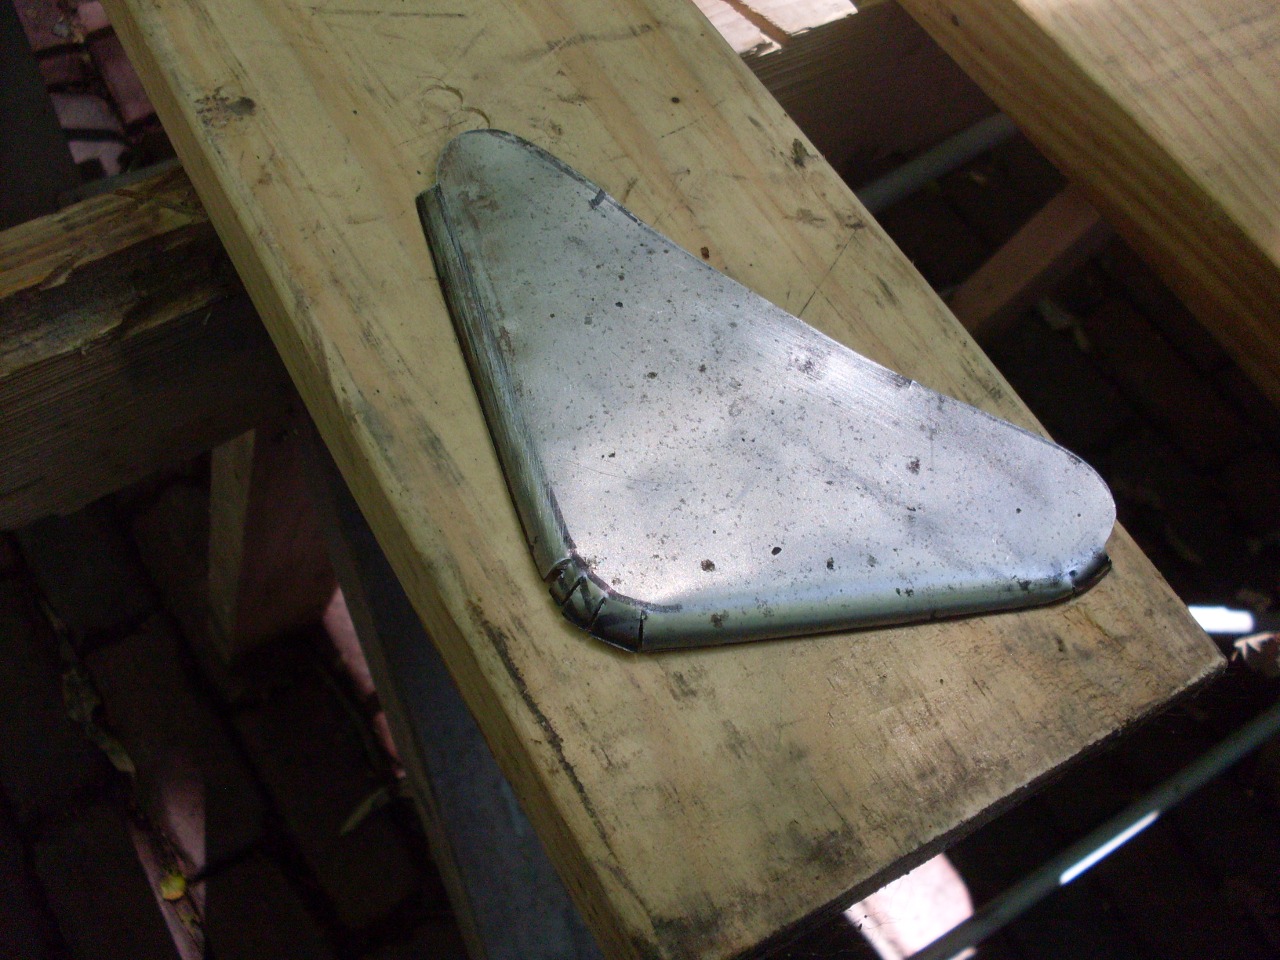
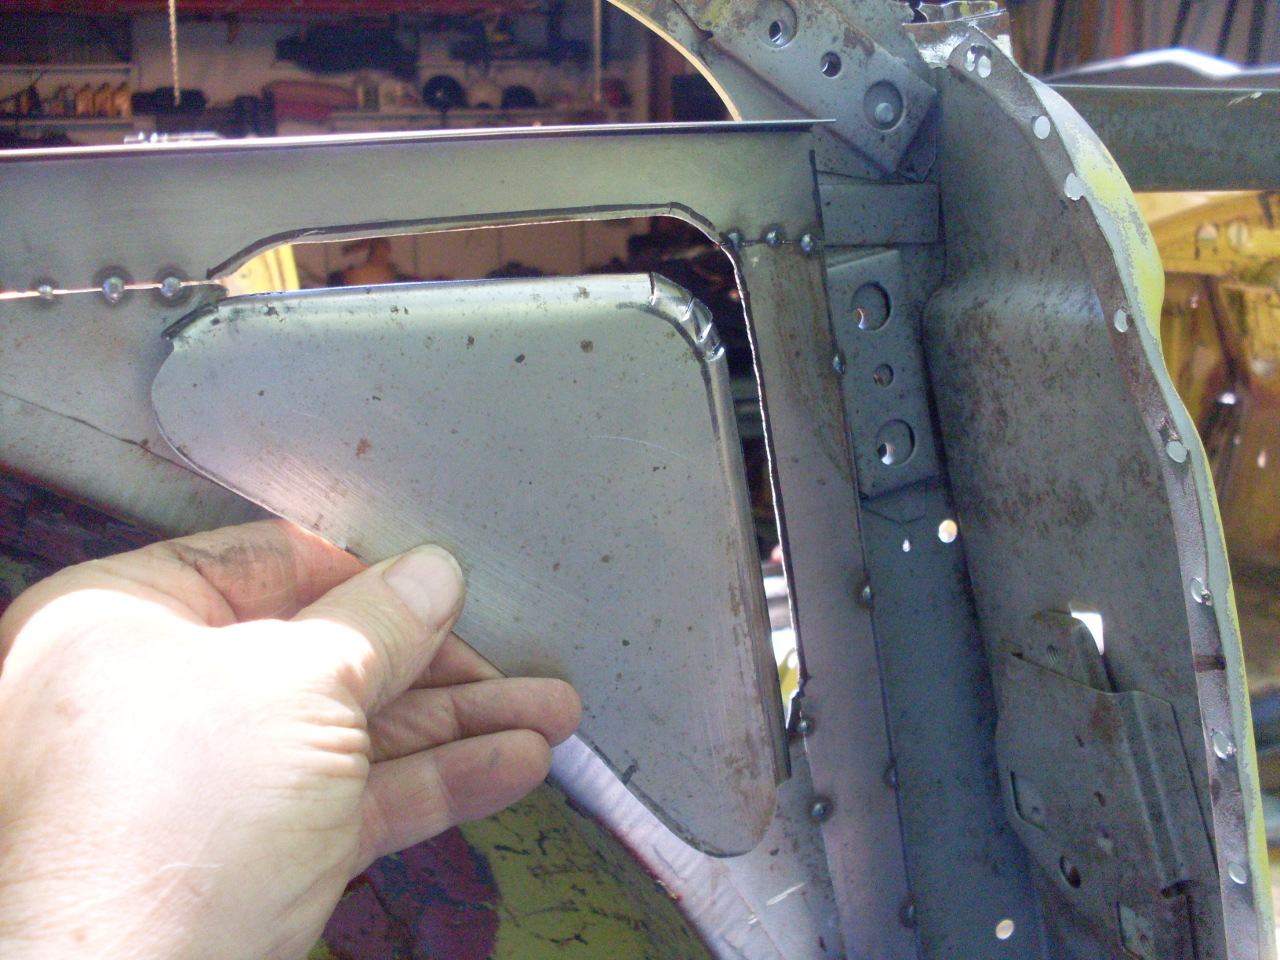
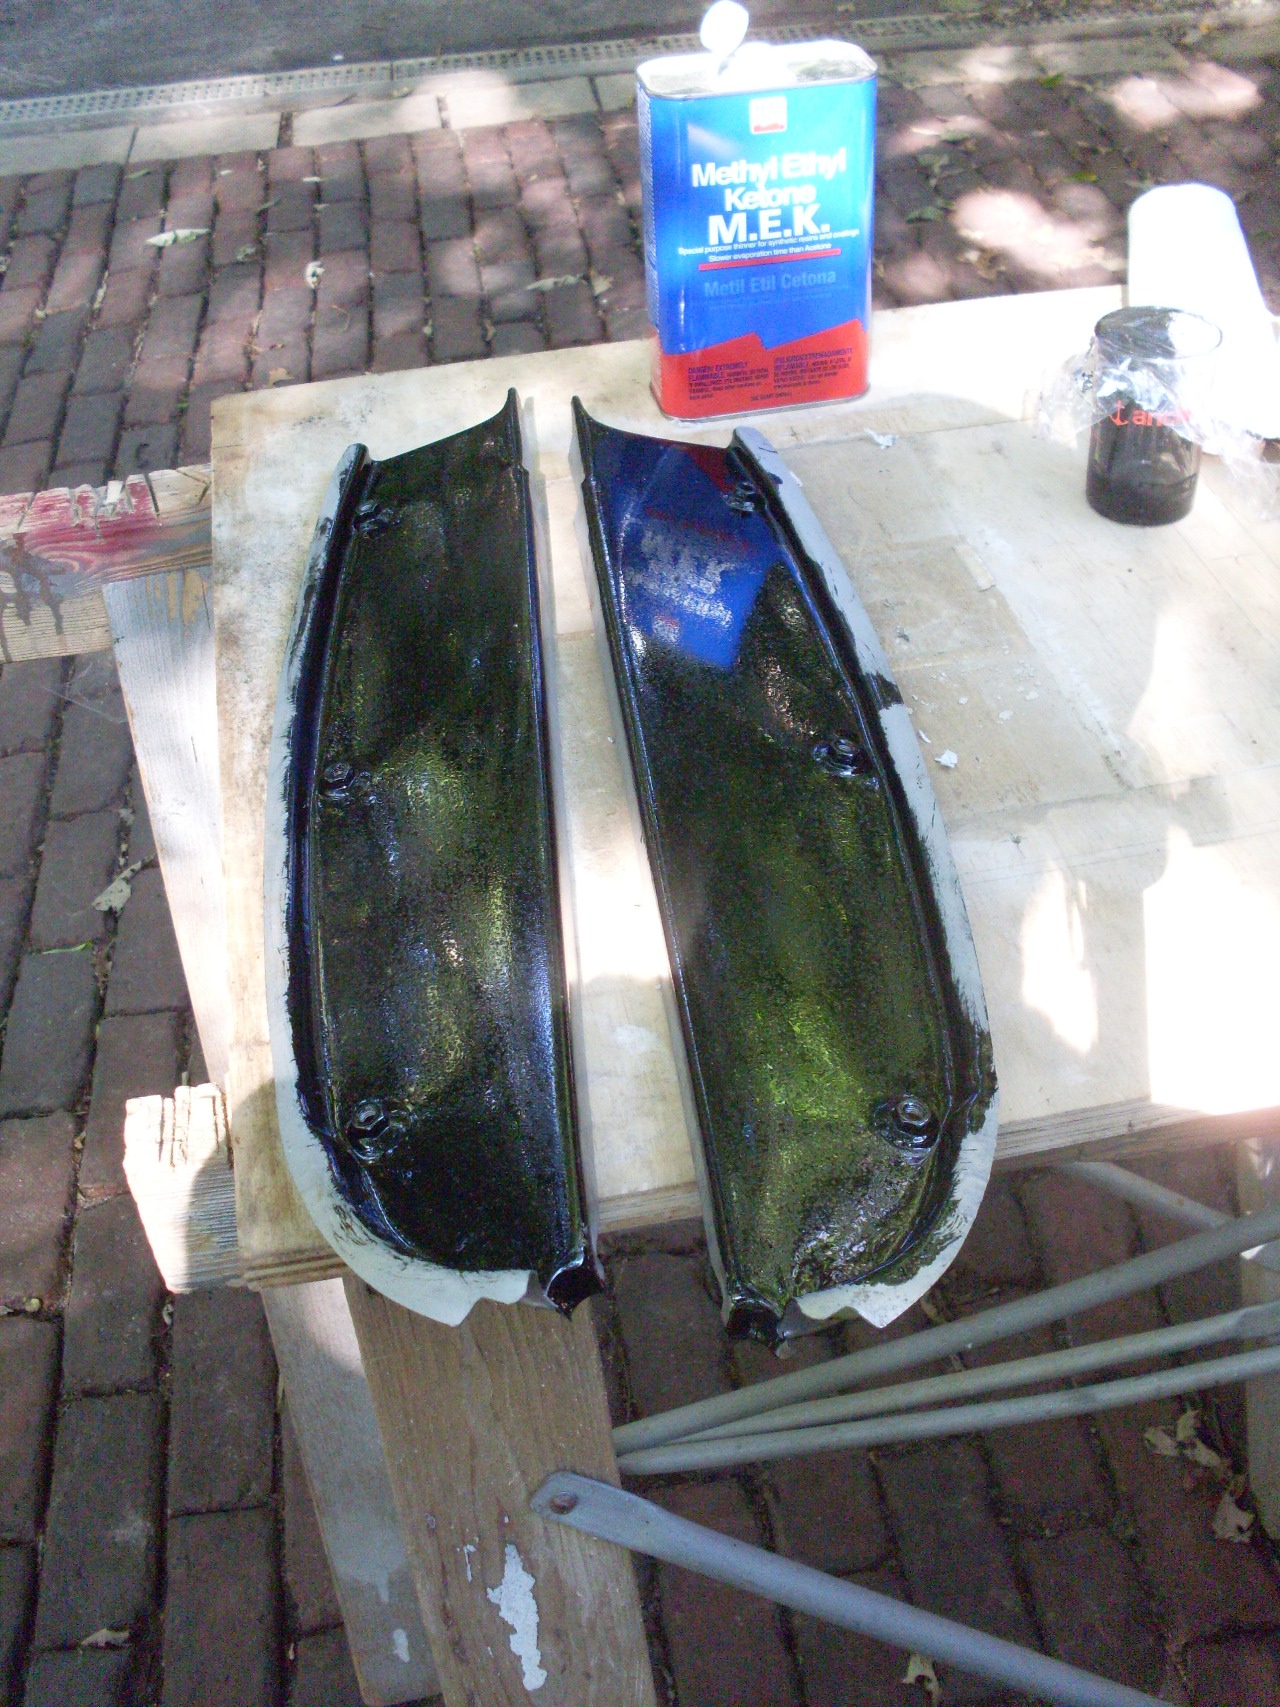
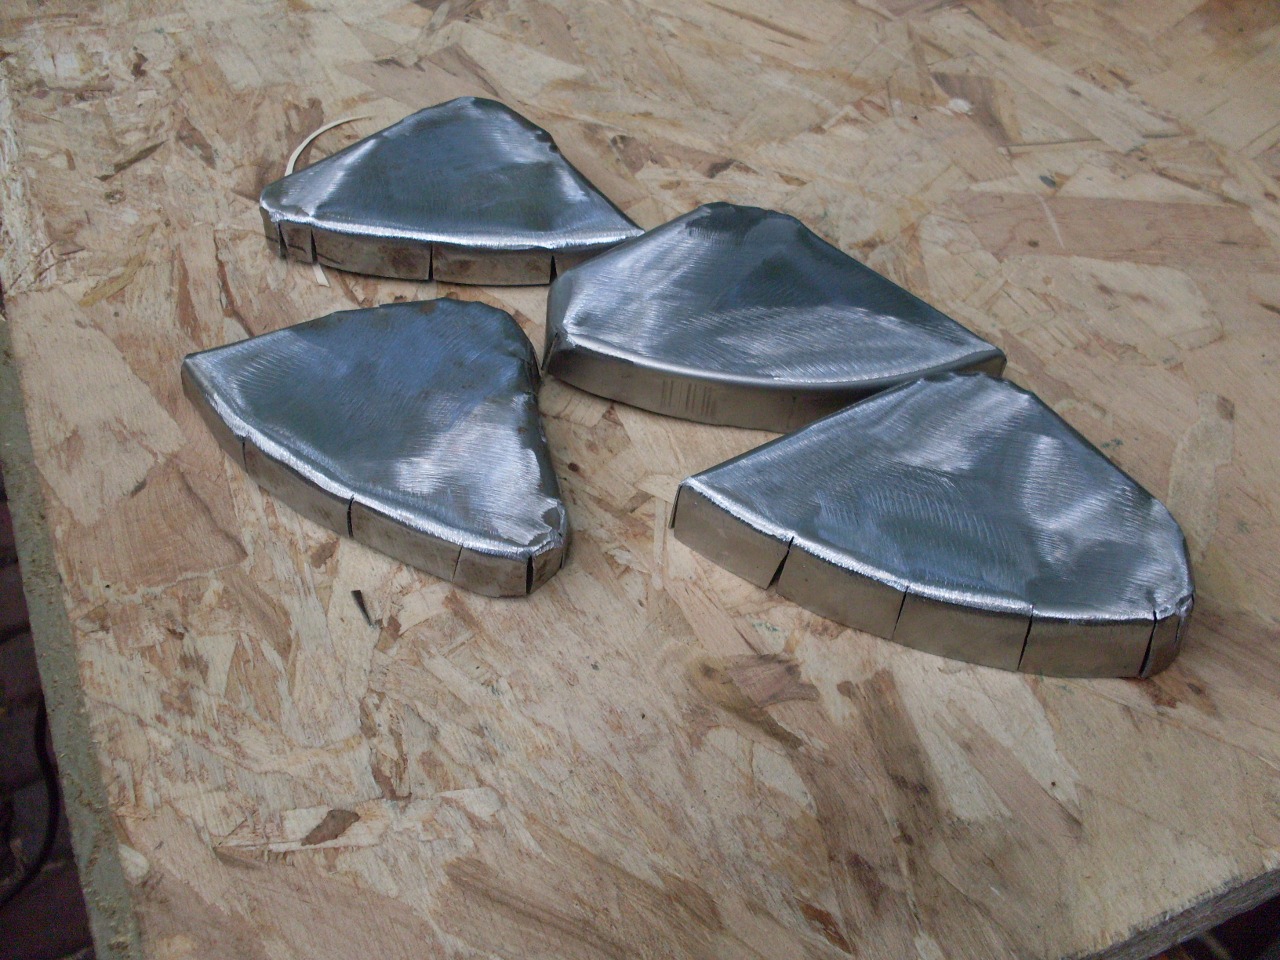
One
last thing to do on the rockers was to place the end caps. I
bought a set, but the fit was so bad that it seemed easier to just make
them from scratch. This is what I did for three of the four.
I'd
come to the point where all the rust was fixed on the two sides of the
car. I had a lot of bare metal exposed to the eastern Nebraska
Dog Days humidity, and it was starting to rust again. This seemed
a little like going backwards, so I decided to lock in what I'd done by
getting a primer on the finished areas. I sand blasted everything
clean, blew it off well, and did a good degrease.
I
chose a good two part epoxy primer designed for DTM (Direct to Metal)
application, and put on two coats. Being primer, I didn't bother
to set up a spray booth, but waited for a day not too hot, humid, or
windy, and just did it outside. The directions for the product
say that any filling should be done over the primer and not under it,
so there may still be a little touch up ahead.
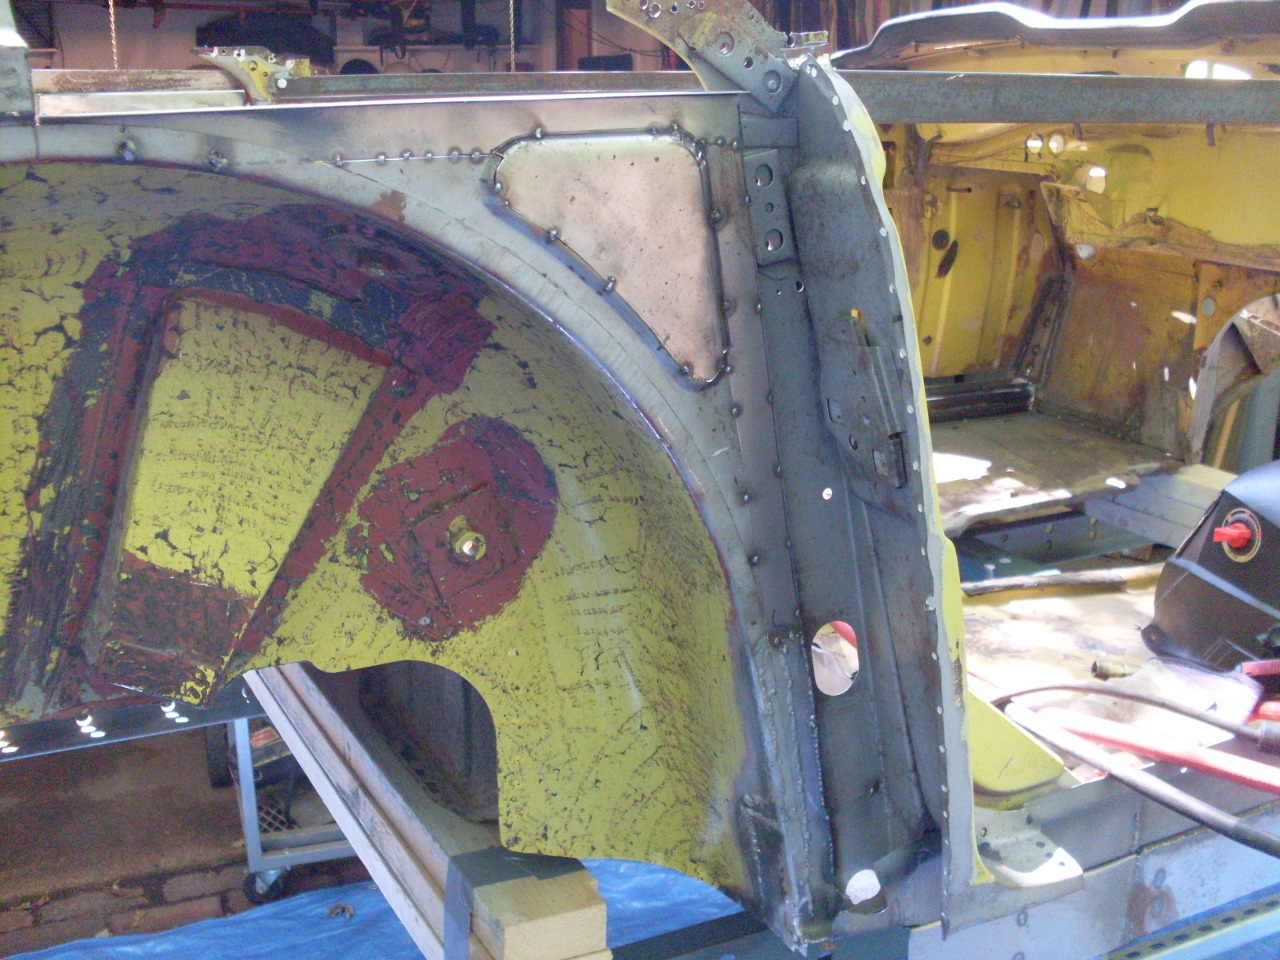
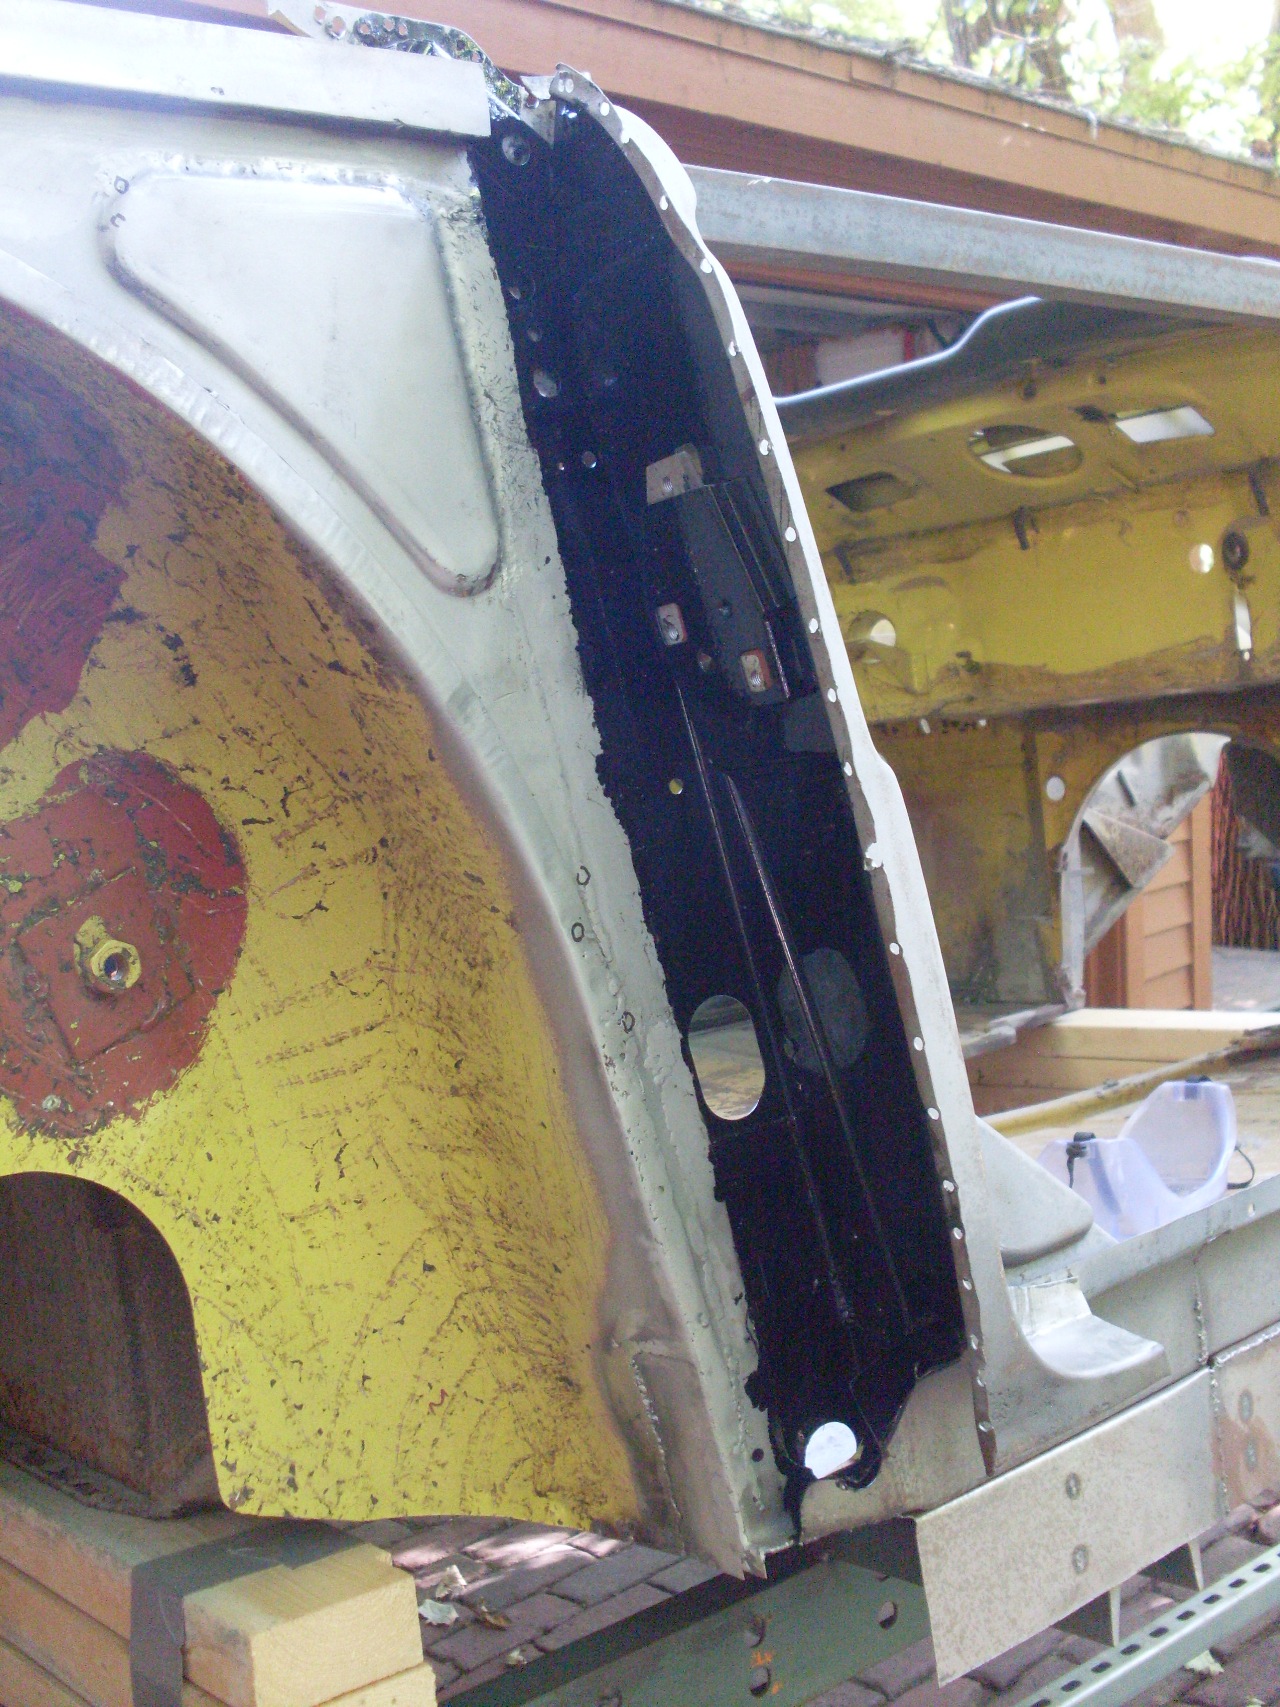
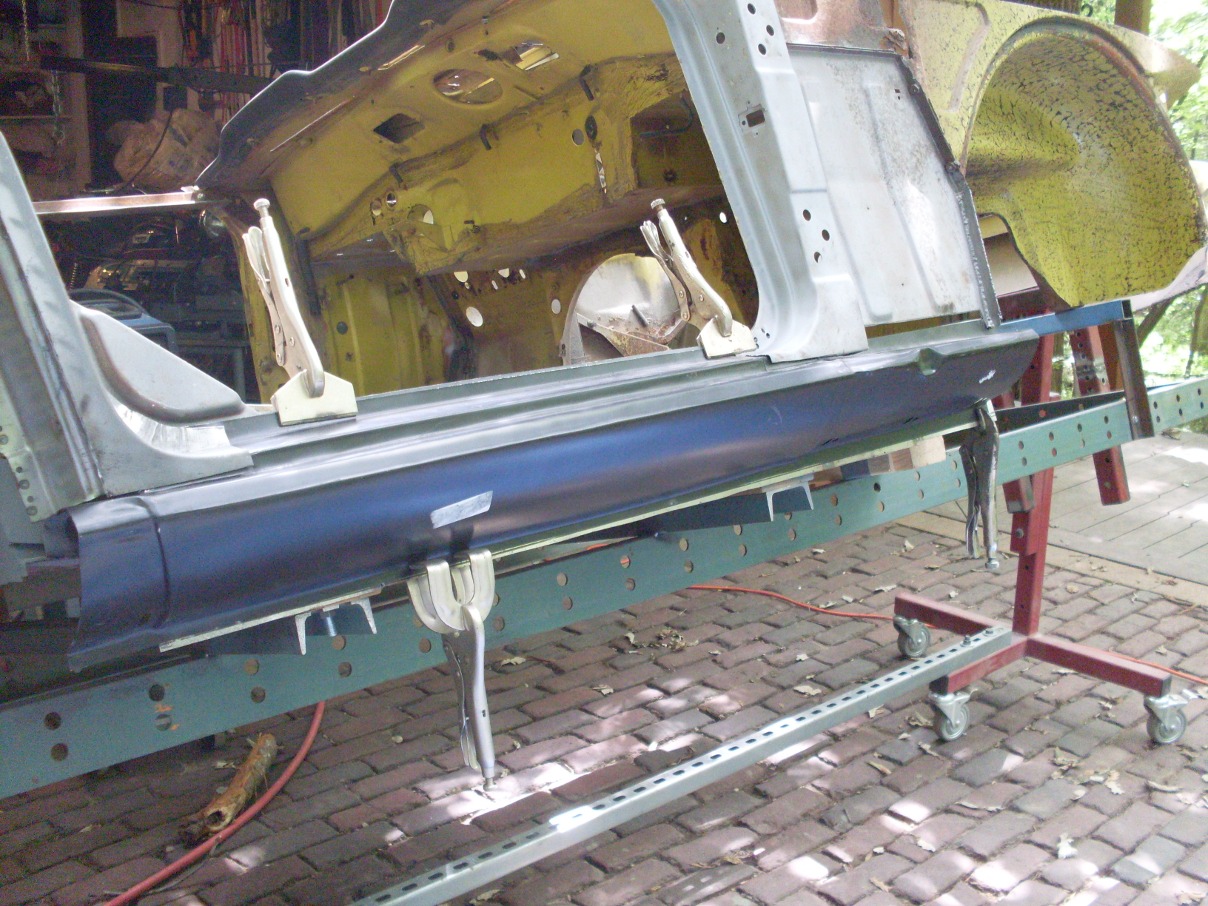
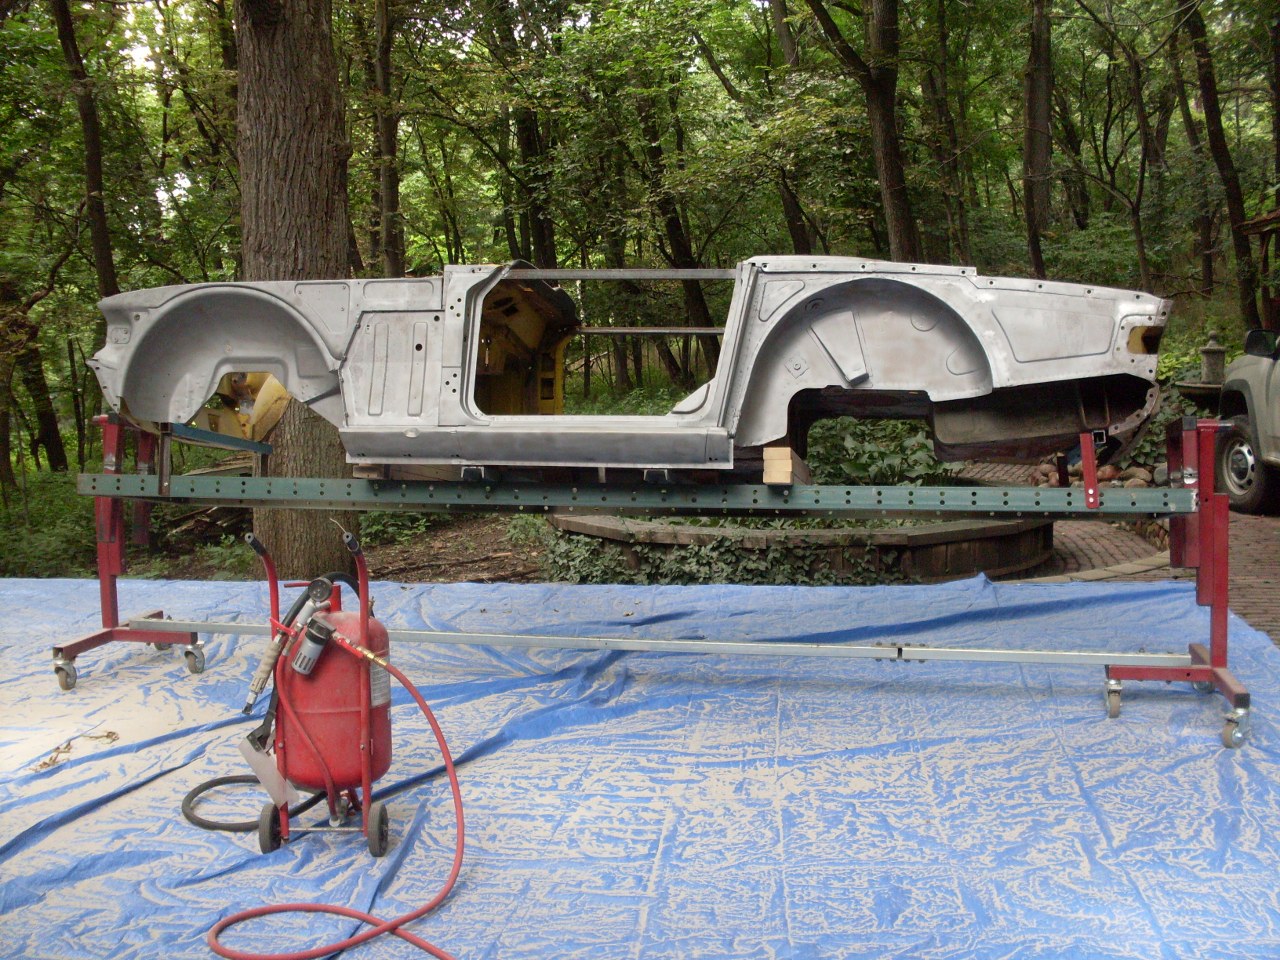
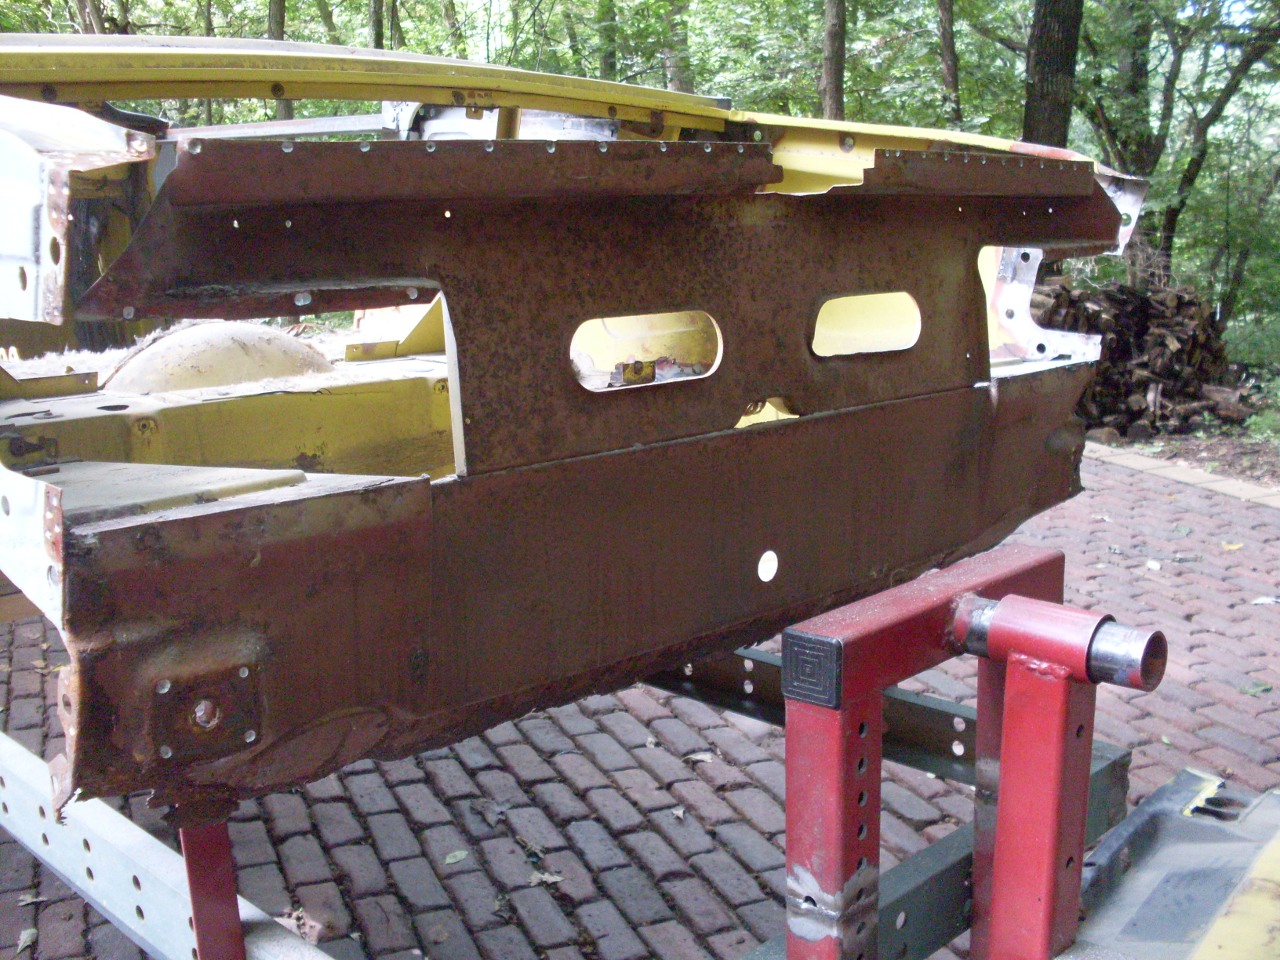
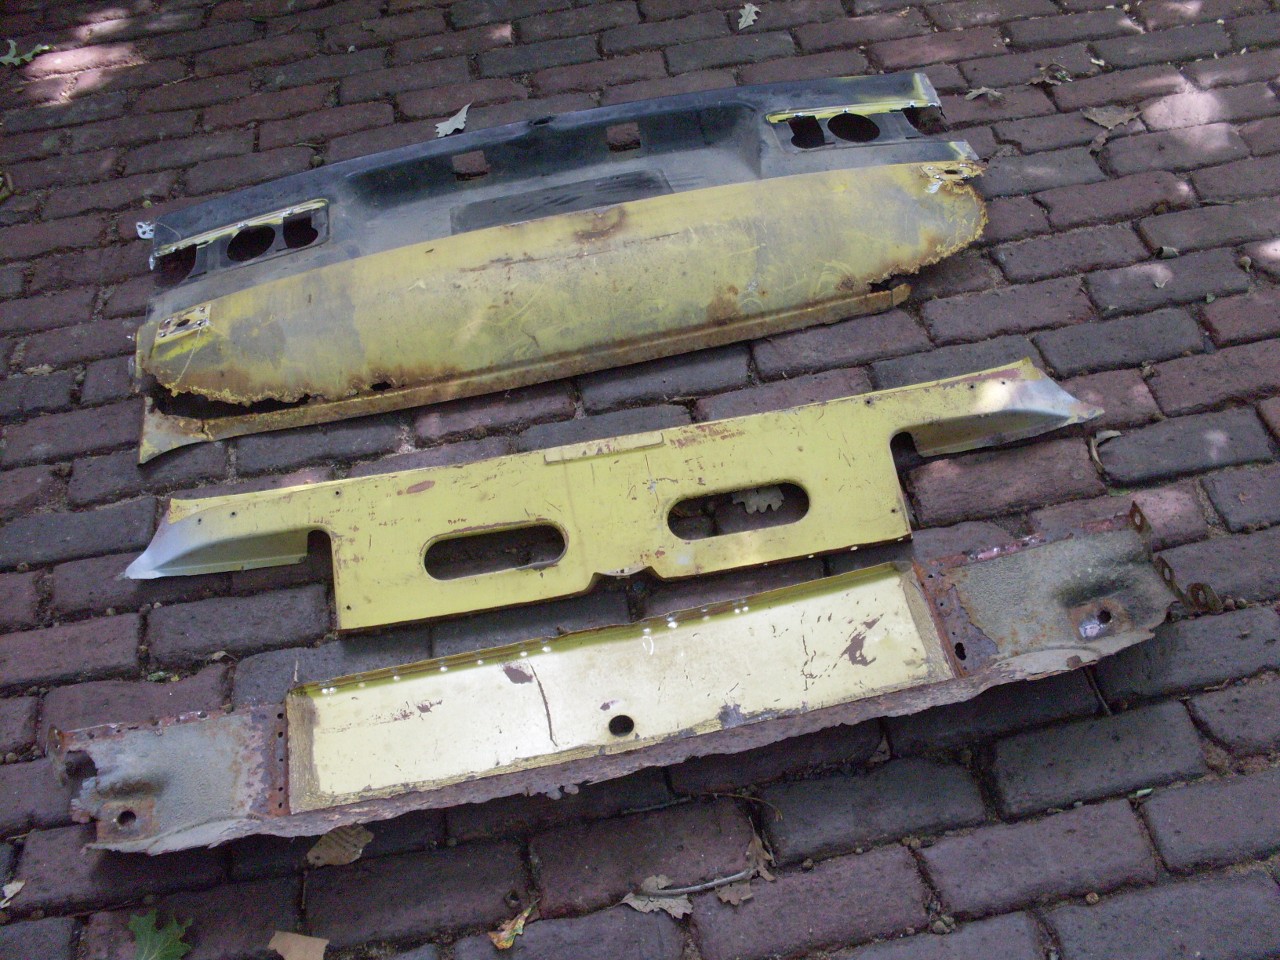
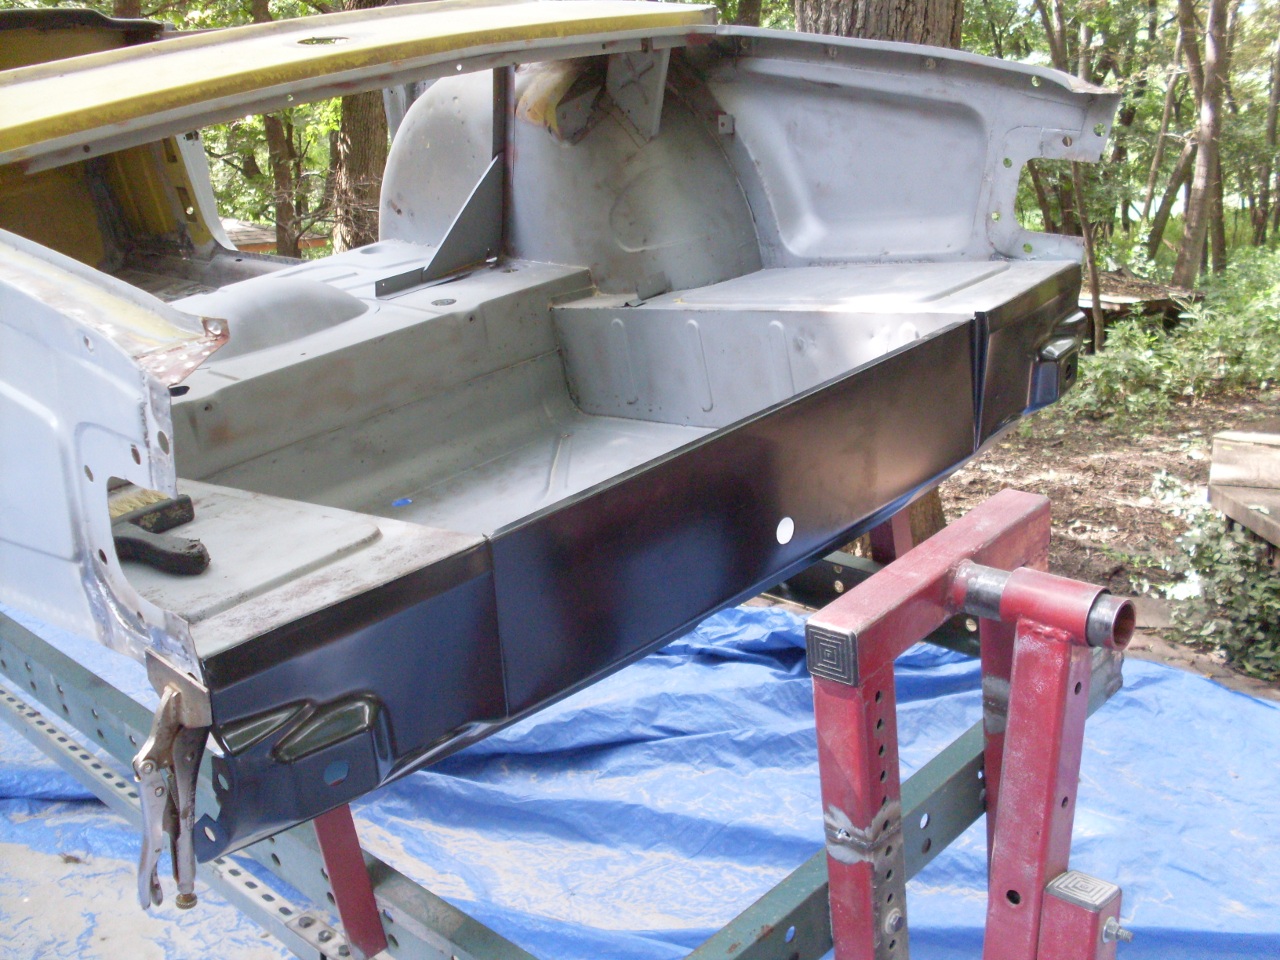
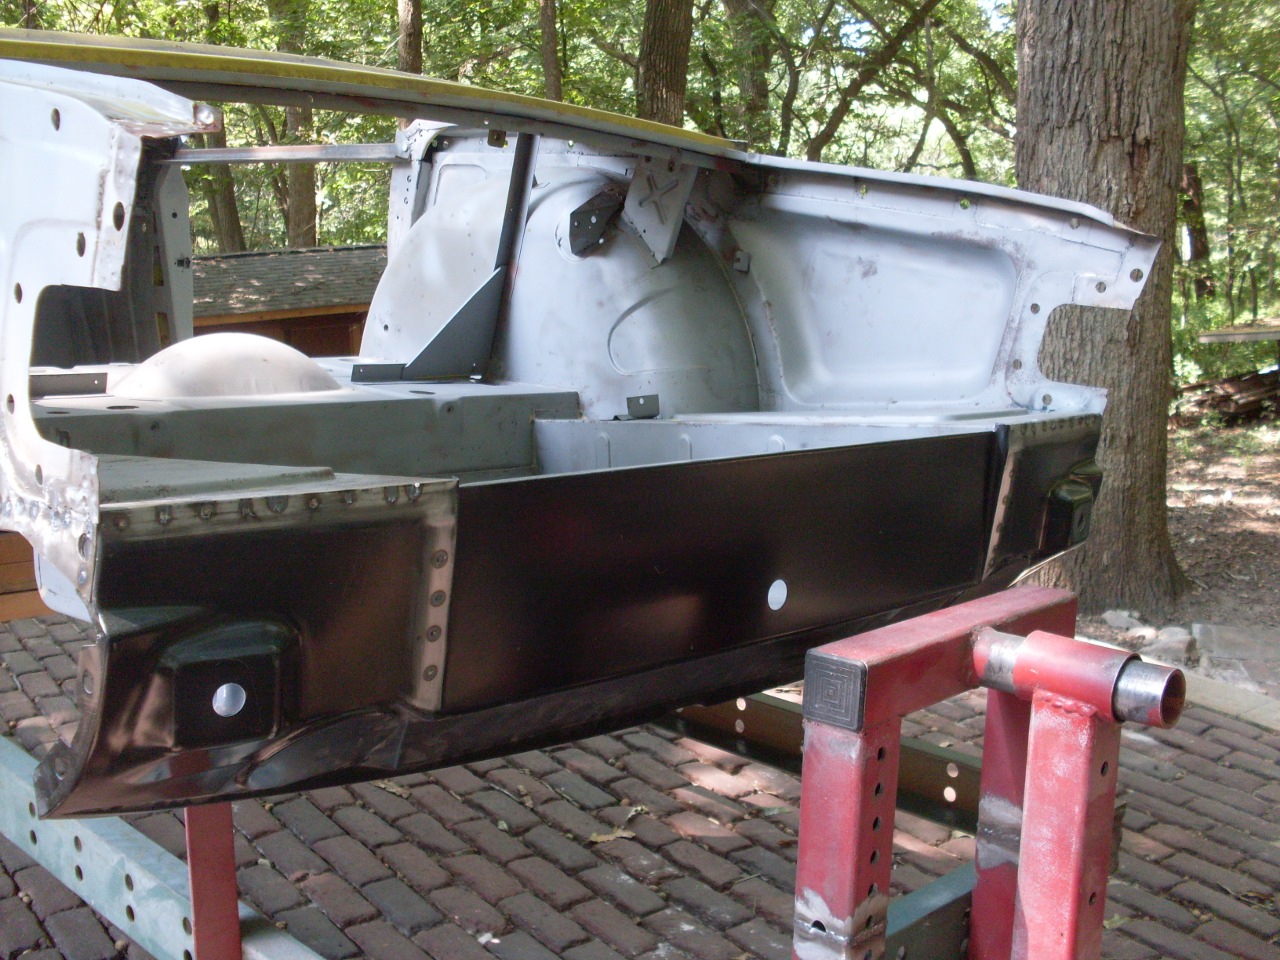
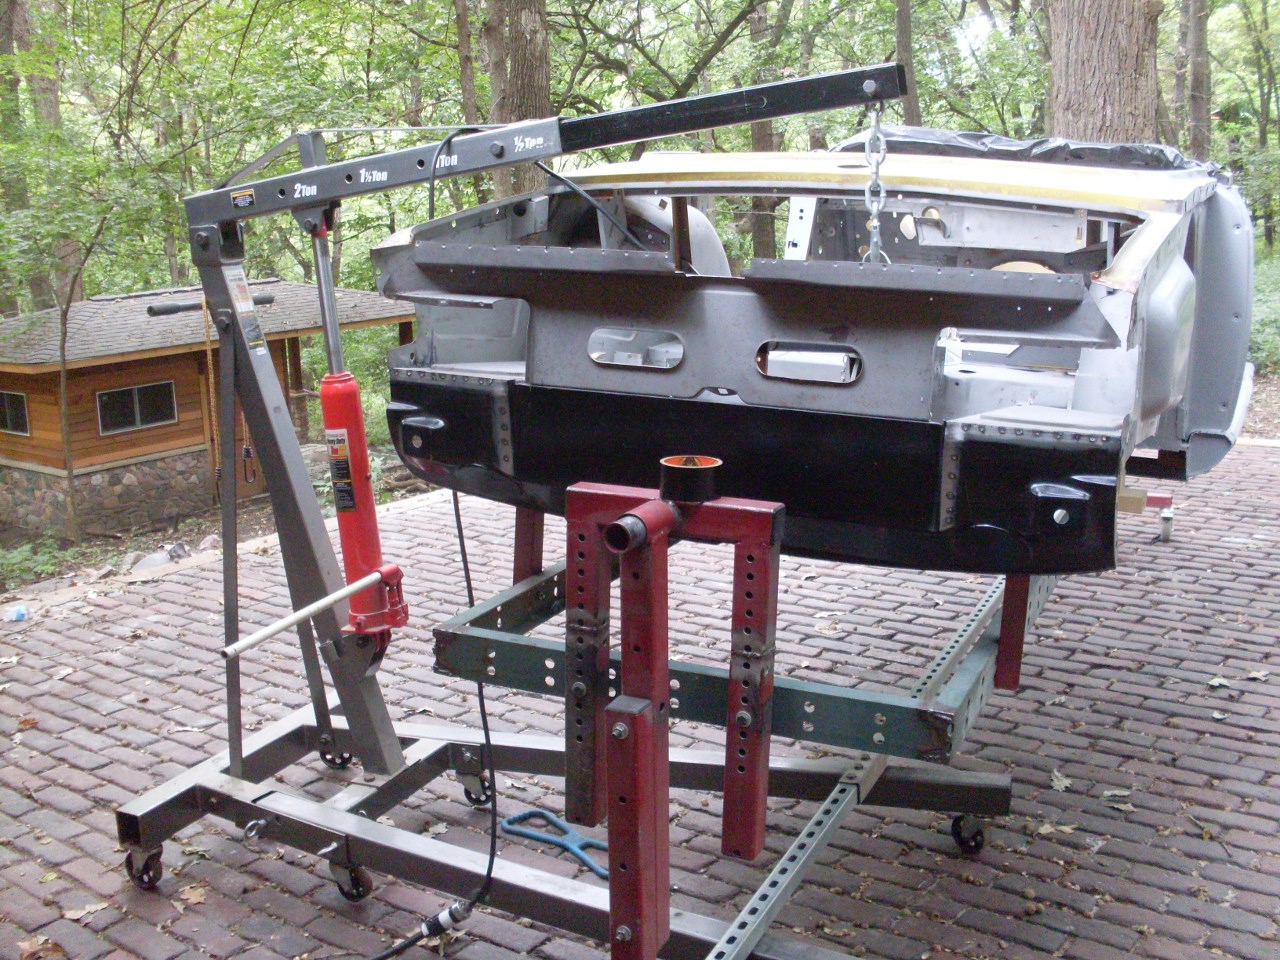
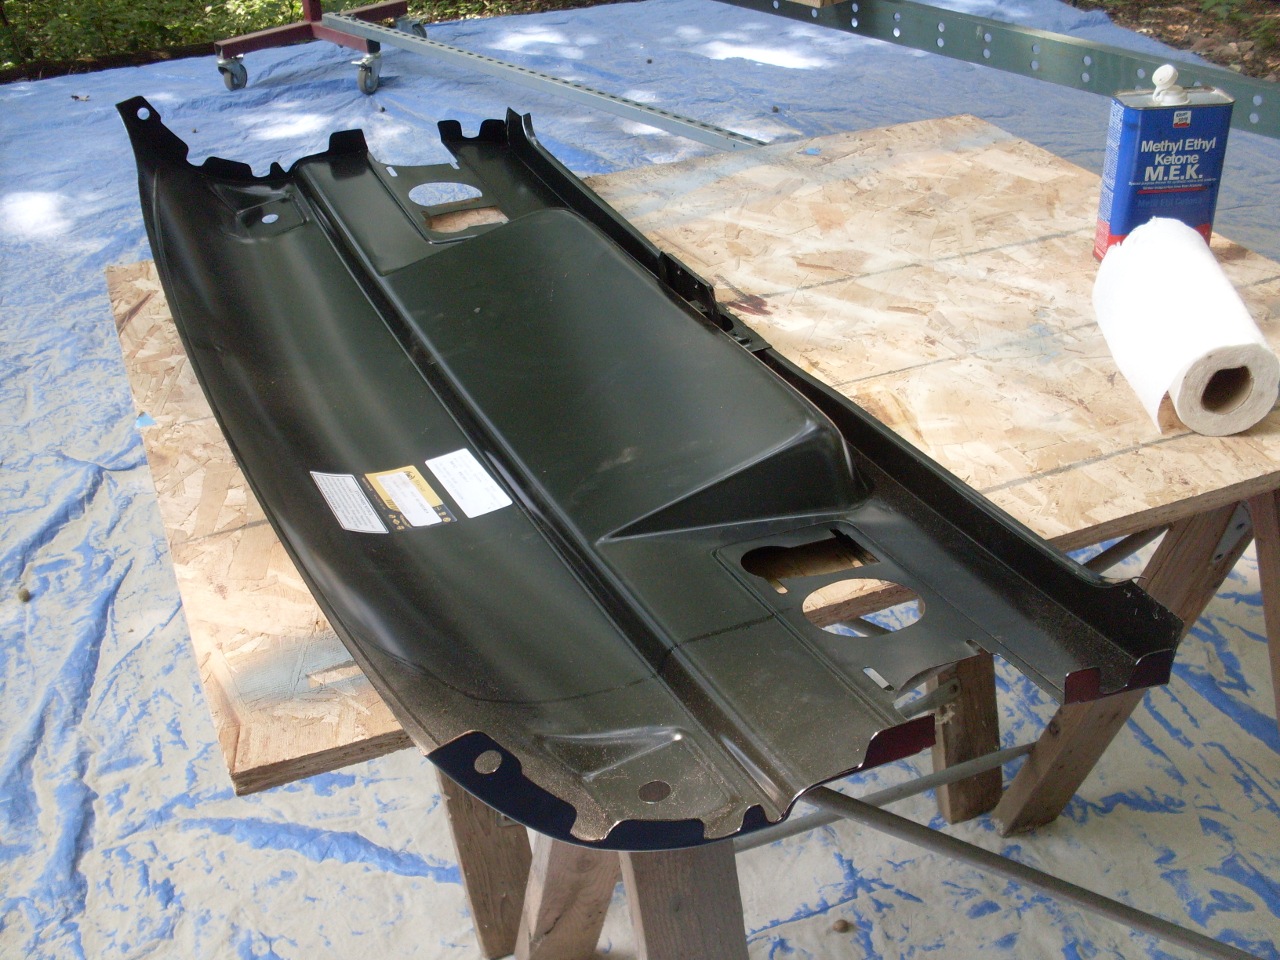
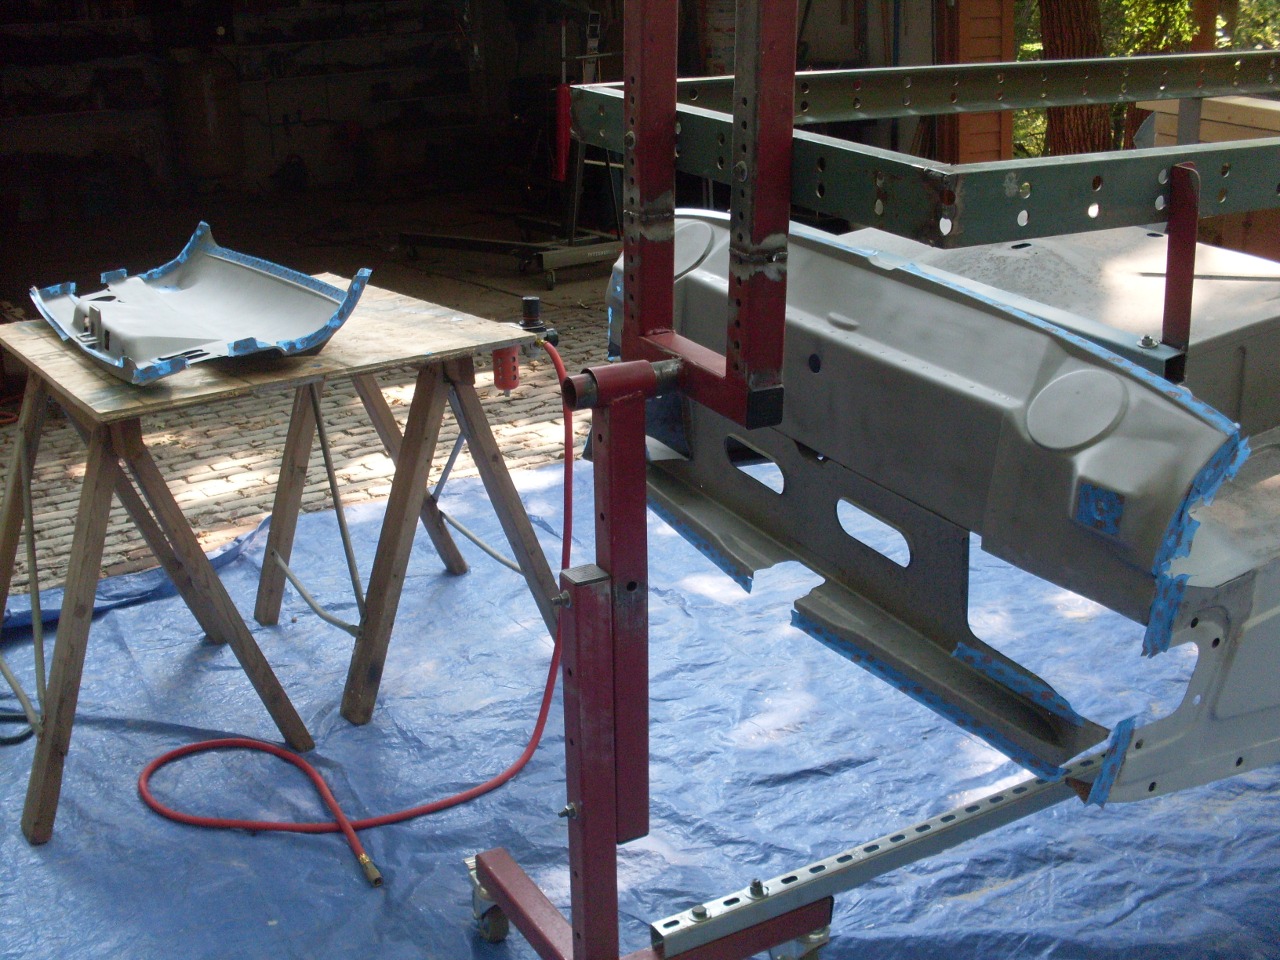
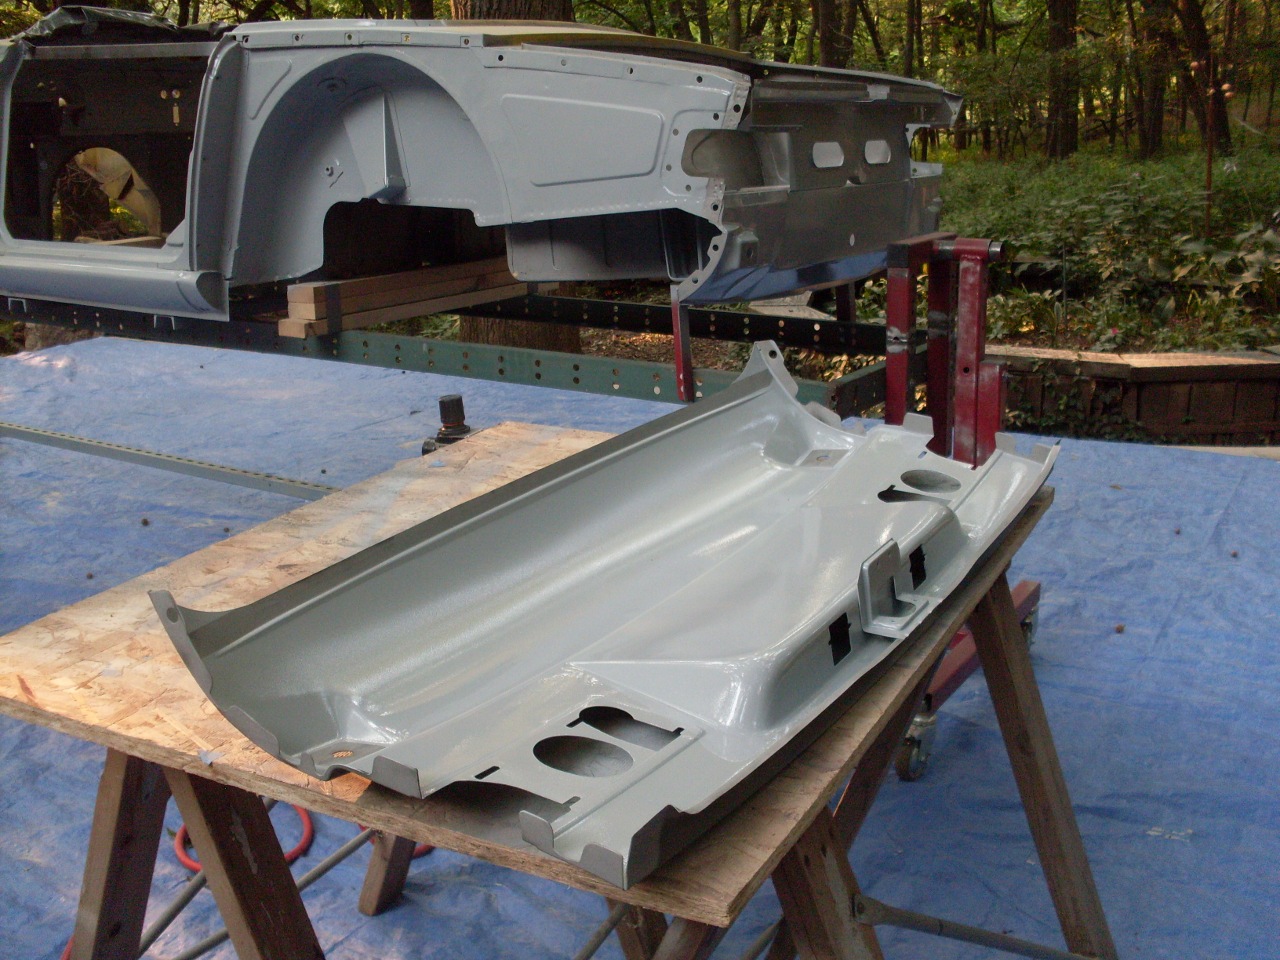
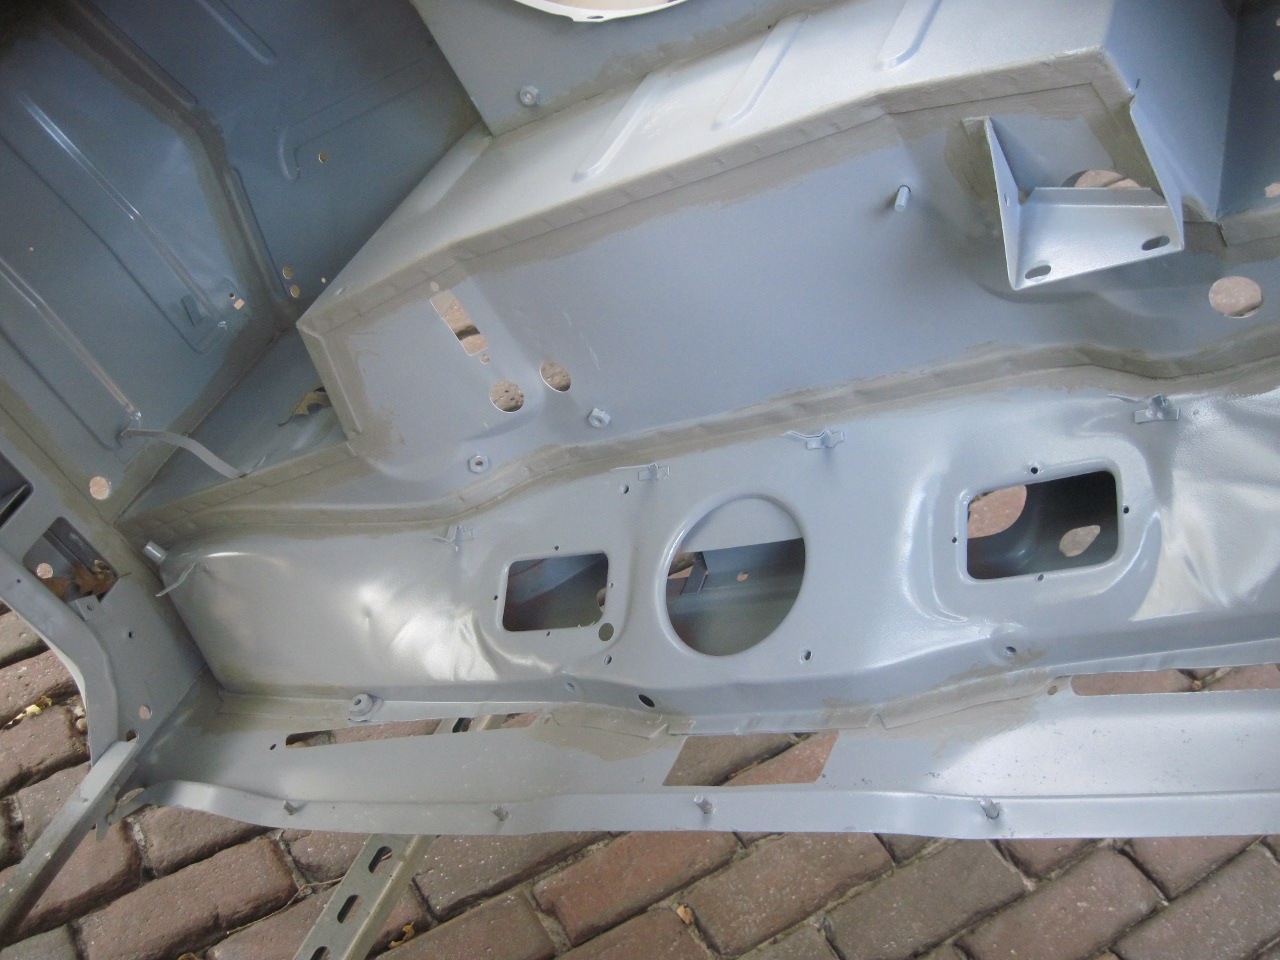
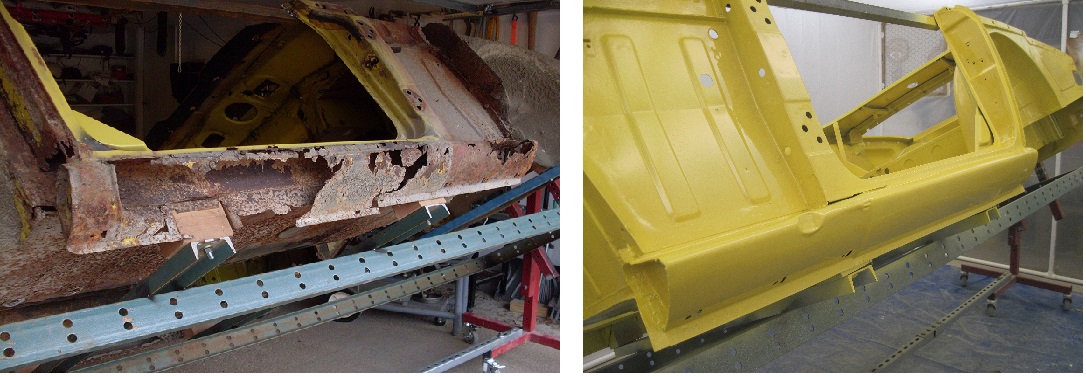
Now, on to the rear valence, which is in real bad shape.
August Update
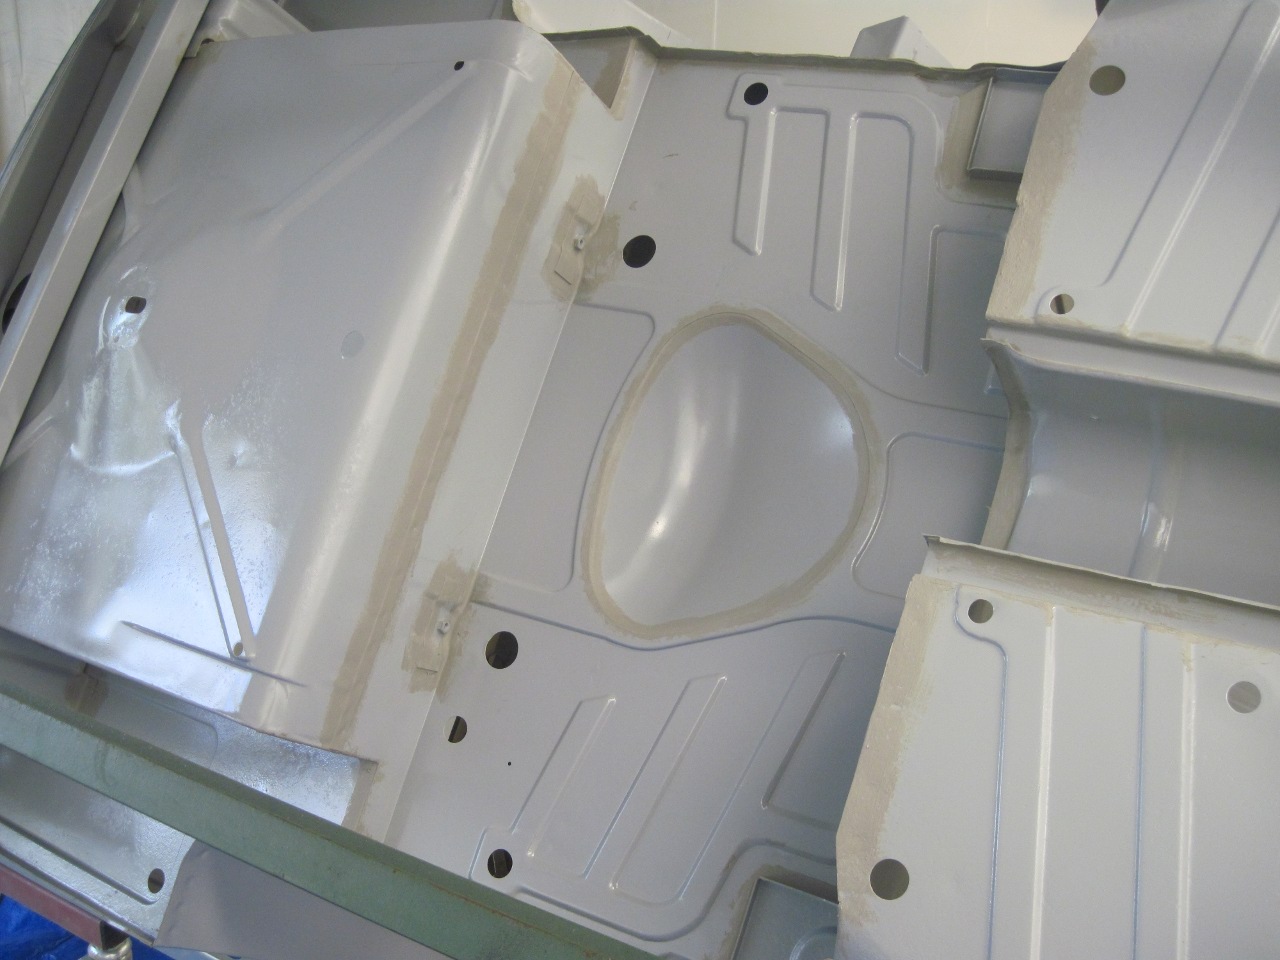
While
wiating for some parts for the rear valance repair, I turned attention
to the floor panels. As I mentioned before, I thought the floor
panels were in pretty good shape, other than the downturned flanges
that form the inside of the rocker panels. After sandblasting the
floors, I was happy to not see anything too disappointing. There
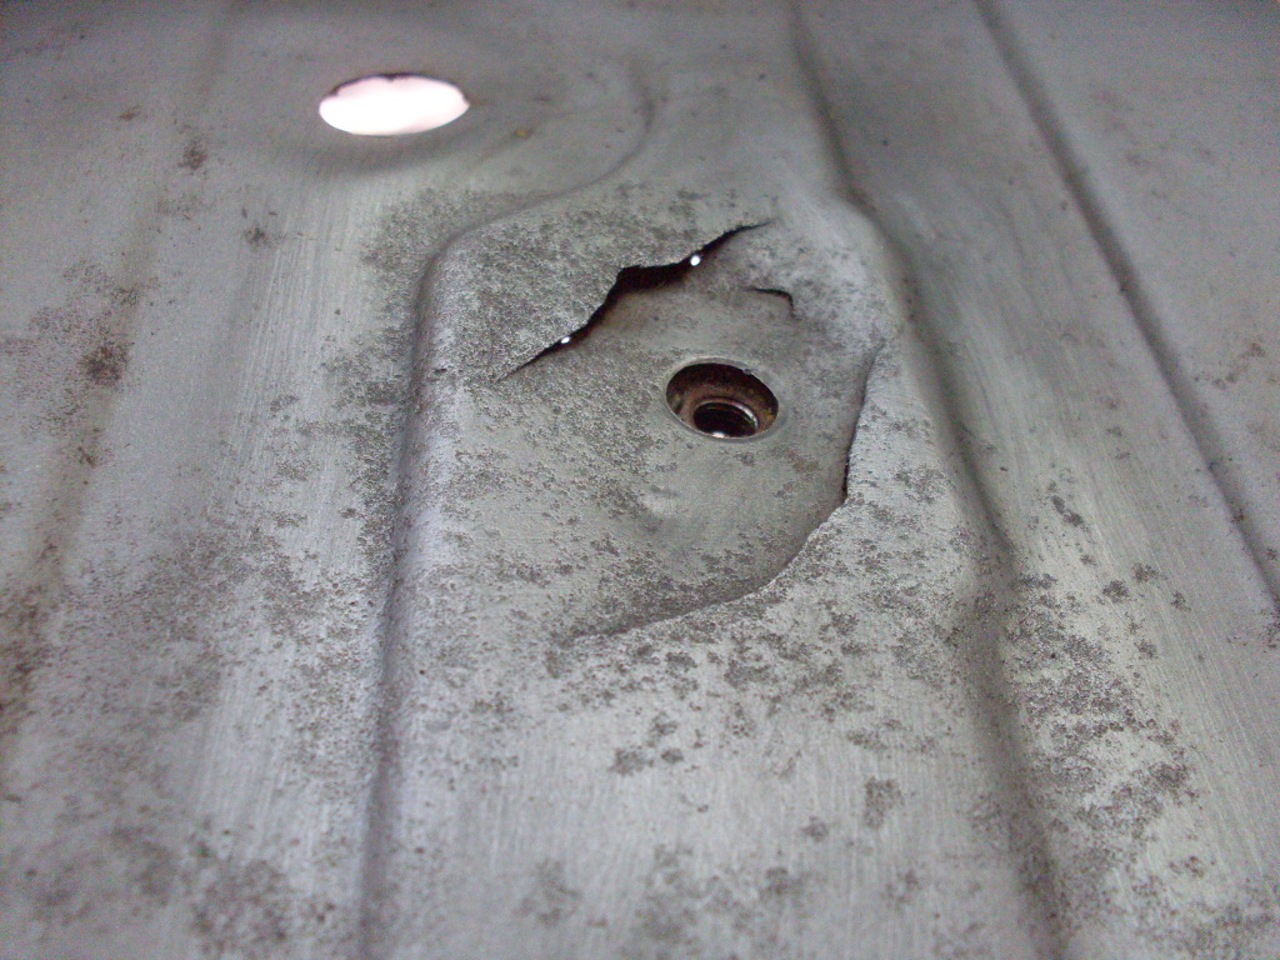
were a few small things to fix, and among them was the rear drivers
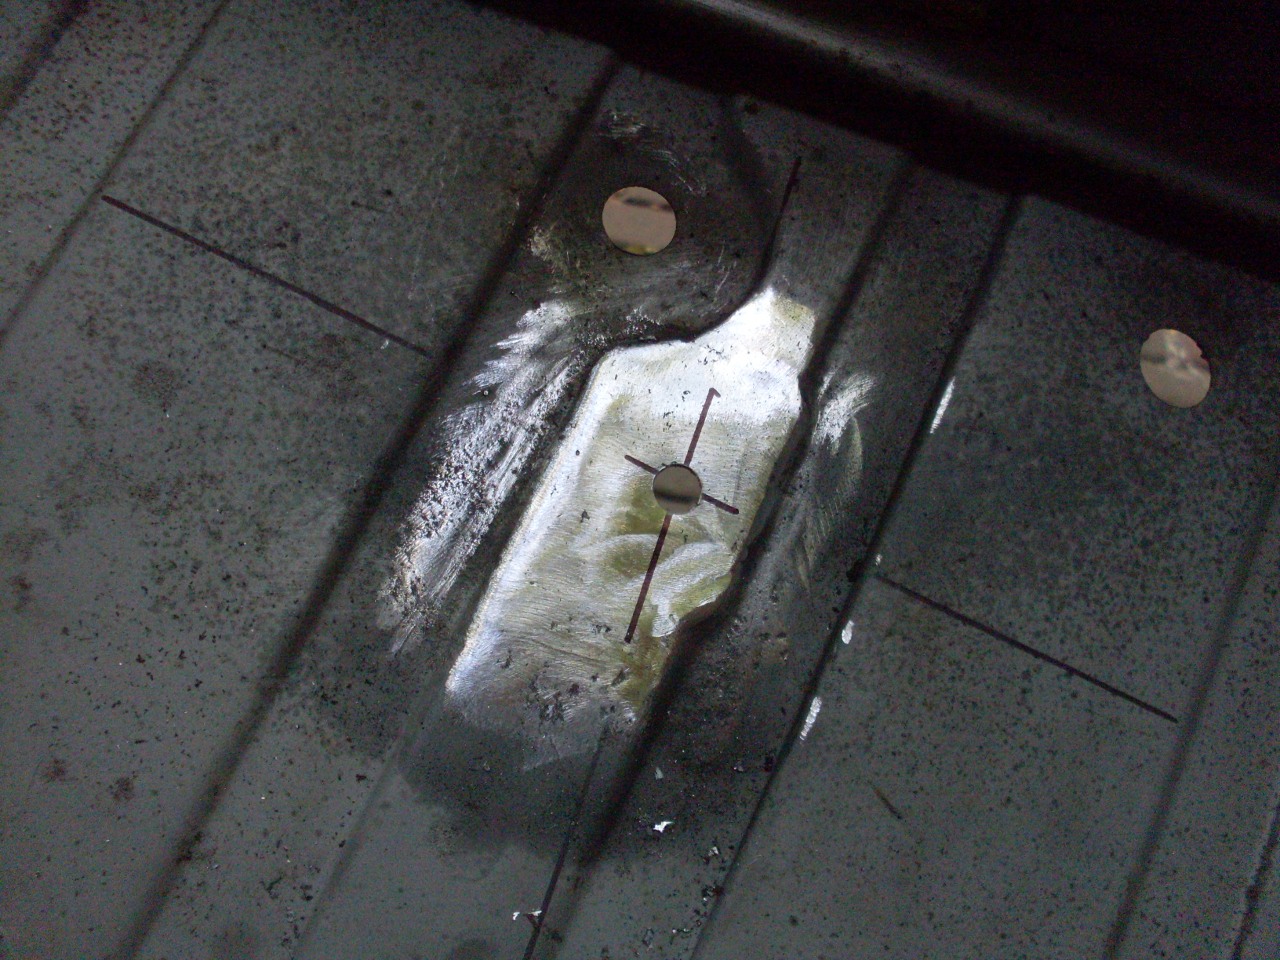
side seat mounting points. The picture shows the worst one.
I'm not a big guy, and the previous (and original) owner was a
petite woman, so I have to assume this is not an unusual failure.
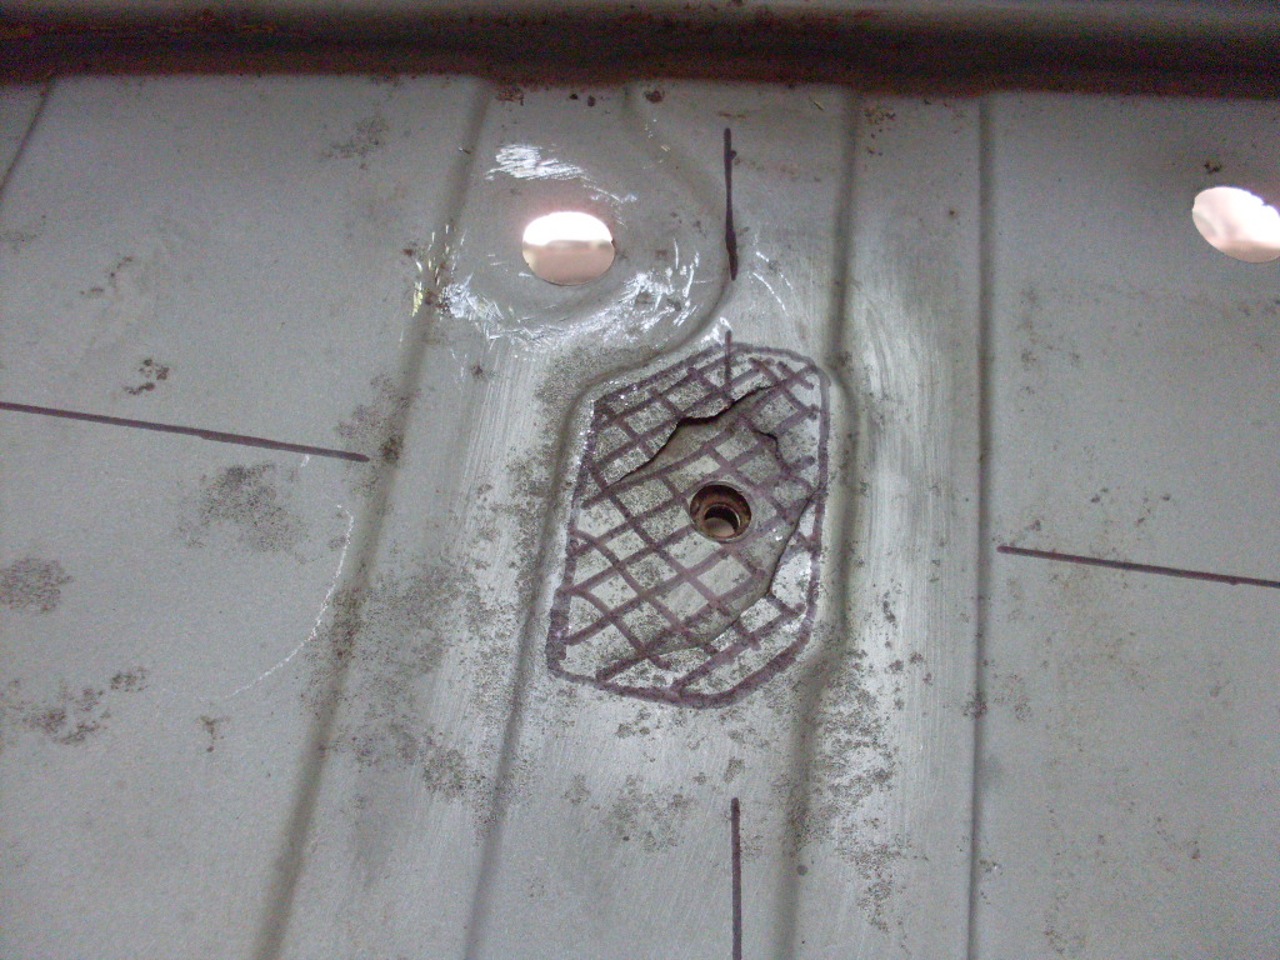
I
cut metal out of the pan outside the damaged areas and made pieces to
fit the holes, and tacked them in. The cross hair lines on the
floor tell me where the hole should go.
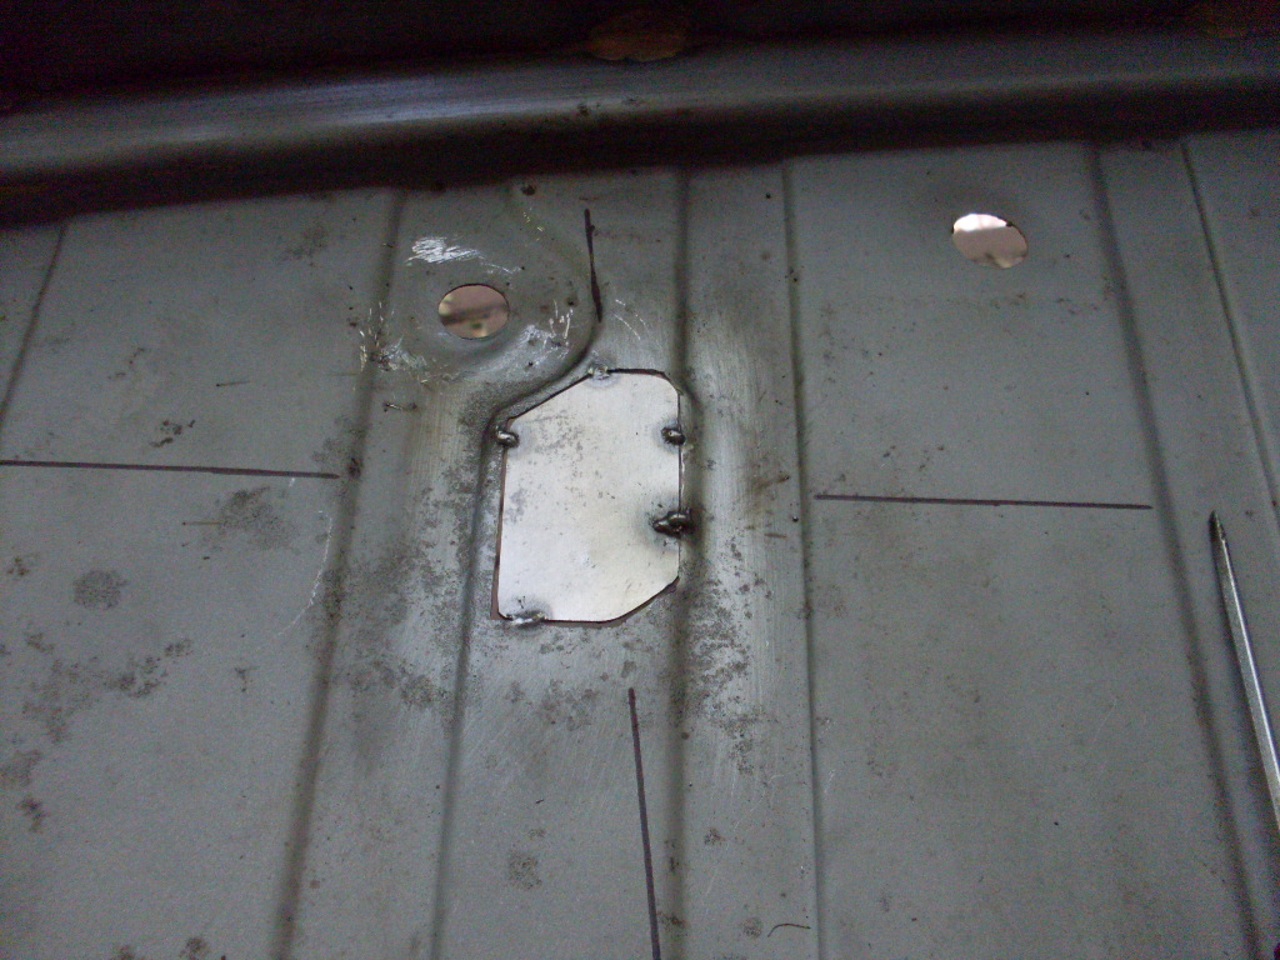
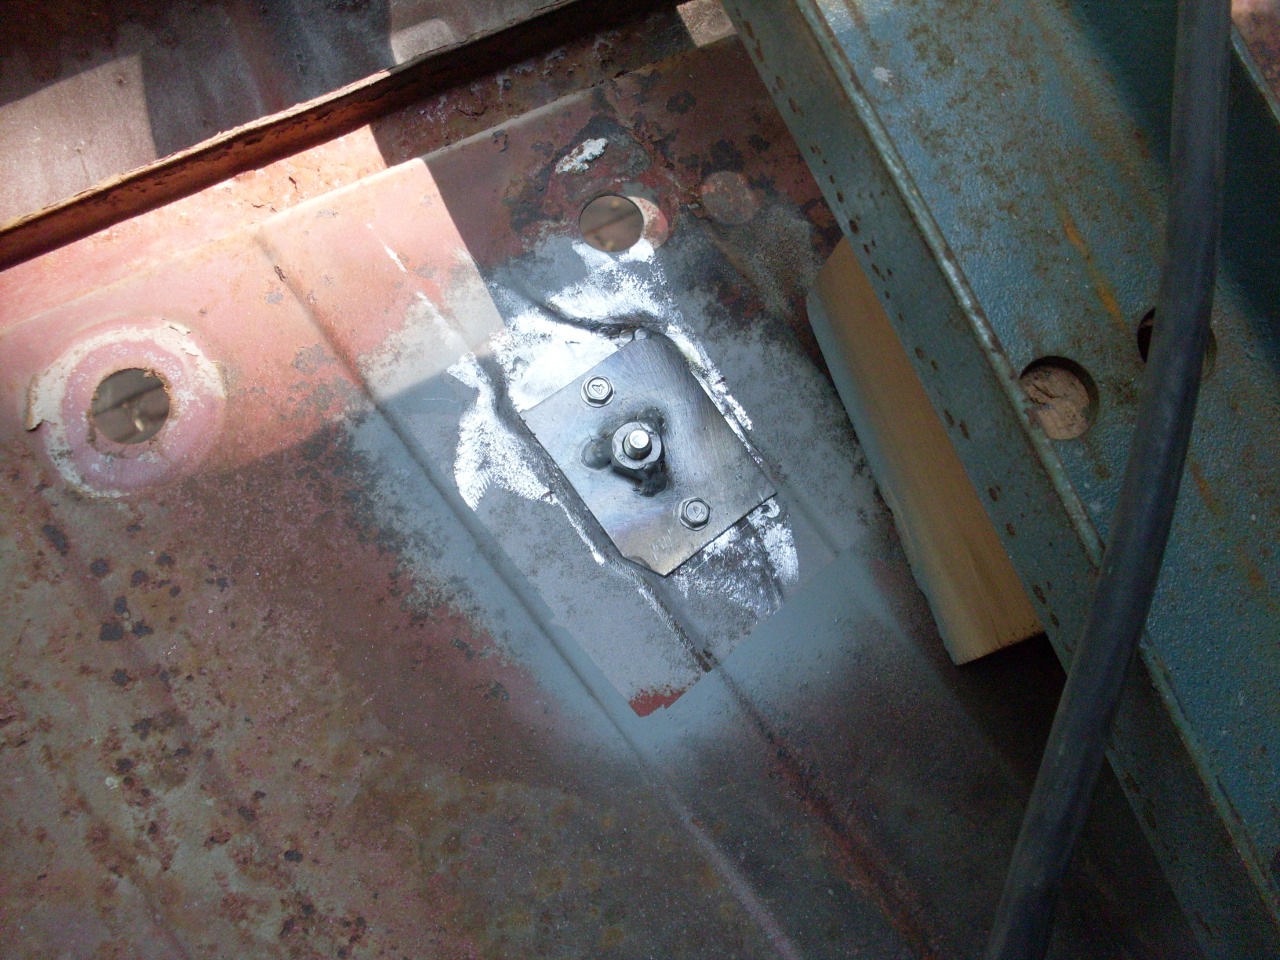
I welded in the patches, drilled the holes, and cleaned them up.
There
were originally small reinforcing plates spot welded to the bottom side
of the floor with 1/4-28 nuts welded to them. I made new plates,
larger than the originals. The screws hold the plate flat
to help with welding it in.
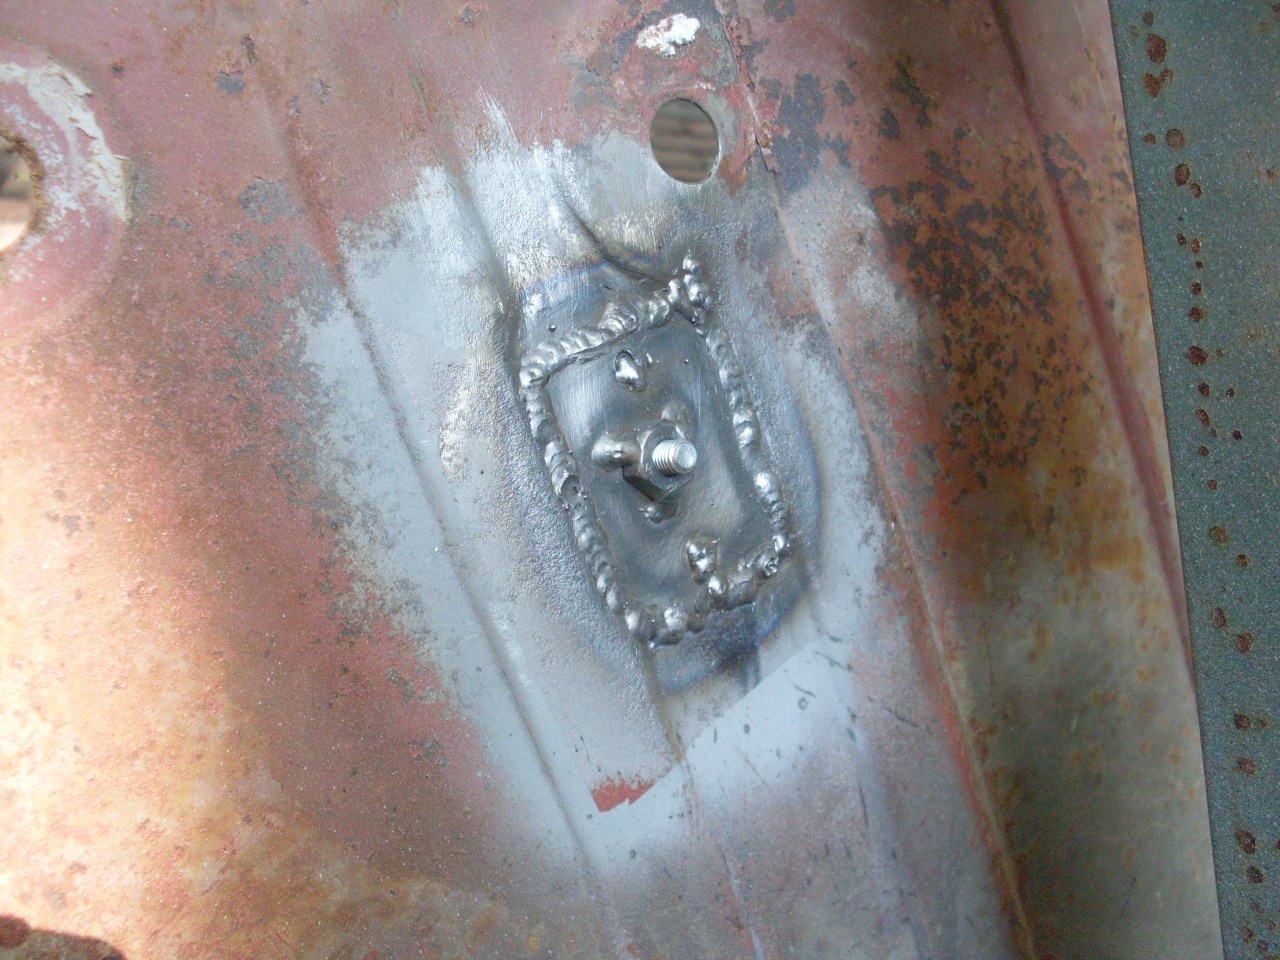
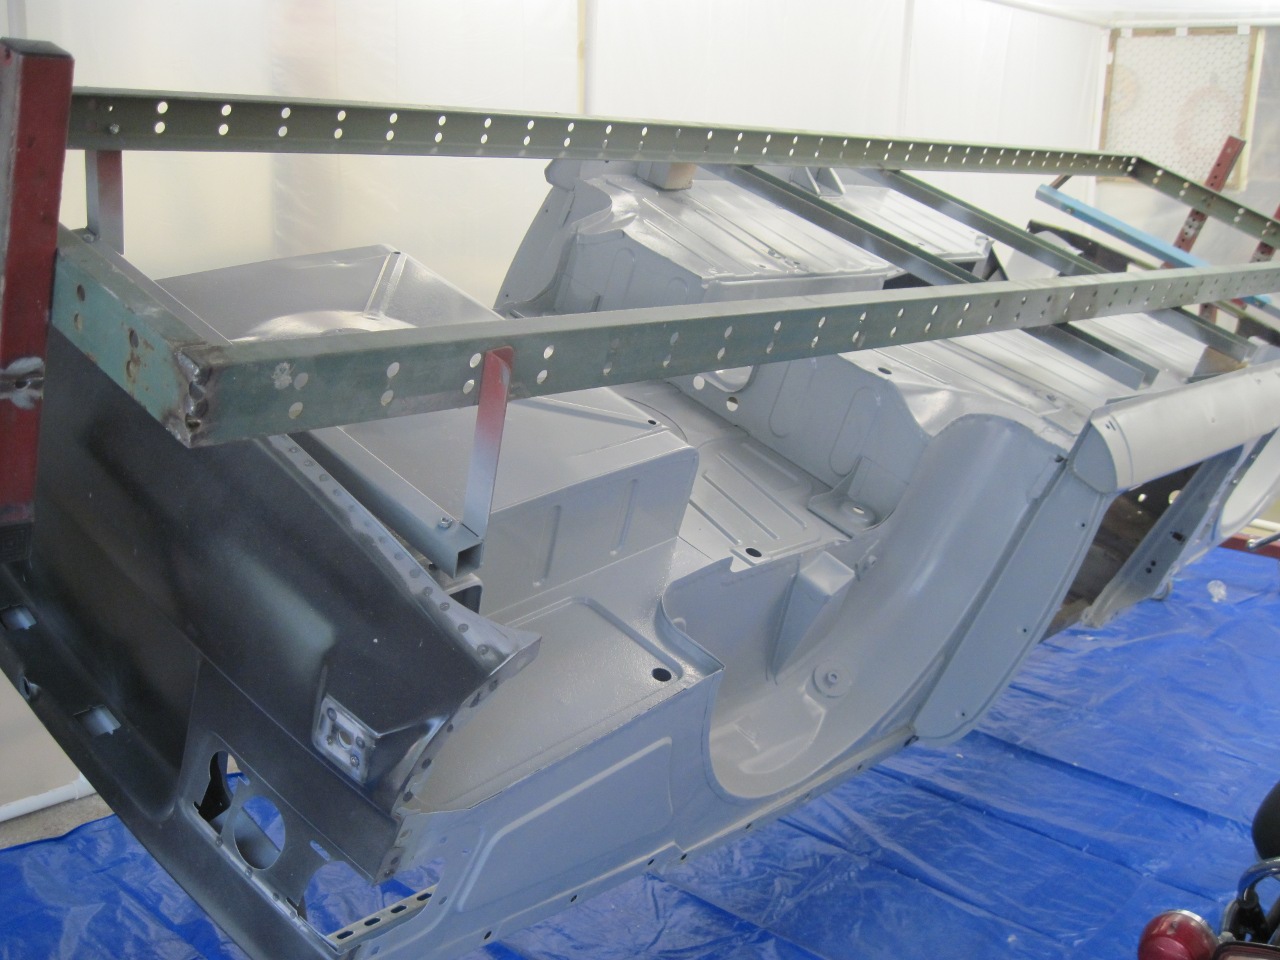
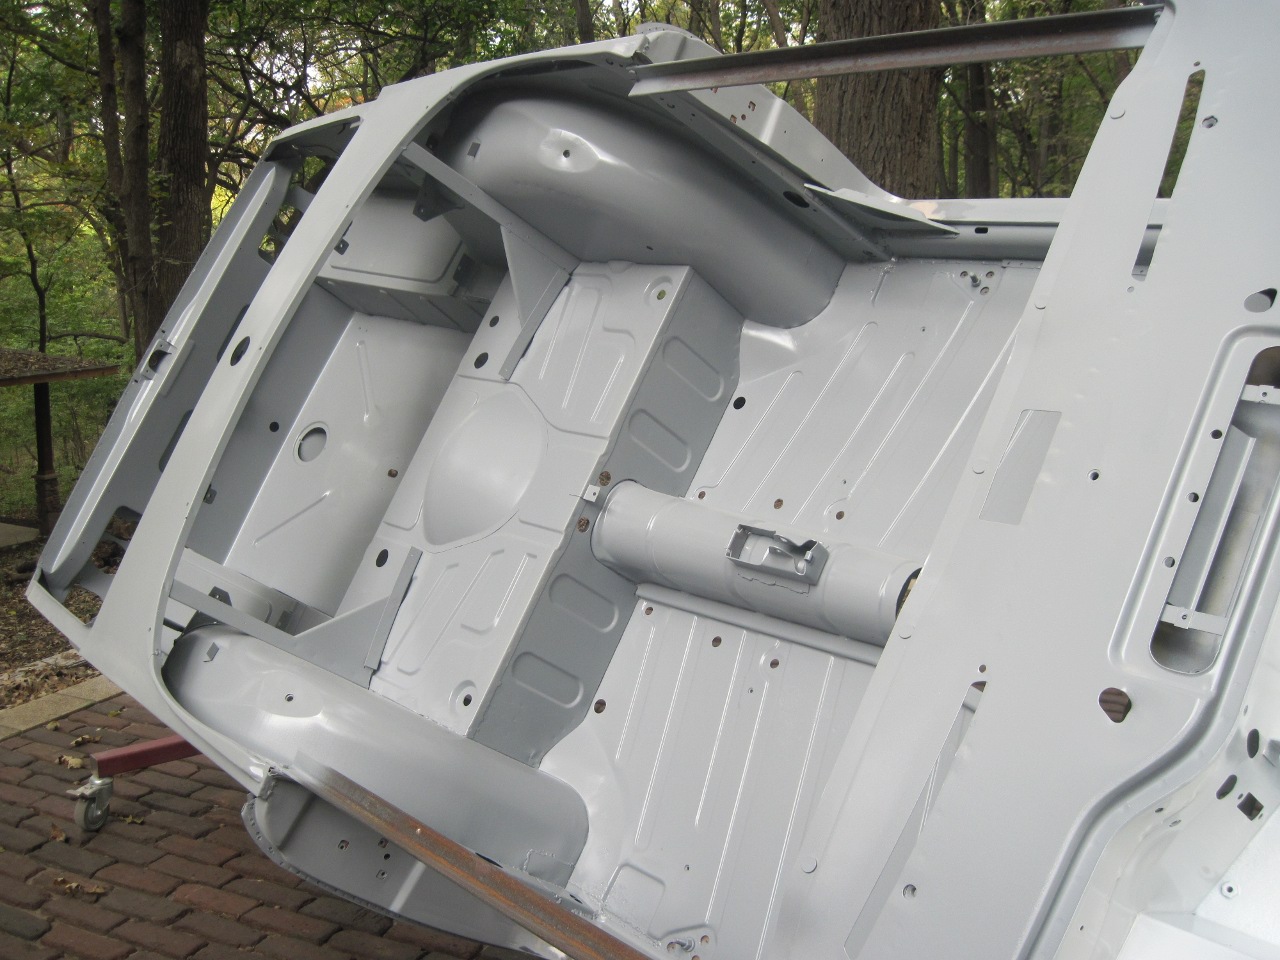
The floors ended up looking really good.
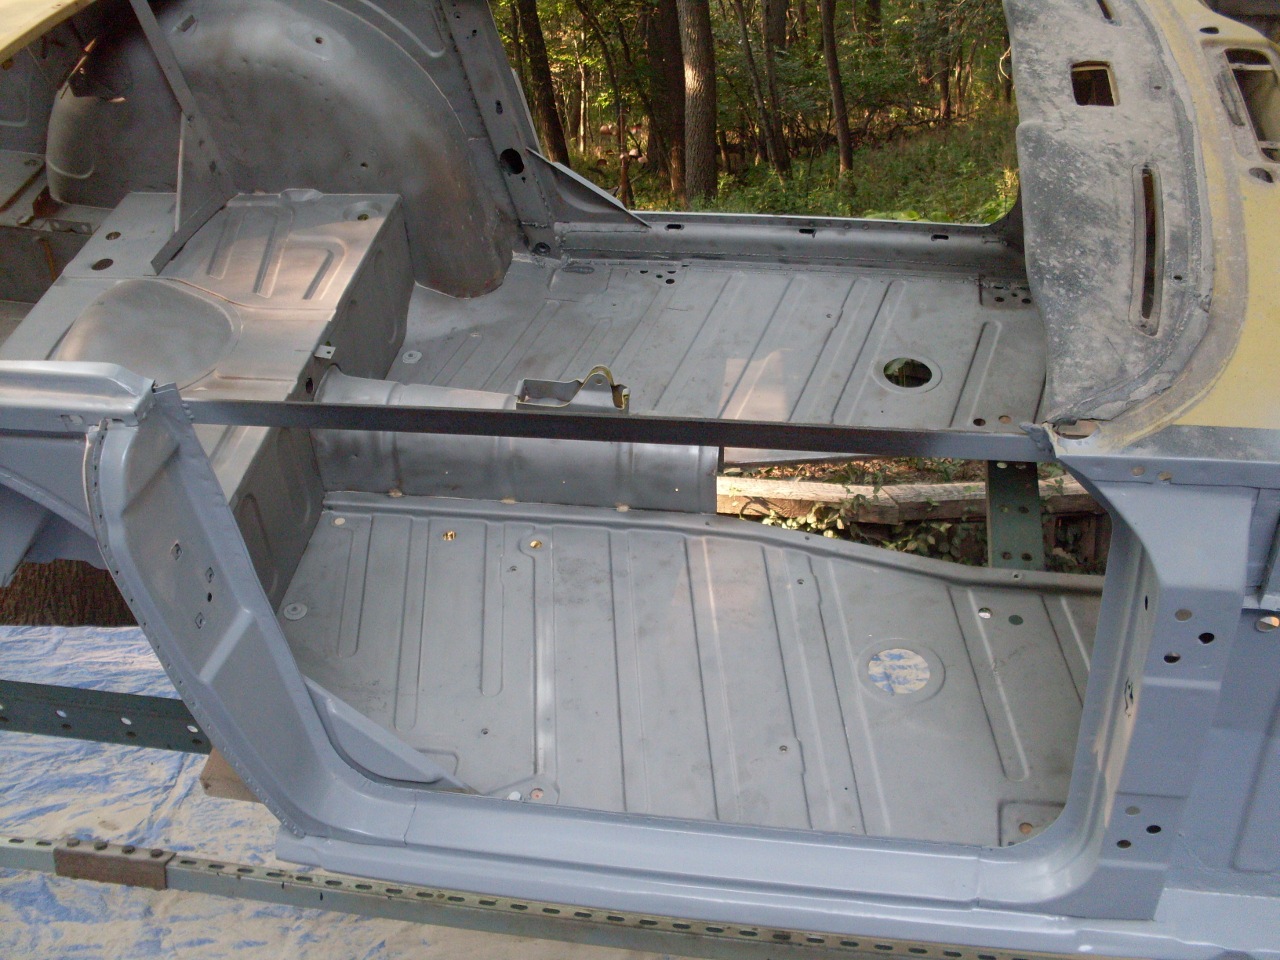
Enough stalling--on to the rear valance!
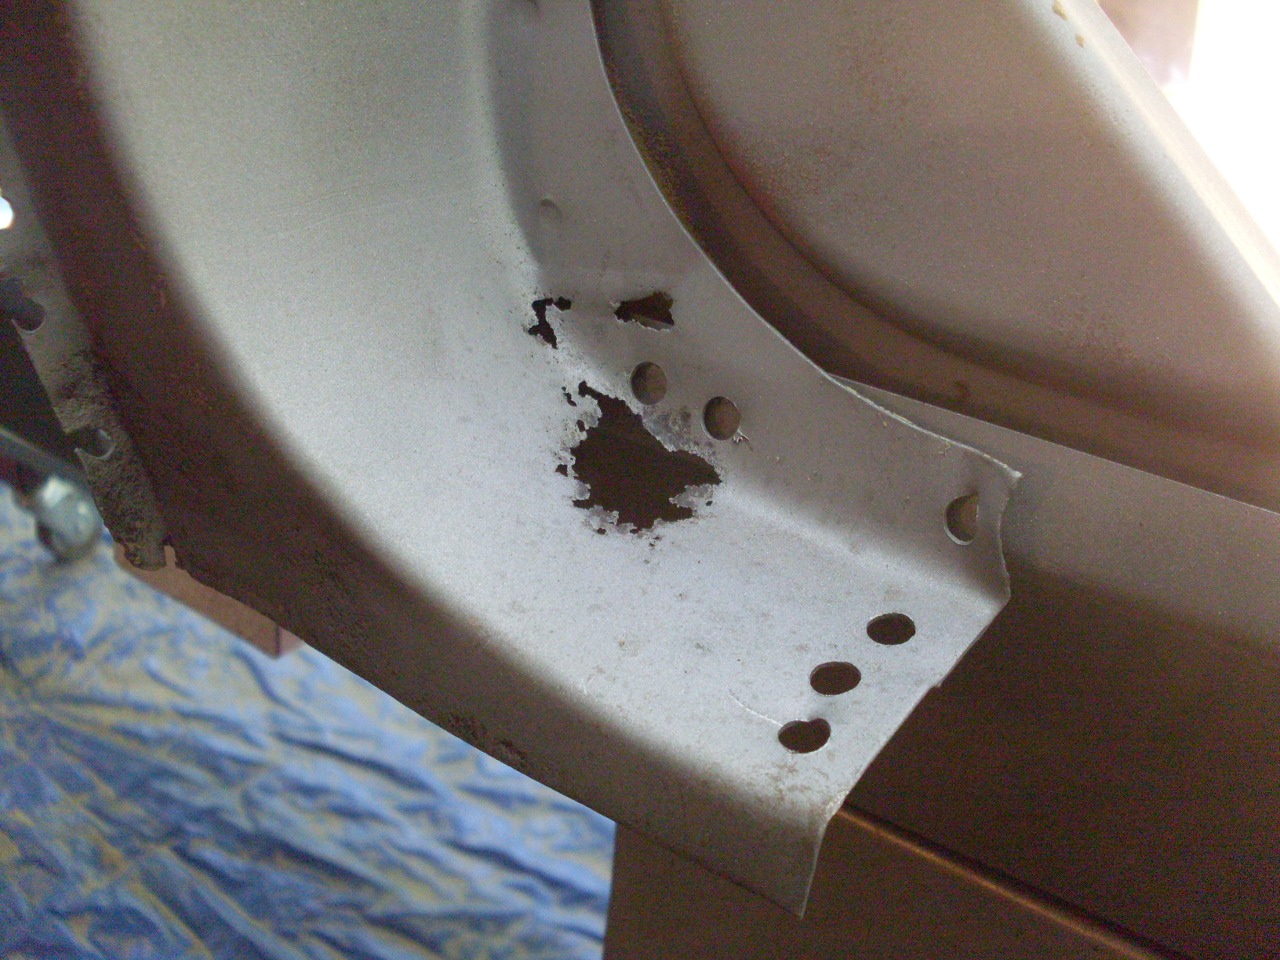
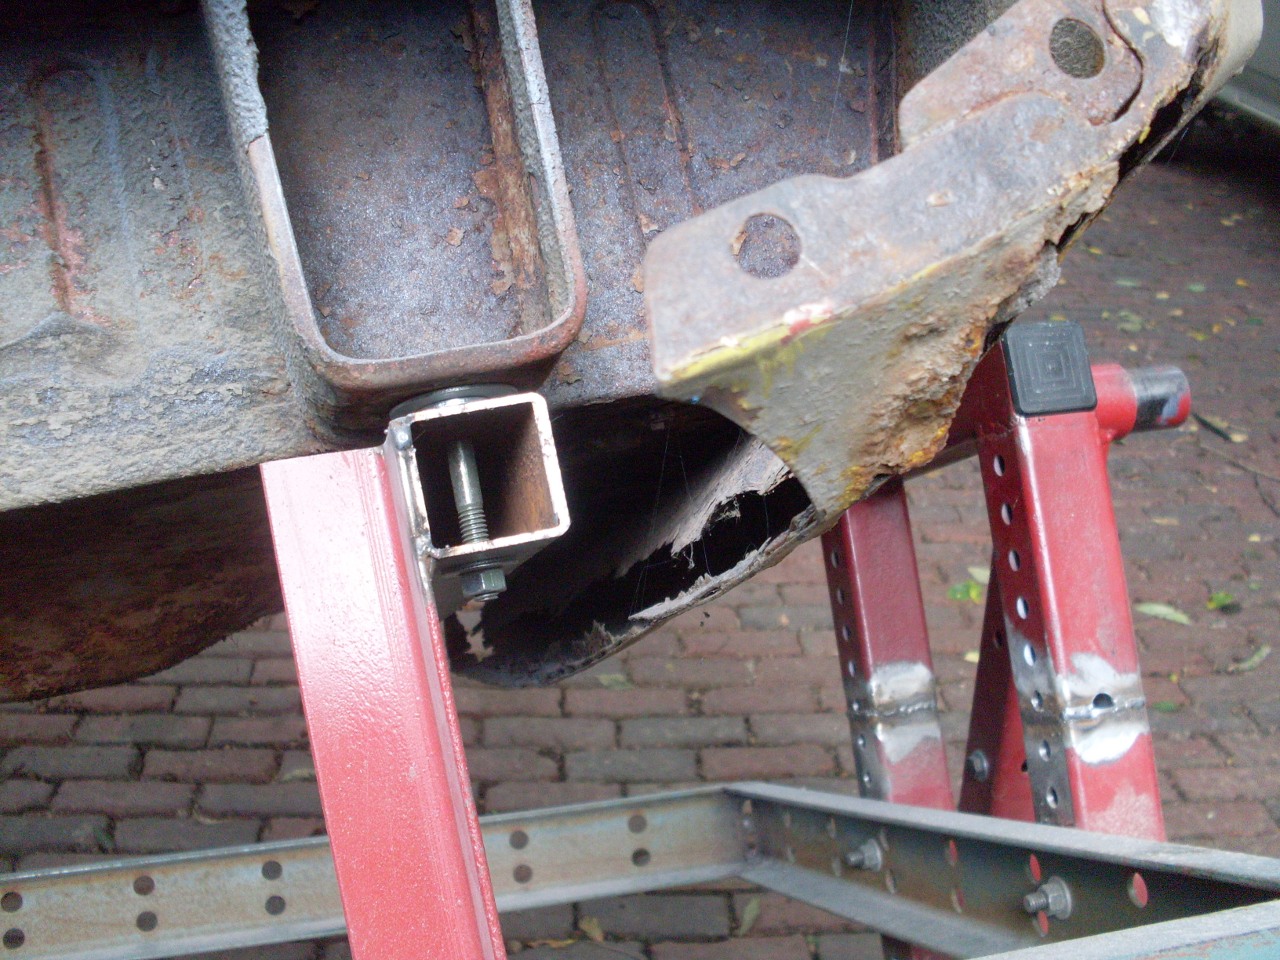
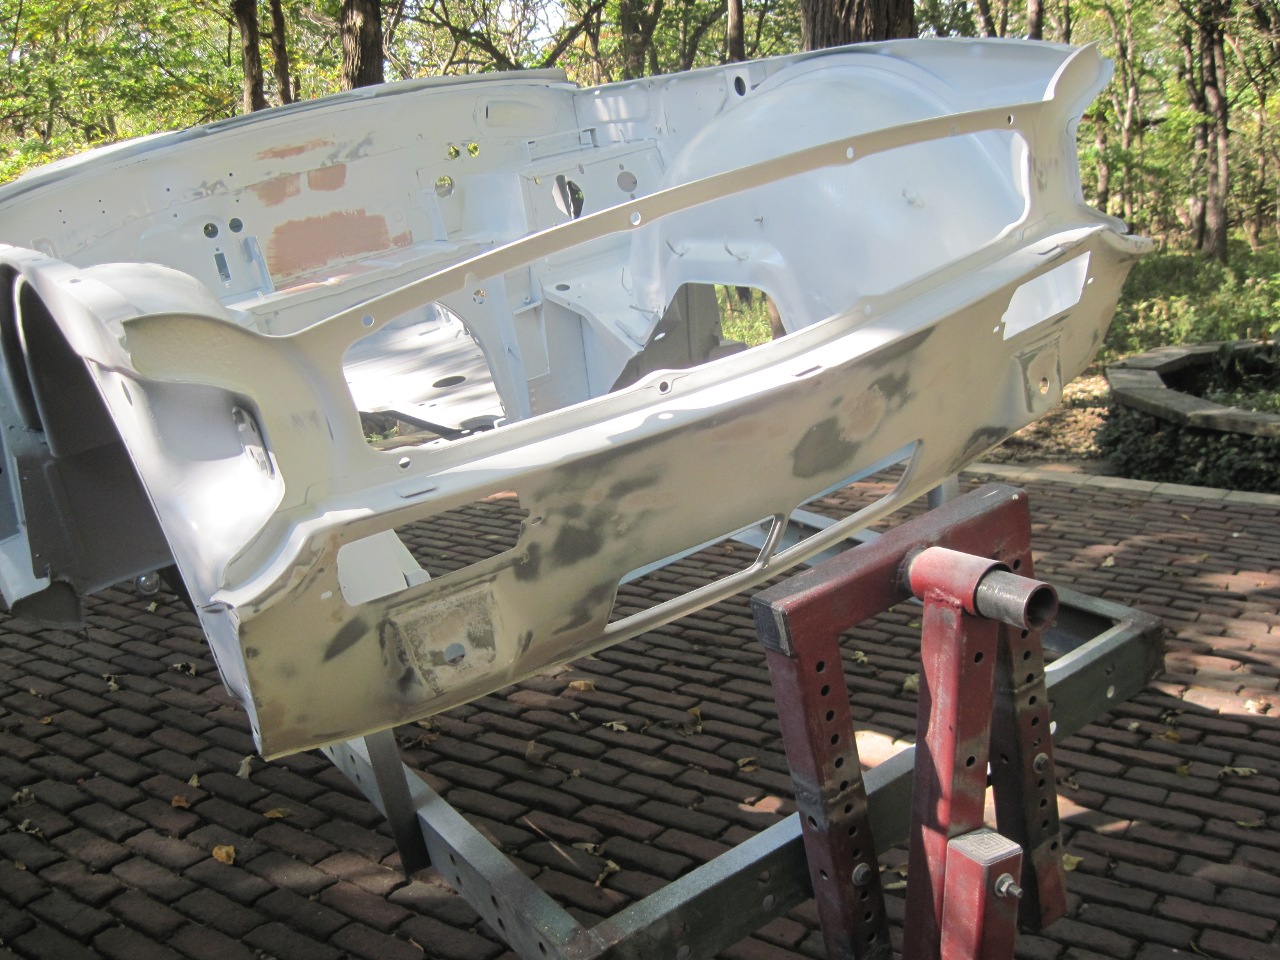
A casual glance might suggest that the rear of the car wasn't too bad...
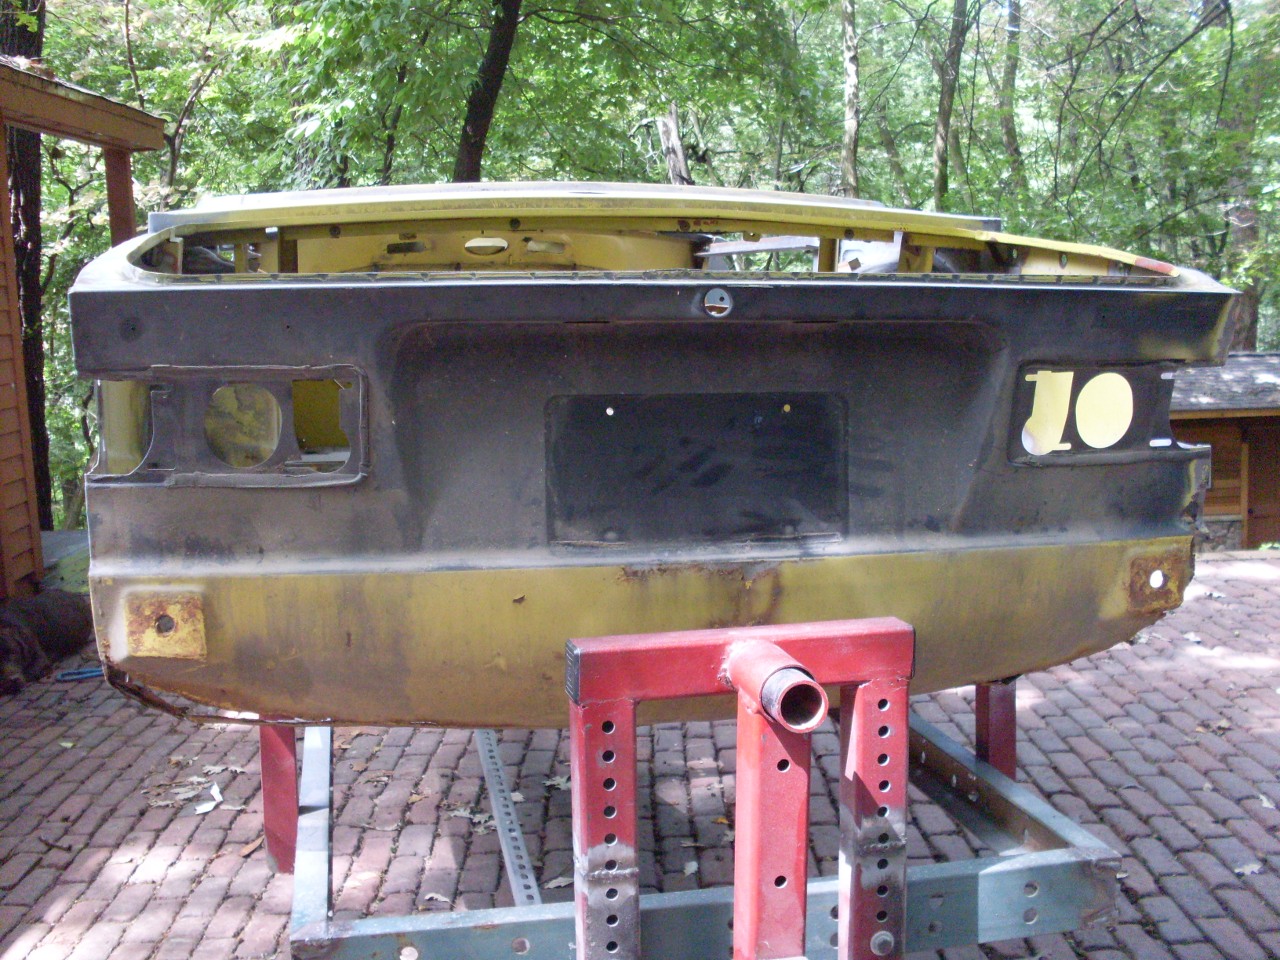
...but a closer look is really disappointing.

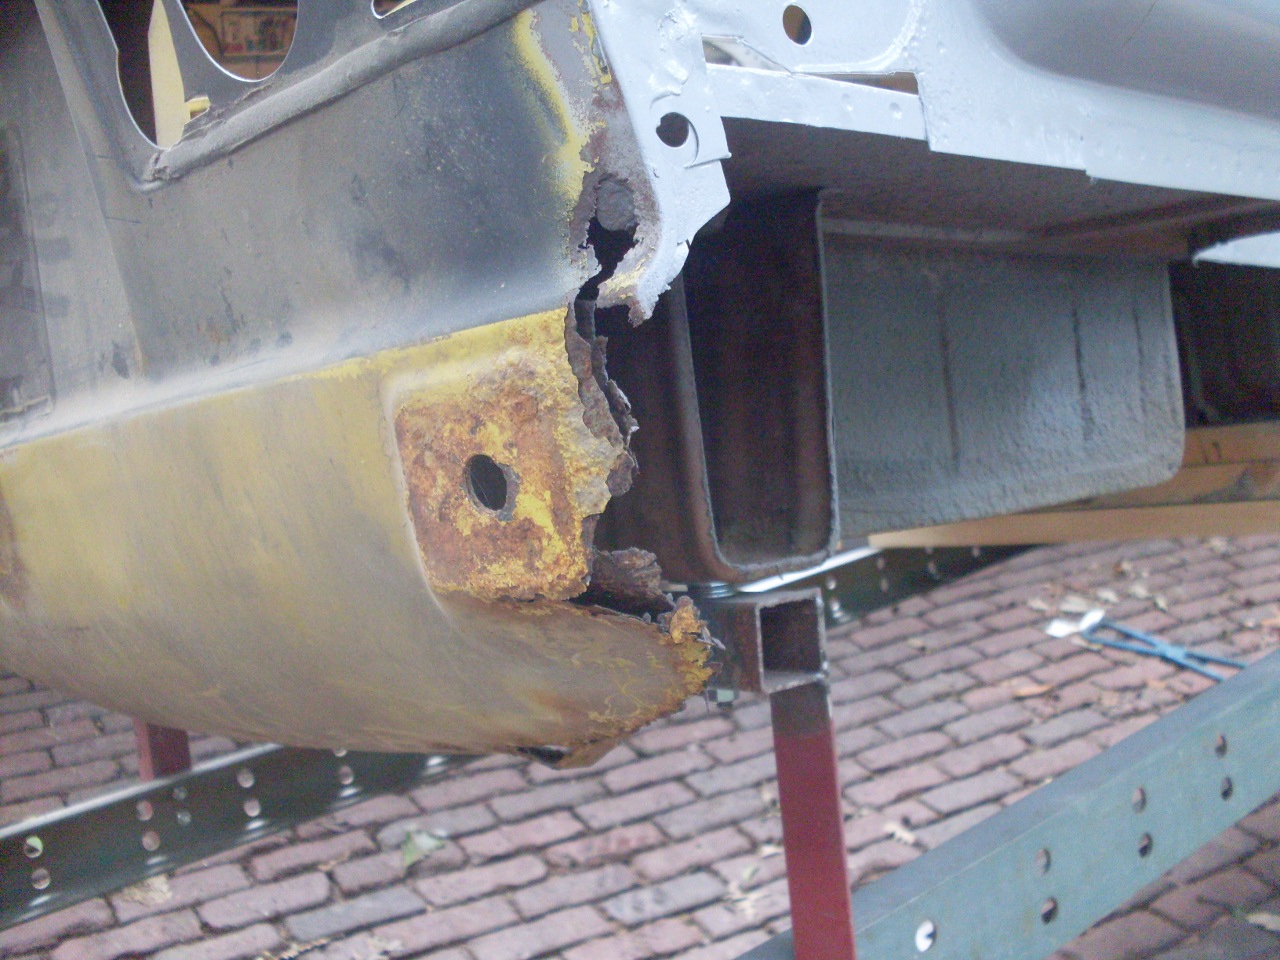
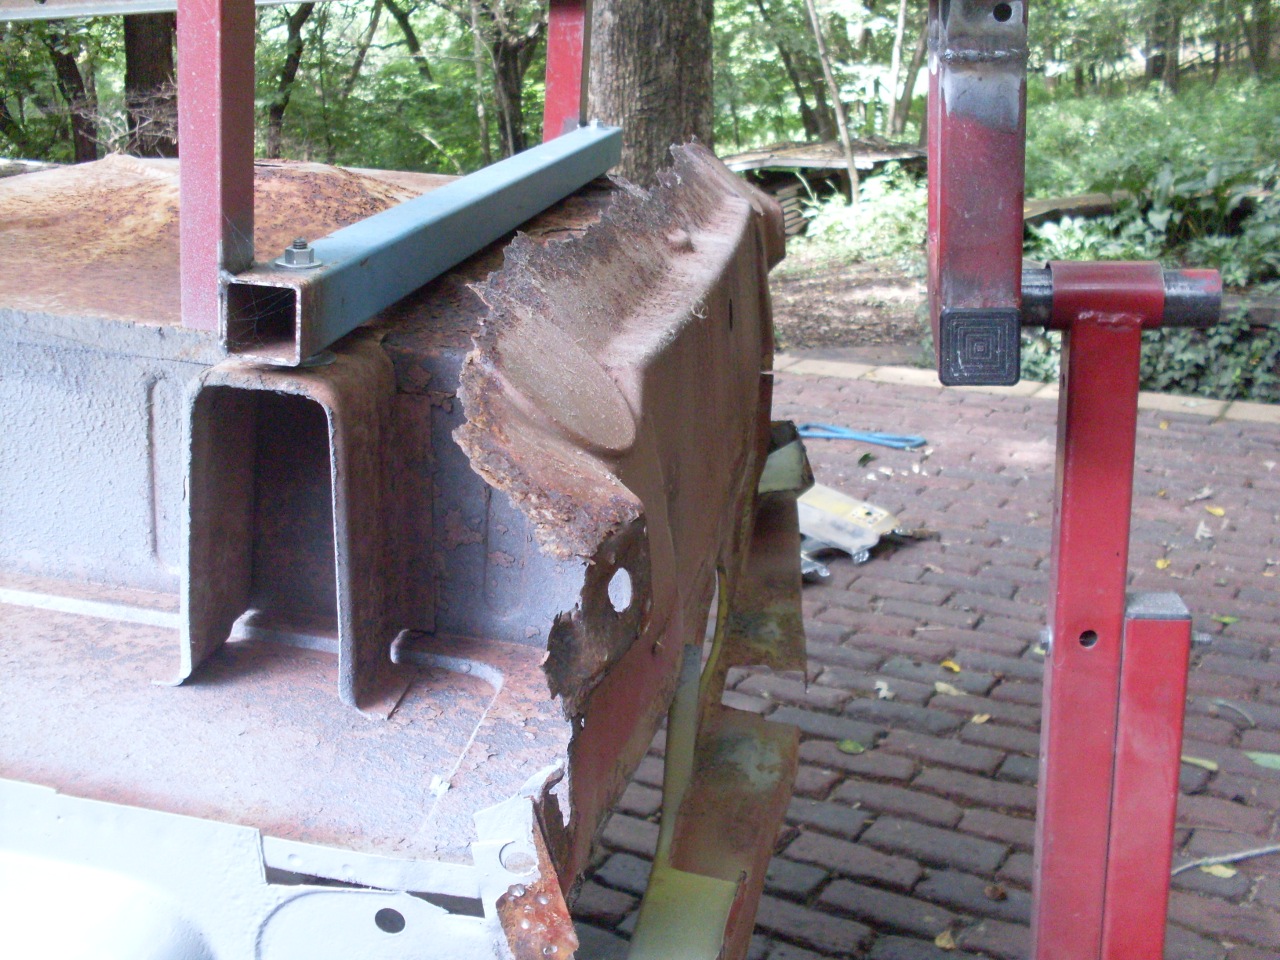
Since
the perished areas only amounted to a small fraction of the panel, I
toyed with the idea of trying to just fix the bad parts. In the
end, I wimped out and decided to buy replacement panels. A man
has to know his limitations.
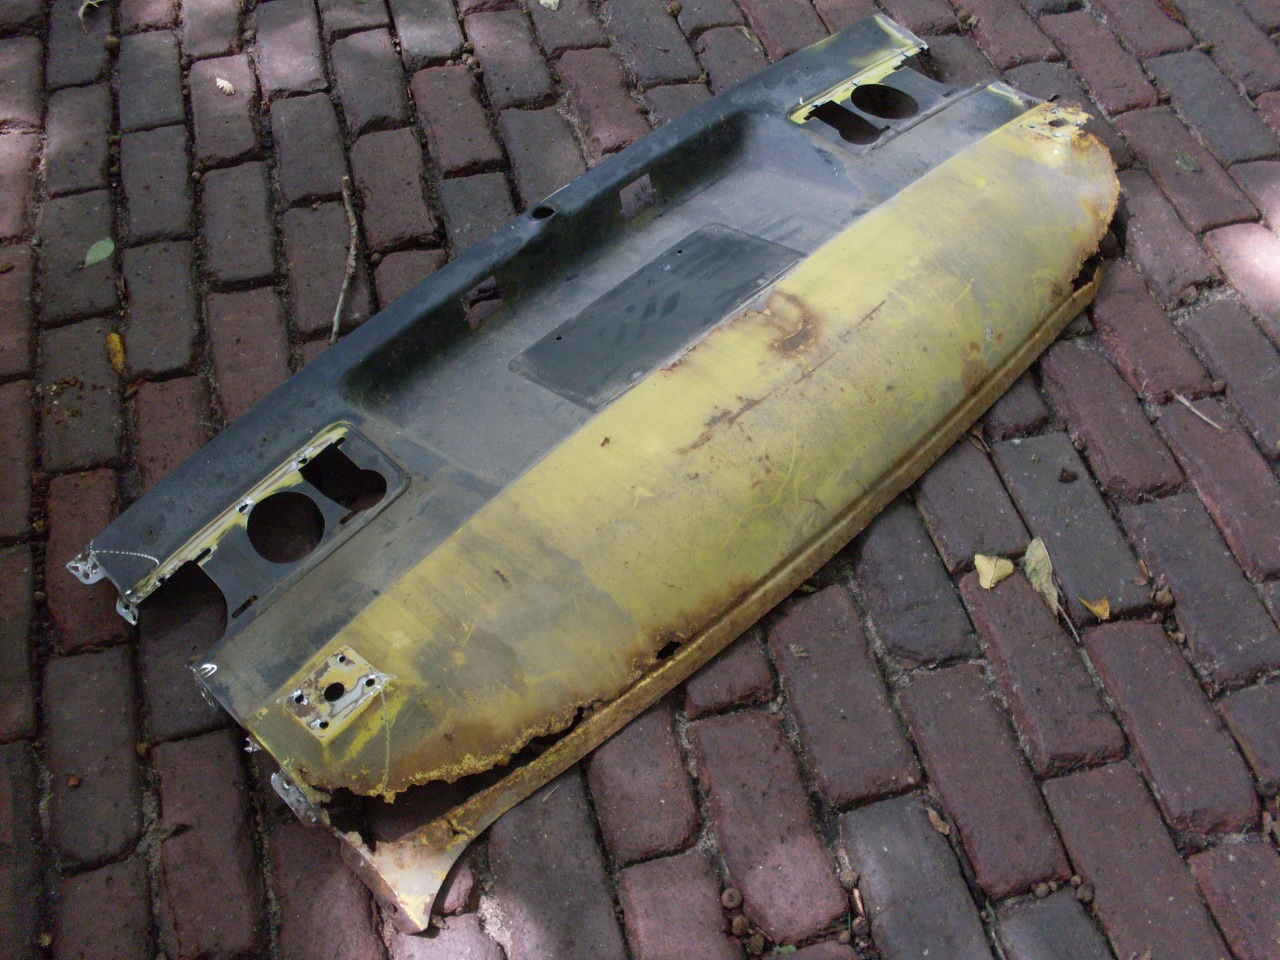
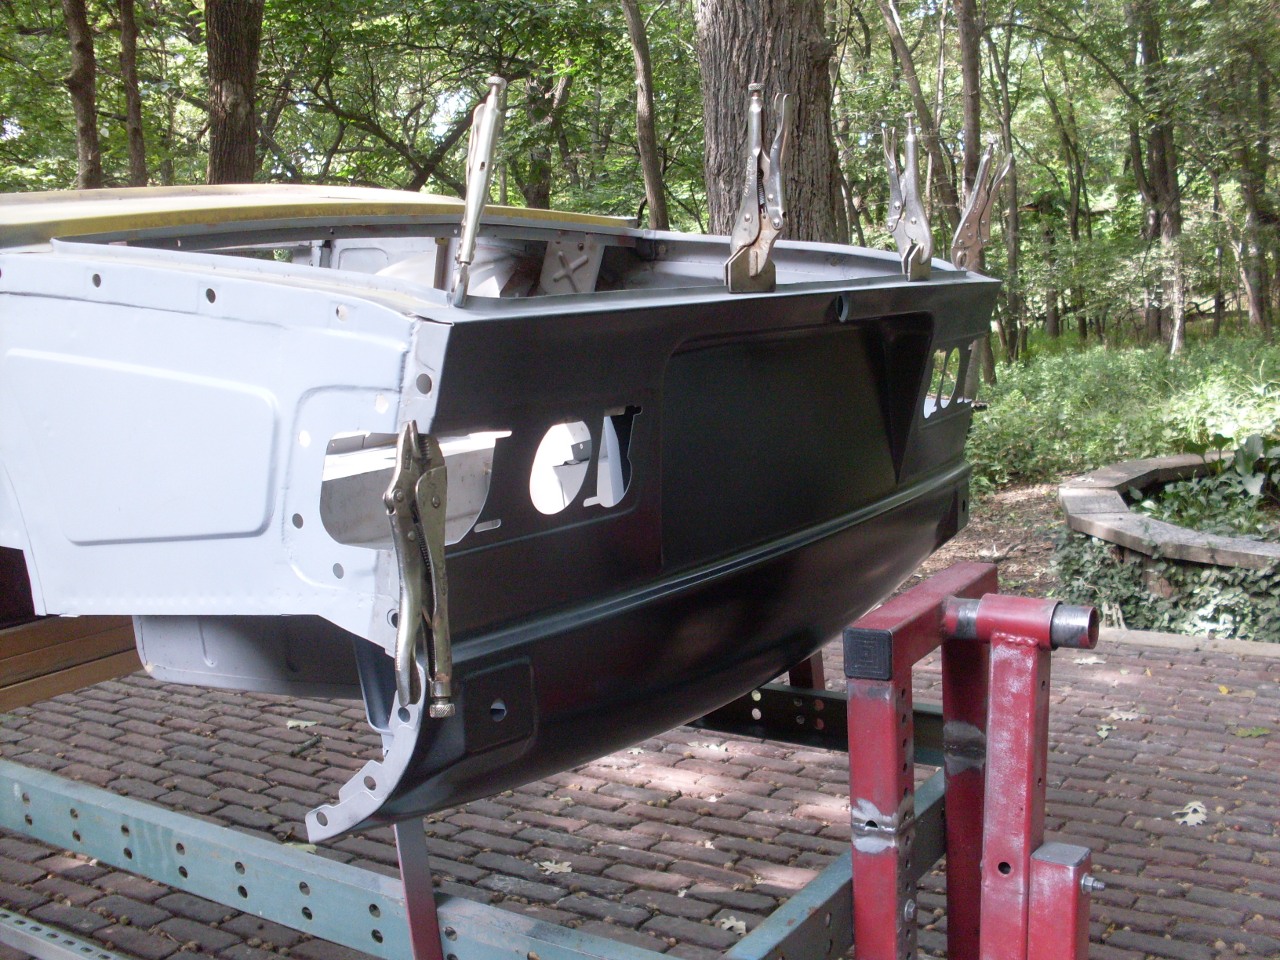
So, off came the rear valance panel.
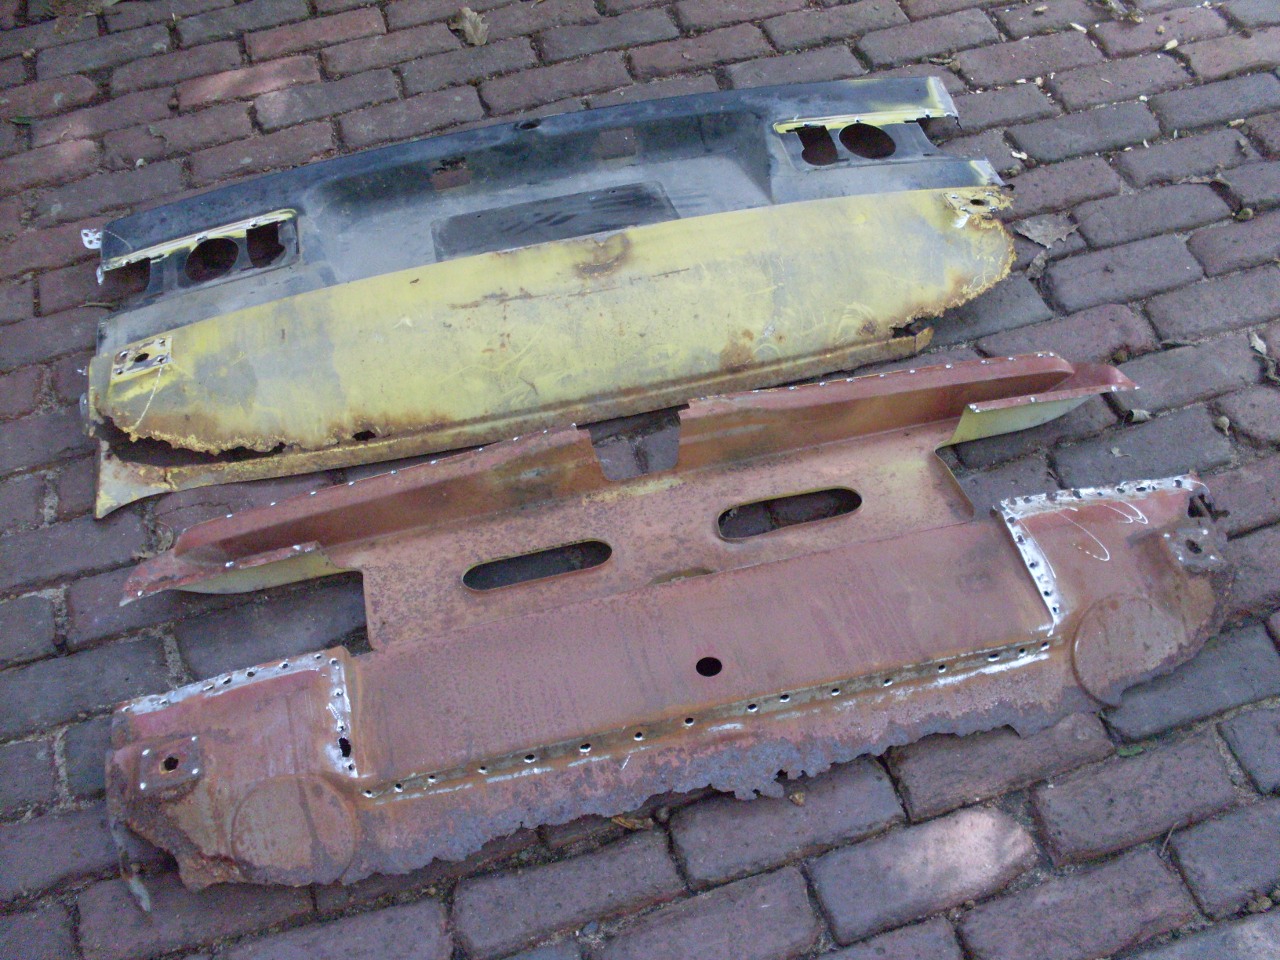
Behind
the outer valance panel is the inner valance panel. It is in two
parts--the upper and lower. My upper panel was sound, with just
some surface rust.
The lower panel, however, was toast. (The tub is inverted in the pic.)
So off came the inner panels.
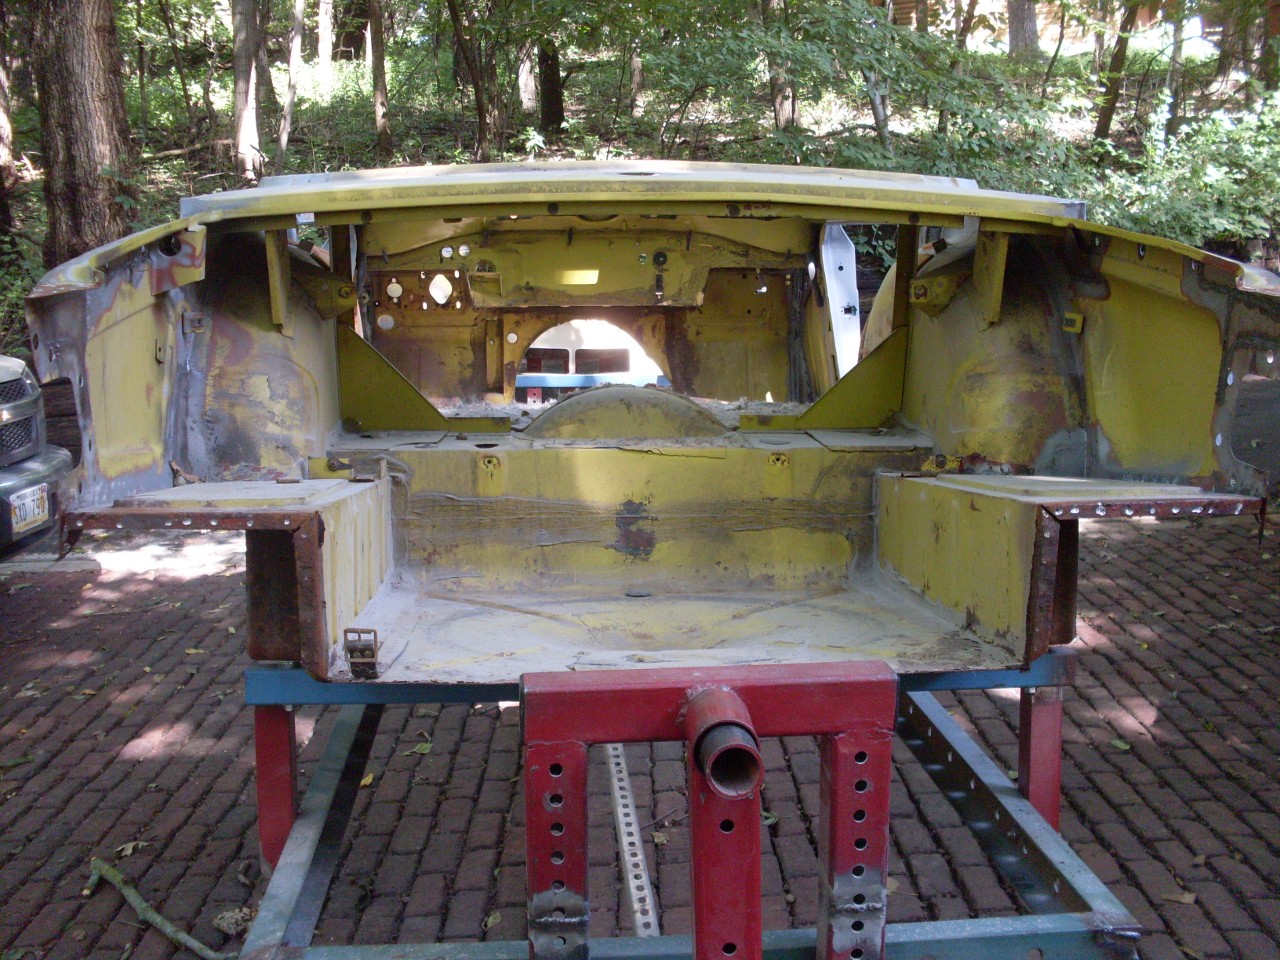
This left the car looking almost embarassingly undignified, with its bare backside out for the worlk to see.
Looking at the removed parts, I verified that I could reuse the upper inner panel, but the others were gonners.
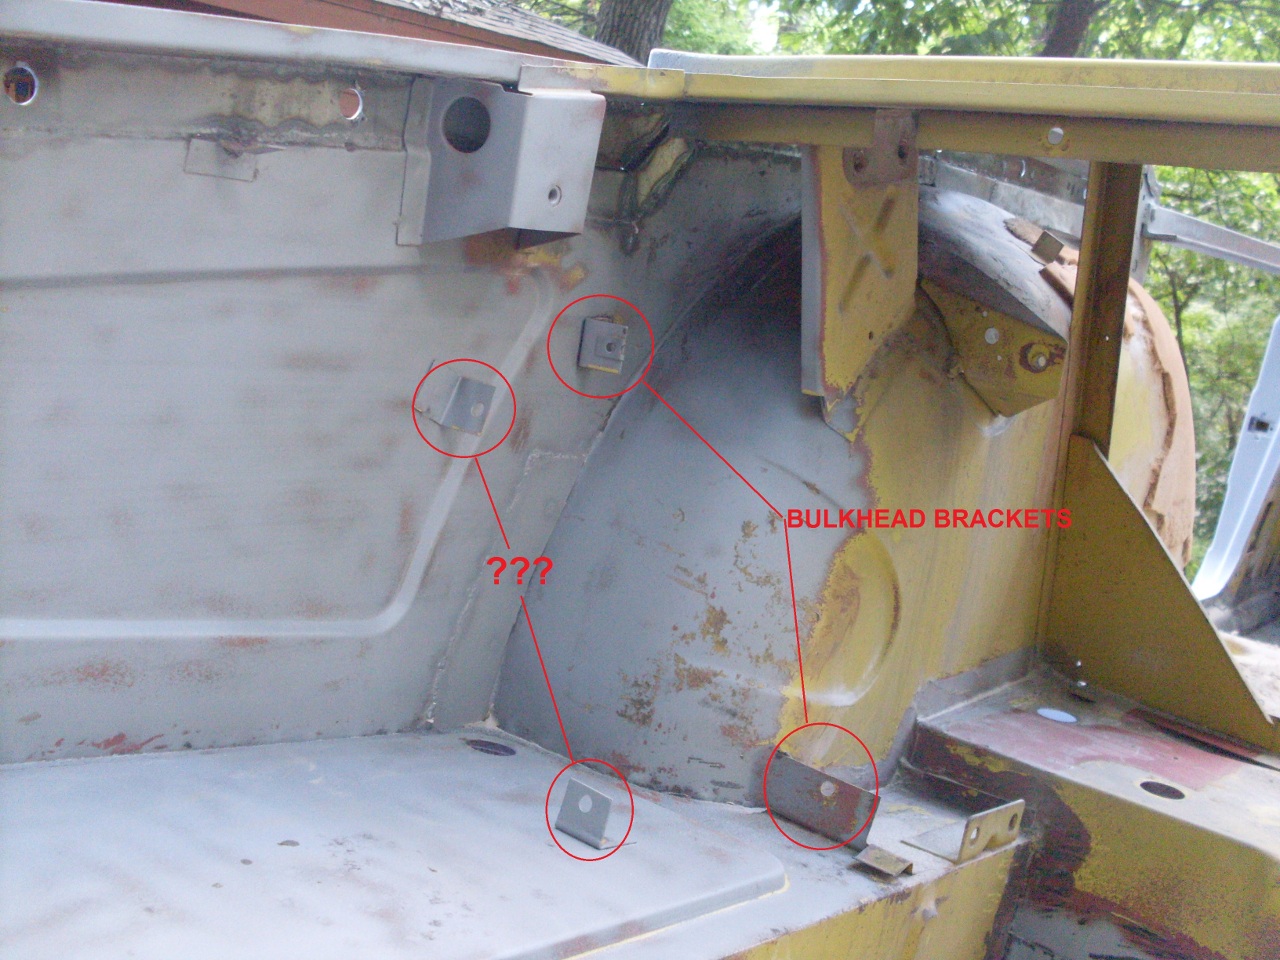
Having
really good access to the trunk area, I took the opportunity to clean
up a few things. For example, I removed the vestigial brackets
that hold the fuel pump cover on "home market" cars. (Marked with
"???" in the picture. A knowledgeable forum member clued me in as
to what they were for.)
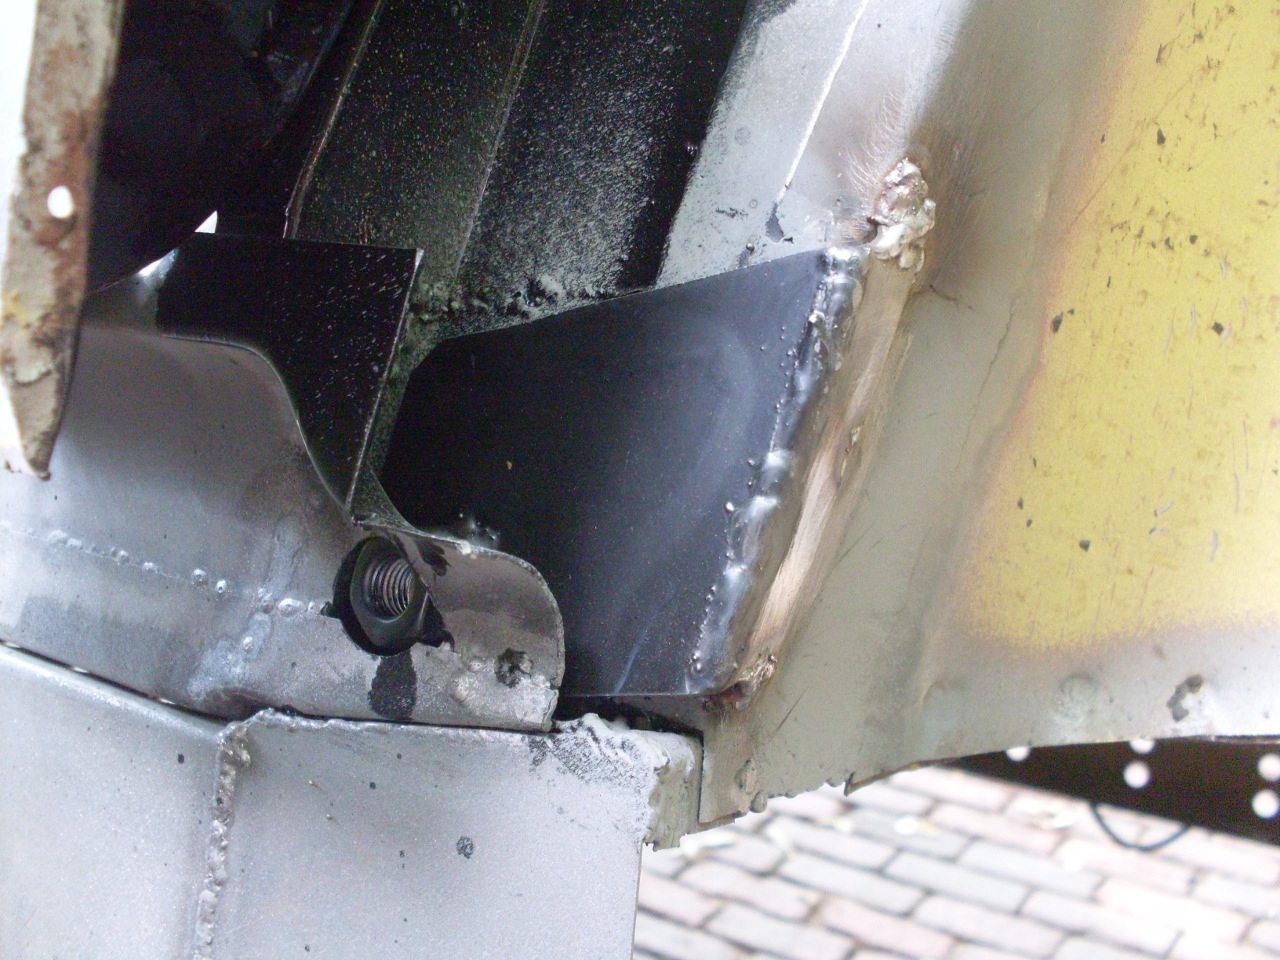
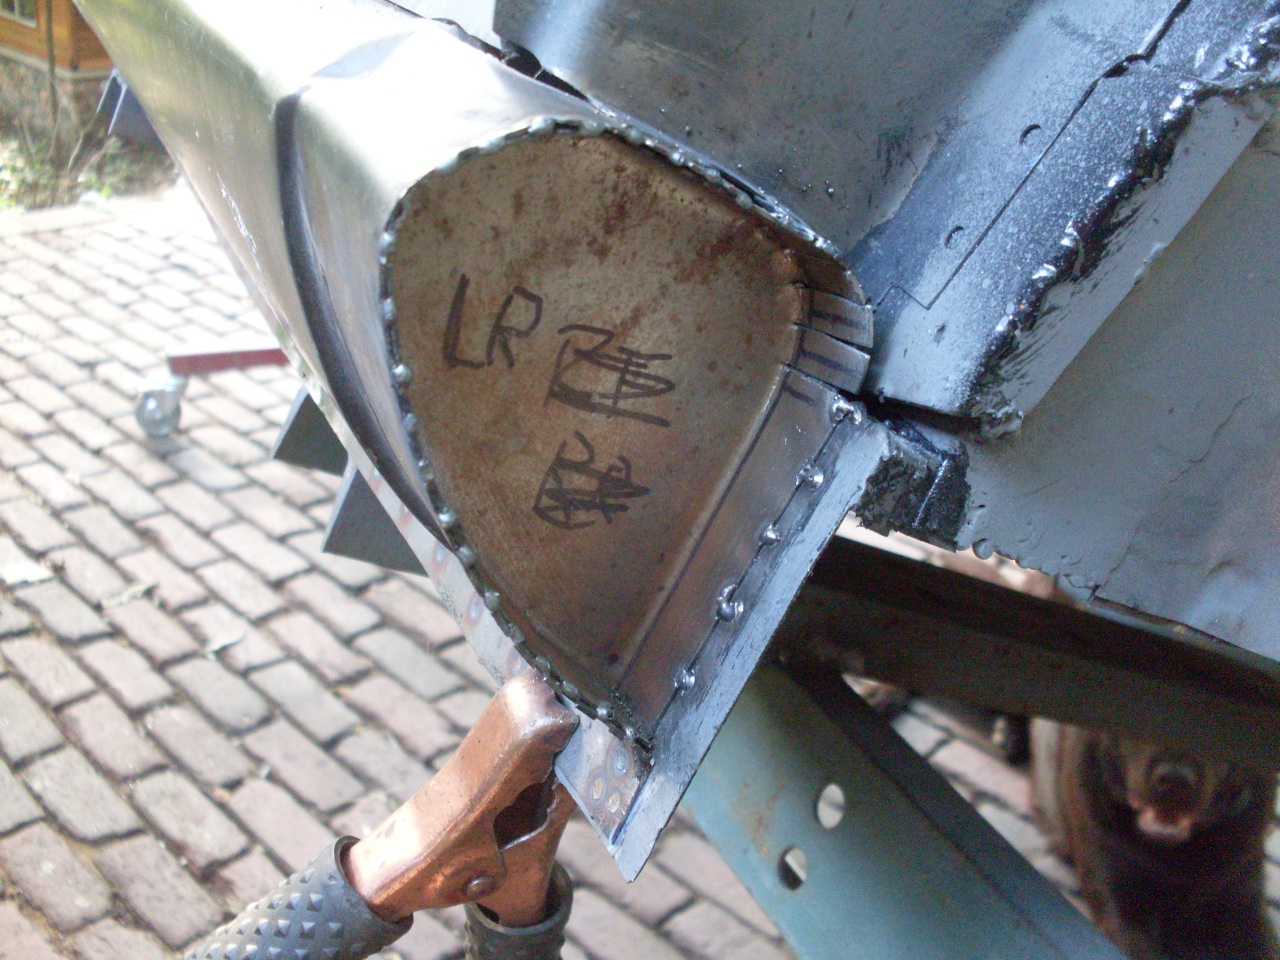
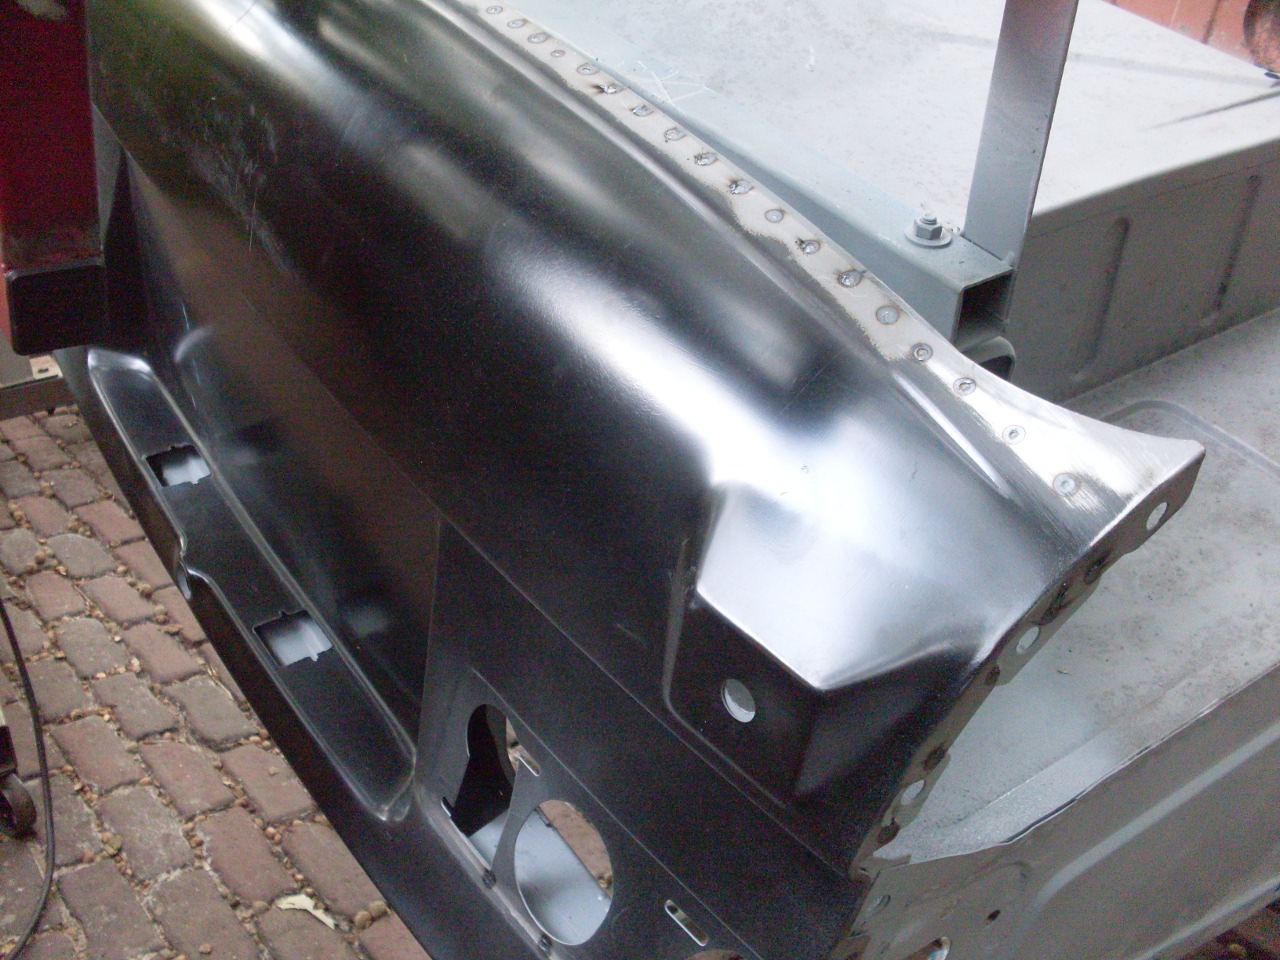
Also fixed these little tail sections on both sides.
With
everything ready, I trial fitted the lower inner panel. It really
was a very good fit and required almost no tweaking. These are
British Heritage panels, which are reportedly made from original
factory dies.
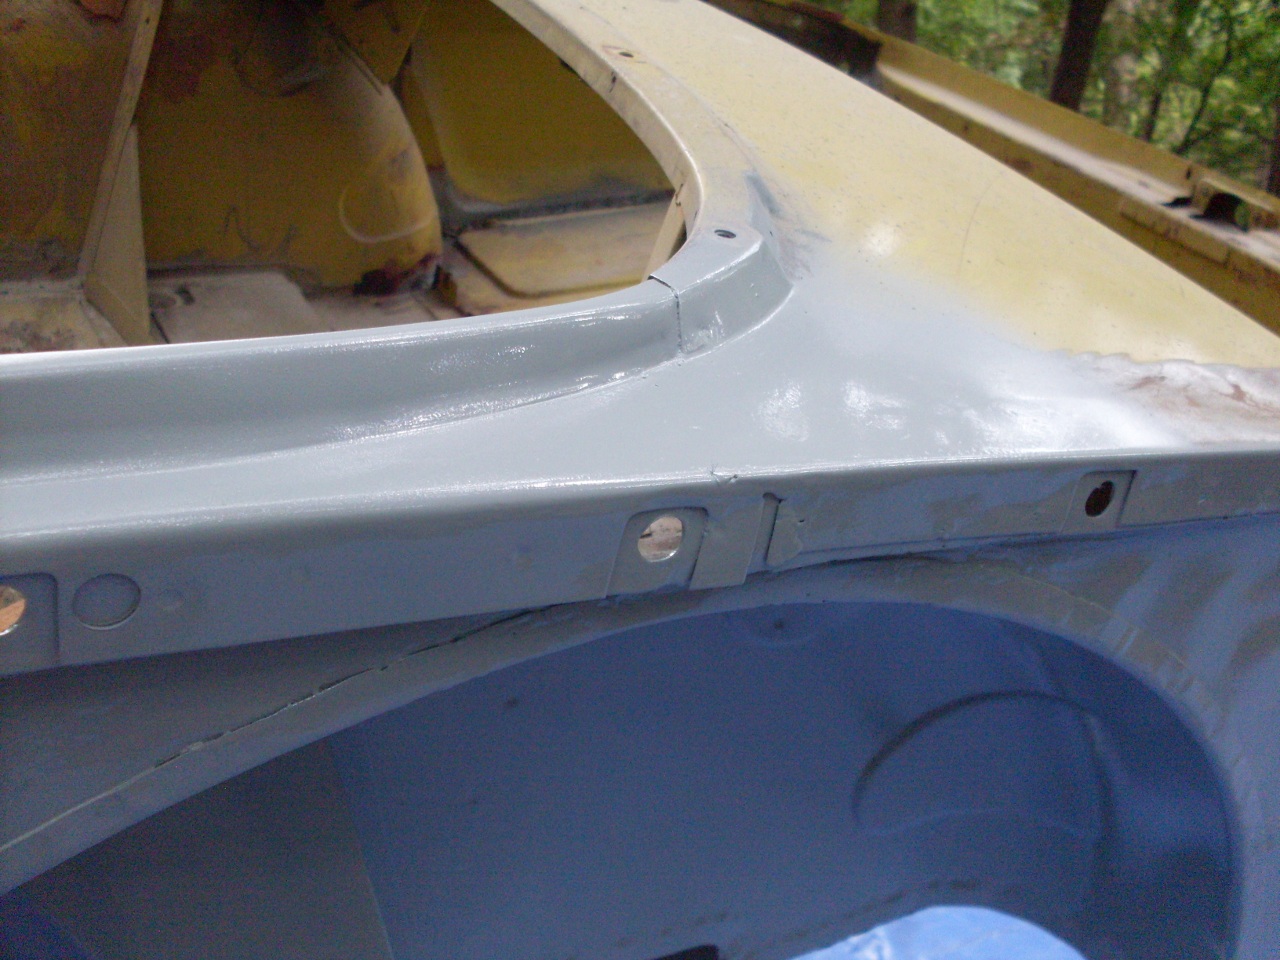
I
noticed when looking at the tub upside down that the rear valance wraps
underneath the trunk floor with only a few inches clearance. I
was concerned that there would be no good way to effectively prime or
paint that small space between the trunk floor and the valance. I
decided to prefinish that area.
The
British Heritage panels come with a nice black finish, but since I
wasn't sure what it was, I sand blasted the areas I was going to paint
down to bare metal, then sprayed three coats of a good epoxy primer.
This primer needs no topcoat, and in fact is rated as a very good
frame and undercarraige paint if at least three coats are applied.
I masked the areas that will be spot welded, and sprayed a
weld-through zinc primer on those areas.
I
thank providence every night before I go to sleep for my vintage
surplus spot welder. I can't bear to think of drilling hundreds
of holes and doing hundreds of plug welds with my marginal welding skills.
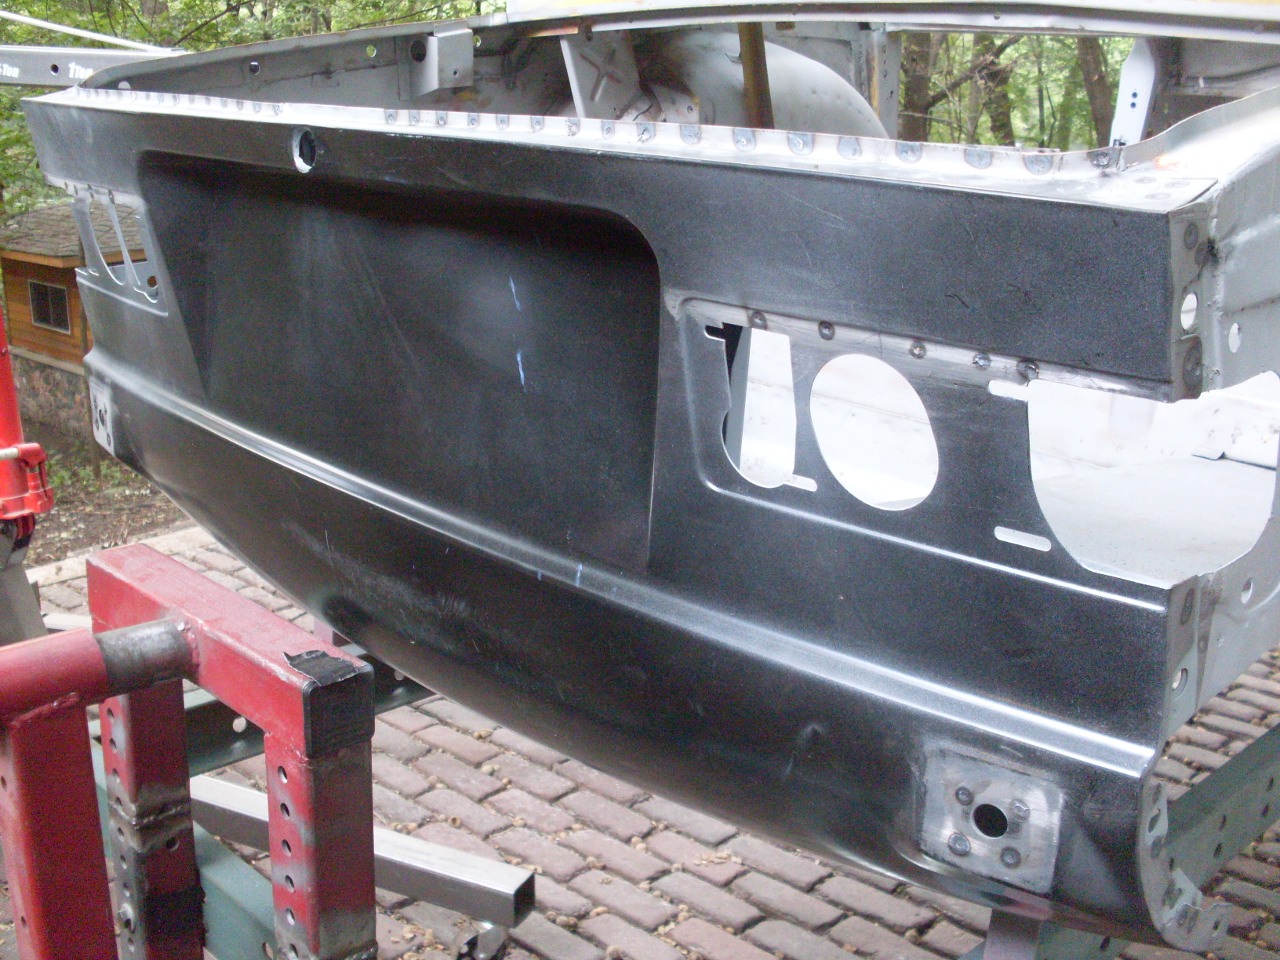
The lower inner valance panel installed:
The
blasted upper panel is stacked on top of the lower panel and spot
welded. I had to get sort of inventive with electrodes for the
welder because that seam is narrow, and there are tall surfaces above
and below it. The factory no doubt had custom designed jigs and
electrodes for each job, but we rebuilders have to make do. A
good part of the time on this job was in planning how to manage the
welder.
But the job got done.
Now
I was ready for the outer valance panel. Similar to the situation
with the lower inner panel and the trunk floor, the space between the
inner and outer valance panels is not accessible after assembly.
I repeated the process for the surfaces of the panels that will
be inside the hidden cavity--blasted to bare metal, three coats of
epoxy primer with the weld seams masked, and weld through primer on the
weld seams.
I mocked up the outer valance, which was also a very nice fit.
About a hundred welds later...
The car looks more comfortable now that it has its britches back on.
September Update--
I
had to take most of September off to catch up on some domestic chores,
but did manage to get one thing accomplished on the tub.
I've
always said I'd like to meet the guy who designed the scuttle drain on
the TR6. Water from rain, carwashes, or whatever, can easly get
into the scuttle through the open vent just in front of the windshield.
(I understand that earlier cars had a operable cover for the
vent, but not on a '74.) Scuttle water exits into a short hose on
either side of car, which in turn dumps directly into the closed space
between the inner and outer front fenders. The water pools there,
or weeps down between the lower fender and the rocker panel.
It's
actually a fairly trivial matter to fix this, and many people have, by
extending the drain hose to the outside of the car, often through
the splash panel at the rear of the wheel well.
This
seems a very righteous thing to me, and I intend to do it, bit it
doesn't solve the whole problem. There is also a channel at the
rear of the bonnet opening that intercepts most of the water coming off
the windshield and the top of the scuttle. This channel also
drains directly into the space between the inner and outer fenders.
In fact, because of the approximate fit of the panels at the ends
of the channel, some of the water would drain into the engine
compartment on top of the bulkhead.
This
seemed like a place ripe for improvement. I'm not the first
to notice this--I'm sure I've seen at least one or two websites where
someone described a fix.
The
approach I decided on was to extend the channel over the edge of the
inner fender, and drain it into a hose that would then connect to the
scuttle drain tube. The mod has to be pretty compact, though.
There isn't much room between the channel and the outer fender.
To do what I had iin mind, I had to remove a little chunk of the
inner fender.
Then
fashion a little gizmo that would fit up to the channel on one end, and
into a 1/2" hose at the other. Here's a trial fit:
The
drain extension is welded in place, and actually fits up under the
channel. I'll treat the joint with seam sealer after priming.
The
other side was almost identical, except that the channel didn't extend
as far, so I had to include a little intermediate piece on the end of
the channel.
Getting close to shooting paint on this puppy.
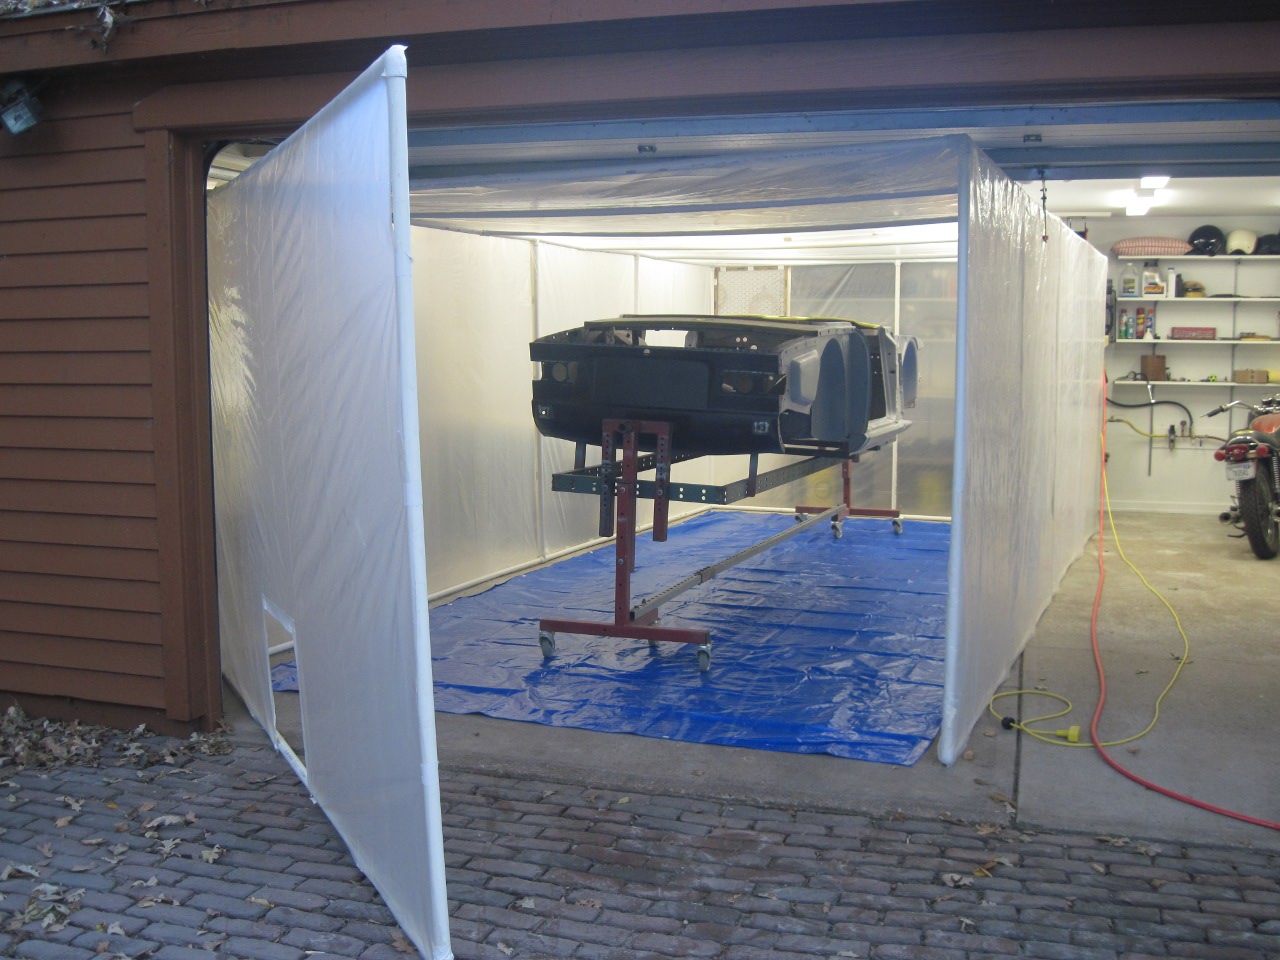
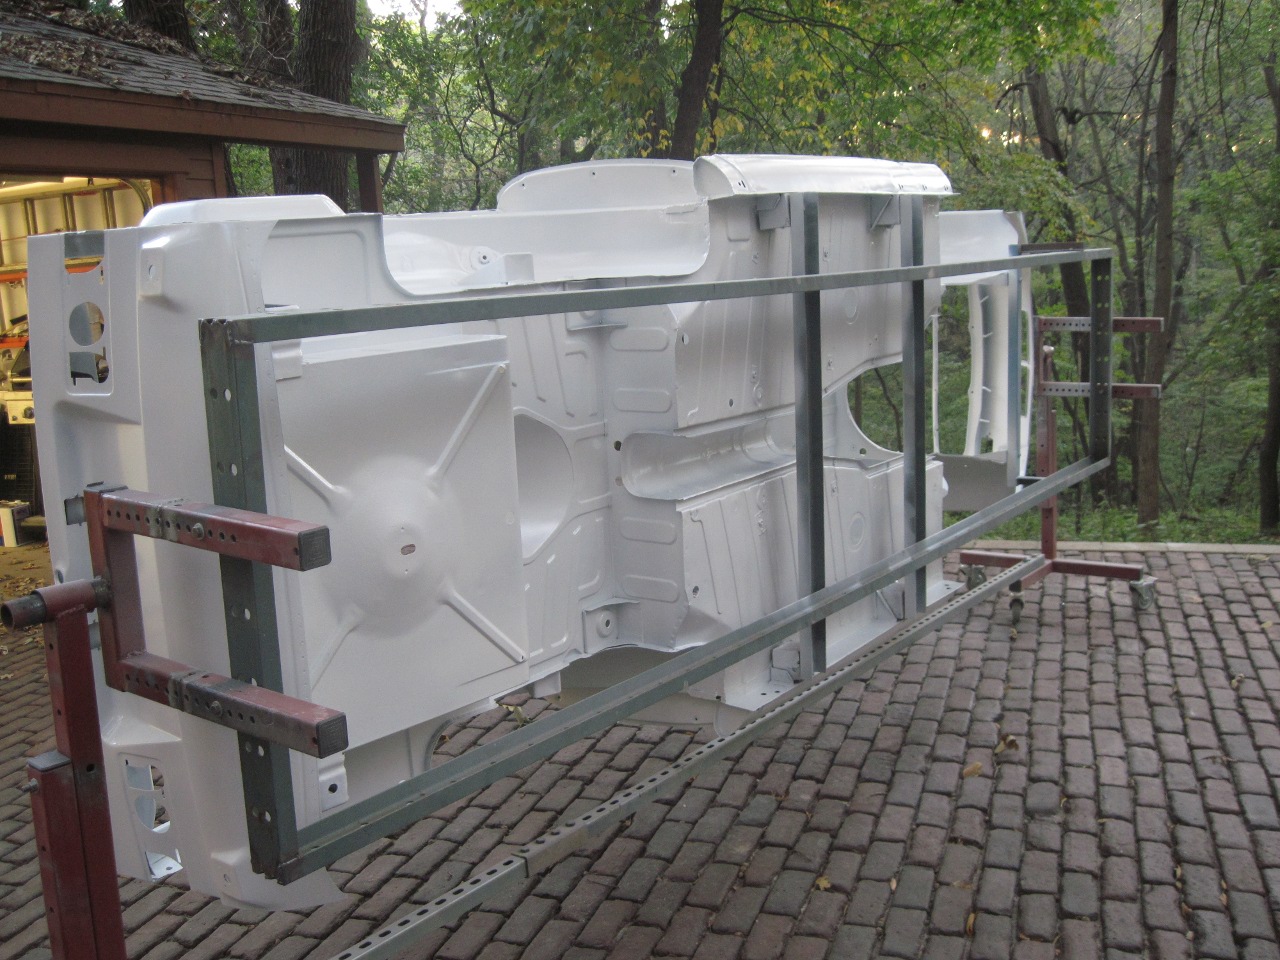
October Update
I
was starting to feel a sense of urgency on this project, with Autumn
definitely here, and decent painting days numbered. I built a
temporary spray booth in the garage, but since it is not heated, I had
to make some haste to get the paint on the tub. I have sprayed
primer outside, but we have a lot of big trees that tend to shed a lot
of debris in the Fall.
The
sides of the tub were primed earlier, but everything else had developed
a layer of surface rust from our September humidity. A quick
sandblast (couple of days, actually) took care of that, but
I had to get primer on the metal quick.
I
sprayed on a coat of gray epoxy primer over the whole tub, and a second
coat on the bottom side. The new rear valance still had its
e-coat, so I saved some paint by skipping it.
The
primer manufacturer recommends doing any filler on top of the primer
rather than under it, so I did a few areas that needed a little Bondo.
There were a few minor dings in the front valance, and some
pitting on the battery tray. There was also the areas at the
sides of the rear deck where I patched in new metal. Also, the
joints where the A and B posts meet the sill were sort of unsightly, so
I filled them, too.

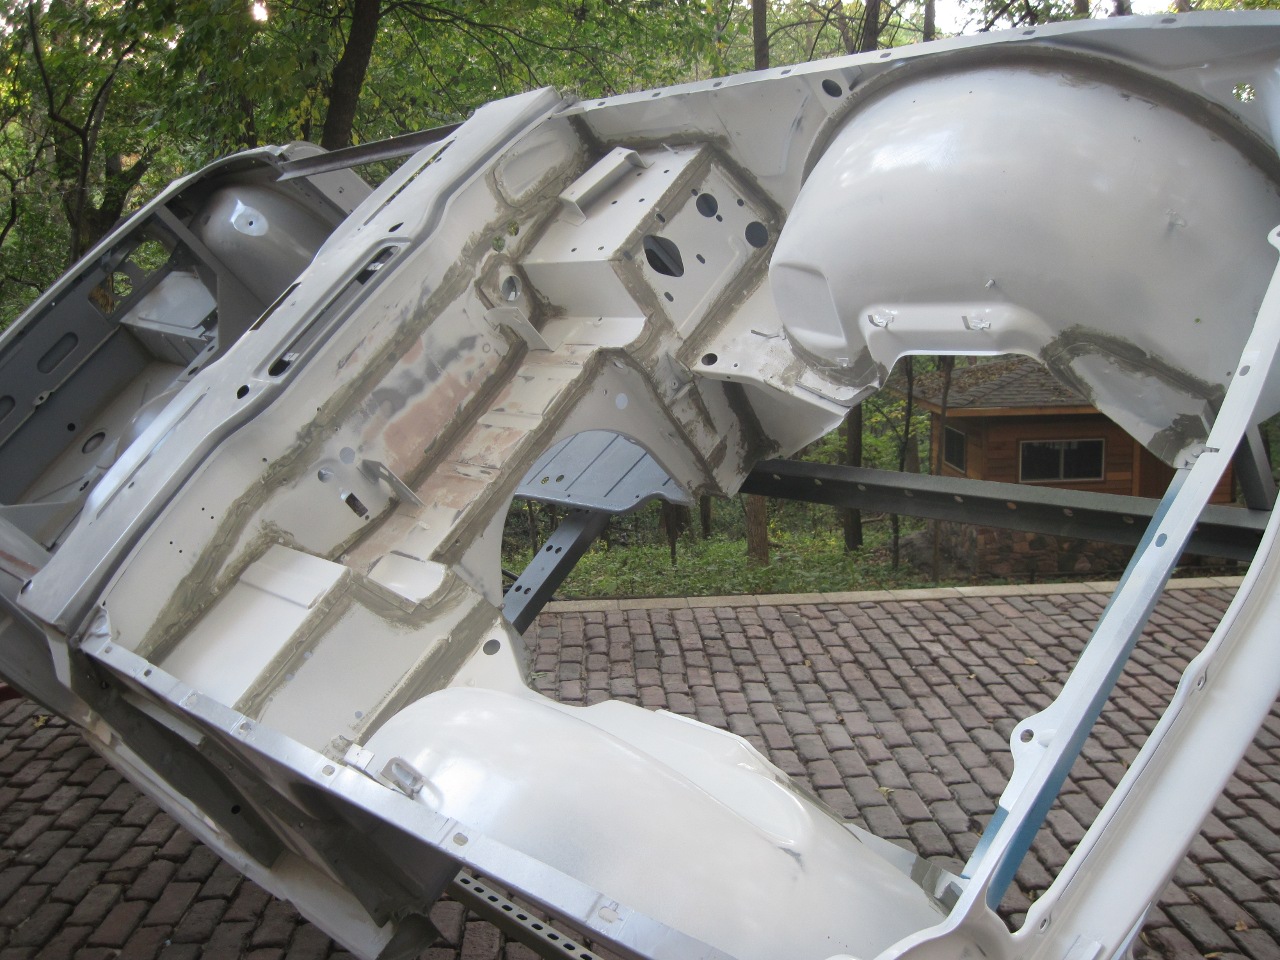
This
was also the time to seal all the metal joints with a commercial seam
sealer. I probably sealed a few seams that the dactory didn't,
including all my repair weld joints with their inevitable pin holes.
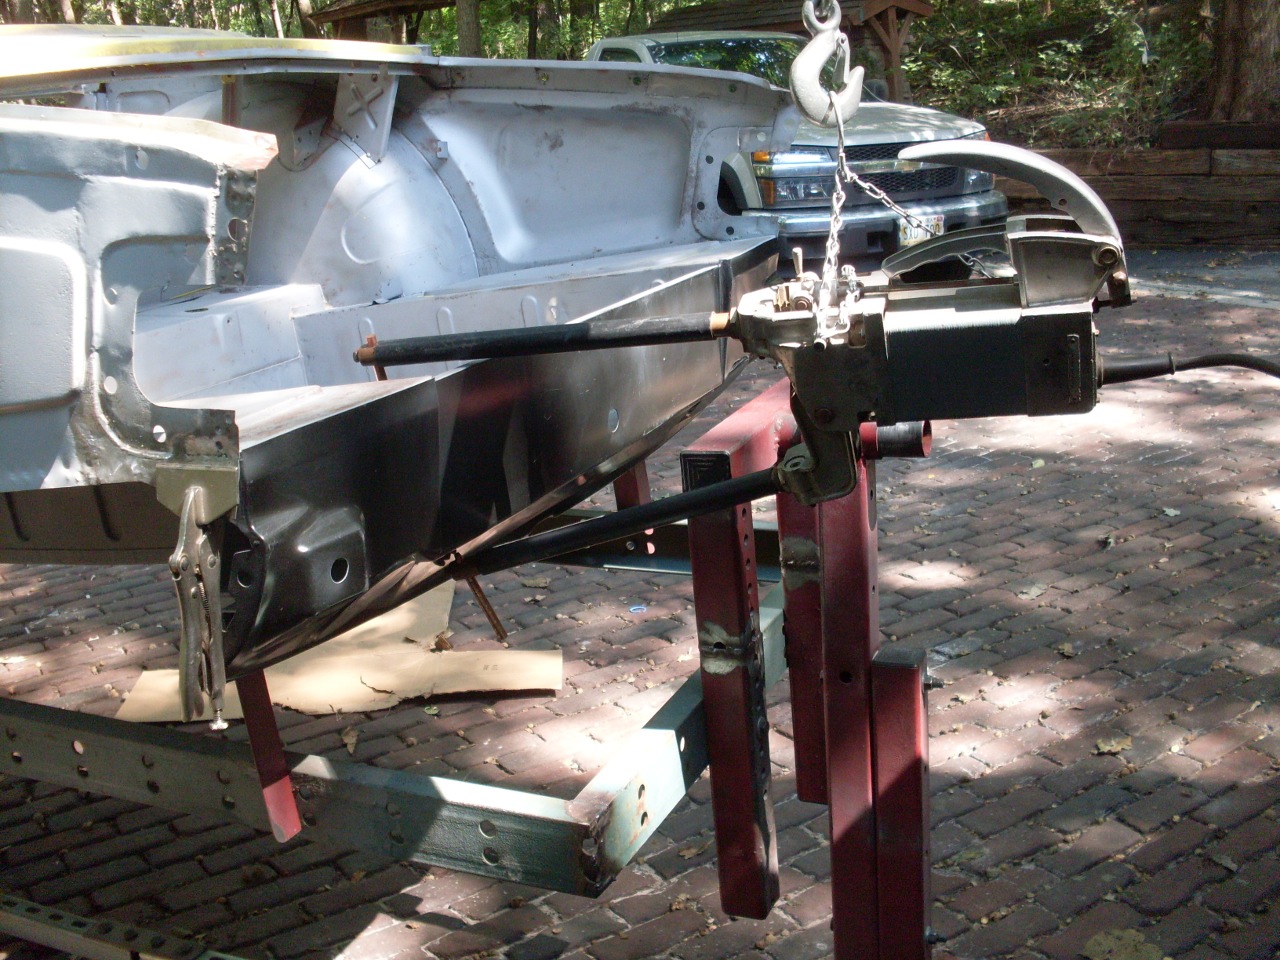
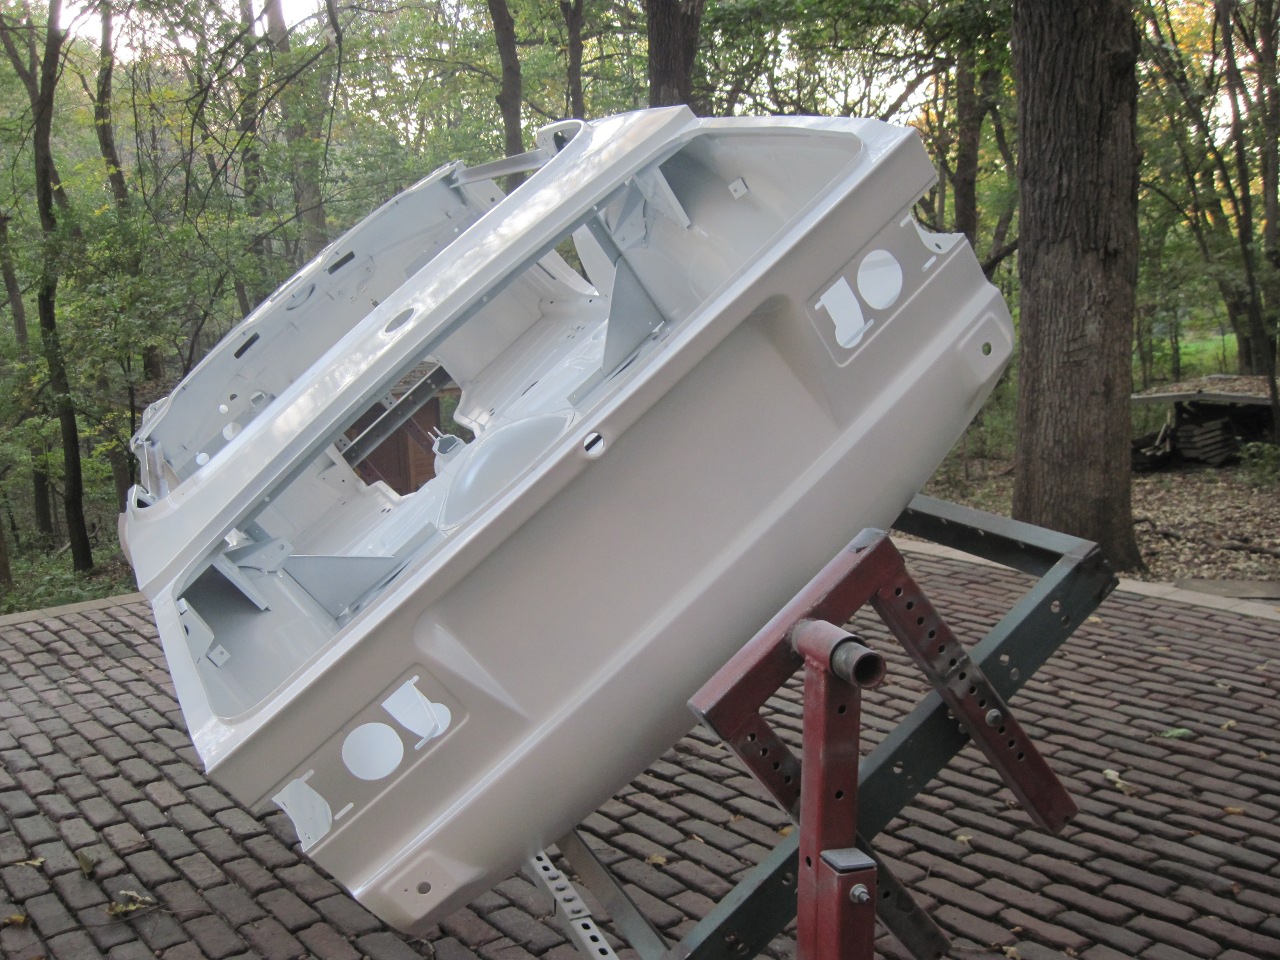
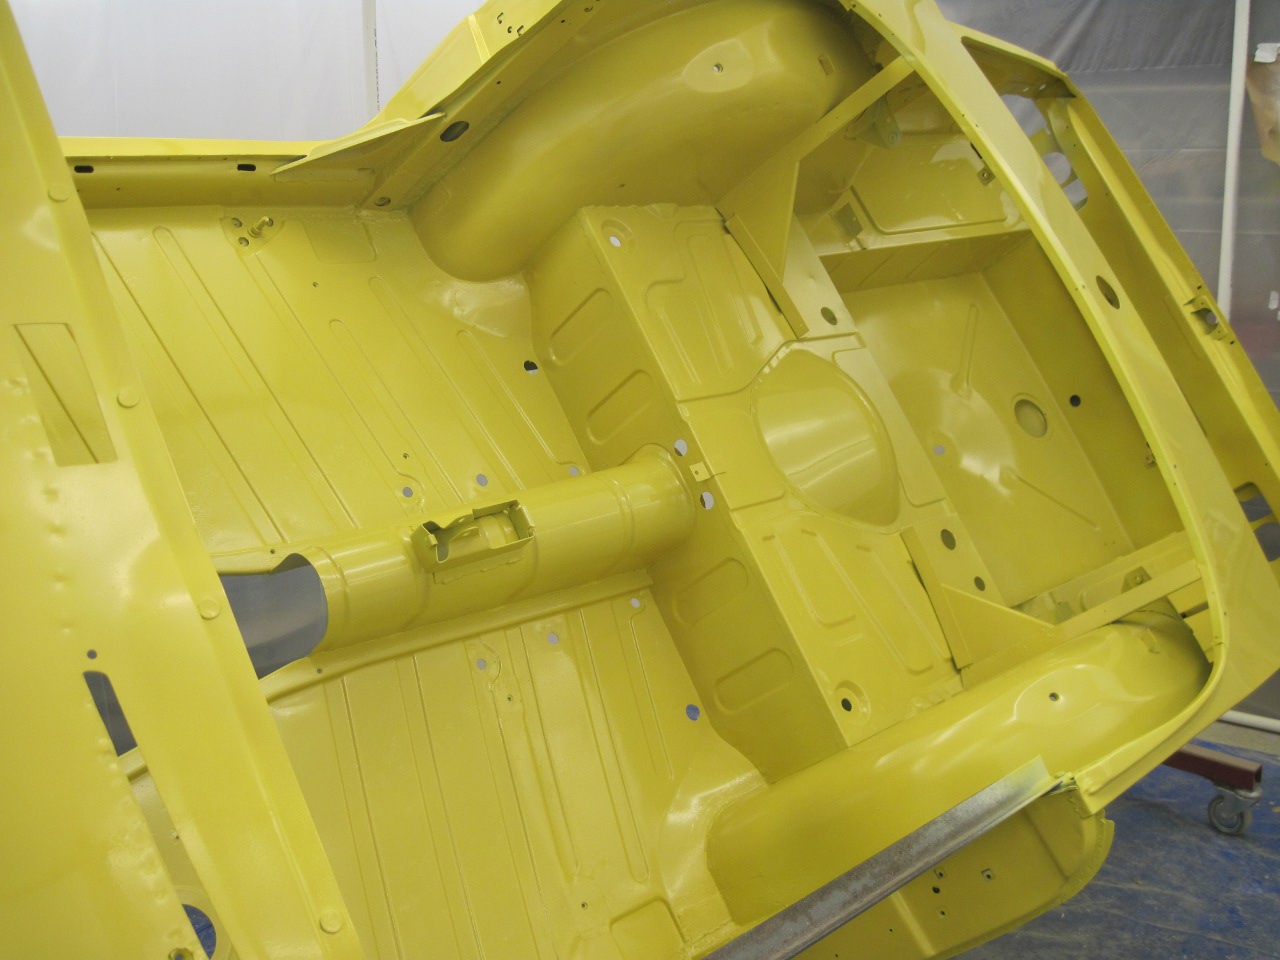
That middle picture is a view not many TR6 owners see. It's
the underside of the dash area. The round hole is where the
heater fits.
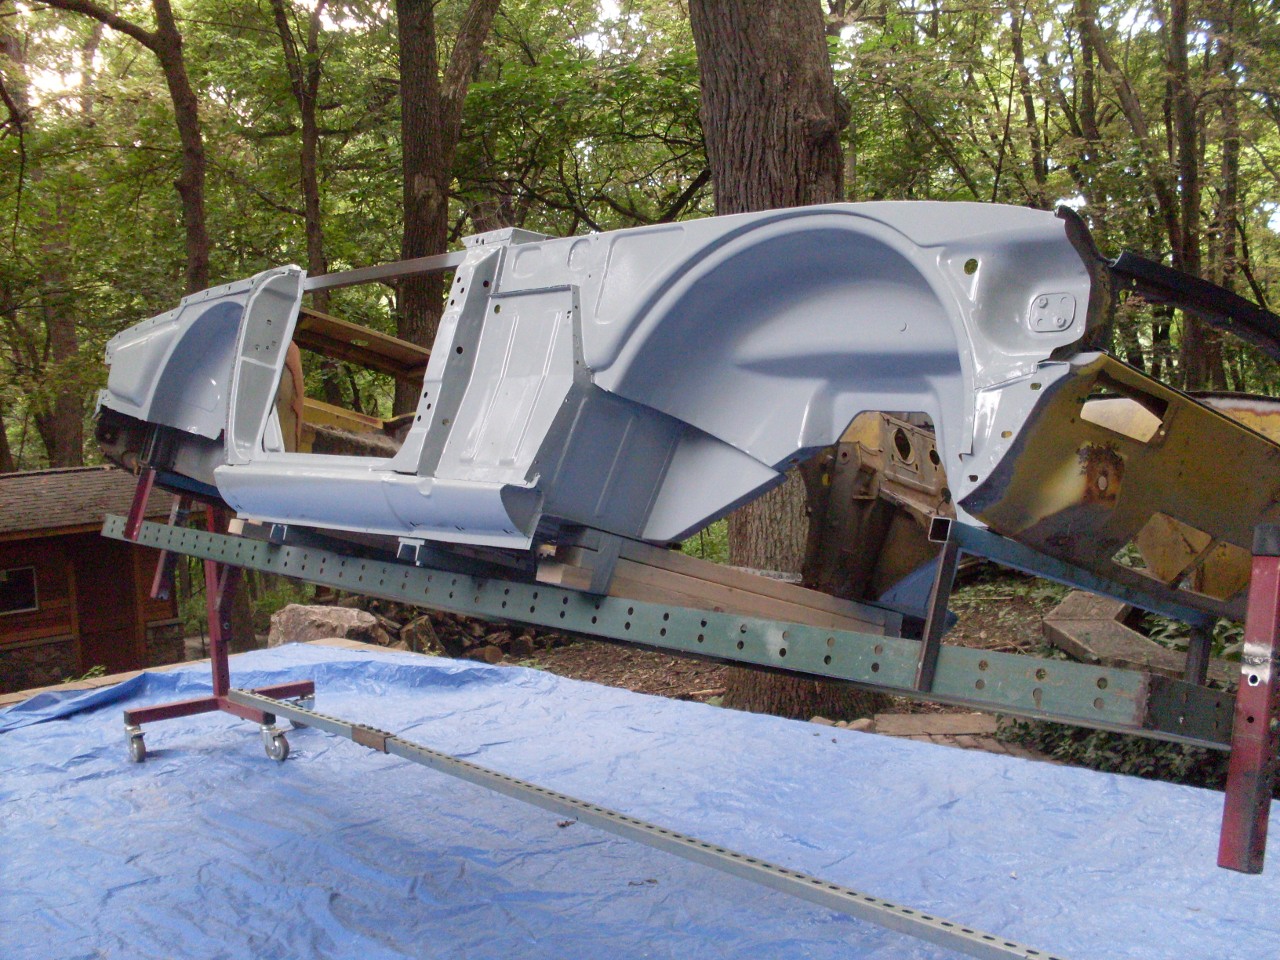
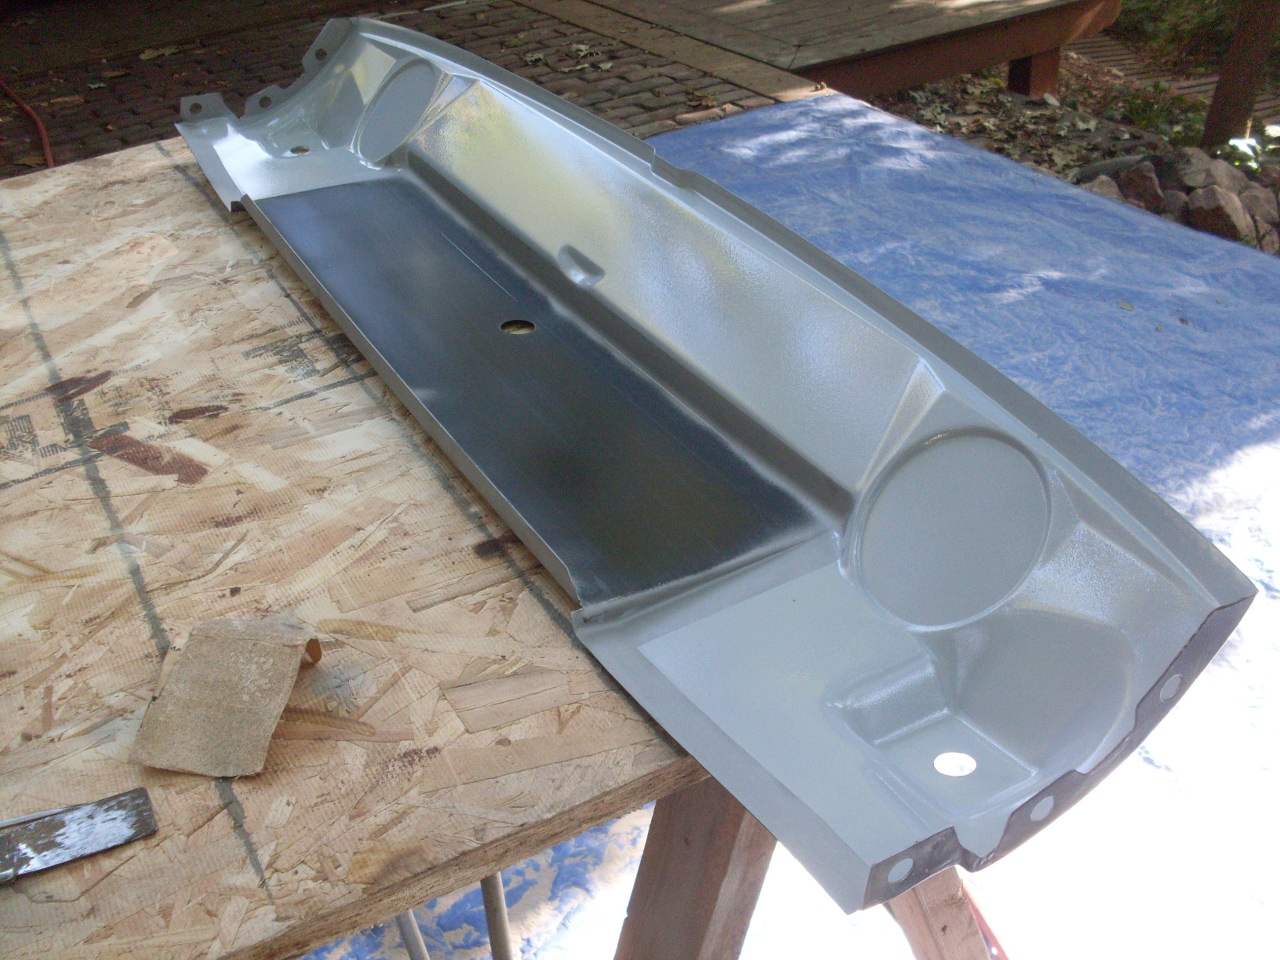
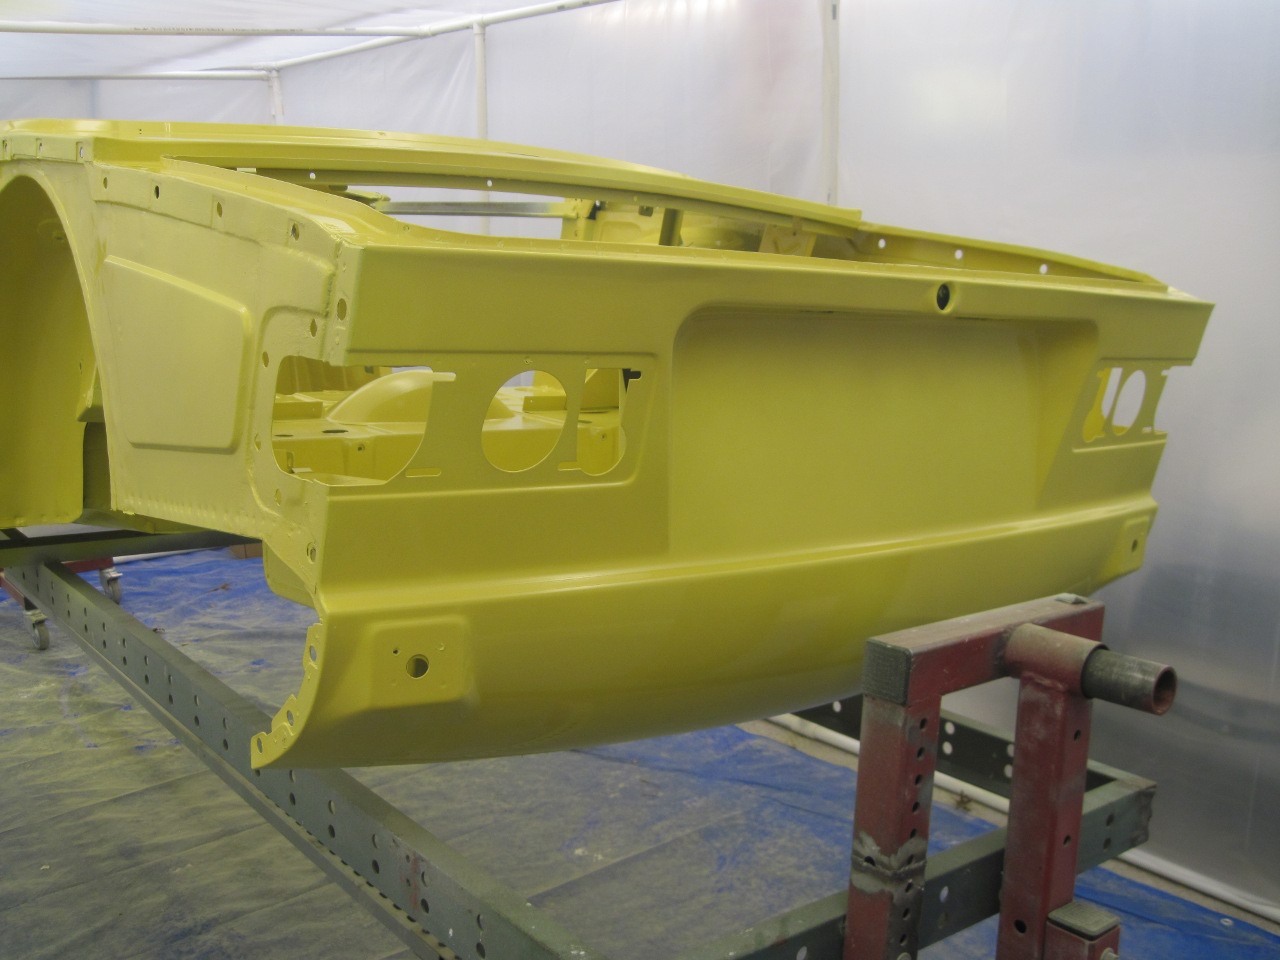
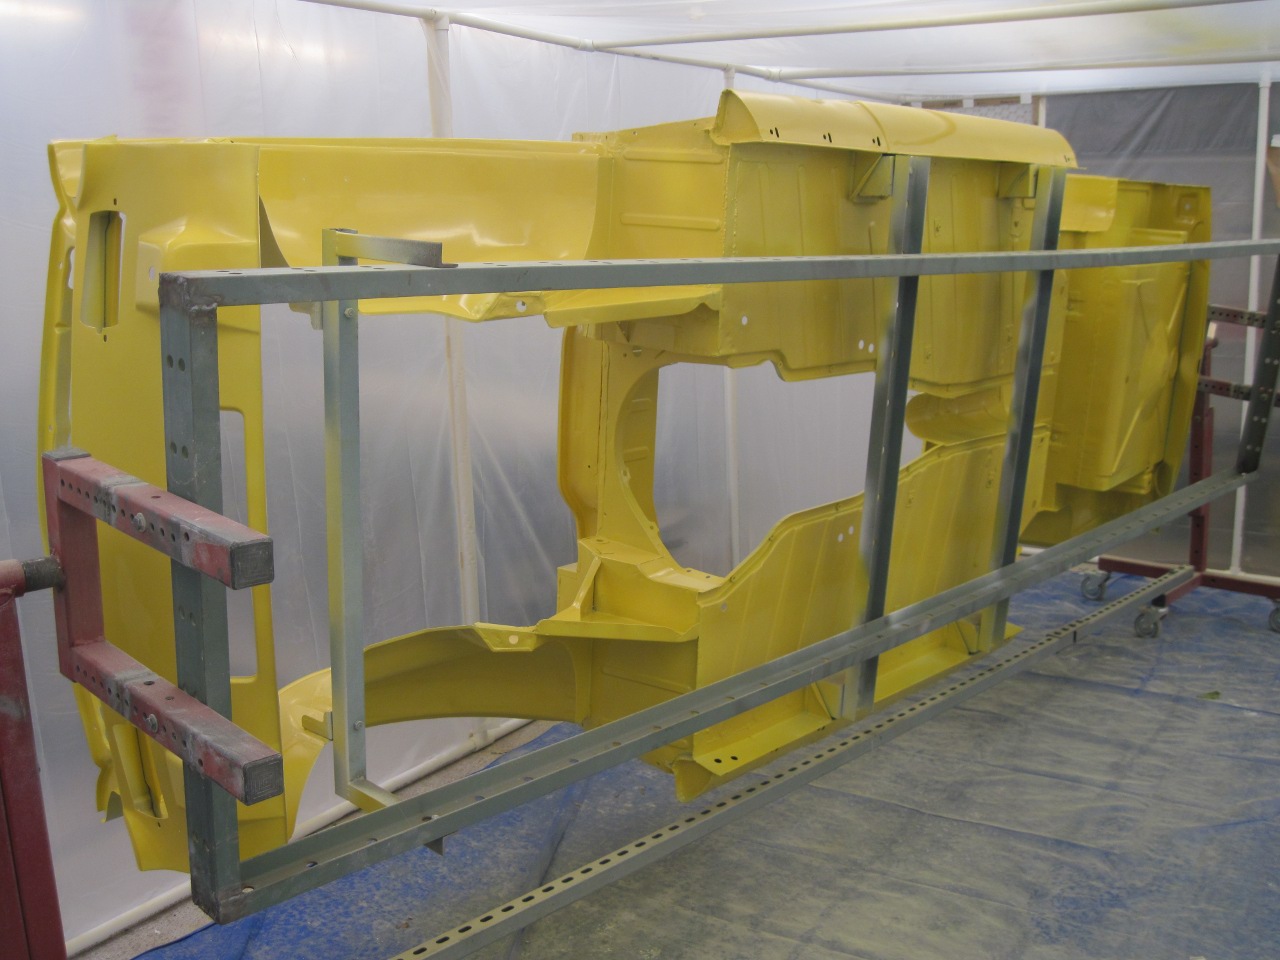
Then I topped it all off with another coat of epoxy primer, white this time since it works better under the yellow paint color.
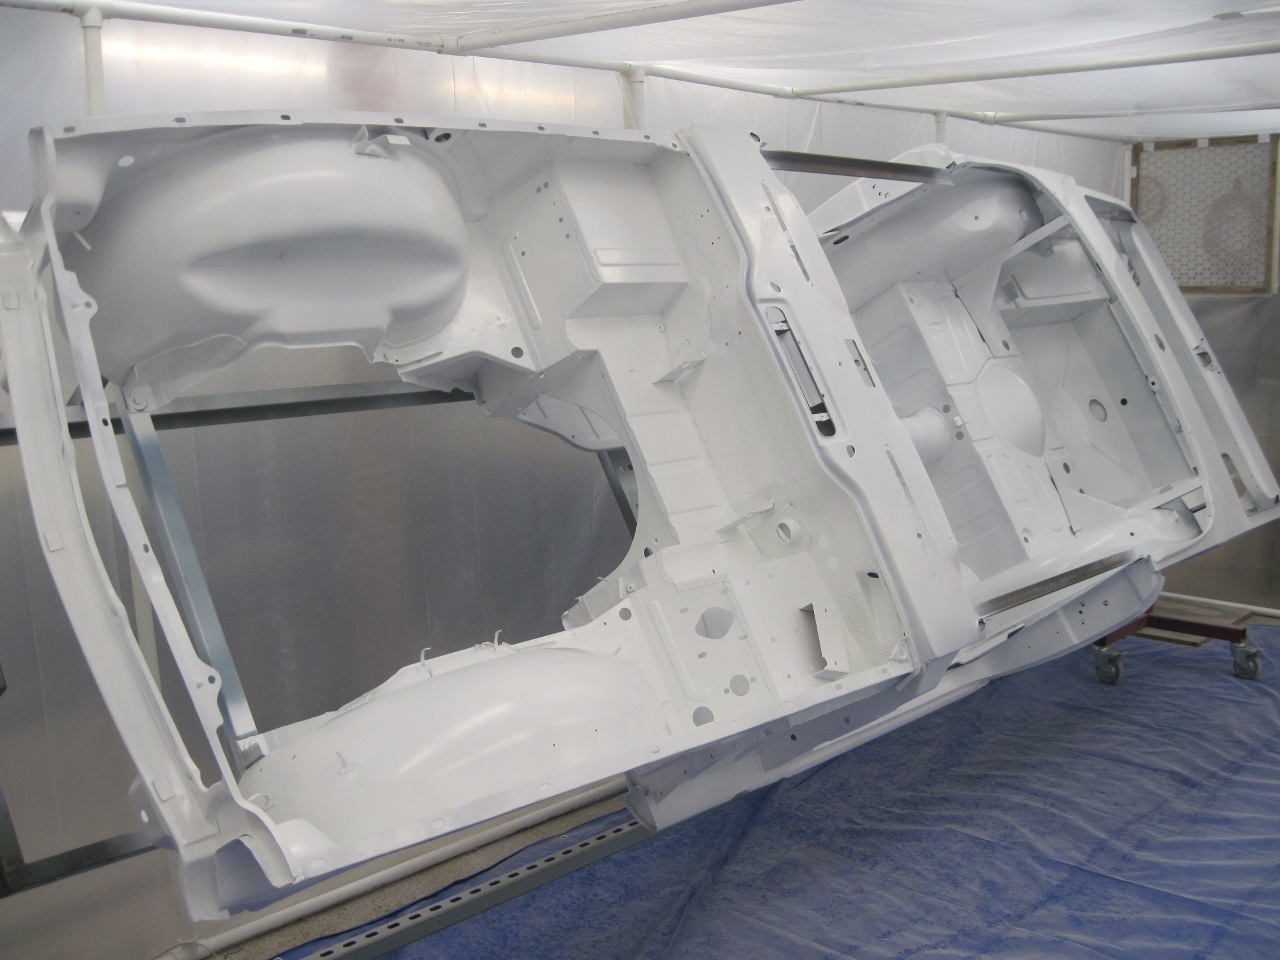
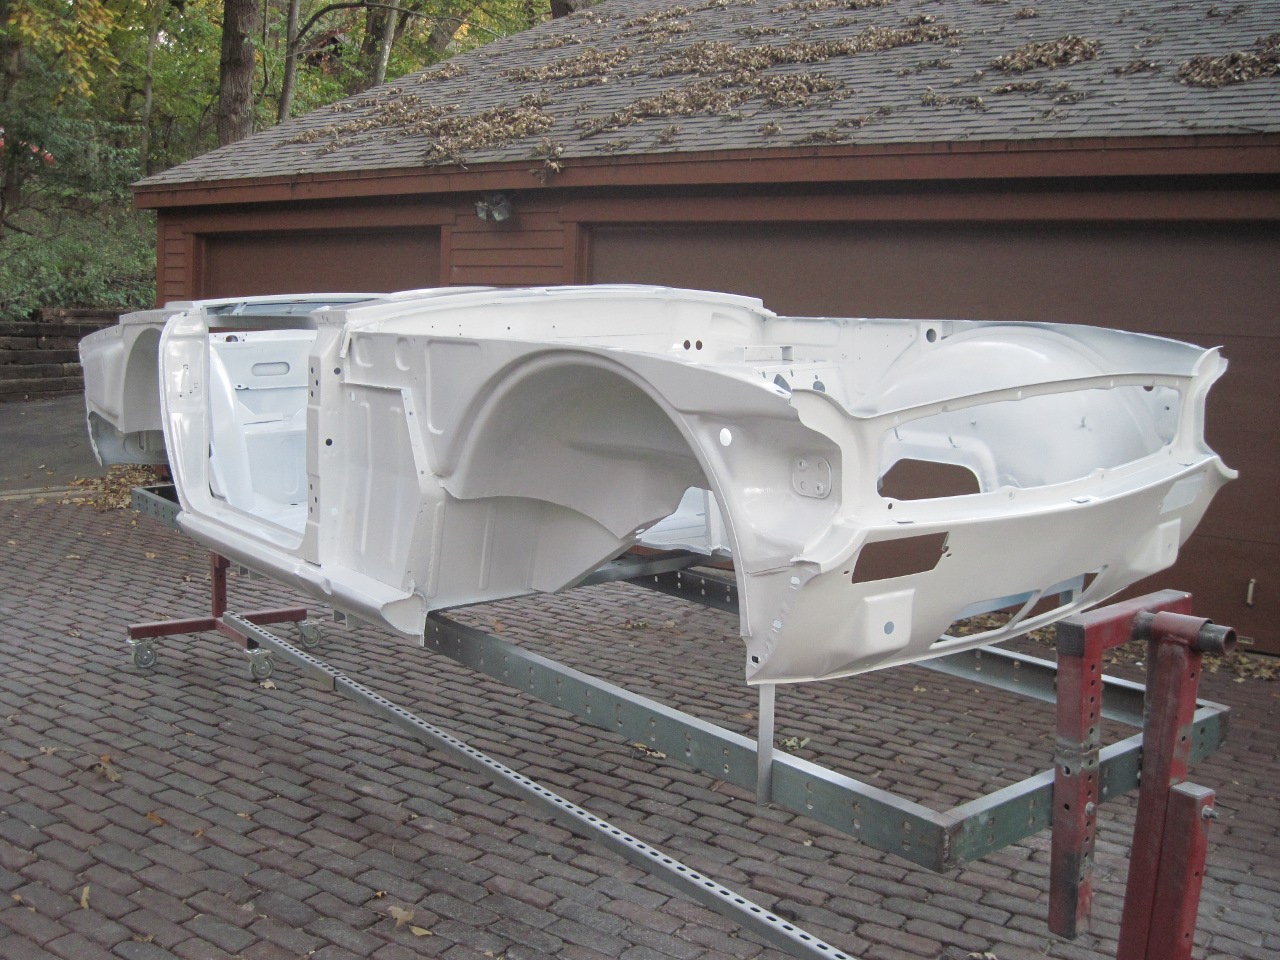
Back
in the booth the next day for the color coat. I didn't have to
paint the underside of the tub since the epoxy primer doesn't require a
topcoat, and is even recommended for frames and undercarriages, but I
was having so much fun, I couldn't resist.

So, this sort of sums up my summer:
Onward!
Comments to Ed at elhollin1@yahoo.com
To my other TR6 pages.