To other pages
August 24th, 2013
[Click on pics for a better view]
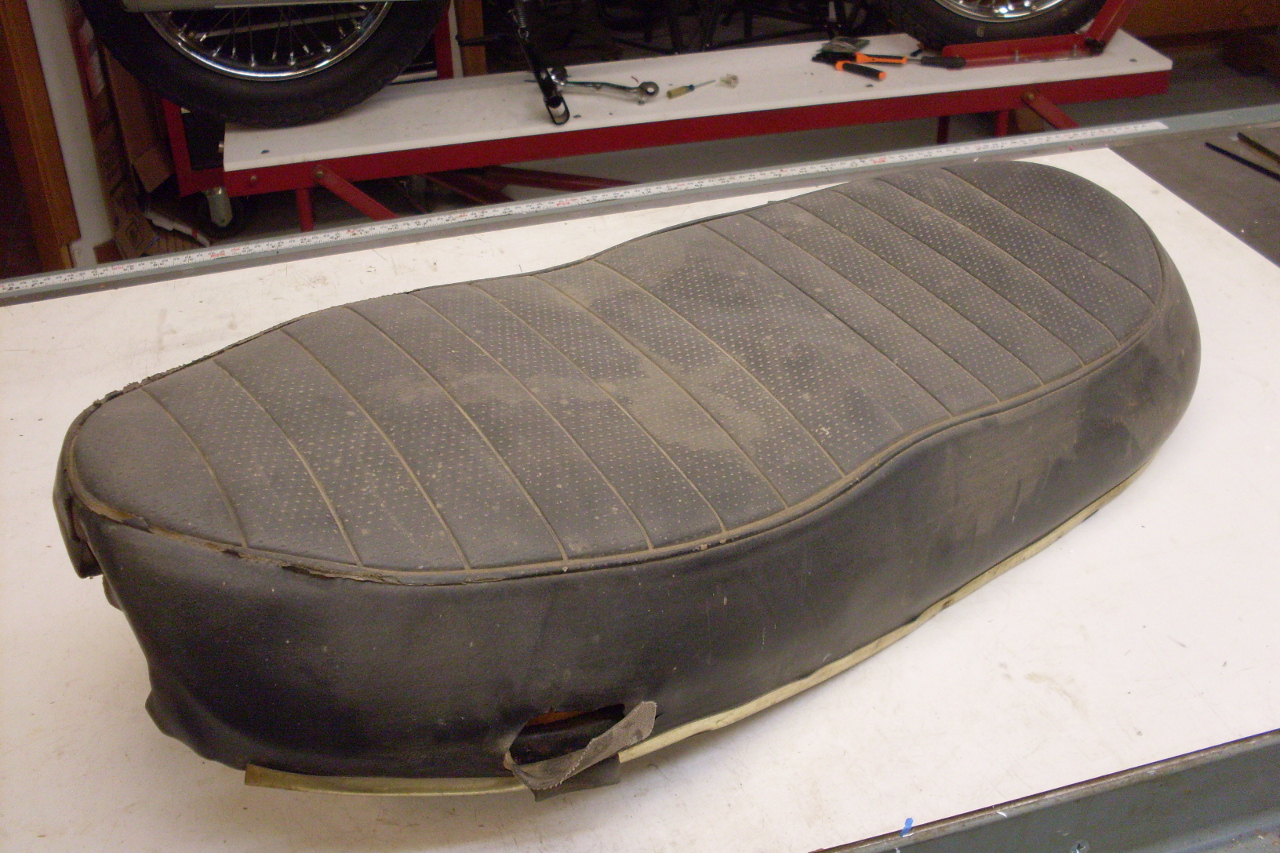
I decided to tackle the seat this week.
The
original seat was really tired and beat up. All those miles under
my backside, much of it with a passenger, had taken its toll.
There was an ancient tear on the left side that I'd tried to
repair decades ago, bit it didn't hold very well.

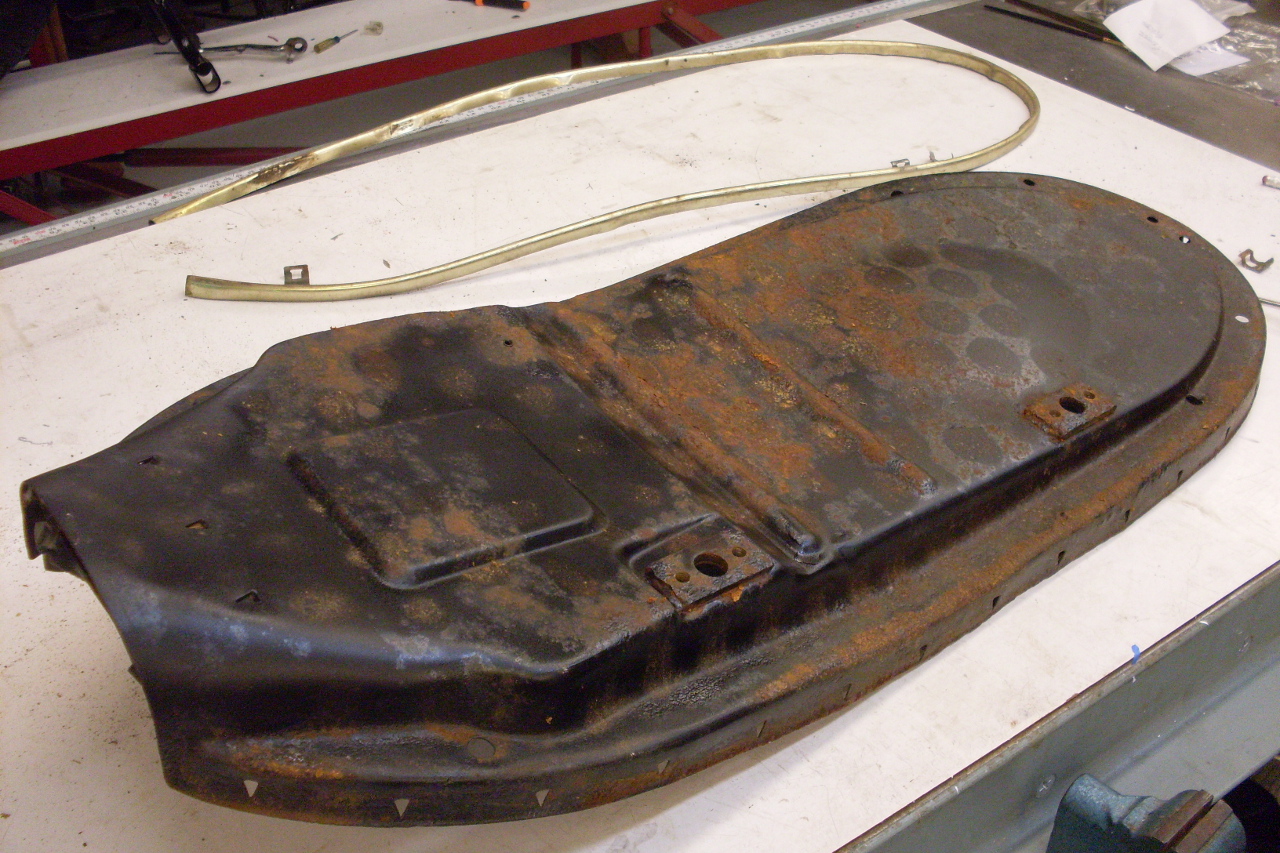
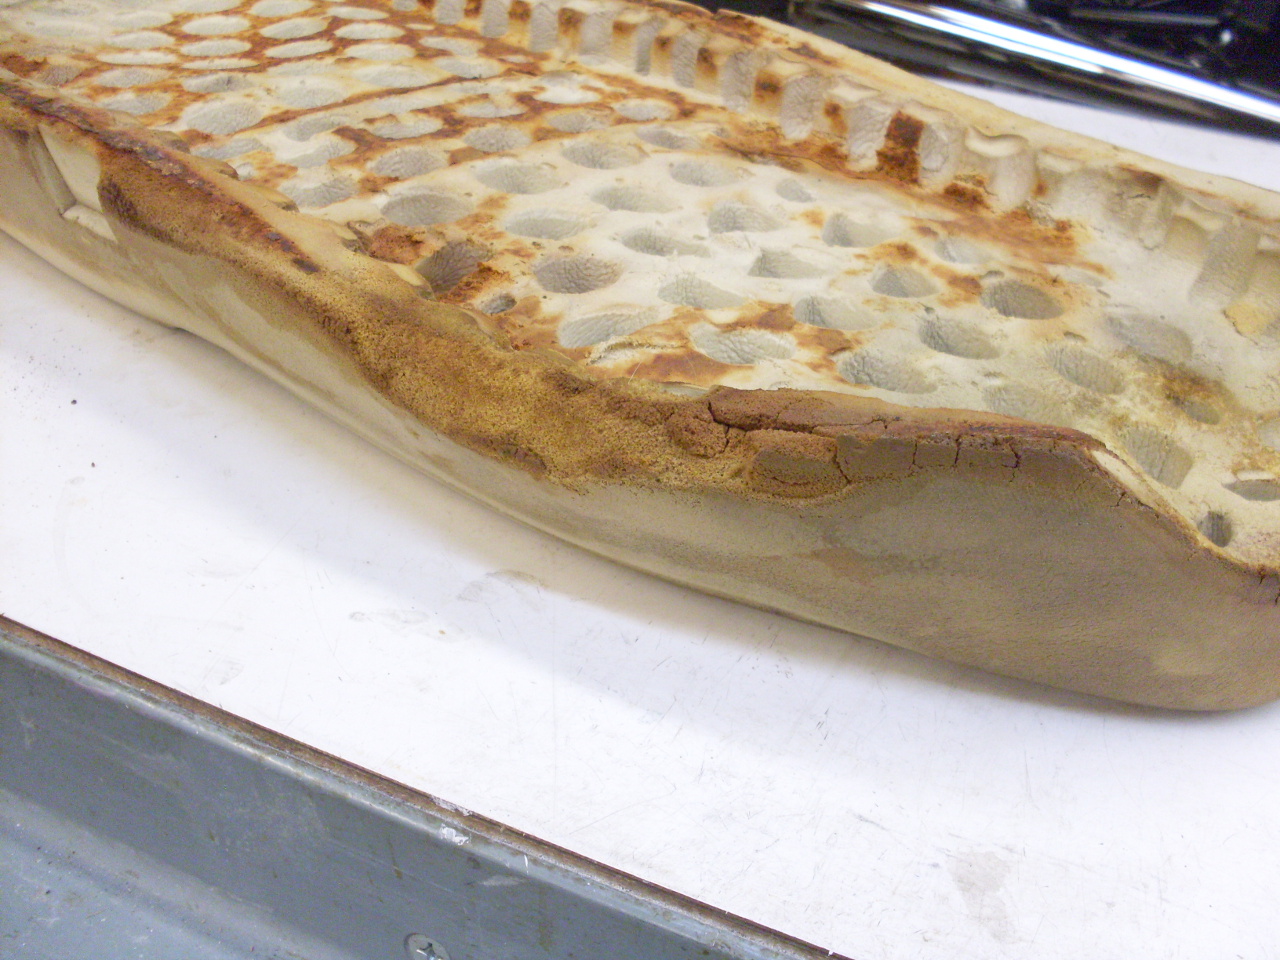
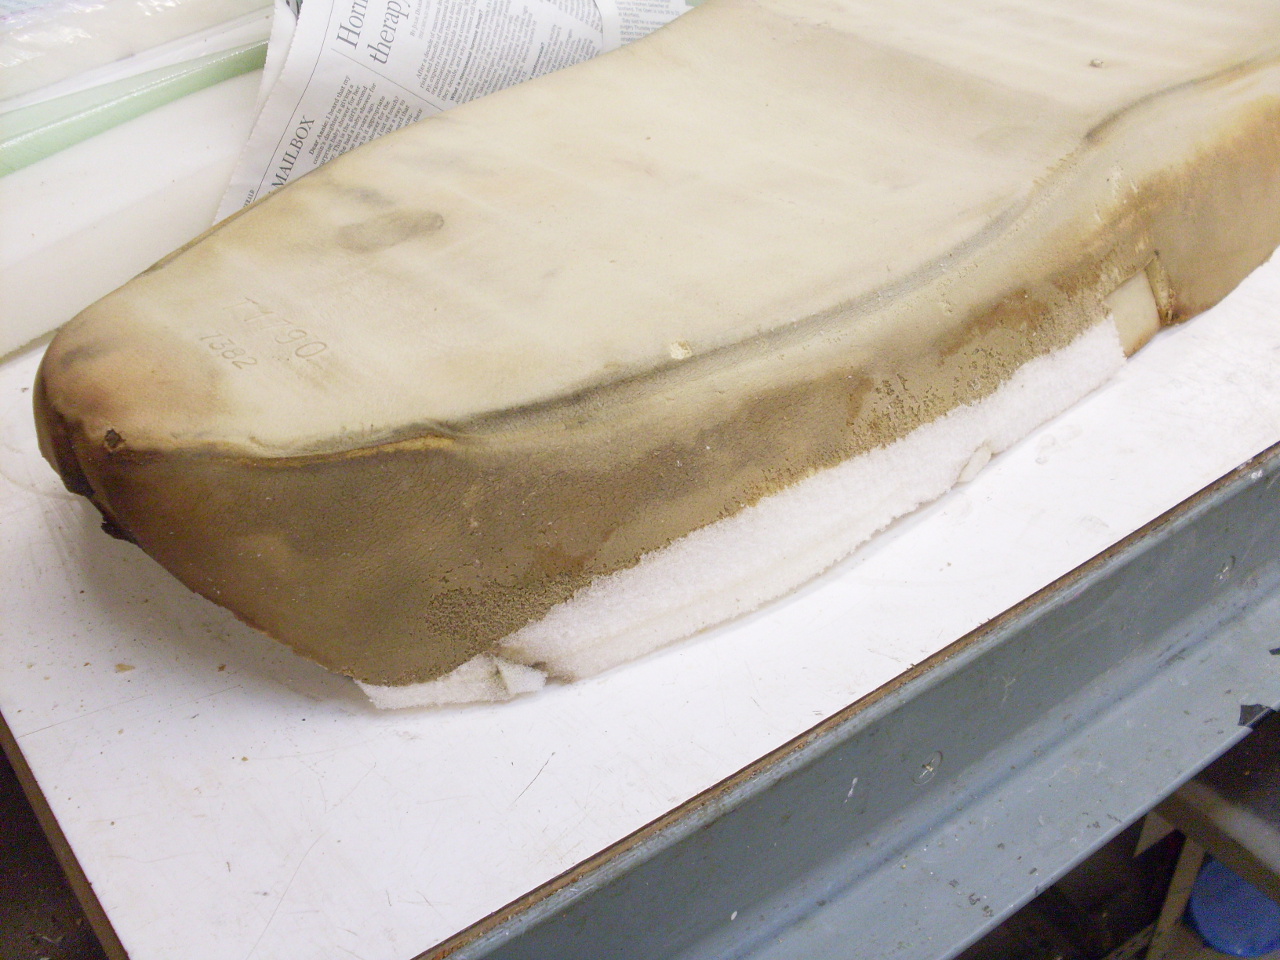
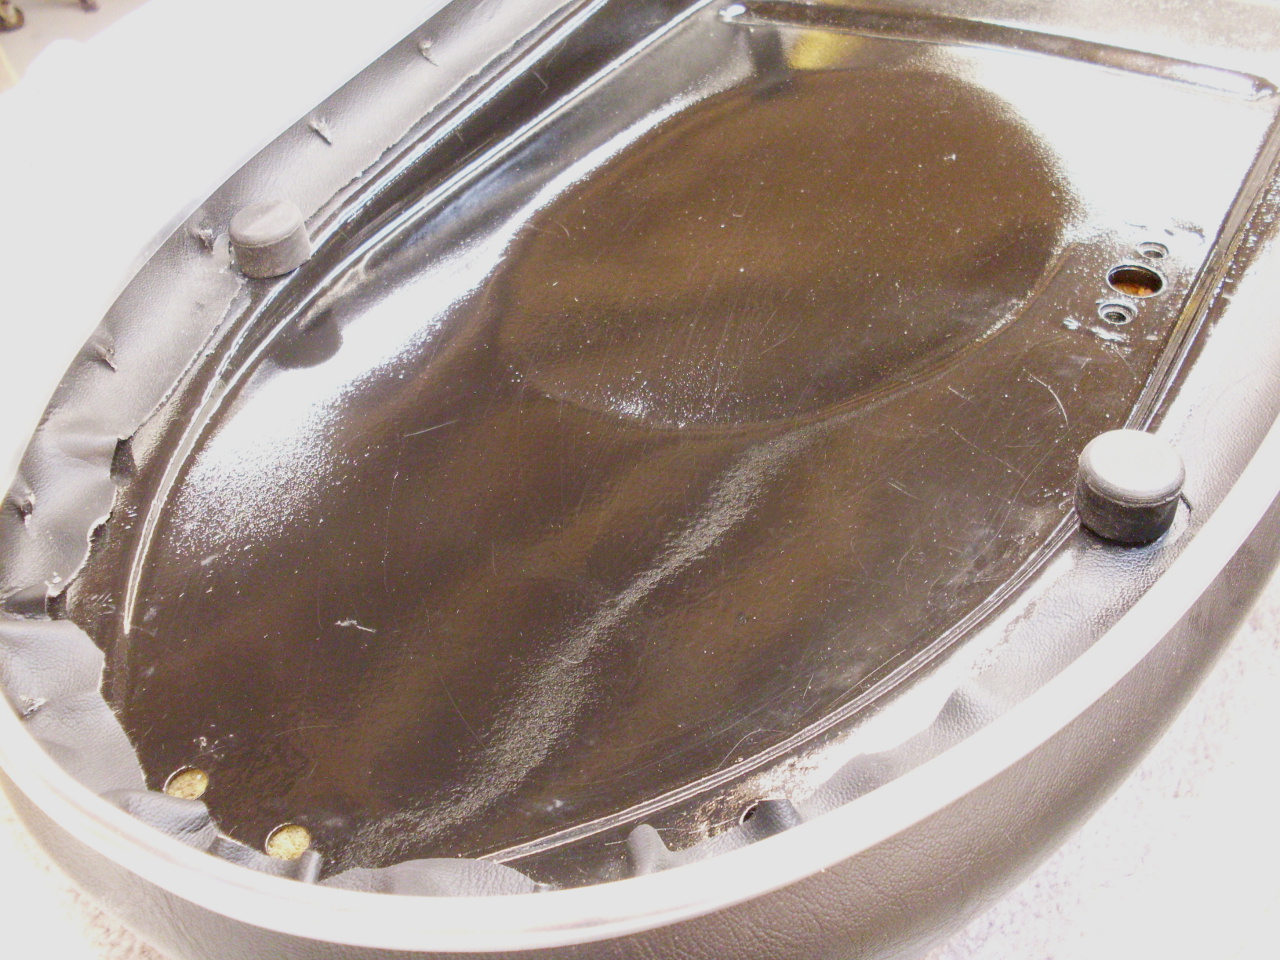
Luckily,
the insides were a little better than the seat cover. The seat
pan was rusted, probably from water that had gotten in through the
tear, but still sound and not otherwise damaged.
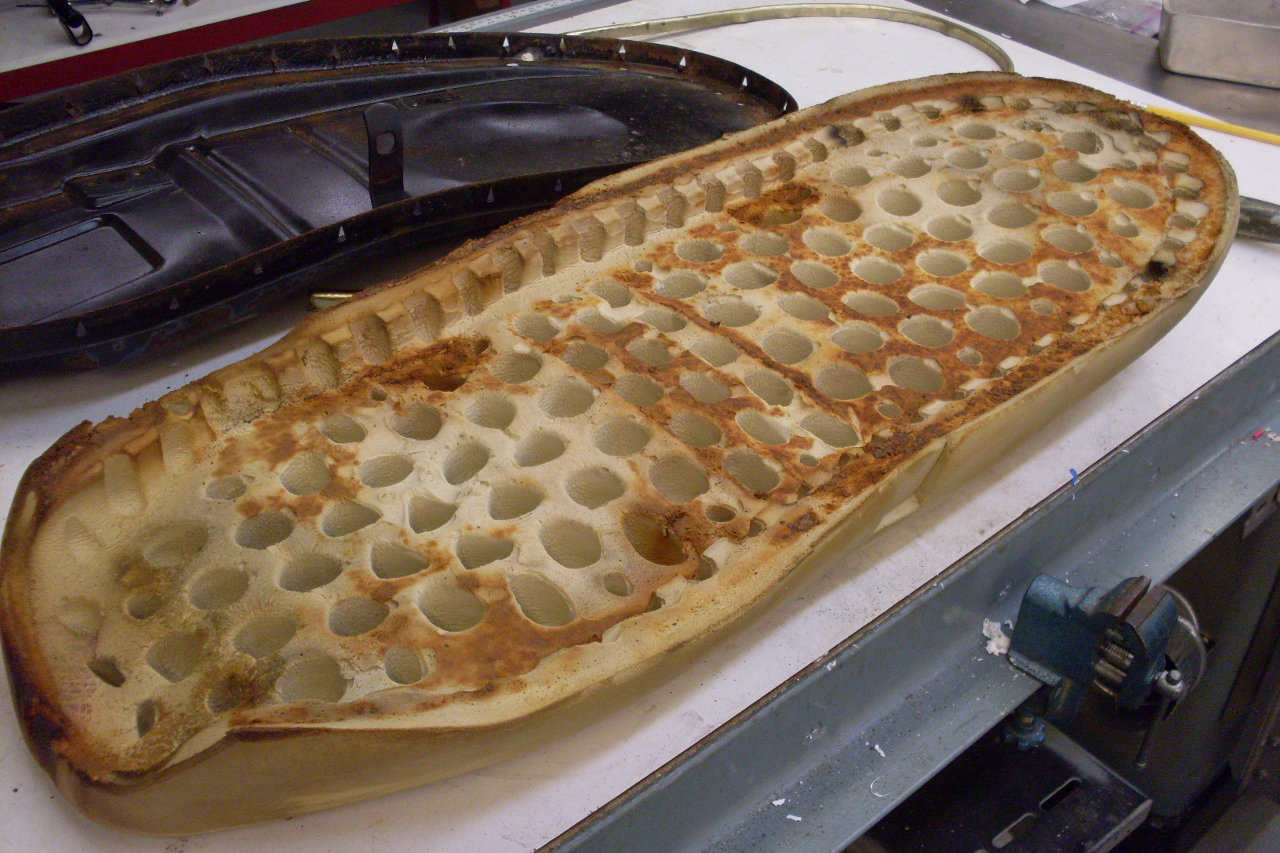
The
foam was rust stained, but intact, and still firm and resilient.
There was one worrisome area near where the tear was that had
deteriorated to a crusty, hardened shell that disintegrated with a
little pressure.
I
figured I didn't have anything to lose in trying to repair the bad spot
in the foam. Considering the many disappointments I've had in the
quality of aftermarket parts, I thought it worth an effort to use the
original. I had seen a few Youtubes of people modifying
motorcycle seats by adding foam and reshaping to a different contour.
The same process could be used to fix up my foam.
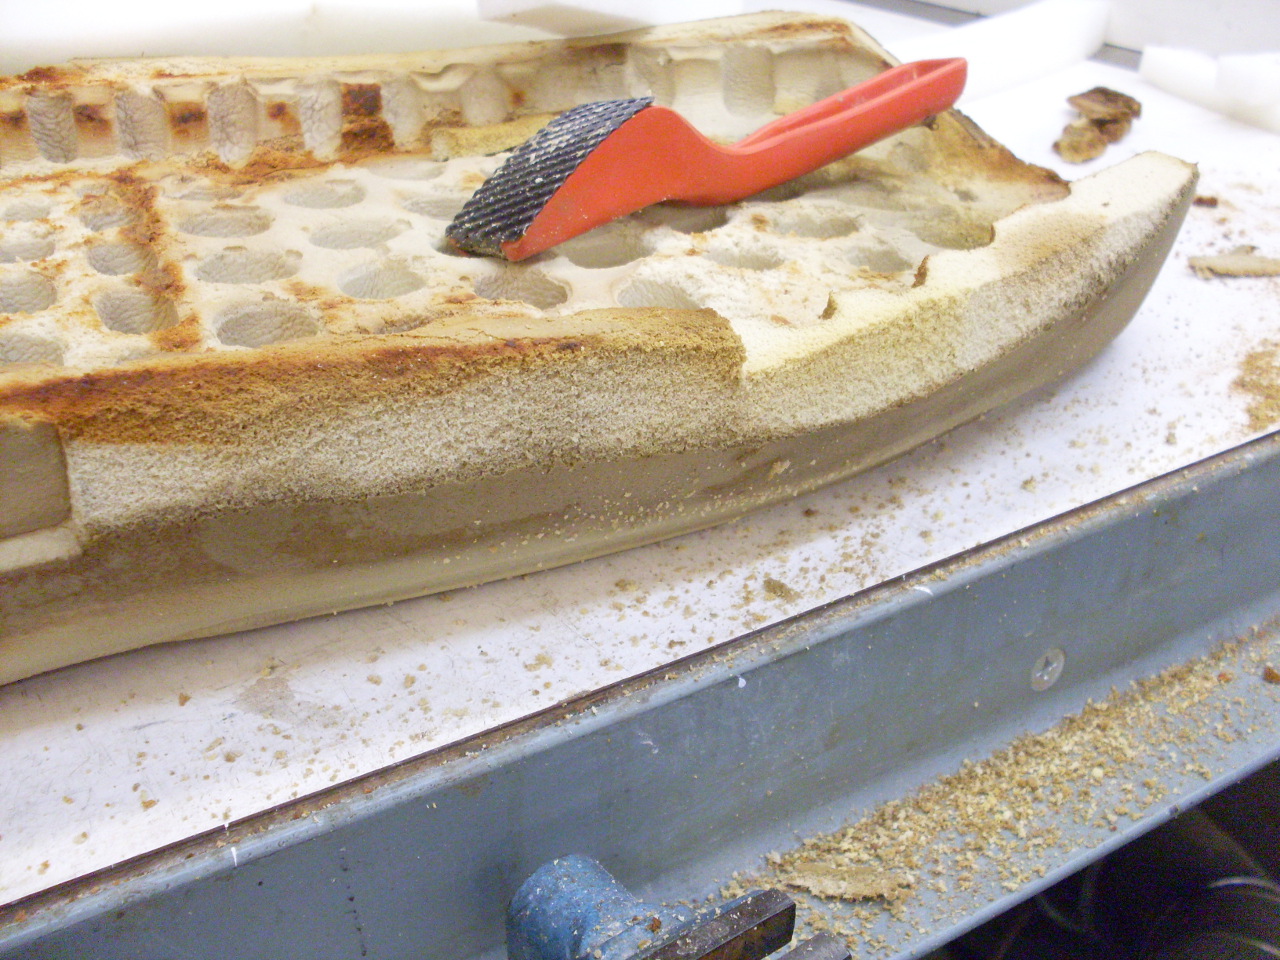
First, I
cut out the bad area of foam back to soft and supple material. I
did it with a 9 dollar electric carving knife from Walmart. A
"Surfoam" cheese grater type tool is also useful in smoothing out the
contour.
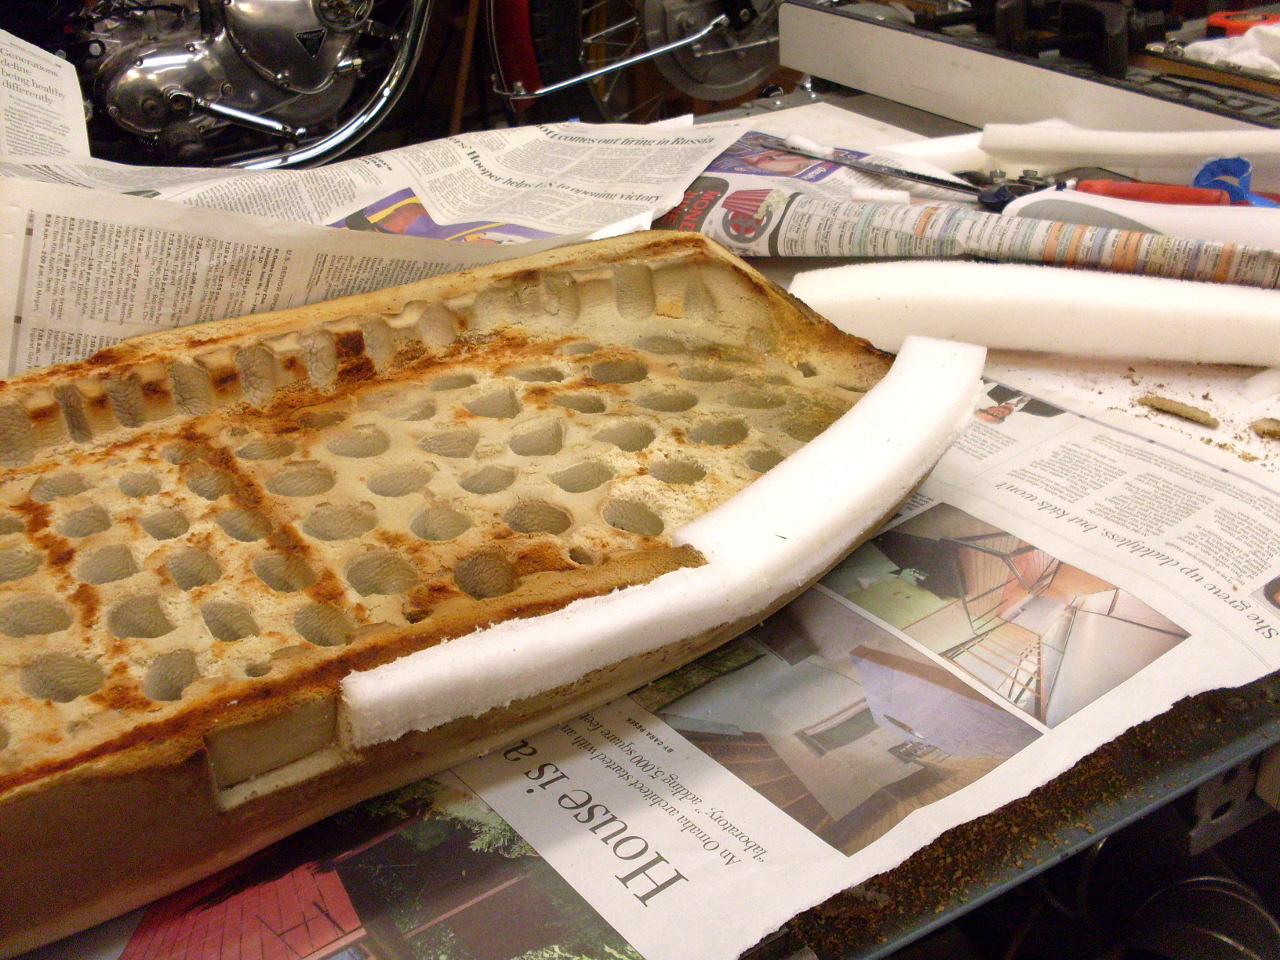
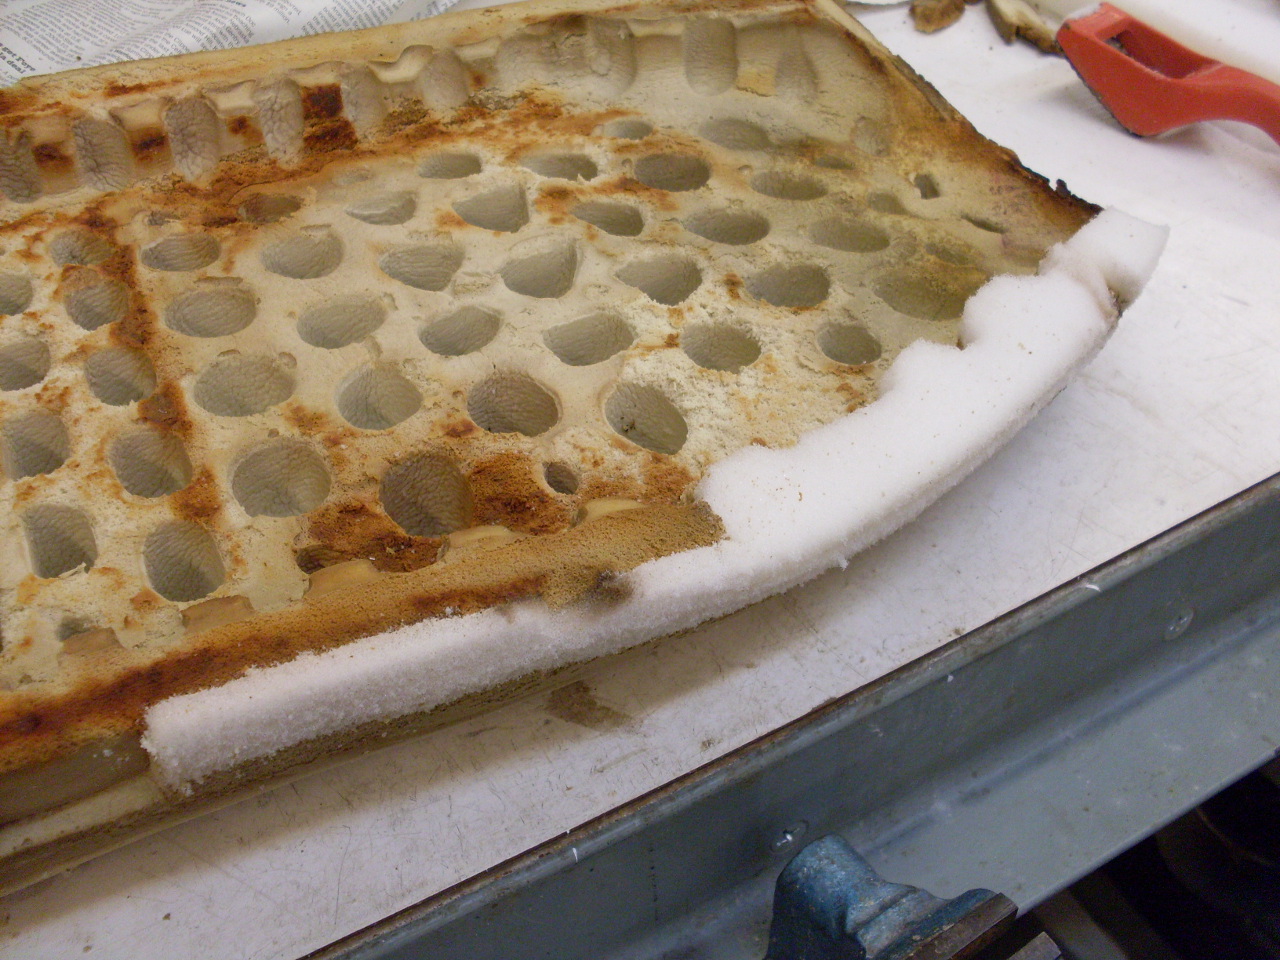
I
was able to score some free foam samples from my wife's friend Barb,
who works at a foam manufacturer. I picked one that had the right
firmness and cut some pieces to rough size. I glued it on with 3M
"77" spray adhesive applied to both the seat foam and to the patch
material. I then used the Surfoam to shape the patch to match the
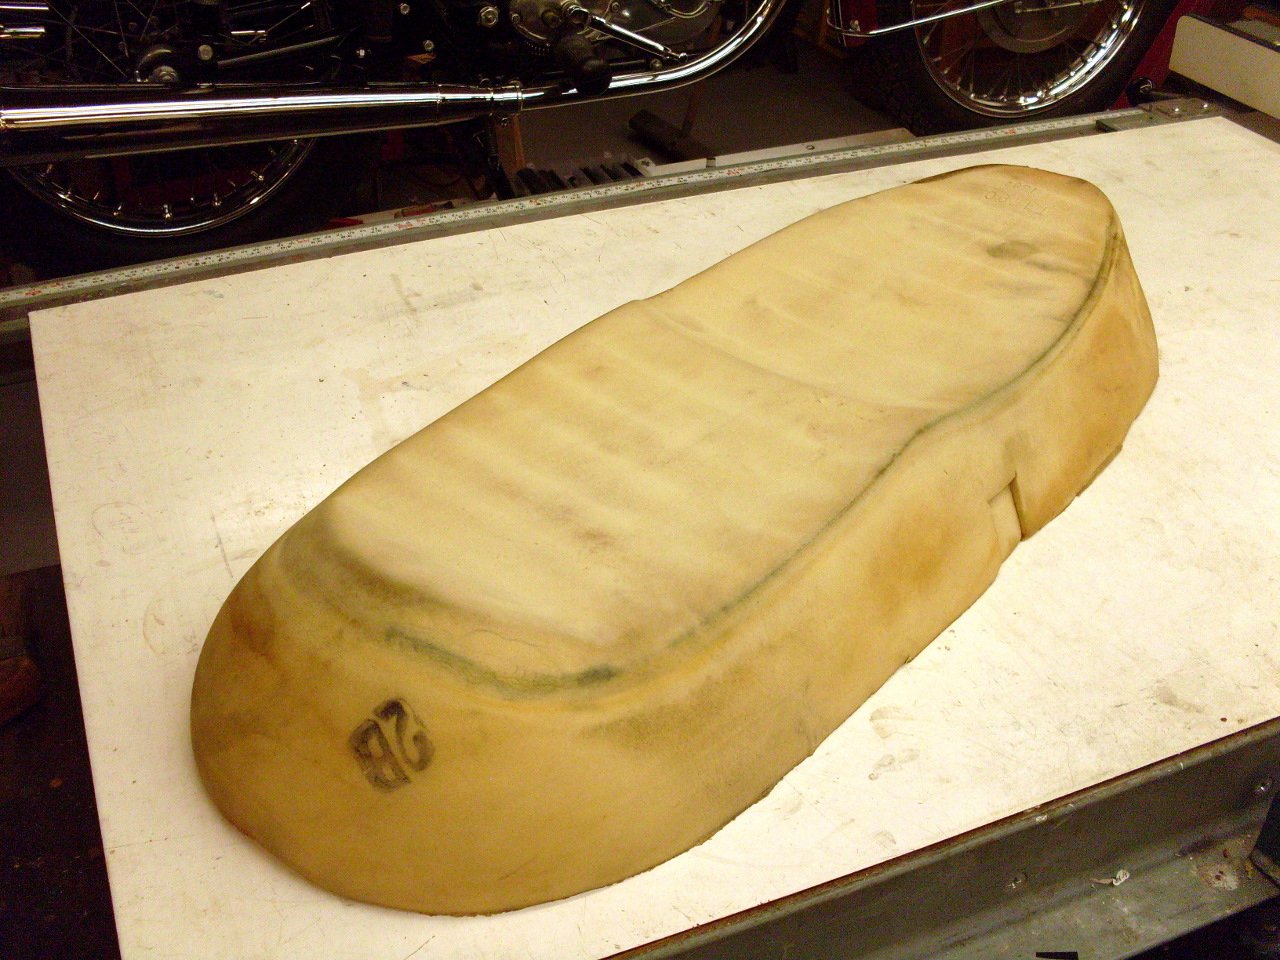
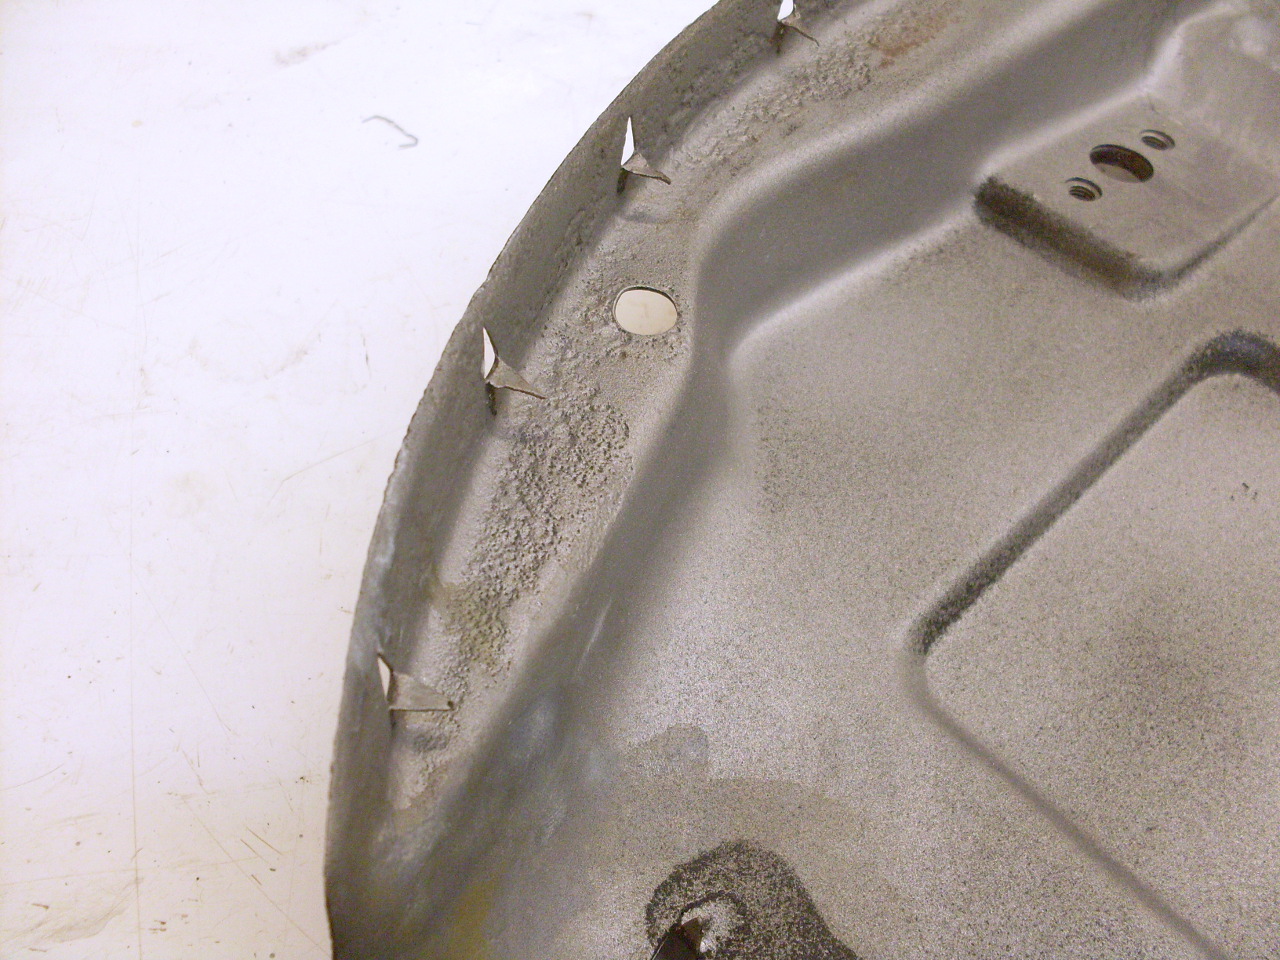
original contours. At one point I tried a grinding wheel in a 4"
grinder to do some shaping, as I had seen on some of the Youtube
videos. Well those guys obviously have more skill at this than I
do since all it did for me is grab the material and leave the two
little divots you see in the pictures. I finished up with the
much safer Surfoam. It's hard to tell from the pics, but I closed
my eyes and ran my hand over the area, I couldn't detect the patch.
Satisfied that the foam was usable, I turned to the seat pan. Sandblasting took off nearly all the rust.
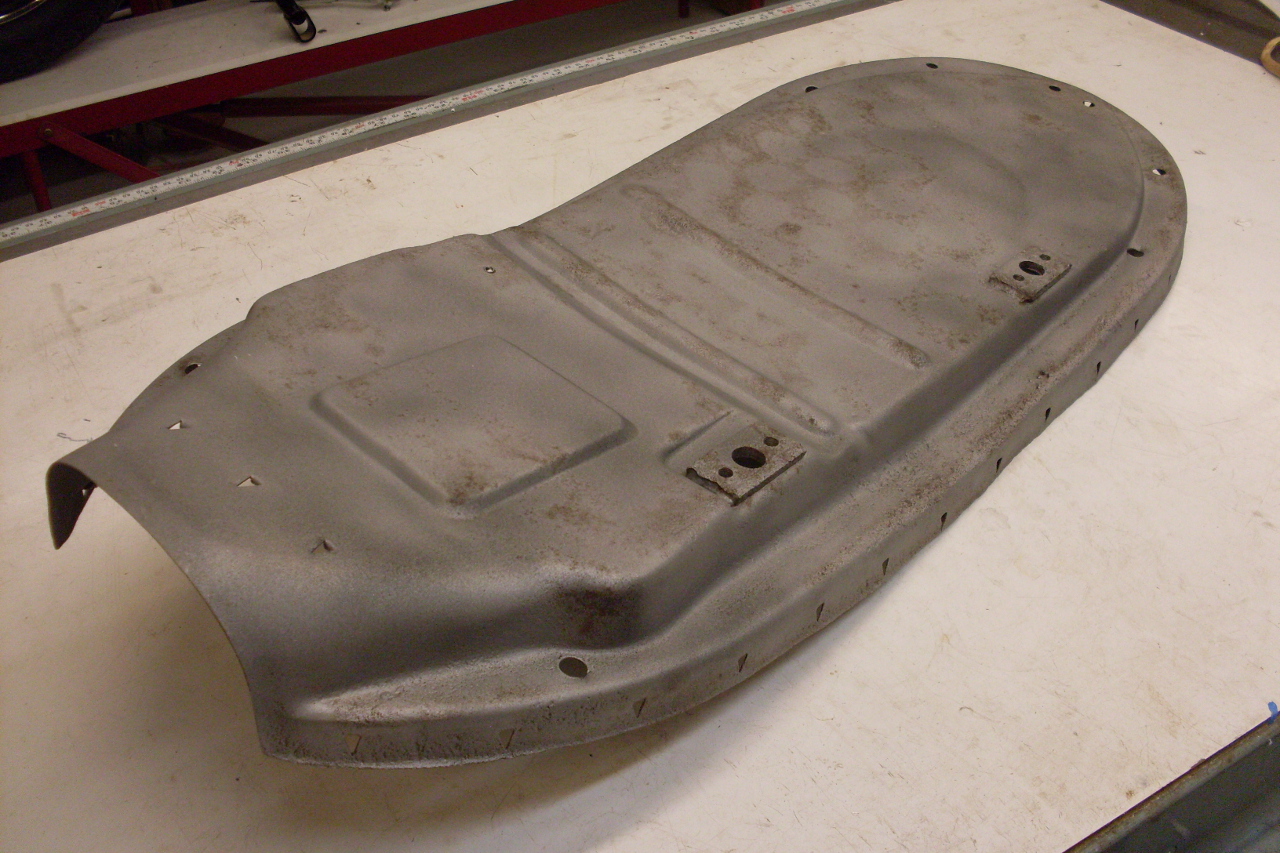
What
the sandblaster didn't get, a wet wipedown with phosphoric acid did.
The phosphoric leaves a characteristic mottled blue-gray,
occasionally brownish coating of iron phosphate that is a very good
base for paint. The rust did leave some pits, but the blasting
and phosphoric treatments cleaned them out well.
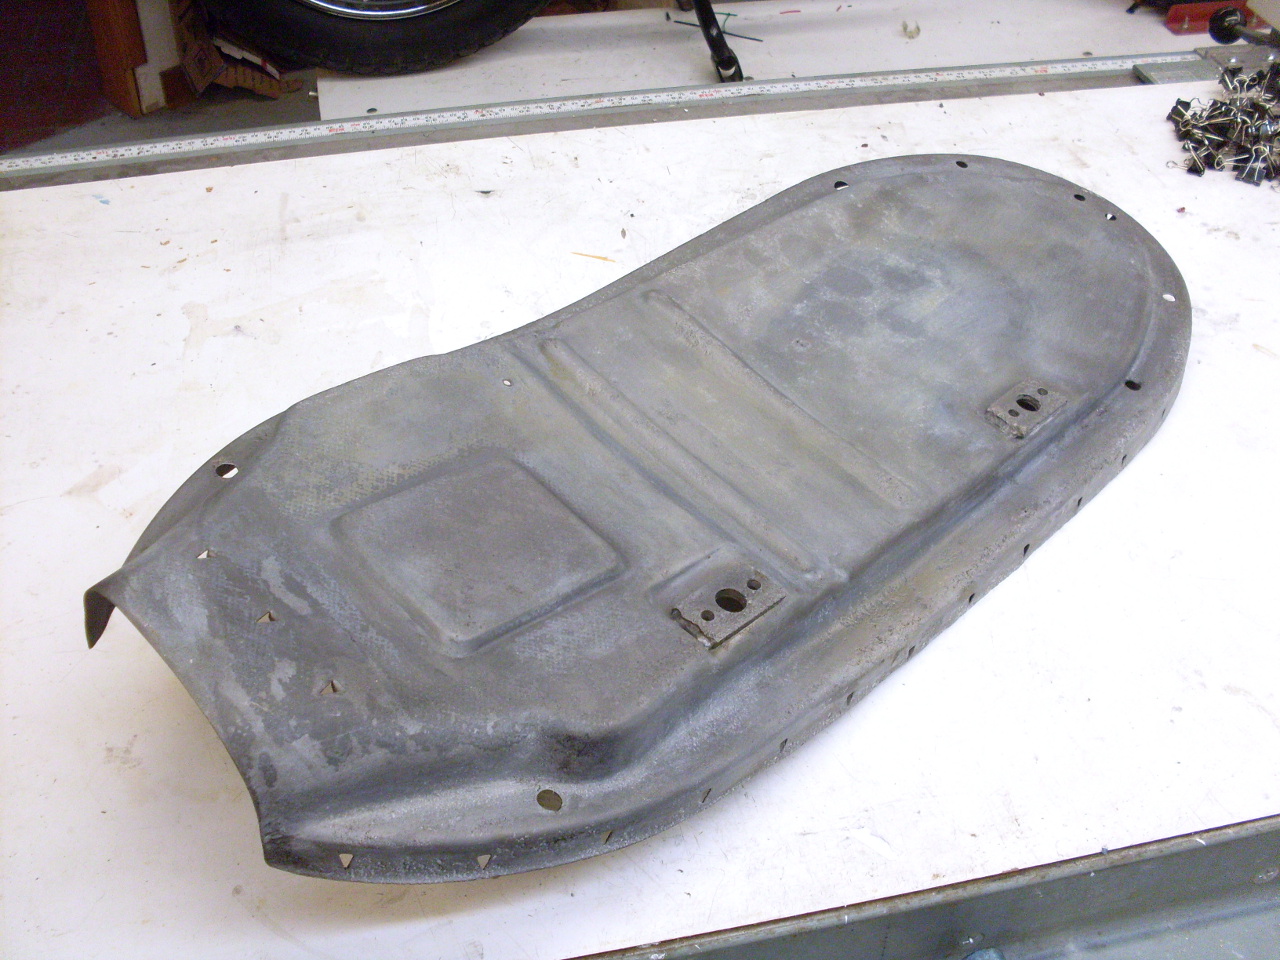
Then primed the pan in preparation for the black paint.
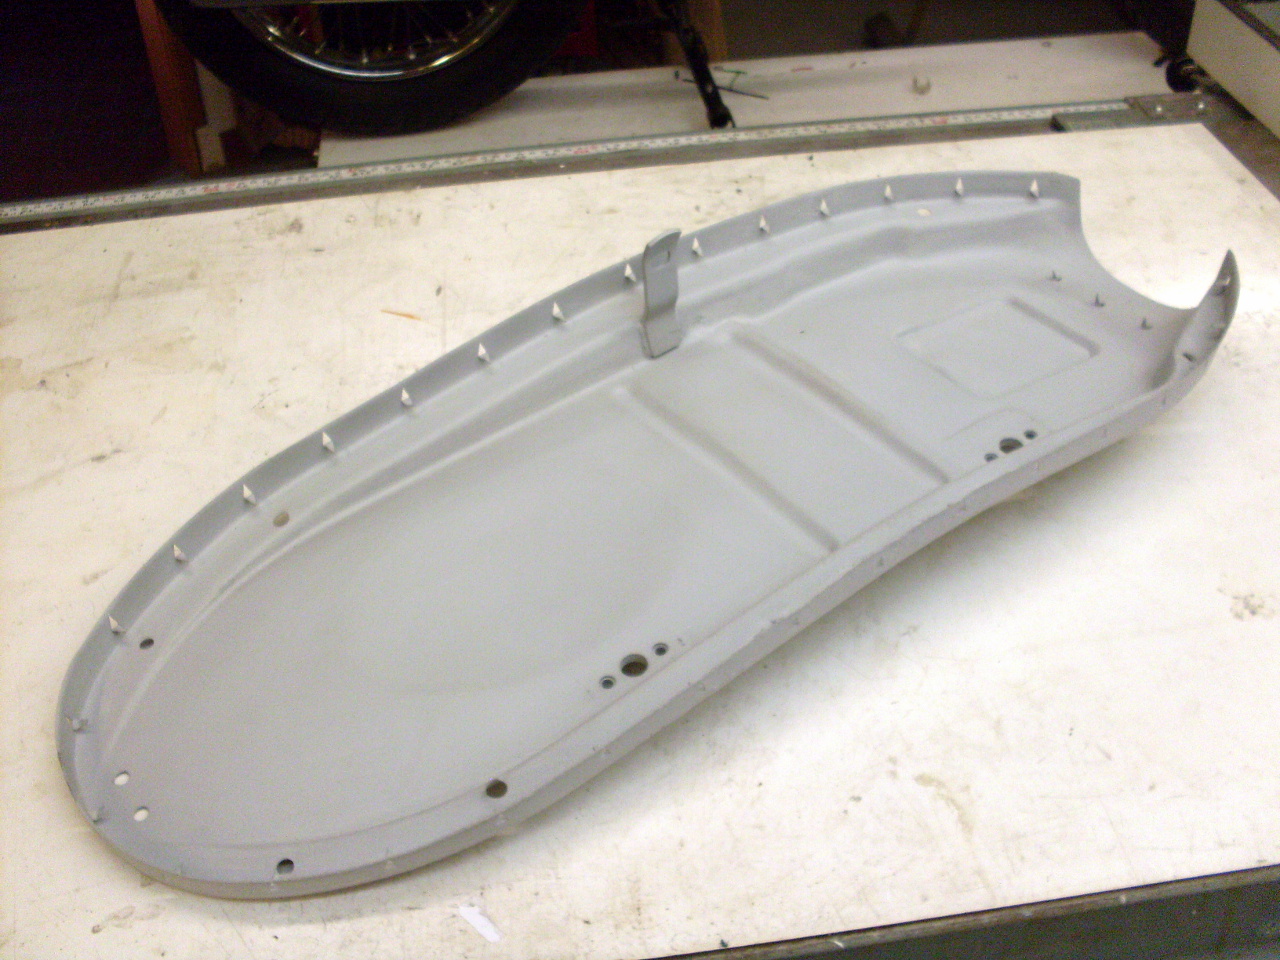
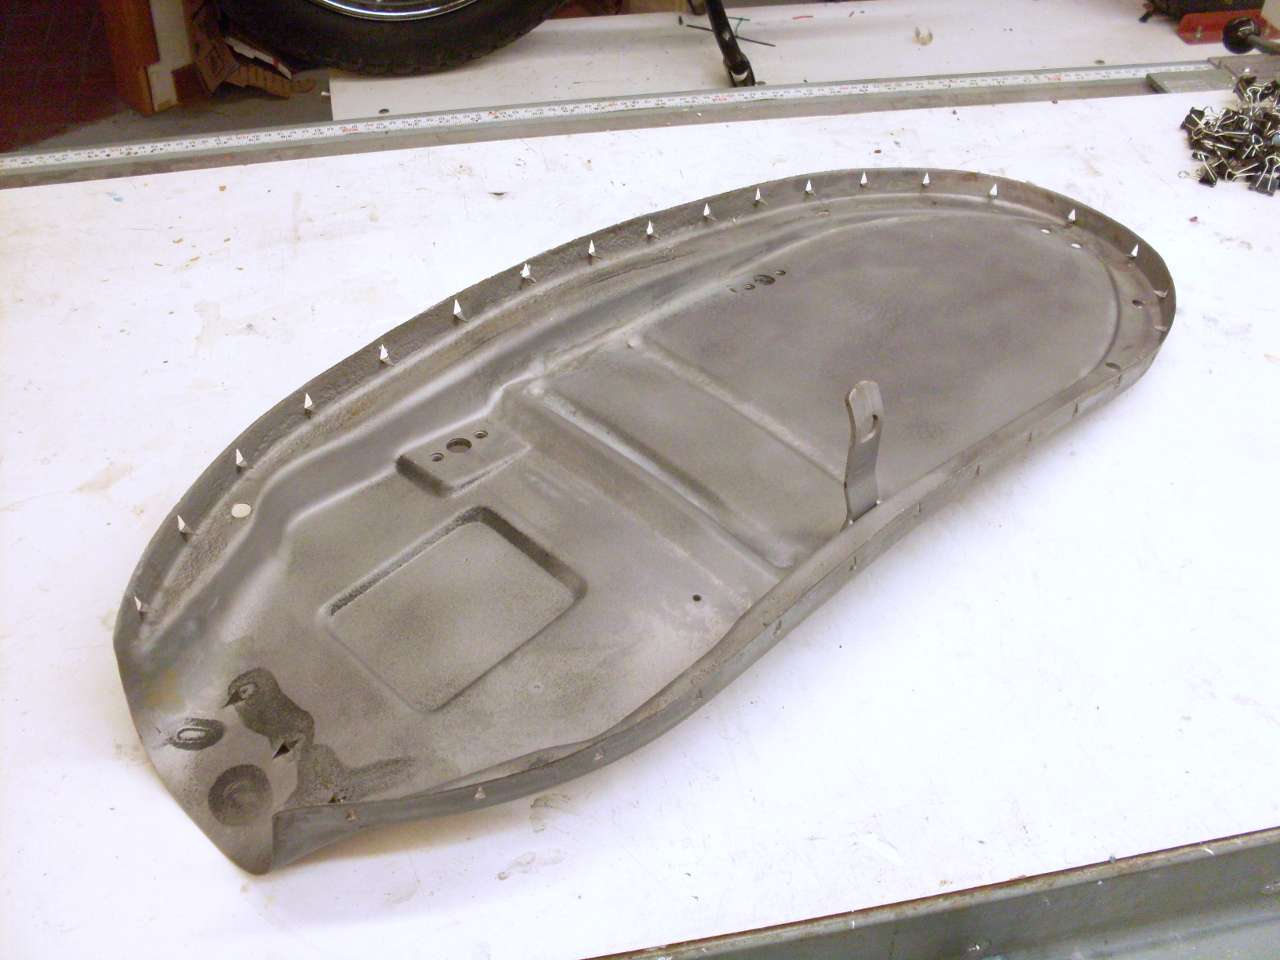
The
seatcovers on these seats are stretched around the foam and then over
the lip on the pan. While it's been done this way for decades
without serious problems, that lip seemed awfully sharp to me, and I
was a little afraid that the very high tension necessary to stretch the
cover could cause the lip to cut the cover. I think the rust had
thinned the lip of my pan in places so that it was even sharper than
usual. To put my mind to rest, I put several layers of vinyl tape
around the lip just ot give a little radius and cusion to the edge.
Probably not necessary, but it made me feel better.

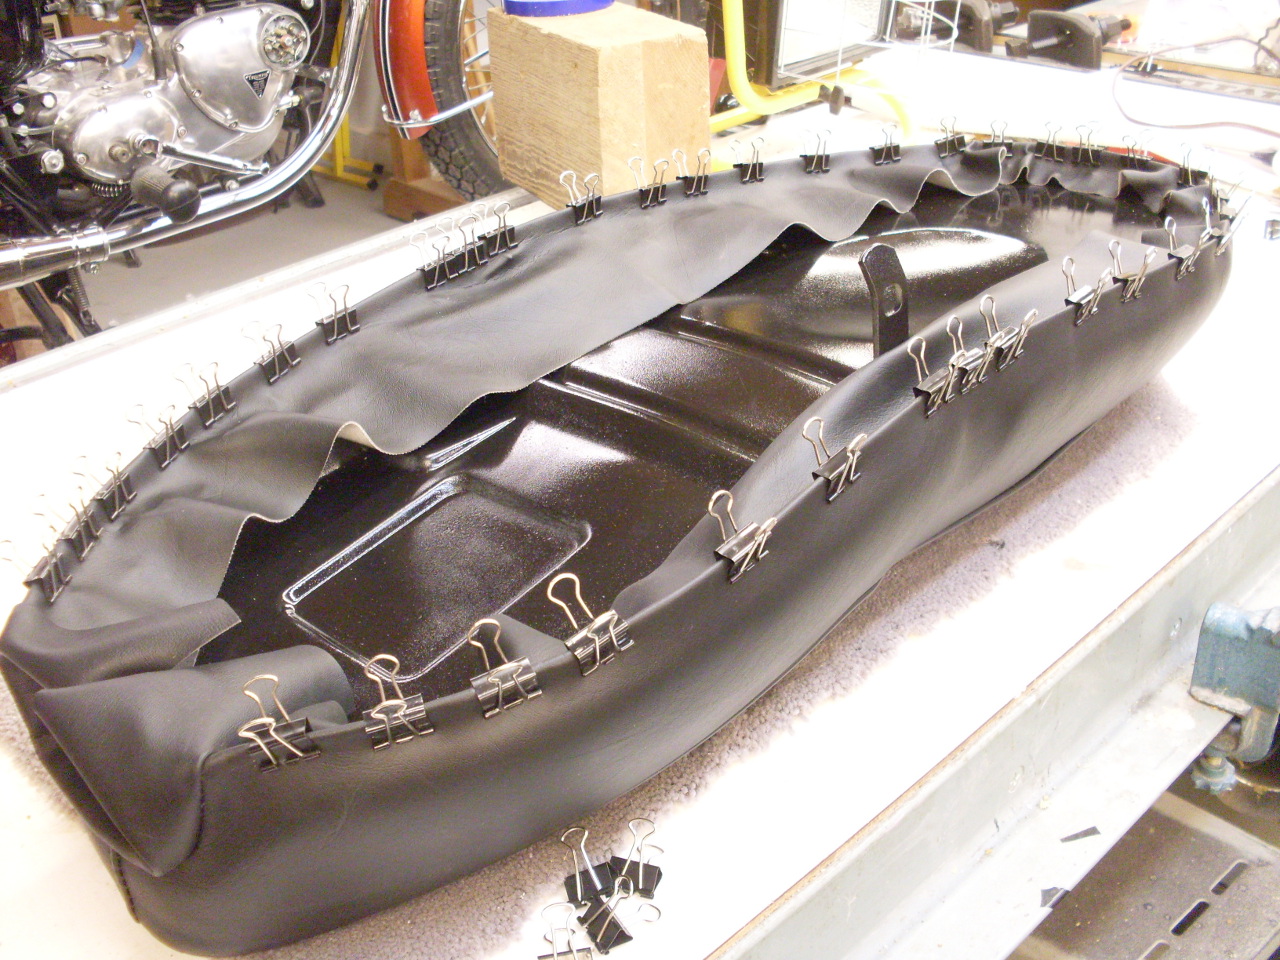
Now
for the seatcover. As I said, I'd seen a few videos on putting on
seatcovers, but by far the best guide I found was an article by John
Healy at Vintage Bike Magazine. Without this, I'm sure I would
have convinced nyself that I had the wrong seatcover. The
seatcover has to both compress the foam and also stretch quite a bit.
At first, it looks like the cover will never go on.
Following John's instructions, it wasn't too bad. Where
John uses clothes pins, I used binder clips borrowed from my employer's
office suppy closet. [Note to self: be sure and get the 62 clips
back to the closet by Monday AM.]

The
cover has to be warm to stretch. Some people do it out in the
sun. I used a couple of 500 watt work lights. It only takes
a few minutes, and these lights could probably melt the vinyl if left
too close for too long.

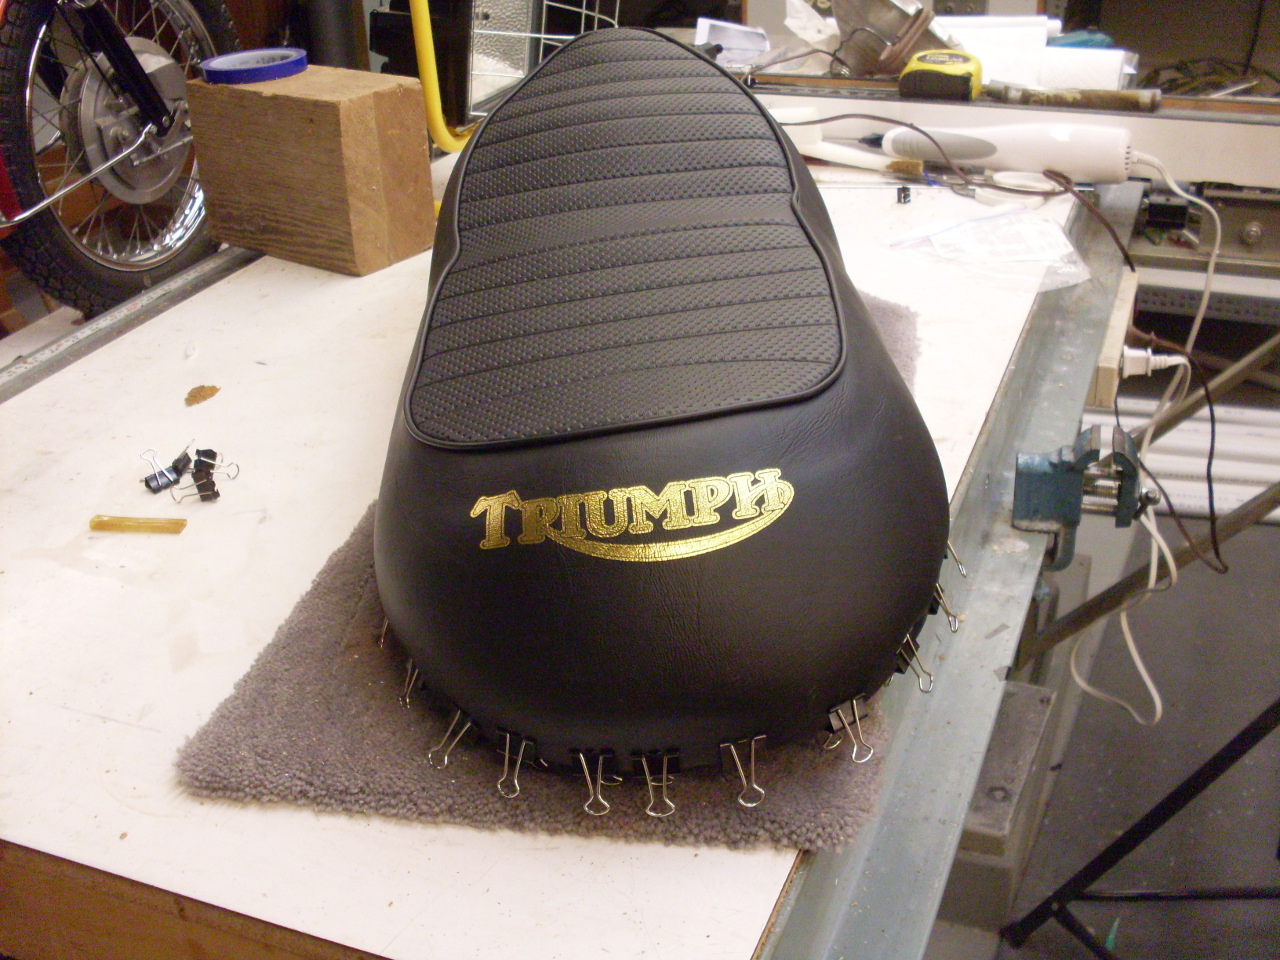
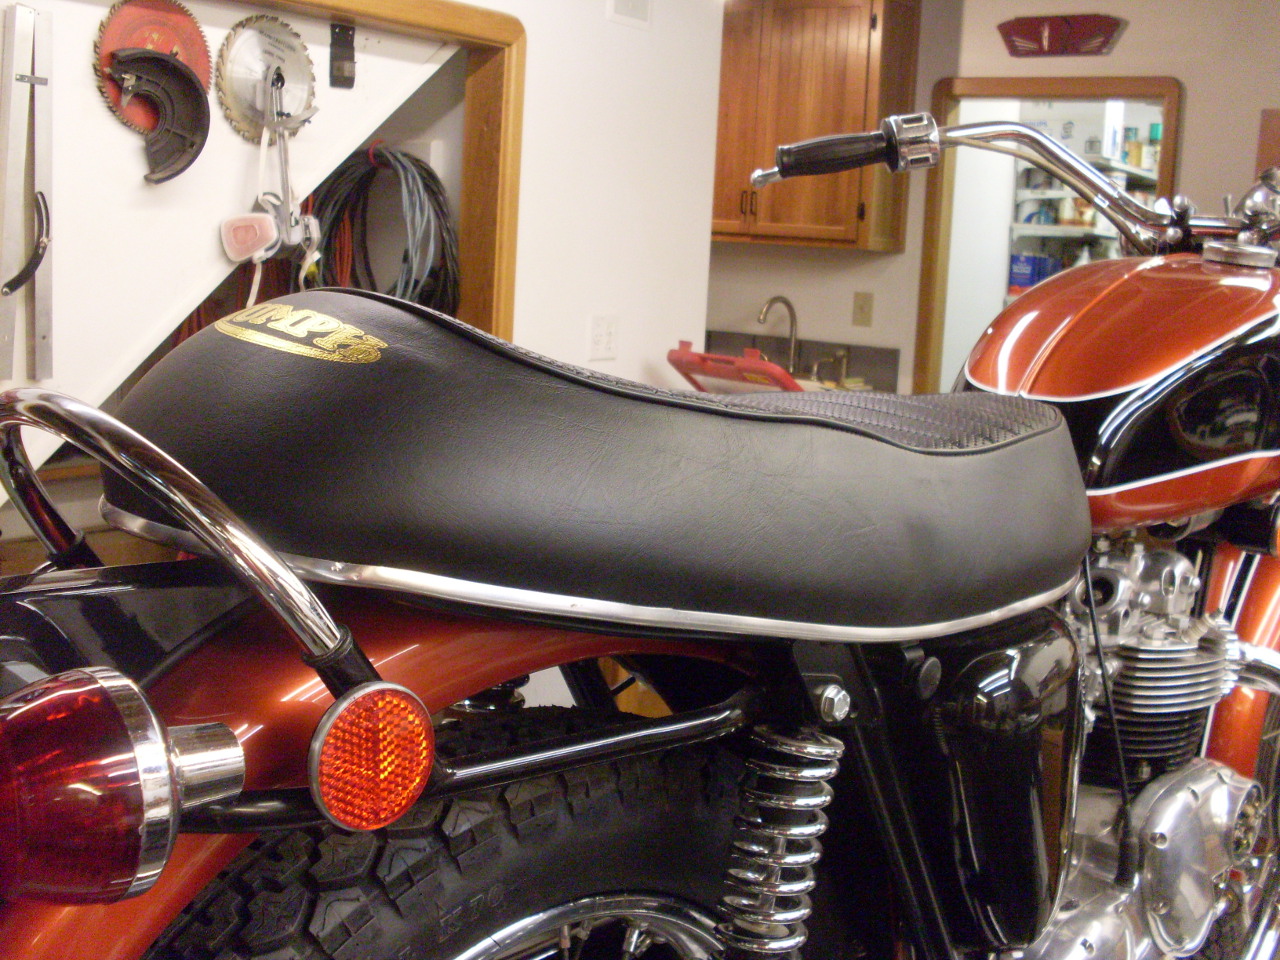
Almost there. Have to make sure the Triumph logo ends up centered.
When
the cover is in final place, the chrome colored plastic finishing strip
gets pushed over the lip of the pan. Some of the videos I saw
implied that the strip is all that is necessary to hold the cover in
place. However, my pan had a series of barbs punched out of the
lip that pierce the cover. When I removed the old cover, I very
carefully bent the barbs up, stressing them as little as possible.
The barbs can't be bent too many times before they break off.
I pulled the cover down over the barbs until they broke through,
then carefully bent them back down enough so not to be dangerous.
A couple of them broke off in the process.
The strip is
stiff and won't easily go over the lip unless it is heated. I
used a heat gun for this, but a hair dryer would have been better.
A couple of times I got the strip a little too hot and it buckled
rather than slipping ove rhte pan lip. It's noticable to me, so
I've ordered another finishing strip.

So
the cover is on, and doesn't look too bad. There are a couple of
places where I can see where the cover was folded for shipping, but I
understand these will come out over time, or with the help of a little
gentle heat.
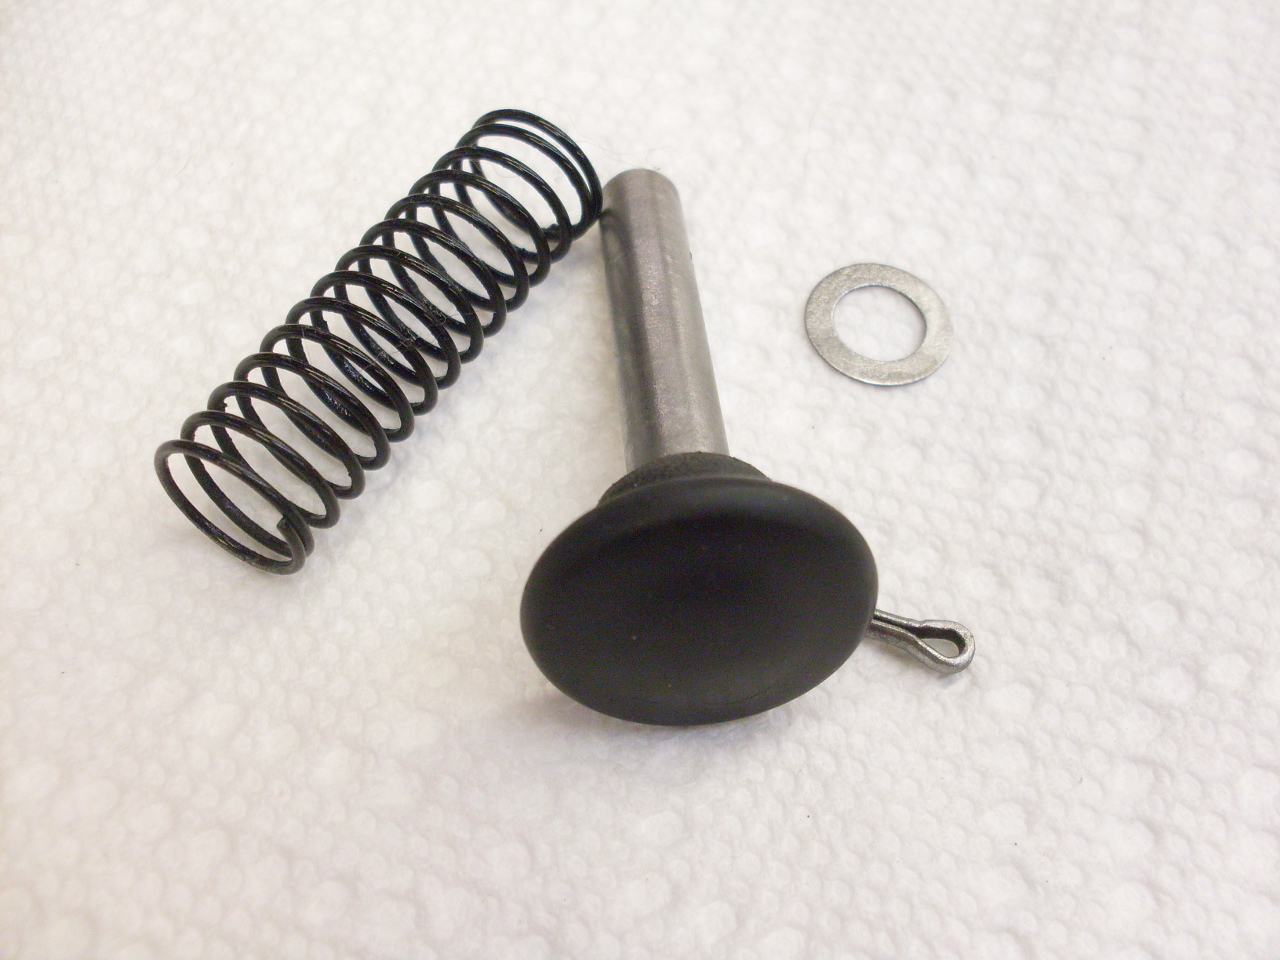
There are four rubber bumbers that compress against
the frame when the seat is down and latched. Ideally these should
have been put in before the the cover was installed, but it wasn't a
big deal. I had a heckofatime with the rear bumpers until I
realized that the holes in my pan were 3/8" while the bumpers needed
1/2". An electrician's reamer and a littl P80 took care of that.
The hinges, latch mechanism, and the stay cable, and the seat is done.

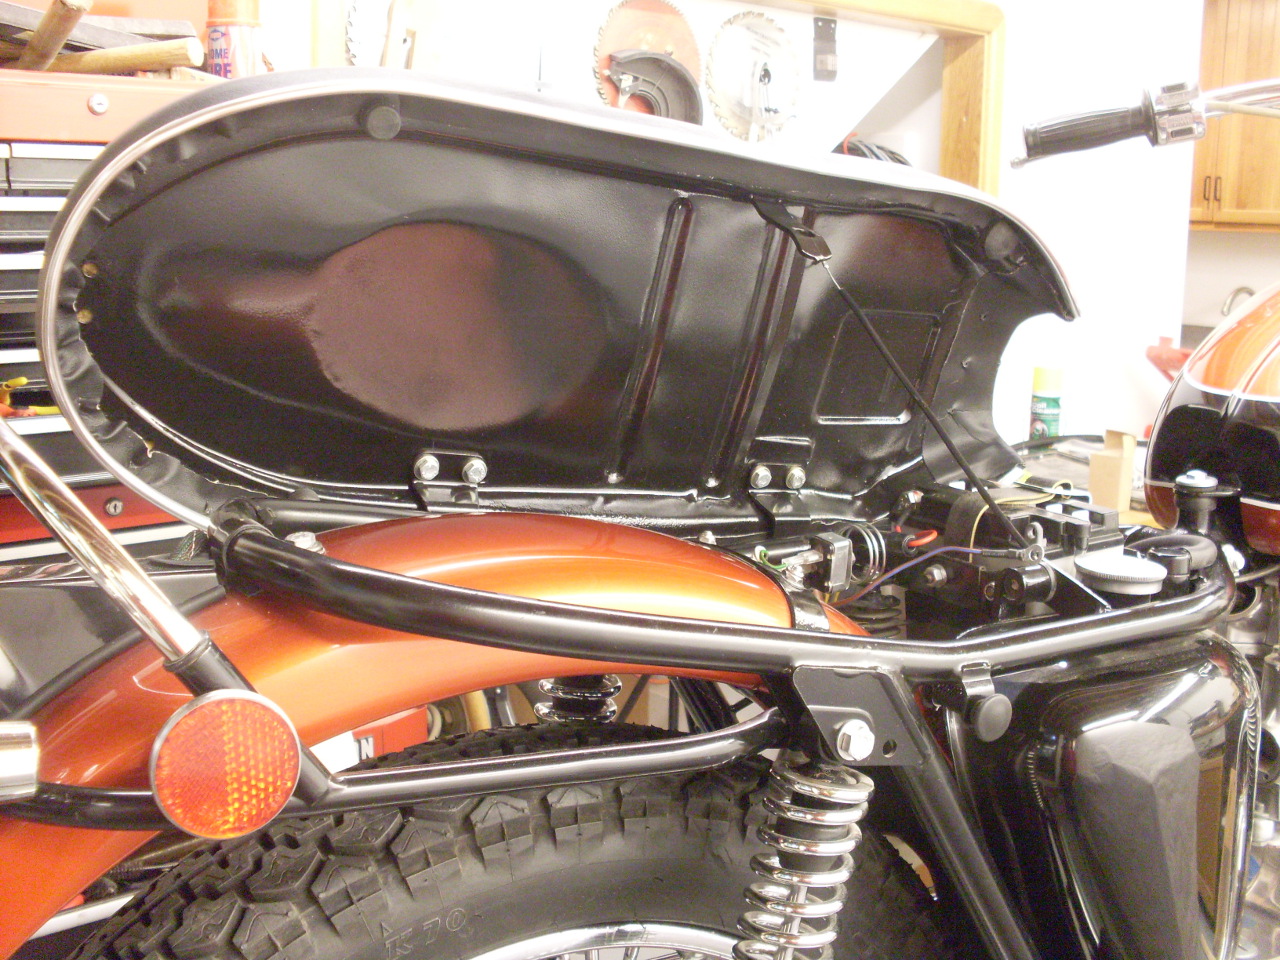
Now I have a new place to sit!
Comments to: elhollin1@yahoo.com
To other pages