May 26, 2013
Tank & Fender Paint
[Click the pictures for a better view]
I
painted a car once many years ago, so I knew some of the basics, but
painting materials and techniques have come a long way since then.
My experience was with one-part acrylic lacquer and a high
pressure gun. I wasn't really prepared for all the new
advancements. Two stage systems with separate color and clear
coats, two part paints with separate activator, and High
Volume Low Pressure (HVLP) spray guns were all new to me. I
read through data sheets of some paint products and in the end felt
that I could still probably do it. Besides, have you seen what
it costs to get a tank and fenders painted these days?
After chemically stripping off the old paint, the first
order of business was to get the metal surfaces prepared.
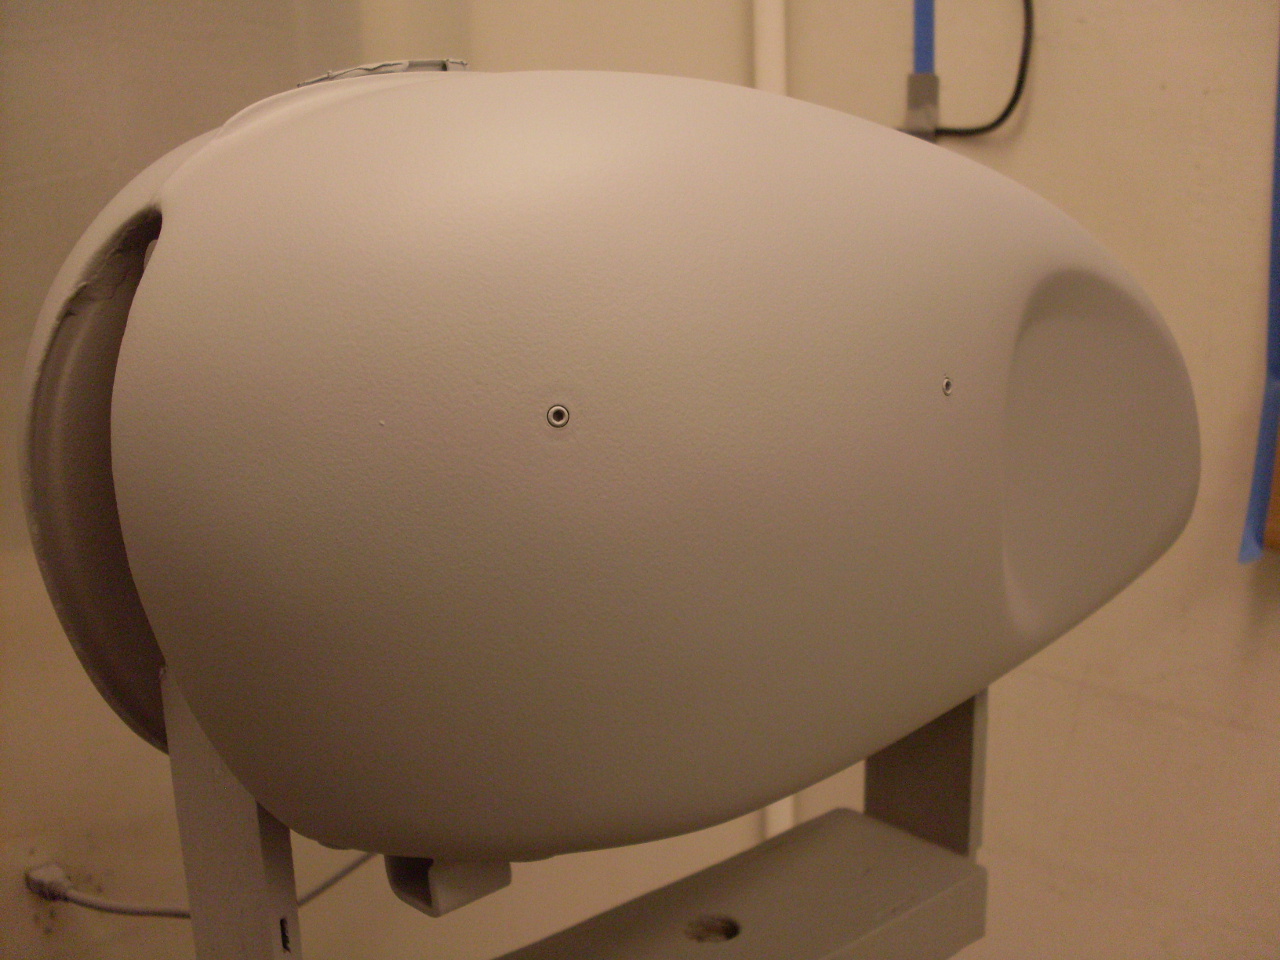
The tins were is pretty decent shape for being over 40 years old,
but did have a few dings, dents, and distortions..


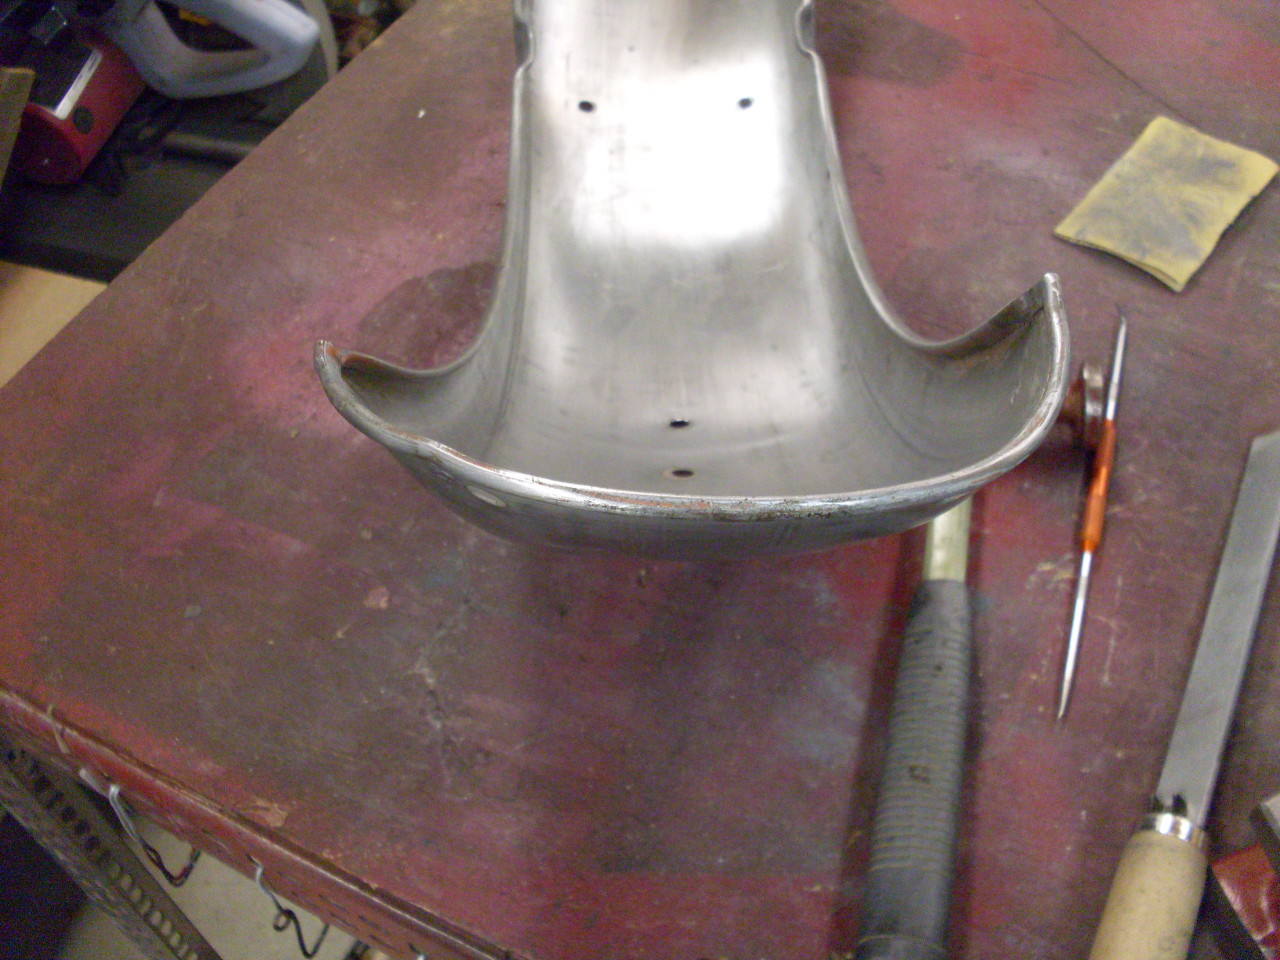
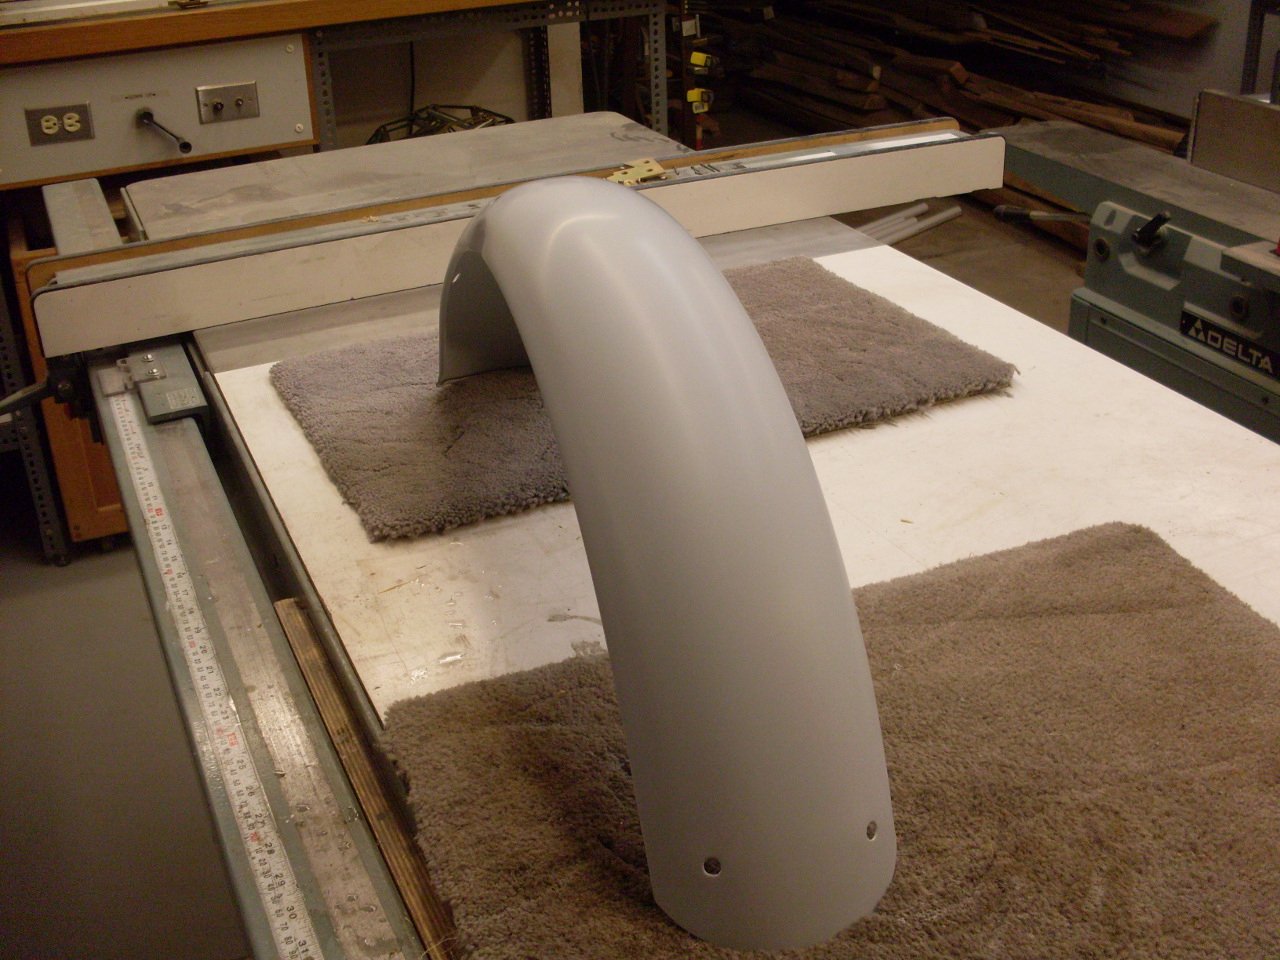
A little dolly work got the fenders back in shape, and a little sand blasting got off the last of the old paint.


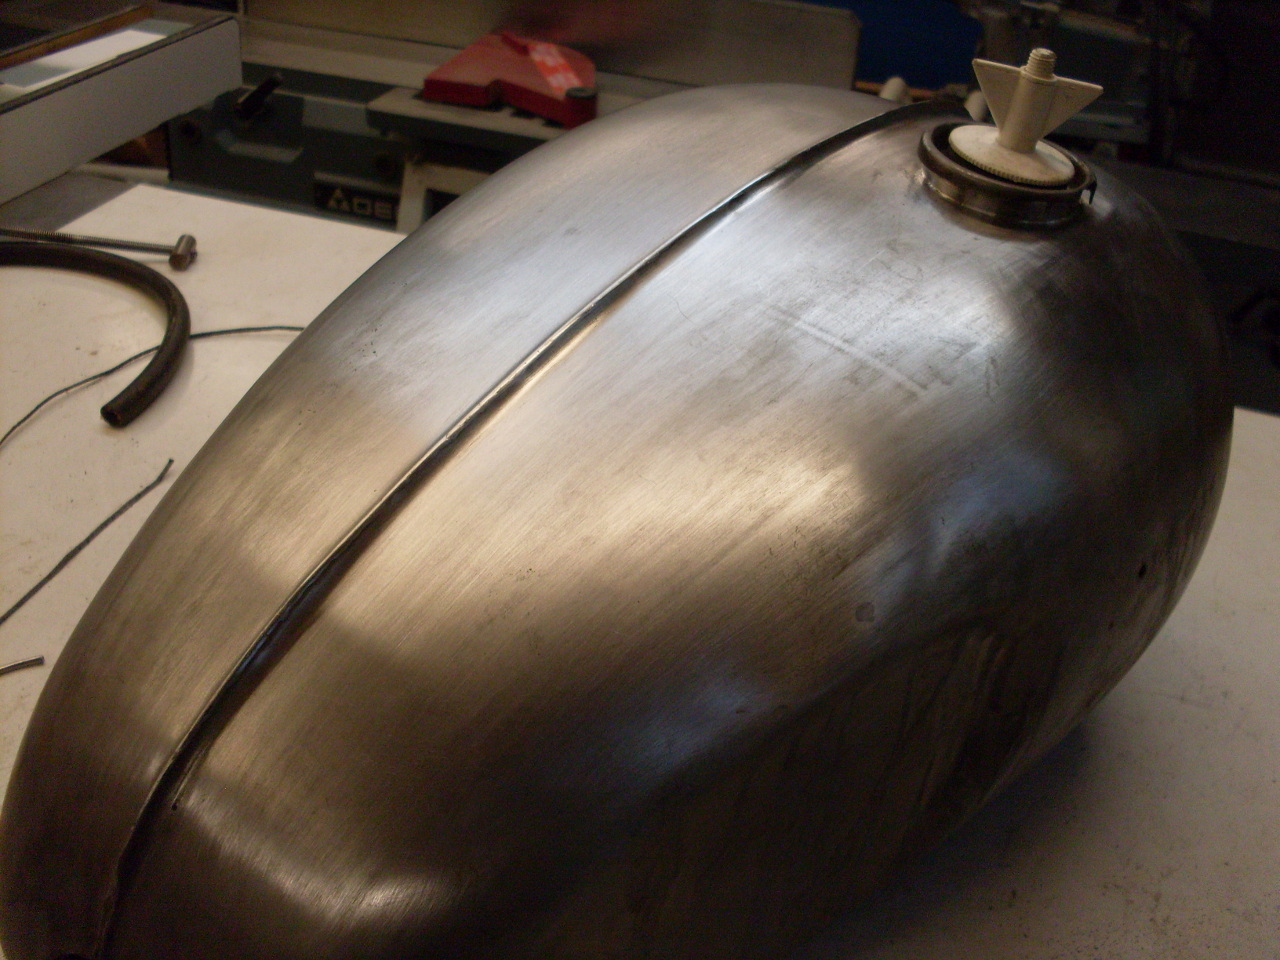
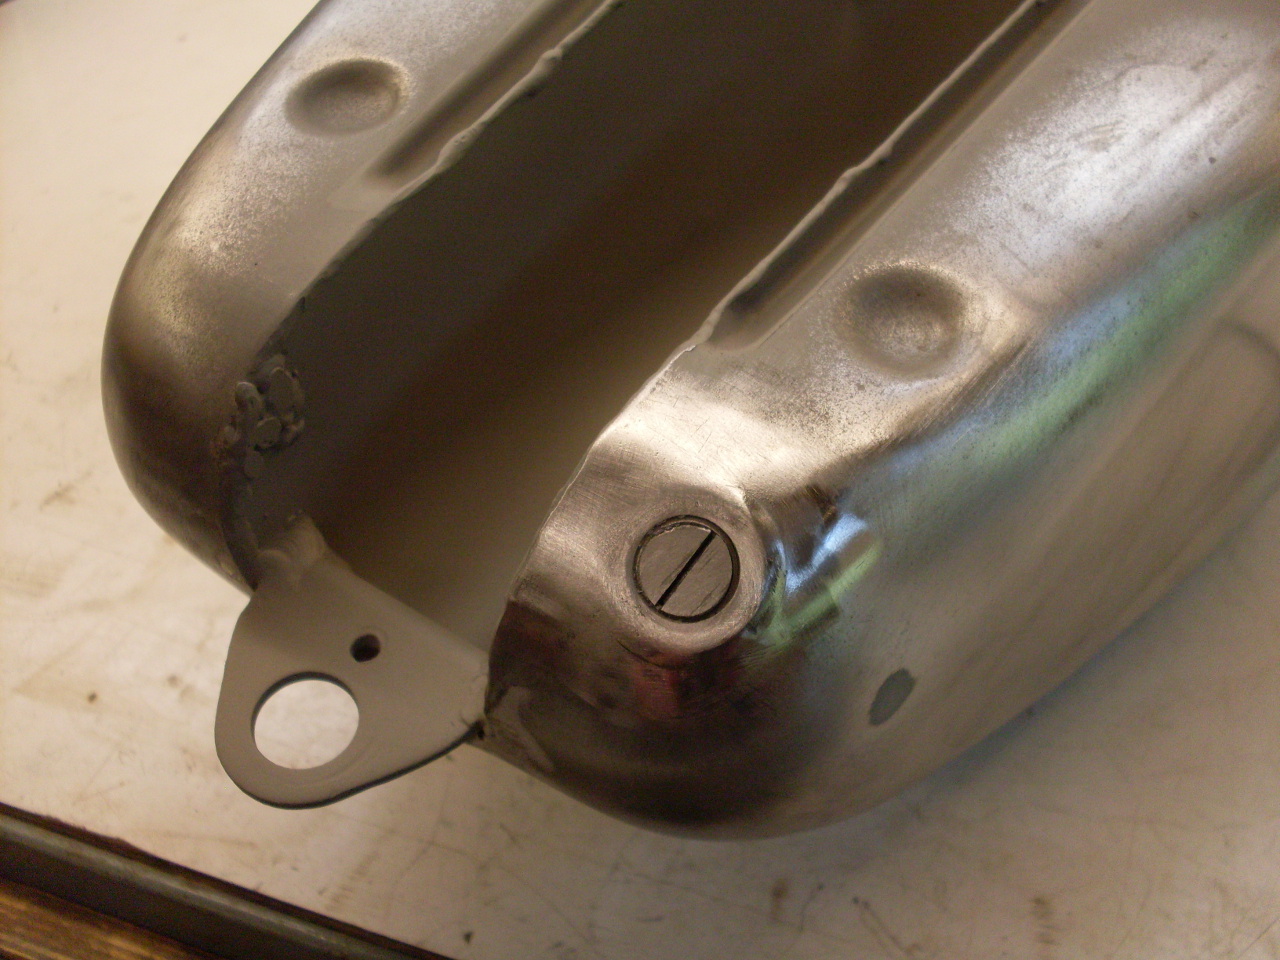
The
tank was a little different. It had a few little dents, probably
mostly from road debris, but since there is no access to the
inside, they had to be filled.
 \
\
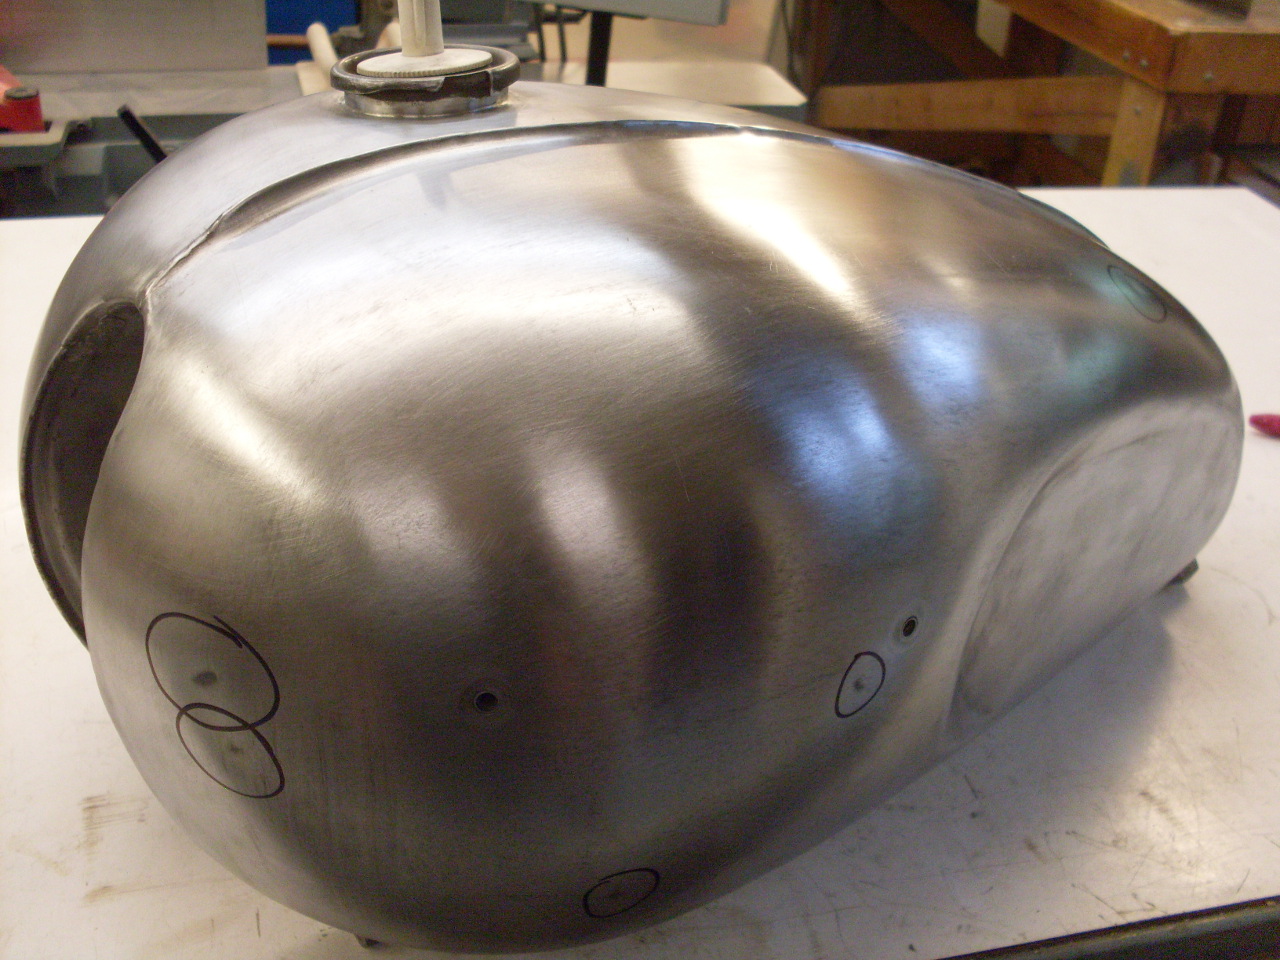
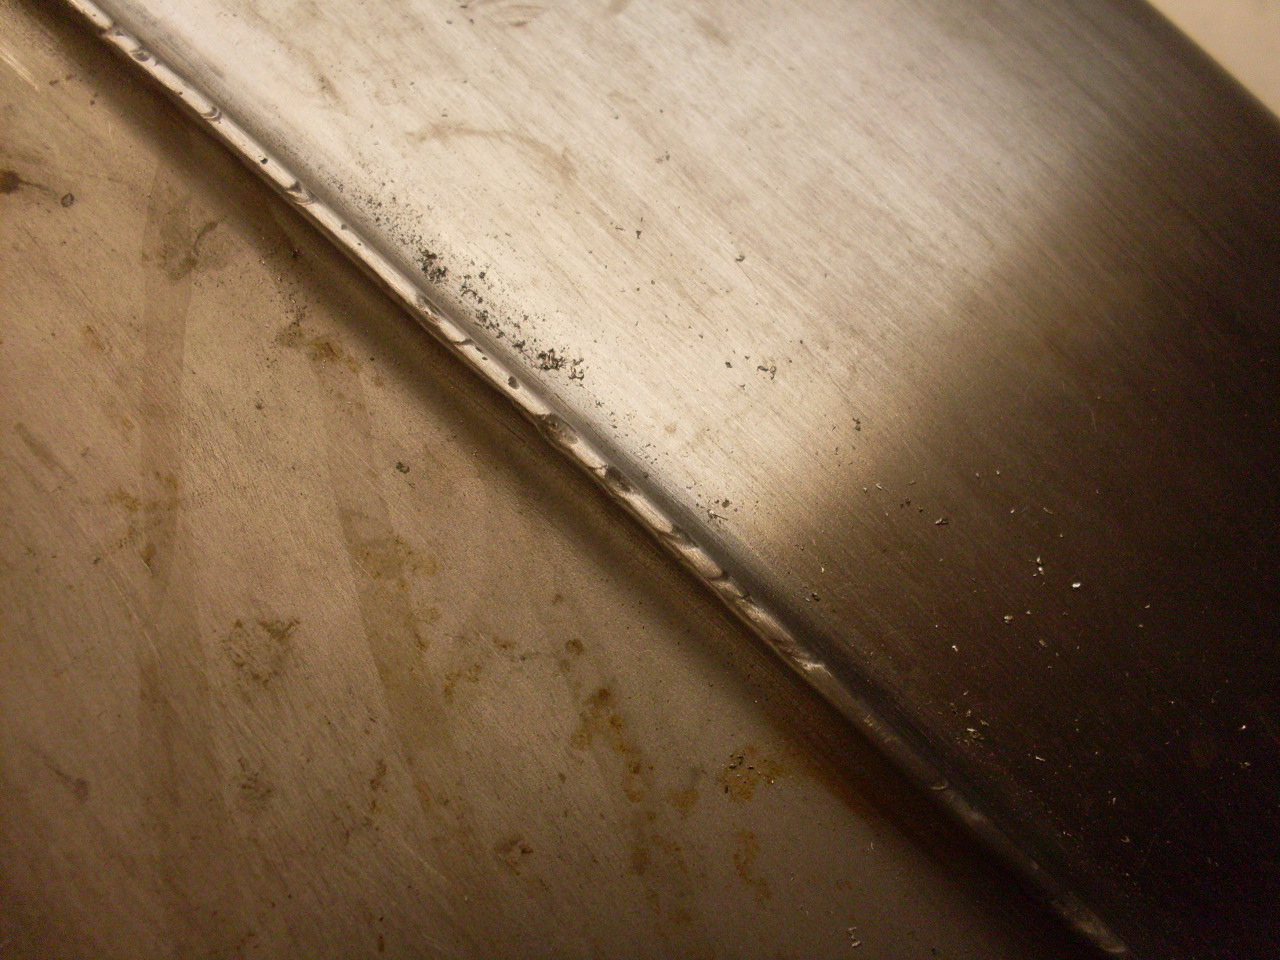
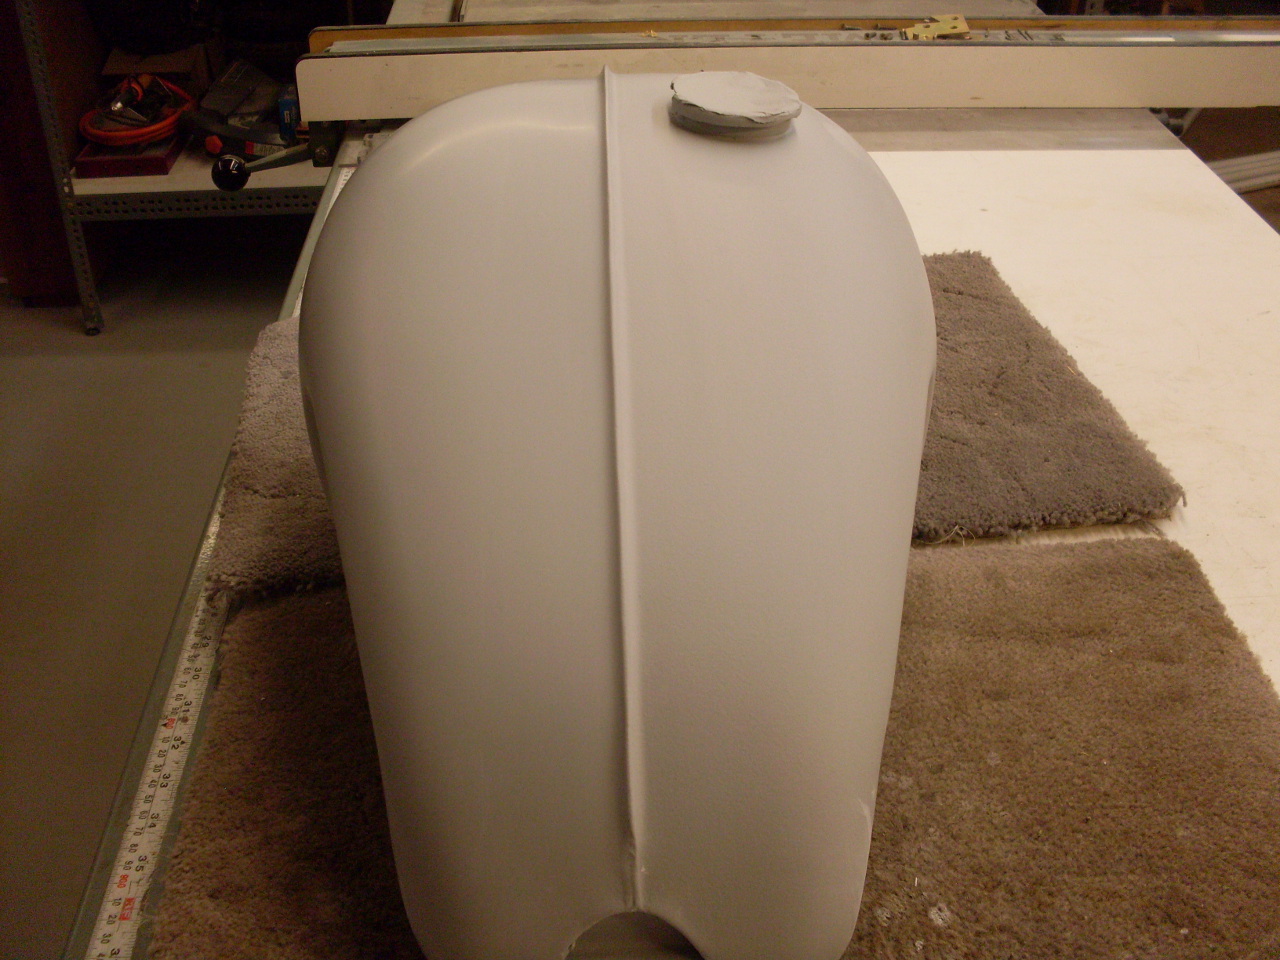
Because
I want the option to not install the chrome trim strip that covers the
welded seam on the top of the tank, I tried to fill in some of the
irregularities in the seam. I used solder since it would be
stronger than bondo.
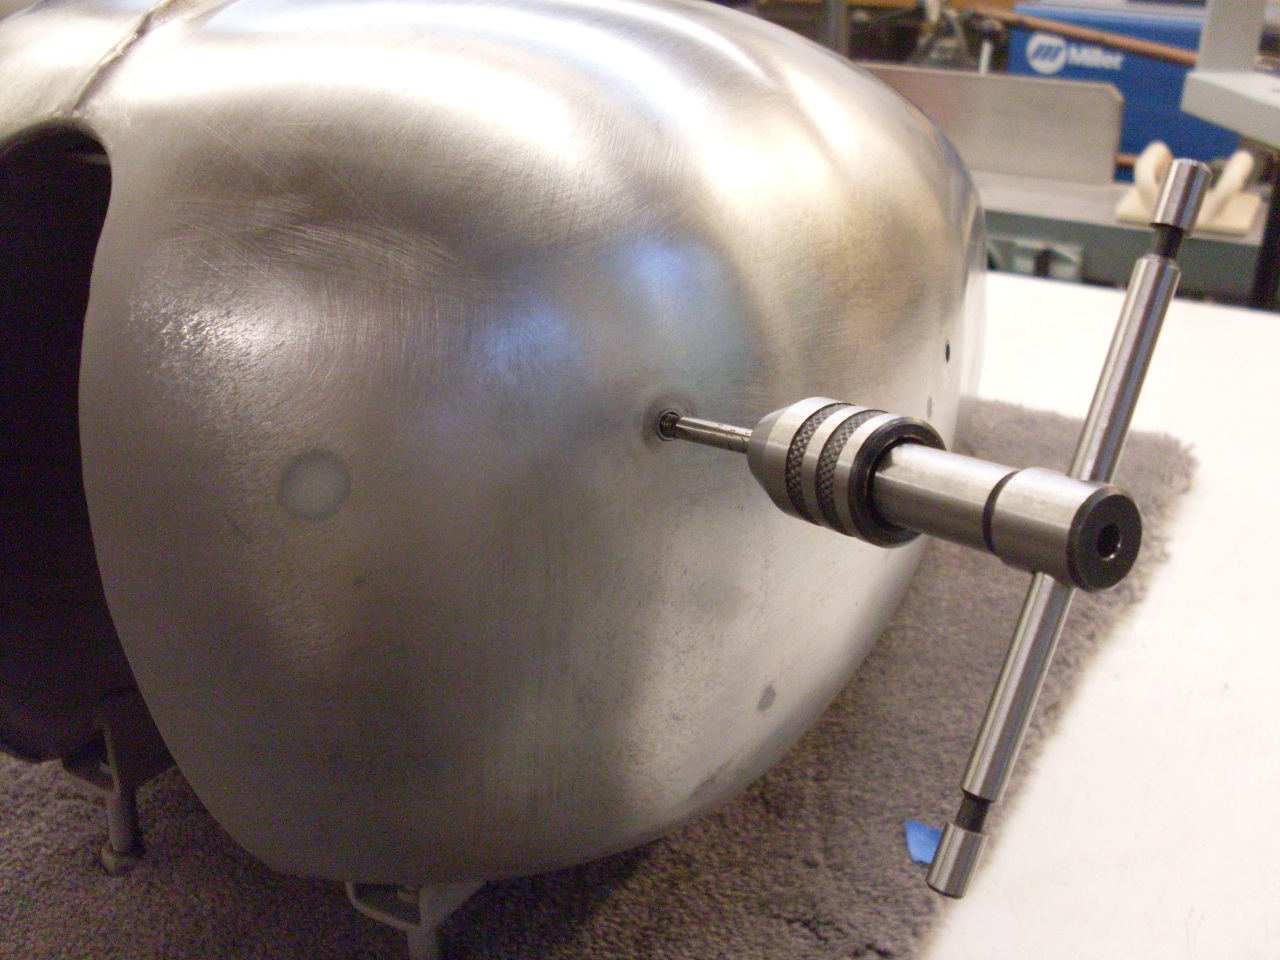
I
chased out the badge mounting holes with a 2BA tap. They had a
lot of crud in them from the paint stripper. To keep the new paint out of
the threads, I plugged the holes with little set screws. No, I
didn't track down 2 BA set screws. I used common 10-32, which is
almost exactly the same diameter, but the thread pitch is very slightly
coarser. I trimmed the set screws very short--maybe a strong
1/8"--so they got just below the tank surface before the threads bound up.
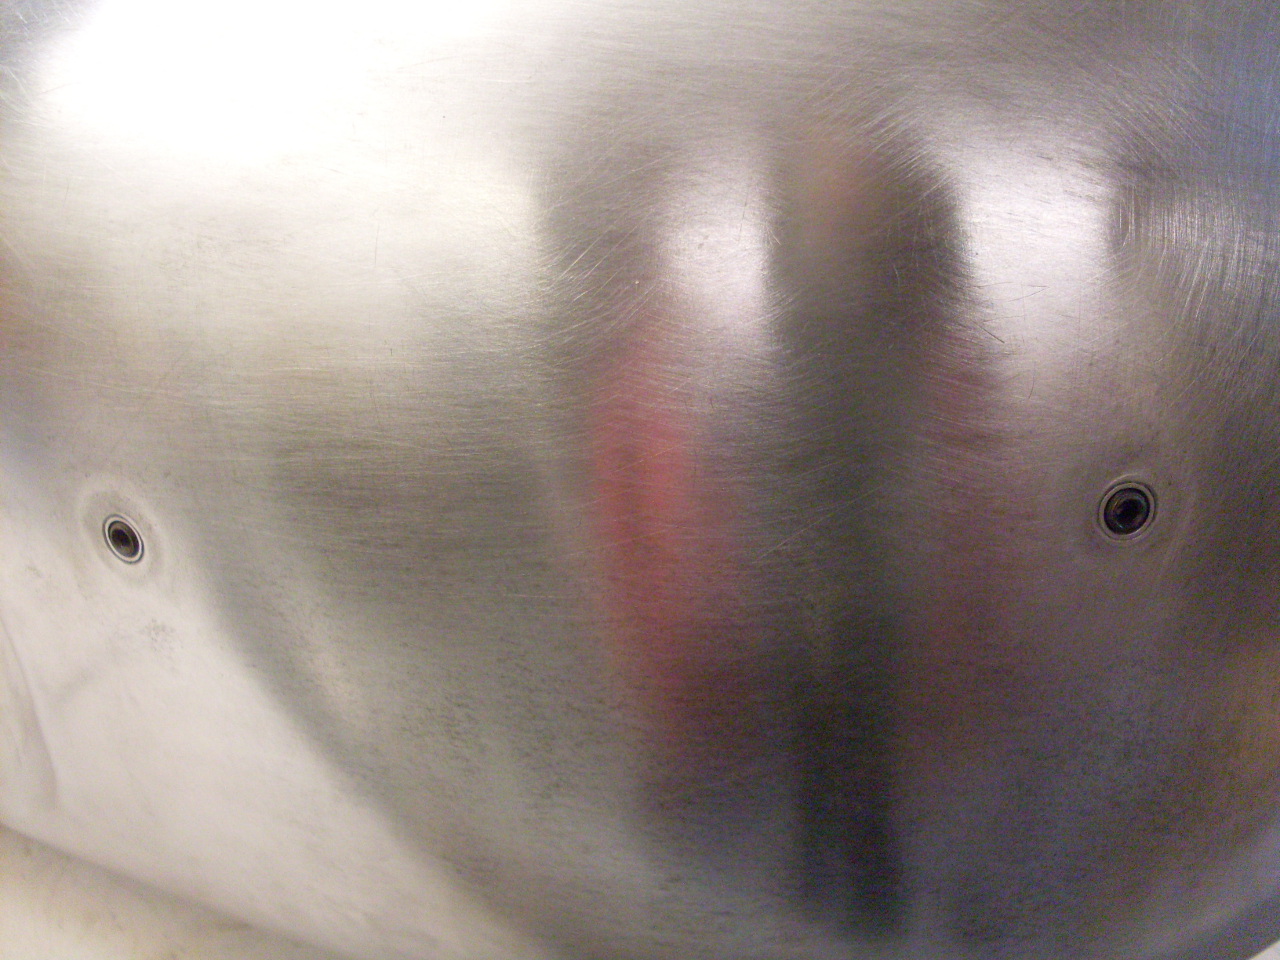
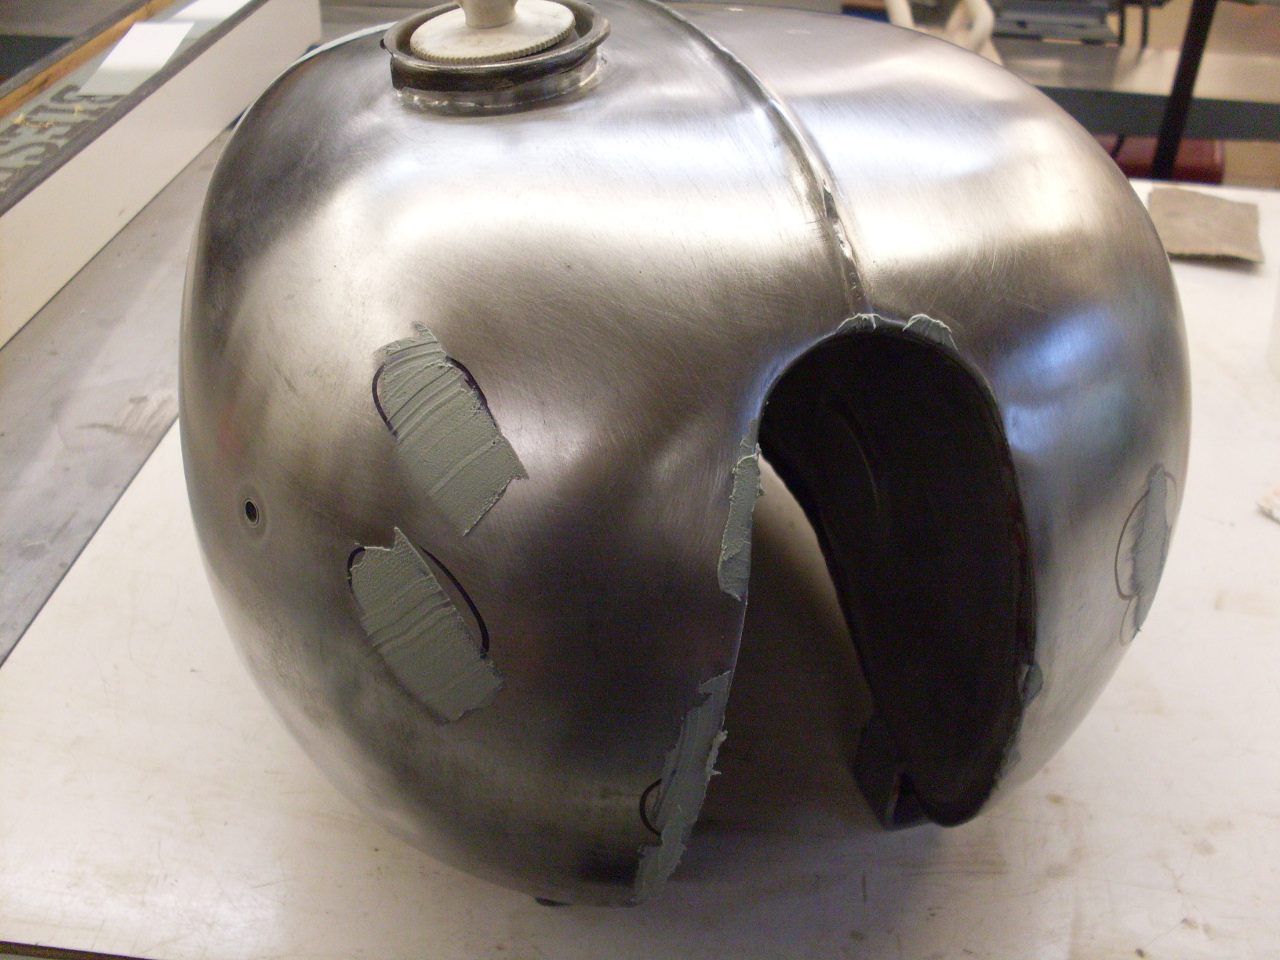
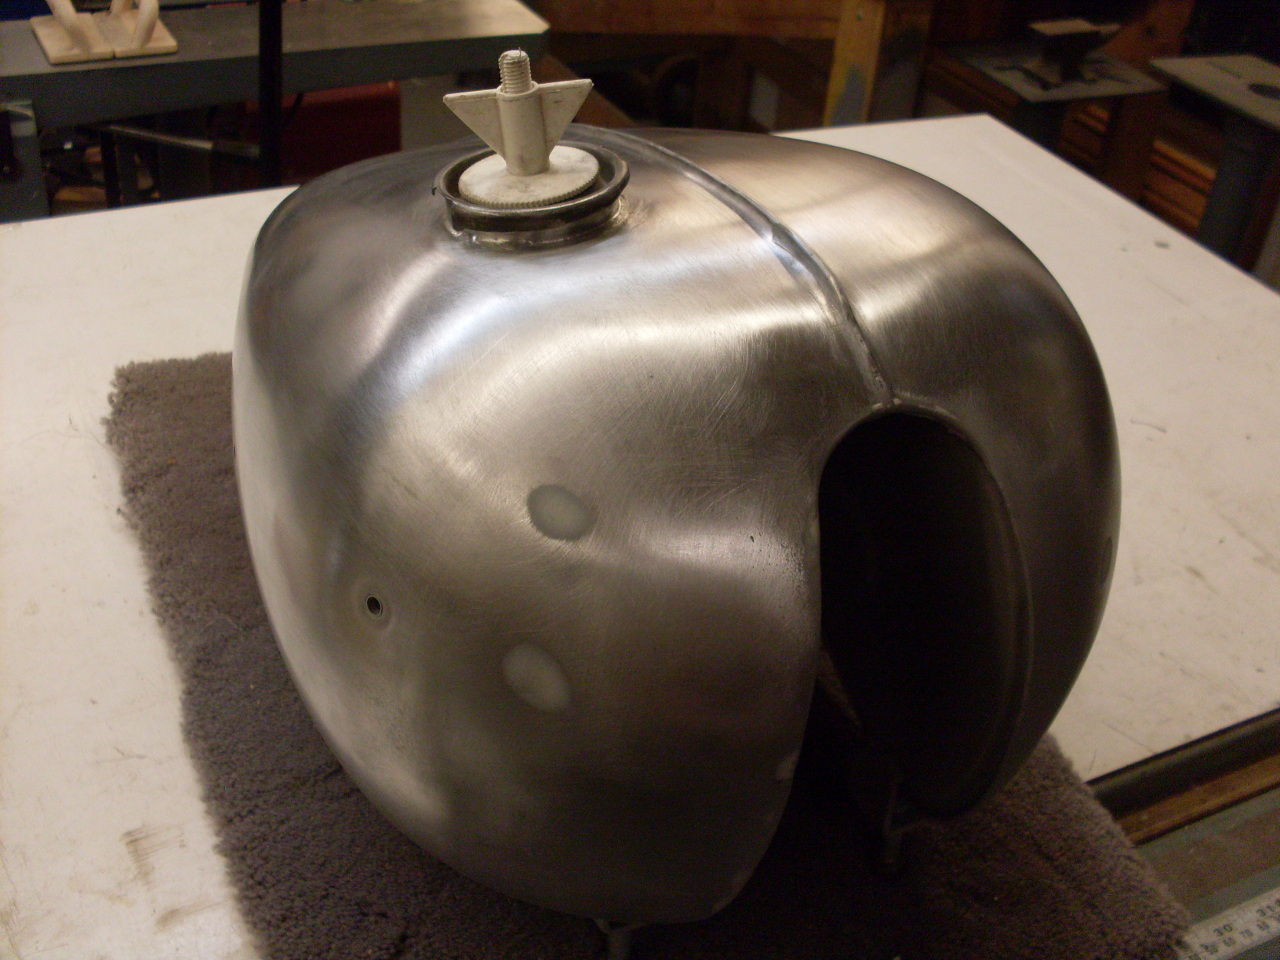
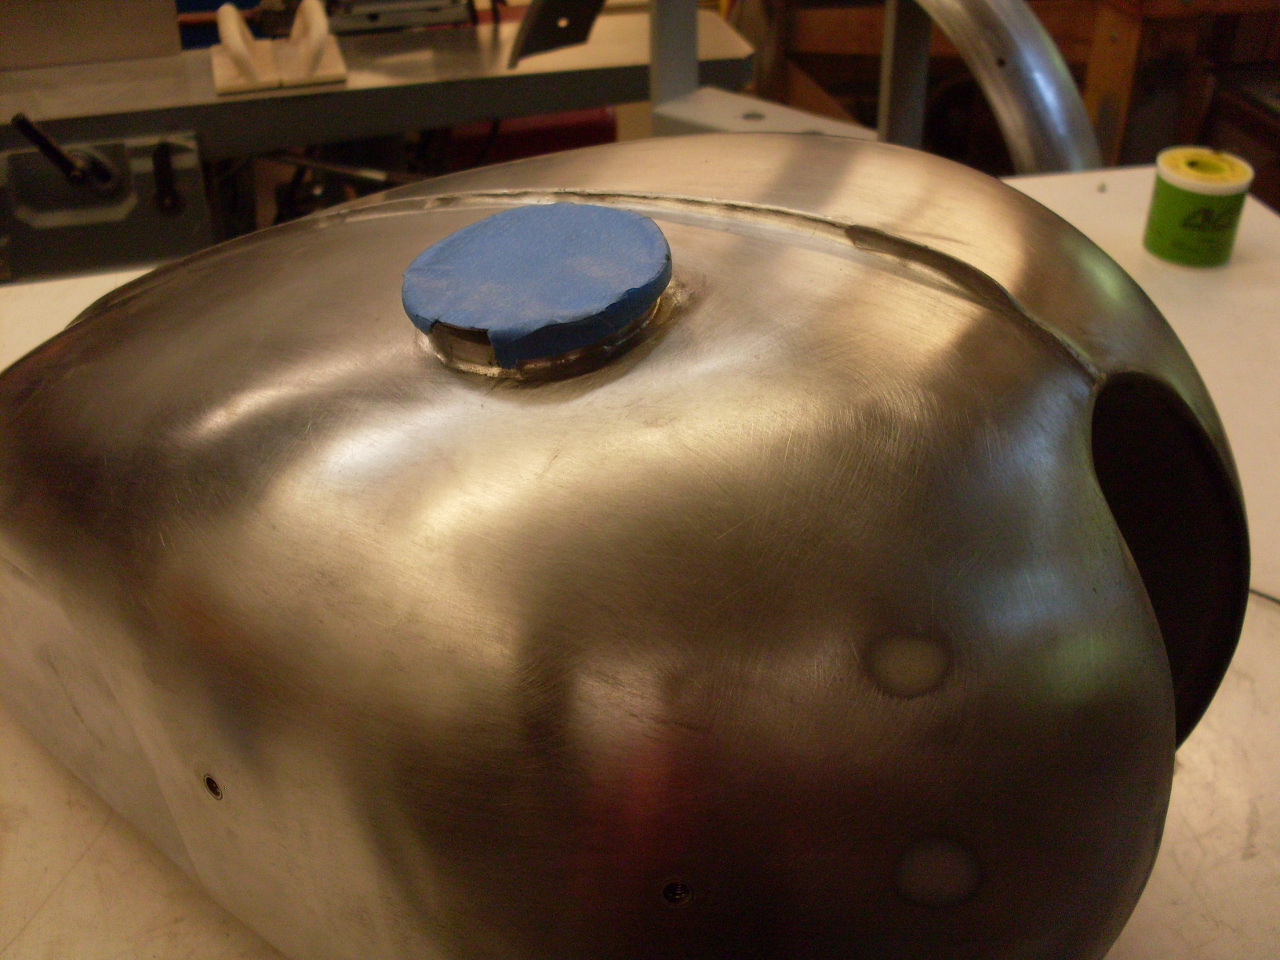
Then
to plug the orifaces. The bung is filled with a standard BSP plug
with the square head cut off and a straight slot sawed into it. I
didn't want to paint inside the filler neck, so I masked down to the
ramps where the cap grabs.
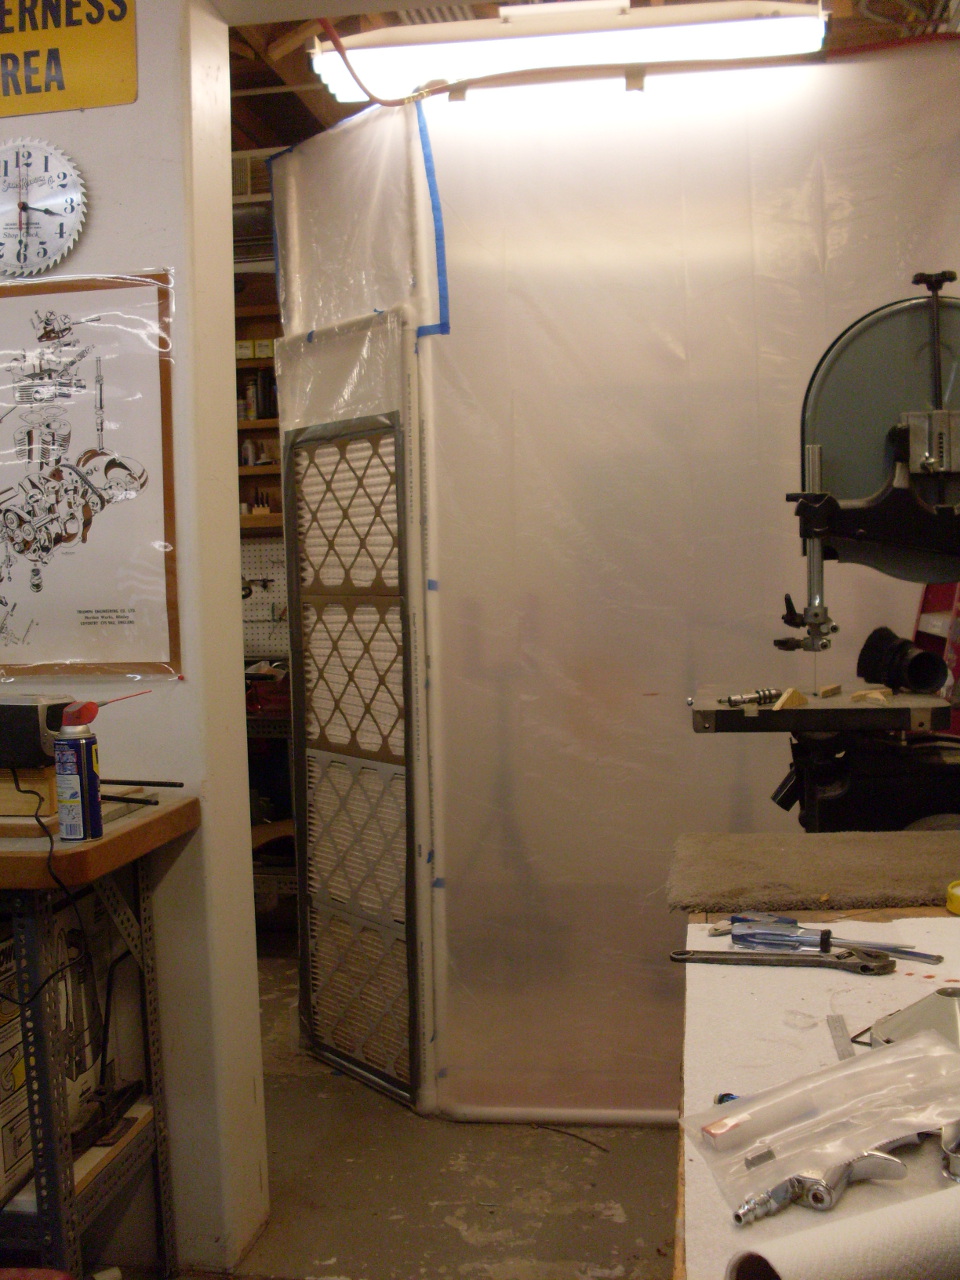
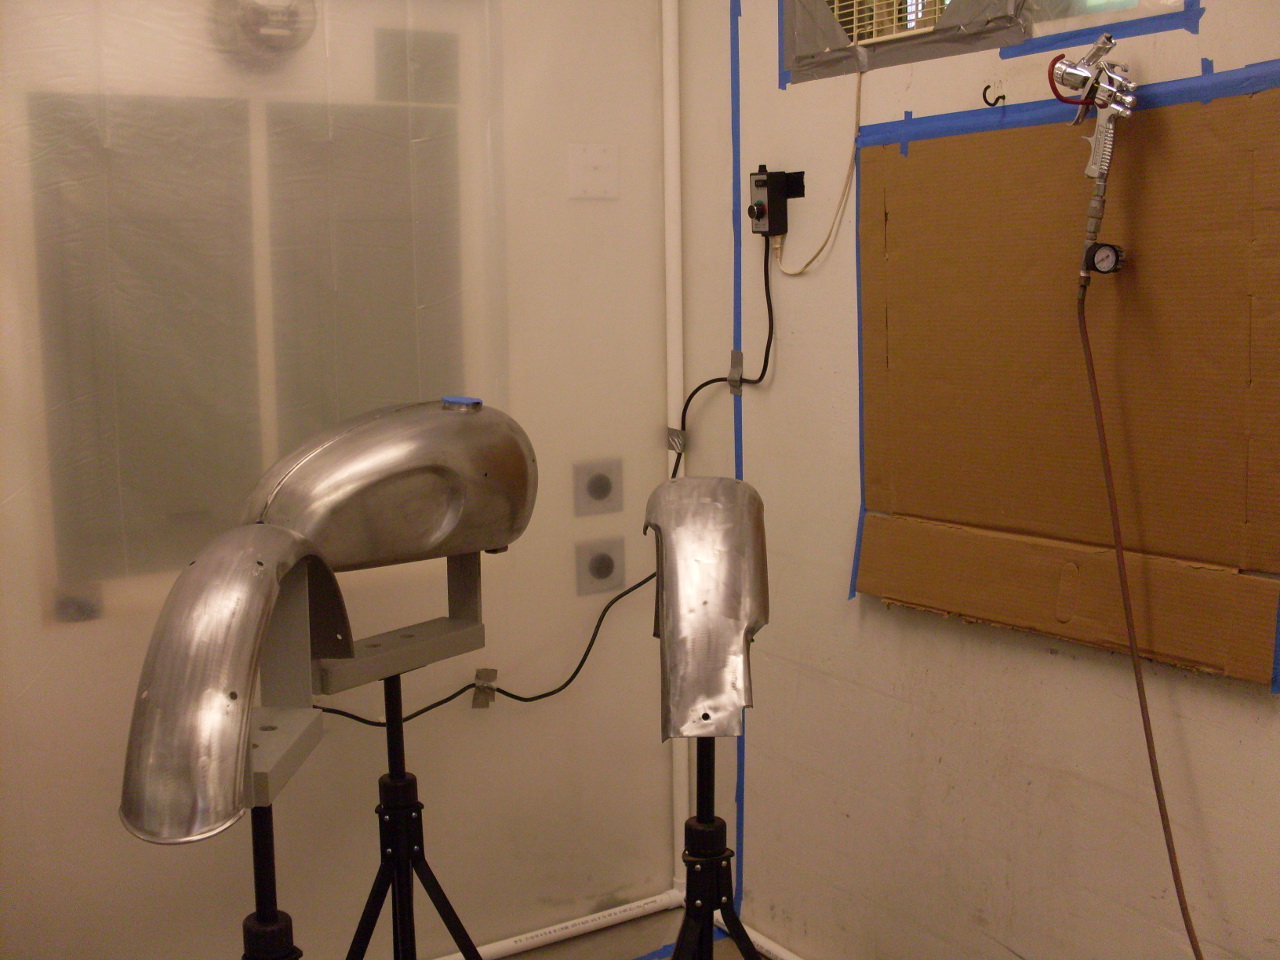
I
set up a temporary spray booth in my basement shop. My first
inclination
was to set it up in the garage or outside, but the shop eventually won
out since it would be more protected from the weather. The booth
is just a frame 8' x 10' x 8' high made from 1" PVC, then covered
with polyethylene sheet, taped at the seams. One side of the
booth was up against a shop wall with a window in it, and I mounted a
good sized box fan in the window, blowing out. This makes a
negative pressure booth, the only kind that makes sense for
an indoor booth since I don't want the paint fumes in the house.
Plus, this arrangement meant that the air coming into the booth
would be pre-conditioned and pre-filtered by the house HVAC
system. I fashioned a door for the booth out of more PVC tubing,
and filled in the door with furnace filters for extra filtration.
The fan worked so well that when I first turned it on, the
plastic walls bowed in about a foot, making the booth considerably
smaller. Plus, there was quite a breeze coming through the
filters. A speed control on the fan took care of that. I
ran an air hose to the booth and down to a pressure regulator/water
trap mounted on the wall. It was hard to get a good pic of the
booth since all the stuff it displaced was crowded around it.
Lighting in the booth wasn't a problem. There were two
existing four tube fluorescent fixtures above it and the plastic film
gave a nice even light.
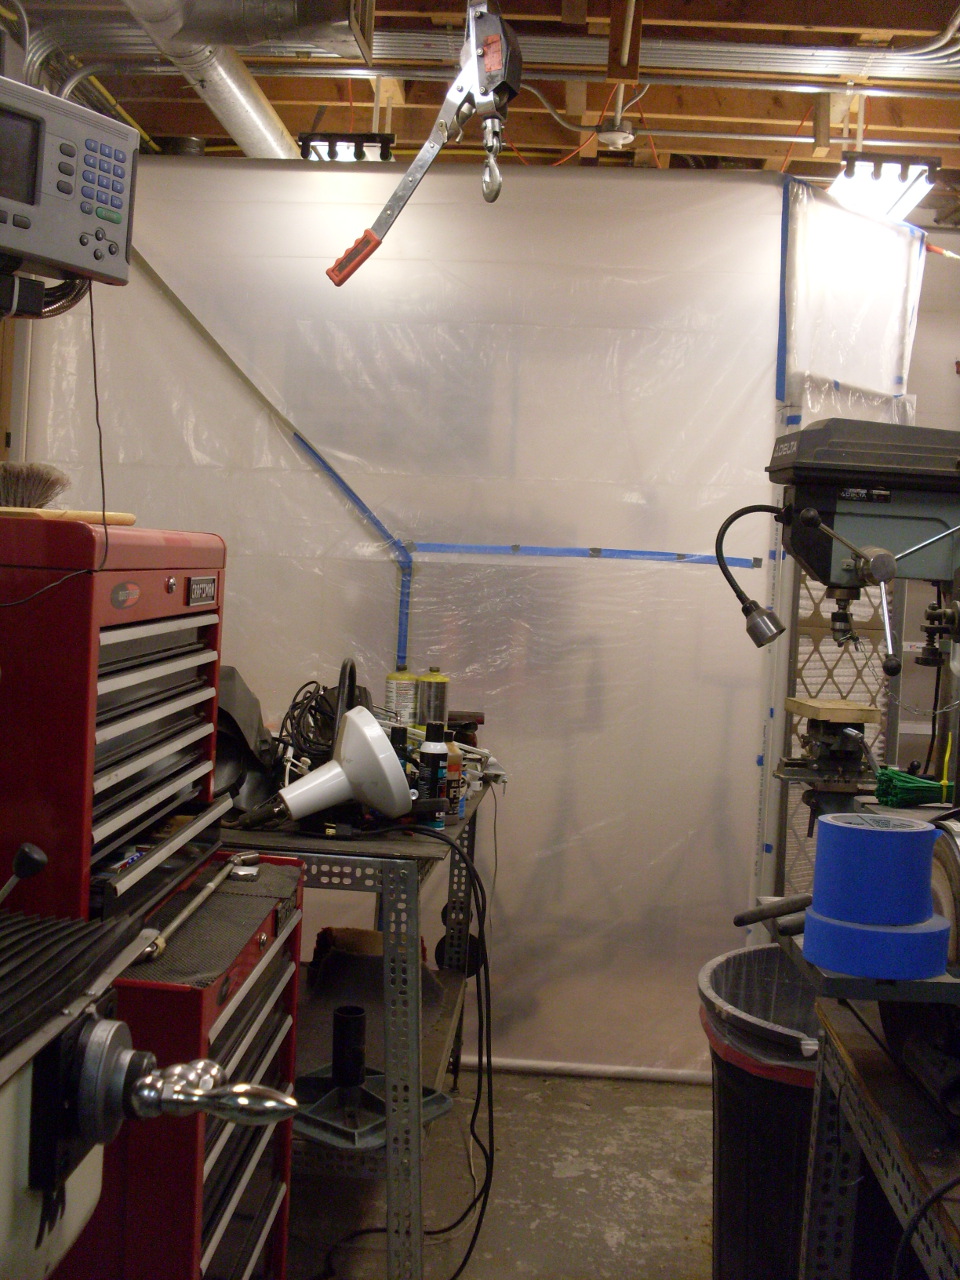
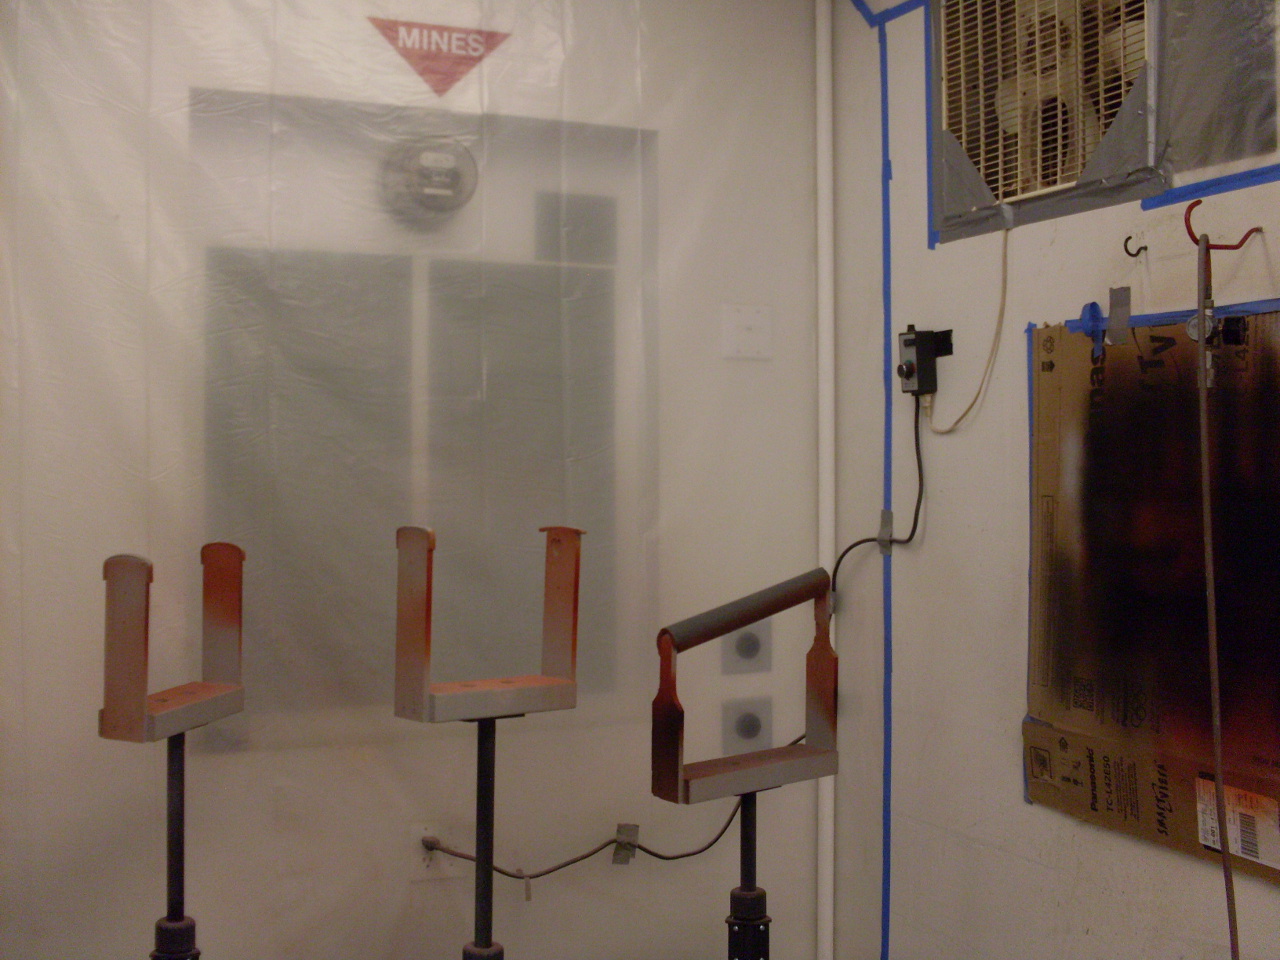
To hold up the tank and fenders, I
adapted three cheap Harbor Freight adjustable roller stands by
taking the rollers off, adding plywood cradles made for each item, and
putting the stands on wheels. The booth was pretty roomy for any
one piece, but with all three, it was nice to be able to easily move
them around. The second pic was actually taken after the painting was done.
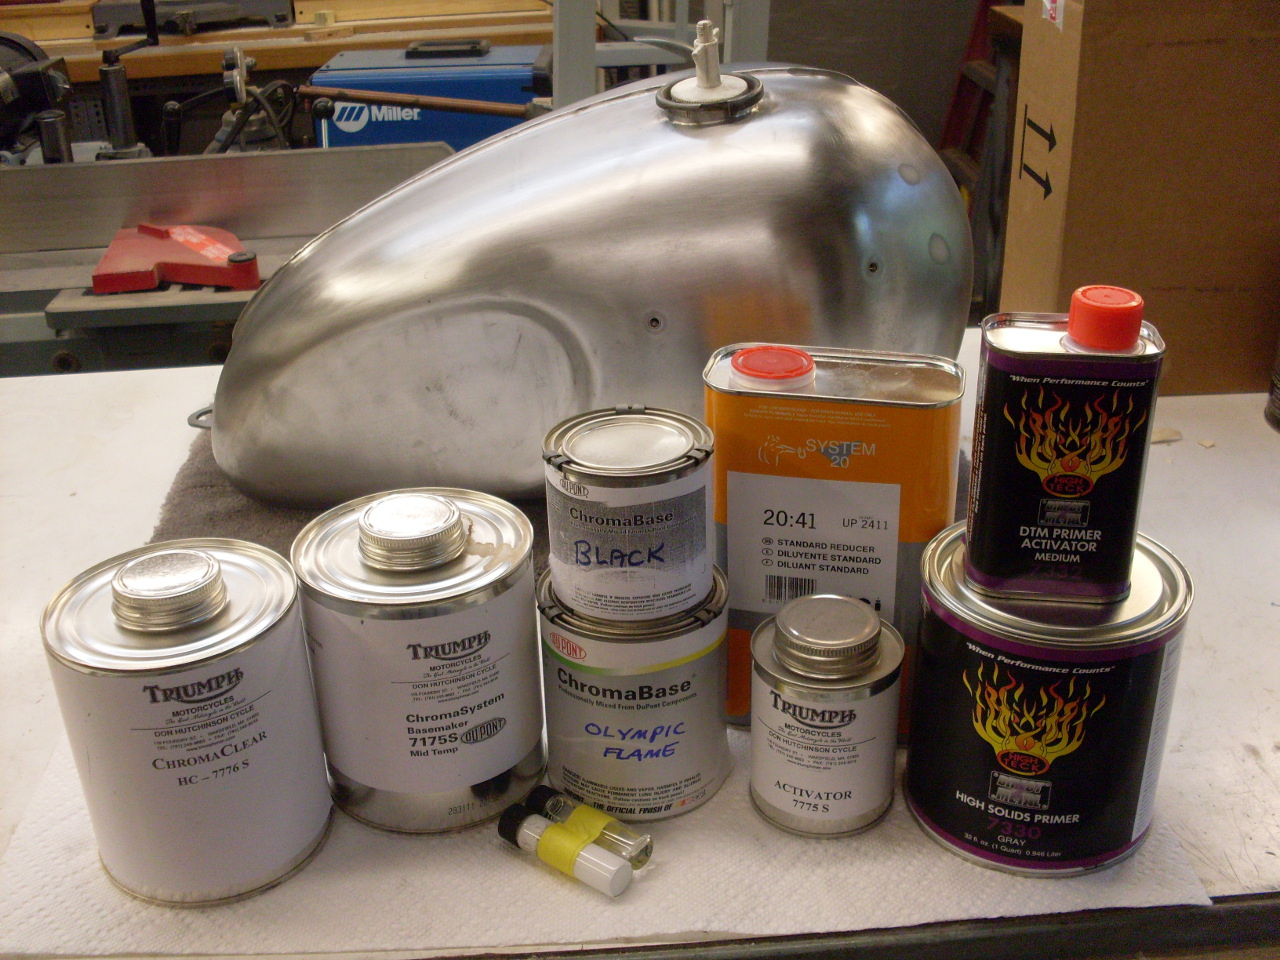
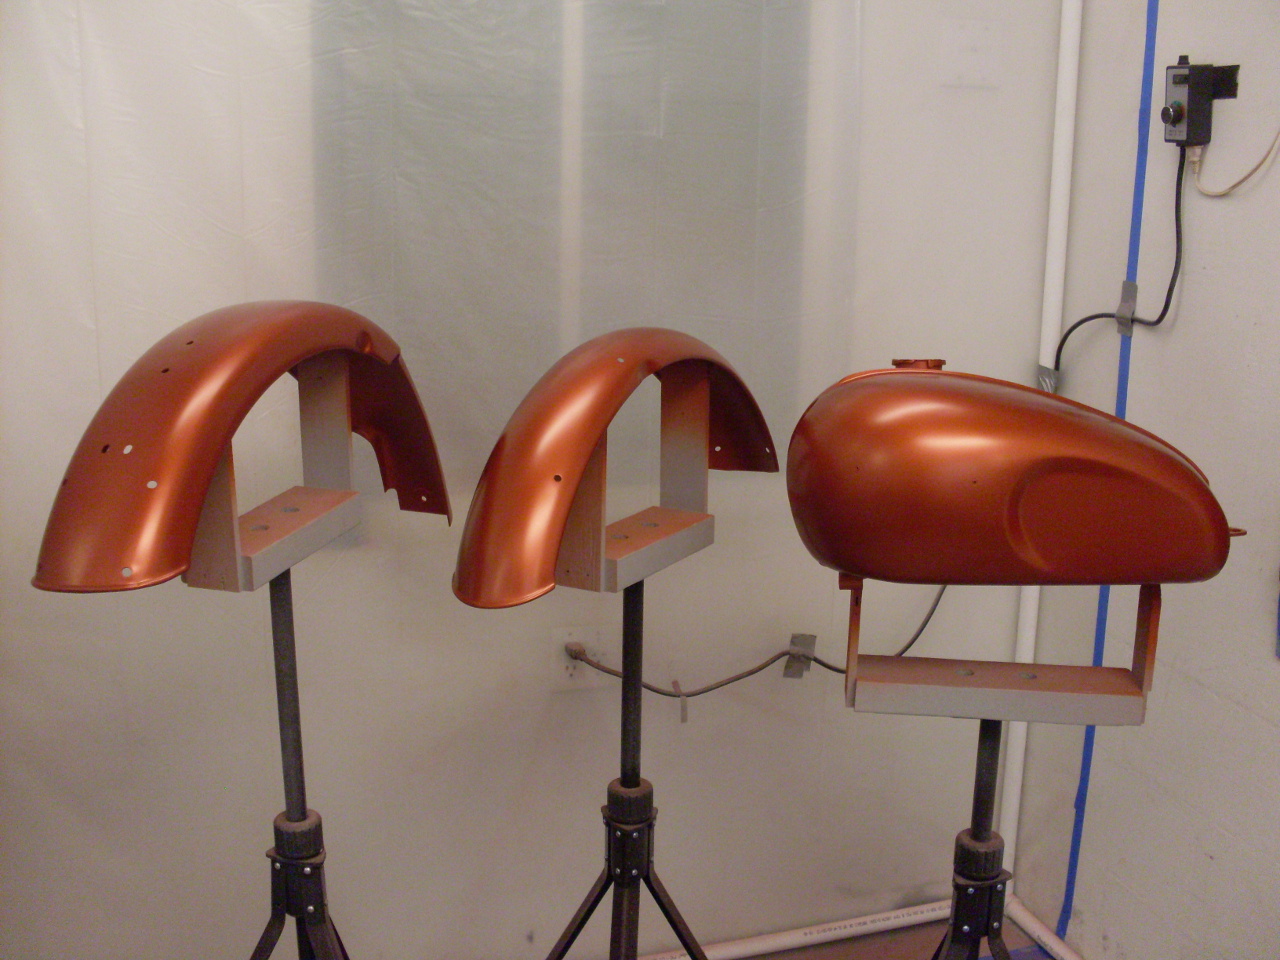
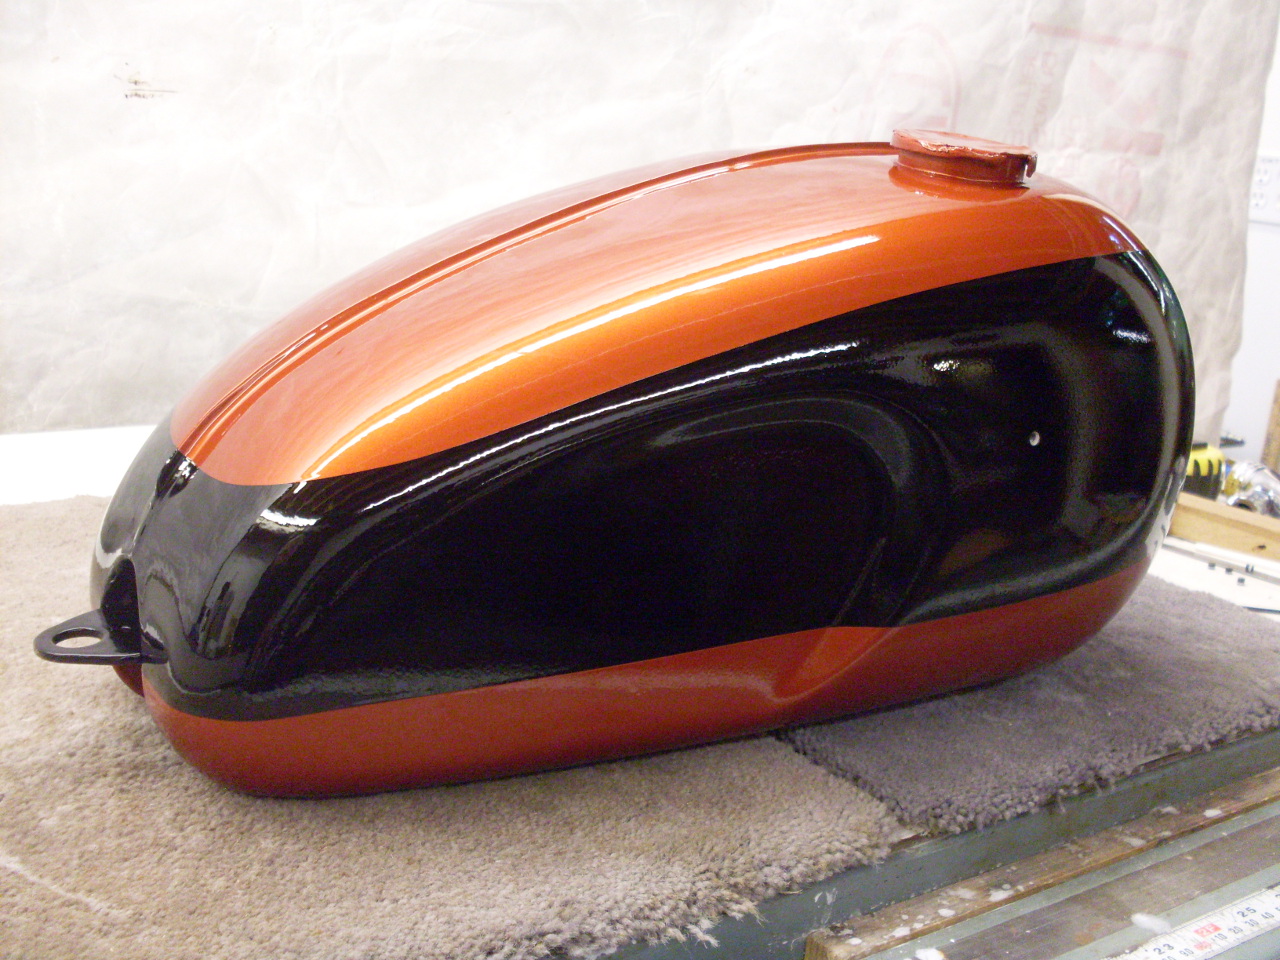
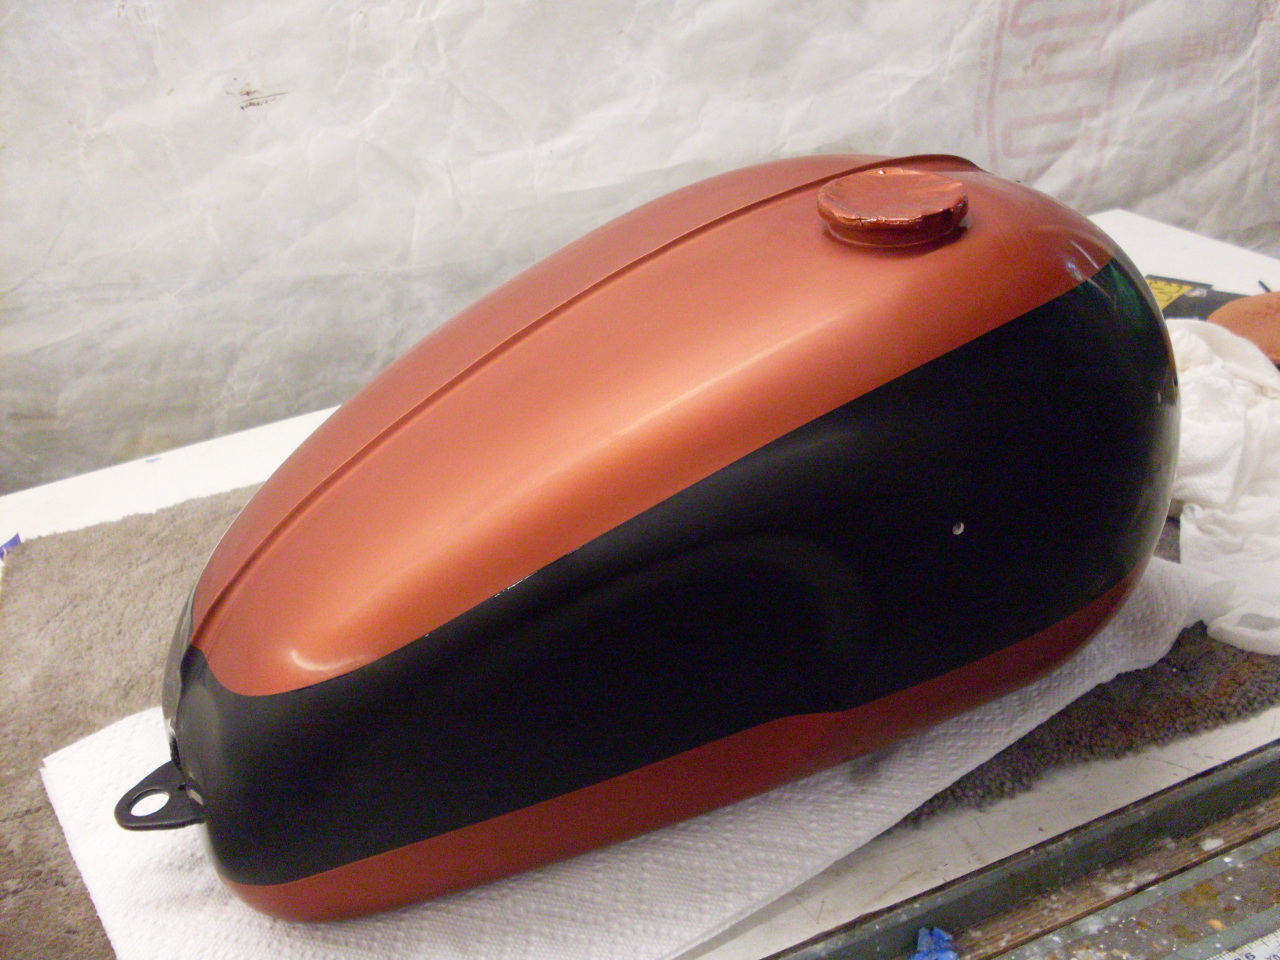
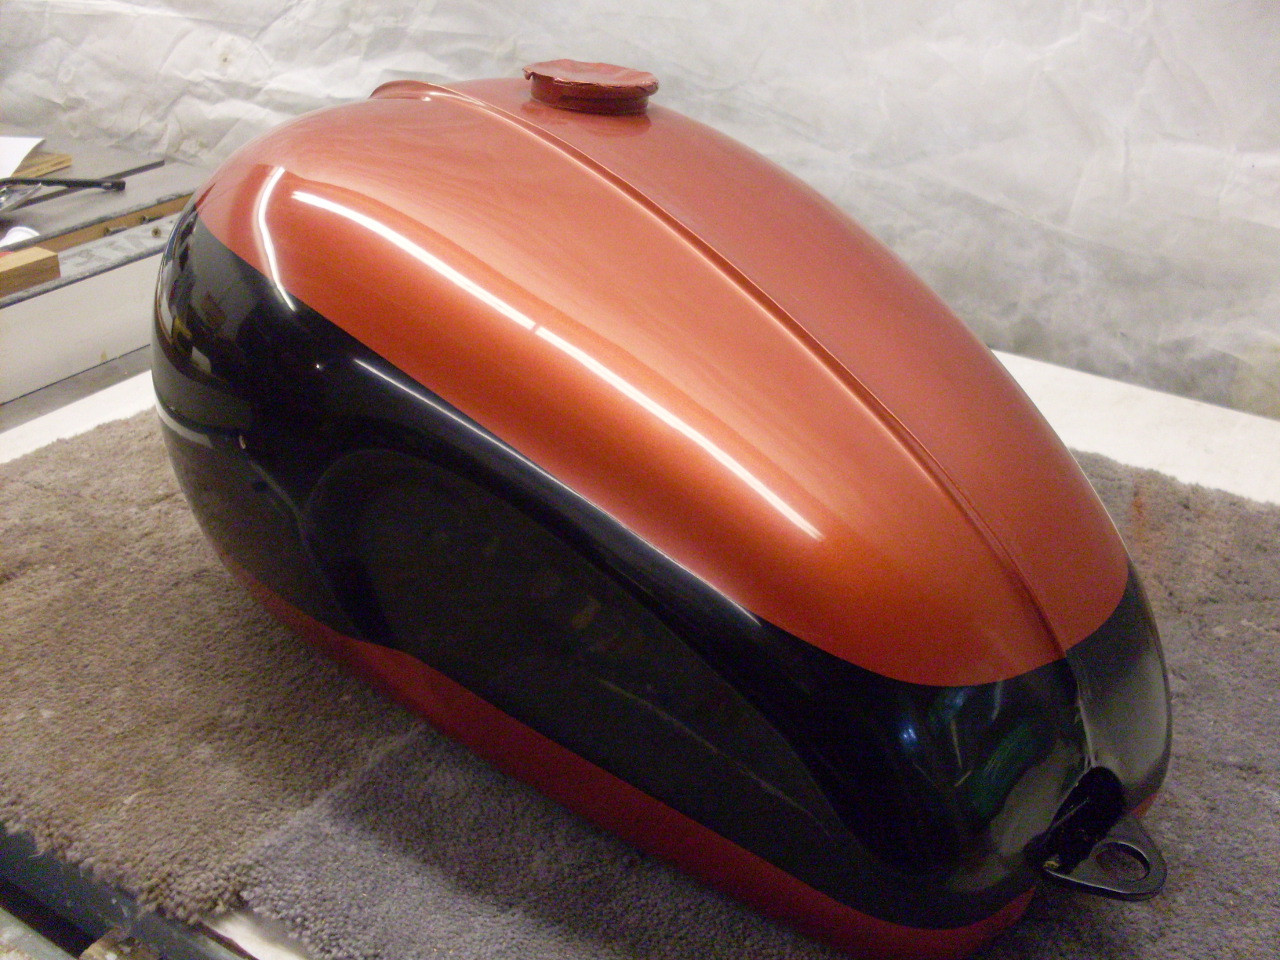
I
had decided to go back to the original colors on the bike, which were
"Olympic Flame" and black with a white pin stripe. Olympic Flame
is a reddish orange metallic. Original Triumph paint codes are
apparently difficult or impossible to get, but there are a couple of
places that supply the paint. Don Hutchinson, a pretty well
known Triumph guy is one of them. I called Don, asked a few
questions, and he was pretty helpful. What Don sells is the
DuPont Chromabase system, and though I could have bought some of the
components locally, the datasheets are a little bewildering, so I ended
up having him send me everything I'd need, except for the primer.
First
up (after a final sanding and wipe down with a degreaser and a
phosphoric acid etch) was a two-part high-build urethane
primer/filler/surfacer. This was my first experience with
two-part paints. I mixed way too much, and of course once it's
activated you use it or lose it. I wasted about half of what I
mixed.
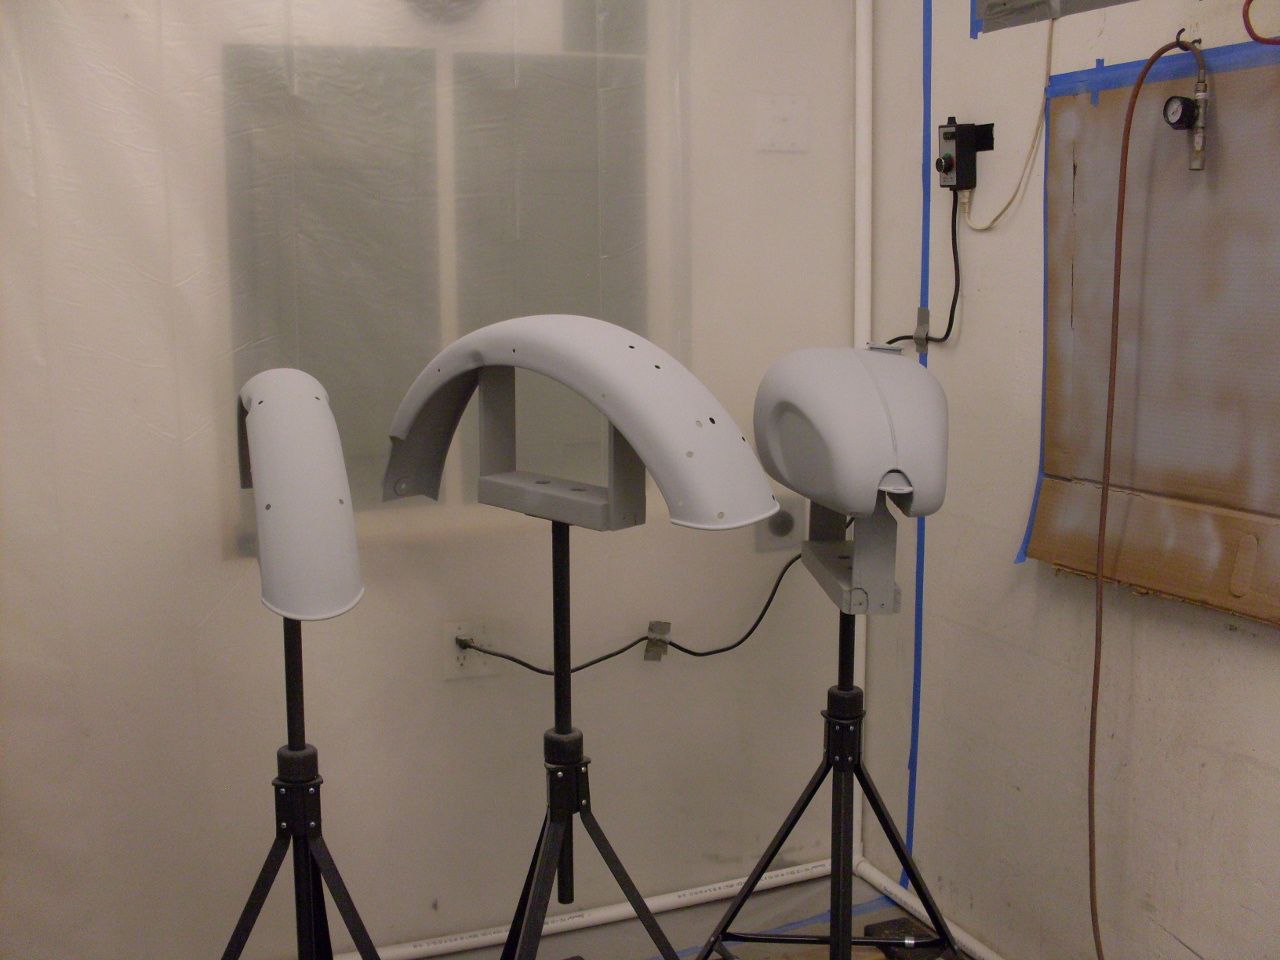
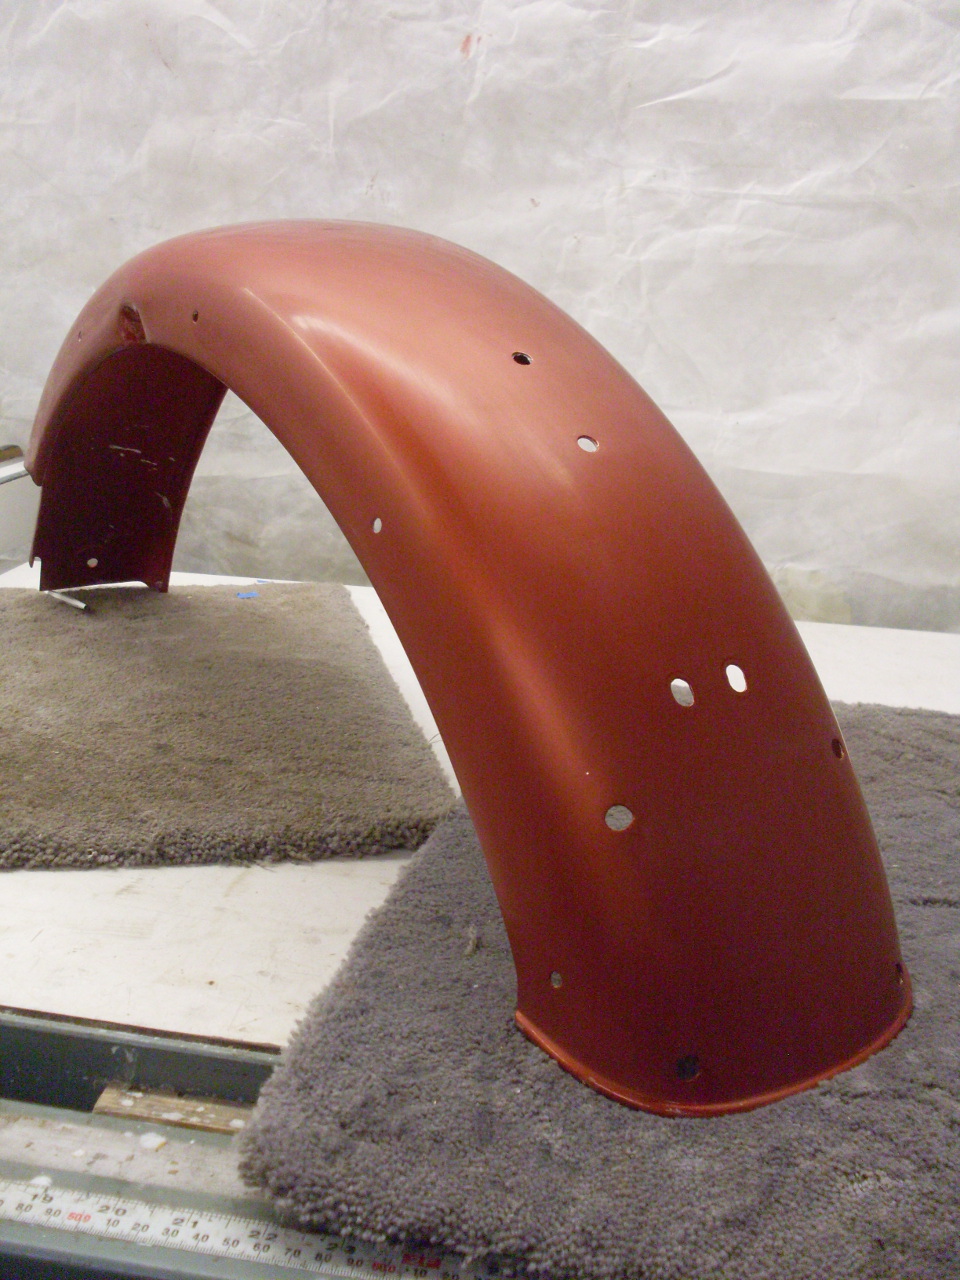
The primer gets sanded with 400 wet.
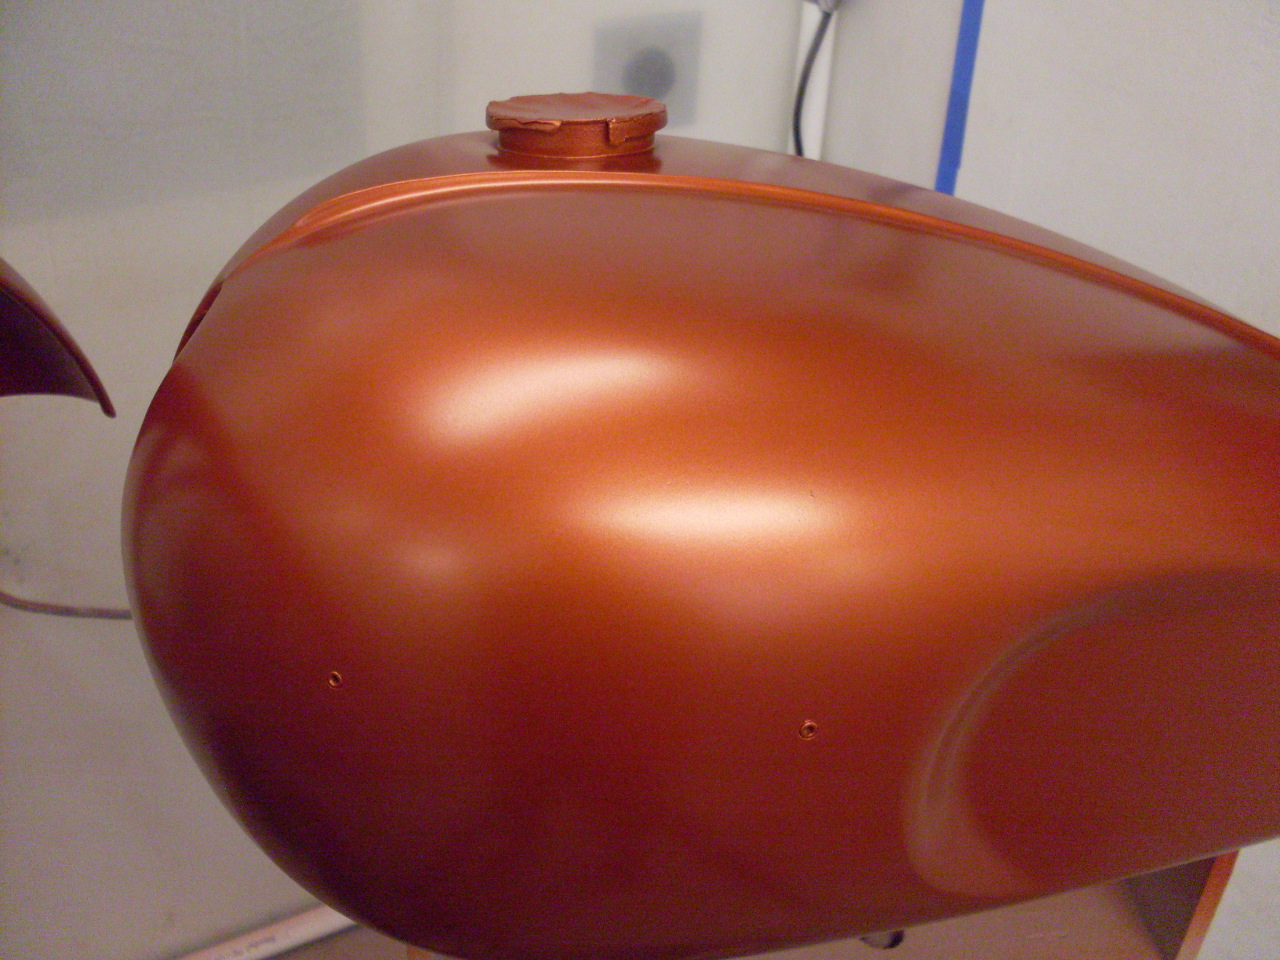
Then
the base (color) coat. It is also a two part paint (three, if you
count the reducer). The pieces got three coats about 10 minutes
apart. The paint is dry enough to handle in 30 minutes. The
base coats of two stage systems (at least this one) dry with a matte
finish.
I wasn't too concerned about painting the underside
of the pieces. The undersides were primed in a separate step, and
will get a different coating--probably something like a truck bed
coating or undercoat.
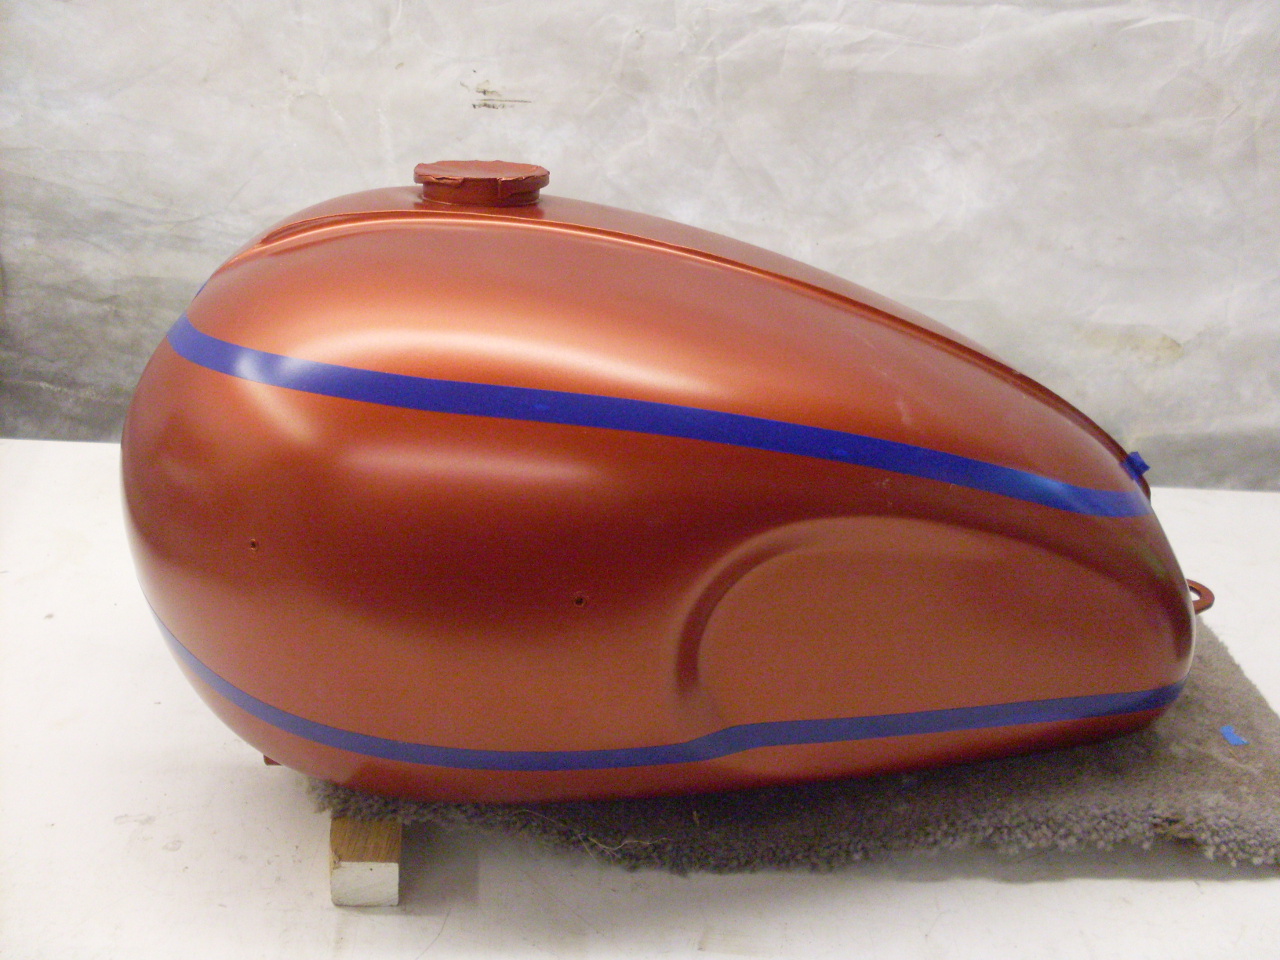
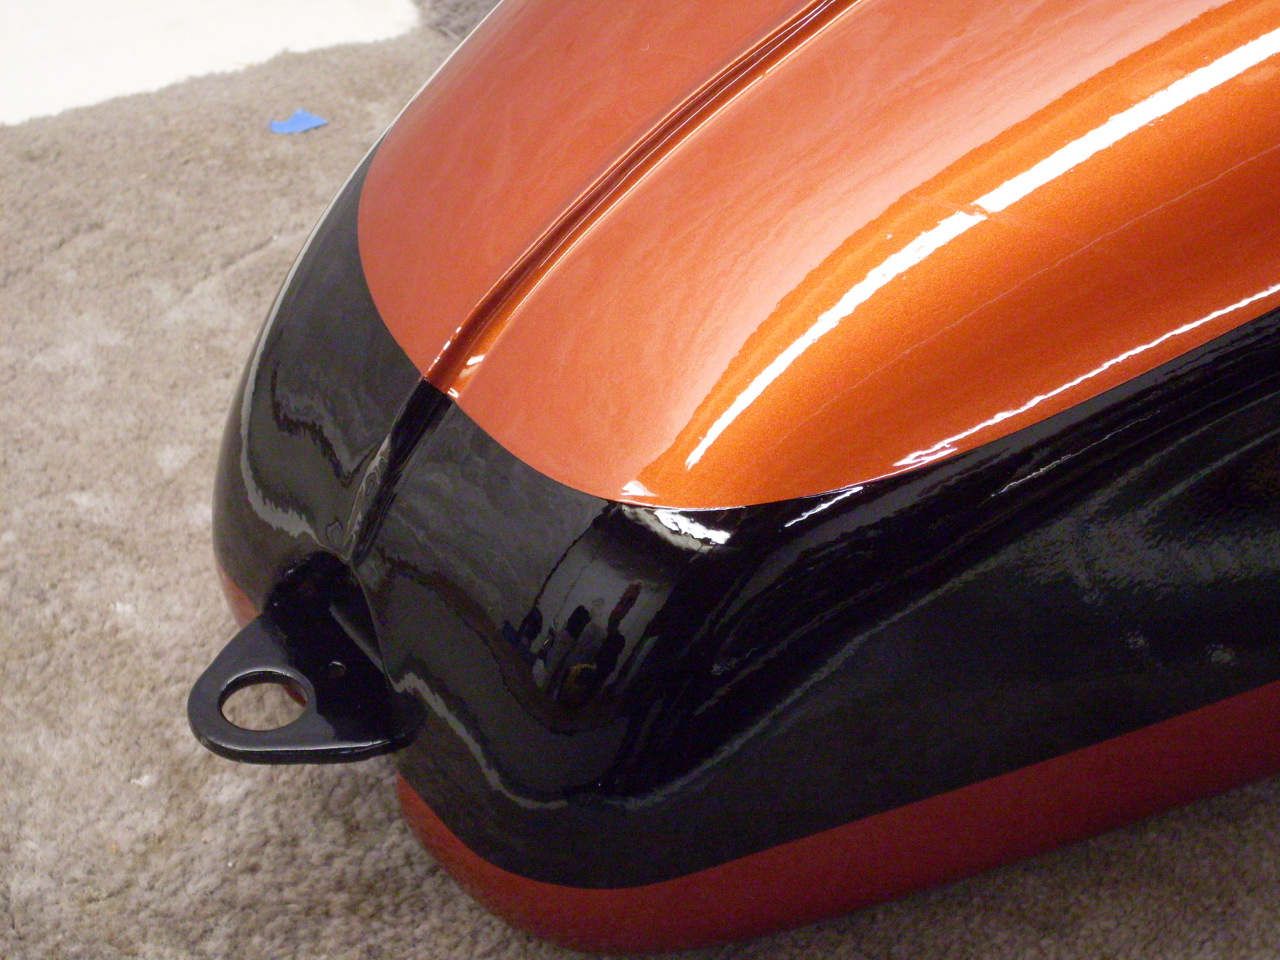
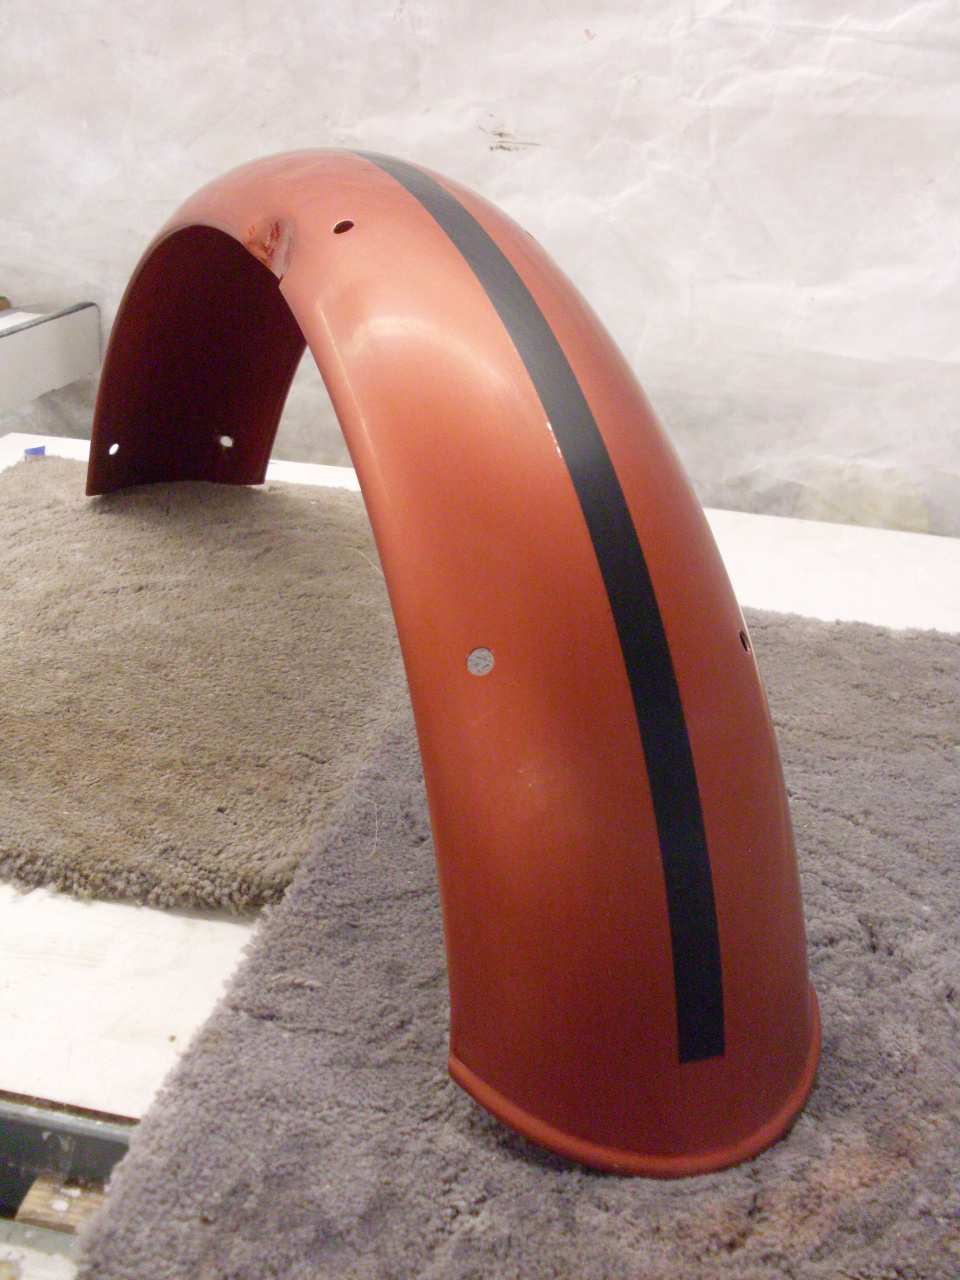
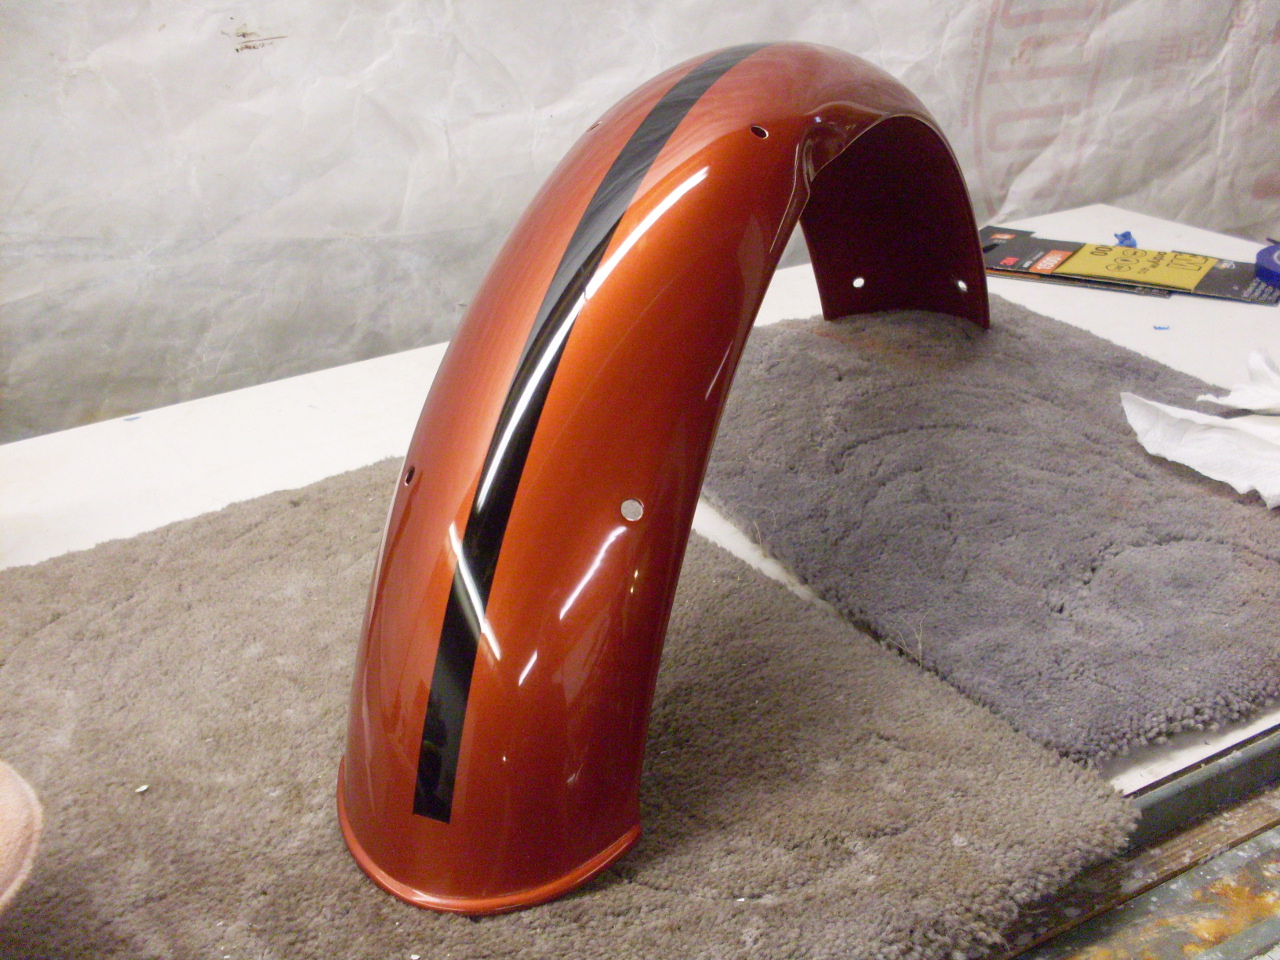
Here
is where one of my main concerns was. I had to mask for the black
paint, but only had a few small pictures to go by.
Let
me digress here for a minute. When I searched the Internet for 71
Triumph Daytona pictures so I could copy the paint scheme, everything
that turned up had the correct colors, but the pattern was way
different than I remembered it. More diligent searching
eventually did produce a couple of pictures with the pattern I
remembered. The only way I can explain this is that bikes sold in
the UK (like this one) must have had the same colors, but a different pattern than
those sent to the US. And since the vast majority of these bikes
went to the US, pics of US bikes dominate the Google search results.
Anyway, I took what measurements I could from the small pics of
UK bikes
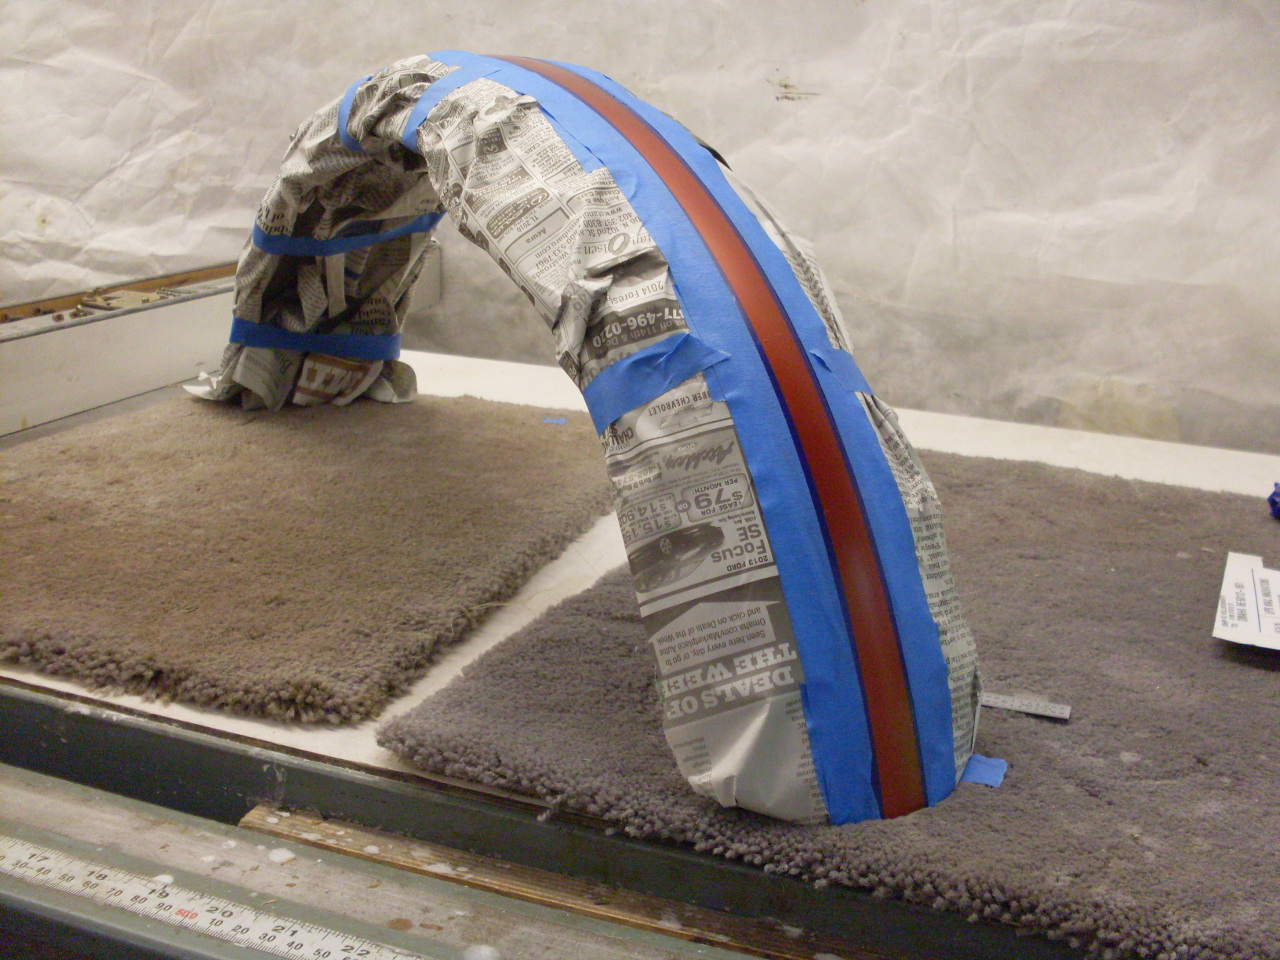
Using a special vinyl tape made for automotive paint
masking, I laid out the curves. It is tricky to get the curves
smooth and to get both sides symmetrical. The little blue tape
tags are guides I put on from my measurements. It took multiple
tries to get this right, and it was a little nervewracking since the
clearcoat has to be applied within a certain time.

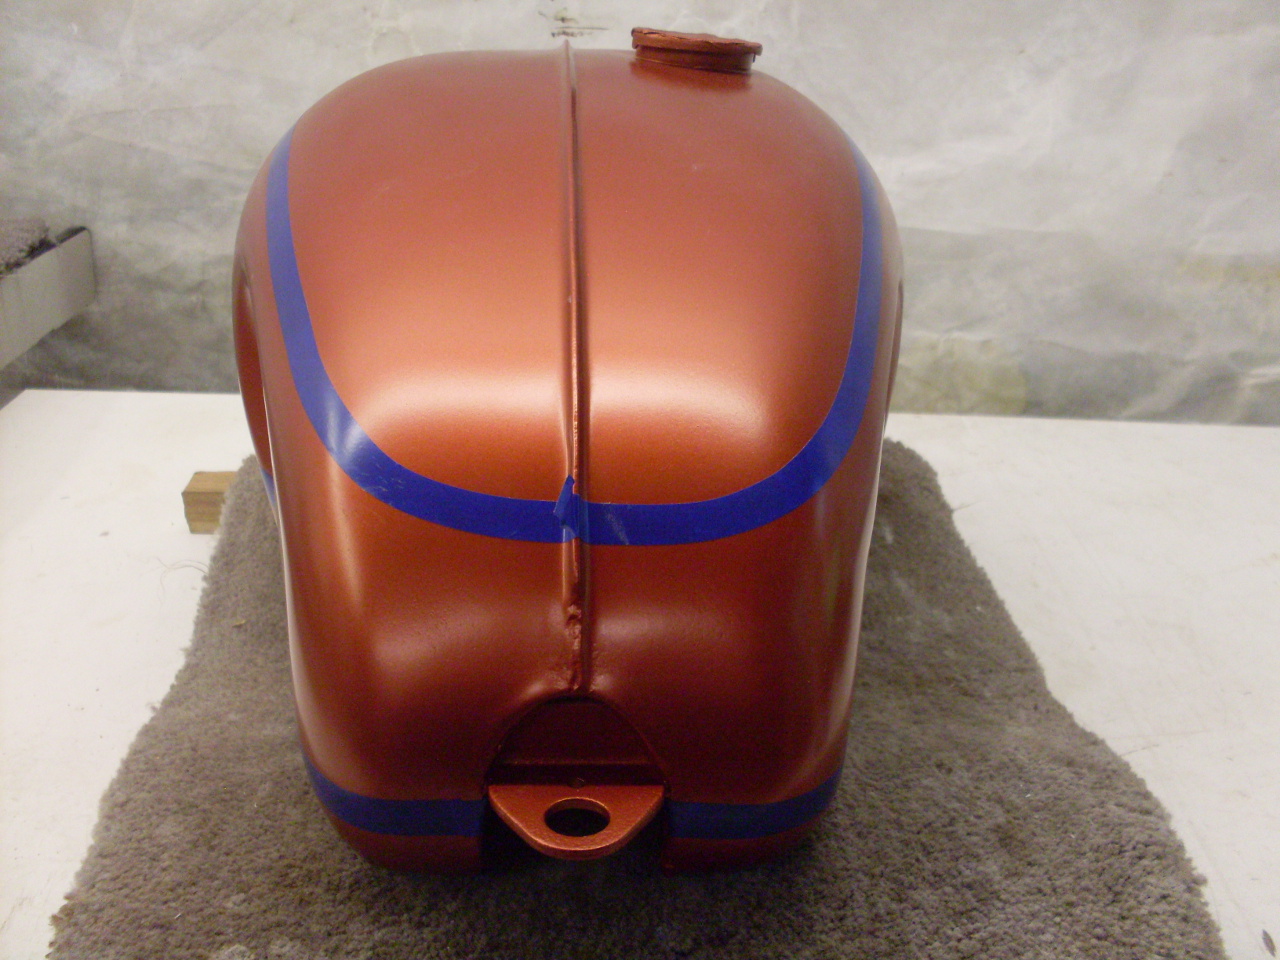
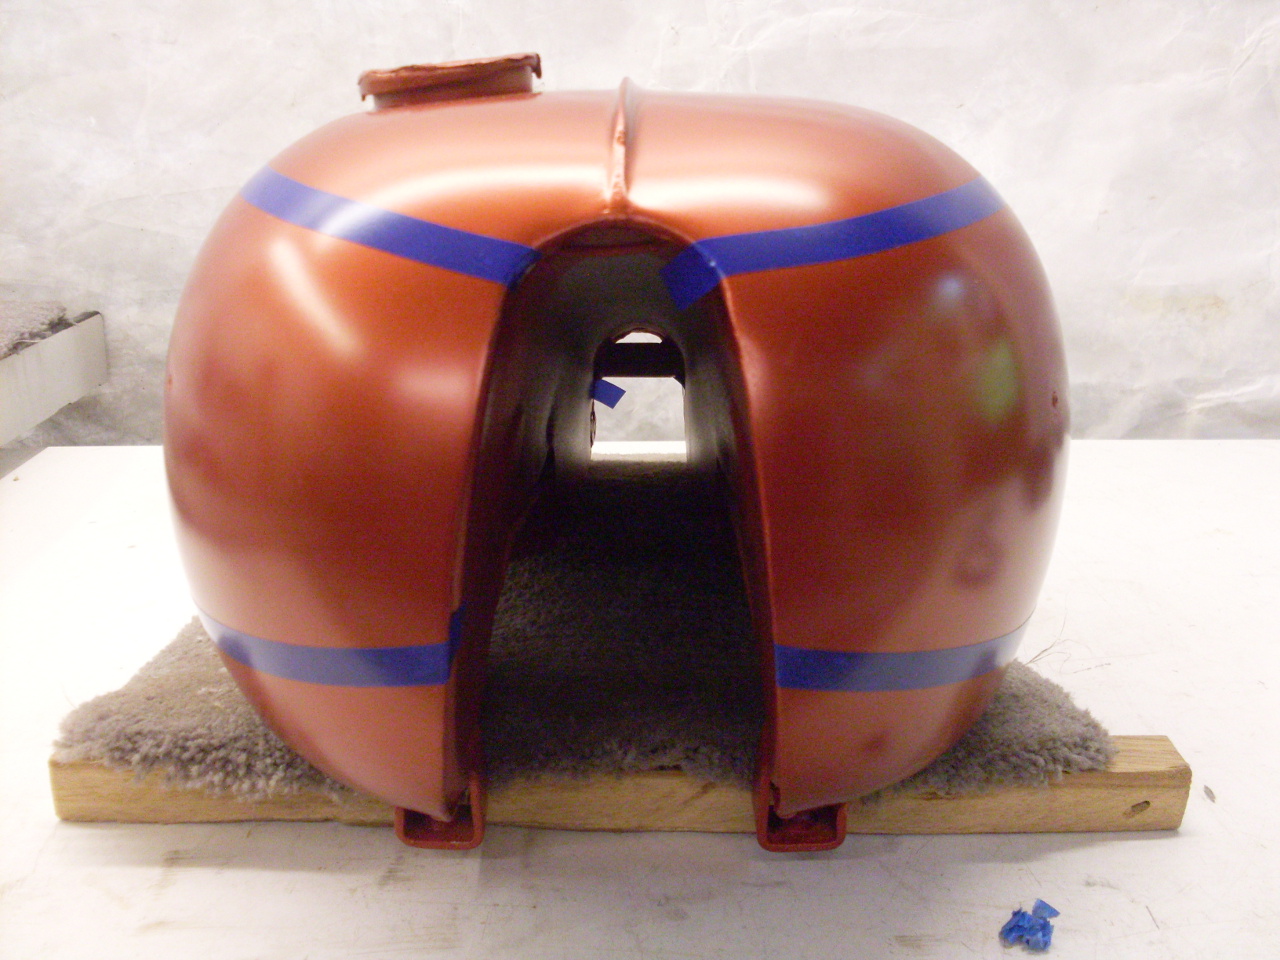
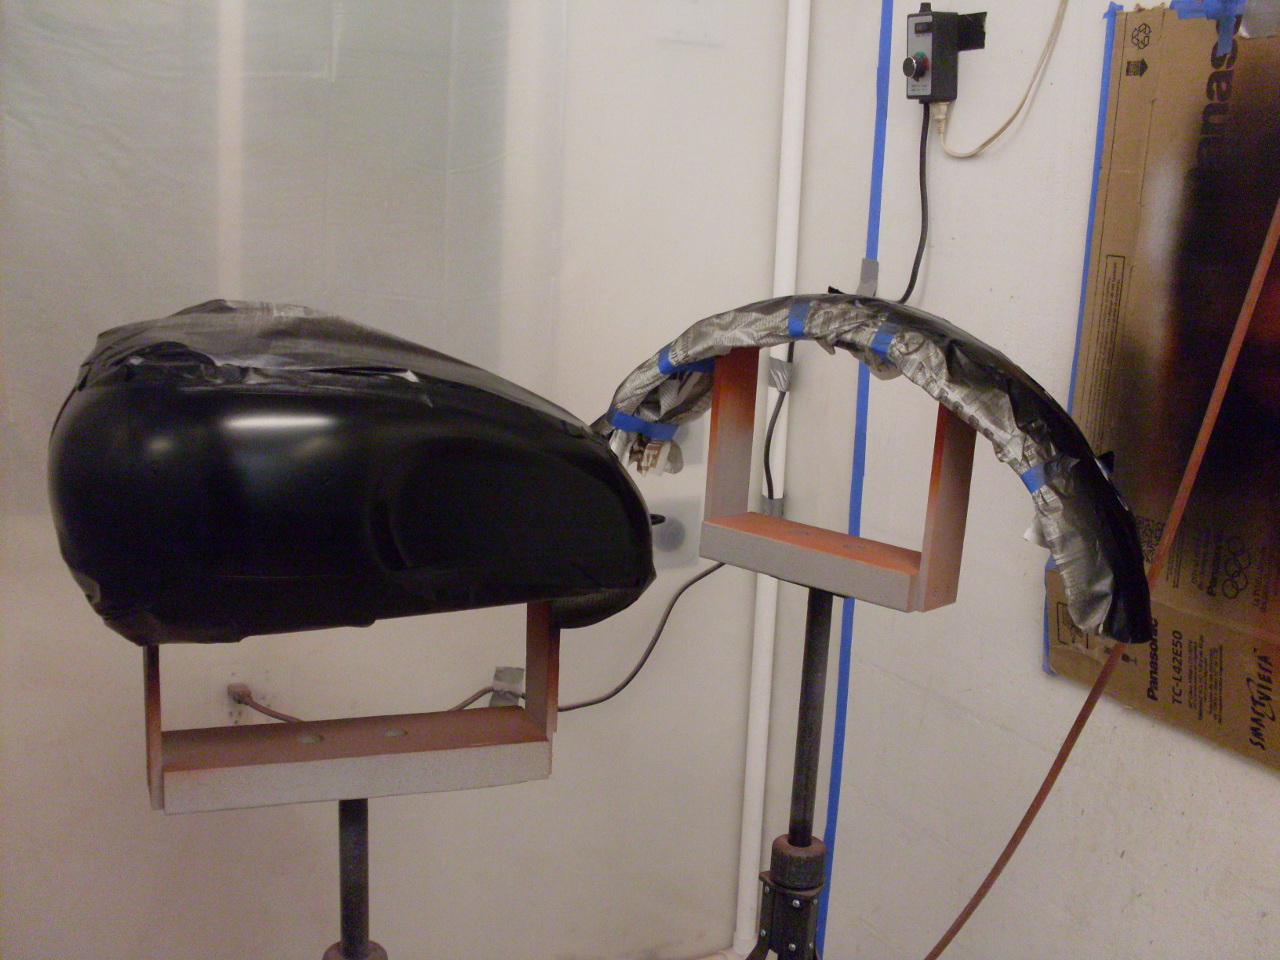
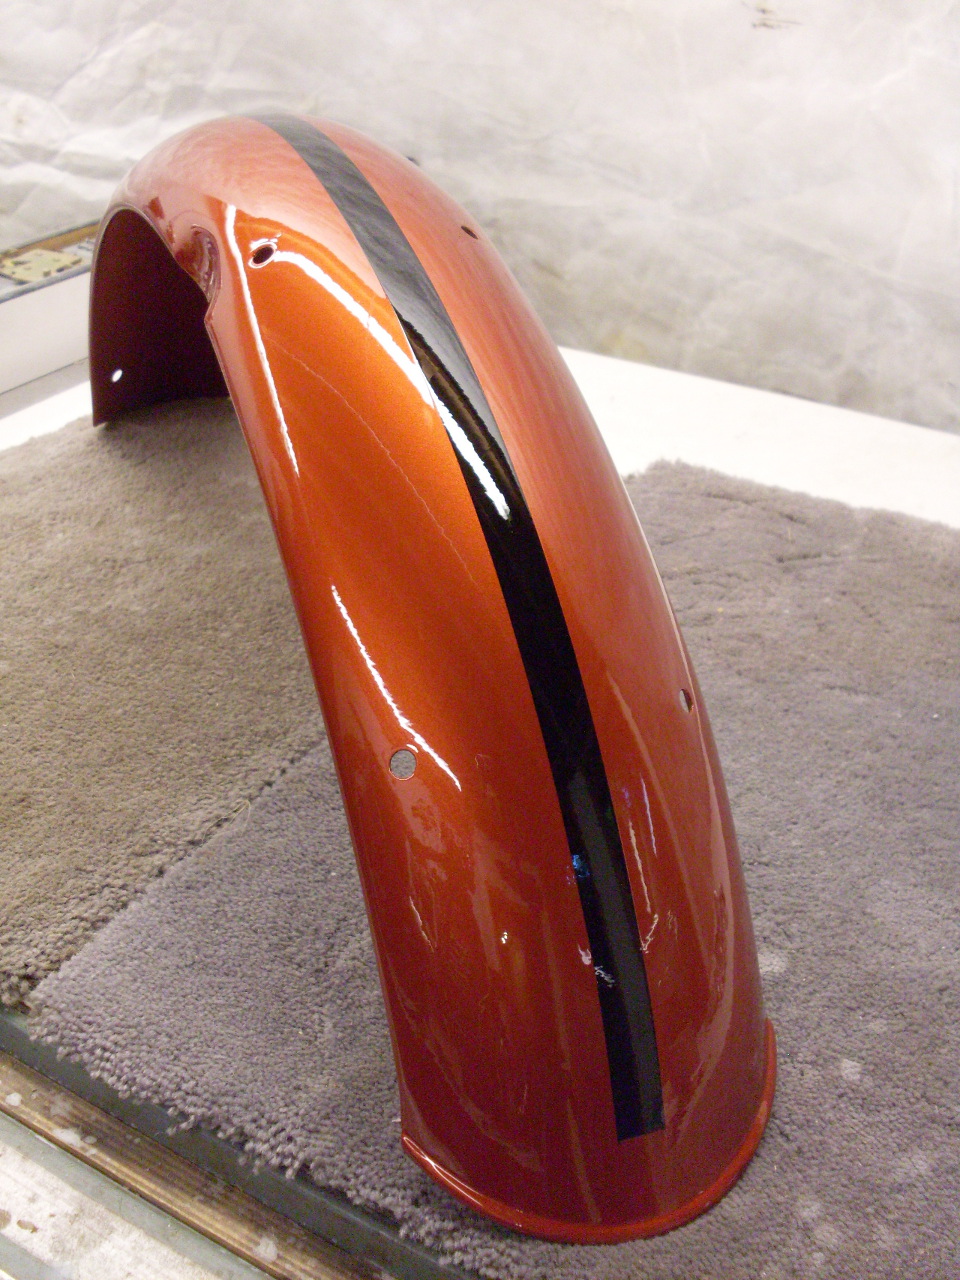
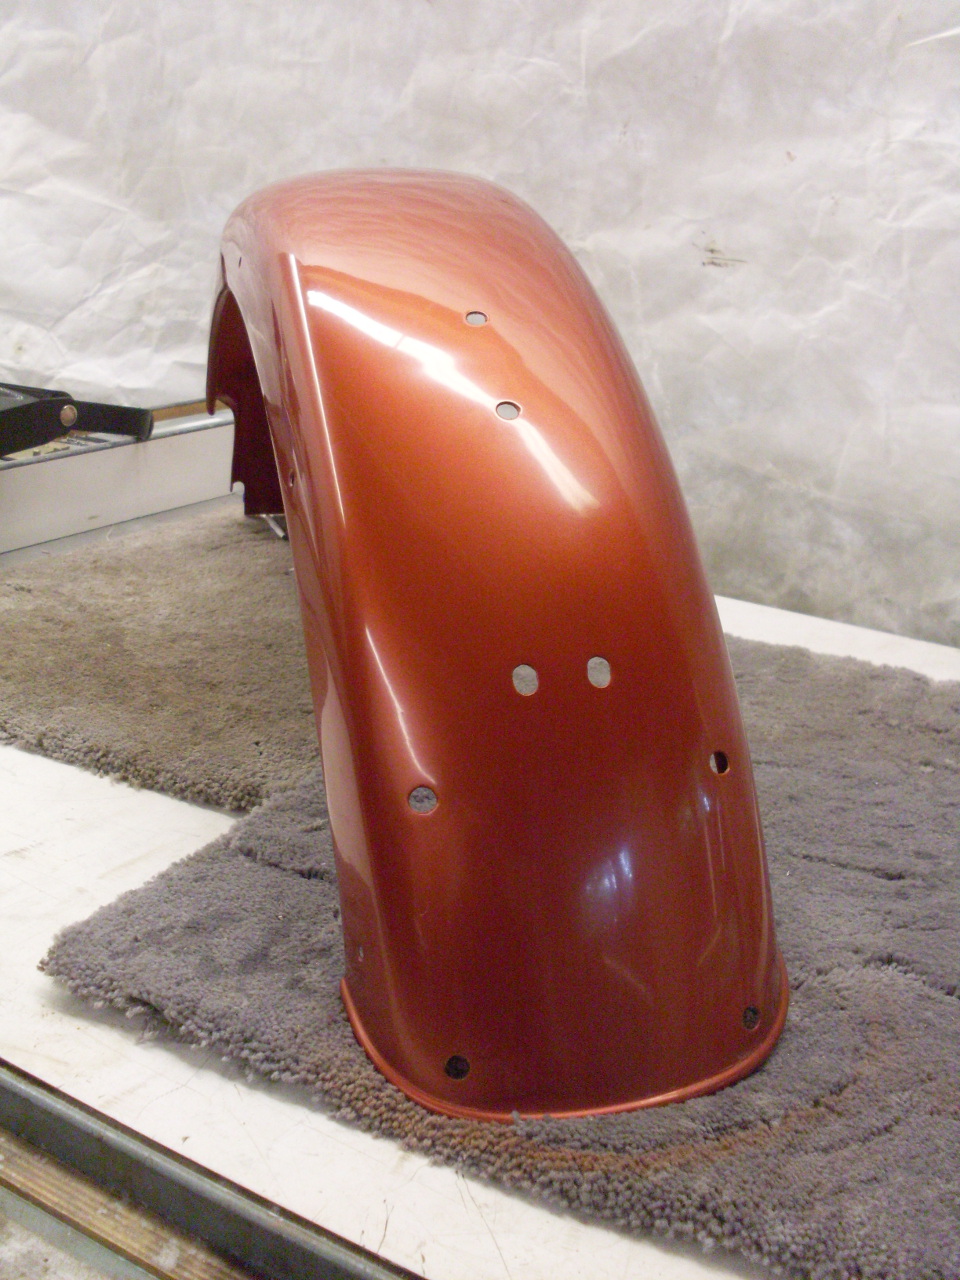
The
front fender was easier, but it isn't trivial to get the stripe located
inthe exact center of a piece of metal that curves in two
dimensions. A cardboard template helped a lot.

Shot the black.
Stripped
off the masking. Those little light areas at the front of the
fender are where the masking tape lifted the paint. Luckily,
I hadn't thrown out the leftover red paint, and it was still (barely)
within its pot life, so I touched the spots up with a tiny artist's
brush. That was the only area where that happened.

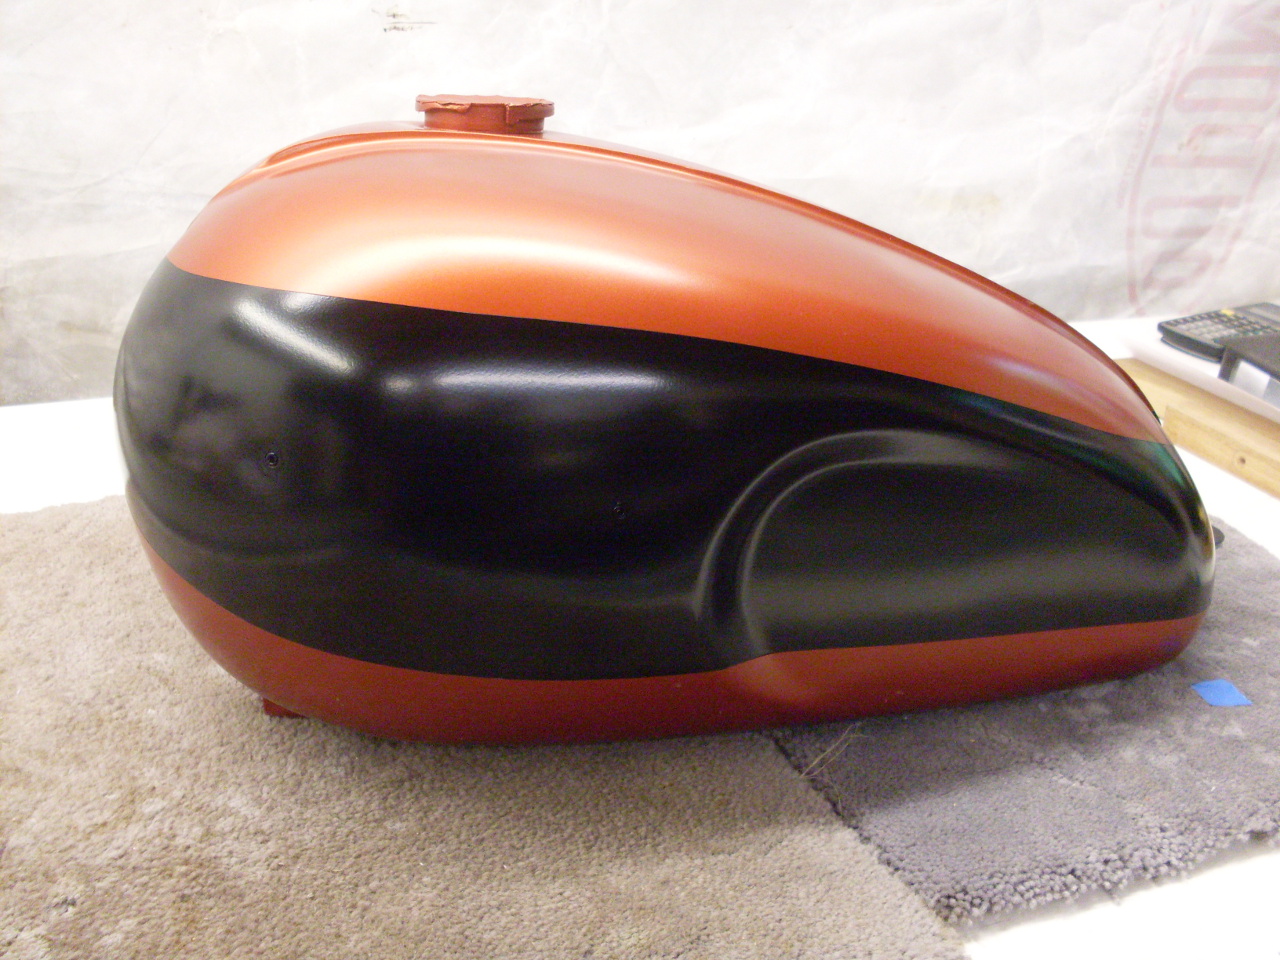
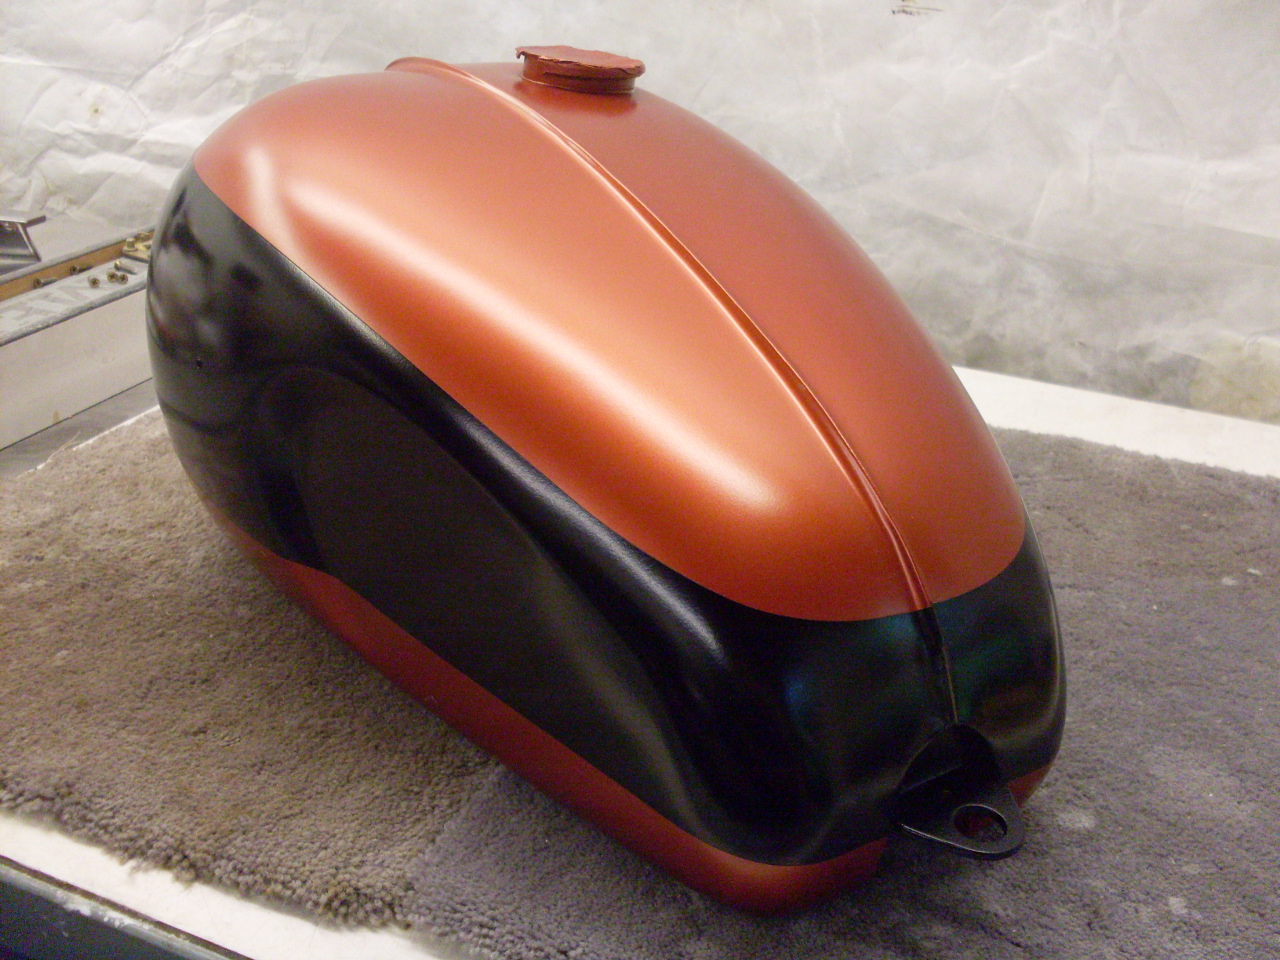
Then
shot the clearcoat. Two medium wet coats 5 minutes apart.
Some areas came out very smooth and glossy. Some others had
very noticable orange peel. This is probably where experience
counts, but since I had planned to rub out the clearcoat anyway, the
orange peel wasn't a big problem.
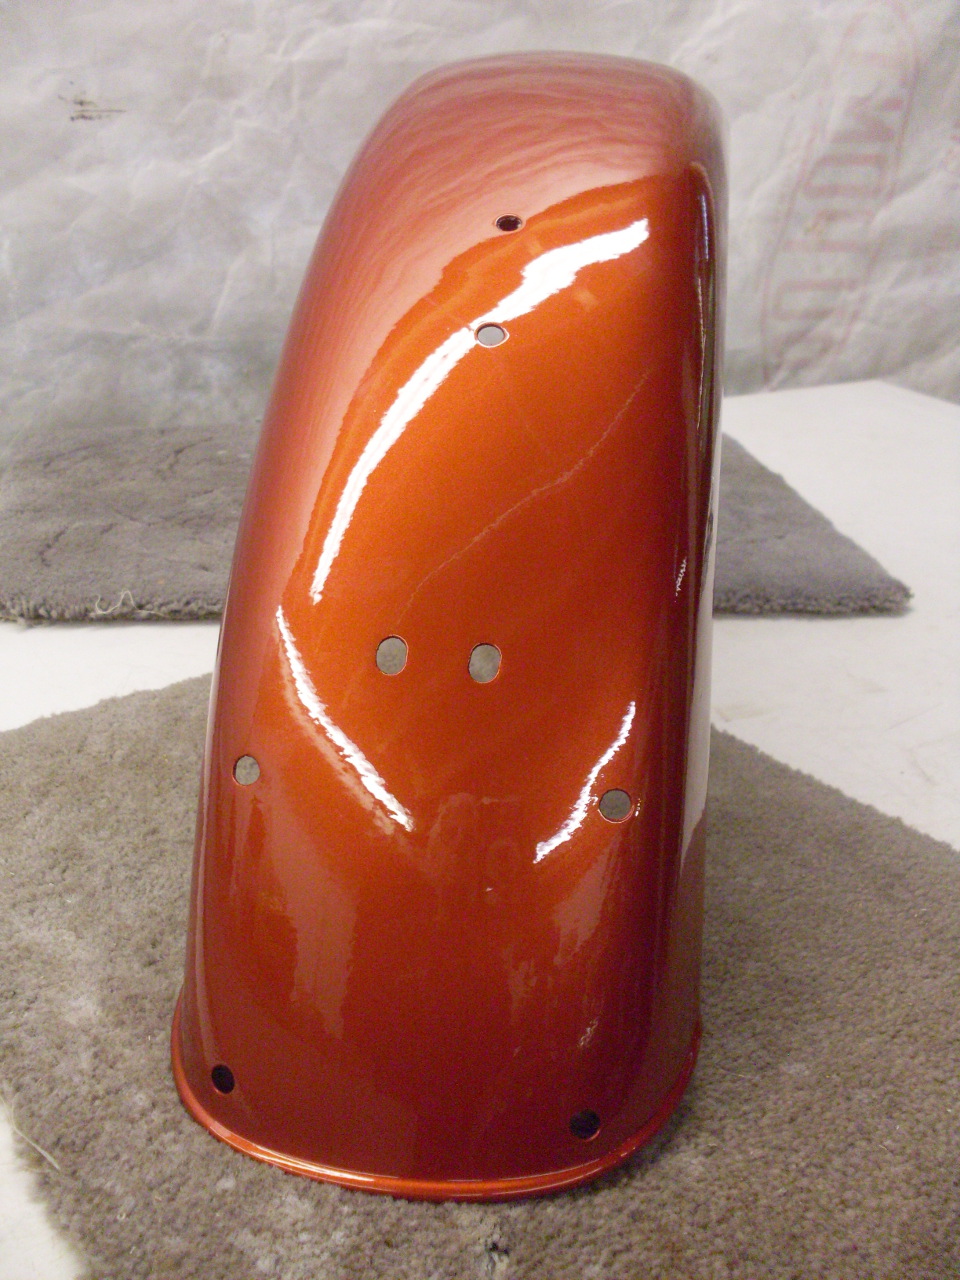
Wet sanded the pieces with 1500 grit.
Rubbed with compound:
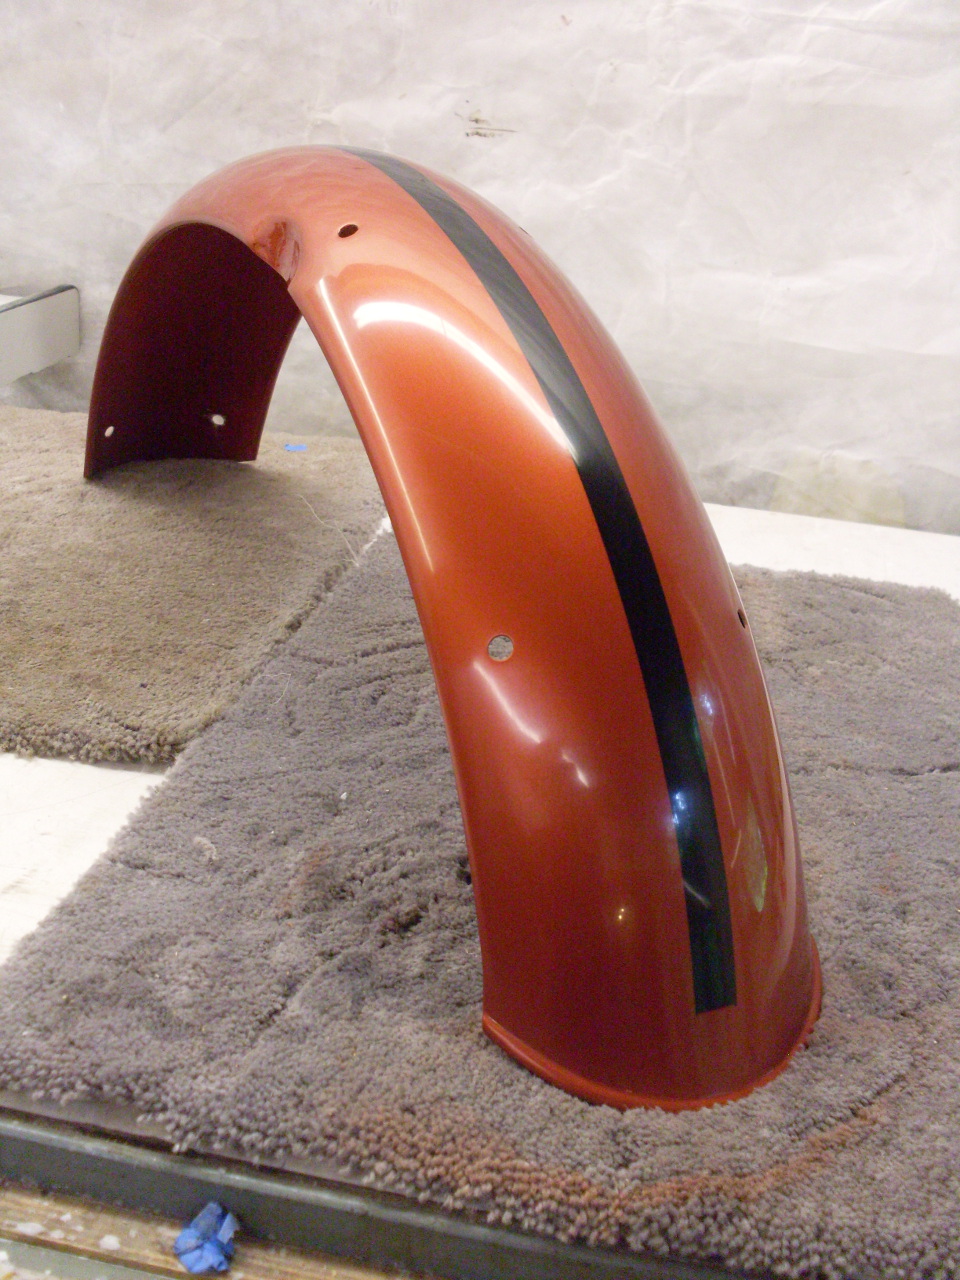
Initial polishing. The pieces will get another thorough polishing before installation.


Pinstriping is next. Still thinking through how to do that.
One
thing I now appreciate after coming this far is how labor intensive
this process is. I'm no longer mystified as to why it can cost
the better part of $1000 to have this done professionally. The
materials alone cost me around $300, and I probably have over 20 hours
in it.
Comments to elhollin1@yahoo.com
Back to other parts of the project.