To my other TR6 Pages
August 5, 2017
Heater Plinth and Controls
Nestled
between the dashboard and the center dash support on a TR6 is a padded
plinth that holds the heater controls and the choke control. The
plinth is composed of a metal base that supports a molded foam shape
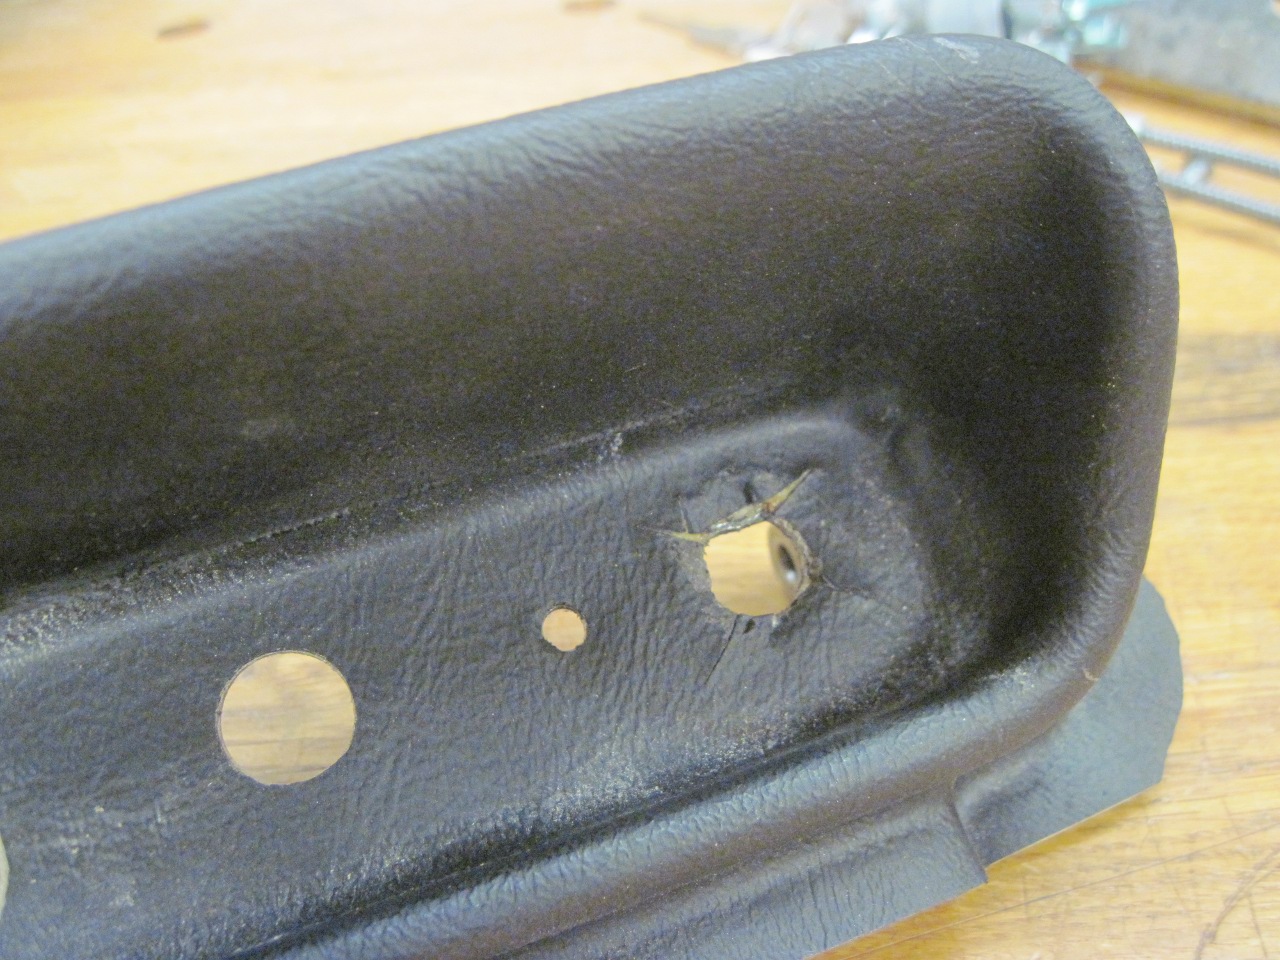
covered with textured black vinyl. My plinth was OK except for a
split in the vinyl above the choke control. This is a pretty
common place for vinyl damage since many people apparently brace their
thumb against the padding to pull out the choke.

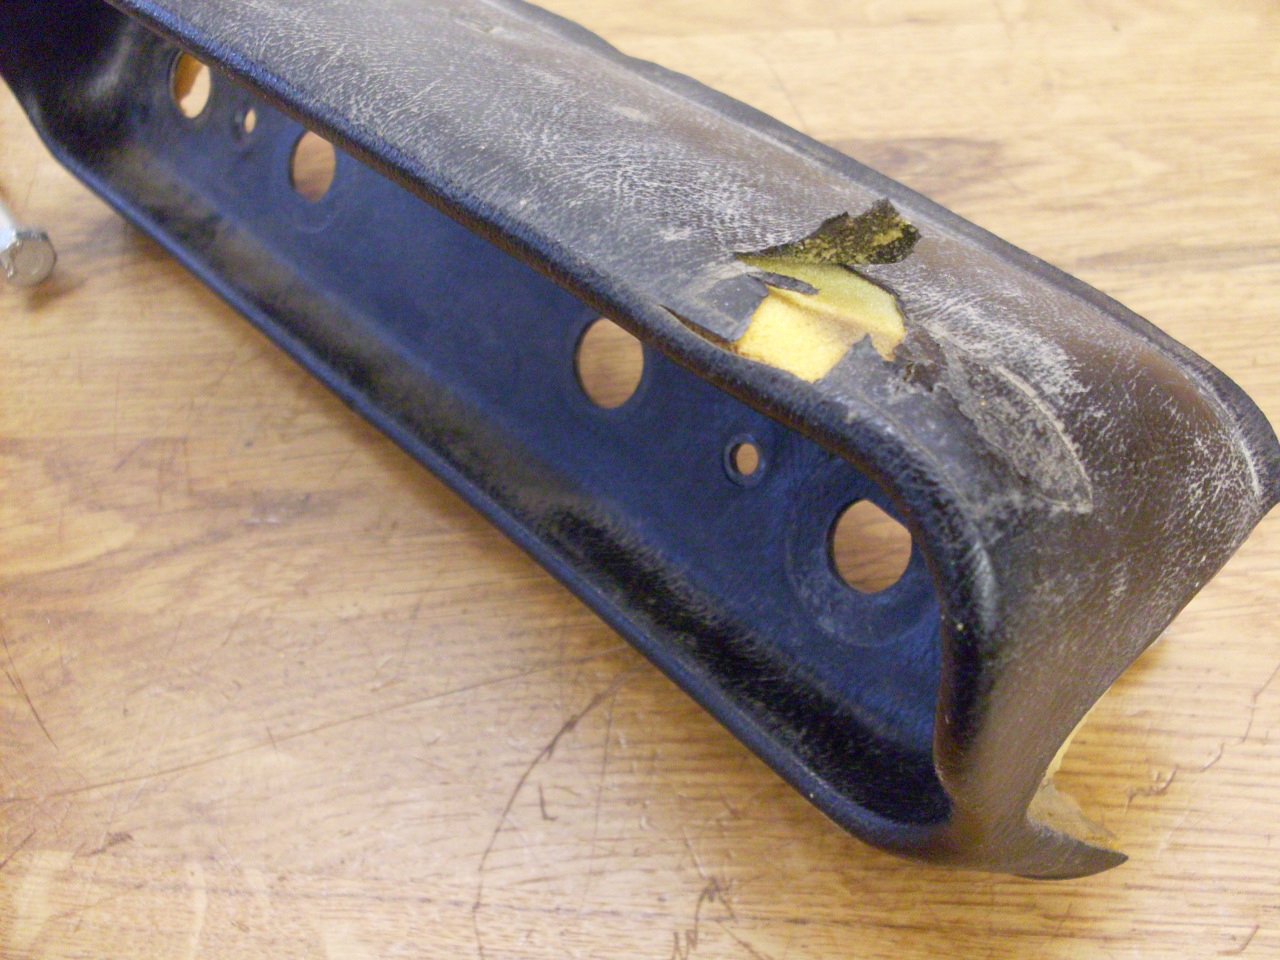
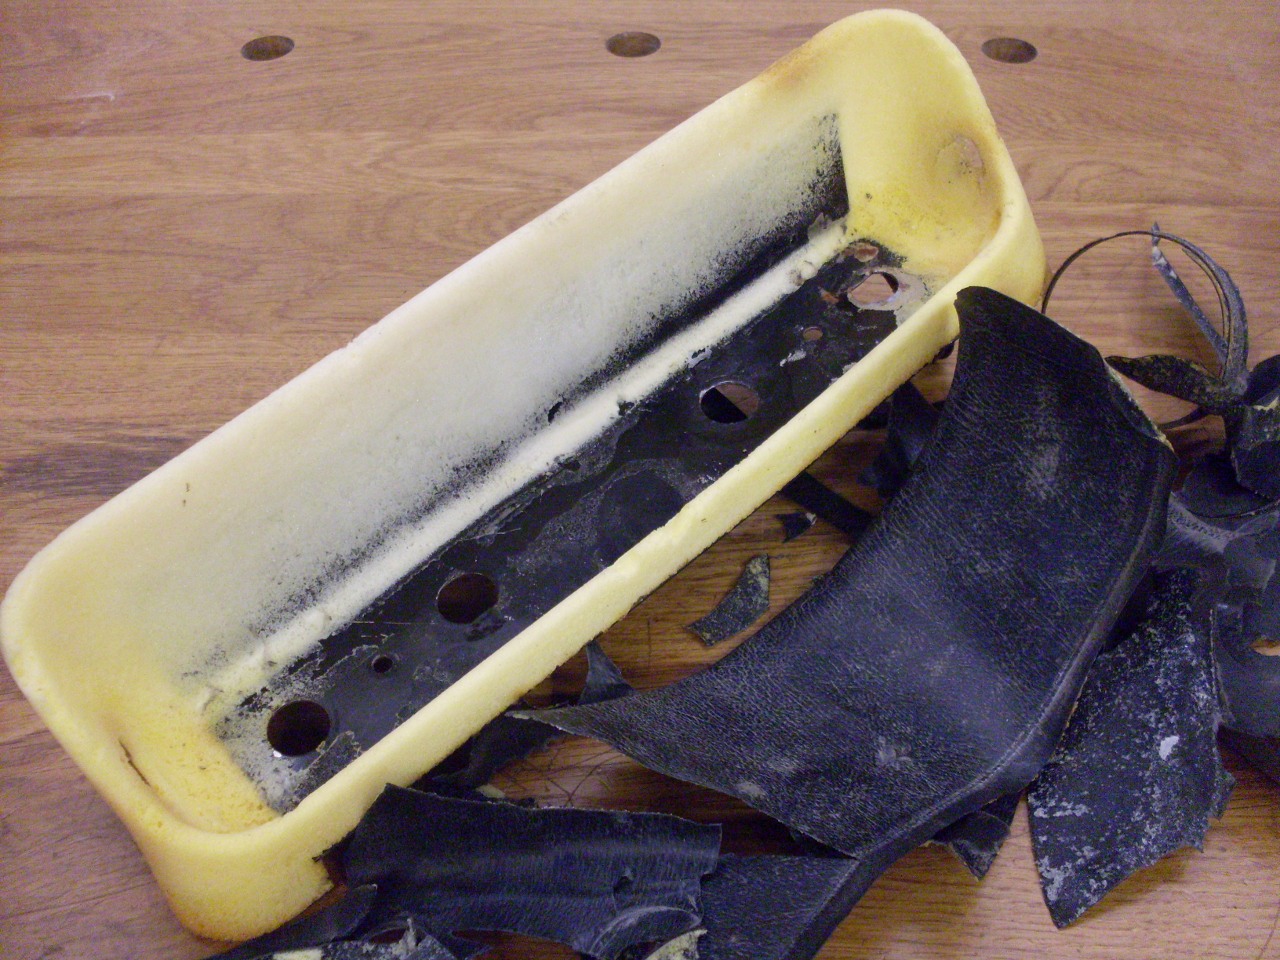
I
didn't see a good way to repair the vinyl, so I peeled it all off,
exposing the foam. The foam was in good shape except for a few
little voids where it decided to go with the vinyl.

Based
on the good underlying structure, I decided to try to recover the
plinth with new vinyl. I gave it a valiant attempt, too. I
first filled the few voids and other minor inperfections with a pliable
filler.

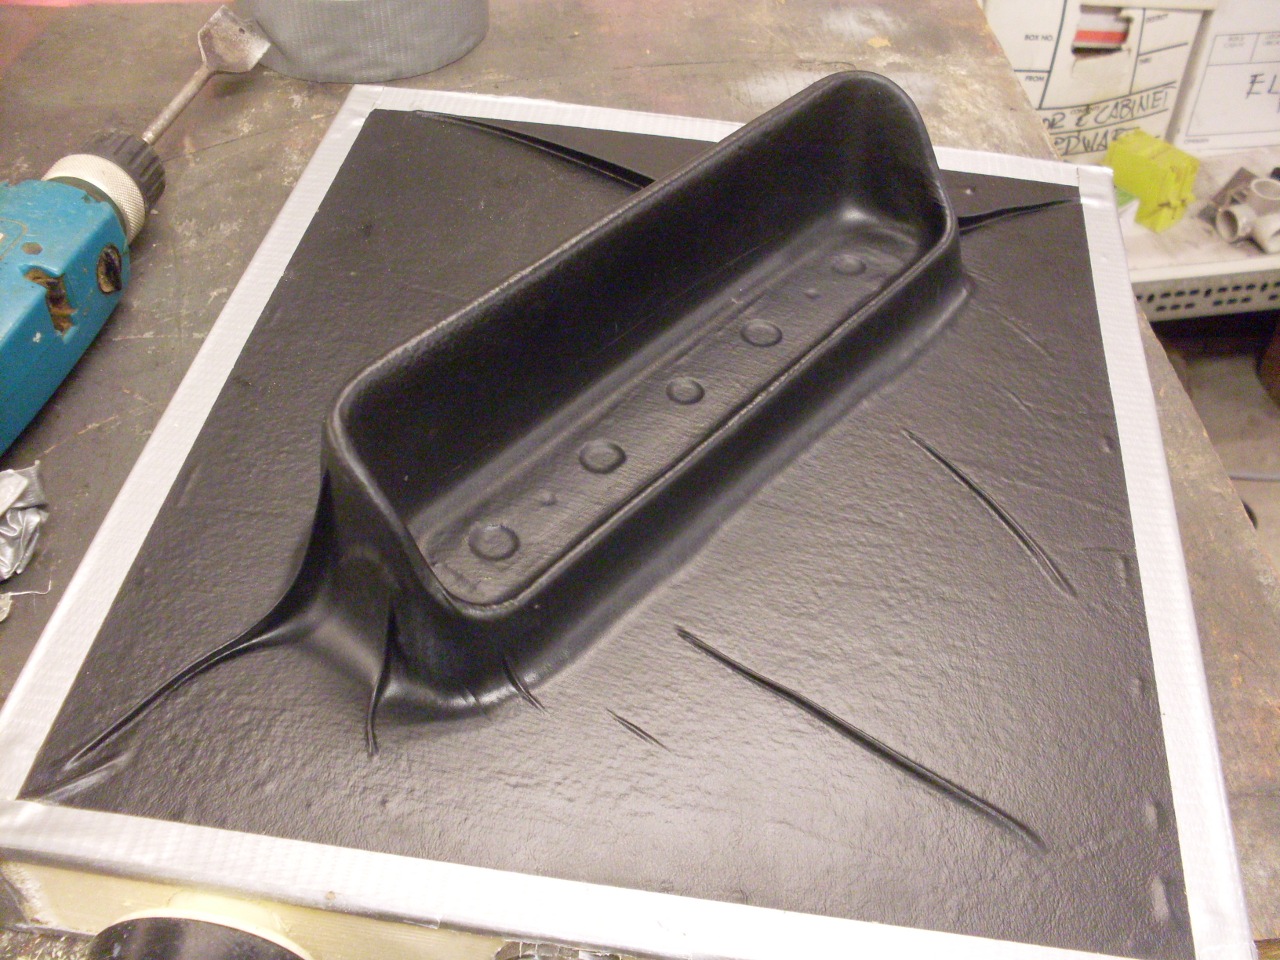
My
first attempts to stretch new vinyl smootly over the plinth by hand
were utter failures. The curves were just too extreme.
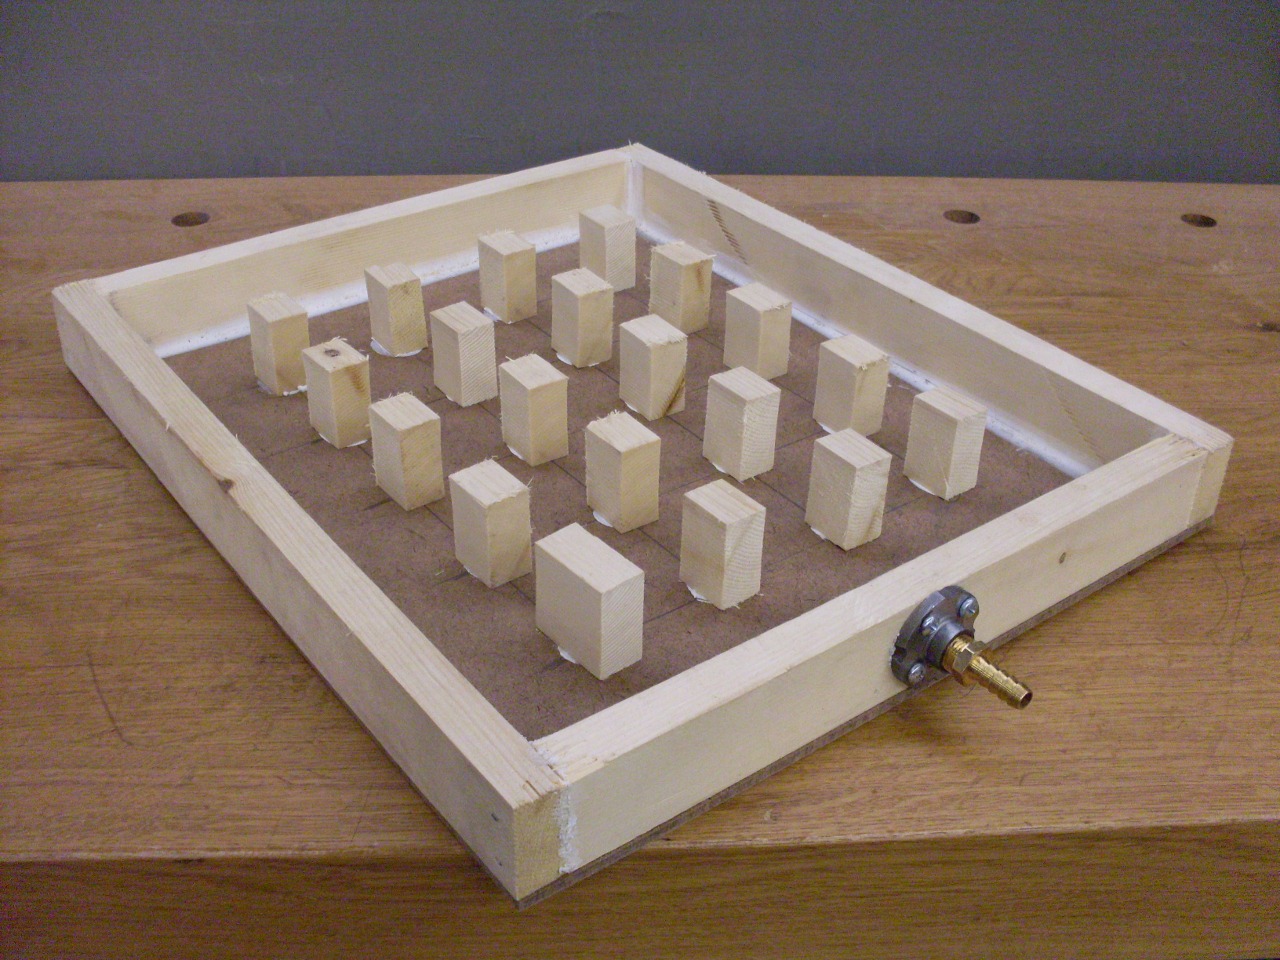
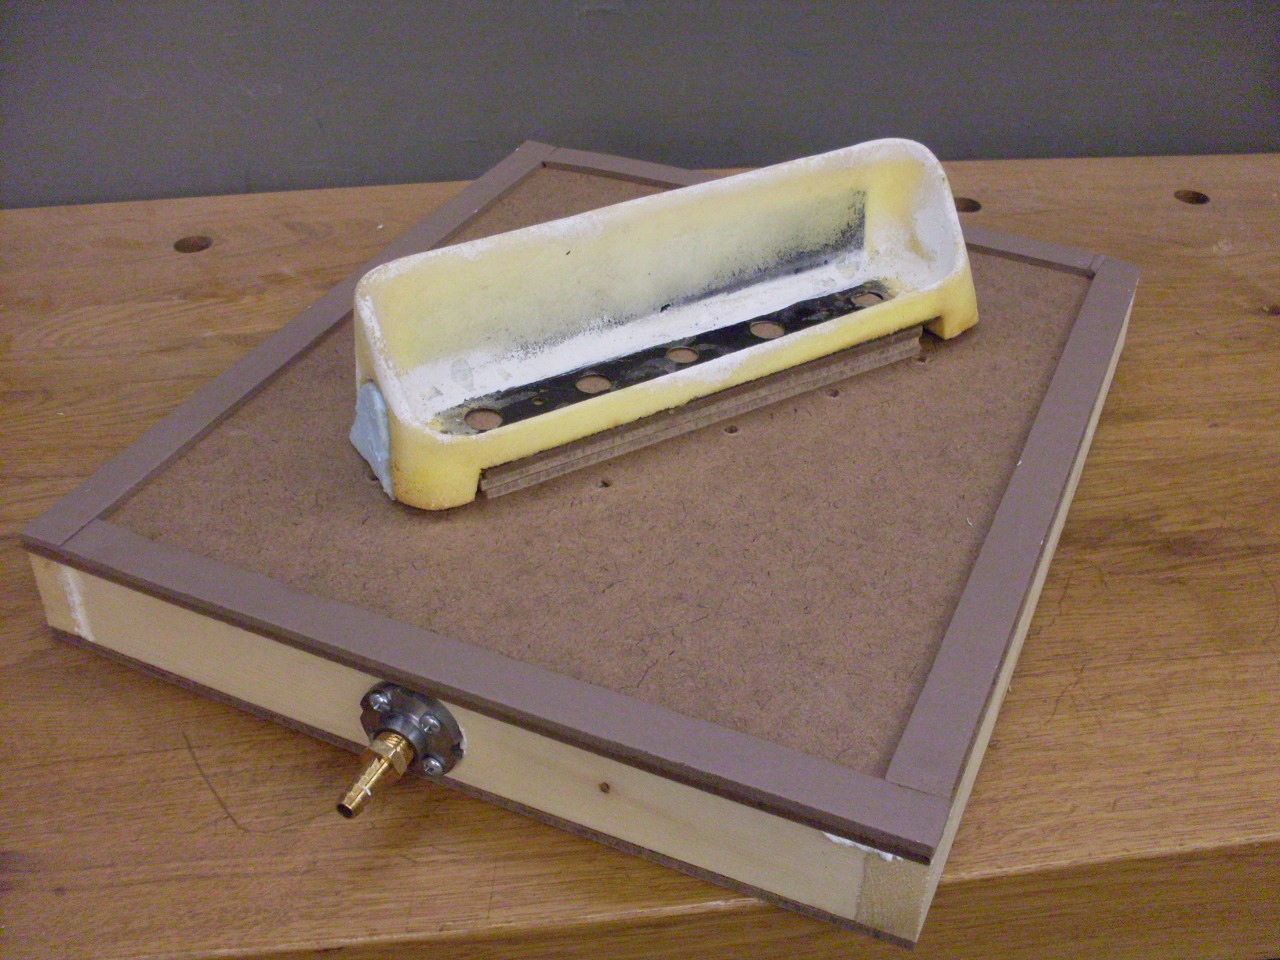
I
erven tried vacuum forming, using a vacuum box and a frame with heated
vinyl. This came closer, but I could never completely eliminate
the excess material at the corners.

In the end, despite heroic effort, I threw up my hands, admitted defeat, and grudgingly ordered a new plinth.
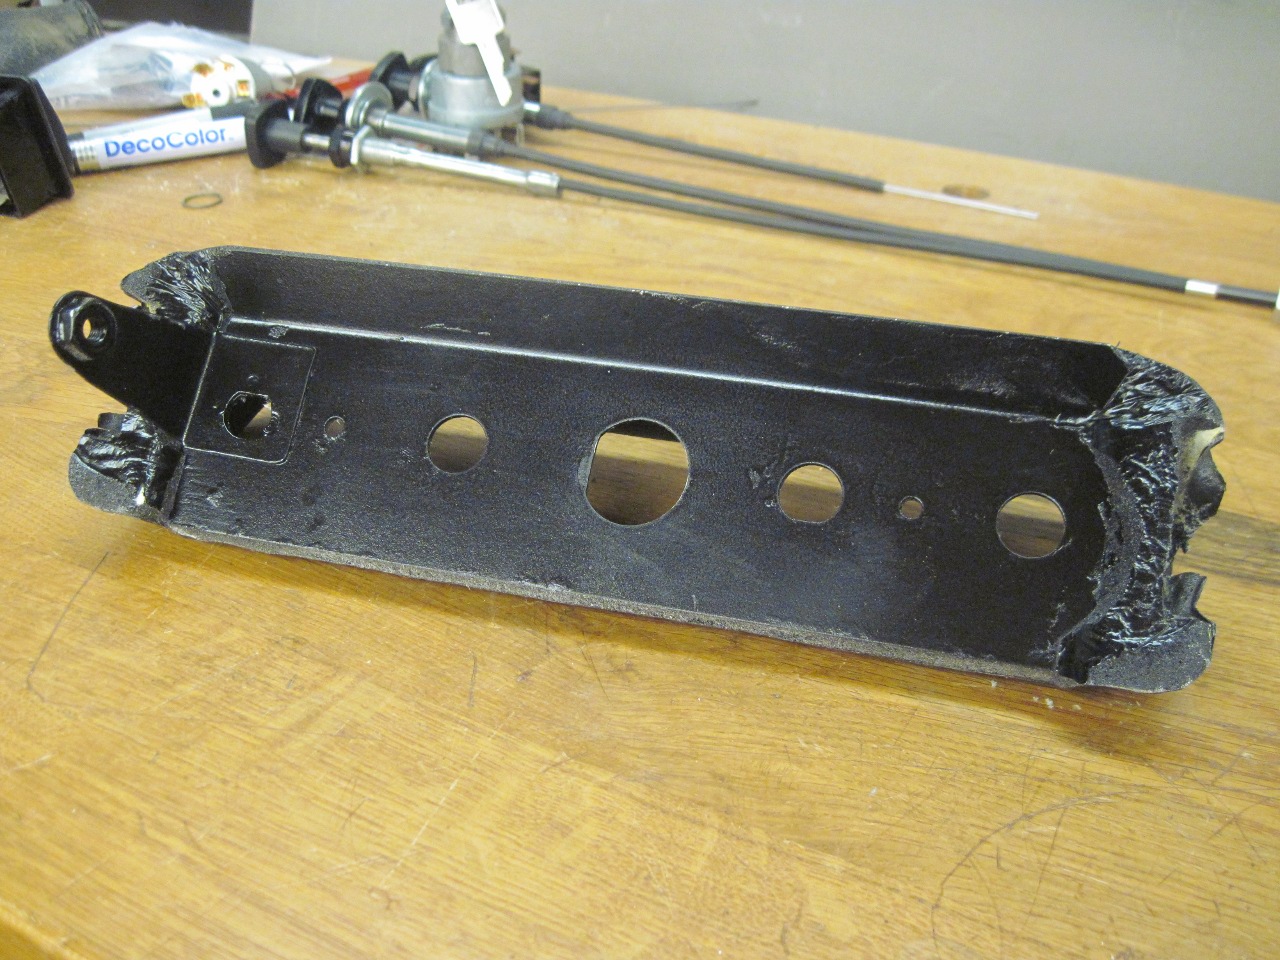
These
items are not cheap, but when I got it, the quality seemed OK. It
came with a lot of excess flash around the perimeter that has to be
removed. It would have been nice if the manufacturer had done
that step.
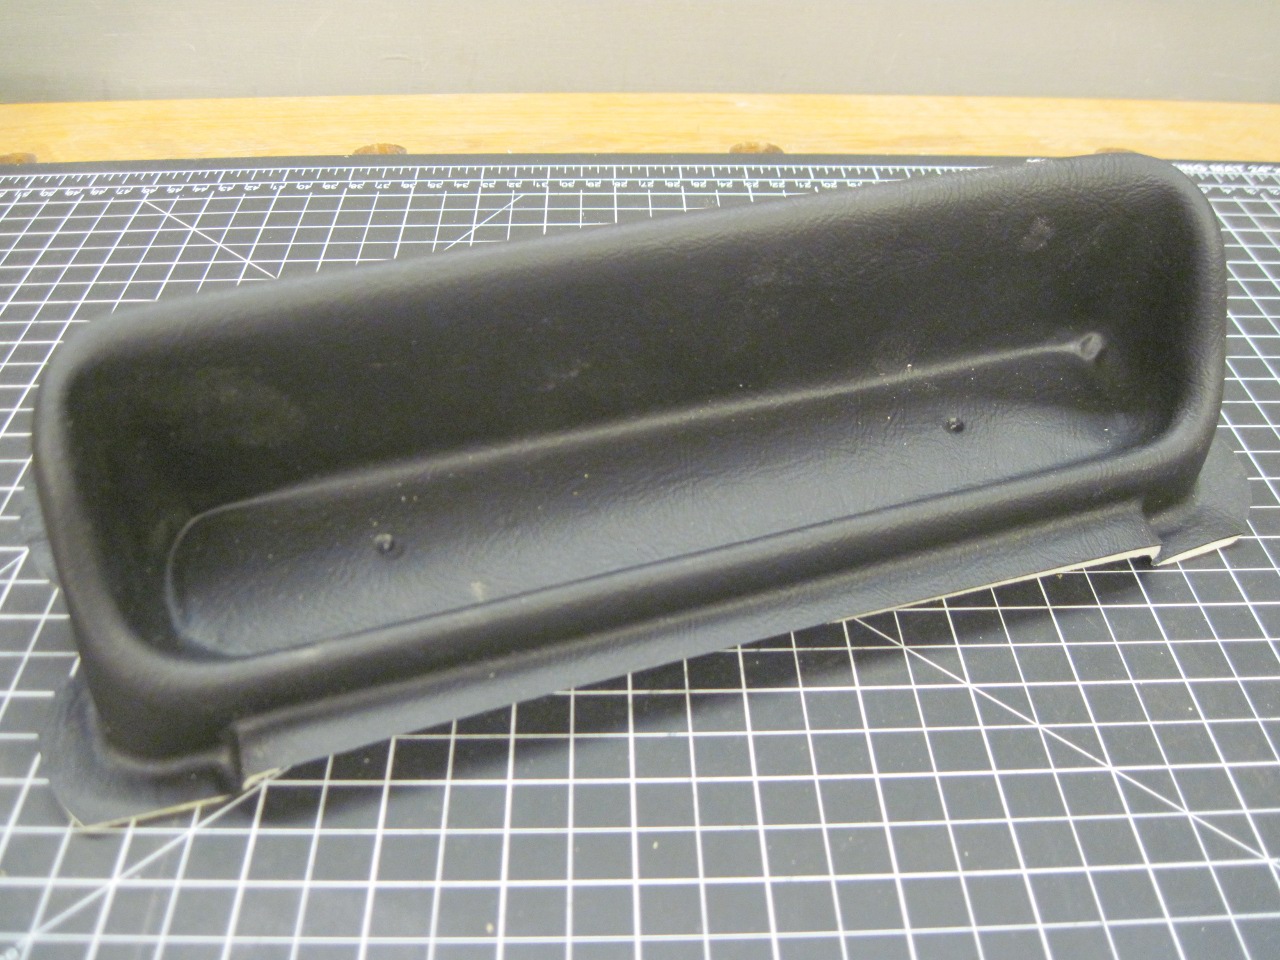
Also, the new plinth lacked the metal bracket on the right side rear of the part.

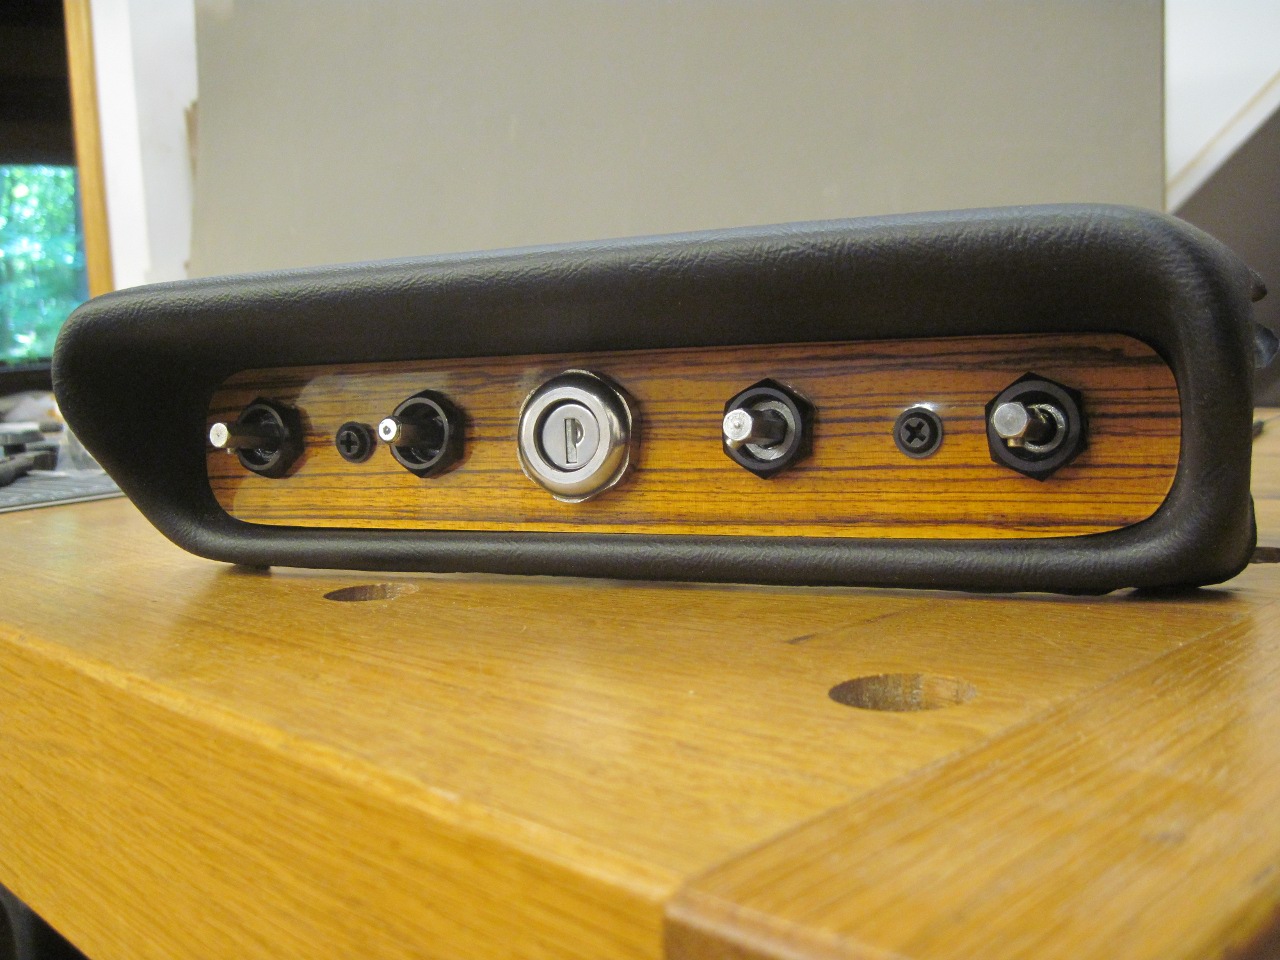
Though
the plinth seemed usable, I had a couple of mods planned for it.
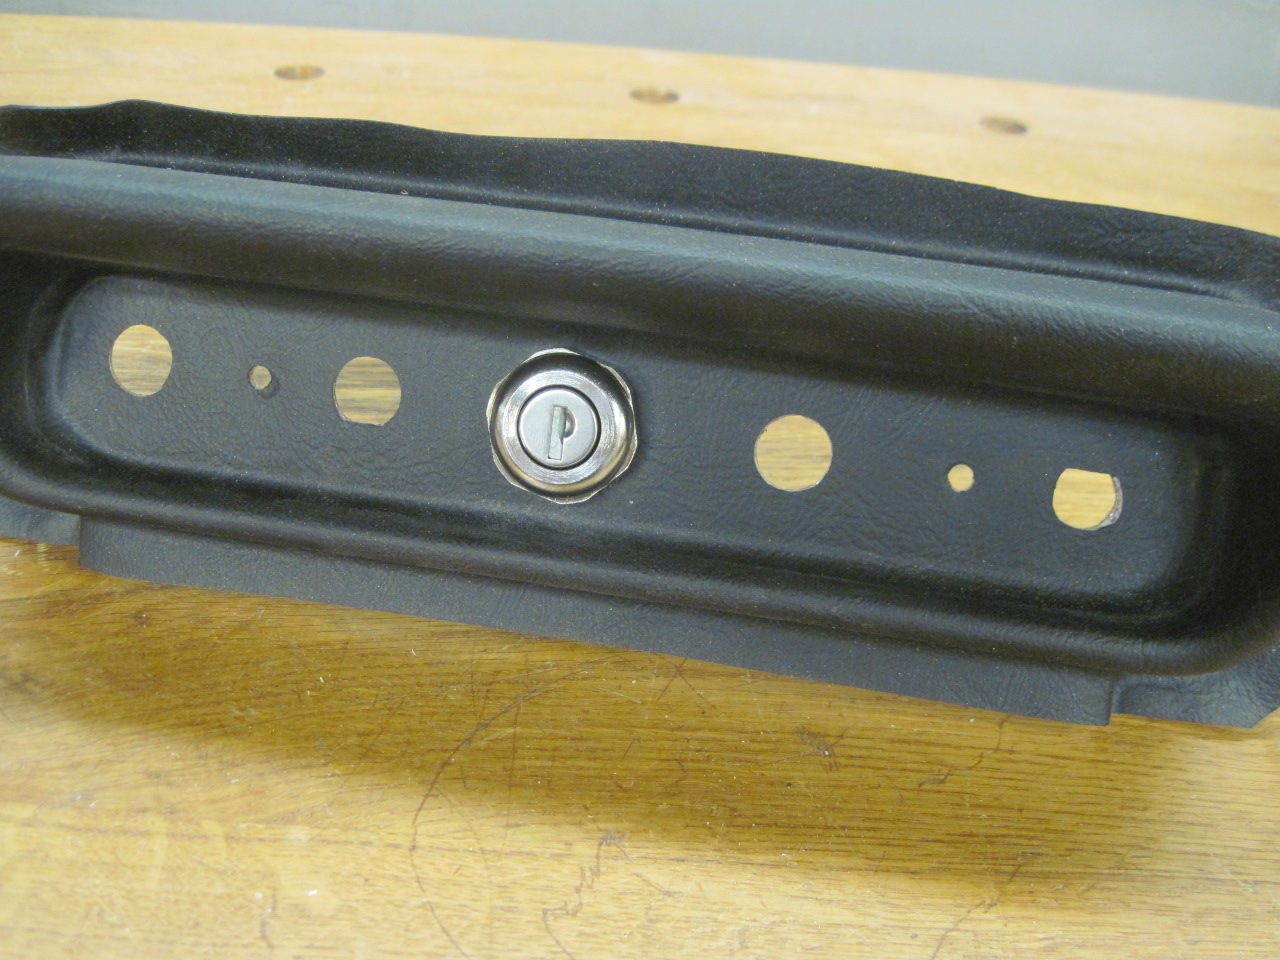
First, I had decided to move the ignition switch from the awkard
and silly location under the steering column to the center of the
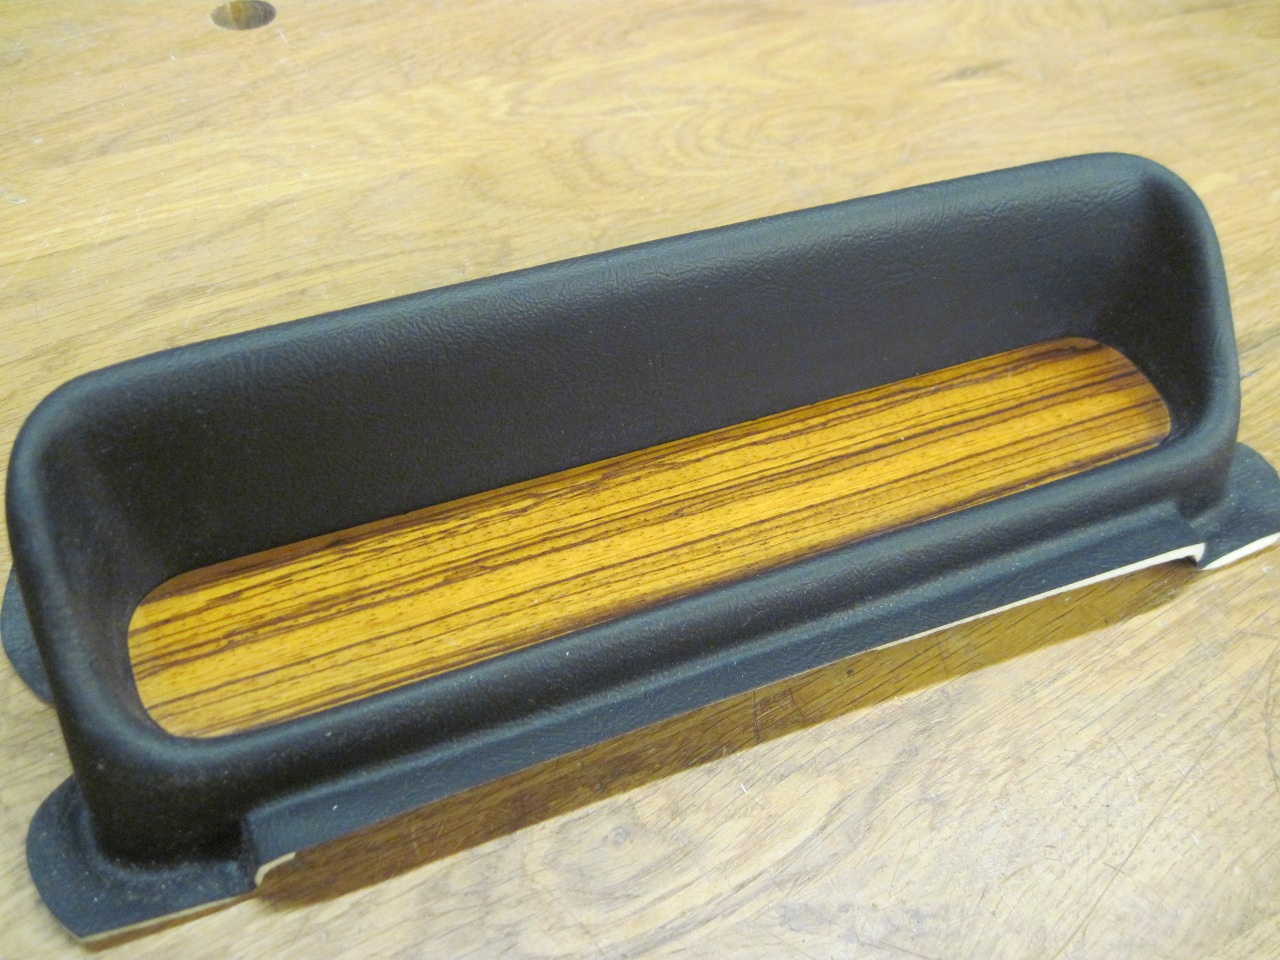
plinth, as in earlier TR cars. Second, I wanted to extend the
theme of the woodgrain dash and dash support to the plinth by including
a zebrawood insert.
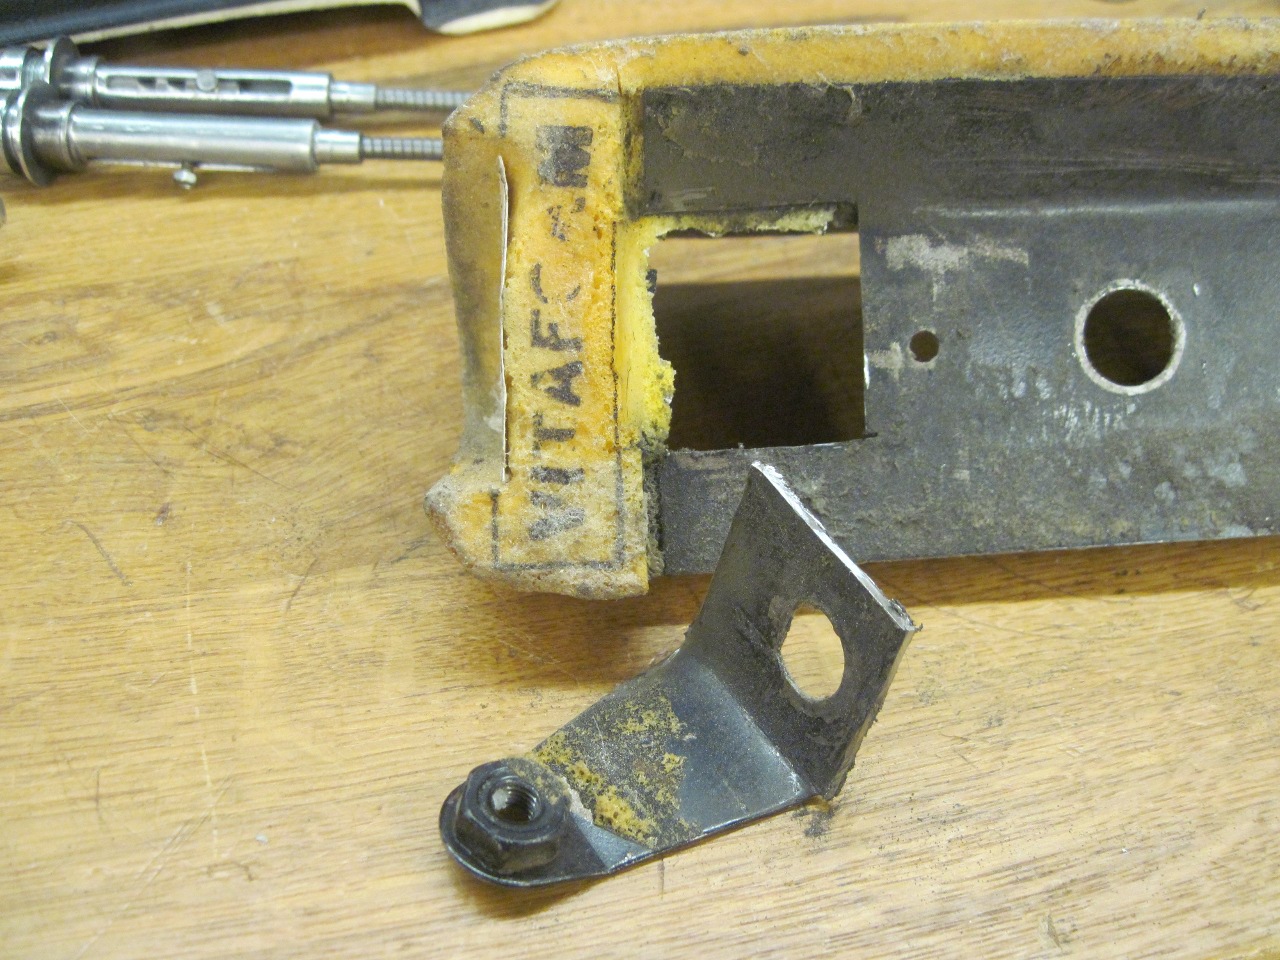
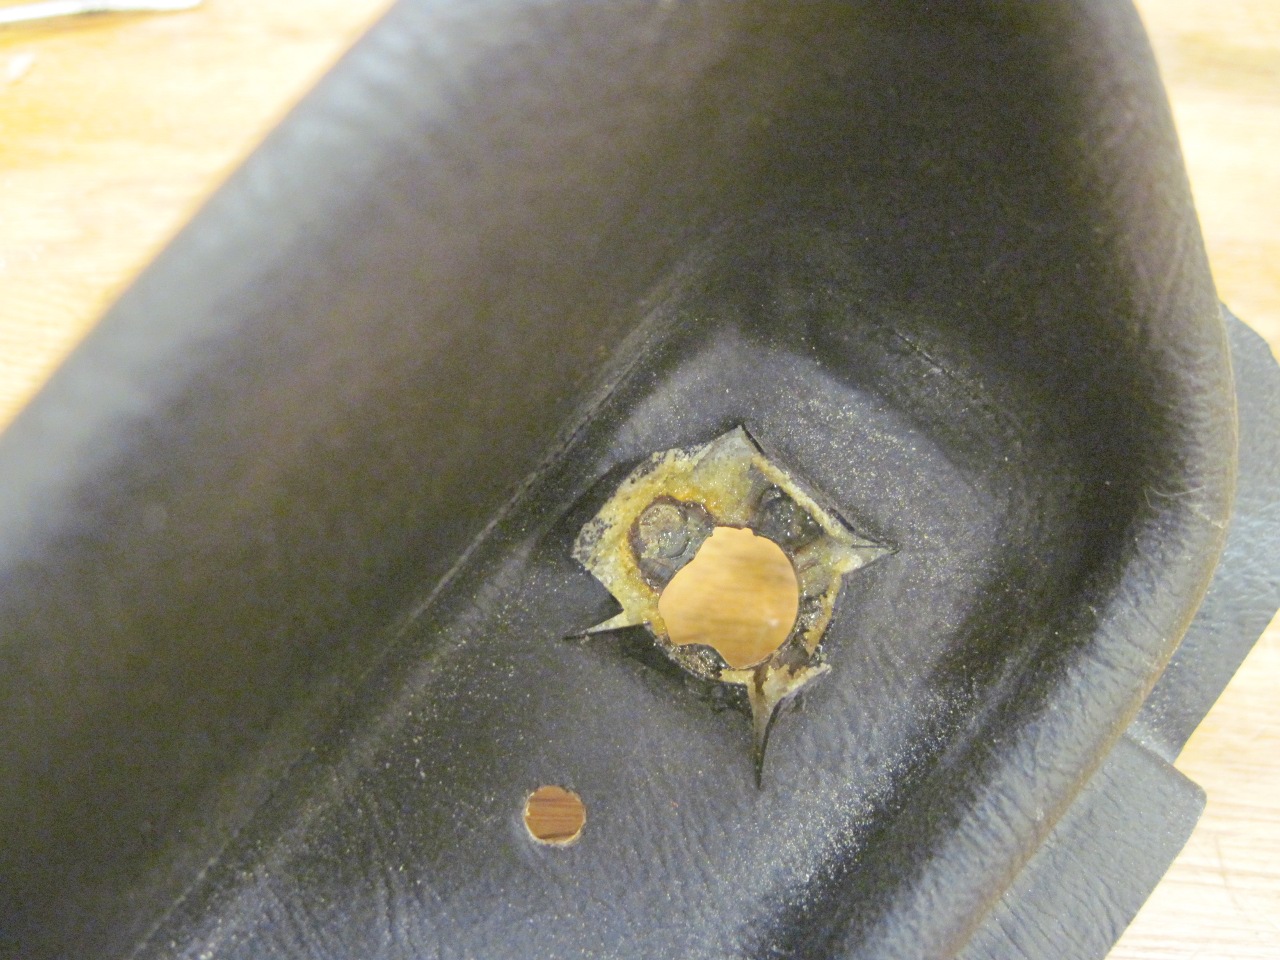
Before
I got to the mods, though, I wanted to see about adding the missing
bracket. I cut the bracket from the old plinth, including the
choke mounting hole. Keeping the hole would help align the
bracket on the new plinth.
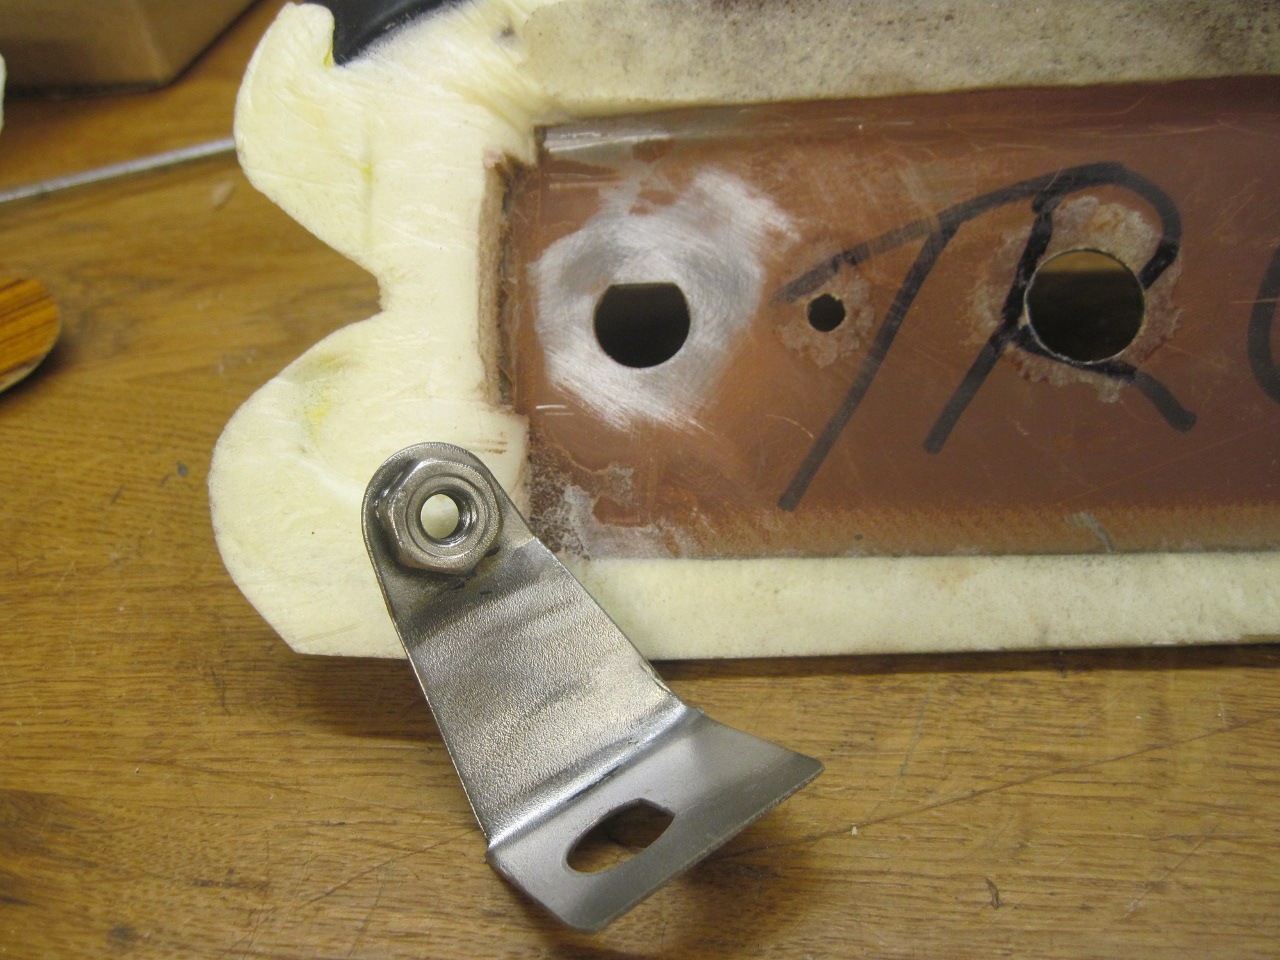
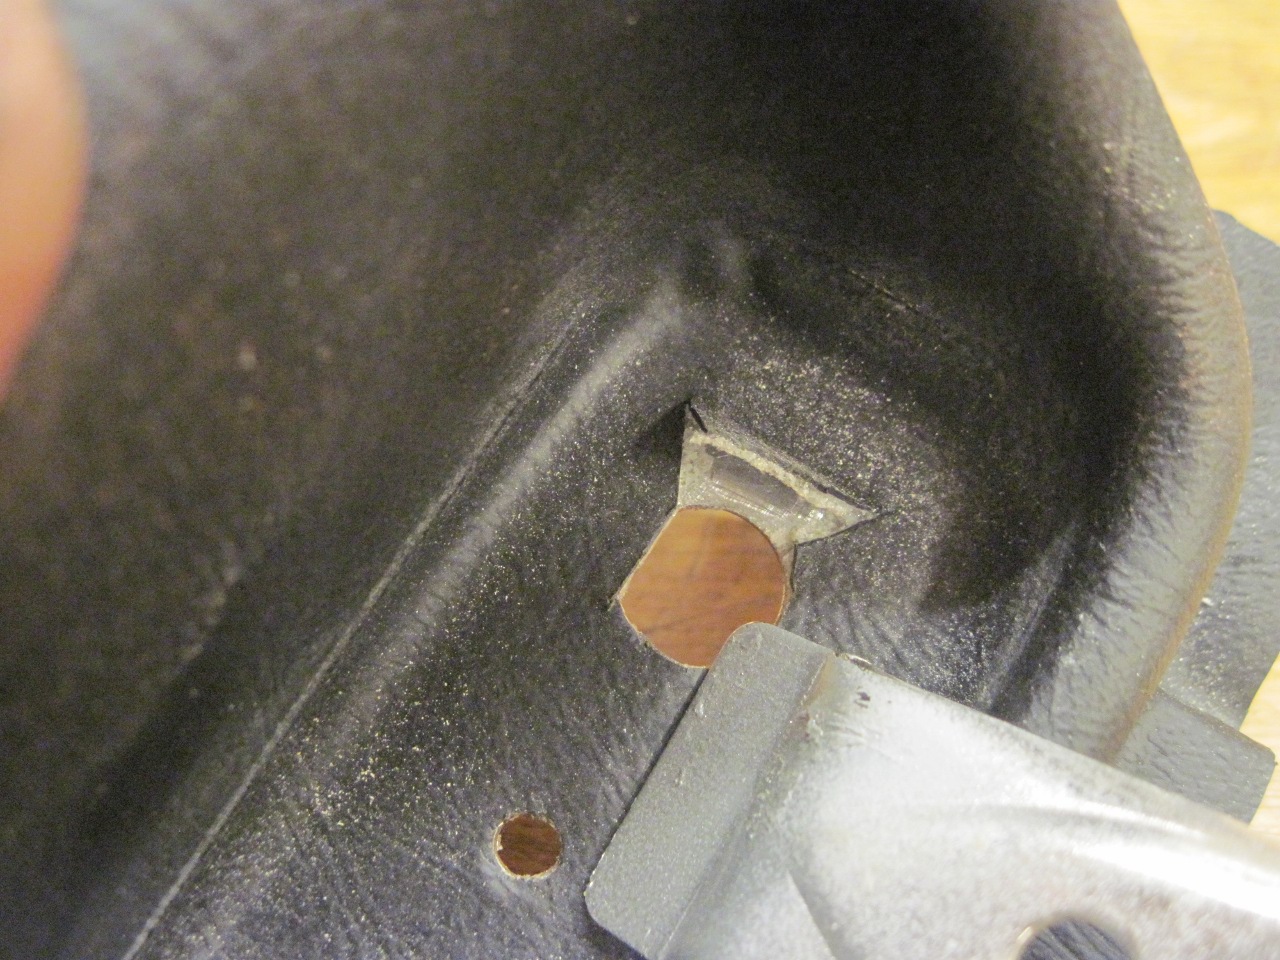
I
cleaned paint and such from all the parts, and peeled back some of the
vinyl from around the choke controle mounting hole. This was
possible only because the wood insert will cover the area up.
Then clamped the bracket in place on the new plinth and fixed it
in palce with a few small spot welds.
Glued down the raised vinyl flaps, and painted the backside.
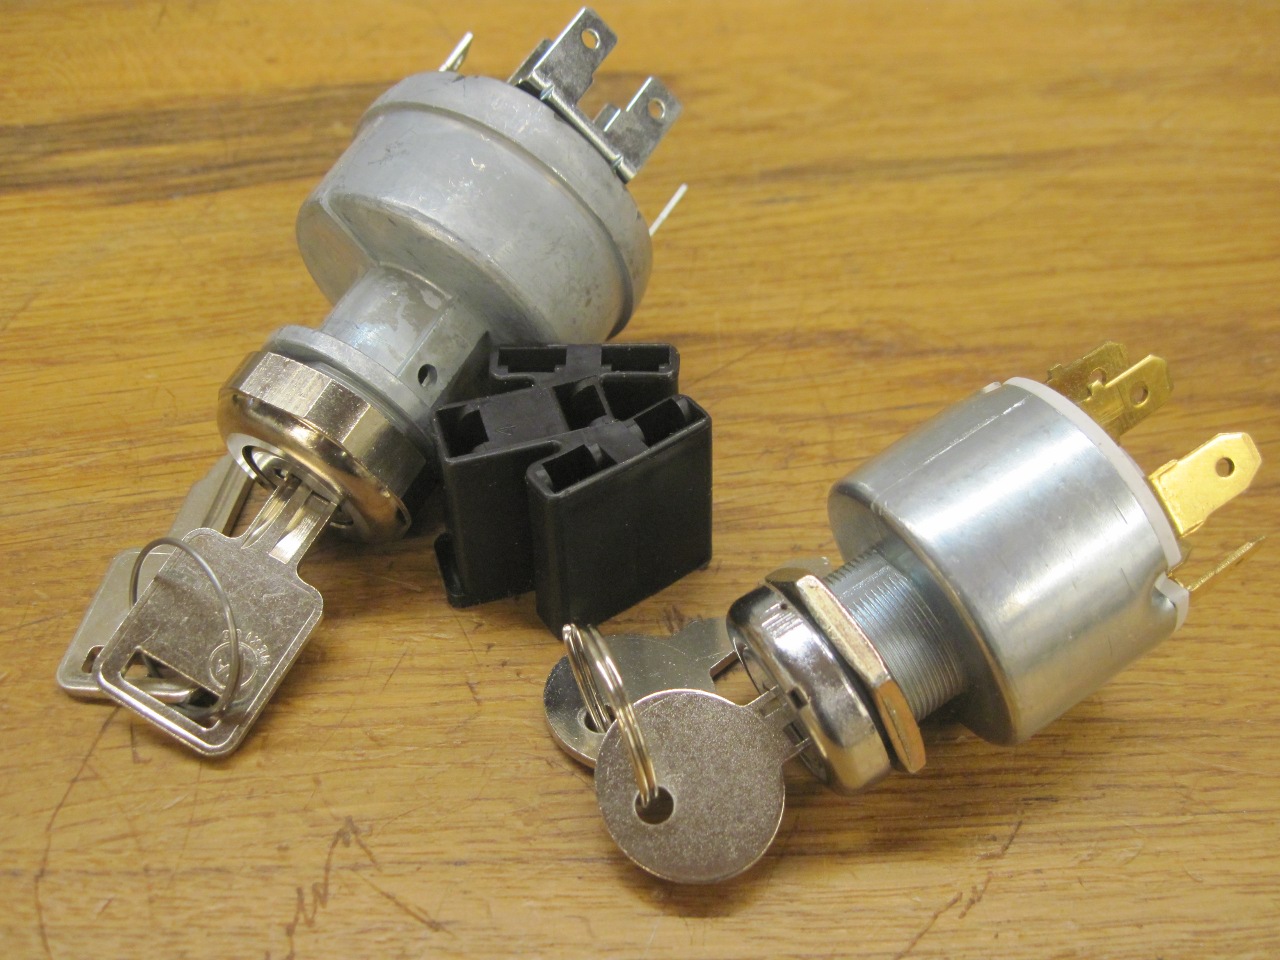
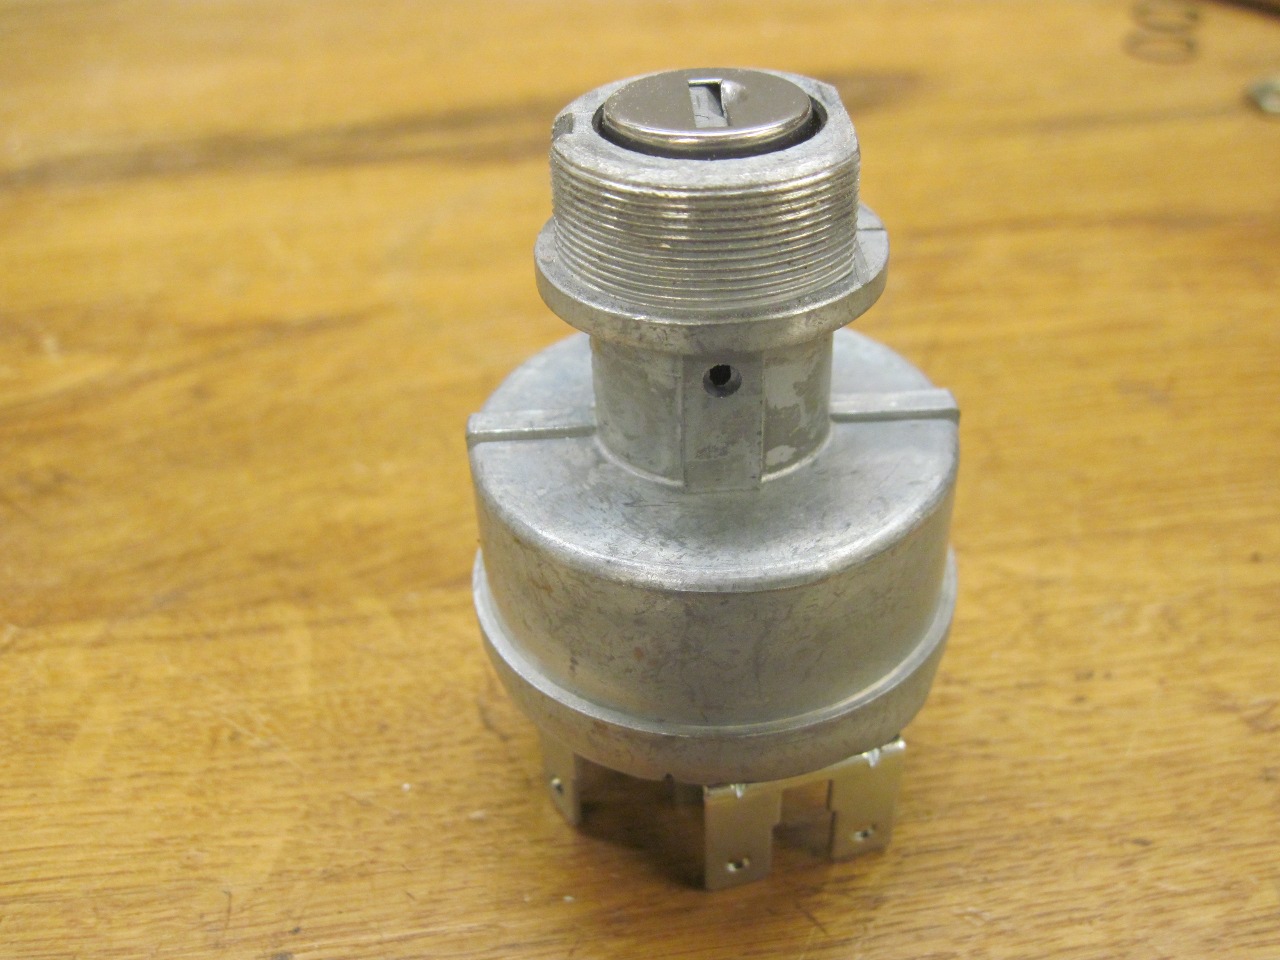
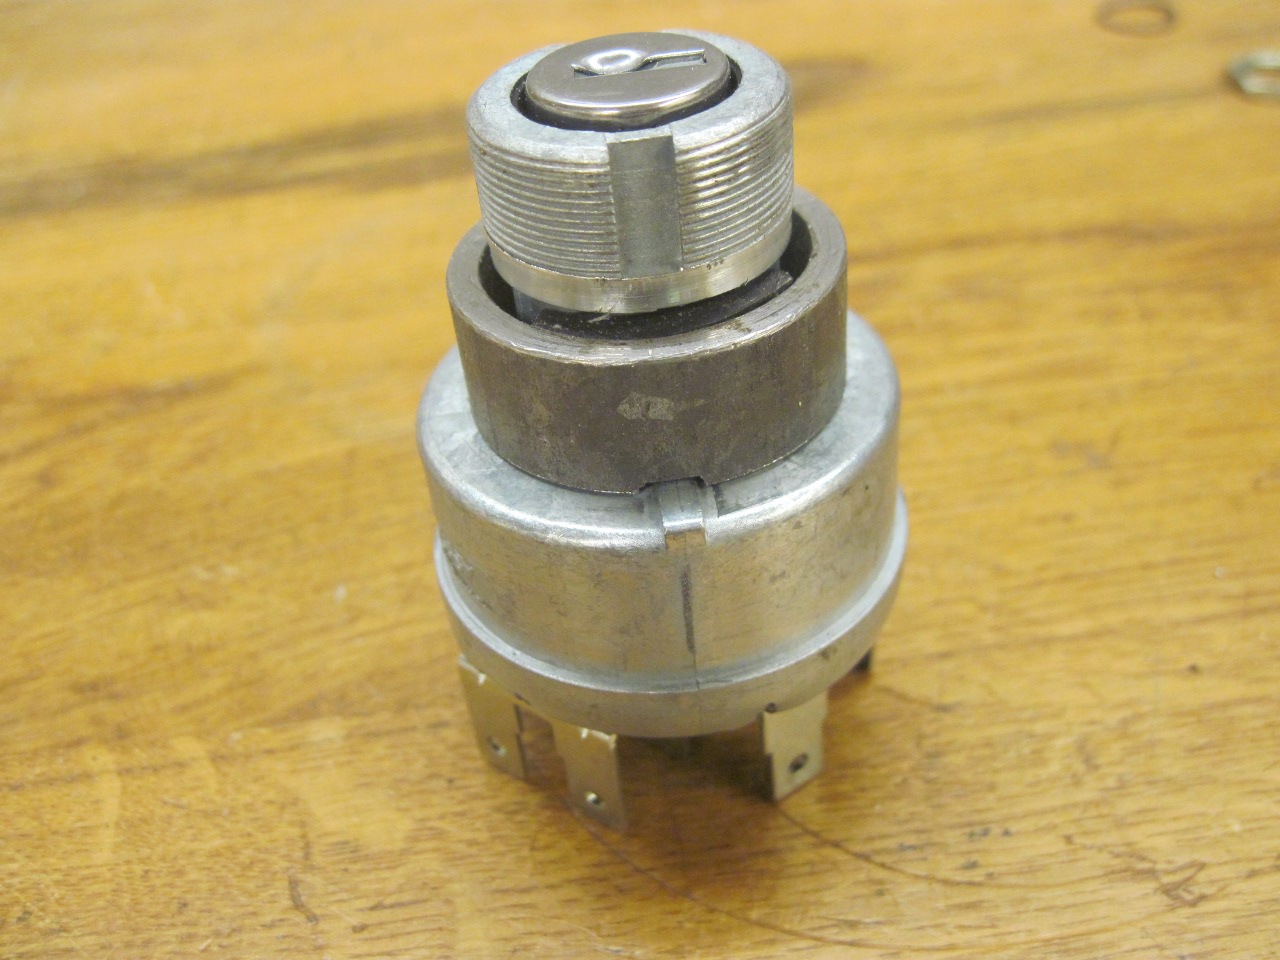
For
the ignition switch, I bought one apparently commonly used for this
application. It seemed a little cheesy, though. Even the
keys looked and felt cheap. I ordered another, more expensive
switch which felt more robust. The better one is on the left. I made the one-inch "D" hole necessary to mount it.

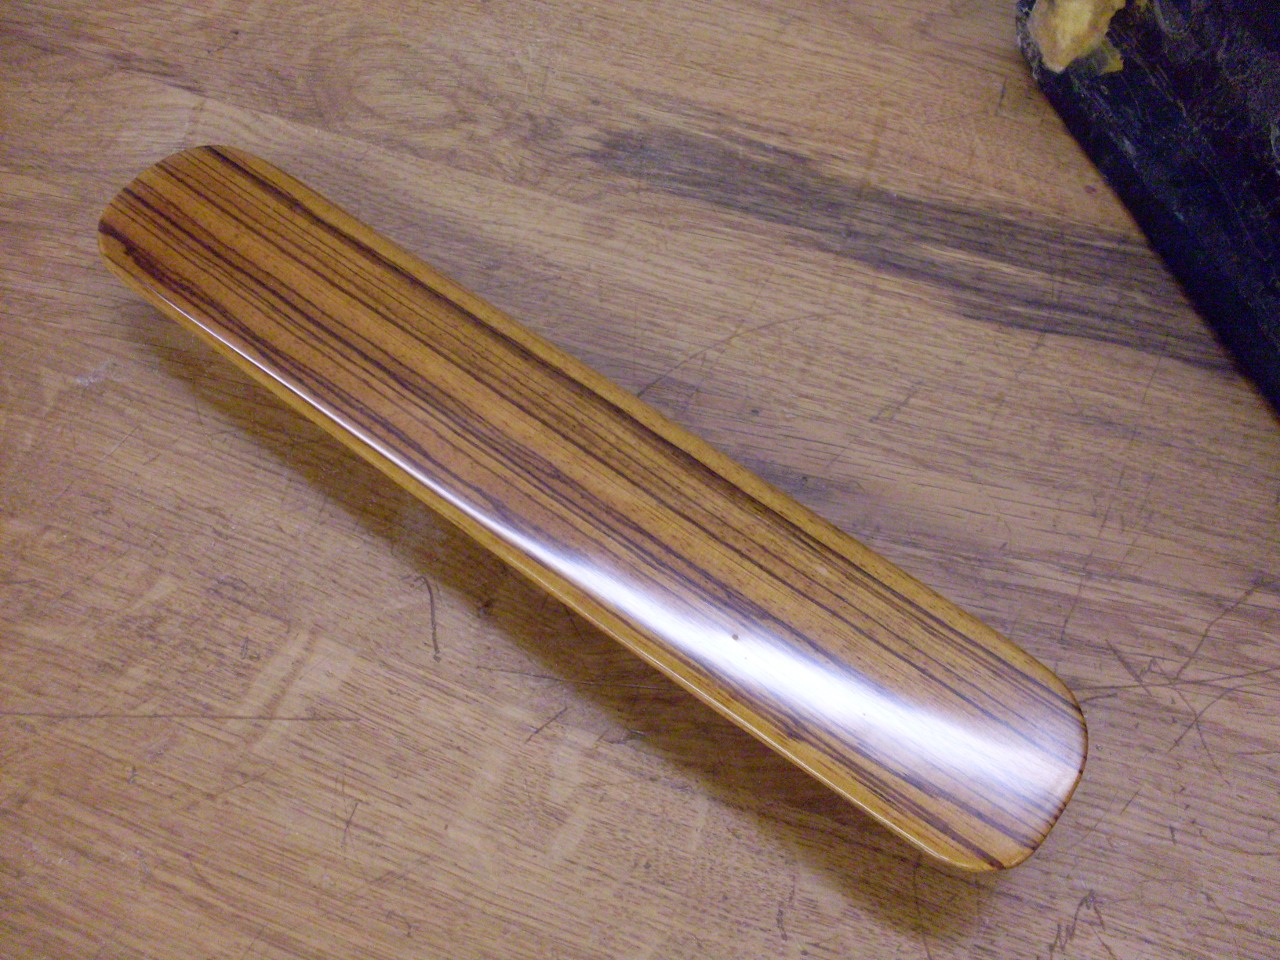
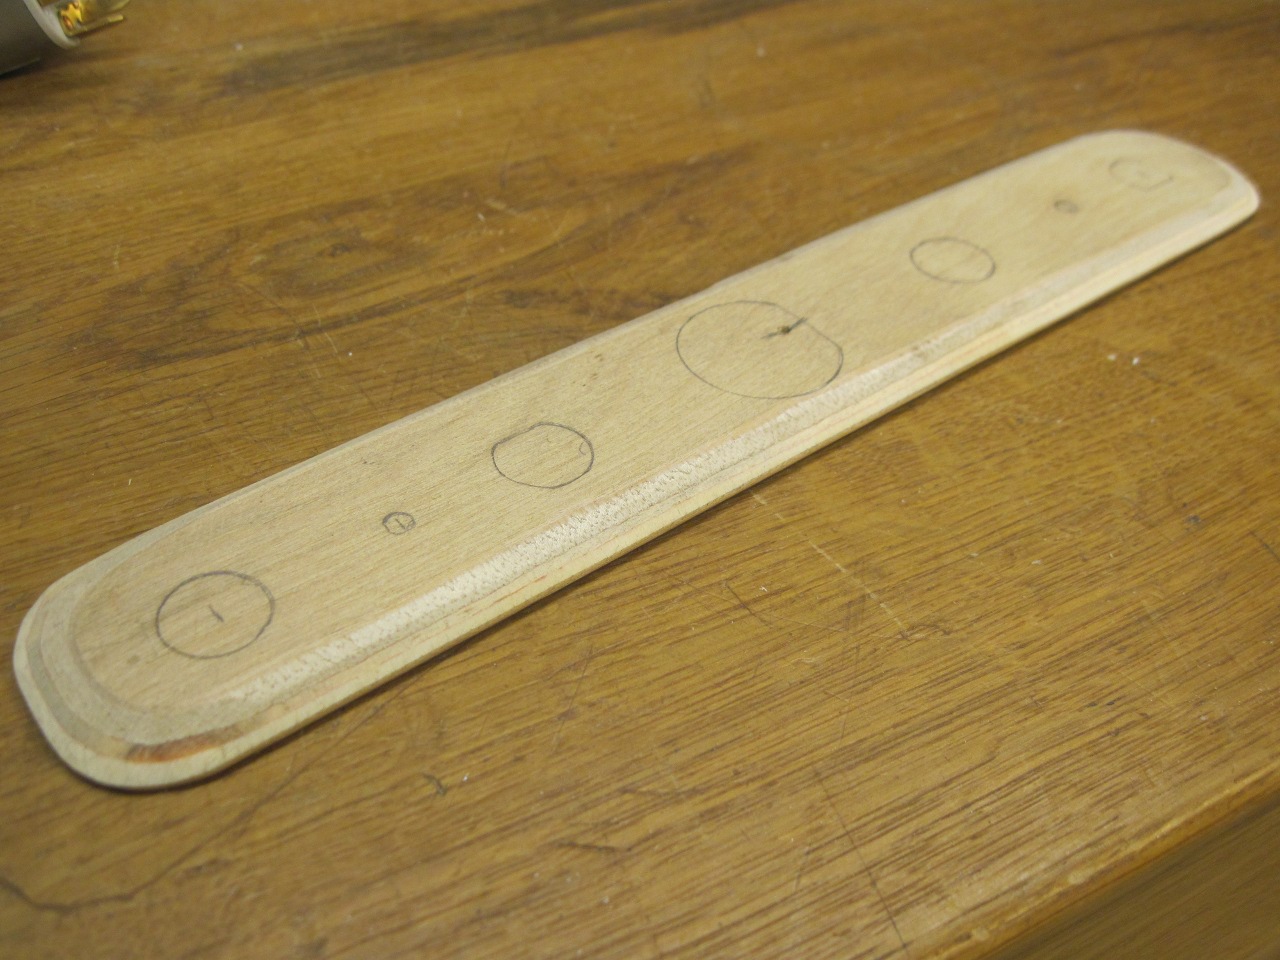
For
the woodgrain, I laminated some zebrawood veneer to some 1/8" plywood,
finished with seven or eight coats of varnish, and cut it to shape.
The backside had to be radiused to accommodate the generous
fillet around the bottom of the cavity in the plinth.
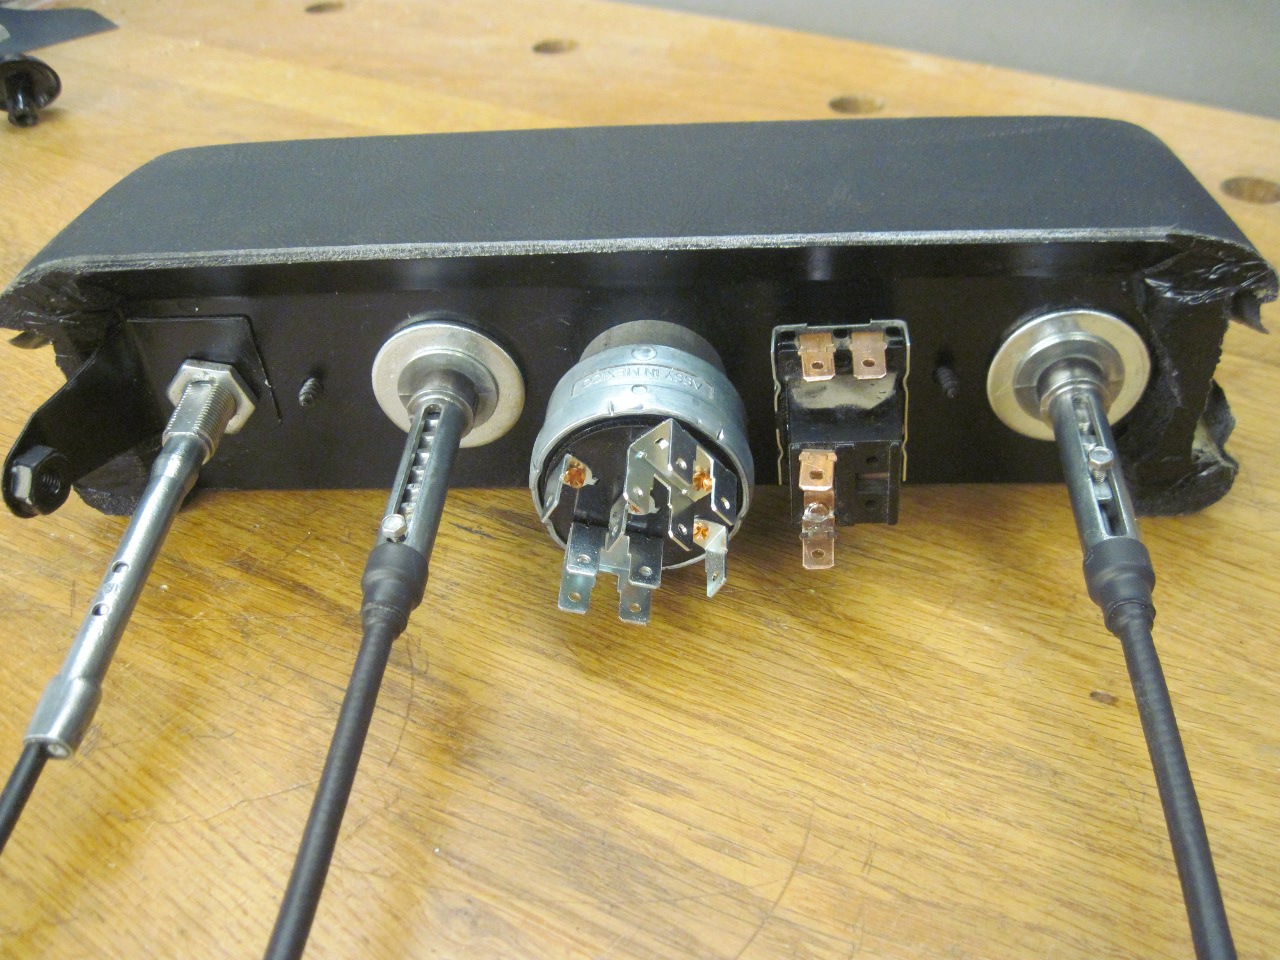
The
extra thickness of the wood insert posed an immediate problem.
The threaded snouts of the controls were now not long enough to
get the nuts on.

For
the ignition switch, I had to turn off the flange that normally would
be right against the backside of the mounting panel, and replace
it with a metal ring that rested on the body of the switch. This
allowed the threaded barrel to protrude enough for the fixing nut.
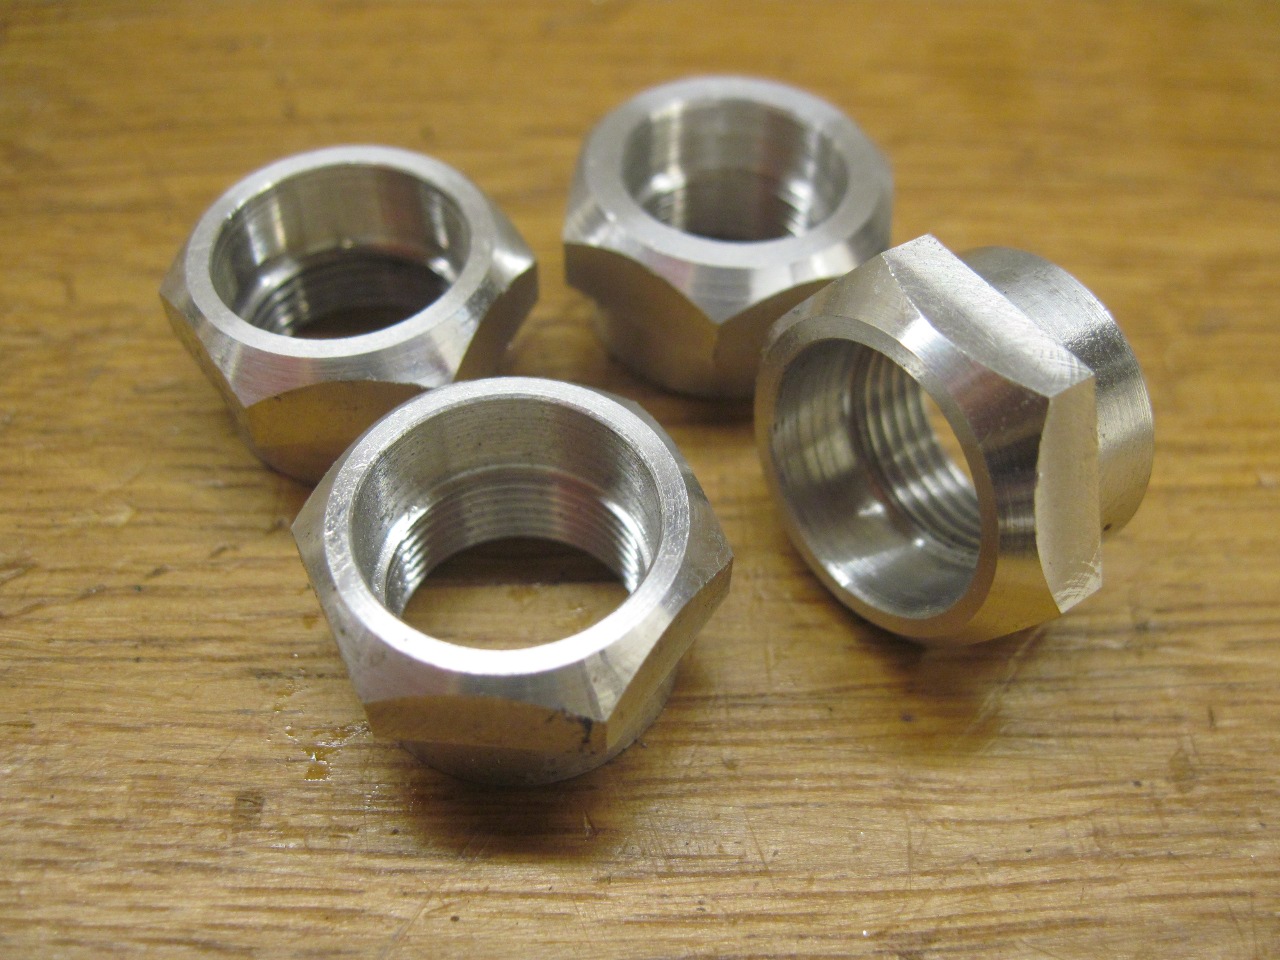
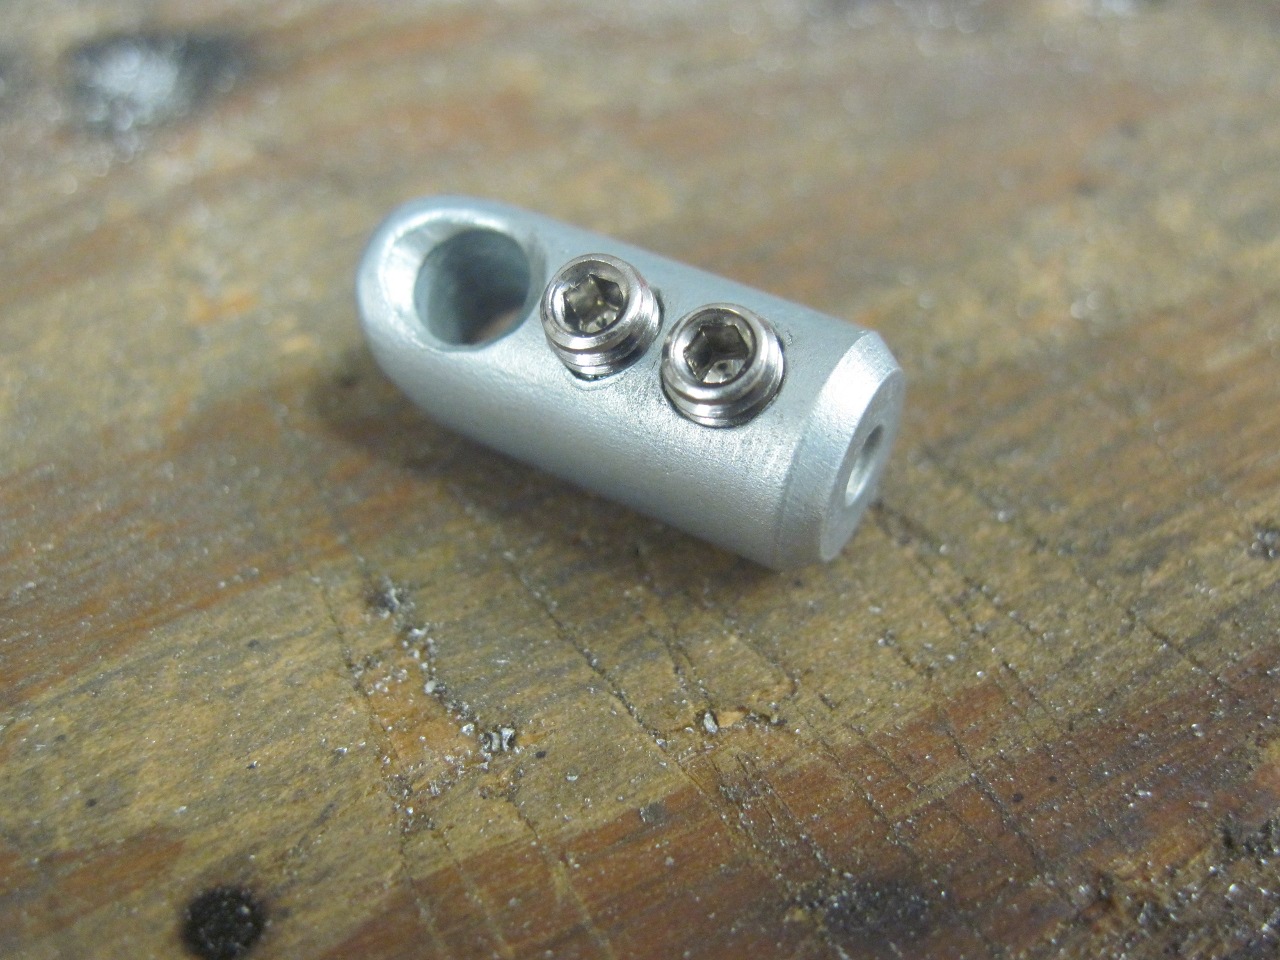
For
the other four controls, my solution was to open up the holes in
the wood insert and use these new custom fixing nuts. Each nut
has a short barrel below the hex that reaches down into the oversized
hole in the wood insert to bear against the metal base of the plinth.
This means that the hex of the nut doesn't actually touch the
finished wood, protecting the finish. I found an interesting
thing when making the nuts. Among the four controls, there are
three different threads. The blower switch is 9/16-28, the choke
is 1/2-26, and the other two controls are 9/16-24. Those Brits
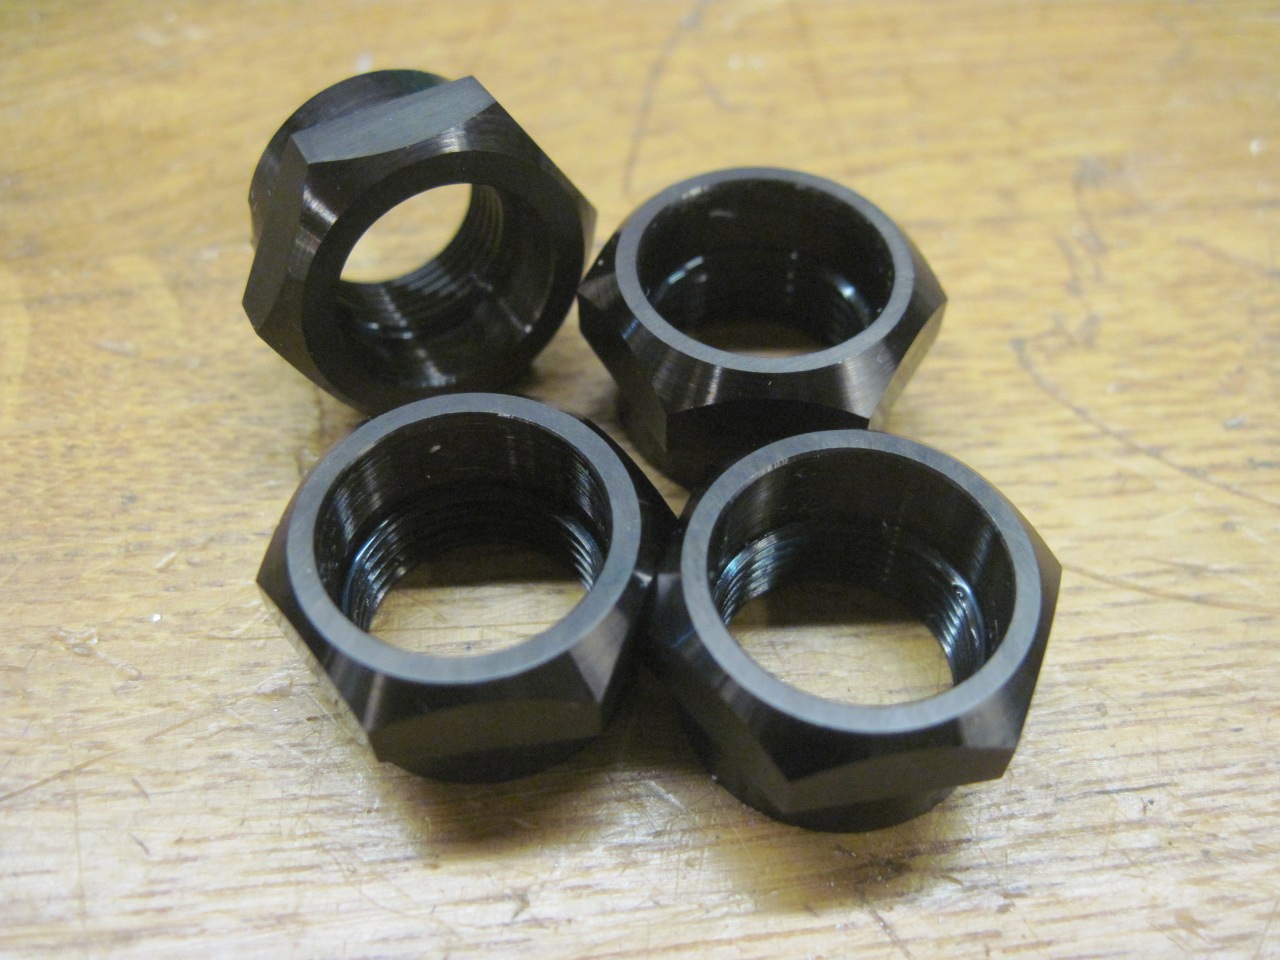
sure do like their odd-ball threads. The nuts are aluminum, and I
anodized them black to match the black oxide hardware I'm using in
other places on and around the dash.
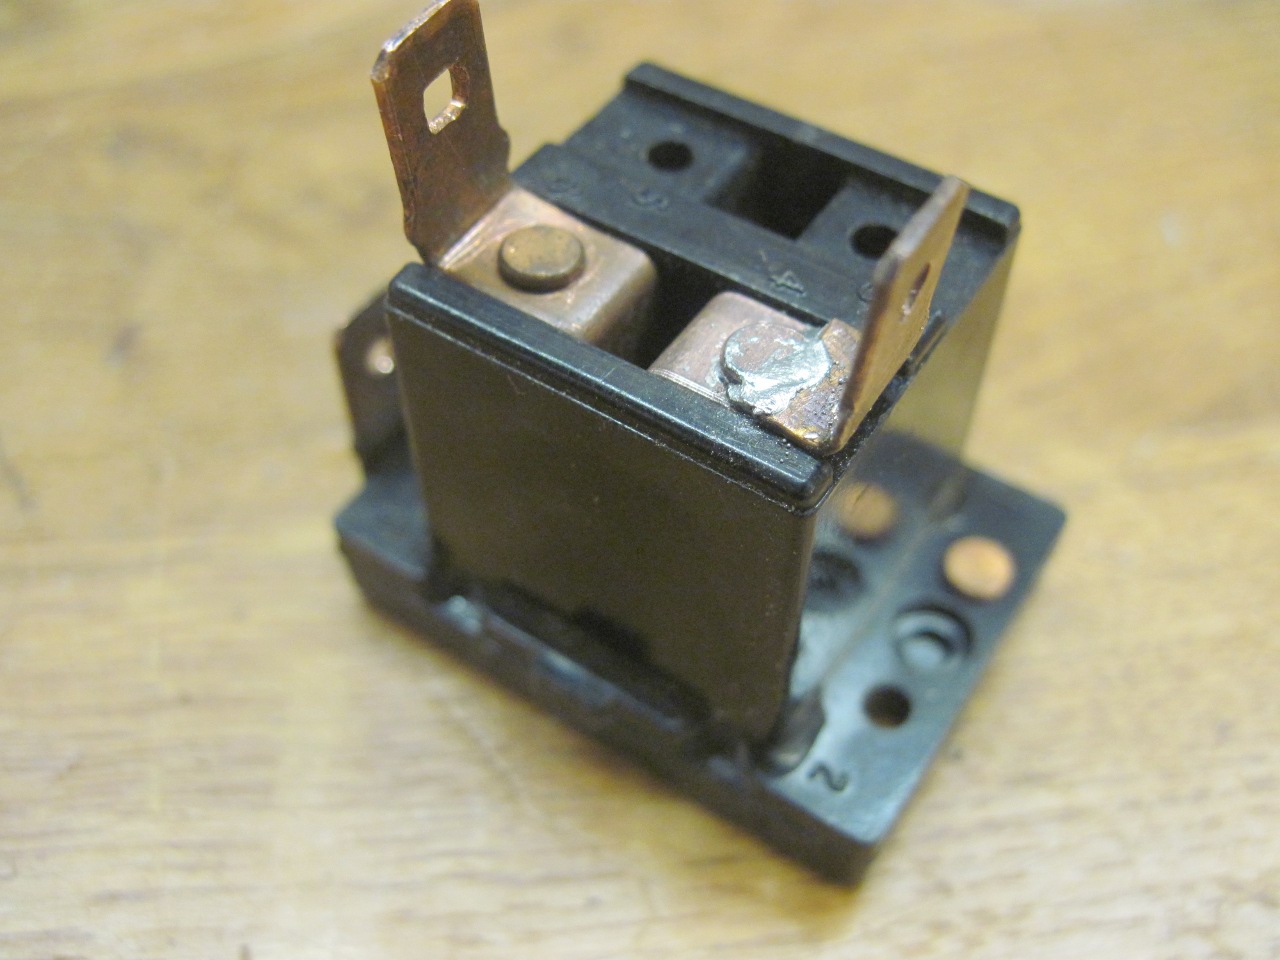
My
blower switch worked OK, but had one of its terminals broken off.
Fortunately, it has an unused terminal which I cut off and
soldered in the place of the broken one. I'll have to be careful
with it since it may not take as much stress as the other terminals,
but at least for now, I don't have to buy a new switch.

The
demister and the temperature controls are accomplished with Bowden
cables with solid wire at the core. Detented hex shafts at the
user end provide multiple positions for the controls. My controls
were dirty, but cleaned up well. One of the outer cable
housings had seperated from its control head, but this was easily fixed
by reinserting it and peening over some metal to retain it. I had
bought some new spring wire to replace the inner wires, but after I
straightened the original wires, they worked so well I didn't bother
replacing them. Heat shrink on the cables provides some extra
protection.
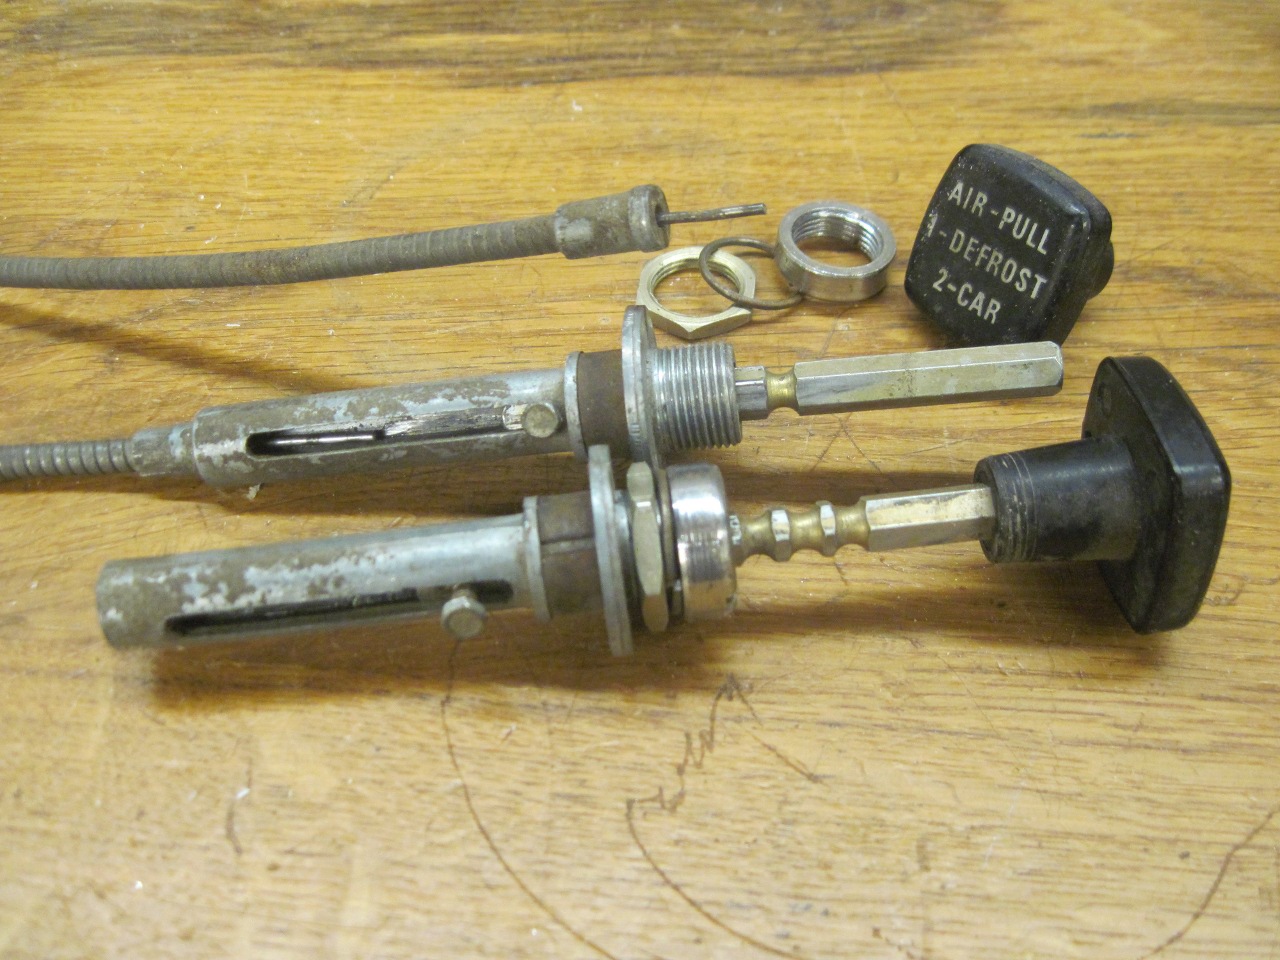

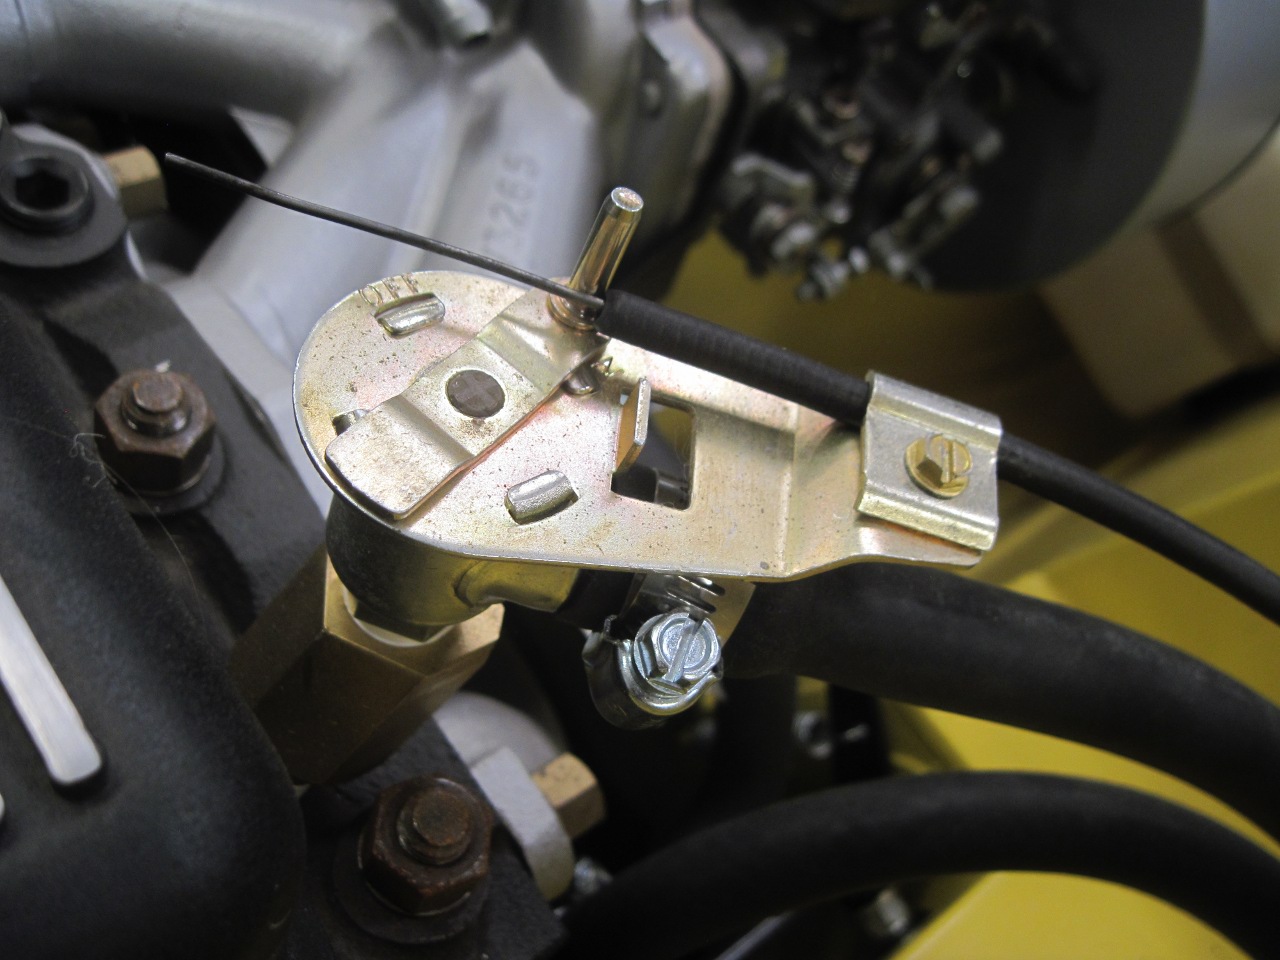
The
choke control on my TR6 was a dual cable with solid internal wire.
Solid wire allows both push and pull actions to be transmitted
from end to end. Earlier cars apparently had stranded
inernal wire. The stranded wire is so flexible that it can't
transmit any significant "push" force. In these cars, the choke
shafts on the carburettors had springs to make sure the chokes were
returned to the off position when the choke cable wass released.
Since
the solid wire cables have a spotty track record as far as longevity
goes, I decided to revert my car back to the earlier design, and had
already installed the return springs on the carbs.
However,
since my solid-core cable was still working, and the cables are not
particularly cheap, I embarked on an ill-conceived effort to build a
hybrid cable. Though the cable worked fine, I deemed it
unnecessarily complex and finicky to set up, so I didn't use it.
Anyone really interested in seeing the complex and wonderful
cable, click here.
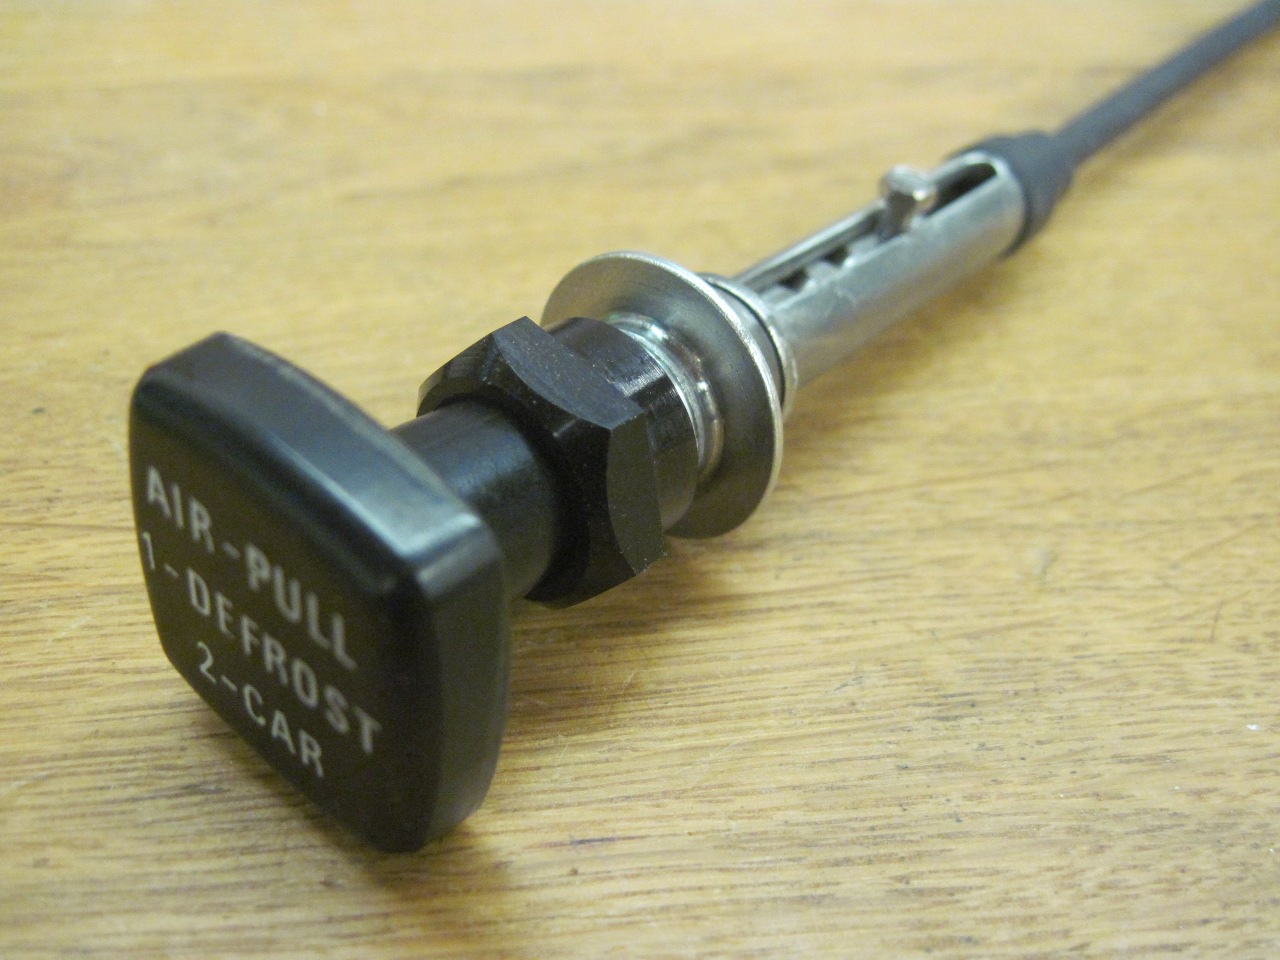
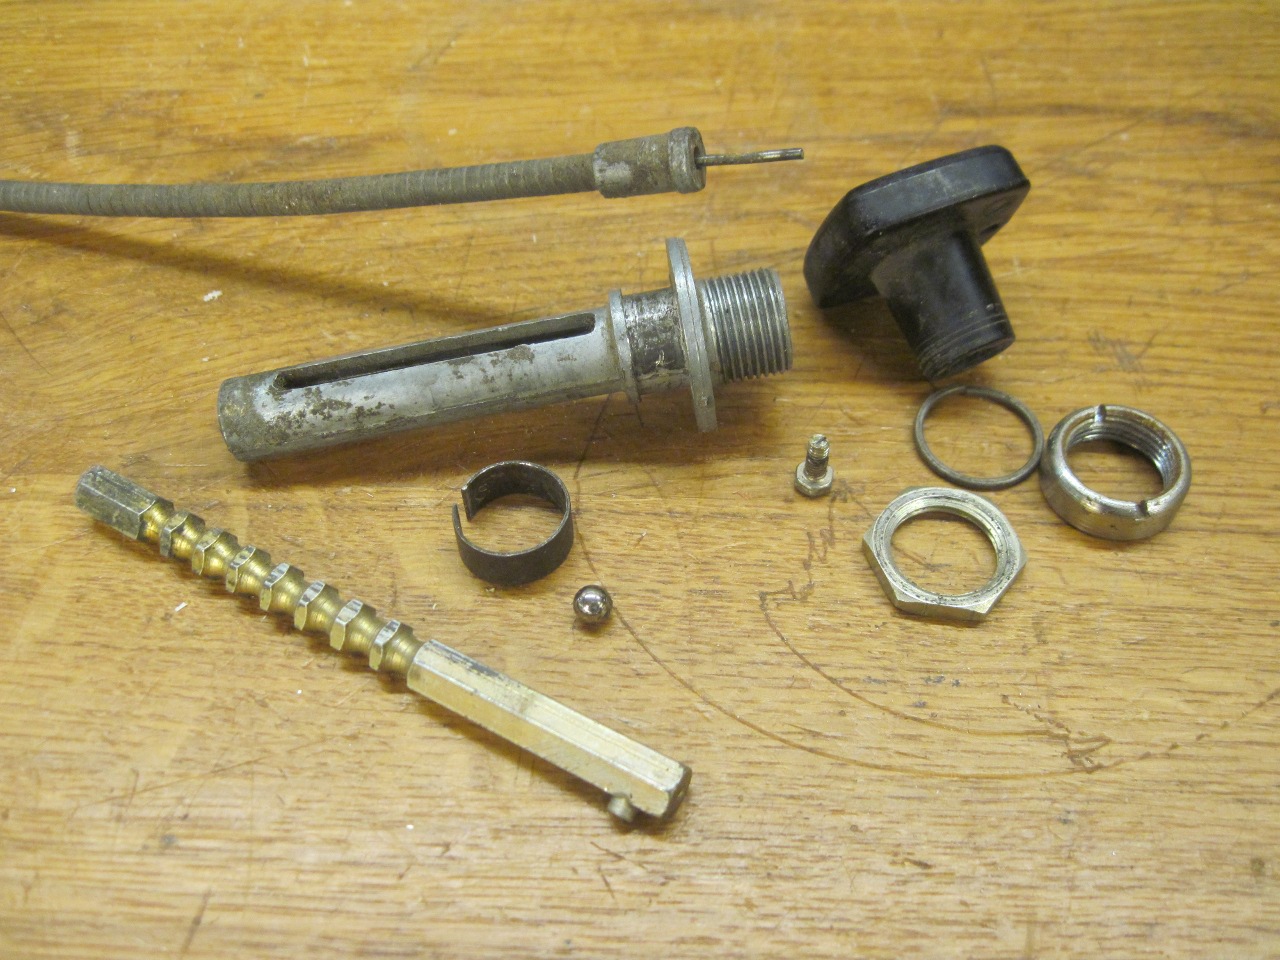
So,
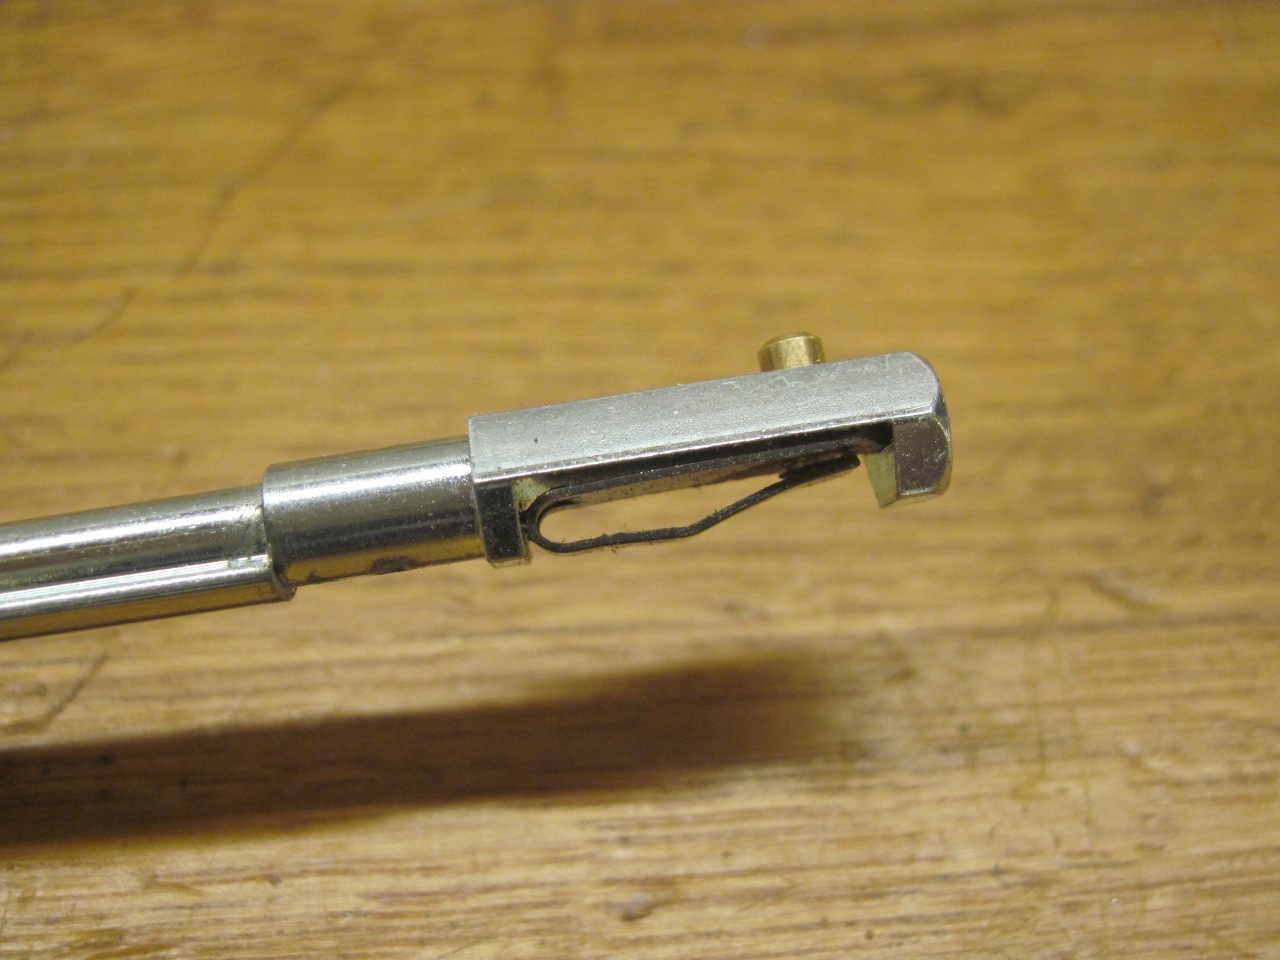
I bought a choke cable. As with many replacement items I can't
avoid buying, this one required a little touch-up before I could use
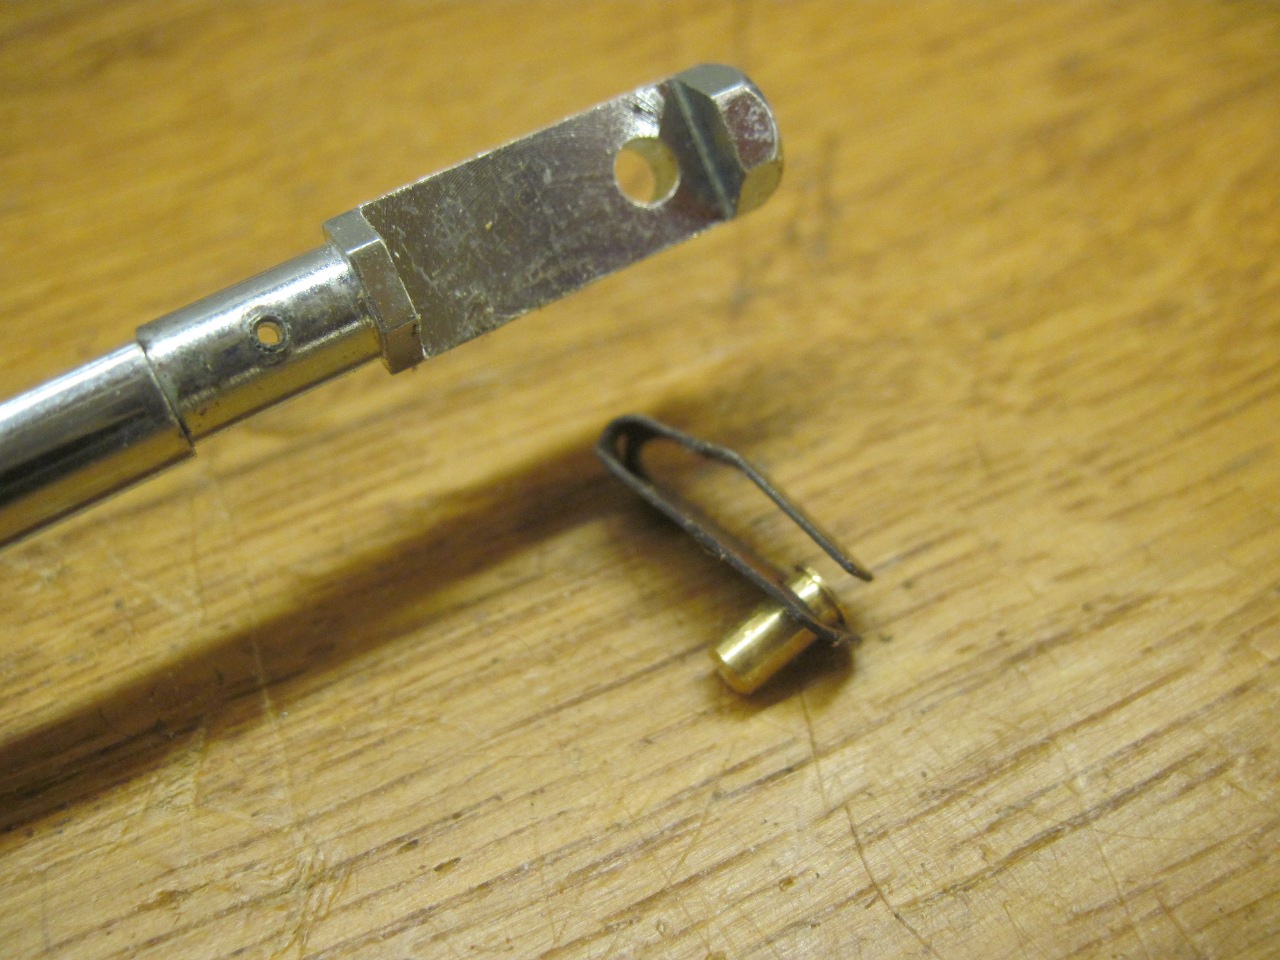
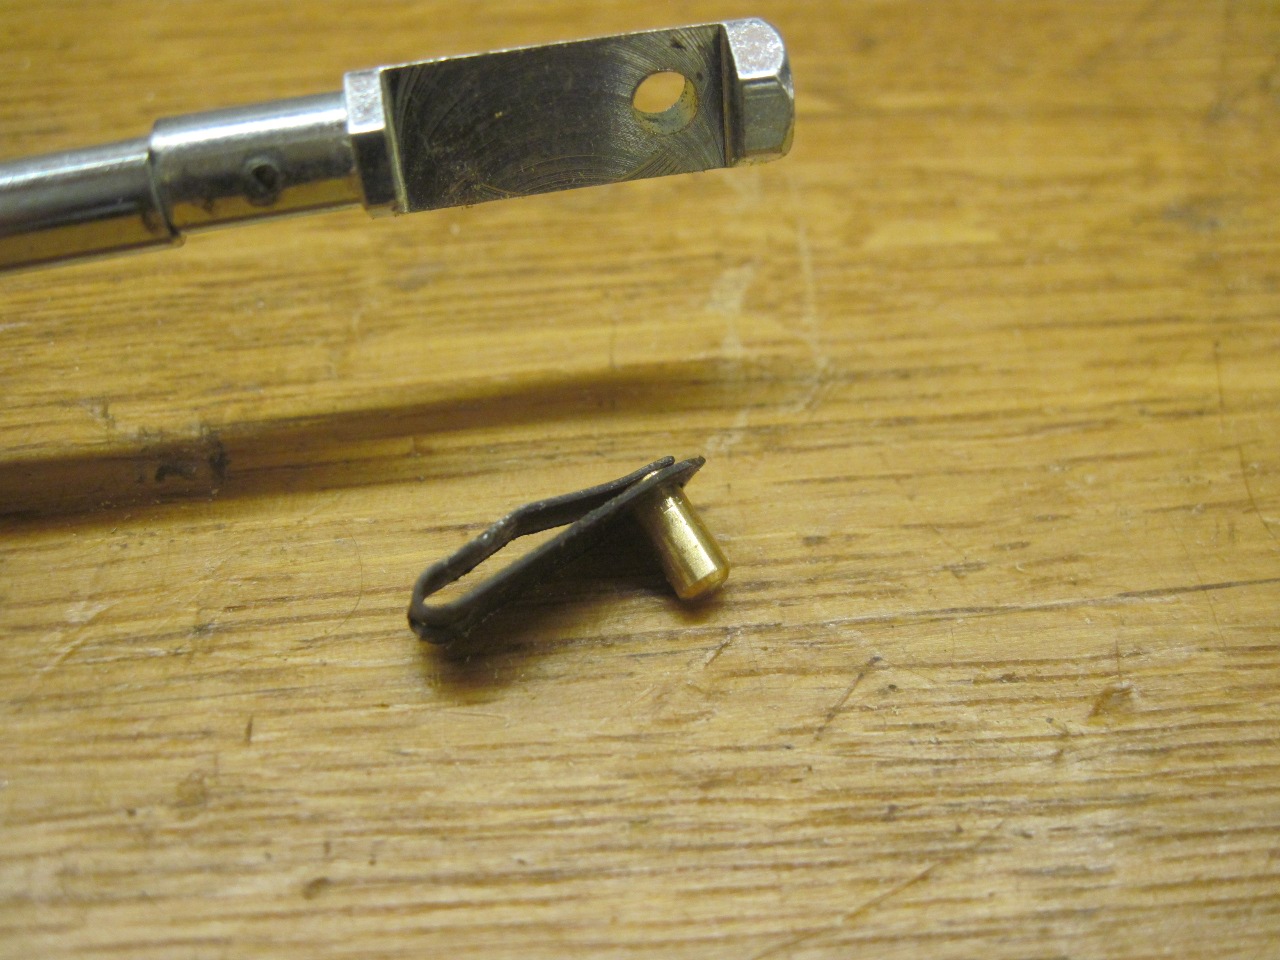
it. I noticed right off that the knob wouldn't stay on. I
traced this to the spring that is supposed to press on a little brass
retaining pin. It wasn't even touching the pin.

Removing the spring and reshaping it slightly fixed that. I get tired of being our vendors' QC department.
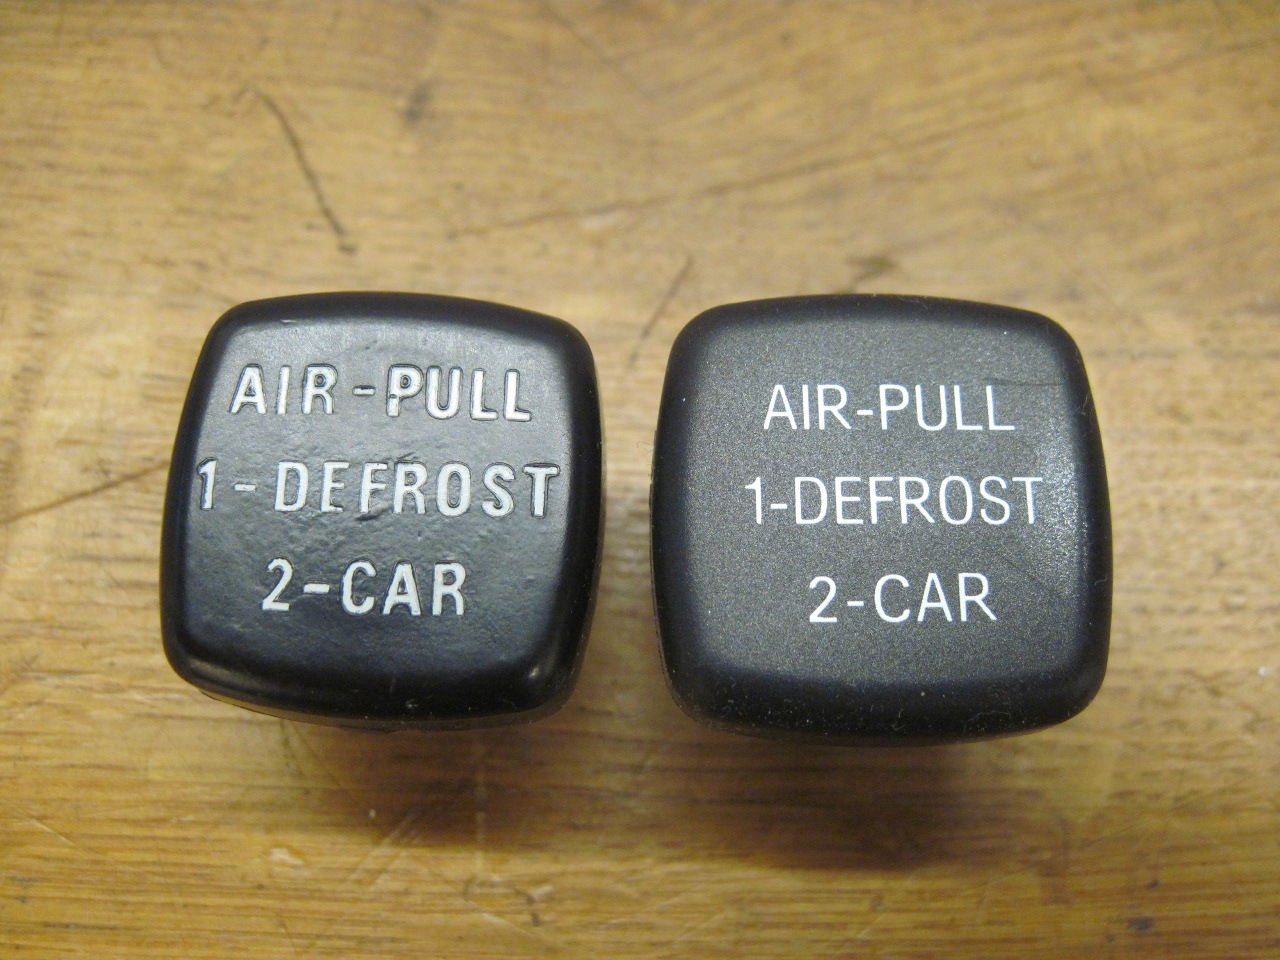
I
bought new knobs, but the originals cleaned up well enough that I might
use them. The new knobs had the legends just painted on, while
the originals were heat stamped or embossed.
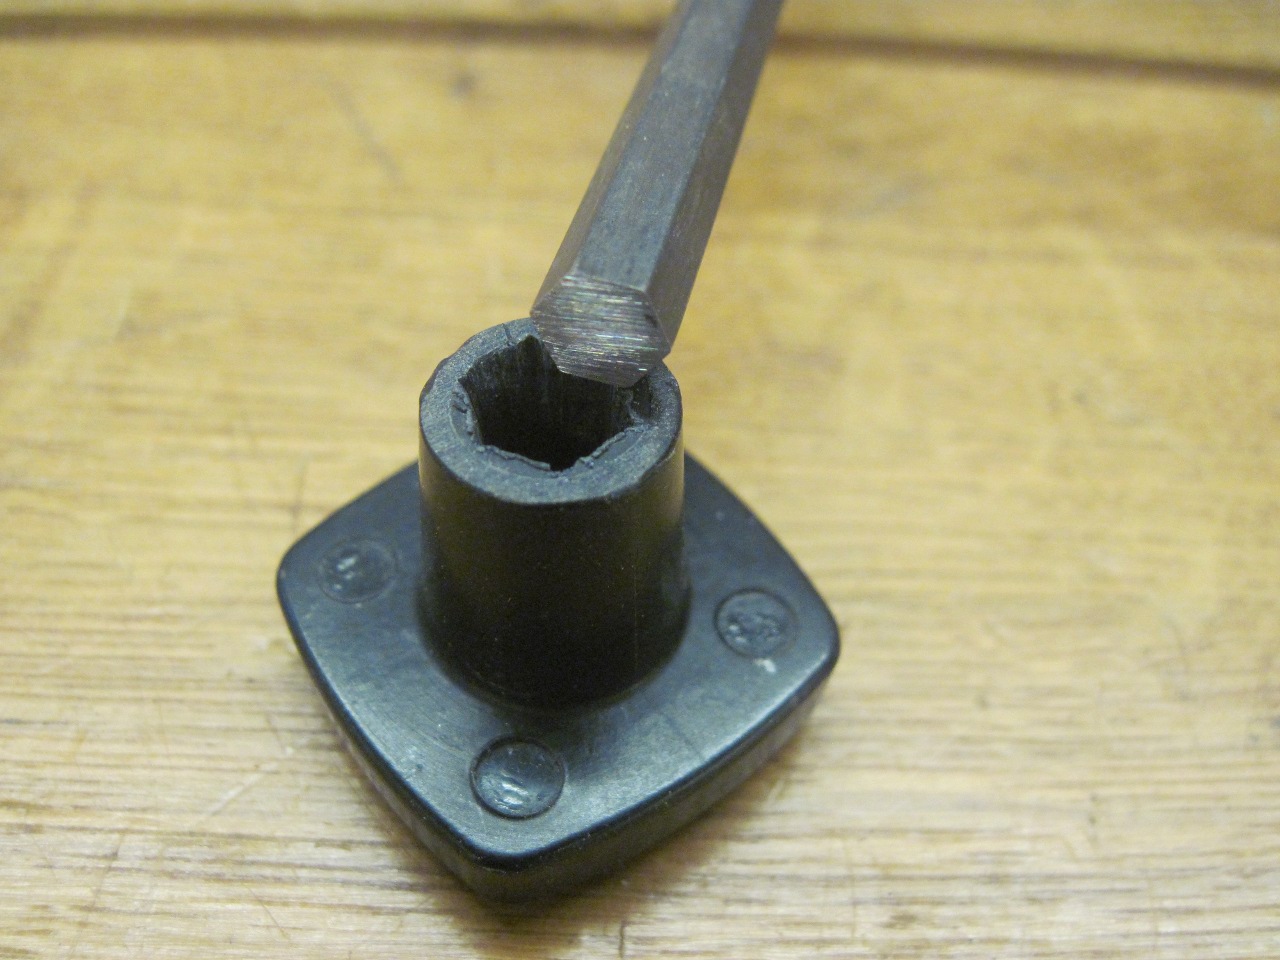
Stuck
knobs are a perennial problem of TR6 cars. They can be very
difficult to get off once they are on. I've been able to fix this
by doing two things: First, slightly file the corners of the hex
shaft, and file the flats near the spring loaded pin. The
staking operation that keeps the pin in place can distort the hex
a little. Second, broach the hex bore of the knob with a 1/4"
allen key that has had one end ground flat so the edges are sharp.
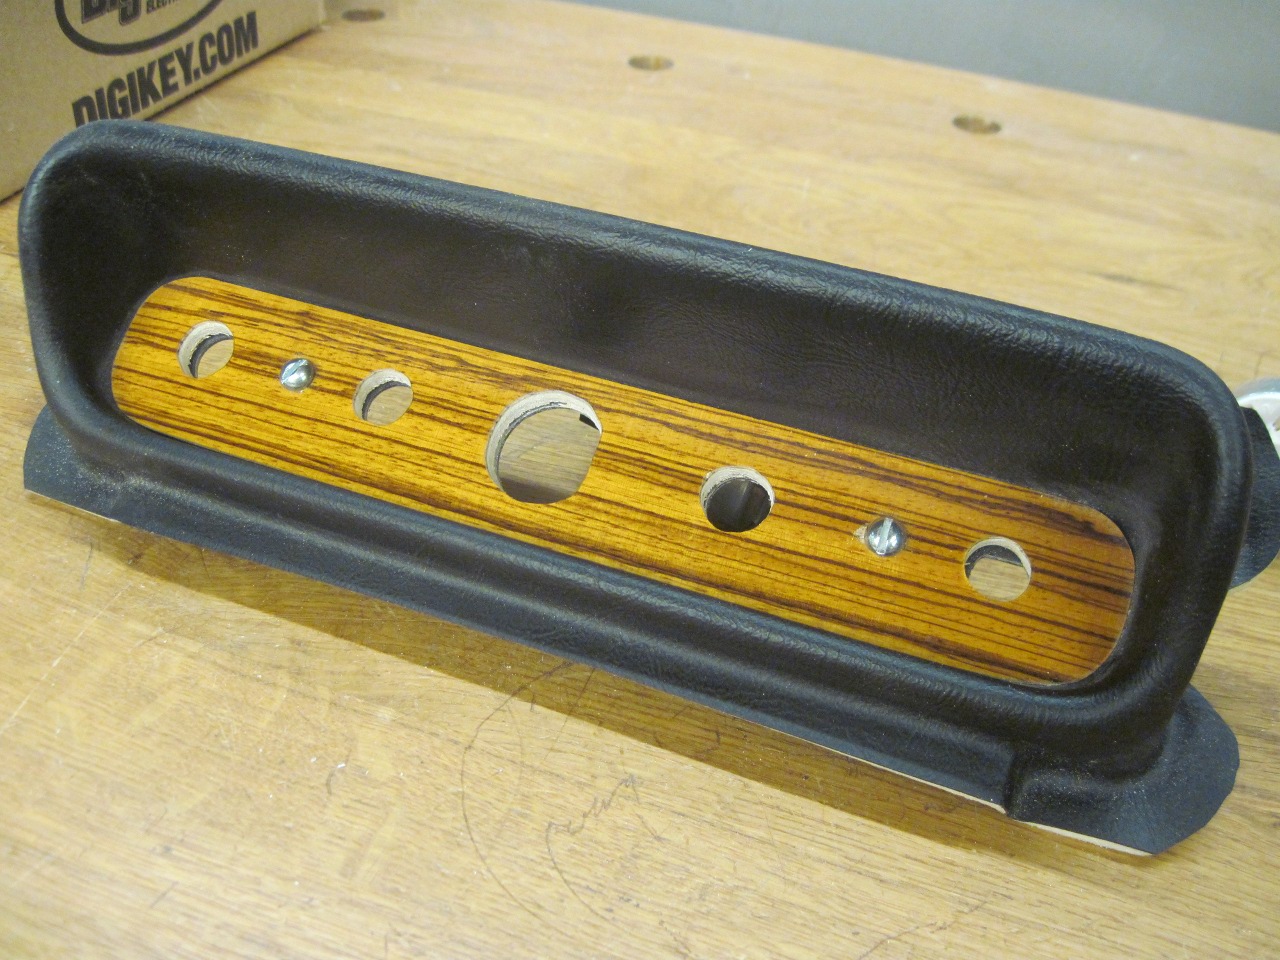
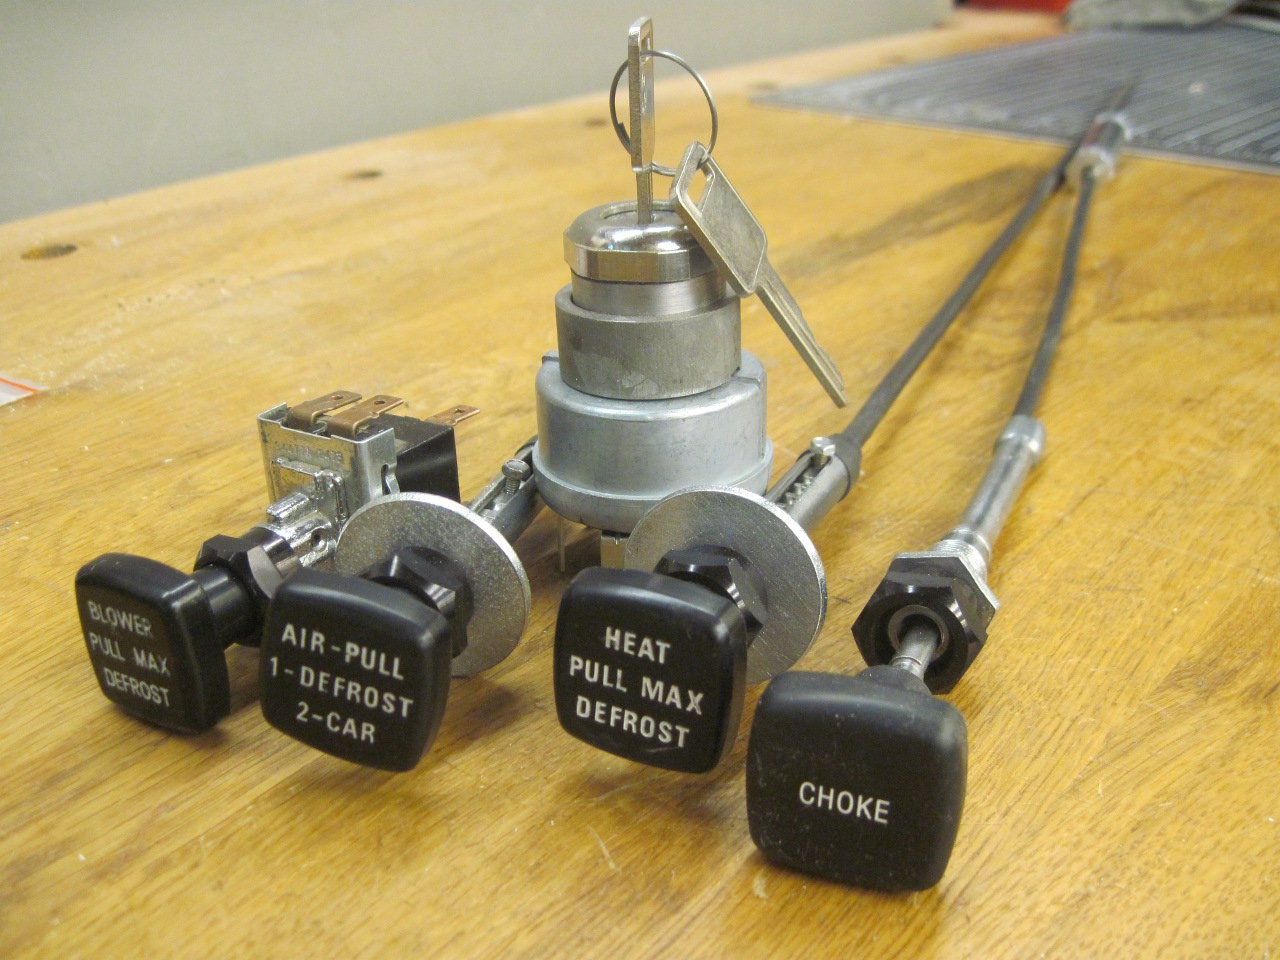
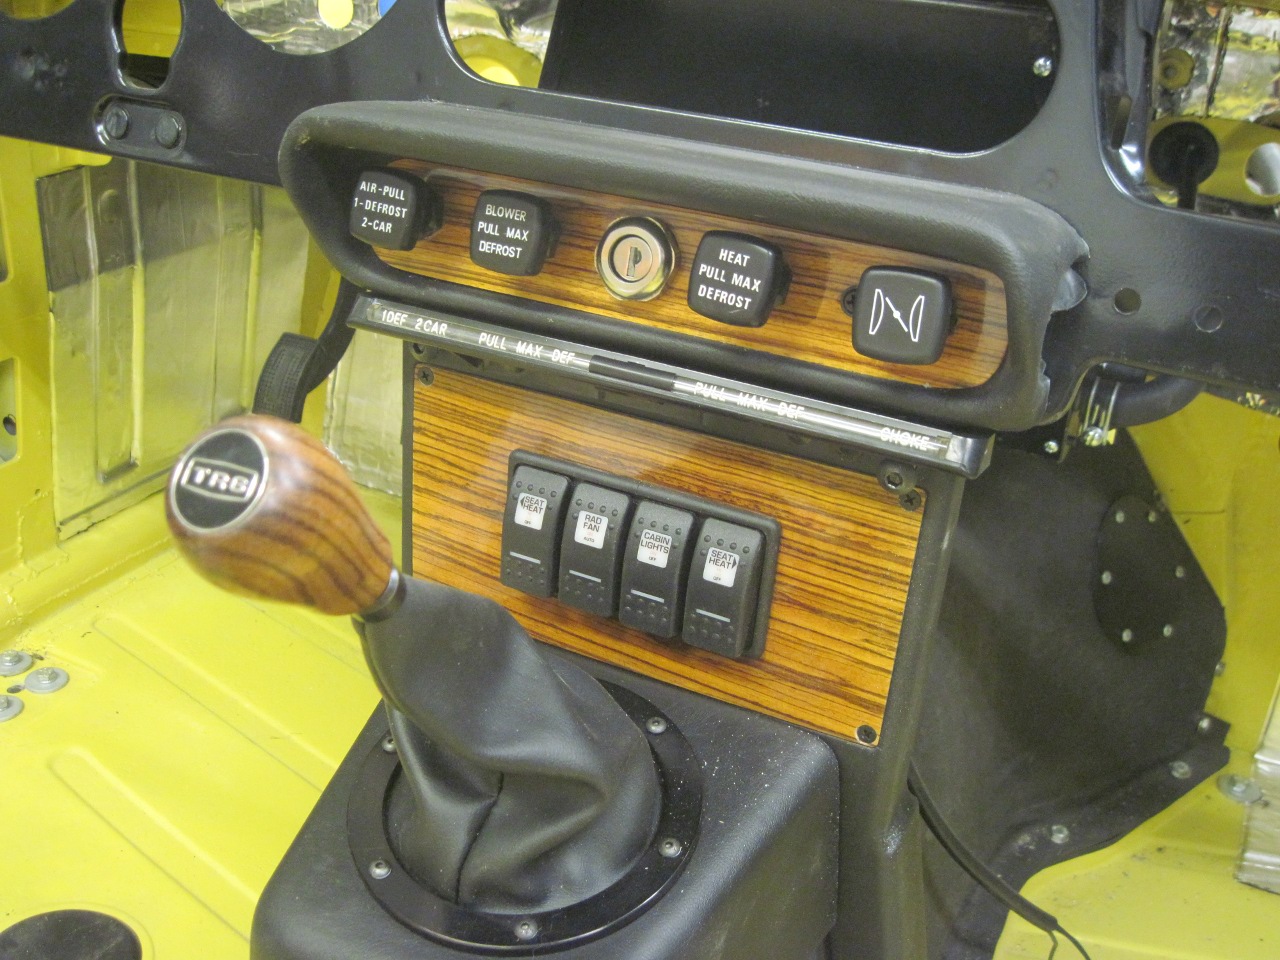
So here are all the controls that go into the plinth, except this was my experimental choke cable which I didn't use.
Test fit-up.

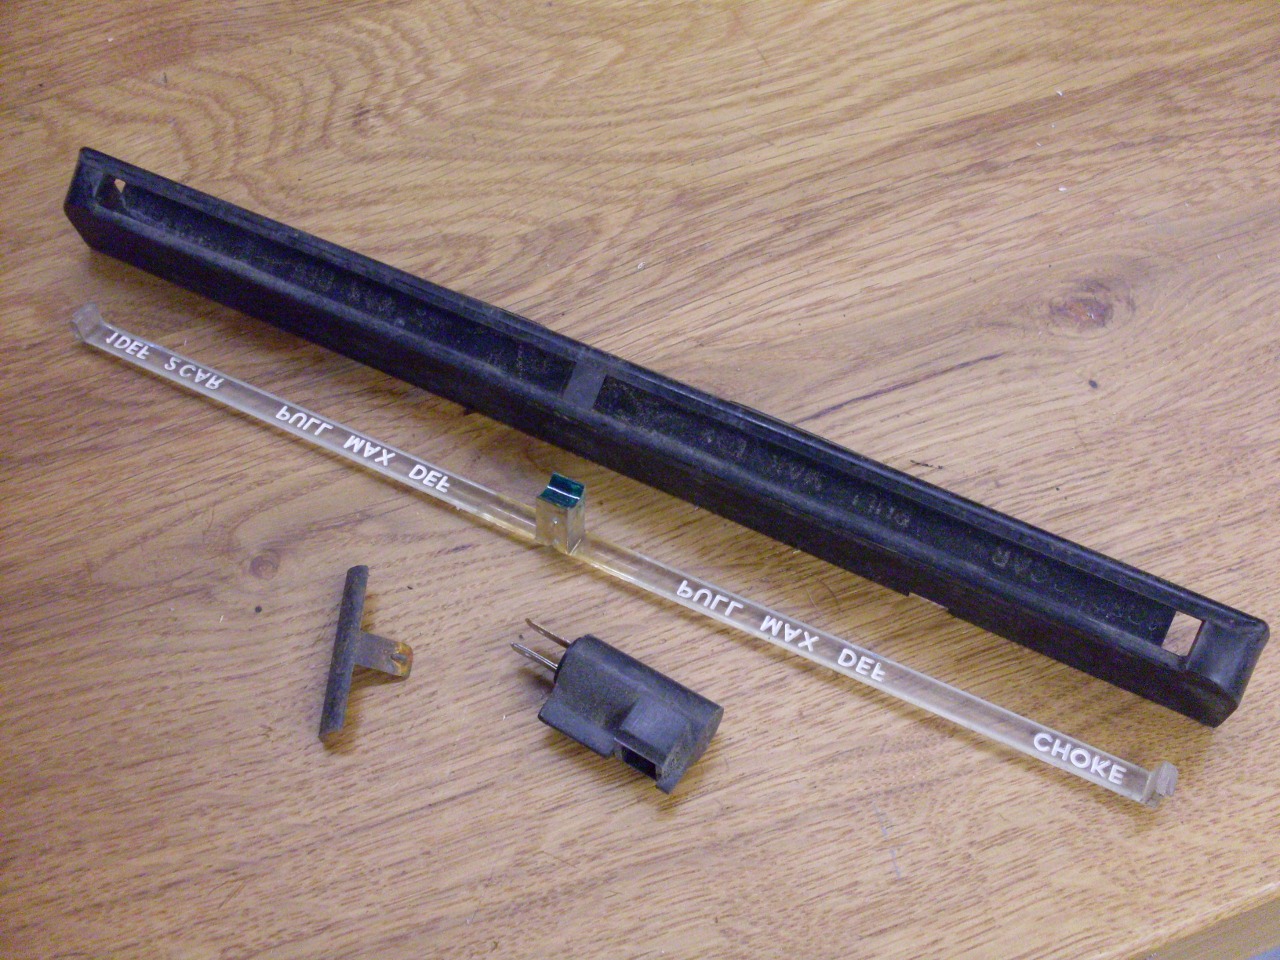
OK,
everything seemed to be ready to mount into the car. First, the
little lighted "Heater Control ID" bar was spruced up and installed.

Plinth goes home.

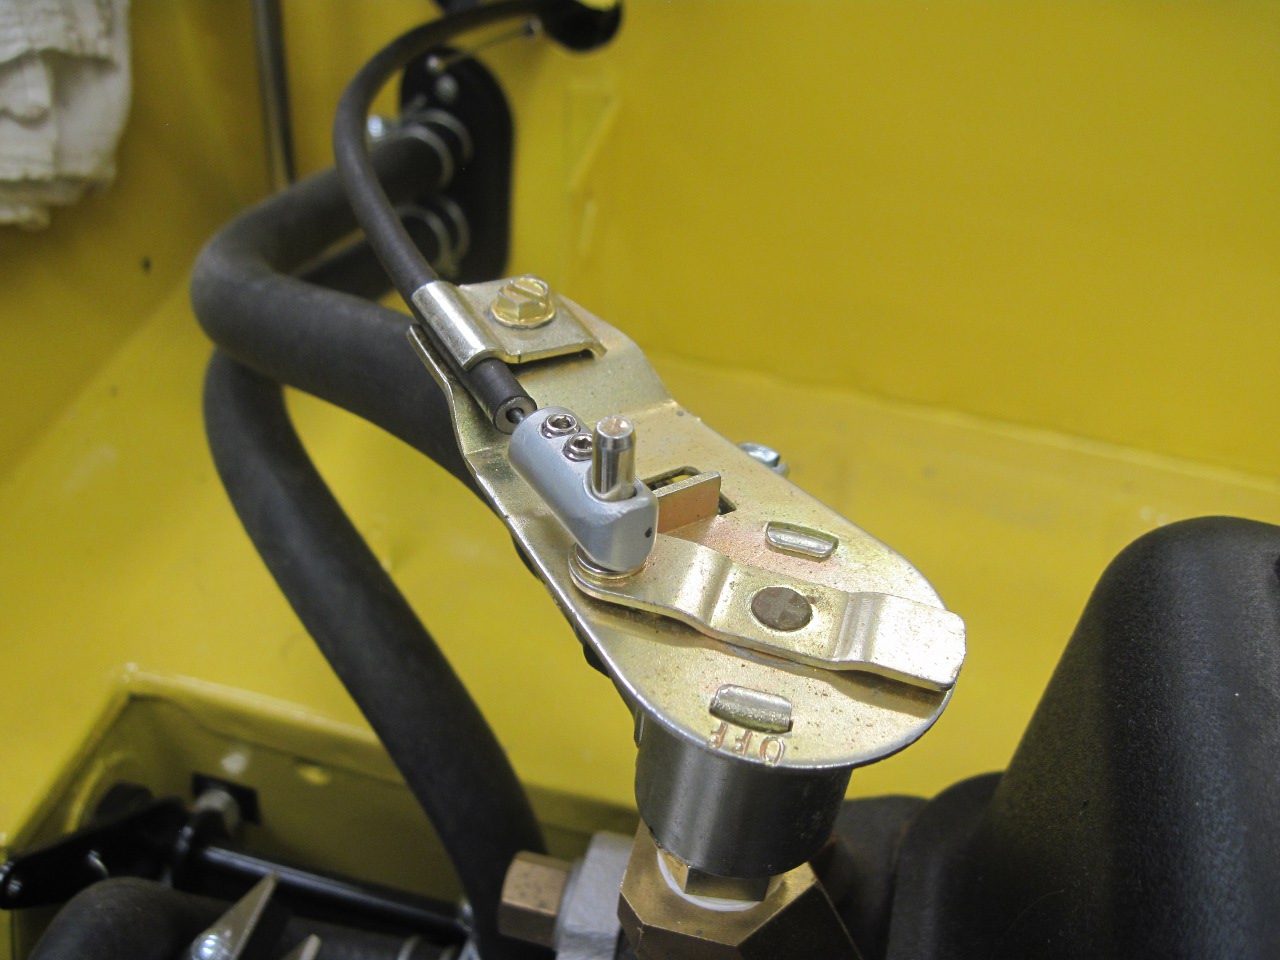
Then
it's just hooking up the cables. My heater temp valve is an
aftermarket model, so I had to come up with a cable end that would mate
with the valve arm. Before that, I had to shorten the outer cable
sheath a little.
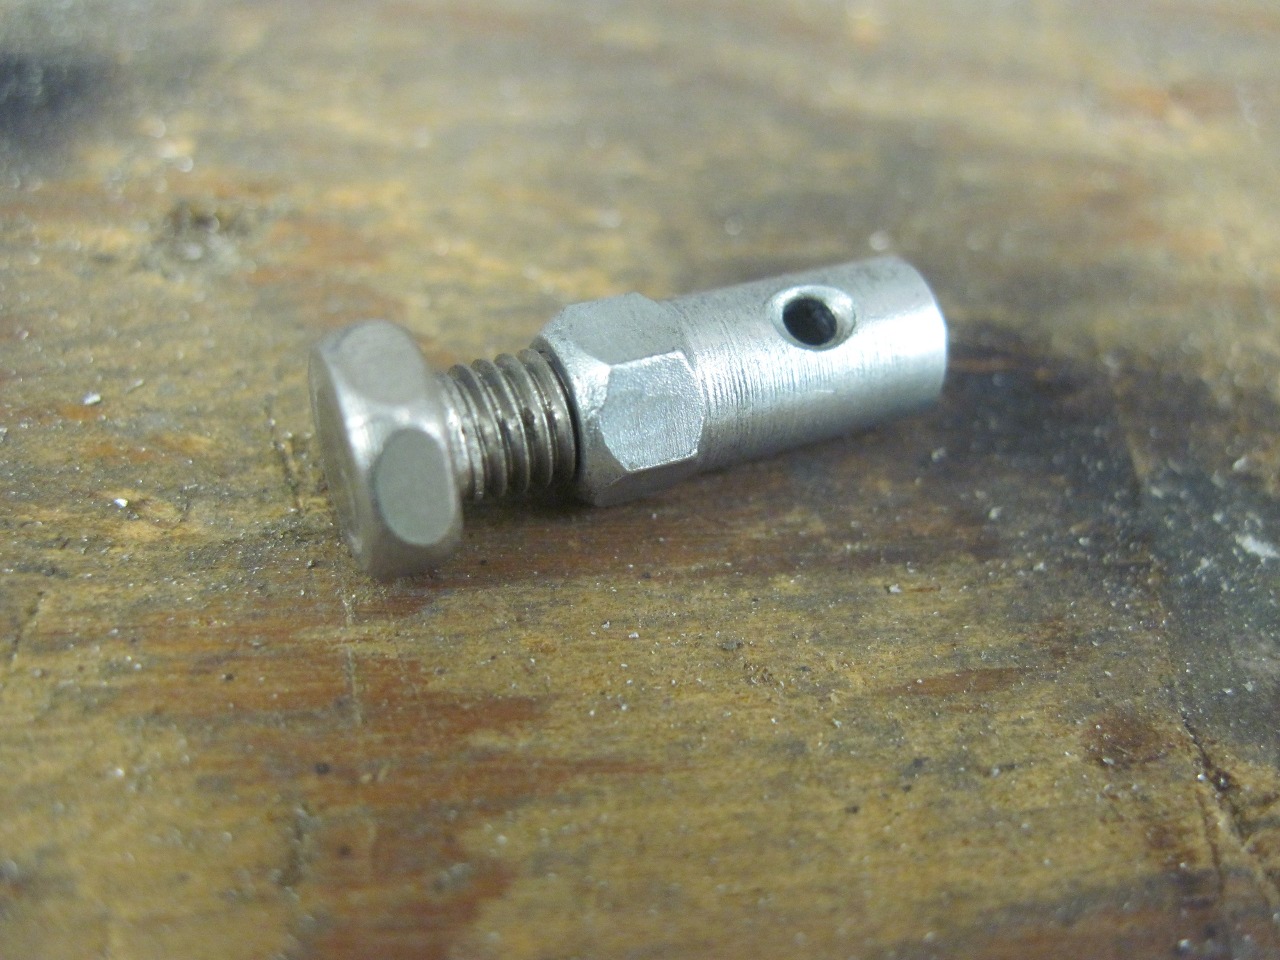
For
the demister control, I had somehow misplaced the cable end fitting.
To make one, I couldn't remember exactly what it looked like, but
it must have been something like this.
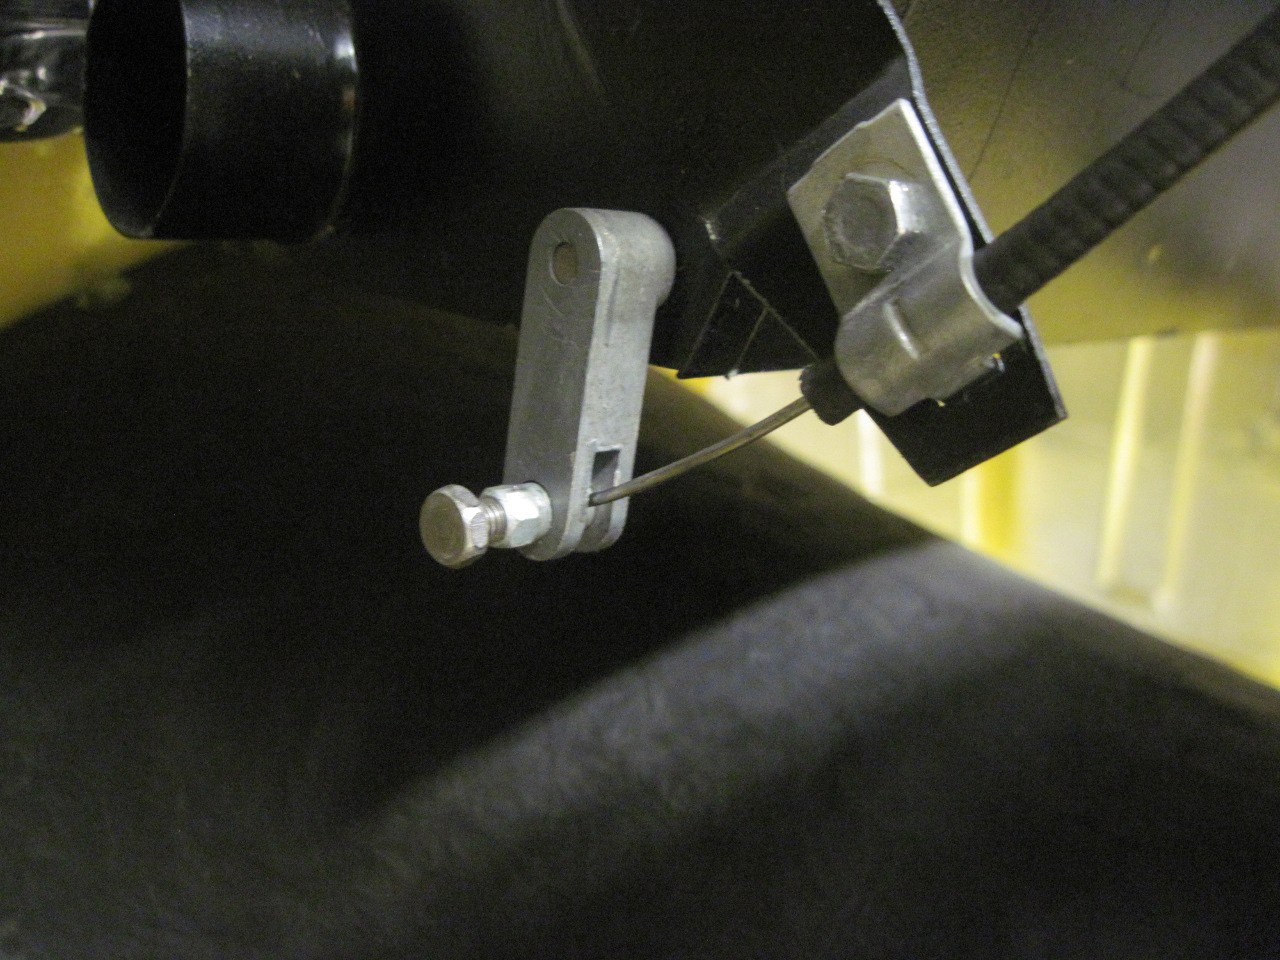
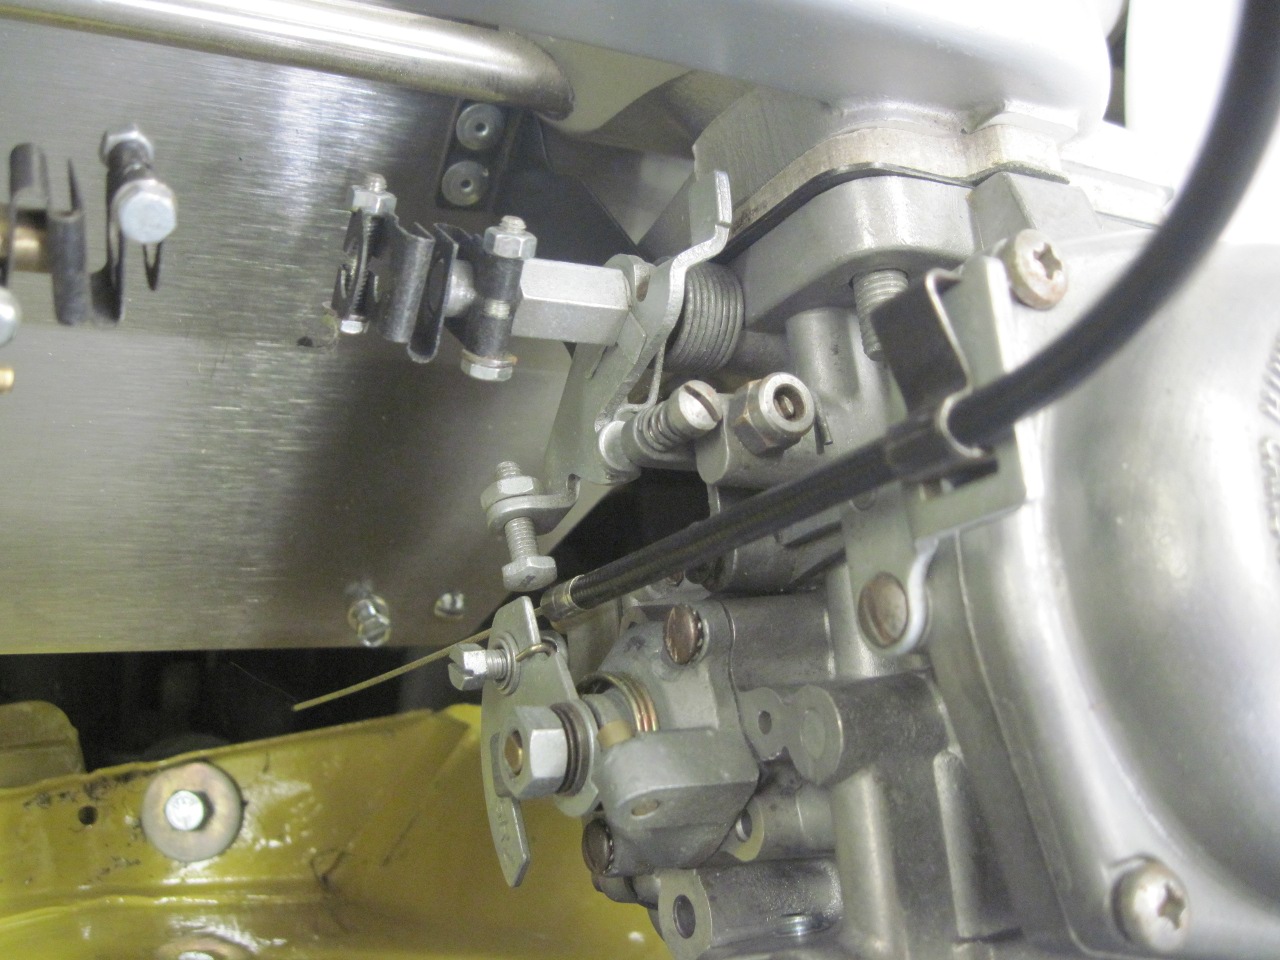
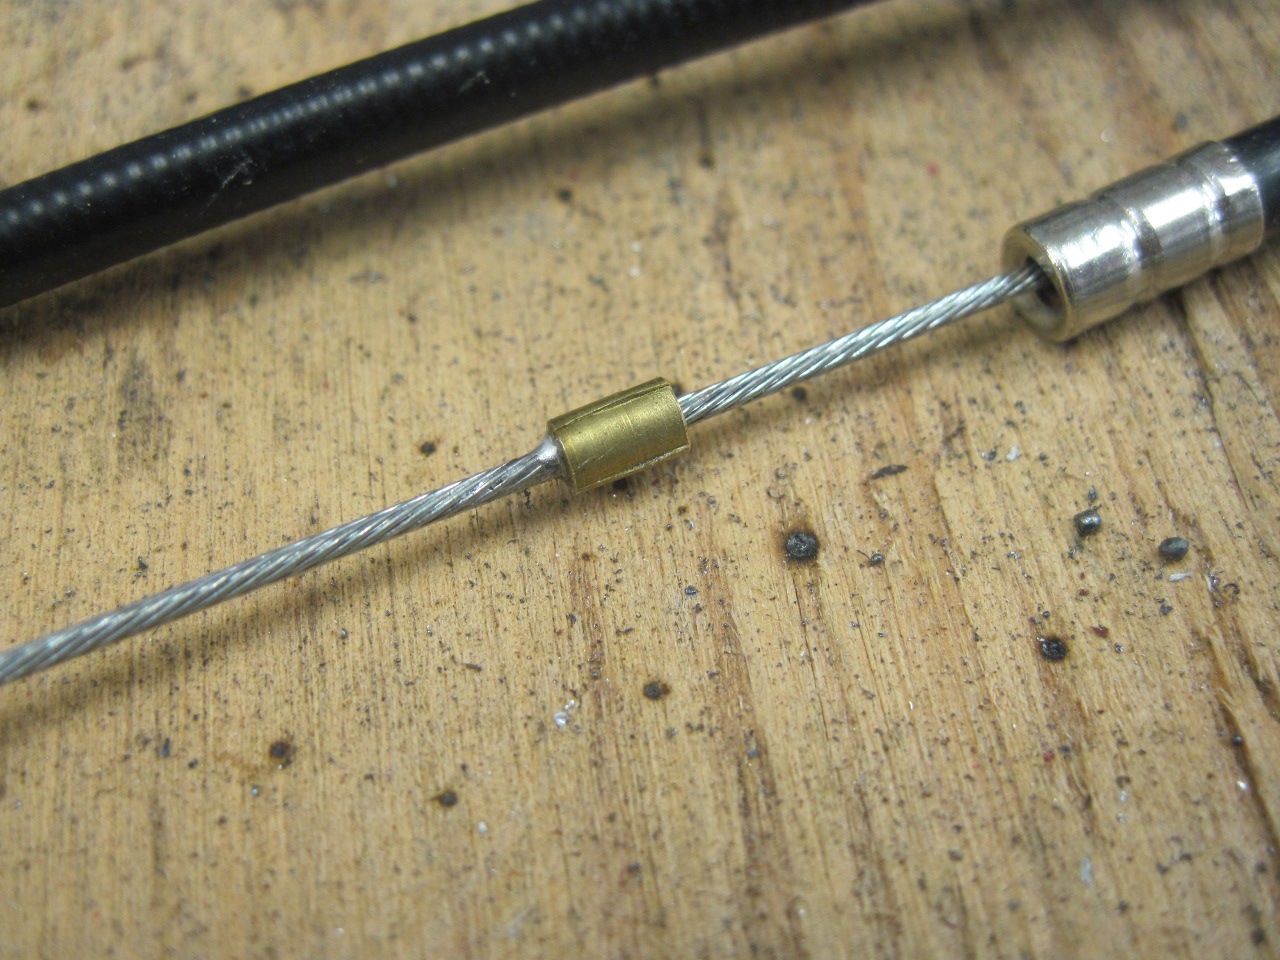
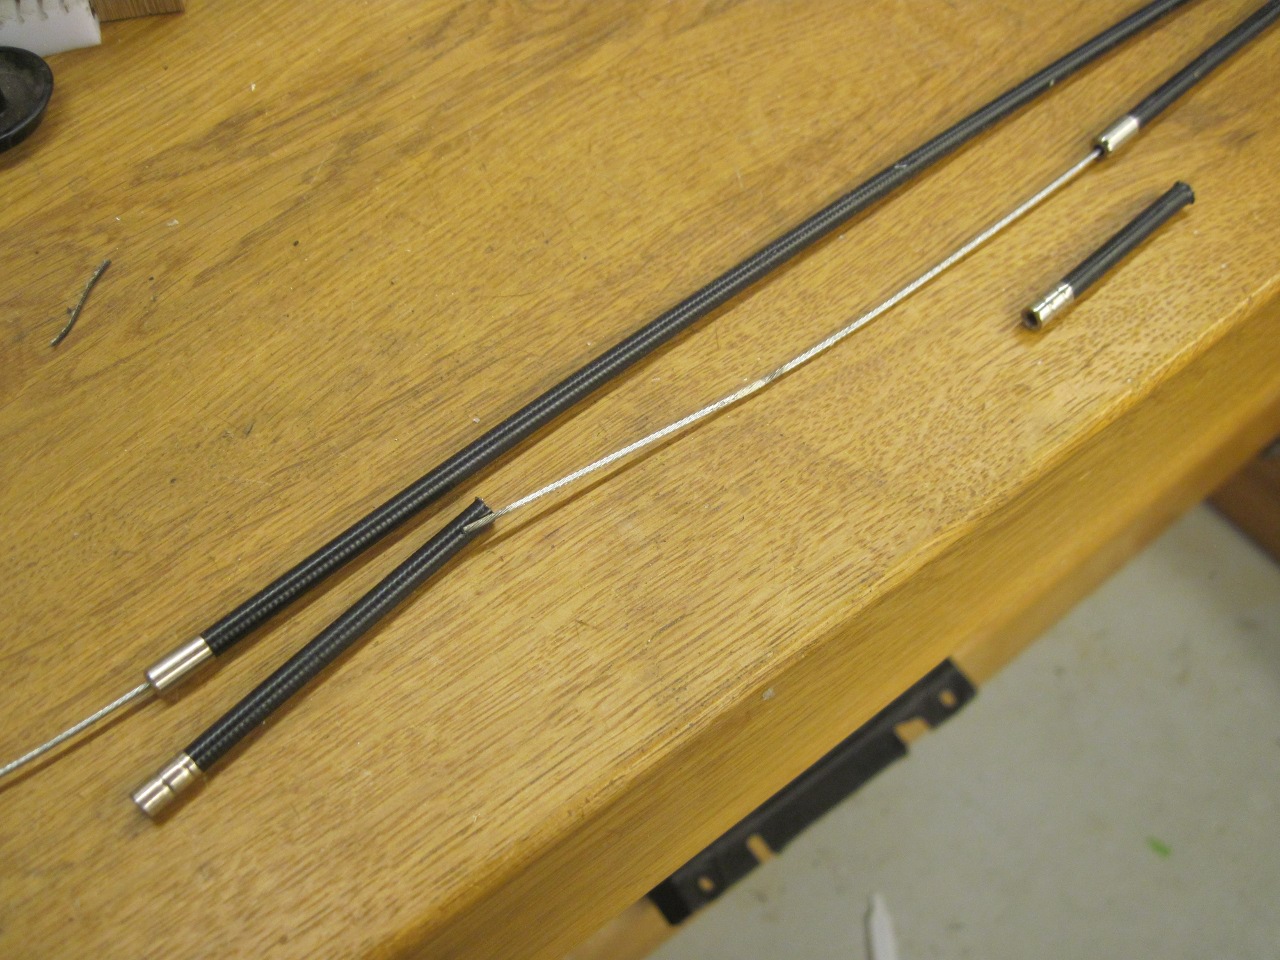
I
thought the choke cables were unnecessarily long, So I cut off a
few inches from each one. To do this, I had to pull the inner
wires back beyond the cut position. In turn, this means that the
little soldered brass keeper has to come off. I had some cable
housing ends to replace the crimped-on ones.
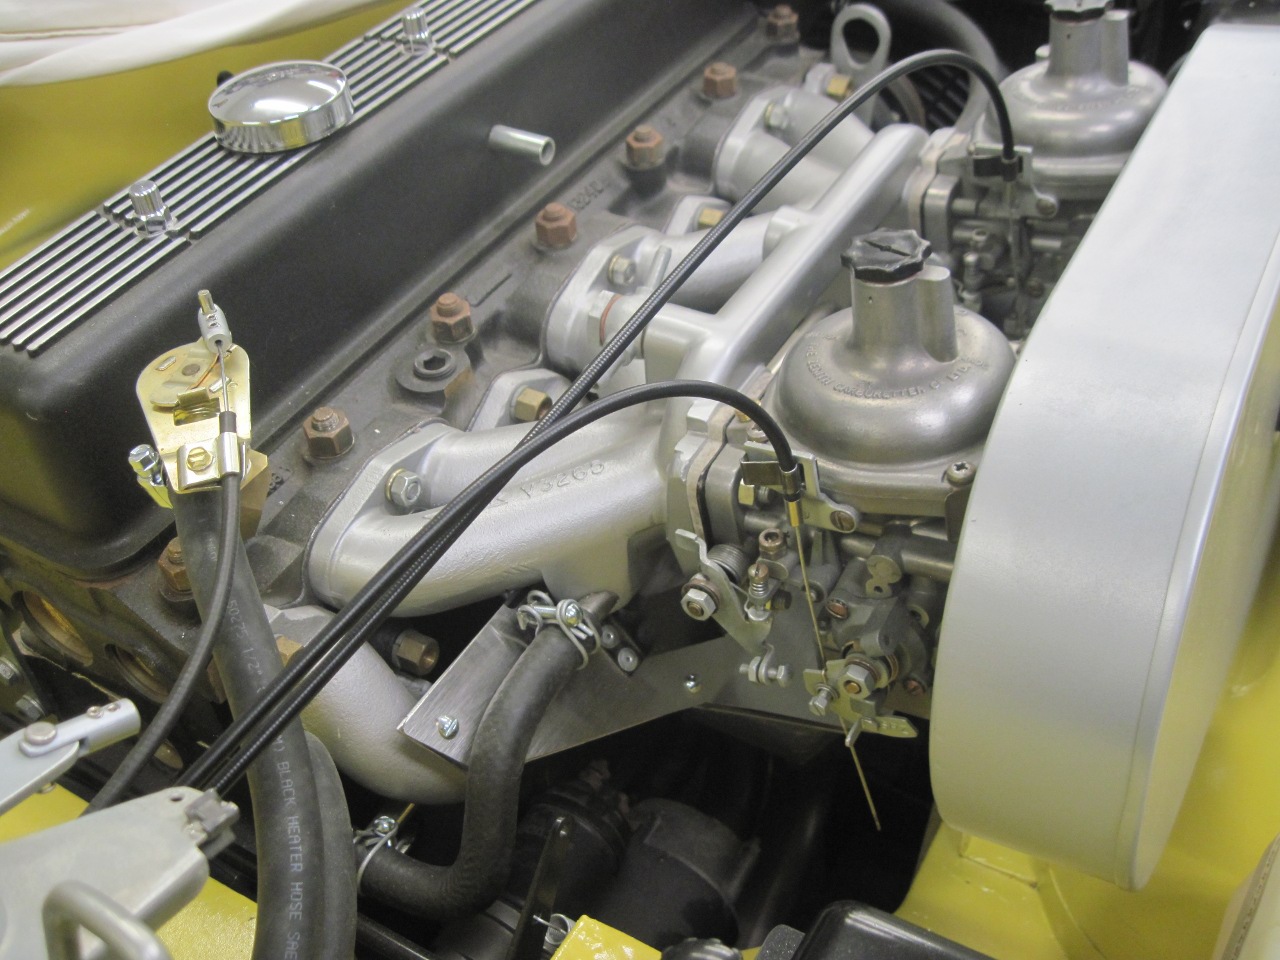
Ahhh, much better. Now they won't be wearing through the paint on the underside of the bonnet.
OK, going to have to find something else to do now.
This
project was a bit of a slog, even without the detour into exotic choke
cables. It was fun, though. About the only significant cost
was the choke cable and the plinth itself.
Comments to Ed at elhollin1@yahoo.com
To my other TR6 Pages