To my other TR6 pages
April 26, 2017
Radiator Shroud
[Click the pics for a bigger view]
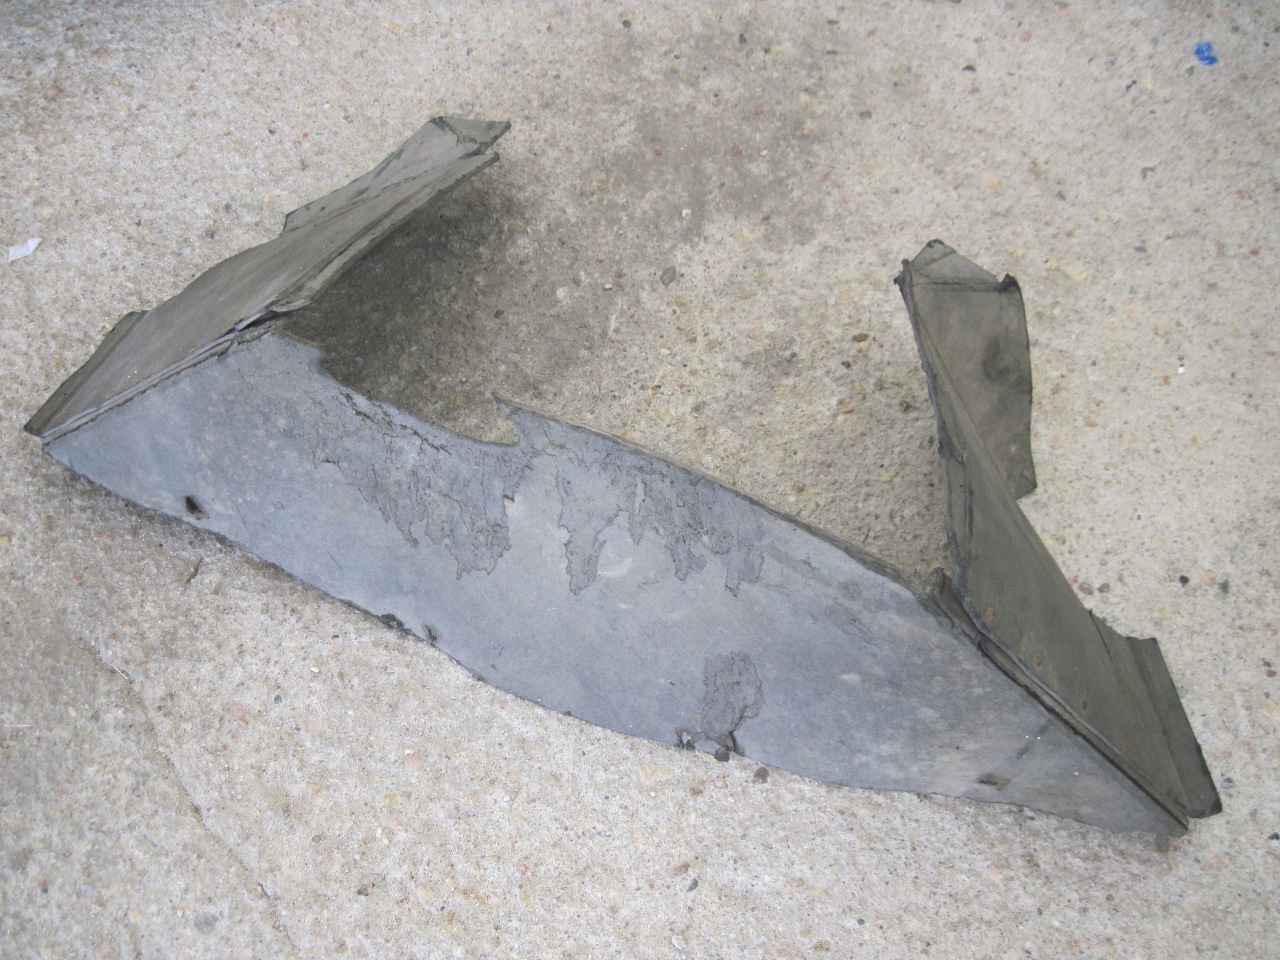
My
TR6 came with a shroud or duct in front of the radiator apparently to
direct air from the grille area through the radiator. The shroud
was made of some sort of fiber material akin to cardboard and it hadn't
aged well. It was dirty, faded, misshapen and frayed. A
chunk was missing.

These
shrouds are available as aftermarket items in the original fiber, in
polymer, and in aluminum or stainless steel. I'd think they all
work fine, the difference being how they look and what they cost.
With my shroud not worthy of re-installation, this seemed to me a good candidate for some DIY effort.
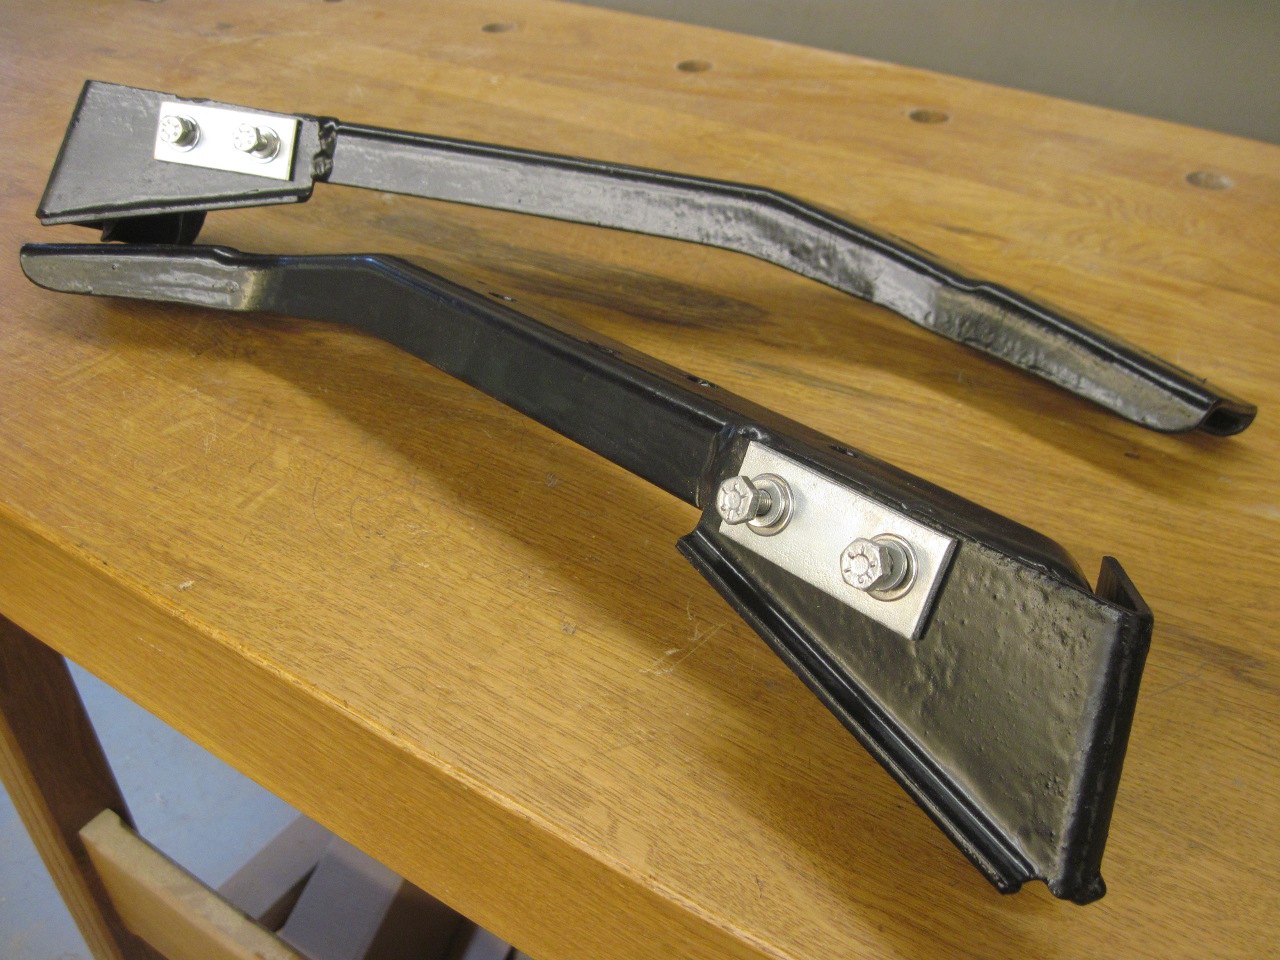
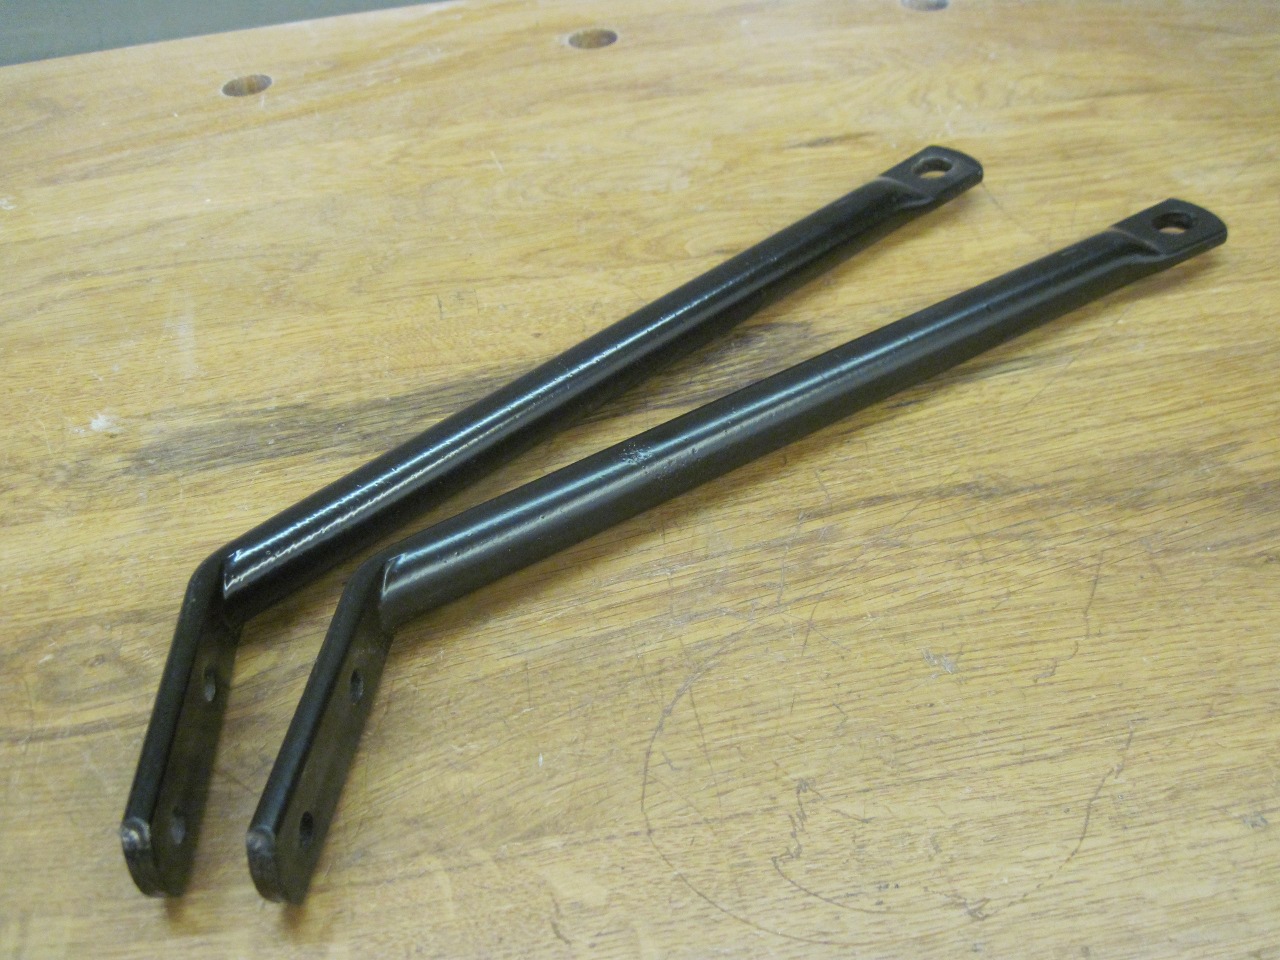
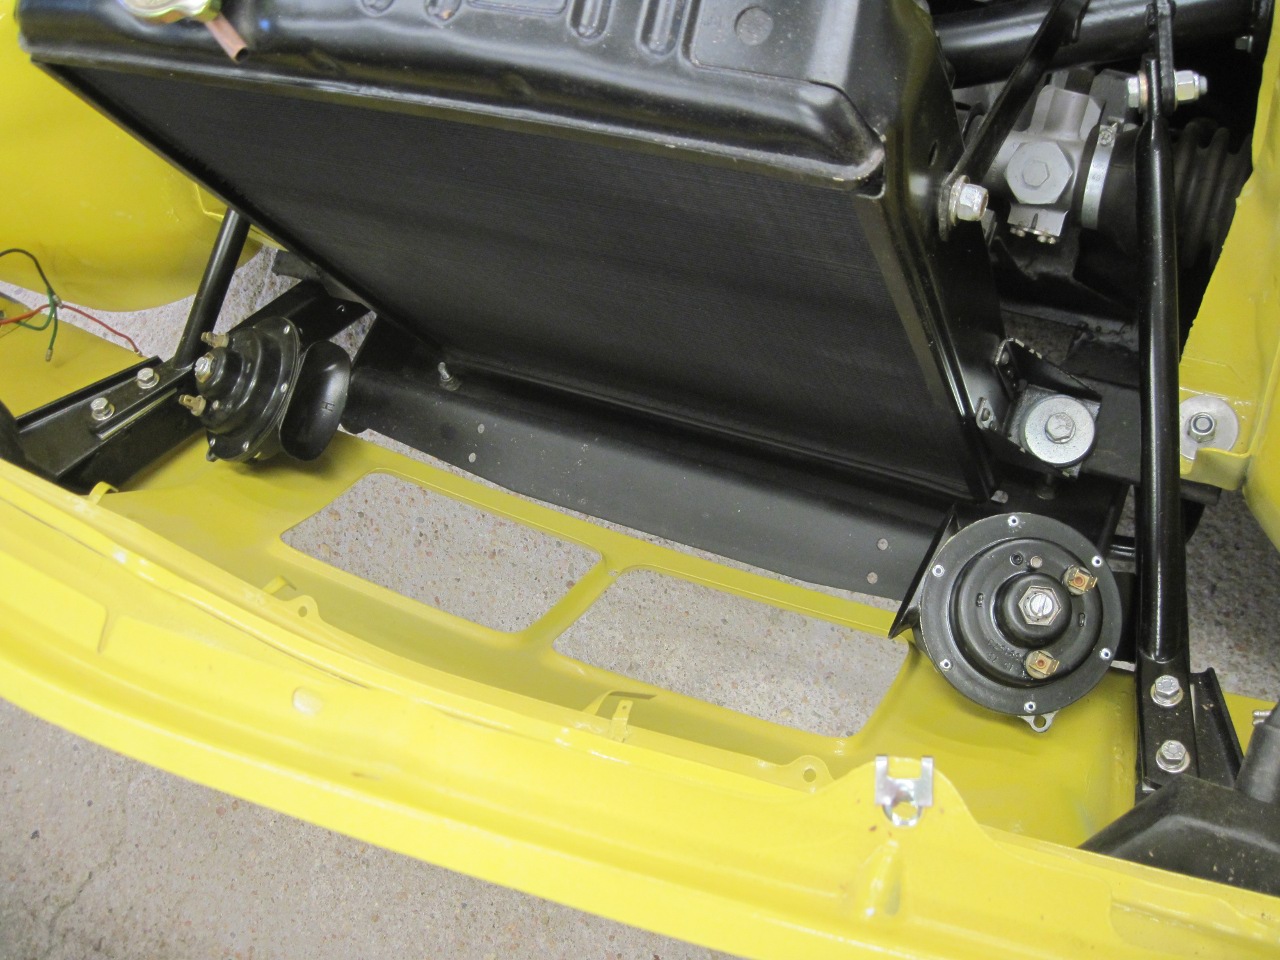
First,
since the shroud has to accommodate some structural items down near the
frame, I had to dig those out and get them installed. There is a
front bumper bracket and a brace on each side. They were painted
or powder coated, and the hardware replated. The shroud also has
to skirt the front signal lights, so those assemblies had to be
temporarily installed.
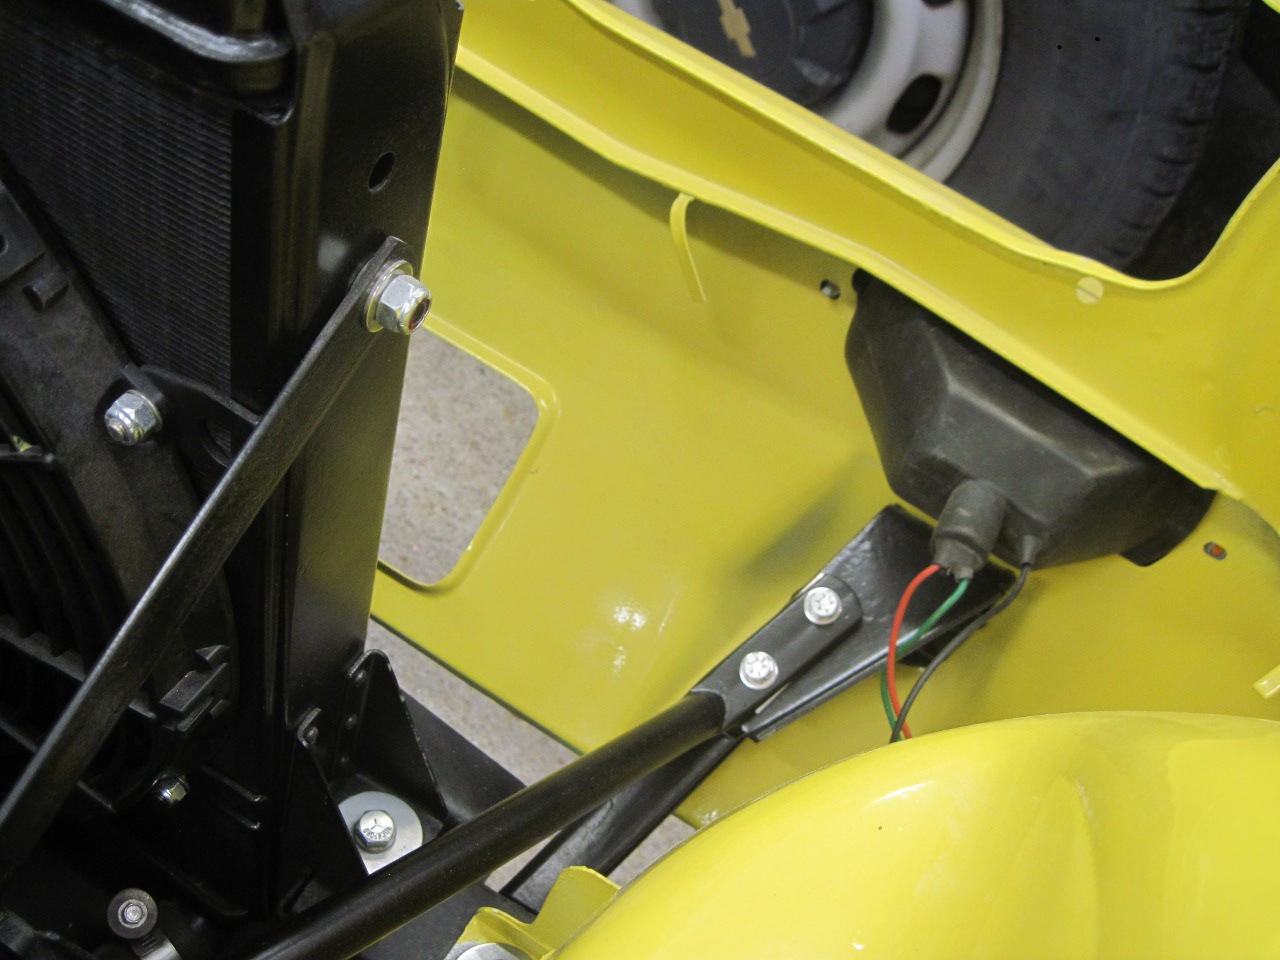
Also the horns:
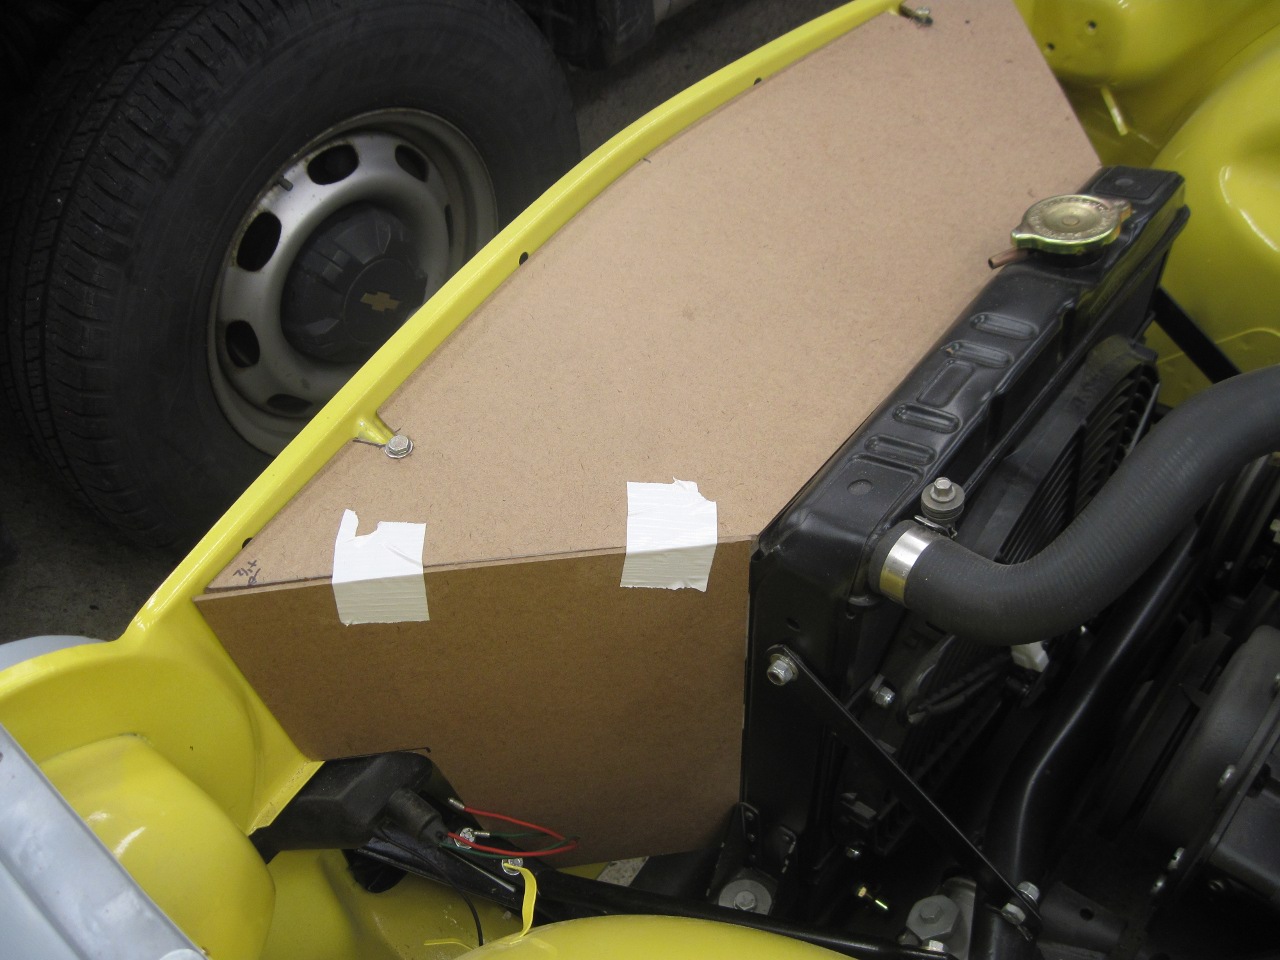
Next
step was to mock up the parts of the shroud. The top panel was
cut from a piece of hardboard. It took a couple of iterations to
get a really good fit.

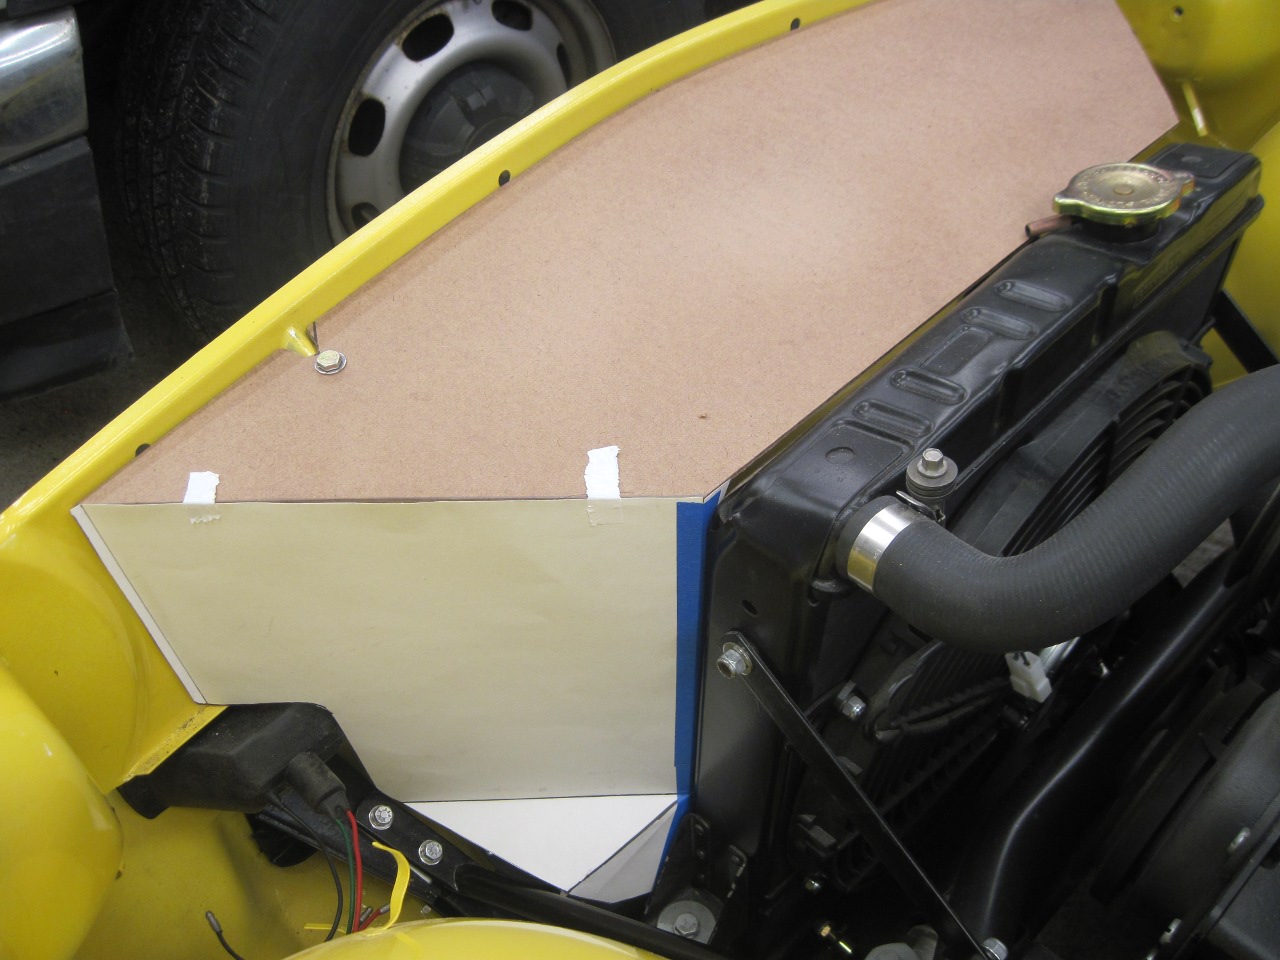
The
side panels started with hardboard to get the general size and shape,
but switched to heavy paper to get the bends right.
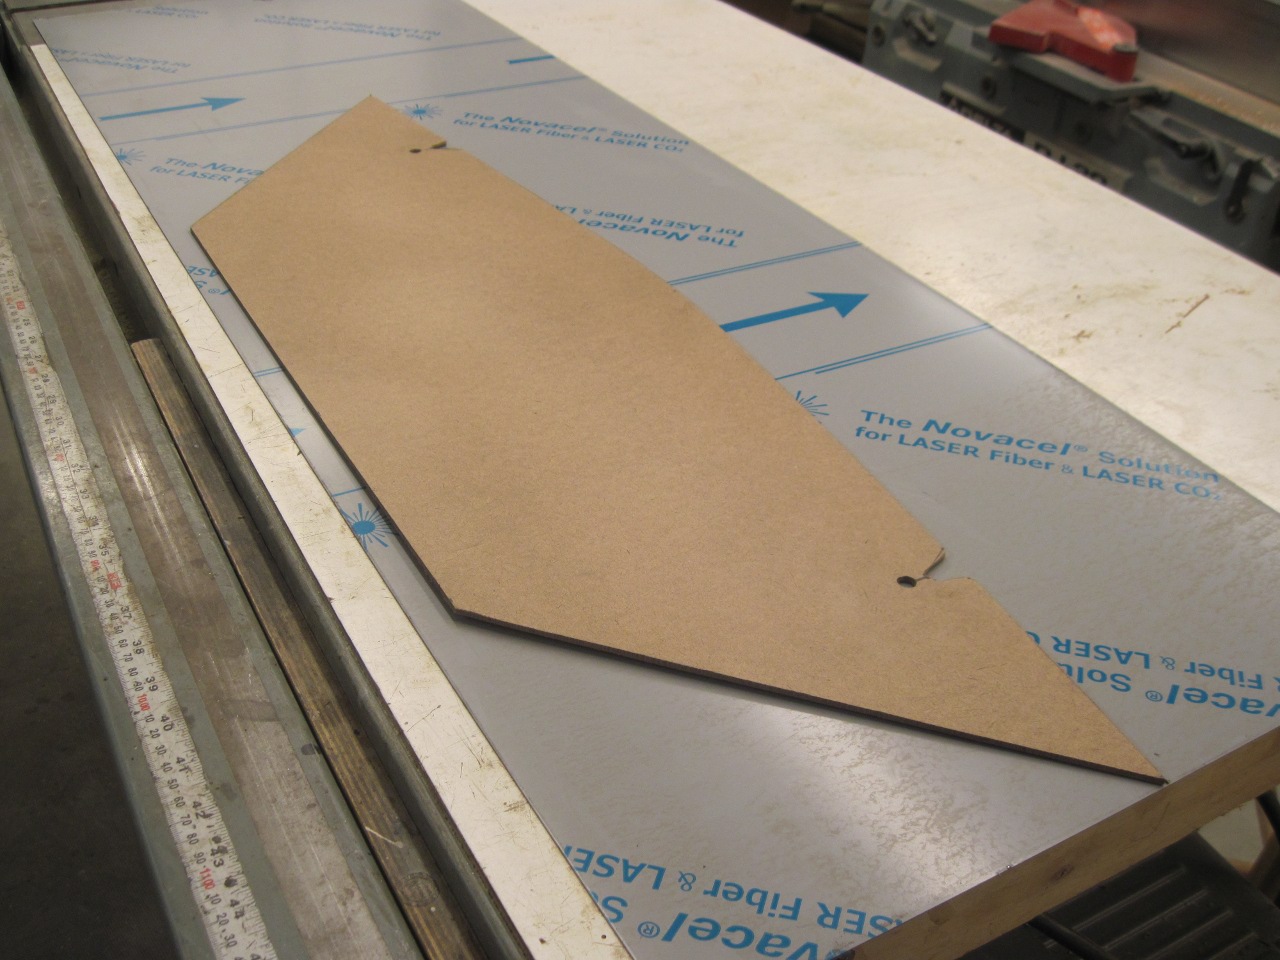
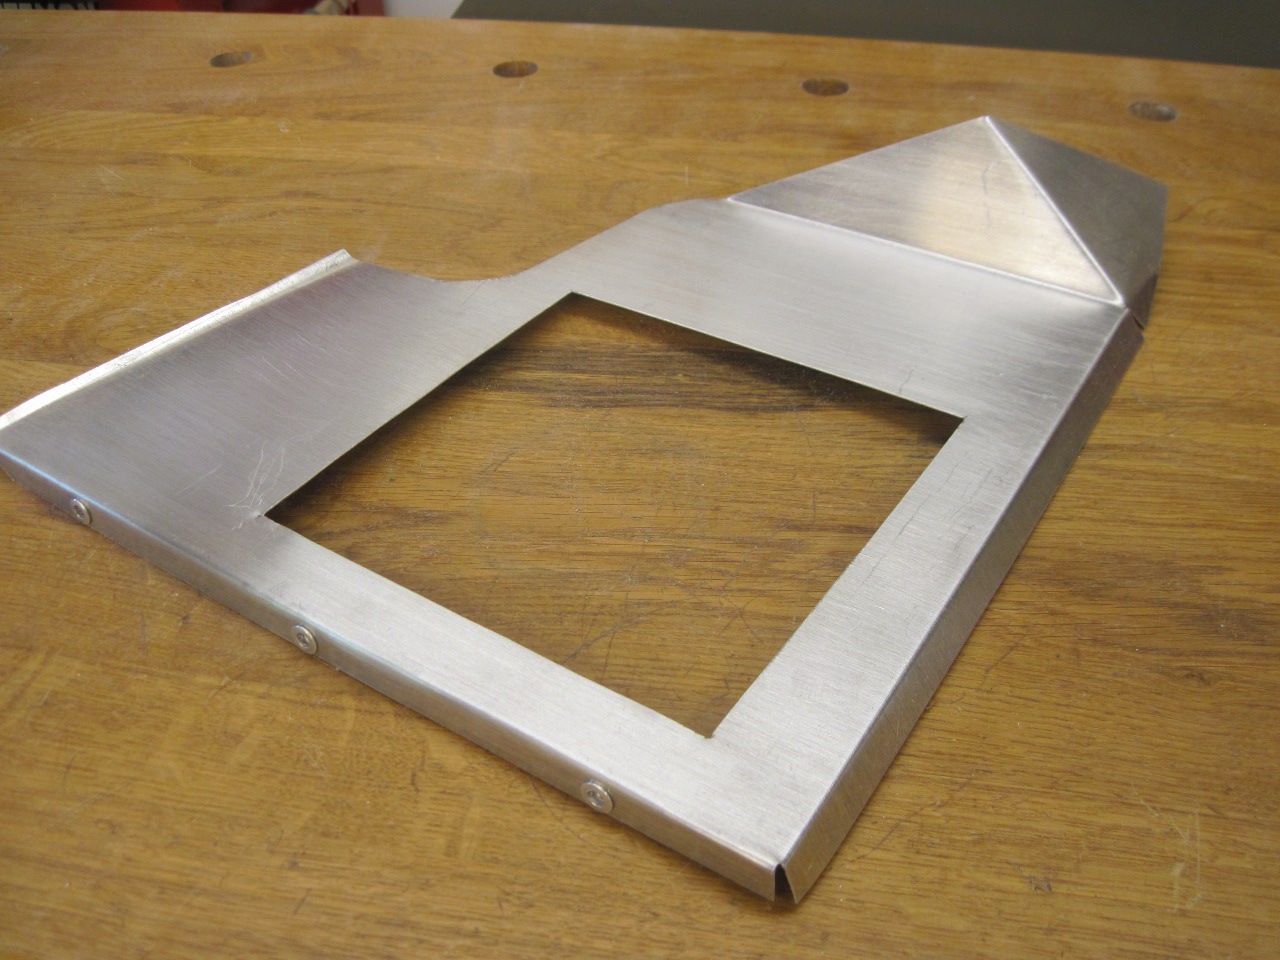
So,
with the patterns fitting pretty well, I cut the top panel out of a
piece of 20 gauge polished stainless. It has what they call a #4
polish, which means that it's shiny, but has a brushed texture that is
supposed to show fingerprints less.
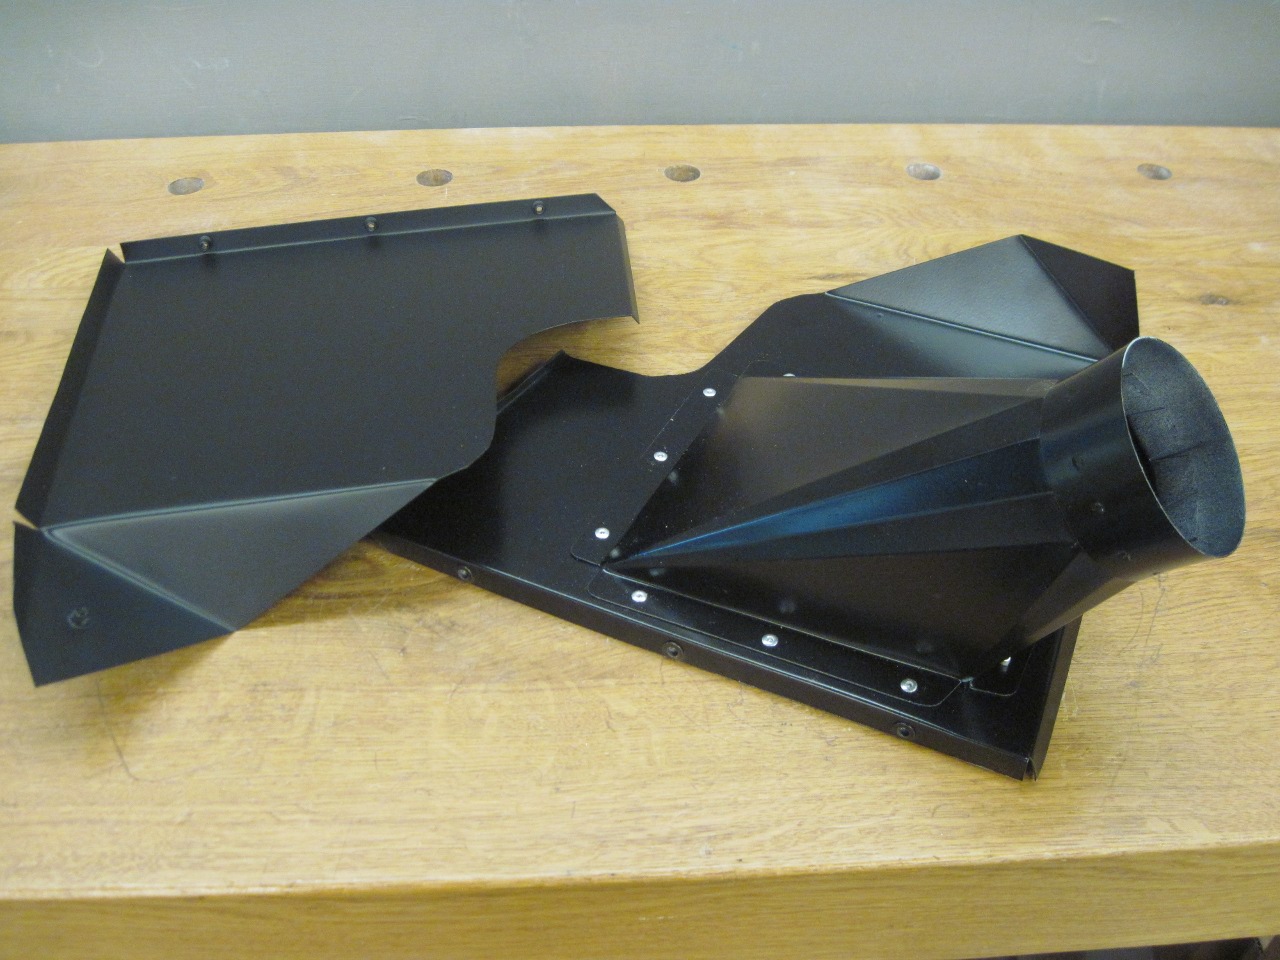
The
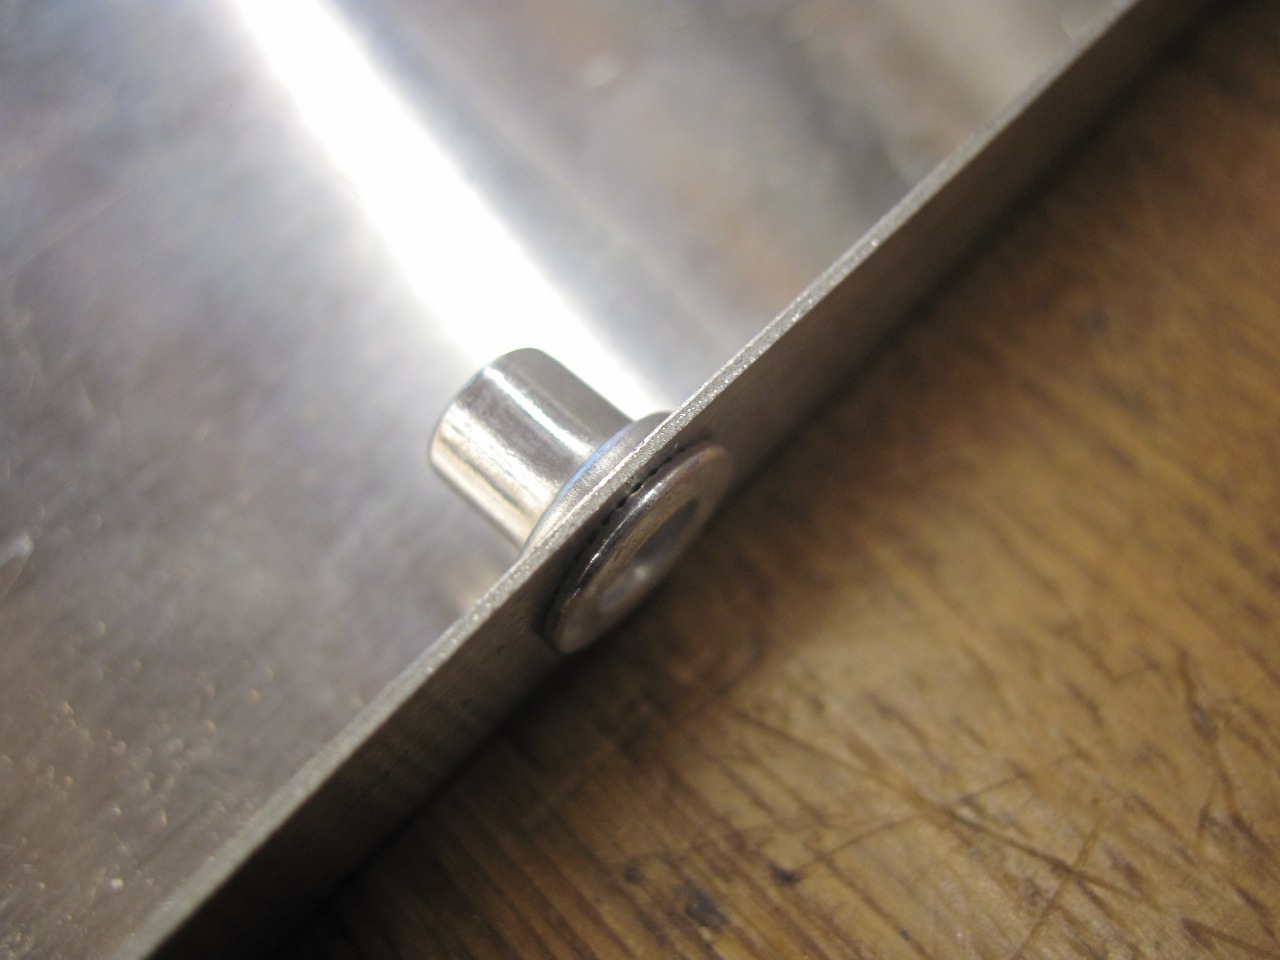
side panels were cut from some 20 or 22 gauge aluminum. They got
some rivet-nuts on their top flanges to attach tothe top panel. I
didn't use the original shroud for a pattern, but when I compared the
aluminum pieces to the sides of the original, they were pretty darn
close to the same.
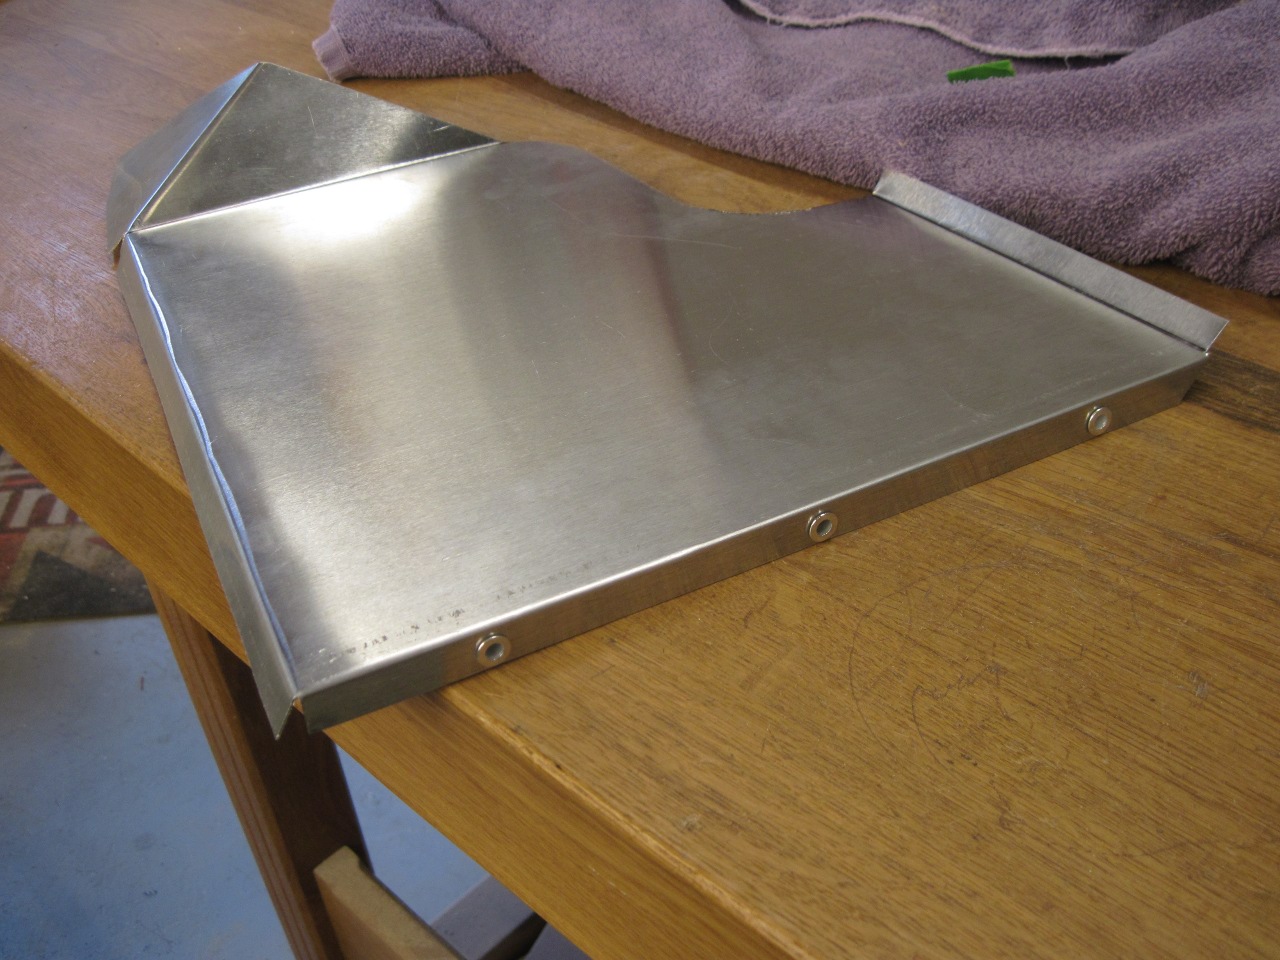
So far, so good. Still some minor trimming and shaping done here.
I
discovered in my research for the shroud that some are available with a
cutout on the right side for a fresh air inlet for the carbs. Now
I am on record as believing that explicit contrivances to bring fresh
air to the carbs, and similar "ram-air" arrangements are of very
limited value. It's been pretty well shown that at any
significant road speed, under-bonnet temperatures are very close to
ambient, and any ram effect is small--probably comparable to moderate
changes in altitude.
On the other hand, the positive effects are not zero, and the setups can look sort of cool.
So on this flimsy footing, I decided to include a fresh air collector in the shroud.
I
decided to make a 6" x 6" square cutout in the right side panel and
make a transition piece to go from that opening to a 3" round for a
flex duct.
For some odd reason I can't explain, I still remember
how to construct transition pieces from a drafting class in highschool.
It's a manual process, done on a drafting table. It's about
the only reason I keep my drafting table.

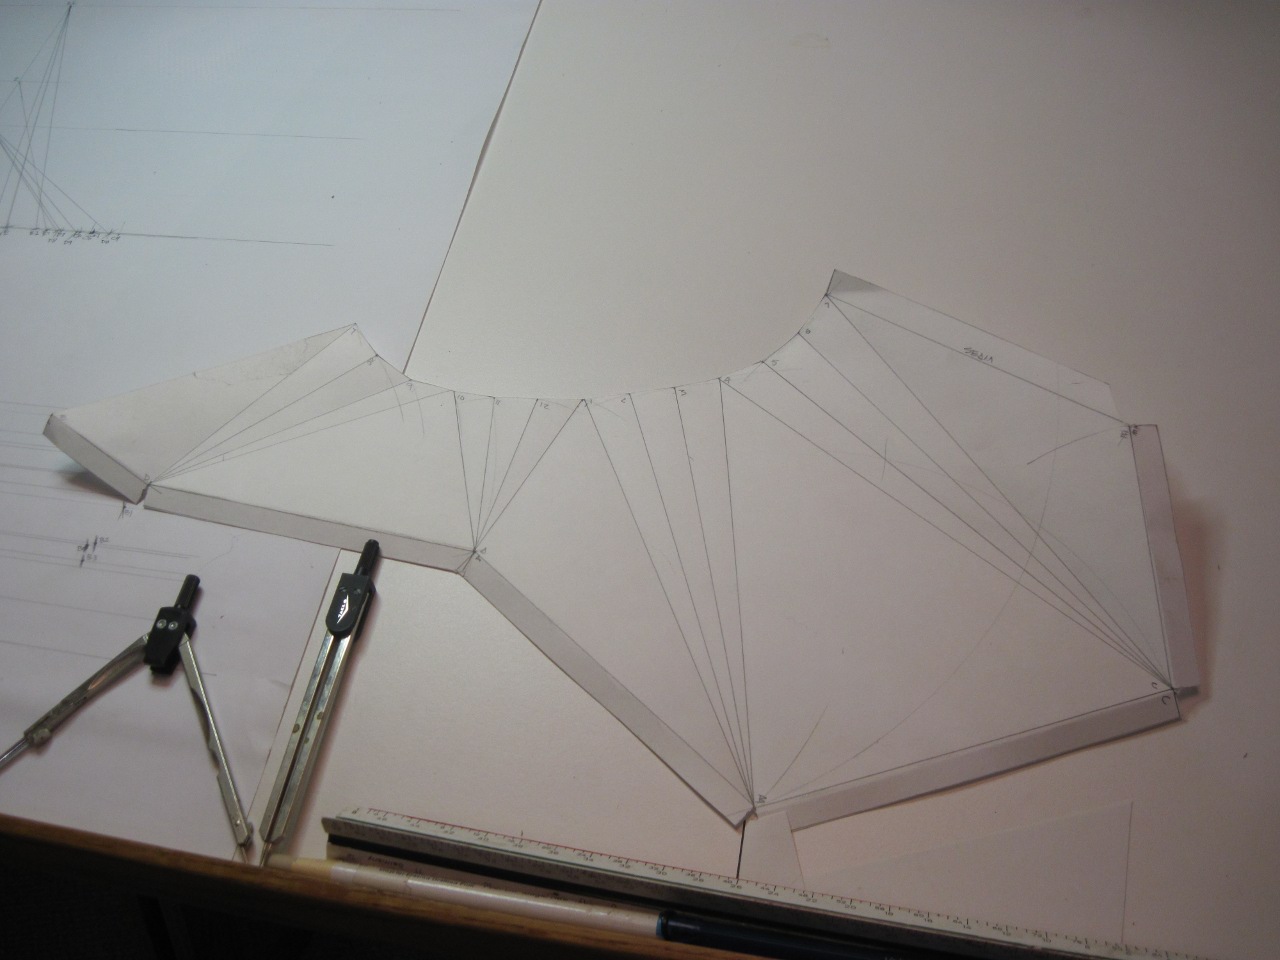
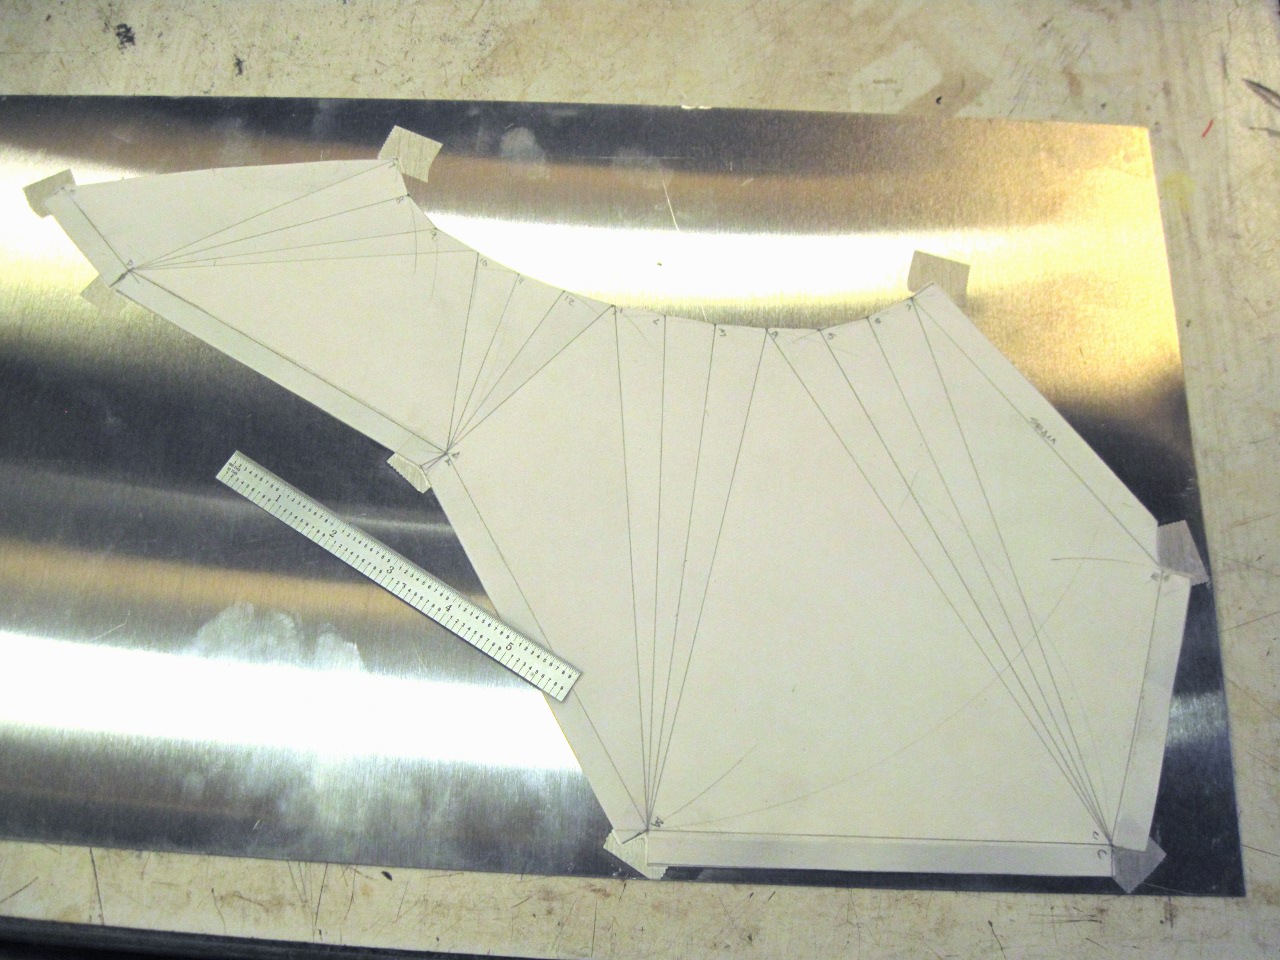
After
checking the paper pattern to make sure it came out to the right shape,
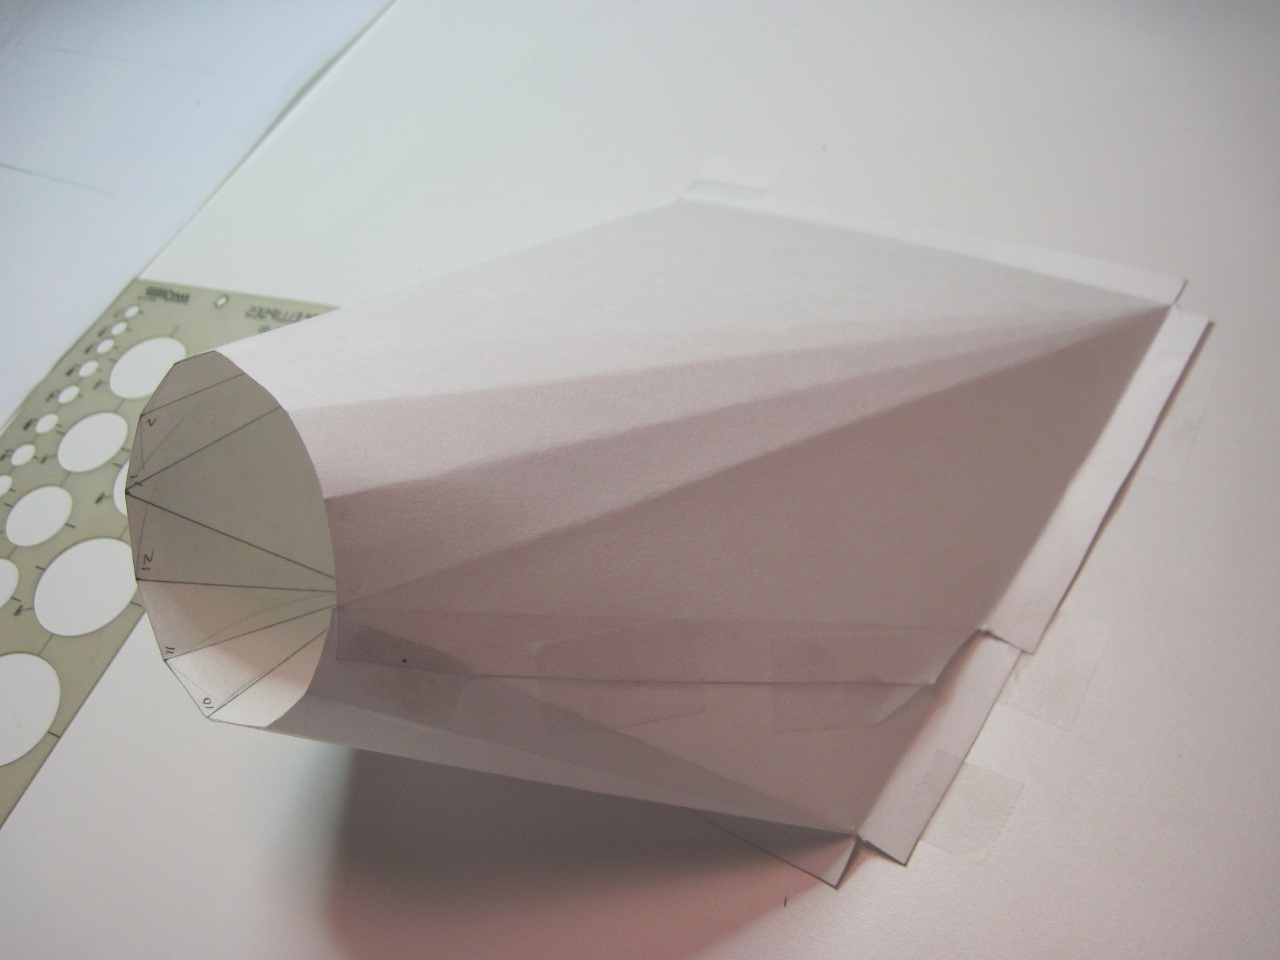
I flattened it out again and taped it to a piece of 22 gauge aluminum.
Marked the metal, cut it out, and folded it up. Folding is
really tricky as the piece becomes more and more closed.
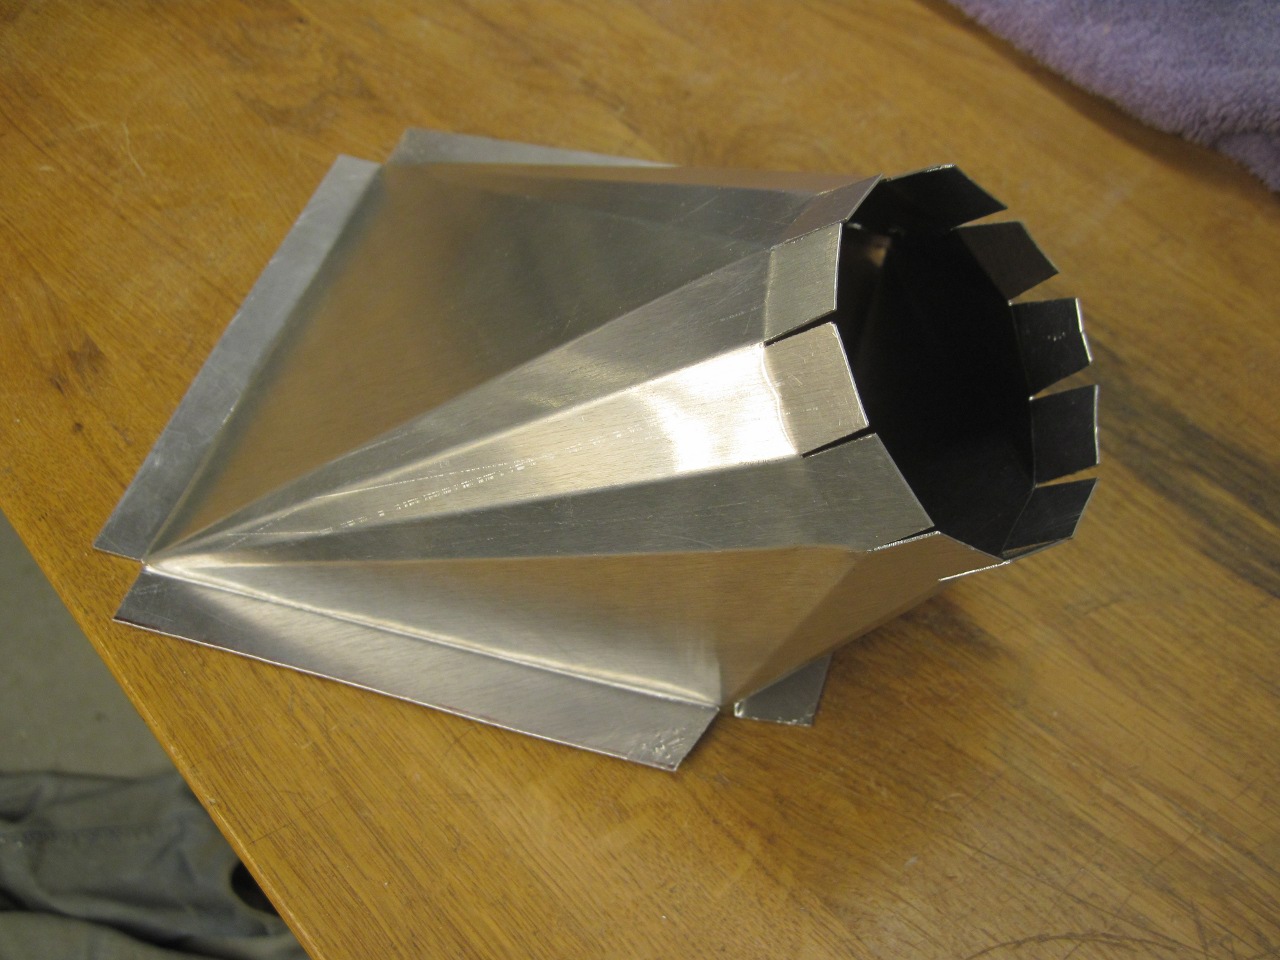
Cut the square opening and checked the fit.

Then added a collar for the flex tube, and drilled holes for blind rivets.

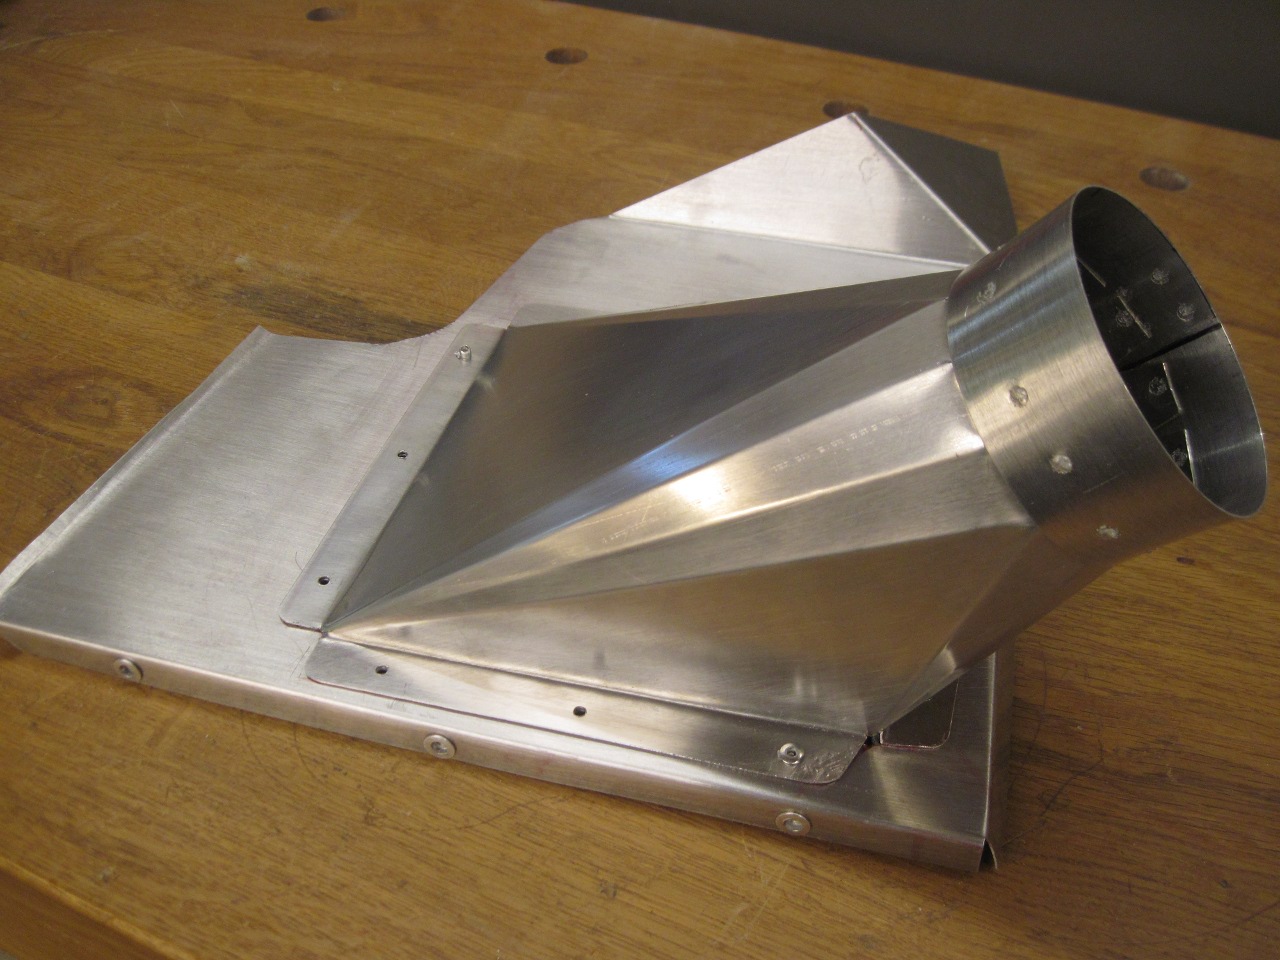
Than a sanity check on the car.
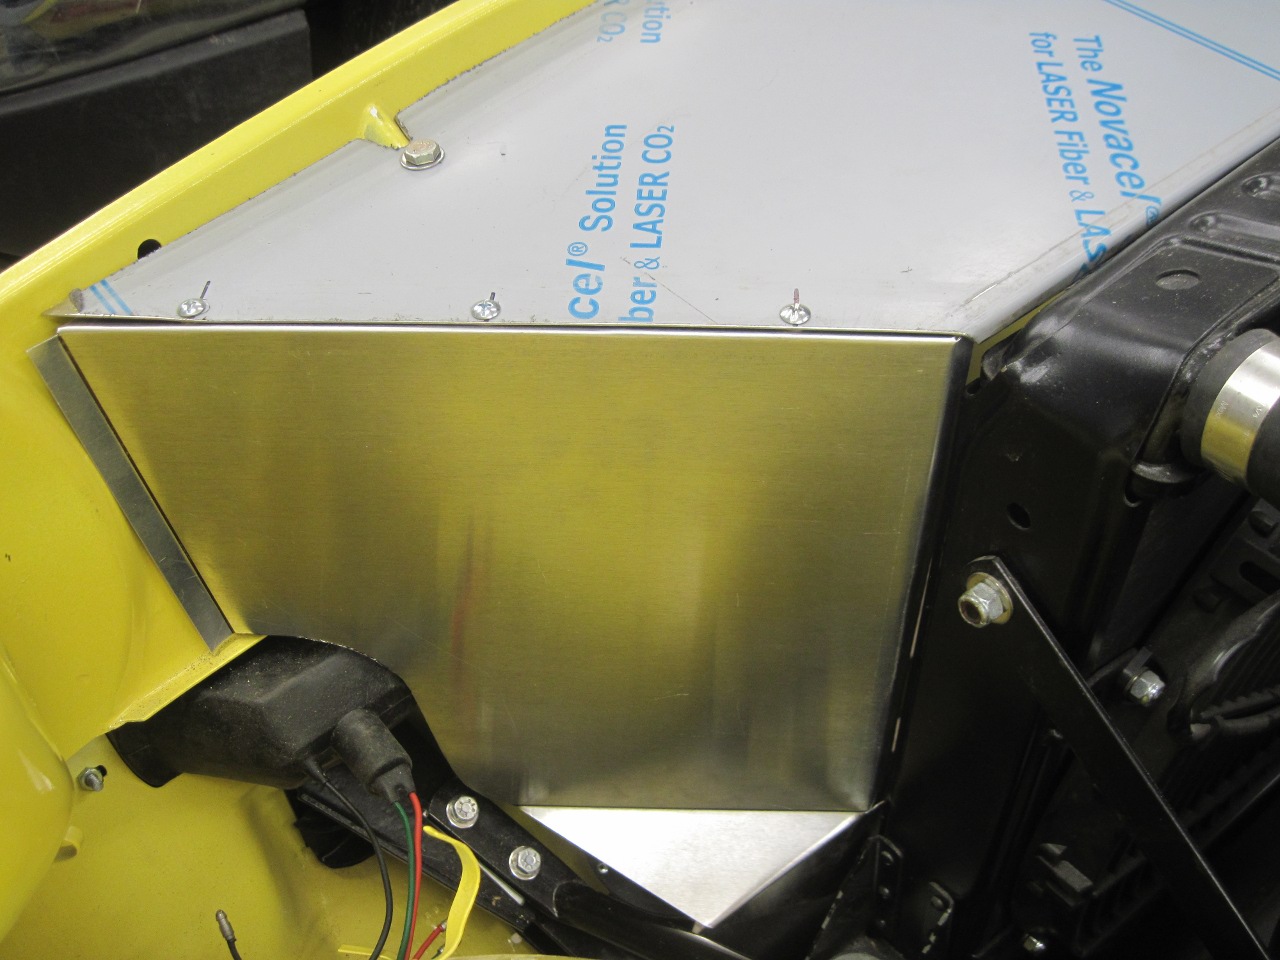
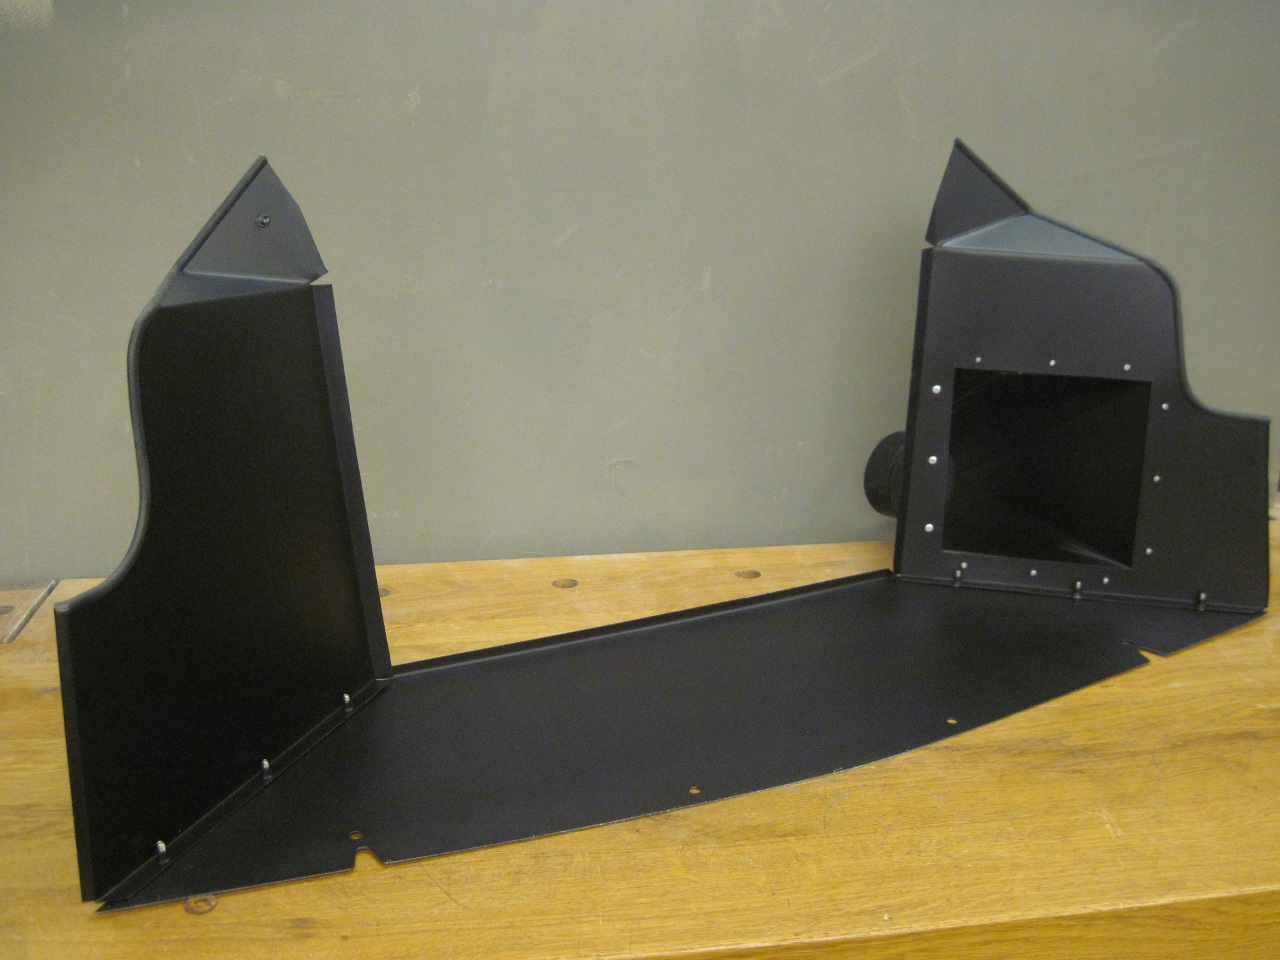
I thought the aluminum side panels added a little too much bling value, so I decided to powder coat them semi-gloss black.
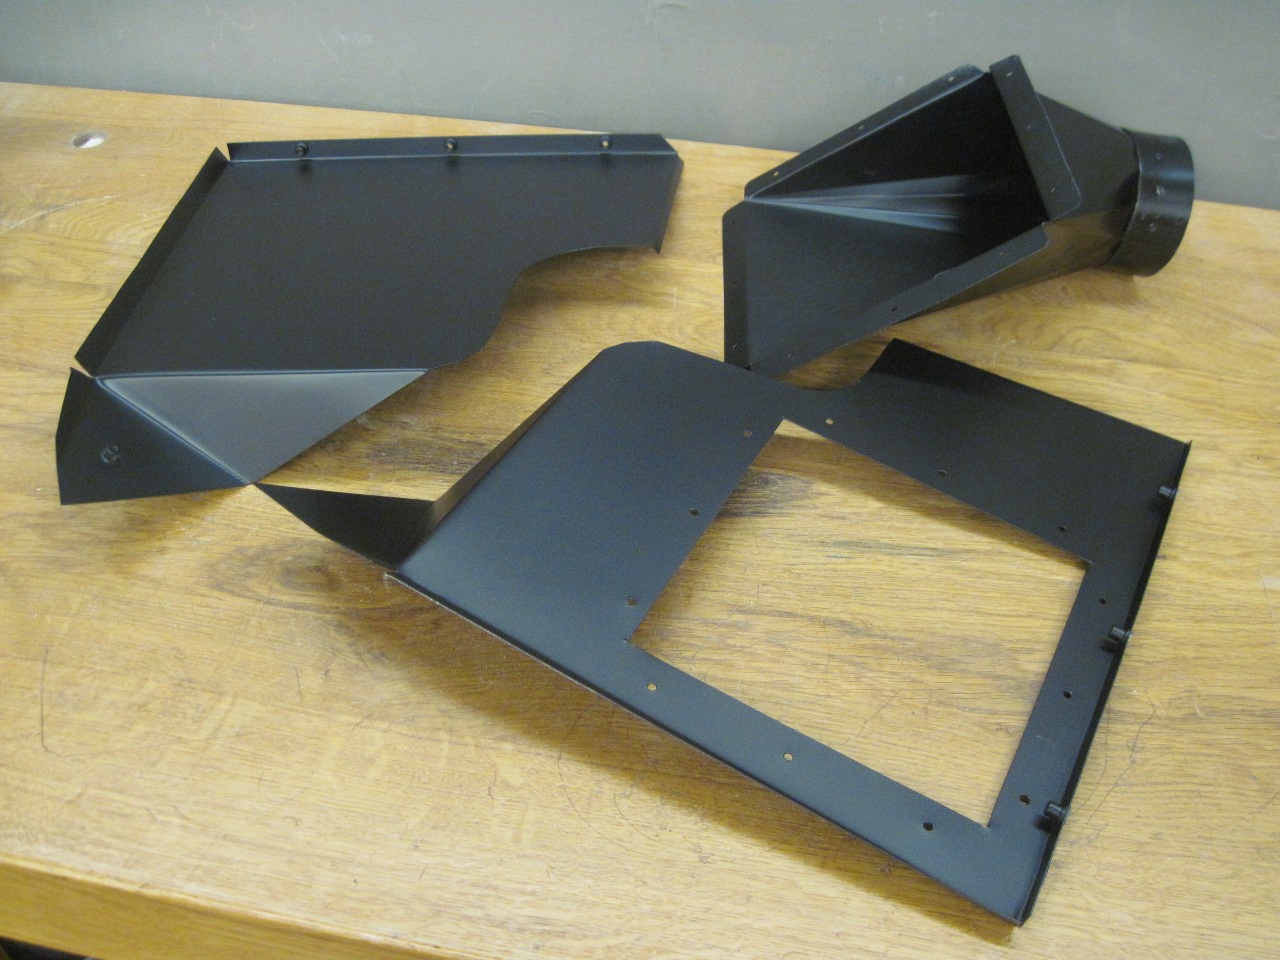
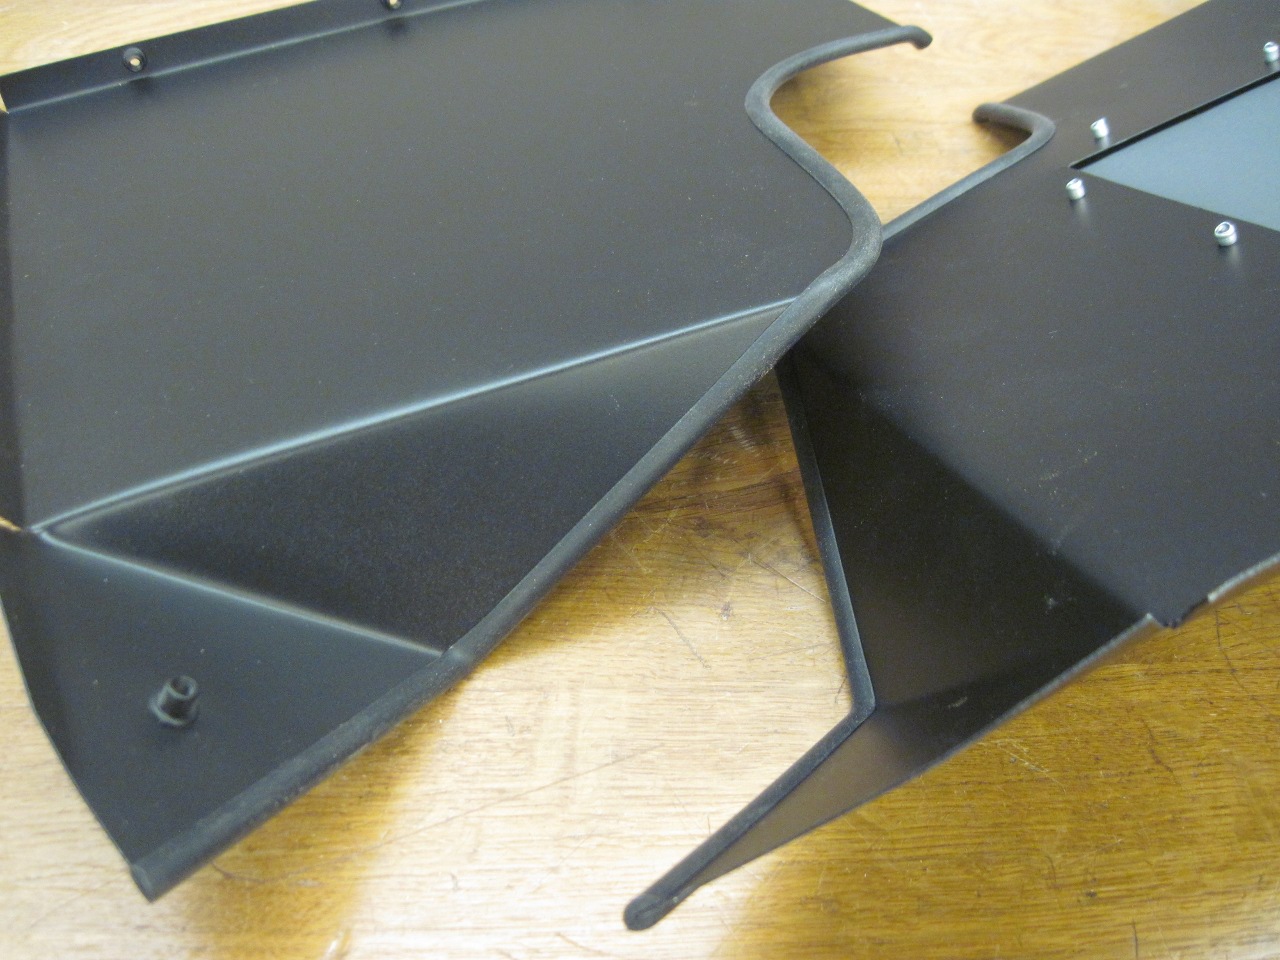
Added some rubber bead to the edges so they can't cut or rattle against anything.
Also painted the bottom side of the top panel black and test assembled on the bench.
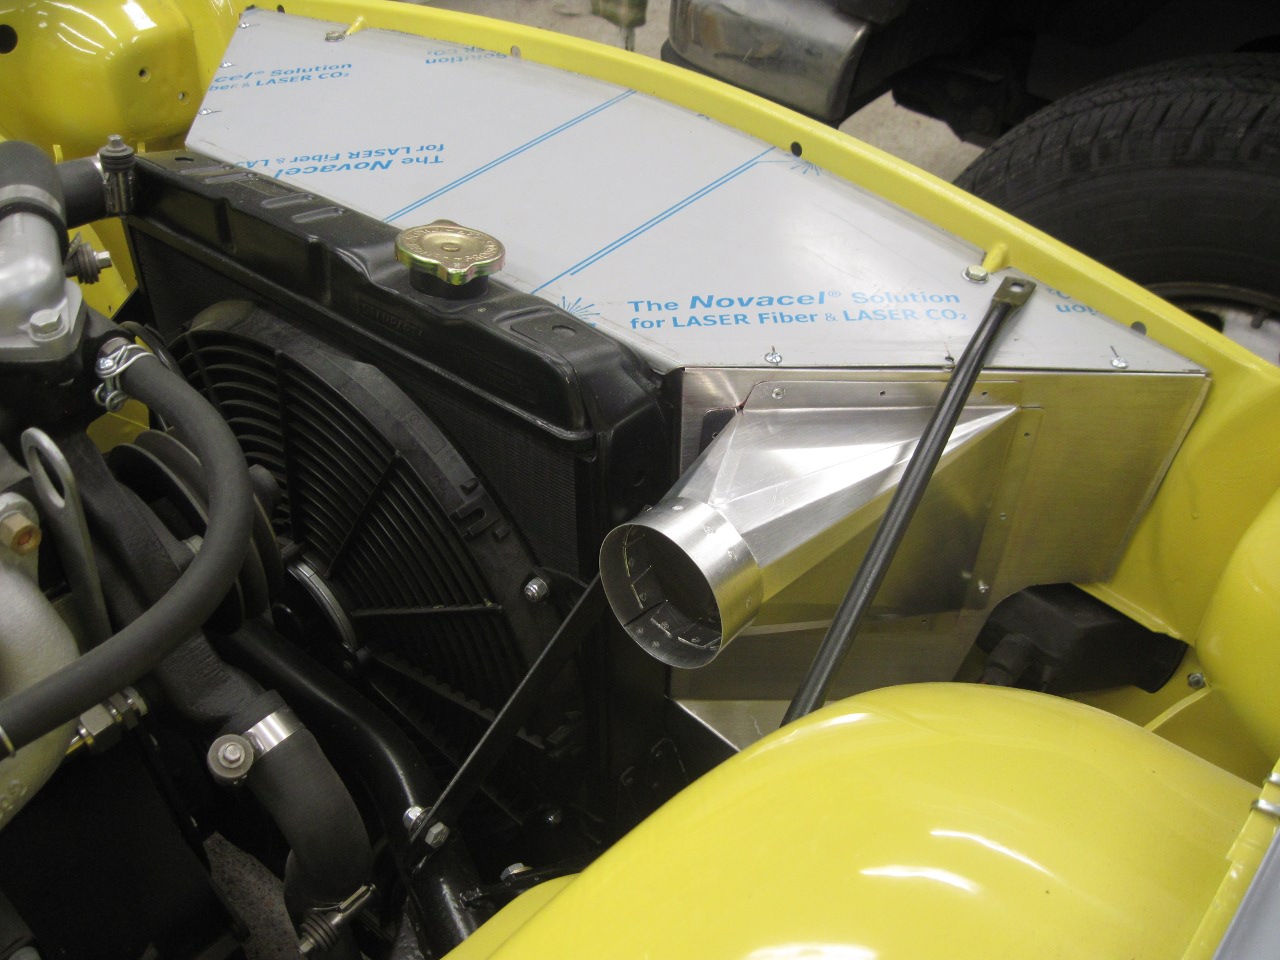
I
applied some self-stick foam strips on the flanges that butt up to the
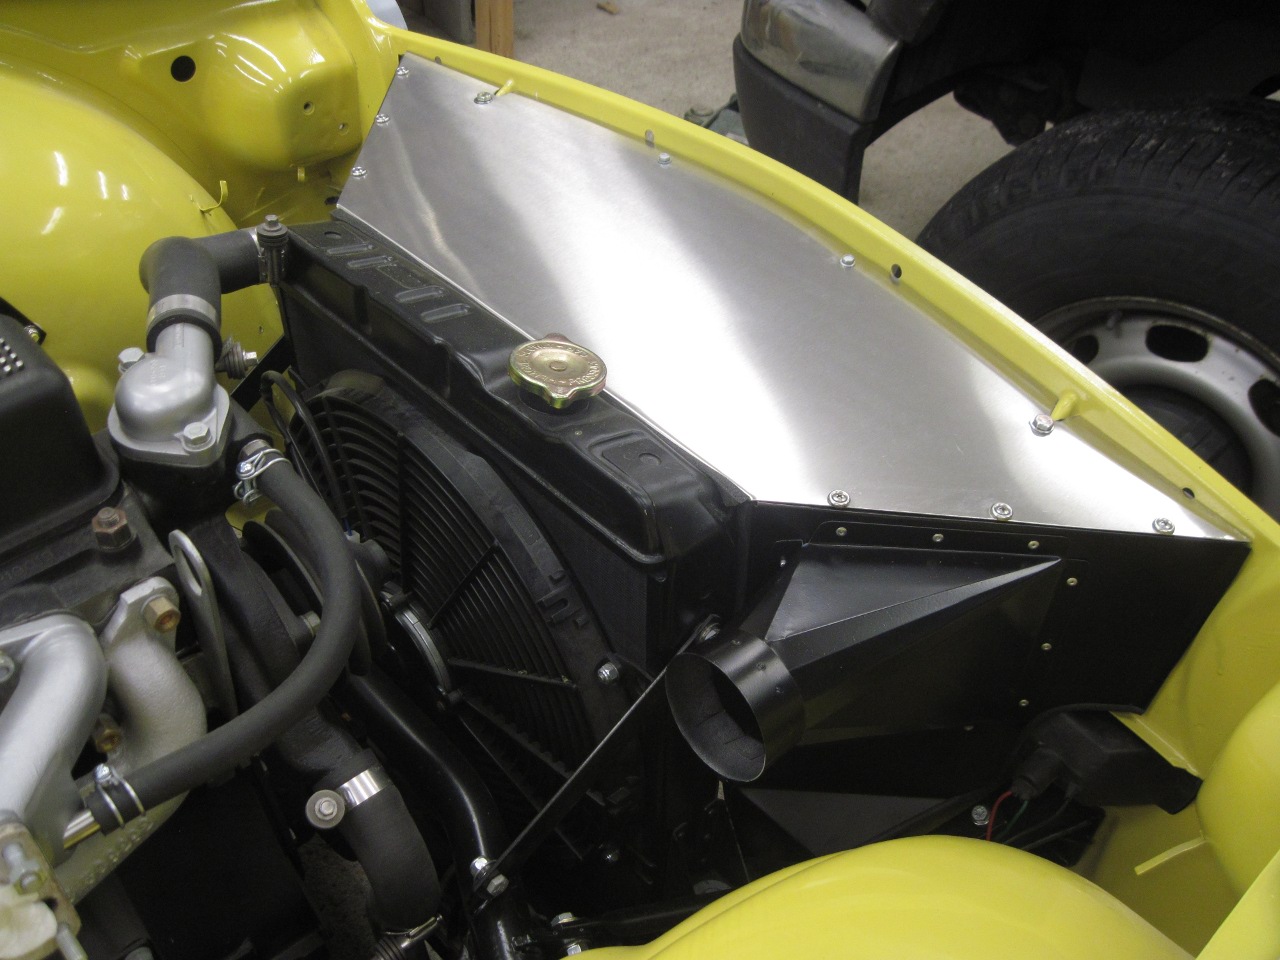
radiator and front valence, and put the assembly on the car. Then
stripped off the protective coating on the stainless.
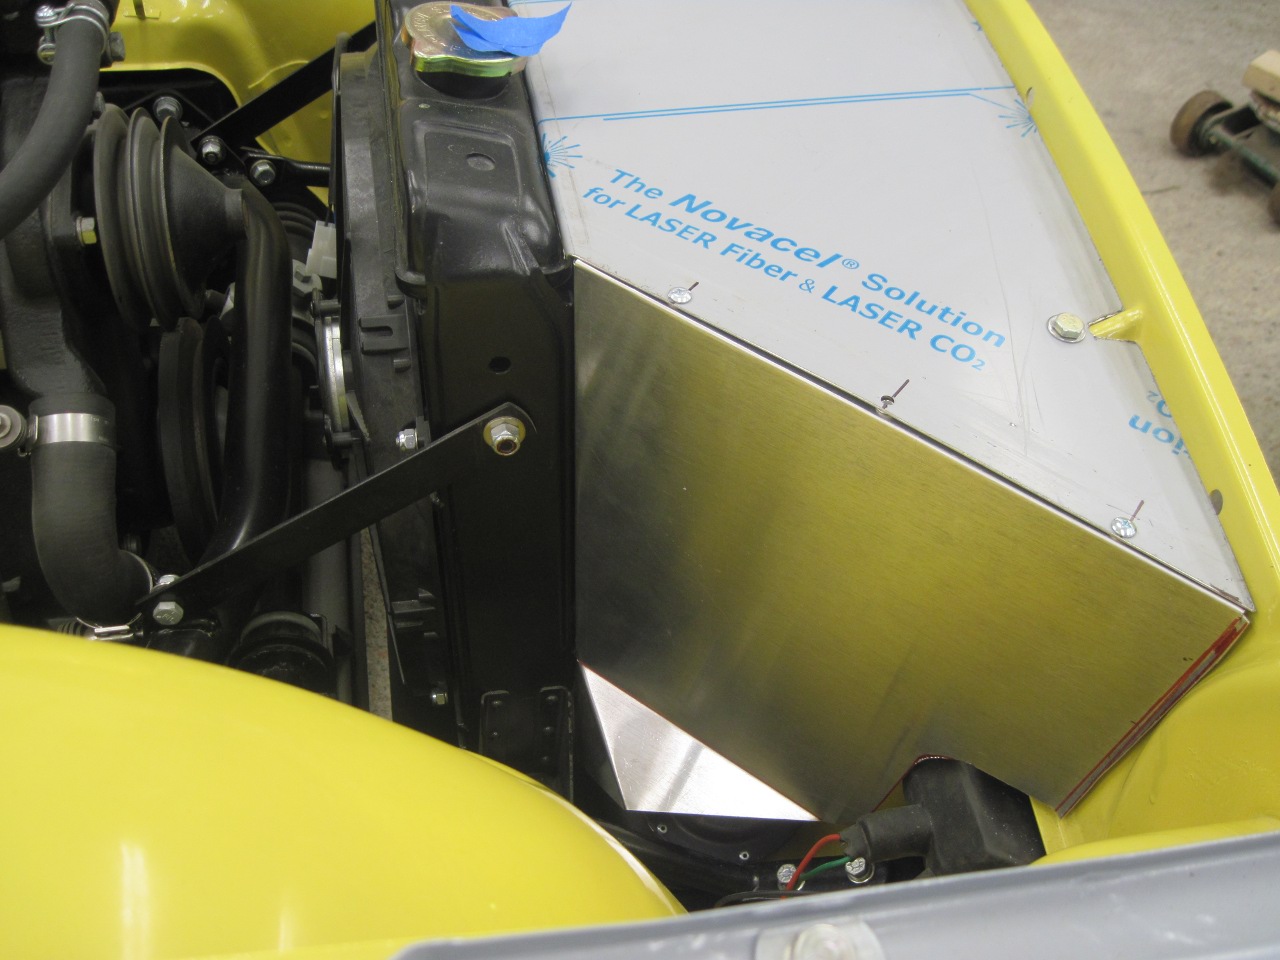
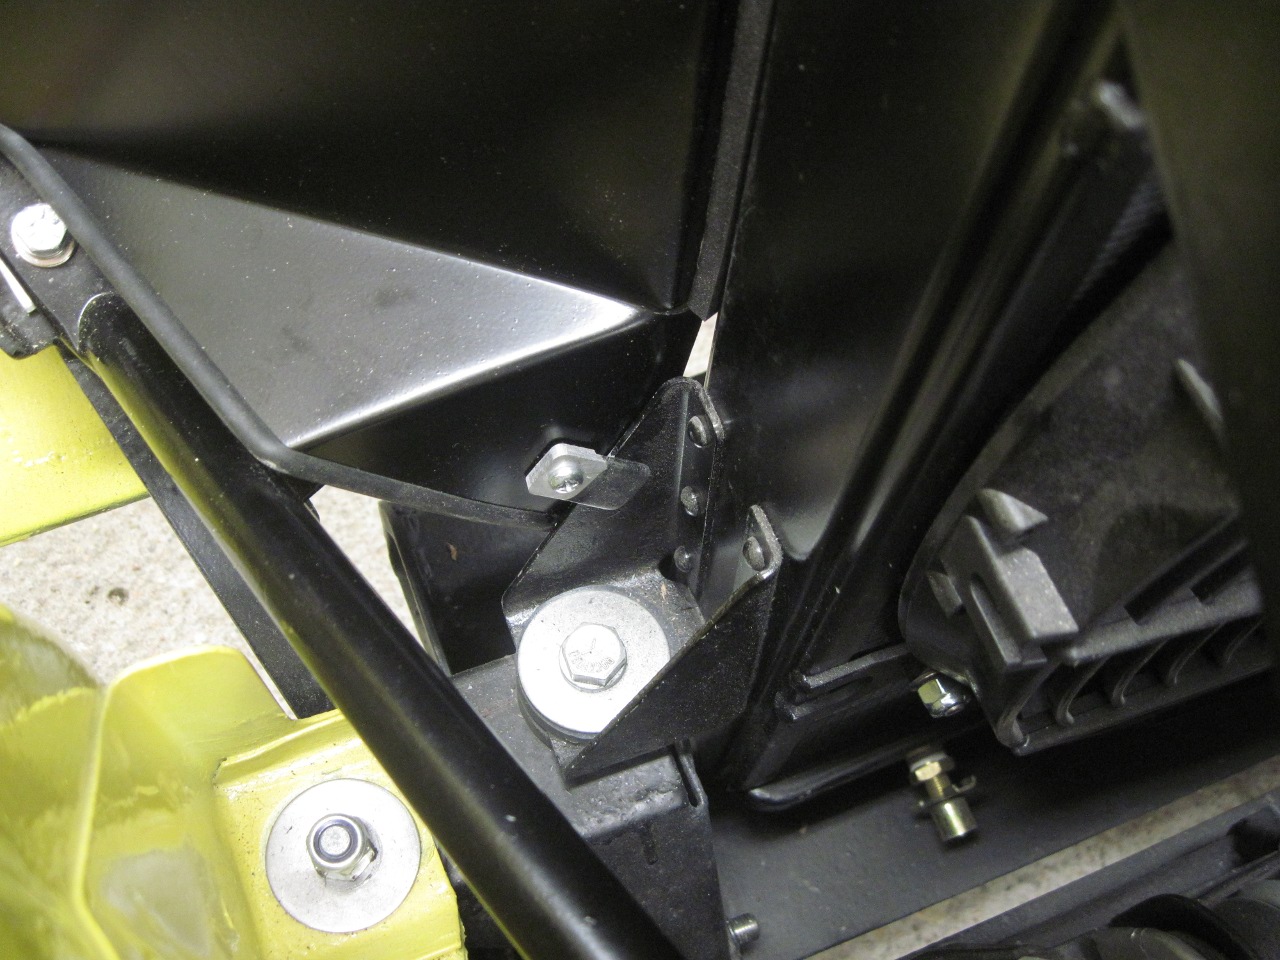
The
entire shroud is only really fastened to the car along the front edge
at the valance. Some of the other edges are wedged in place with
compressed foam strips, but the lower extremes of the side panels are
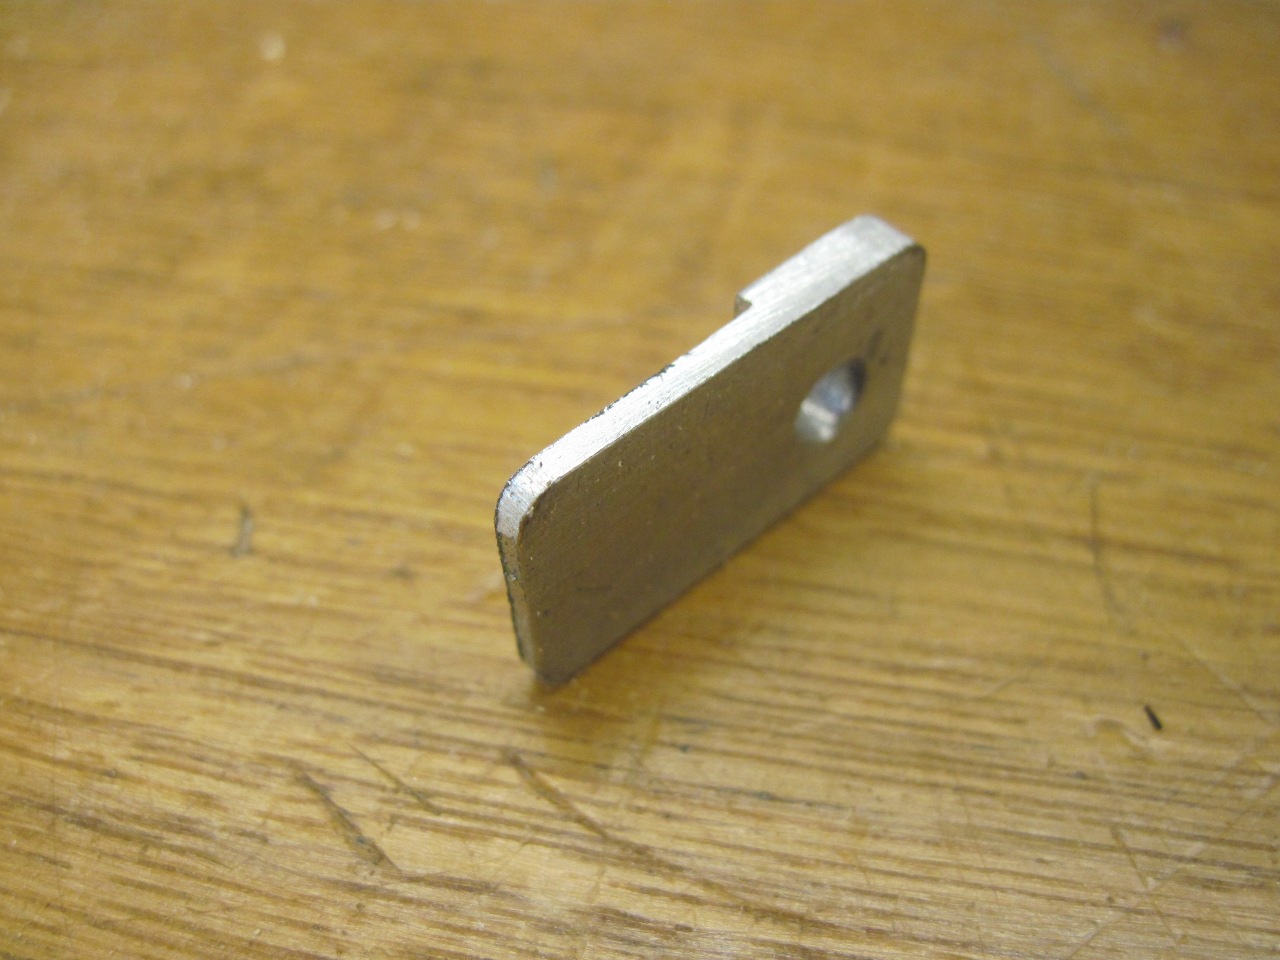
sort of just hanging in the breeze. On the left side, I made this
little clamp piece that holds the panel against the radiator mount.
I didn't put one of these on the right side since I believe the
fresh air system will stabilize it when it is connected to the air
cleaner housing.
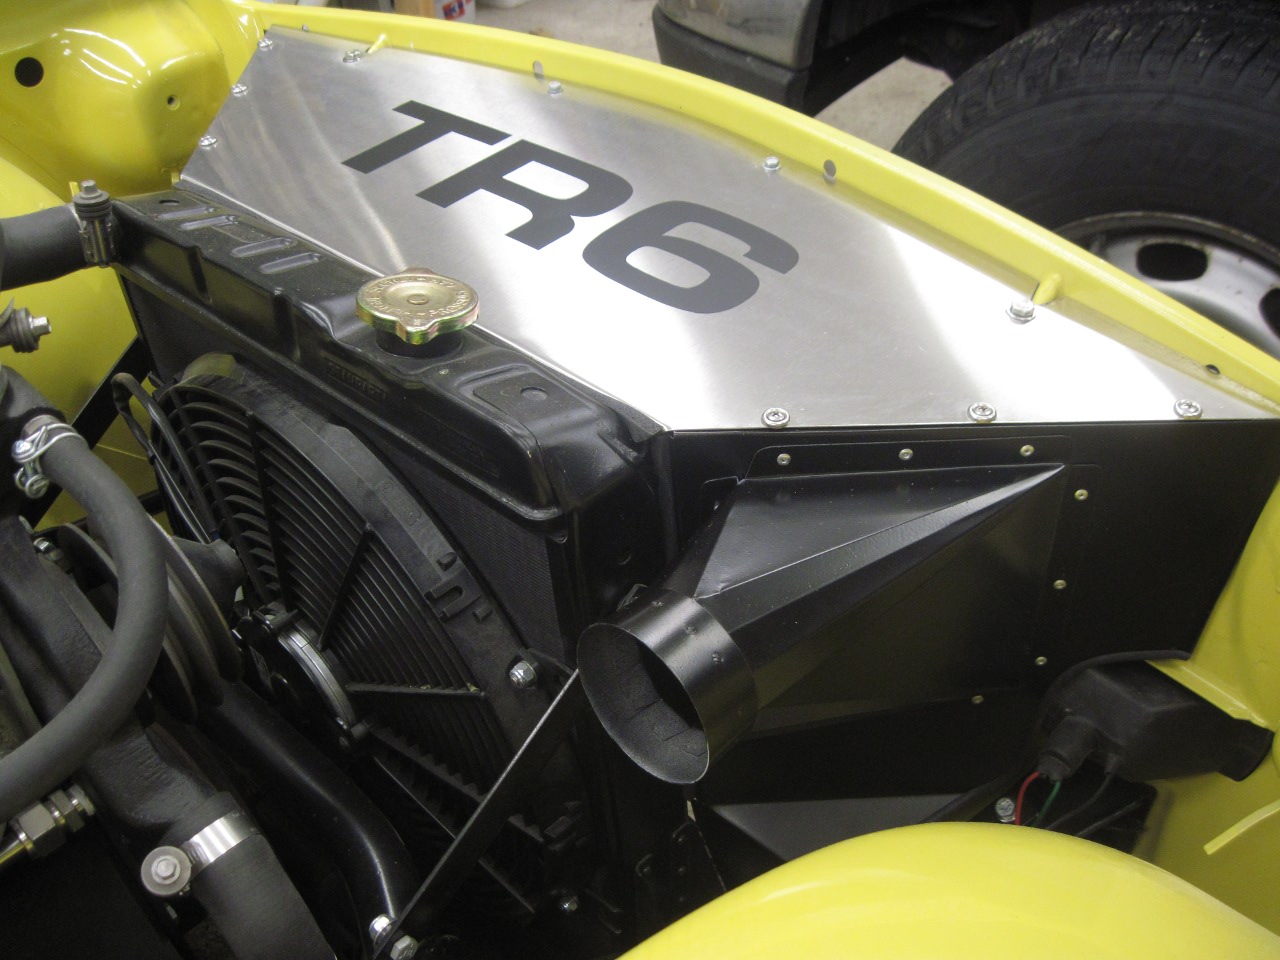
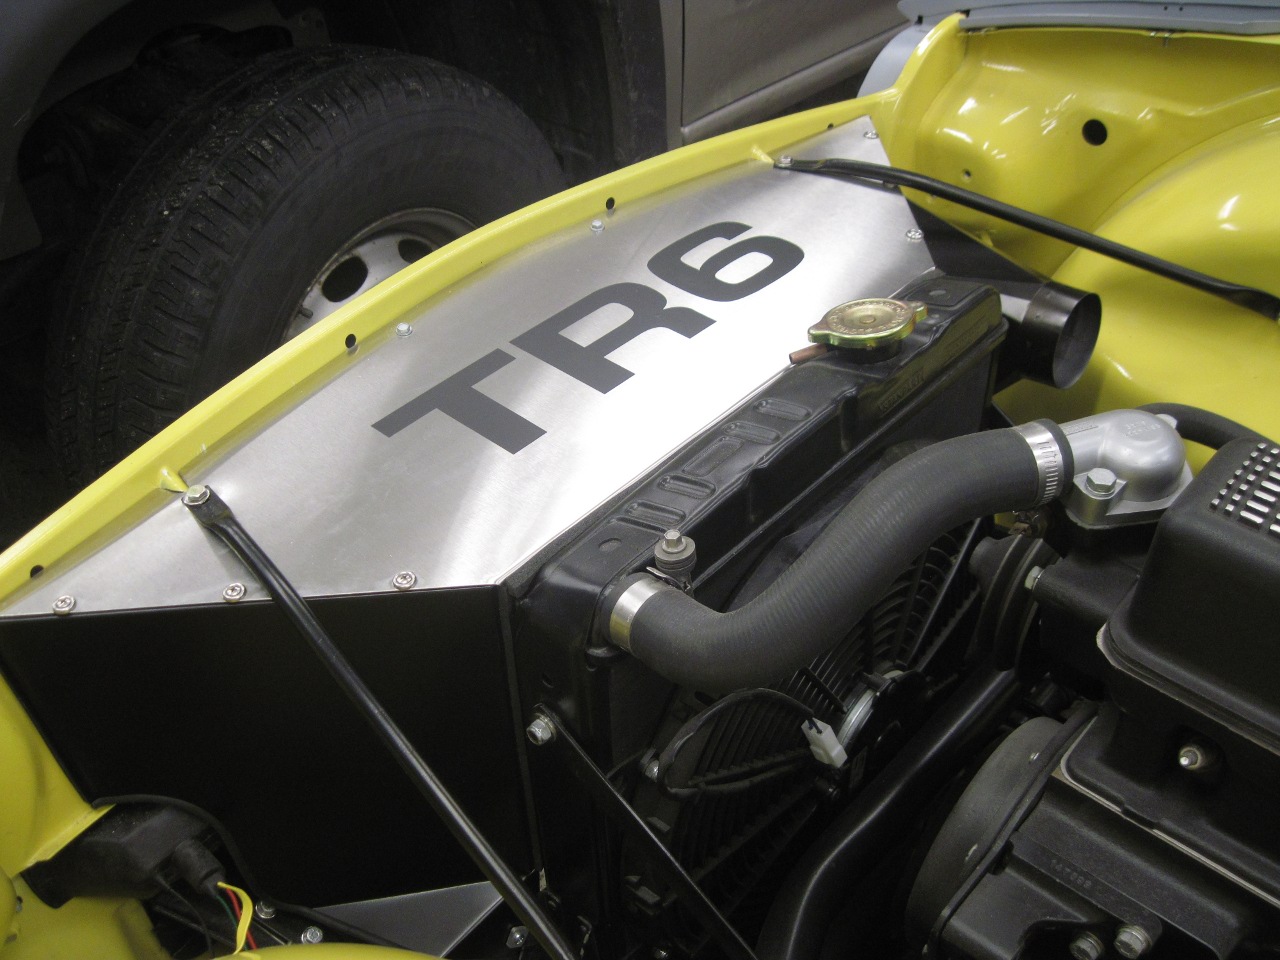
After
staring at it for a long time, I decided I wasn't really fond of that
expanse of shiny stainless. It seemed a little too flashy or
something. To try to tone it down a little, I copied something
I'd seen on a few other cars. I cut out some vinyl letters in the
correct font and applied them to the shroud. I'm not sure the
vinyl will stand up to the engine bay environment, but it's really more
of a style experiment. I like it better than the bare metal, but
it may not be the final answer.
I
liked this project. I'm not particularly fond of fabricating
sheet metal, but this had enough variety to keep my attention.
Materials added up to around $30, mainly for the stainless, but
I've got quite a bit left over.
Comments to Ed at elhollin1@yahoo.com
To my other TR6 pages