To my other TR6 pages
February 20, 2017
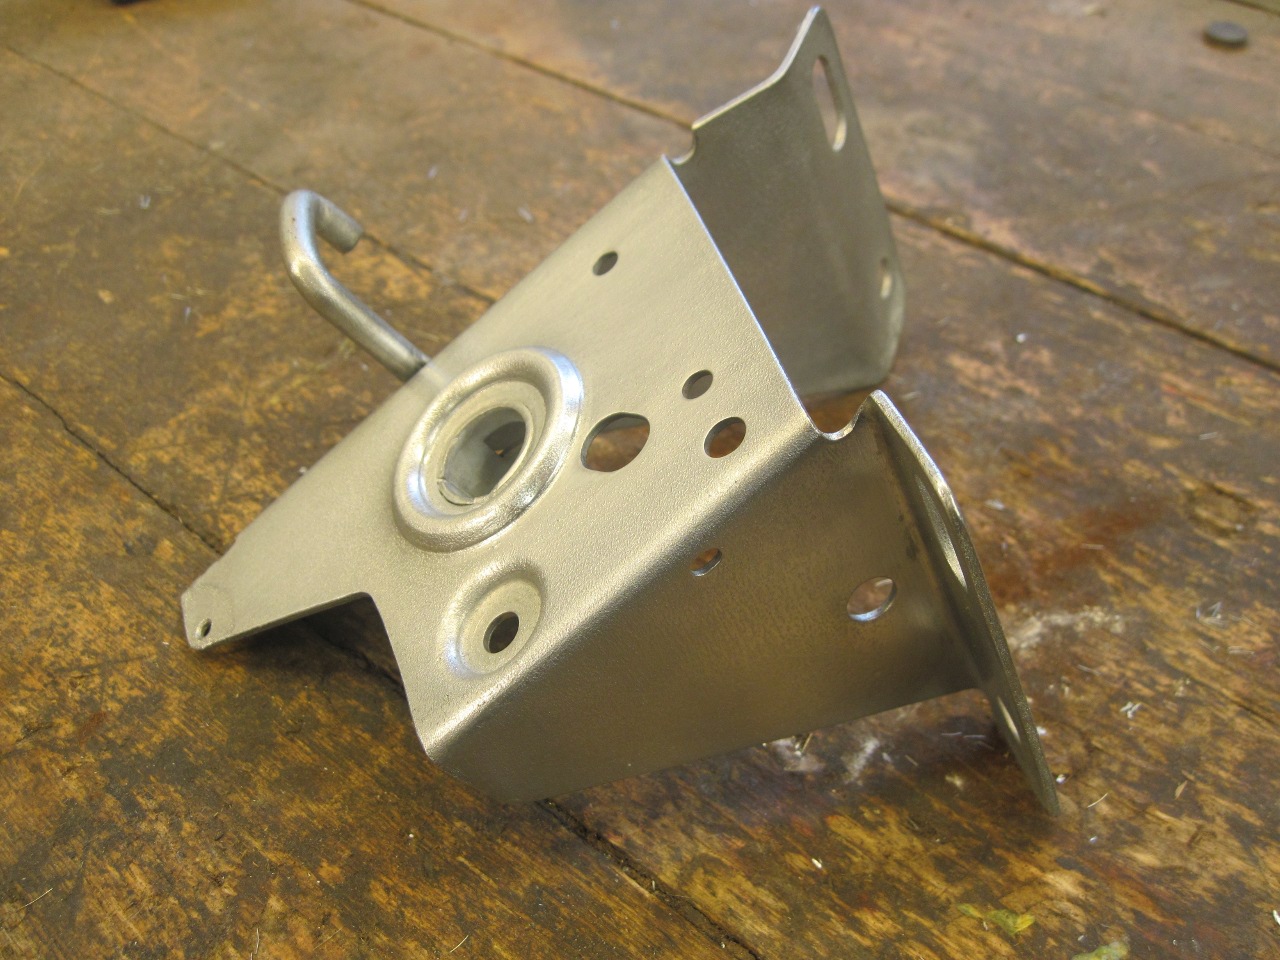
Bonnet Latch
The
bonnets on TR6 cars were hinged at the front, and so there was a latch
mechanism mounted on the cowl to secure the rear in place. The
latch mechanism is pretty typical, where a stud with a cone-shaped end
on the bonnet finds its way into a receiving hole on the latch.
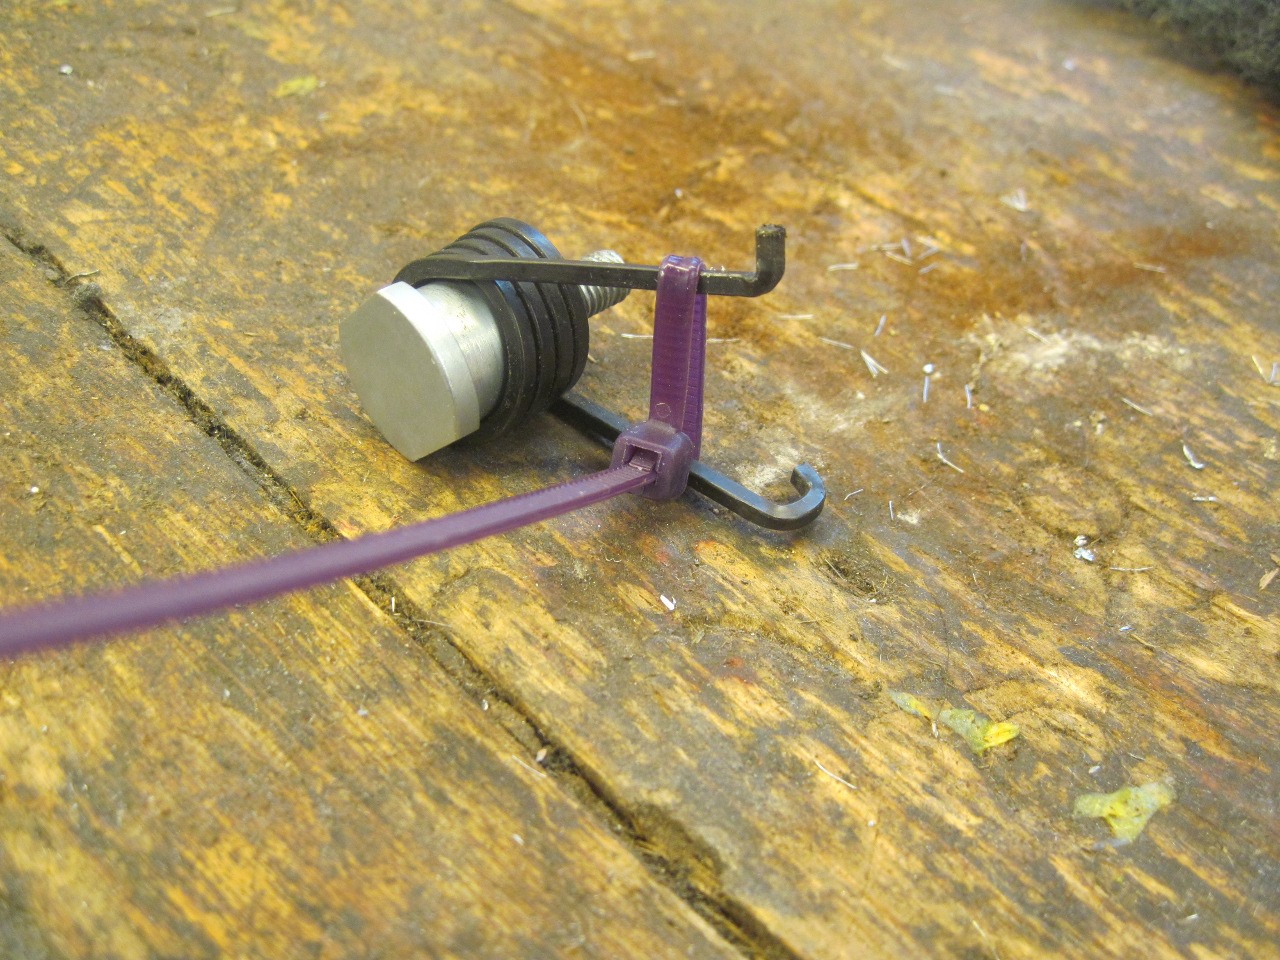
On closing the bonnet, the stud forces it's way past a spring
loaded catch arm which rebounds behind the cone to capture the stud.
To release the latch, the catch arm is pulled back by way of a
Bowden cable operated from the passenger cabin.
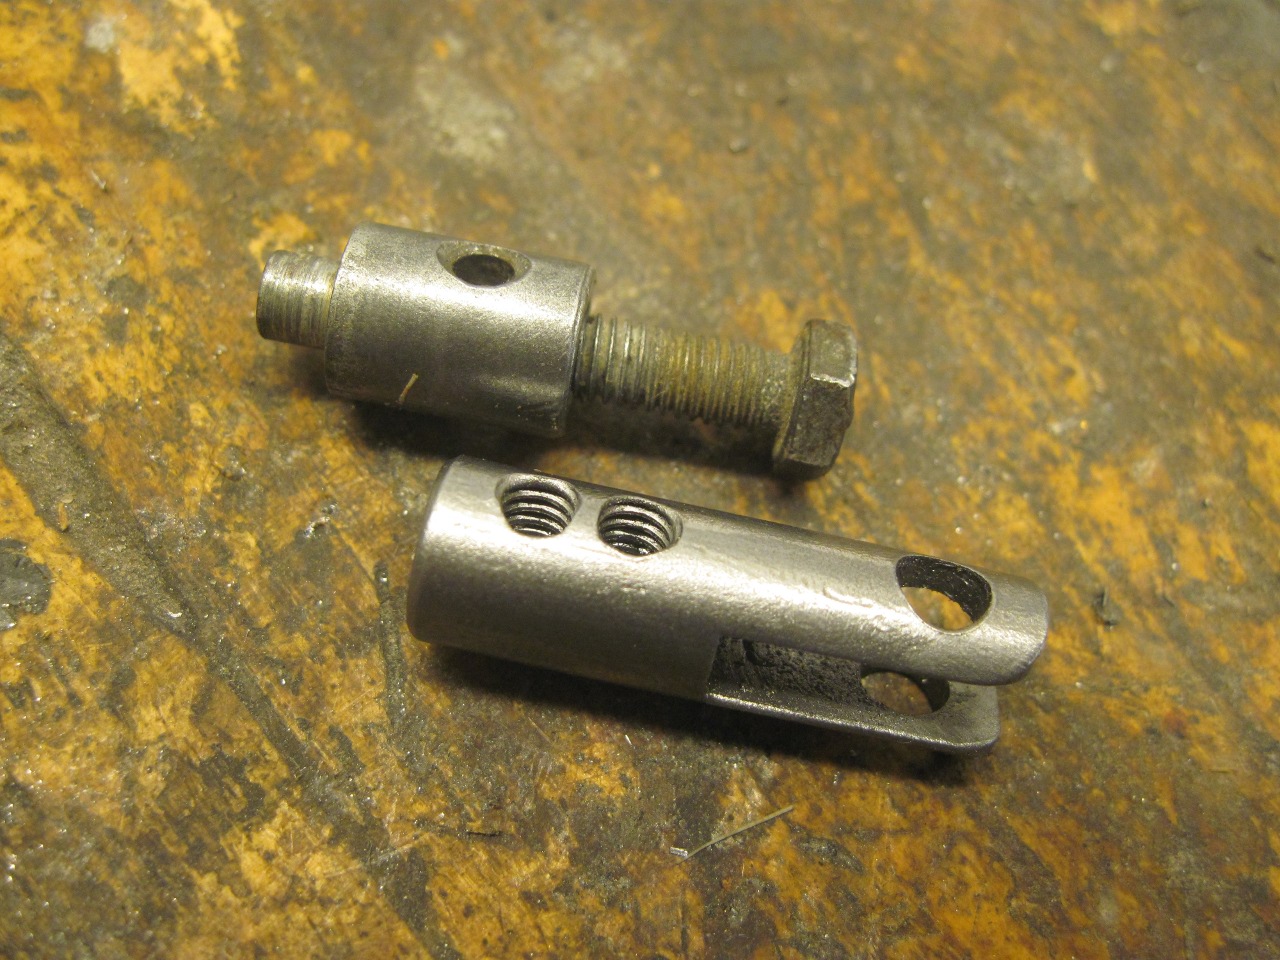
My latch assembly was dirty, rusty, and sticky, but intact.
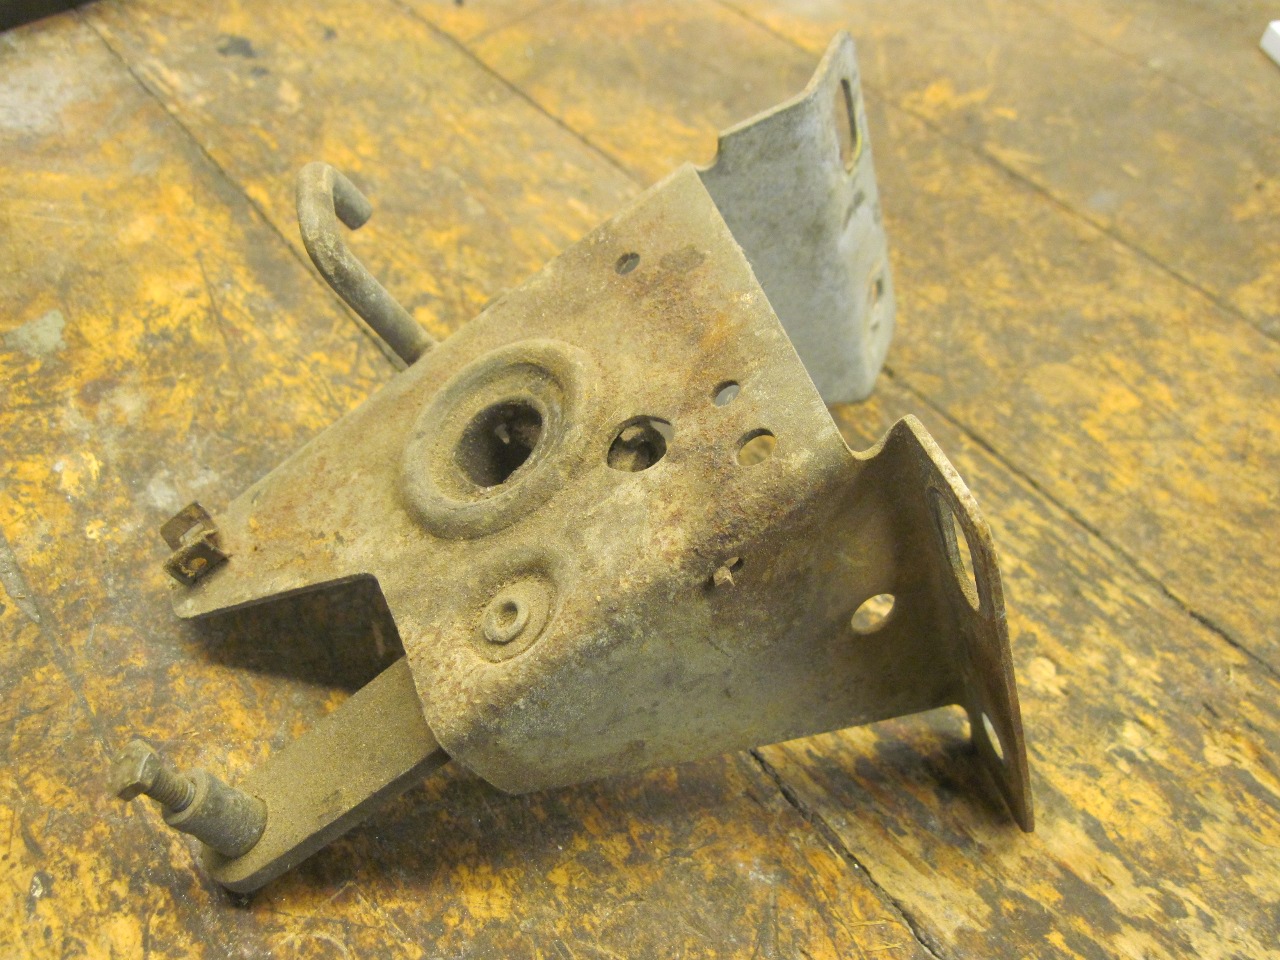
To
do a credible refurbish, I felt I had to disassemble the mechanism,
which presents a problem since the catch arm is held in place by a
staked pivot piece that also holds the sturdy spring. Removing
the pivot isn't actually hard, but it gets sacrificed in the process,
so a new one has to be made.

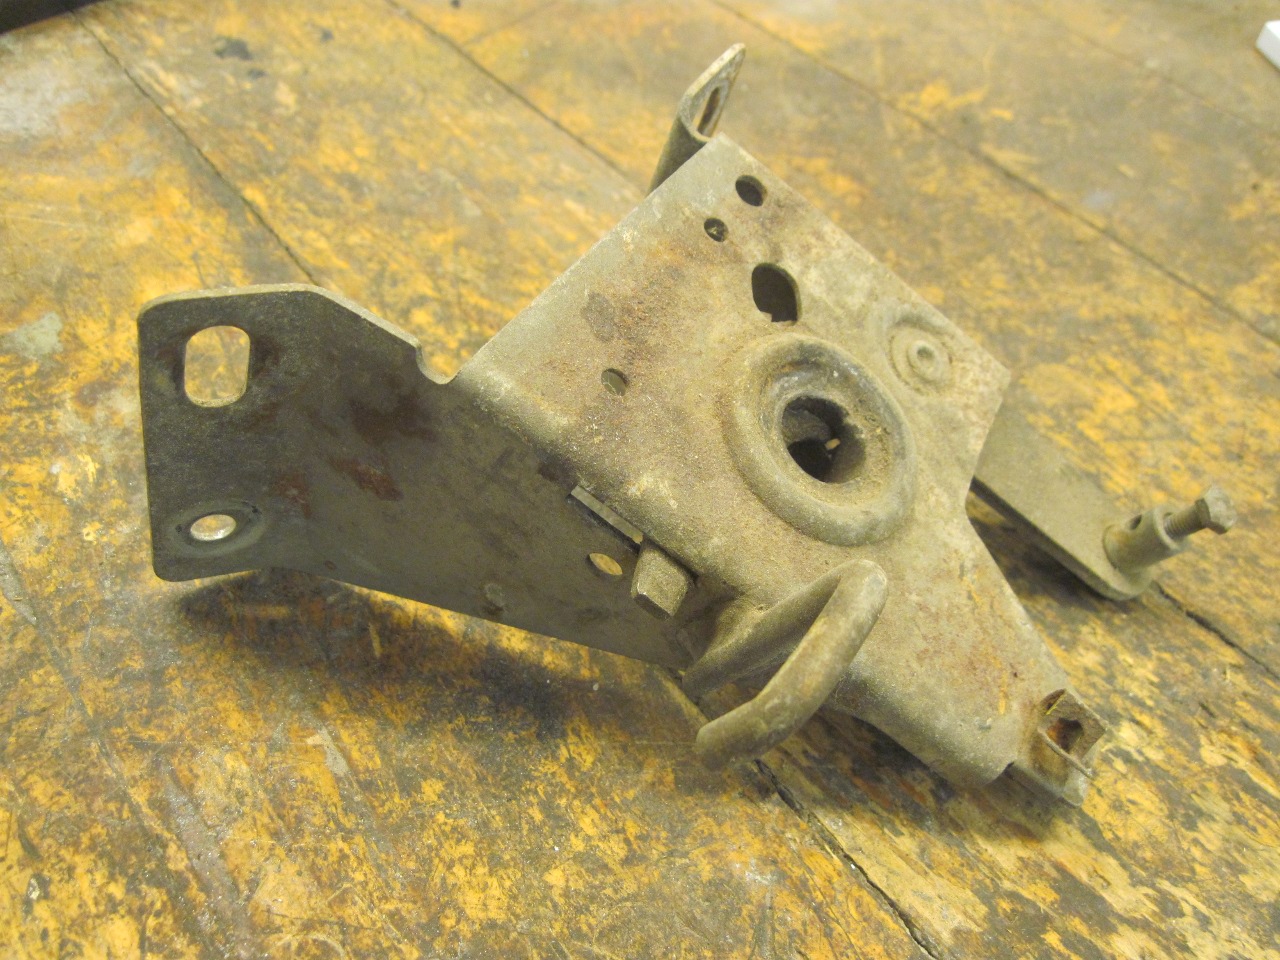
With everything apart, cleaning was much more effective. An acid bath removed what plating was left.
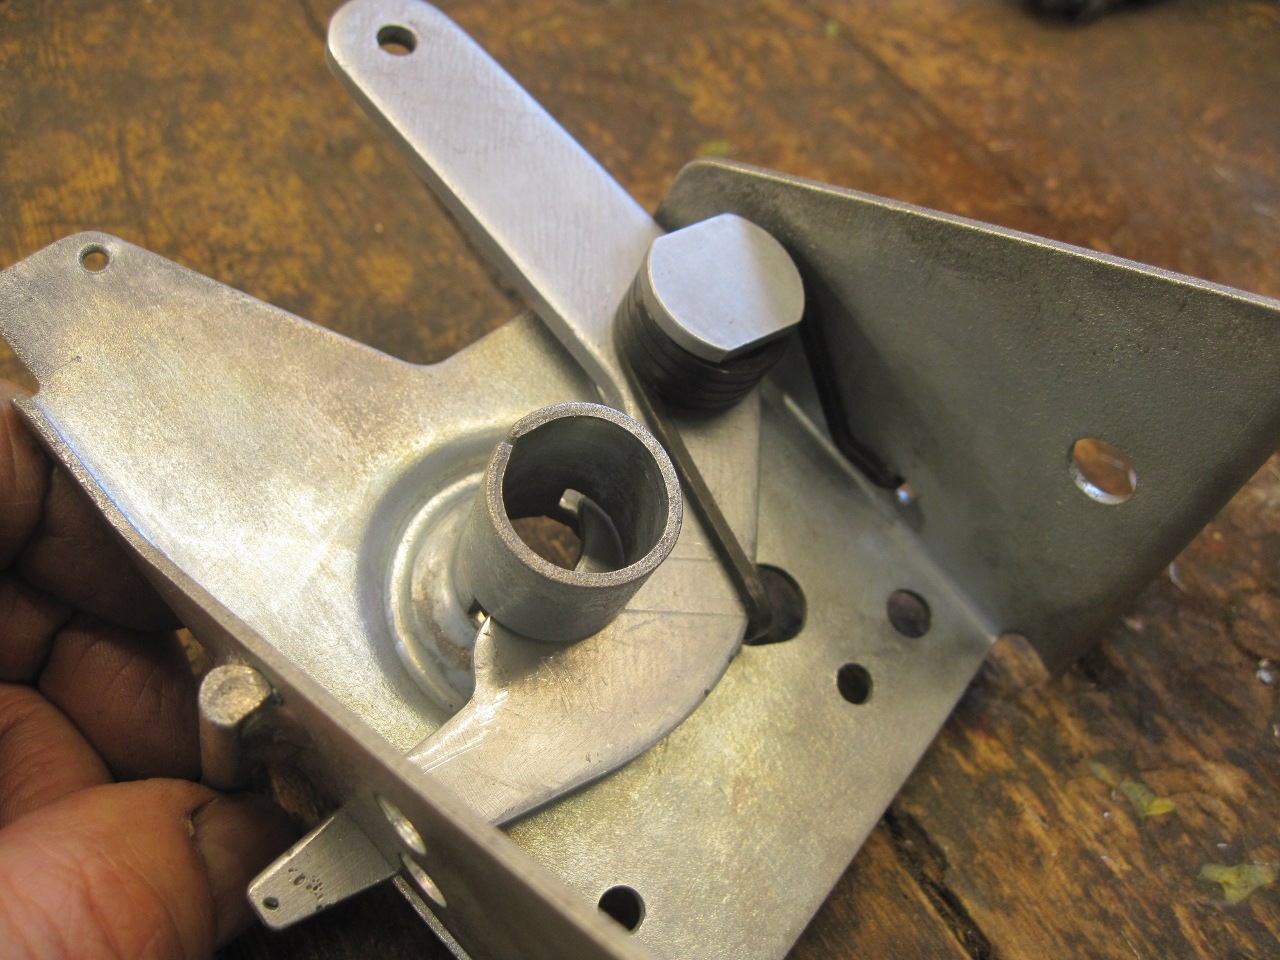
The
catch arm includes the attachment fitting for the actuating cable.
I had an idea for what I think is an improvement for that piece,
so I removed it.

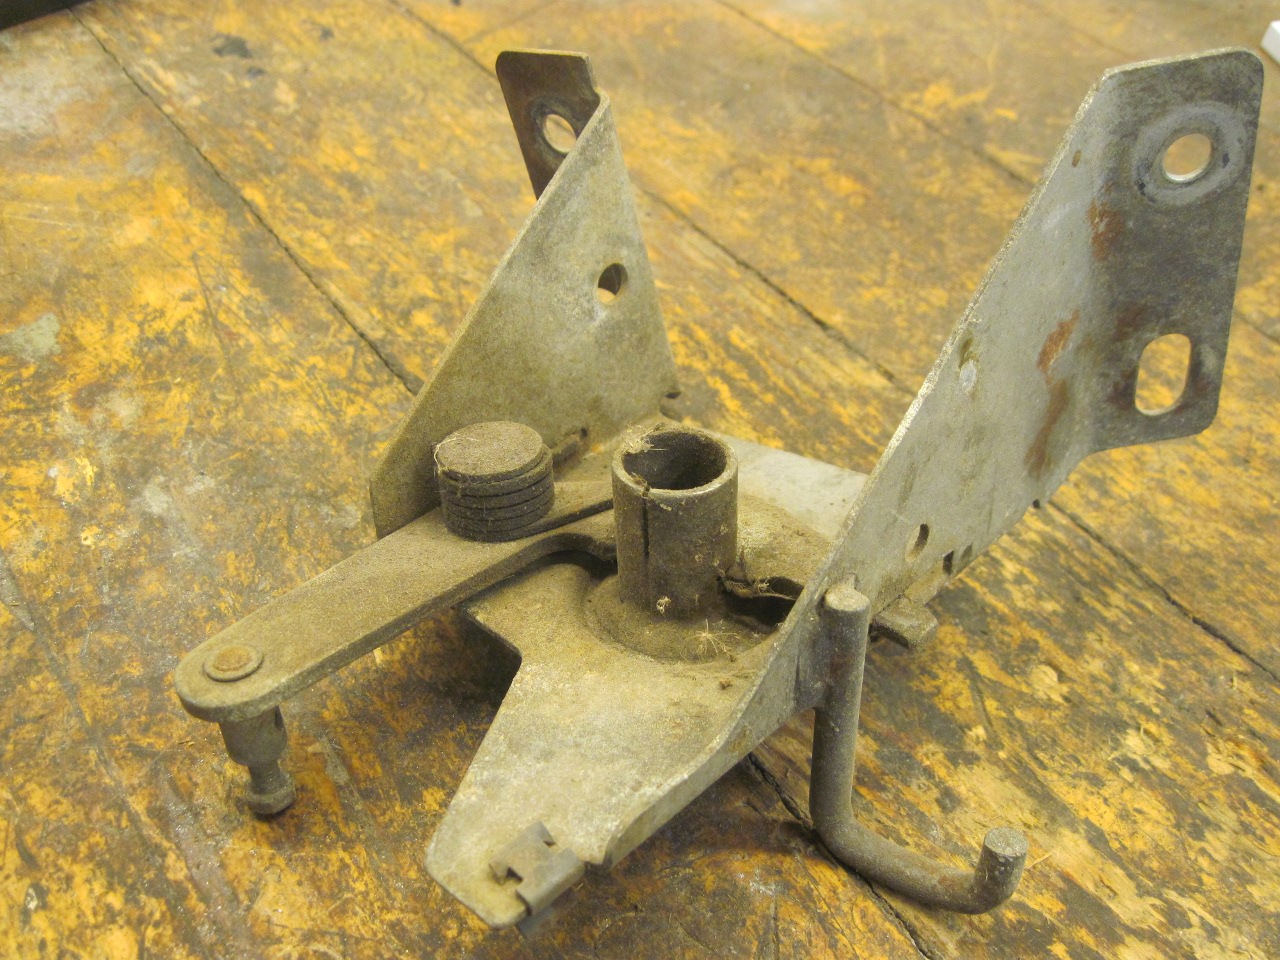
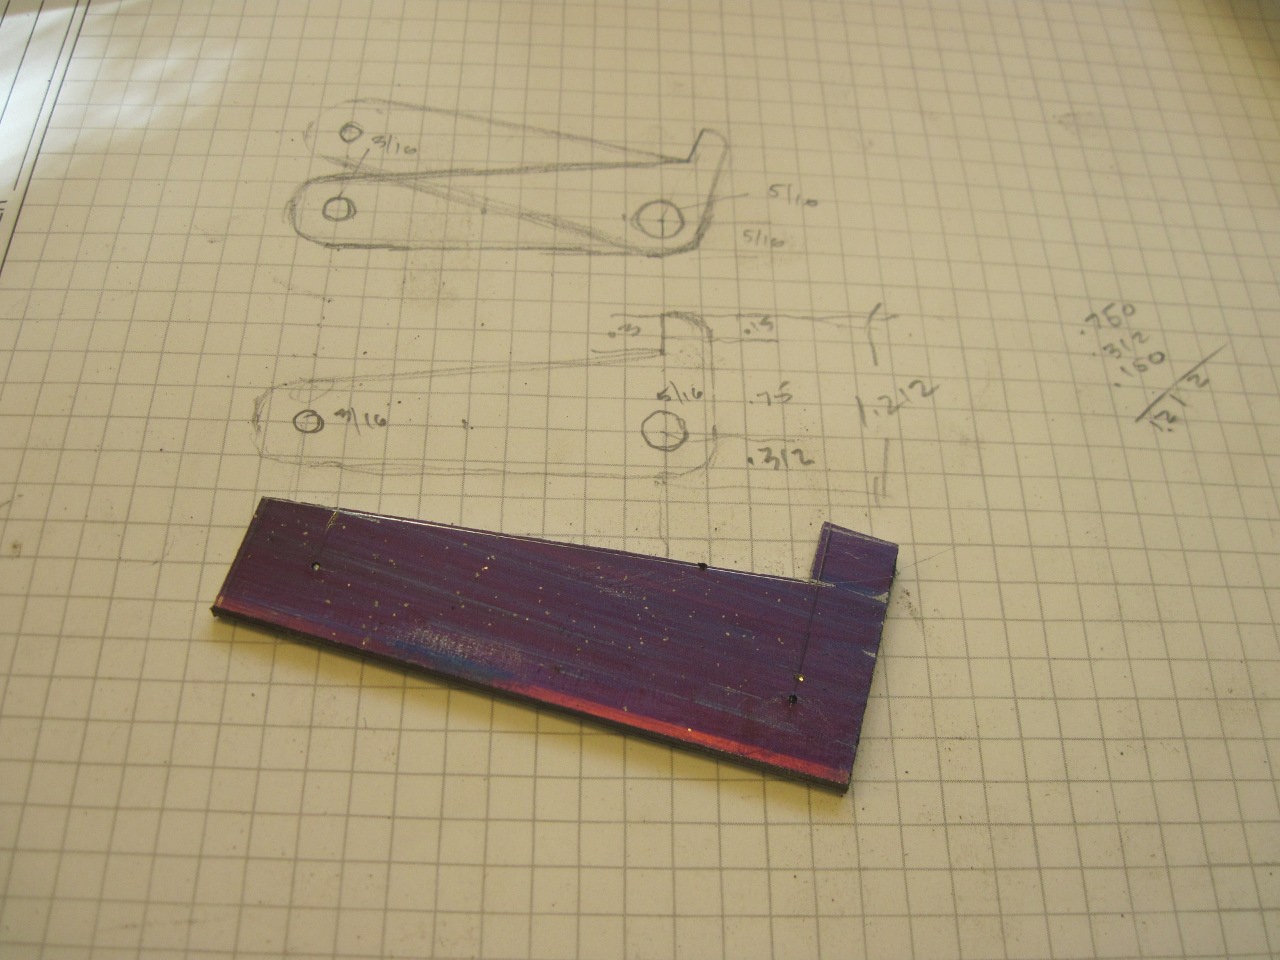
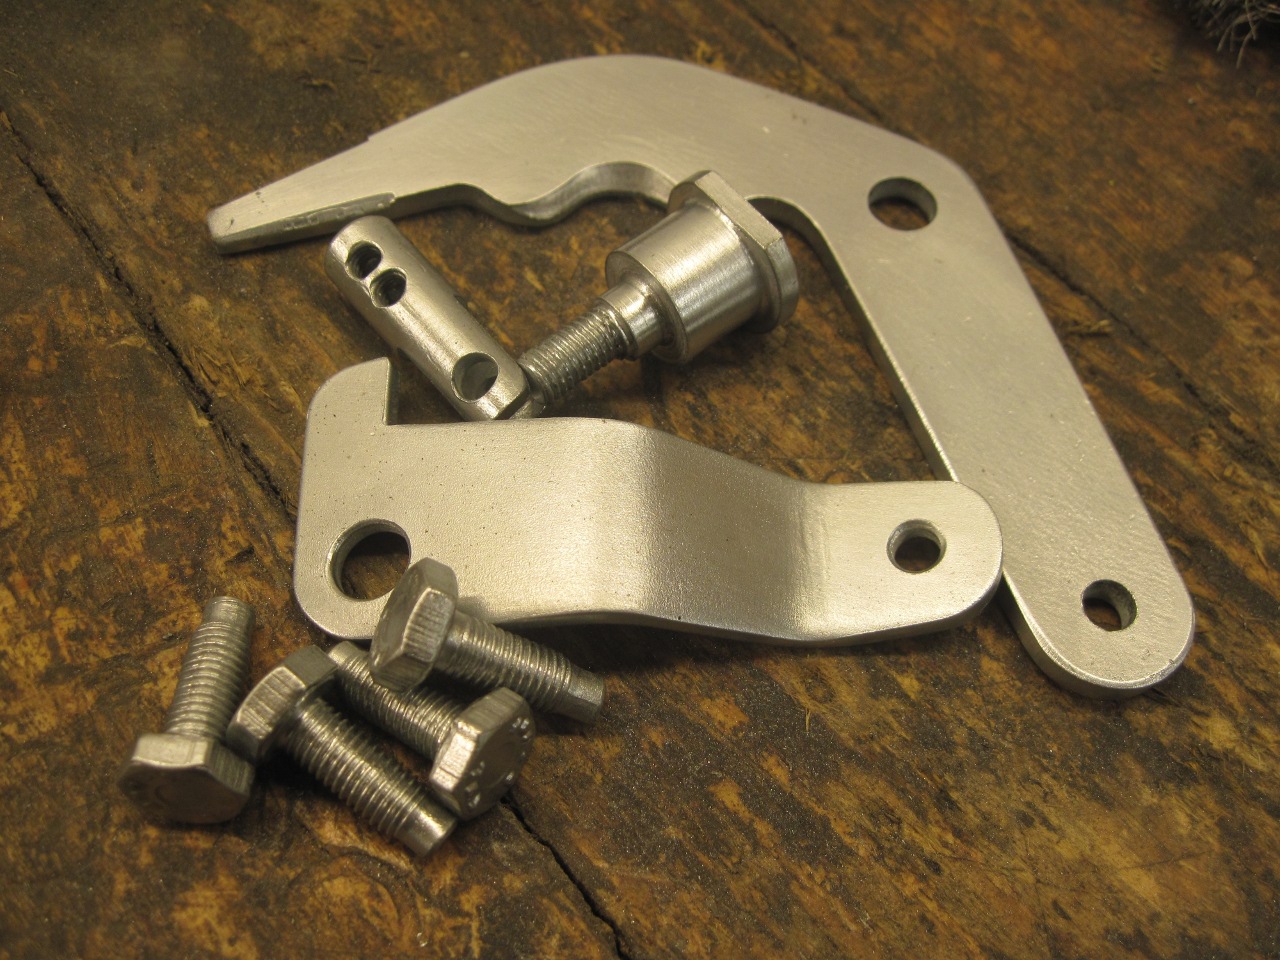
Here
is the replacement for the catch arm pivot. Instead of being
staked, it will have a threaded stud and be attached with a locknut.
The flats on the top are for a wrench so the nut can be tightened.

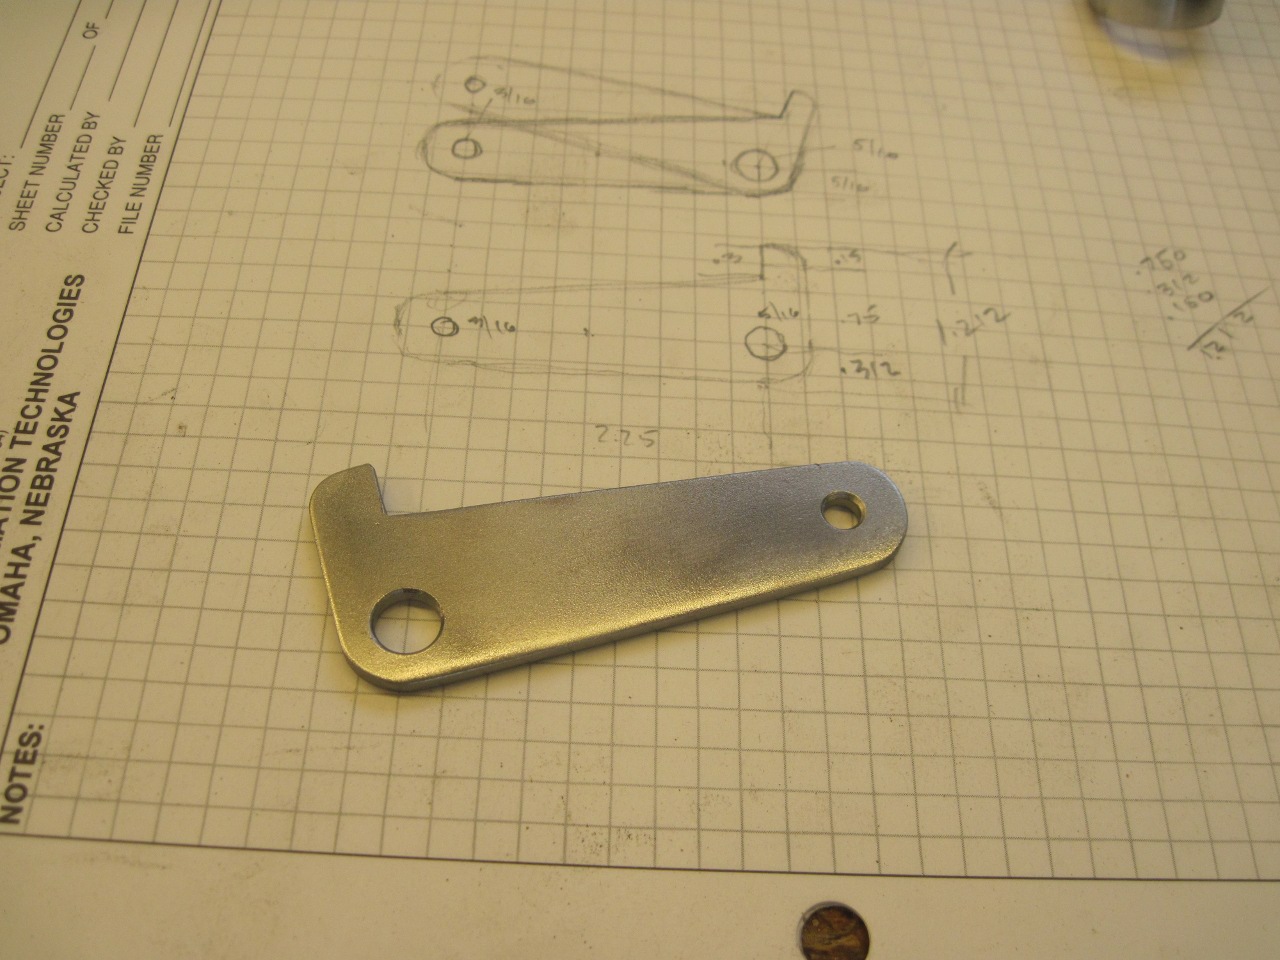
And here is the alternate cable attachment fitting. It's more "in-line" with the cable and I like the looks better.
Now for the real meat of this story.
Anyone
who has spent much time with British cars of this era has certainly
experienced the inevitable heartache that comes with the use of
so-called Bowden cables. These are mechanical devices that can
transmit a push or a pull over a circuitous path between points A
and B. Many of these cars are litterally infested with them.
Among the several things that can go wrong with Bowden cables is
that they can break, which causes the push or pull at one end to fail
to appear at the other end. In the case of a heater control or
maybe even a choke this may only be a nuisance, but with the bonnet
latch it can constitute a crisis. Whether it's tinkering or just
showing off, LBC bonnets tend to be open a lot, and being locked out of
one's engine bay can be enormously stressful for LBC owners.
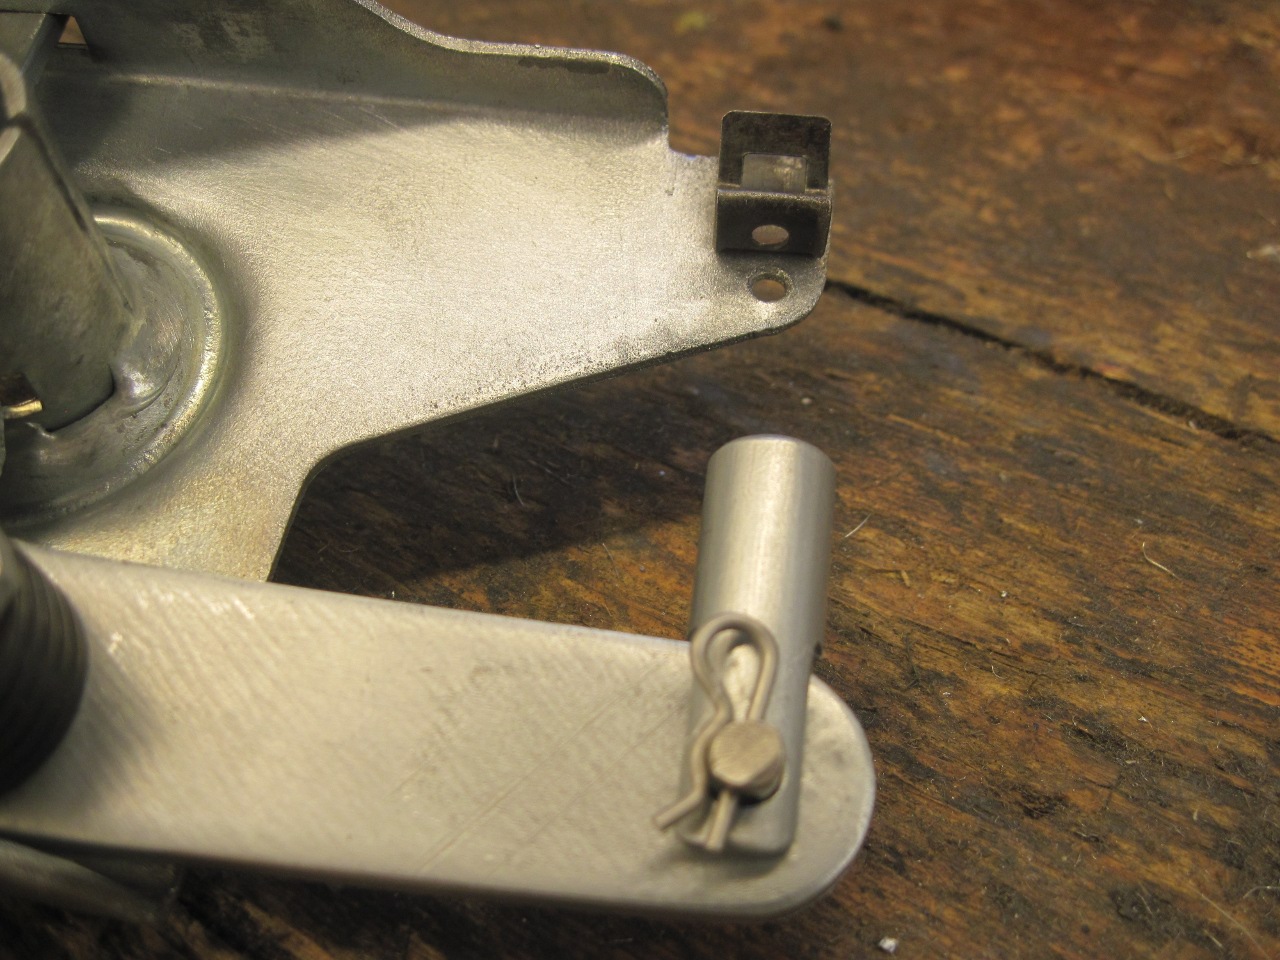
This
is the motivation behind the secondary bonnet latch release. The
idea has been around as long as the cars have. There are kits
commercially available, but many owners just fabricate their own.
Fortunately, adding a backup release is straightforward and
simple on the TR6 latch.
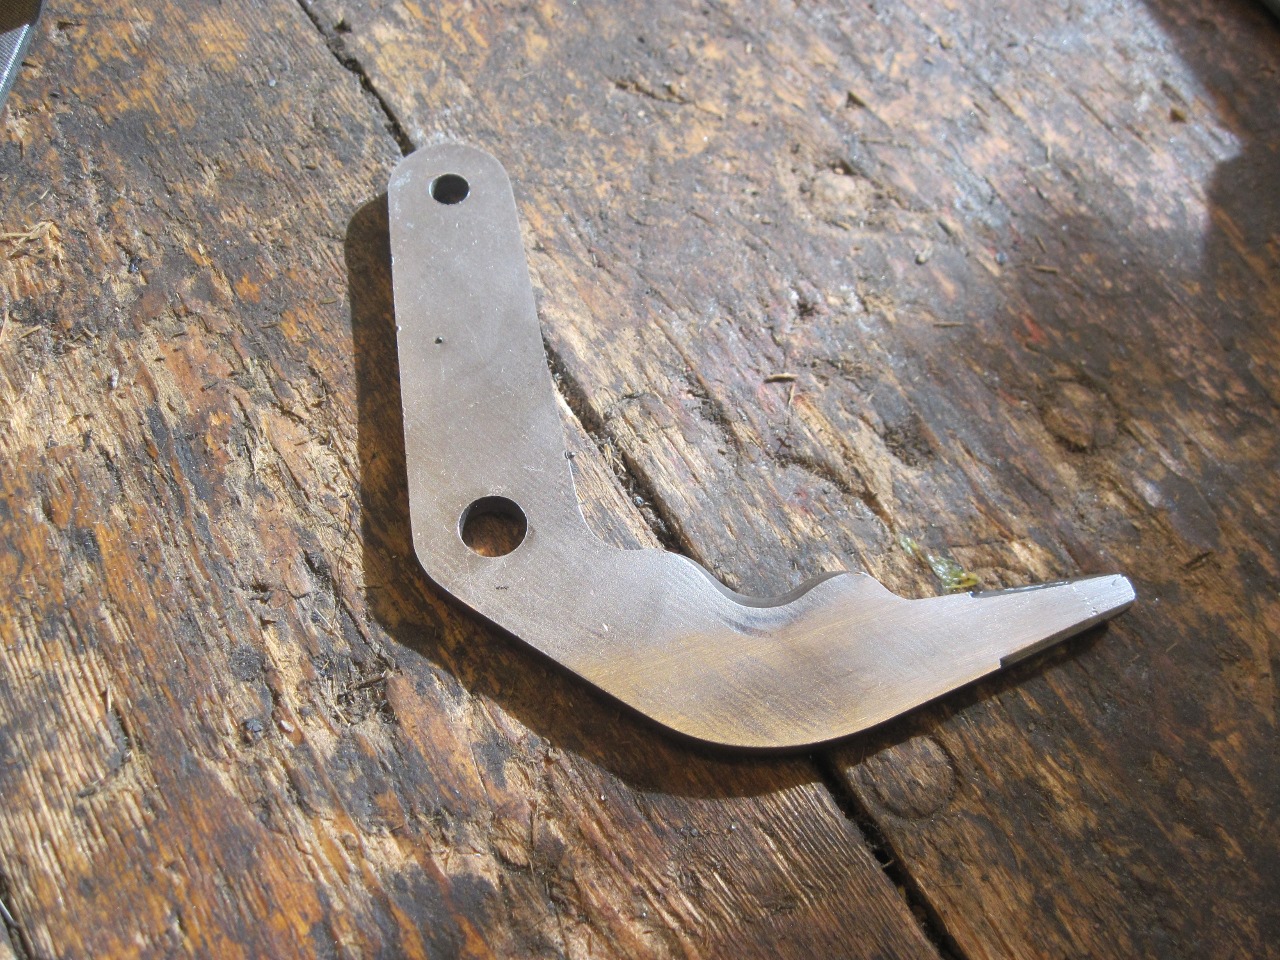
Most
of the examples of safety releases I've seen work basically the same
way. The catch arm has an extension on the end opposite the cable
fitting. The extension rides in a slot in the latch body.
Moving the extension to the left will release the bonnet.
In the picture, I've marked the approximate travel needed to
release the catch.
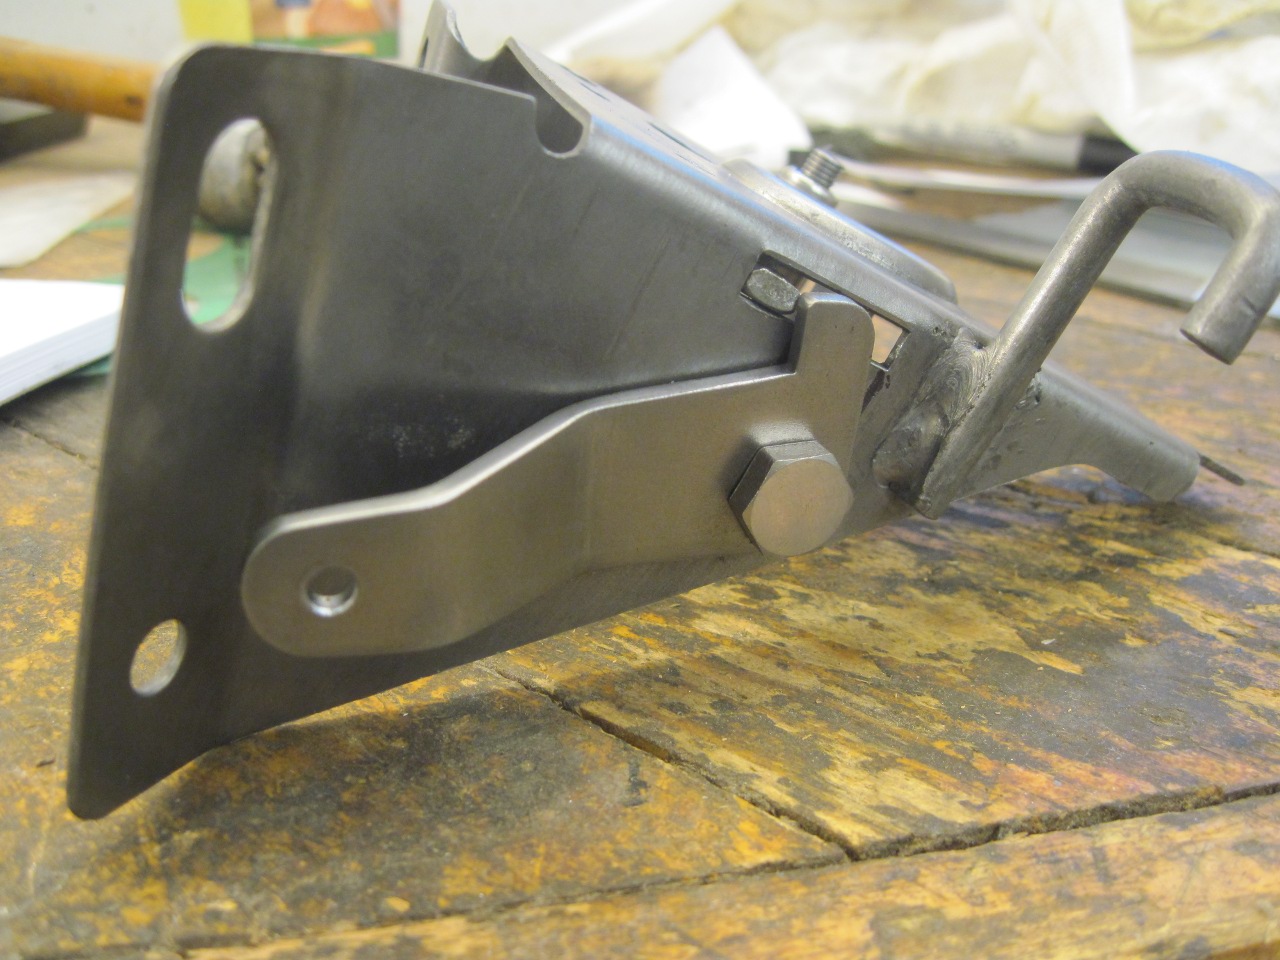
A
simple right angle lever arrangement, cleverly placed, will move the
extension with some mechanical advantage. Putting a jog in the
piece made it easier to connect an actuator to it. It is fastened
to the latch body with a stainless shoulder bolt.

The pivot for the arm is centered in the travel span.

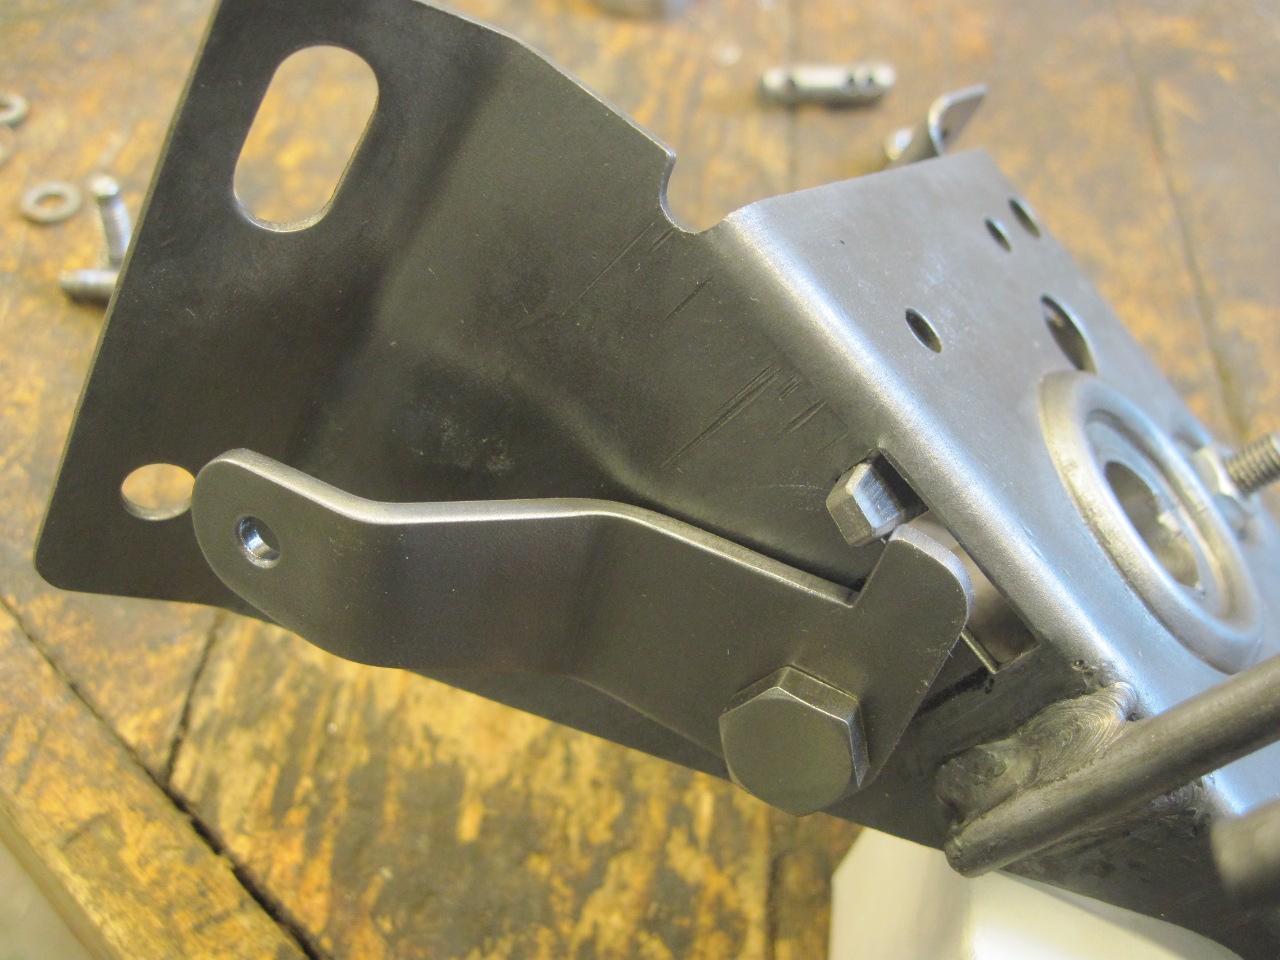
Looks
good, but the extension on the catch arm really needed to be a little
longer. Enough preassure on the new lever arm would cause it to
ride up on the extension tip and bind.
A blob of weld on the tip ground to shape added about 1/4" to the extension.

Ahhh... Much better.
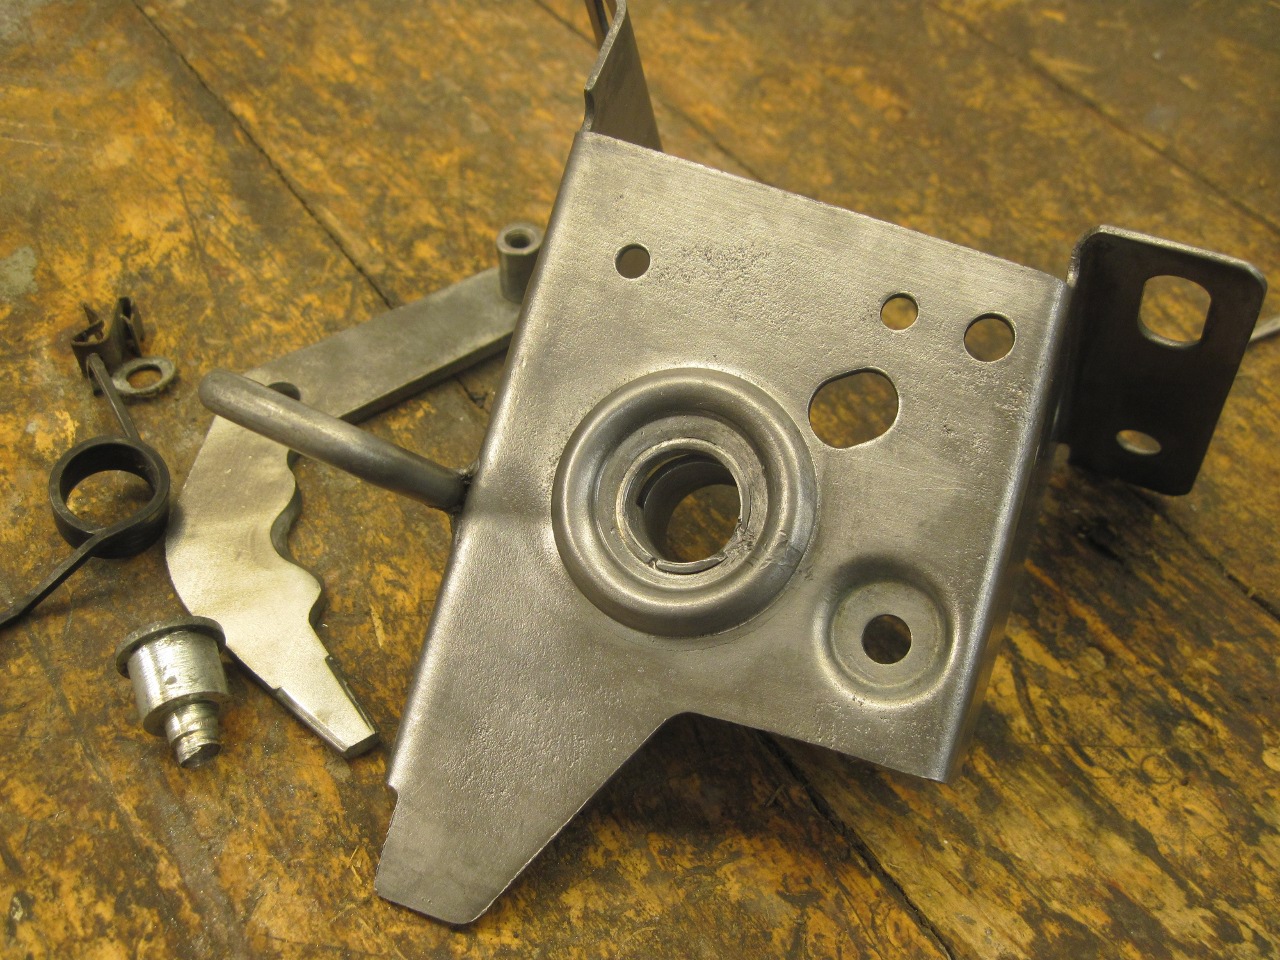
With everything now fitting and working well, it all got a nice zinc plate.
On reassembly, I fiddled with the spring way too long before I got smart and enlisted a high-tech aid.
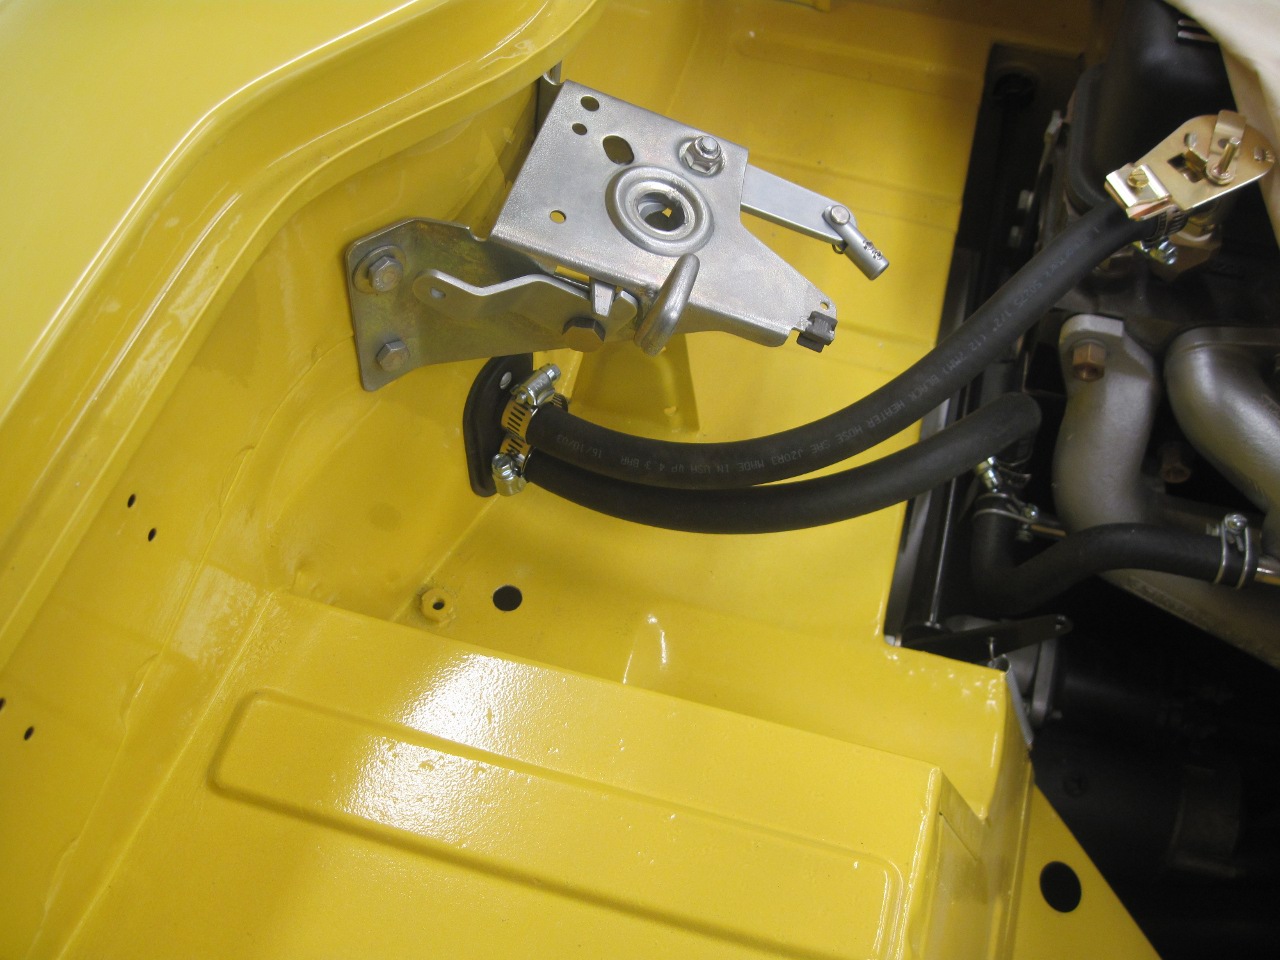
Since
the new main cable fitting is lower than the stock one, the little clip
that holds the cable sheath has to go on the bottom side of the latch
body instead of on the top.
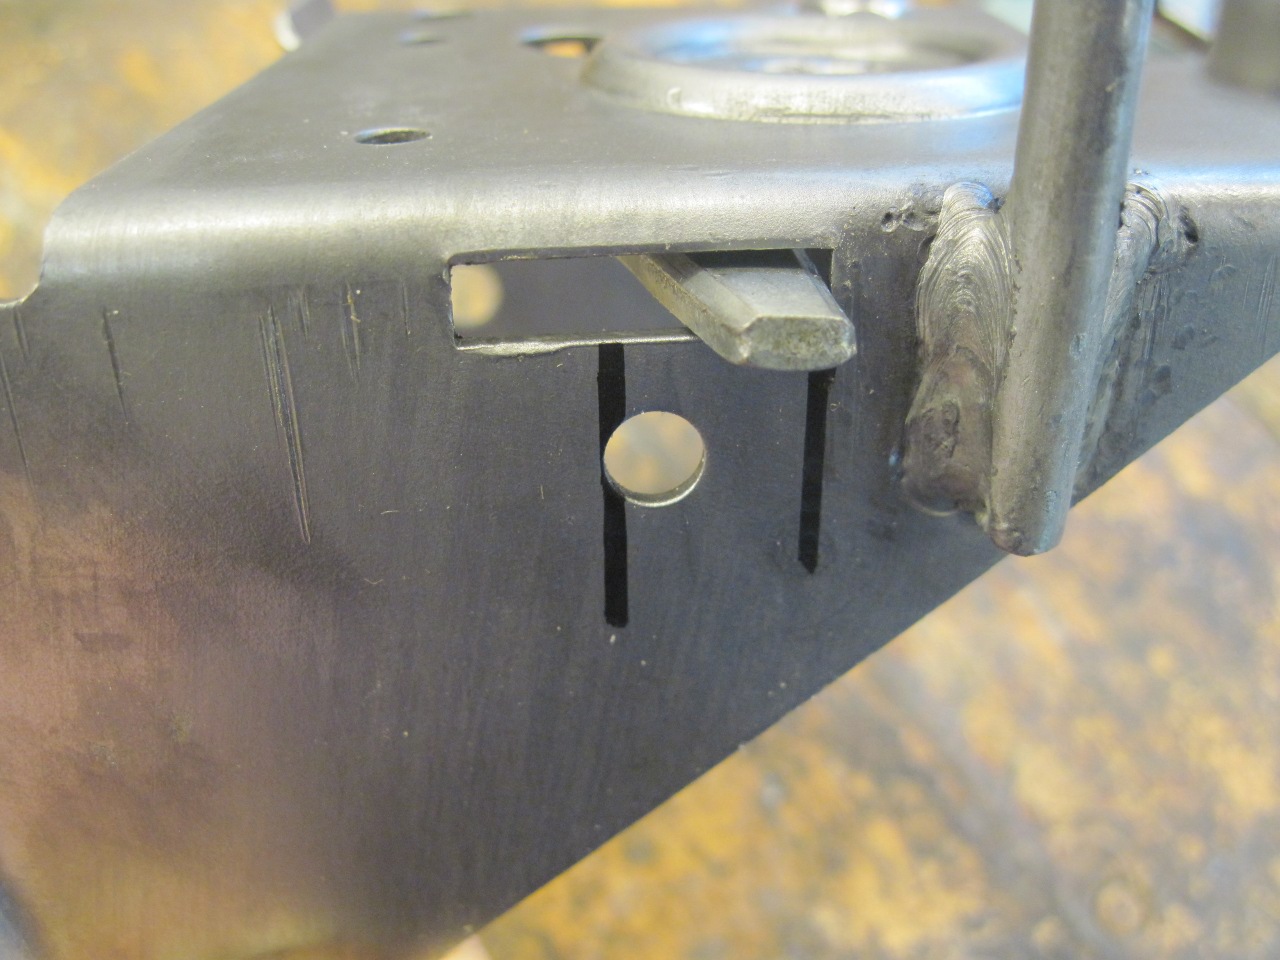
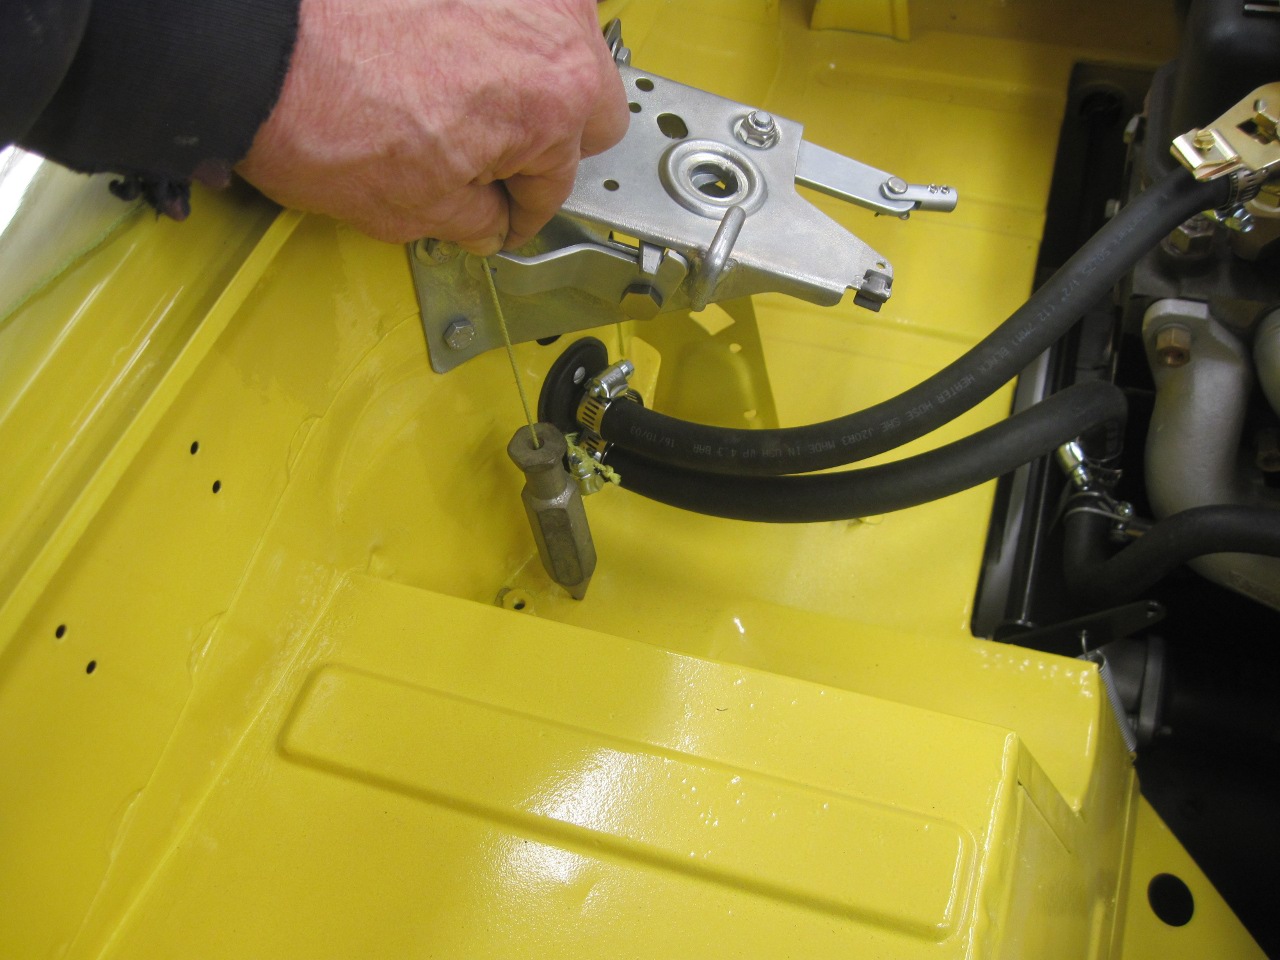
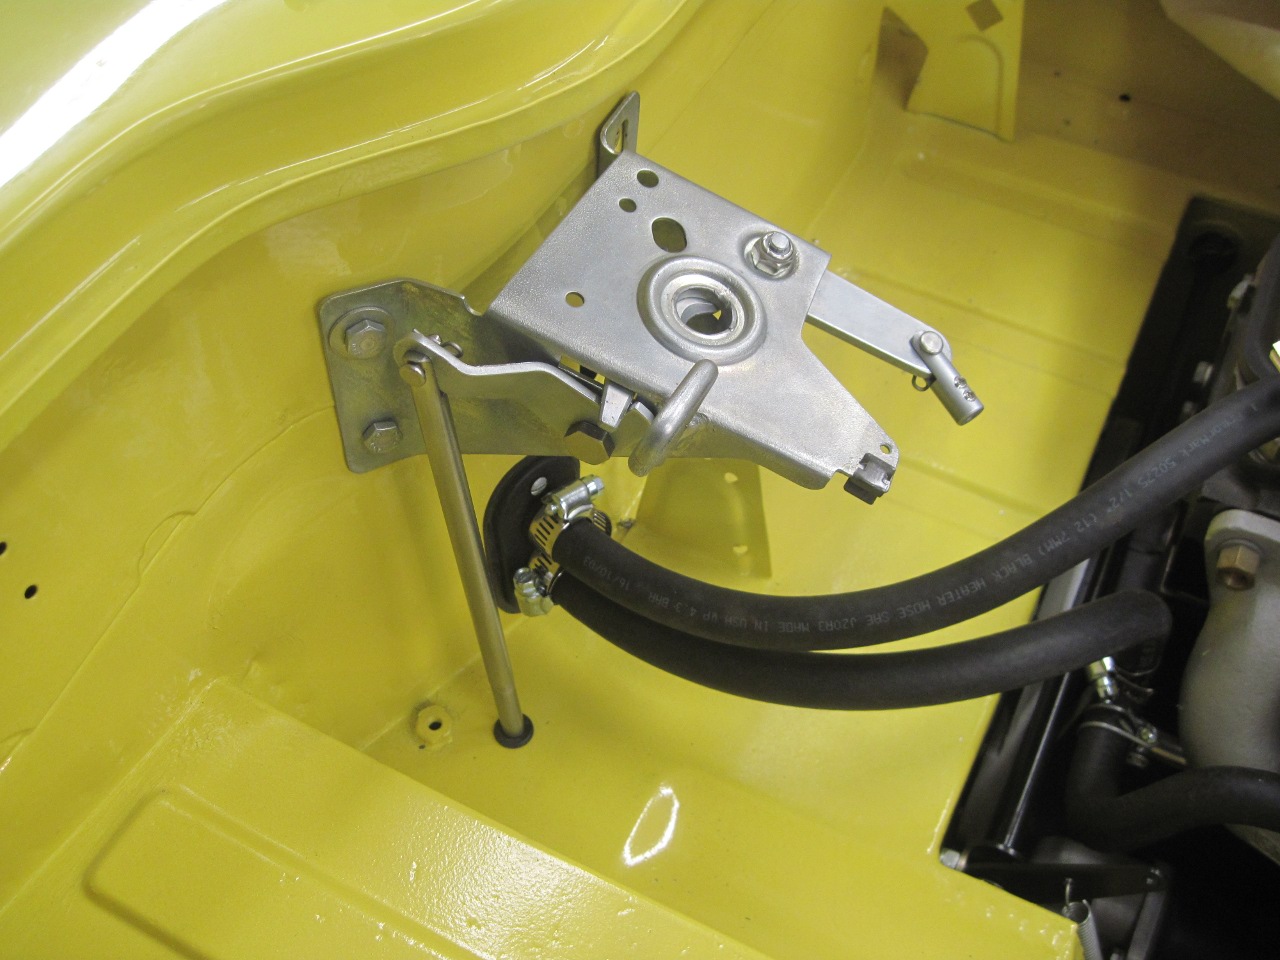
A
trial fit on the car showed that I could just drop a rod straight down
from the new release lever. I marked for the hole with a plumb
bob, drilled the hole and installed a rubber grommet.
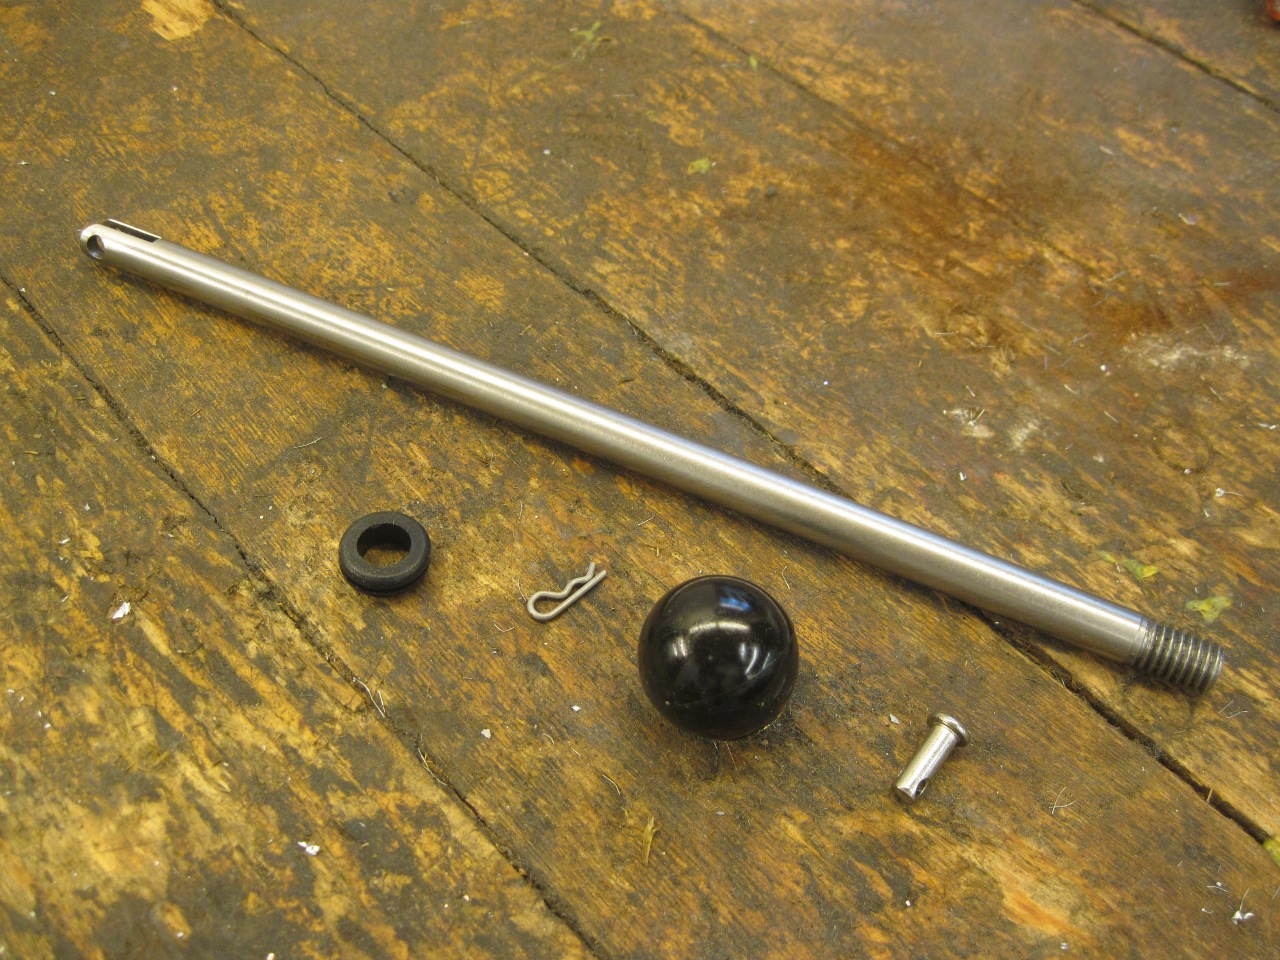
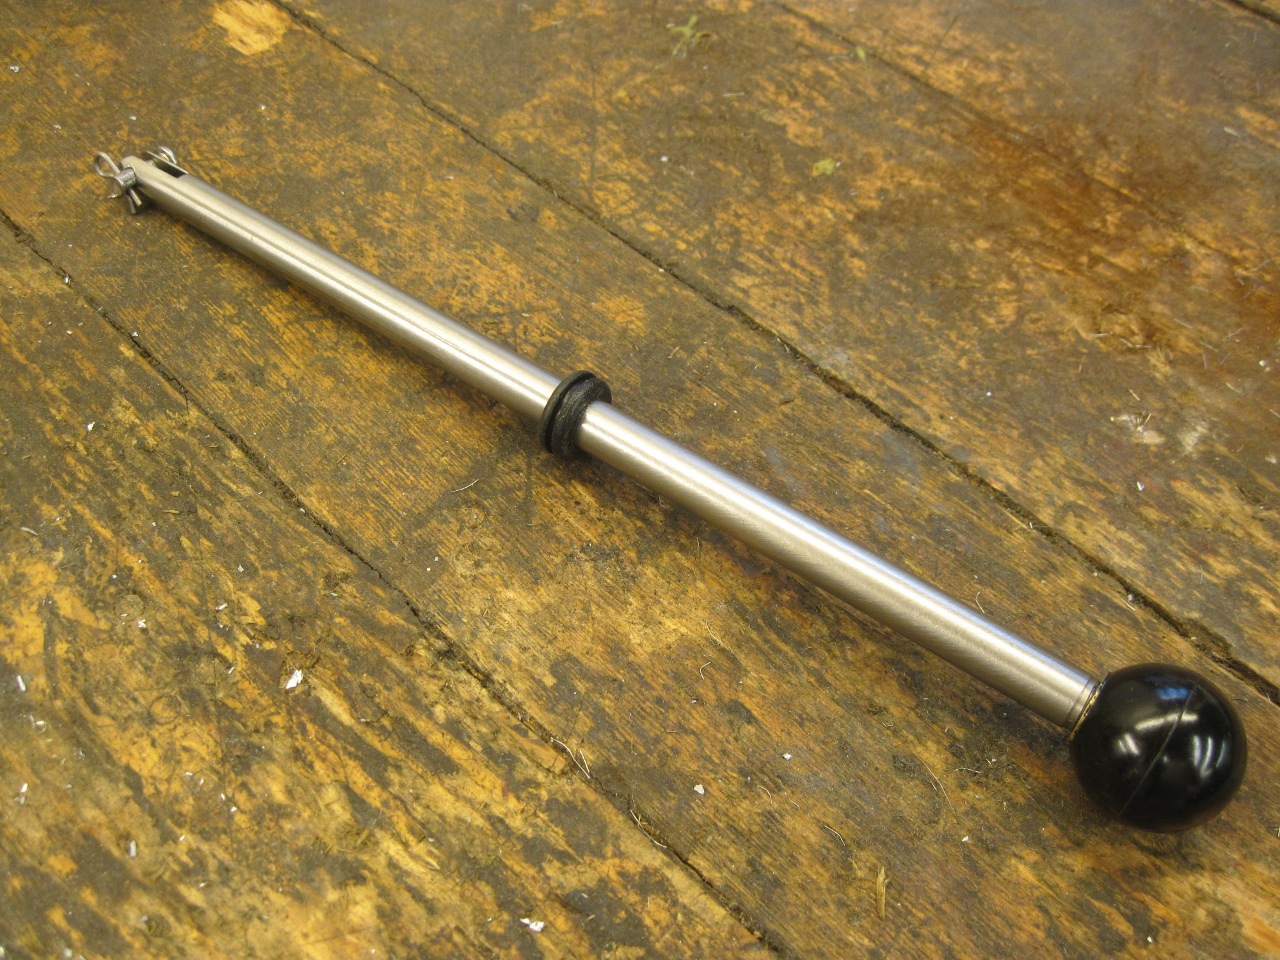
The
actuating rod is just a piece of 3/8" stainless with a fork cut on one
end and a ball for a handle on the other. The handle ends up near
the heater in the passenger foot well.

There
is nothing particularly ingenious or new in this work, but it was an
enjoyable project. It took some time, but the cost was probably
under $10.
Comments to Ed at elhollin1@yahoo.com
To my other TR6 pages