To my other TR6 pages
October 14, 2016
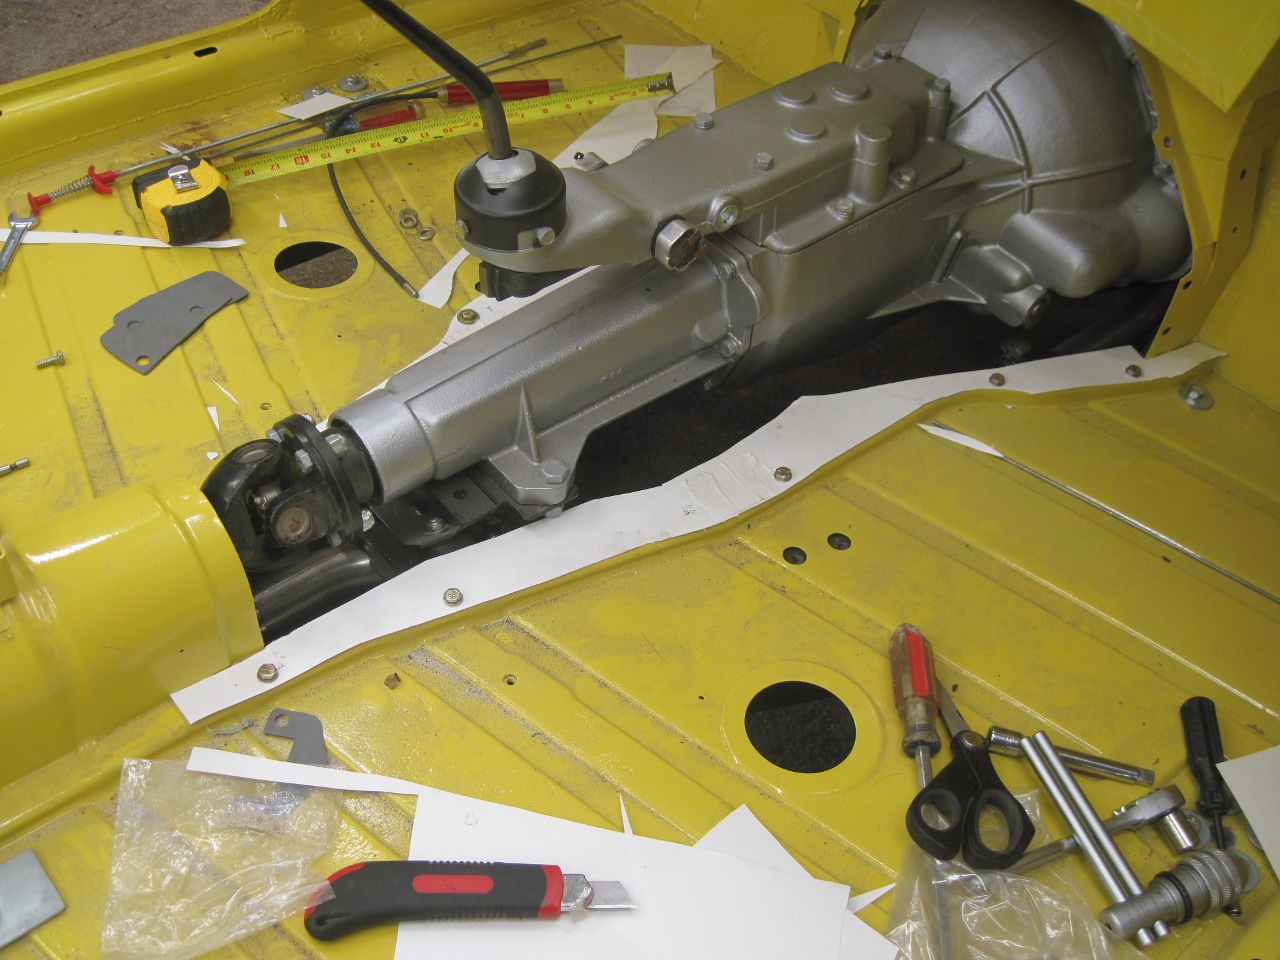
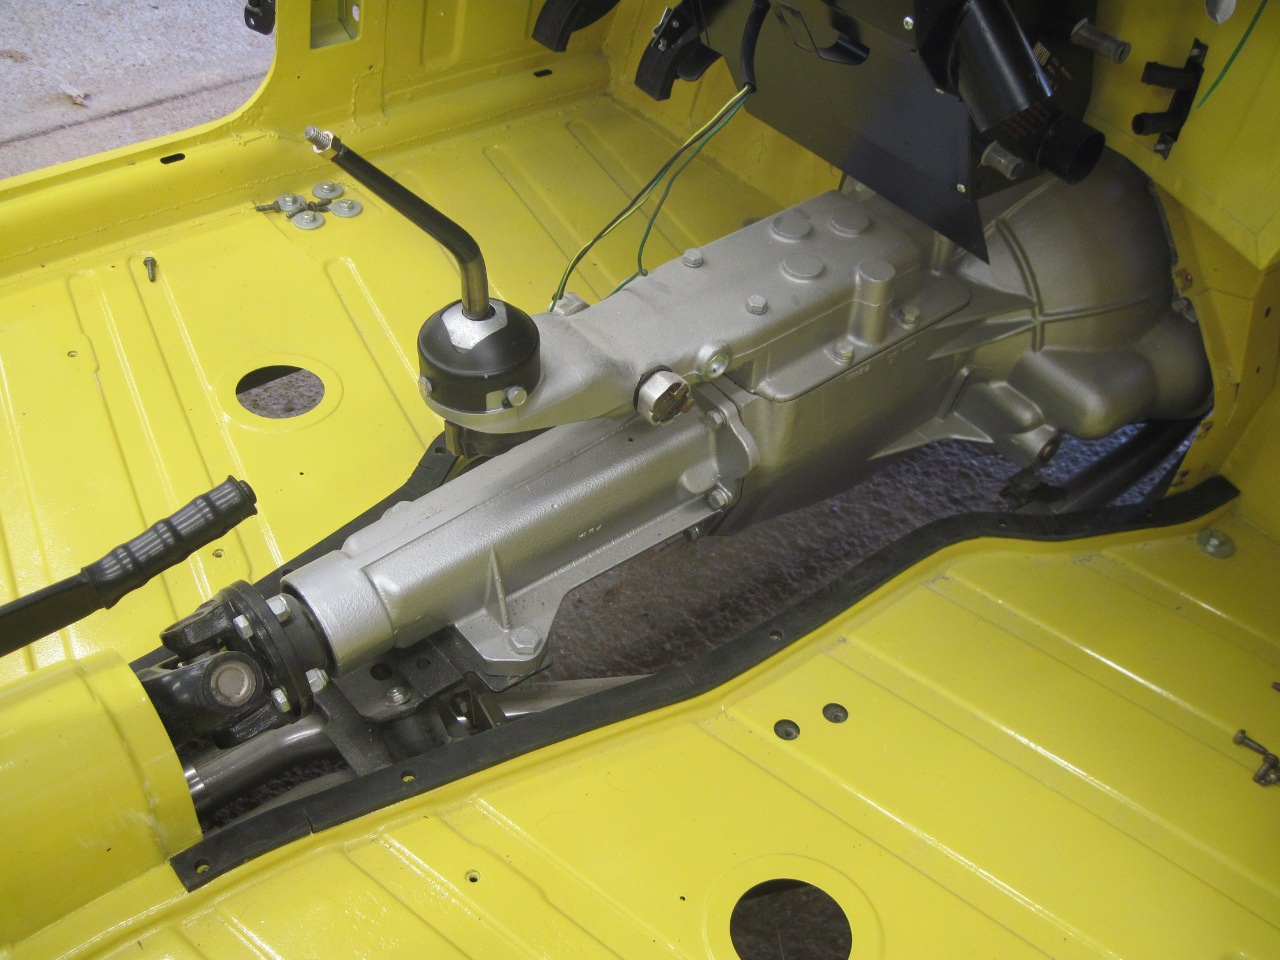
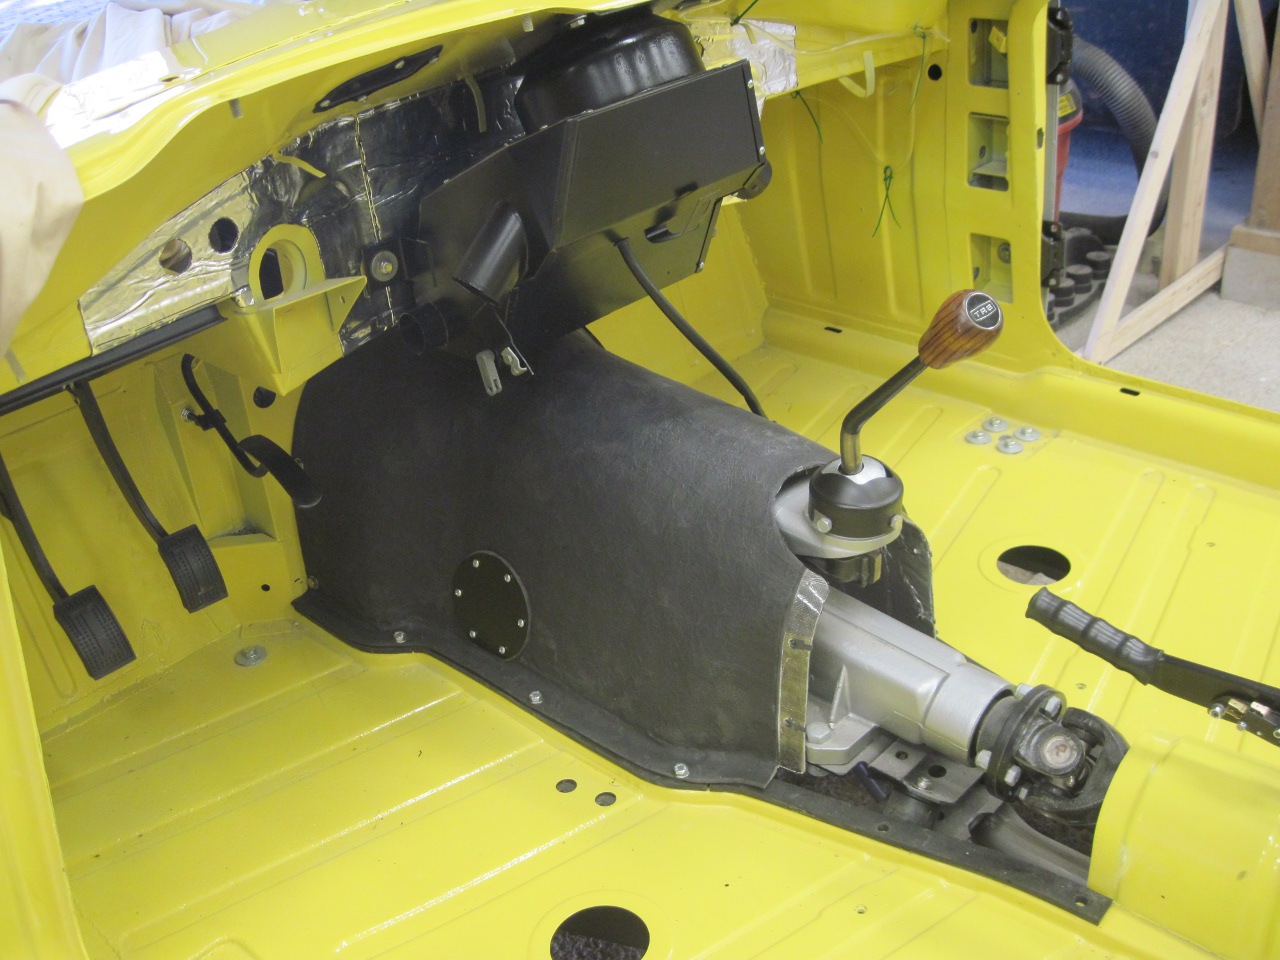
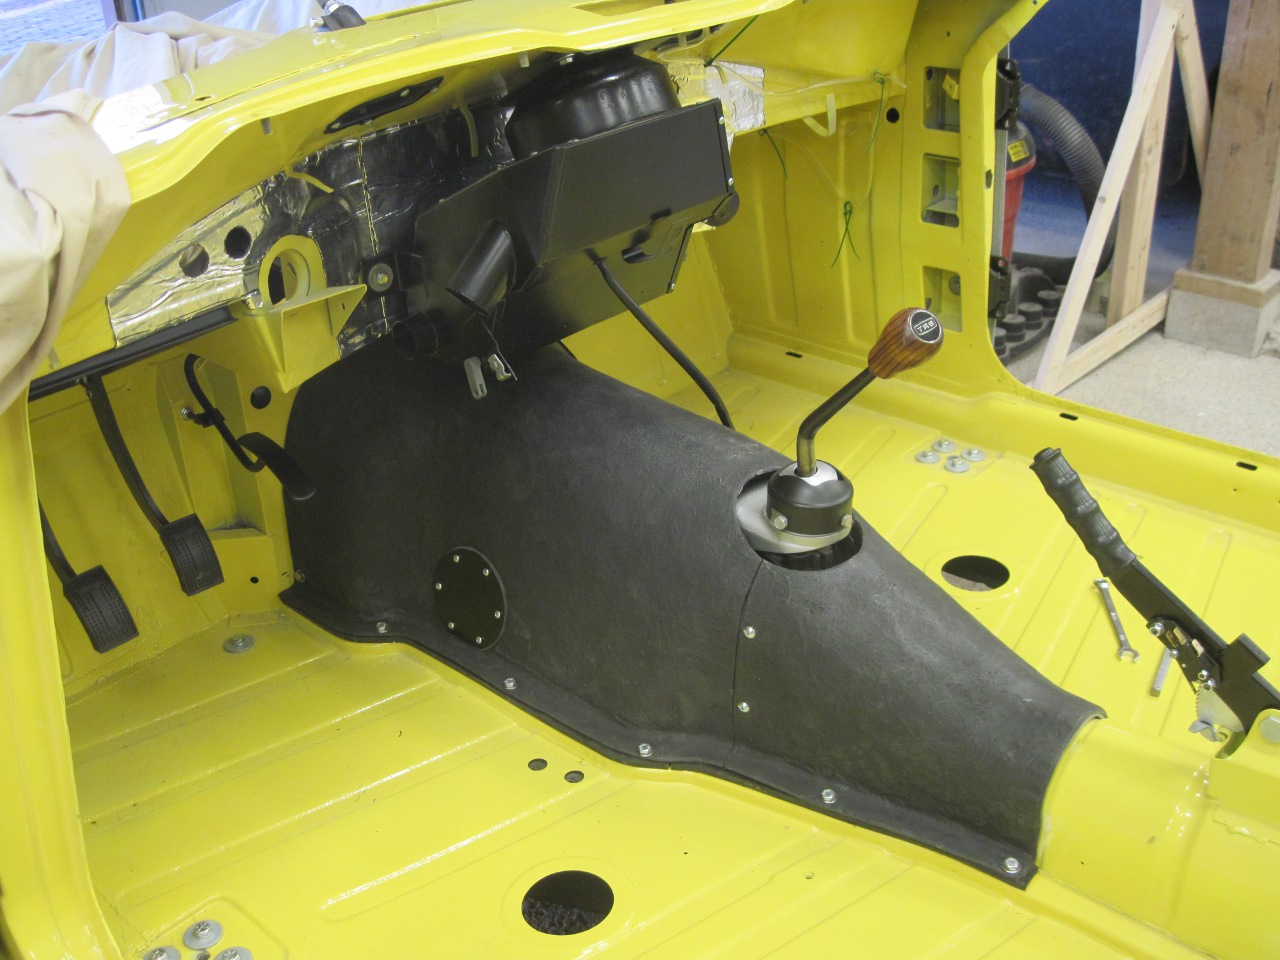
Transmission Tunnel
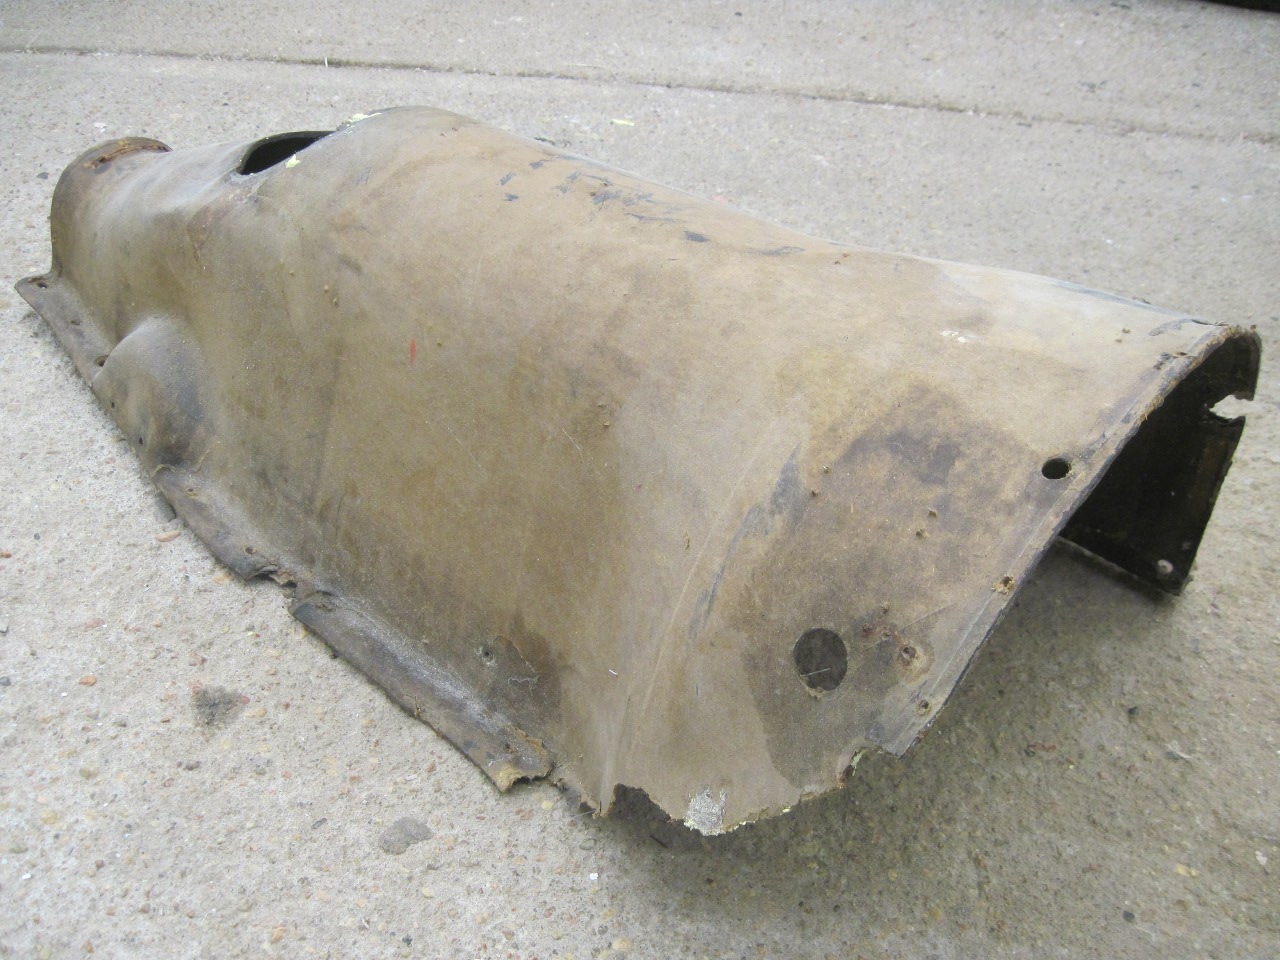
My
TR6 had a cover over the gearbox in the passenger compartment made
essentially of shaped cardboard. The years hadn't been kind to
the cover, with large chunks of it completely missing.
Aftermarket
plastic or fiberglass versions of this cover are readily avalable.
They aren't all that expensive, and I have no reason to think
they wouldn't be a totally adequate replacement. On the other
hand, I already know how to order the part--what I'd really rather do is figure out how to make one.
Now it's hard to argue that this is a reasoned approach, but I do
have a little rationale. I'm noodling some ideas around a center
console that would require modifying the aluminum H frame that supports
the dashboard. Also, I think I like the idea of a two piece
tunnel cover, but with a split in a different place than those
commercially available. To get lined up for these things, I'd
like to tweak the tunnel design a little.
I
first considered making a female mold using the original cover, and
then making a copy of the cover from the mold. This seemed like a
lot of work for just one part. The other approach would be to use
the old cover to produce a "plug", which is just a copy of its internal
volume, then I'd use the plug to make a replacement cover. This
latter option is the one I chose.
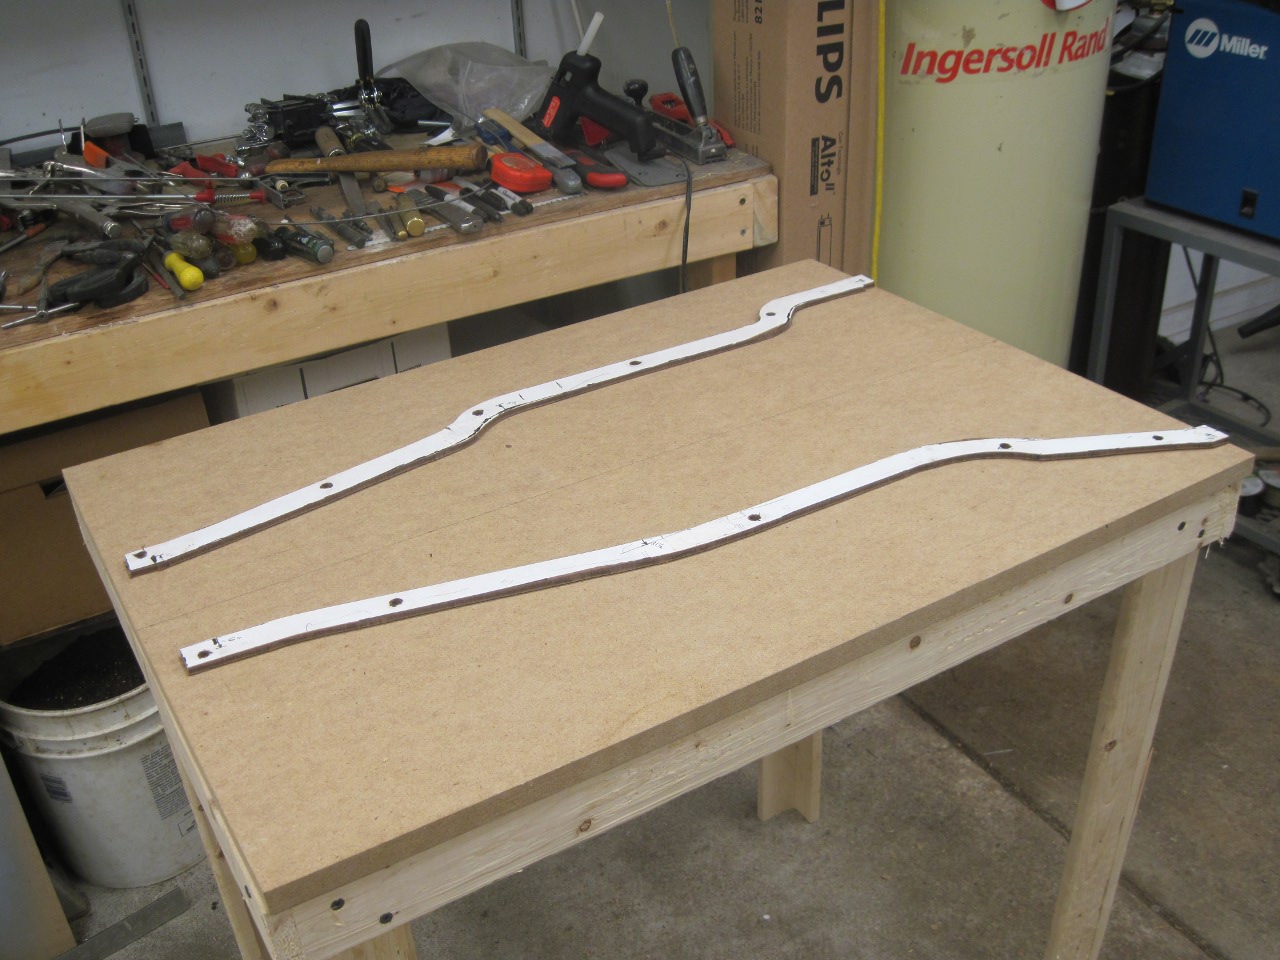
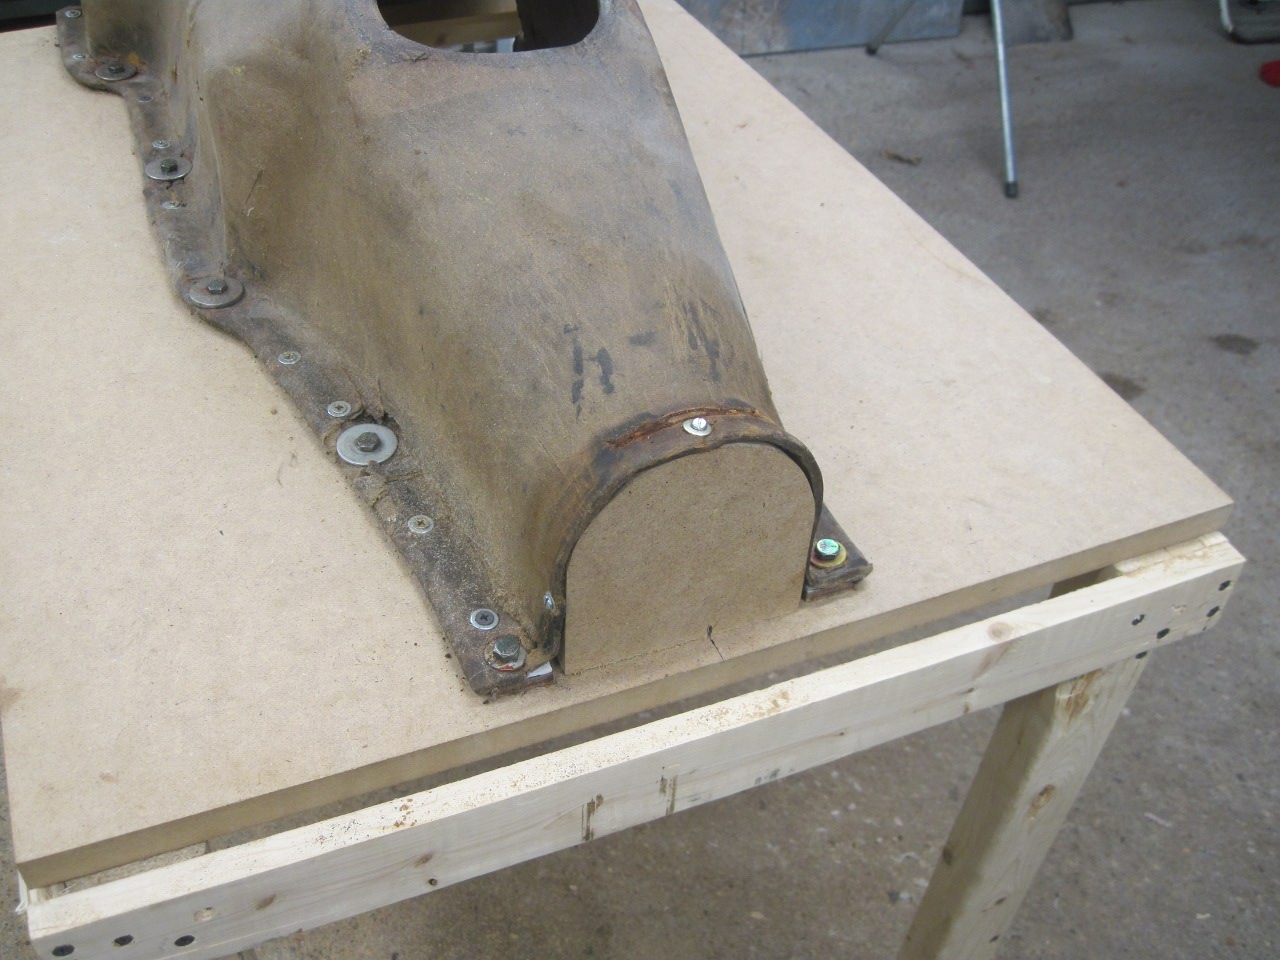
First,
since the old cover was pretty floppy and distorted, I had to find a
way to stabilize it to the correct shape. I first made some paper
templates of the cover's mounting surfaces on the cabin floor.

Then
transfered them to some 1/4" Masonite, and cut them out. I built
a quick table just for this purpose, and mounted the Masonite patterns
to the table top, matching spacing between the two sides to
measurements form the car. I now had a duplicate of the car's
horizontal mounting flanges.
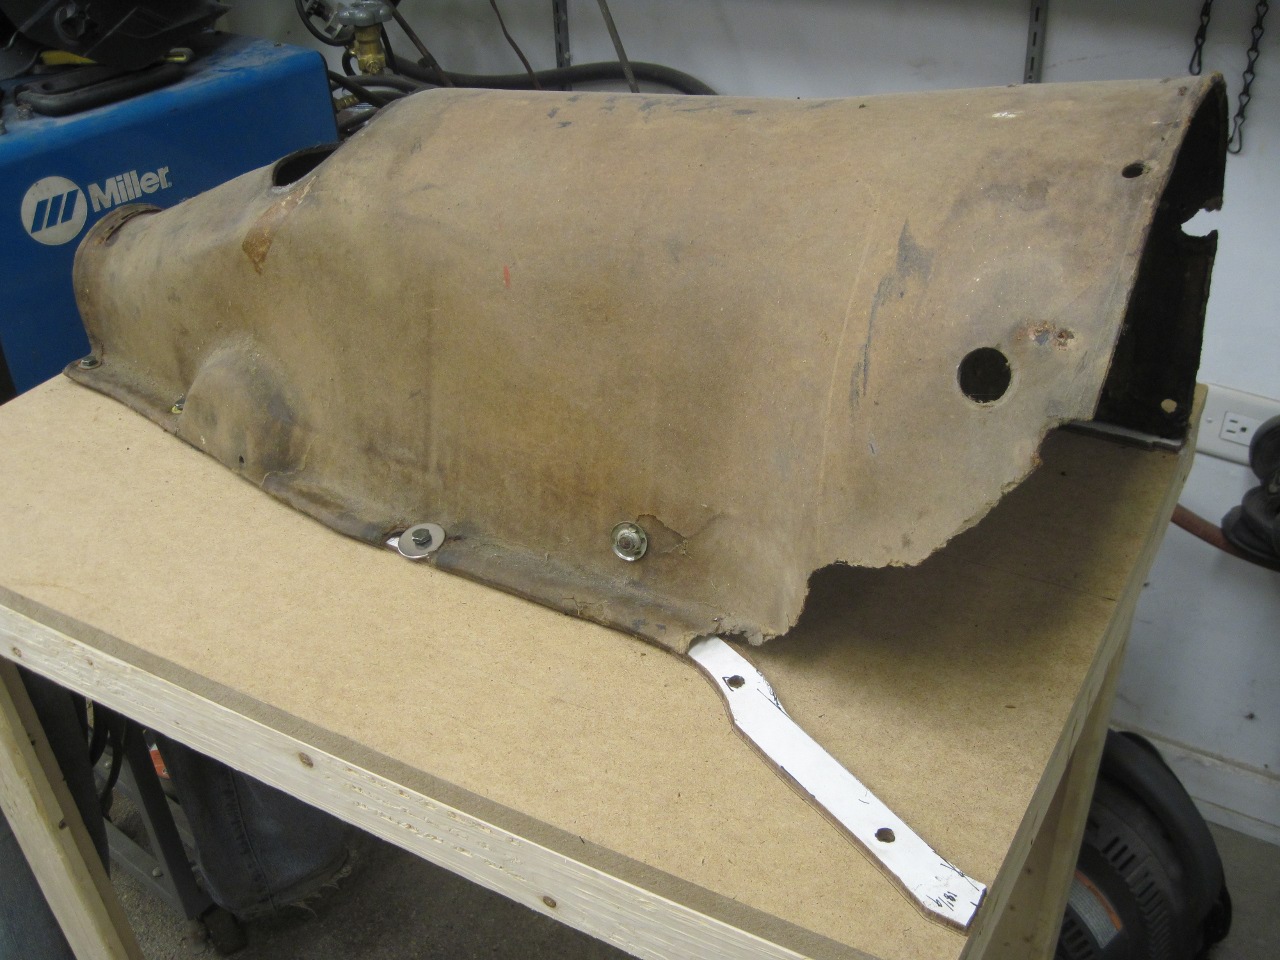
Then,
with careful measurements and patterns, I cut out end caps that match
the mating surfaces at the firewall at the front, and at the drive
shaft cover at the rear. This held the tunnel to its proper
installed shape.

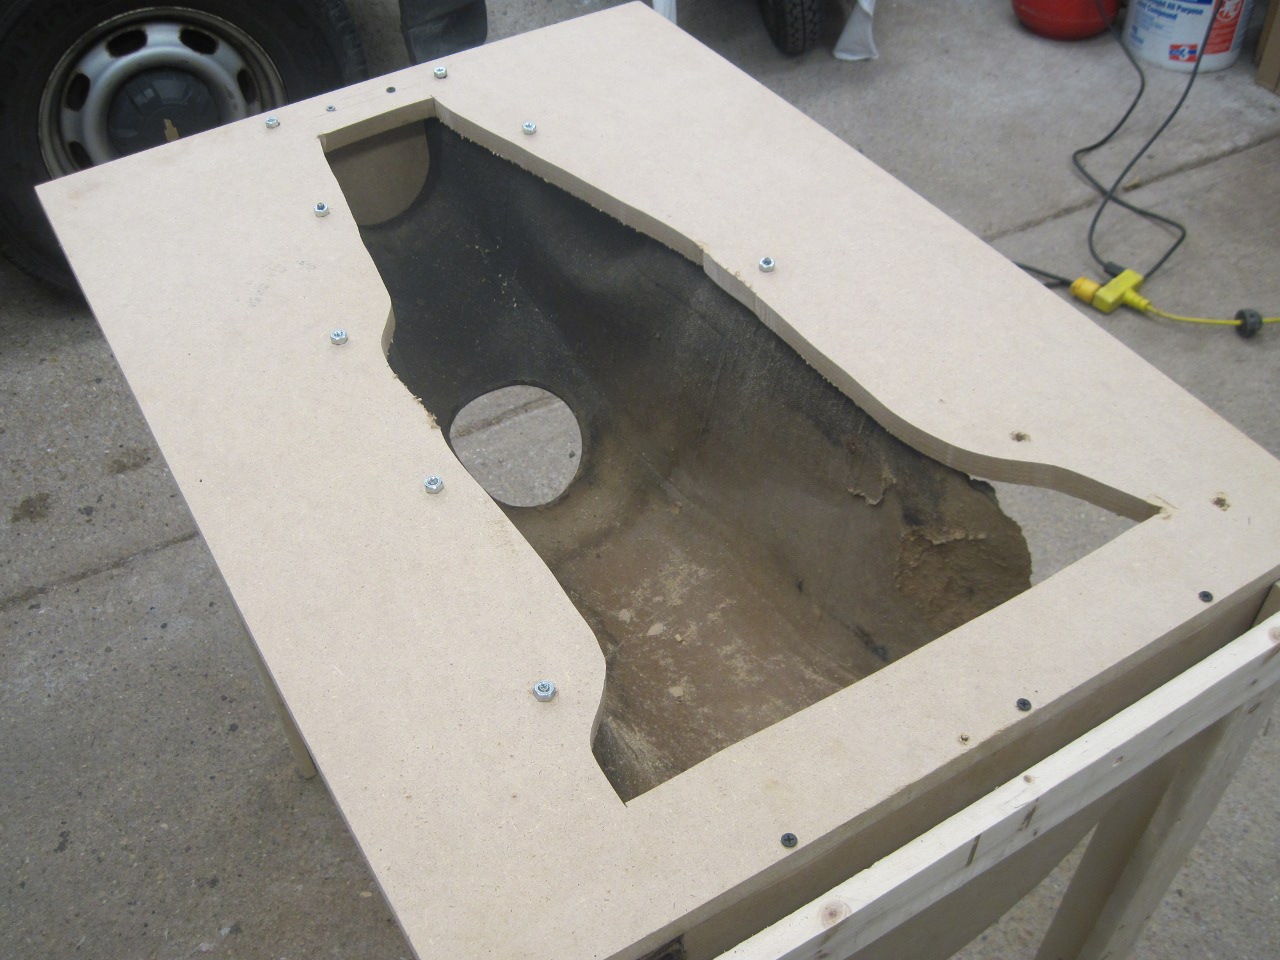
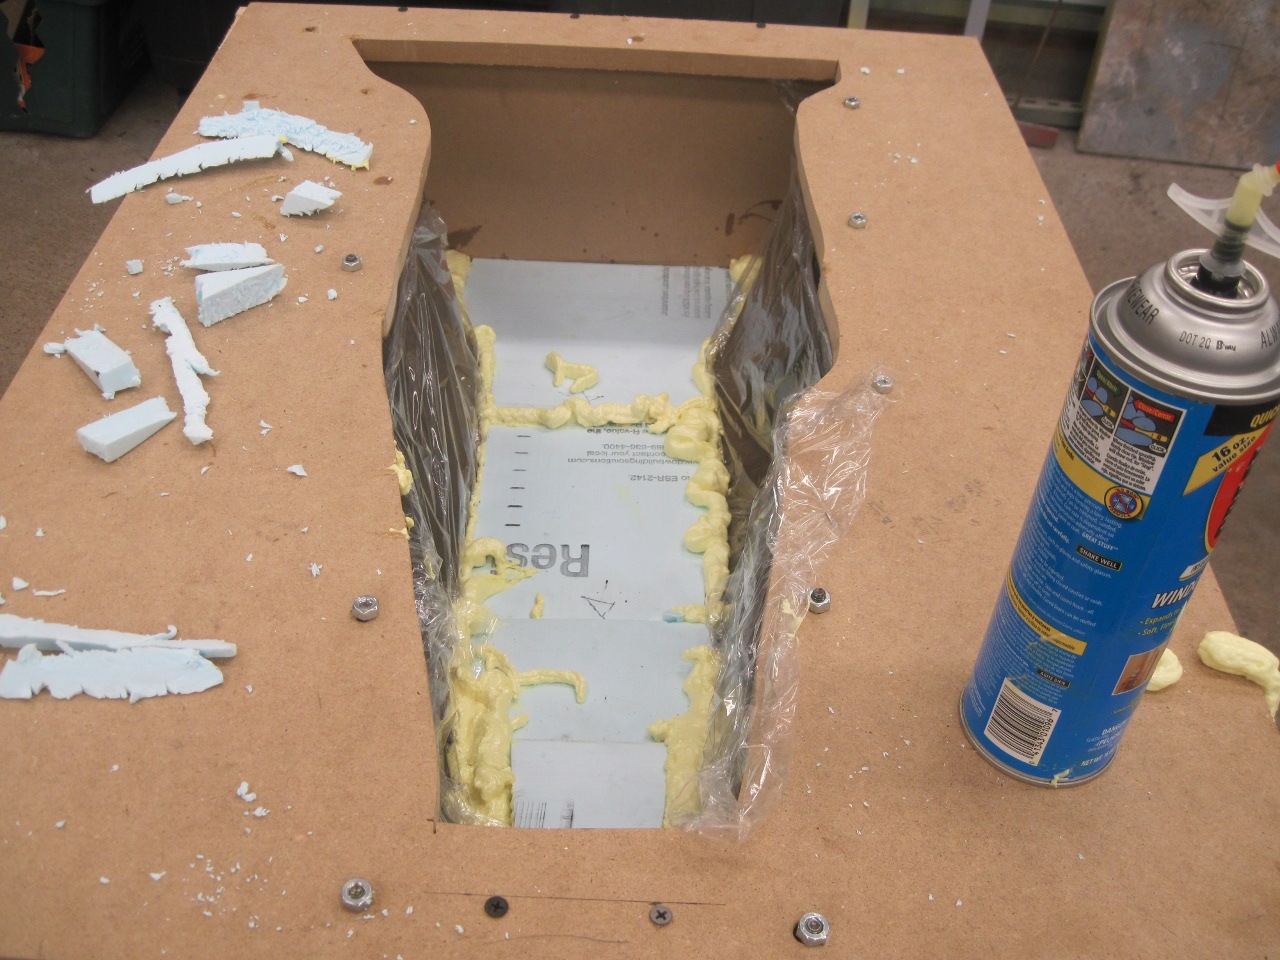
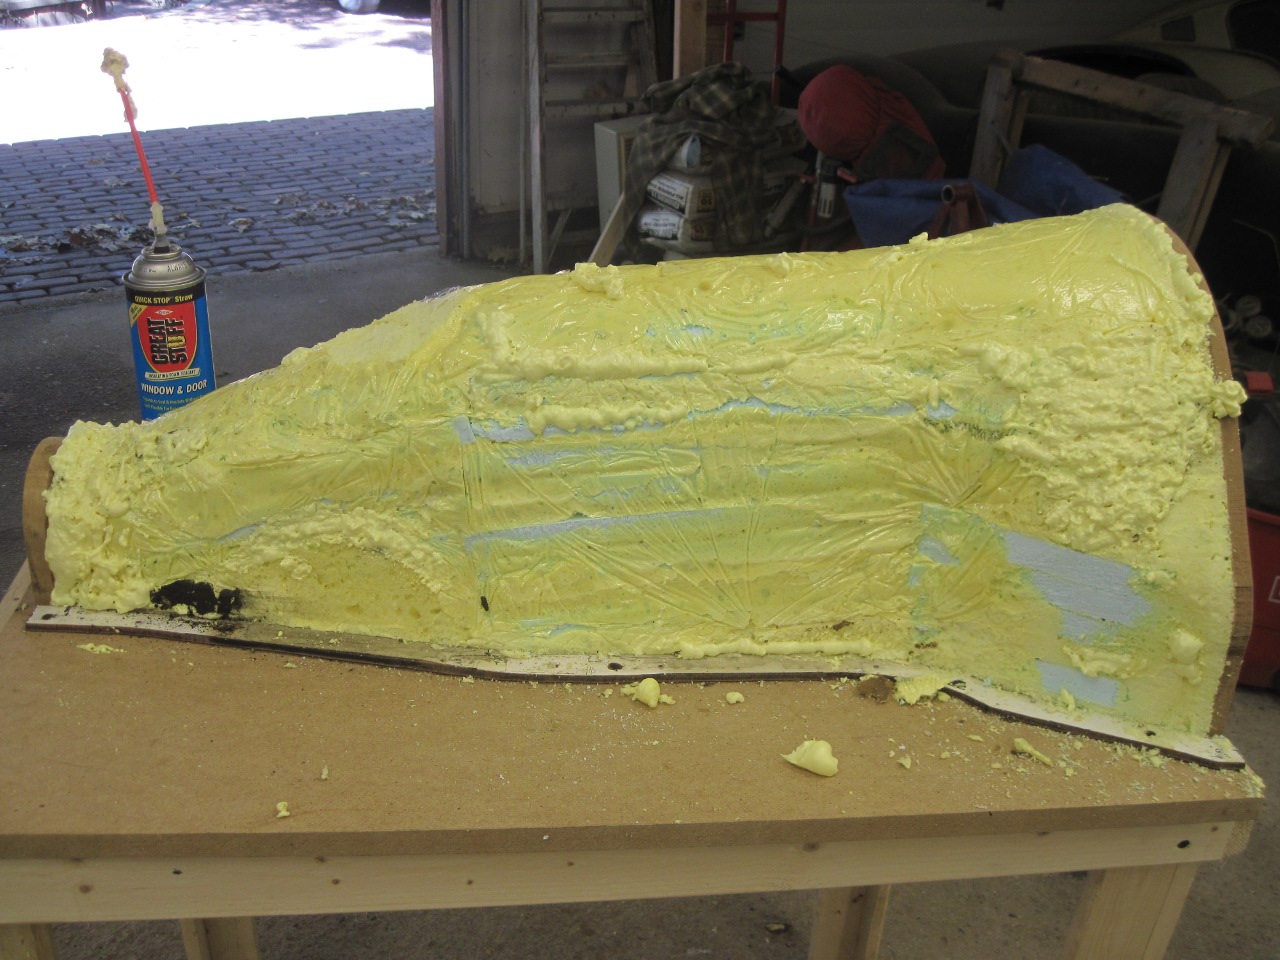
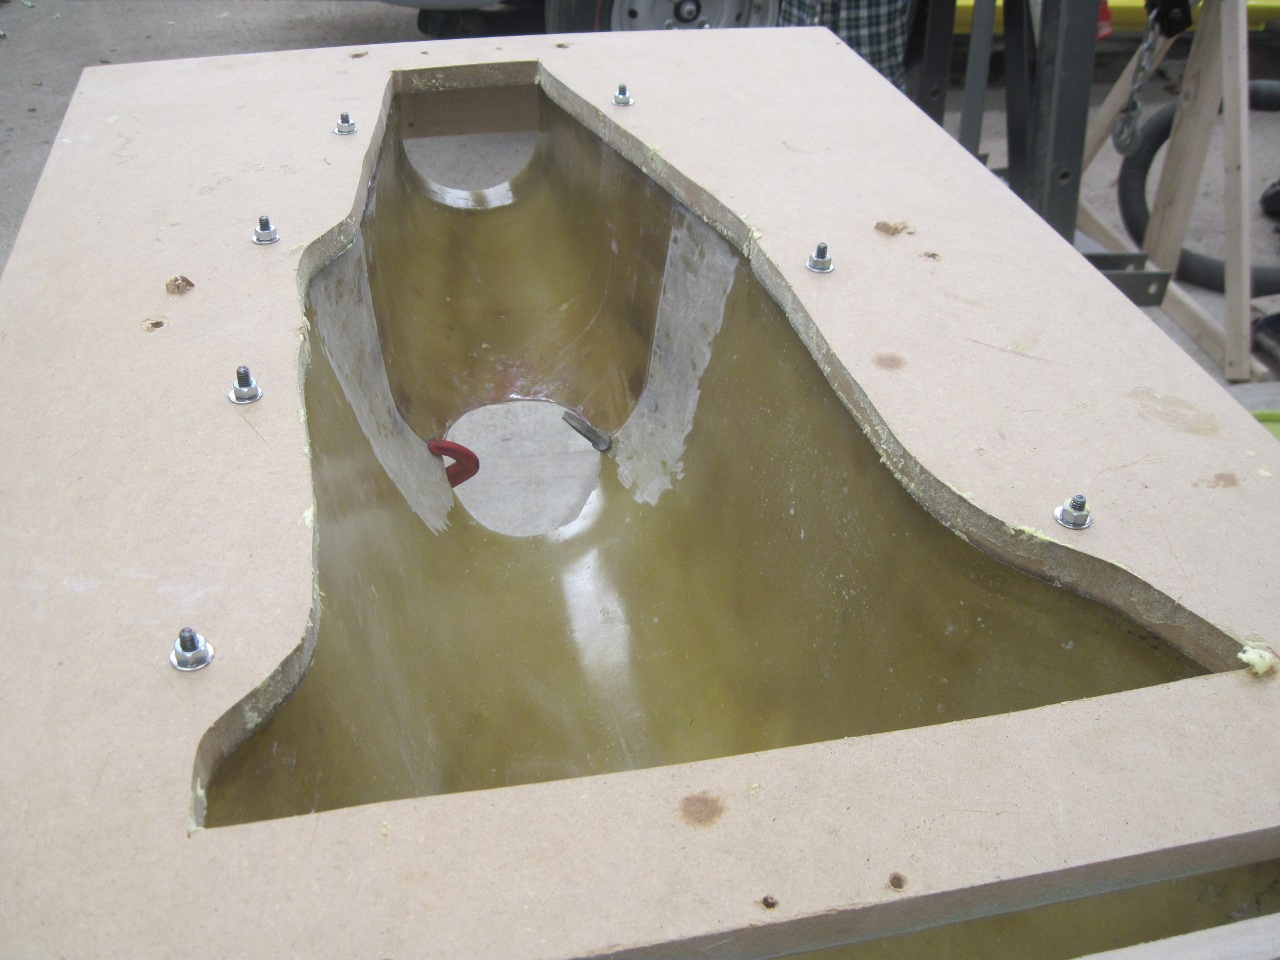
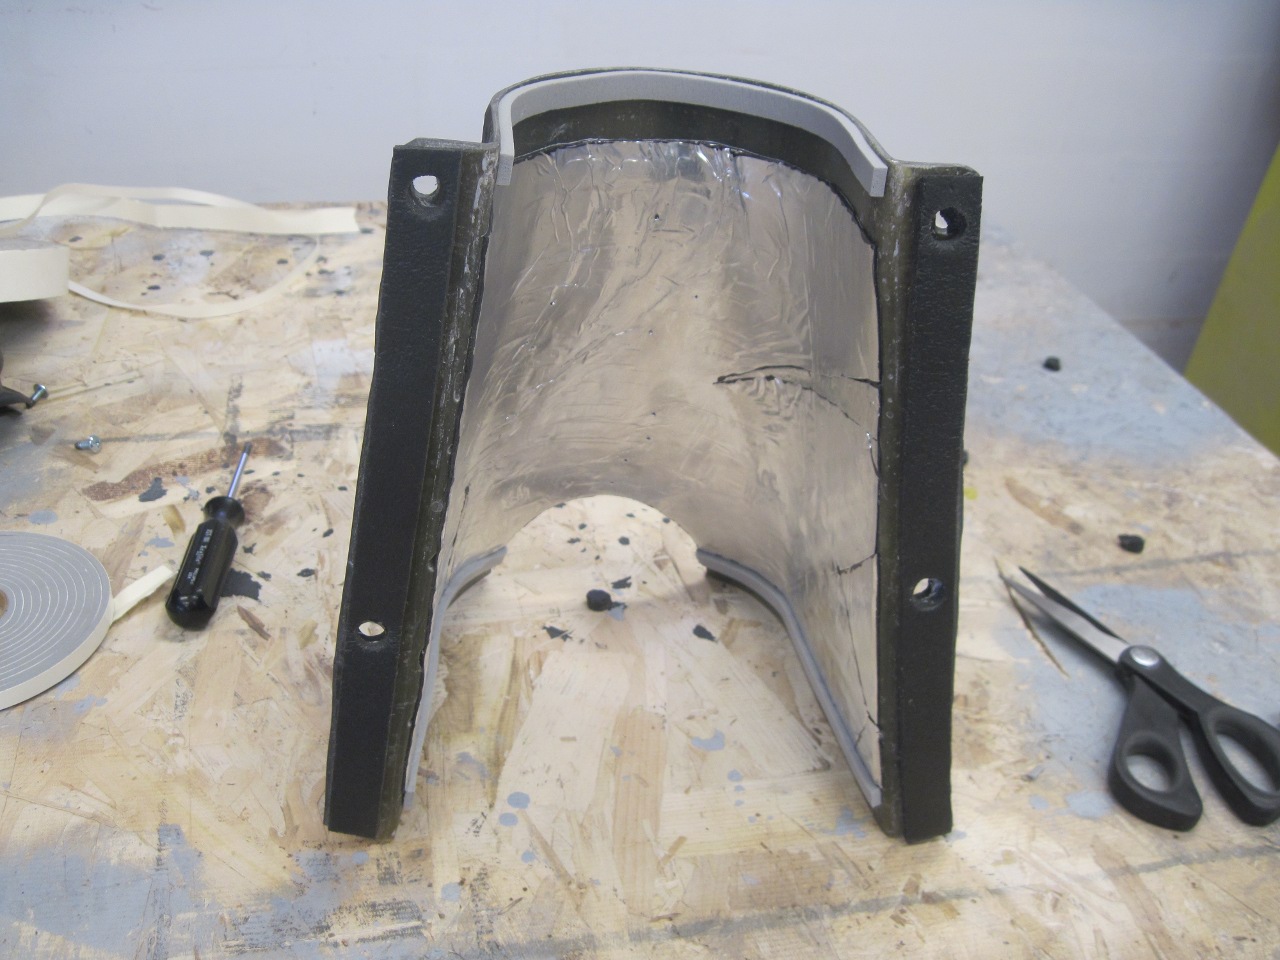
Now
to create a plug of the internal space. My original thought was
to just fill the cover with expanding foam dropped in through the
shifter hole. I was a little worried that the pressure from the
expanding foam could distort the cover, or cause the crumbling flange
to tear away from the mounting board. In the end, I decided to
flip the table top over so the cover was hanging upside down, then cut
away most of the board between the mounting flanges. I could then
build up the foam from the inside. I coated the inside of the
cover with oil as a release agent.
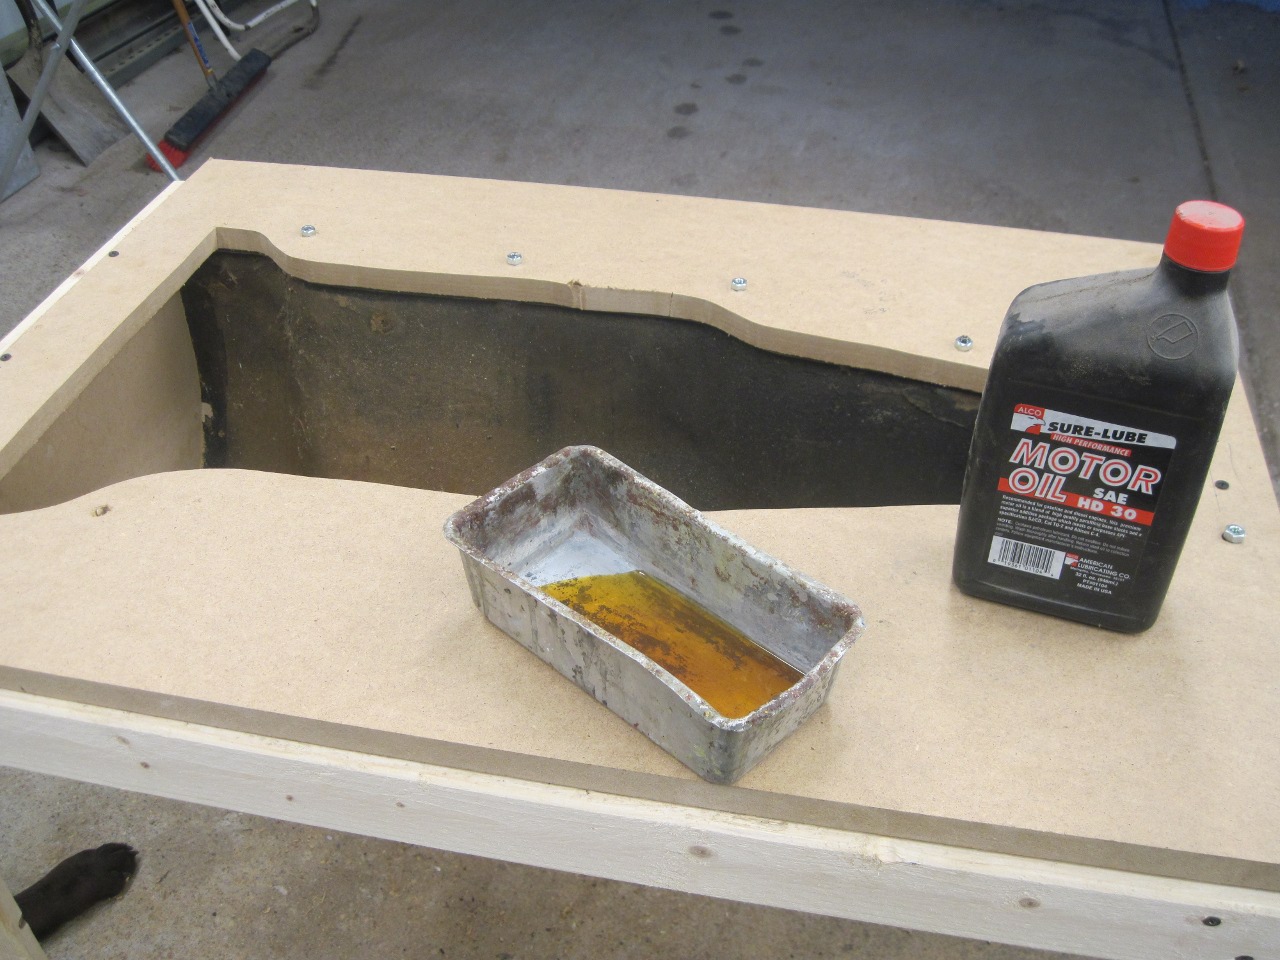
Then,
to avoid having to use great quantities of expanding foam, I cut
loosely fitted pieces of foam insulation board, put them in place on a
bed of expanding foam, and squirted more foam around the edges. I
repeated this, layer by layer, until the cavity was completely filled.
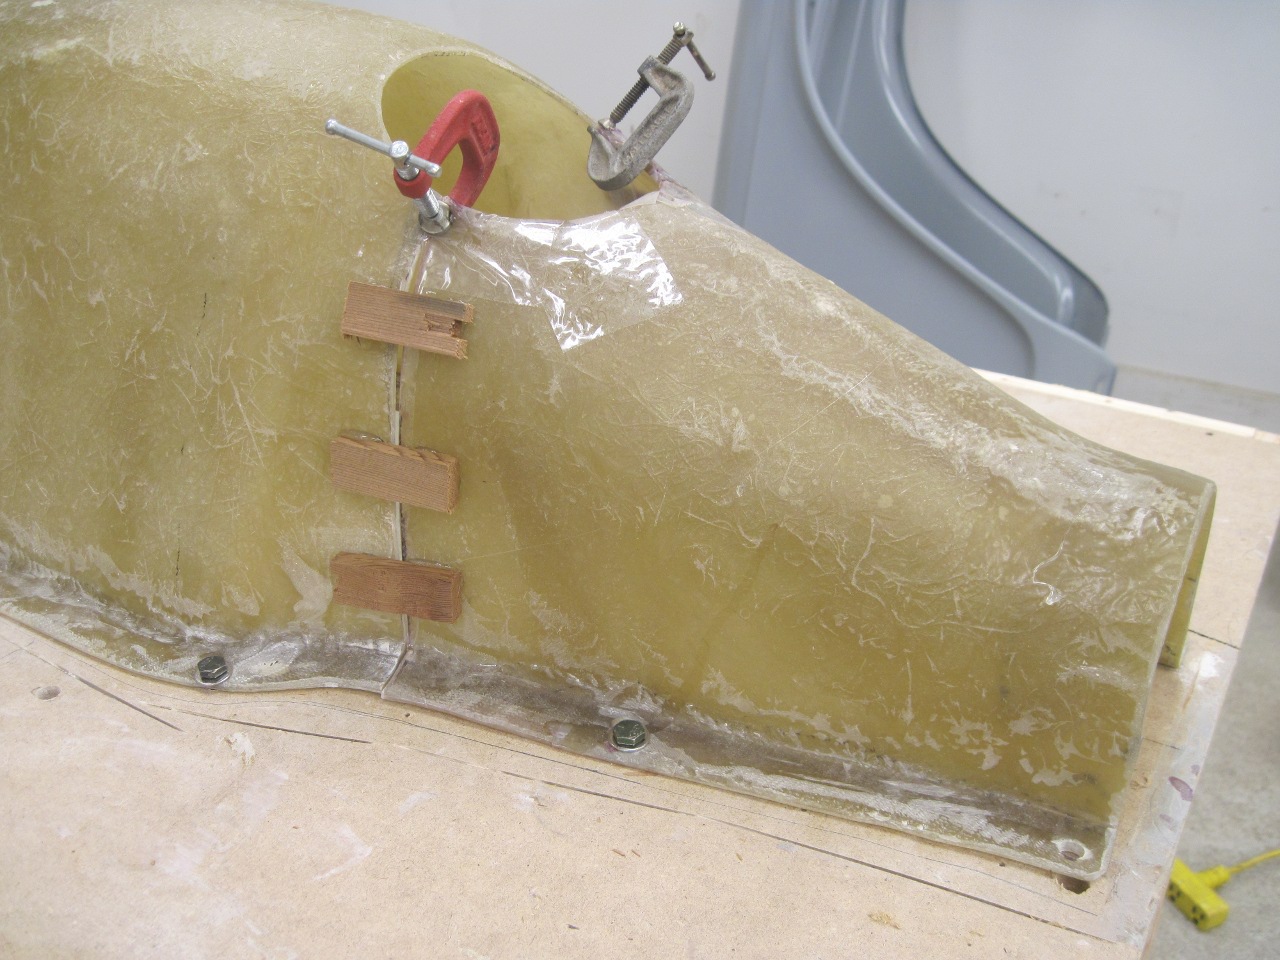
I stapled some plastic wrap to the sides of the cover to make
sure the foam wouldn't bond to the cardboard.

Then added some extra foam to build out the missing area of the cover. I had to look at pictures to see what the shape should be.

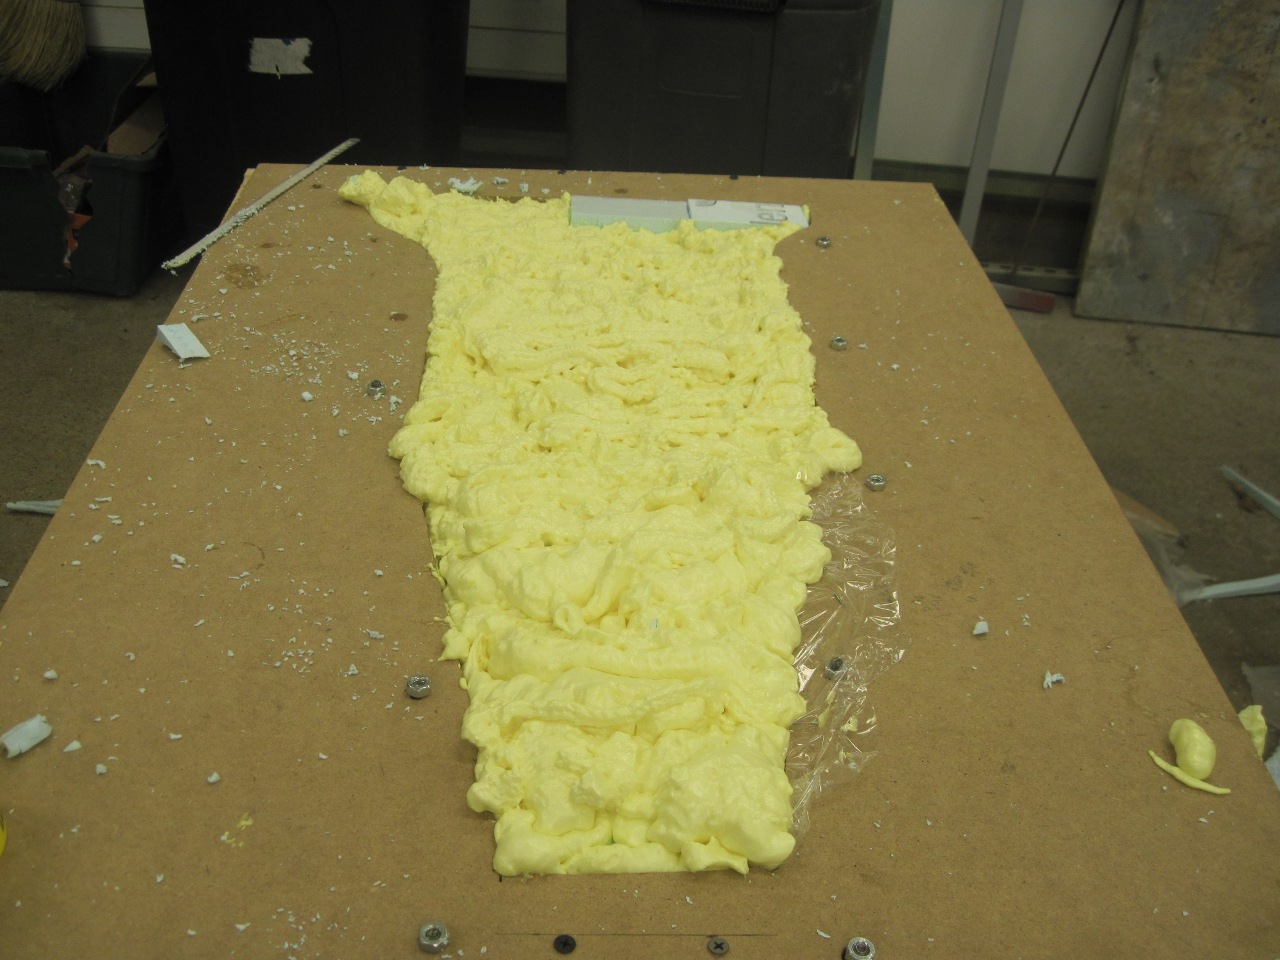
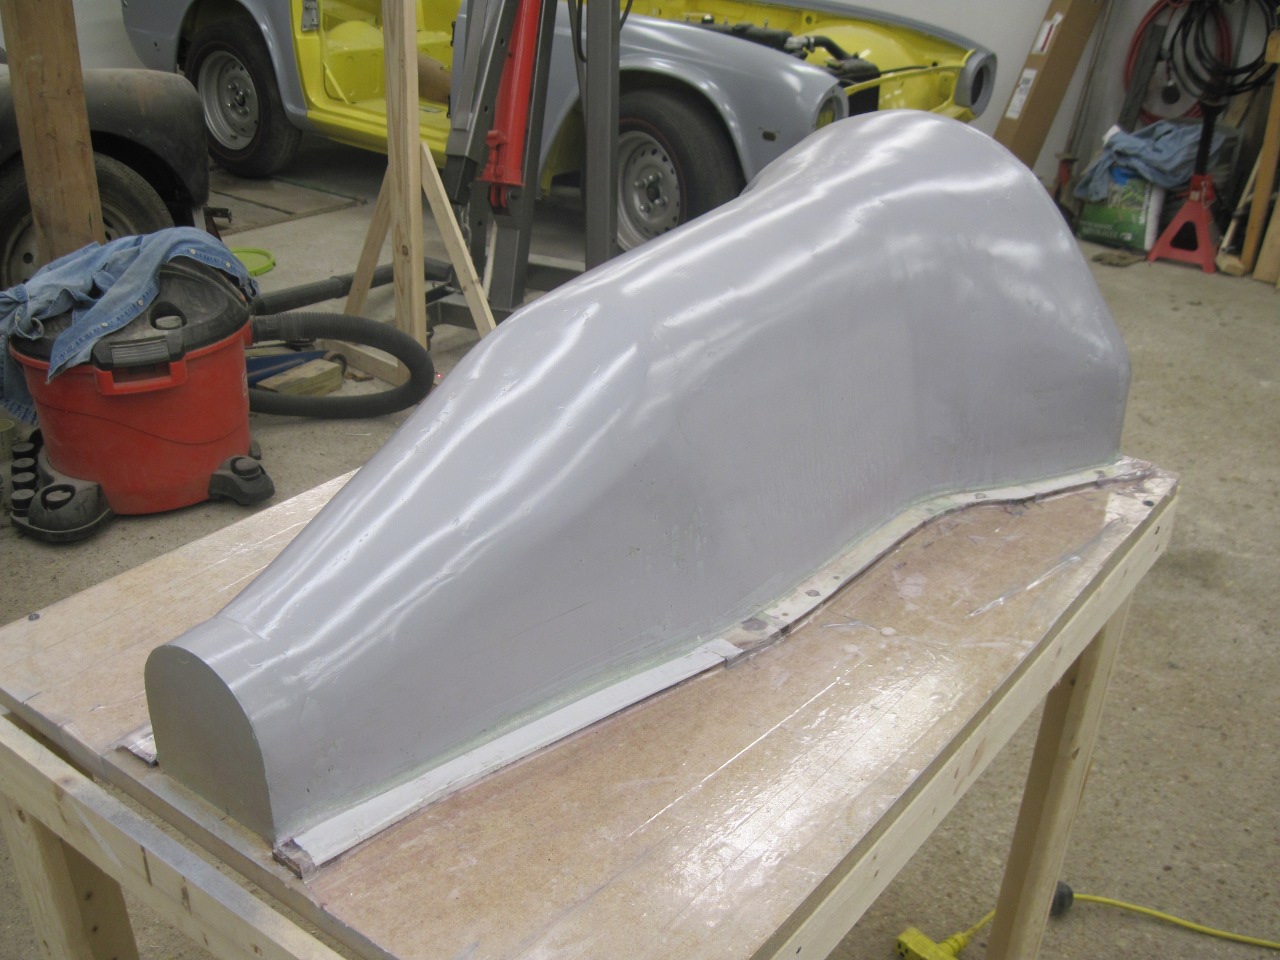
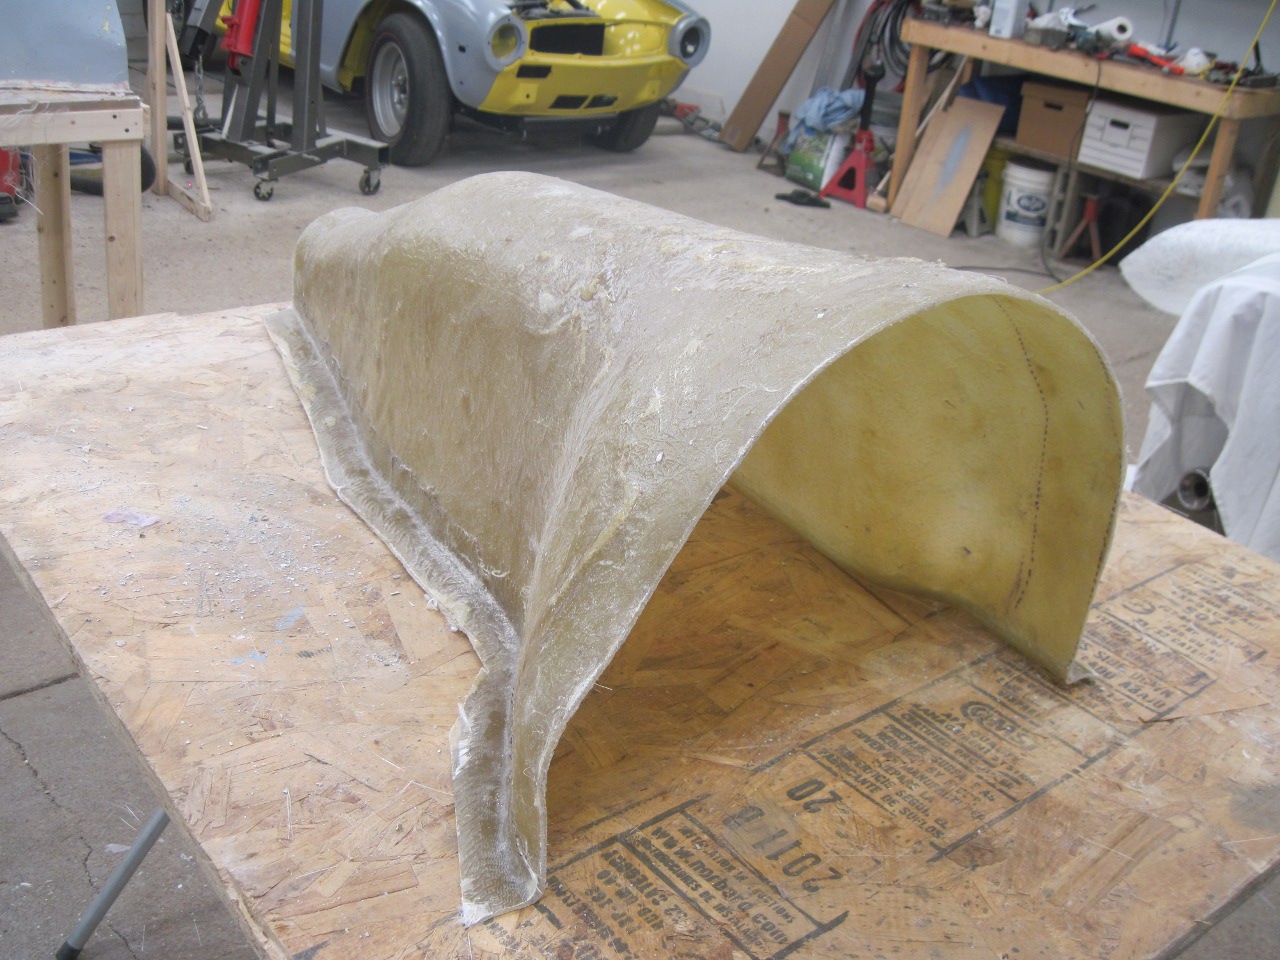
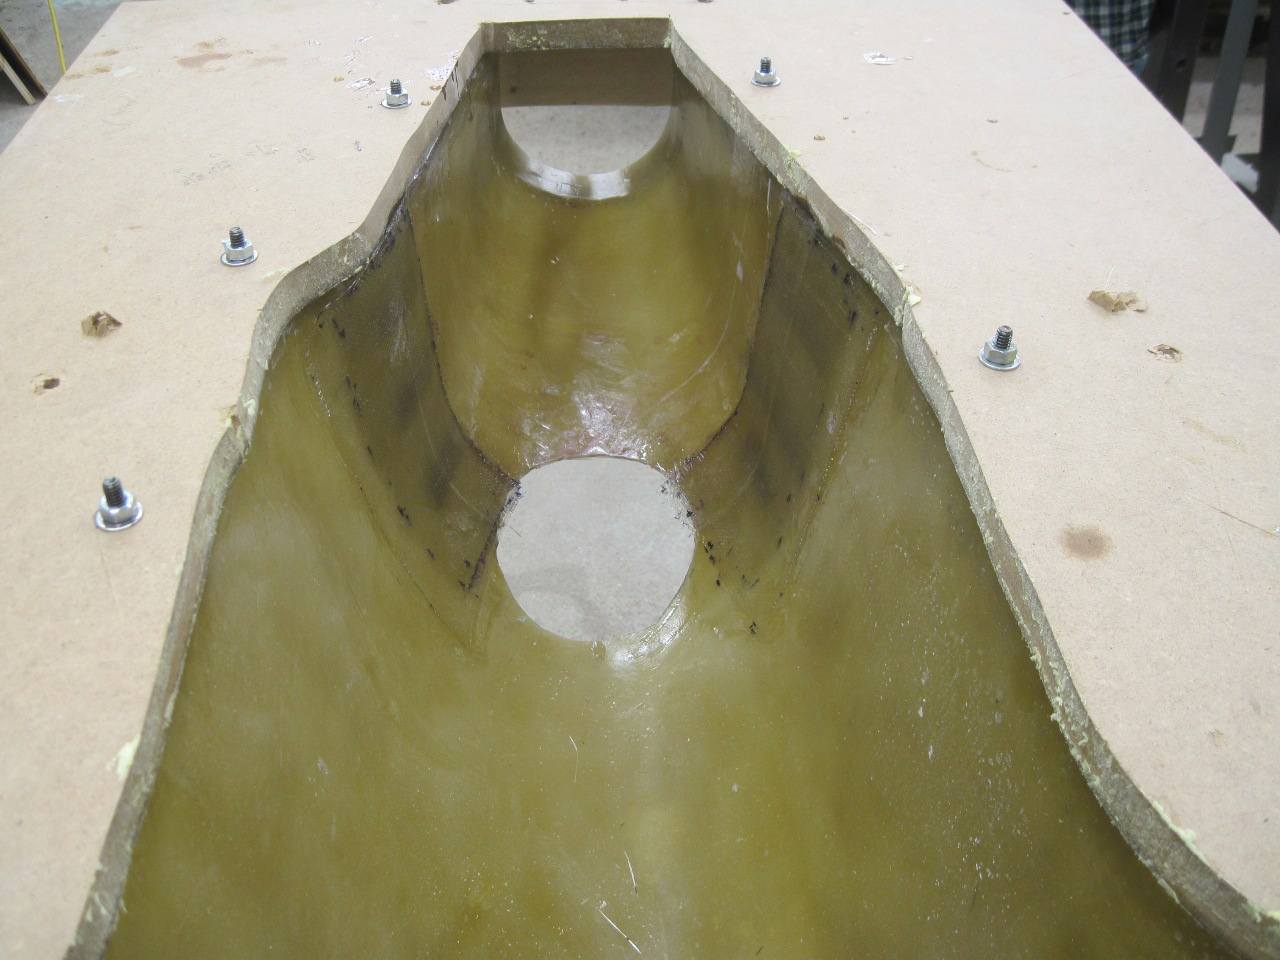
After
setting over night, I popped off the cover, and it appeared that I had
a reasonable facsimile of the inside of the tunnel. A little more
foam helped to fill some voids and correct the shape here and there.
Here
is where I decided to make some slight modifications. There are a
couple of small "protuberances" on the sides of the cover--one on the
right side near the flange just behind the shifter hole, and one on the
left side just forward of the shifter hole. These don't appear to
be necessary for this transmission, but possibly are to accommodate one
of the overdrive units that were fitted to this car. I sawed both
of these features off, which left the plug simpler and more
streamlined. Since I might be fabricating a new "H" frame, the
smooth left side could negate the need for the jog on the left leg of
the frame.

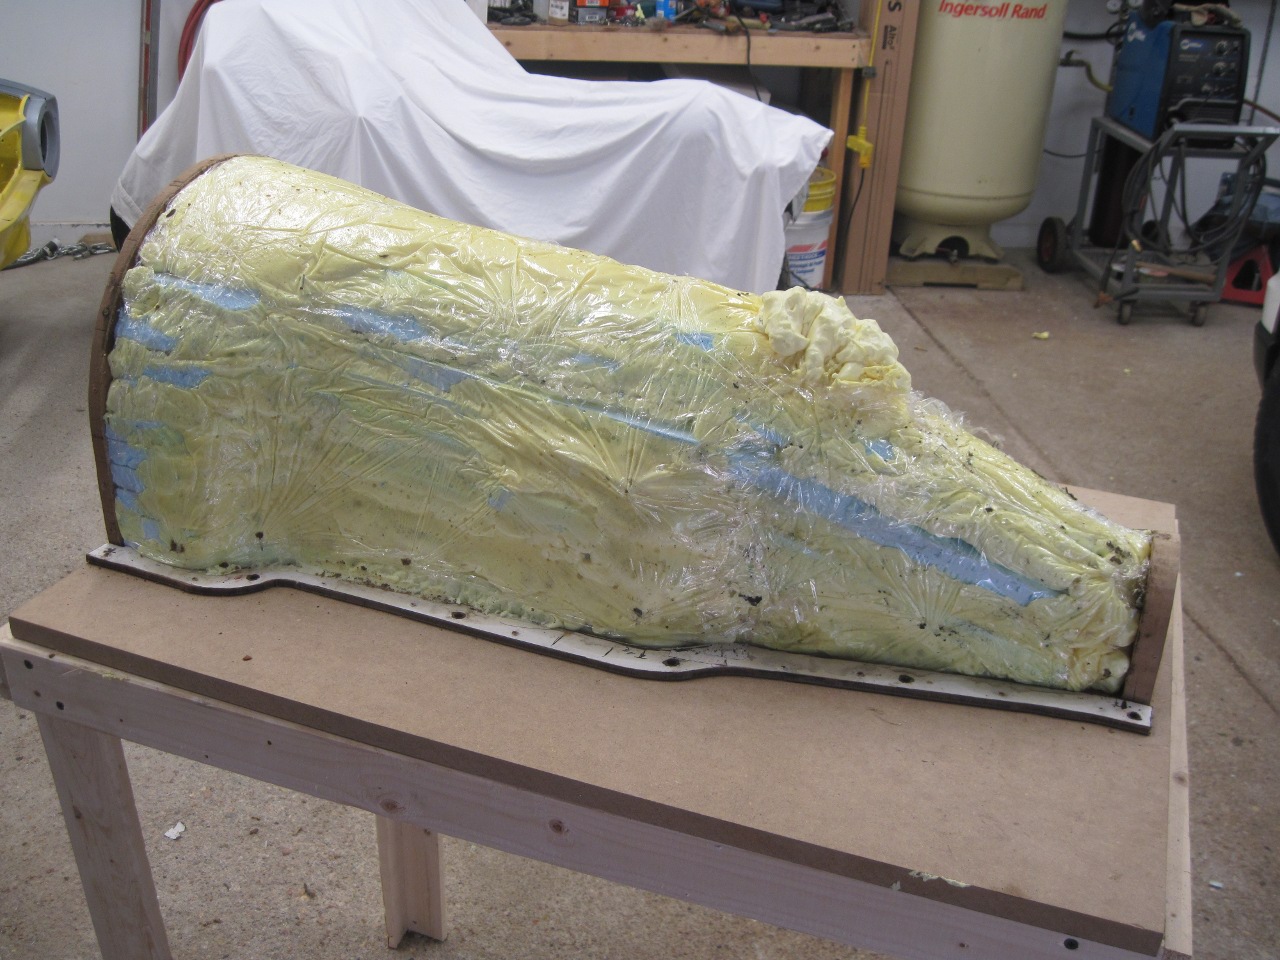
After some final shaping of the foam, a couple of layers of Bondo gave a smoother surface.
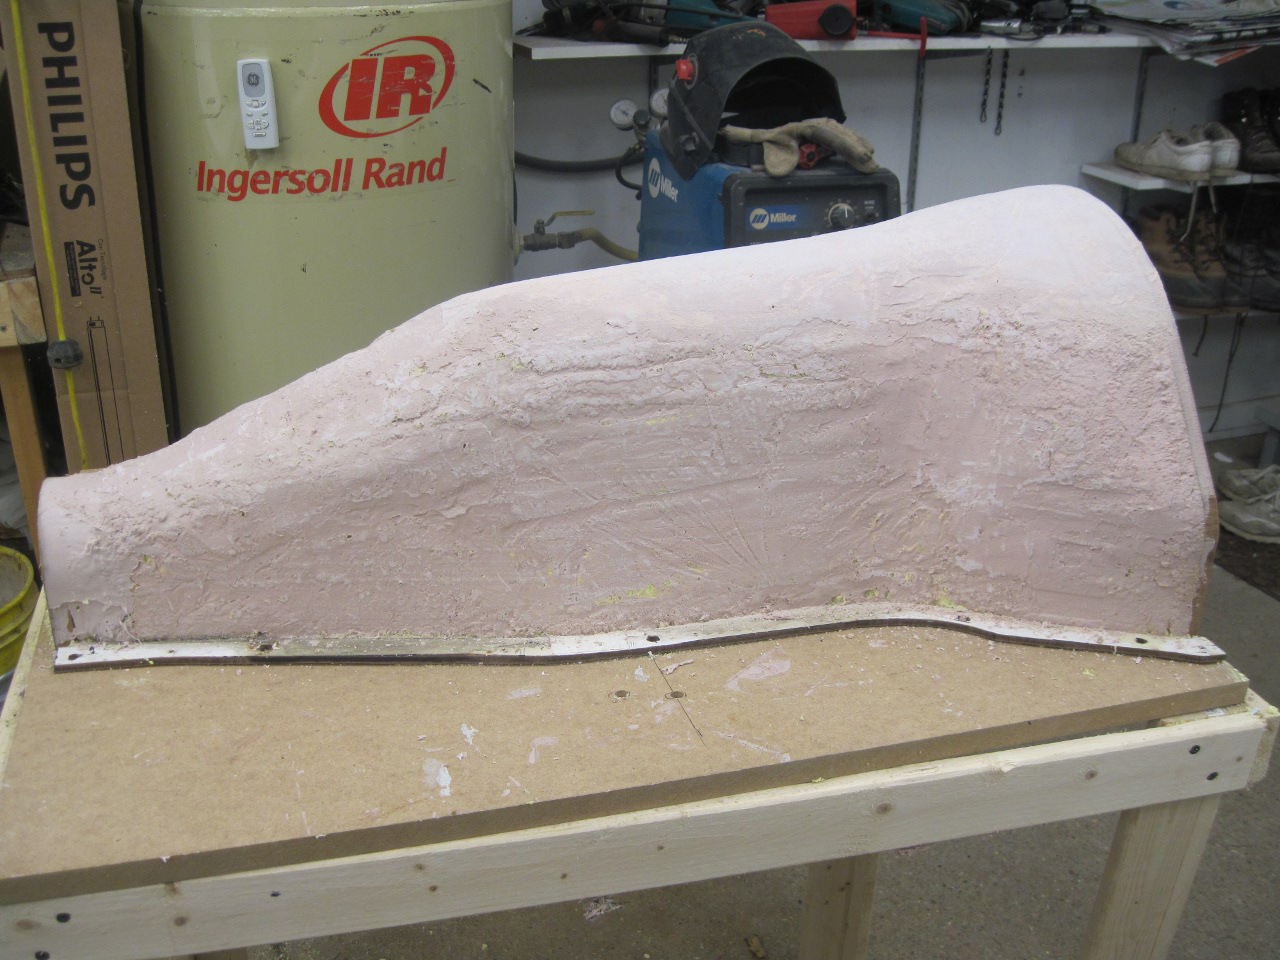
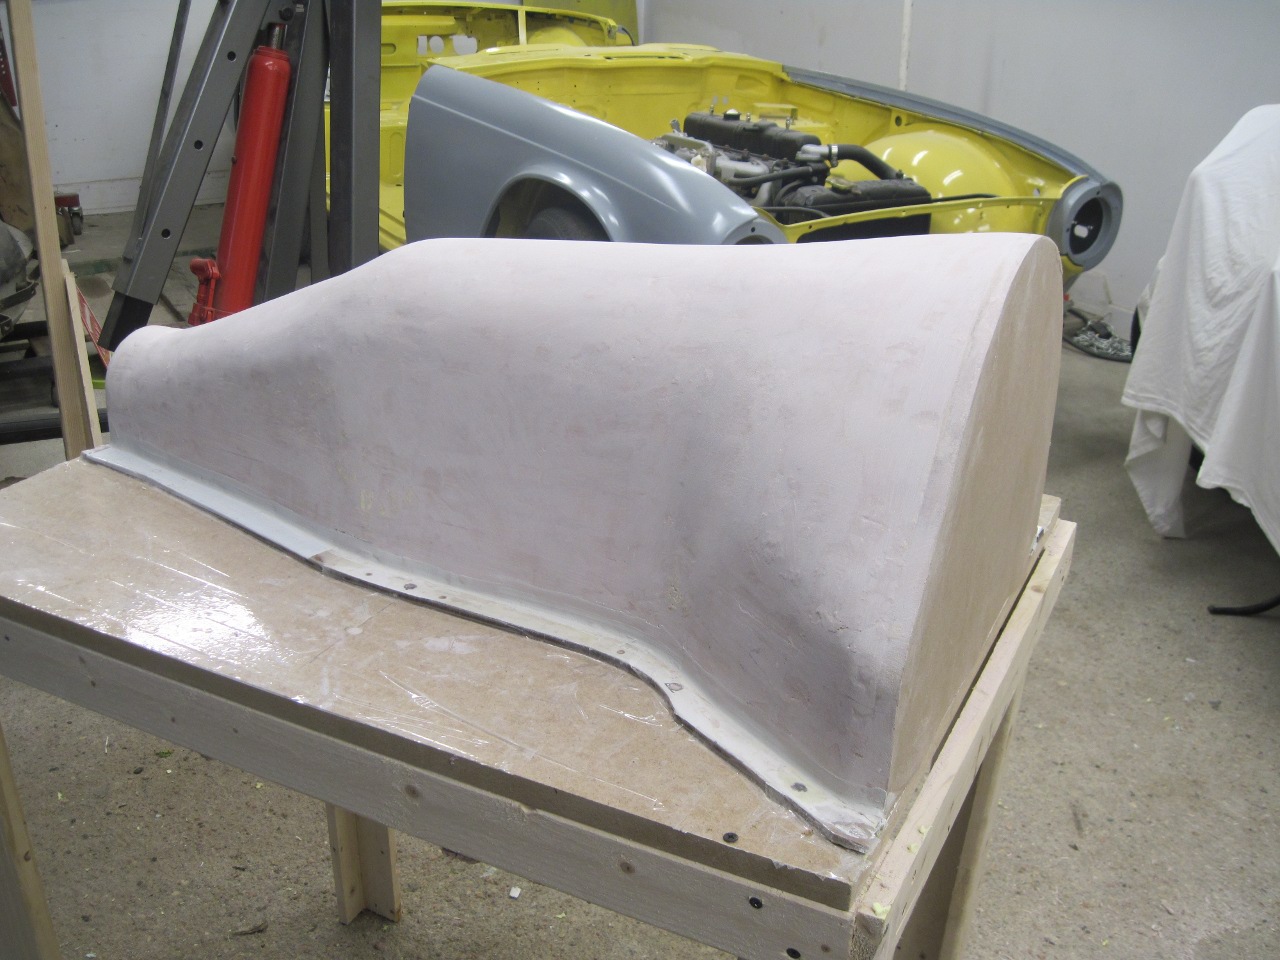
Then a primer, and a few coats of wax as the first release agent.
Then sprayed on a real release agent.

I
ordered enough fiberglass to apply four layers of mat and one layer of
cloth. The cloth is a modified twill weave that can accommodate
countours without having to cut the fabric. The mat consists of
random short (2" or so) fibers held together with a binder. The
binder dissolves in the resin, which releases them to move to conform
to curves.
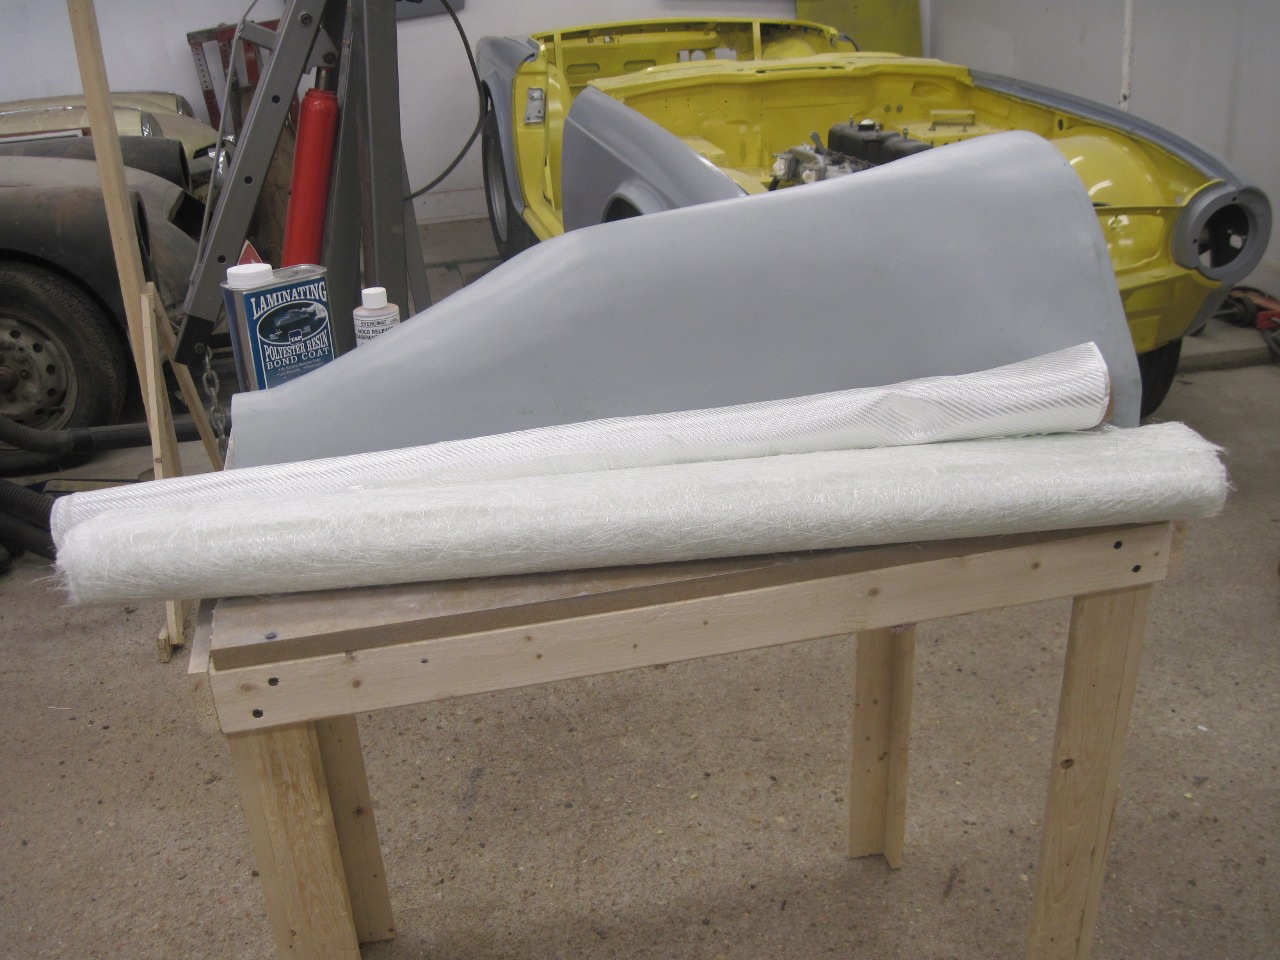
I
precut the mat and cloth to save time during layup. I also cut
some strips of cloth to add extra reinforcement to the flange areas.


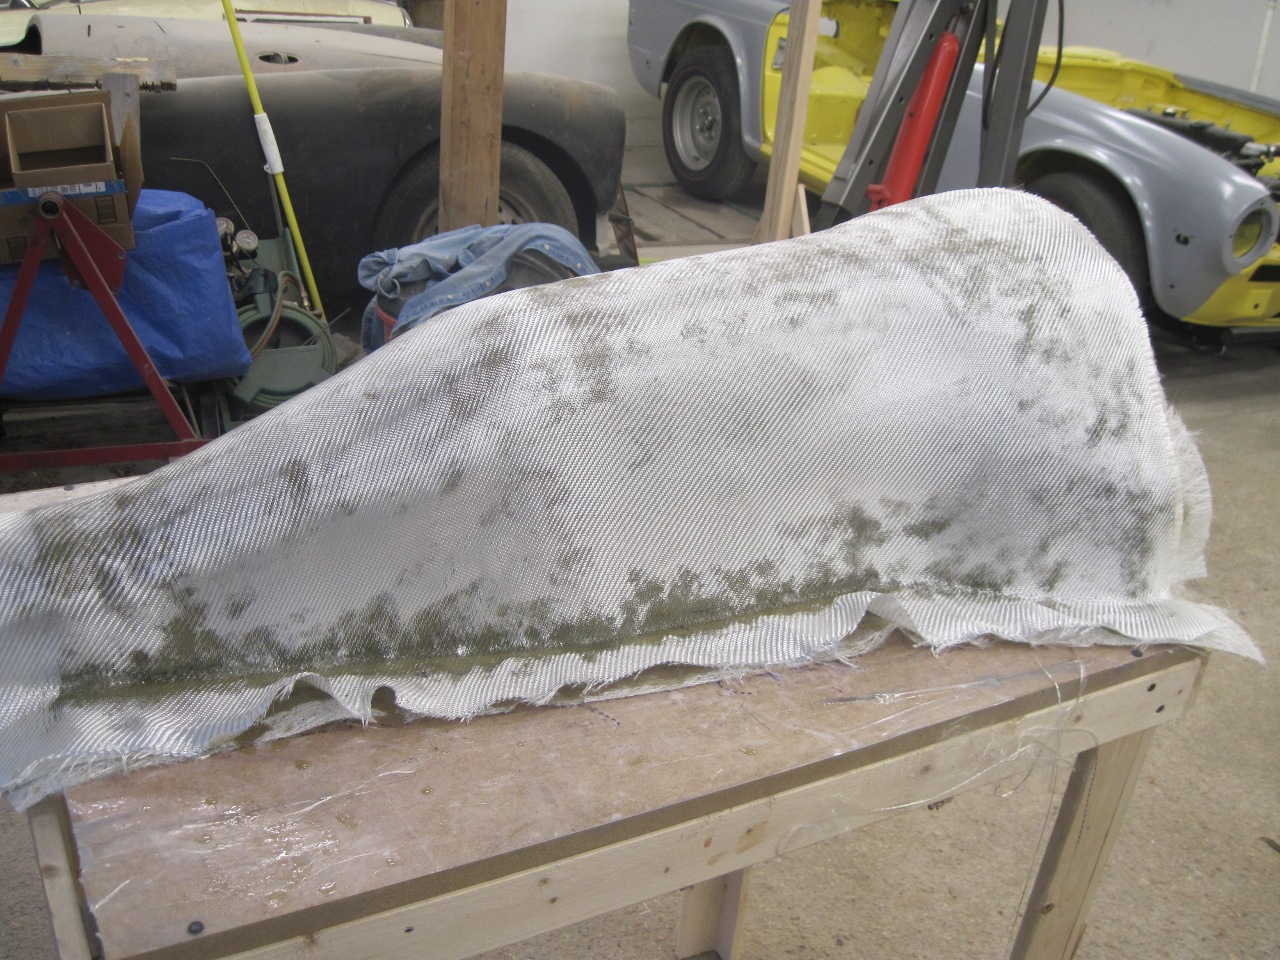
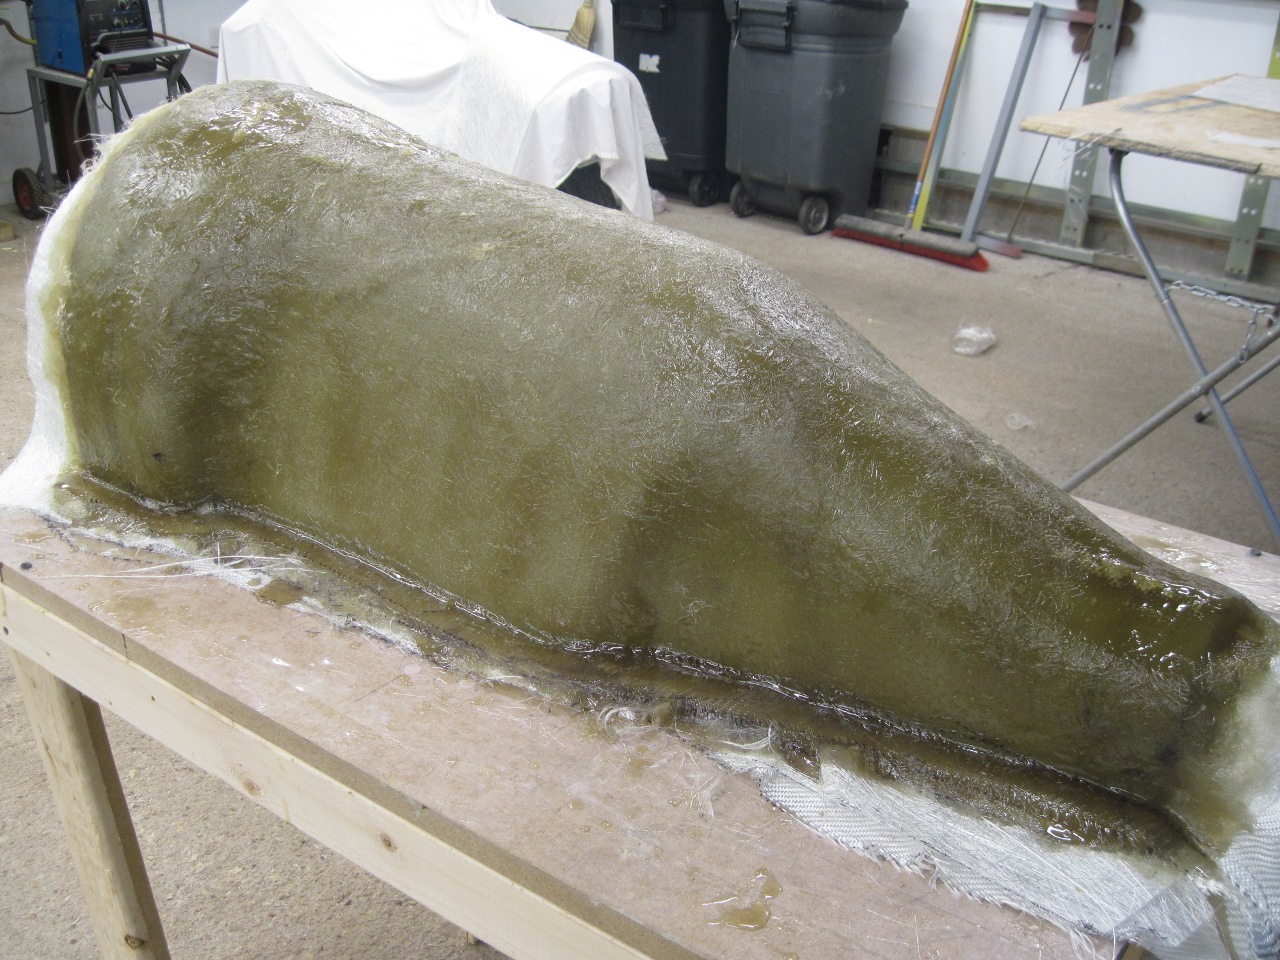
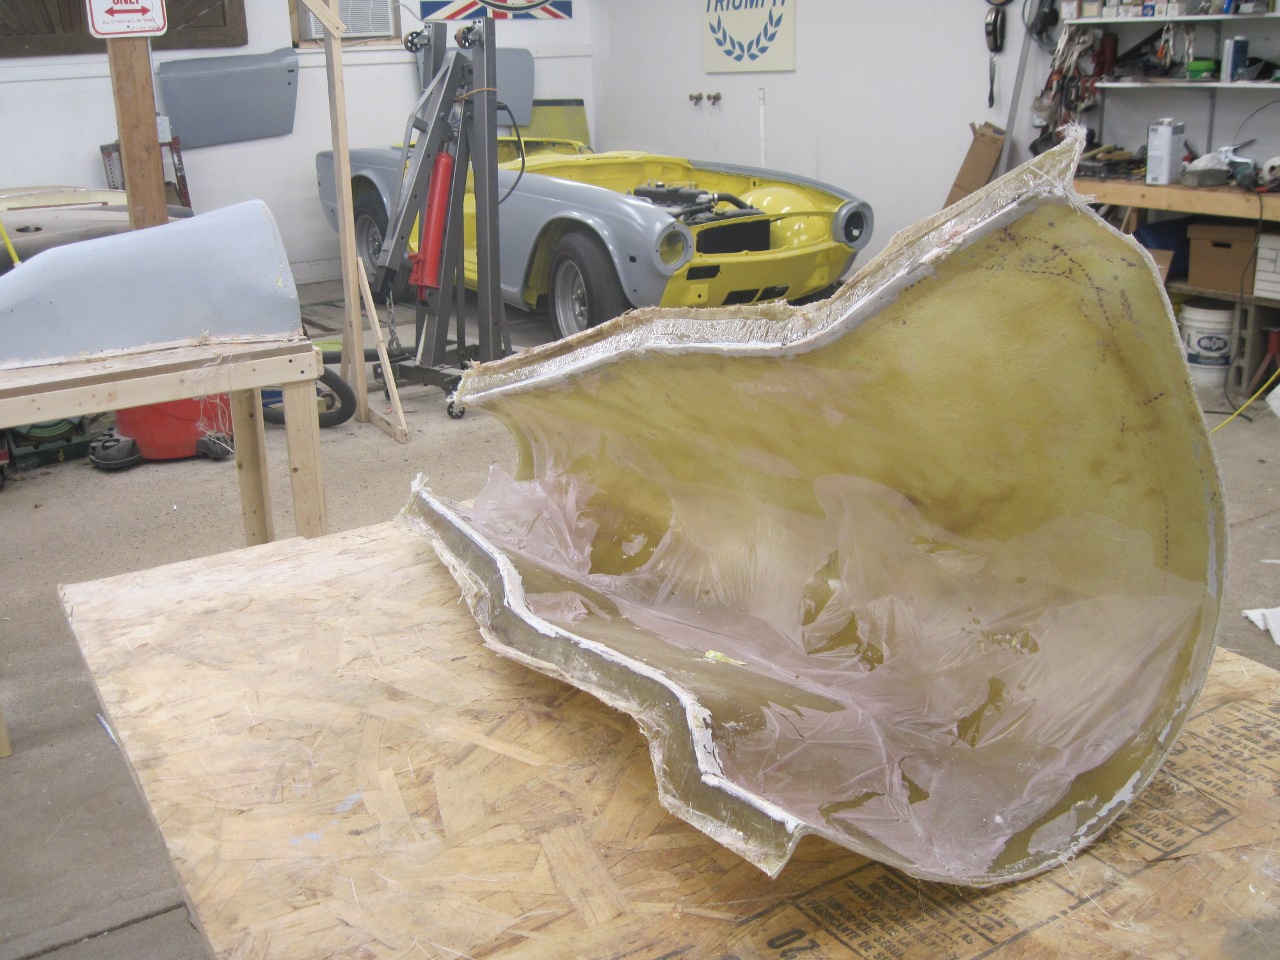
I
was pretty busy during layup, so there aren't many pictures. The
first pic is the cloth placed on top of two mat layers already in
place. The cloth isn't saturated with resin yet. The second
pic is after the final (4th) layer of mat.
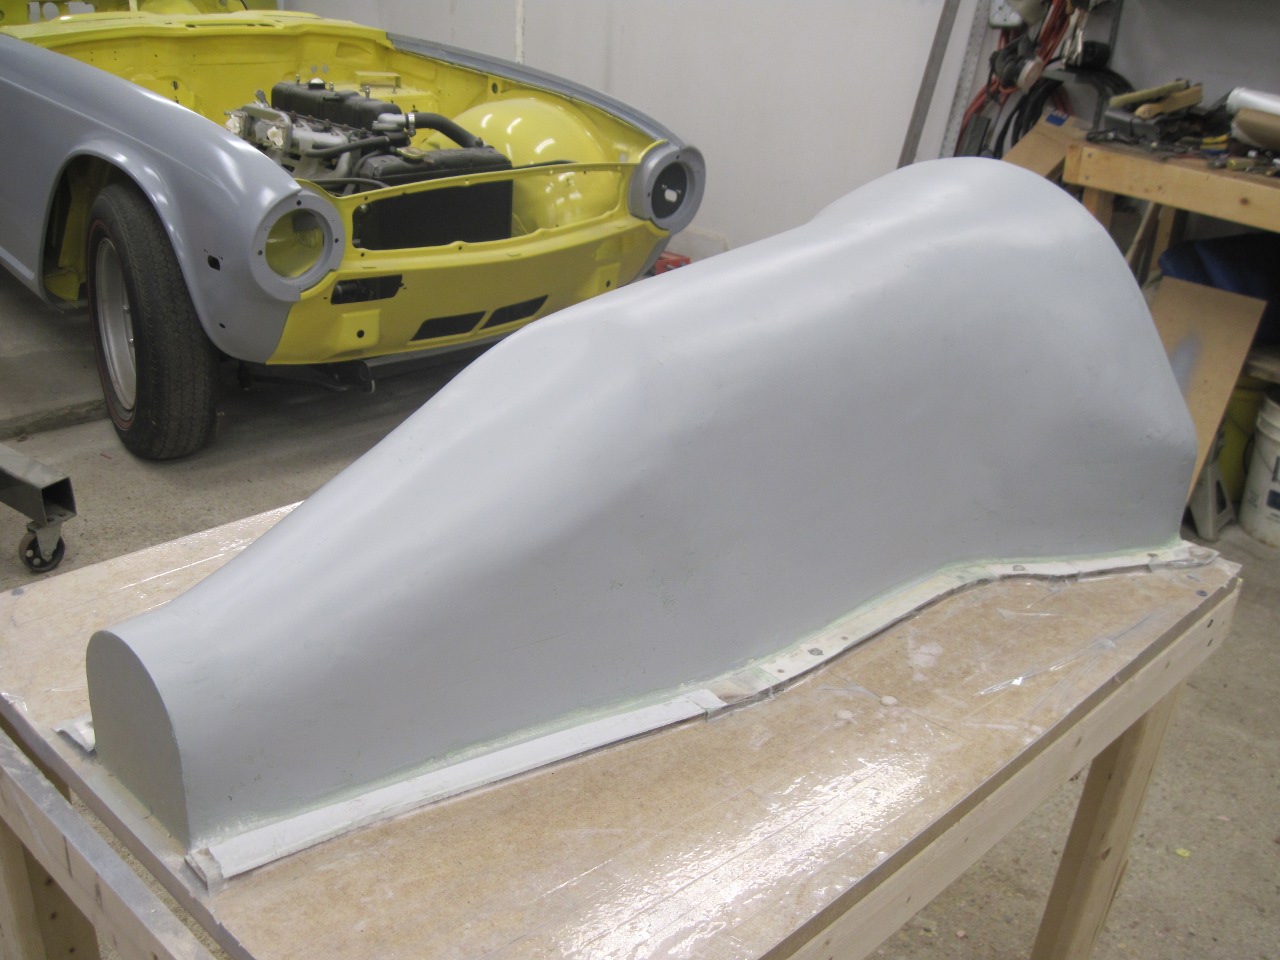
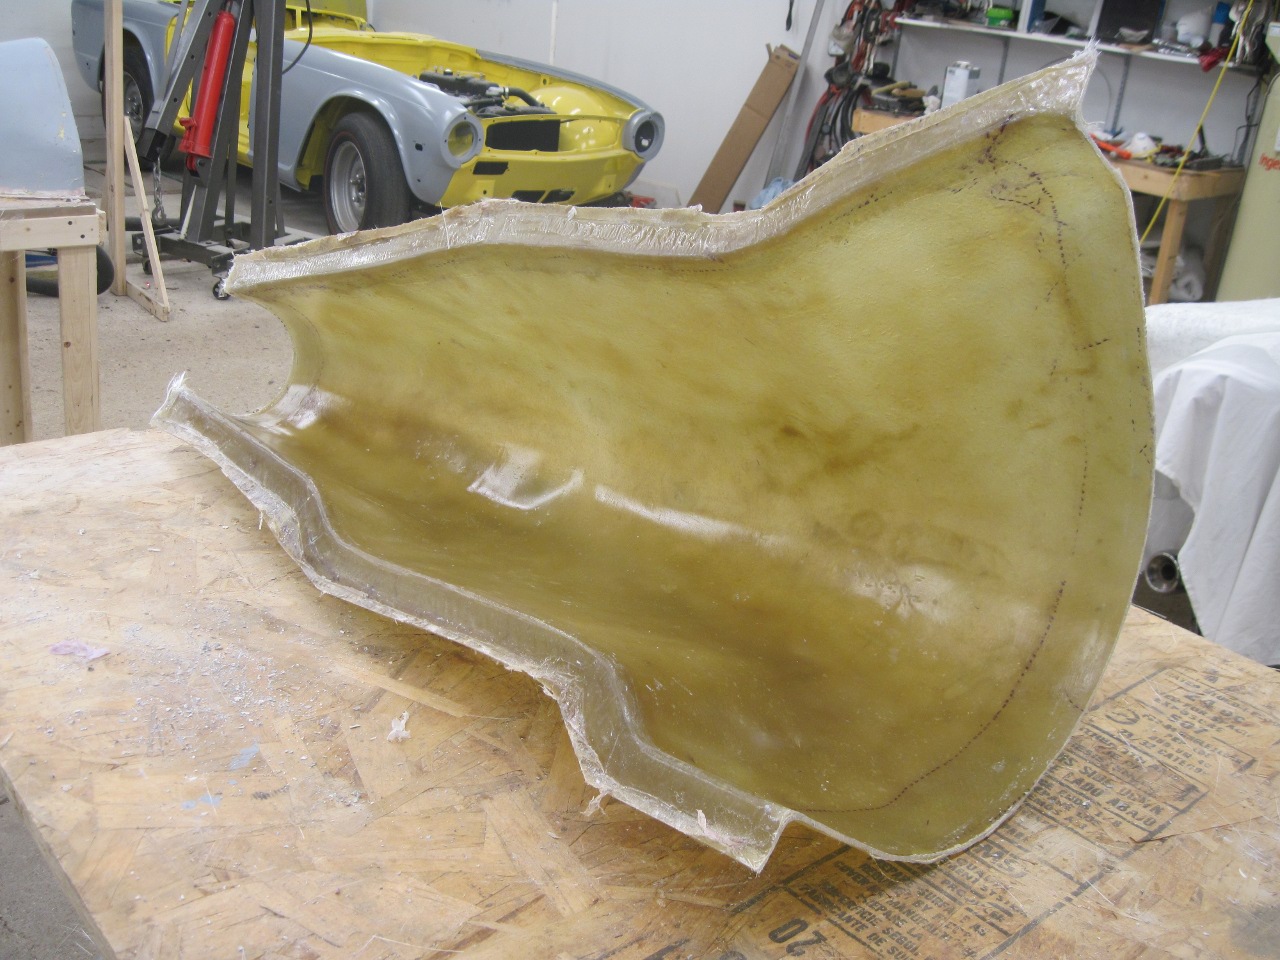
After
the resin set, I trimmed the excess fabric and mat off, and began to
try to coax the part off the plug. It took a lot of cajoling, but
the part finally agreed to part ways with the plug. The pinkish
film is the sprayed on release agent.
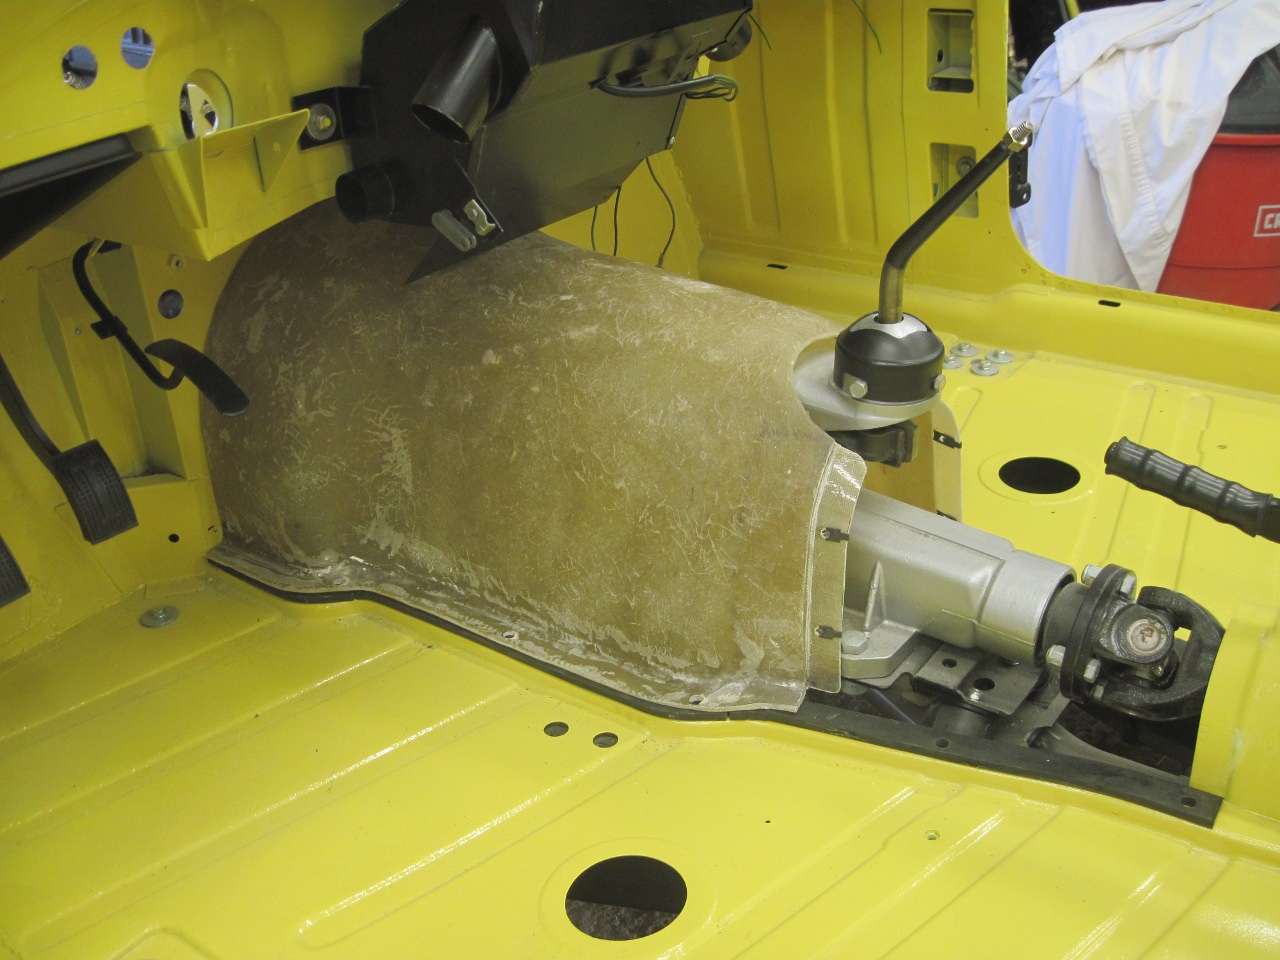
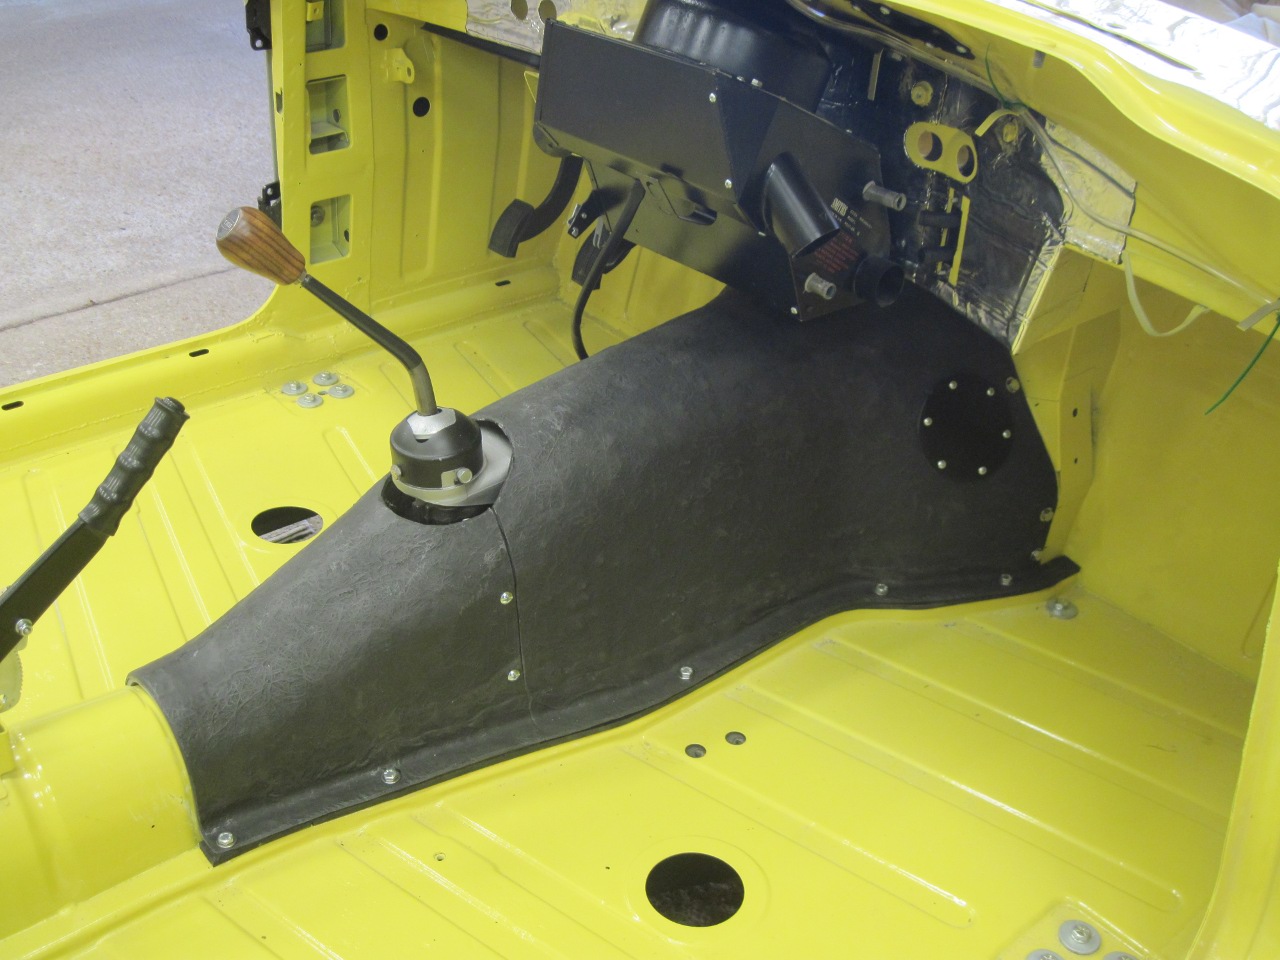
After a little some cleaning, the new tunnel looks pretty good. But does it fit?
I
cut the shifter hole and cleaned up the original boot. I'm often
amazed at the longevity of some British rubber. The boot could
pass for new.

The moment of truth.
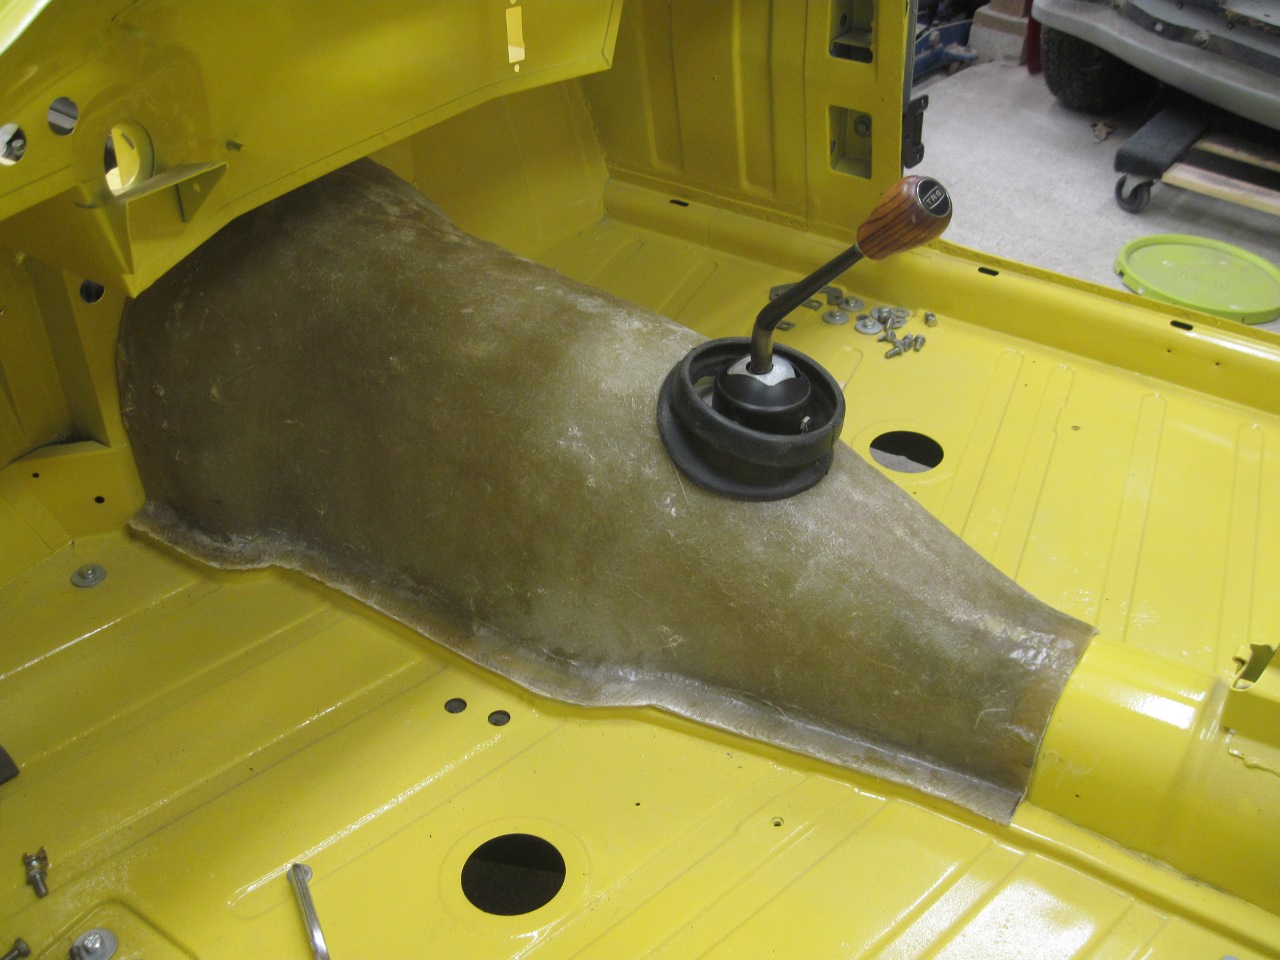

The fit was really pretty good. Some minor trimming made it near perfect.
Update--November 7, 2016
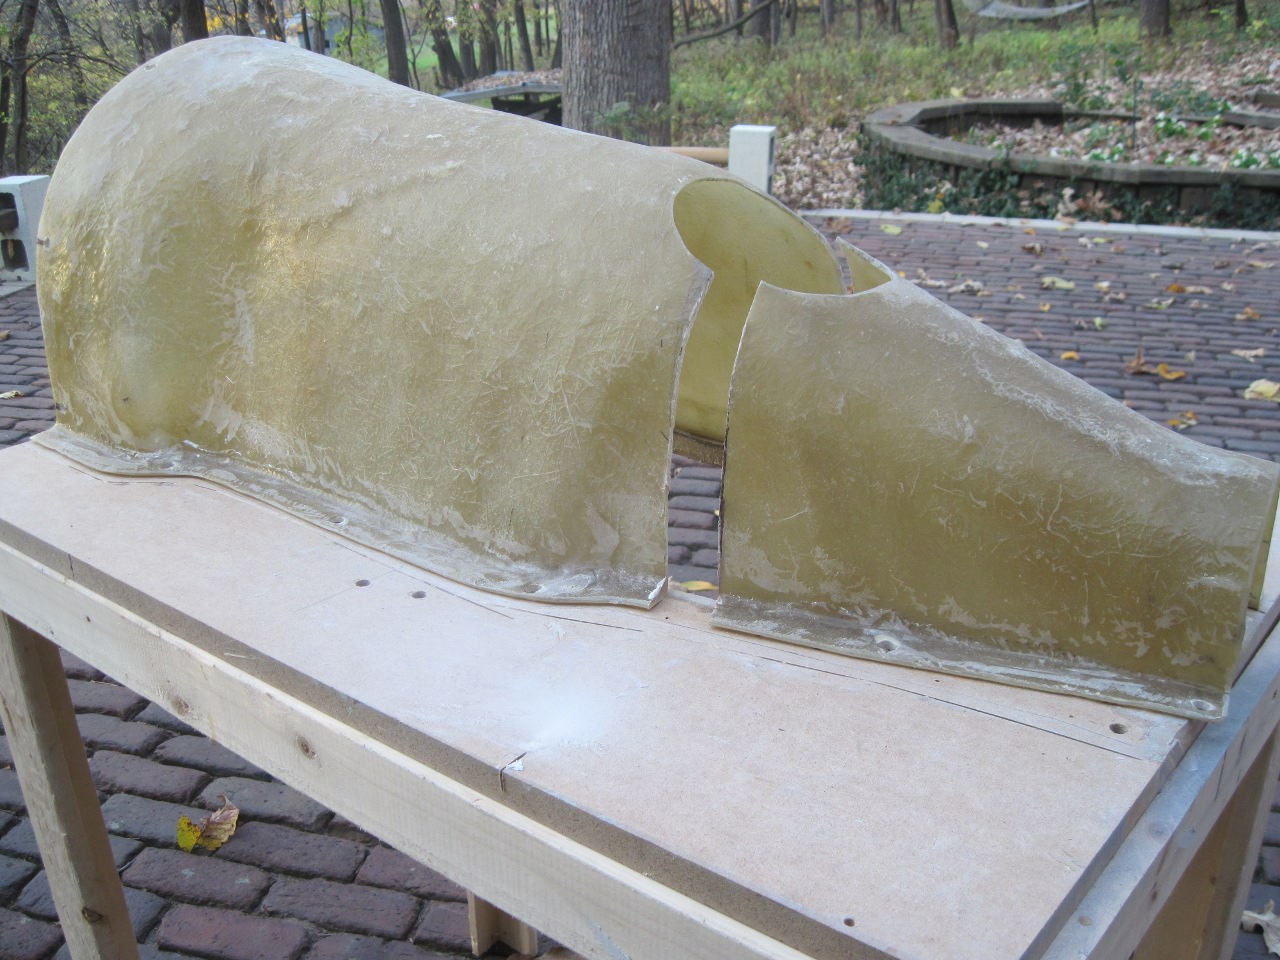
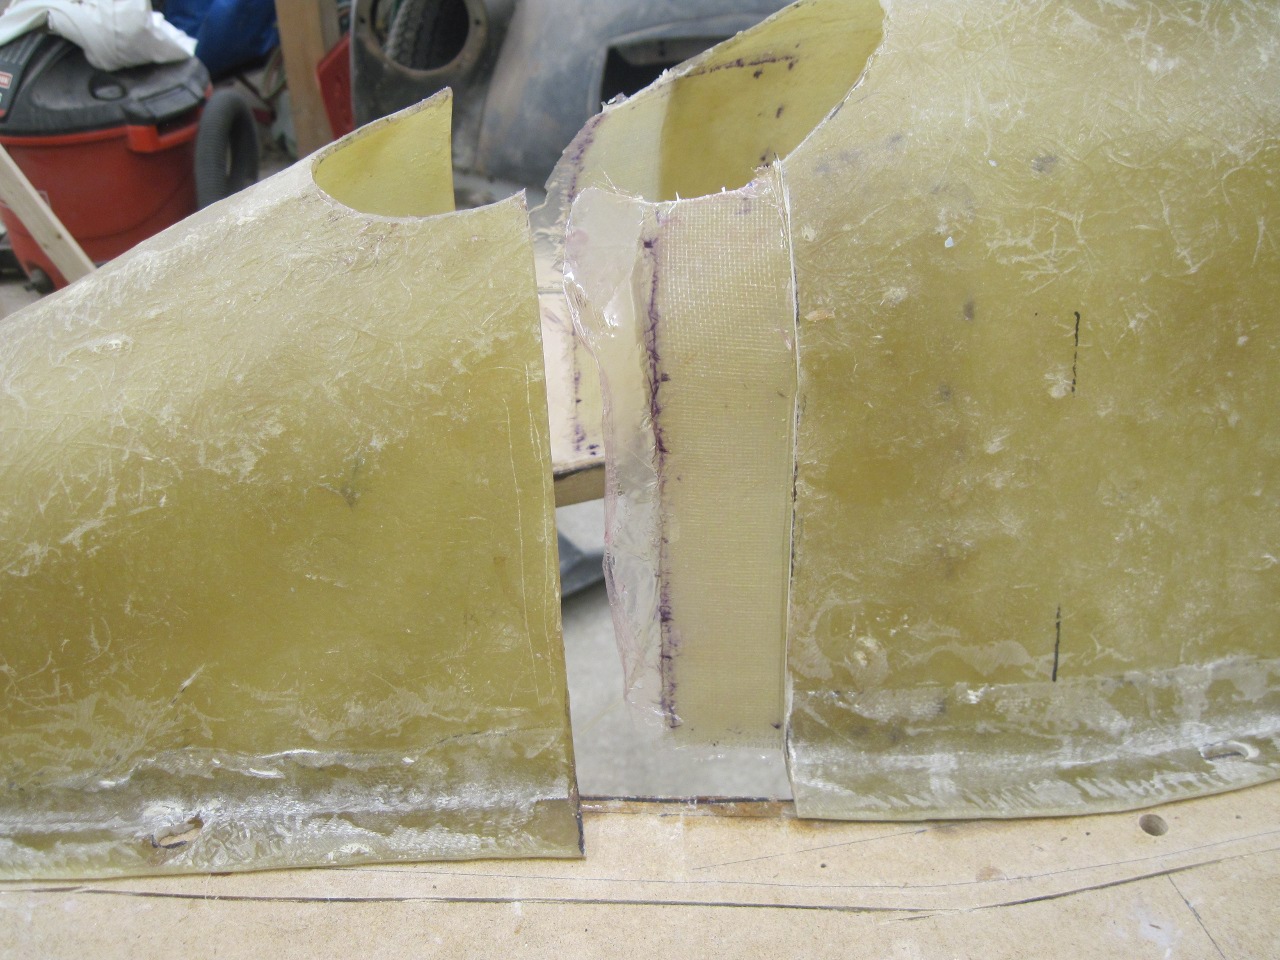
I
stalled a while trying to decide if I wanted to cut the tunnel into a
two-piece cover. A two piece tunnel is much easier to maneuver
around the shifter and brake levers, and I still had hopes of having a
tunnel that could have its rearmost part removed without taking out the
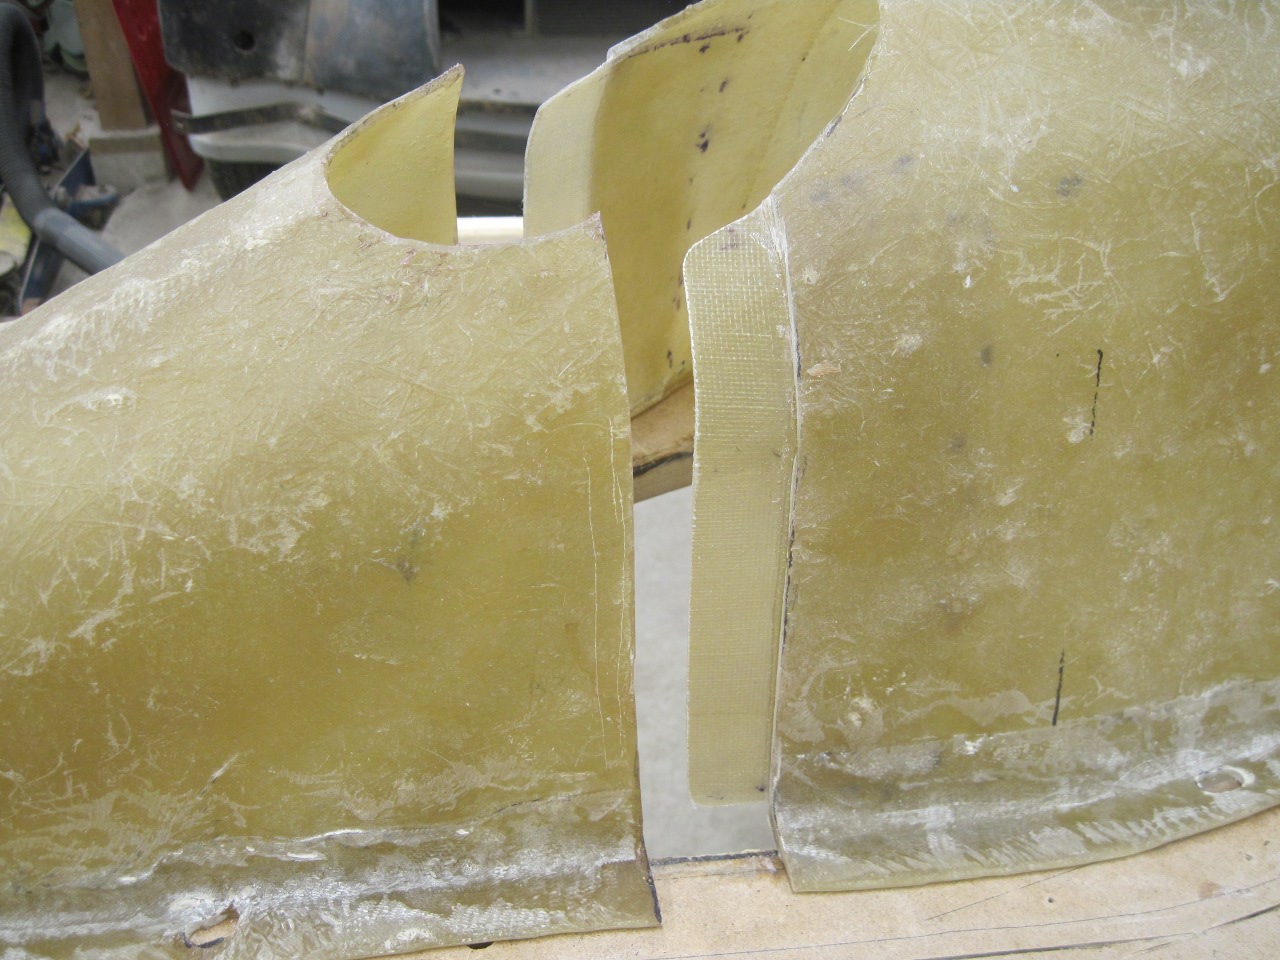
H frame dash support. I finally decided to do the surgery to
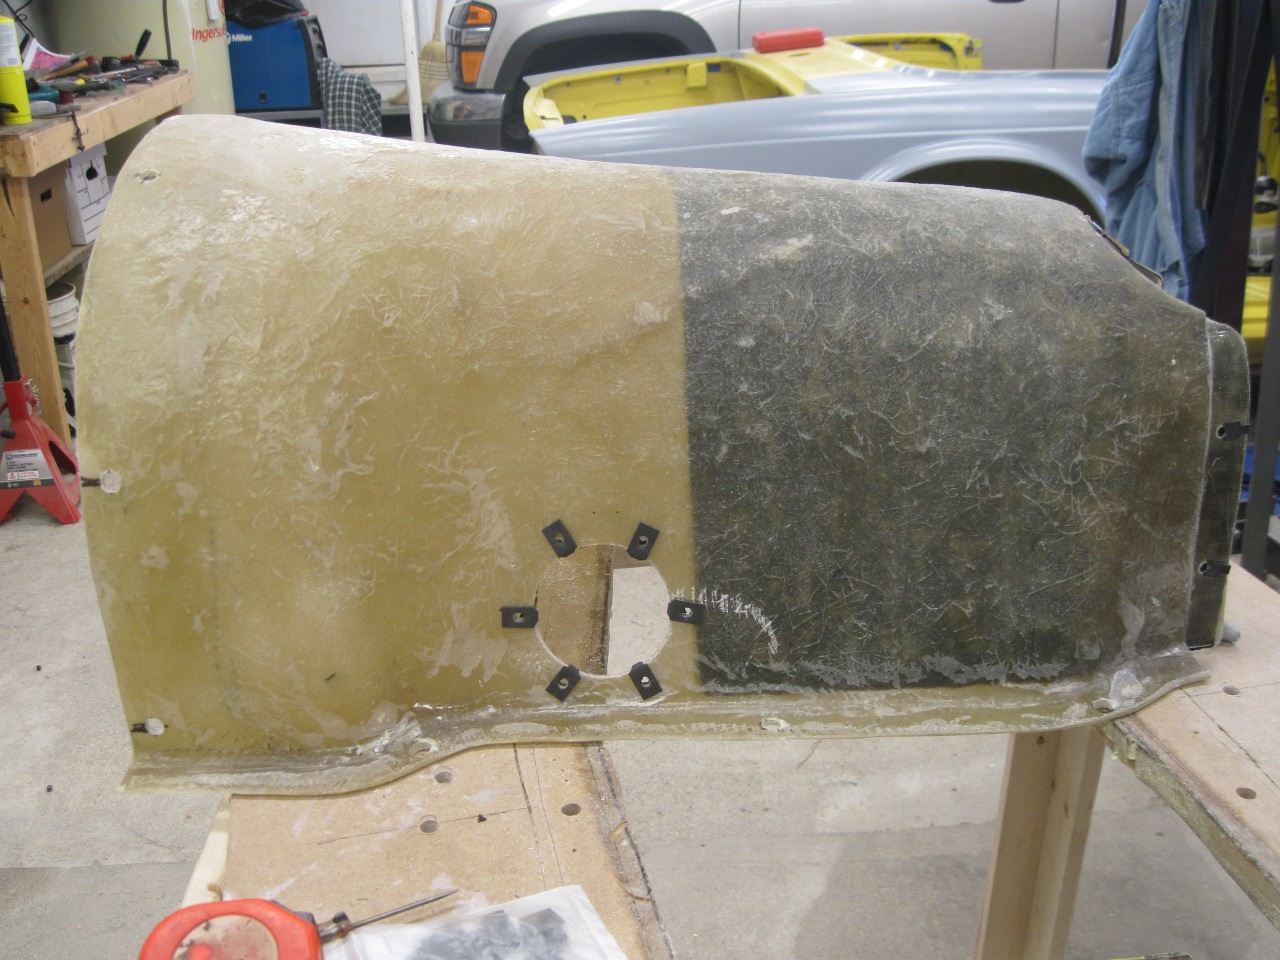
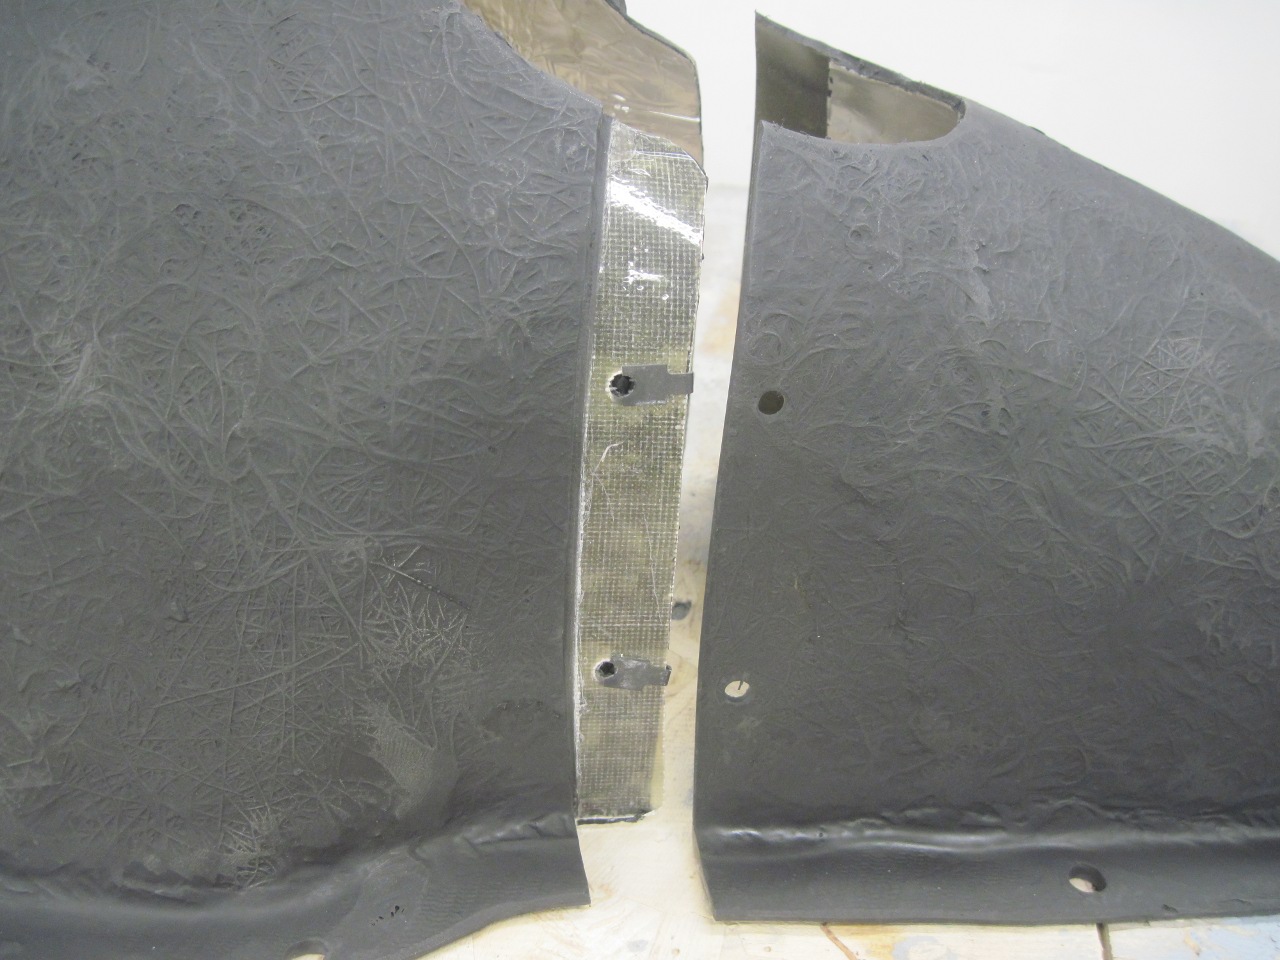
divide the tunnel. I chose a place for the incision roughly even
with the shifter. I believe this is more aft than the commercial
two piece covers.
I took the cover outside to do the deed so I wouldn't have to deal so much with the glass dust.
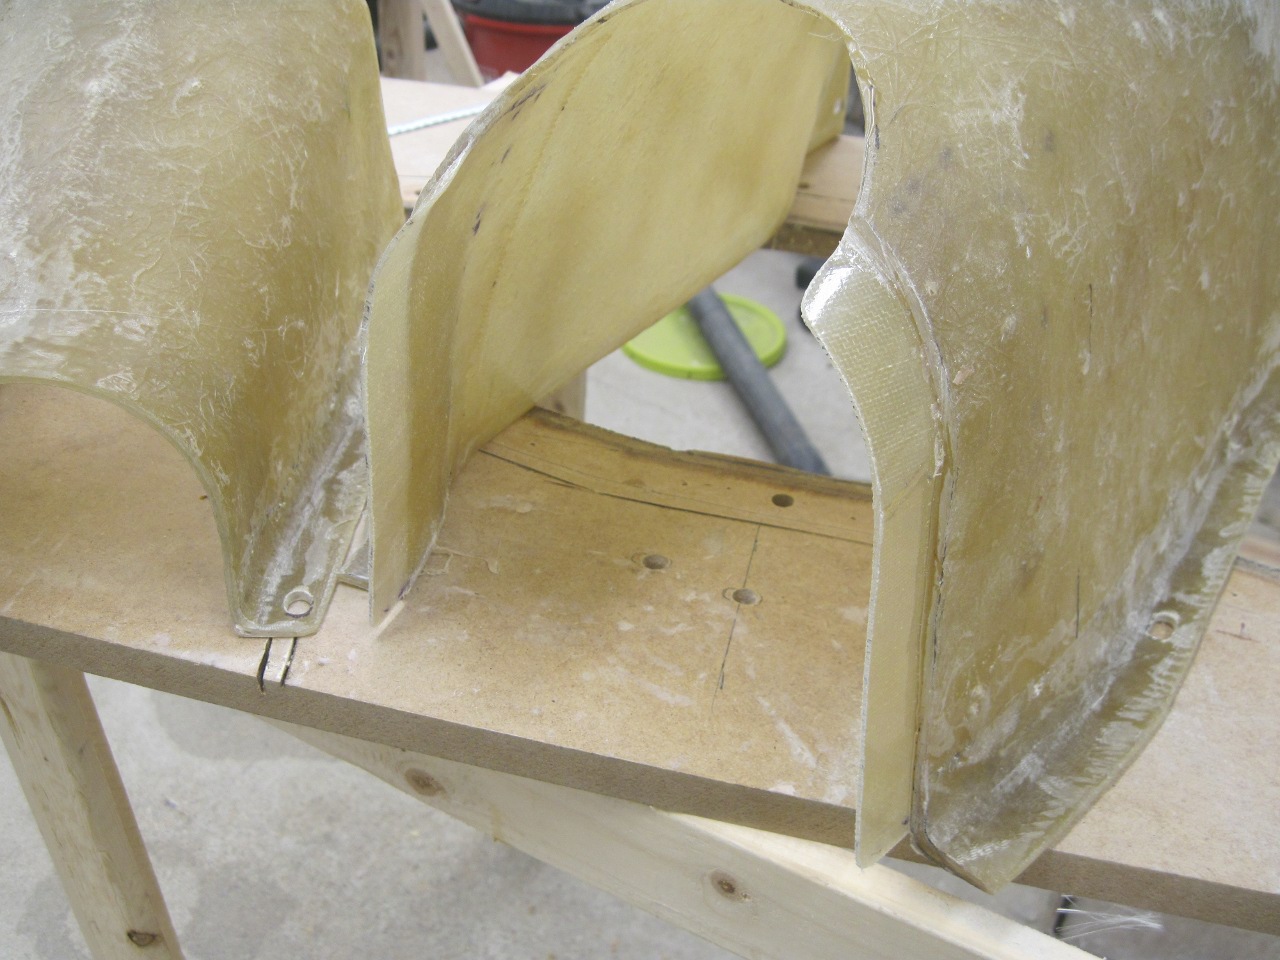
I
then had to arrange for some flanges on the larger front piece so I
could screw the parts back together. I first roughed up the
inside surfaces where the flange would attach. Thus would ensure
a good bond.
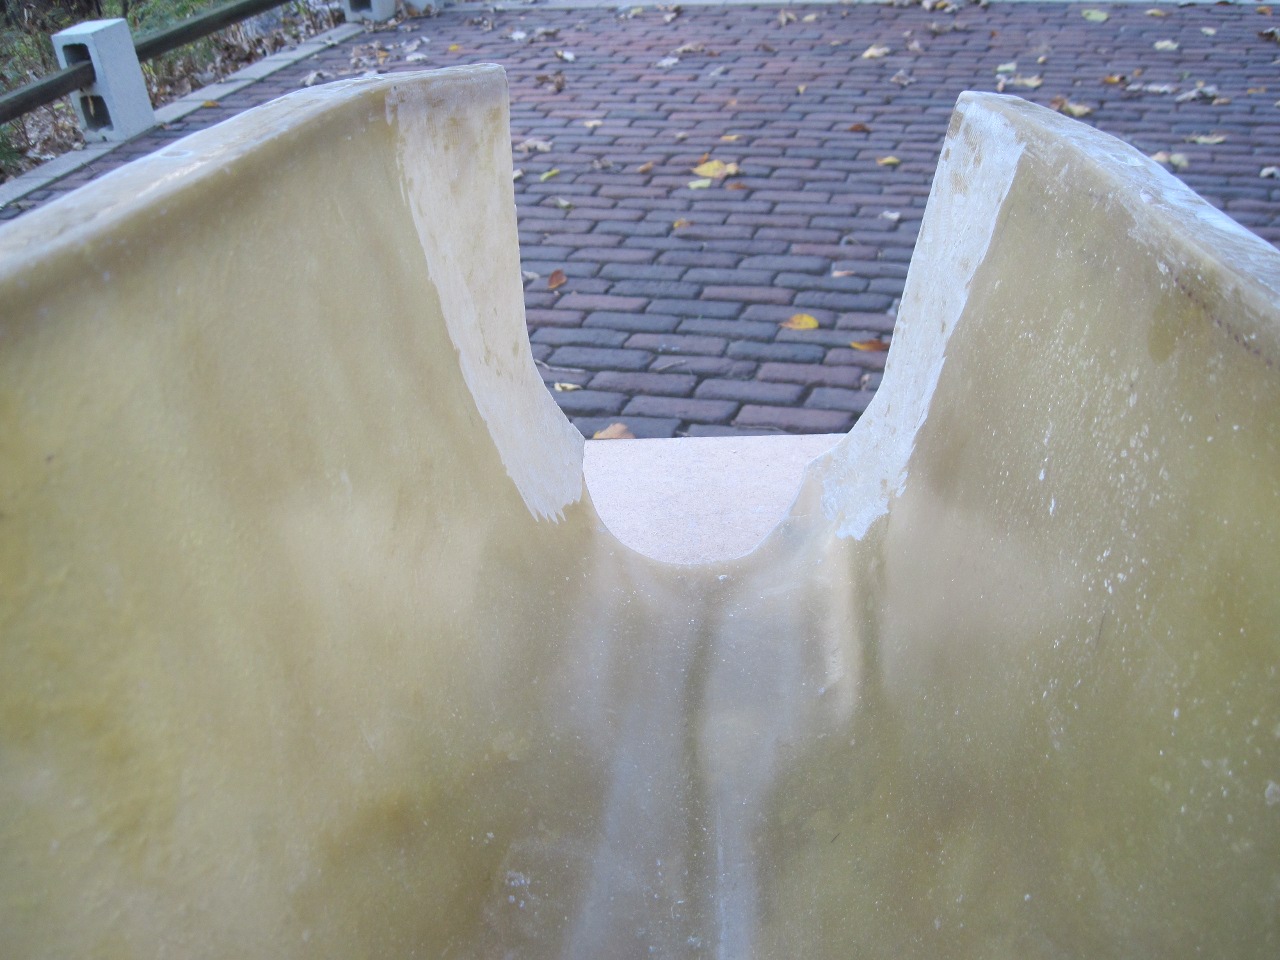
I
added some packing tape and some release agent to the smaller part so
the flange material wouldn't stick to it, then aligned the two pieces
with some little wood strips and hot glue.
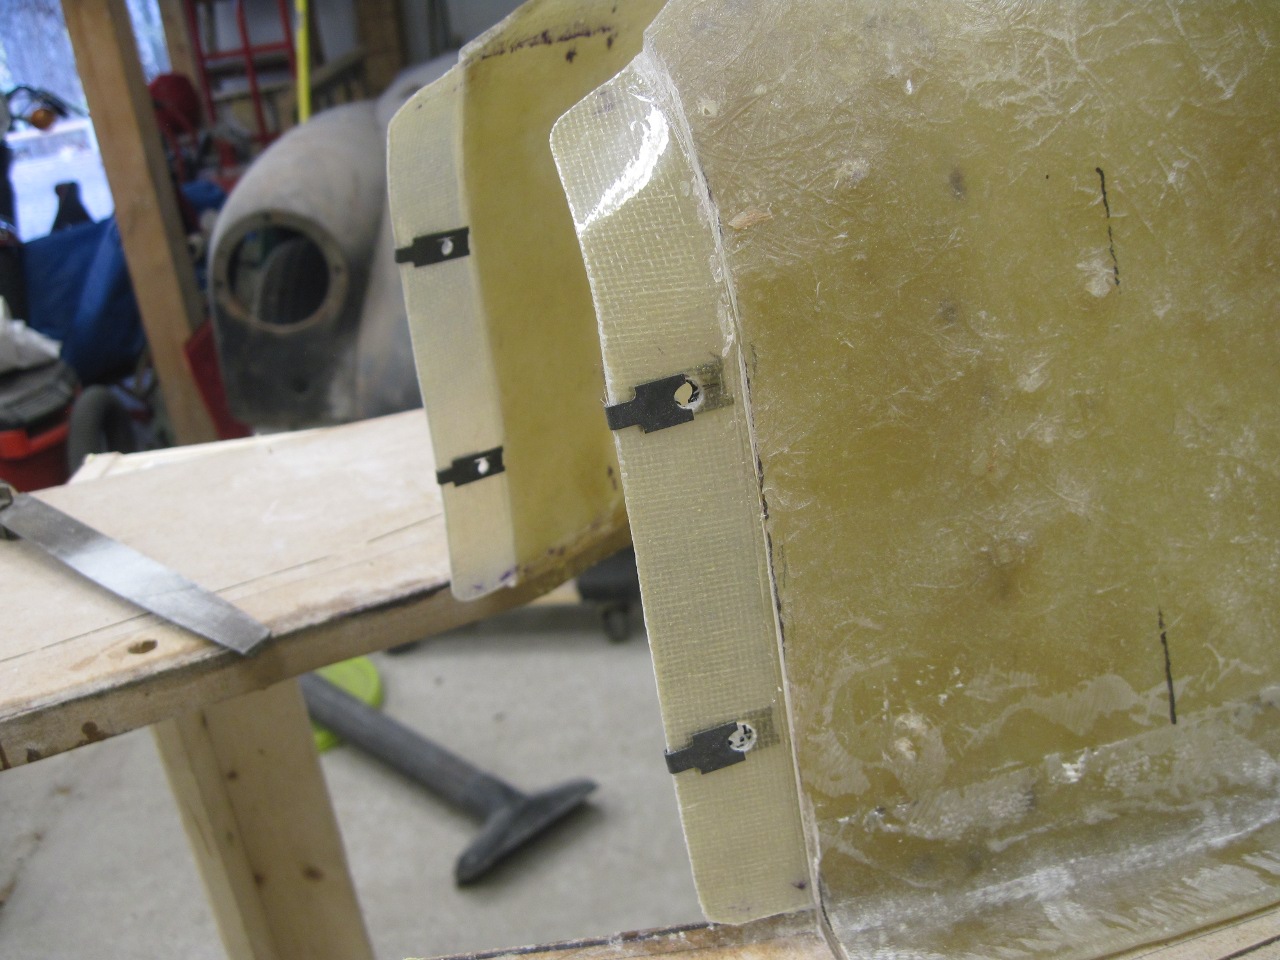
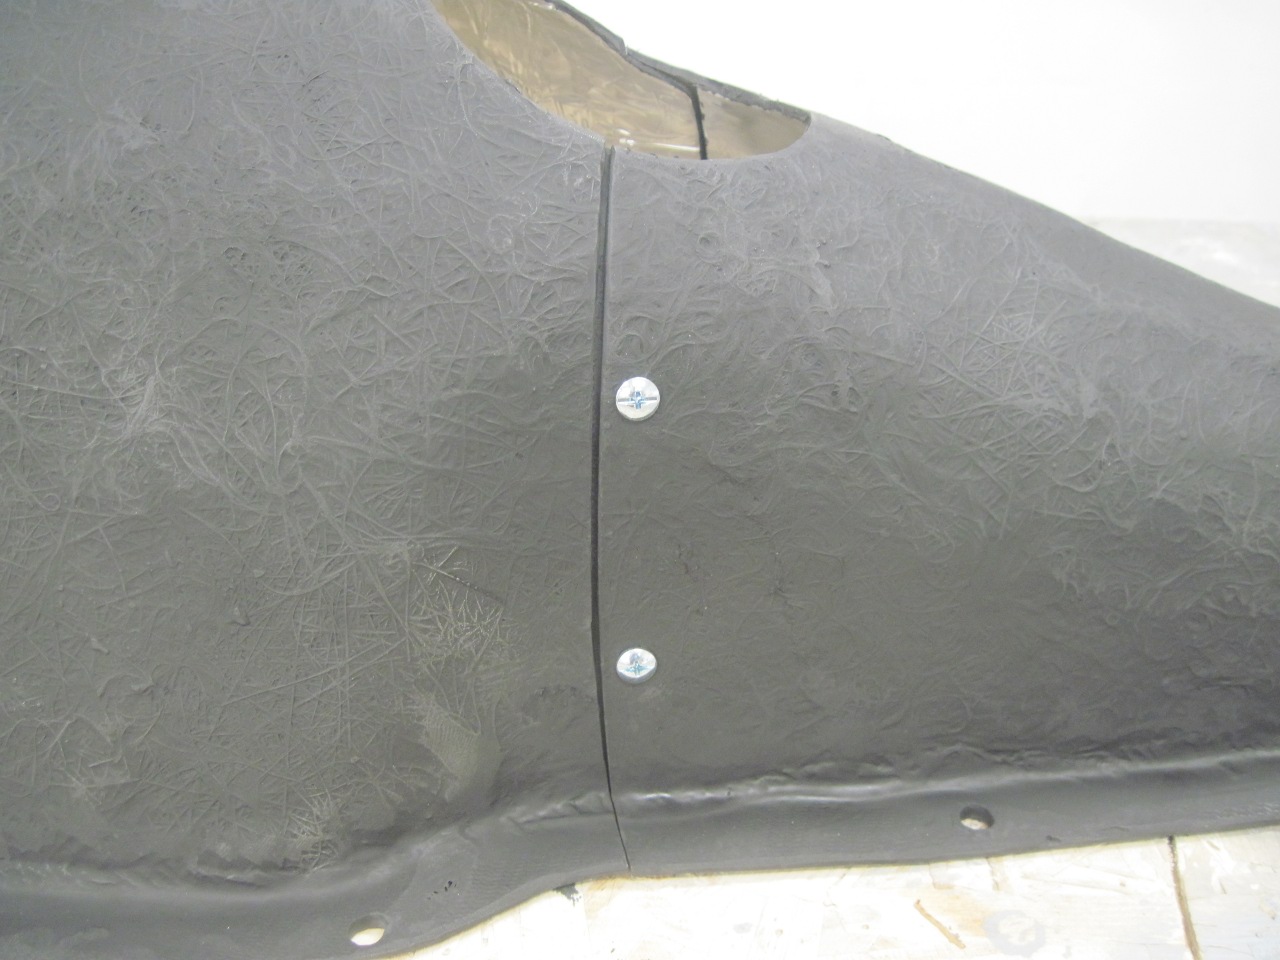
Then
bolted the cover back to the original board that held the plug, and
applied a few layers of glass cloth and mat over the new joint.
After a few hous of setting, the parts were separated and the new flange trimmed.
Drilled some holes, added some clip-on nuts, and screwed the pieces together.

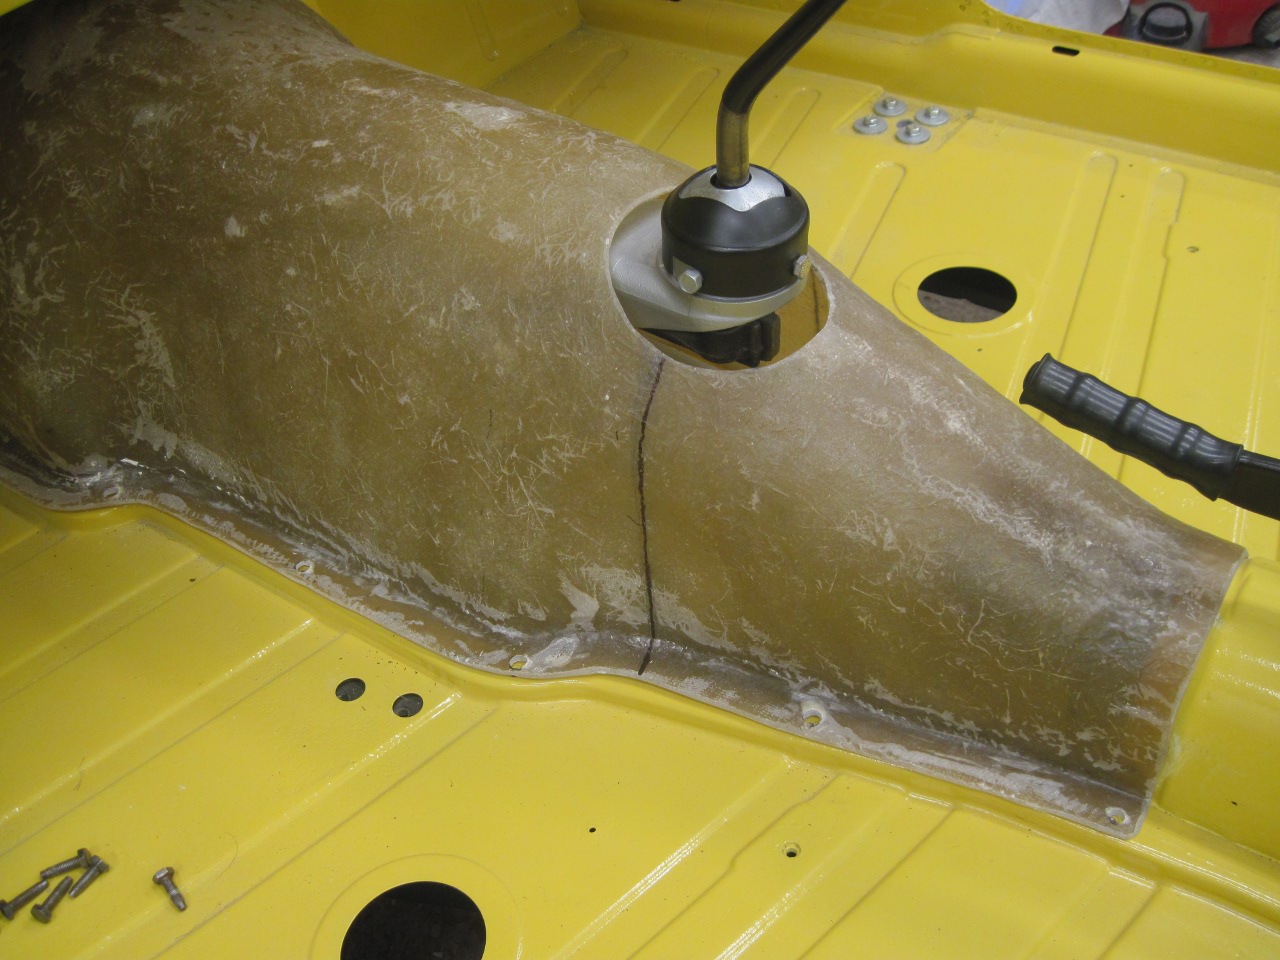
Before
mounting the thunnel back in the tub, I had a little remedial work to
do. In previous test fitting, I realized that although the tunnel
fit the tub very well at the front and rear, there was about a 1/4" gap
all along the floorboard flanges. I traced this to a measurement
or math error in setting up the plug. My solution to this little
boo-boo was to glue a 1/4" x 1" hard rubber strip to the floor flanges.
The strips wouldn't quite conform tot he tight curves, so some
notching was necessary.
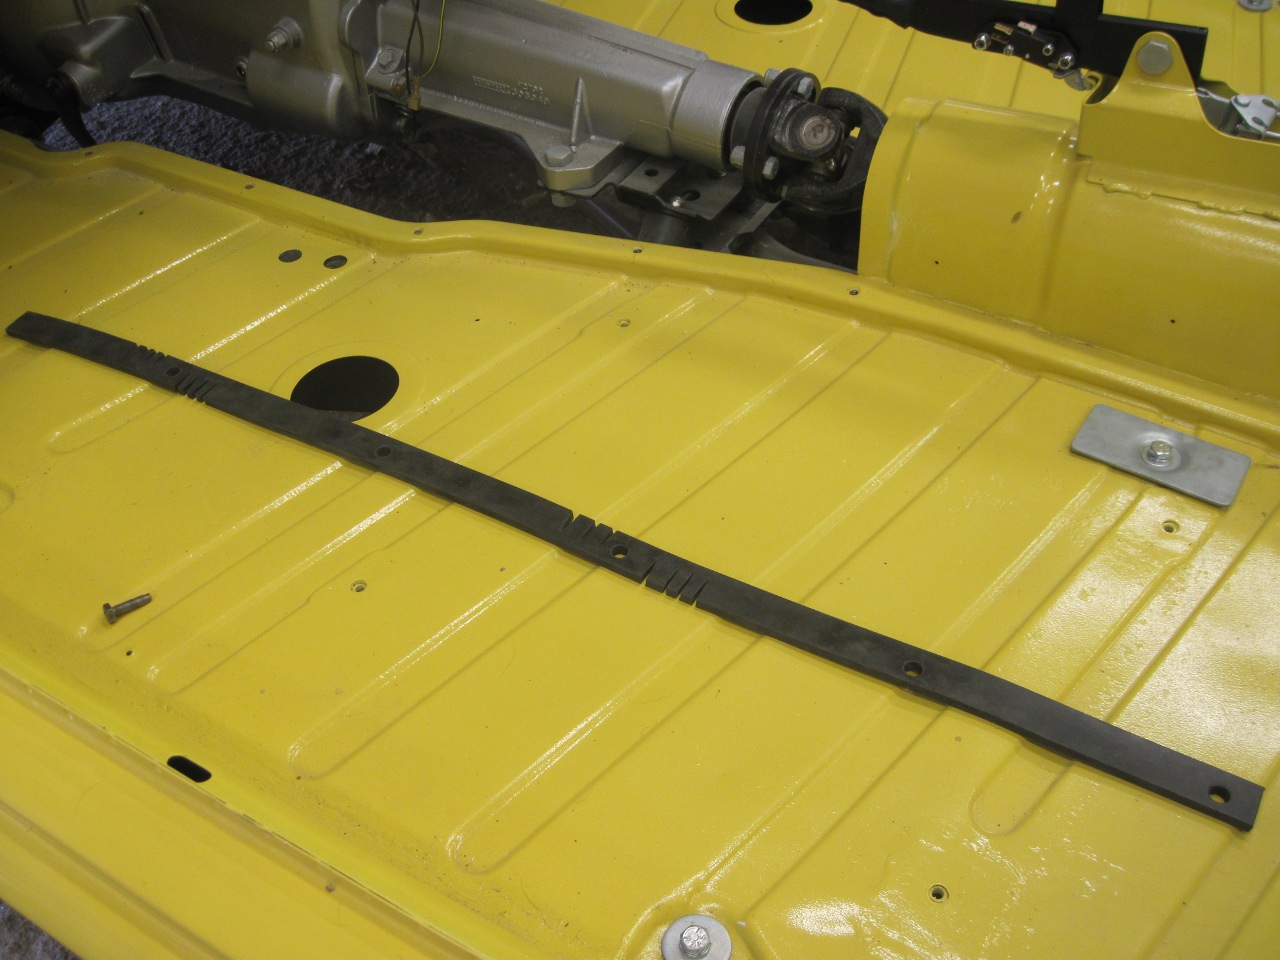

The tunnel then fit pretty well to the floor.
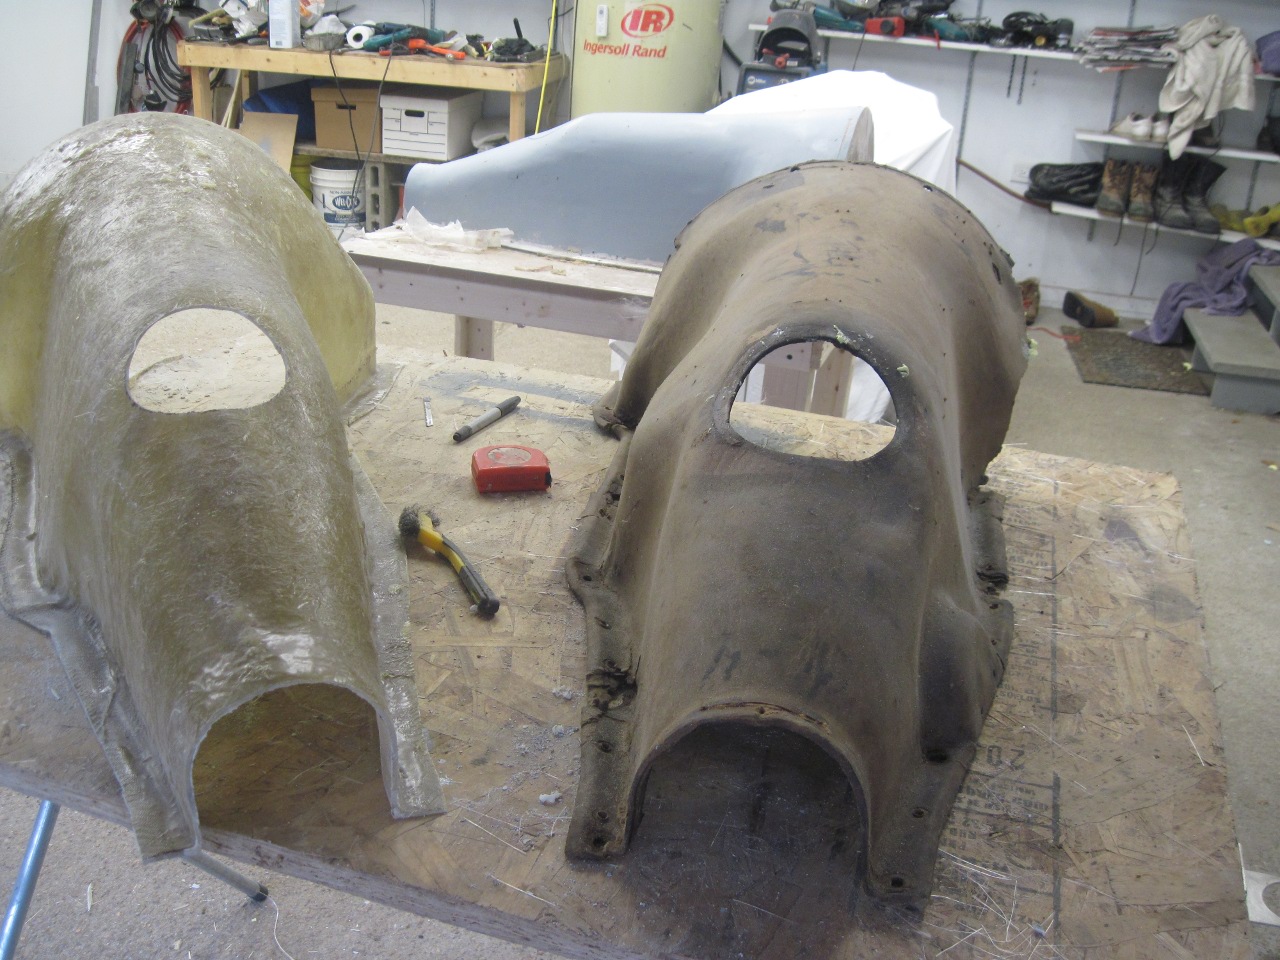
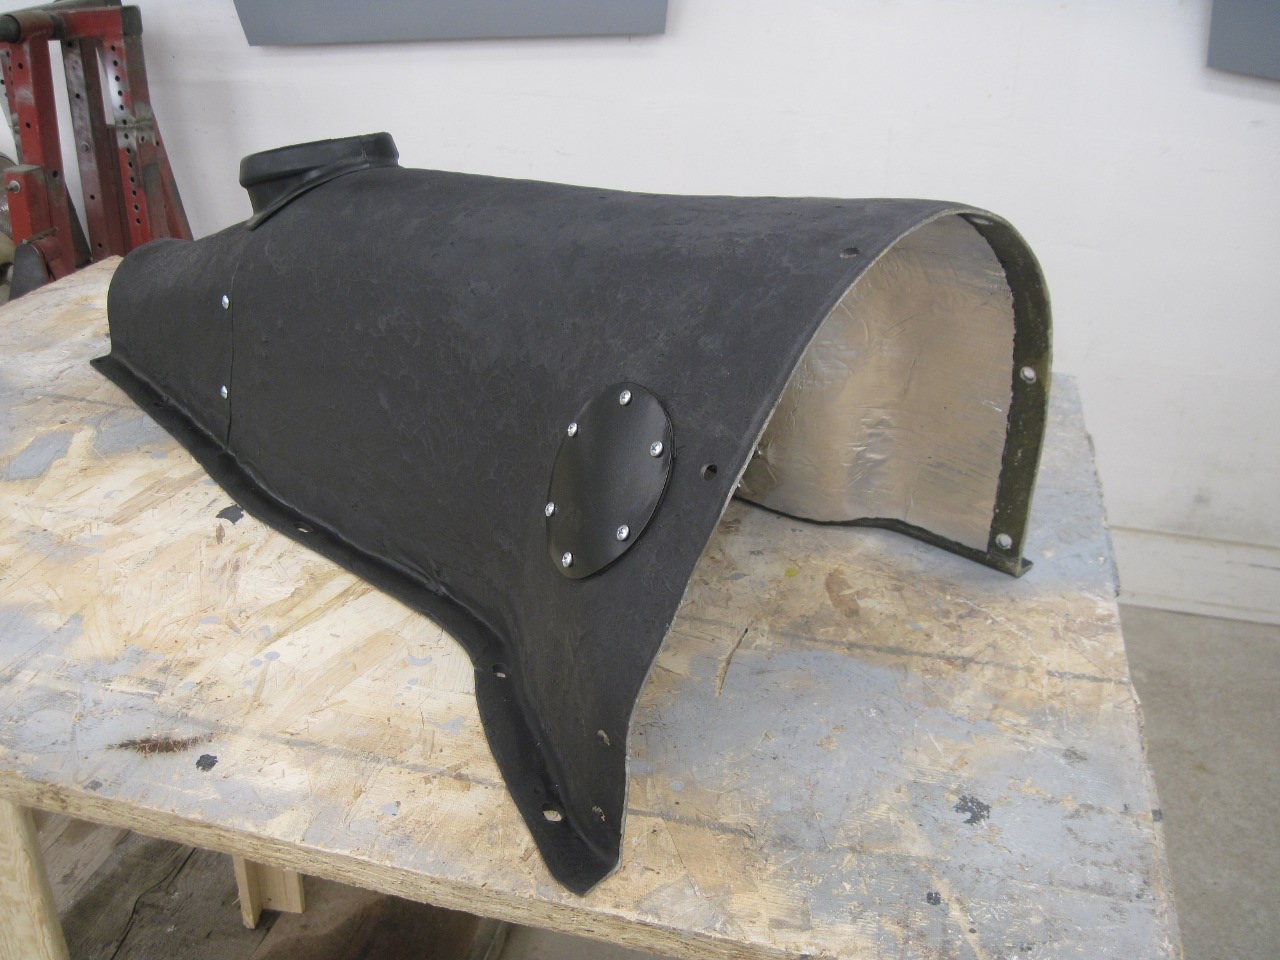
Then
came the question af access ports. Due to some suggestions on one
of the popular TR6 forums, I considered ports for the gear box oil fill
plug, the speedometer cable connection, and the top starter mounting
fastener. In the end, it seemed to me that the speedometer cable
nut was probably better accessed from under the car, but that the other
two ports made some sense.

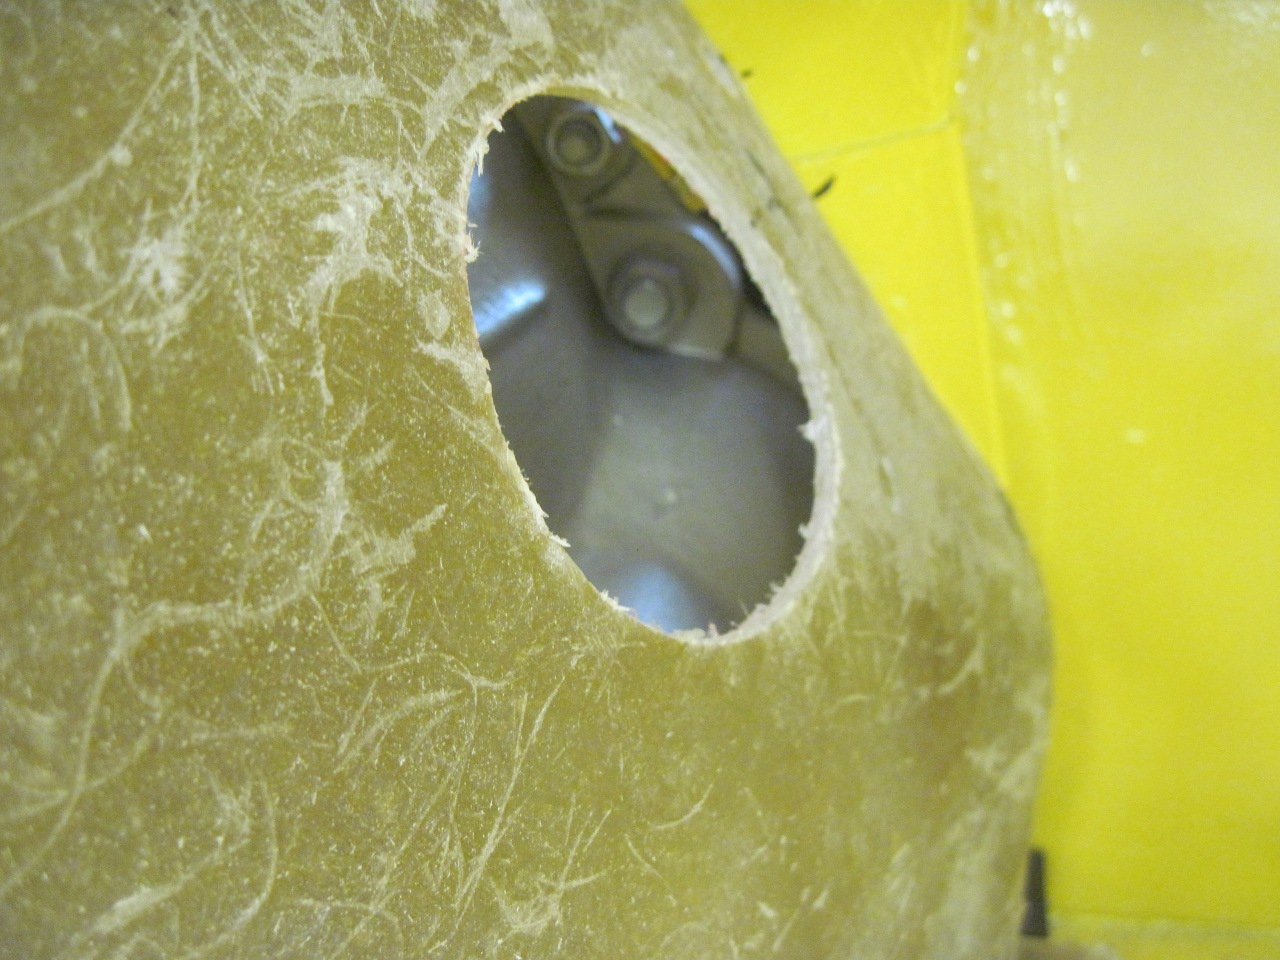

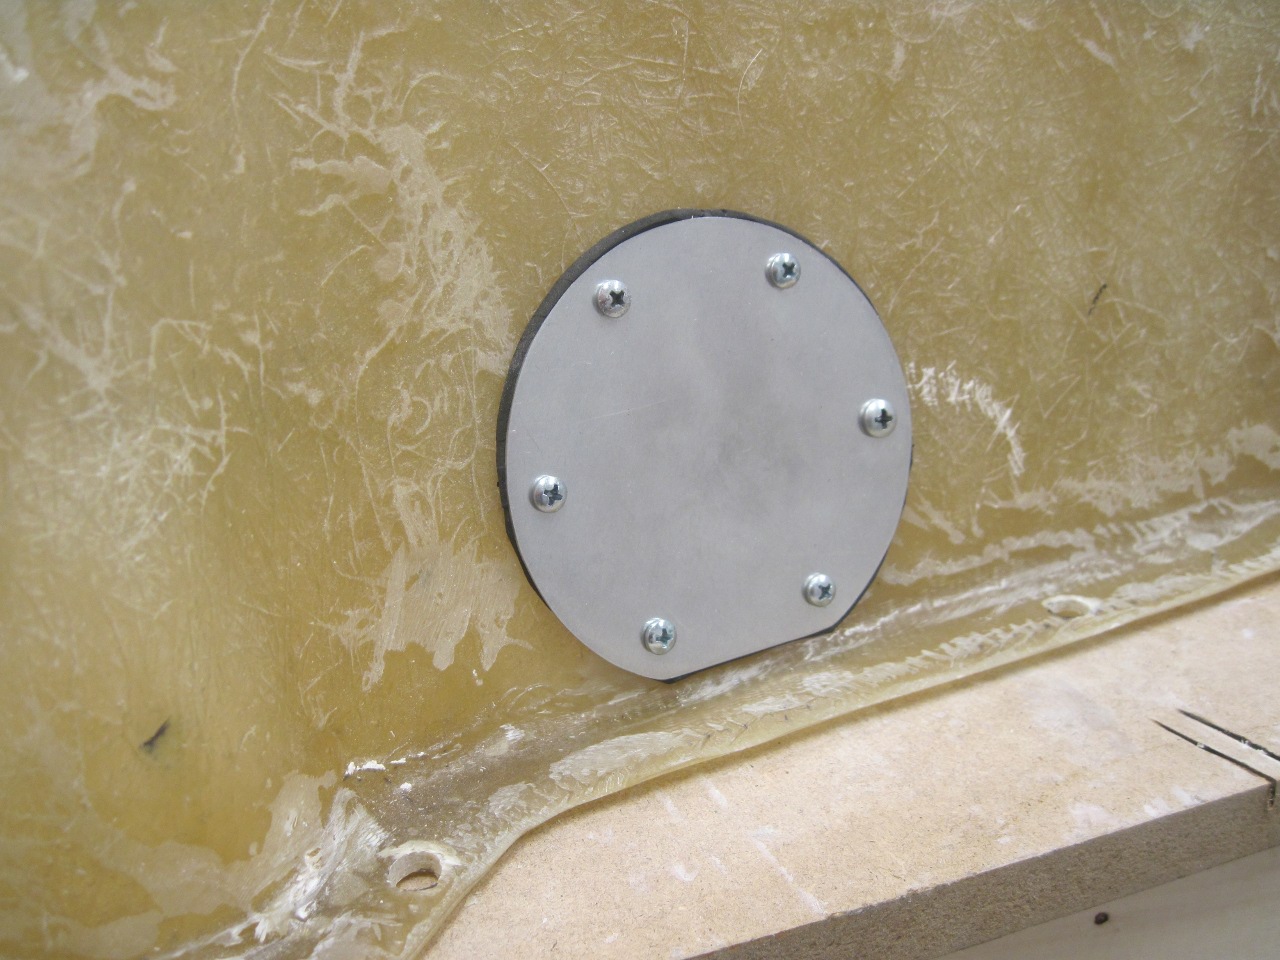
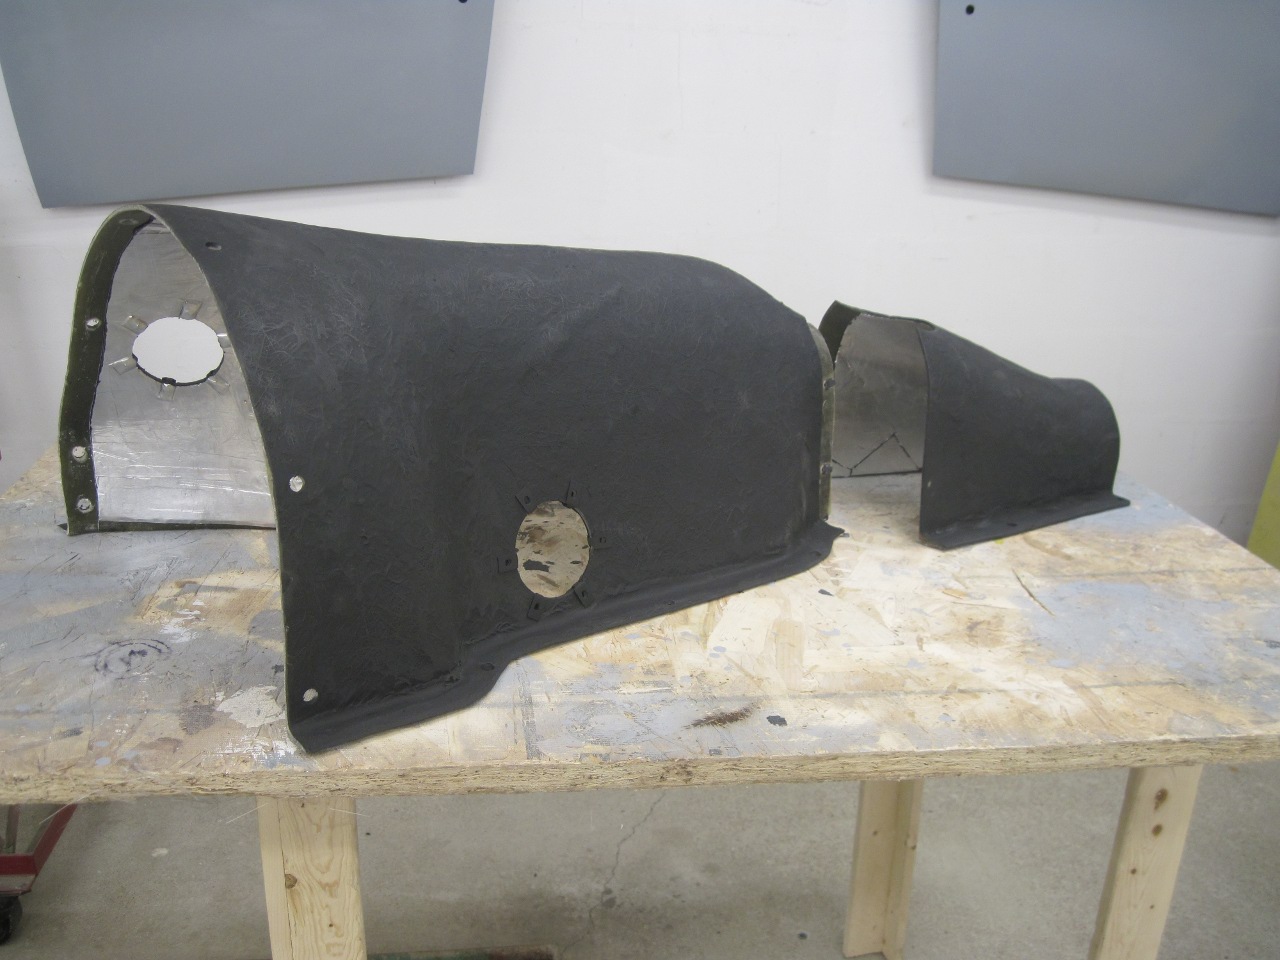
I made some aluminum covers and foam gaskets for the ports and fastened them on using some clip-on nuts.

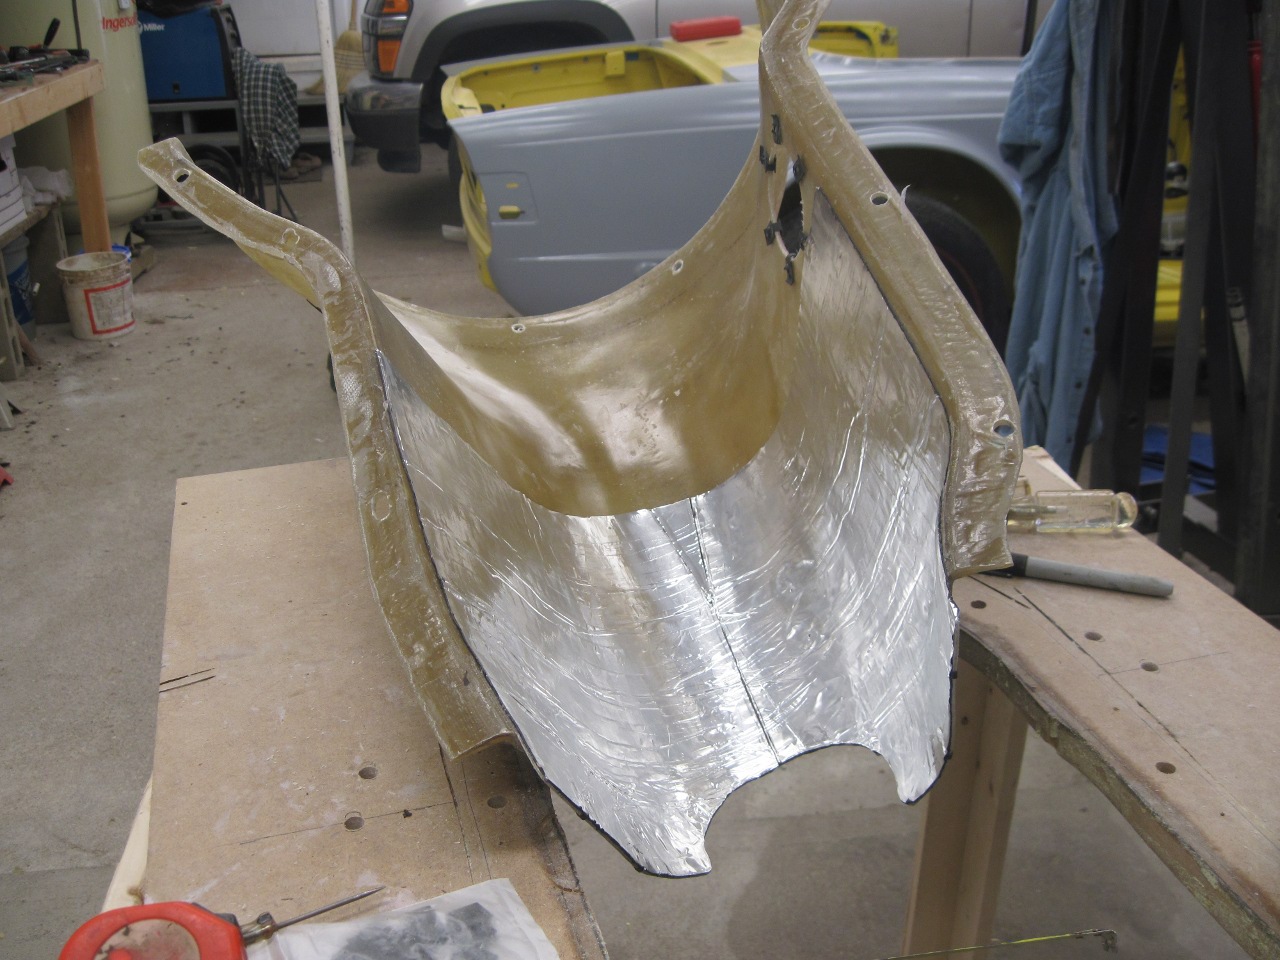
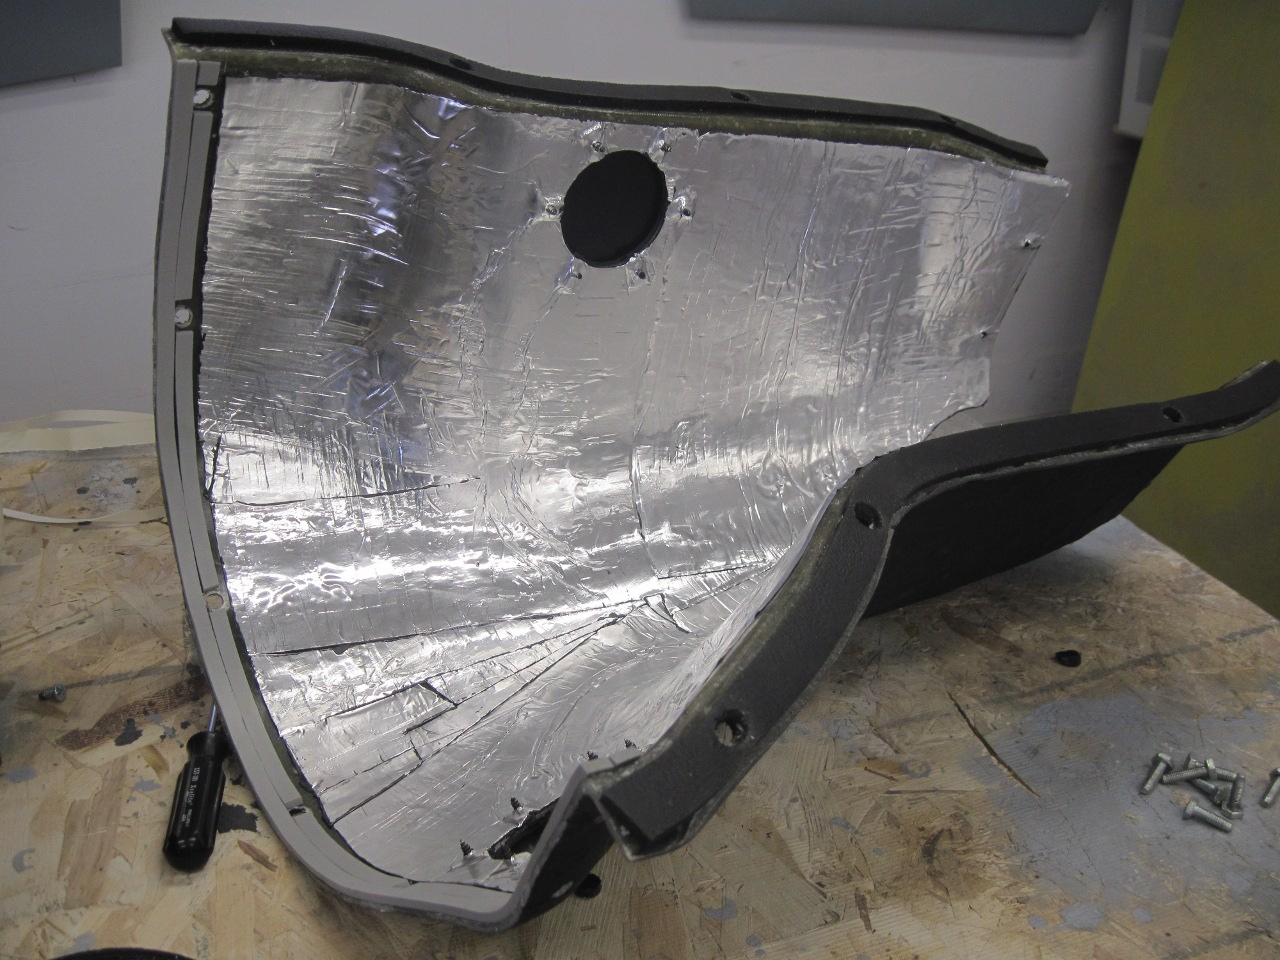
Last
up was some sound deadening. Now, this fiberglass cover
was fairly dead already, so this step might not have been
necessary. On the other hand, even though I don't really buy the
marketing blather form makers of sound deadening mats about their
phenominal heat insulating properties, I did see some value in having a
reflective coating on the inside of the tunnel to act as a barrier to
radiant heat. Since I had some mat on hand after doing the
bulkhead behind the heater, I decided there wasn't really a downside to
coating the inside of the tunnel.
The first pic illustrates just how translucent the fiberglass is.

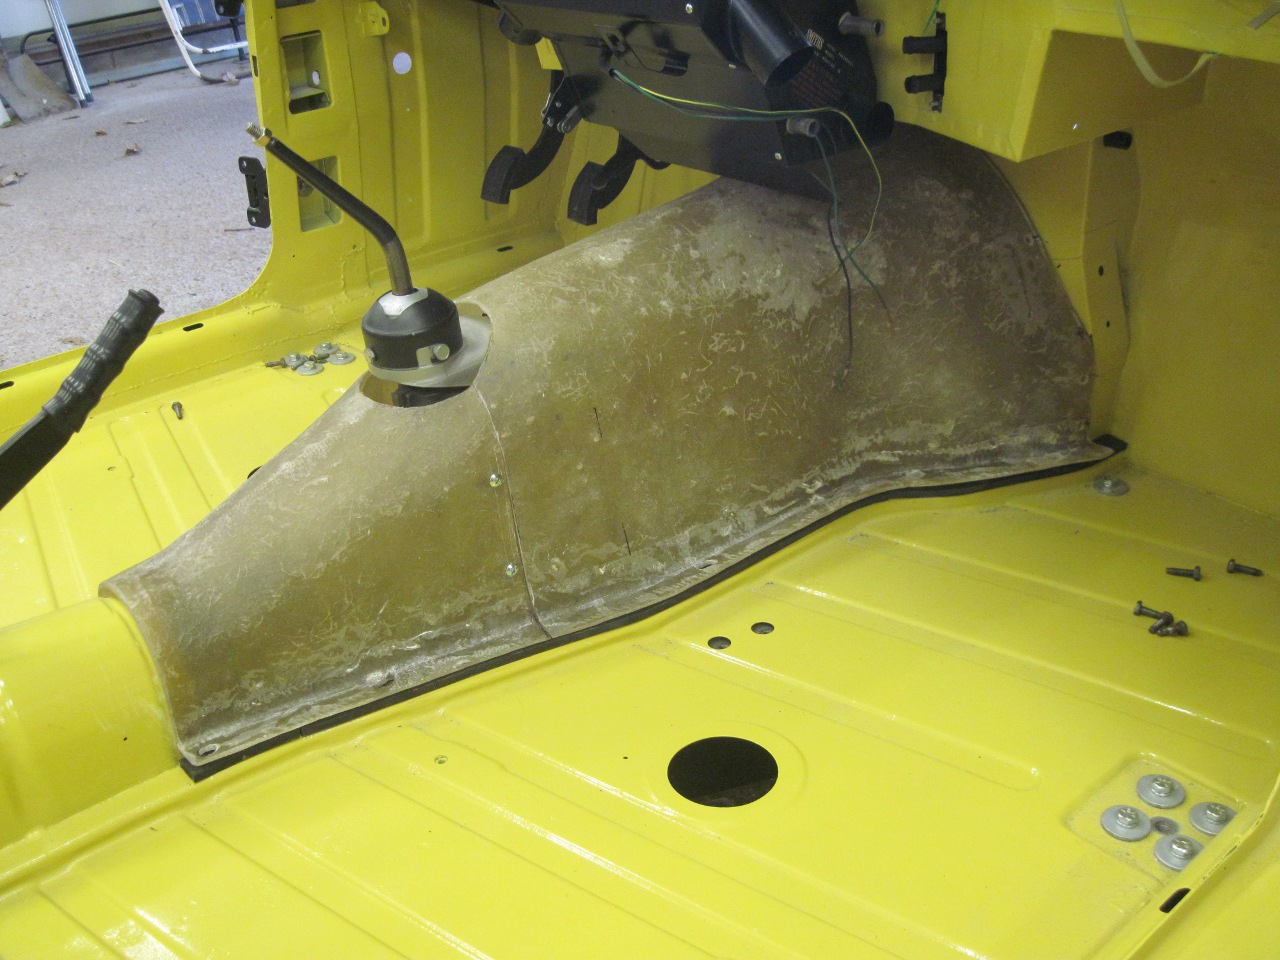
A coat of primer, and I'm calling this tunnel ready to install.
Some soft foam tape to seal the joints...
...and the big front part slides into place.

Followed by the smaller rear part.
The tunnel is very strong. Bolted in, I'm pretty sure I could stand on on it without any damage.
As expected, I didn't really save much money by fabbing the tunnel, but the experience was priceless.
Comments to Ed at elhollin1@yahoo.com
To my other TR6 pages