To my other TR6 pages
April 14, 2016
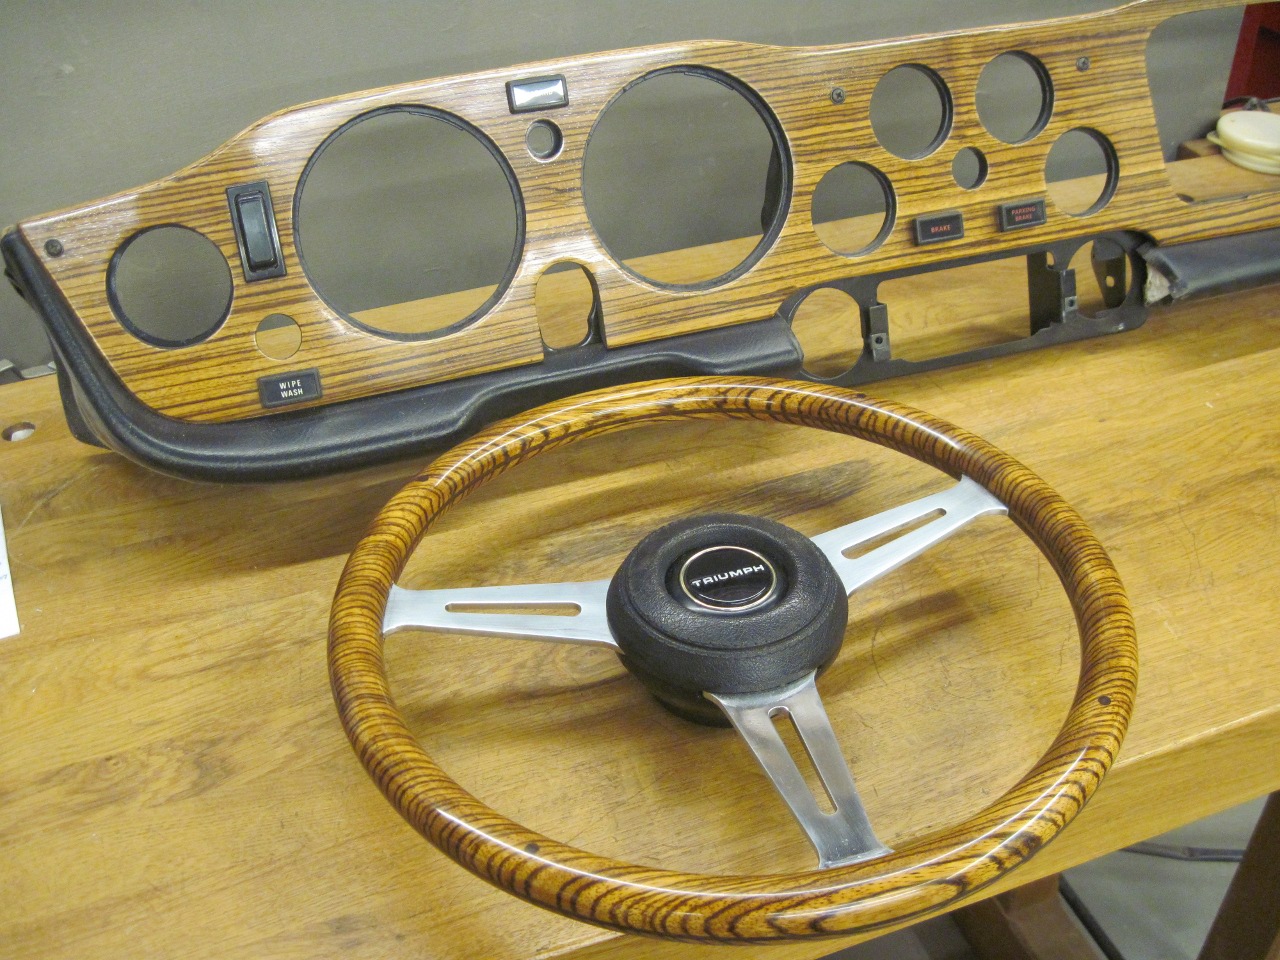
Steering Wheel
My
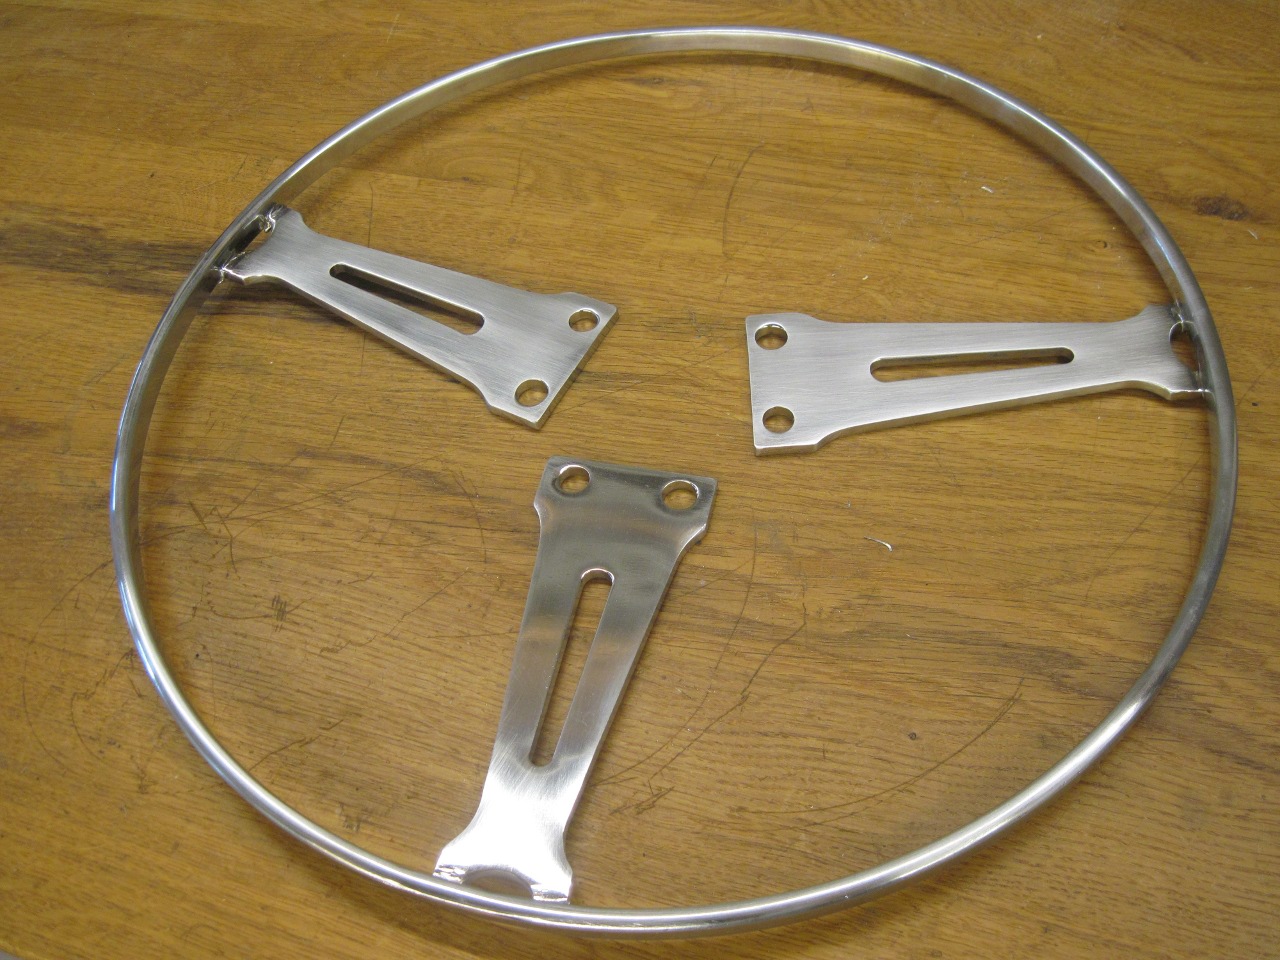
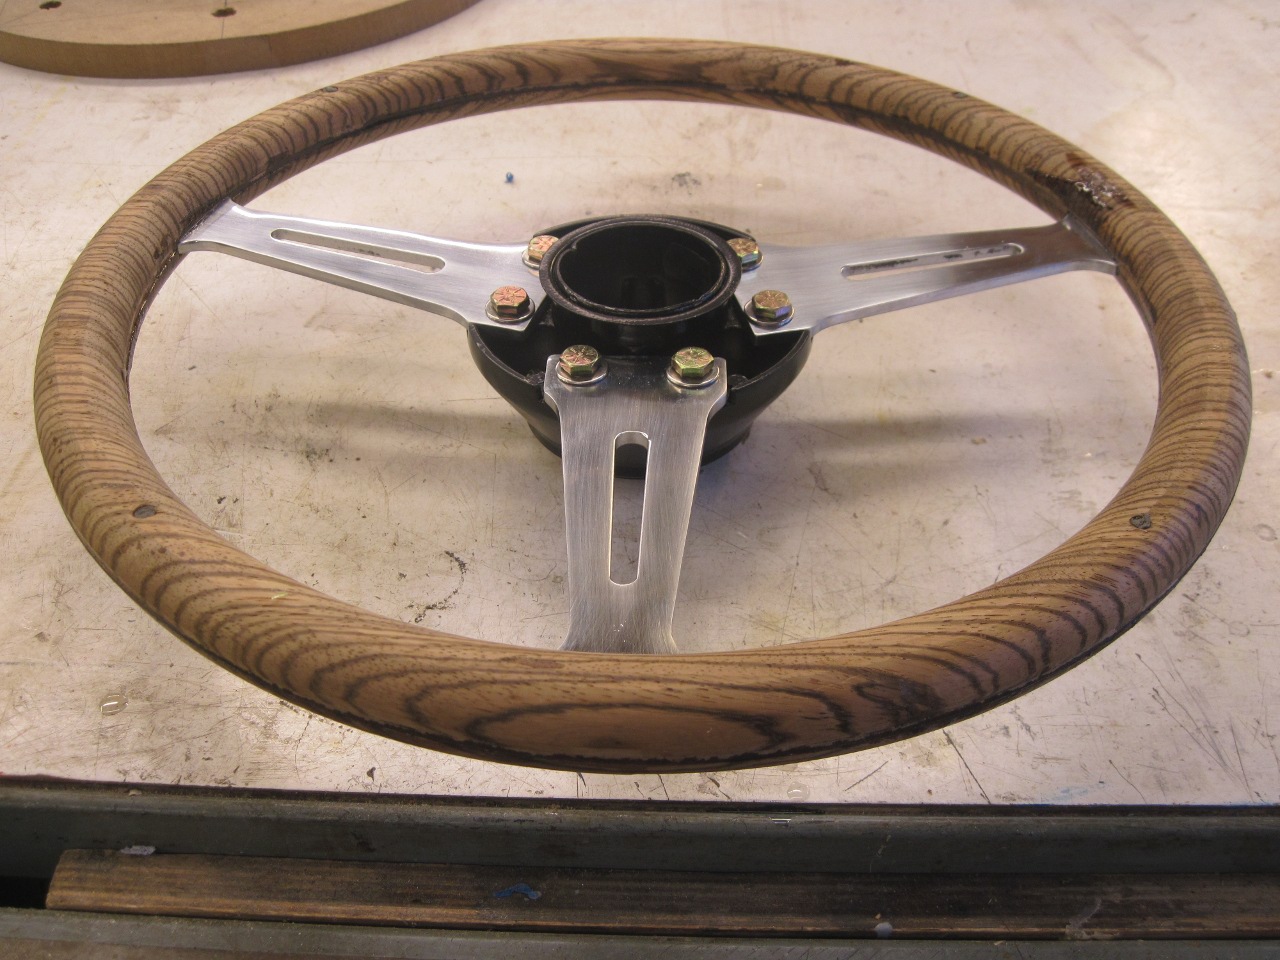
car had the original foam covered steering wheel. It is a 14½
inch three spoke design with a slight dish. The brushed chrome
spokes had extensive pitting and some areas where the plating had
flaked off. The foam on the rim was dirty and worn.

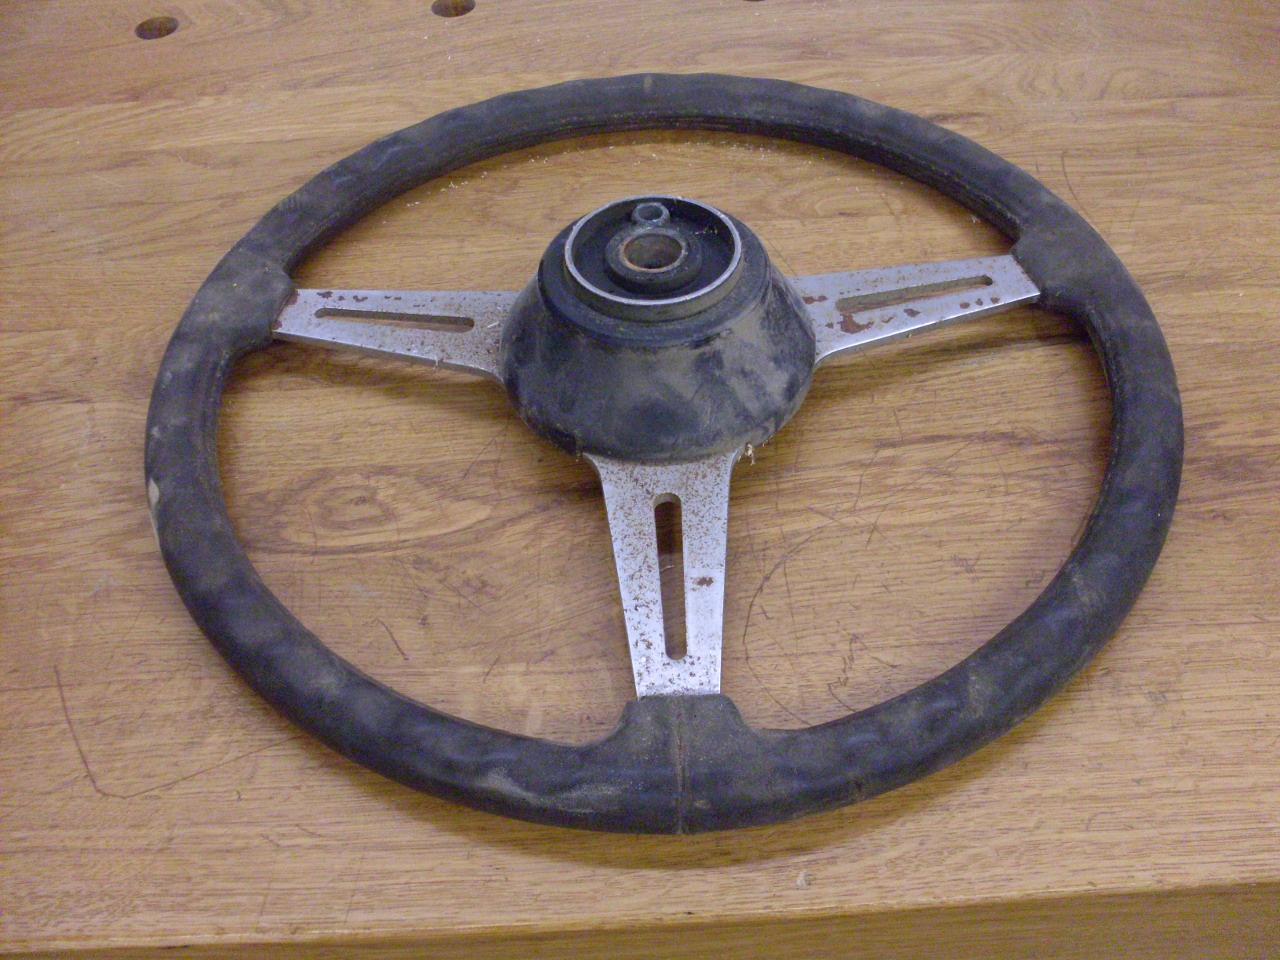

I
decided that the wheel wasn't usable in this condition, so I pondered
the obvious question: Buy a new one or refurbish this one?
I'll almost always come down on the latter choice if it's at all
feasible, so I started with the what-ifs. I could have the spokes
replated, but the foam grip would have to come off. How would I
replace that? What about a wood covering? What if it
matched the Zebrawood dash? This really appealed to me, but
though I've done a lot of woodworking over the years, I've never tried
anything remotely like this.
"How hard could it be?" I heard myself say, and the project was on.
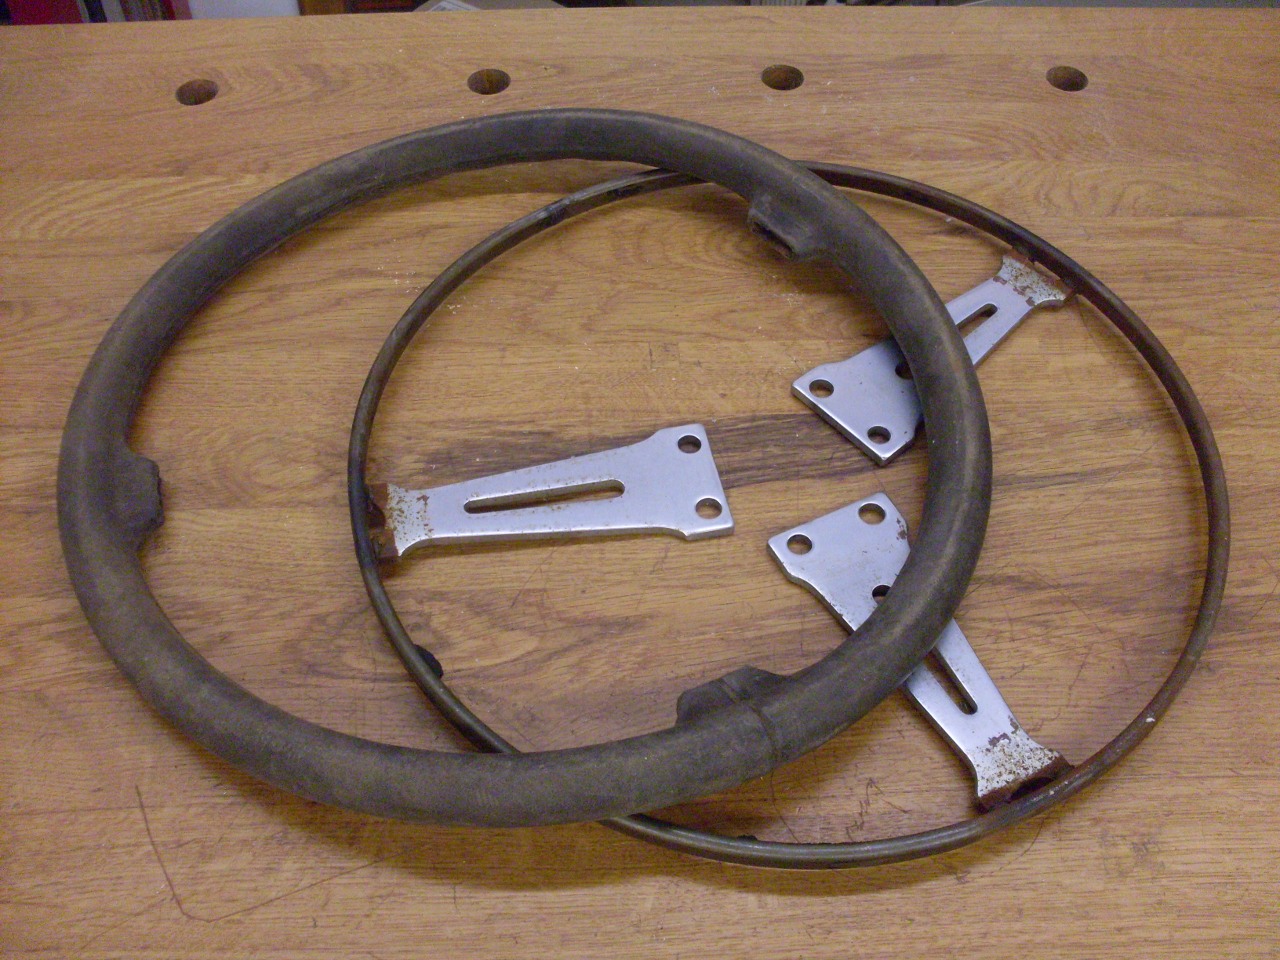
The
molded-on foam came off easily in one piece. I realized at this point
that it could probably be glued back on to the replated spoke assembly,
but I already had my heart set on a wood wheel. Besides, the foam
wasn't in very good shape.]
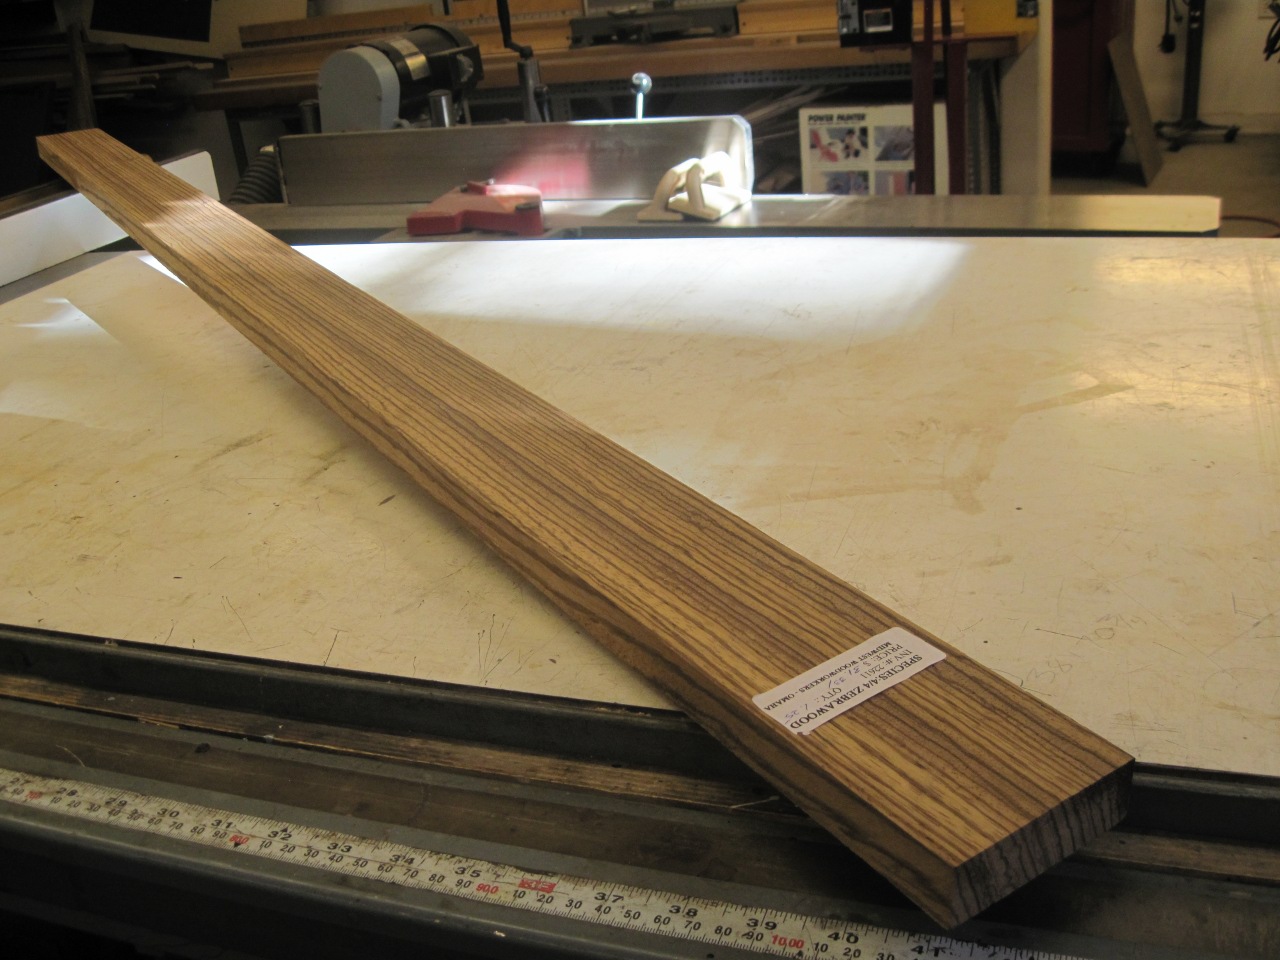
I bought a nice piece of Zebrawood to match the dash.
One
common way to make a wood steering wheel is to cut the wood into
trapezoidal pieces that when glued end to end form a six or eight (or
more) sided polygon that the circular wheel blank is cut from.
This makes the wood grain more or less follow the curve of the
wheel. In this approach, the grain takes an abrupt turn at each
joint, which is fine for woods with subtle grain. But with a
bold-grained wood like Zabrawood, I thought the changes of direction
would diminish the continuity of the wood grain.
So
the approach I took was to keep the grain direction constant, as if the
wheel was cut from a very wide board. This should make the joints
nearly undetectable.
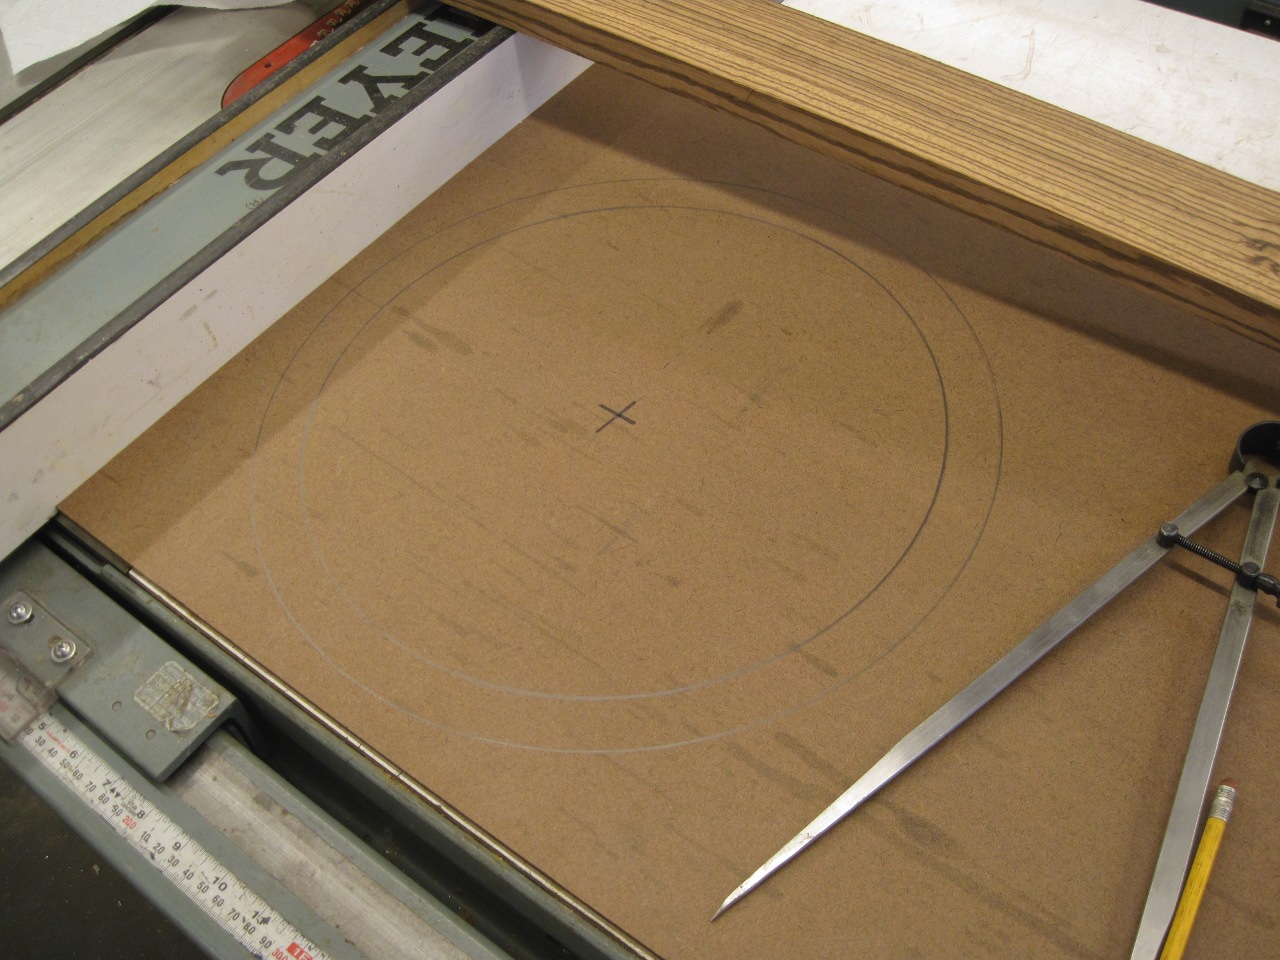
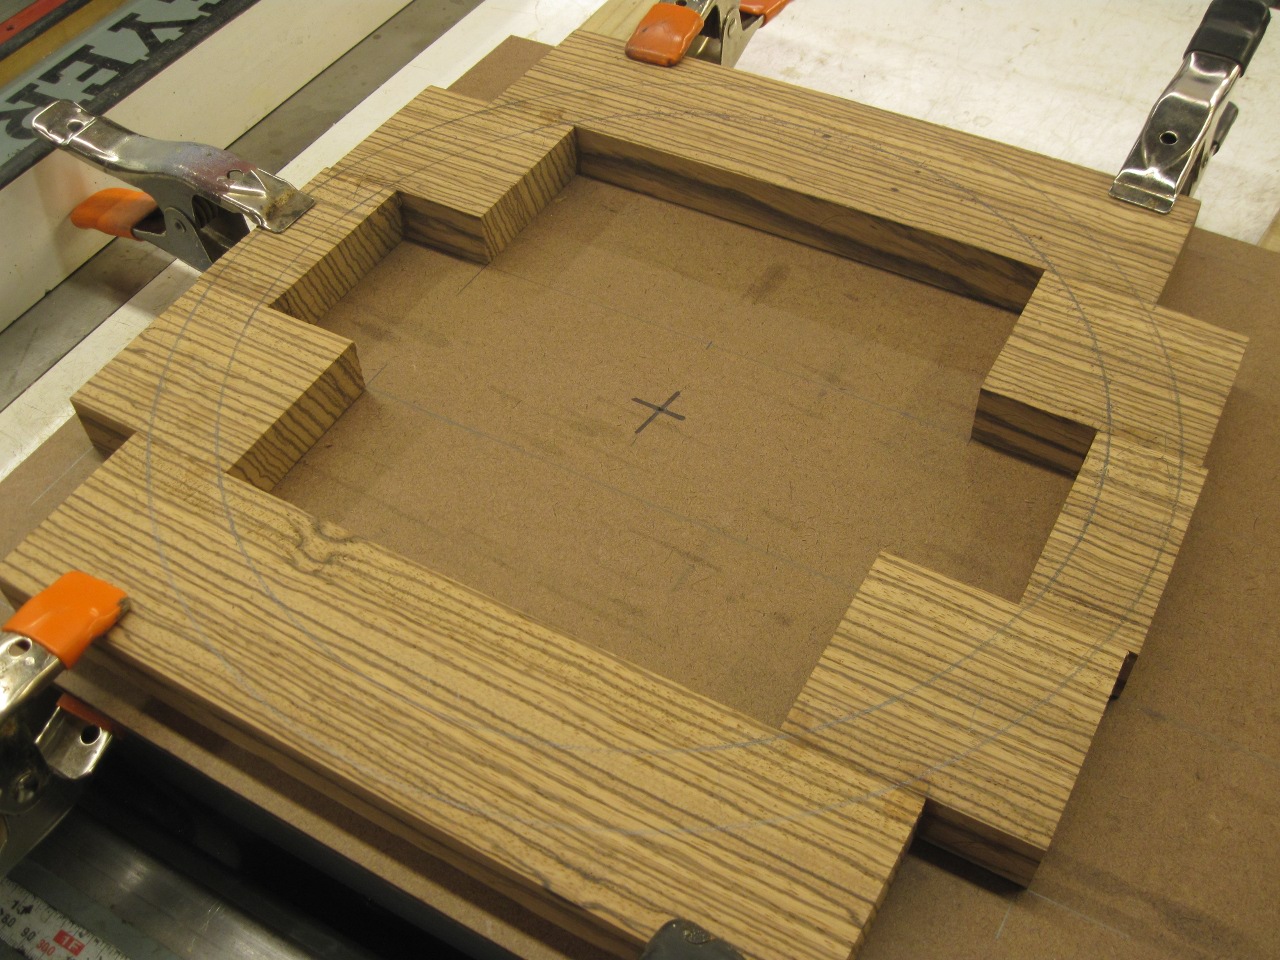
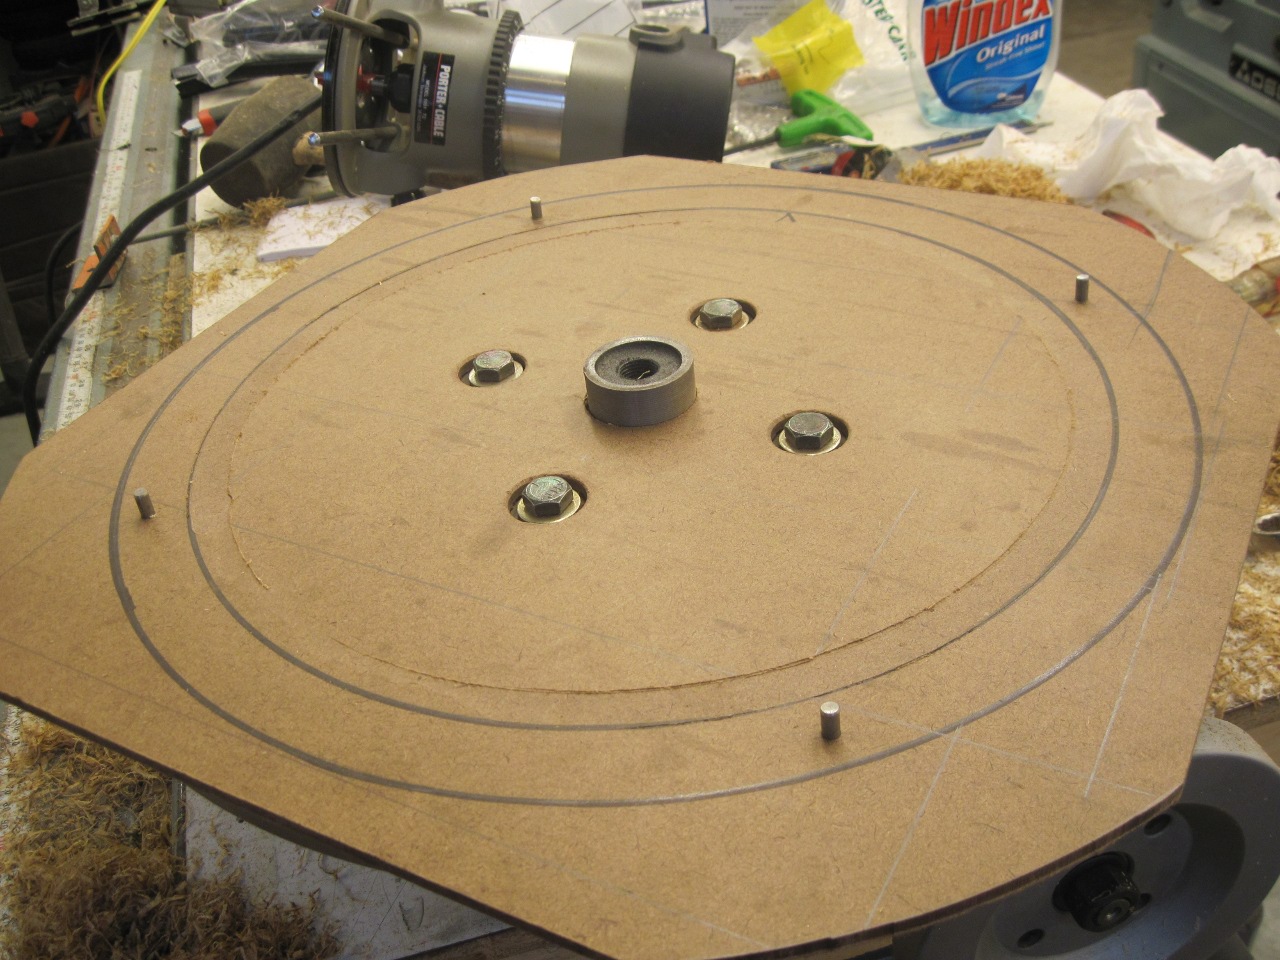
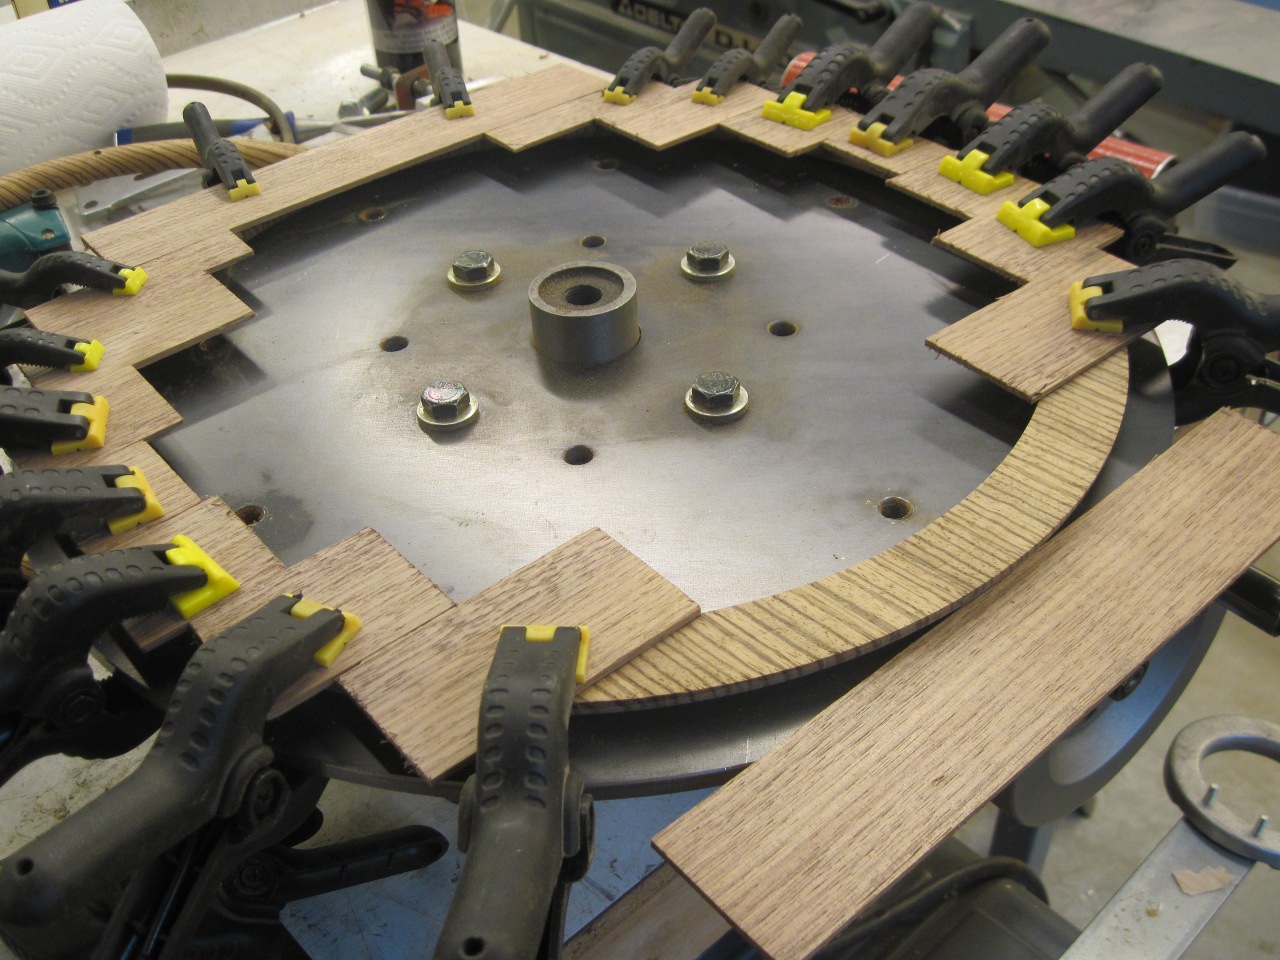
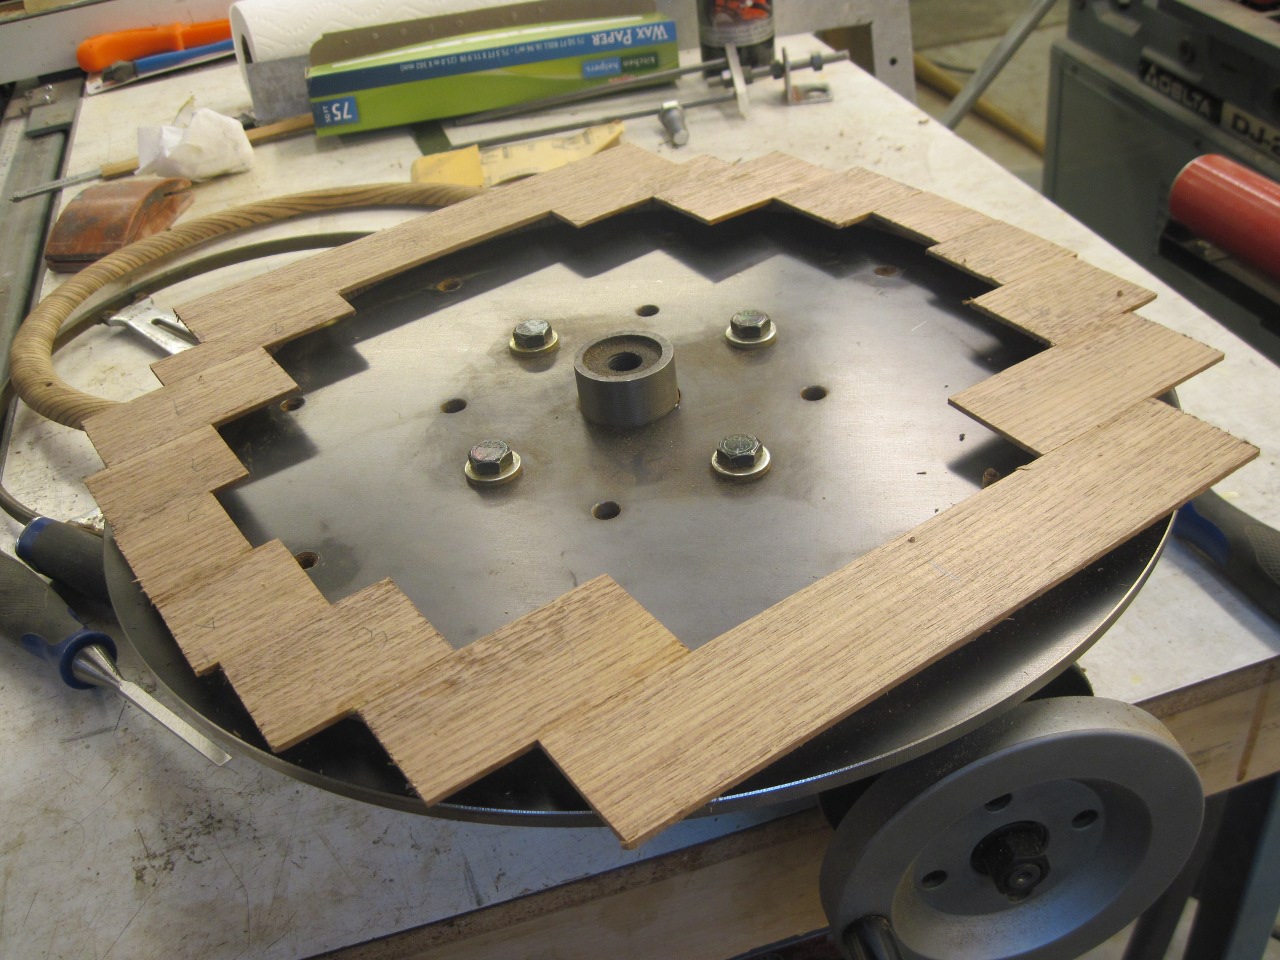
First,
I laid out the full size wheel pattern, then cut blocks to cover it.
This allowed very efficient use of the expensive wood.

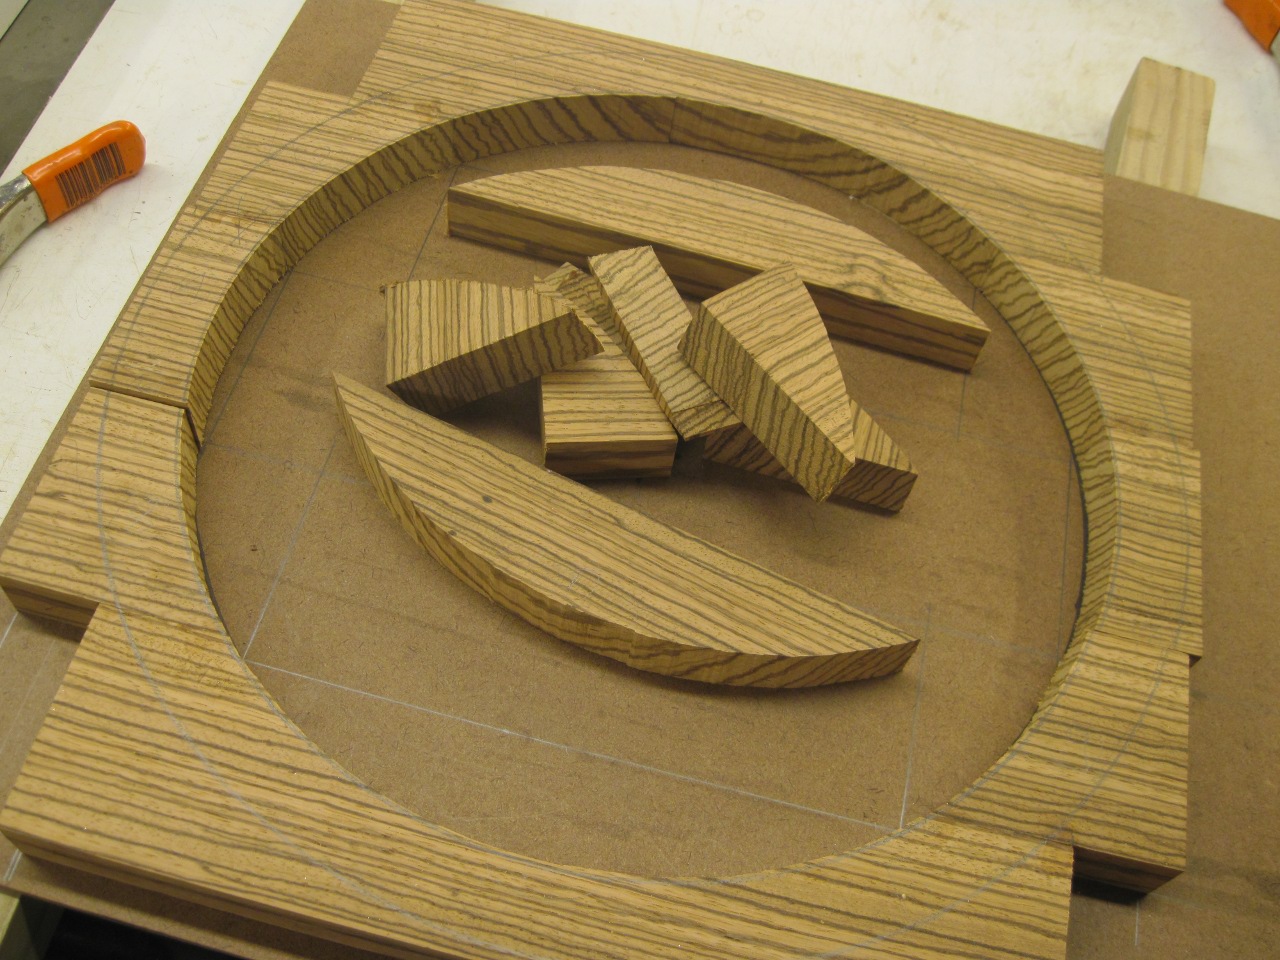
I glued the blocks into an upper and lower half, bandsawed the inside circumference, and glued the two halves together.
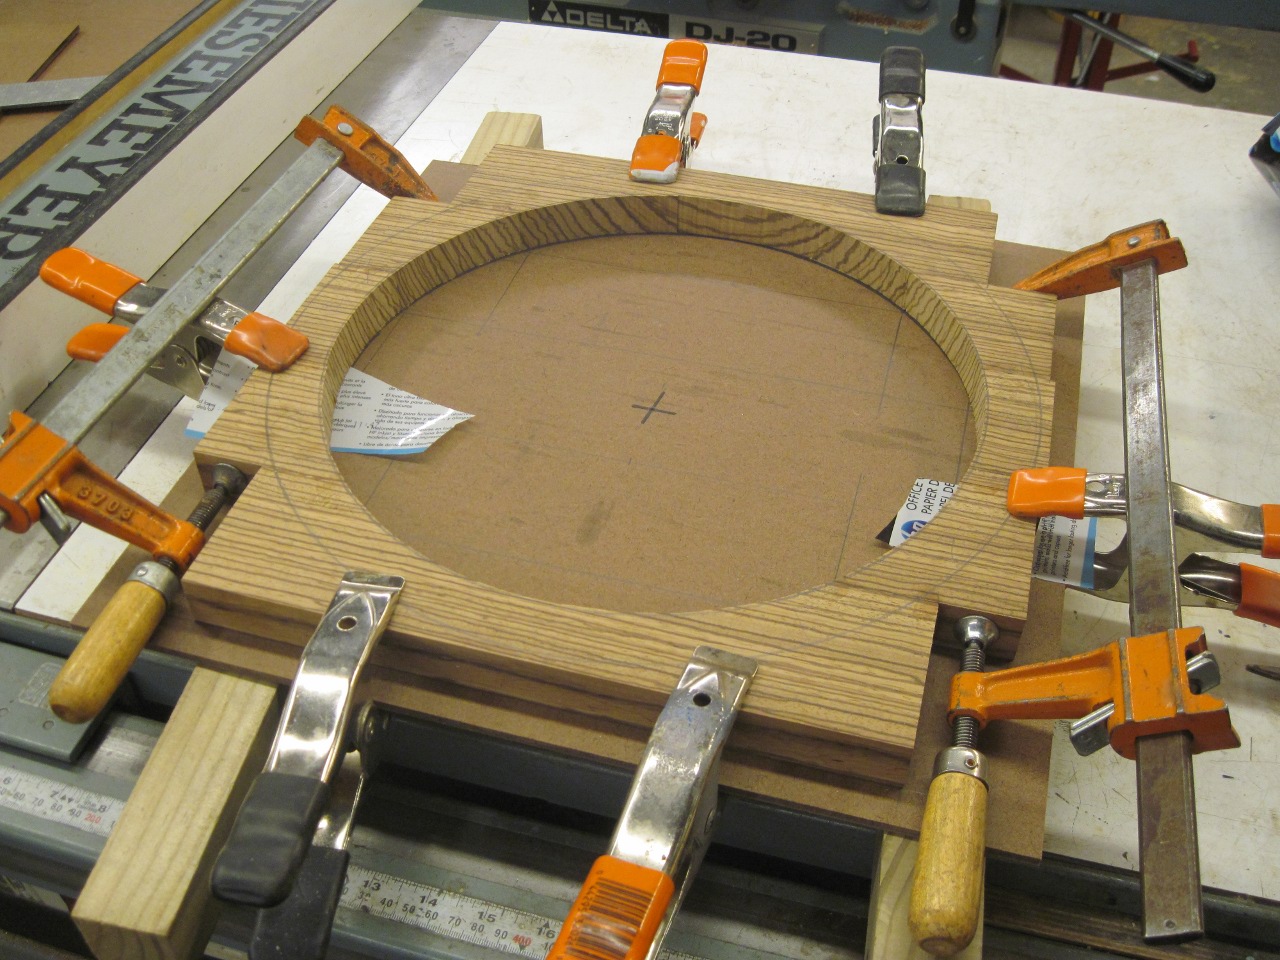

I
then made a platform to mount the assembly to for the next operations.
The platform has four steel pins that go into matching through
holes in the glue-up. This allowed me to register the piece, then
flip it over and have it stay registered.
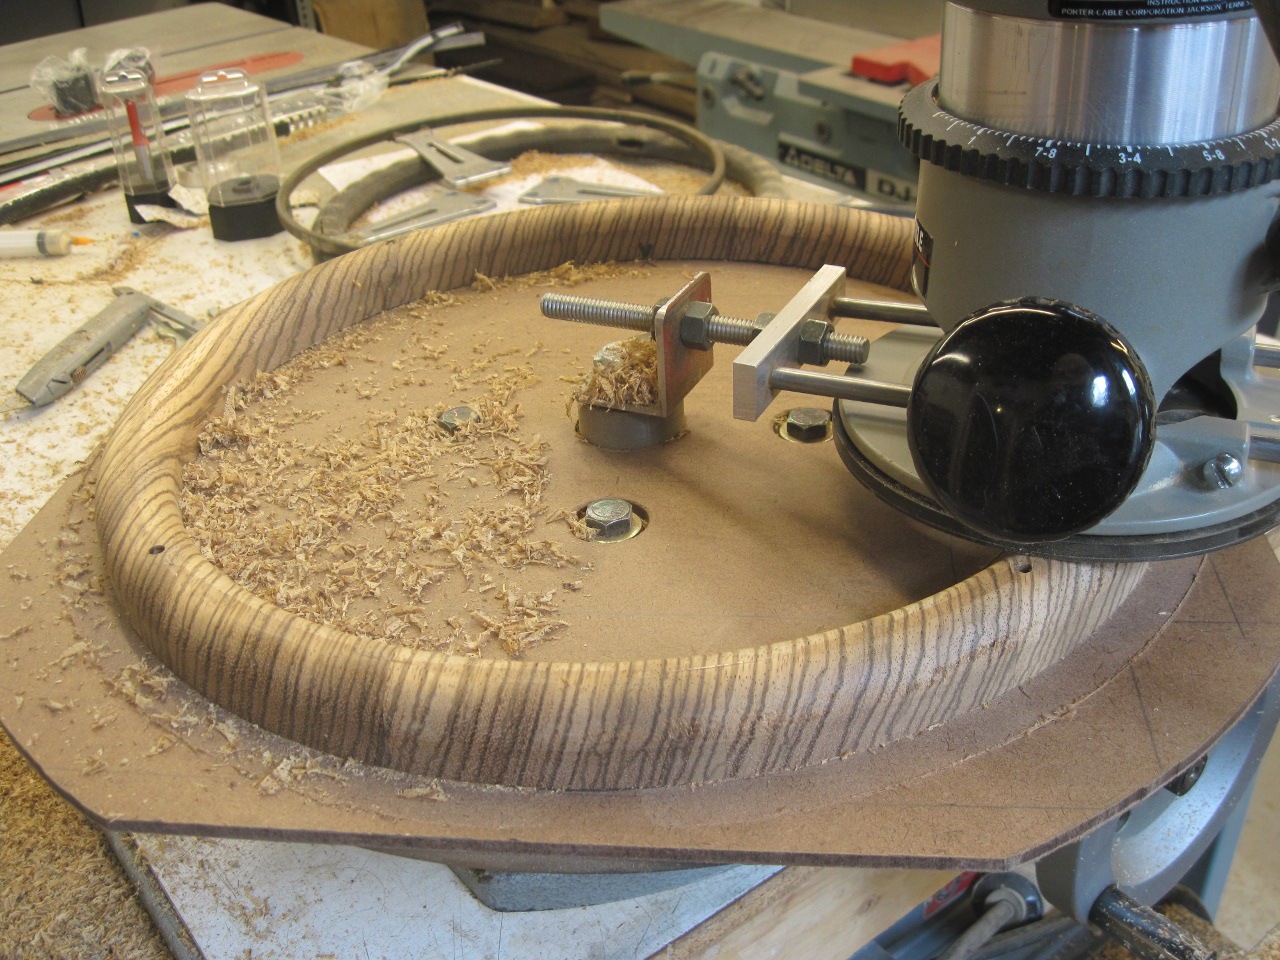
A
little home-brew radius jig for the router mounts to the center of the
platform. This lets the router clean up the inner circumference.
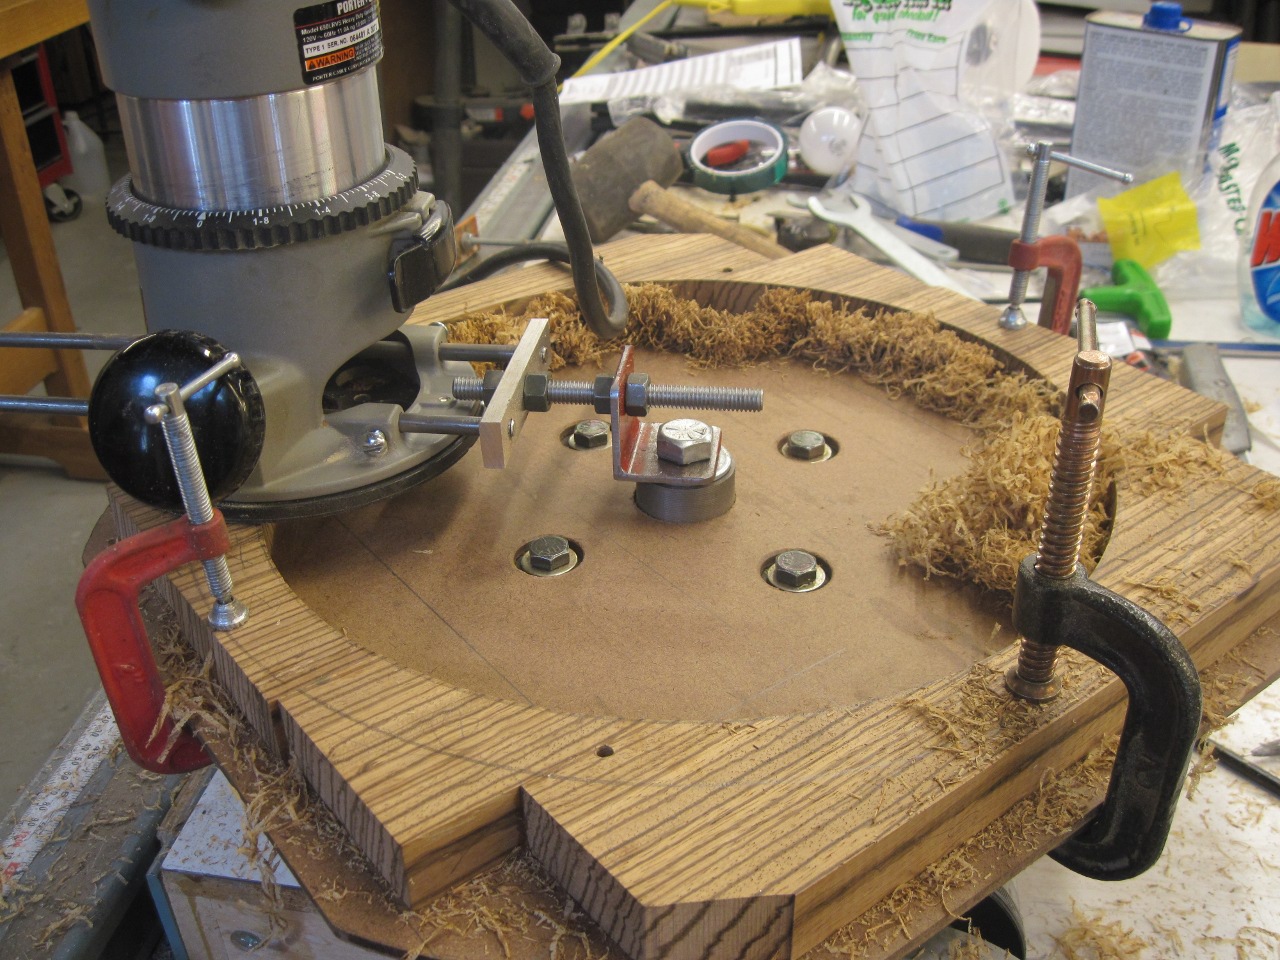
Then rough bandsawed the outside circumference and cleaned it up with the router.
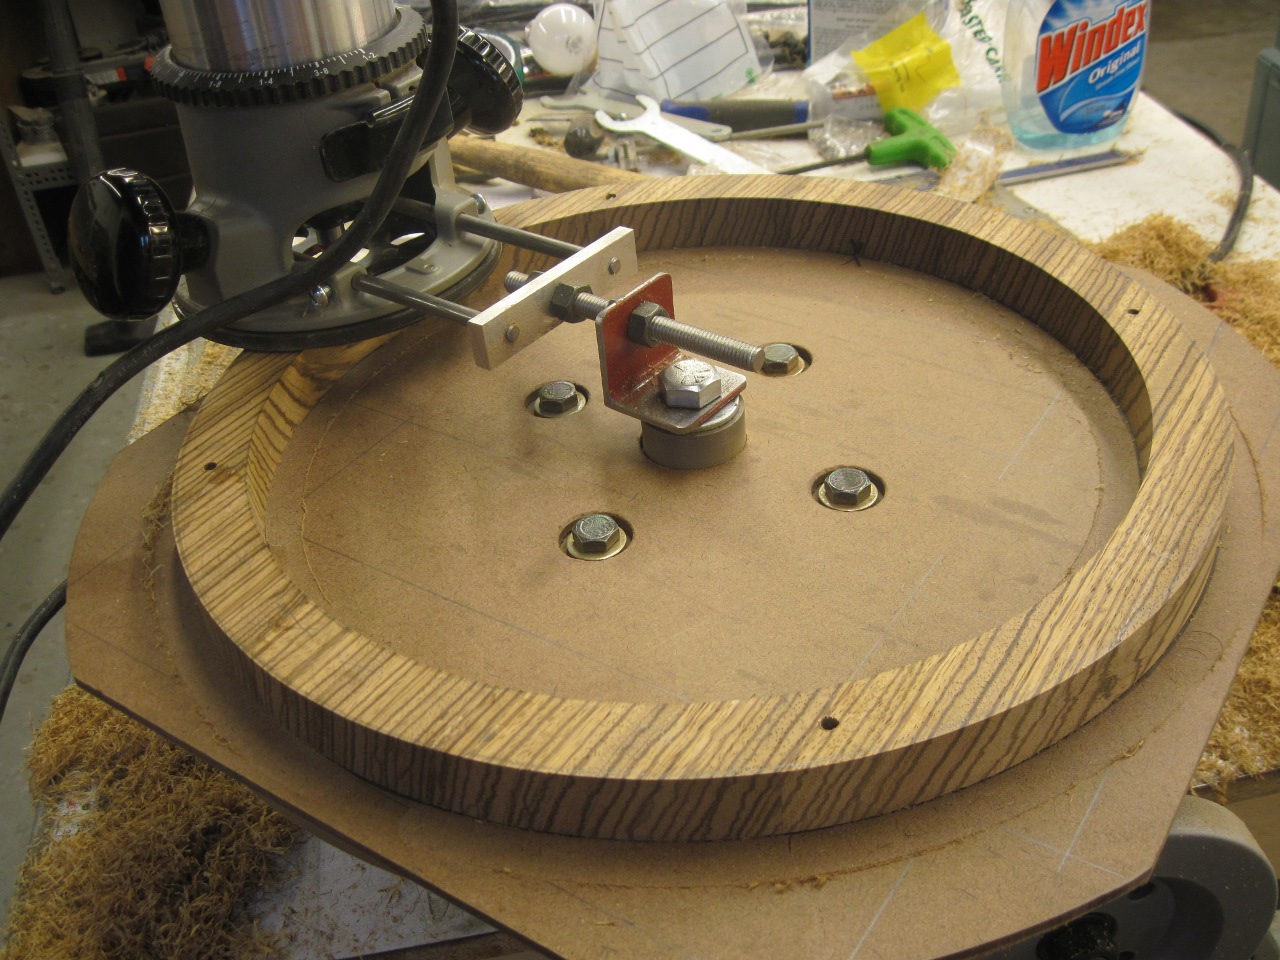
Then using a 1/2" roundover bit, formed the circular cross section with four passes (OD, ID, flip, OD, ID).
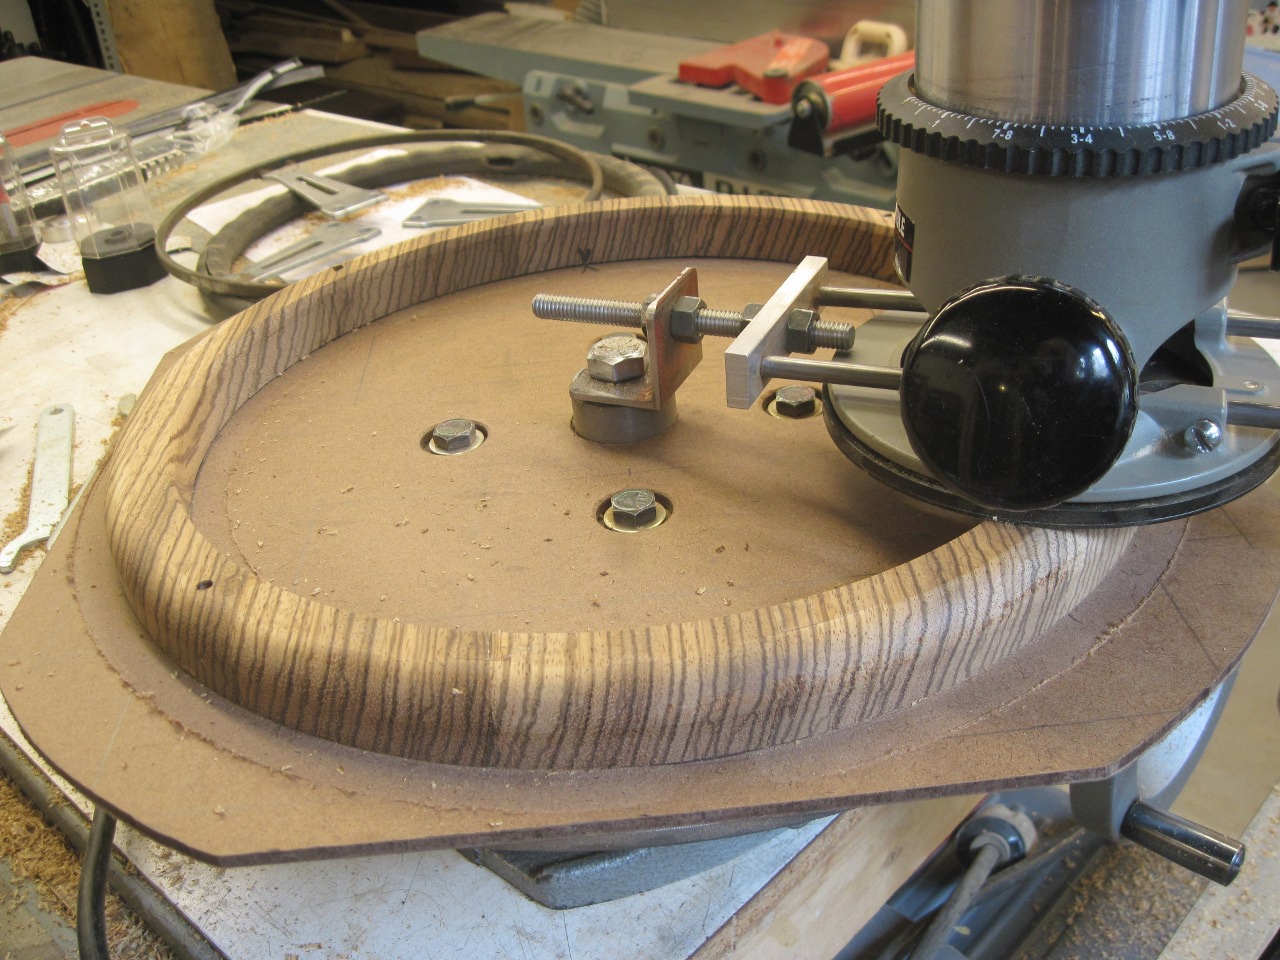

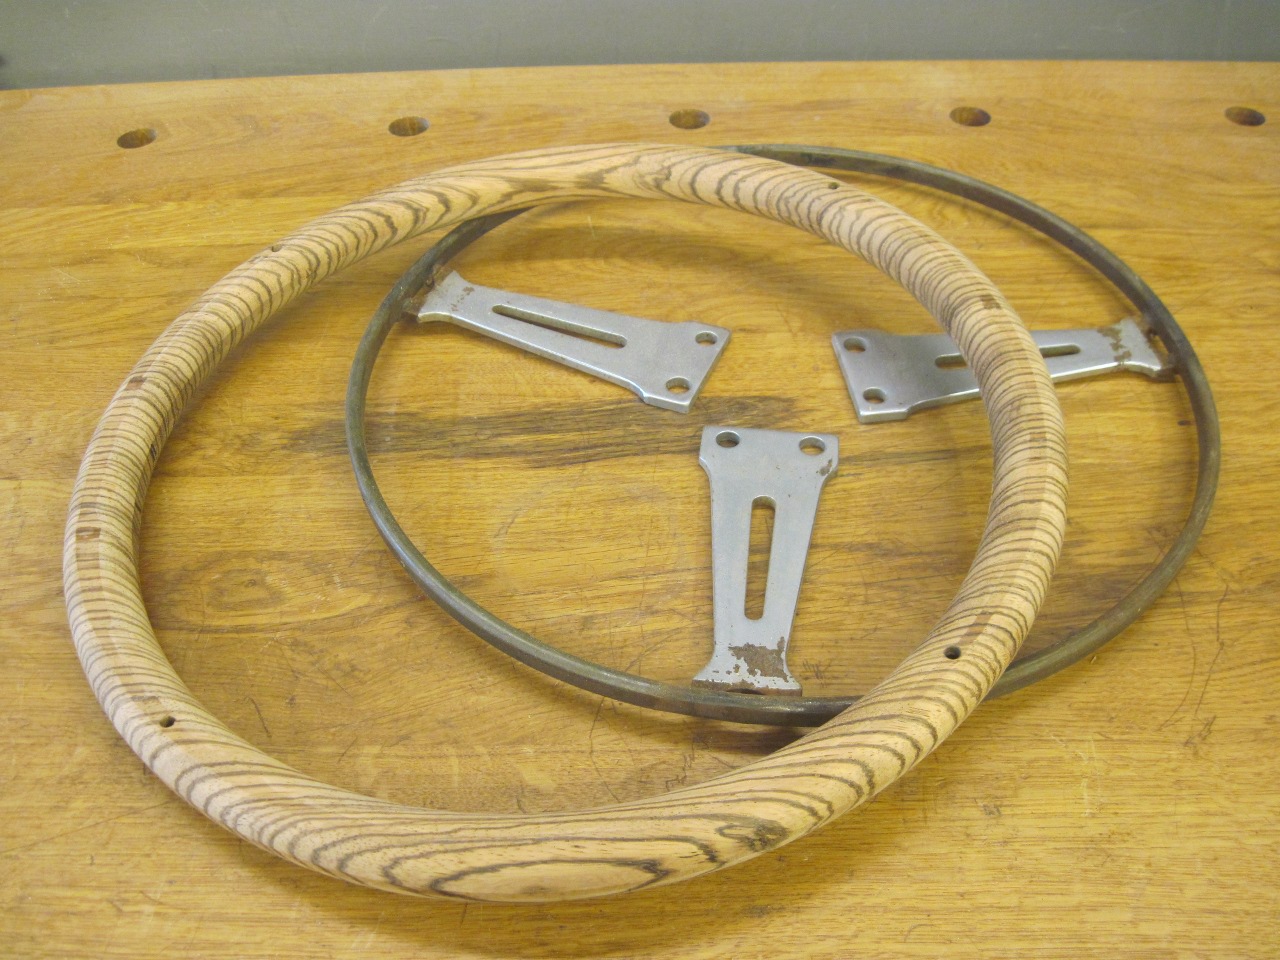
This gave me a nice 14½ inch Zebrawood torus That I somehow had to get the original steel rim into.
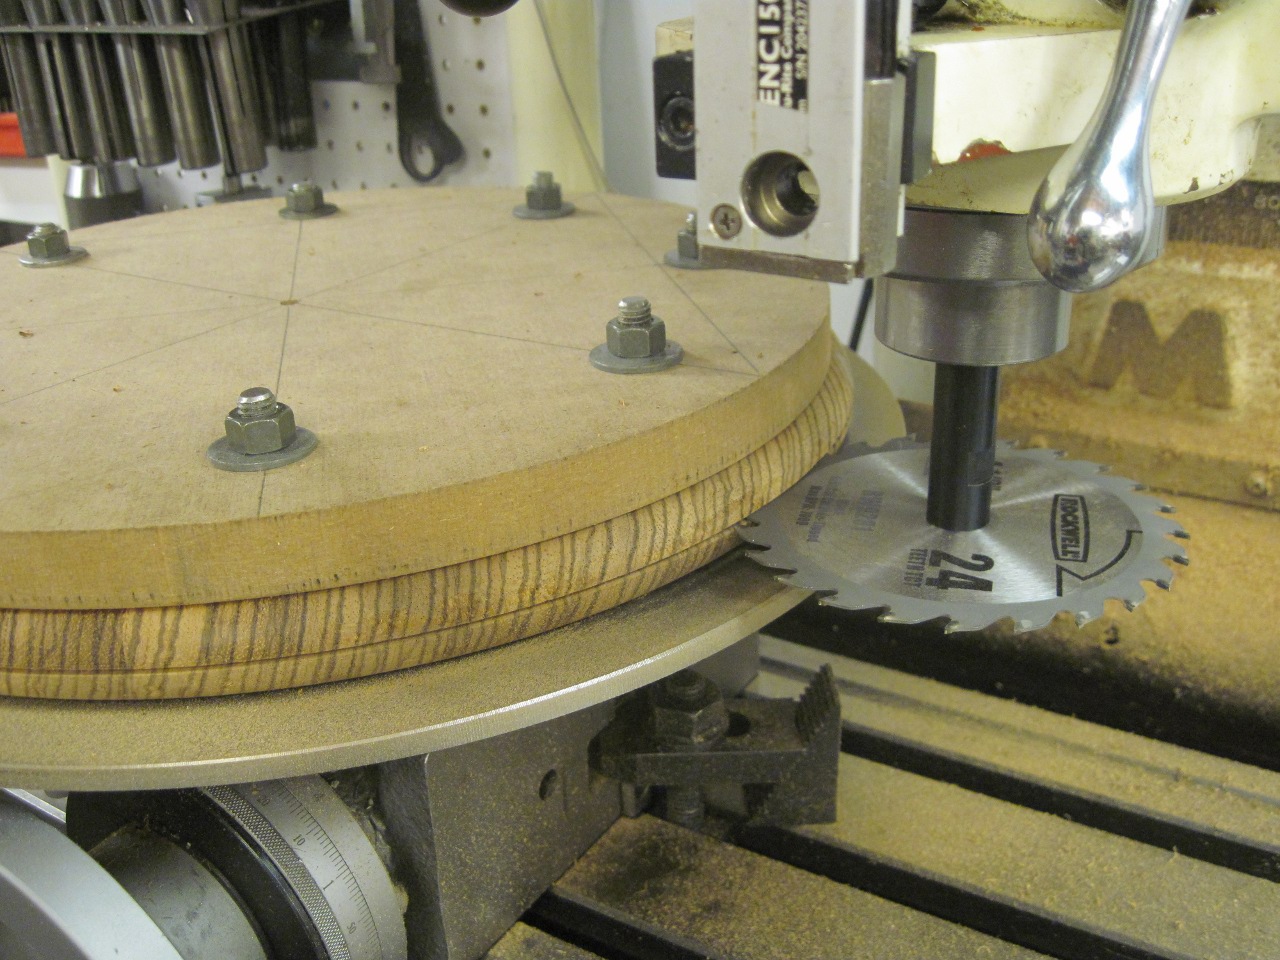
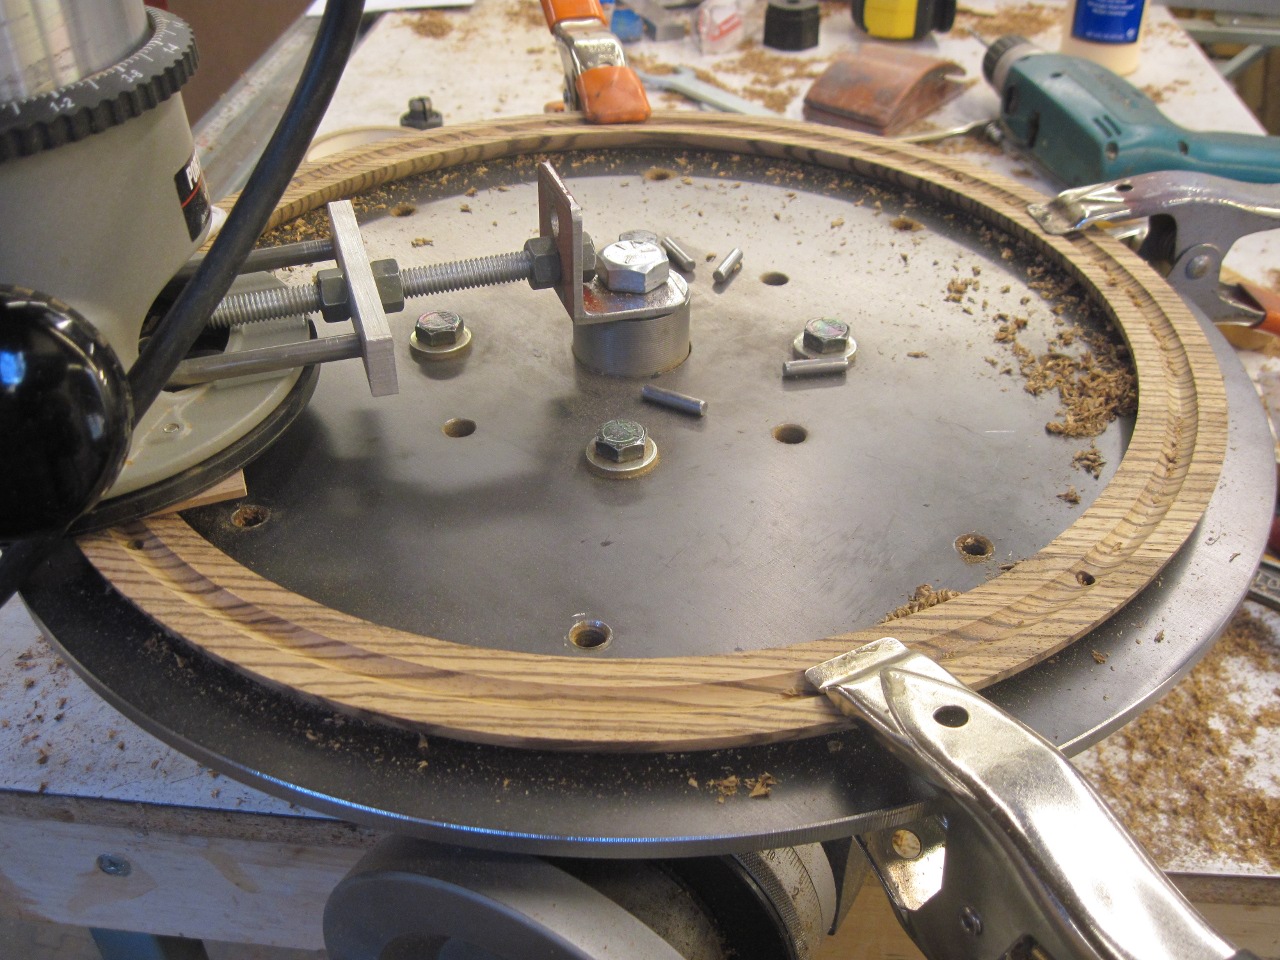
To
accomplish that, I had to cut the torus in half the hard way, like
slicing a bagel. The cut had to be pretty accurate and smooth,
since the halves would have to be glued back together, and I also
wanted to minimize the amount of waste in the cut. So here is
where some sort of specialized equipment comes in. I mounted the
platform to a rotary table and put it on my mill with a thin-kerf 4½
inch carbide wood saw blade on the spindle. Though I used a mill
and rotary table, I think it could be done on a drill press with a
simpler hand operated radius arrangement. I used a piece of
particle board to hold the piece down.
I
cut slightly less than halfway through the torus from the outside, then
likewise from the inside. This kept the top and bottom properly
spaced for a smooth cut all the way around.
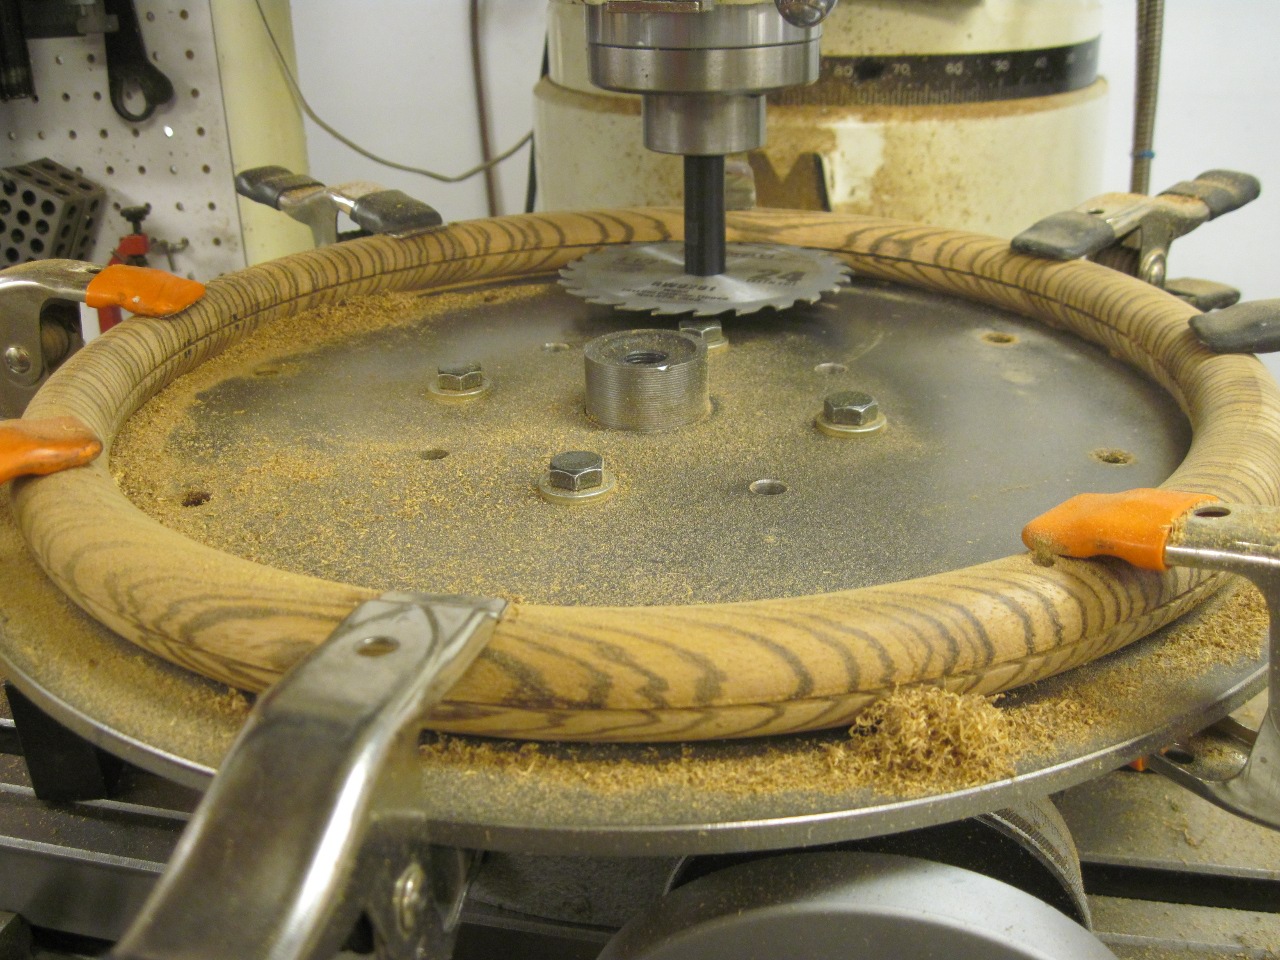
I then carefully cut the remaining wood with a thin hand saw to separate the top and bottom halves.

I
then cut some walnut about 5/32" thick and glued pieces to one half of
the torus with the grain running perpendicular to that of the
Zebrawood. There were three reasons for the walnut. First,
the thickness of my original Zebrawood board was slightly less than the
cross-section dimension I was looking for in the final wheel. The
bagel cut took away a little more. The walnut brought the
cross-section dimension to whare I wanted it. Second, the way I
laid out the original blocks meant that there would be areas of
"short grain" on each side of the wheel. Short grain can't resist
stresses very well, and will easily crack along the grain. The
walnut adds a cross-grain layer, like plywood, to help strengthen the
weak areas. Last, the walnut will add a nice contrasting feature
around the rim of the wheel.
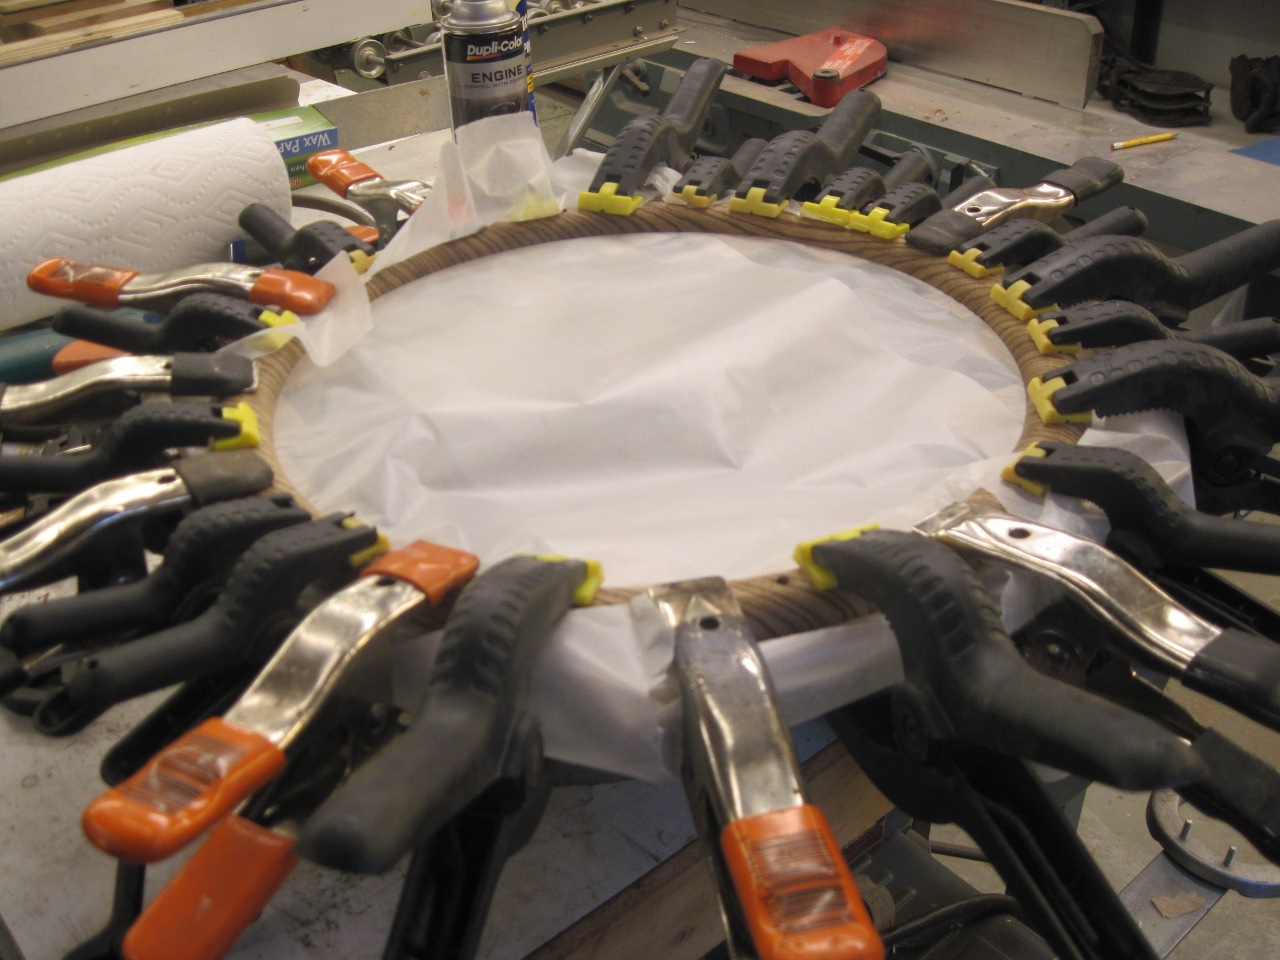
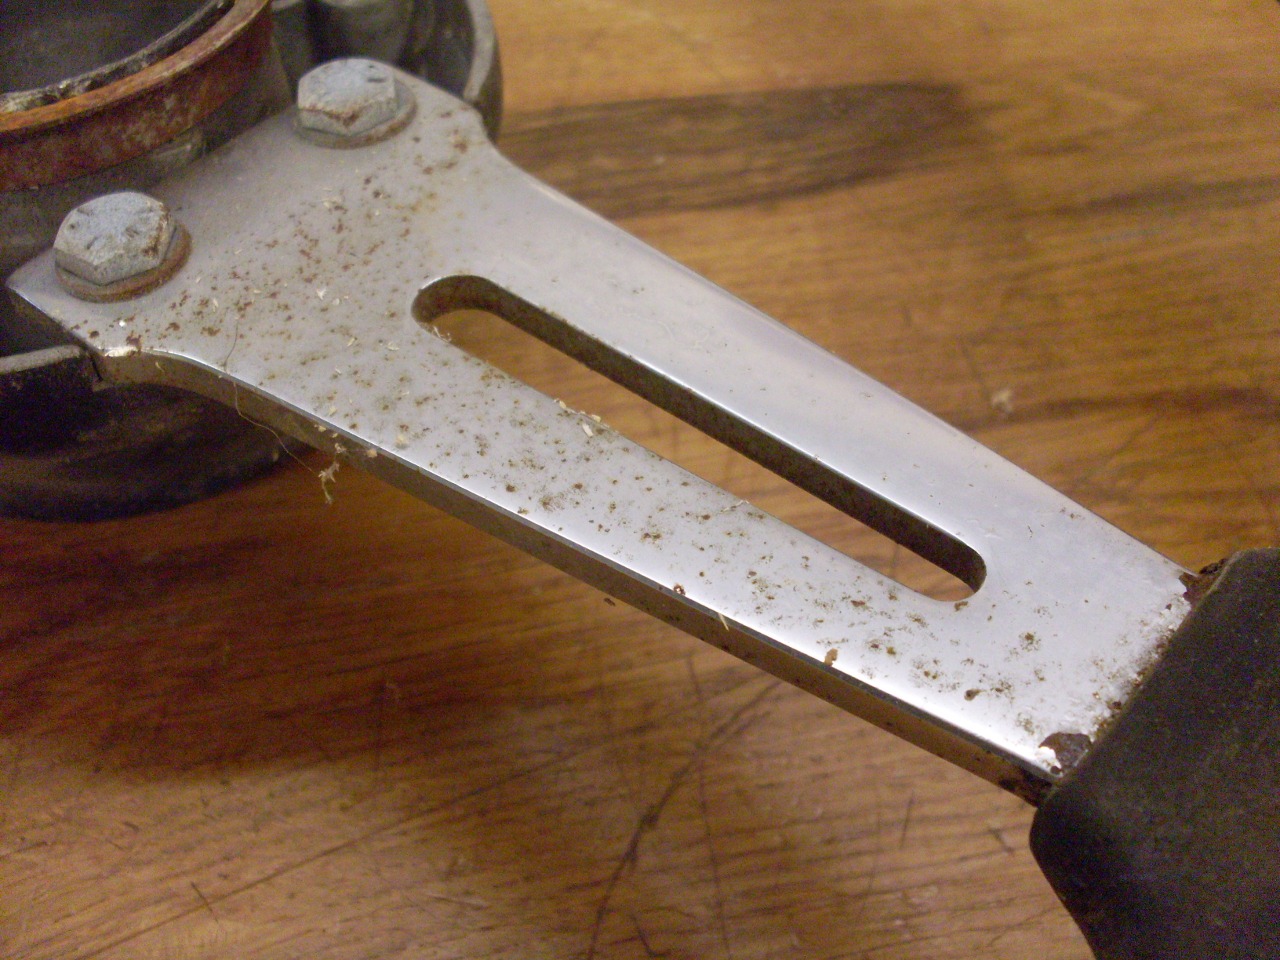
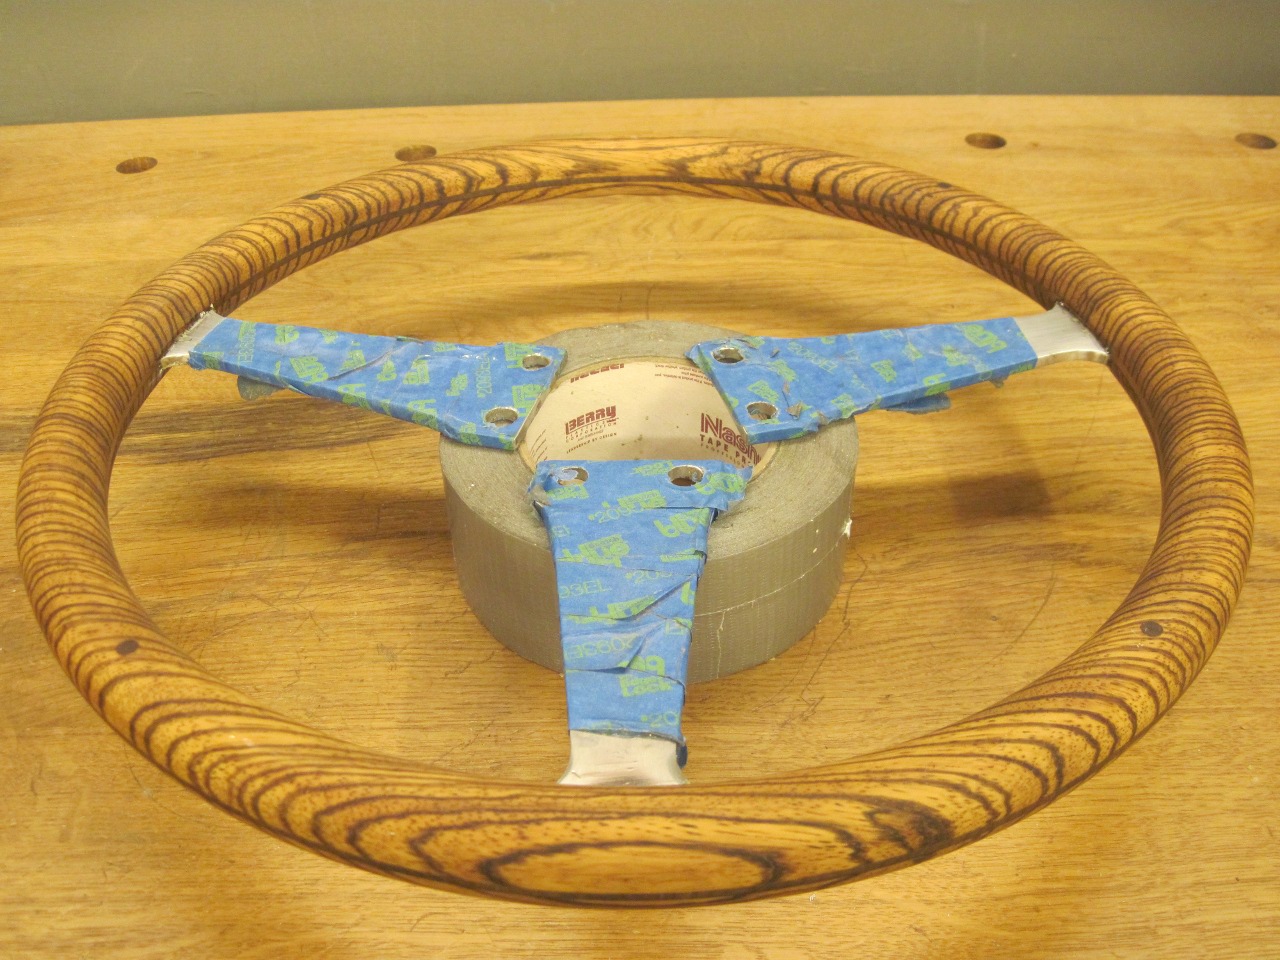
Then, back to the router to form the groove in the top and bottom halves to receive the original steel wheel rim.

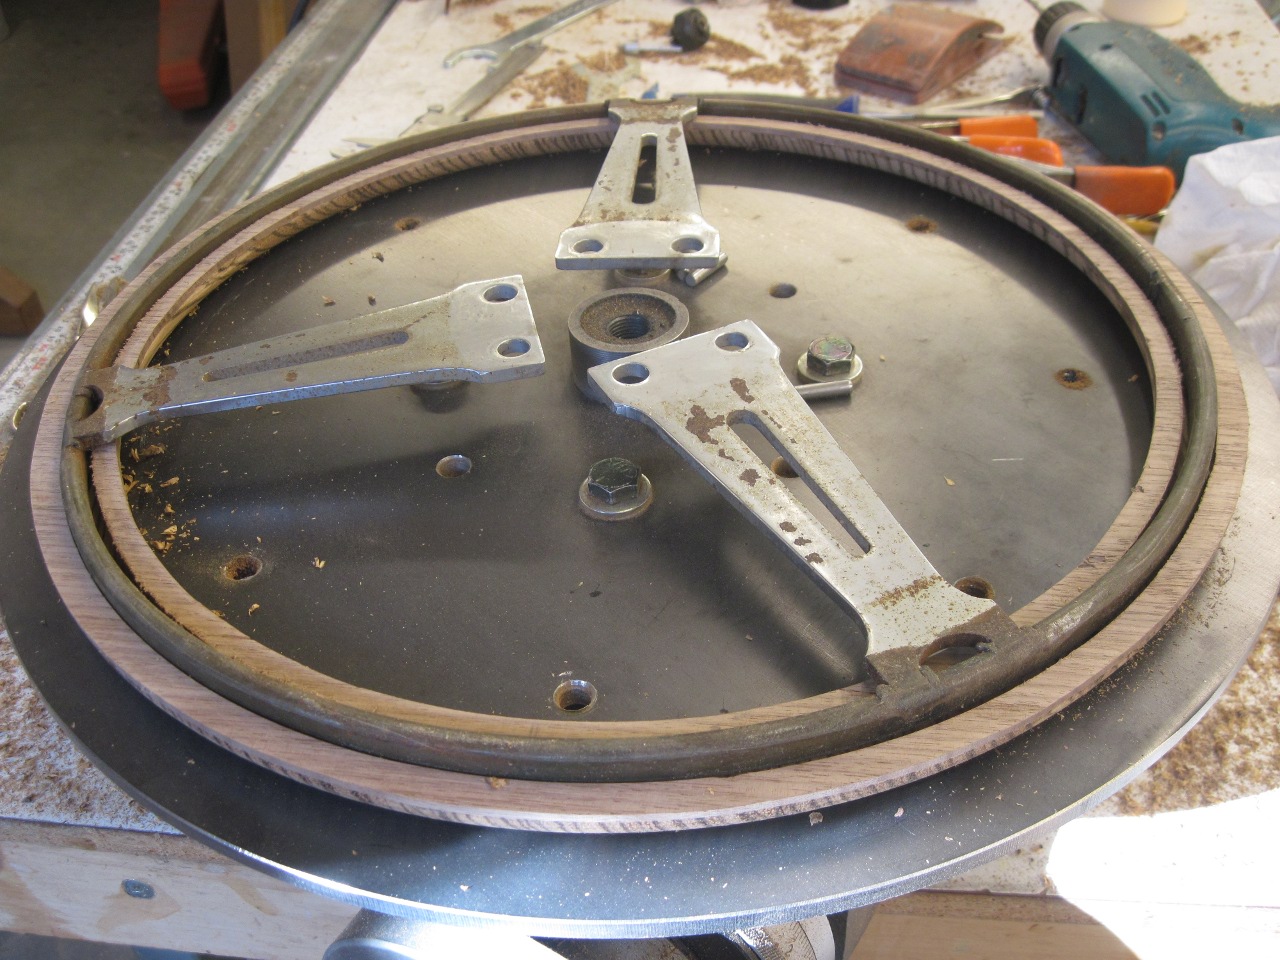
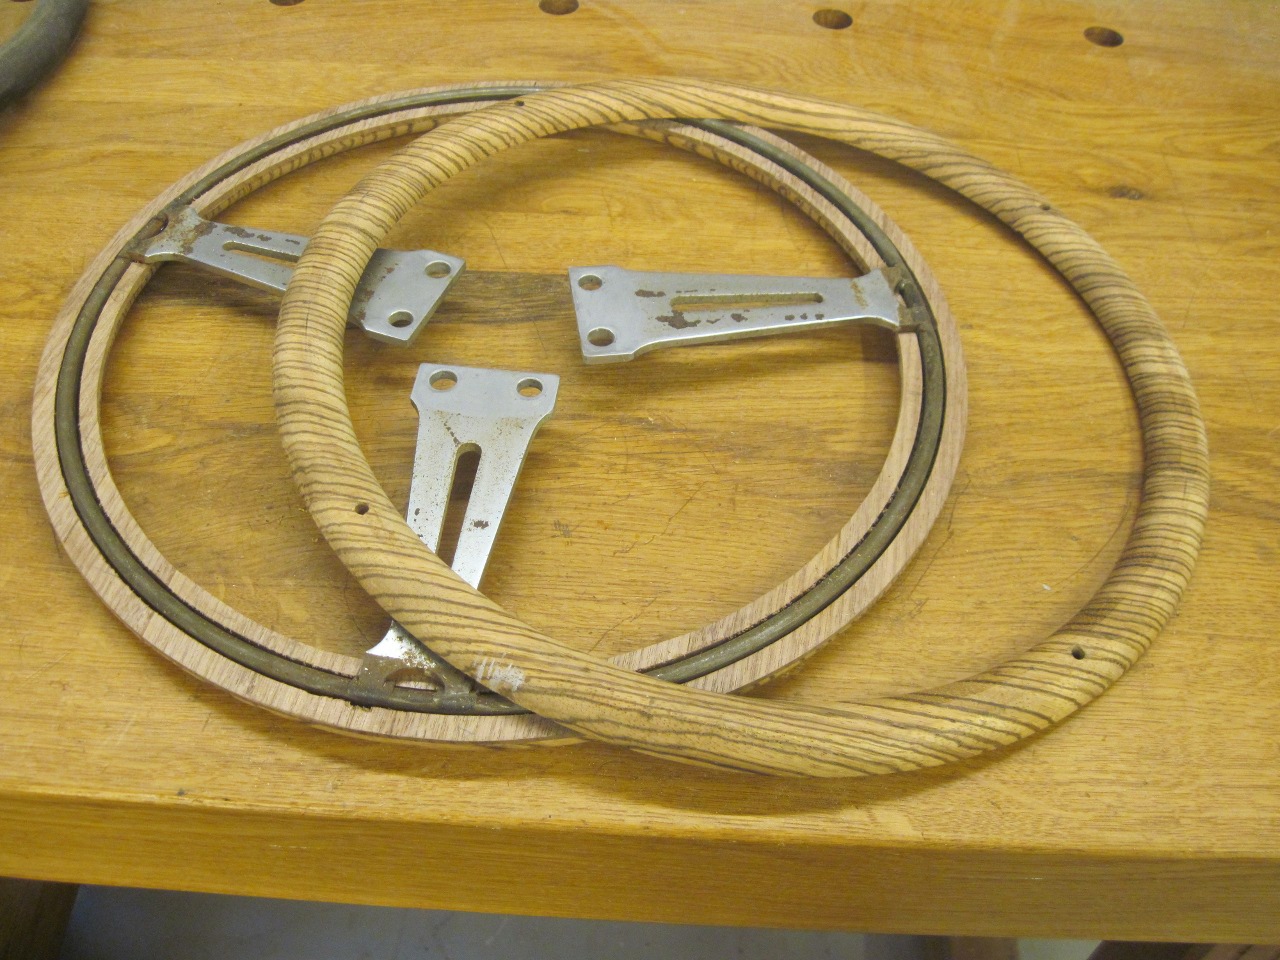
After hand- trimming the areas where the spokes join the rim, the torus finally fit the rim.
At
this point, it appeared that thiks approach might actually work, so I
sent the steel spokes and rim out to be satin chrome plated.
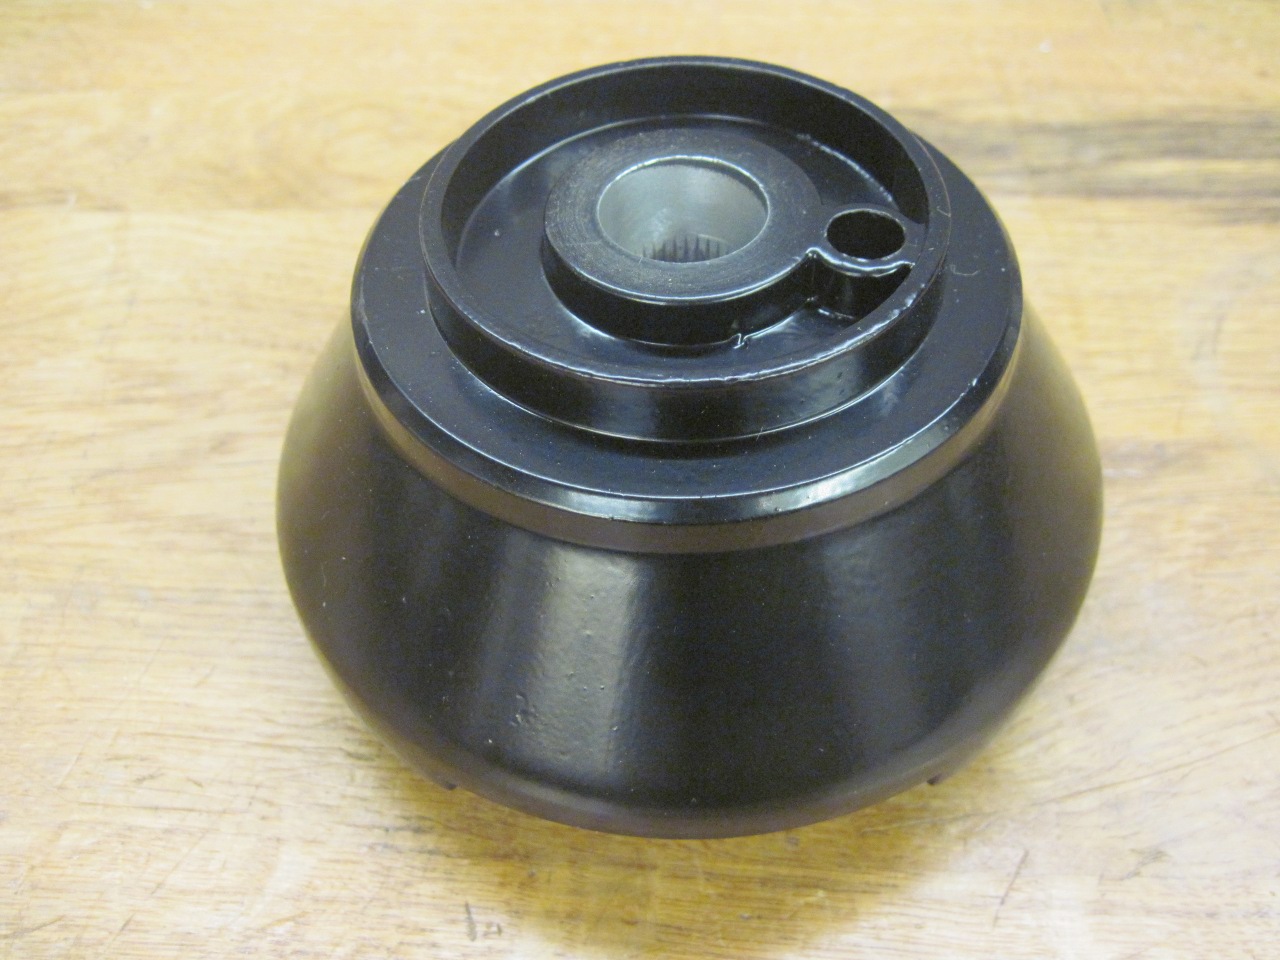
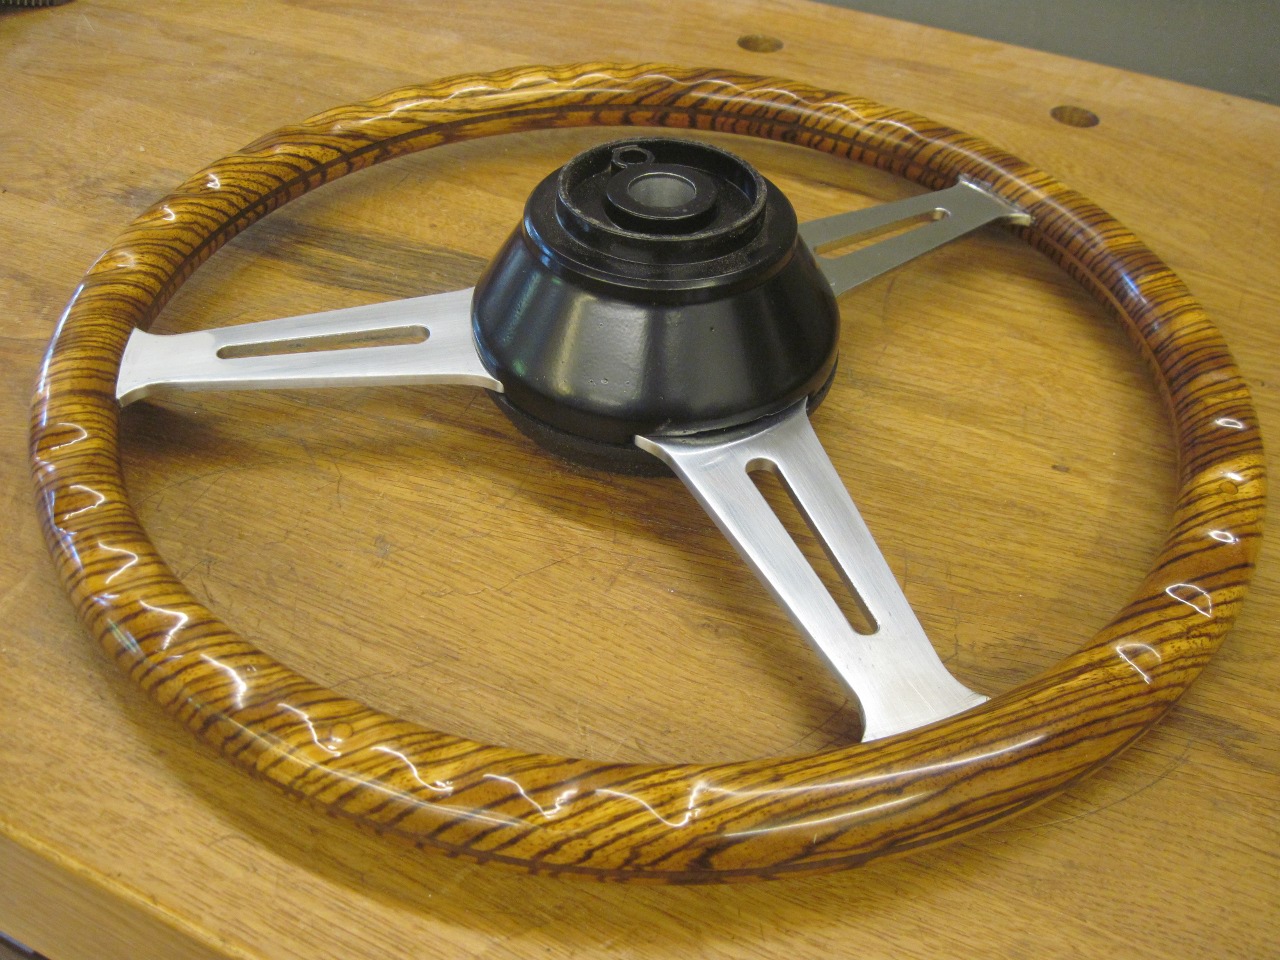
In the mean time, I dug out the wheel hub. It was dirty and corroded, but intact.

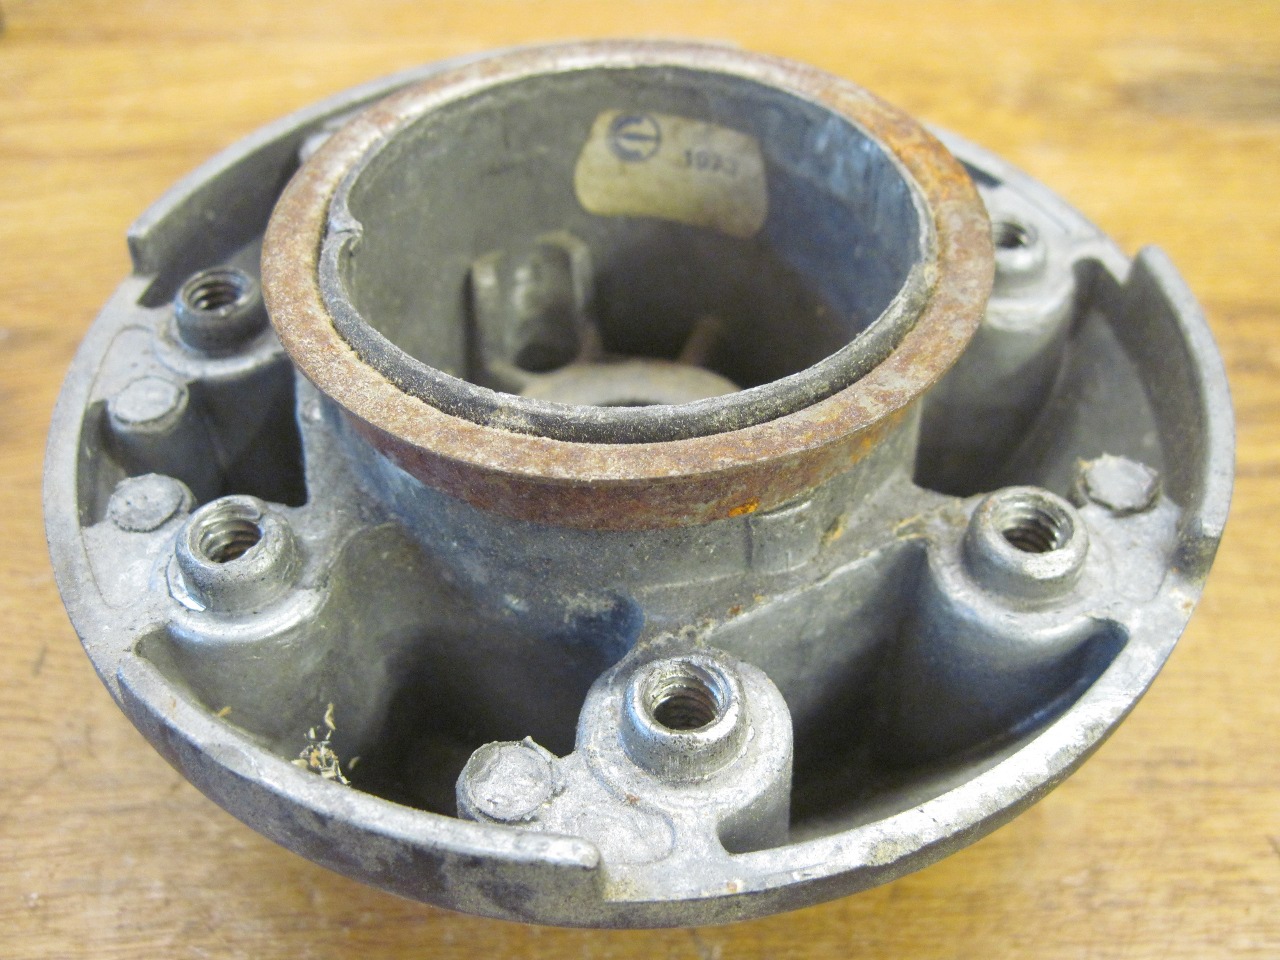
A quick blast and powder coat, and better than new.


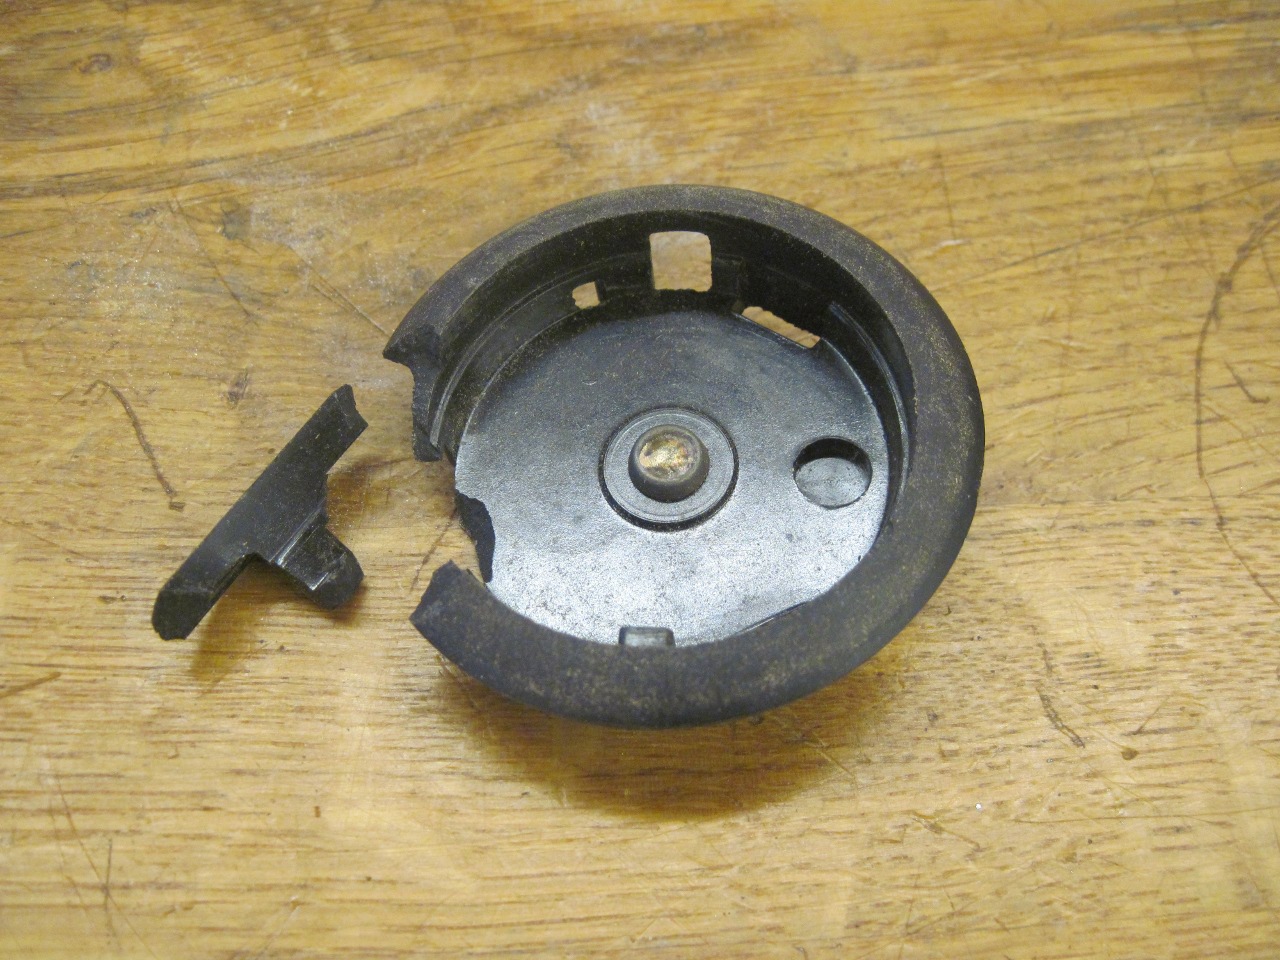
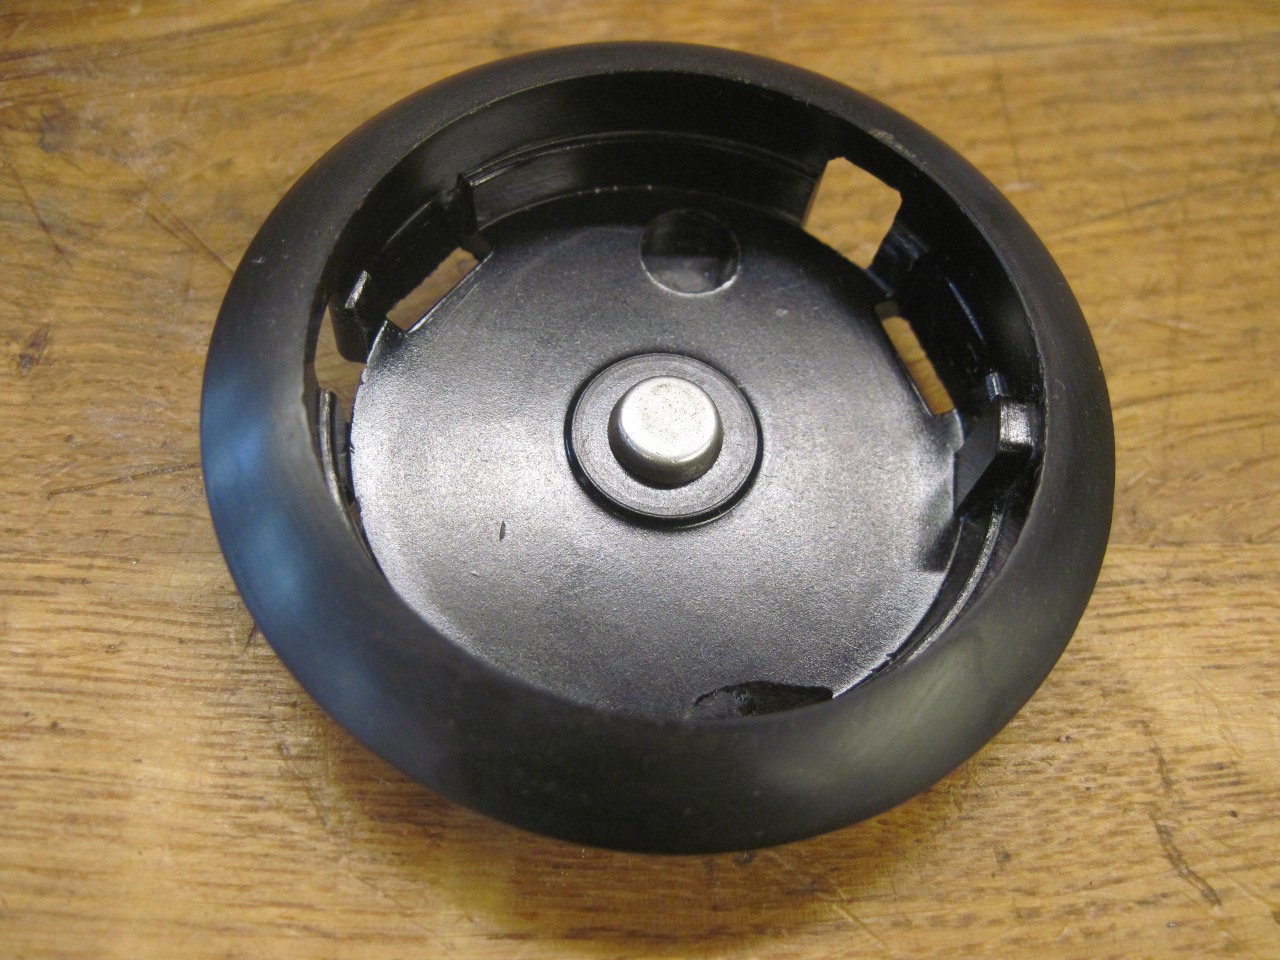
The plastic pocket the horn button goes into was broken, but a little superglue and some cleanup made it usable.
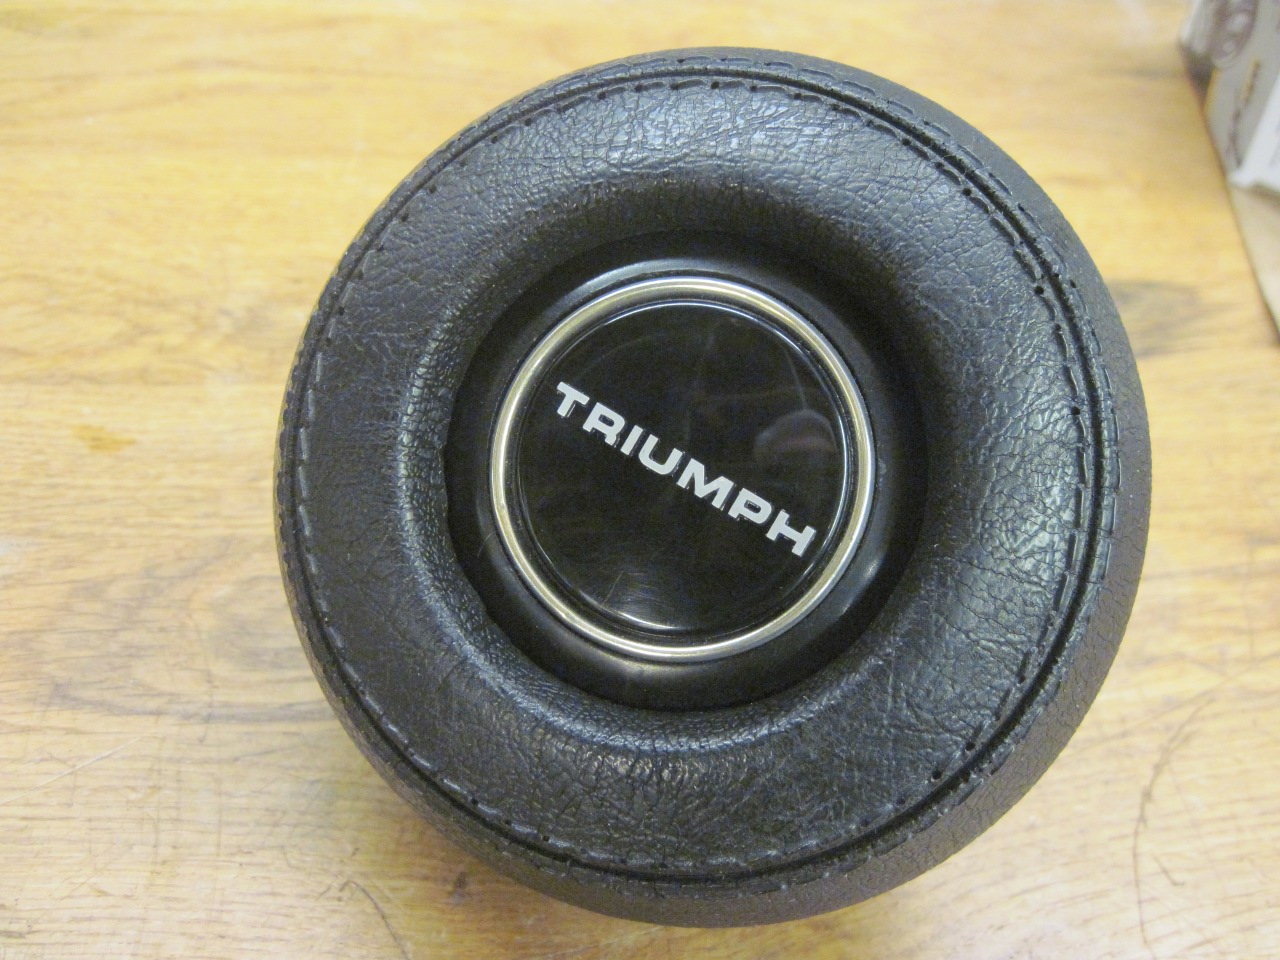
Polished
up the horn button and the metal rim that goes around it. I
considered replacing that black foam surround with Zebrawood too, but
decided against it. There is such a thing as too much wood.
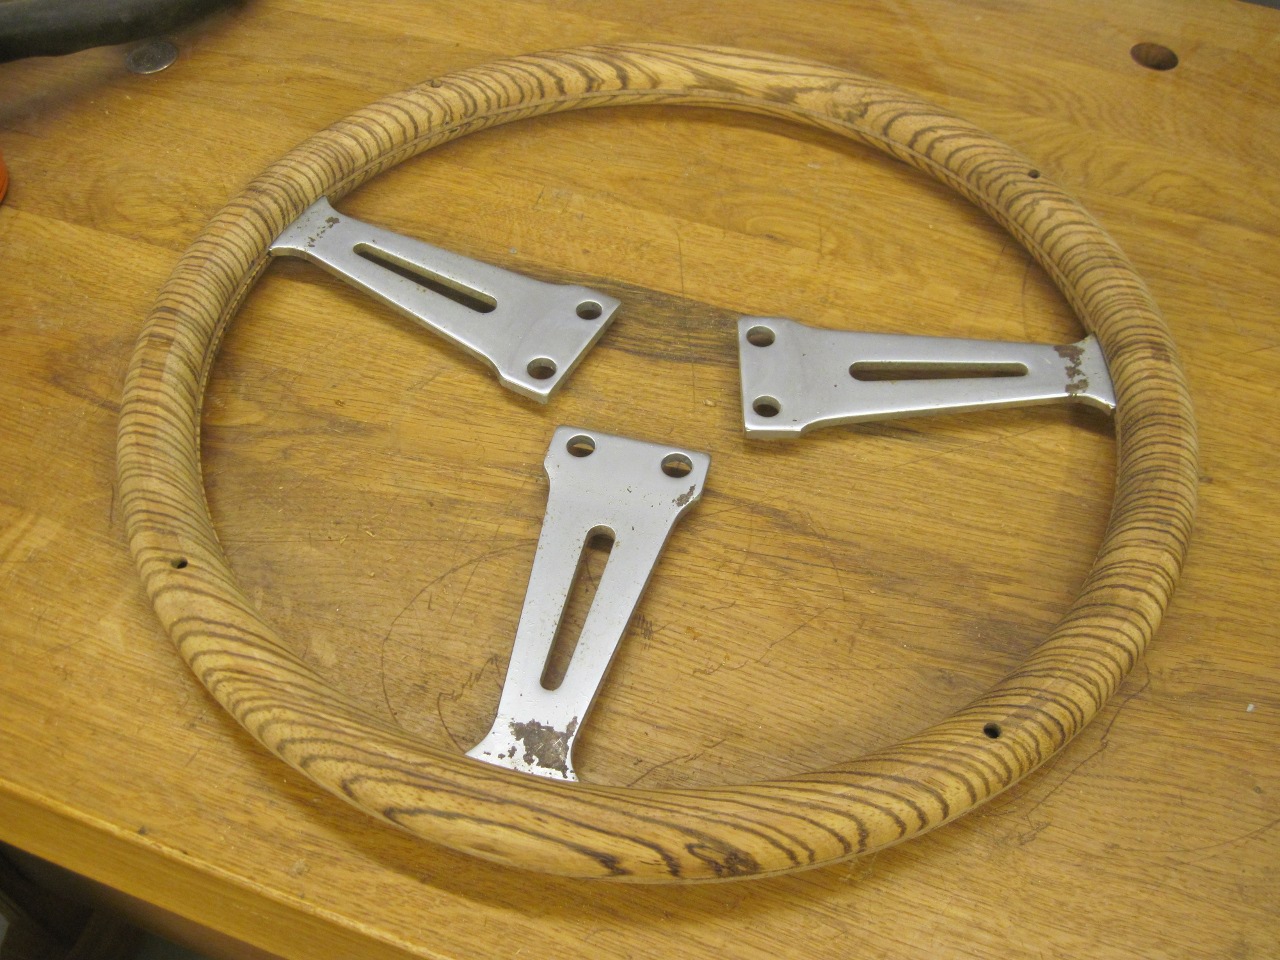
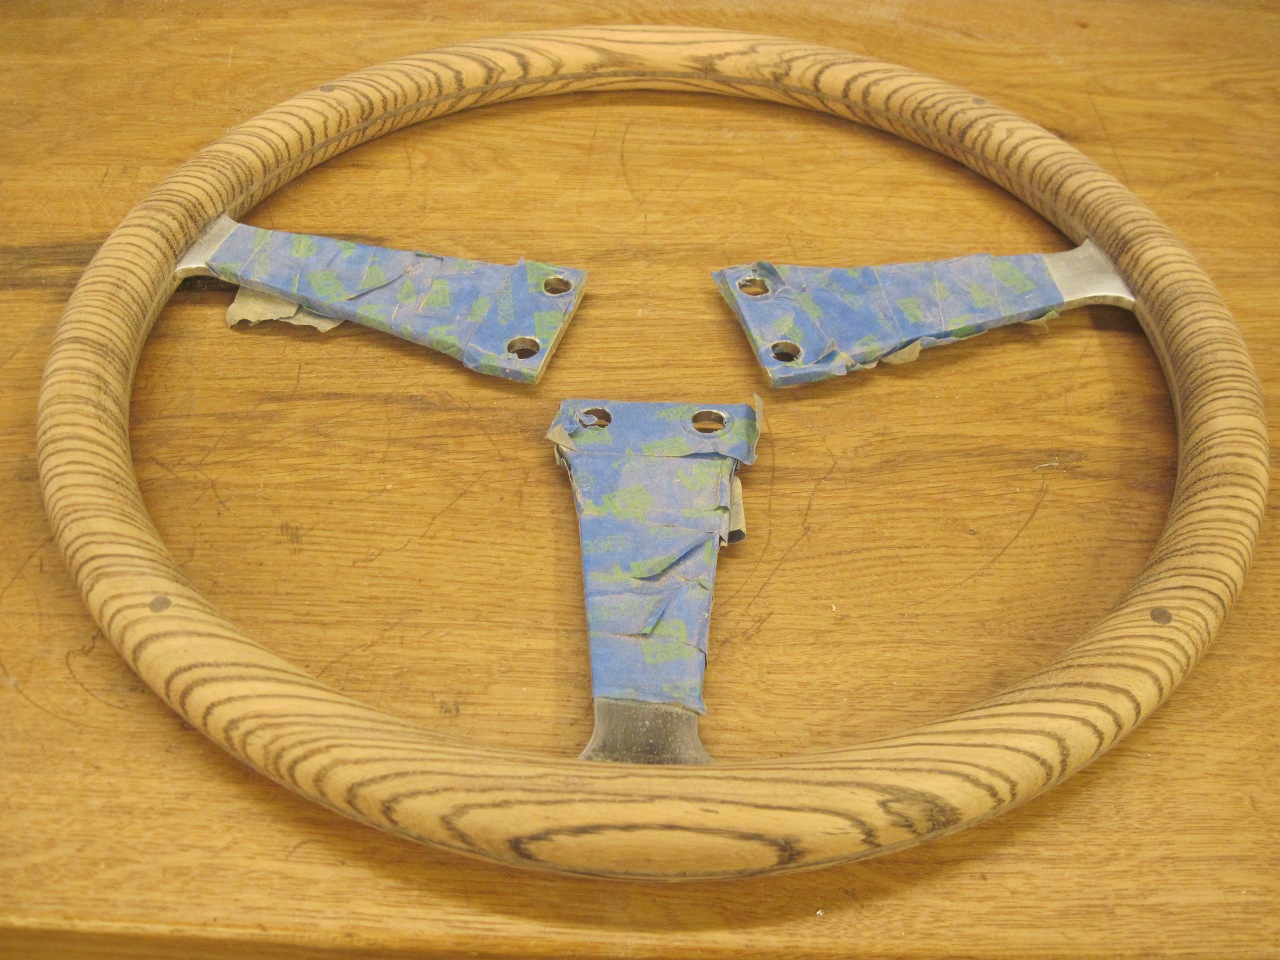
After a month wait, the steel rim was back from the platers.
Looks like it still fits. I mounted the rim to the hub so the spokes would be in final position for the glueup.
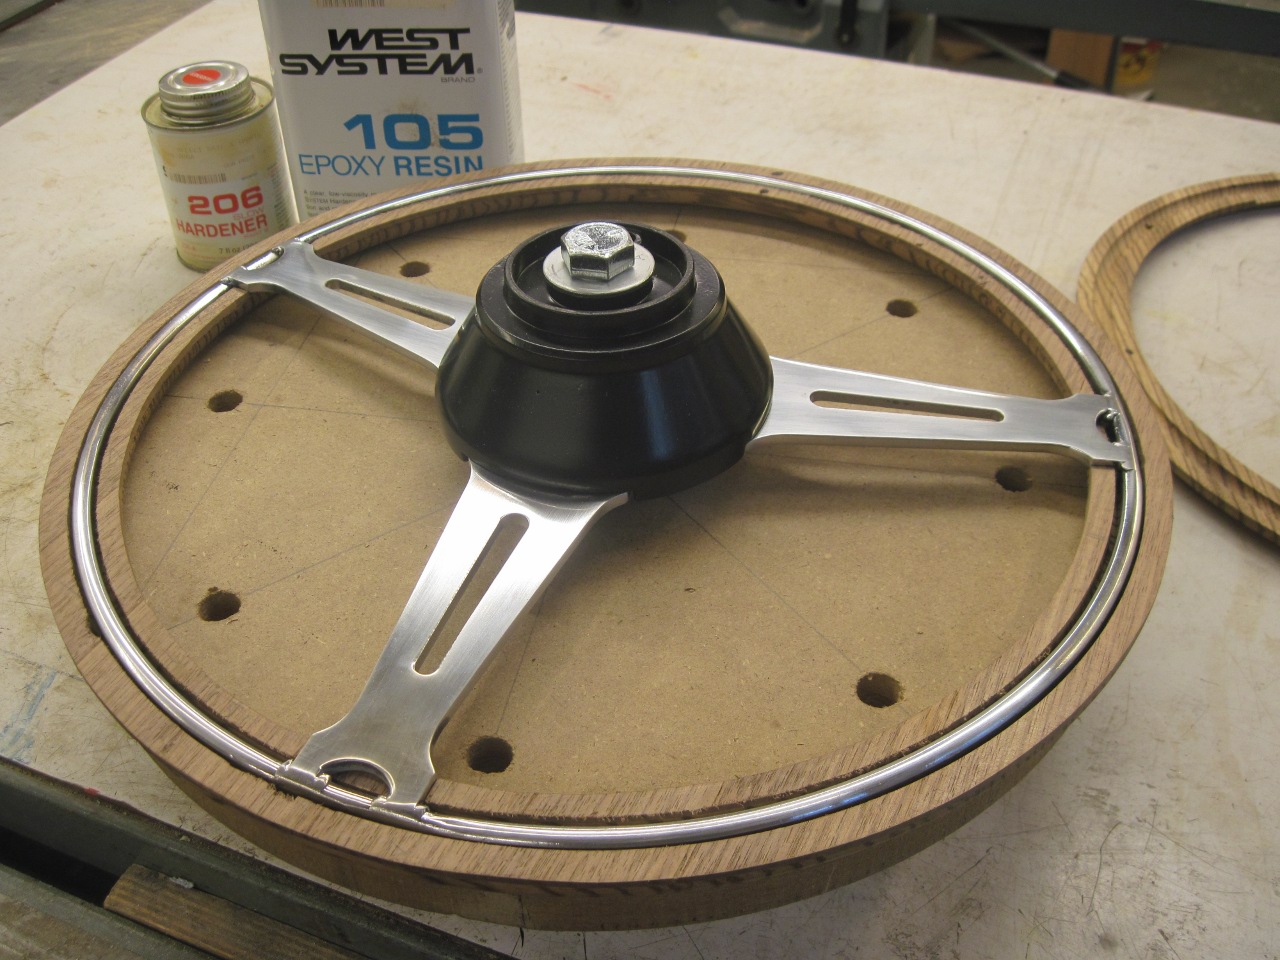
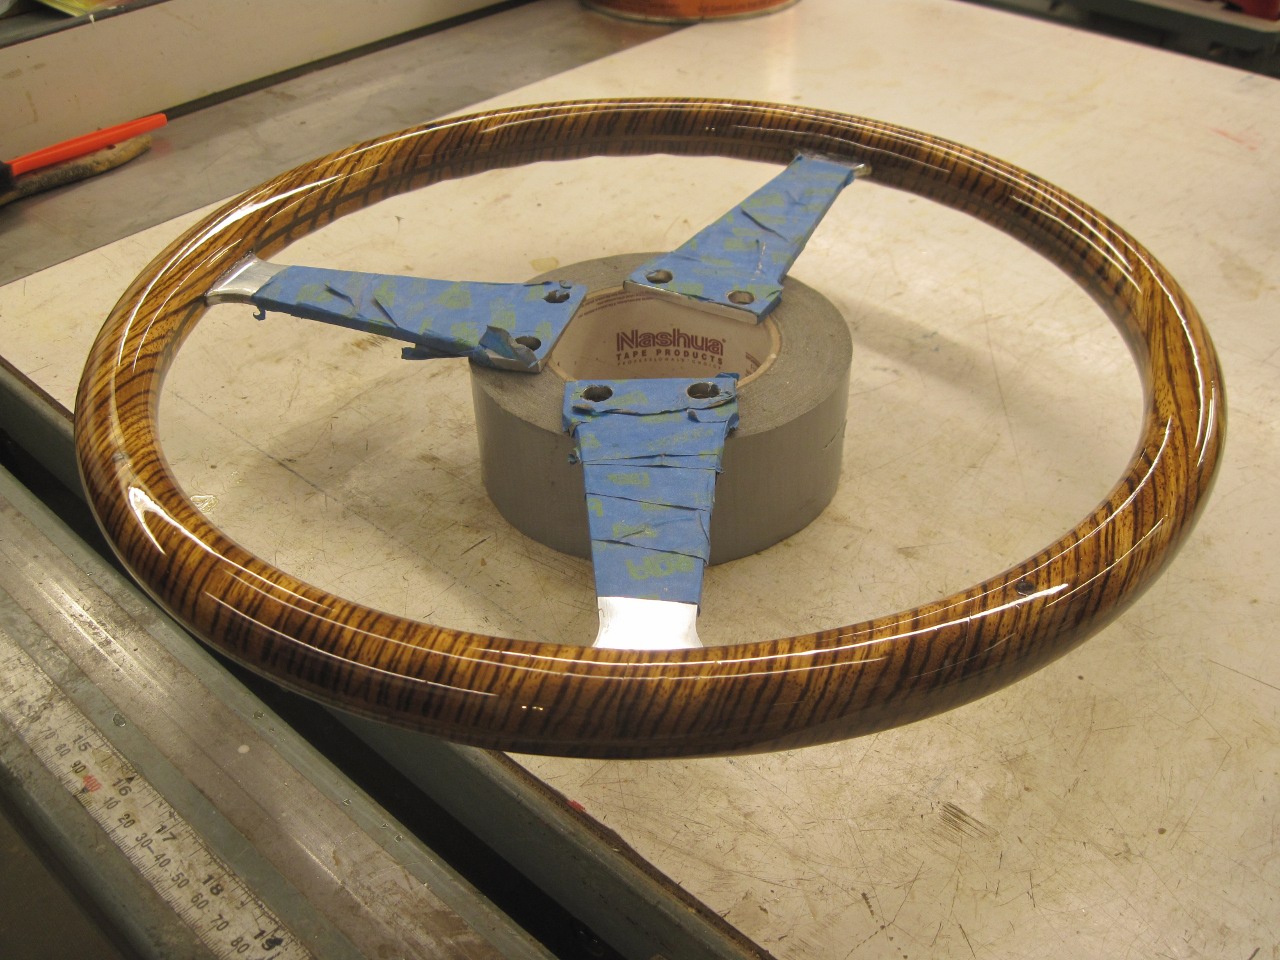
I used epoxy to glue both the steel rim into the torus, and to glue the two halves of the torus together.
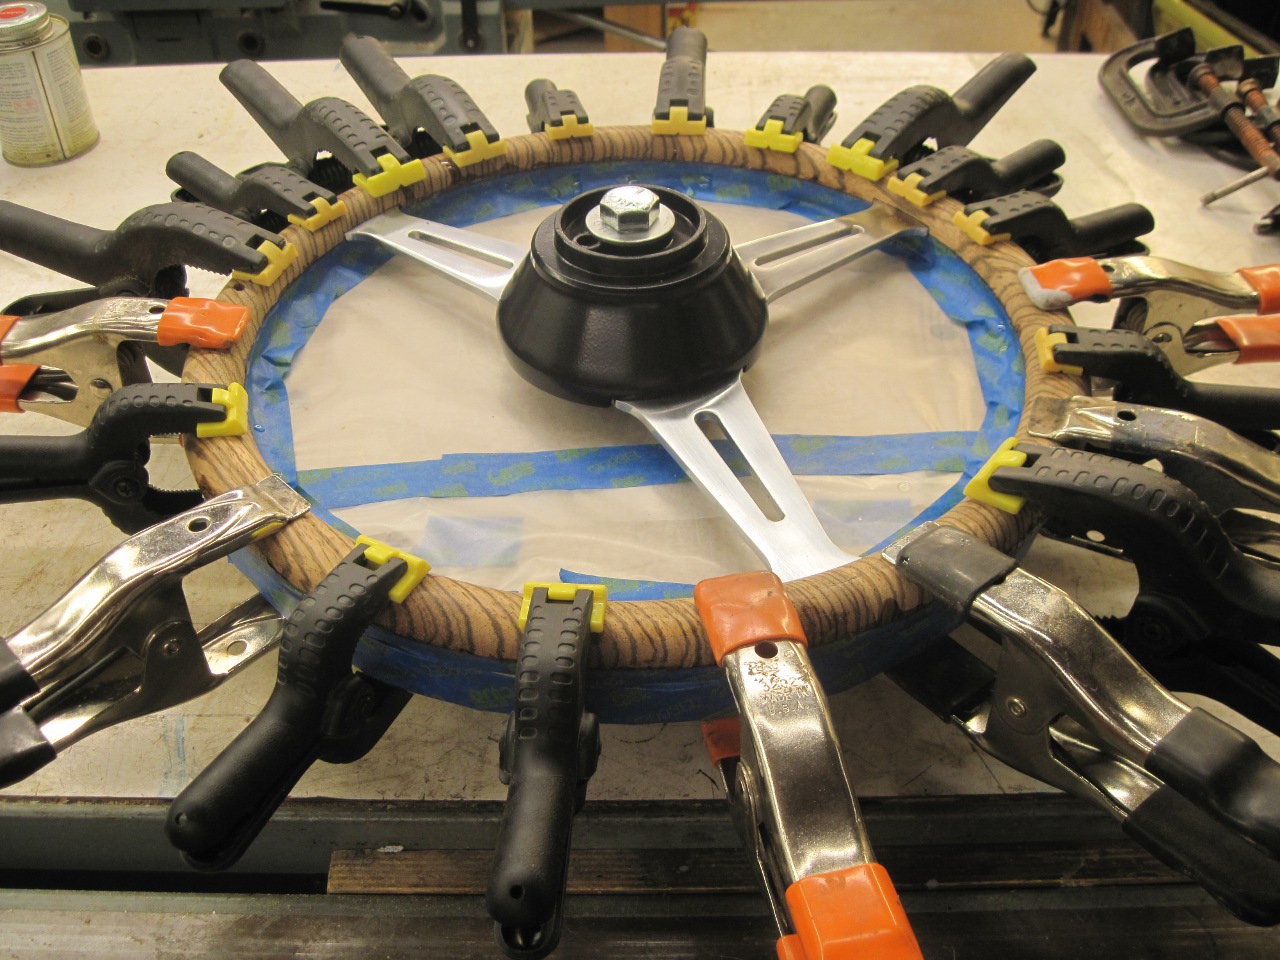
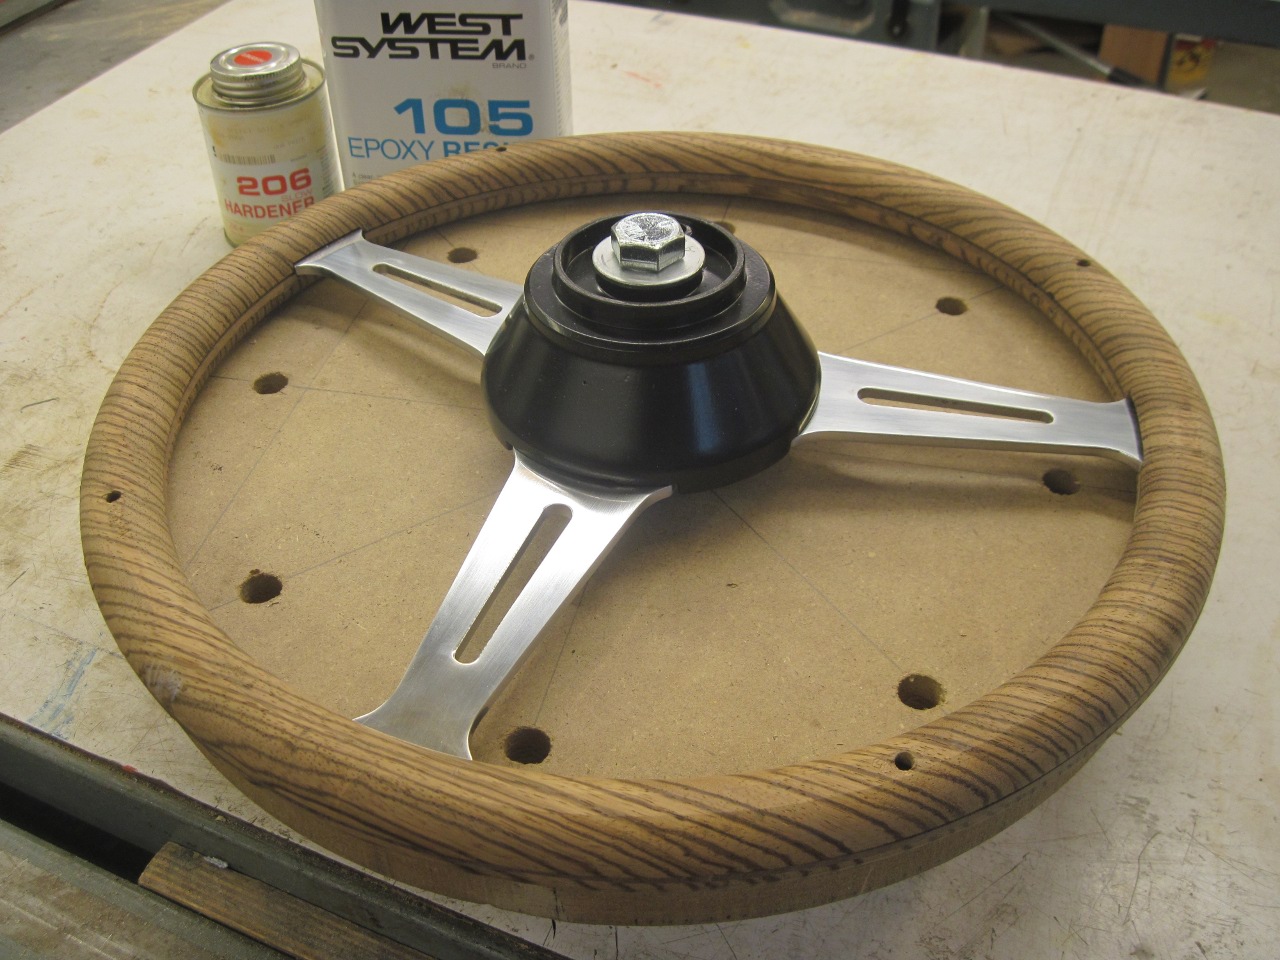
Then
did a lot of sanding to remove excess glue, and to do final shaping.
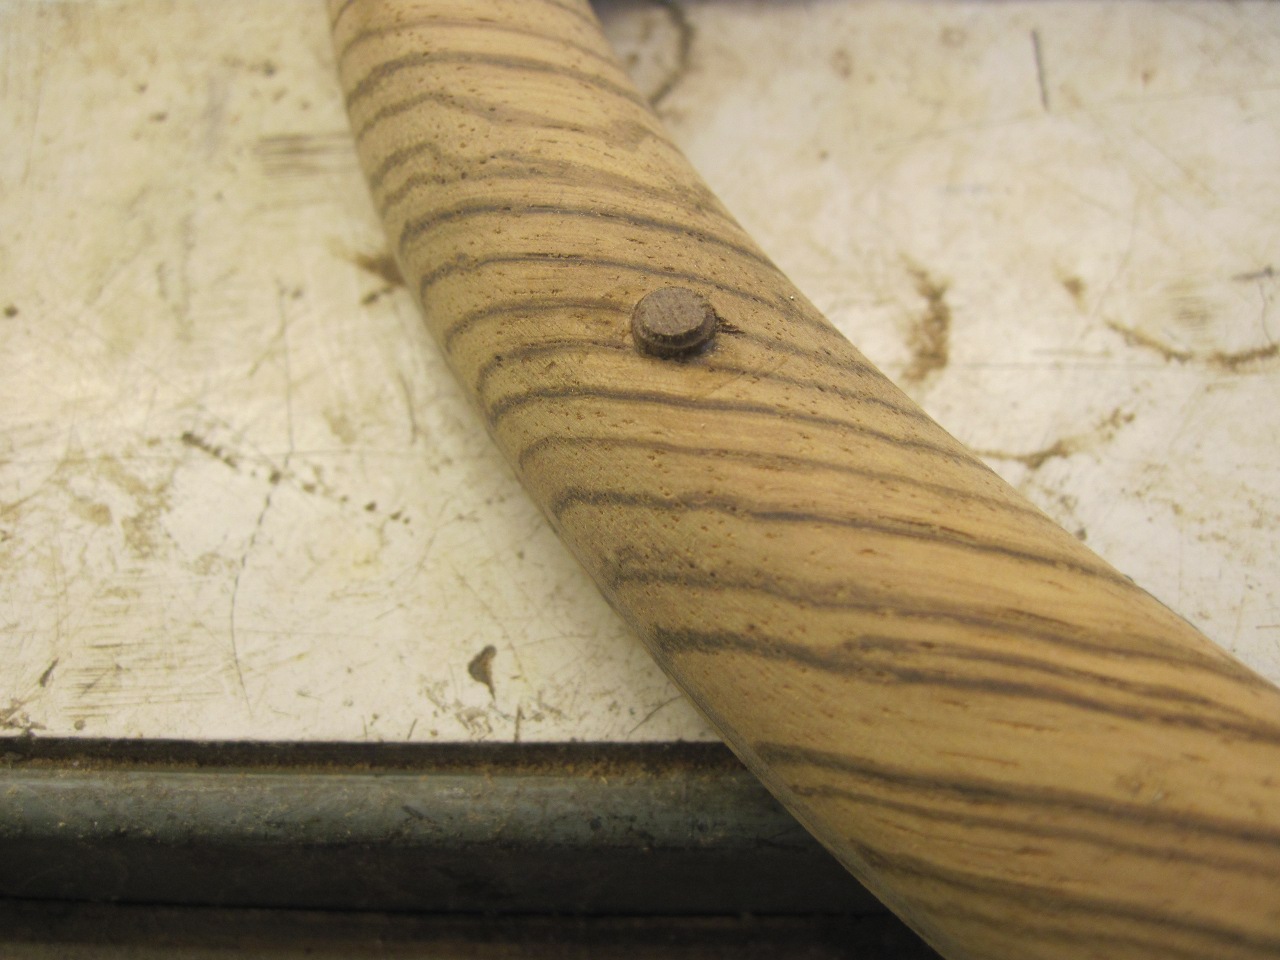
I put finger grips on hte backside of the wheel by hand with a
radiused wood rasp. Also plugged the registration holes with
little walnut buttons.

More sanding, and it was ready for finish.
Eight coats of varnish later, it's pretty shiny. It's a "vulgar" shine, though, and needs to be rubbed out.

Rubbed back to 400 grit.
Then brought back up to the desired sheen with finer grits and compounds.
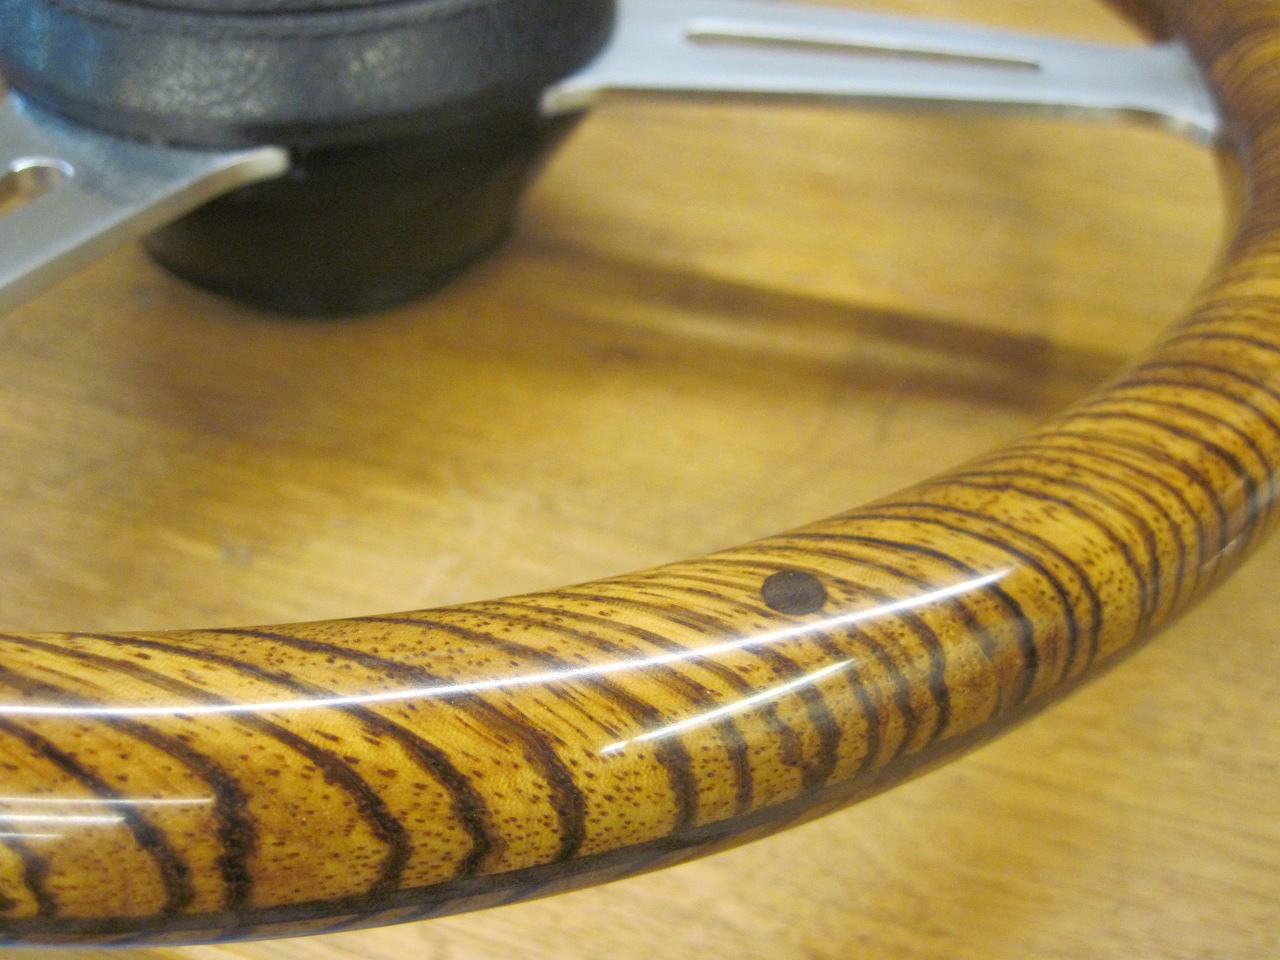
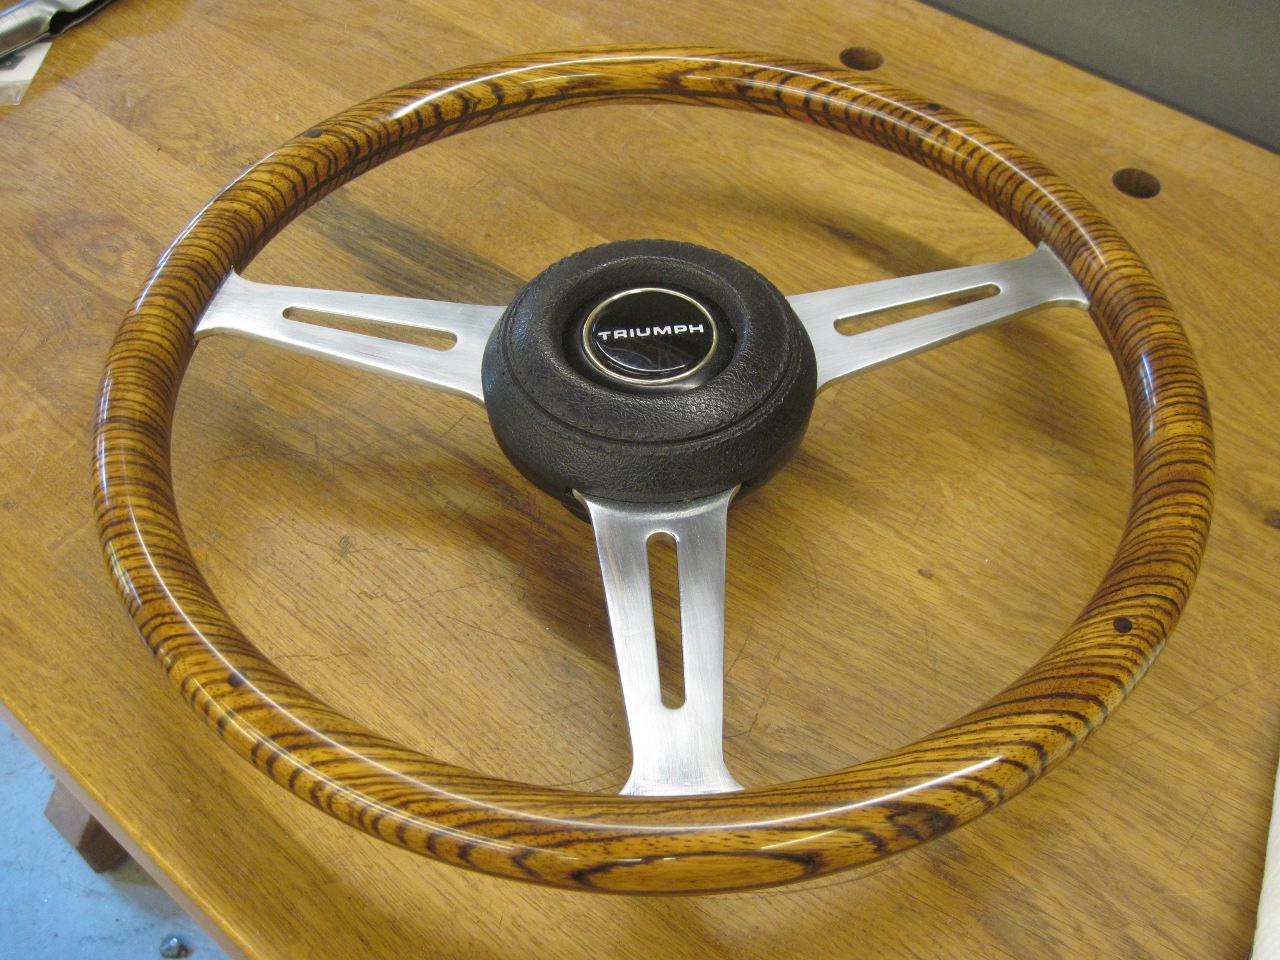
Should look nice with the dash.
Comments to Ed at elhollin1@yahoo.com
To my other TR6 pages