To my other TR6 pages
April 13, 2016
Radiator
Engine
cooling on the TR6 is provided by a traditional pump-assisted
thermosiphon system. When the engine is at operating temperature,
waste heat is loaded into the coolant, which circulates to the
misnamed radiator, where it transfers its heat to the environment.
The radiator is misnamed because its primary mechanism for heat
transfer is convection, not radiation.
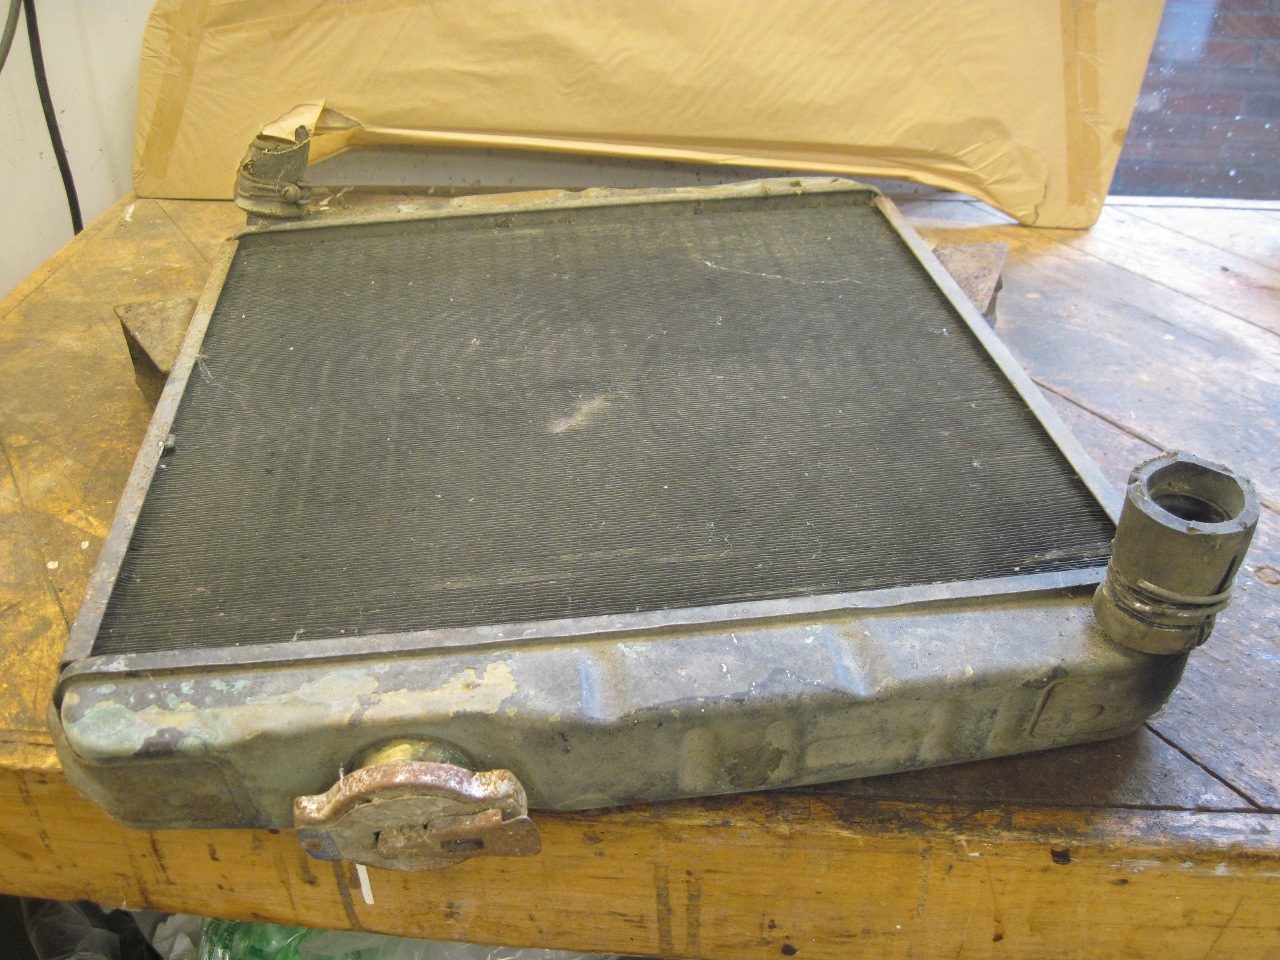
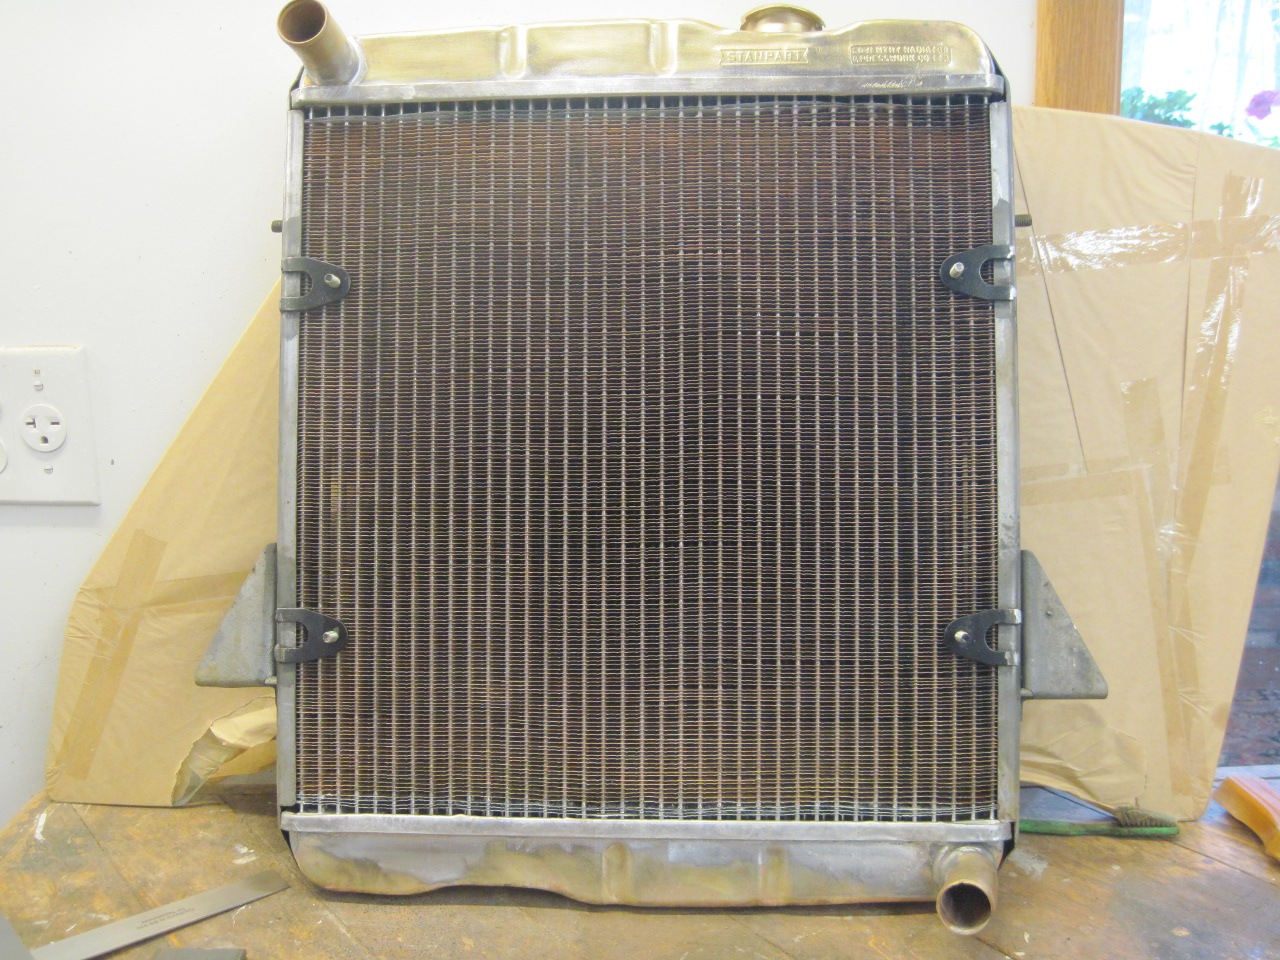
My radiator was pretty
grody looking, but it wasn't leaking. While cleaning it up, I was
surprised at what good shape it appeared to be in for a 40+ year old
original. However, while brushing the crud from between the
fins, some of the fins crumbled on a couple of areas near the bottom.
This "fin rot" is likely caused by long term corrosion from road
salt. It was limited in area, and didn't appear to affect any of
the tubes. On the other hand, it bothered me a lot. Beside the
cosmetic aspect, I wasn't comfortable relying on a crucial component with unknown internal condition.
So
I had a decision to make: Replace or repair? If I decided
to replace, would it be aluminum or traditional copper/brass?
There is a holy war raging in some quarters over the
question of copper versus aluminum radiators. Radiators in
new cars are moving to aluminum cores, but this is probably influenced
mostly by weight and cost. Aluminum is cheaper and lighter than
copper, but copper has better heat transfer characteristics. In
a classic car, copper looks correct, aluminum looks bling.
There is a lot of anecdotal evidence of aluminum radiators having
short lifetimes, and they are more difficult to repair.
Based
mainly on the spirit of this rebuild, I decided to stick with copper.
Further, due to my bias against aftermarket parts in
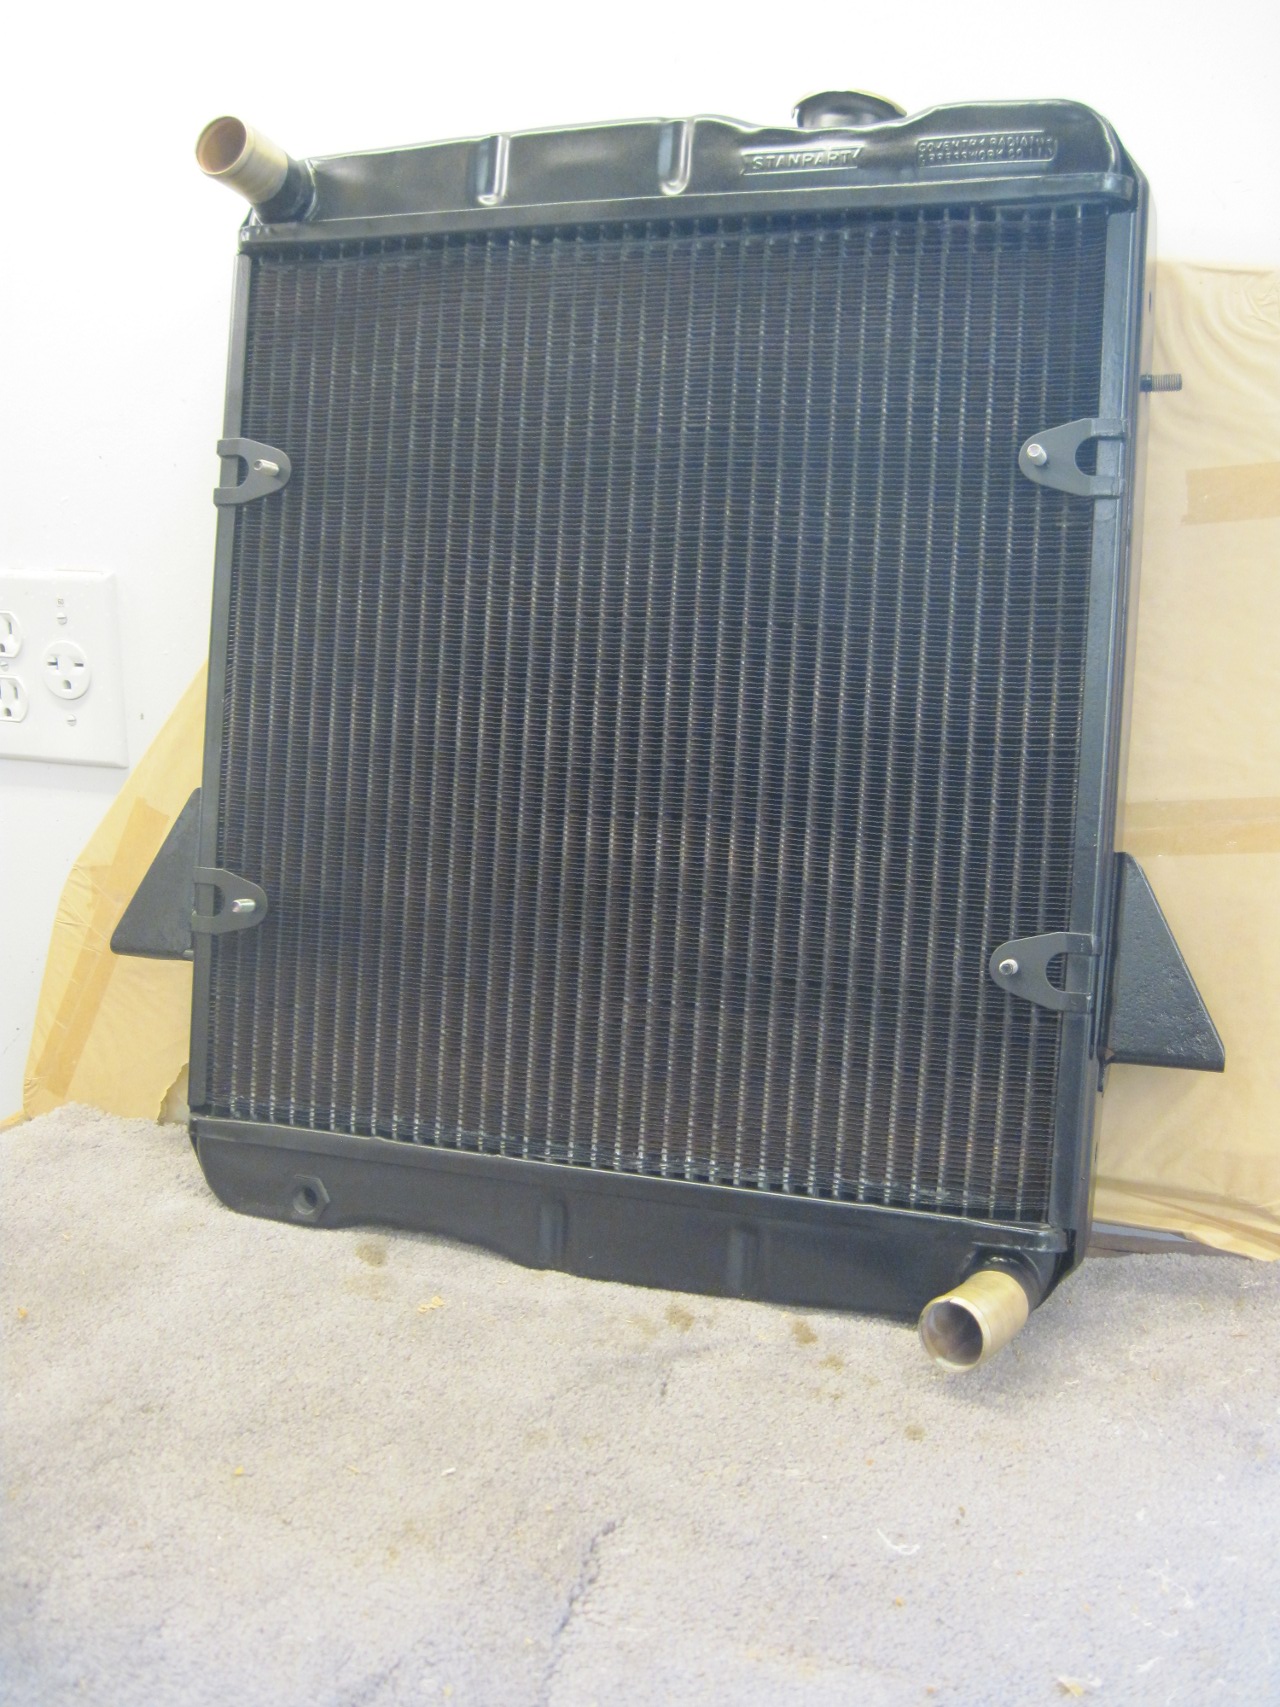
general, I decided to have my radiator re-cored rather than buy a new
one. I went to a local radiator shop that specializes in classics
for some advice. Cliff recommended a custom made core to
reproduce the original. It wasn't cheap--it was considerably more
than an aftermarket unit, but I told him to go ahead.
I asked
Cliff not to paint the outside of the radiator, since I wanted to do
that myself. He did paint the interior surfaces of the frame that
would be inaccessible after assembly.
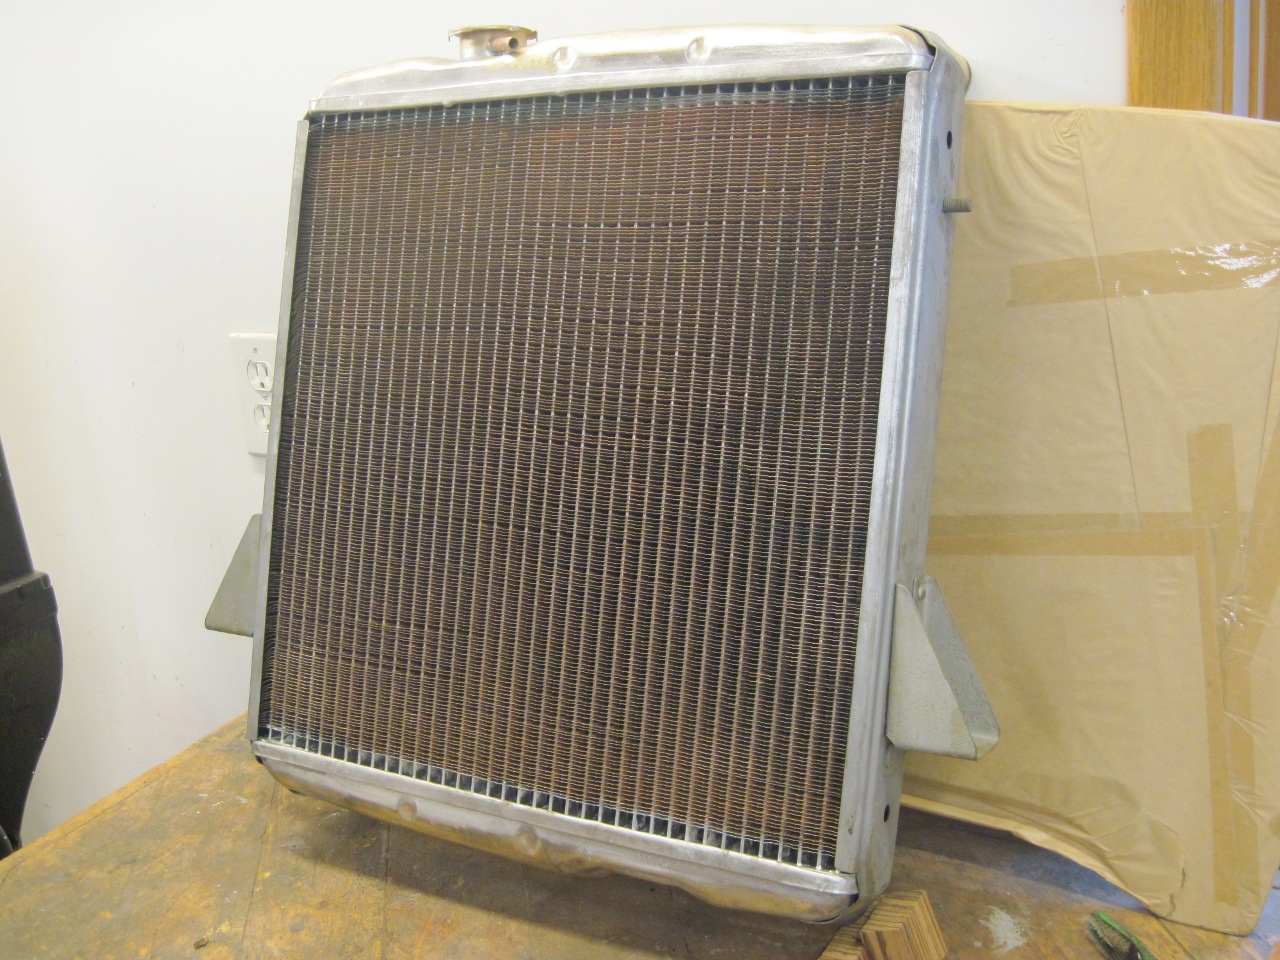
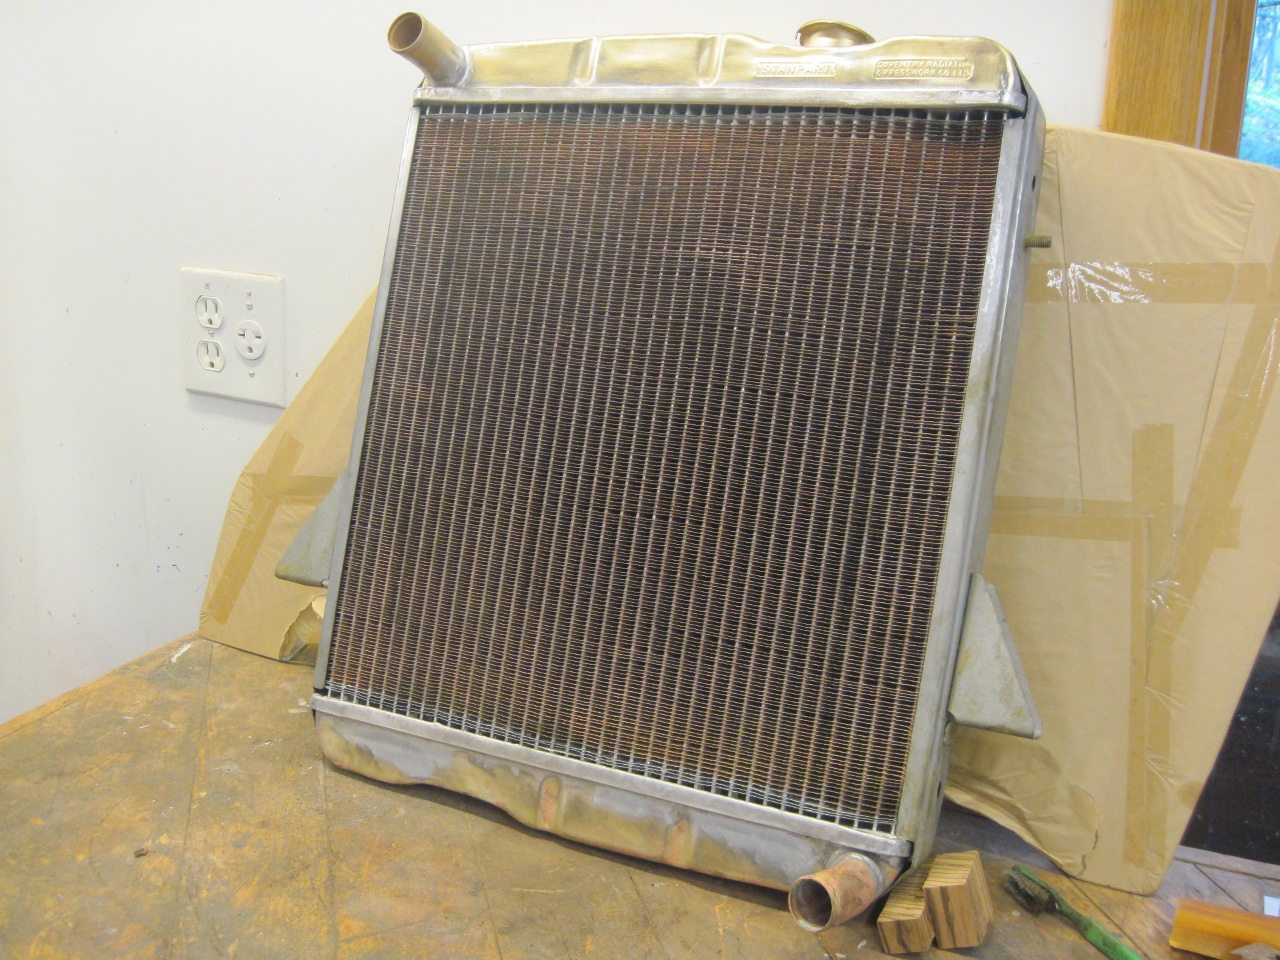
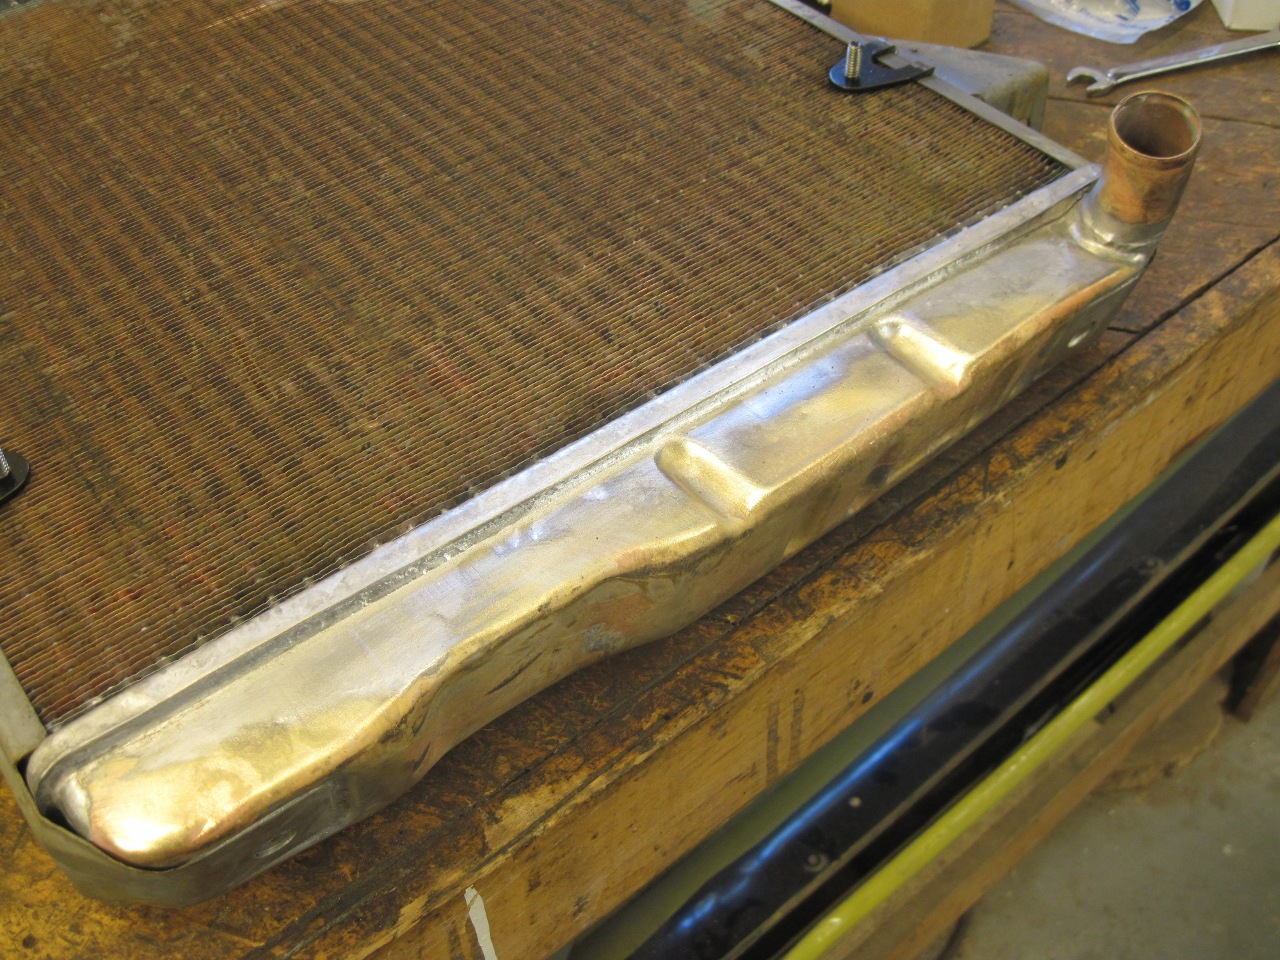
Without paint, the
rebuilt radiator wasn't pretty, but I was able to see past that.
Cliff removed some dents in the top and bottom brass tanks, bead
blasted all the paint and rust form the side frames, and gave them a
phosphate bath.
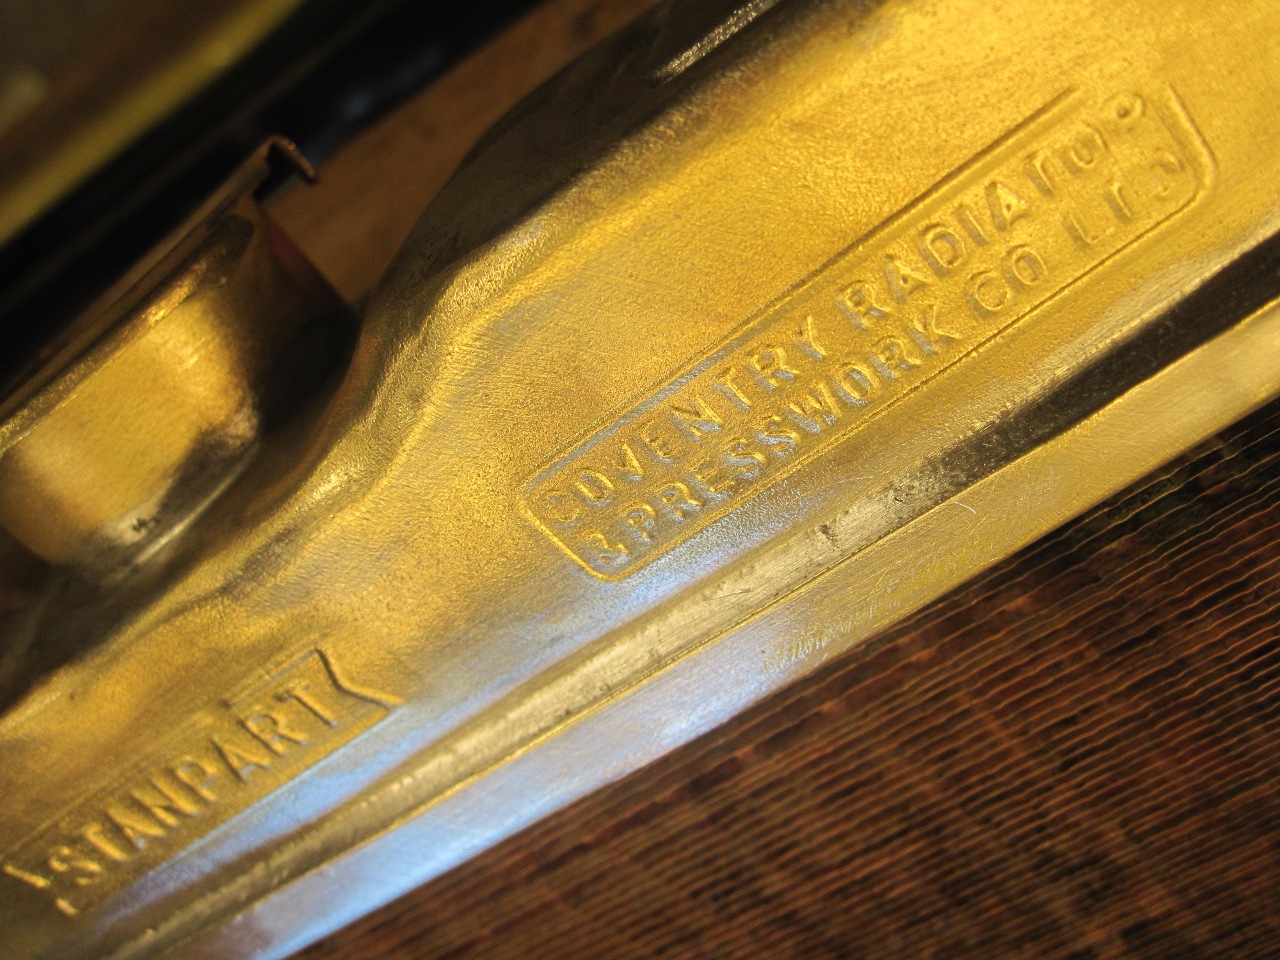
And of course, I got to keep this.
Now
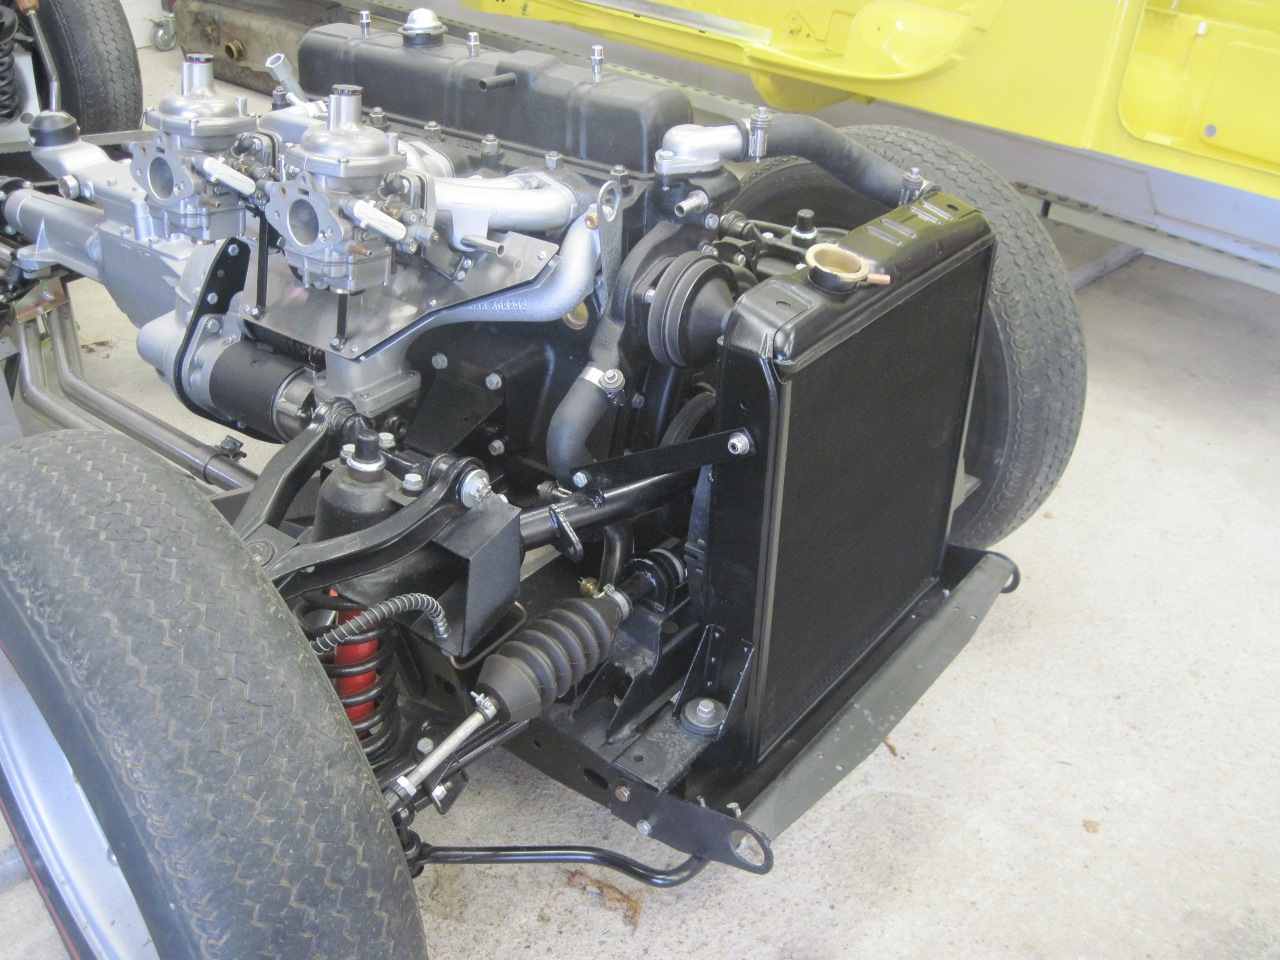
since I removed the stock cooling fan, I now had to arrange for an
electric fan. I was pretty sure that clearance could be an issue,
so I mounted the radiator on the car to get some measurements.
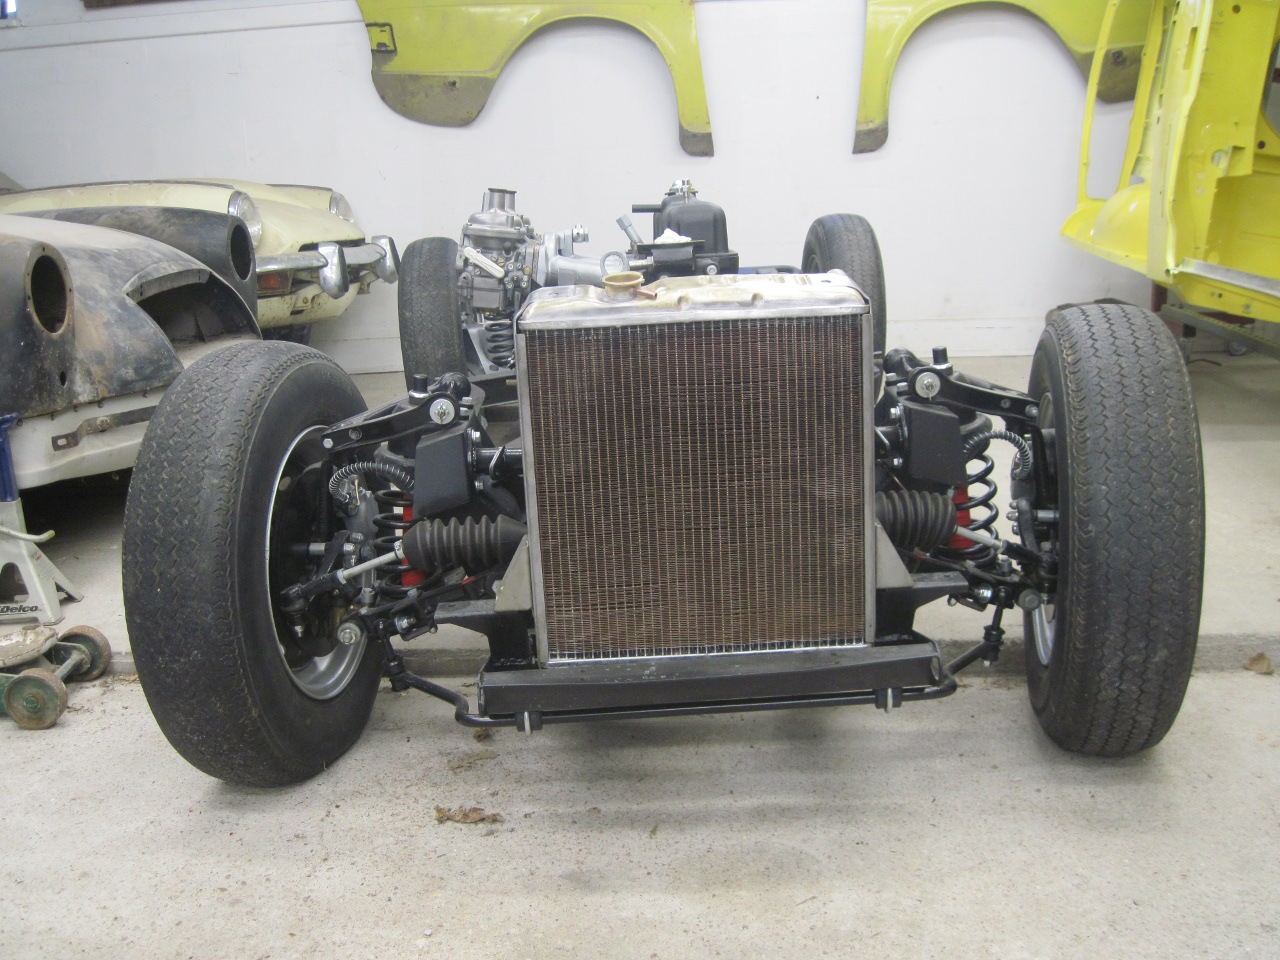
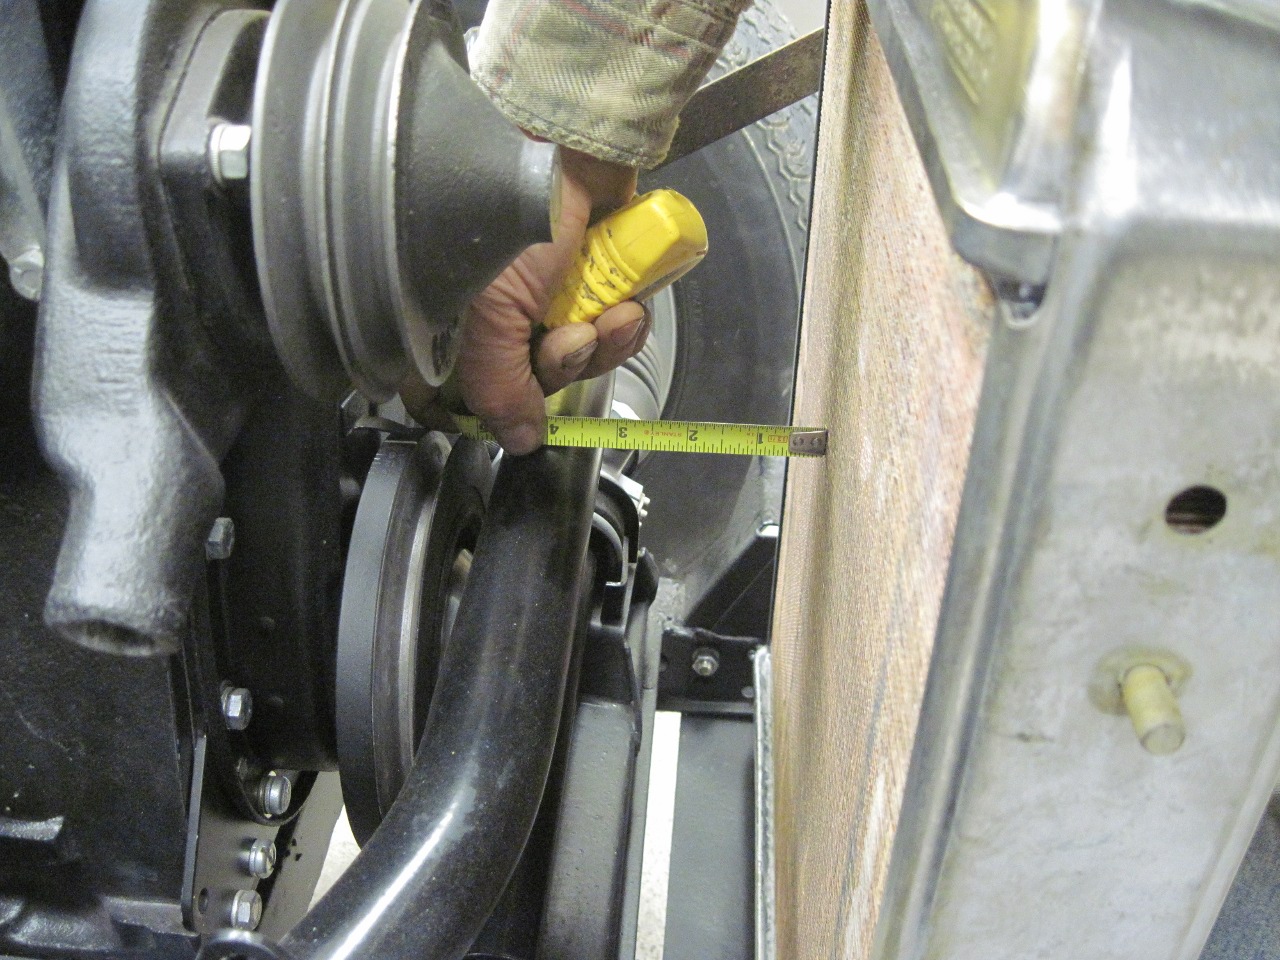
I determined that I had to keep the mounted fan depth under three inches to avoid some bad heartache.
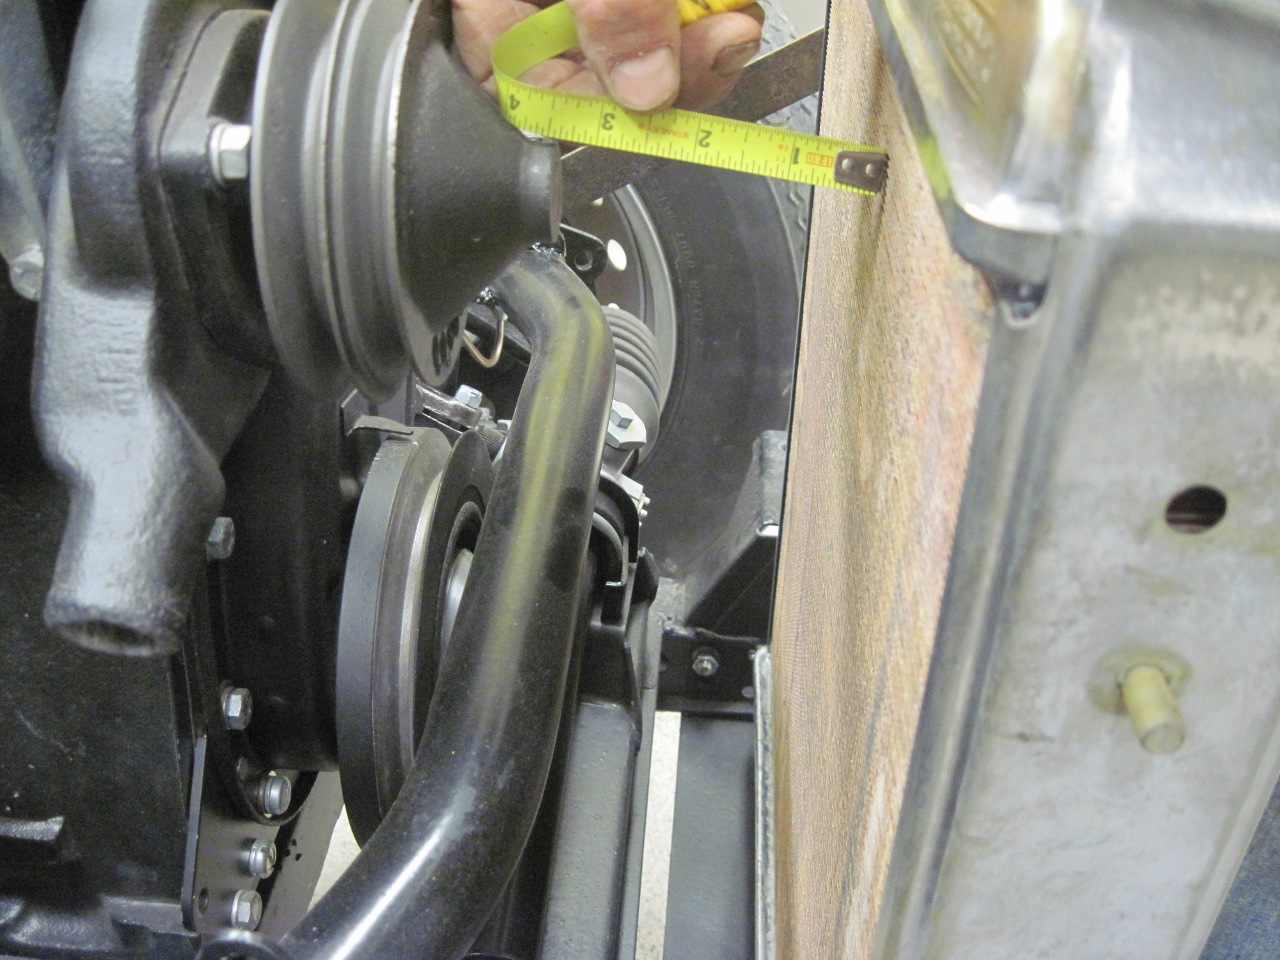
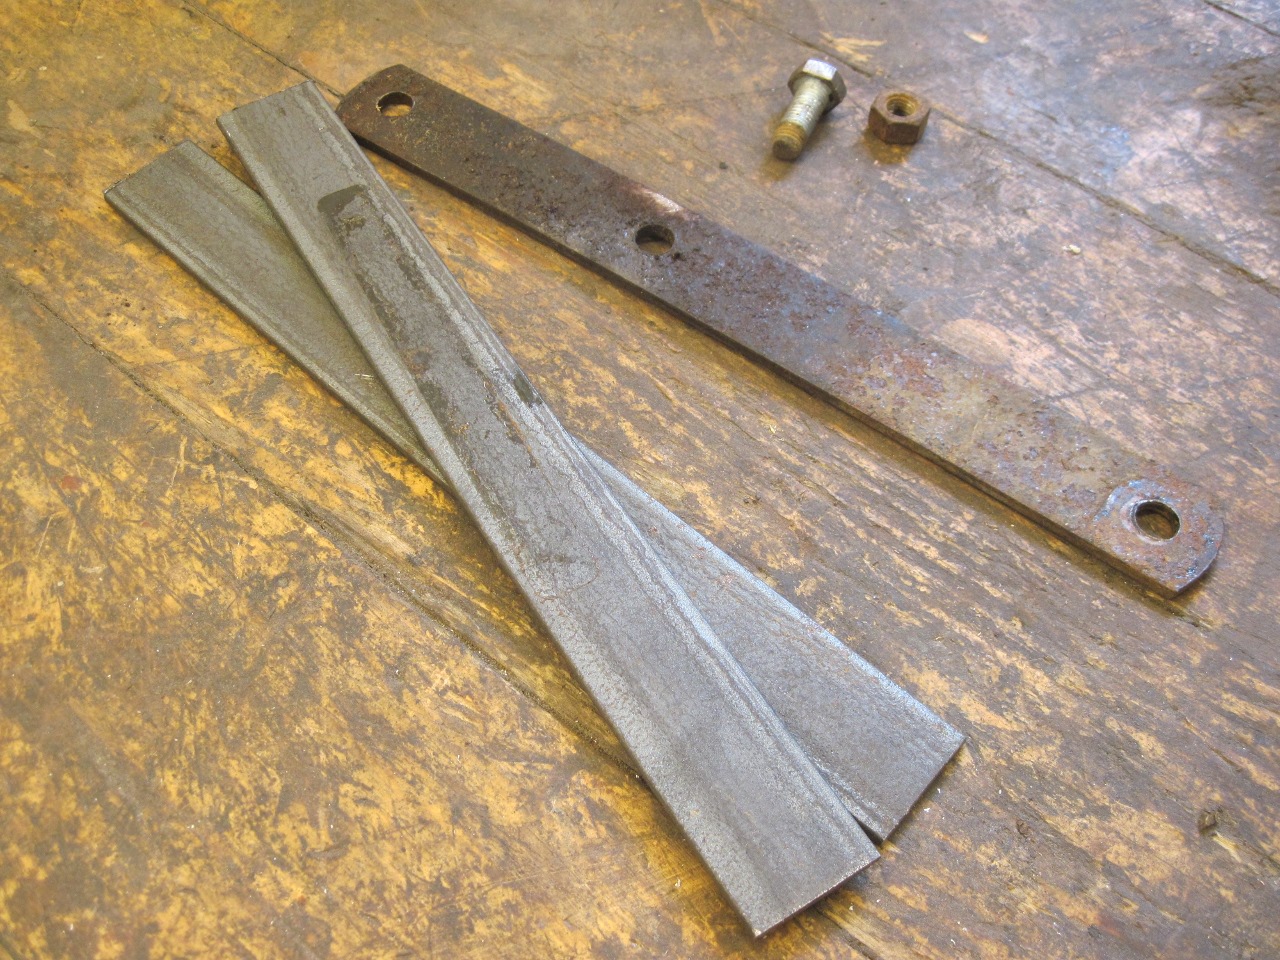
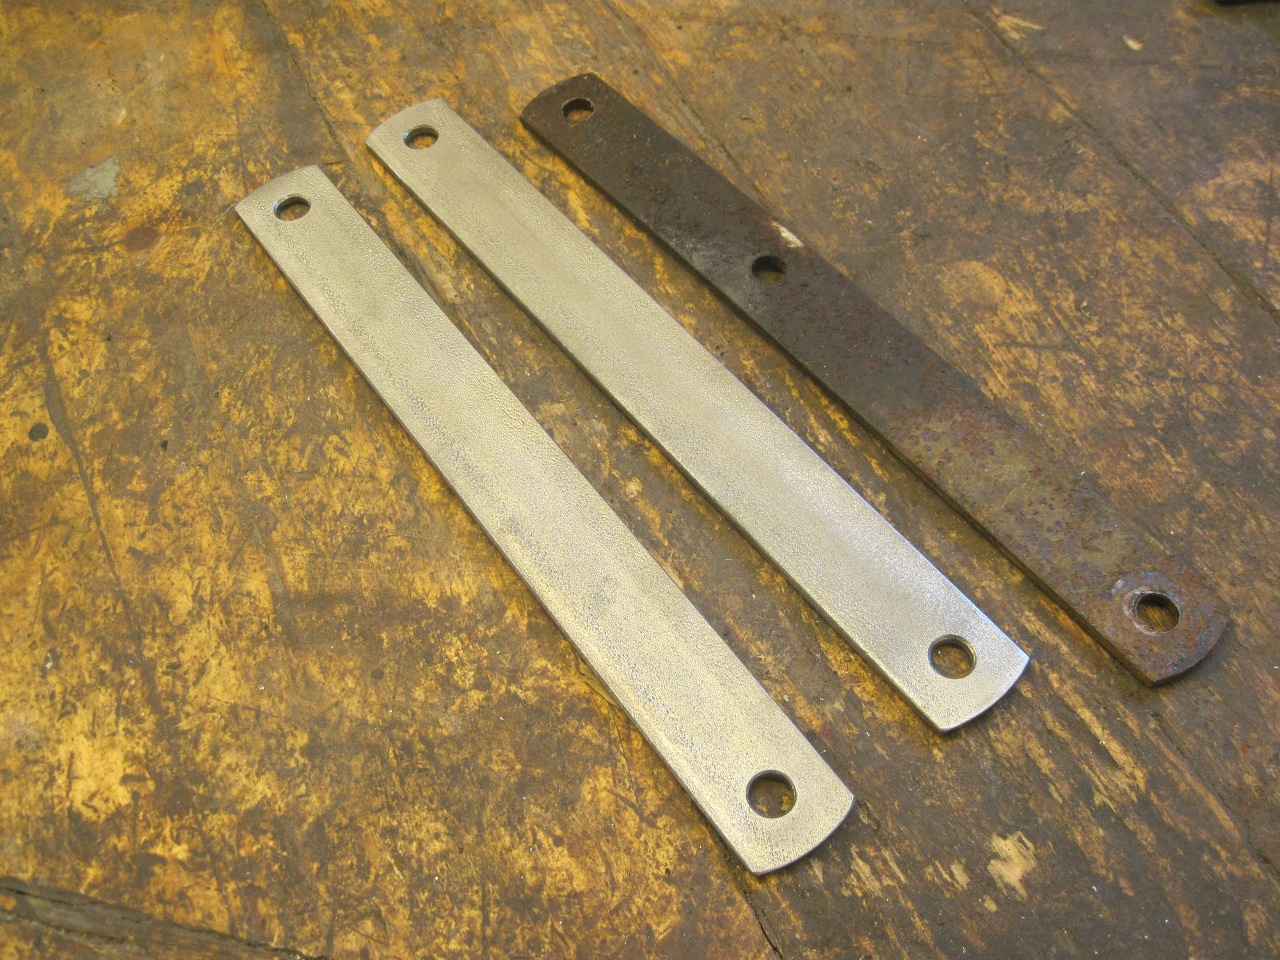
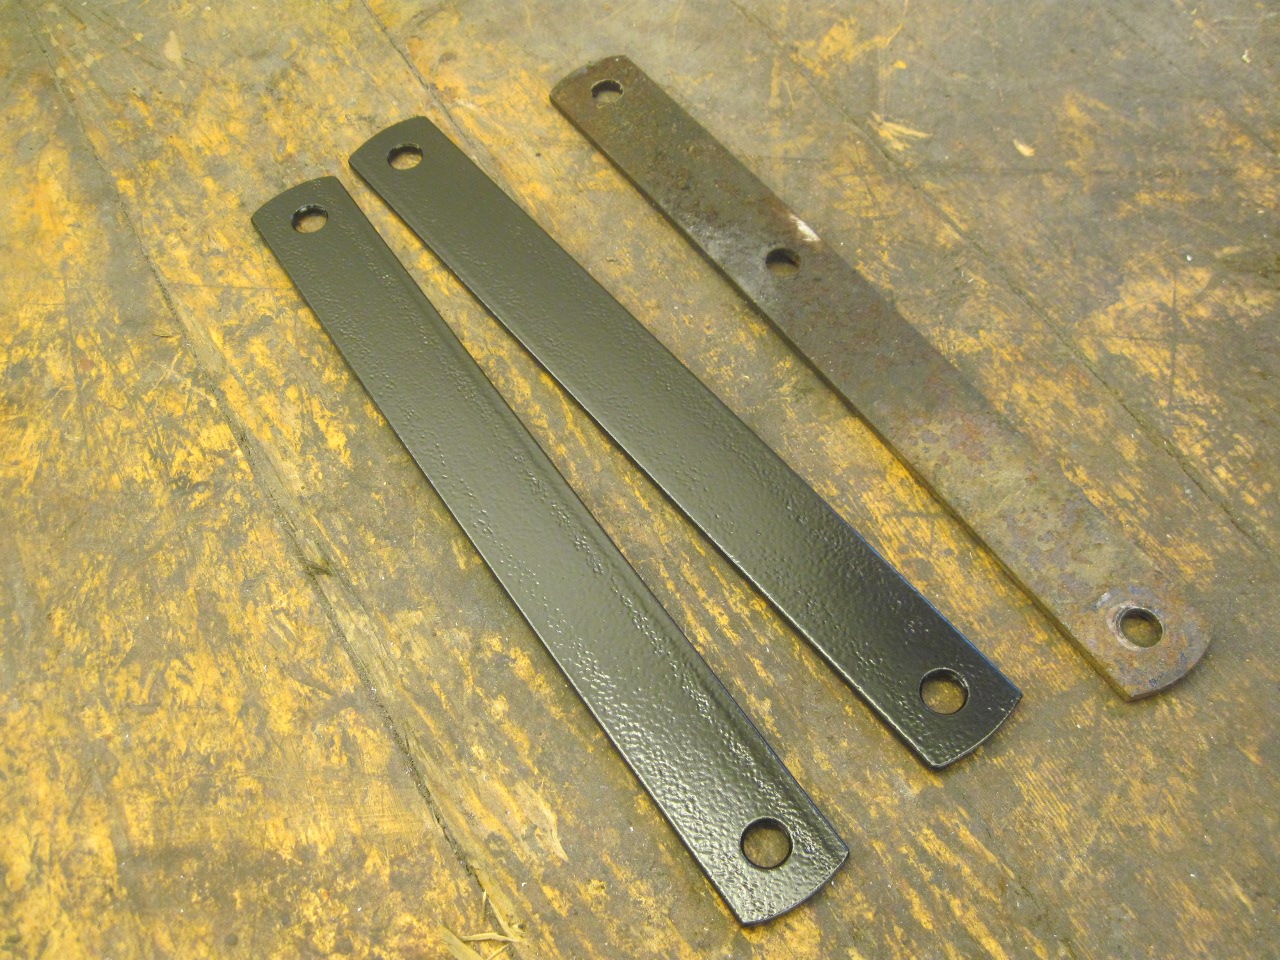
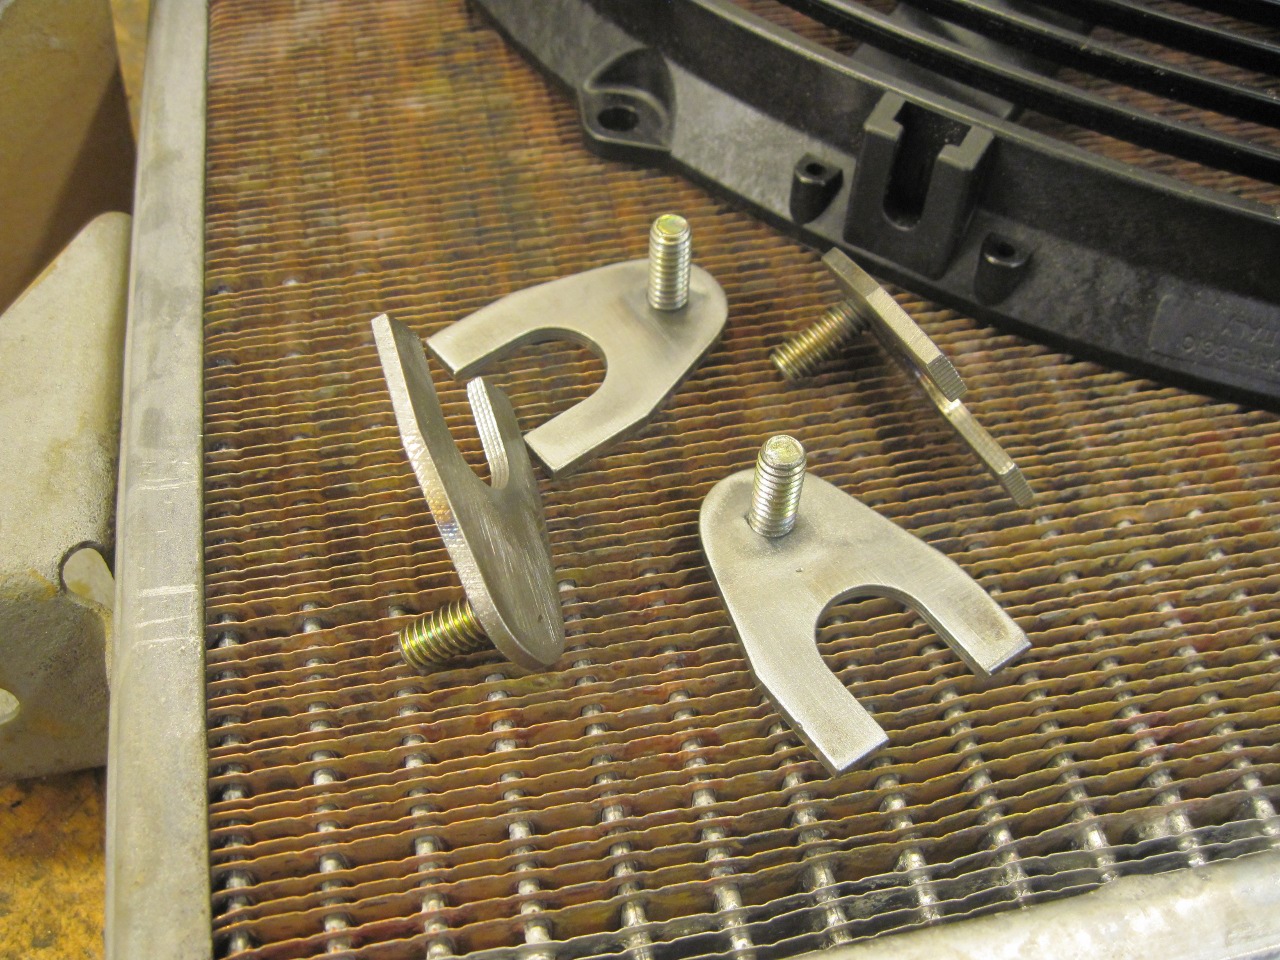
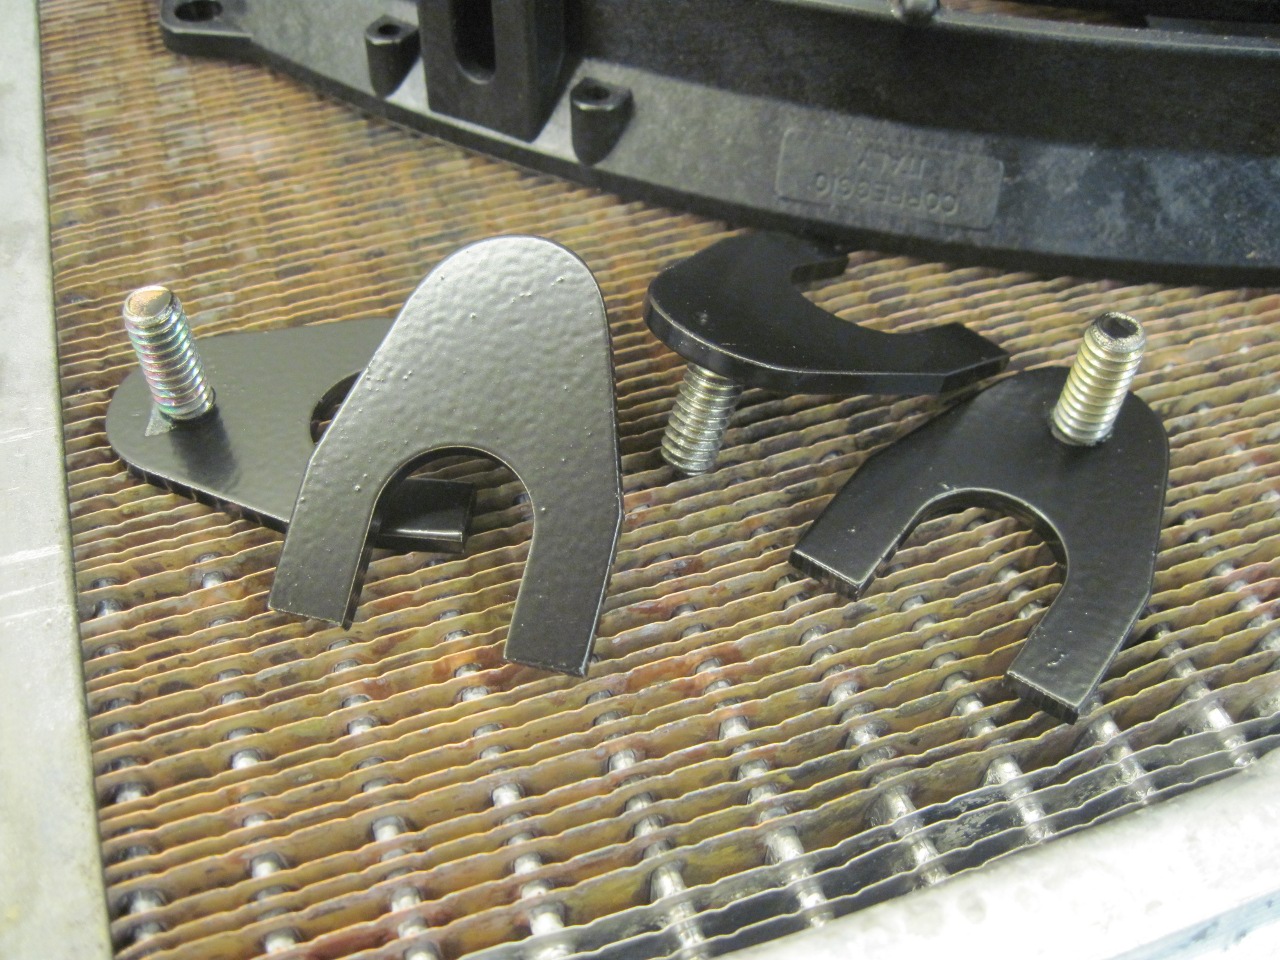
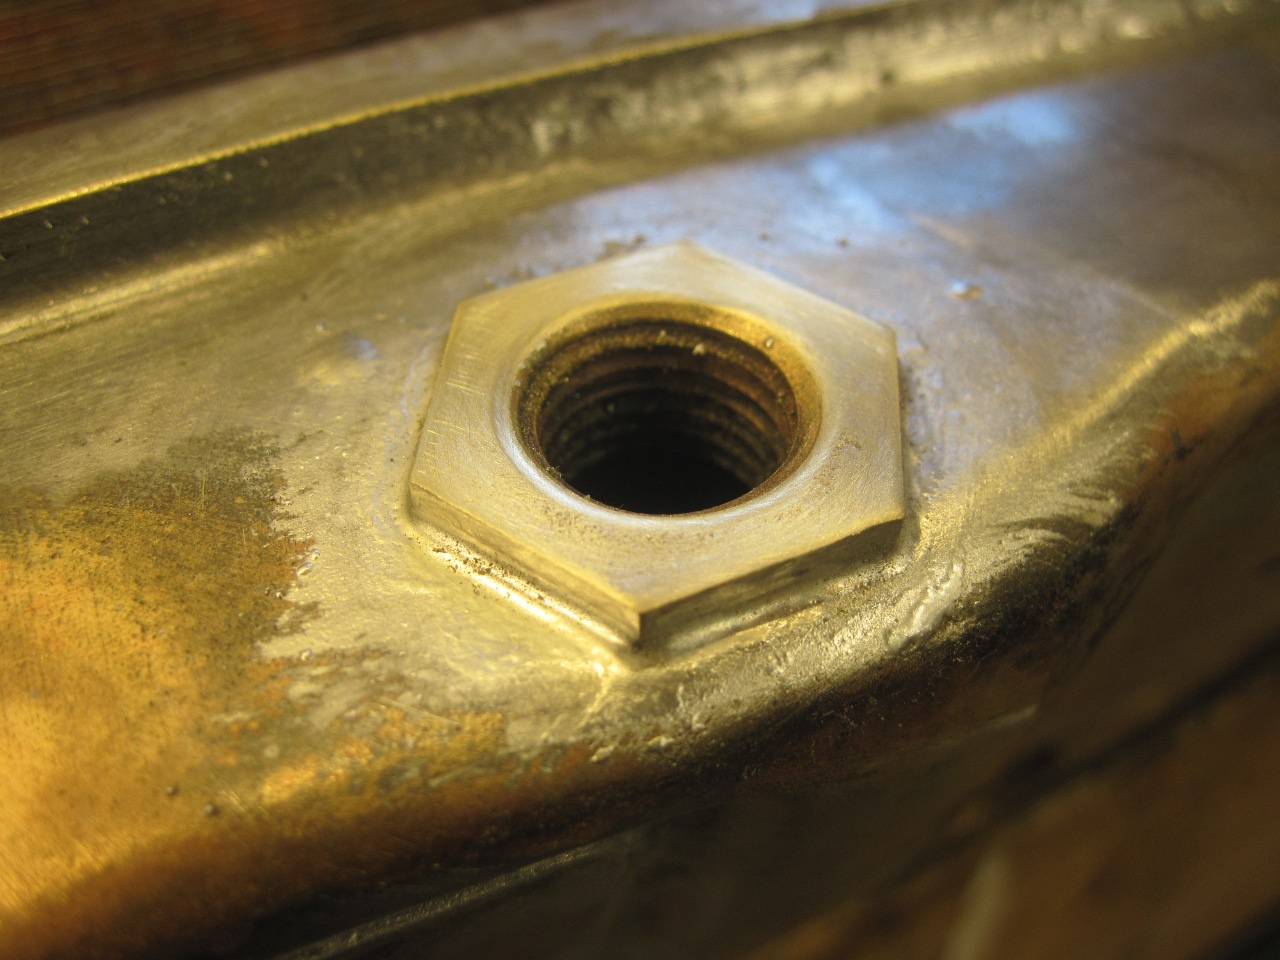
As
a side task, when mounting the radiator, I found that one of the side
braces had gone AWOL, and the one I had was deeply rusted and pitted.
I decided to just make a couple of new ones. Not sure what
the center hole was for. If I find out, I may have to drill it
later. Even with the powder coating, the job was only about an hour.
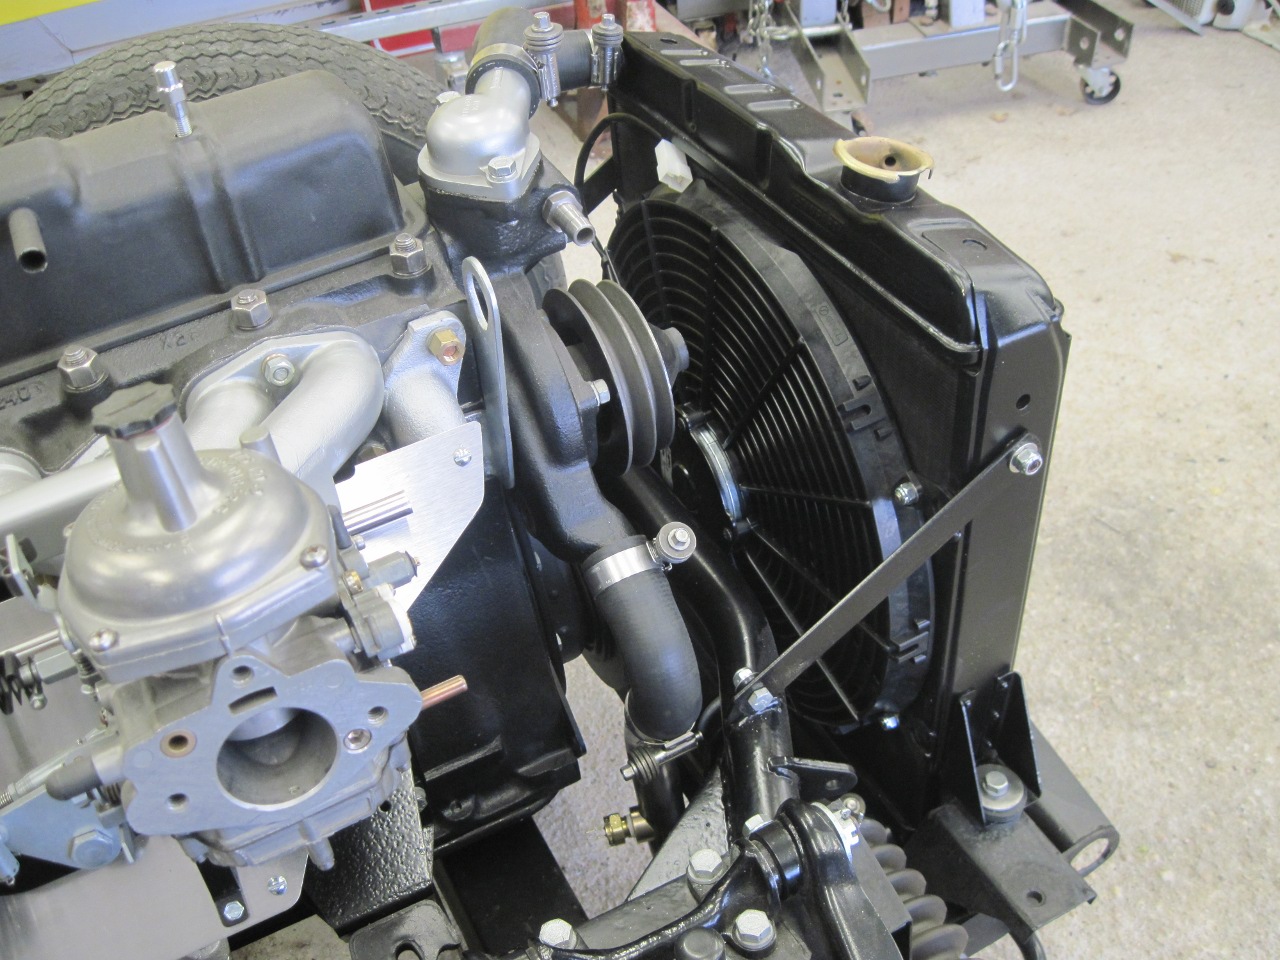
Now,
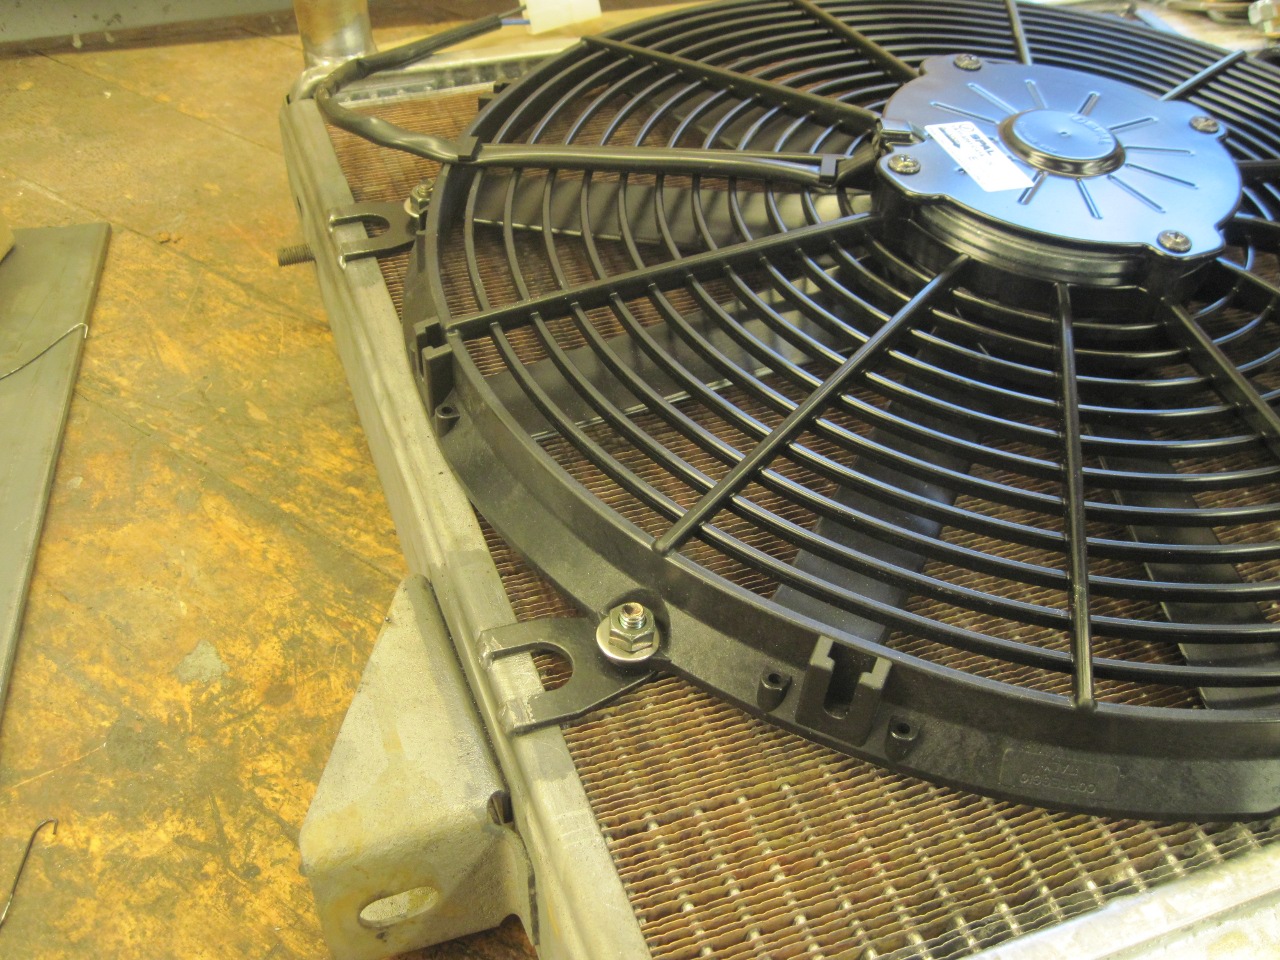
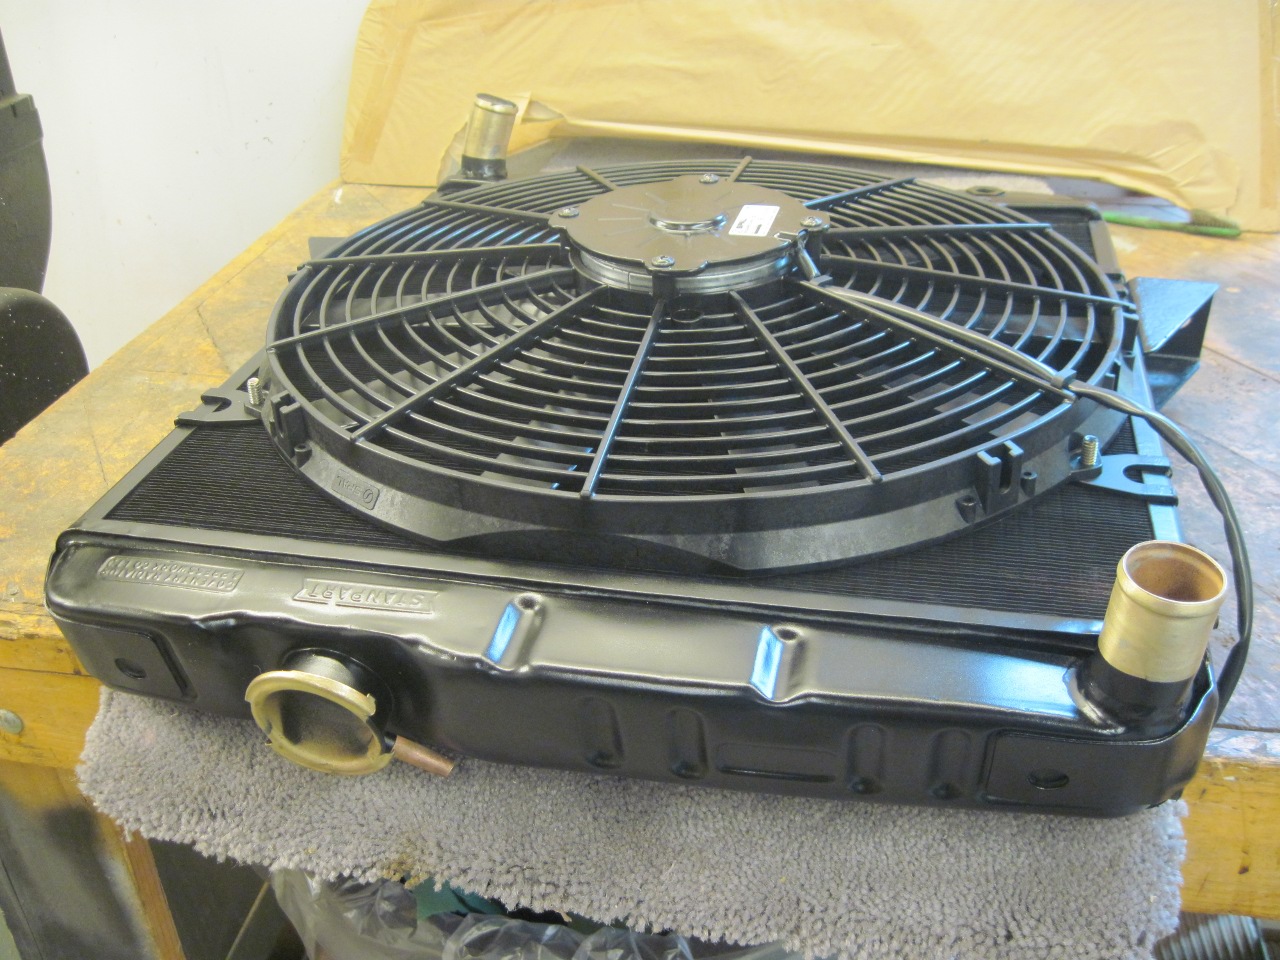
back to the fan. I determined that the radiator could accept a 16
inch fan nicely, so I went looking for 16 inch fans less than three
inches thick. I also wanted to be careful about the current draw,
so that was a consideration, too. I ended up with a Spal unit.
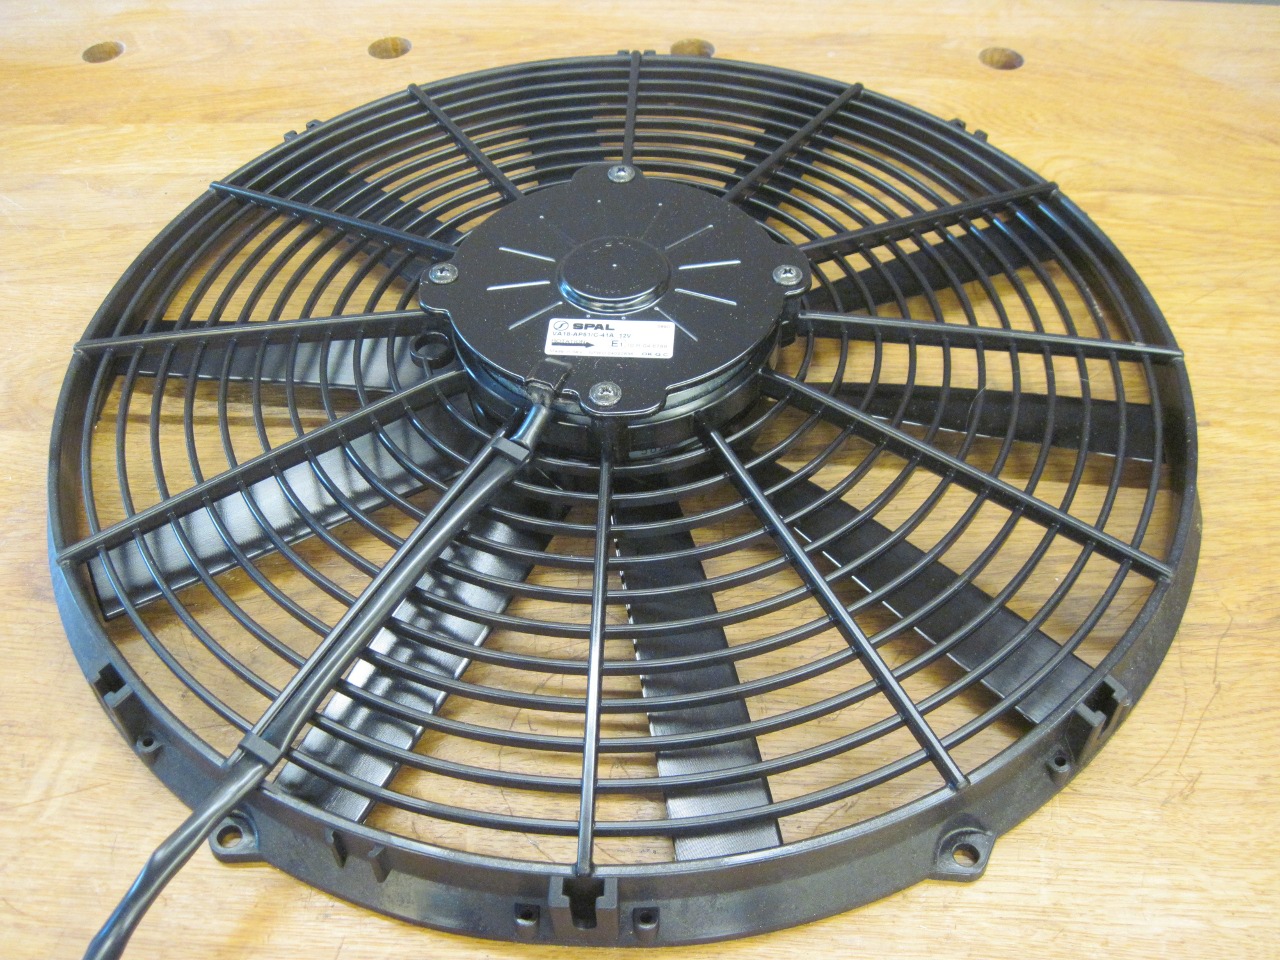
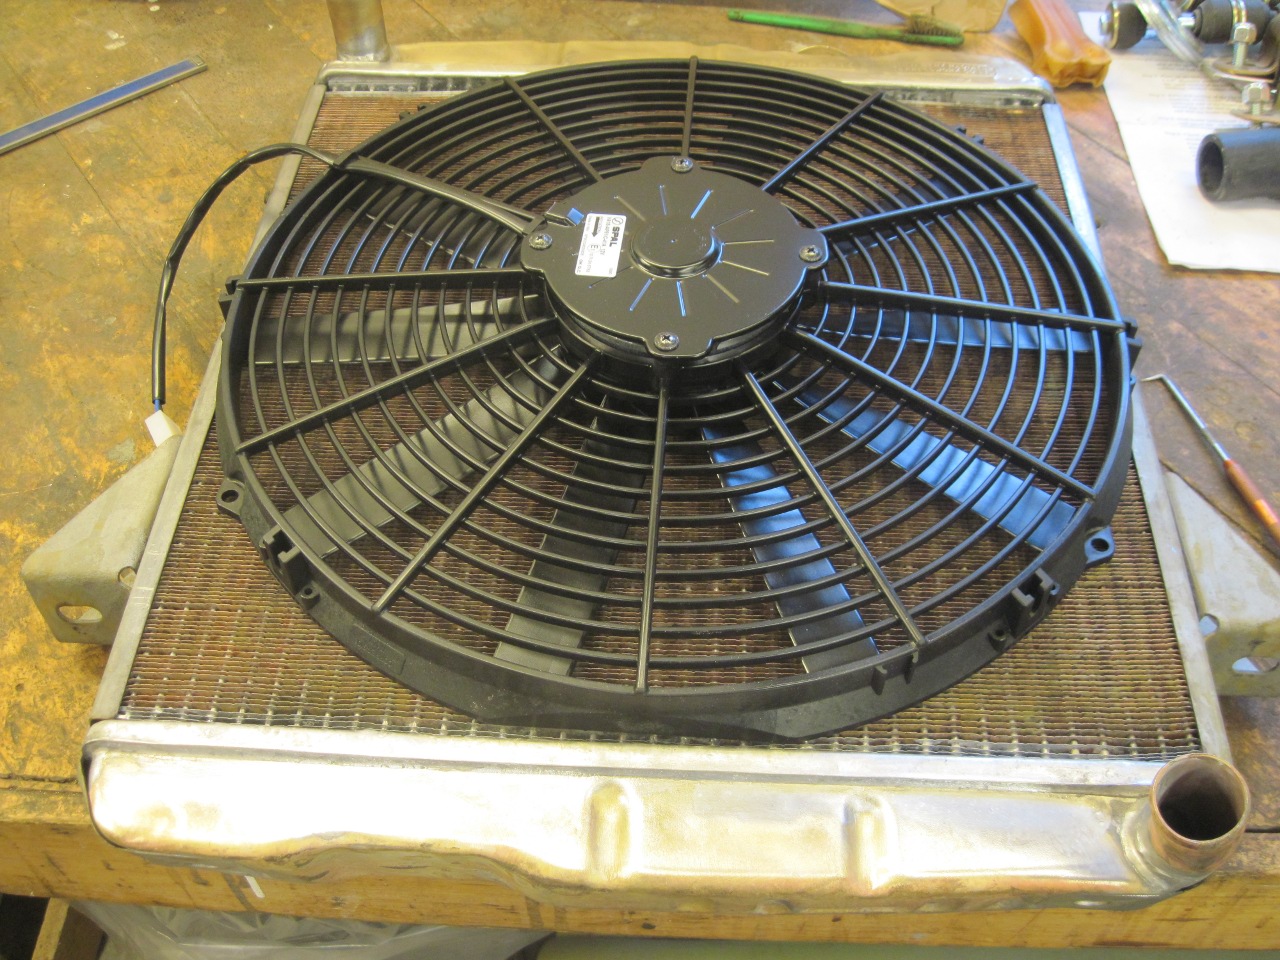
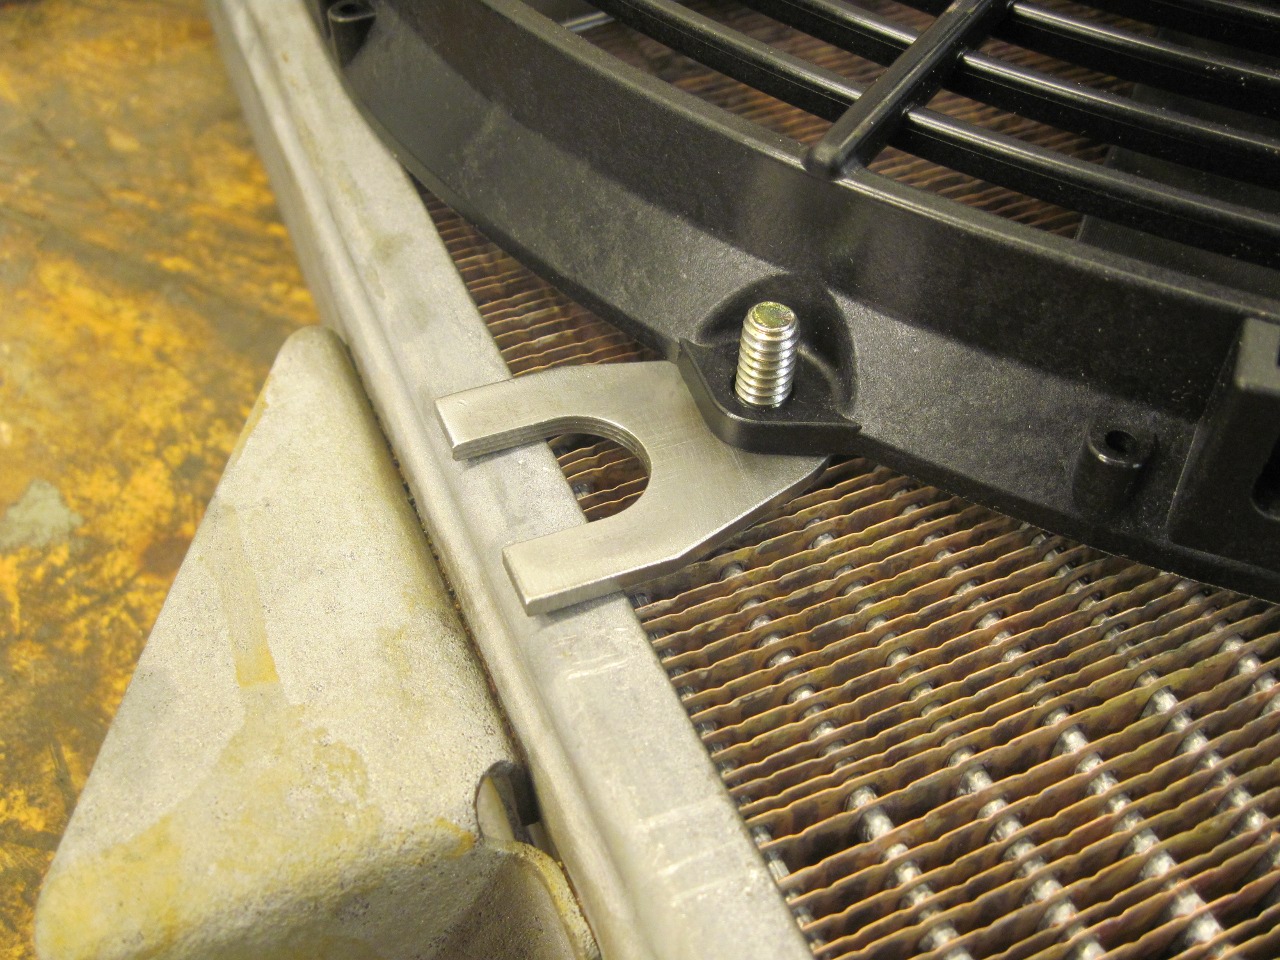
Spal
offers various kinds of plastic mounting tabs that fit into slots on
the fan housing, but it looked easier to me to just make something.
The last thing I wanted to do was to mount the fan directly to
the core with straps through the fins. I made four little metal
brackets to weld to the radiator frame. I like my mods on the
car to be easily reversible, so I tried to minimize the welds.
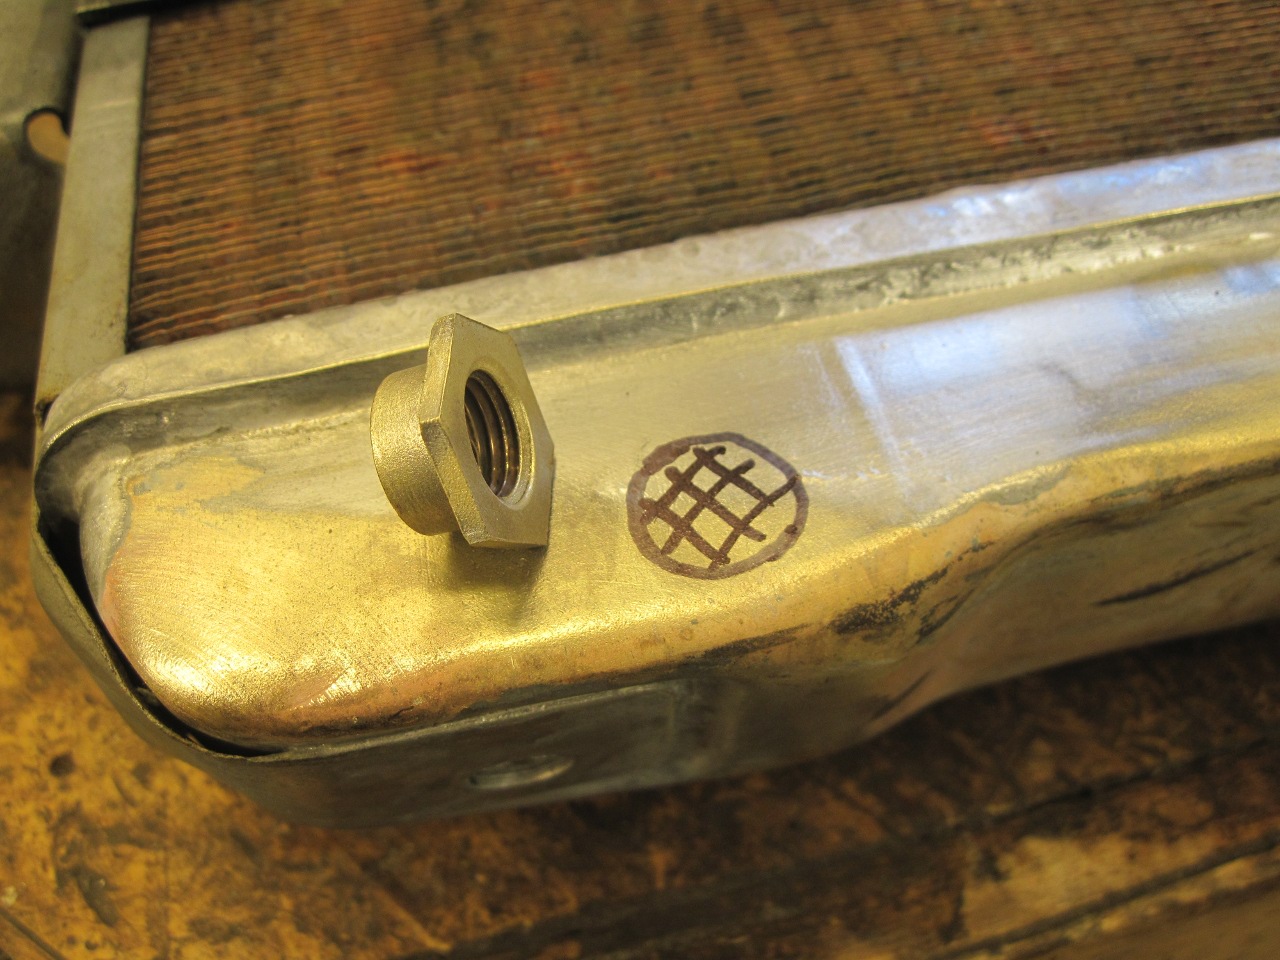
One
other little job I wanted to do before I painted the radiator was to
add a bung for a draincock. The shop would have done this for no
charge, but I forgot to ask them.
Then
painted the radiator. I used a good primer and two coats of high
temp paint on the frame and tanks, but since paint won't do anything
positive for heat transfer to air, I just dusted the fins with flat
black. The next day, I mounted the fan.
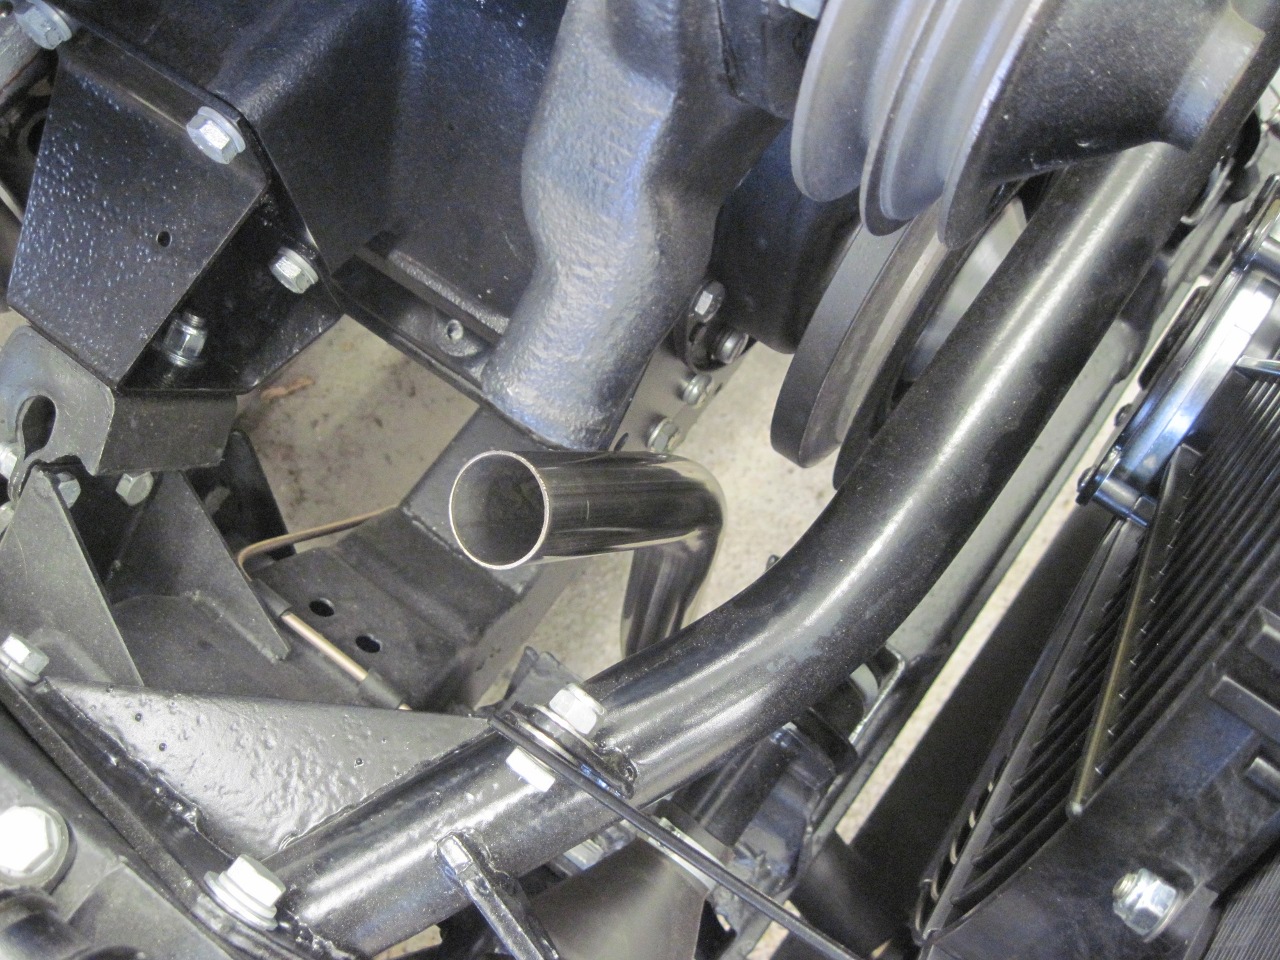
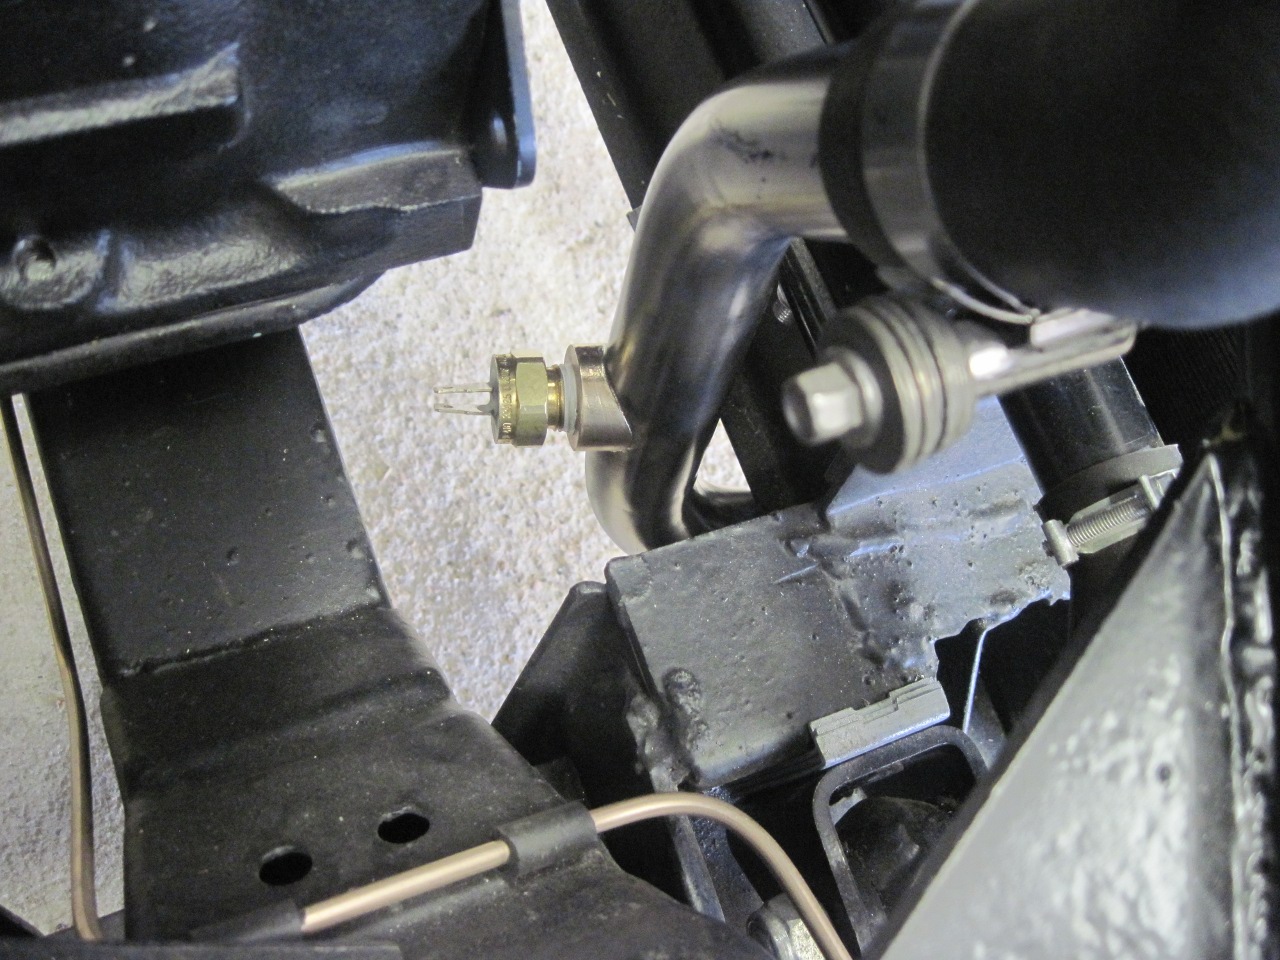
Then
there is the small matter of a thermal switch for the fan. This
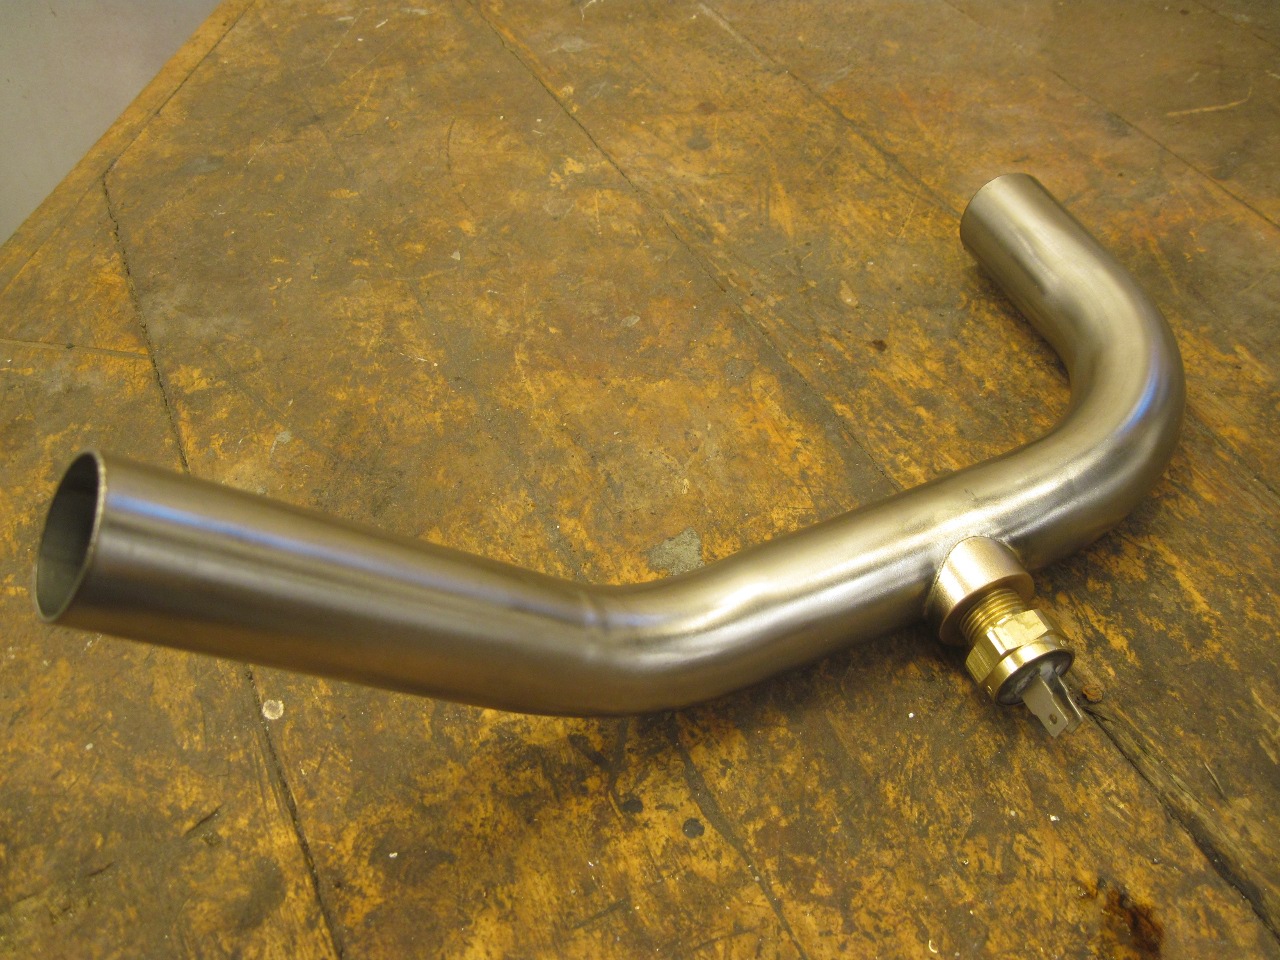
is often mounted directly on the radiator, but I opted to mount it on
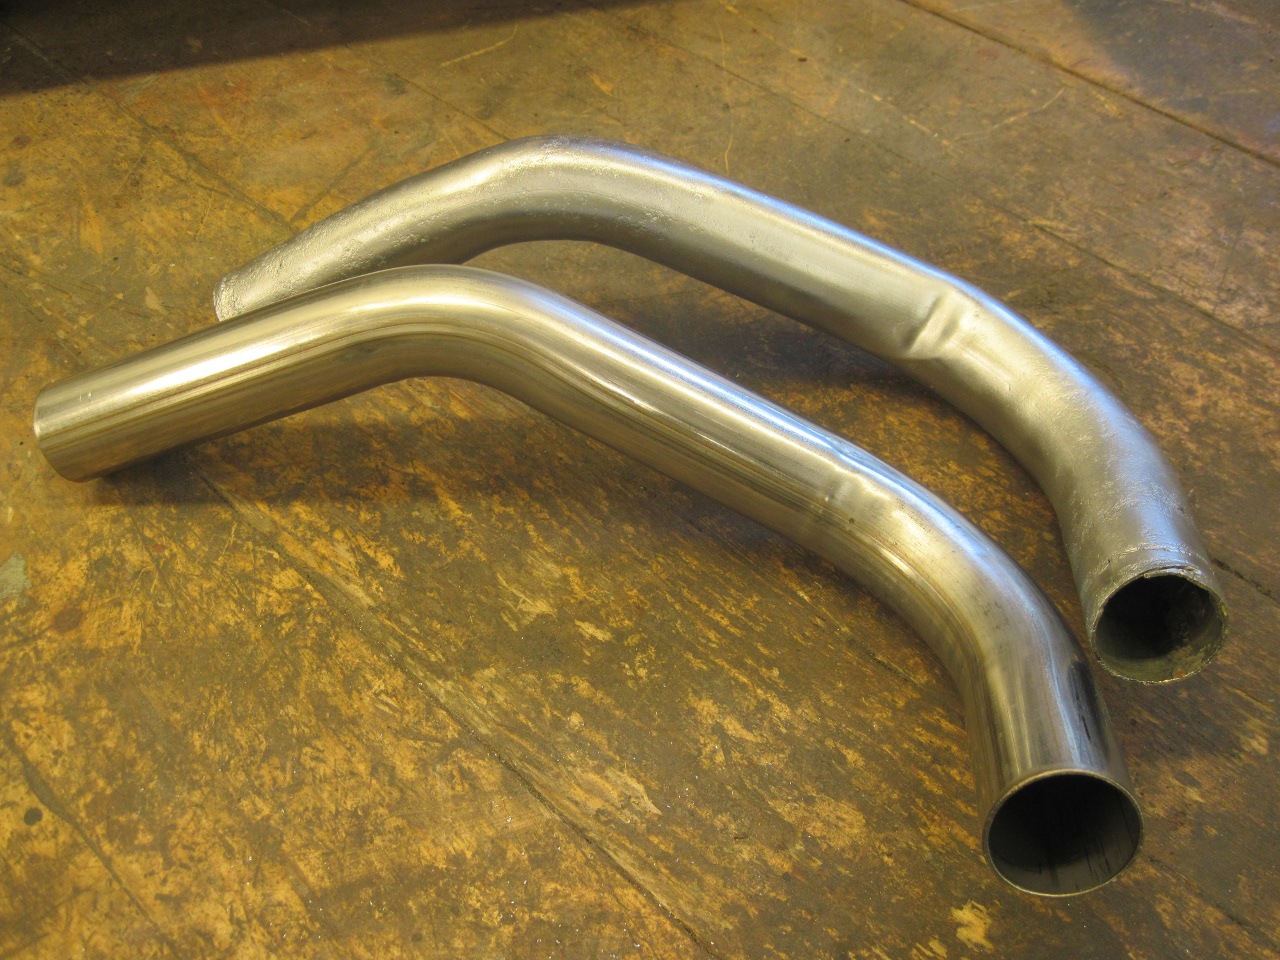
the hard pipe between the two lower hoses. Since my original pipe
was pretty rusted and pitted, I ordered a stainless replacement pipe.
Though my expectations are never very high when ordering
aftermarket parts, I have to say that in this case, the new part is far
superior to the original.
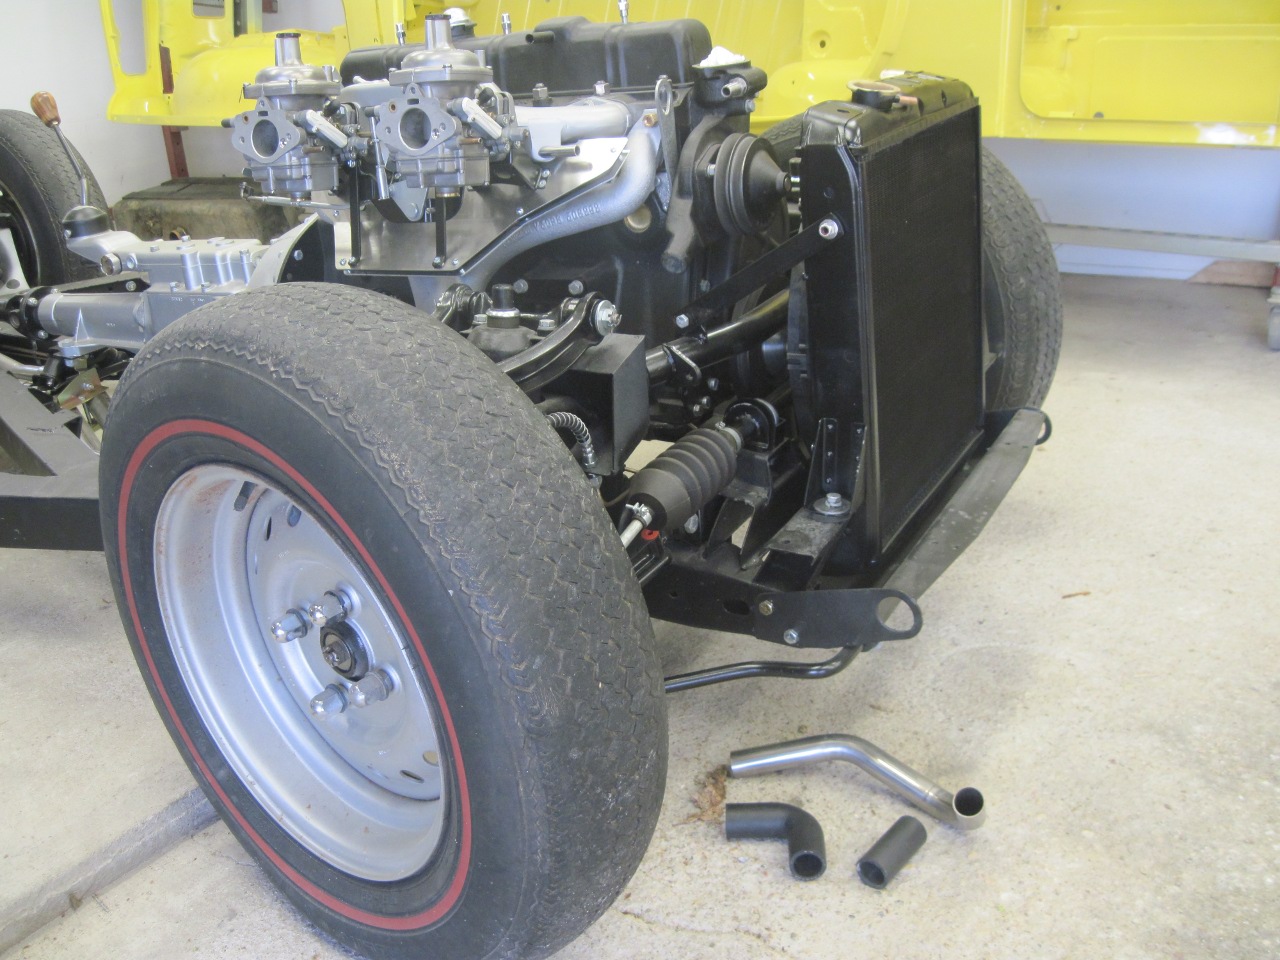
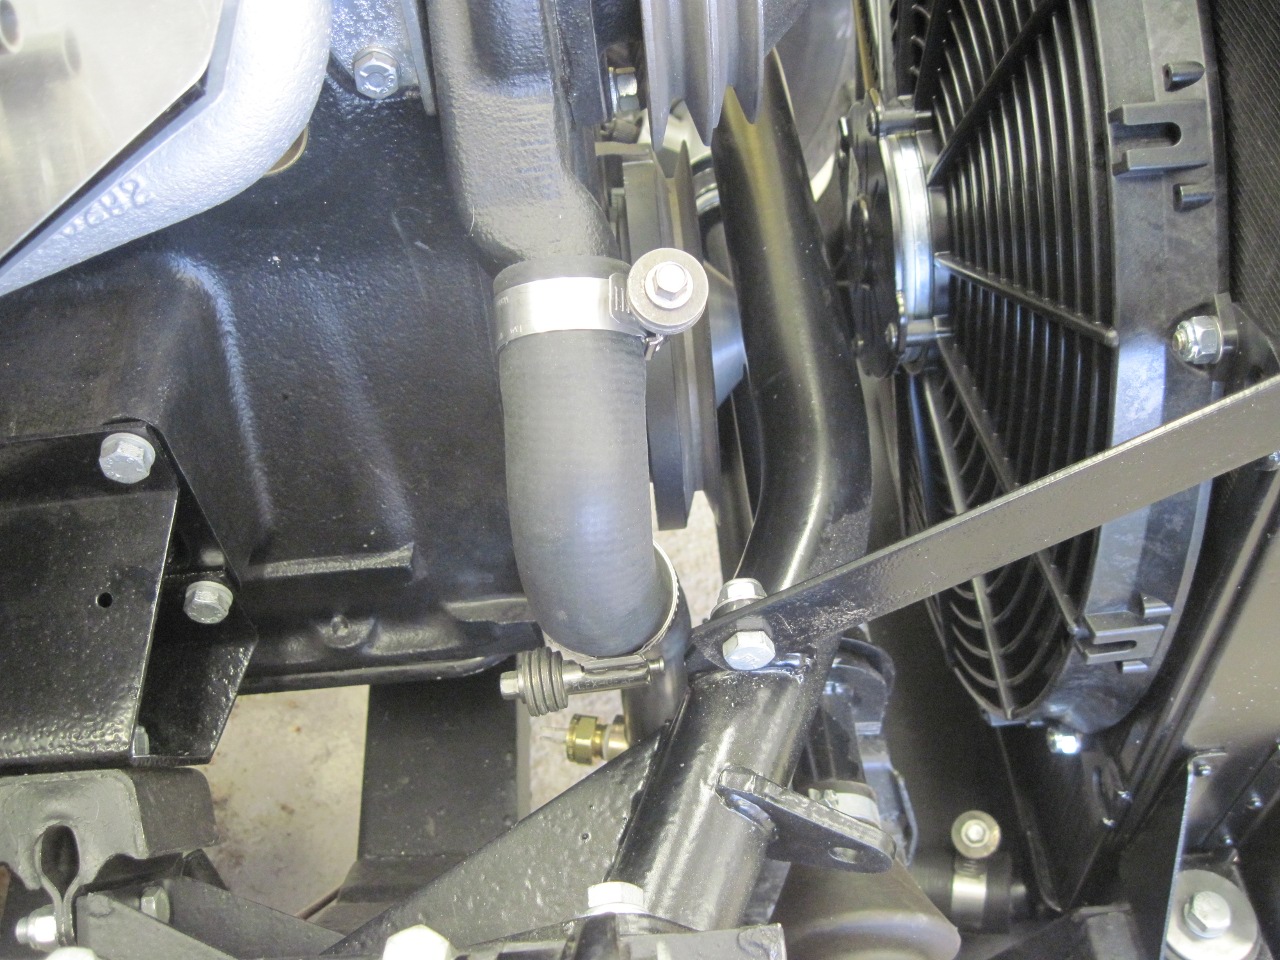
I
mounted the radiator and the pipe and hoses to see where the best place
was. I picked a place low down on the vertical run of the pipe.
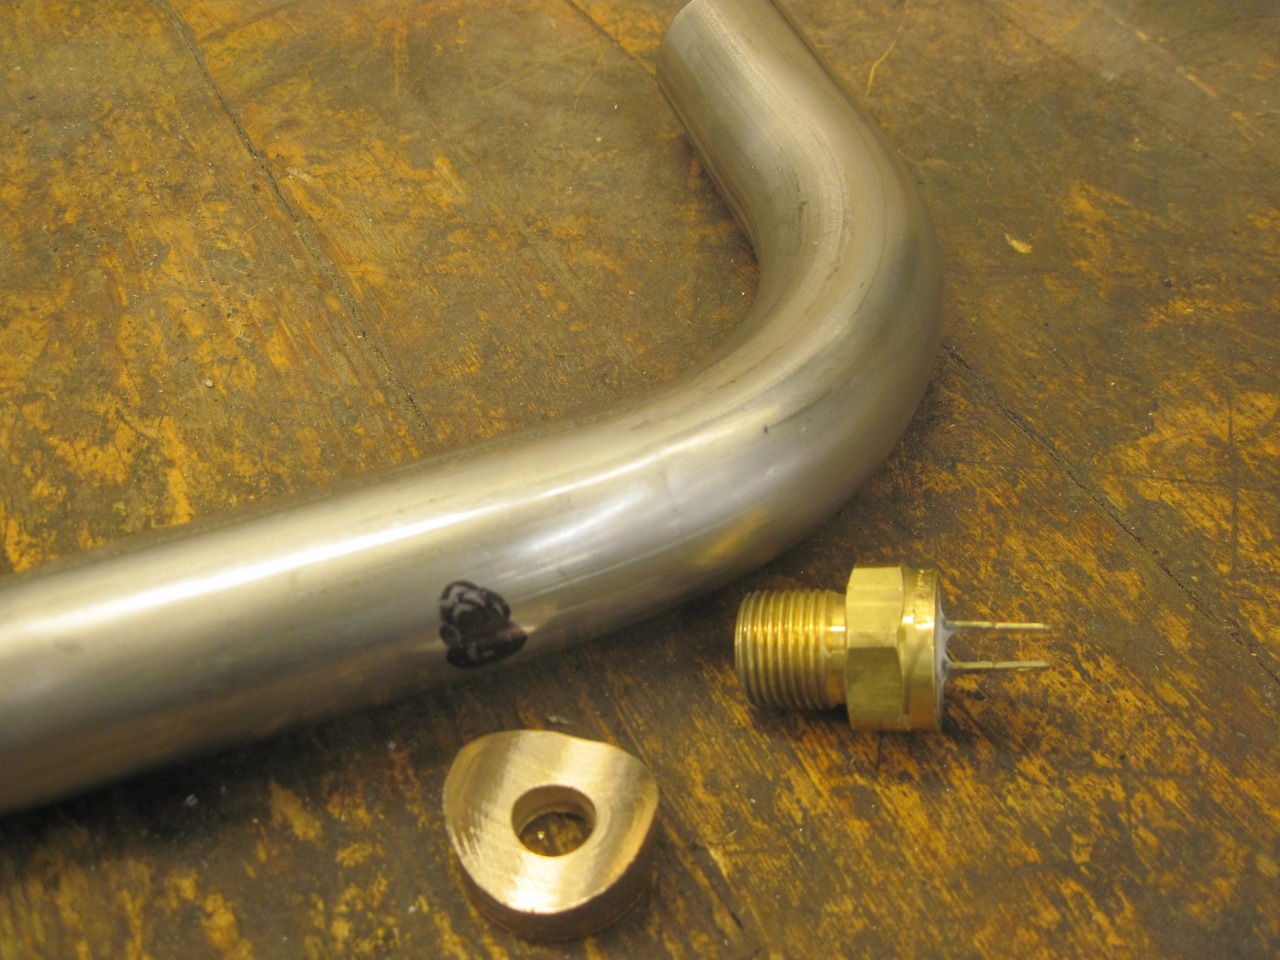
On
electrical stuff, I try to avoid using the car frame or body (or
engine) as a ground return if I can. I much prefer explicitly
wired returns. Because of this, I hunted down a two terminal,
ungrounded switch. Besides, with a more common single terminal
switch, I'd have to figure out a way to ground the coolant pipe.
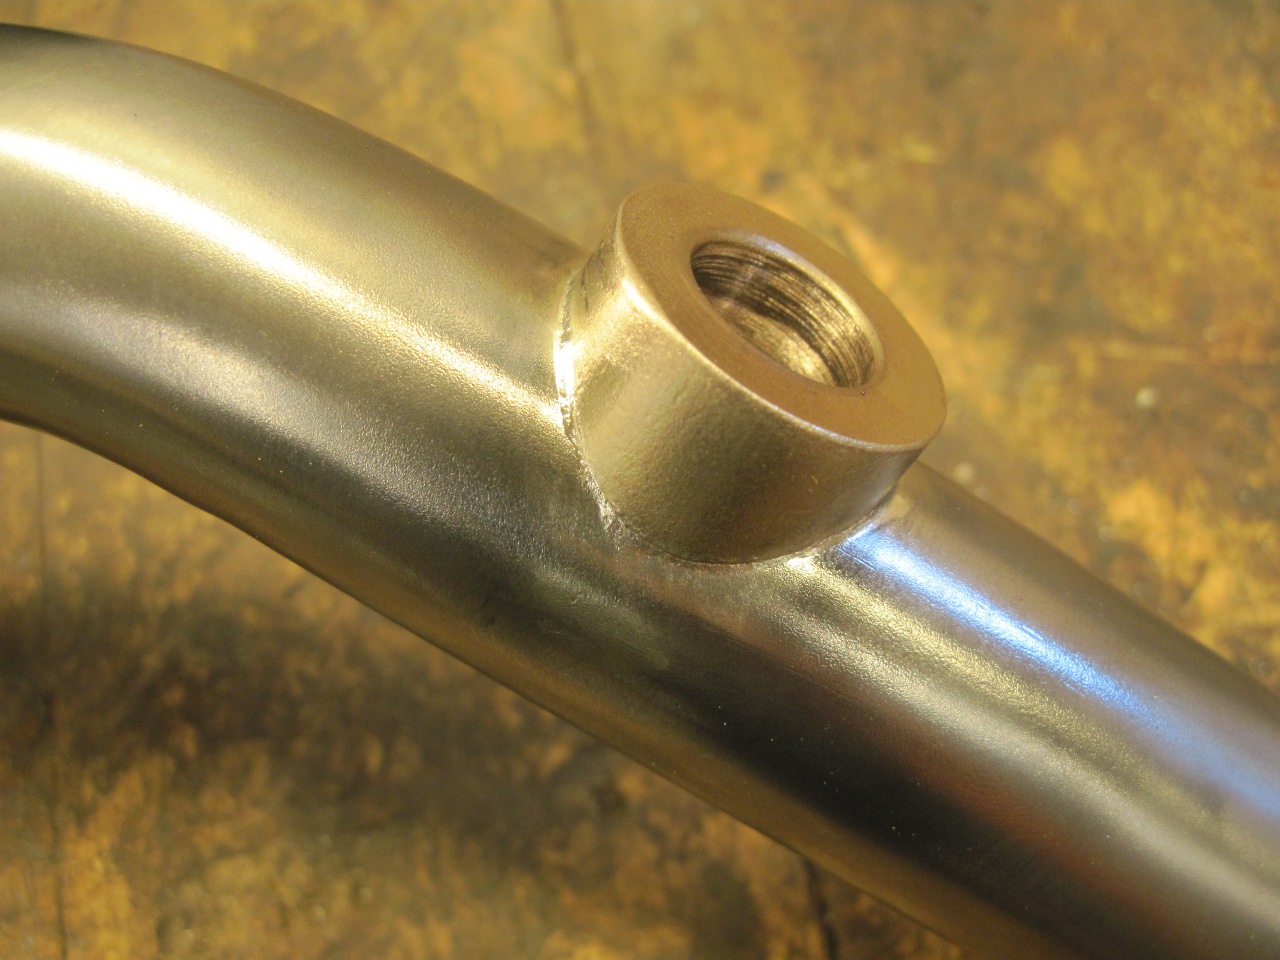
I made a little brass bung for the switch, silver brazed it to
the pipe, then threaded for the 3/8 pipe thread of the switch.
I'm using a 180 degree thermostat, so I picked a 185 degree fan
switch. My thinking is that there is no point in running the fan
until the thermostat is fully open and the temp rises a little more.
This reasoning is a little idealized, though , since the switch
point on these switches is usually around +/- 10 degrees, and the
thermostat probably isn't any better. So there might be some
tweaking later.

So
here are some of the other parts associated with the radiator.
The top hose is actually from an earlier model car since I won't
be using the thermostatic vacuum dump normally found on the '74.

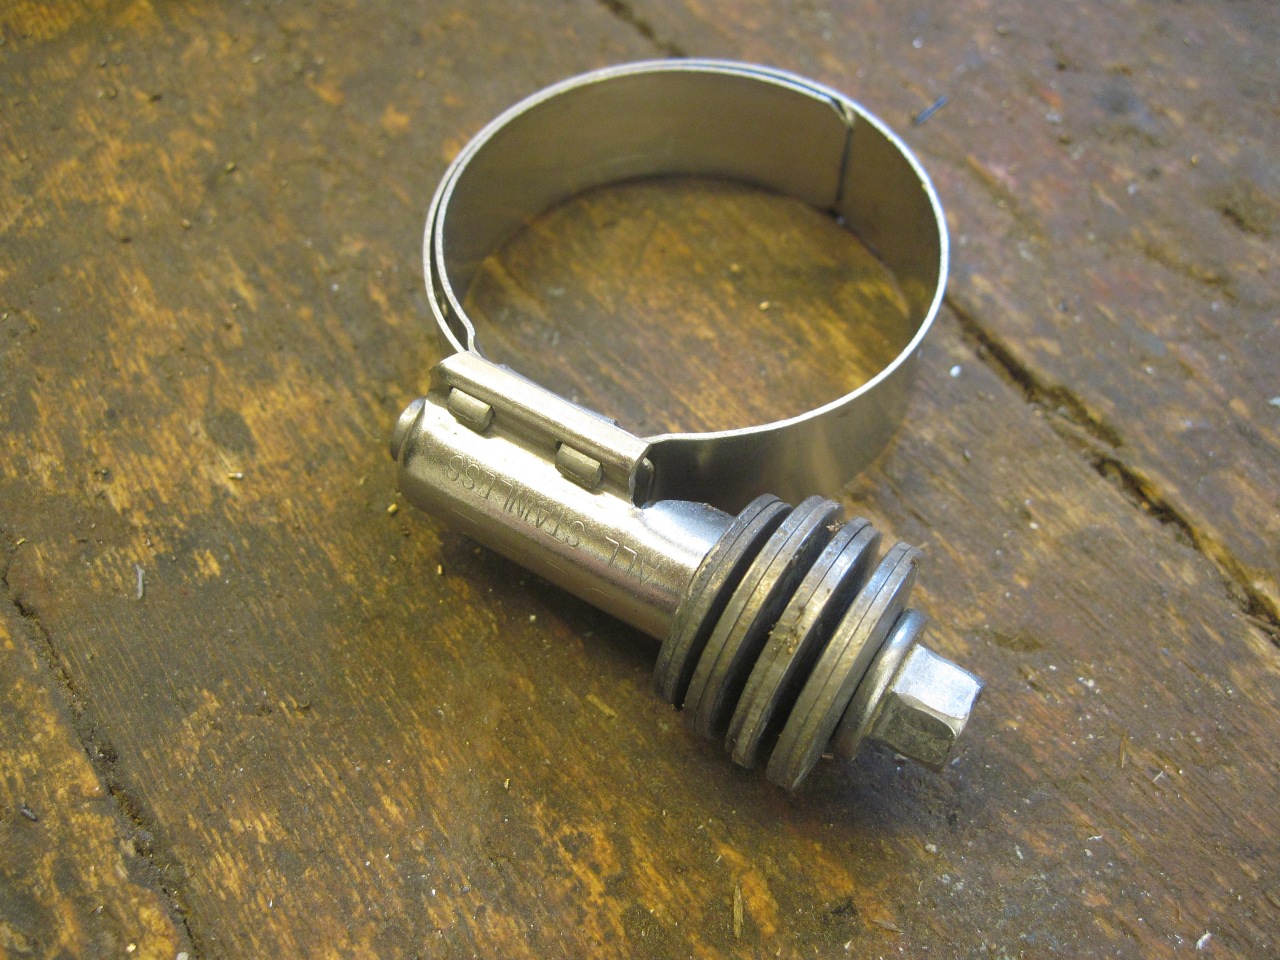
The
stainless hose clamps are described as "constant tension". This
is accomplished by that stack of Belleville spring washers on the
tightening screw. I don't know how important that is, but my
geeky side liked it. More important to me was that the clamp band
extended over the tooth cutouts so that the hose cant extrude through
them.
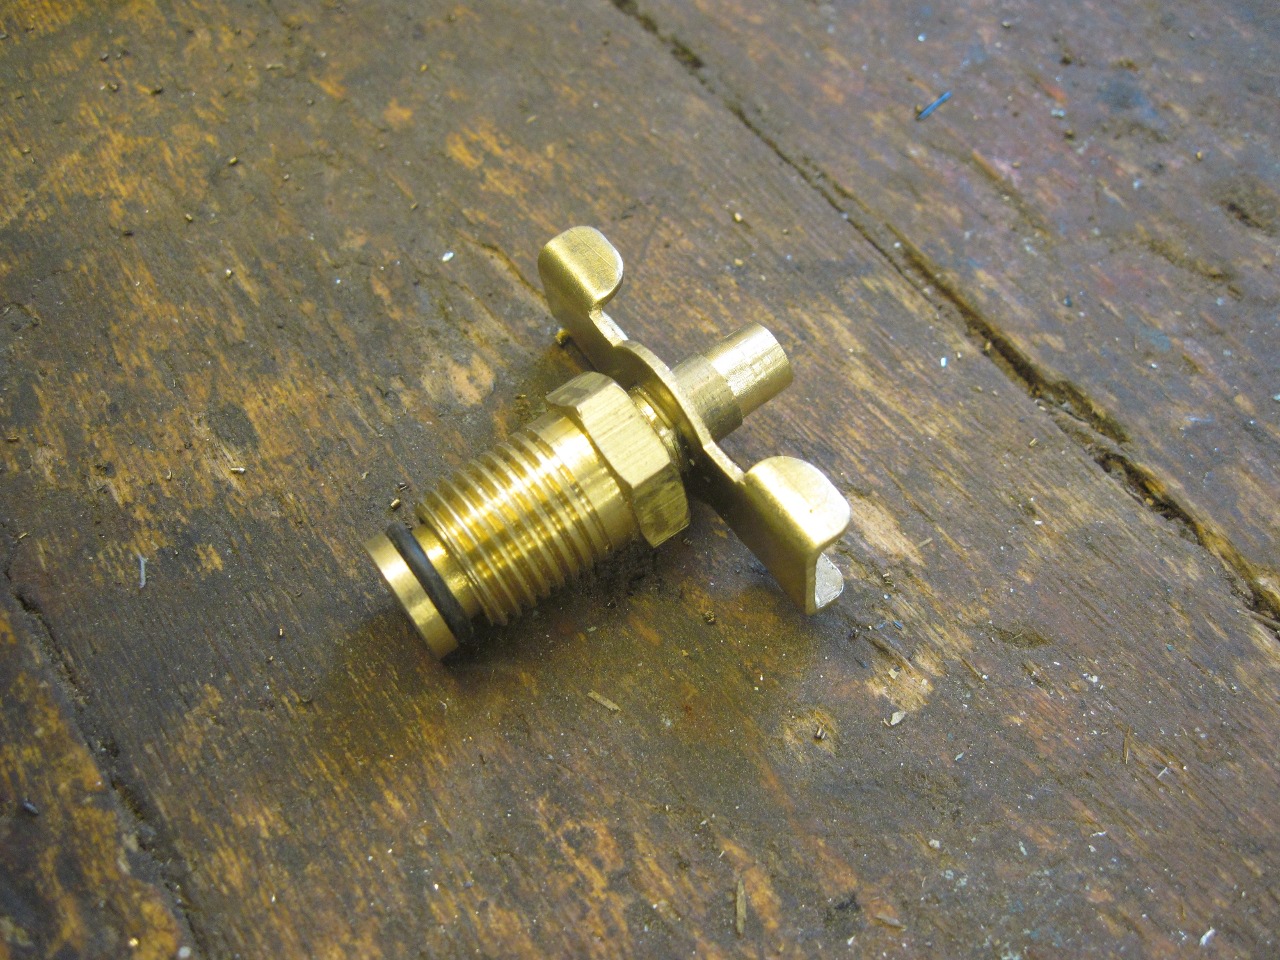
Because
the radiator drain is above the belly pan, I wanted a drain cock that I
could attach a hose to. I was surprised to find one where even
the turning handle was brass. Mostly those are plated steel, and
they usually rust pretty quickly.
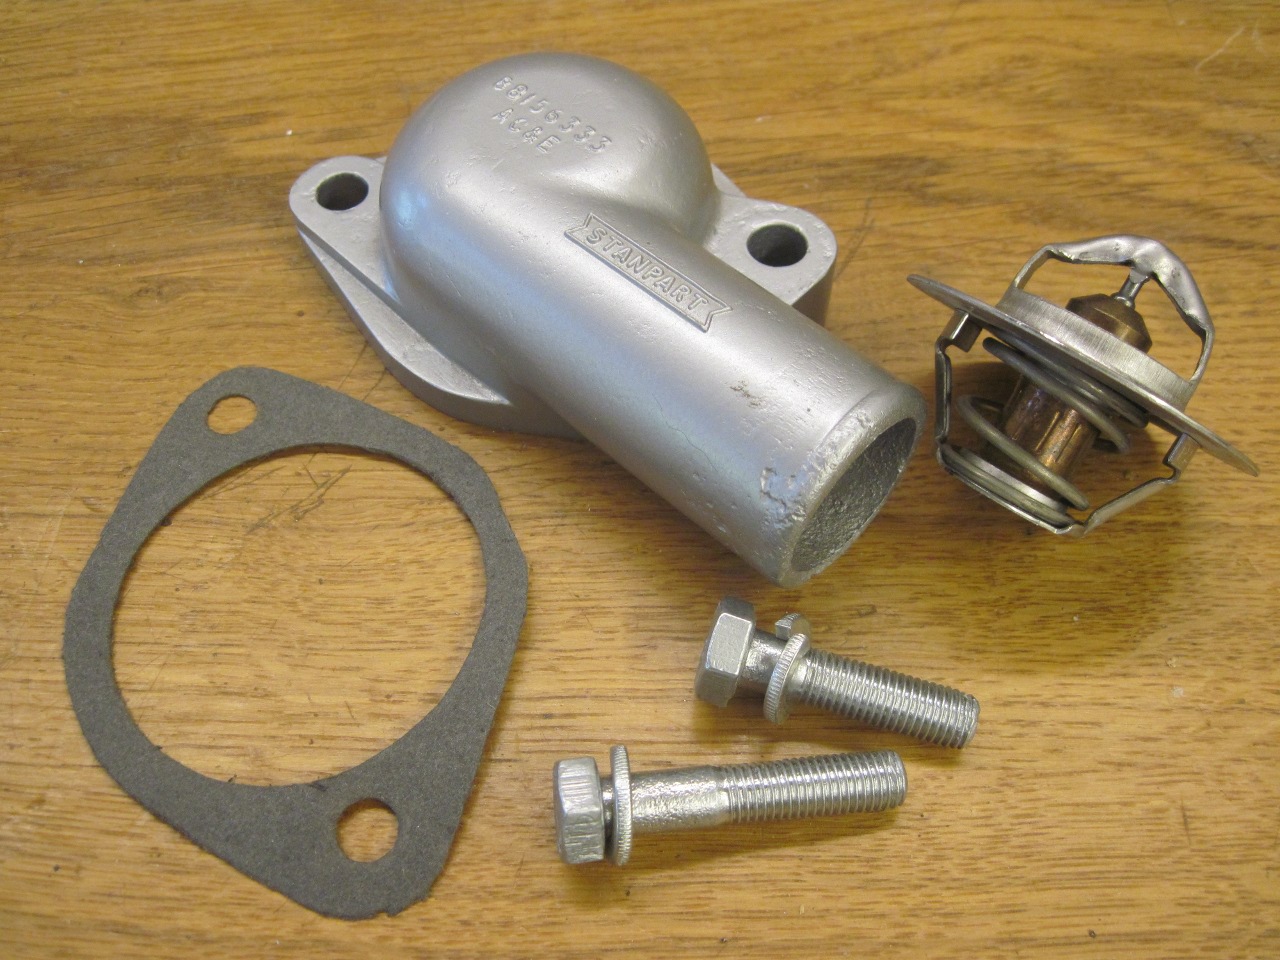
The
thermostat housing, new thermostat, homemade gasket (forgot to order
one), and replated original hardware. I was tempted to
polish up the housing, but the Stanpart logo and other lettering make
it really hard to do a good job. Besides, in an engine
compartment, the shine doesn't last long. In the end, I powder
coated it silver.
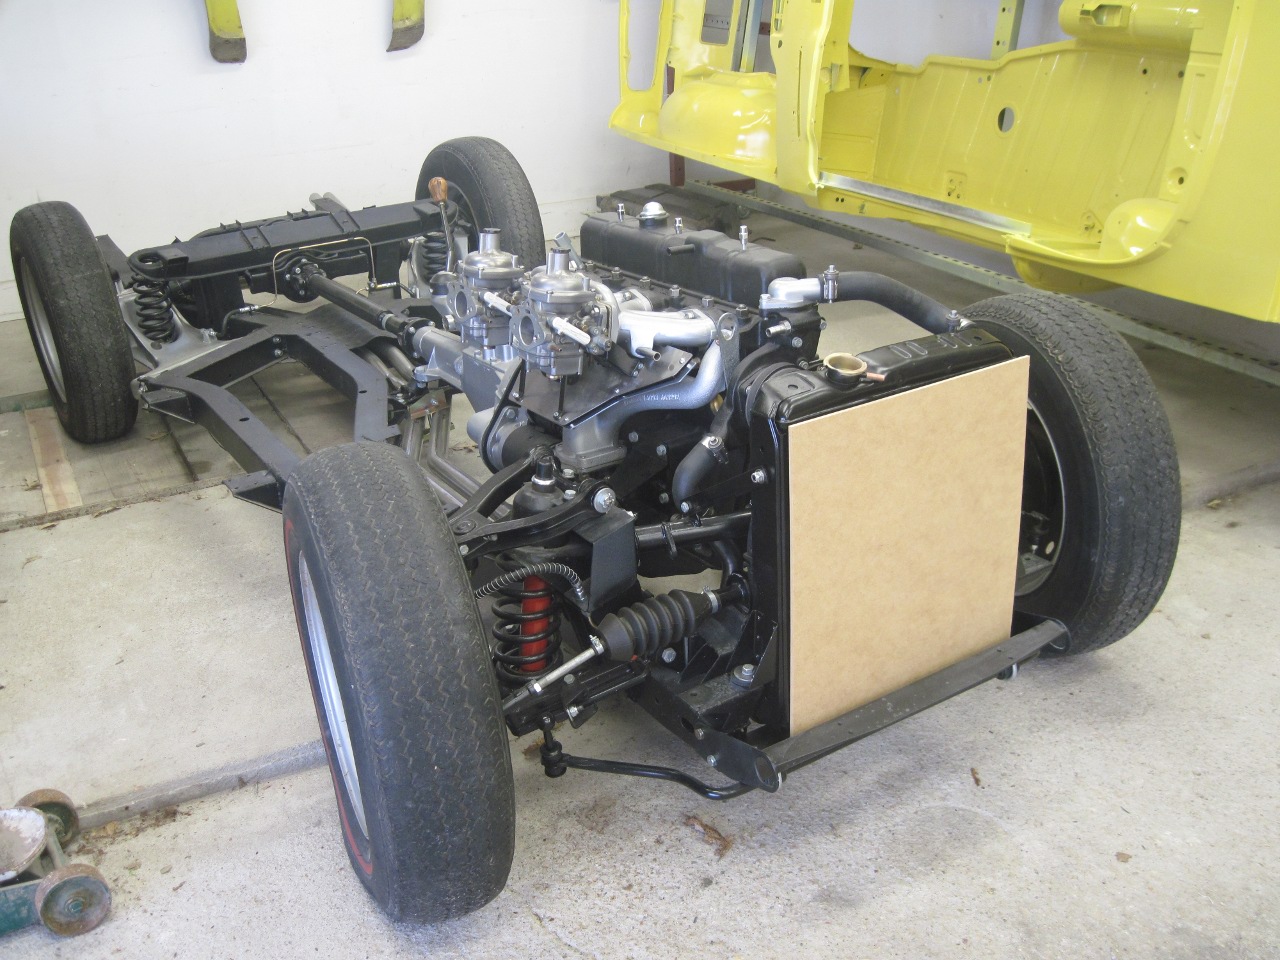
So, putting everything together, it's starting to look like transportation.
The spring loaded hose clamps take up a little more room, but can actually be easier to reach and operate.
The fan switch is pretty accessible, but I have to think of a good way to protect the connections from water.
Finally, I mounted a piece of hardboard in front of the radiator to protect the delicate fins.
This was a fun part of the project. It was fairly expensive, but almost entirely due to the outsourced work.
Comments to Ed at elhollin1@yahoo.com
To my other TR6 pages