November 7, 2013
Stripping, cleaning, and inspecting the Block.
[Click pictures for a larger view]
The
bare block for the TR6 weighs around 135 pounds, so it's much easier to
manipulate than the entire engine or the block with the rotating and
reciprocating stuff in it.
The
first thing I wanted to do is clean it up so it was more pleasant to
handle, and also so any
gross defects would be easier to see. SOP for this has
historically been to take
blocks and heads to a shop to have them "hot tanked". This is a
hot
caustic bath that the block would go in for up to a few days.
I've done this for previous blocks, and though I don't remember it
doing much for the rust, it does a reasonable job on grease, oil, and
some paint.
I decided to put off the decision on whether to do the hot tank until after I did an initial power wash cleaning.
To make any clening most effective, I had to open up the innards of the block as much
as possible. This means removing the core plugs and oil gallery
plugs.
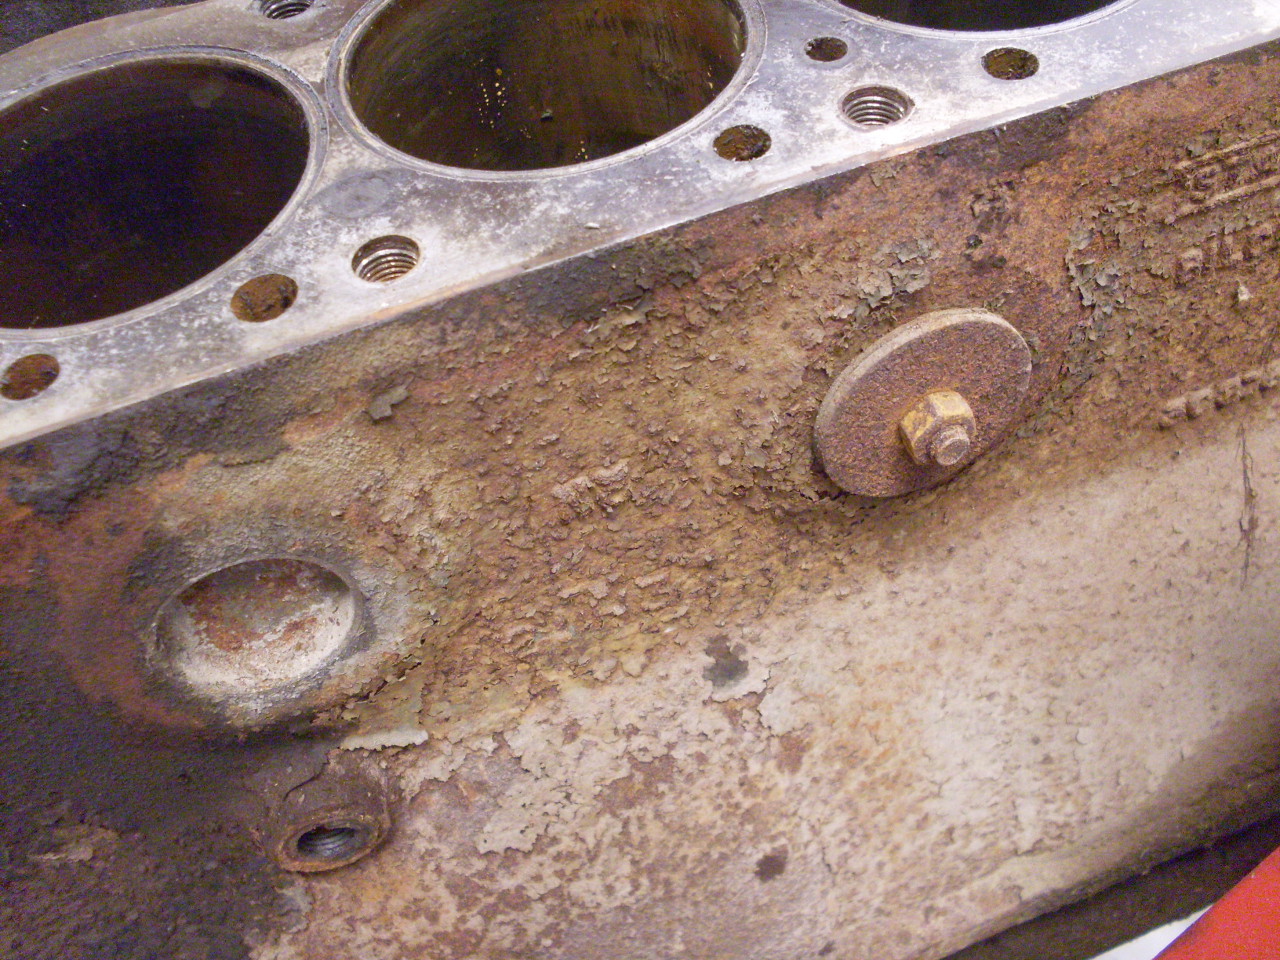
The core plugs, sometimes mistakenly called freeze plugs,
cover holes required for the casting process. I noticed that one
of my core plugs looked different from the others. It turned out
to be a rubber plug that expanded when the nut was tightened.
This must have been an expedient repair of a leaking plug before
I got the car. Once I saw what the plug looked like on the
inside, I was glad to get it out of there.

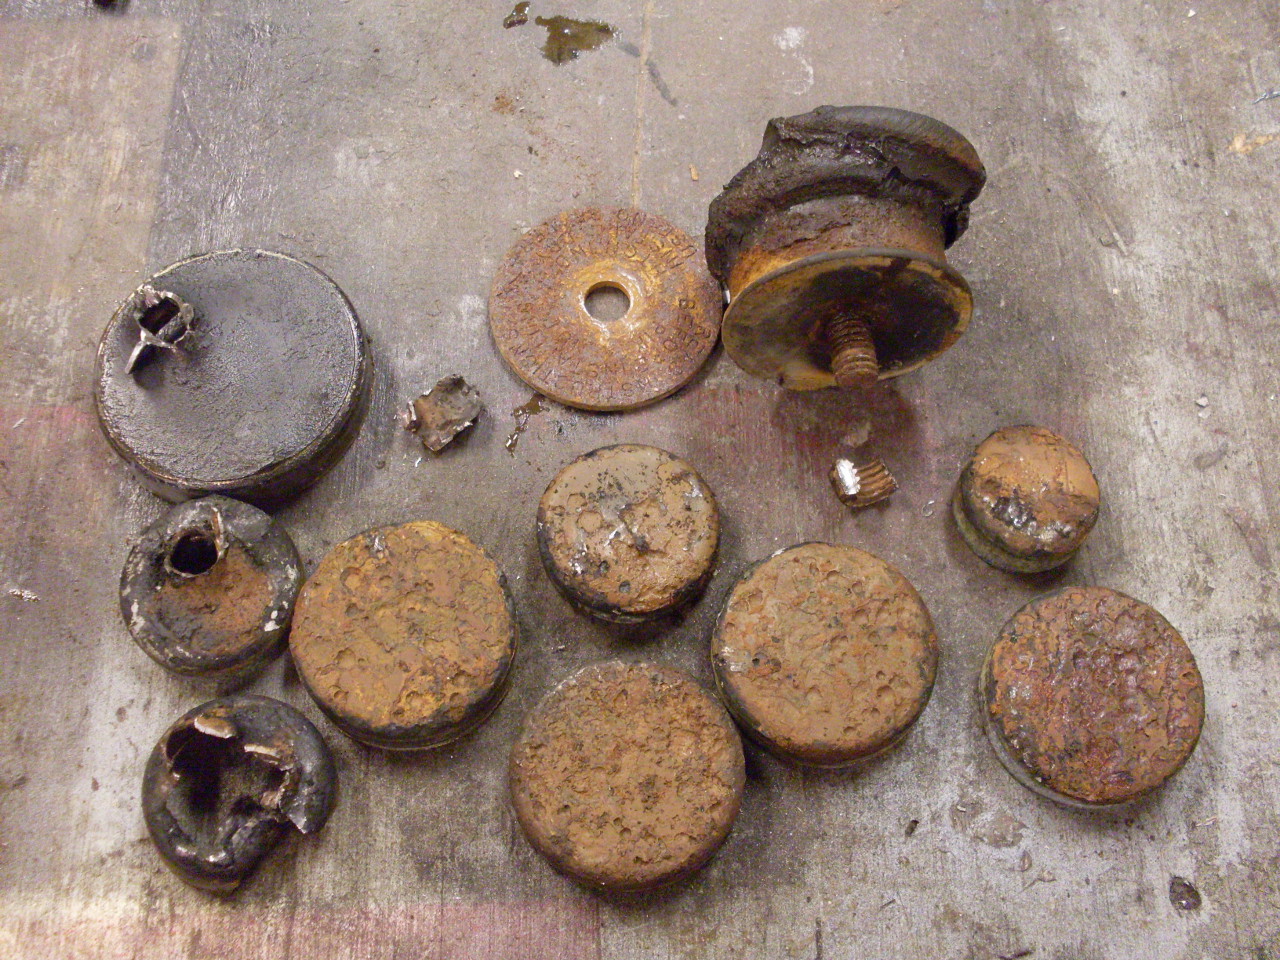
Some of the plugs didn't give up easily, and most (the ones in the coolant galleries) were pretty pitted with rust.
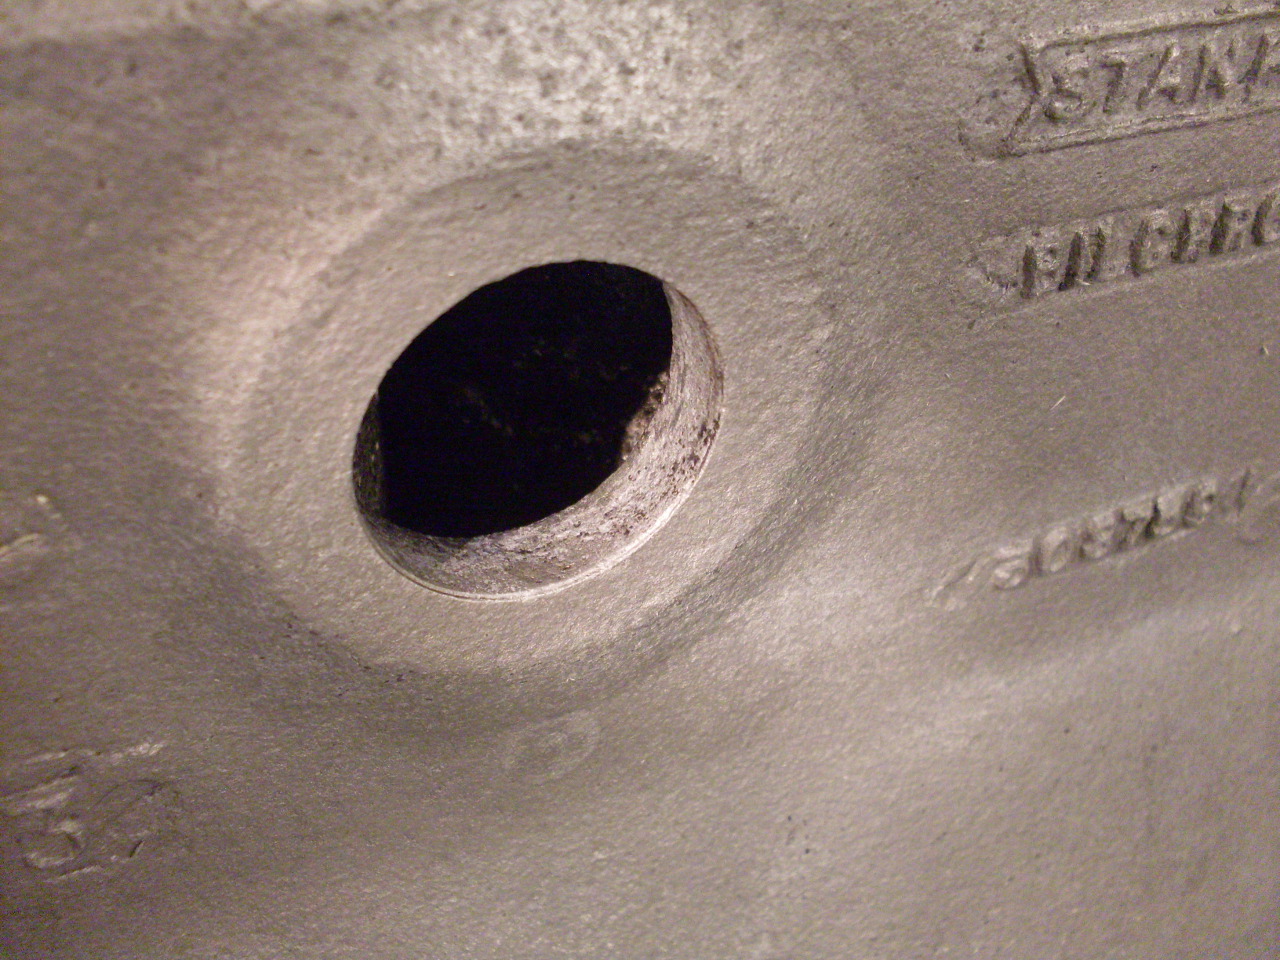
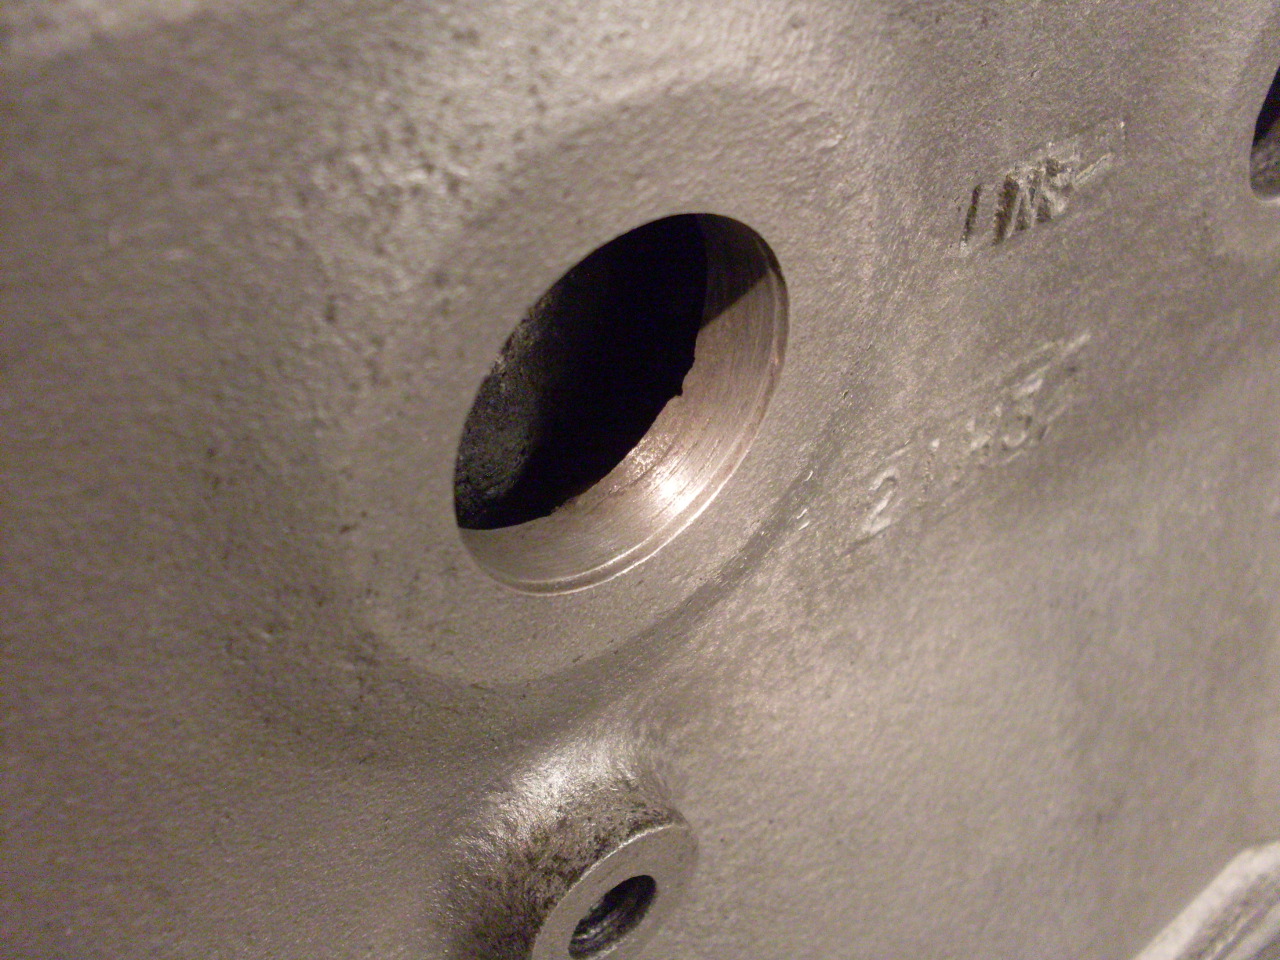
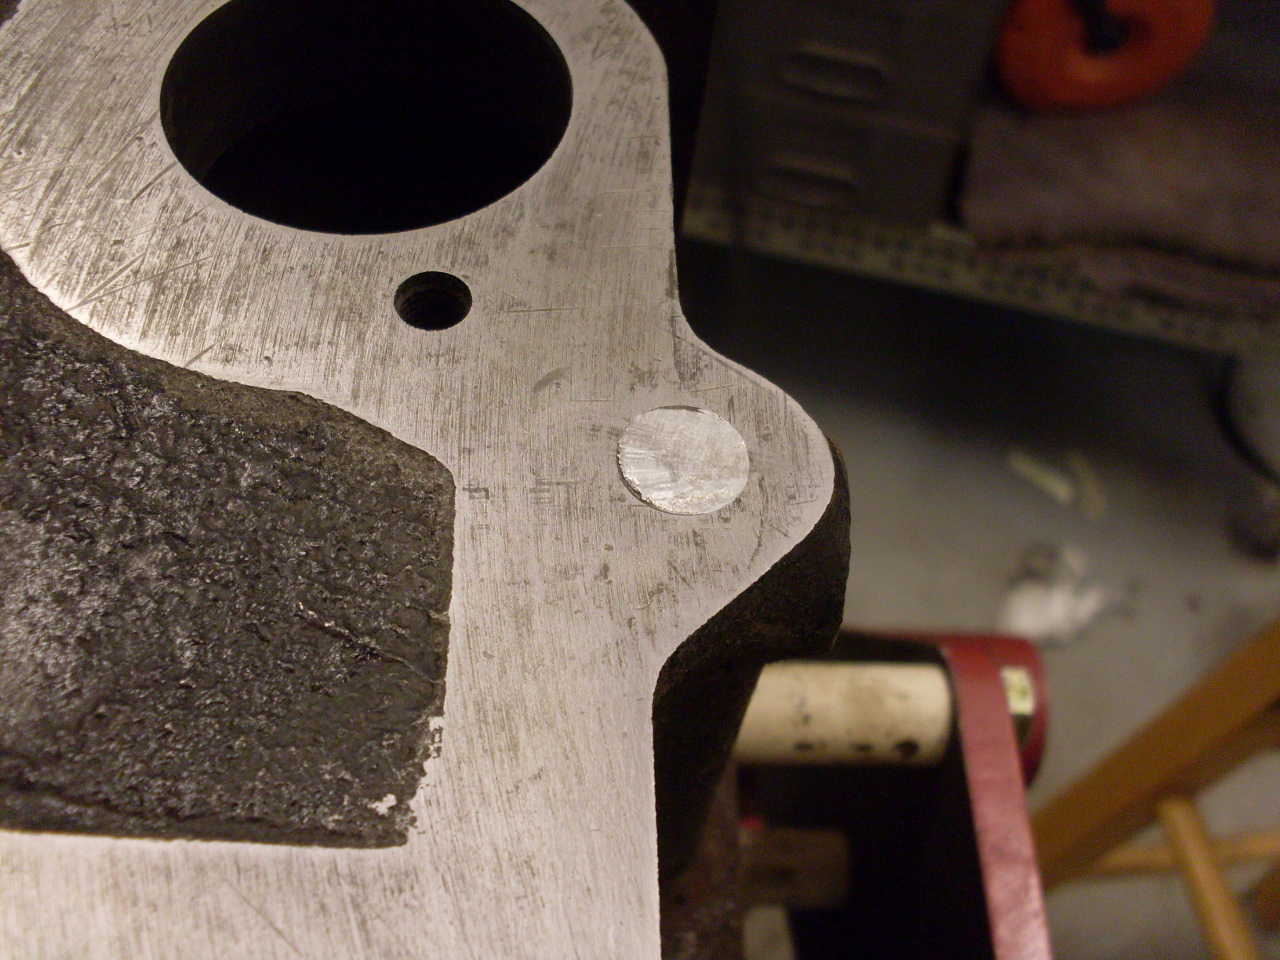
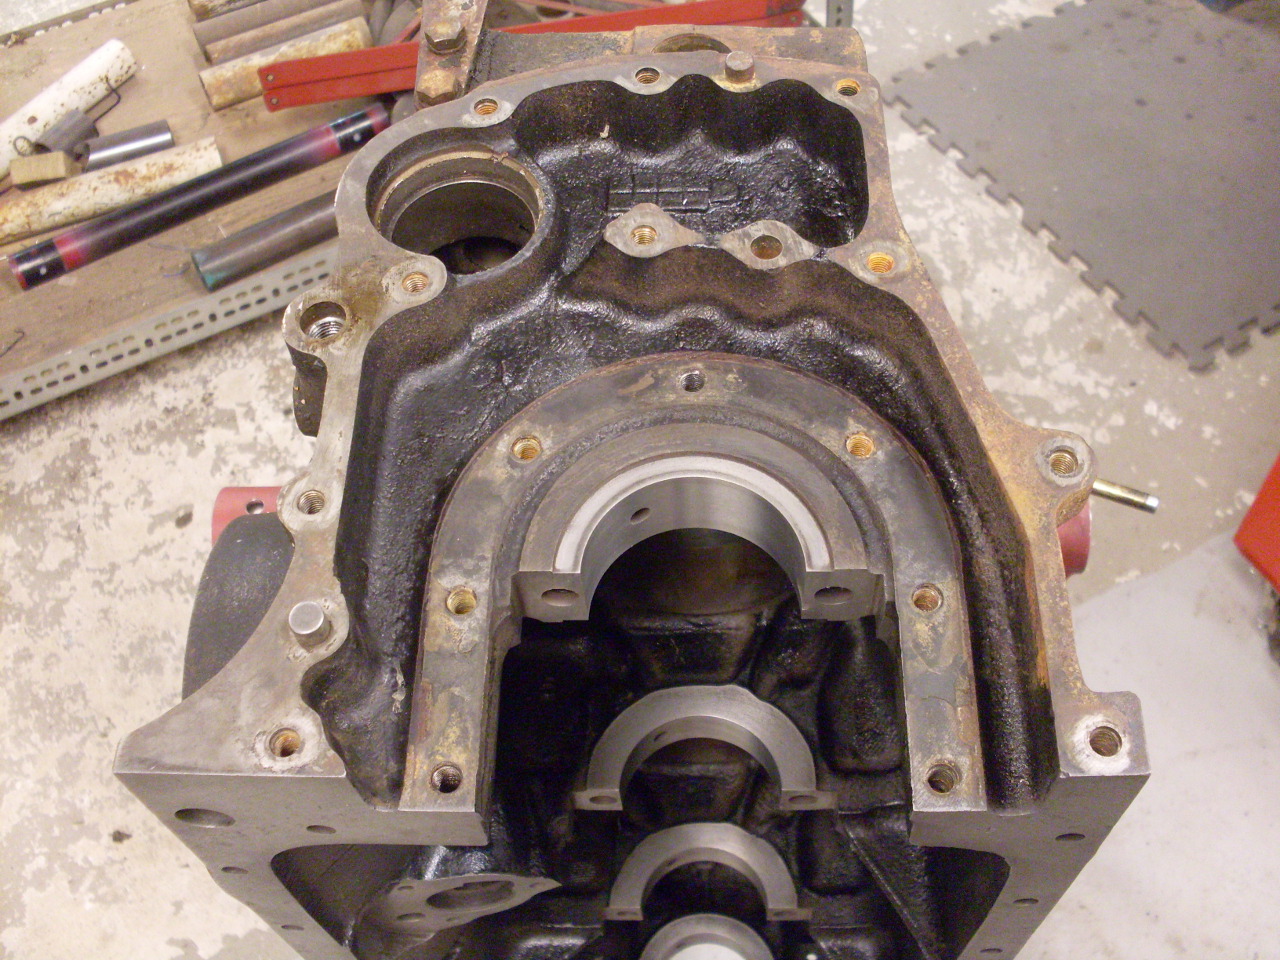
The
core hole that had the rubber plug offered some clues as to what might
have happened. It appears that the circumference of the hole is
not machined all the way around, so that part of it has the same rough
texture as the raw casting surface (left picture). The hole has
the correct nominal diameter, but that rough surface will make sealing
difficult. I'm considering boring the hole out from the current
1-1/2" to to 1-5/8" for a larger plug.
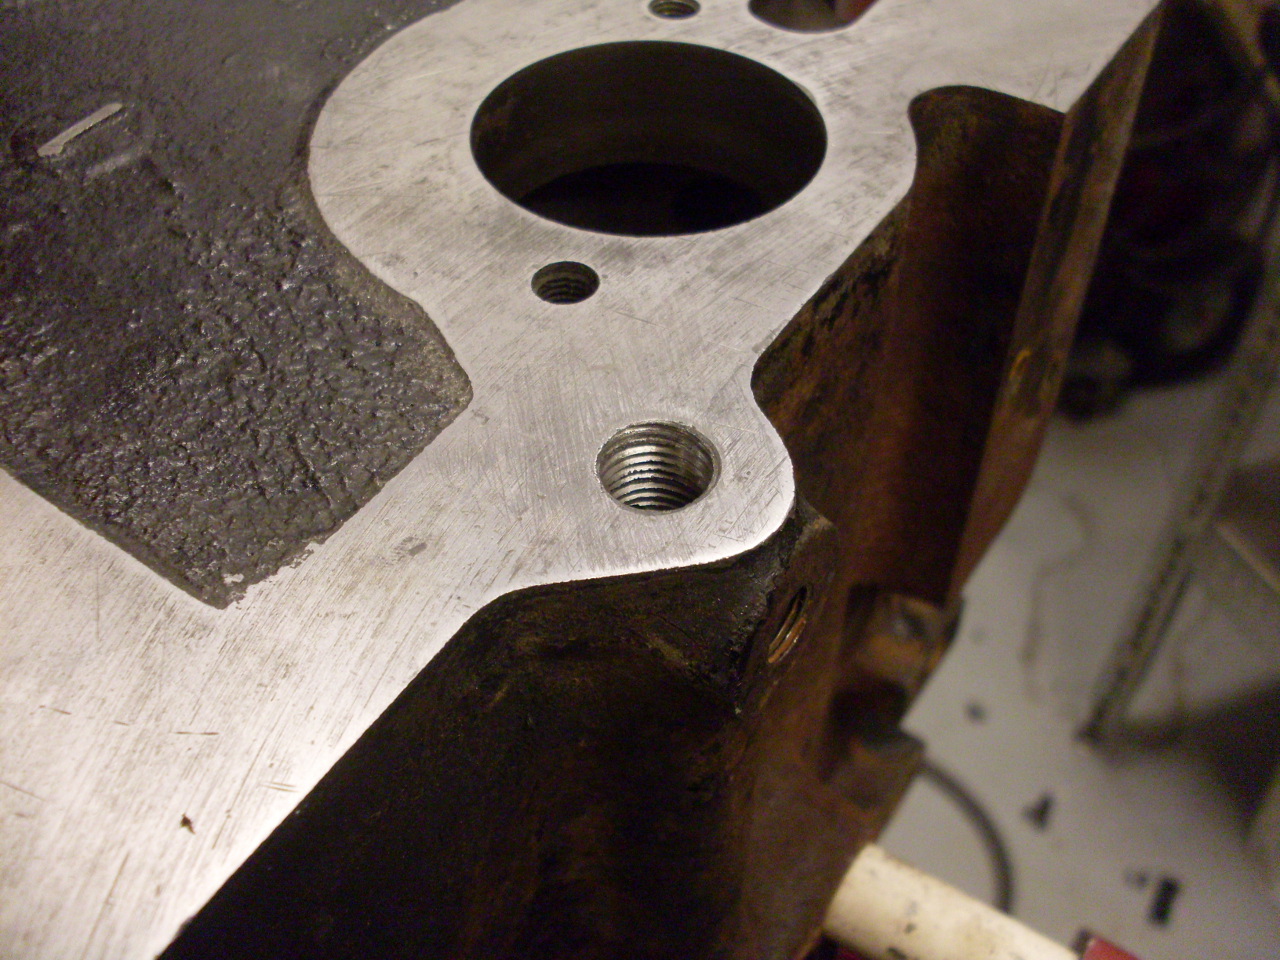
There
is a long main oil passage running the length of the engine on the left
side. It accepts pressurized oil from the oil pump and
distributes it to the crank and cam bearings through cross drillings.
The cross drillings and one end of the main gallery are plugged
by allan pipe plugs on the outside wall of the block. None of
these plugs really wanted to come out, and after stripping the allan
recess of a couple of them, I had to resort to welding a short hex head
bolt to them to convince them.

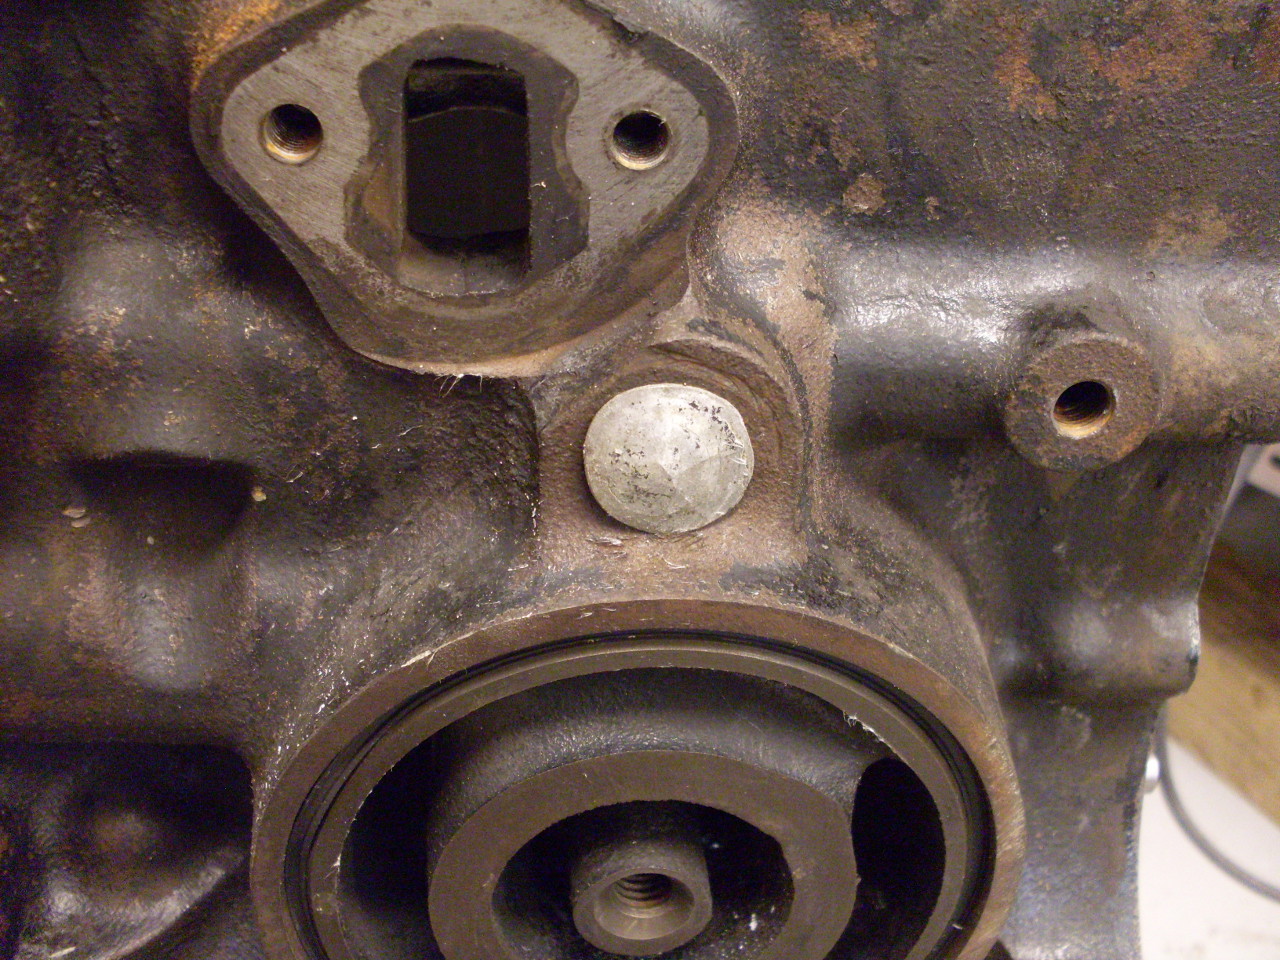
Additionally,
and who knows why, two
of the plugs are some sort of soft metal (some have said lead, but it
seemed more like soft aluminum to me) that has to be drilled out.
It
takes some care, though, because the holes are actually threaded.
I'll probably replace these plugs with conventional threaded
plugs.

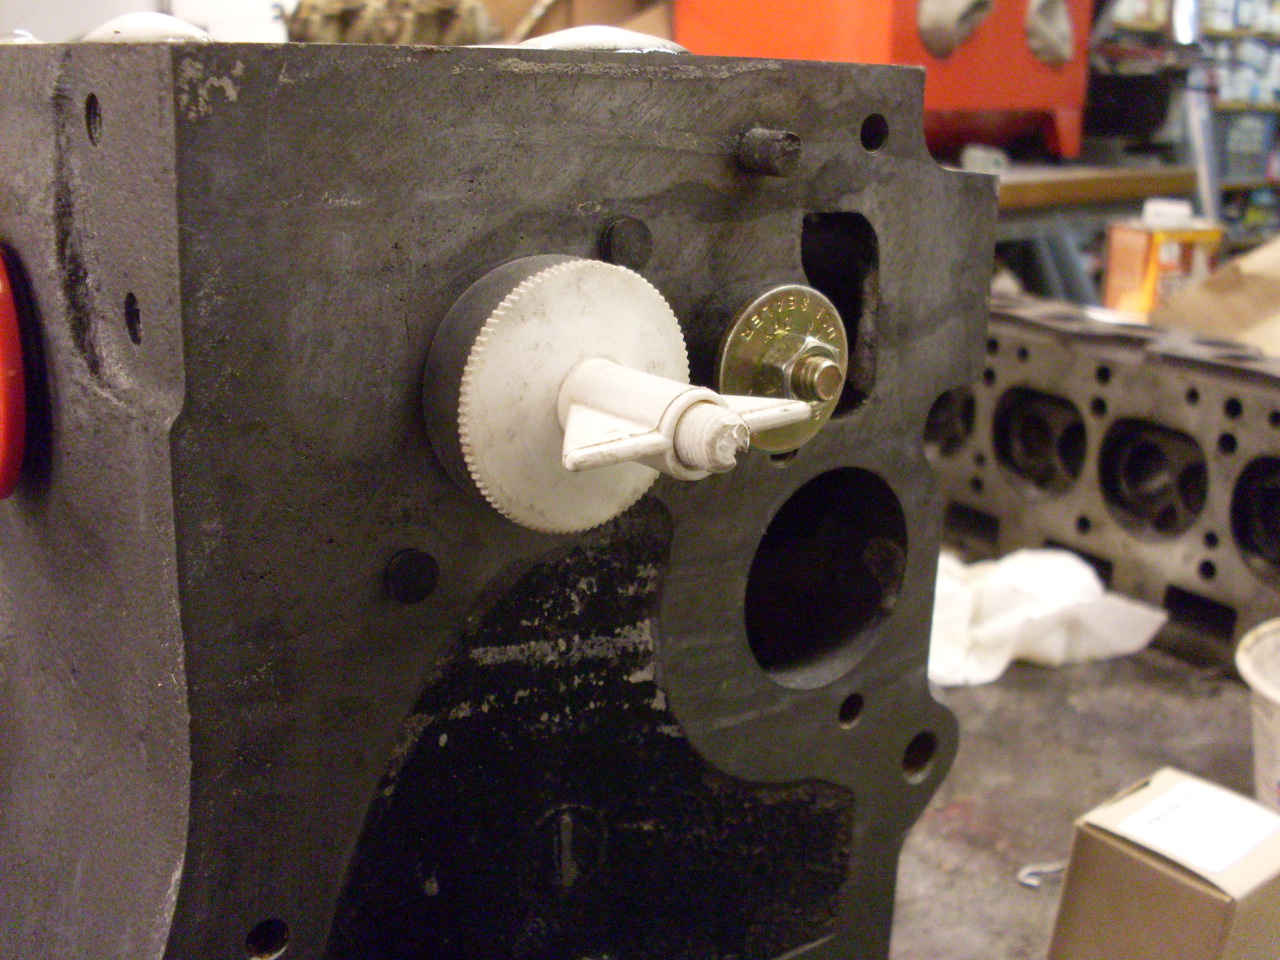
Here
is a home brew arrangement to pull the cast iron distributor drive gear
bush out. The bush is a little fragile, and can be prone
to break if drifted (pounded) out.

I
spent some time at the car wash shooting hot soapy water down the oil
passages and into the water jacket through the core plug openings, and getting myself thouroughly soaked.
A lot of nasty rust-colored water came out, but eventually
it was running clear.
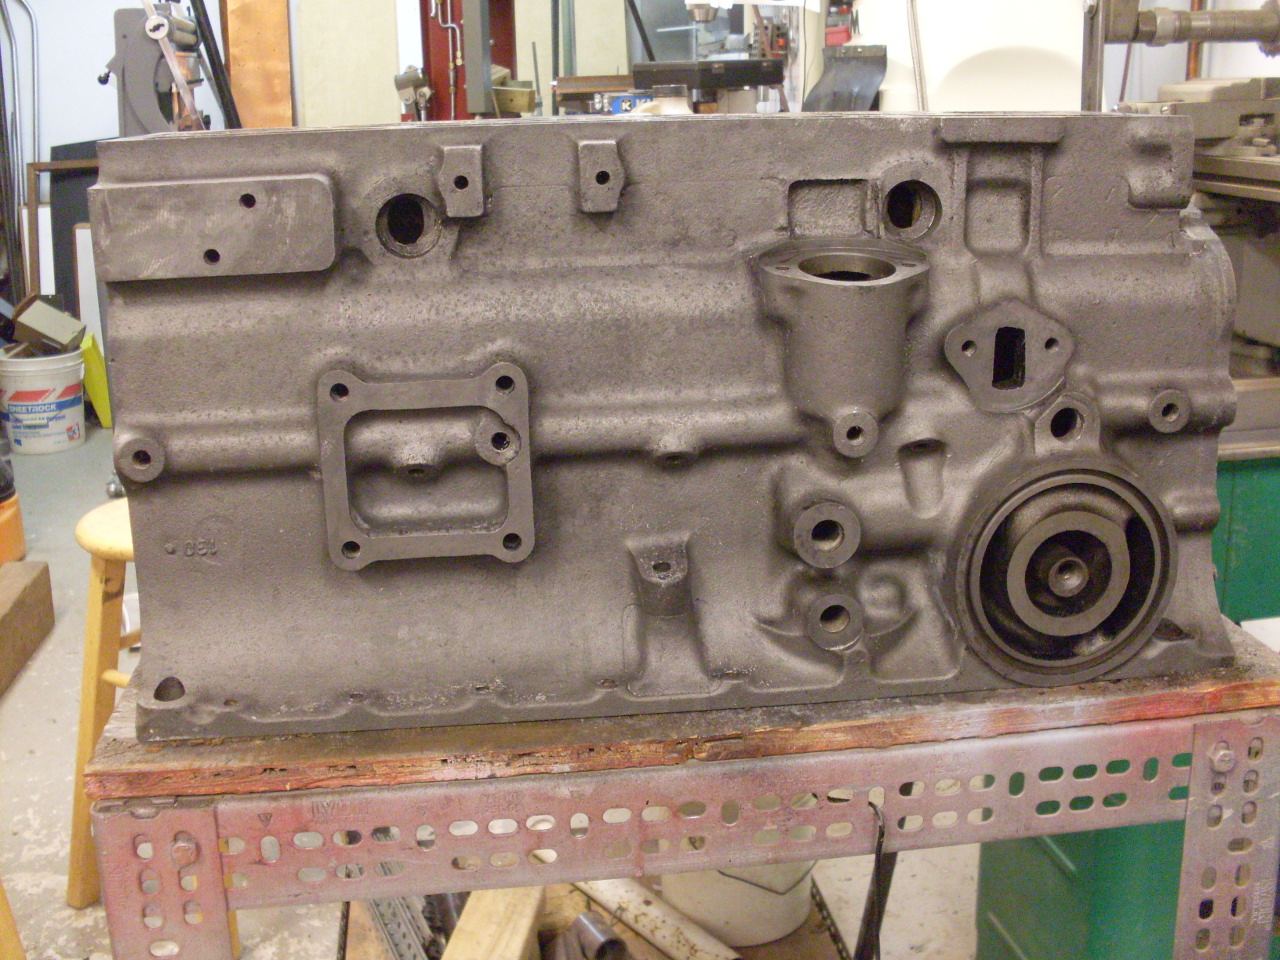
The
pressure wash did a good job of
getting the dirt, grease, and oil off the block, but it
didn't do much for left over gasket material, rust, or
paint. There were also some greasy recesses inside the block that
I could feel with a finger, but couldn't reach with the washer wand.
I decided to check the block in for a hot tank soak after all.
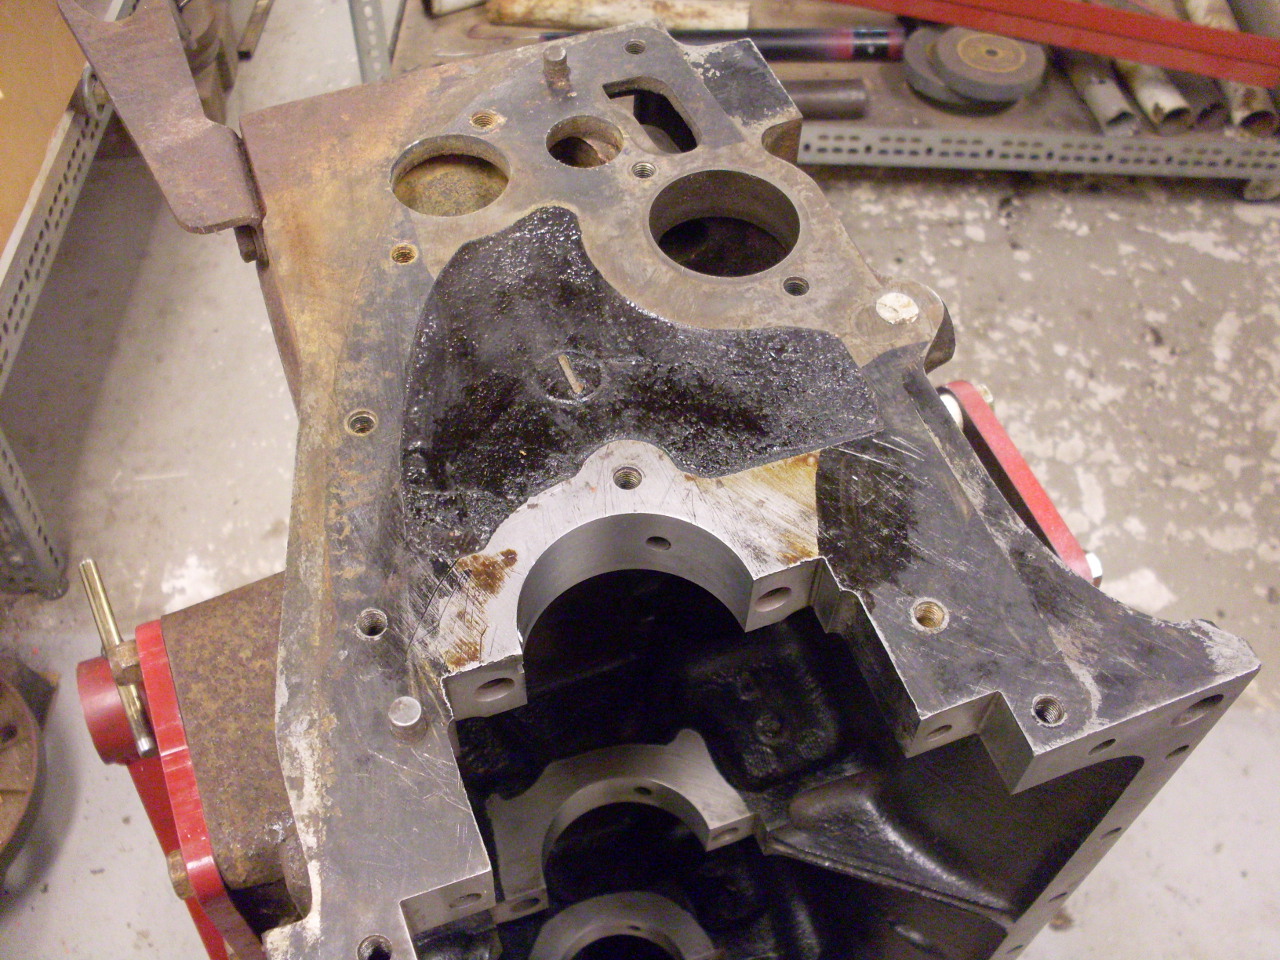
After
almost three days in the tank, the results didn't do much to improve my
opinion of hot tanking. The block looked just about the same as
when I took it in. Some of the unreachable recesses seemed a
little cleaner, but the rust and most of the paint were still there. This left a lot of manual cleanup work.
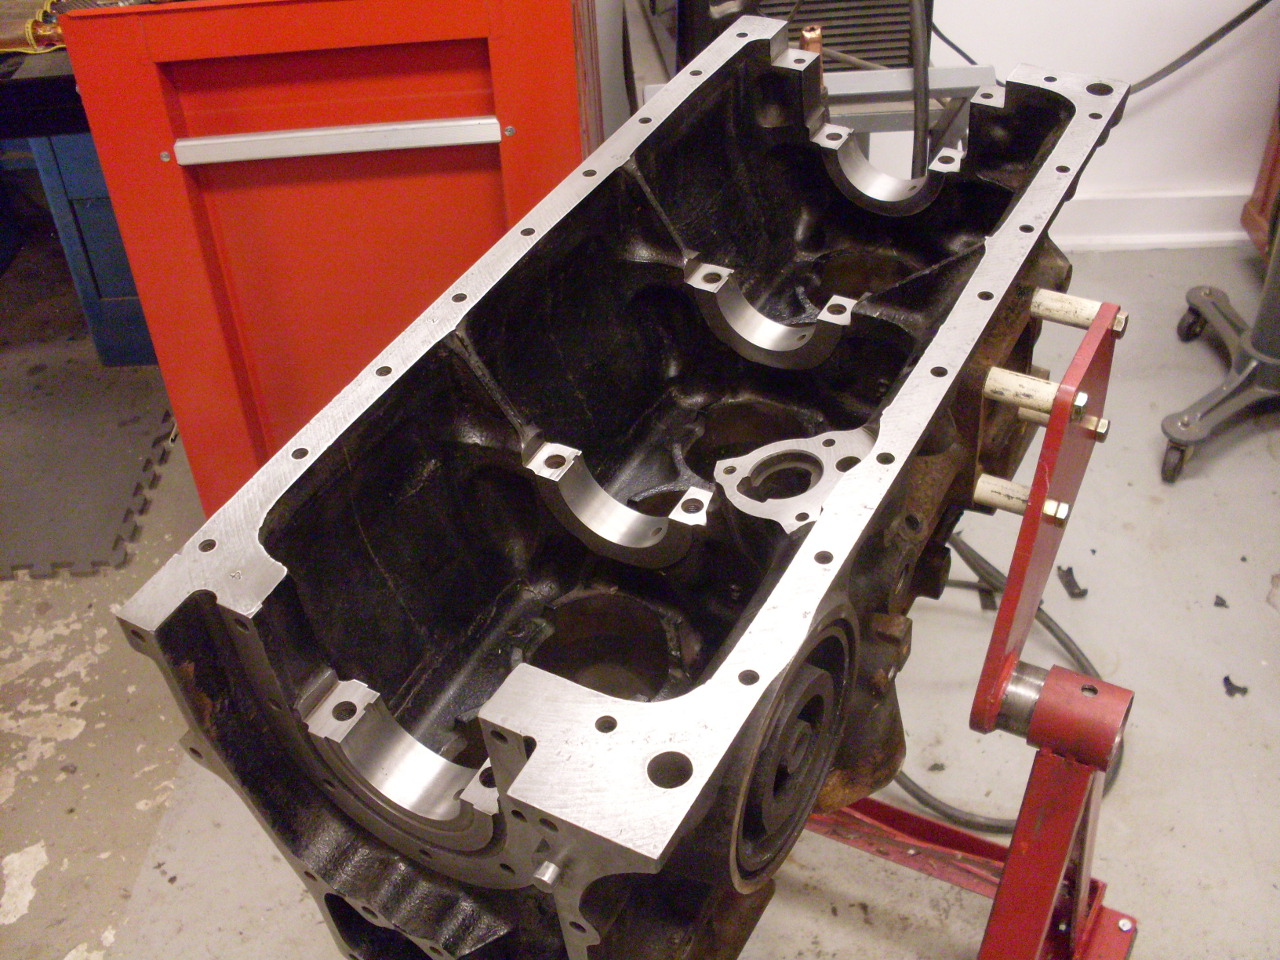
I cleaned up all the machined surfaces, checking for obvious problems.


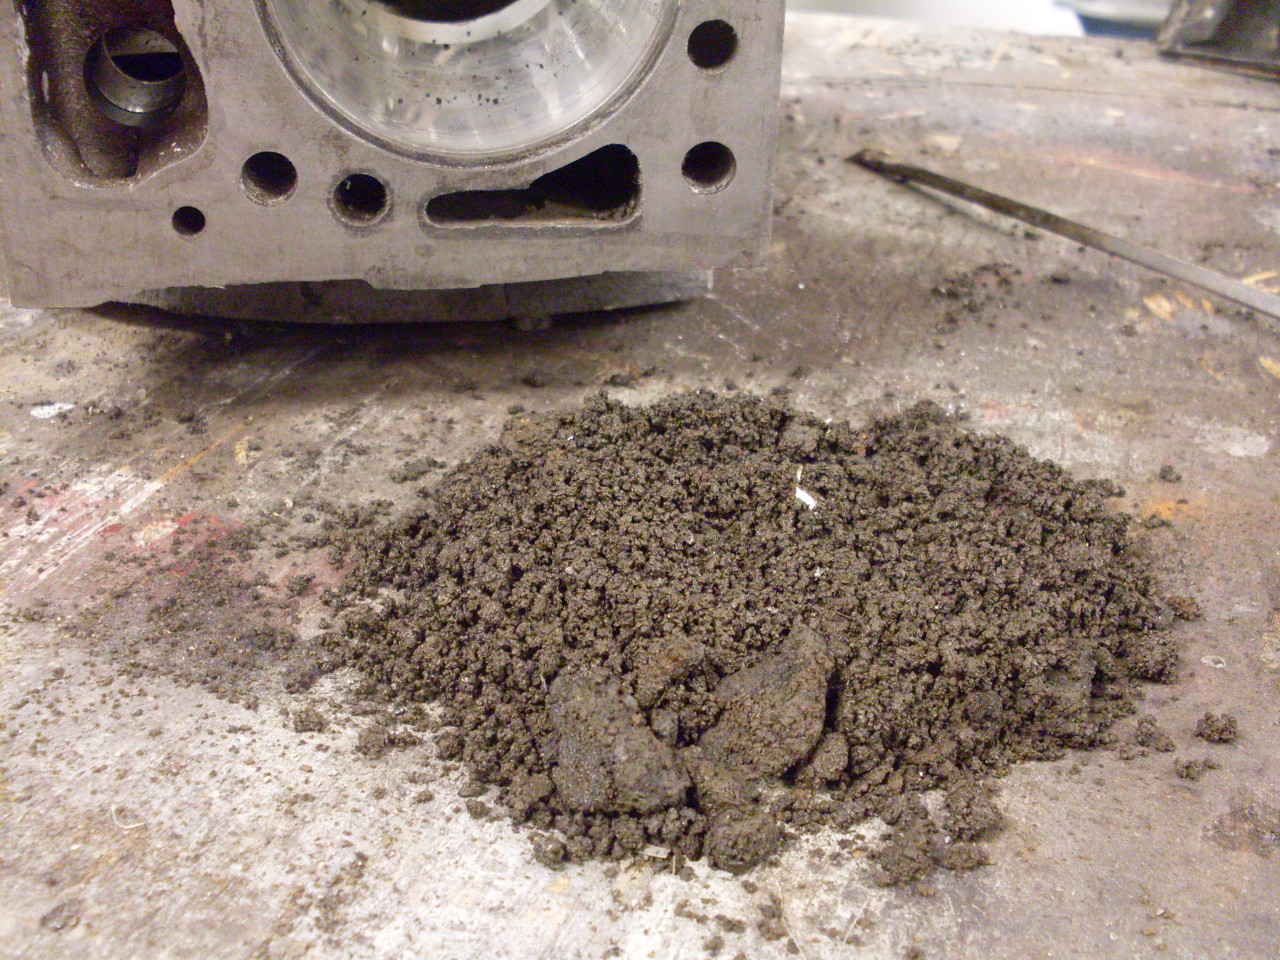
At
some point, I remembered that when I opened and removed the block
coolant drain, nothing came out, even though I knew there was coolant
in the block. I probed the drain hole, and it appeared to be
blocked. Looking and probing down into the water jacket from the
top of the block, it also appeared that the floor of the jacket was
well above the drain hole. To make a long story shorter, I
eventually managed to remove a large amount of hardened, gritty sludge
from the jacket around the drain hole. This is stuff that neither
the hot power washing, nor the hot tank managed to touch, and except
for the blocked drain, I might have missed. I'll flush the water
jacket one more time before starting to reassemble the block.
After
getting the block pretty clean, I measured the cylinder bores
front-to-back, left-to right, top and bottom to find oversize, taper,
or oval conditions.
Ovaling
varied from just about nothing to about 1.2 thousanths. Taper in
the worst cylinder was a little less than 2 thousandths.
Measurements ranged from just inside the Grade B spec to about a
thousandth and a half outside spec. For 65K+ miles, I didn't
think the wear was all that bad, but I'll have the block bored to 0.020
over. There is little or no scoring, so this should clean up the
bores nicely.
I ordered the +0.020 pistons, and the block is waiting to go to the machine shop.

Update--Nov 20.
I
was still concerned about the sediment I found in the water jacket,
mainly because I wasn't sure I got it all. I know some cooling
system flush products are based on moderately strong acids, presumably
to attack the scale and rust. I decided to soak the water jacket
in an acid solution. Not wanting to use hydrochloric acid in the
shop (its fumes rust everything in sight), I fell back to my old
standby of phosphoric acid. It isn't as strong as hydrochloric,
but safer and more pleasant to use, and nearly as effective.
First, I had to plug up the core holes and other assorted holes
in the sides of the jacket.

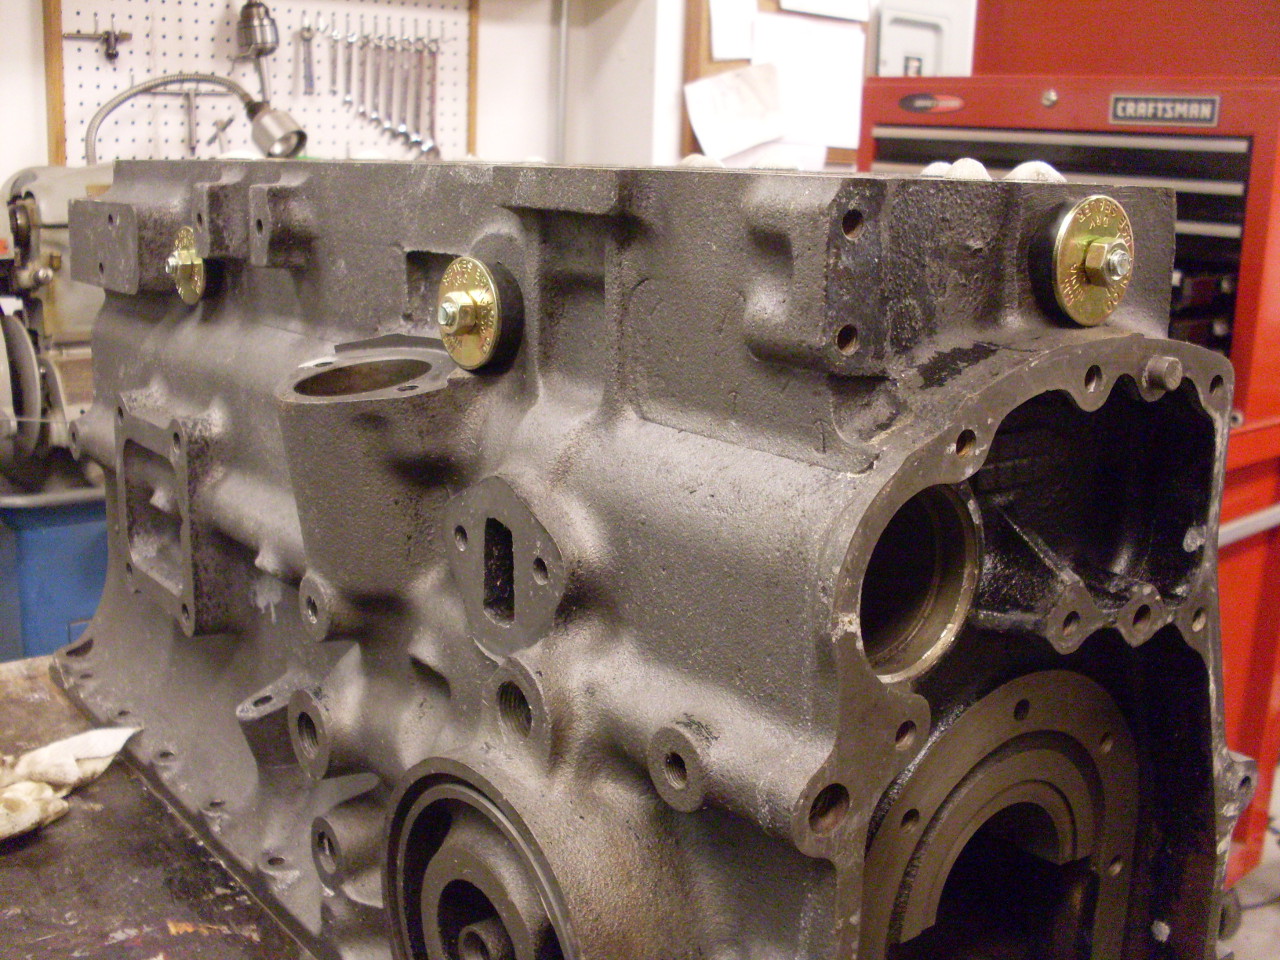
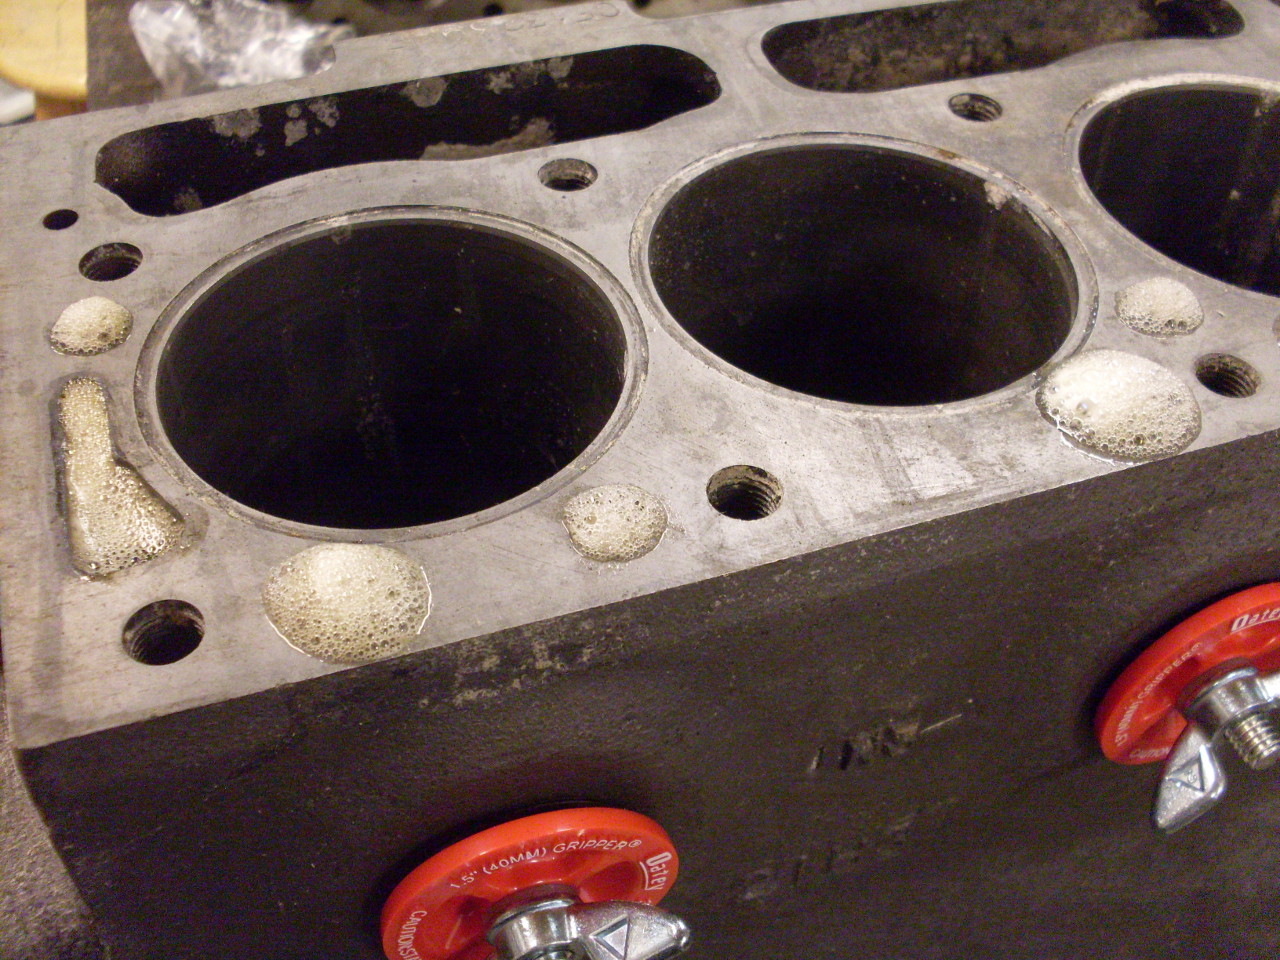
Then
filled the jacket with about half a gallon of phosphoric acid solution.
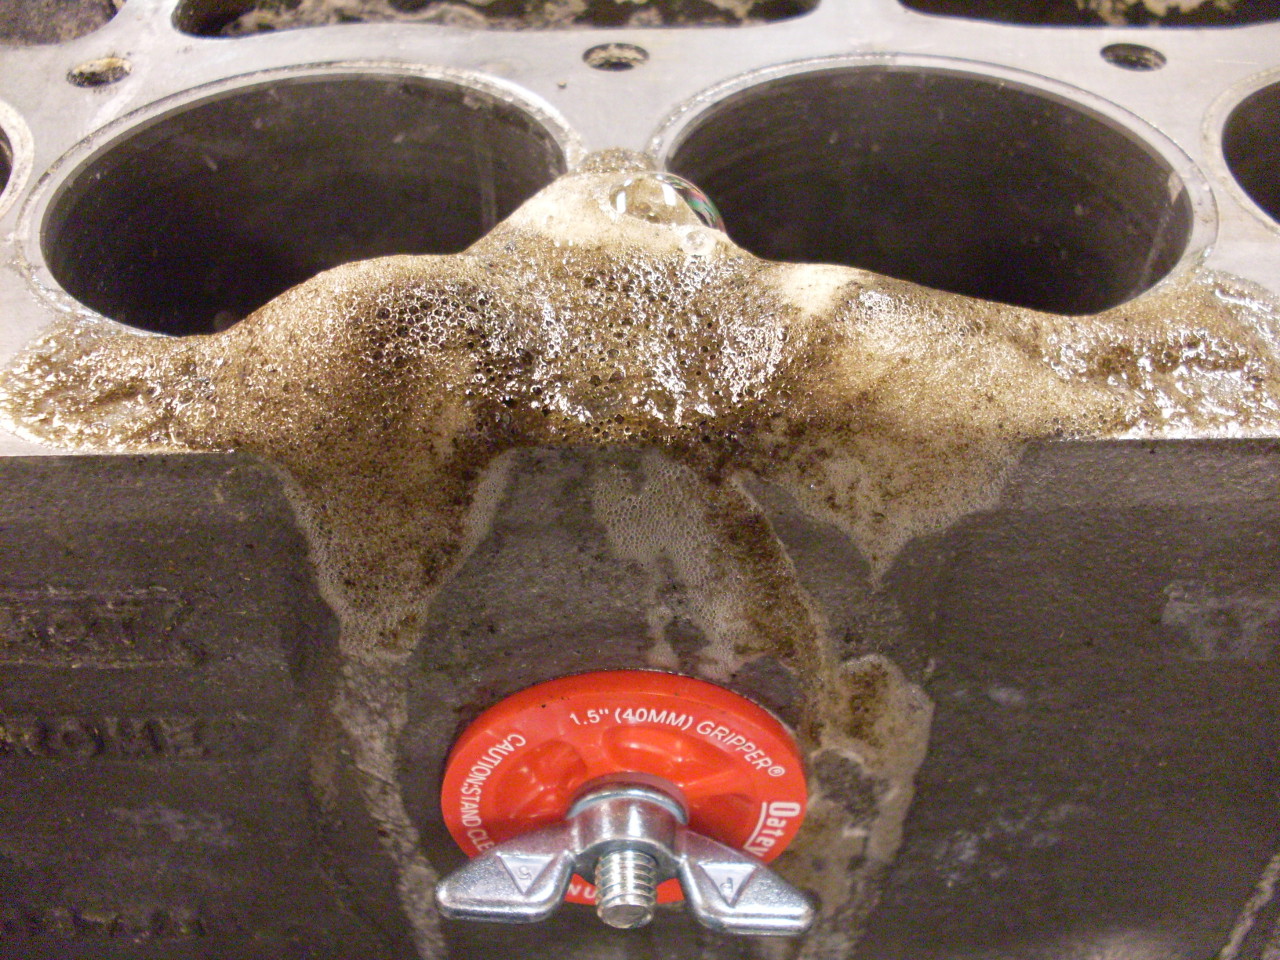
Almost right away there was some foaming action. This was
encouraging since it indicates some kind of chemical reaction, probably
on scale. After a few hours, even more evidence that some kind of
cleaning was going on.
After
a few hours, I drained the acid and rinsed the cavity with several
rounds of hot water, then repeated the entire process twice more.
Visual inspection through the core holes showed that the internal
surfaces were getting cleaner.
Then,
assuming that the cleaning process could have dislodged more of the
gritty deposits I found before, I hauled the block back to the car wash
where I used the hot high pressure wand again, concentrating on the
water jacket. Quite a bit more sandy material was flushed out,
but eventually the water ran clear. I'm sleeping better now.
The block now goes to the machine shop for boring.
Comments to: elhollin1@yahoo.com
To other pages