To other TR6 pages.
February 13, 2014
Cylinder Head
Been working on the head for the past month or so, and finally finished it.
The
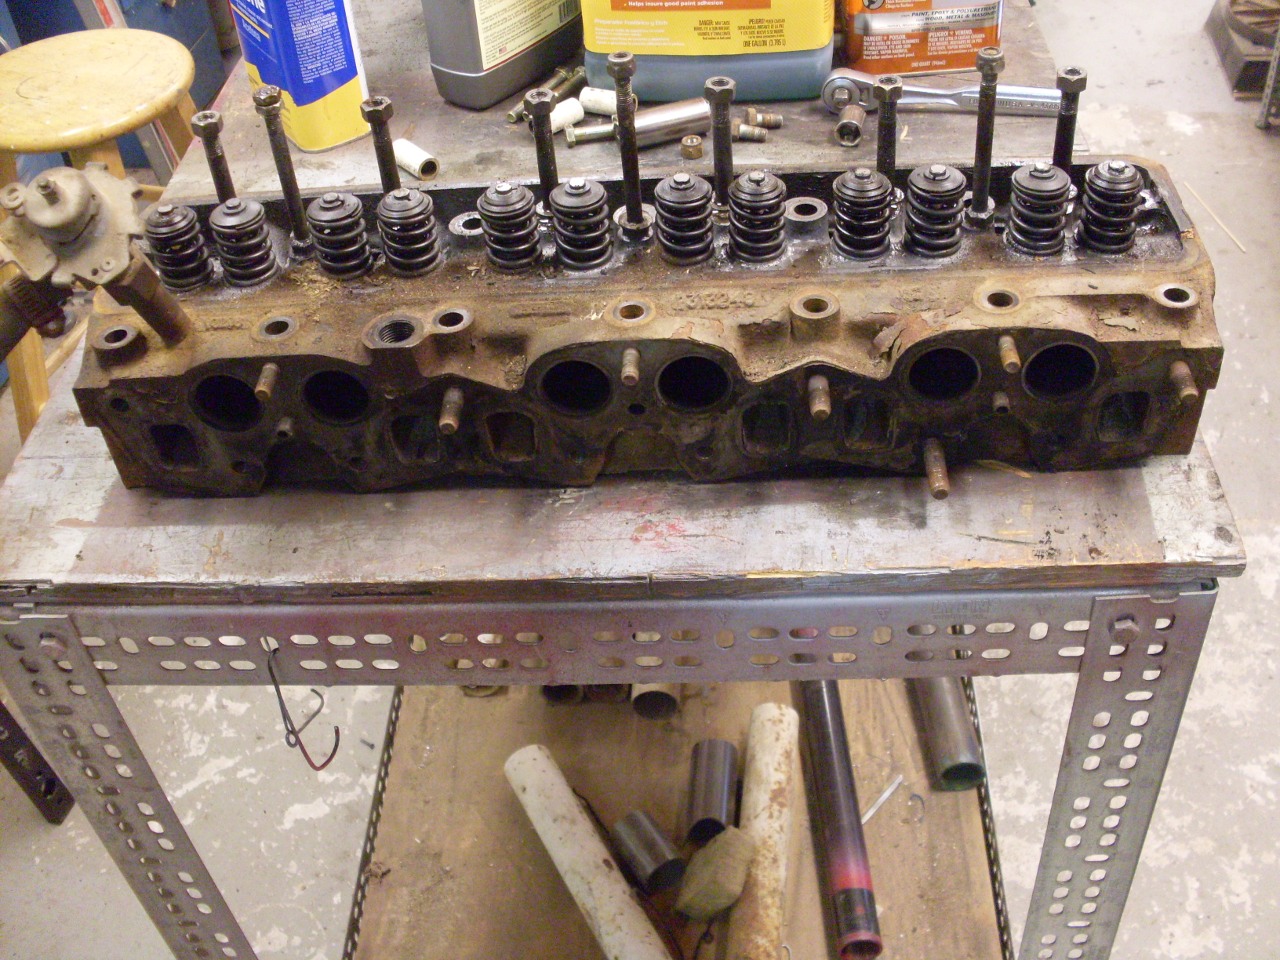
TR6 cylinder head is a 60-pound brick of cast iron. It's pretty
ordinary in every way, providing two vertical valves for each cylinder,
and a separate port for each valve. A conventional rocker shaft
holds the twelve rocker arms. Mine was appropriately greasy,
dirty, and rusty. Here it is after the rocker gear had been
removed.

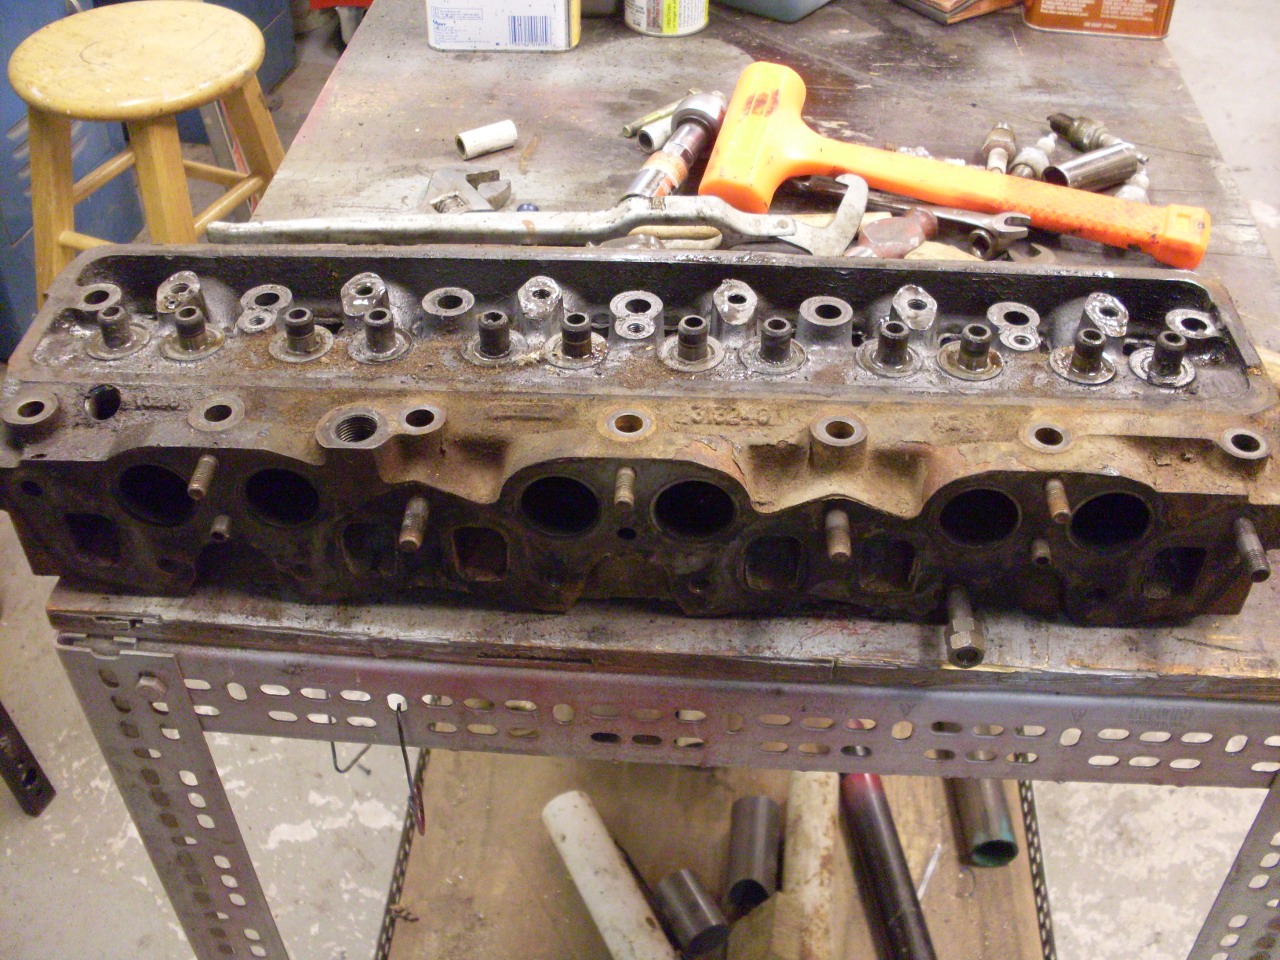
First,
I stripped out the valves ans associated parts so I could inspect and
measure them. Valve stems were right at or slightly outside the
spec range, so this meant new valves. Some valve springs were
slightly out of spec for length too, so I ordered a set of springs.
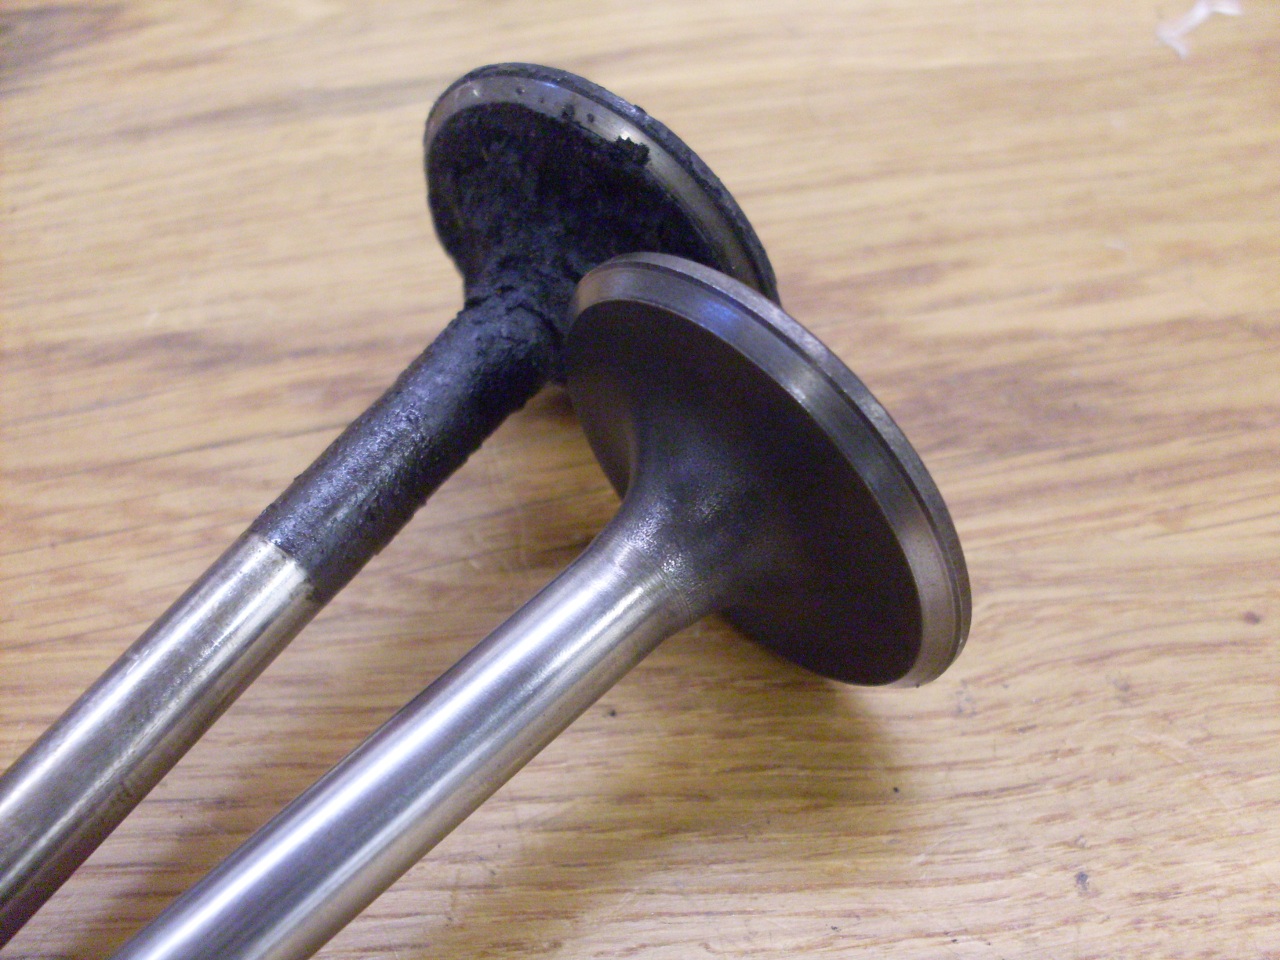
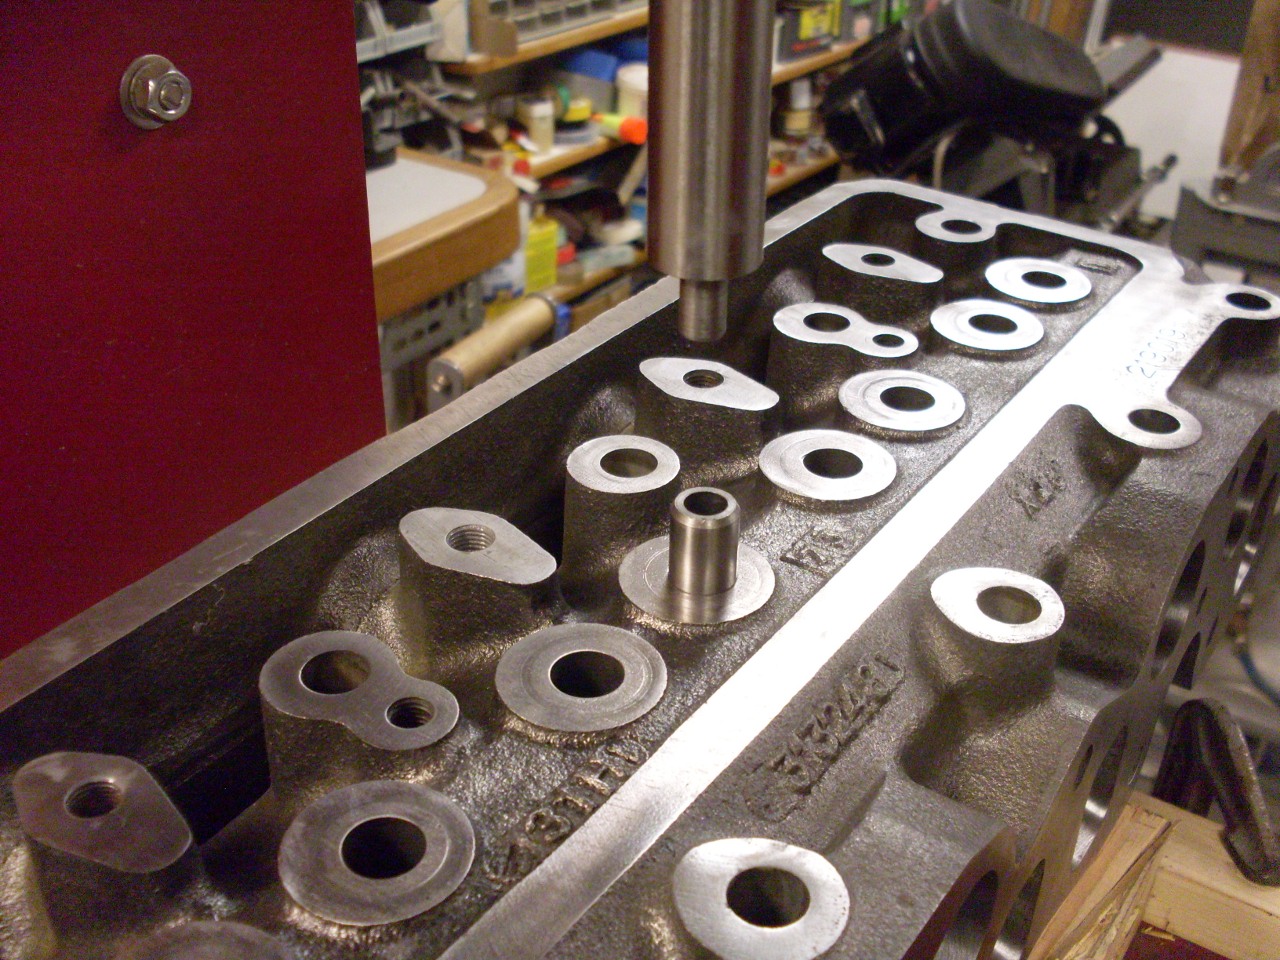
I
don't have a good way to accurately measure the valve guide bores, but
judging from the fit of a couple of the valves that were just in spec,
they seemed loose. Besides, they are a relatively low cost item,
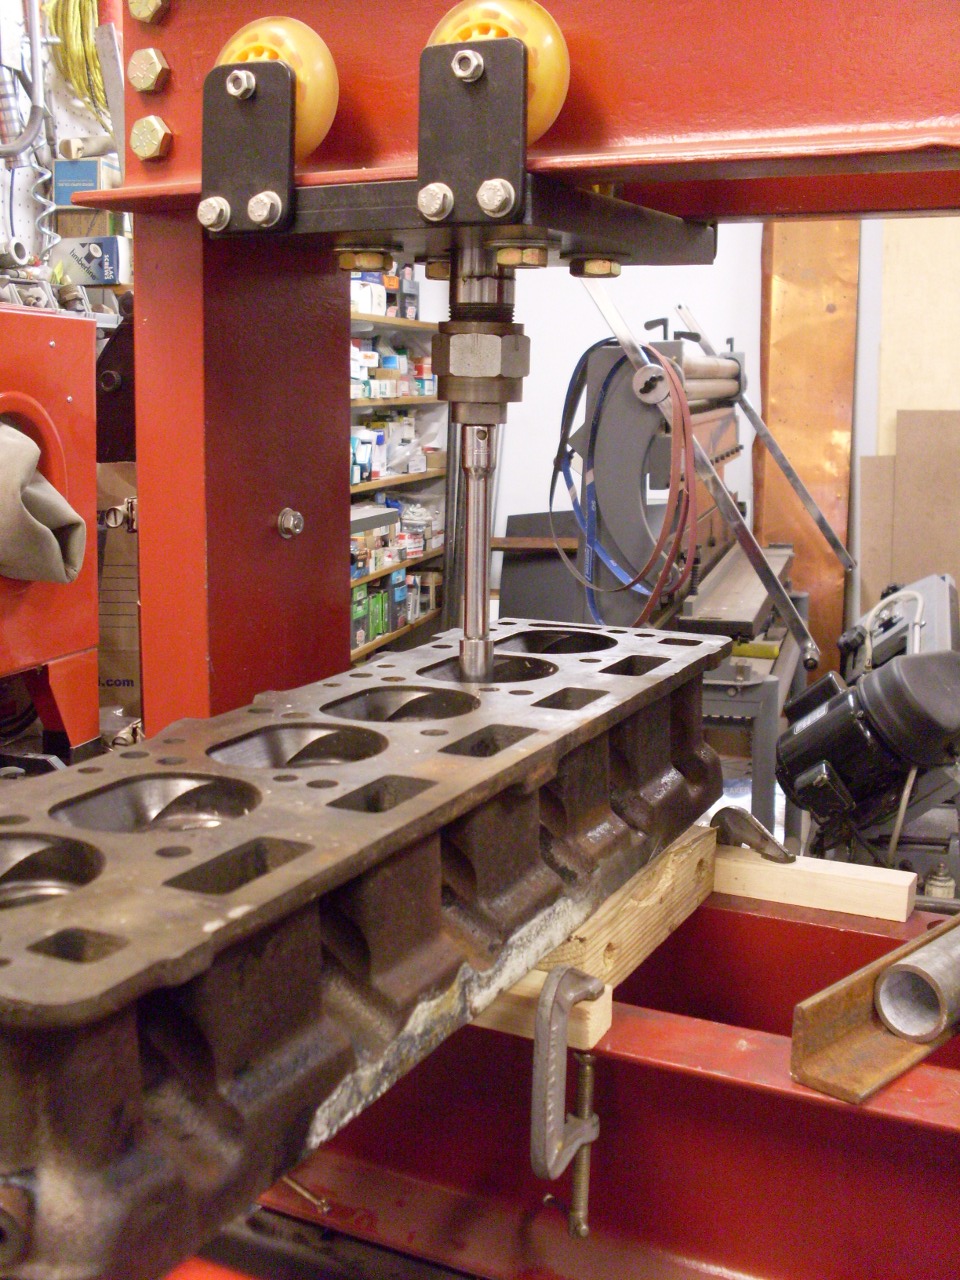
so it seemed prudent to have new guides, too. Here is my home
made press pushing out the guides with a little shop made tool.
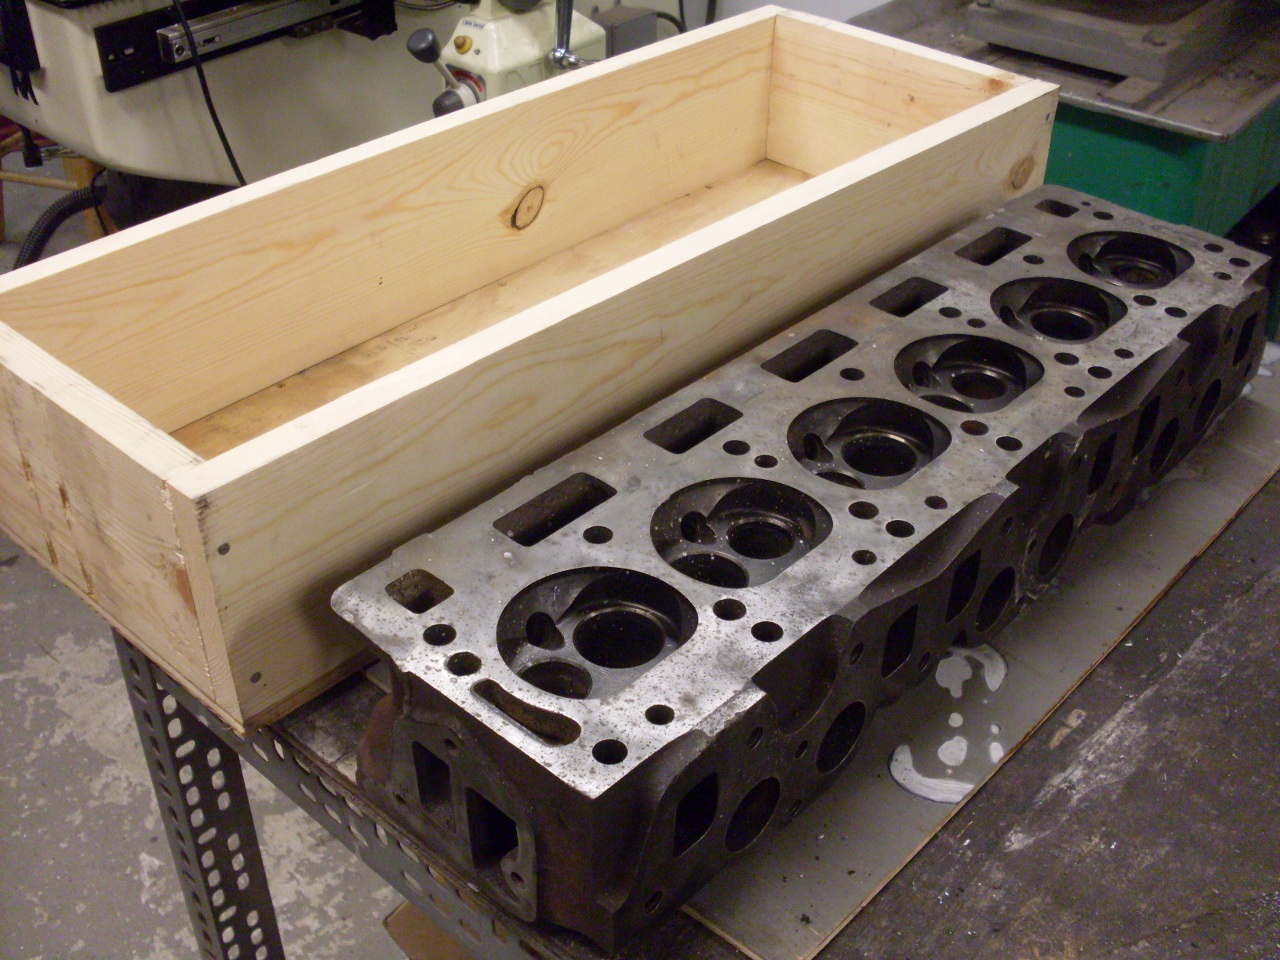
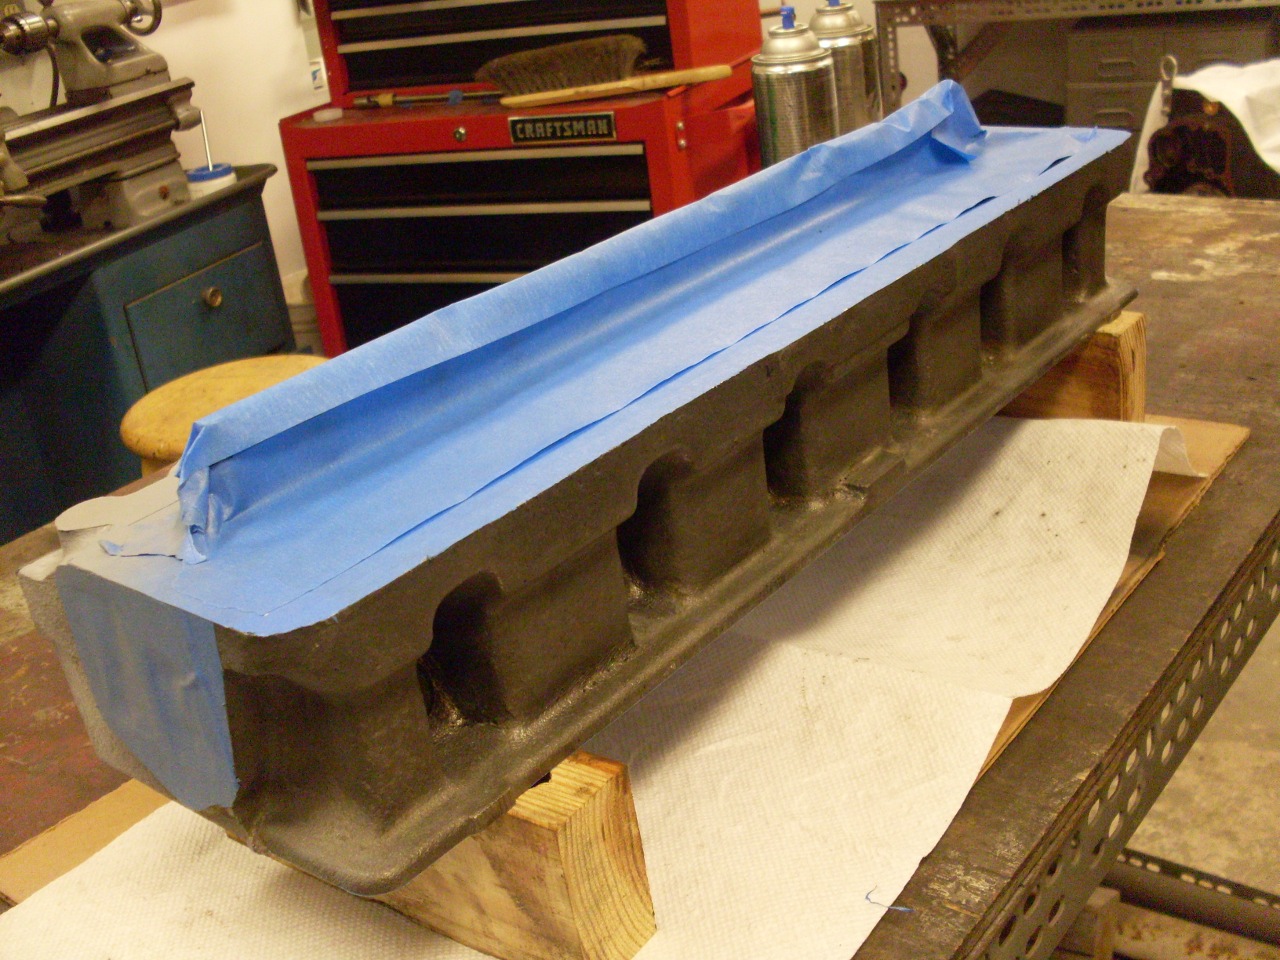
Now
the bare head needed to be cleaned up. Rather than take it to the
shop for a stay in the hot tank, I decided to tank it myself. I
made a wooden box, lined it with plastic, and put the head in it.
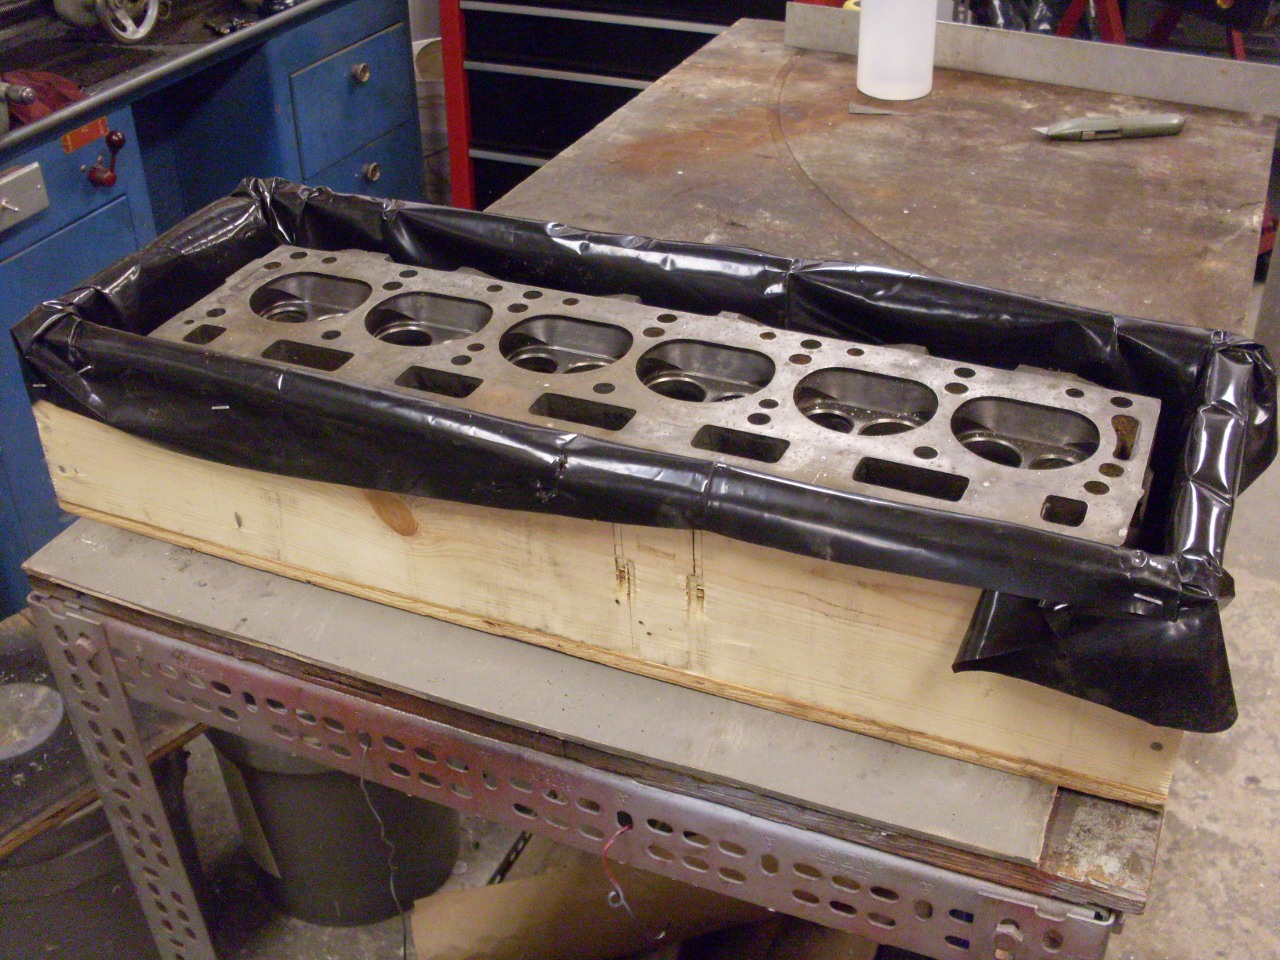
I
poured in a gallon or two of phosphoric acid cut 50/50 with
water. Commercial hot tanks typically use a caustic solution like
lye, which is pretty effective on grease and oil, but not so much on
rust or scale. Phosphoric, on the other hand, is really effective
on rust and scale, but less so on grease or oil. Since my main
concerns were with scale in the water jacket, and the exterior of the
head was mainly rusty, I took the head to a coin-op car wash to remove
what grease and oil there was, then gave it a soak in my acid tank.
This is what it looked like after a few minutes, a couple of
hours, and the next day.
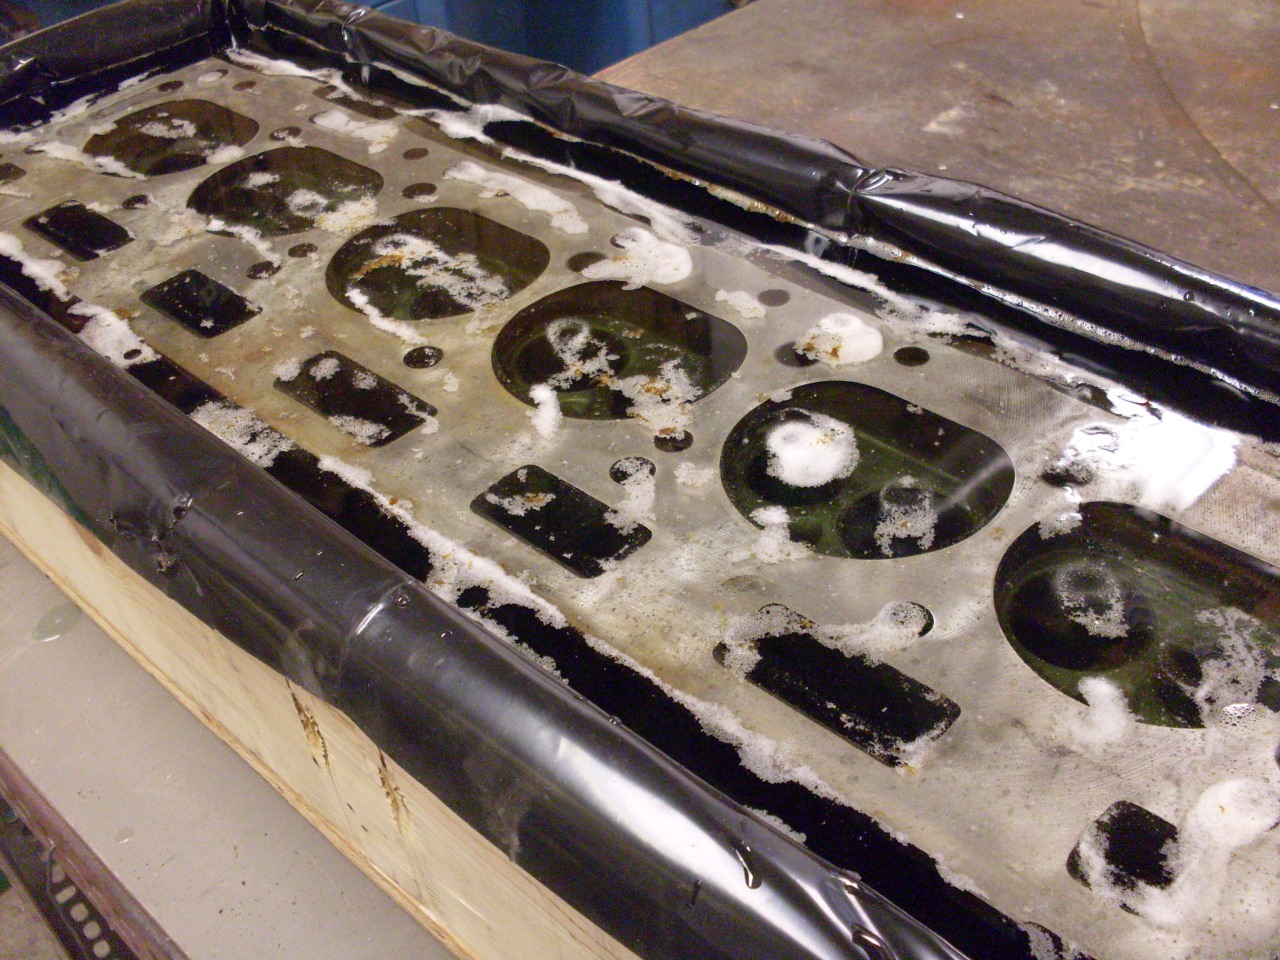
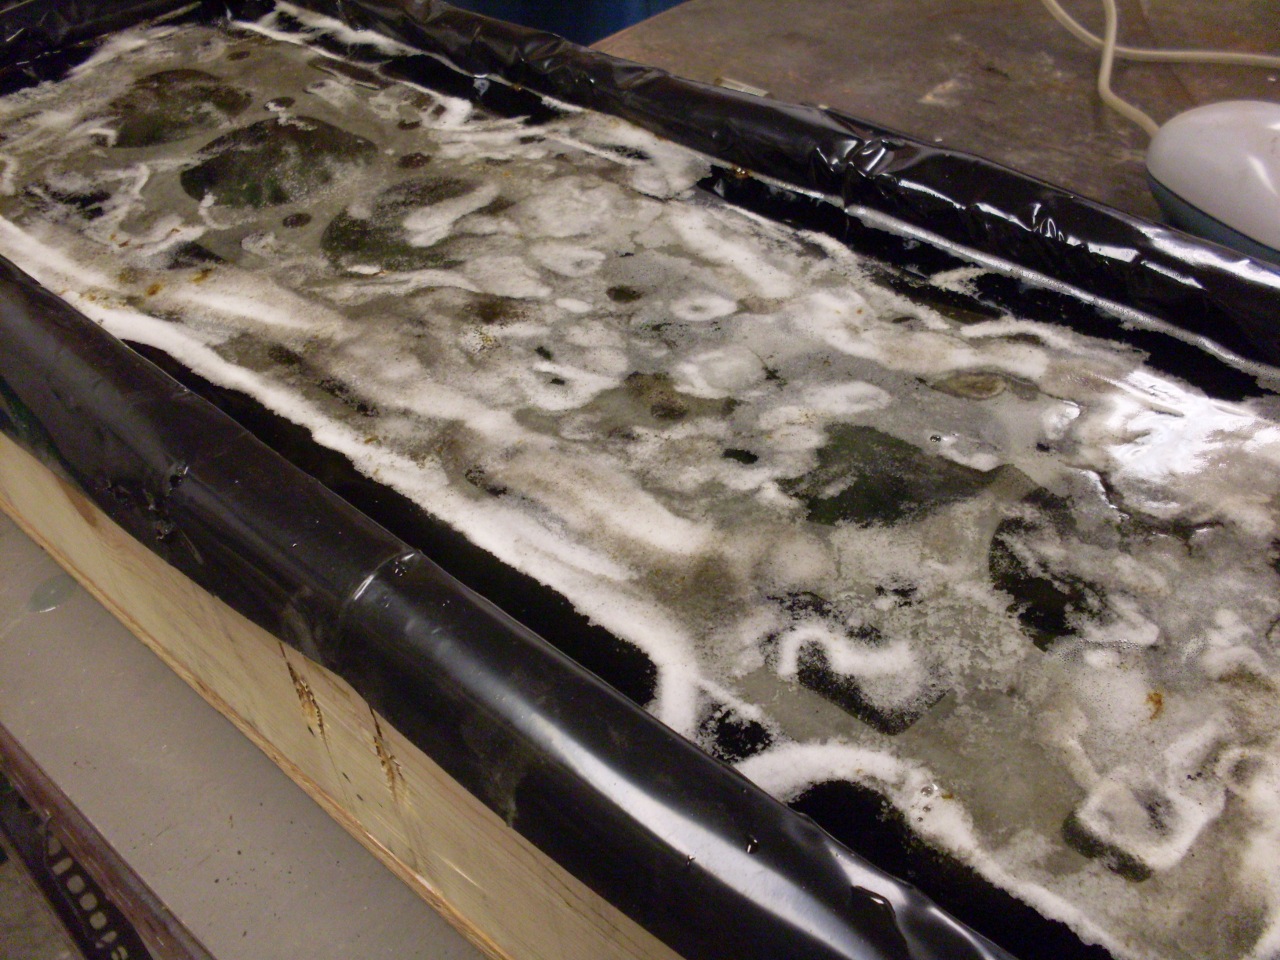
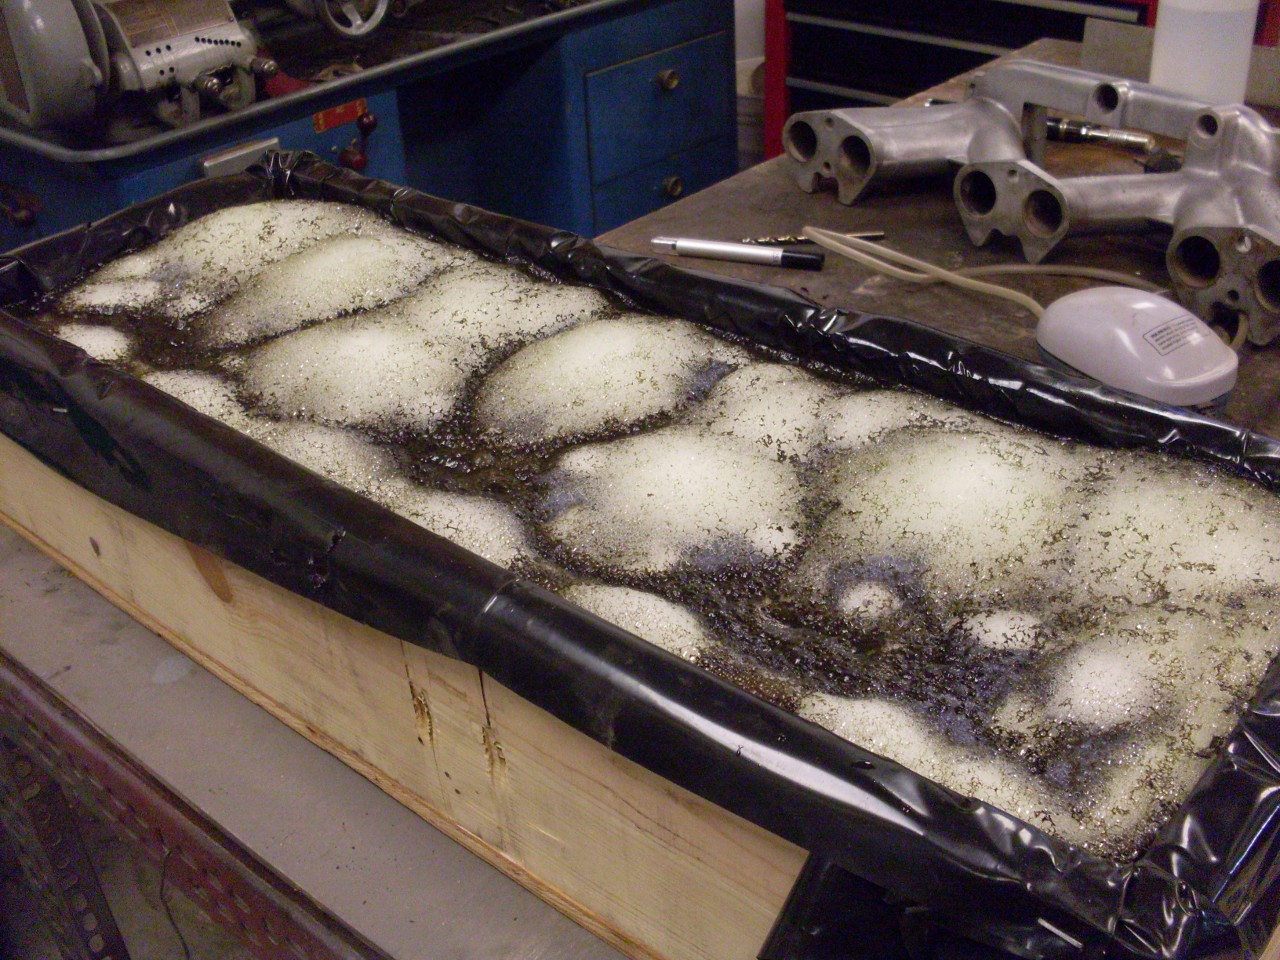
The tank did a good job, and there wasn't all that much left to do by hand--mainly just some carbon in the combustion chambers.
There
really isn't too much that needs to be done to the TR6 head, but there
are a few tweaks that can improve flow in the ports a little.
Anything that interferes with smooth air flow, like changes of
size, shape or direction, or protrusions into the flow presents
opportunities to enhance performance. For example, the
channels for the ports are formed by sand cores in the mold, and
the throats for the valves are machined to meet them. There is
usually some mismatch at the intersection of the machined throat below
the valve seat and the rough port channel. I tried to remove that
step in each port, or at least smooth it out.

One
other thing that is commonly done to the TR6 head is to slightly
straighten the inside curve of the intake port where it changes
direction below the valve seat. Removing metal has to be done in
a controlled way, since too much enthusiasm in cutting could result in
breaking into the water jacket. It's reported that about 2 mm can
safely be carved away from the curve, but being pretty nervous about
it, I settled for a safer 1.5 mm. One common method for
controlling the depth is to use a little shop made depth gage to guide
in cutting a groove to the right depth, then using the groove as a
guide in cutting the rest of the metal away. I used a carbide bur
for gross metal removal, and then little cylindrical or conical
abrasive "cartridges" for final smoothing. Reportedly, the intake
port shouldn't be "polished", as some texture on the walls of the port
may help promote turbulence to aid fuel dispersion.
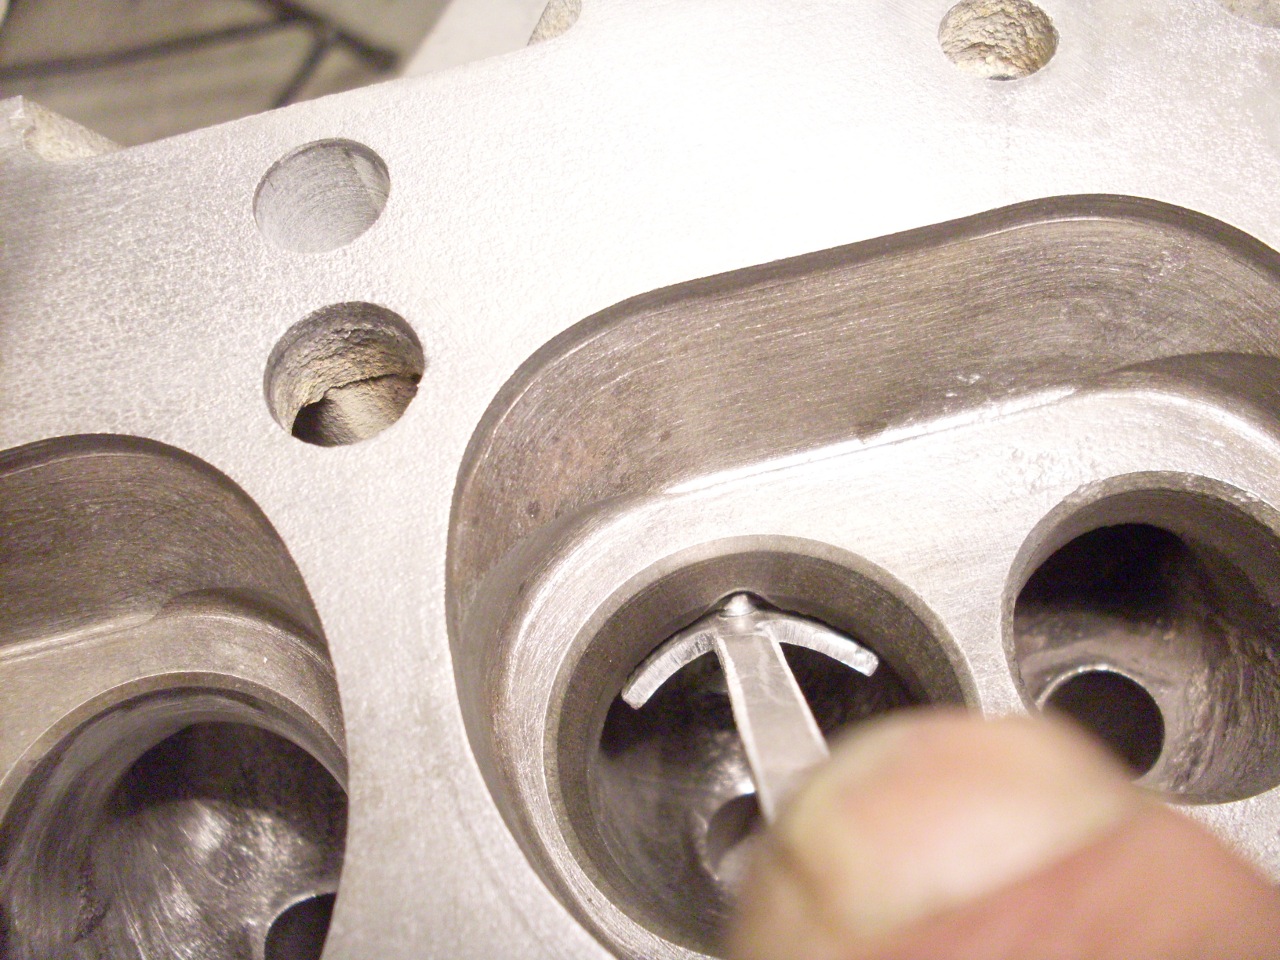
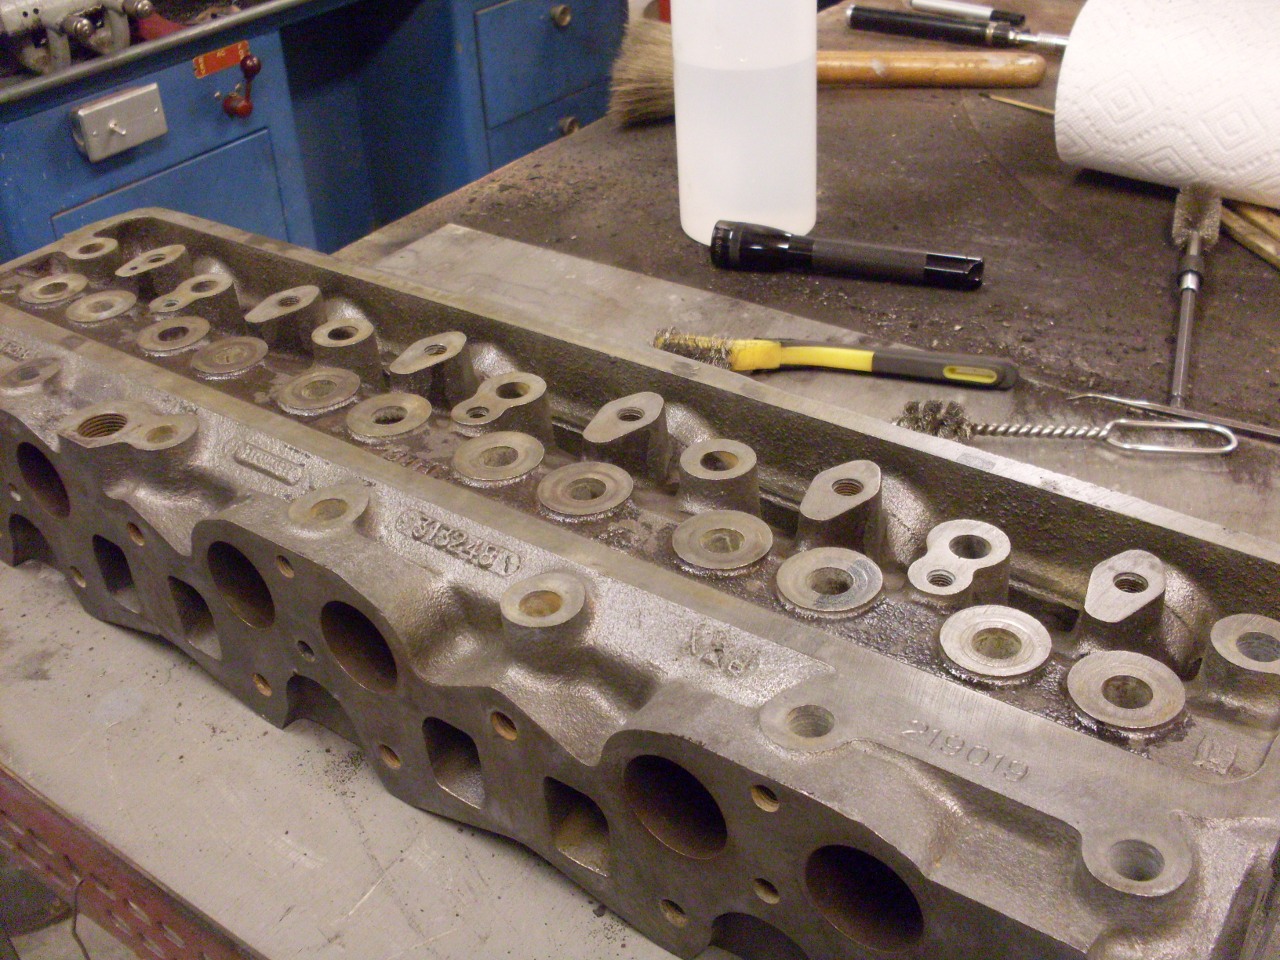
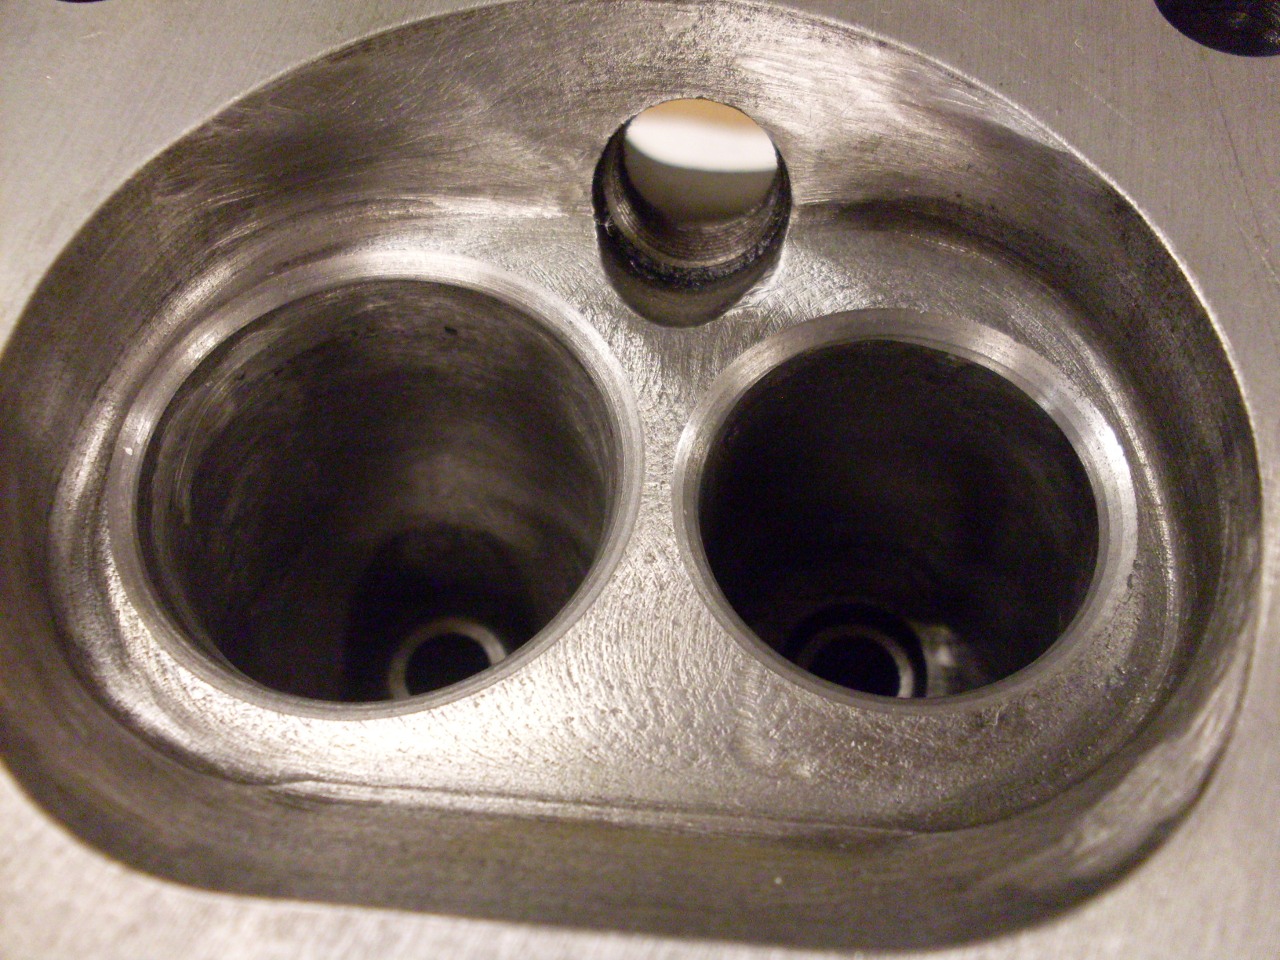
The
exhaust ports were basically just cleaned up, matched to the manifold,
and profiled so that the same rounded retangle shape is maintained all
the way into the throat below the valve seat. The profile tool
helps with this. Also, each exhaust port has a protuberance
around the valve guide that sticks into the flow path. I ground
those away. The second pic below also shows the one minor mod to
the combustion chamber itself. The four sharp "eyebrows" were smoothed to elimiate the edge.
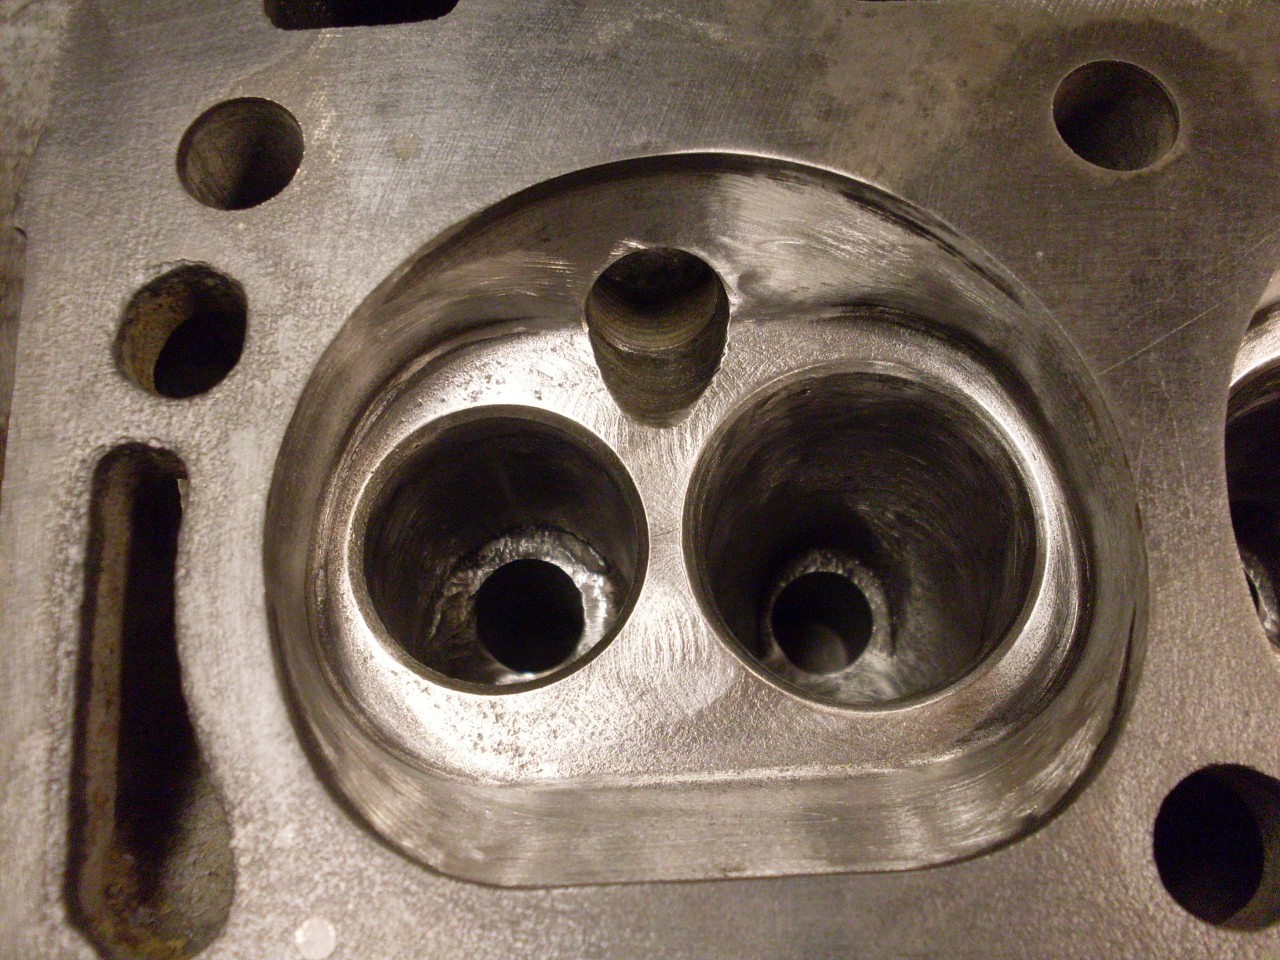
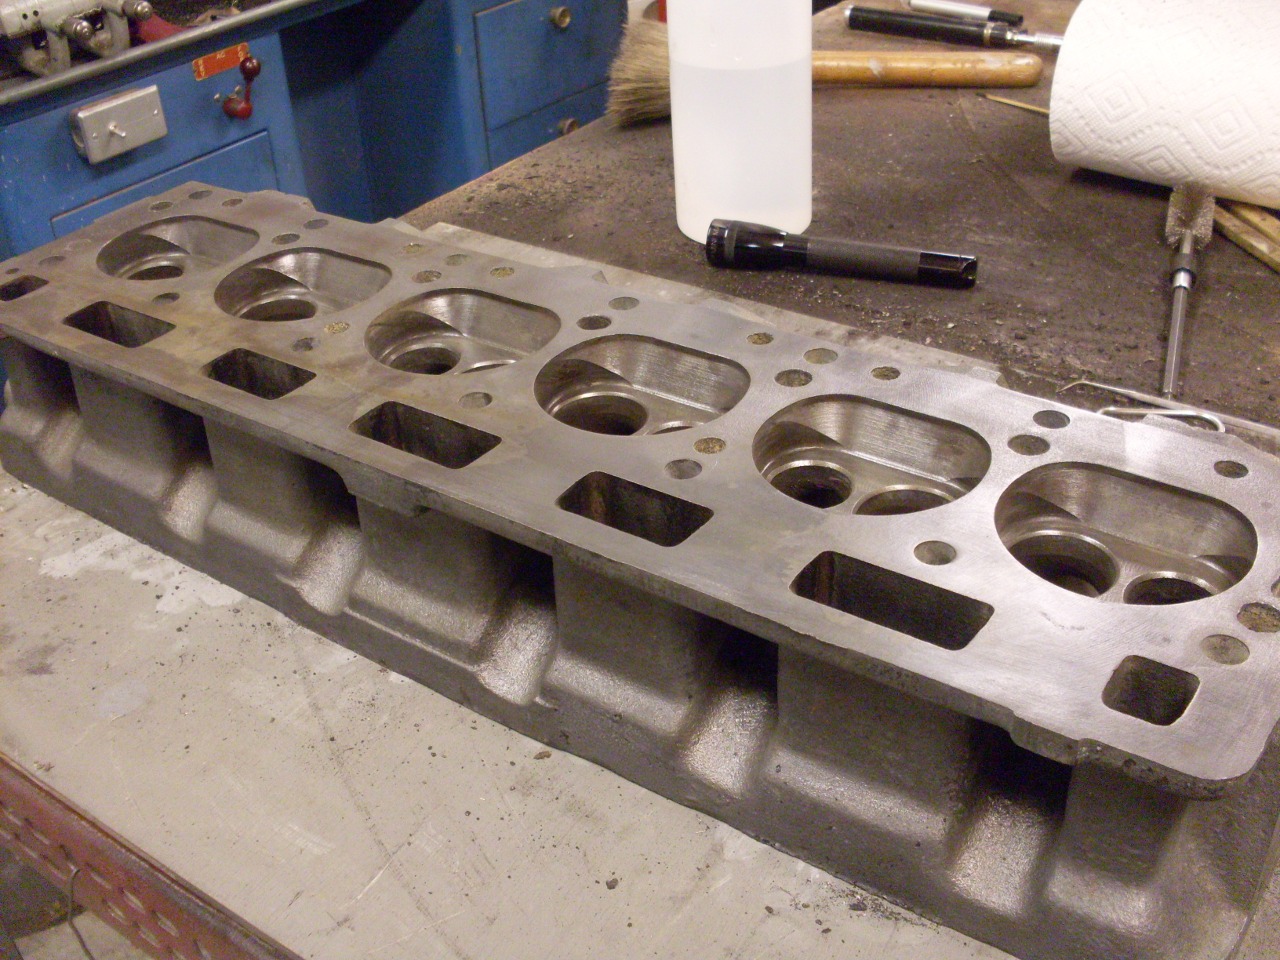
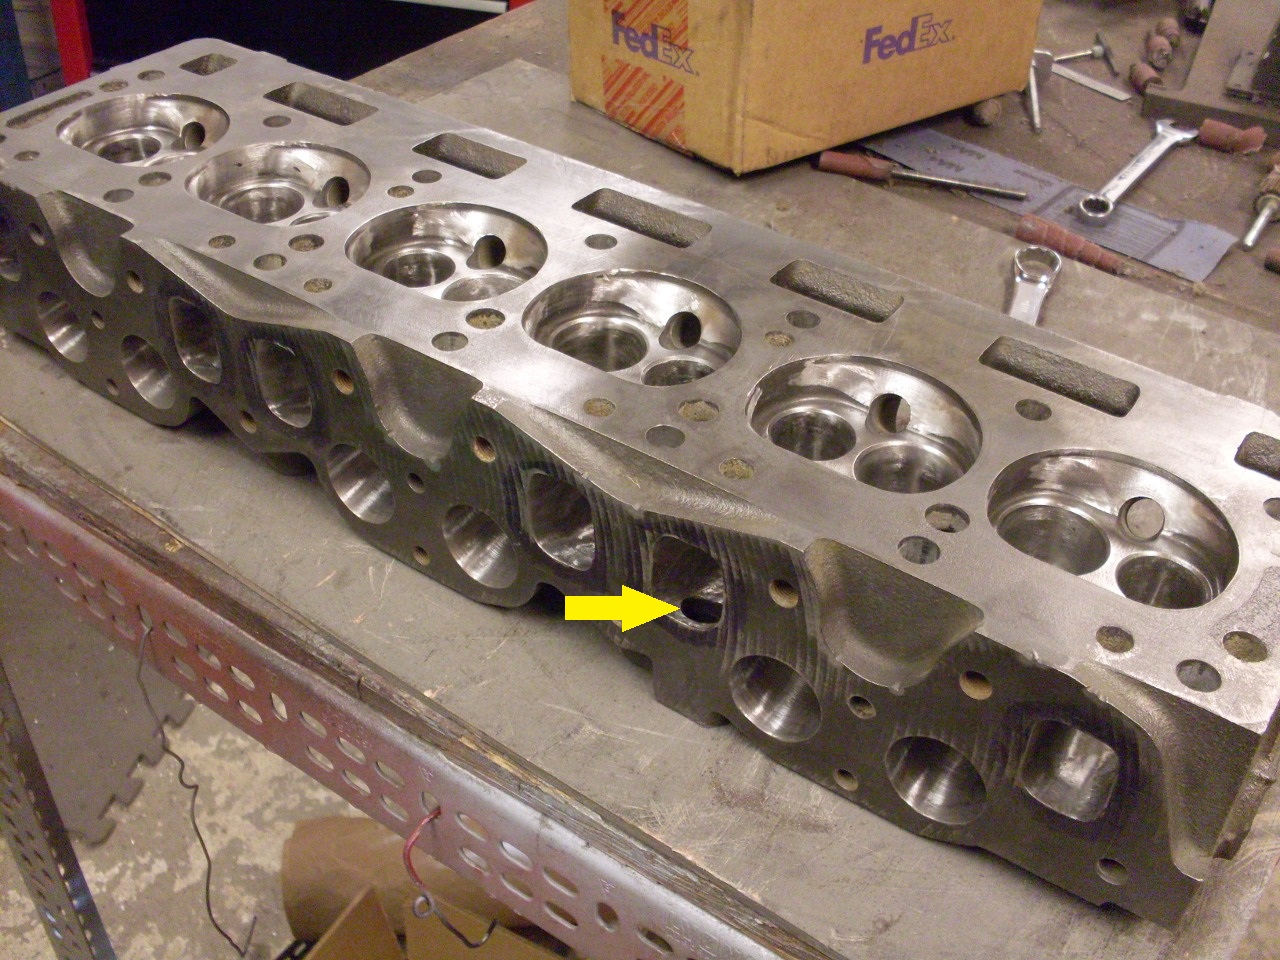
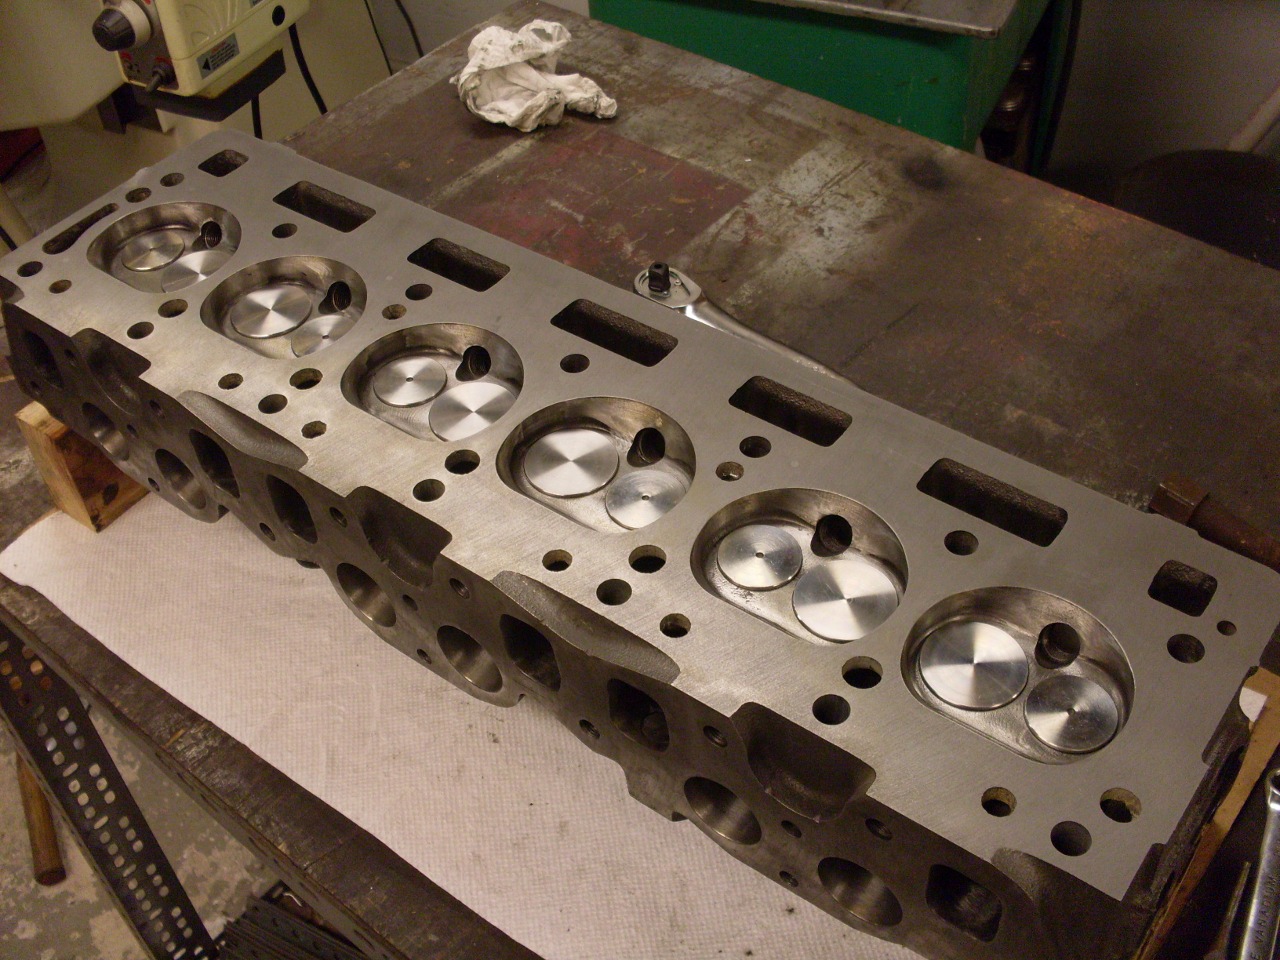
So here is the ported head...


...but
there was one more thing to take care of. Notice the gaping hole
in the roof of the #5 exhaust port. That is the Exhaust Gas
Recirculation (EGR) port. I won't be using EGR, so I wanted to
not only plug the EGR port, but to restore the smooth profile to the
exhaust port.
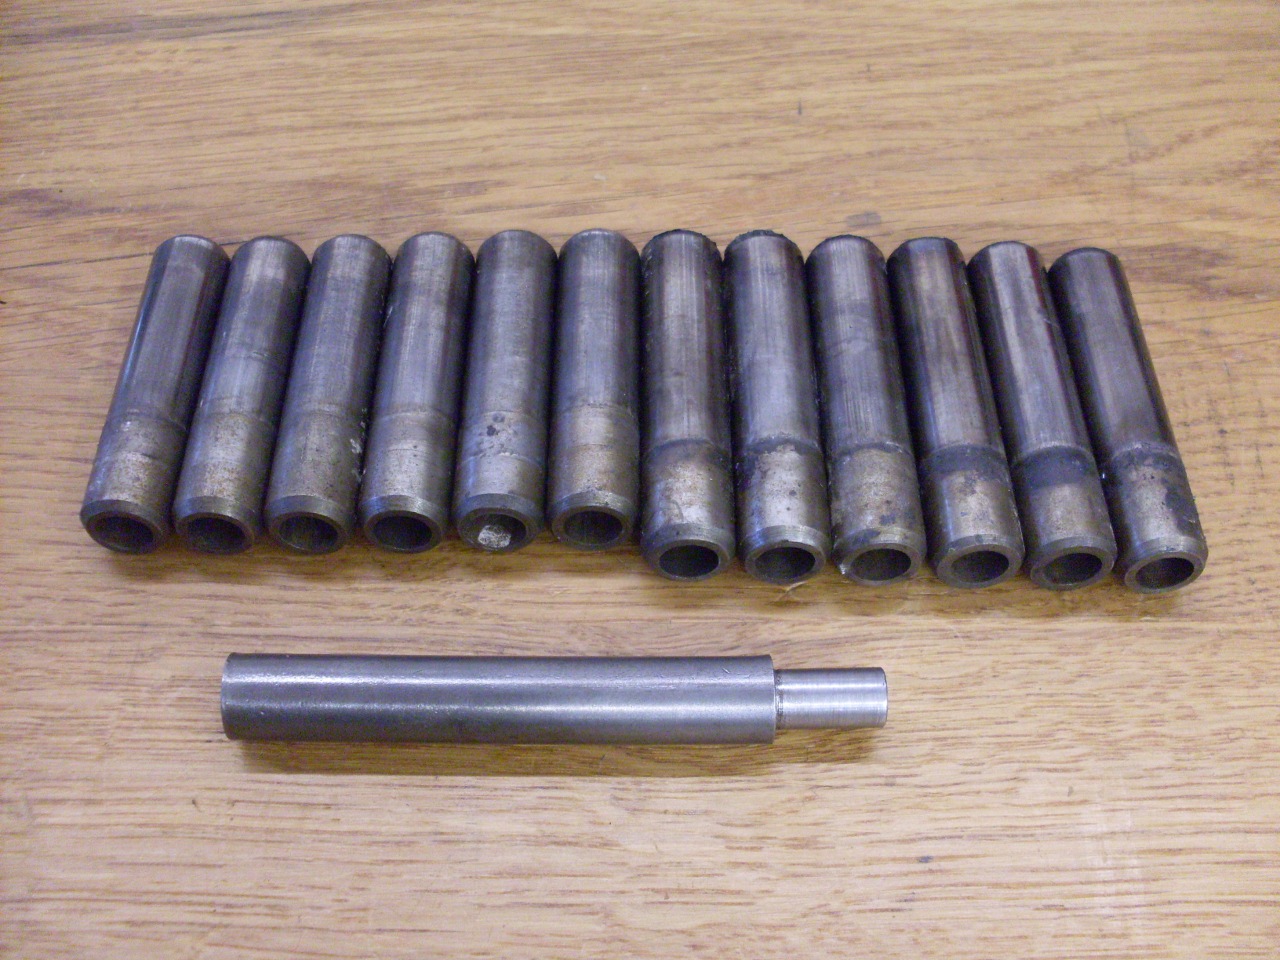
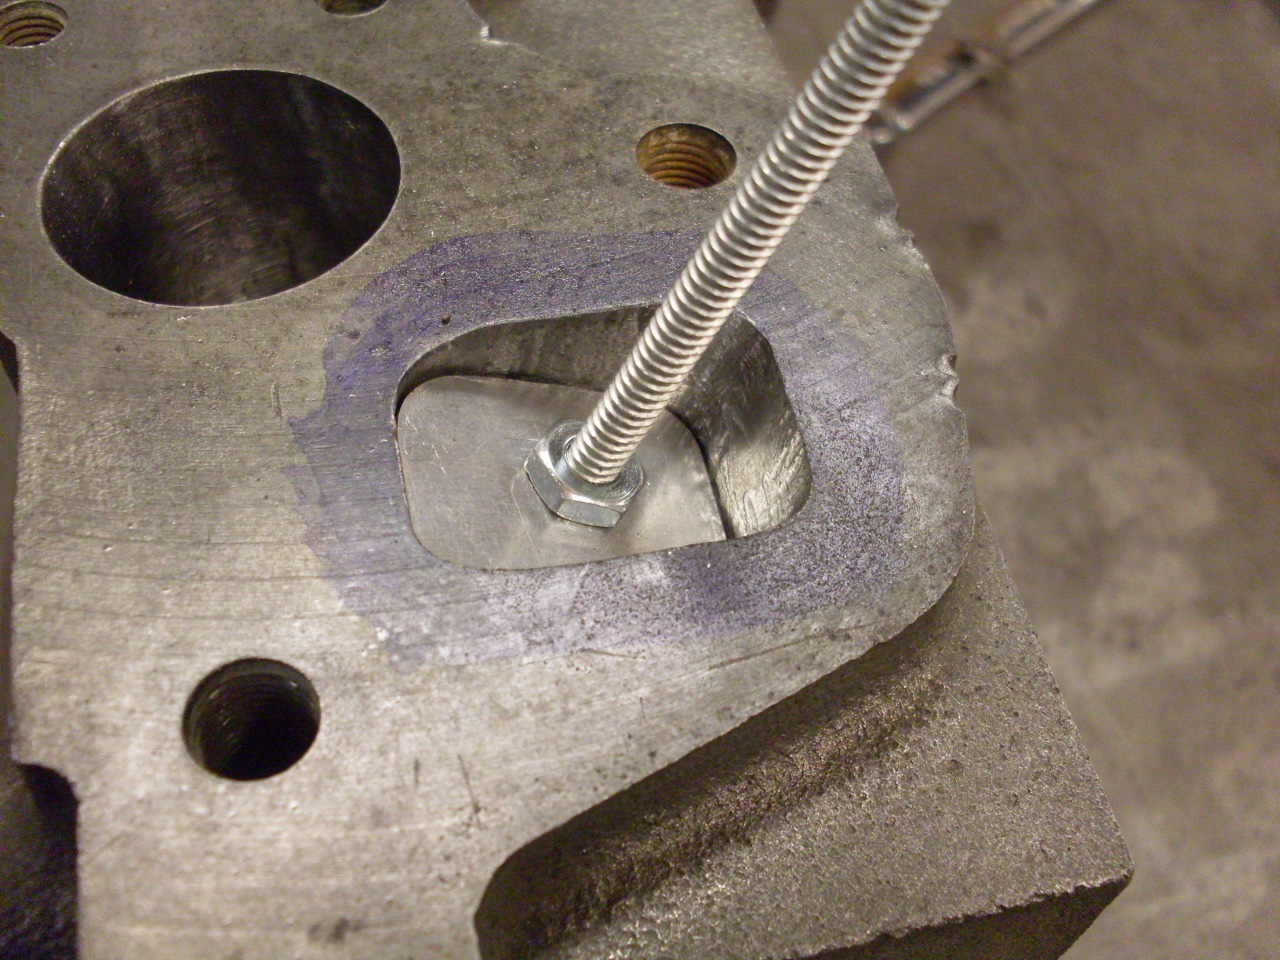
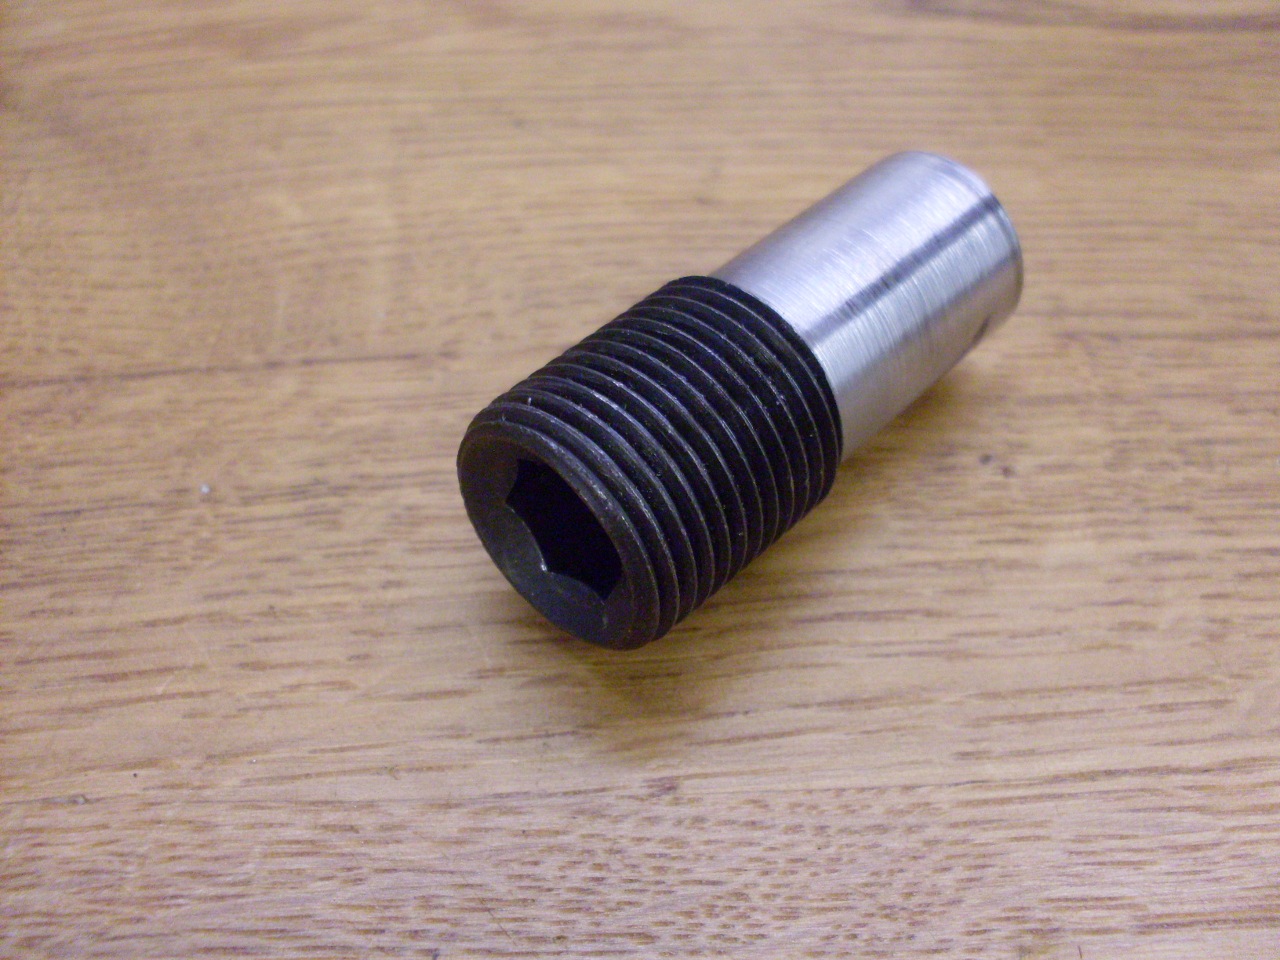
The
EGR port on the top of the head is threaded 3/4-16, so I started with a
big 3/4-16 allen set screw. Since the EGR port isn't threaded all
the way into the exhaust channel, I cut the set screw to length and
turned the bottom end down to fit the untapped part of the hole and
extend slightly into the exhaust port.


I
then ground the bottom end of the plug so it matched the port profile.
To keep the plug from turning, I set it in place with red
Loctite. I forgot to take a pic of the topside of the plug, but
it will show up in a later picture.


At
this point I sent the head out to have 0.130" shaved off. This
should take the compression ratio up to around 9.4:1. Here is the
shaved head:

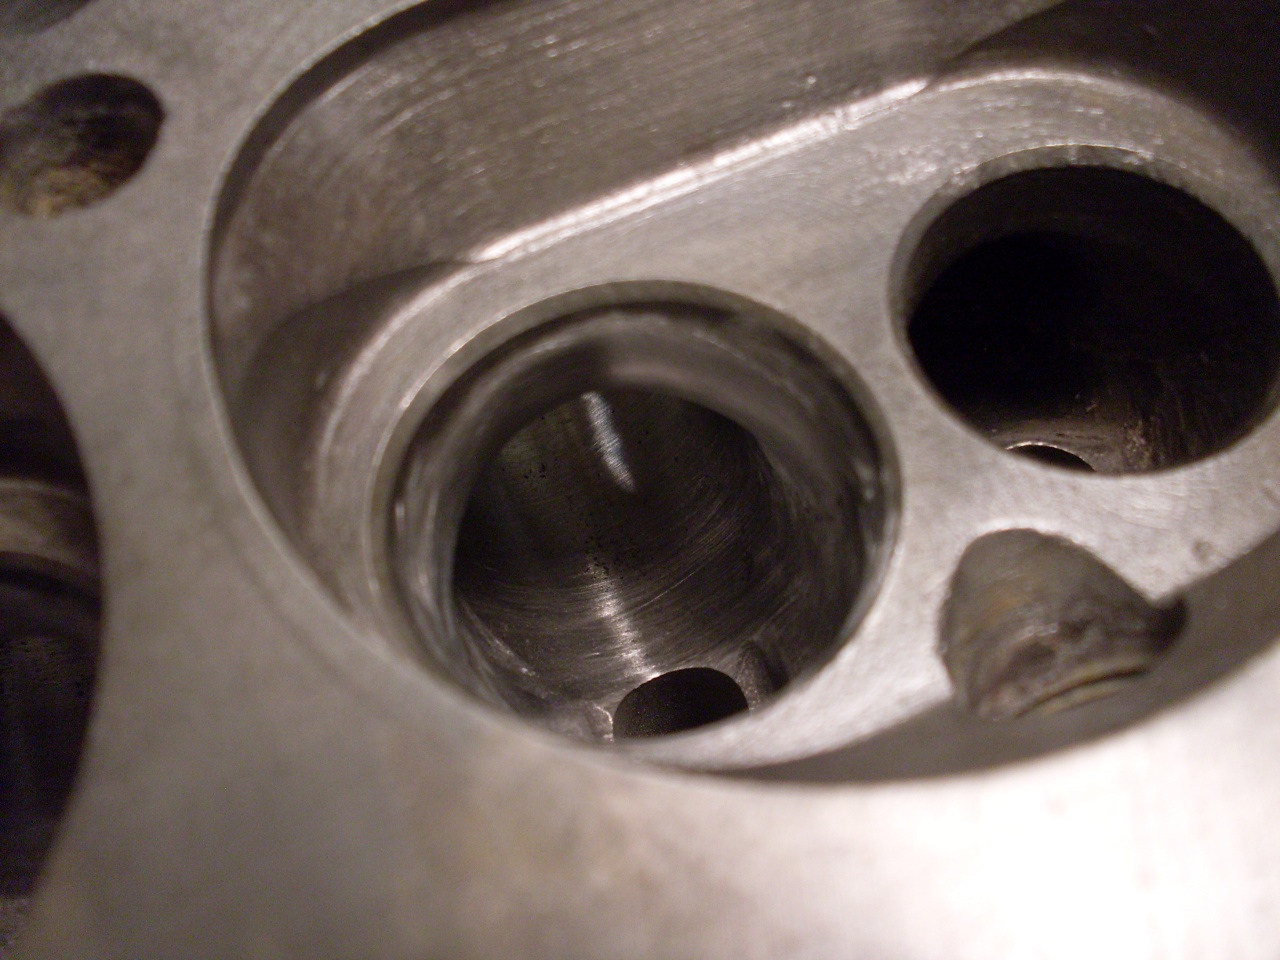
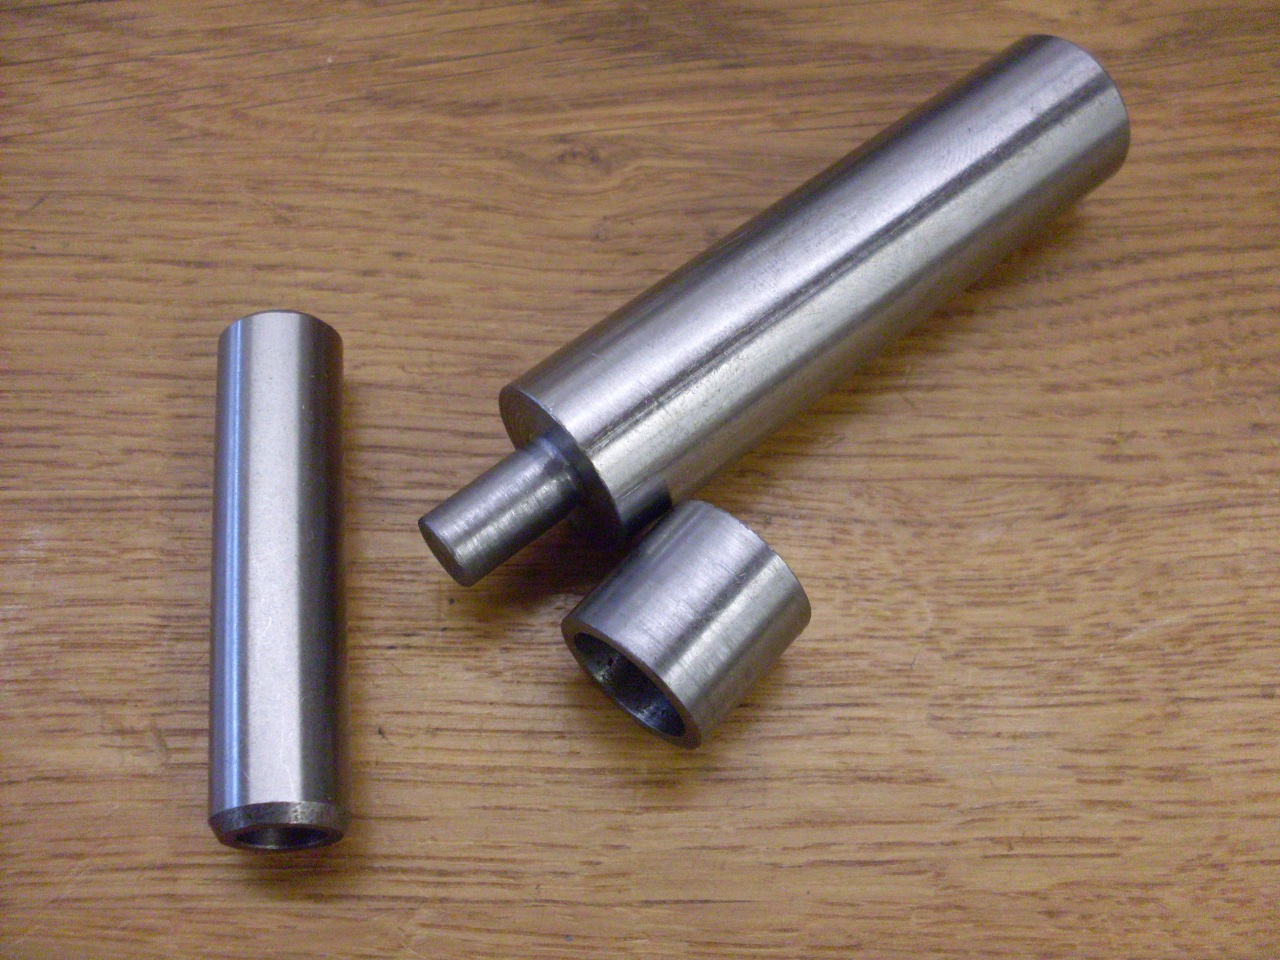
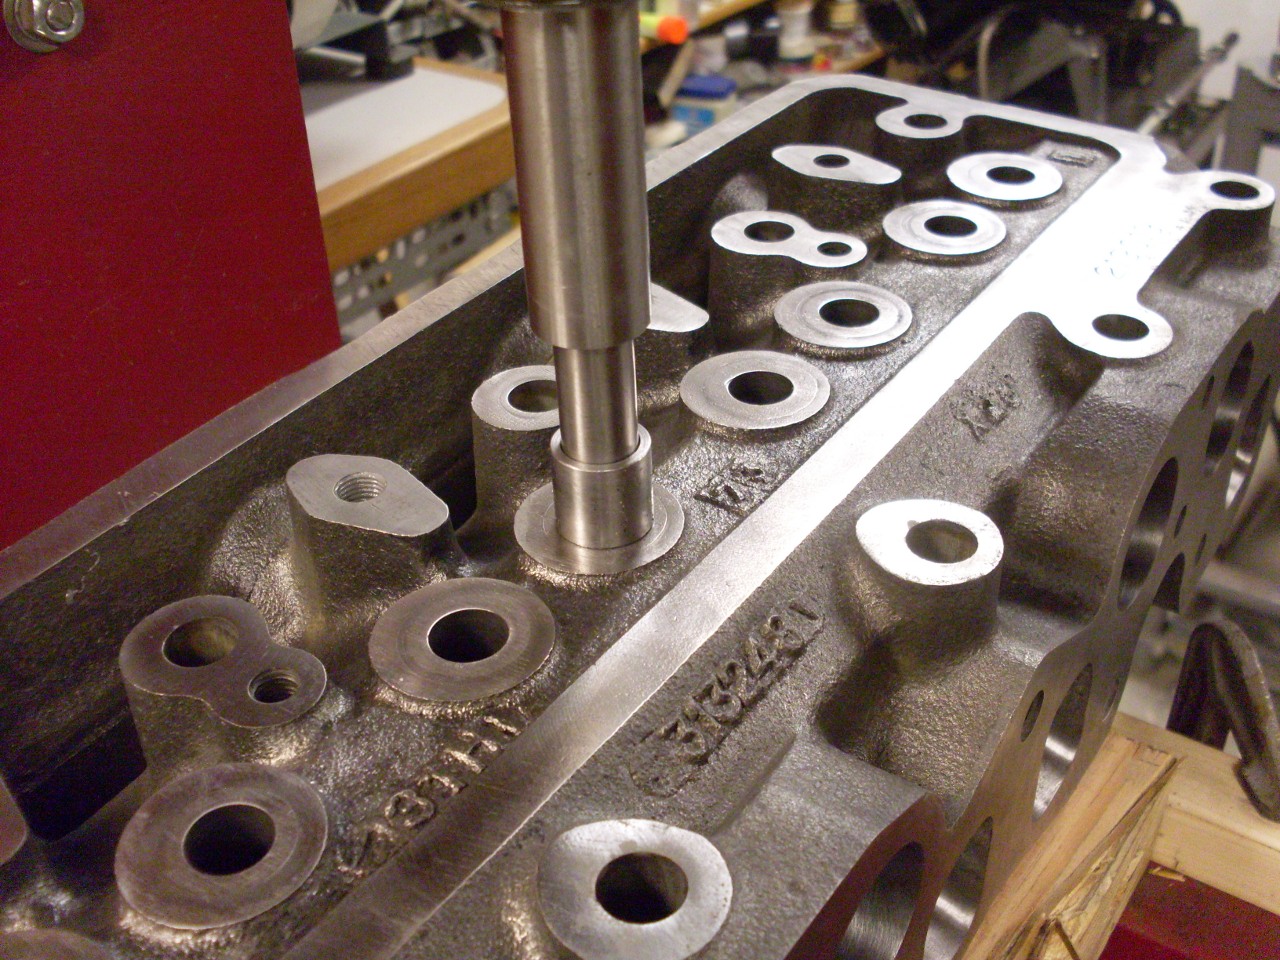
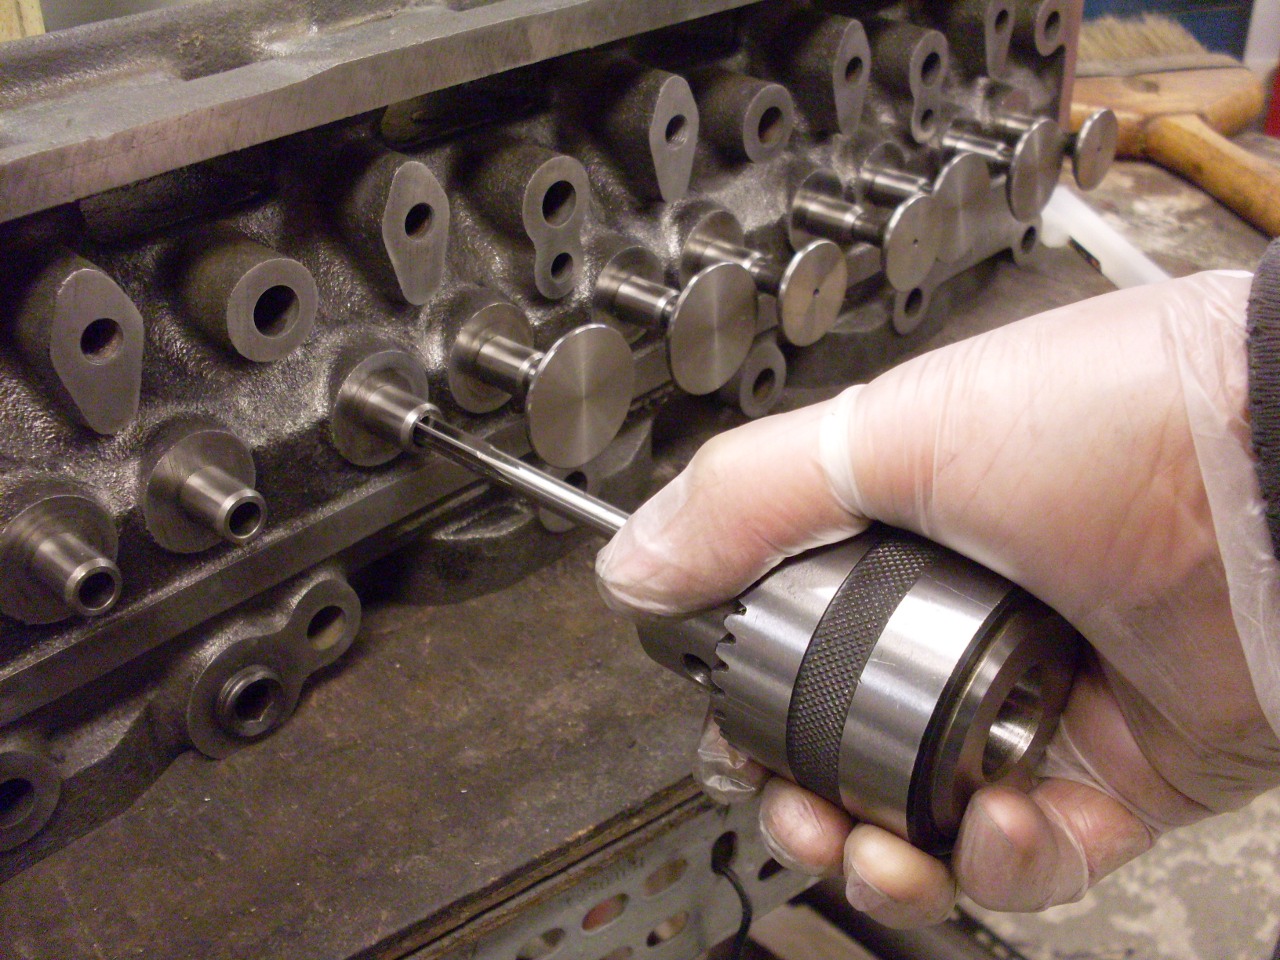
Next
up was to insert the new valve guides. The stock guides were
steel, and using bronze guides is a popular substitution. I
didn't see any particular advantage to bronze guides, so I stayed with
the steel units. The second pic shows the shop made drift to help
push the guides in, plus the collar that limits the process to the
proper stick out of 0.62" above the top surface of the head.

The
new guides were just a little tight on the new valves, so ran a
5/16 reamer through them. So little metal had to be removed that
I could easily do it my hand.
Then
it was back to the shop to have the valve seats cut. Should have
done this in the same trip with the shaving. Not sure what I was
thinking. Nice 3-angle seats:
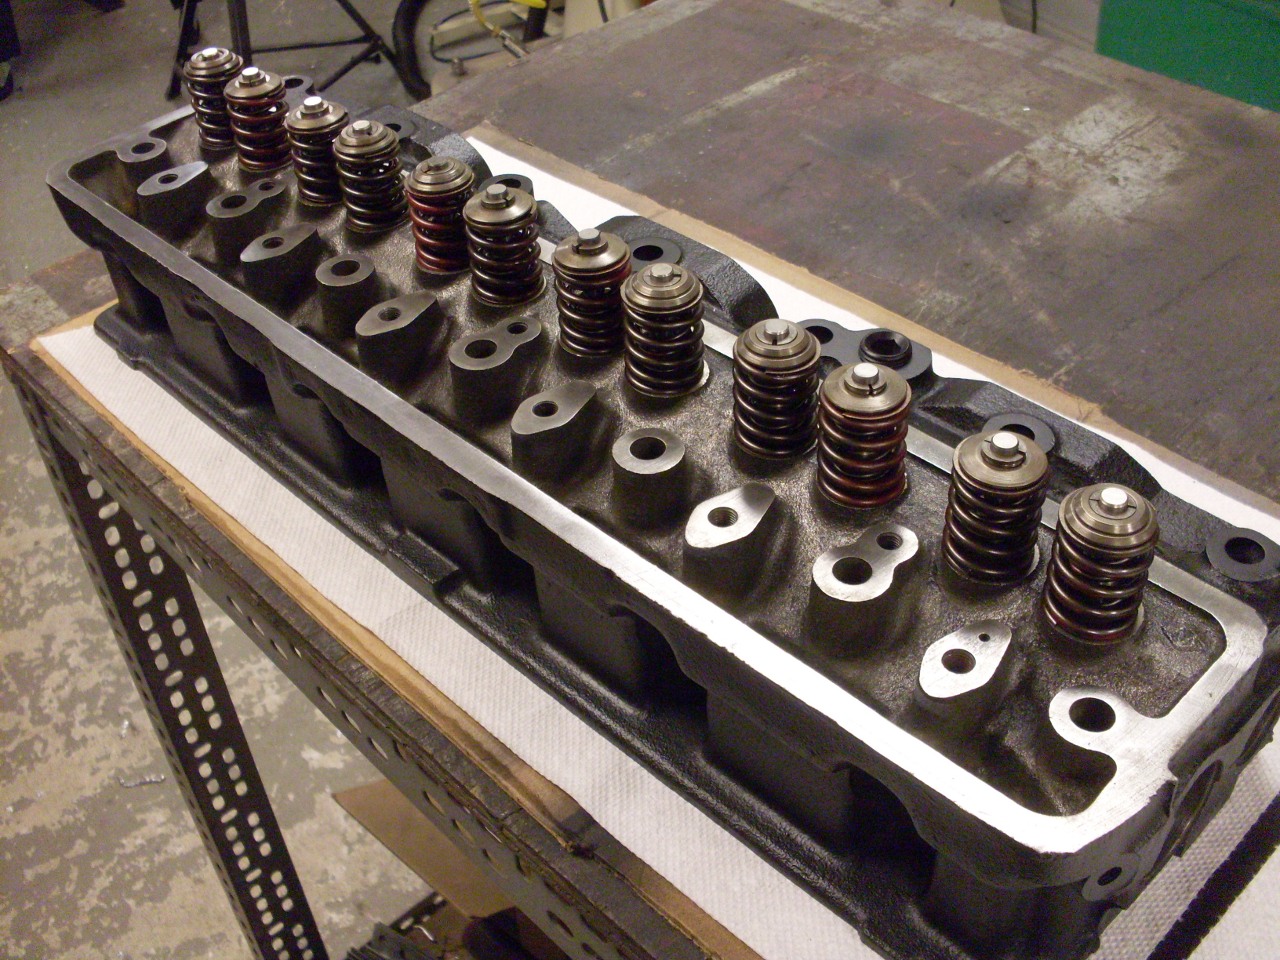
Next
up was to lap the valves to their seats. The valves get a nice
matte ring showing that they mate perfectly with the middle angle on
the seats.

At this point, I painted the head. Would have been easier earlier.
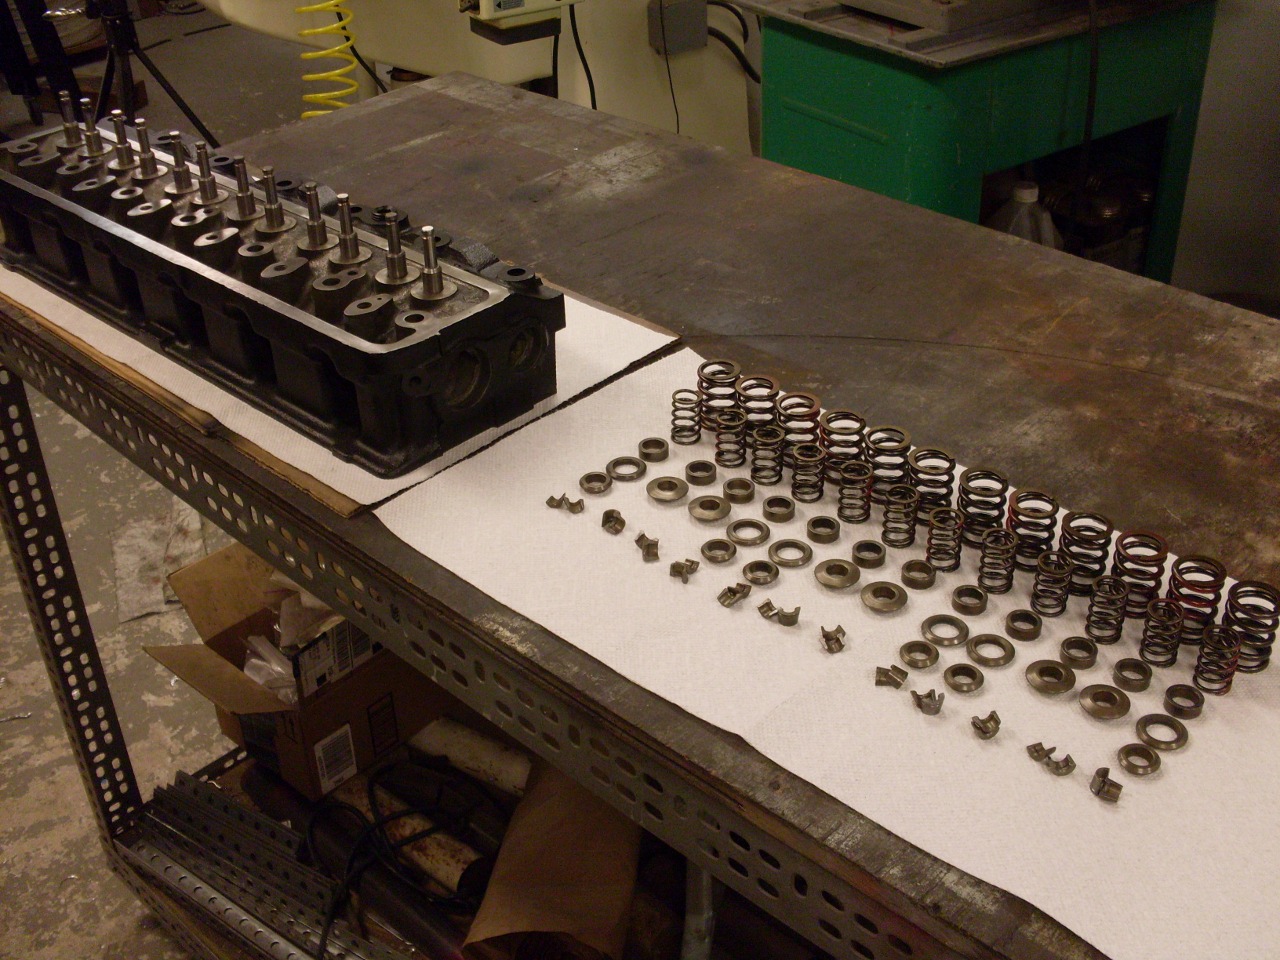
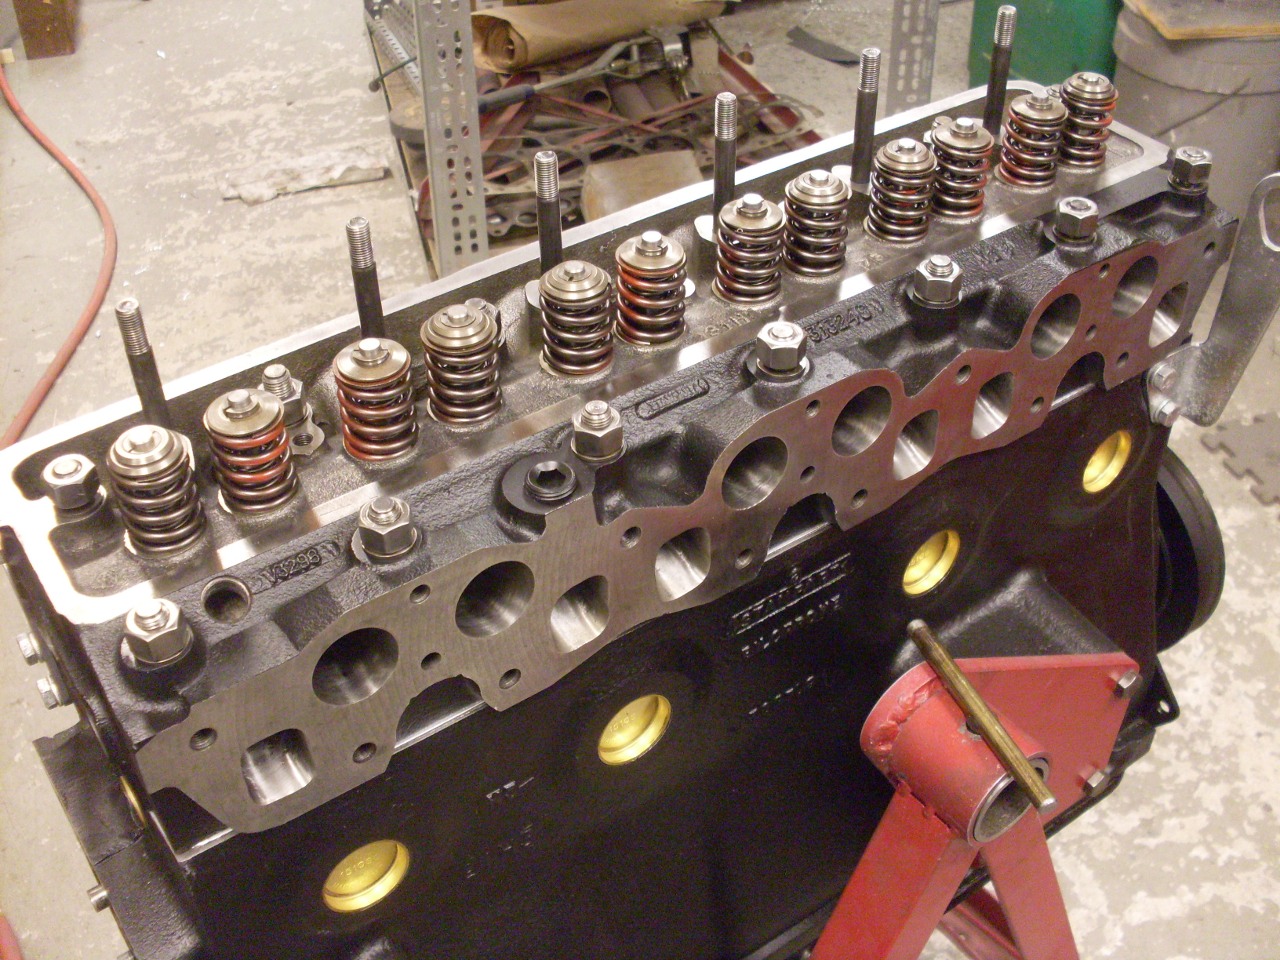
Now the springs and associated hardware:
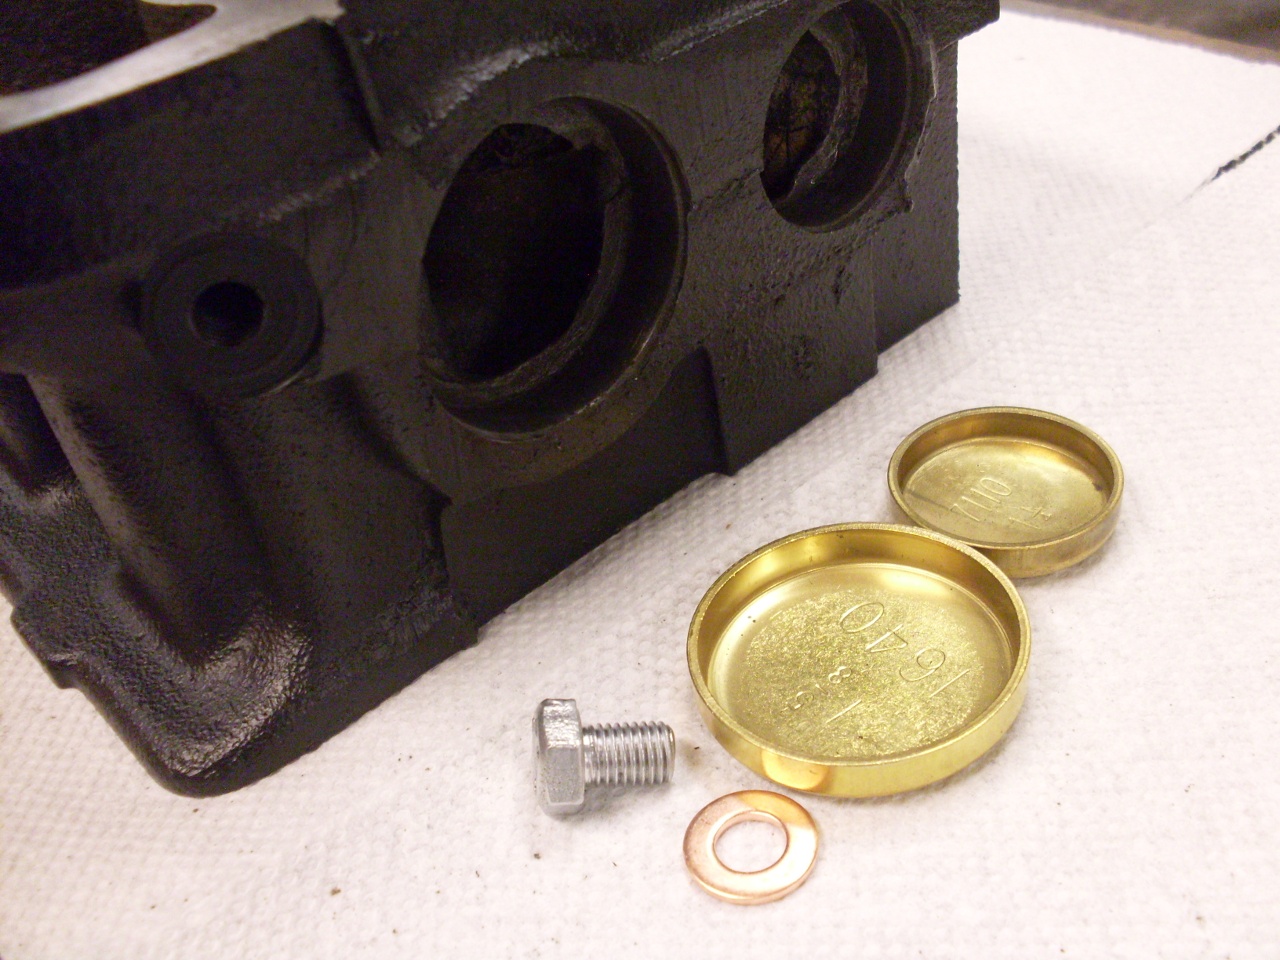
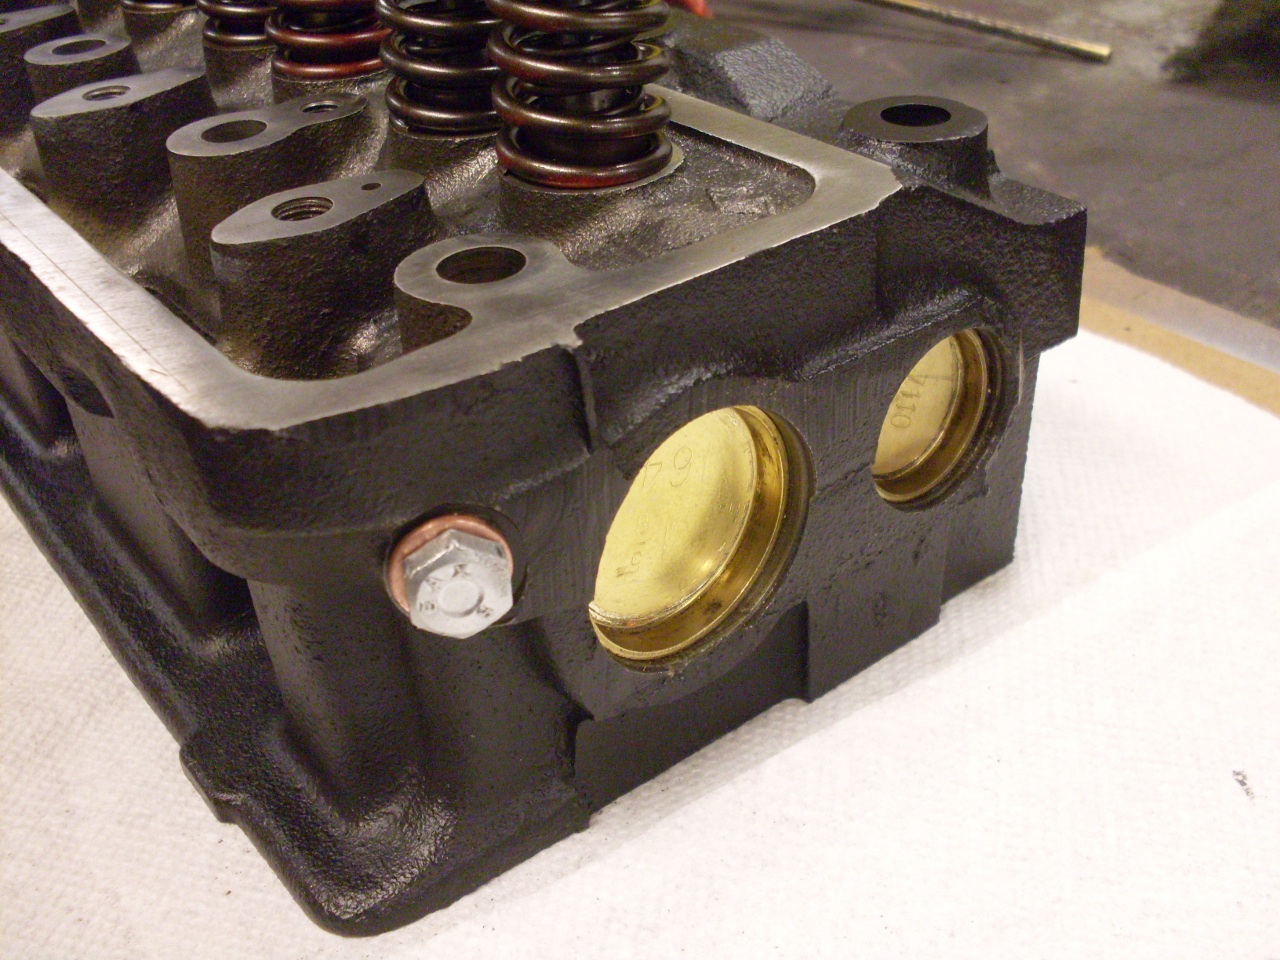
Some odds and ends: Core plugs and the oil gallery plug. I usually anneal copper gaskets, even if they are new.
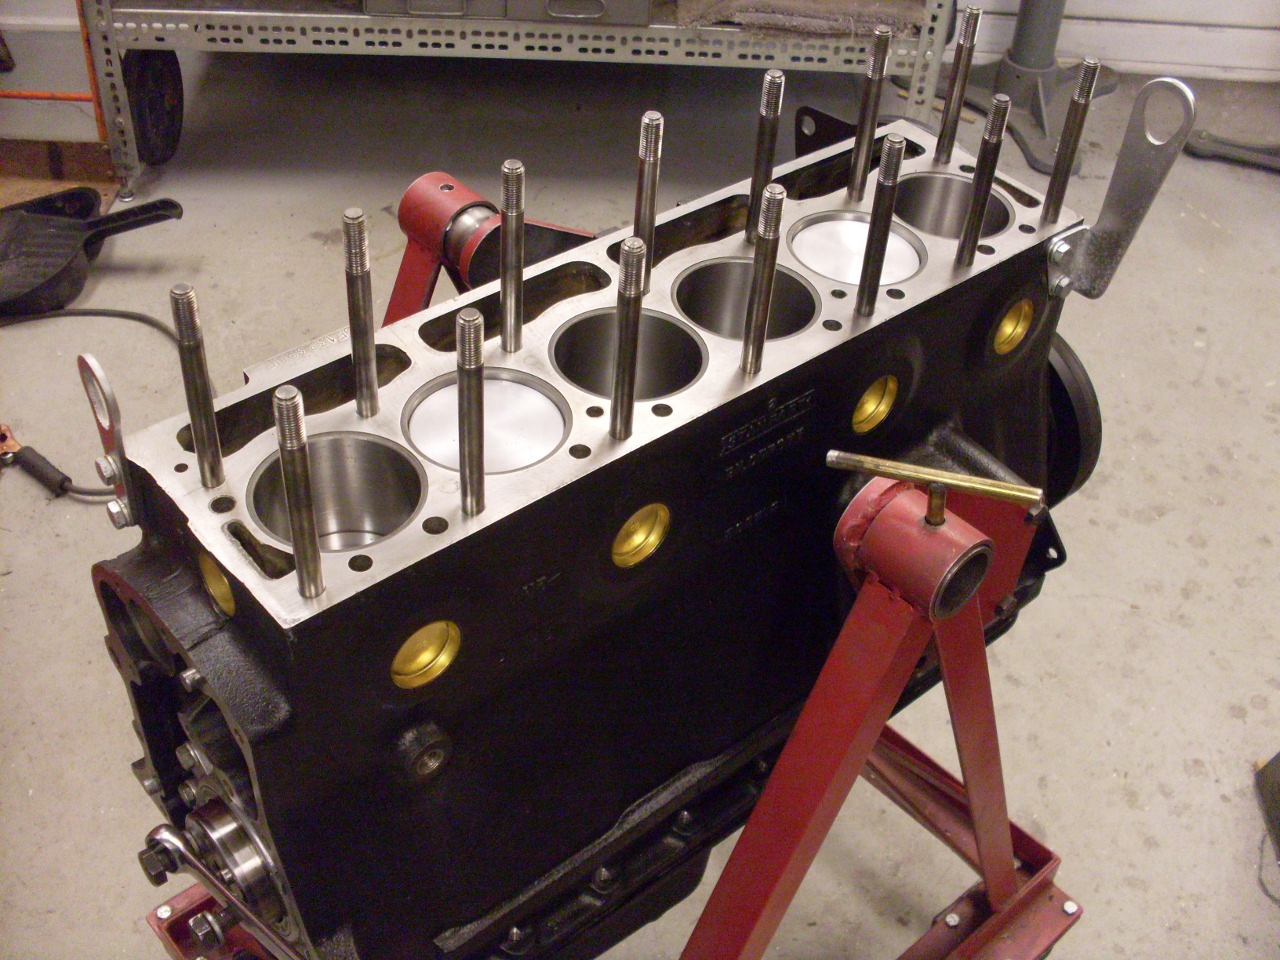
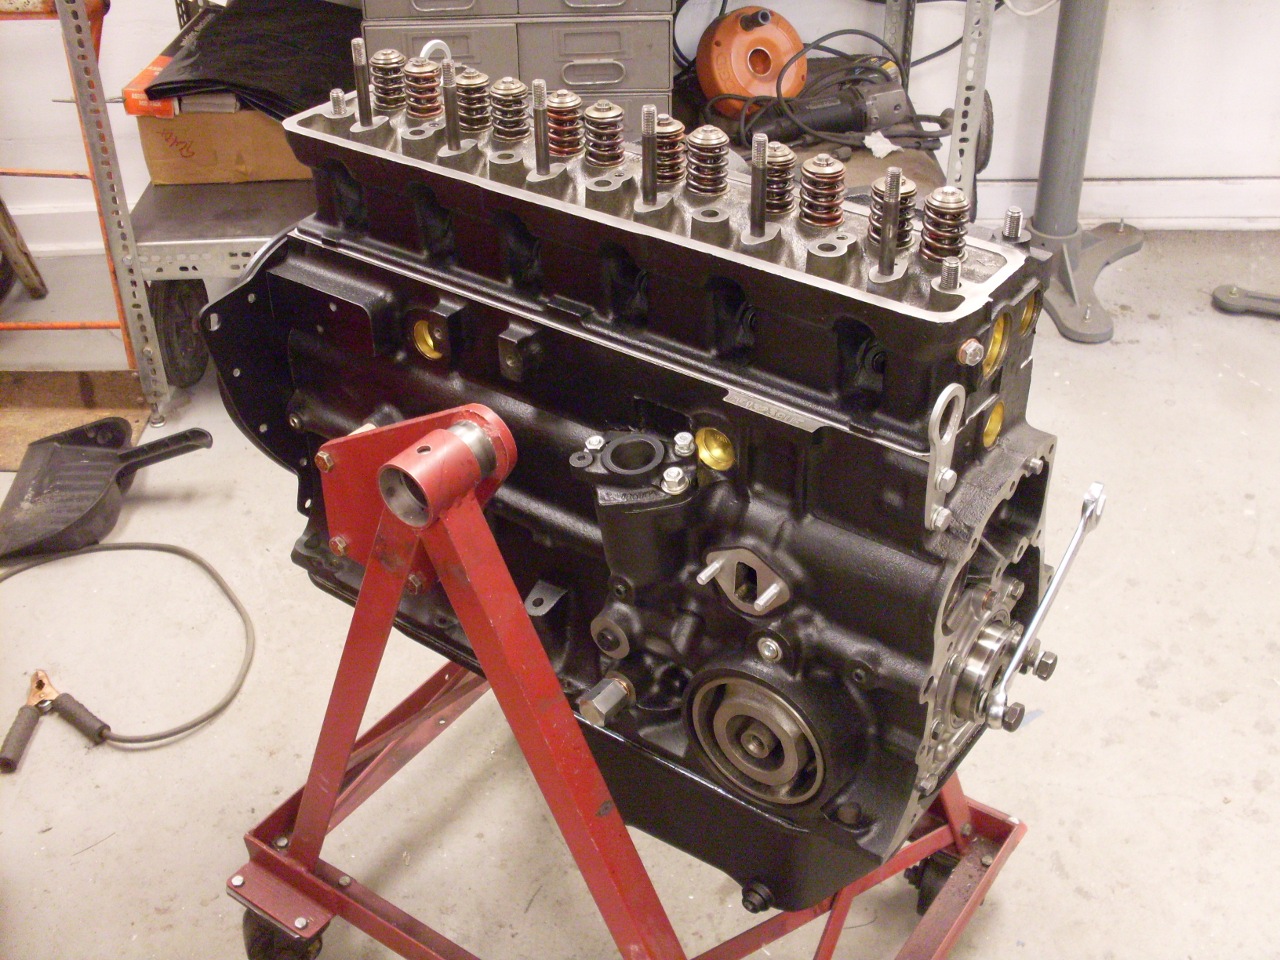
Prepare the block to receive the head:
It's a milestone! Now need to sort out the rocker gear.
Comments to: elhollin1@yahoo.com
To other TR6 pages.
.