To my other TR6 pages
November 4, 2018
First Start
I realized that there were really only a few last details to attend to on this car, and it will be ready to start.
I
put in five quarts of a high zinc oil designed for flat tappet
classics. This brought the sump level to a little above the max
oil level mark on the dip stick. This was of course because there is no
oil yet in the oil galleries or in the oil filter. Rather
than suffer the few anxious zero oil pressure moments on a first start
until the pump fills fills everything up, I decided to run the pump to
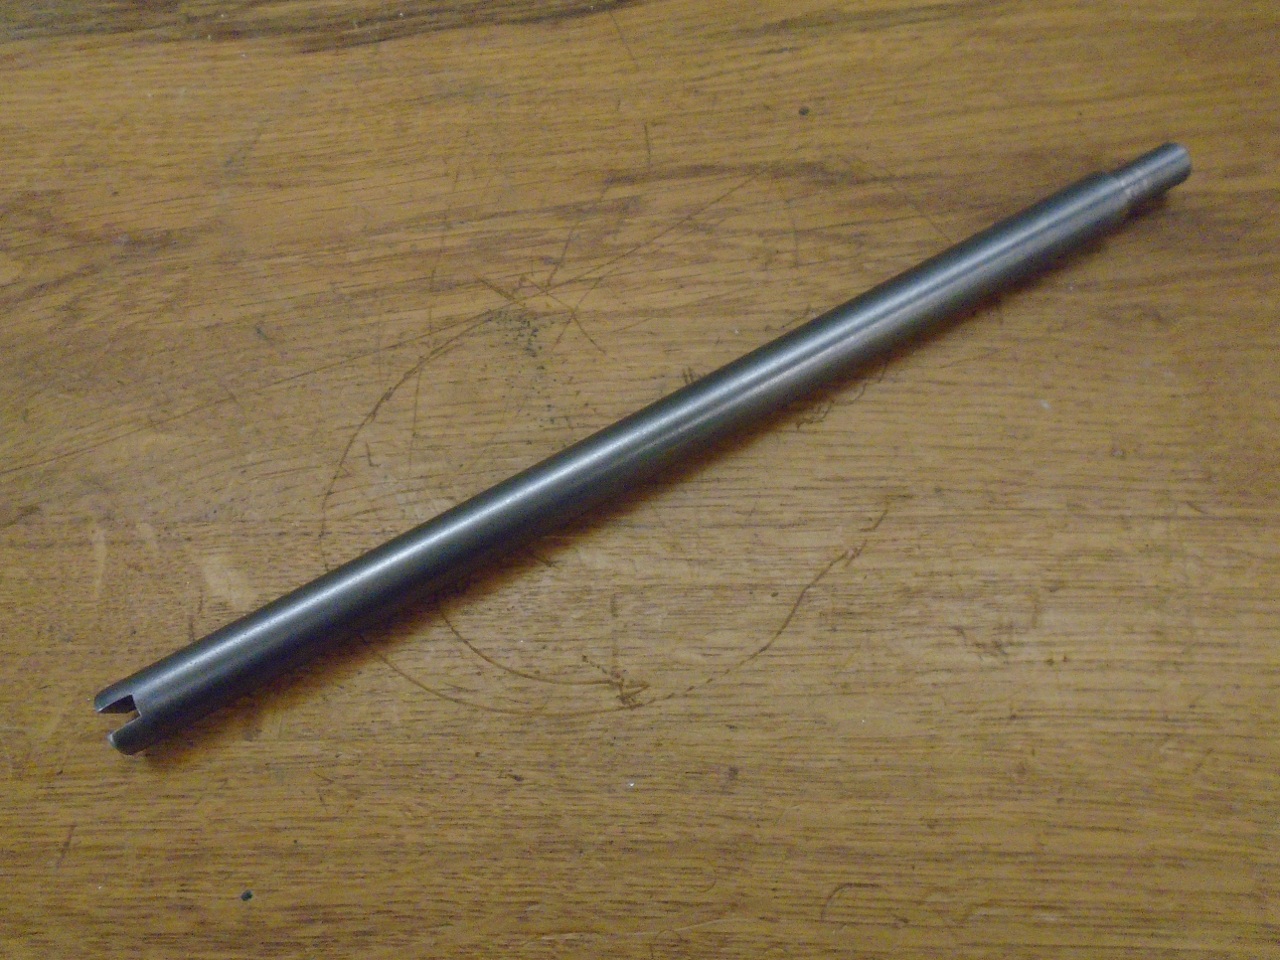
prime the system. This is a pretty common practice, and it just
involves making a simple rod that fits the top of the oil pump
shaft.
On
the TR6 engine, a gear that is driven from the cam shaft in turn drives
the distributor above and the oil pump below. To get to the oil
pump shaft, the gear has to be pulled out. Then the oil pump drive rod is inserted and keyed to the slot in the oil pump shaft.
The
rod is then driven counter-clockwise with an electric drill. It
takes a few seconds for the pump to fill with oil. It's easy to
tell when it does--the load on the drill jumps higher. I was
watching the oil gauge, and was a little concerned when it jumped to
full scale--over 100 PSI. This didn't seem right. Before I
panicked, I decided that, rather than take the dirt simple stock
gauge's word for it, I would connect a decent pressure gauge to one of
the normally plugged ports along the main oil gallery. The
good gauge read a rock steady 90 PSI while spinning the pump. I
reasoned that this was probably OK, since the oil was cold, and there
wouldn't be much flow into a non-rotating engine. The 90 PSI
would certainly represent the setting of the oil pressure relief valve.
I decided that panic wasn't necessary after all.
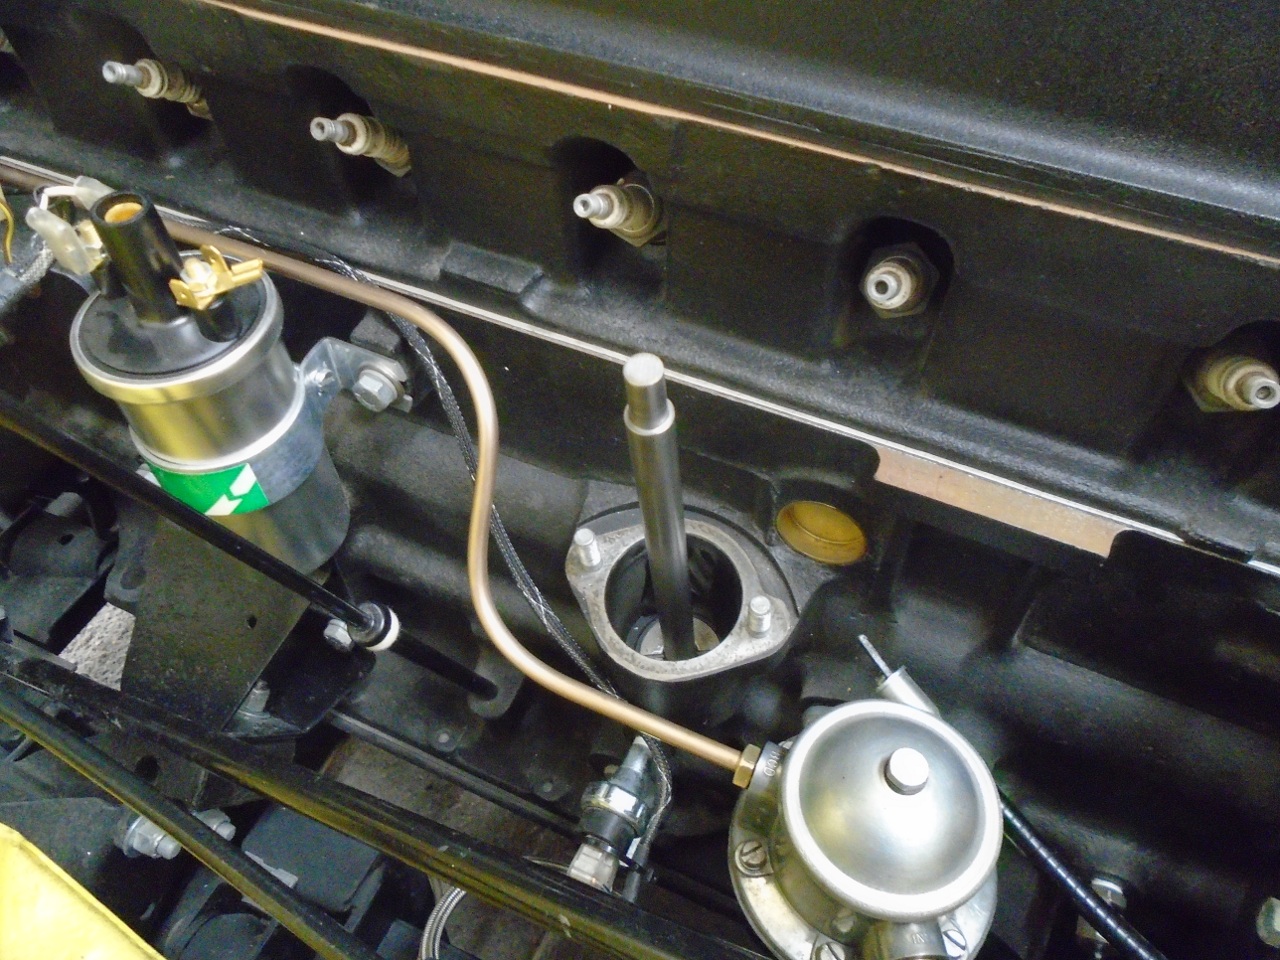
Now, with the
system primed with oil, I could replace the drive gear and move on to
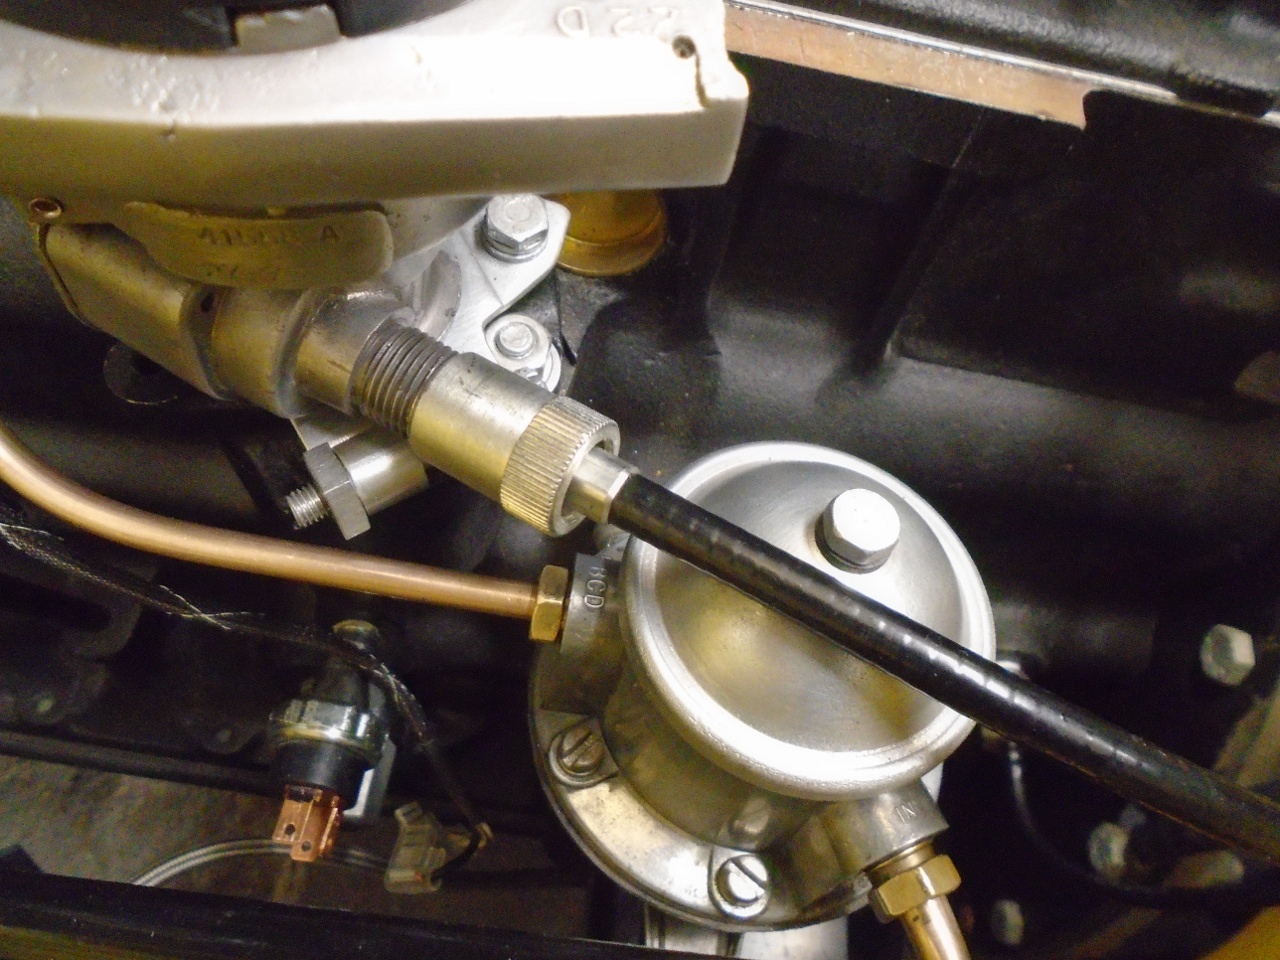
installing the distributor. Setting the gross static timing is
pretty easy to do with a test light. After setting the ignition point
gap to spec, and rotating the crankshaft to the static timing setting
(various sources give various numbers for this--I used 10 degrees
BTDC), a 12 volt light is connected so that it will be on when the
points are closed. Then the distributor is rotated until the
light just goes out. This is the starting position for the
distributor.
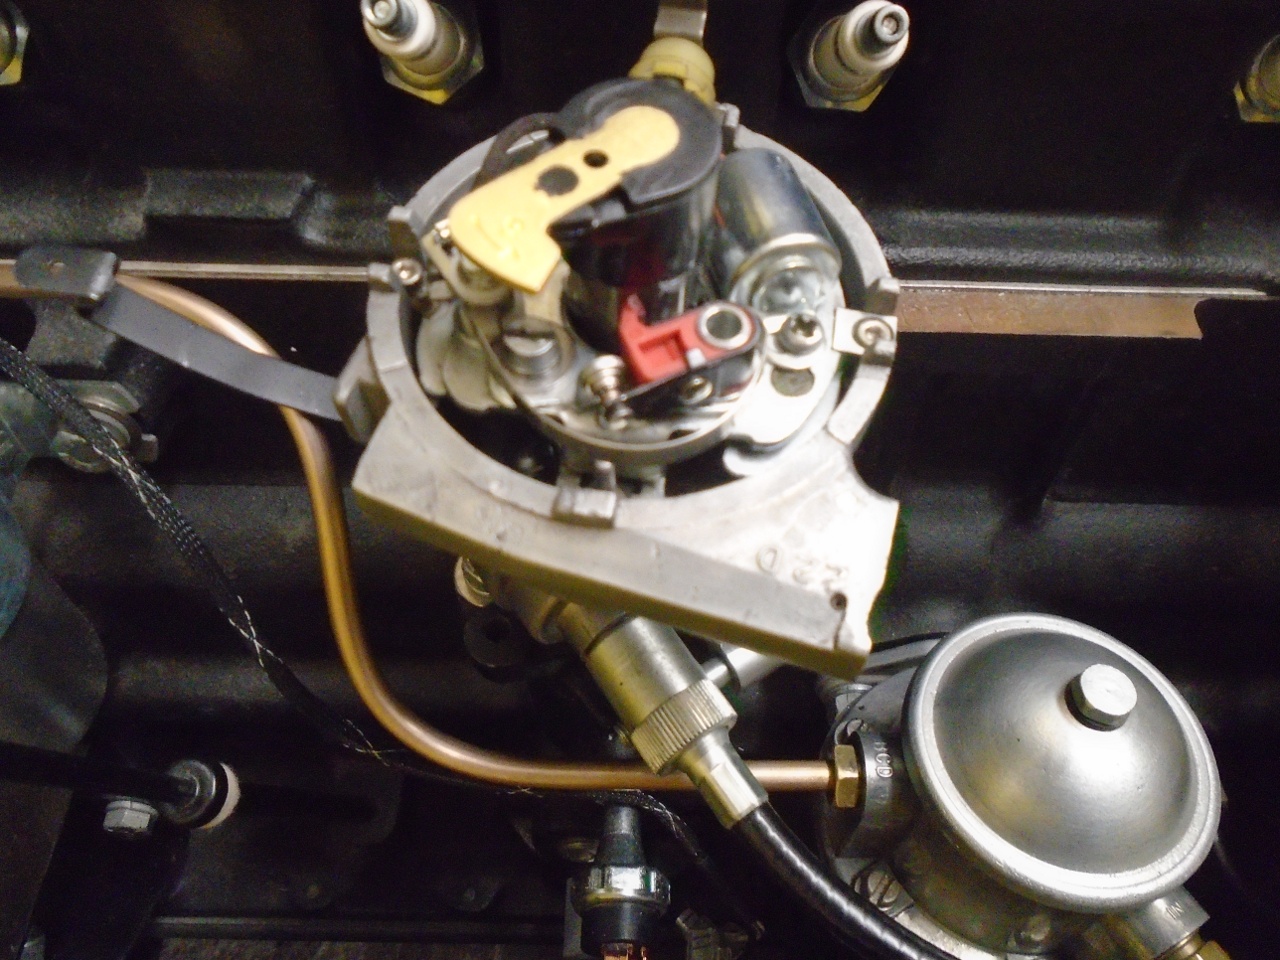
If the position of the distributor requires
a path like this for the tach cable, the distributor drive gear is one
tooth off. Time to start over. The engine would run that
way, but the tach might be impossible to connect.
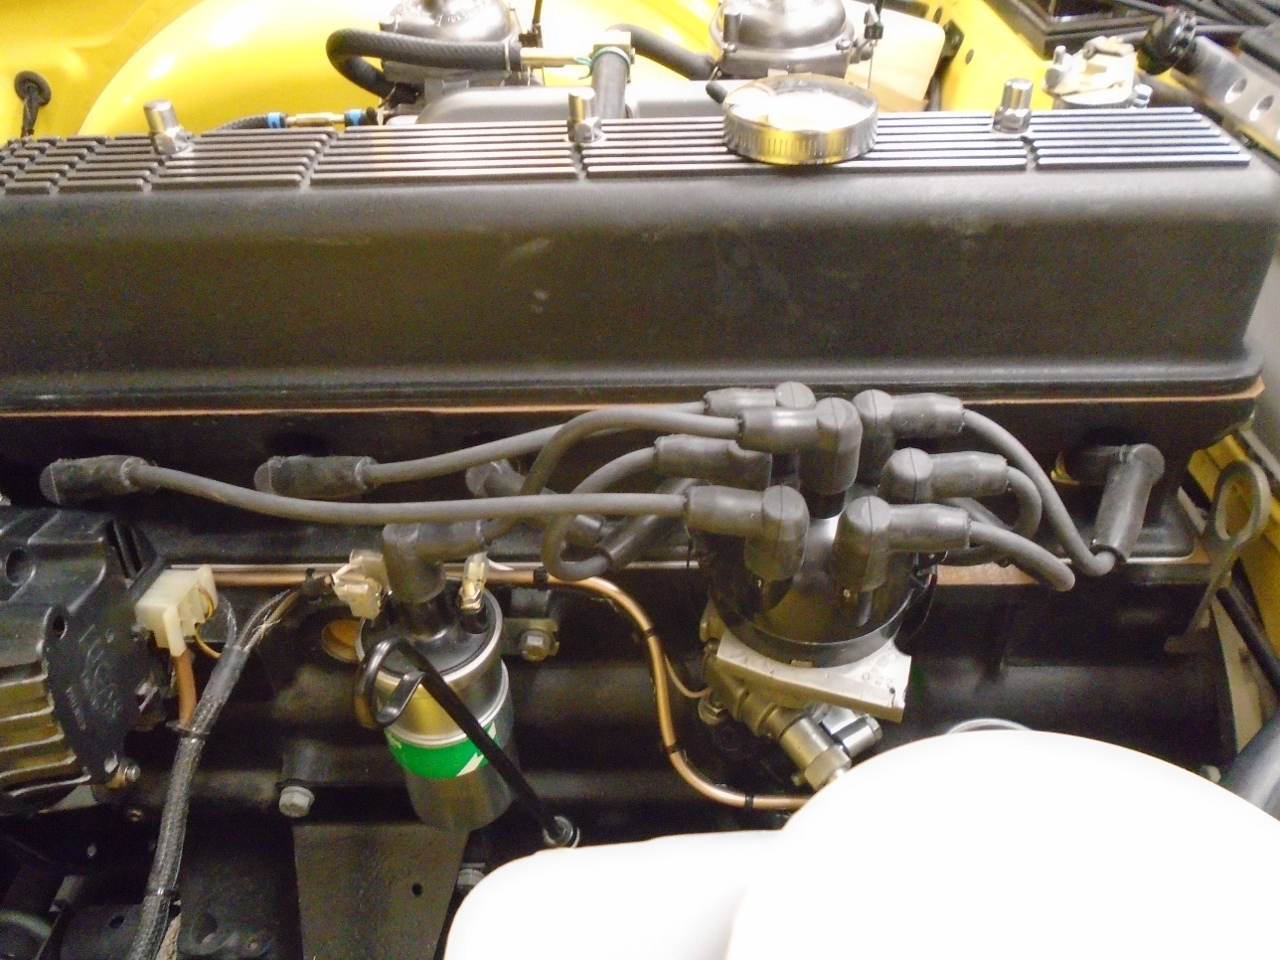
Ahh, much mo' betta.
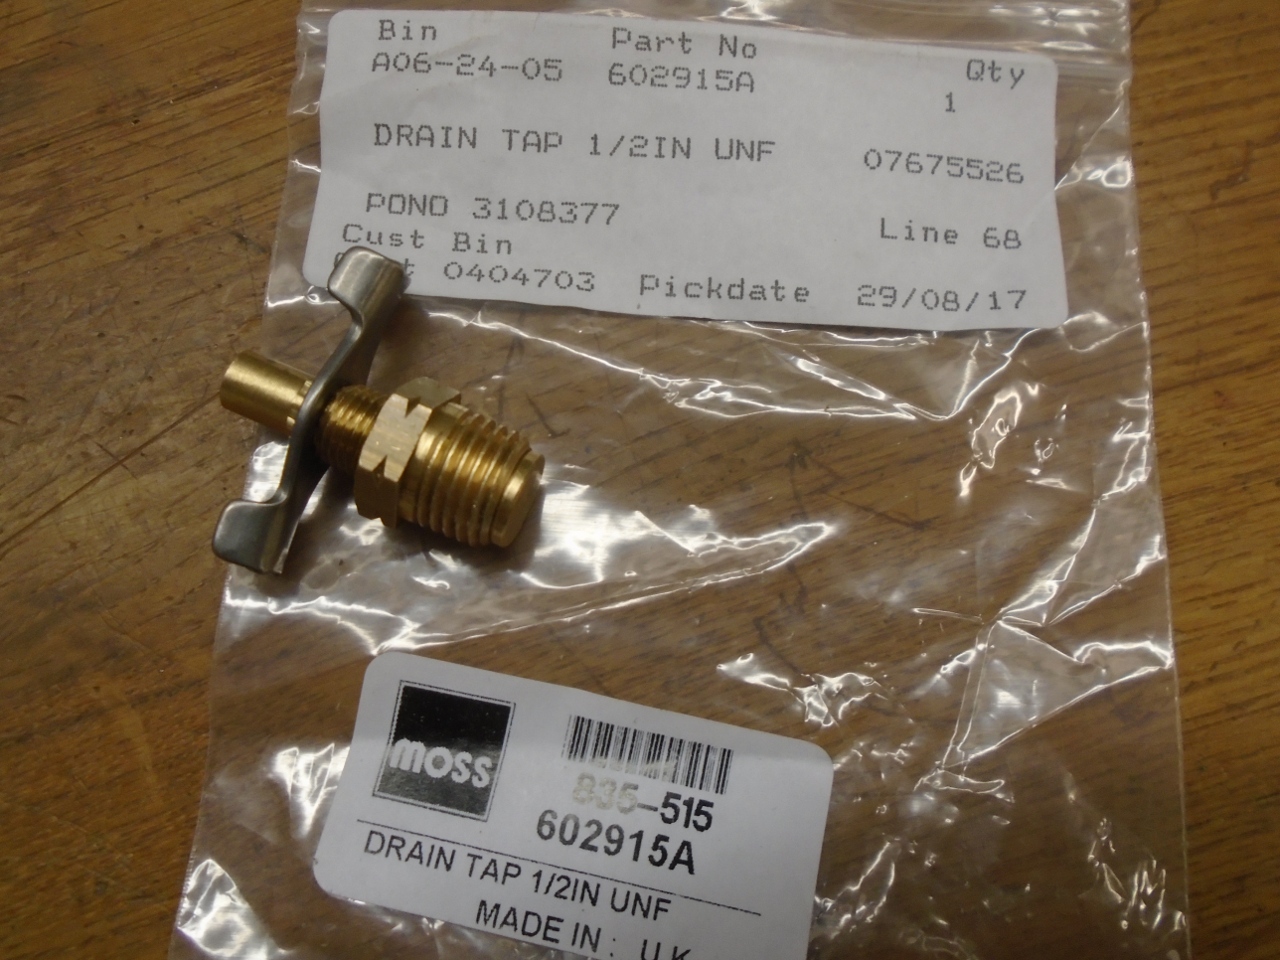
Next
up was one of the last parts to trickle in from the vendors--the block
coolant drain cock. I knew by checking it with a bolt that the
thread in the block for the drain was 1/2-20. The packaging
verified the size--1/2-20, but it was obvious by looking at the part
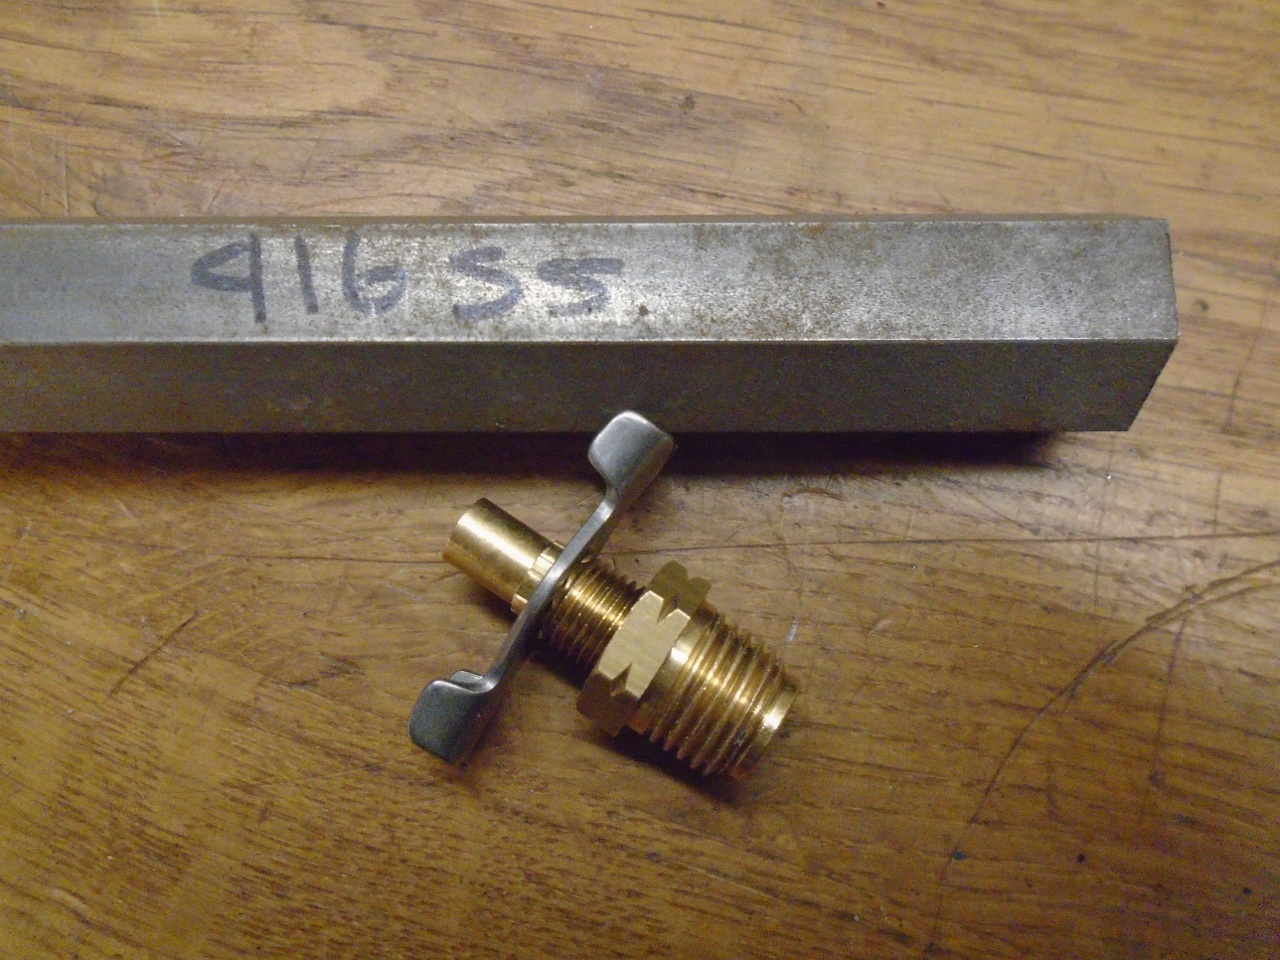
that it was not 1/2-20, but a 1/4 NPT thread.
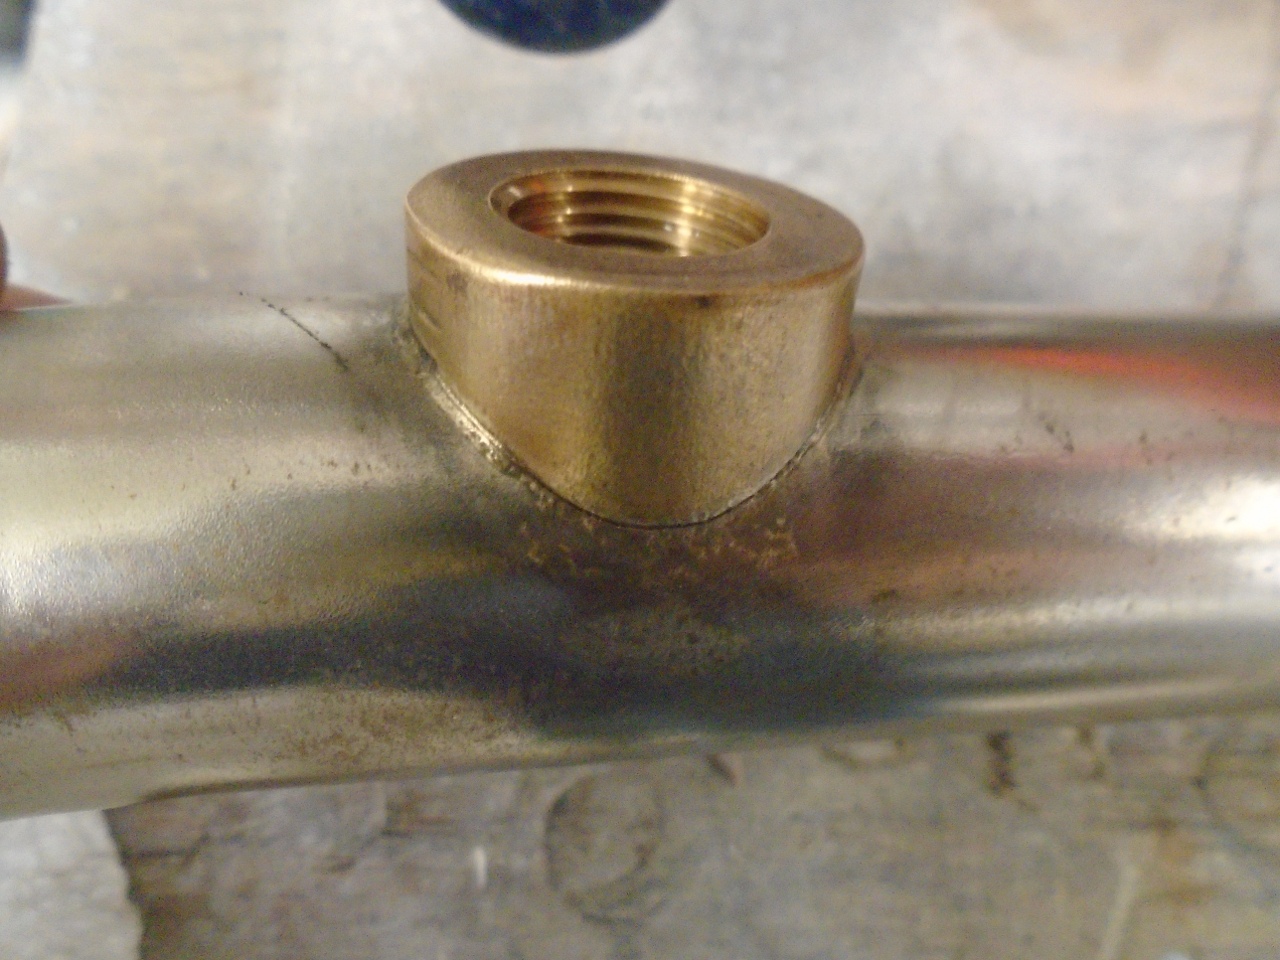
I
called the vendor. They tried to be helpful, but couldn't seem to
determine if the other parts on the shelf were correct or not.
They said they would find out and let me know. By the
time I got an email from them a couple of days later, I had made an
adaptor, making the issue moot, at least for me. However, I
wonder how many folks would have just jammed that drain in, only to
have it leak, or maybe even mess up the threads in the block.
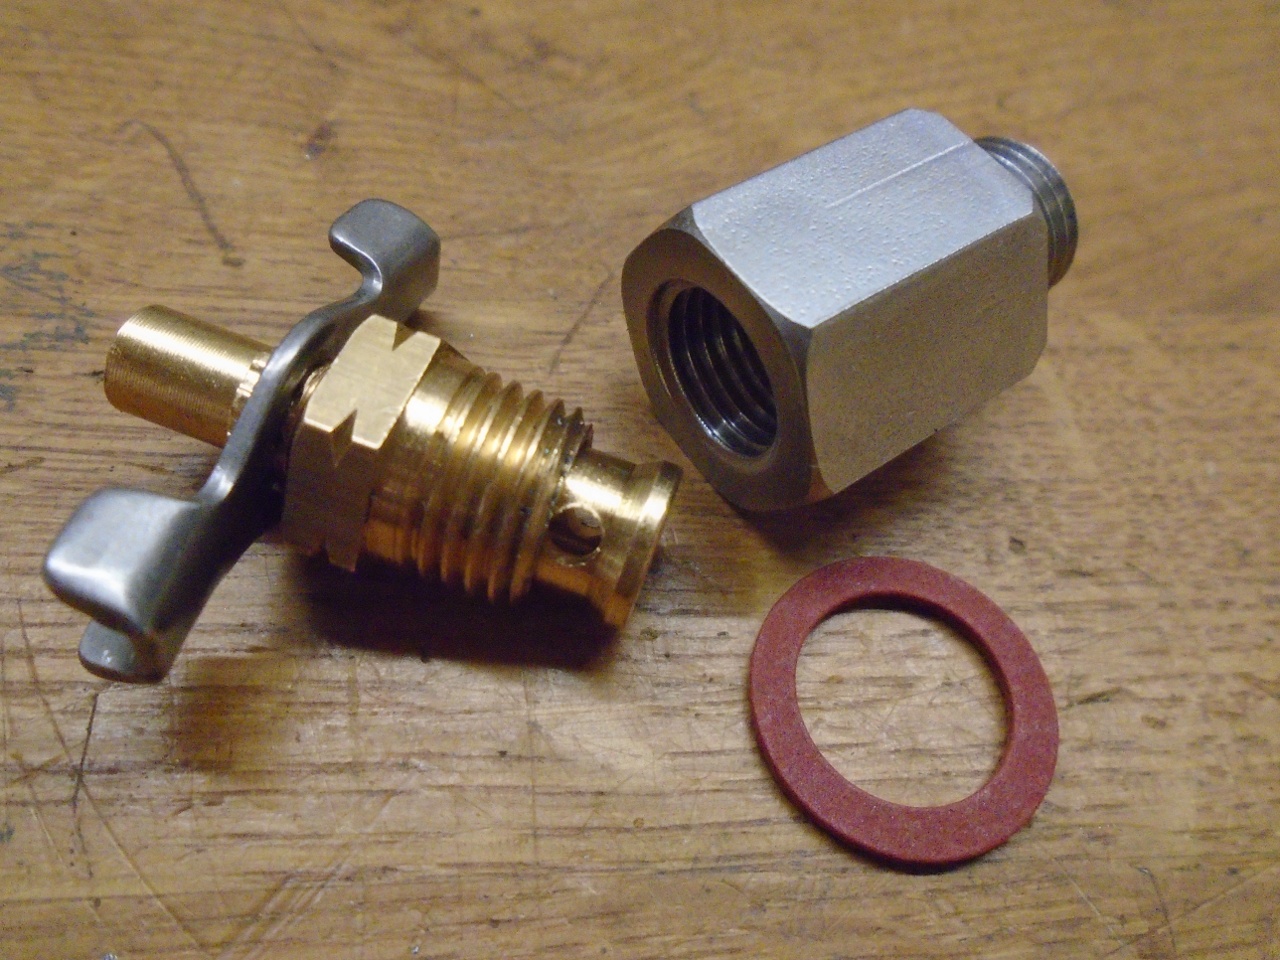
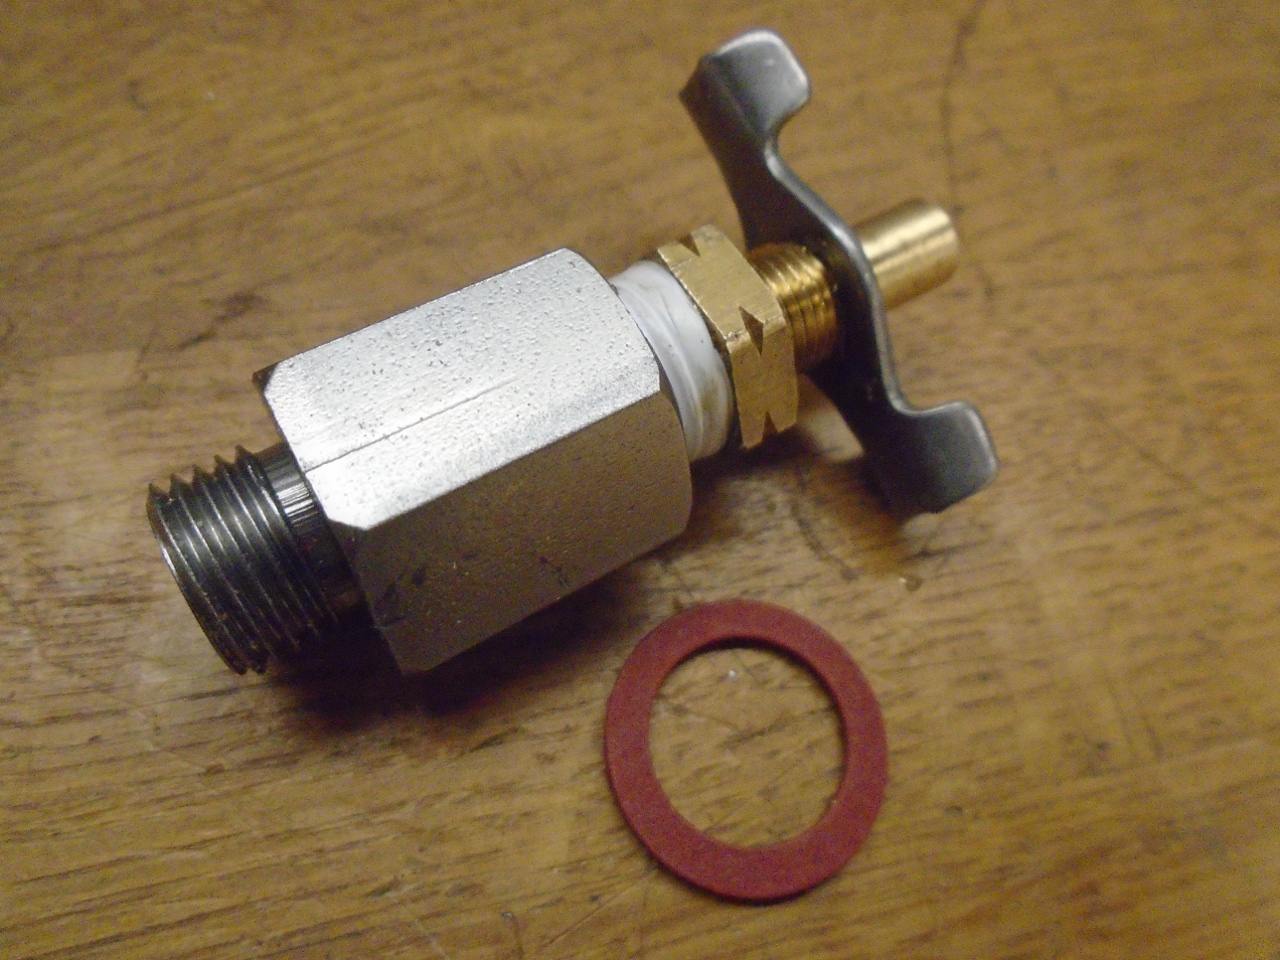
It
seems that no good idea goes unpunished, though. The extra length
of the adaptor put the wings on the drain far enough out that they
fouled the starter solenoid. Not by much, luckily, and I was able
to trim 1/8" or so from each side and it worked fine.
Then
the plug wires I ordered came in. I bought a basic set for $15 or
so. By training, I know a little something about electricity, and
the marketing copy for wire sets costing almost ten times as much make
me smile. While I think the set I bought is totally adequate, it
wasn't very customized. The set consisted of three different
lengths of wires, all too long. The second pic compares the
longest wire in the kit to the longest that was on the car (possibly
not factory).

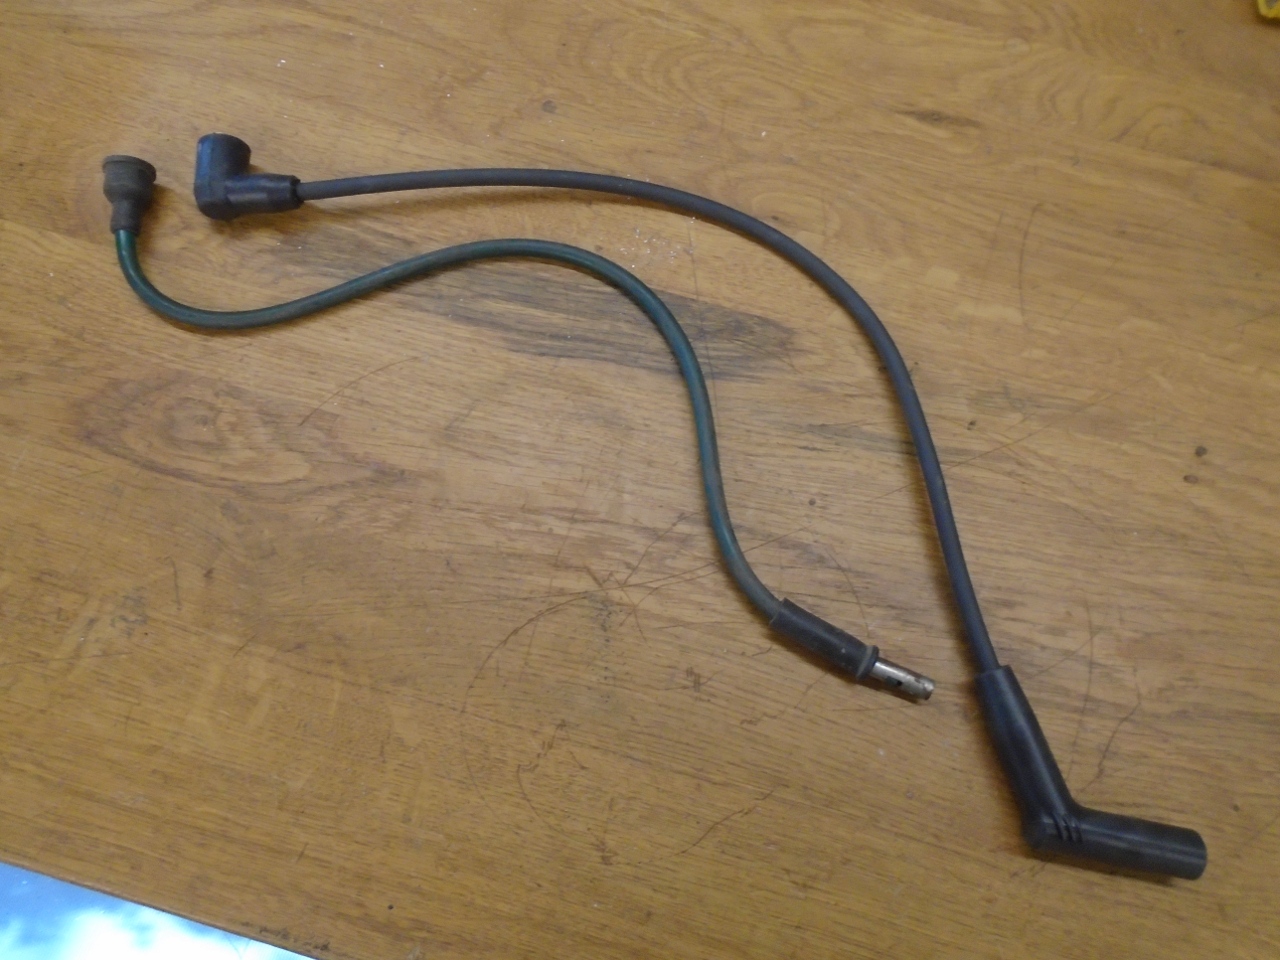
Installing the set created sort of a rat's nest.

I
thought I could do better. For just a few bucks, I bought some
right angle terminals identical to what was on the wire set. I
cut each of the wires to a better length and installed the new
terminals. I could make half another set with the excess wire I
cut off.
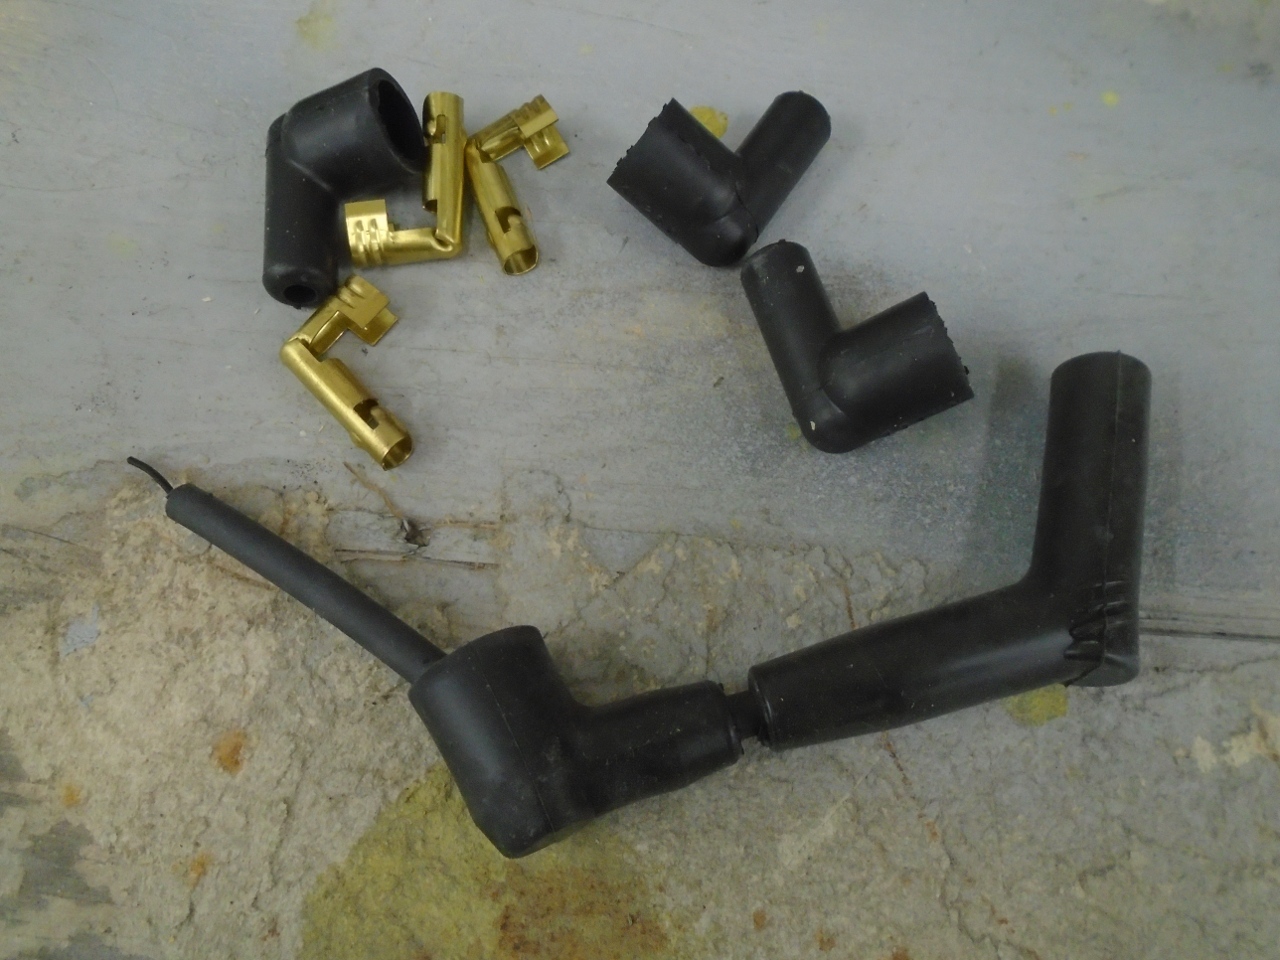
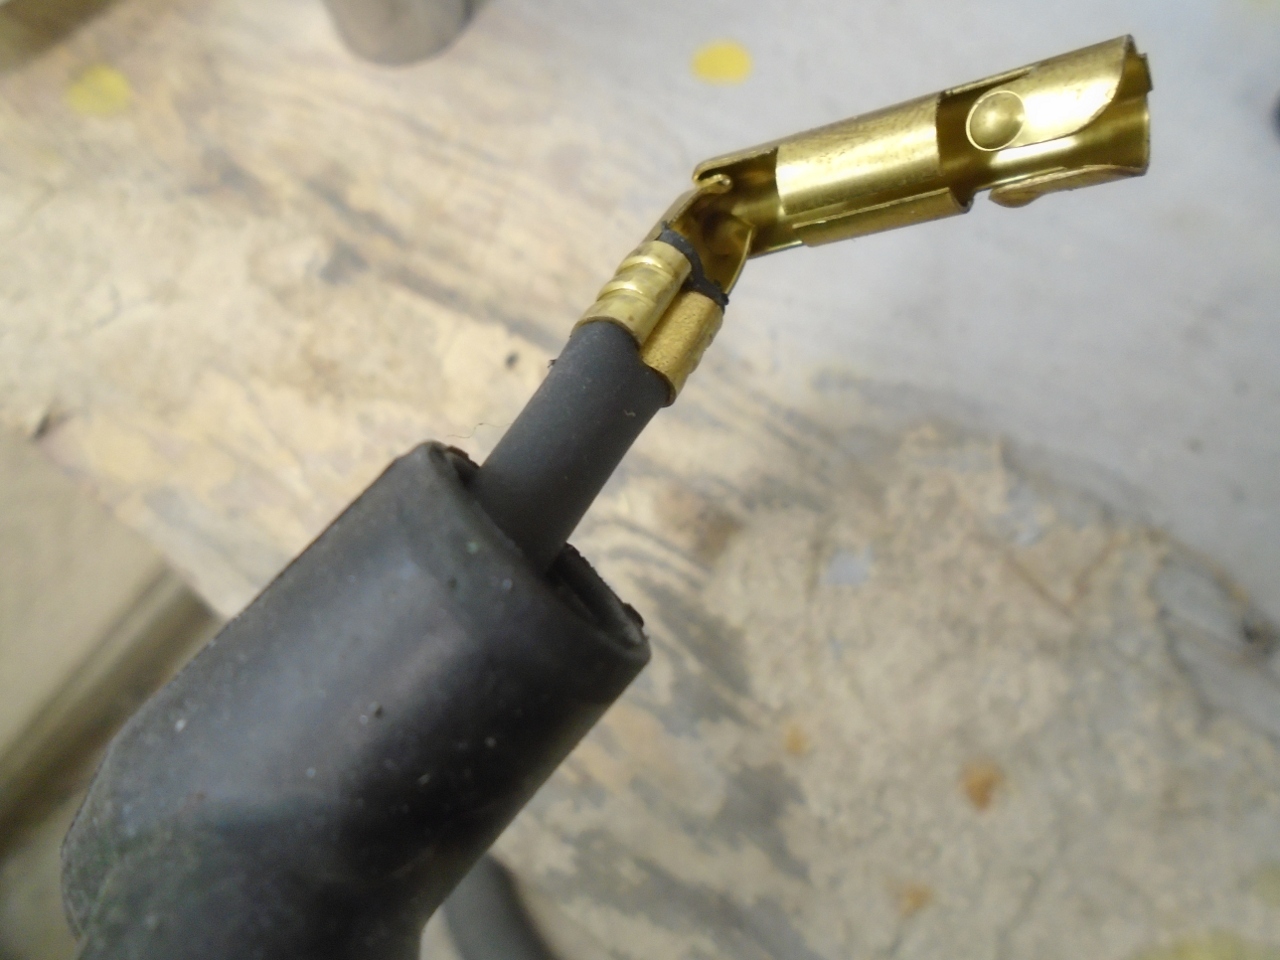

This made a much tidier installation. There is still enough slack to turn the distributor for fine timing.
Then
came the coolant. I considered using a waterless coolant. I
liked the fact that they run at zero pressure and had less corrosion
potential than a water/glycol mix. On the other hand, they seem
quite overpriced. They are apparently straight glycols, and there
doesn't seem to be any reason for them to cost what they do. That
by itself would not have stopped me, but since glycols have lower
specific heat than water, they could make the engine run hotter.
Also, they are flammable. It was a close call, but I
decided to use a conventional 50/50 glycol-water mix.
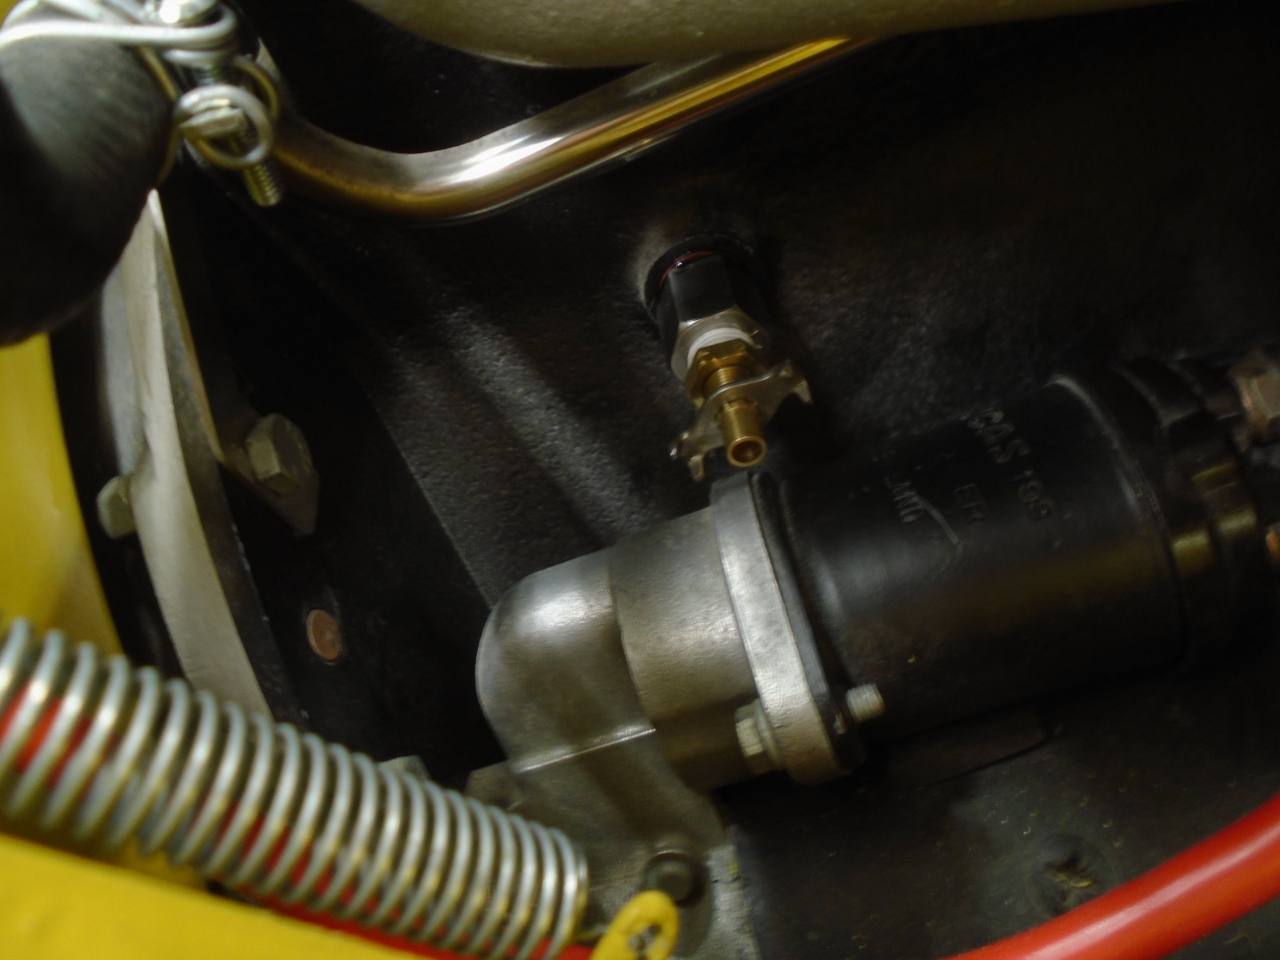
On
slowly filling the system, I noticed something splashing on my feet.
It was a pretty good leak at the bung in the downpipe for the fan
thermostat. I'm not sure how I missed that. I pulled out
the pipe and rebrazed it. After that, the system seemed to keep
the coolant in.
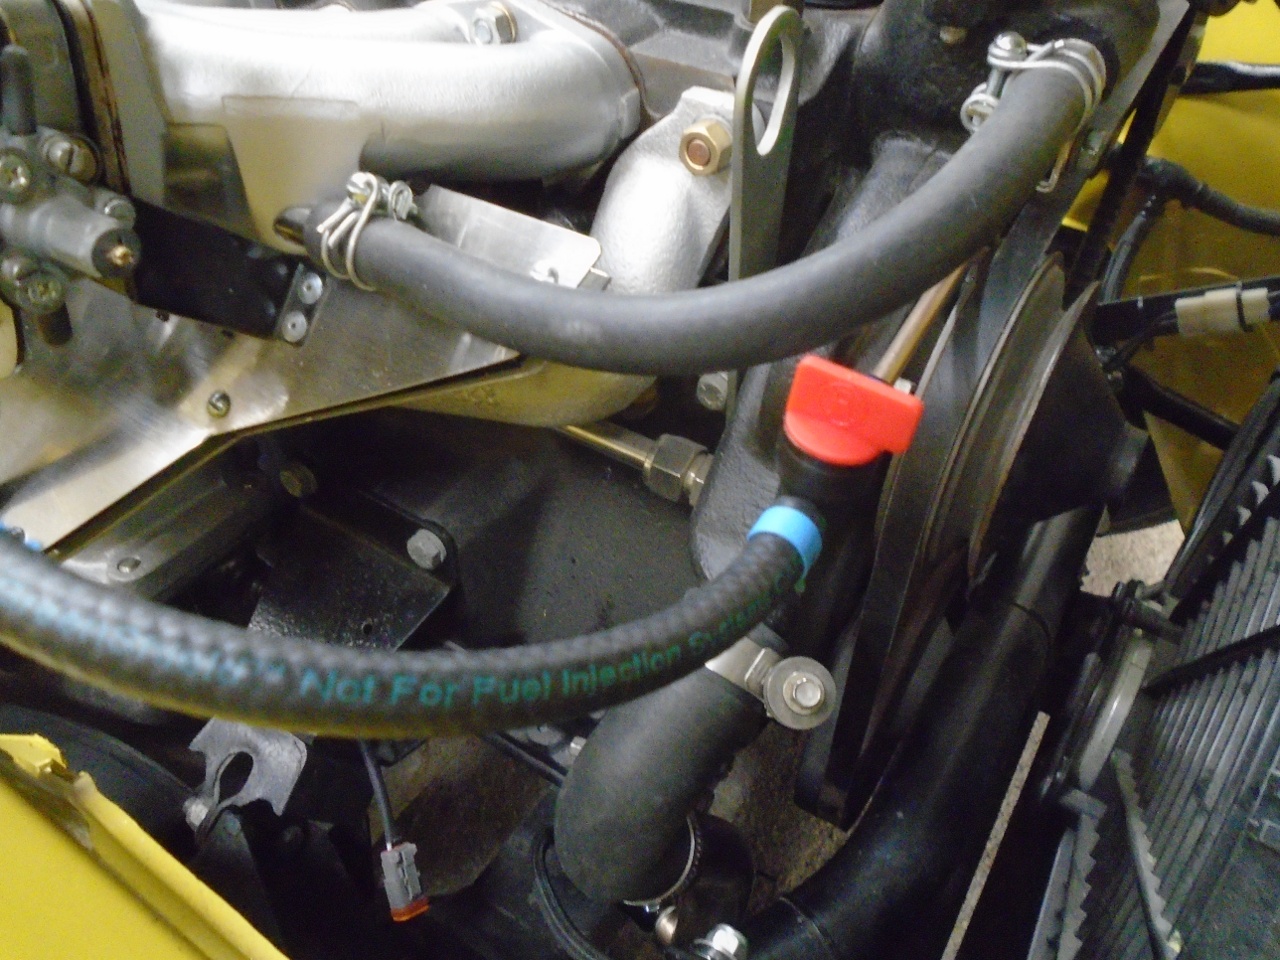
Then
on to the fuel system. On good advice from folks on the forums, I
added a fuel shut-off right before the carbs. I would have added
one before the fuel filter, too, but there was already fuel in the
tank. I've made a note to install that shutoff the first time I
replace the filter.
While waiting for a nicer day so I could try to start the engine and let it run in, I was looking for another job to do.
One
of my least favorite things about my engine bay is the air box.
It just looked sort of plain and nondescript. I decided to
pimp it up a little.
I made this plate to mimic the ribbed valve cover.
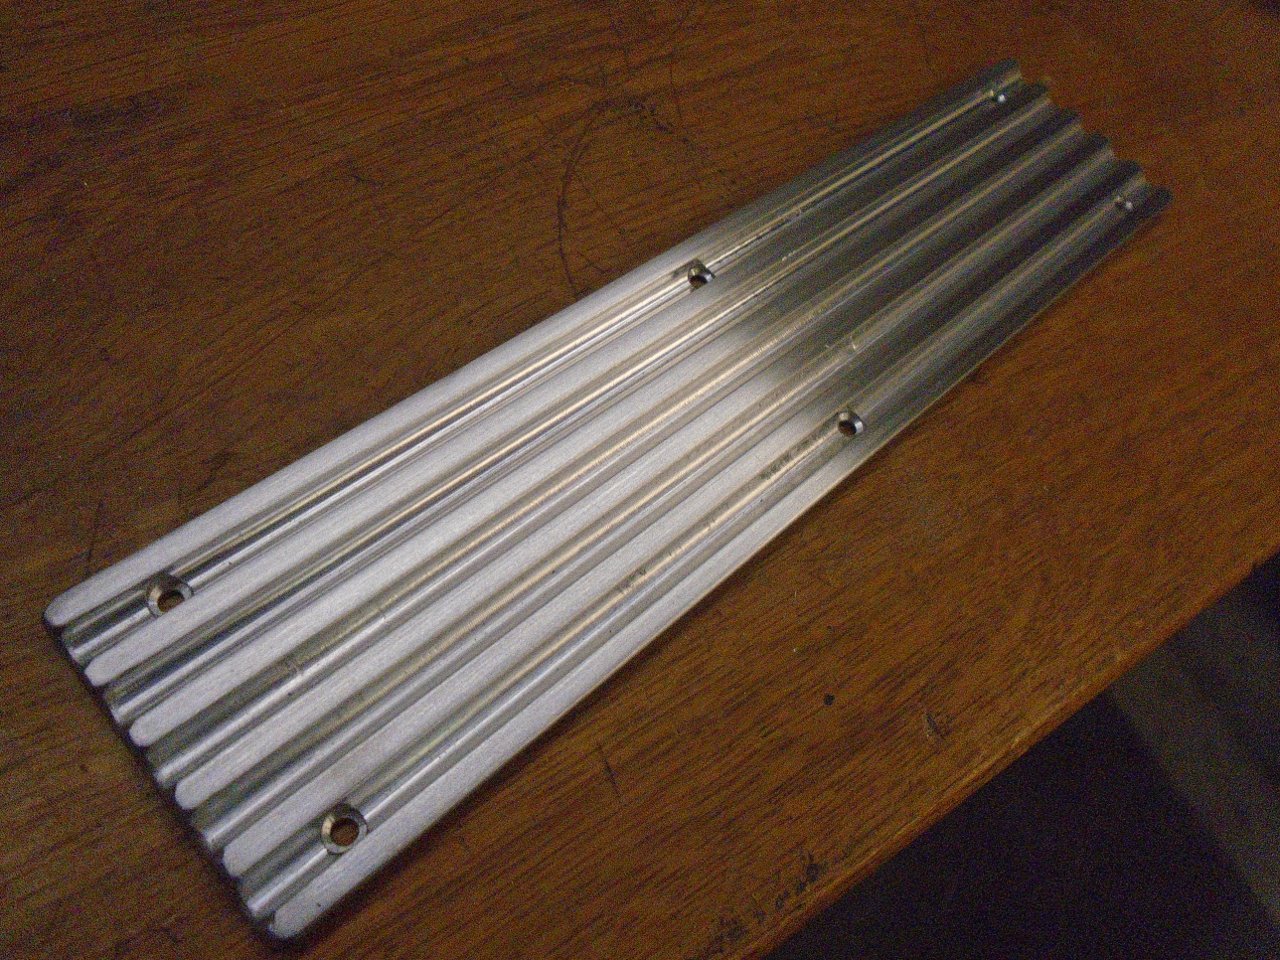
Applied it to the air box and painted it with the same texture paint on the cover.
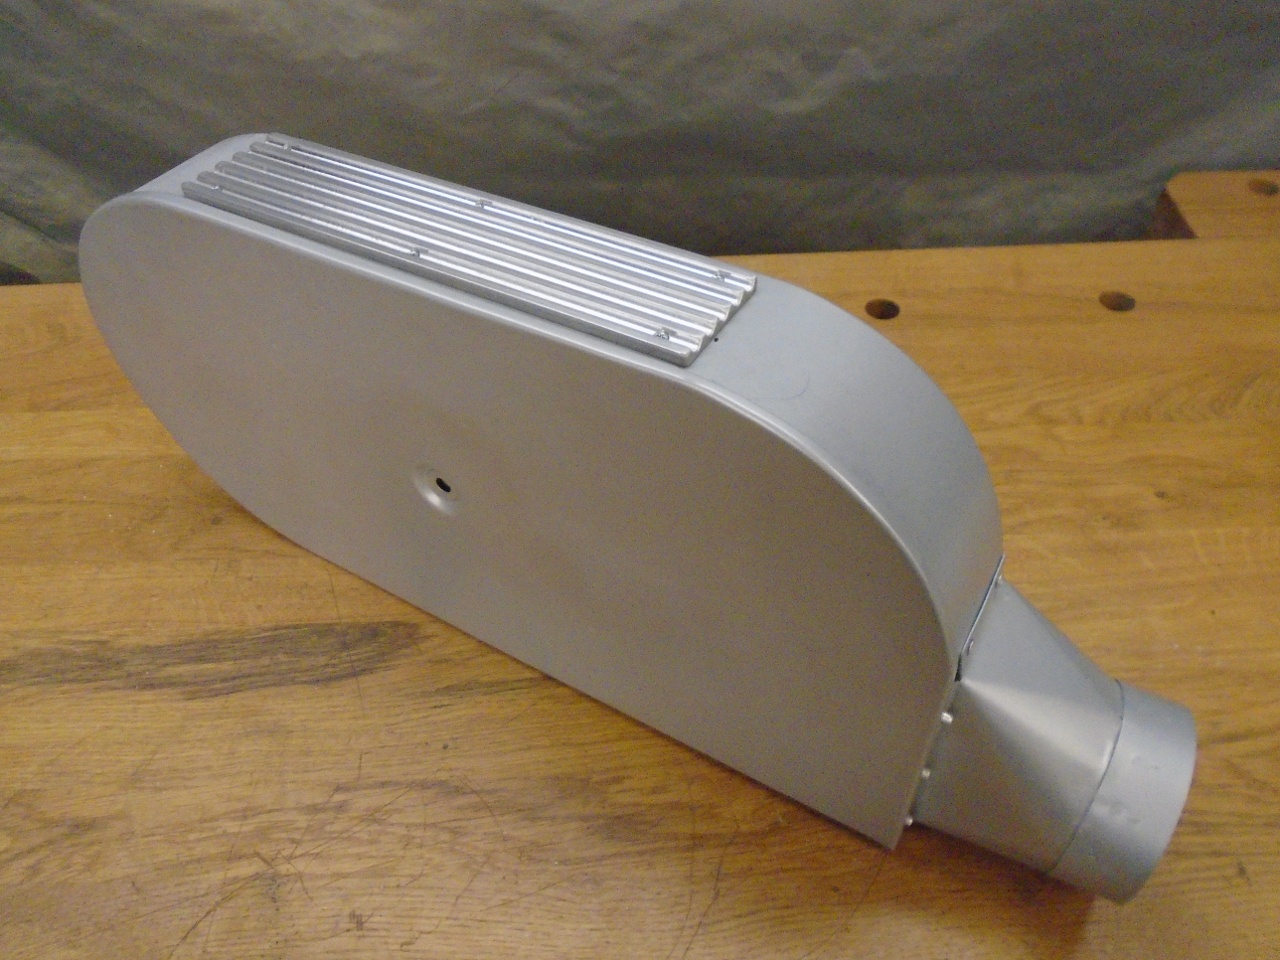

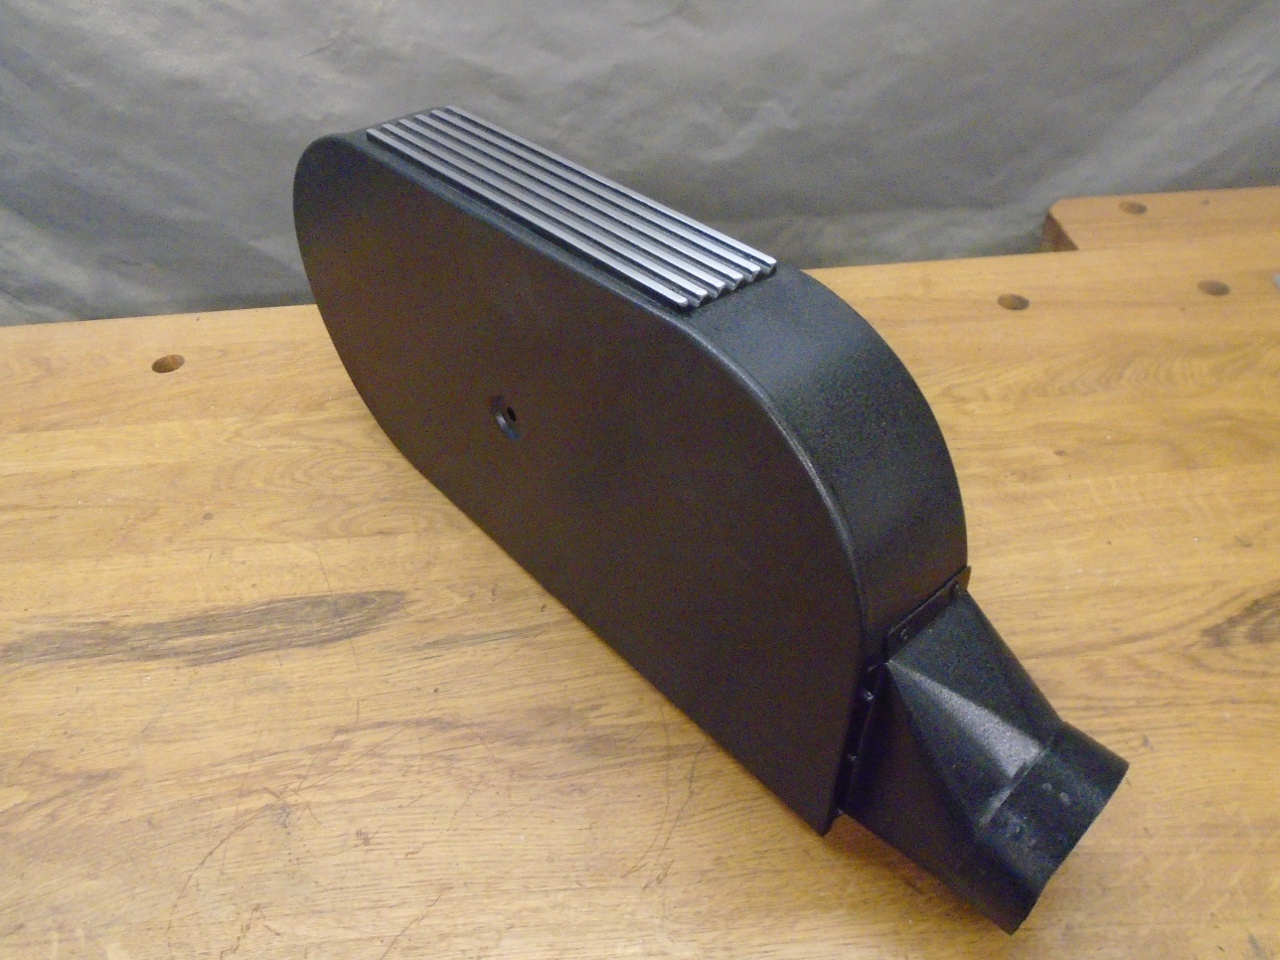
I'm not usually in to purely cosmetic mods, but I like this better. I think it may need the cross grooves like the cover.

So
the moment of truth finally came. I charged the battery, pulled
the choke, and turned the key. On the second try, it coughed to
life. It took some throttle play to keep it running, and it was
pretty ragged at first, but it eventually smoothed out quite a bit.
It took a minute or two before I noticed the growing pool of
coolant on the floor. I traced it to this:
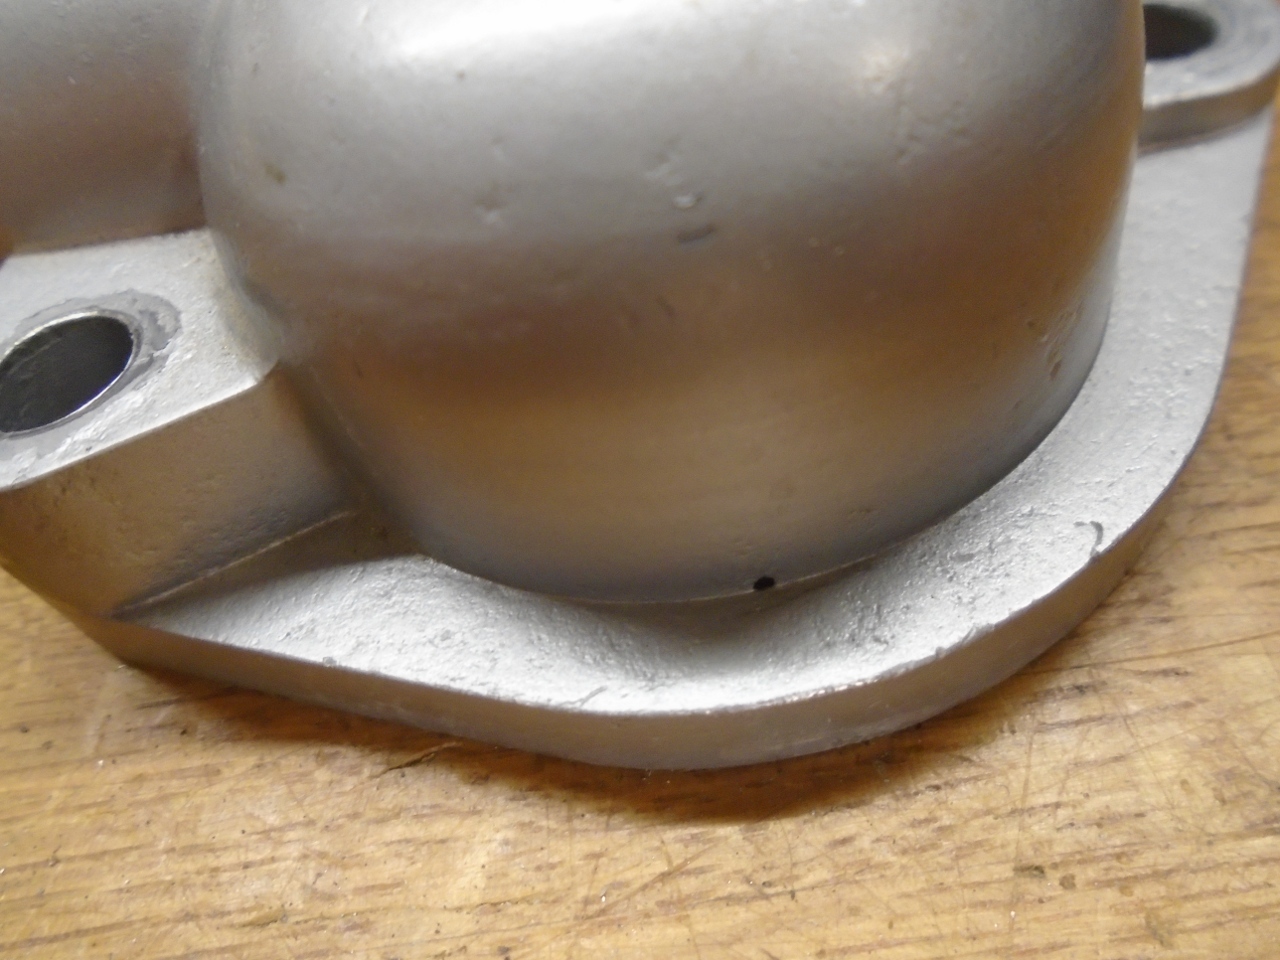
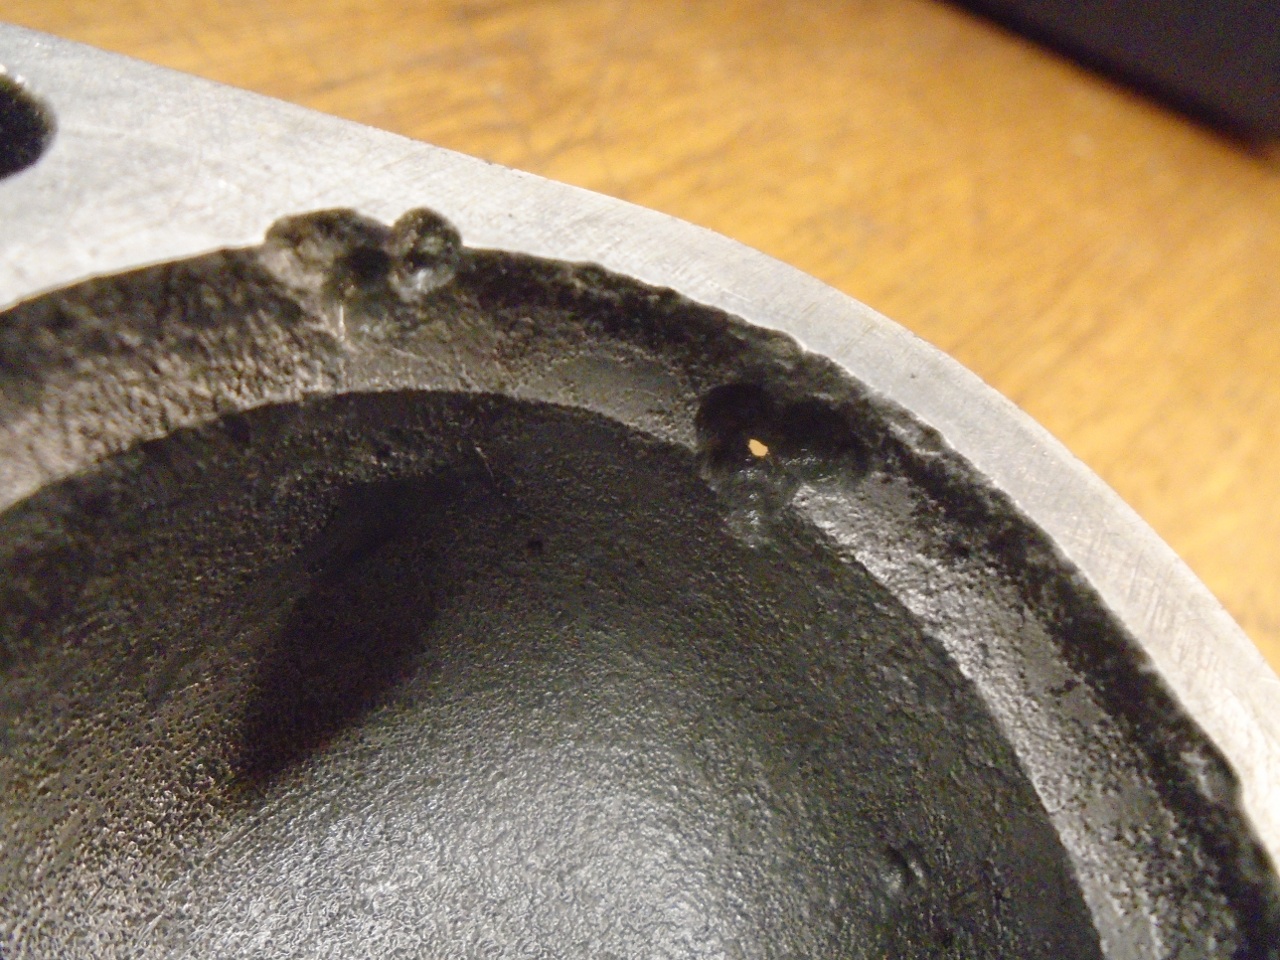
I'm not sure how I missed this when I cleaned this part. I guess maybe I might have my own QC problems.
I'll have to decide whether to get a new thermostat housing of fix this one, but it's a relief to know that at least the car can run.
Comments to Ed at elhollin1@yahoo.com
To my other TR6 pages