To my other TR6 pages.
January 26, 2018
Kidney Panels
In
a nod to a more civilized cockpit experience, Triumph included
some panels to conceal the space behind the H frame console.
Besides making the cabin look a little more finished, they
provided a place to mount radio speakers.
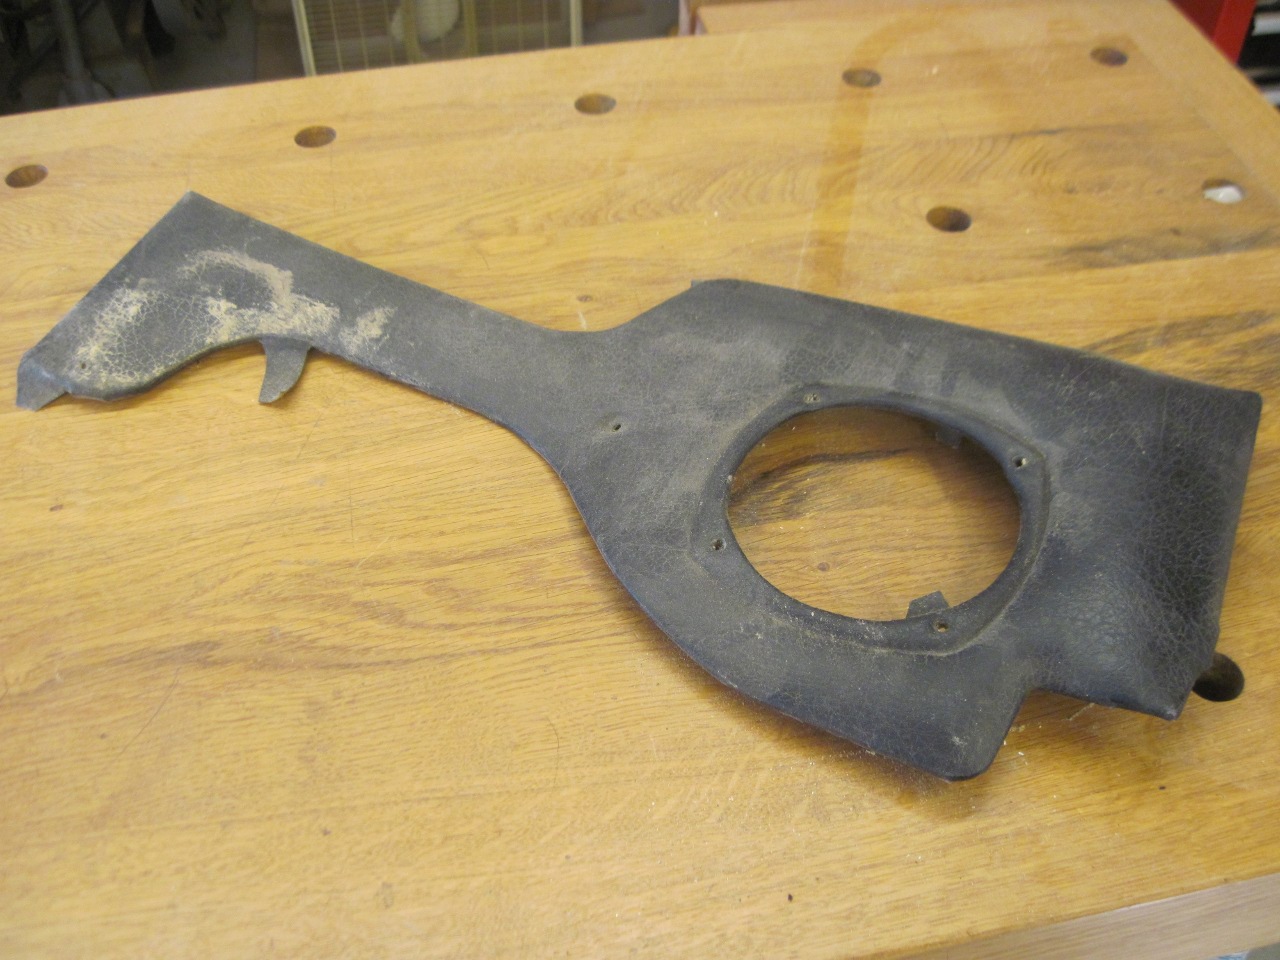
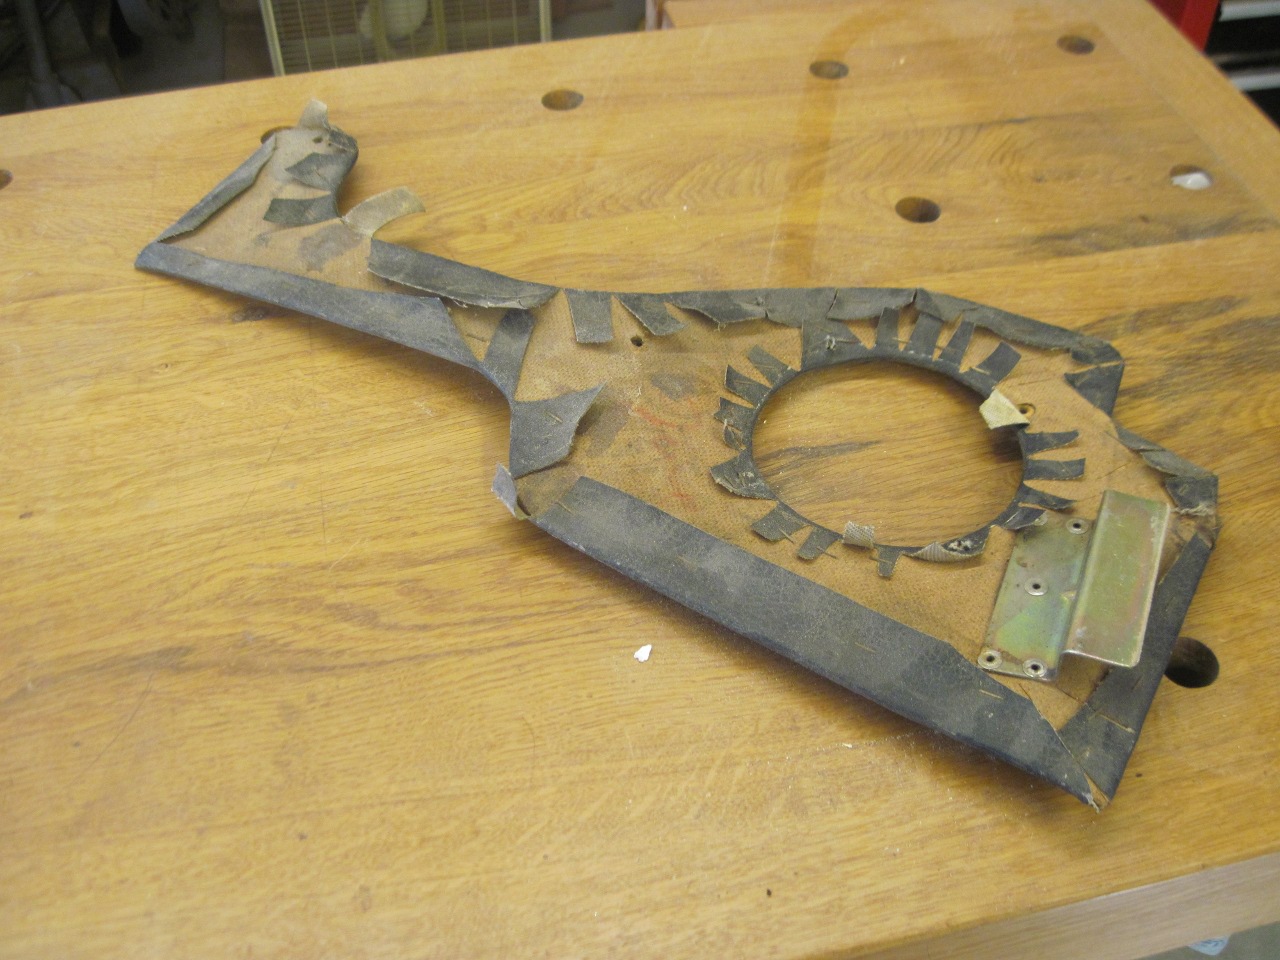
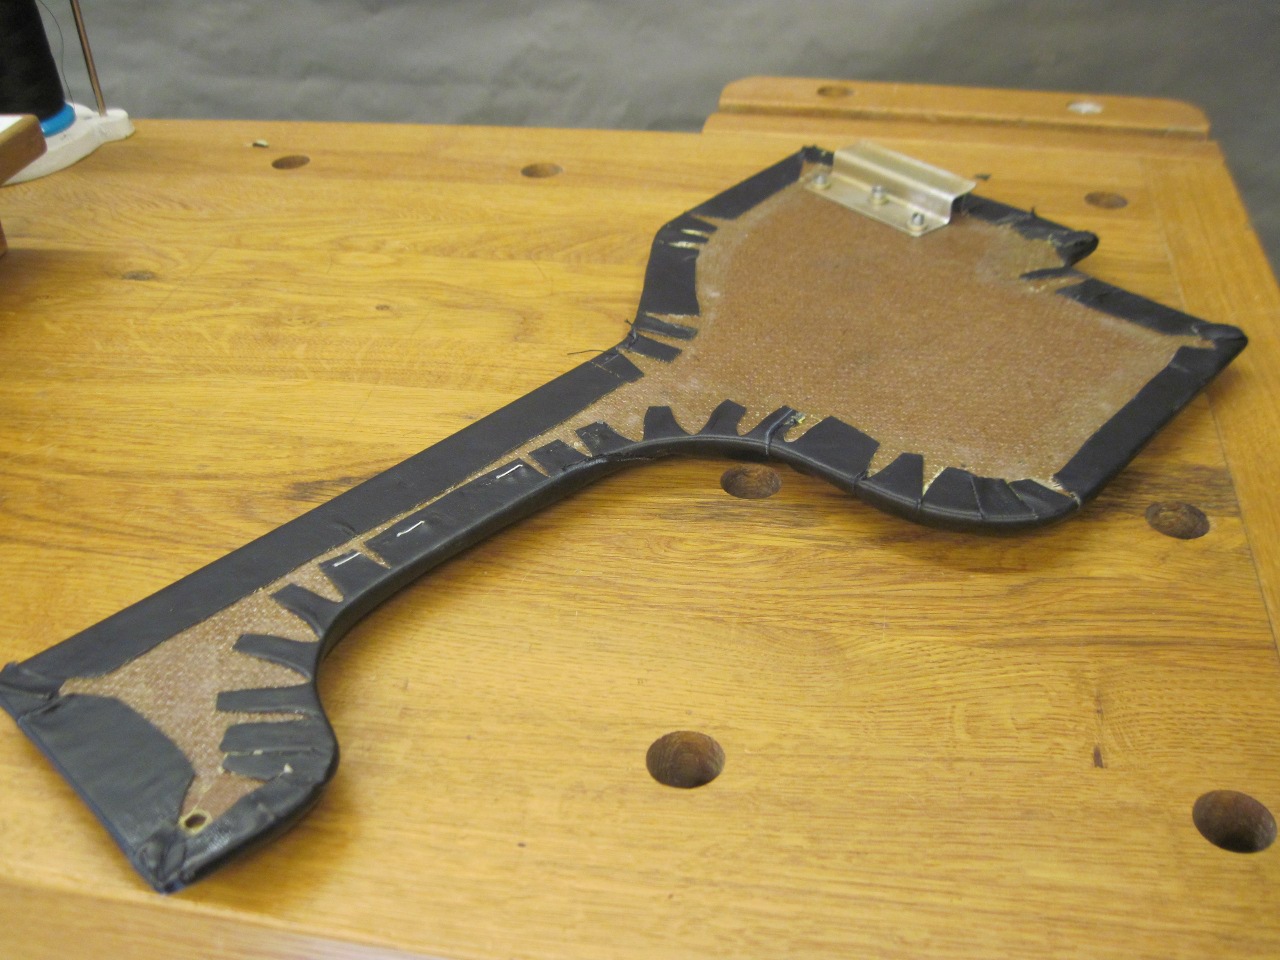
The odd-shaped,
kidney-esque panels were made of 1/8" hardboard, padded with thin foam,
and covered with vinyl. I think I may have recovered my panels
back in the 80s, but they were pretty tired looking. The
hardboard was twisted and warped.


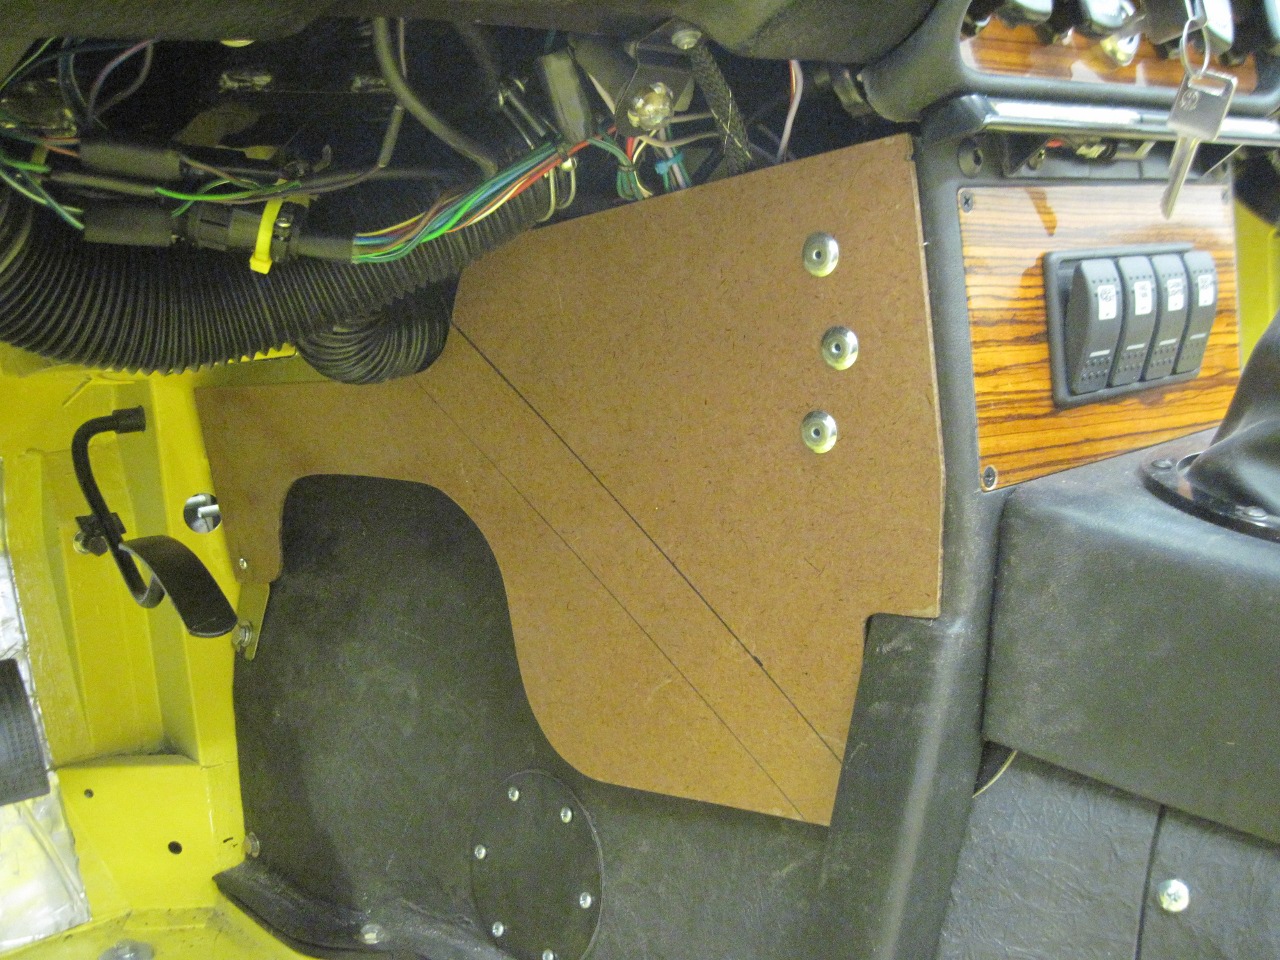
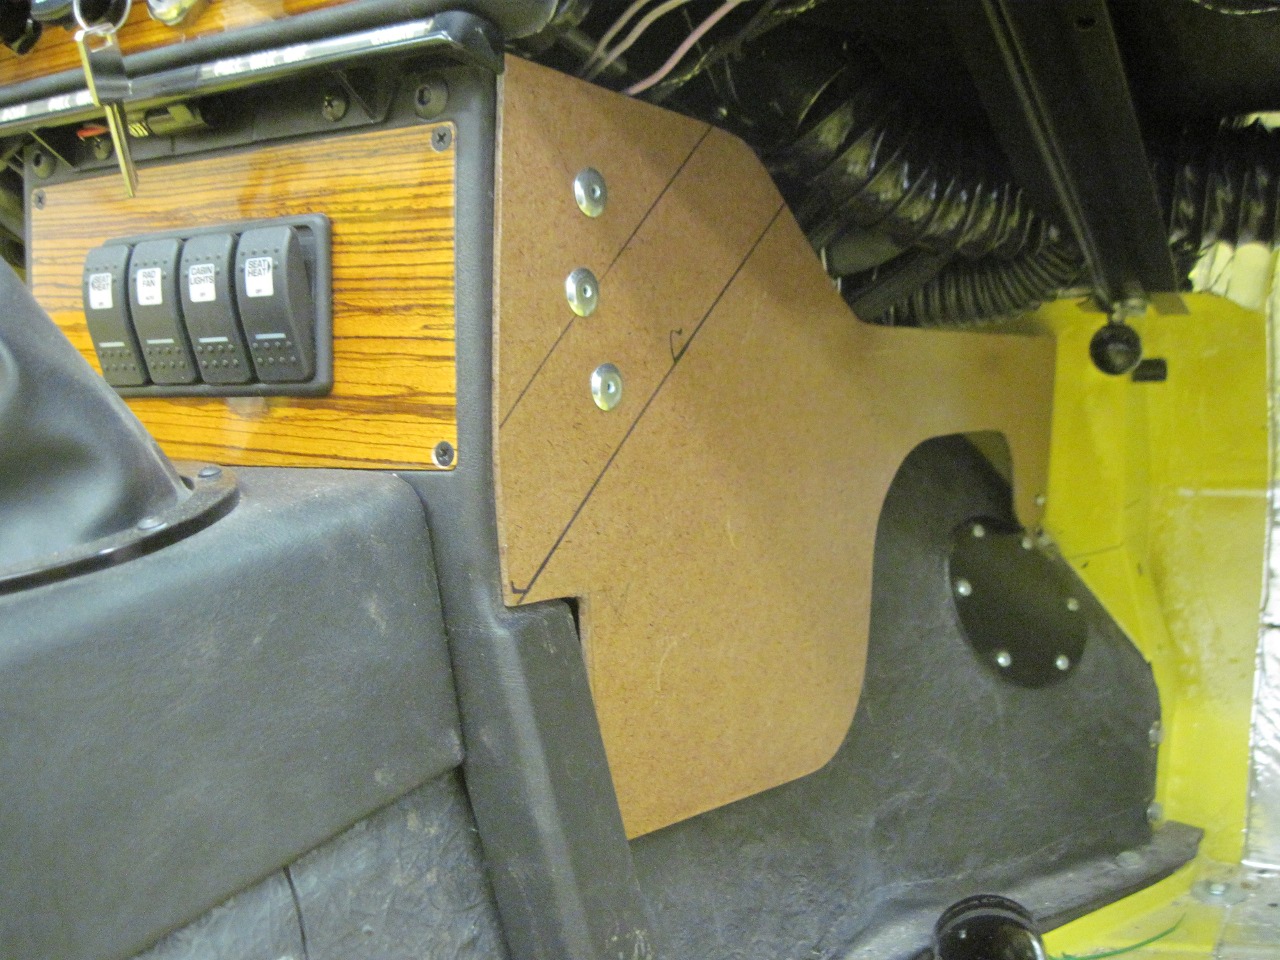
I
used the old hardboard panels as a starting point, but since my tunnel
is a little skinnier than original, the new panels needed to be a
little larger. Since this underdash area shouldn't be in much
danger of getting wet, I made the new panels from hardboard, but took
some steps to try to make them a little more moisture resistant.
.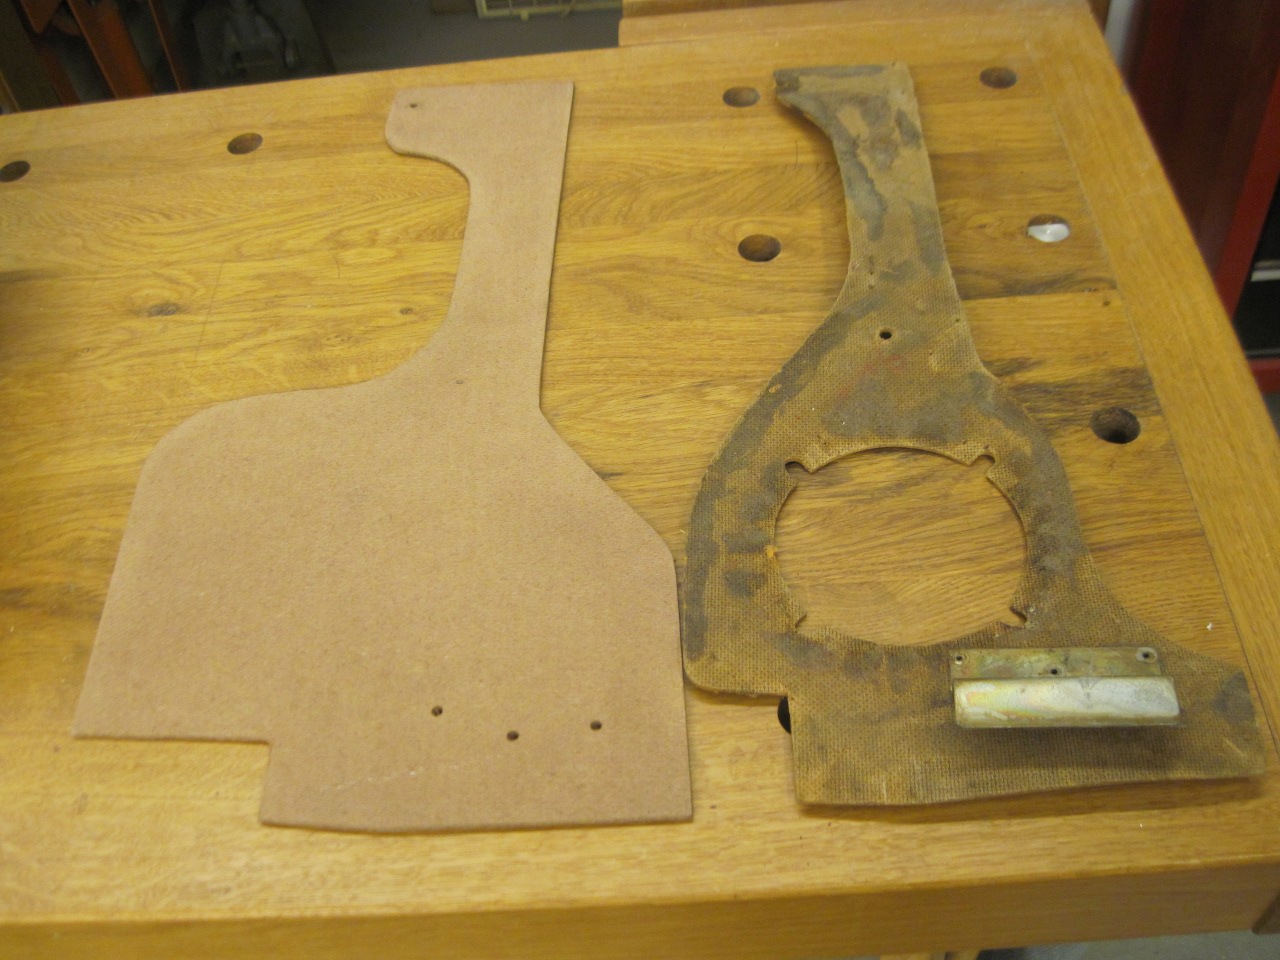
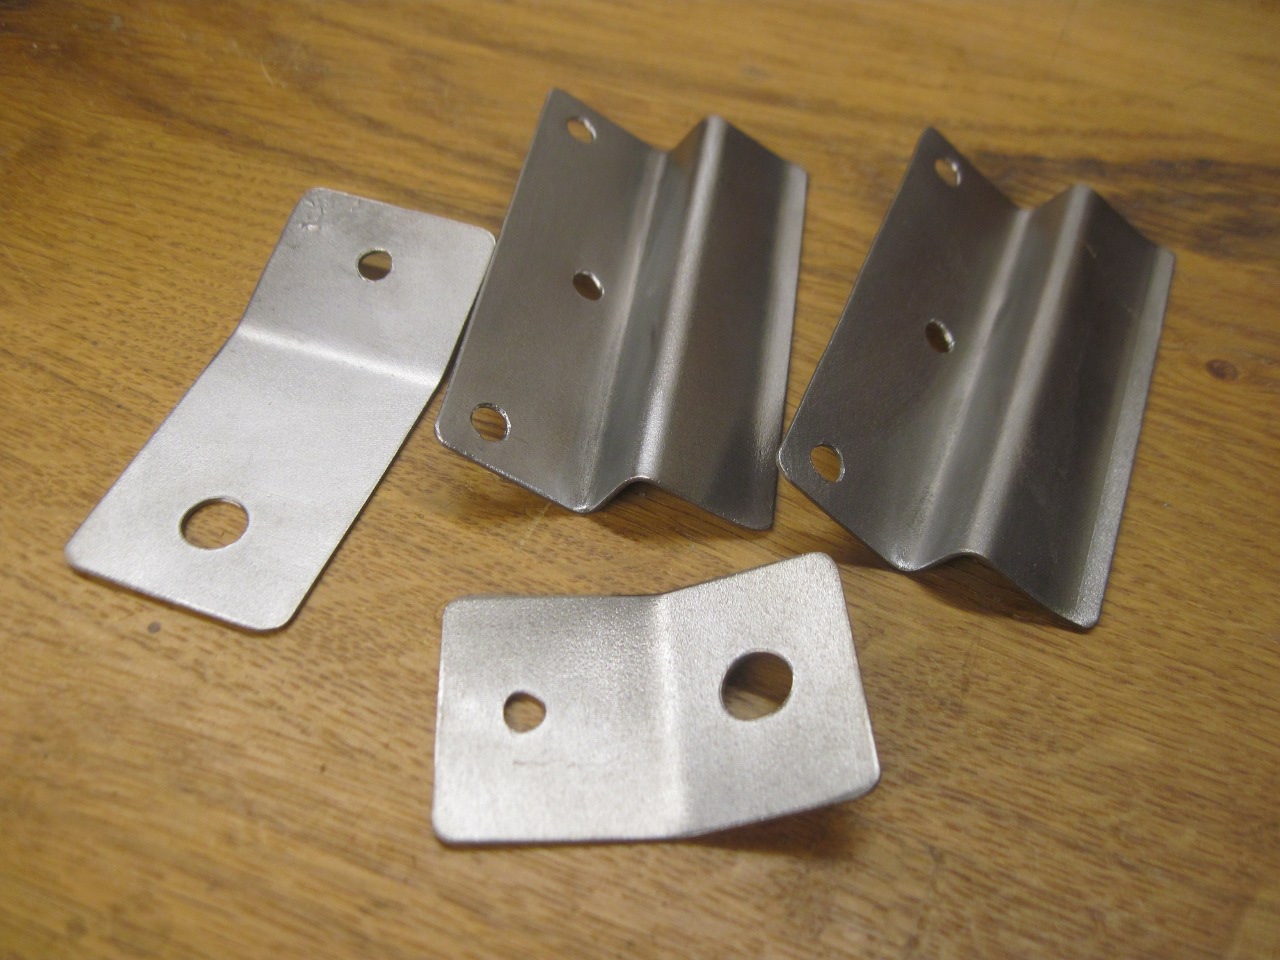
Also,
since my shop-built H frame his uprights a little thinner than the
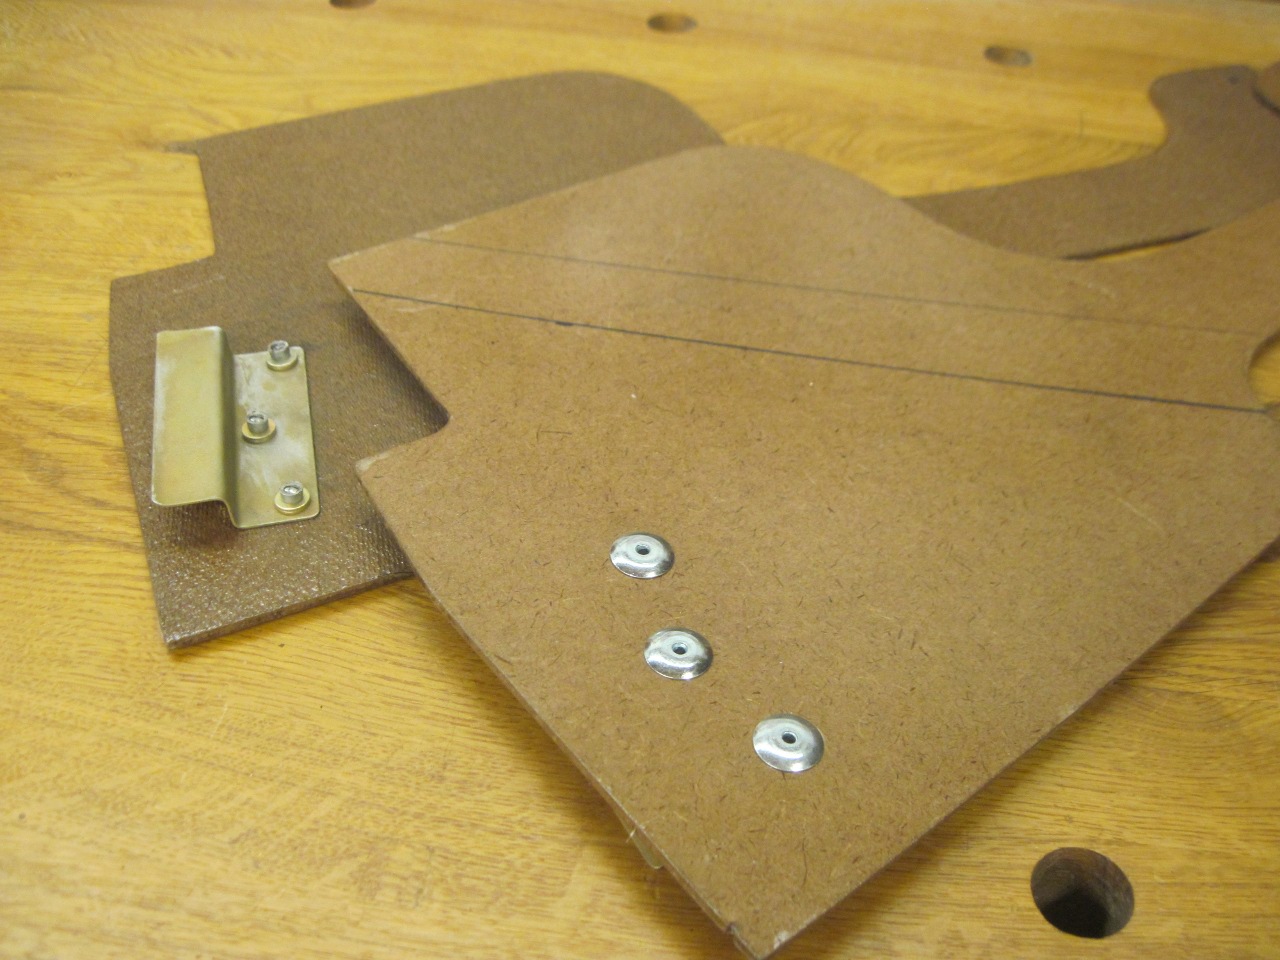
stock one, the original metal fittings were too loose to use. I
had to make some new ones. The little dog-leg brackest are to
hold the panels to the tunnel at the forward end. At this stage,
the panels had been coated all around with three coats of polyurethane.

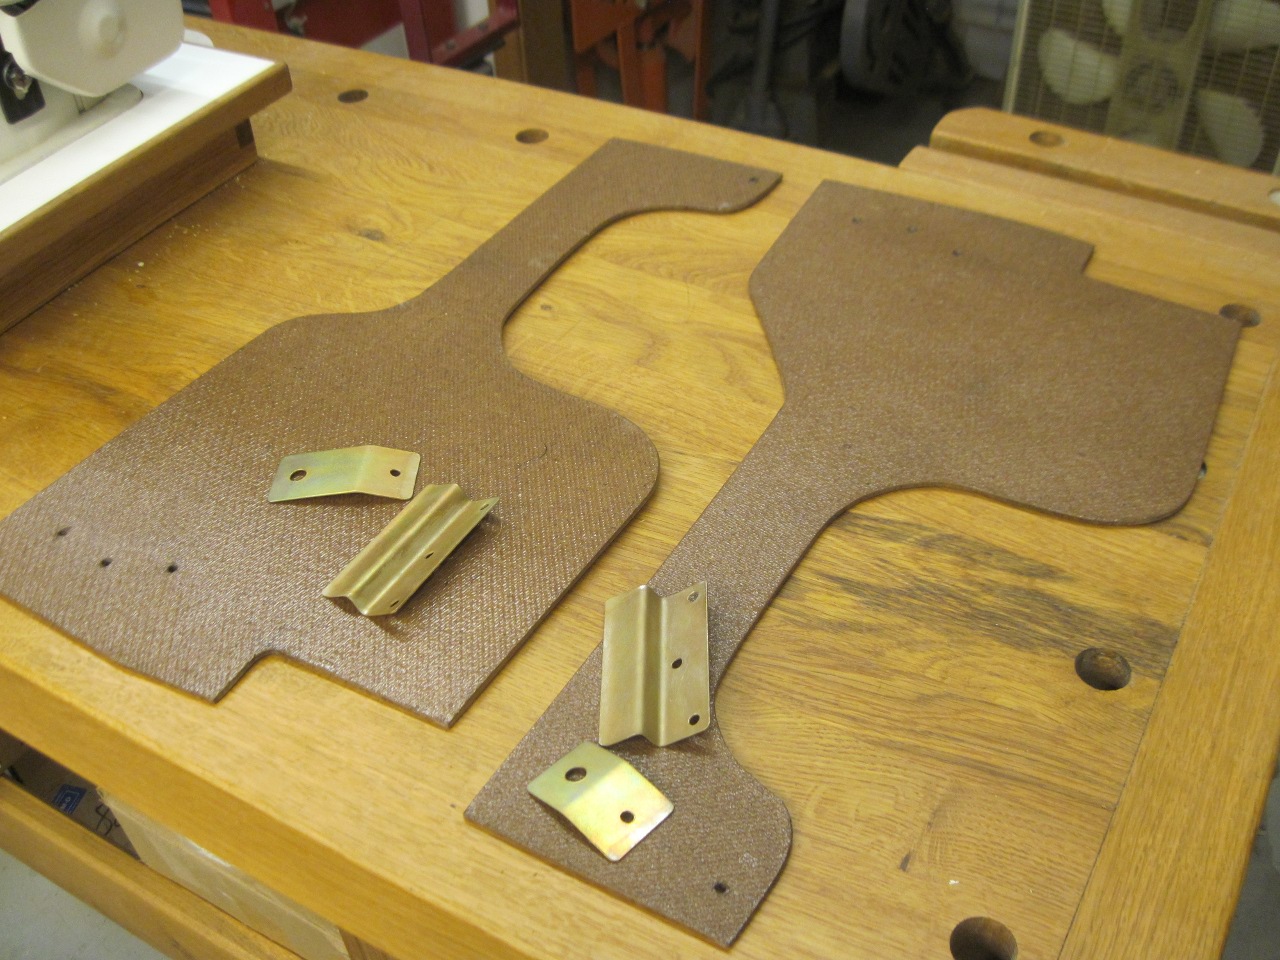
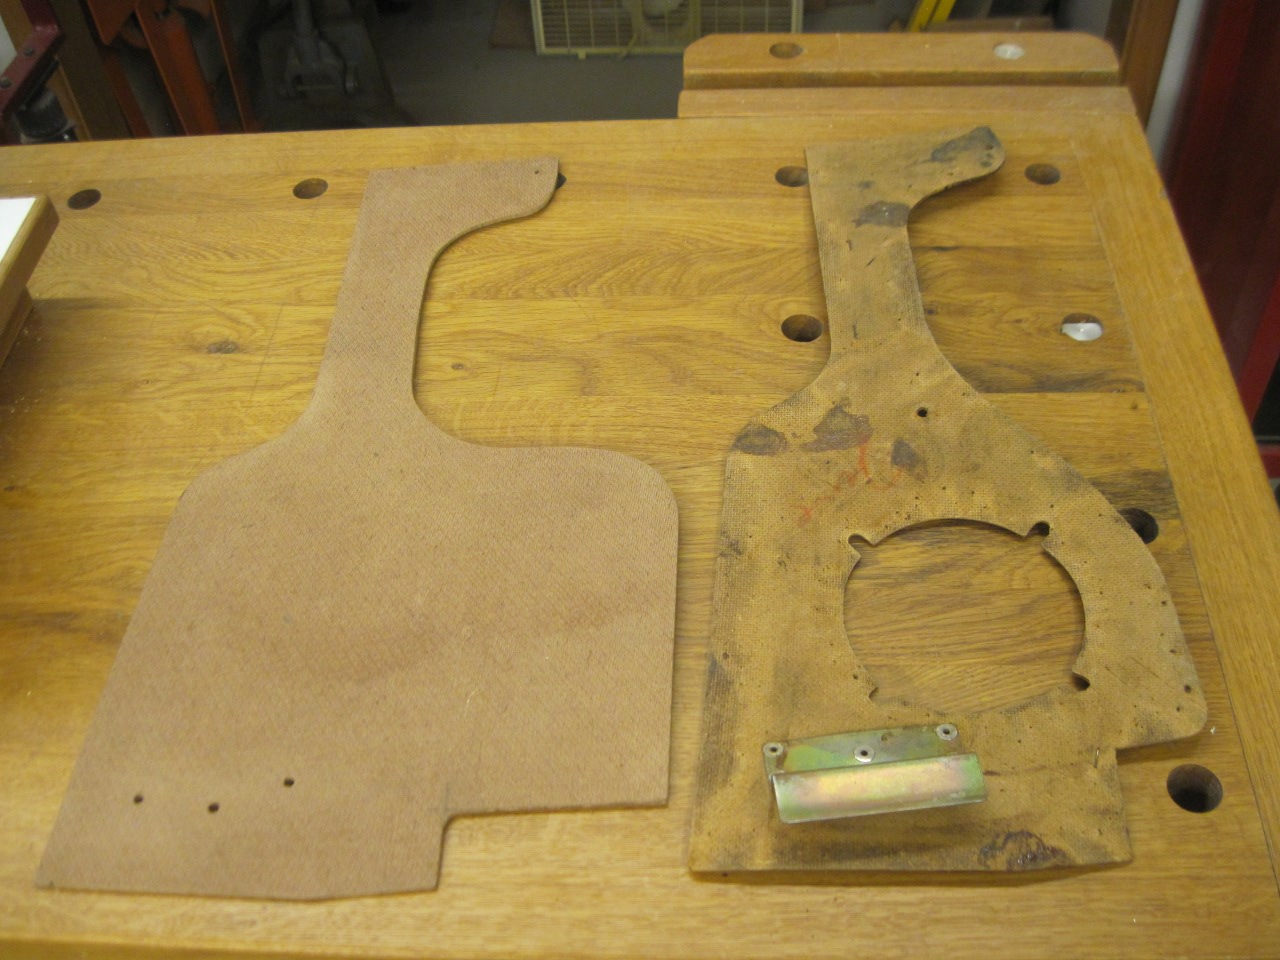
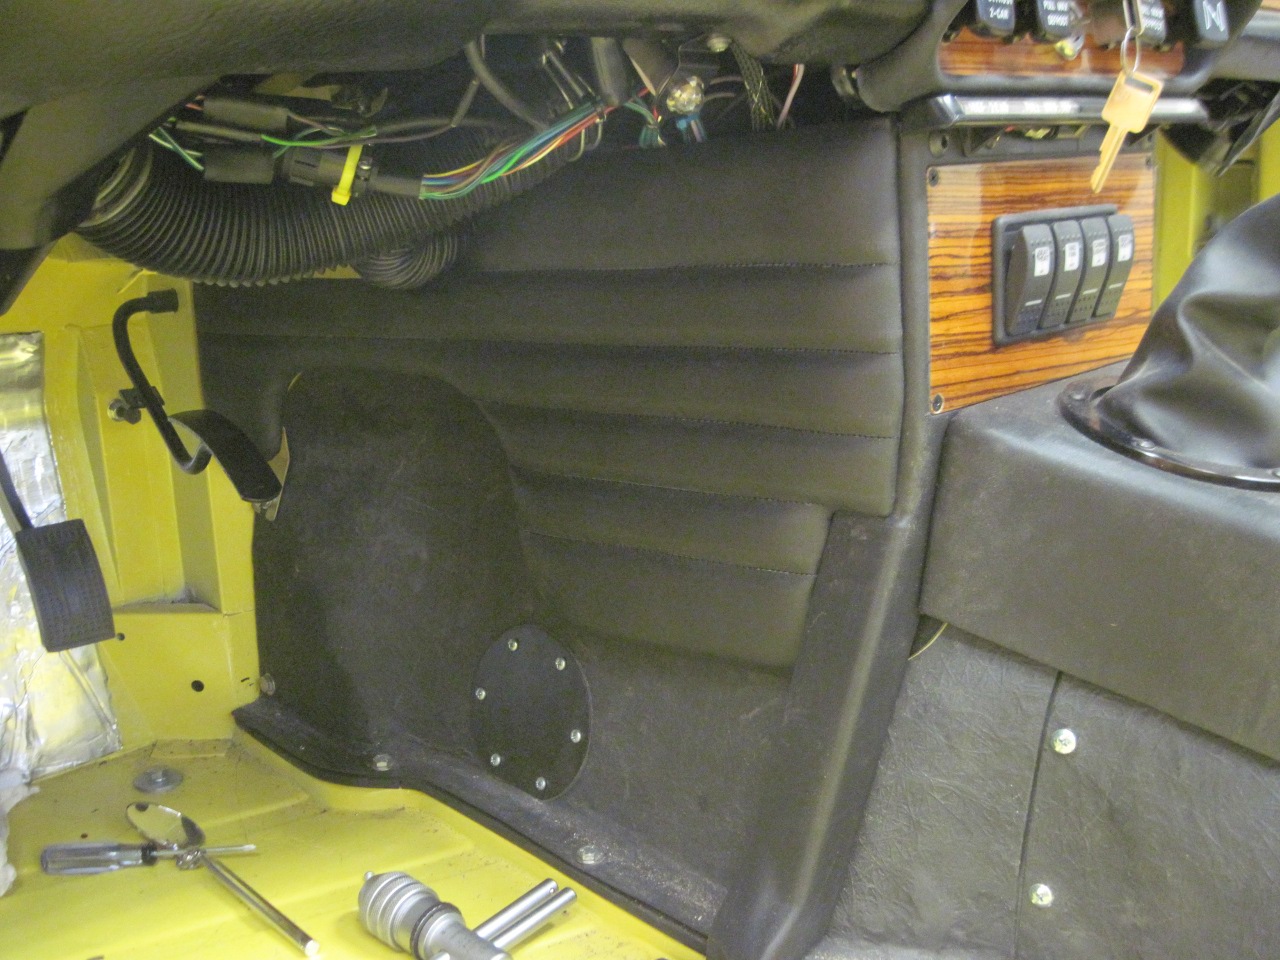
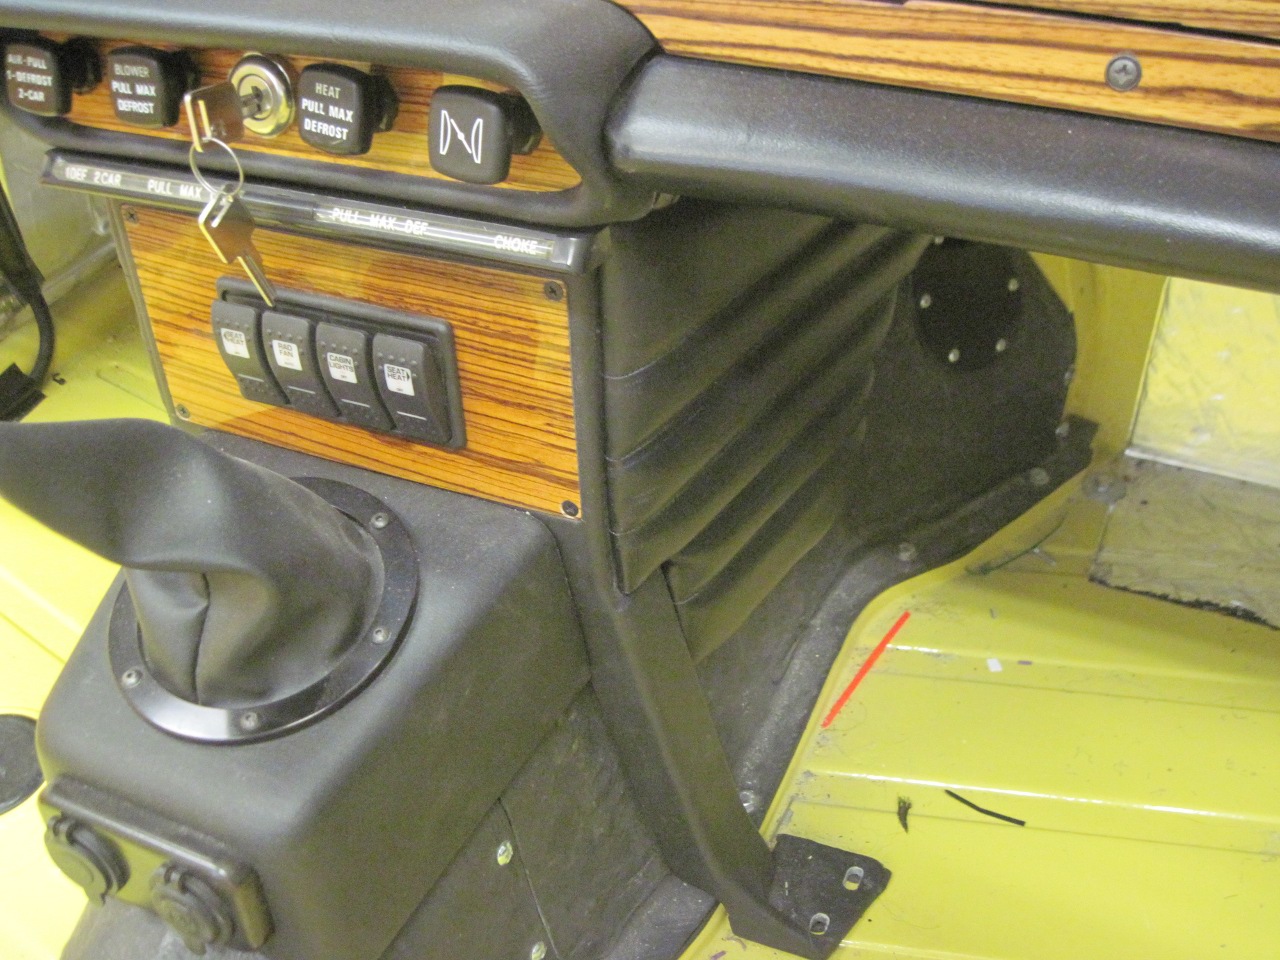
Test
fit of the panels and bracketry. The upsweep near the far end of
both panels is to allow warm air from the heater to reach the fooewells.


Now, the foam and vinyl covering.
I have to give a big shout out here to Bob Danielson and his wonderful website. In particular, Bob has a beautiful section on his site about making interior panels. Once I saw his treatment of the kidney panels, the option of just using plain flat foam and vinyl was off the table.
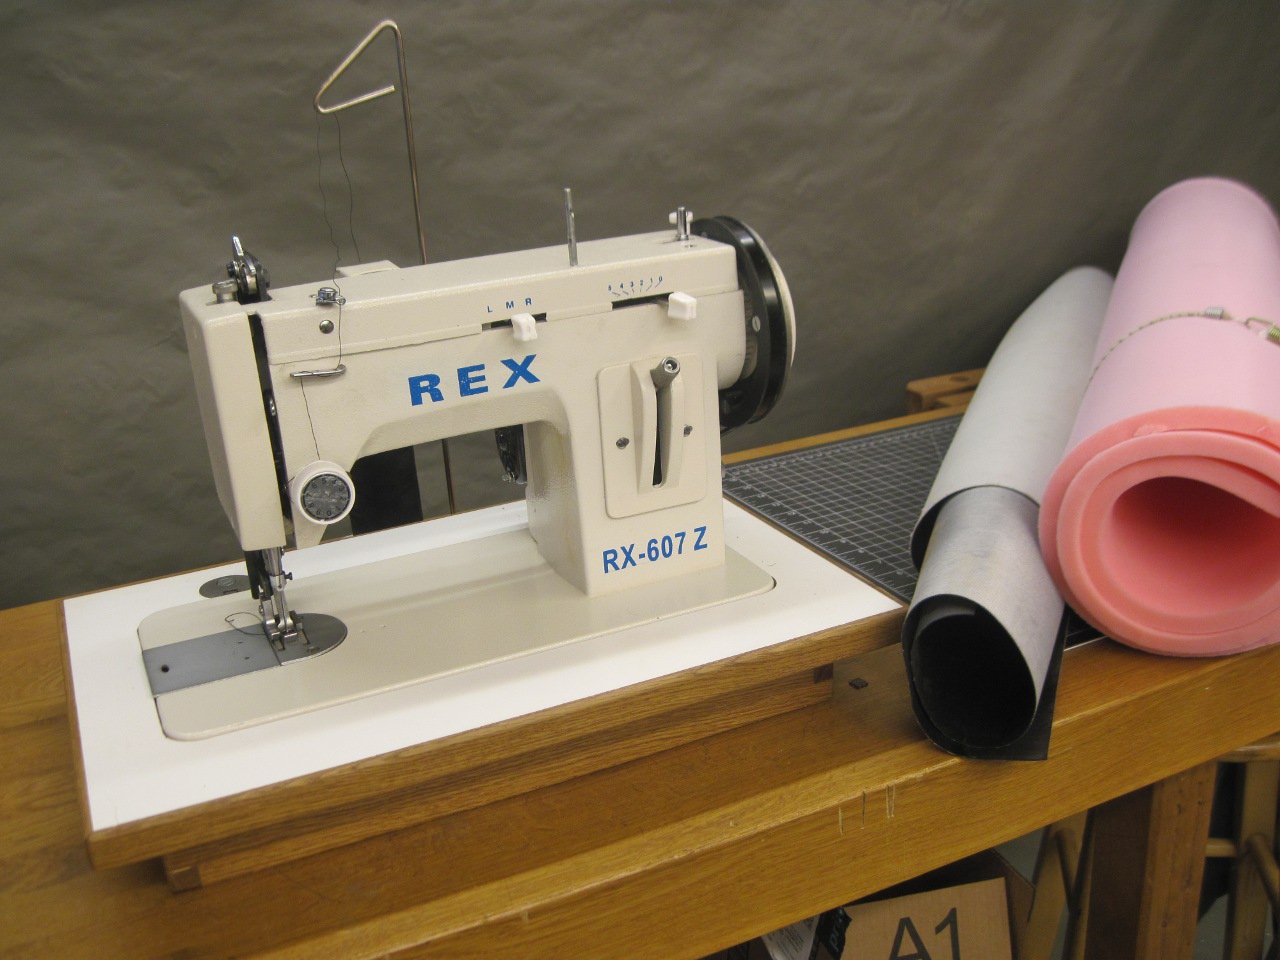
The
only rub is that I didn't own nor know how to use an adequate sewing
machine. But in a leap of inspired faith, I bought one.
Sewing
machines capable of handling heavy fabrics need to have something
called a walking foot--an arrangement that pulls the fabric through the
machine from both the top and bottom. This is a lower-end walking
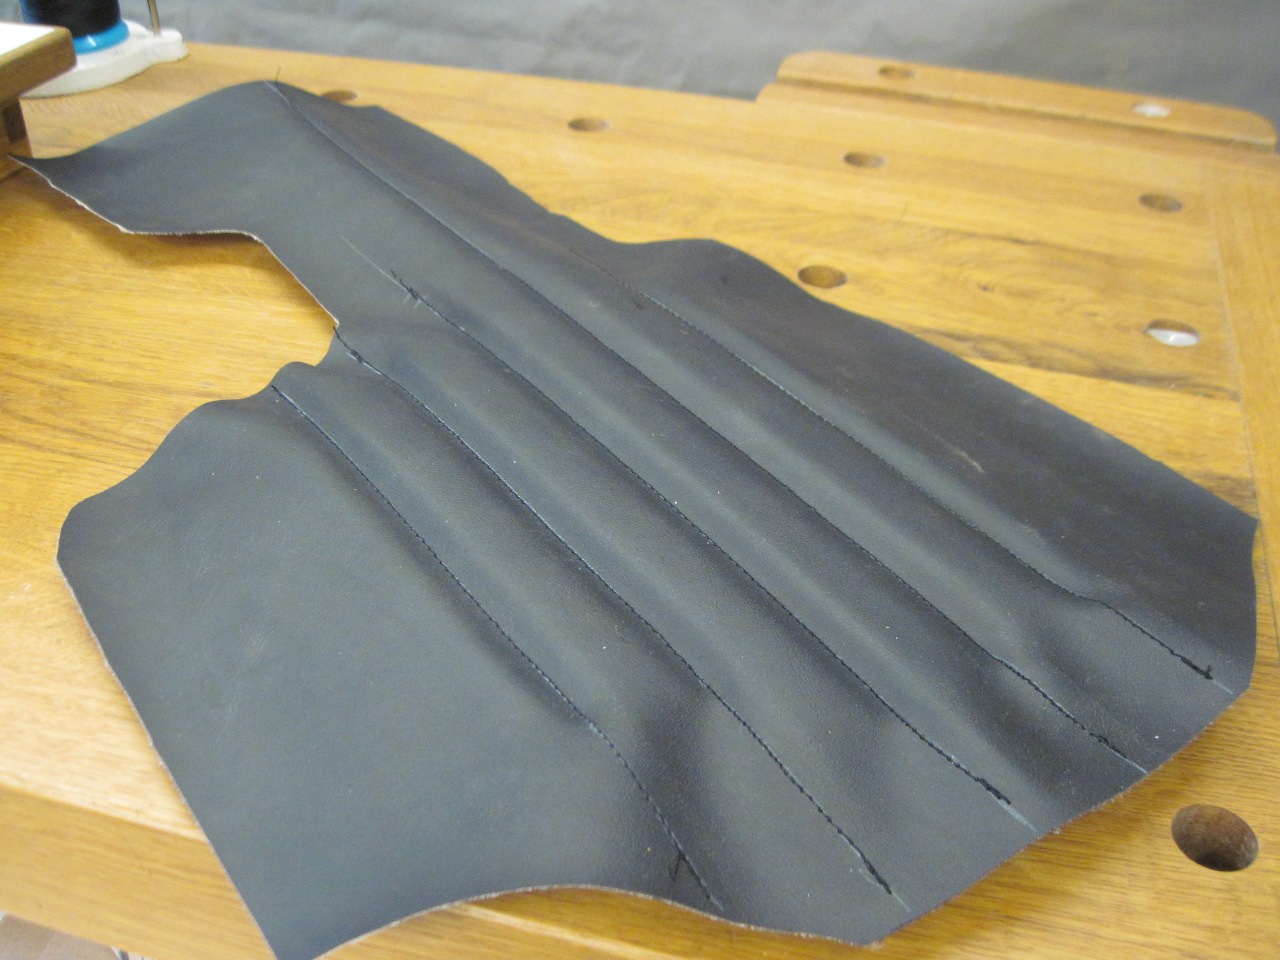
foot machine. To the right are rolls of black automotive vinyl,
and some 1/2" "scrim foam" that has a fabric on one side so that it
will hold stitches. The machine is pretty basic, and doesn't come
with a base, so the one in the pic is home made.
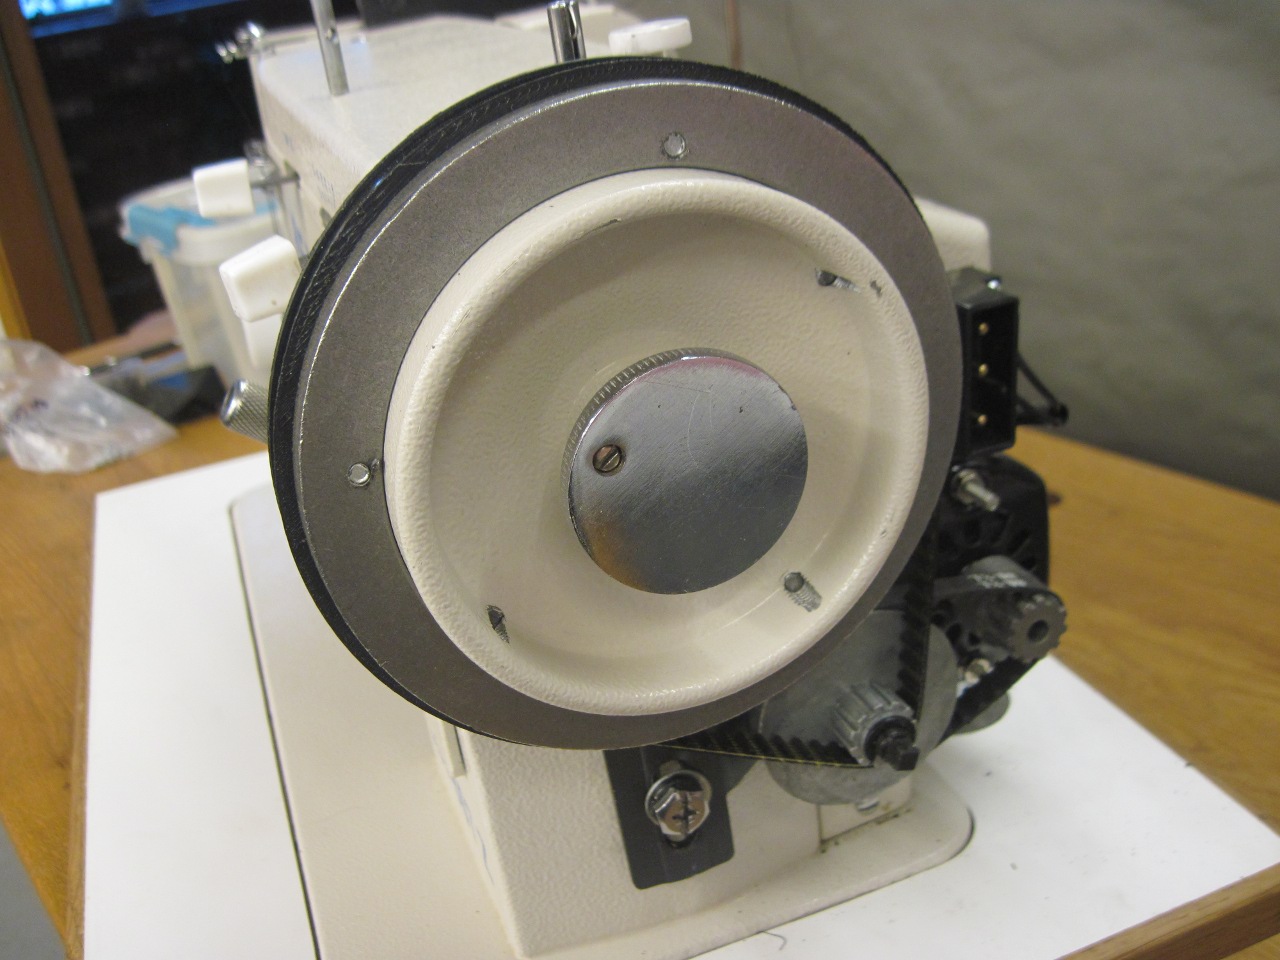
Also,
being a rank novice at machine sewing, I was intimidated by the speed
of the machine. The speed control on the machine was a
little notchy at the low end, and I had trouble maintaining
a speed slow enough for my rudimentary fabric-guiding skills. My
solution was to put a bigger pully on the balance wheel to cut the
speed in half. This worked great for me.
After a few familiarization runs, I felt a lot better about my ability to sew a straight line..
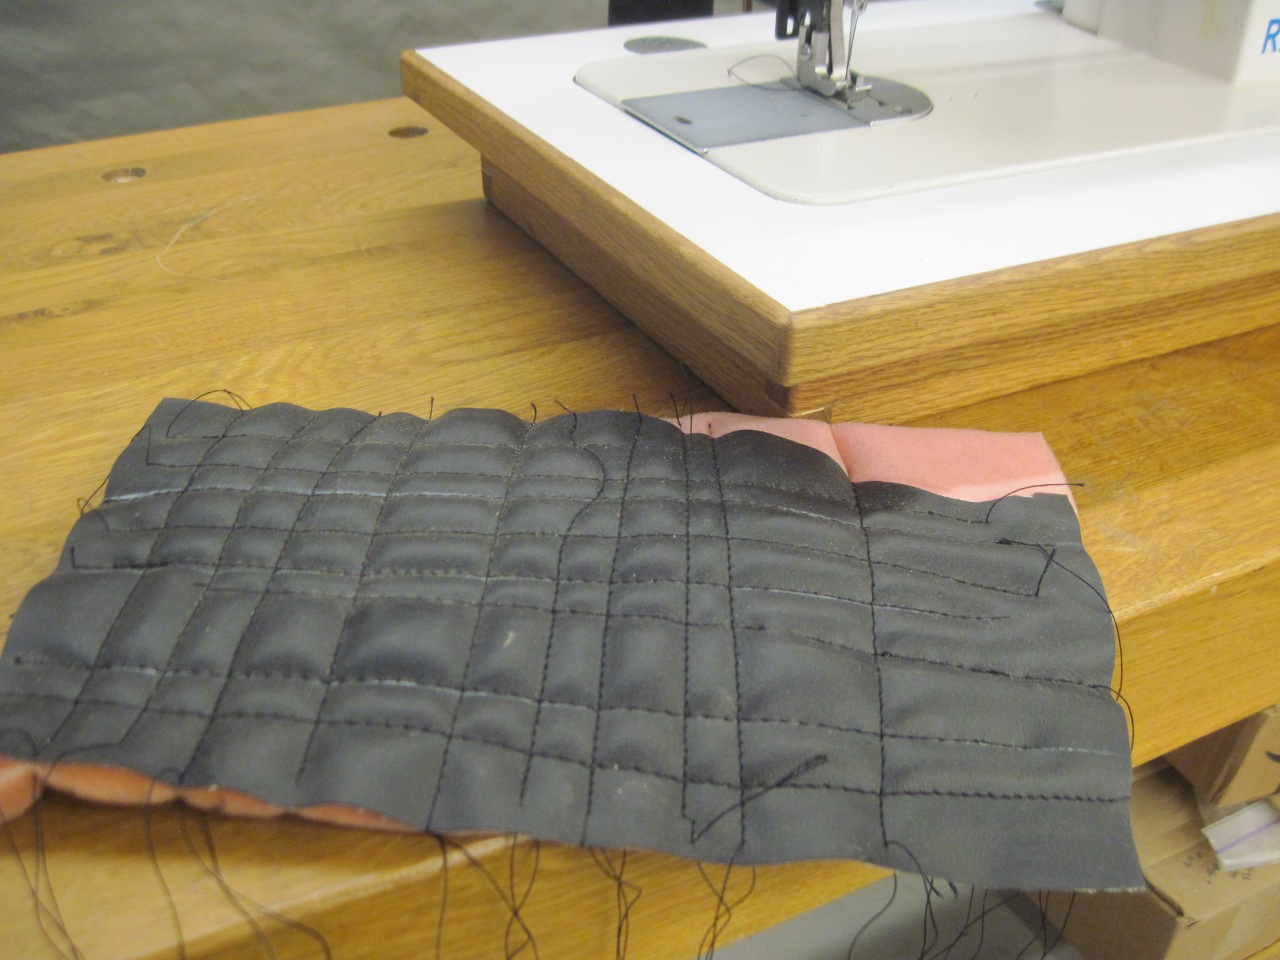
I transferred the panel shape to the foam, cut it out, and lightly glued it to a piece of cut vinyl

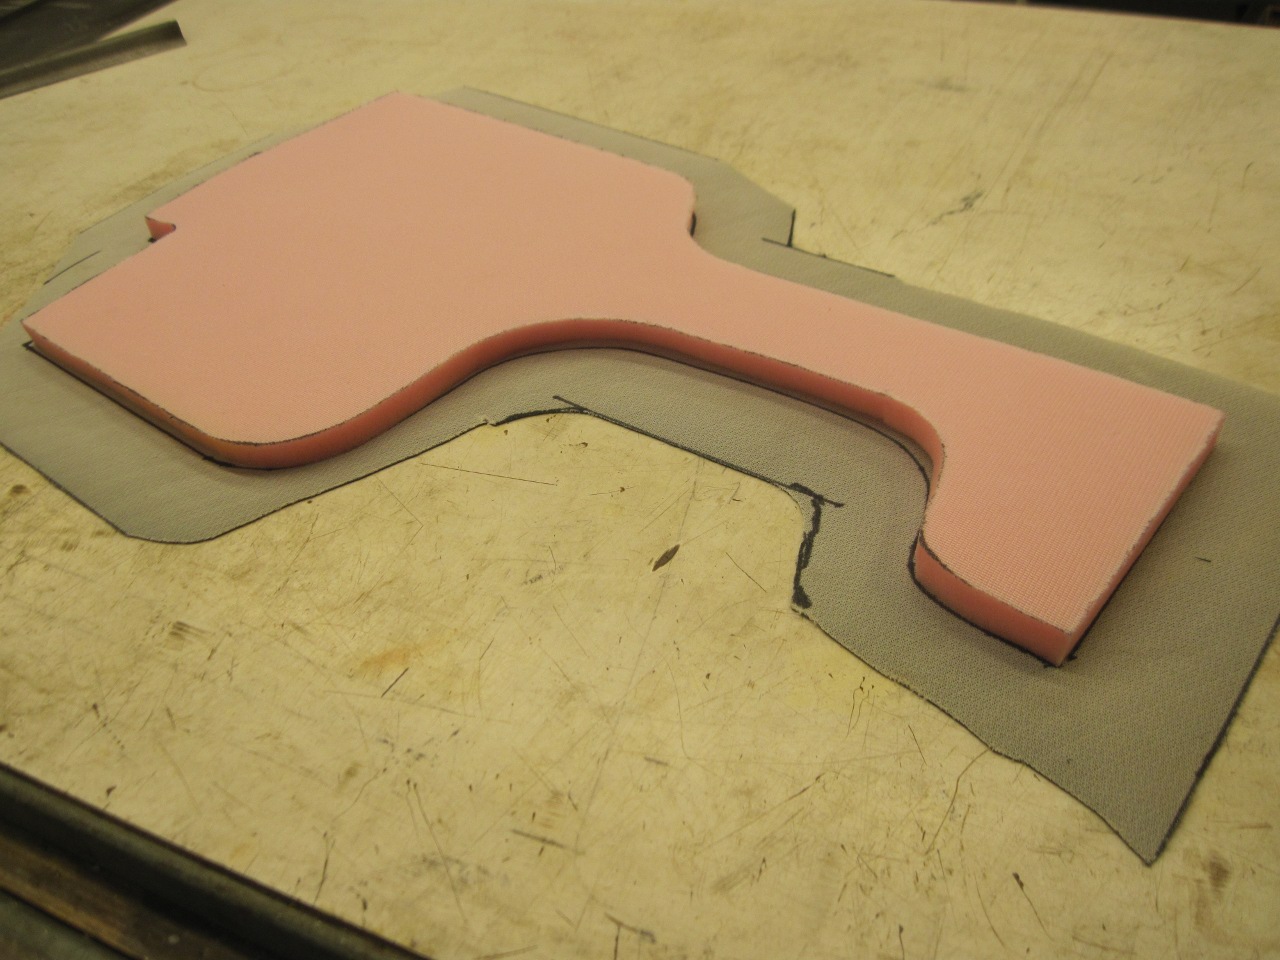
Then sewed a few straight pleats.
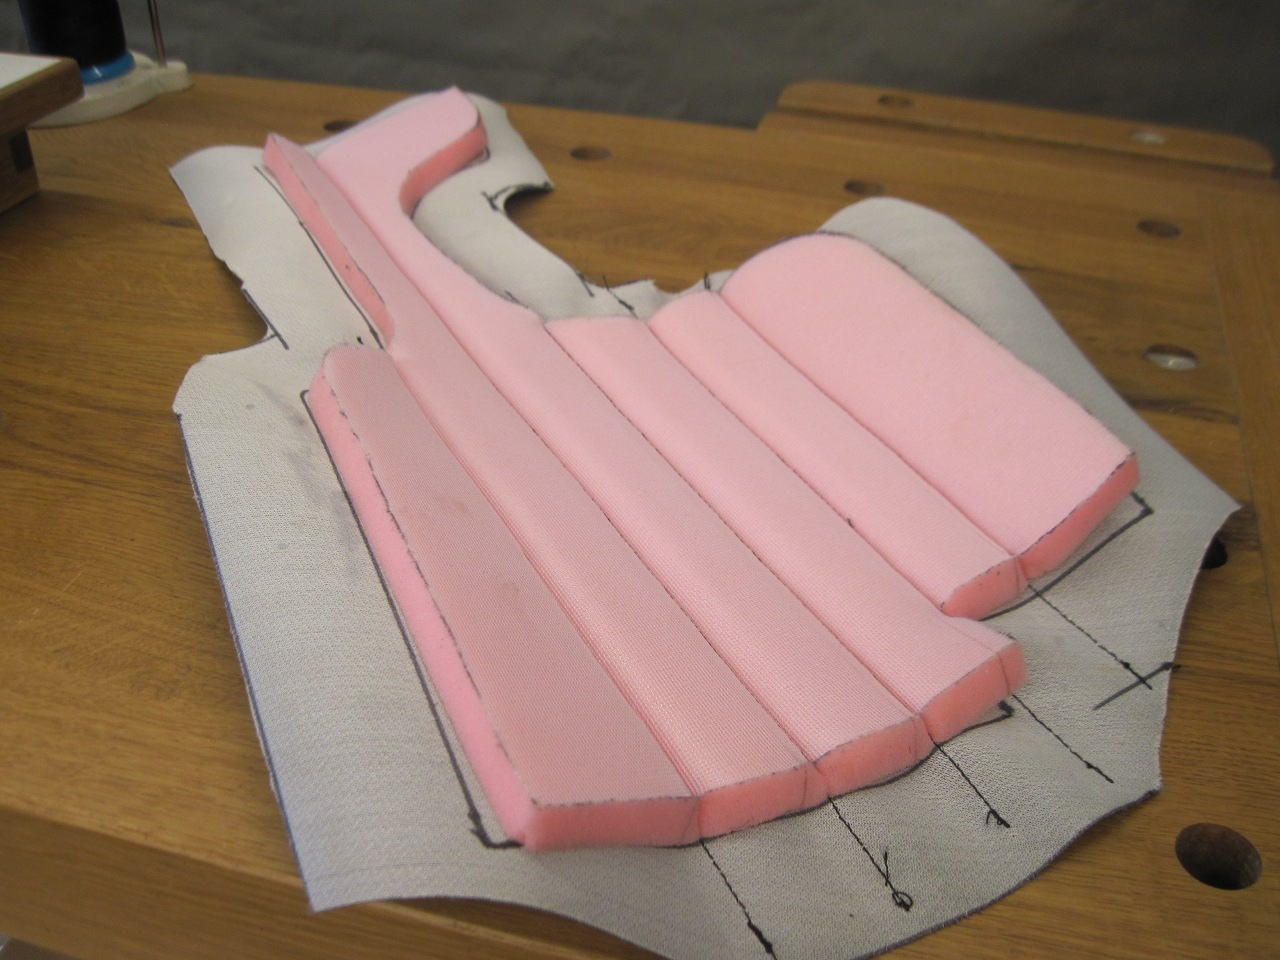
Then
lightly glued the assembly to the hardboard panel, trimmed the
wrap-around, and glued it on the backside. Then poked the hole
for the front mounting screw.
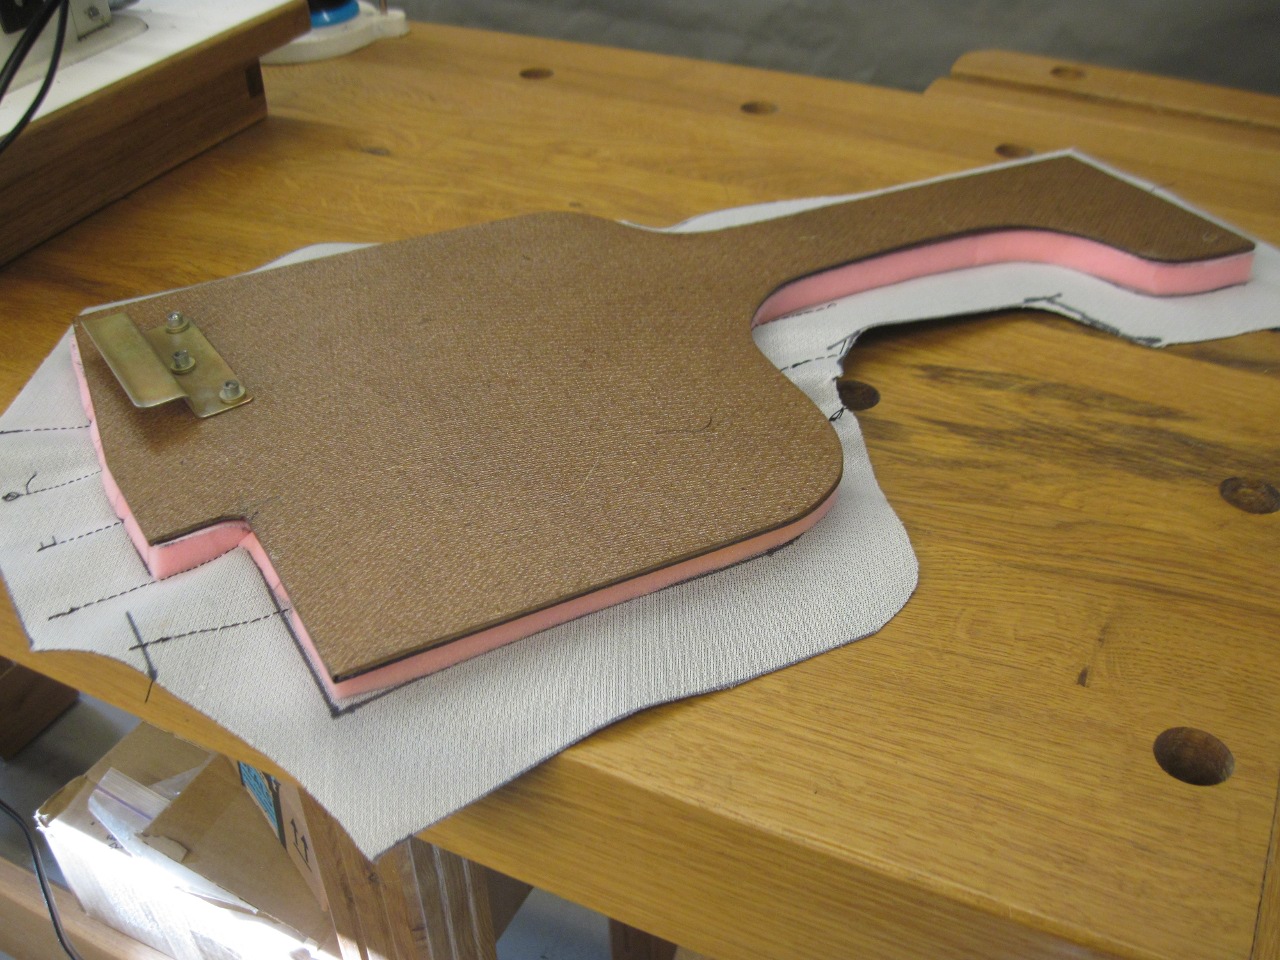

Then
did the other panel. Even though I included a power circuit and
fuse for an audio system in my Power Module, I'm not sure I'll install
a radio. At least not right now. Speakers would be pretty
simple to add later. I haven't tried it, but the larger panels
might accept larger speakers.
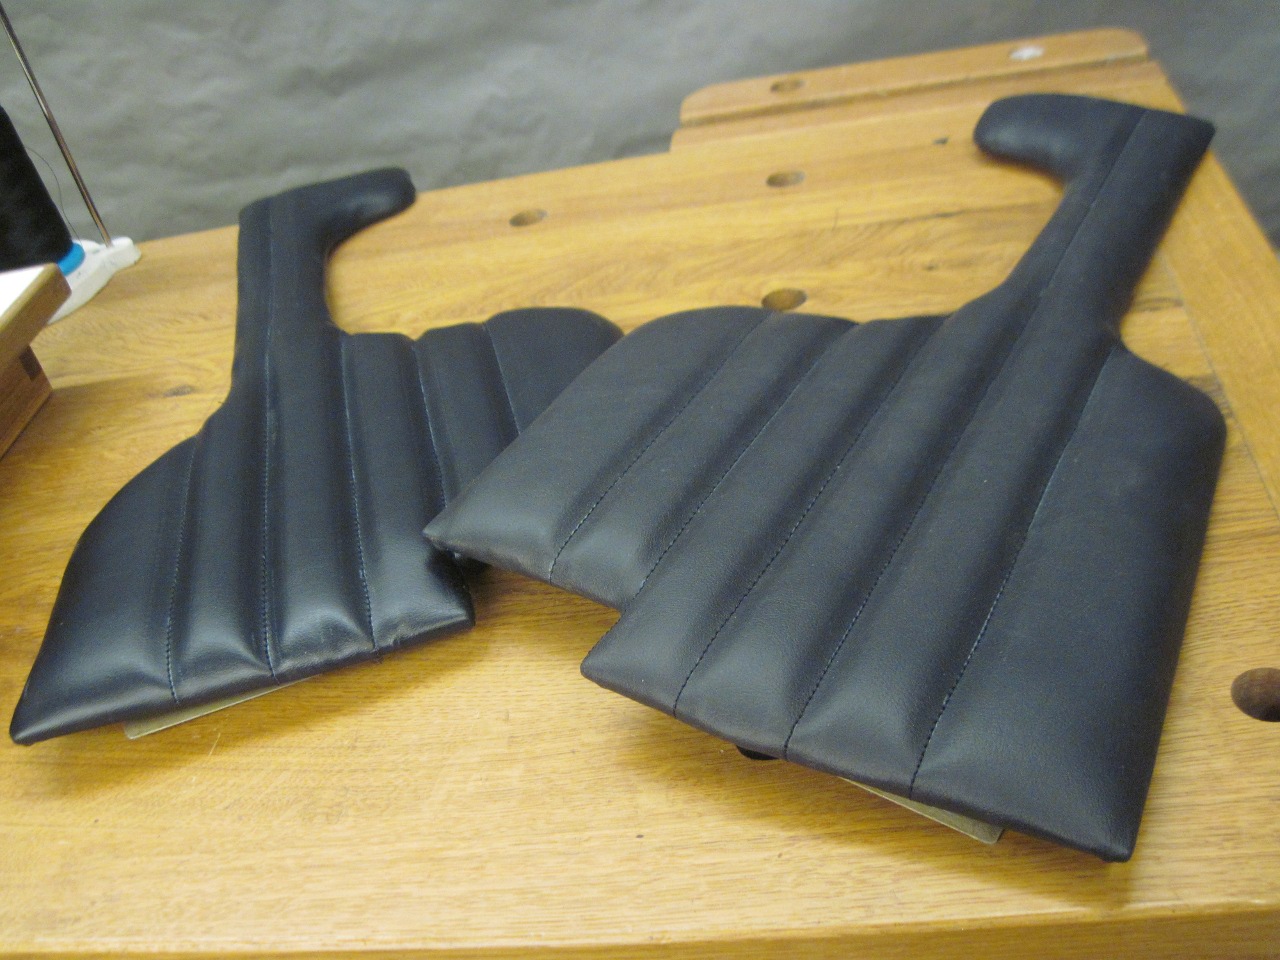
They
seem to fit pretty well. I'm toying with the idea of putting
black piping at the joint between the panel and the H frame.

This was a fun one. I learned a new skill, and now have a better sewing machine than my wife does.
Cost was pretty low (except for the sewing machine, that is).
Comments to Ed at elhollin1@yahoo.com
To my other TR6 pages.