To my other TR6 pages.
December 18, 2017
Boot Trim
The
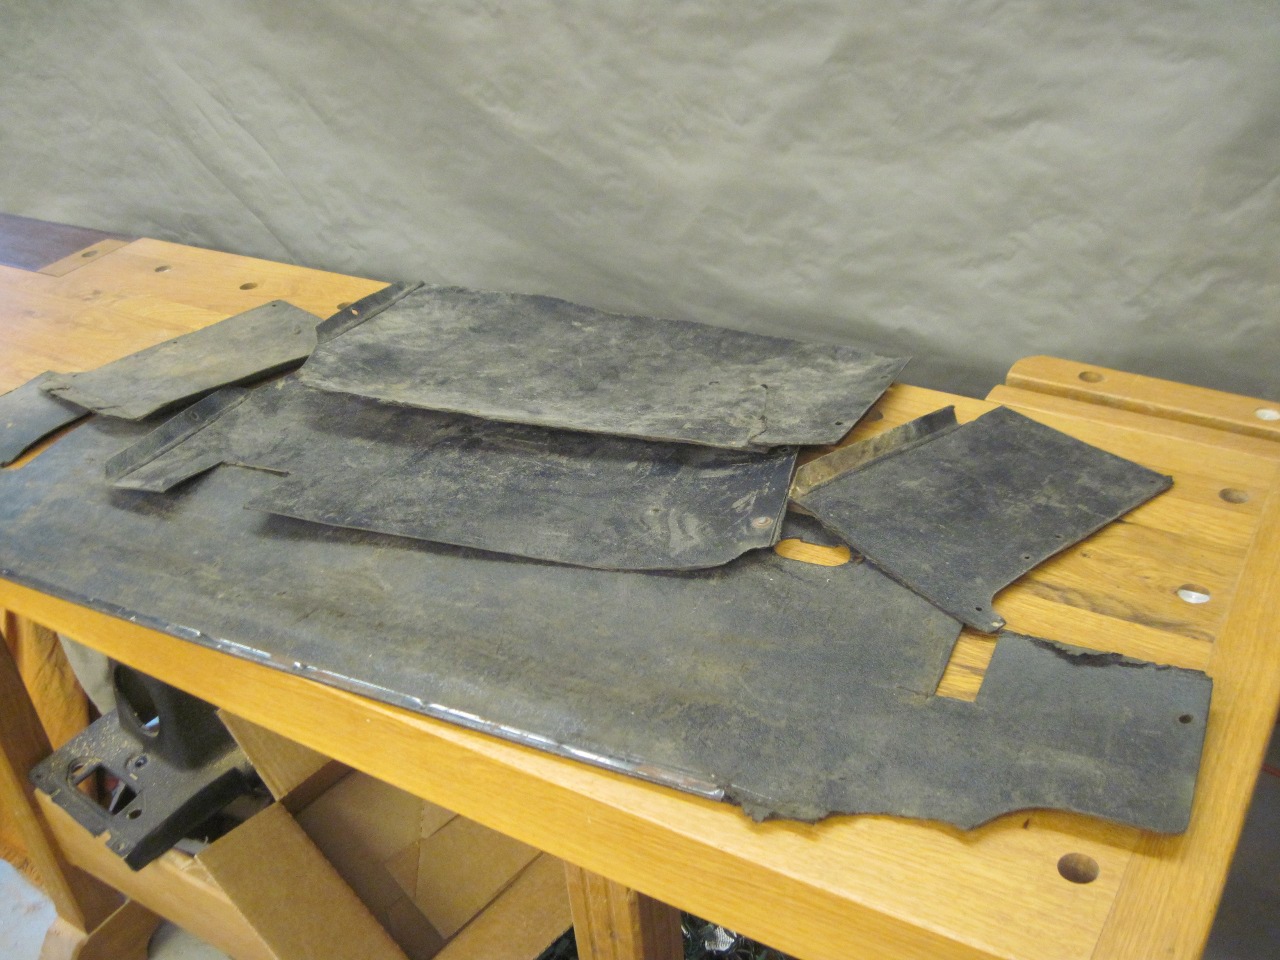
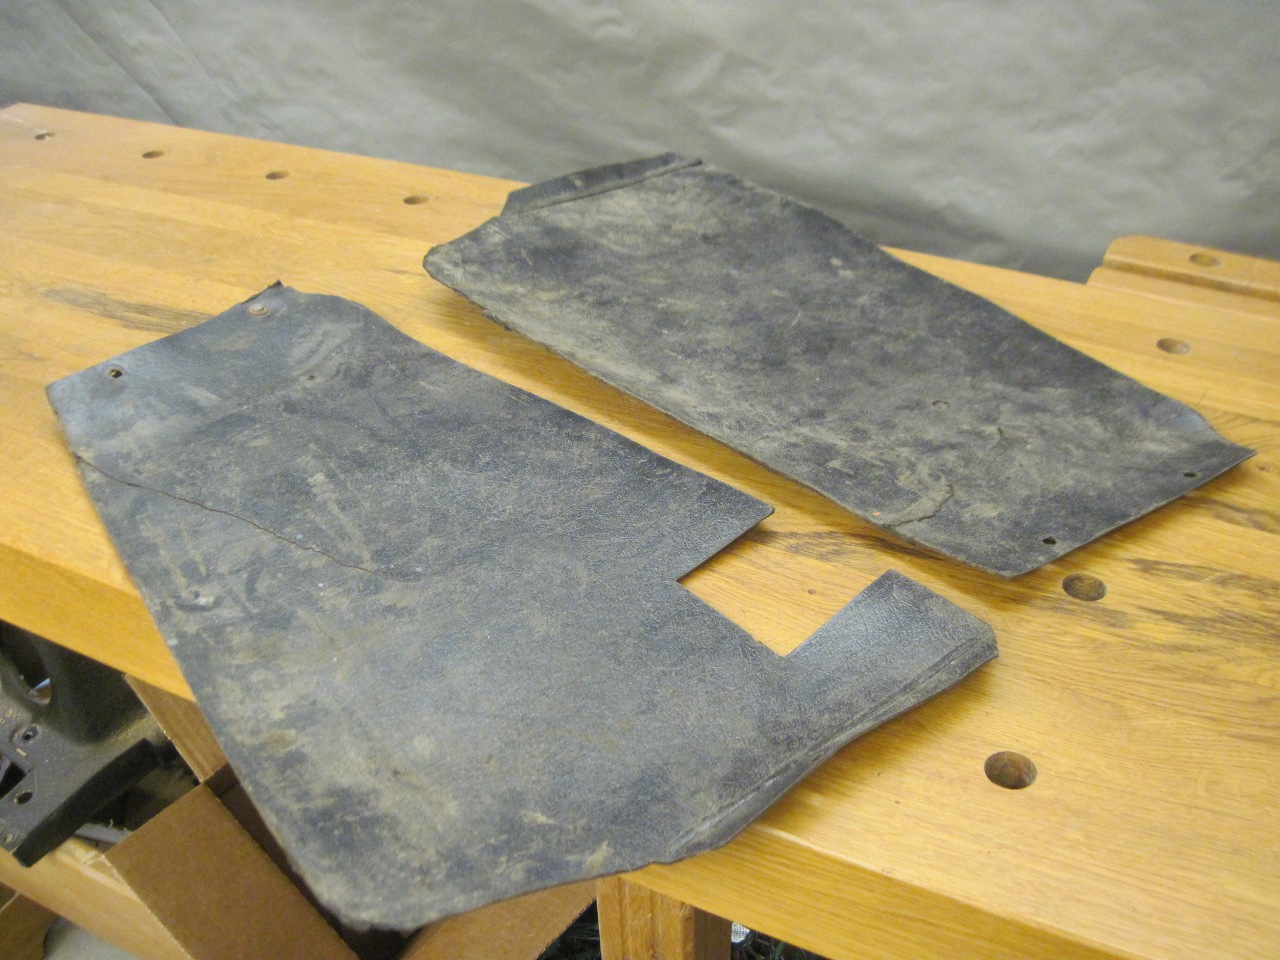
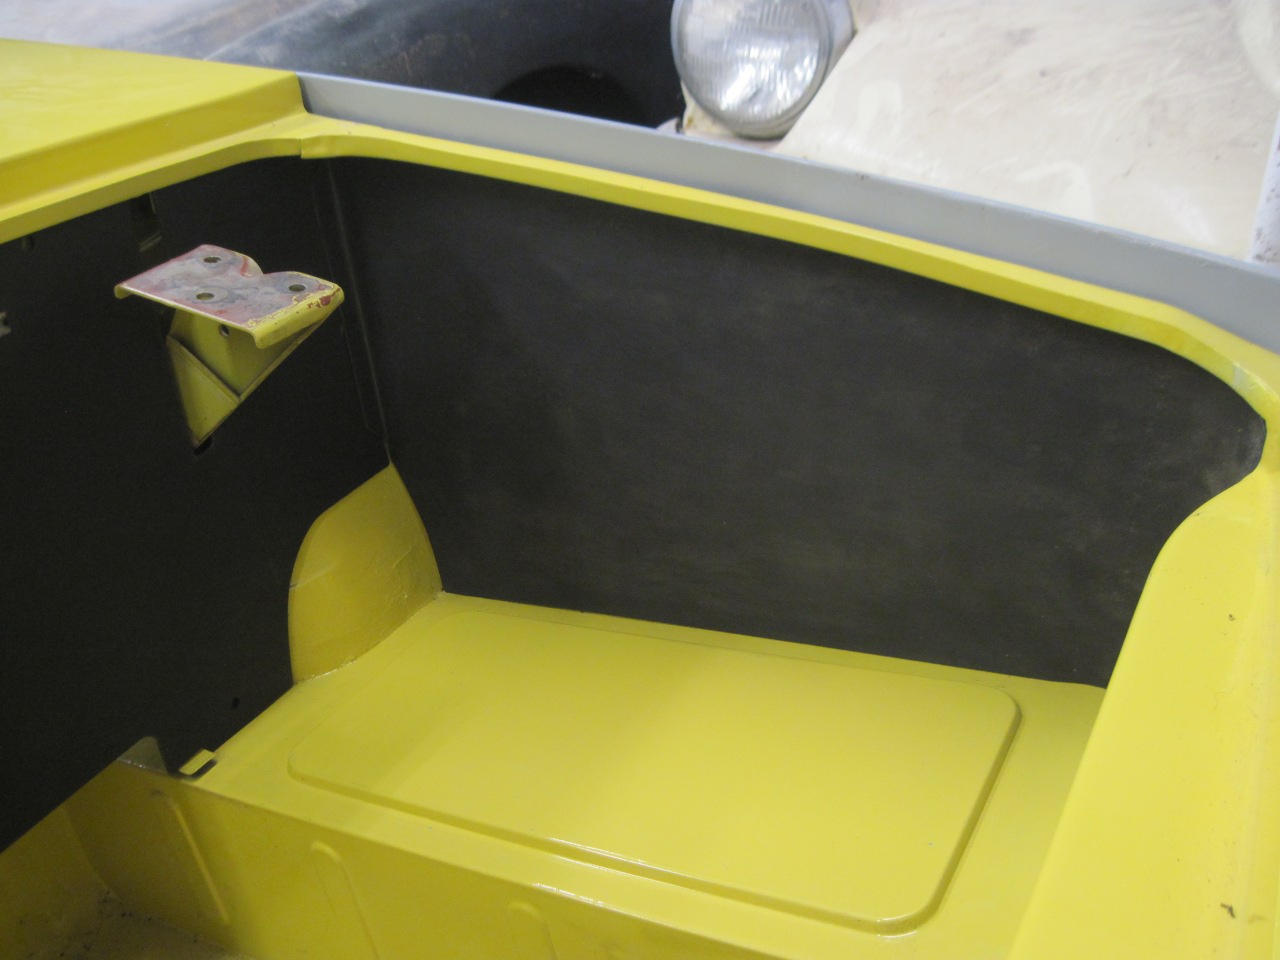
TR6 had pretty spartan trim in the boot. The sides, front, and rear were covered
in six fitted panels of some flexible fibrous material that was
sort of a cross between hardboard and cardboard. The panels
didn't stand up to pressure, abrasion or water very well and mine were in sad
shape. They were dirty, warped, frayed, and had large chunks
missing.
While
replacement panel sets can be ordered in either original or a more
durable plastic material, they seemed to me a reasonable thing to
attempt to make myself.
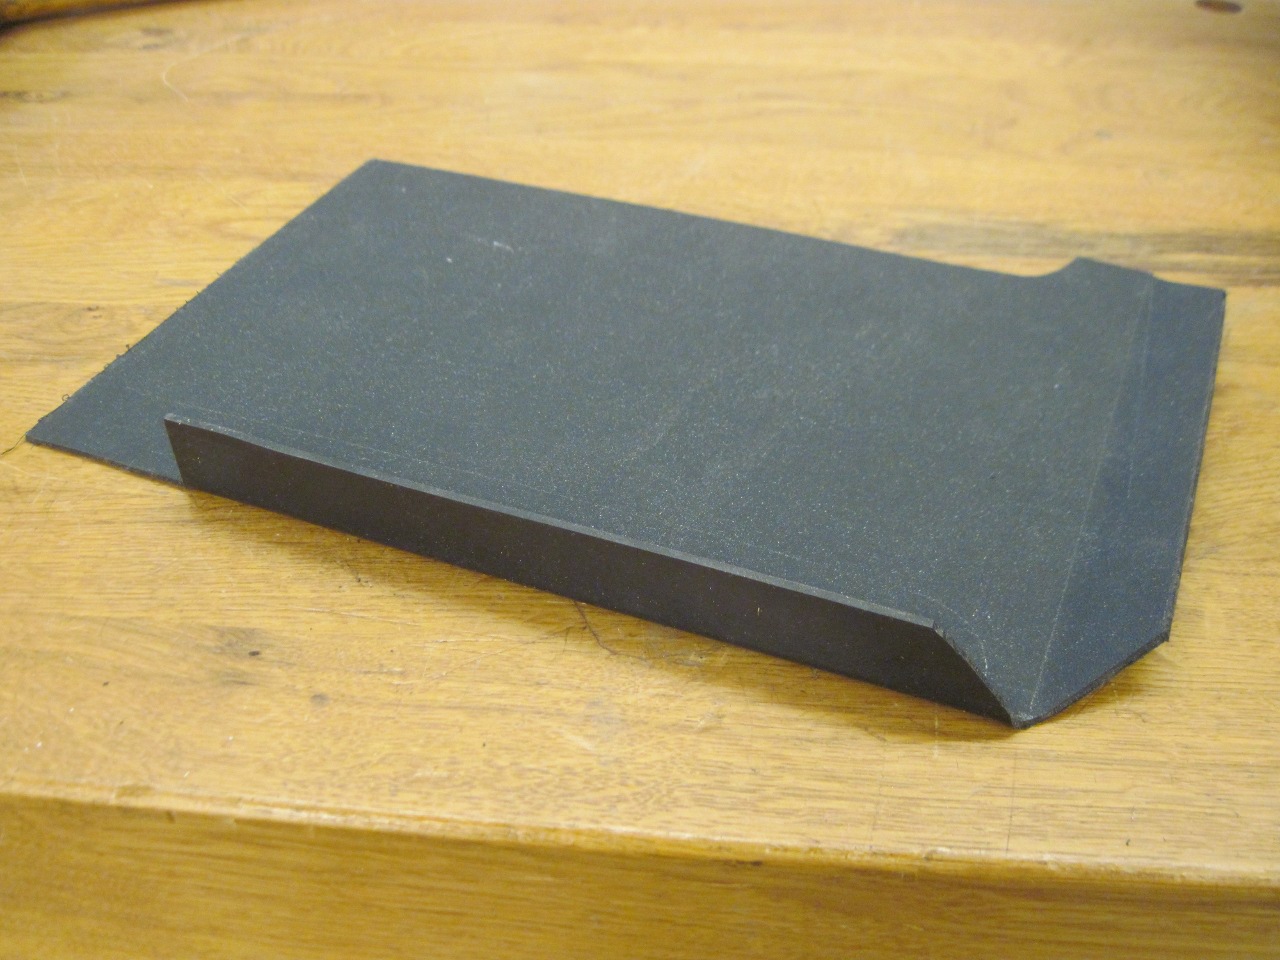
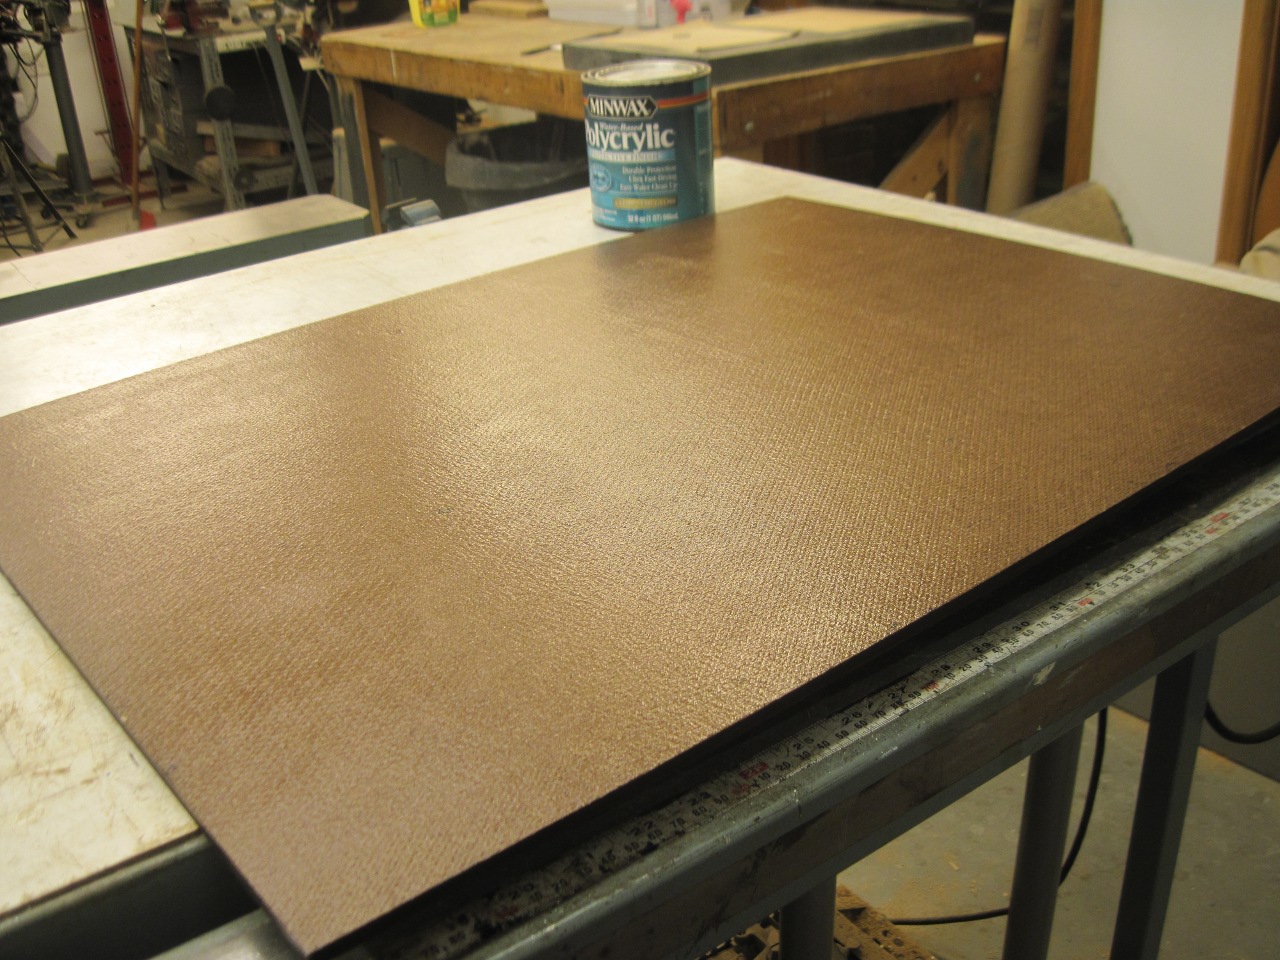
I chose a plastic material called Kydex.
It is an alloy of PVC and acrylic that has some interesting
properties. While normally fairly stiff, when heated to something
over 300° F, it goes limp, and can be easily formed. When cooled,
it regains its stiffness, but in the new form. It is most
commonly used to make form-fitting hand gun holsters or knife sheaths.
It has a low gloss grained surface texture on one side not too
different from the original panels. Kydex comes in various
thicknesses, and I chose 0.080" stock, which is still fairly flexible,
but very tough.
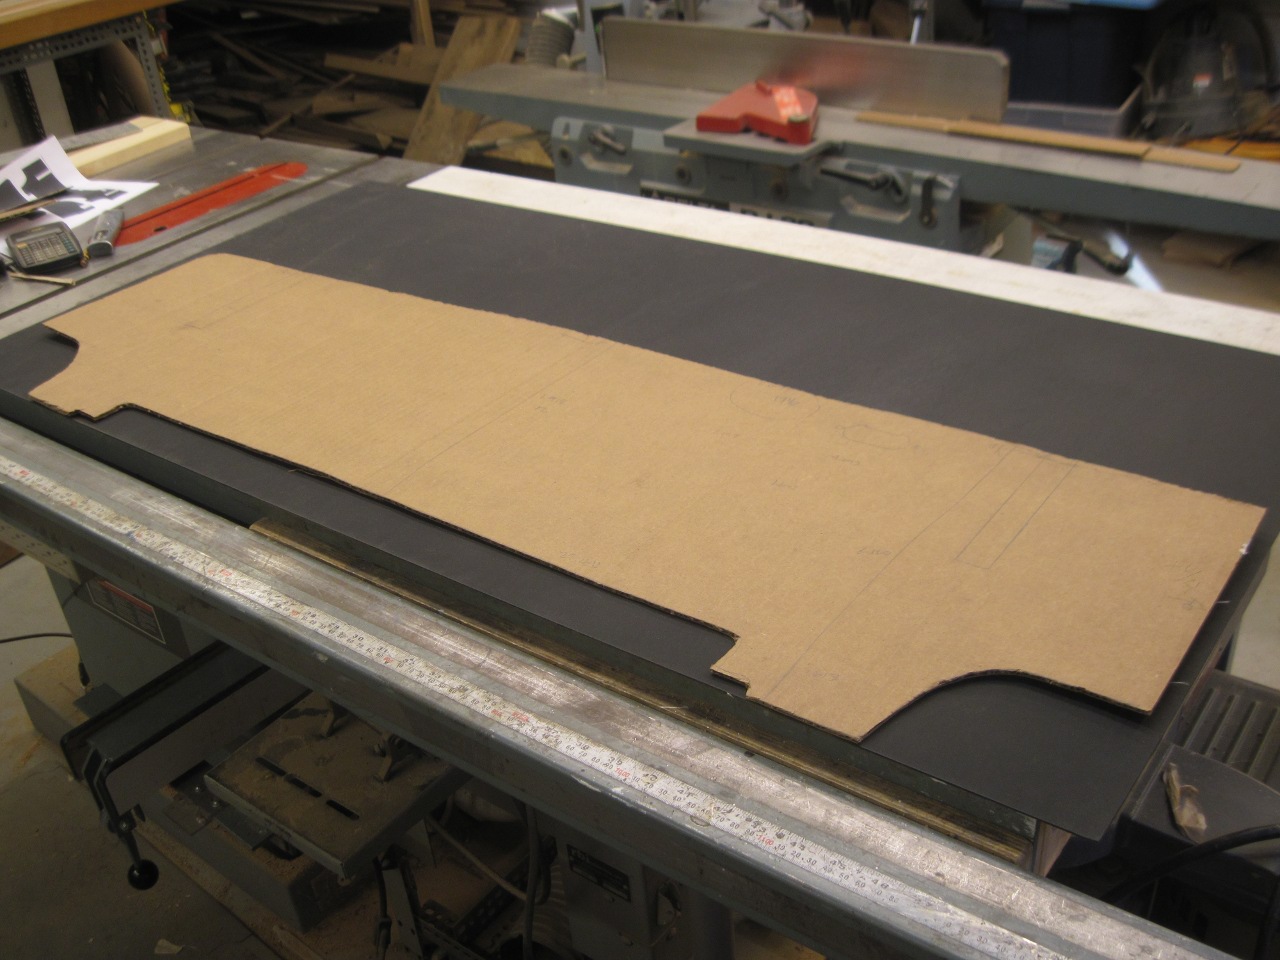
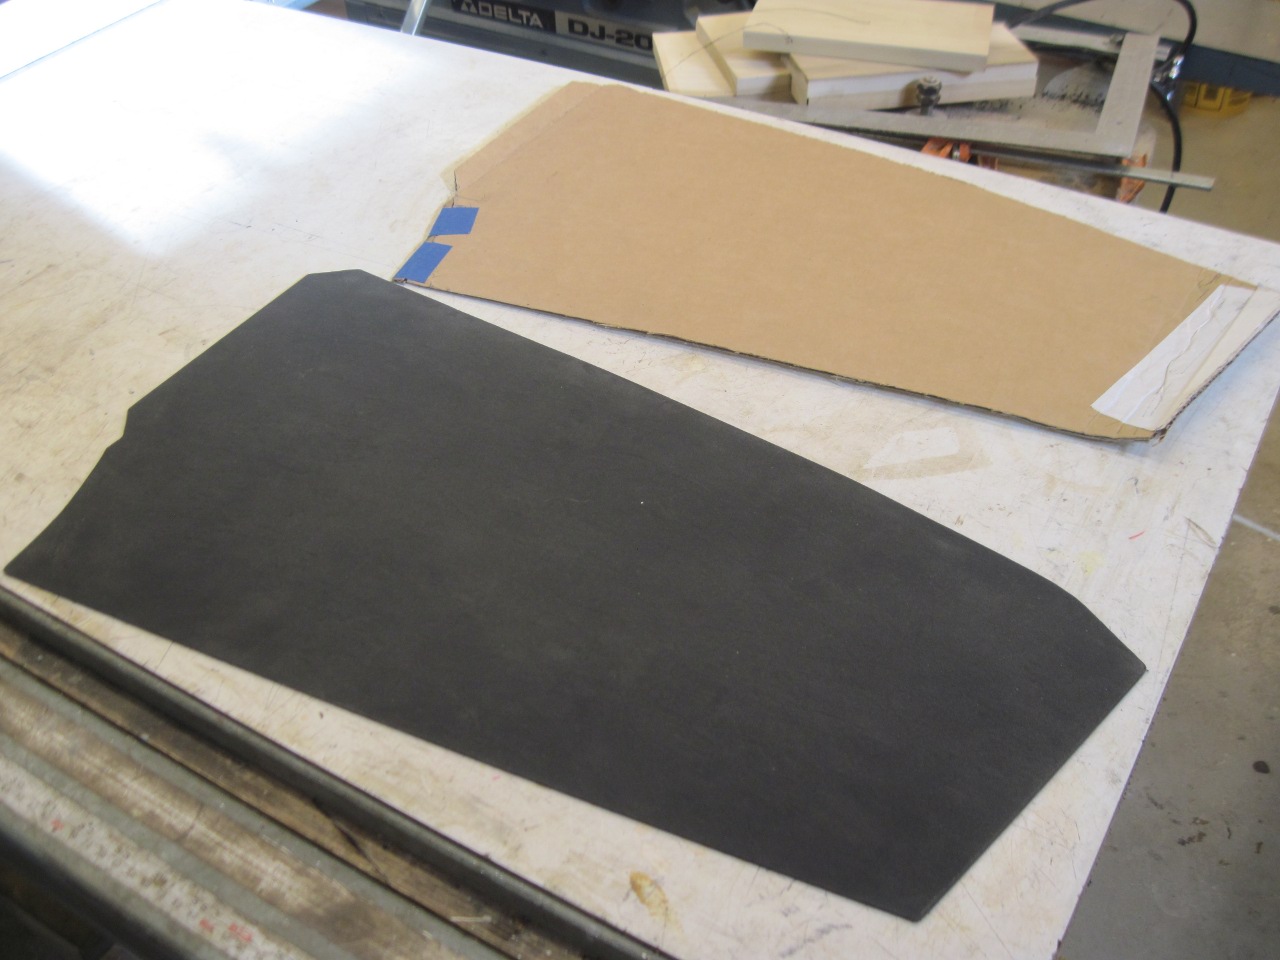
To get the hang of the materiaI, I started with the front panel since it had no curves.
I
used the old panel to help make a cardboard template. I also had
to look at some catalog pictures because so much of my original panel
was missing.

After a few rounds of fitting and trimming, the template fit pretty well.
Then the template was used to make the Kydex shape.

I
installed the boot lid hinges temporarily to help me mark out the
clearance slots in the panel. I hoped that by doing it this way,
the slots would not have to be as wide as they were in the original
panel. They turned out to be only about half as wide as the
originals. I also made the cutout for the boot light. It
looked a little lopsided, so I cut for another one on the left side.

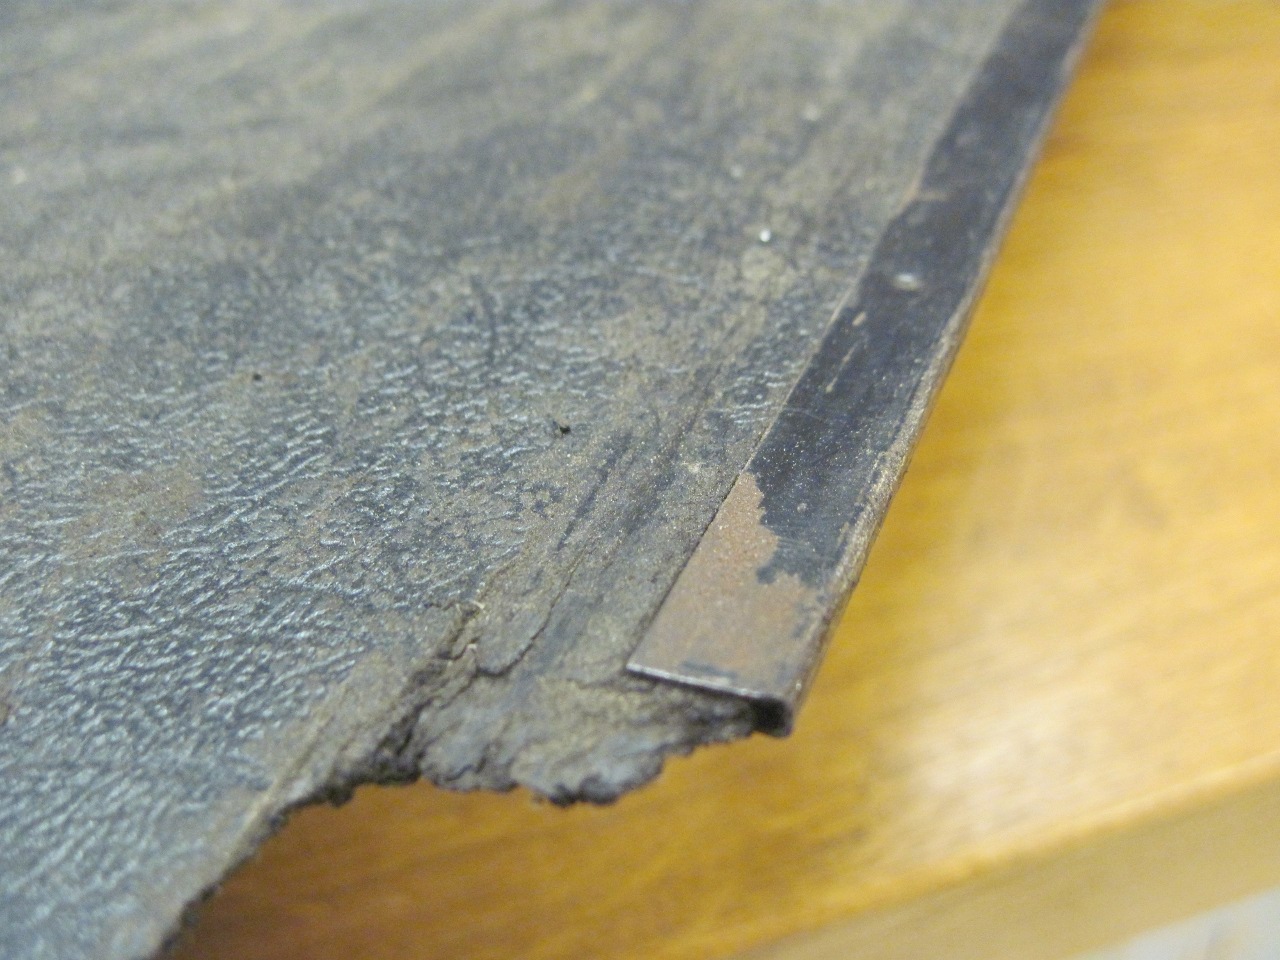
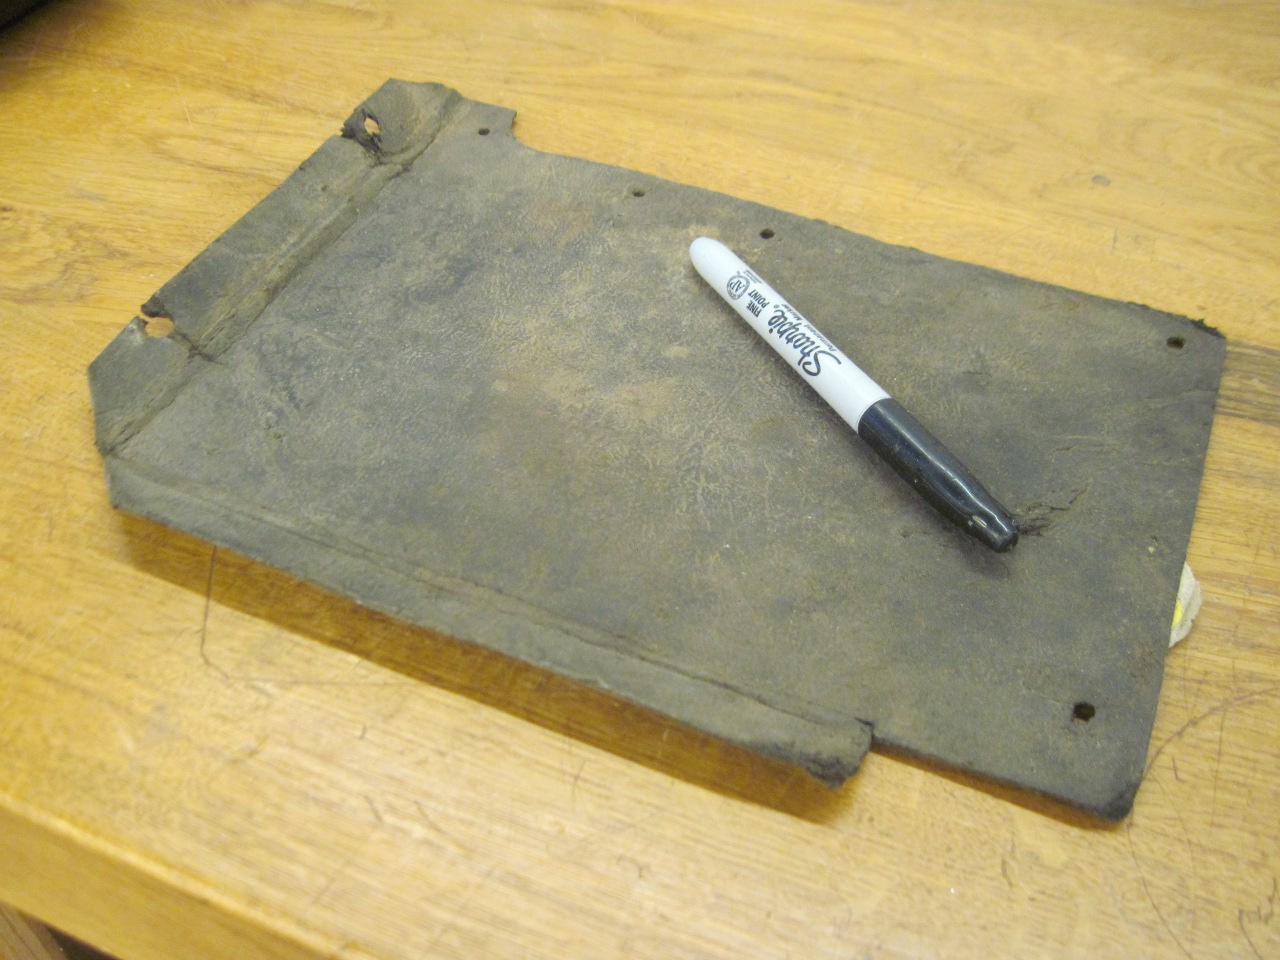
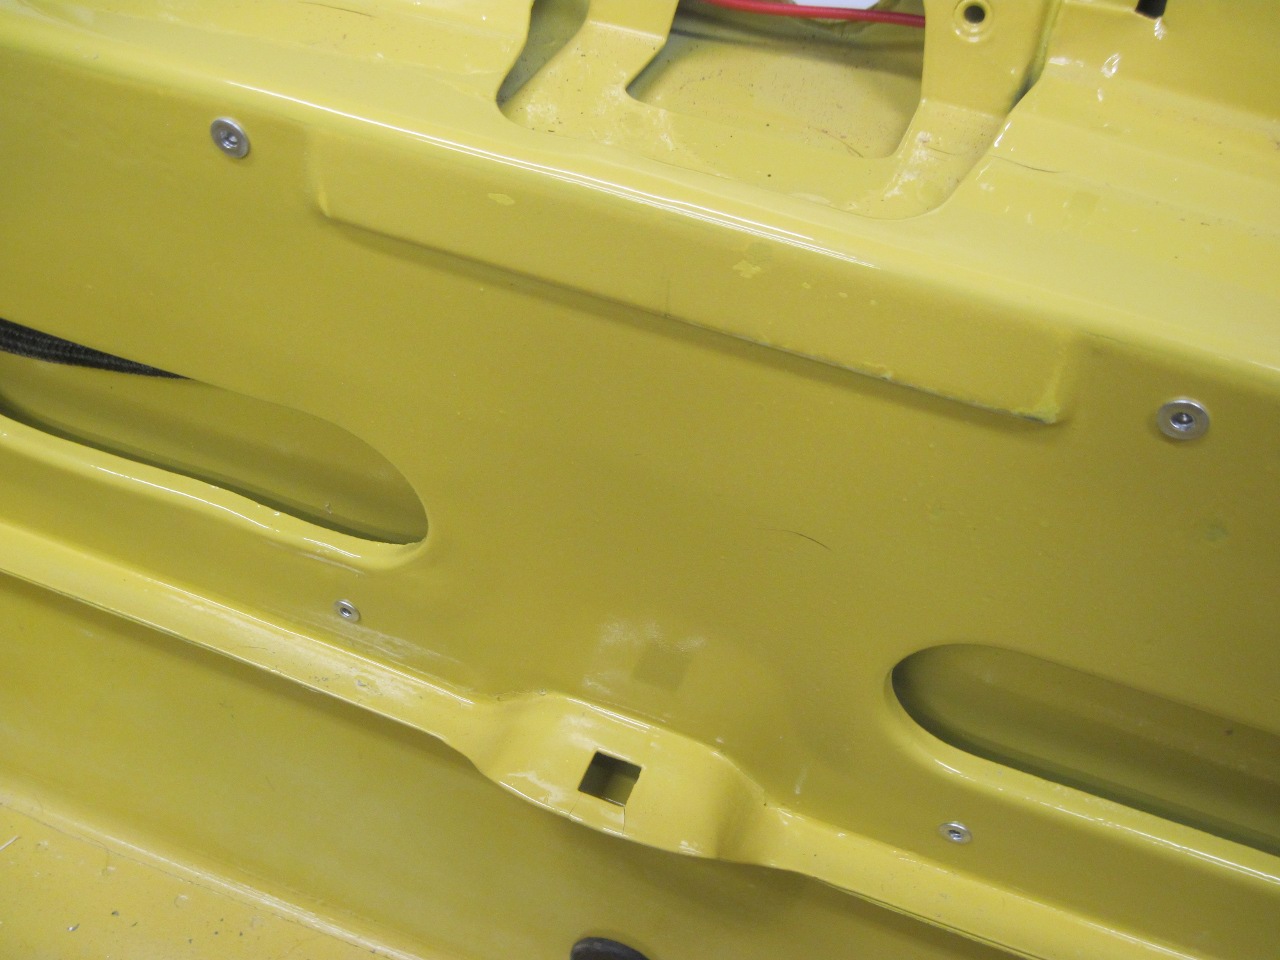
The
original front panel had a stiffener on its bottom edge where it
spans the spare tire well. It was just a piece of light-gauge
metal wrapped around the edge of the panel. I thought a small
aluminum L shape would do a better job.
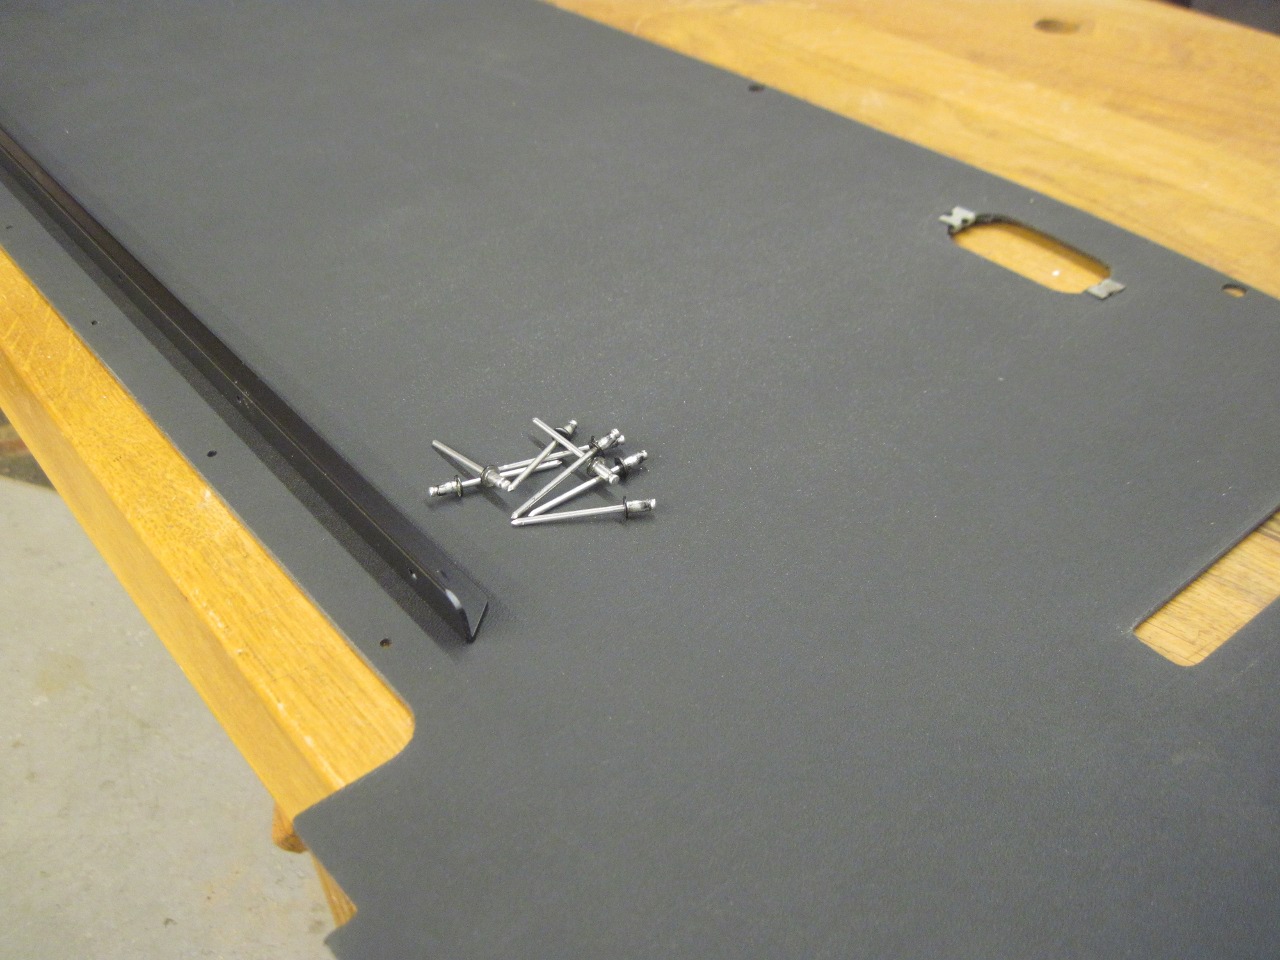

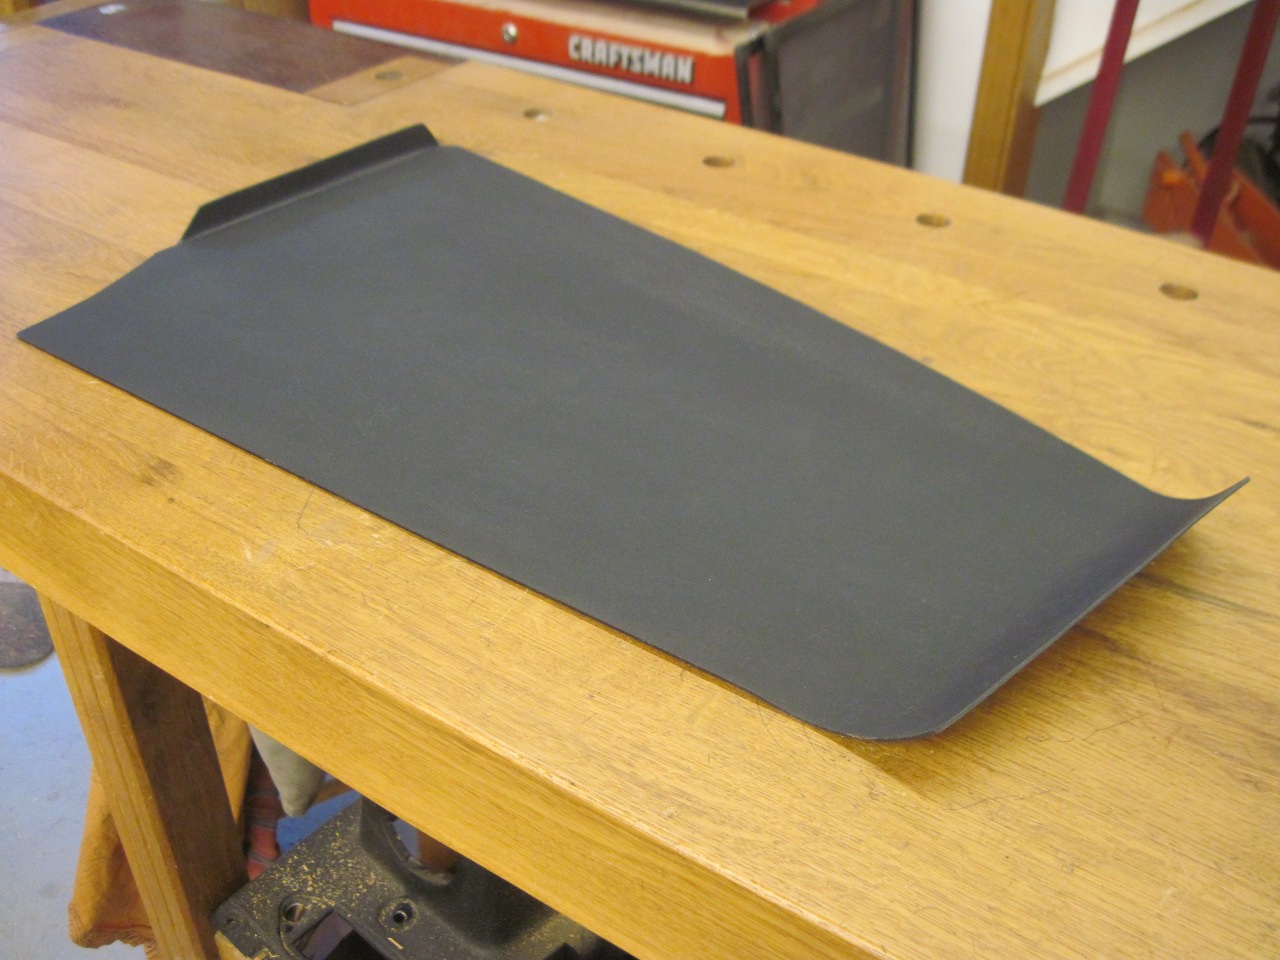
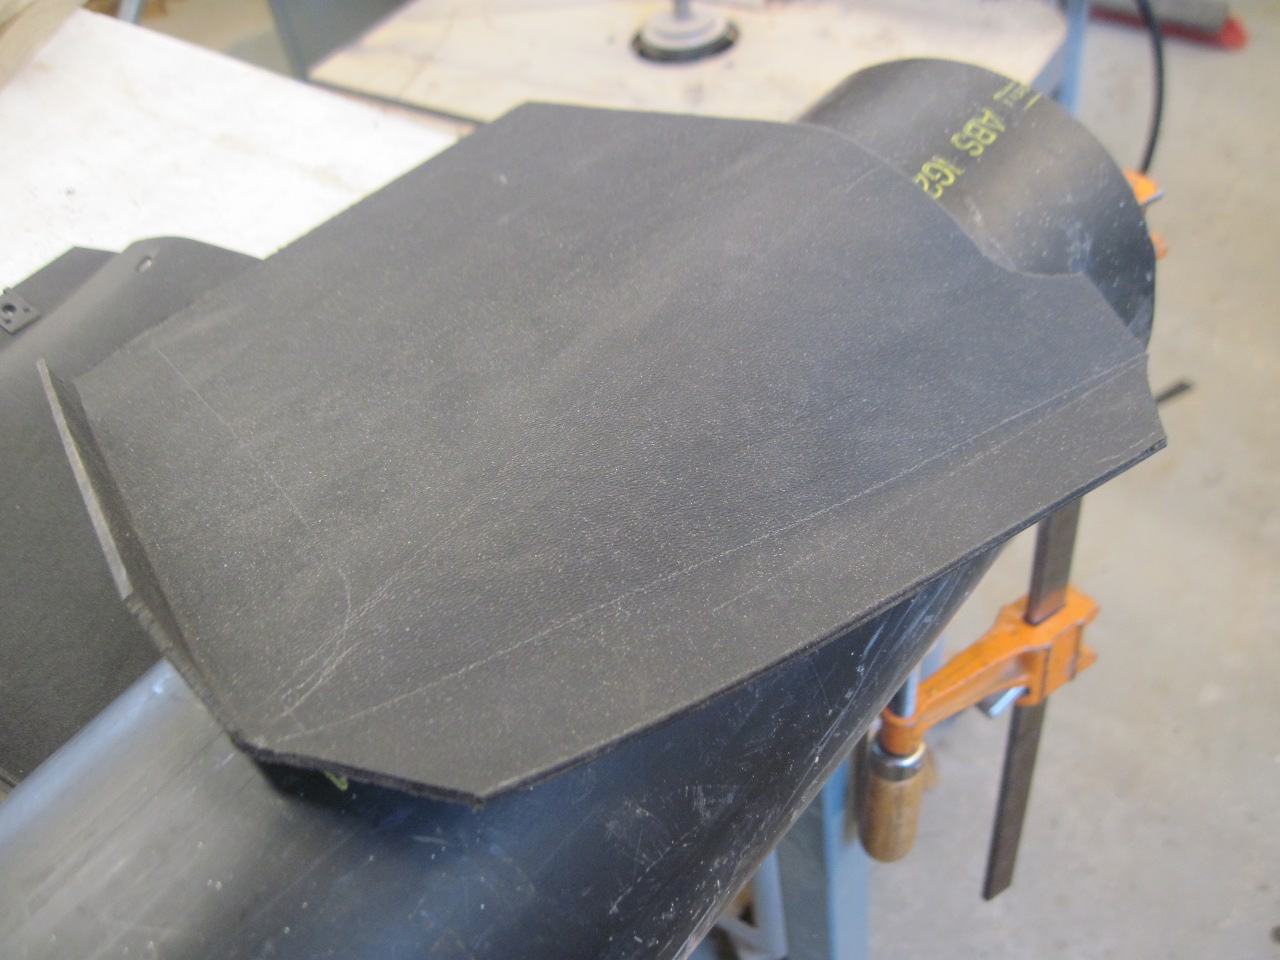
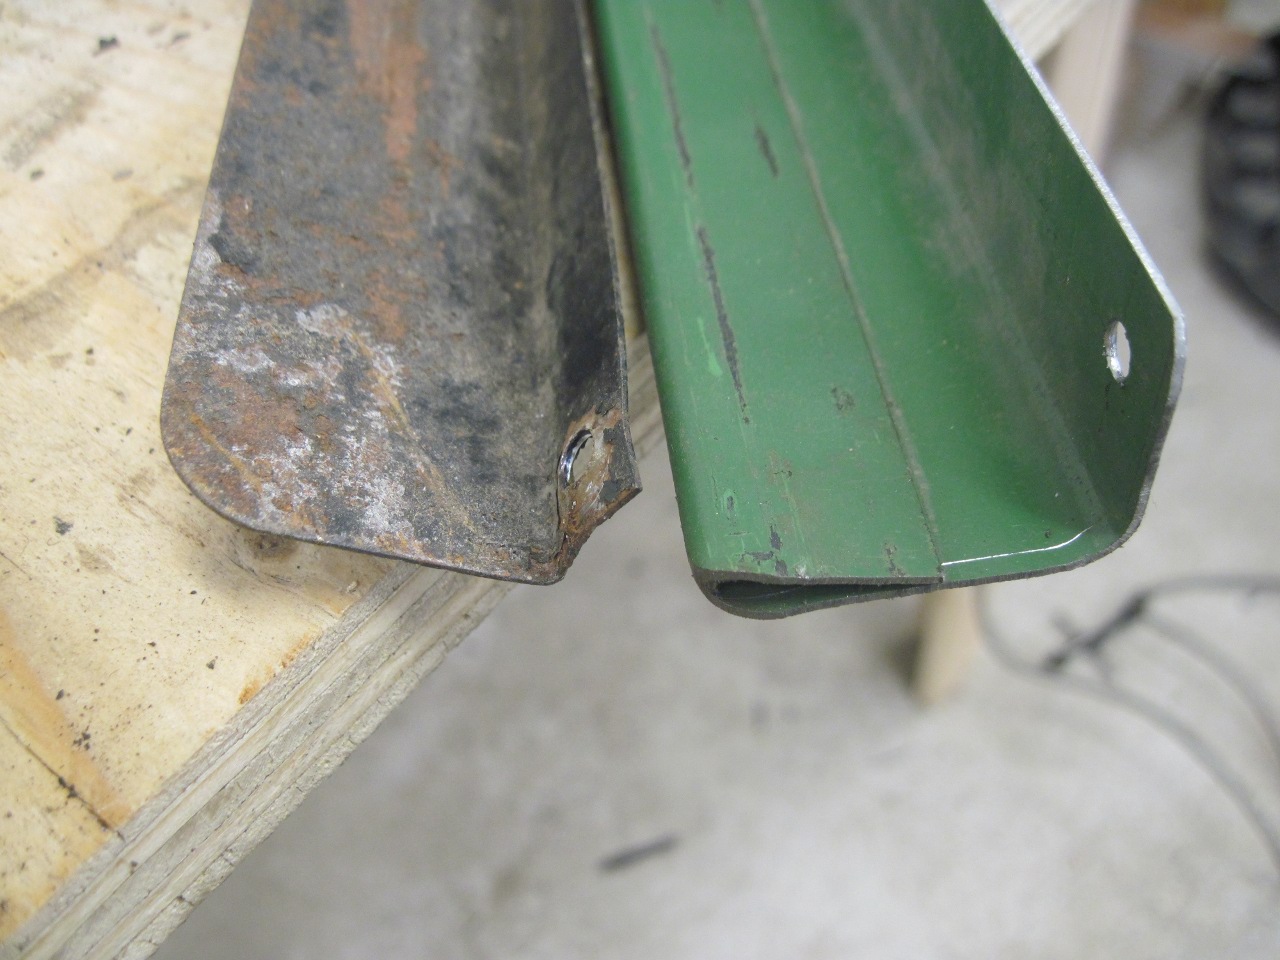
I did
the side panels next. They were a little more challenging since
they had a right angle flange at the front and a curved section at the
rear. The originals served as a starting point for cardboard
templates. I had to add nearly an inch to the length of the
templates in order for them to hold the rear pieces in the correct
position. I've seen quite a few pictures of ill-fitting rear
panels, and I think this is the cause.
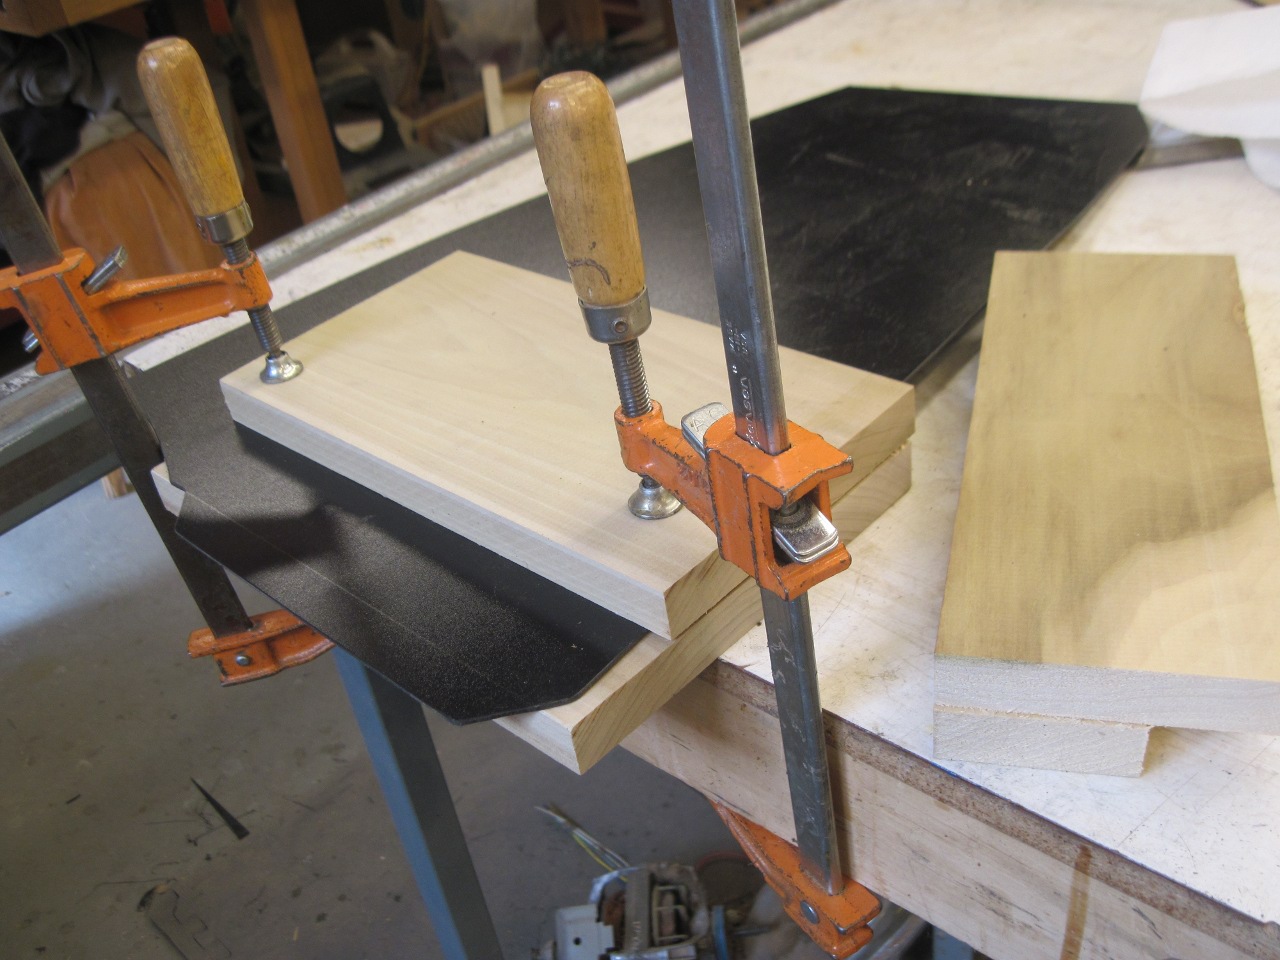
I
cobbled together a way to bend the right angle flange. The
material was heated until it was pretty flexible, and the wood former
to the right was pressed in place until the plastic cooled.
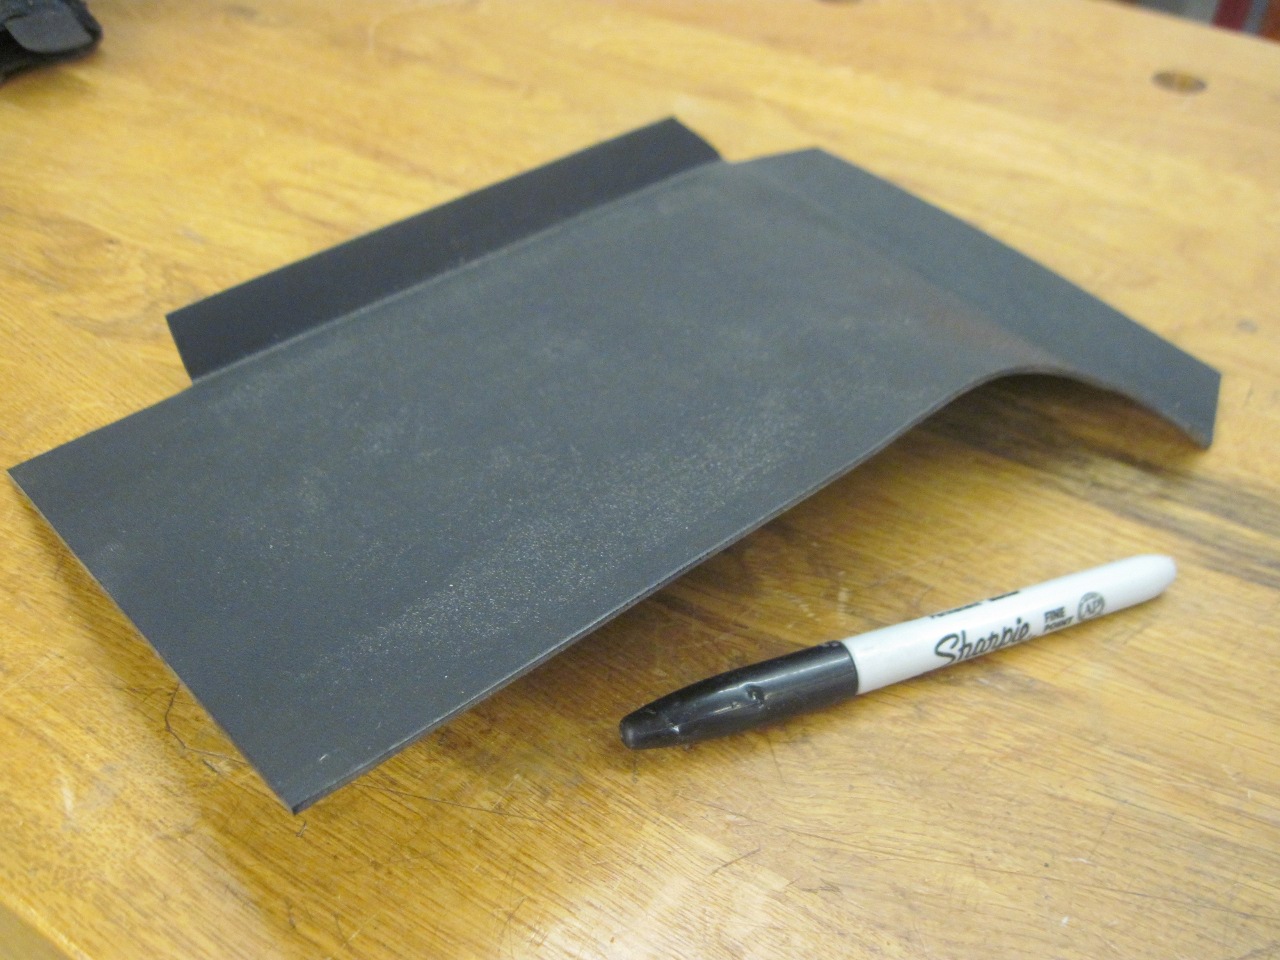
For
the curve at the other end, I heated the appropriate area of the
plastic and then formed it over a piece of pipe of the approximate
radius needed.
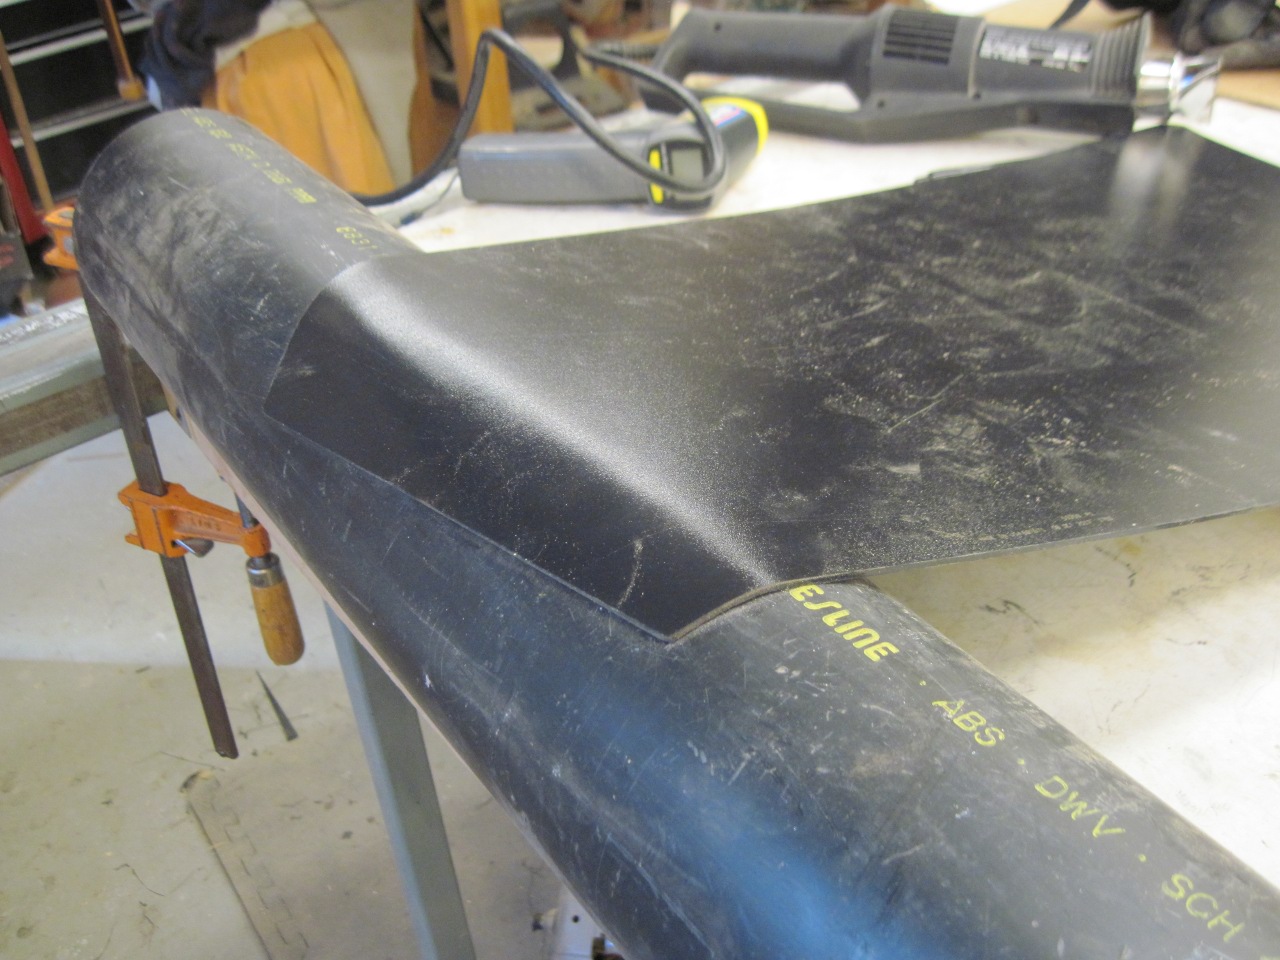
Not
bad for my first try at forming this material. It looks dirty in
the second pic because it was. It cleans up really well, though.
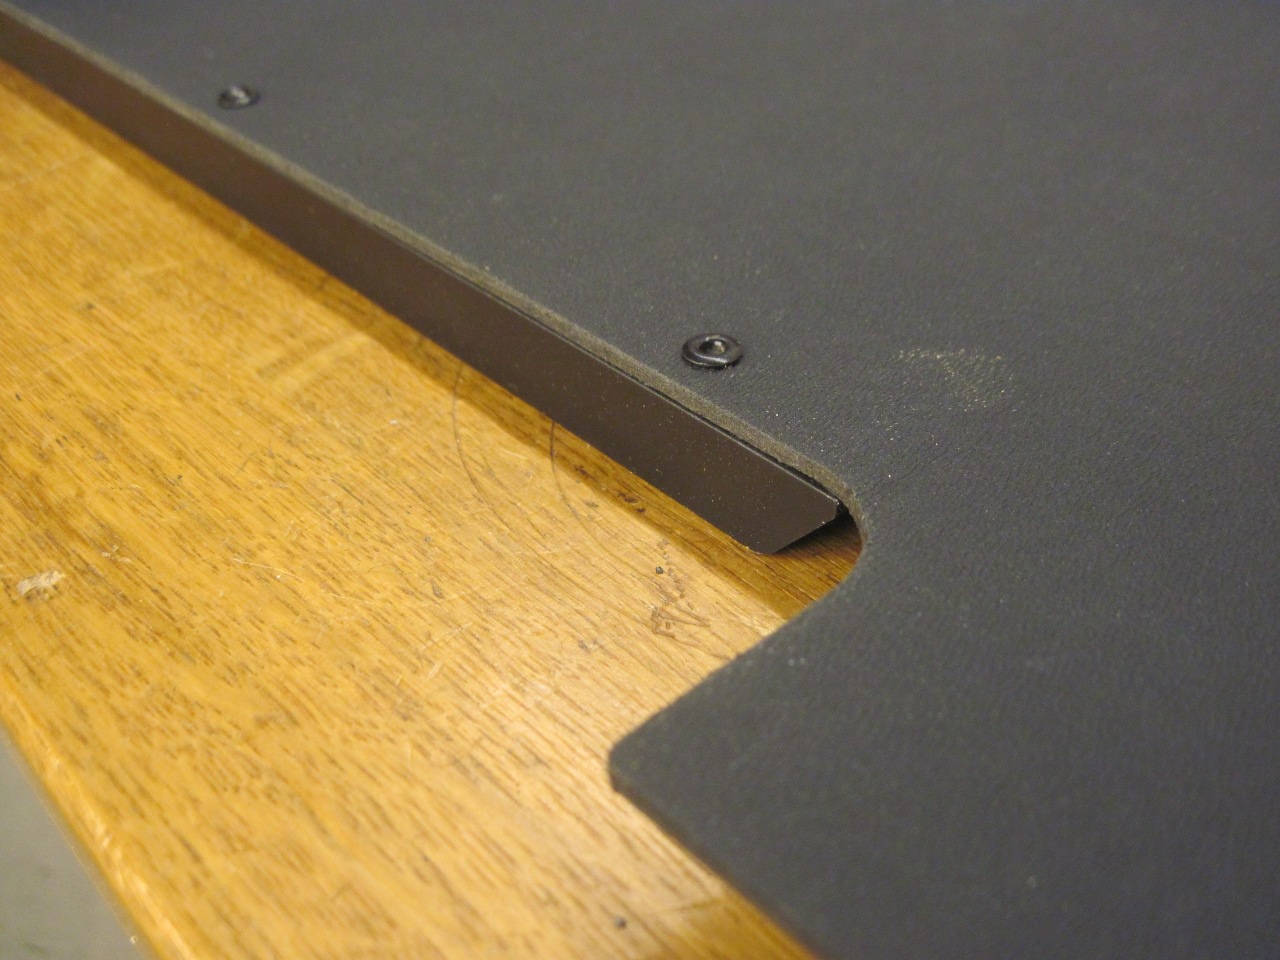
The other side was the same except for the cutout for the boot
lid support boss. I was able to cut that quite a bit smaller than
the original for a much neater look.
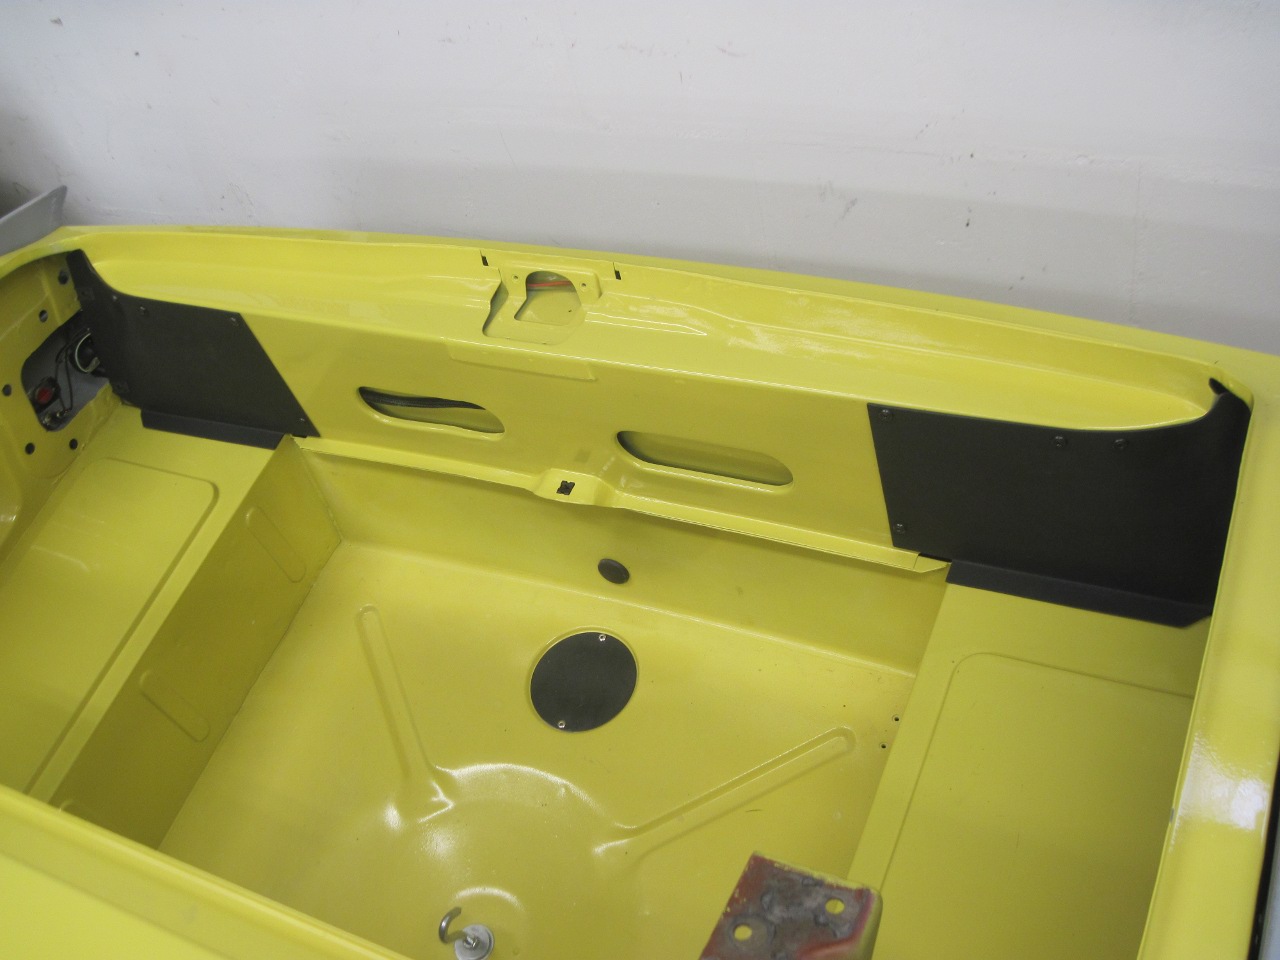
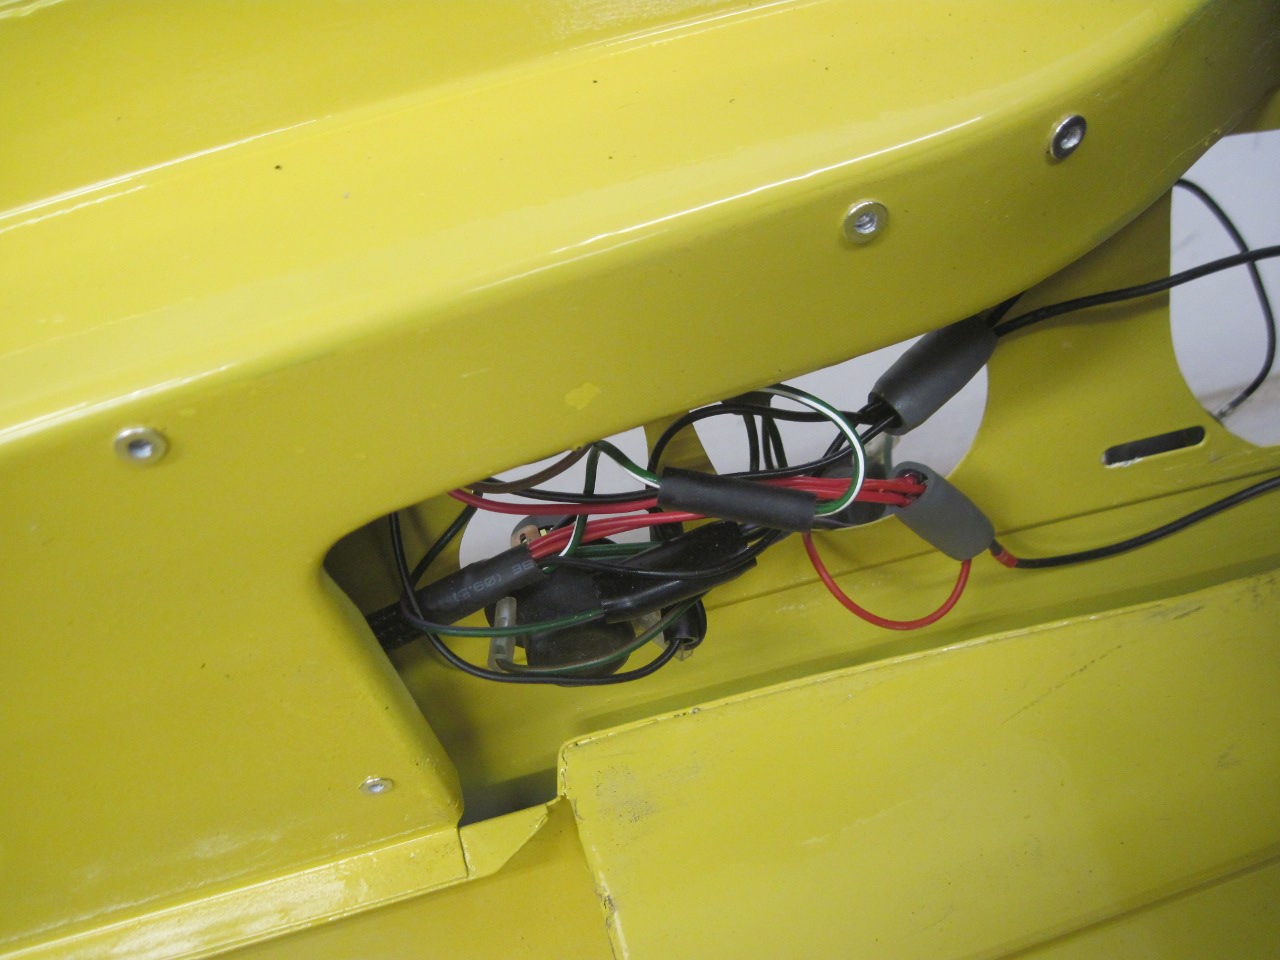
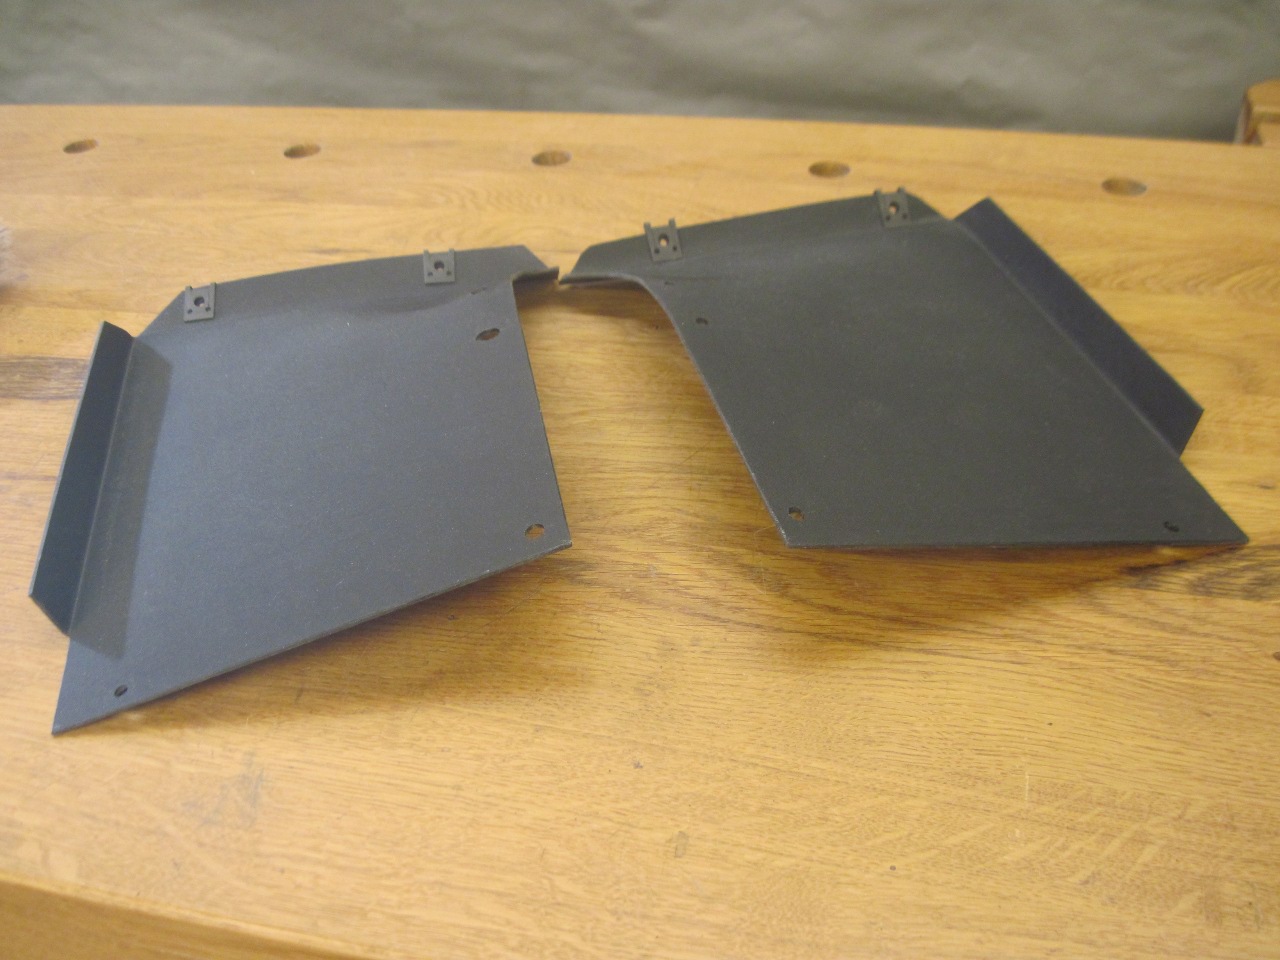
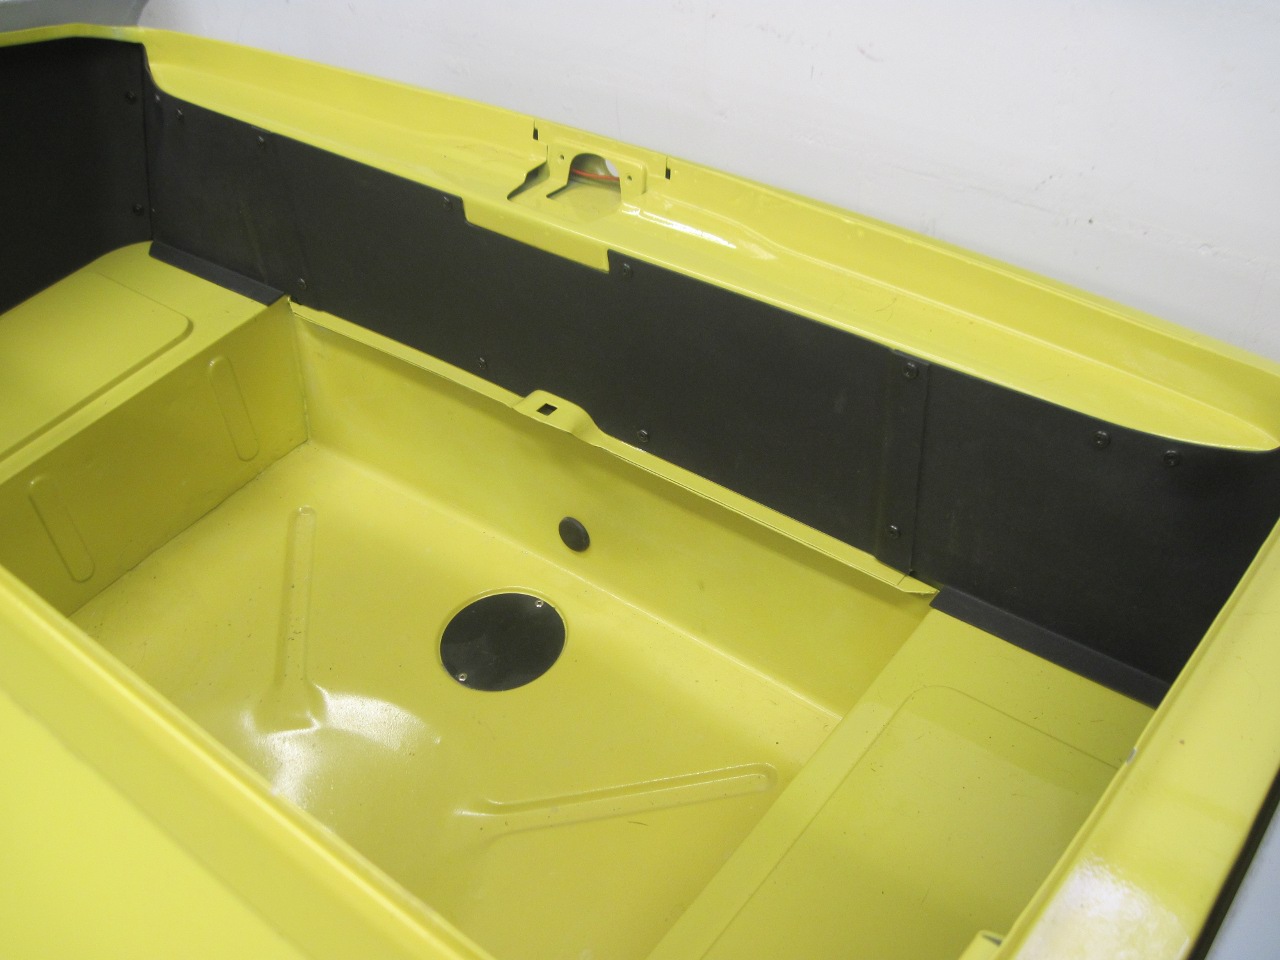
The
two rear panels cover the tail light wiring areas at either side of the
back of the boot. They are more complicated than the others, each
with two flanges and a curved area to fit to the rear header in the
boot. The original panel served as the template.
The flanges and curves were formed as with the side panels.
It took a few iterations to get the fit right.

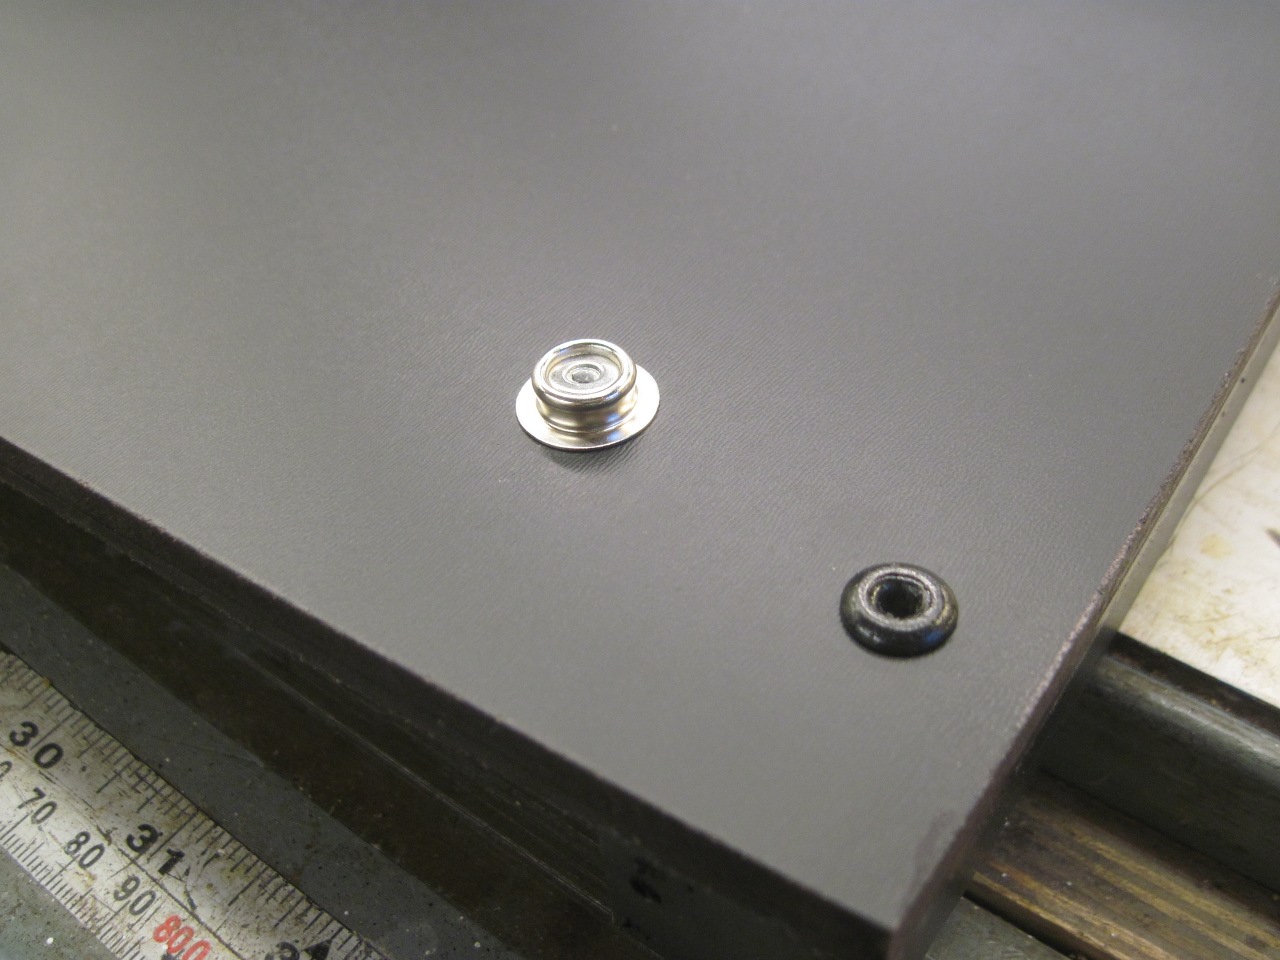
The
rear panels were originally fastened directly to the tub with sheet
metal screws. This is never a good idea for fasteners that have
to be removed and replaced. The holes get stripped and hogged out
so that they won't hold the original size screws. I found a
variety of screw sizes holding the panels on. I decided to put an
end to that nonsense by installing 6-32 rivet nuts. It's what the
factory really should have done.
Most other places, the panels are held to each other and to the tub with sheet metal screws in clip-on "U" nuts.
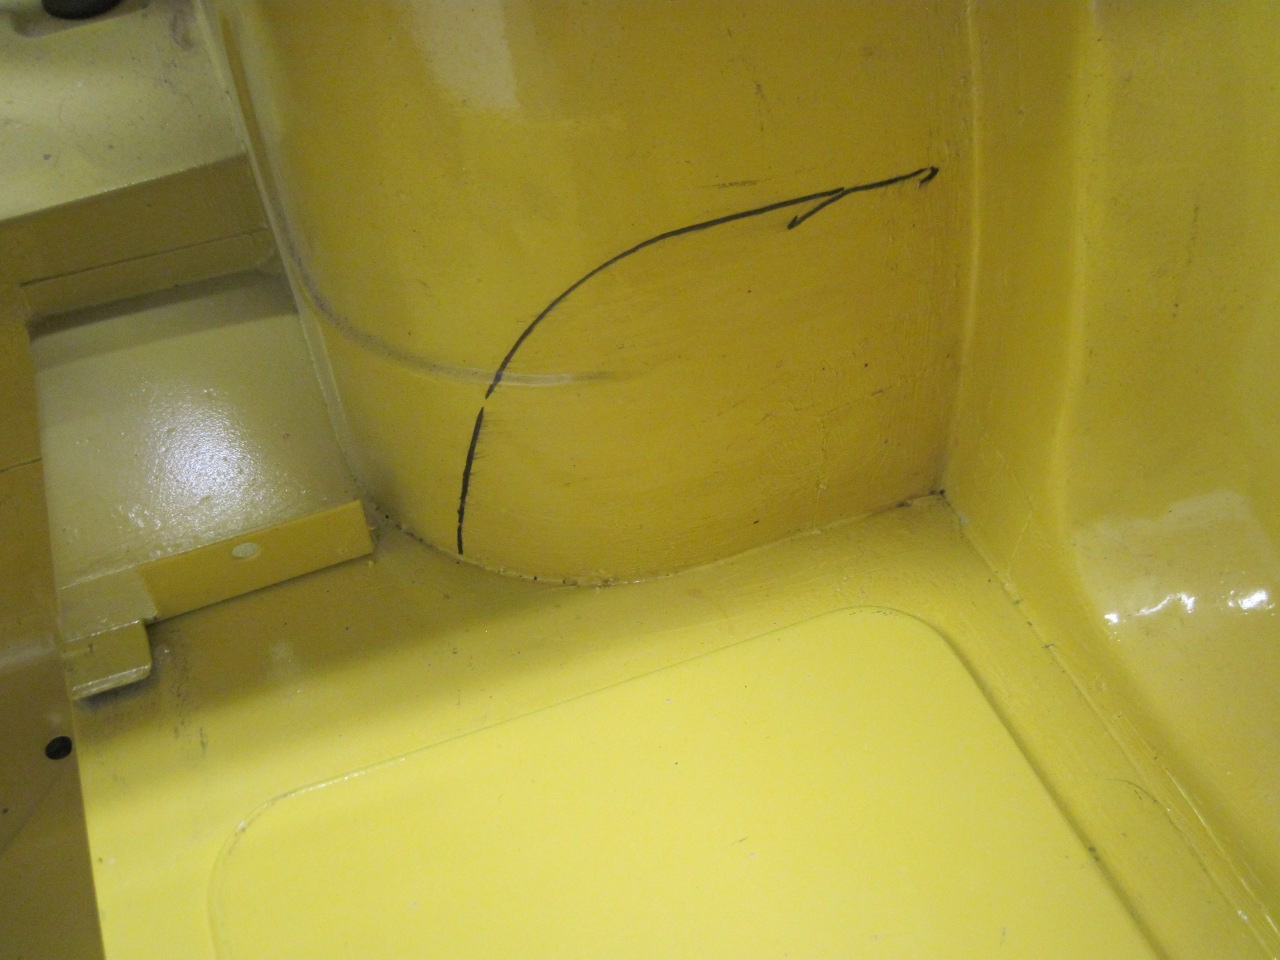
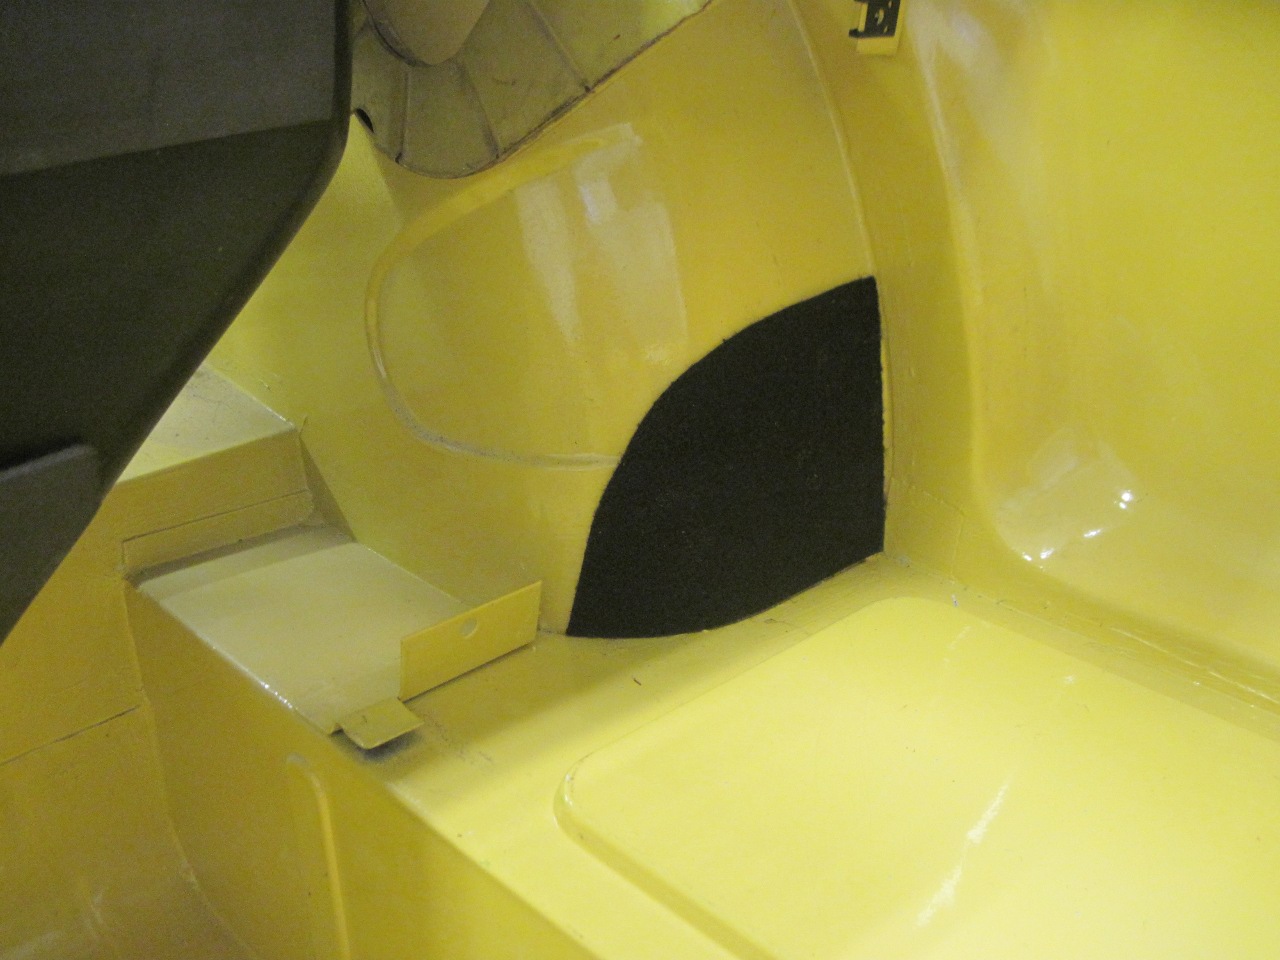
Now,
before I could finally install all the panels, there is an important detail
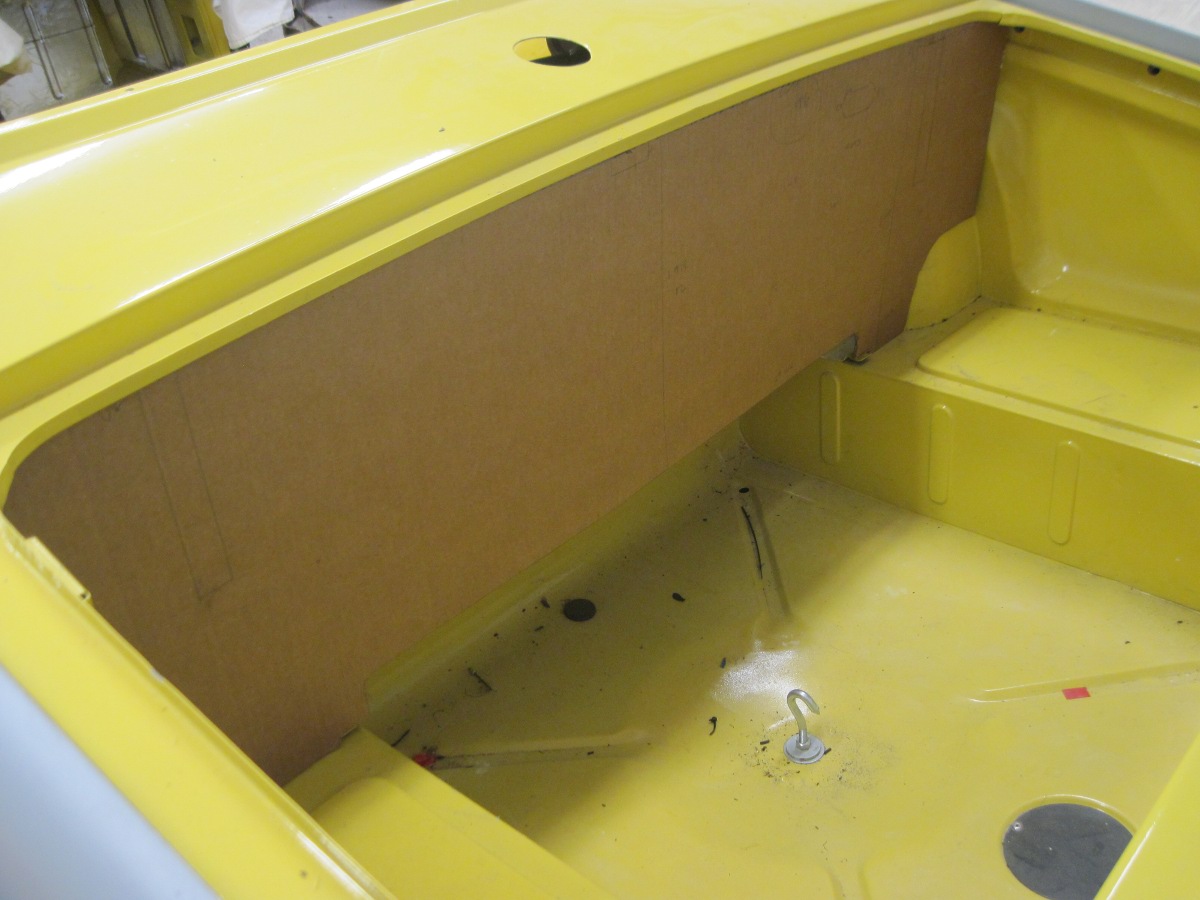
to take care of. There is a small section at the rear of the
wheel well that is not covered by the trim panels. I don't
remember what this area was originally covered with, but I had some
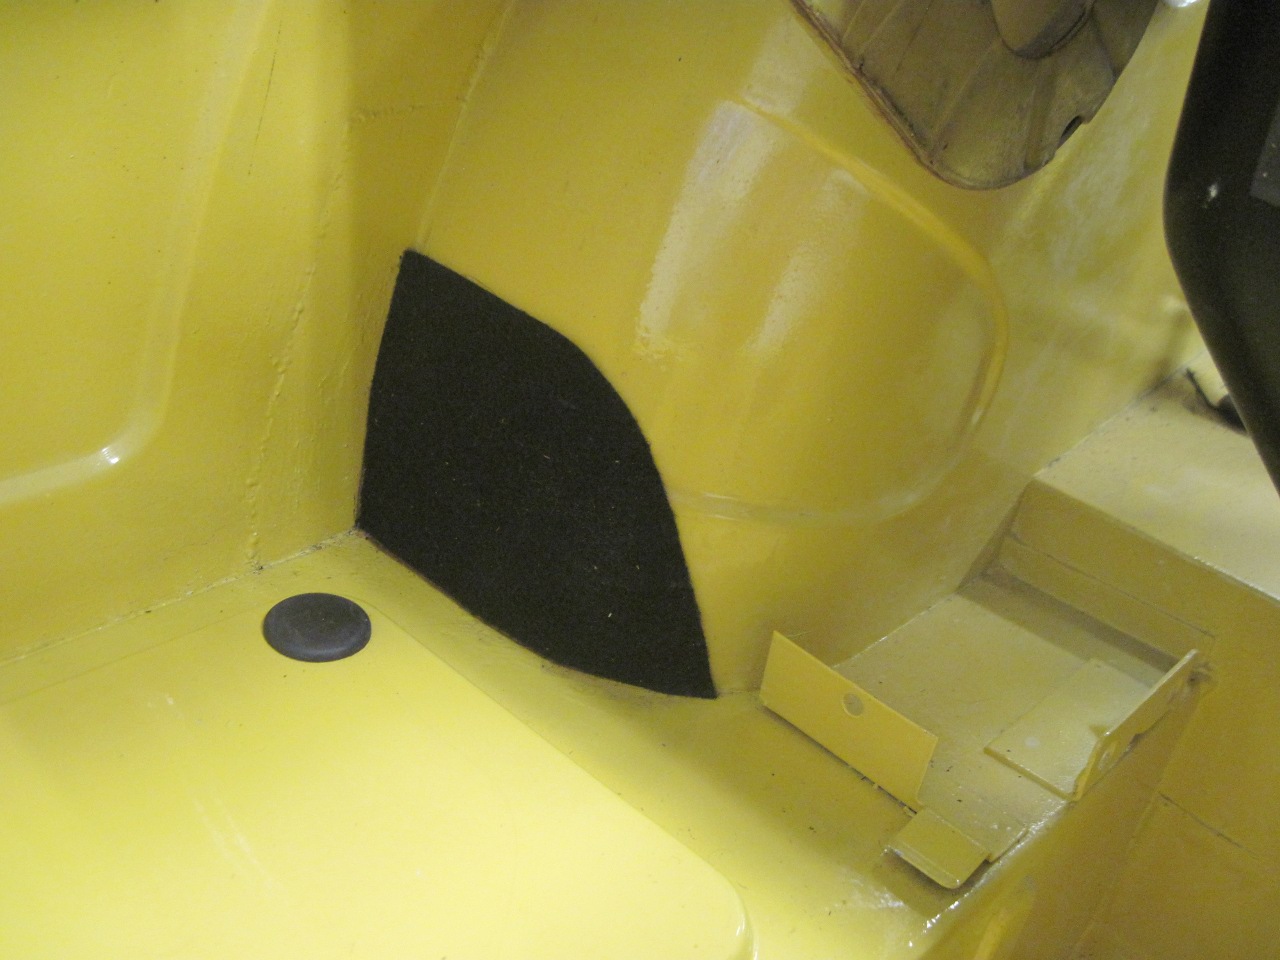
automotive utility carpet that seemed to be appropriate. I marked
the areas that had to be covered.
Then made masking tape templates to use to cut the carpet.
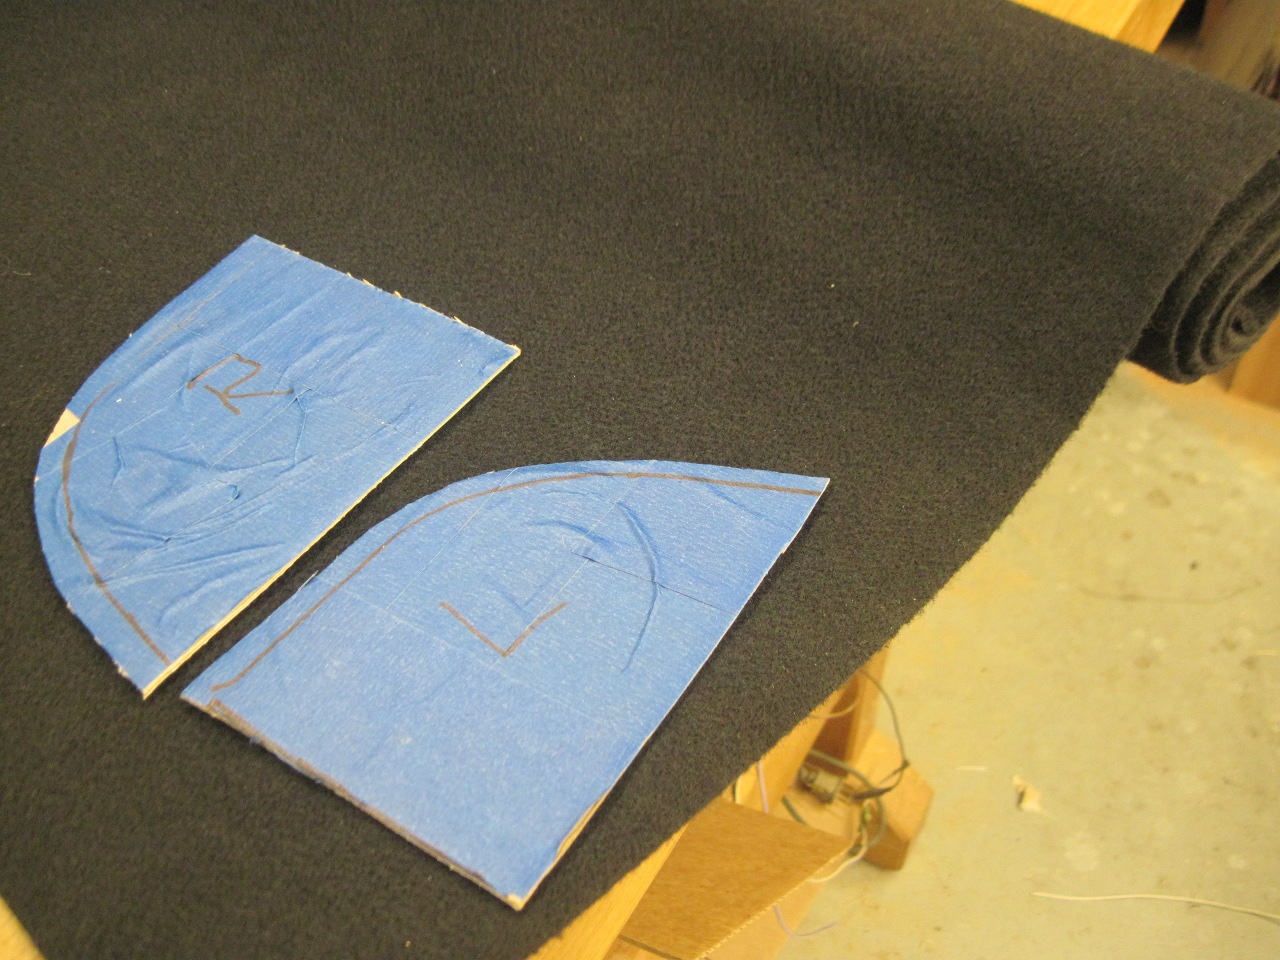
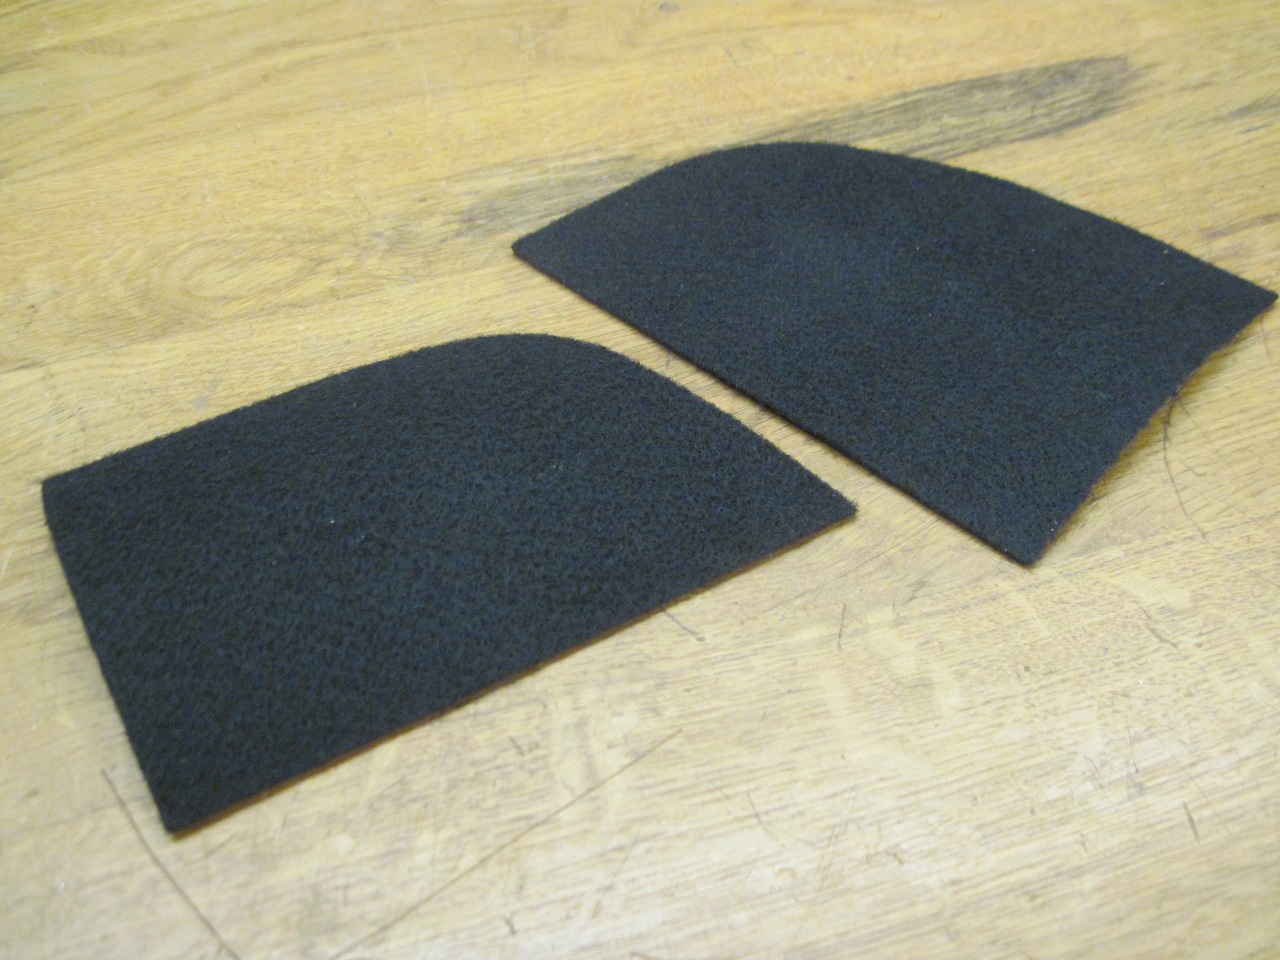
Then glued them in place.
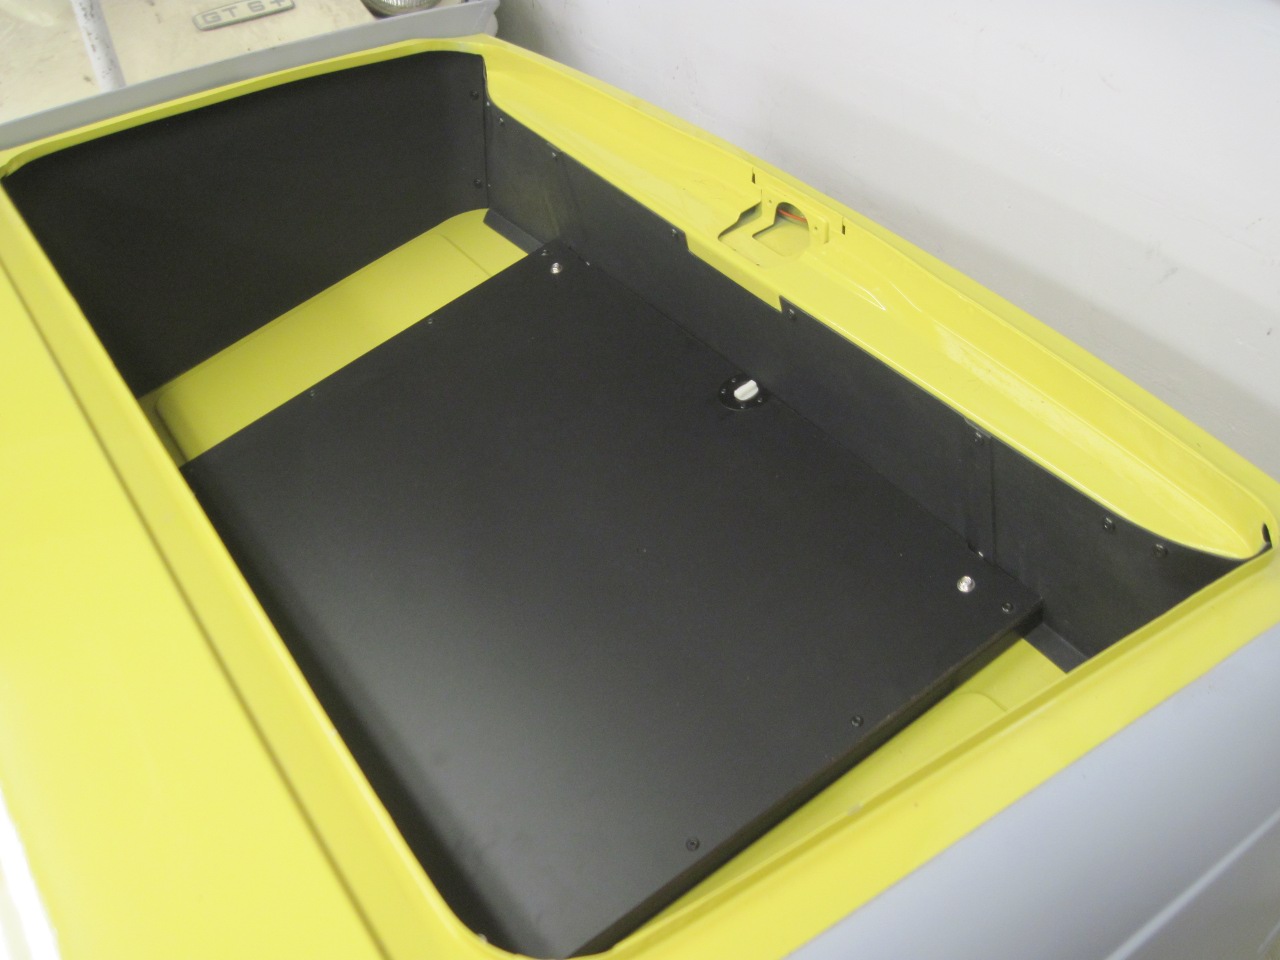
Side panels screw to the rear panels, and to a tab on the tub in front.

Front panel goes on last.

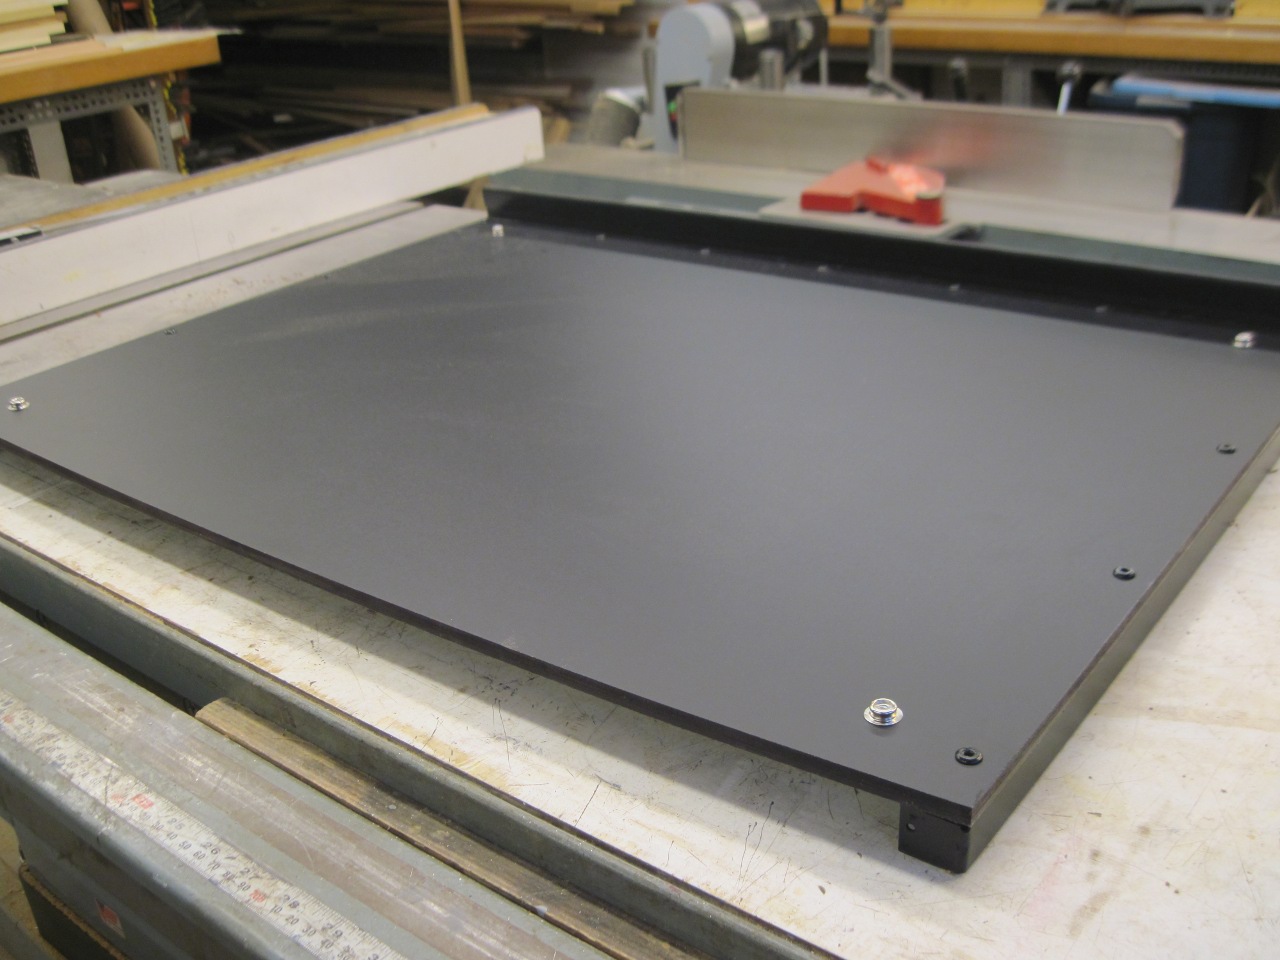
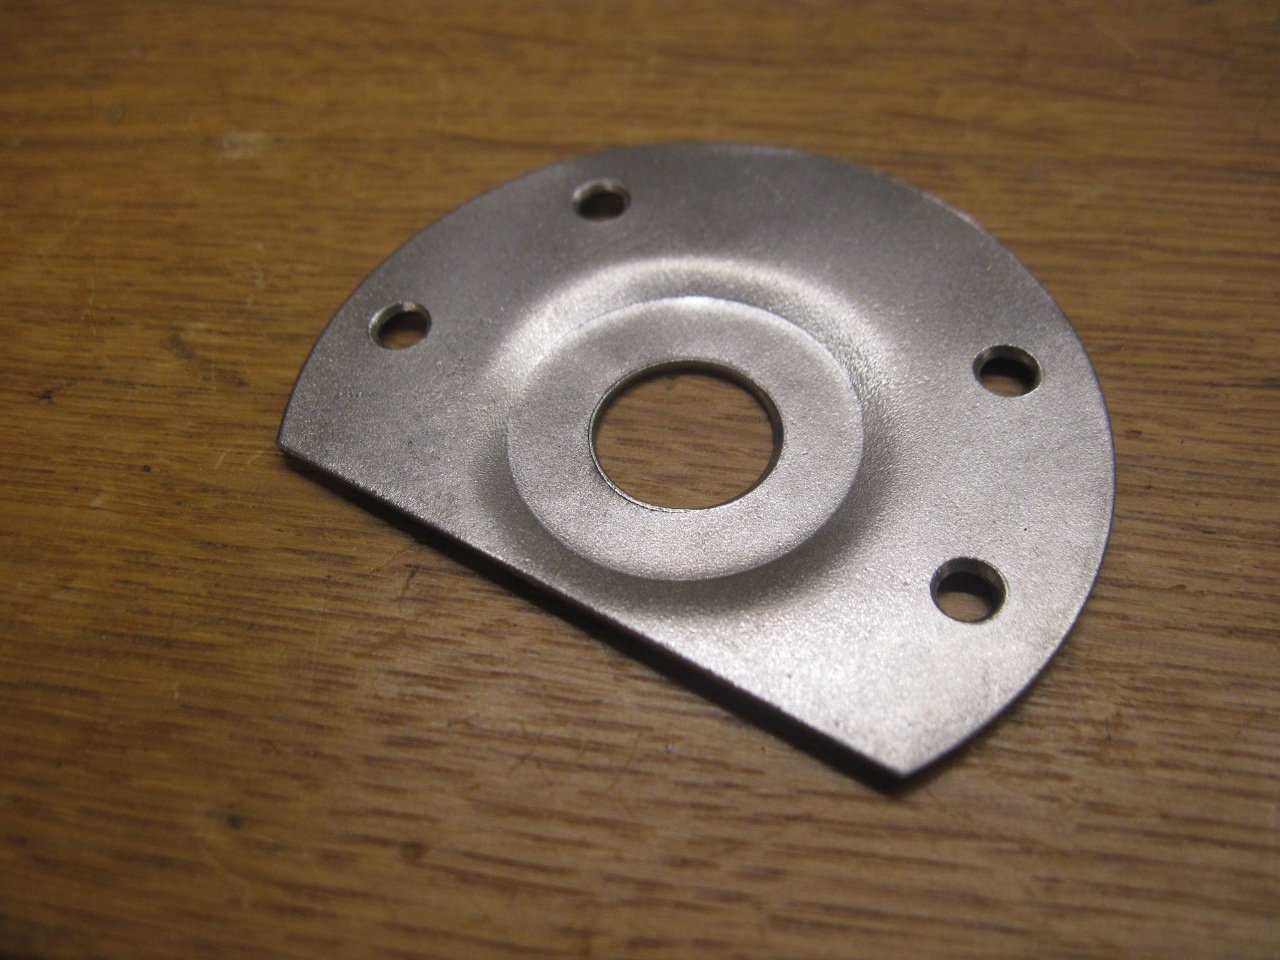
Next
up was the spare tire cover. Mine was all there, but the metal
parts were pretty rusted, the hardboard panel was scuffed and warped,
and the metal stiffener at the front was buckled.
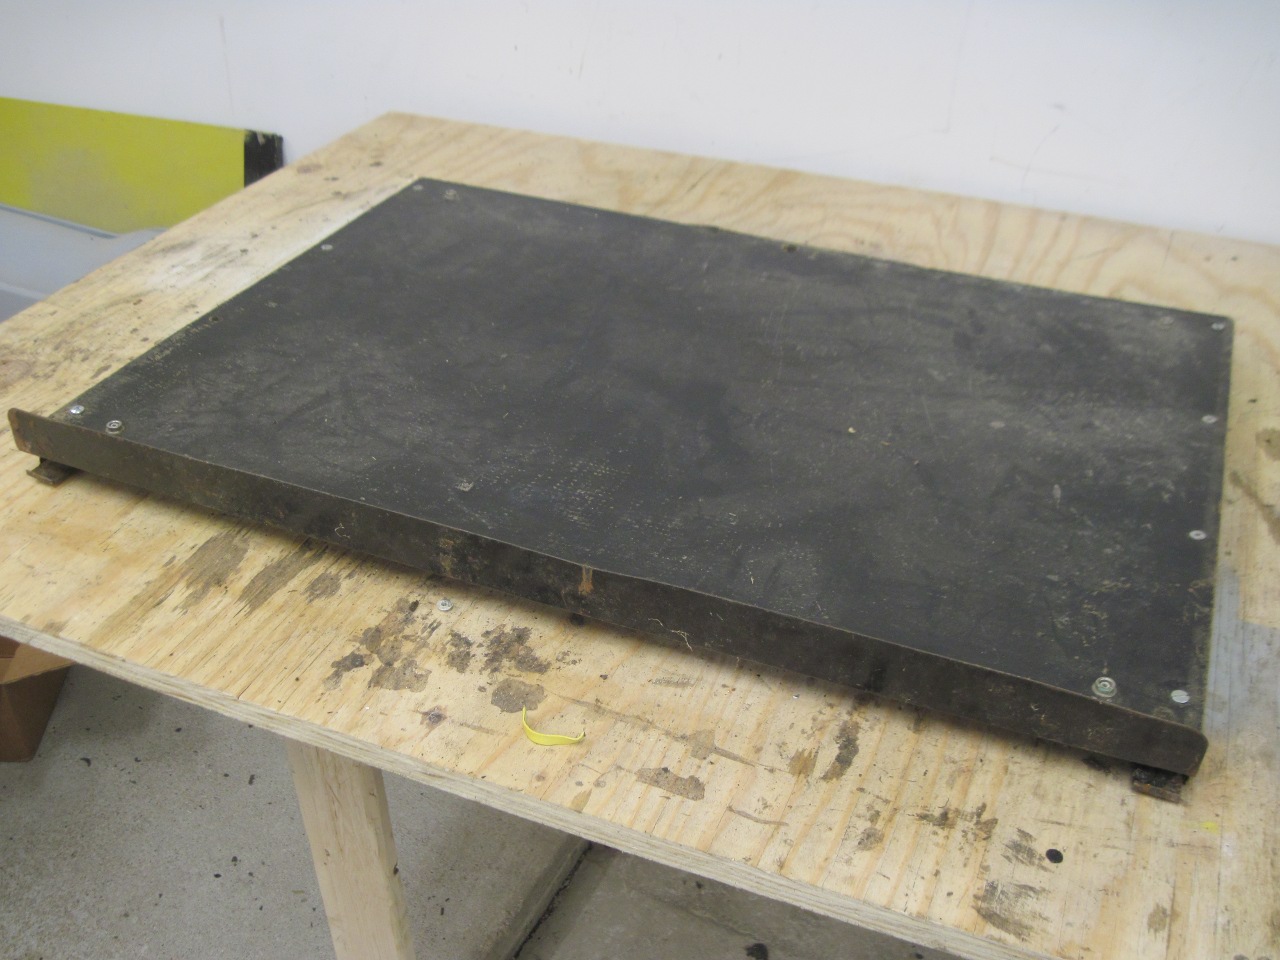
I
decided to start over, but I thought I could re-use some of the metal
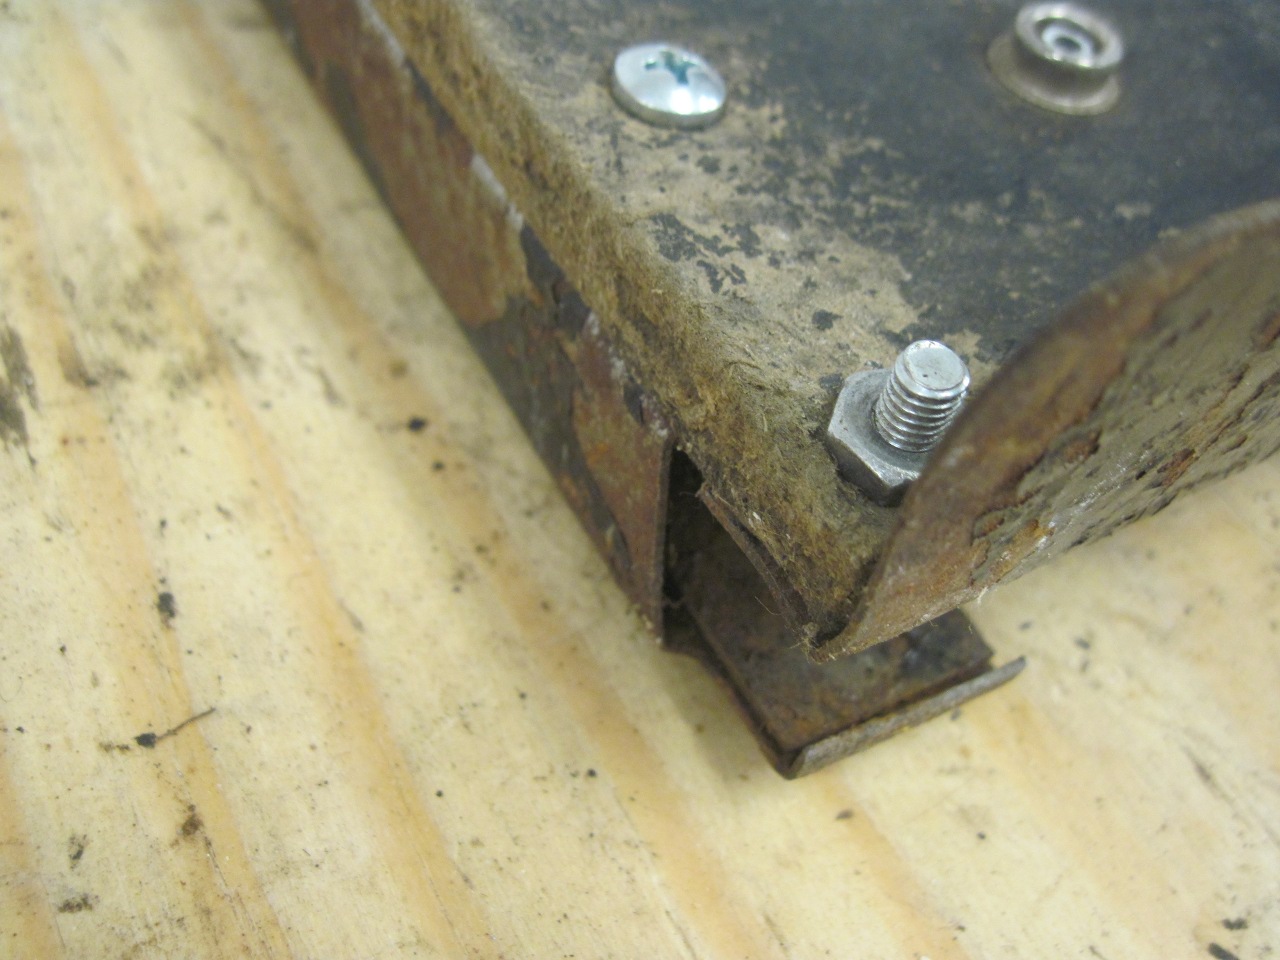
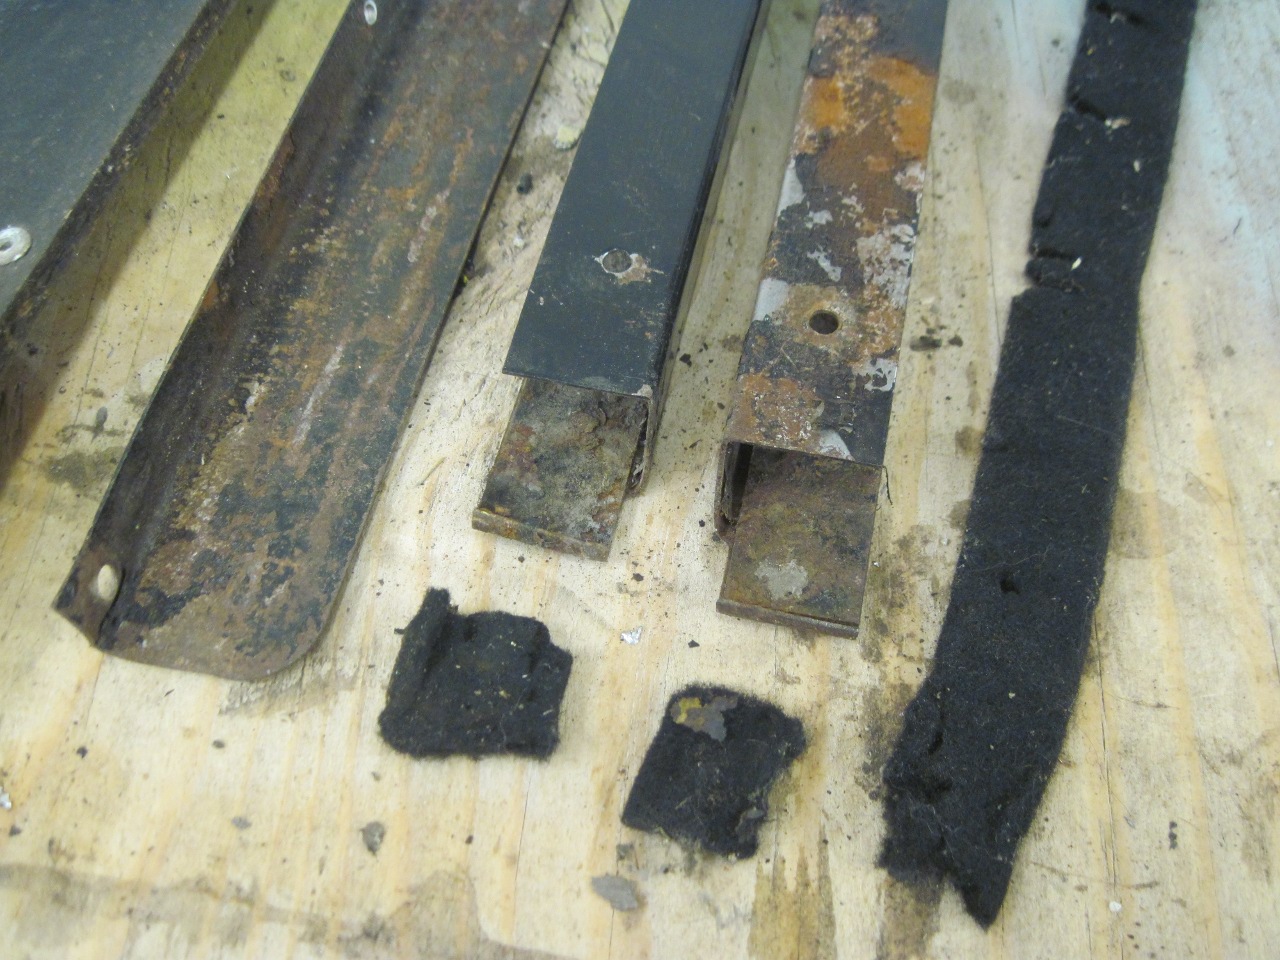
parts. Taking everything apart, I decided that the "C" section
rails at either side of the cover could be saved, but the
front stiffener could be improved on. I fashioned a new "L"
stiffener from slightly heavier metal, and included a doubled over
vertical flange for even more rigidity.
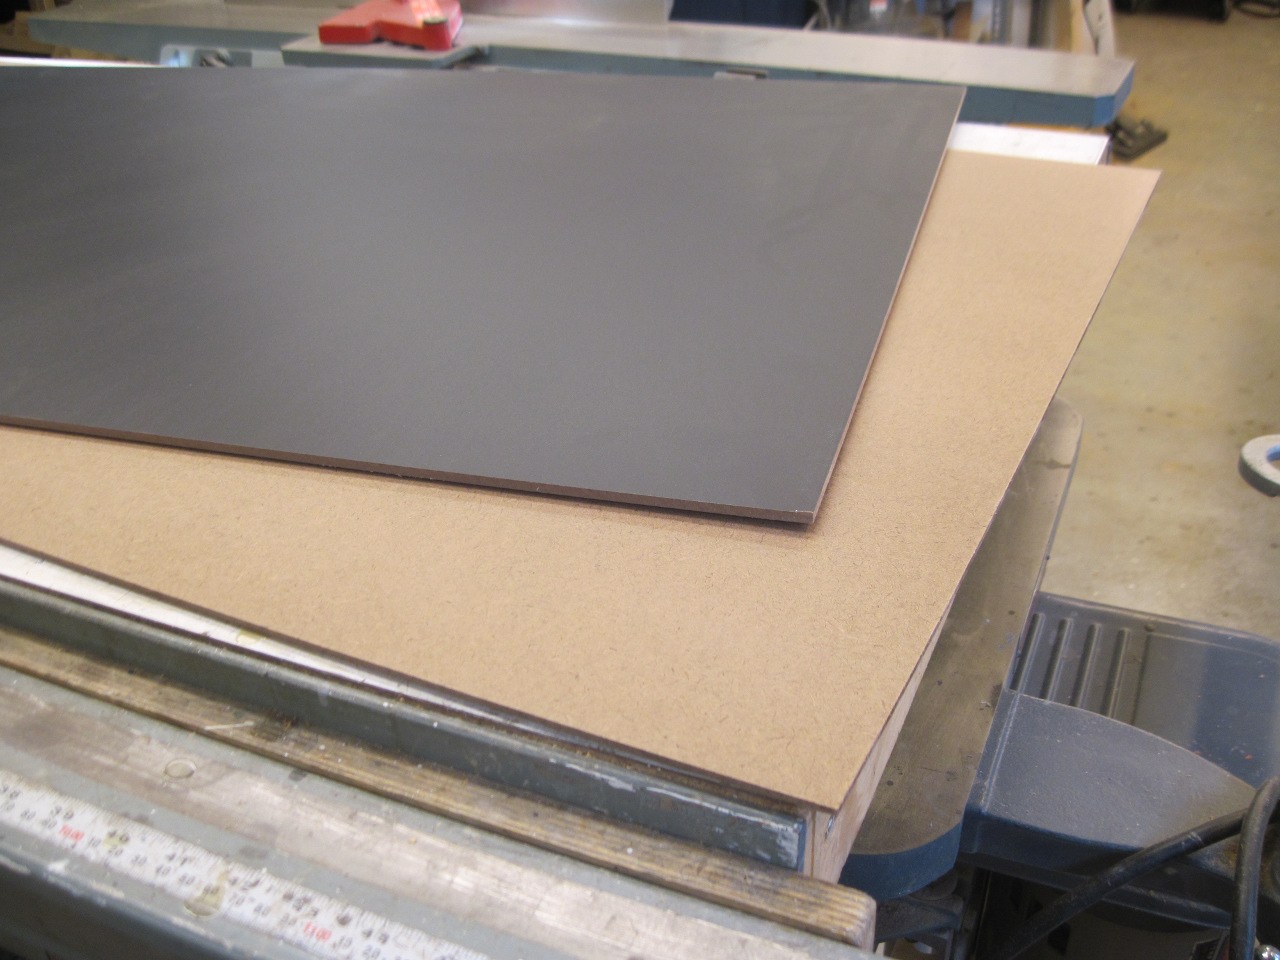
The
original panel was 1/4" hardboard. Since today's 1/4" hardboard
is actually significantly less than 1/4" thick, and since I really
wanted more strength, not less, I ended up laminating a piece of 1/4"
with a piece of 1/8" hardboard (which is also undersized). I
bought the 1/4" material with a black melamine finish. It is sold
for cabinets or displays. The two pieces were joined with contact
cement. The total thickness comes to almost 5/16".

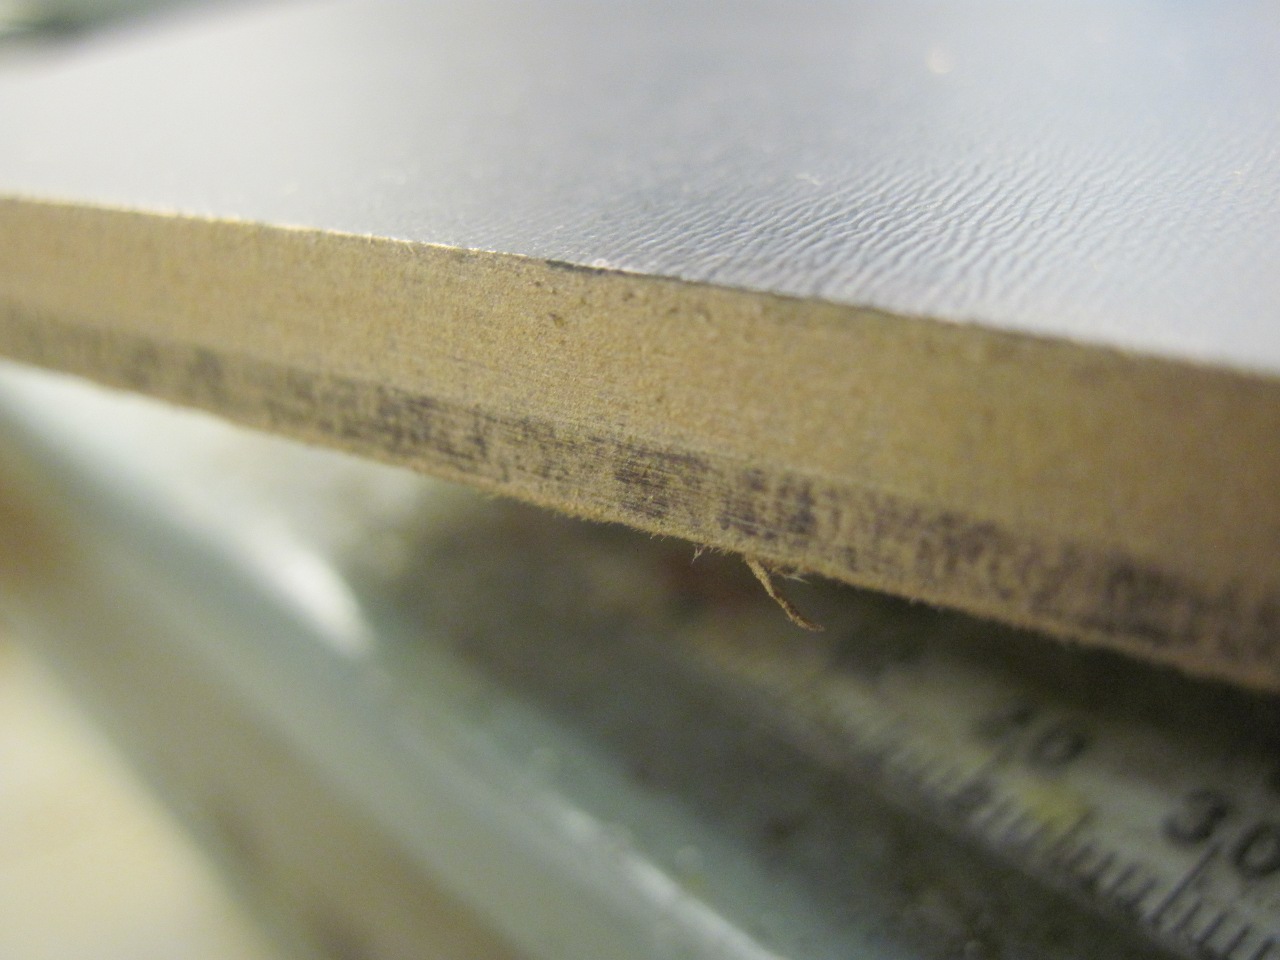
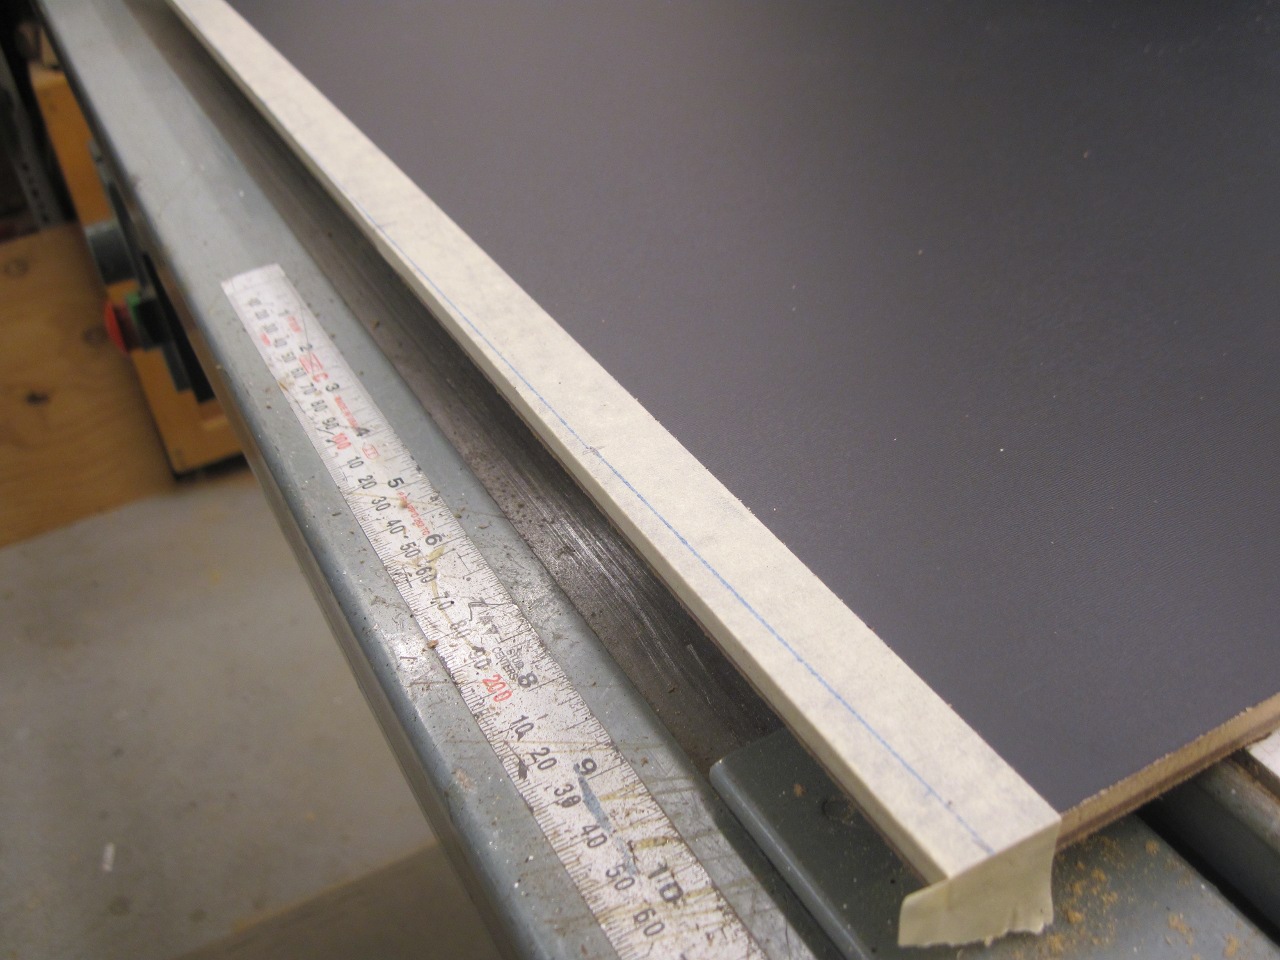
I trimmed the panel to size, including the slightly curved rear edge, then sealed the backside with a few coats of polyurethane.
I
painted the metal parts and secured them to the panel with blind
rivets, as original. Also installed the snaps for the carpet.
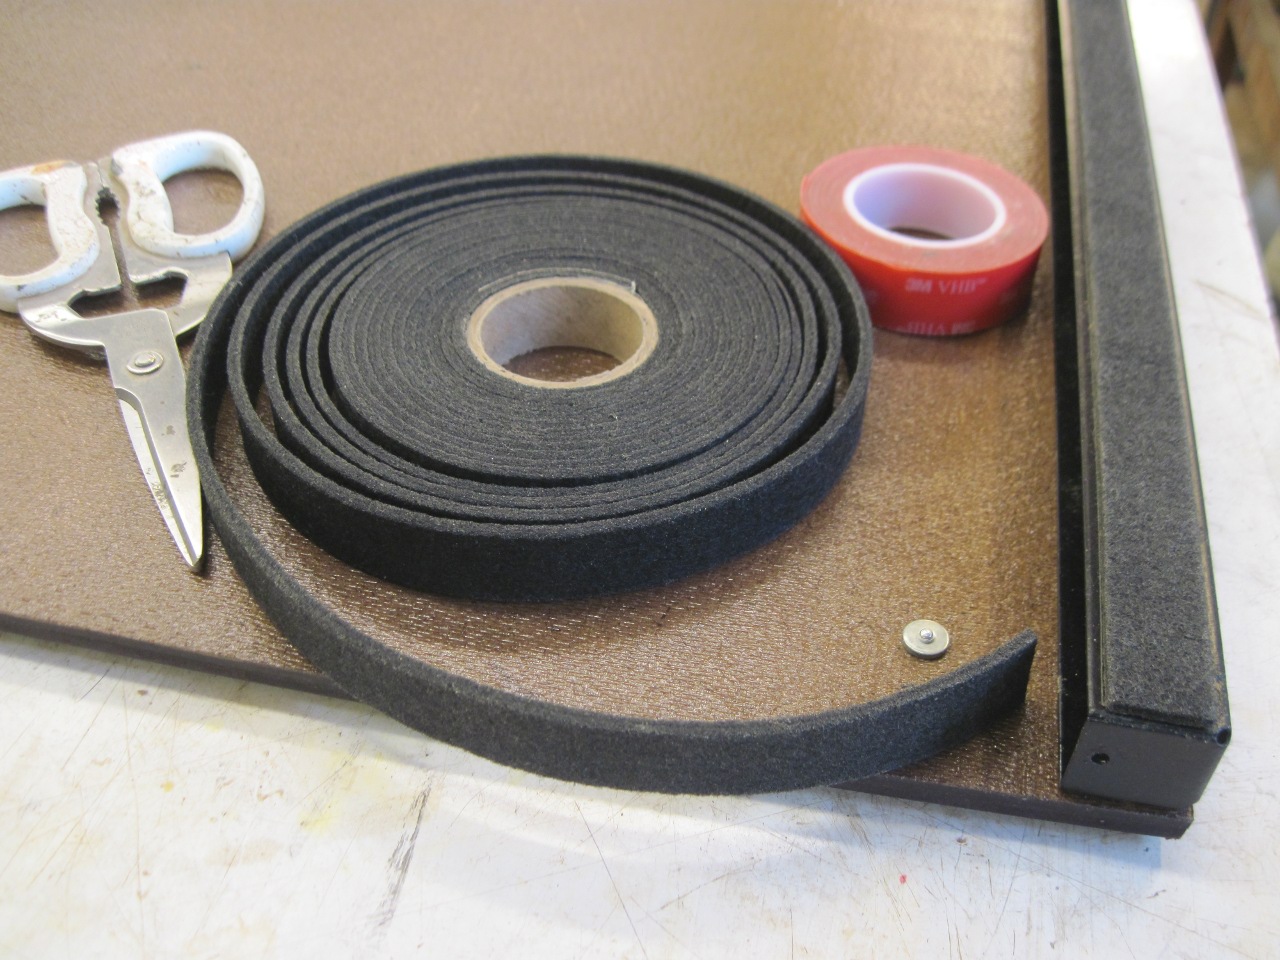
A
strip of felt goes on each rail to pad where it rests on the boot
floor. Also, a little pad of felt goes where the tub retaining
tab rests.

In
case anyone is under the illusion that I don't make mistakes, let me
announce here publicly that when I drilled the hole for the cam latch,
I mismeasured and put it in the wrong place. Rather than start
over, I just covered up the problem. Took an extra few hours,
though.
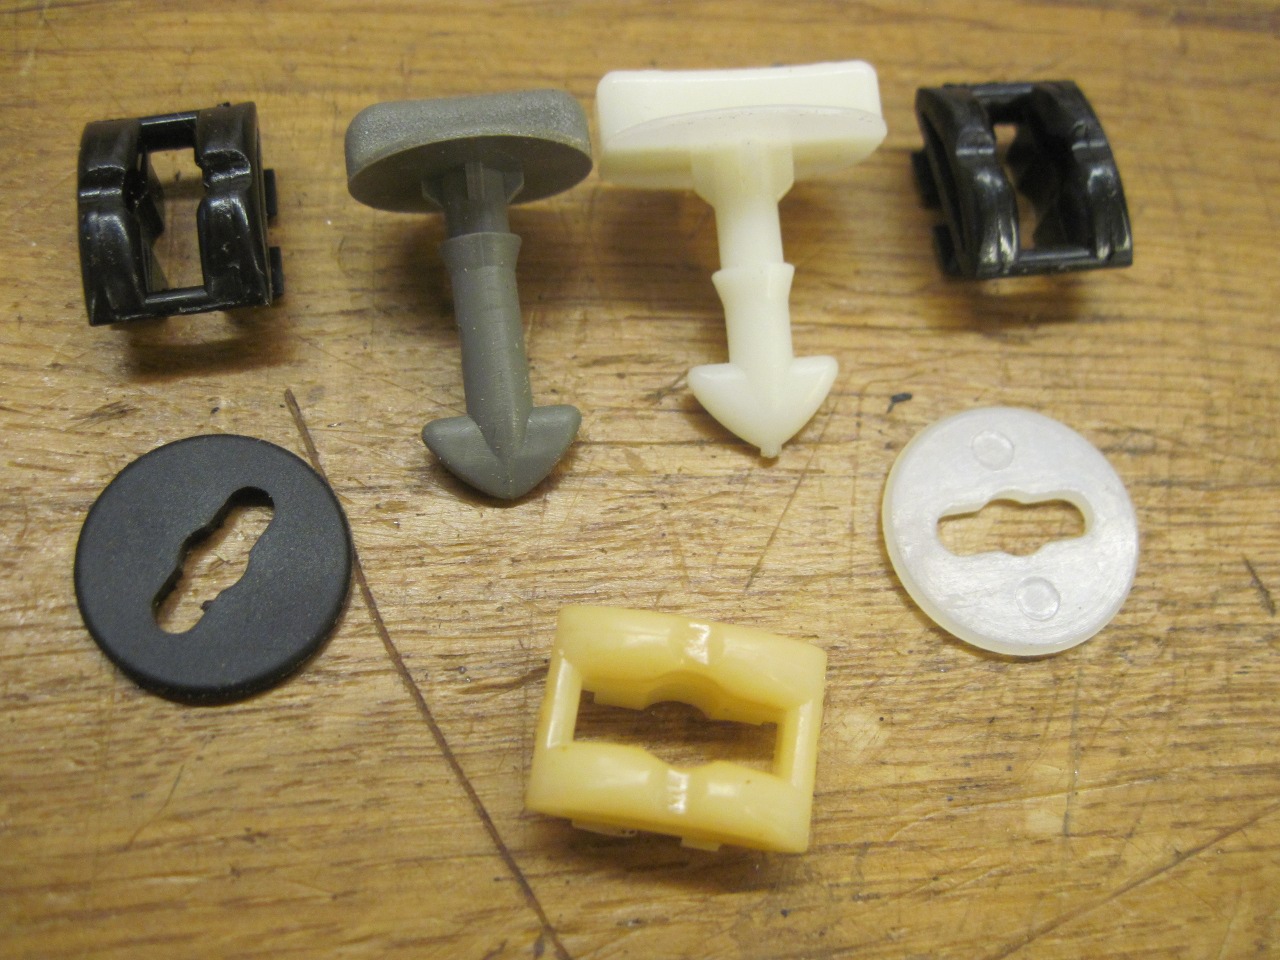
Speaking of the cam latch, here's another little item we can add to the gripe list for aftermarket parts.
The
three parts on the left are what I got in a "spare tire cover cam latch
kit" from one of the three major TR6 parts suppliers. The long
part is supposed to go through a hole in the cover, and the round part
slides up and over the barb-like feature to retain it in the panel.
Well, obviously, the position of the barb won't let this happen
for a 1/4" panel--it's too high on the shaft. It looks like it
would work OK for a 1/8" panel. The three parts on the right were
from an eBay seller, and it is correct and works fine.
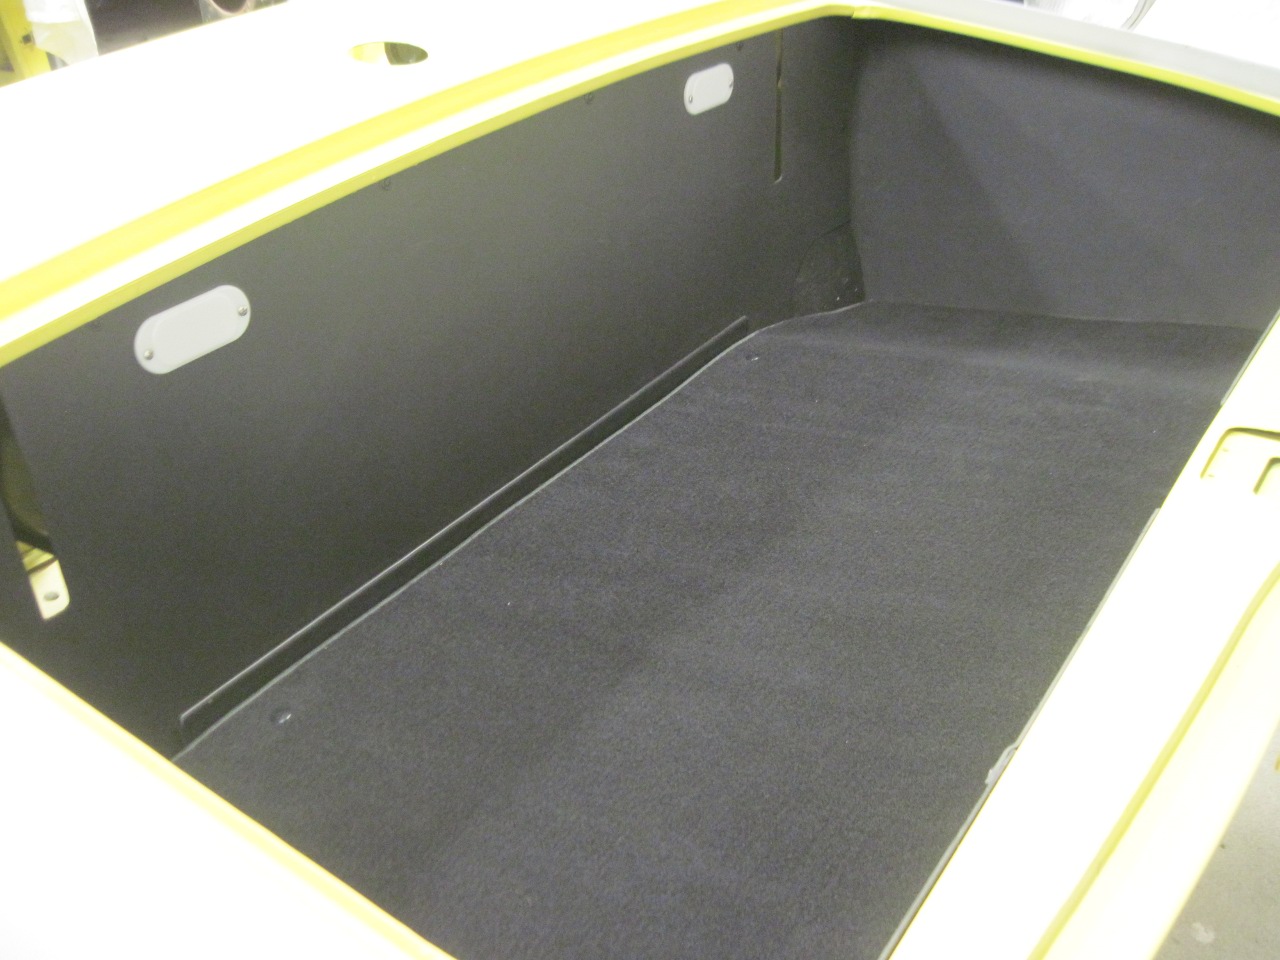
So here we are with the trim panels and the tire cover installed.

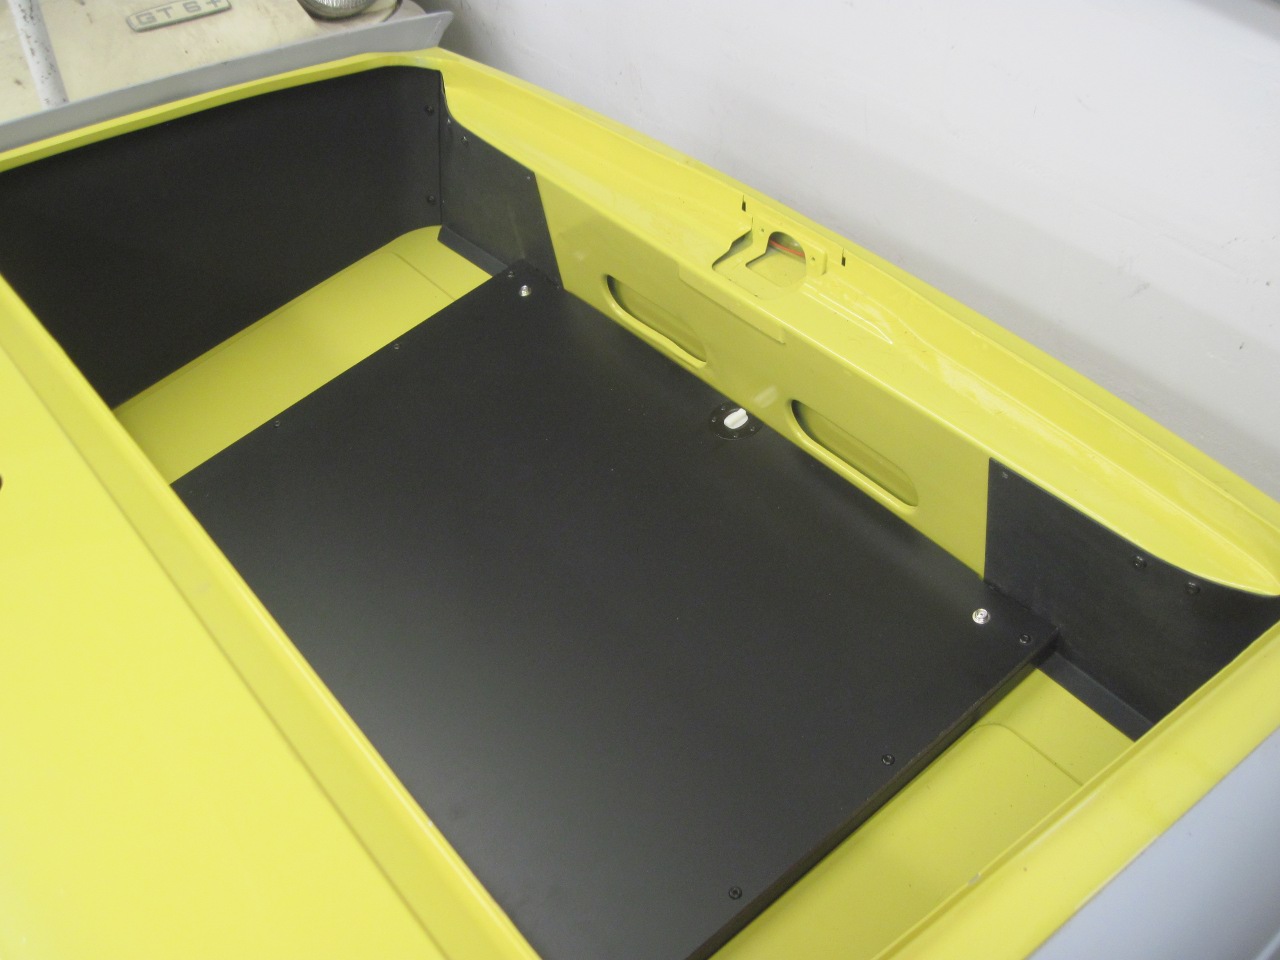
To
me, it looks unfinished. That space between the two rear panels
seems to stick out. And I'm not the only one who thinks so.
I've seen at least a couple of cases where people did something
about that gap.
I had just enough Kydex left over to make a panel to fit that space.

Now, on to the carpet. First, I made a cardboard pattern...
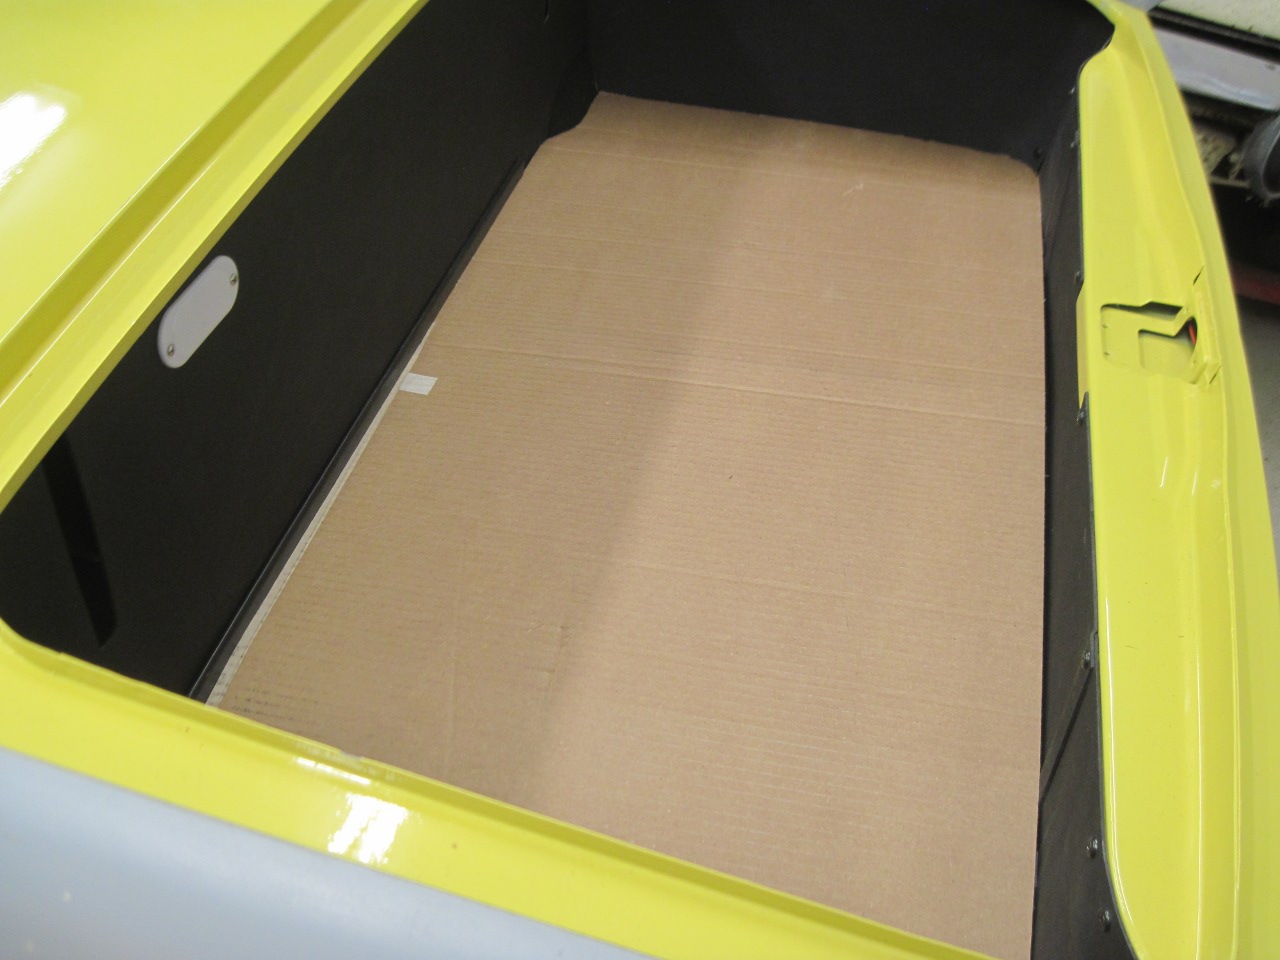
...and laid it out on some automotive utility carpet.
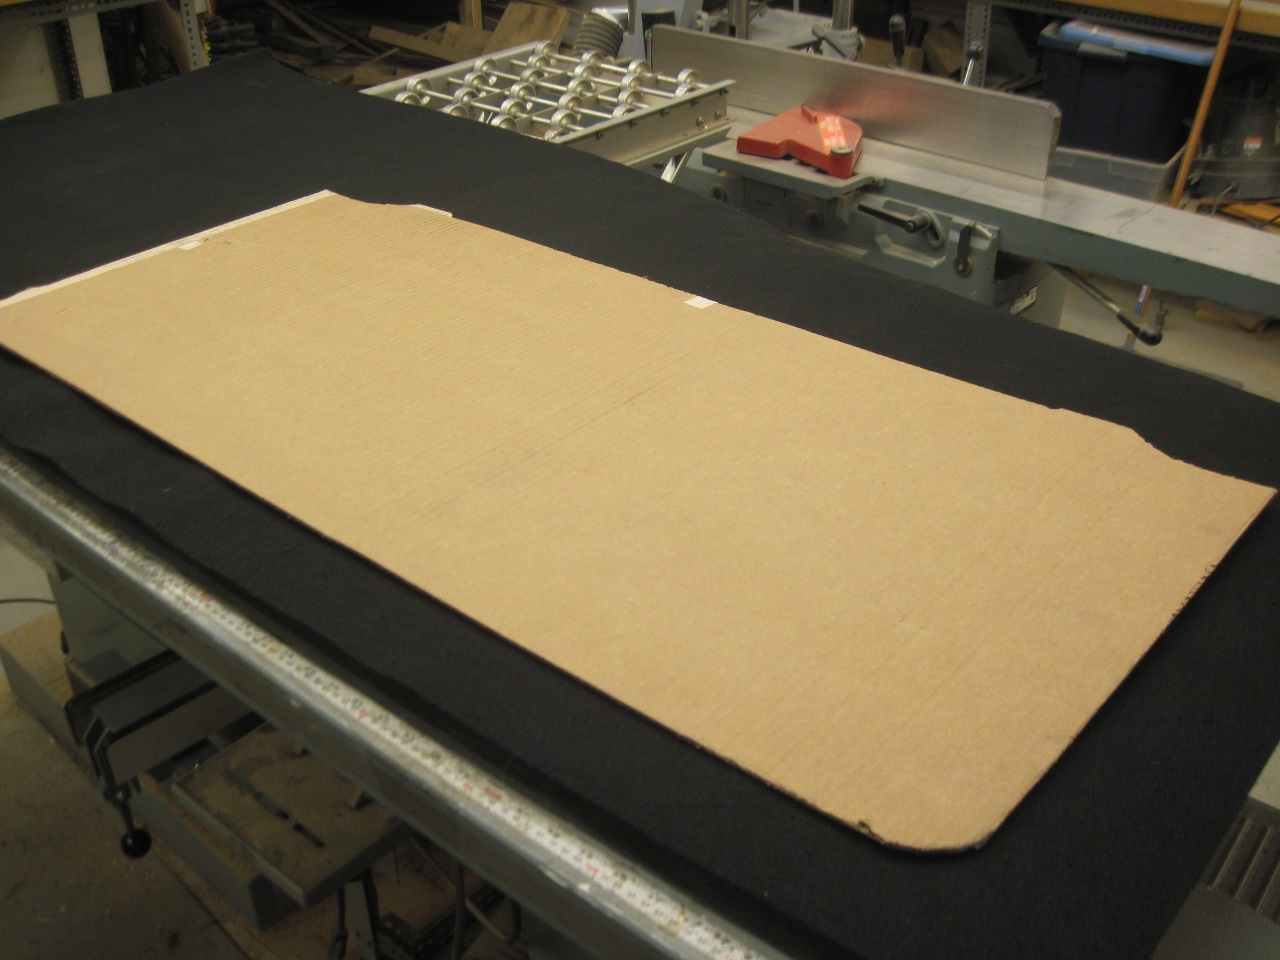
After
a couple of test fits and trims, I was satisfied. I cut the
carpet to leave about a 1/4" gap all around to make room for this edge
treatment. The carpet I used is not woven, so technically no edge
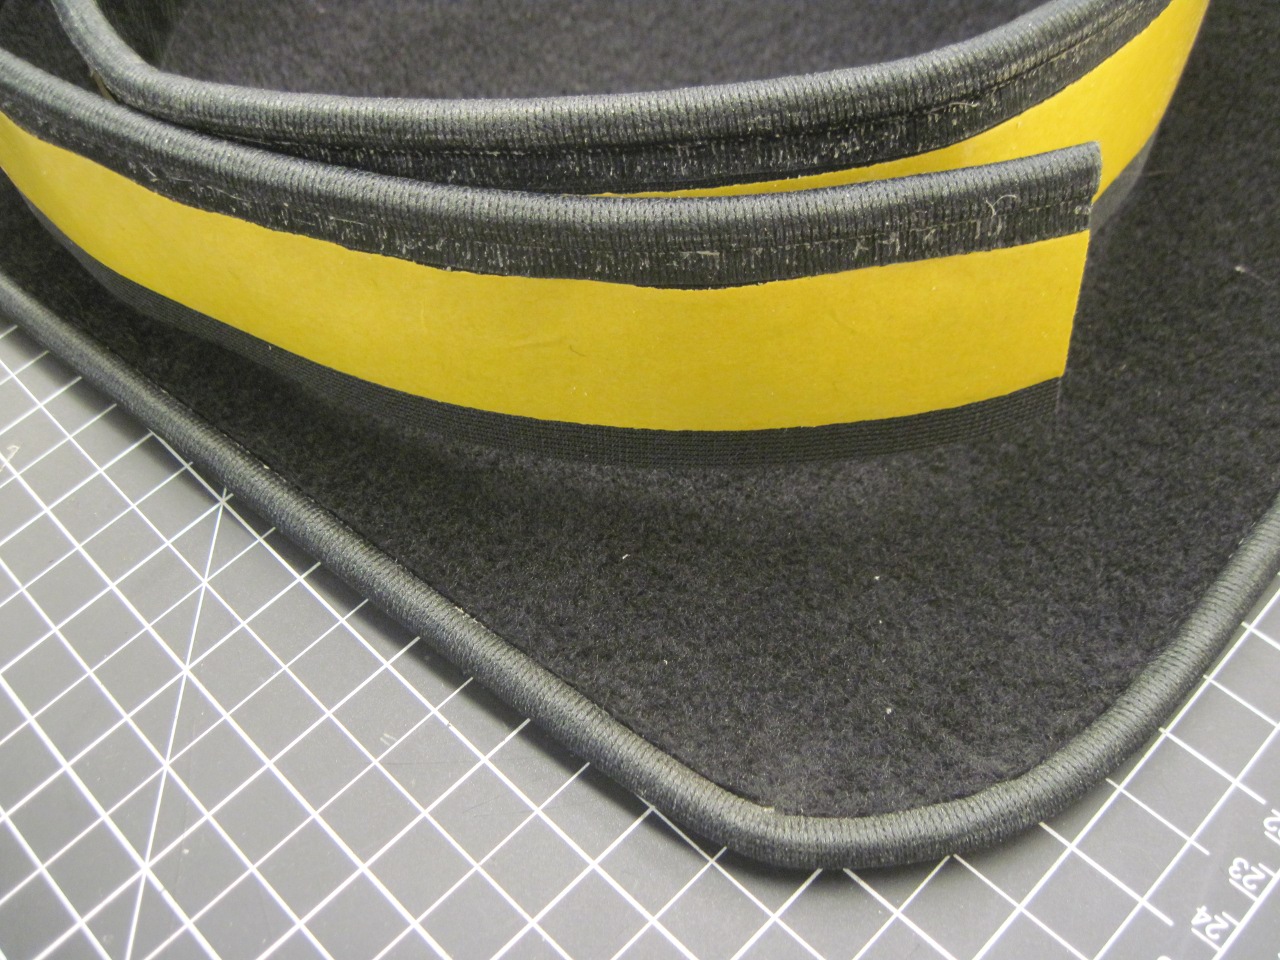
binding is necessary, but some kind of finish strip makes the piece
look more "workmanlike". The edge material is basically a vinyl
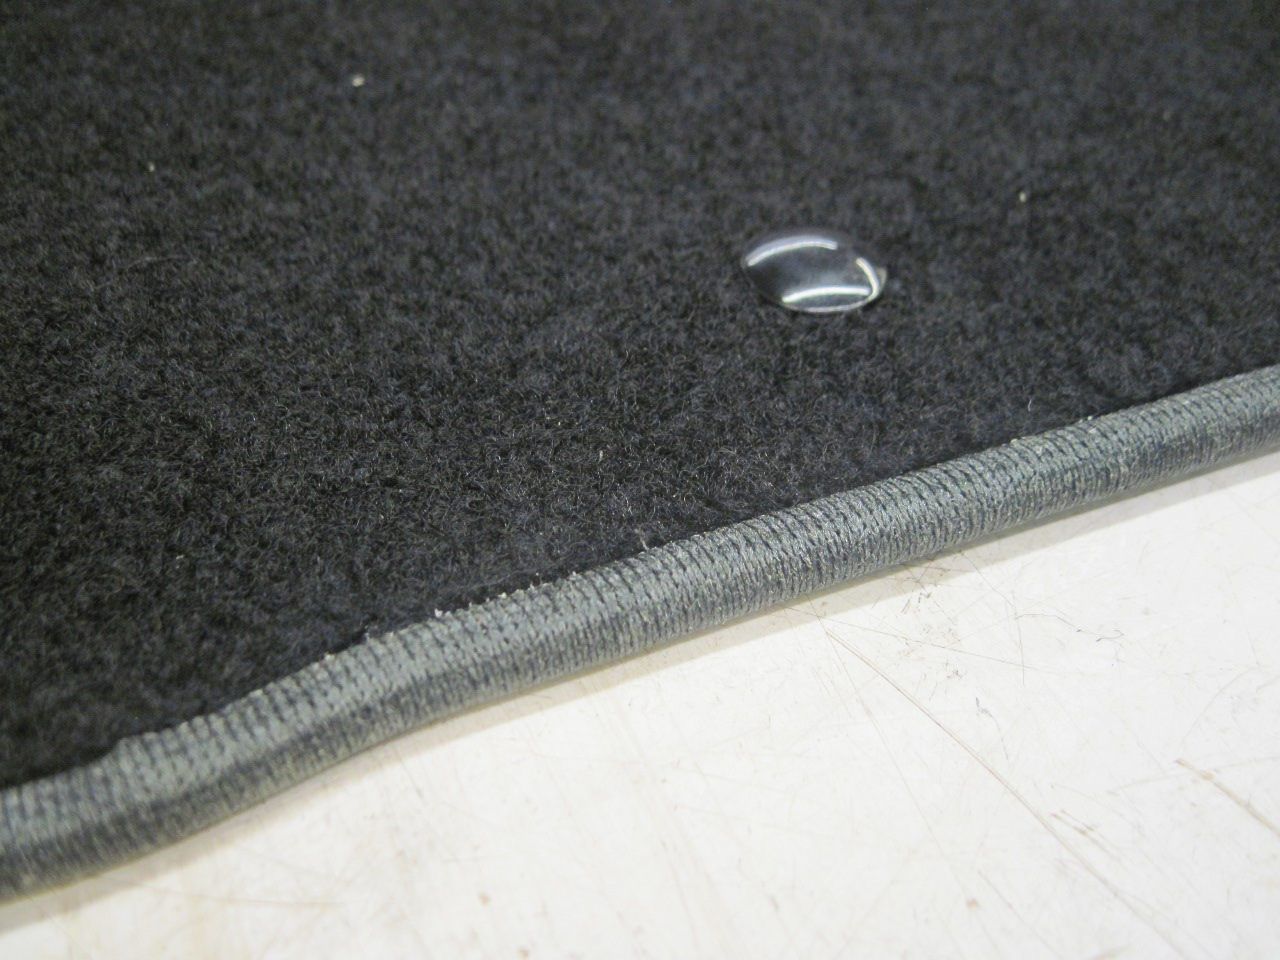
piping with a tab that adheres to the bottom side of the carpet.
Then marked and installed the four snaps.
The only thing is that this approach leaves the backside of the carpet looking sort of tacky.

As
a little piece of serendipity, I had some carpet that I originally
bought for the boot project, but thought was too lightweight
for the job. It just felt like heavy felt. It seemed
perfect for a backer. I cut out and fitted a piece of it and
glued it to the assembly I'd just made.
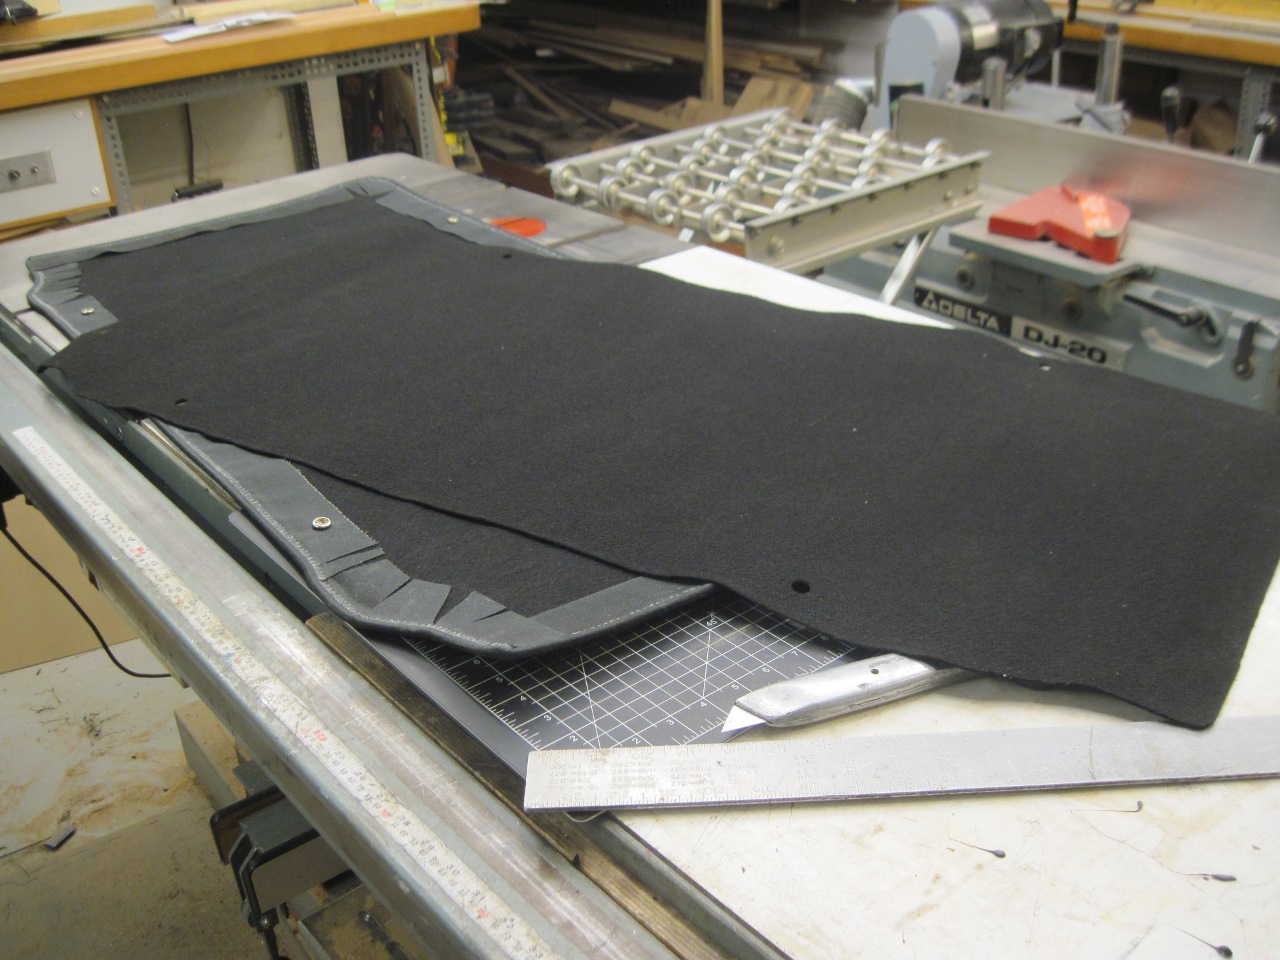
Now the back looks almost as good as the front.
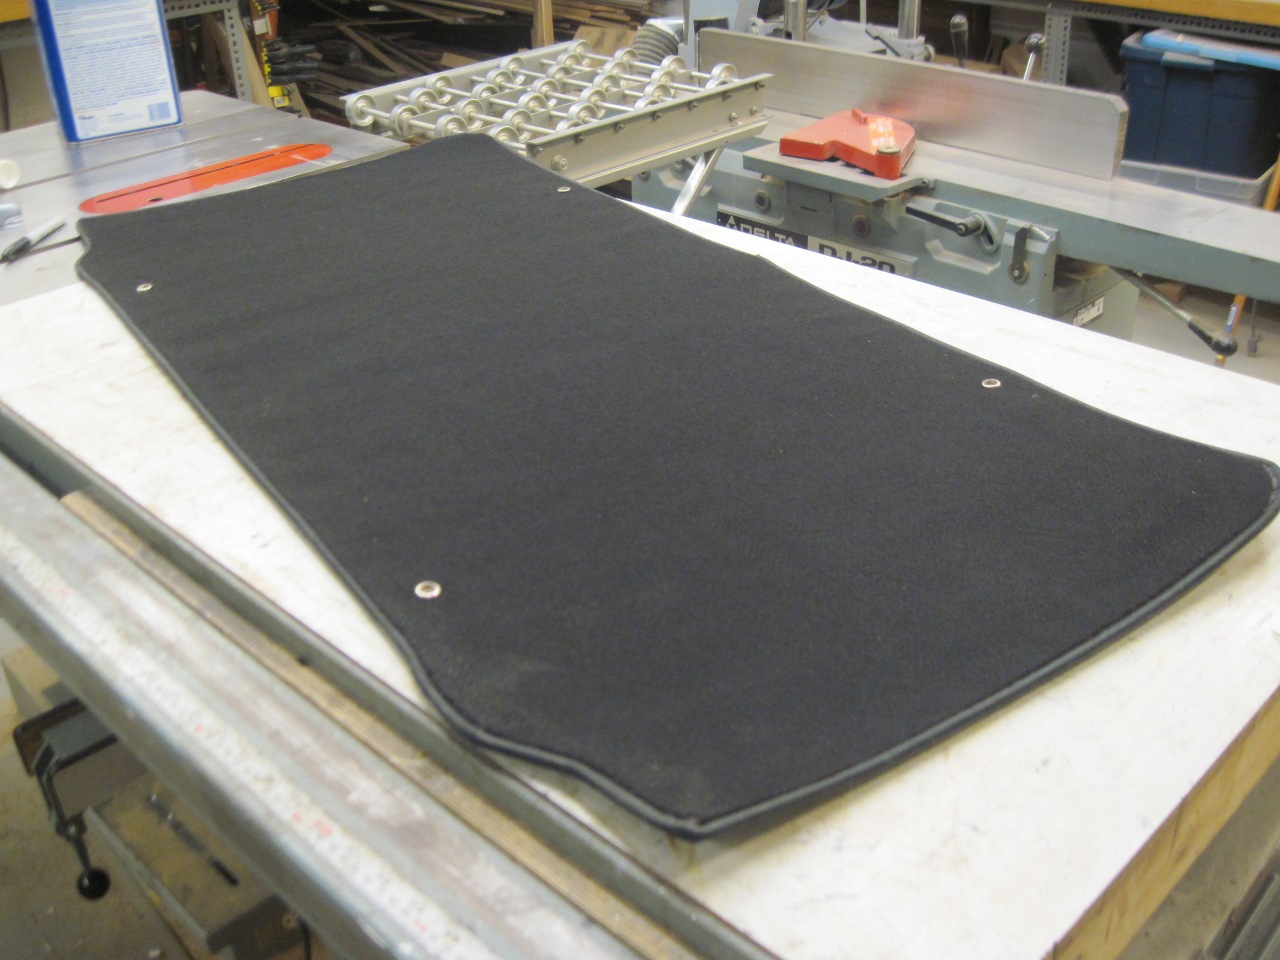
Fingers
crossed, I took it to the garage. Seems to fit OK. This job
is done. Now I'll take it all out and store it out of harm's way
until I need it.
This
was a project with a lot of learning involved. I like those
projects. The total cost was under $100, not counting
the considerable time it took.
Comments to Ed at elhollin1@yahoo.com
To my other TR6 pages.