To my other MGA pages
May 25, 2025
Front Stabilizer Bar
MGA cars didn't get a front stabilizer bar from the factory until after
my car was made. It was considered a worthwhile upgrade though, so
in my 70s restoration, I put one in. I believed it was an ADDCO
brand that was popular at the time.
I pulled the bar and it's various attachments out of the pile dirty
parts, and brought it to the shop. The bar itself looked cruddy
but undamaged, while the rubber parts seemed like good candidates for
replacement.

I ordered the rubber bushes, and while I waited for them, I moved to some prerequisite tasks.
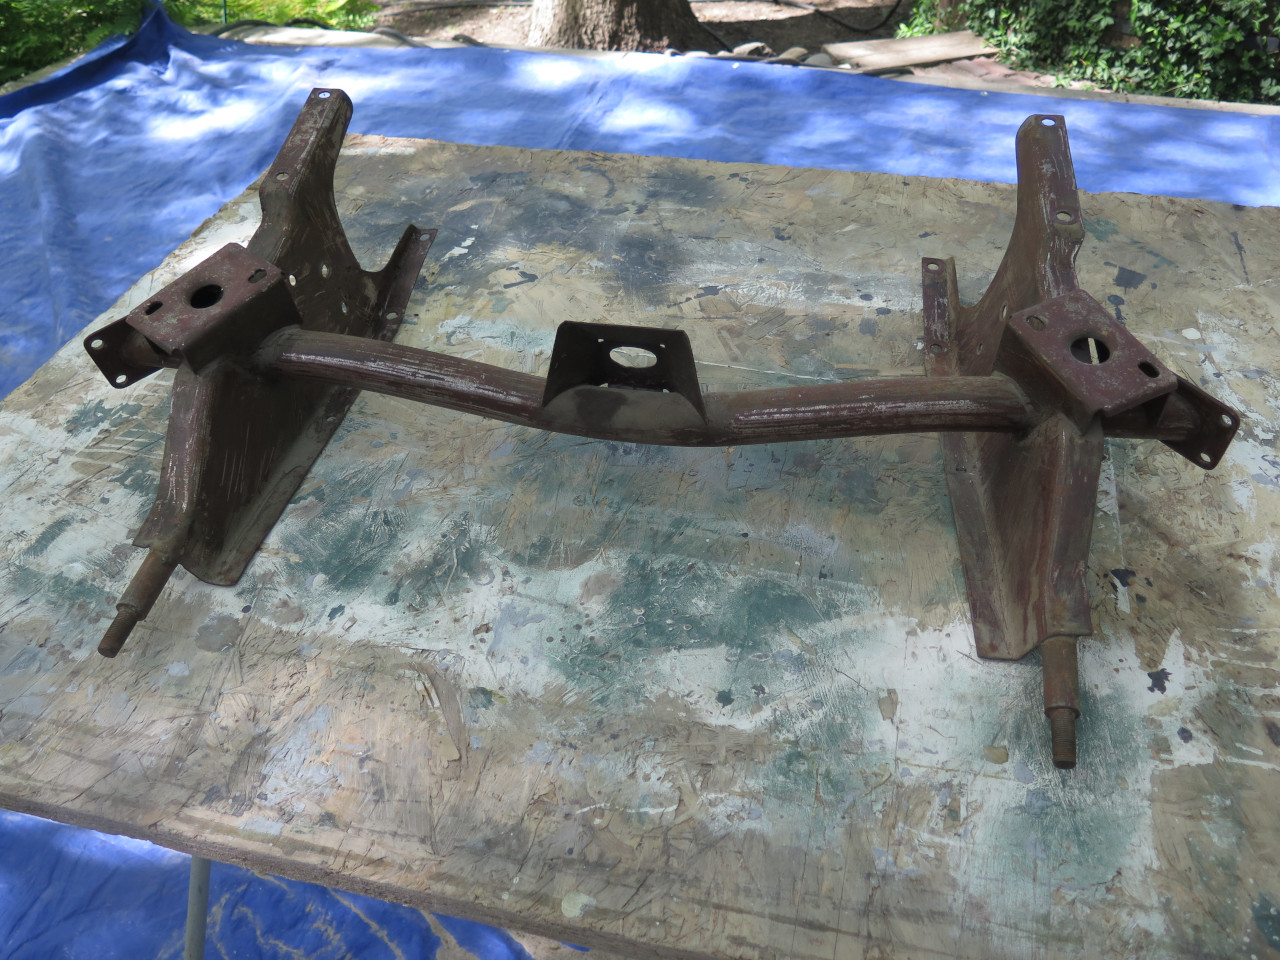
First, since the bar mounts to the front frame extension, I'd have to
get that ready for install. I dragged it out of the pile and onto a
table outside for cleanup and blasting.
Then down to the shop for some noodling. I re-acquainted myself
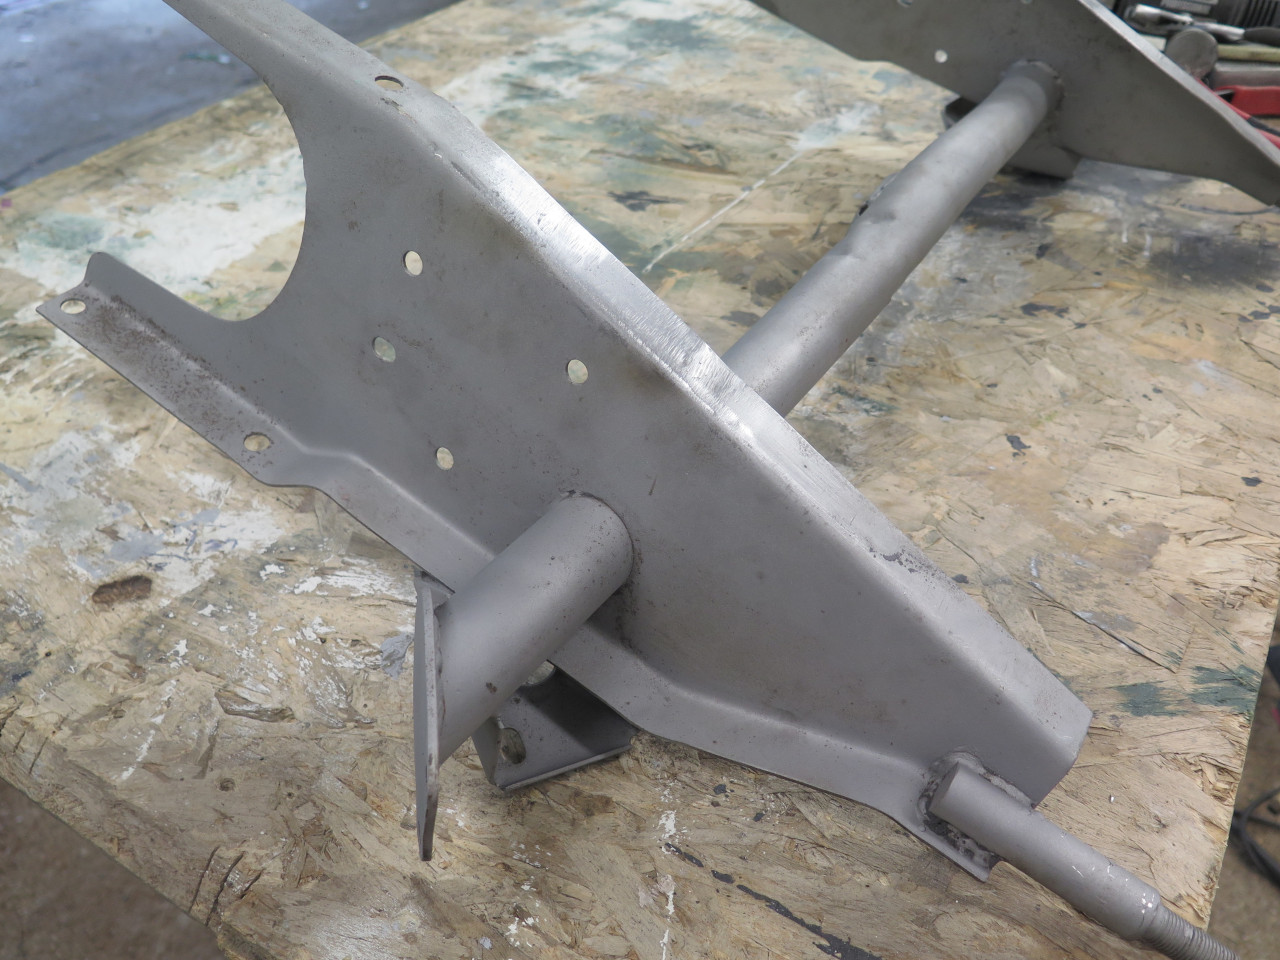
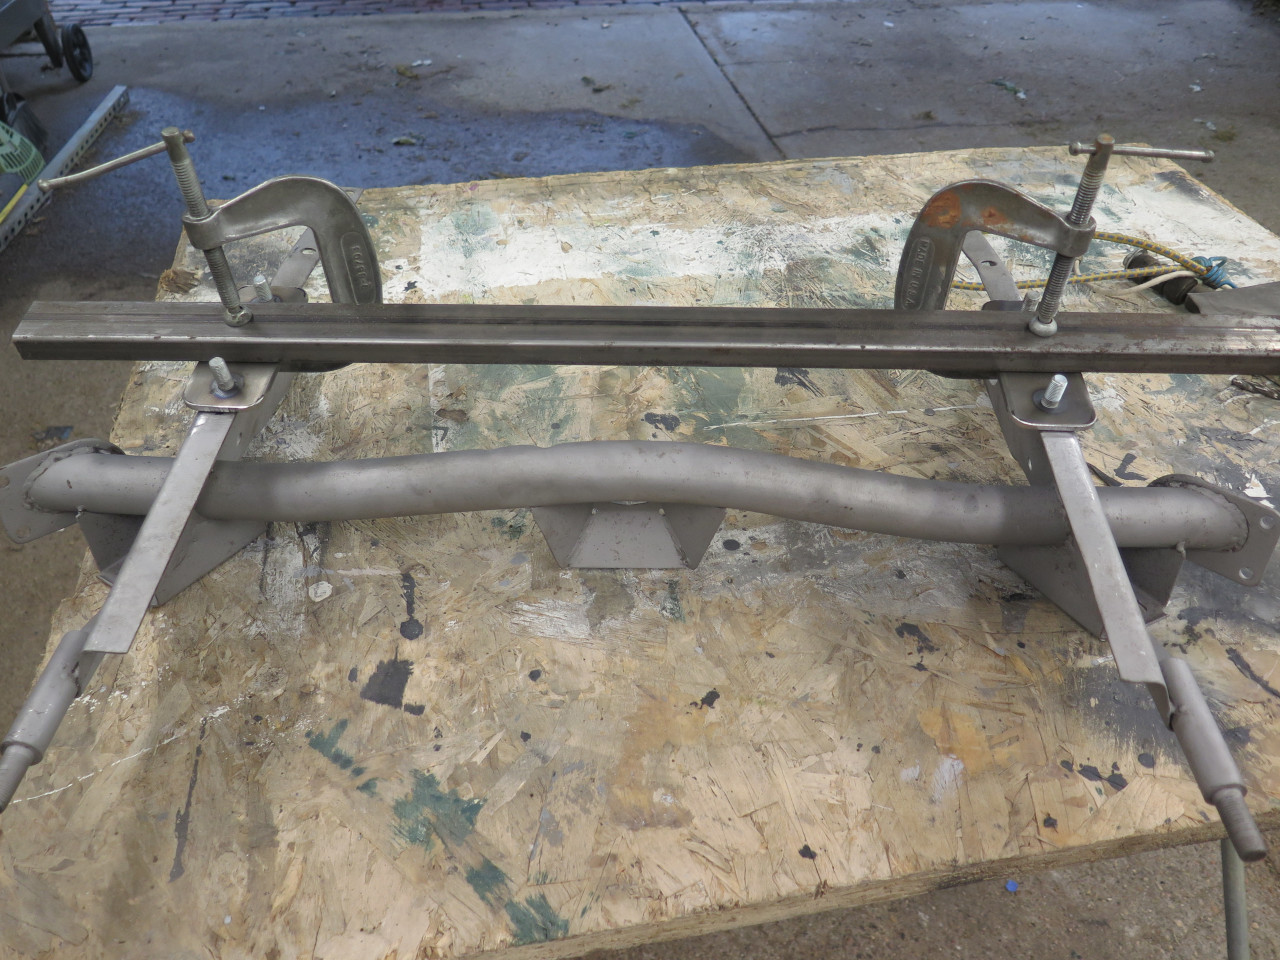
with how the bar was mounted to the extension. The brackets that
hold the bar were mounted by square U-bolts through the lower flange on
each arm of the extension. The mounting holes can be seen in the
second image below. I know this isn't an uncommon practice, but it
still seemed a little cheesy to mount the bar essentially to sheet
metal.
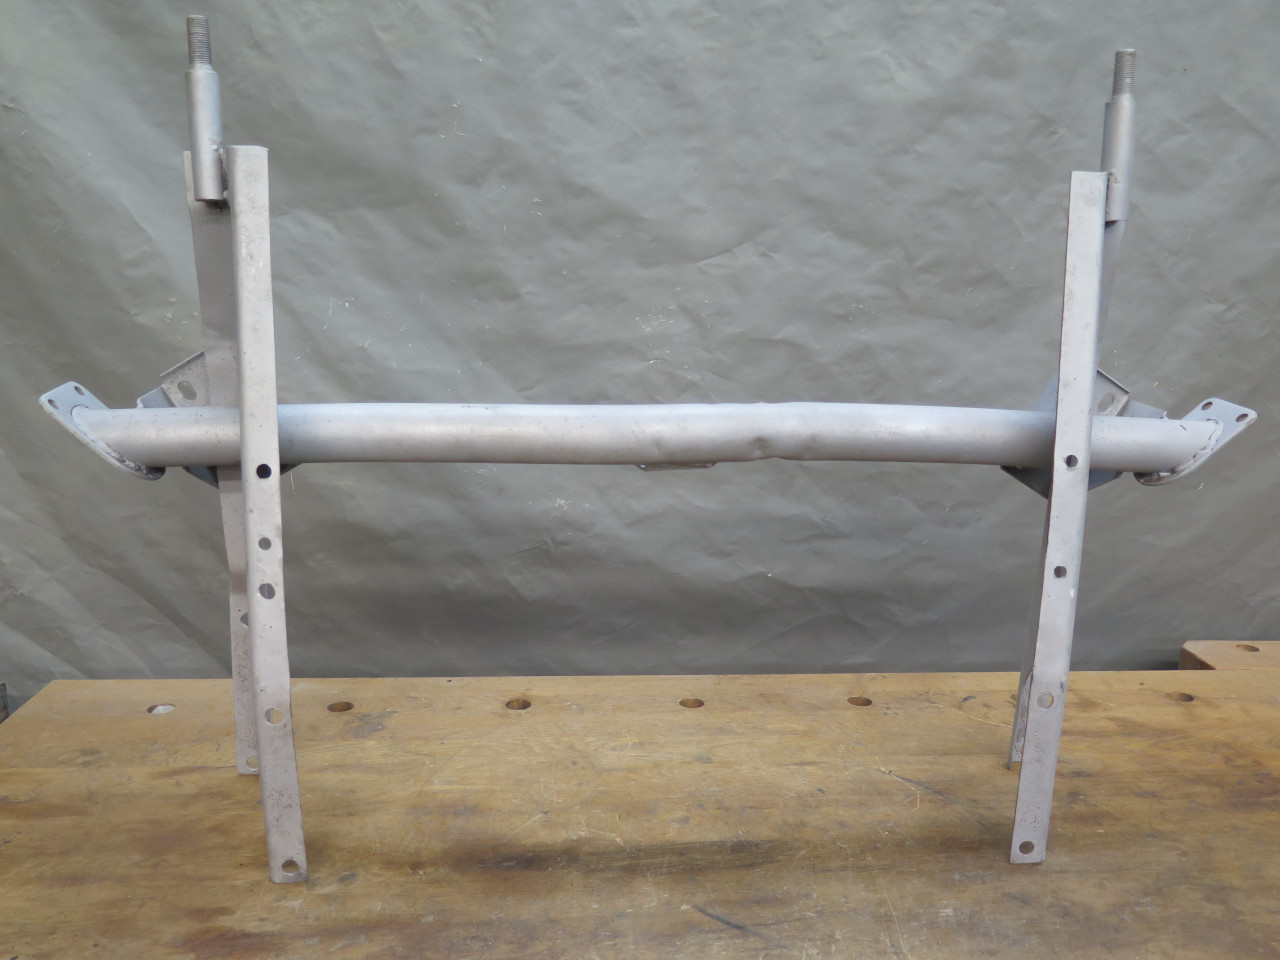
I heard my Inner Engineer whisper under his breath, "We can fix that".
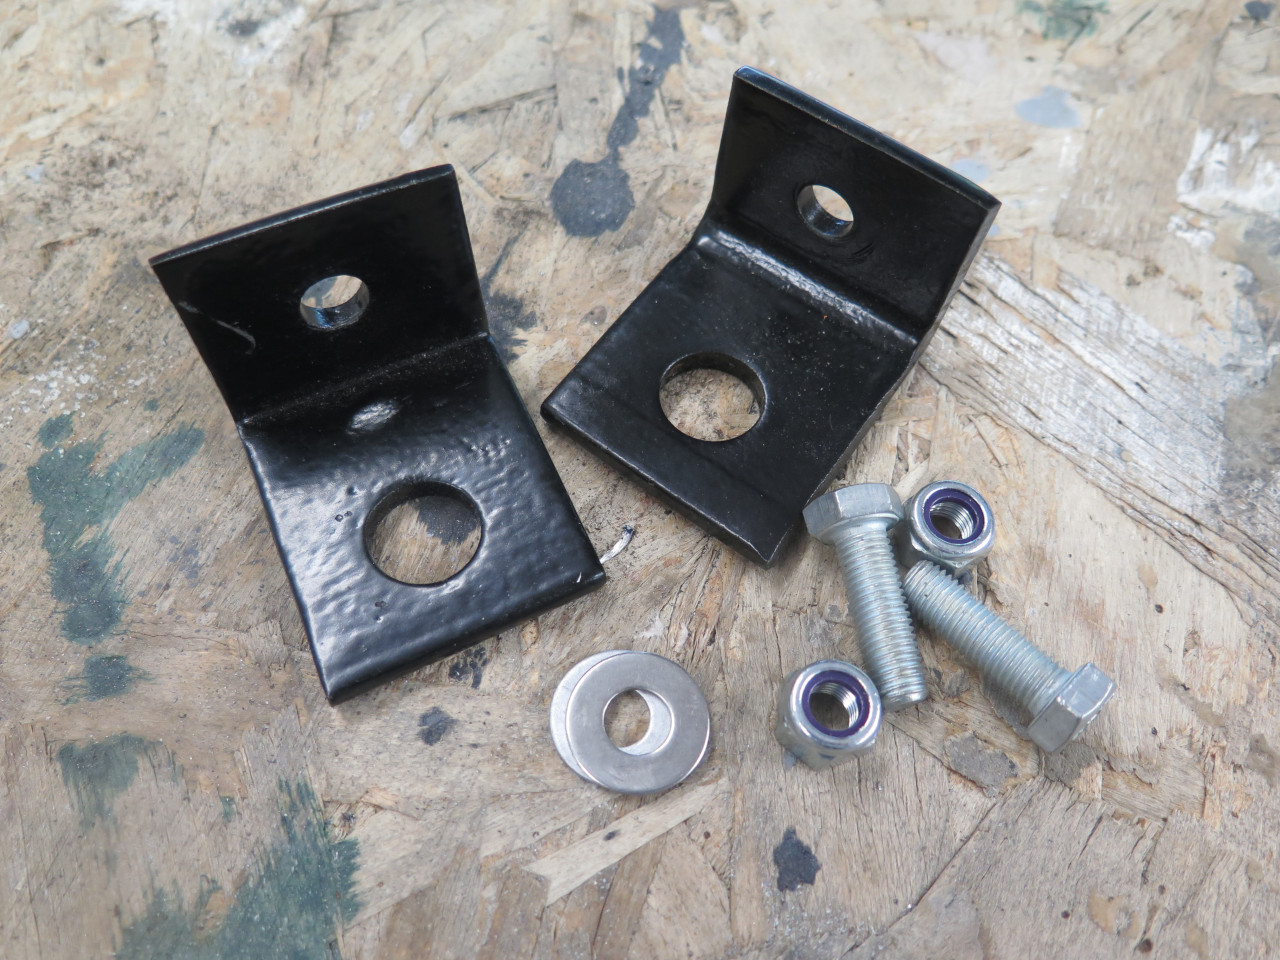
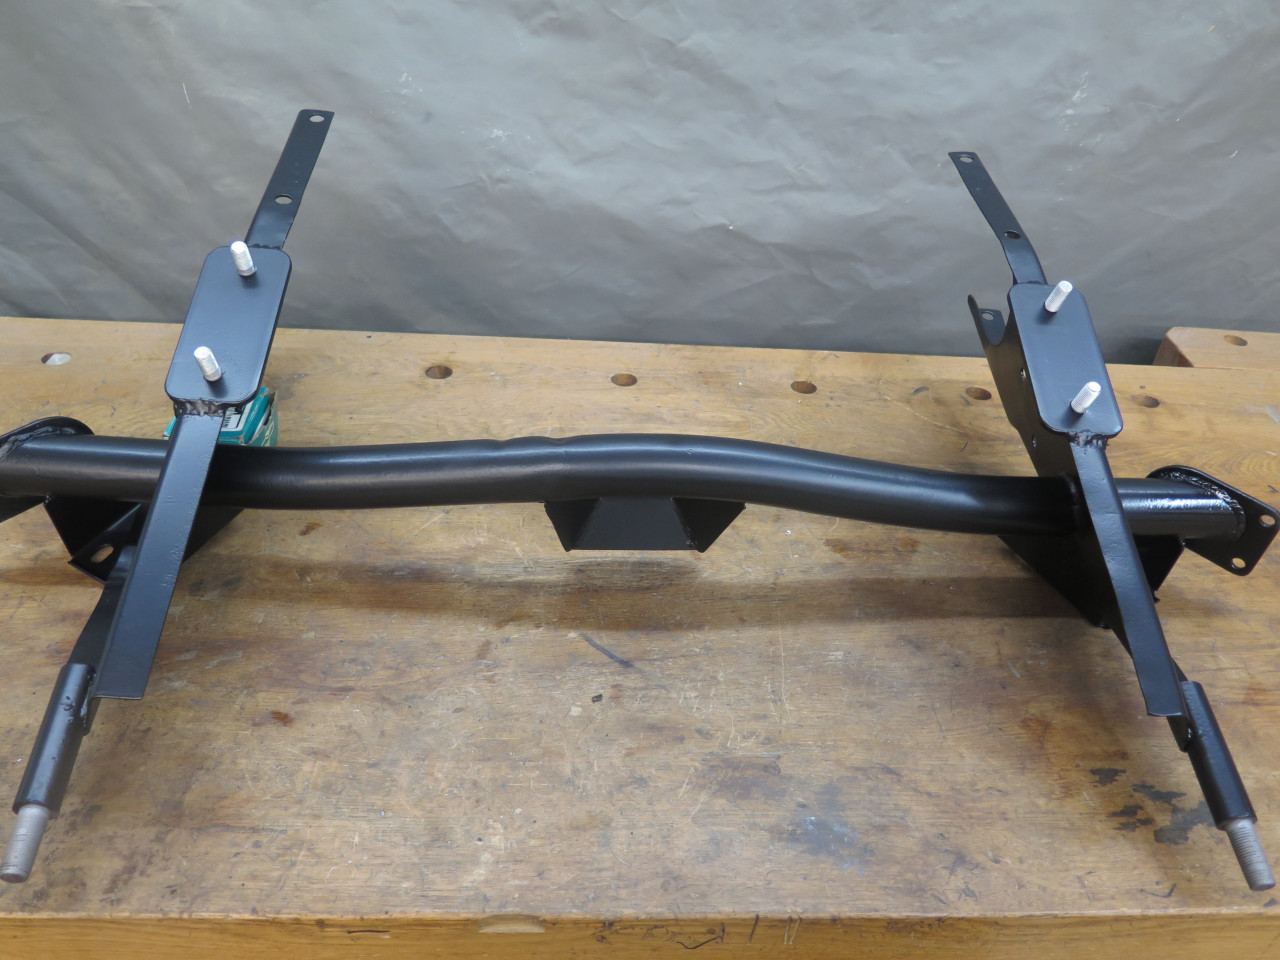
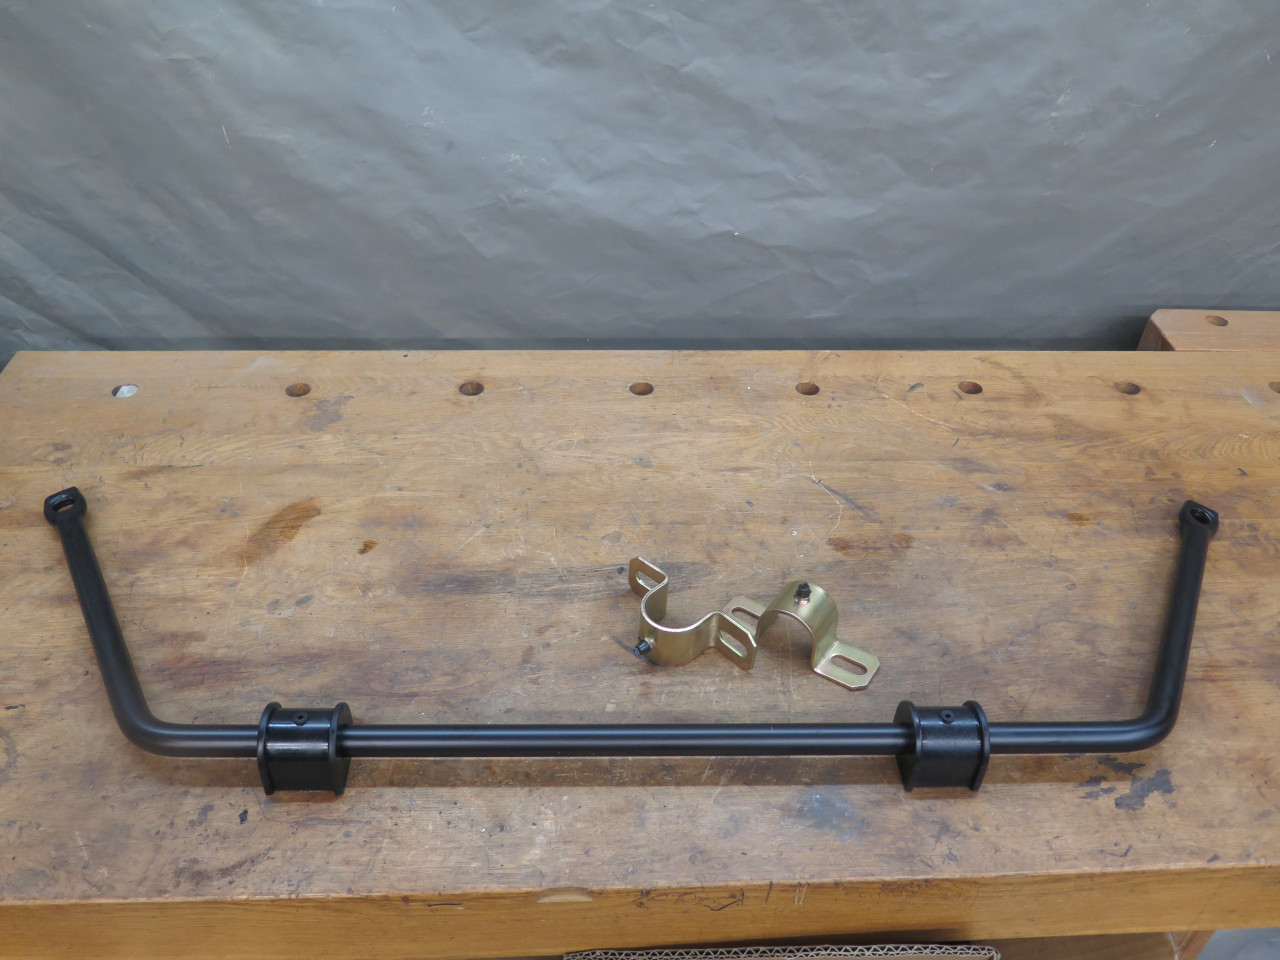
By this time, the new mounting bushes and brackets had arrived.
They are generic parts with polyurethane bushes for a 3/4" bar.
They also sport a grease zerk for lubrication. Pursuant to an
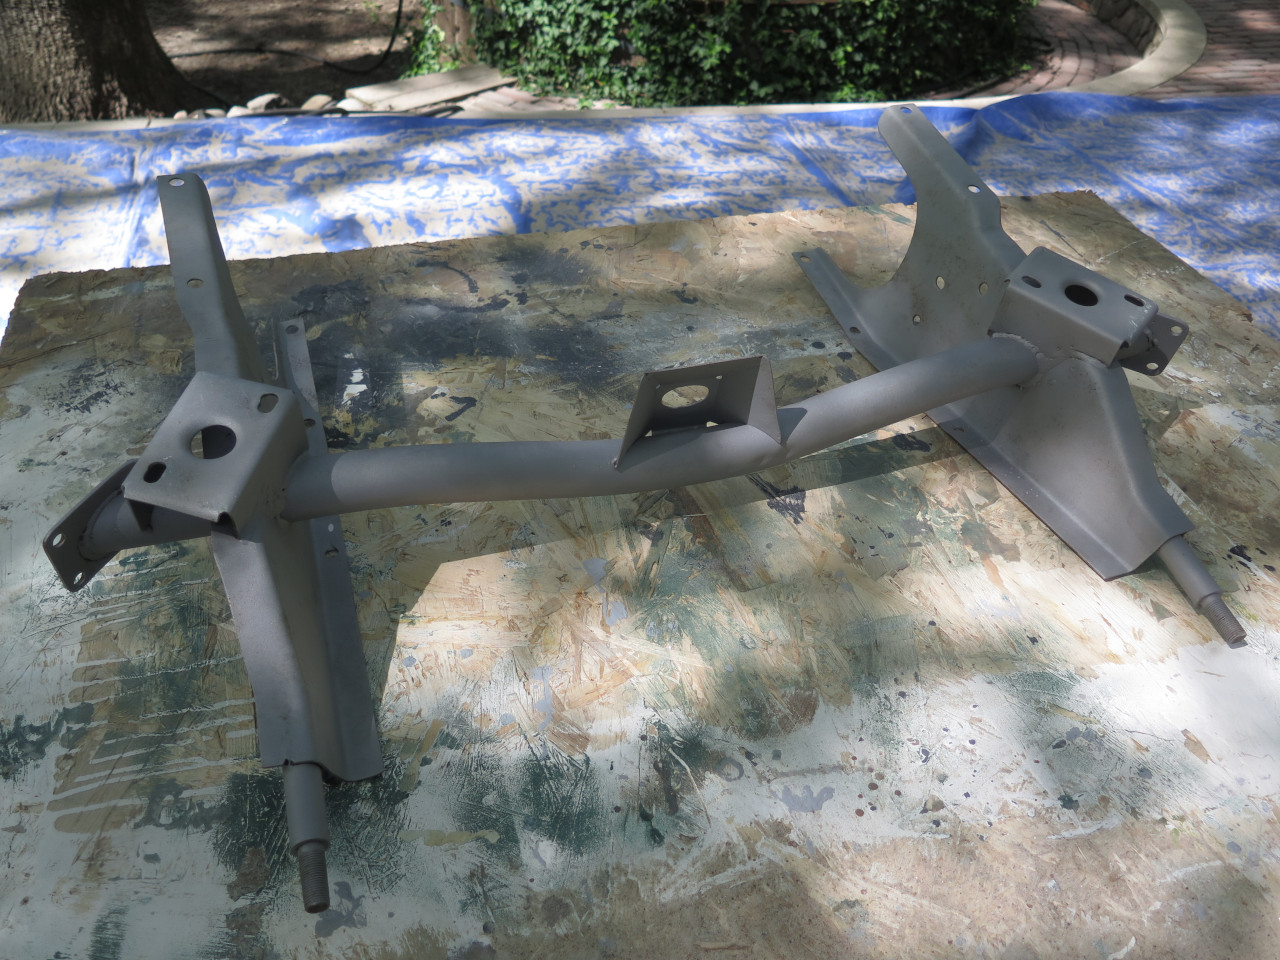
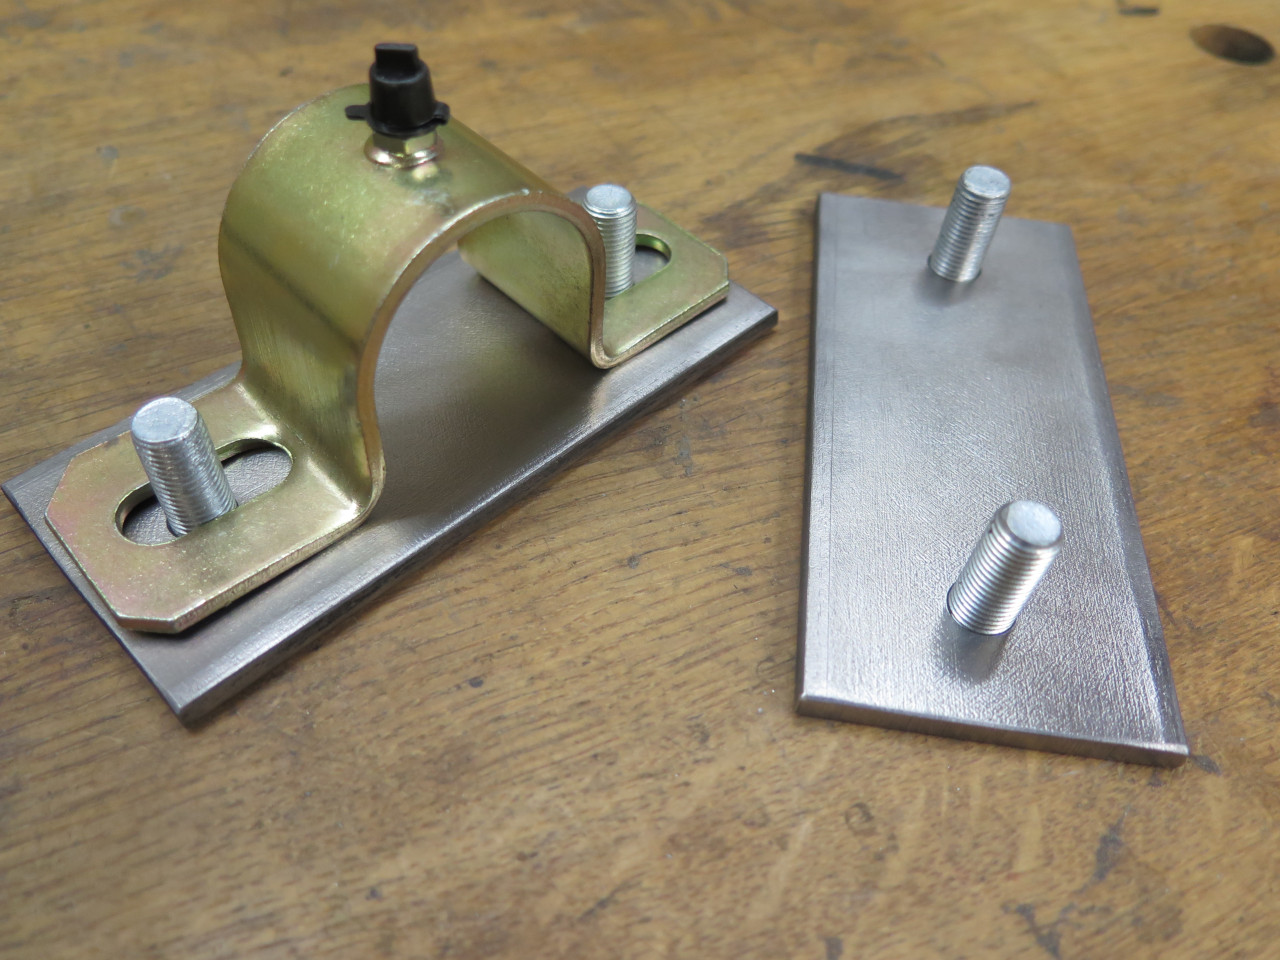
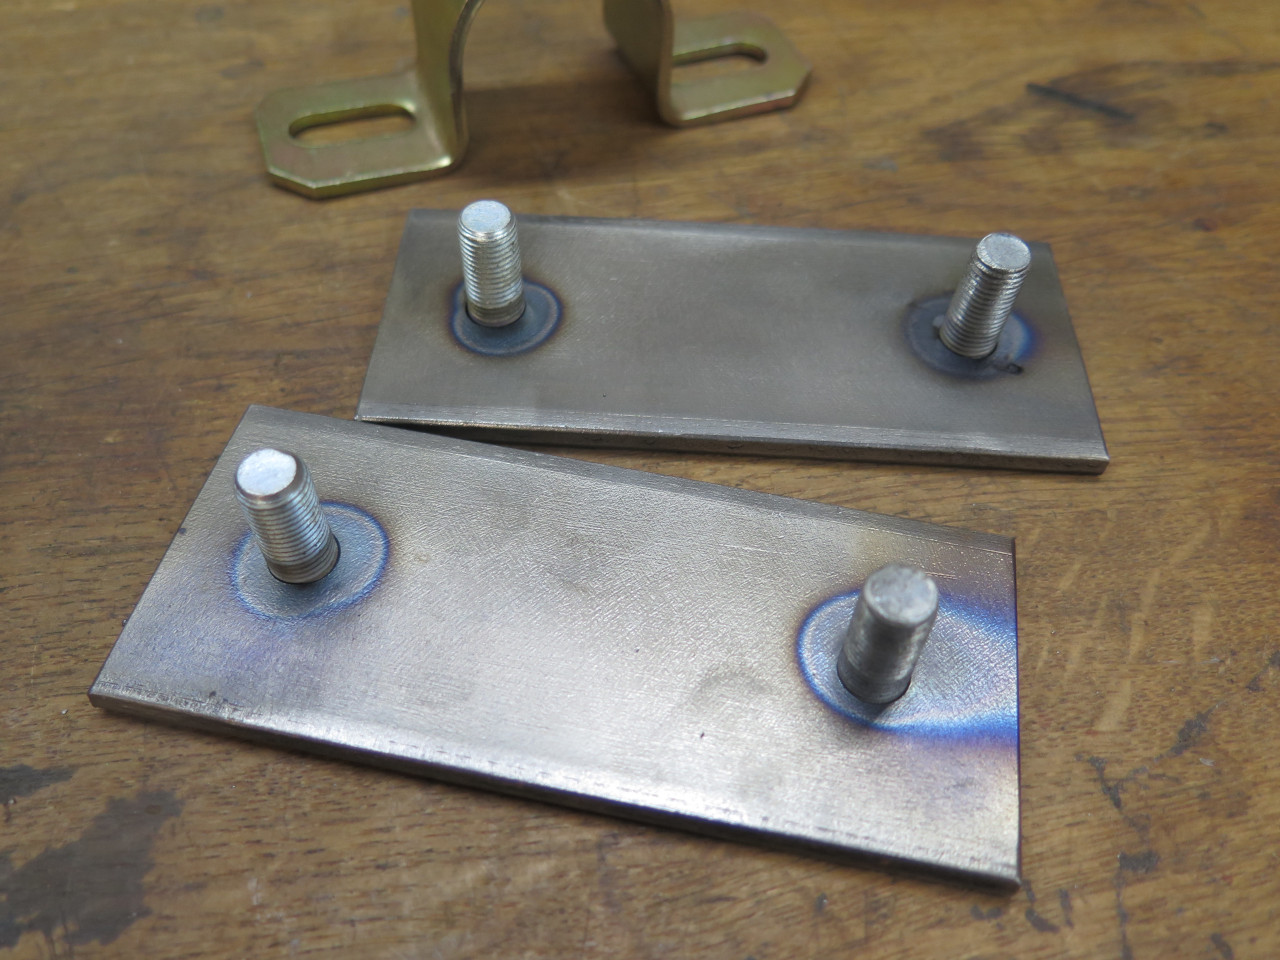
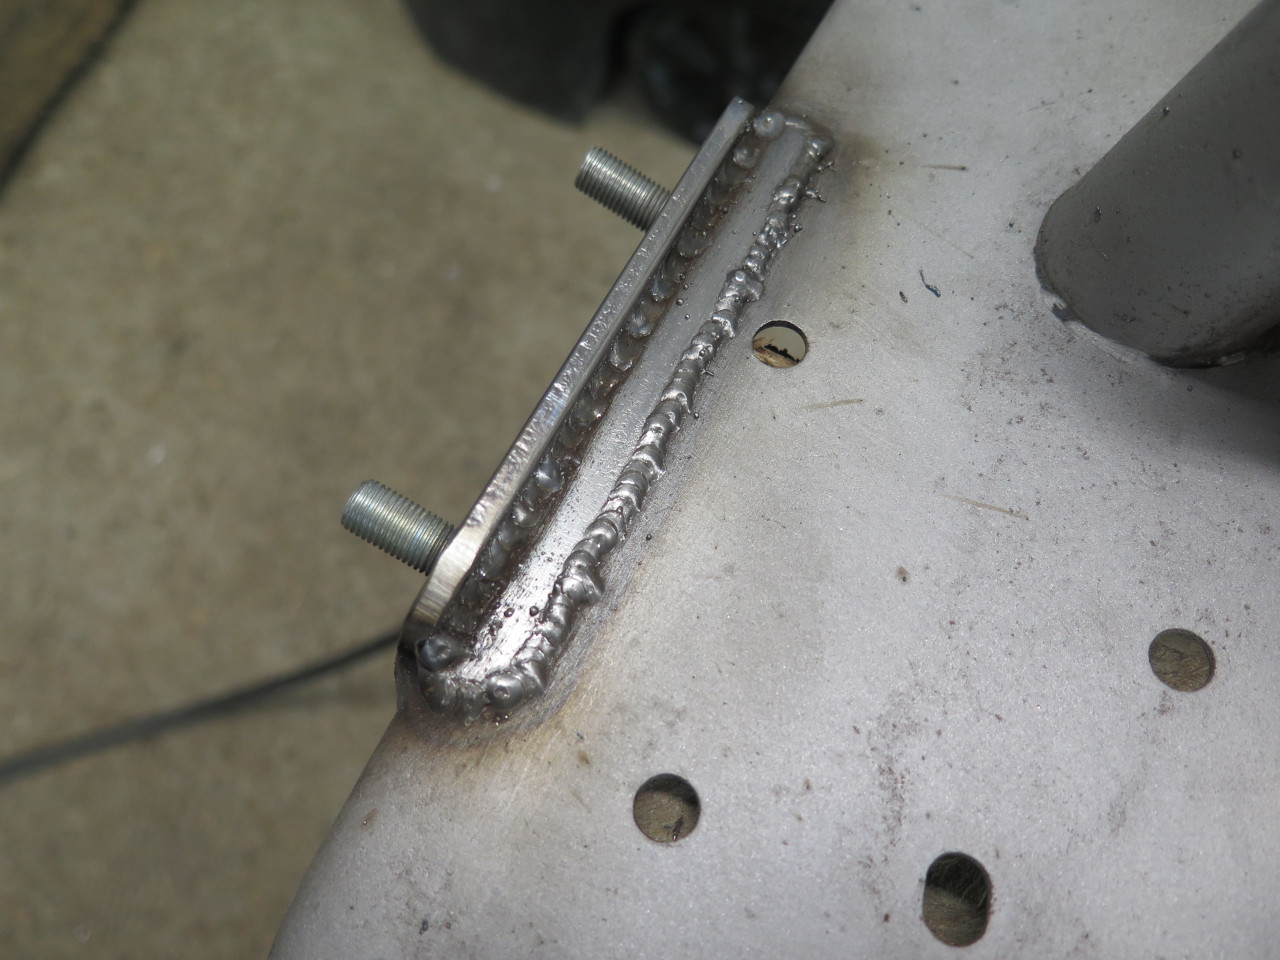
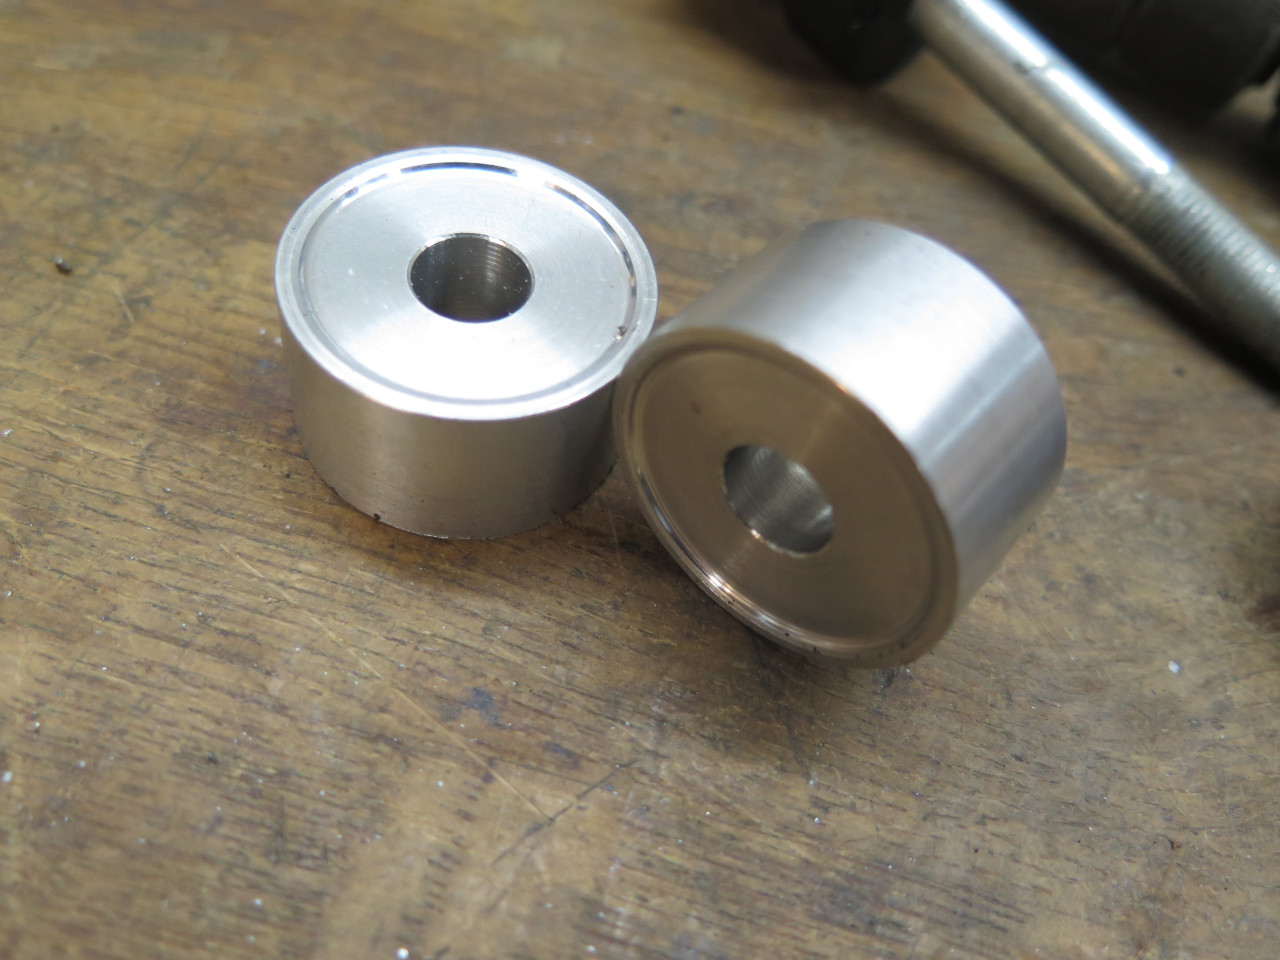
improved mounting method, I made a couple of metal pads for them.
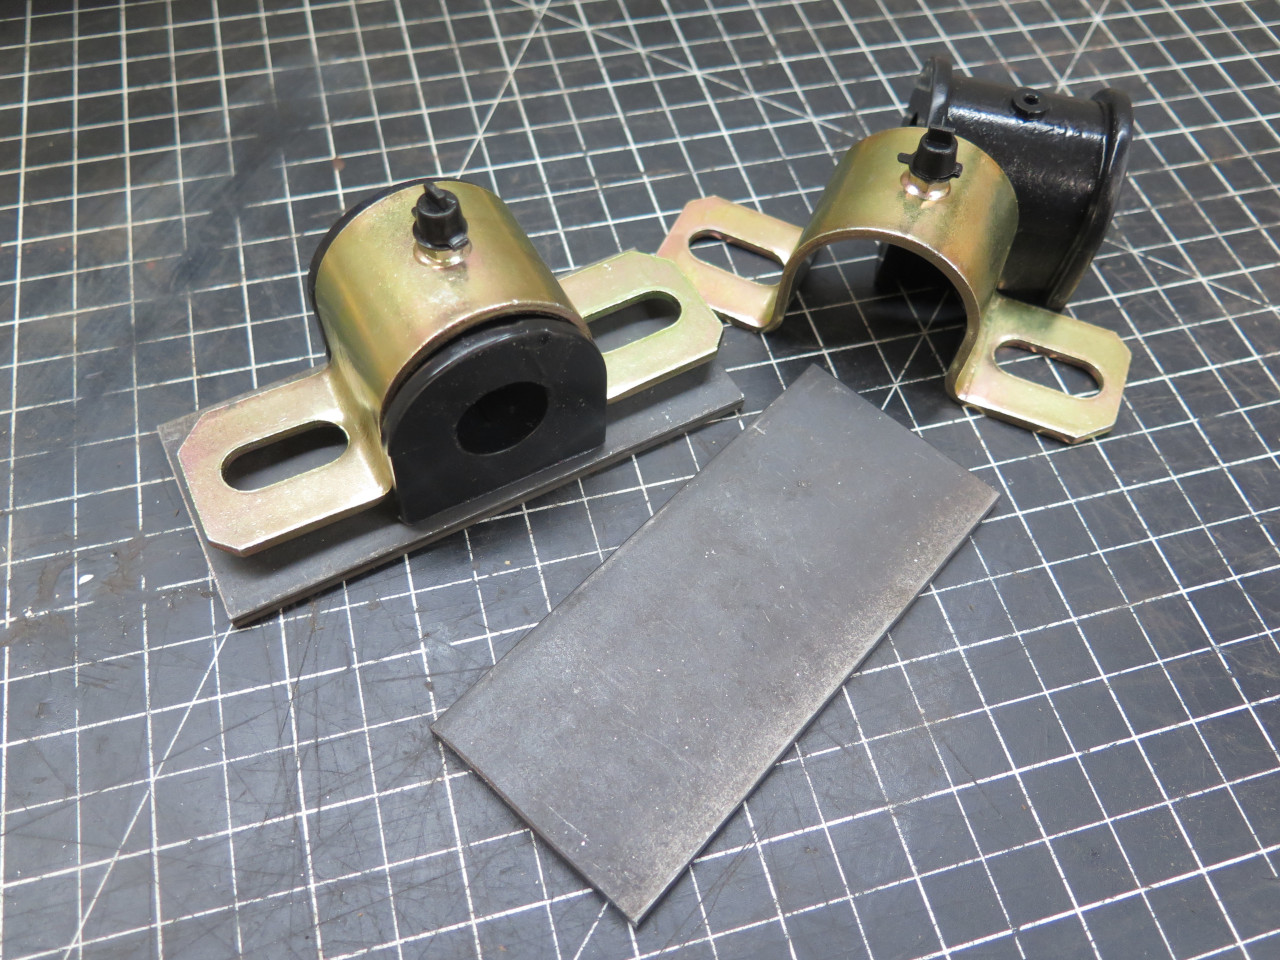
Rather than bolts or the silly U bolt, I thought captive studs would be convenient.
Just to make things right, I filled the old holes on the extension
flange. The fifth hole was apparently original, and I don't know
what it was for.

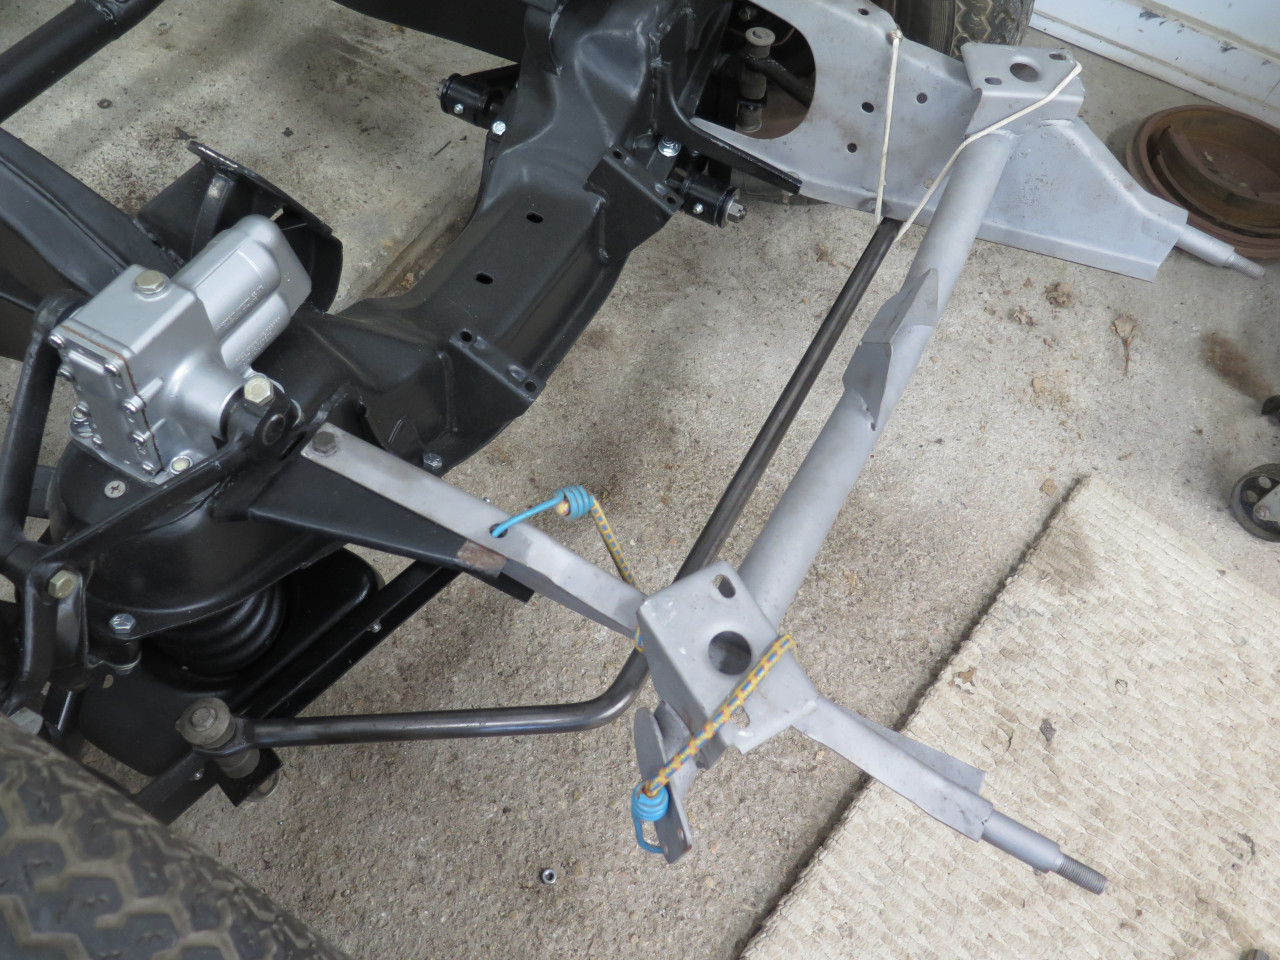
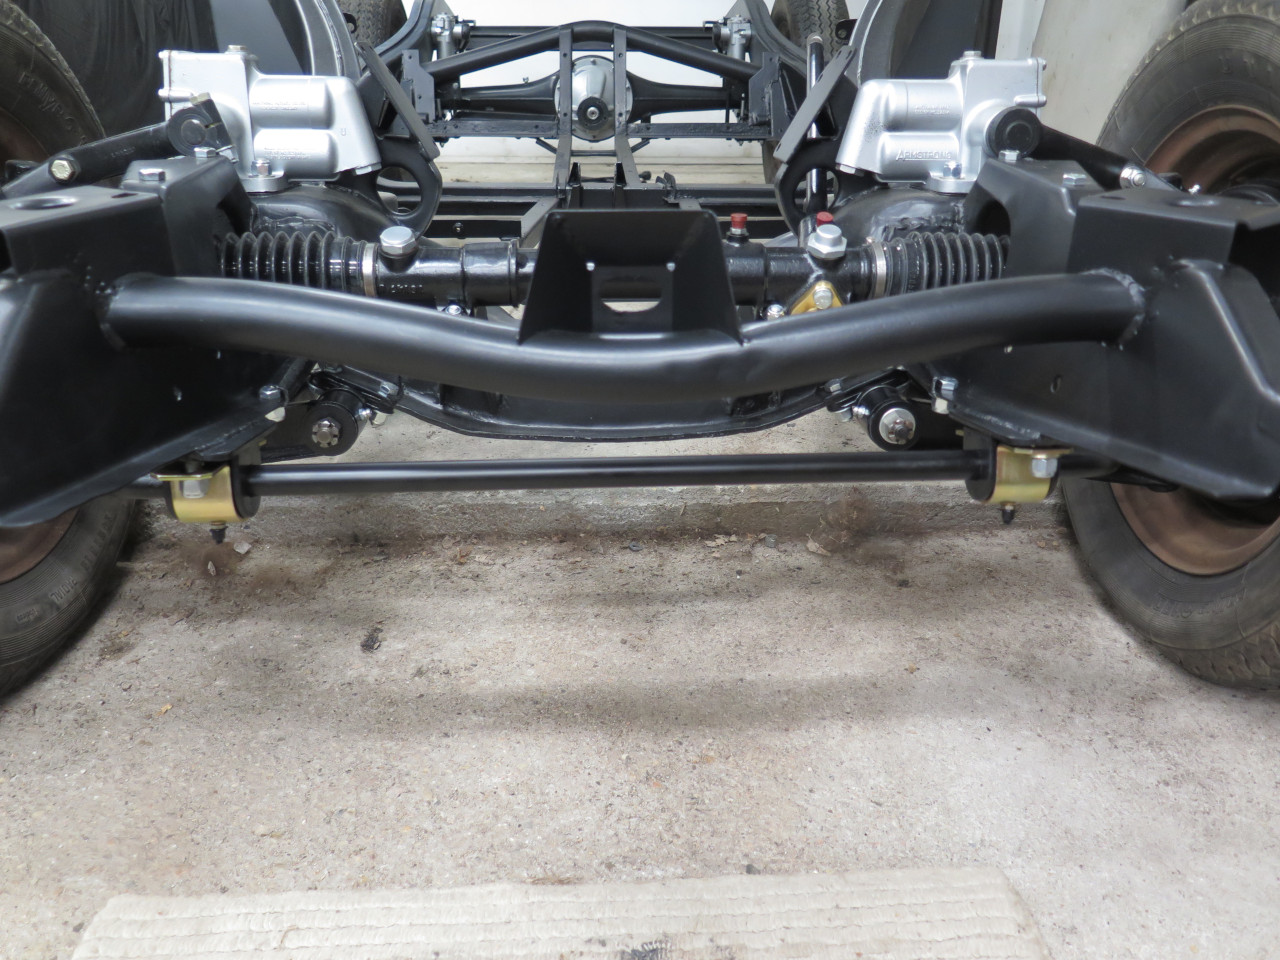
The next step was to mock up the bar and extension on the frame to
determine the mounting location of the bar. I had to install the
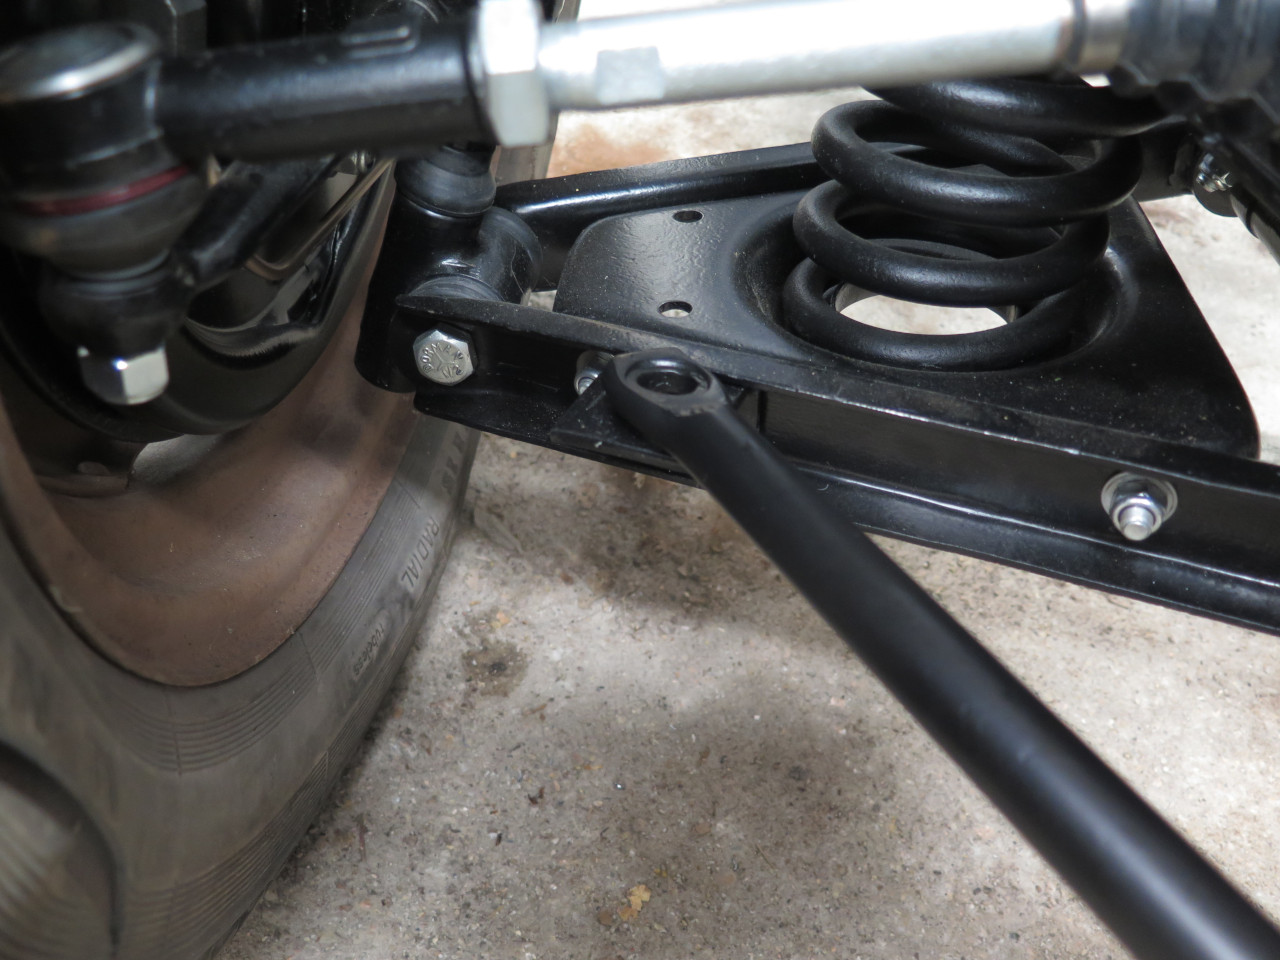
link brackets on to the lower A arms.
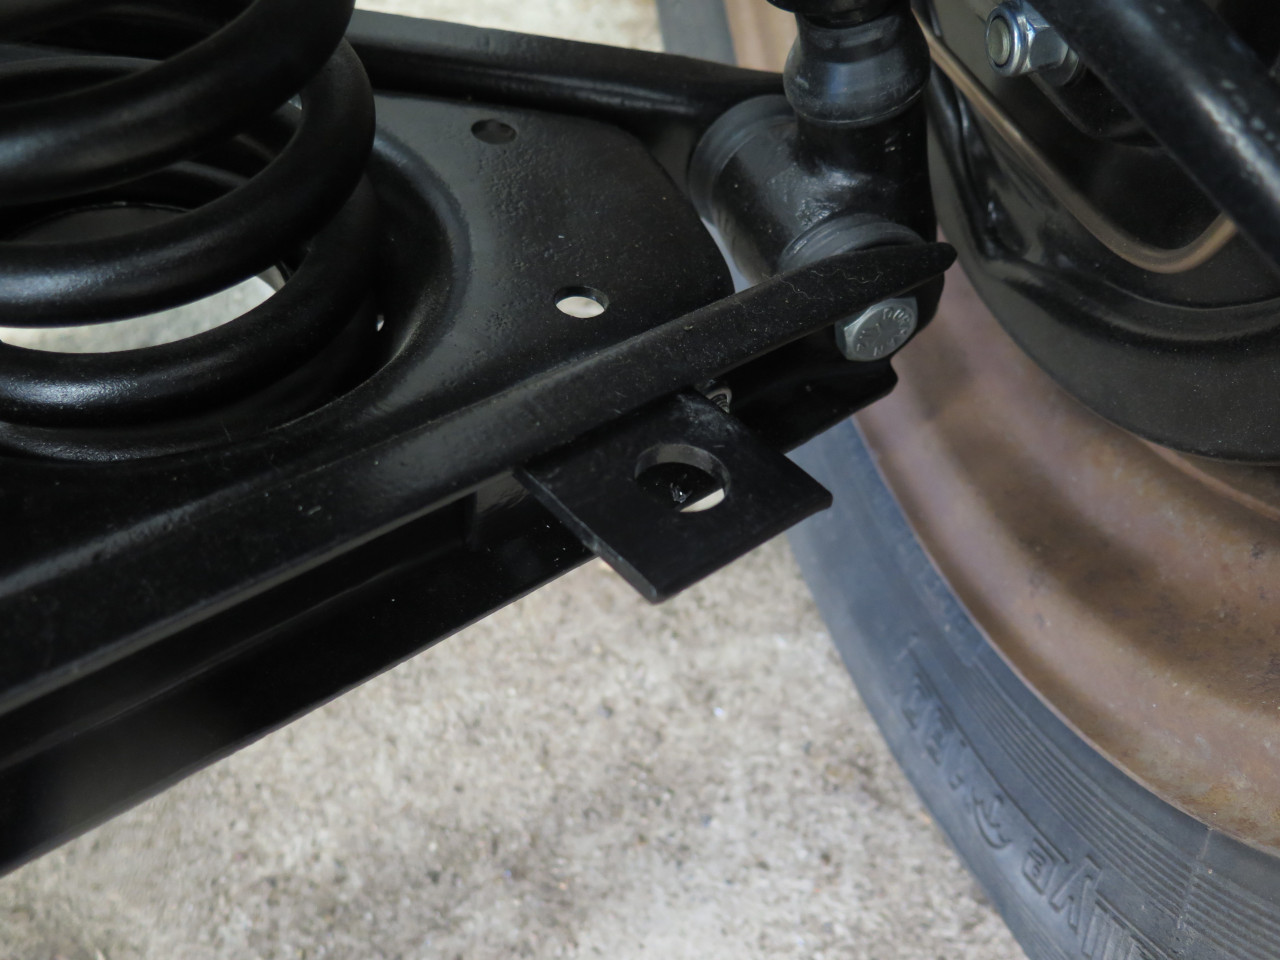
Then mounted the extension with a few bolts, hung the bar from bungee
cords, and installed the old links. This let me mark the
centerline of the bar on the extension.
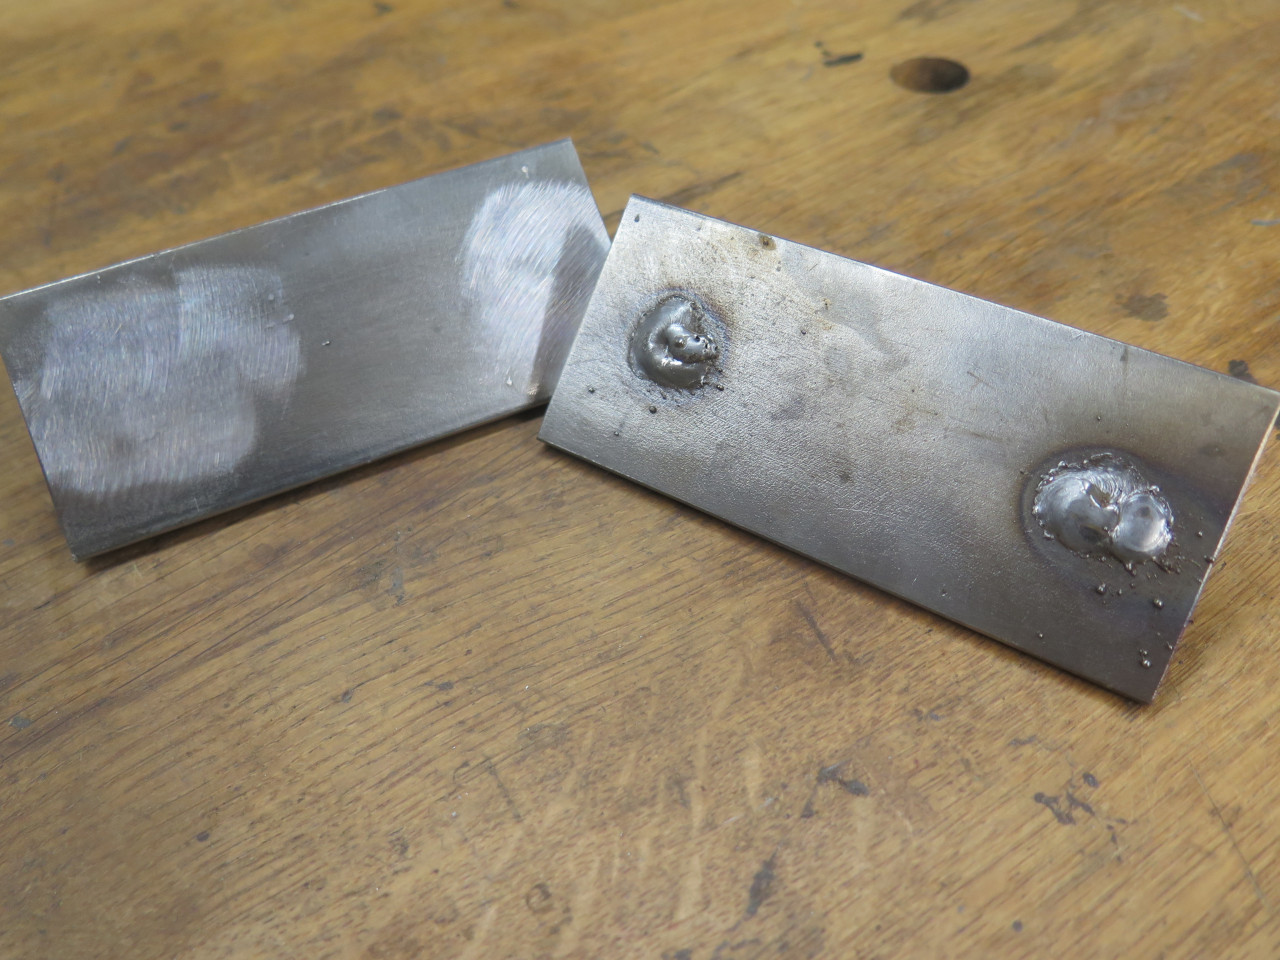
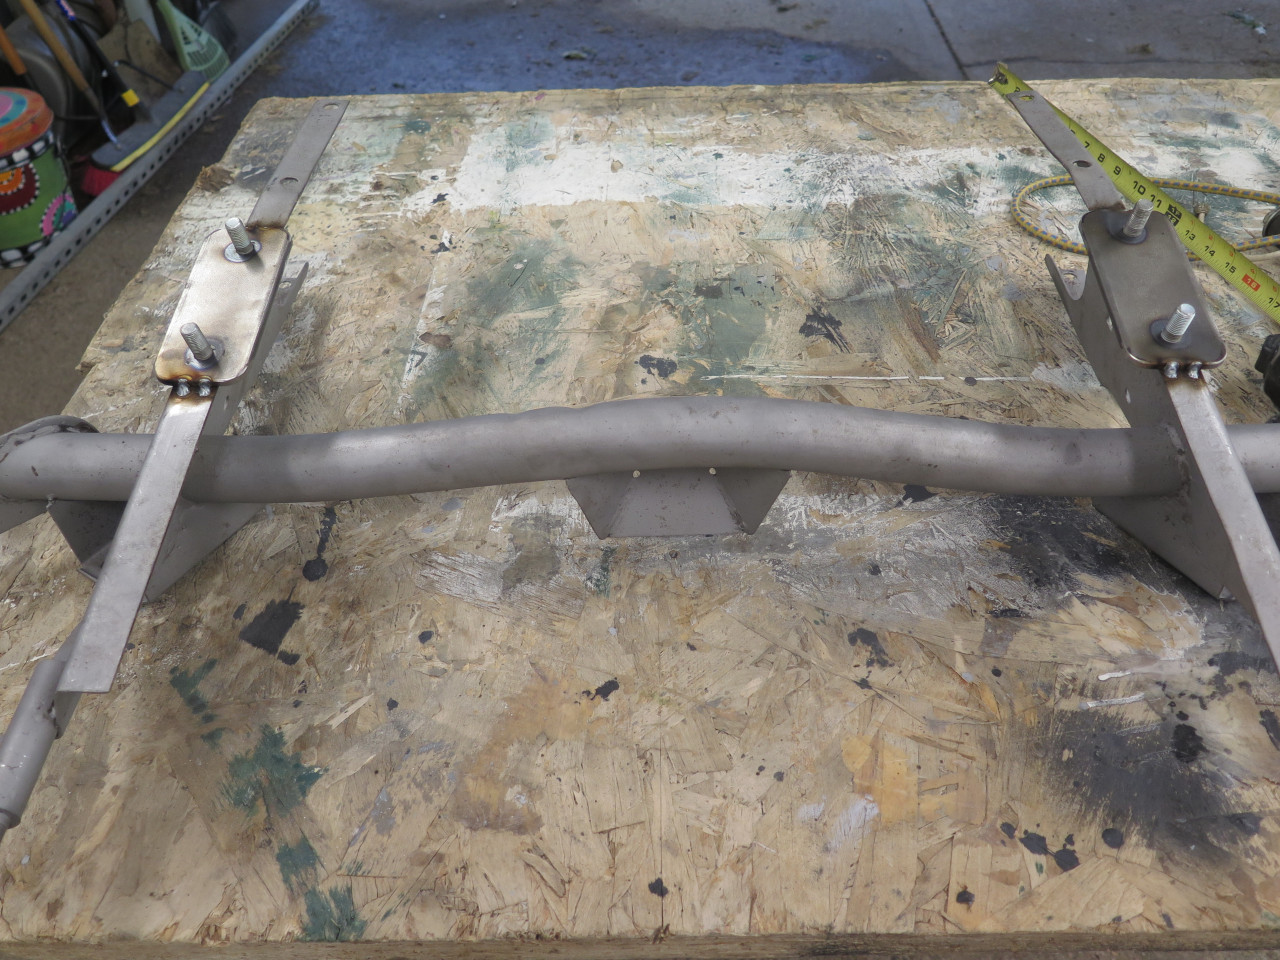
Back up on the table, I clamped the mounting pads in position.
They of course need to be parallel to each other and to the centerline
of the car and also need to be co-planar. This was complicated by
the fact that the arms of the extension are not parallel to each
other. The metal bar clamped to the pads keeps them in the same
plane, and careful measurements got the pads in the right position to be
tacked in place.
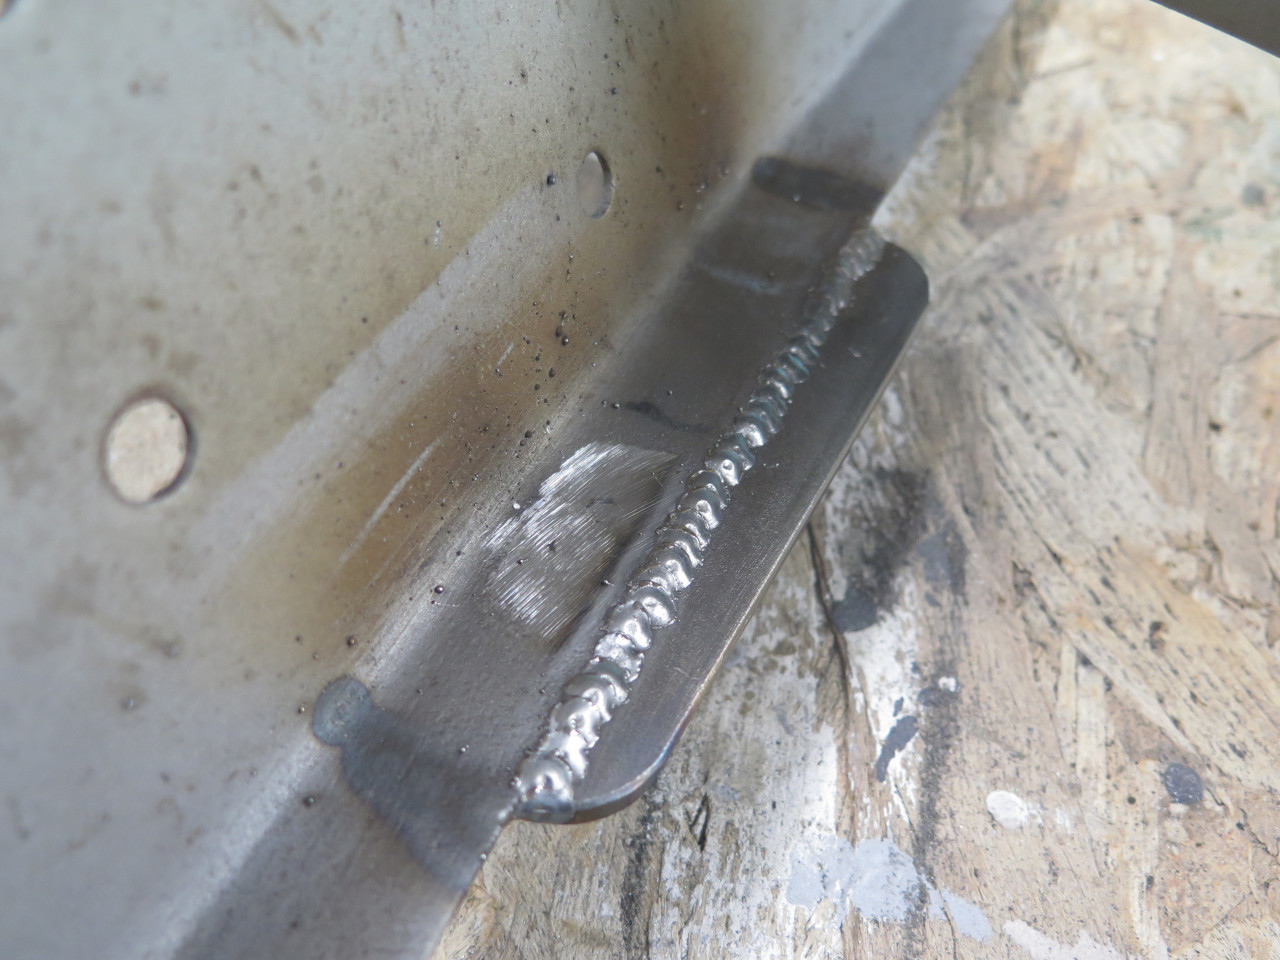
I did a complete weld all the way around to hopefully keep moisture out
of the joint. One side of the extension arm has a pretty generous
fillet, so I added a little fill piece to bridge the gap, and actually
give more support to the pad.

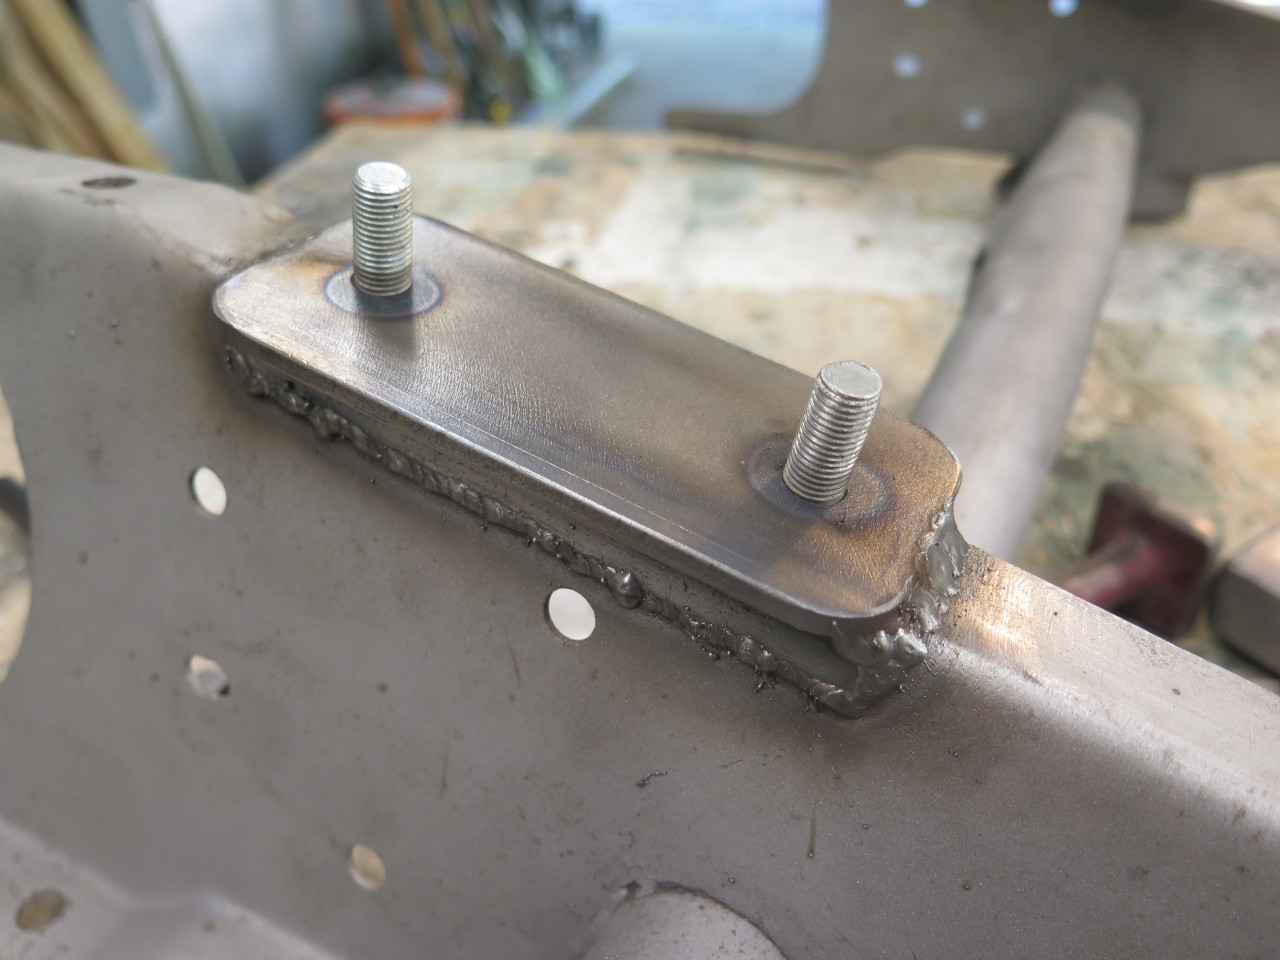
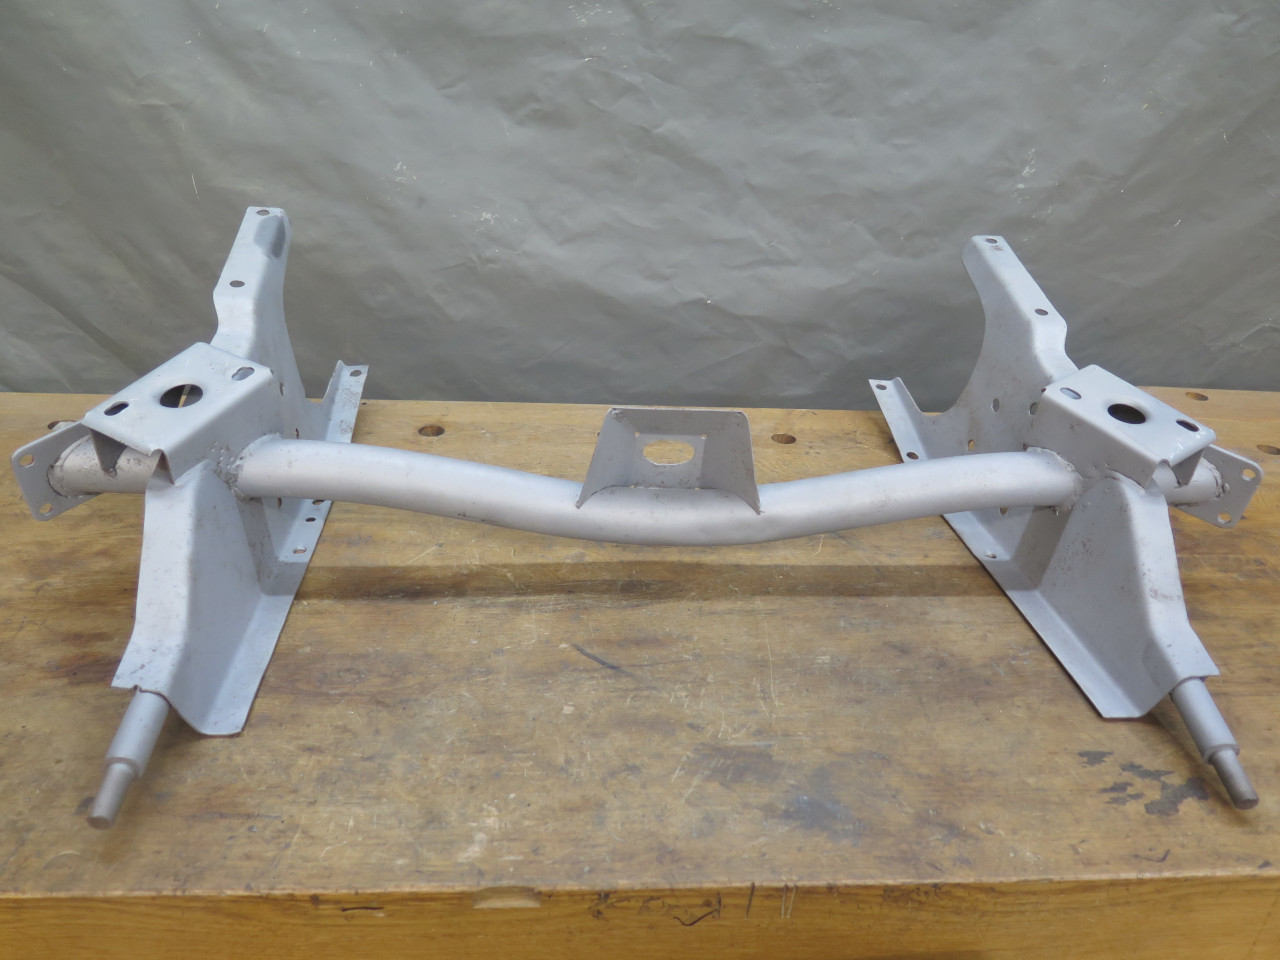
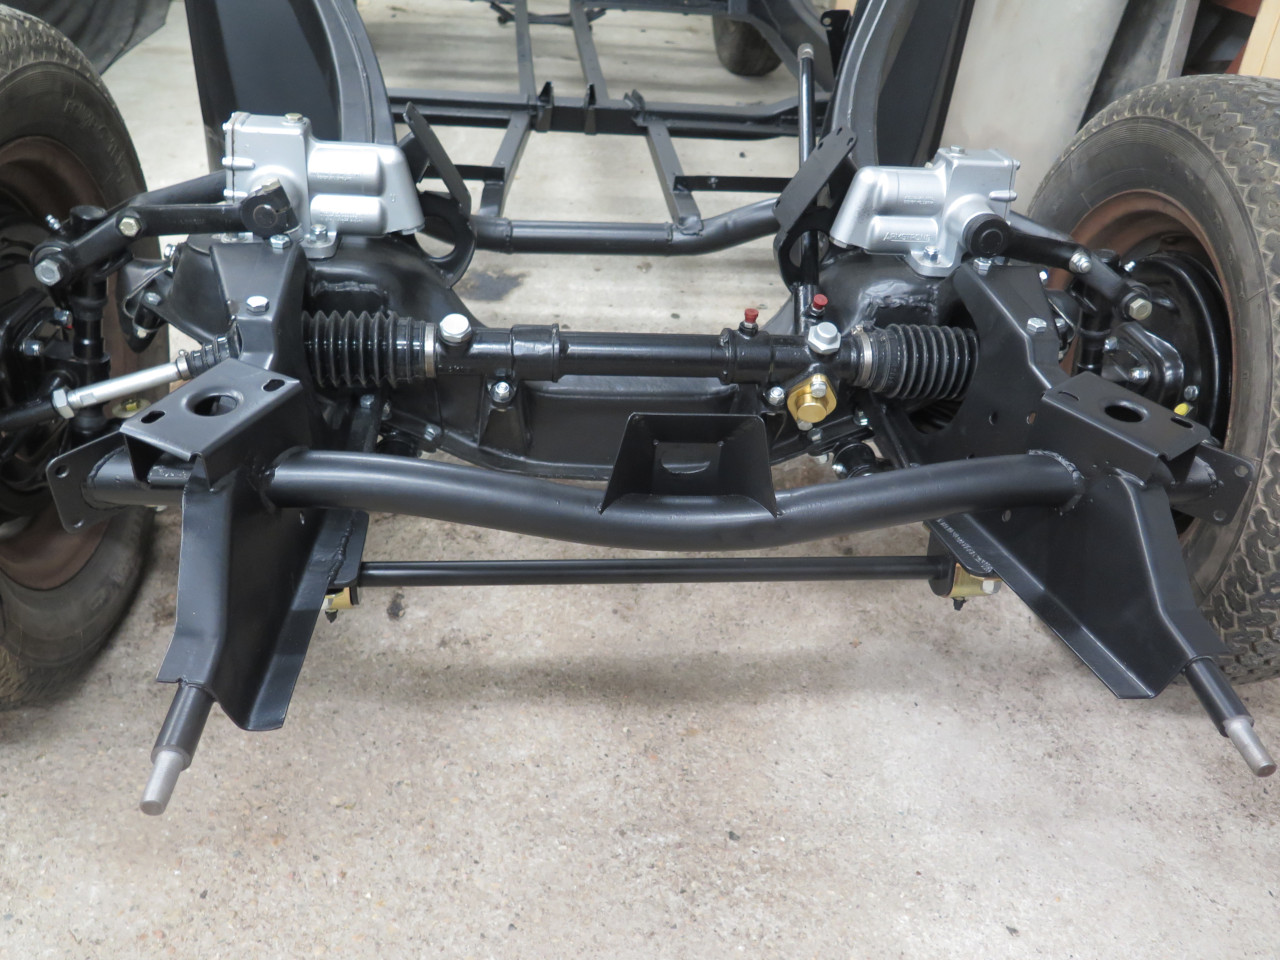
Then shot the extension with a good epoxy primer and a tasteful top coat.
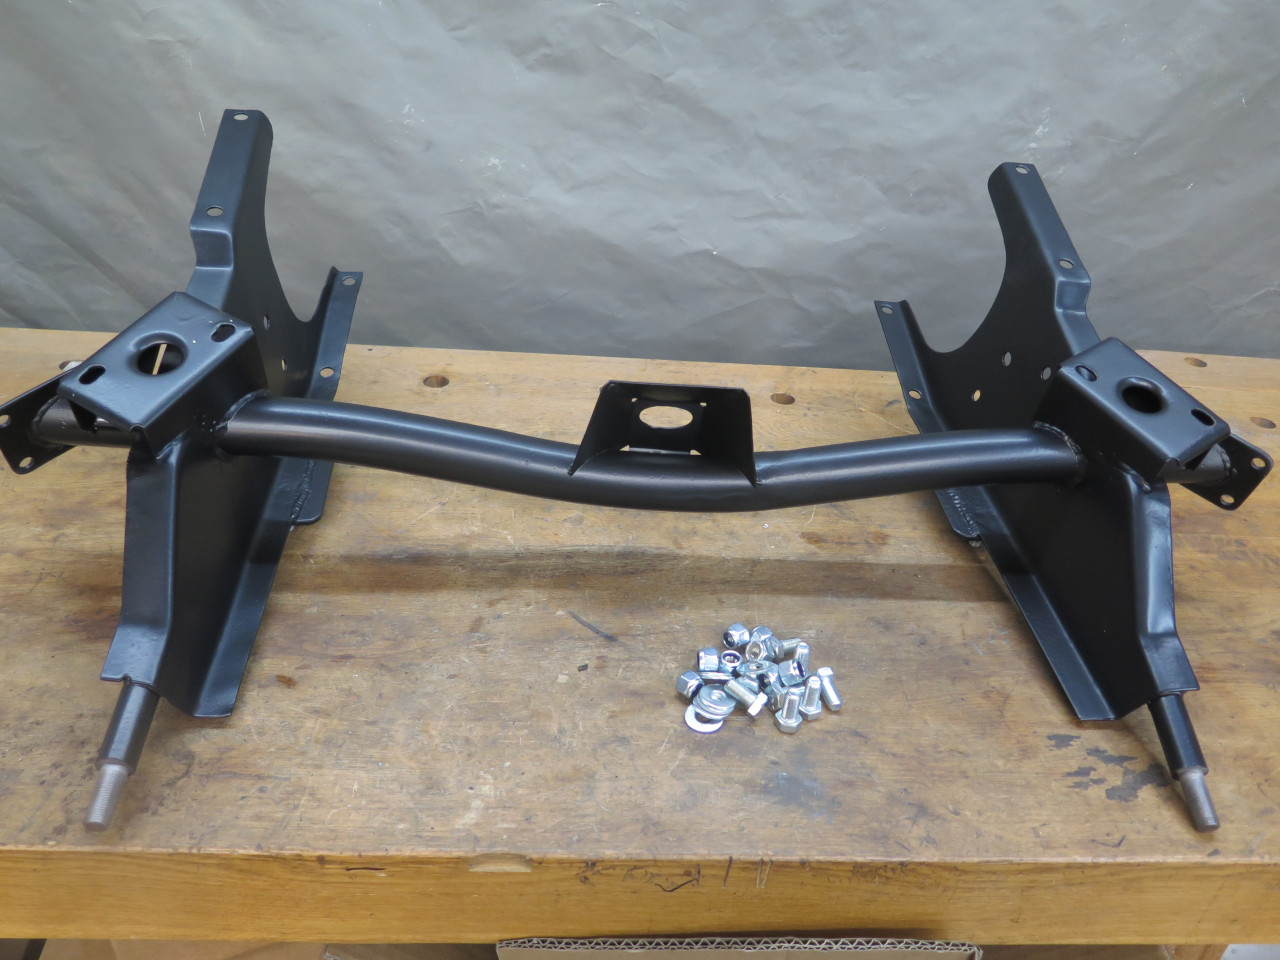
It seemed like the extension was ready to install, but as I offered the
it to the frame, it occurred to me that this would be an excellent time
to install the steering box. So the extension went back on the
table, and I retrieved the rebuilt steering box from the top shelf.
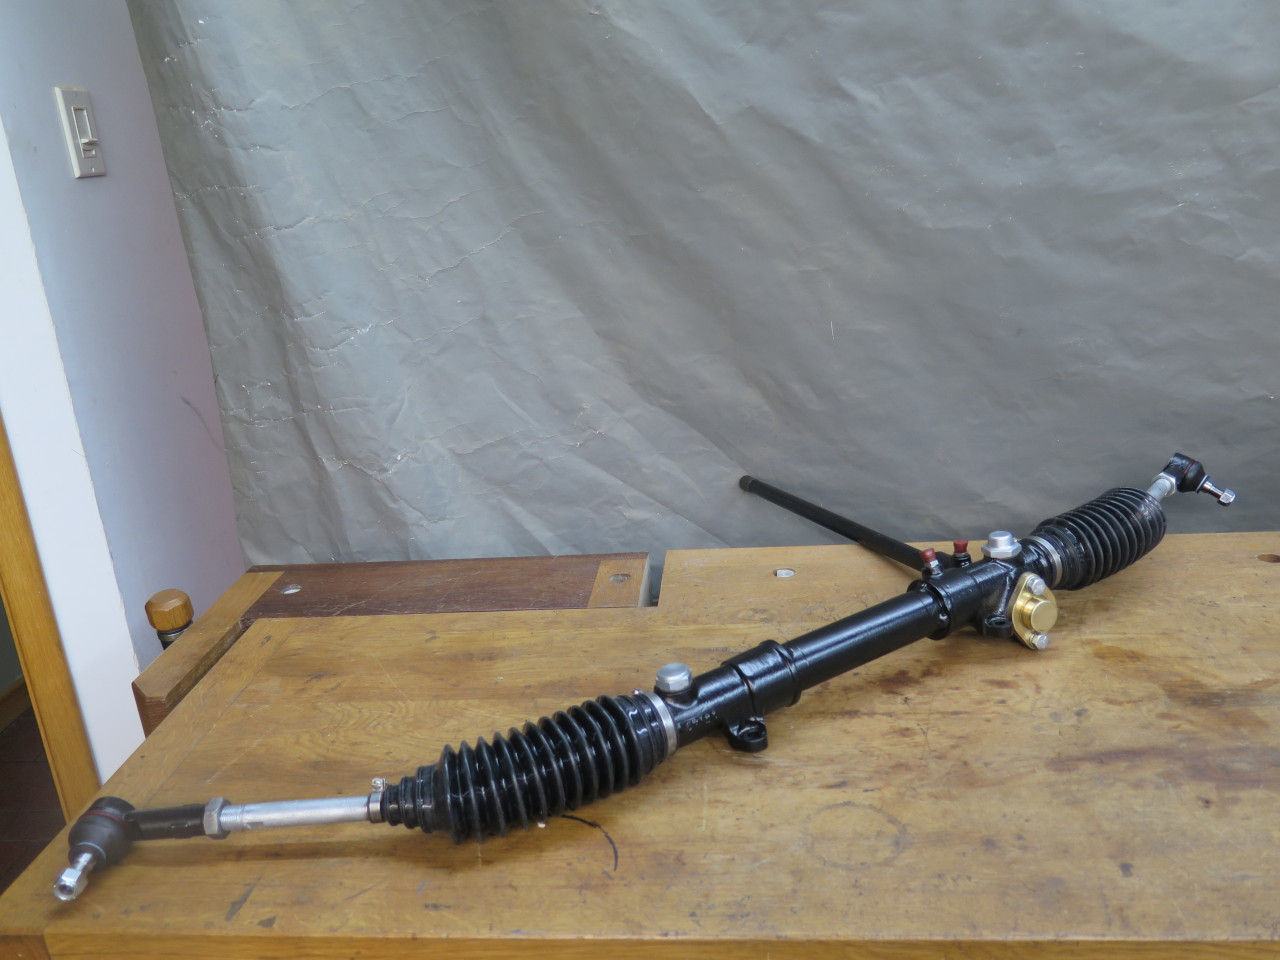
I managed to remember that I hadn't filled it with oil yet, and I
reasoned that then would be a good time to do it. The challenge
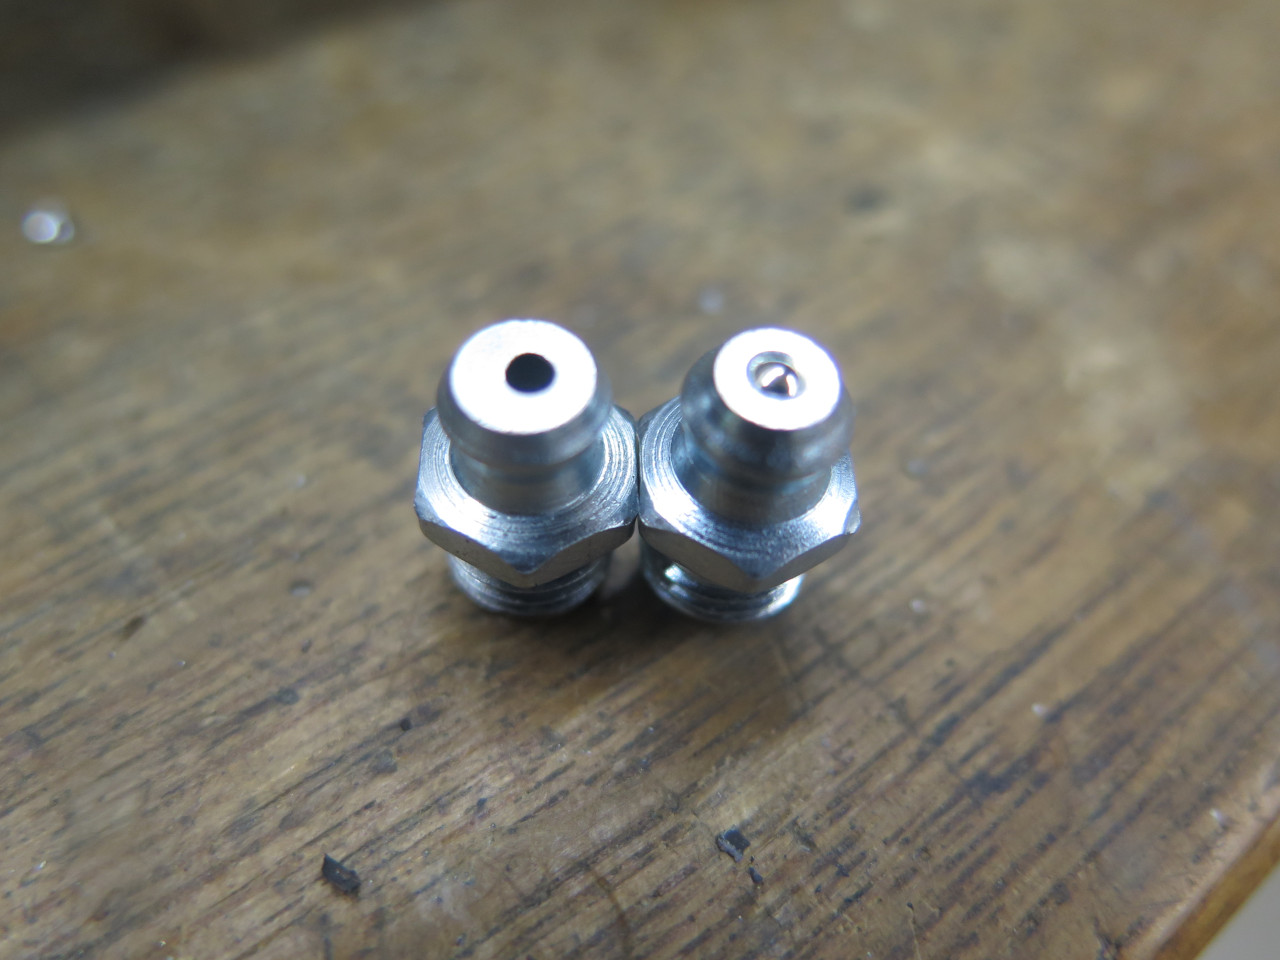
seemed to be getting the oil through the zerk fitting on the box.
I've tried modified oil pump cans in the past, but found that they
typically can't muster enough pressure to open the check valve in he
zerk.
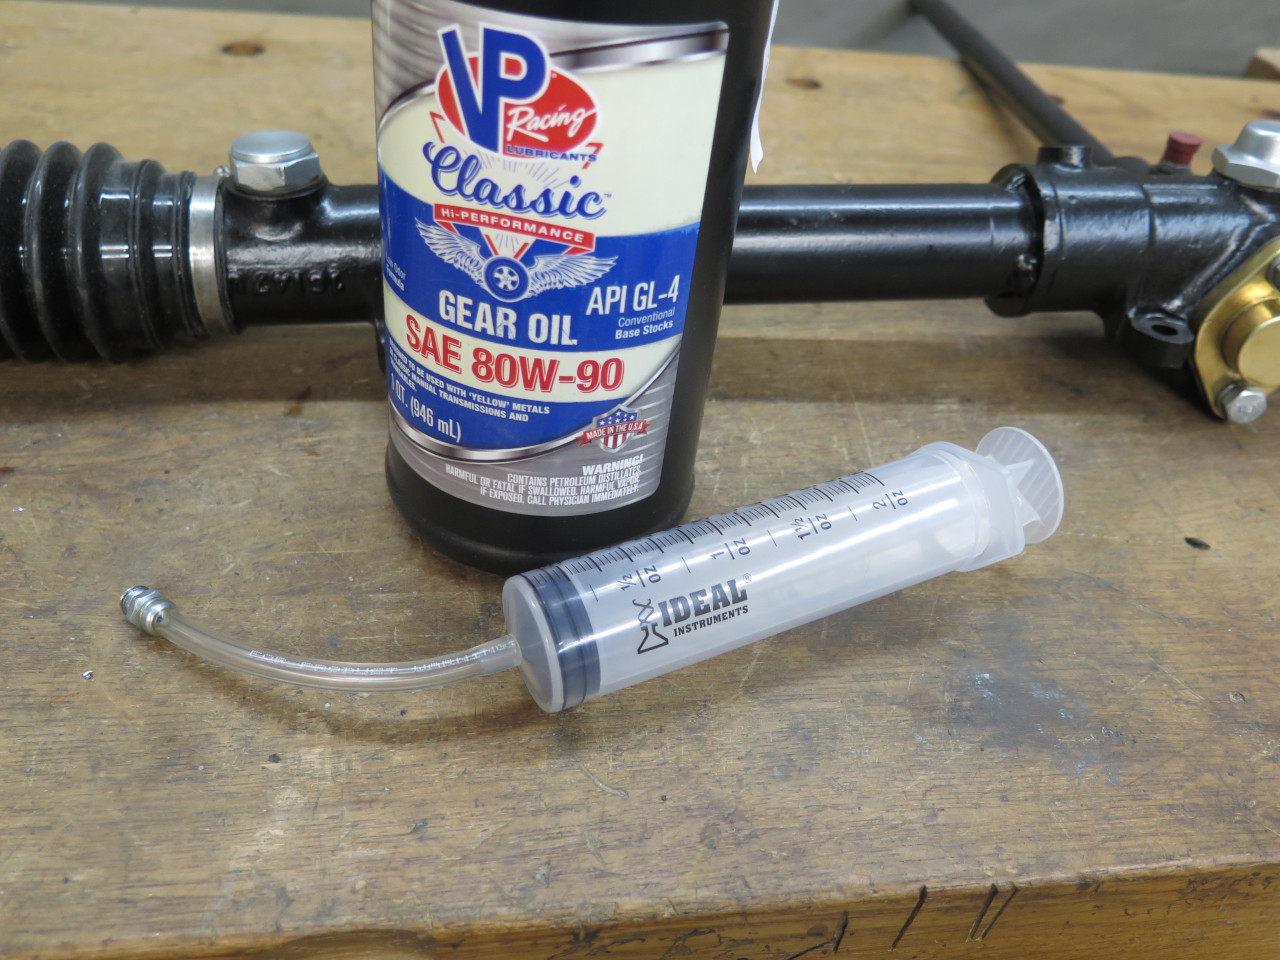
in this case, I just modified zerk by removing the check ball and
spring. Added a short piece of tubing, and a syringe instead of an
oil can, so I could measure the amount transferred.
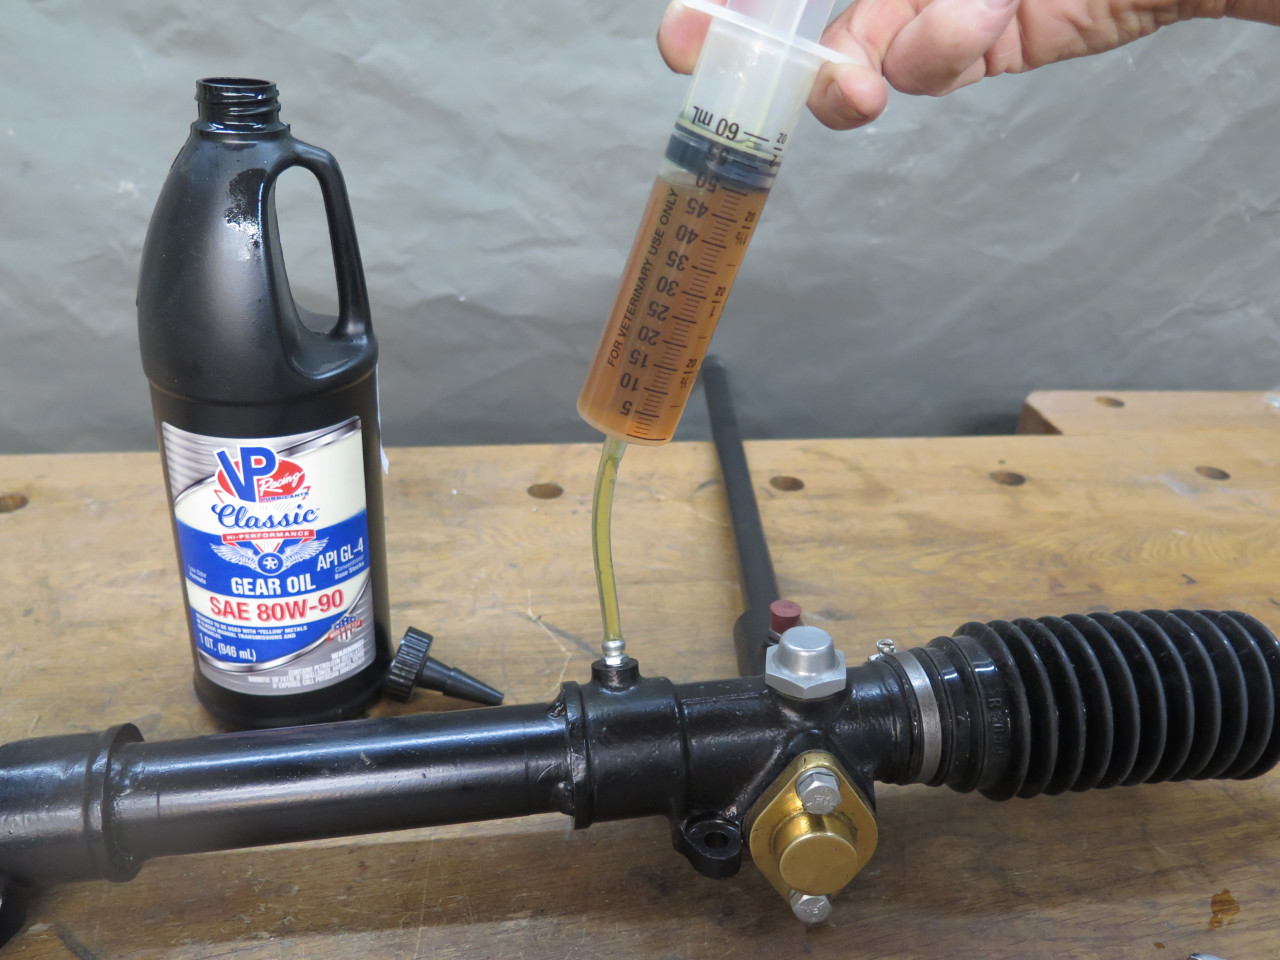
Then a squirt of grease into the column zerk.
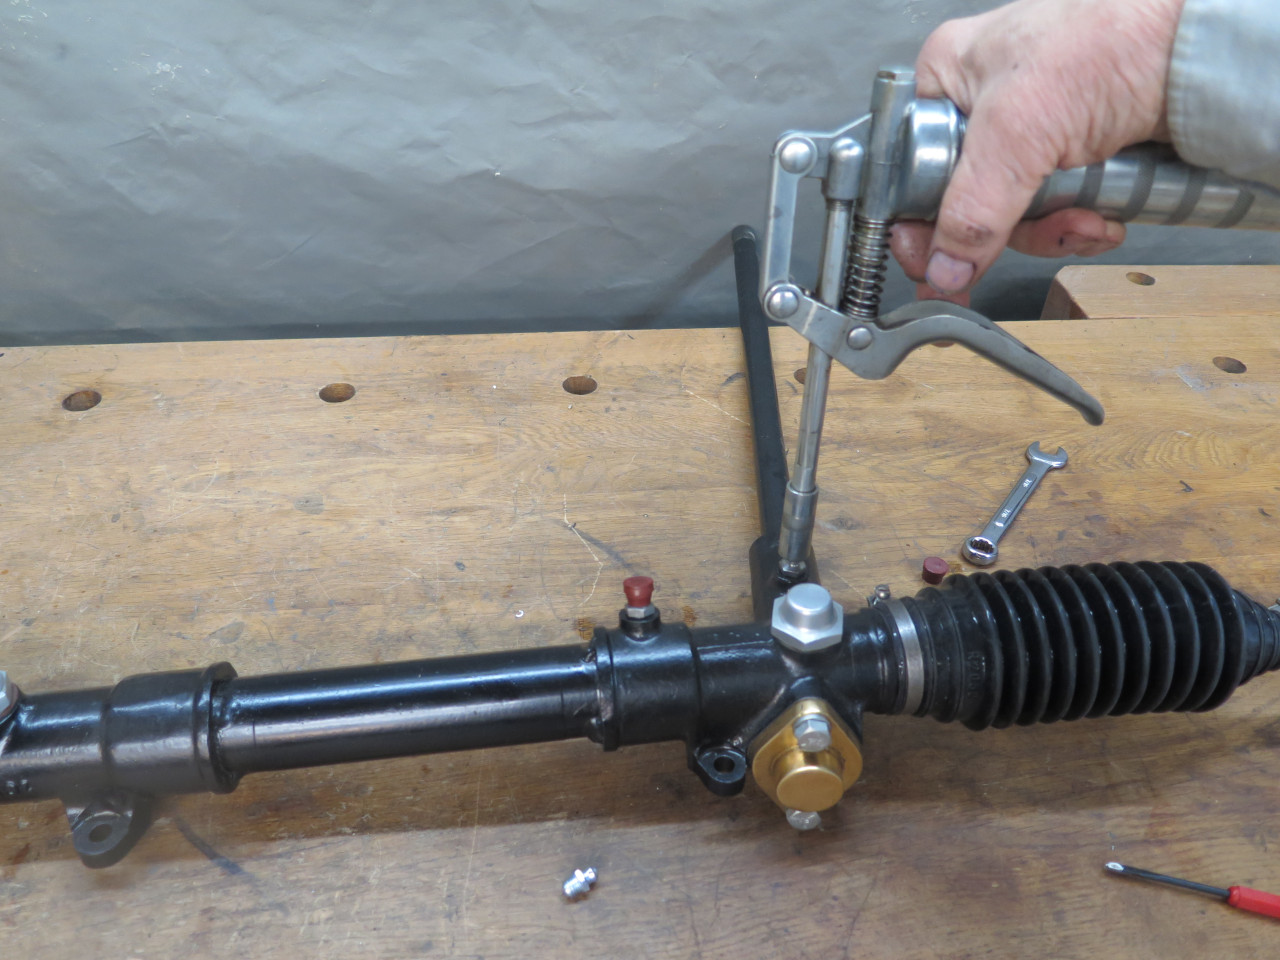
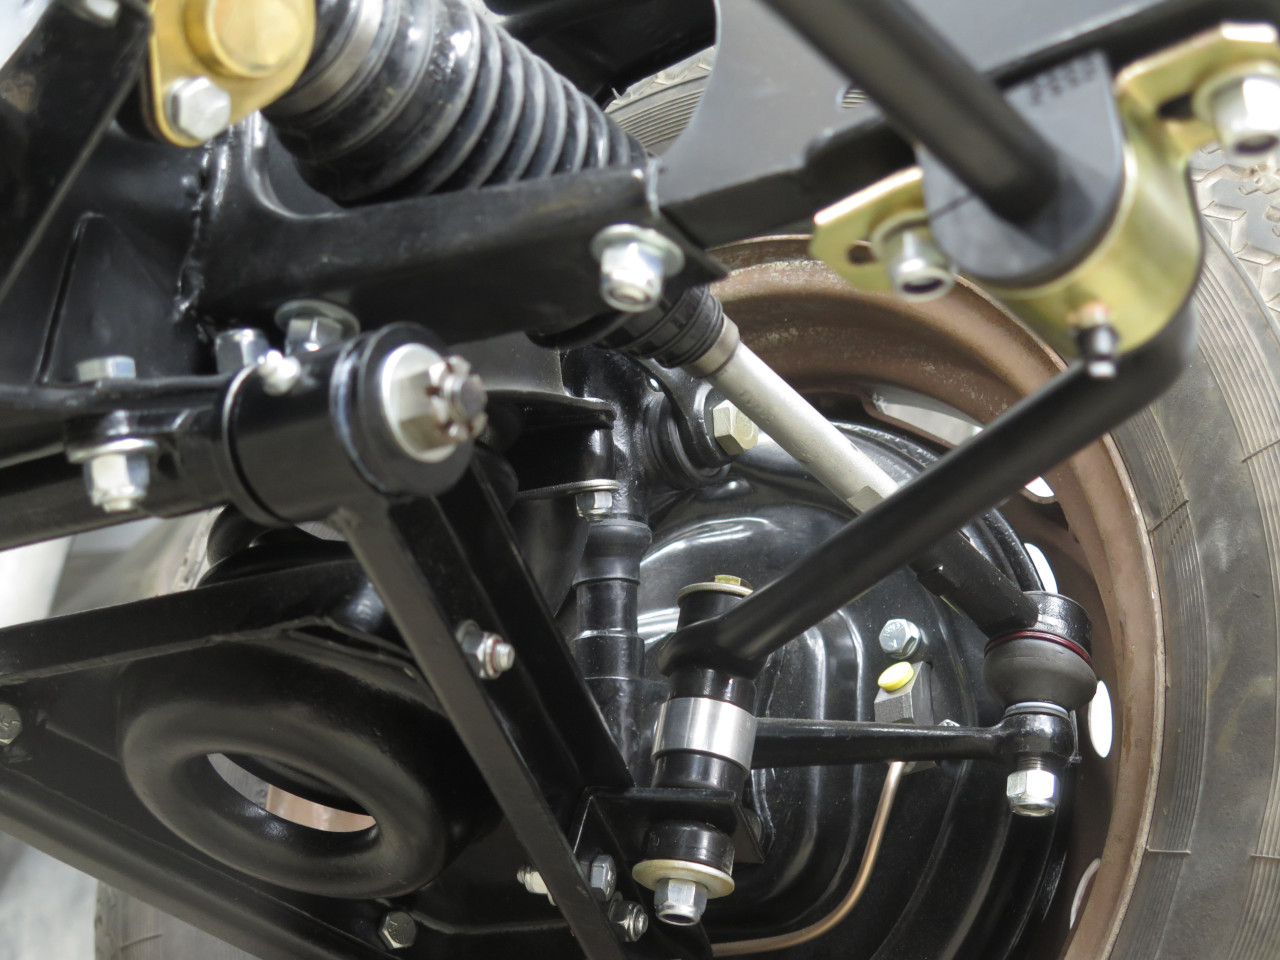
The box went home without complaint. I left the tie rods loose for now.
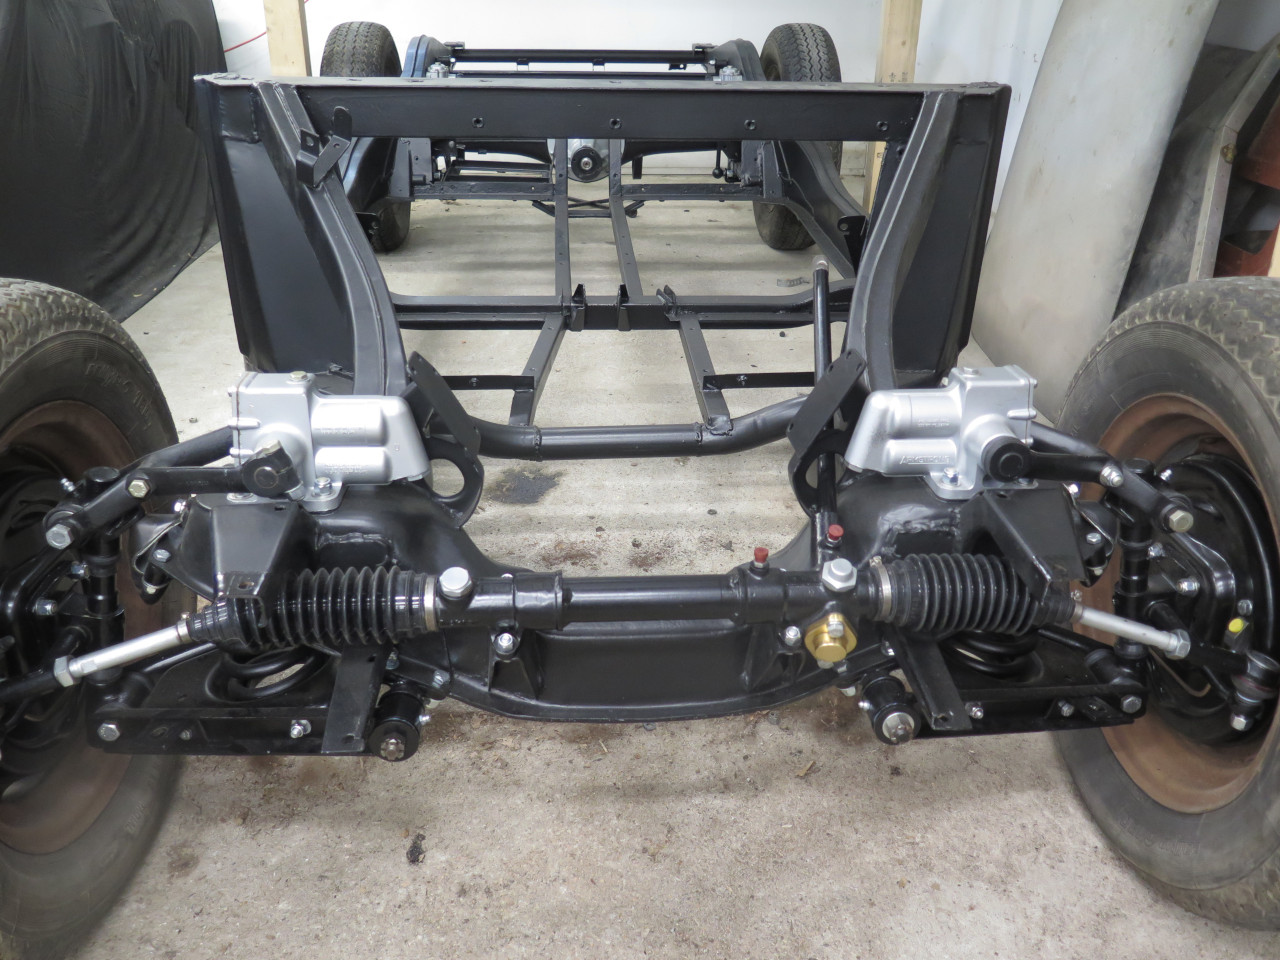
Then the extension.
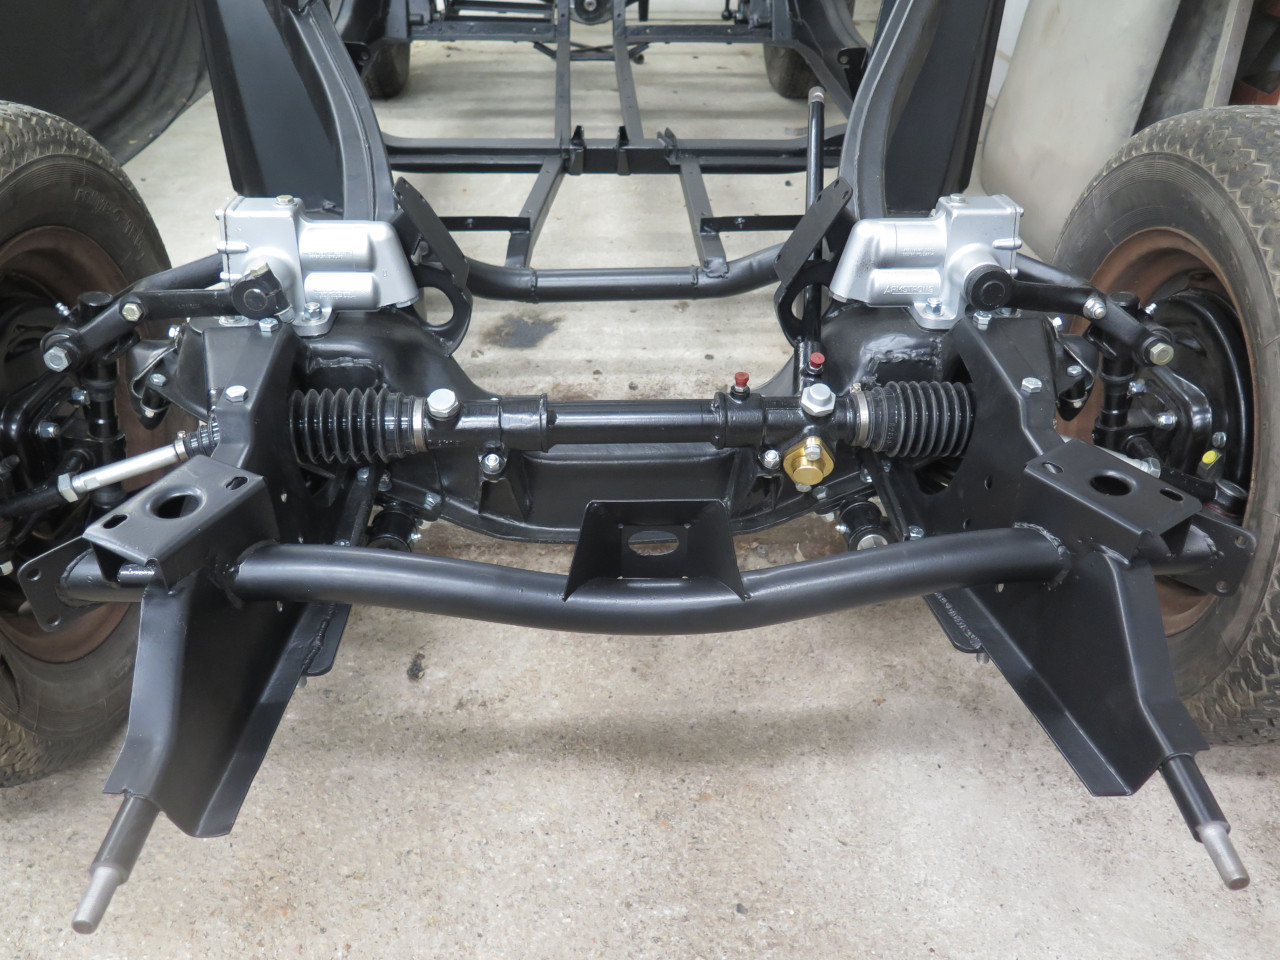
Finally, the stabilizer bar got cleaned up and painted. It's
source was confirmed. The new bushes are quite a lot more
substantial than the original ADDCOs.

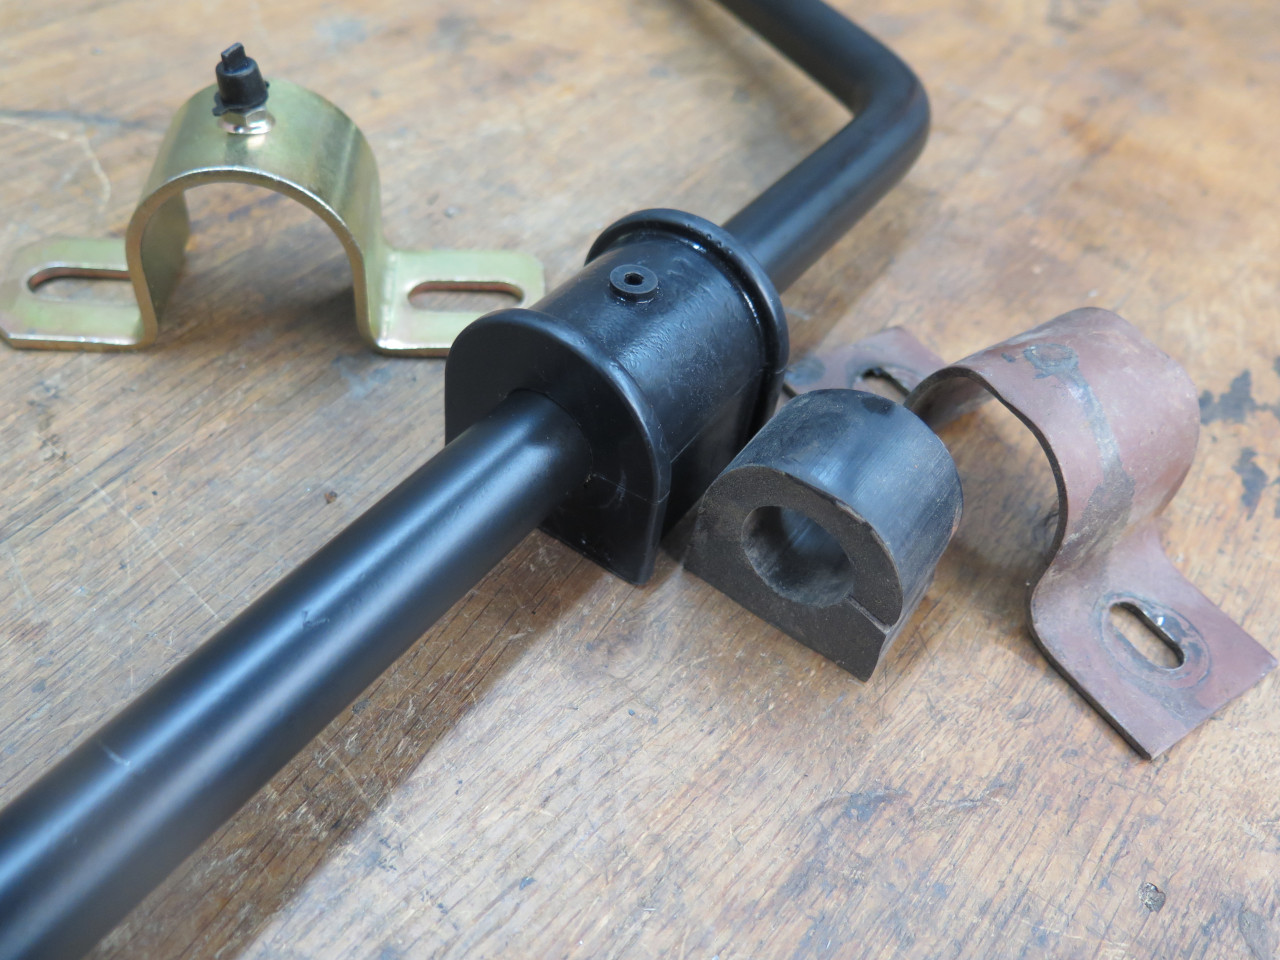
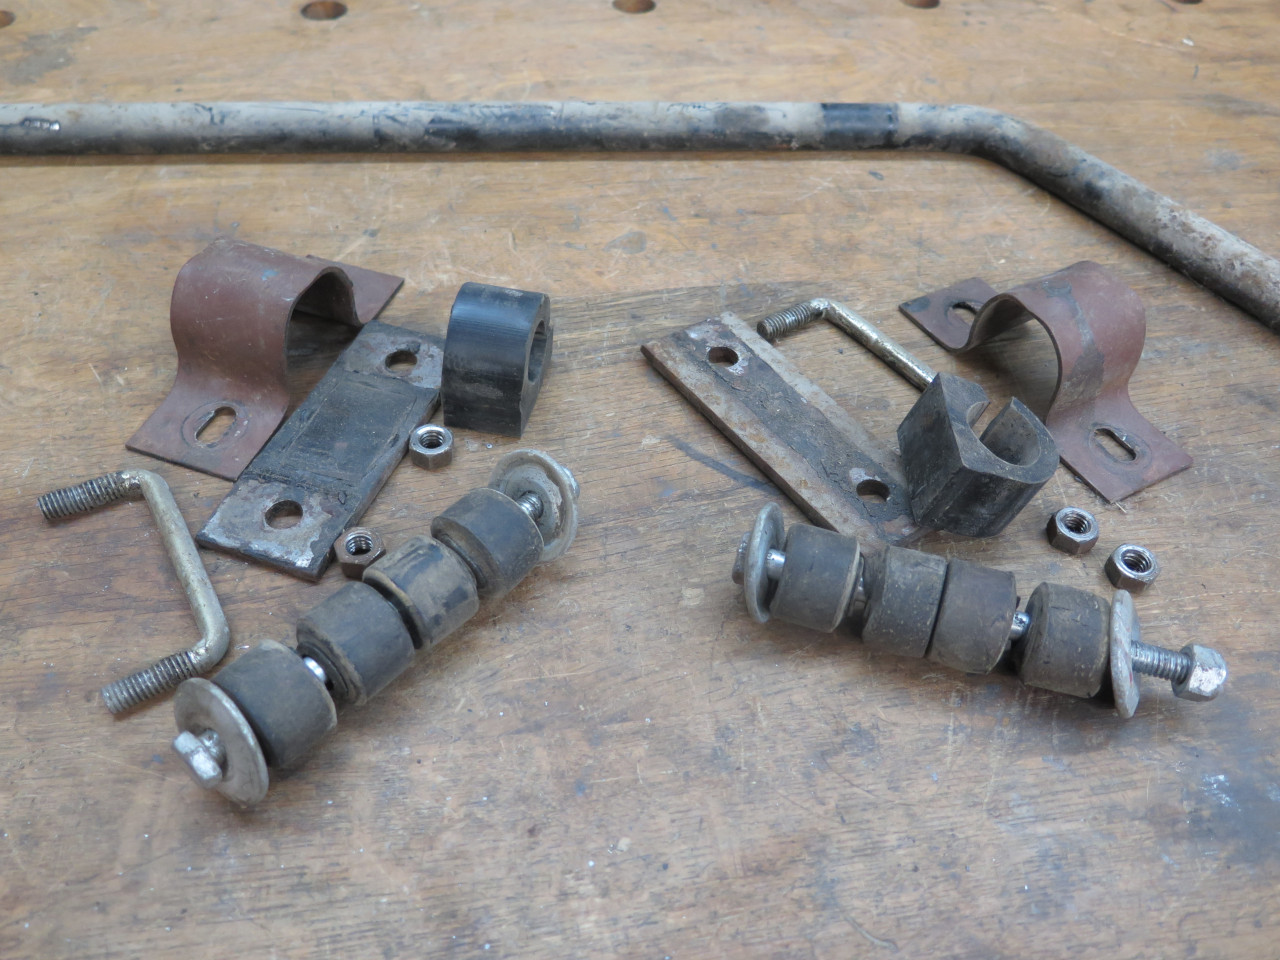
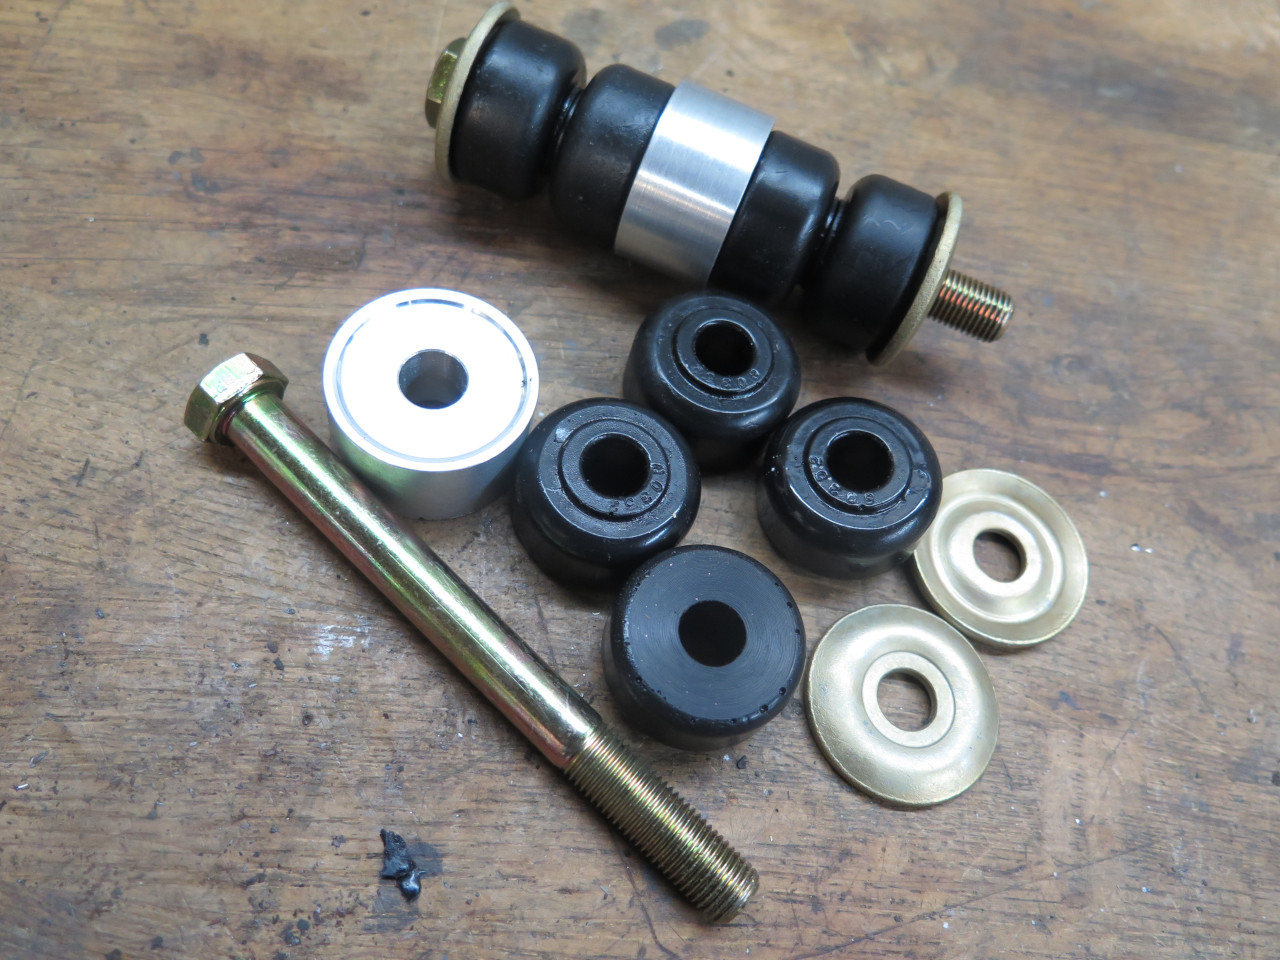
The final issue was the bar's end links. I bought a generic polyurethane bush set that would fit the bar hole size.
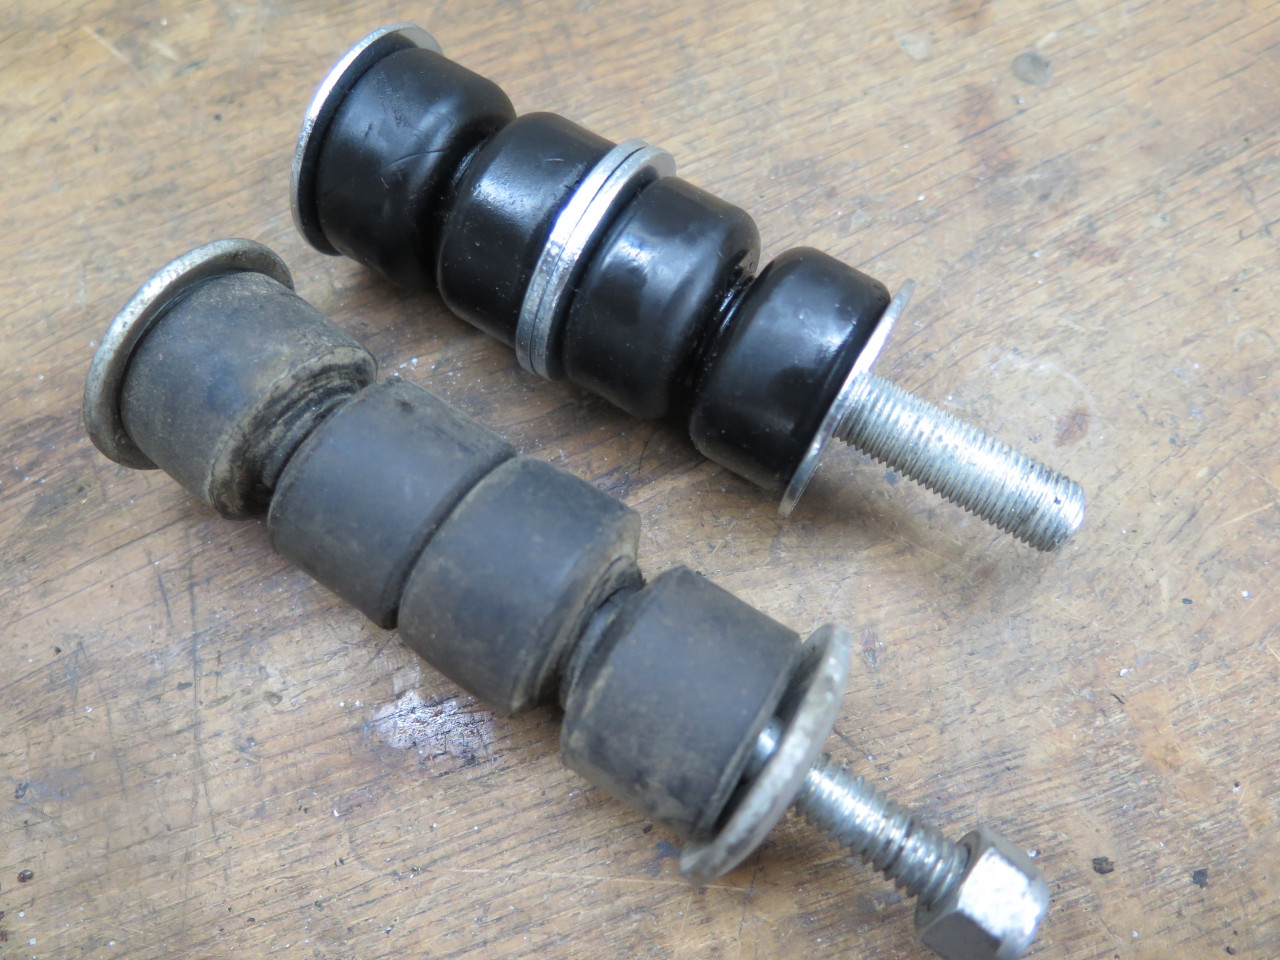
The stack of new bushes was quite a bit shorter than the originals
though. I'm not actually sure it that would be a problem, but
decided to add a spacer in the middle of the new stack to bring the
length up.
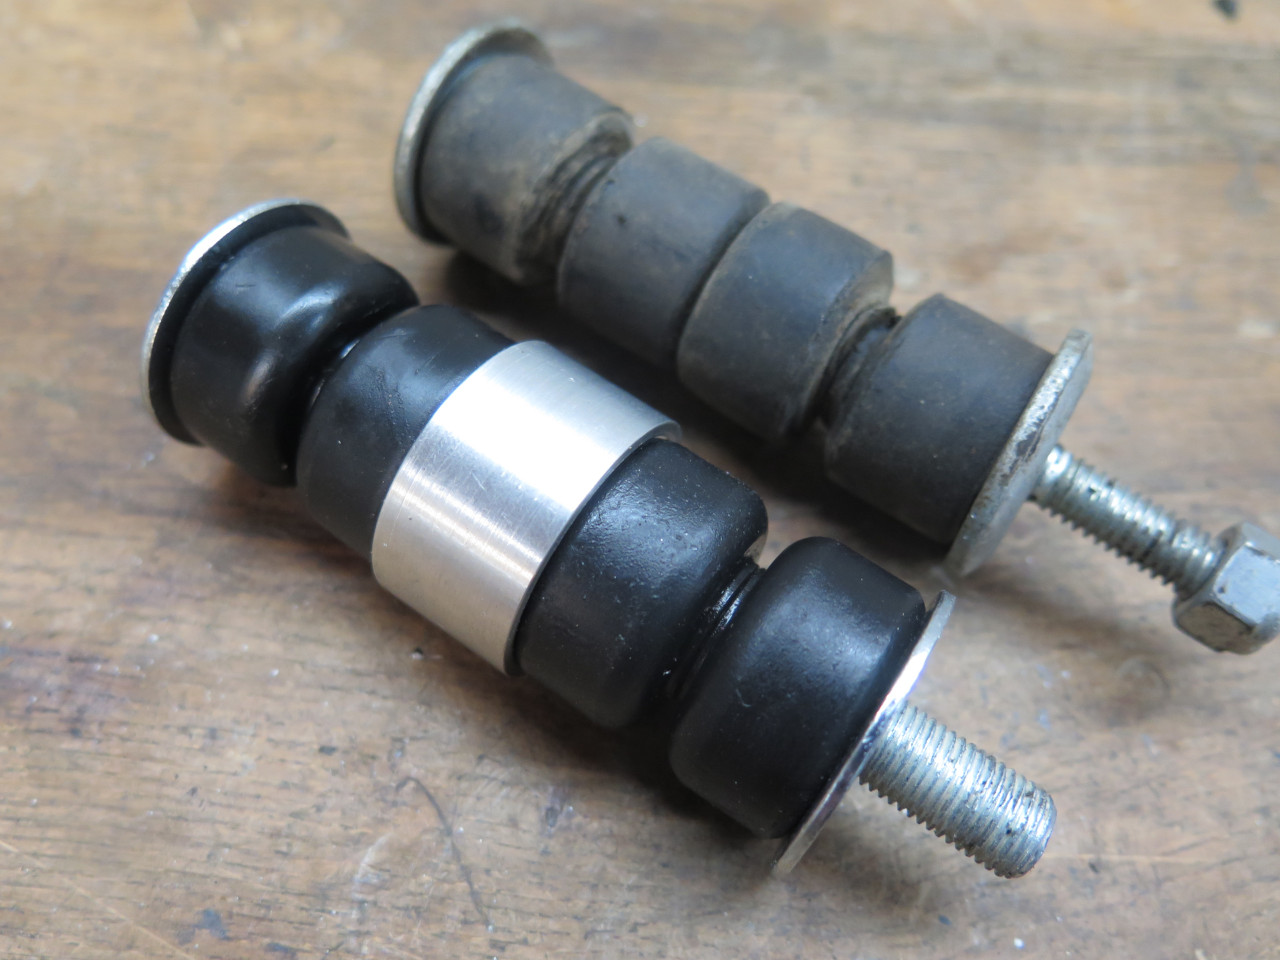
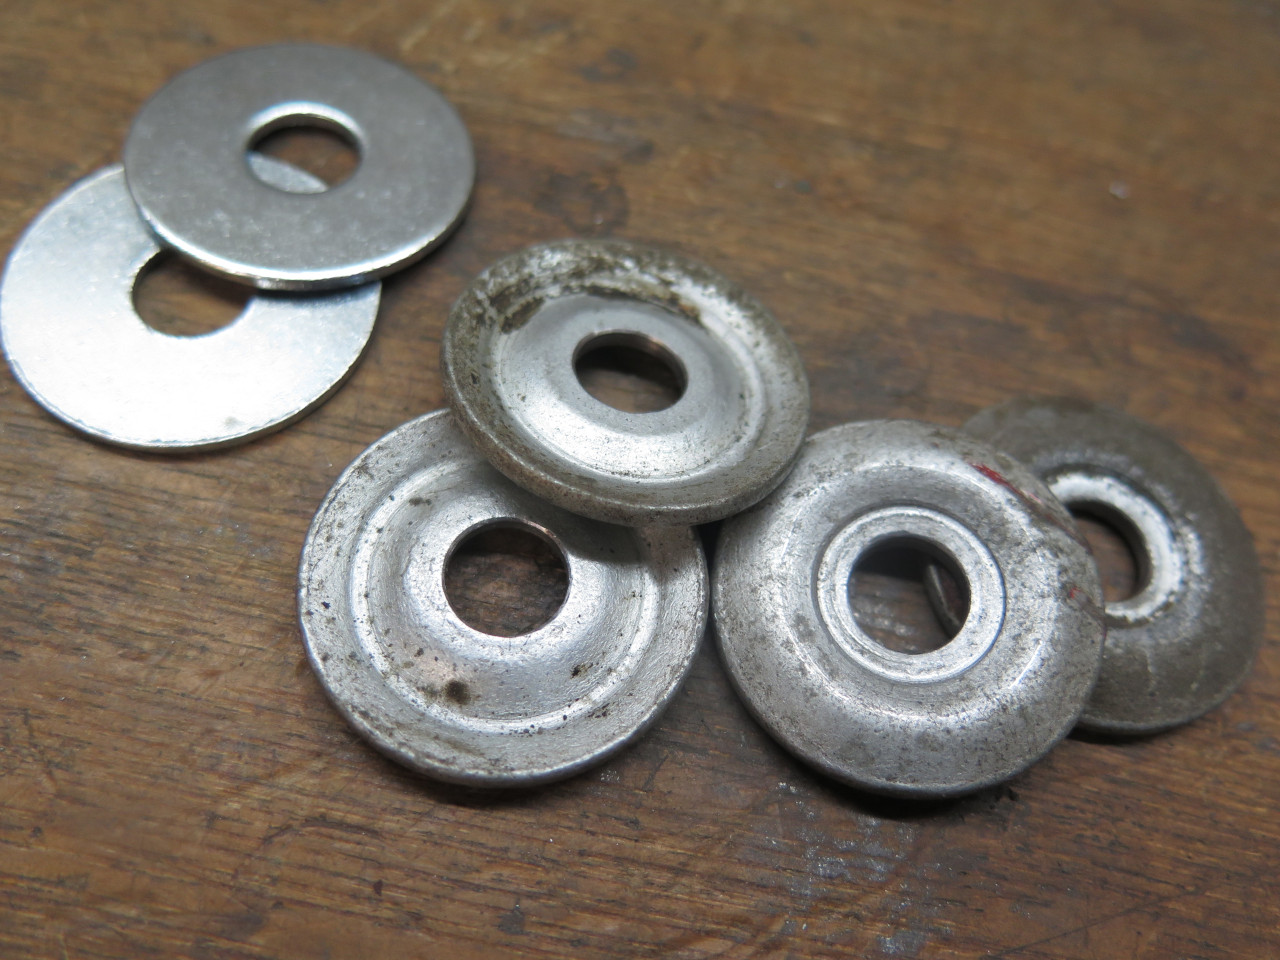
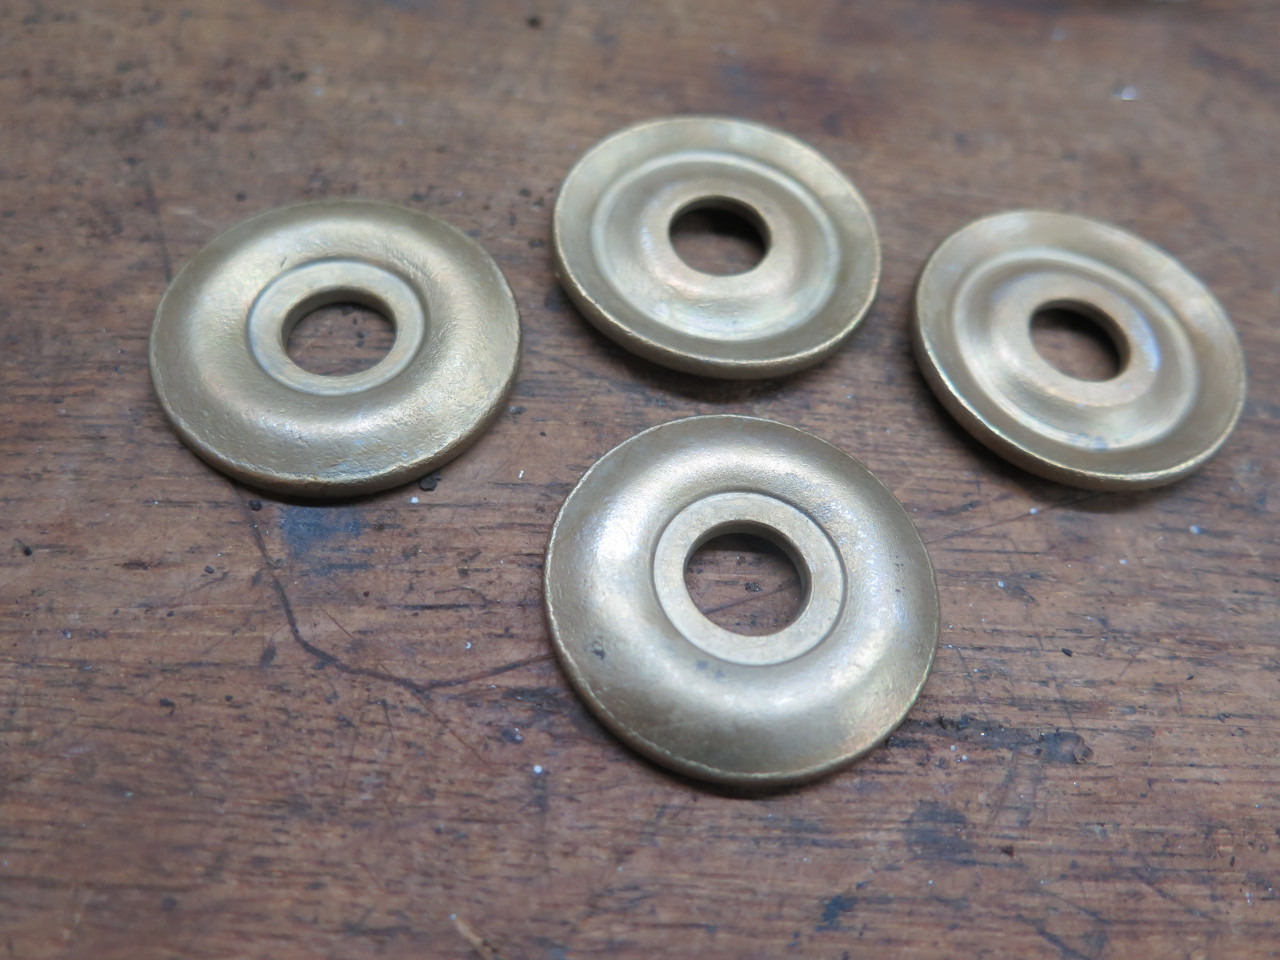
Also, I liked the top and bottom washers on the ADDCO set better than
the plain flat washers the came with the universal set. They were
thicker, and shaped to sort of cradle the bush. So I cleaned them
up, plated them, and used them.
The new end links...
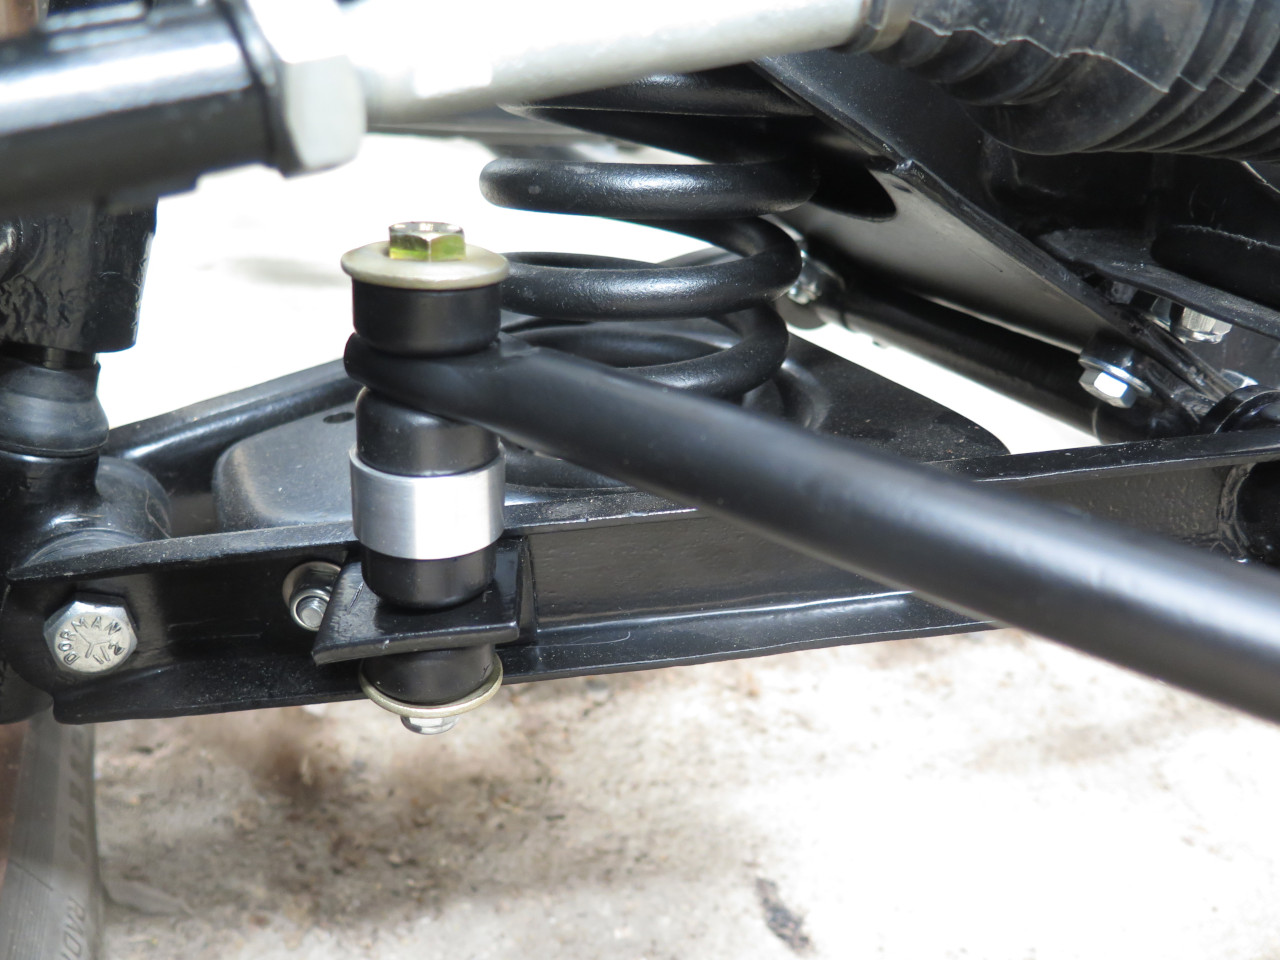
Front end is pretty much done.
This job took a while, mainly due to all the things that had to be done
first. Cost was around $70 for the bushes and end links.
Comments to Ed at elhollin1@yahoo.com
To my other MGA pages