To my other GT6 pages
May 27, 2022
Oil Filter Adapter
Even into the seventies, Triumph cars clung to the archaic oil filter
arrangement that consisted of a replaceable cartridge type filter
element inside a reusable housing bolted to the left side of the
engine. There was a pressure relief valve built into the housing
that would allow oil to bypass the filter if the filter became clogged.
It isn't that these filters were ineffective--they filtered oil just
fine. It's more that they made sort of a mess when changing the
filter element. On a lesser point, they also lacked an
anti-drainback valve that most modern filters have. Without this
valve, oil in the filter could at least partially drain back into the
sump when the engine is shut down, requiring a little time to fill up
again on the next start.
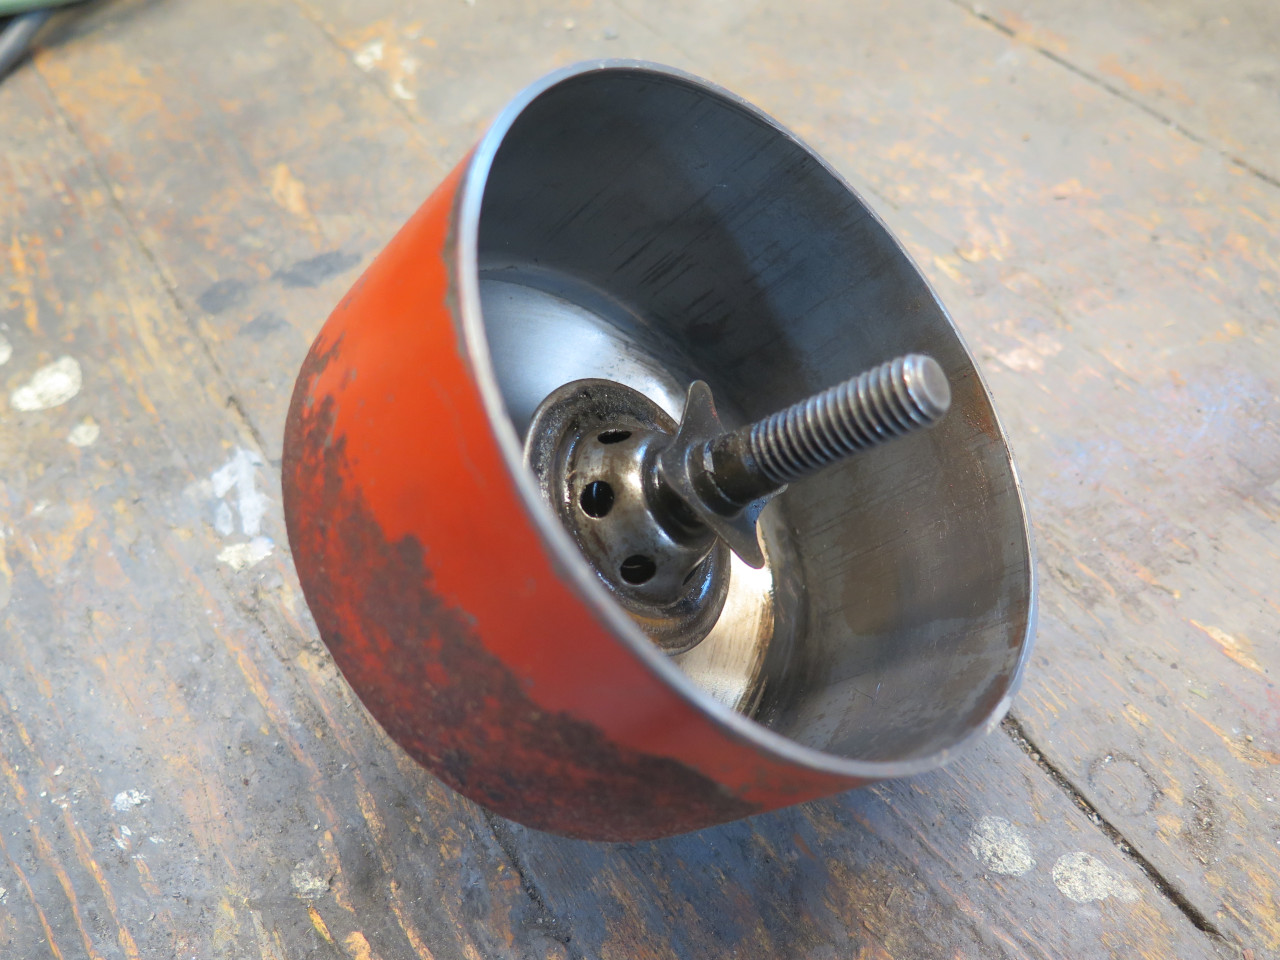
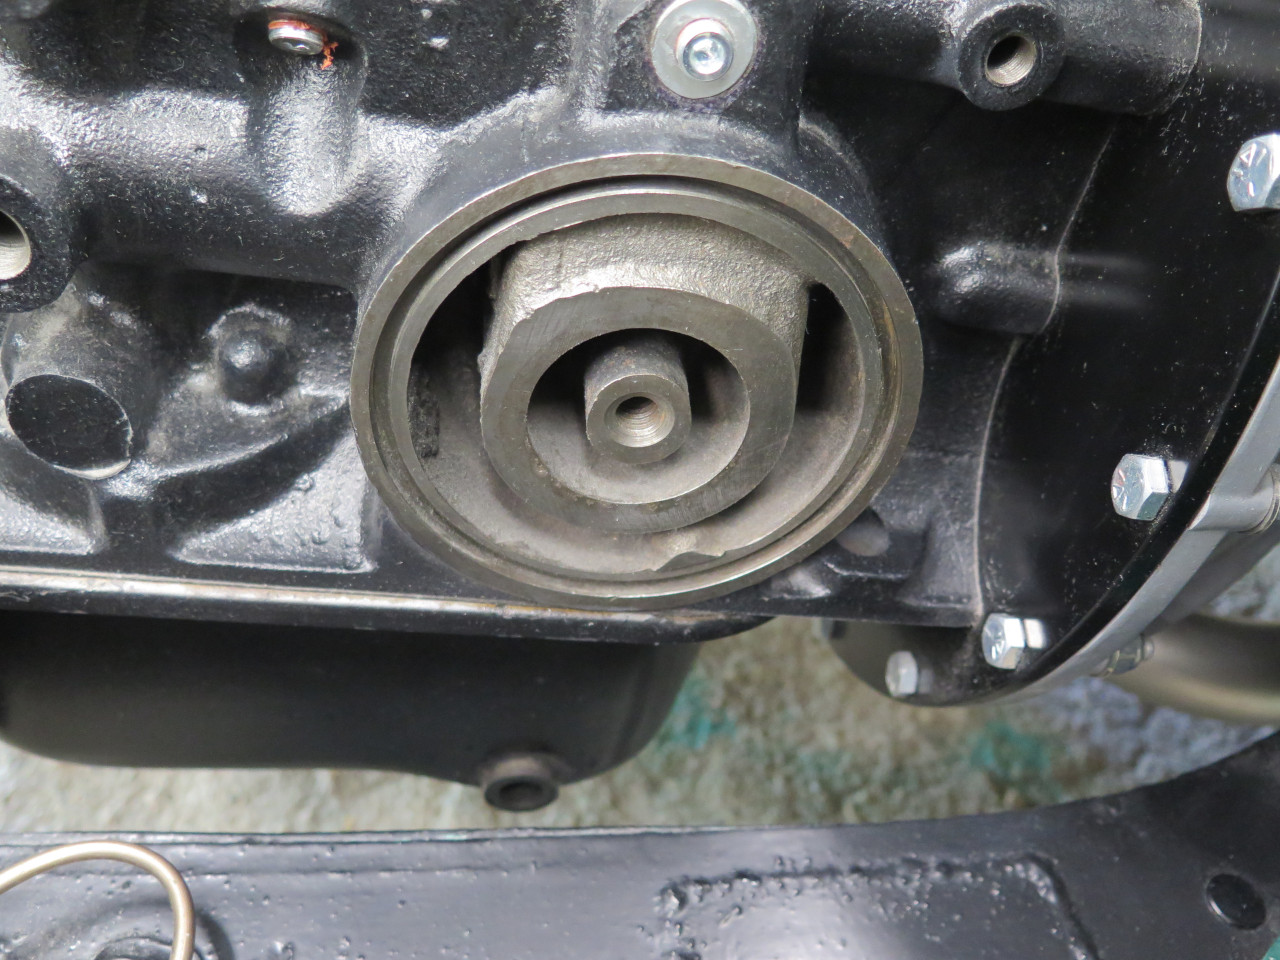
This is the filter housing on my car. Please forgive the Chevy
Orange color. I apparently once thought it was cool. The
flying saucer-shaped thing inside is the relief valve.

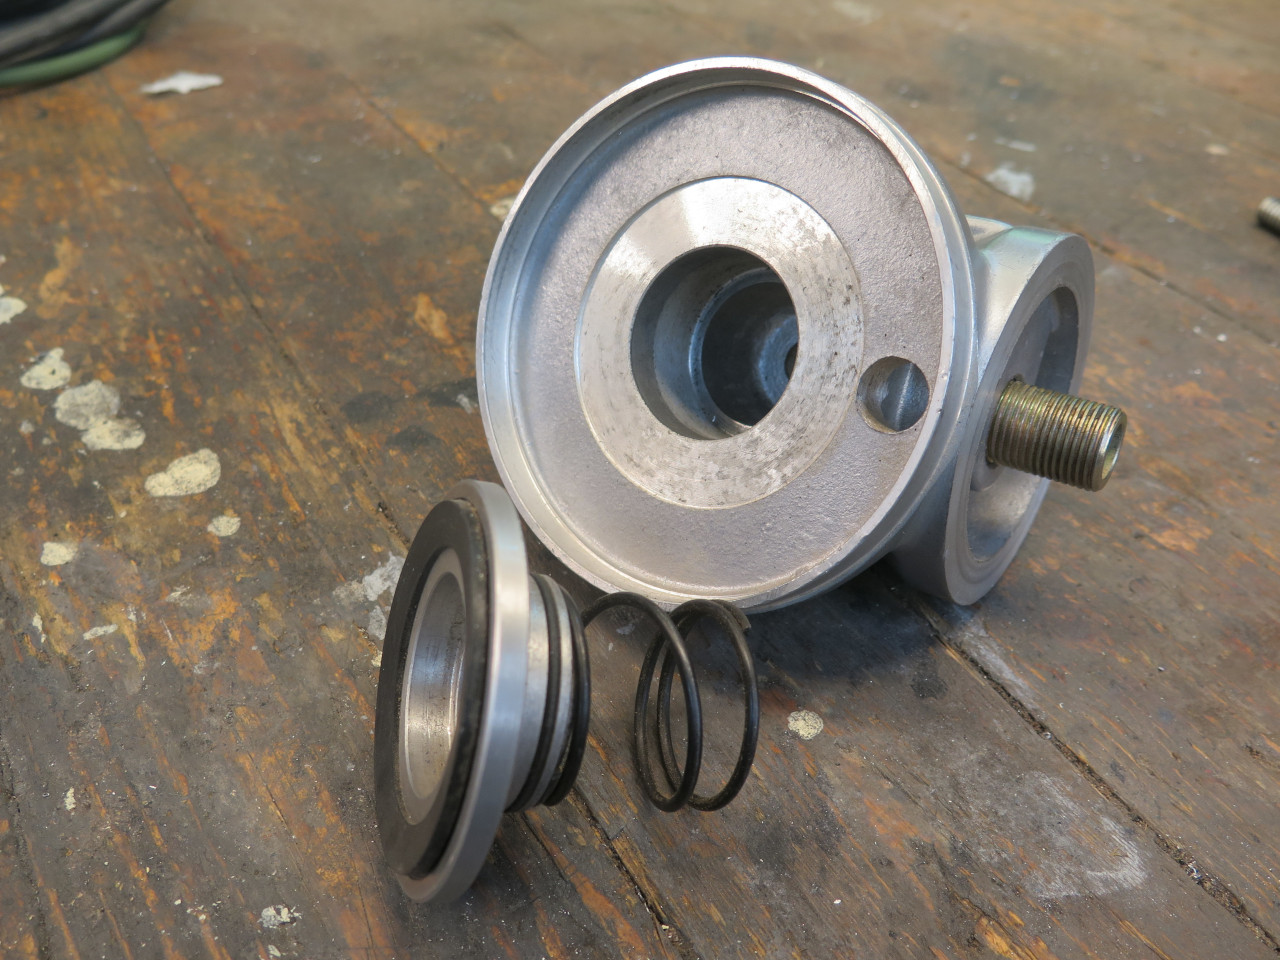
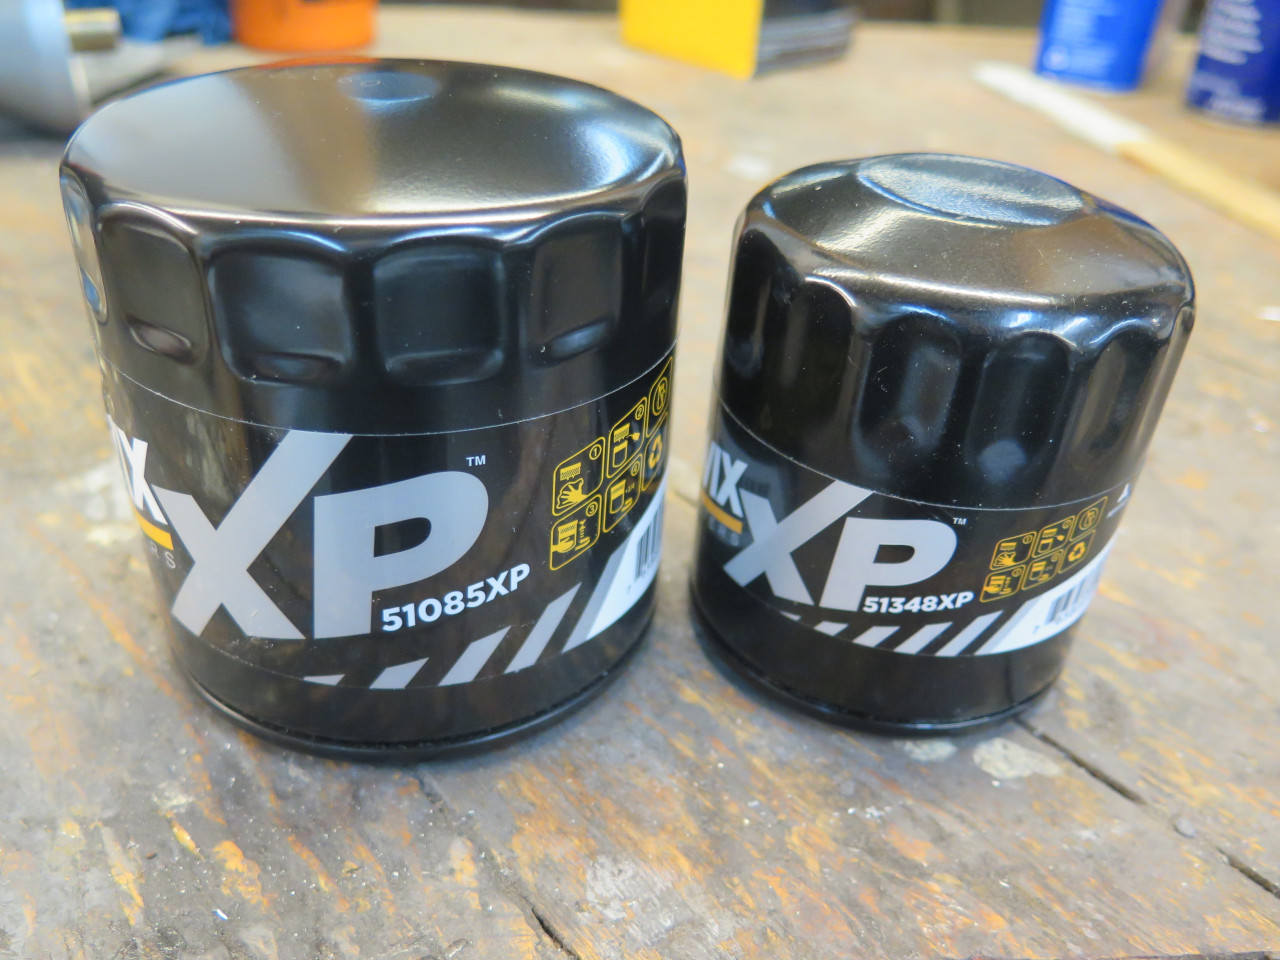
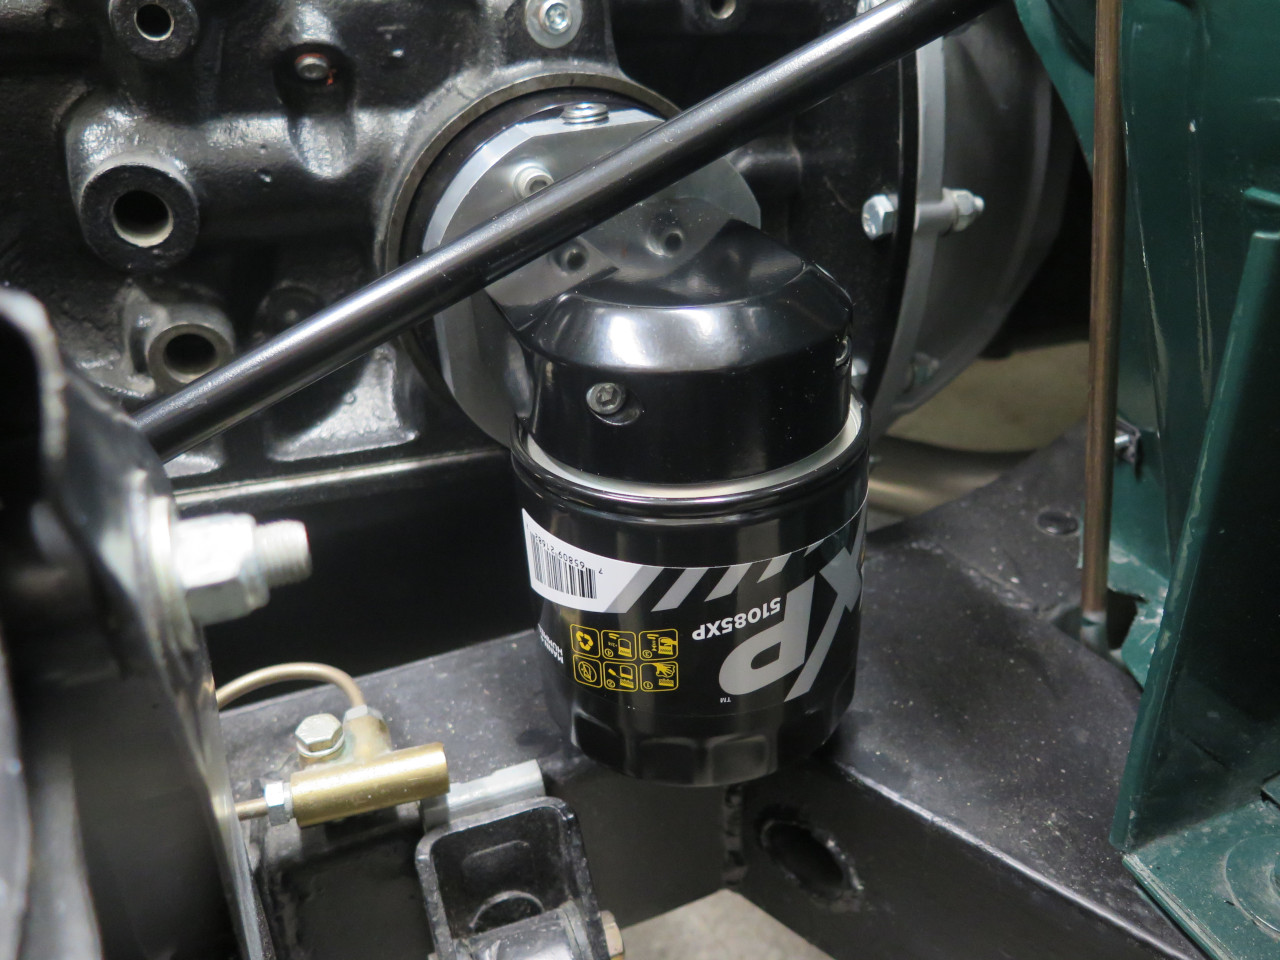
It's a pretty common mod for owners of these cars to install an adapter
to convert the car to use a modern spin-on filter. The idea is to
make changing the filter a simpler and more pleasant job. All of
the adapters I have seen are similar to this one, which I bought online,
along with the recommended filter.
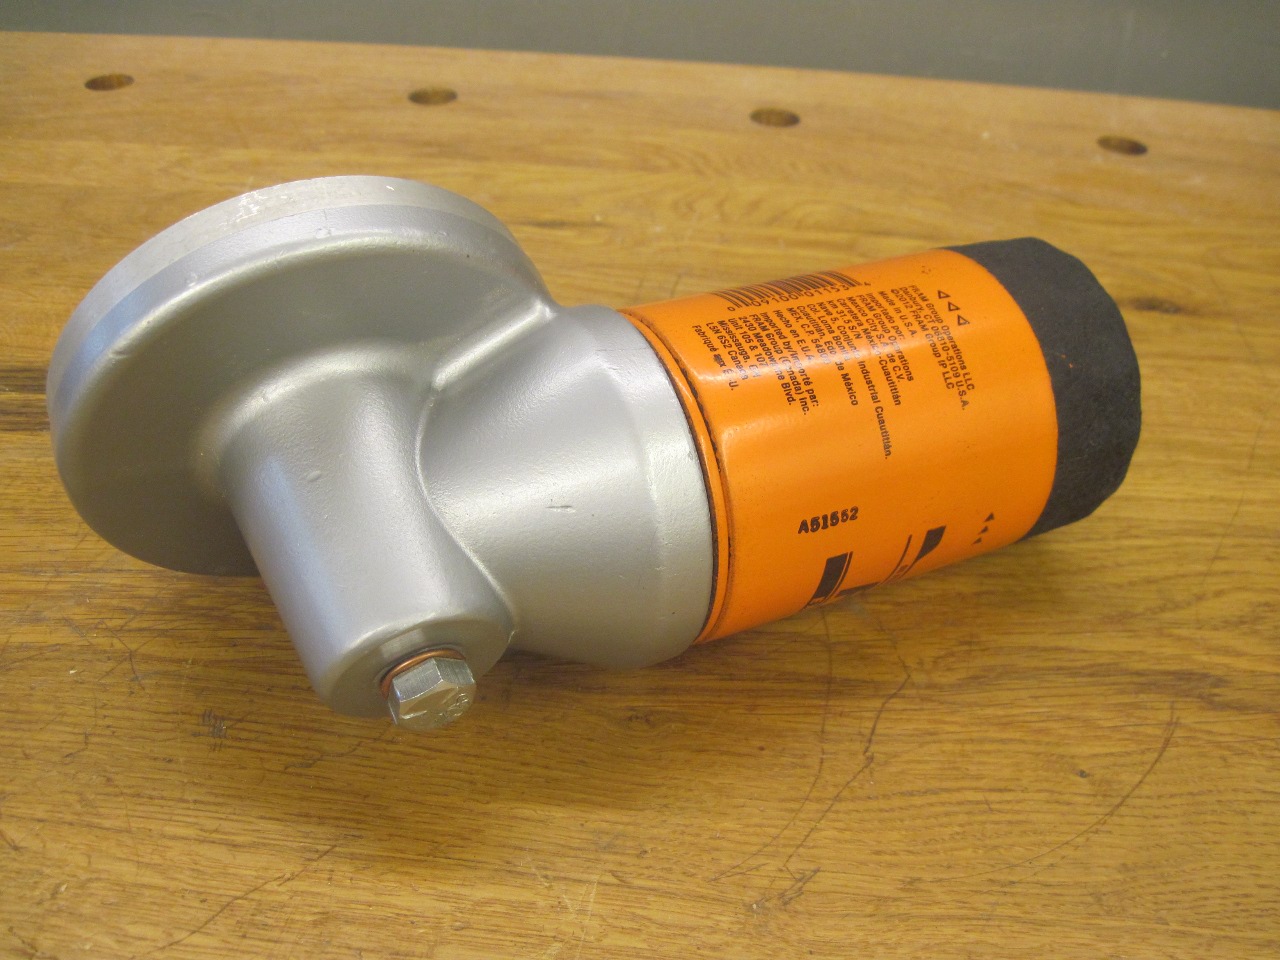
The adapter fits in place of the original filter housing, but the filter
has to be placed at a pronounced angle to clear obstructions in the
area. Even switching to the shortest filter I could find doesn't
help much.
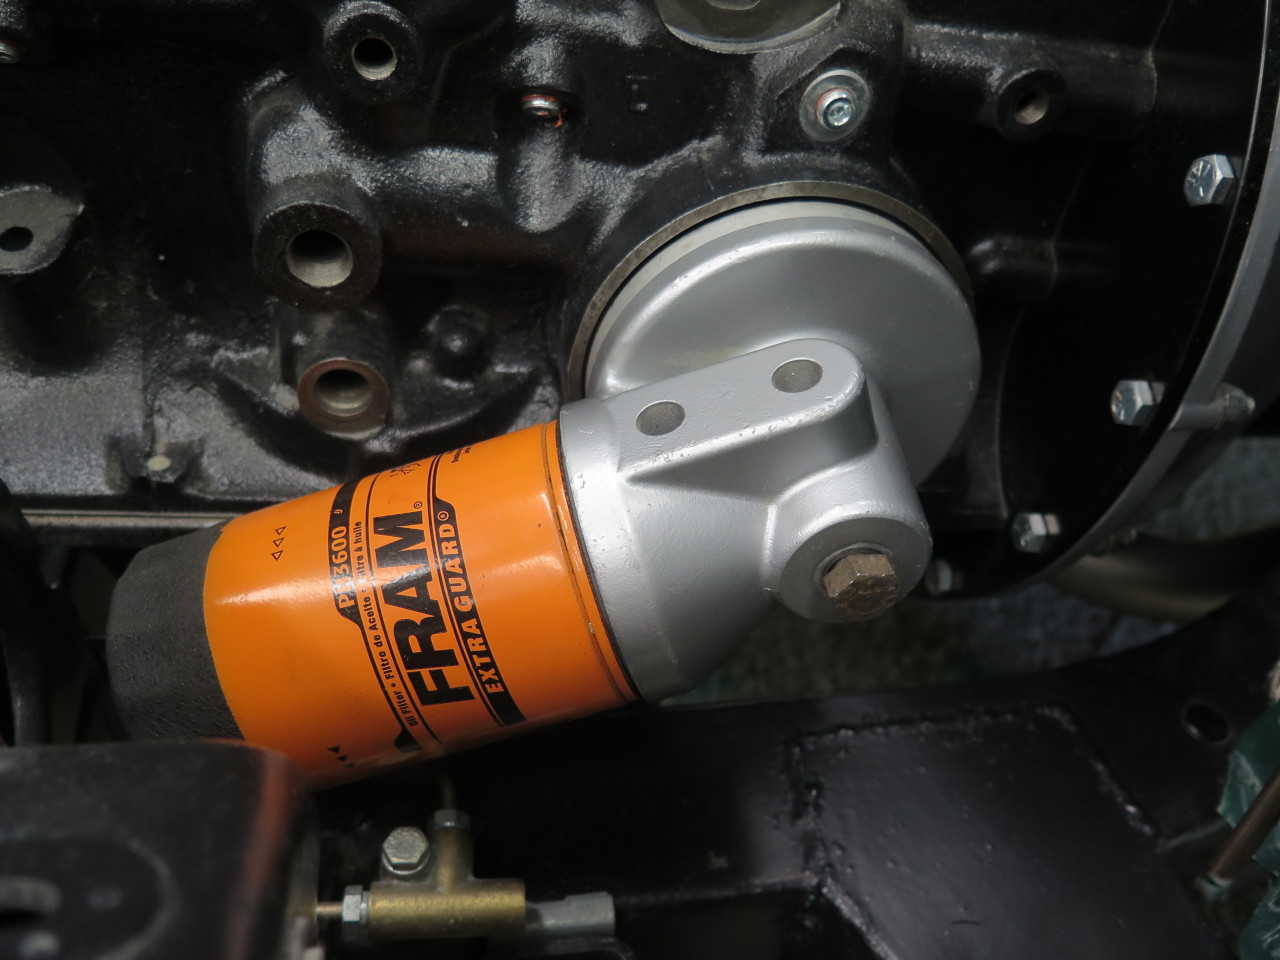

Now, having the oil filter at an angle isn't really the end of the
world, and I know that some modern cars have the filter at an angle, but
I didn't like it. First, it compromises one of the main reasons
to fit a spin-on--not having oil drip all over when you remove the
filter. Second (and just as important to me), it violates my sense
of righteous rectitude. It looked like a general purpose design,
meant to fit a wide range of cars, but none of them very well.
I was ruminating, sitting and staring at the skewed filter when Inner Engineer popped into the garage.
"Wassup?" he asked, probably not really expecting an answer.
"I'm just trying out this spin on filter adapter I bought," I answered anyway.
"Hmm. Why's it all wonky like that?"
"So that's the first thing you noticed, too?"
"Yeah. Looks cockeyed."
"I don't think there are any other choices if I want to go with spin-on."
"Didn't you do something for your TR6?" he asked, looking at me sideways.
"Well, yeah, but it was a lot of work."
"You're retired, Dude. What else do you have to spend your time on?"
I didn't have a good answer.
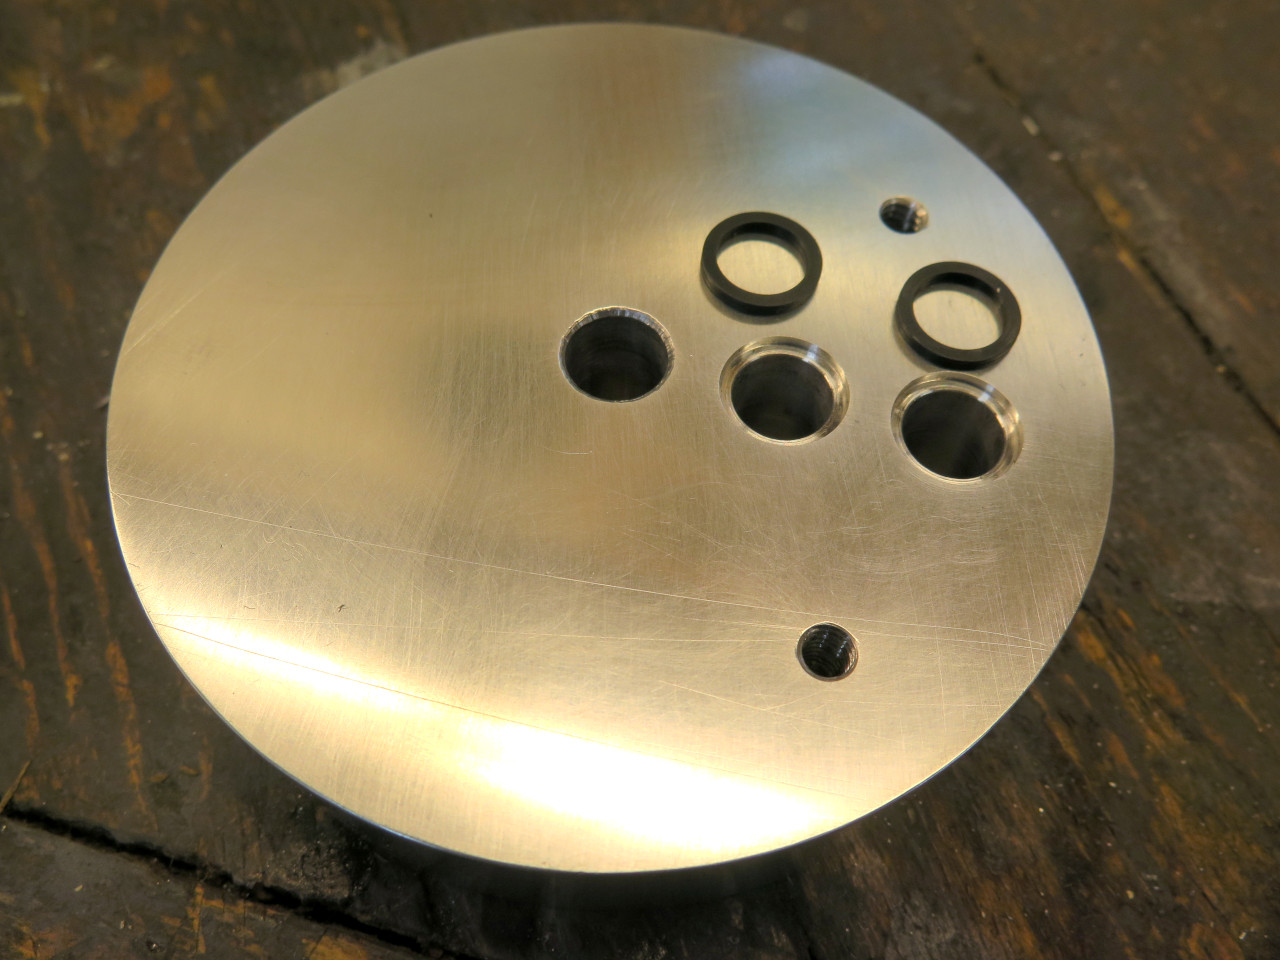
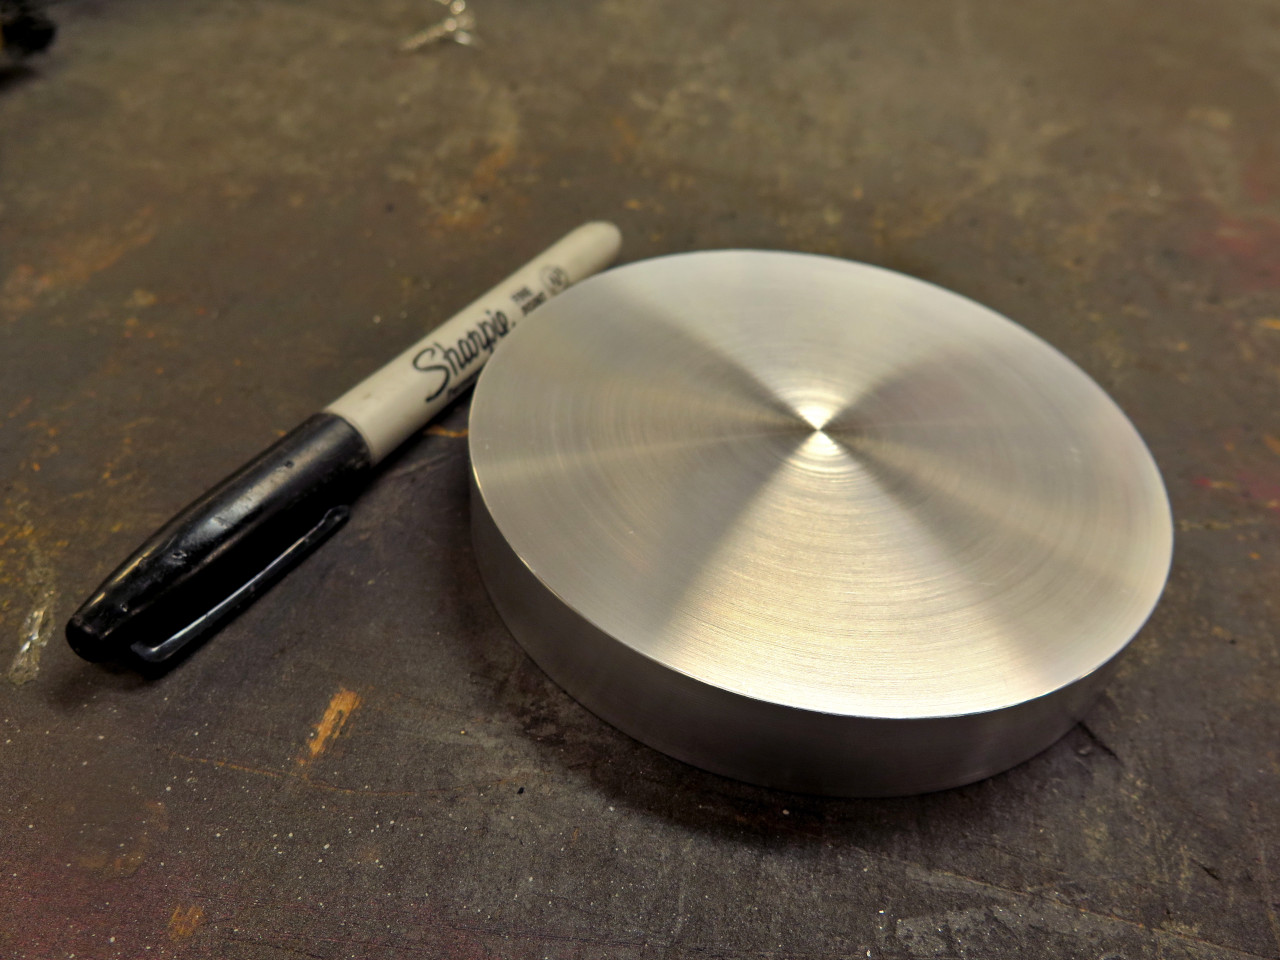
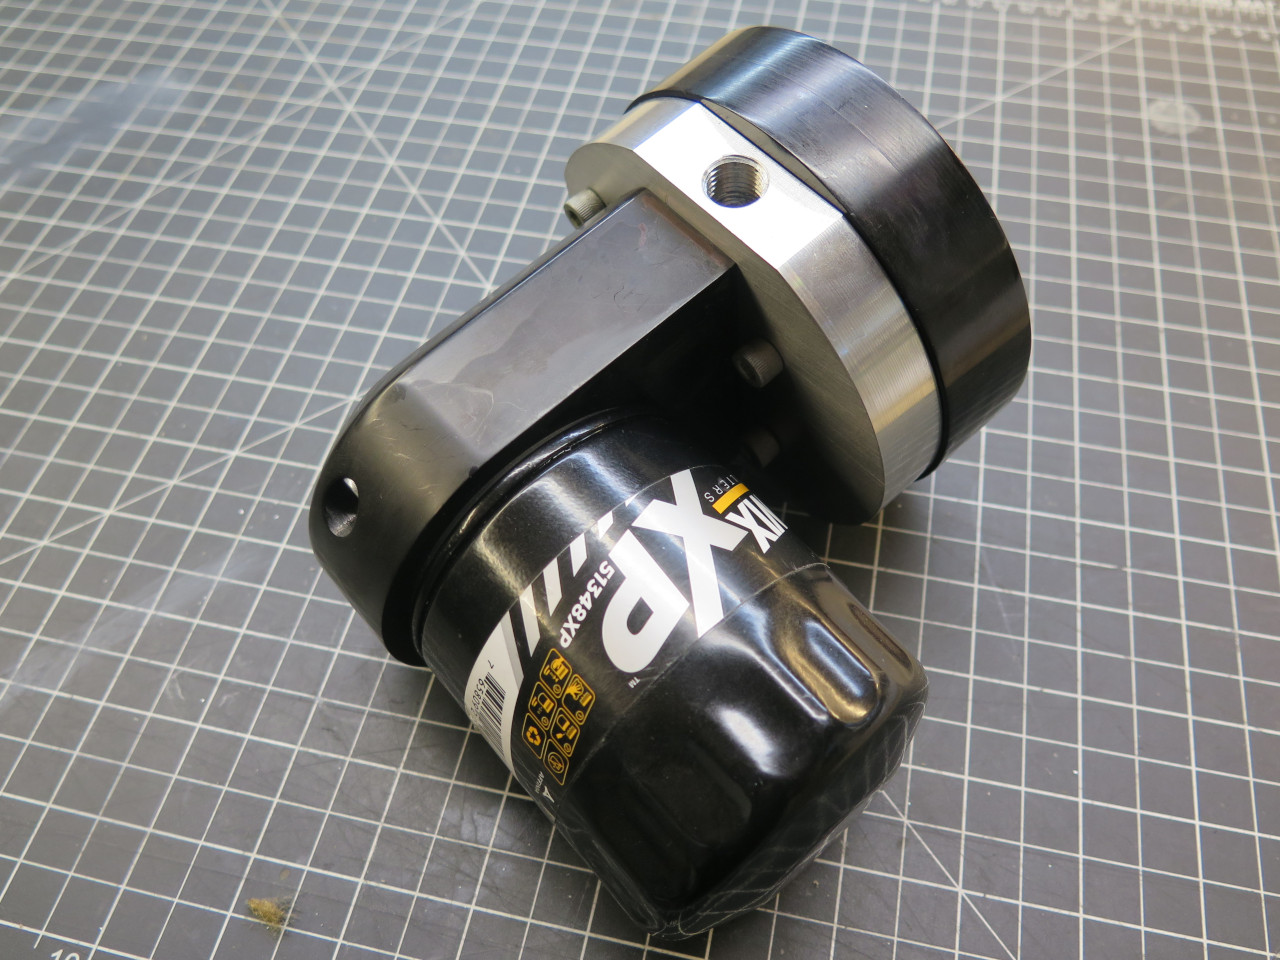
I went online and ordered a couple of chunks of aluminum.
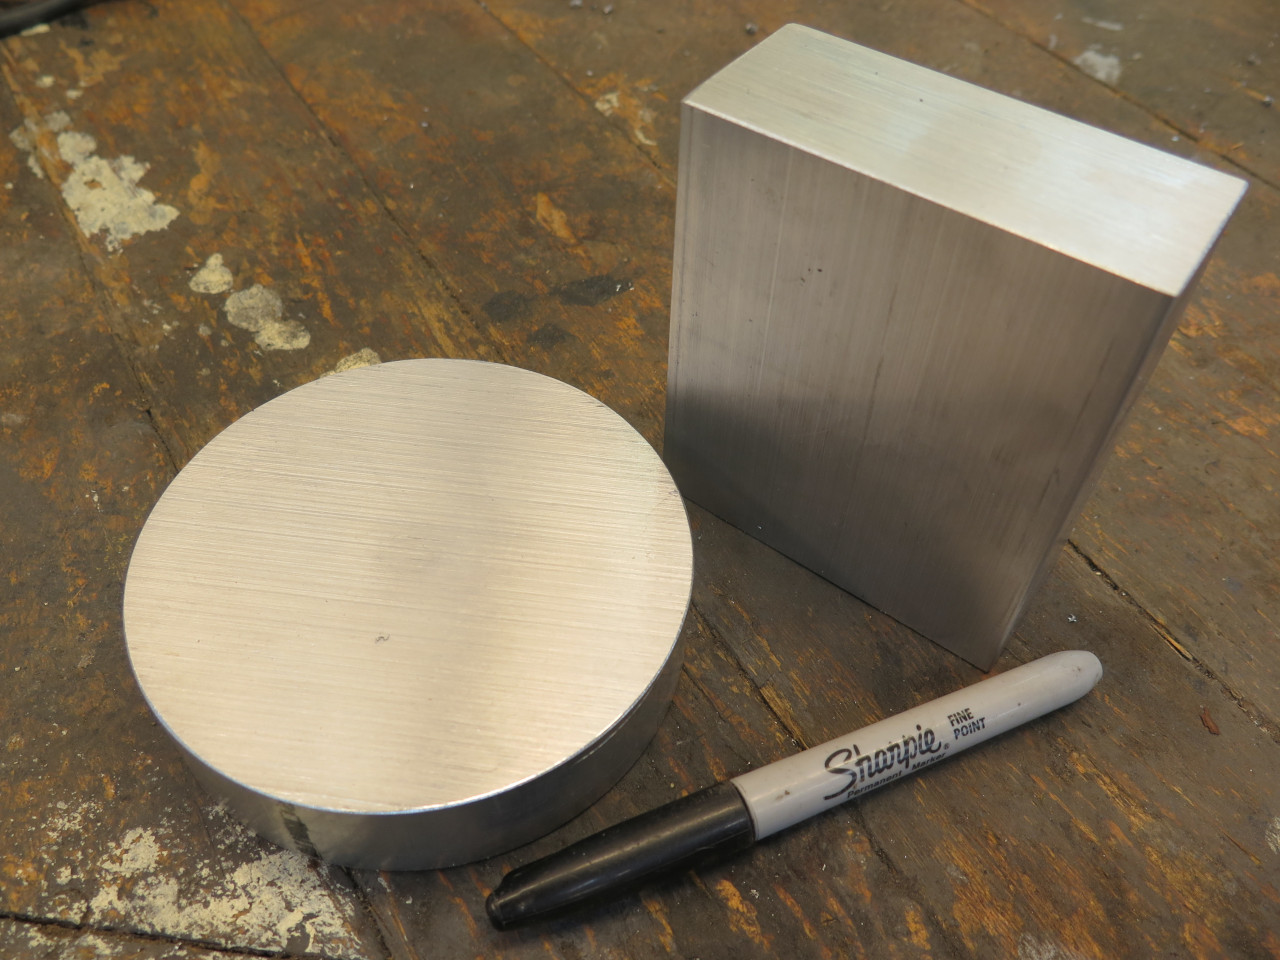
The puck-shaped piece is for the base of the adapter--the part that has
to interface with the engine block. It has to have a lip around
the outer edge that fits in the groove in the block. That groove
is where the big skinny square section O ring seal goes. It also
has to have a seal that bears against that intermediate circular feature
on the block. That seal keeps the dirty incoming and clean
outgoing oil streams separate.
The commercially available adapter has a spring loaded carrier for that
inner seal. My understanding is that this was necessary because
that seal surface on the block varied in depth relative to the outer
sealing surface. The variation was certainly over car years and
models, and maybe even over individual blocks.
Since I was making this adapter just for this particular car, I saw no
need to account for that variation. It was still a sensitive
dimension, though. Ideally, on tightening the adapter to the
block, I wanted the outer seal to touch and compress first, followed by
the inner seal. I took what measurements I could, but to be sure
of the relationship, I 3D printed a little mockup of the base with my
calculated dimensions, then cut a wedge out of it so I could see inside.

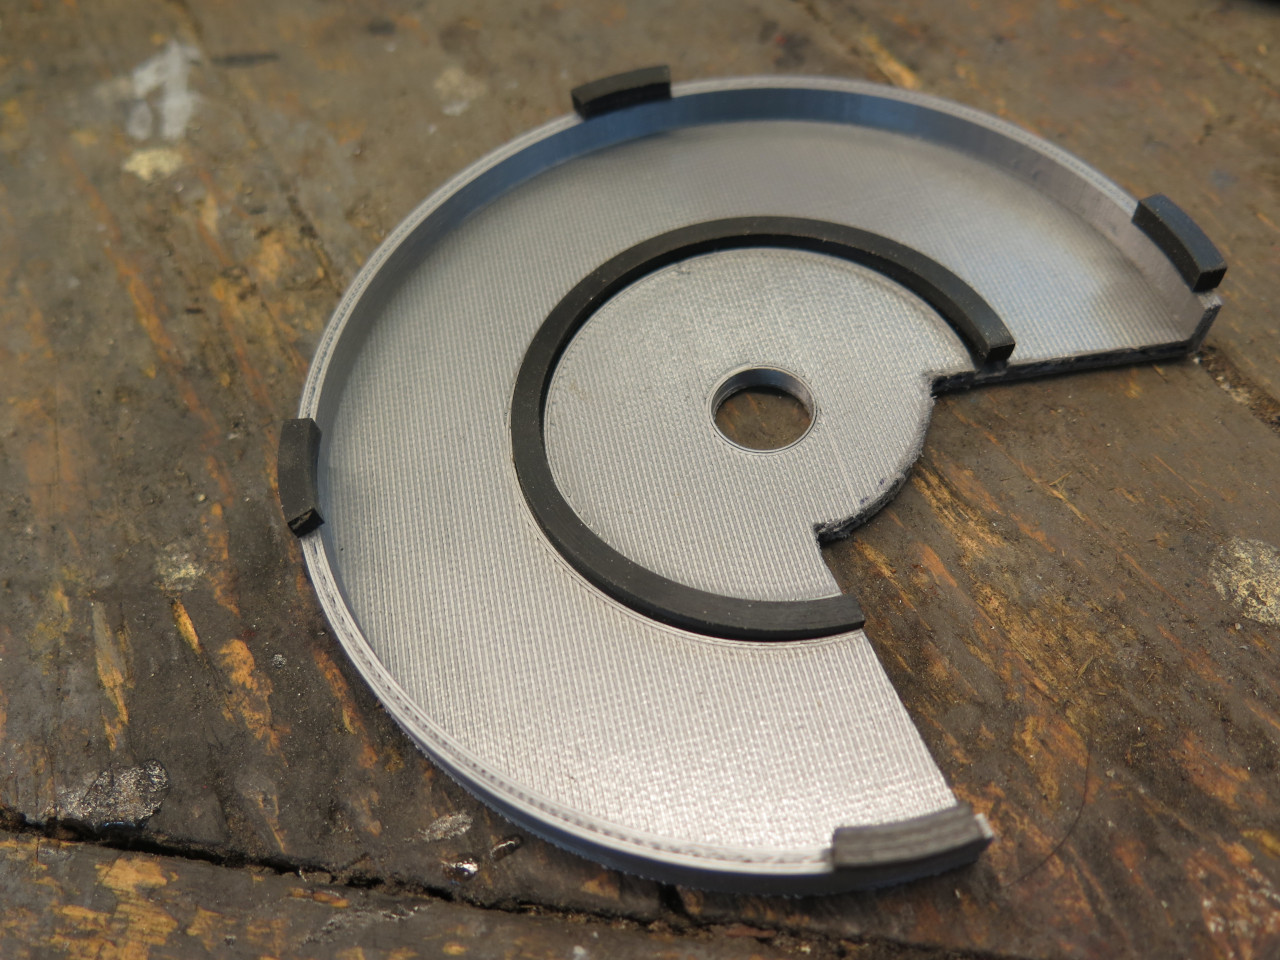
With the part's outer rim seal sections just bottomed out in their
groove, the inner seal was still about 0.015" from touching. I
knew from measuring the used outer seal I removed from the block that it
compresses at least 0.025" when the fastening bolt is fully tightened,
which would see the inner seal compressed by about 0.010". Even if
these numbers are a little off, a little oil weeping past the inner
seal wouldn't be a big deal.

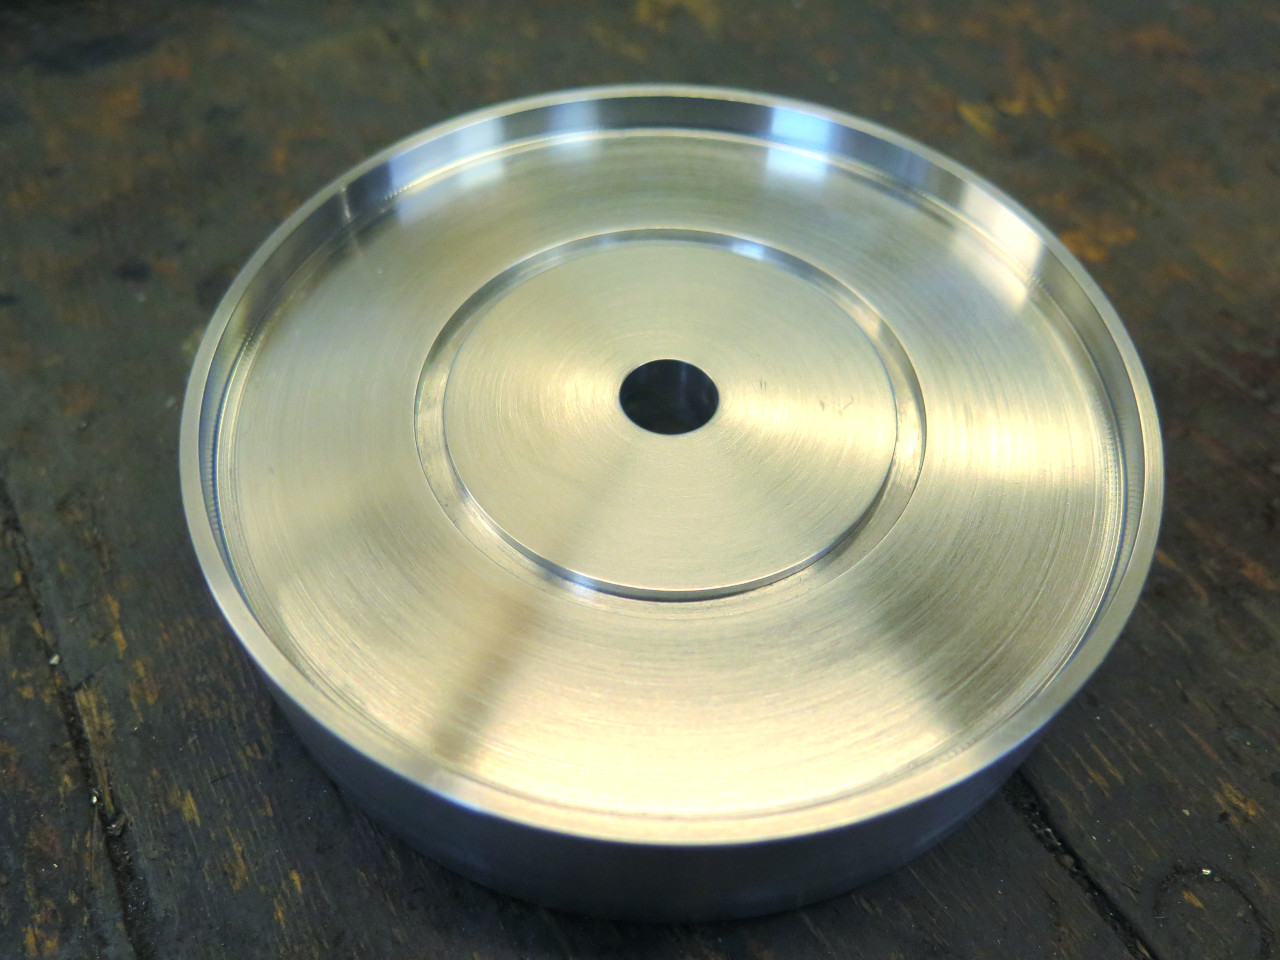
With some comfort in the dimensions, I committed the puck of
aluminum. The inner seal is an industry standard square section
size -227, while the outer seal is whatever is supplied by the
vendors. The fastening bolt also has to be sealed, and that copper
looking thing is an AN900 crush washer, a common aviation part (AN900-7
for the 7/16 ID part).

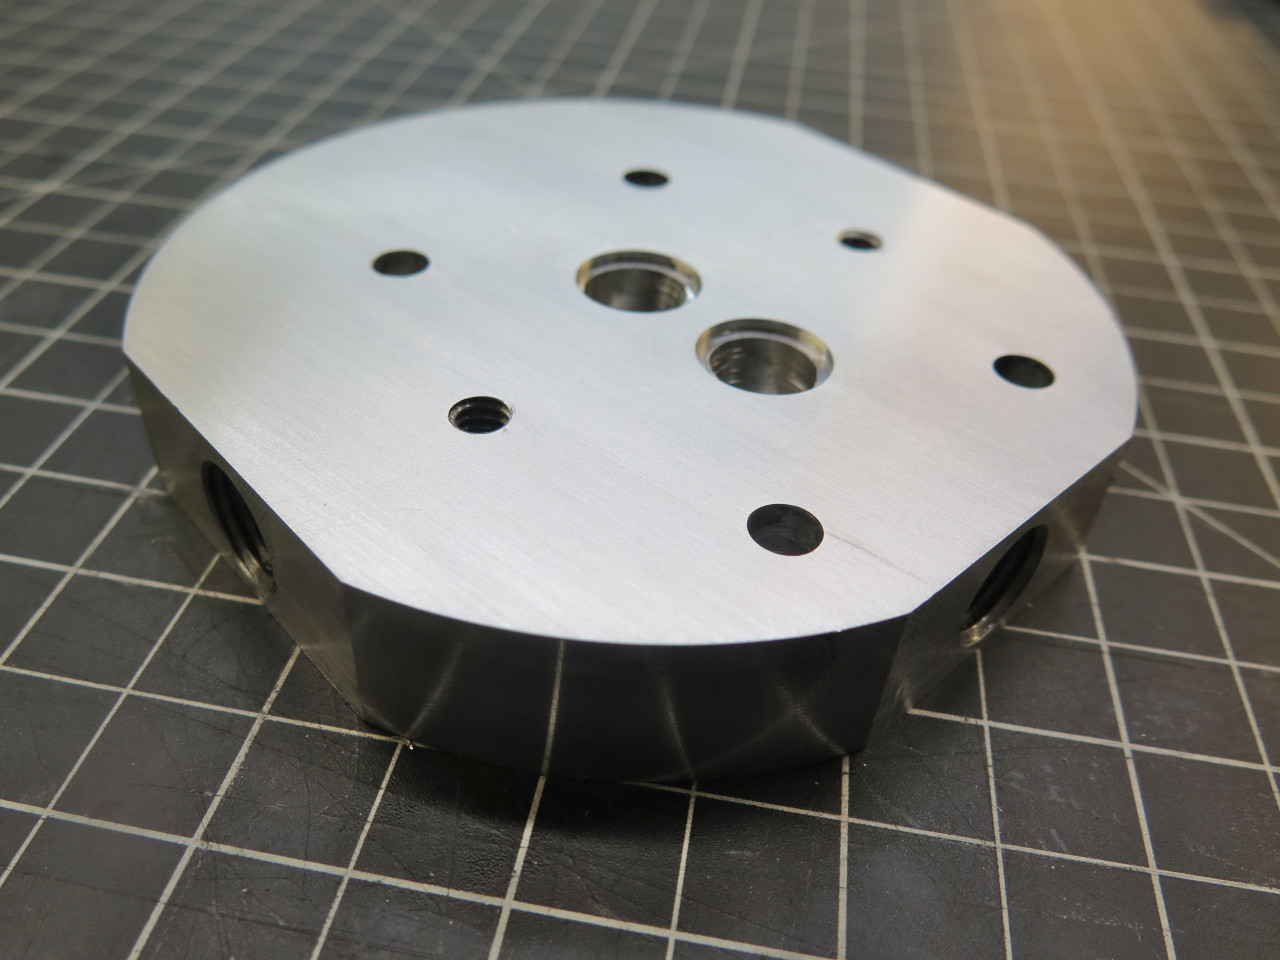
Now, in order to get the oil from he block side to the other side and
vise versa, there had to be an oil passage on either side of the inner
seal. Each of these passages needed a seal to the part that holds
the filter.
The squarish block became the filter mount. It was drilled and
tapped to receive the filter nipple. There are quite a few possibilities
for this thread, but I chose 3/4-16 as a pretty common one. The
nipple itself was made form a 3/4-16 bolt. Oil passages were also
drilled to match the ones in the base.


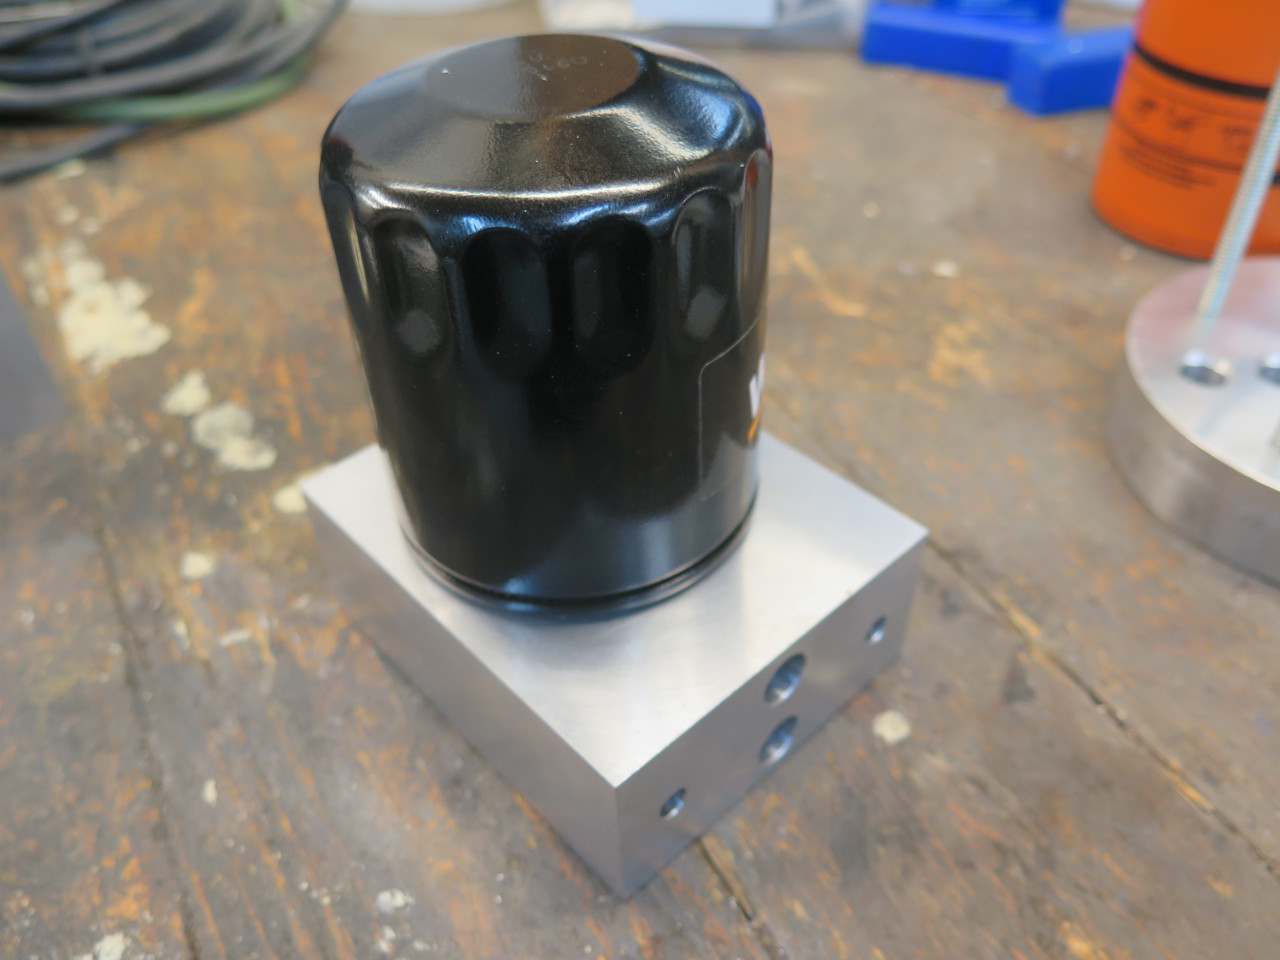
Fitting the two parts together, everything matched up OK, but the assembly looked piecemeal and awkward.
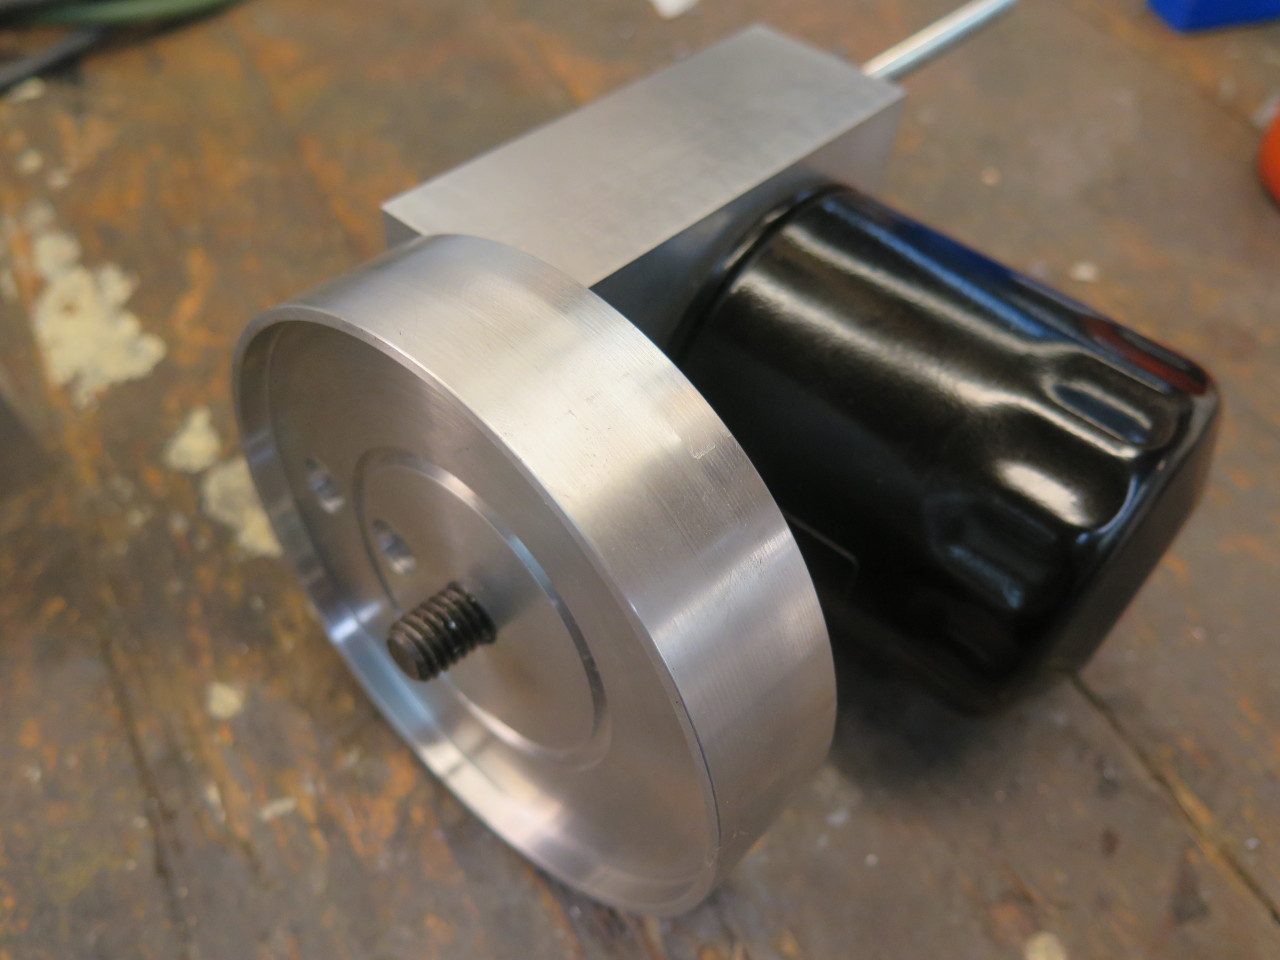
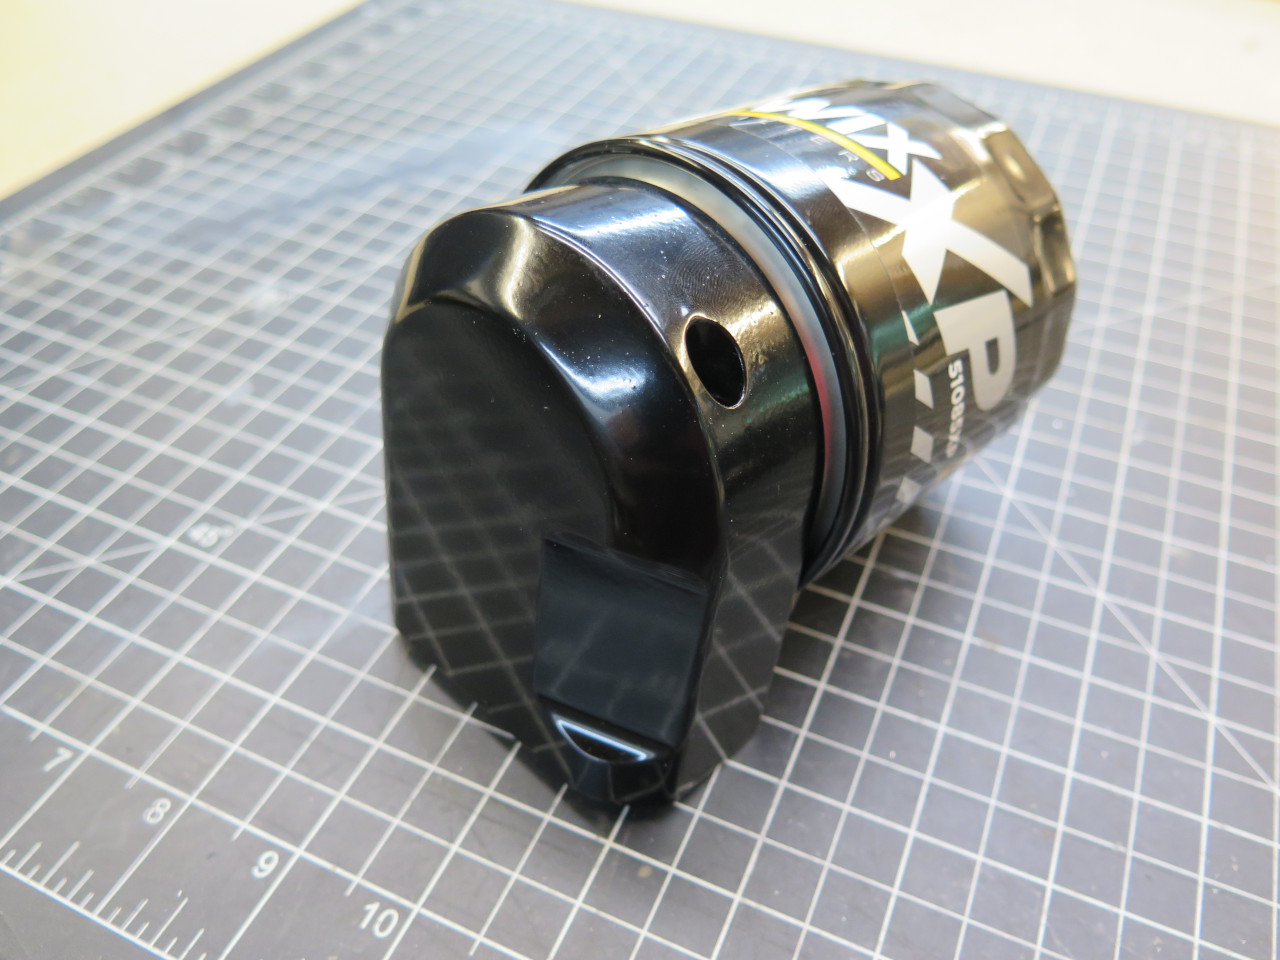
Rounding the filter mount to match the filter helped a lot.

A generous chamfer made it even better.
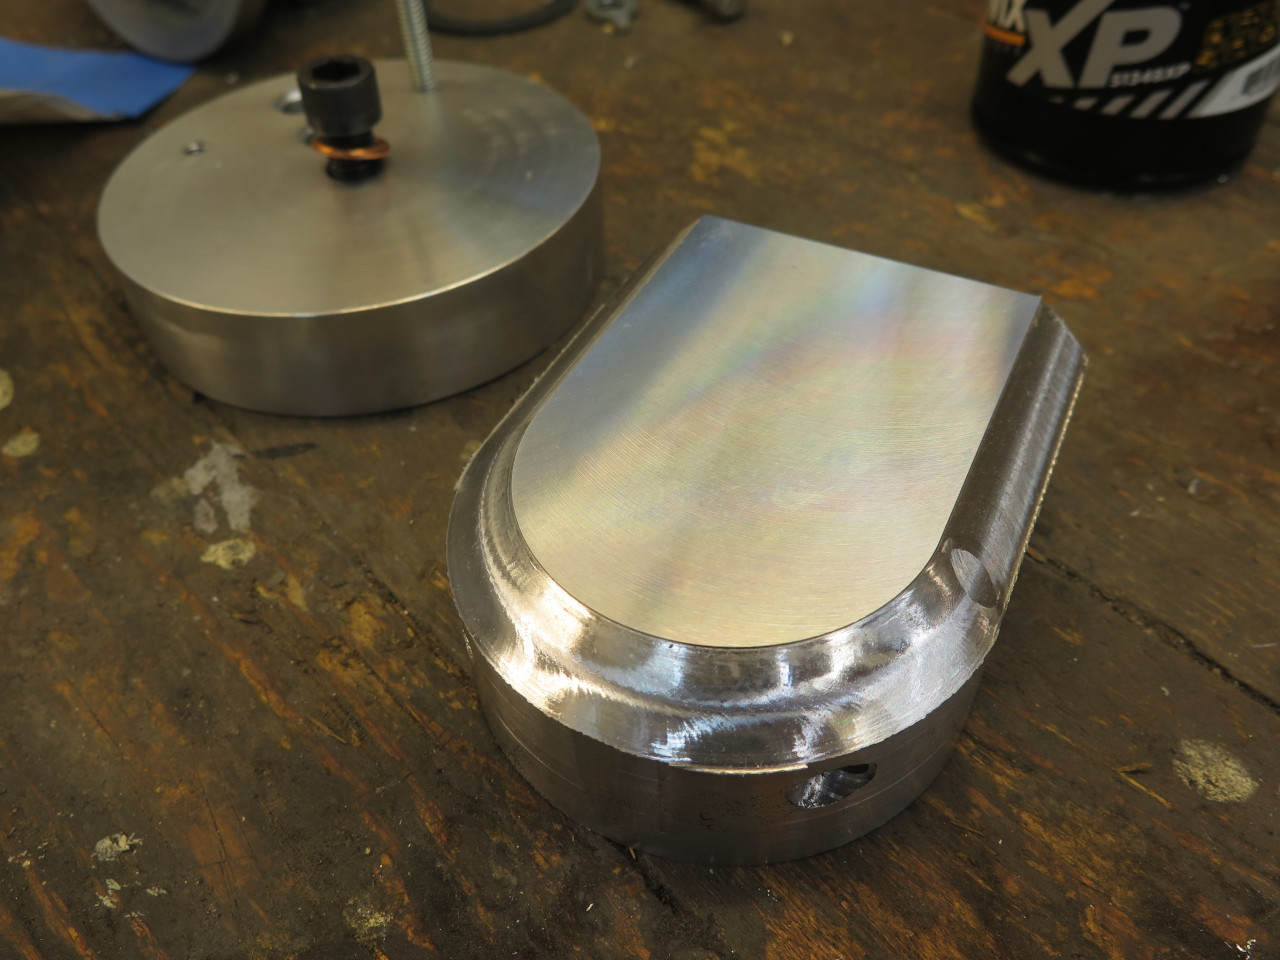
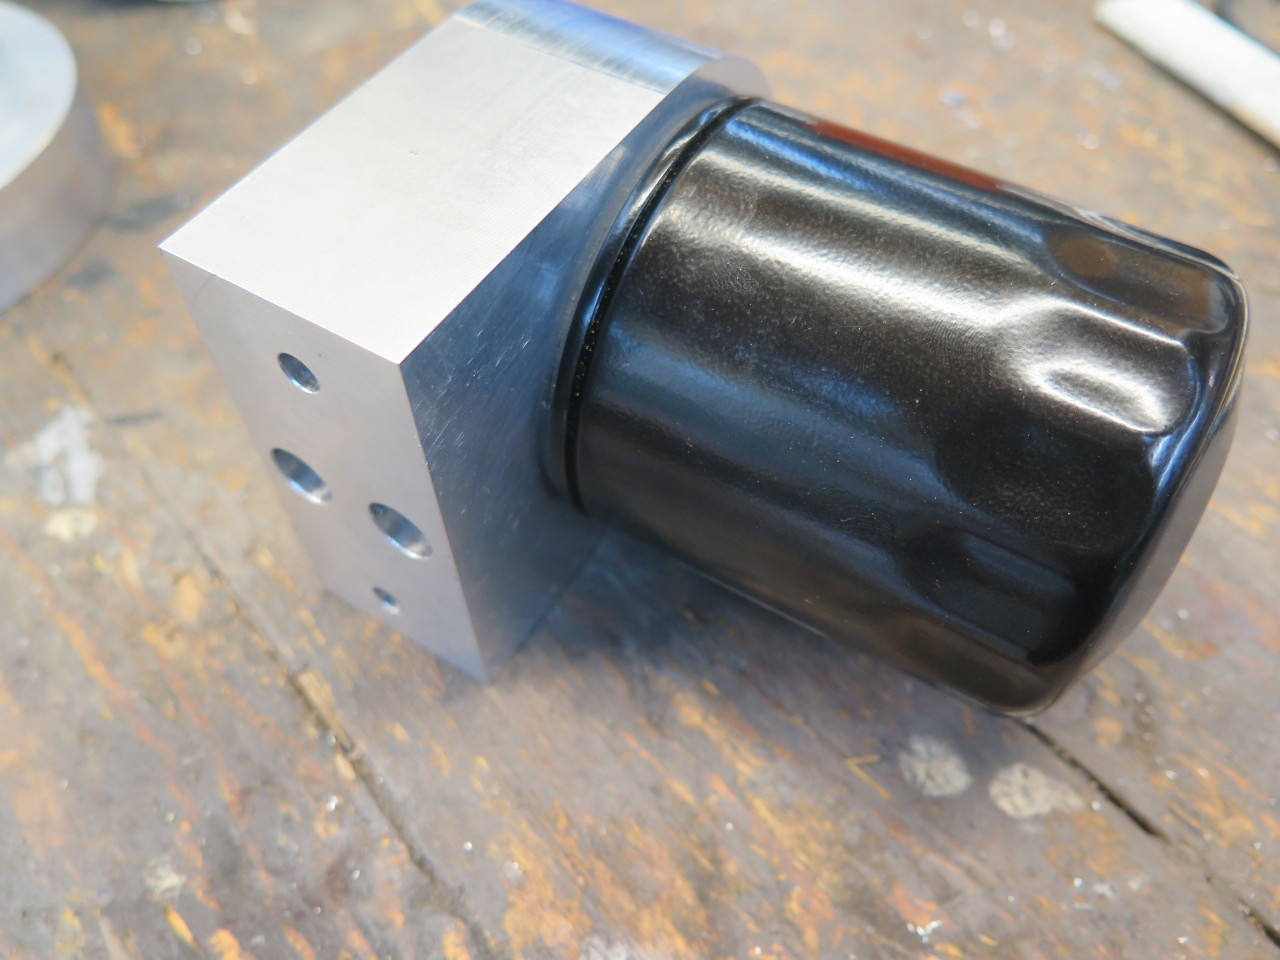
A little polish, and some might even call it attractive.


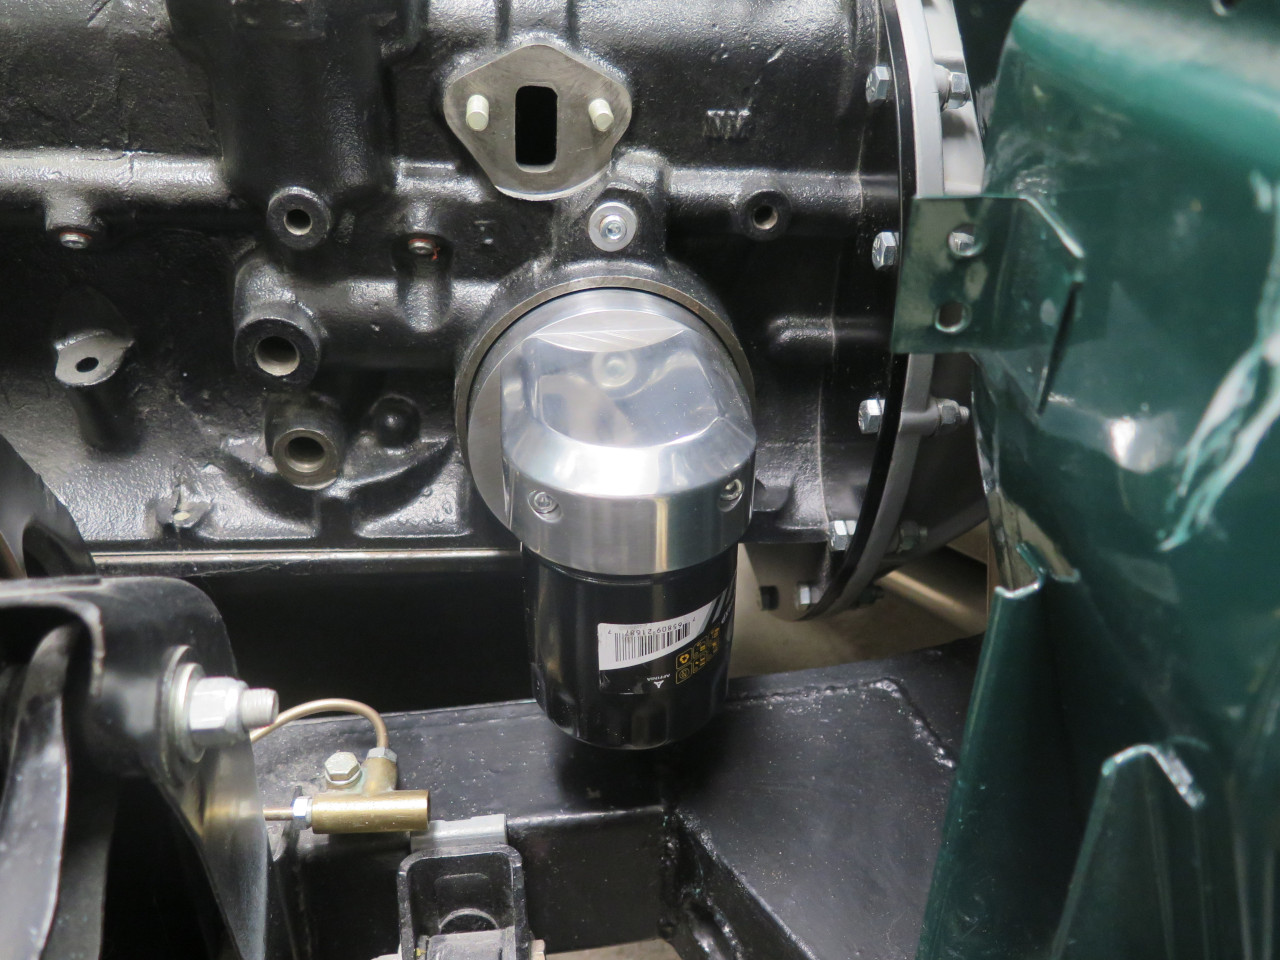
And on the car. Hmmmm, looks a little too blingy to me.

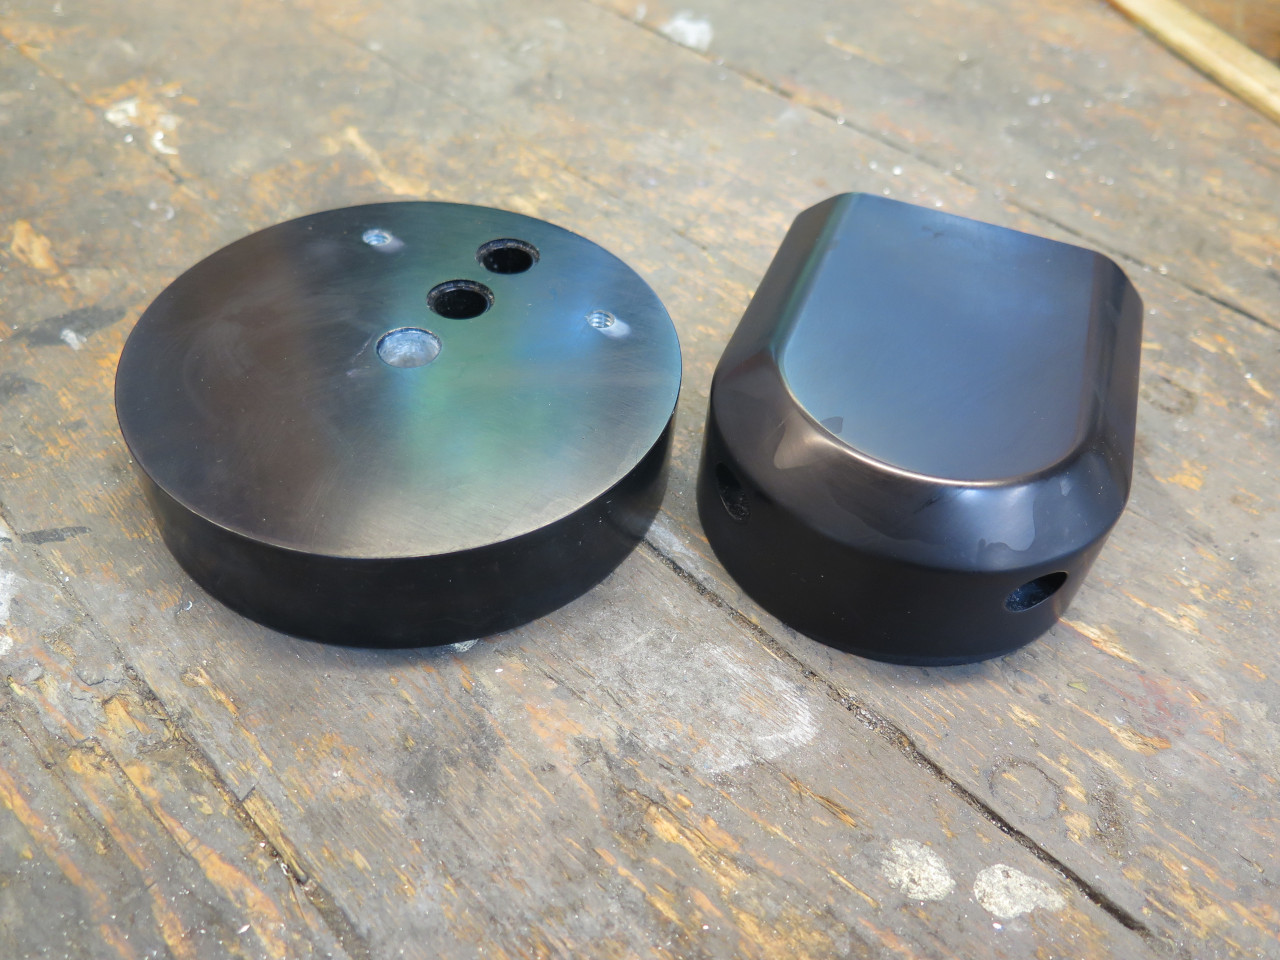
I thought about powder coating the parts, but in the end anodized
them. Red or green anodizing were in contention, but lost out to
boring black.
Since the filter nipple has a hole in its side that has to align with
one of the oil passages, I didn't want it turning. It was
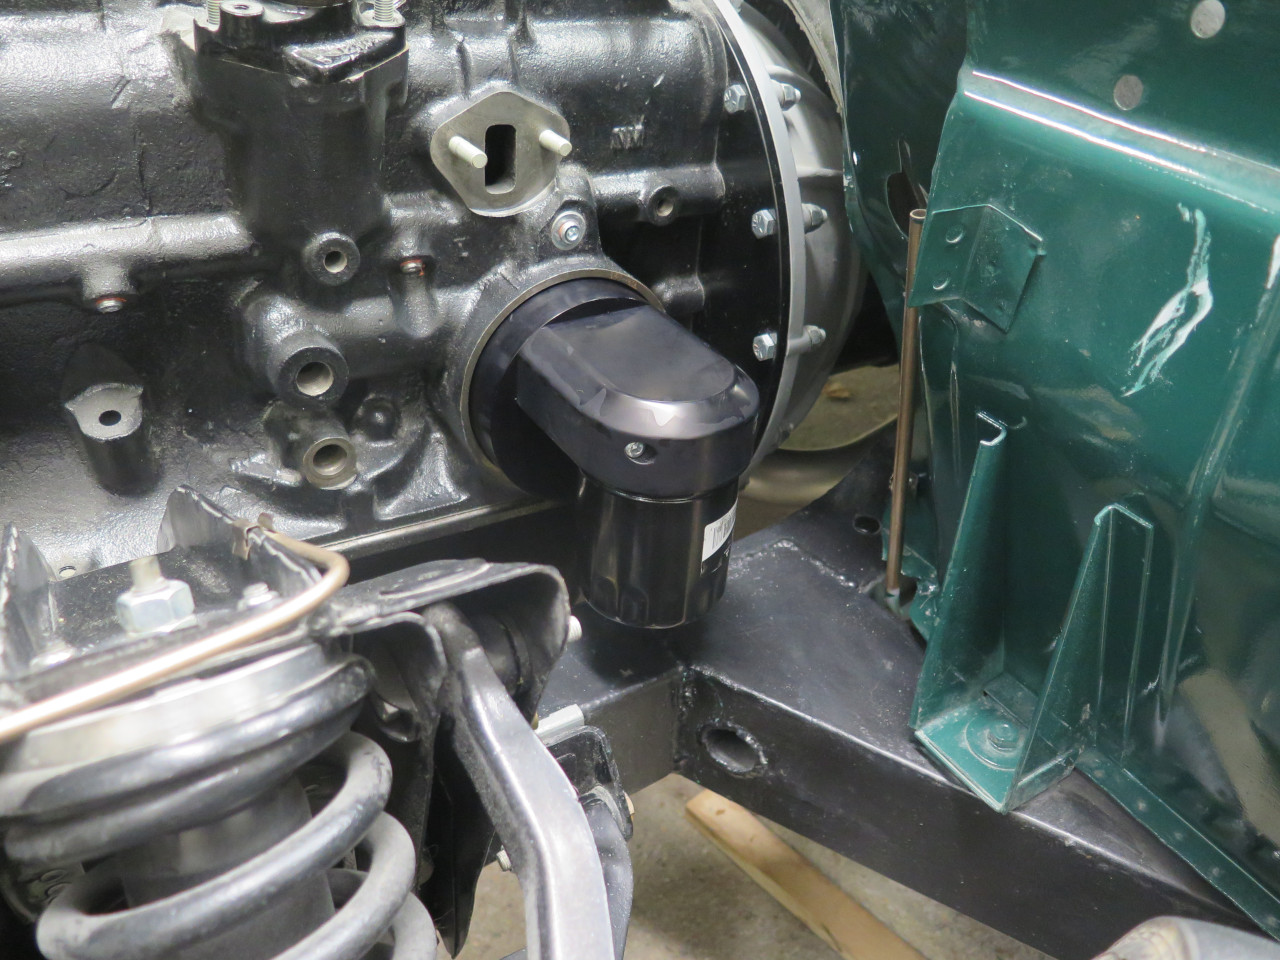
installed with red Locktite, and was staked all around.

Ready to go.

Looks better to my eye.
I did a little research for alternate filters. This is a quite a
bit larger filter that works, but for clearance reasons, I have to use a
hex head fastening bolt instead of the socket head cap screw.

This one was quite a lot of work, especially since it was largely for
aesthetic reasons. It took a few days, and the cost added up to
probably not much less than the commercial adapter (which I also
bought). No regrets, though. It was an enjoyable job.
Update--July, 9, 2022
When I published the above page on a few forums, I got a question about
interference with the steering column. The questioner pointed out
that the reason that the factory GT6 oil filter housing was smaller than
the TR6 housing (at least on LHD cars) was that the GT6 steering column
interfered with the larger housing.
In fact, I had thought about the potential for interference, but in a
maybe over-optimistic eye-ball evaluation, I thought that any
interference would be minor, and I could probably just reshape my
adapter a little to accommodate the column.
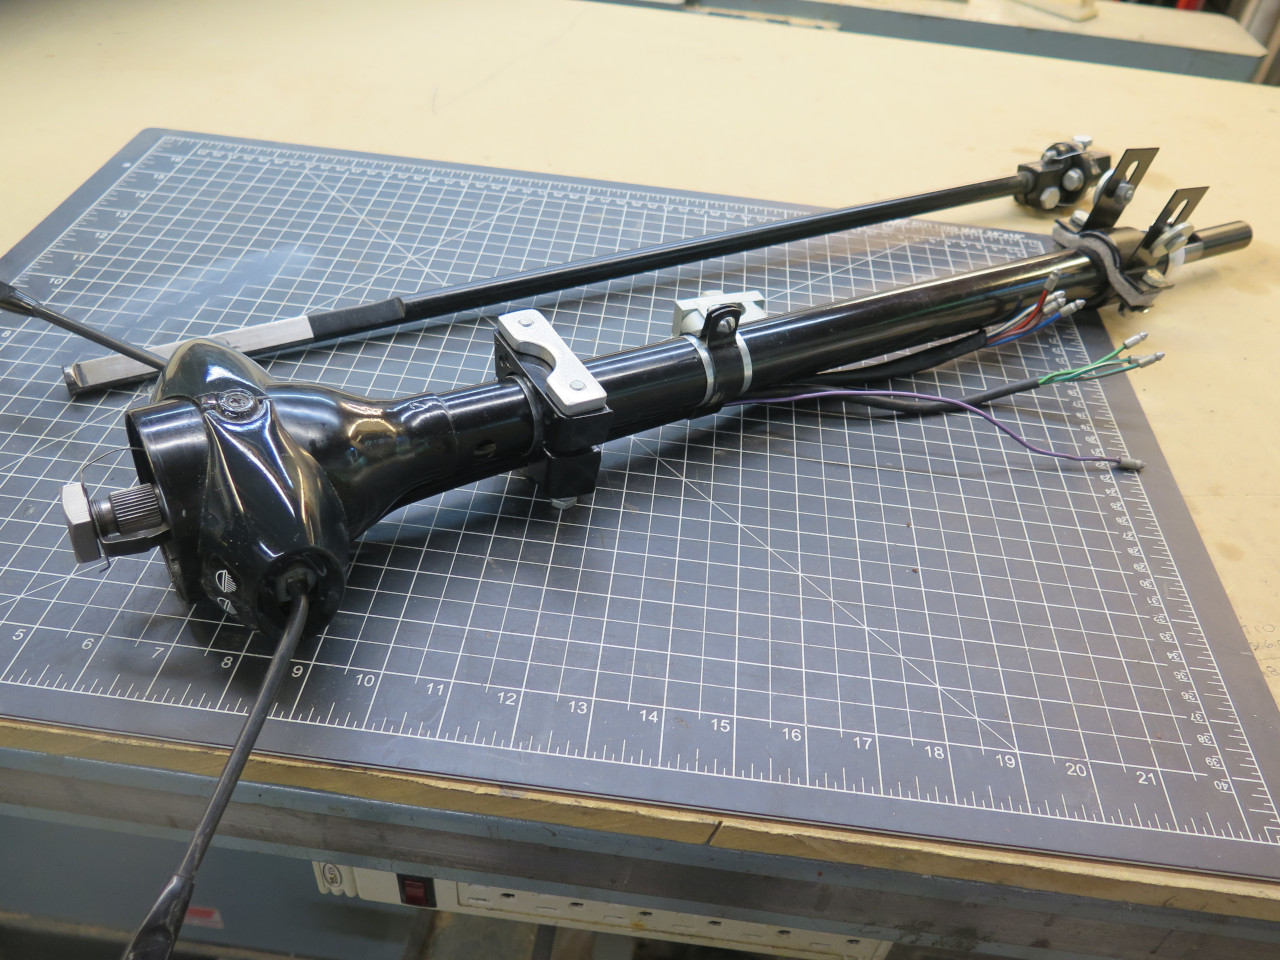
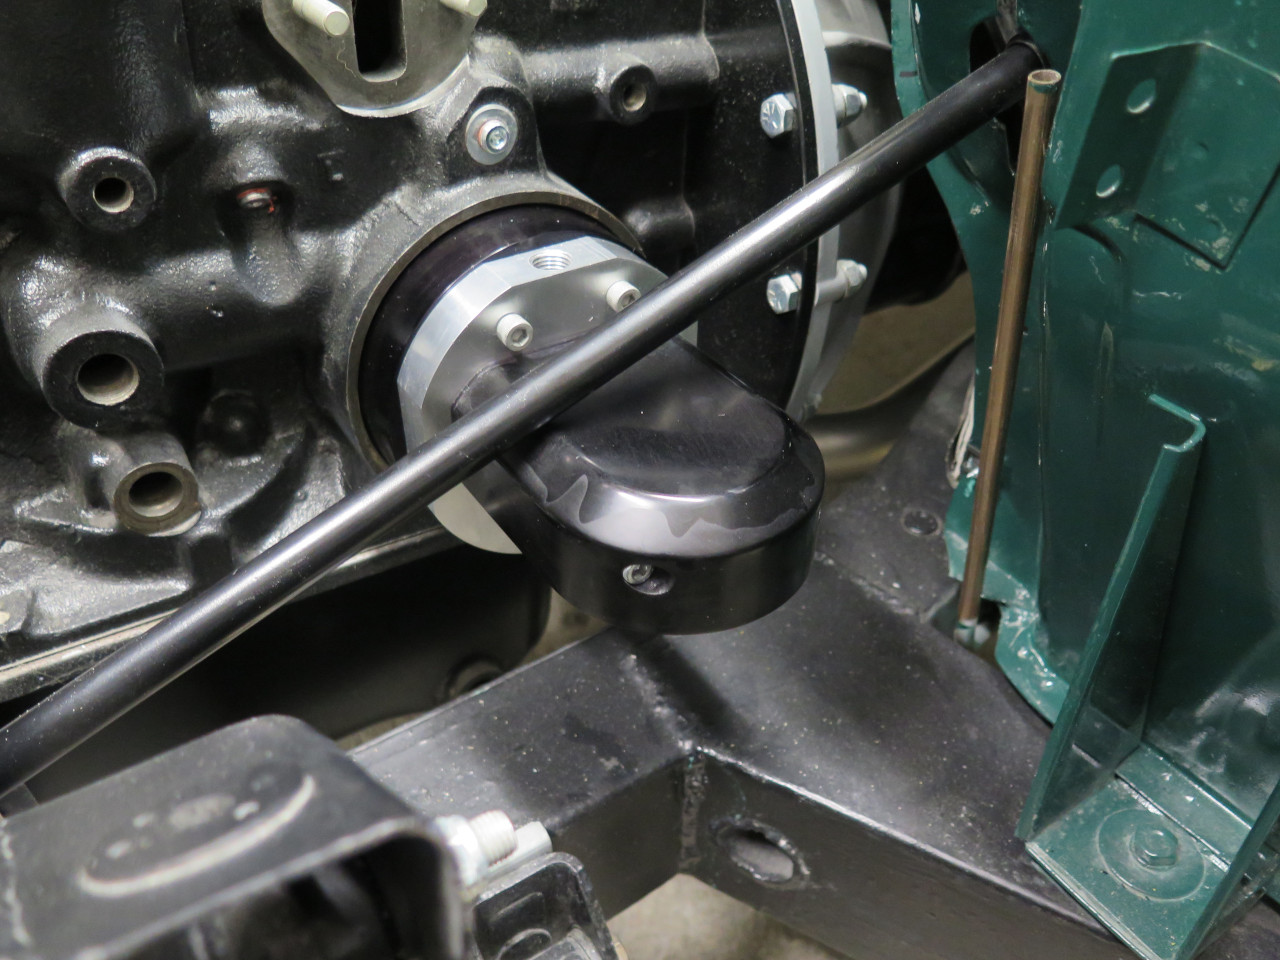
Well, I dug out the re-furbed steering column
a few days ago and installed it. Then I went to install the
filter adapter, and to my horror saw immediately that the interference
was not minor. and that no amount of reshaping the adapter was going to
fix it. In fact, the column would pass directly through the top
oil gallery of the adapter.

It looked like the filter mount part of the adapter needed to be at least 3/4" lower to clear the column.
I slept on it for a couple of nights.
I finally landed on making a transition piece that would go between the
adapter base, which bolts to the engine block, and the part that holds
the filter. The transition would jog the two oil galleries
downward by 3/4". I figured I could do this translation in a piece
about 11/16" thick and still have generous sized galleries.
I started with an aluminum puck similar to the one that became the
adapter base, and drilled the required passages, and some mounting
holes.
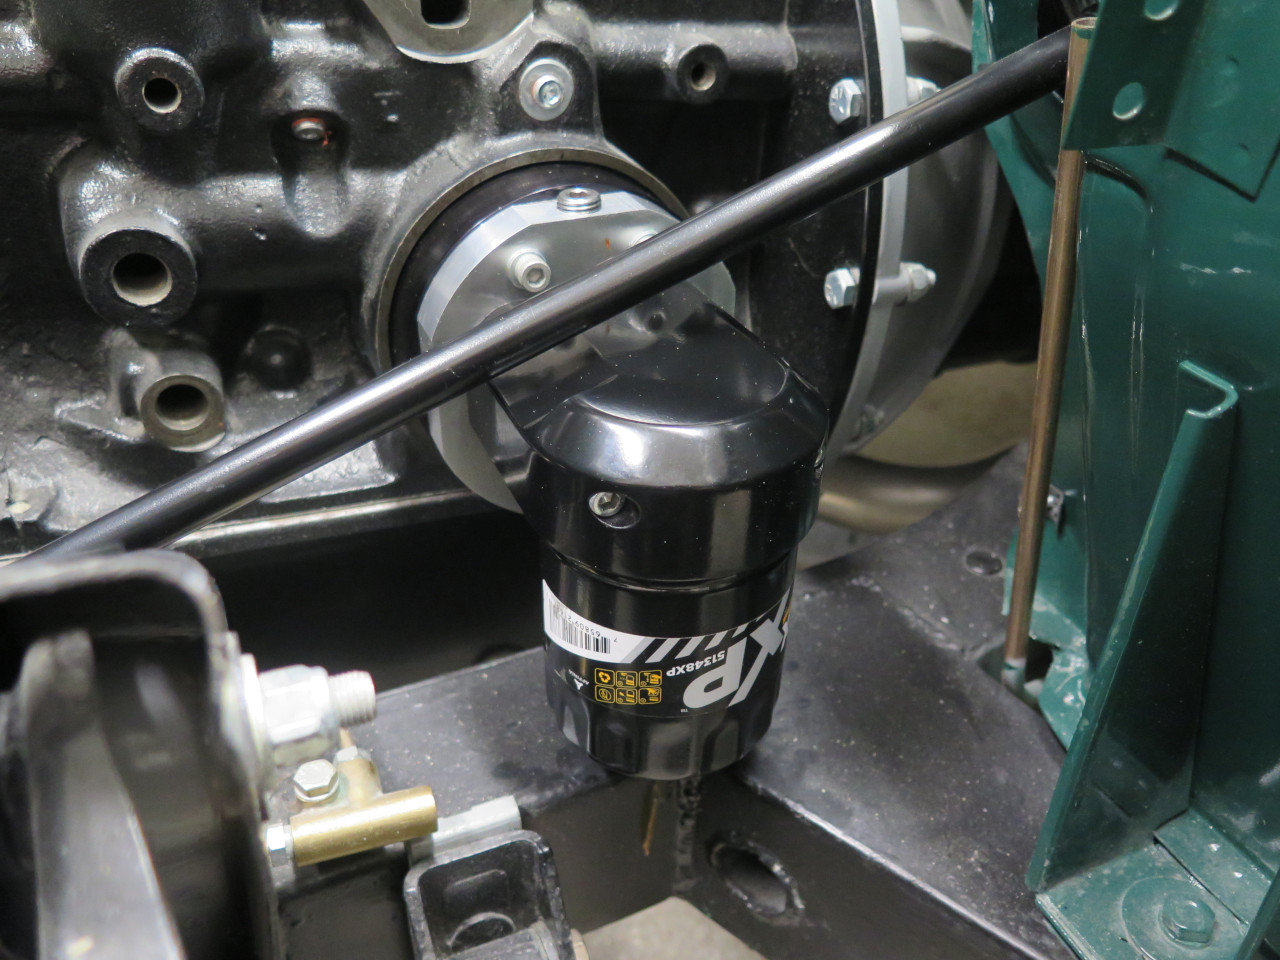
Then attached the filter mount in its new lower position.

Bolting the adapter to the engine, I found that there was no longer any
interference, but that the steering shaft was very close to the filter
mount. I know that the engine can rotate a little on acceleration
or engine braking, so this seemed like an issue.
So, here is where the re-shaping came in. All I had to do was
carve out some of the meat of the adapter near where the steering shaft
ran.

That did the trick.
I knew that the smaller filter could accommodate being shifted down by
3/4", but I wasn't sure about the larger one. Happily, it still
fits, too, but barely. Running the brake line to that T connector
might also rule out the larger filter.
If I had known at the outset that this adapter was going to be so much
work, I'm not sure I would have done it. The resulting piece is
complex. The best part about it is that it's done.
Comments to Ed at elhollin1@yahoo.com
To my other GT6 pages