To my other GT6
pages.
March 14, 2021
(pi day)
Exterior Lighting
I've spent the winter this year working on things that can be done
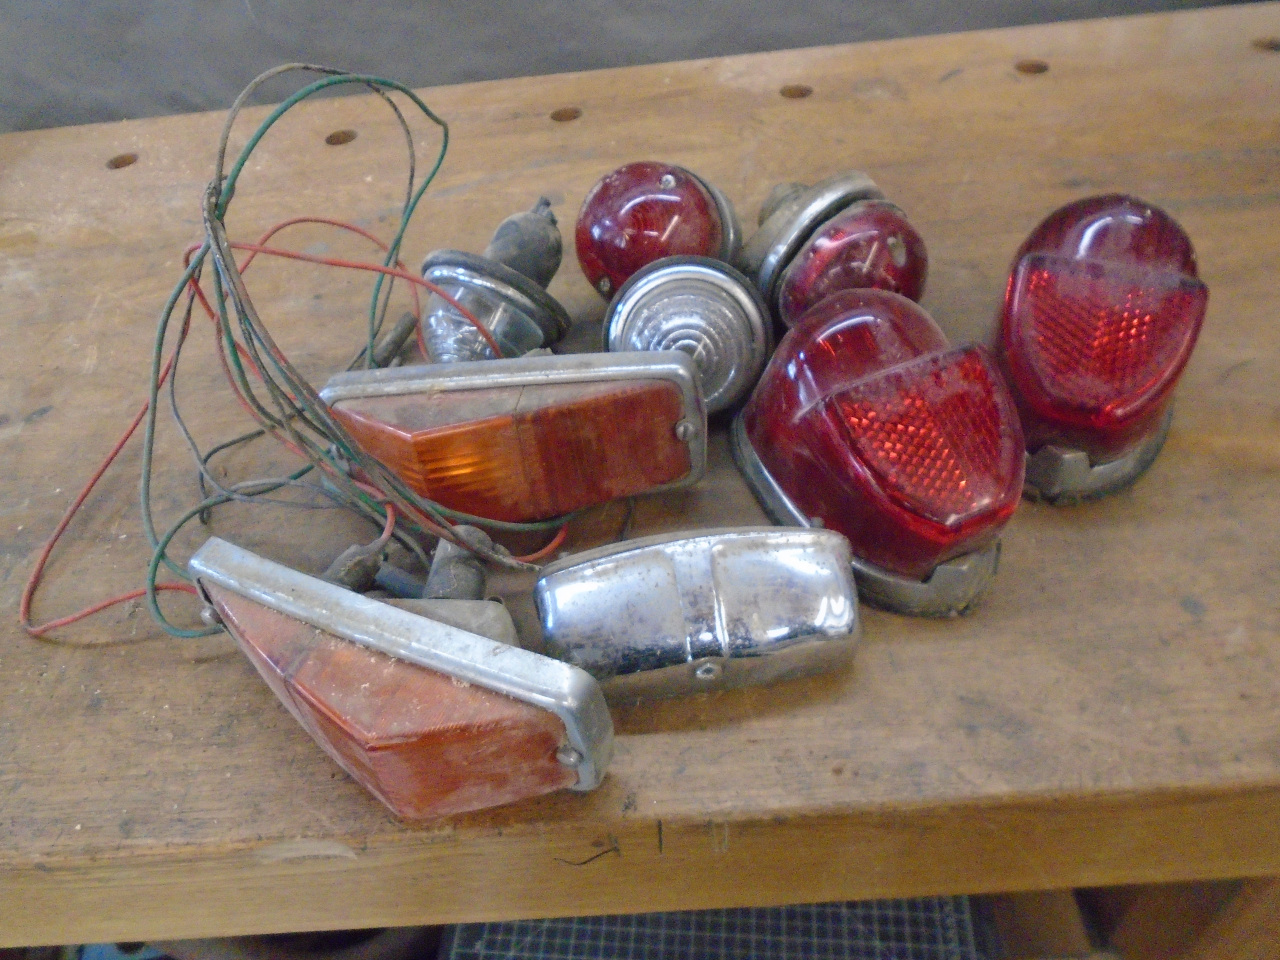
in the warm shop rather than in the chilly garage. The last
week or so was occupied, among a few other things, by the exterior
lighting assemblies. There isn't anything much remarkable
about these items. They are pretty much all Lucas products,
and so they do have their challenges as far as reliability and
longevity go. Most of the assemblies were complete without
much overt damage. The headlights must have been in a
different box.
Other than a few mods to enhance reliability or ease of
installation, the only major change in these parts was to go to
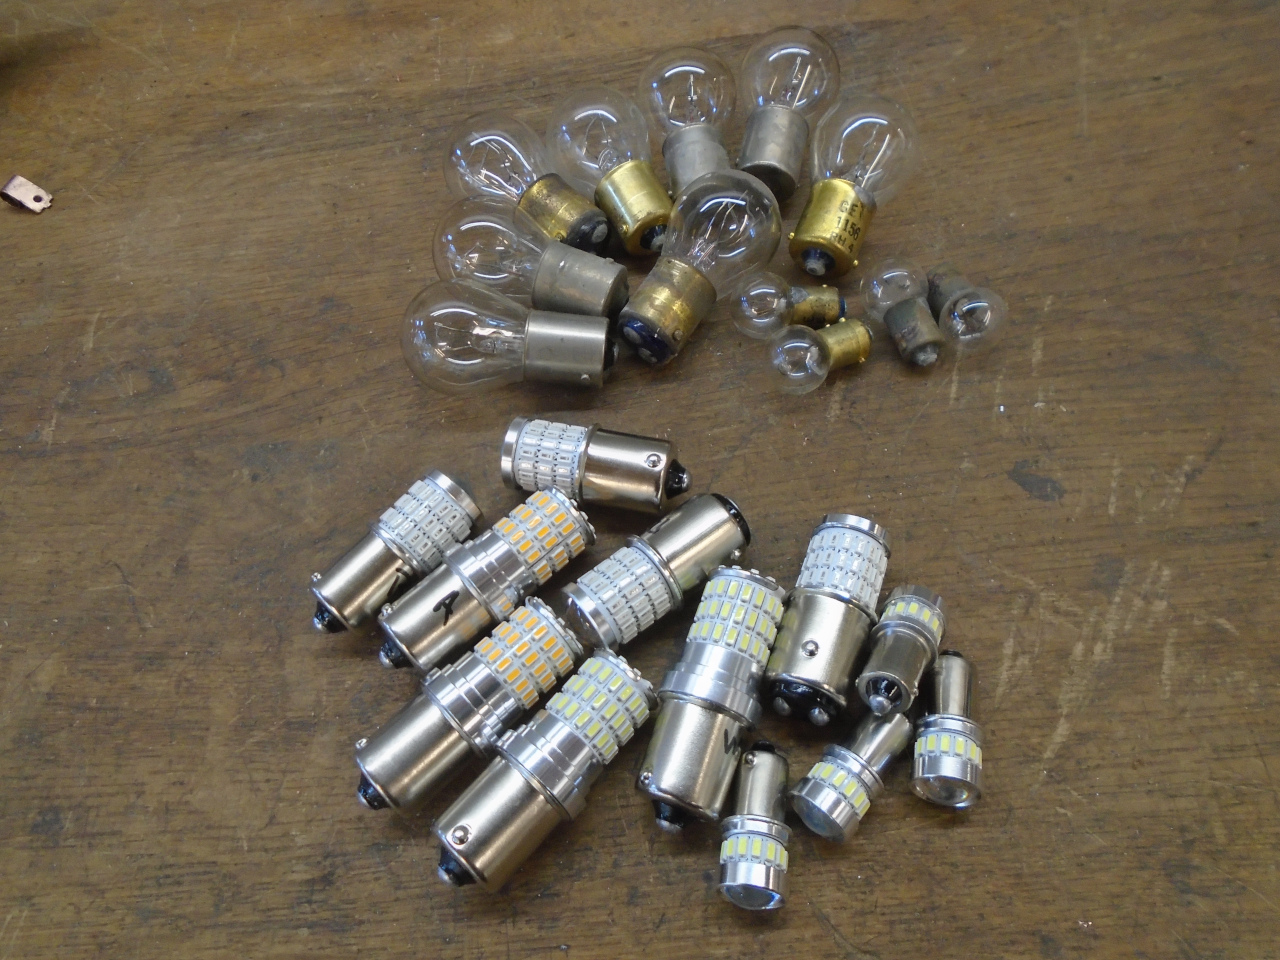
LED lamps. The motivation for this was primarily current
draw. I anticipate adding some significant loads to the
electrical system, and I can offset those by reducing the load
from lighting. Excluding headlights, with all exterior lights on,
I calculate the load to drop form nearly 18 amps to just a little
over two amps by going to LEDs. (I realize that having all
exterior lamps on at the same time would not be all that common,
but it could happen.)
To jump ahead to a particular assembly:
Front
Park/Turn Assembly
Headlights
License
Plate Light
Rear
Turn Signals
Reverse
Lights
Tail/Brake
Assembly
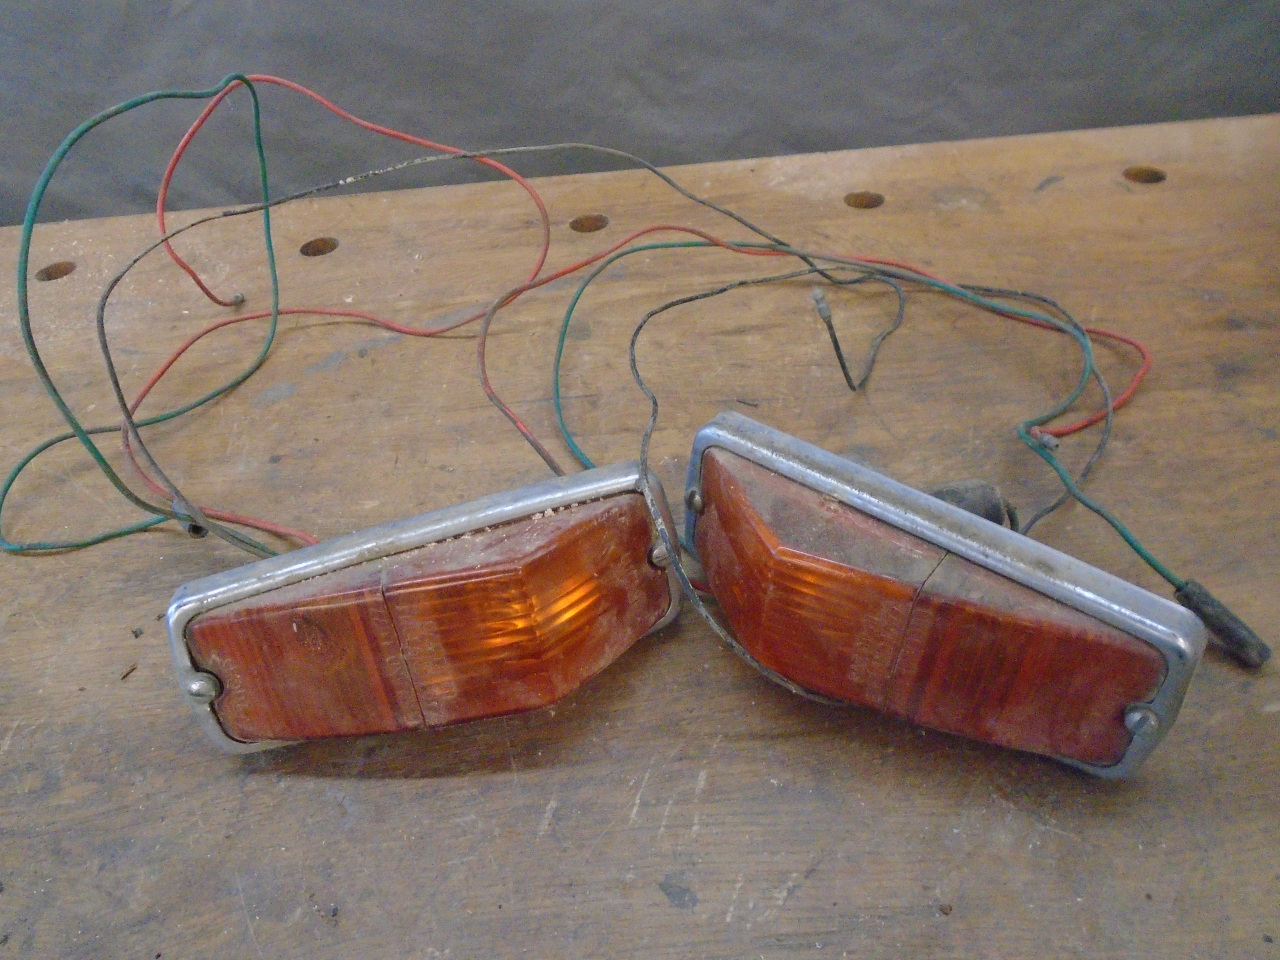
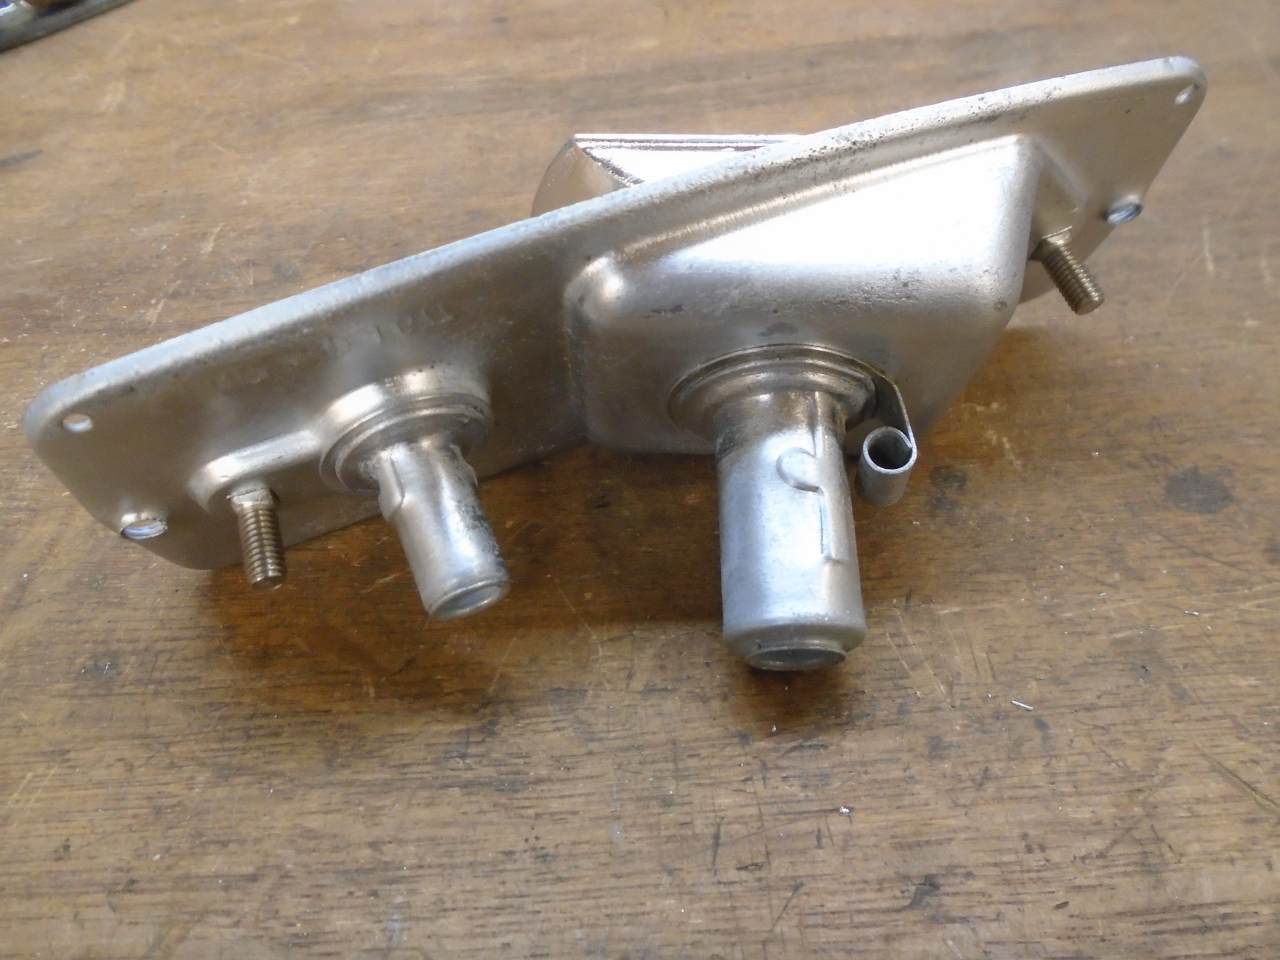
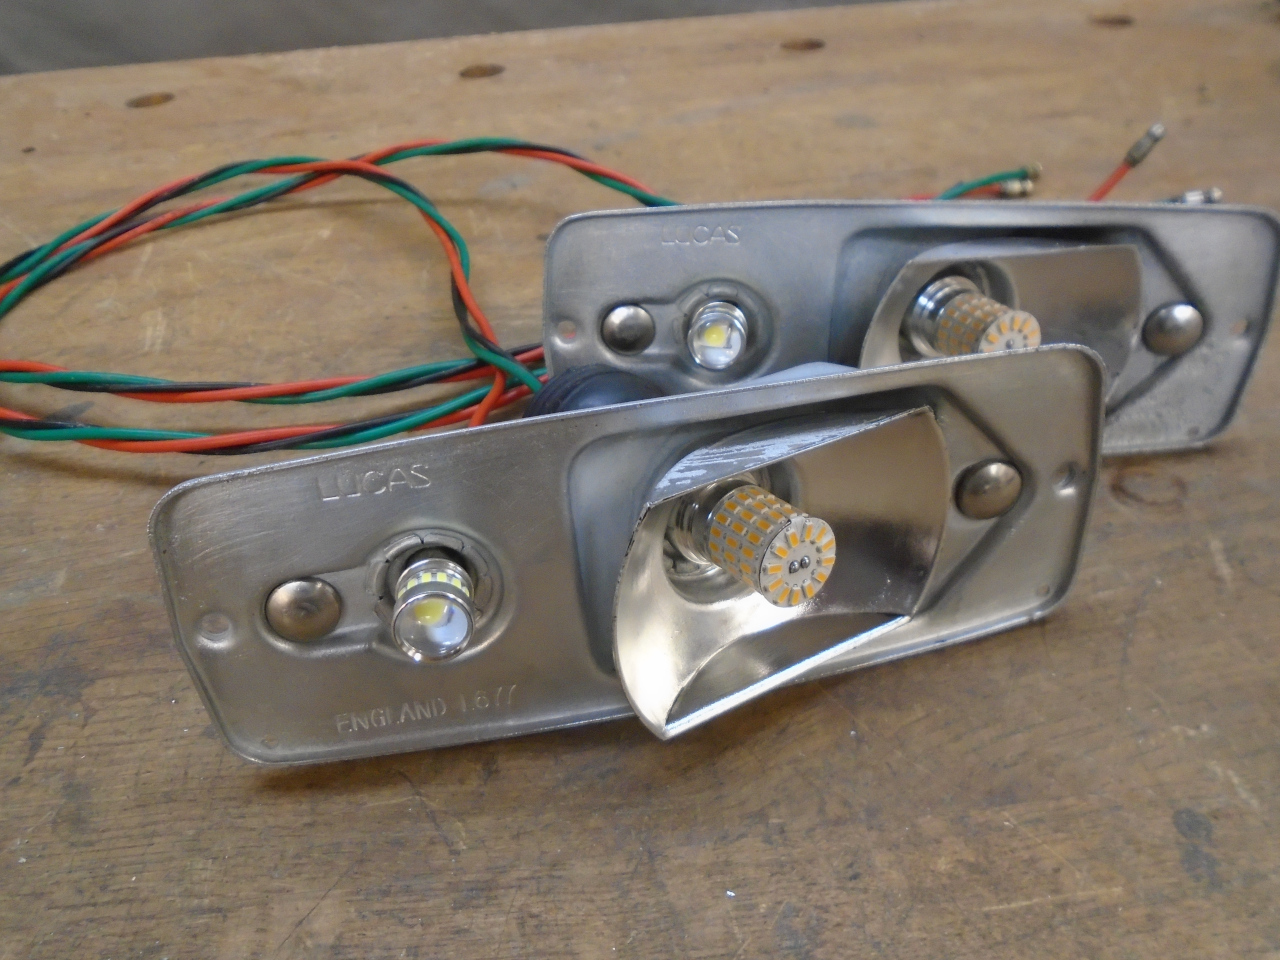
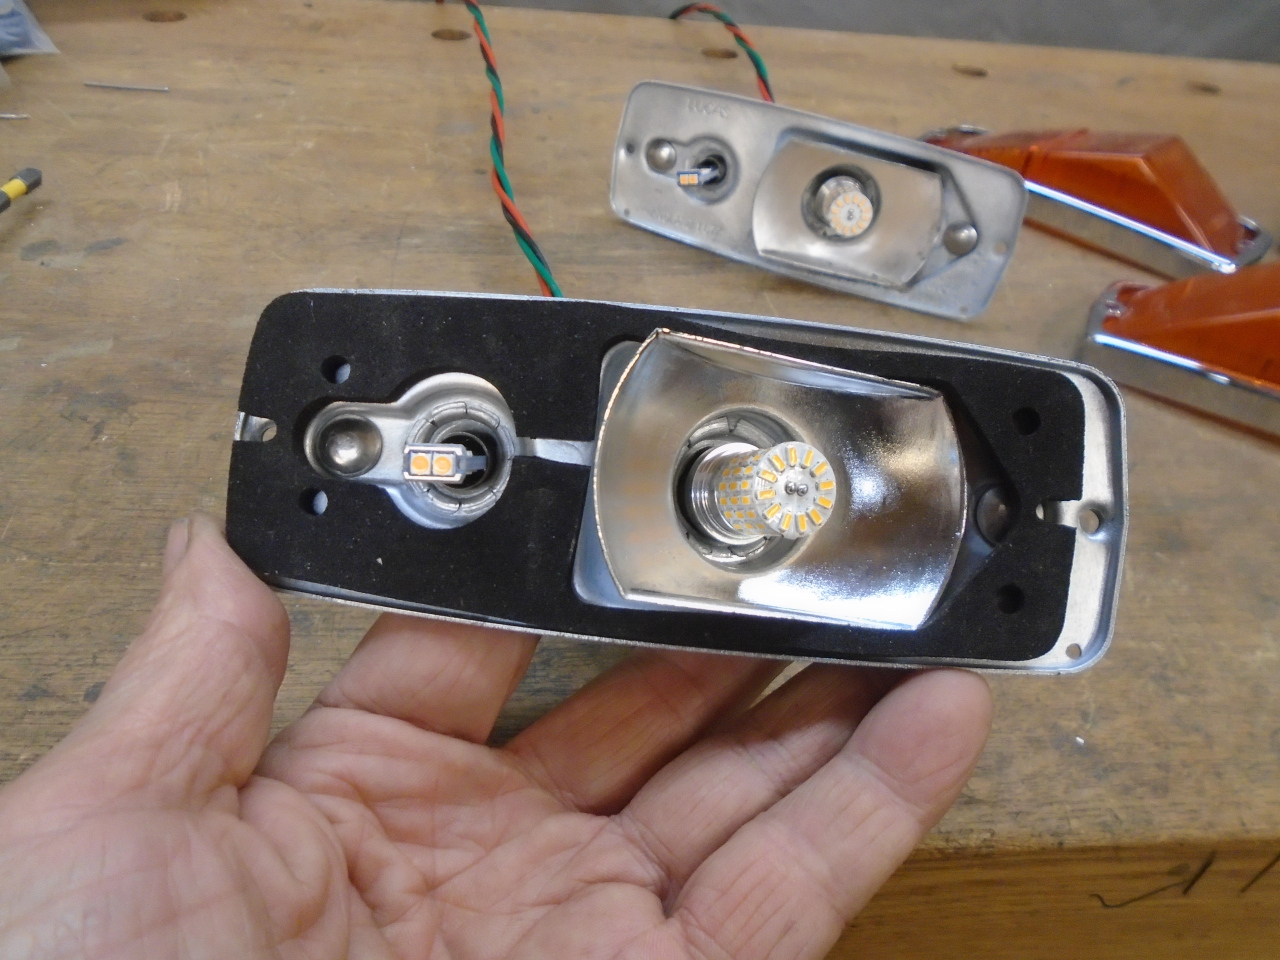
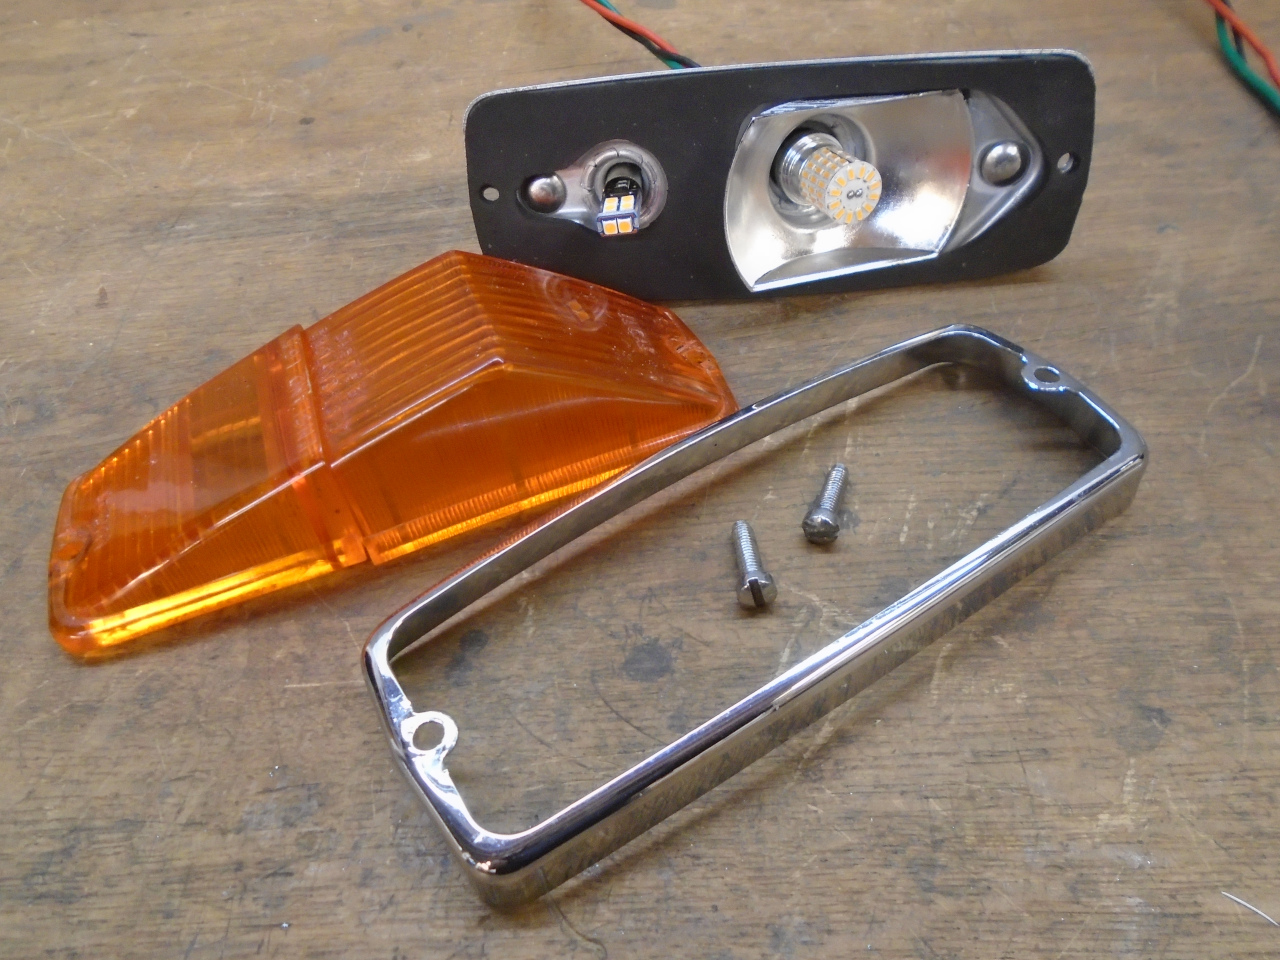
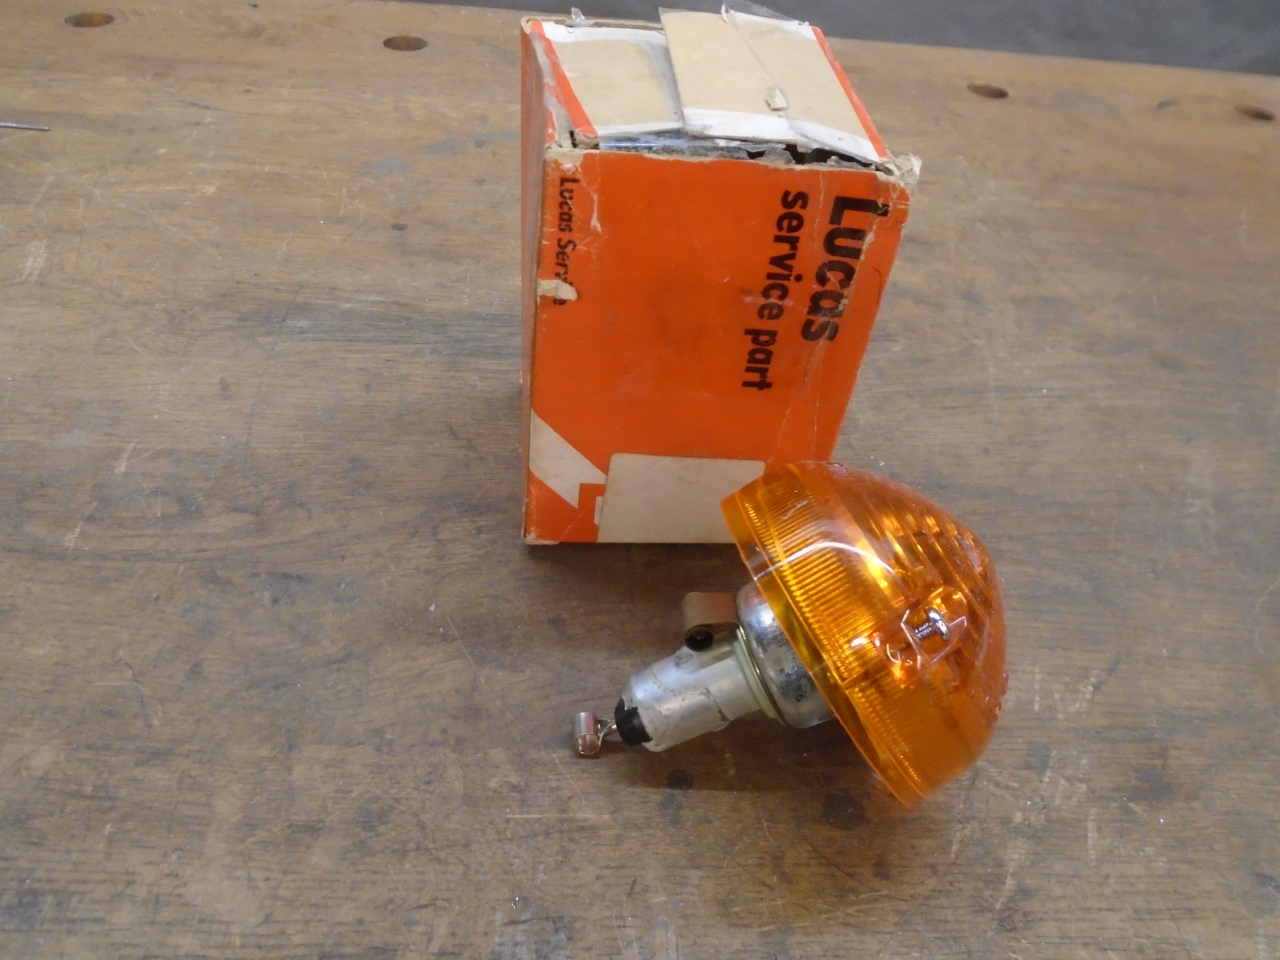
Front Park/Turn Lights
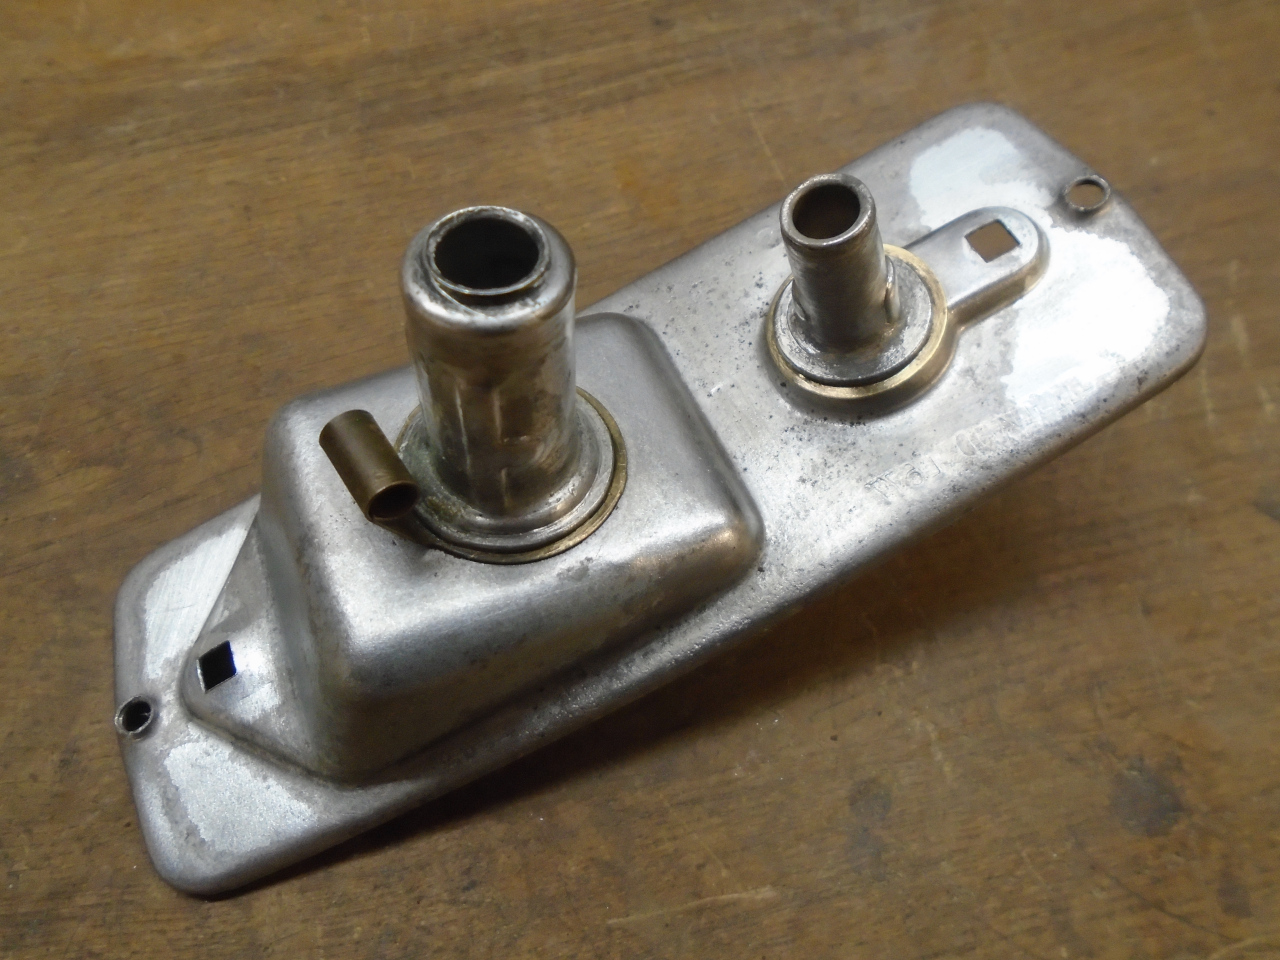
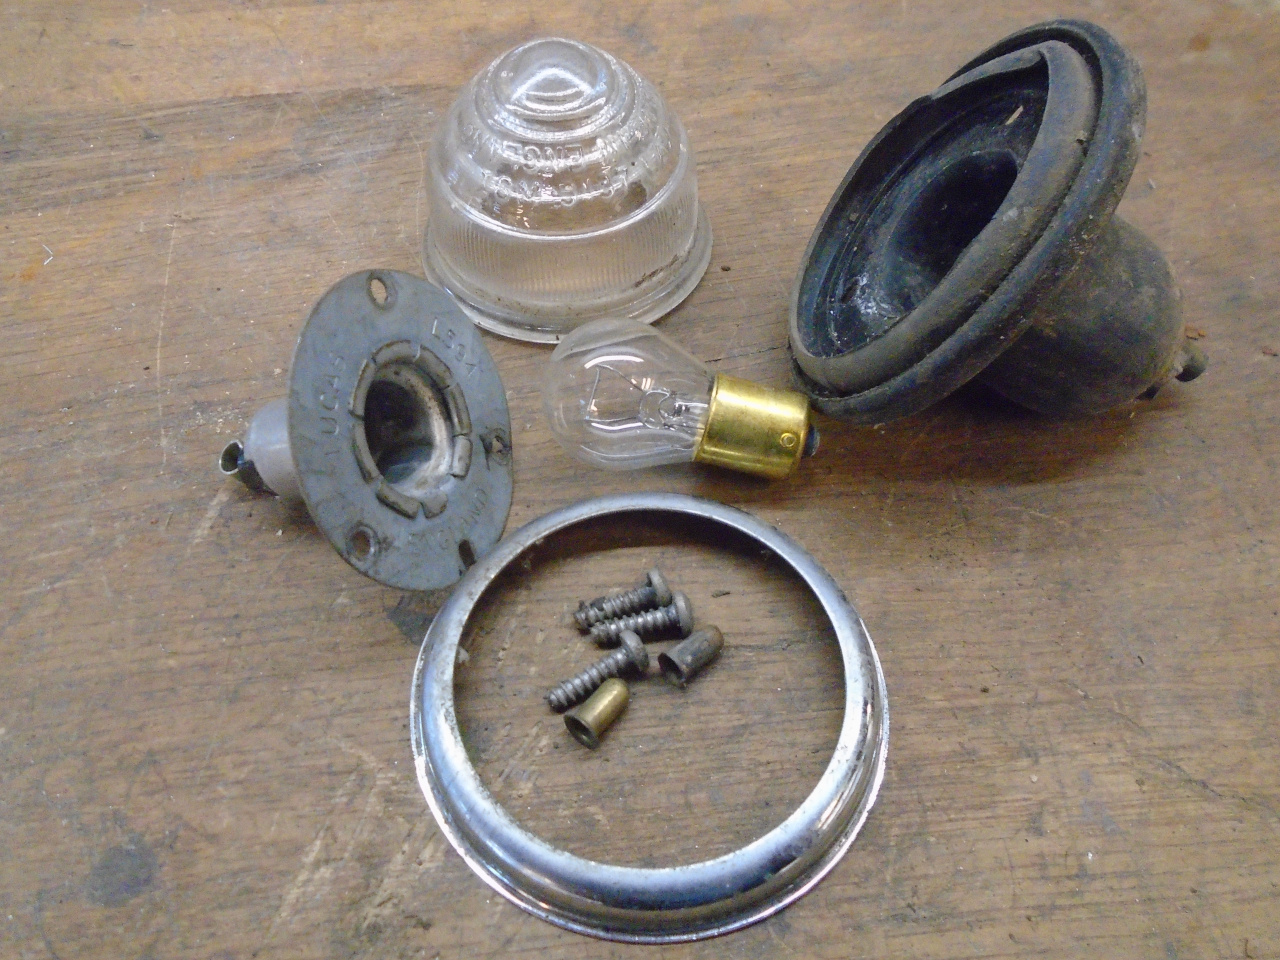
The front park/turn signal lighting assembly contains a socket for
a standard 1156 type lamp for the turn signals, and a socket for
the smaller 1895 type lamp for the parking lights. Standard
wattage for these lamps would be about 27 and 4 watts,
respectively.
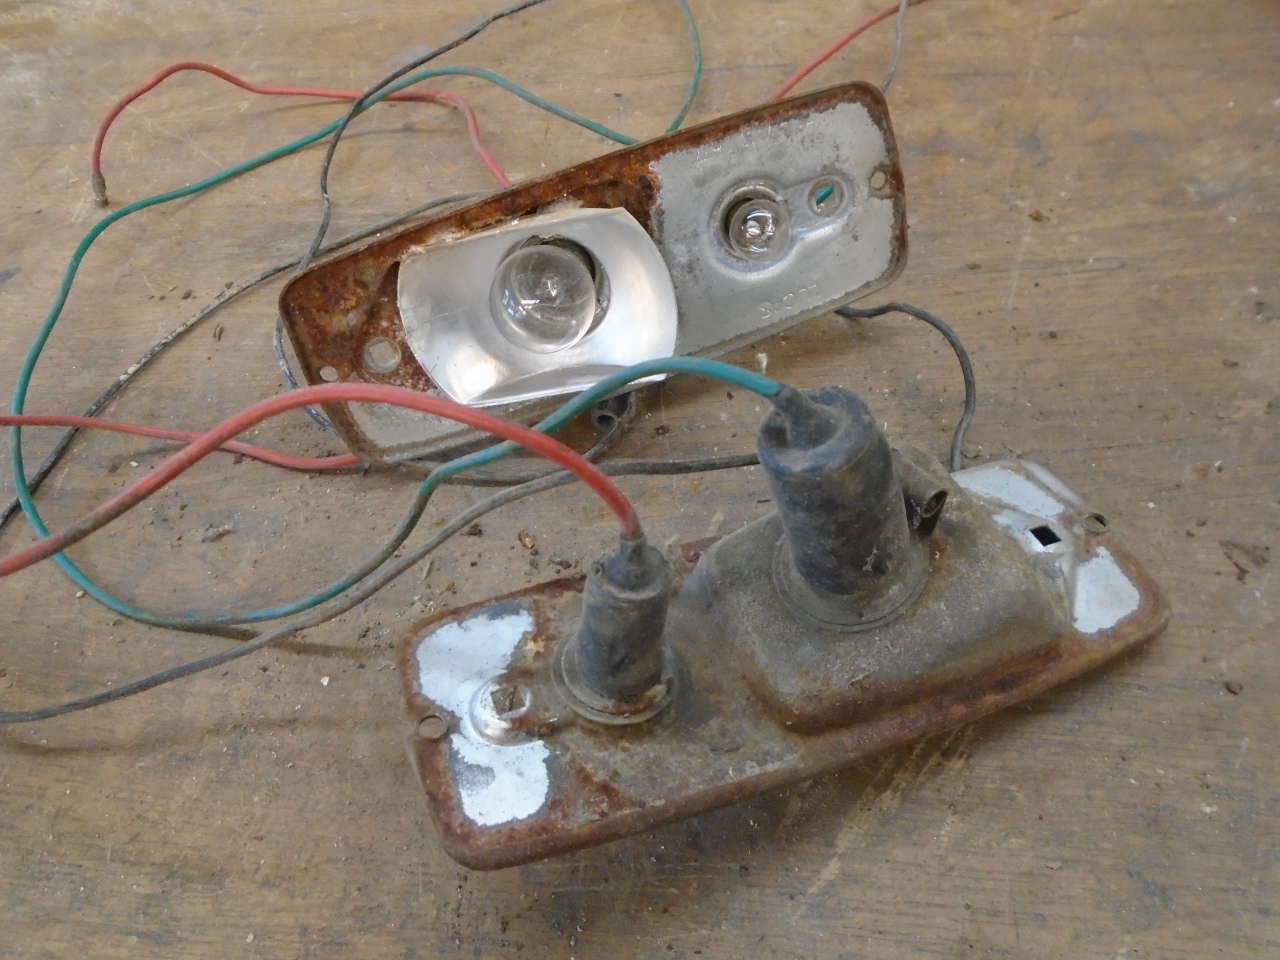
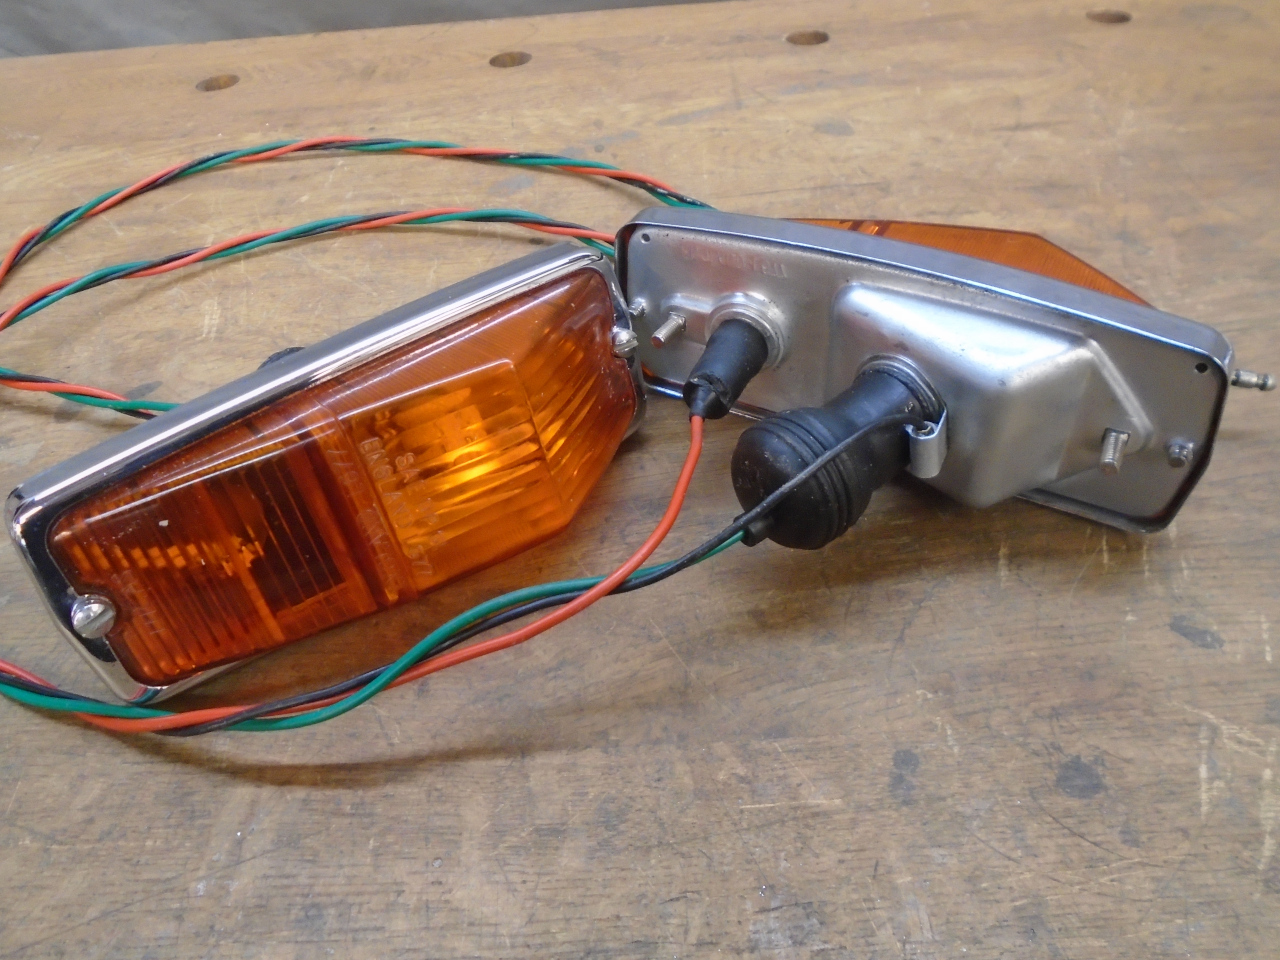
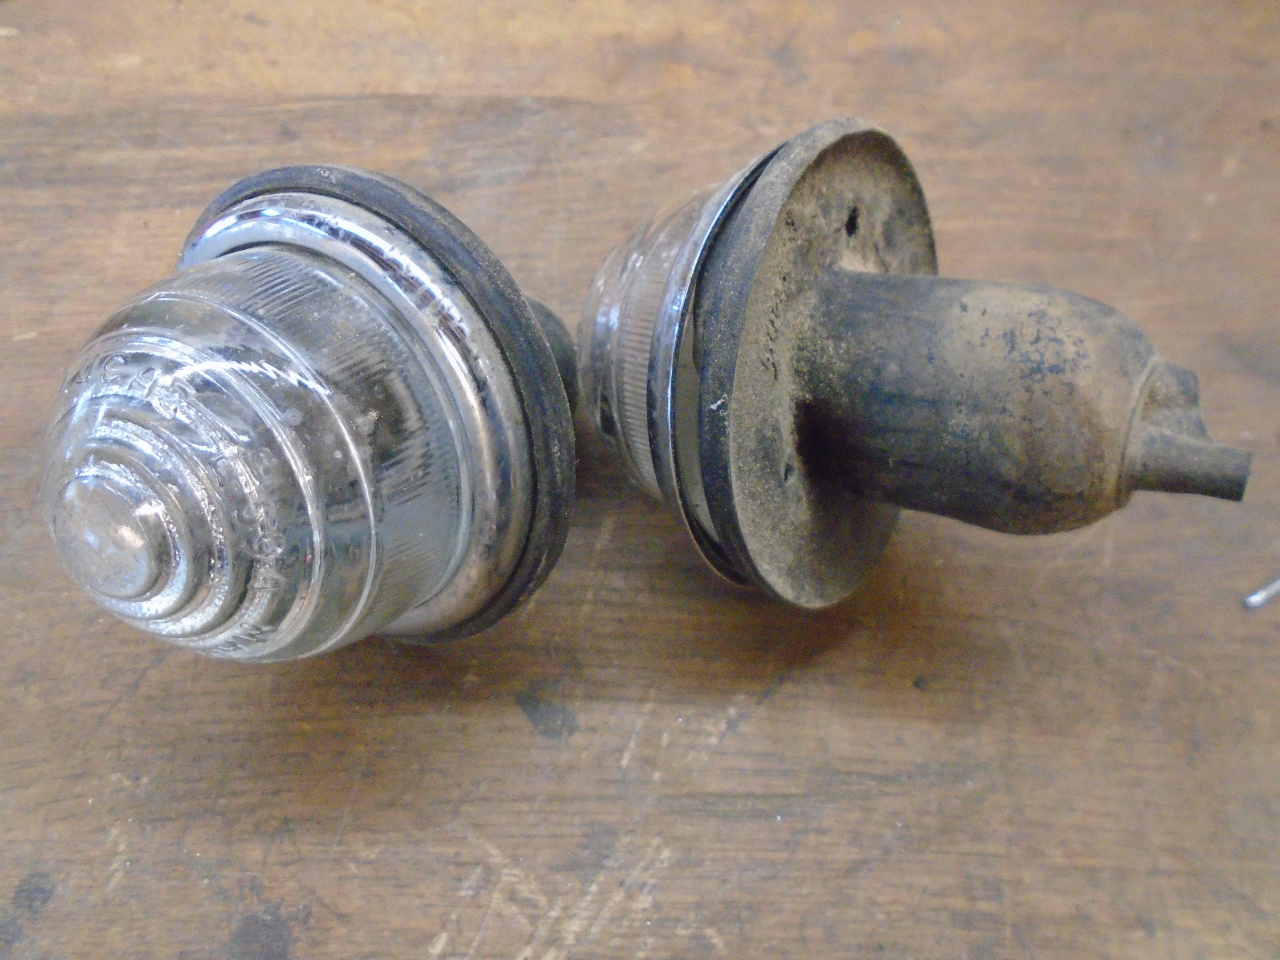
My units looked pretty grody, but from the outside, didn't appear
to be damaged.
Inside, they were a little worse. The zinc plated steel
housings had quite a bit of rust.
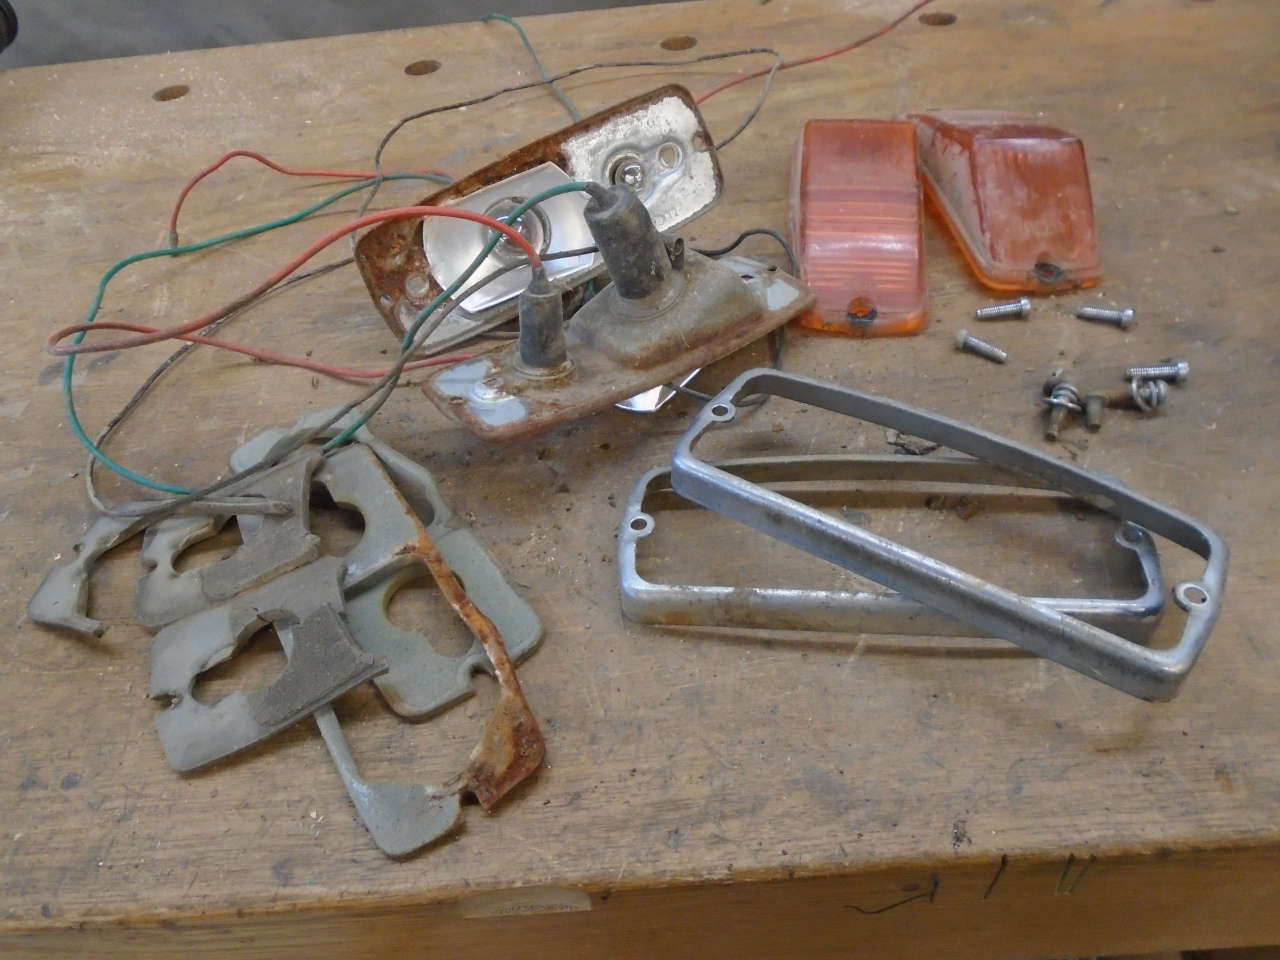
The rust is not difficult to remove, but since I thought there was
enough of the zinc plating left to save, I chose a chelate type
rust remover, which will not attack the zinc or the aluminum
reflector. In this case, it was Evaporust. It's easy
to see the difference between the zinc and the bare steel
surfaces.
I considered paint to protect the bare steel, but in the end
decided to zinc plate the housings. My hesitation was with
the anodized aluminum reflector. It didn't seem practical to
remove it, and I wasn't sure how it would react to the plating
process. I ended up masking the reflector with some lacquer
paint. It dies quickly and is easy to remove.
I tried the process on one housing, and it ended up looking pretty
good compared to the other one.
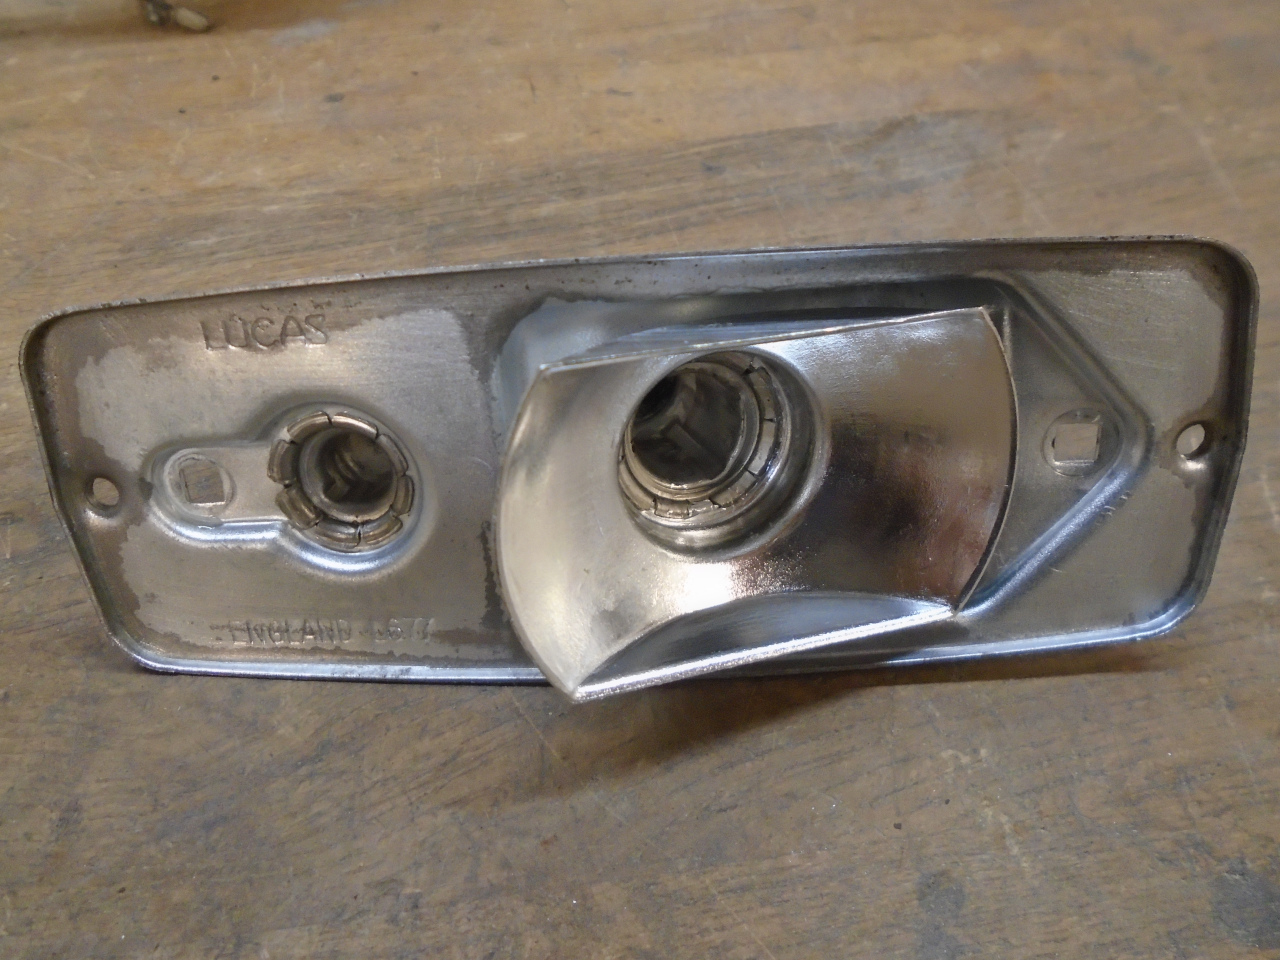
While fiddling with these housings, I noticed that they had square
holes for the mounting screws. However, the mounting screws
I found were just ordinary 10-32 machine screws, though I can't be
sure they were original. I'd seen these square holes on
Triumph lighting assemblies before. My TR6 had them, and
used a carriage style bolt with a short square shank that snapped
in to the square hole. It seemed unmistakable what the
intent of those holes was here, and whether Triumph opted to just
use ordinary fasteners, or whether the original fasteners had been
lost, it seemed appropriate to go back to the square shank
hardware. They should make installation a little
easier. Mostly, they snapped in and are self-retained,
One had to be helped with a drop of CA glue. A side benefit
of this is that the assembly can be removed or installed without
removing the lenses.
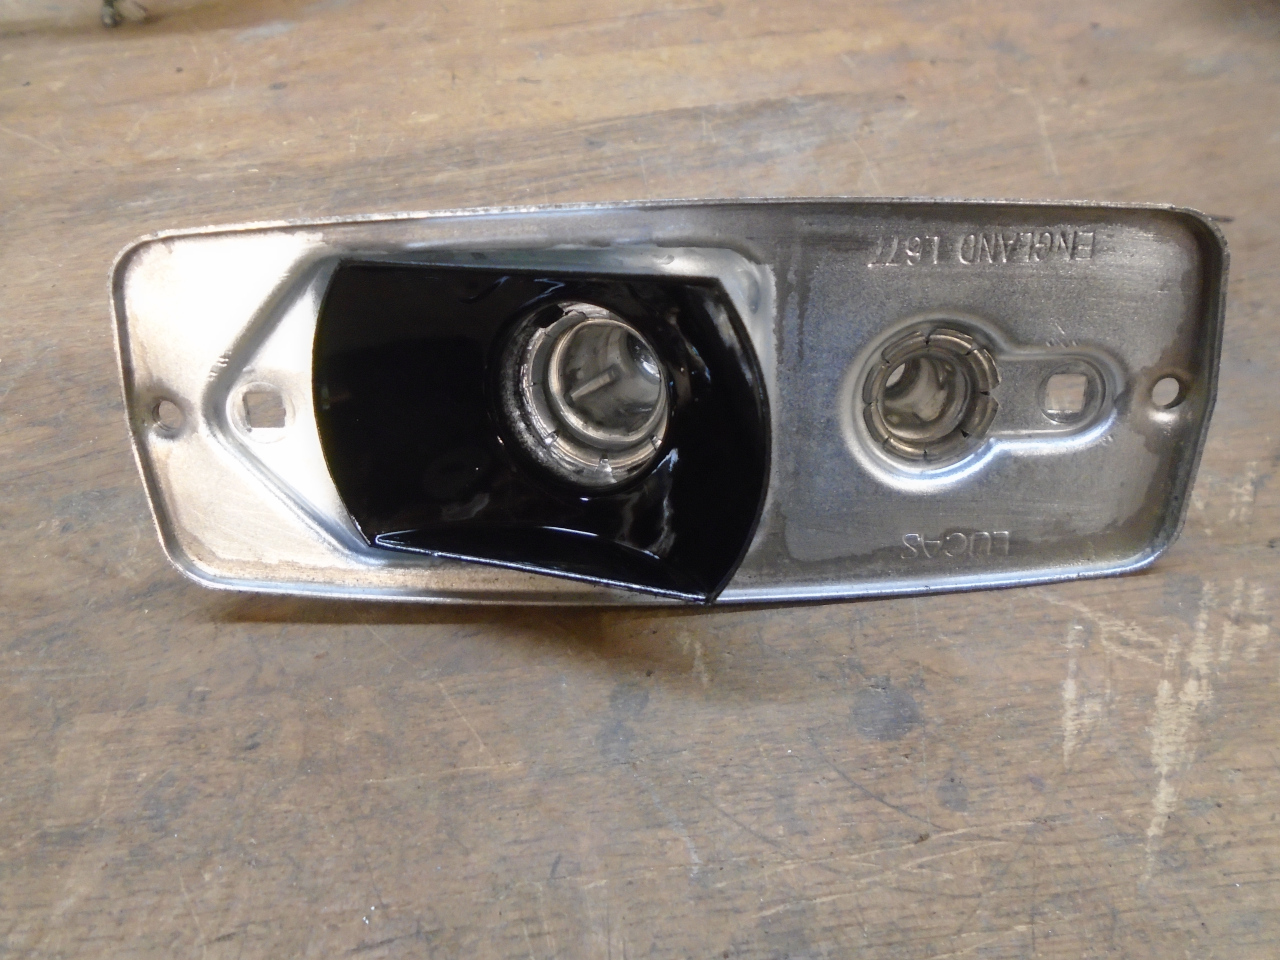
Next up was to clean up and install the contacts and lead wires
for the lamps, and push on the cleaned up rubber boots. I find it
not unusual to find 50 year old British rubber parts to be in very
good shape.
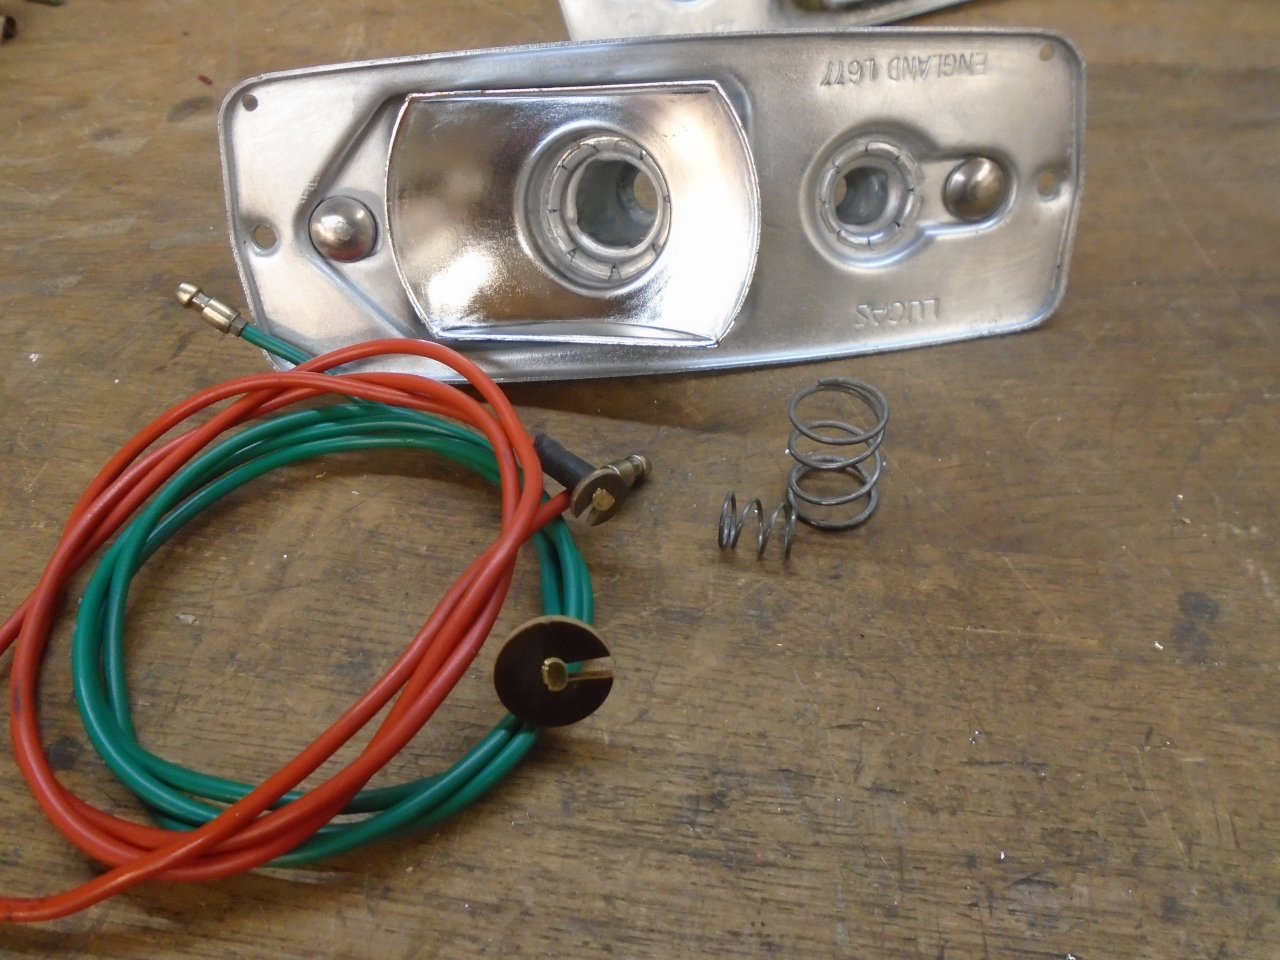
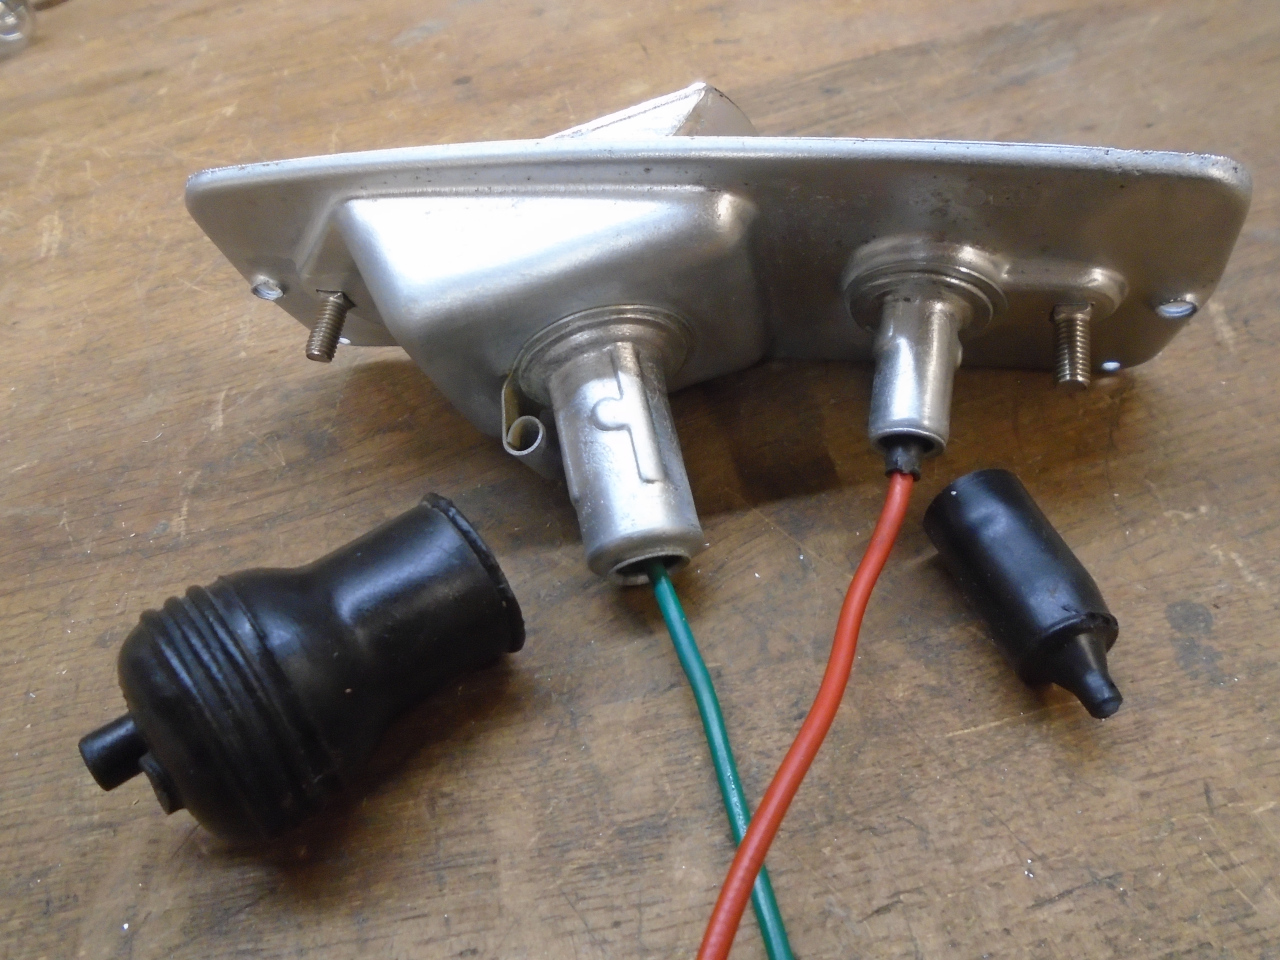
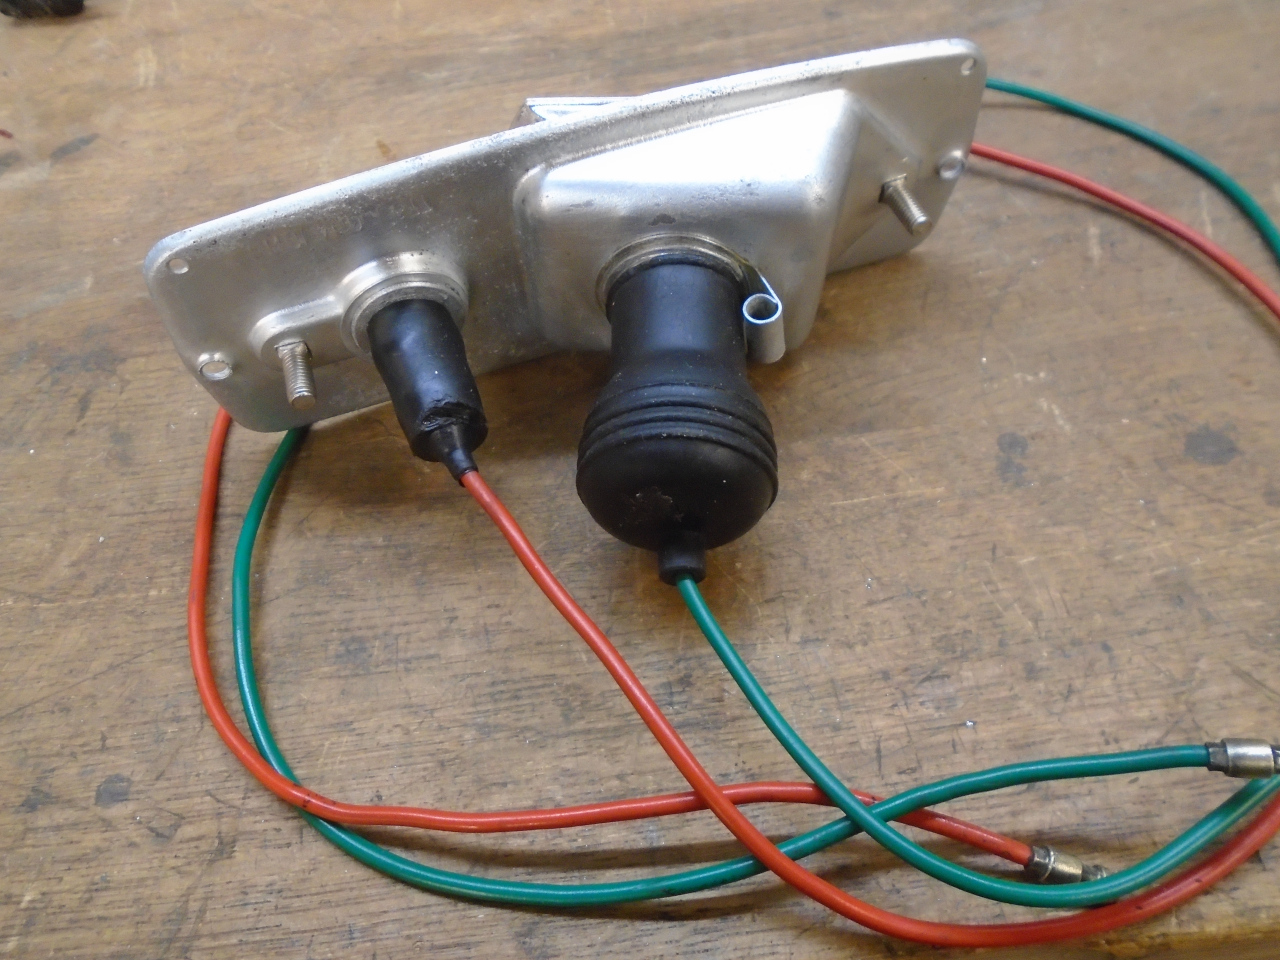
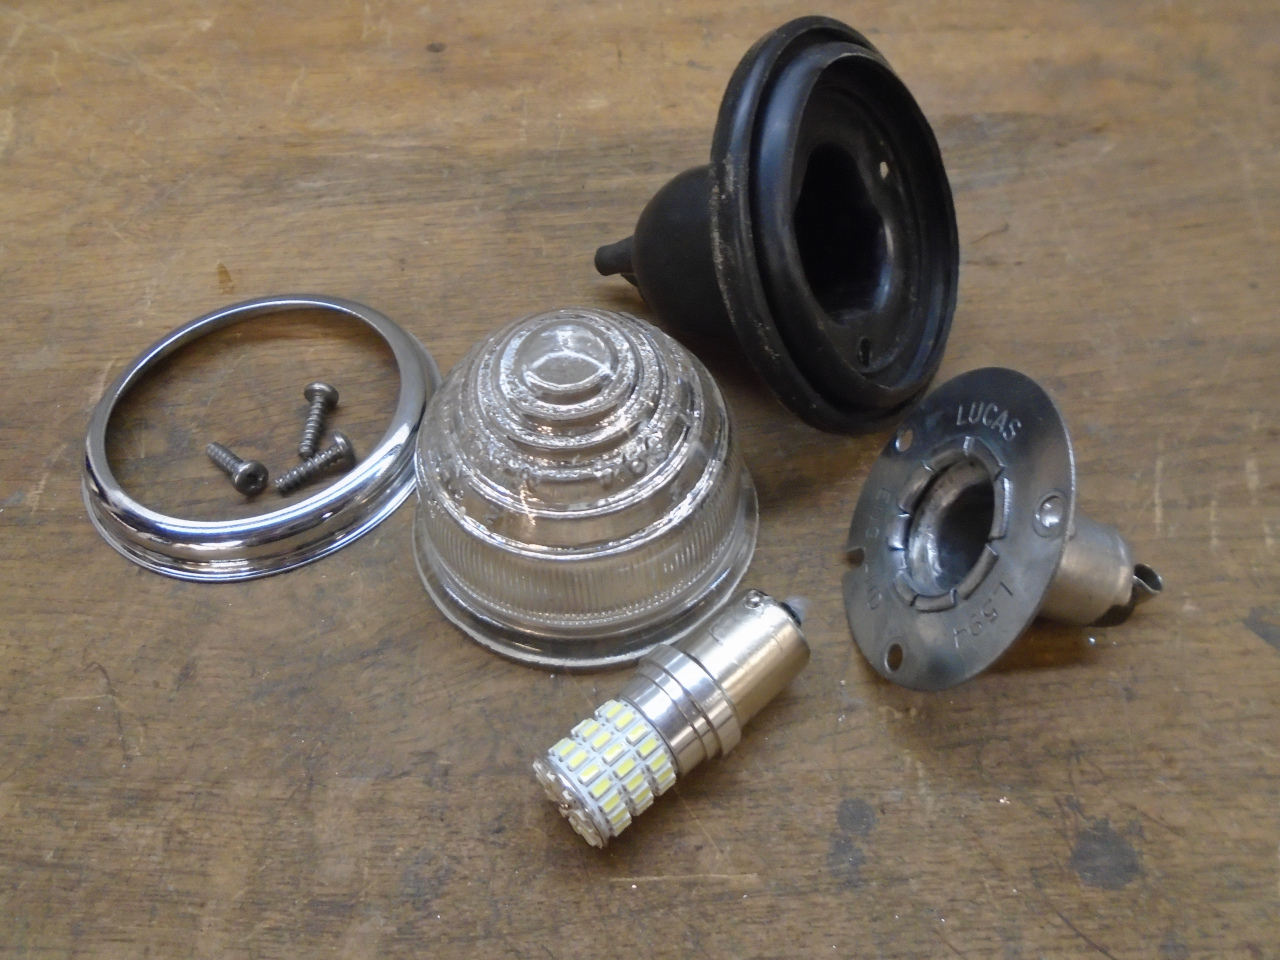
Then install and test the LED lamps. A word about replacing
incandescent lamps with LEDs: Incandescent lamps provide a
broad spectrum white light, and this light can be filtered by
colored lenses to allow only the desired color range
through. It's a little trickier with LEDs. Basic LEDs
emit a pretty narrow spectrum of color. White LEDs are
typically made by starting with a blue LED, and adding a phosphor
to absorb some of the blue light and re-emit it as light more
towards the yellow orange part of the spectrum. This is
engineered such that to the human eye, the combined light looks to
be a shade of white, but is not broad spectrum like incandescent
light is. For this reason, white LEDs can give disappointing
results when used with colored lenses. It is possible that
the light frequency that would pass through the lens may not even
be present in the LED light. For this reason, we need to
pick LEDs with a color that matches the lens color.
These are amber LED lamps. You can't normally tell the color
of an LED until it is on.
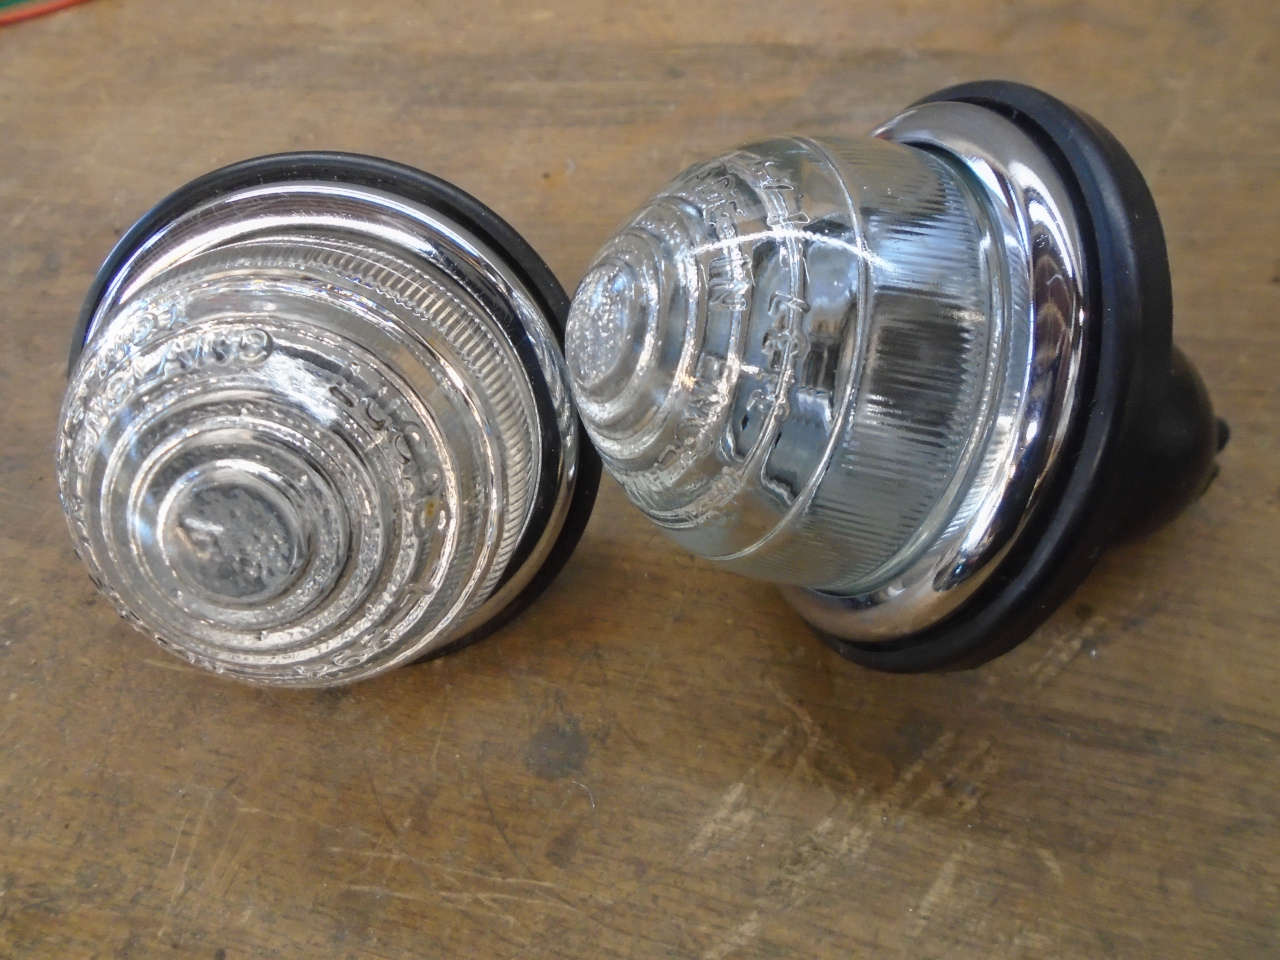
Cleaned up the lenses...
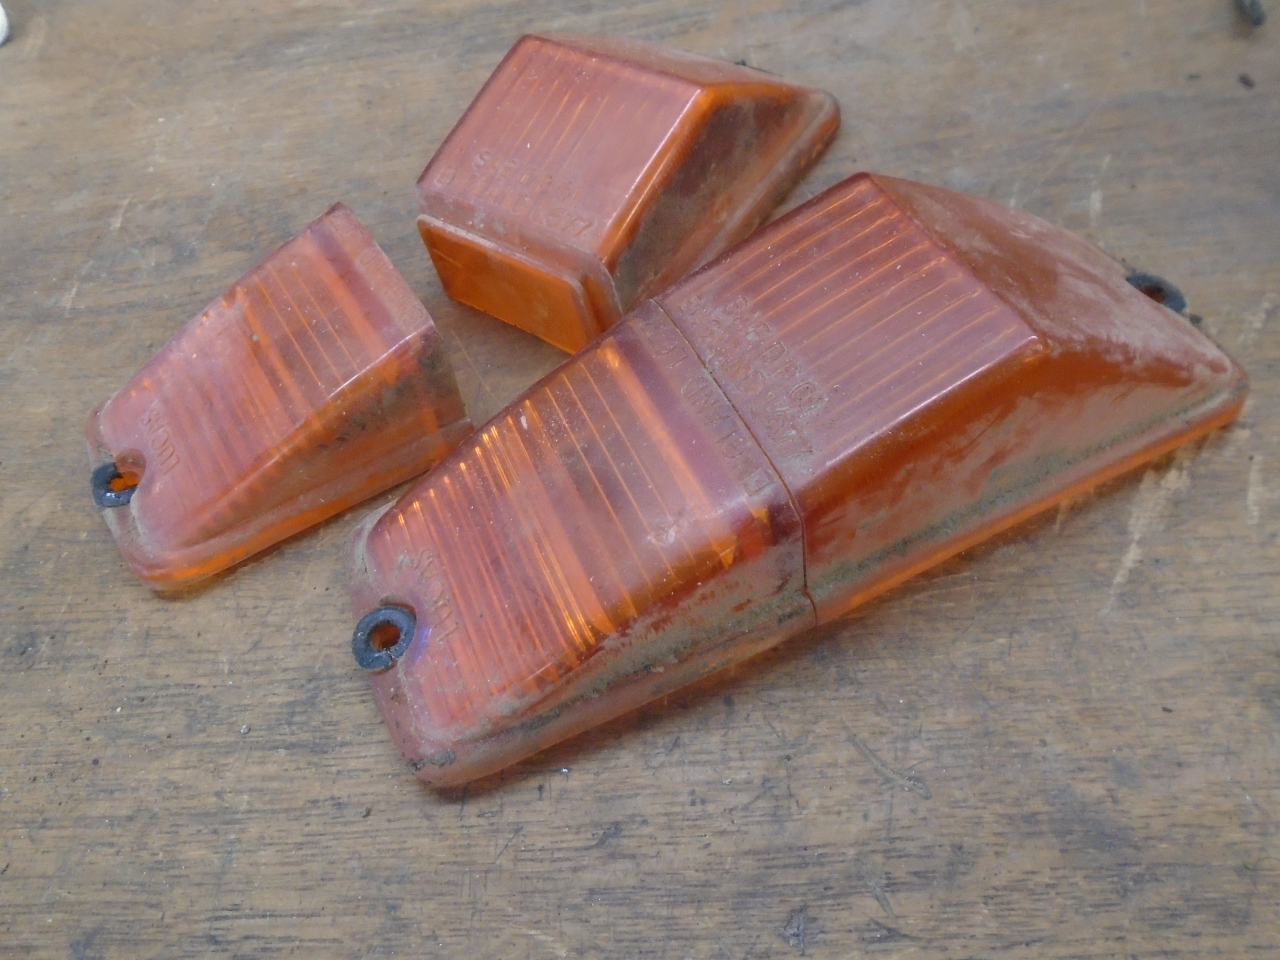
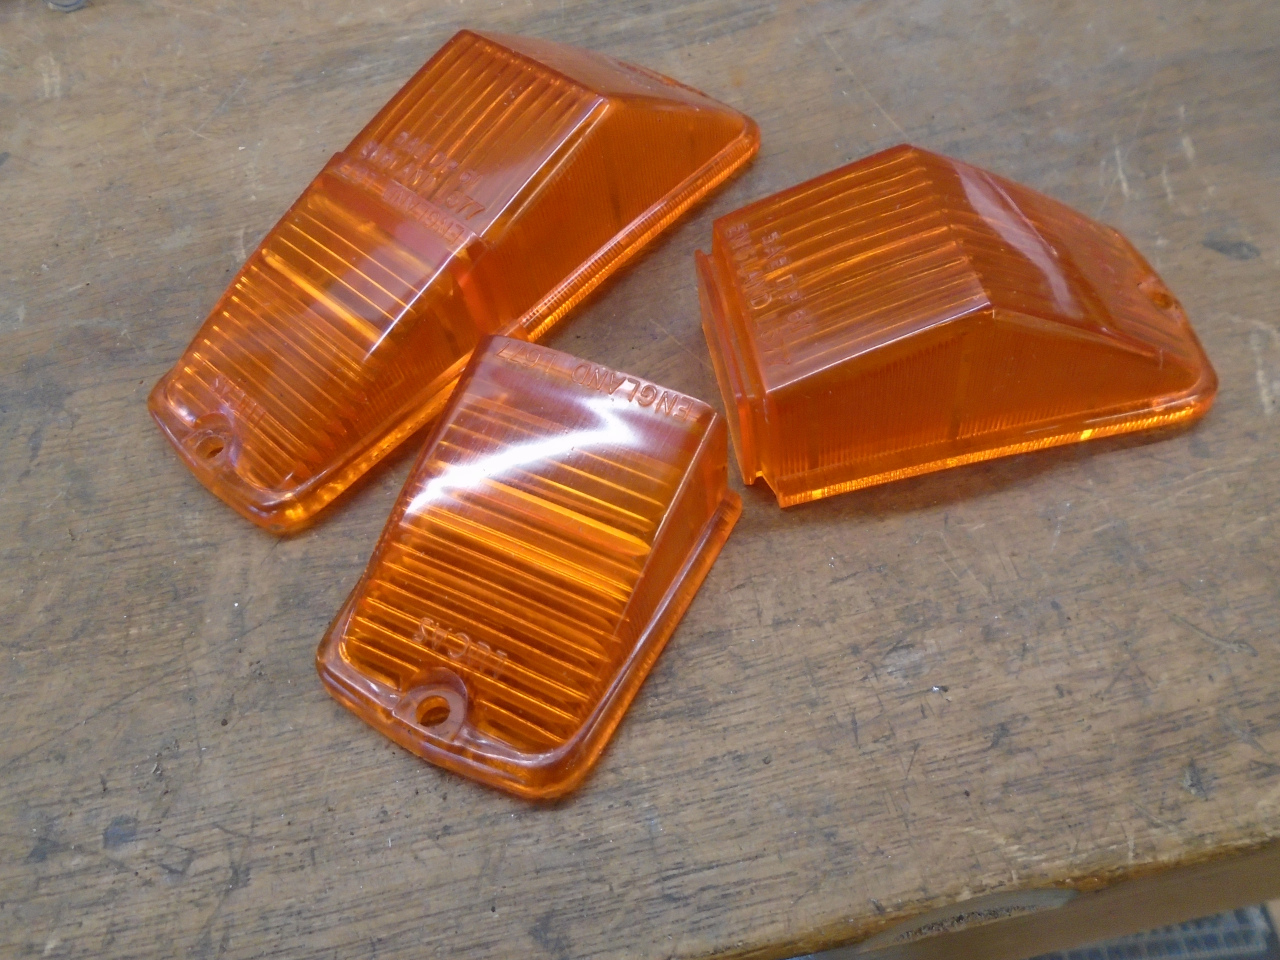
...and prepared for final assembly.
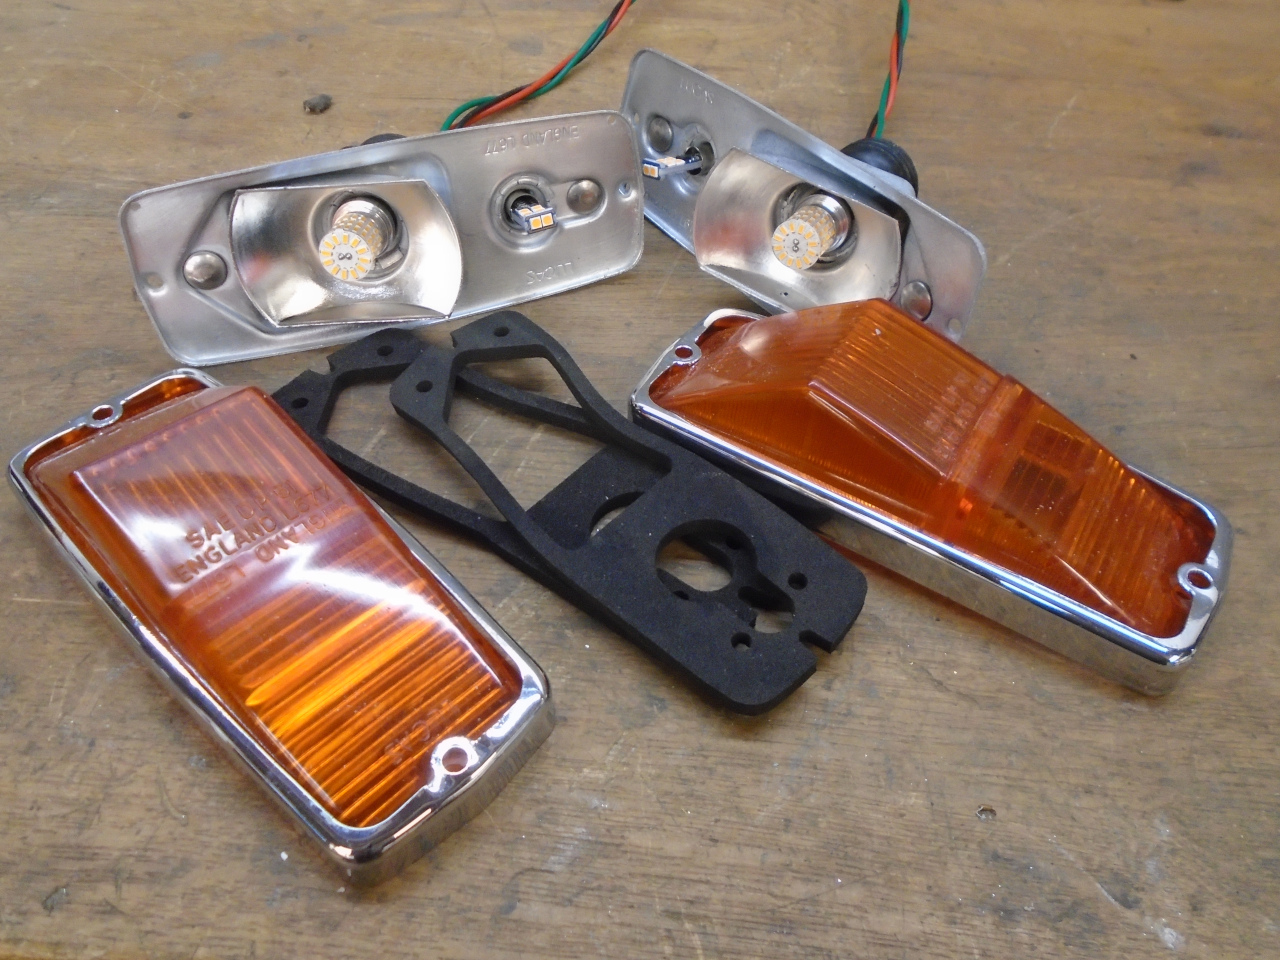
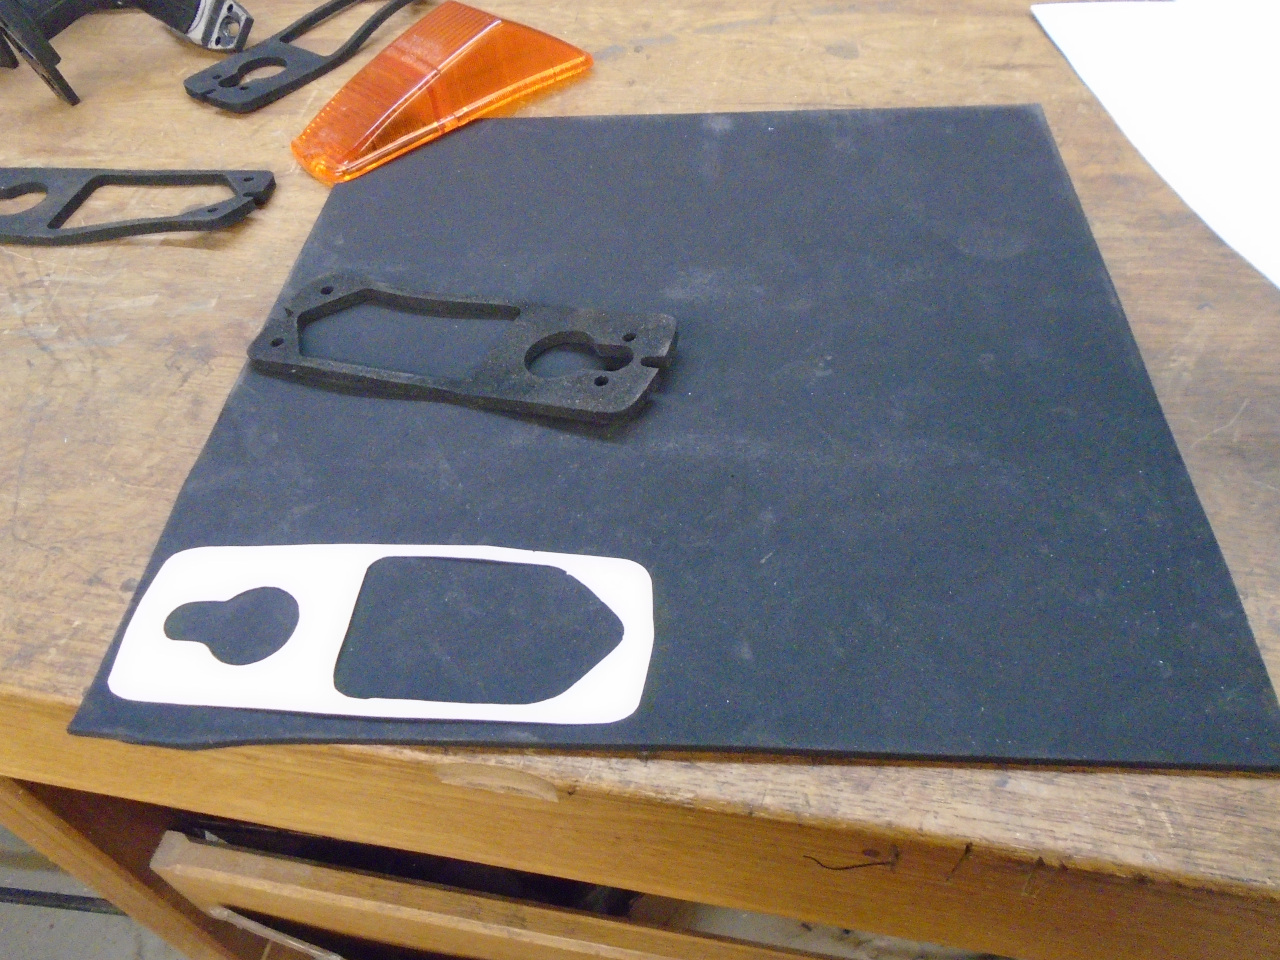
Oops! One of the brand new lens gaskets was too short!
No worries. This is a piece of 3/16" closed cell neoprene
foam. The material is pretty similar to the store-bought
gaskets, but a little finer texture, and maybe a touch
firmer. Paper template was made from the fixture itself.
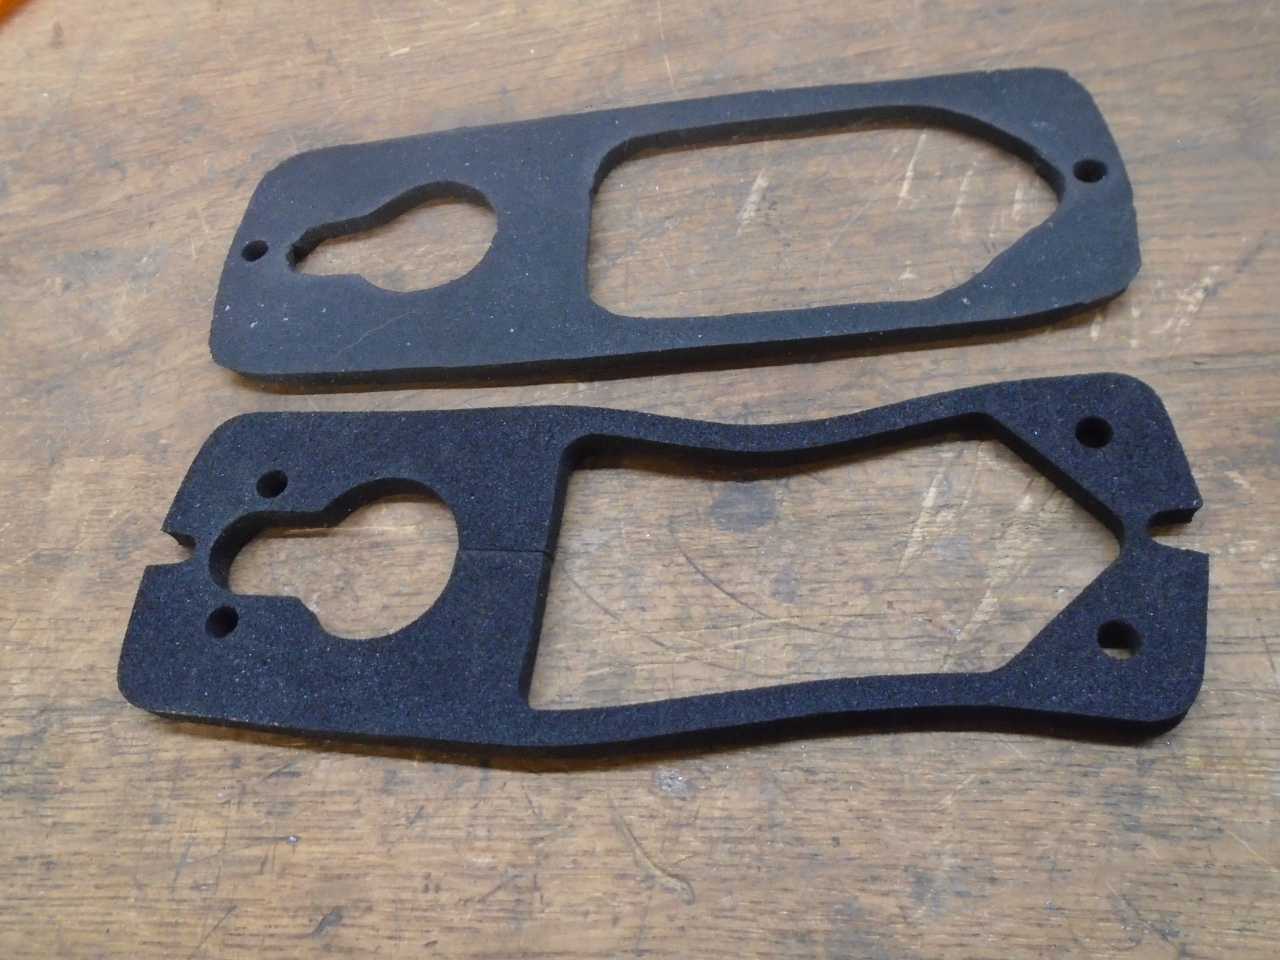
Home made gasket fits way better than the bought one.
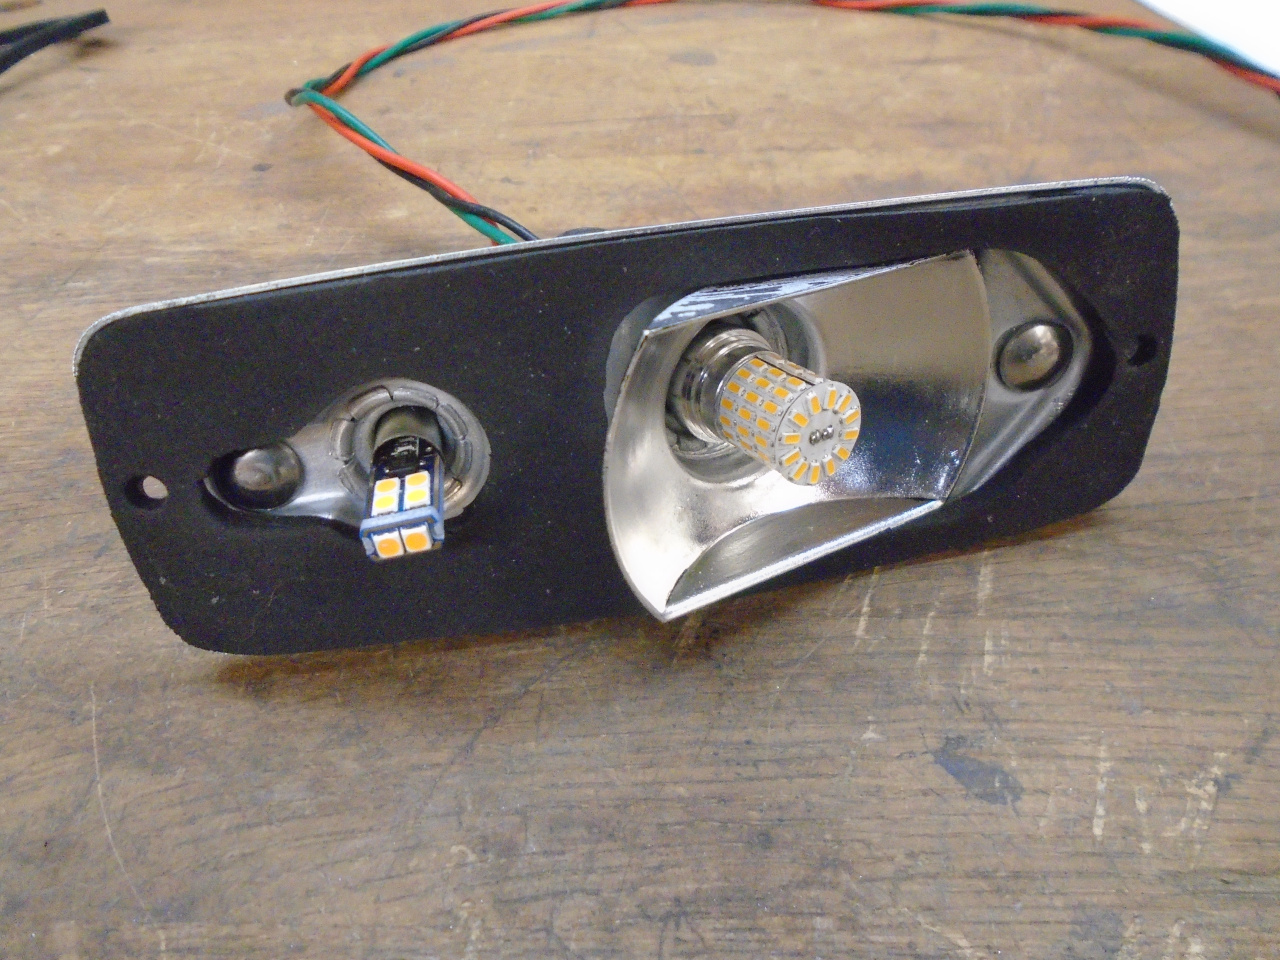
Final assembly.
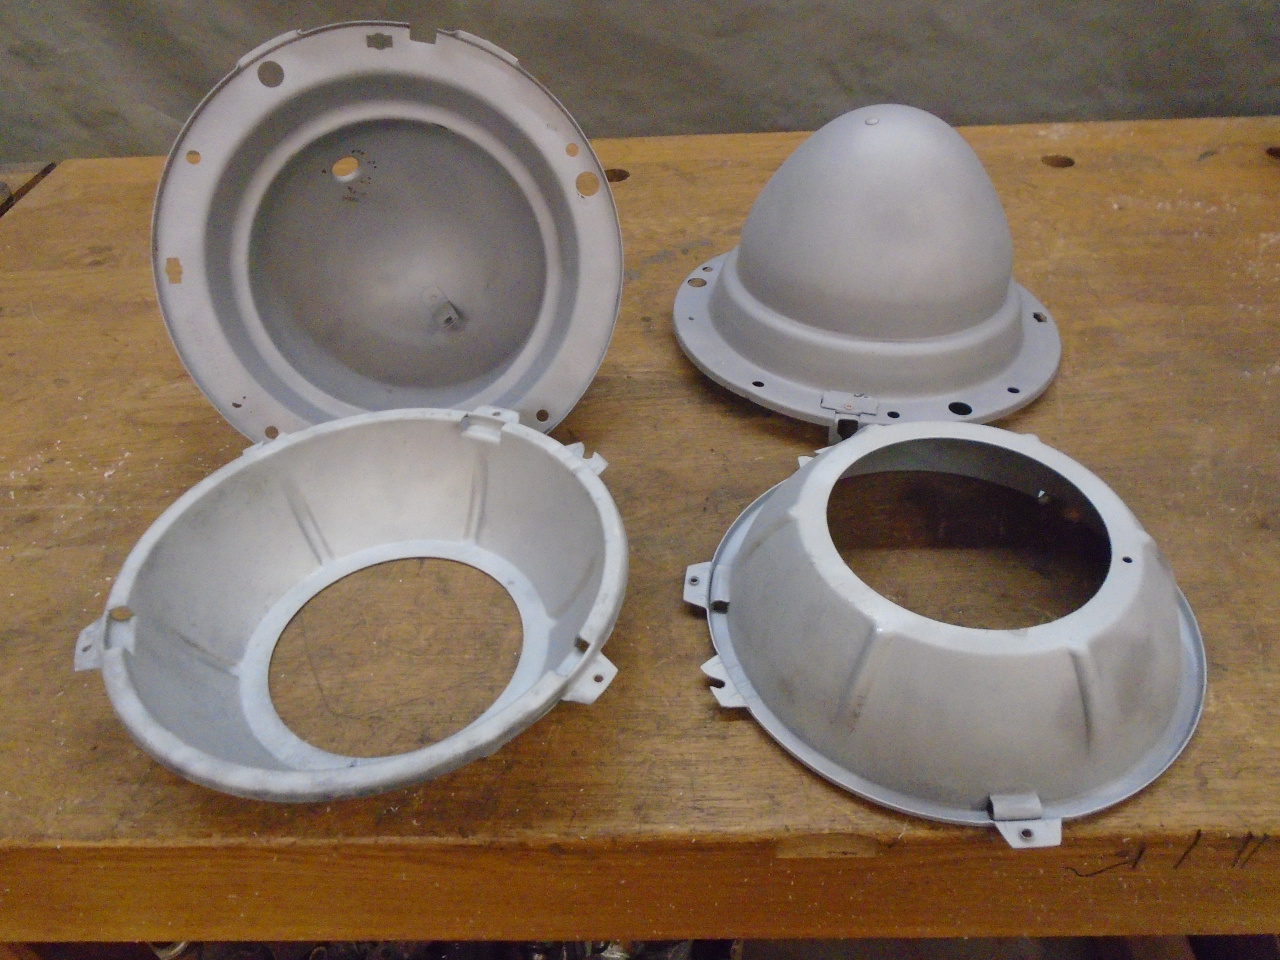
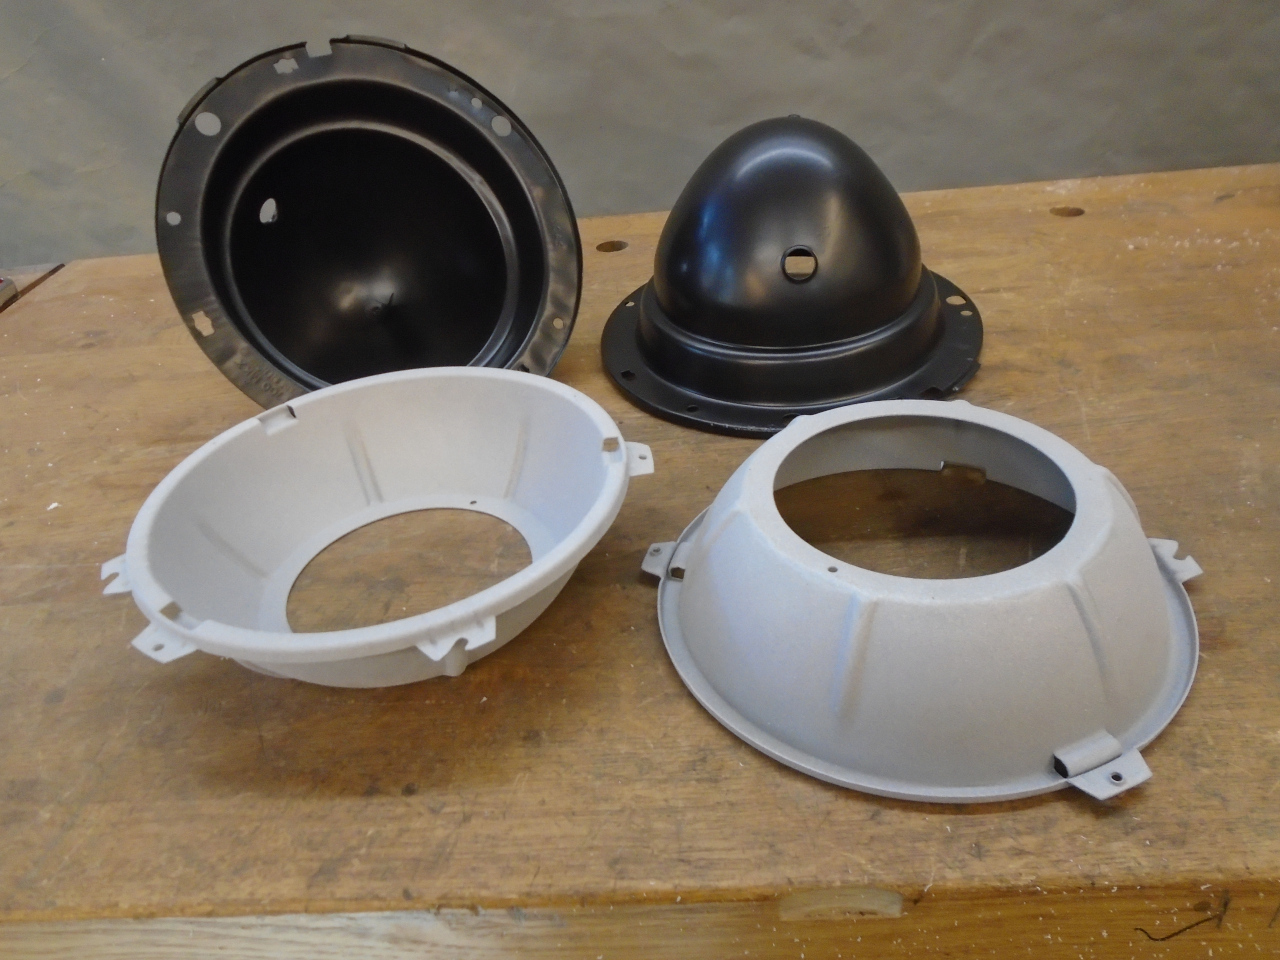
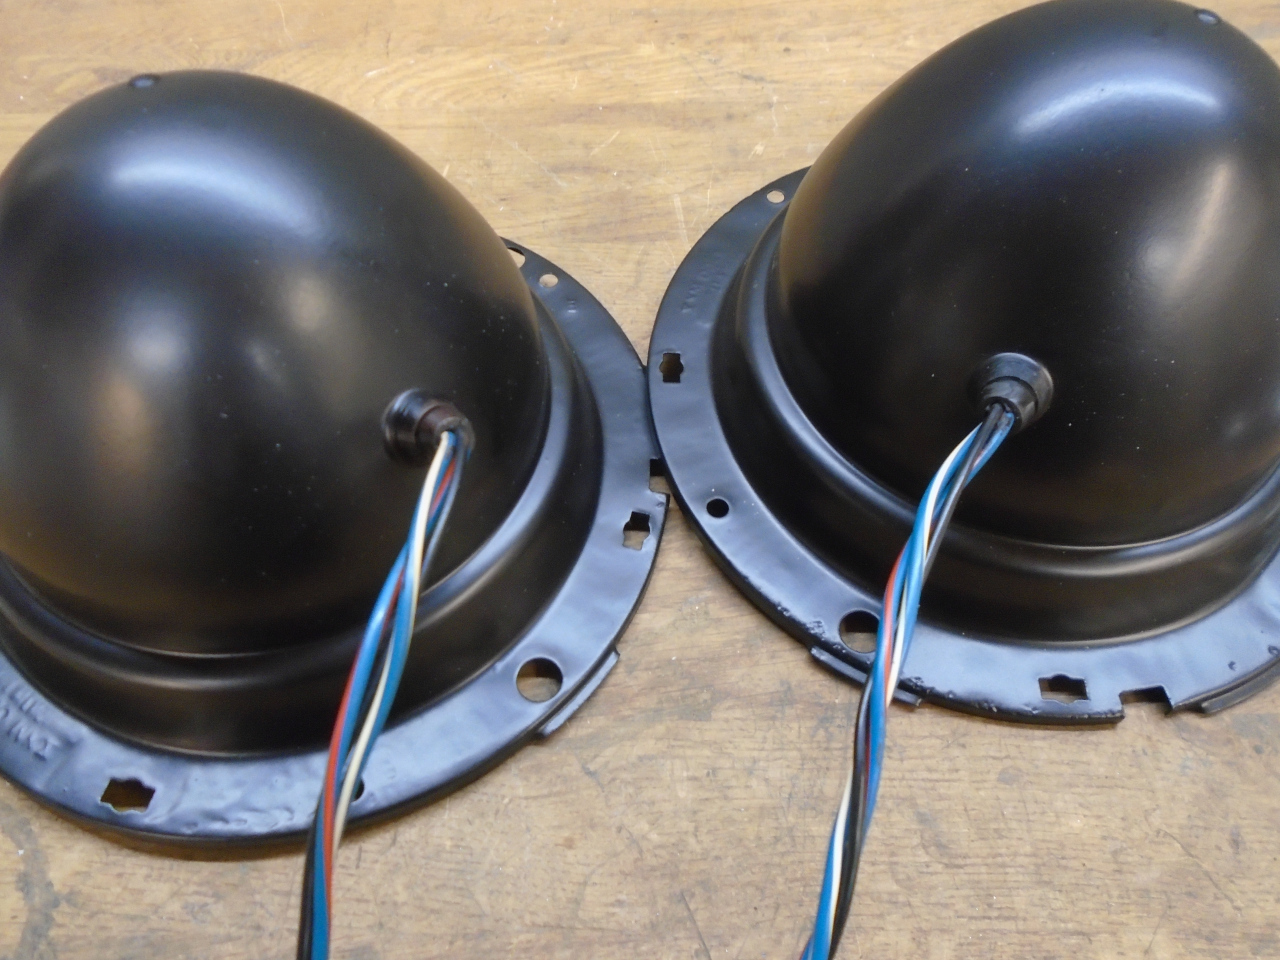
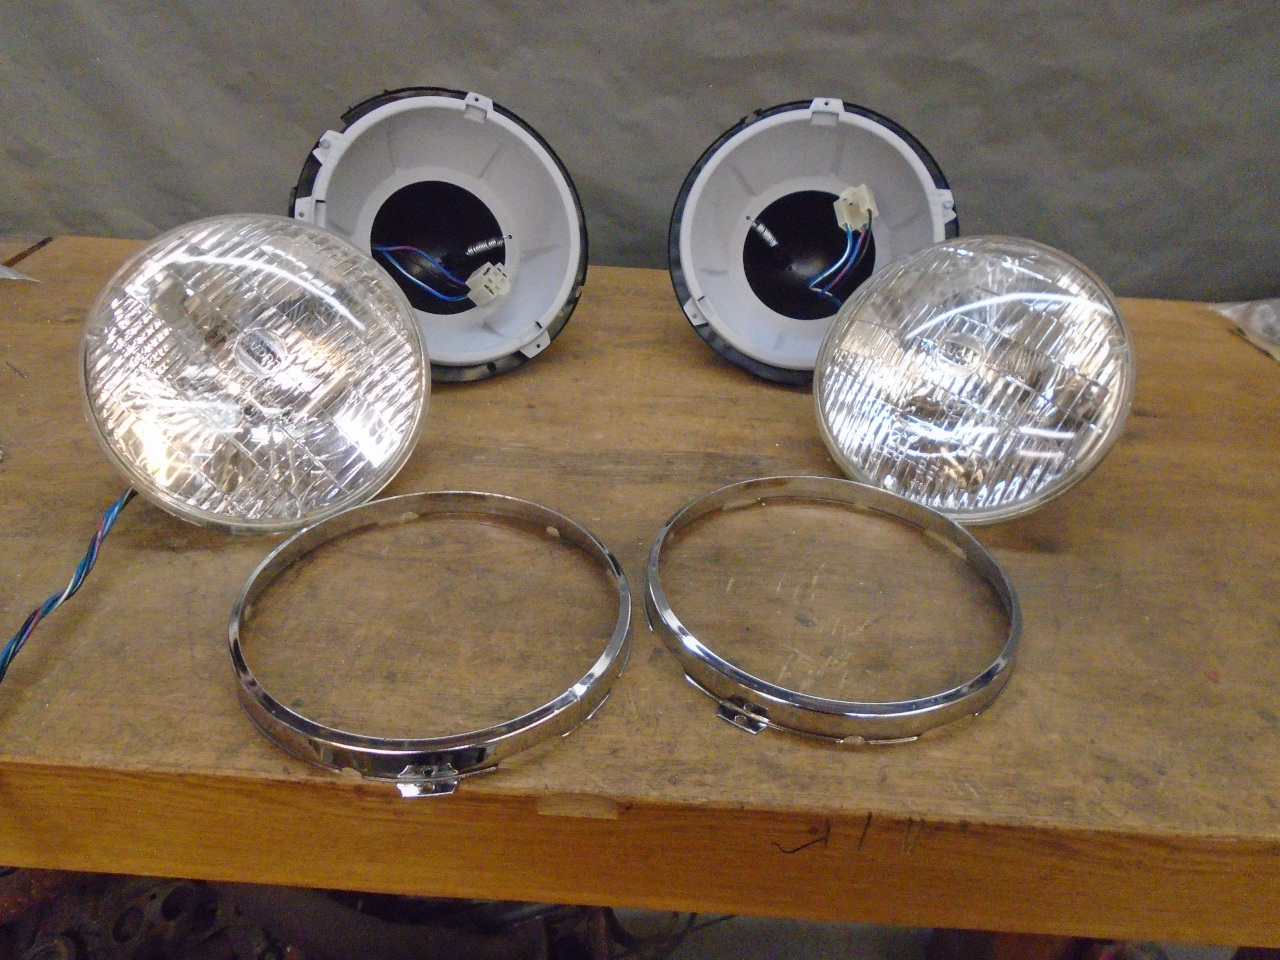
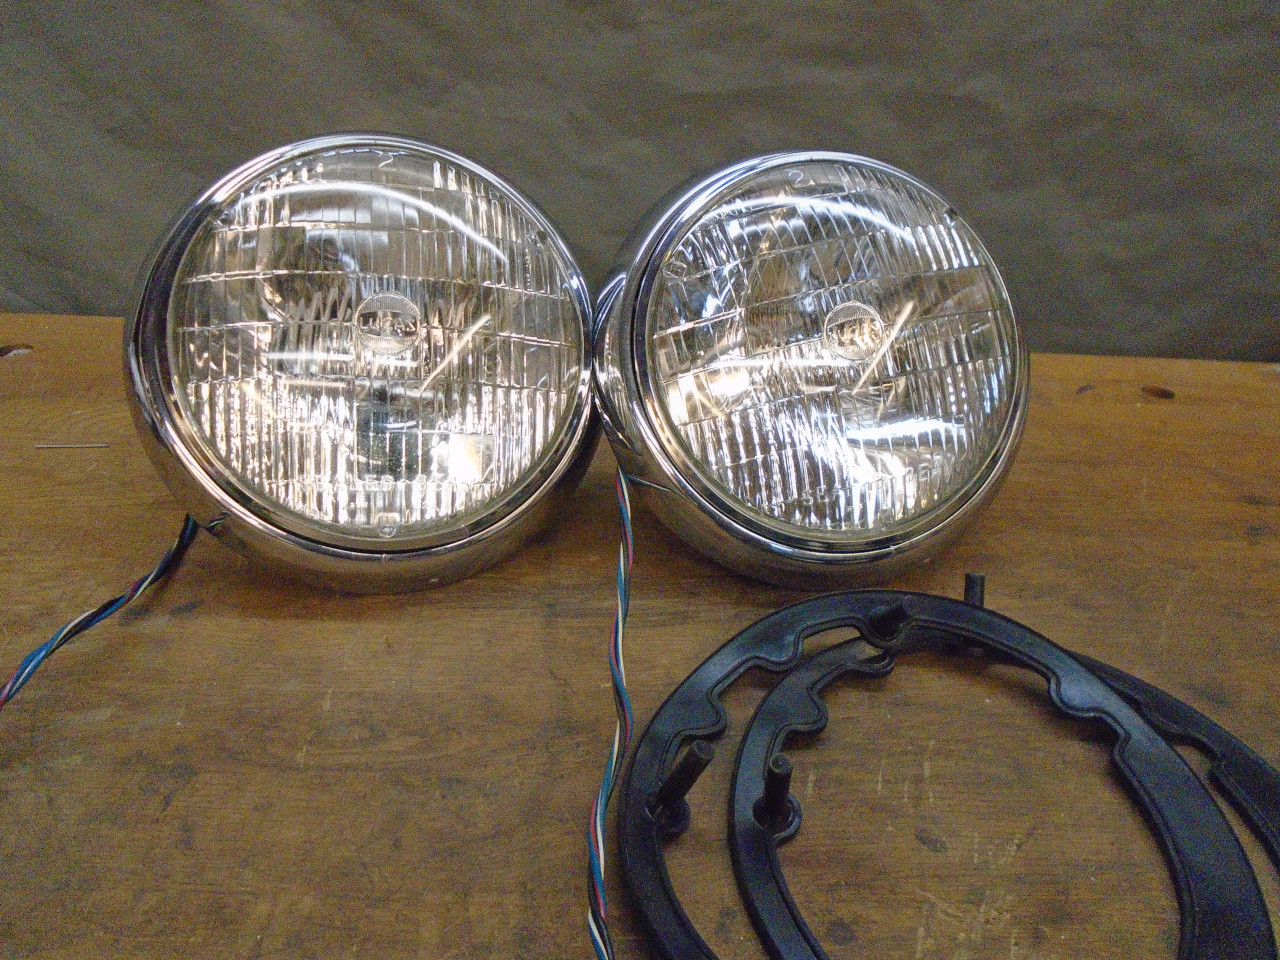
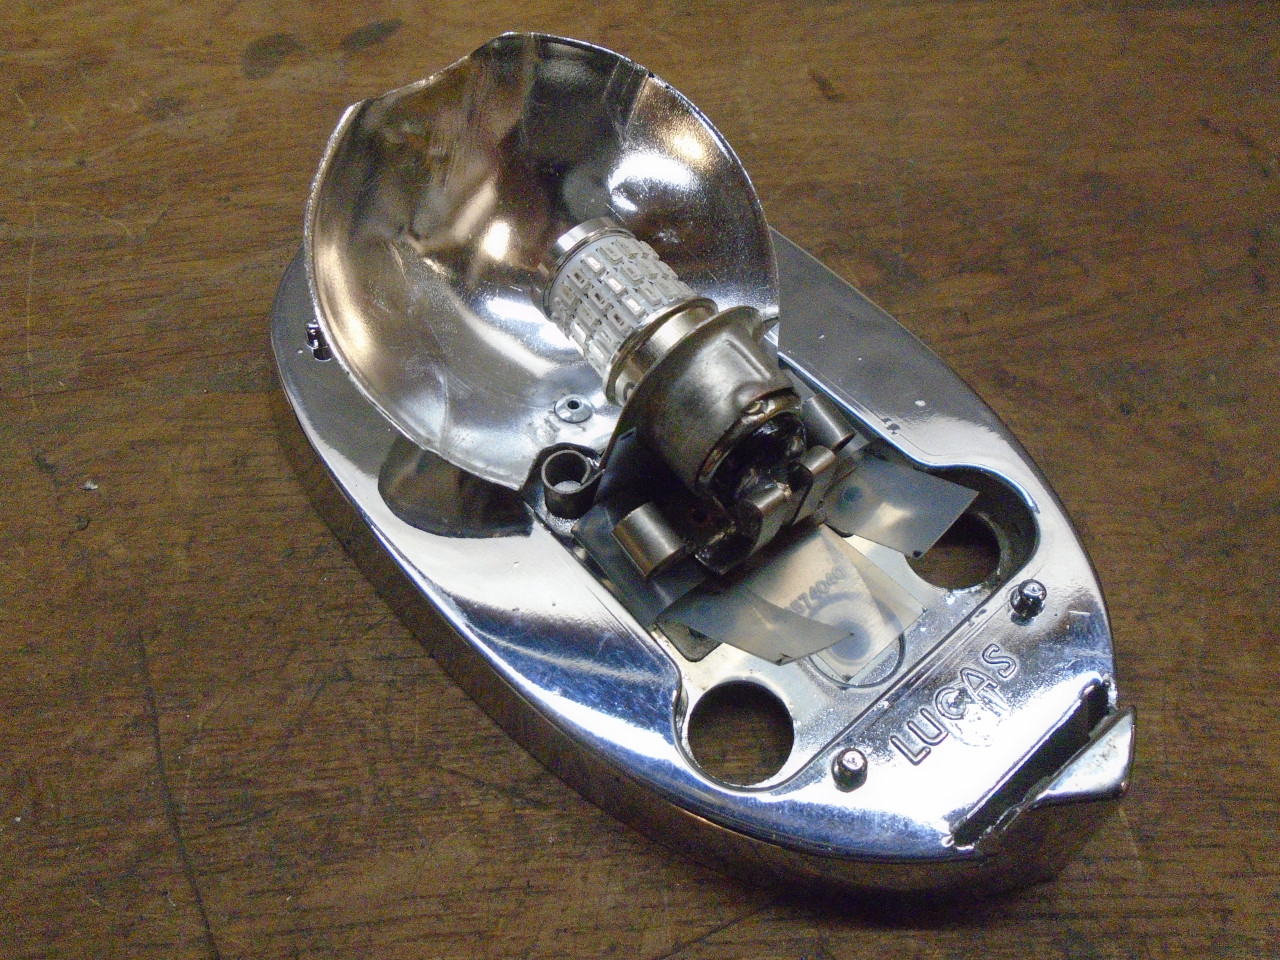
Headlights
My headlight assemblies were just dirty, with a little corrosion
in a few areas.
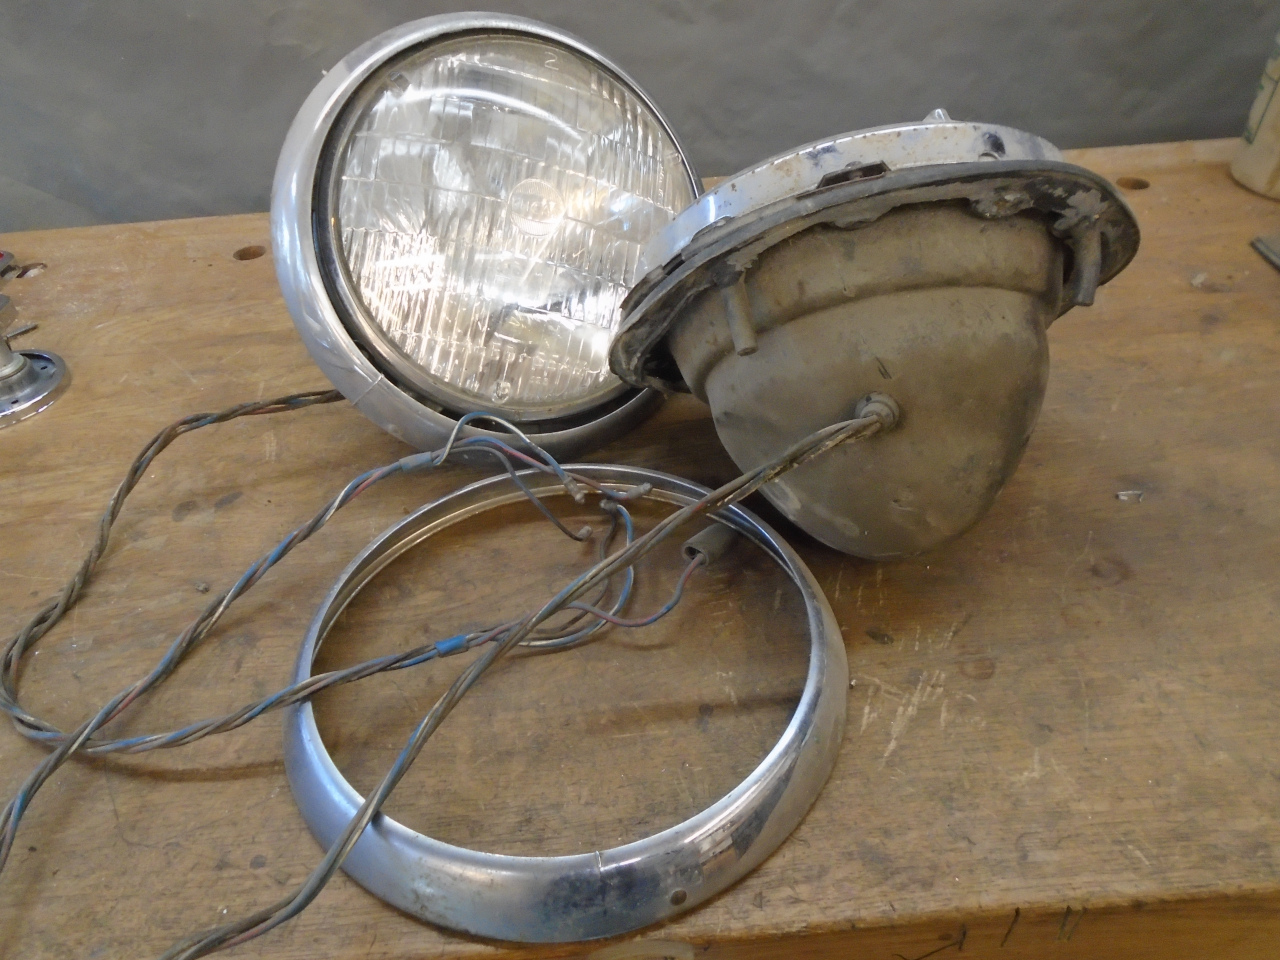
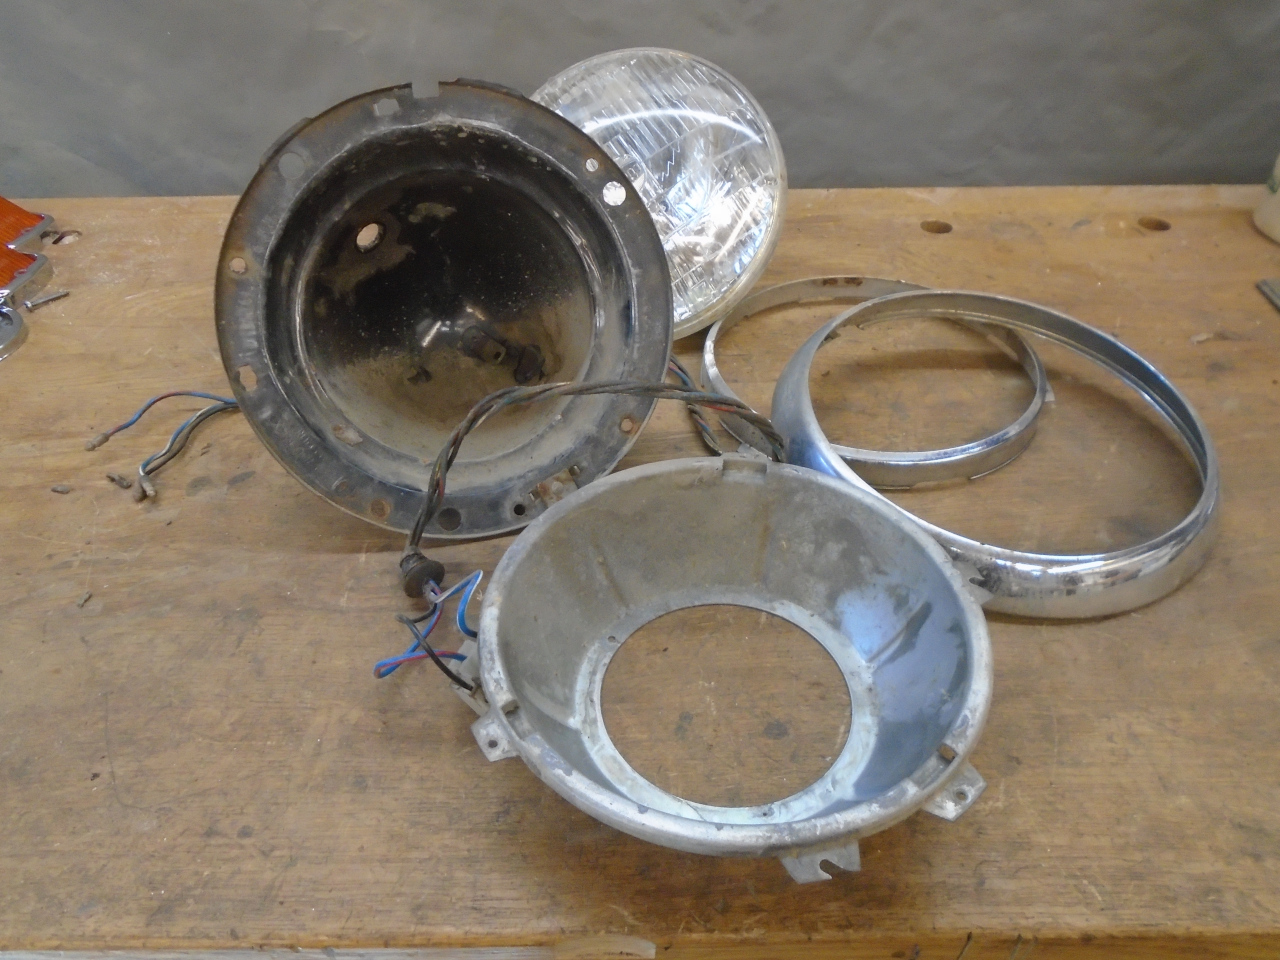
Blasted the buckets and the lamp carriers, and powder coated them.
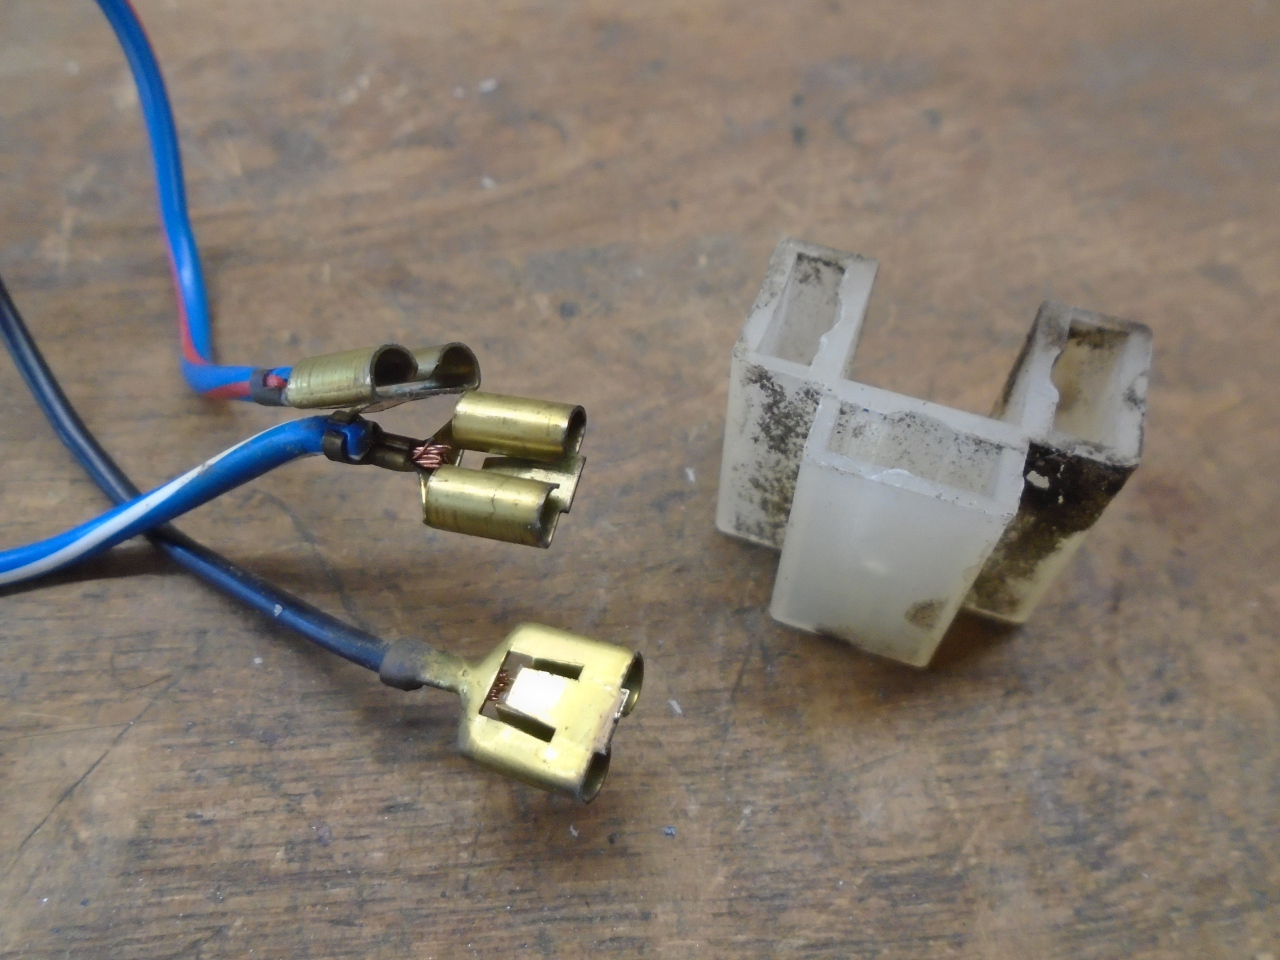
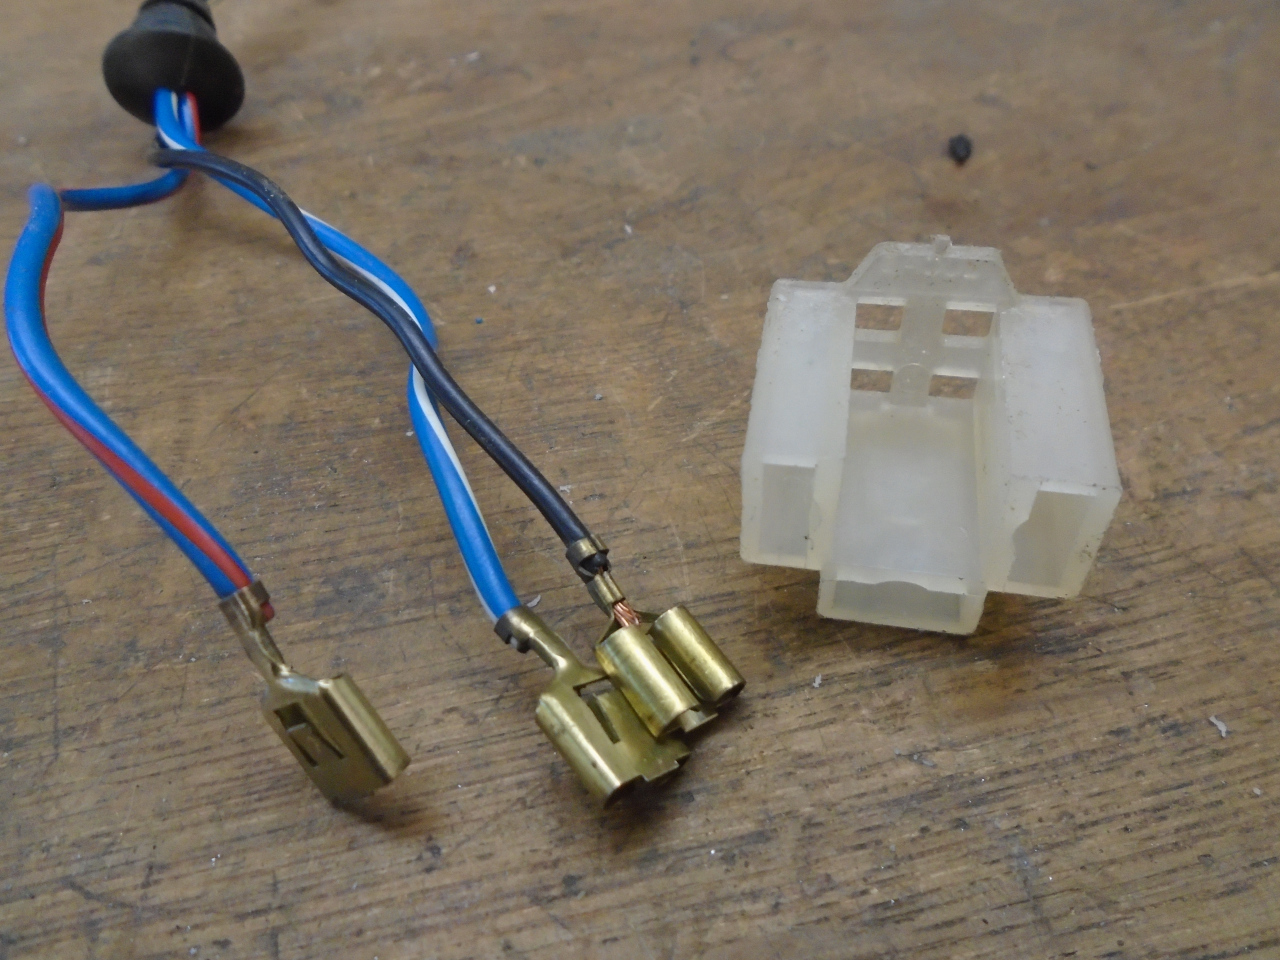
Cleaned and inspected the pigtail wires and connections.
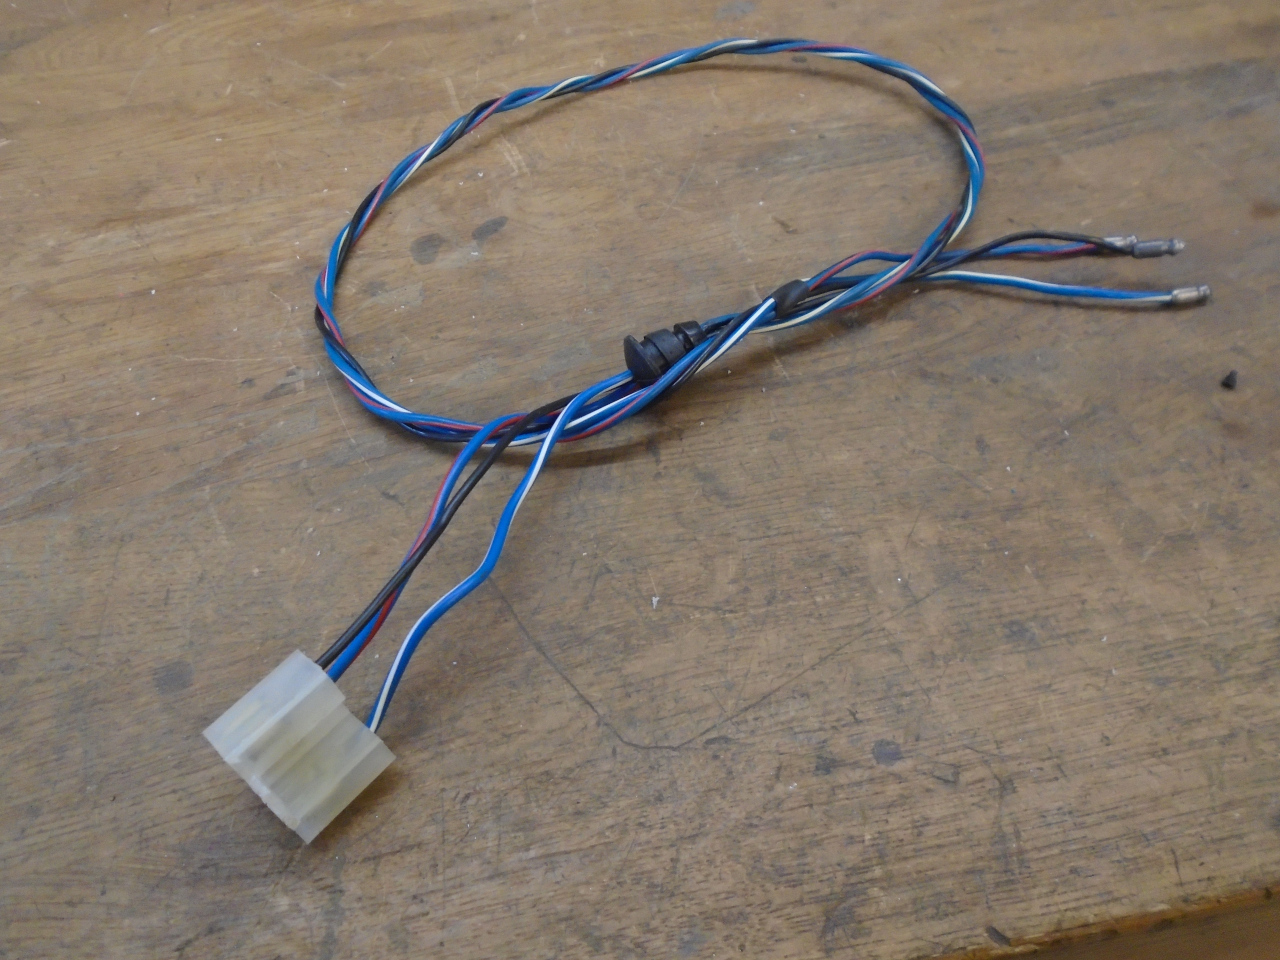
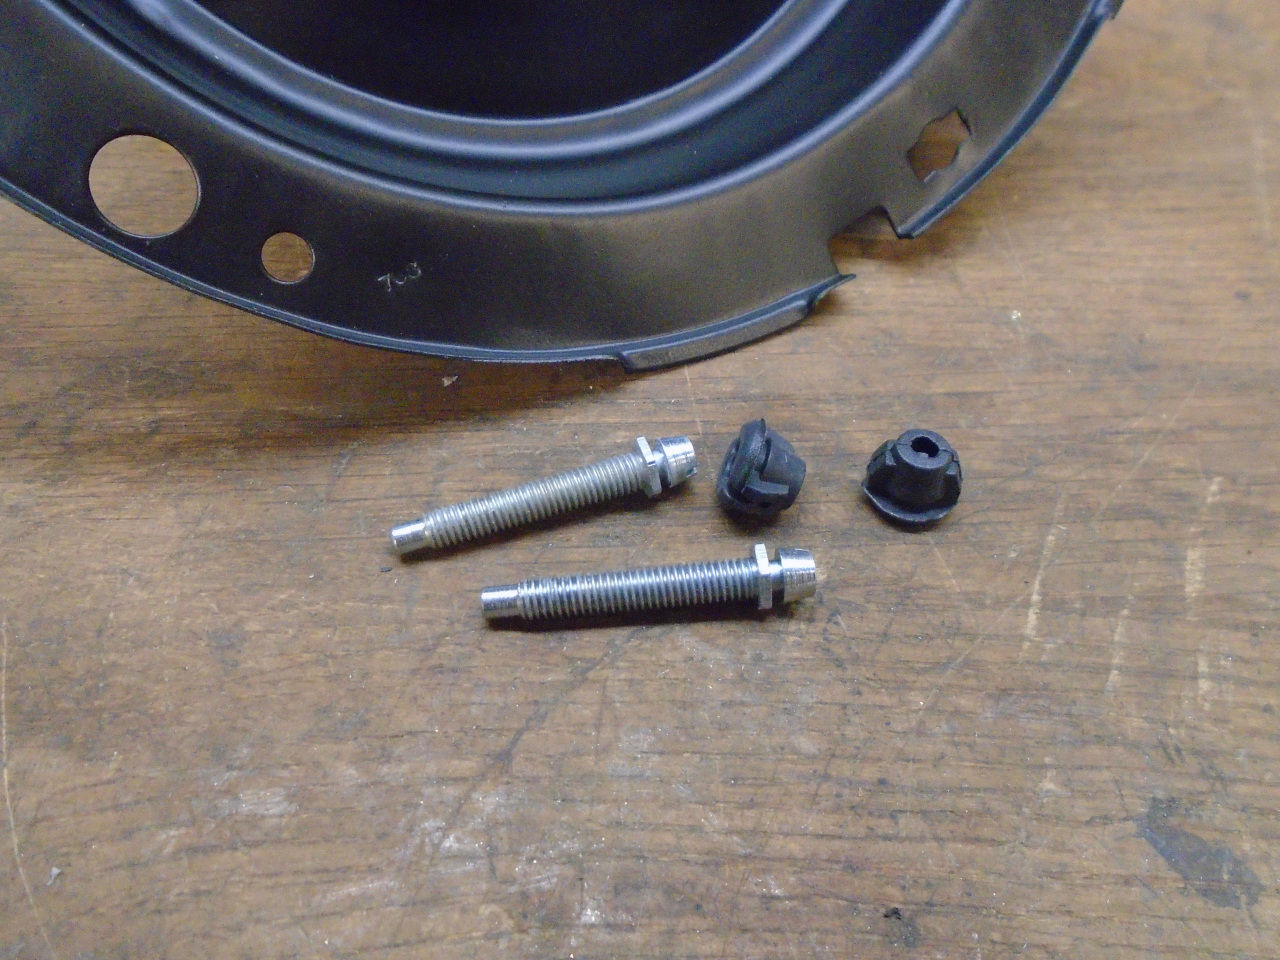
Installed new adjusters. These were the only parts I had to
buy for the headlights.
And put everything together.
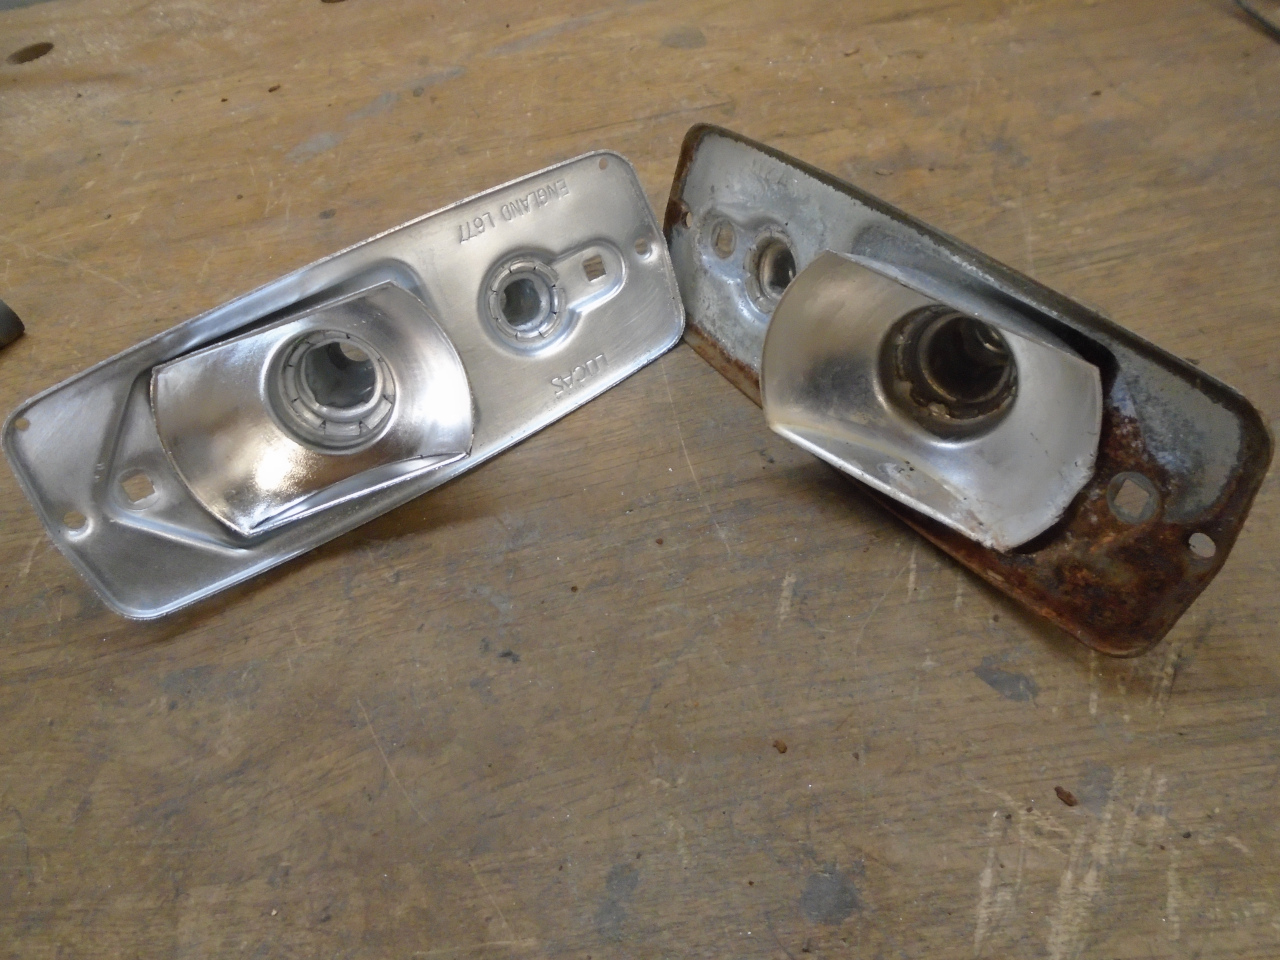
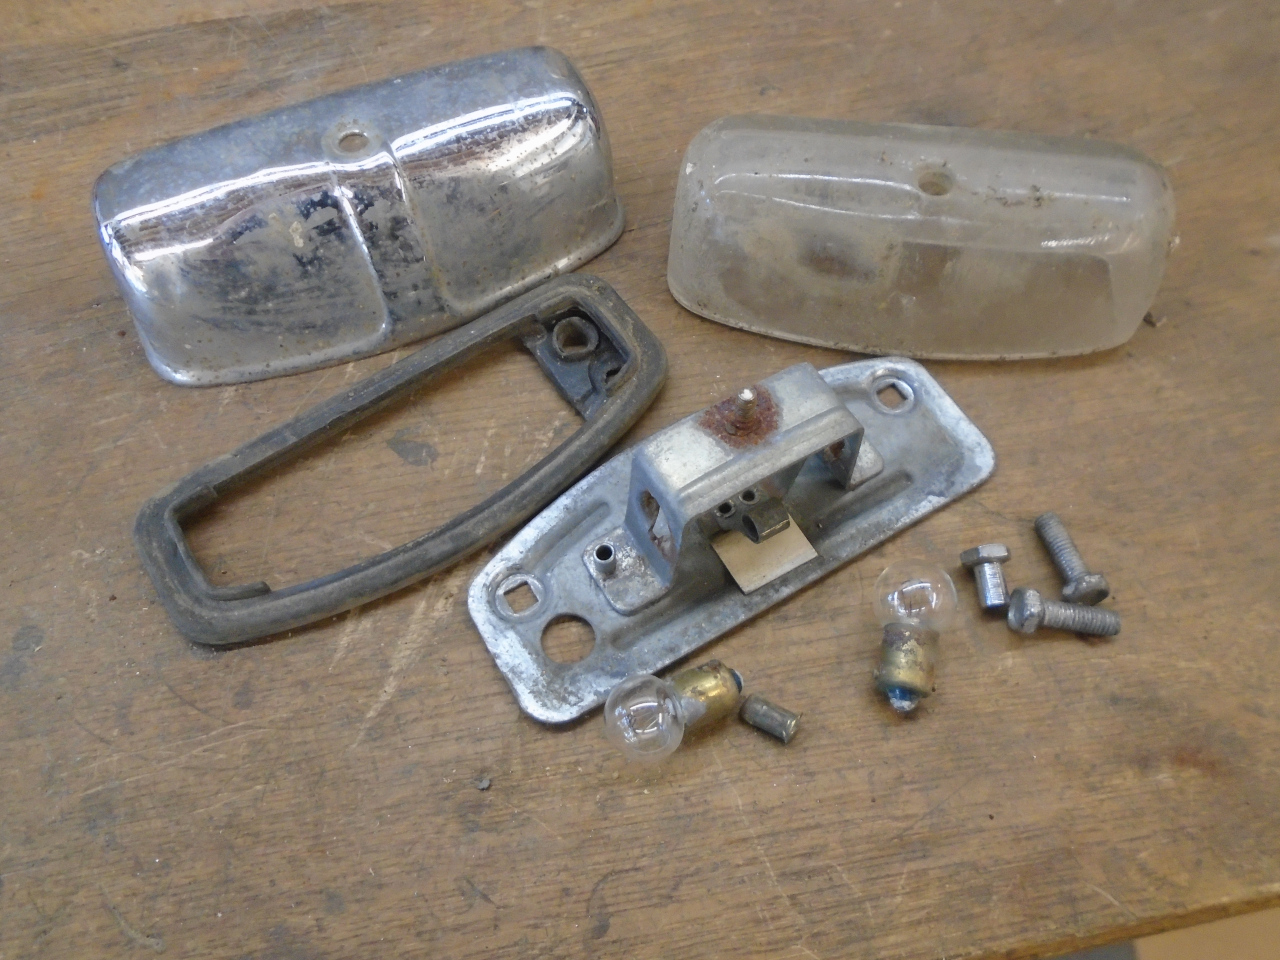
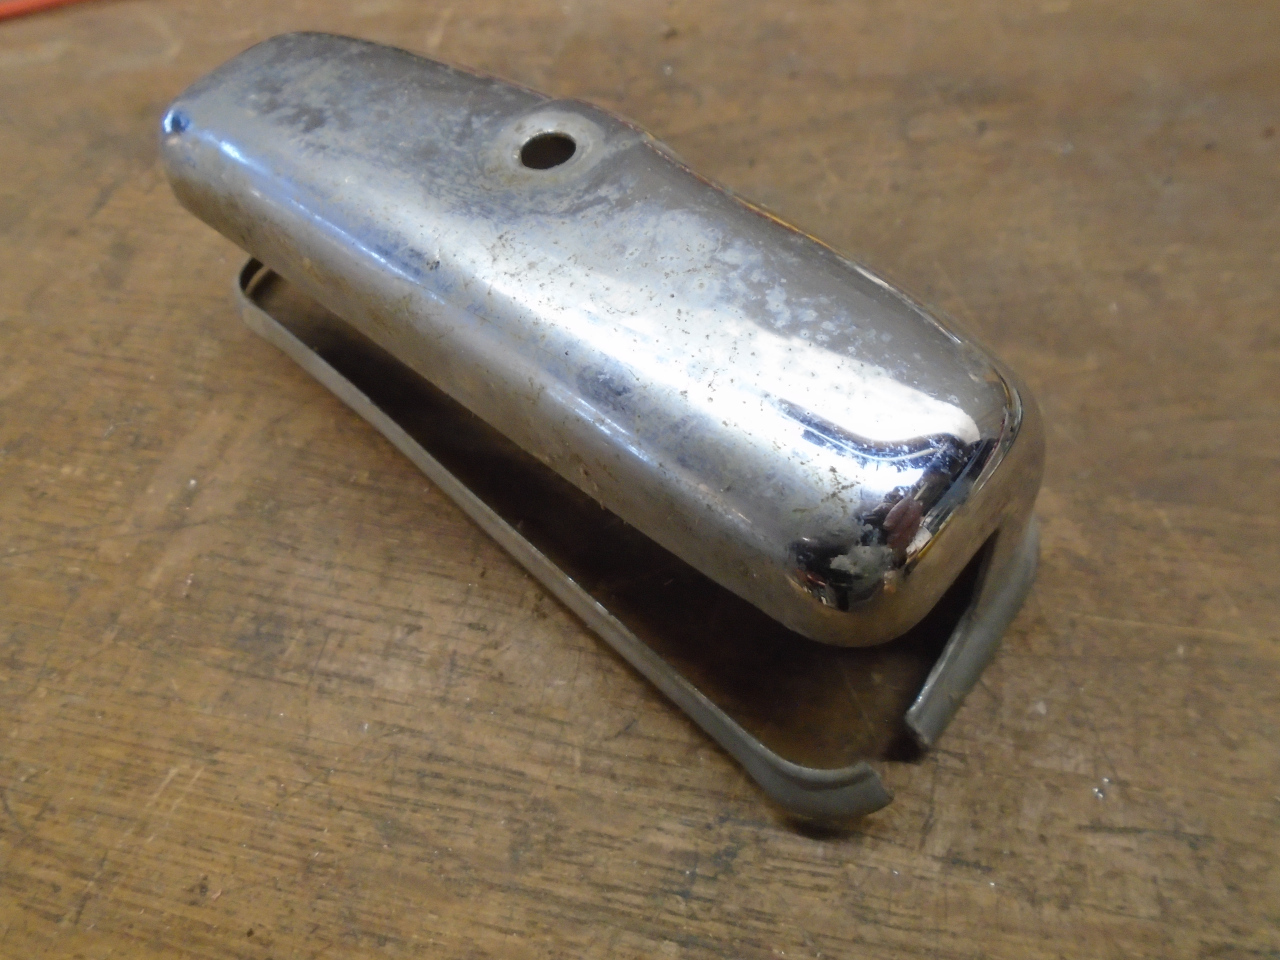
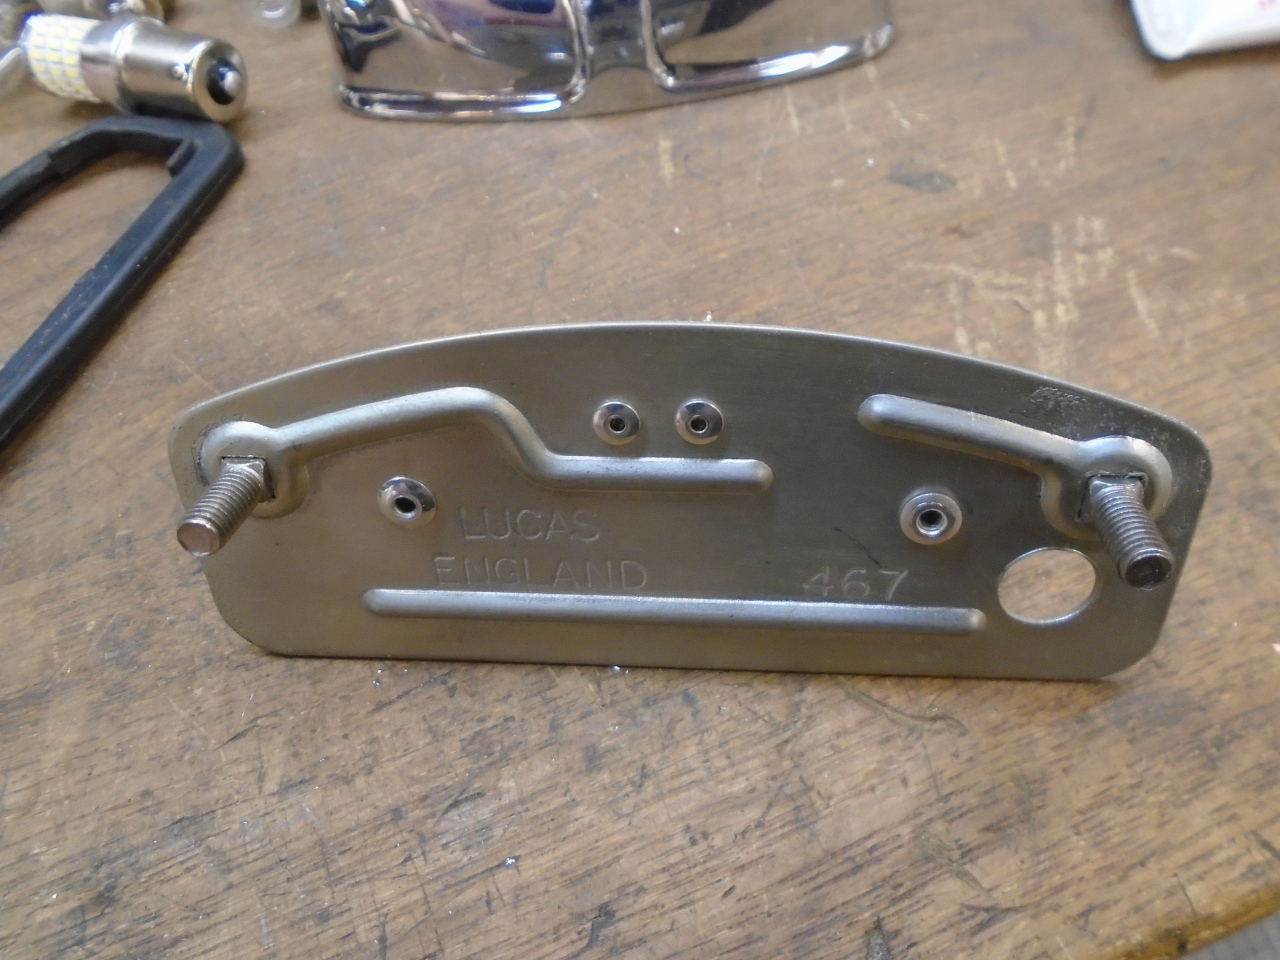
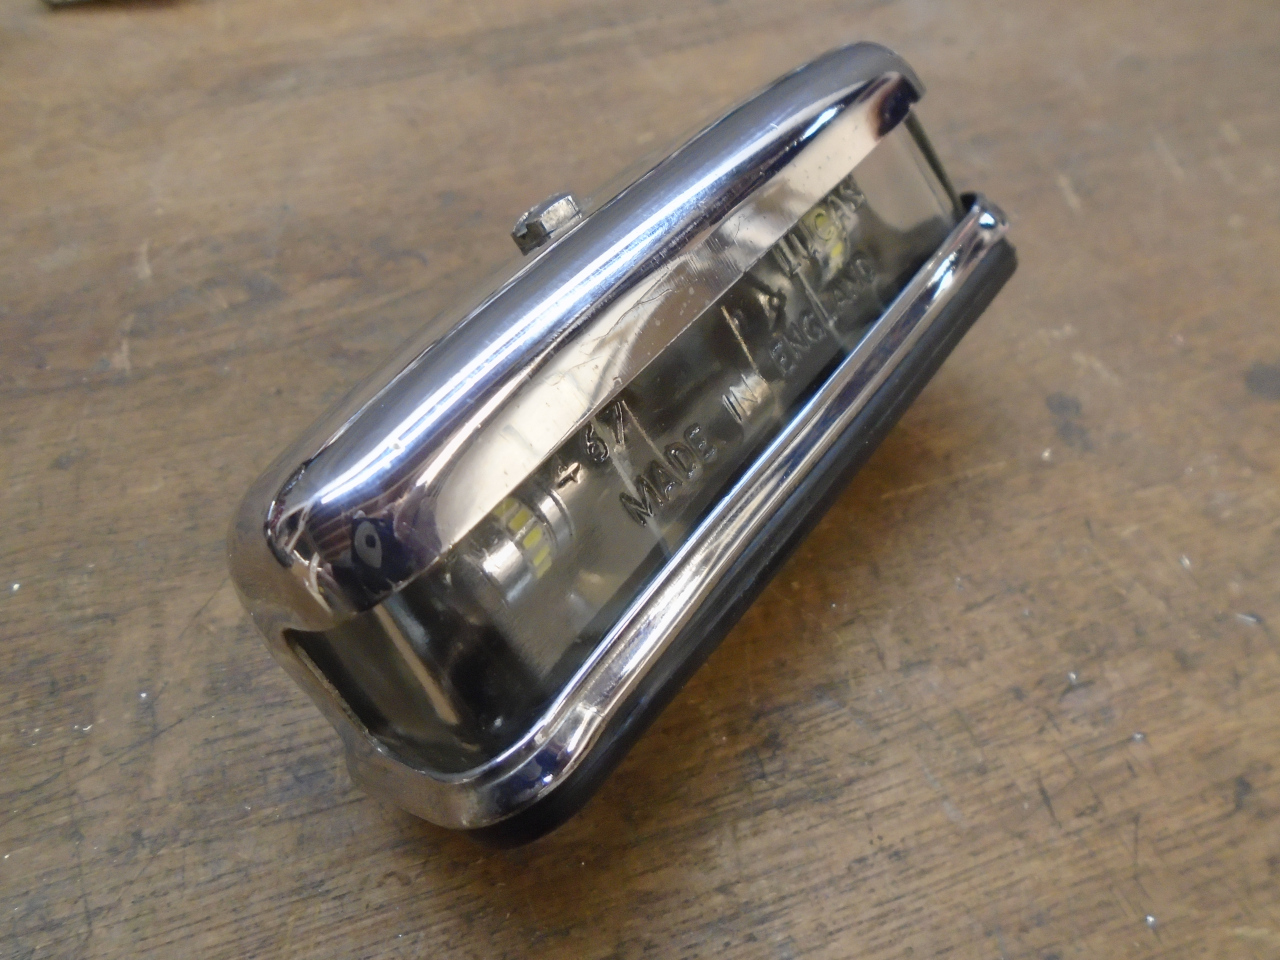
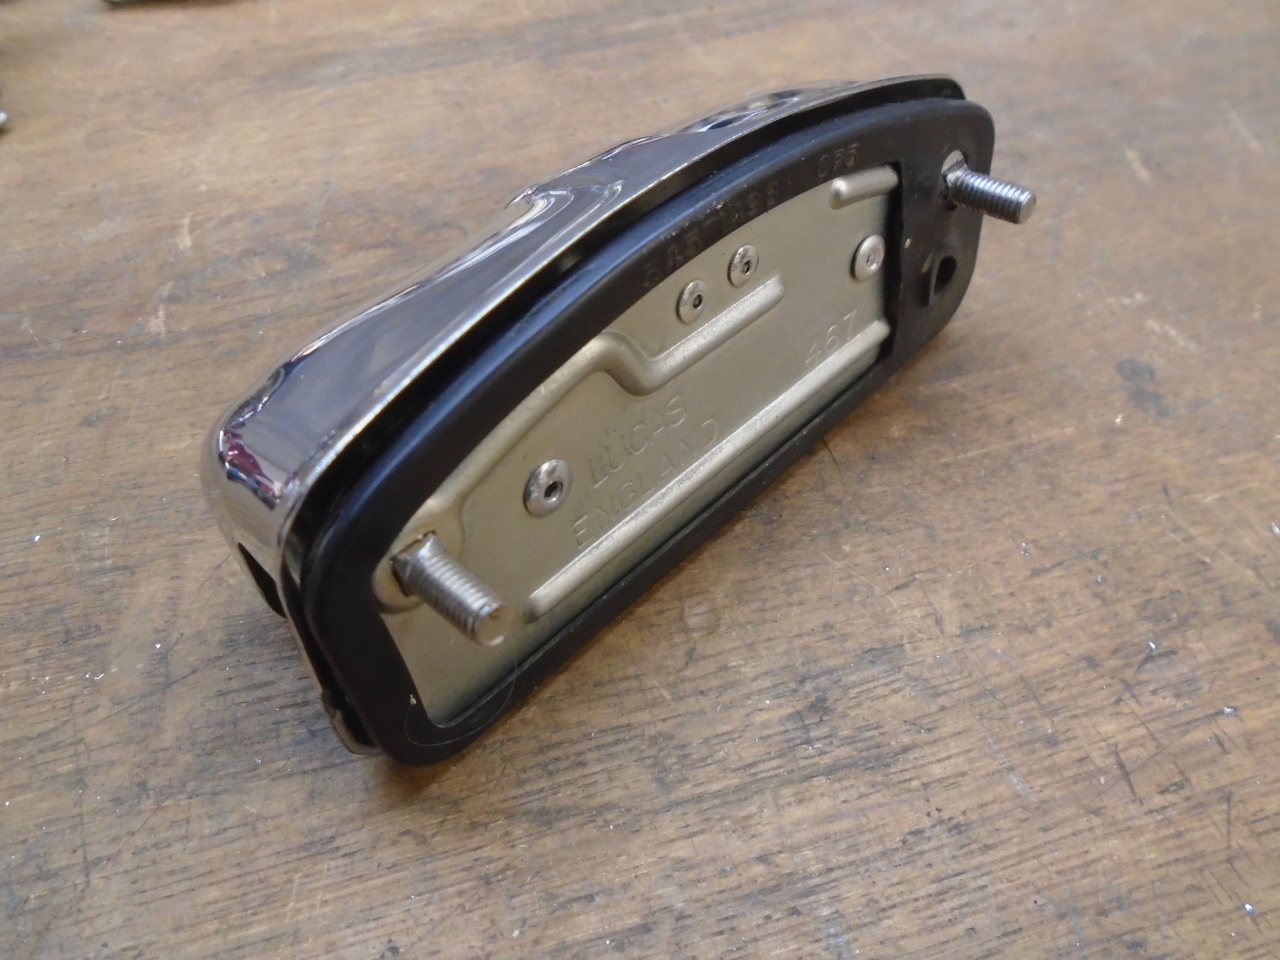
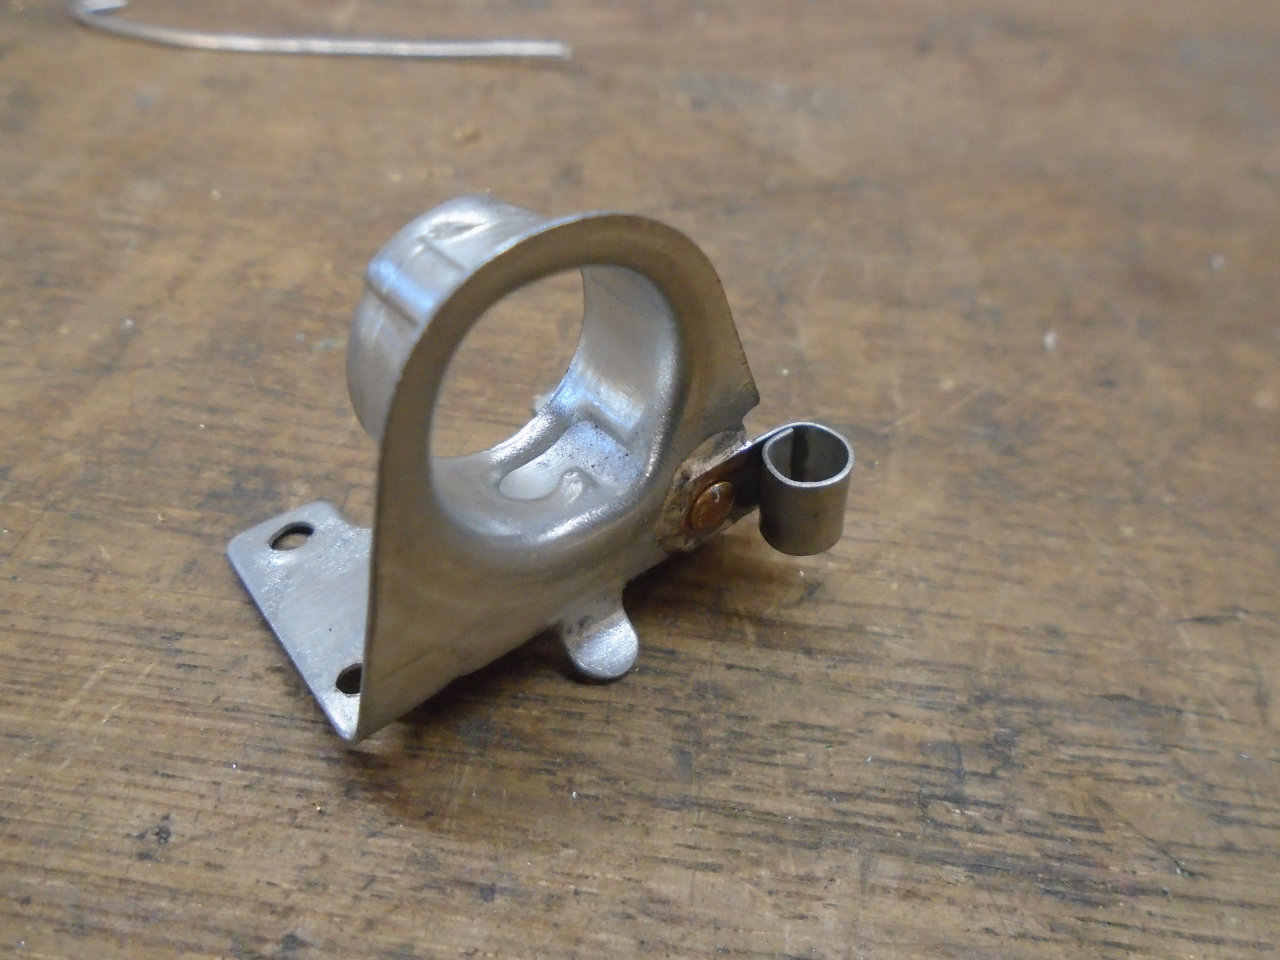
License Plate Light
The license plate light assembly was all there, but was dirty,
with some corrosion damage in a few places. I noticed it
used one of those fake bullet connectors that you just wrap the
bare wire around. I'll fix that during wiring.
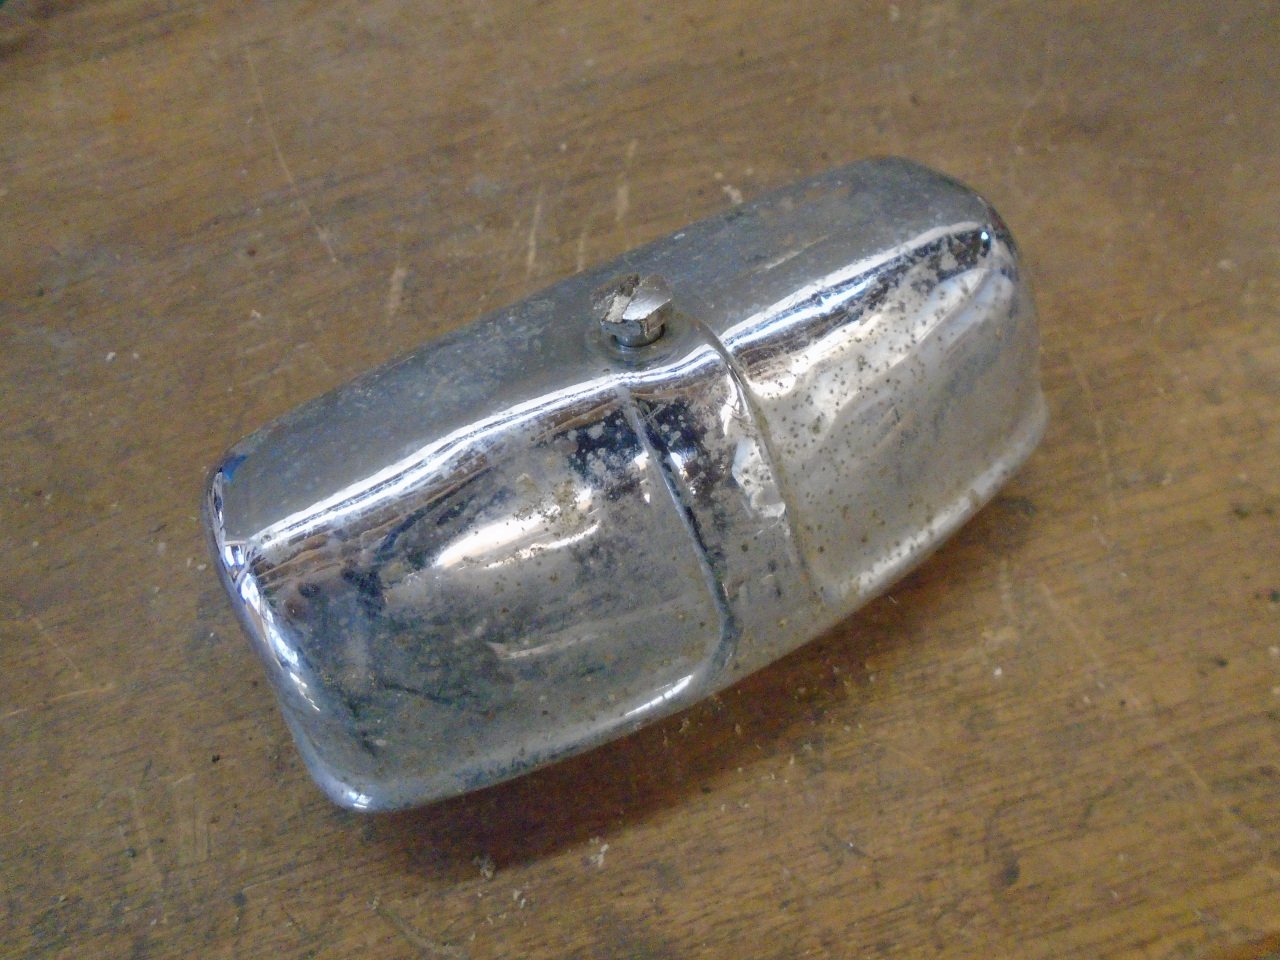
The chrome cover had a broken corner. It looks like someone
(probably me) tried to solder it, but it didn't hold.
The internals were pretty crusty. This is bad for electrical
continuity.
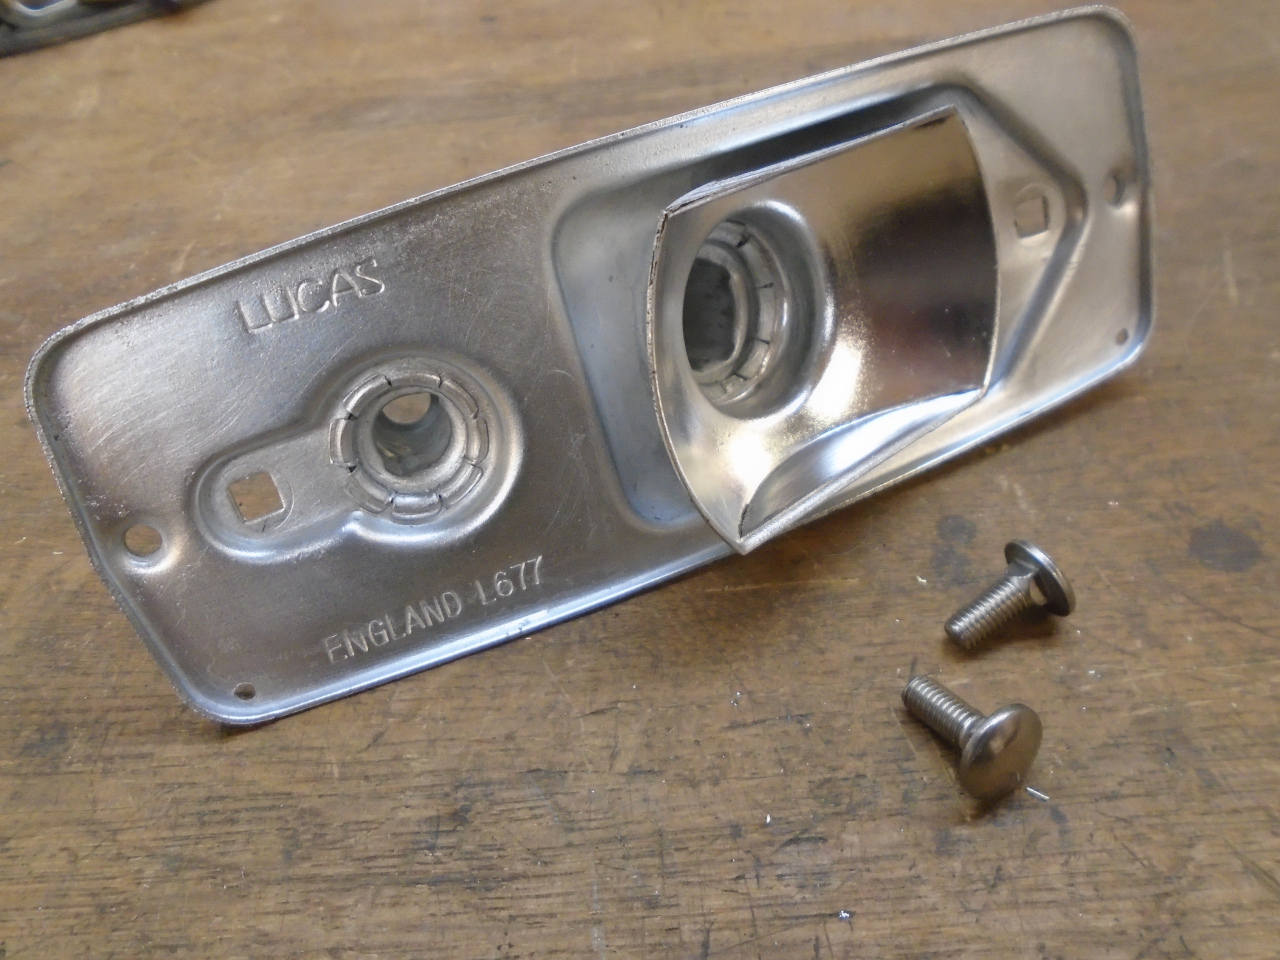
Apart it came, and the steel parts got stripped and re-plated.
The electrical contacts got cleaned up and tested for good
continuity.
Then the unit was re-assembled.
I had noticed that this assembly lacked an explicit ground
connection. Since I'm not a fan of using the car's body as
an electrical return path, I added a bullet socket for a ground
wire. Unsoldered joints like this get a coat of dielectric
grease to protect the surfaces from oxidation.
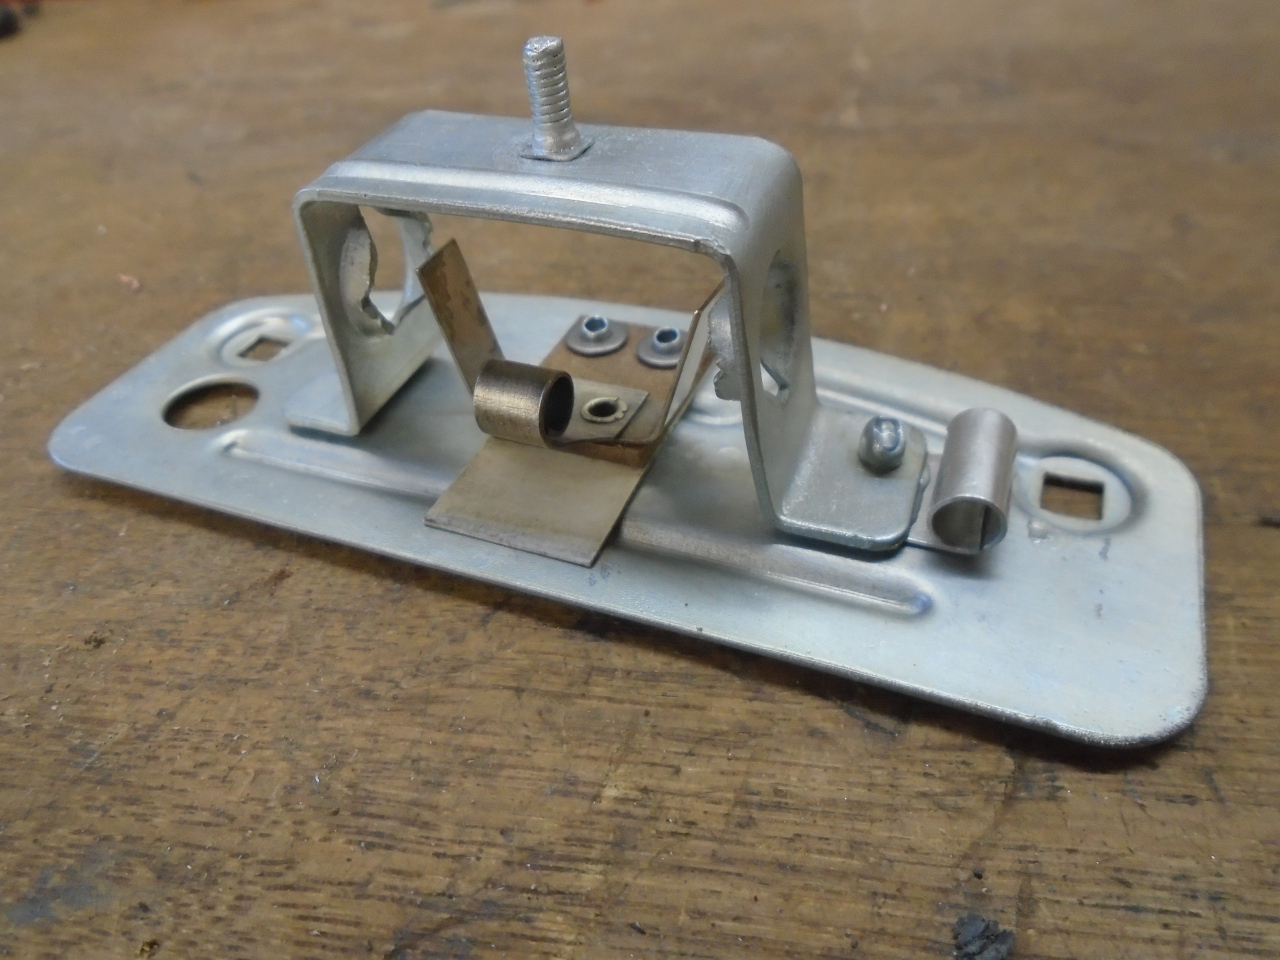
This unit also had those square mounting holes like the front turn
signals. Carriage type bolts snapped right into them.
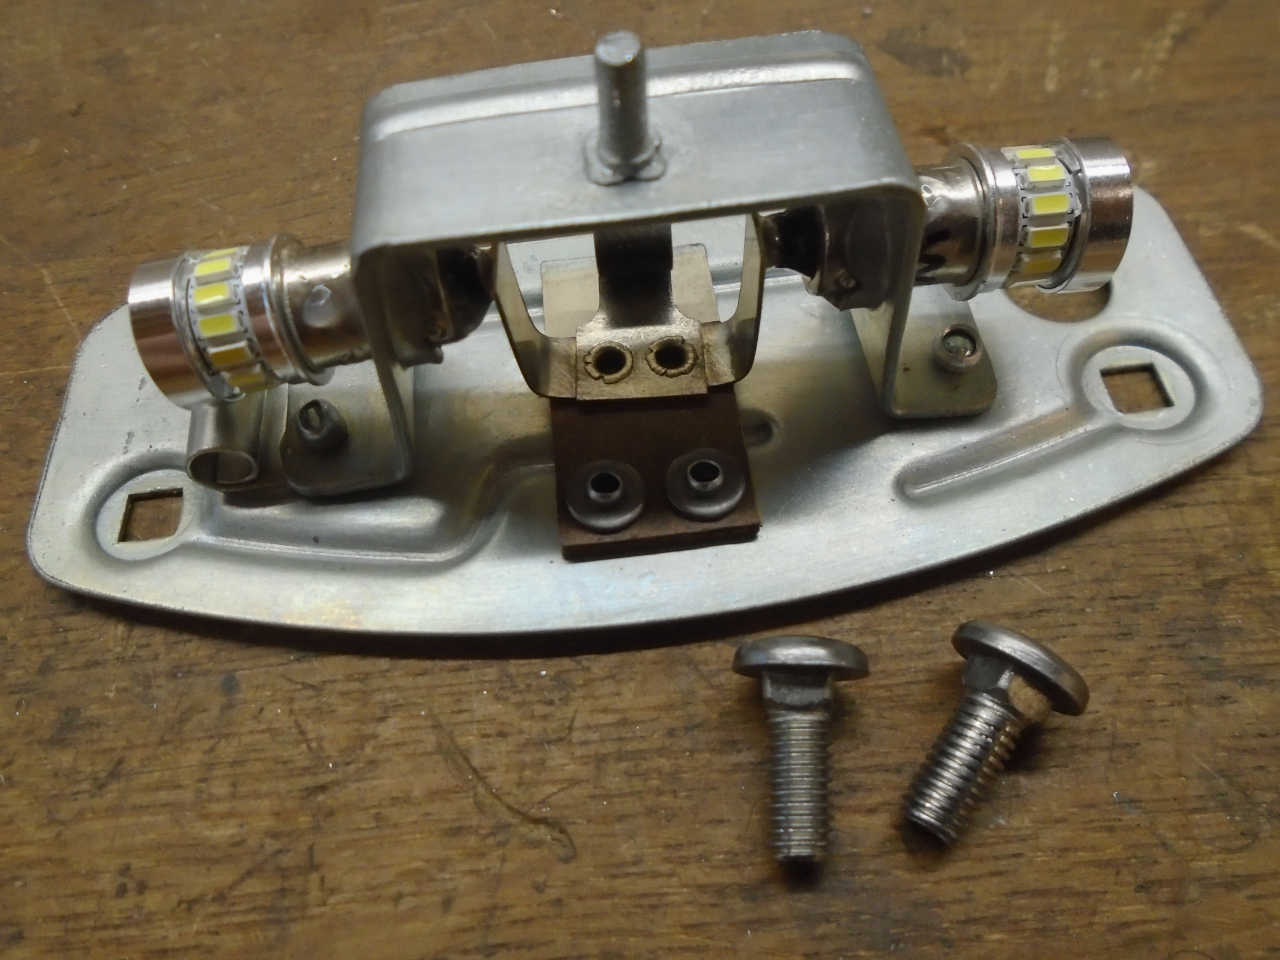
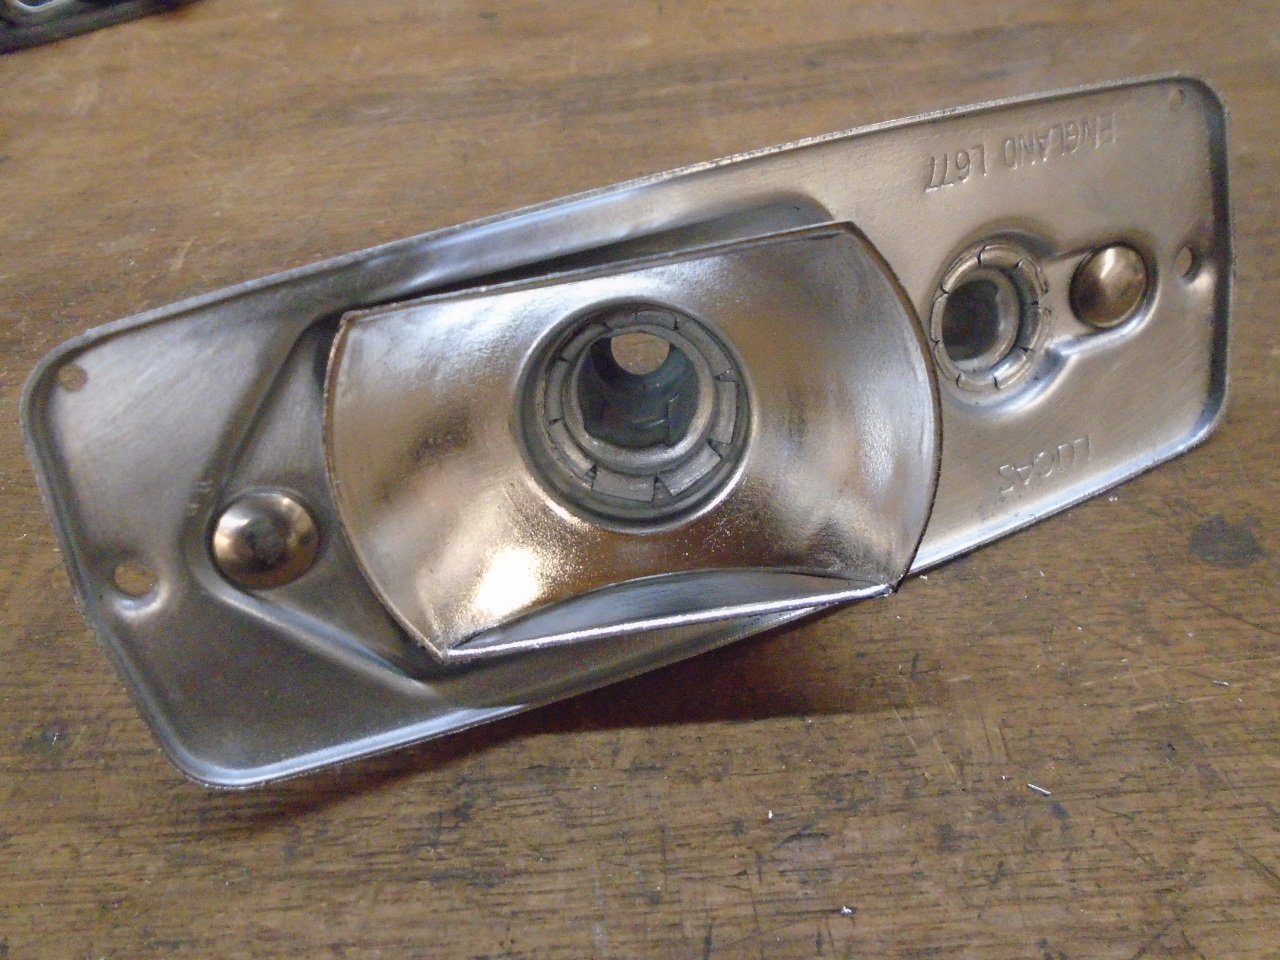
Added the gasket, and put her back together. I fixed the
chrome cover by epoxying a wire reinforcement around the corner on
the inside. The repair isn't visible from the outside.
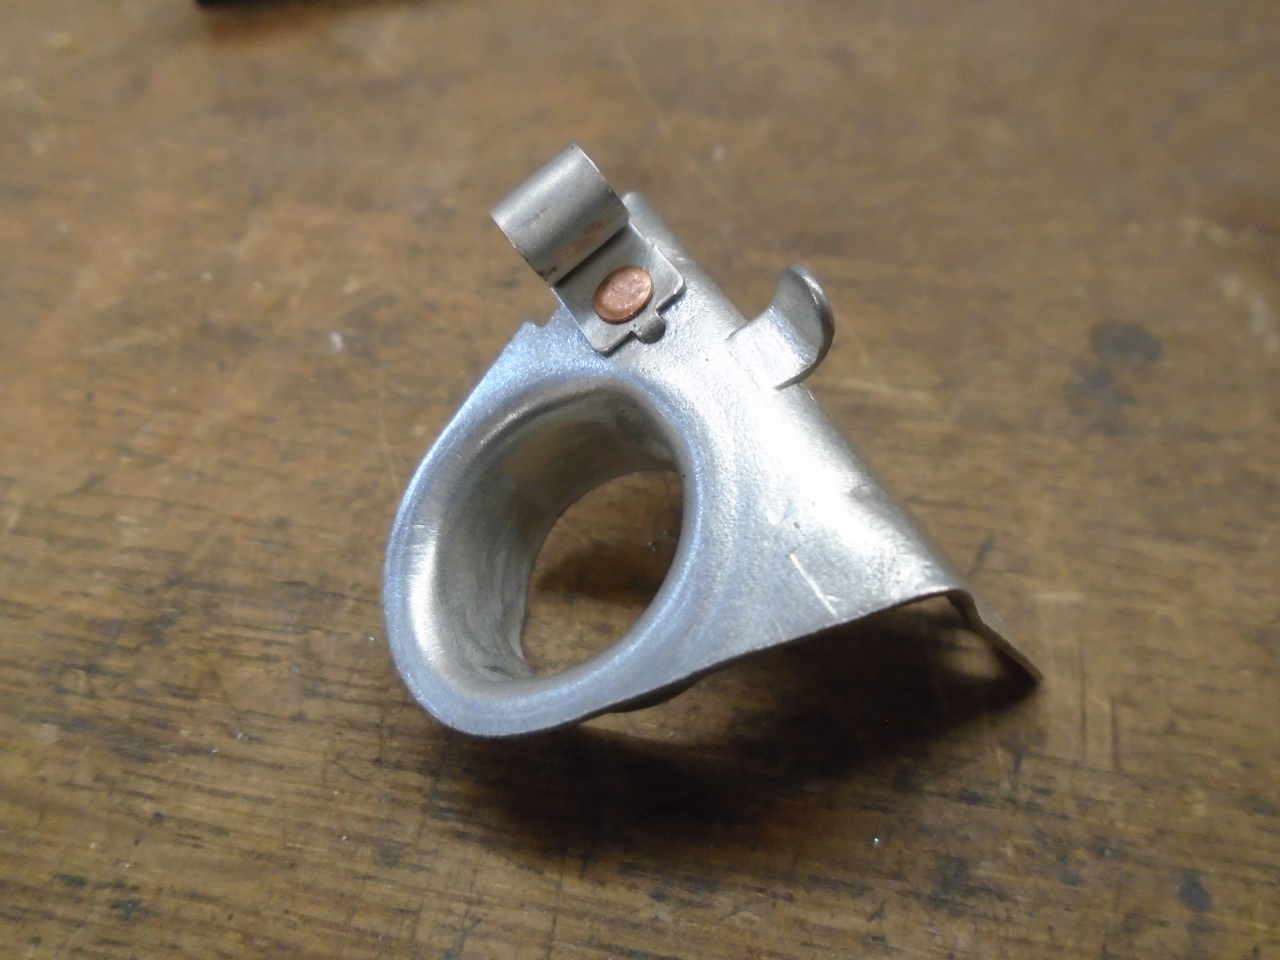
Rear Turn Signals
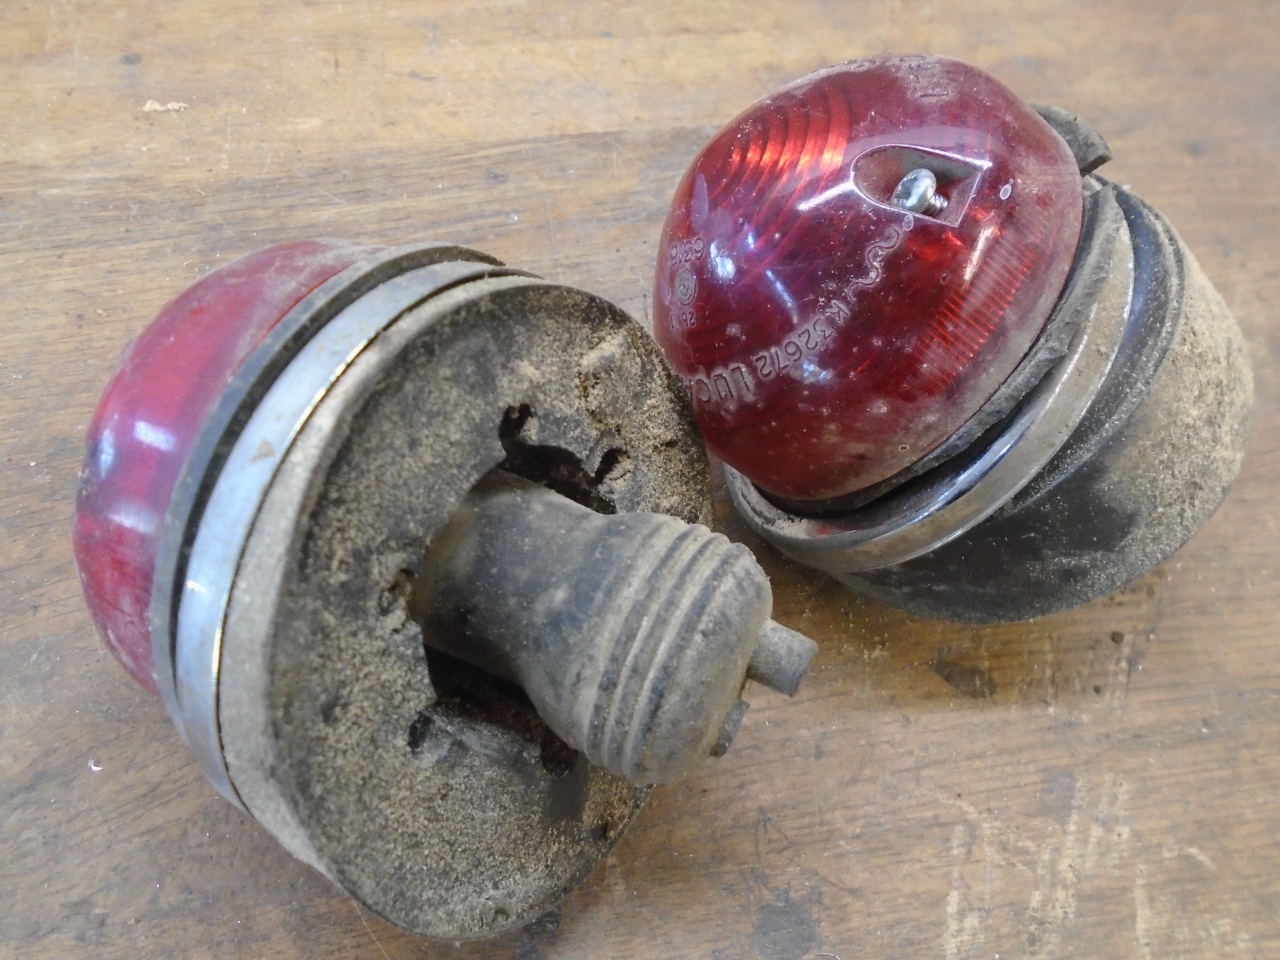
One of my rear signal lights appeared to be intact. The
other had a broken lens, a missing rubber gasket, and a broken off
ground terminal. Here are the parts for the good one.

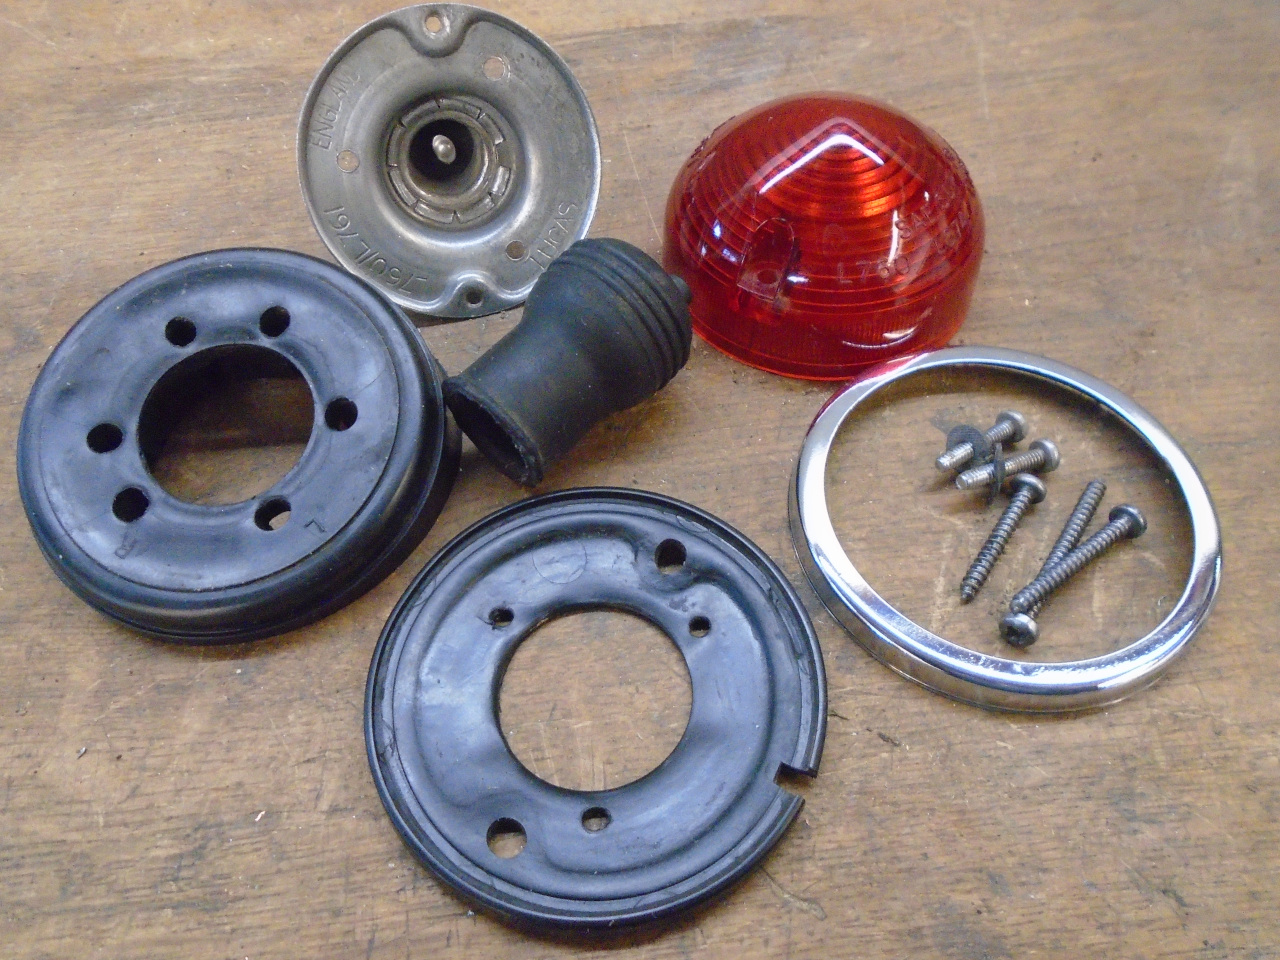
I endeavored to fix the missing ground on the other fixture:
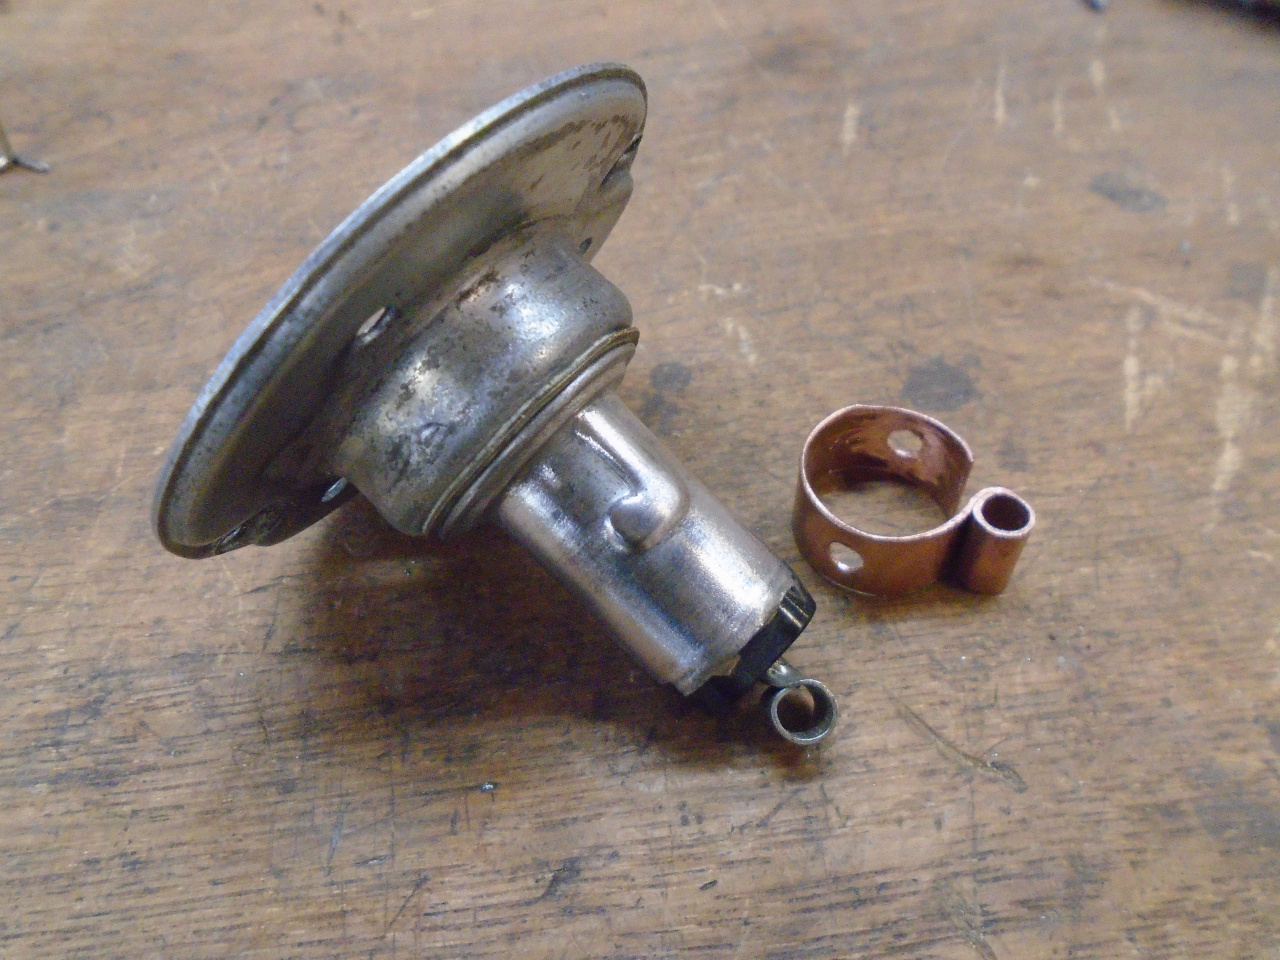
I was pretty proud of myself until I realized that the rubber boot
would now not fit over the new ground terminal. So I had to
backpedal and order a new socket, which appeared to only come with
an amber lens (at least from SpitBits). There appears to be
some confusion about which models and years had red, and which had
amber lenses. So I ordered a red lens, too.
I always fear the worst when I have to order parts like this, but
the part I got appeared to be New Old Stock. I was pretty
happy with it. The red lens, though, was definitely not NOS.
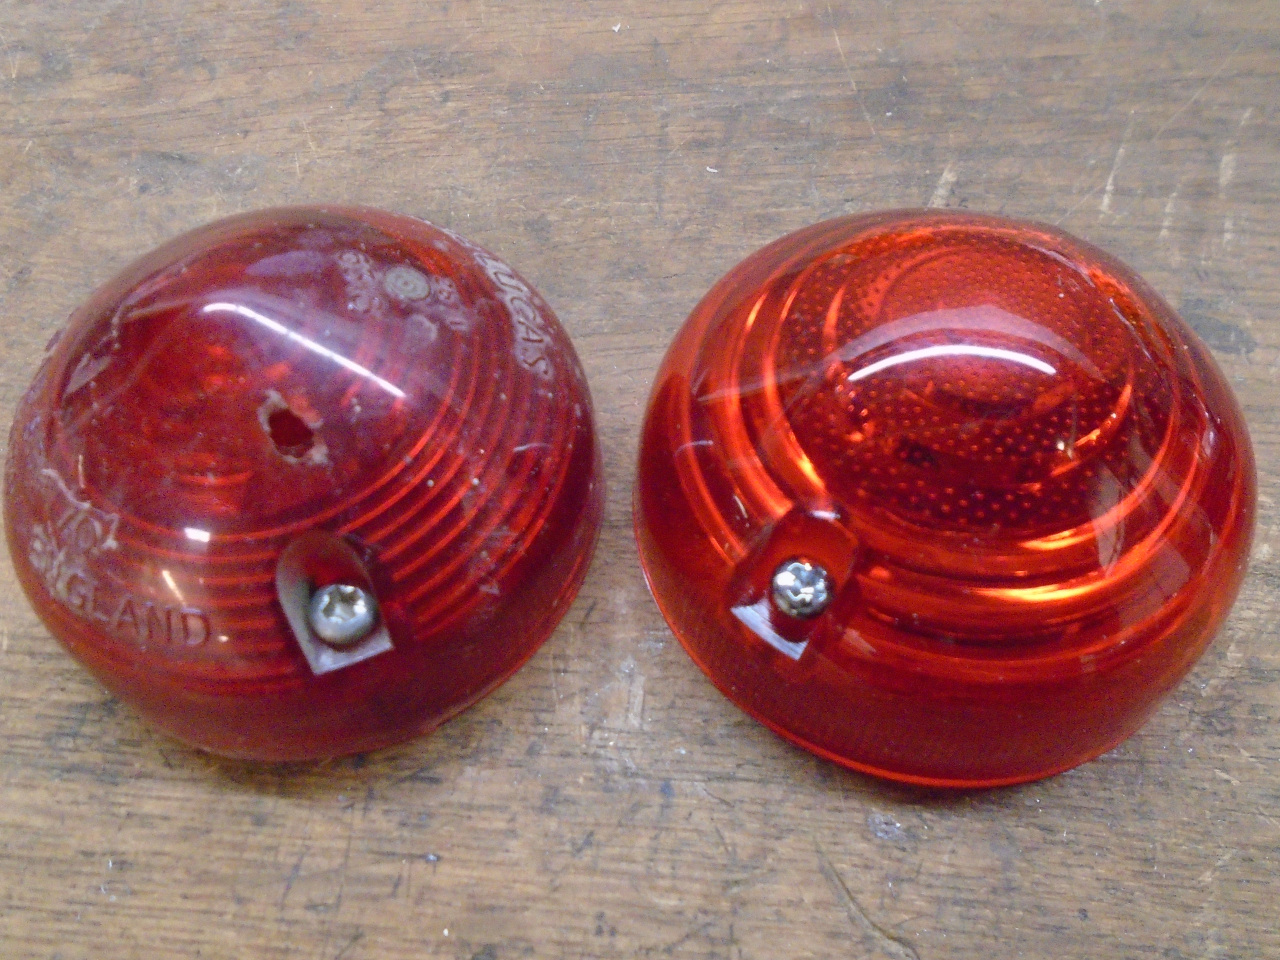
The final assemblies. The mismatching lenses is a minor
irritation, but I'll get over it.
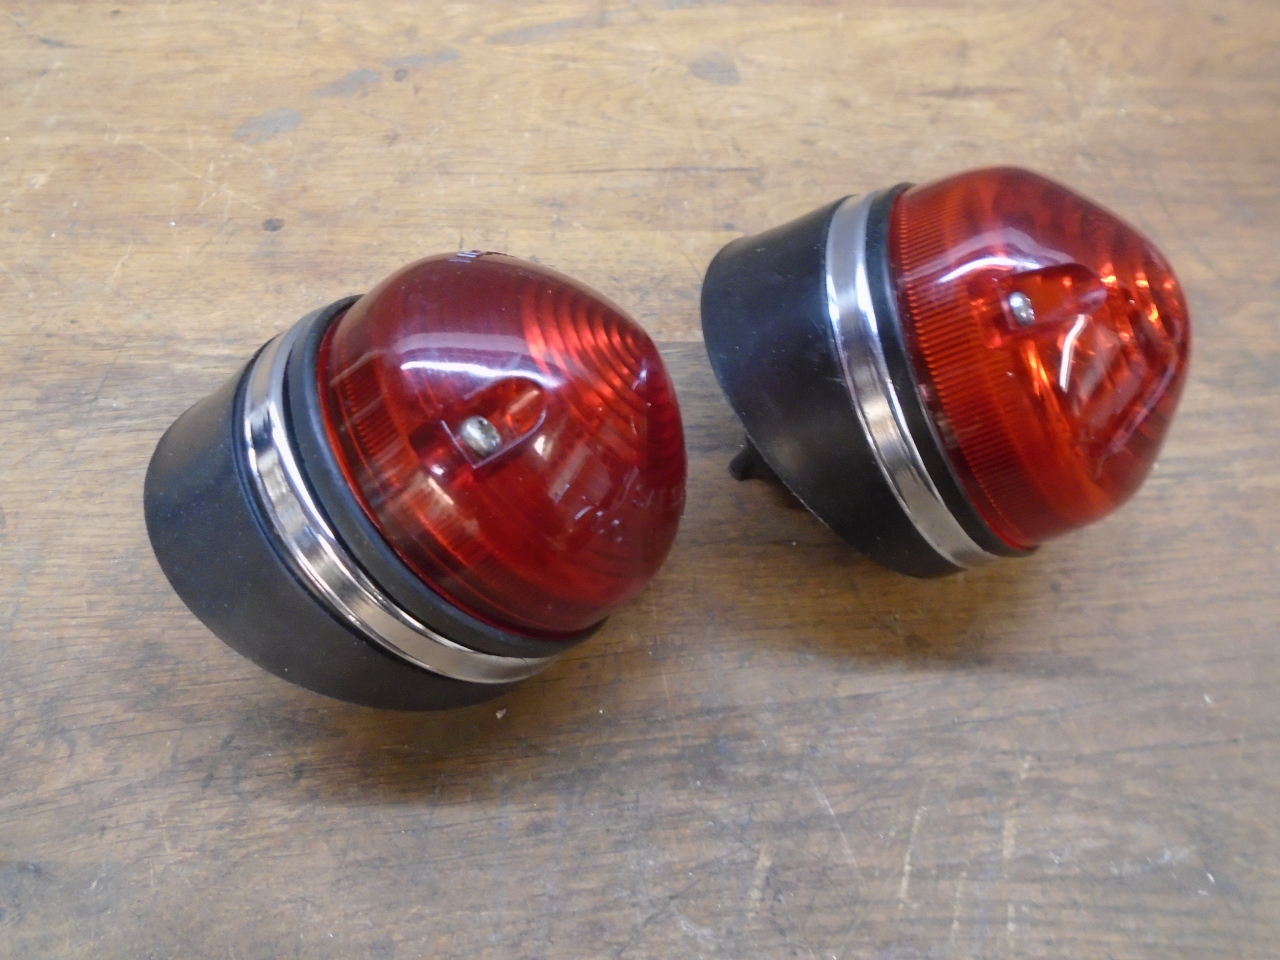
Reverse Lights
The reverse lights didn't need any mods or
repairs at all. Just cleaned them up.
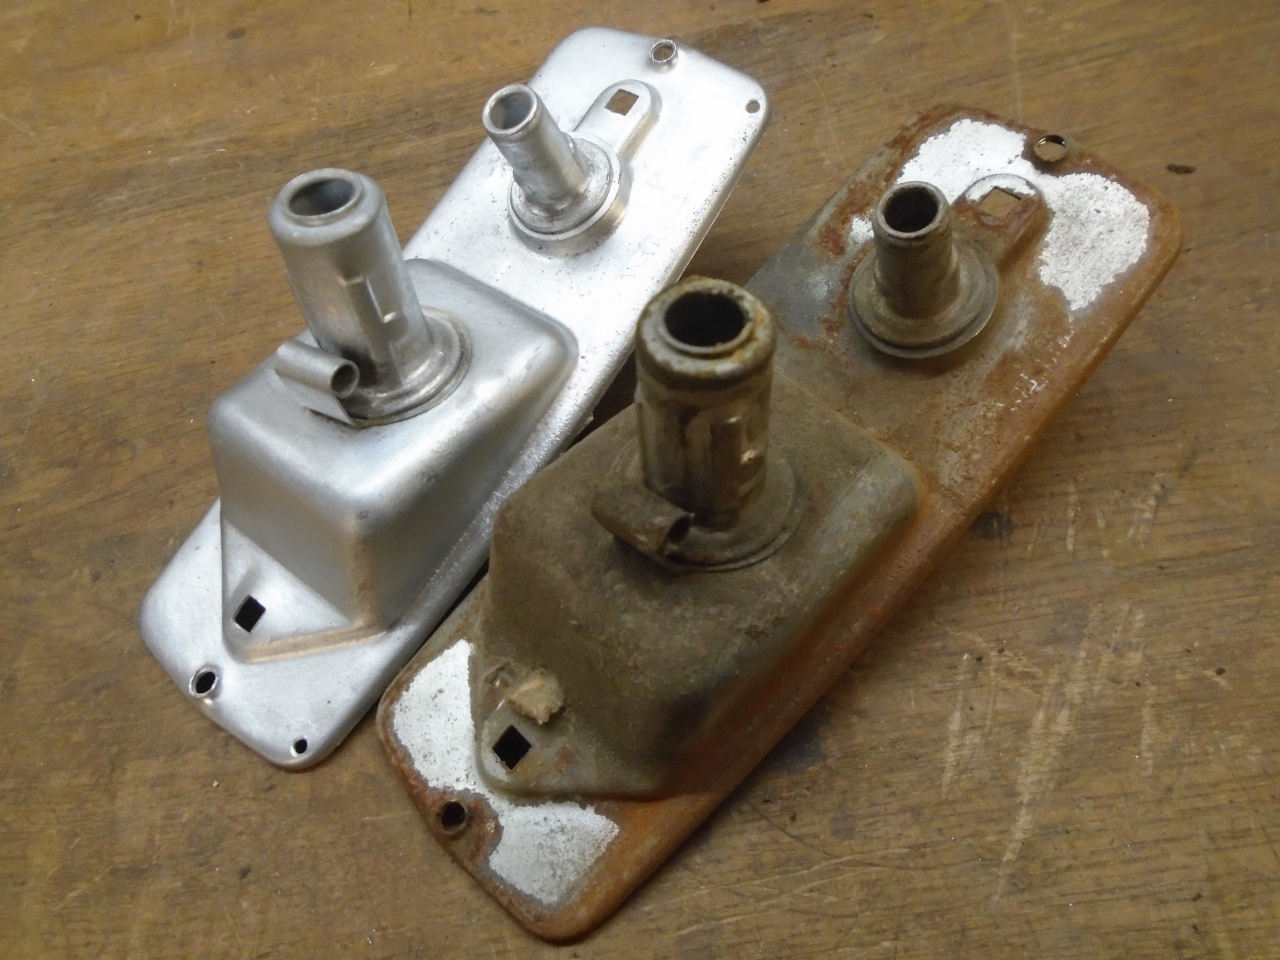
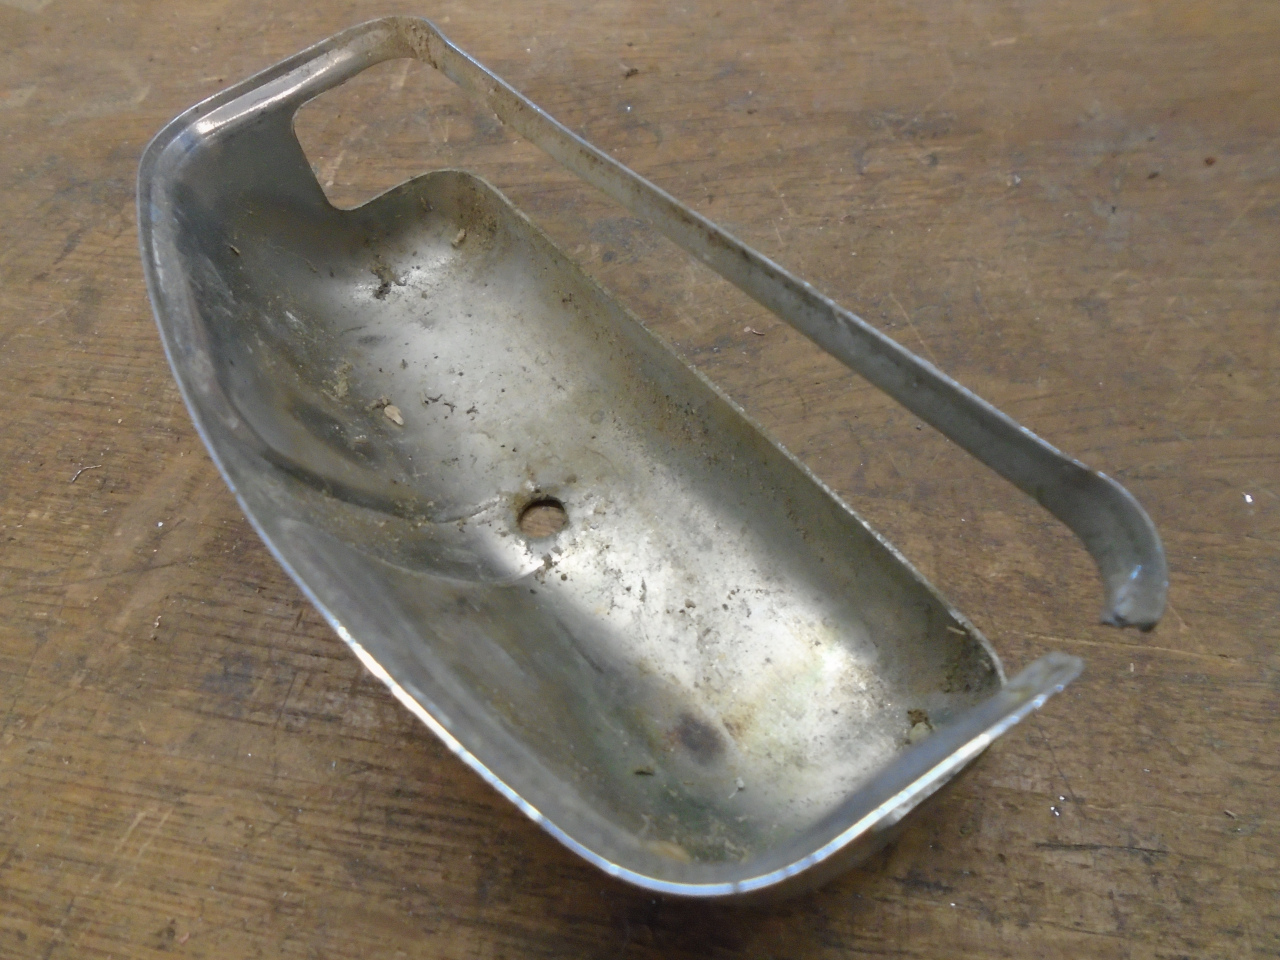
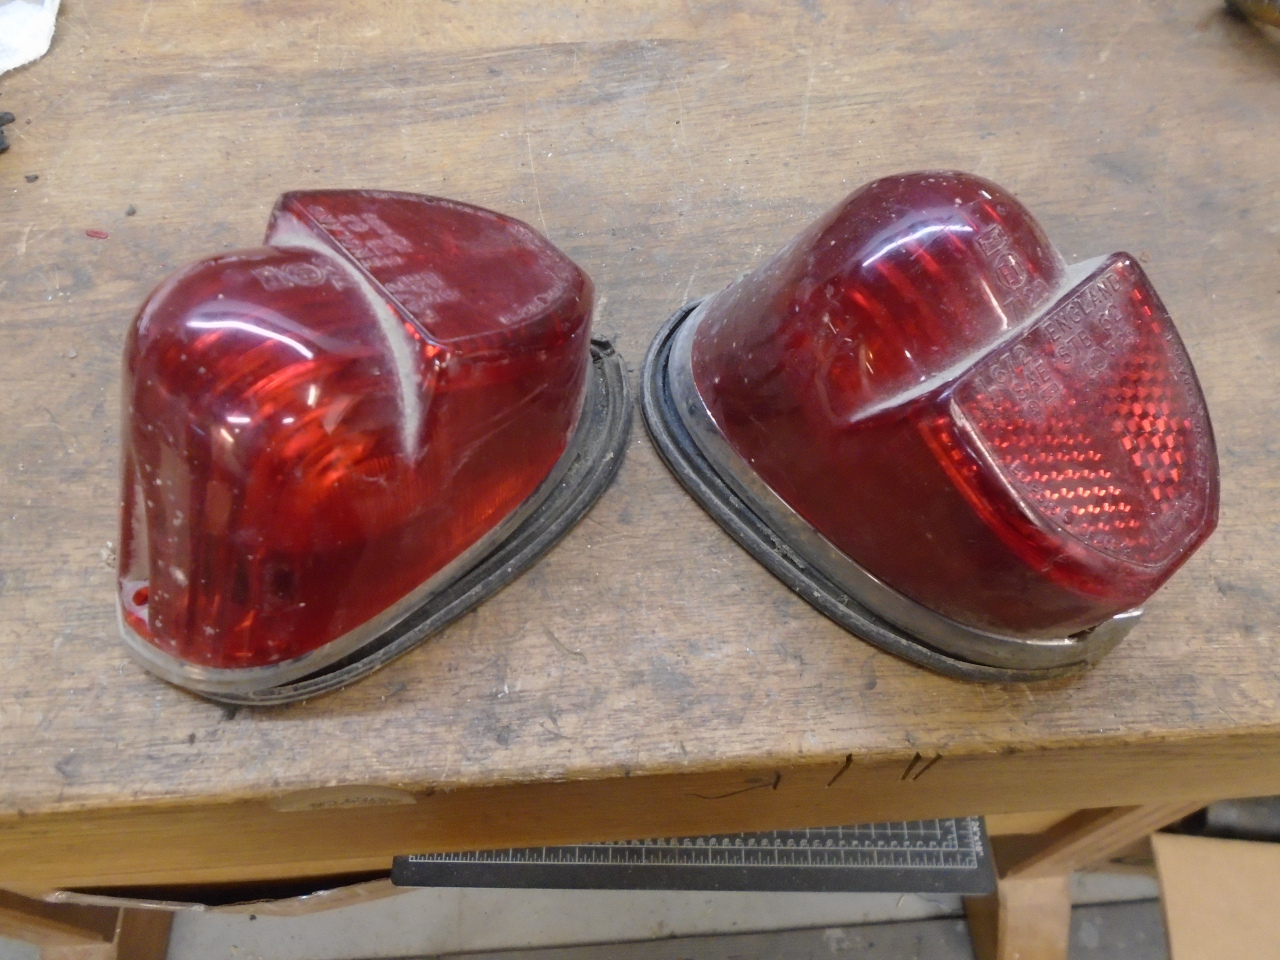
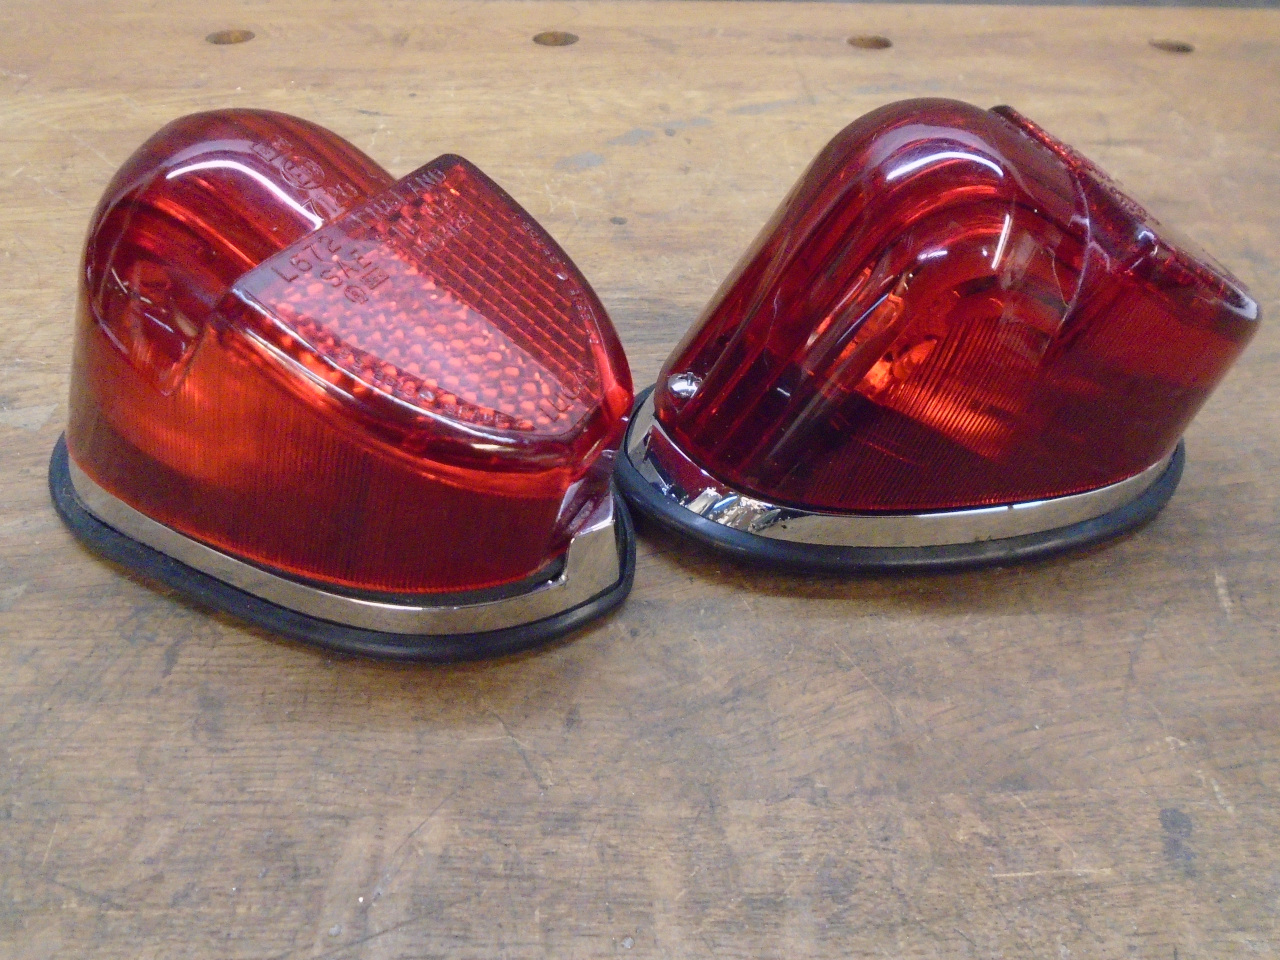
Tail/Stop Lights
The tail/stop light assembly was designed for a standard 1157 dual
filament lamp. These lamps have wattage ratings around 27
and 8 watts for the stop and the tail light filaments
respectively.
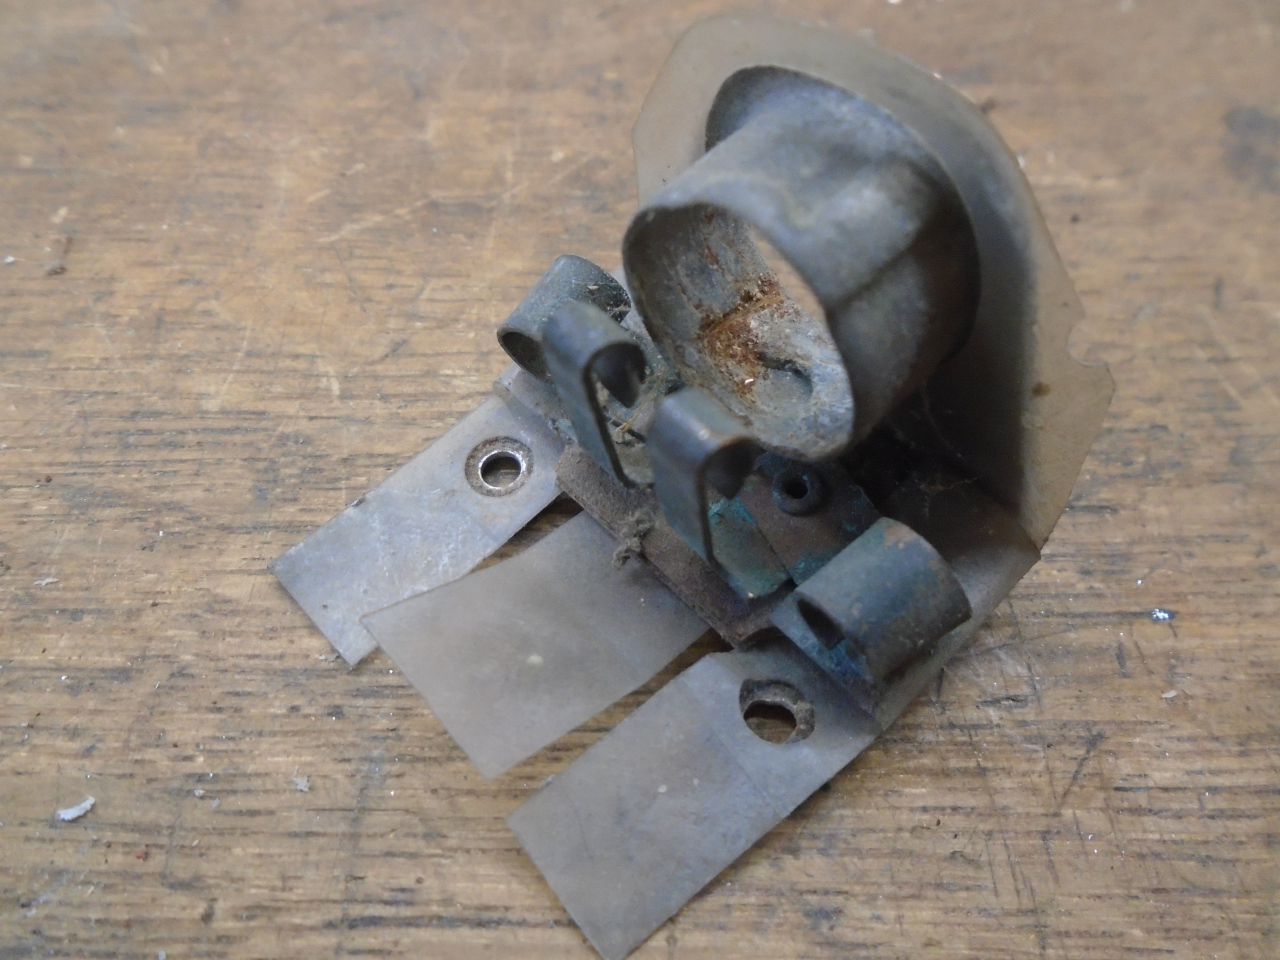
My fixtures were pretty cruddy inside and out, especially around
the electrical bits.
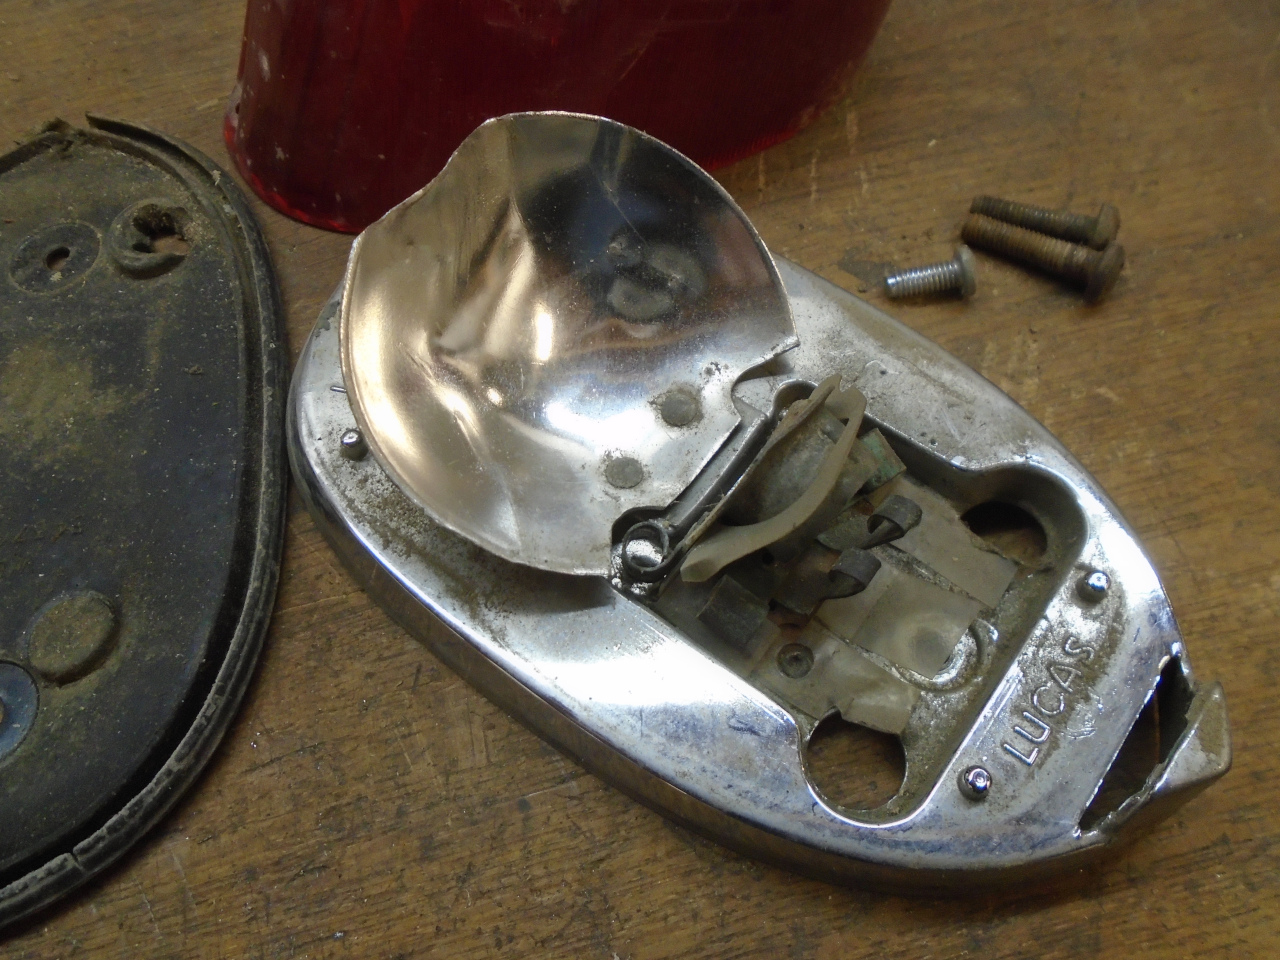
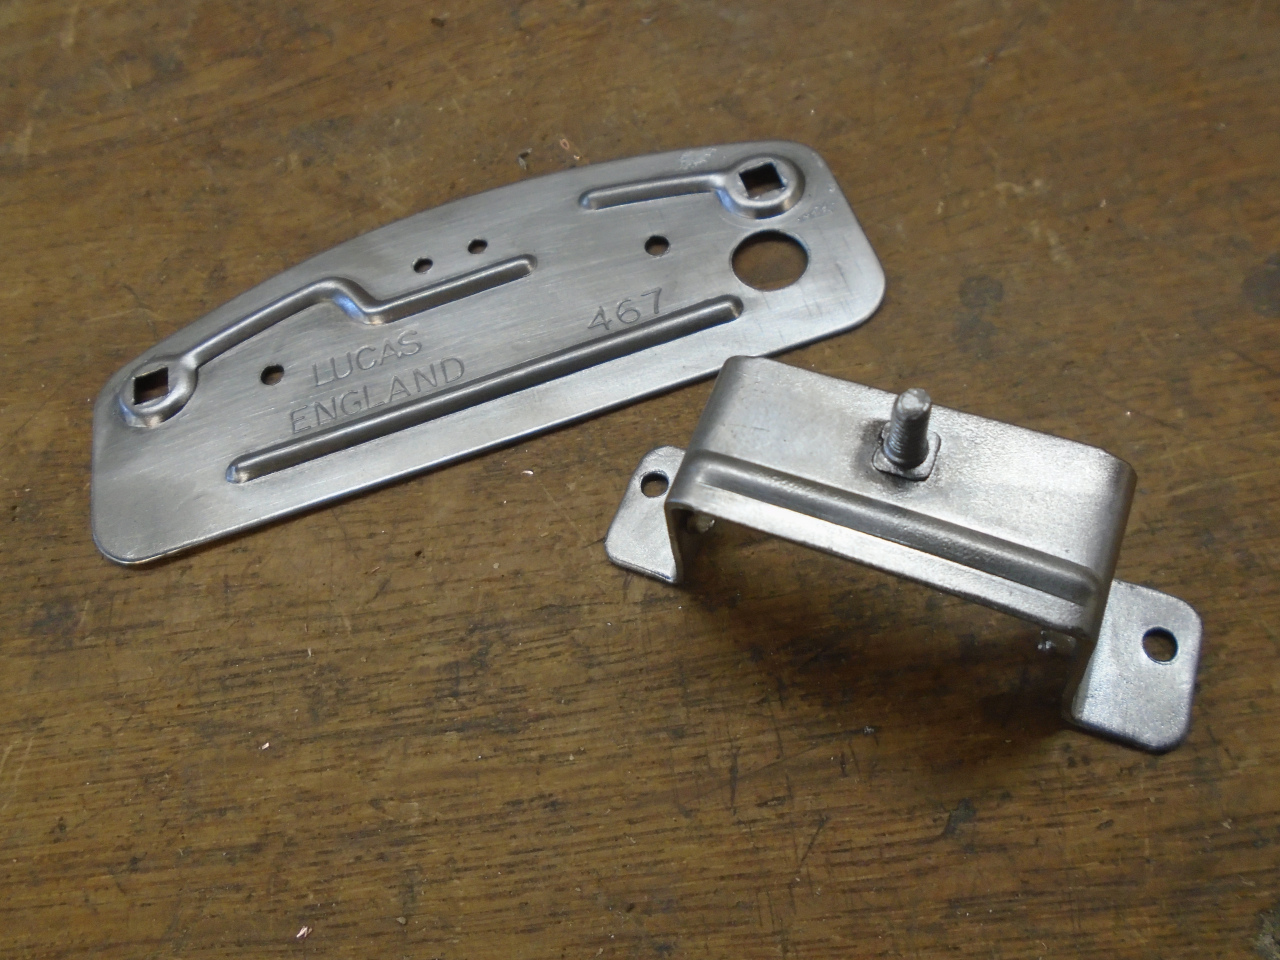
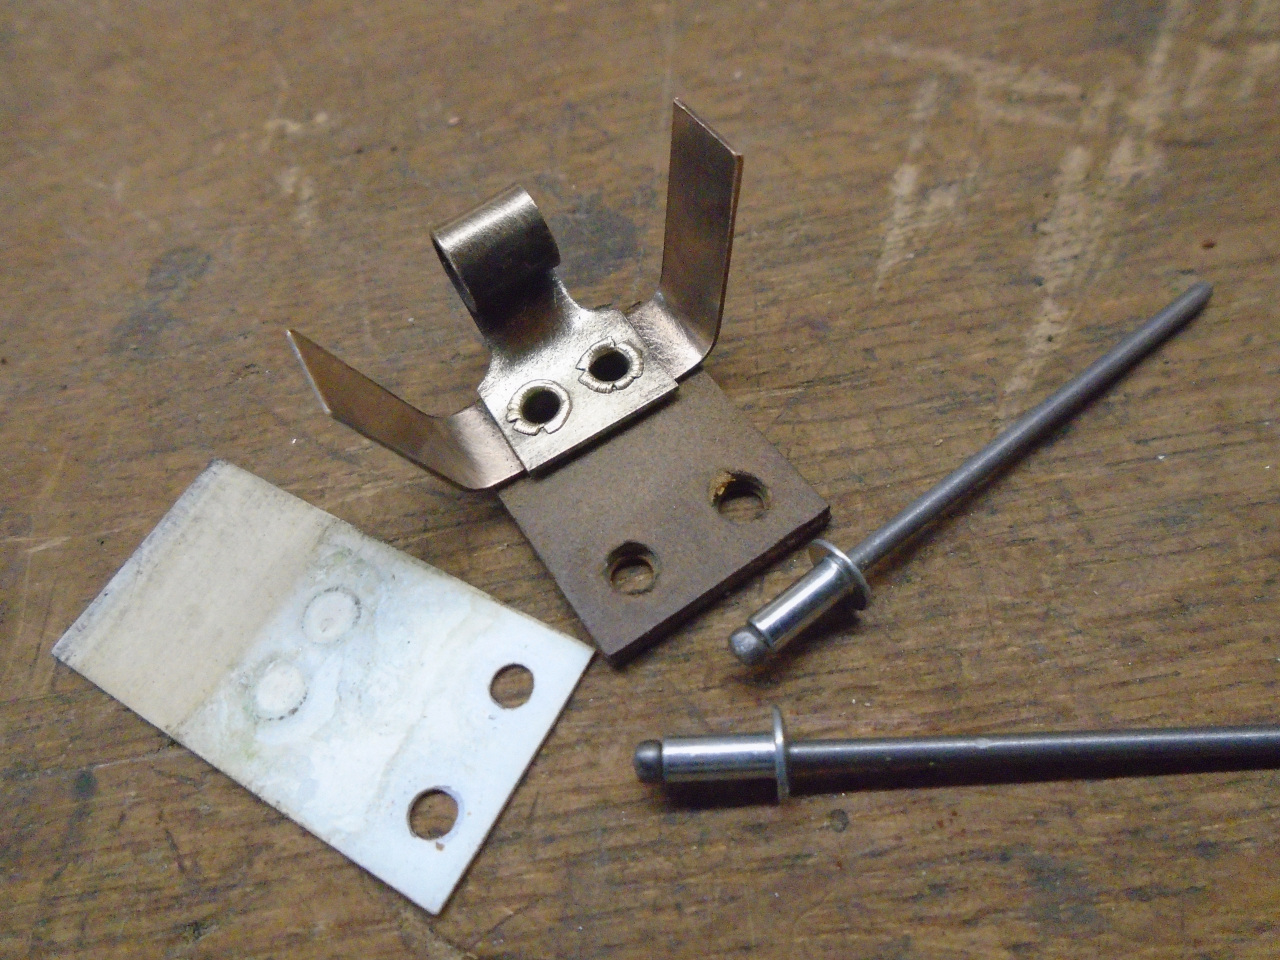
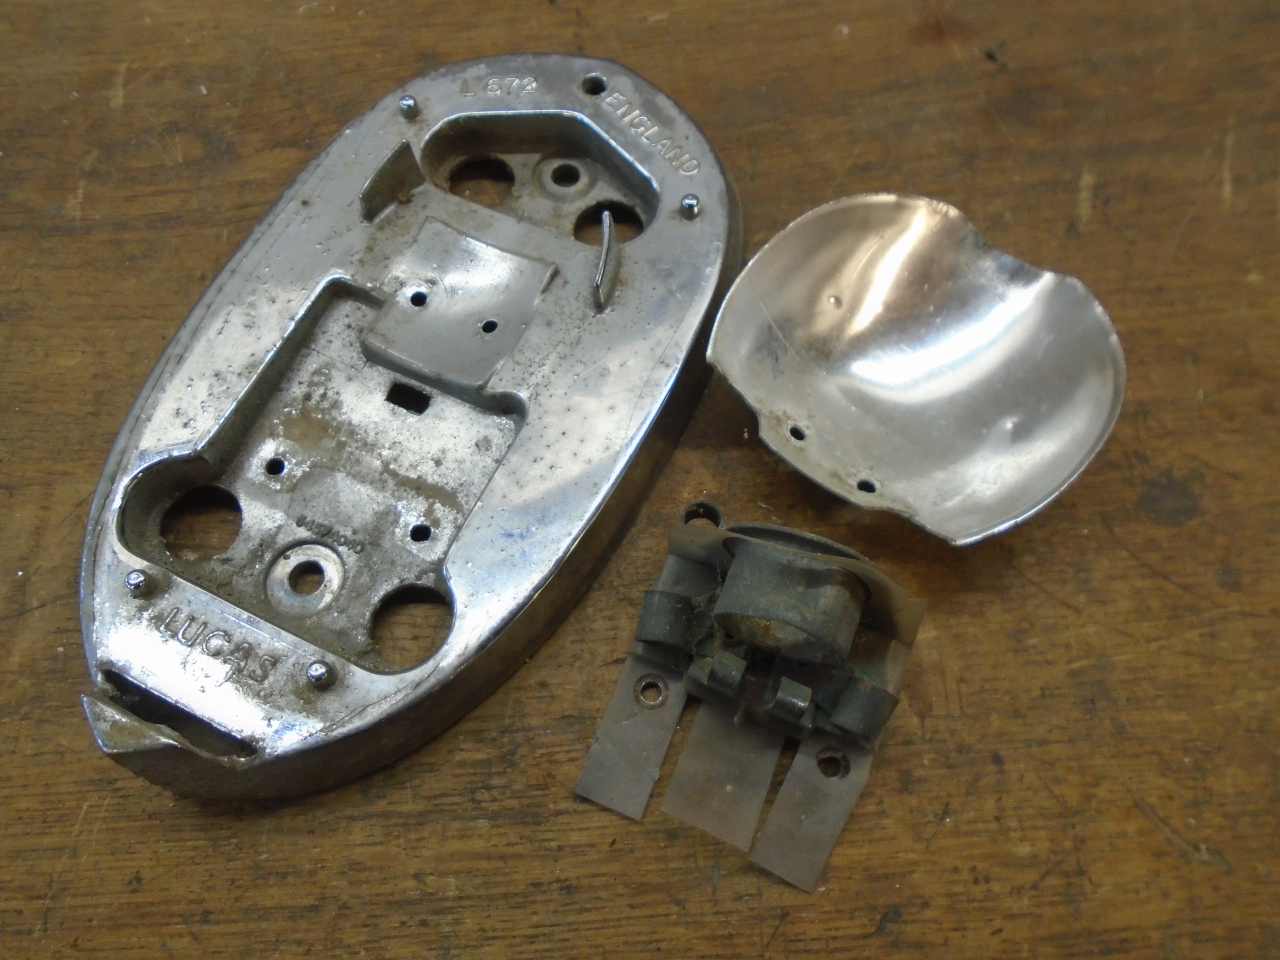
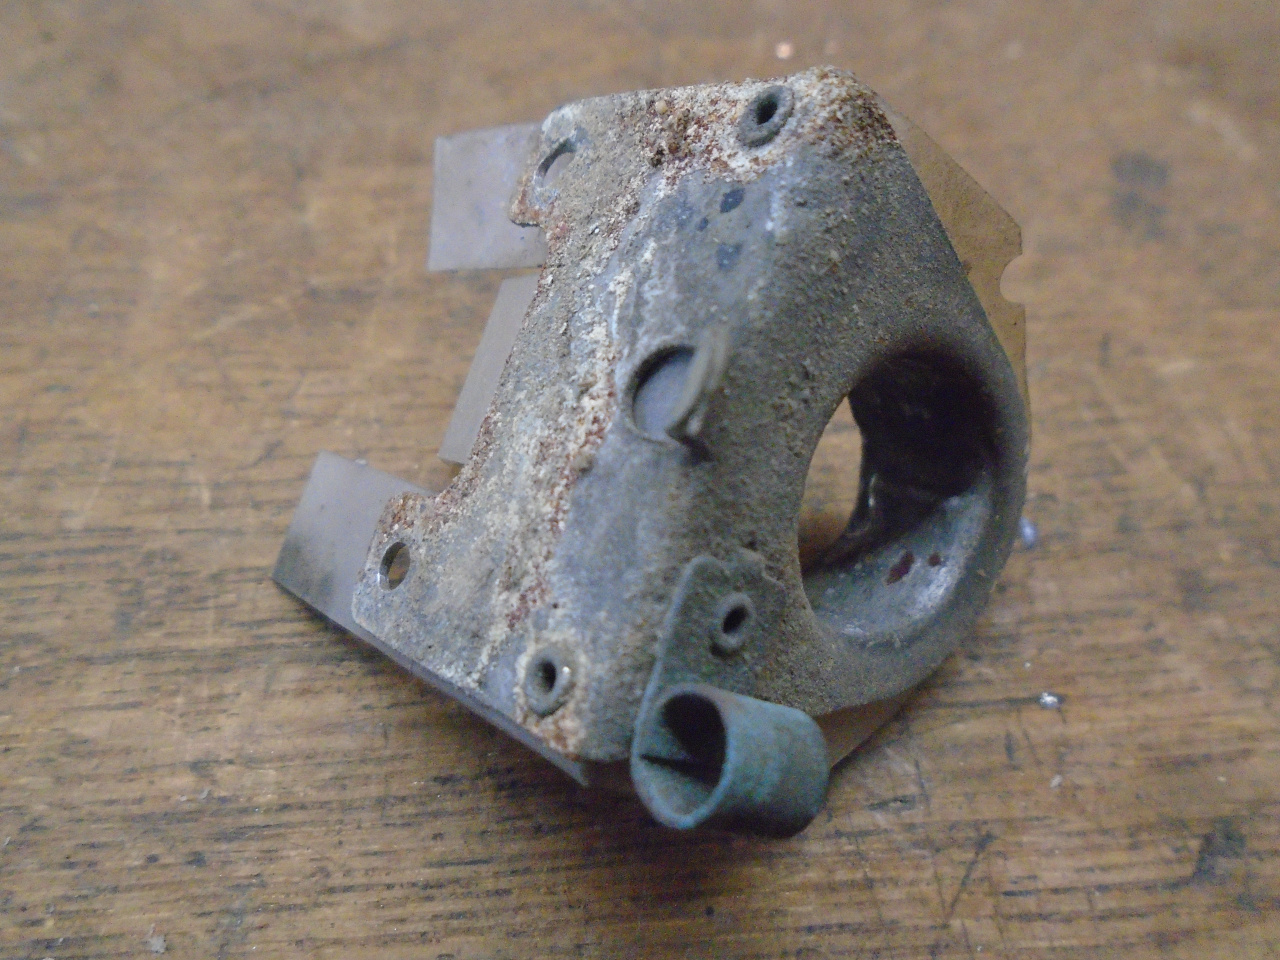
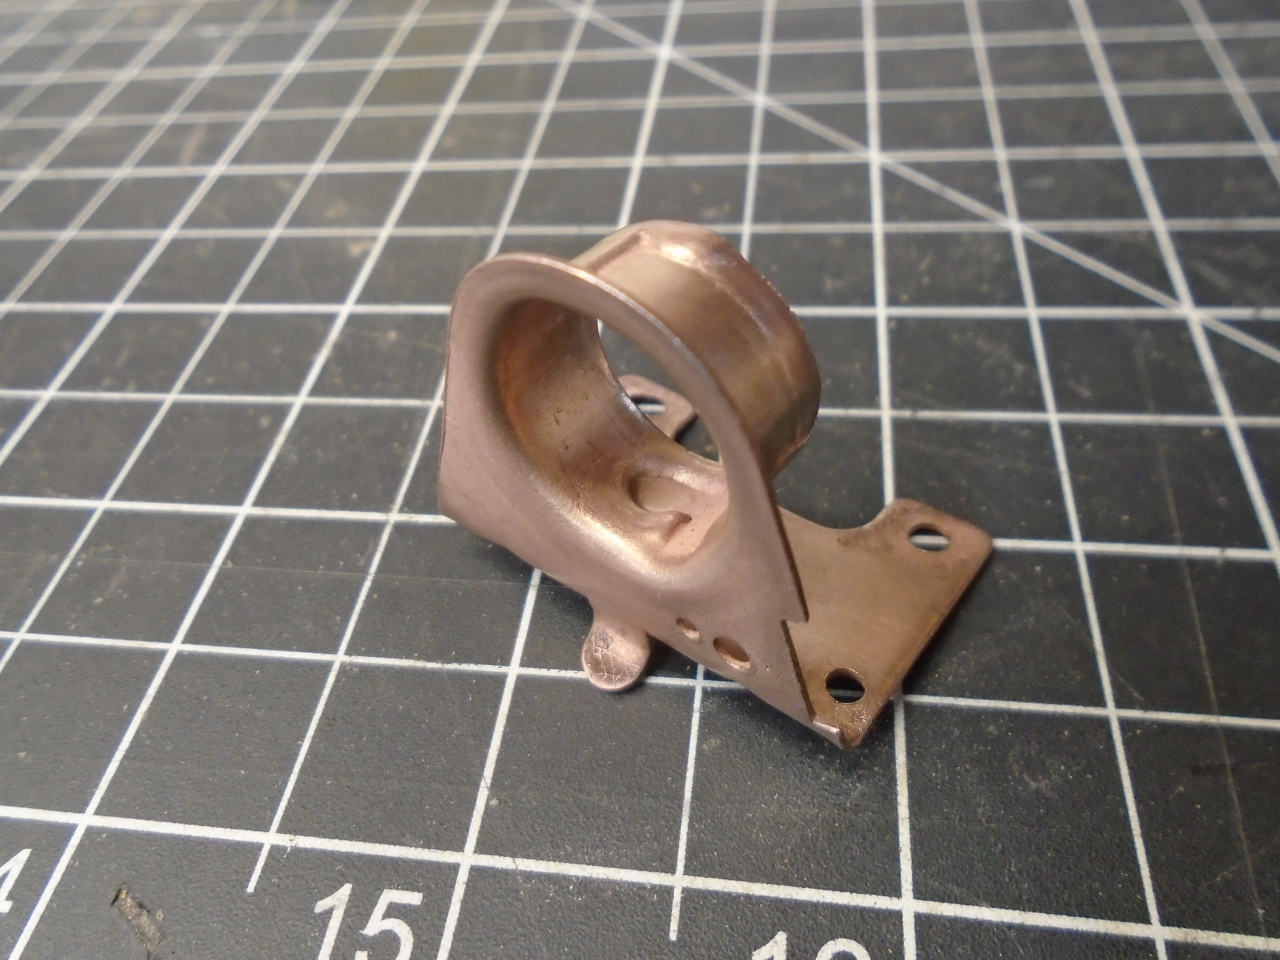
Drilling out a few rivets frees up the anodized aluminum
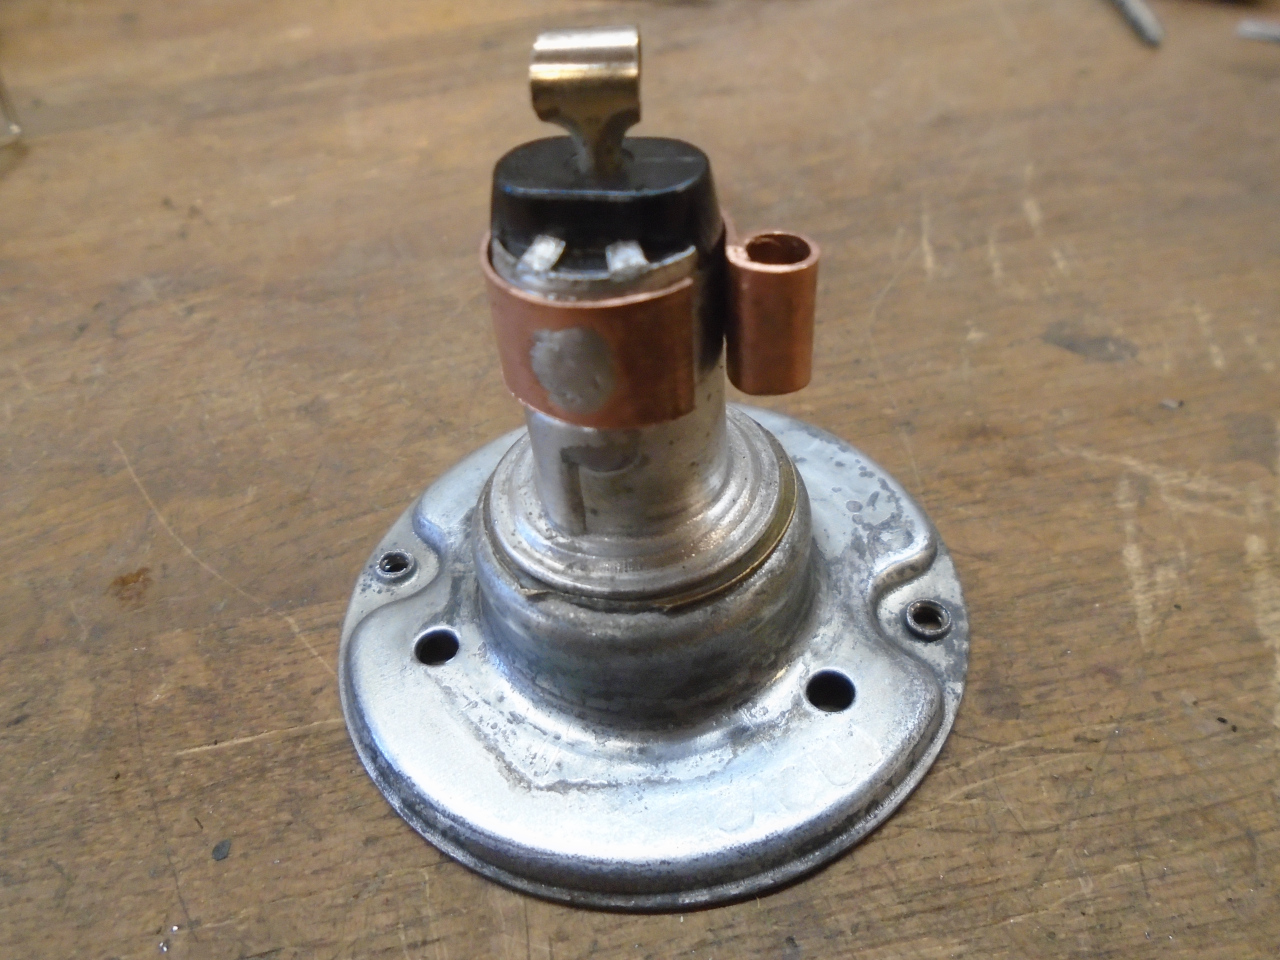
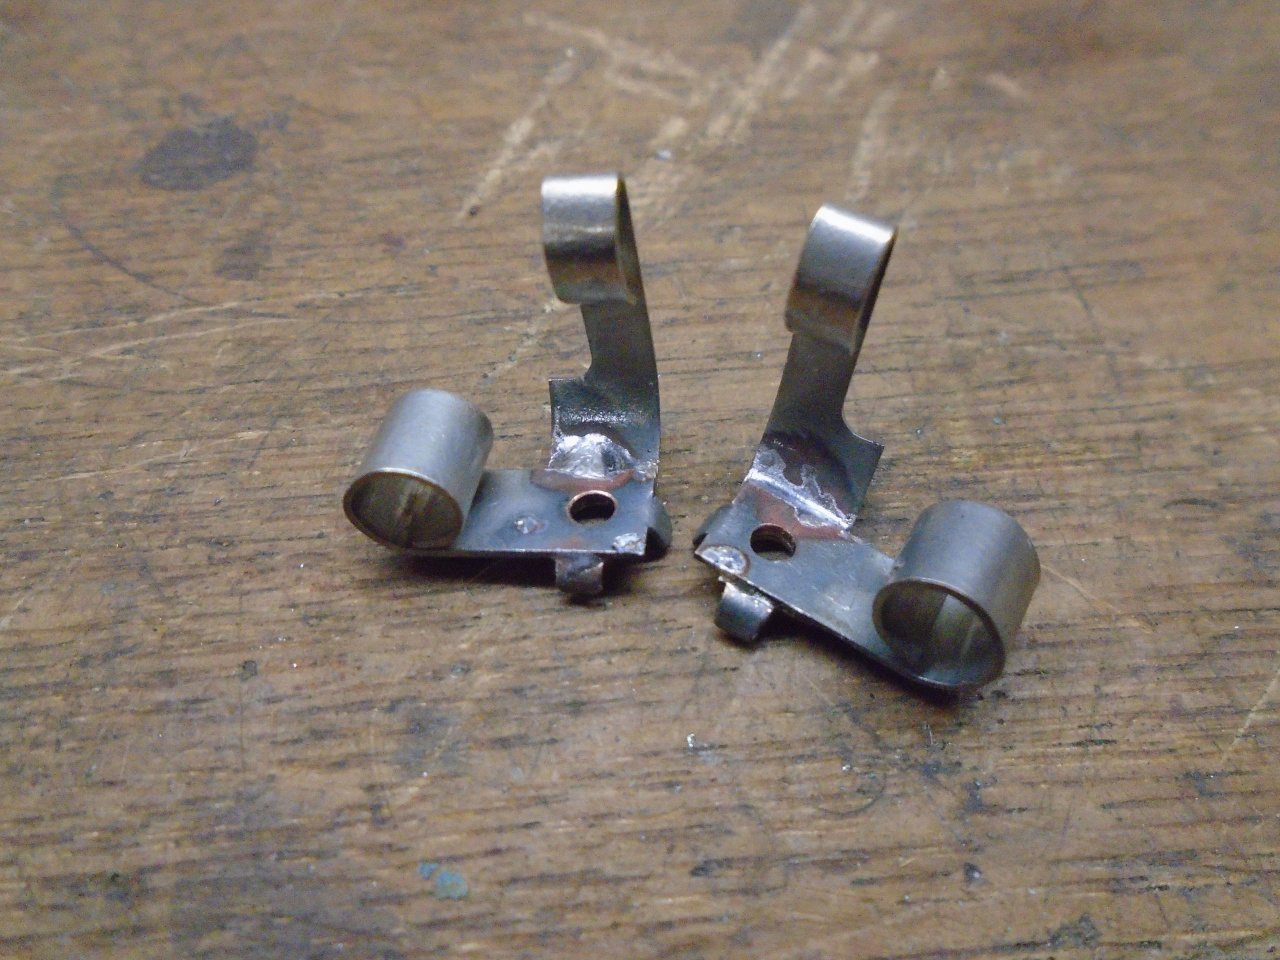
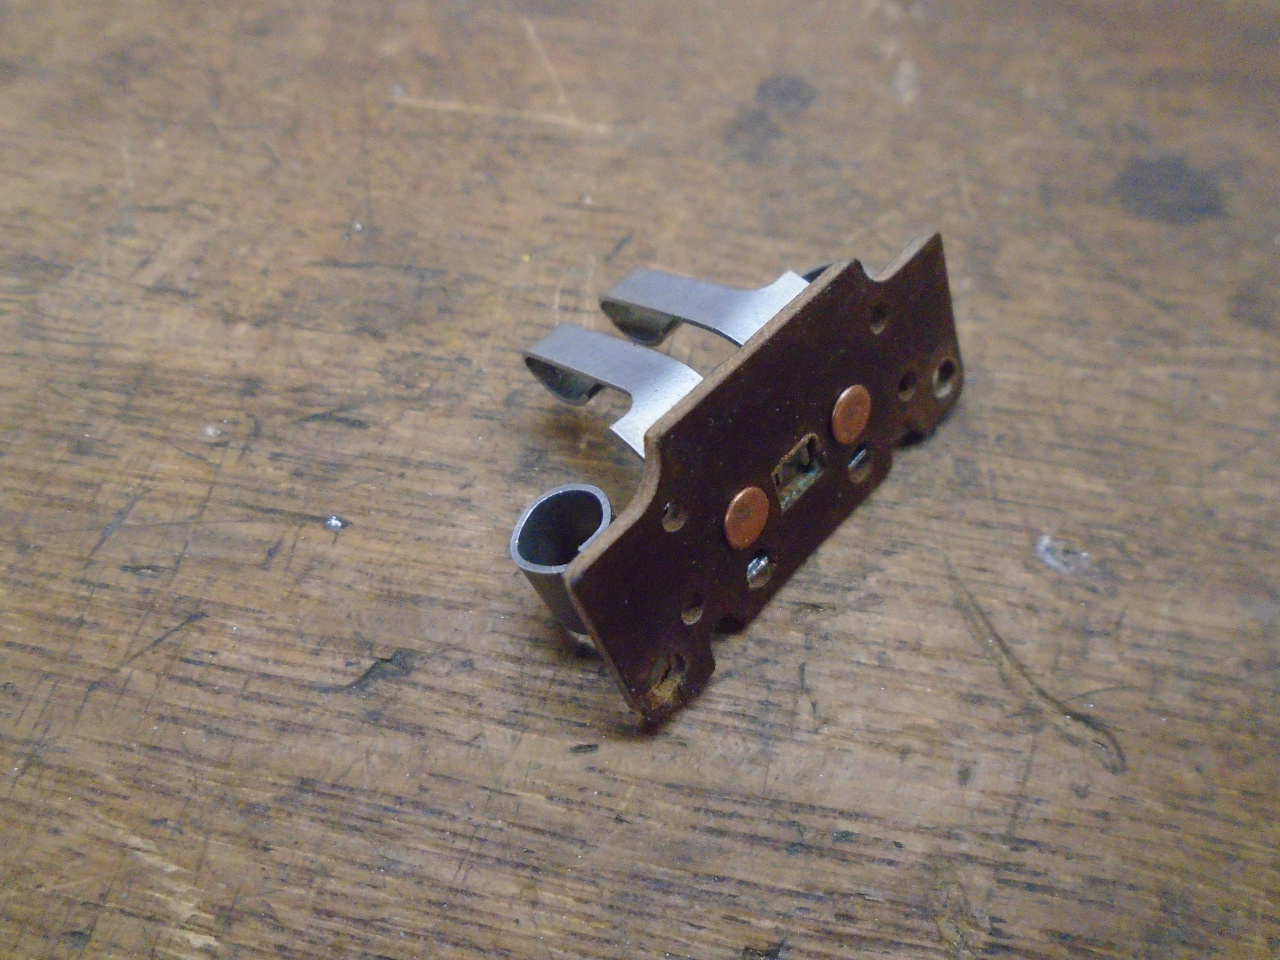
reflector, and the lamp holder assembly.
It was obvious to me that the lamp holder needed some serious
attention. Each circuit (tail and stop) had a copper (likely
bronze, actually) socket for a bullet terminal, and a copper
spring terminal for contact to the base of the lamp. They
were fastened together with a single rivet. The parts were a
little loose, and there was corrosion all over them. The
ground bullet socket had a single rivet as a fastener between
dissimilar metals. This is not a reliable electrical design.
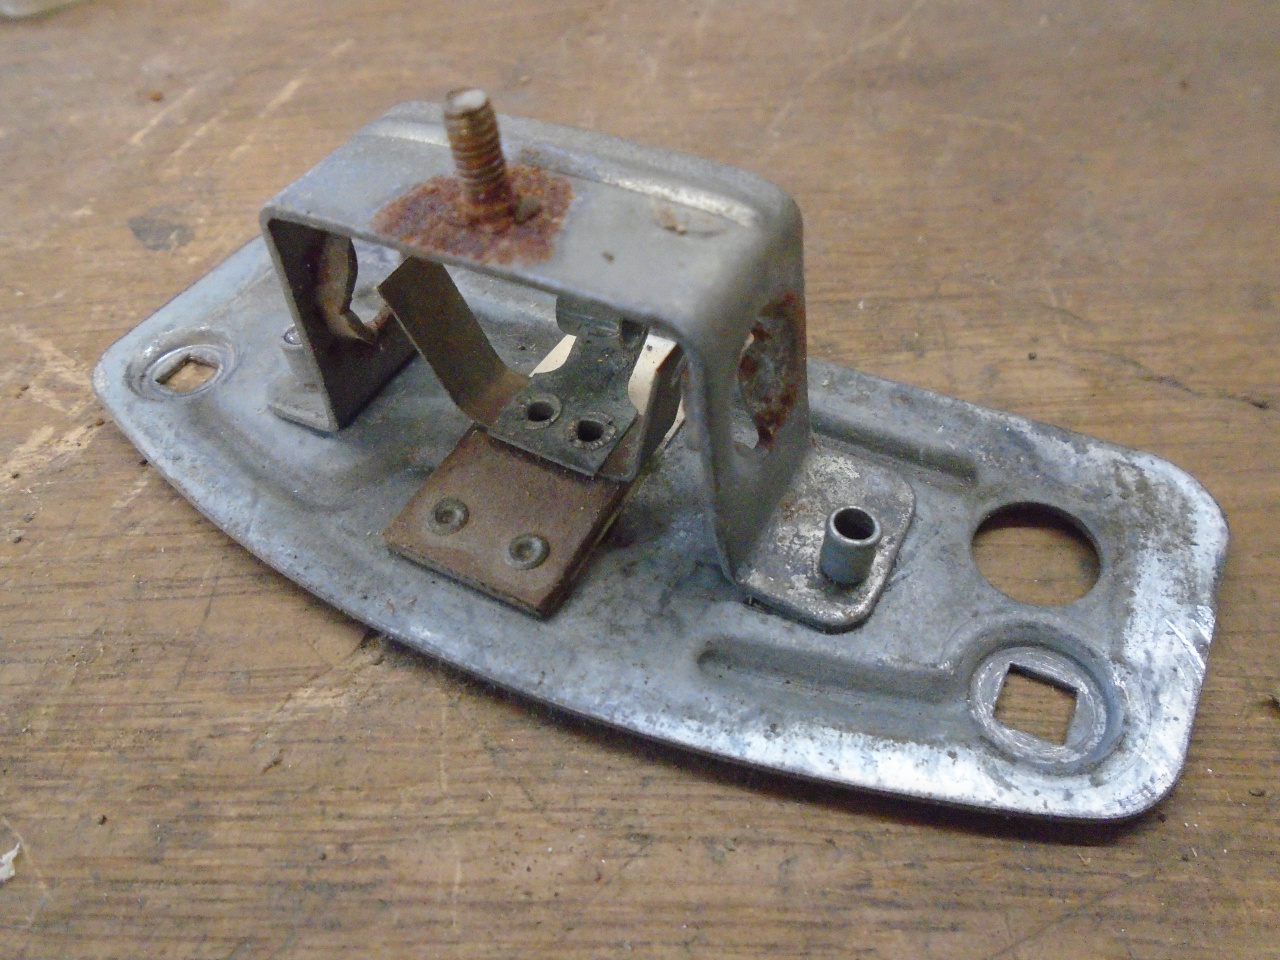
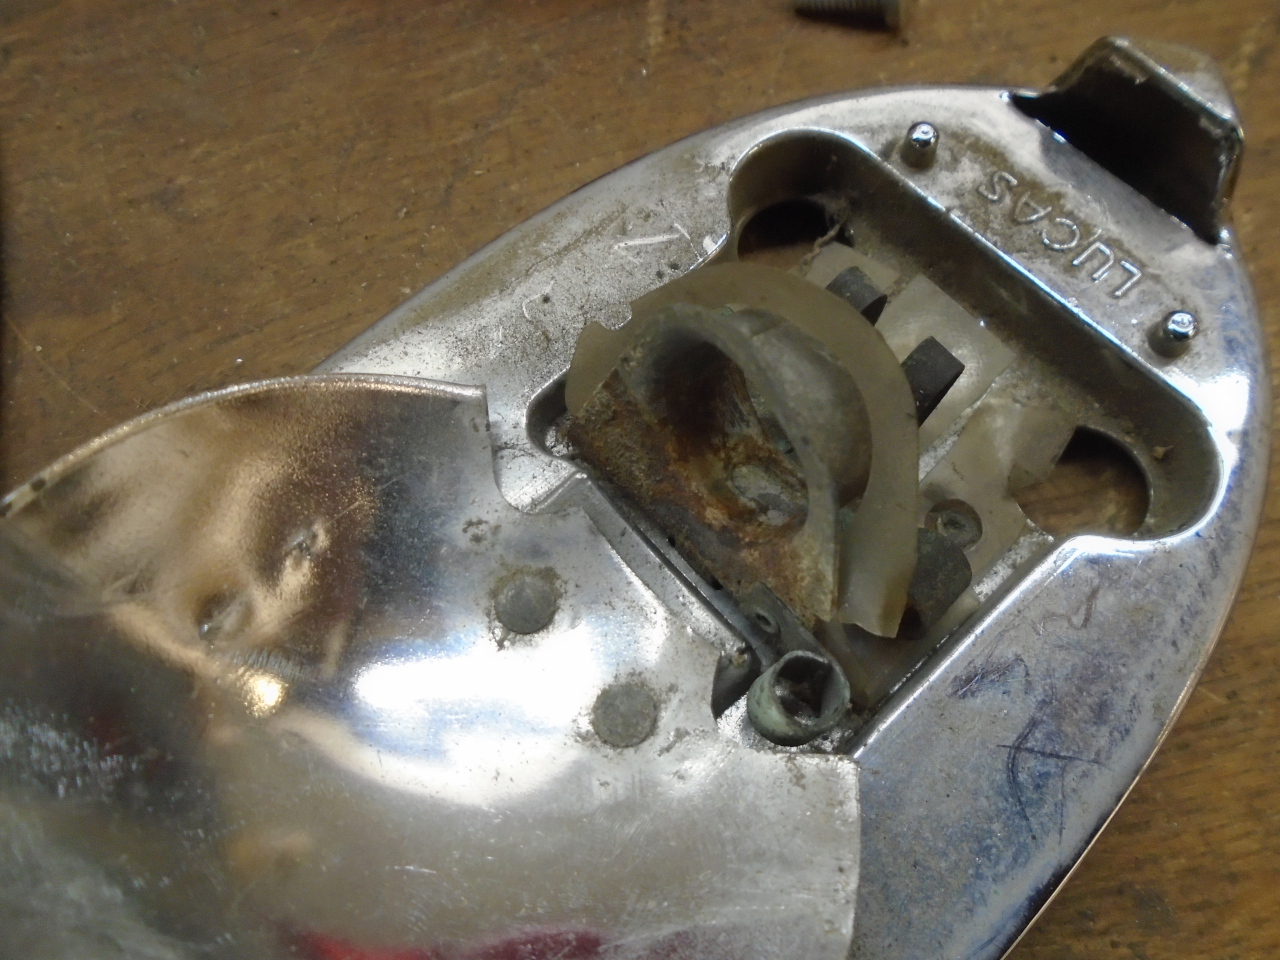
I thought I could turn this into a proper electrical device with a
little TLC. I removed the contact parts from the lamp
holder, and freed up the contacts from their phenolic carrier.

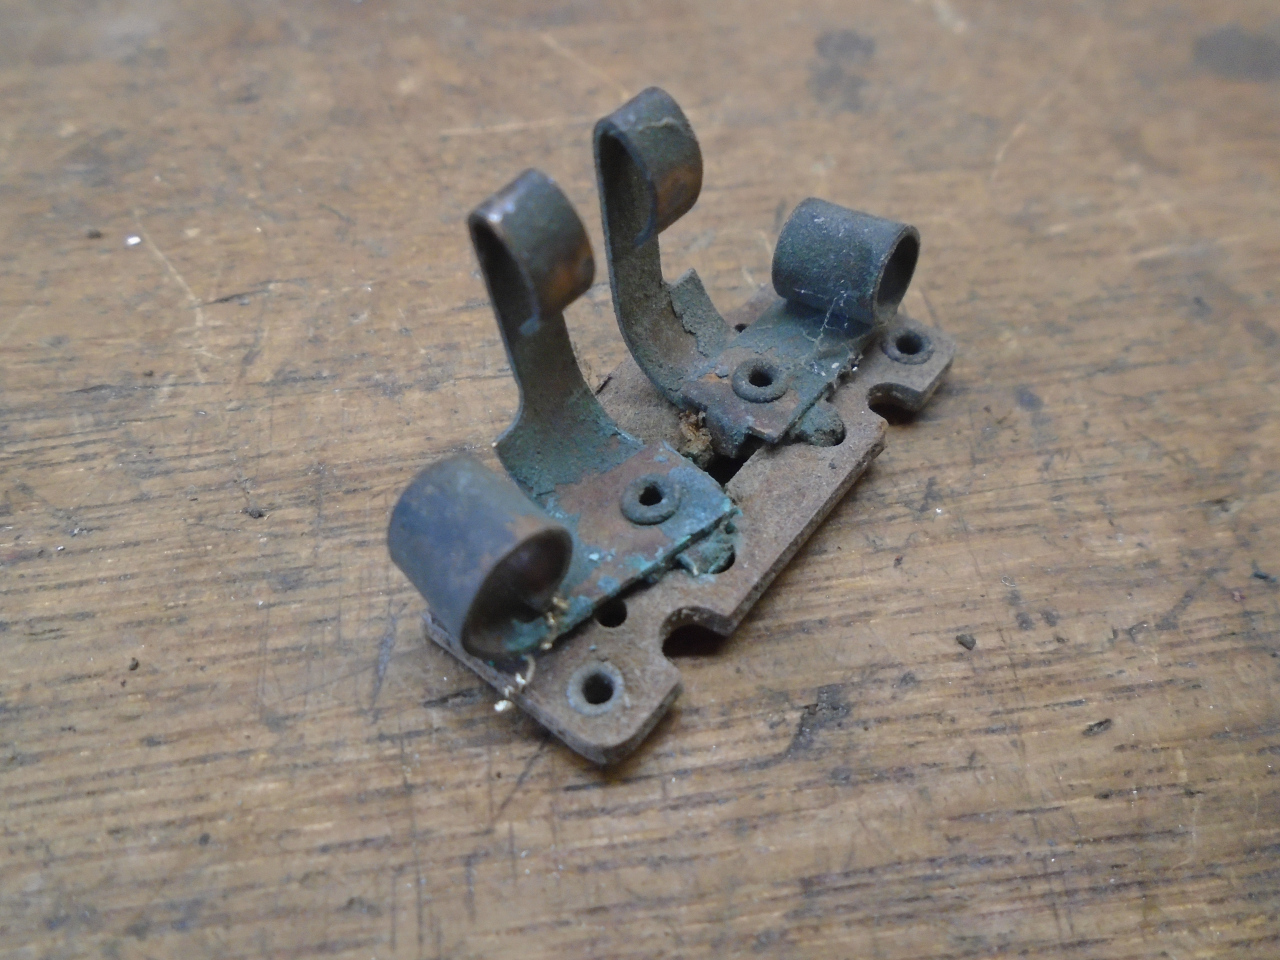
The bulb holder got stripped of the corrosion, and any zinc that
might have remained.

I was getting ready to zinc plate the carrier when it occurred to
me that for an electrical component, copper plating would be more
appropriate.
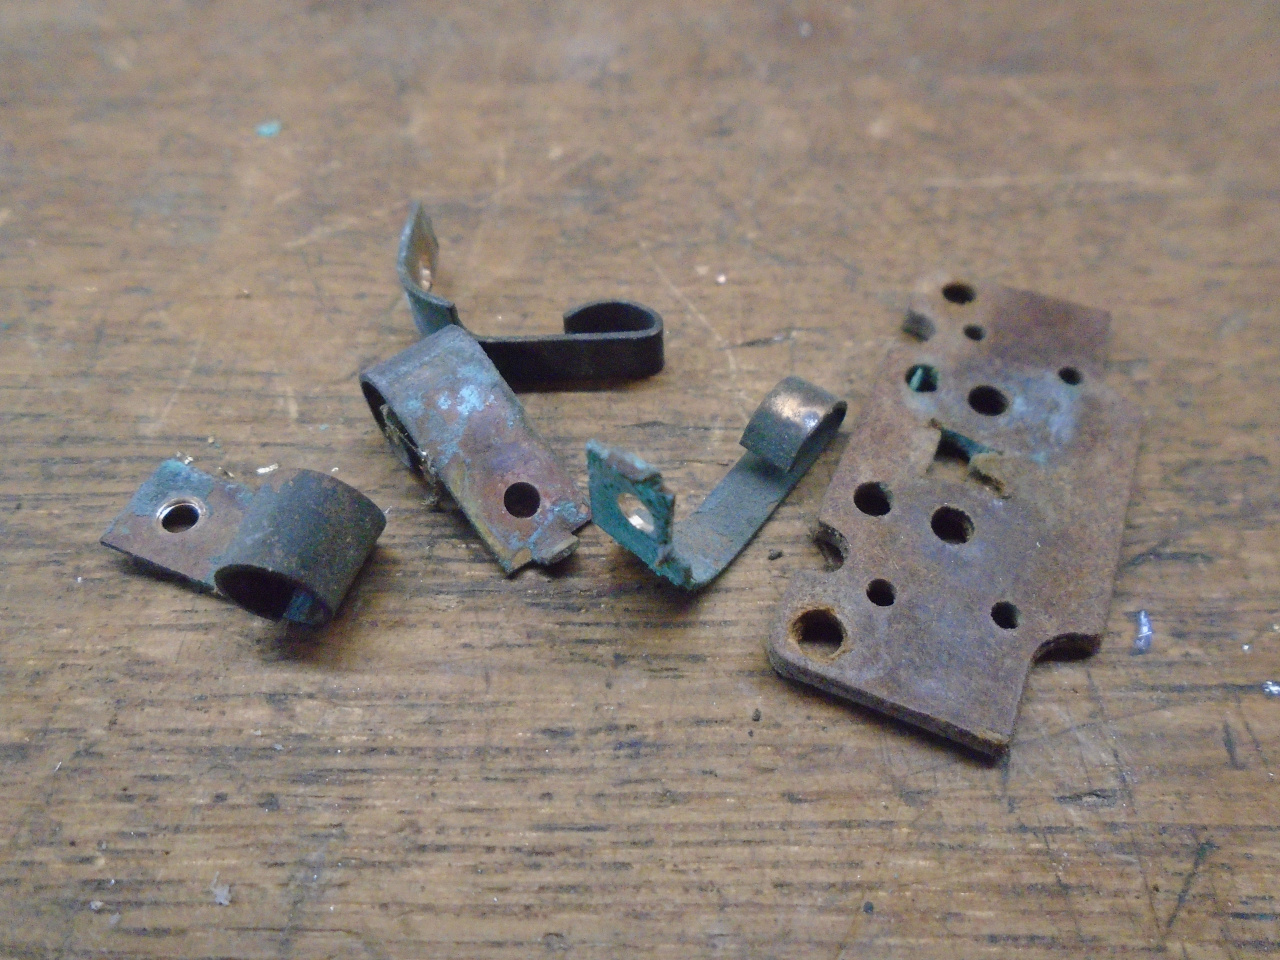
The copper/bronze parts all got rid of their corrosion, then got
treated to a tinning bath, along with the lamp holder. The
tin protects the copper from tarnishing, and also makes soldering
way easier.
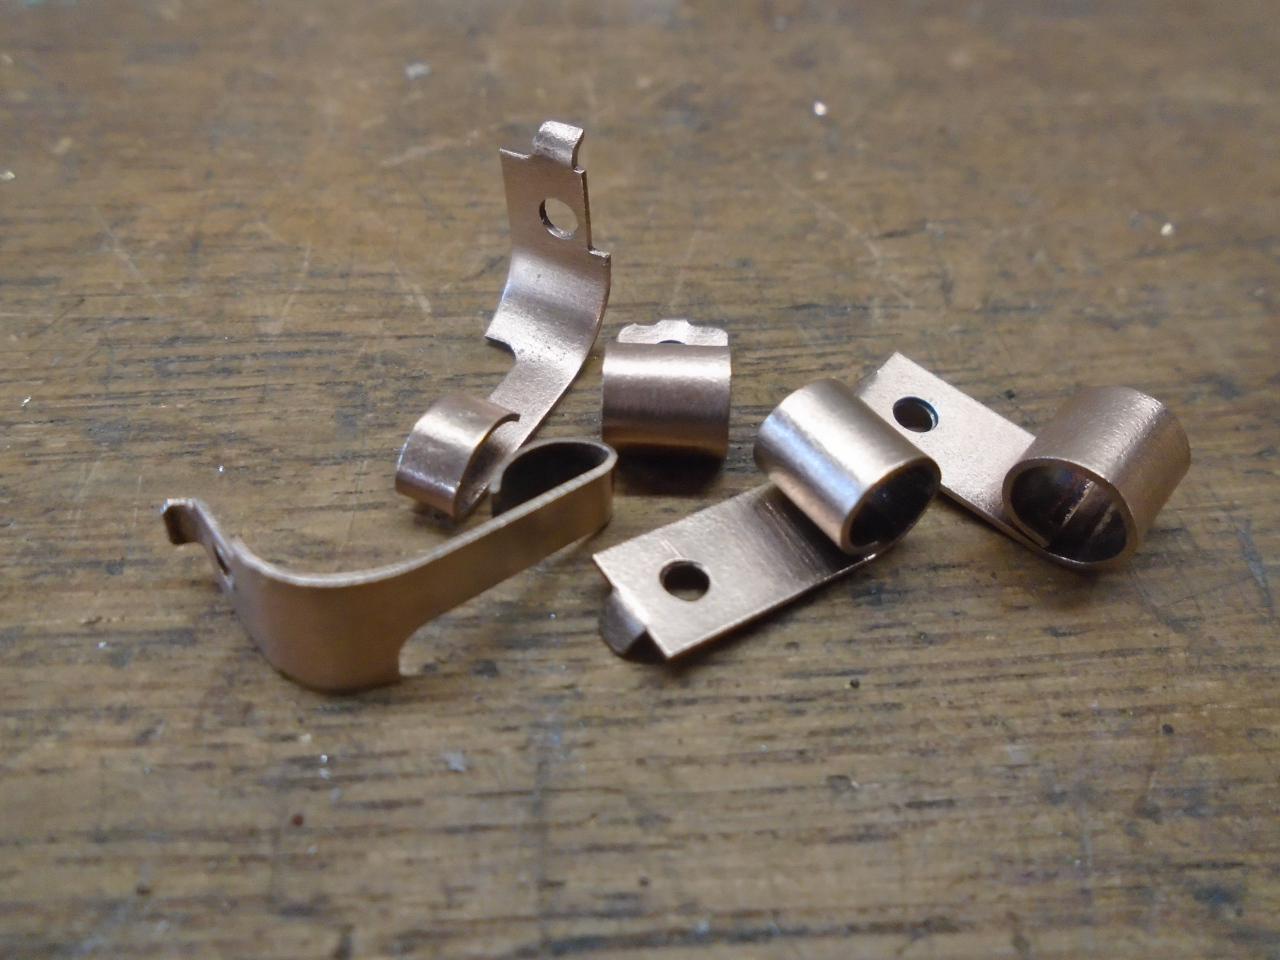
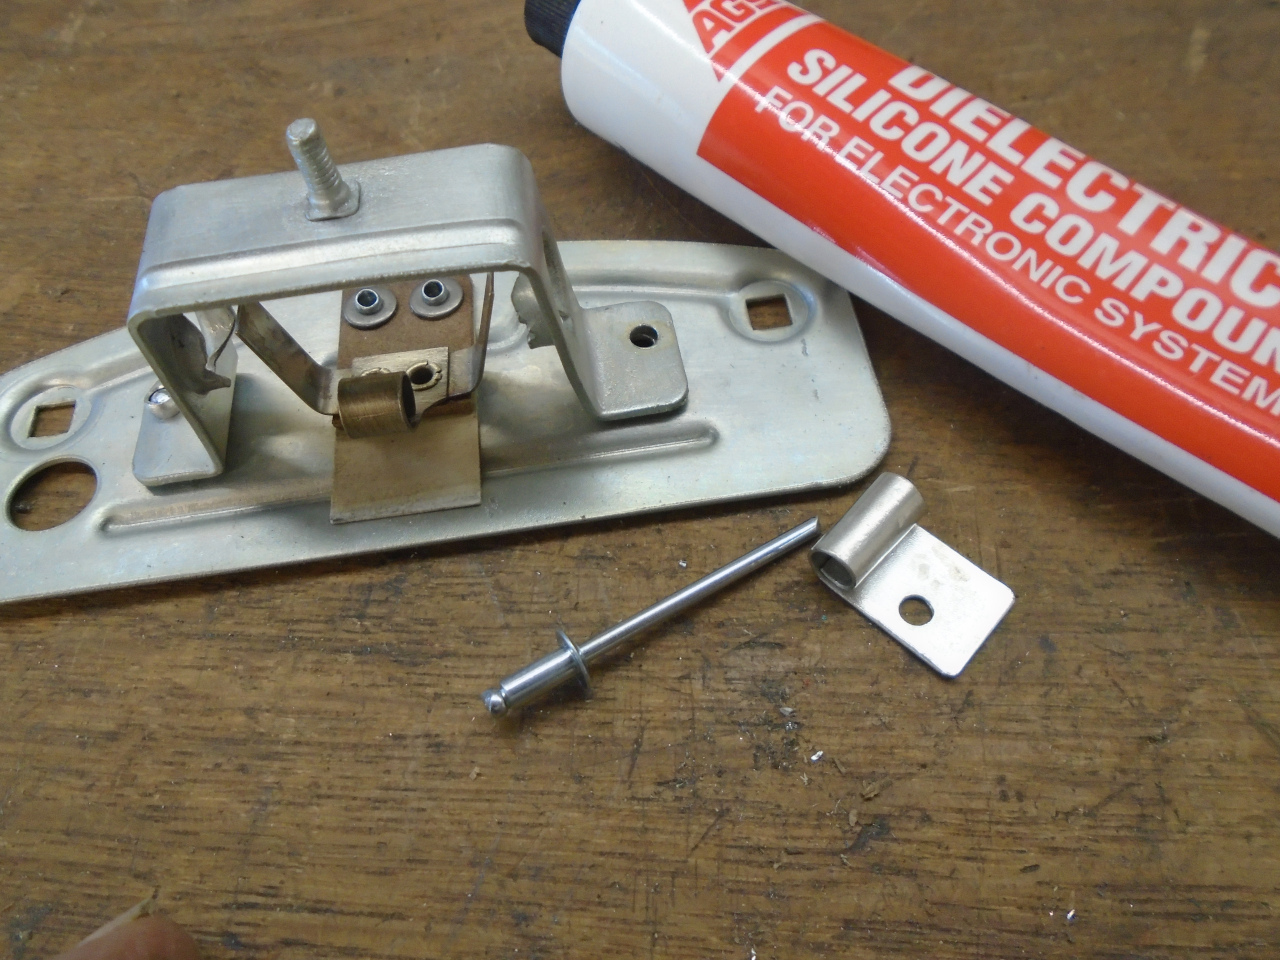
The ground bullet socket got riveted back in place on the lamp
holder with a copper rivet, and then soldered.
The two parts of each lamp contact were also soldered. Those
should have been designed as one piece in the first place.
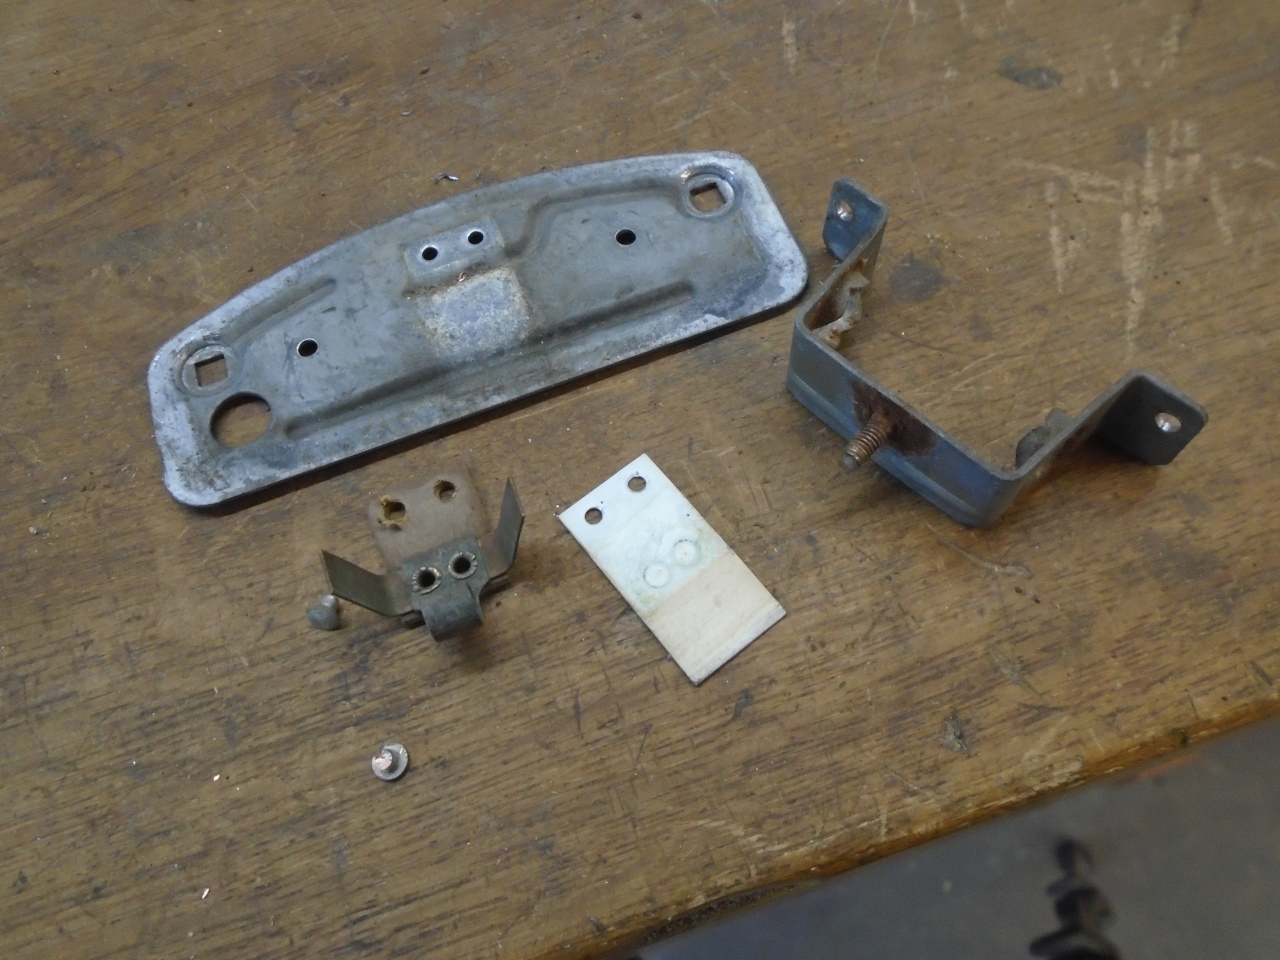
Then they were riveted to their phenolic carrier board.
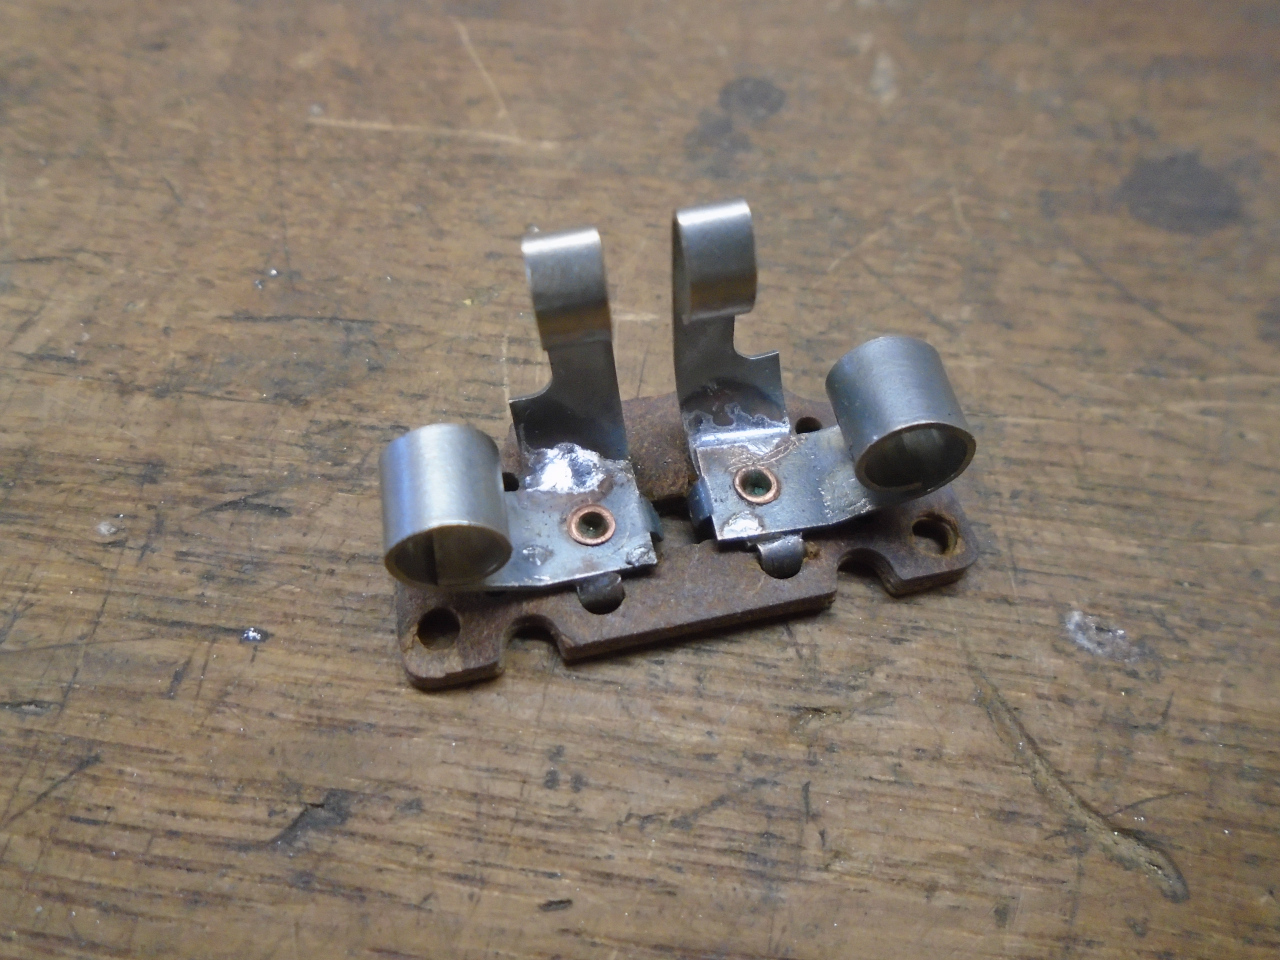
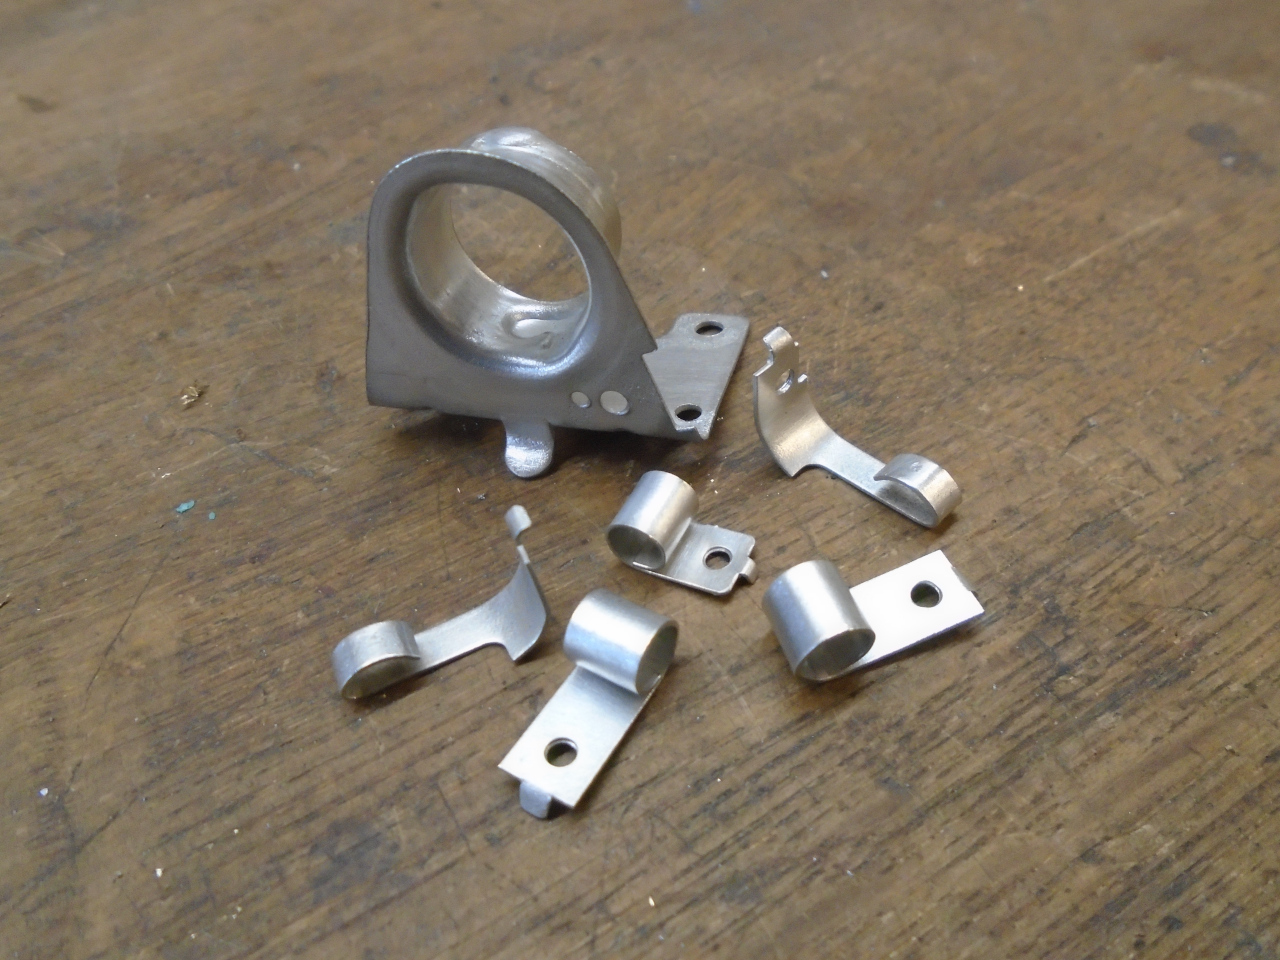
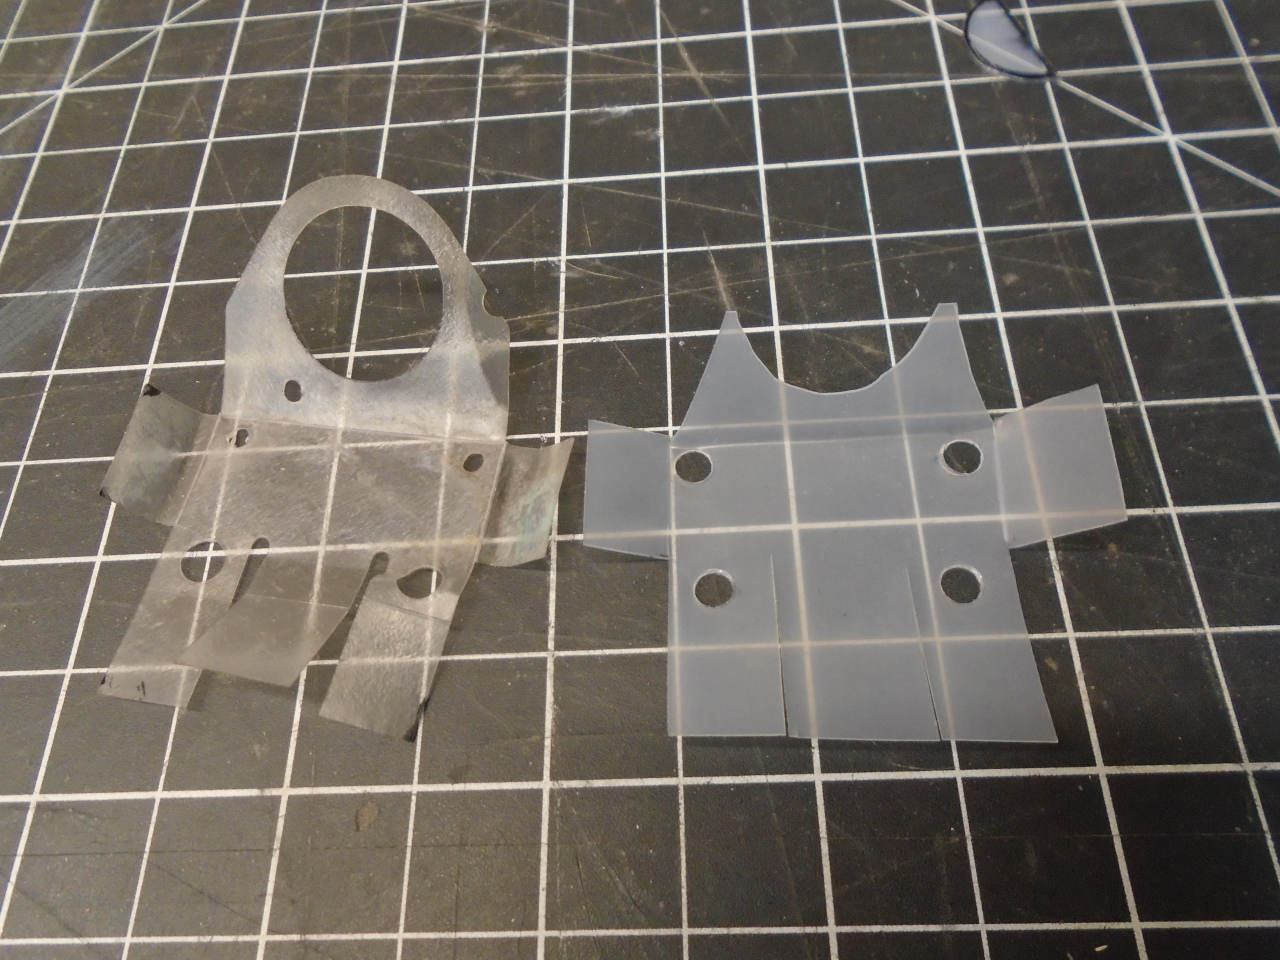
With so many hot and grounded metal pieces so close together in
this assembly, a little insulator sheet was included in the
design. The original wasn't in very good shape, so this is a
copy made from 0.010" nylon sheet--a material pretty close to the
original.
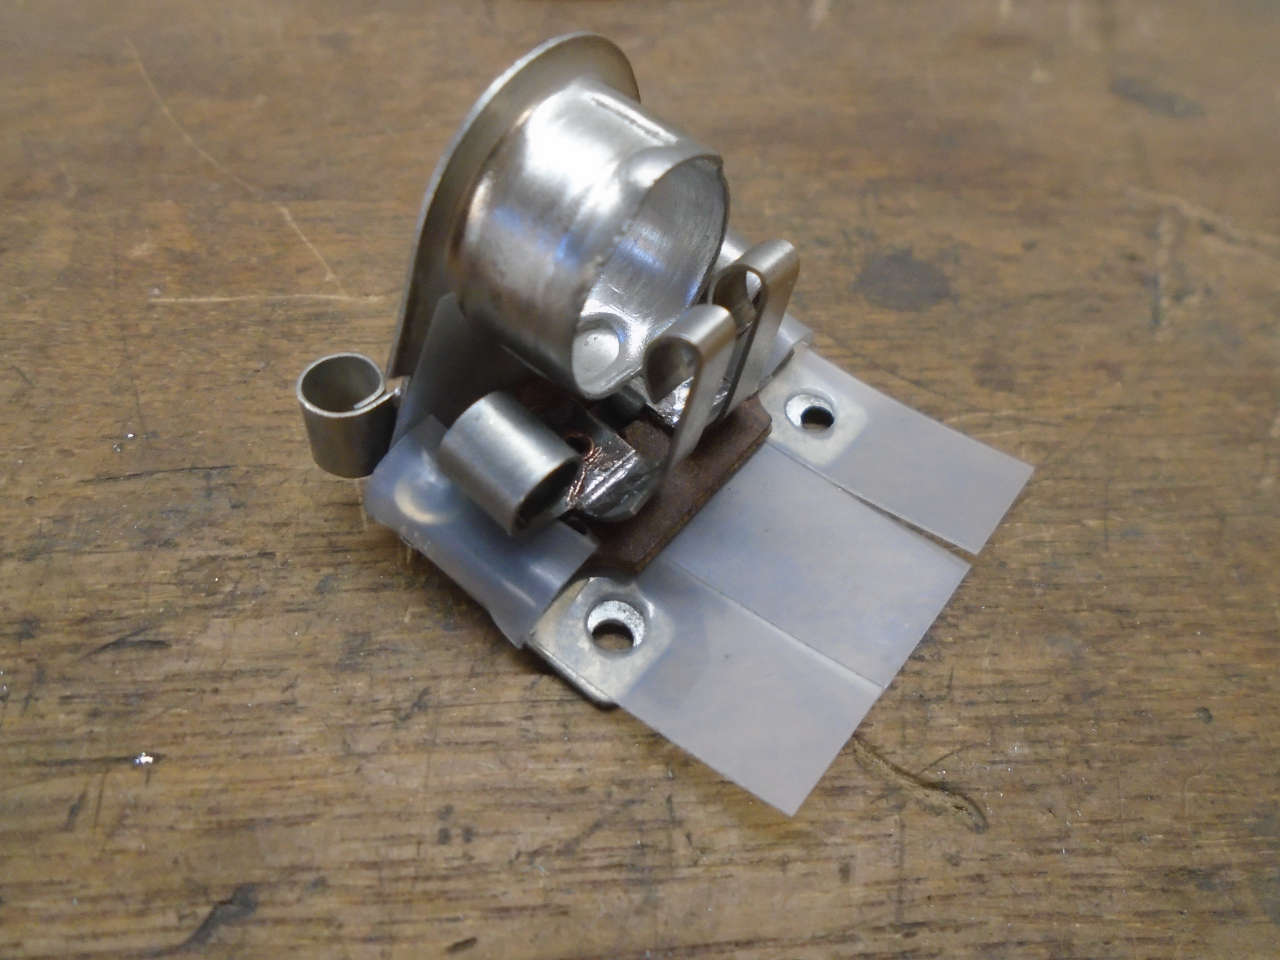
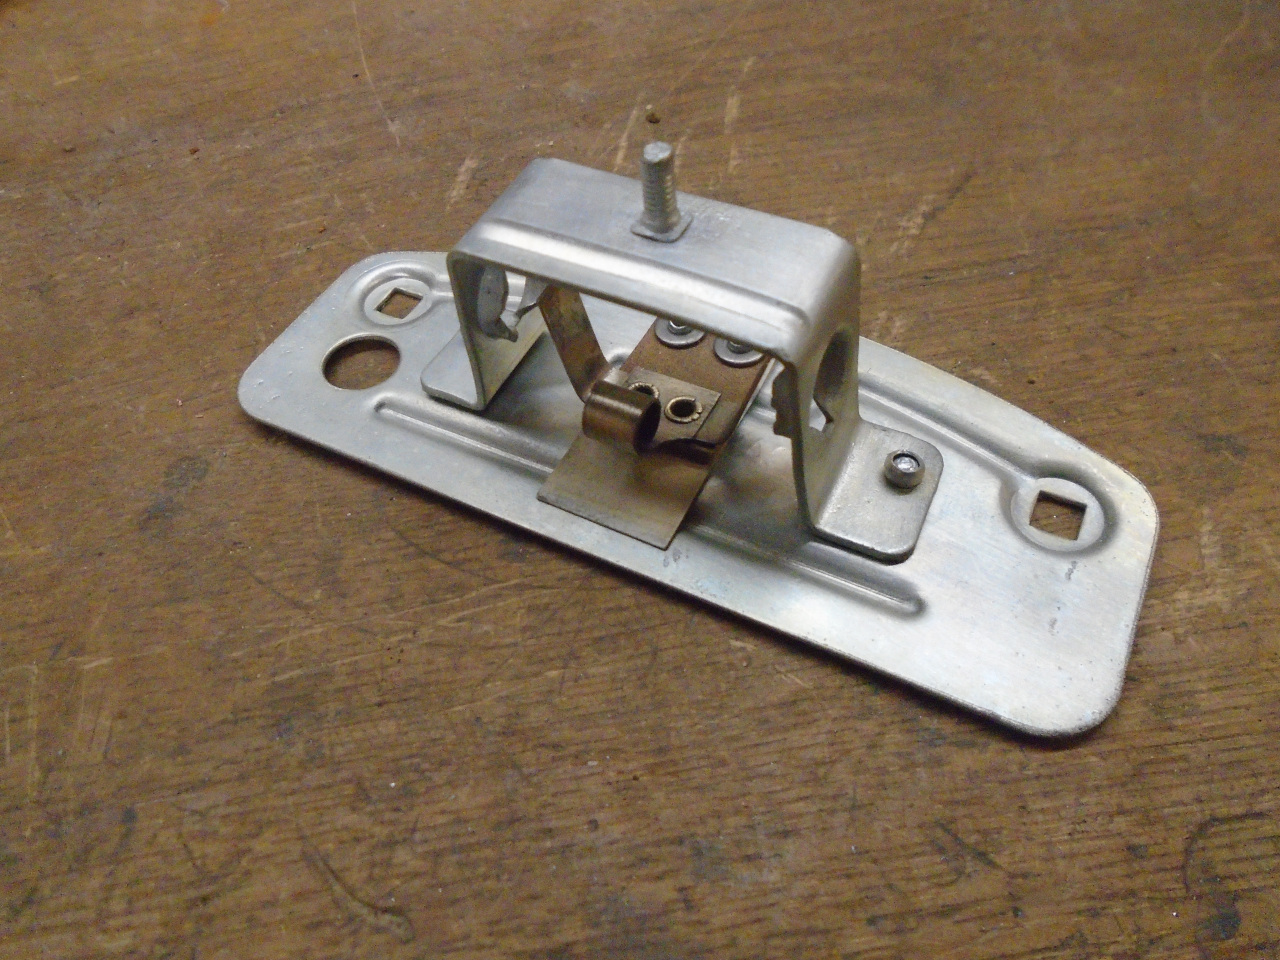
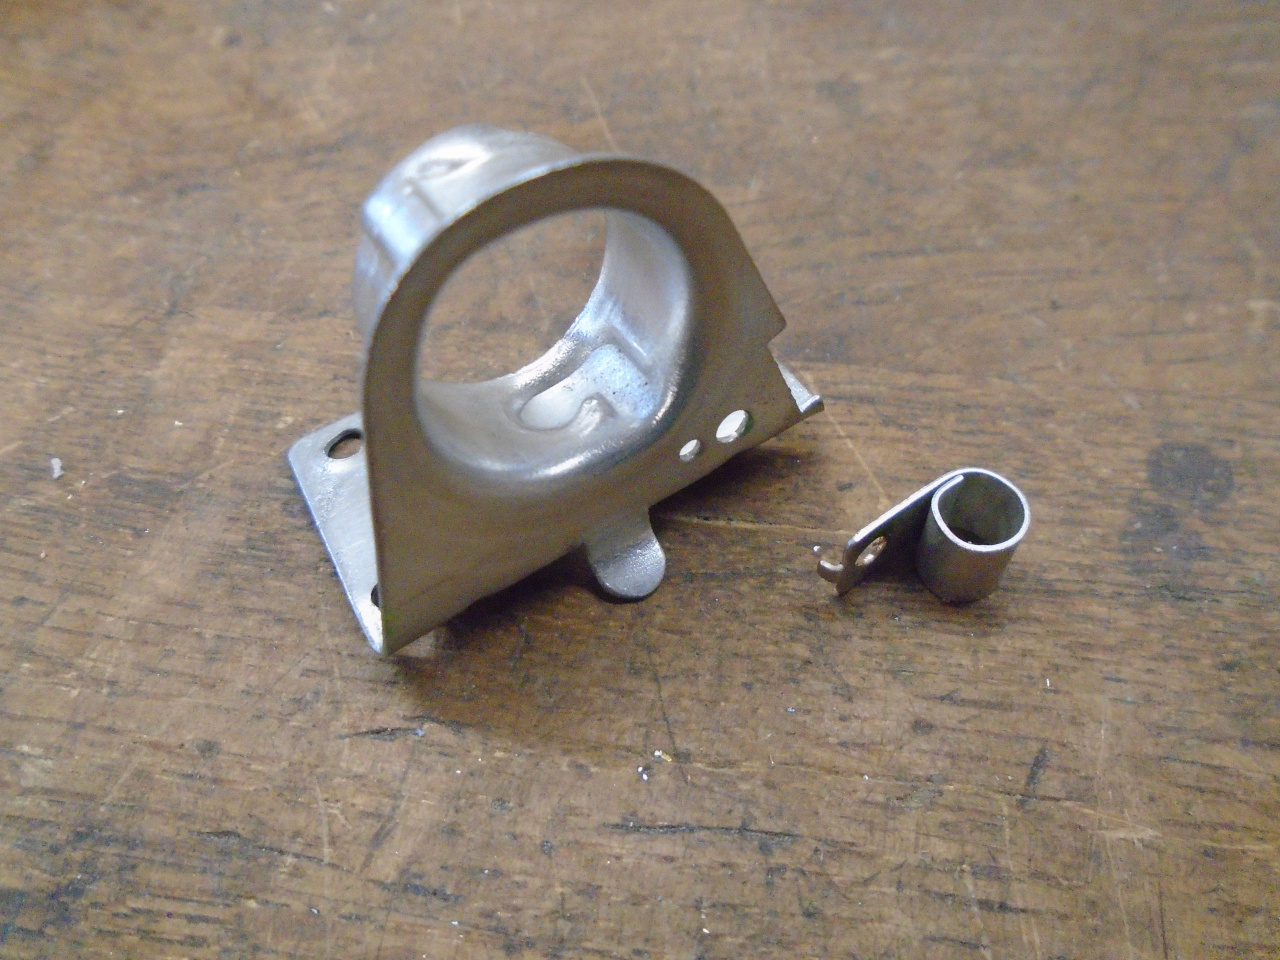
Finally, riveted the lamp assembly and the reflector back on to
the main frame.
The lenses responded pretty well to a good cleaning and polishing.
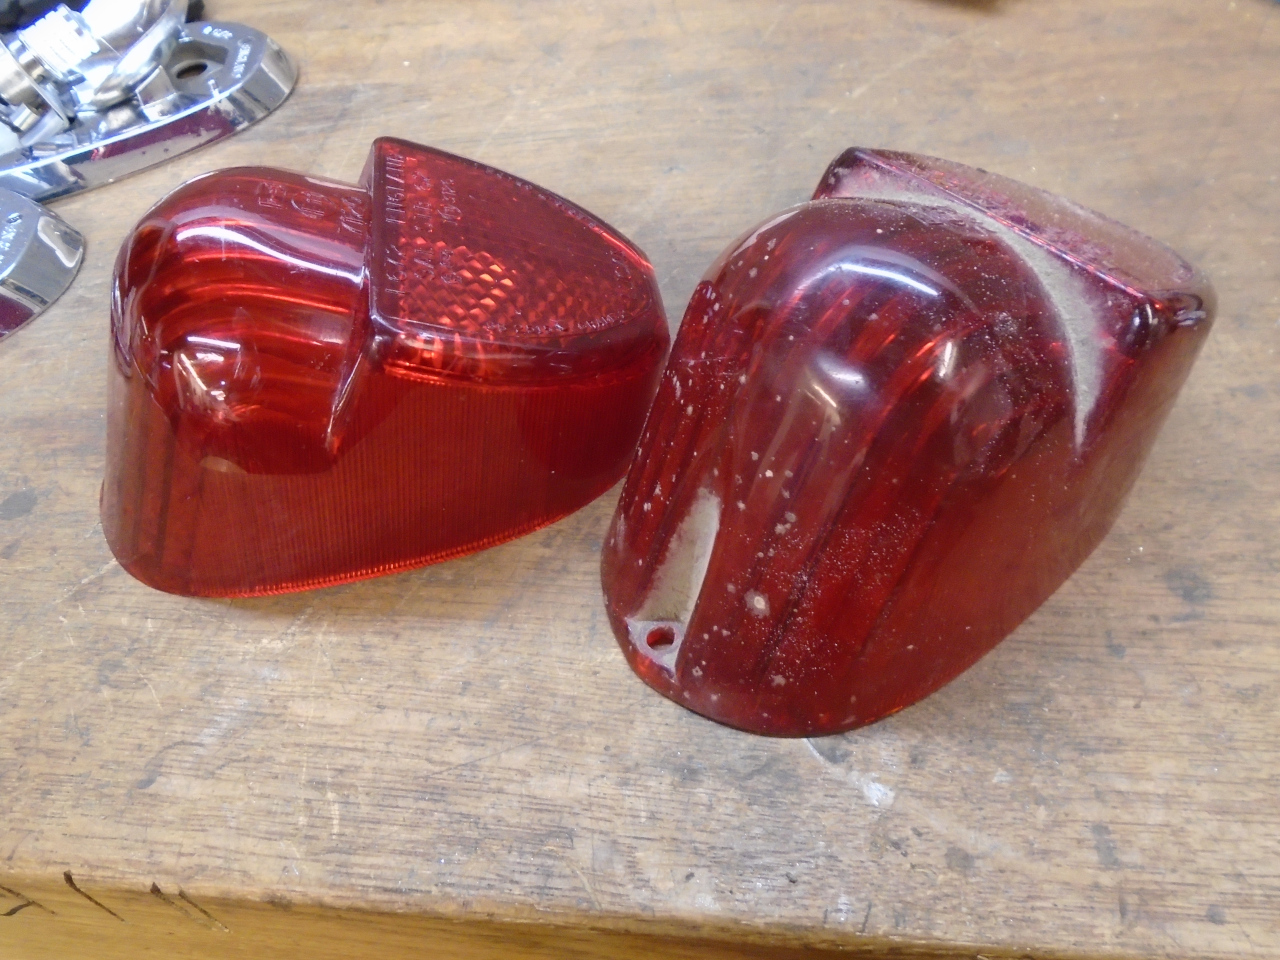
Oops, forgot to order the lens gaskets, and the one remaining
original was stiff as a board. That's OK, I had some foam left
over from the front signal lights.

I did have new body gaskets, though.
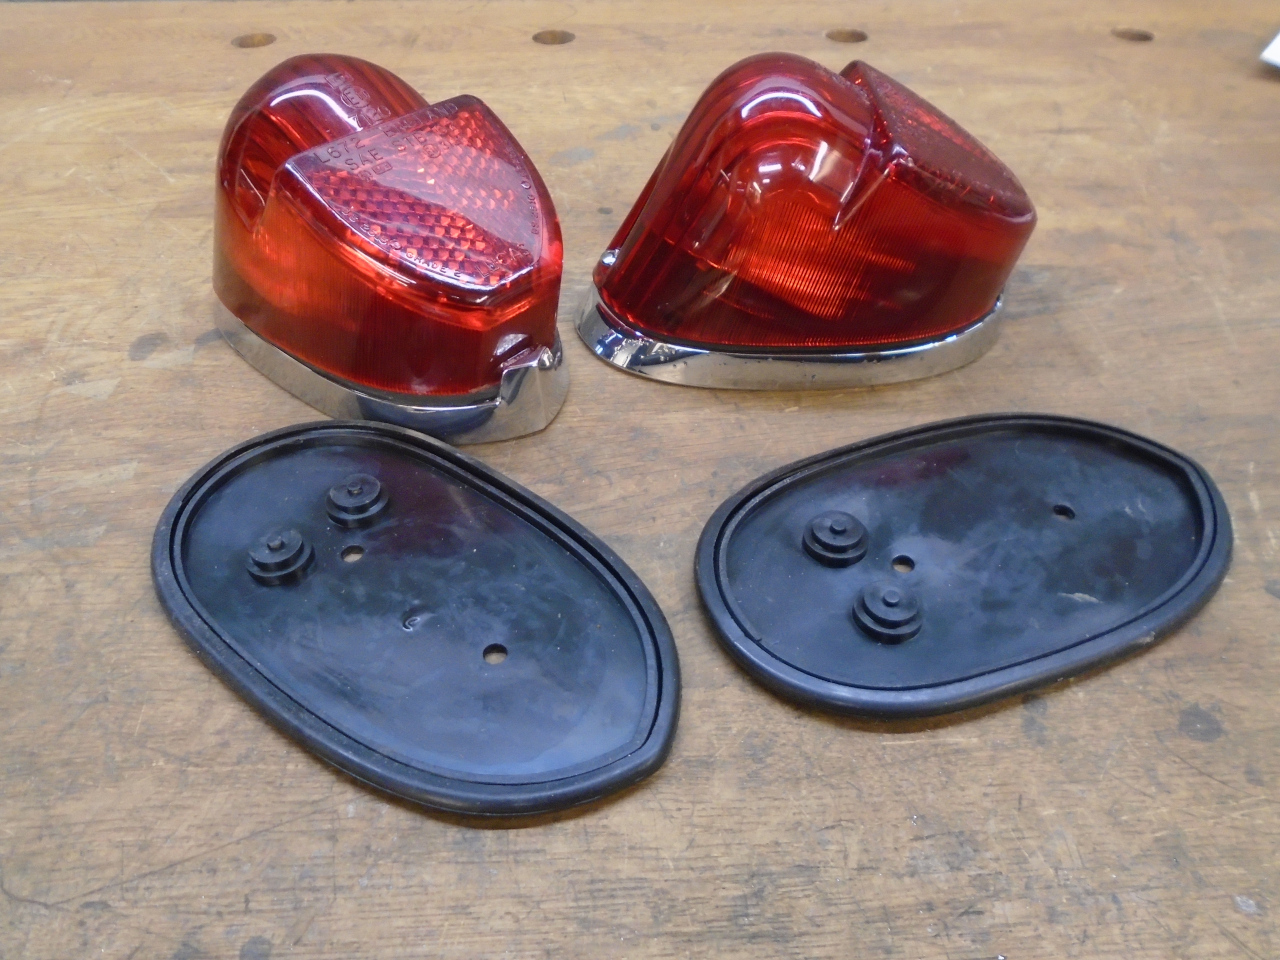
Looking pretty OK. There is some pitting on one of the
chrome bodies, but I don't seem to be stressing over it.
Conclusion
So this completes the refurbishing of the external lighting
assemblies. They will go in a box until the installation
ceremony.

This was a finicky project in places, but I'm pretty confident
that these parts are in original condition, or better. It
was fairly cheap at around $75 for various parts and gaskets, some
of which I didn't use.
Comments to Ed at elhollin1@yahoo.com
To my other GT6
pages.