To my other GT6
pages
February 1, 2021
Dashboard
Many of the British sports cars of the 50s into the 70s had a few
things that contributed to their mystique. The small, nimble
size, for one. The distinctive sound. The utilitarian,
almost spartan interiors. And the dashboards--mostly simple
and flat, with plain toggle or rocker switches and basic round
gauges reminiscent of an aircraft cockpit. About the only
nod to any kind of luxury or indulgence was the real woodgrain
dash that many models sported. Never mind the questionable
judgement that would put wood in a roadster, the makers bragged
about it in many of their glossy ads of the day.
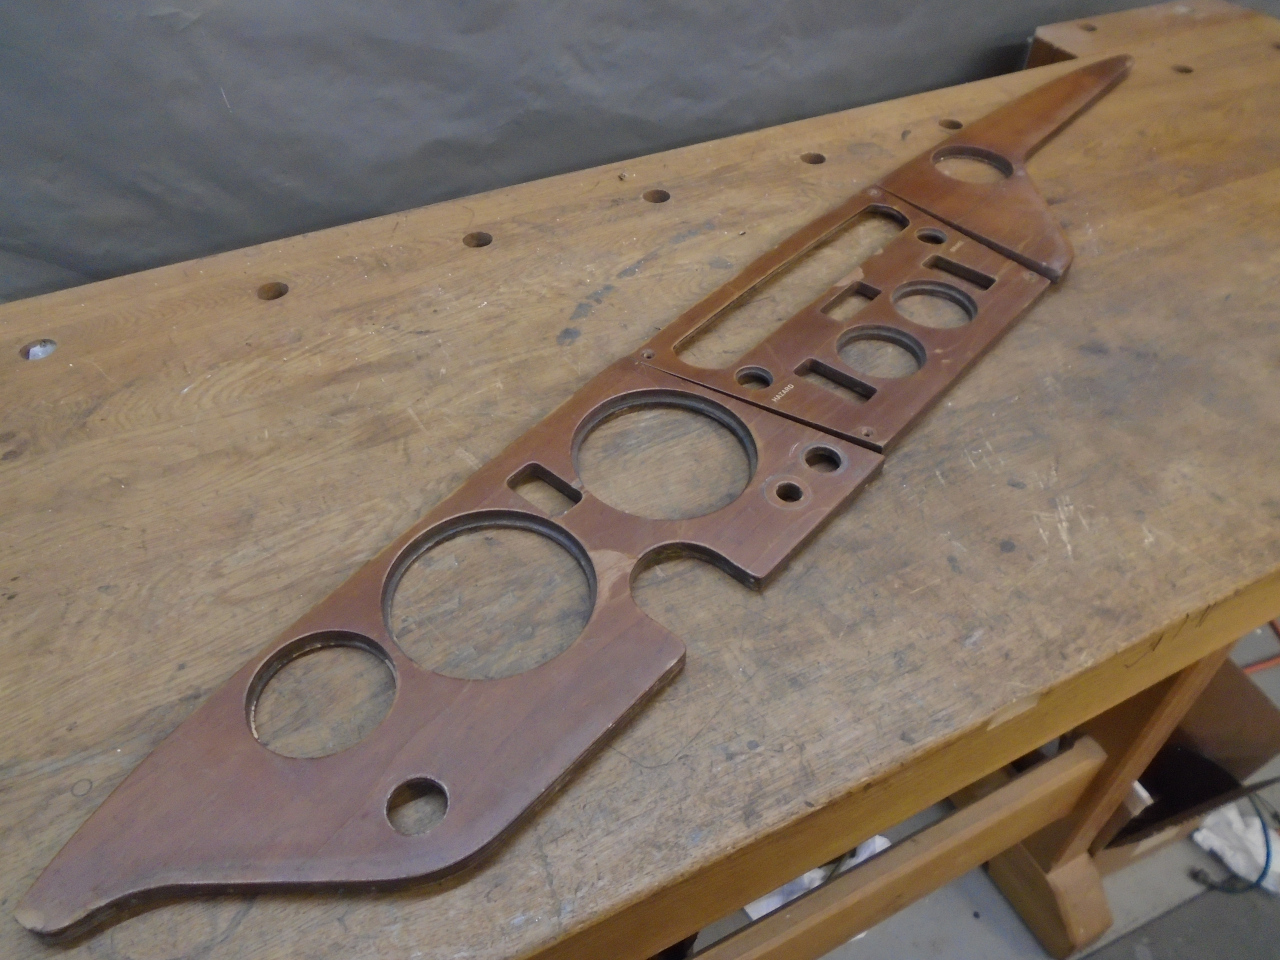
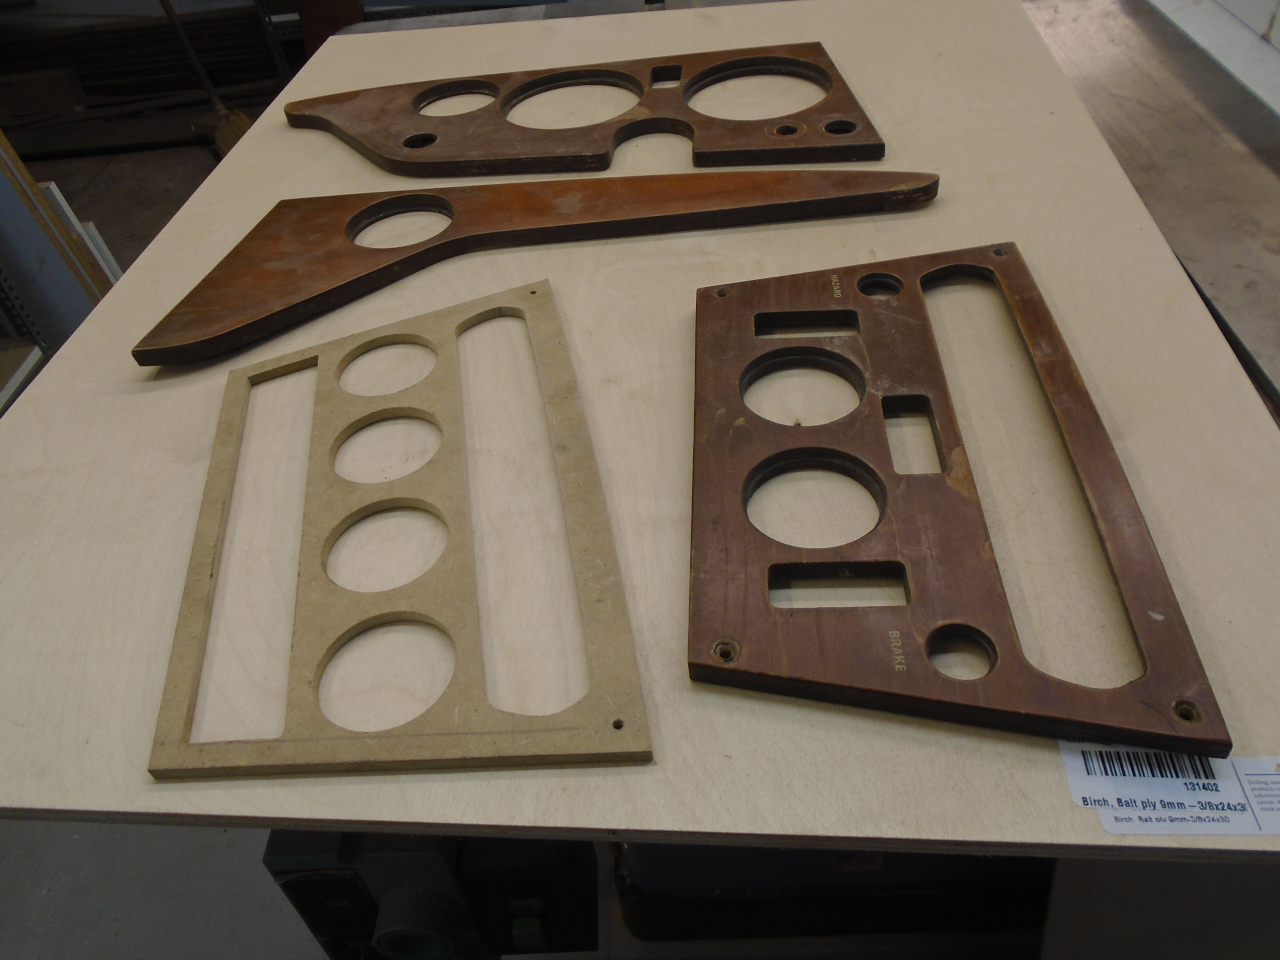
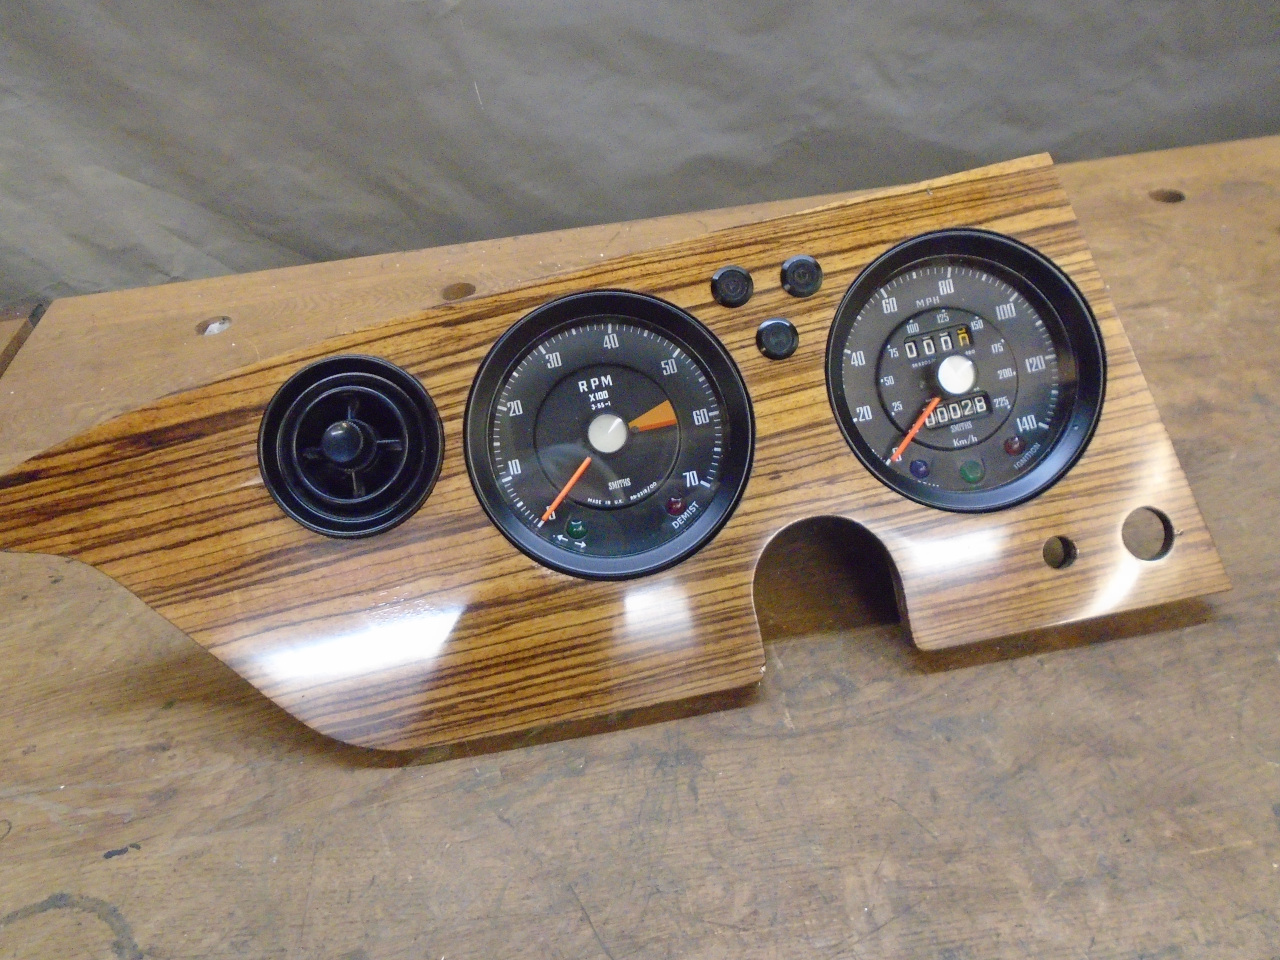
The GT6 was not a roadster, so the genuine walnut veneered
dashboard actually made sense. The dash was in three
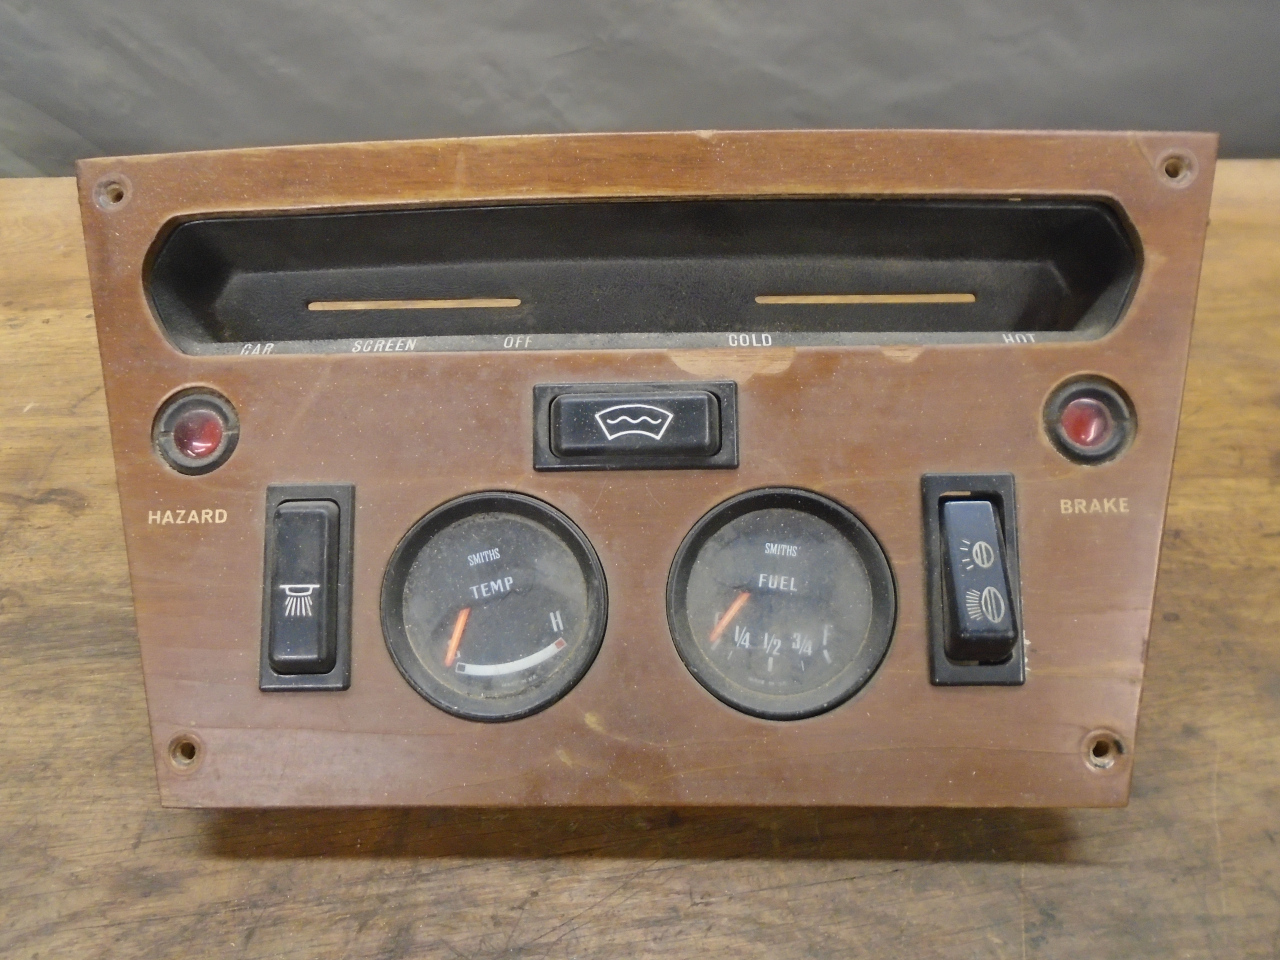
sections: The driver's side had the tach and speedometer, the
center part had fuel and temp gauges, the heater controls, and a
few switches and indicators, and the passenger side over the
"glove shelf" had just an air vent.
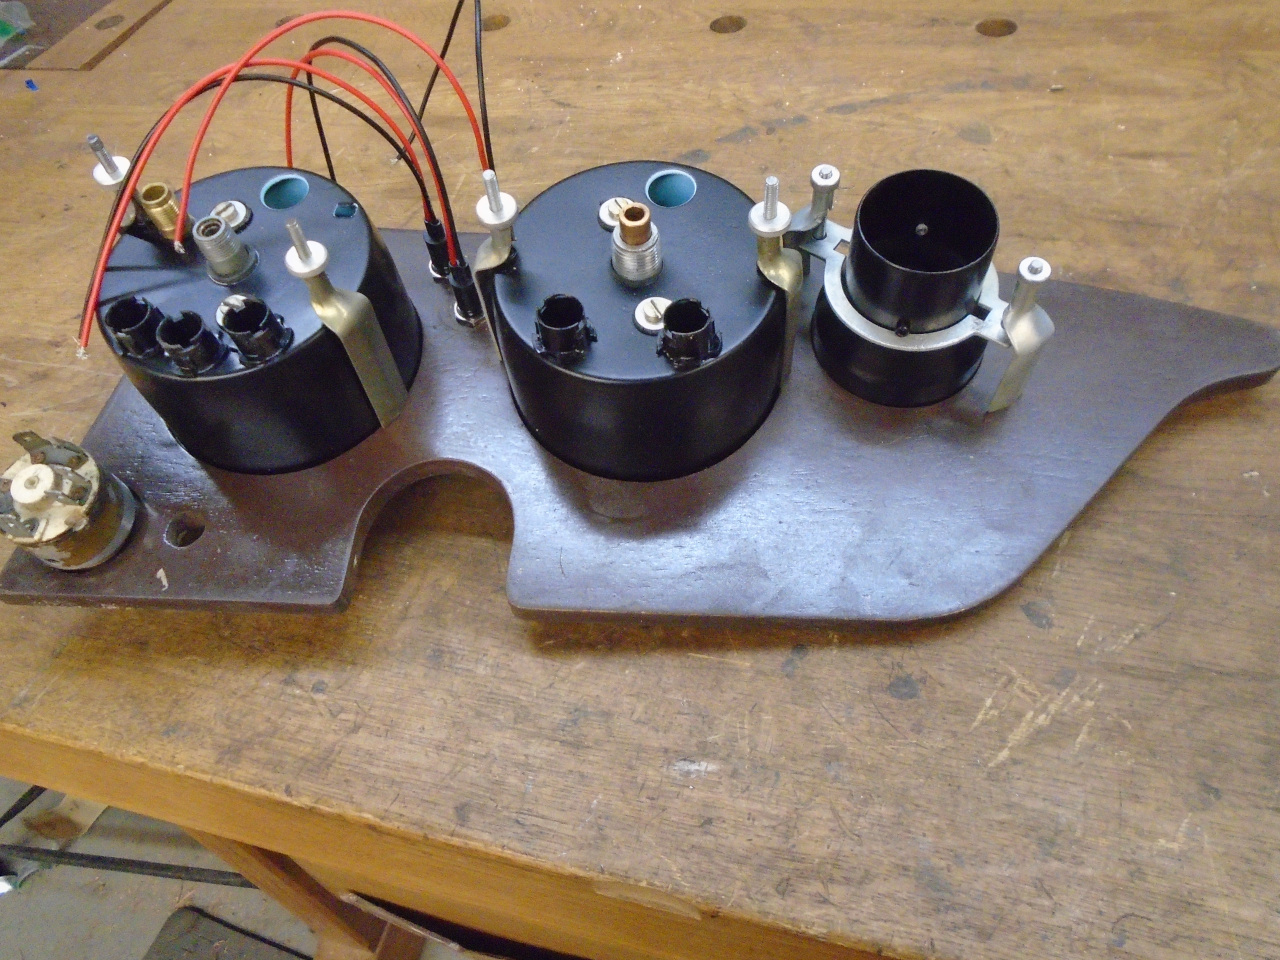
After removing everything from the dash, I could see that while
the backing plywood and the veneer were in pretty good shape, the
finish was not. It was cracked everywhere, and missing is
spots.
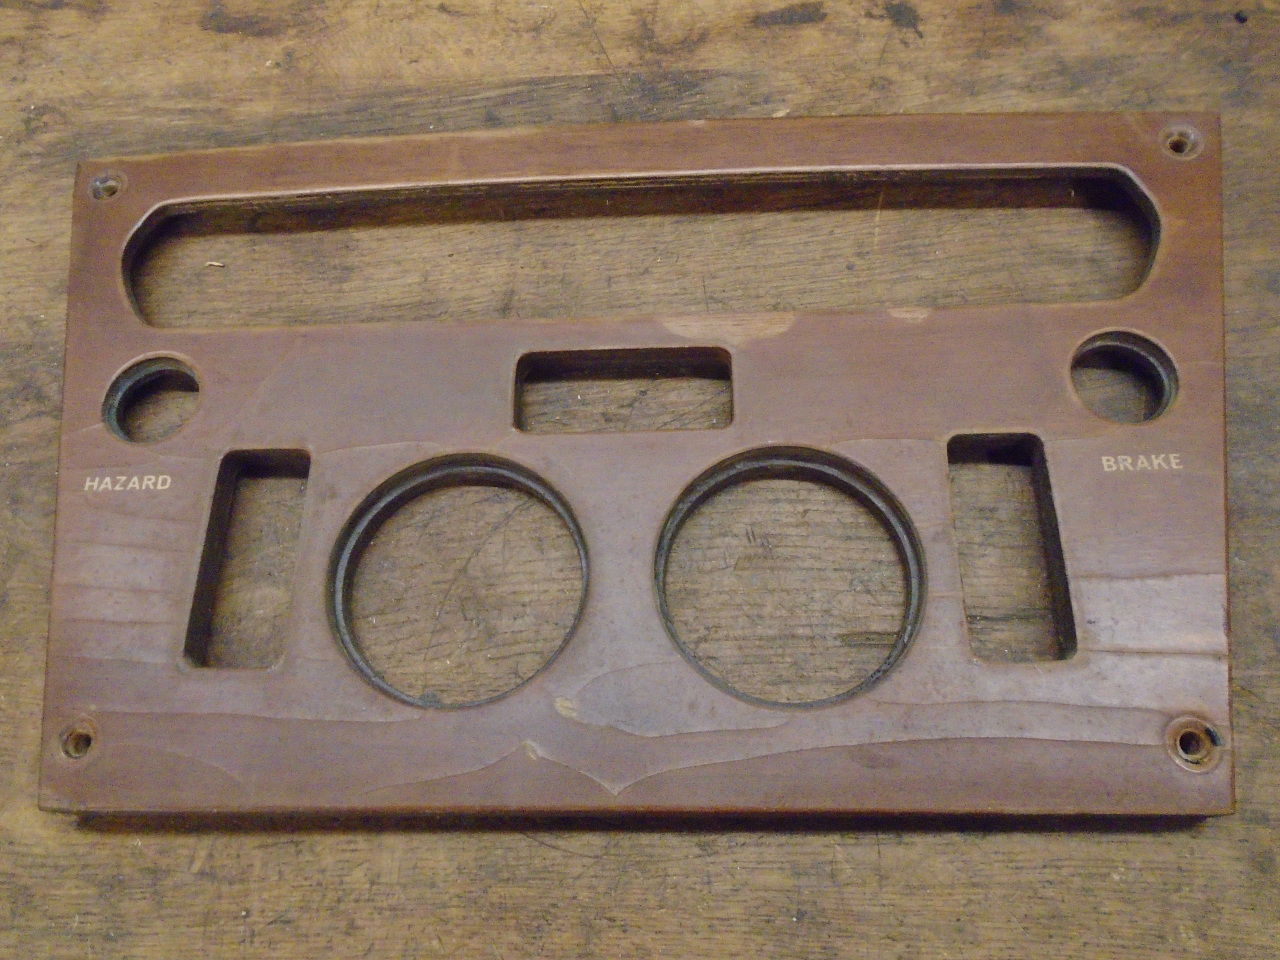
Now, while I'm mostly in the camp of originality on issues of
appearance, I'm not rabid about it, and make notable
exceptions. For me, the GT6 dashboard had a lot of potential
for improvement. First, it only had the two small gauges,
while many cousin and sibling cars (e.g. TR6) had the full
complement of four. Second, it seemed to me that the
switches and indicators on the dash were sort of haphazardly
placed. Third, though I do like walnut in general, I thought
it a little too sedate and boring in this application.
So, after some thought about the amount of work involved, I
resolved to re-create the dashboard, and since the changes would
be fairly major, especially to the center panel of the dash, I
thought starting from scratch was the smartest way to go.
This preserves the original dash panels for some future owner who
might not fully appreciate my taste.
I had actually been thinking about this even before I started on
the GT6, and I had some ideas. I've always loved the
dashboards in the Jaguar E-types. Maybe the rectilinear,
no-nonsense, logical layout of the gauges and switches appeals to
my inner Engineer, but it speaks to me. So I became intent
on building something sort of Jaguar-esque.
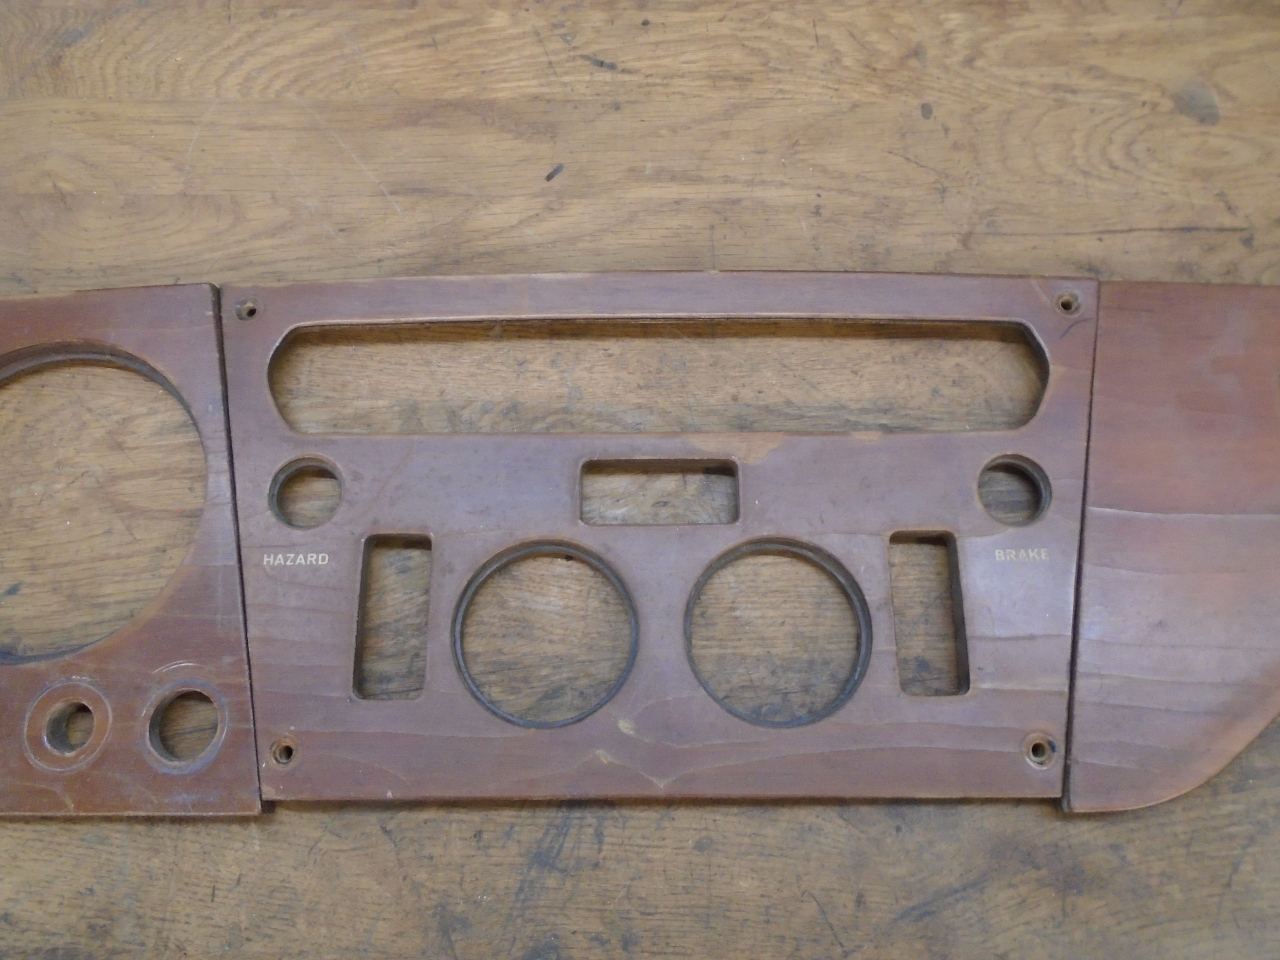
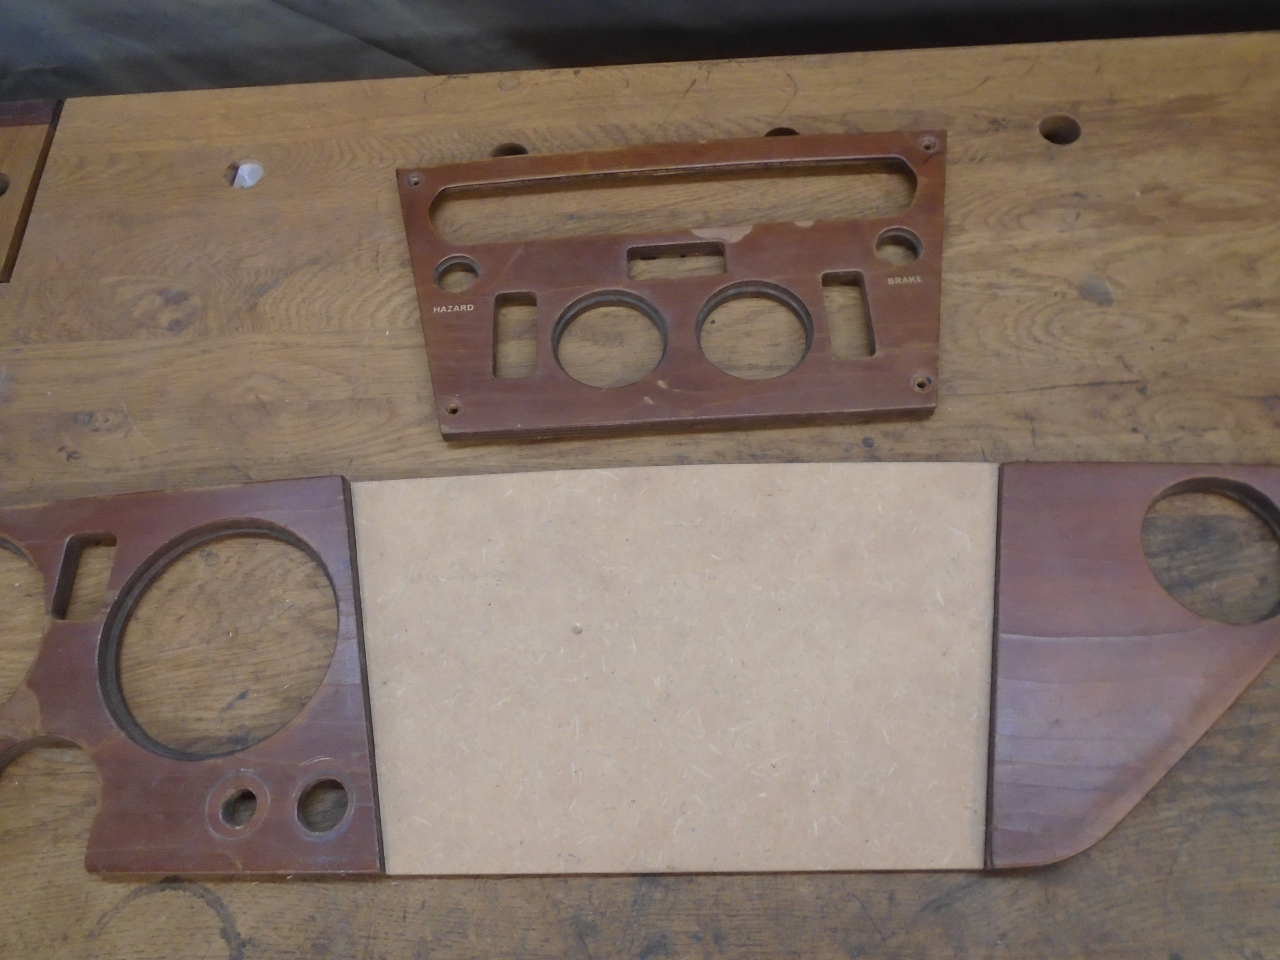
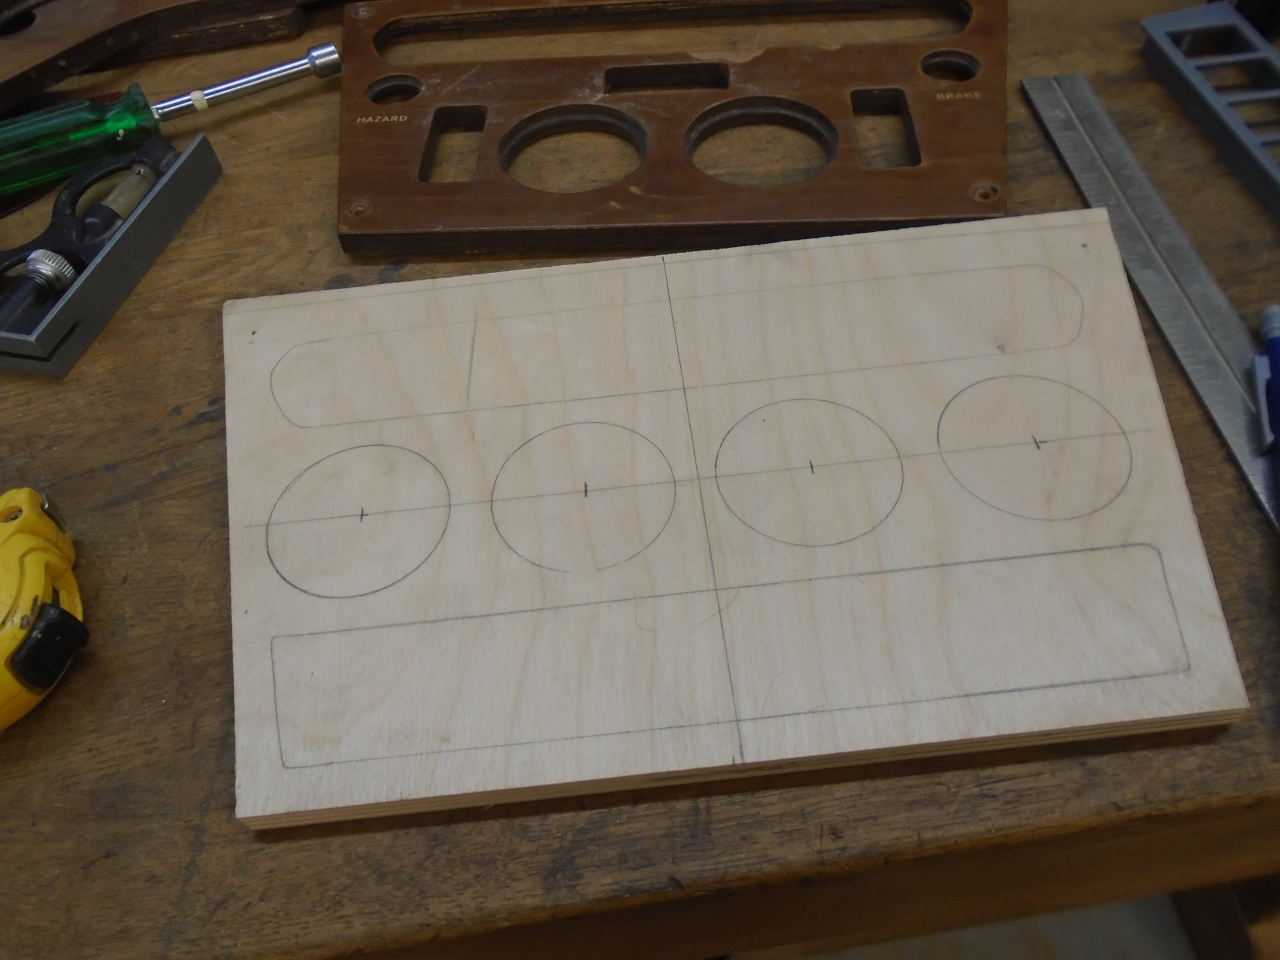
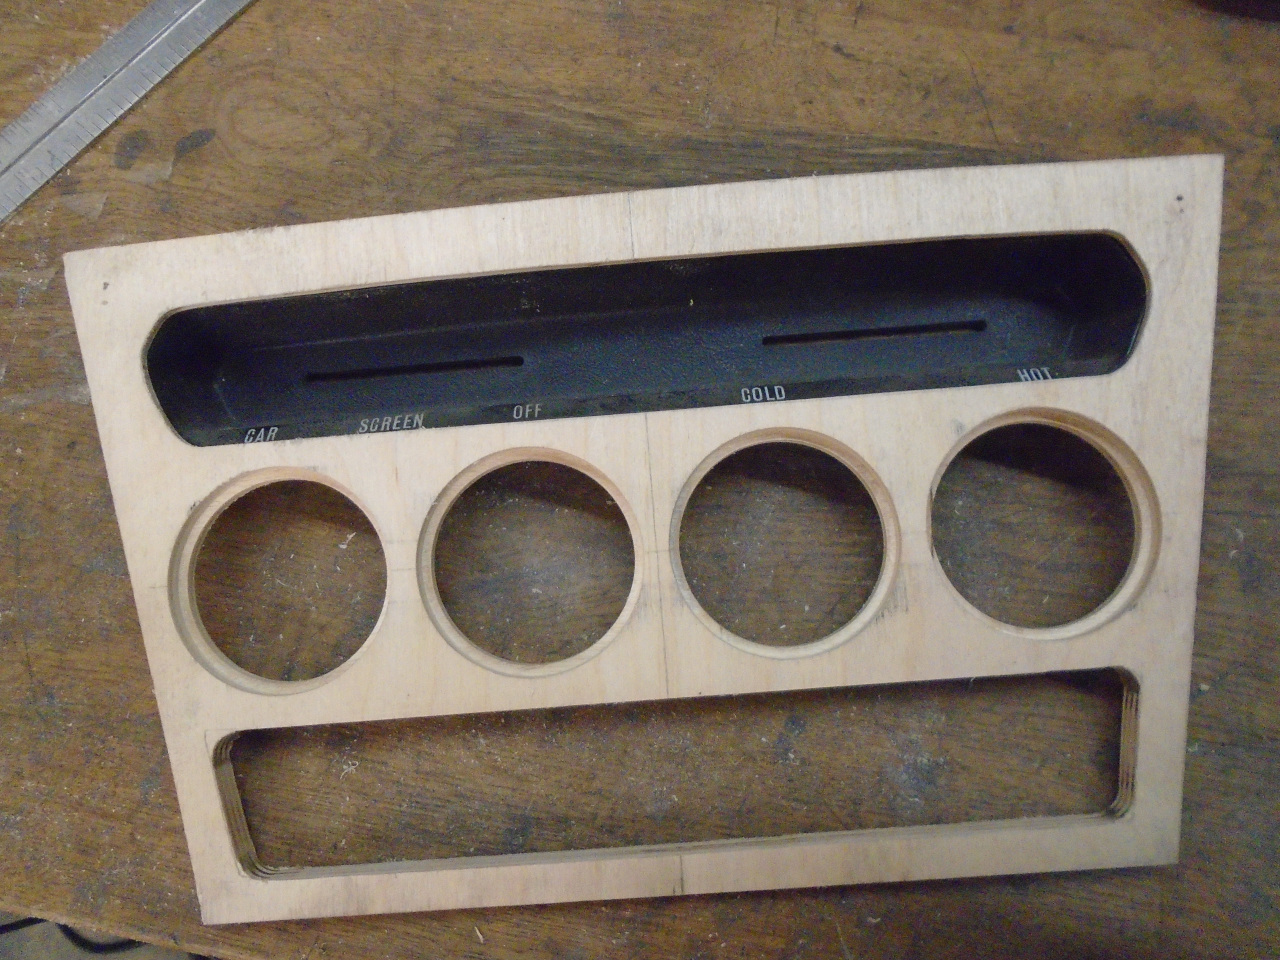
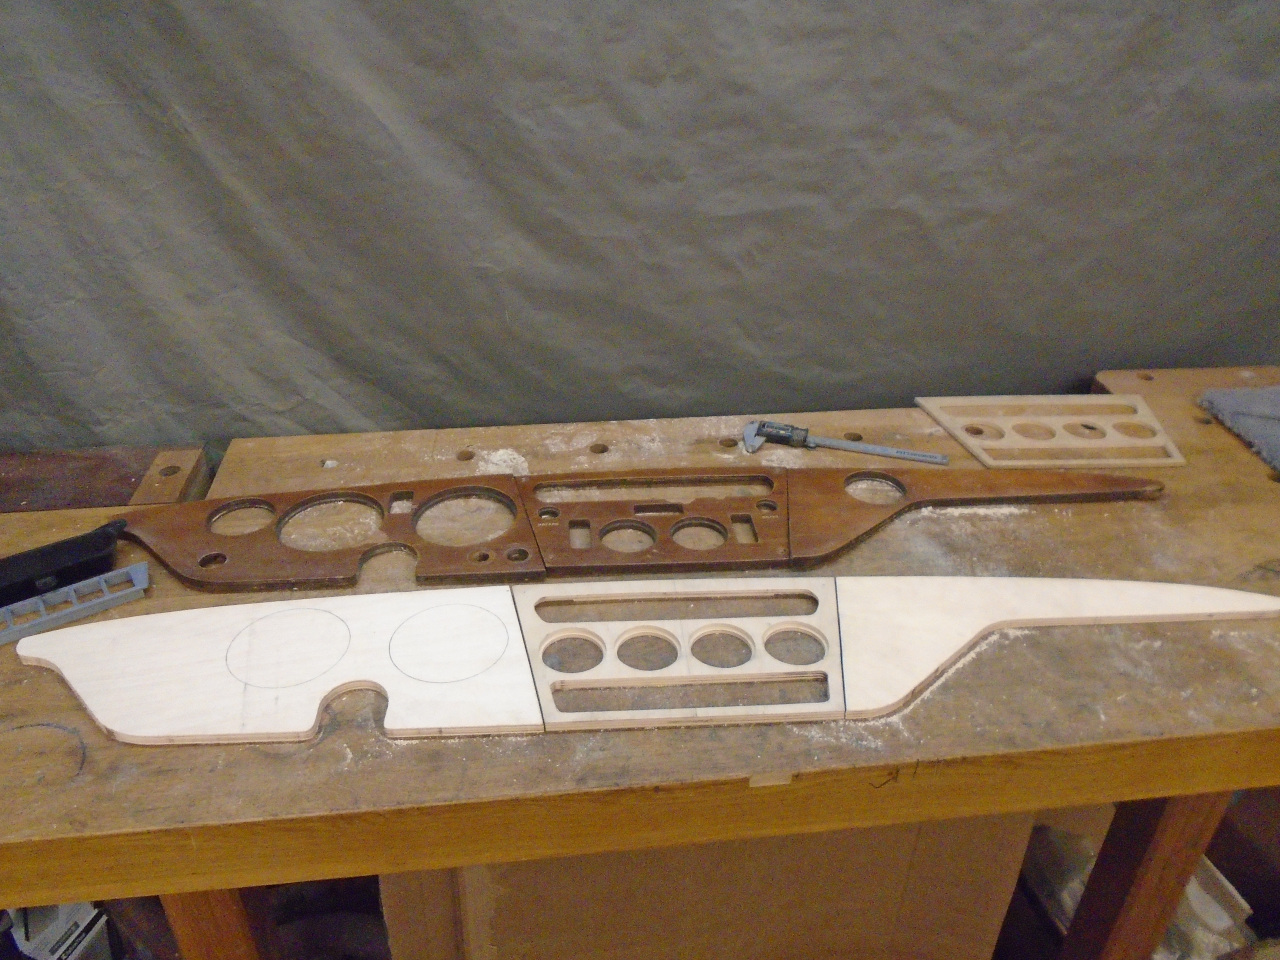
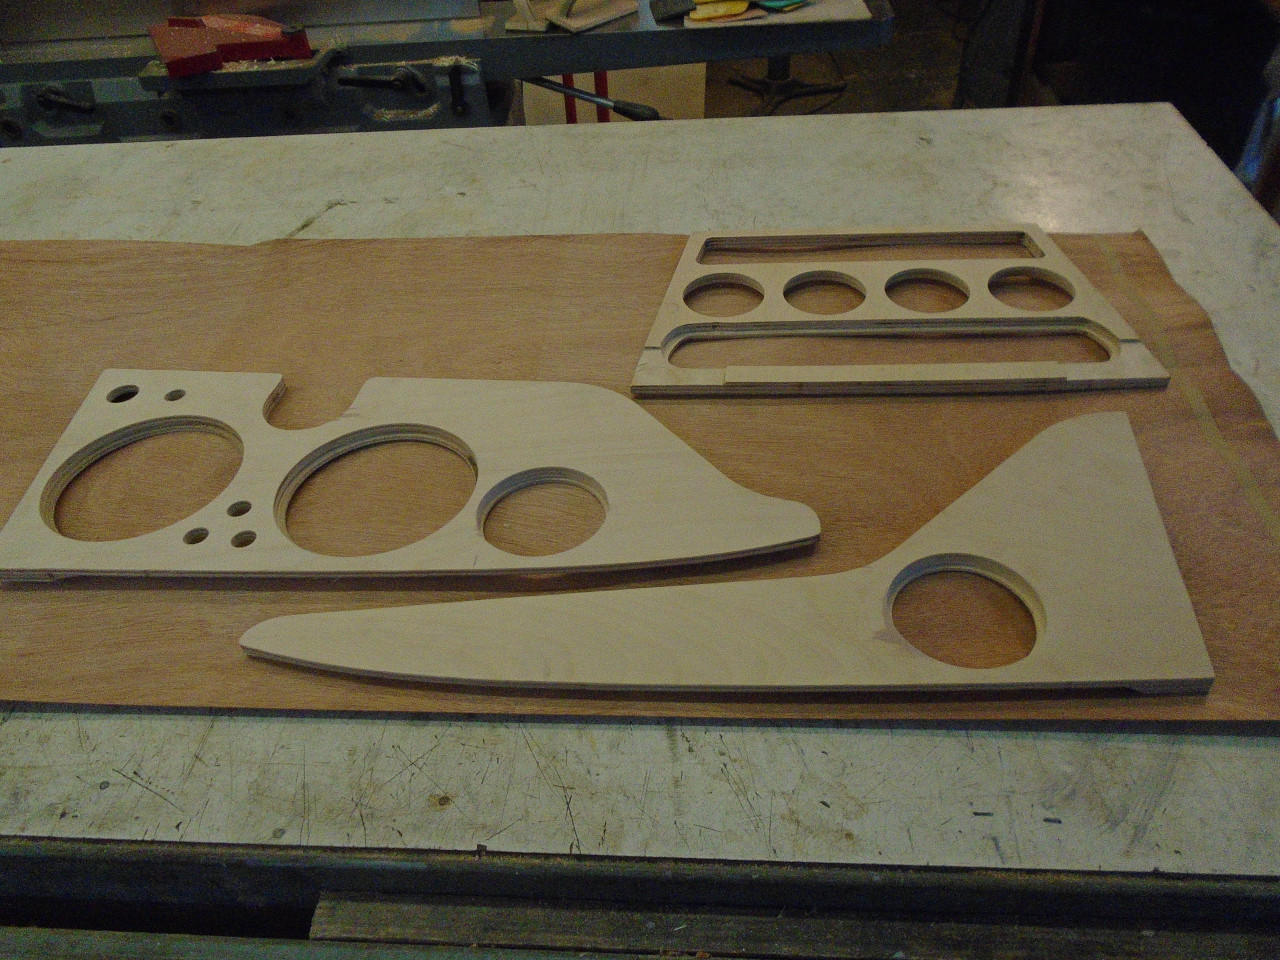
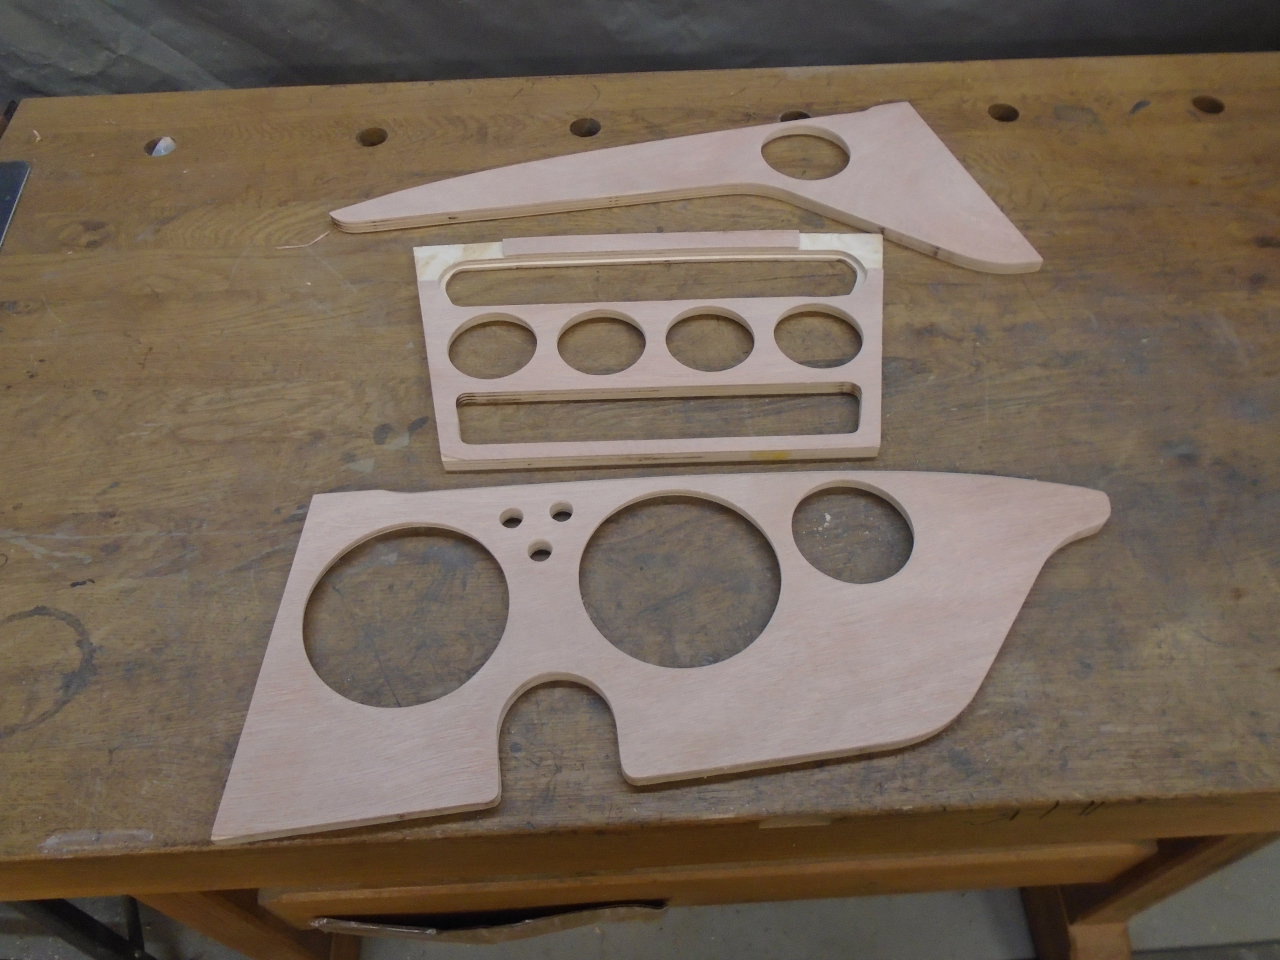
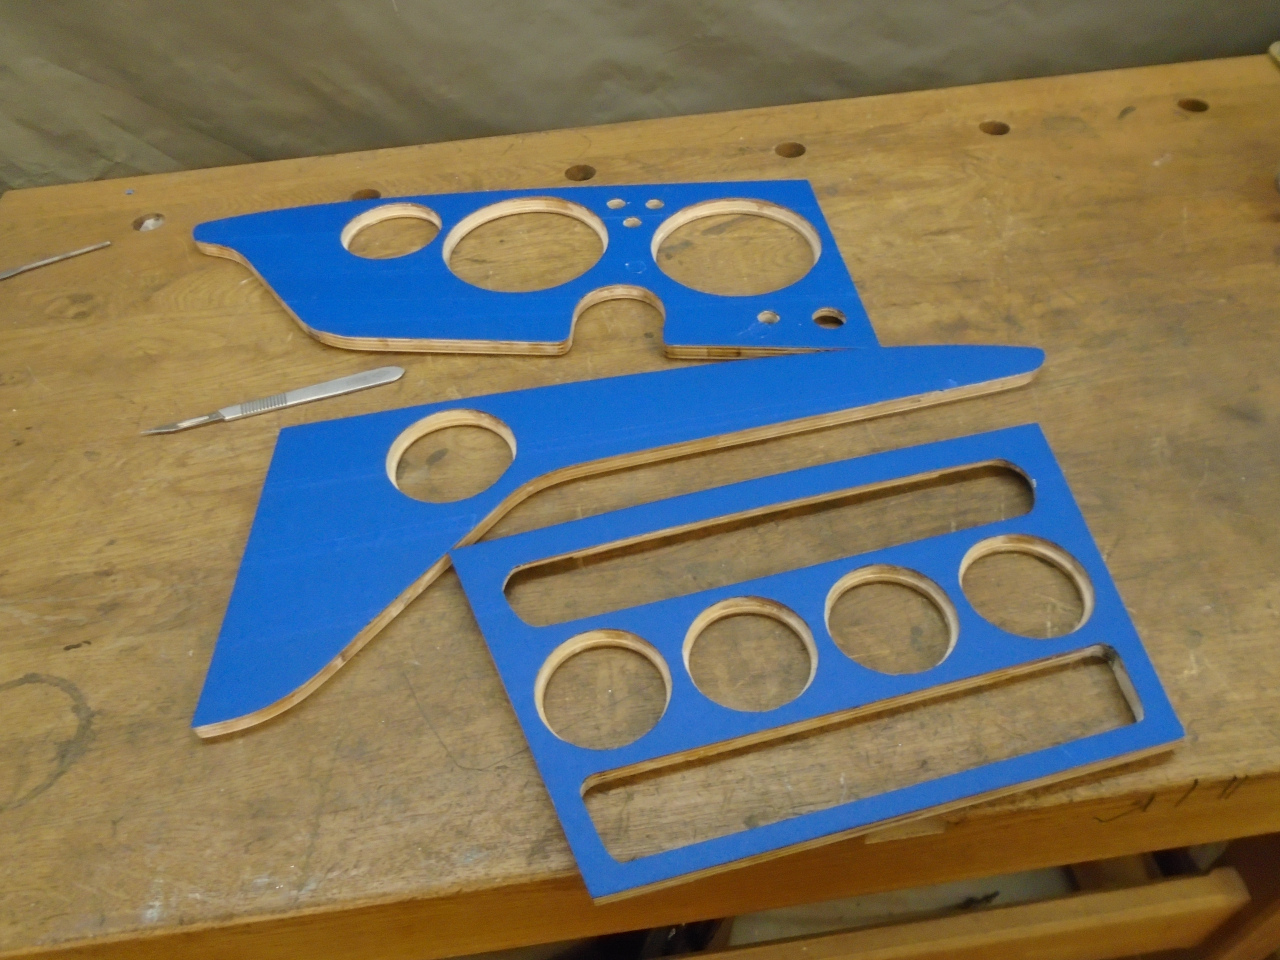
Only the center panel had major changes, so for that piece, I
started with a piece of 1/4" hardboard as a template, shaped to
match the outline of the center panel. The original panel
seemed to be a little short in height compare to its
neighbors. I hope this wasn't intentional, because I made
the template a little taller.
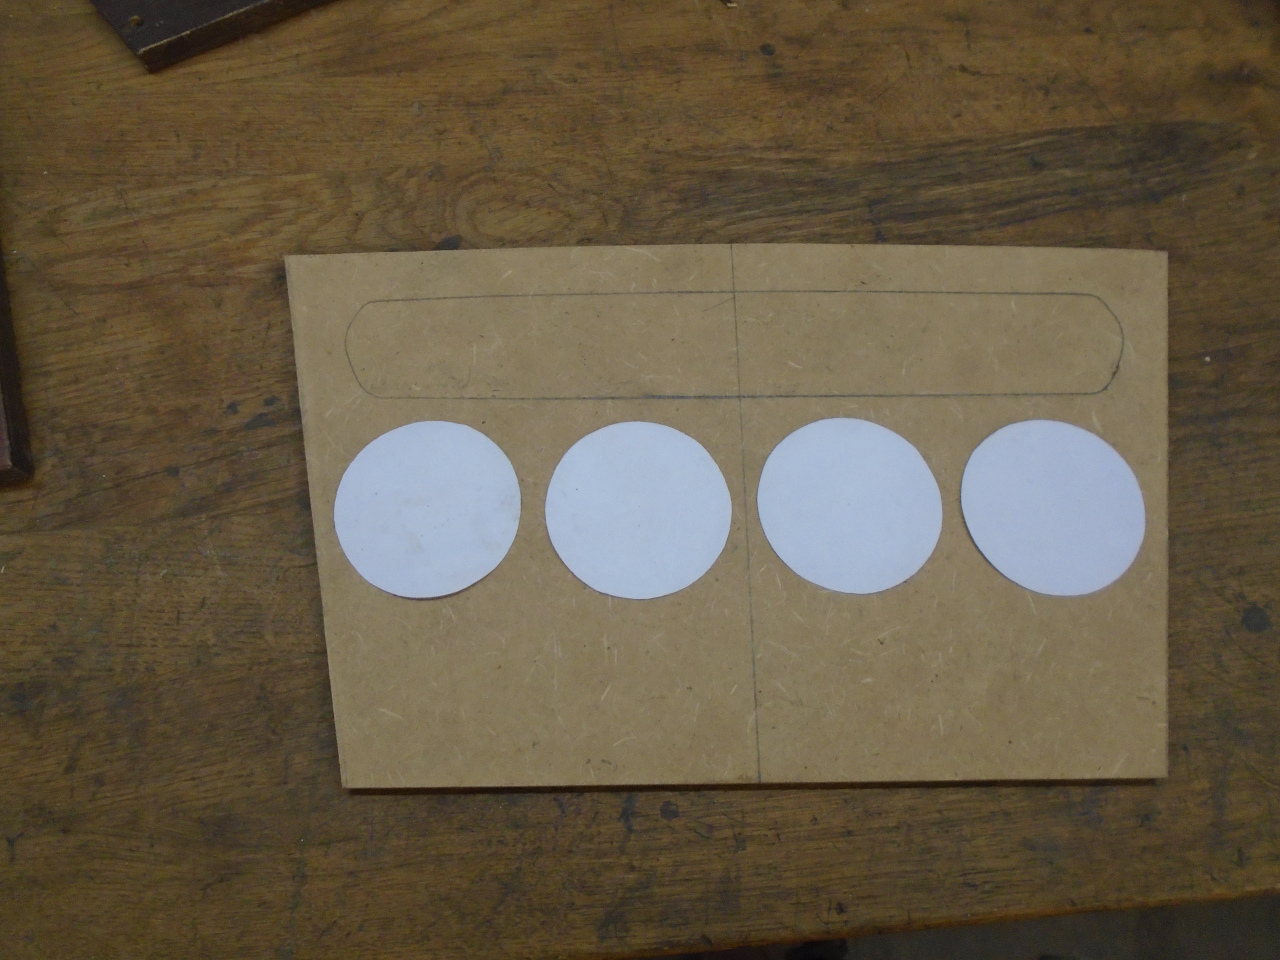
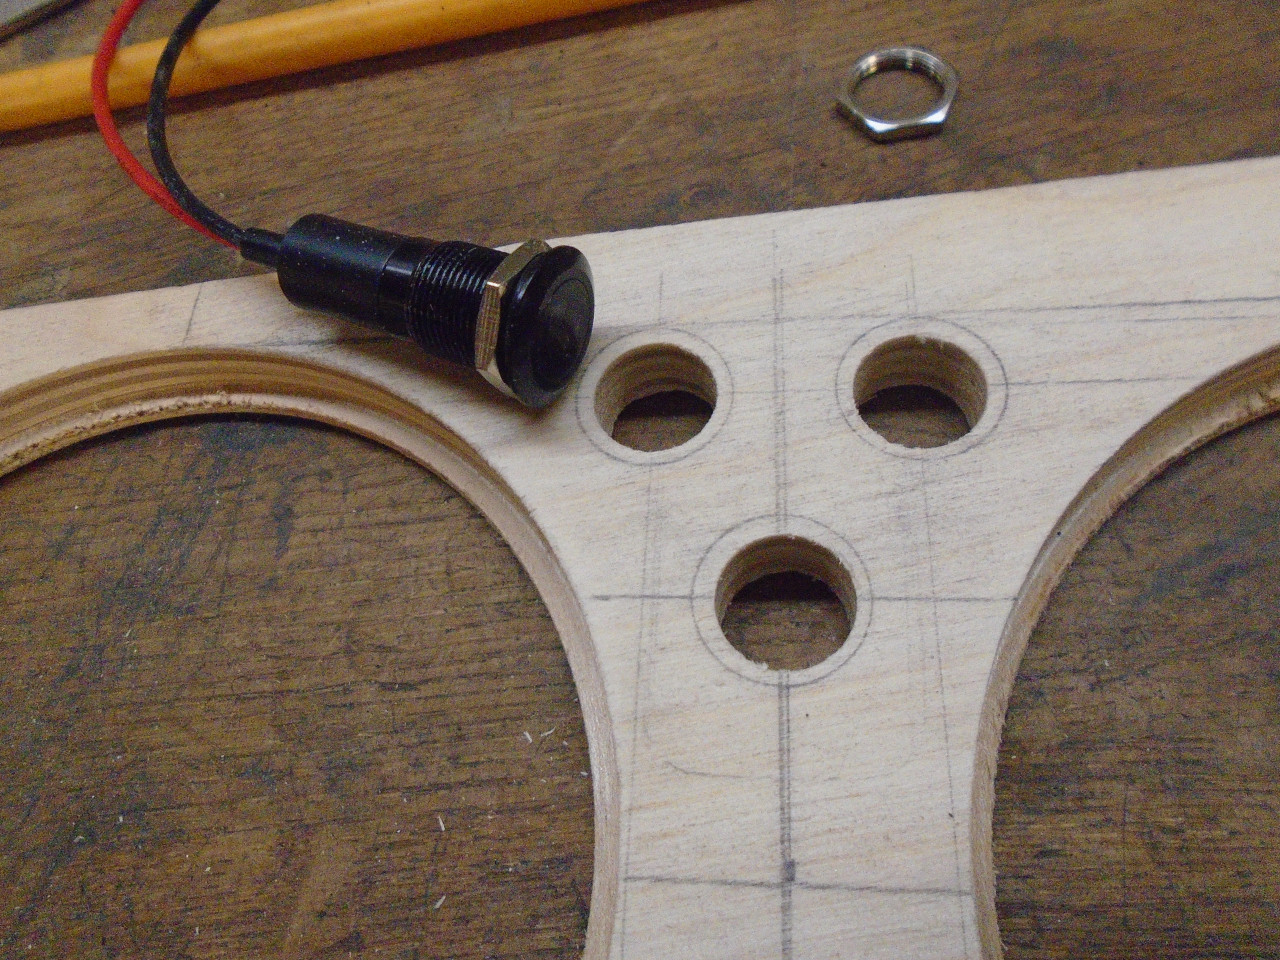
I cut out circles to represent the gauges. I was hoping they
would fit in a straight line. They did. Barely.
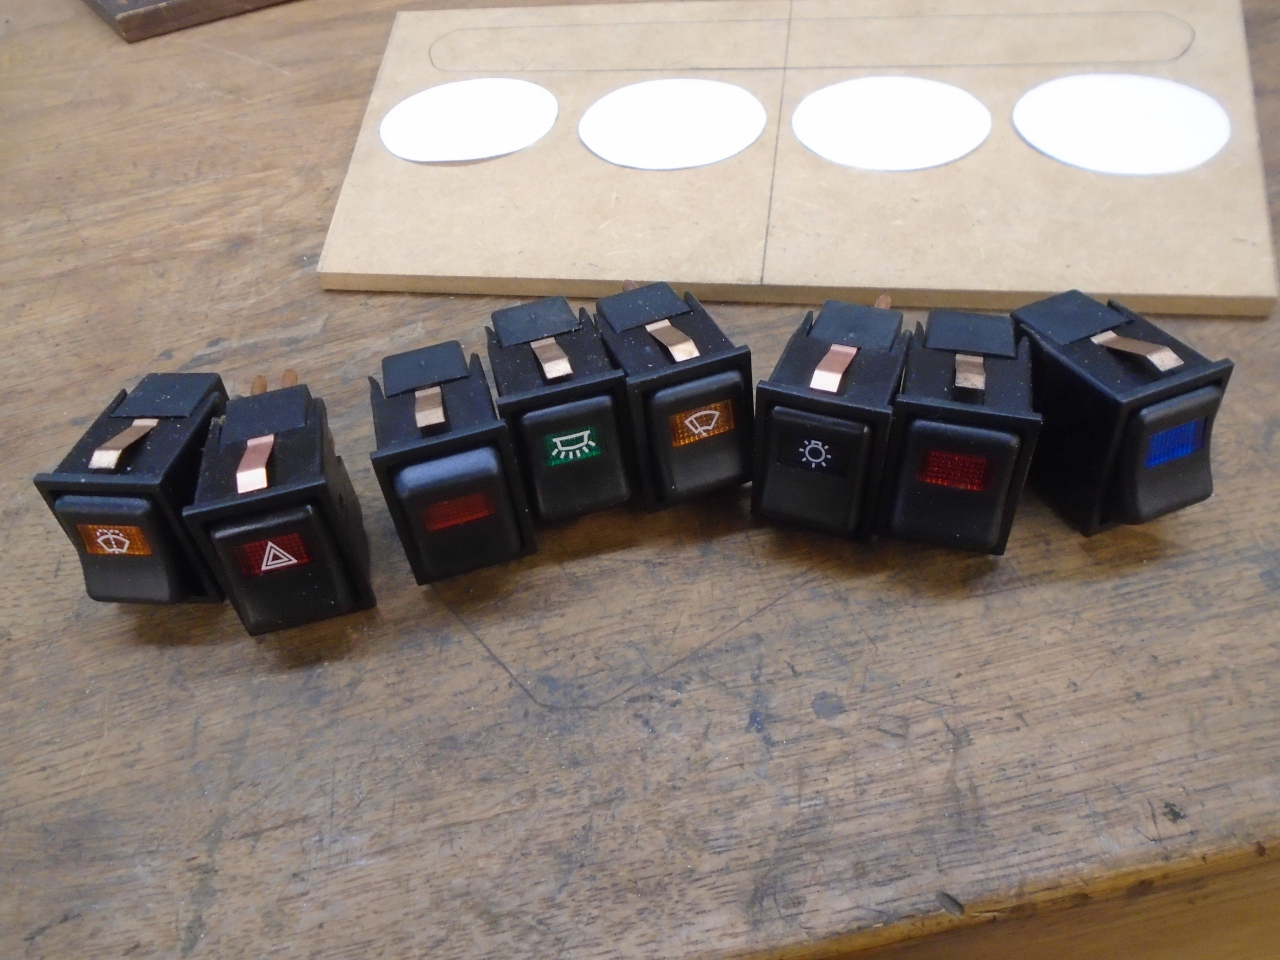
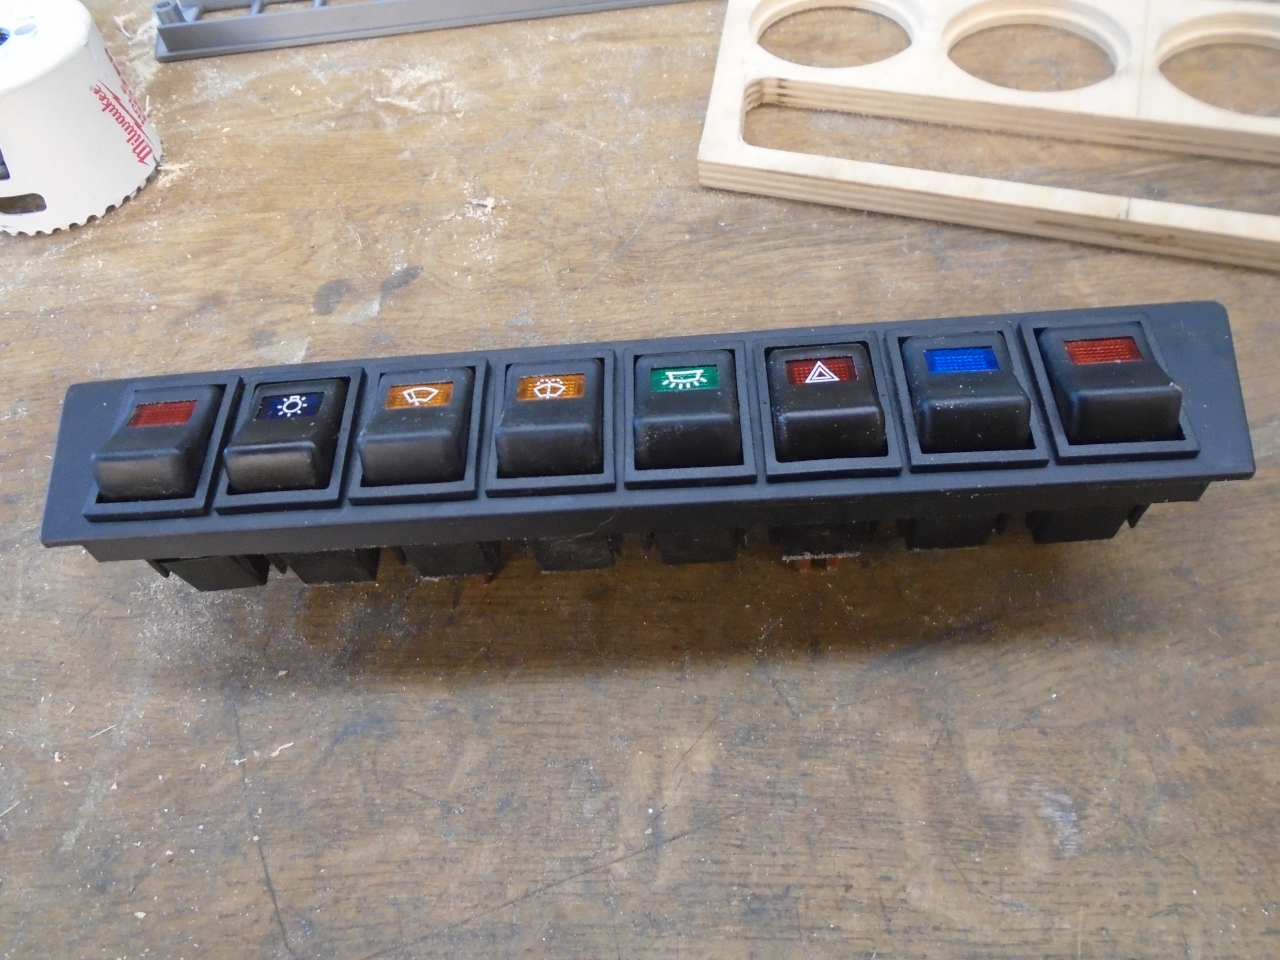
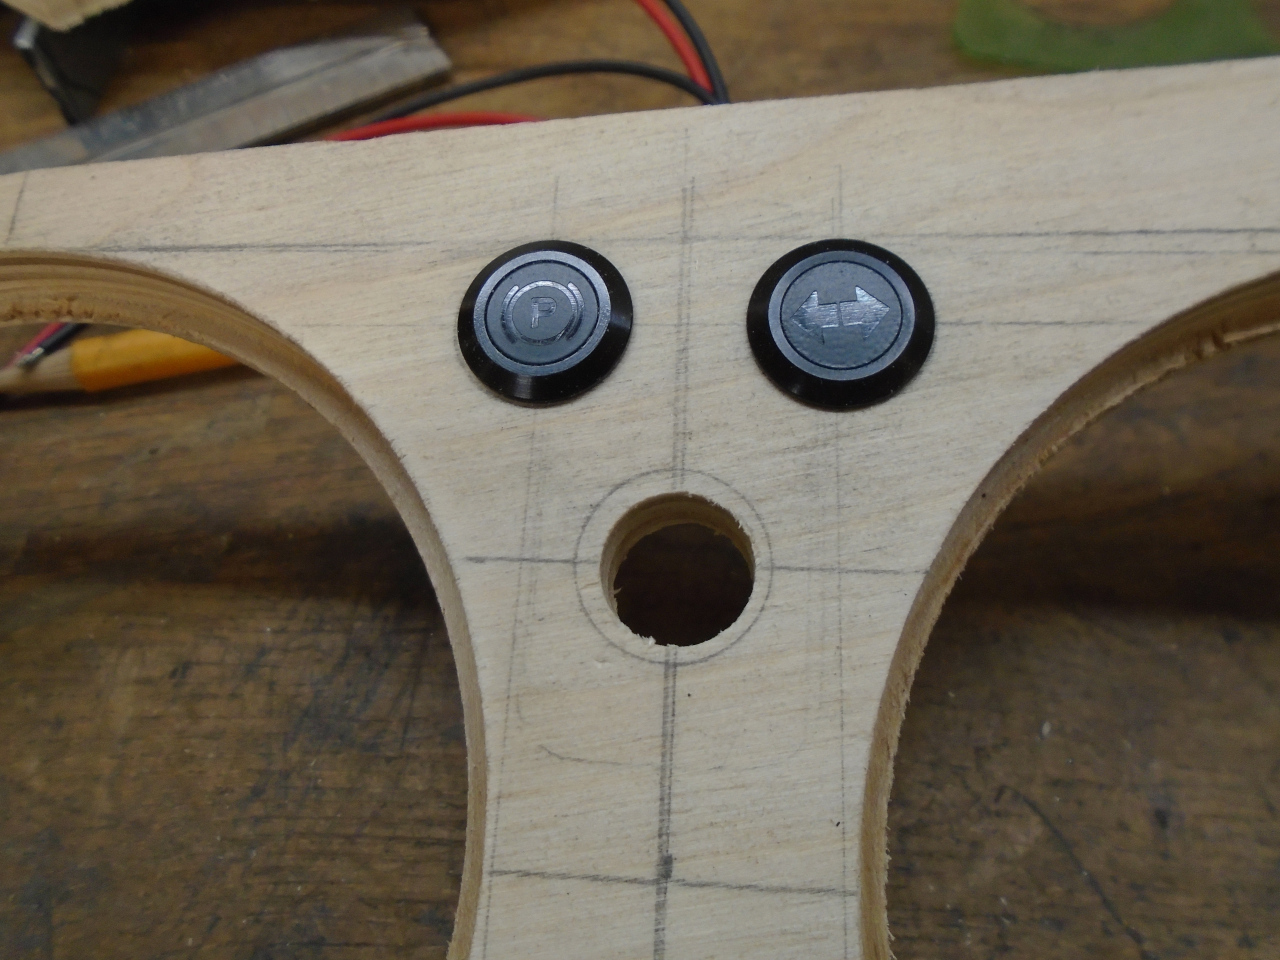
Then switches. Jaguar used both toggles and rockers,
depending on the year. I preferred the look of rockers, but
the limited real estate I had to work with had me doubting that I
could find rockers short enough. Then I happened on a post
on one of the forums from a guy named Dirk from Belgium. He
showed a pic of his dash, and it was almost exactly what I
wanted. He turned me on to a UK company that makes
automotive accessories, including a lot of electrical ones.
I ordered a bunch of rocker switches.
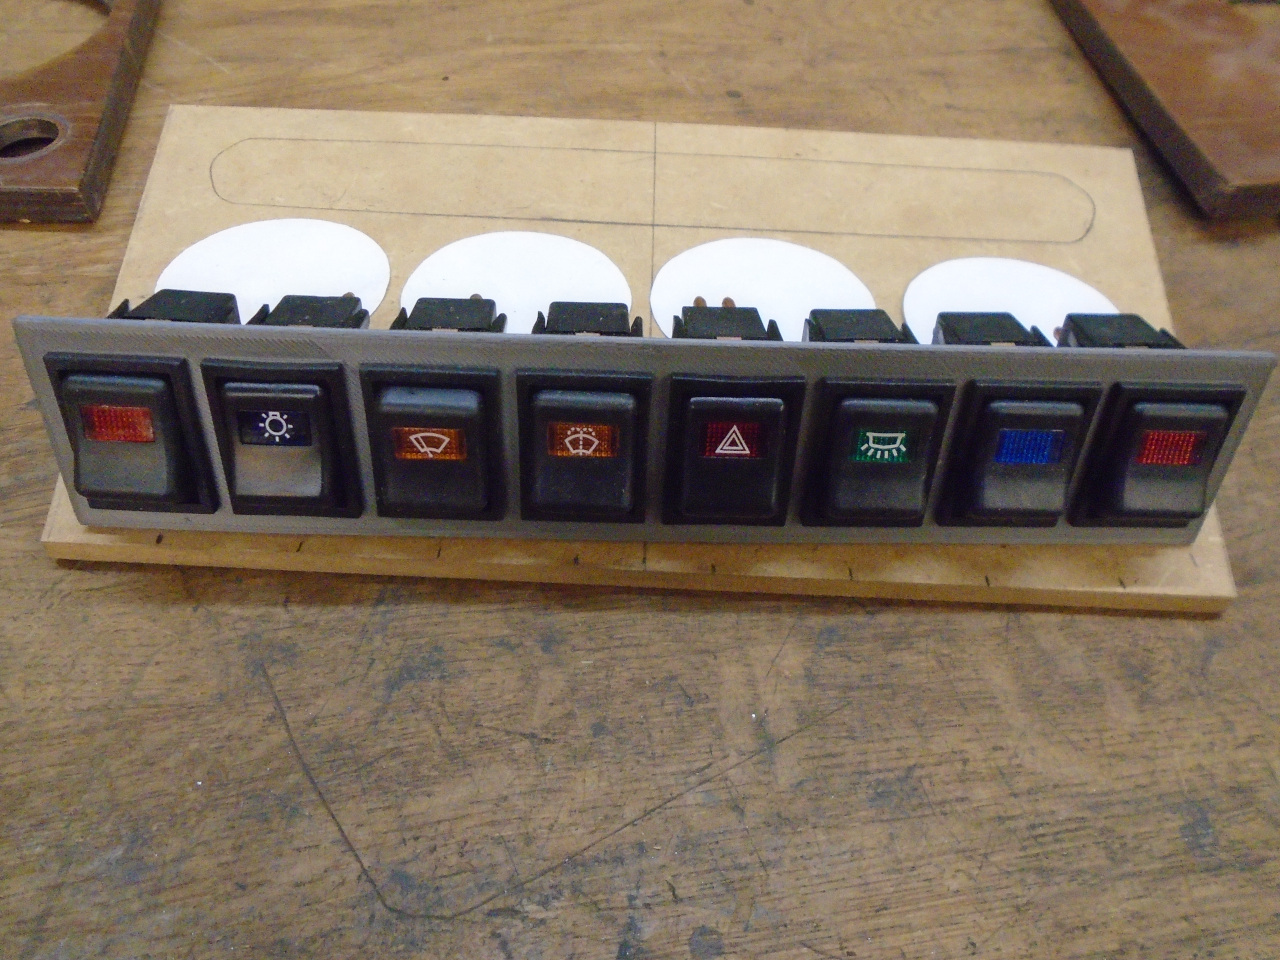
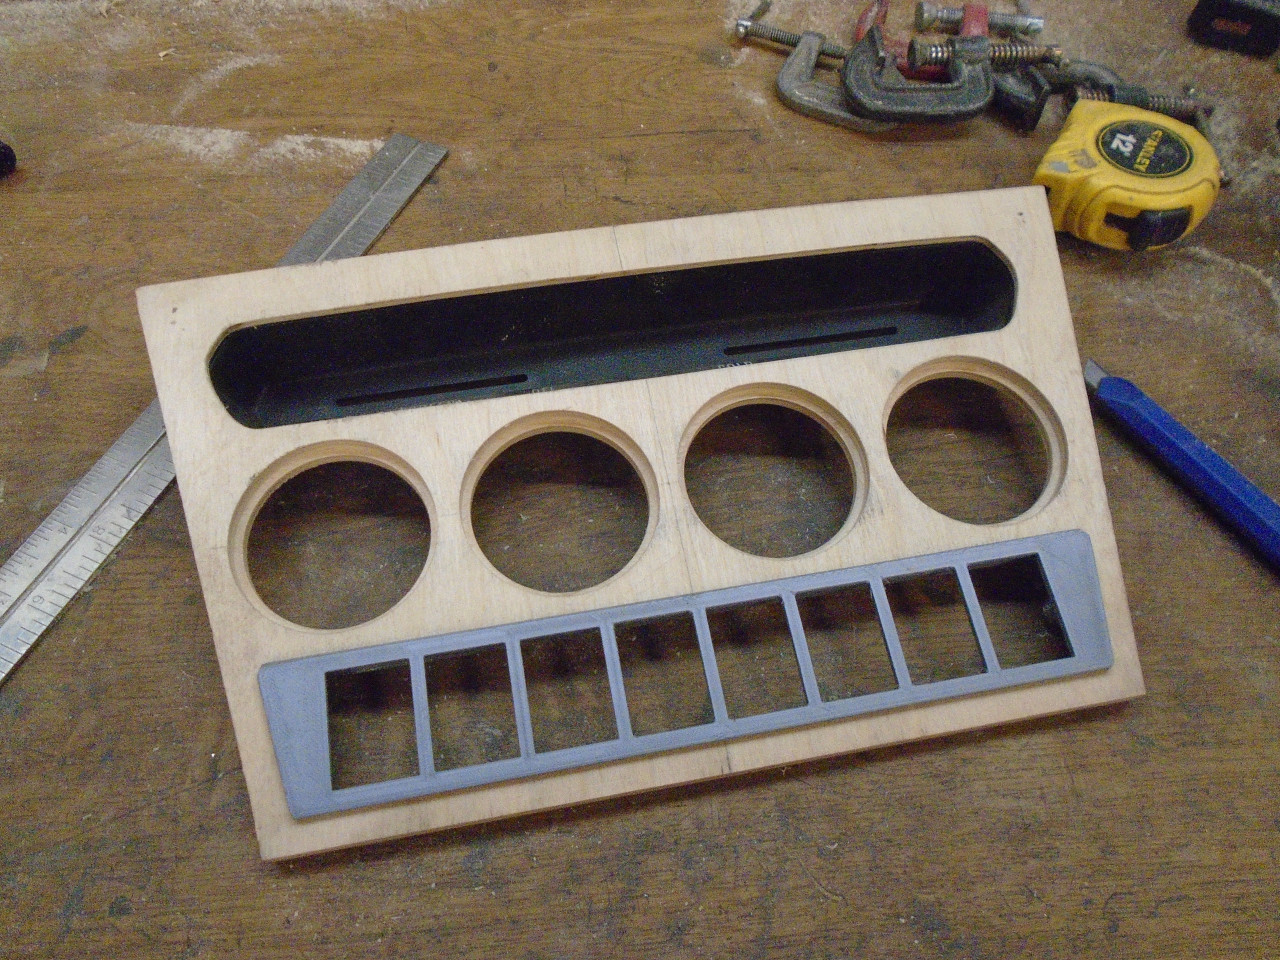
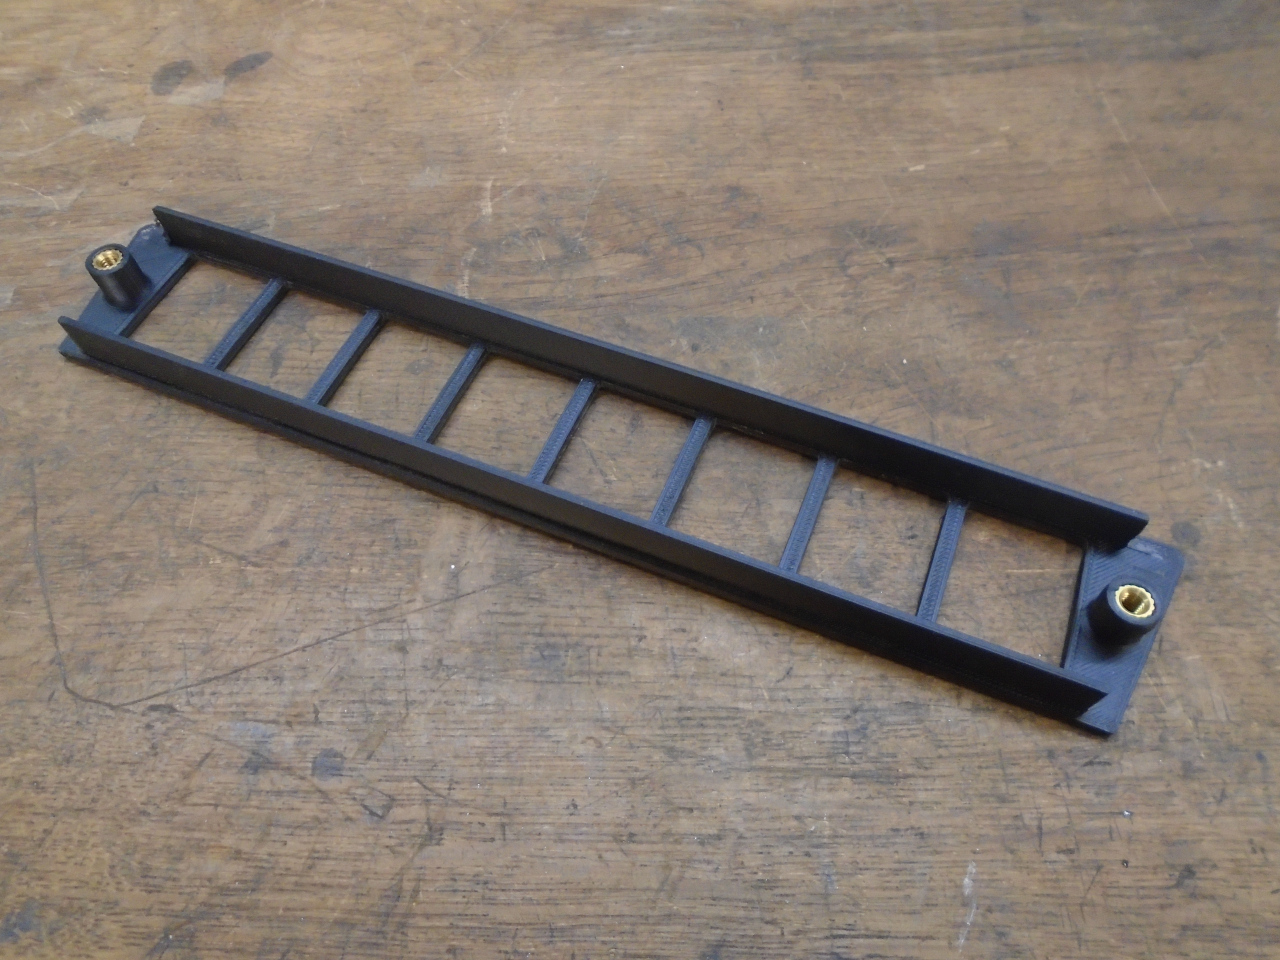
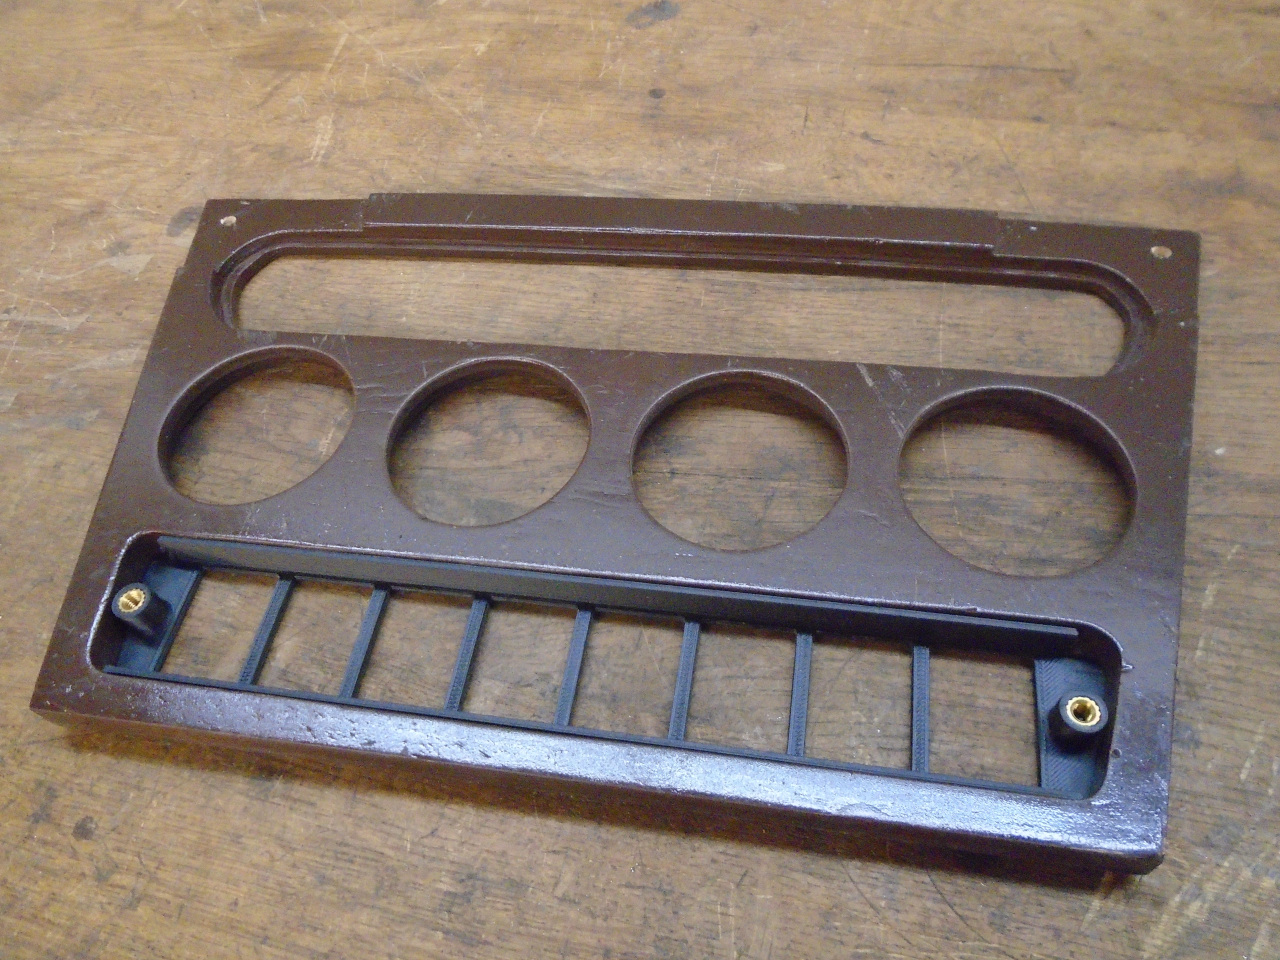
I didn't really relish the thought of cutting all of those
rectangular holes in the template or the final dash, so I cheated
a little and 3D printed a plastic carrier that would hold all of
the switches.

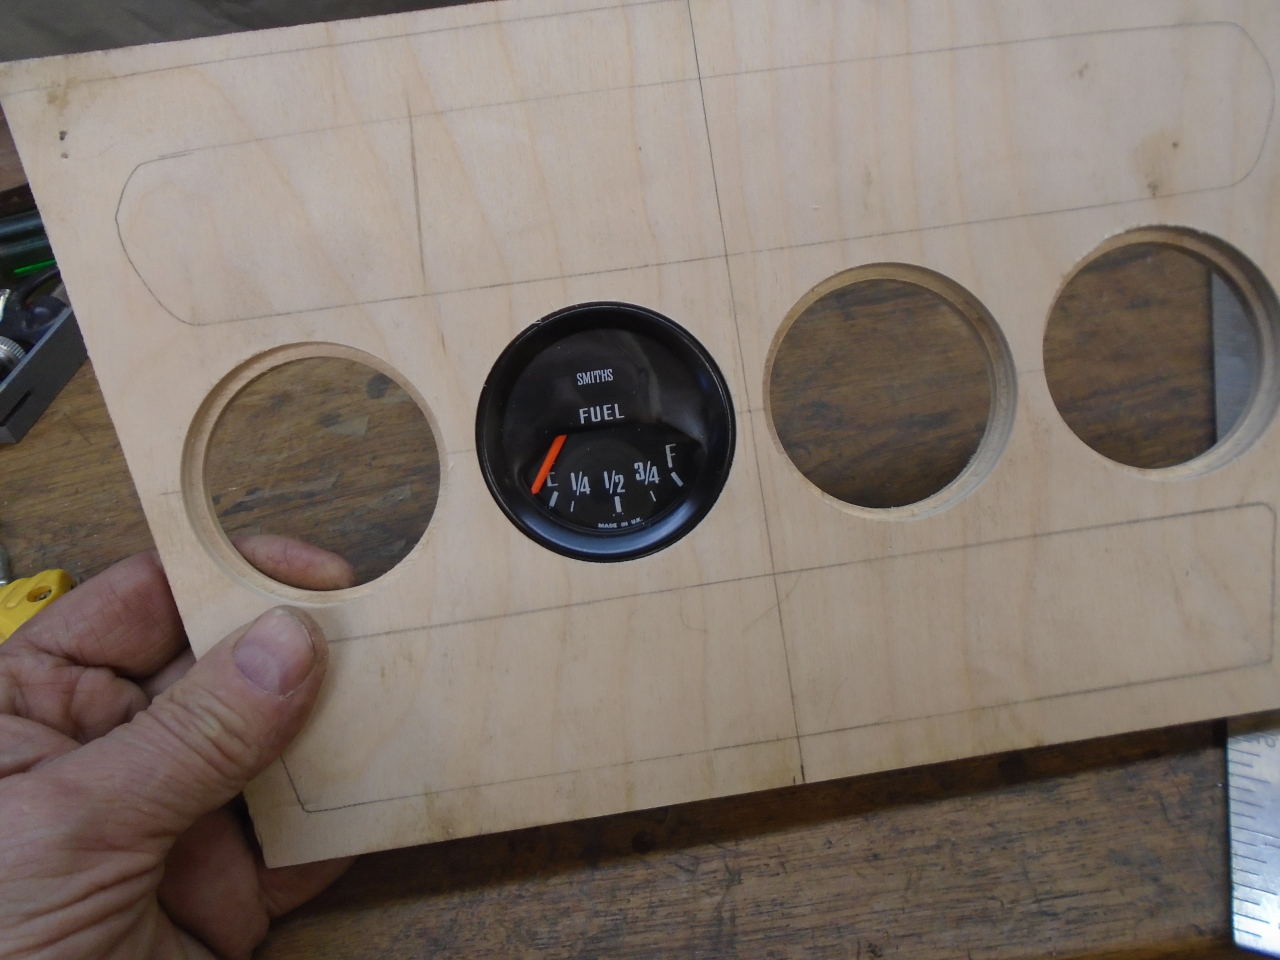
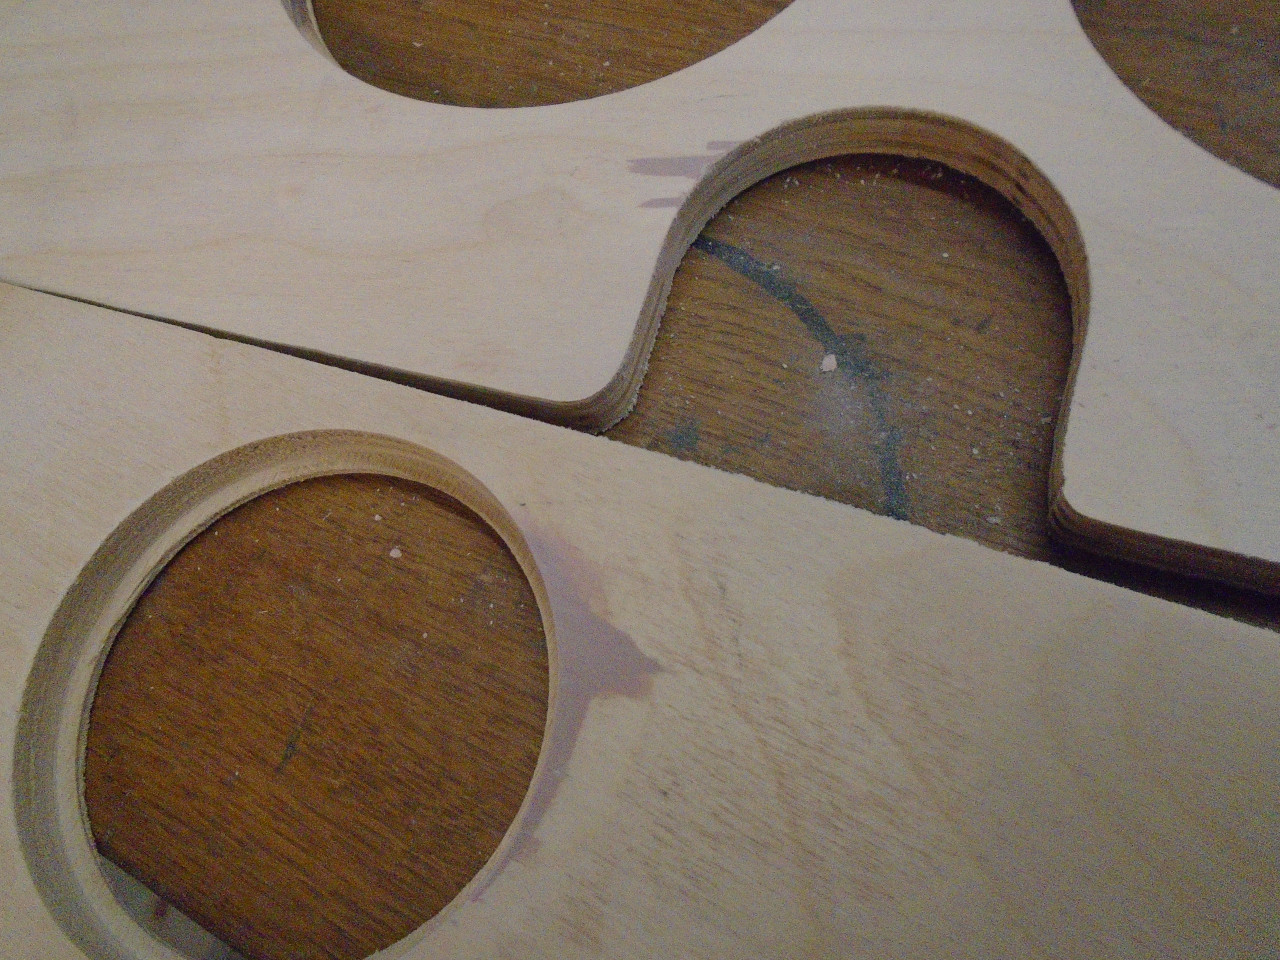
The heater control cutout was traced from the original panel, and
the gauge holes cut with a hole saw.

When the template seemed to be right, it was time to transfer it
to the actual dash material. This is a sheet of Baltic Birch
plywood. It's a premium all-hardwood product that comes
primarily from Russia or Finland. It is 3/8" thick, has
seven birch plies, and appears to be very similar to what the
original dash used.
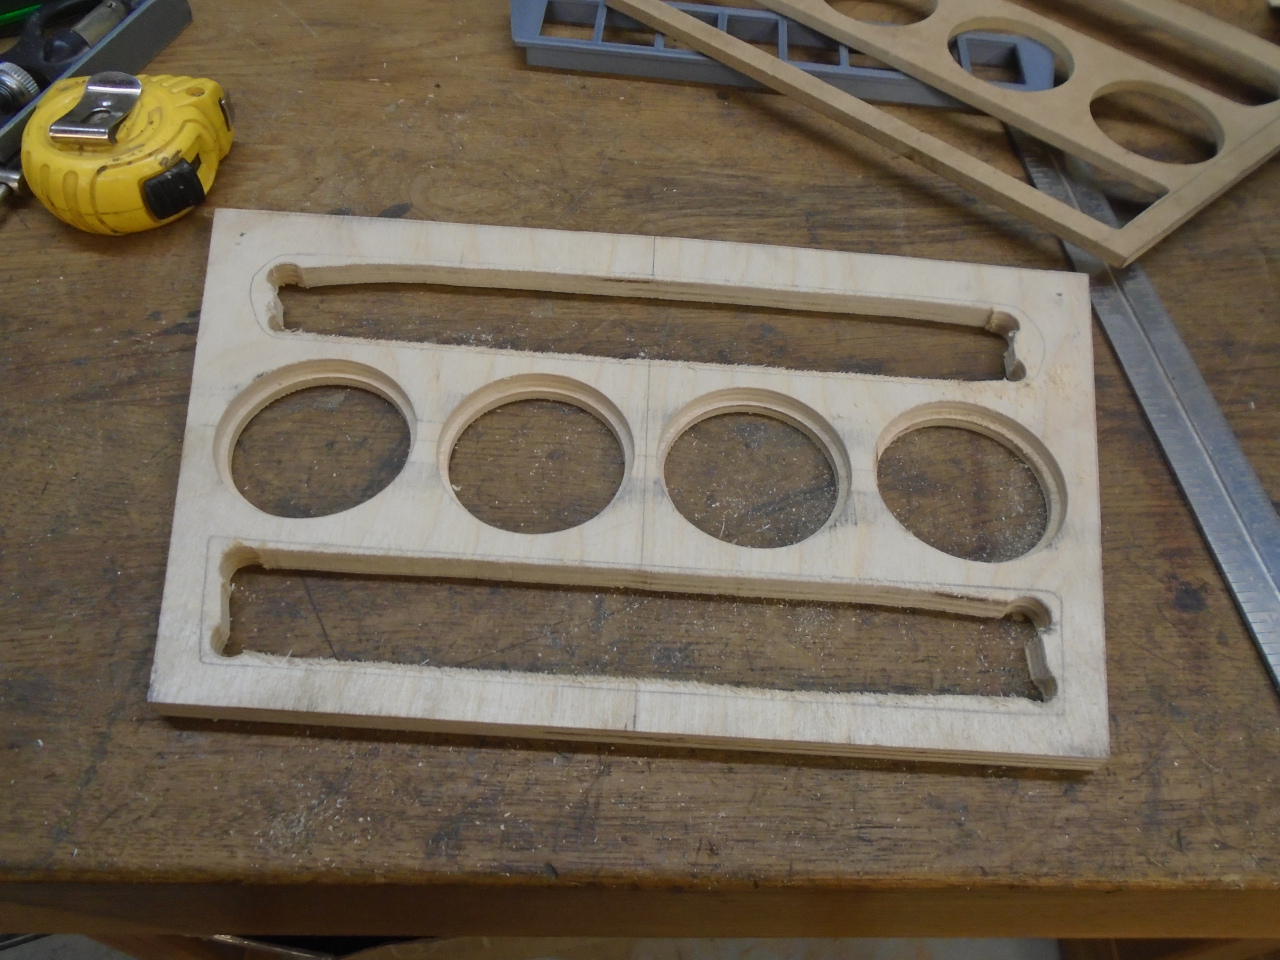
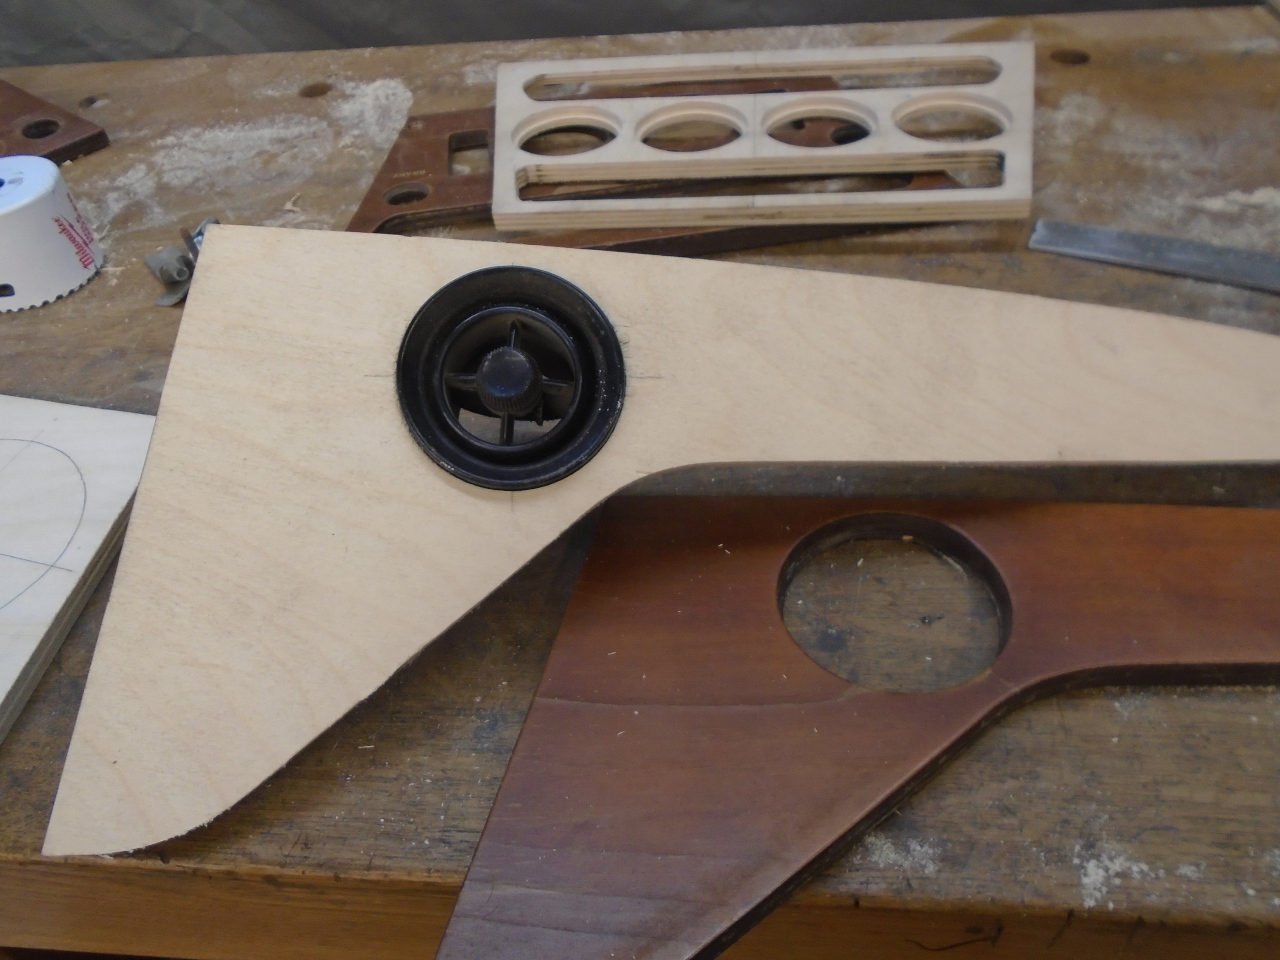
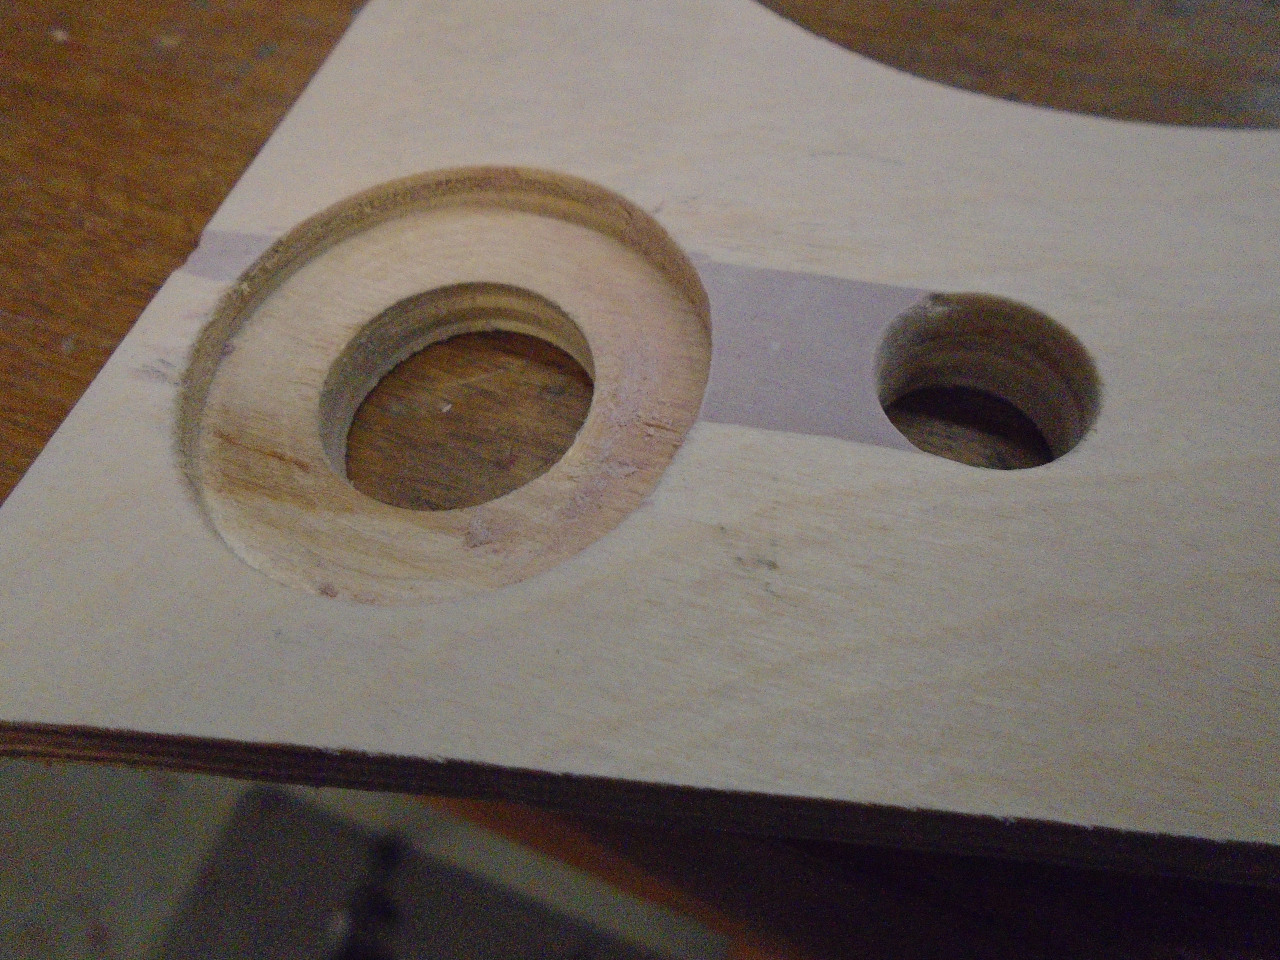
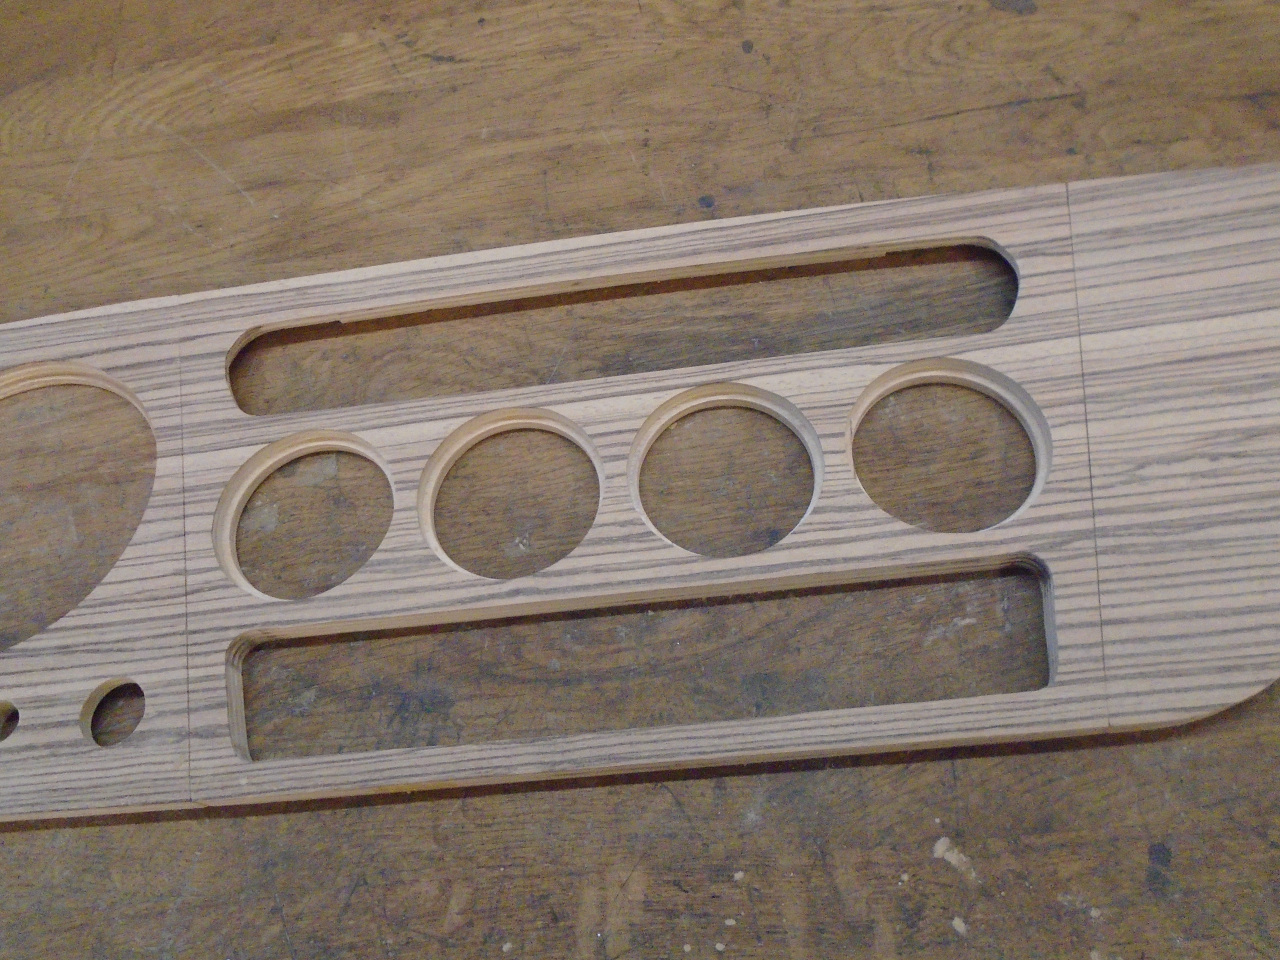
The gauges actually are set into a counterbore in the dash
panel. This might have been a 60s US safety requirement, but
I liked the look so I took the trouble to do it that way.
Openings for the heater controls and the switch module were rough
cut and then trimmed with a router. The camera perspective
is kind of funny in some of these pics. It males the panel
look rectangular, but it is really a trapezoid.

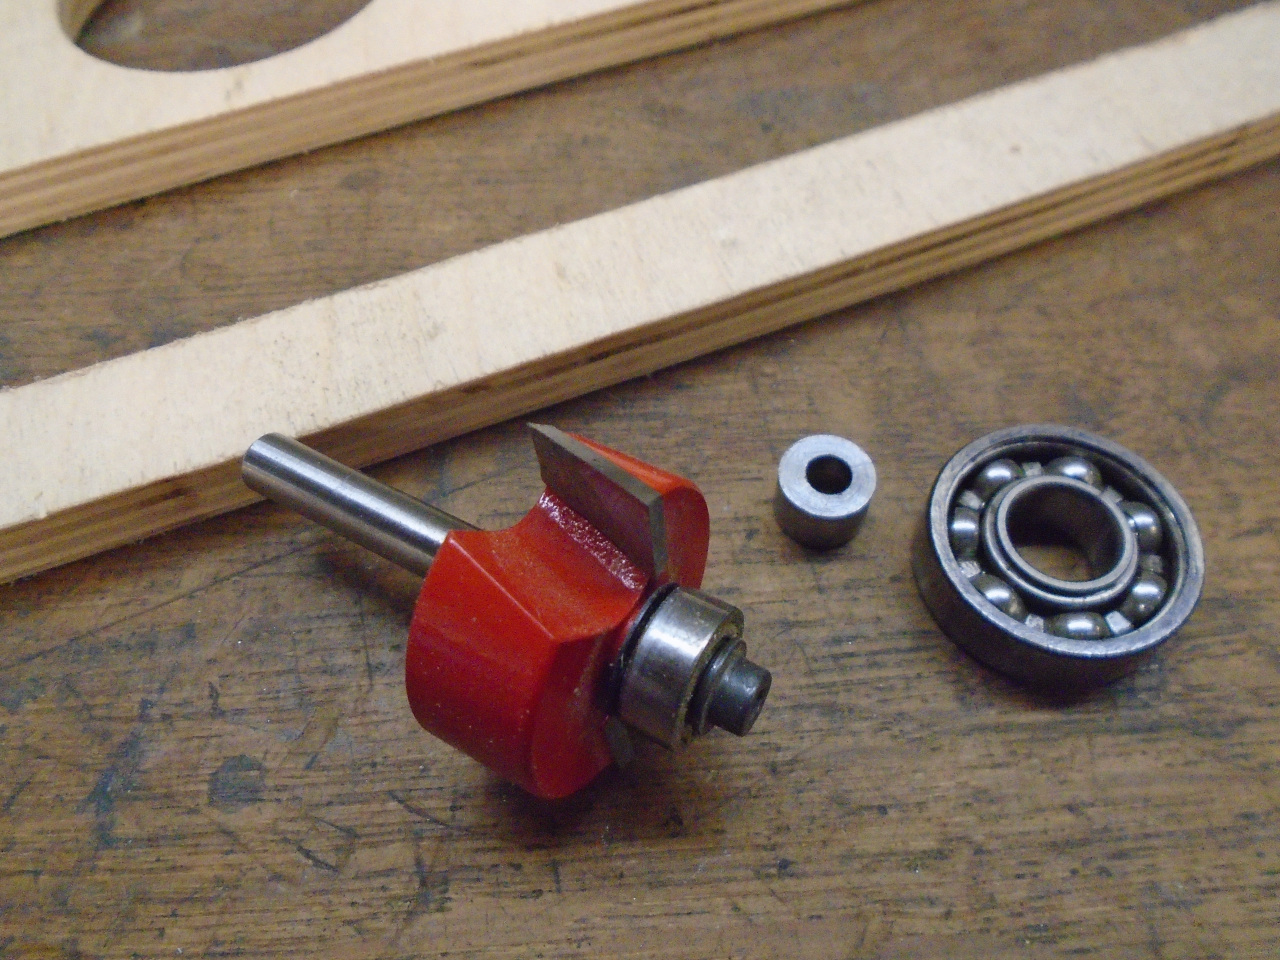
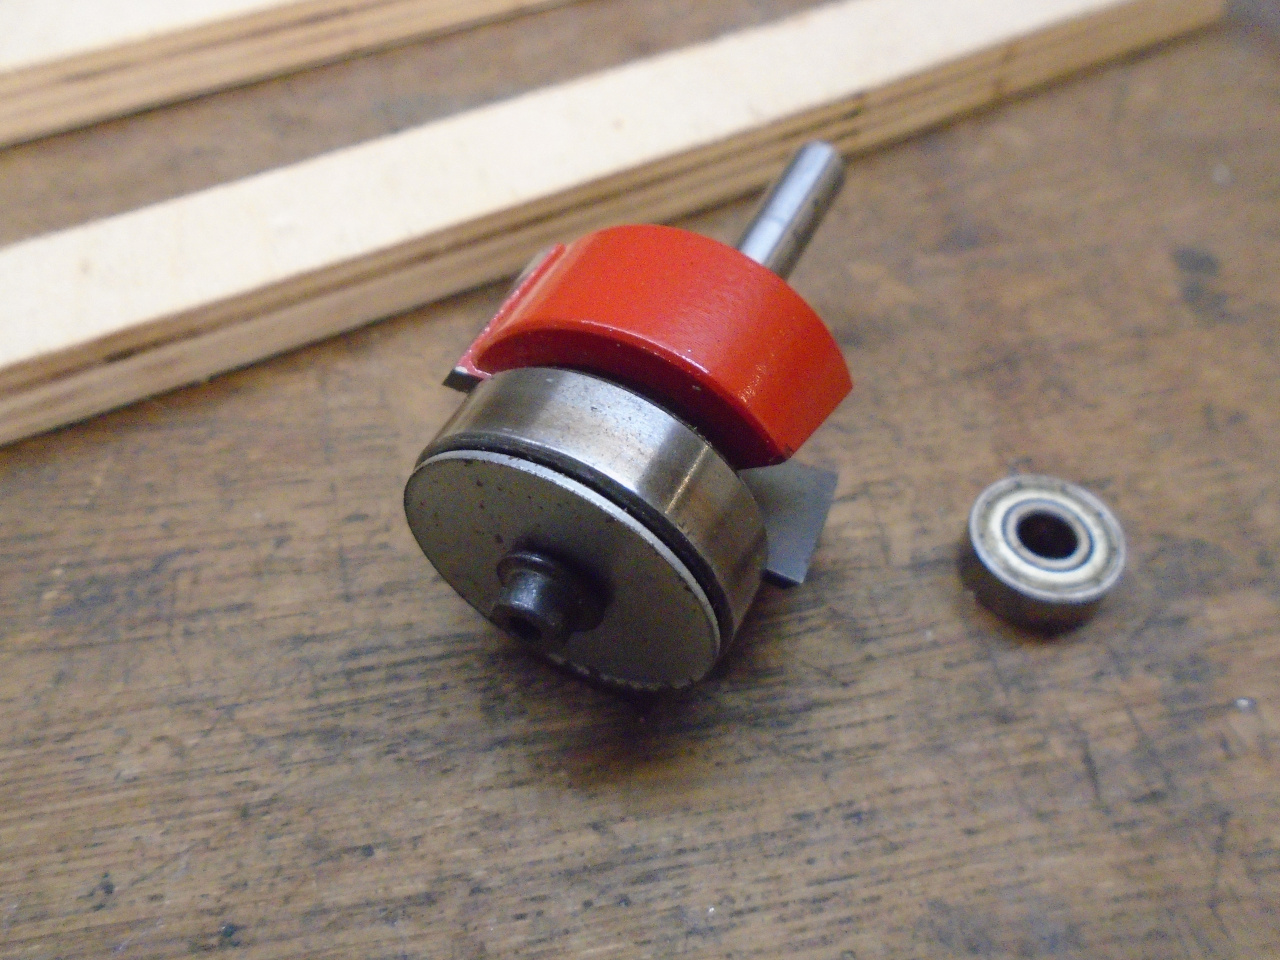
The recess for the plastic heater control plinth took a little
creative assembly of the router bit after finding the right sized
guide bearing.
The plinth was still dirty in these pics.
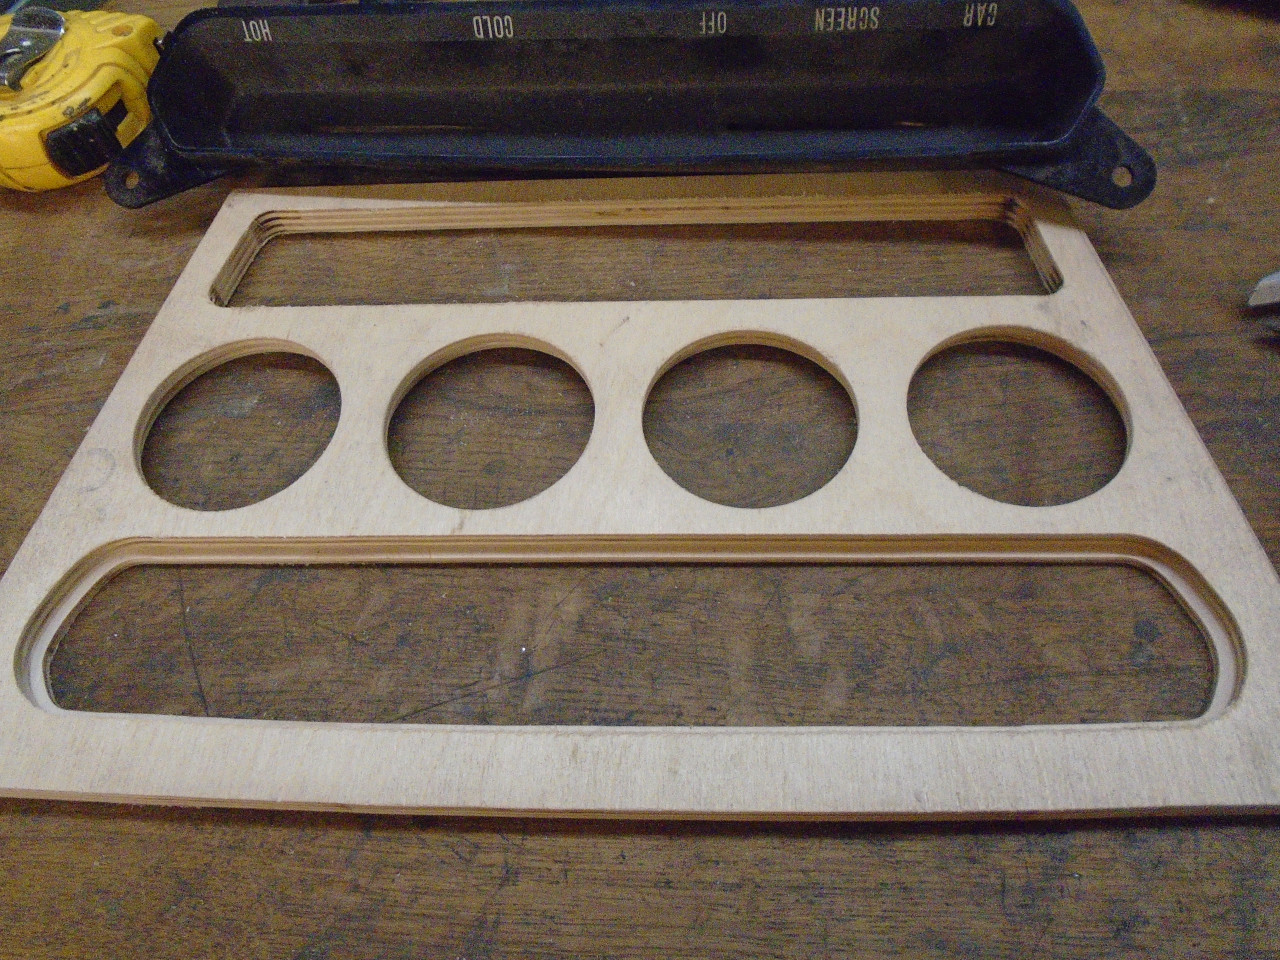
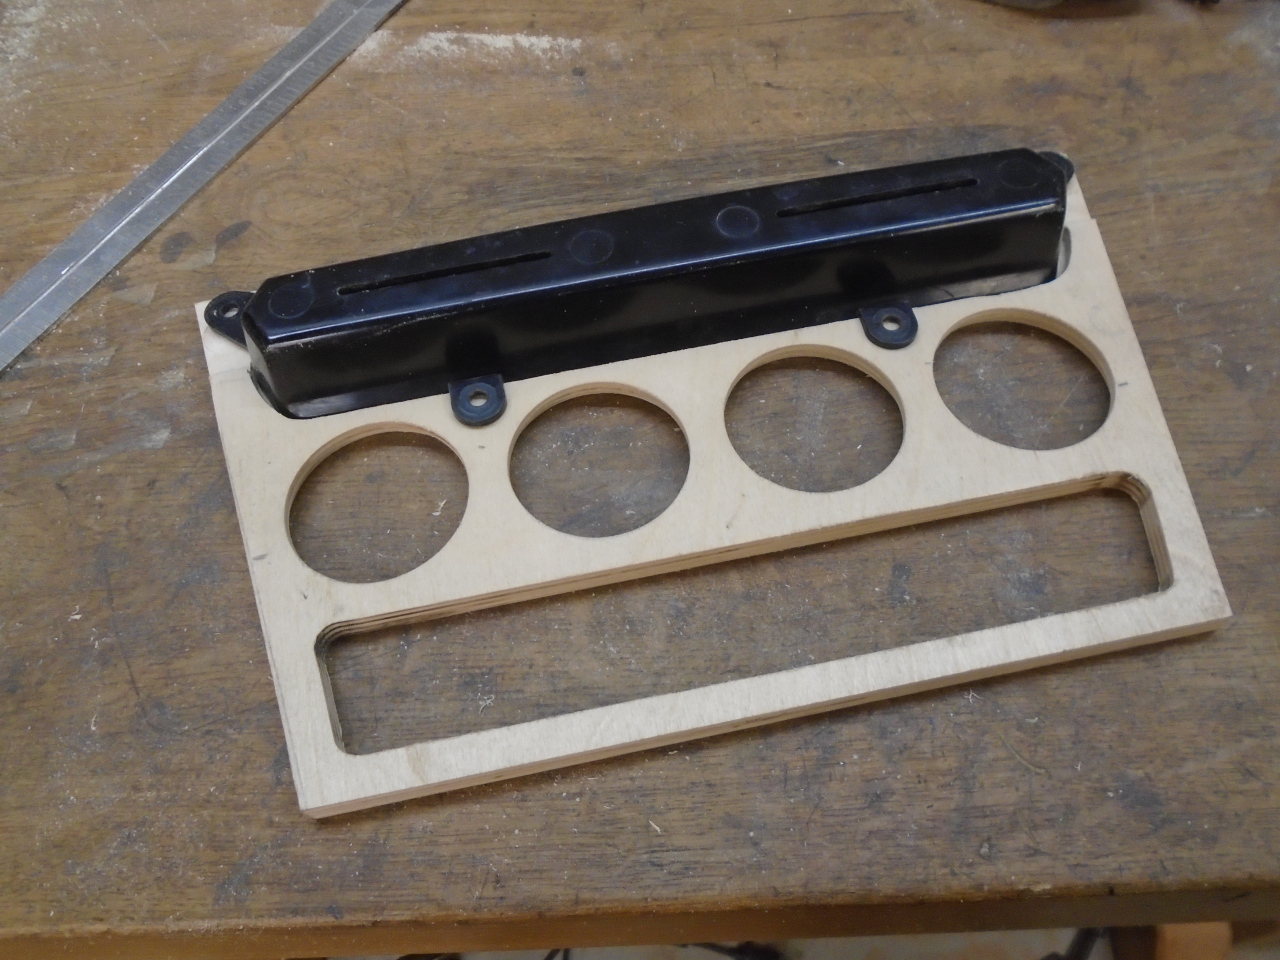
Everything seemed to fit OK.
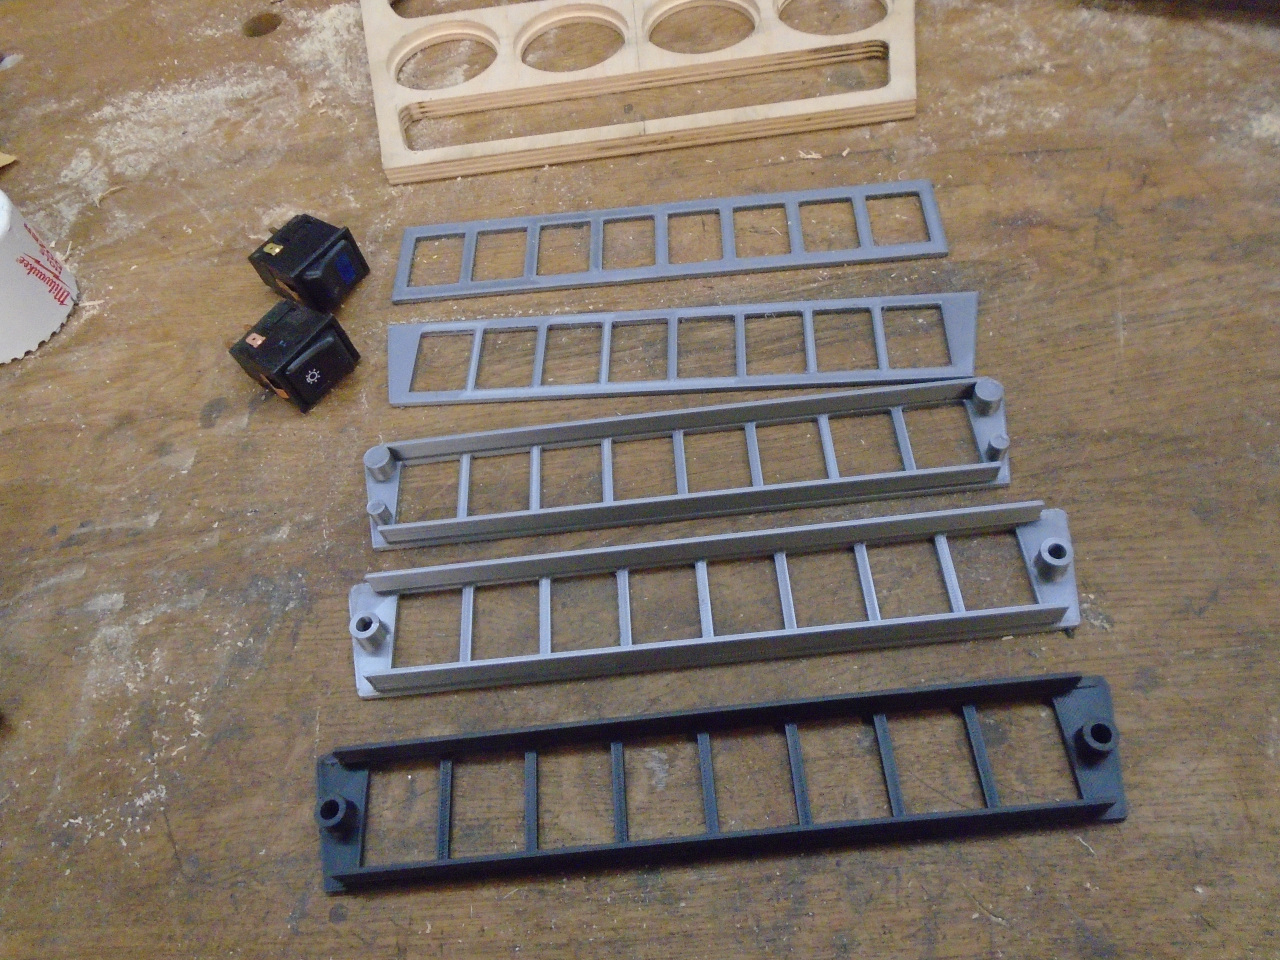
I went through a series of iterations on the switch carrier.
The final one is black ABS. It was printed face down, so the
surface is really smooth, and I don't plan to do anything else to
it.
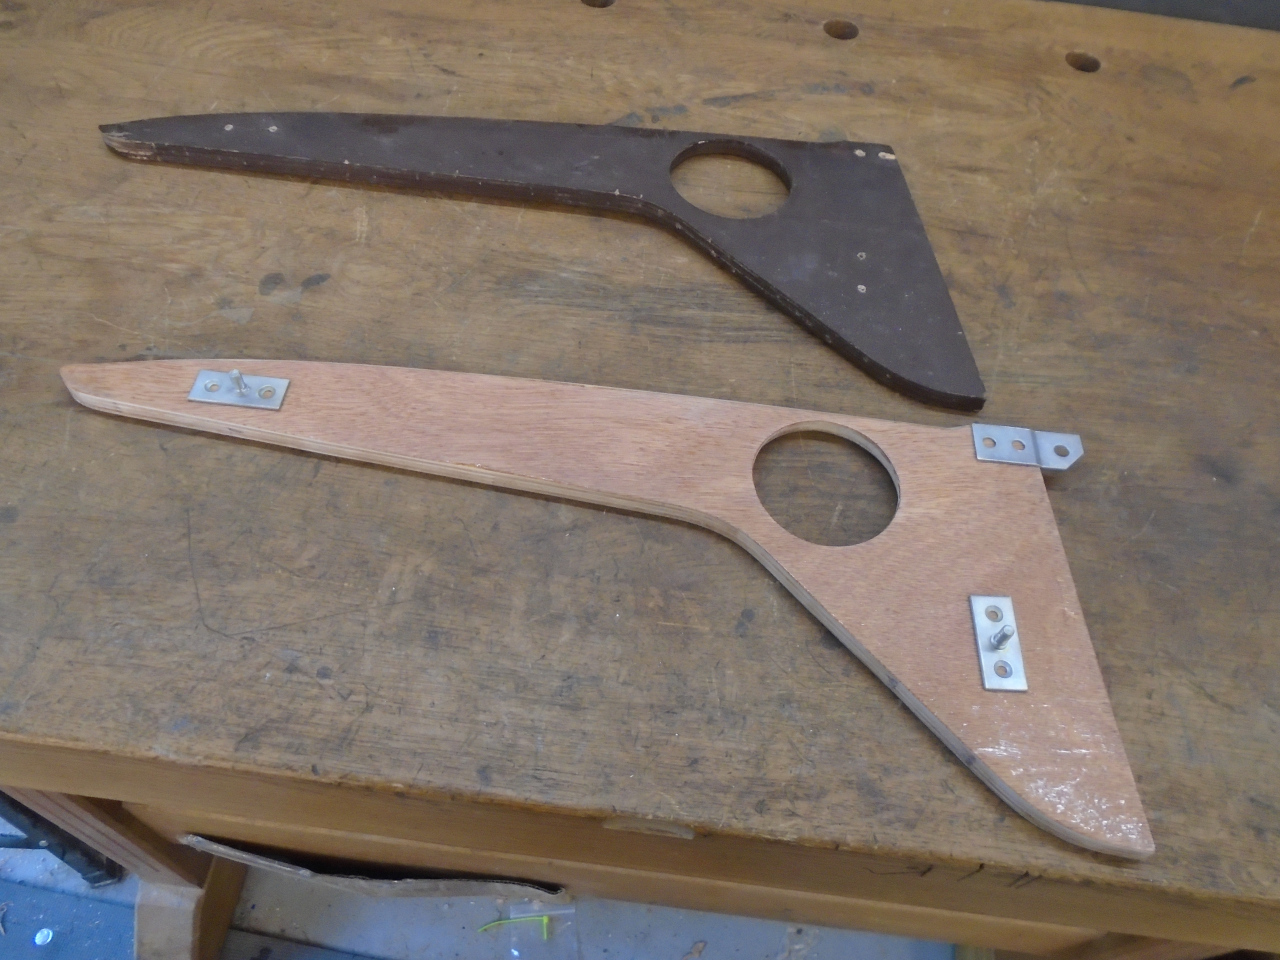
I just used the original panels as templates for the other parts
of the dash.
The passenger side panel was pretty simple--just one lipped hole.
The driver's side panel was almost identical to the stock
one. Ignition switch, choke, tach, speedo, and air vent all
in stock locations.

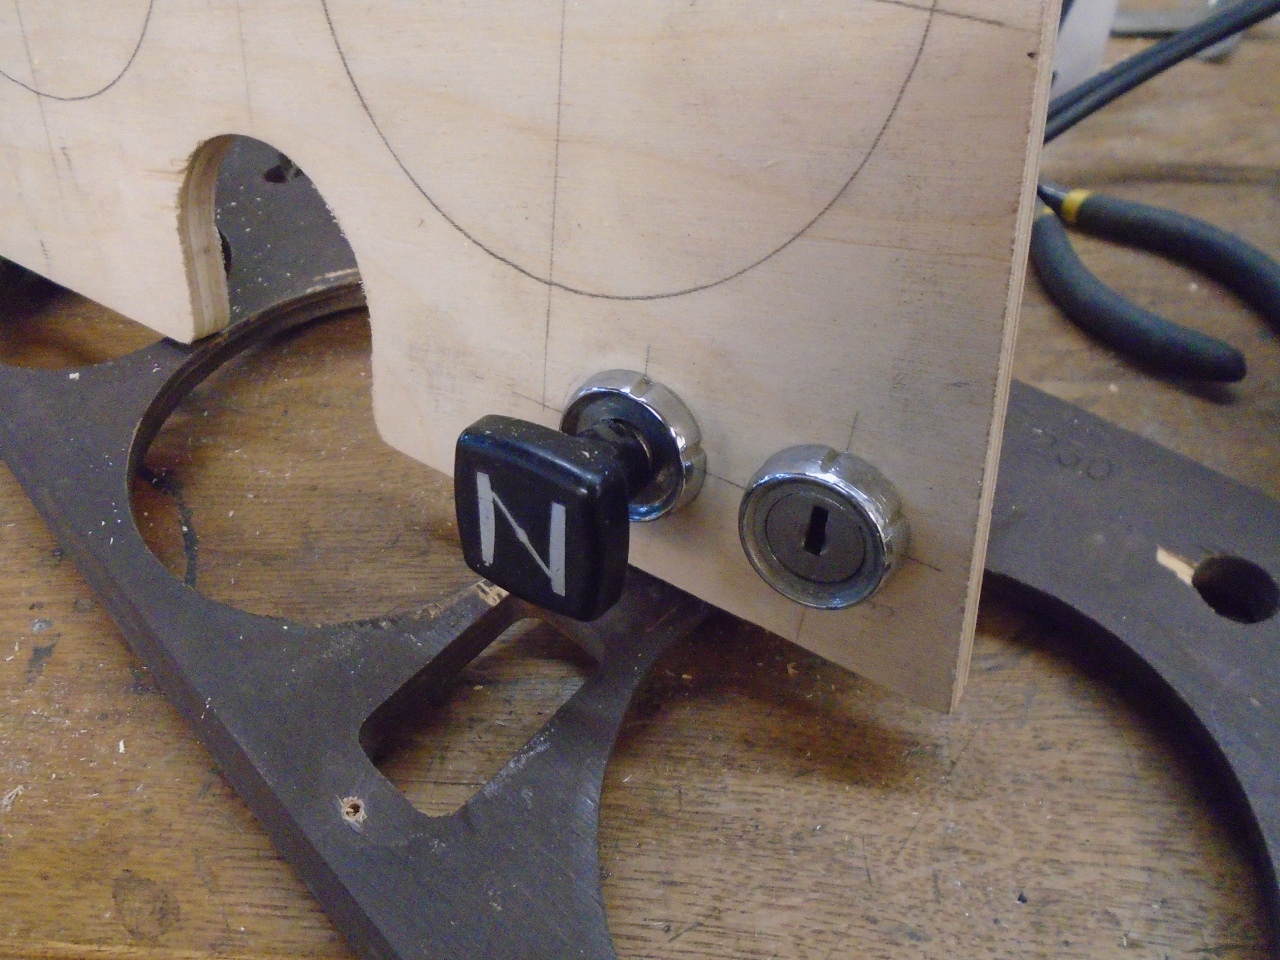
The only departure from stock on the drivers side was between the
tach and speedo. There was previously a hazard switch there,
but I moved that function to the switch bank in the center
panel. In place of it, I put in three indicator lights: one
for the PDWA brake fail, one for a hand brake warning, and one for
turn signal indicator (since you can never see the wimpy one on
the tach face in daylight).
With everything now fitting, it was time to think about
veneer. I went through this process once already with the dash on my TR6.
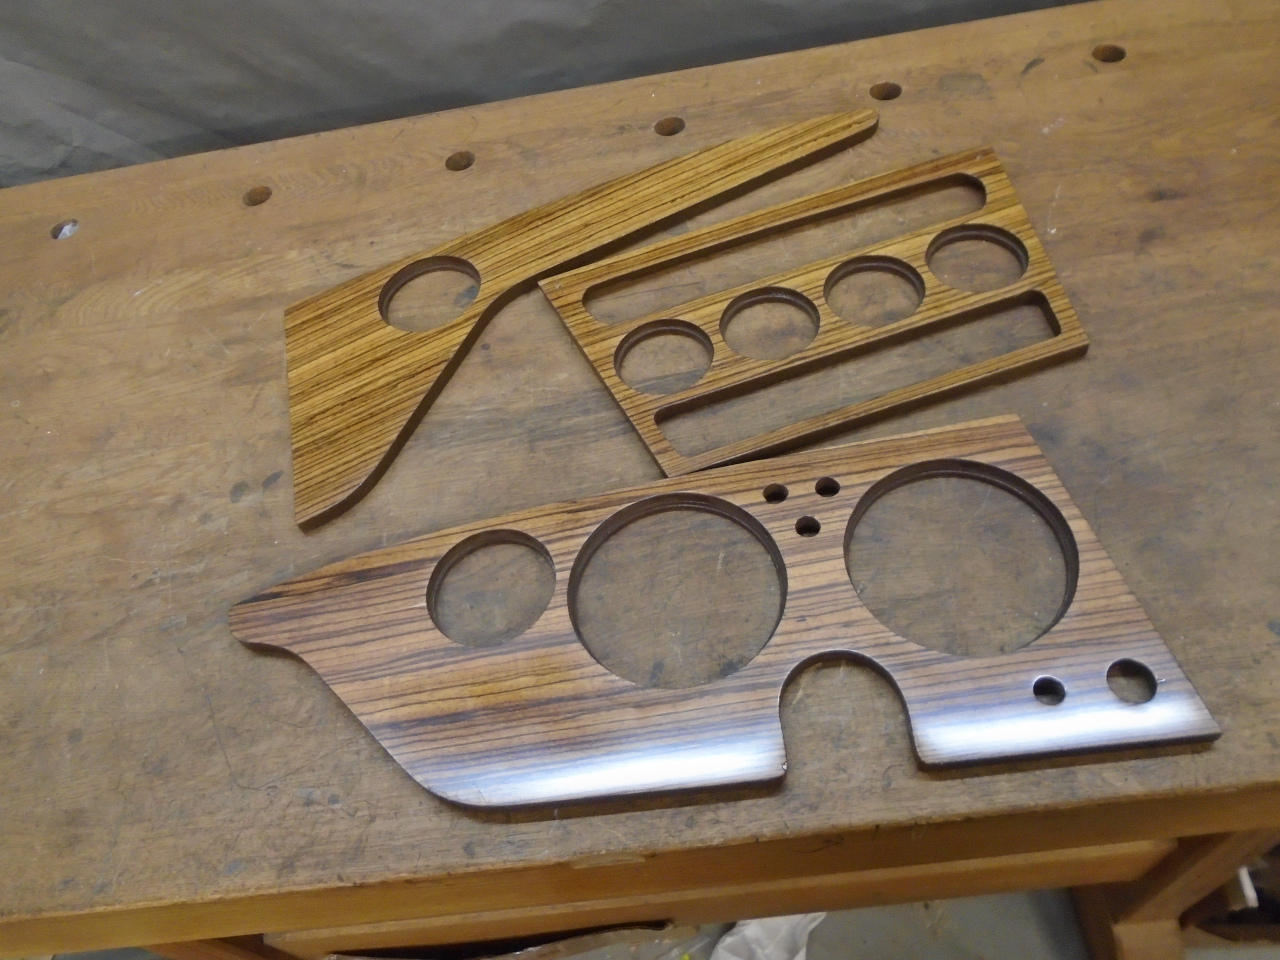
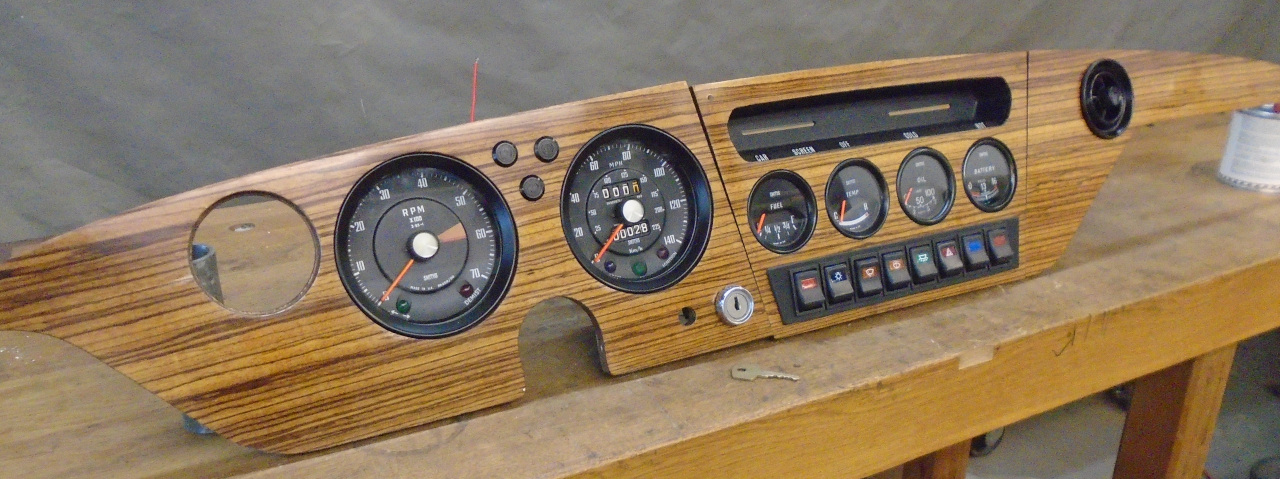
I considered a lot of wood species. I considered, but
discounted burl veneers as beautiful, but too formal for this
application. In the end, I came back to one of my favorite
woods--Zebrano, or Zebrawood. It was what I used on the TR6,
and I liked the look. And, I still had some on hand!
It will be sort of a common personal connection between the two
cars. So, Zebrano it was.
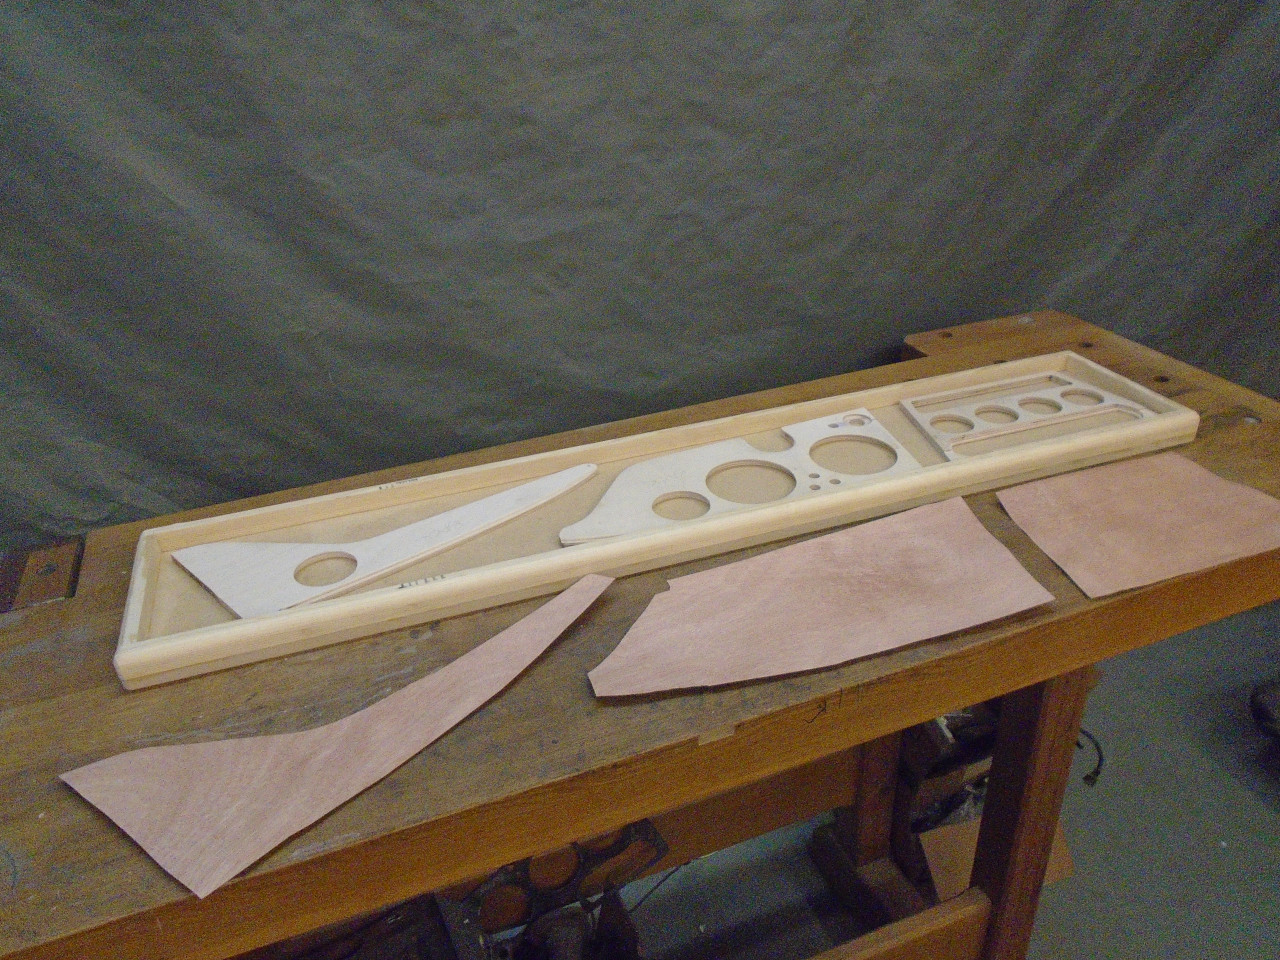
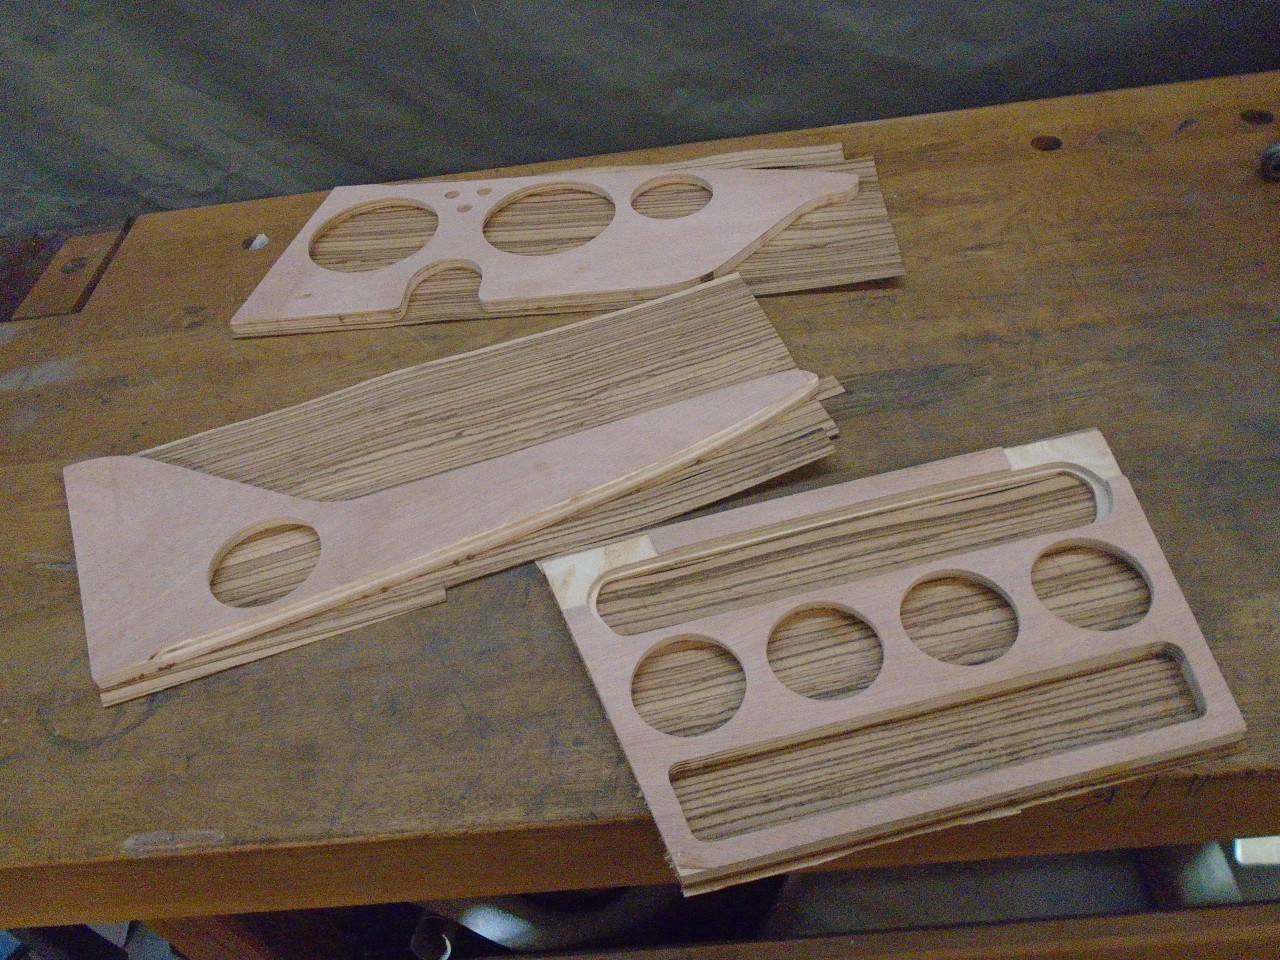
First, a little prep work. All of the panels were sanded,
and there was a little repair work here and there to fix grain
tear-out near the cut edges. I just used Bondo.
I use a vacuum bag for veneering, so I built this shallow tray to
hold the dash and the pressure board.

It is pretty common practice in veneering to apply a veneer to the
backside of the piece as well as the front. Called a balance
veneer, the idea is that it keeps the plies balanced so that
warping is less likely. On smaller or well constrained
panels like these, I don't think a balance veneer is strictly
necessary, but I decided to apply one anyway. For one thing, it
would bring the final thickness of the veneered panels to just
about exactly what the originals were.
Balance veneers are usually a cheaper or lower grade veneer than
the finish side veneer. This is a species called
Okoume. It comes from Africa, has a grain like mahogany, but
a pink color like cherry. It's pretty inexpensive and often
used as a balance veneer.
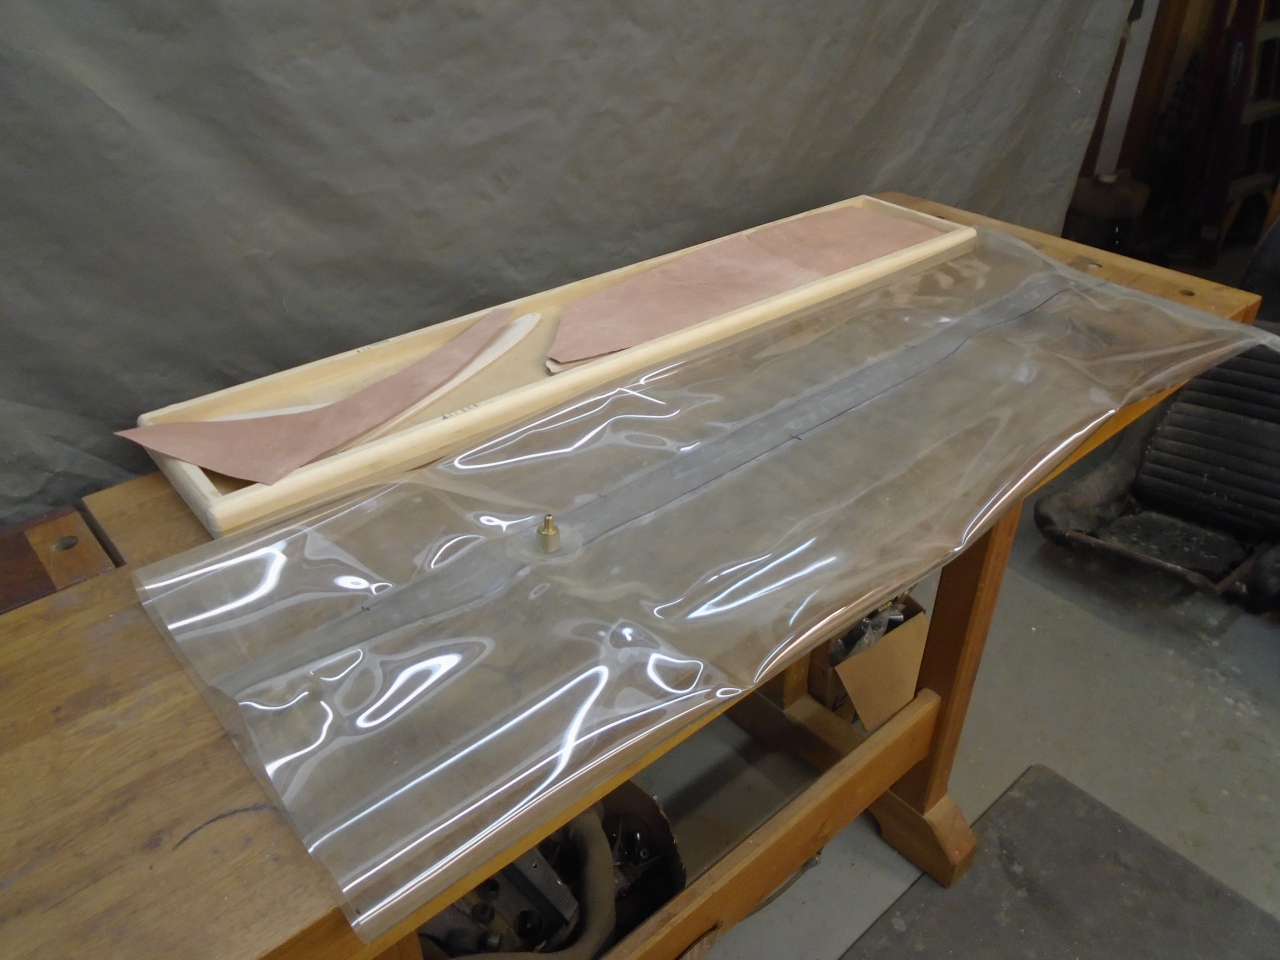
So, I spread glue on the panels, set on the veneer pieces, put on
the pressure board, and slid the assembly into the vacuum
bag. The bag is made from heavy clear vinyl--the same
material used to make rear windows for LBC convertible tops.
The vacuum pump is something I built a few years ago, and it is
overkill for this application. A simpler pump would do as
well, and I've heard of folks having success with a shop vac, or
even one of those vacuum bagging devices for food storage.
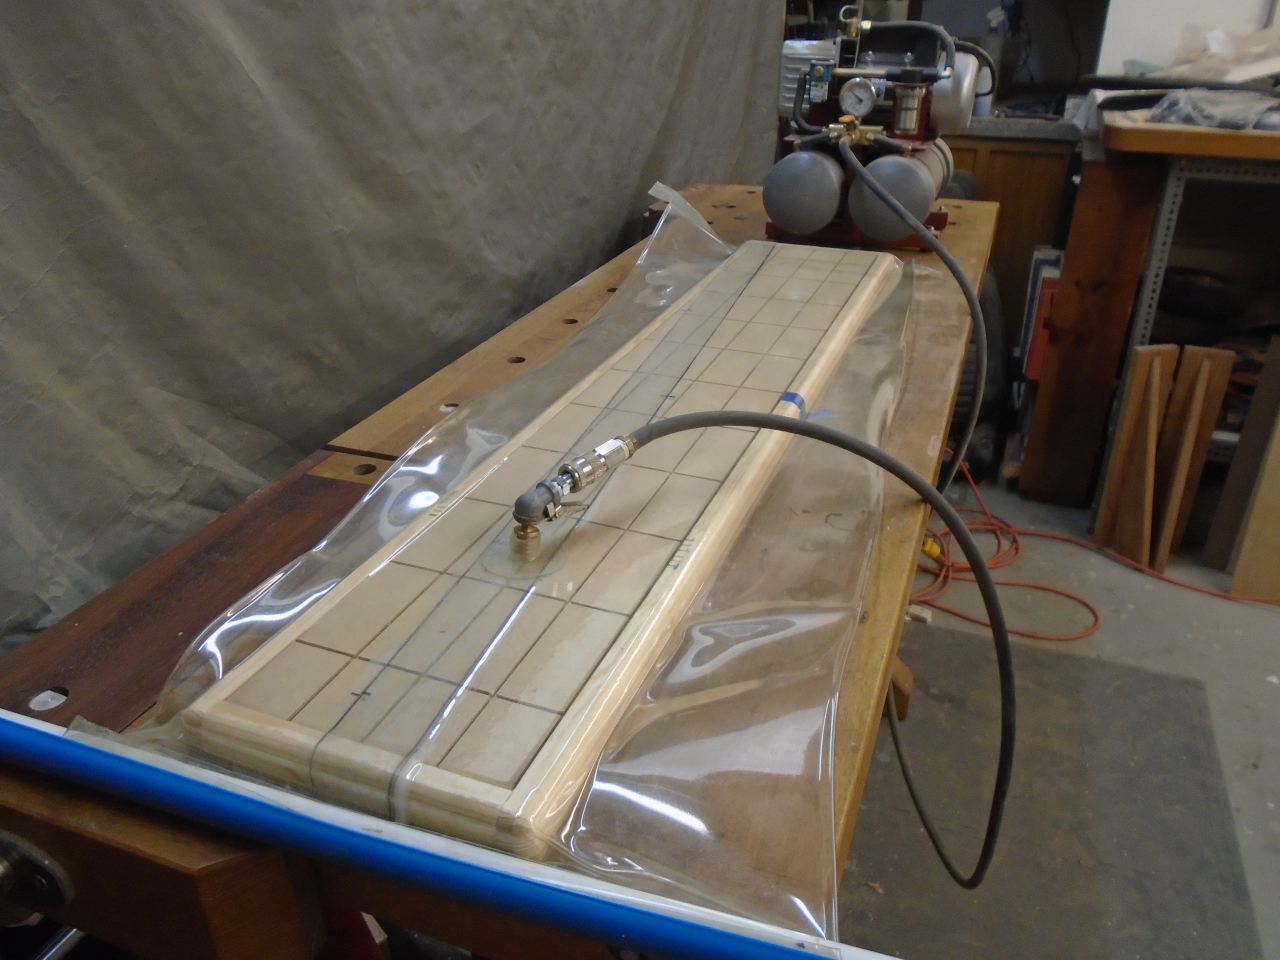
After an hour or so, the pieces came out for trimming.
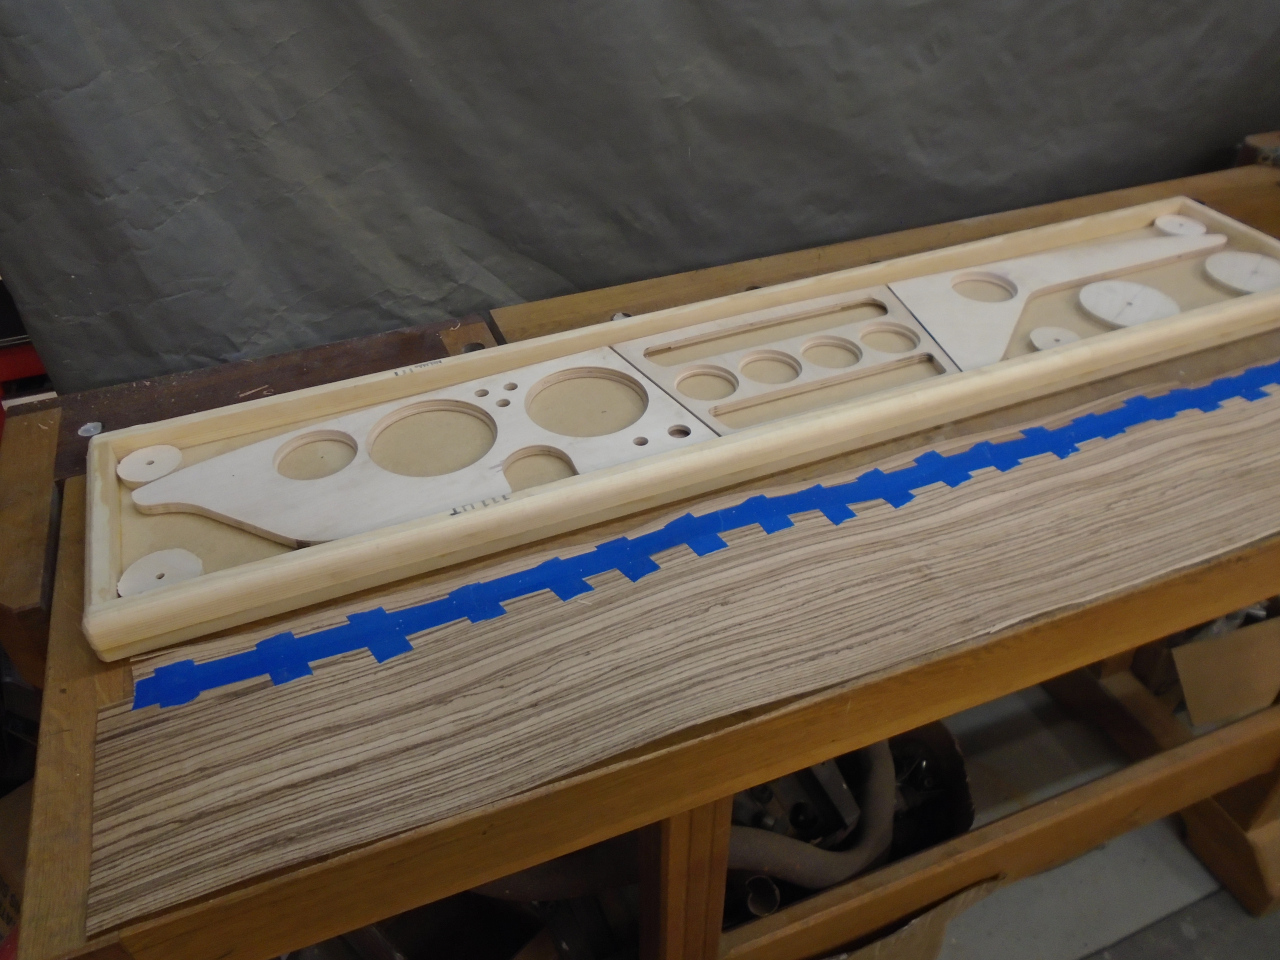
Then it was time for the main event. I taped across the
joints between the panels on the backside to keep them properly
aligned so that the grain of the Zebrawood would be continuous
across the joints. I did leave a little gap in the joints so
I could get a scalpel in there to separate them. The veneer
sheet I had was just barely as wide as the dash
panels. This made me nervous, so I taped a narrow strip of
veneer to one edge so that alignment wouldn't be quite so
critical. Edge joining veneer like this is pretty
common. The cutout pieces are in the tray so that the
pressure board is supported in the empty areas.
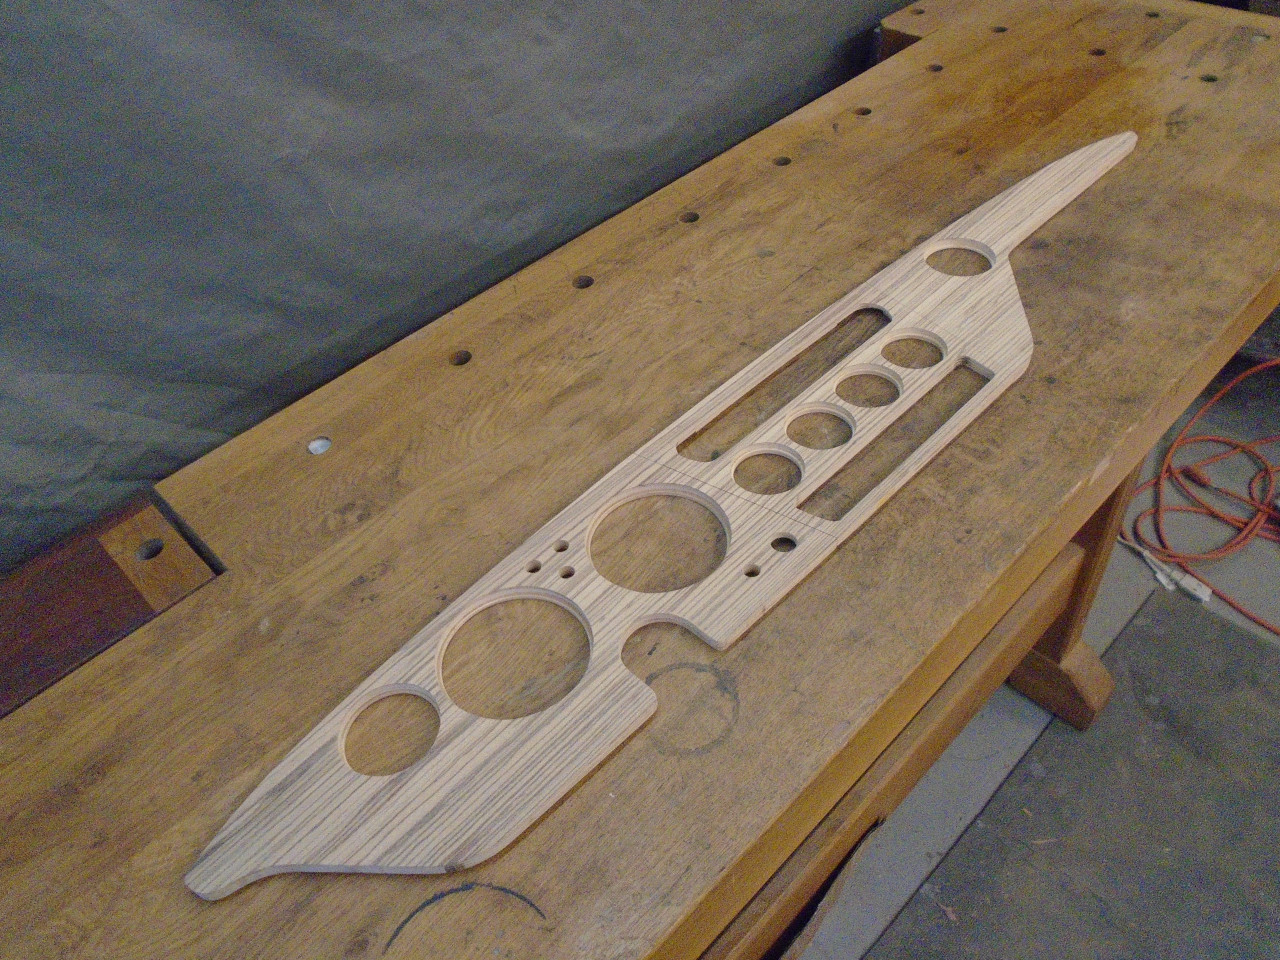
After clamping, it was trimming time. I used a sharp
scalpel, trying really hard not to get blood on the veneer.
The grain aligned nicely.
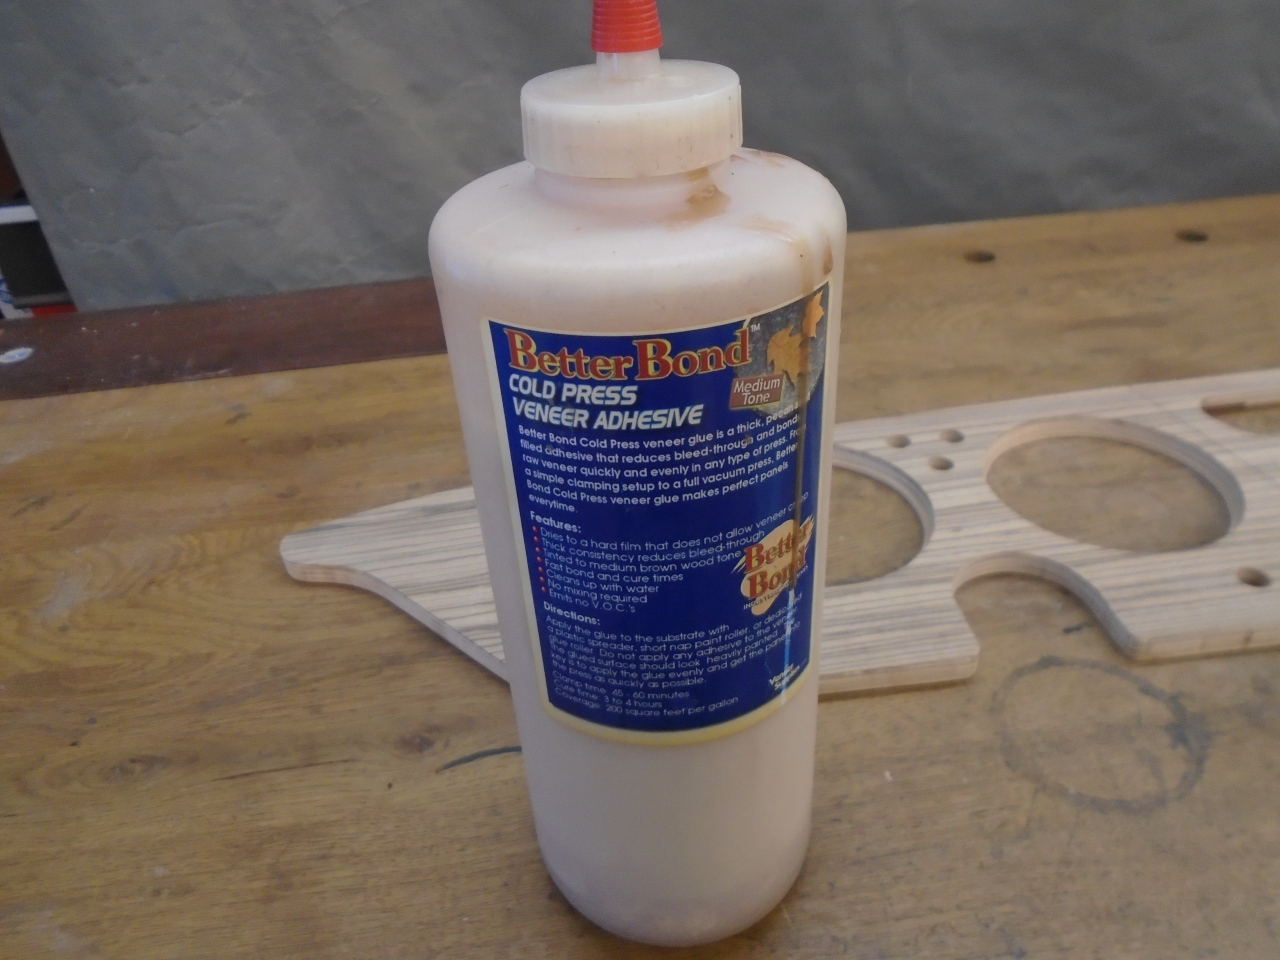
By the way, I know some will ask. This is the glue I used.
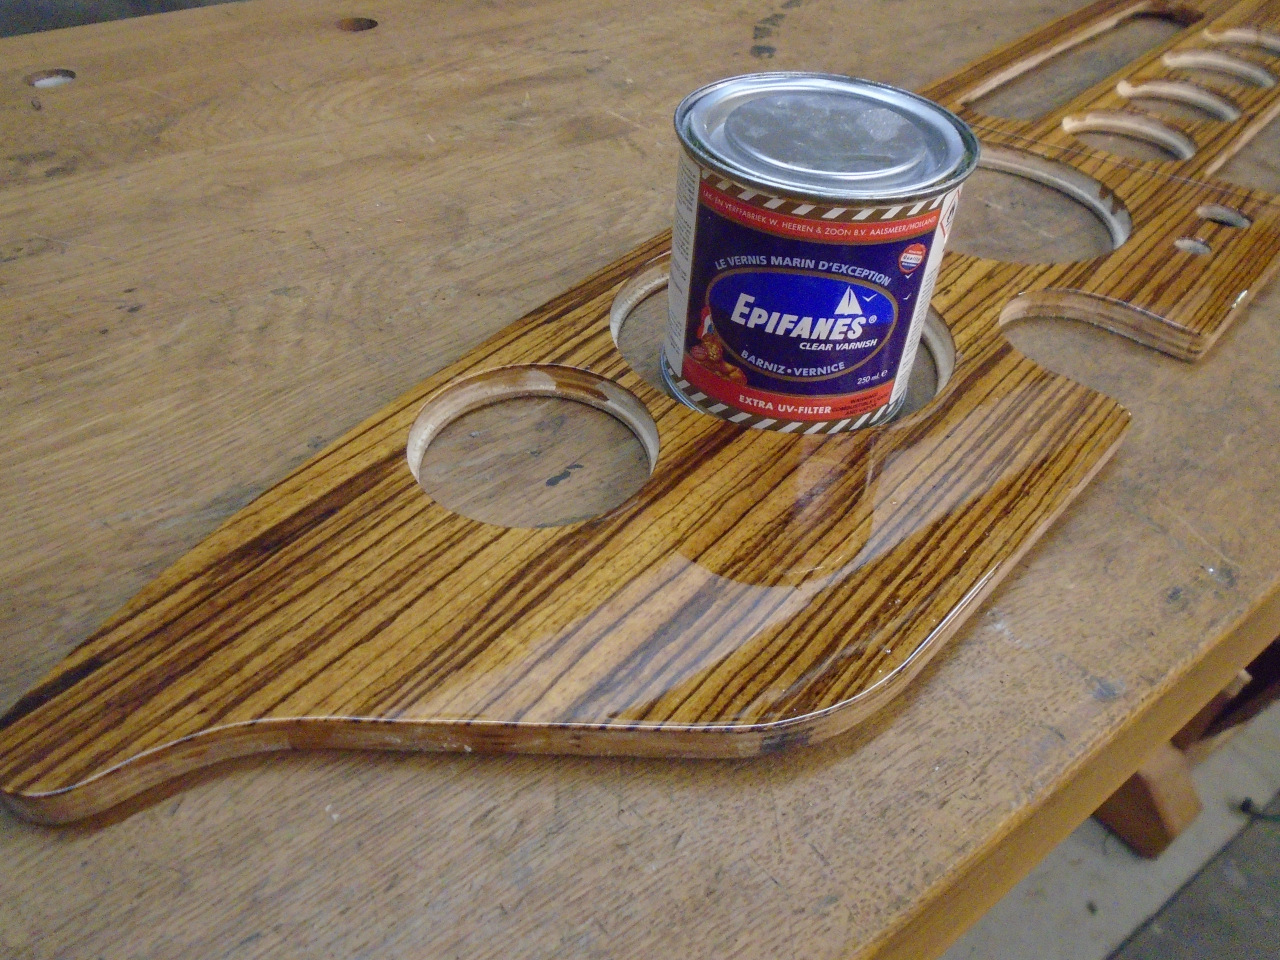
Then on to the finish. Choosing a finish coating can be
confusing. I've been a wood worker for many years, and have
used most of the common offerings at the big box stores.
Most of them have worked OK. But for a dashboard, which is
essentially an outdoor application for all but the most pampered
cars, I wanted something top notch. On the TR6 dash (which
is even more outdoors than for a GT car) my research led me to
true marine varnishes (not necessarily ones that have thee word
"marine", or "spar" in their name). I chose one that is
popular with the wooden boat crowd. It comes from Holland, I
believe.
The instructions recommend at least seven coats for non-tropical
use. I applied nine coats over about a two week
period. The can says to wait 24 hours between coats, but for
me in my chilly shop, 36 to 48 was more like it. Then after
the last coat, a full week before hand rubbing. I rubbed the
finish to a pretty high gloss, then backed it off to a little more
of a semi-gloss.
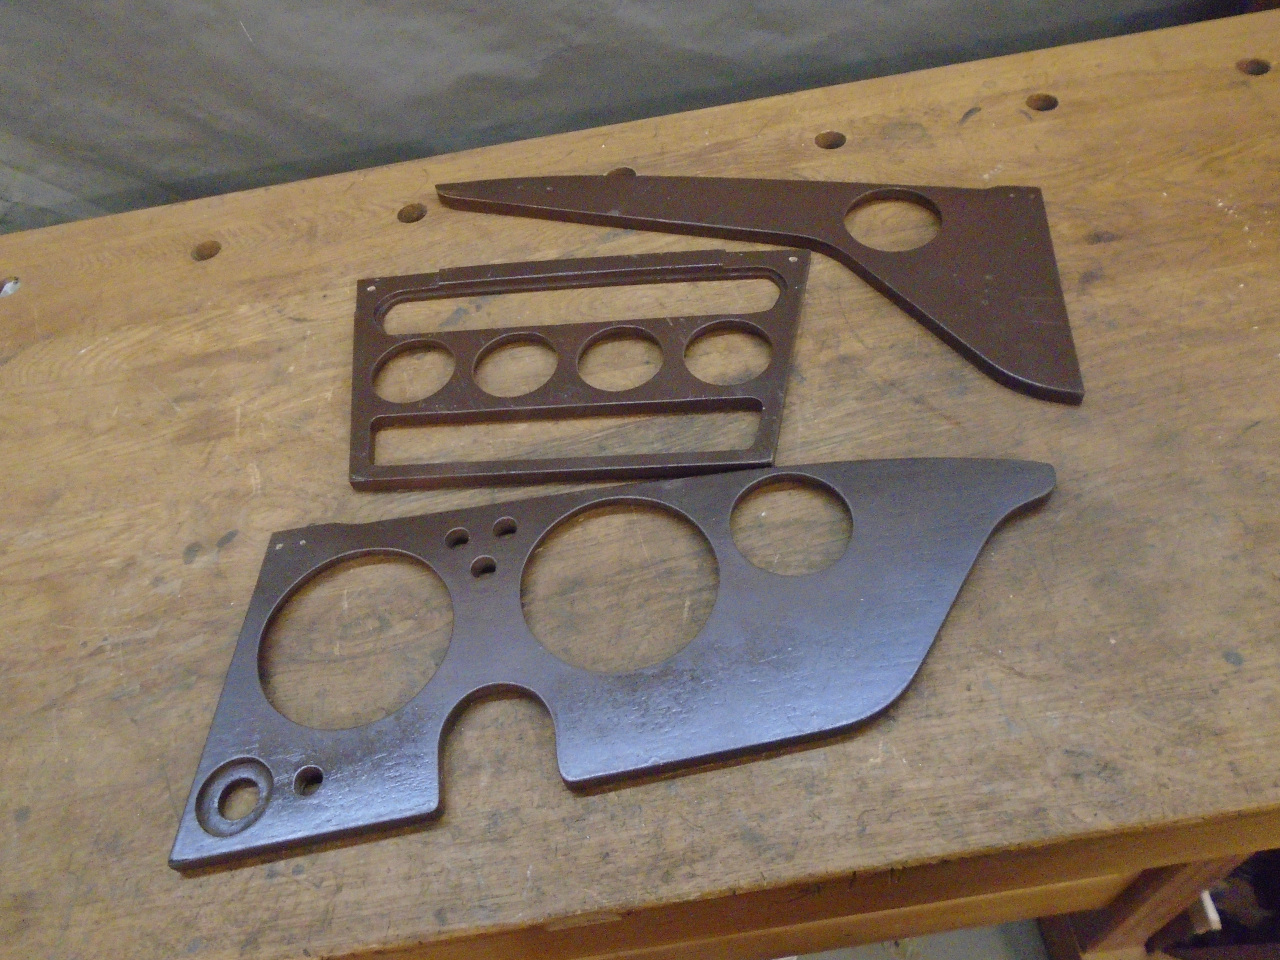
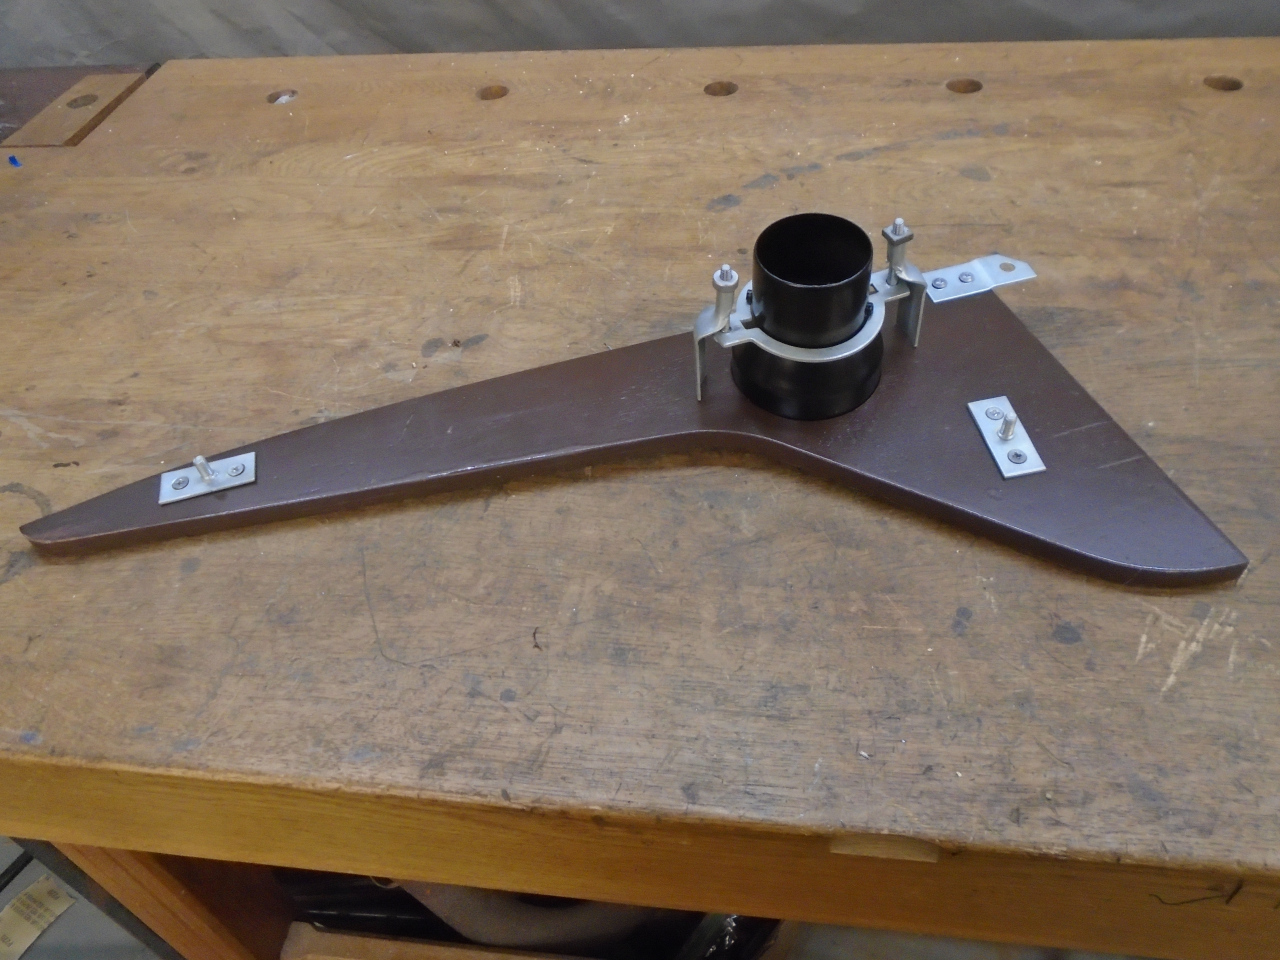
After the finishing, here were assorted bits and brackets to
fit. They were all stripped and replated.
Then, to re-create the brown color on the backside and on the
circumferences of the holes, I masked off the varnished areas.
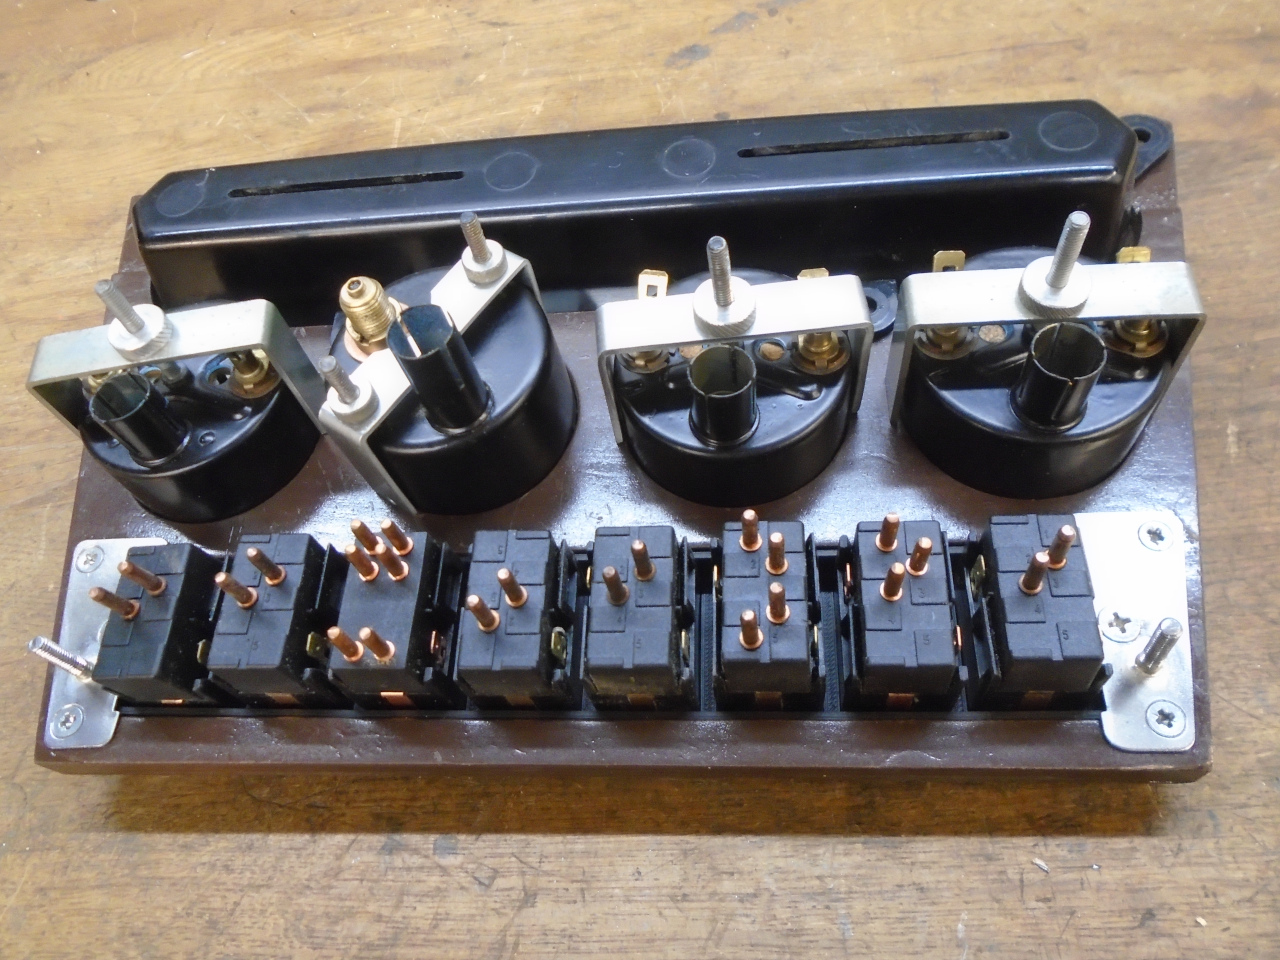
Finally, it was time for assembly. One little detail on the
switch panel was to install these little threaded inserts.
They are heated with a soldering iron so that they melt themselves
into the holes in those bosses.

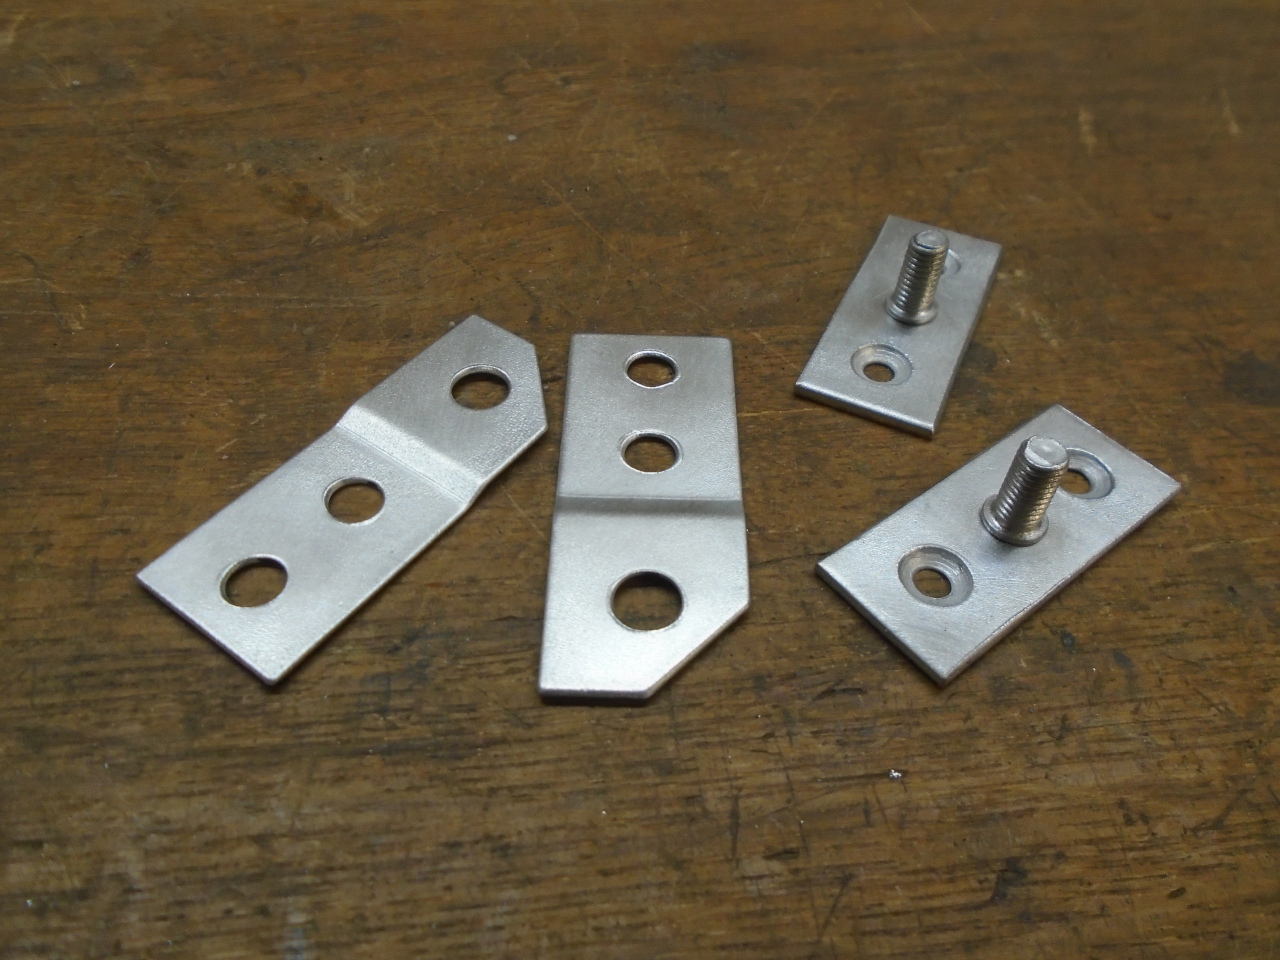
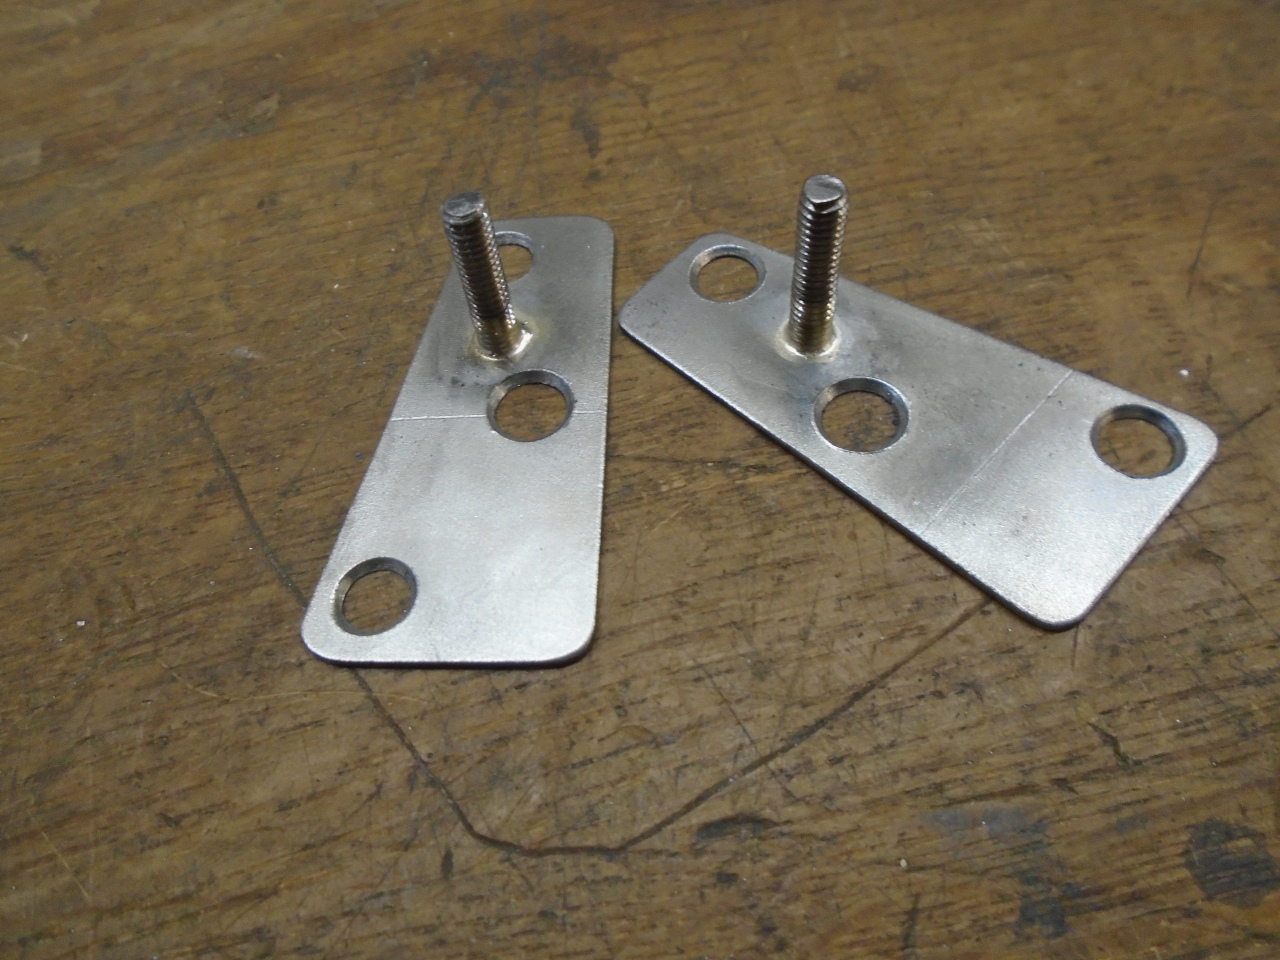
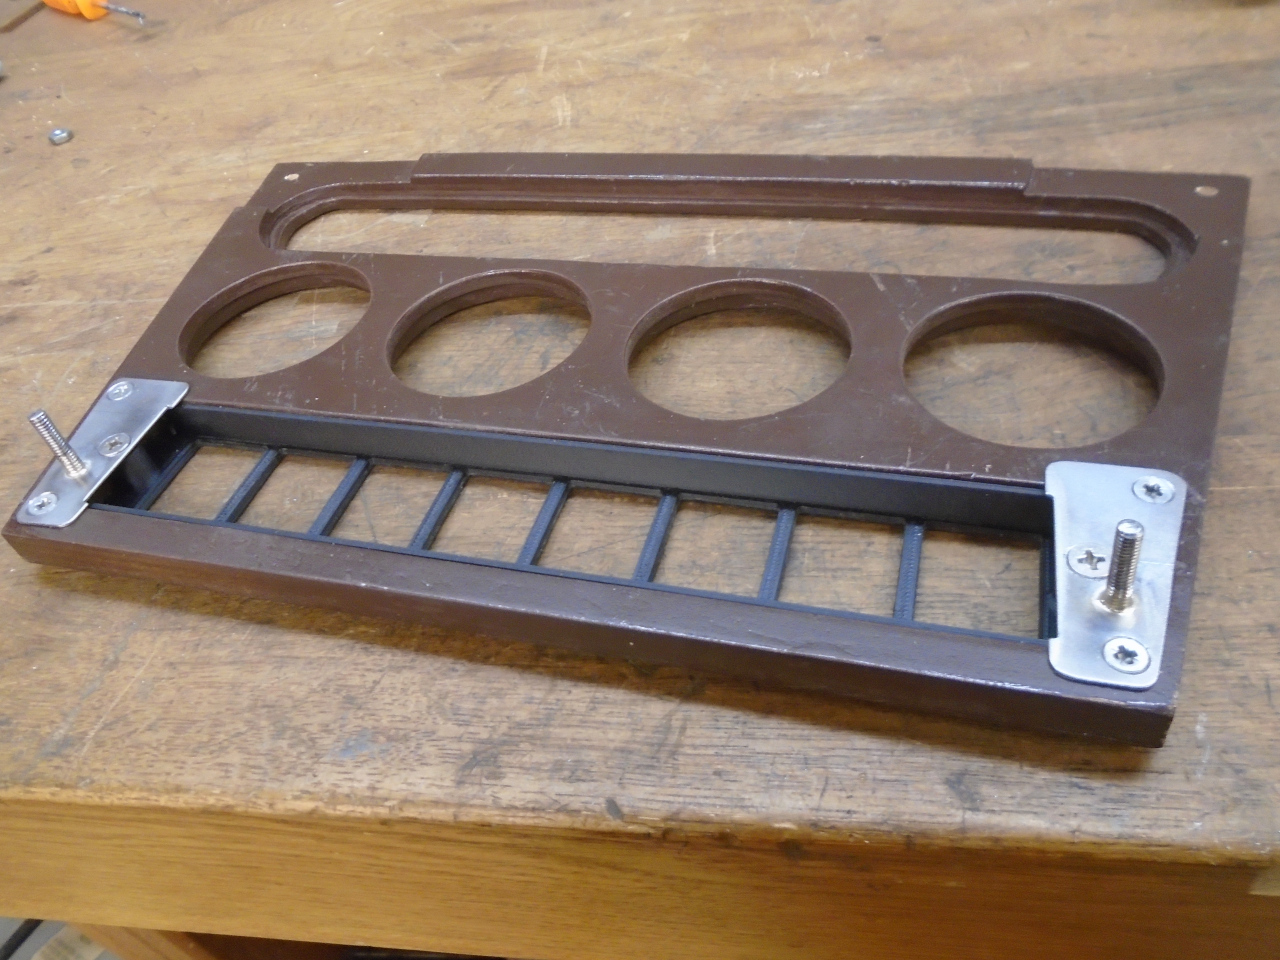
One little oops realization I had while fitting the switches was
that there was now not room for the lower two mounting screws for
the center panel. I worked around this crisis by making
these little gizmos. They screw to the lower corners of the
panel, and provide a place to screw the switch panel to, and also
have studs to take the place of the original lower mounting
screws. I just hope access to the backside for getting nuts
on the studs isn't a problem.
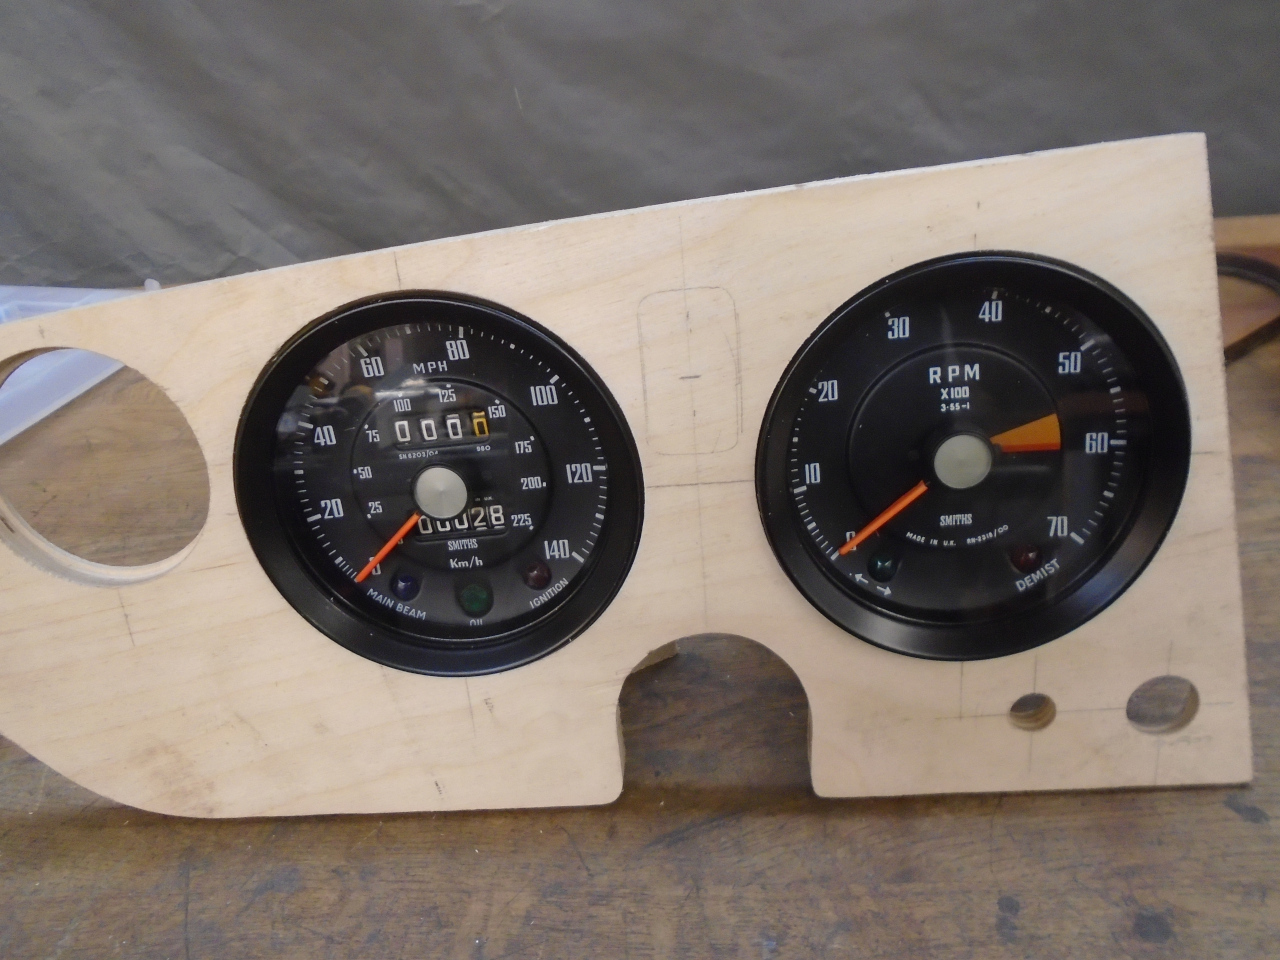
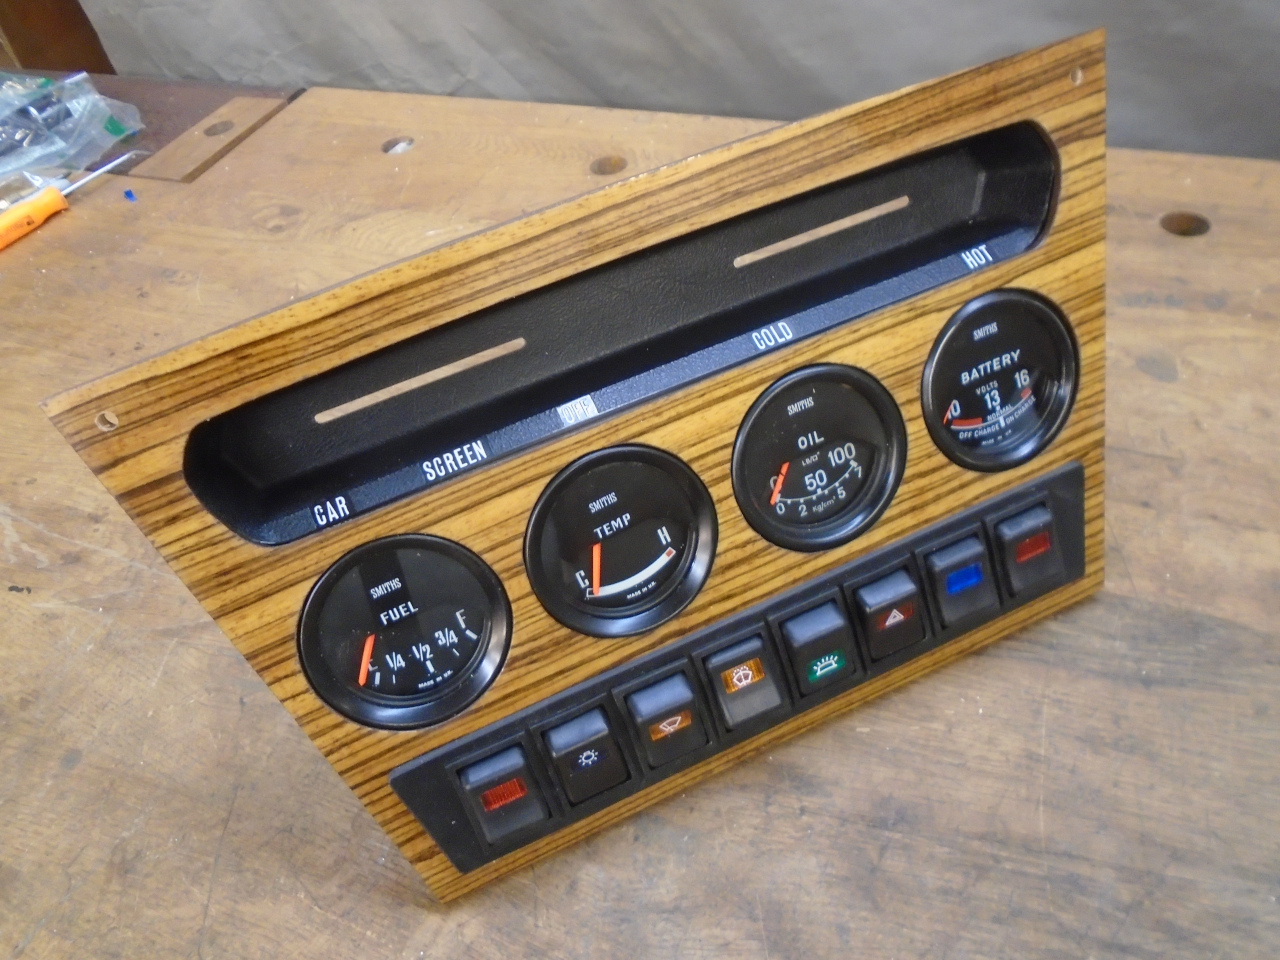
The new center panel. I have new bezels on the way for the
right two gauges, so they will match the two originals. The
different font on the new gauges still bothers me a little.
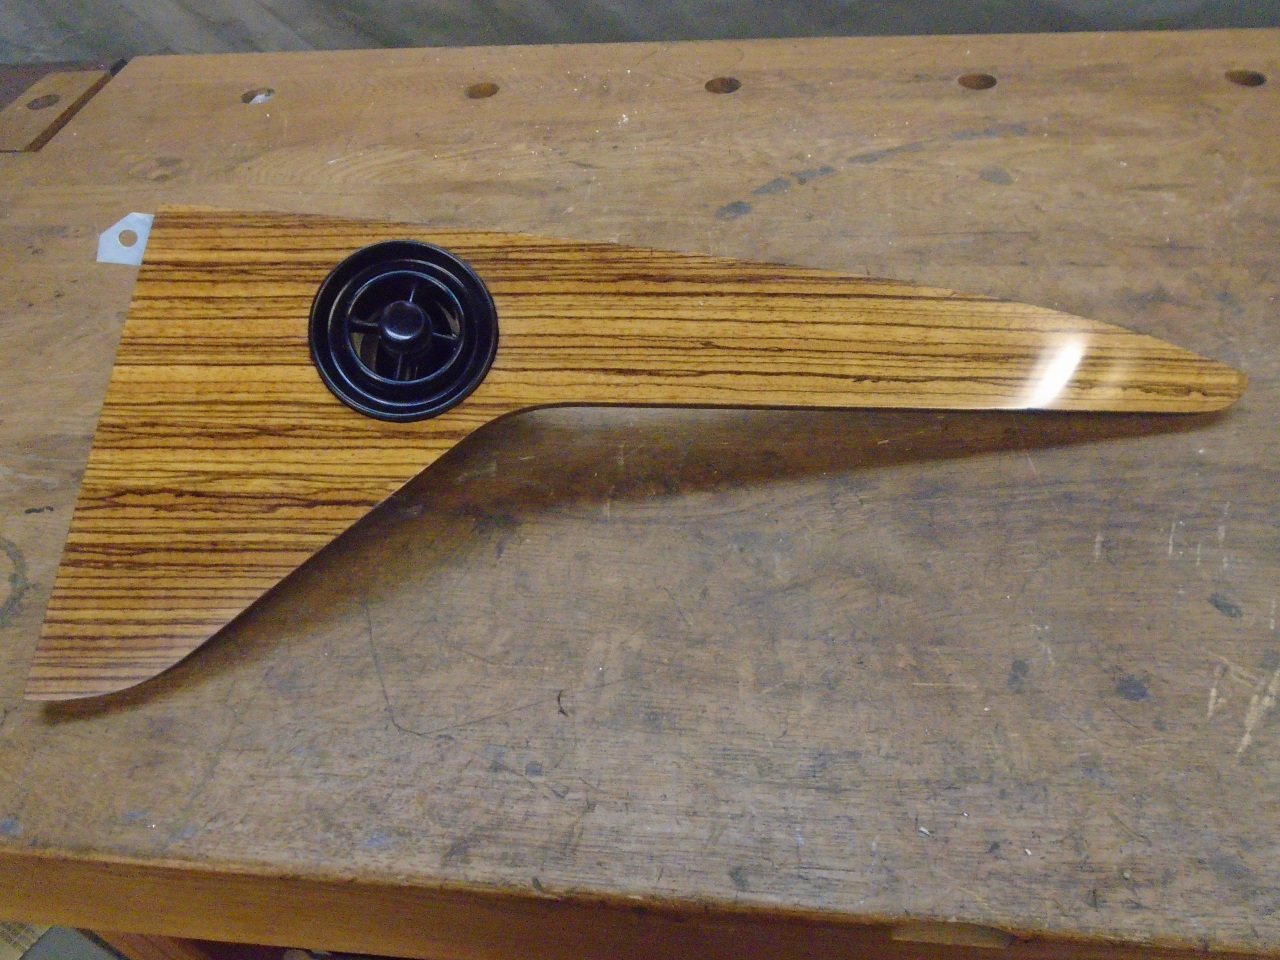
The passengers panel.
Drivers panel.
The whole enchilada. I didn't notice that the left air vent
wasn't installed. The panels are sort of propped in
approximate position.
This was a bit of a marathon project. I think I've been
working on it for a couple of months. The result seems OK,
and I can't wait to see it in the car. Cost was probably a
couple of hundred dollars for the switches and the additional
gauges.
Comments to Ed at elhollin1@yahoo.com
To my other GT6
pages