To my other GT6
pages
February 8, 2020
Heater
One of the common criticisms of Little British Cars of this era
is that they had poor cabin climate control. They were too
hot in the summer, due to prodigious amounts of engine heat
coming through the firewall and gearbox tunnel, and too cold in
the winter, due to the anemic heaters. These charges are
largely true in my experience, but only add to the charm of the
species. British sports cars have never been for the
timid.
The GT6 heater is a simple assembly. Hot coolant from the
engine is circulated through an interior radiator-like core, and
a fan blows outside air through the core into the cabin.
The GT6 heater is very similar to those in the Spitfire cars,
but the GT6s, at least early ones, had additional vents that
allow unheated air to also be directed to the cabin.
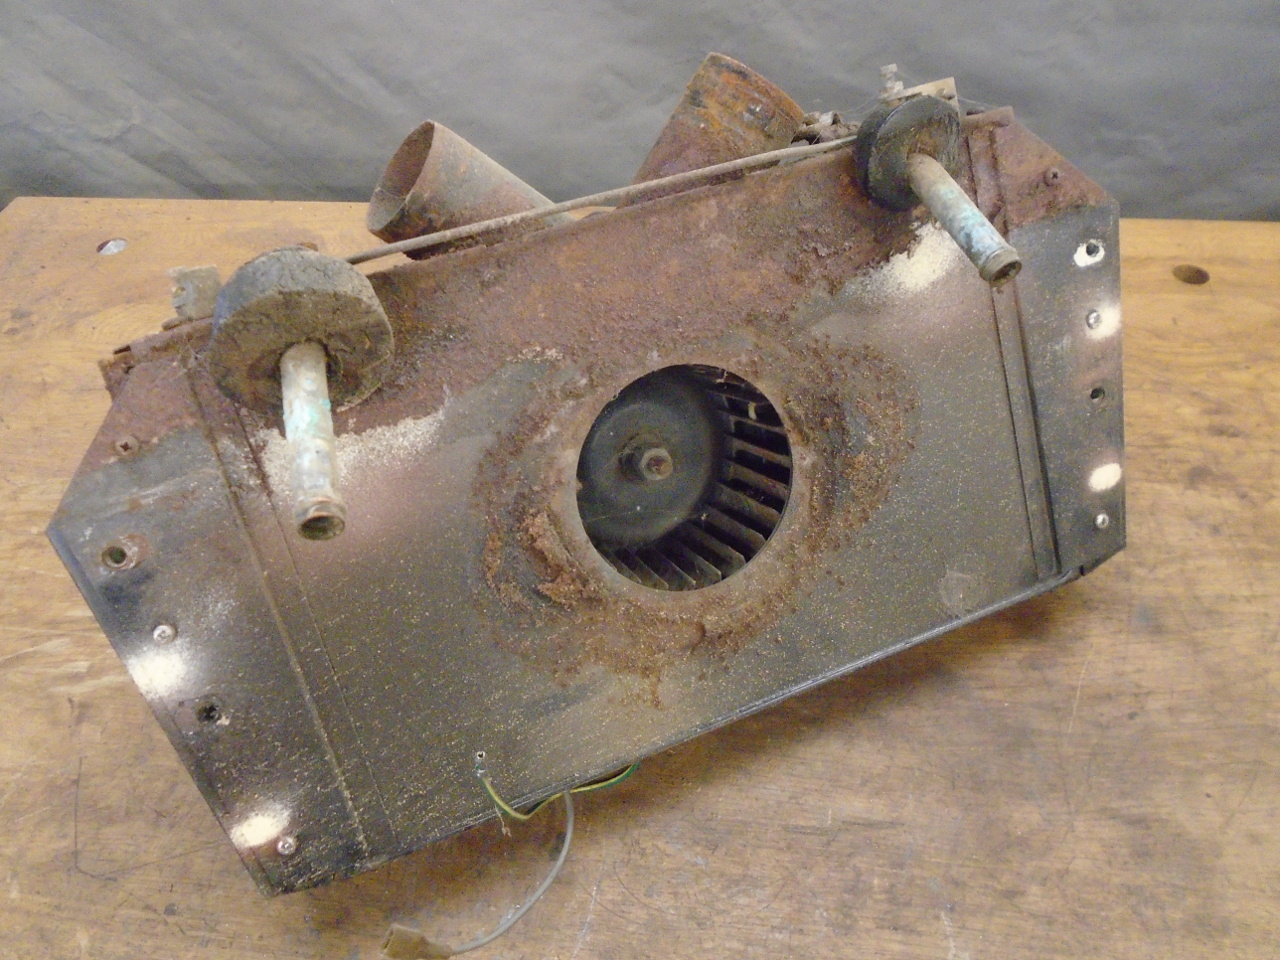
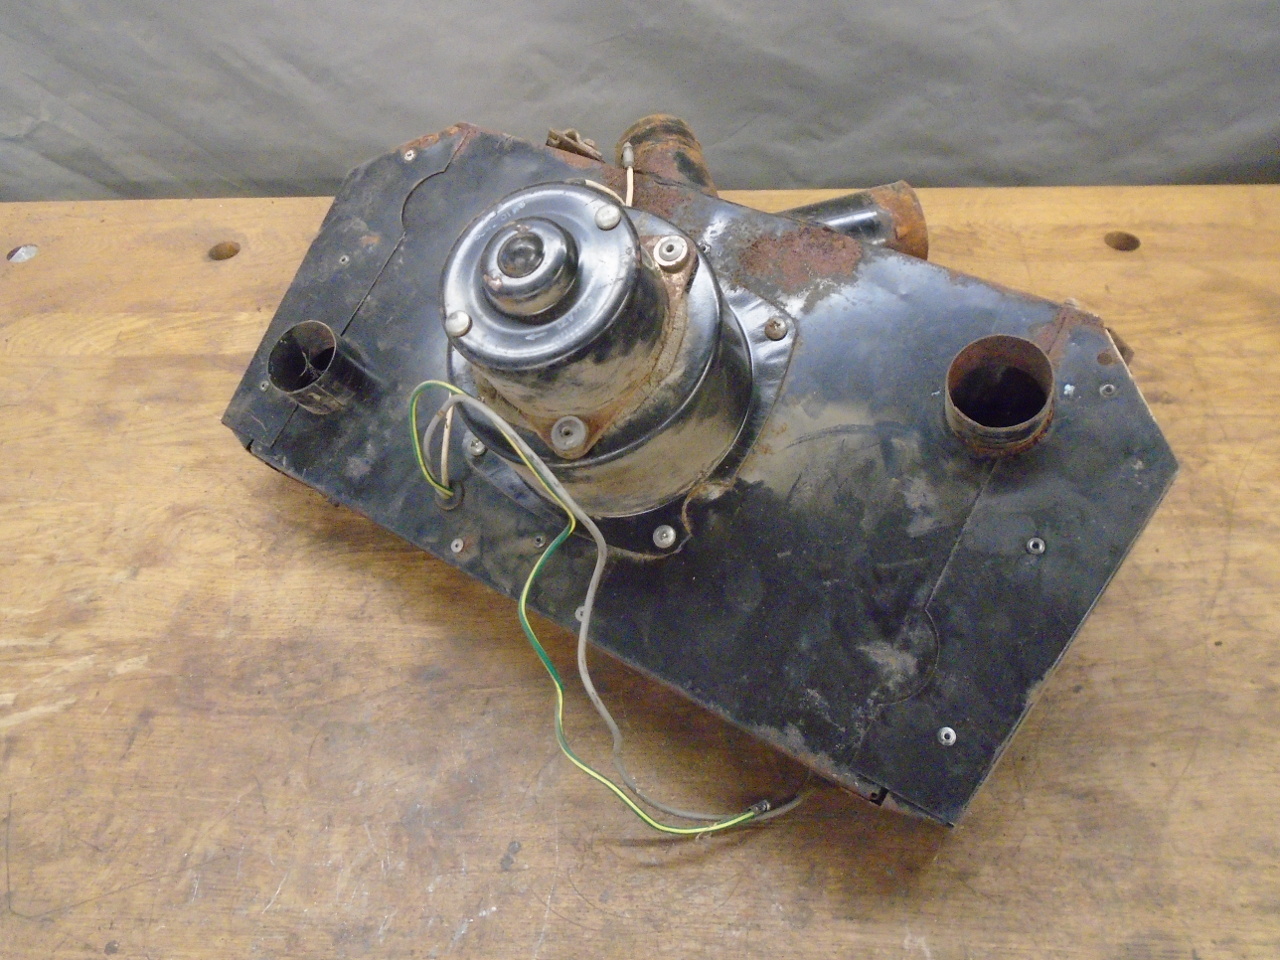
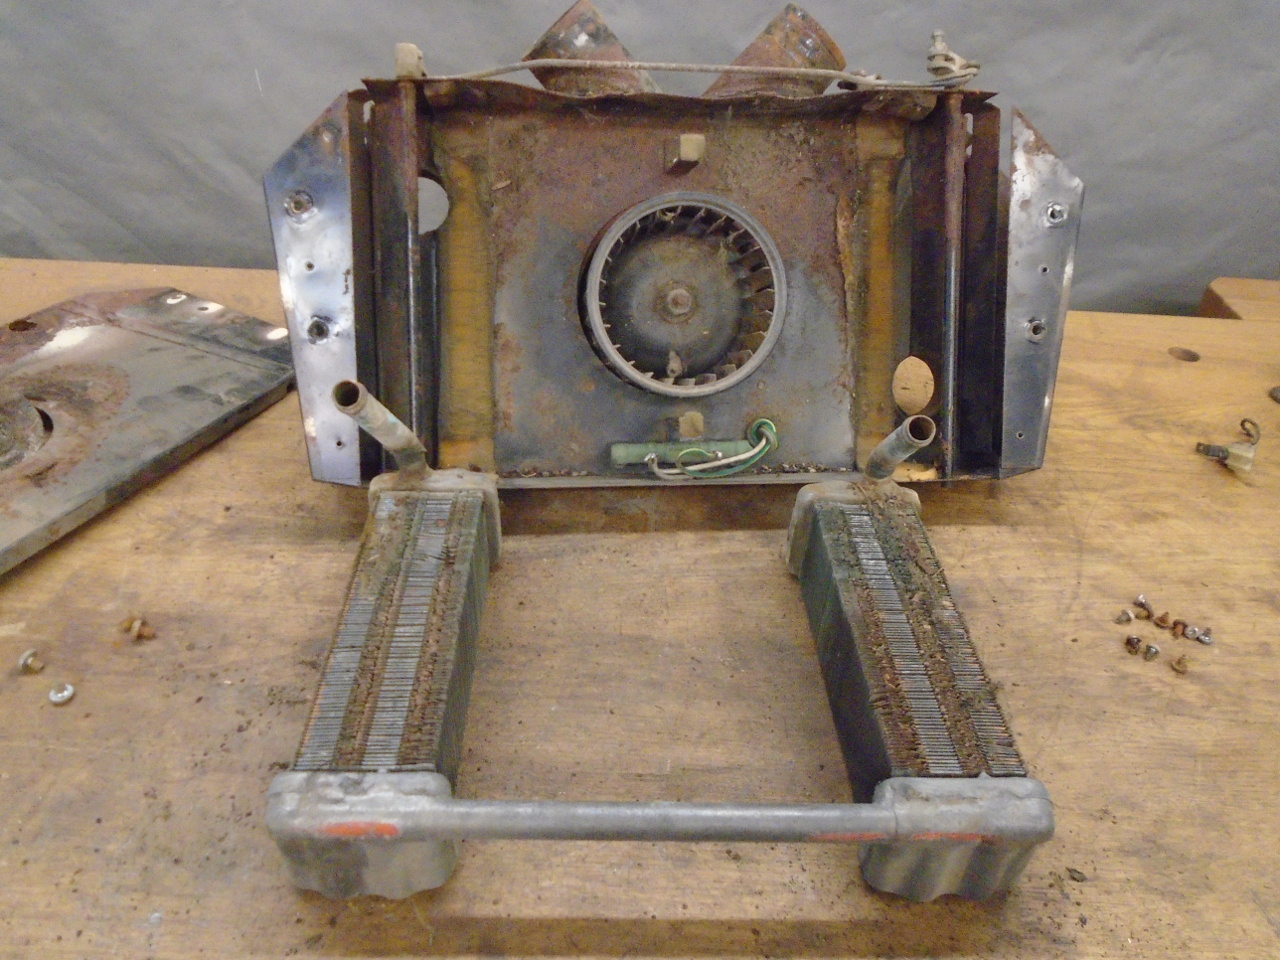
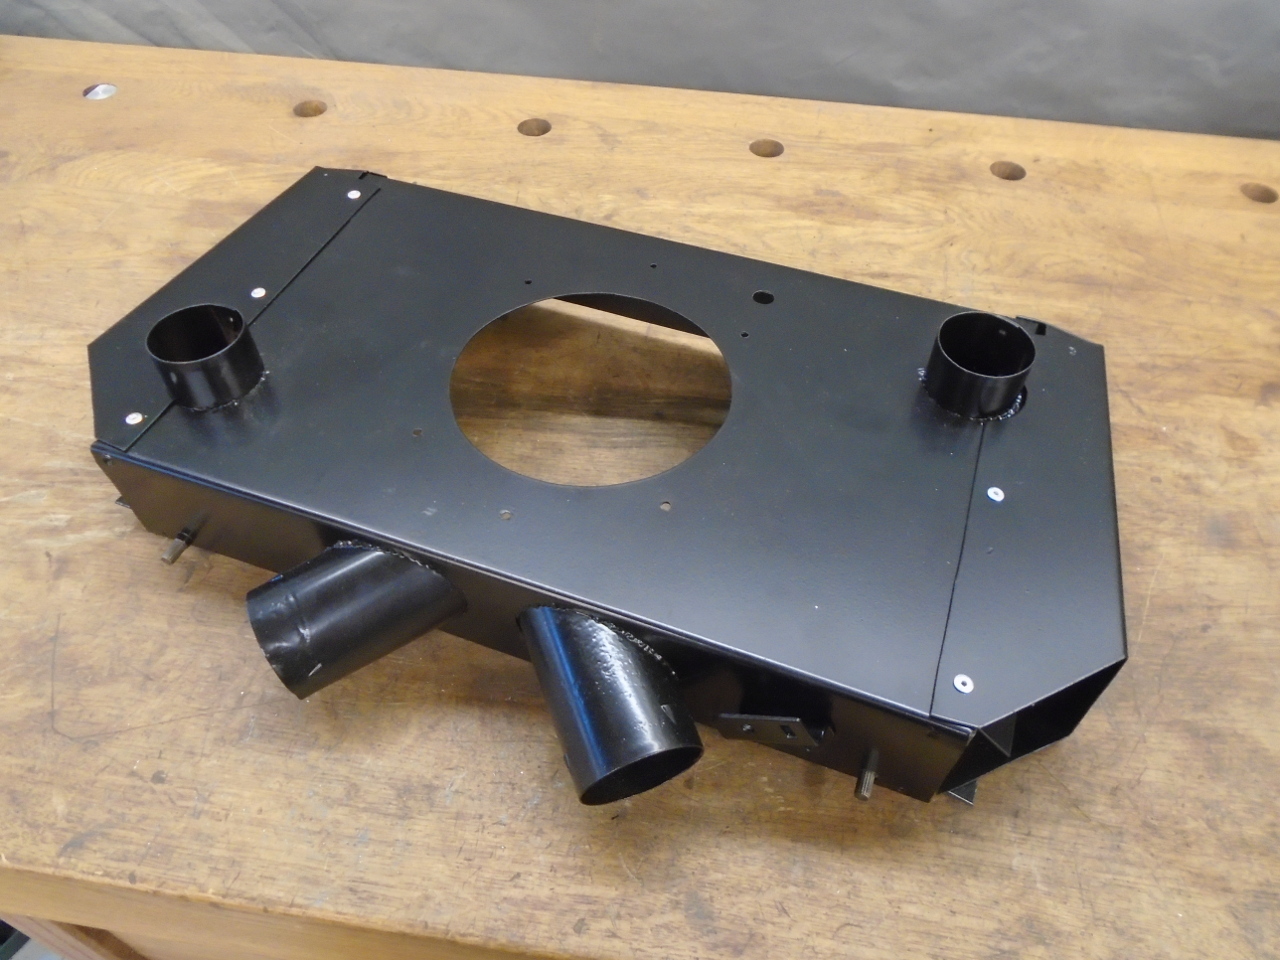
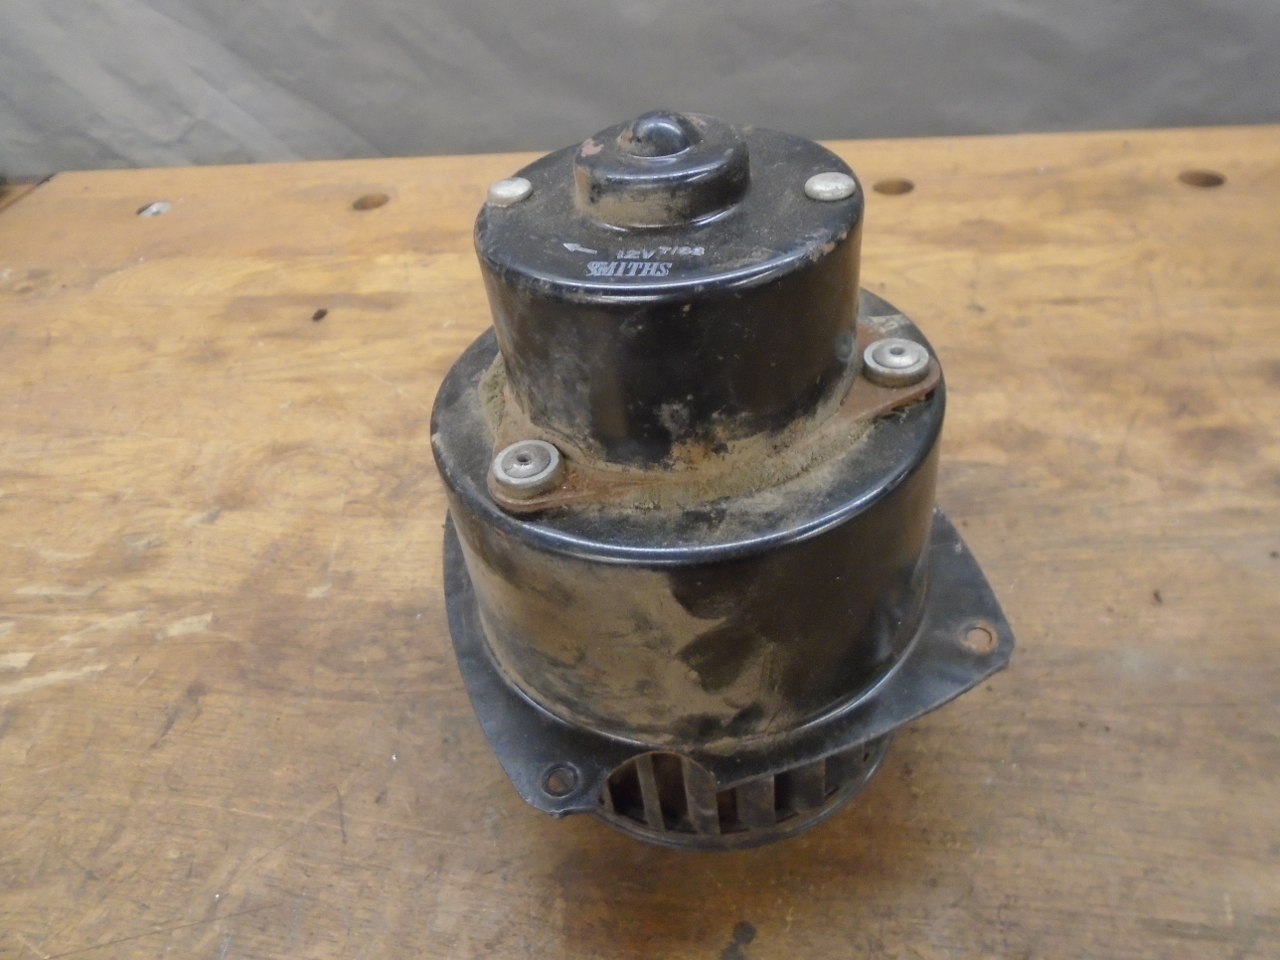
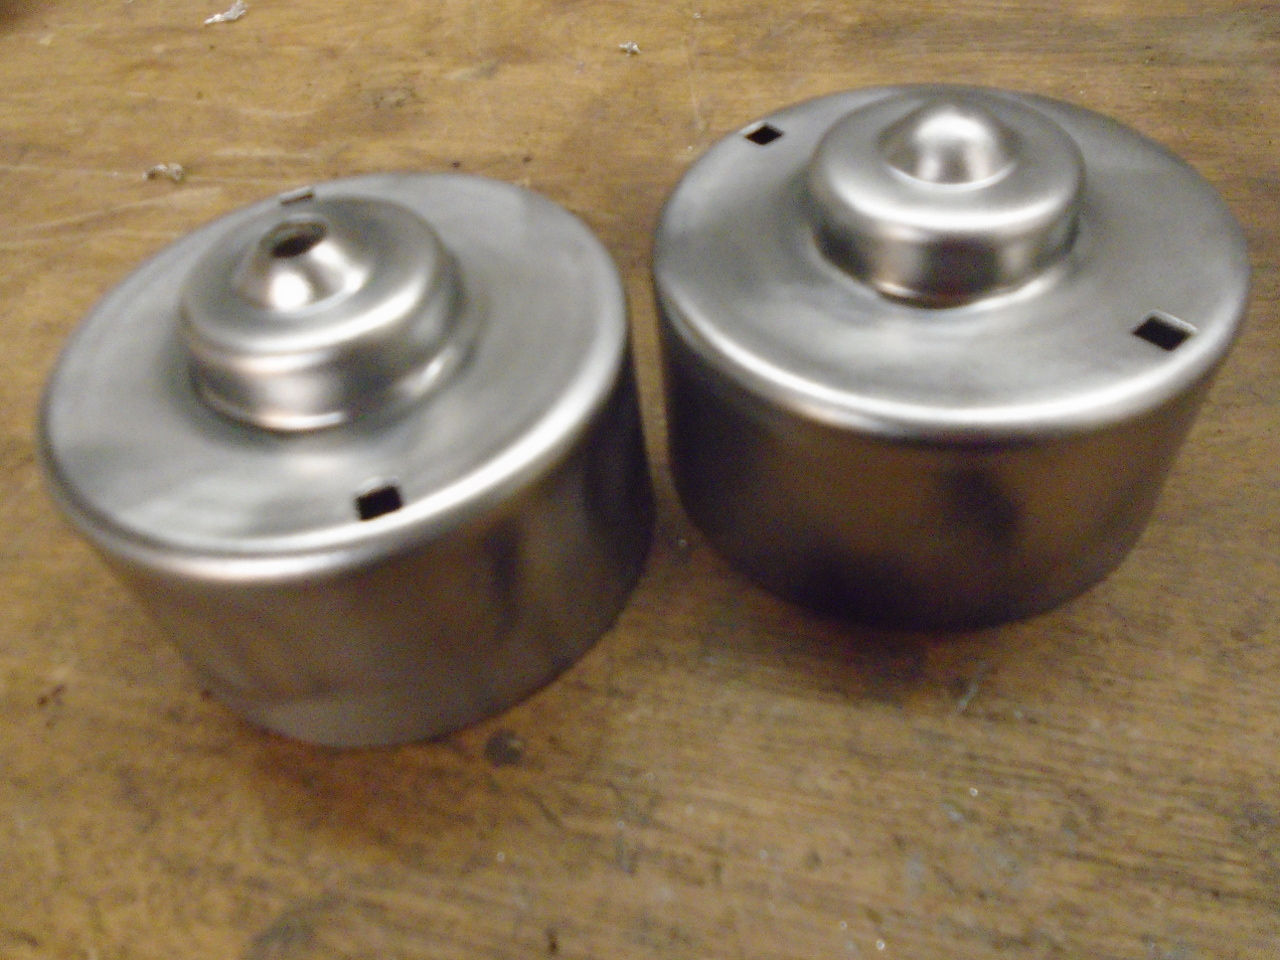
This is my GT6 heater as I found it. It is upside down in
the pictures. The angled pipes at the top are the fresh
air vents unique to the GT6.
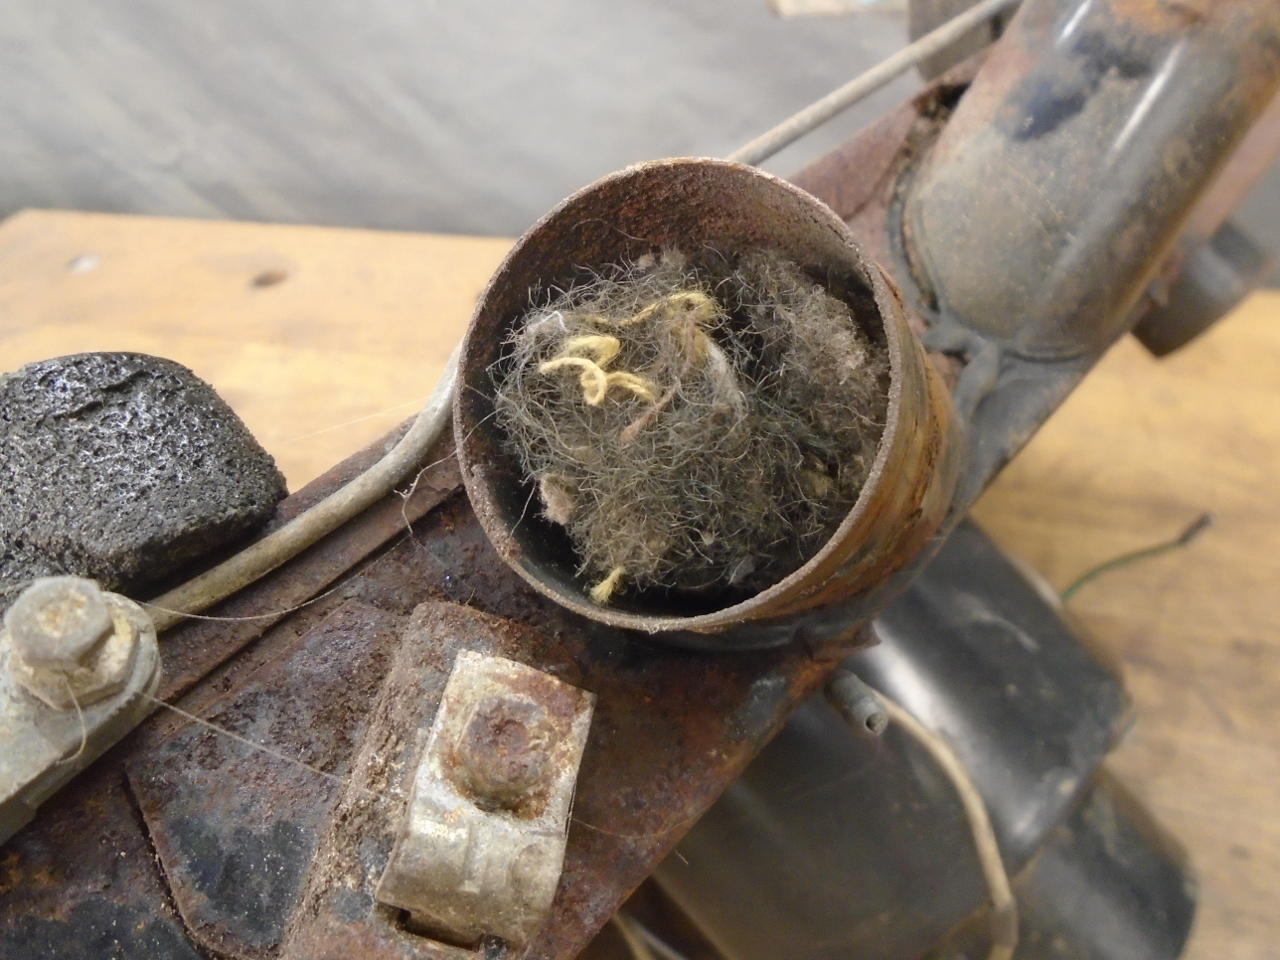
It appears that my heater had been a home of a few generations
of critters.
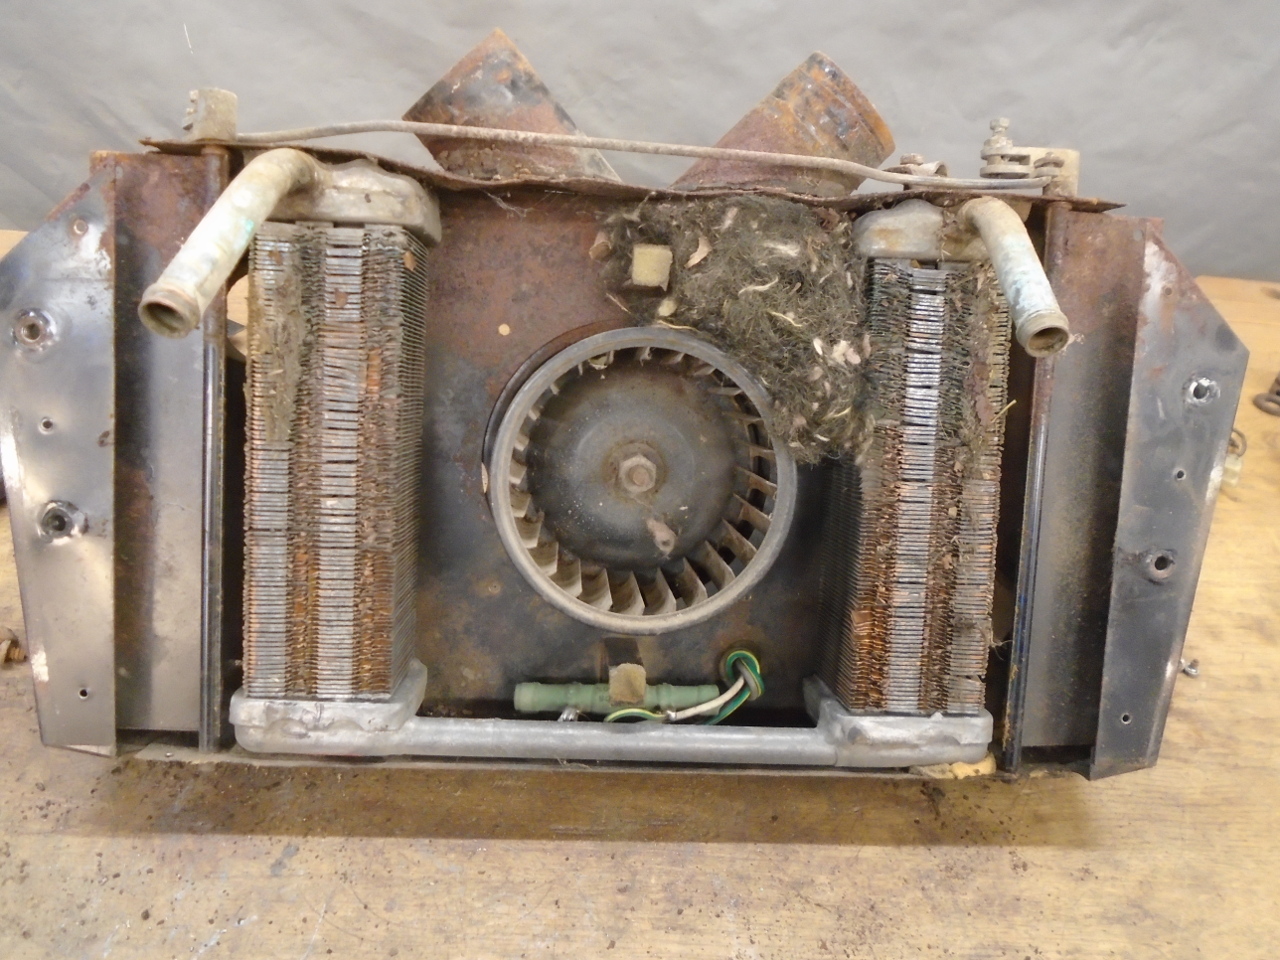
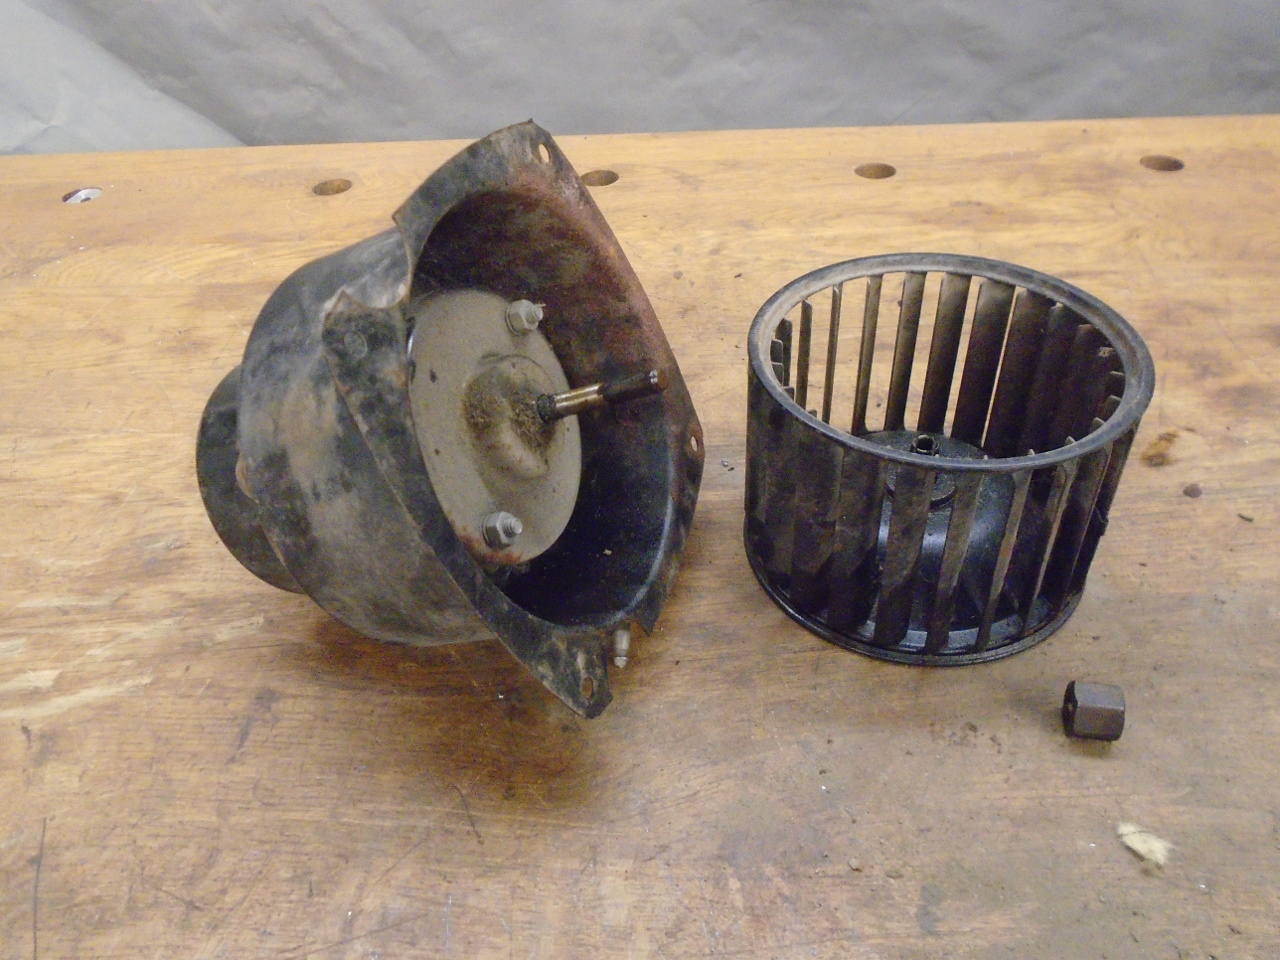
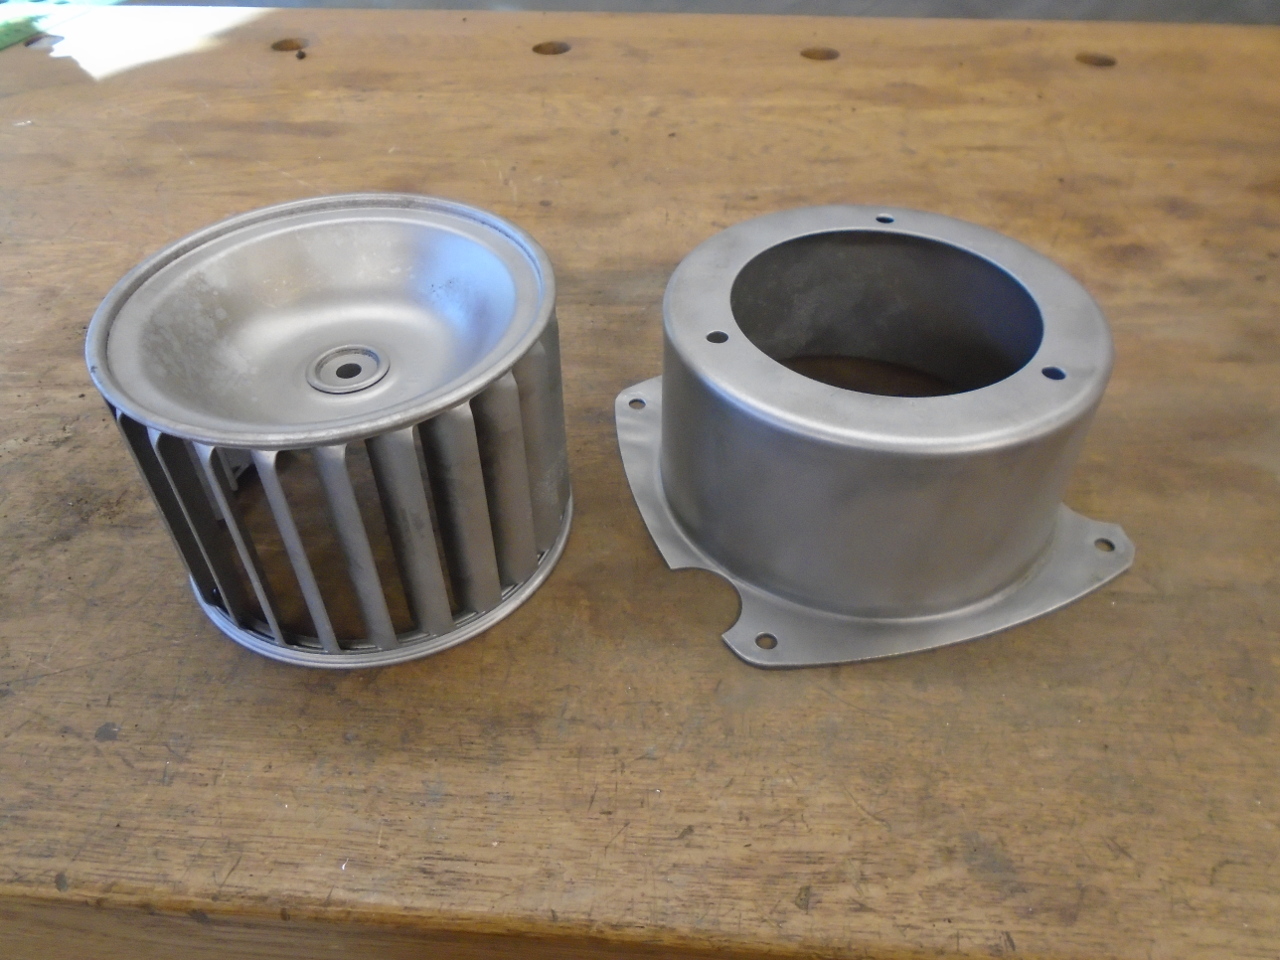
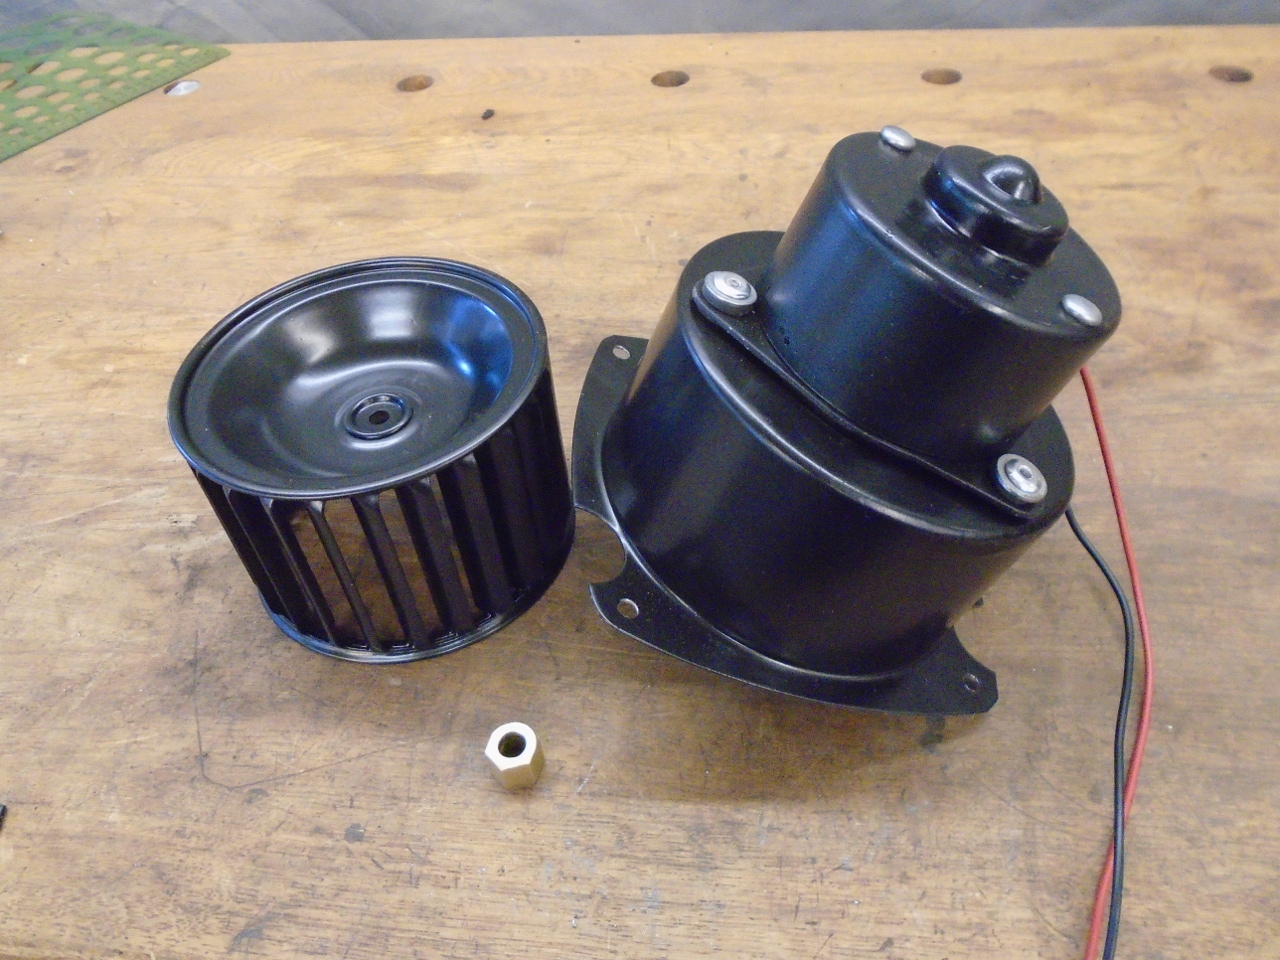
The heater can be broken down into three major parts: The
core matrix, the fan and motor, and the housing. The
housing was the most problematic, so I'll cover that first.
The housing is made of pretty thin sheet metal--it measures at
about 22 gauge. It was very pitted with rust, and nearly
corroded through in places. It had some interior places
that would be very hard to get to for derusting, cleaning, or
painting.
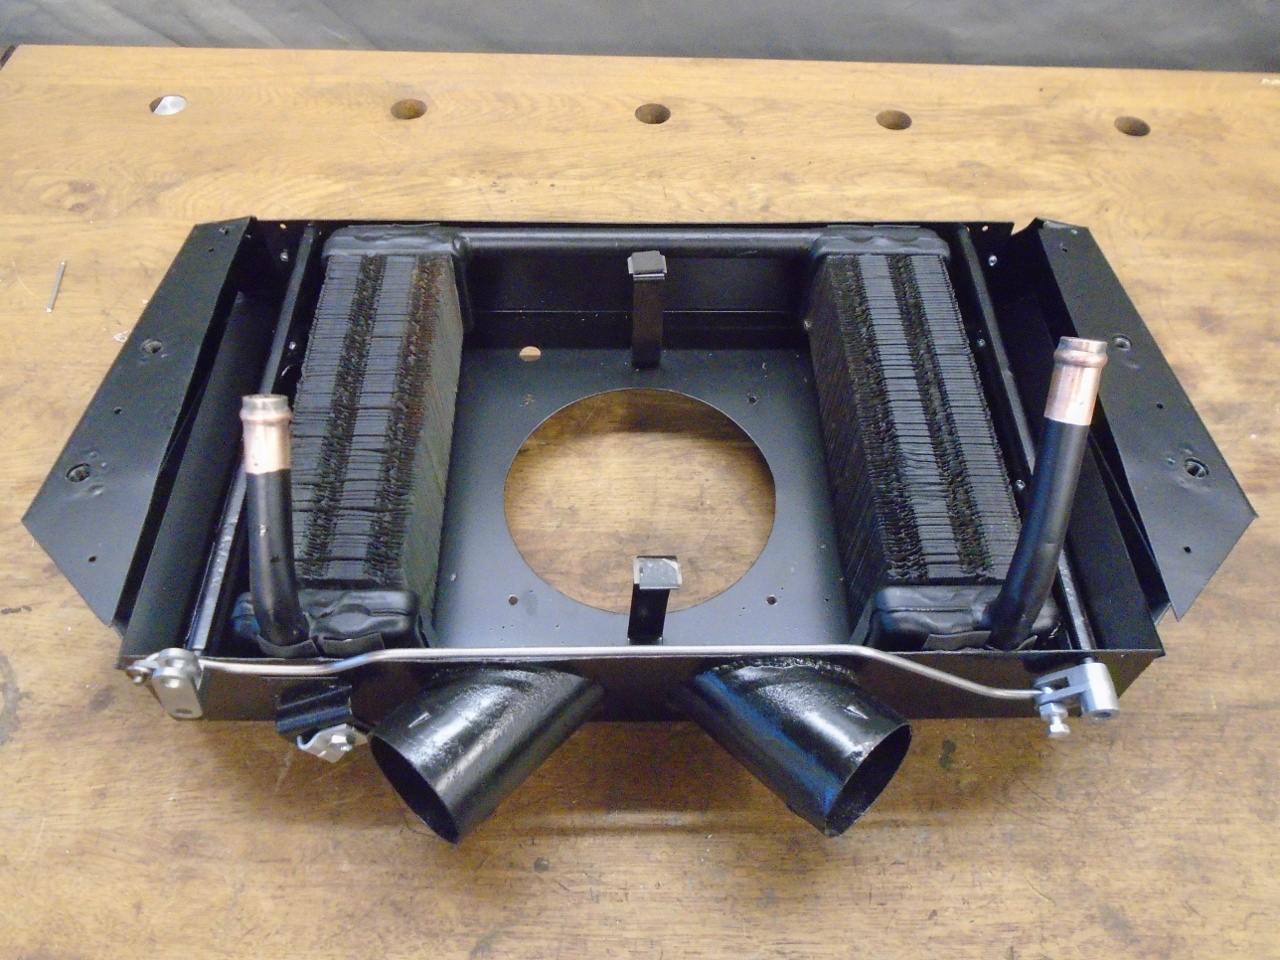
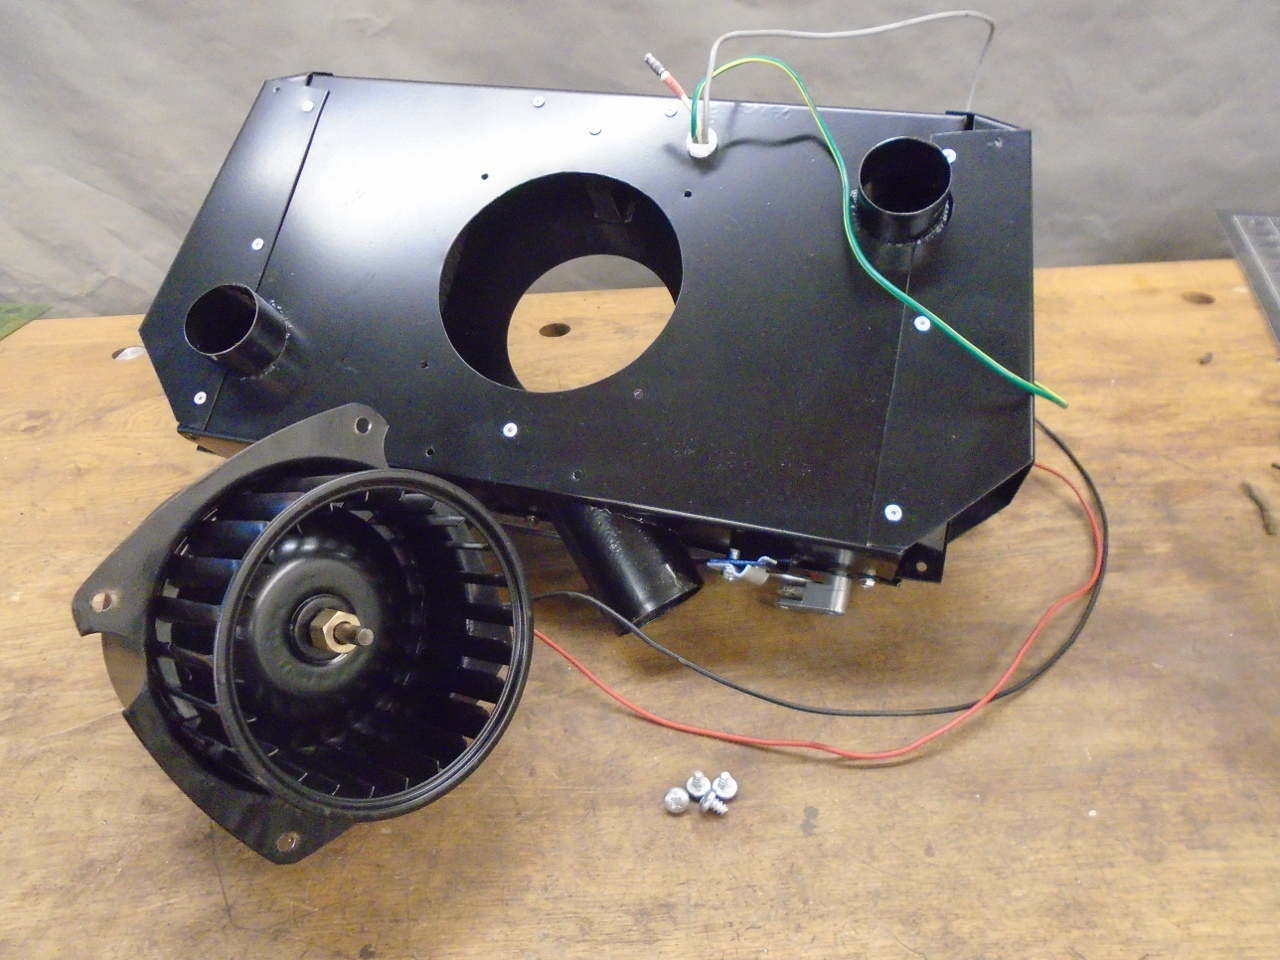
In the end, I chose a course that even I consider a little
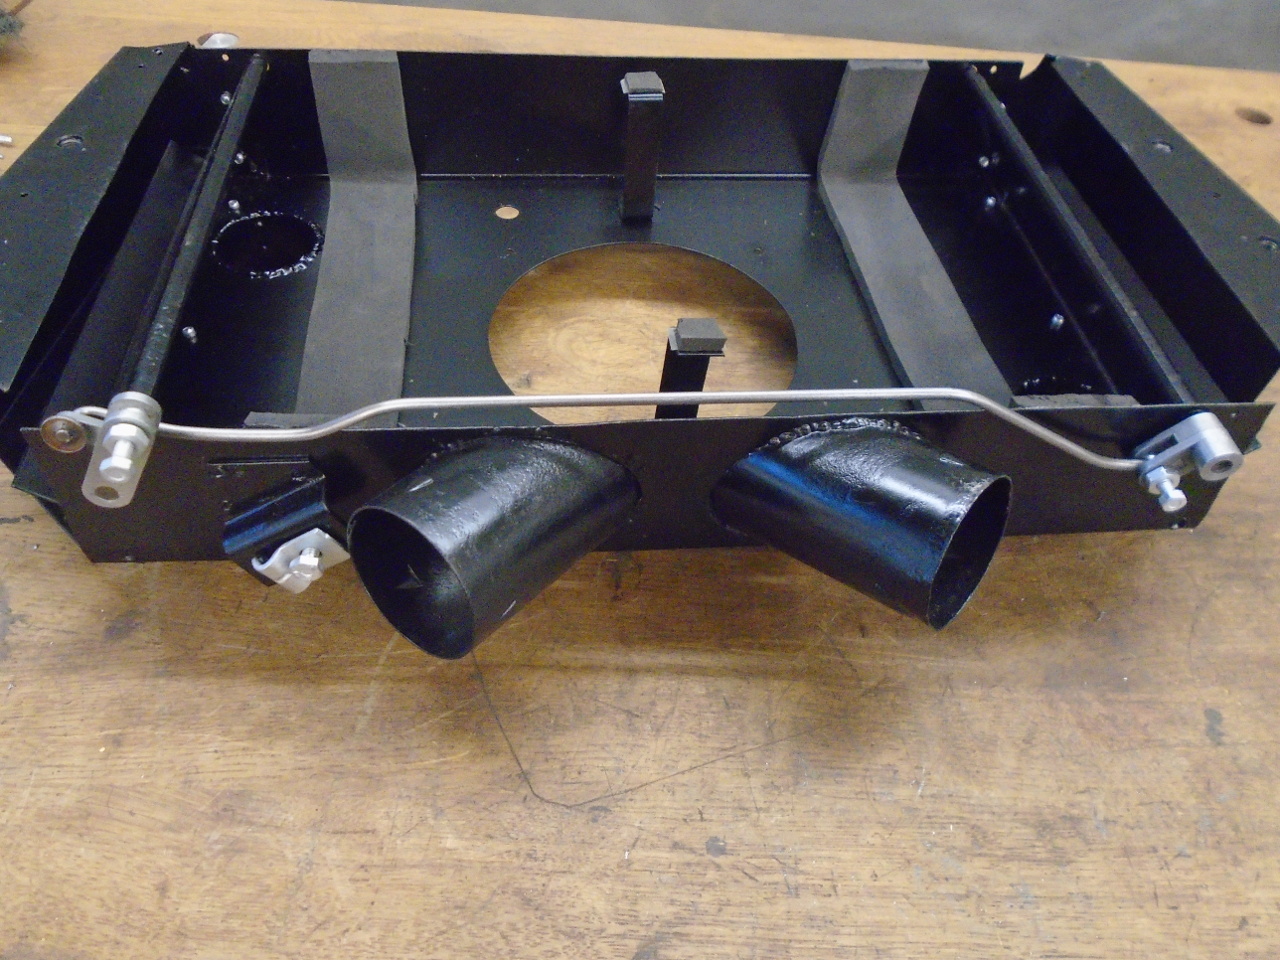
extreme--I decided to fabricate a new housing. Skipping
over some of the gory details, this is the fabricated
housing. Like the original, it has a main chamber that
holds the core and the fan, and a separate duct on each side
that directs air to the footwells. I harvested a few parts
from the original housing: four hose spigots, and the
flaps that divert air either to the footwells or the defroster
vents.

On the original housing, the hose spigots were just spot welded
on three small tabs, and then caulked. Since the tabs were
sacrificed in the salvage, the spigots were fully welded onto
the new housing. No caulk necessary.
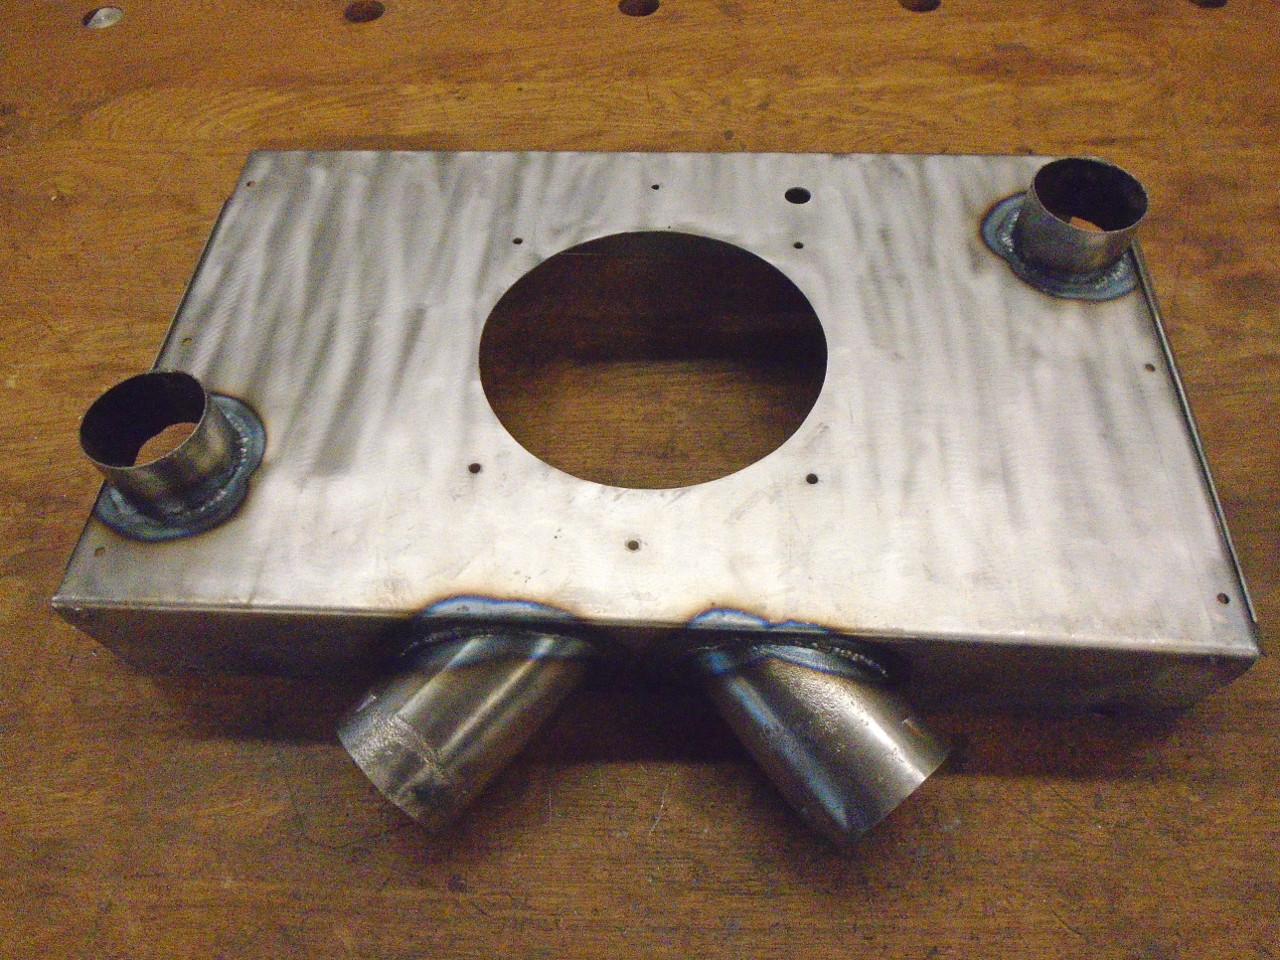
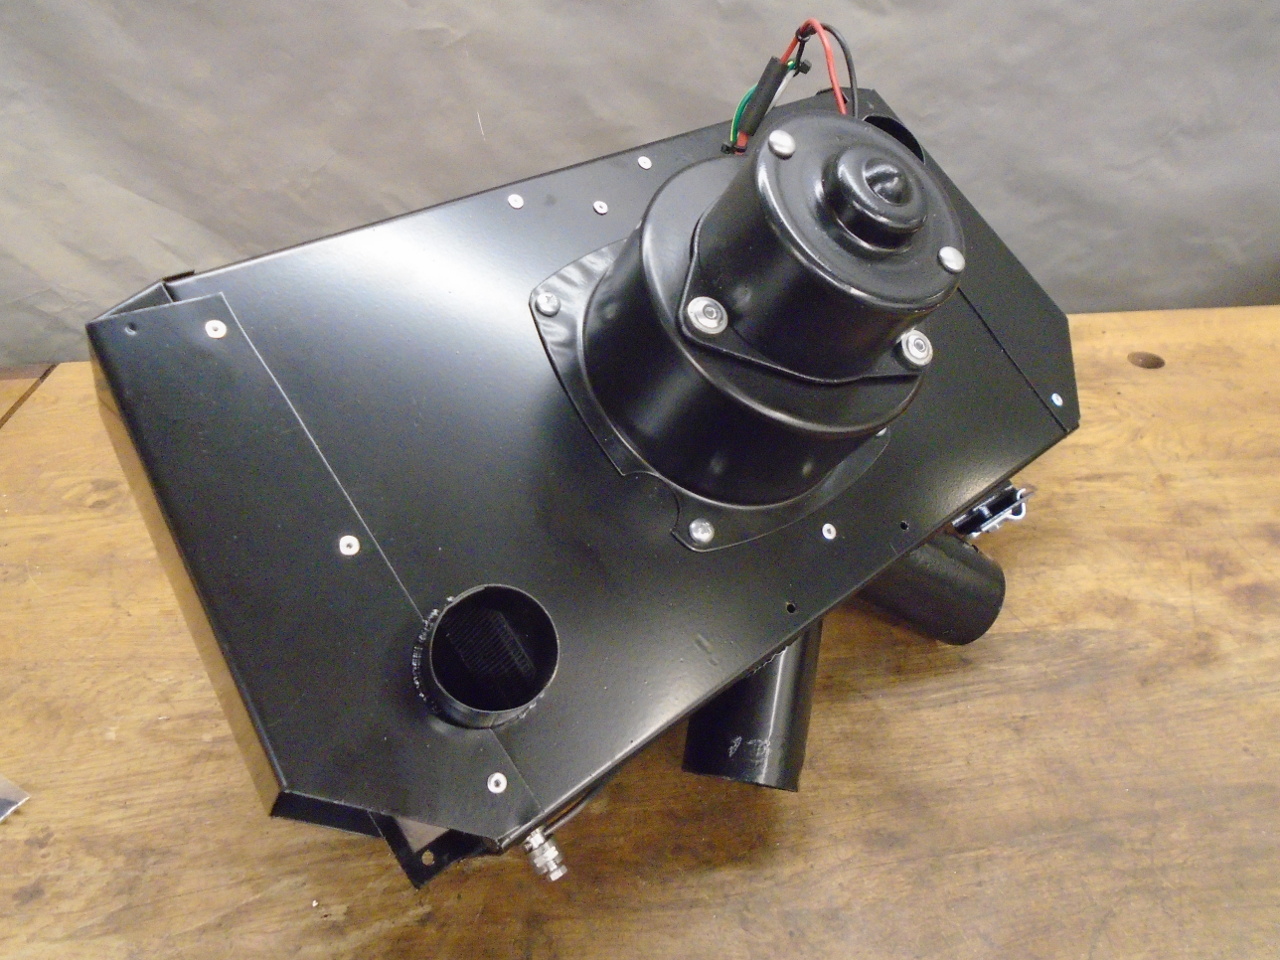
I also salvaged the abutment bracket for the flap control cable.
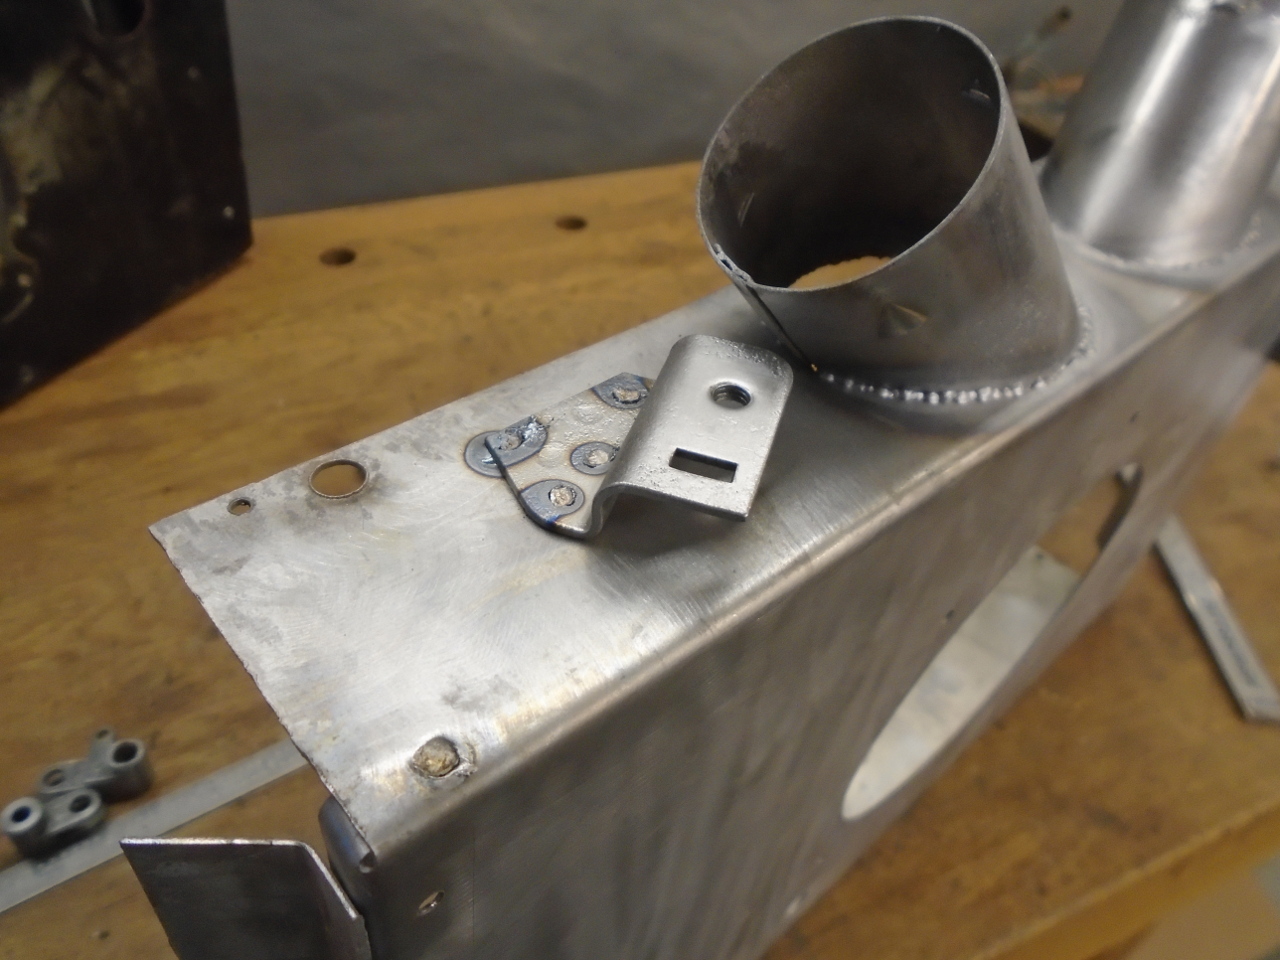
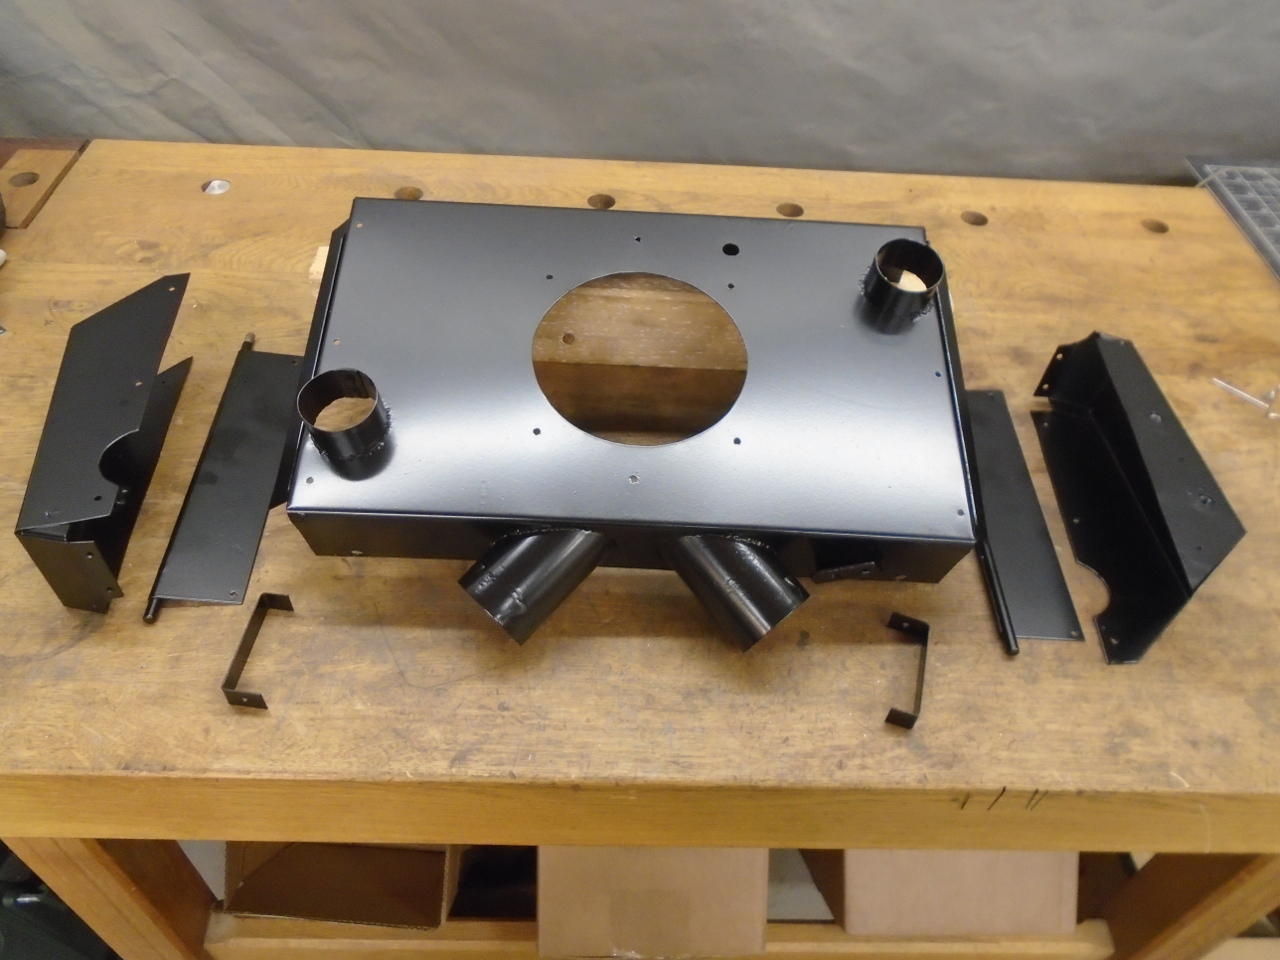
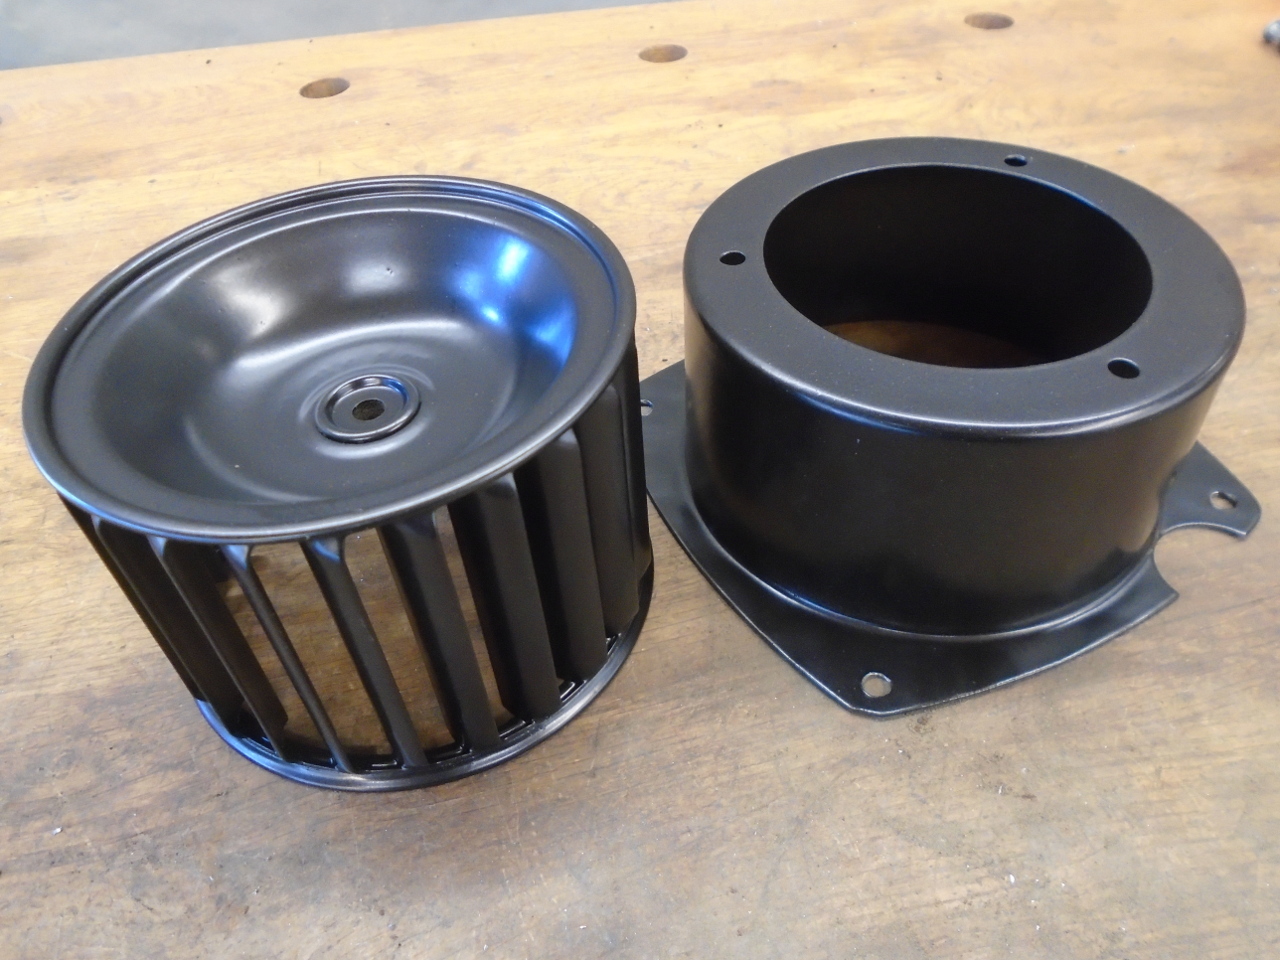
Then powder coated all the parts and put it together. The
new housing is made of 20 gauge steel, so it is noticeably
heavier and stiffer than the original.
I installed the flap control rod, and some foam tape in
preparation for the heater core.
Speaking of the core, it occurred to me that I probably should
have determined whether the core was any good before I expended
all this effort.
I could blow through the core, so I at least knew that it wasn't
blocked, but I could see what appeared to be some scale inside
the connecting tubes. Flushing the core seemed like a good
idea
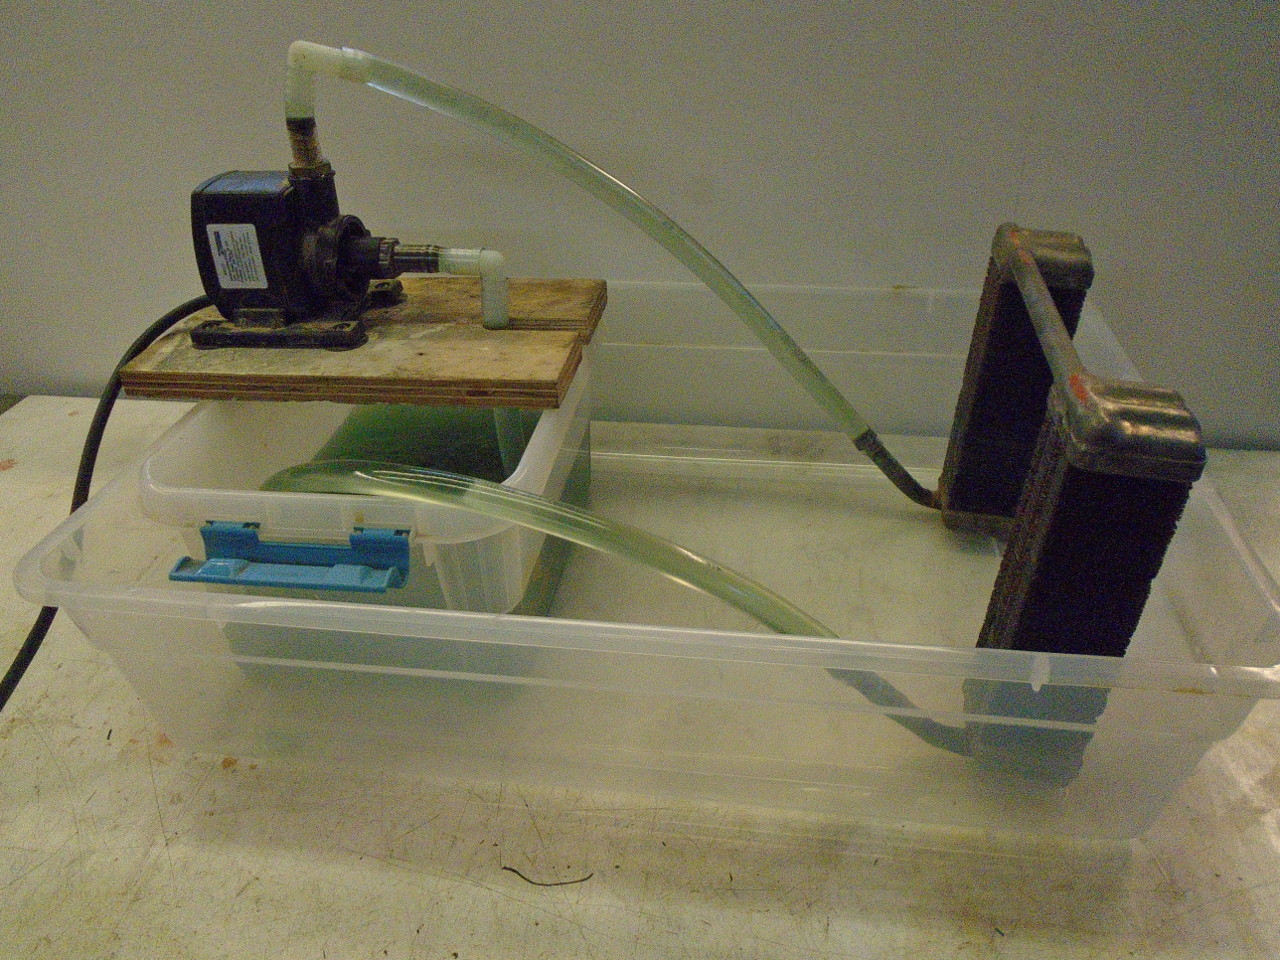
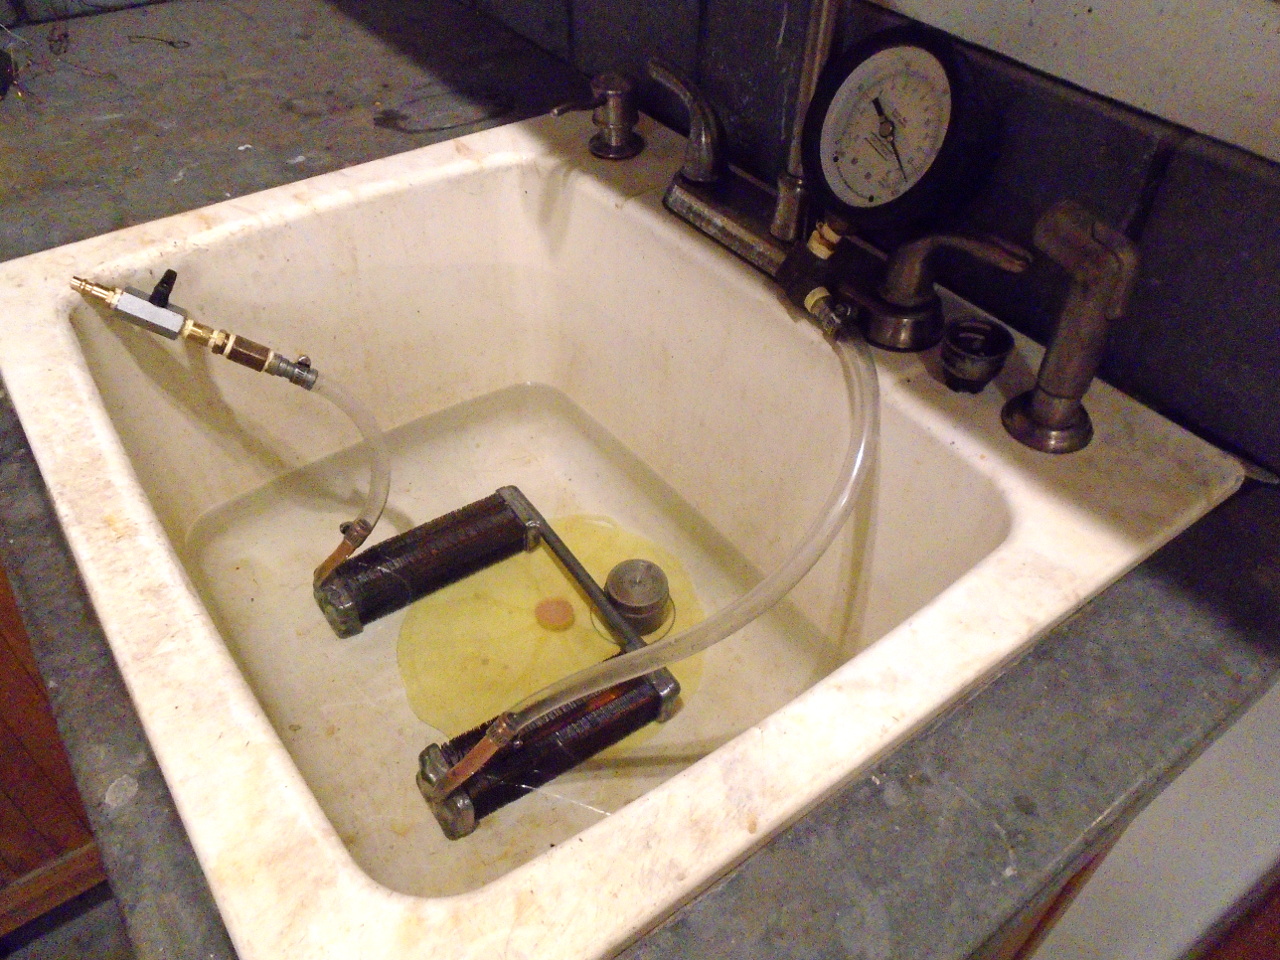
I rigged up a circulating pump to run water through the
core. The first gush came out pretty dirty, but it cleared
up quickly. After a while, I added some phosphoric acid to
the water to try to attack the scale. The acid product I
used had a green tint. I let it run for a couple of hours.
At this point I was pretty sure the core was clean inside, but
that isn't the same as being serviceable. There were no
leaks in the cleaning step, but that was at essentially no
pressure. The next step was a pressure test.
GT6 cooling system pressure, at least for this year, is seven
psi. I decided to run the pressure test at 15 psi.
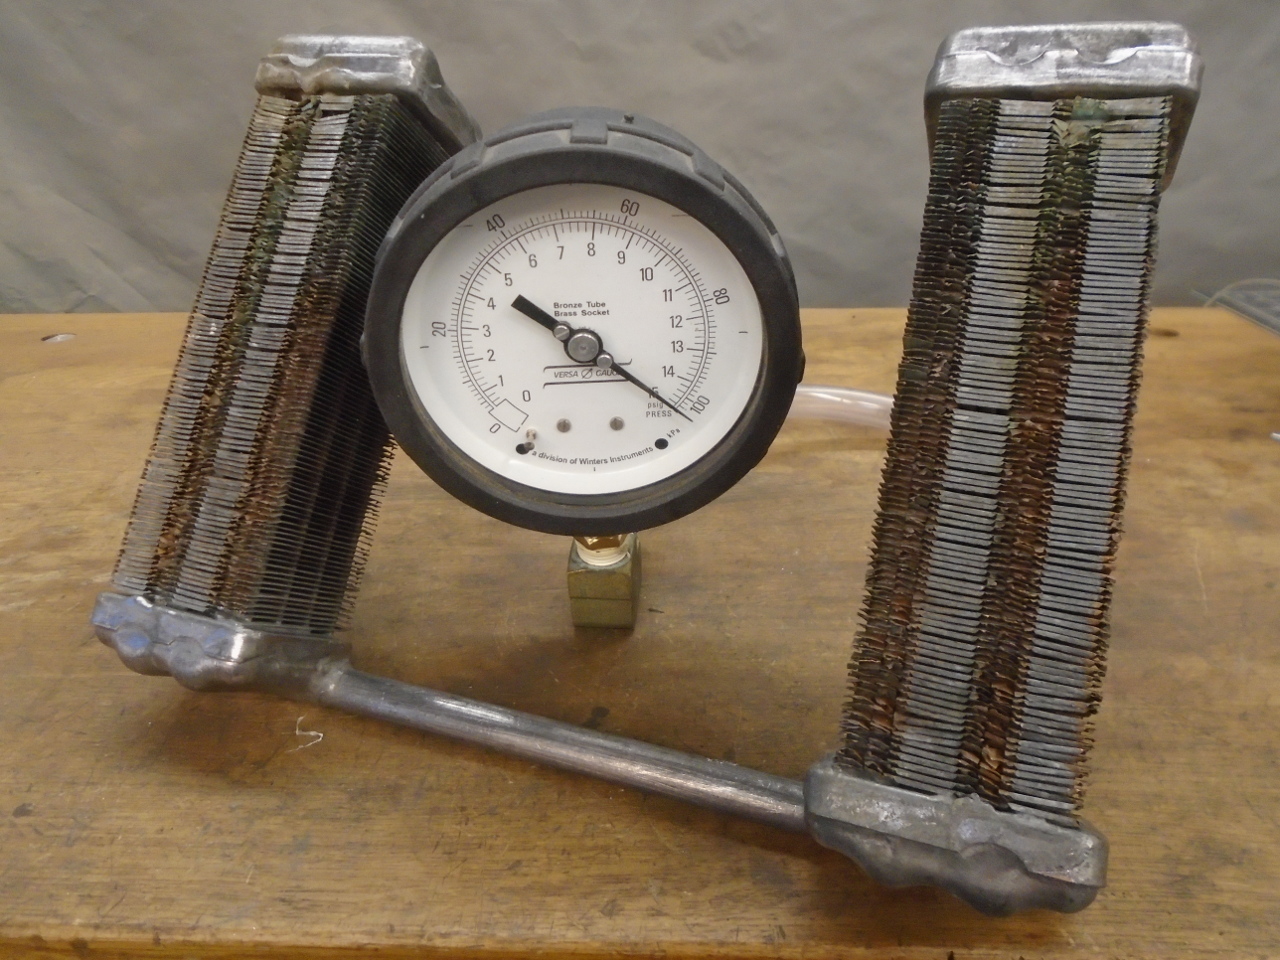
The pressure held pretty steady, which is a good sign, but the
real test is the bubble test. The pressure dropped when I
first dunked the core under water, but I think it was just
because the water was cold. Over 30 minutes or so, no
bubbles, and no more pressure drop.
So then the core could go home.
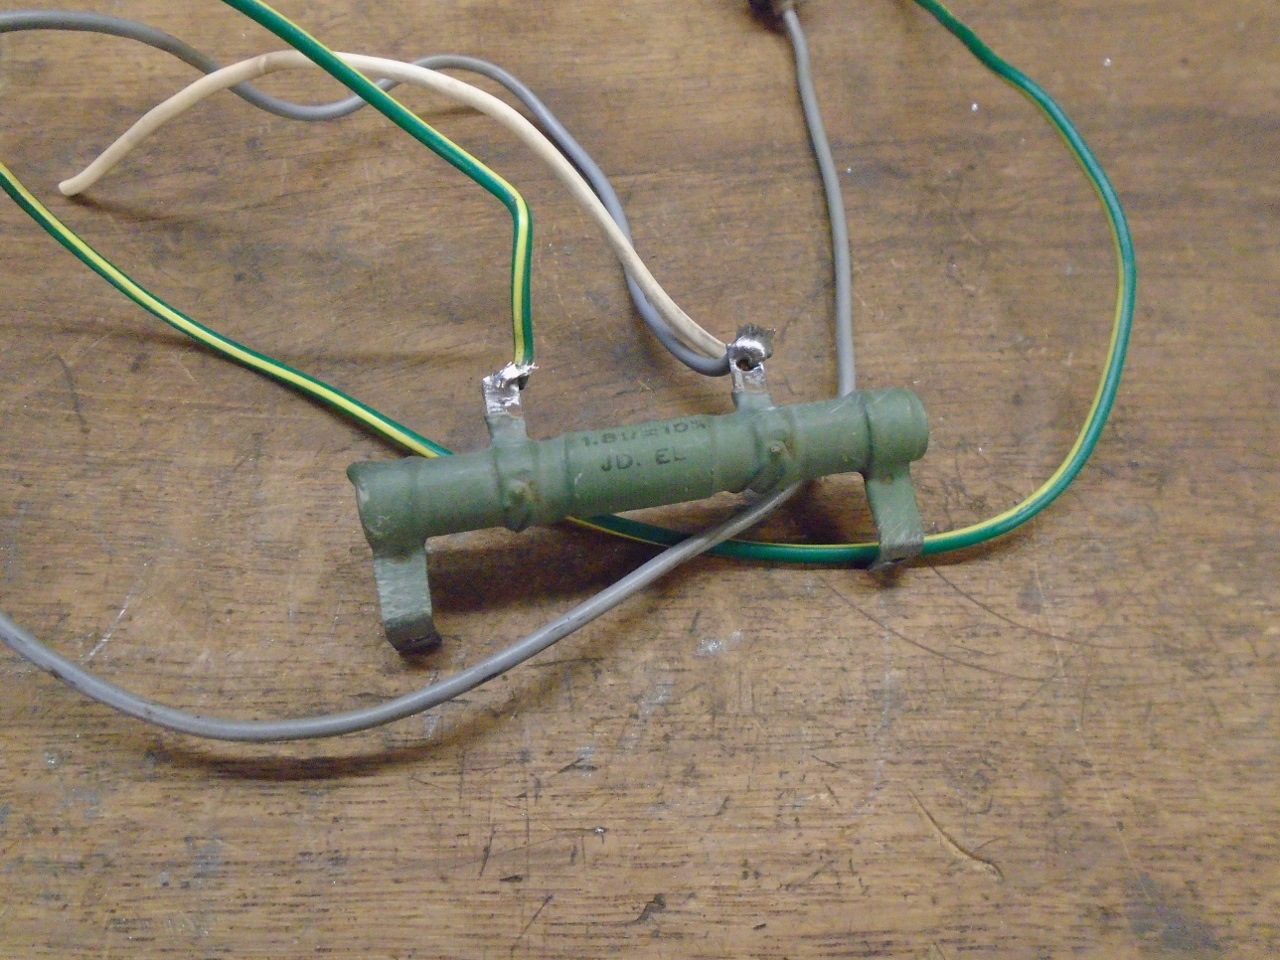
Another little item that goes in the main chamber was taken from
the original heater--the dropping resistor for the low fan
speed. It is marked at 1.8 ohms. The wires from the
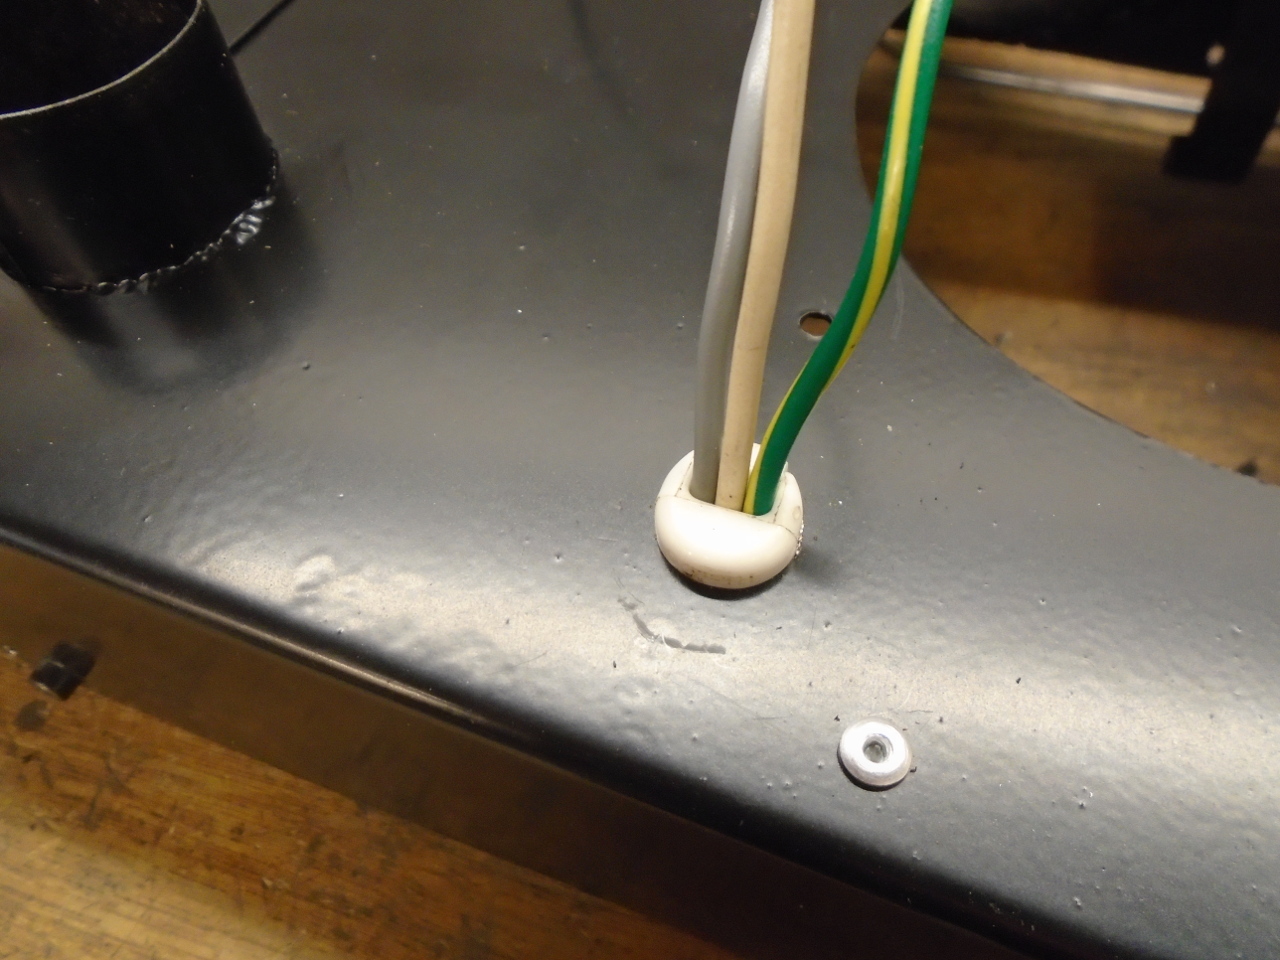
resistor originally passed through a rubber grommet in the
housing wall, with a knot for strain relief. A true strain
relief seemed like a small but nice little upgrade.
The rear cover for the housing was also from the original
heater.

Now the only thing left was the motor and fan. It occurred
to me again that I maybe should have checked the motor first.
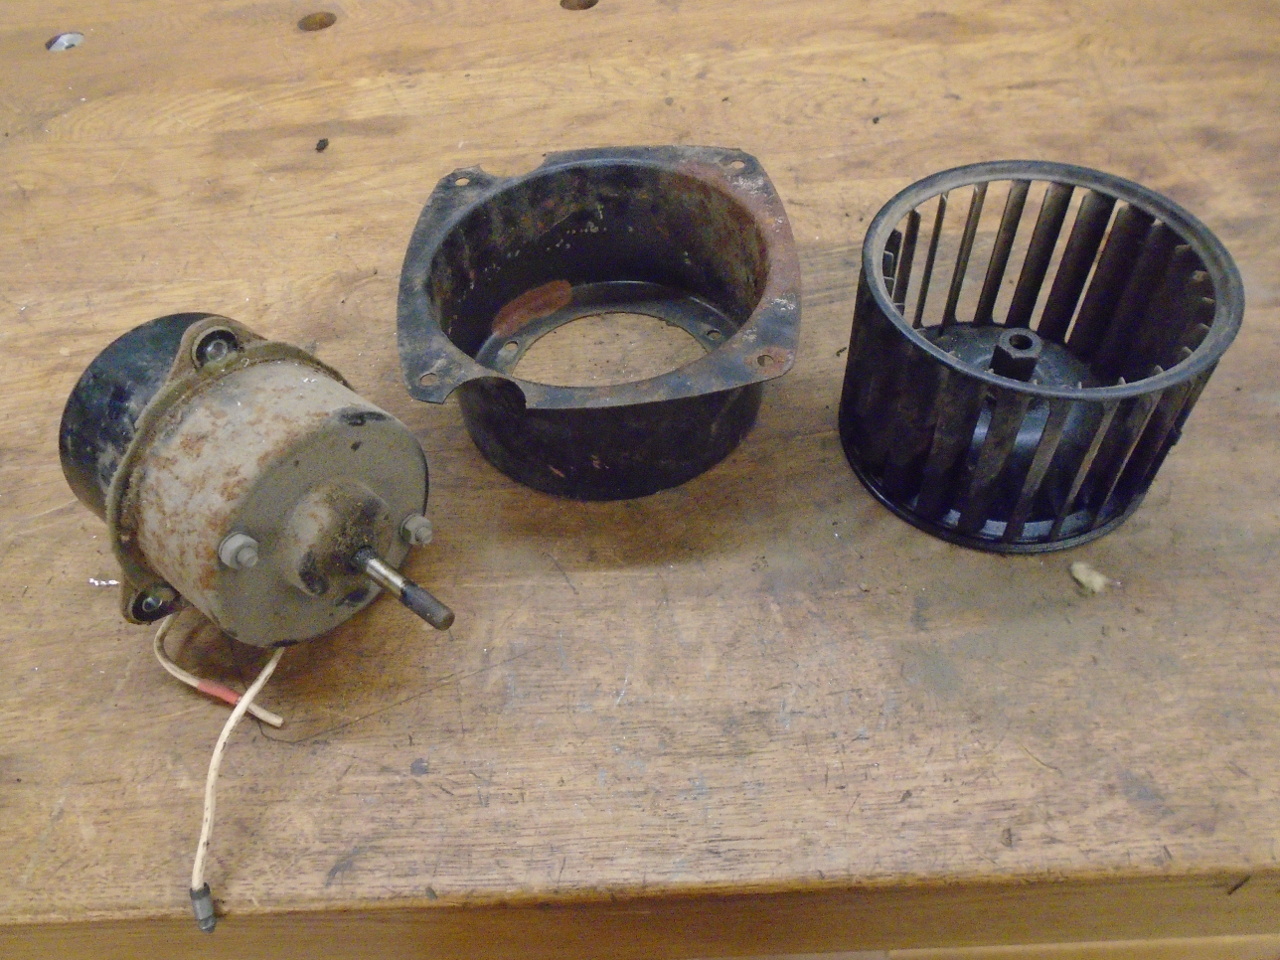
The outside of the motor was pretty crusty, but the inside
seemed OK. The brush board was clean, and the brushes had
plenty of life left.
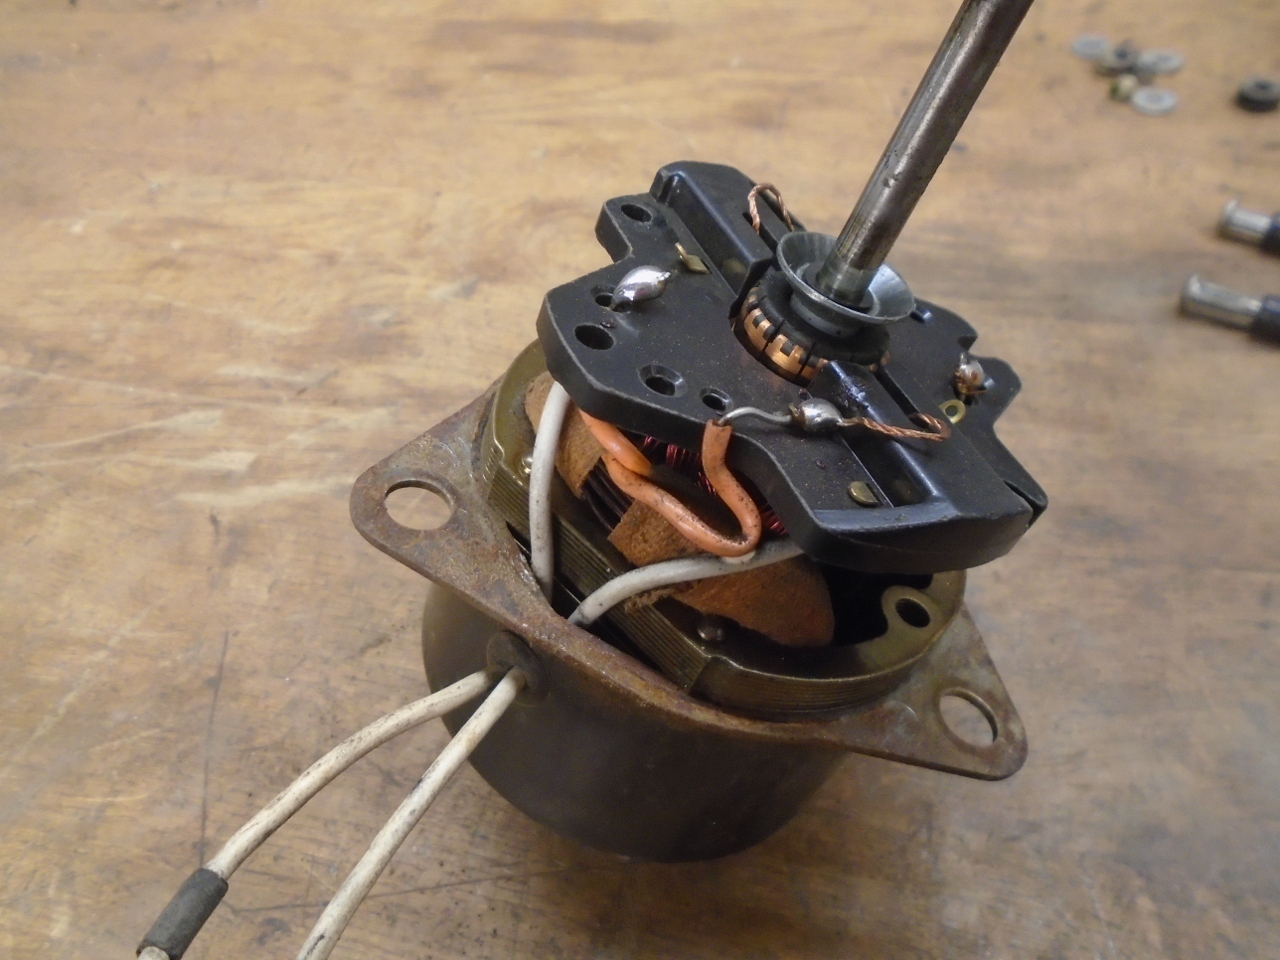

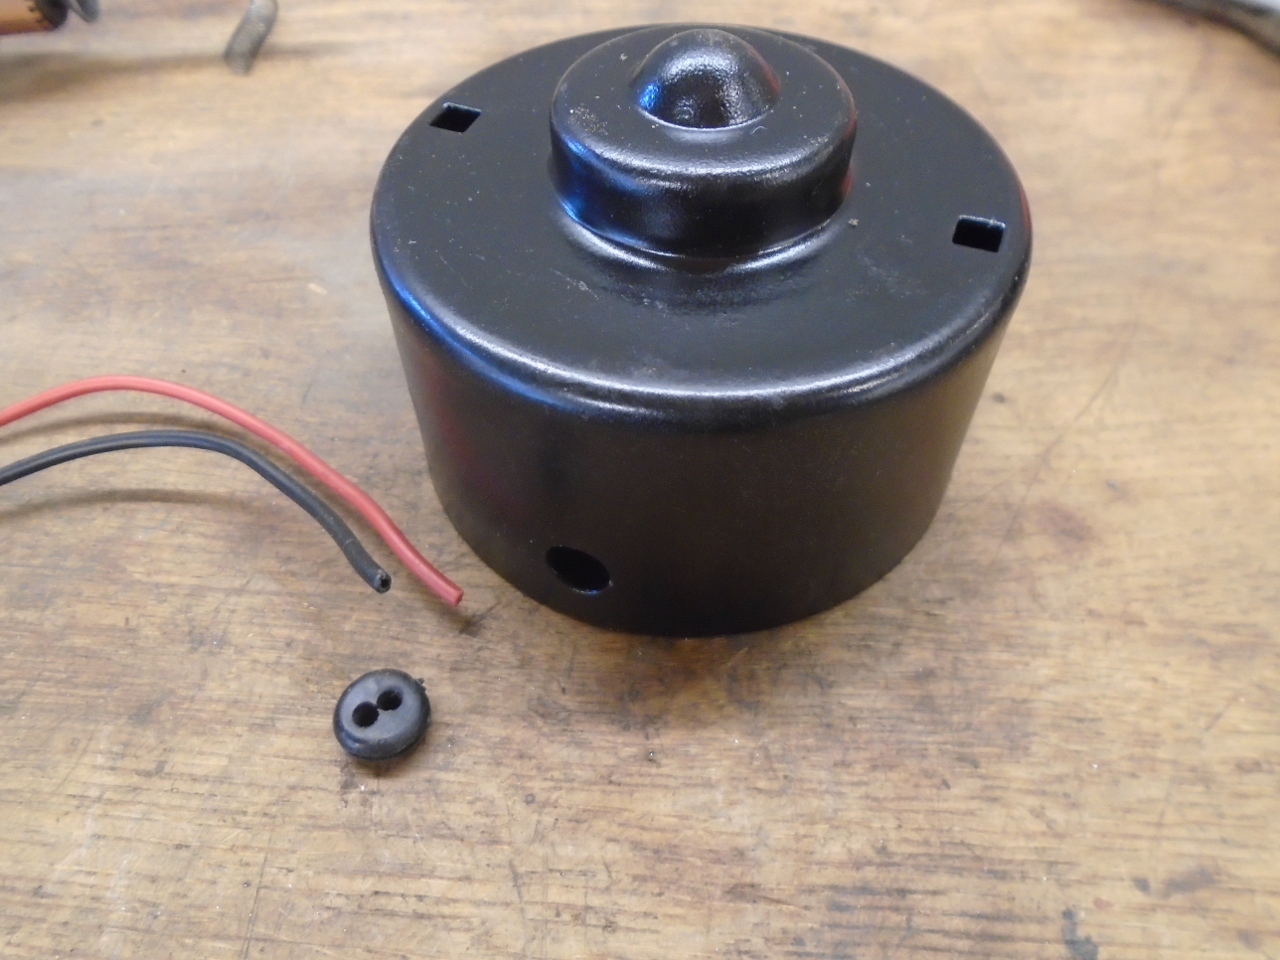
De-painted, de-rusted, and powder coated the metal parts.
And cleaned up the commutator with some Scotchbrite.
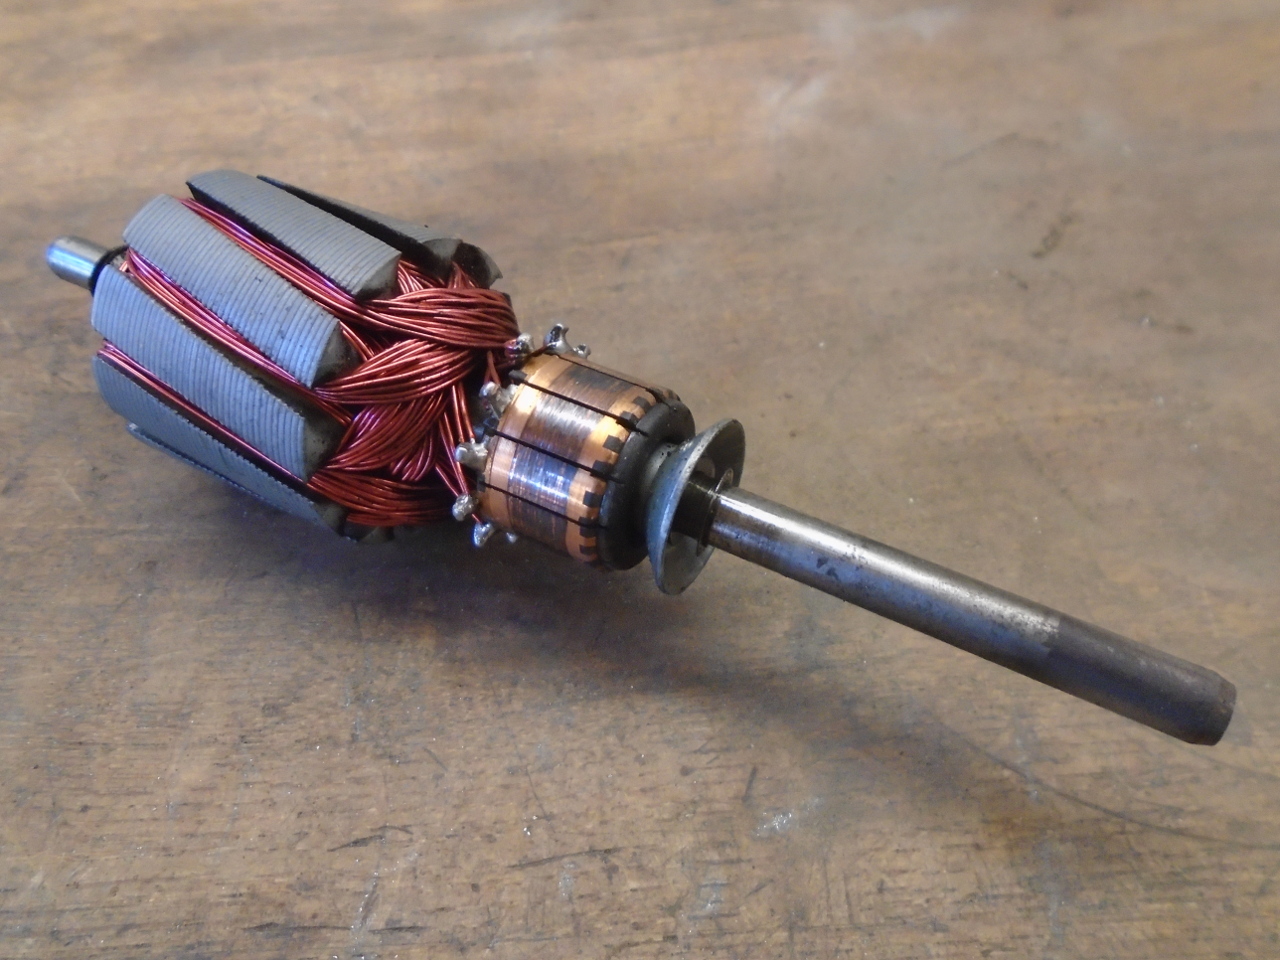
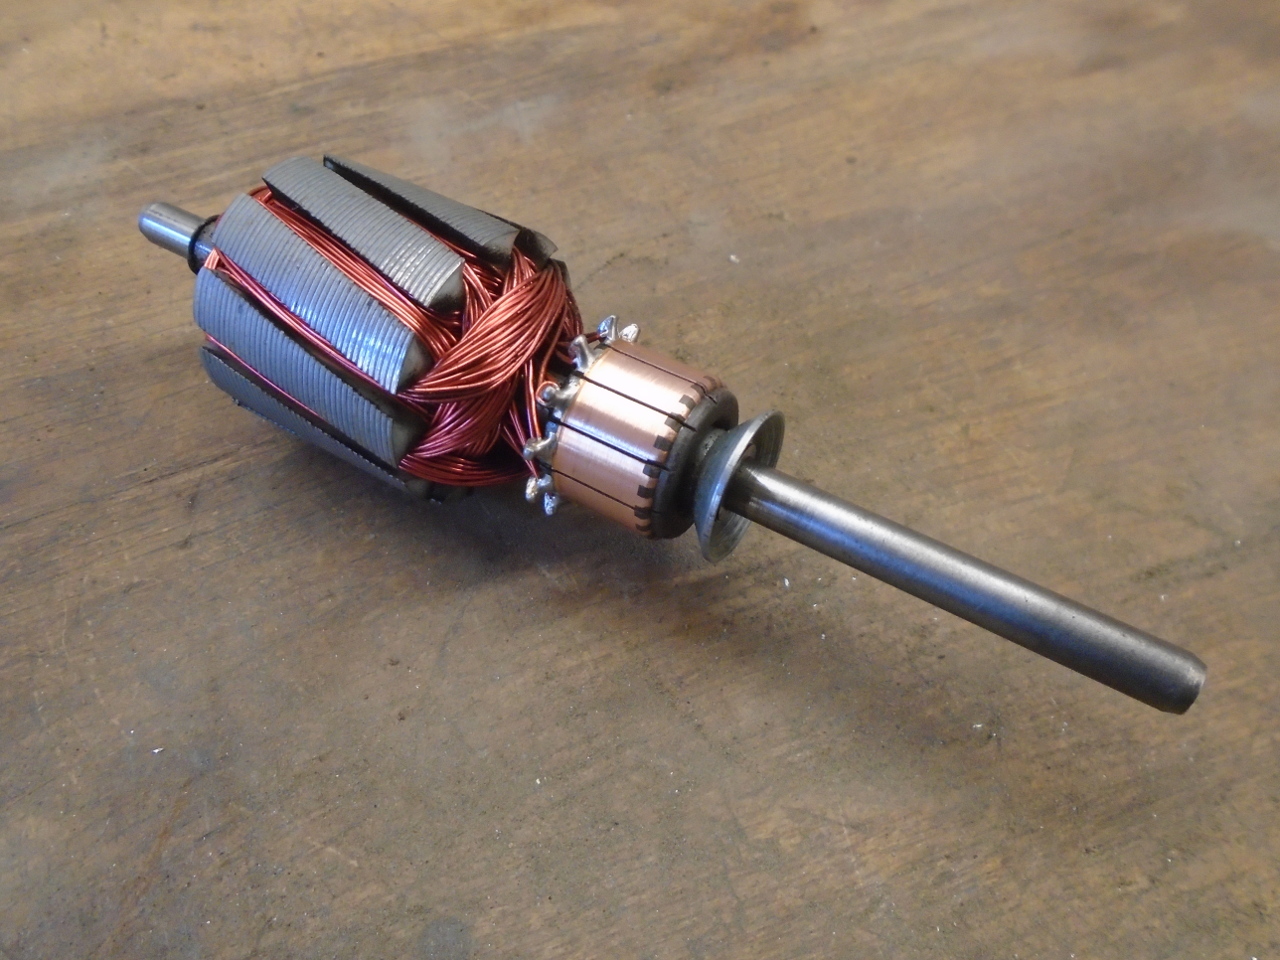
I decided to change the motor's lead wires, which were a little
worn. I changed the colors to red and black, as God
intended. Originally, they were both white.
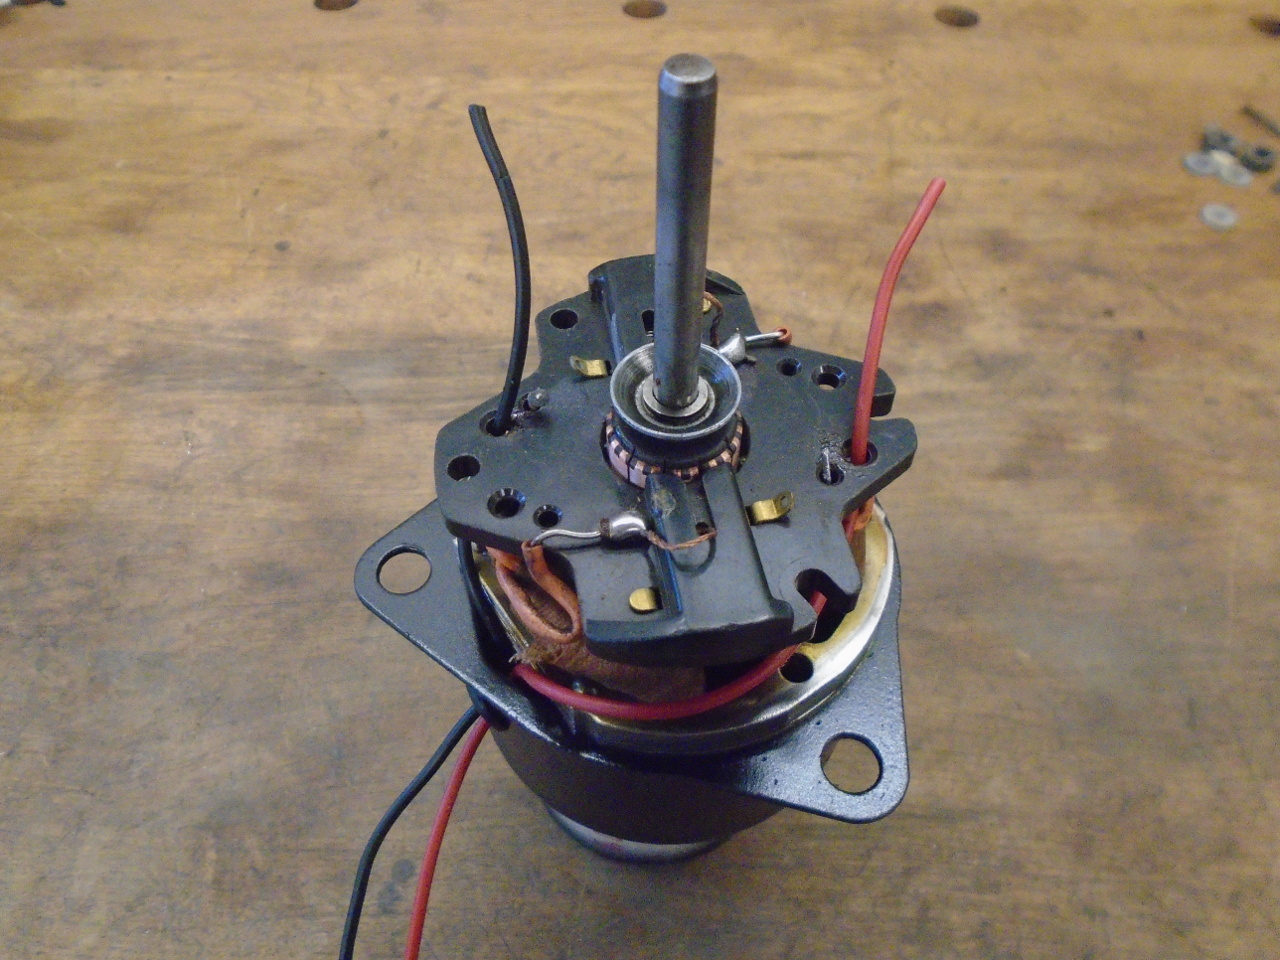
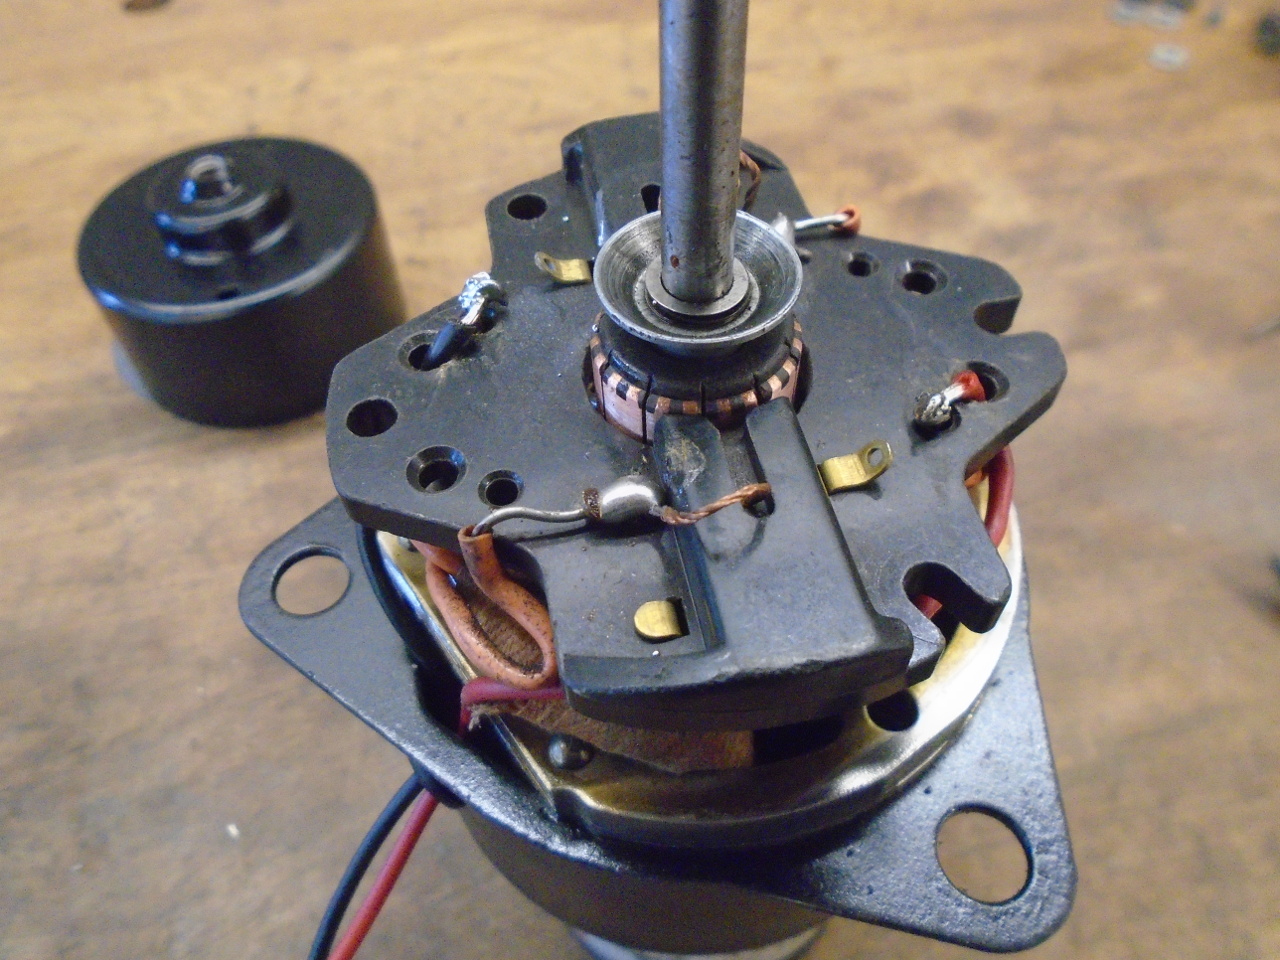
And final assembly is just the reverse of disassembly, as the
manuals like to say.

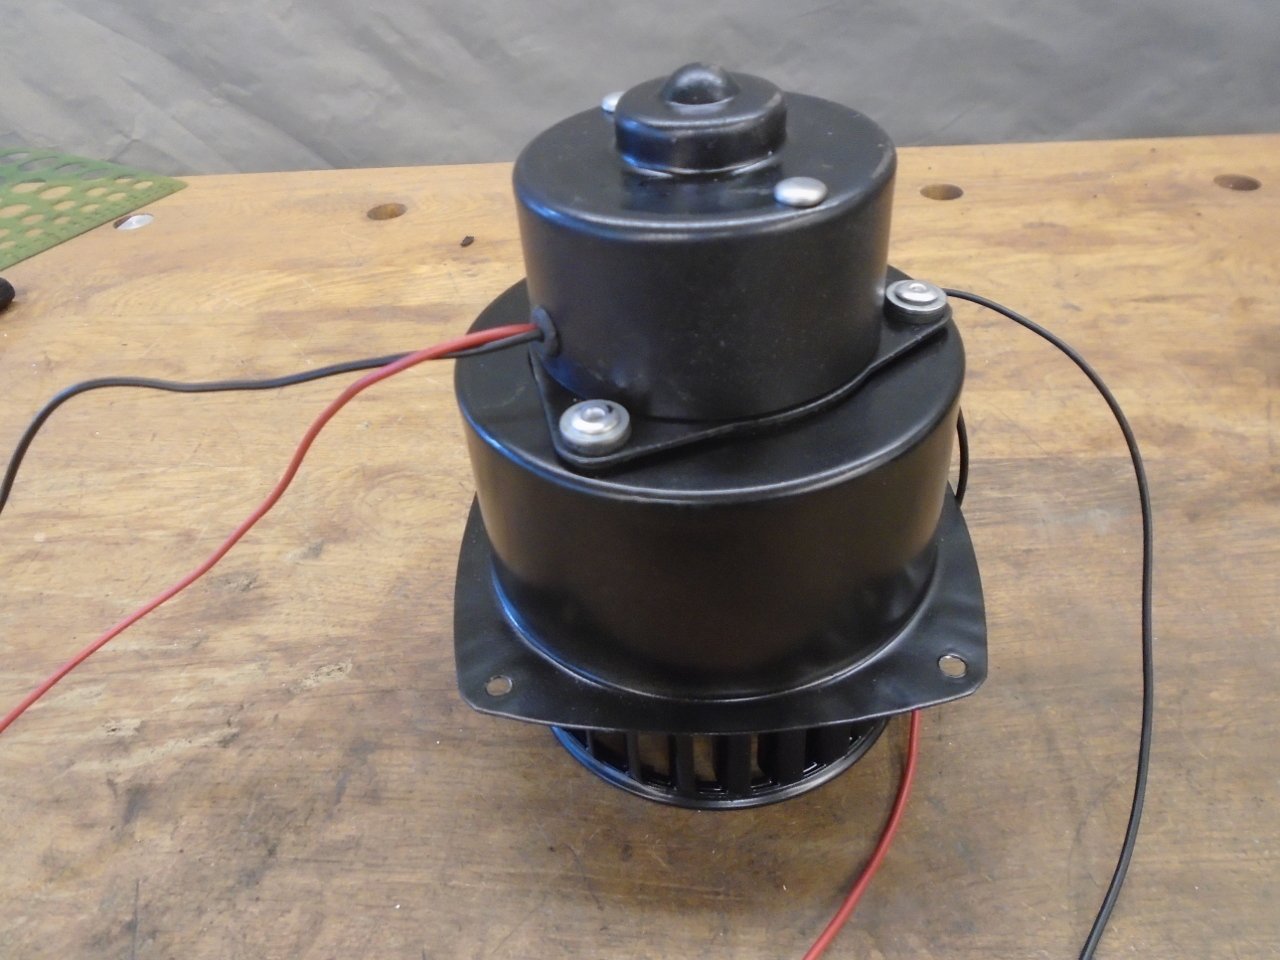
And finally, everything comes together. A test shows it
actually spins--and the right way!
Well, I do think I may have gone a little off in the weeds on
this one. But it's done. It took a couple of days,
but the cost was almost nothing--just consumables.
Comments to ed at mailto:elhollin1@yahoo.com
To my other GT6
pages