To my other GT6 pages
April 2, 2024
Front Overriders
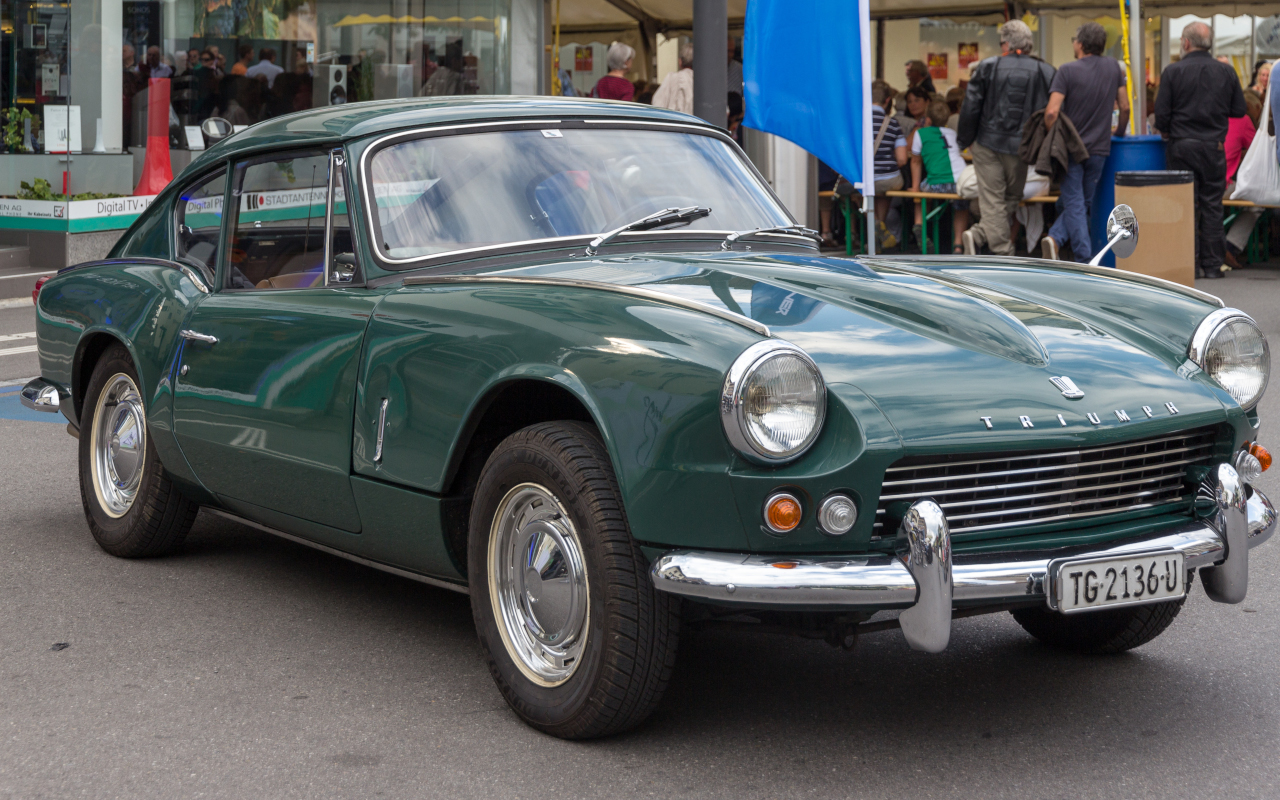
Both GT6 cars and their Spitfire cousins saw an evolution of front bumper arrangements over their runs.
For GT6, the Mark 1 cars had a low bumper and a pair of chrome
overriders. Starting in late 1968, the Mark 2 (called GT6+ in the
US) had a raised bumper, certainly due to US FMVSS rules, and overriders
had rubber buffers. In 1971, the Mark 3 retained the
high bumper, but the overriders changed to black rubber blocks below the
bumper.
These images are not mine. They were borrowed from the GT6 Wikipedia page, and credit for the photos can be found there.
a.jpg)
.jpg)
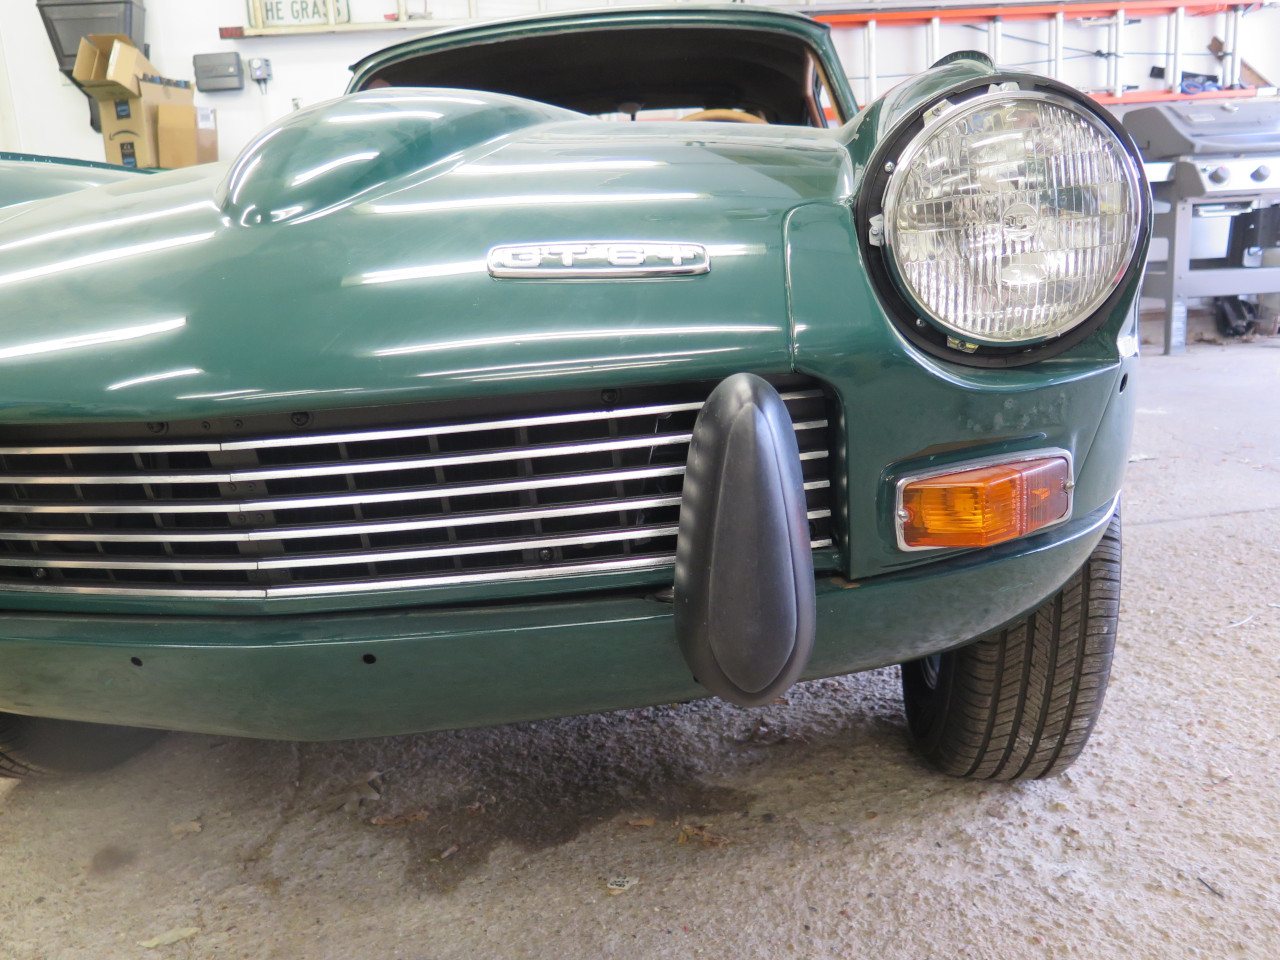
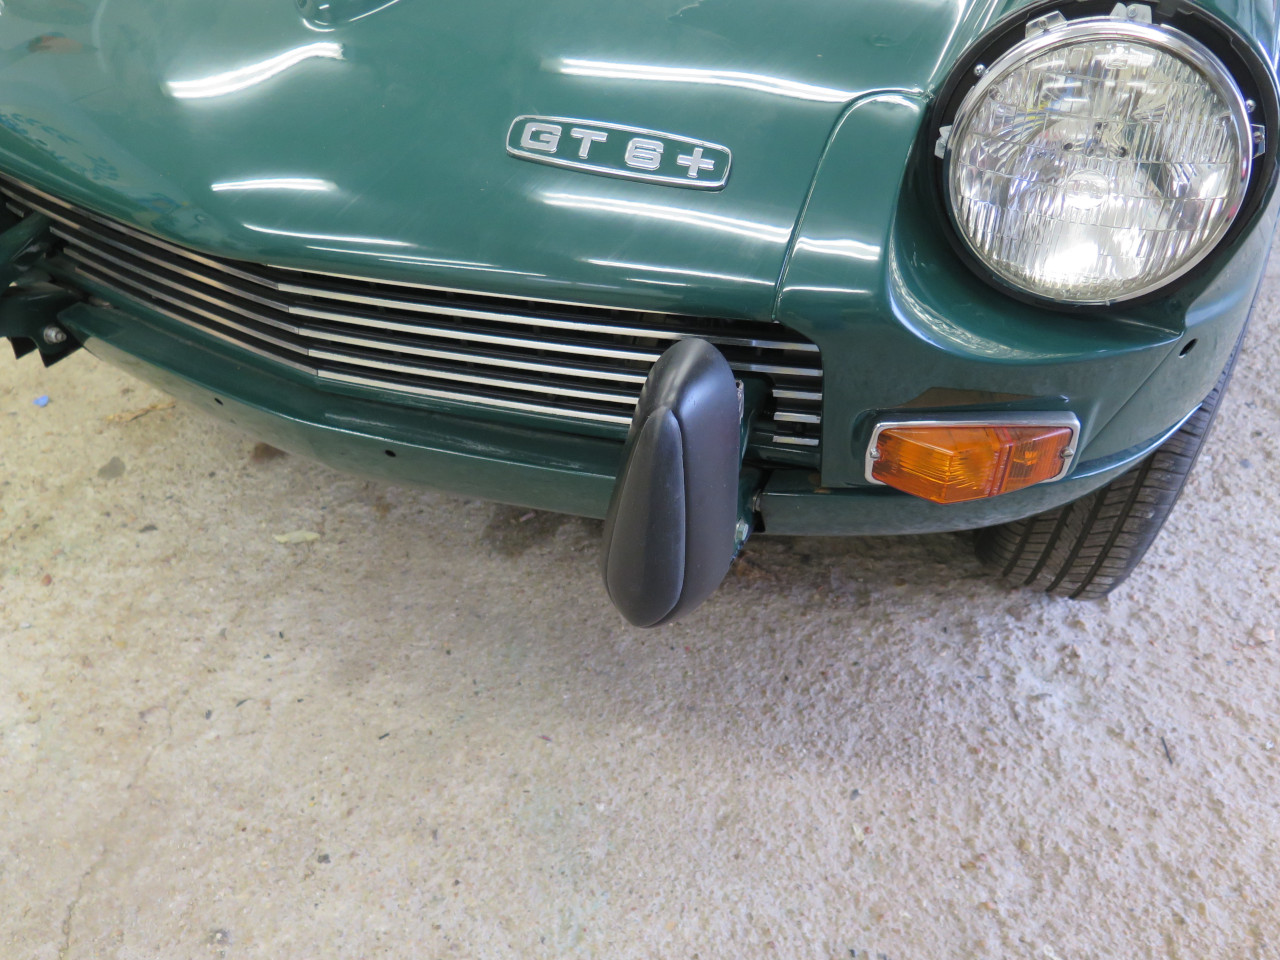
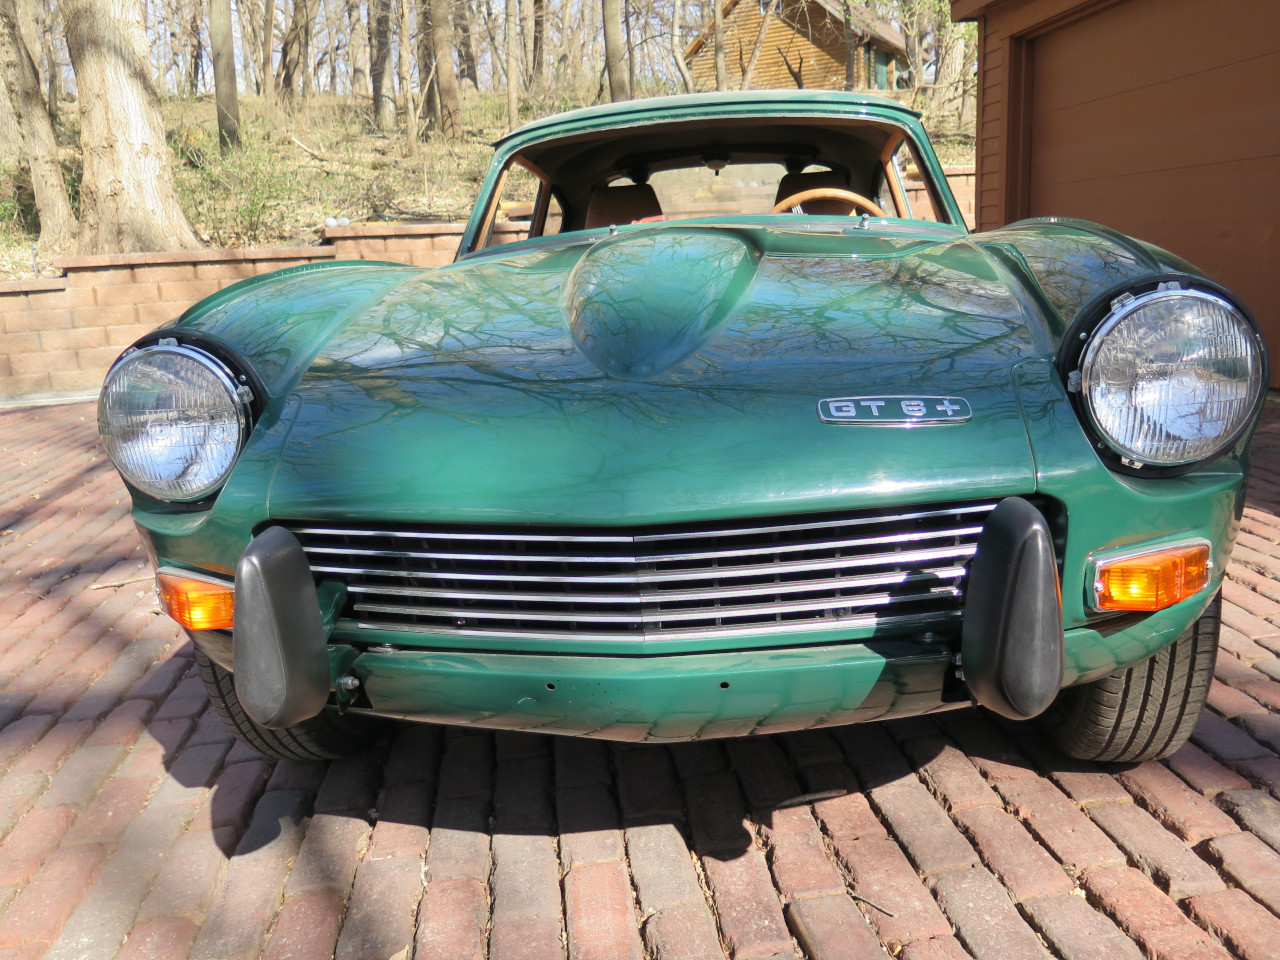
Of all three GT6 iterations, I like the Mark 2 (+) the best. I
like the round tail, and I like the rear suspension. But I really
can't love that front bumper. It obscures the grille, which I
think looks really nice on the Mk 1.
So, what to do? I launched an image search, and found that I'm not
the only one who feels this way. There are quite a few ingenious
solutions out there. Some folks cut out the center part of the
bumper, with varying degrees of finish work to patch up the
wounds.
Quite a few owners dispense with the front bumper entirely. One
fly in this ointment is that the overriders serve to cover the bonnet
hinges, and the hinges aren't really that attractive when fully exposed.
Some find a way to re-attach the stock overriders, or some alternative
(such as those from an AC Cobra!).
I was mulling this over a few weeks ago, when Inner Engineer wandered into the room, playing "Stairway to Heaven" on a kazoo.
He paused just before the guitar solo. "Wassup, Dude?"
"Oh, I'm trying to figure out what to do with the front bumper on the GT. I don't like the way it covers up the grille."
"Yeah, I see what you mean", he said, looking at the images on my
computer screen. Why'd they do that? Ruins the look."
"I know. US safety rules, I guess."
"Can you just lose the bumper?"
"That's what I'm thinking, but if I pitch it all, the bonnet hinges stick out and look bad."
"Can you keep the--what do you call them--overriders?"
"Maybe, but they have these ugly cutouts on the sides where the bumper went."
"Can you just weld 'em up and re-chrome them?"
"Maybe, but my welding always has little pits. Not good for
chrome. And chrome is stupid expensive. And I'm not even
sure I want chrome anyway."
"Ahhh. So maybe satin black? Could be plastic then?"
"Yeah, could be."
"How about that 3D printer of yours?"
"I thought about that. 3D prints are great, but not always that strong, and most materials aren't good outdoors."
"Cast them then."
"Say what?"
"Cast plastic resin. Any shape you want. Just need to make a
pattern then a mold, then pour in the plastic. Piece of cake.
"Sounds like a lot of work", I protested weakly.
"What else do you have on your busy schedule, Dude?"
I could tell by his little sideways glance what the next words out of his mouth would be.
"How hard could it be, Dude?" he said as he wiped off the kazoo and walked away, starting into the guitar riff.
I hate it when he says that.
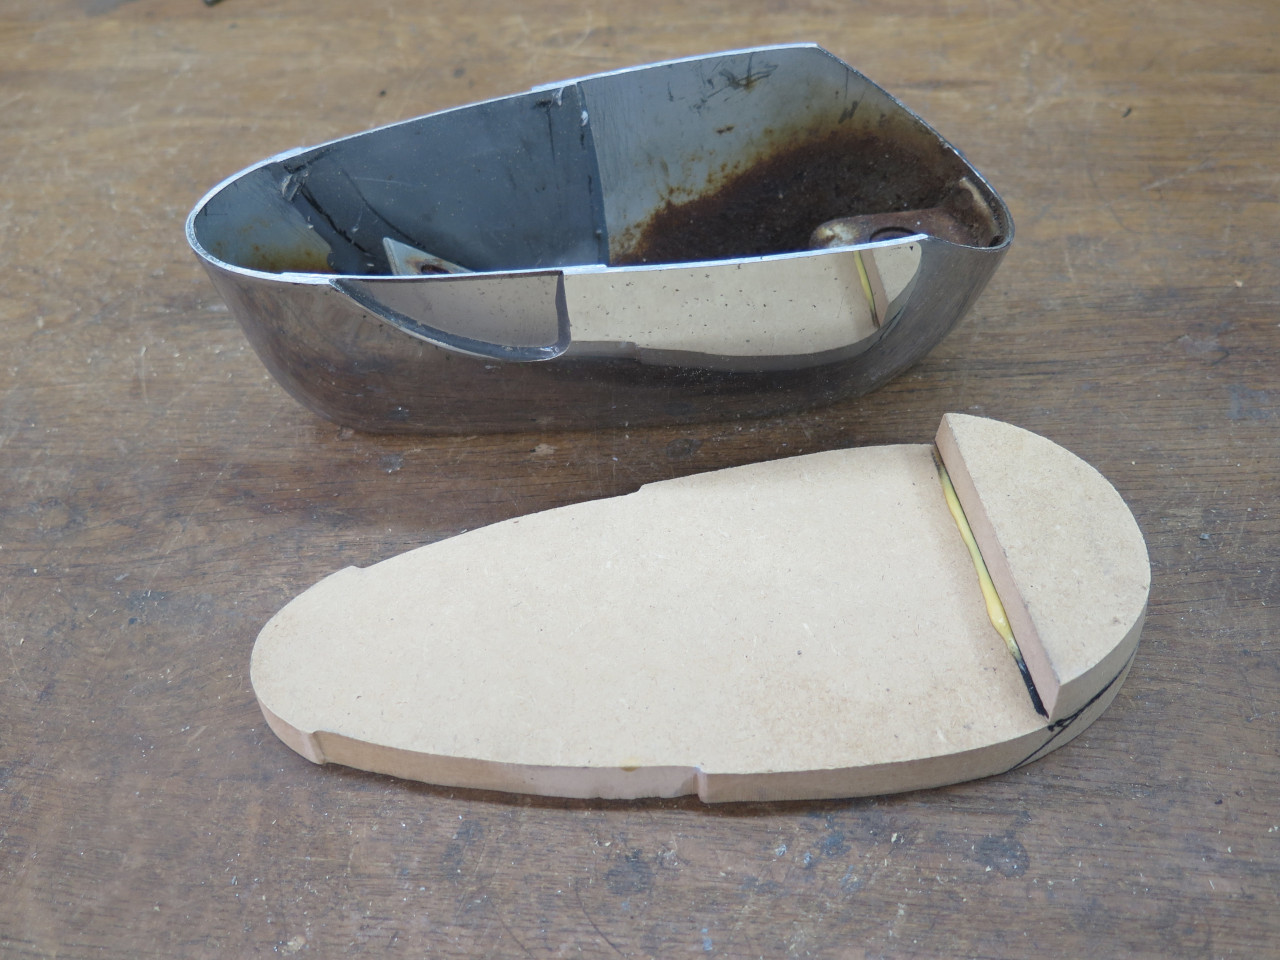
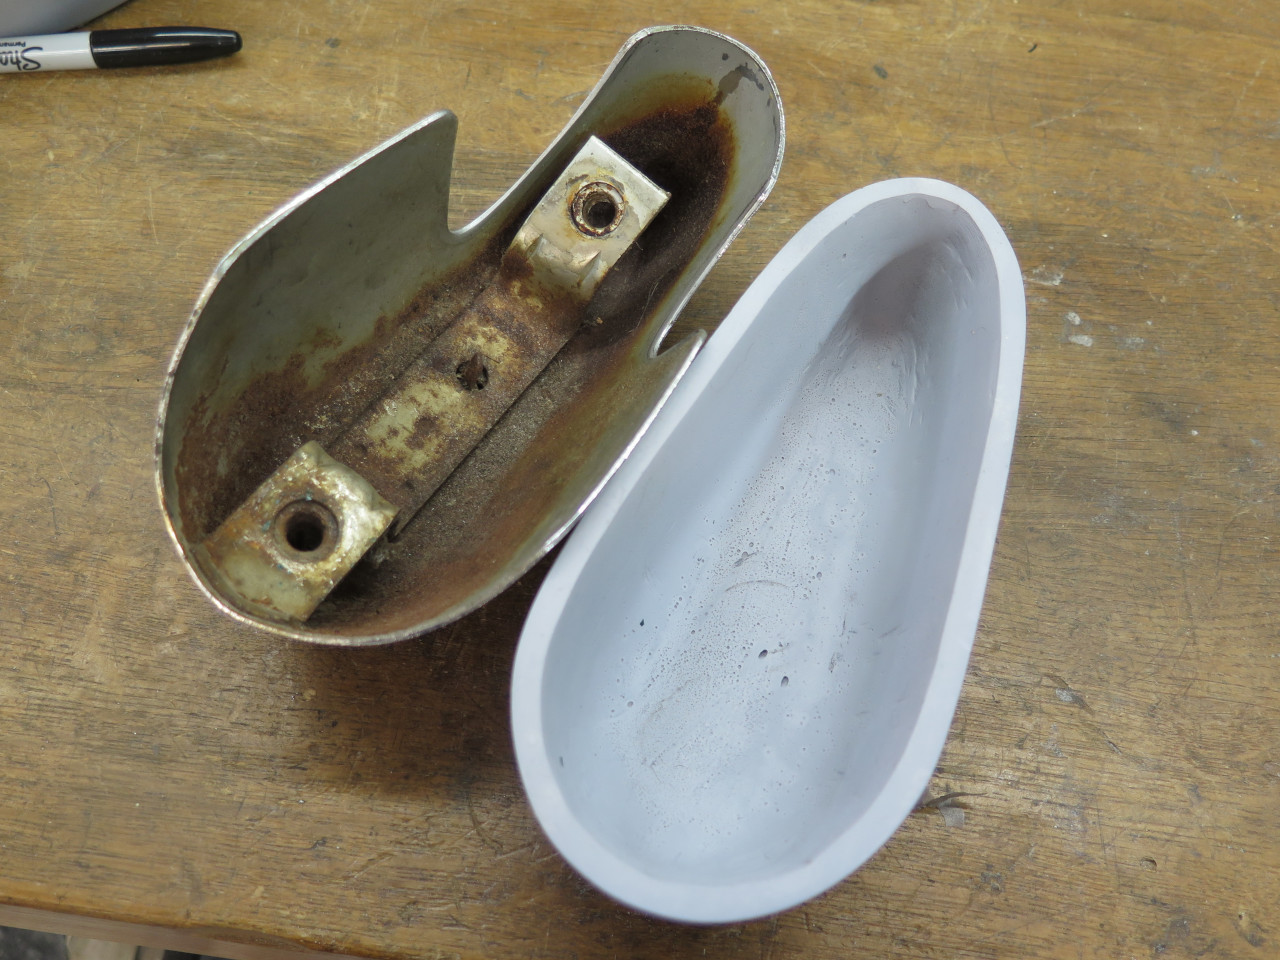
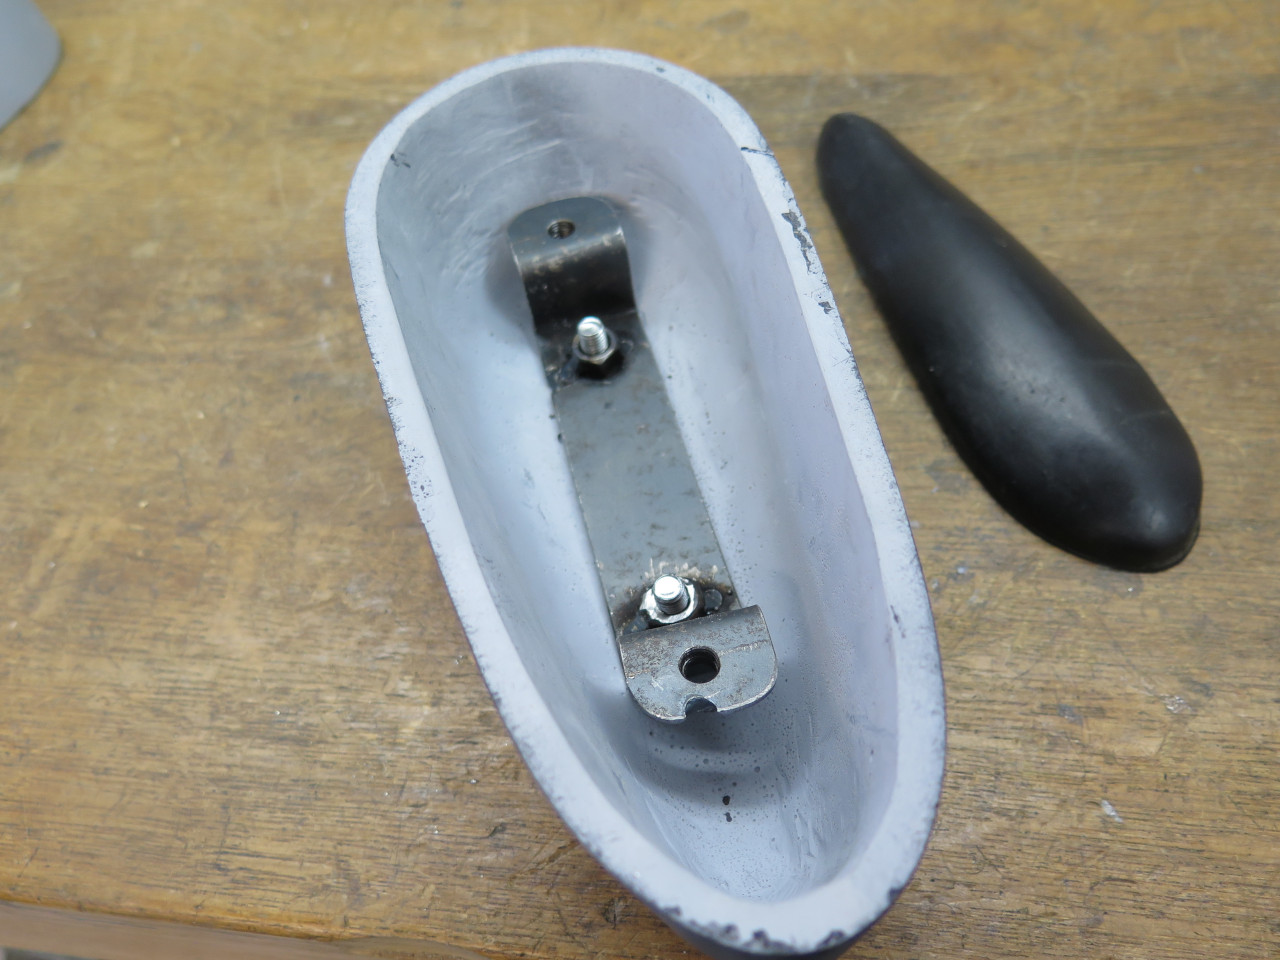
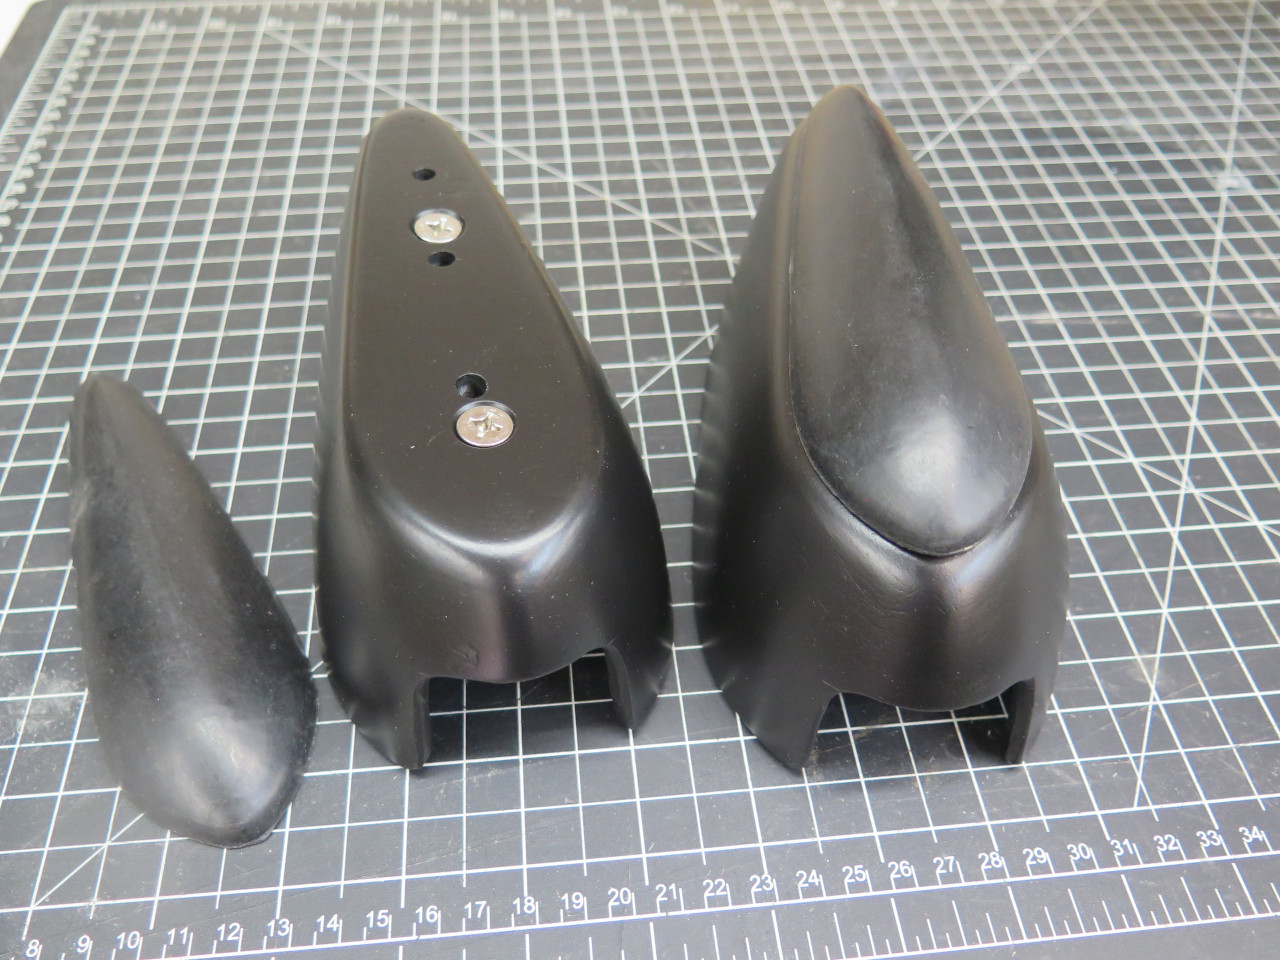
So, I needed a pattern. I looked around at the bumper assembly on
the bench. I'm not sure I even realized it at the time, but the
bumper is upside down in the picture. The bumper itself was pitted
with rust, and twisted out of shape. Eliminating it would be no
great loss.

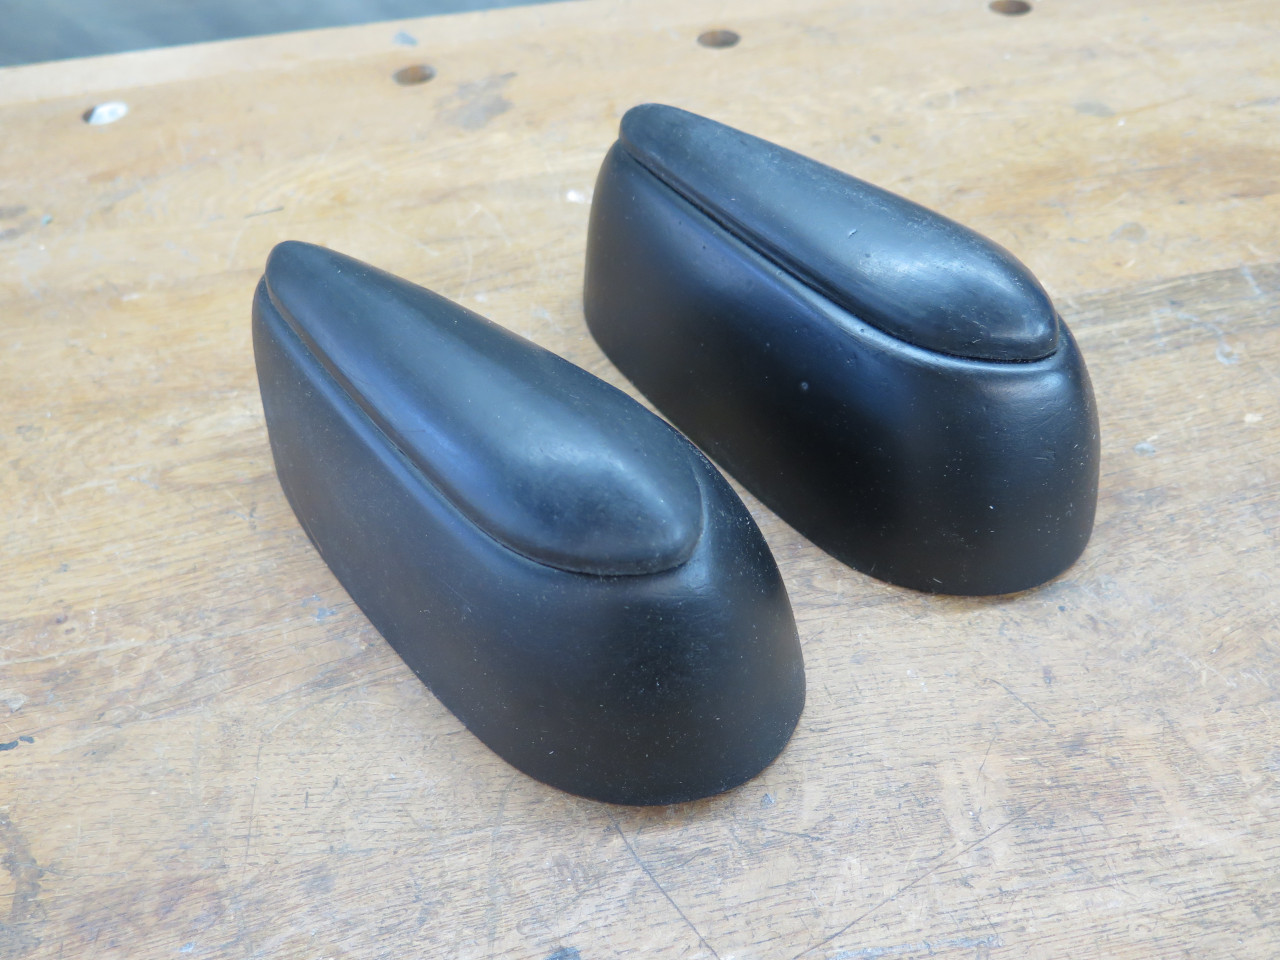
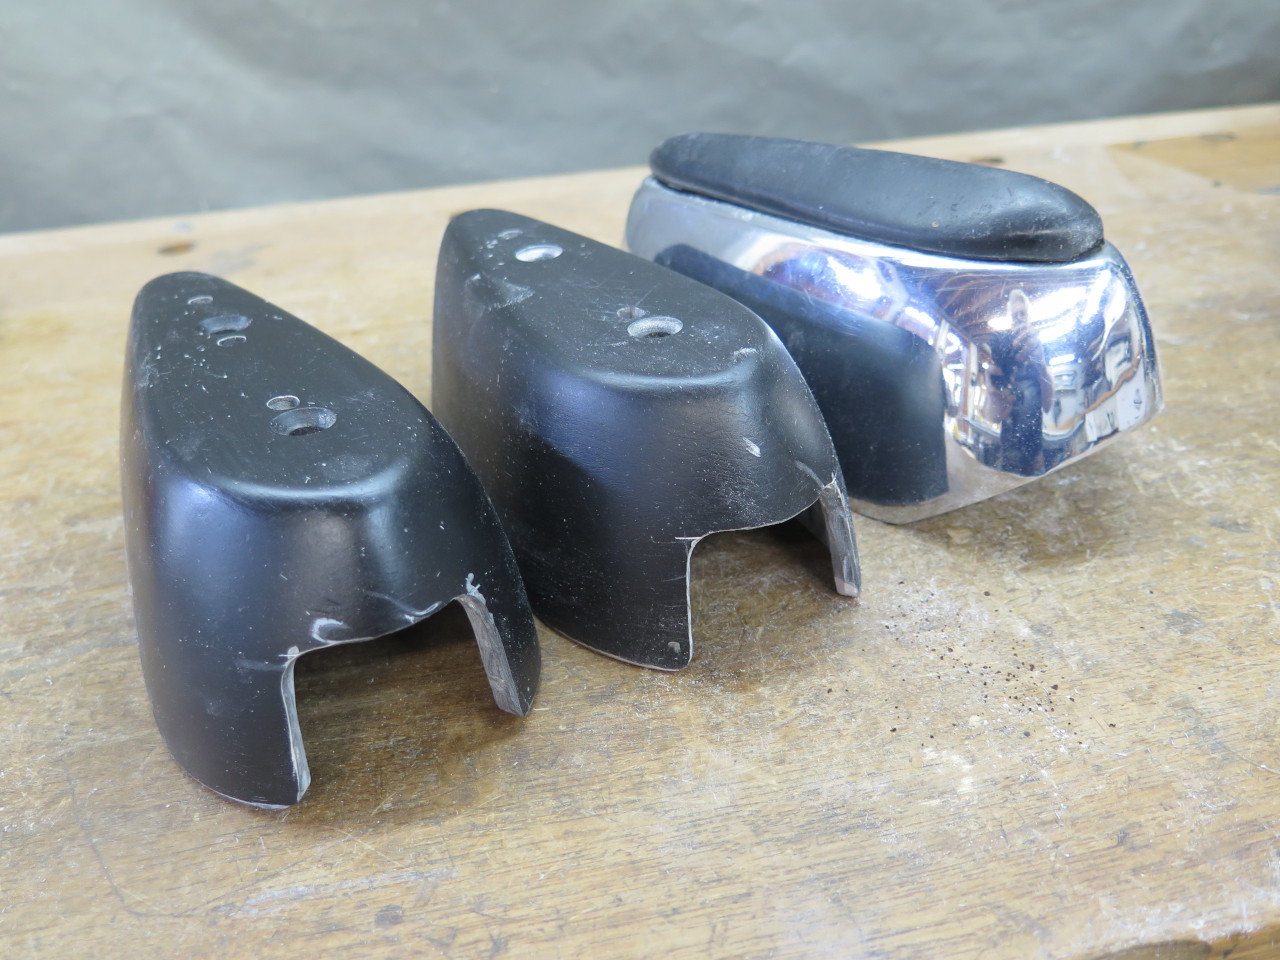
Overriders came off, as did the rubber buffers.

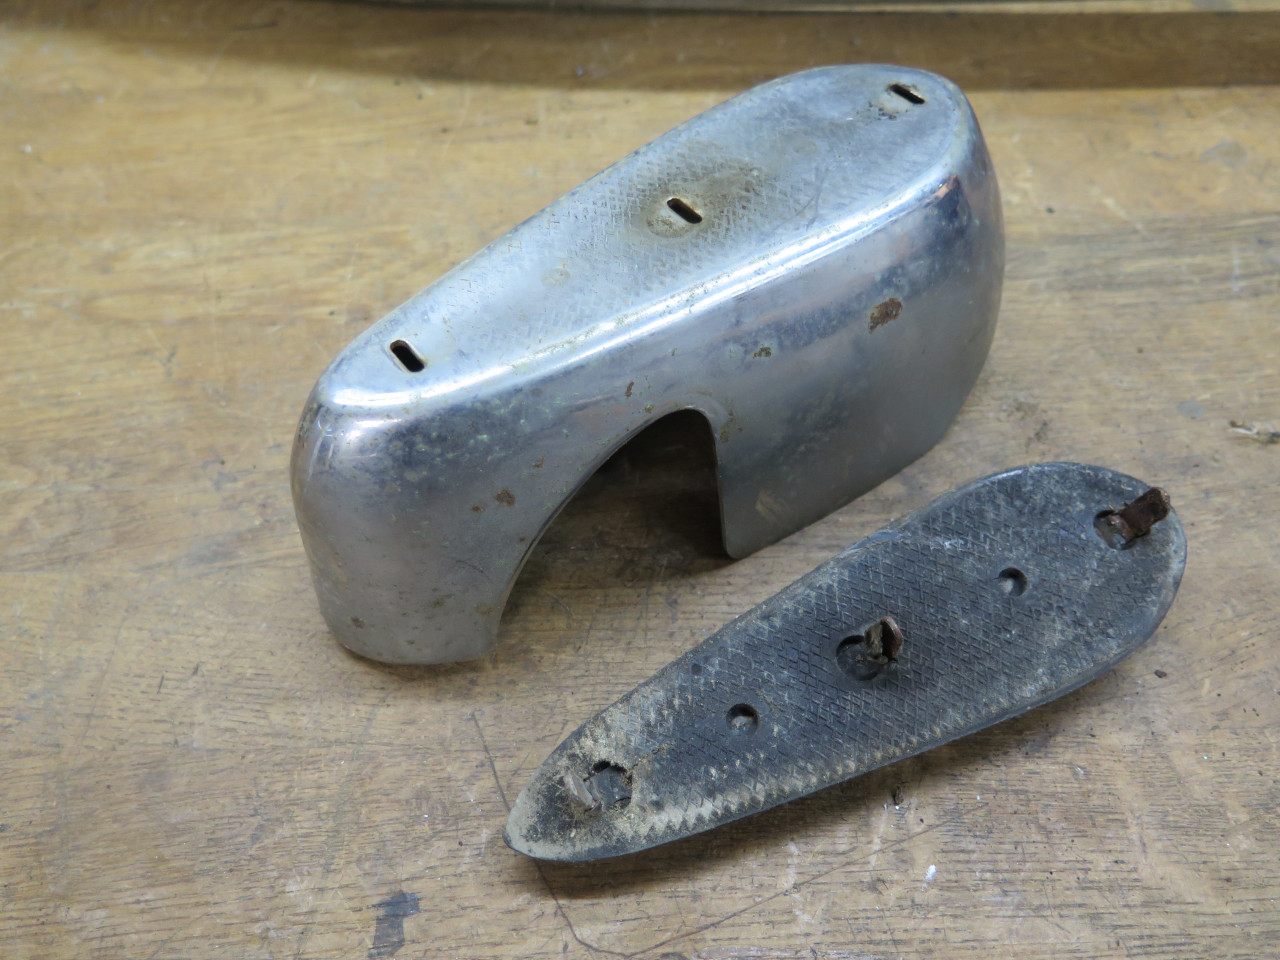
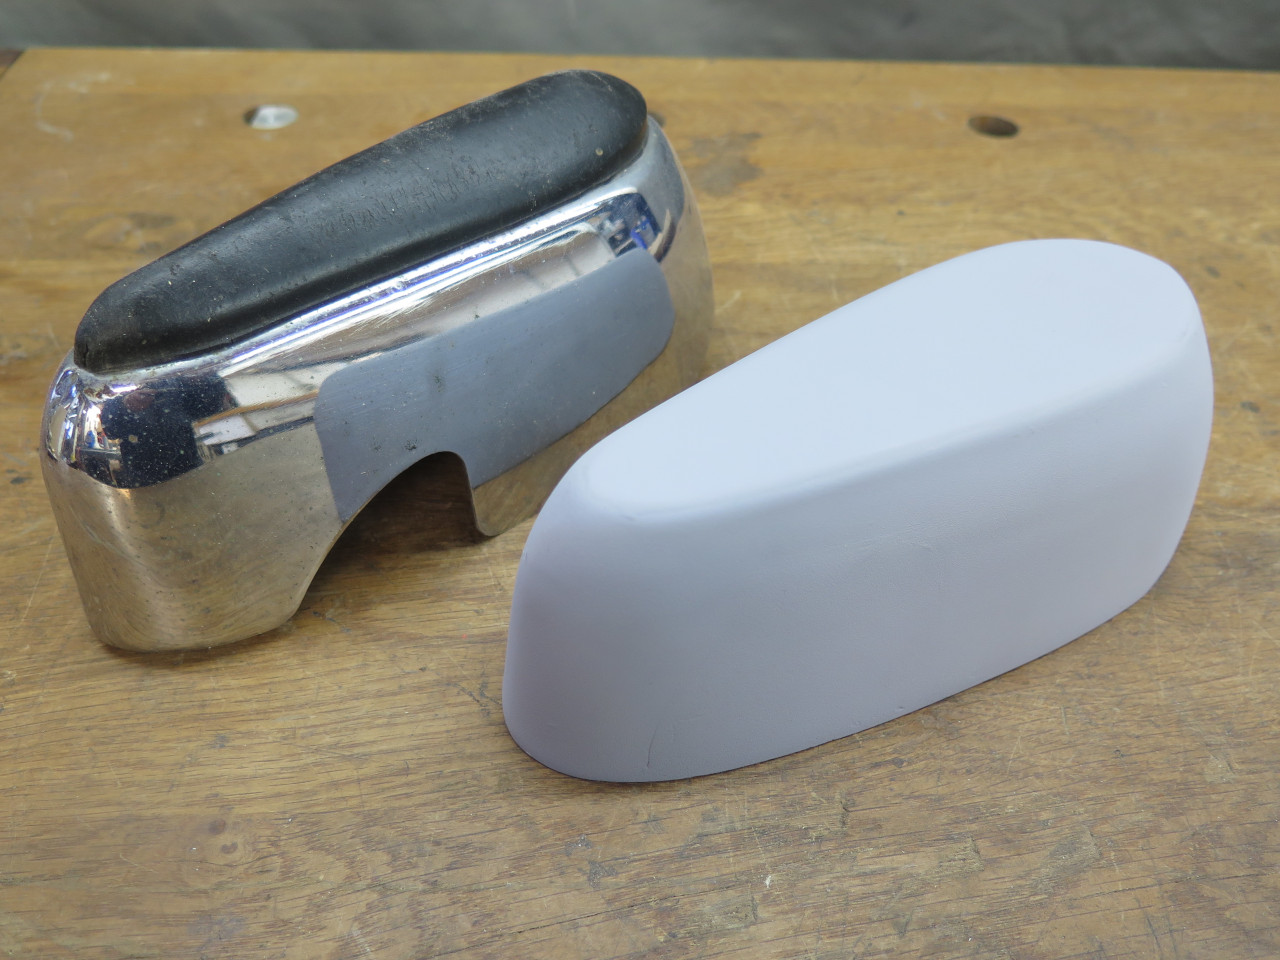
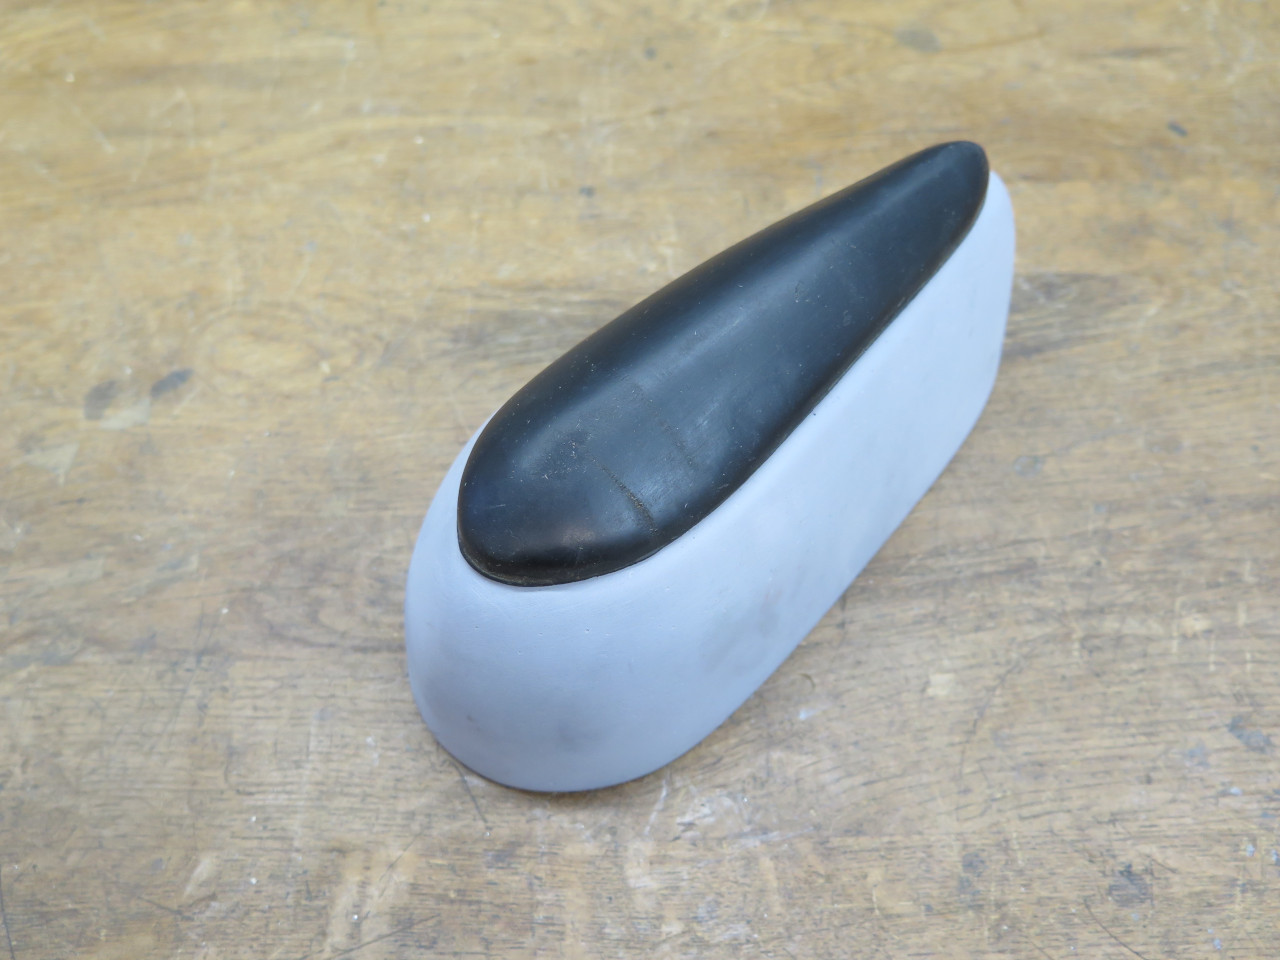
As I held one of the overriders in my hand, I slowly realized that I
really liked the shape. This would be my pattern. And I
could retain the rubber buffers too, as sort of an homage to the factory
parts.
It wasn't exactly a perfect pattern though. First, it had the
cutouts. Second, it had a mounting bracket inside that wouldn't
work any more since the top end of it bolted to the bumper. I
started modifying one of my overriders to become a pattern.
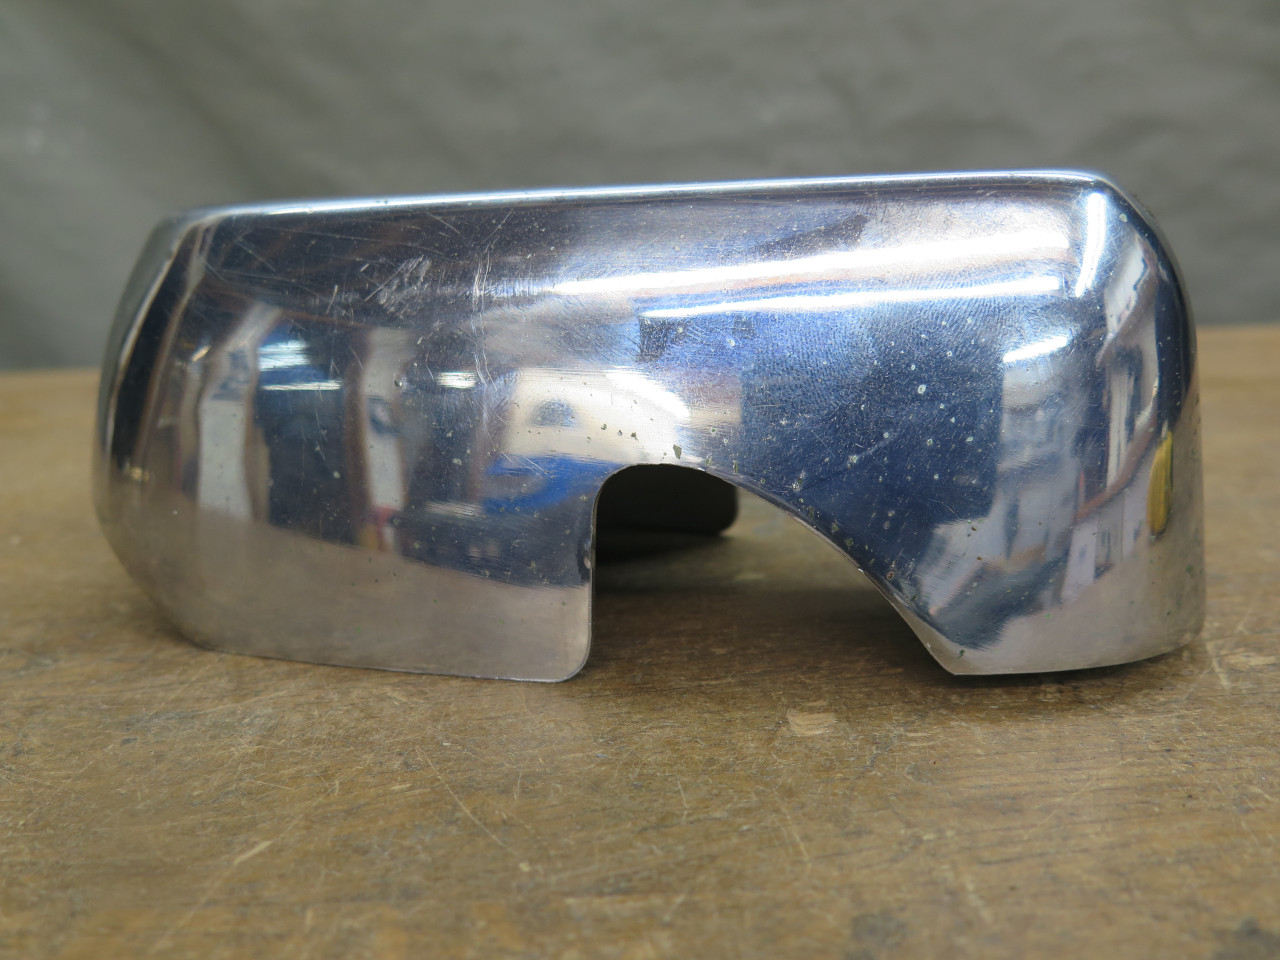
First the cutouts. Metal patches were epoxied on the inside.


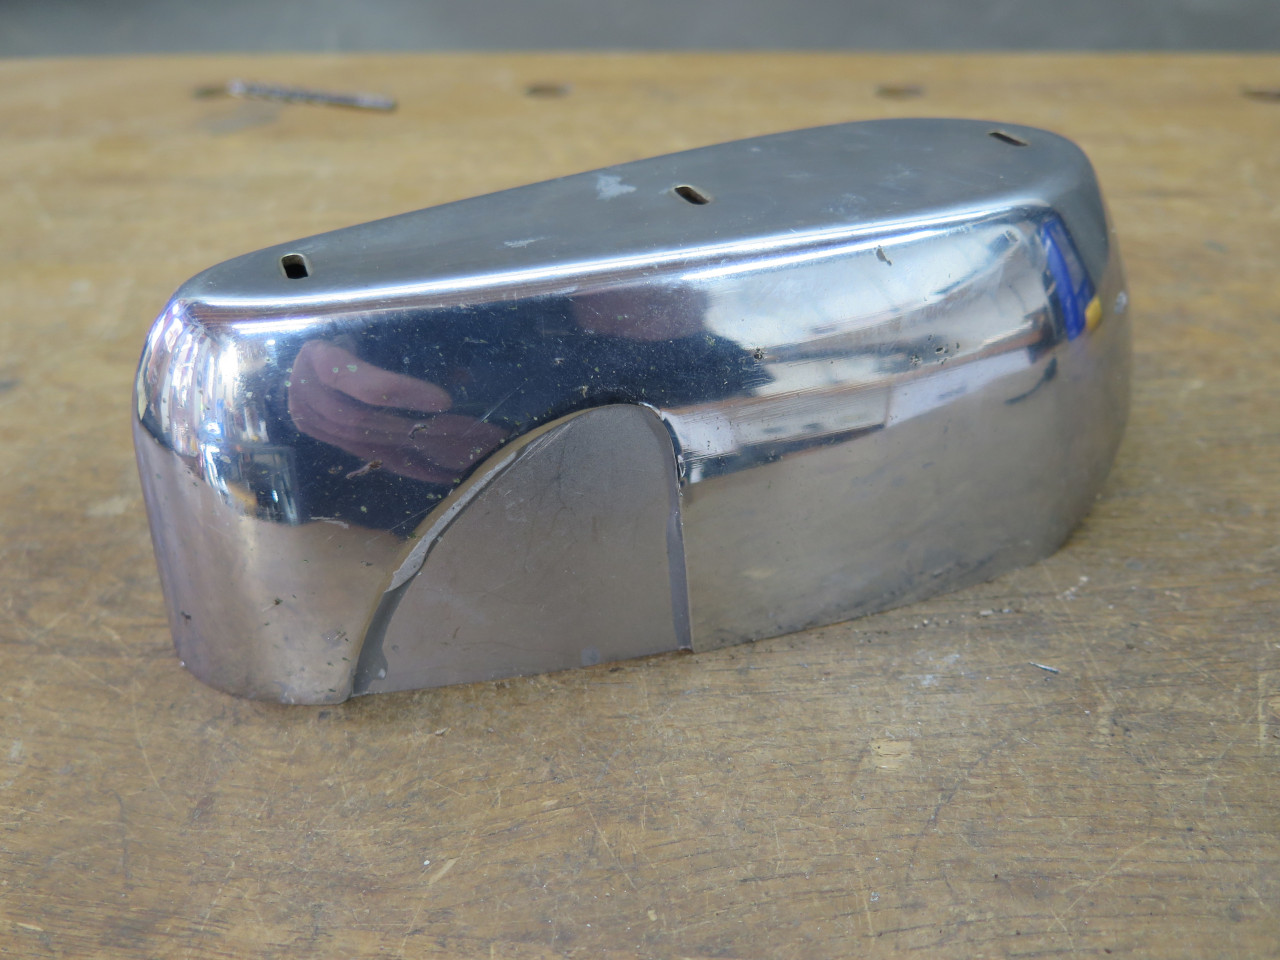
Then, to close off the backside, an MDF plug.


Then, some Bondo to smooth out the shape and plug the remaining holes, followed by a primer.
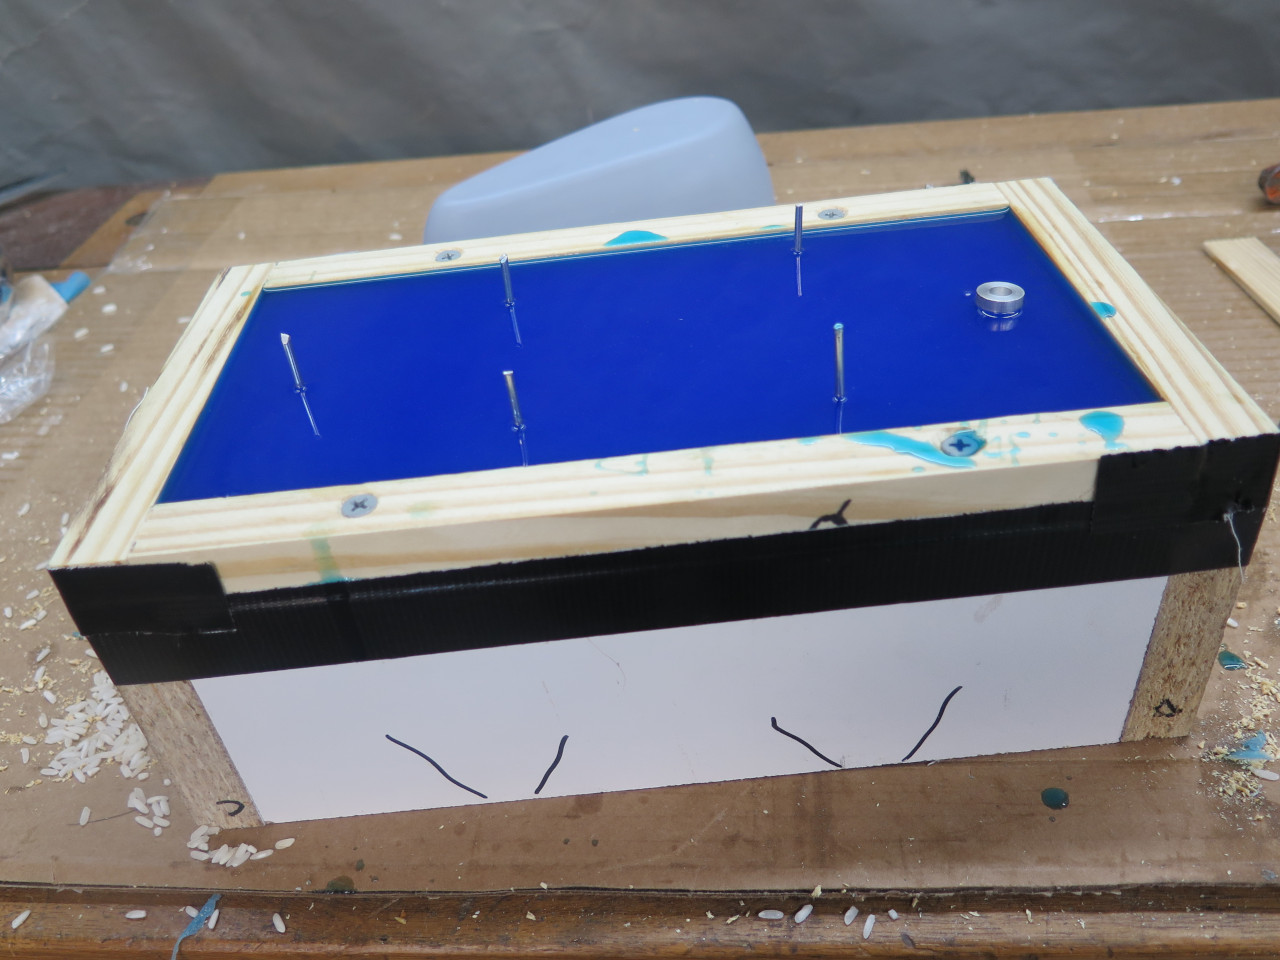
This pattern was fastened to the bottom of a mold box...

...and some silicone rubber poured in.

The box removed, and the pattern pulled out.
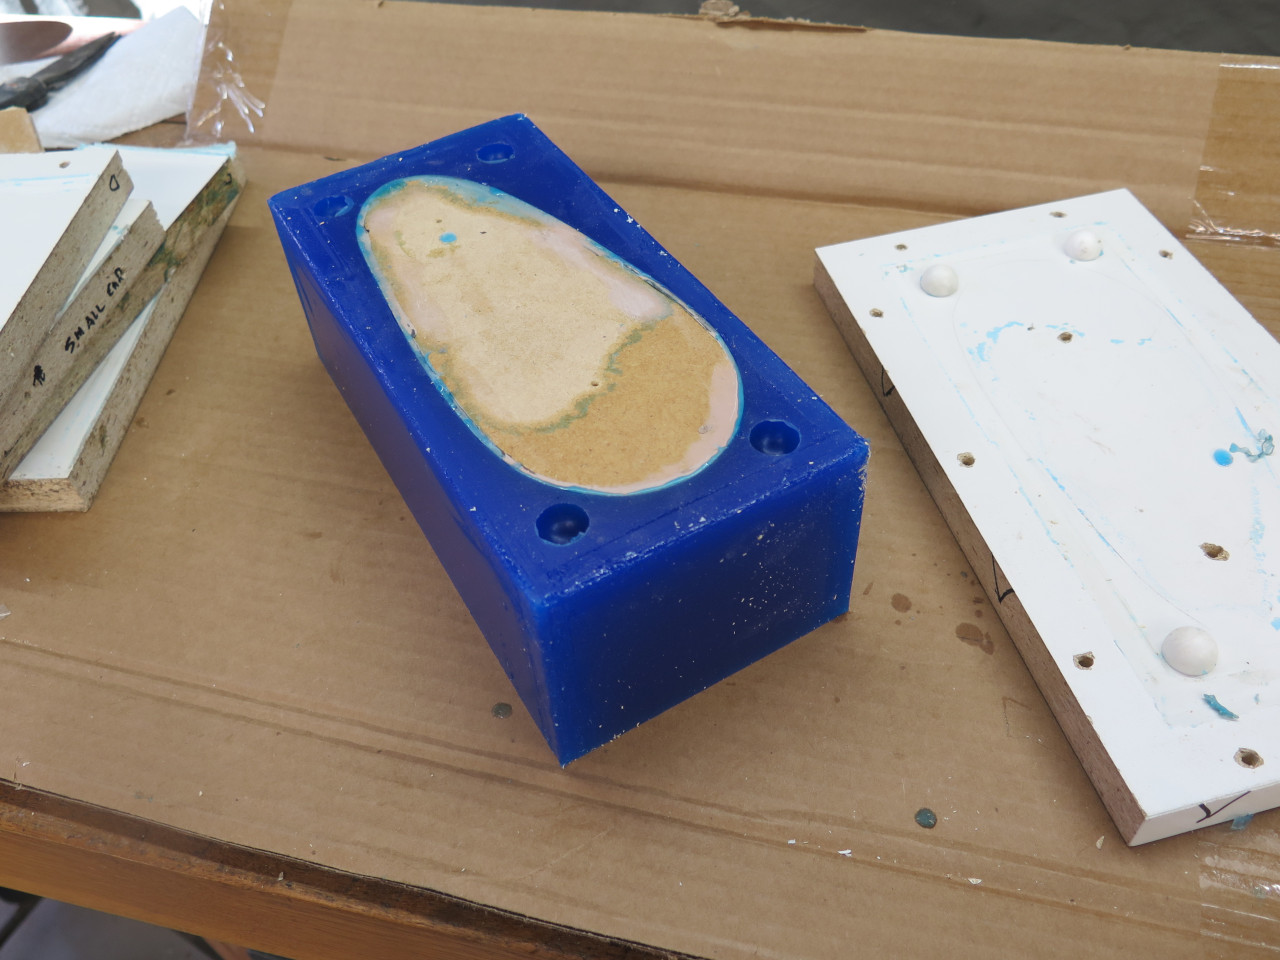
This was the mold shape for he outside of the piece. I now needed something to pattern the inside shape.
This is sulfur free clay, which is supposed to be compatible
silicone. Silicone is a little picky about what's touching
it. It can refuse to cure.
I rolled out a 3/8" thick piece for the bottom of the mold, and 1/4" pieces for the sides.

The clay represents the part that will eventually be cast in
plastic. The little wires will form air vents, and the aluminum
cone will form the pouring funnel. The wood box had to be extended
too.

Then, more silicone.
When cured, the mold halves are separated. This "plug" part of the
mold came out pretty wrinkled. That's because I became convinced
that there was an incompatibility between the clay and the
silicone. I think it was unfounded, but I freaked a little and put
in a layer of plastic wrap (Saran) on top of the clay. The
wrinkles in the plastic wrap were faithfully reproduced in the
silicone. Though disappointing, this is not a crisis. It
just means more cleanup on the inside of the cast parts.
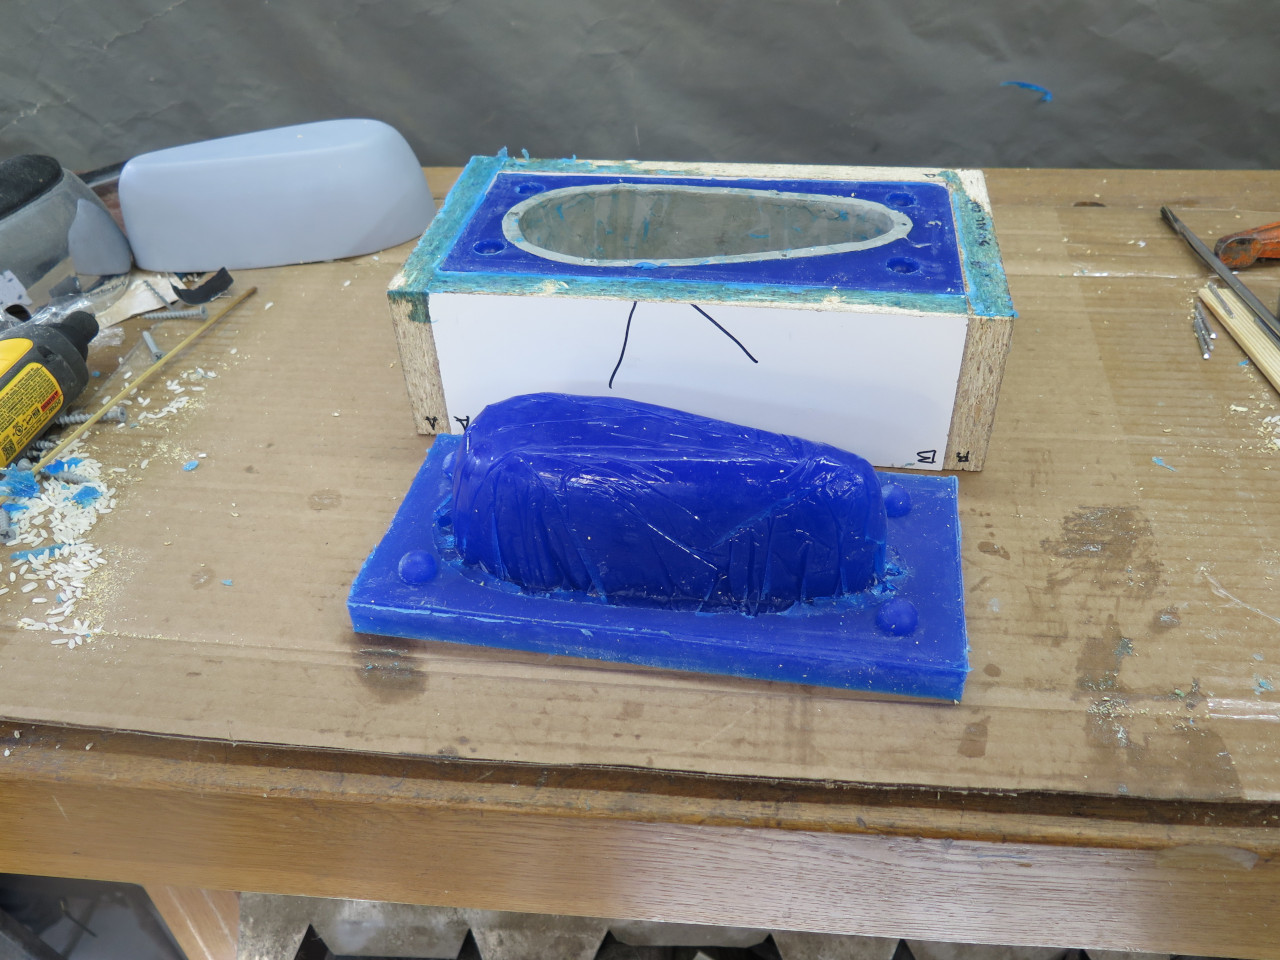
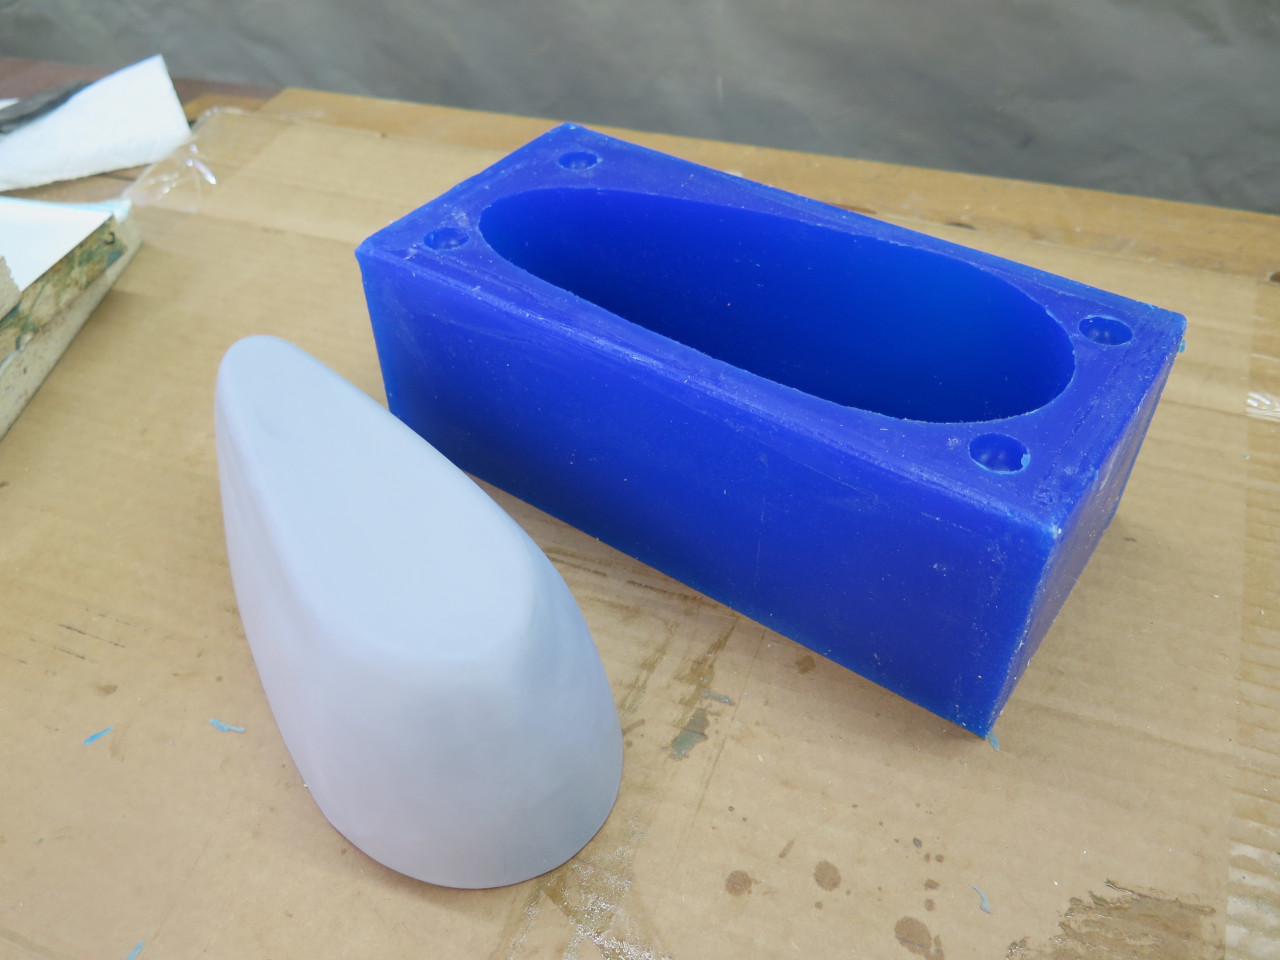
Then the clay was removed. This finishes the mold.

The next day, I mixed up some epoxy casting resin and poured it
in. The resin itself is clear, but I added some black color.
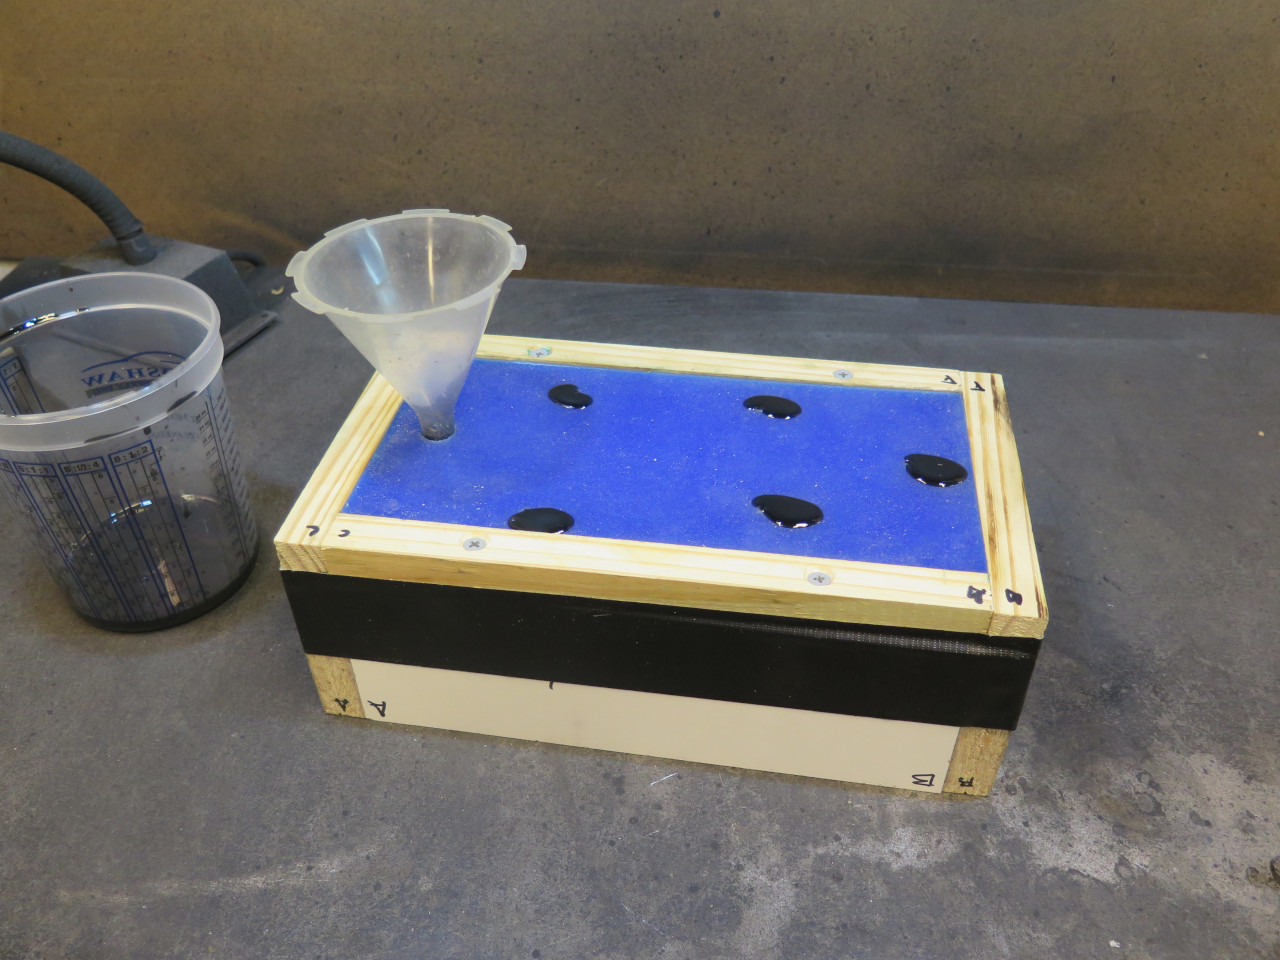
It took the resin two days to cure in my cool shop, but finally came out pretty darn good.

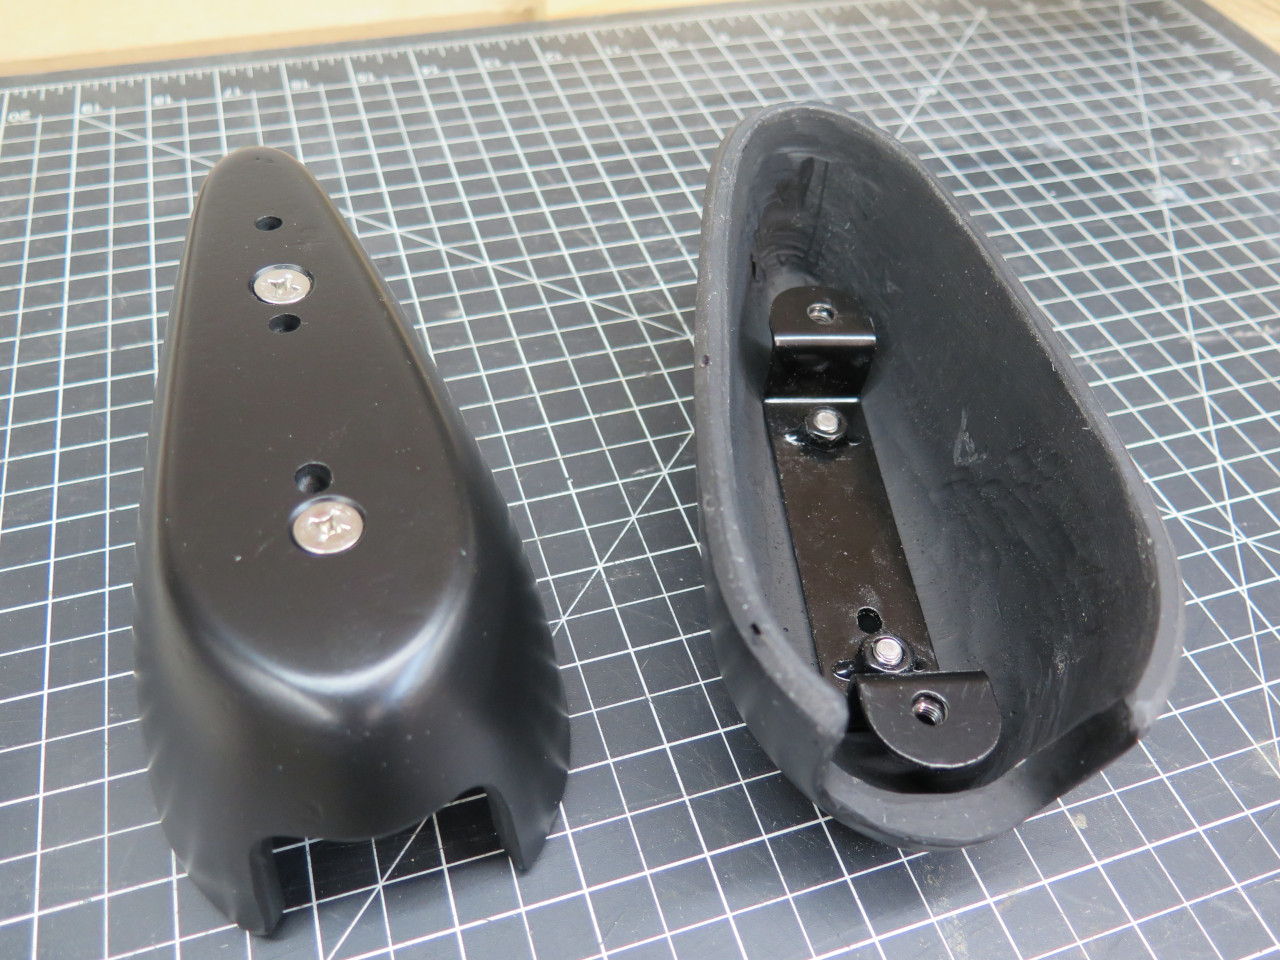
A little surface sanding and some primer, and it's hard to tell the part from the pattern.
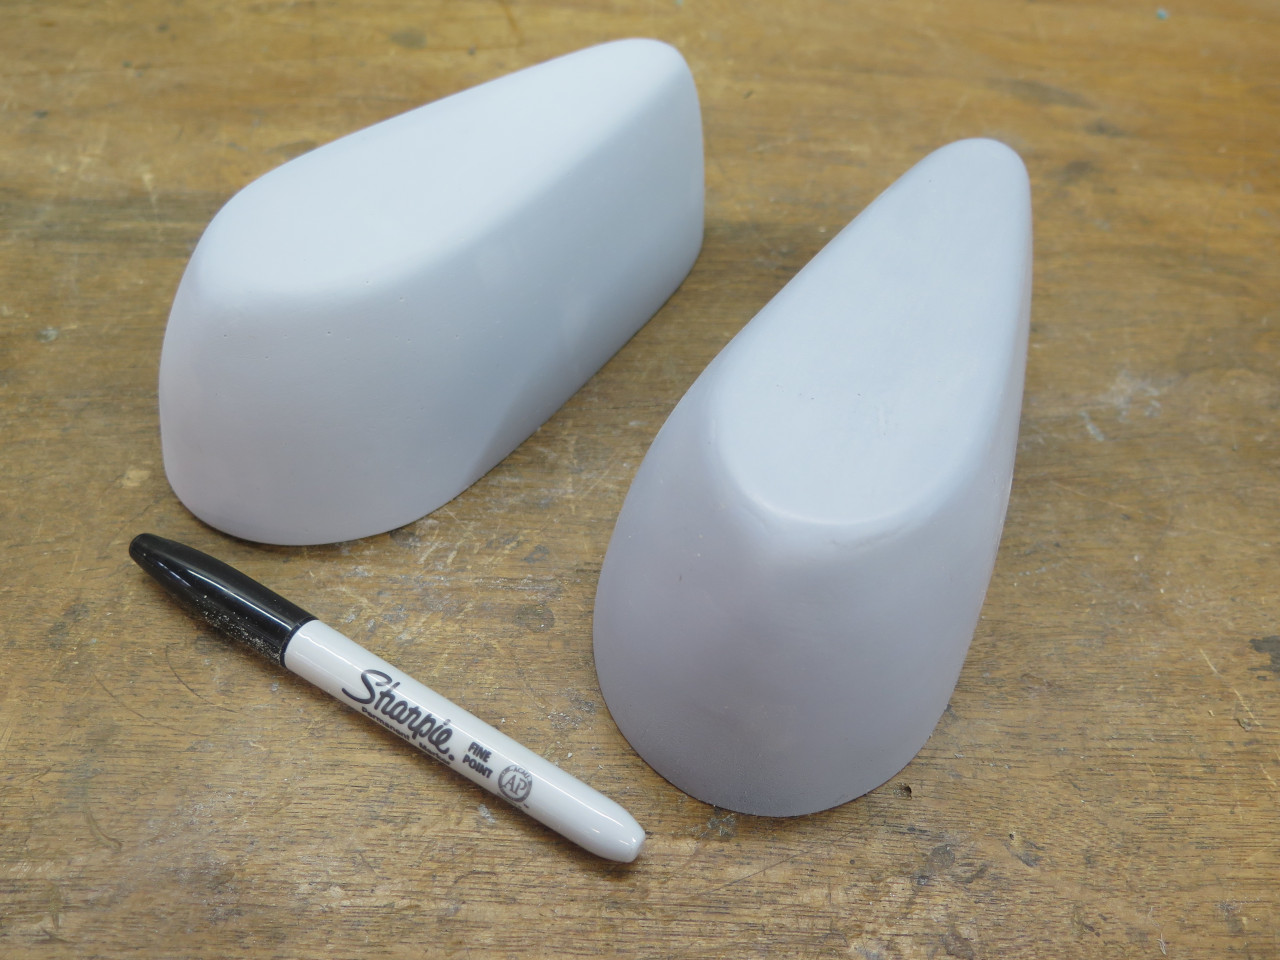
The mess on the inside cleaned up pretty easily. The cured epoxy is very tough, but yields well to course sanding.

At this point, I still considered this sort of a science project that
might not work out, so before I cast another piece, I wanted to mount
this one and see if there were any unforeseen problems, or if I even
liked it.
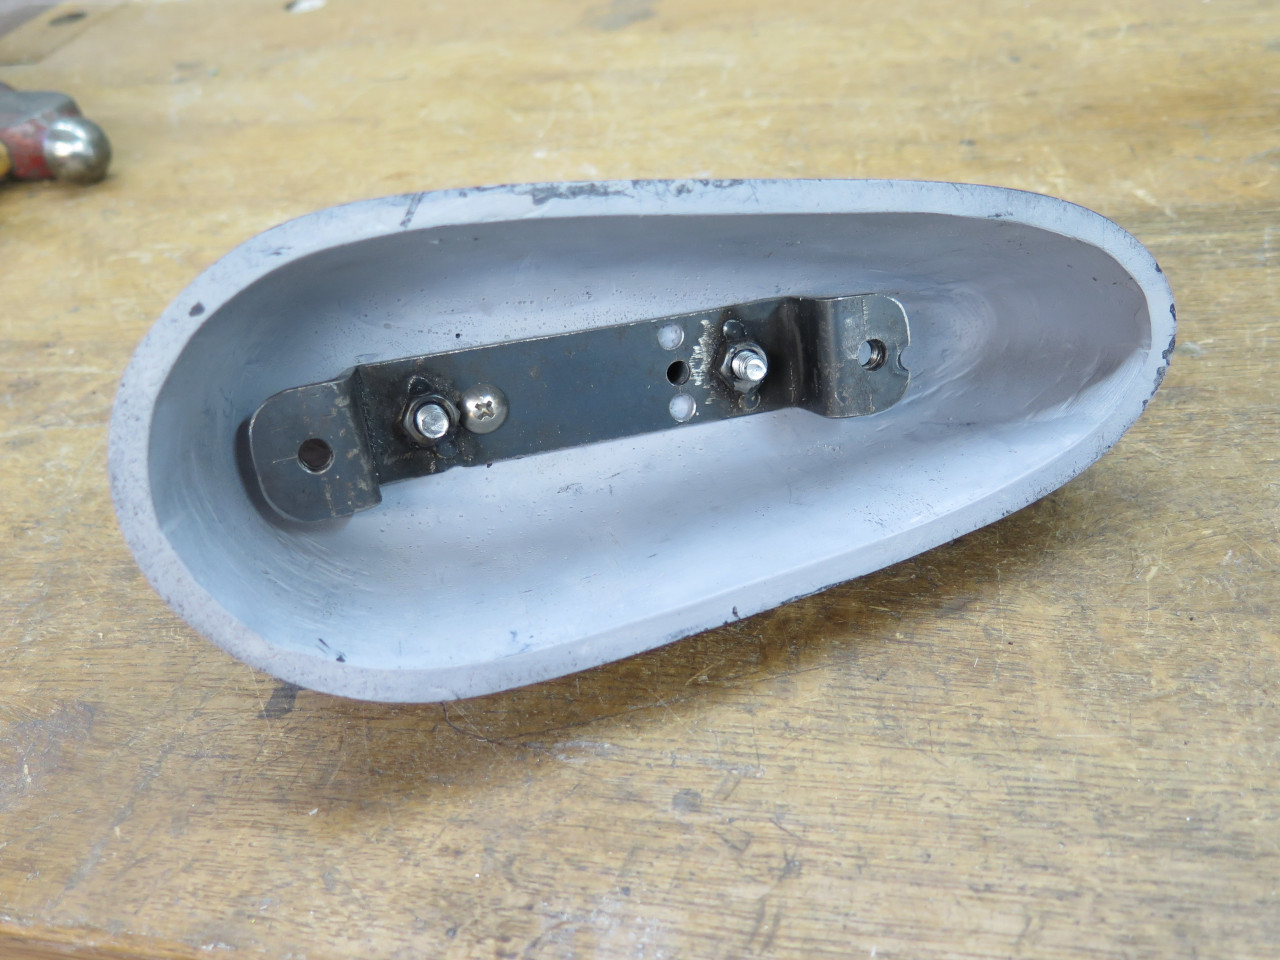
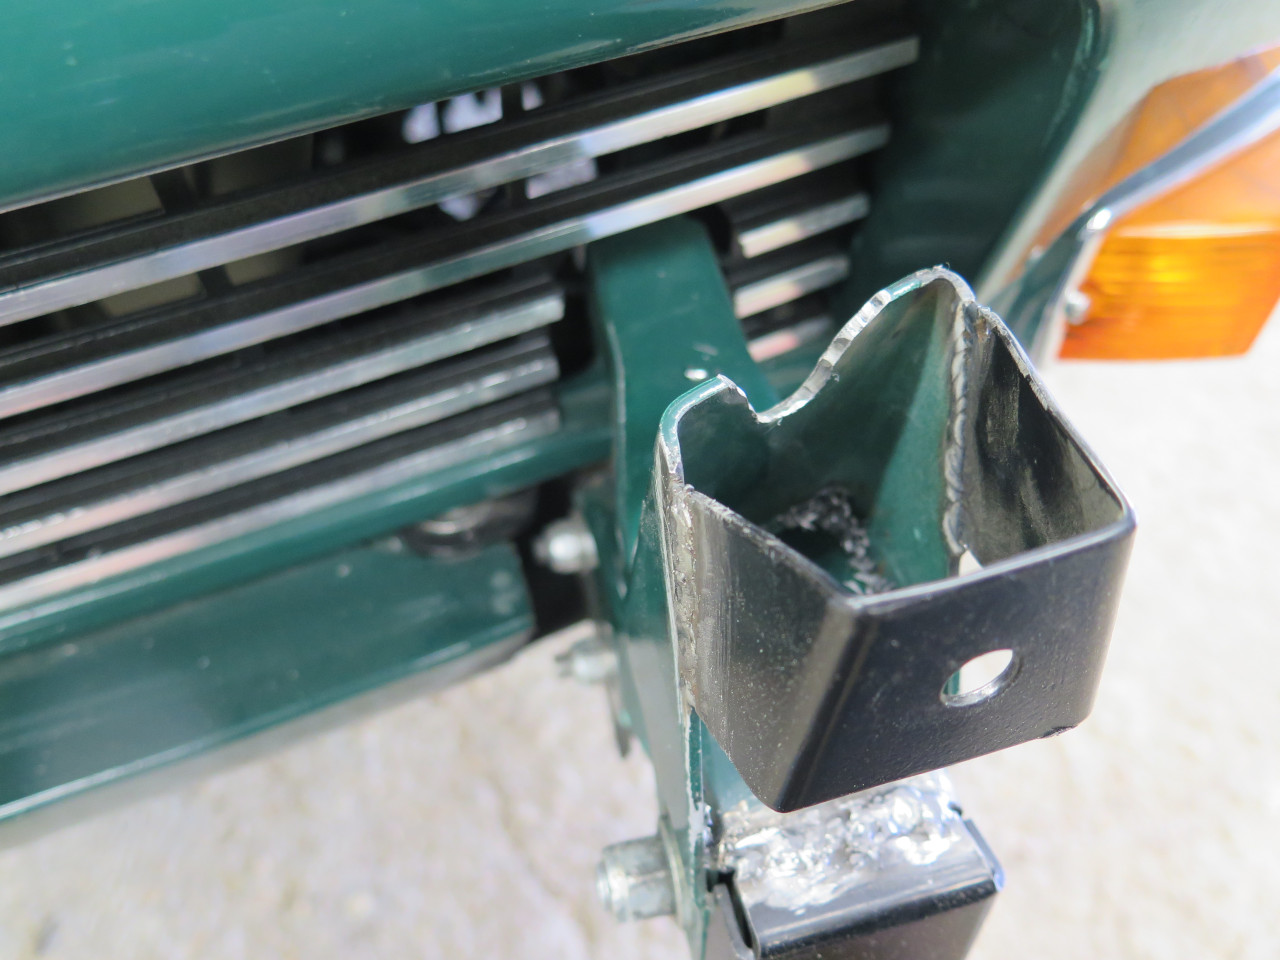
There was a little work to do on the car. First, most of the
mounting points for the original bumper system weren't going to work.
There is a tab on the bonnet hinge assembly that the lower part of the
overrider mounts to. This point can be reused, but the tabs were
bent and distorted for reasons I can't recall. The metal is pretty
heavy, so it was easier to just cut them off and make new ones to weld
on.
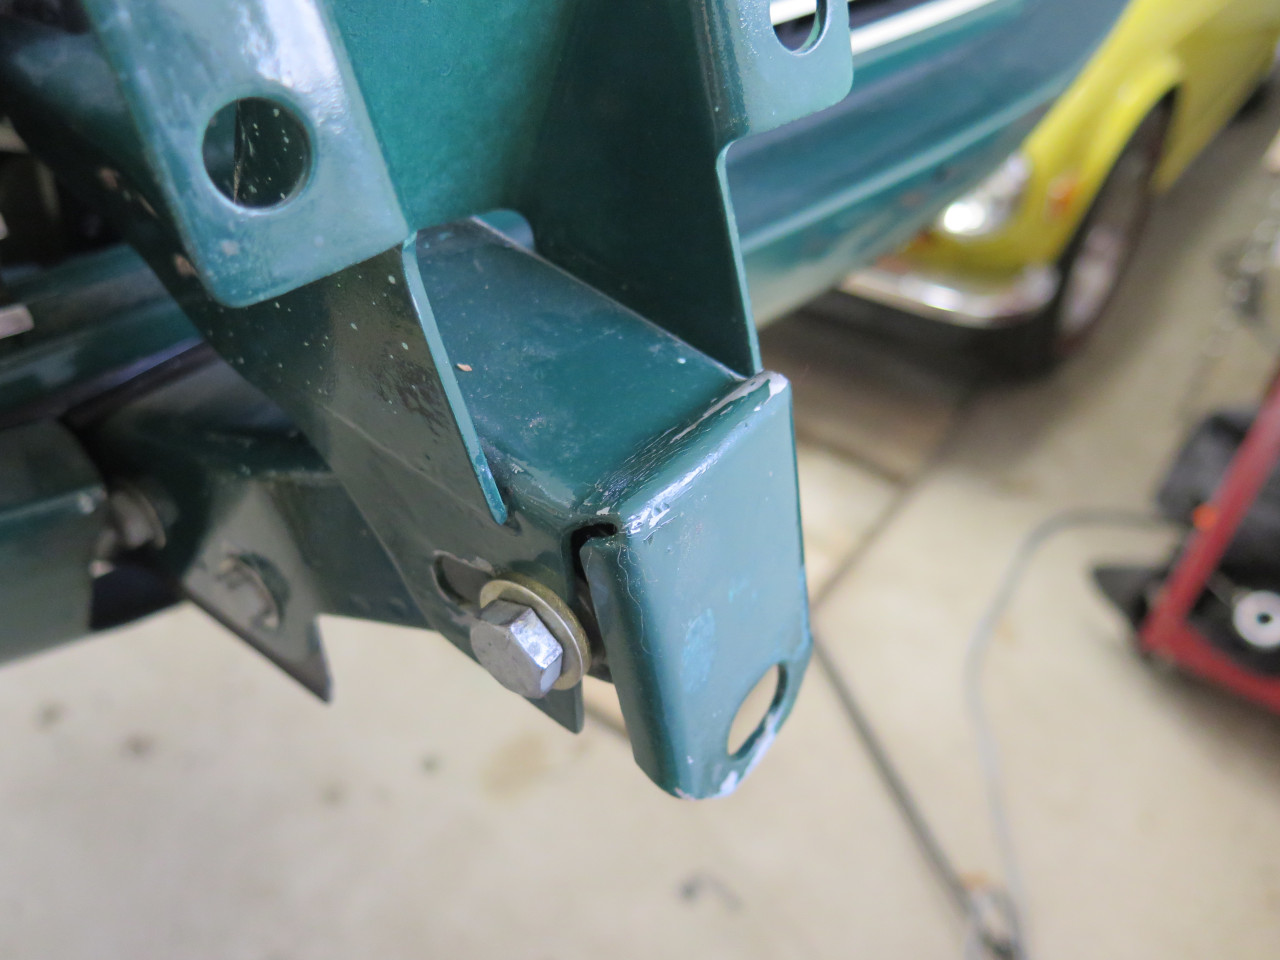

Next, there was a pair of tabs on each hinge assembly that the bumper
itself bolted to. Those tabs extend outside the profile of the
overriders, so they had to go. I normally avoid making
non-reversible changes to this car, but I made an exception here.

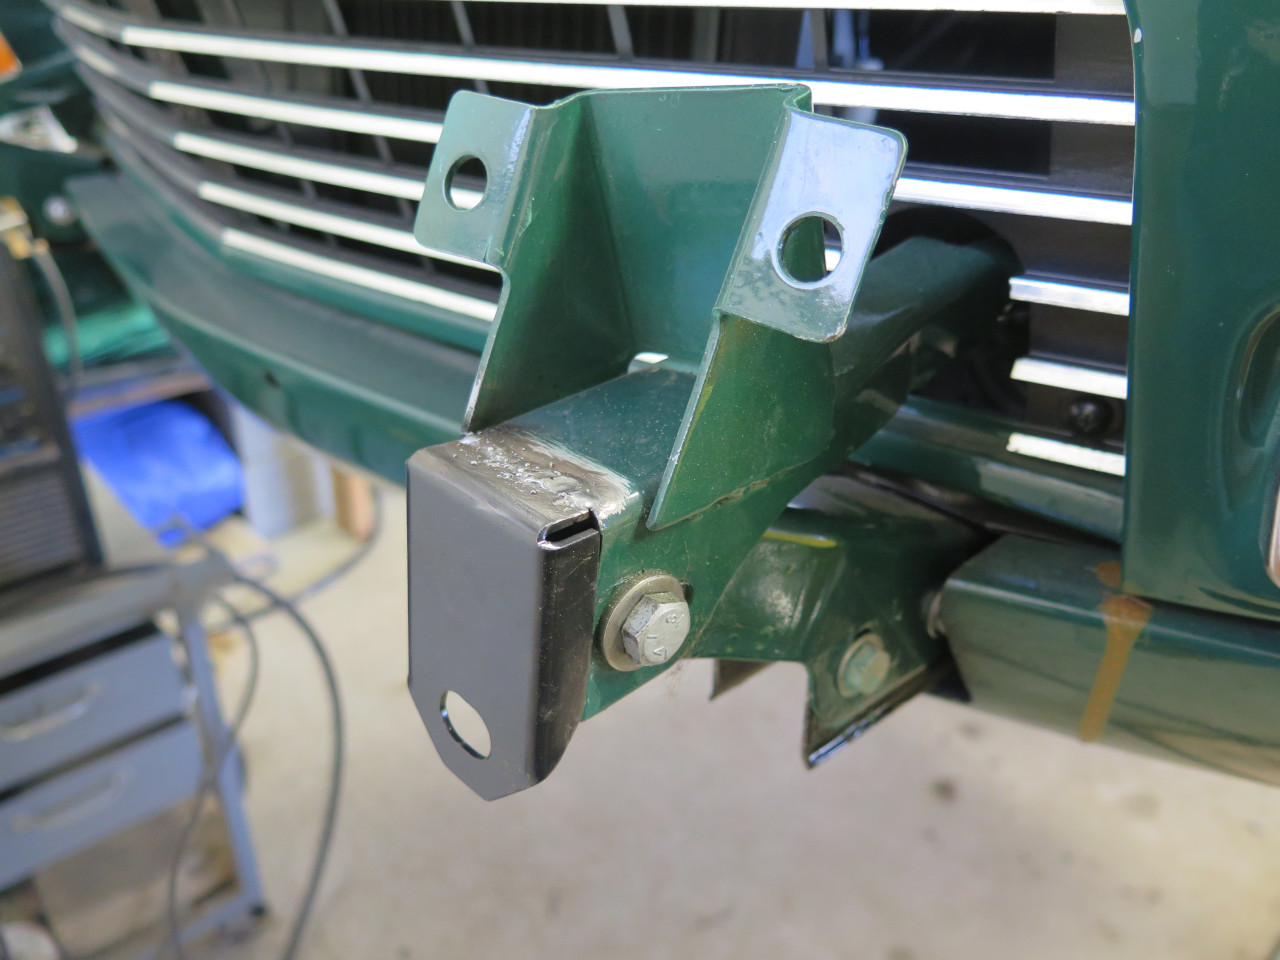
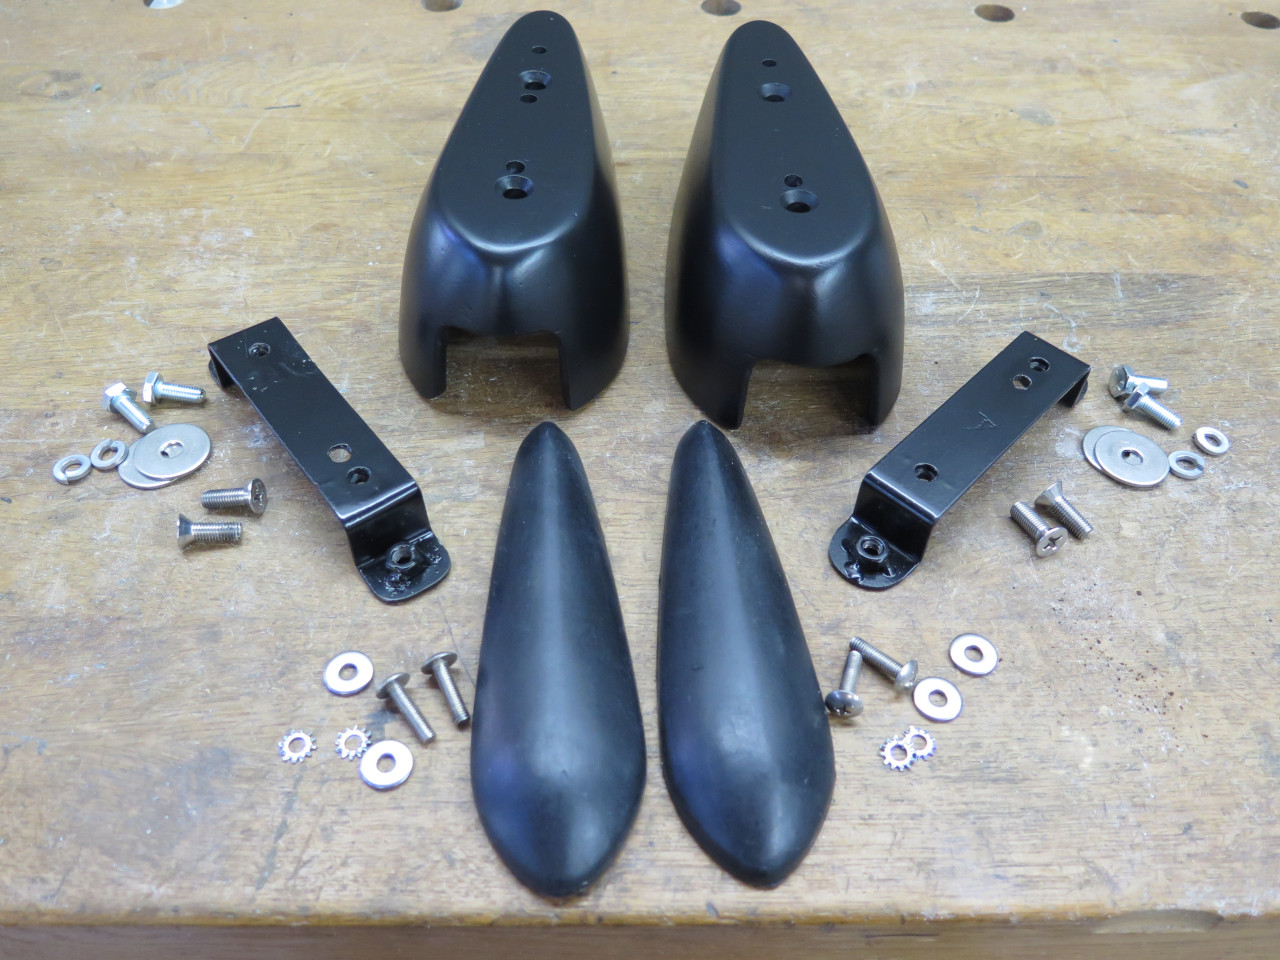
In place of the tabs, I welded these brackets that the top of the overriders will bolt to.


Then made this little bracket that will live inside the overrider and bolt to the hinge brackets.
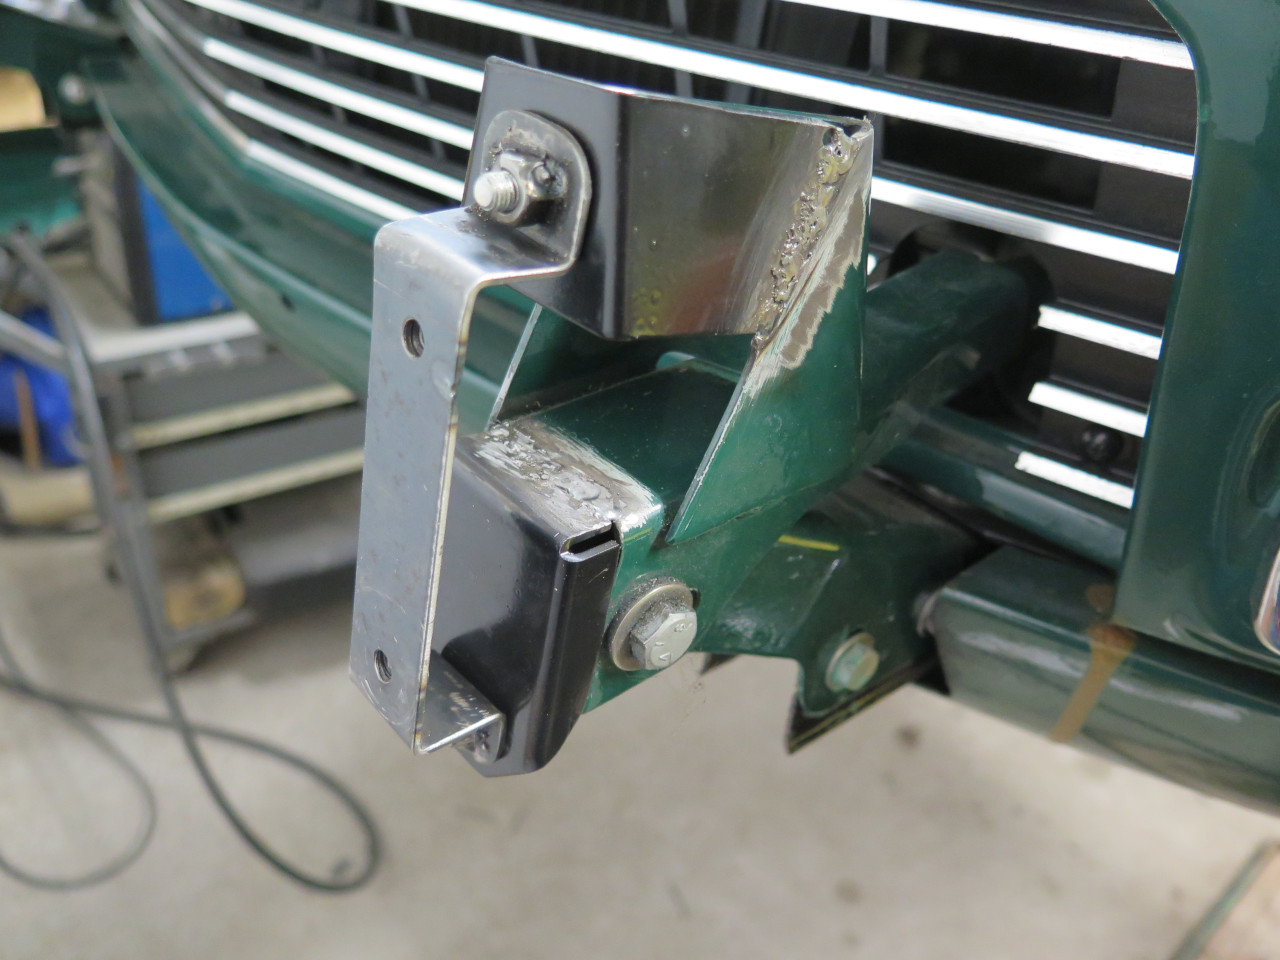
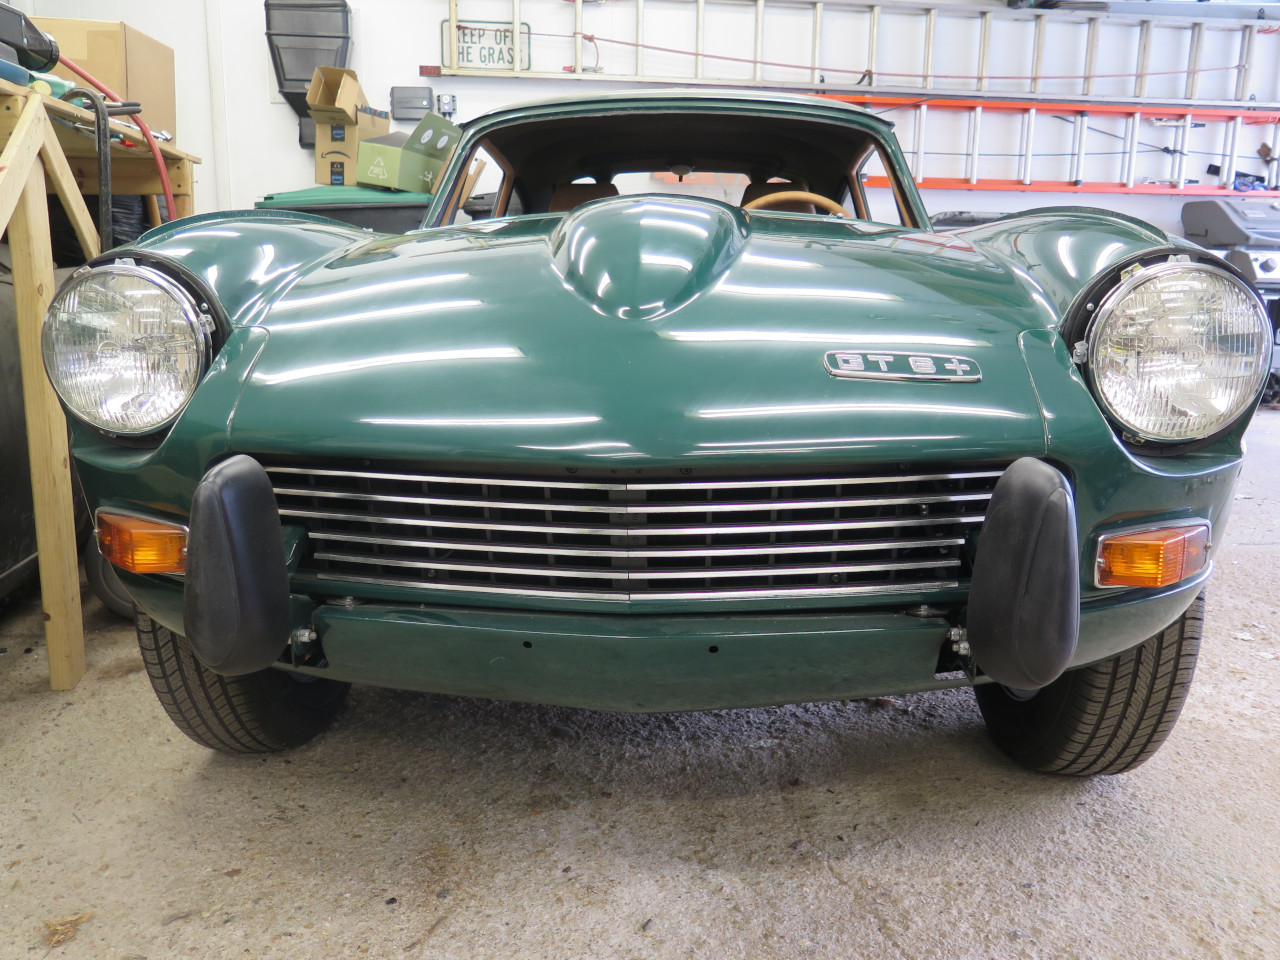
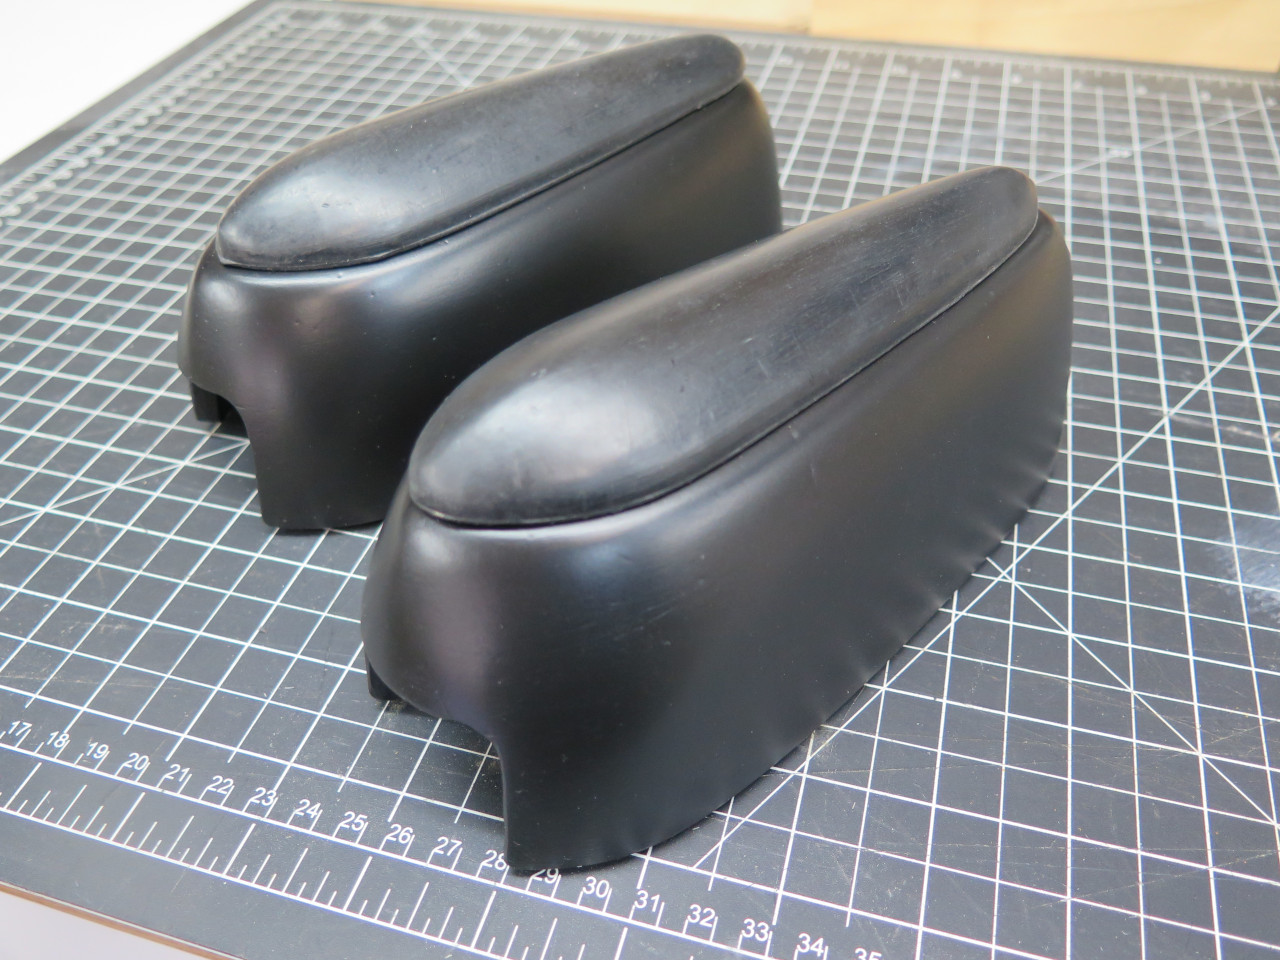
The new overriders seem to fit OK.

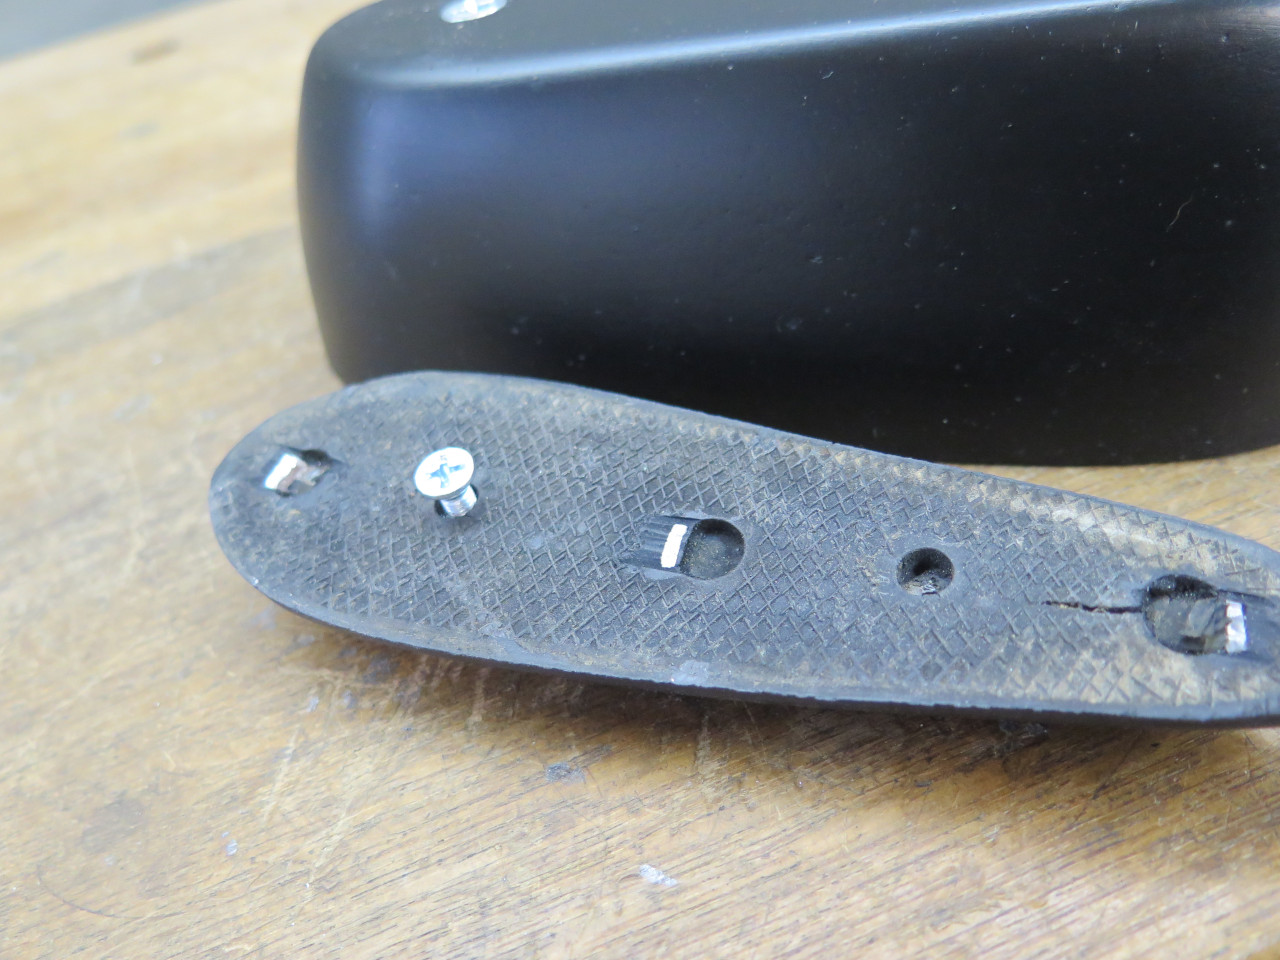
Then it was time to see about the rubber buffers. The originals
had a cast-in metal frame that had three tabs sticking out. These
tabs went into slots in the overriders, and were twisted in the inside.

That method of attachment wasn't going to work with the new
system, so I removed the tabs from one of the buffers to check the
fit. Some black satin paint, too.

The buffers are attached to the overriders with two machine screws from
the inside of the overrider. This meant drilling and tapping holes
in the metal core of the buffer. That core isn't very thick, so
with a 10-32 screw, there is a little less than two threads. I'll
have to be careful on tightening them.
The first sanity check.
I like it well enough to make one for the other side.

Still encouraging...
One thing I noticed when installing these was that starting the top bolt
was just short of impossible. A little more surgery helped a lot.

Some paint to cover all the cutting and welding scars.

Only one more thing to do. The original overriders had a cutaways on
their bottom ends. Since the overriders tilt down when the bonnet
goes up, The bottom can foul the frame bracket that the hinge attaches
to. These little cutouts solved that problem. They
aren't visible from any normal viewing position.

At this point, it looked like I was on to something here, but I still
wasn't sure on the chrome vs black question. If I decide against
the black, I have a contingency plan to use the epoxy parts as patterns
for casting aluminum in a sand mold. The aluminum could be
polished to be chrome-like.
To help me decide, I mounted one of the original chrome parts.

I'm leaning towards the black. It seems to tie well with the black parts of the grille.
So let's get everything cleaned up and in final paint or powder coat.
I like it way better that with the full bumper, and I'm 80% sure about the black. It will satay this way for now.
This project was sort of a slog. The casting materials are
relatively expensive, so it wasn't really cheap, either. Probably
approaching a couple of hundred dollars.
Comments to Ed at elhollin1@yahoo.com
To my other GT6 pages