To my other GT6 Pages
October 8, 2019
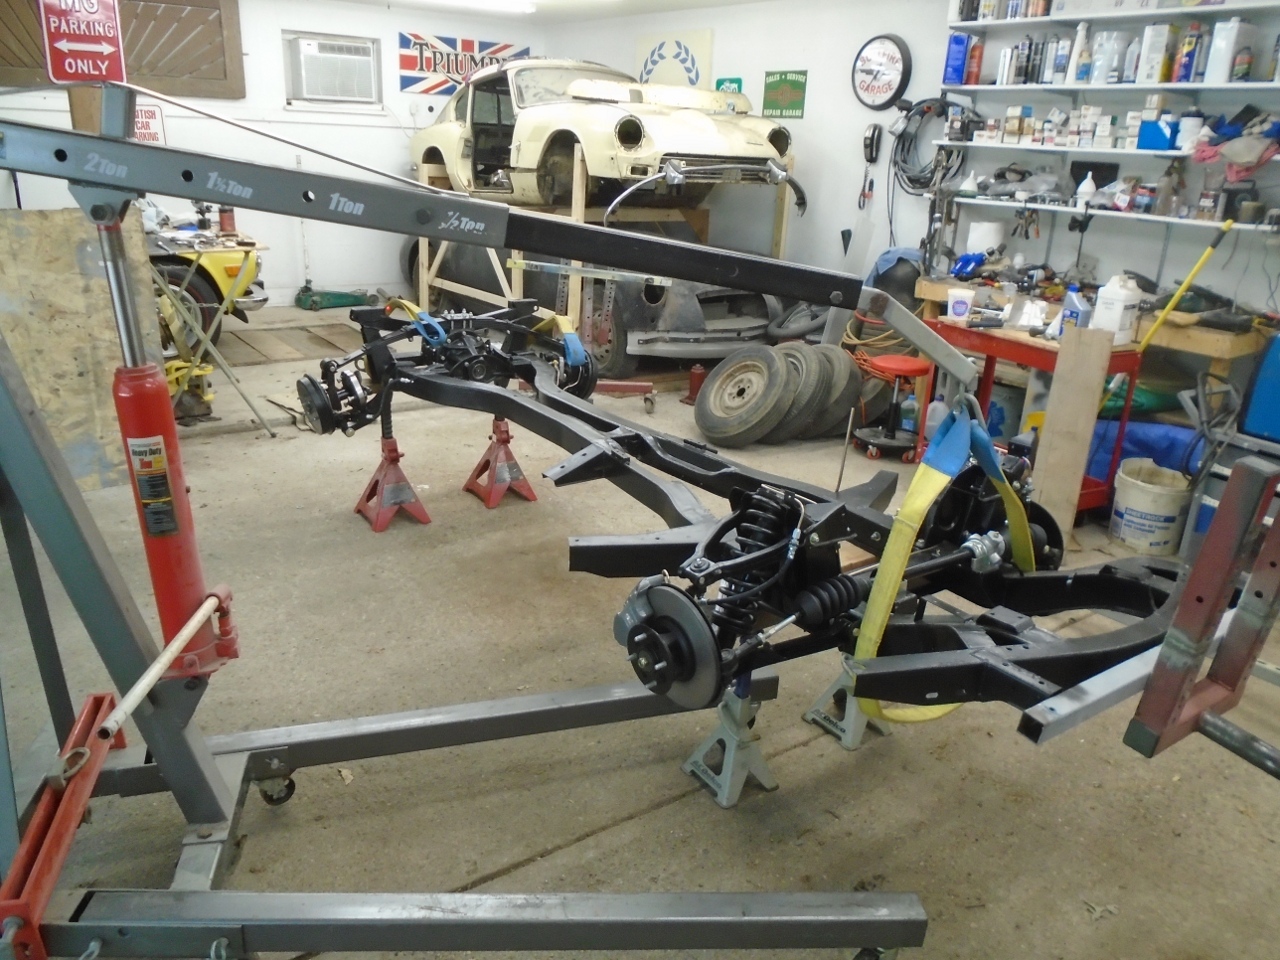
Inner Axles
At
this point, the rear drive train was complete on the GT6, except for
the inner axles. There was a reason for that, which I'll get to
shortly, but it turns out that doing the inner axles last is not a bad
way to do it.
I was pretty certain that these axles had never been serviced. They looked to be in OK shape...
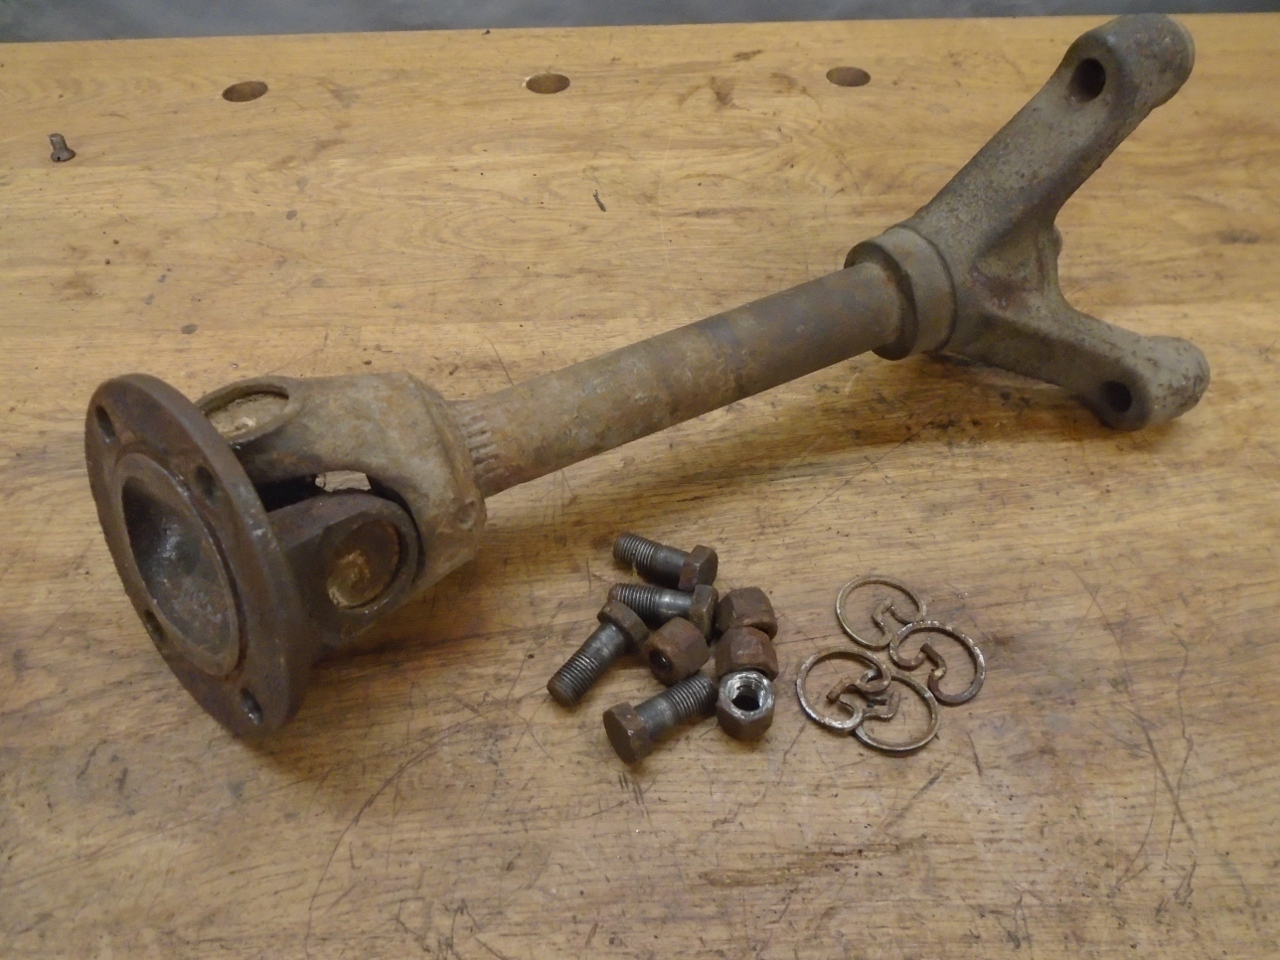
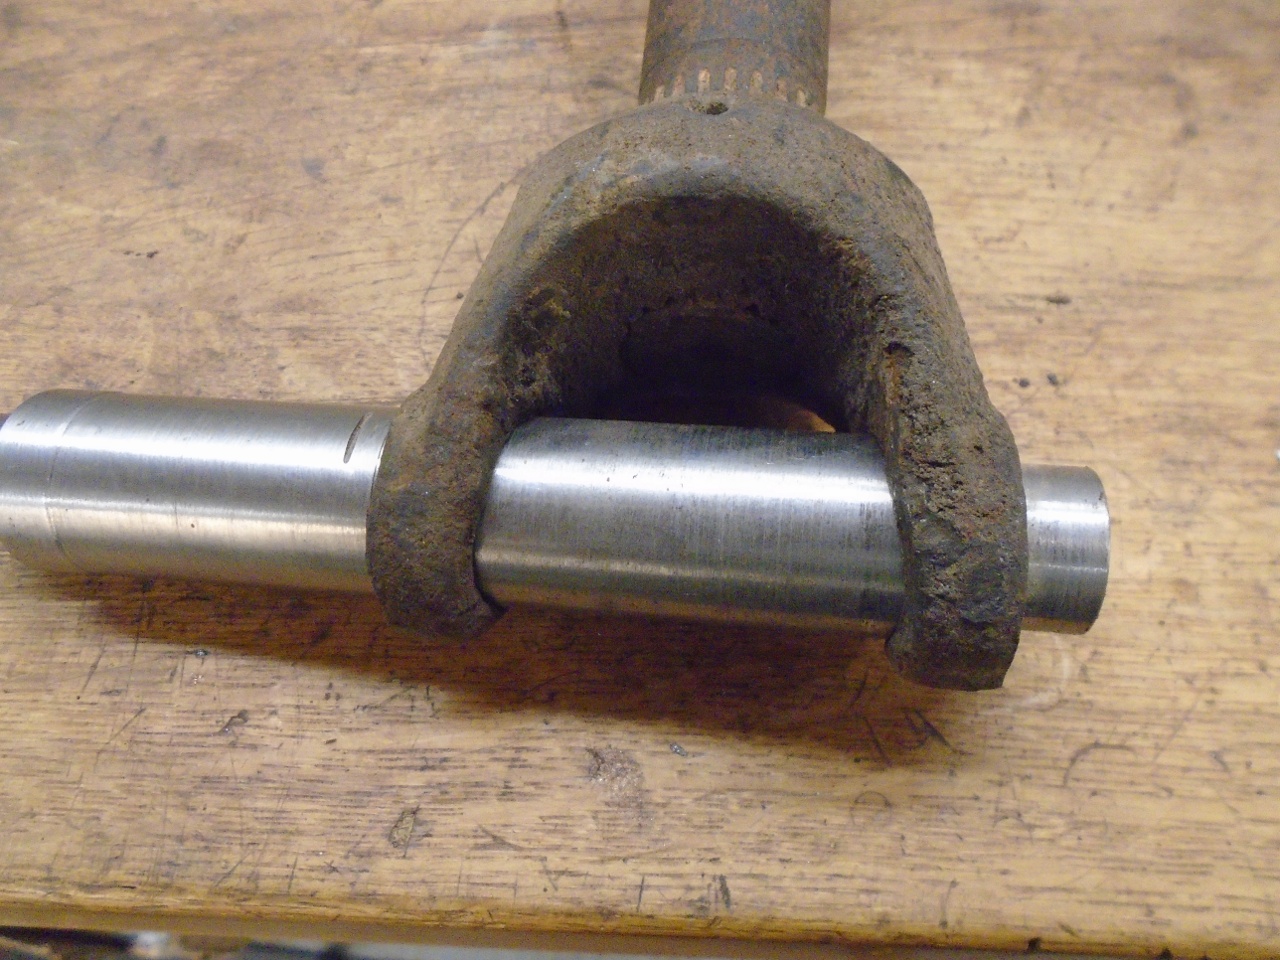
...and
one of them was. The other, not so much. On pressing out
the U joint cups, three of them basically fell apart in pieces.
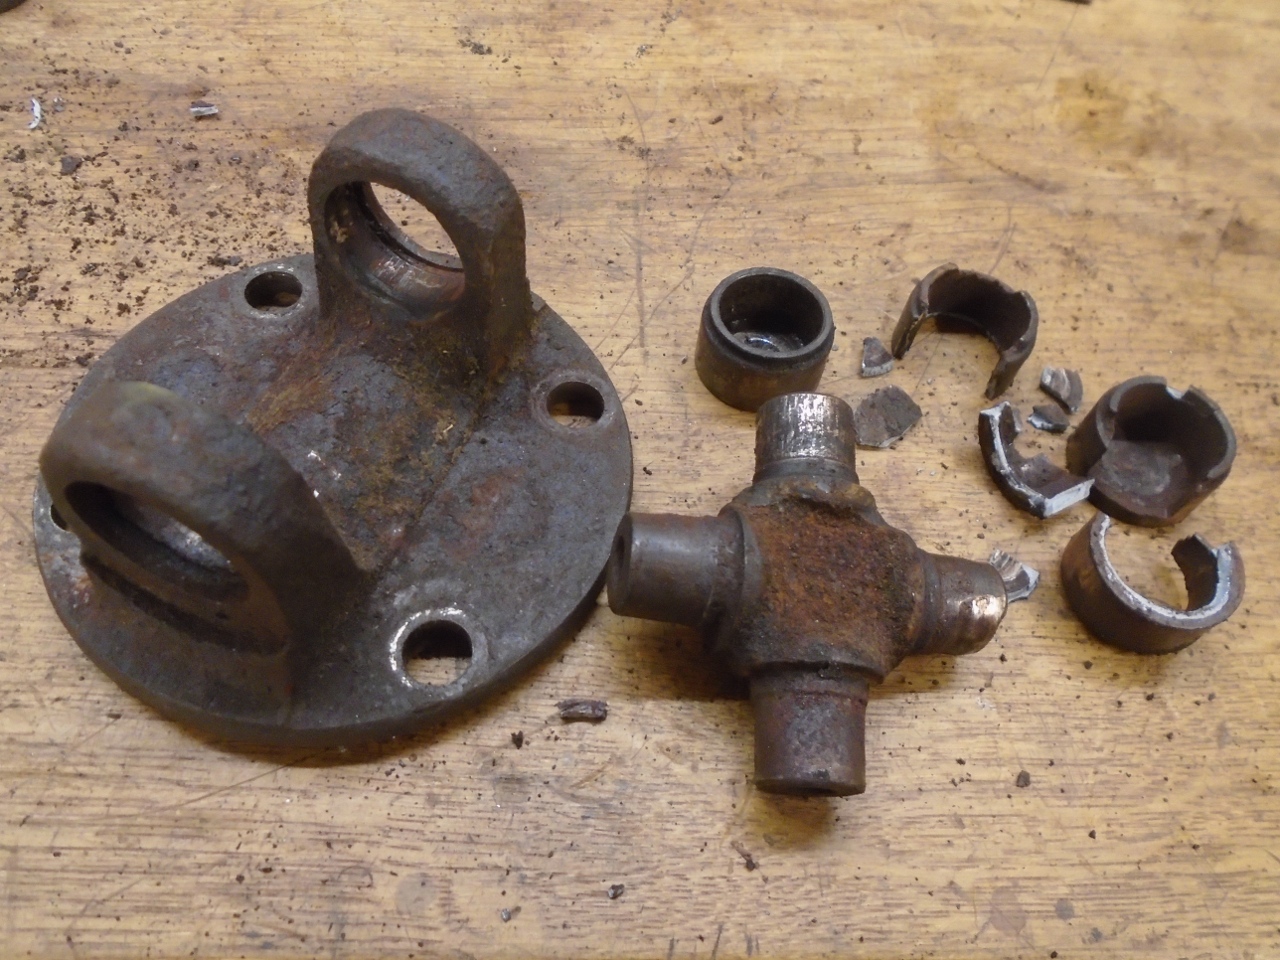
This led me to look at the yoke on the shaft side.
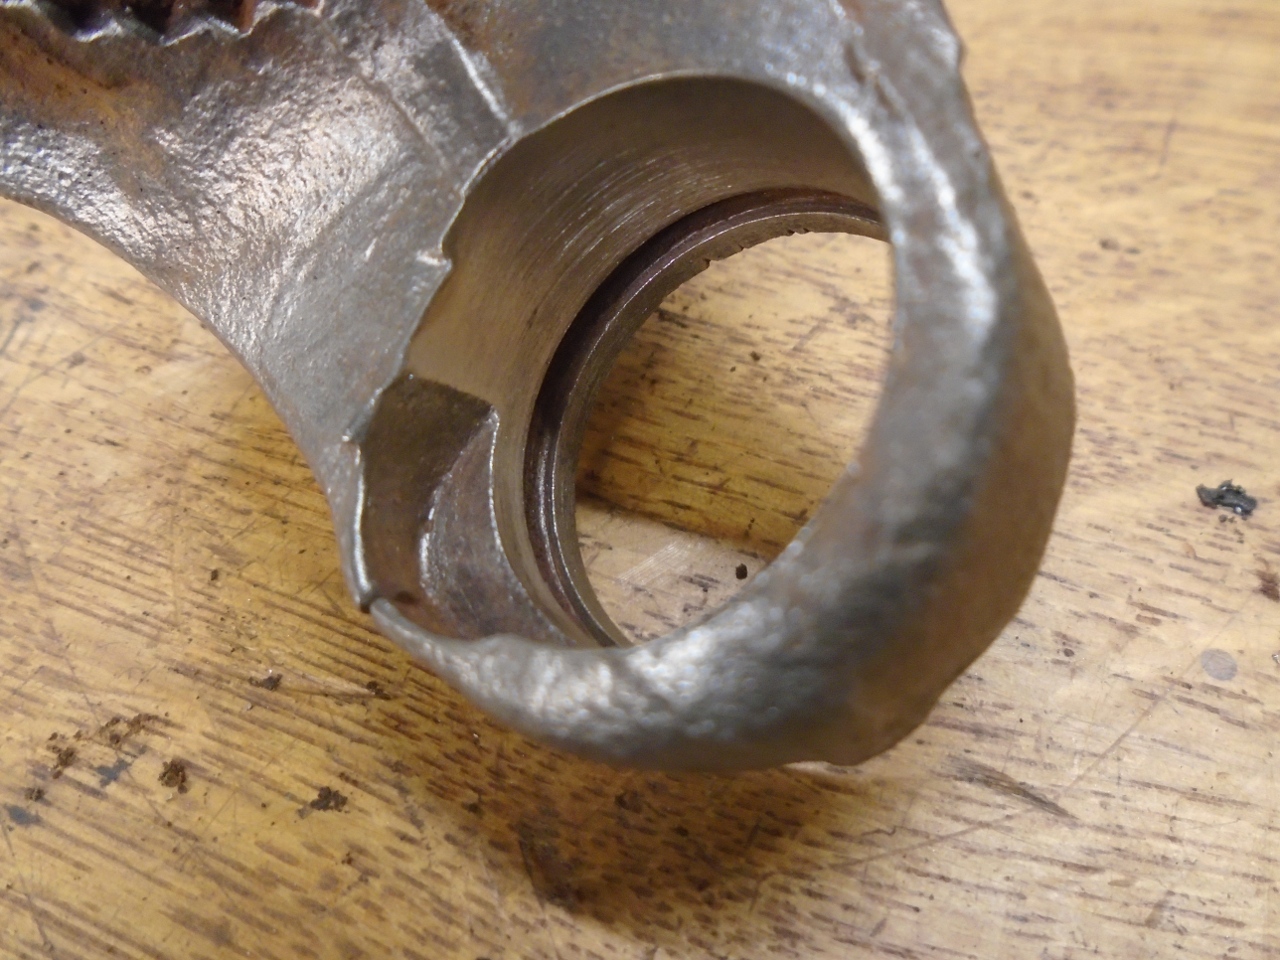
The
U joint had obviously been flopping around in that joint for a while.
I can't really blame some faceless OP, since I was the last one
to drive the car, and it was a daily driver for at least a couple
of years. In my defense I think I was a twenty-something, in
college, with no time, no money, few tools, and nowhere to work on a
car. A clunk in the back of my car wasn't a high priority item.
Well, now there was no excuse, It was time to set it right.
Though
I can imagine some ways that the damage to the yoke might be fixed, I
preferred to just get another axle. I don't believe these are
available new any more, but used ones are not hard to find. I
bought one on Ebay. I decided to go ahead and install the rest of
the suspension while I waited for the axle, and that's why the axles
went in last.
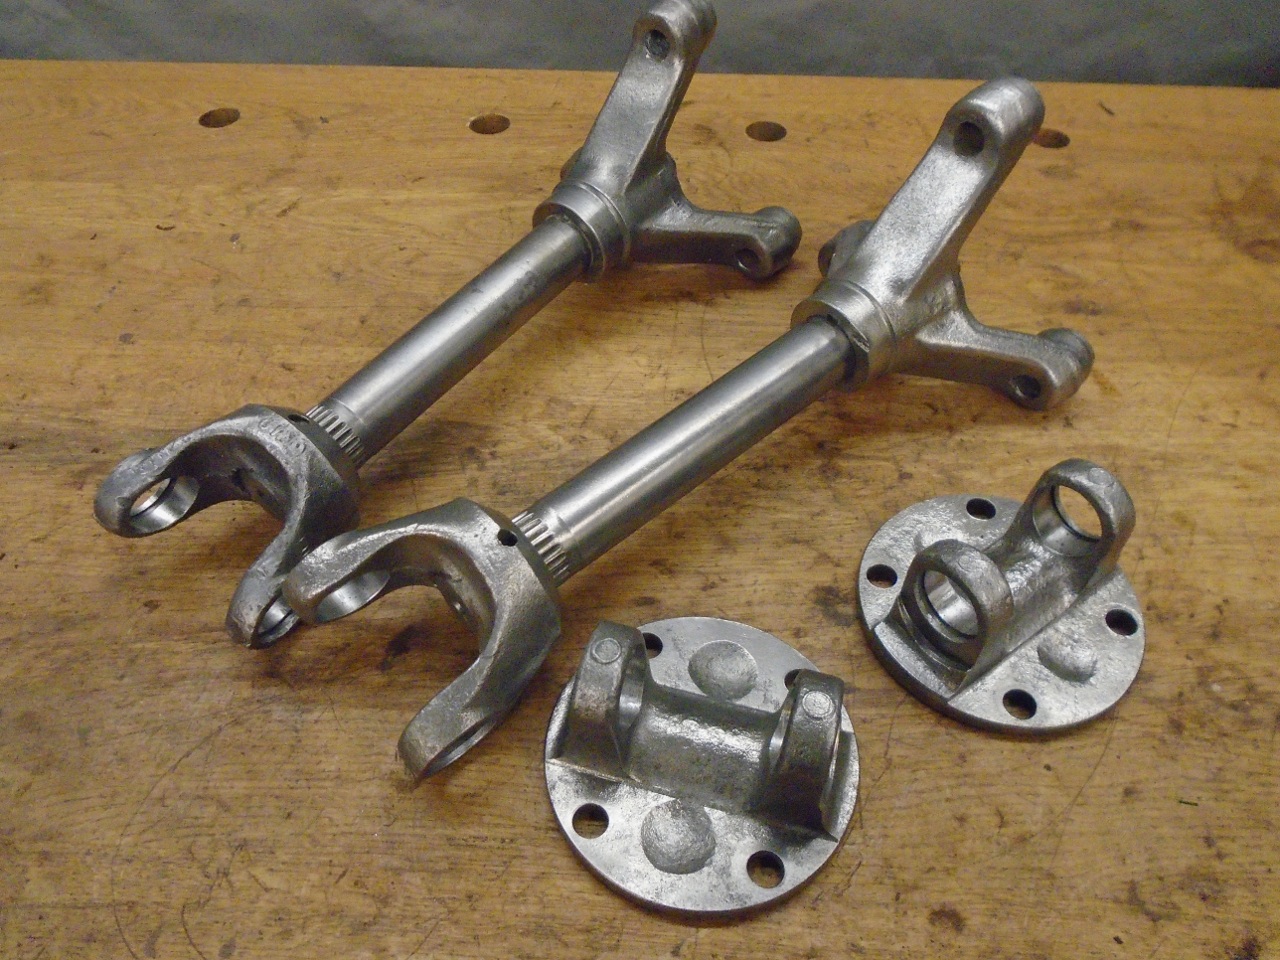
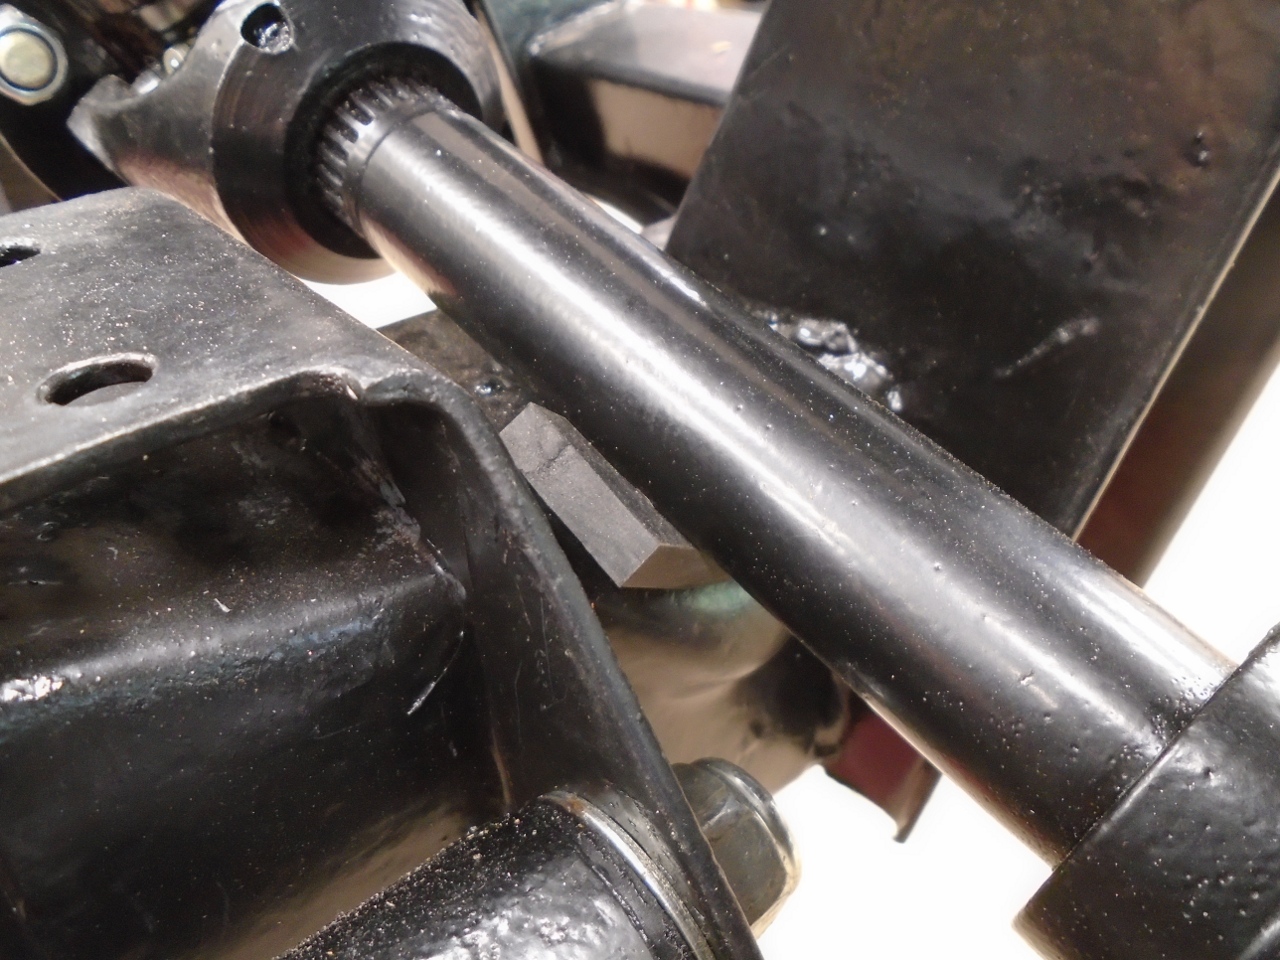
When
the axle arrived, it looked to me like the ears of the yoke were
splayed a little. Measurement showed that I was rignt--they were
almost 0.100" farther apart than my other yokes.
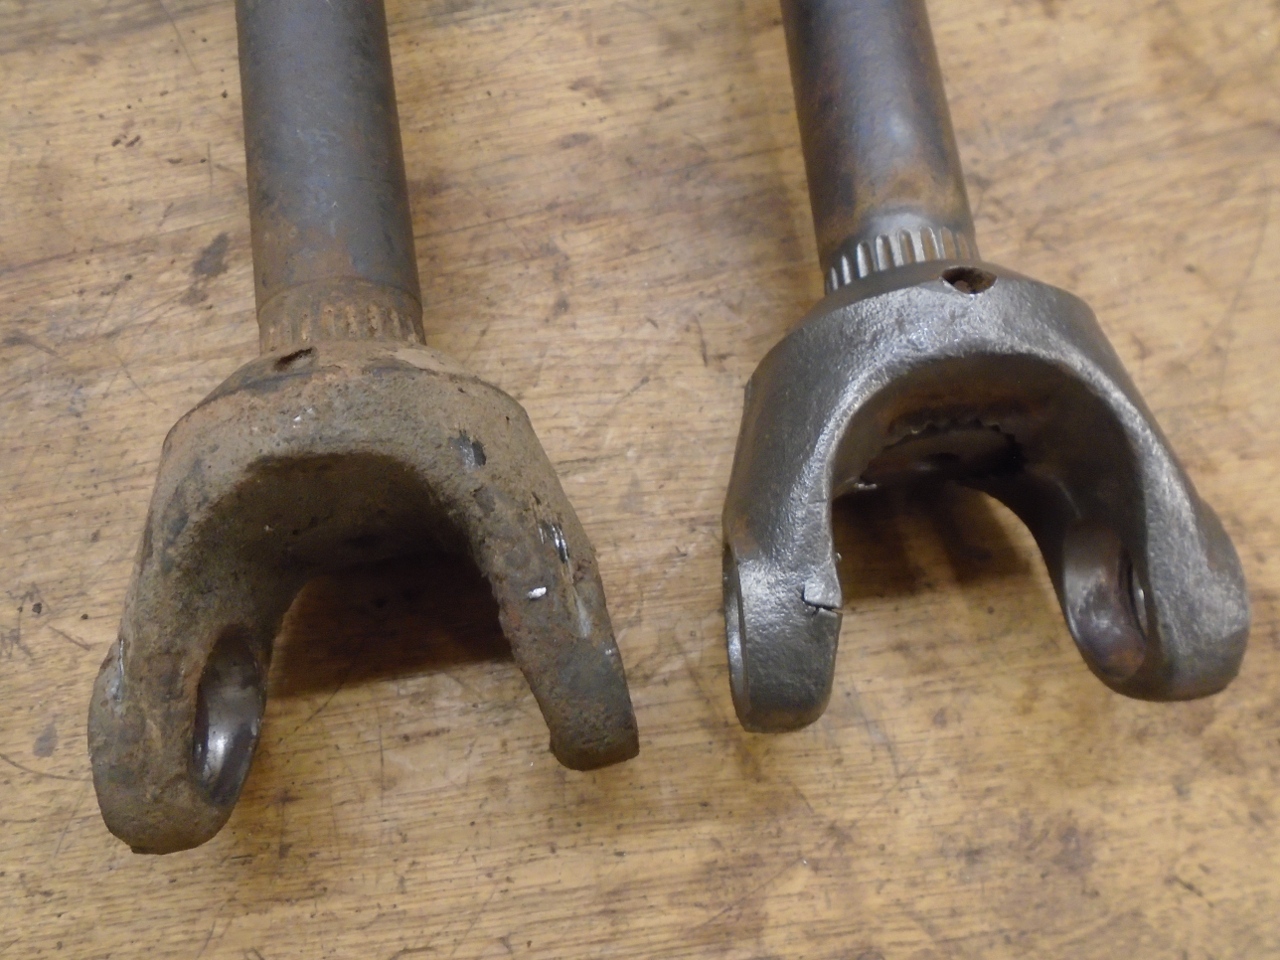
Well,
this was disappointing and frustrating. I didn't want to delay
the project any more, so I decided to try to fix it. It was a
pretty simple matter to press the ears back to the proper alignment,
but the risk there is that the bores could end up non-colinear.
After the press work, I made a test bar to check bore alignment.
I was relieved to see that the bar slipped nicely through both
ears of the yoke. This also indicates that the bores are
perpendicular to the shaft.
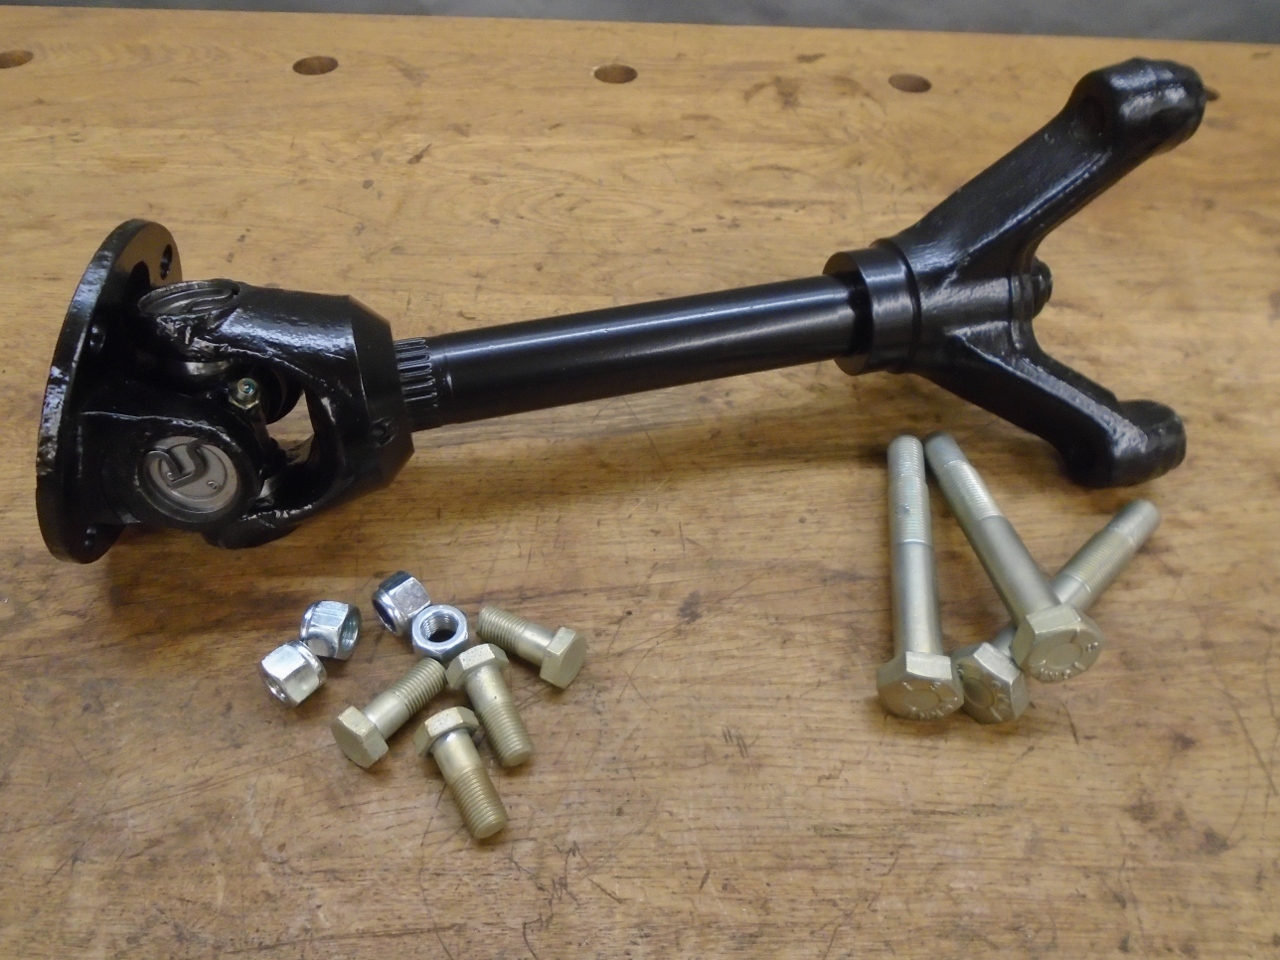
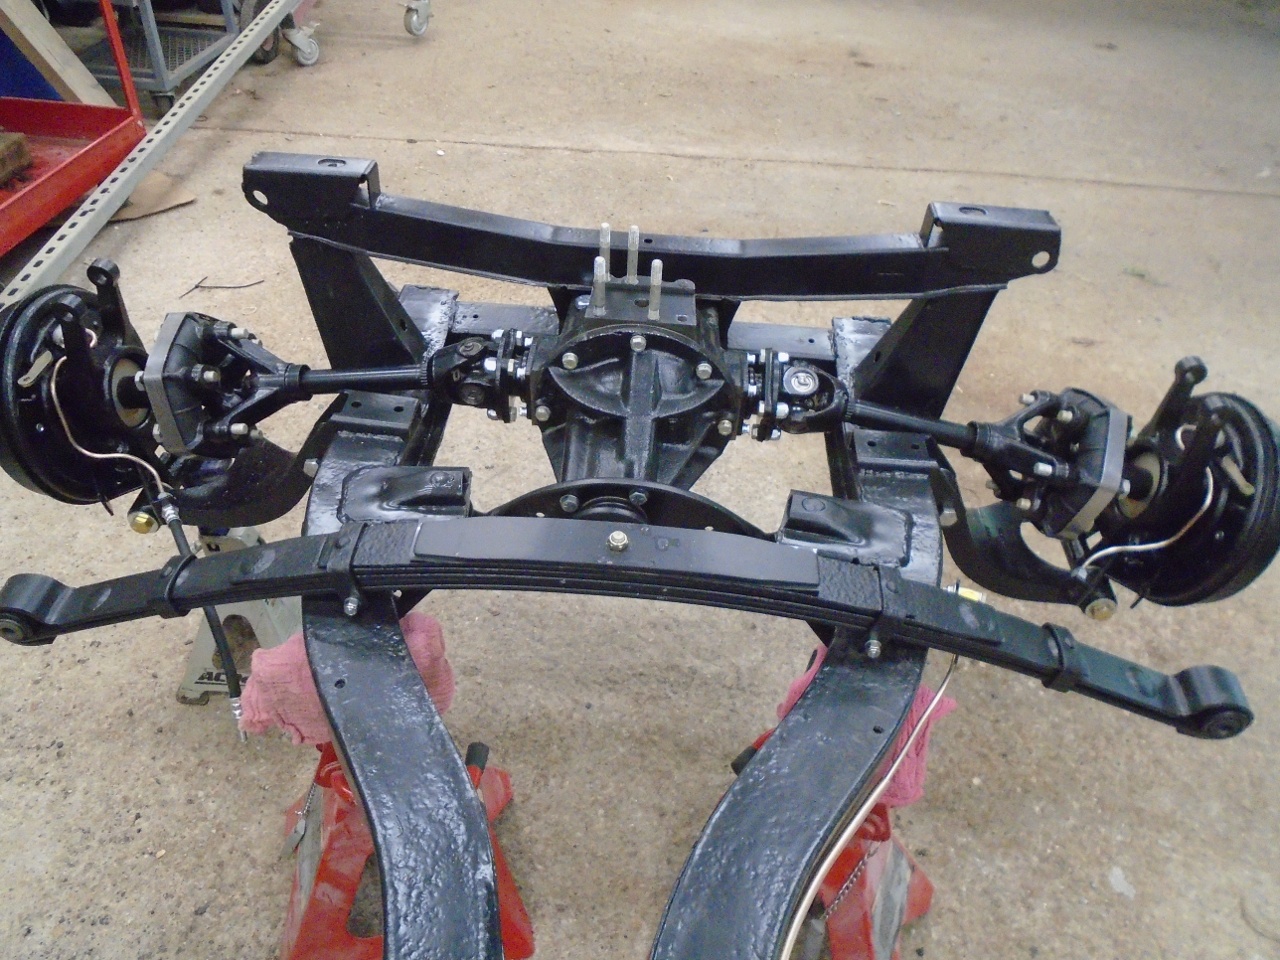
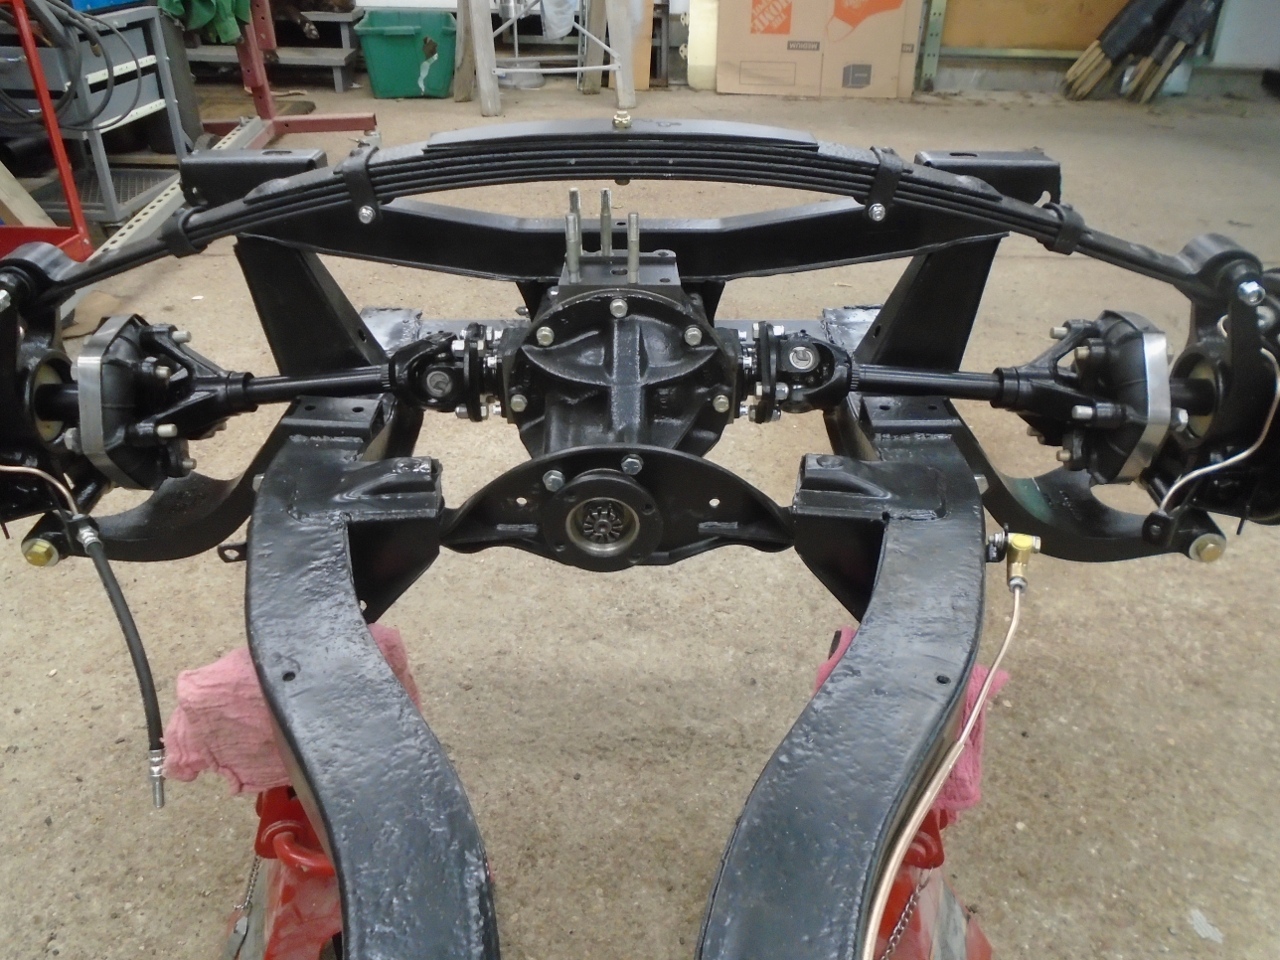
With that little side track out of the way, I fiished cleaning up the axles and flanges,
...gave them a nice powder coat,
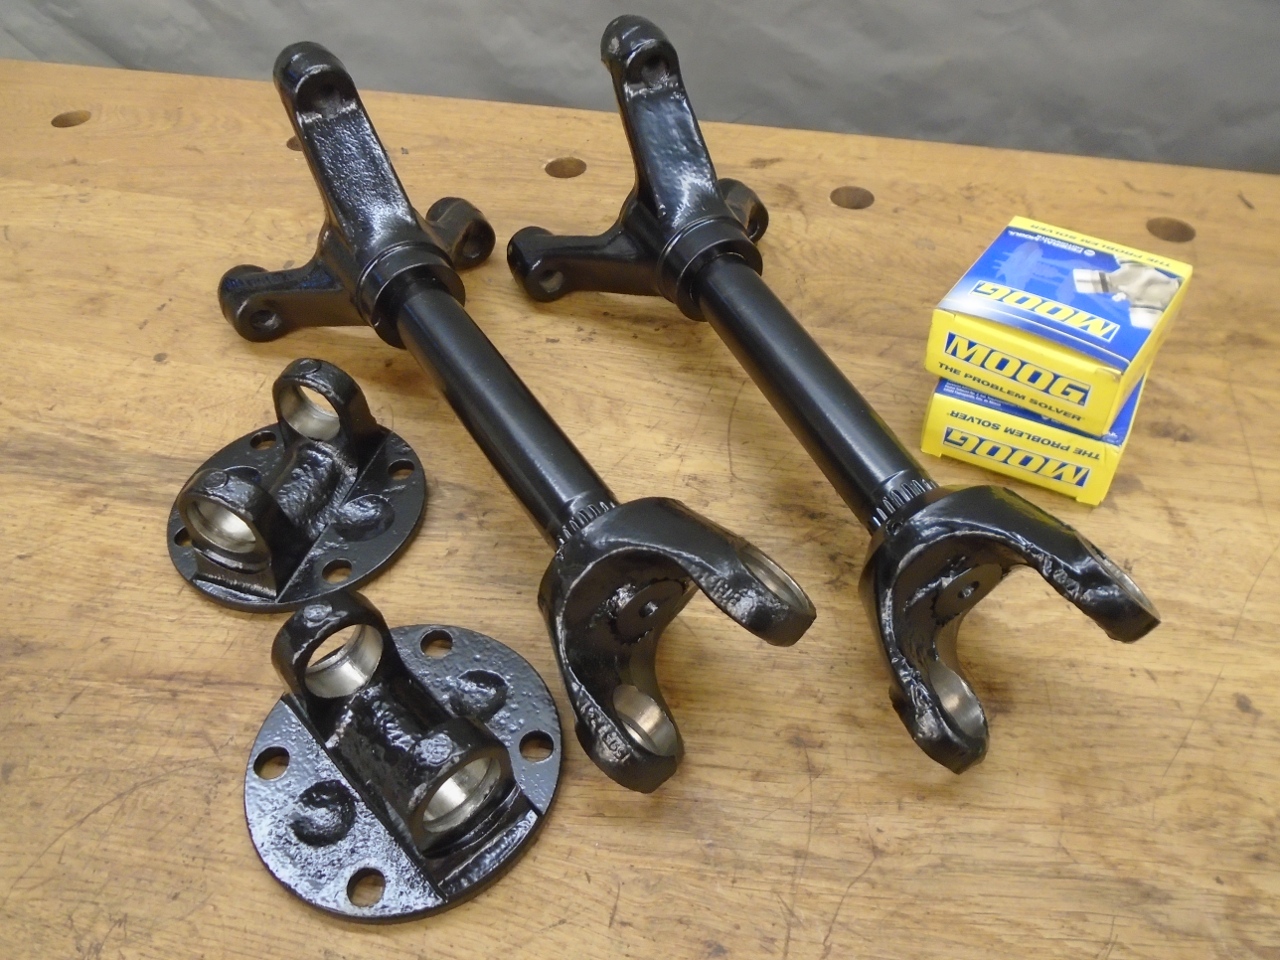
and popped in new U joints.

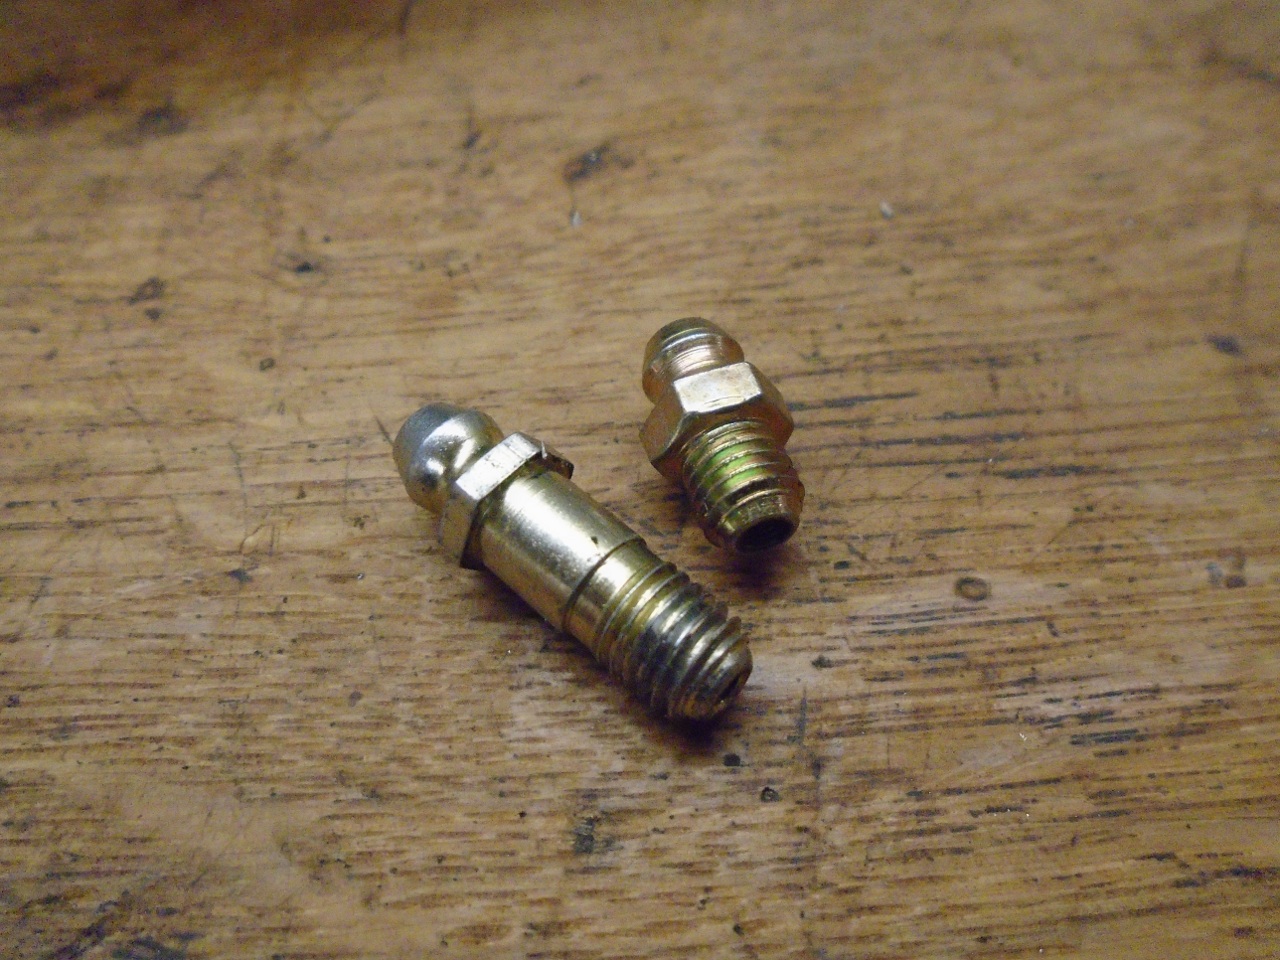
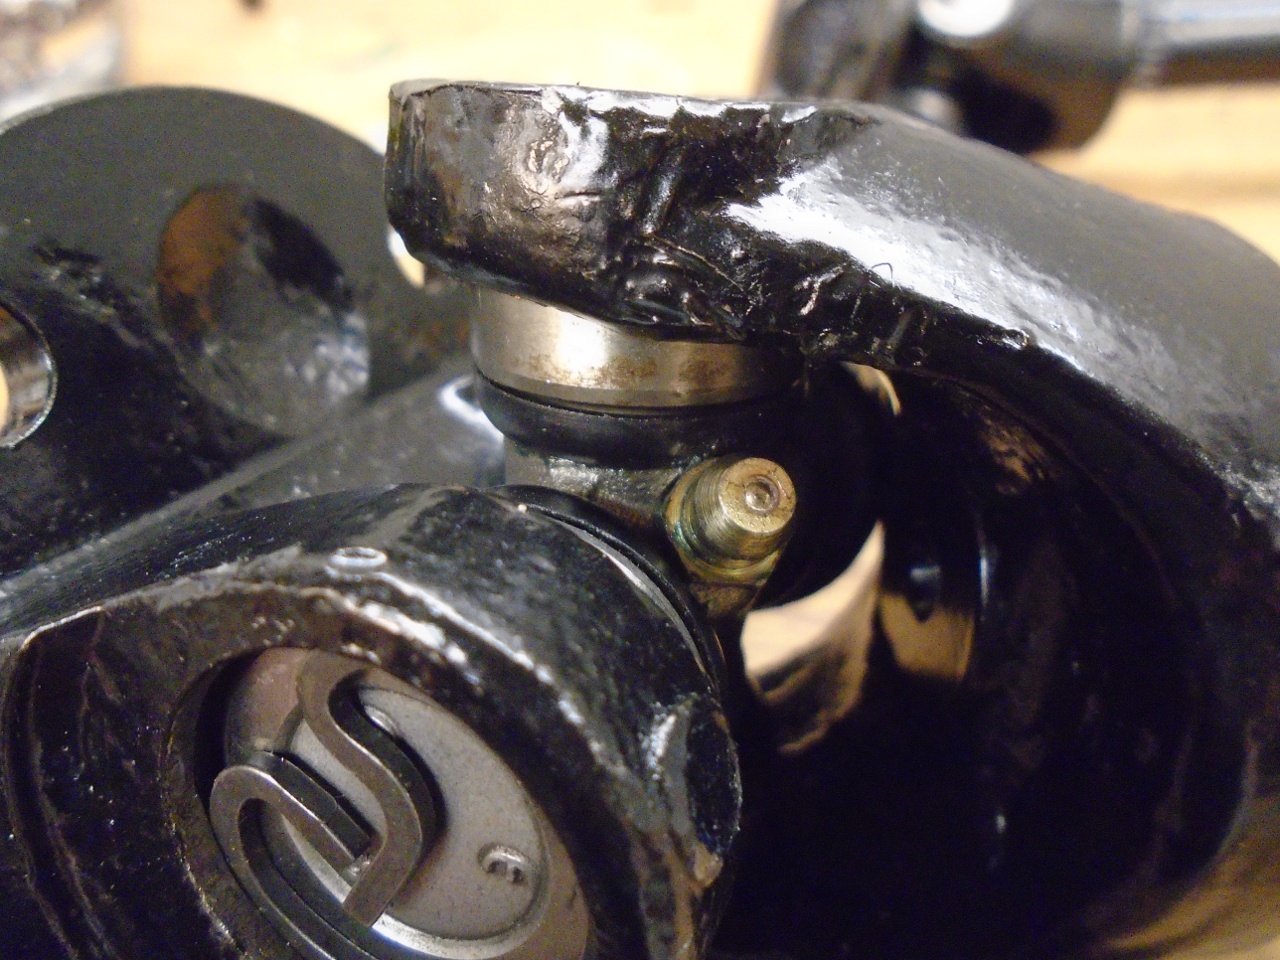
One
small fly in the ointment was that the long grease zerk fittings that
came with the U joints didn't work because they fouled the shaft yoke.
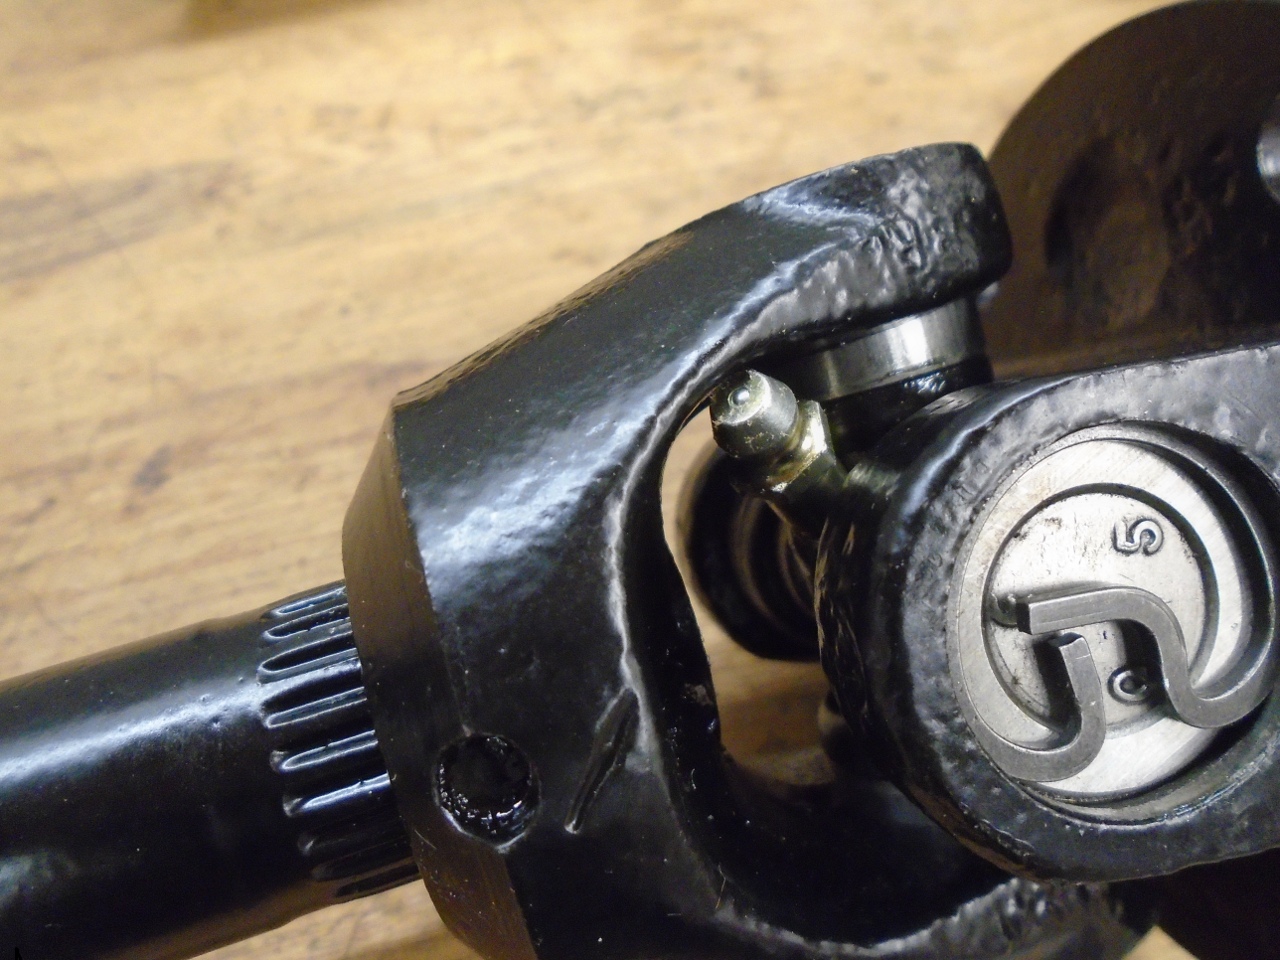
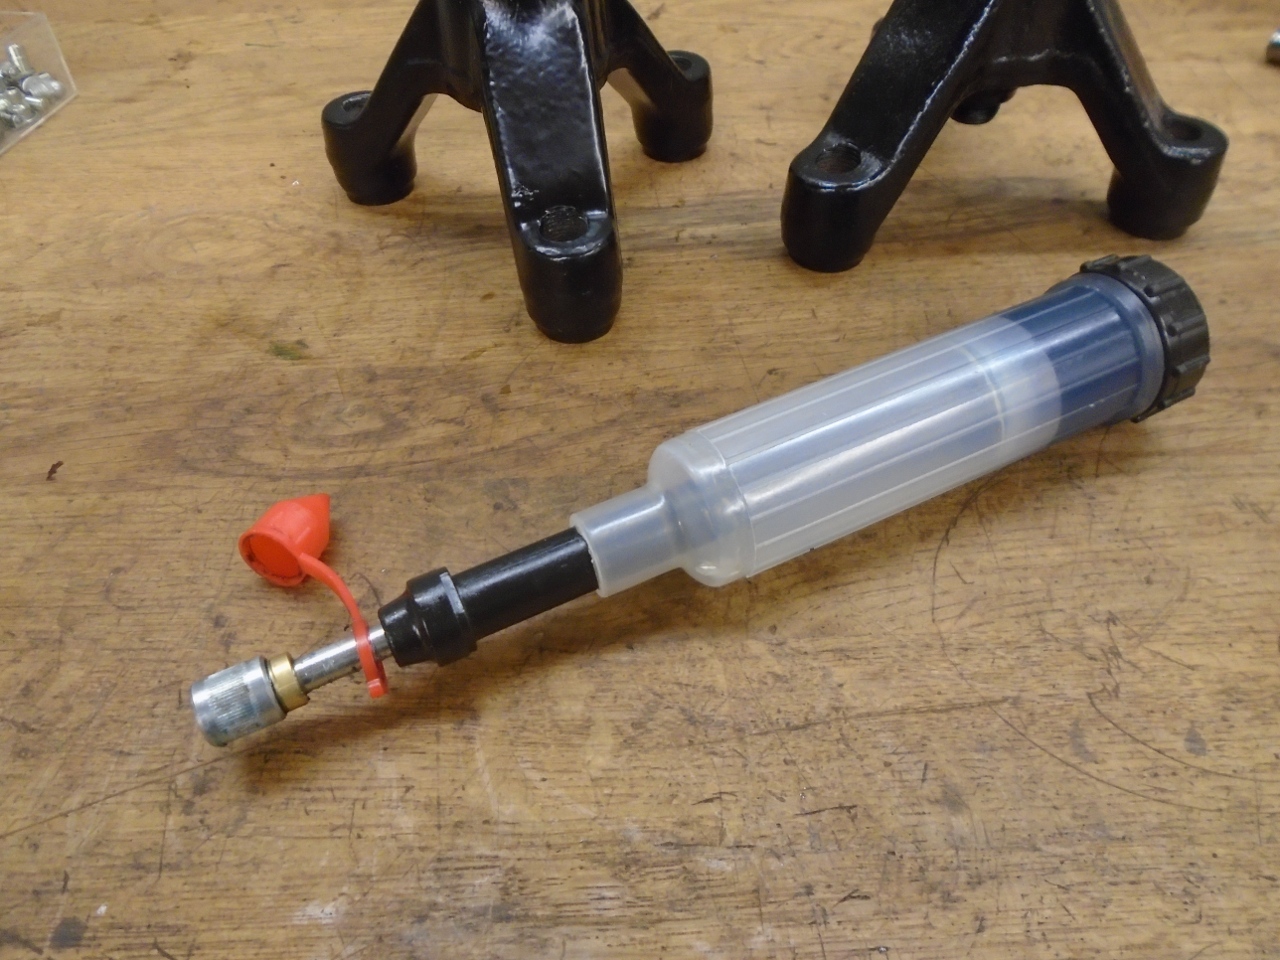
I found some shorter zerks, which worked fine, except then a strandard grease gun tip would not reach them.
But this little push-type grease gun works fine.
So, finally, ready to go. Original hardware, except for the lock nuts, was re-plated.
I
thought it might be easier to do the install with the chassis on the
floor to prvide some load. Getting it off the rotisserie was a
small production.
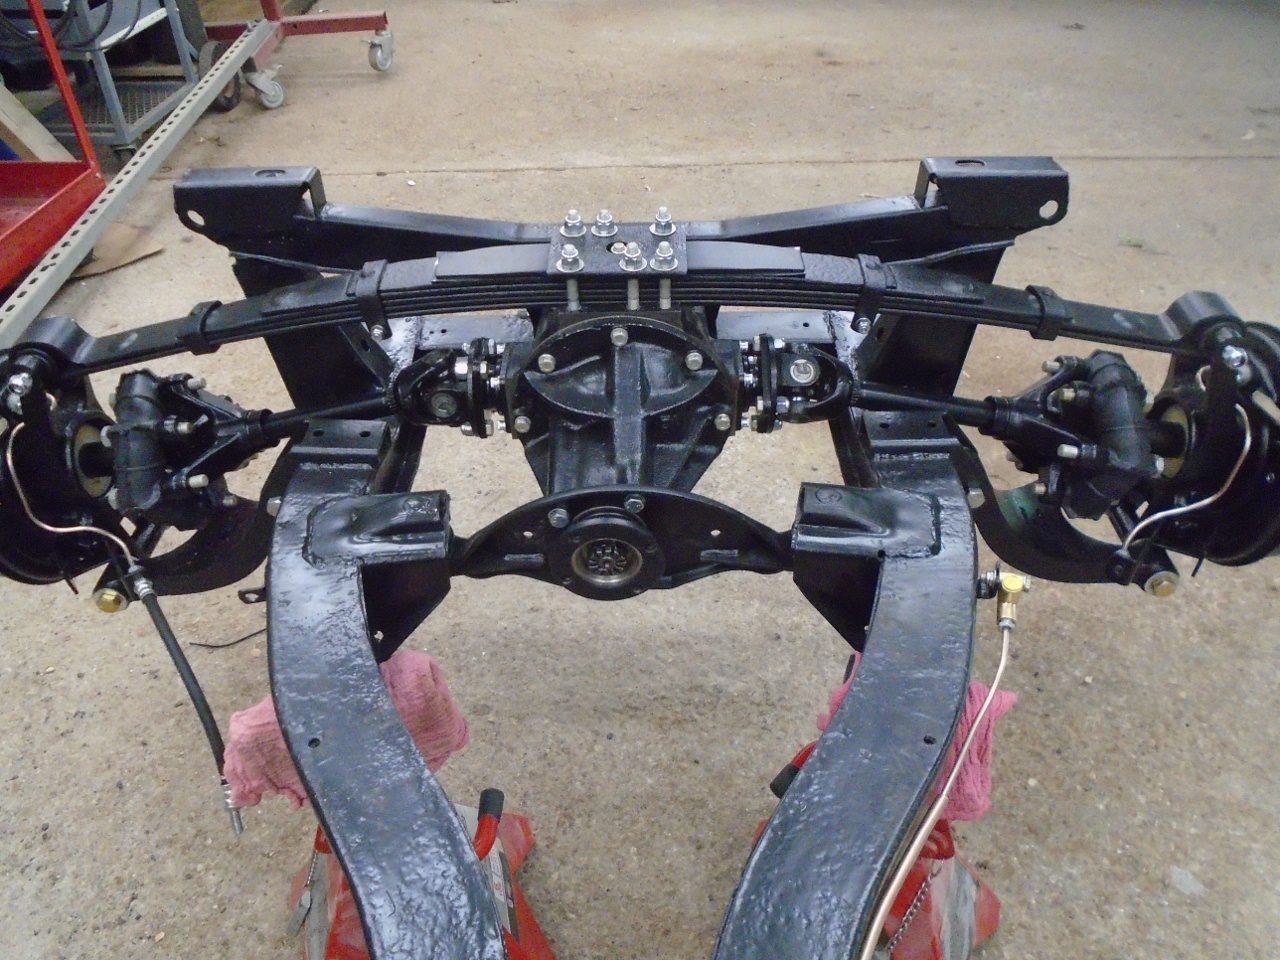
Getting the axles in place was pretty easy, but I had to disconect both vertical links from the spring.
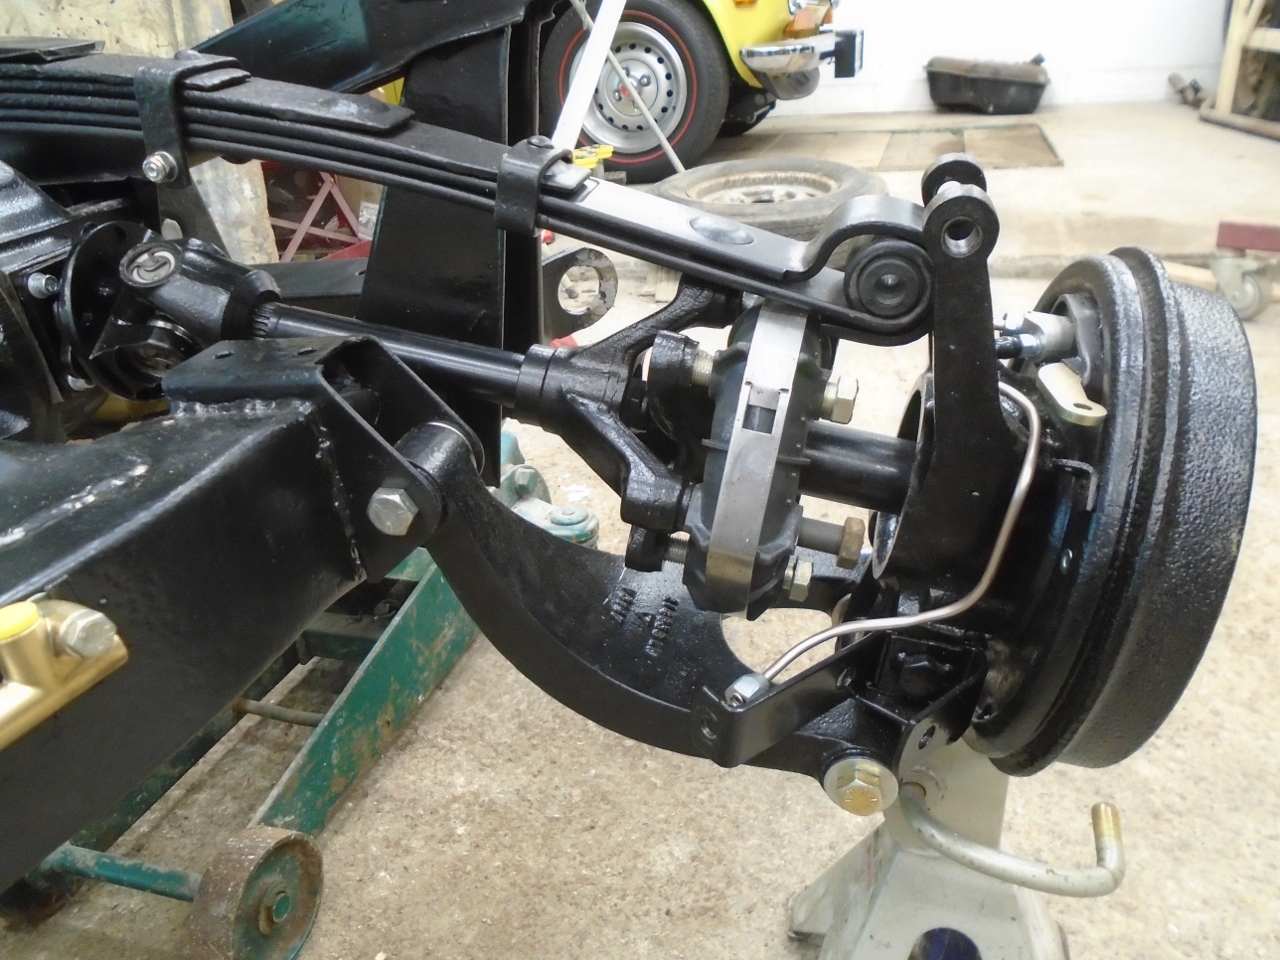
In fact, it was even easier if I removed the spring entirely.
Then, after both axles were secured in place, connected the spring eyes to the vertical links. This of course left the spring about four or five inches above its differential mounting pad.
A couple of ratchet straps pulled the spring down far enough to get nuts on the fastening studs.
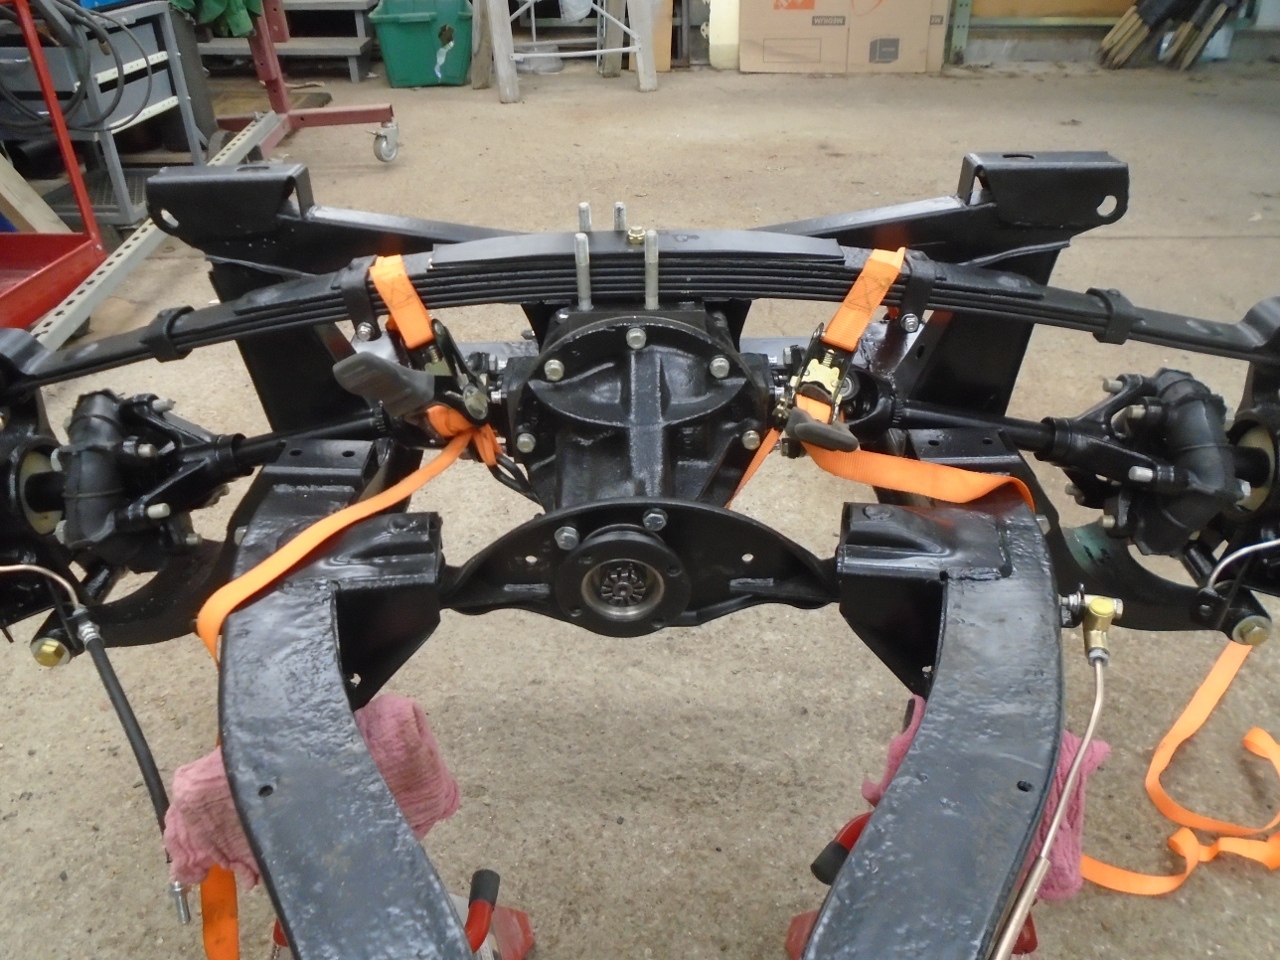
The
"Official" way to do this is to leave the spring attached to the
differential, and use a lever tool to lift up the end of the spring to
attach to the vertical link. Without the weight of the body
though, the chassis would just lift off the ground before the spring
deflected enough.
In
this unloaded state, the suspension is biased very low, to the point
where the inner axles are resting on the frame. I inserted a
thick rubber pad on each side between the axle and the frame, both to
protect the paint, and to raise the suspension a little so the brake
flex hoses weren't so stretched.
Rear suspension and drive train are done!
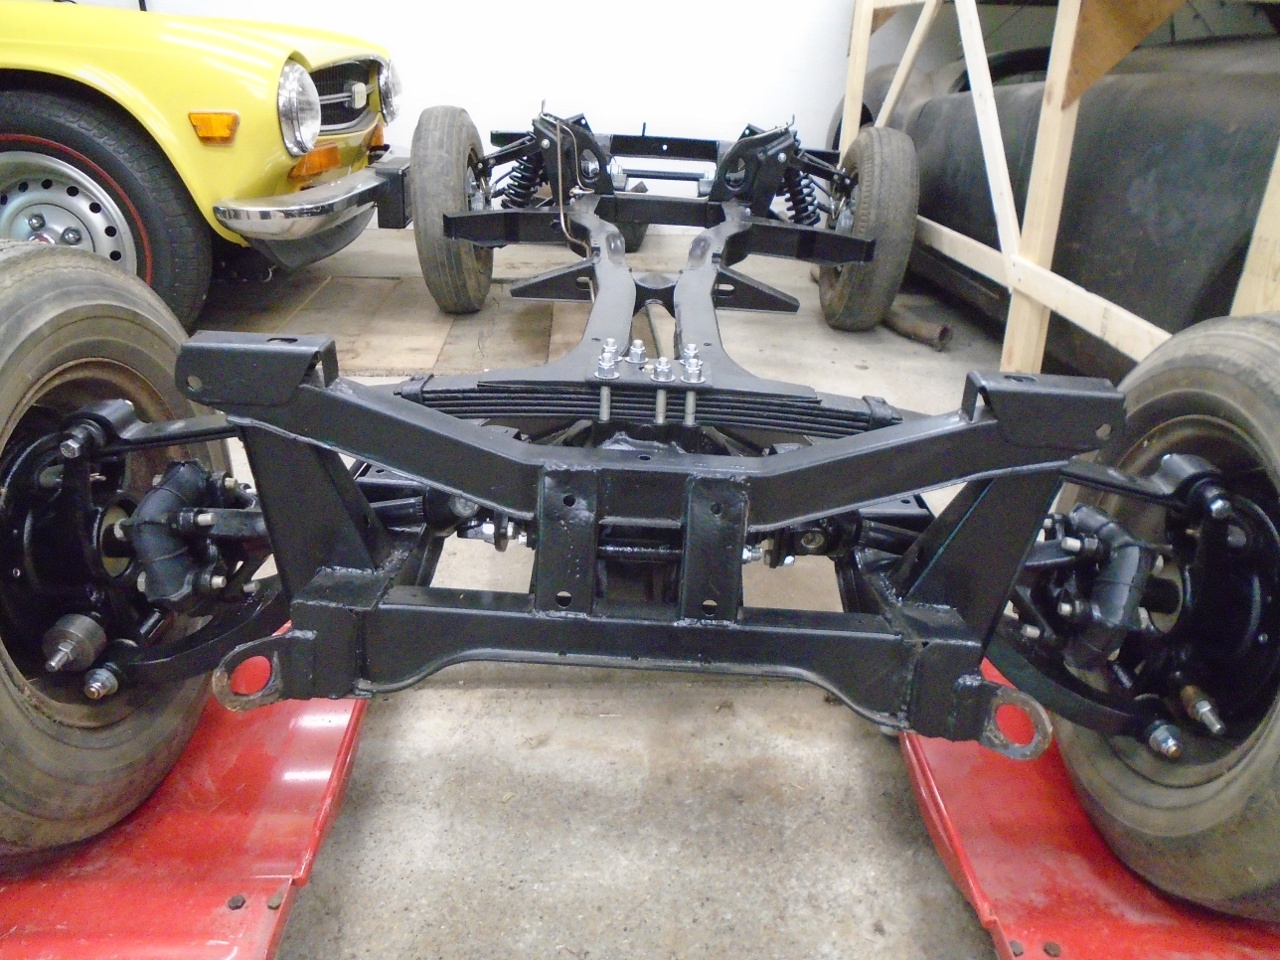
I
was sort of fearful of this project. I had read that getting the
vertical links to mate to the spring could be a bear. In the end, it
wasn't that bad.
This part of the project came to around $100, for the new U joints, and the used axle.
Comments to Ed at elhollin1@yahoo.com
To my other GT6 Pages