To my other GT6 pages
March 19, 2023
Hand Brake System
Most cars have a backup braking system variously called a parking
brake, emergency brake, auxiliary brake, or hand brake. While
some folks may make a distinction between these names, the terms are
mostly used pretty much interchangeably. These systems are
typically mechanical, usually on the rear wheels only, and bypass the
hydraulic systems completely. On most British sports cars of this
era, the hand brake was actuated by a hand operated lever on the central
tunnel. The systems provide considerable mechanical advantage.
Having already refurbed my hand brake lever a couple of years ago, I now turned to the rest of the system.
On this GT6, and likely on Spitfires of the same vintage, the hand brake
system can be viewed as consisting of three parts: The brake
lever, the primary cable, and the secondary cable. The lever pulls
on the primary cable, and the primary cable pulls on the secondary
cable, which in turn pulls on the mechanical actuating levers of the
rear drum brakes.
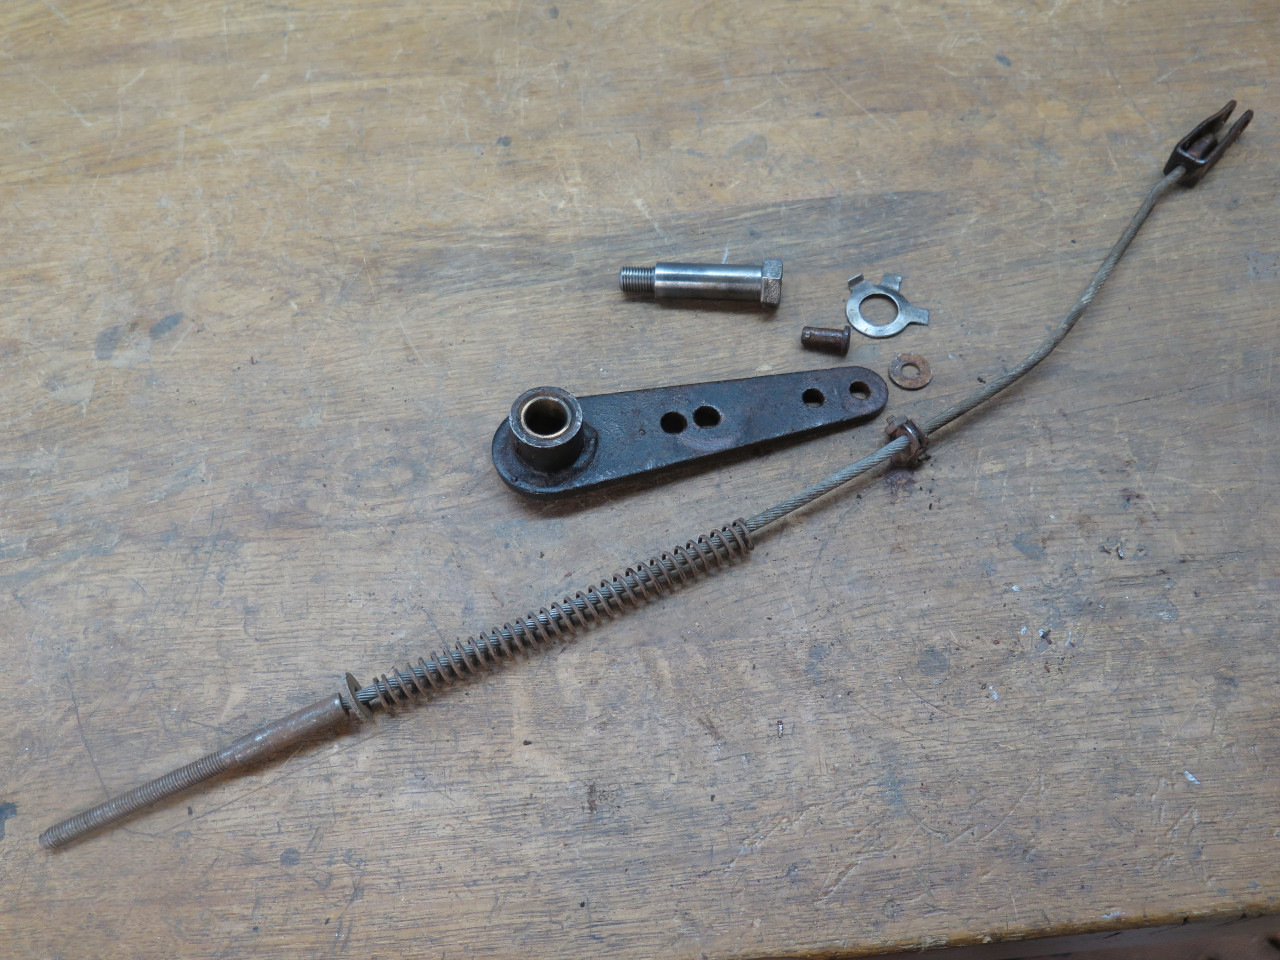
The parts of my brake system were dirty and rusty, and some of them were
broken. The short cable with the spring is the primary cable, the
longer coiled one is the secondary. One of the threaded ends of
the secondary cable broke on disassembly.

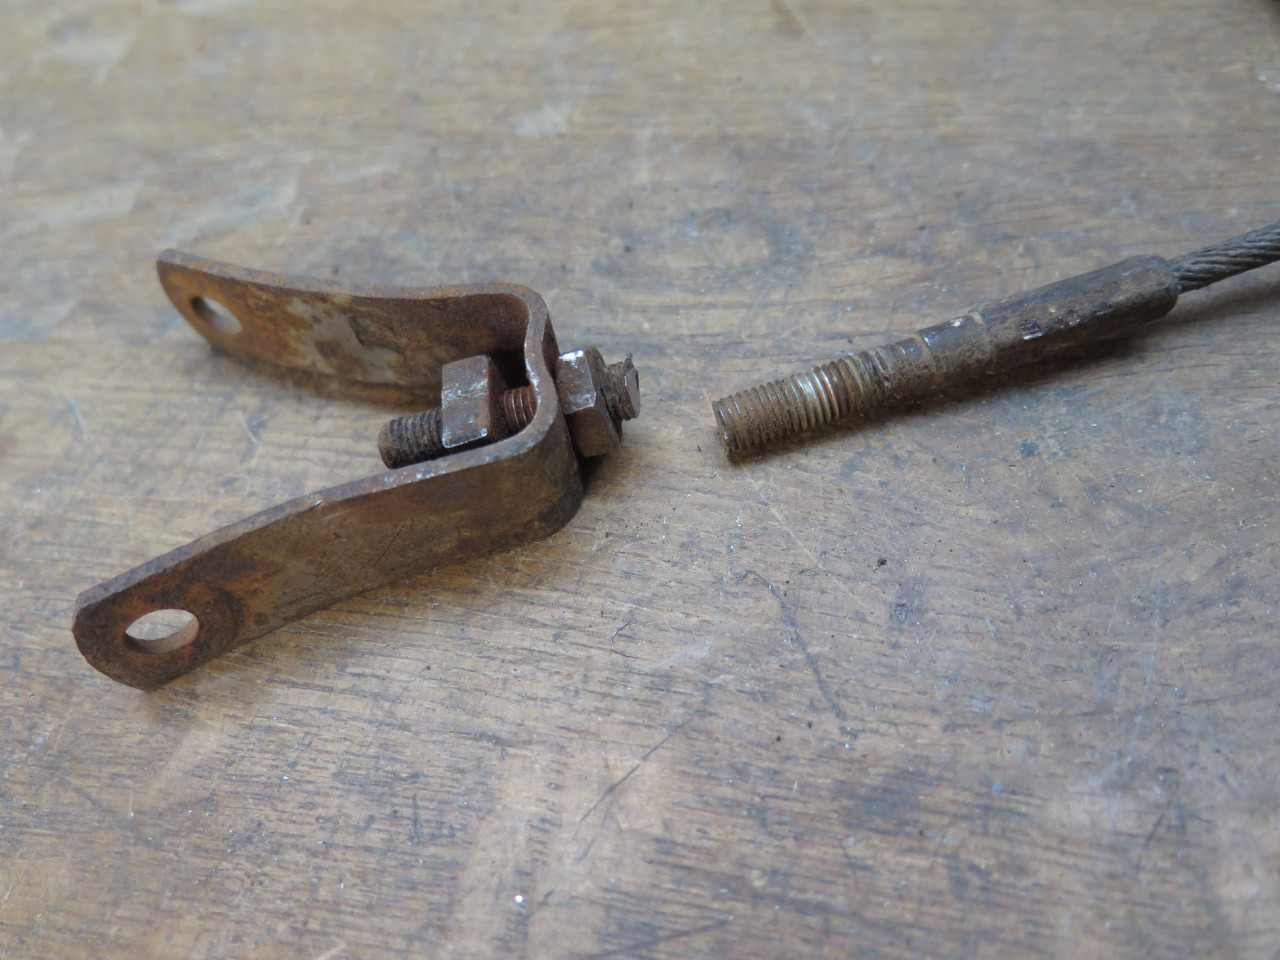
The primary cable connects to this "relay lever". The primary
cable is an assembly that includes a spring that pulls the hand brake
lever to its home (down) position. There is a clamp that sets the
preload of the spring.

I thought I could clean up and re-use the primary cable, but the swaged
ends don't permit easy disassembly. But I really wanted to remove
and clean up that spring, so I cut off the clevis. This made
cleanup much easier.


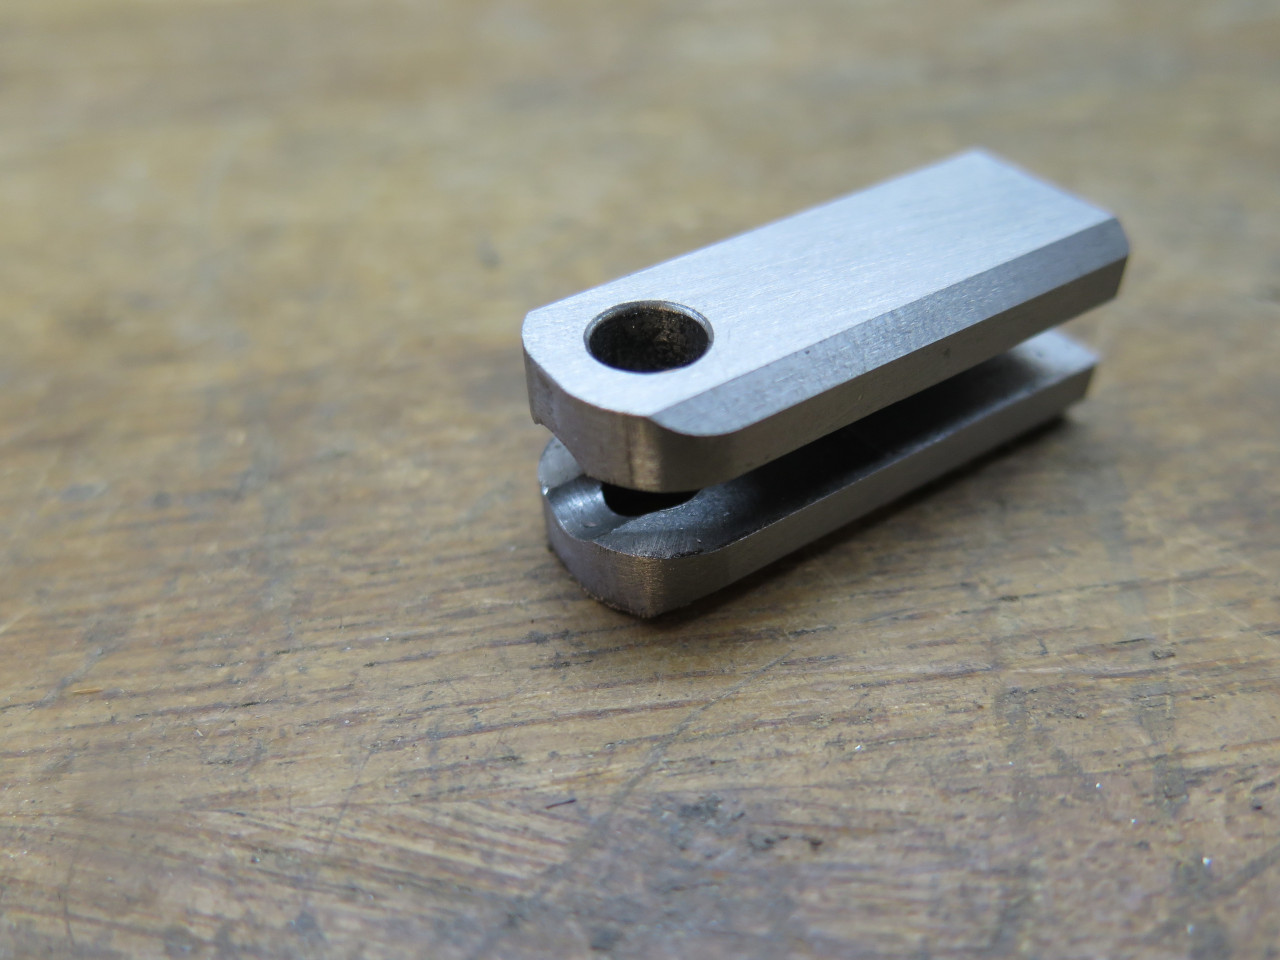
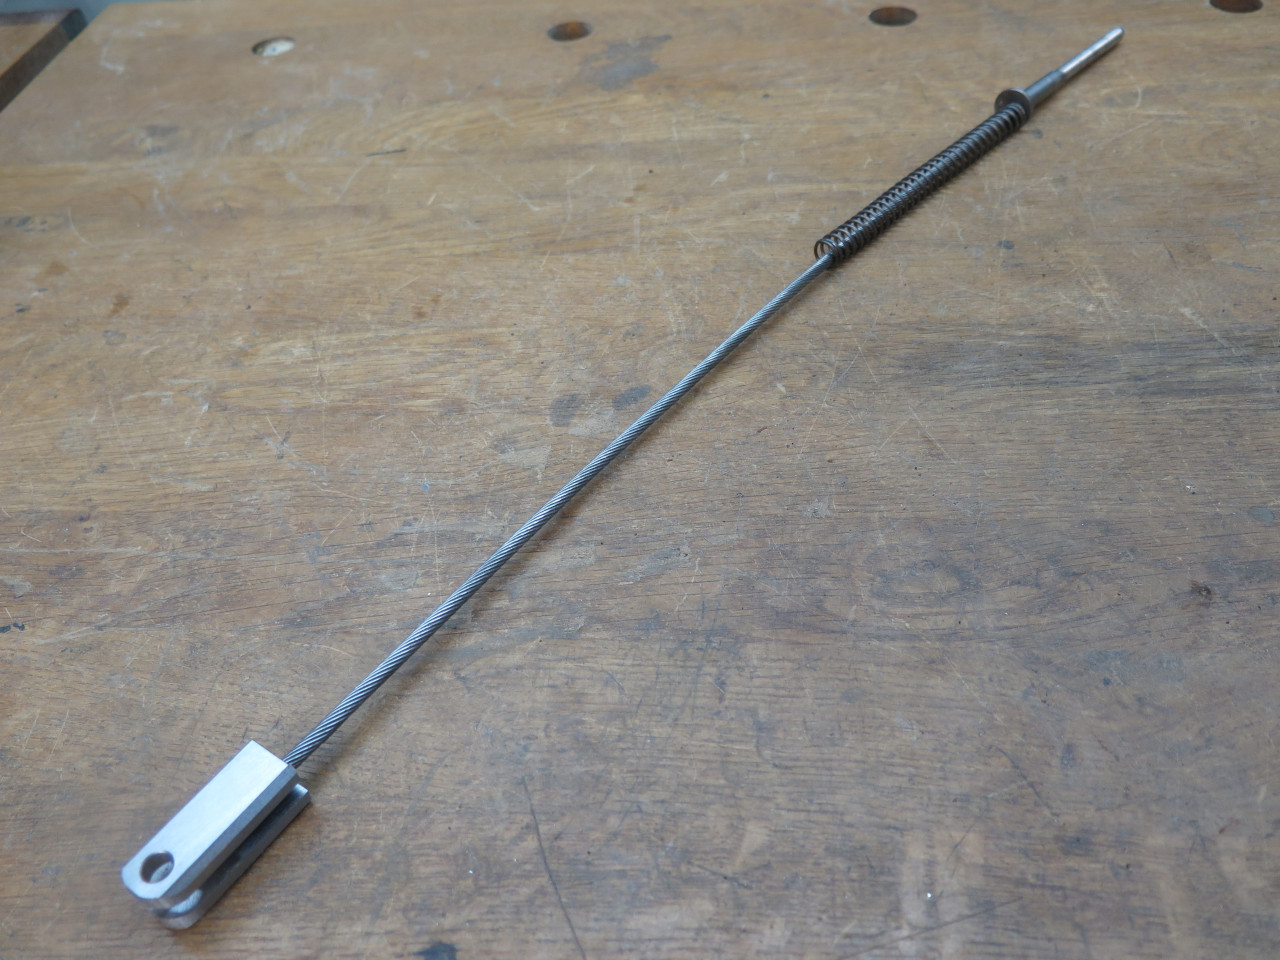
I then made a new, proper clevis that can be removed, but captures the cable end when its clevis pin is in place.

The little clamp that locates the spring never really had a
chance. The screw head twisted off almost as soon as the
screwdriver touched it.

I don't believe anyone sells these clamps, so here is my rendition.

Now, this was admittedly a fair amount of work to save a $10 part, but it was a nice challenge.
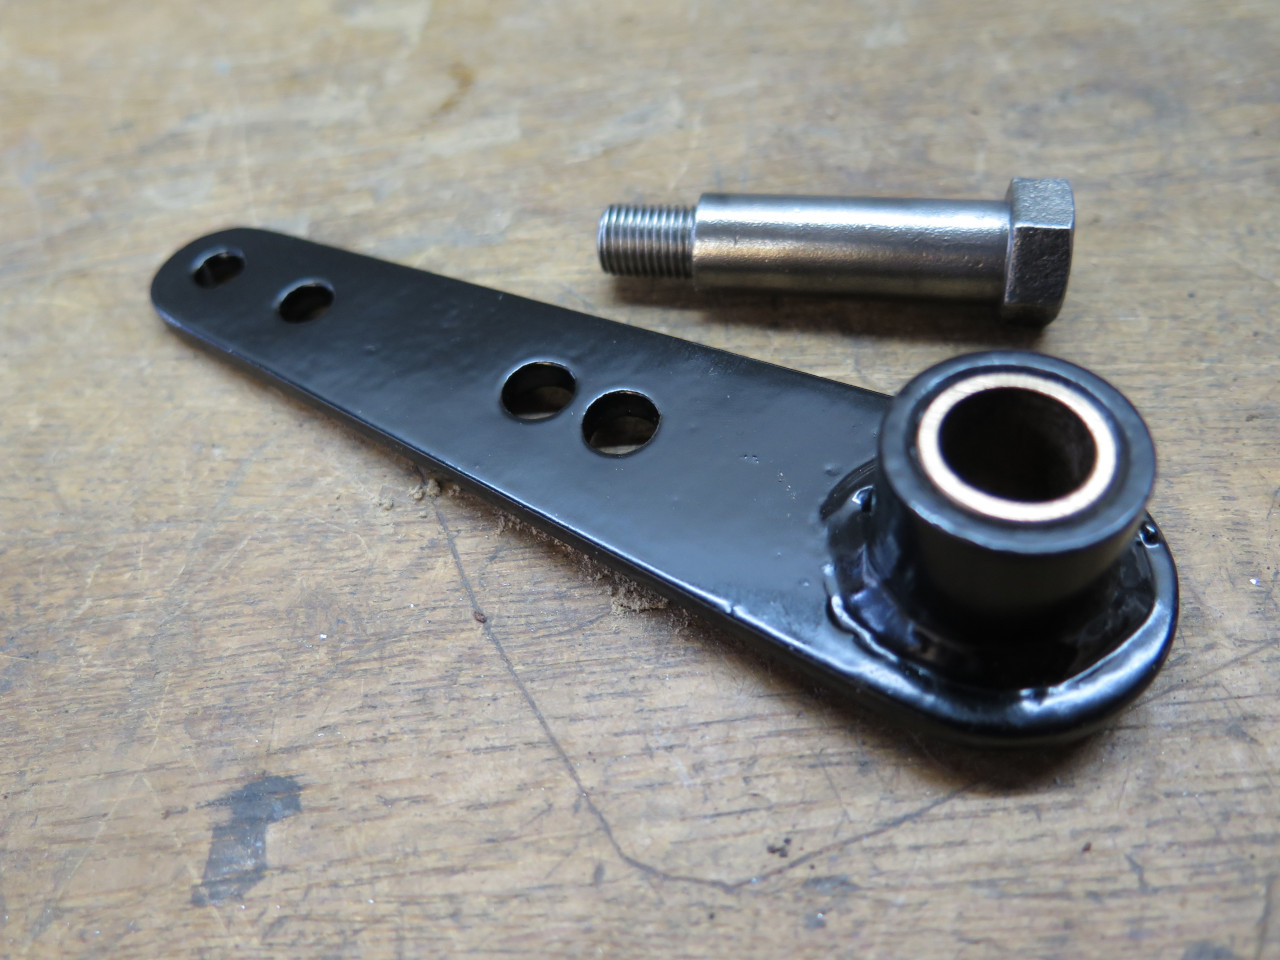
Next up was the relay lever. It pivots on a shoulder bolt that
fastens to a bracket on the body. An Oilite bushing tries to keep
it from seizing. The parts cleaned up well, and aside from some
minor rust pitting, they were in good shape. Even the bushing was
still a very nice fit on the shoulder bolt. I attribute this to
the fact that the hand brake never really worked for most of this car's
life, so the lever rarely got pulled.
I resolved to re-use the bush, but wanted to re-charge it with
oil. This is typically done by soaking the bushing in SAE 30
weight oil over night. I got a little impatient though, so I stuck
the cup in a vacuum chamber. If any of the tiny passages in the
sintered bush had air in them, this would pull it out. Then by
repressurizing, oil will be sucked back in. There was plenty of
bubbling. Some of this is certainly air that was dissolved in the
oil, but I could definitely see small streams of tiny bubbles coming
directly from the surface of the bushing.
A nice powder coat in the lever, and the bush went back home.
This lever lives in a really inhospitable place, is difficult to access,
and is not on any scheduled maintenance list. In a valiant but
ill-fated attempt to preserve lubrication in this joint, some designer
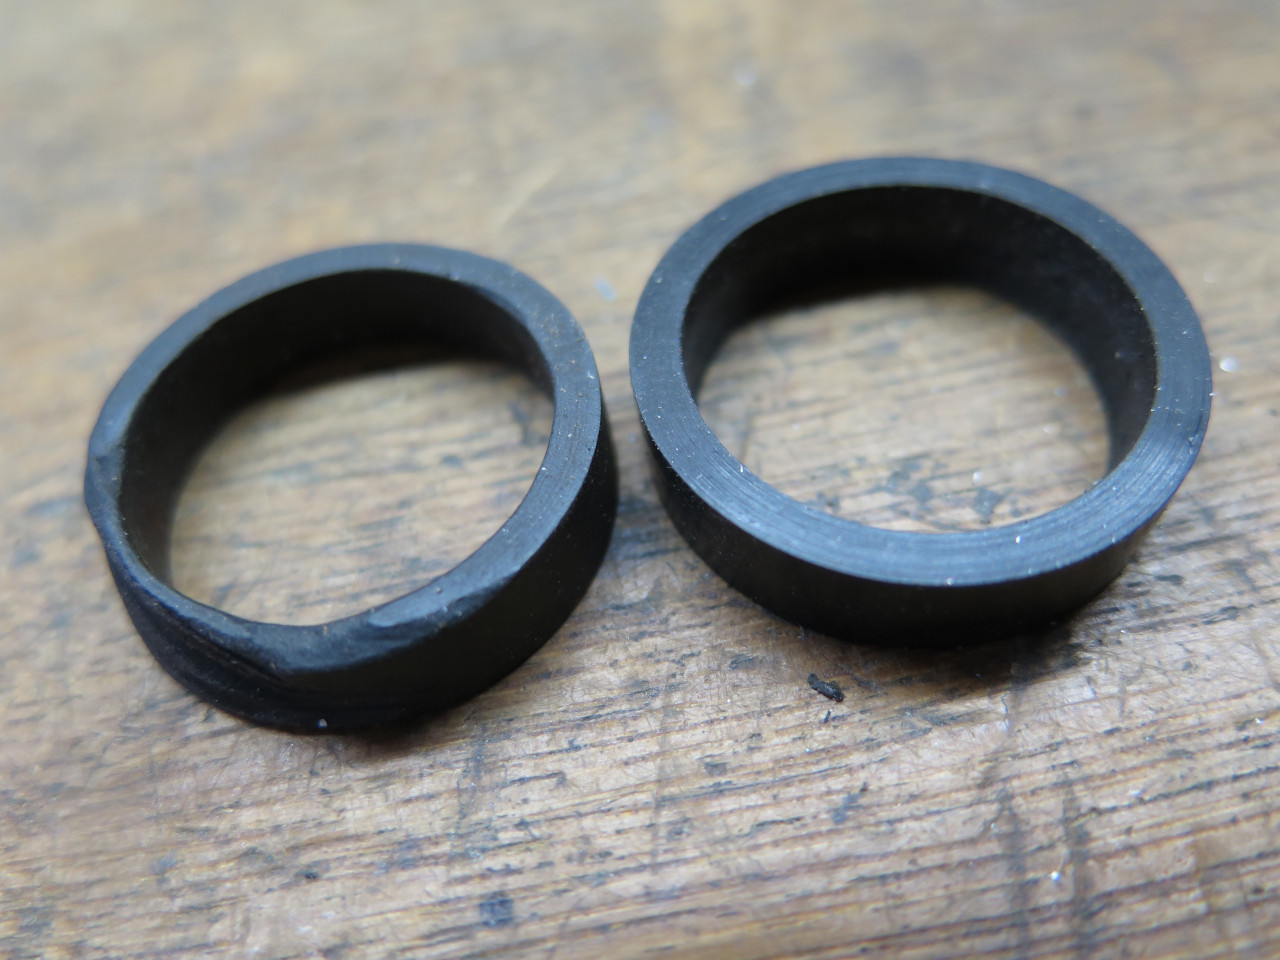
included another pair of parts. One was a rubber seal that fits
the bottom of the bushing boss, and the other was a felt washer at the
top. Presumably the washer was saturated with oil on assembly, and
this was intended to be the bushing's life-time supply of lubrication.
My rubber seal was very hard, misshapen, and dried out. I
understand that these may be available from a UK supplier, but it seemed
a little extreme to order a $2 part from 4000 miles away. A check
of my shop bucket list revealed a desire to cast small rubber parts
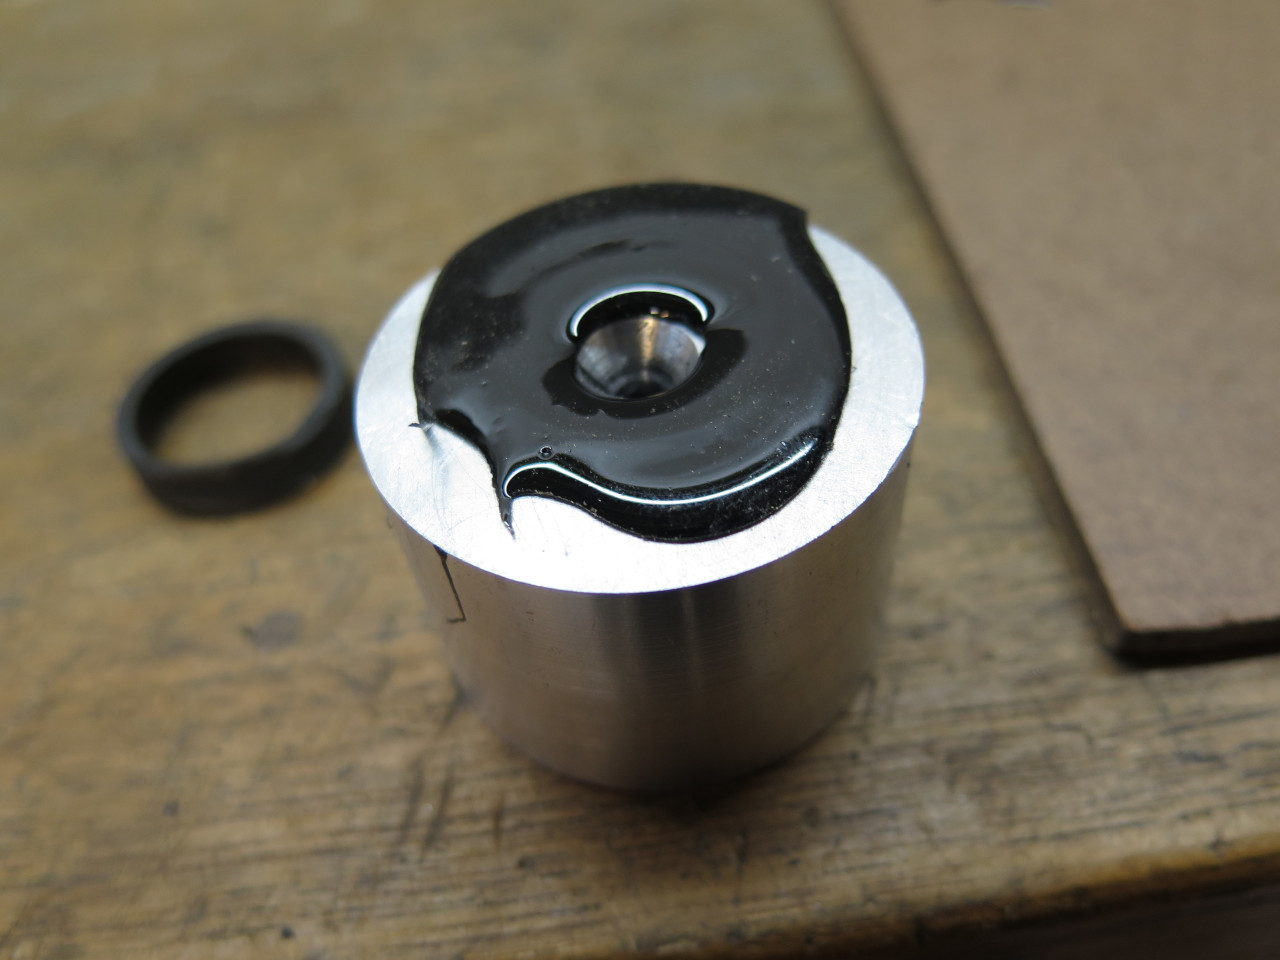
some day. Well the day arrived. A simple mold from some
scrap aluminum, pour in some two-part urethane casting rubber, let it
cure, trim, and pop a new seal out of the mold.
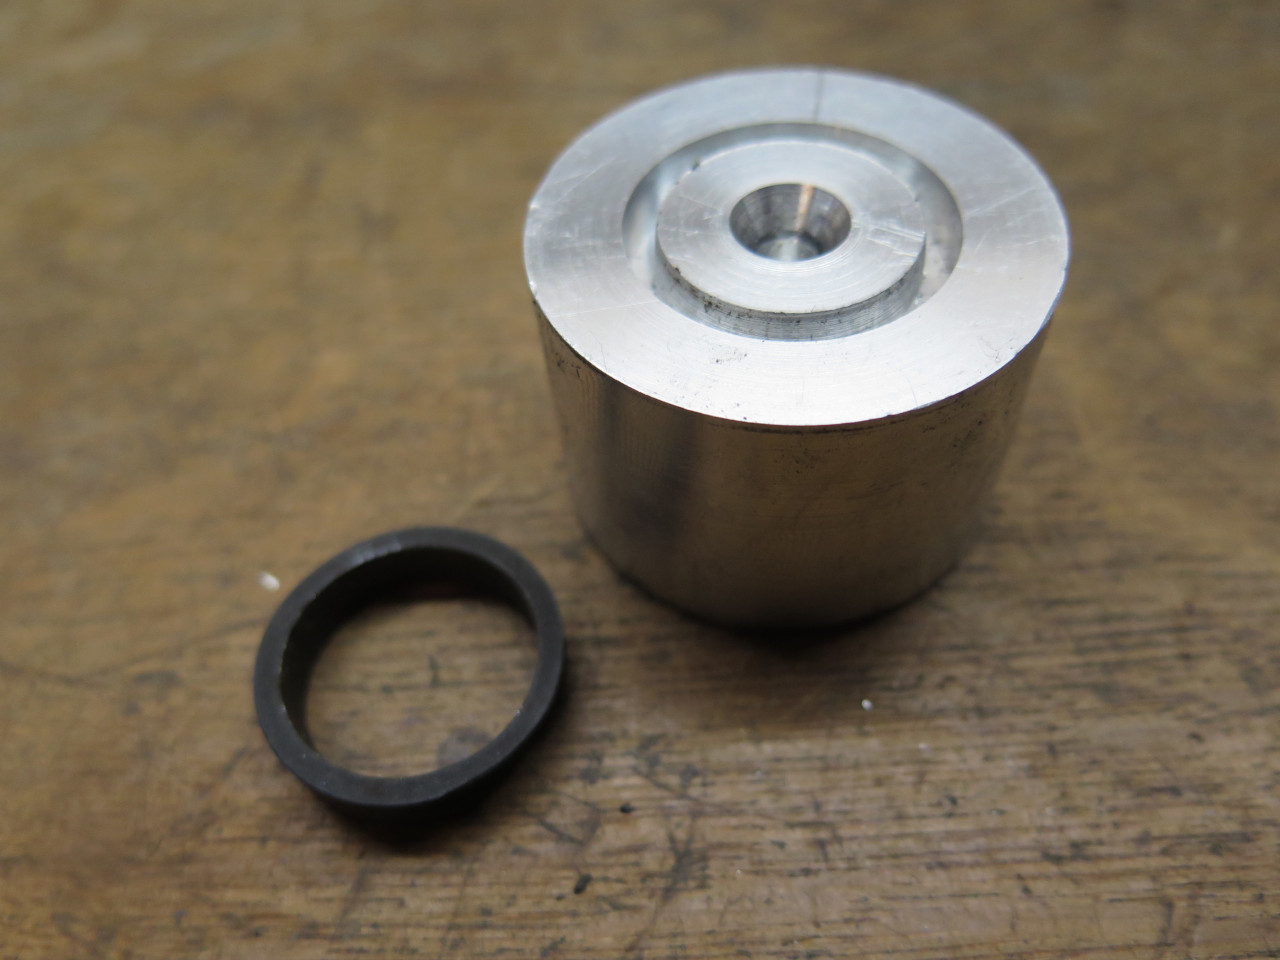
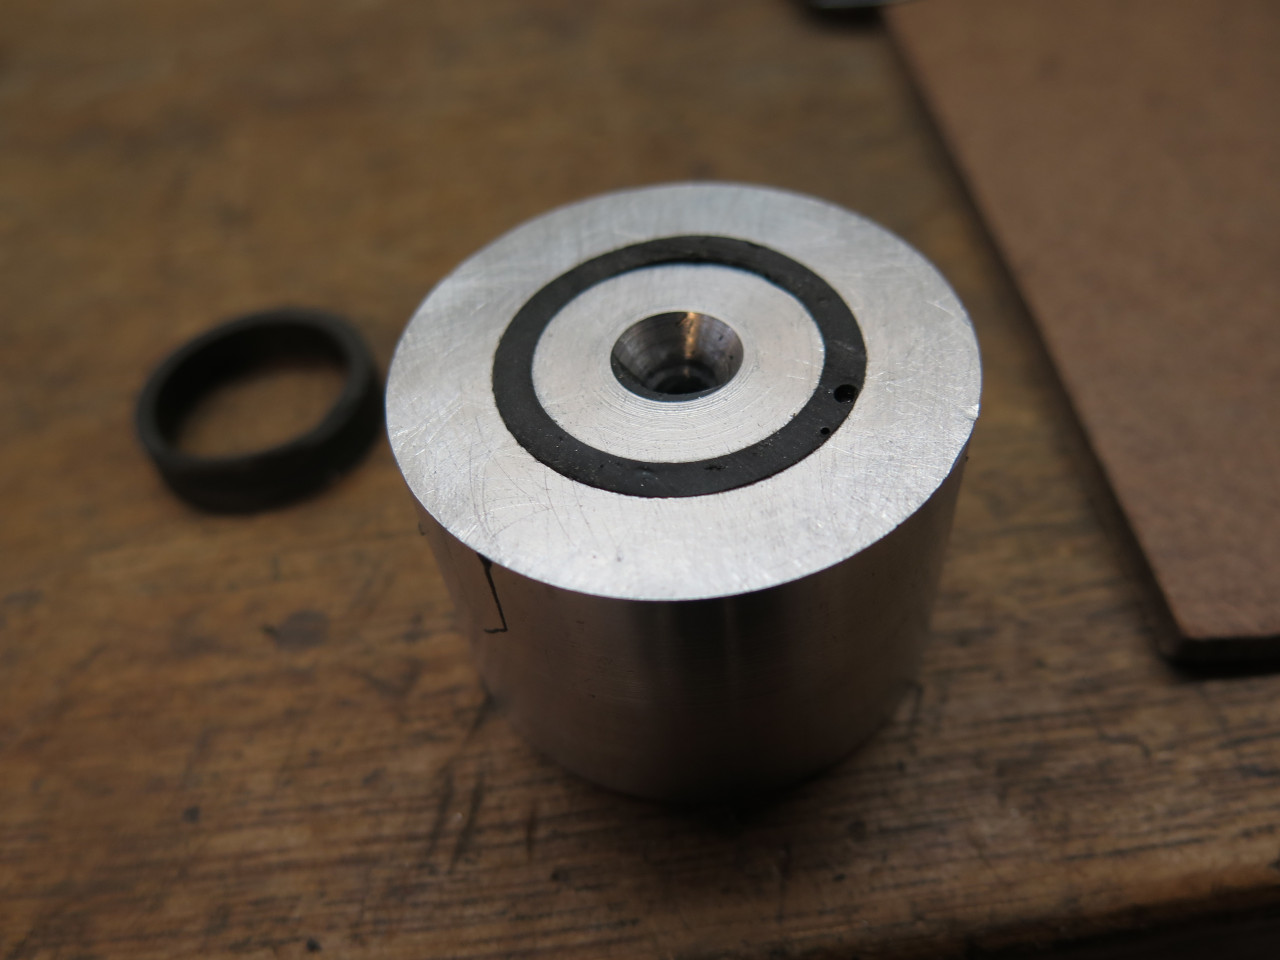
My seal has the same ID as the original, but a slightly bigger OD because, you know--upgrade!
As far as the felt seal/oil reservoir, it was totally AWOL, and these seem to not be available anywhere. No problem...


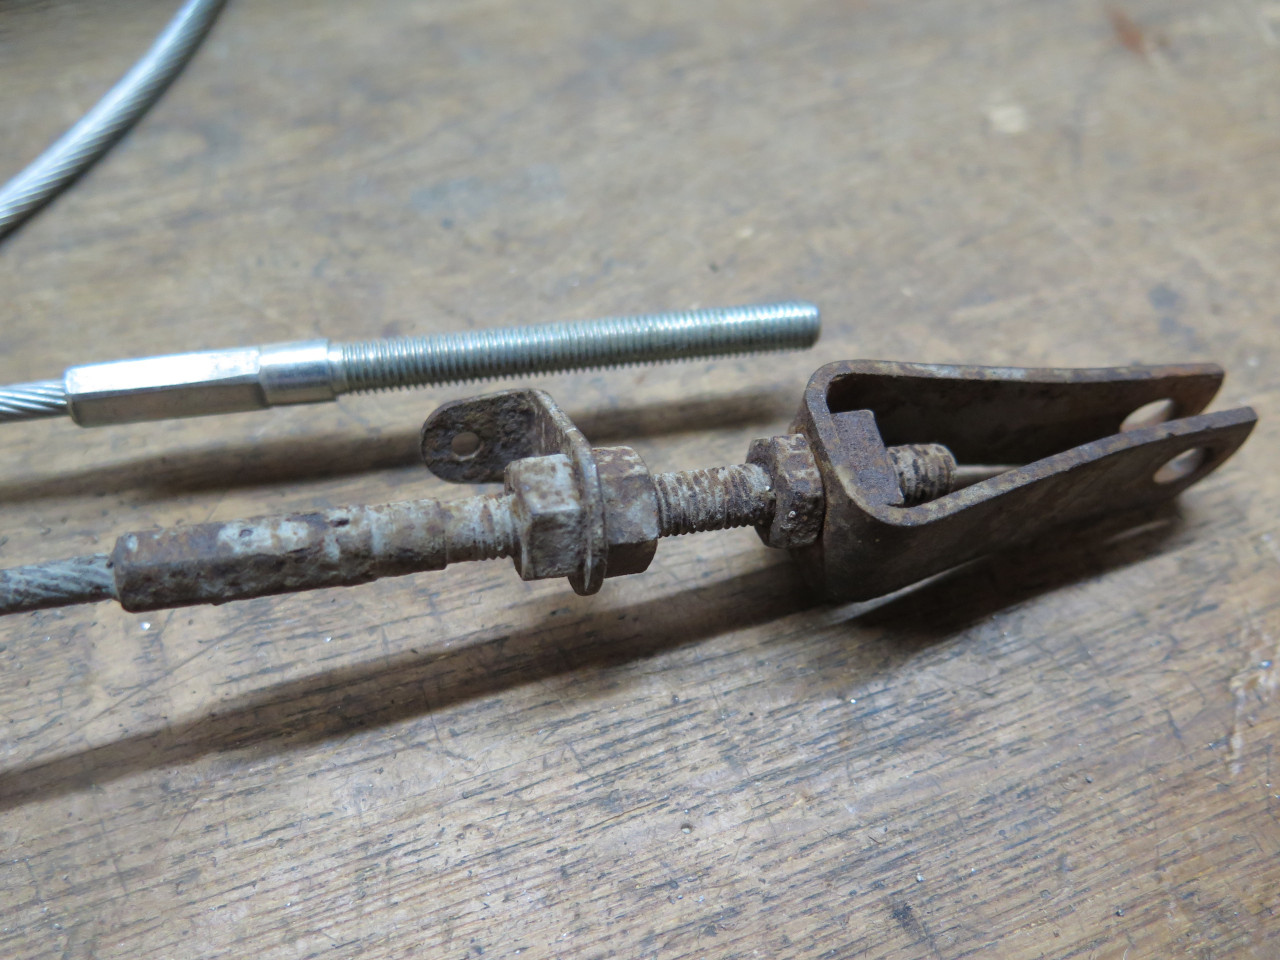
I did order a new secondary cable since mine had a broken end. I
was mistaken in thinking that it would come with the clevises and other
hardware for the ends. I considered cleaning up the original
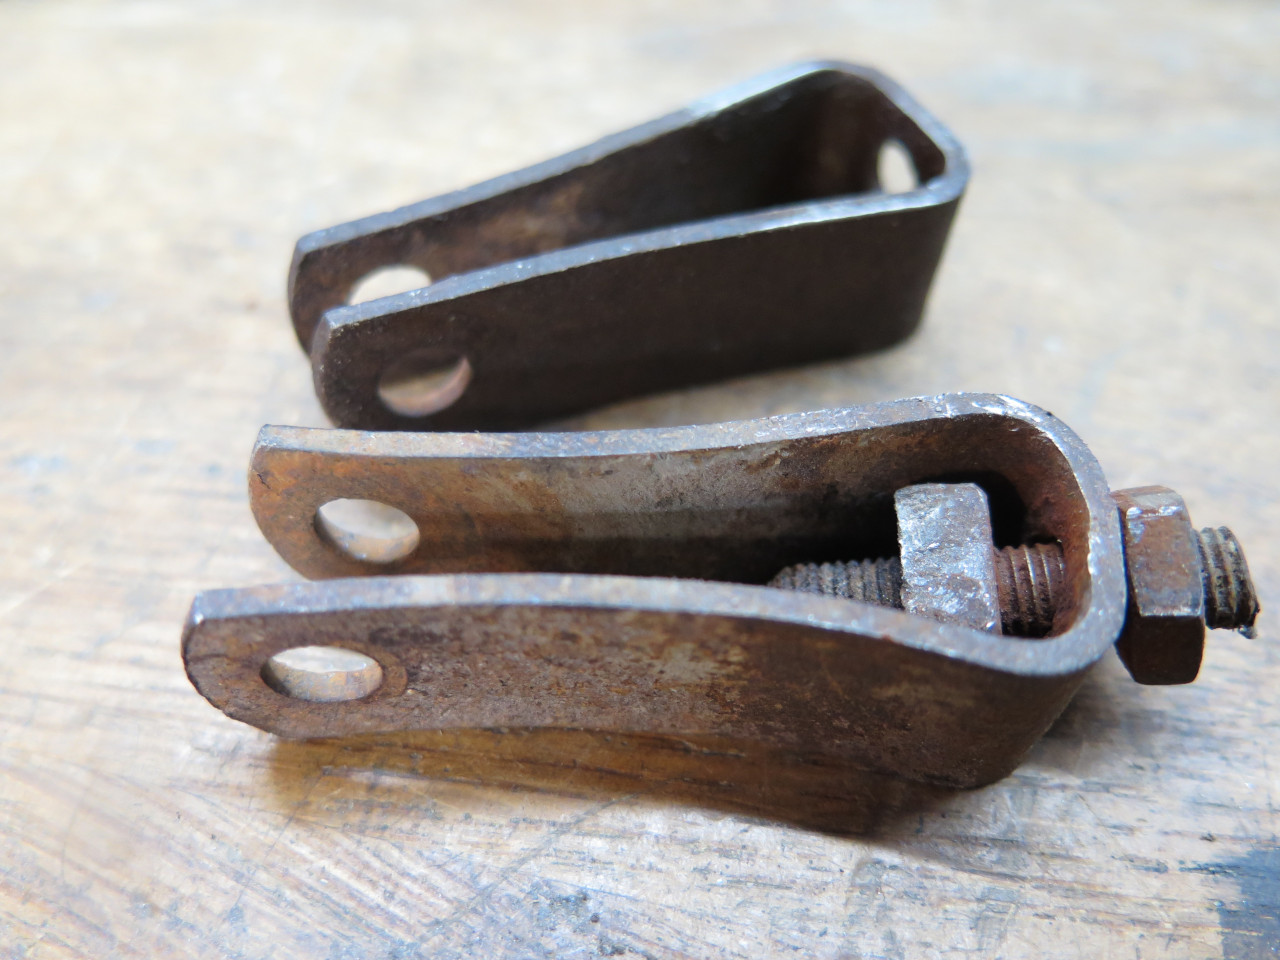
clevises, but I just couldn't bring myself to do it. The original
bent sheet metal clevis was apparently designed to capture that square
nut in its crotch, which would keep it from turning. Well, that
never works. The square nut spins, making adjustment or
disassembly a great big hassle.
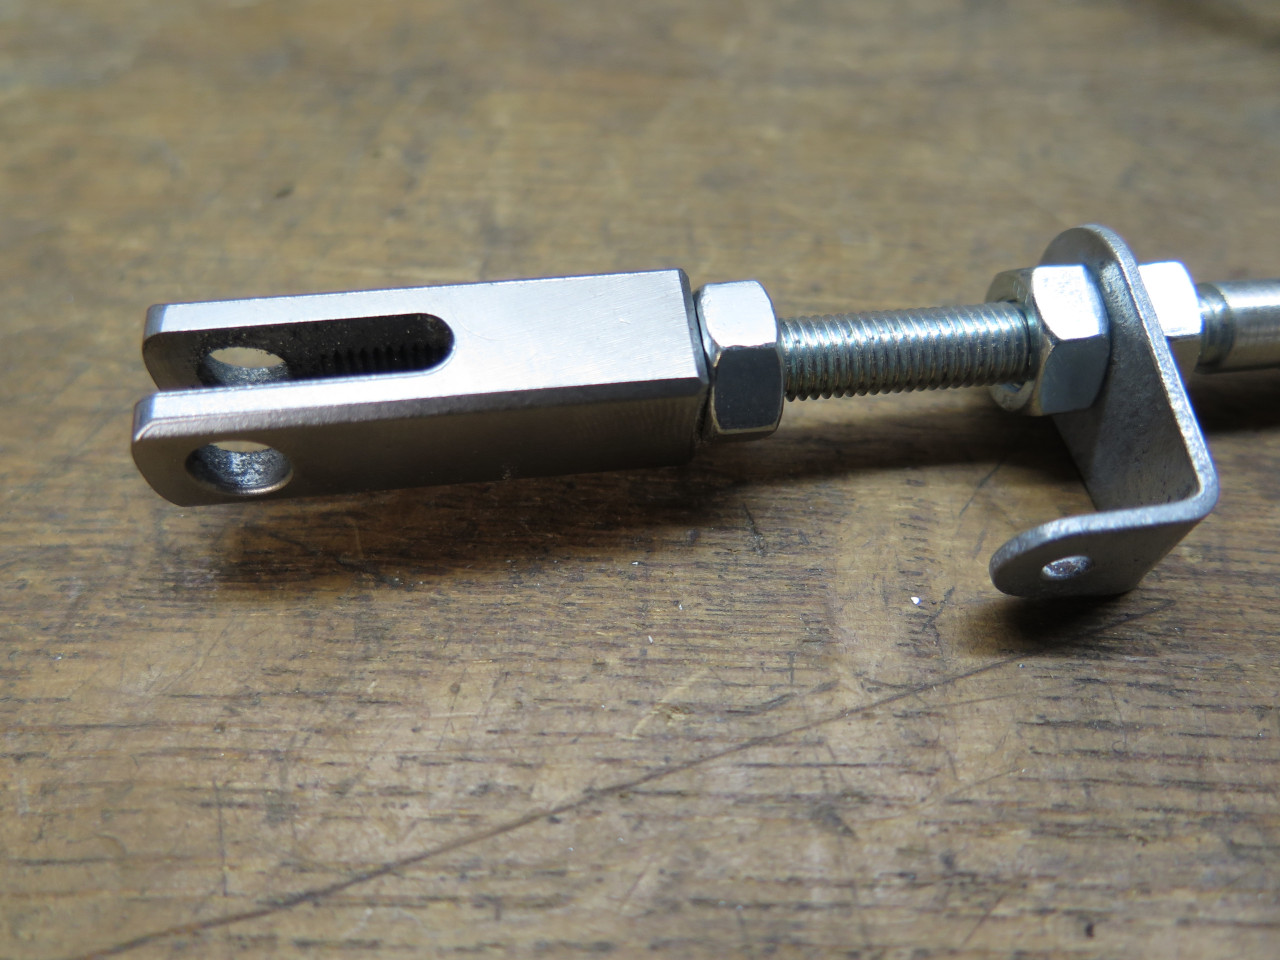
Now these are proper clevises.

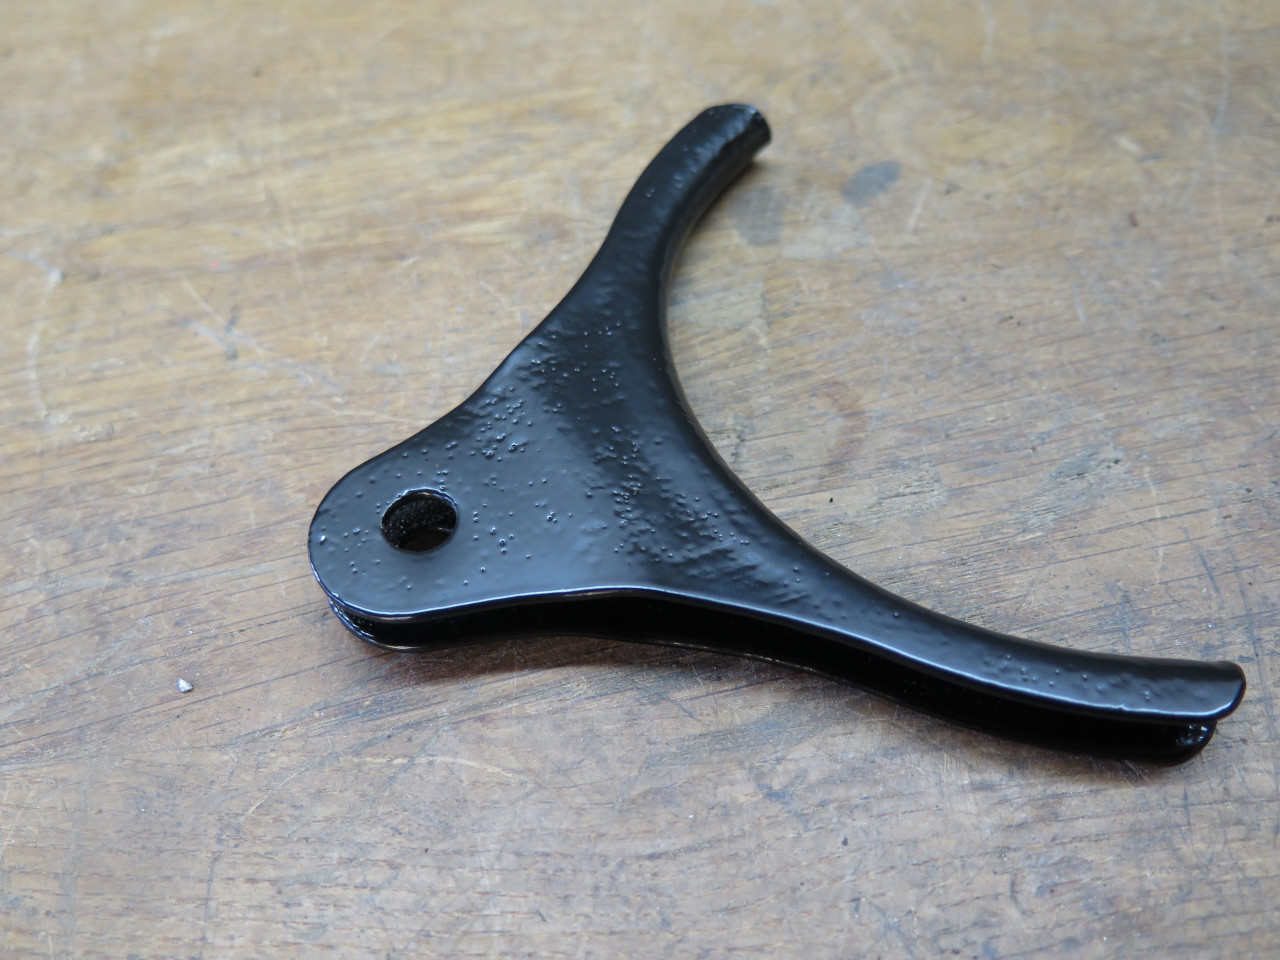
The last part was this yoke-like thing. Cooly named a "compensator
sector", the secondary cable threads around the arc so that pulling on
the sector pulls both ends of the cable. It's got some pitting,
but the powder coat should protect it from further corrosion.
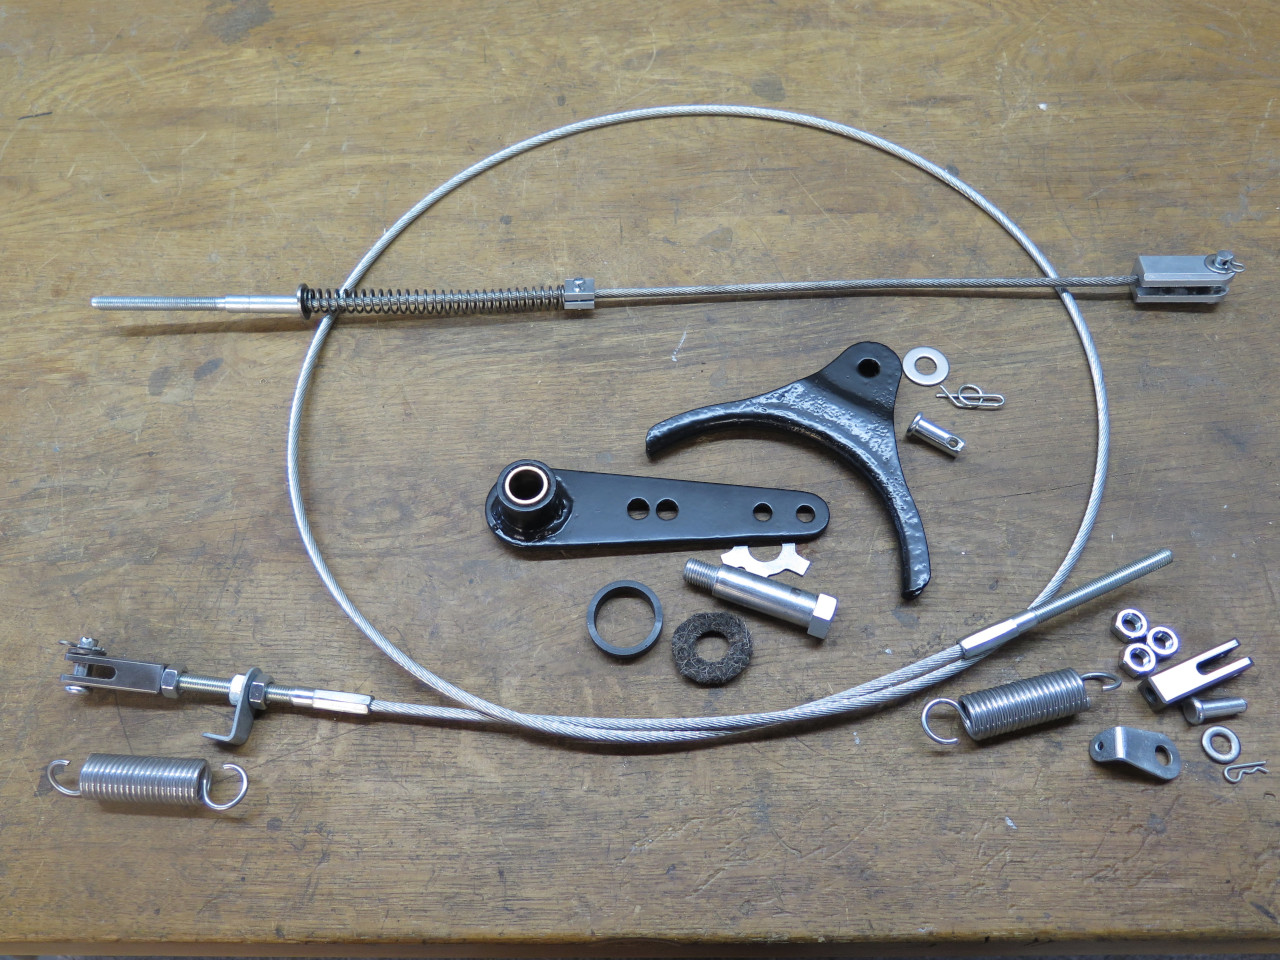
So here are all of the parts that will go back into the car.
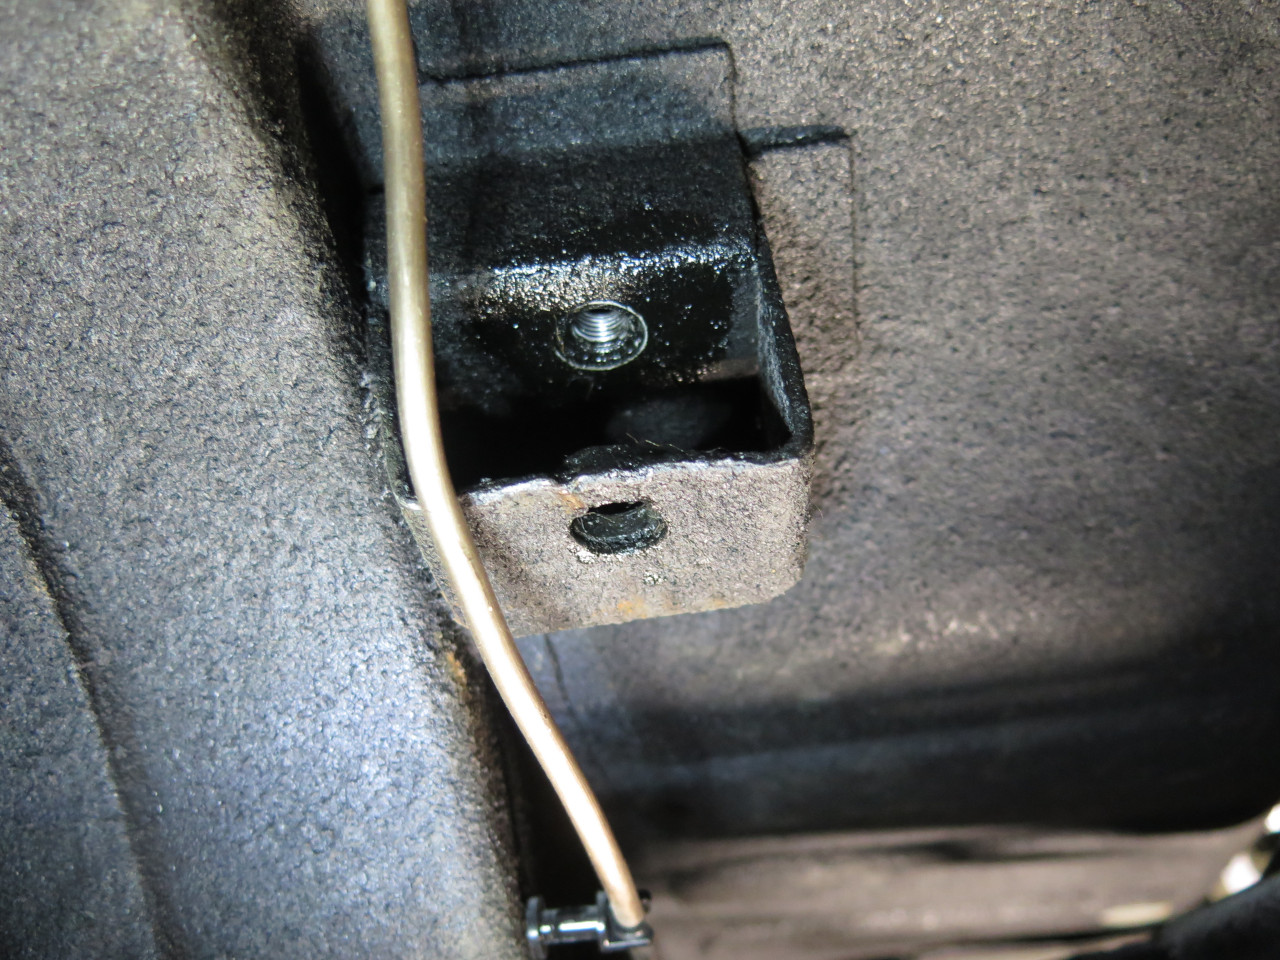
If you ever read or hear that installing the hand brake cables should
really be done with the body off of the frame, believe it. This
was a really disagreeable job. The bracket for the relay lever is
just to the right of the U joint. This is of course after the
exhaust was removed. I eventually had to drop the rear end of the
prop shaft to get enough access.

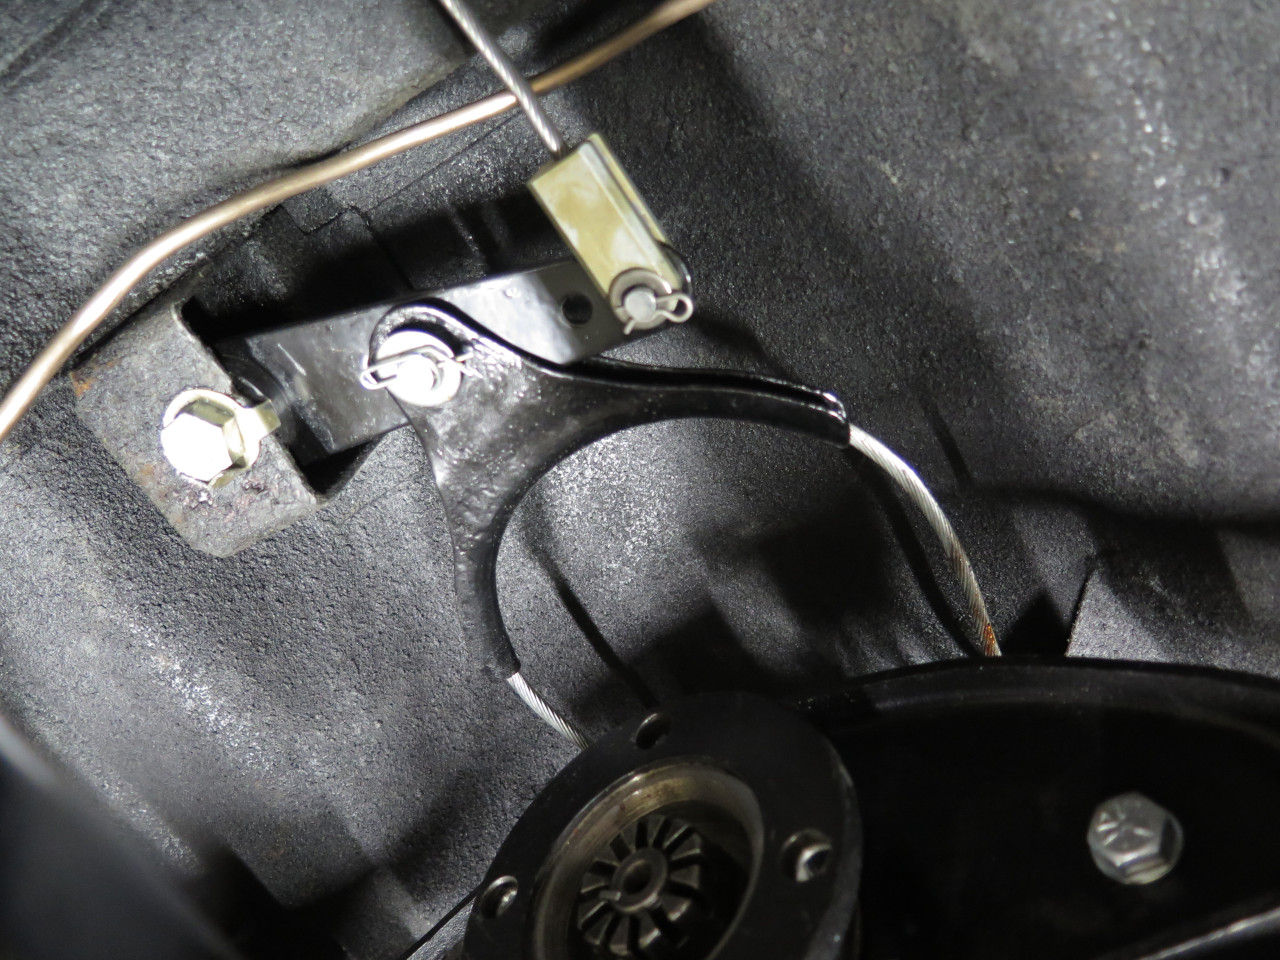
The relay lever somehow finally went home. I had to re-make the
felt washer with thinner and stiffer felt. The first one was just
too limp to maneuver, especially when saturated with oil.

Installed the refurbed operating lever, and primary cable, then set the spring clamp for some preload.
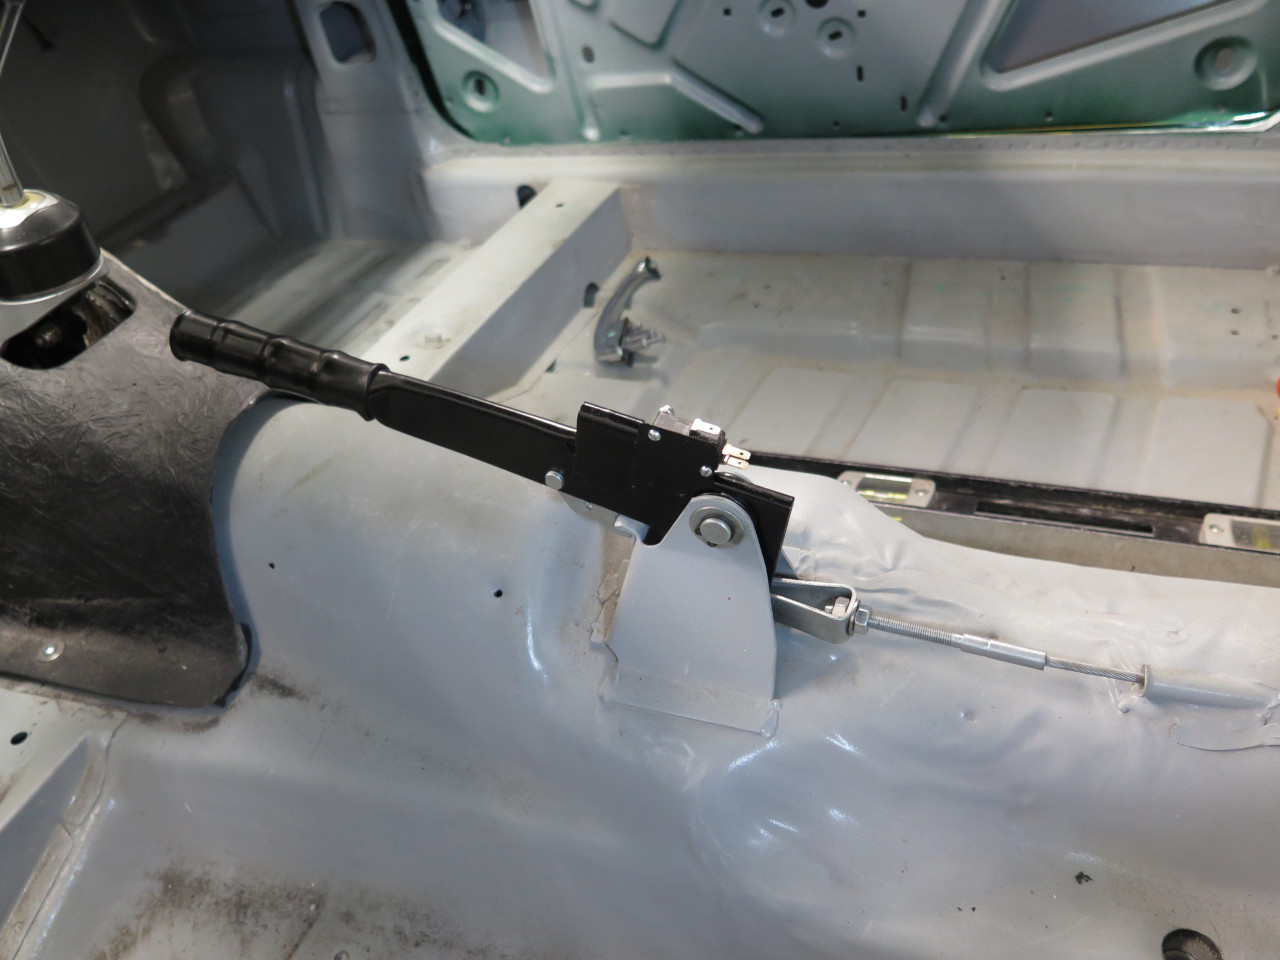
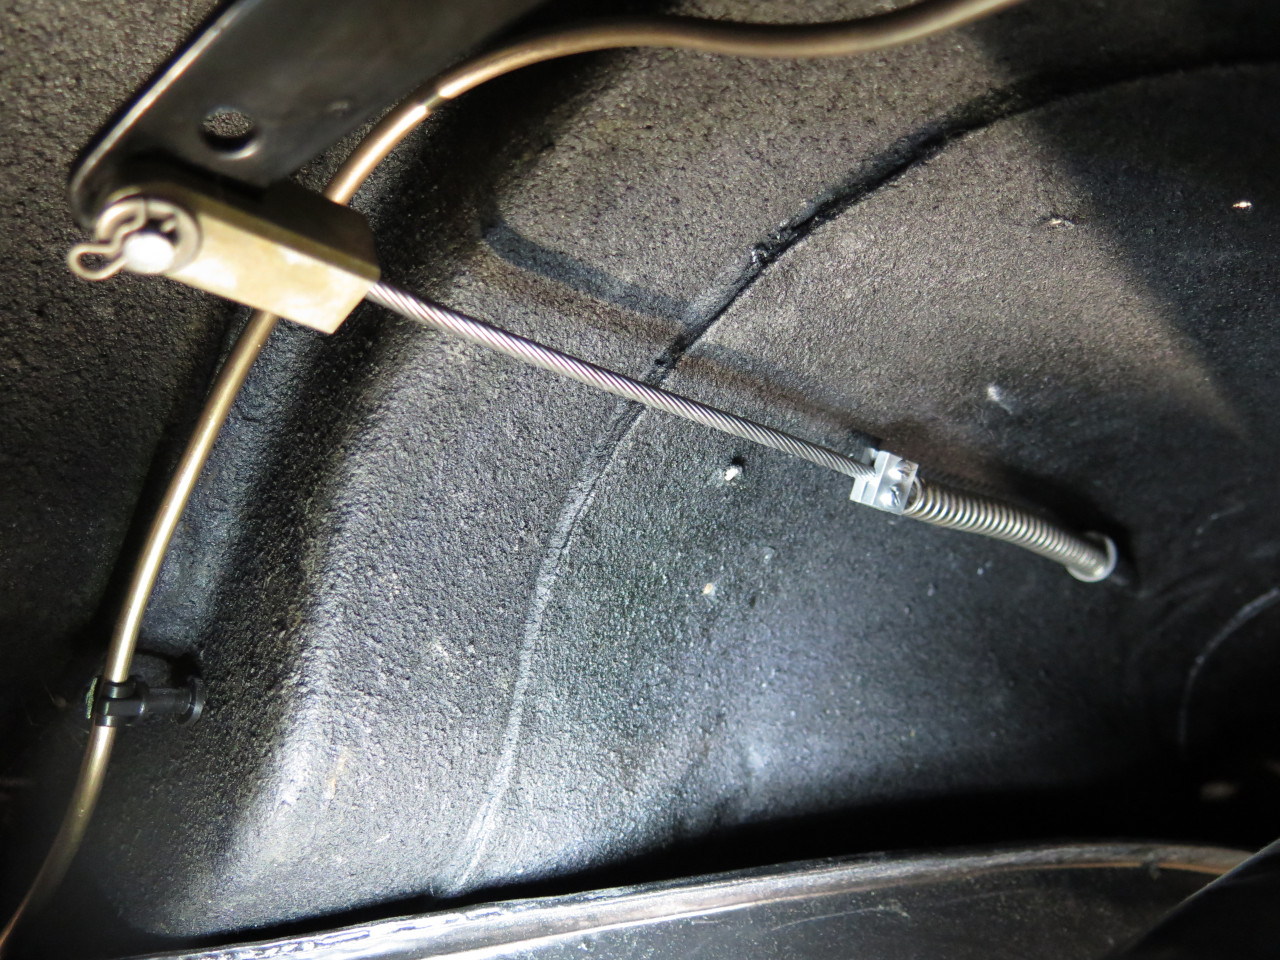
Then strung the secondary cable. It has to go through a curved
right-angle guide on each side on the way to the brakes. The shop
manual says to load up those guides with grease.
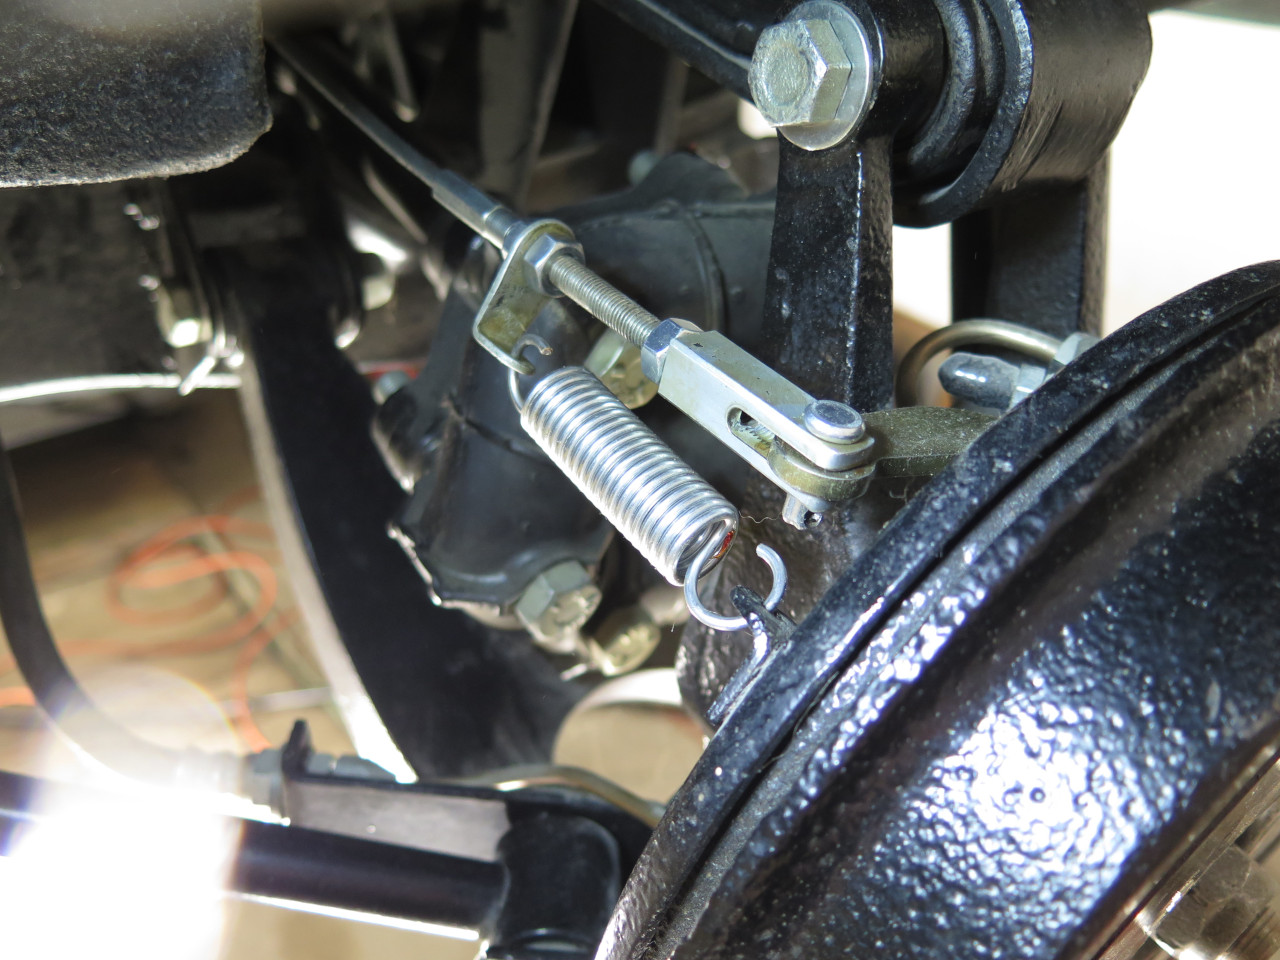
And finally to the rear brakes. Pulling the last clevis into place
took some doing. The springs are from the hardware store, but
have a similar size and spring rate (around 23 lbf/in) as the originals.

I wish I had taken advice I heard and installed these cables while the
body was off the frame. It would have been almost trivial.
Doing it like this was an ordeal.
Comments to Ed at elhollin1@yahoo.com
To my other GT6 pages