To my other GT6 pages
February 23, 2023
Crash Pads
To help protect life and limb, the US Government wrote voluminous safety
standards for cars sold in the US. This included requirements for
the interior of the car that would limit injury in the event of a
collision. These included stipulations that protrusions from the
dash and other surfaces be blunt and/or padded. On the GT6 and
sibling and cousin cars, this led to the padded perimeter of the dash
boards.
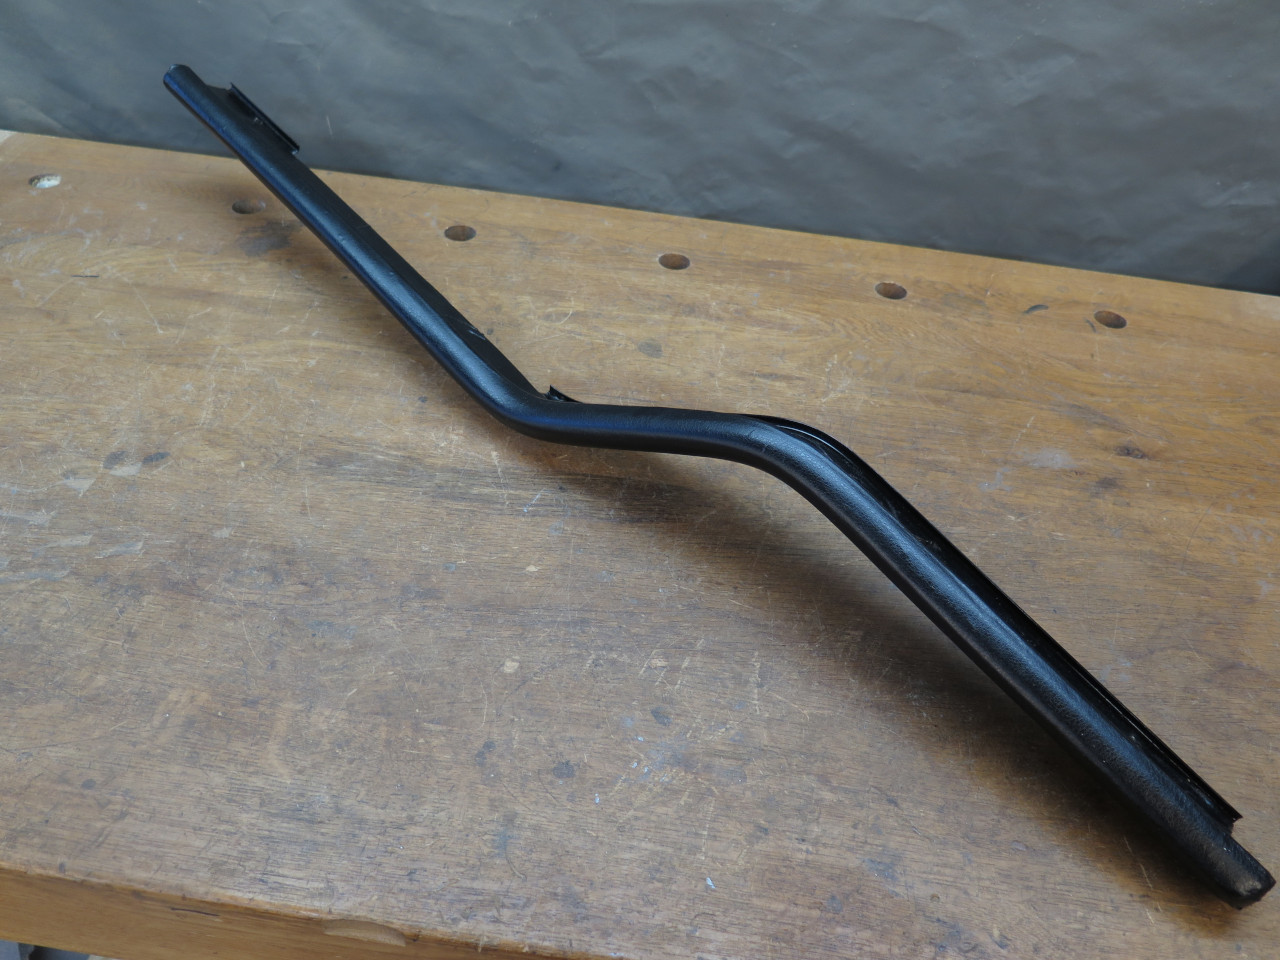
I had already done the dash pad
atop the dash, and now turned to the padded rails beneath the
dash. These included a pair of pieces along the bottom edge of the
dash, and a couple of "parcel shelf supports" that hold what passes for
a glove boxes in the GT6.
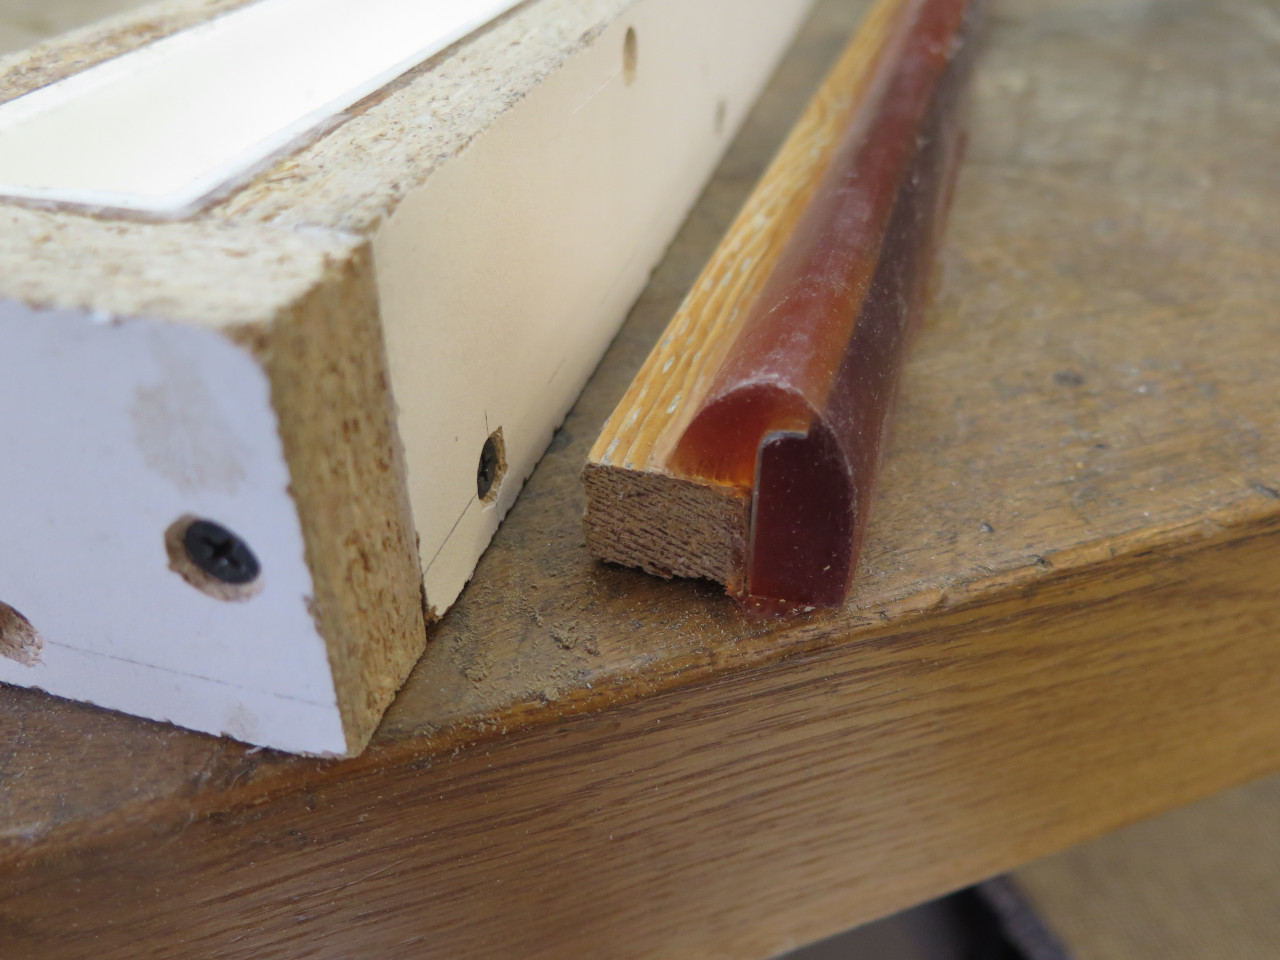
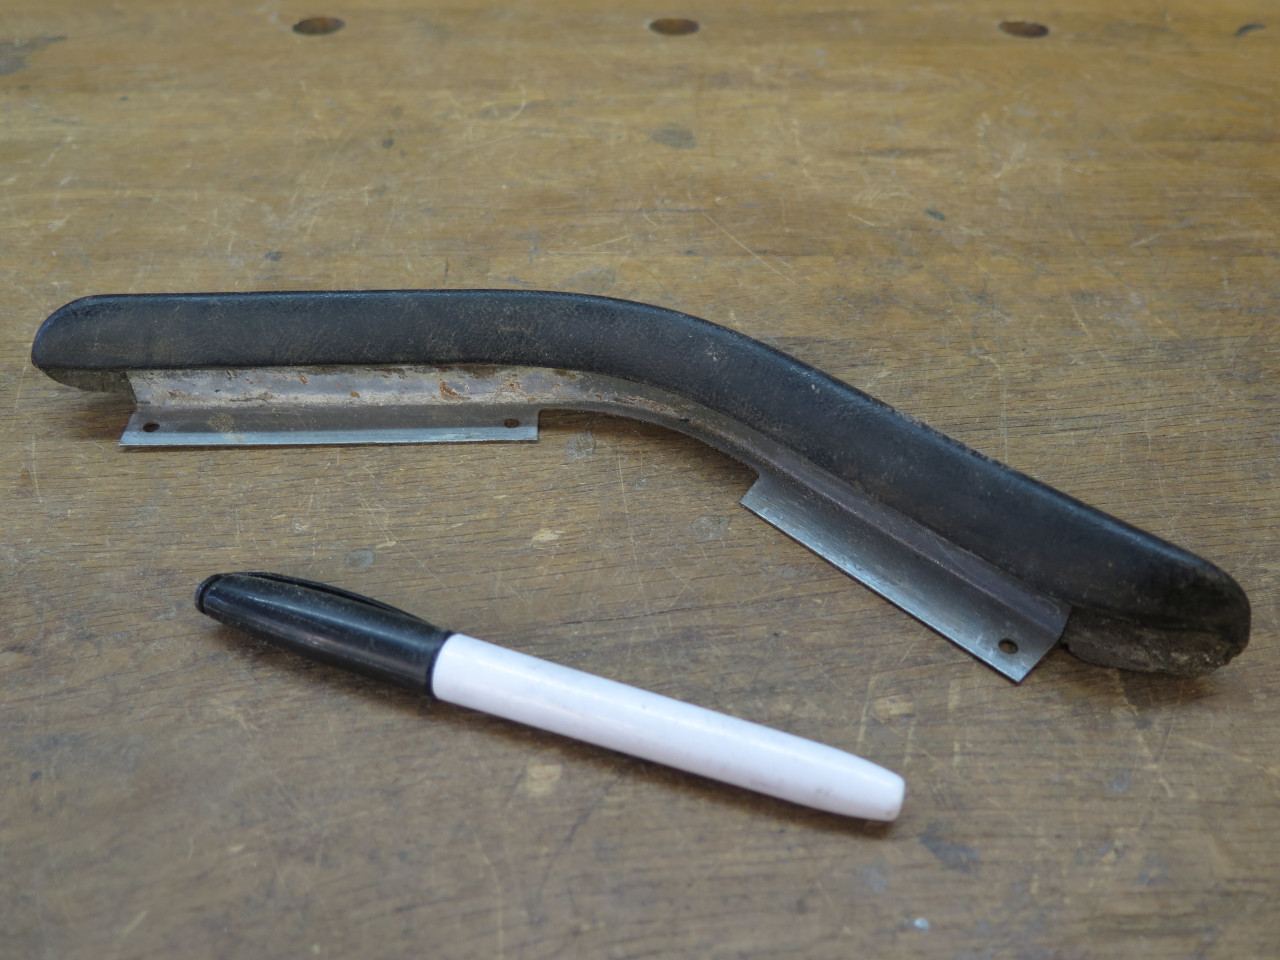
I had already stripped off the petrified and cracked vinyl from most of the pieces.

The foam on the longer passenger side rail was crispy and frail.
One end had a patch that looked like spray insulation foam. I
think I did that during a minor refurb in the 80s.

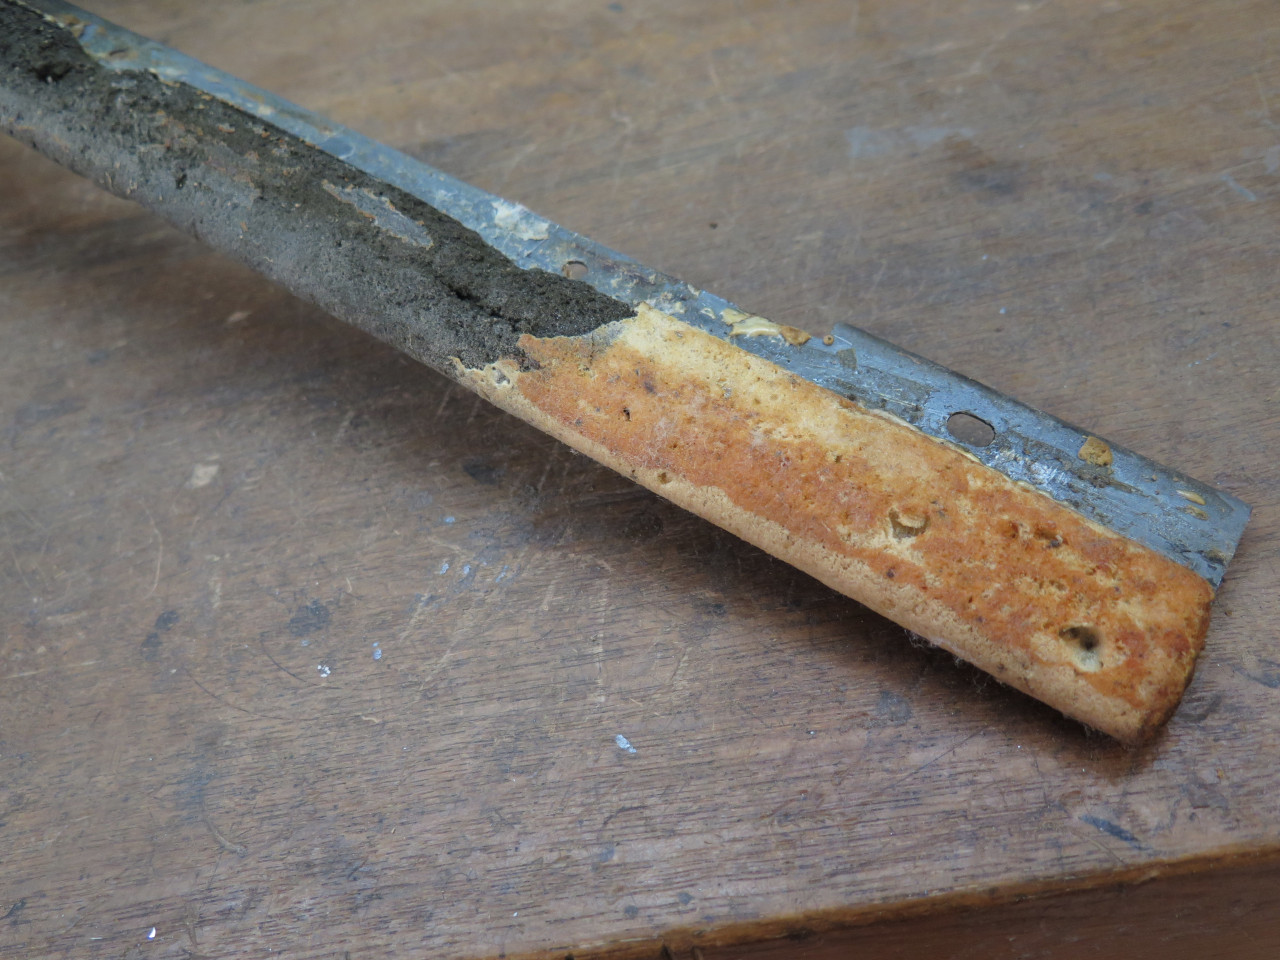
This part is listed as NLA by most vendors, but at least one claims to
have it. Mainly due to my hard-earned skepticism regarding
aftermarket parts, and the fact that it was not exactly cheap, I decided
to at least try a restoration first.
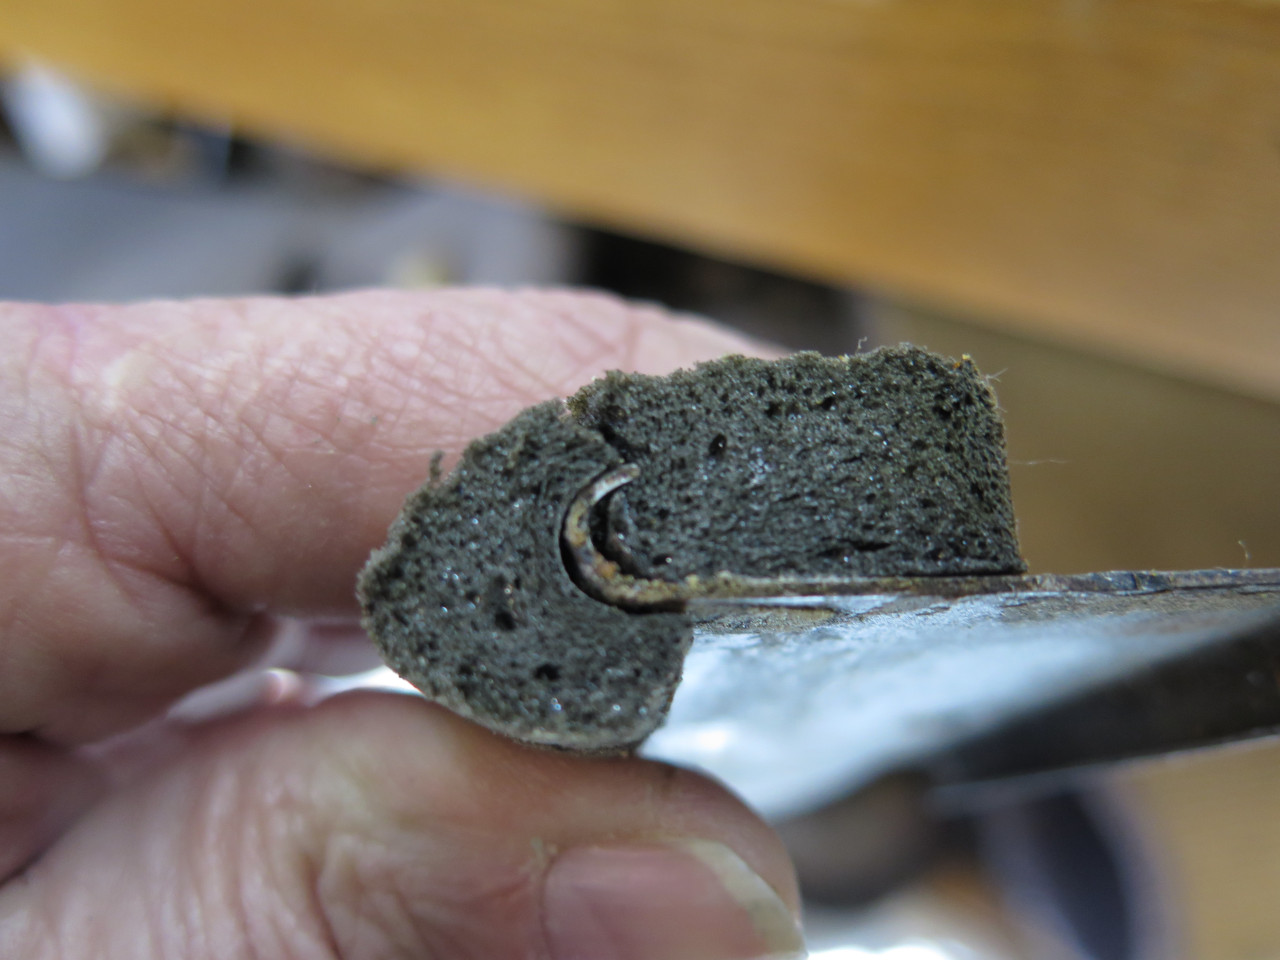
I carefully removed the foam from the metal support. At this
point, I had no idea what I was going to do with this part, but I wanted
to preserve the foam, maybe just for forensics. It appeared that
the foam was formed over the metal core.

I considered a few ways to try to recreate the foam part--casting foam
in a mold, shaping from bulk foam material, and building up the shape
from smaller foam strips. For various reasons, I eventually
abandoned the idea of using foam, and diverted to looking into castable
rubber compounds. There appeared to be more choices for rubber
materials, and the process seemed simpler.
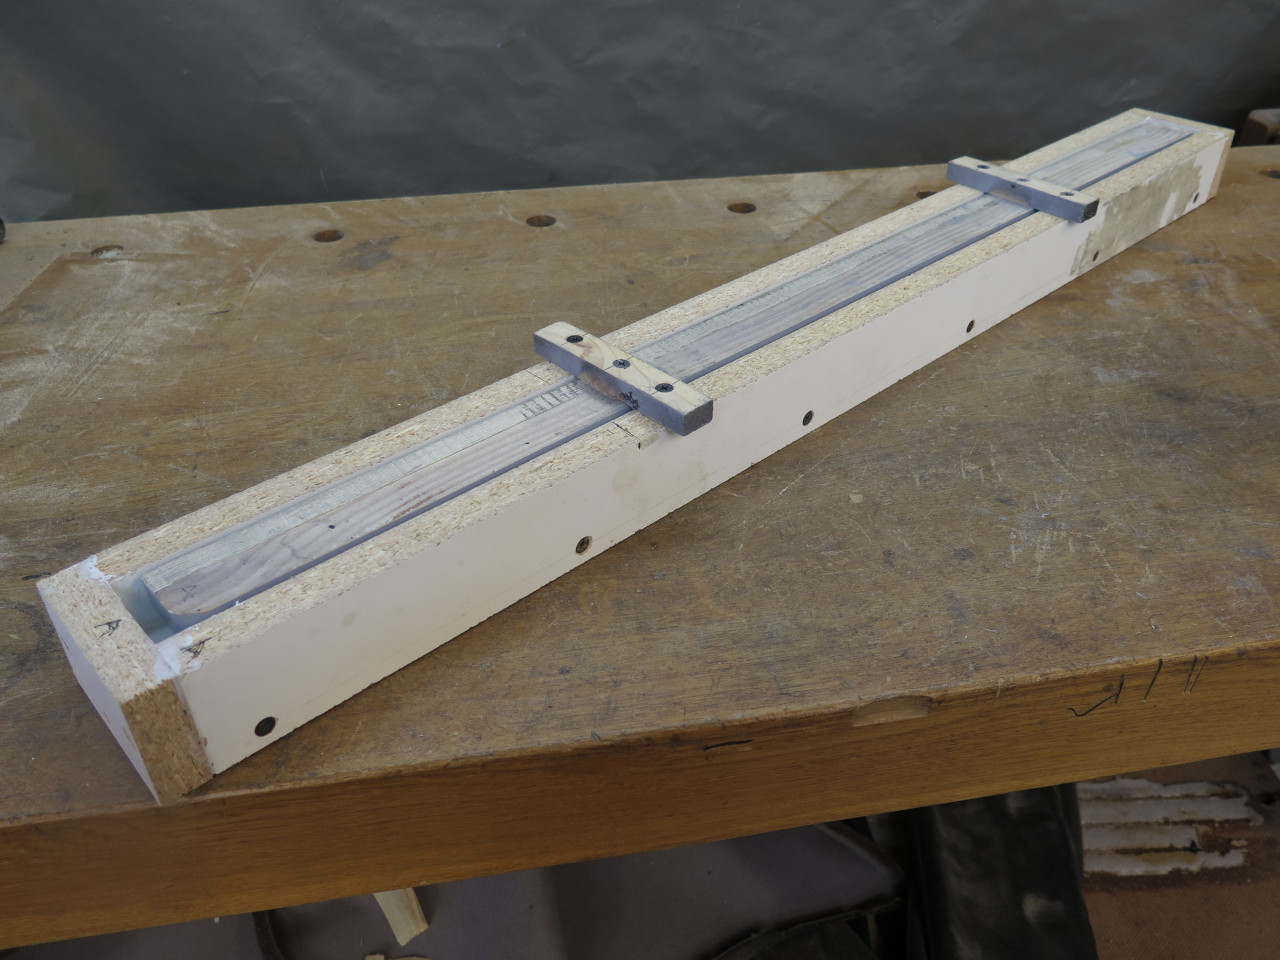
I would need a mold, and to make a mold, I'd need a pattern. Being
rubber, I was pretty sure I could make the part straight, and not have
to fret about making a mold with the dog-leg in it. I chose wood
for the pattern.
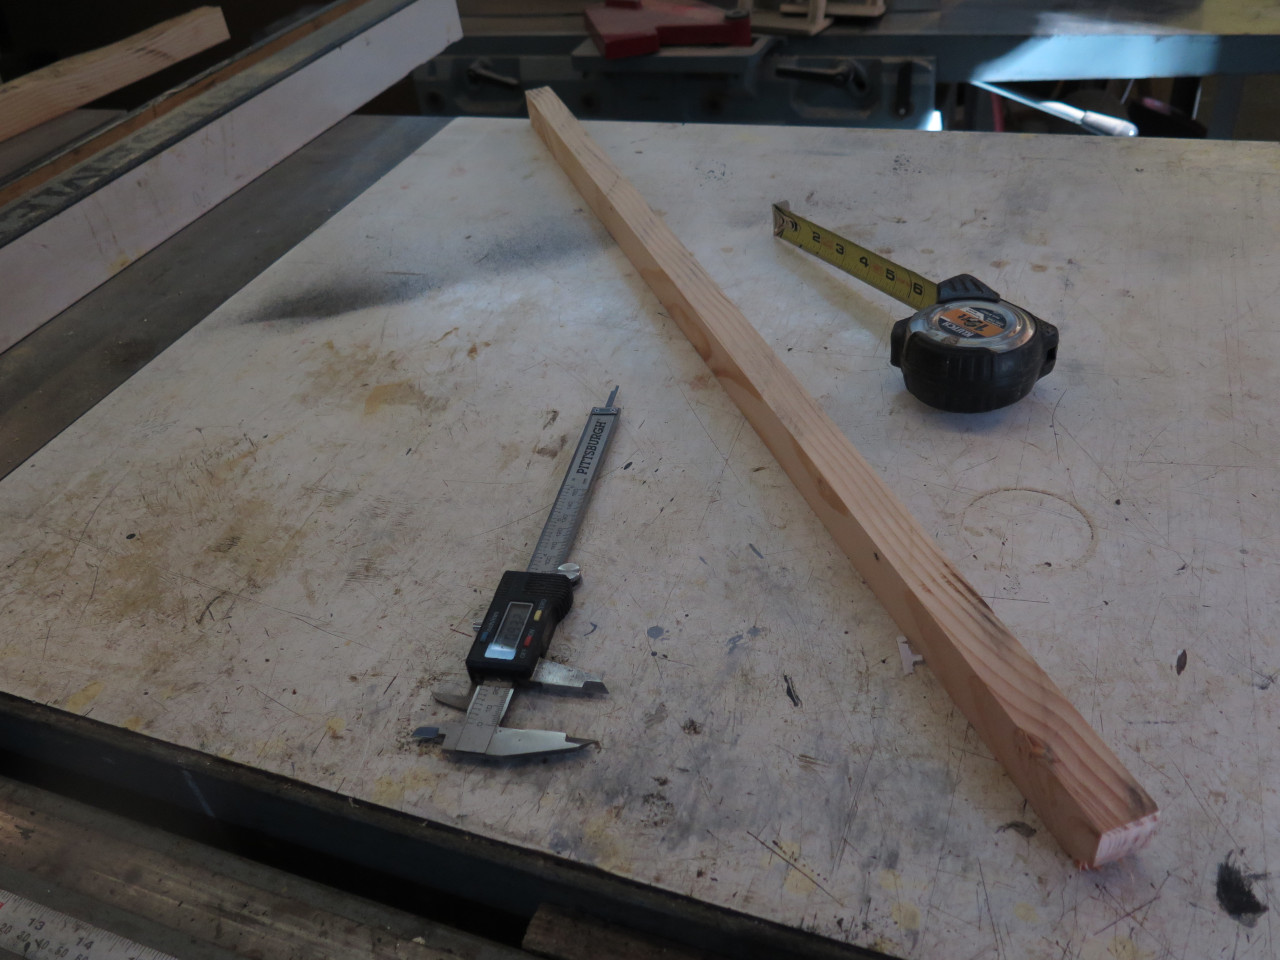
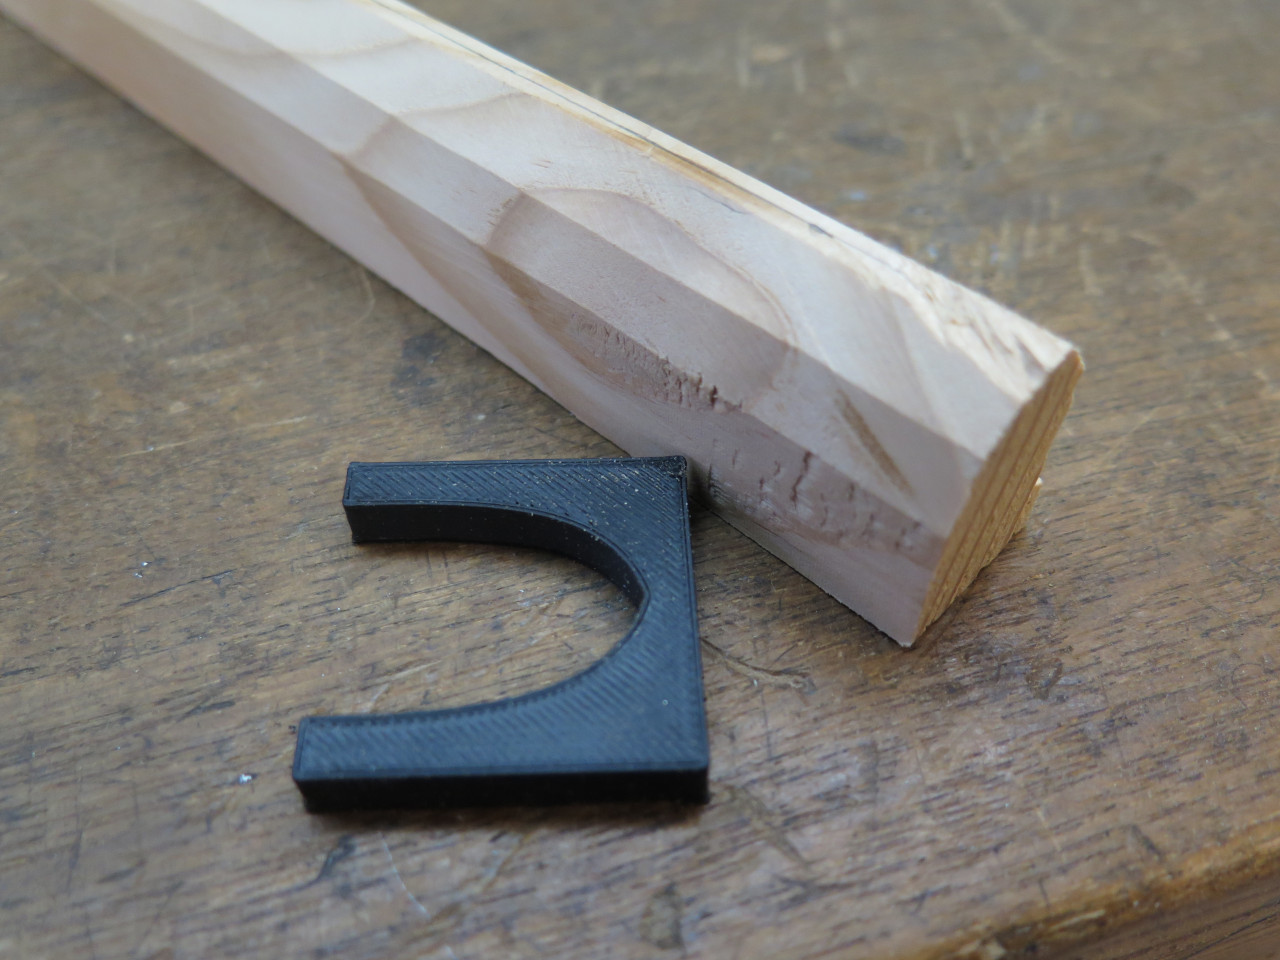
Taking dimensions form the old foam, I drew up the gross cross-section
in CAD, and 3D printed a little contour gauge. I sawed the wood
strip to rough shape, then sanded until it fit the gauge over its
length.
I glued another strip of wood onto the side of the pattern (explained
later), then prepped it with a few coats of primer, then a few coats of
wax, and a coat of a silicone release agent. Then popped it into a
previously made mold box.

I poured in some 2-part polyurethane resin, and let it cure.
One of the valuable lessons from this project was learned shortly after
that. When the resin was fully cured, I attempted to pull out the
pattern. Despite the release agents, and despite ample draft on
the pattern, it wouldn't budge. I ended up having to chisel to out
of the mold in splinters. Lesson: don't cast a rigid material
around a rigid pattern. I should have used a resilient mold
material.
Nevertheless, I still got a usable mold.

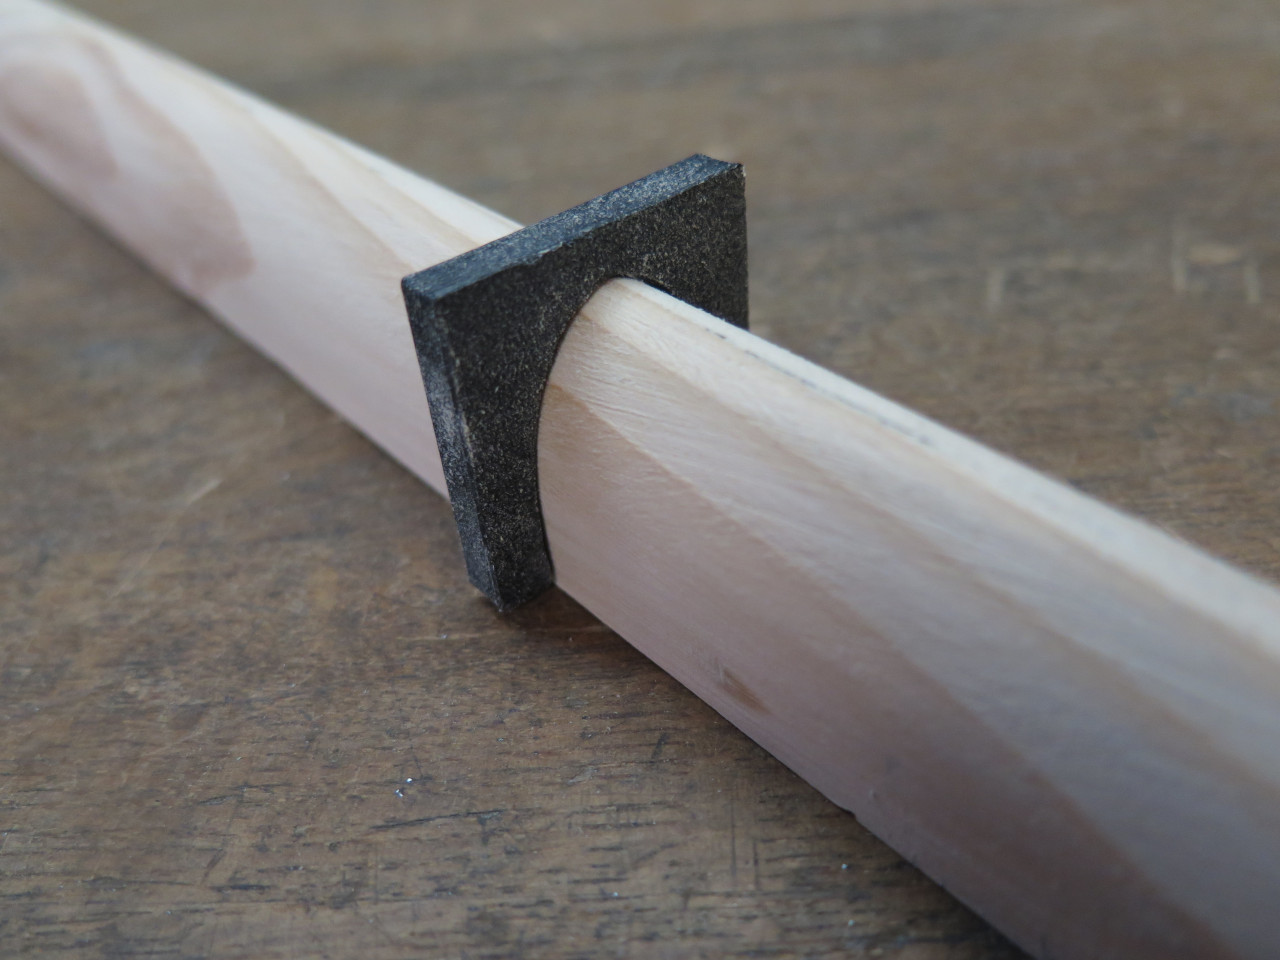
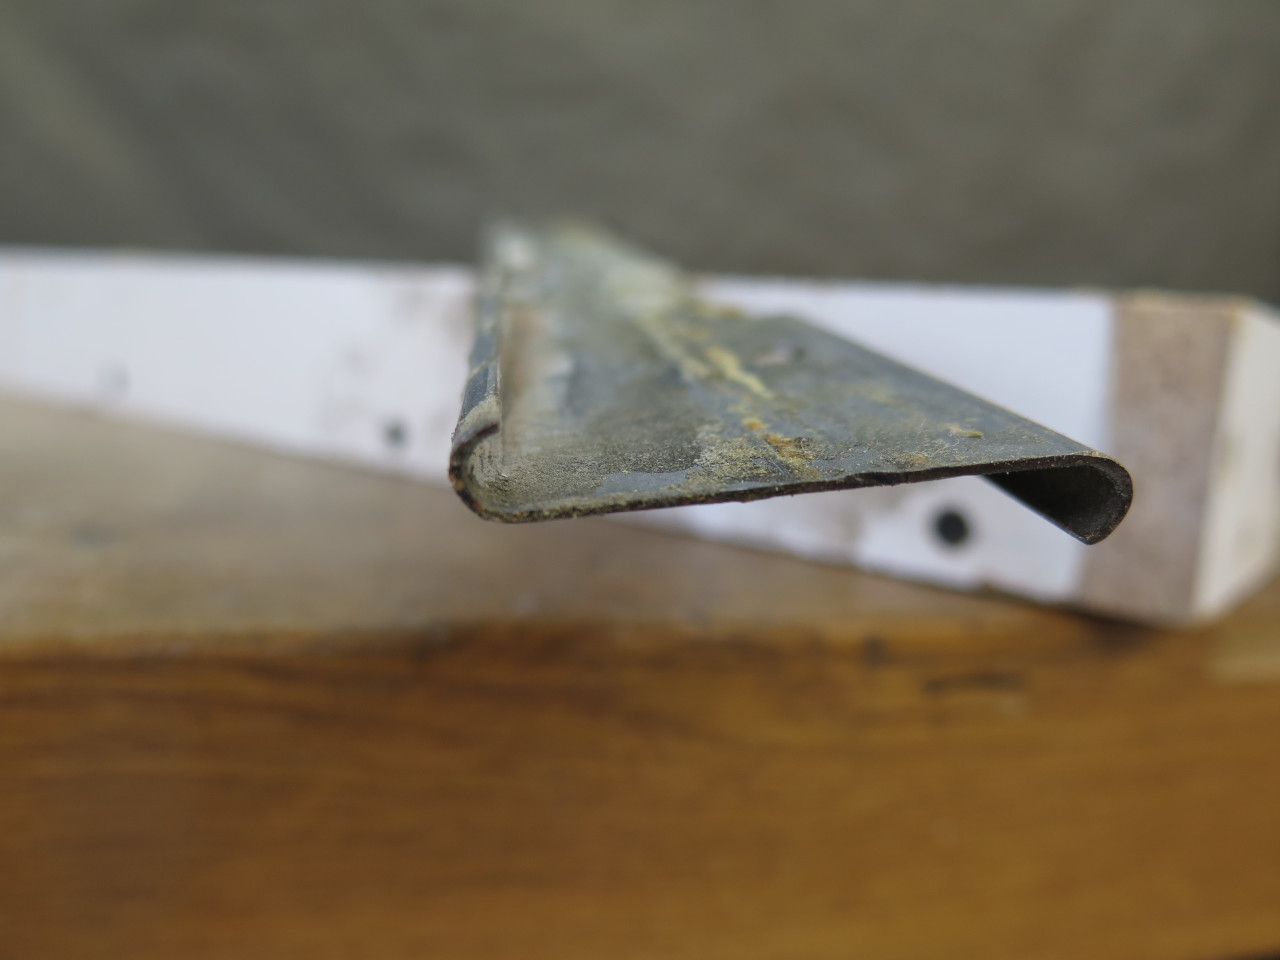
The next step was to provide something in the mold to form that little
curved slot that runs the length of the piece to accept the leading edge
of the metal backbone. I decided that trying to recreate the full
"J" profile of the original was just asking for trouble, so I went with
a truncated version instead. It was formed from sheet metal the
same thickness as the original backbone. The metal piece was
screwed to a piece of wood sized to fit on the shelf created by that
extra strip of wood attached to the original pattern. This
suspends the metal piece in the right place in the mold. The
inside of the mold and the insert were waxed and treated with a mold
release.
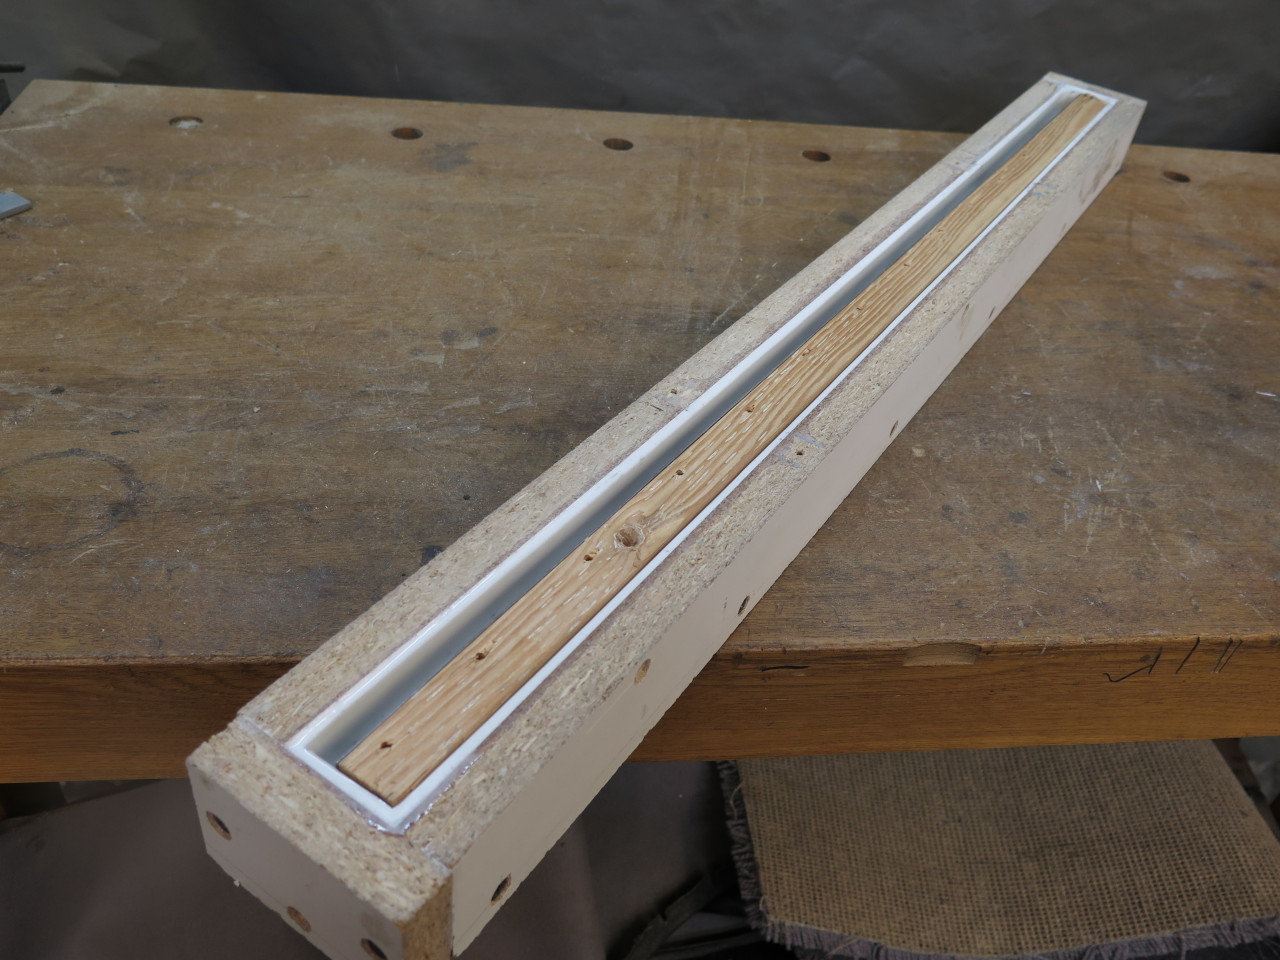
Then, finally, poured some 2-part castable rubber into the mold.
This was tricky, since the compound I used was thick as honey, had to be
mixed very thoroughly, required vacuum de-gassing, and had a pot life
of a whole six minutes. It did get placed in the mold
though. This is after the over-fill was trimmed off.

The part, being resilient, was no problem to de-mold, and the insert pulled out easily, too.
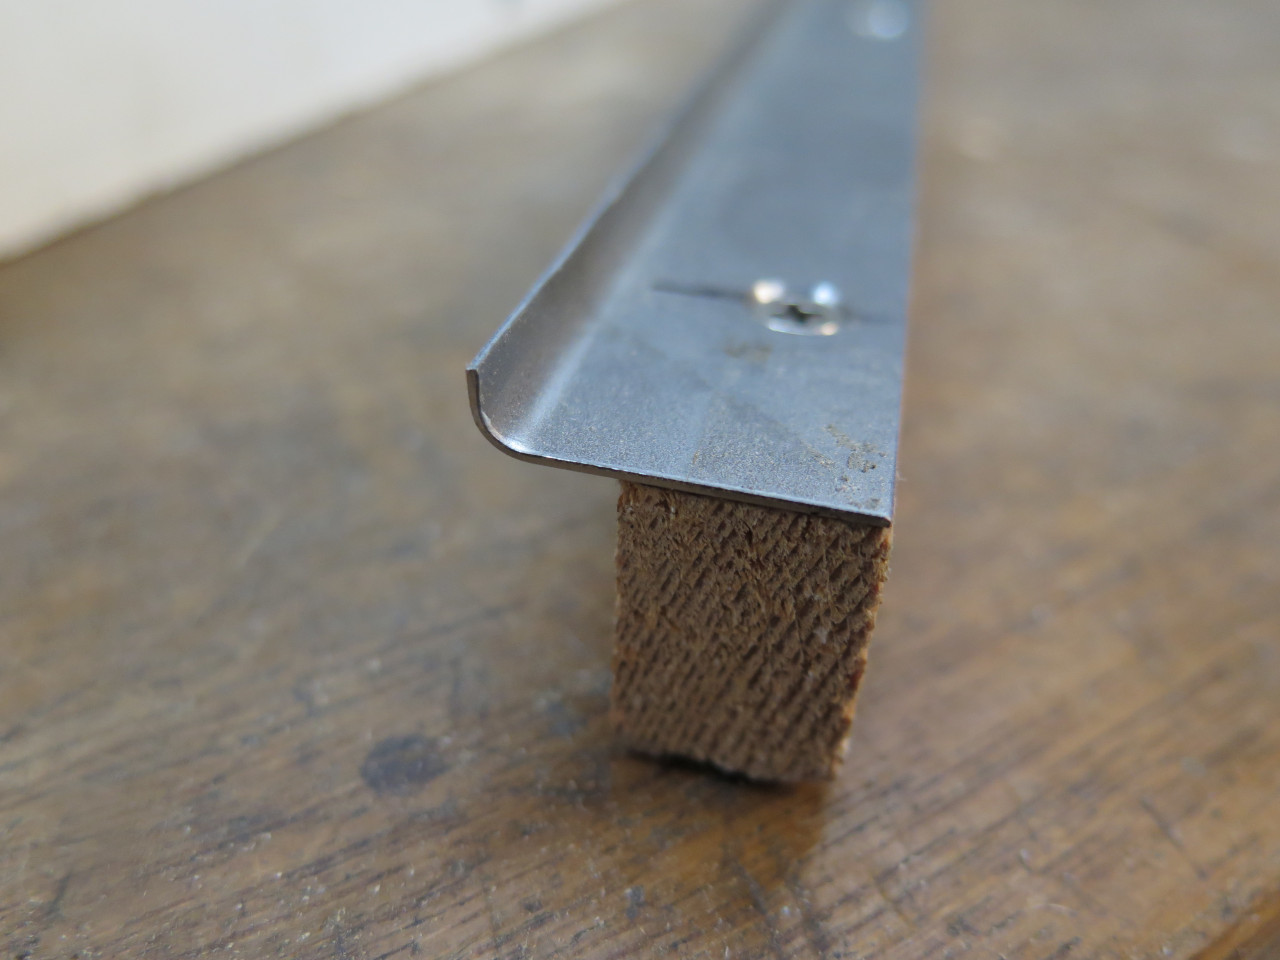
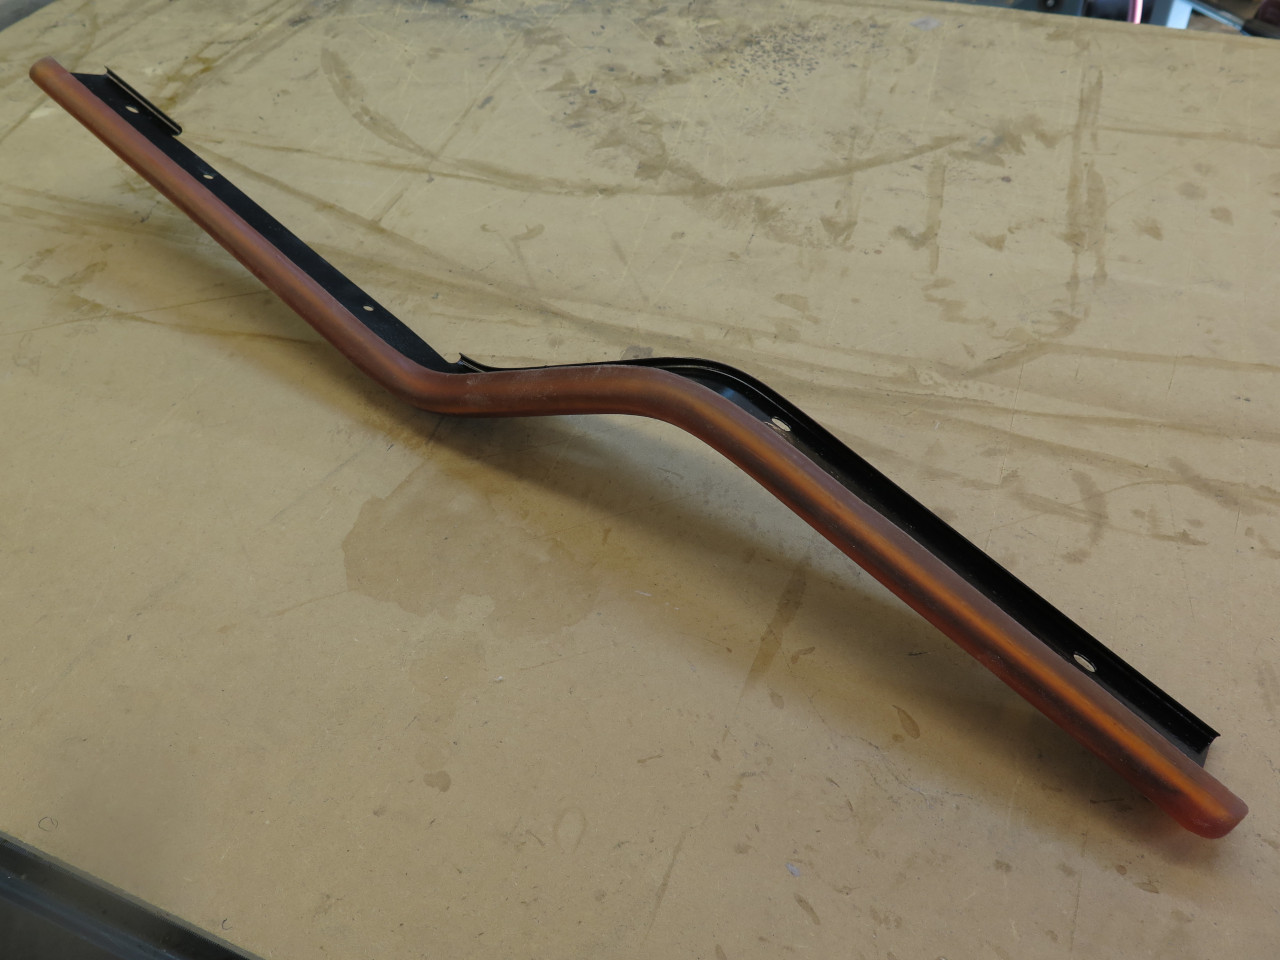
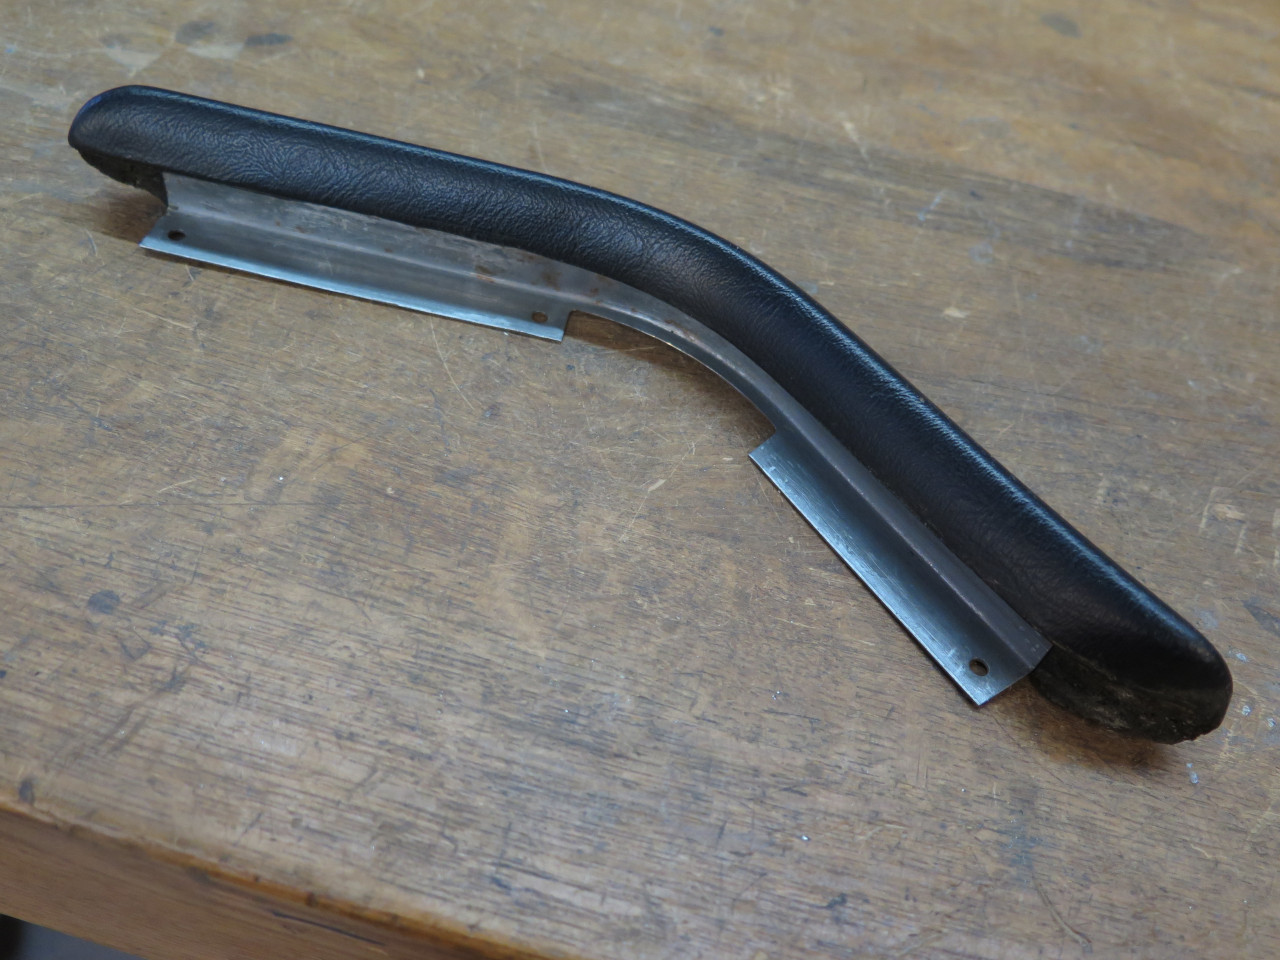
I then had to modify the original metal rail to the truncated profile.

Blasted the rail and tested the fit.


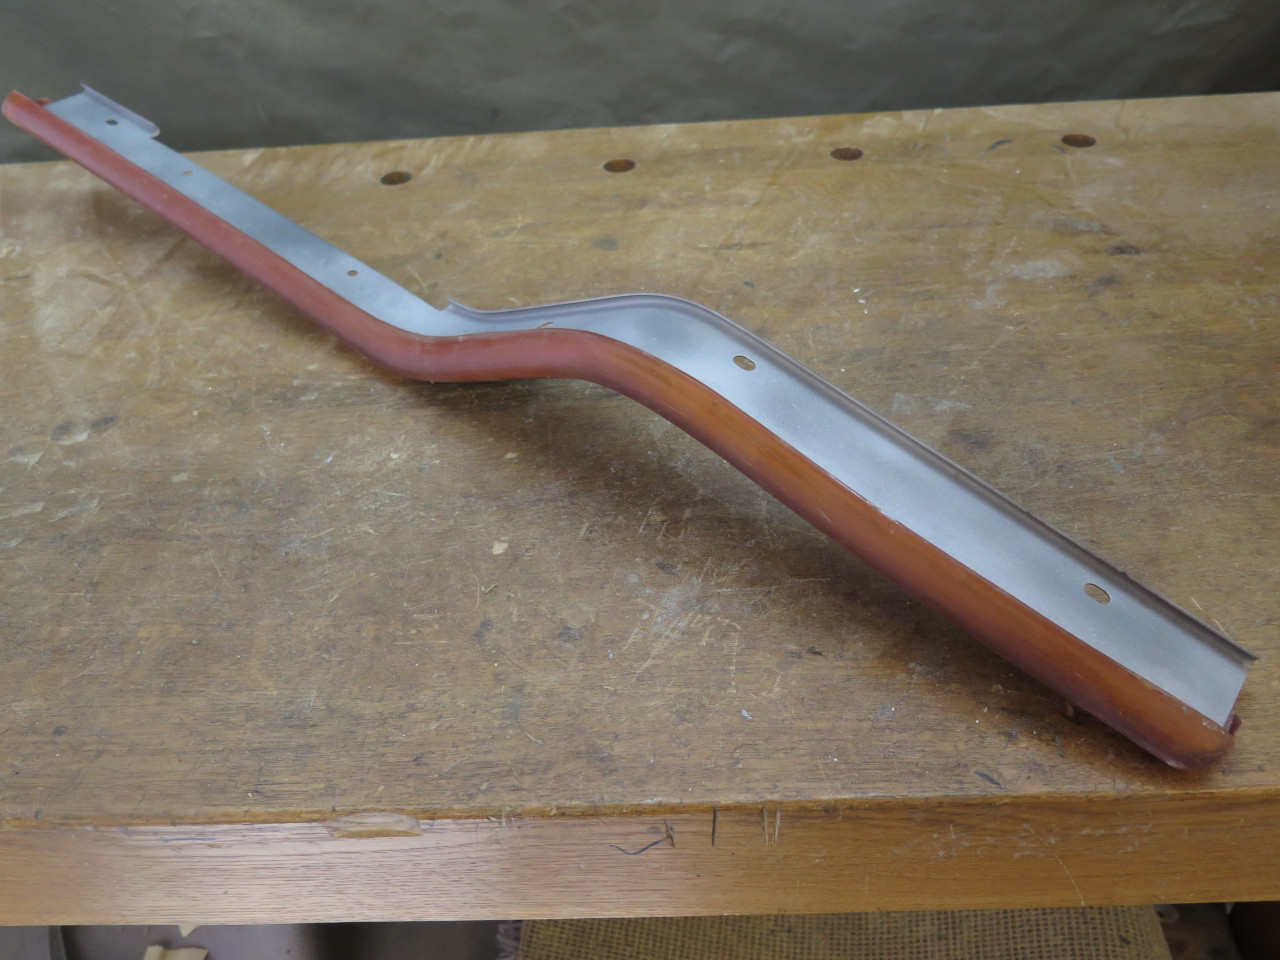
All looked good, so I painted the rail.

For covering this part, I used a vinyl "wrap" product. It is thin,
self adhesive, and stretchy, especially if heated a little. One
small drawback of this material is that it is so thin and compliant, it
will telegraph any imperfections in the substrate it is attached
to. I noticed this in a few places, but they are minor, and mostly
on the bottom side, out of site. I traced these nubs to nicks in
the mold that happened when I had to chisel out the pattern.

As for the resiliency of the pad, It's a little hard to compare to the
original foam since the foam had deteriorated so much. I would
call it similar in firmness, but the feel is more "rubbery" and less
"foamy". The rubber compound I used has a durometer of 60 on
the Shore A scale, which makes it comparable to car tire rubber.
It is easy to compress with a firm finger press, and it rebounds
immediately. The piece is very flexible lengthwise, and made the
dogleg bends with no effort.
This passenger lower crash pad has a companion on the driver's side, but
it is much smaller. Mine was dirty, but still fully intact.
After cleaning it up, I couldn't see anything wrong with it other than a
little corrosion on the metal flange. The vinyl might be a little
harder than original, but I couldn't really justify doing much to it
other than cleaning up the corrosion. The vinyl grain pattern is
actually pretty close to the passenger side part.
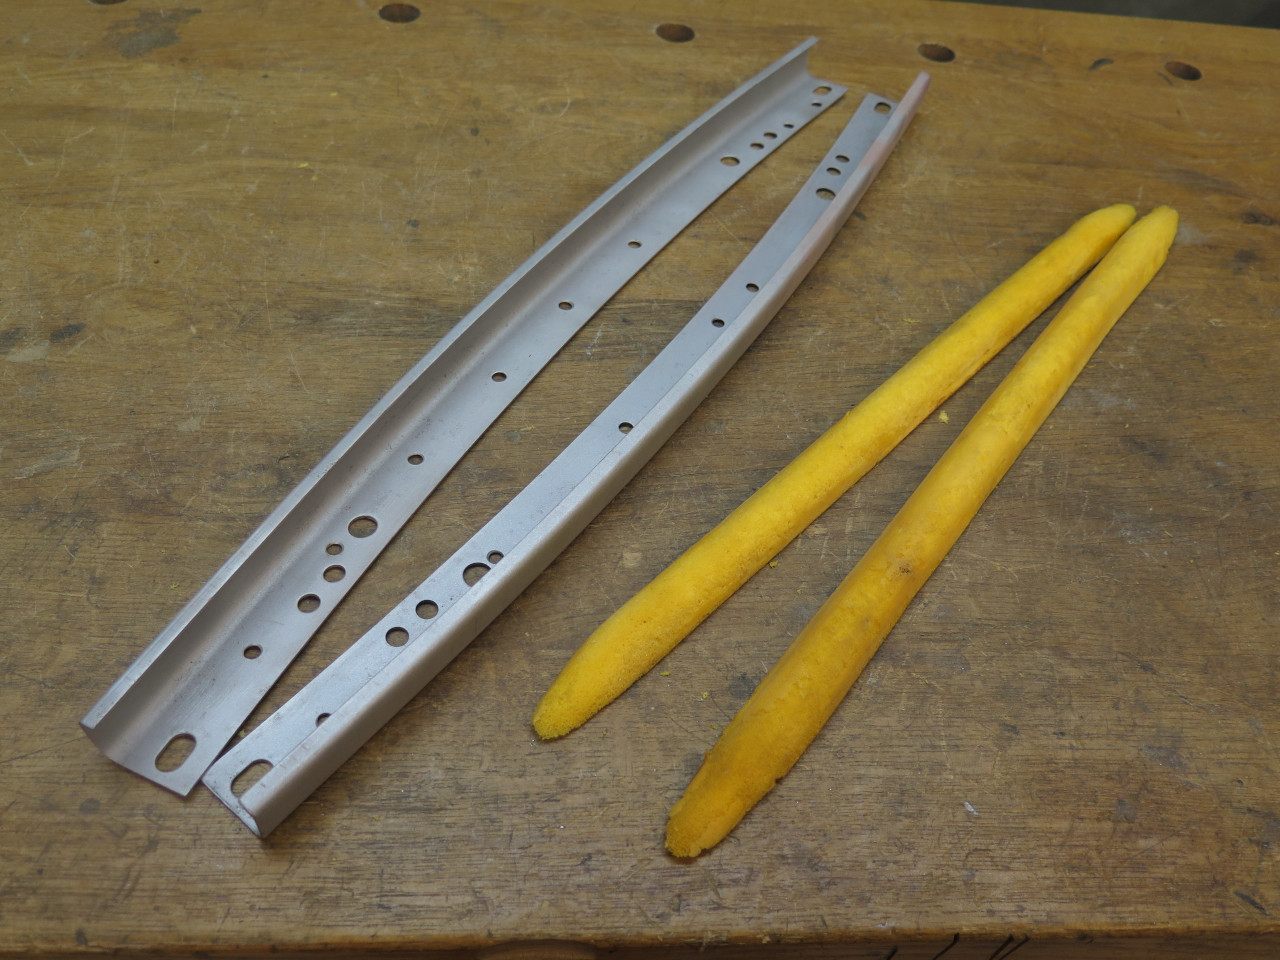
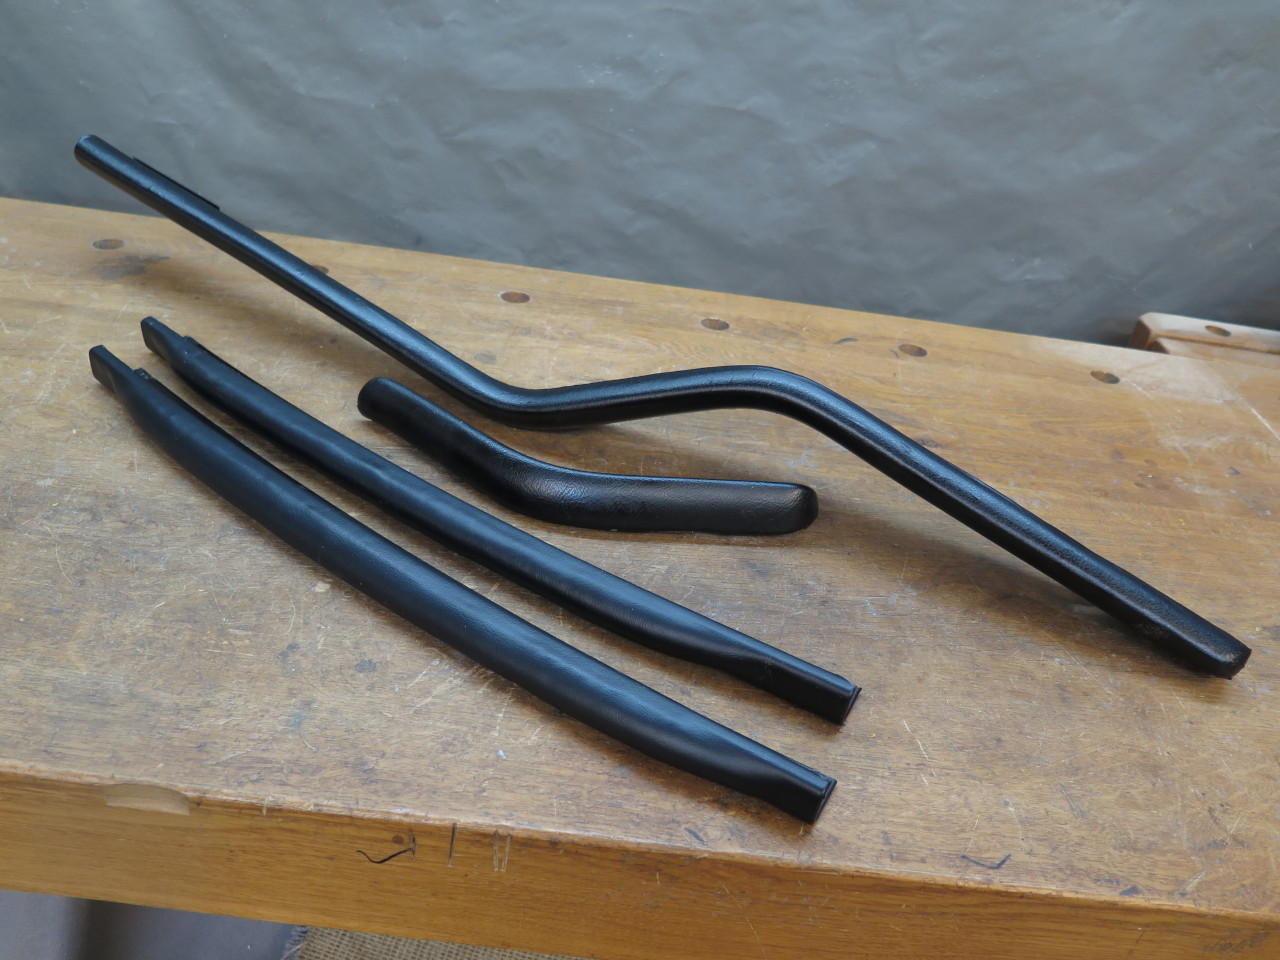
The remaining parts were the two so-called parcel shelf supports--one
for each side of the car. Each is a metal strut with a molded foam
insert, covered with vinyl. At this point, the perished vinyl had
already been removed.
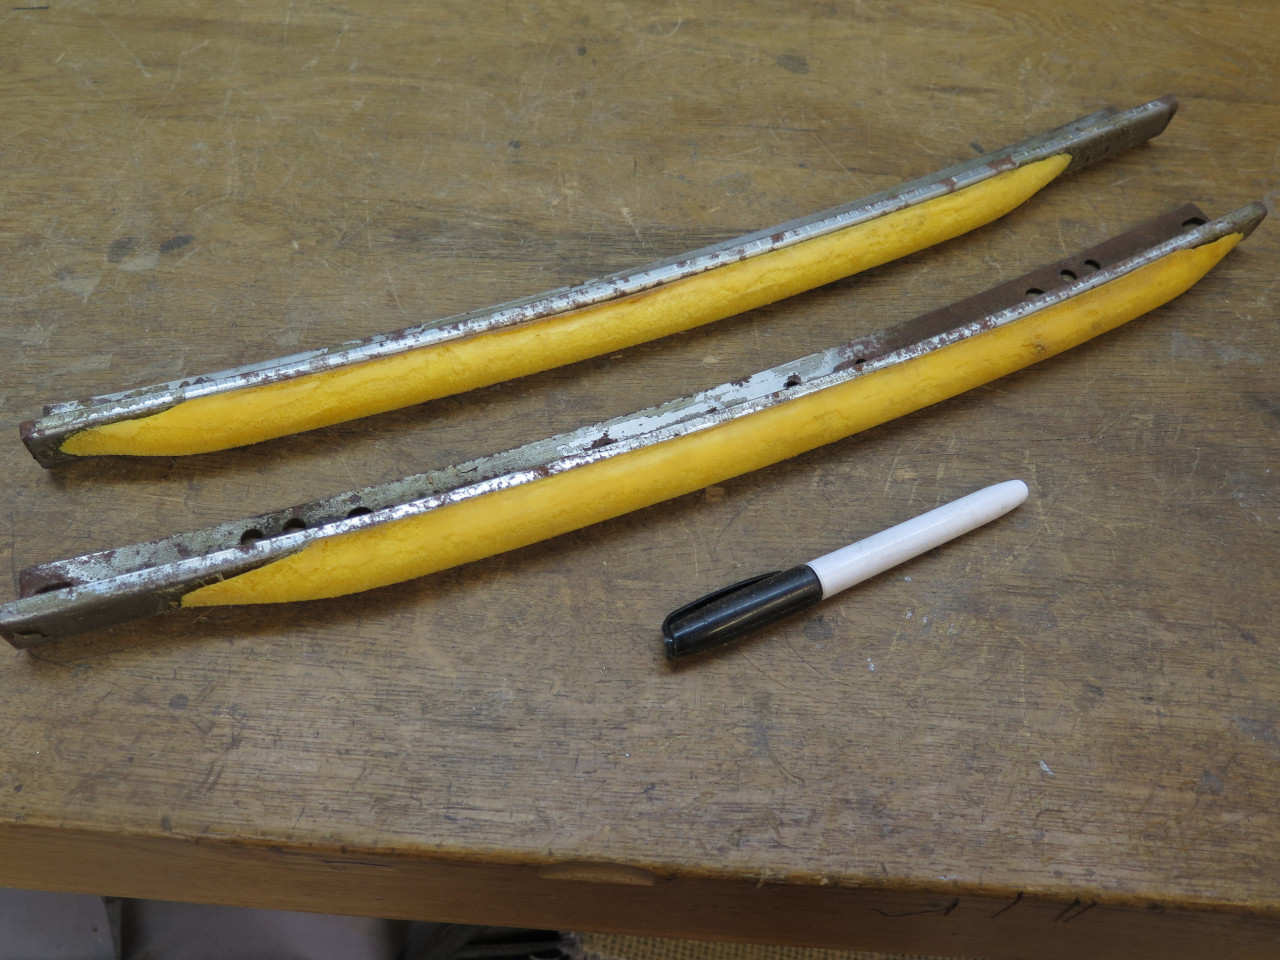
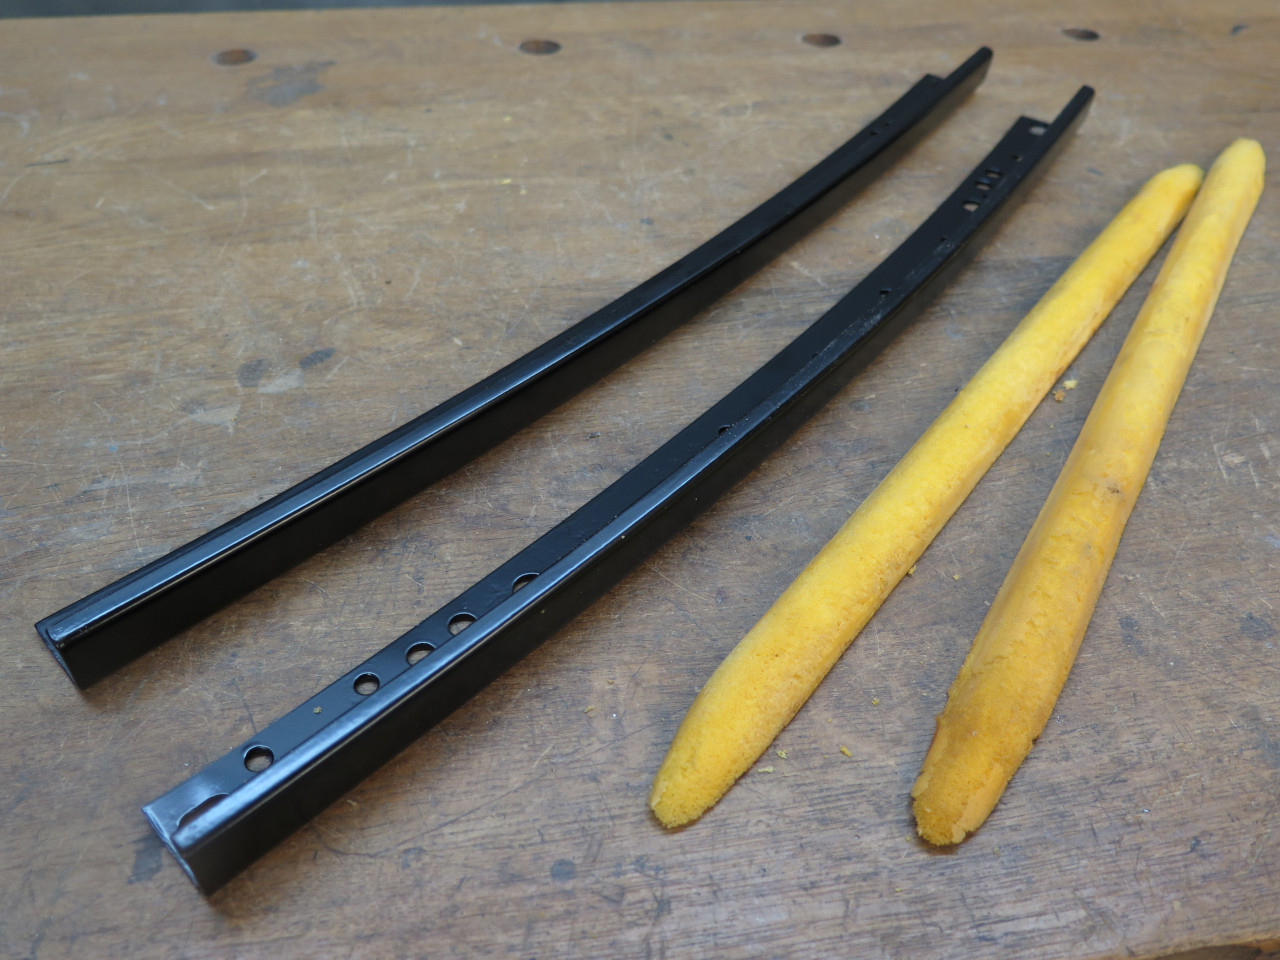
I wanted to clean up the metal parts, so carefully pulled off the
foams. The metal didn't appear to be either plated or painted from
the factory, so there was a fair amount of rust.

Blasting and powder coating made them look a lot more respectable.
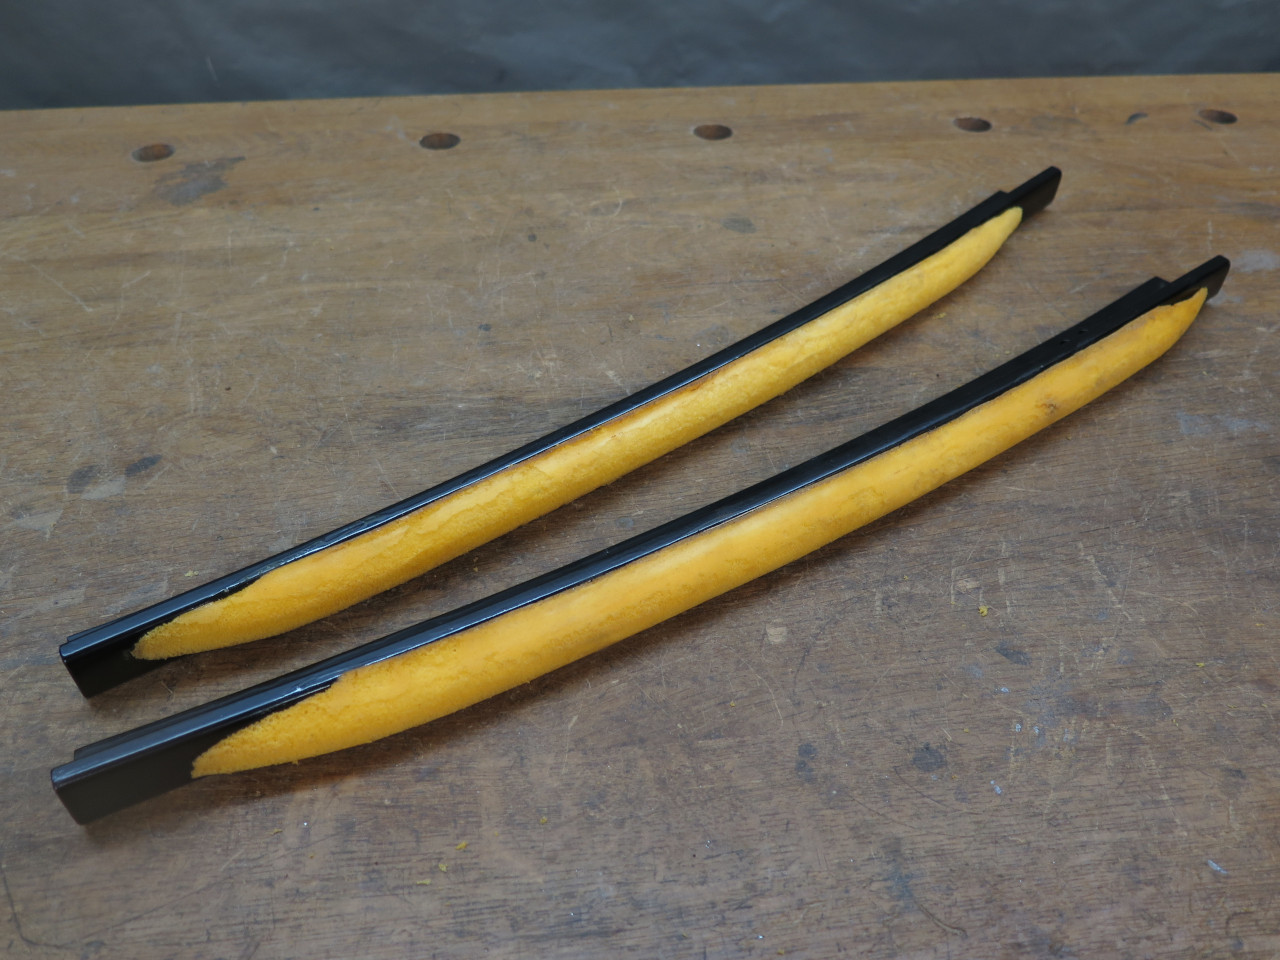
I applied the wrap vinyl to the parts, but they came out looking
awful. The foam pieces had sort of a rough surface, maybe because
removing the vinyl took some of the foam "skin" with it. This
roughness showed through the very compliant wrap. So I removed the
wrap and applied conventional automotive vinyl. The grain isn't
an exact match to the other parts, but not too far off.
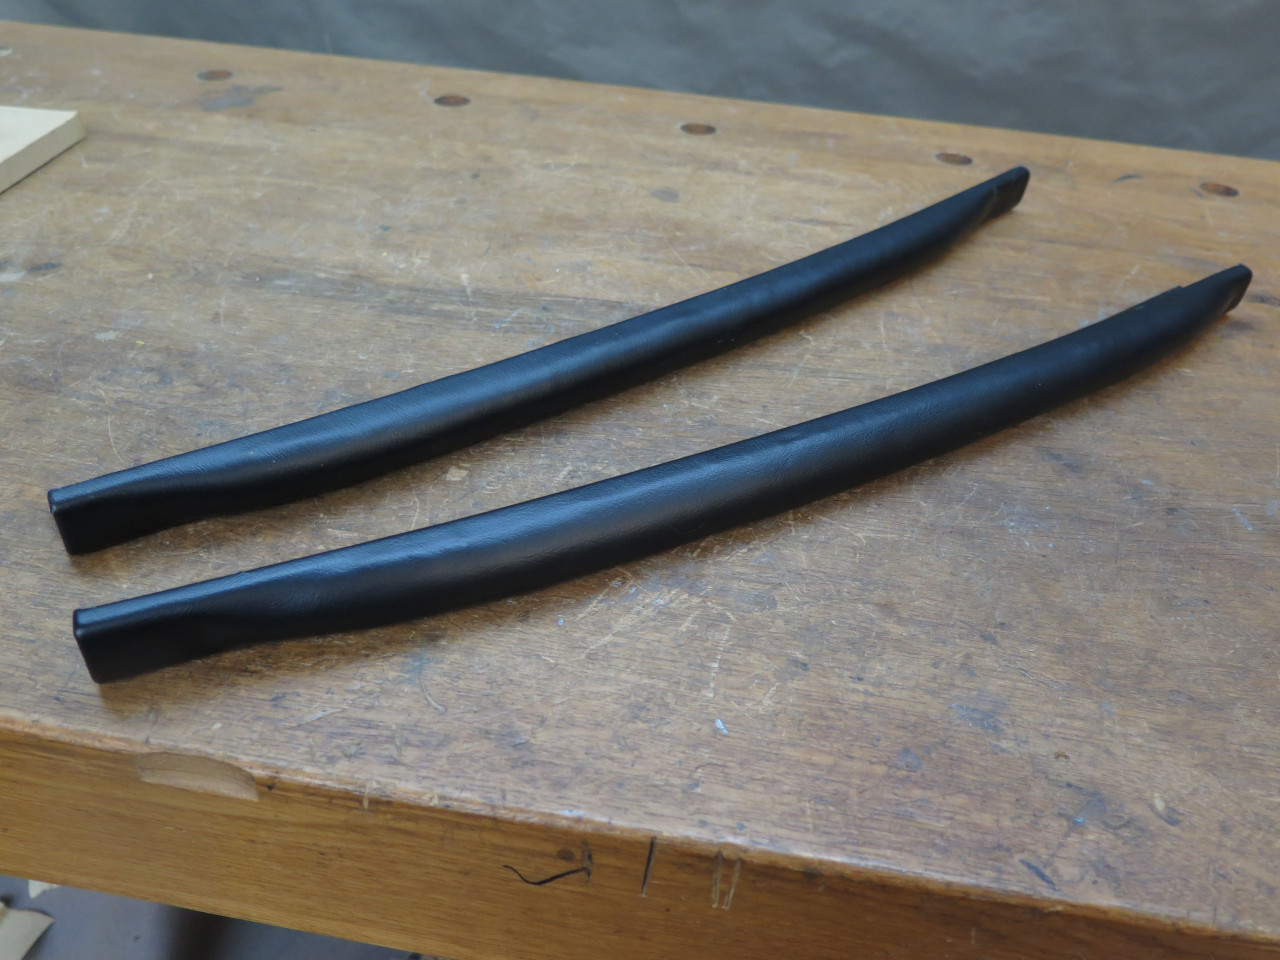
On the shelf with these dudes.
I considered refurb of the passenger crash pad sort of a risky project,
which could have failed at any of several stages. It wasn't
without incident, but came out pretty OK. Cost was less than a
store bought part, but not by a lot. But the experience
gained? Priceless.
Comments to Ed at elhollin1@yahoo.com
To my other GT6 pages