Recreational Rigging--Moving a knee mill.
March, 2012.
[Click on pictures to enlarge them]
So
I was looking for a milling machine, and had just about decided on an
RF-45 type mill when I was perusing Craig's List and saw an ad for a
Jet JTM-4VS Bridgeport clone mill for not too much more than the RF-45.
I called about it, met a nice guy named Dave who used it for
gunsmithing, but wanted to sell it to go back to school and start a new
career. The mill was less than five years old, and looked pretty
well cared for.
Before I committed to buying the Jet, I wanted
to check out the cost of moving it. The 2420 pound machine had
to come up the stairs out of Dave's basement shop and across town to my
place. The cost to get it to my garage amounted to about a third
of the cost of the mill, which took me to the absolute limit of my
budget for the project. Unfortunately, my shop is also in my
basement, which is up three steps to a tiled entryway, across 12 feet
of oak strip floor, and down 16 steps to the basement, where the bottom
riser is only about 36 inches from a facing wall.
I
didn't want to pass on the machine, so I decided to have the machine
deposited in my garage, then I could take my time figuring out a way to
get it to the shop myself, breaking it down if necessary. If I
got into trouble, I could still call the riggers back to rescue me.
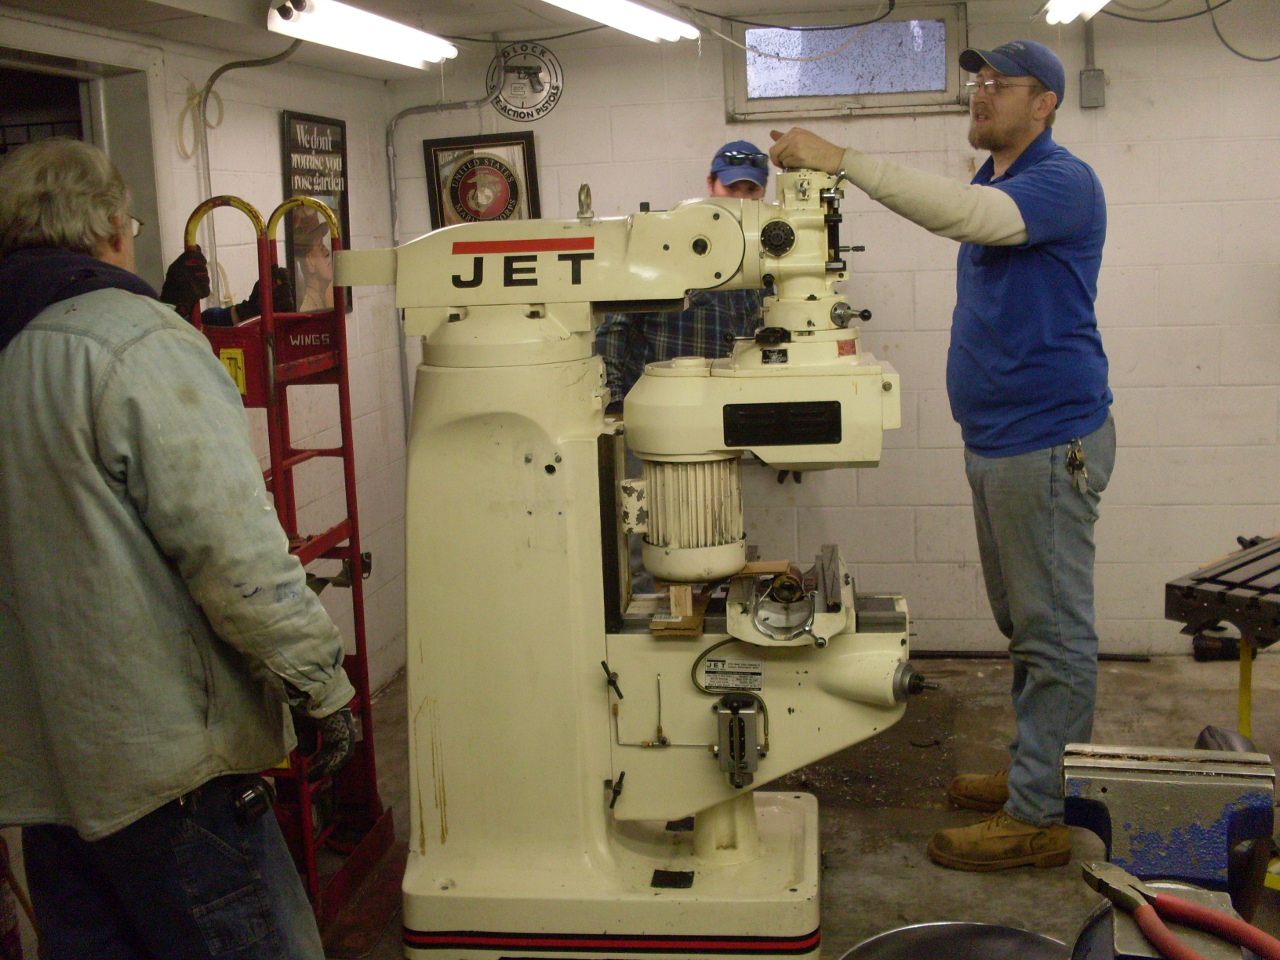
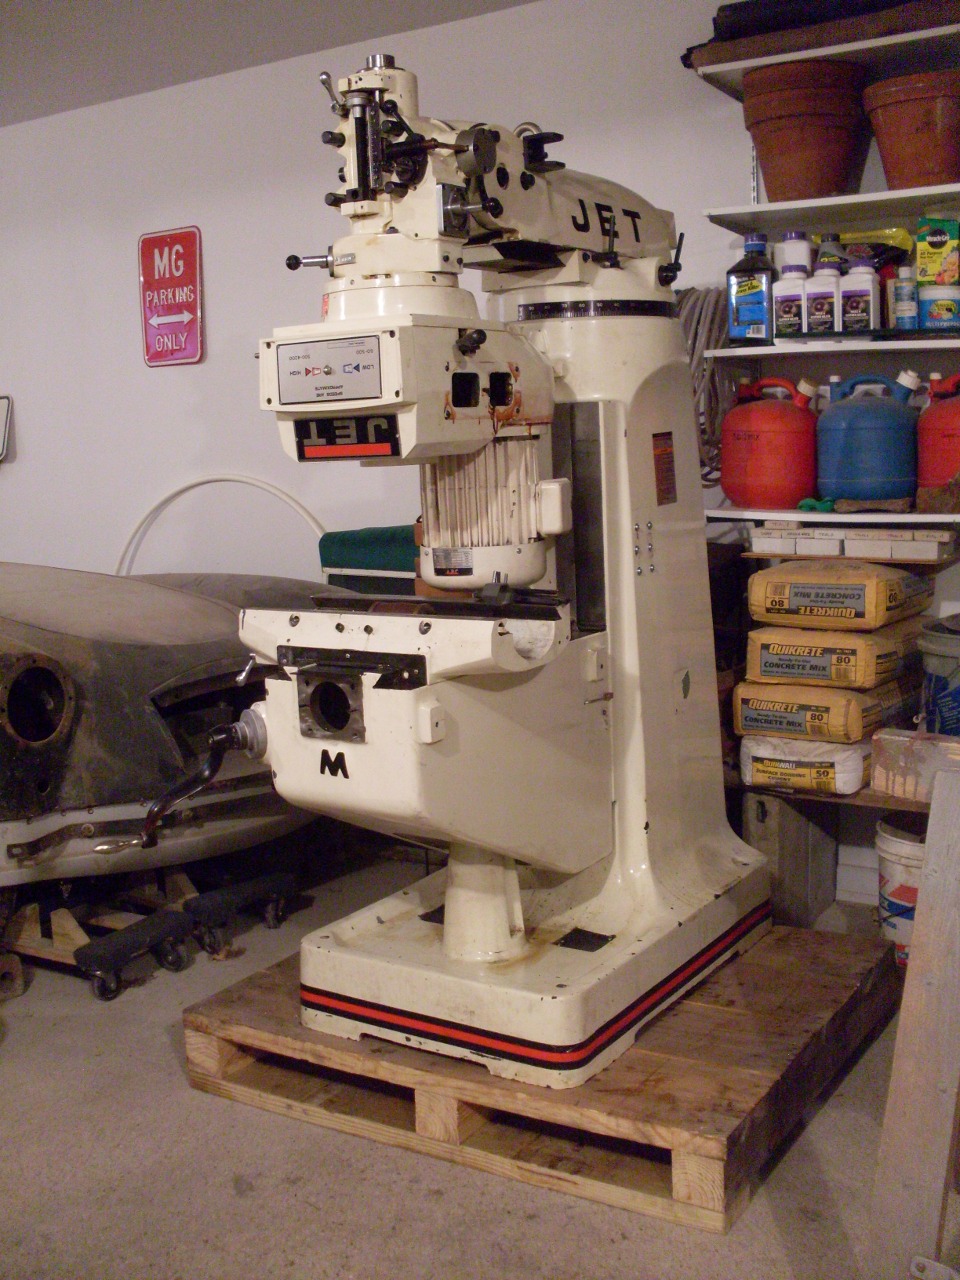
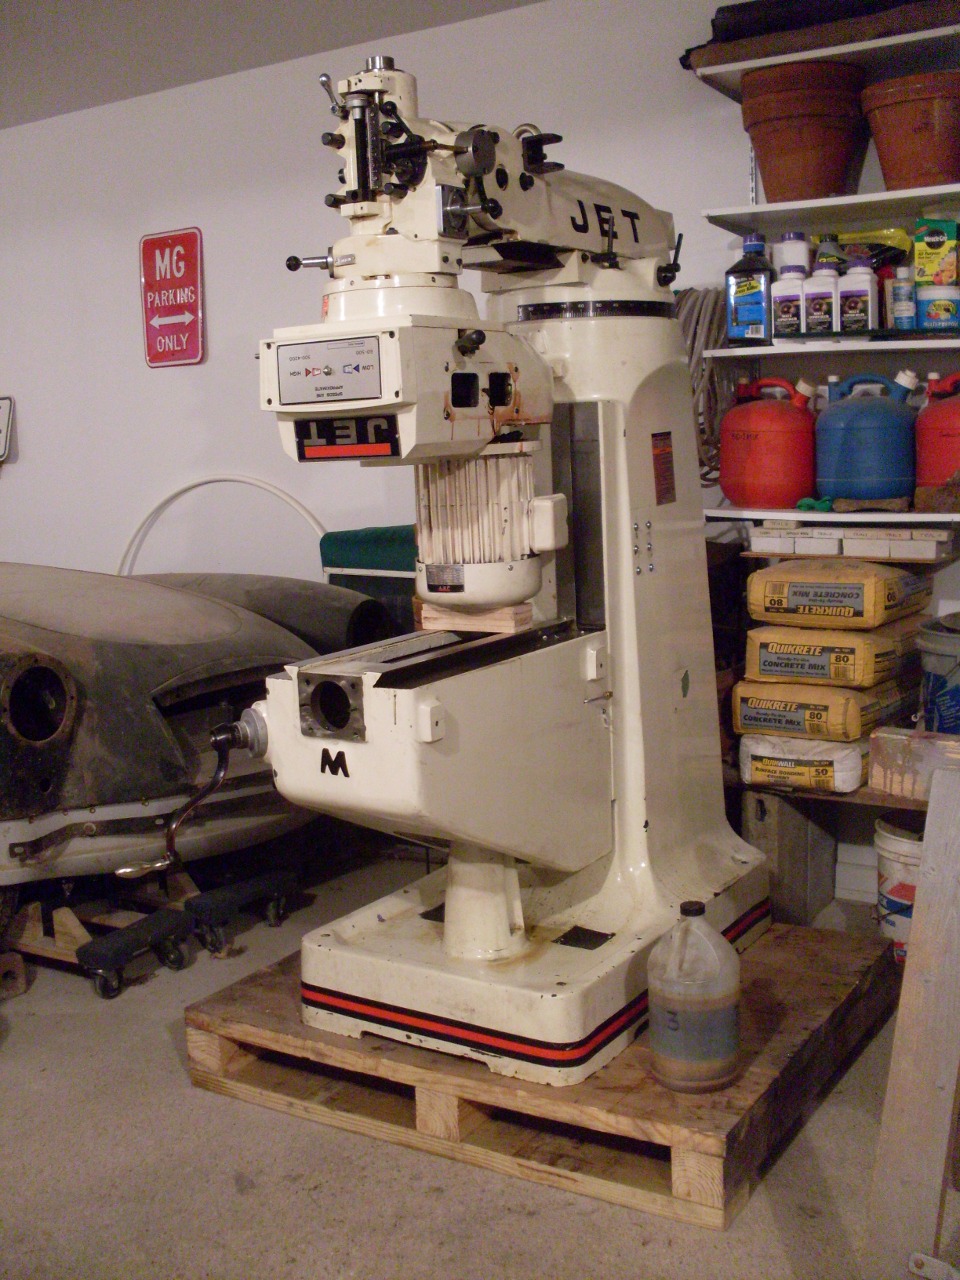
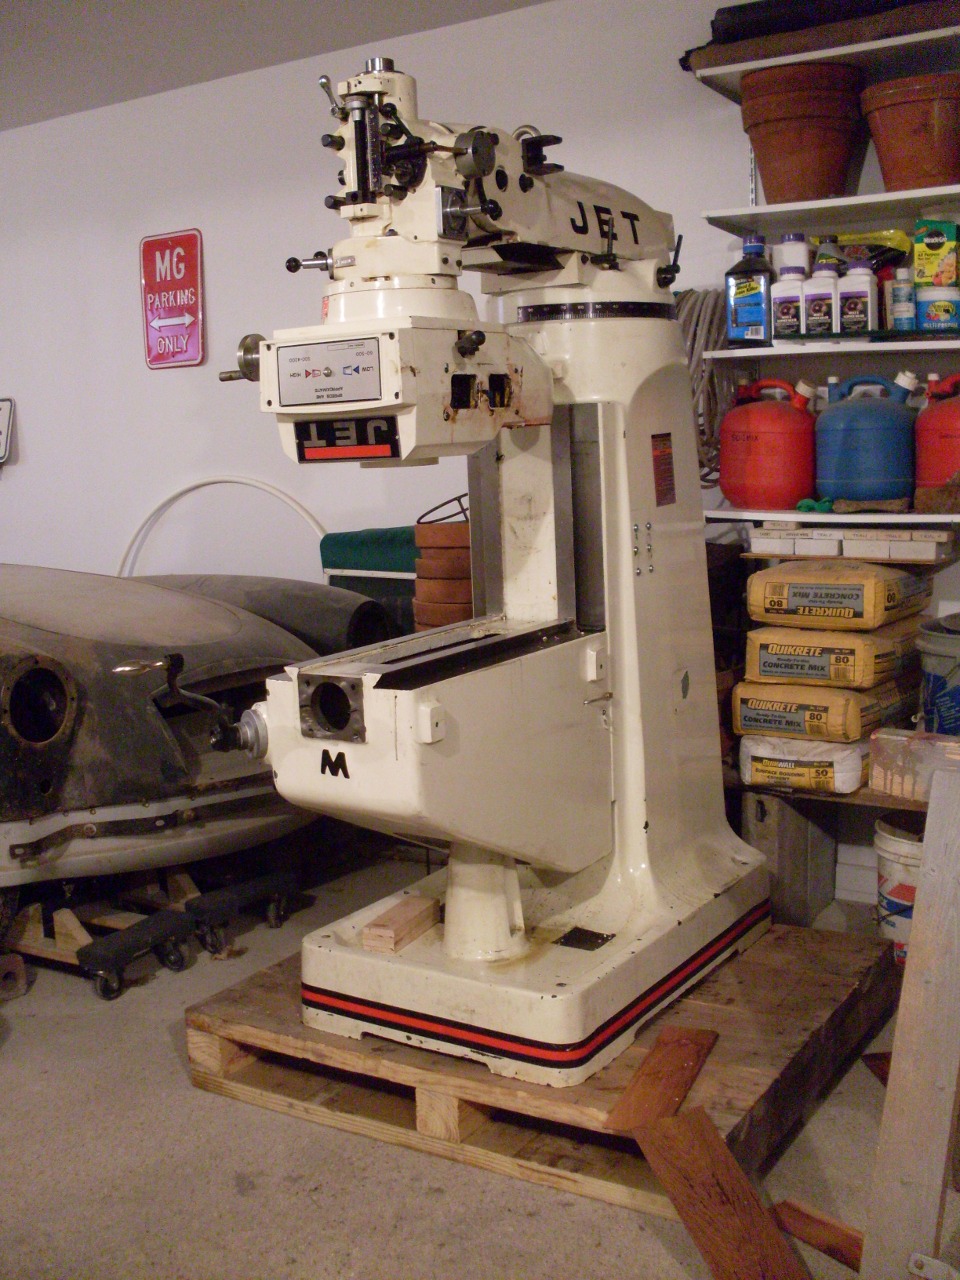
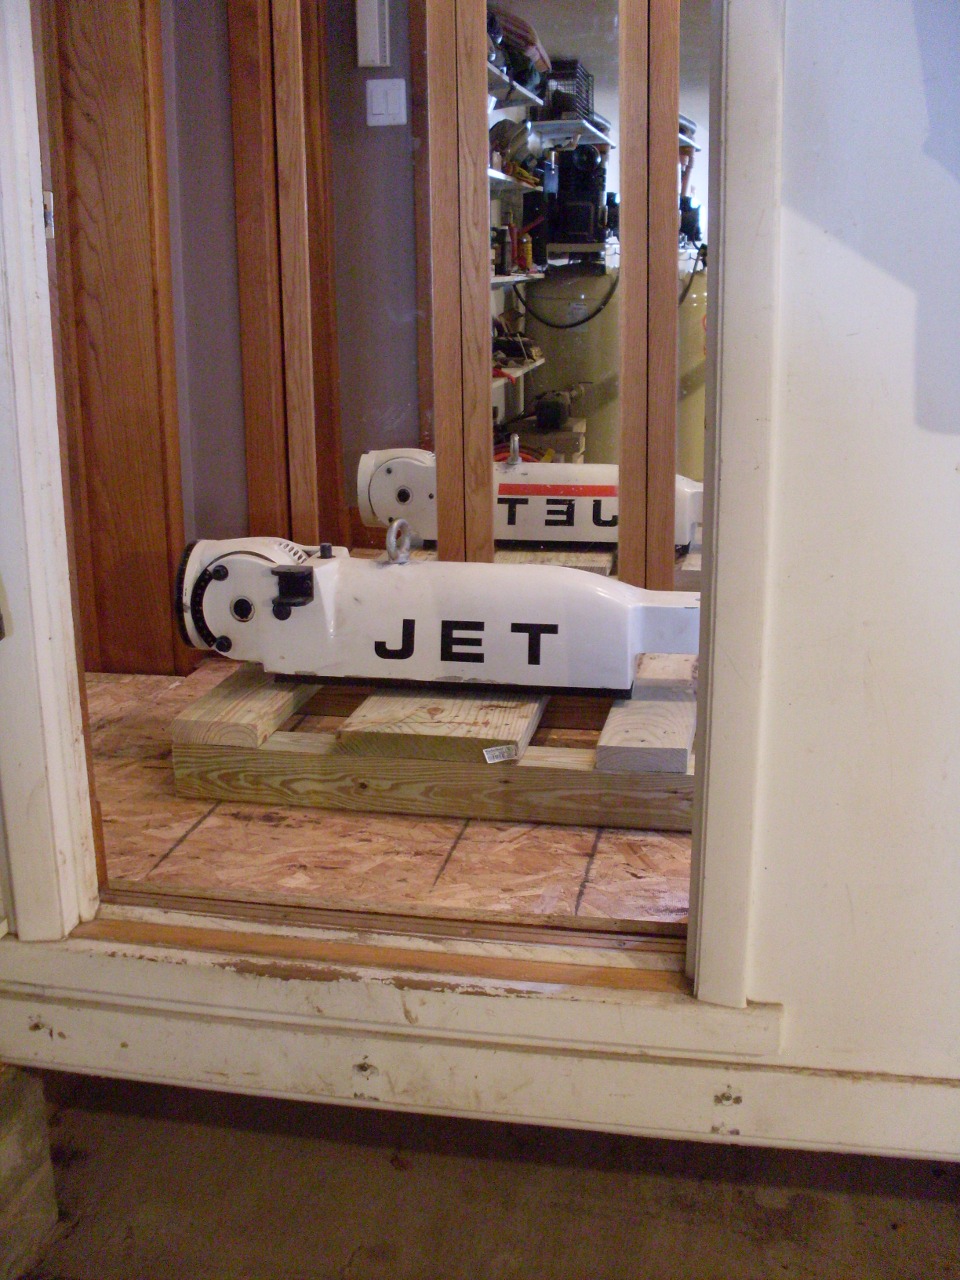
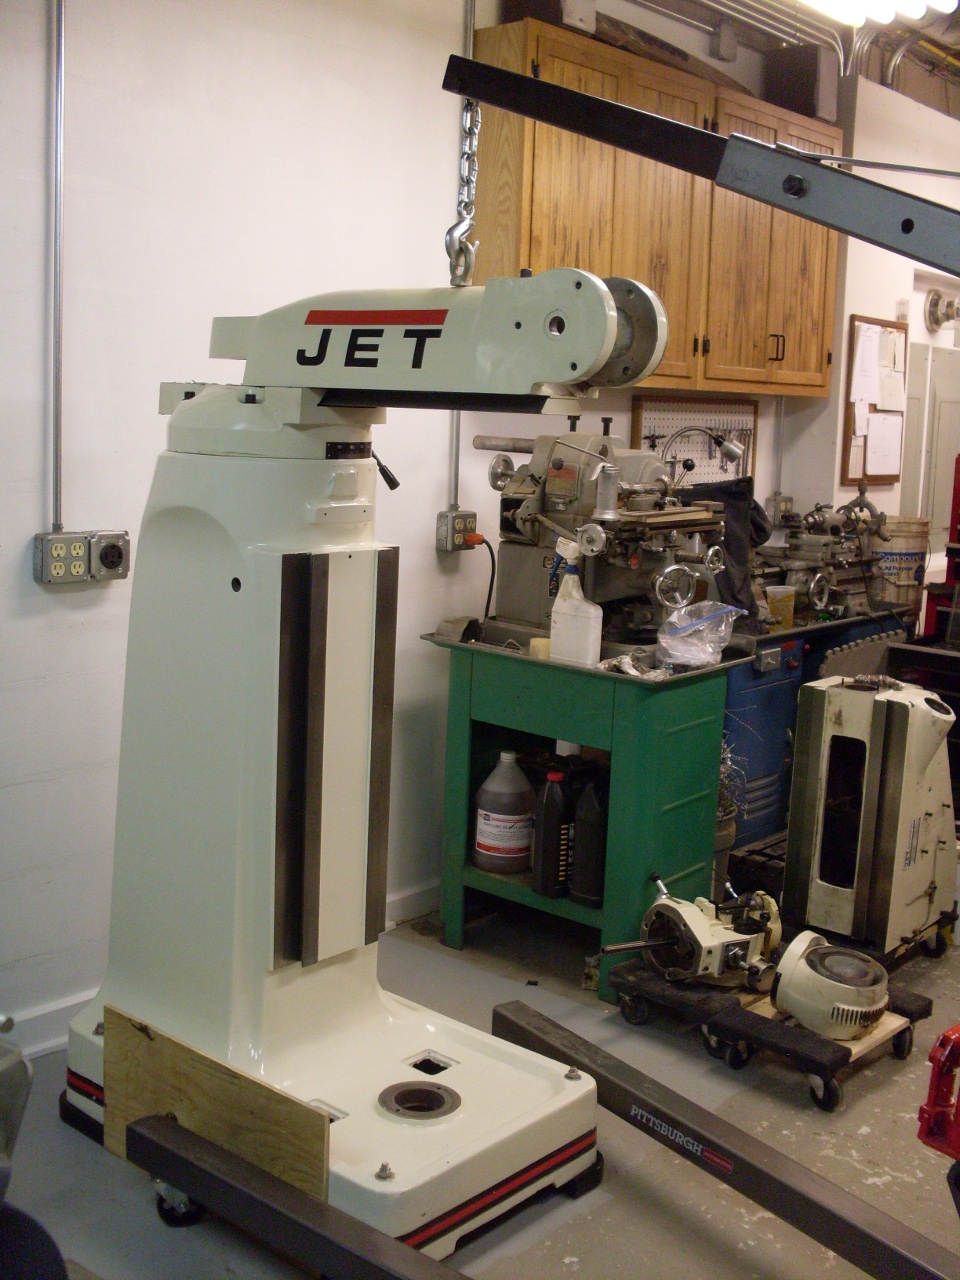
Here
it is in Dave's basement on moving day. Dave and I had already
removed the table and turned the head upside down to make it more
compact.

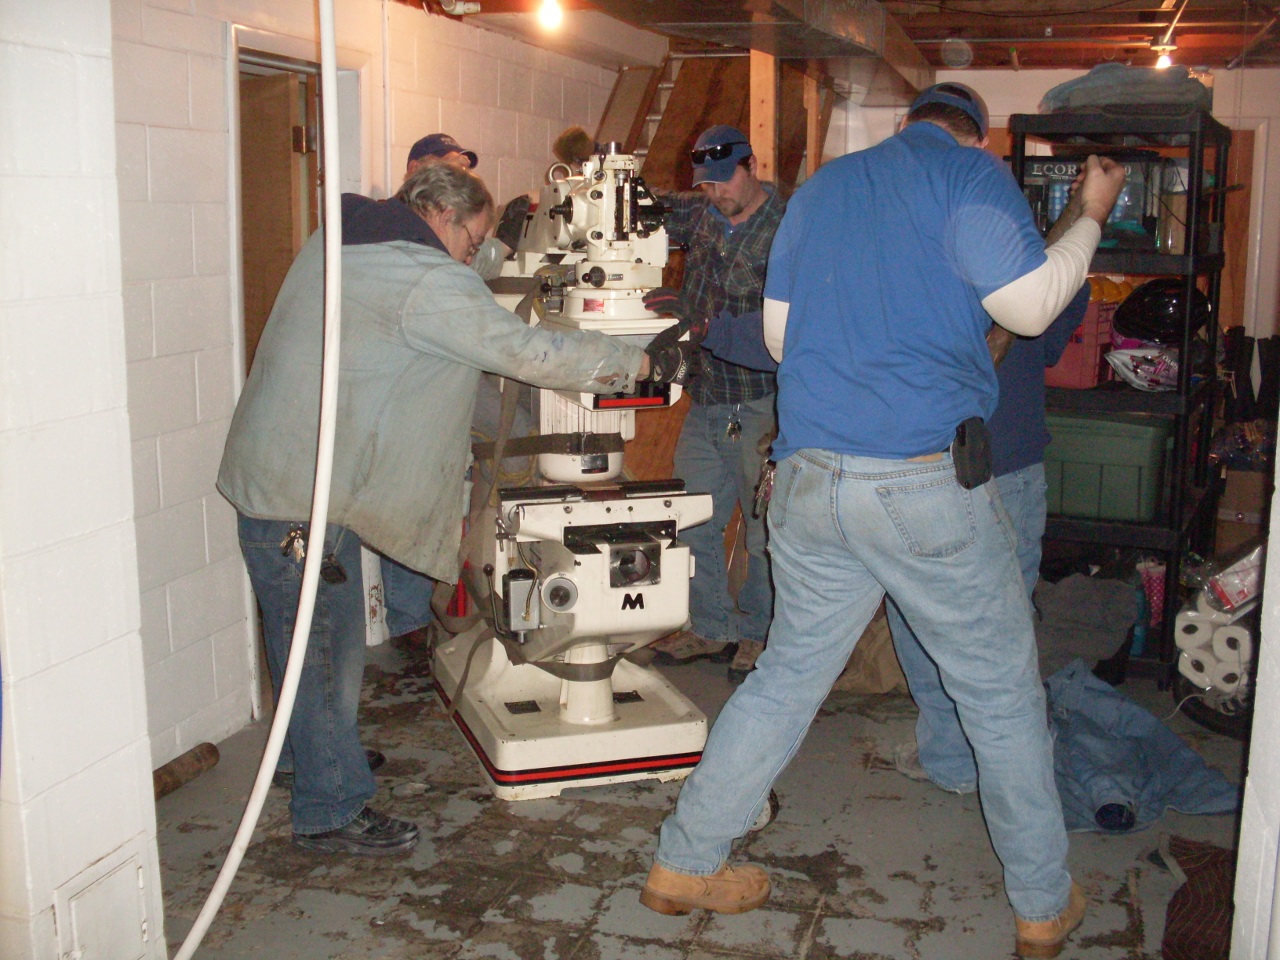
I
hired Wings Transfer in Omaha to do the move. They brought seven
guys but made the whole process look almost effortless. It was
obvious they knew what they were doing. They had the mill on
their truck in just a couple of hours.
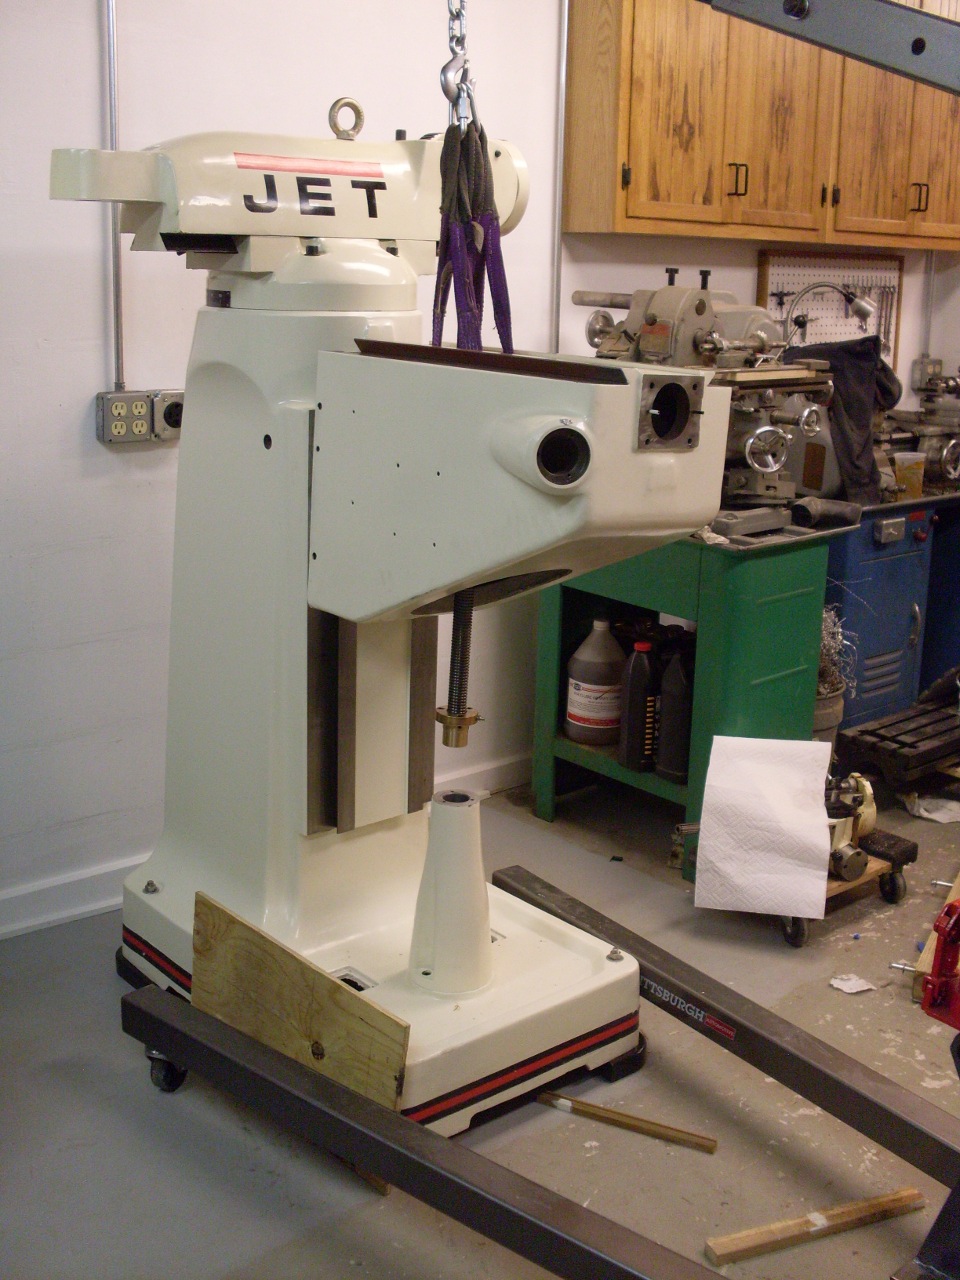
Less than an hour after that, it was sitting in my garage:
The
saddle and motor were light enough that I could get them off
without help. I could tell when I removed the motor that there
appeared to be a lot of grease on and around the drive belt and
pulleys. This didn't seem right. I surmised later that it
was because the head was upside down for a few days, and the grease
flowed.

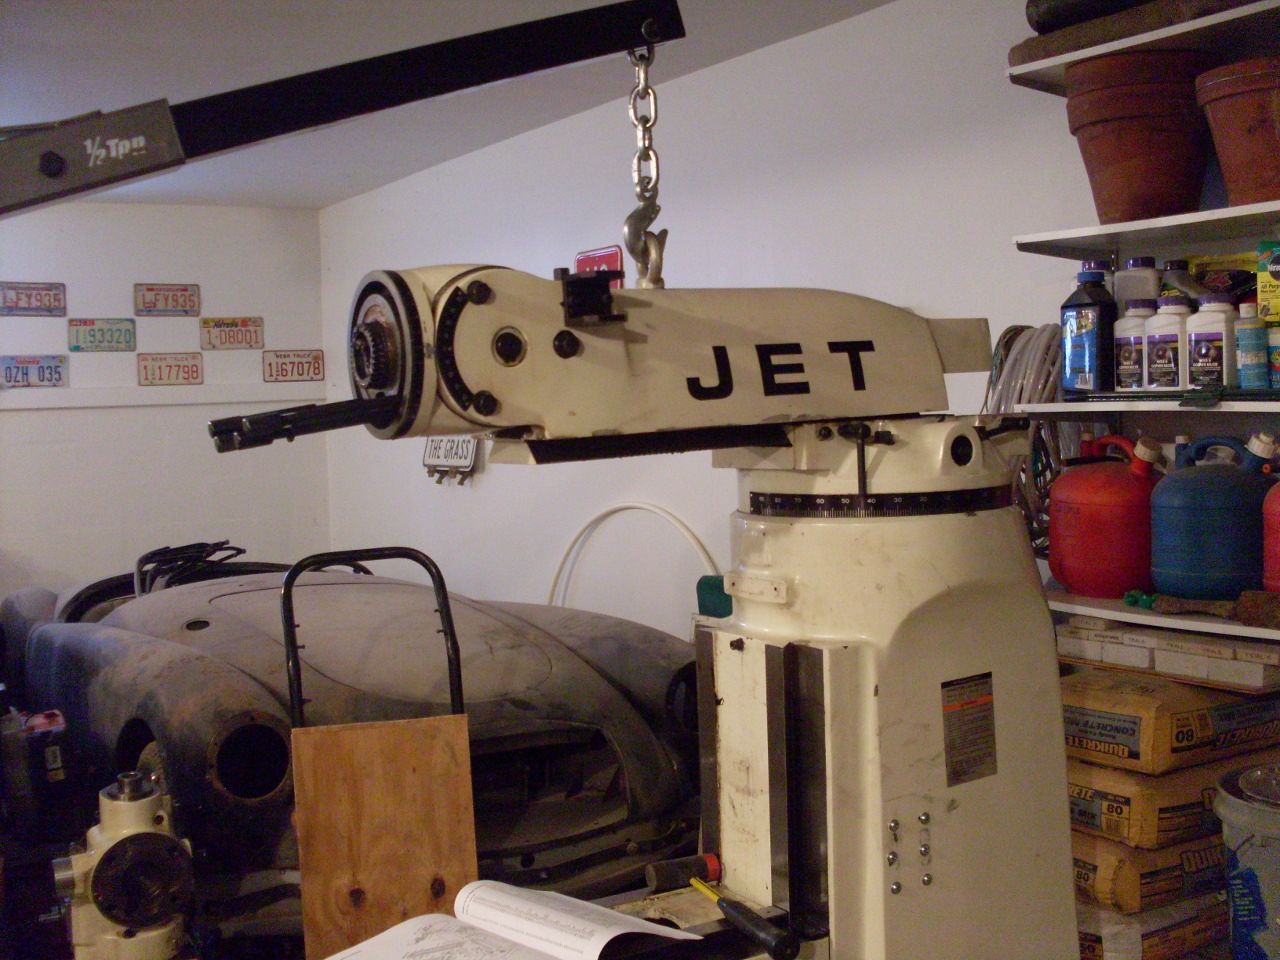
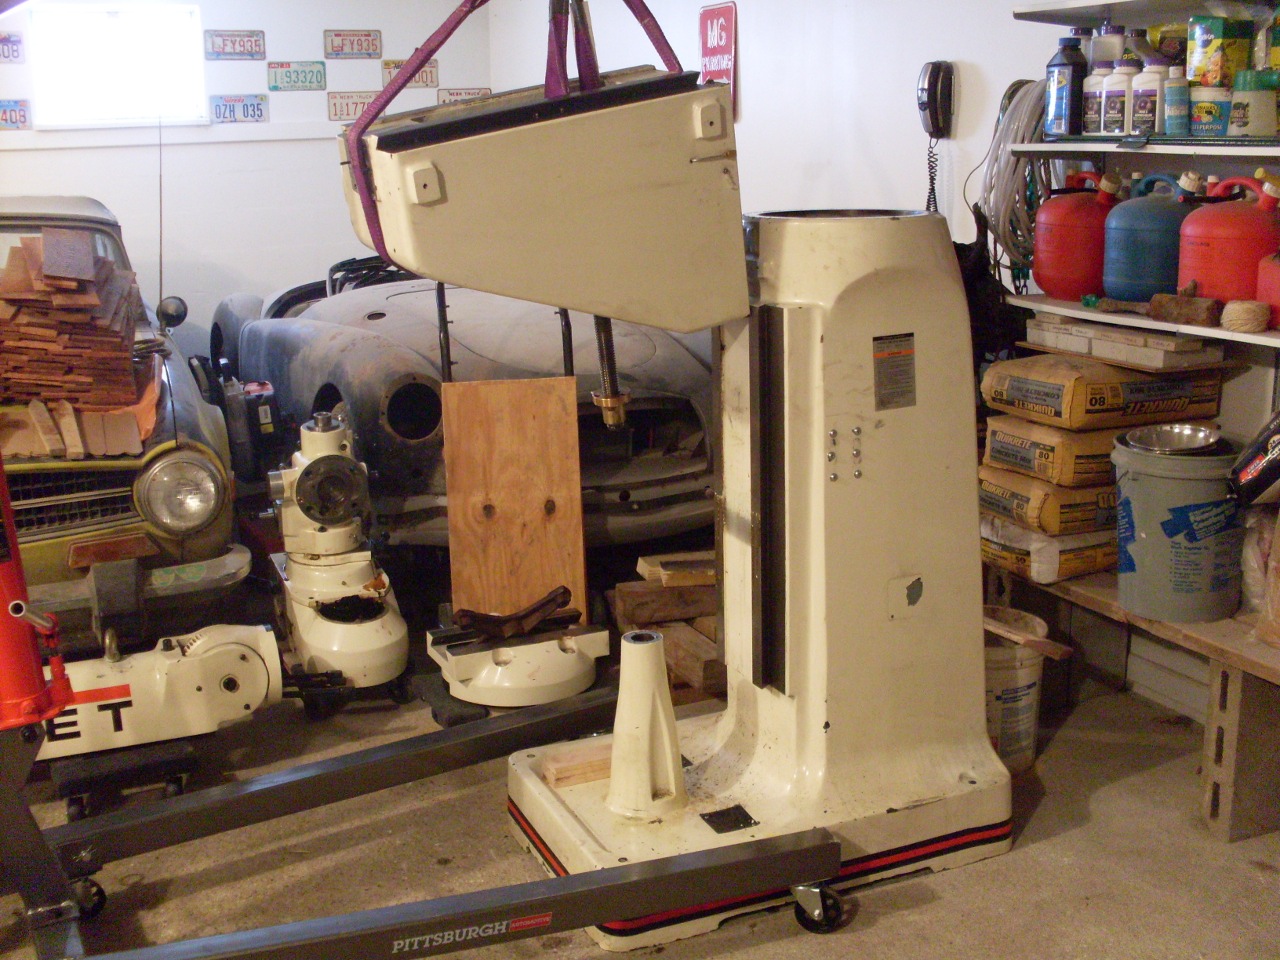
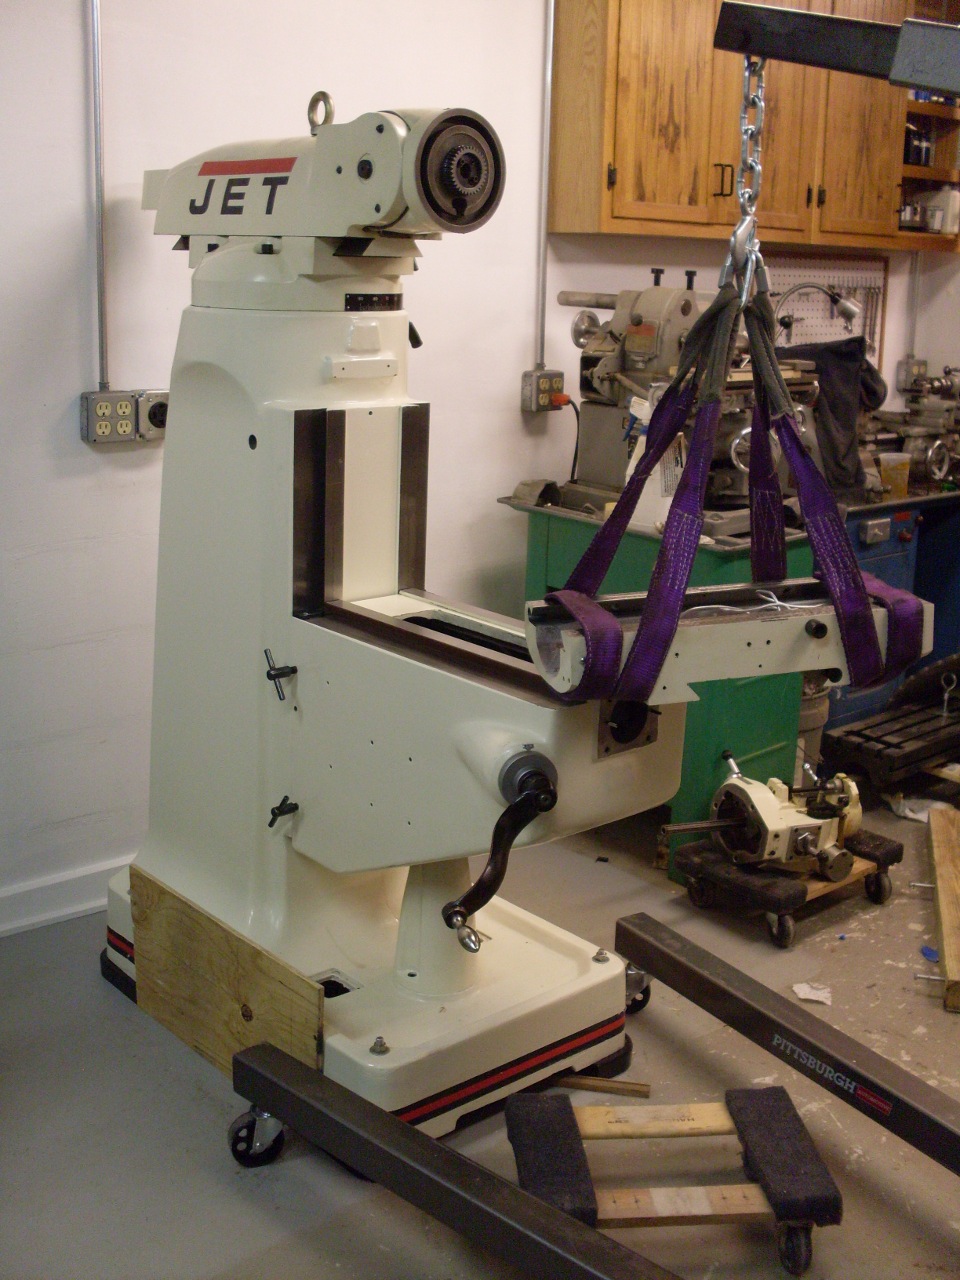
Next,
the head with the variable speed drive system came off. Since I
was doing this job solo, I needed a skyhook for this.
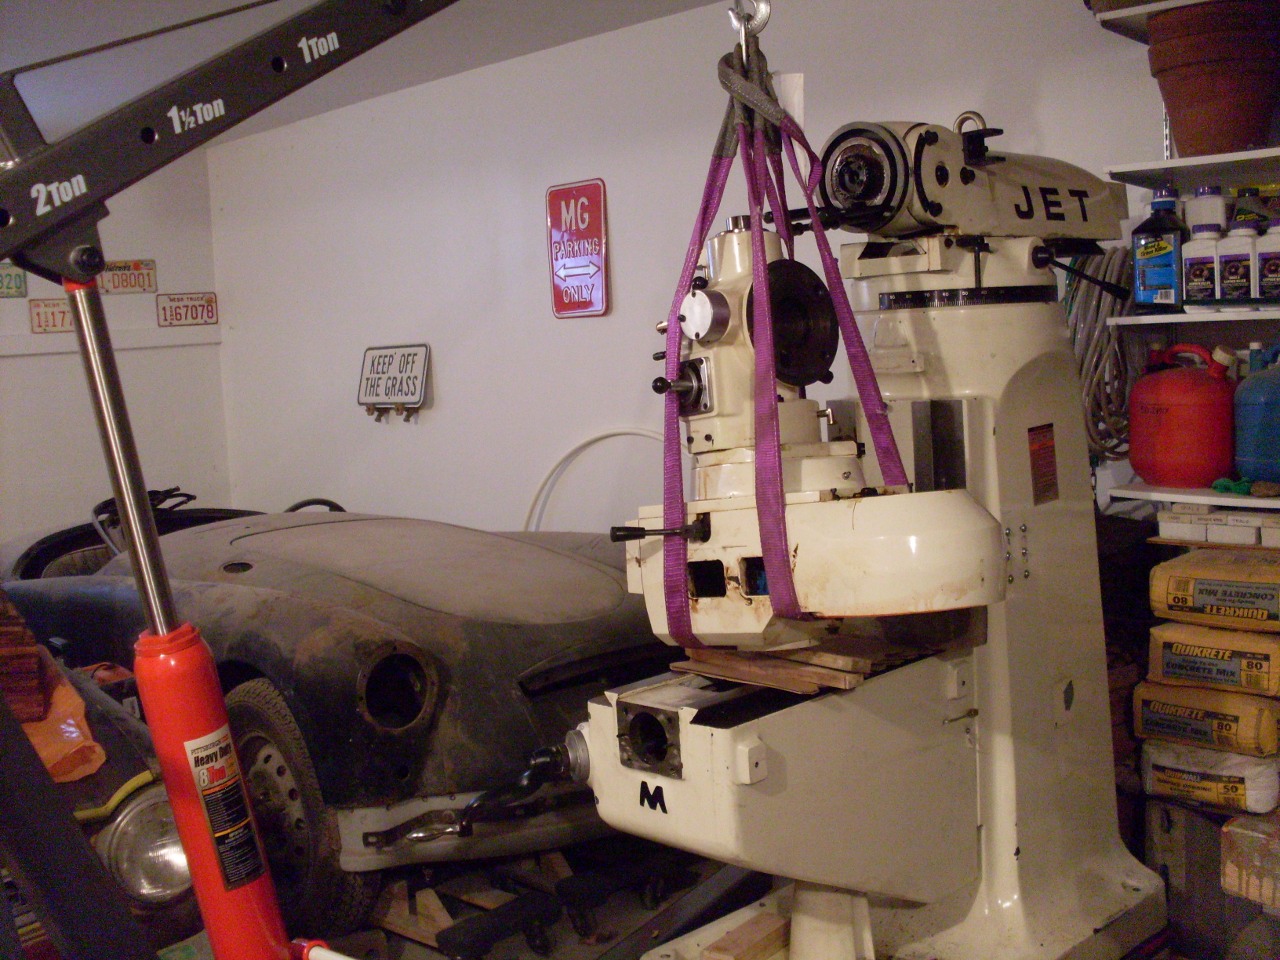
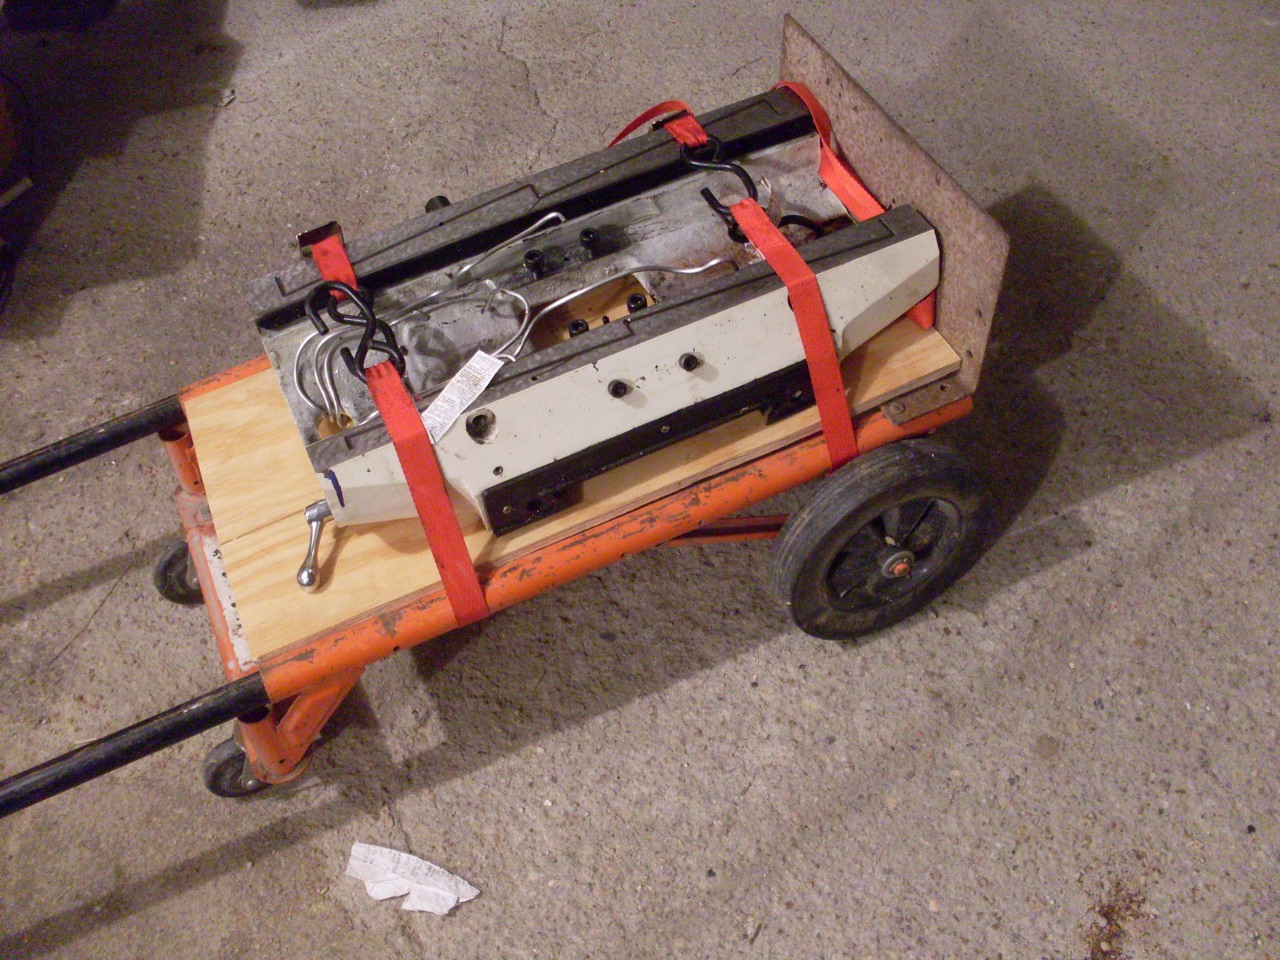
The ram and turret were next:
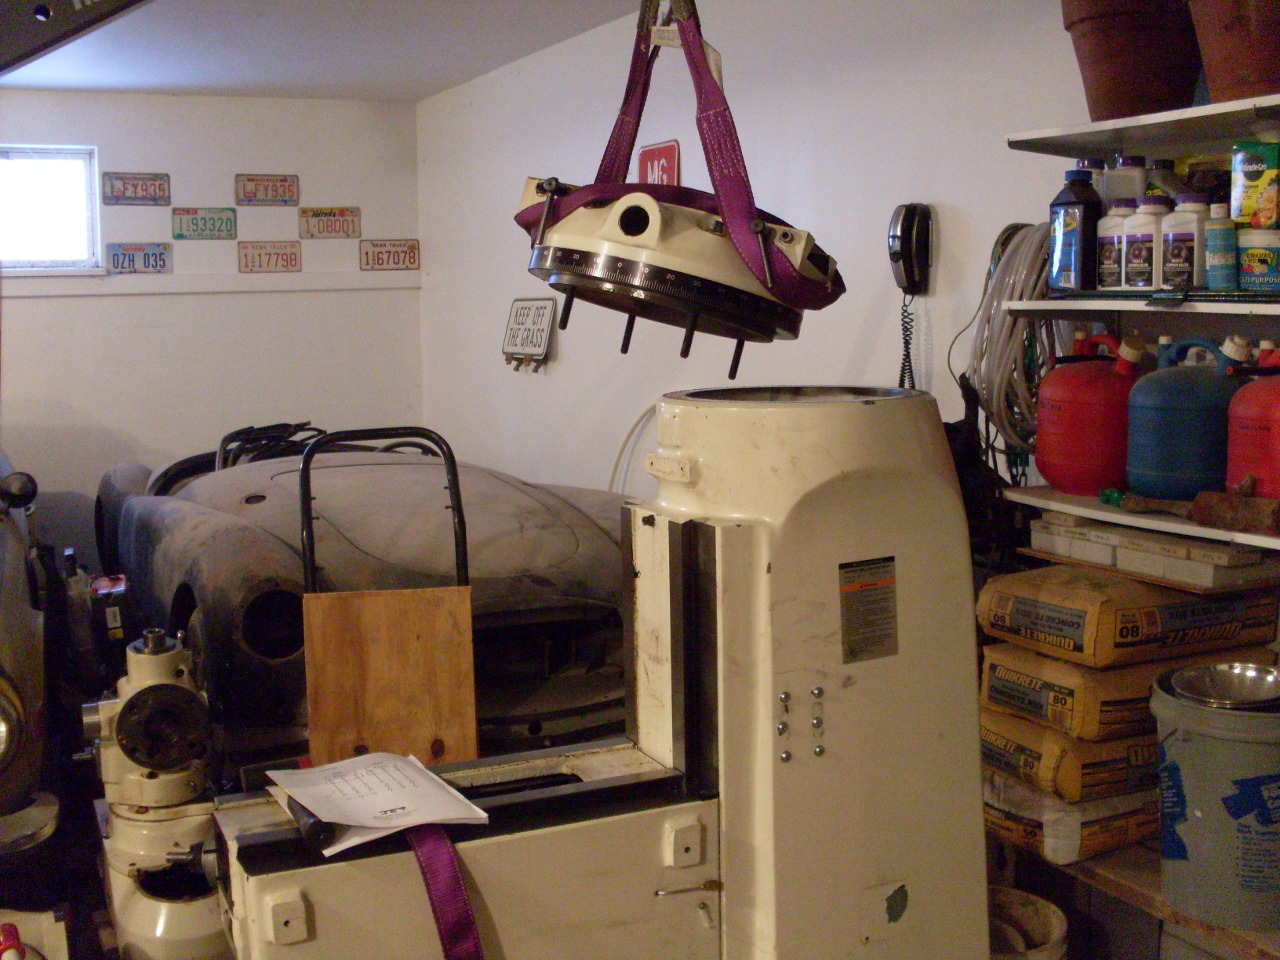
Then
the knee. It must weigh close to 300 pounds. It has to come
up high enough to clear the column dovetails. I had maybe an inch
to spare before the boom would have hit the ceiling.
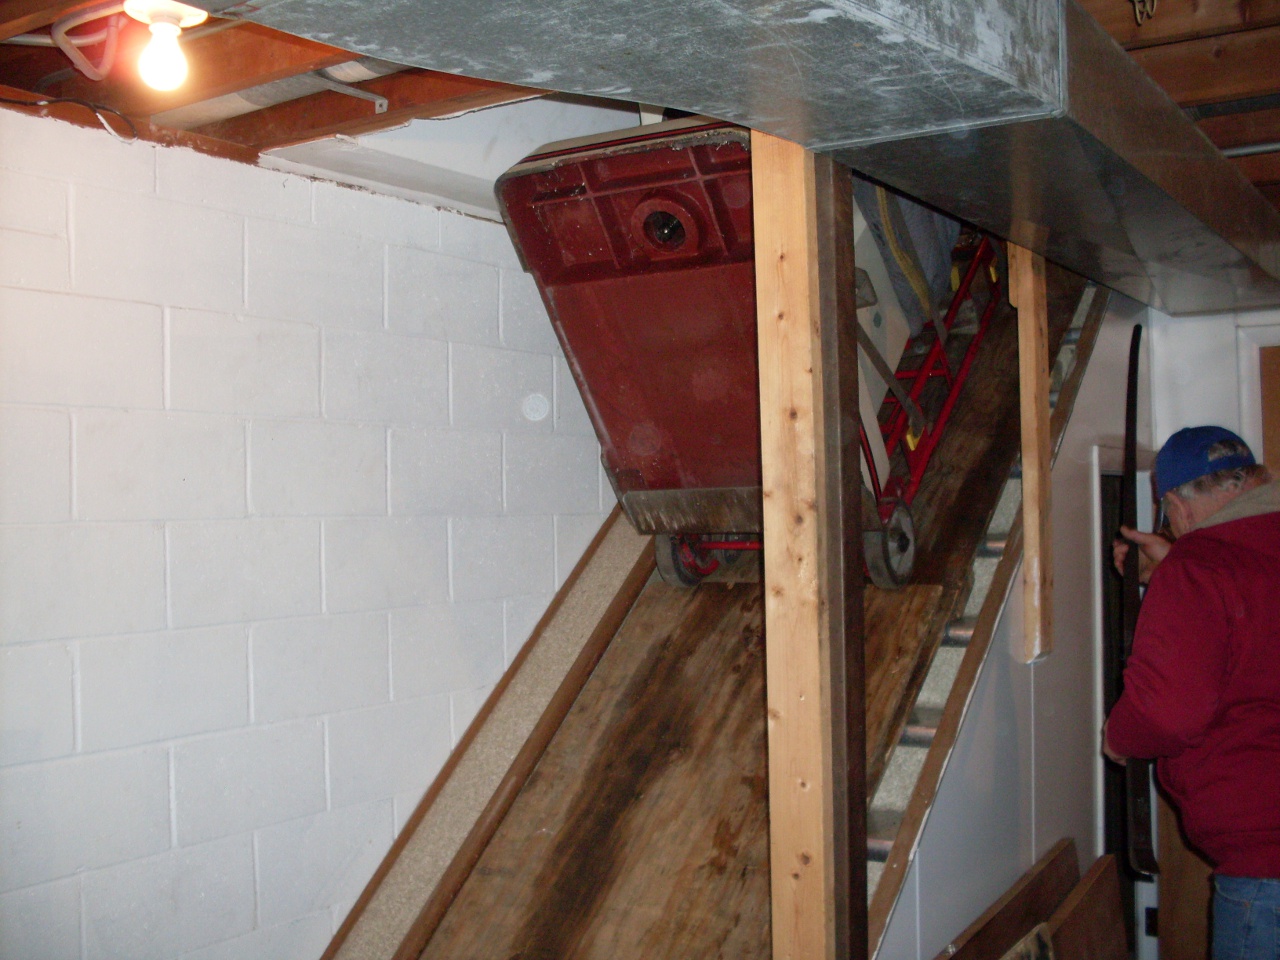
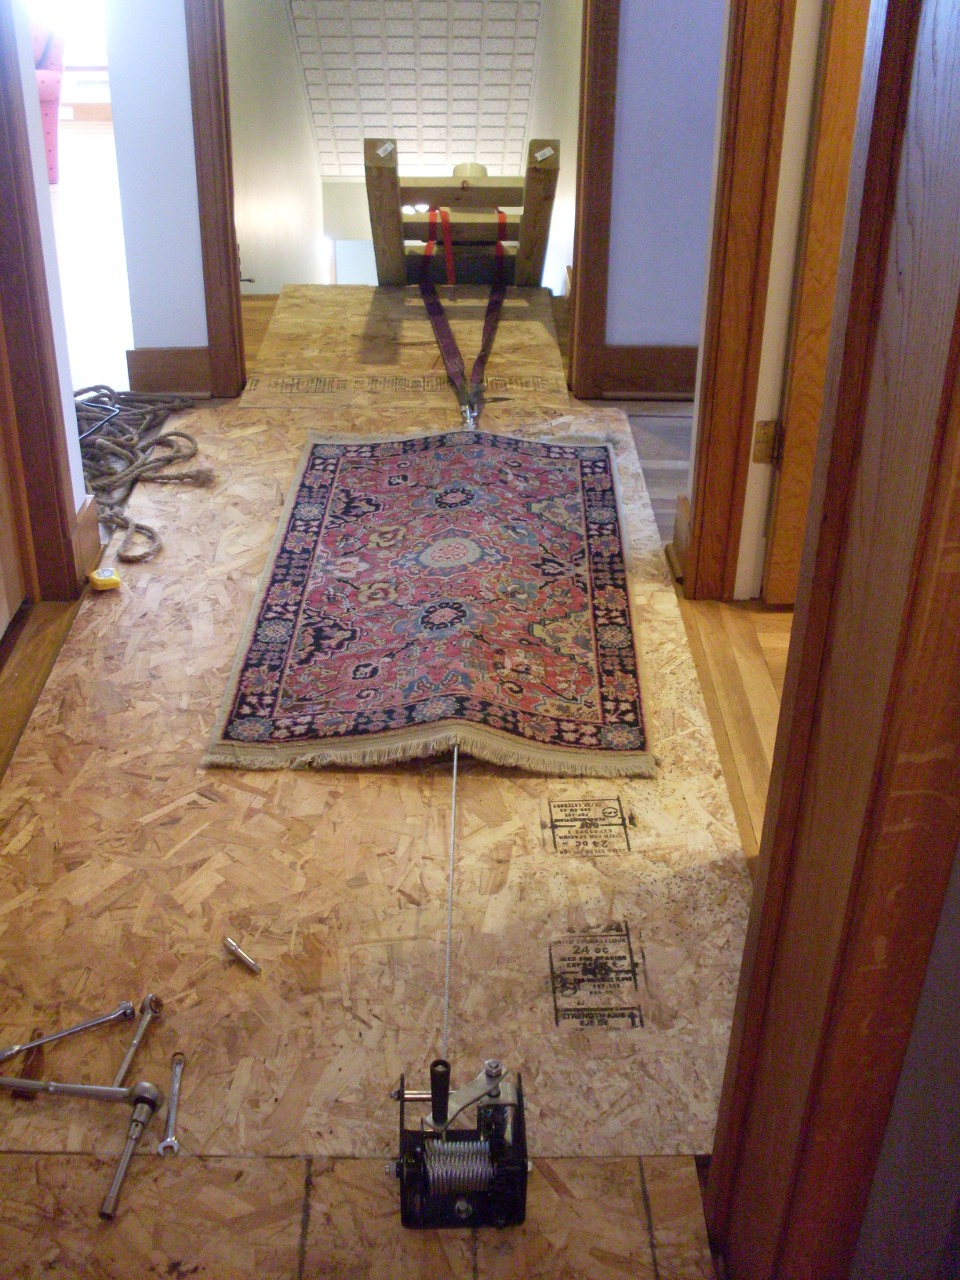
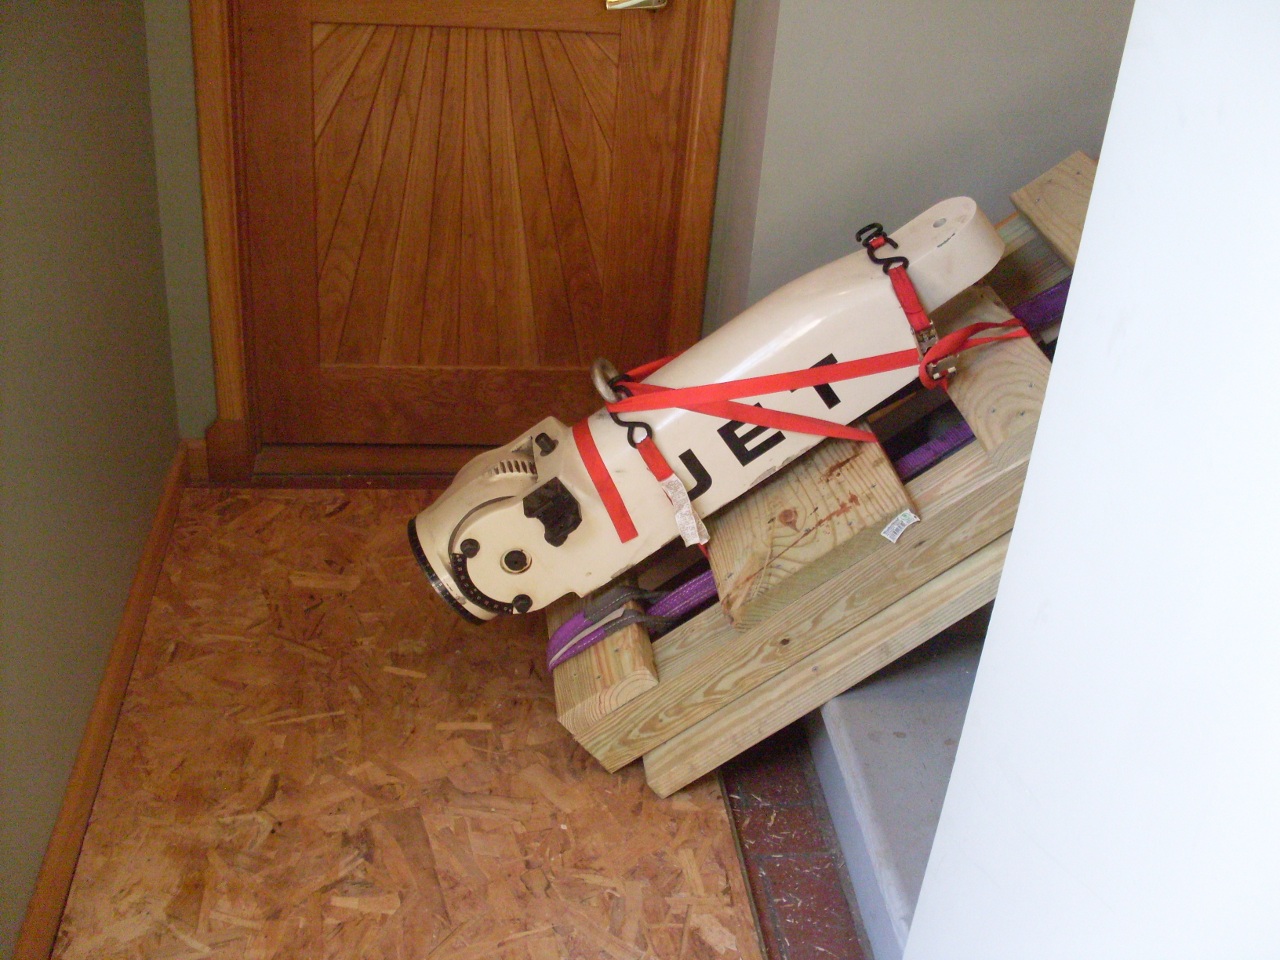
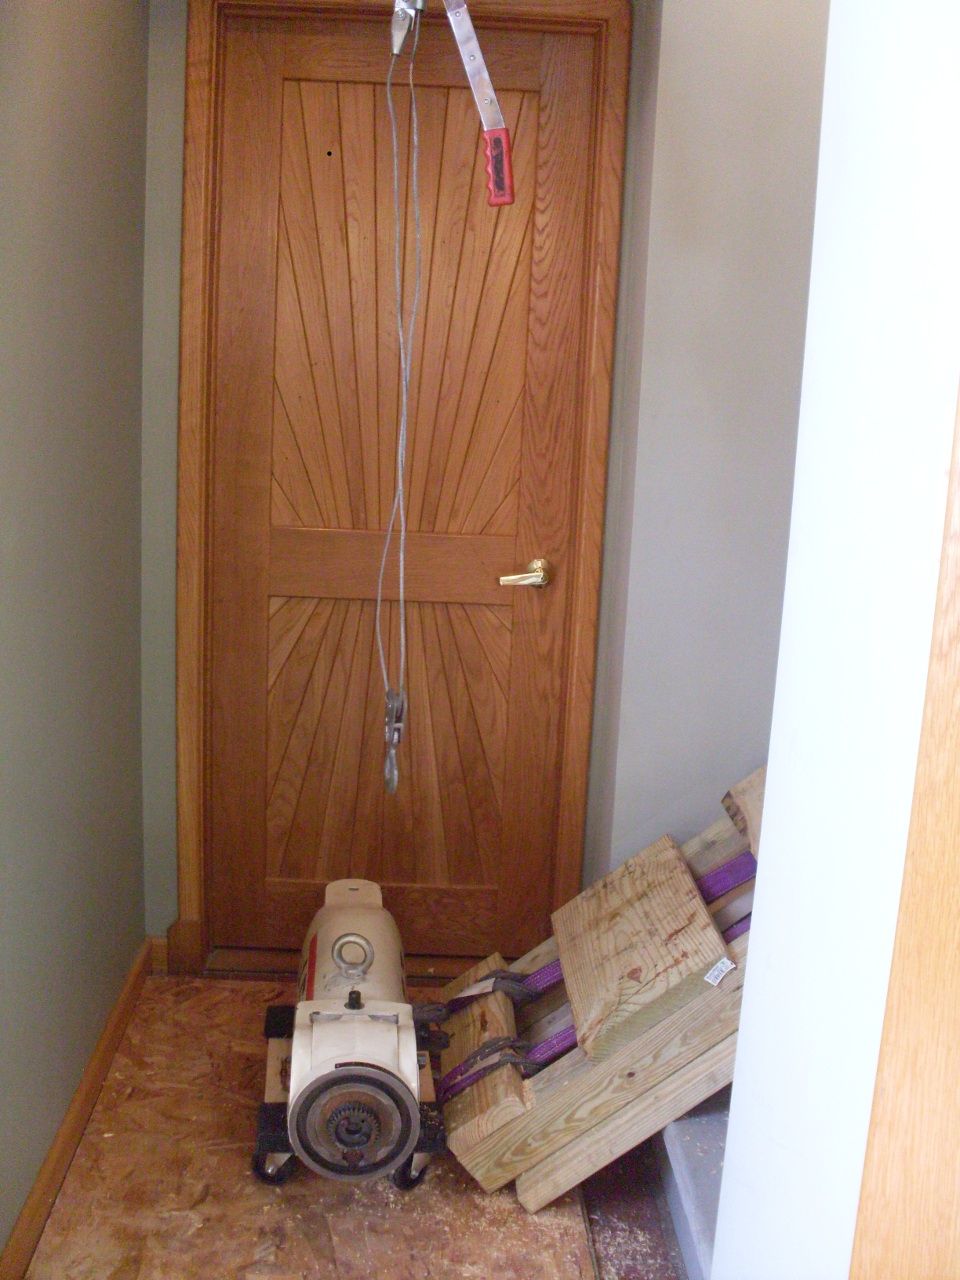
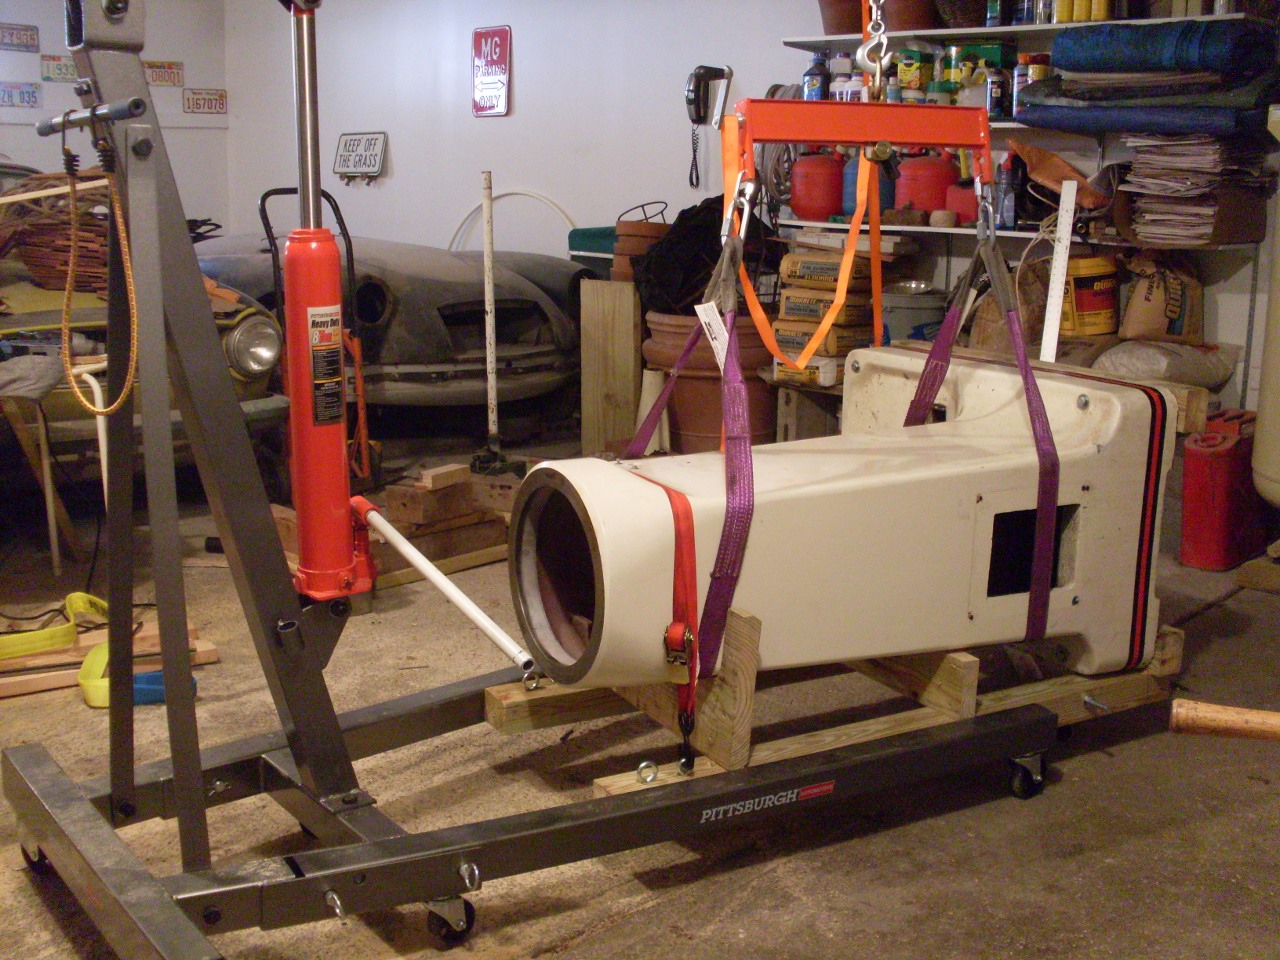
To
get the bigger pieces down the stairs, I fashioned a pair of
wooden tracks screwed to the stairs, and a sled to run in the tracks.
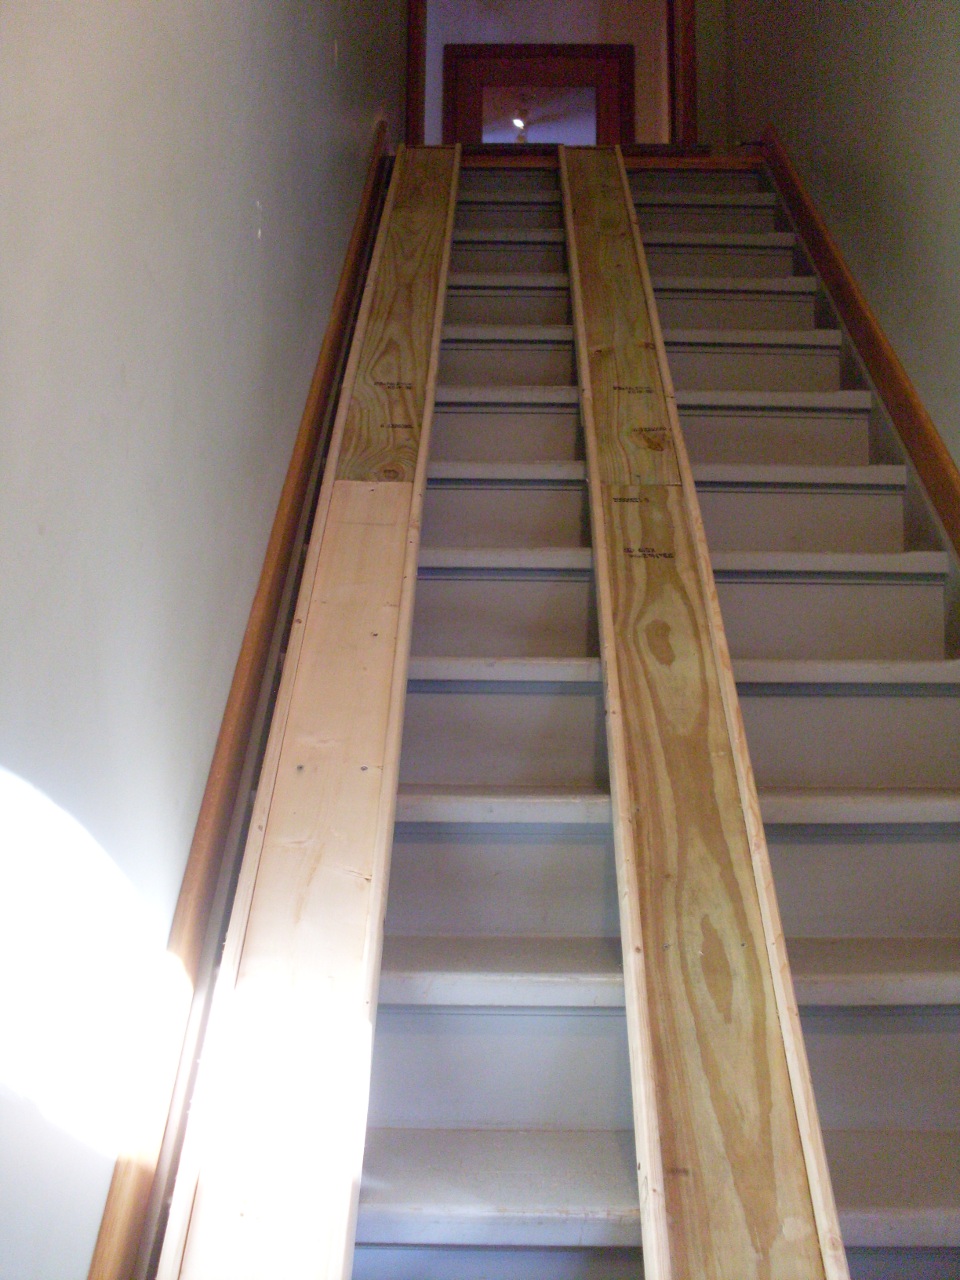
I put the parts on the sled with the crane, and push the sled to the top of the stairs.

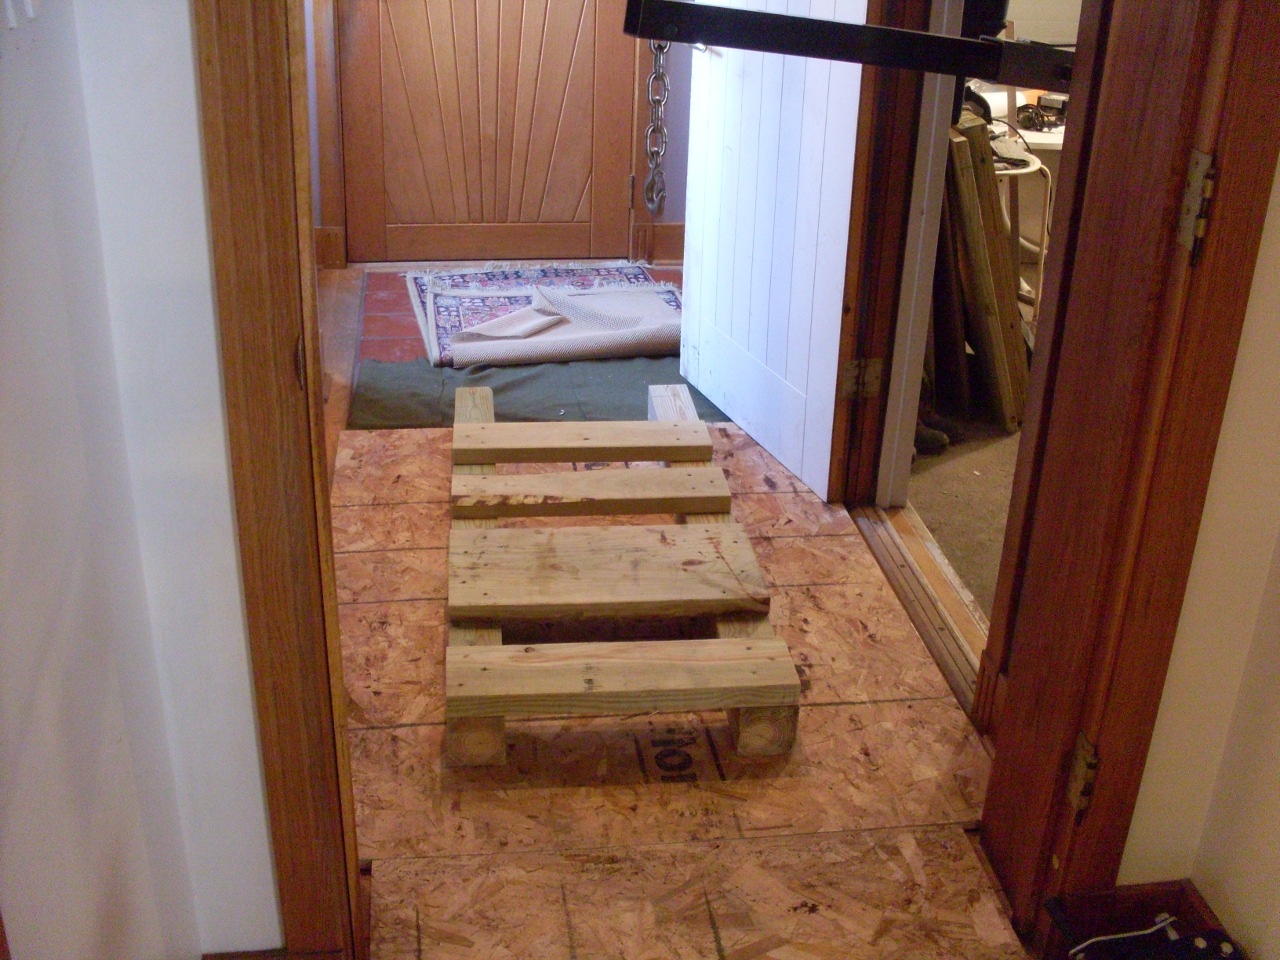
Then
I lag bolted a hand winch through the floor into the framing below.
I did this in a place where I removed a threshold, so the holes
would be covered. The
winch is a worm gear type rated for one ton. The worm gear design
is self-holding: there is no need for a ratchet or pawl mechanism to
hold the weight. The rug is on the cable to keep it from whipping in the unlikely case that it would snap.
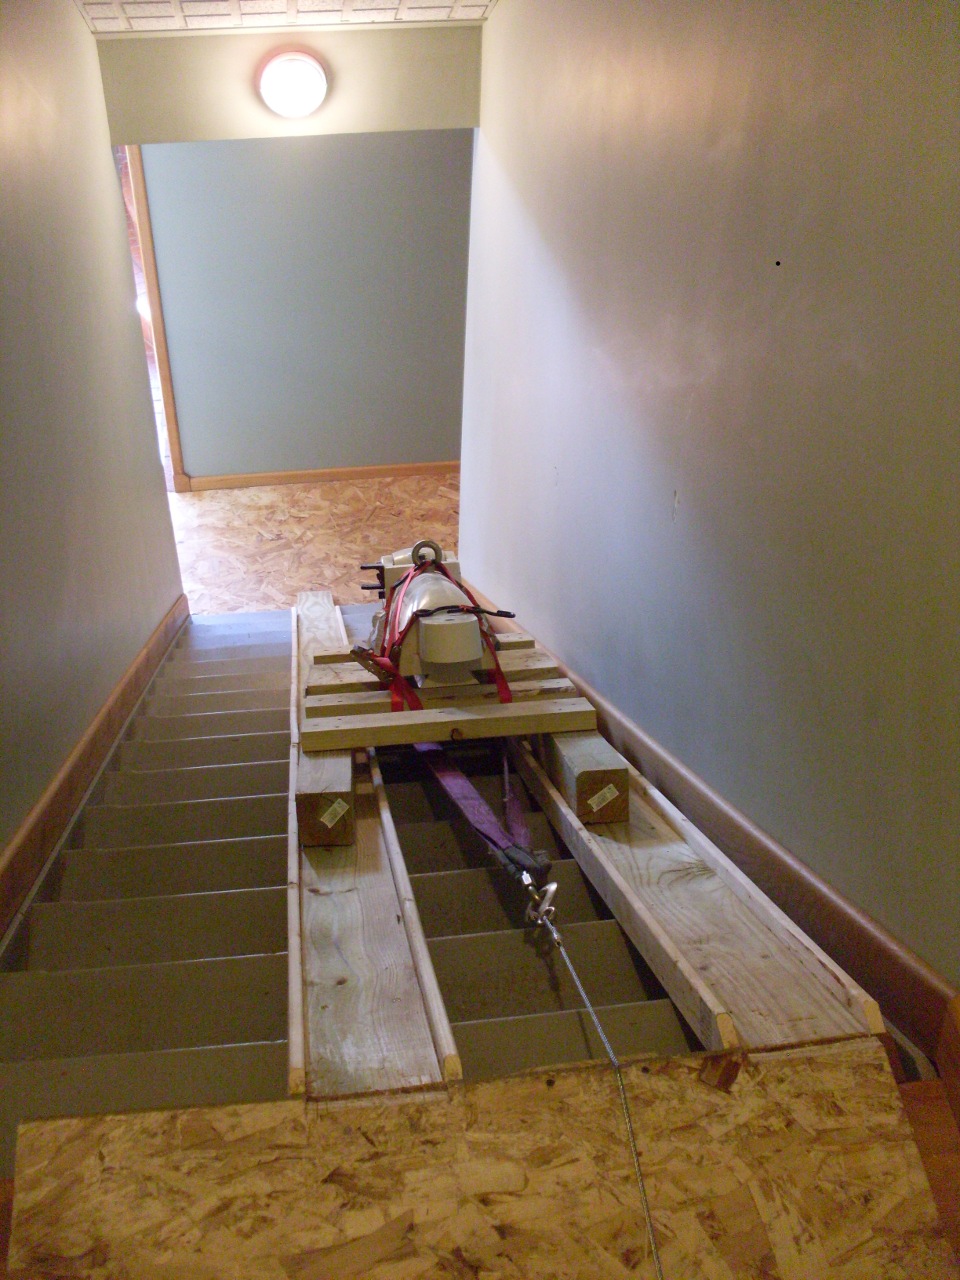
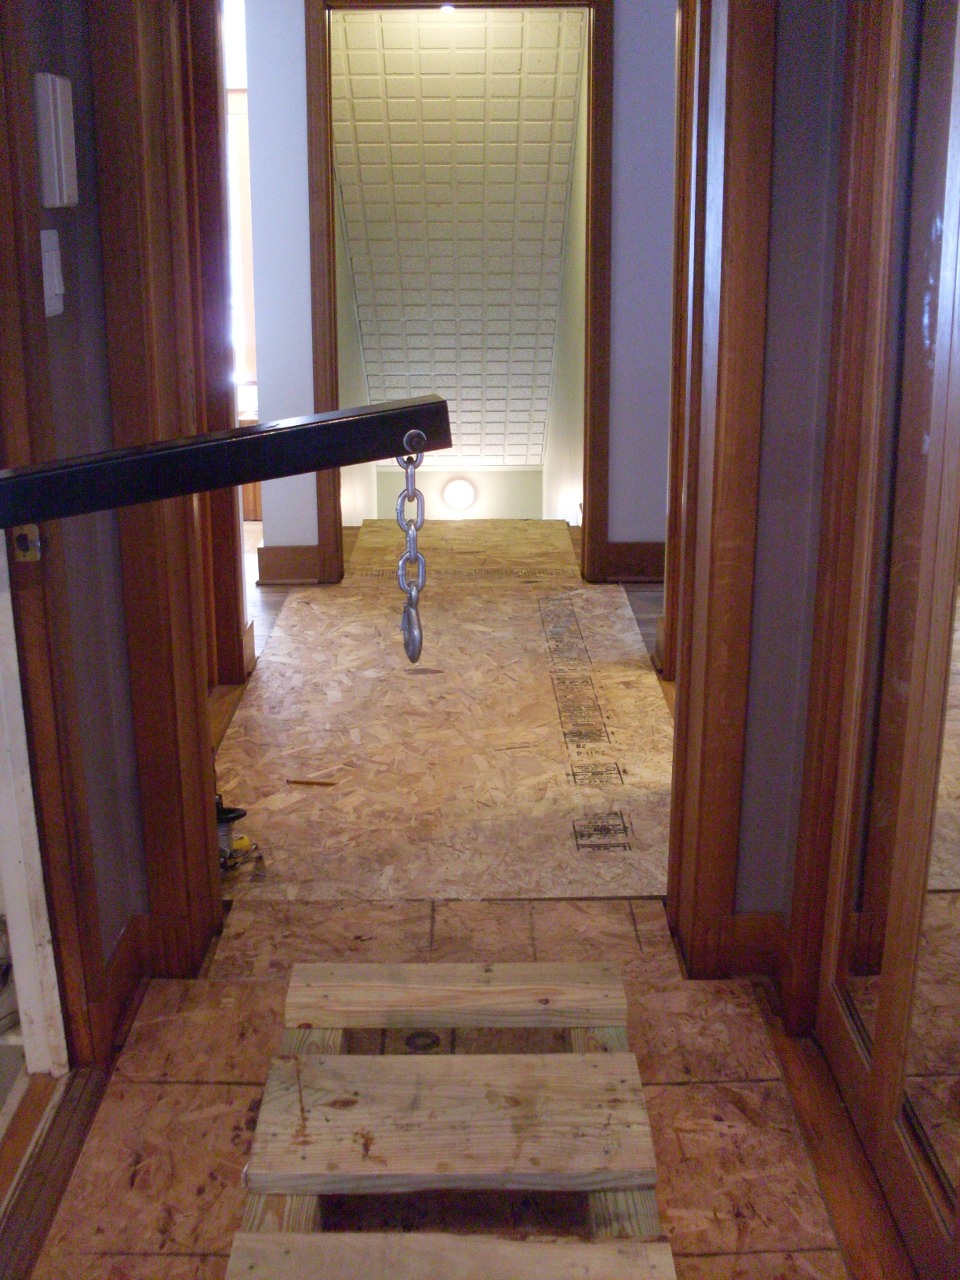
At
the bottom of the stairs, I had a come-along hanging from the
ceiling framing to help get the piece from the sled to a dolly.
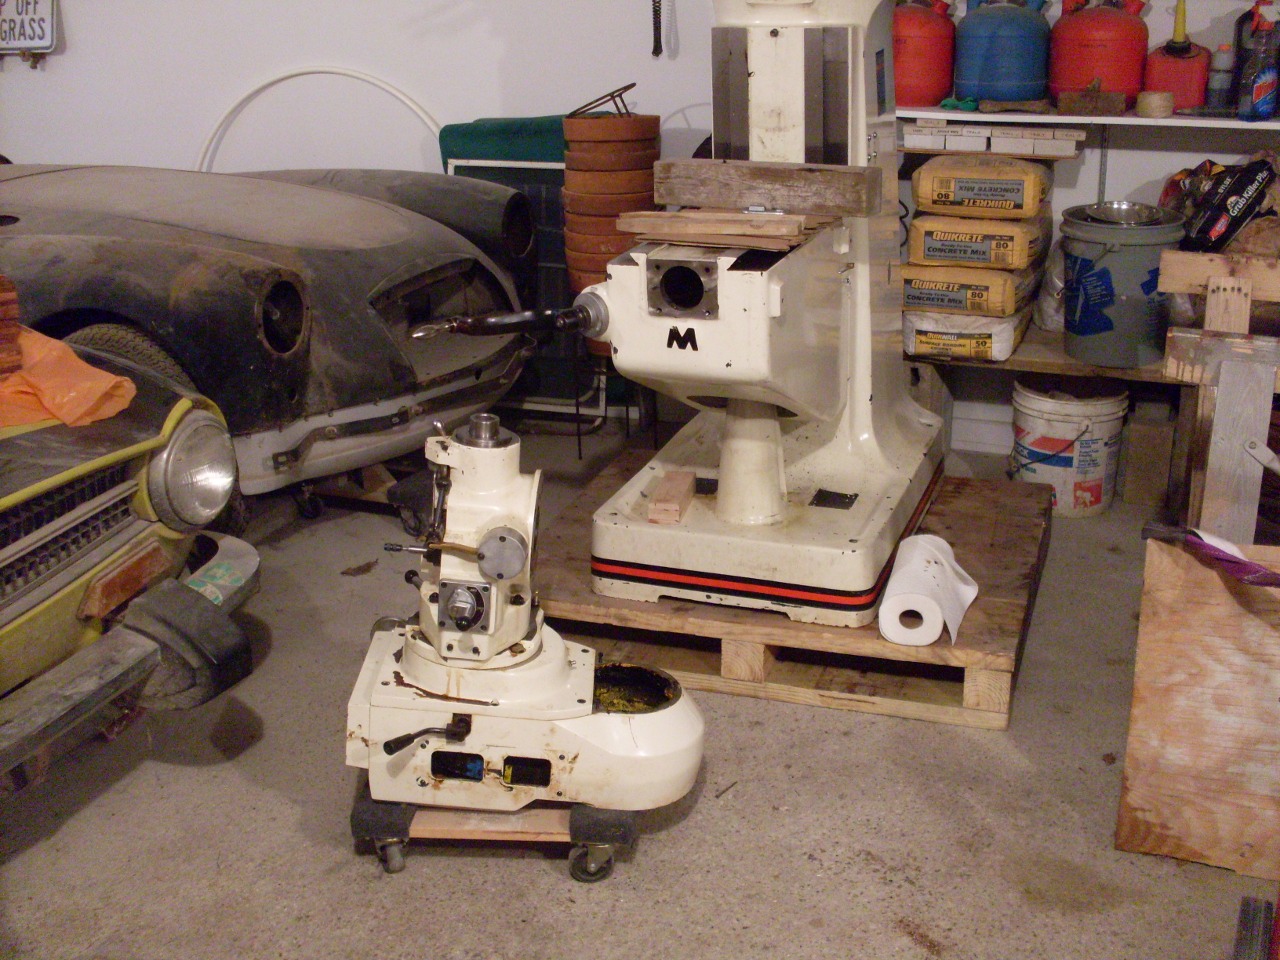
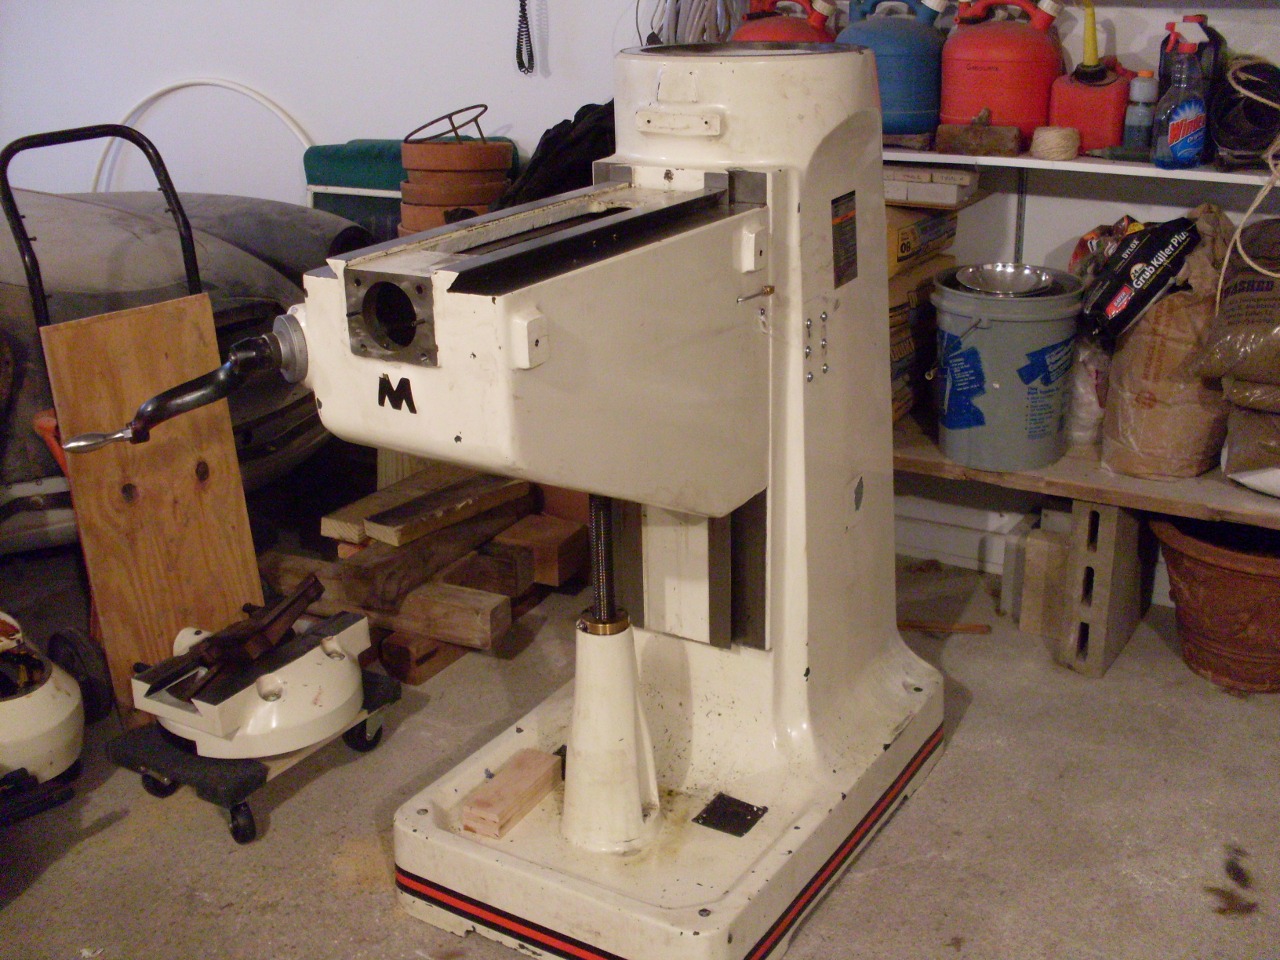
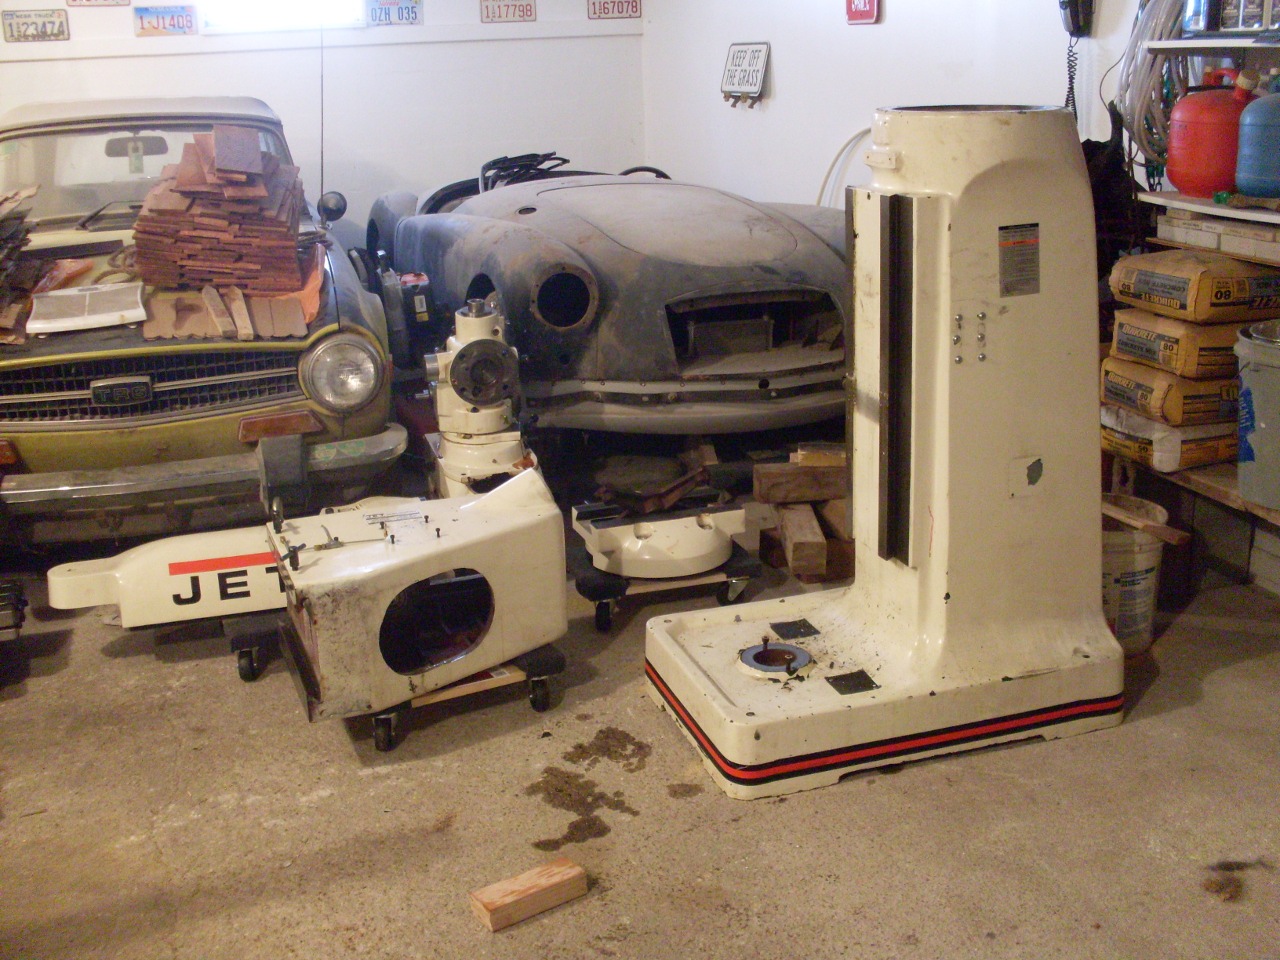
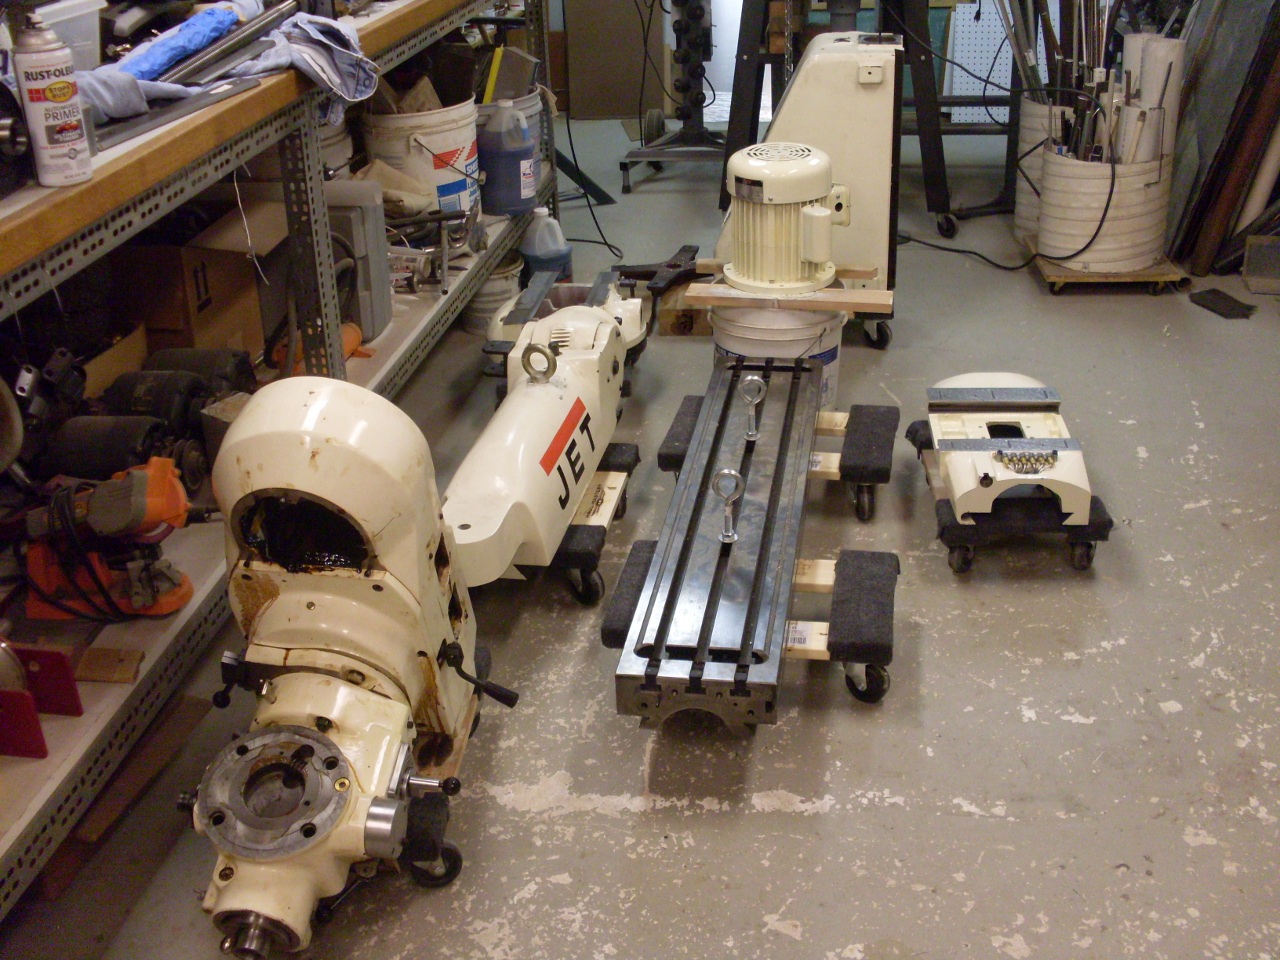
Here are all the parts in the shop except for the column:
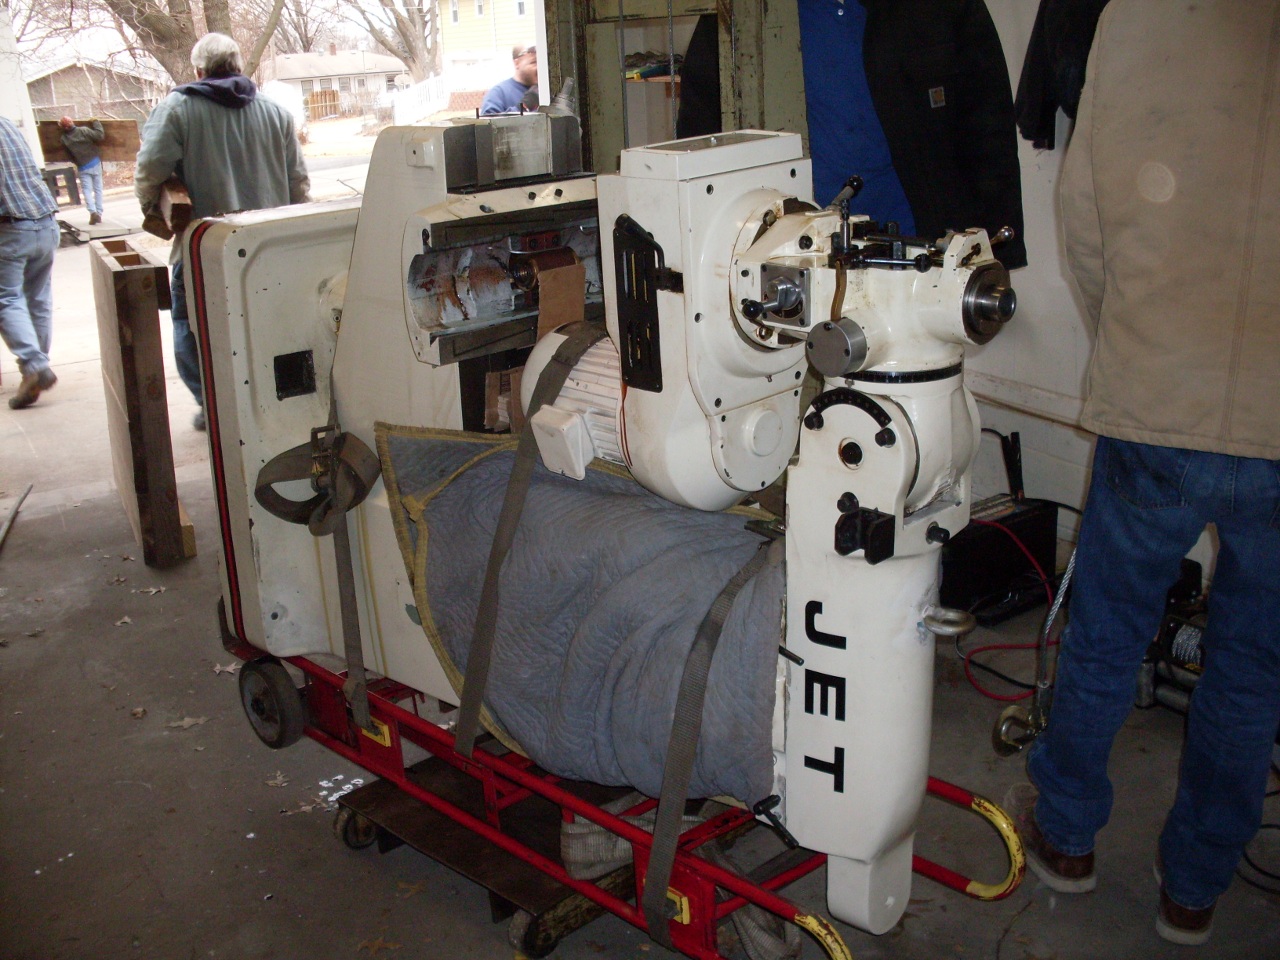
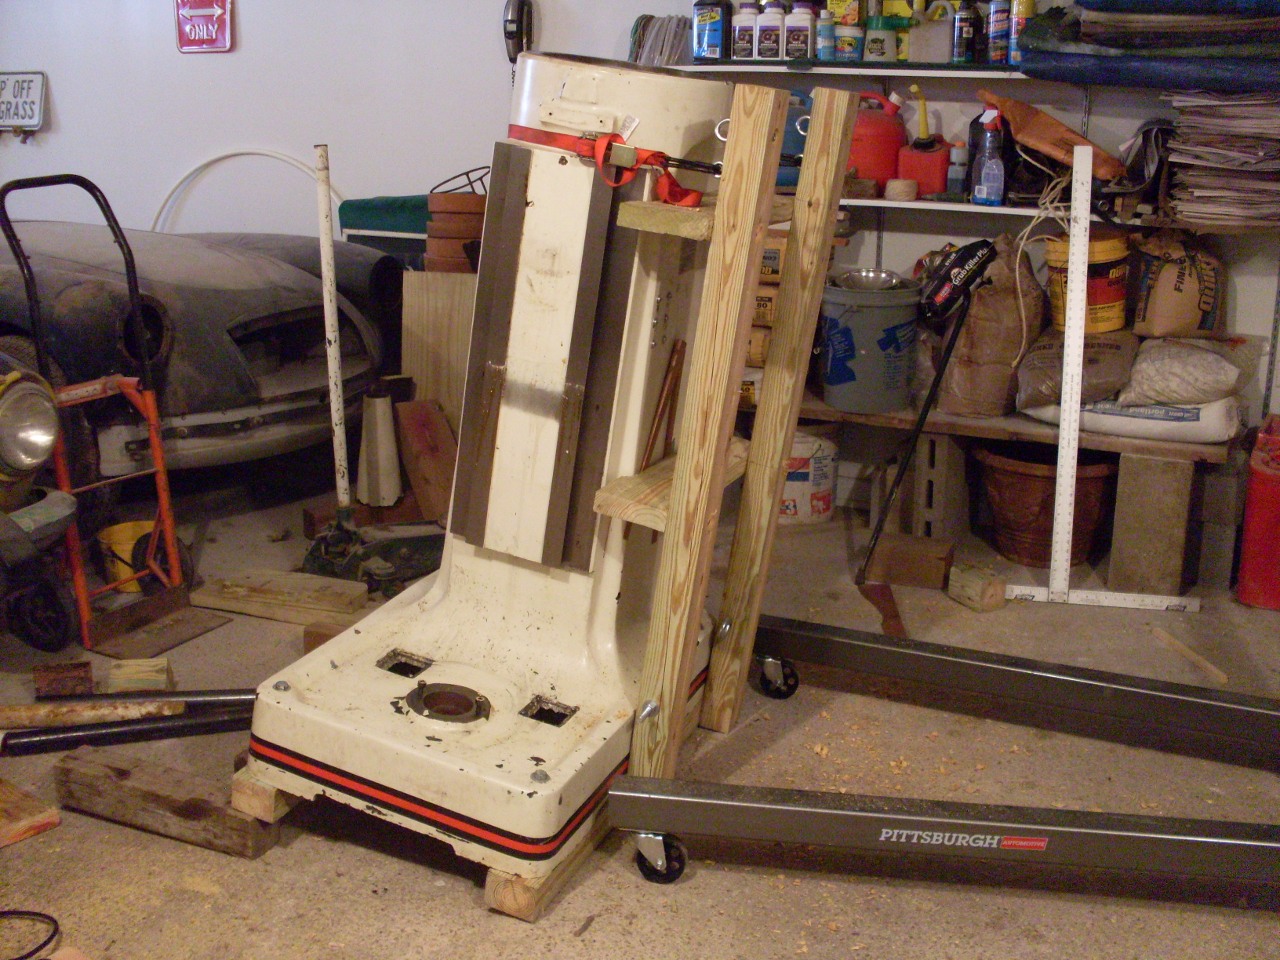
This
bad boy weighs close to 800 pounds. I fashioned a custom sled to
it before I tipped it on its side. It had to go down the stairs
on its side because of the limited room at the bottom. The shape of the column base was the reason that the tracks on the stairs were offset to one side.
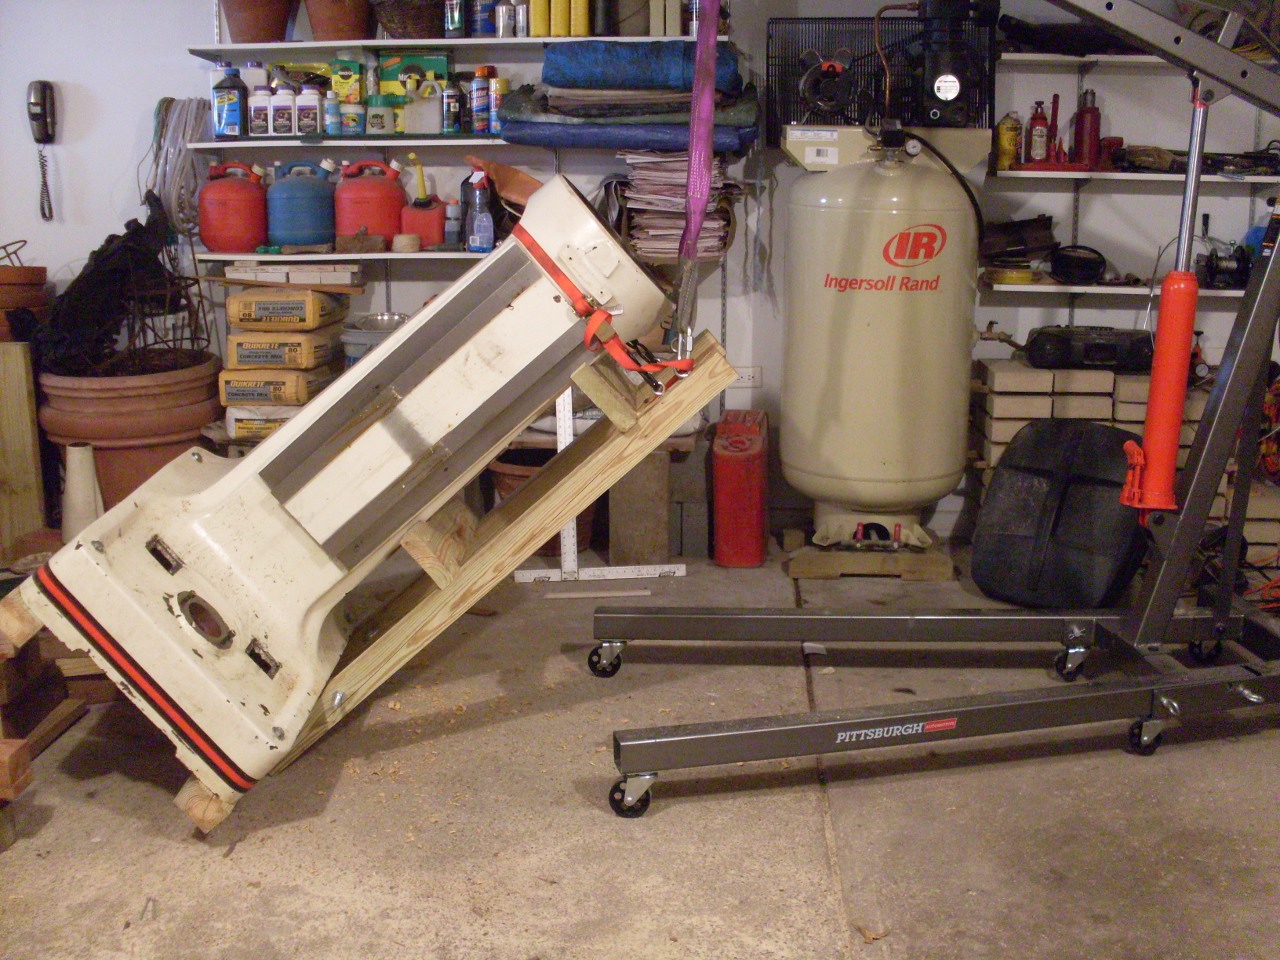
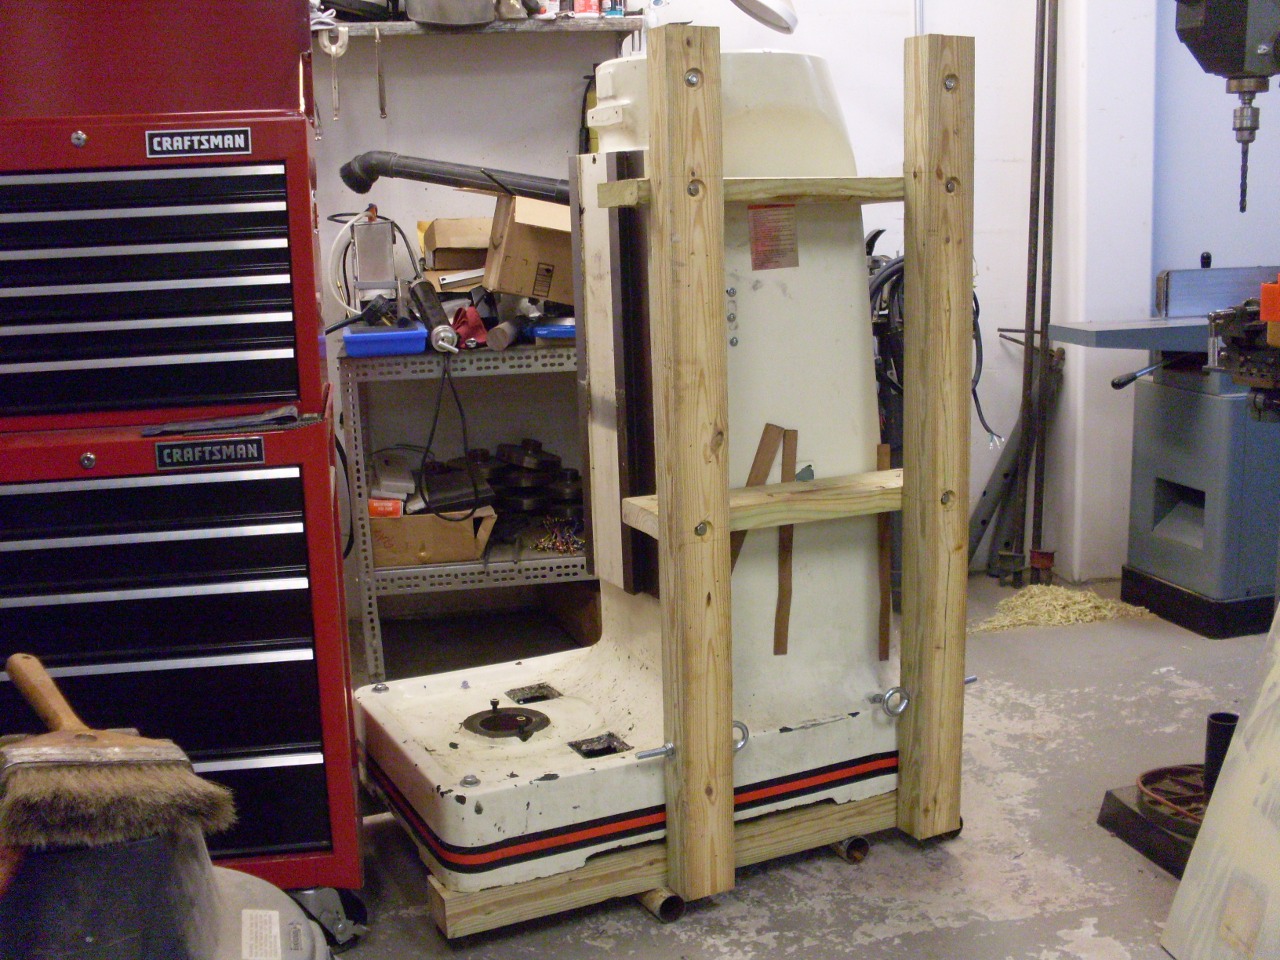
I
don't have pictures of the column coming down the stairs because,
frankly, I was a little busy, but here it is in the shop. I was
able to maneuver it around the shop by using pipes under the 4x4s
under the base.
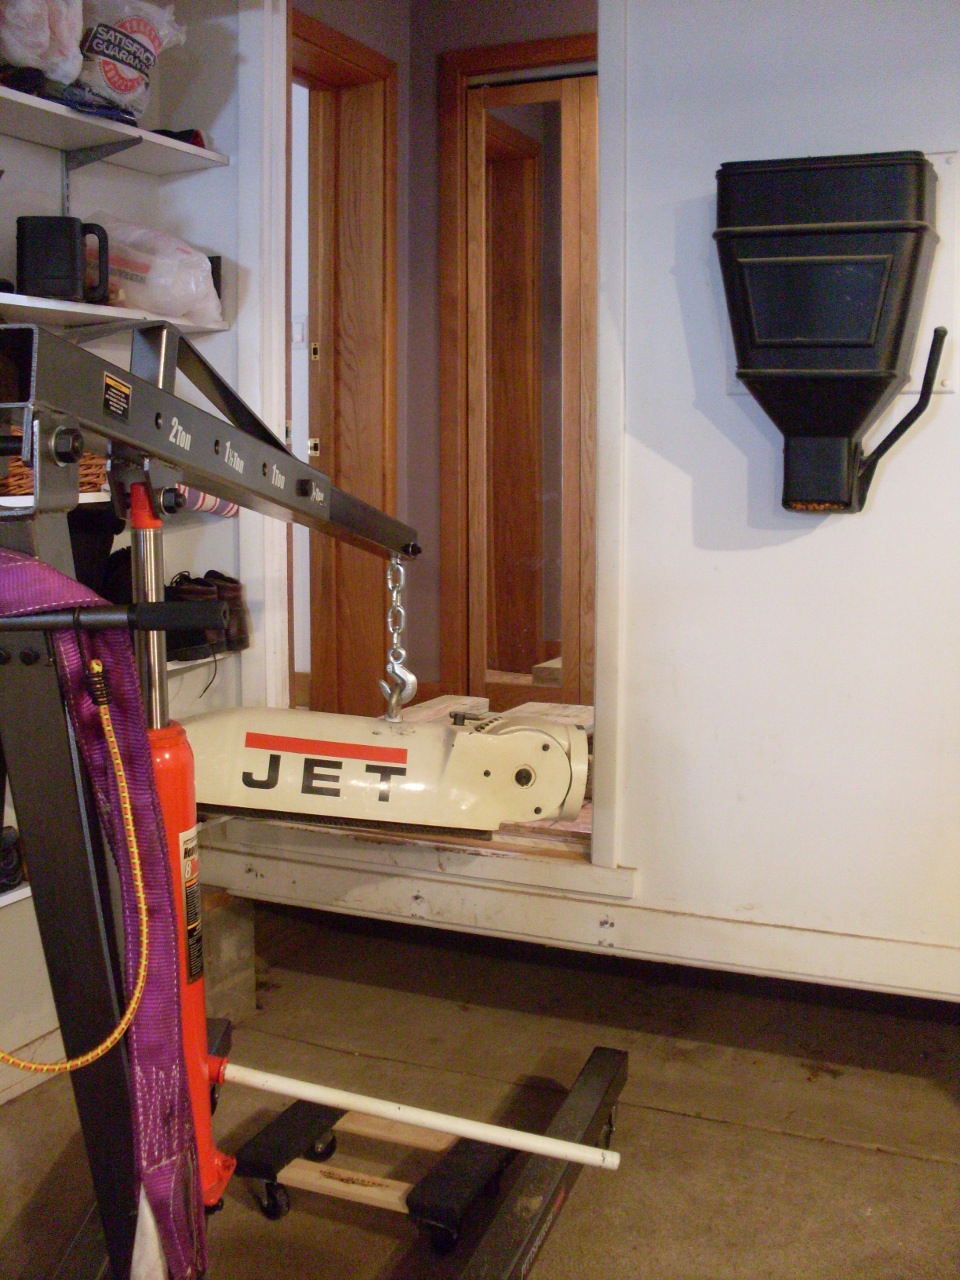
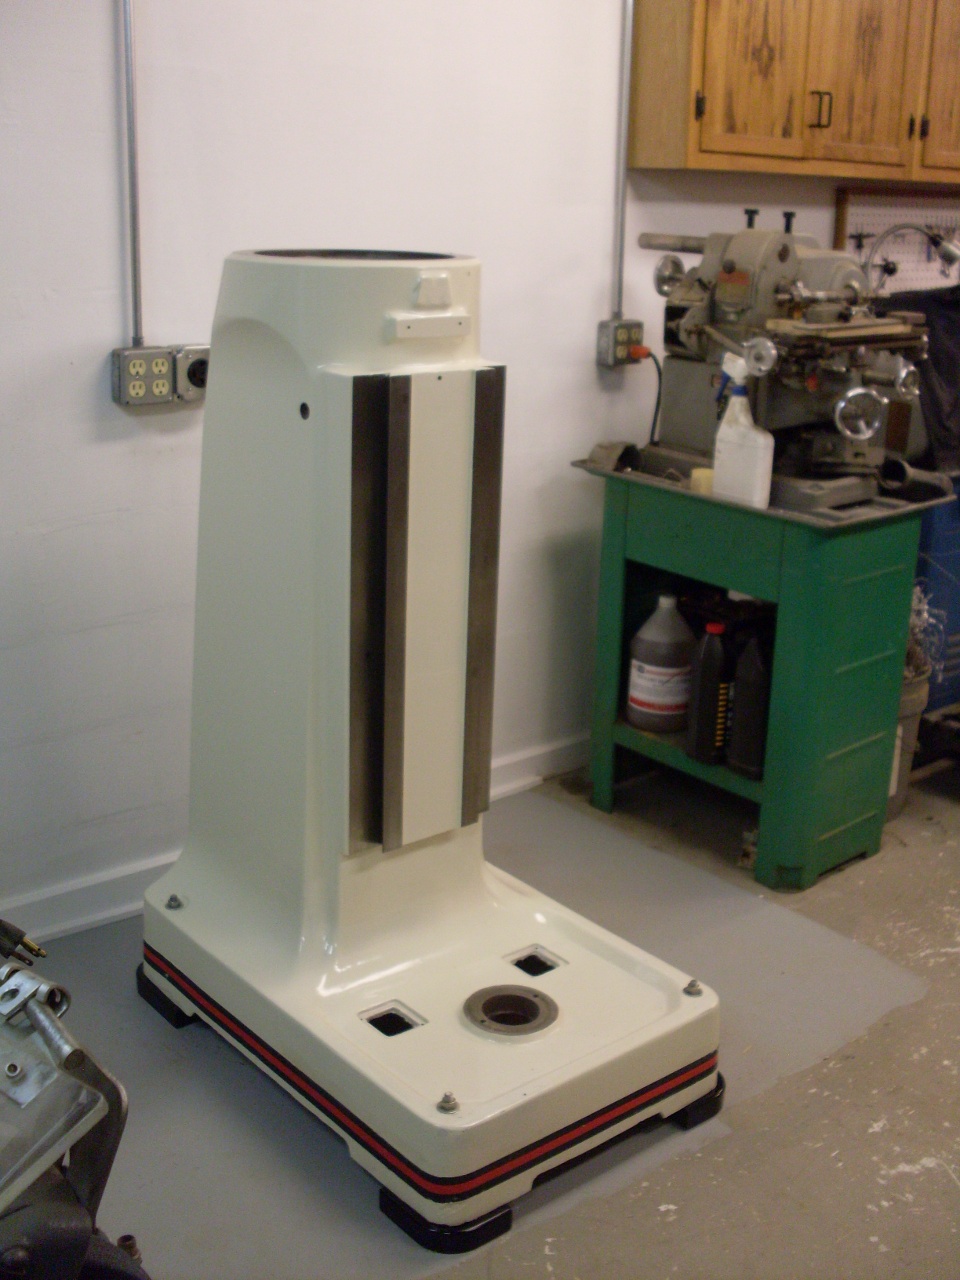
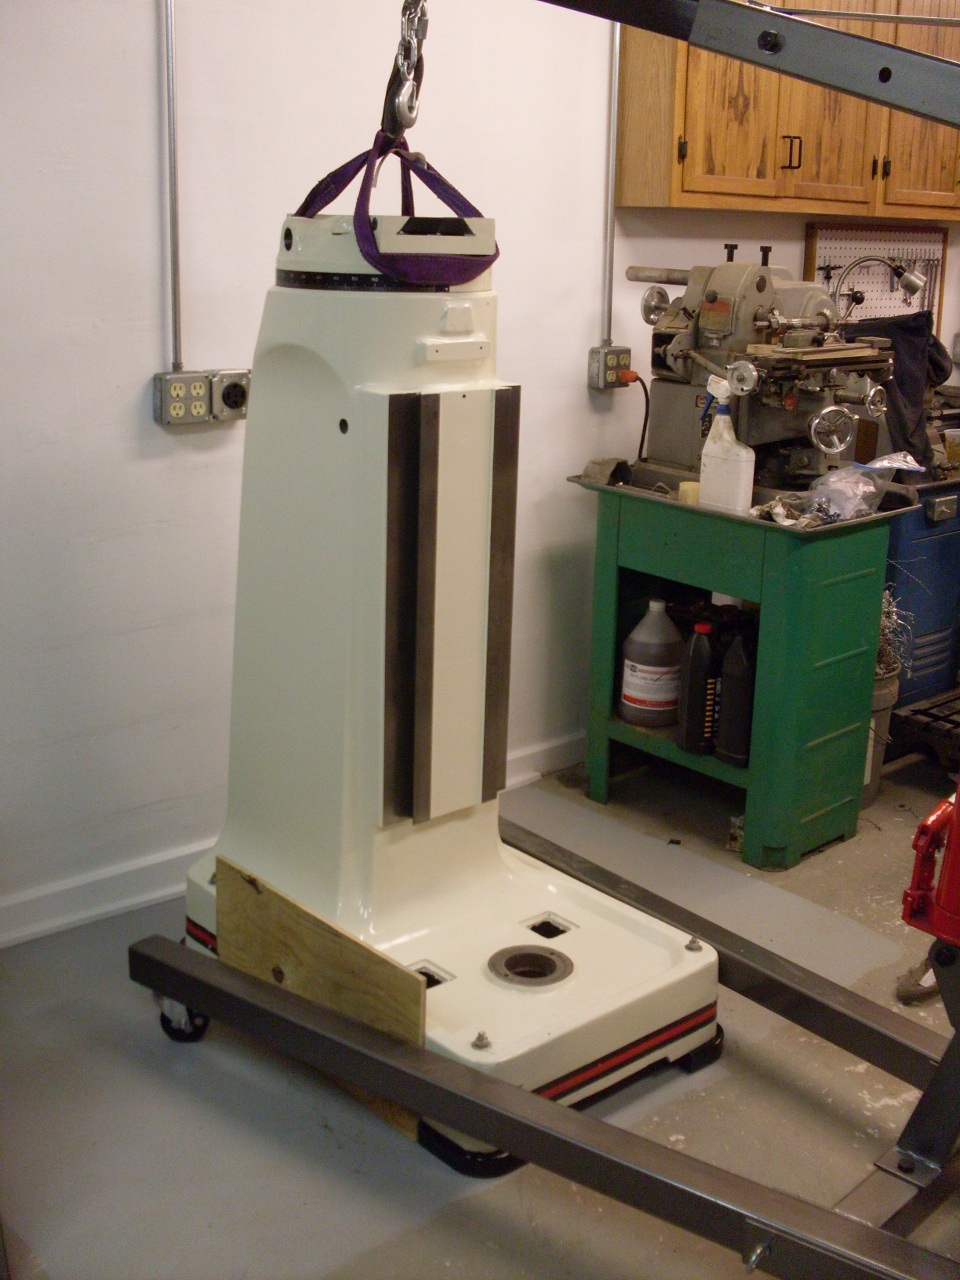
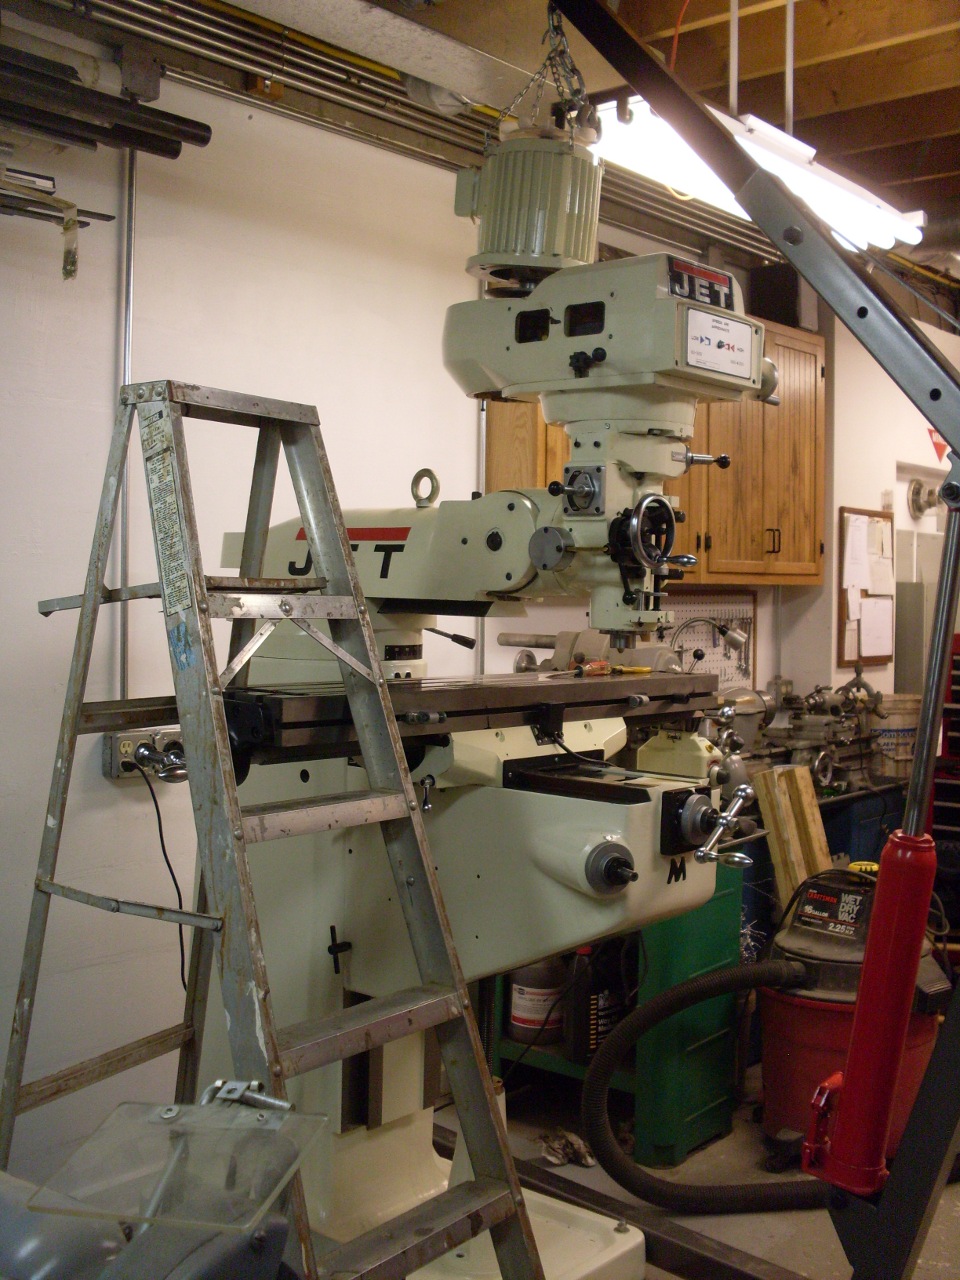
After
fixing some dings and repainting the base, I moved it to the place I'd
previously prepared, complete with a new dedicated 220 V circuit. I
had a heckofatime with incompatibility between the new paint and
the filler that Jet used on the castings on this machine.
Anywhere the filler was exposed, the urethane paint would not
dry. Even a conventional primer didn't help. I finally made
it work by spot priming with Kilz, a product mainly used to keep
staining from showing through new paint.
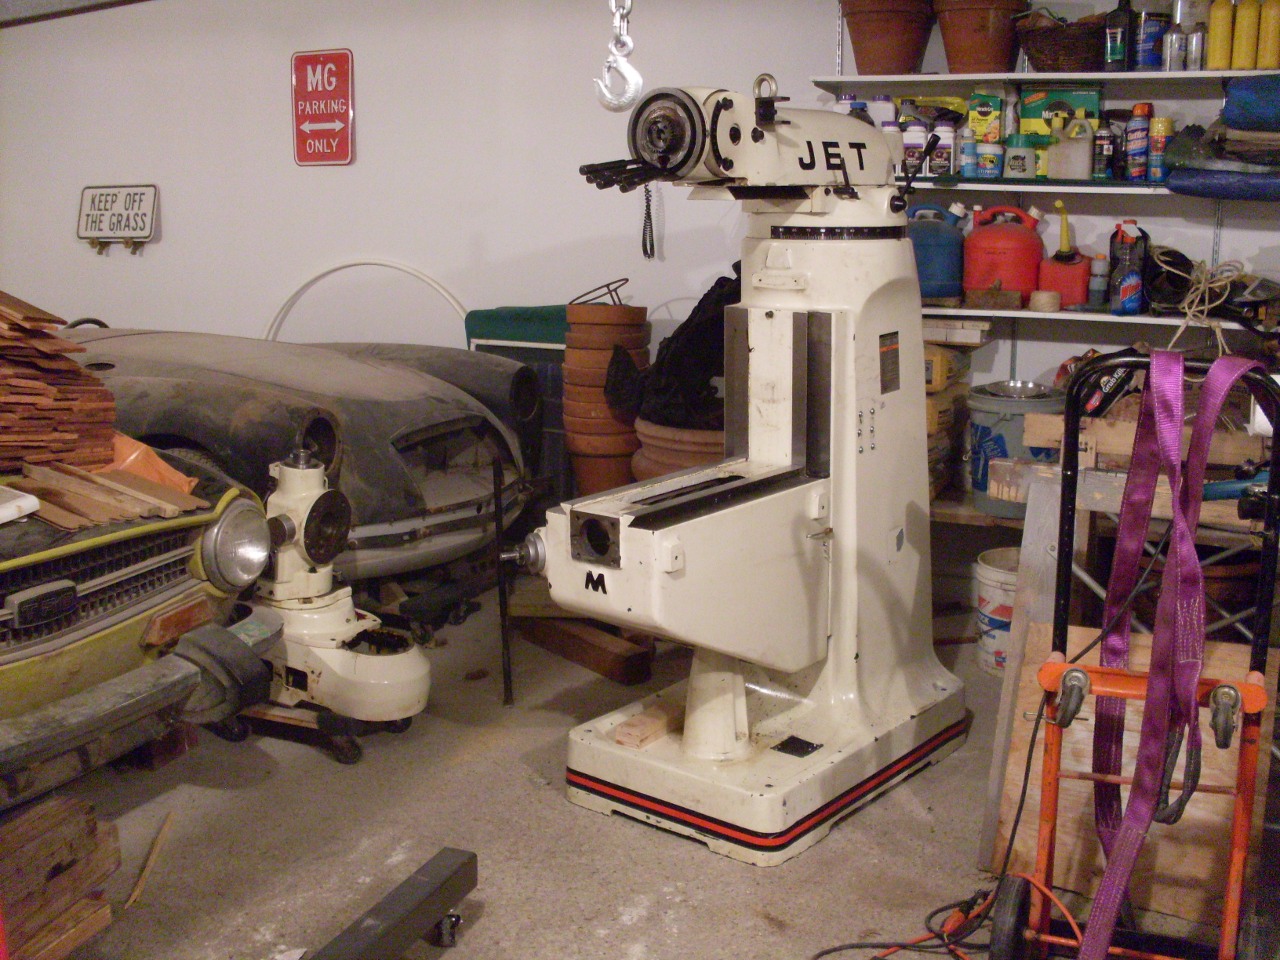
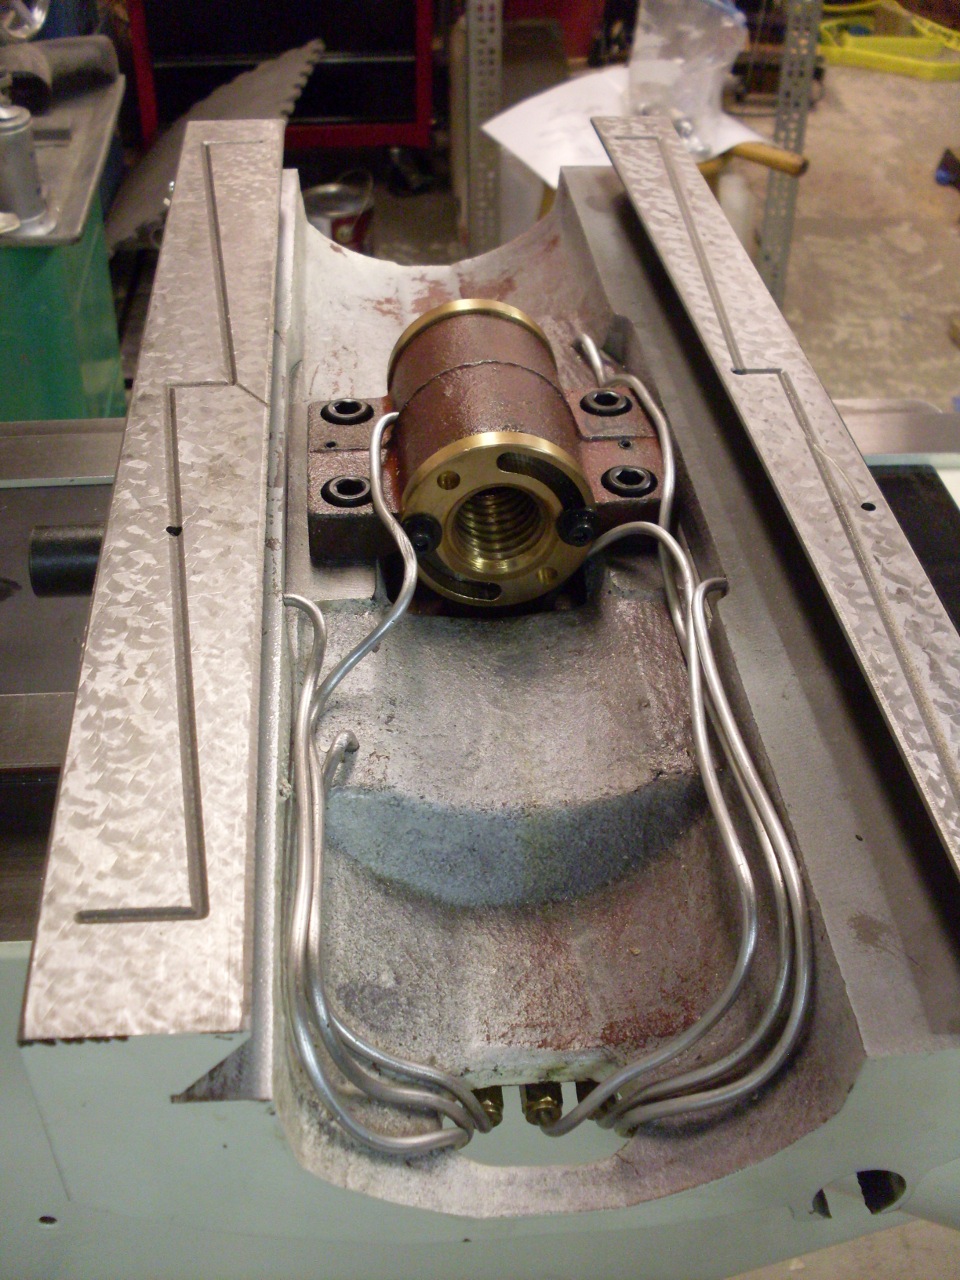
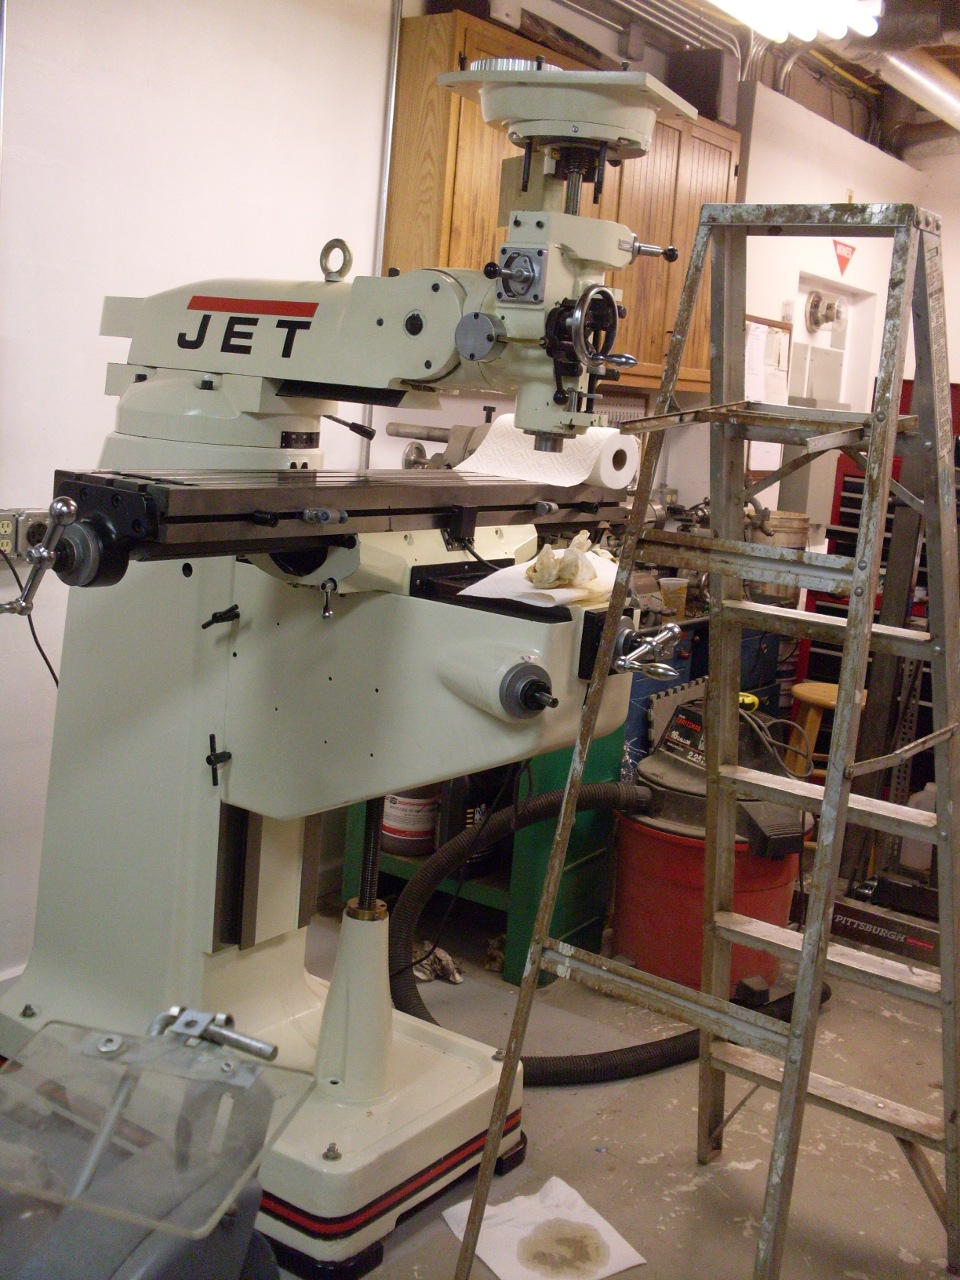
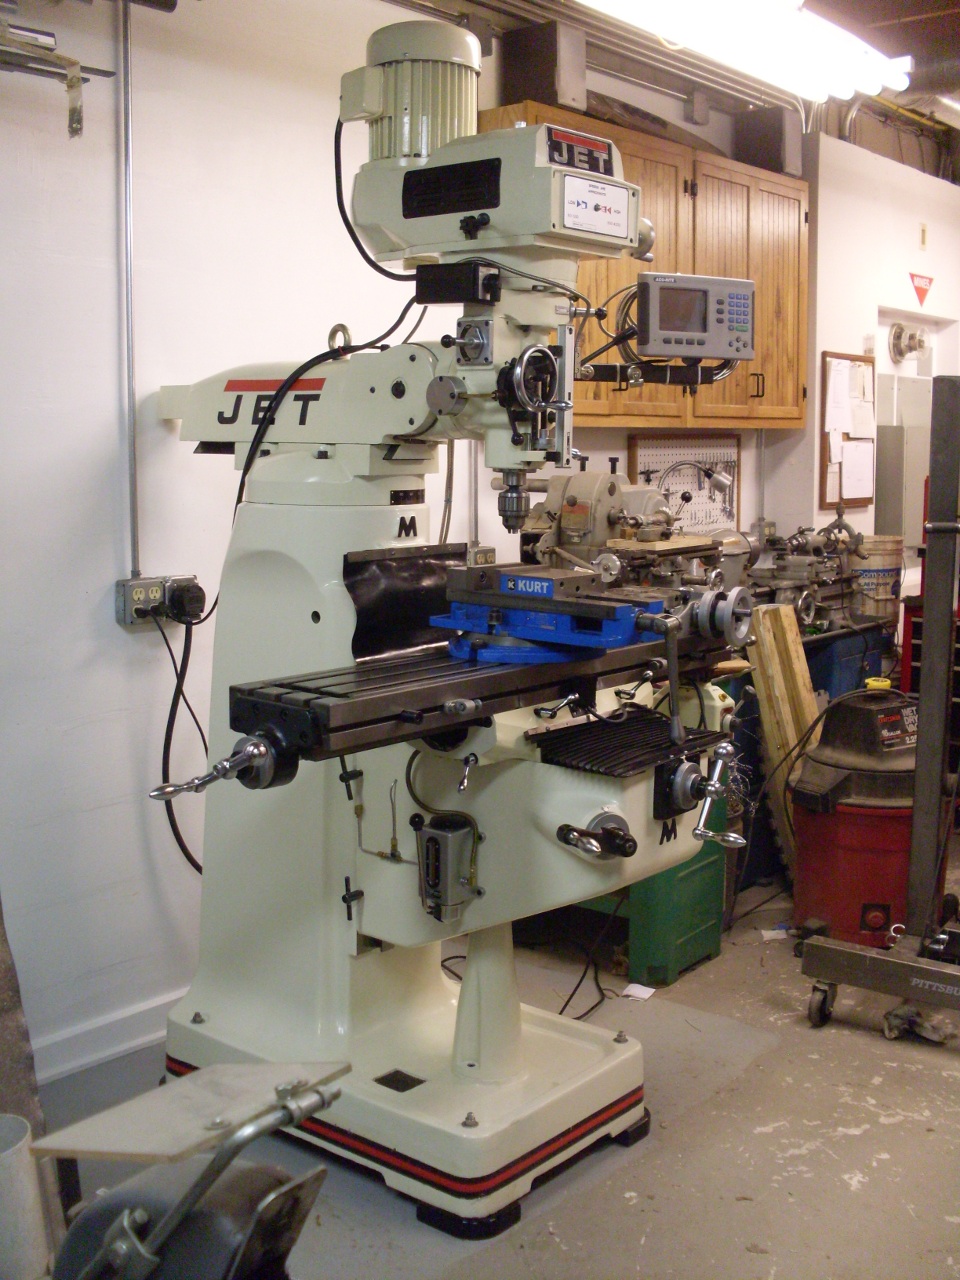
Reassembly was pretty much a reverse of the disassembly process:
The saddle has the feed nuts in it, and all of the one-shot lube lines to reconnect.
The table is another pretty substantial hunk of steel, and weighs well over 300 pounds. It has to slide on from one end.

I mounted the spindle assembly by balancing it on the table and using the table and knee feeds to position it.
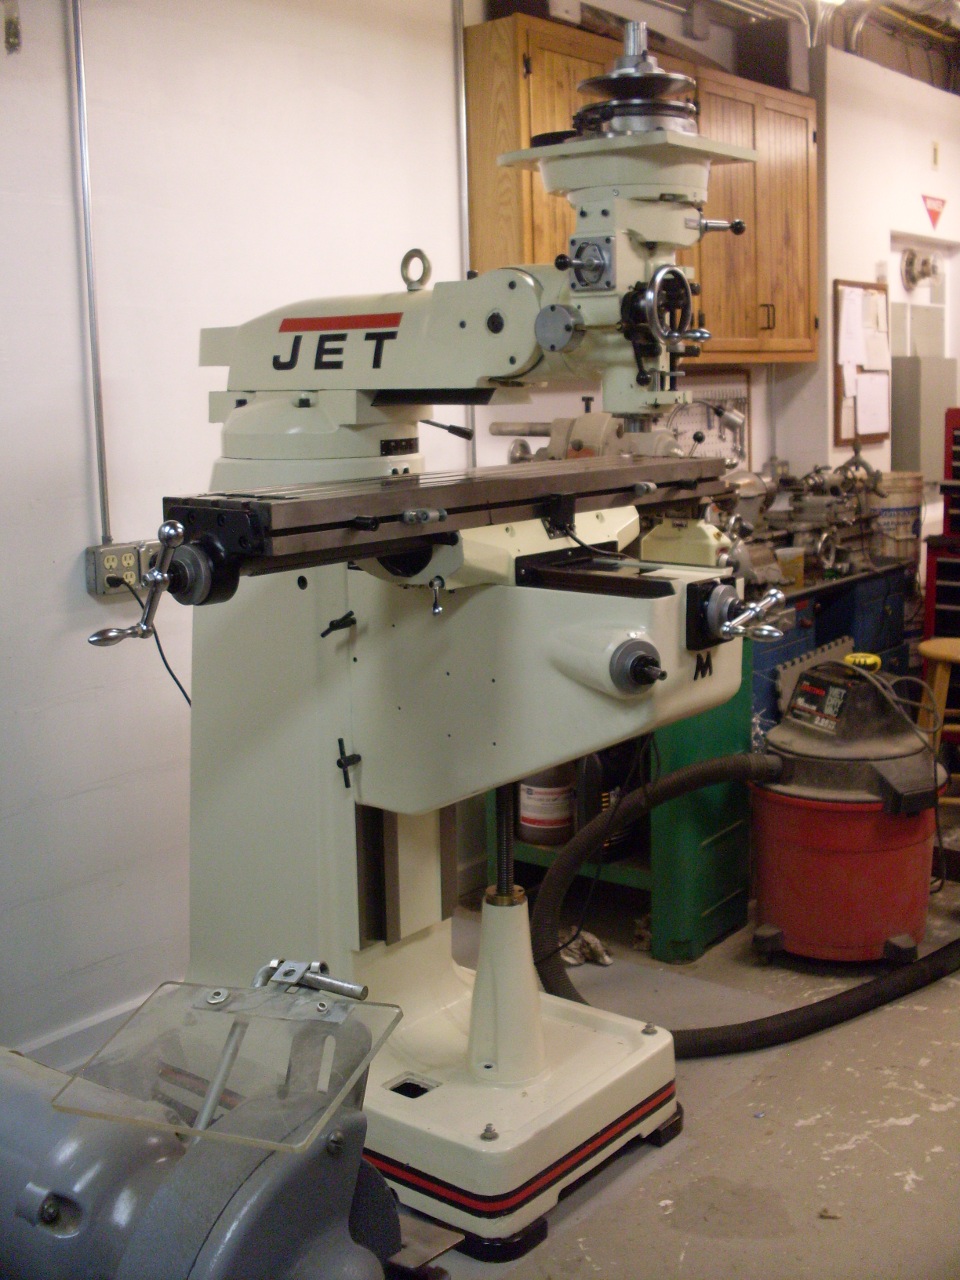
This
manchine was new enough, and in such good shape, that I for the most
part didn't really have to do anything to it or disassemble it any
further than necessary to move it. The exception was where grease
had gotten where it shouldn't be. This necessitated disassembling
the parts of the head that included the Vari-Speed and back gear
assemblies.. Here is the back gear cleaned up and repacked with
fresh grease.

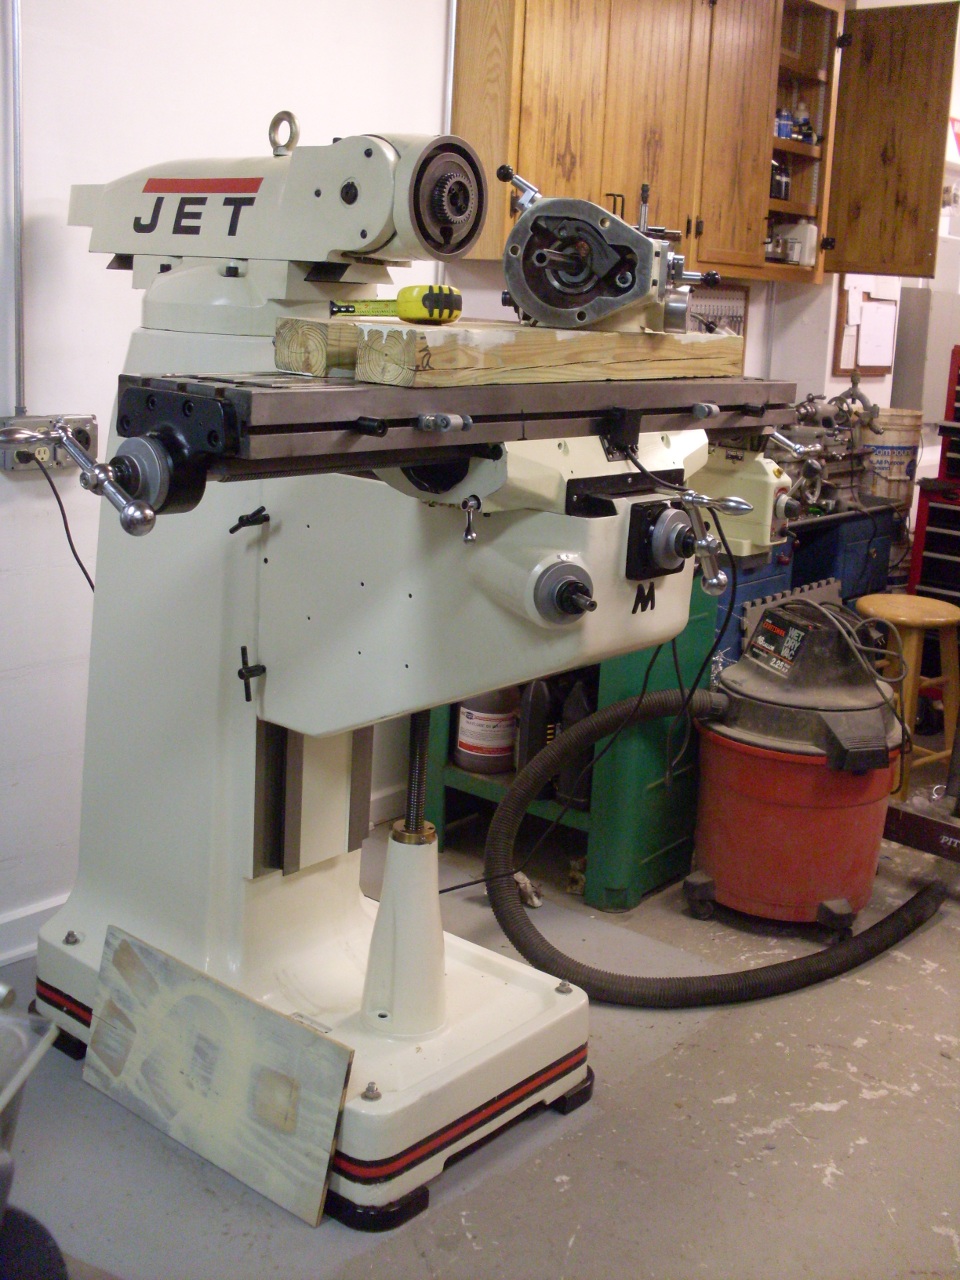
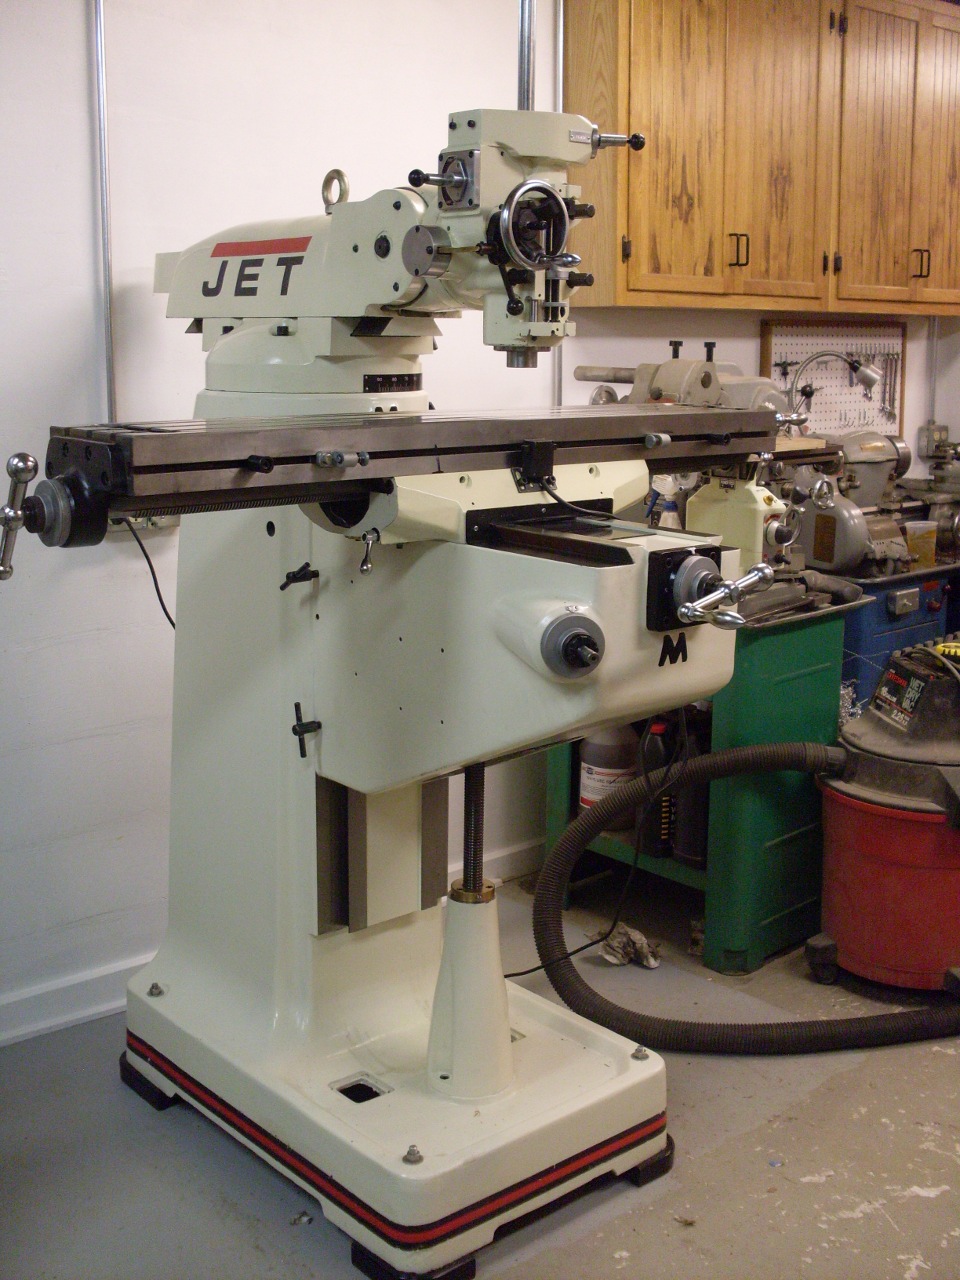
The rest of the head went on in order.
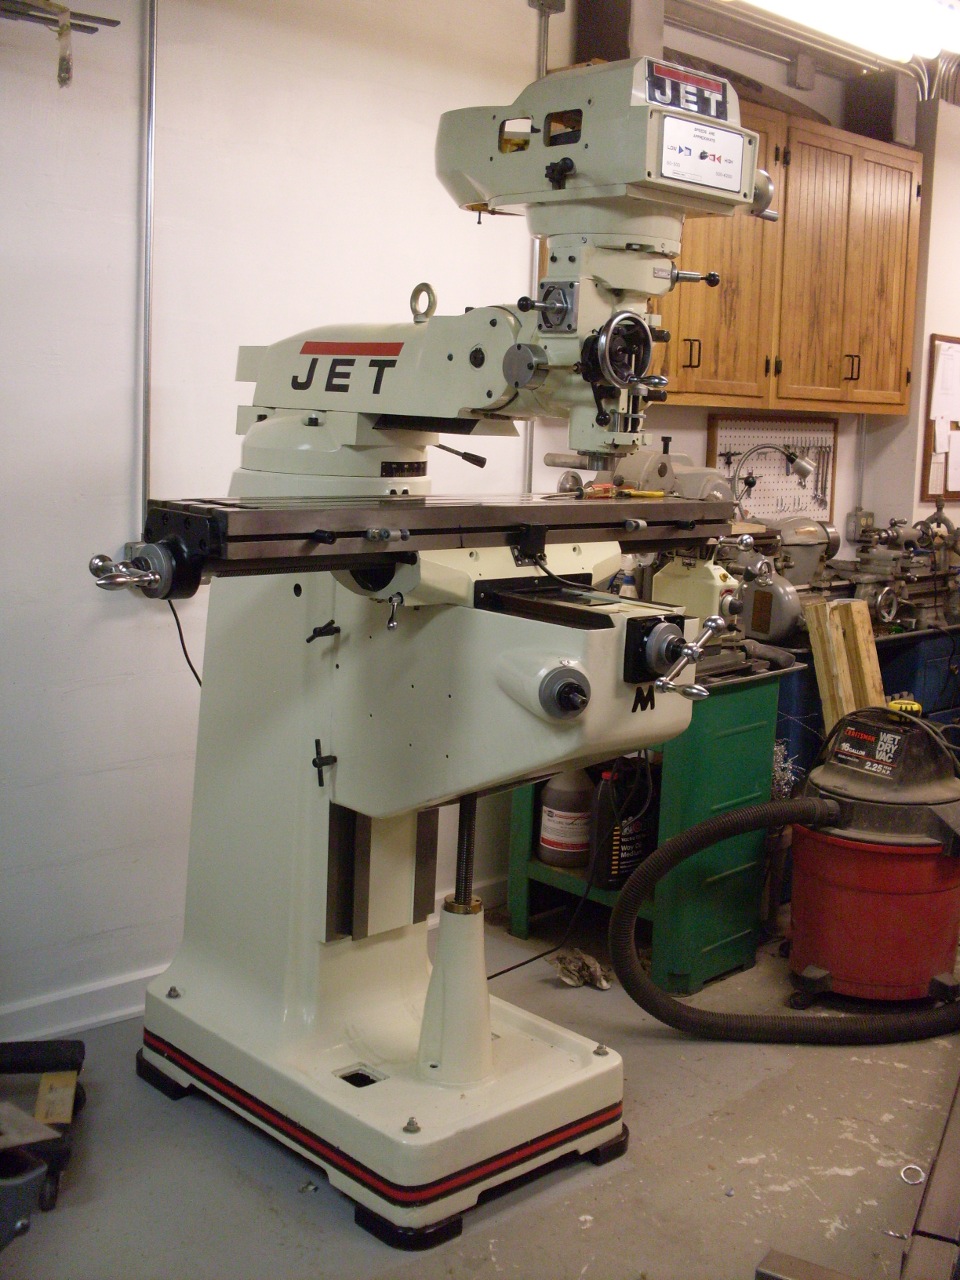
Another couple of days, and I got it wired, and the DRO, scales, lube system, X power feed, and the vise mounted. Evereything seems to be workng fine. Next step will be to dial everything in and start making some chips.
Send comments to: elhollin1@yahoo.com