To my other MGA pages
May 29, 2025
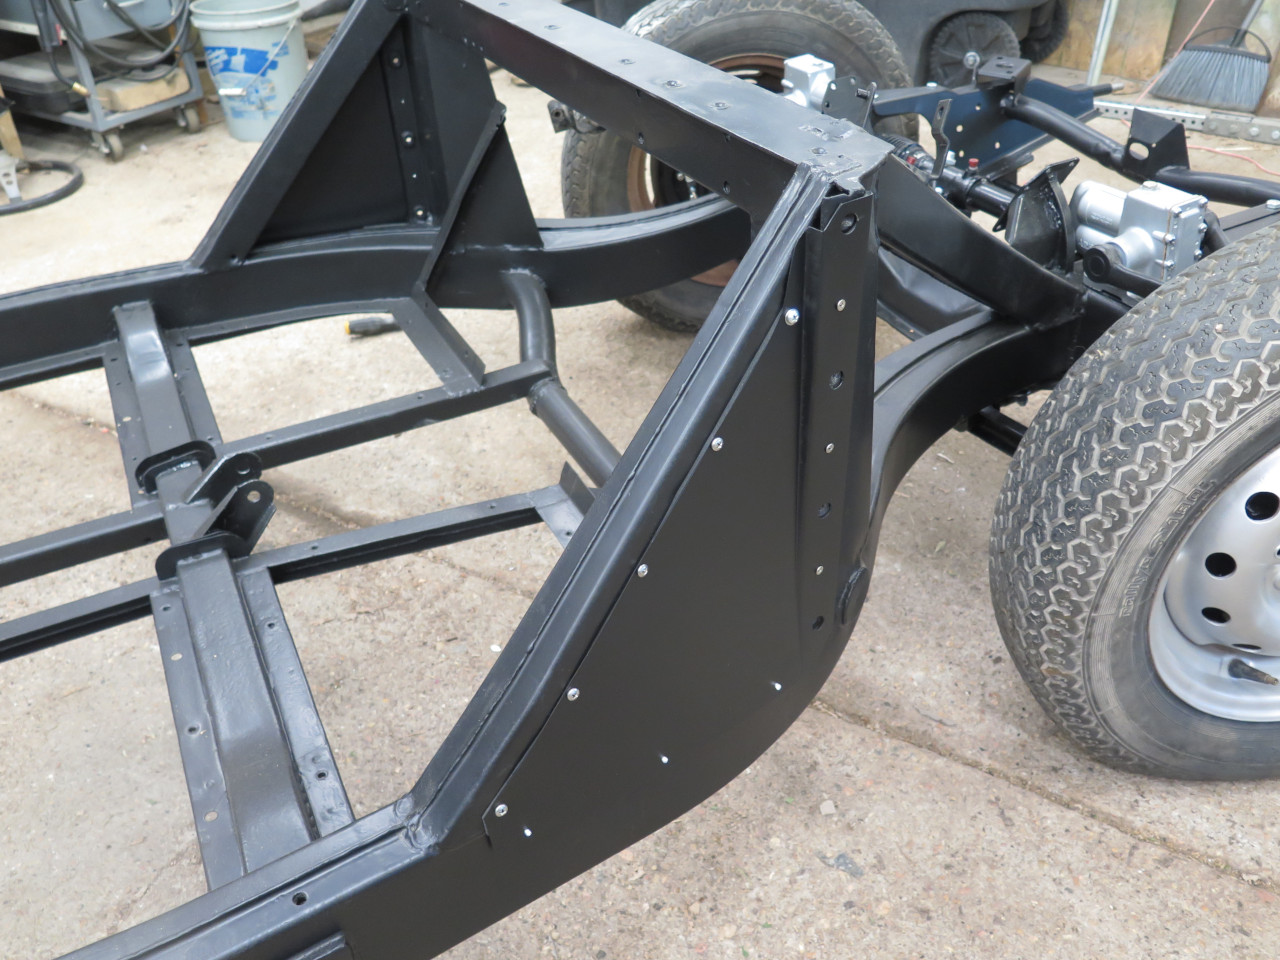
Frame Closure Panels
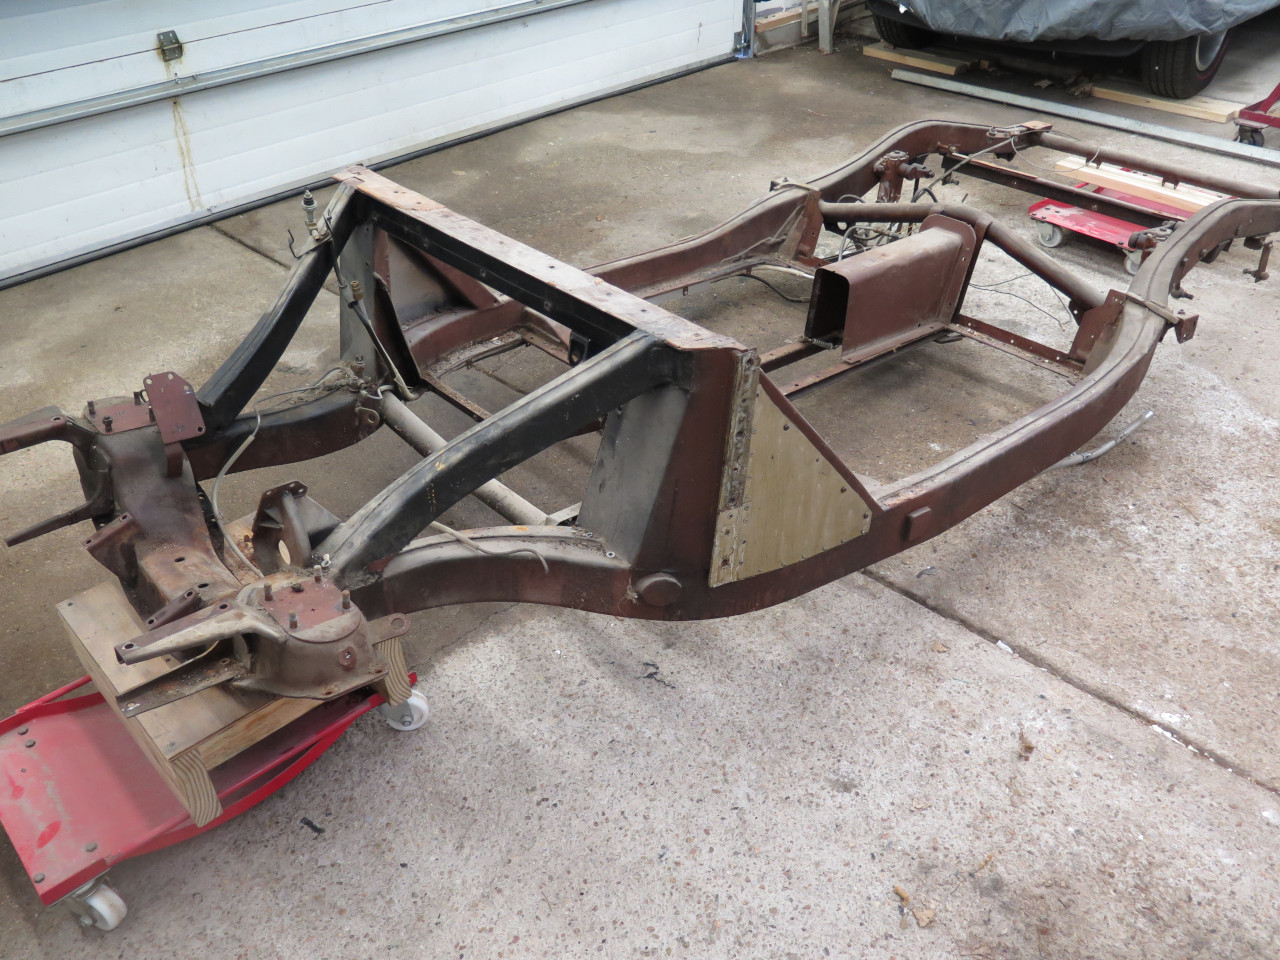
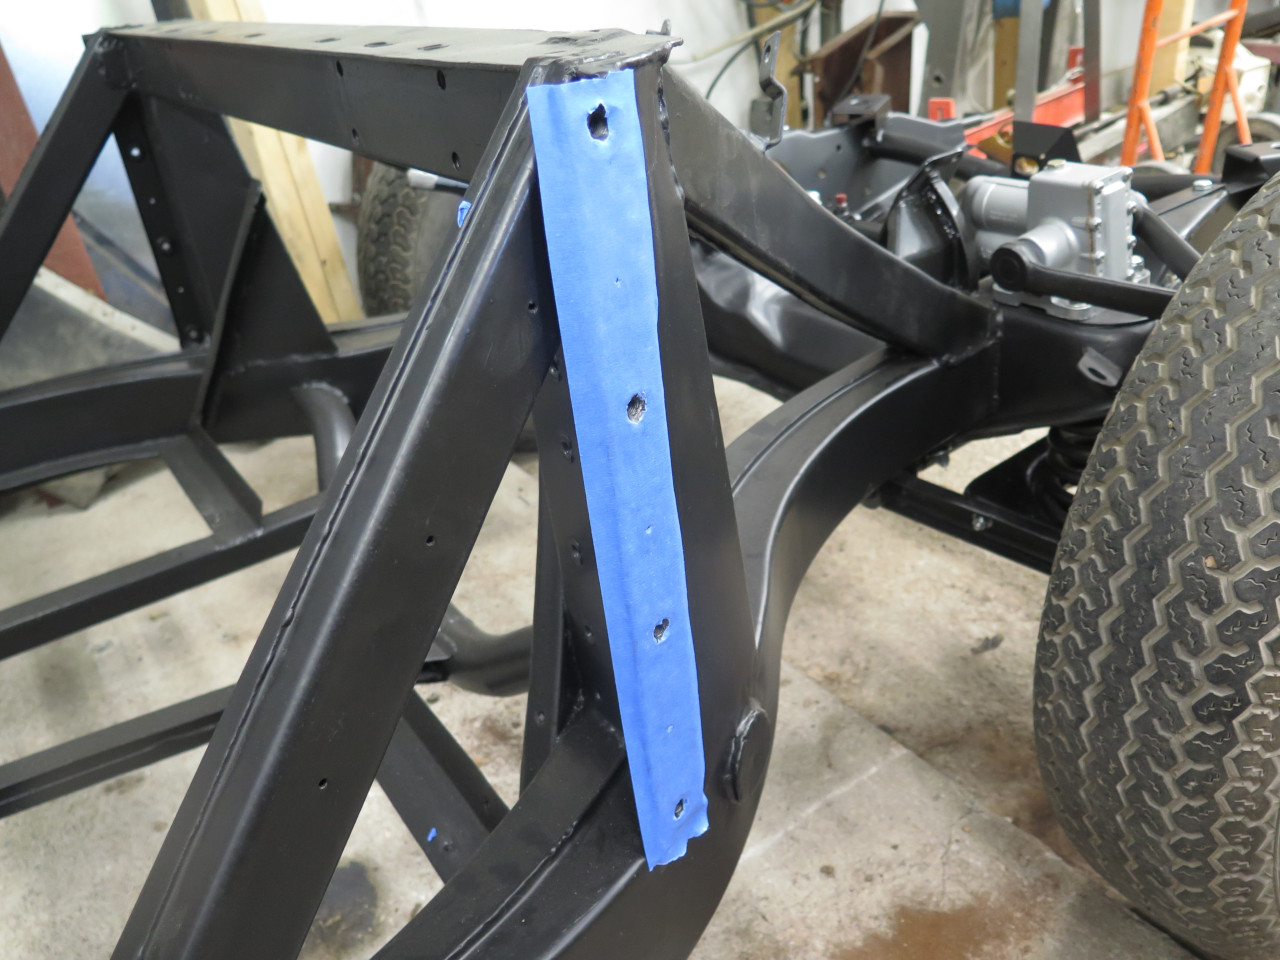
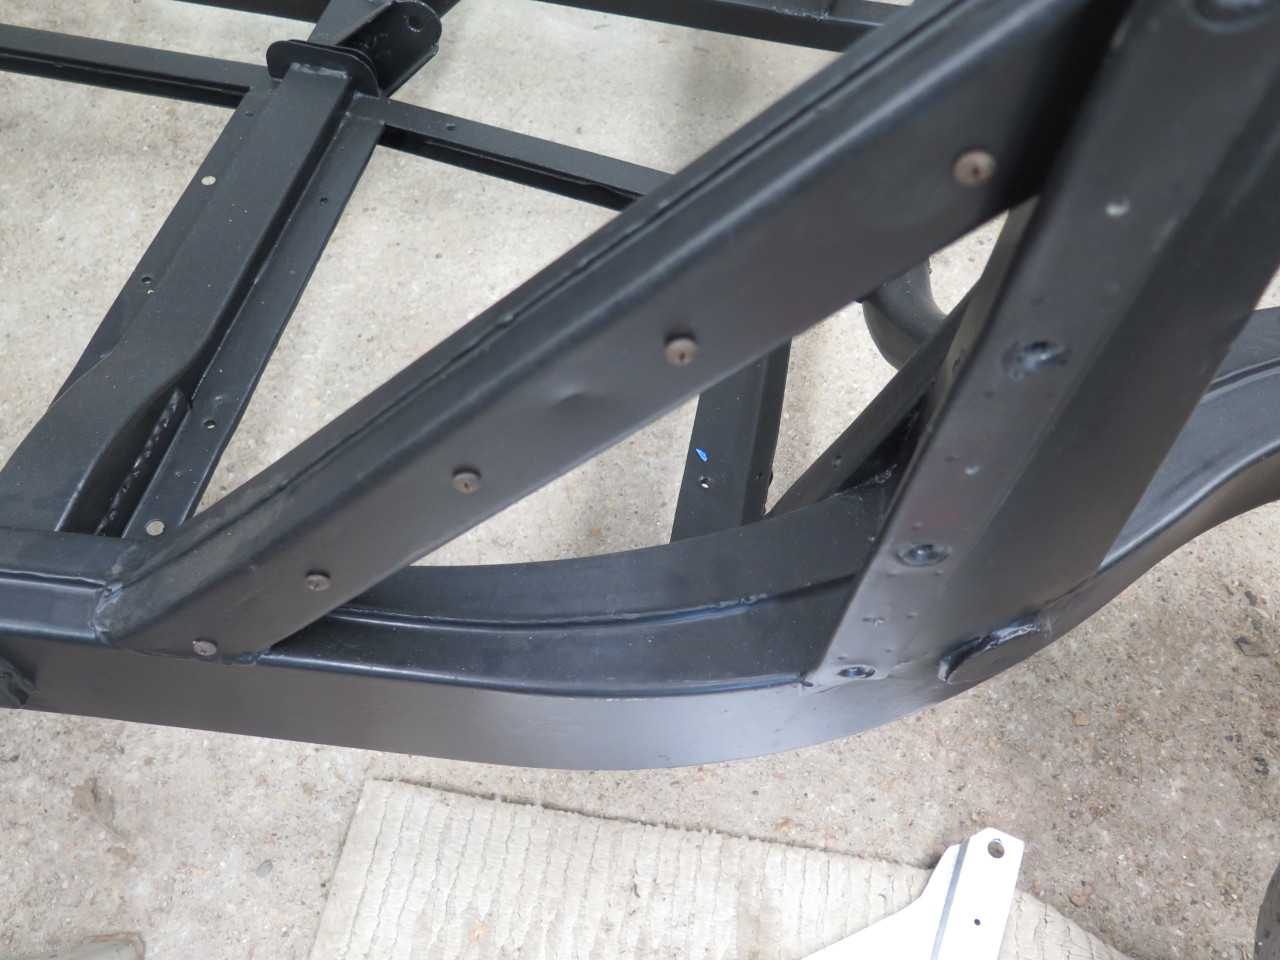
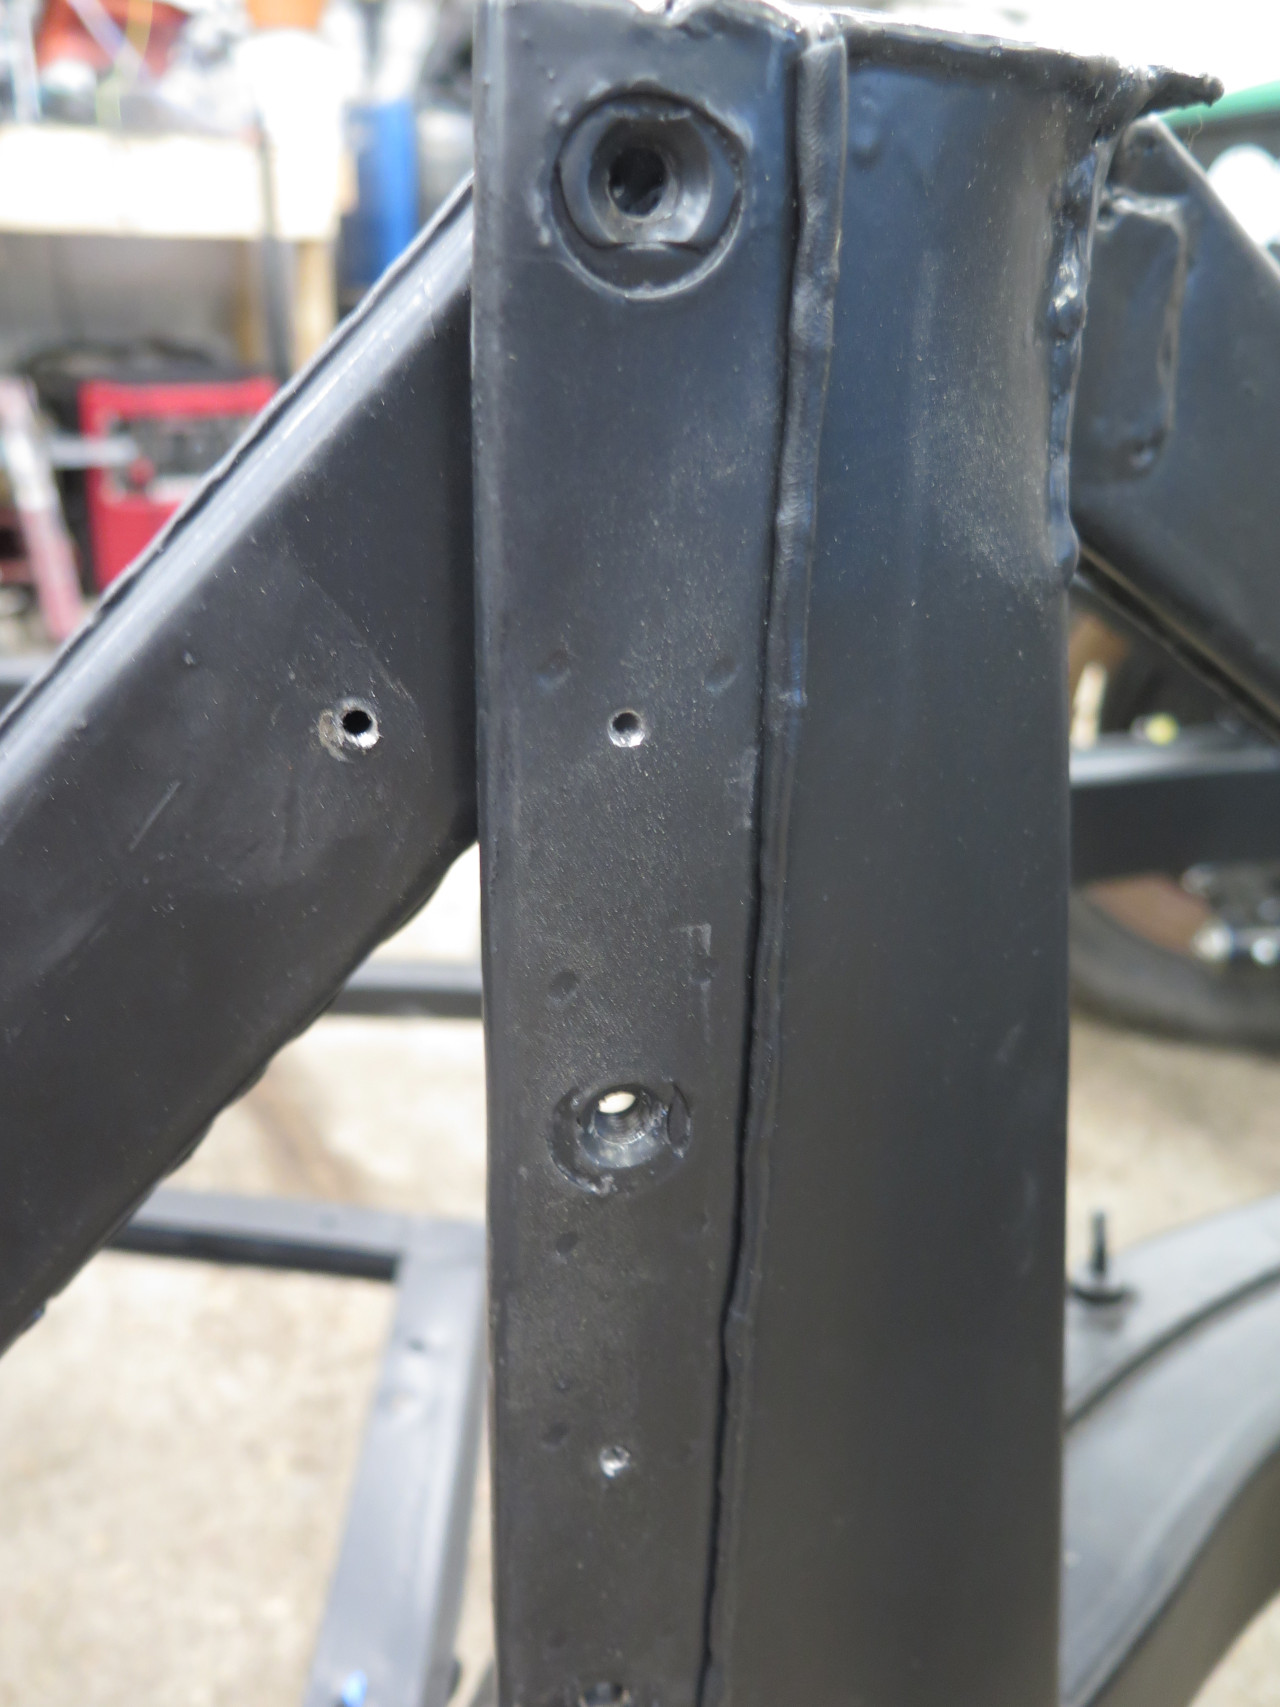
The MGA frame includes a beefy "goal post" structure that supports the
firewall and cowl, and delineates the passenger and engine
compartments. There are heavy diagonal braces to the front and
rear of the bridge. The rear braces are actually in the passenger
compartment, and the factory provided triangular aluminum panels to
close off the space under them.
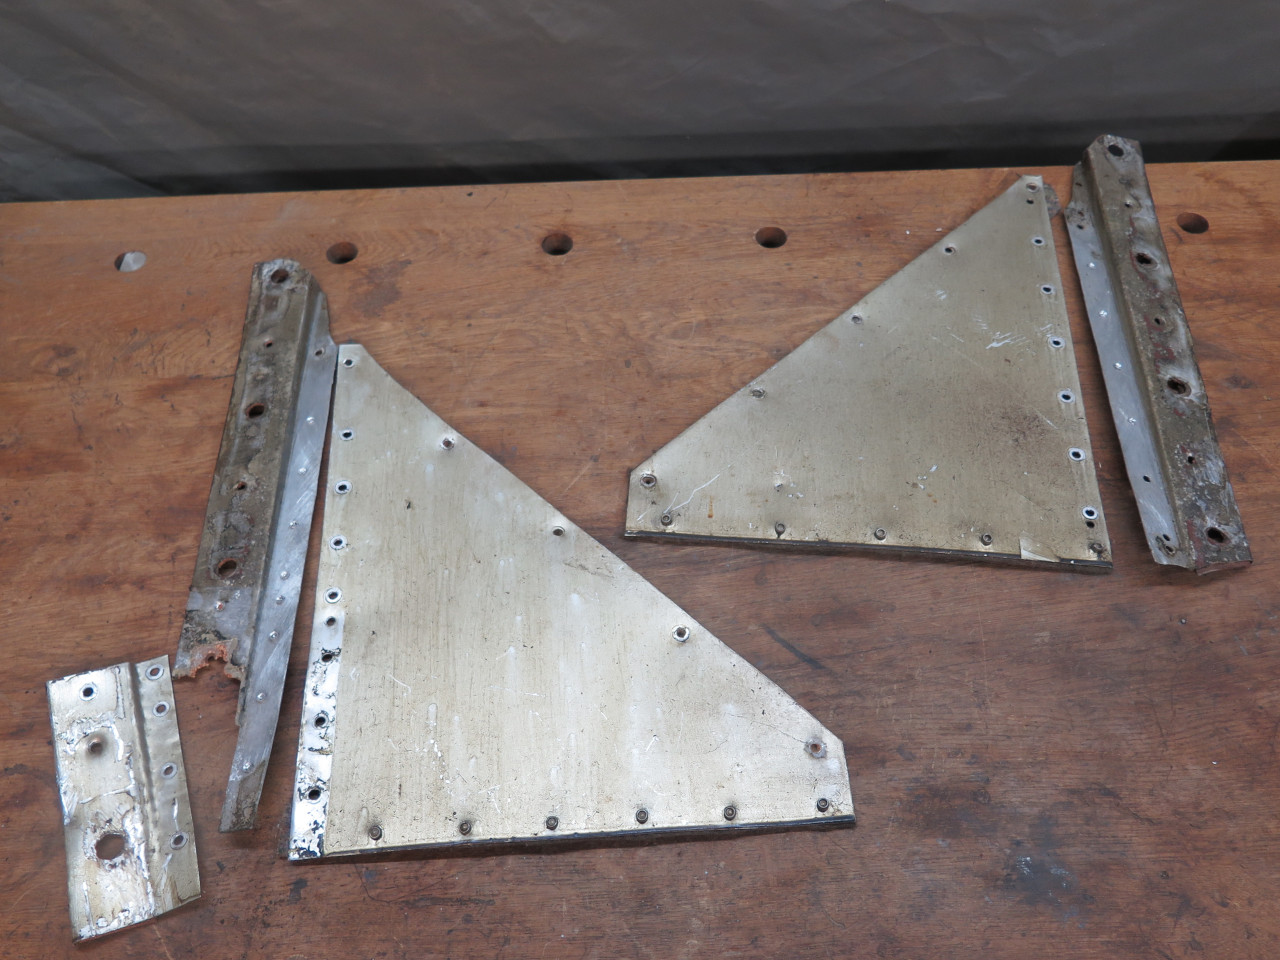
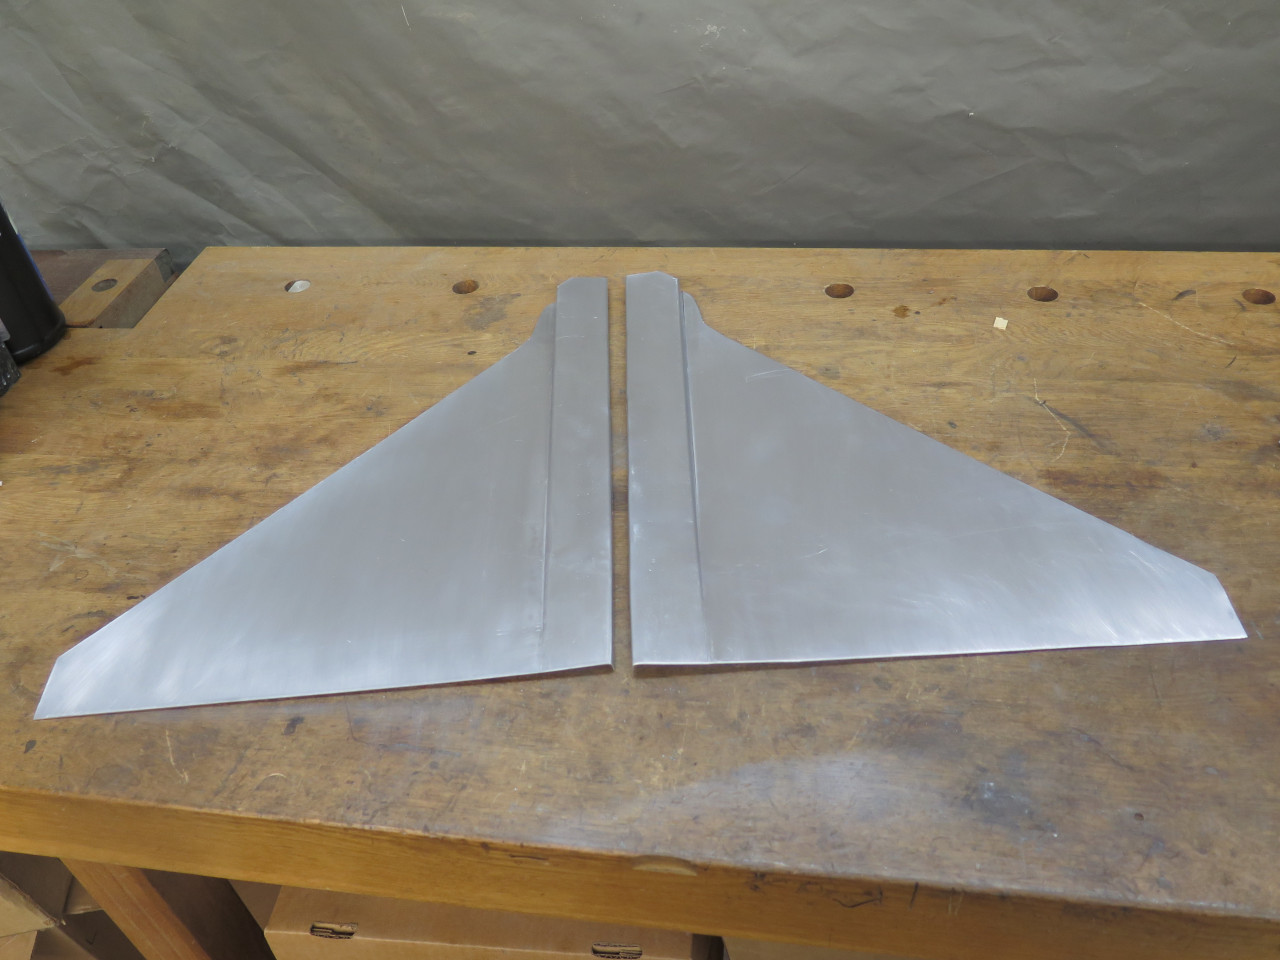
In my 70s restoration, I found these panels largely corroded away.
I was able to save most of the leading edges of the panels, but just
riveted on thin aluminum to replace the rest.
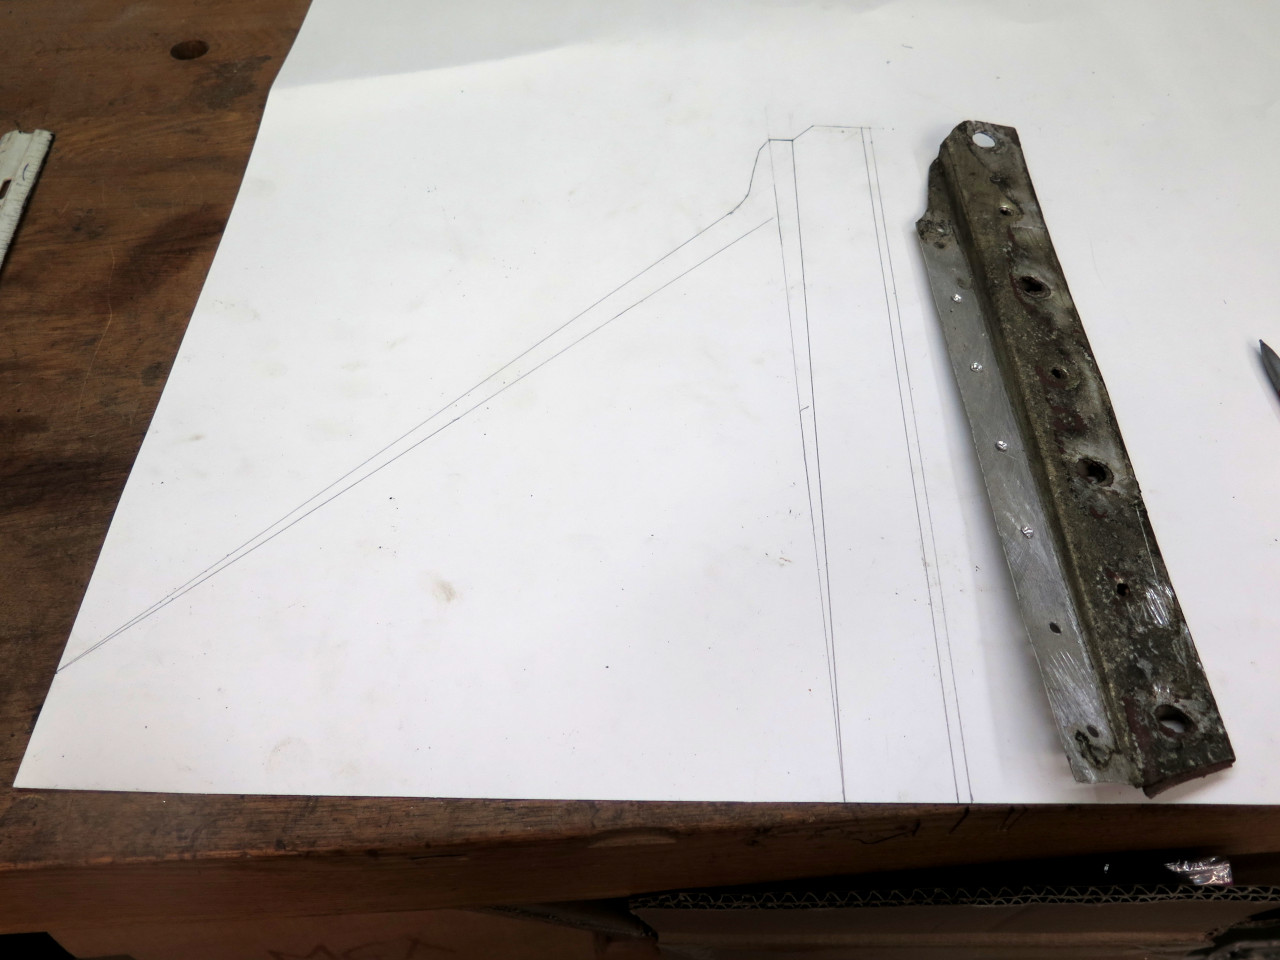
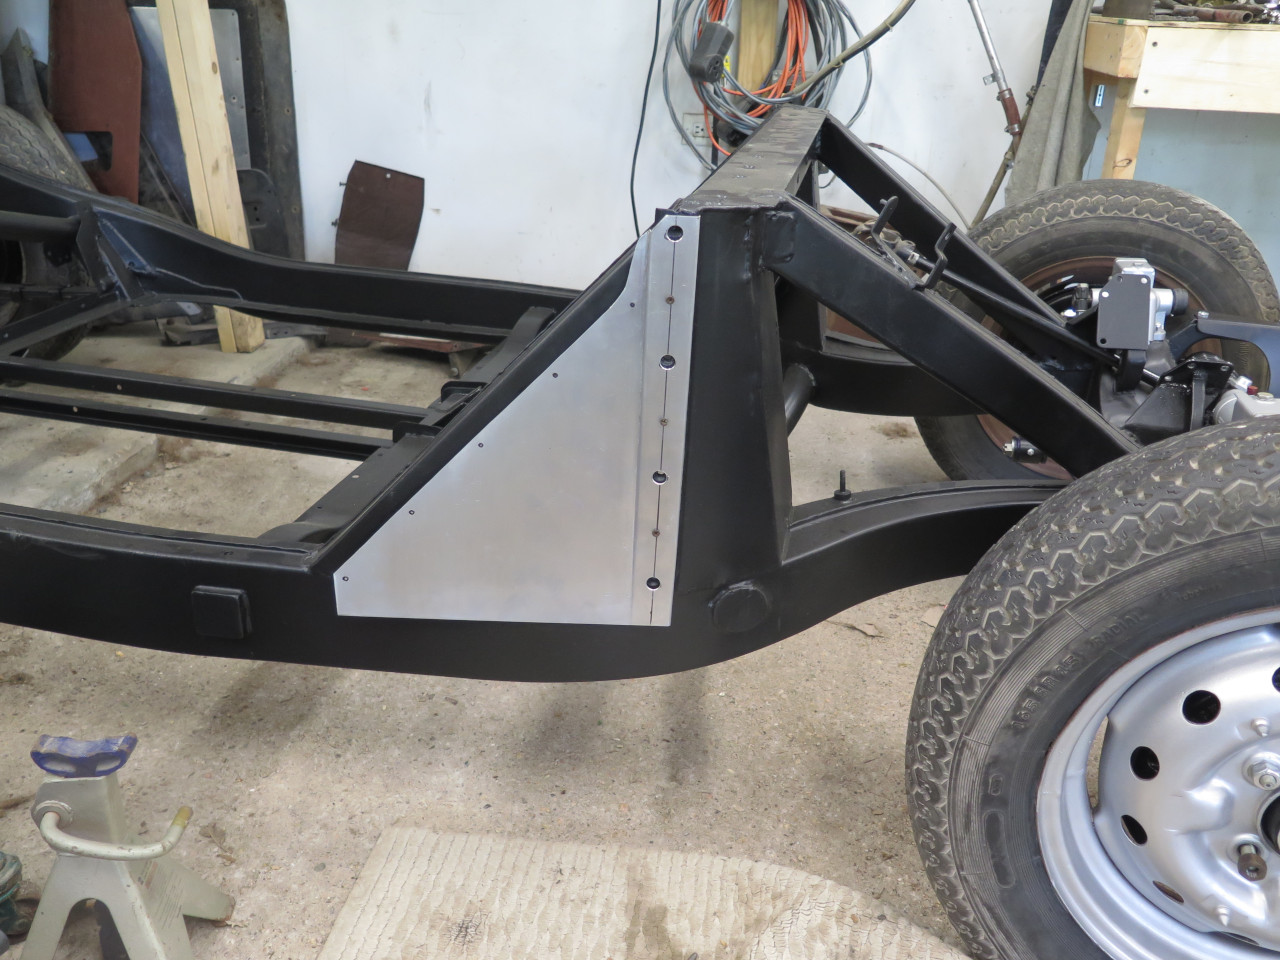
This time around, I decided to just make new panels. This isn't
exactly trivial though, because the front edges are actually formed to
partially wrap around a vertical bracket welded to the bridge upright,
and have a tapered jog.
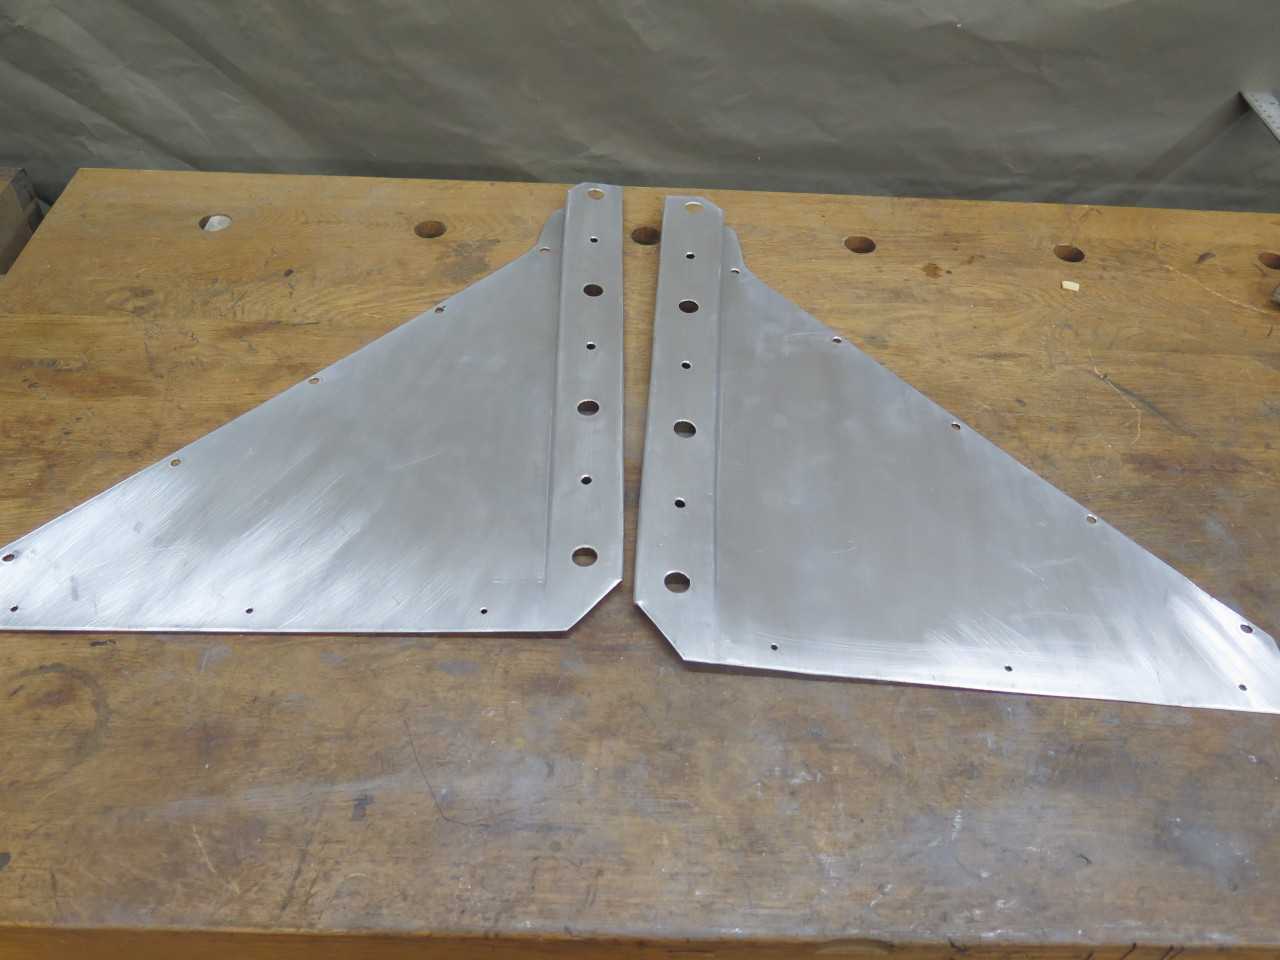
Between the remnants of the old panels and measurements from the car, I
was able to determine the necessary original size and shape. I
later found some online drawings that confirmed that I was pretty darn
close.
I made a heavy paper pattern that fit the car pretty well.
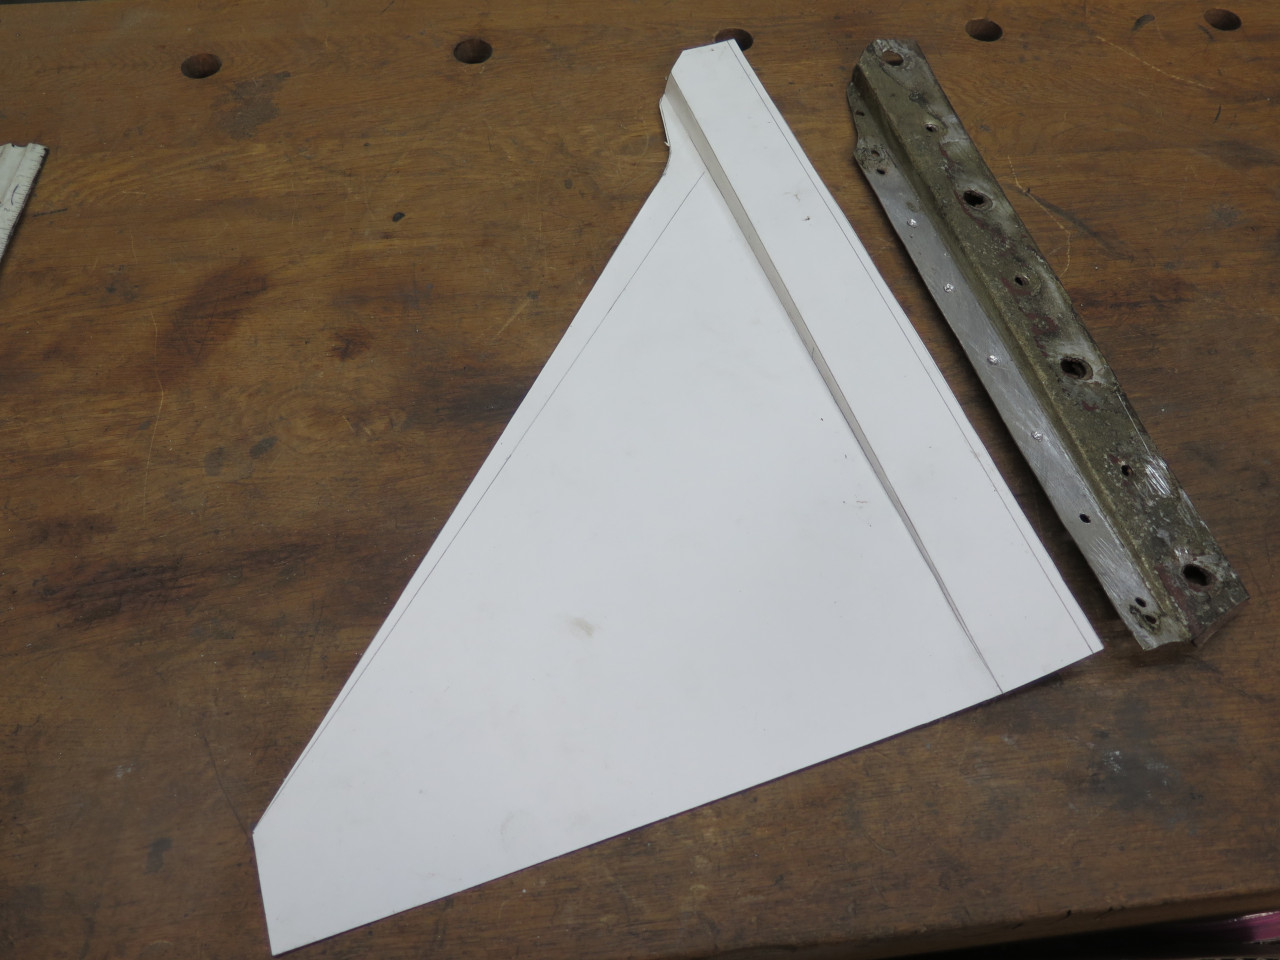
Then transferred the flat pattern to some actual aluminum. The
original panels measured at about 0.035", and the new material was
0.040", so, you know--upgrade!
Straight bends in sheet this thin is normally not much of a problem, but
while my brake has no trouble with a single bend, it can't really do
another one that is too close to the first one, such as in this
piece. So, for these panels the second bend was done with a hand
bender.
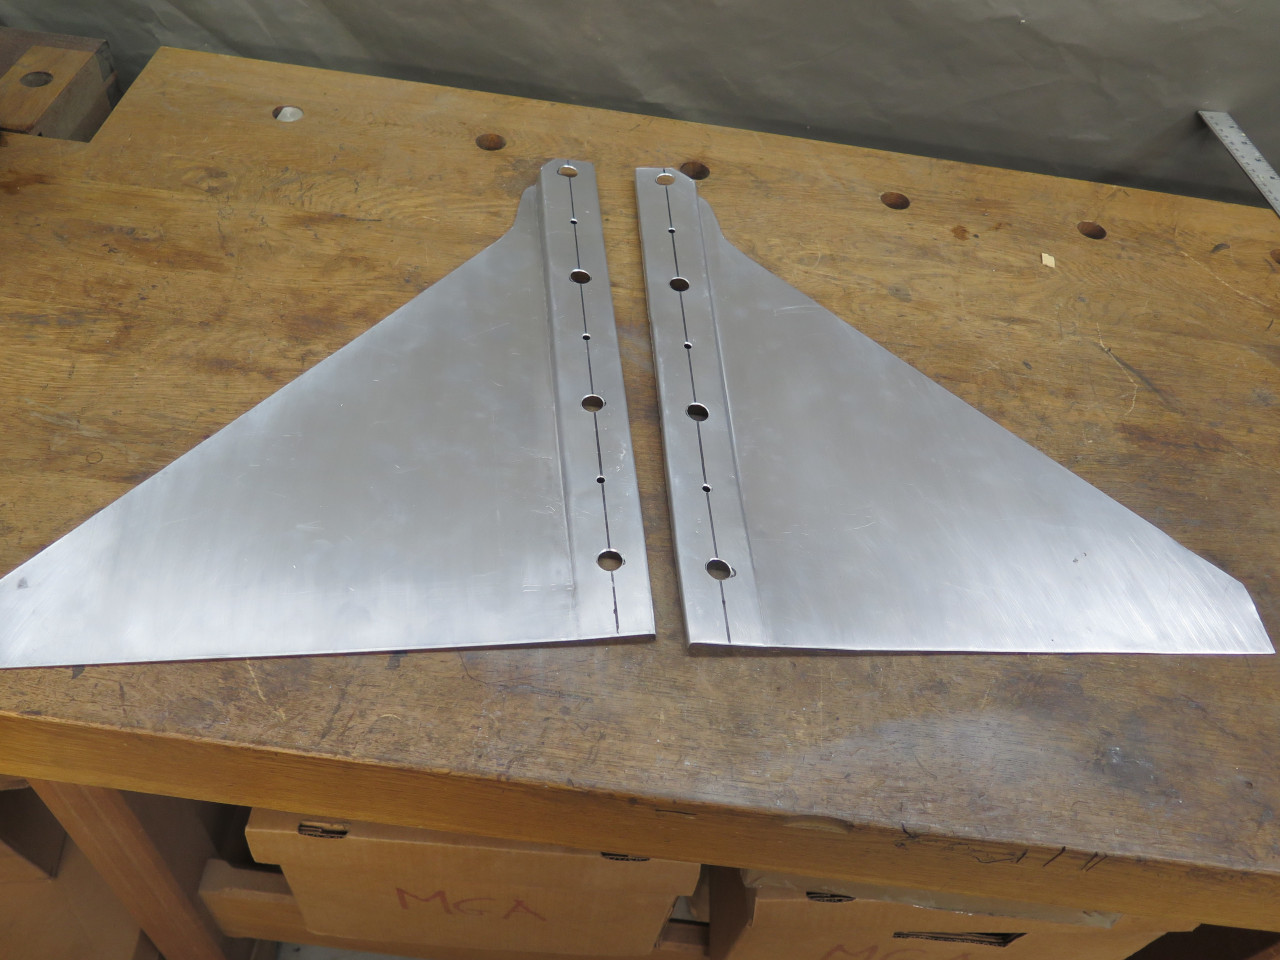
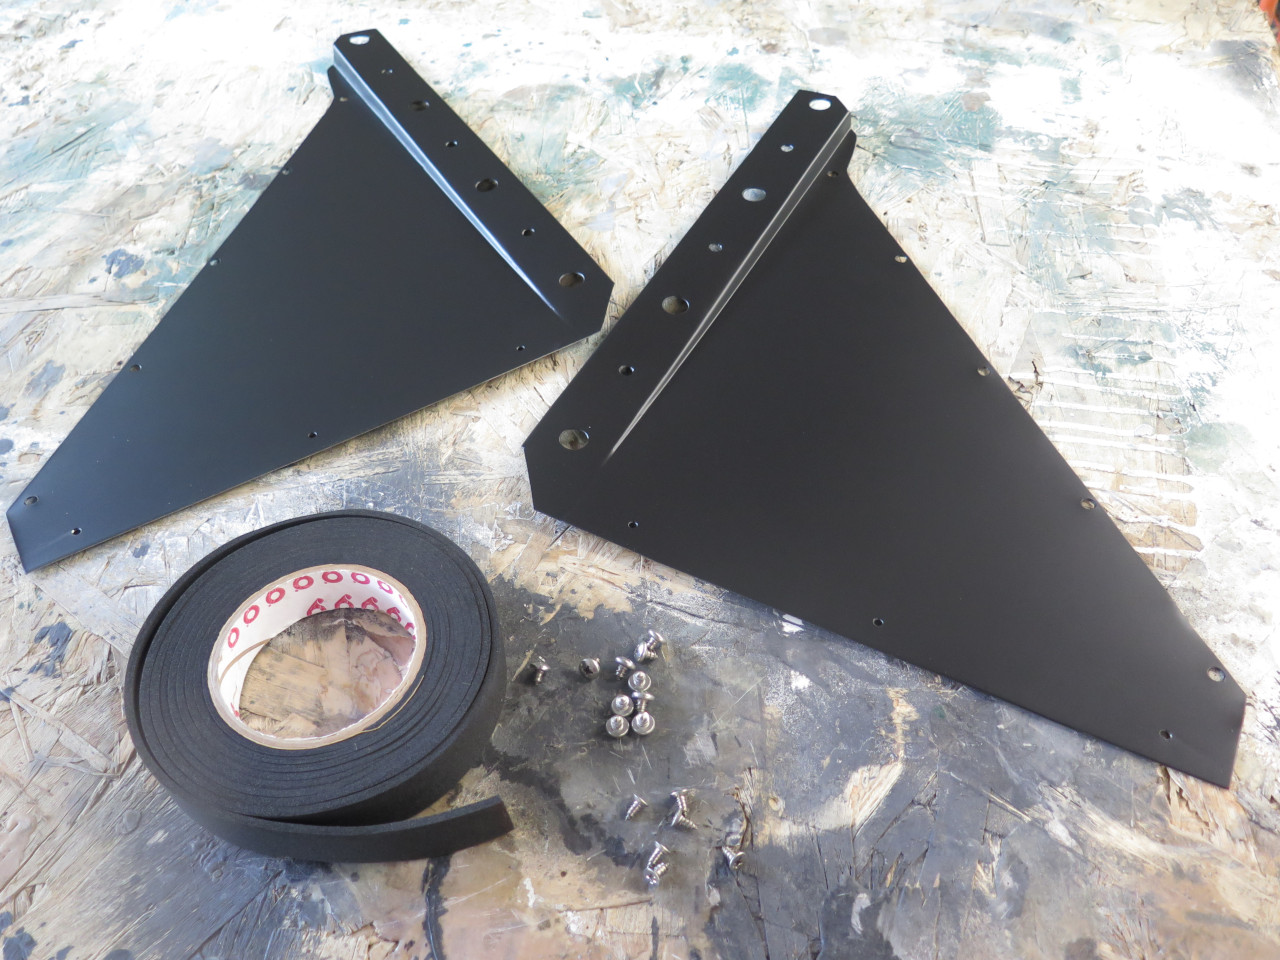
There are five holes in the leading edge of the panel--three small ones
to mount the panel, and four large ones for body fasteners to pass
through. To help align the panel holes with those in the frame
member, I used the old tape trick.
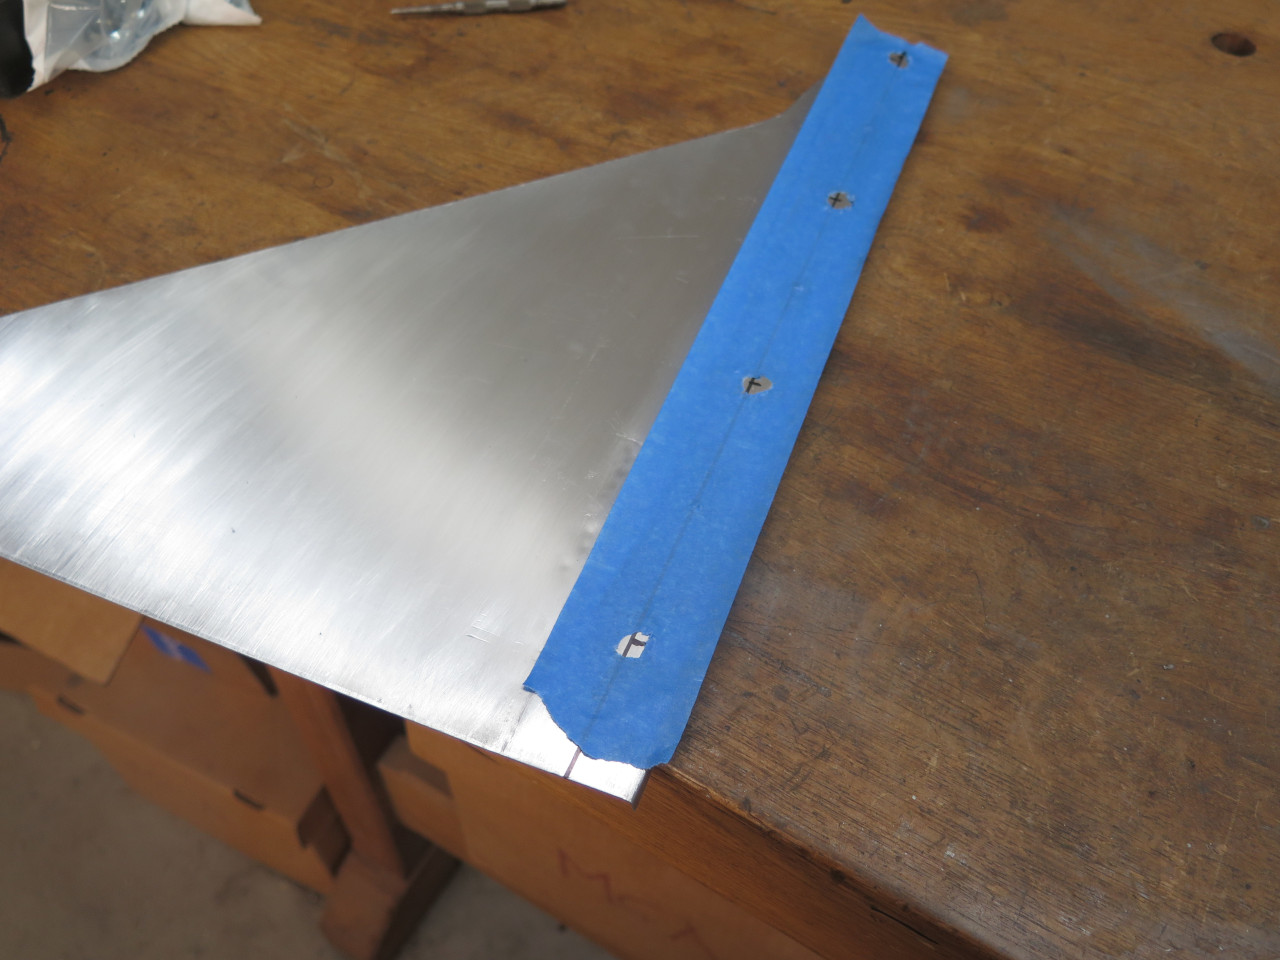
This was enough to hang the panel to mark for the other holes. I
put the five original screws in their holes in the diagonal rail, then
hung he panel from the front edge. A little hammer tap at each
screw location put a mark on the backside as a guide for drilling.
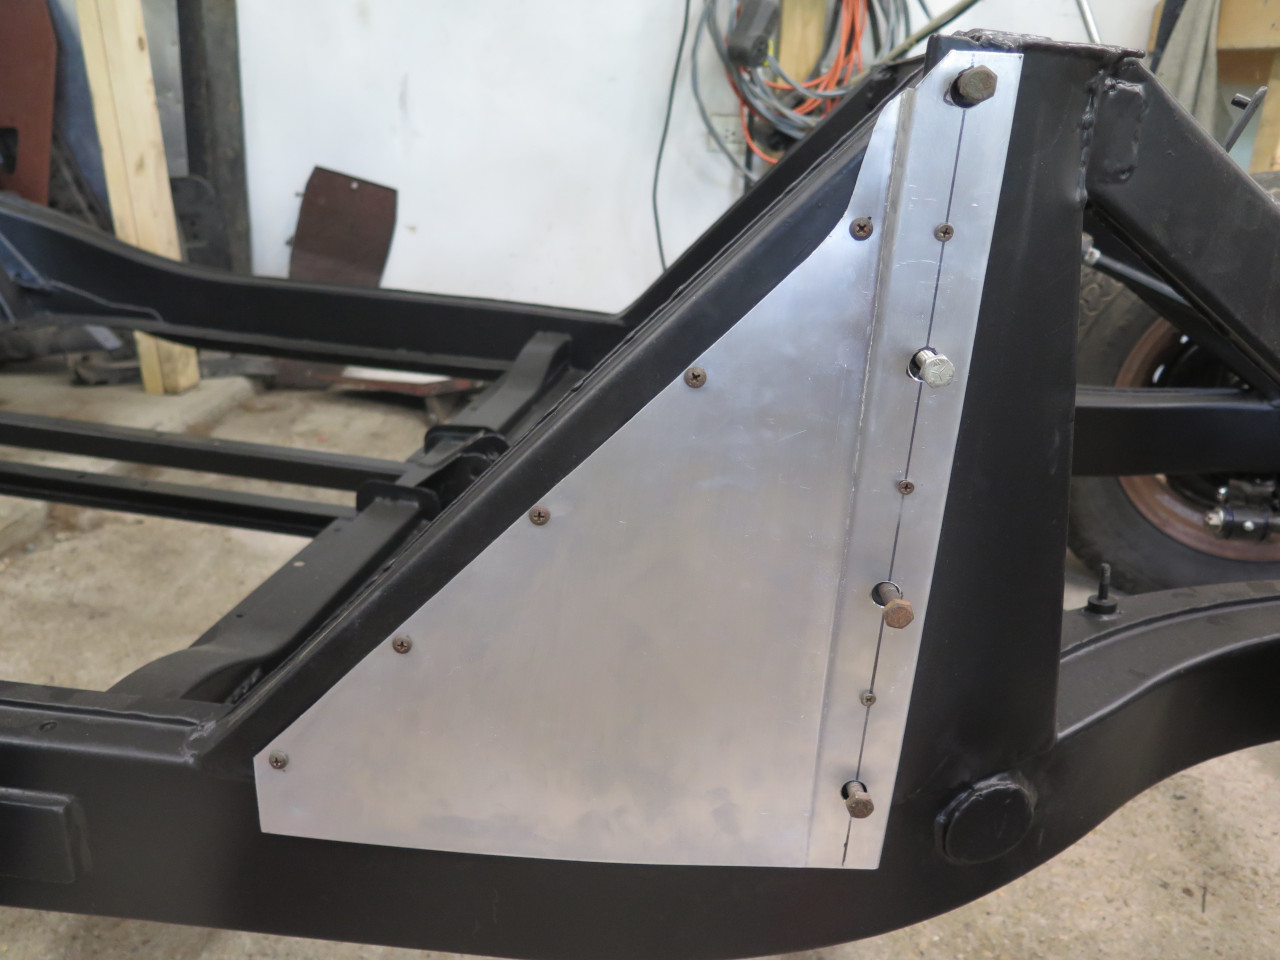
There are also some holes along the bottom. These were apparently
just to hold sealing strip, since there were no corresponding holes in
the frame rail.
Speaking of the sealing strip, it's pretty well known that the original
design used felt at many places on these cars, including on these
panels. This seems to me a questionable application for a material
that wicks and holds water so well. I tested a small piece of
felt, and found that it sucked up and retained seven times its dry
weight of water, and was still pretty damp the next day. Many
pictures I've seen of old original panels seemed to have the most
corrosion on the bottom edge, where road splash could get to the seal.
In the end, I decided to use what I believe to be a more suitable
material. This is a closed cell weather resistant EPDM foam with
dimensions similar to those of the original felt.

I painted the panels. I believe they were natural color originally, but it's my car. Also got new stainless screws.
Cut the foam and punched holes for the screws or rivets.
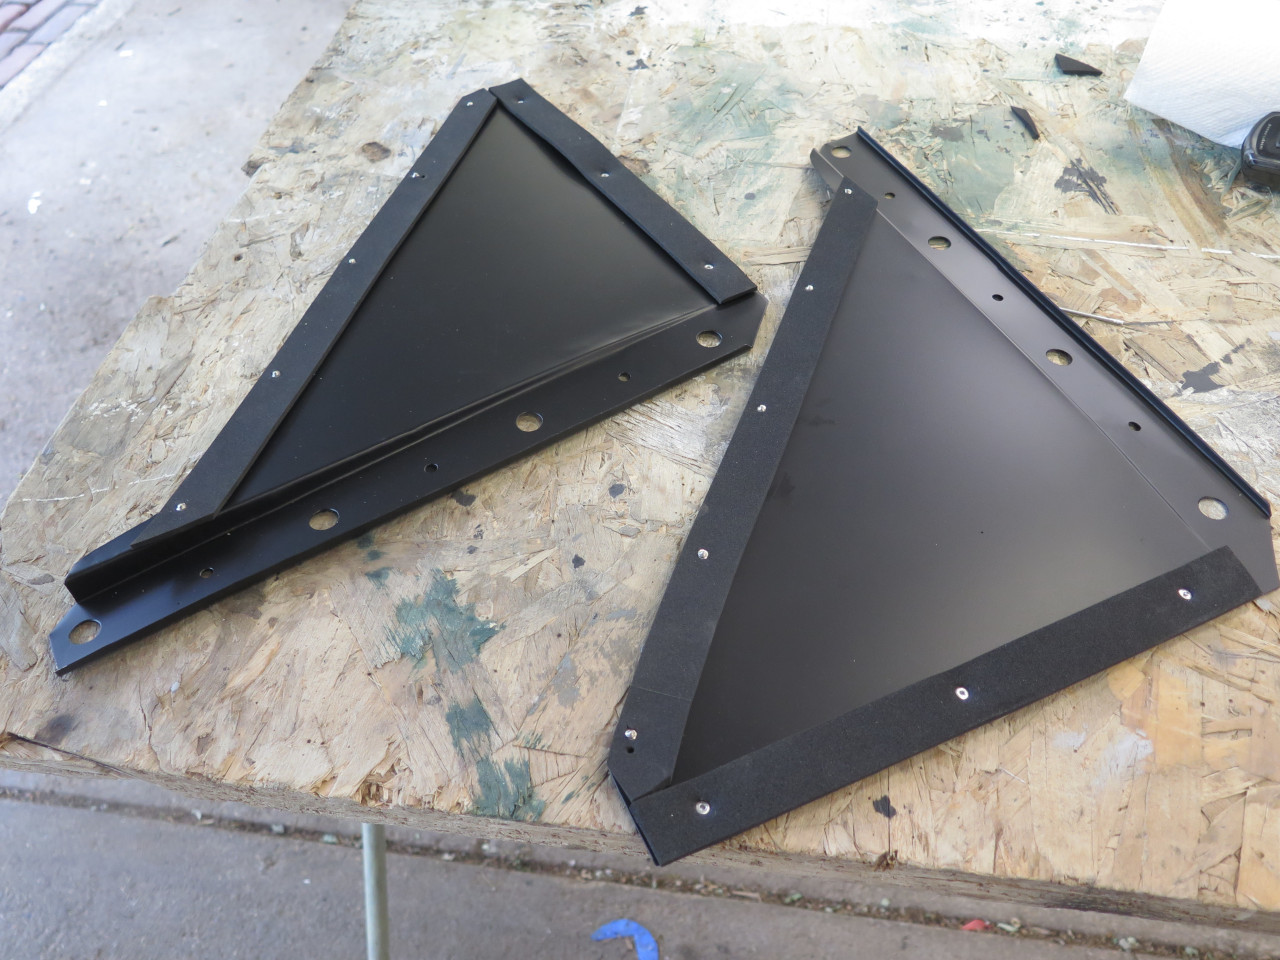
Test fit seemed OK, but I did notice a couple of things.
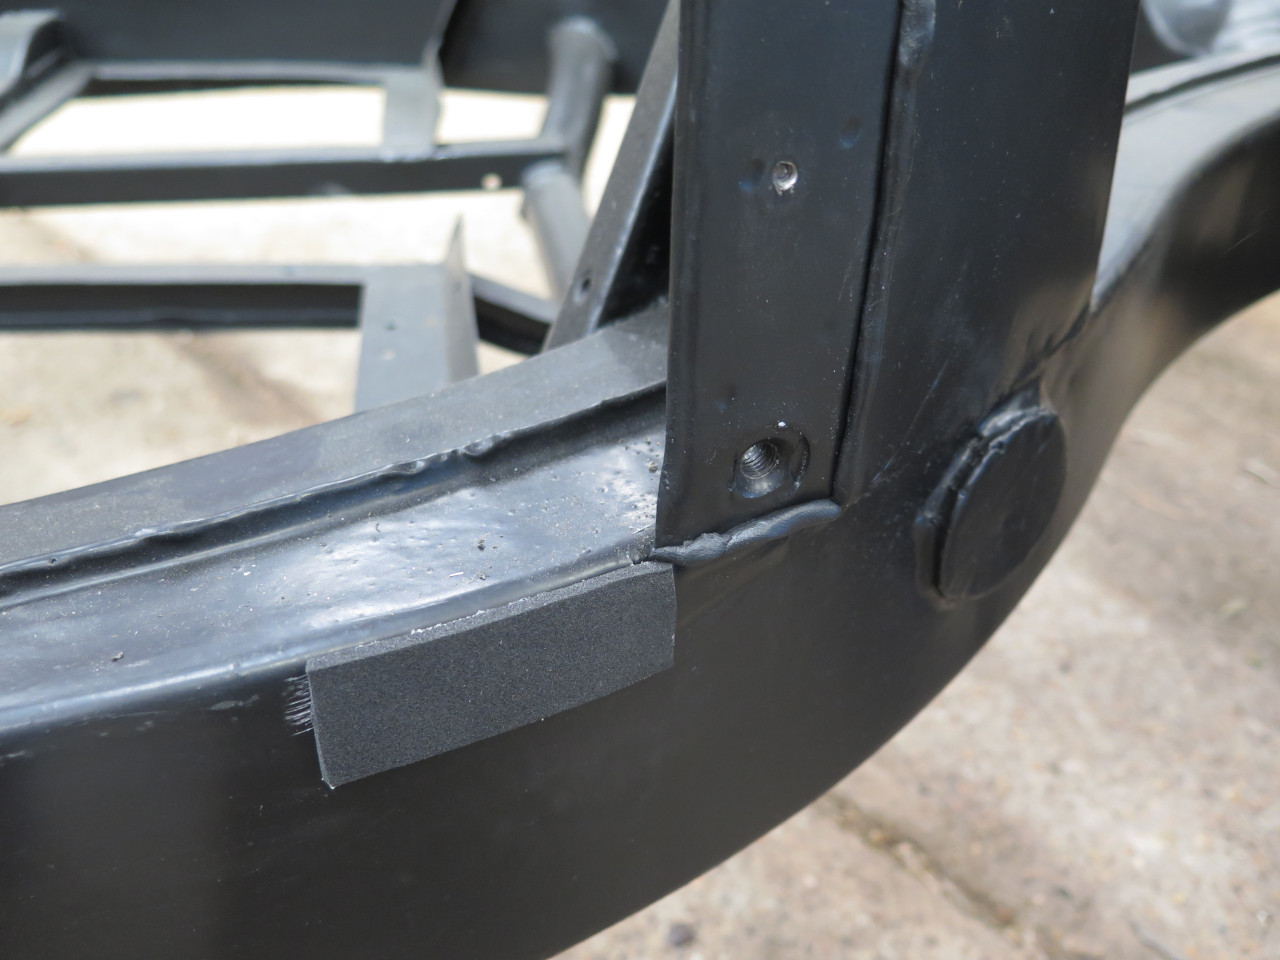
First, the factory apparently didn't use a sealing strip for the front
edge of the panel. This seemed like a strange omission. I
considered putting a strip of foam there, but in an act of concession to
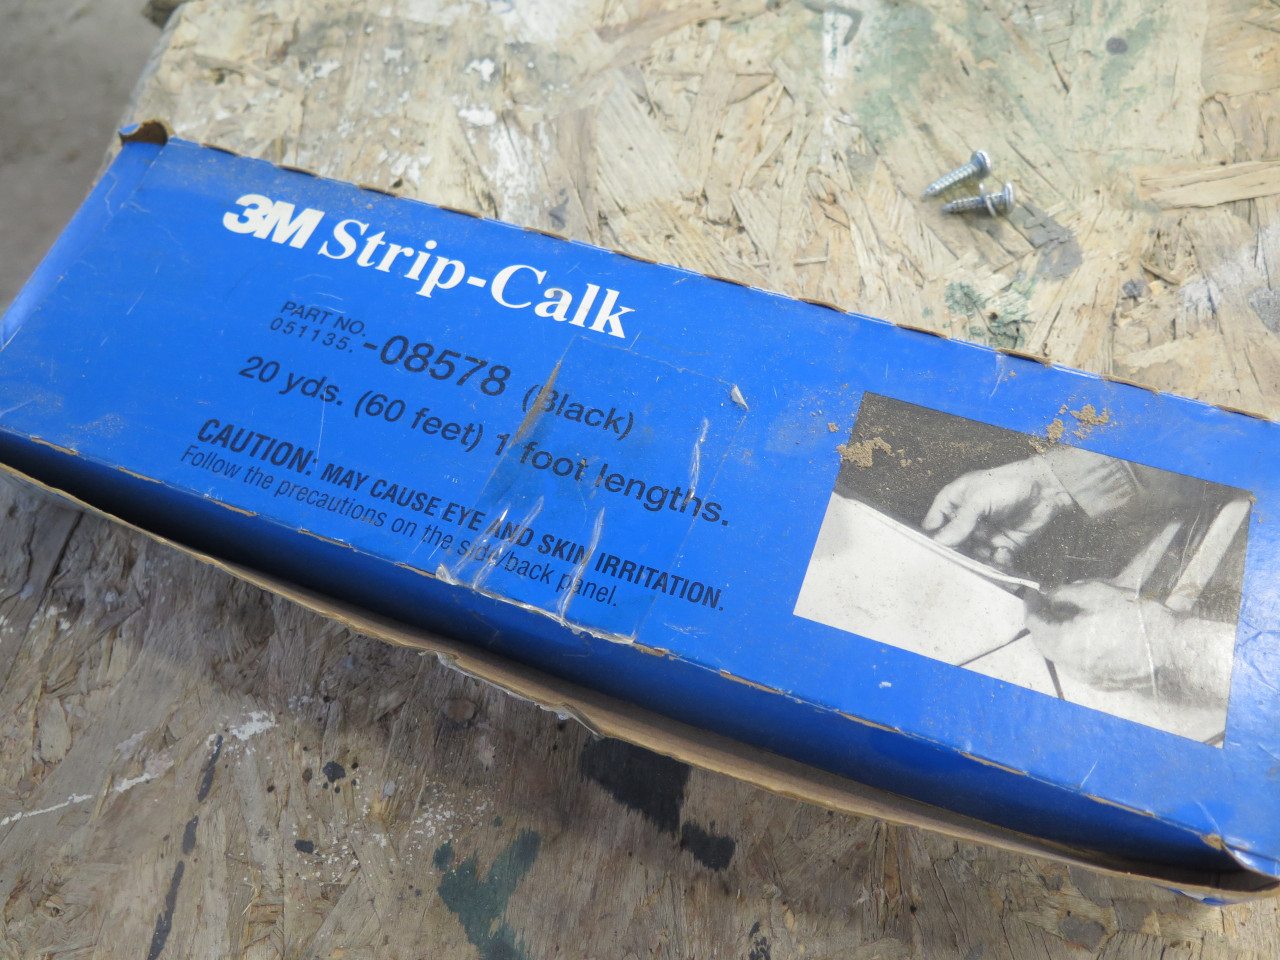
the original designers, I instead just put a bead of strip caulk on the
leading edge, where the panel wraps around the frame bracket.
The second thing I noticed was a gap at the bottom edge of the panel
where it meets the vertical bracket. The bracket is proud of the
frame there, and a single layer of foam wasn't thick enough to fill that
void. A short strip of foam glued there fixed that right up.
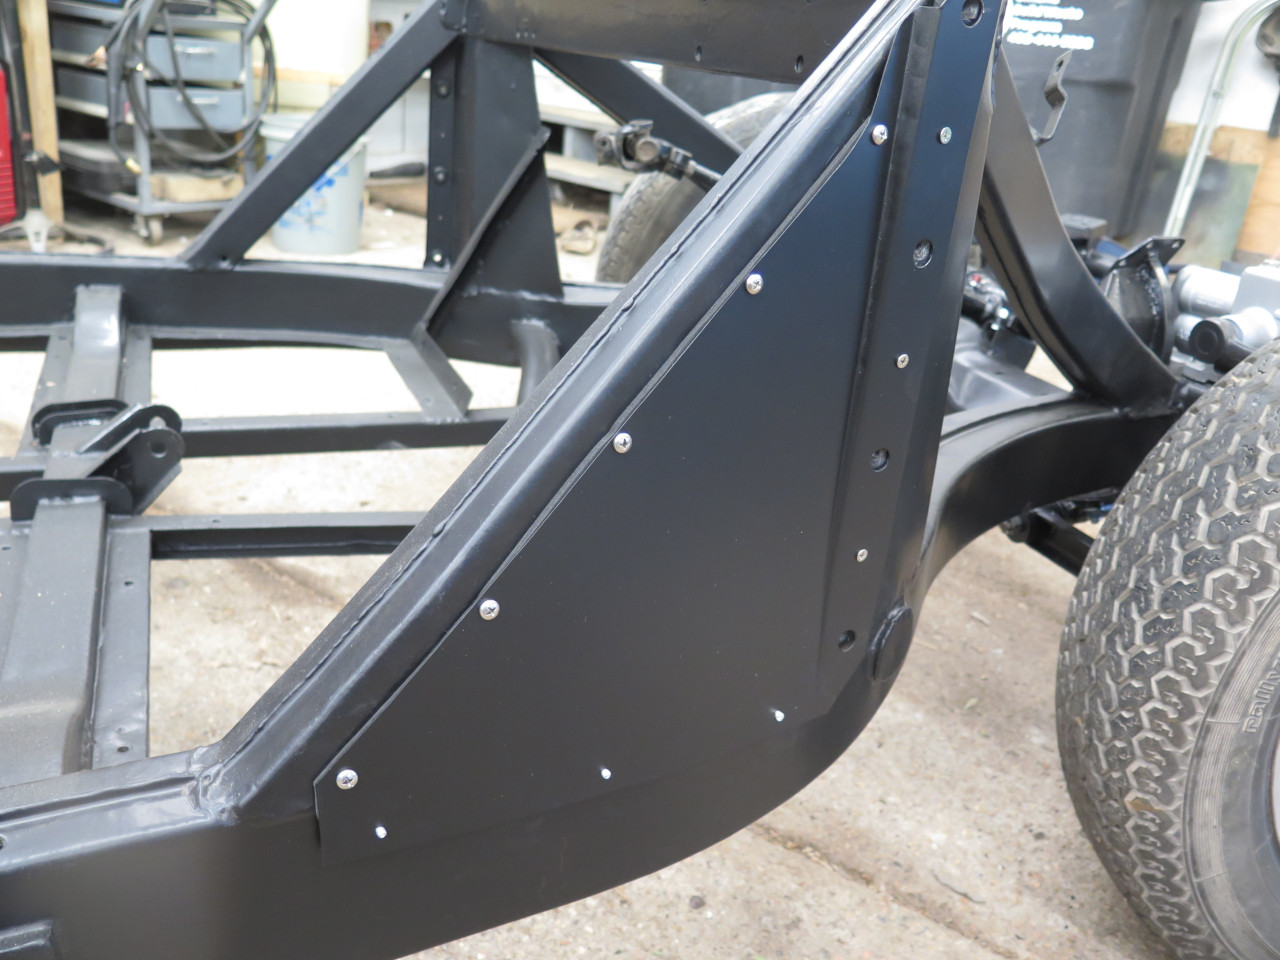
Finished up the other side. All done.
This addition to the frame somehow makes it look more, I don't know,
substantial, I guess. It was a fun project with few big
challenges. Cost was maybe $20 for the foam and fasteners. I
think I had everything else on hand.
Comments to Ed at elhollin1@yahoo.com
To my other MGA pages