To my other MGA pages
March 10, 2025
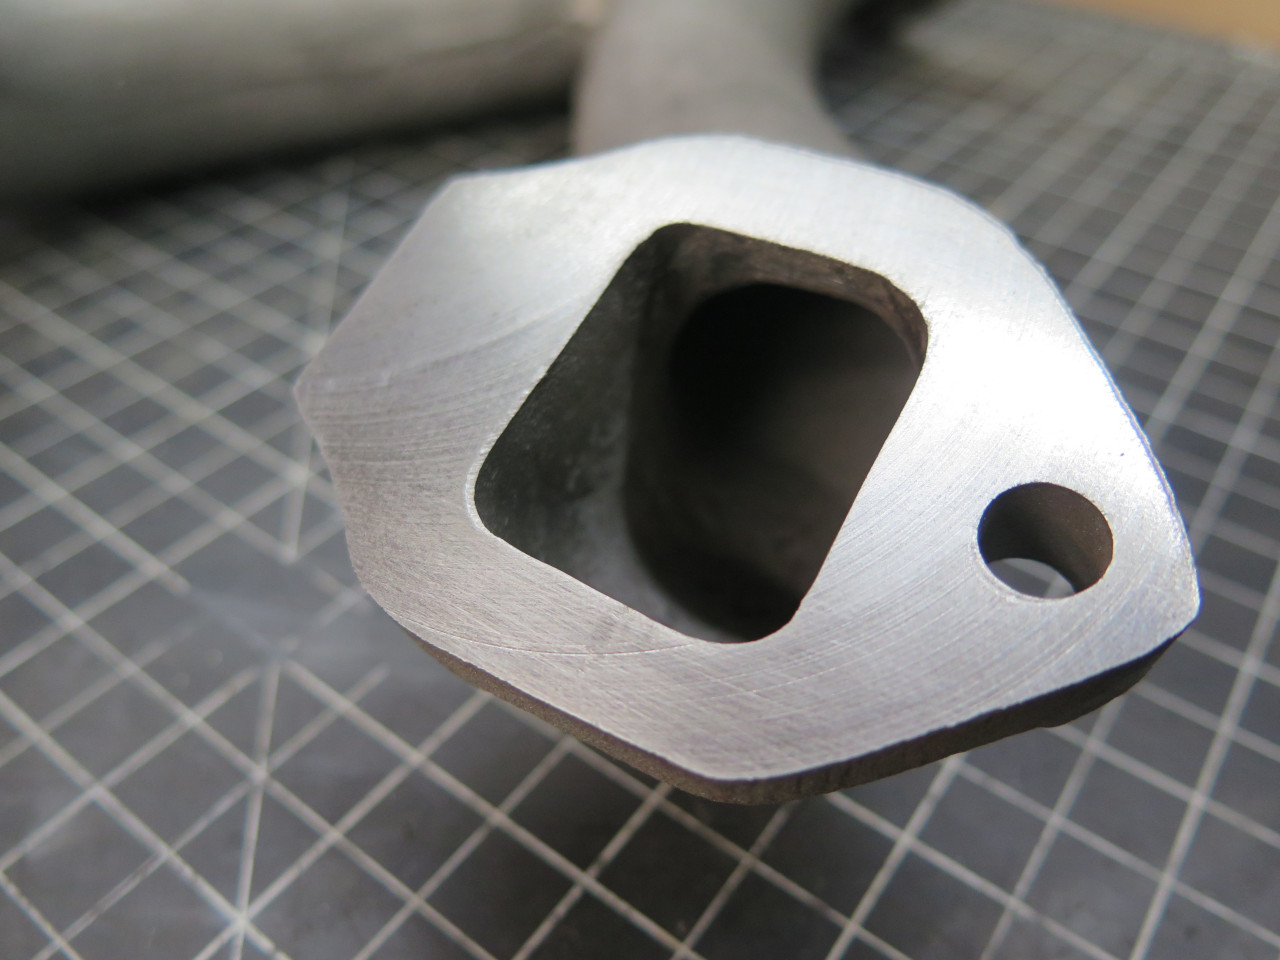
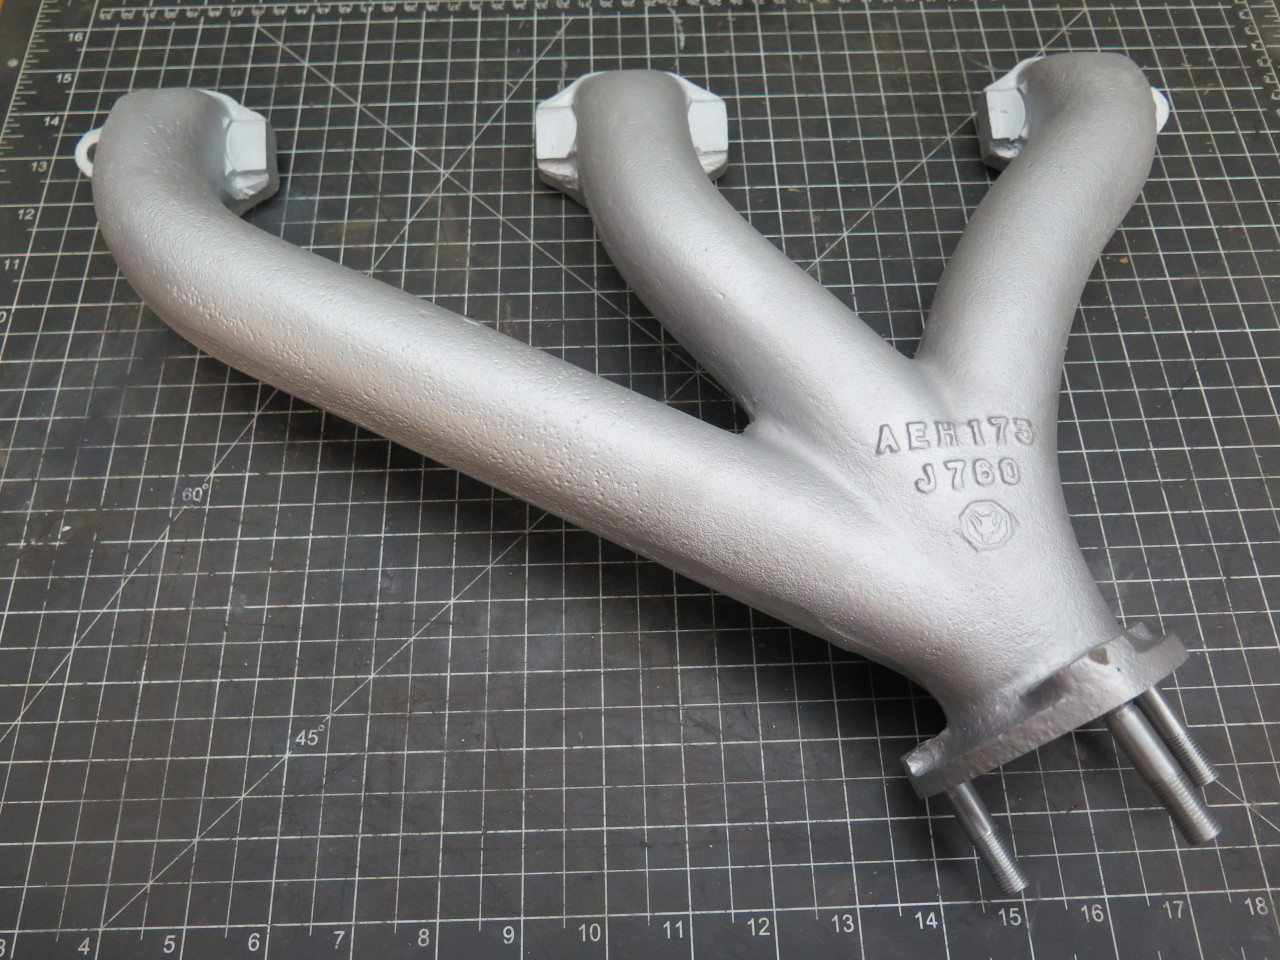
Exhaust Manifold
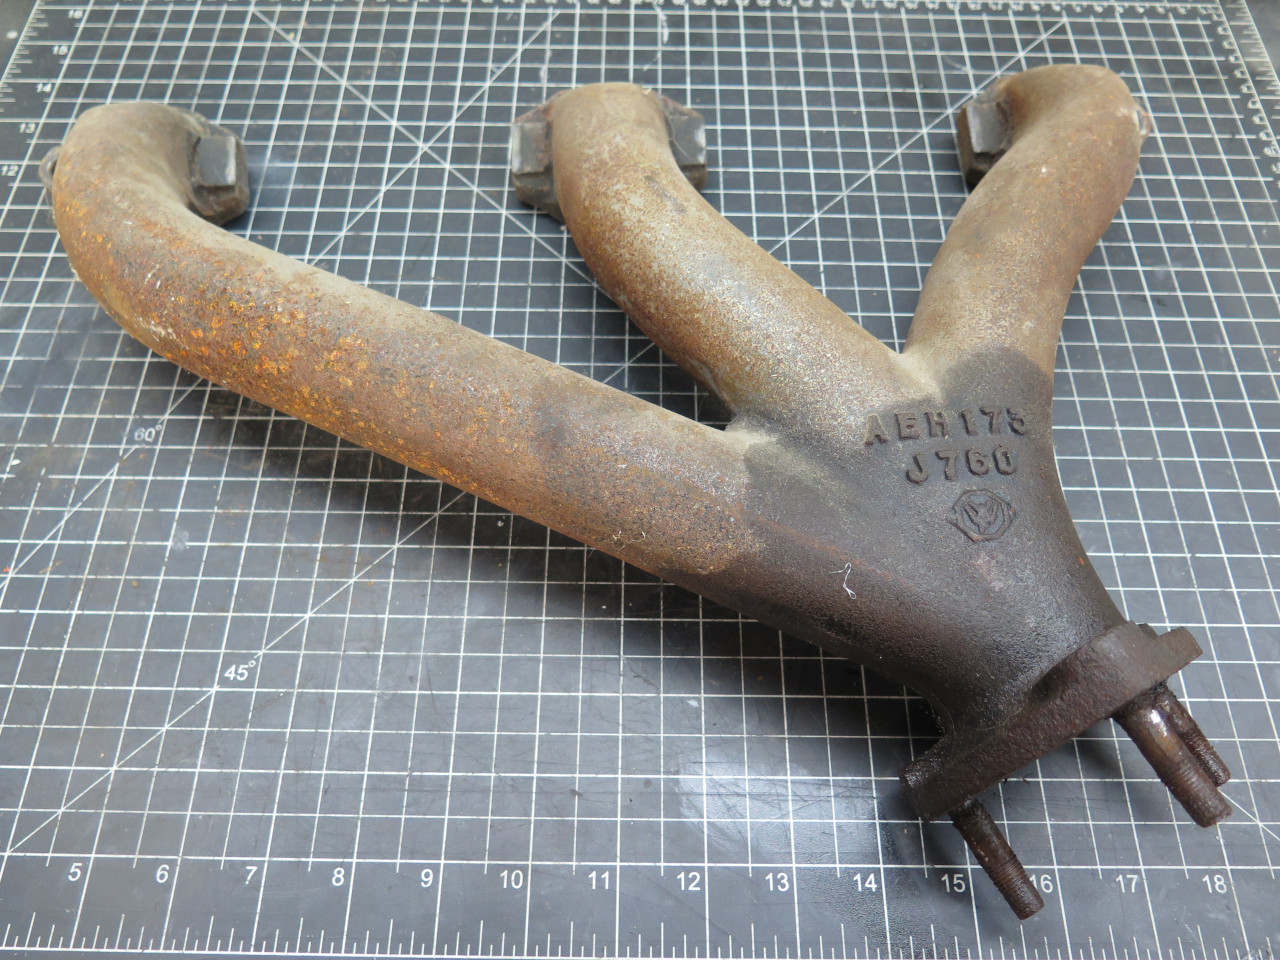
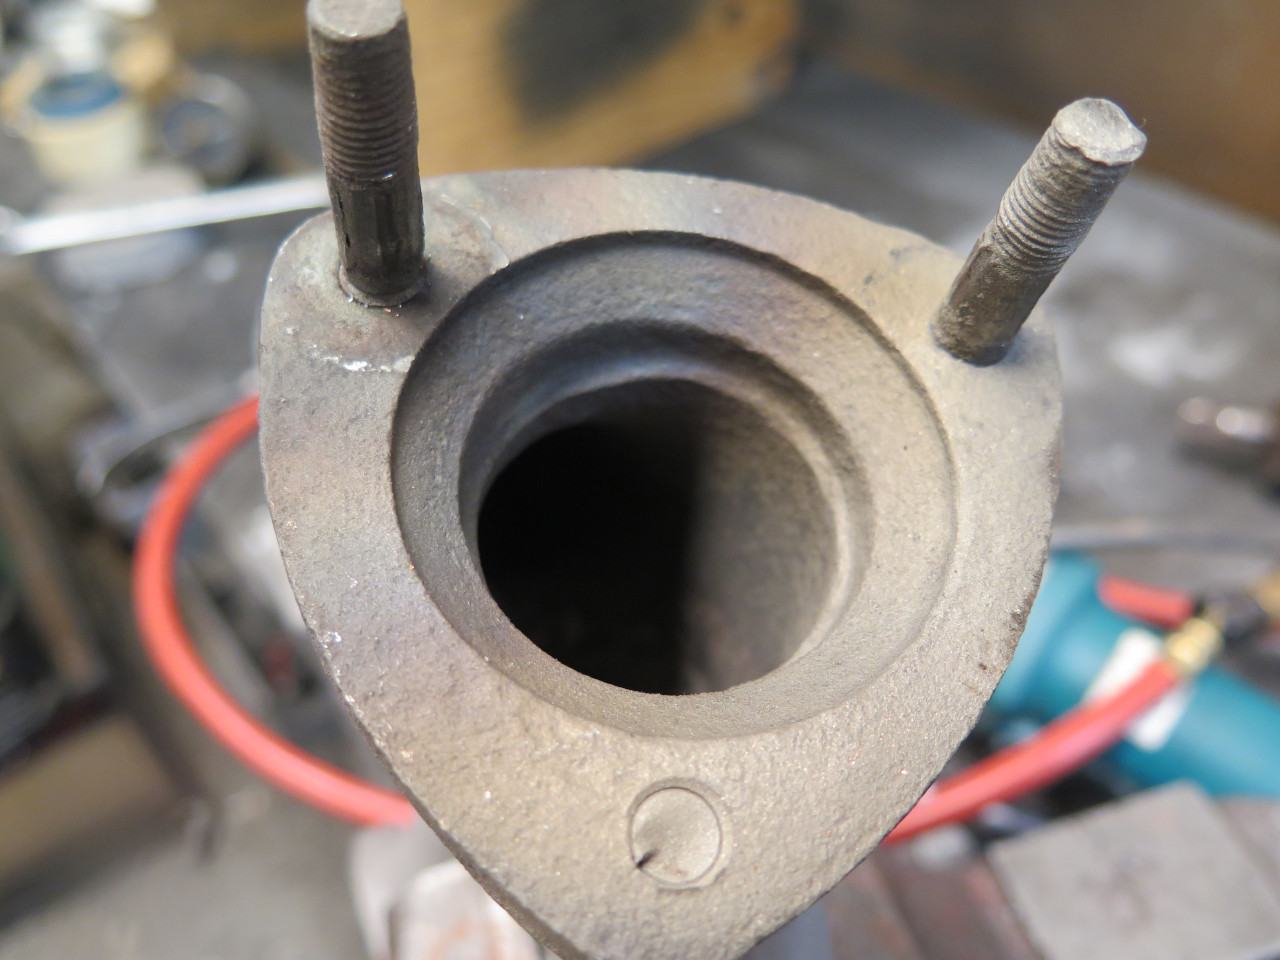
The exhaust manifold on the MGA is not remarkable in any way. It
is a pretty standard cast iron piece with three runners--the middle one
serving the siamesed ports from cylinders 2 and 3. It's a
relatively sturdy items, and mine was intact, but appropriately rusty.
The "wet" area was from spraying penetrating oil onto the studs.
Speaking of studs, that was my first order of business. These
items are notoriously often difficult to remove, living with extreme
temperature cycles in a location prone to getting wet.
My first attempt was naïve, with a stud puller on a 1/2 inch drive
ratchet. The stud sacrificed itself almost immediately.
Manifold--1, Me--0.
I soldiered on, but with a little more finesse this time. With
heat, penetrants, and patience, I finally got the second stud to budge a
little. It would move back and forth slightly, but wouldn't go
beyond hard limits. I was pretty sure it was galling the threads,
and didn't press it any more. More sophisticated measures were
clearly called for.
But before going further, I decided to clean up the manifold, if for no
other reason than to make it more pleasant to handle. This really
just meant de-rusting.
I first experimented with media blasting. This worked fine, but
was slow. I regrouped and switched to an even slower method, but
one that didn't require me to stand over the part for the entire
process. I submerged the casting in my favorite de-rusting potion,
which is just a solution of phosphoric acid.
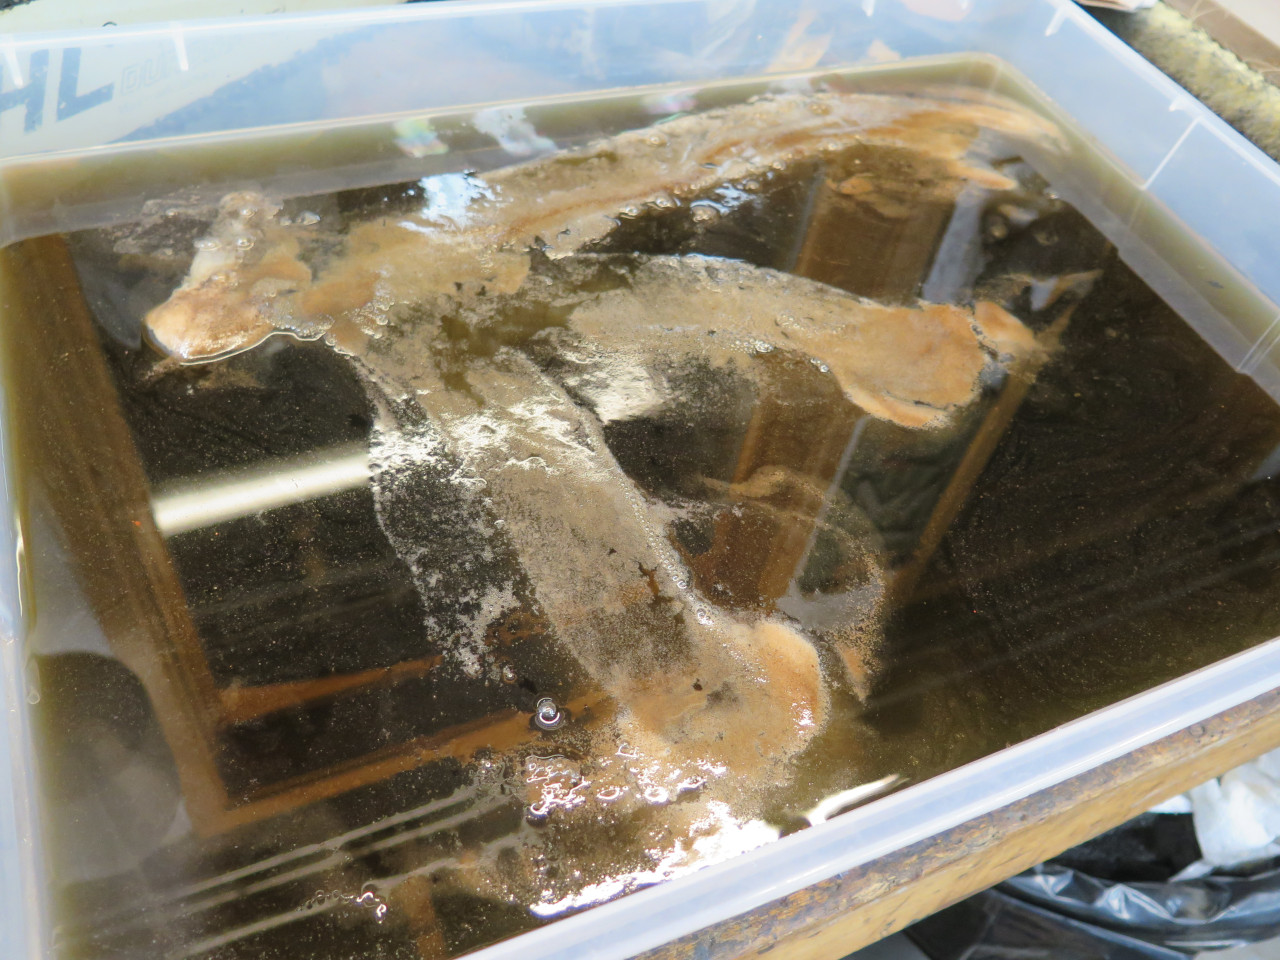
Over a couple of hours, this loosens the rust to form a black smut, which is easily brushed off.
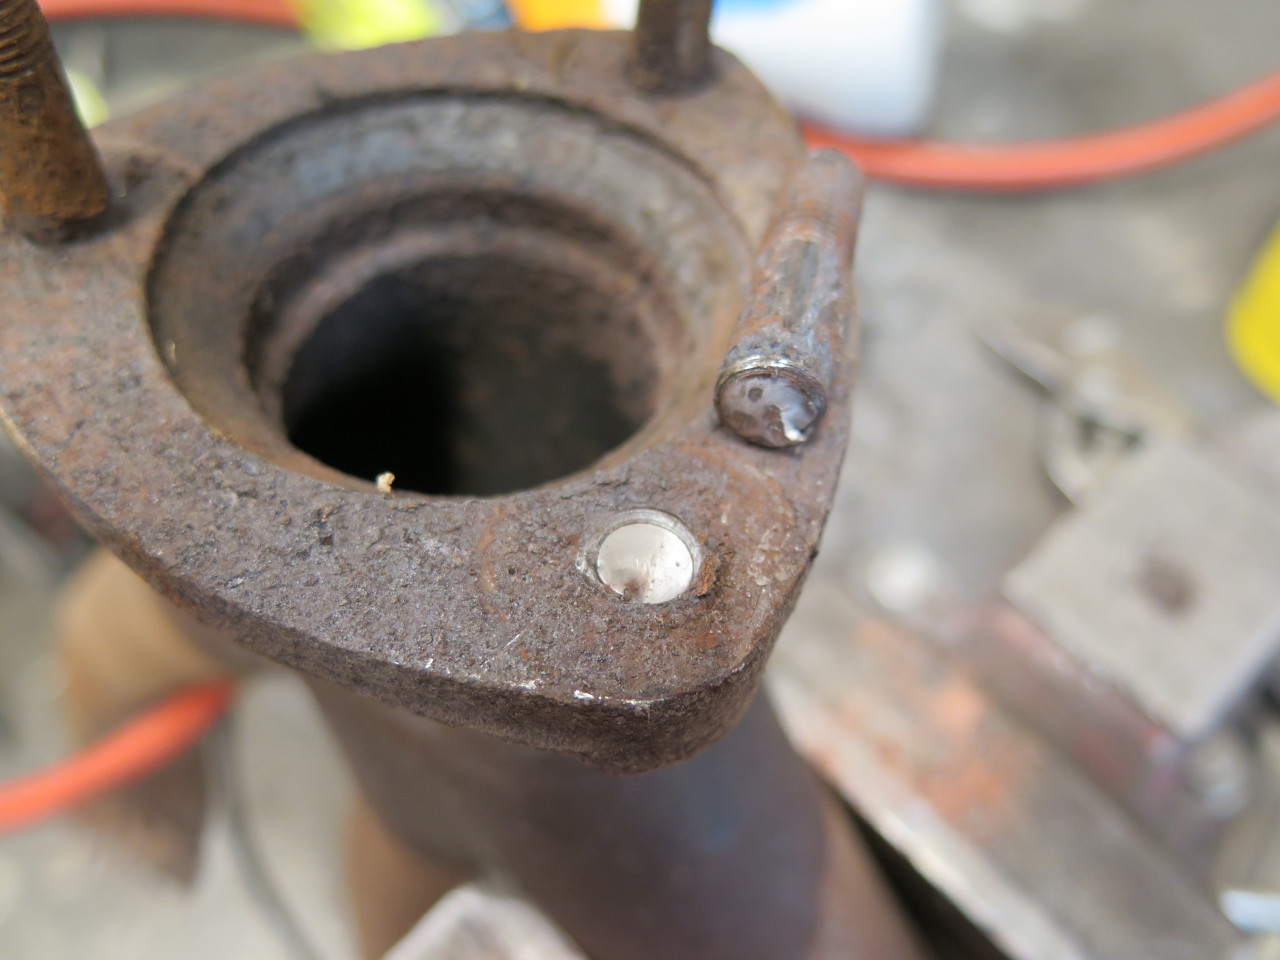
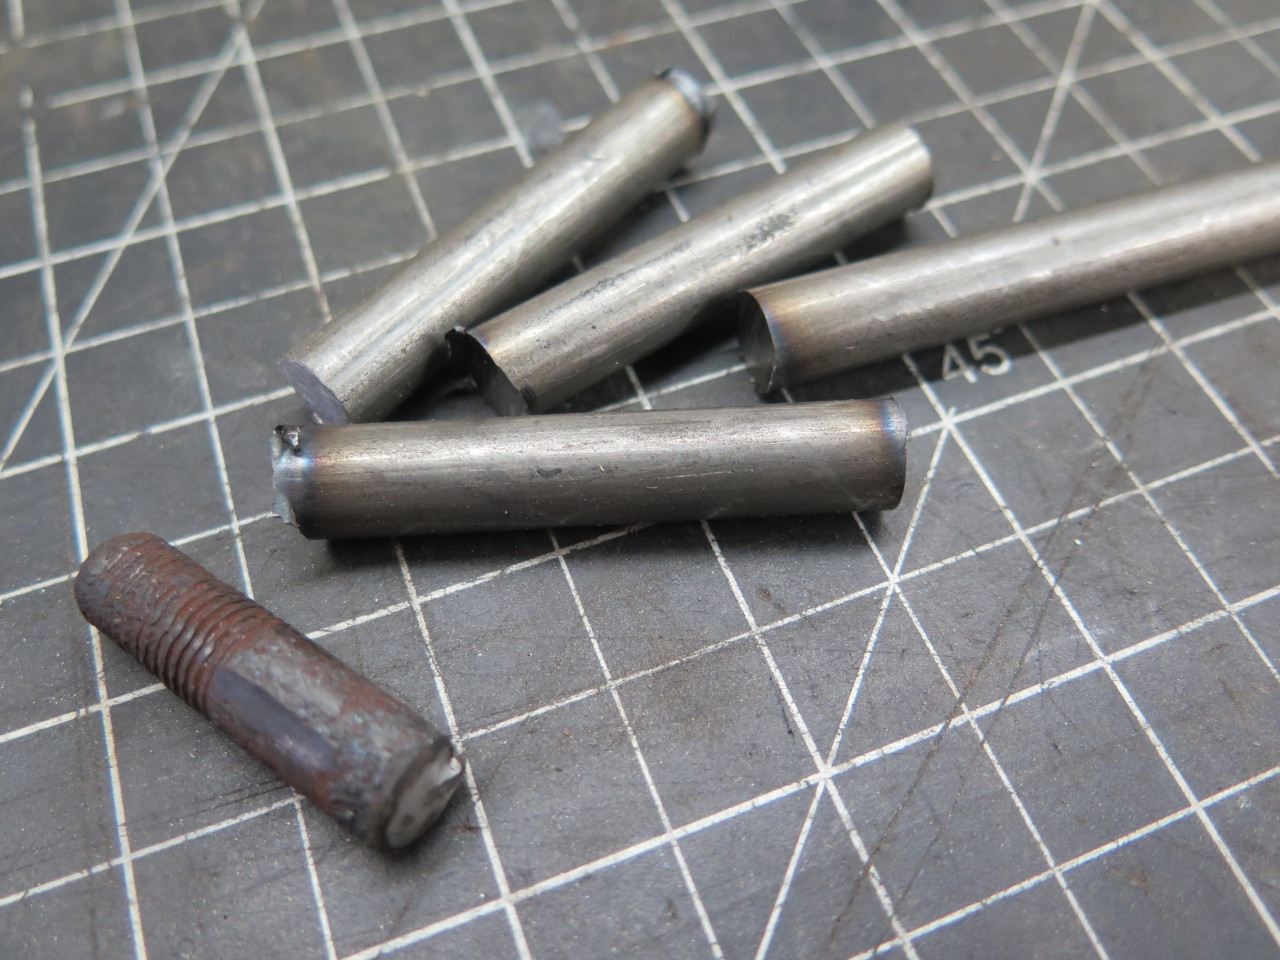
Now, back to those studs. They clearly had to be drilled out.
In a feat of heroic work-holding, I mounted the manifold on my
mill. Drilling works best if the drill can be accurately aligned
with the axis of the stud.
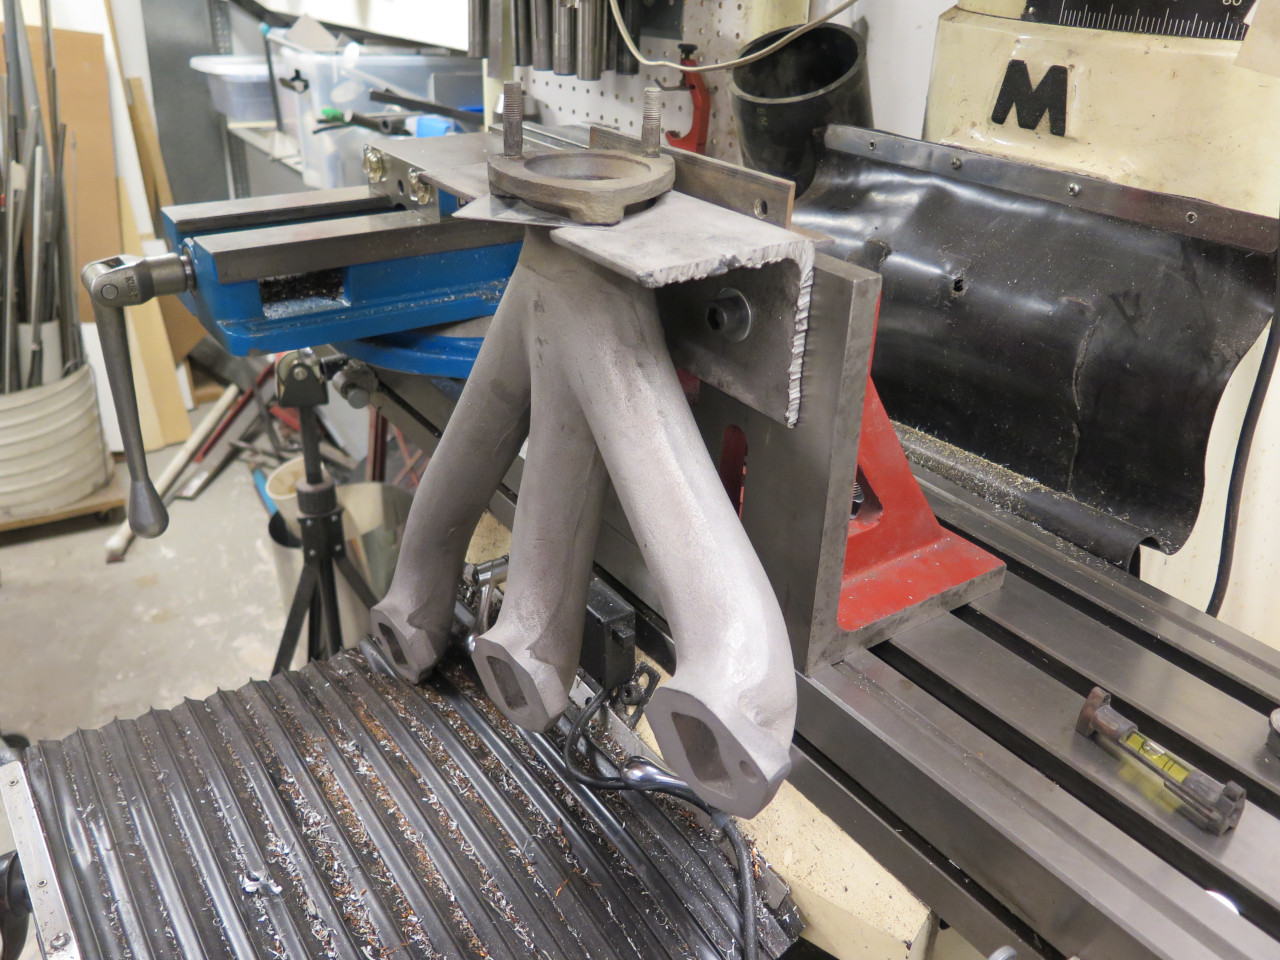
I cutoff the remaining studs to a more workable length. This
allowed a little alignment tube to be fit over the stub, so that the
drill could be centered.
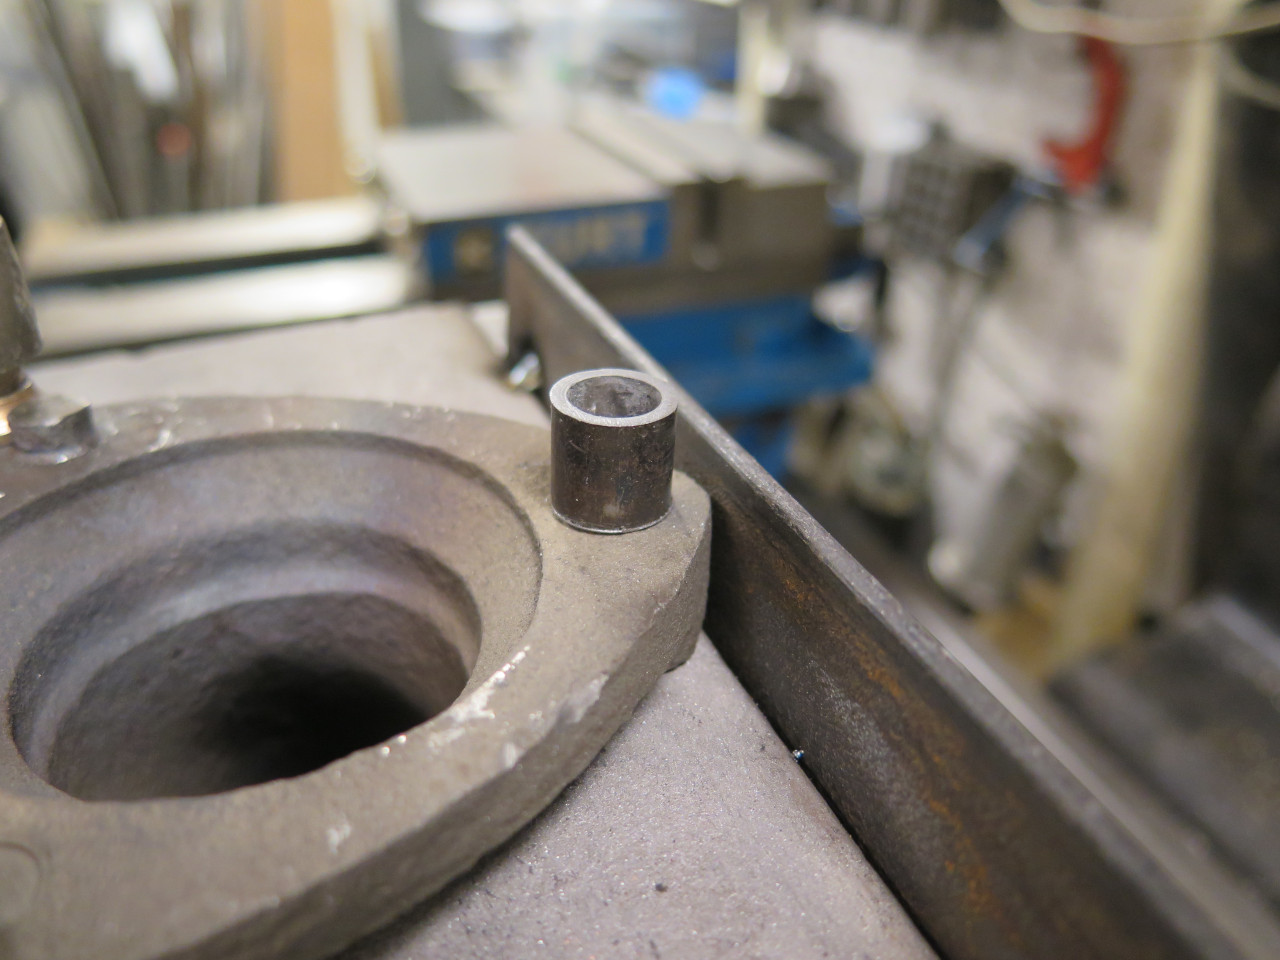
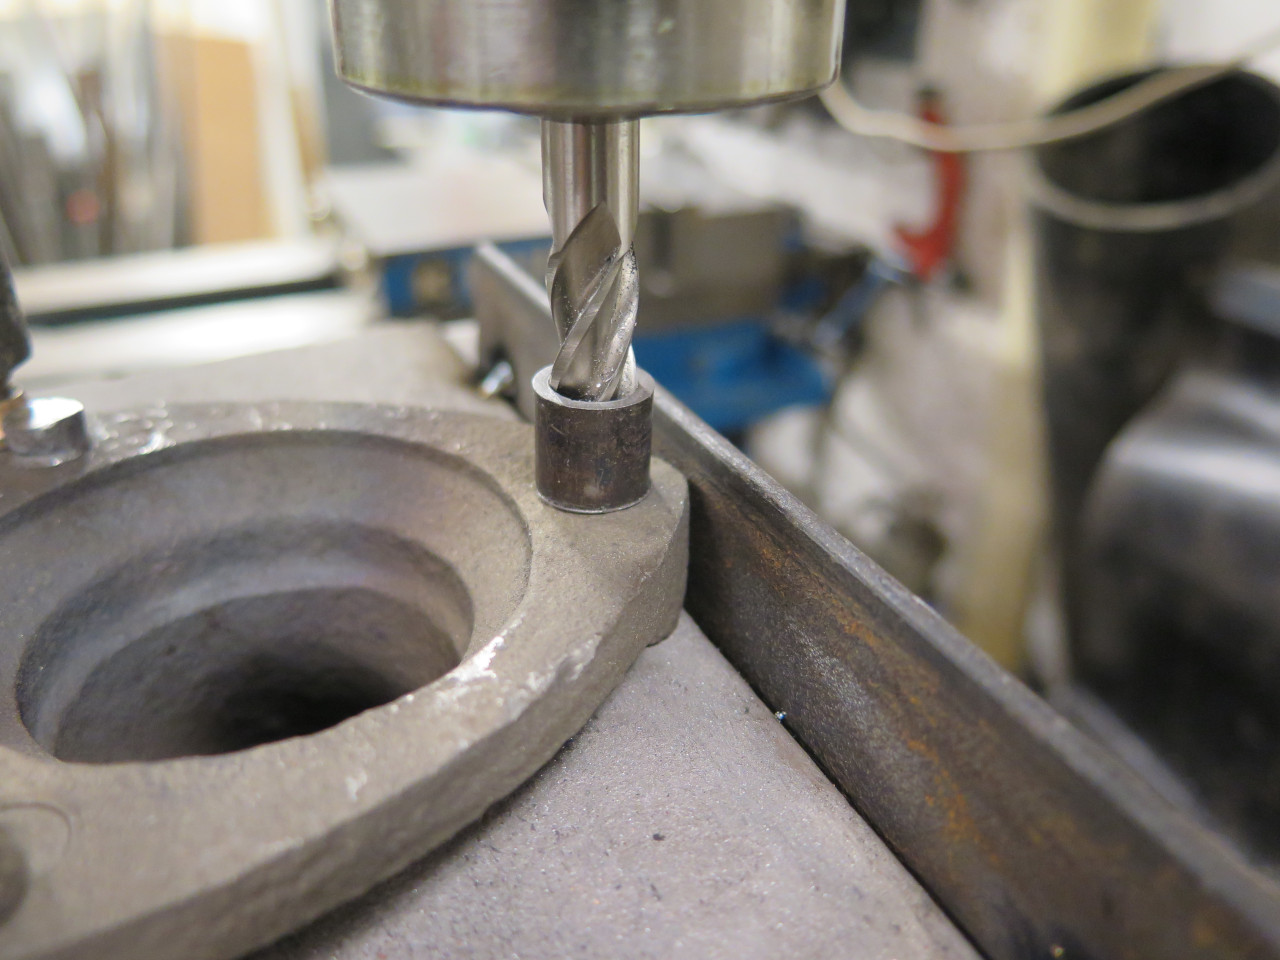
Then a 1/4" drill, followed by a 5/16", which is the tap drill size for
the 3/8" studs. The remains of the stud--pretty much just the
threads--sheepishly fell out in utter defeat.
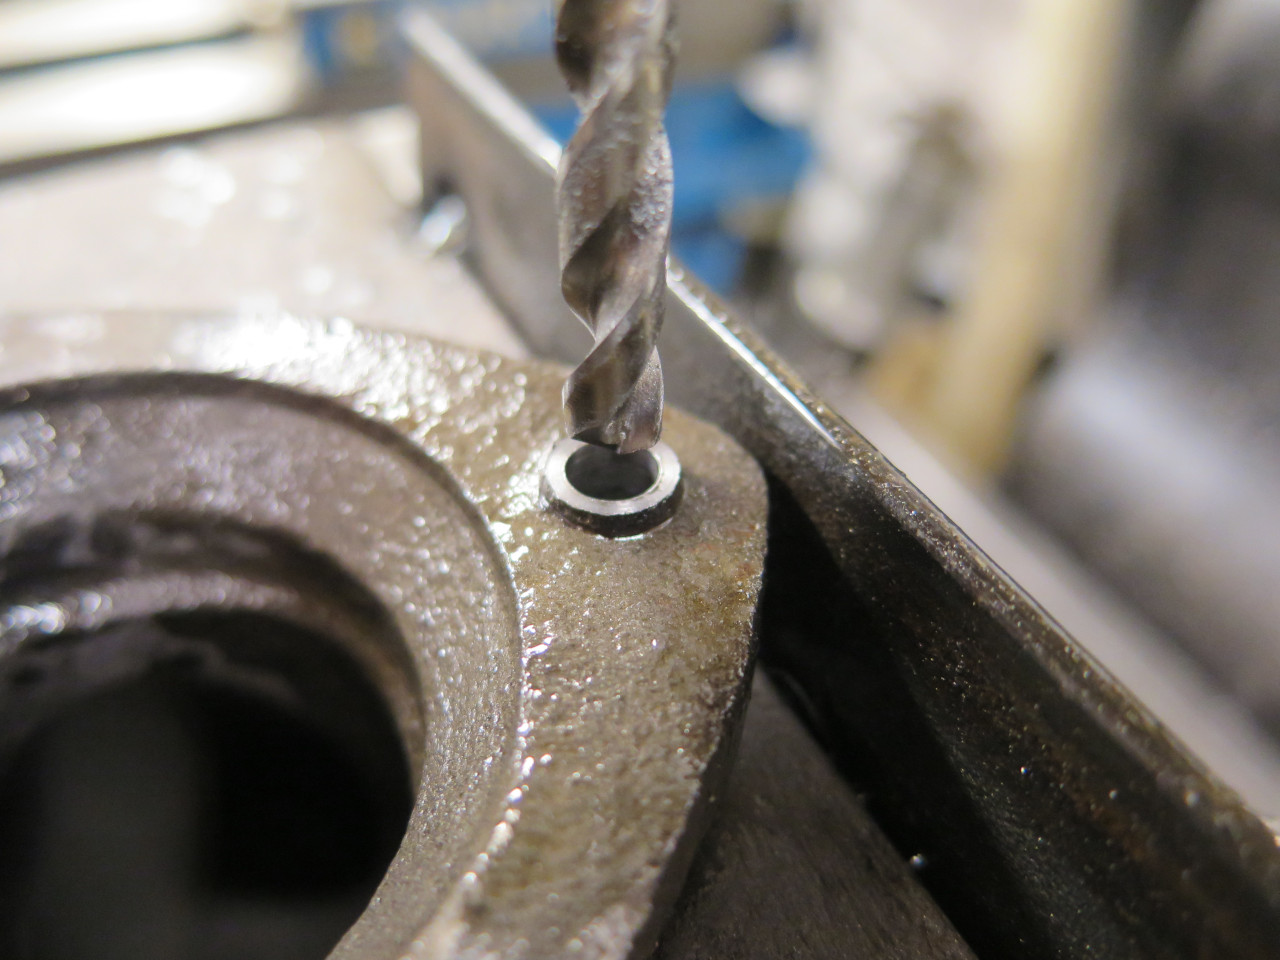
The other long stud went similarly, but the broken one was a little more
problematic. Alignment was a little more approximate, so the
drills were slightly off center. This meant that the final
remnants had to be picked out.
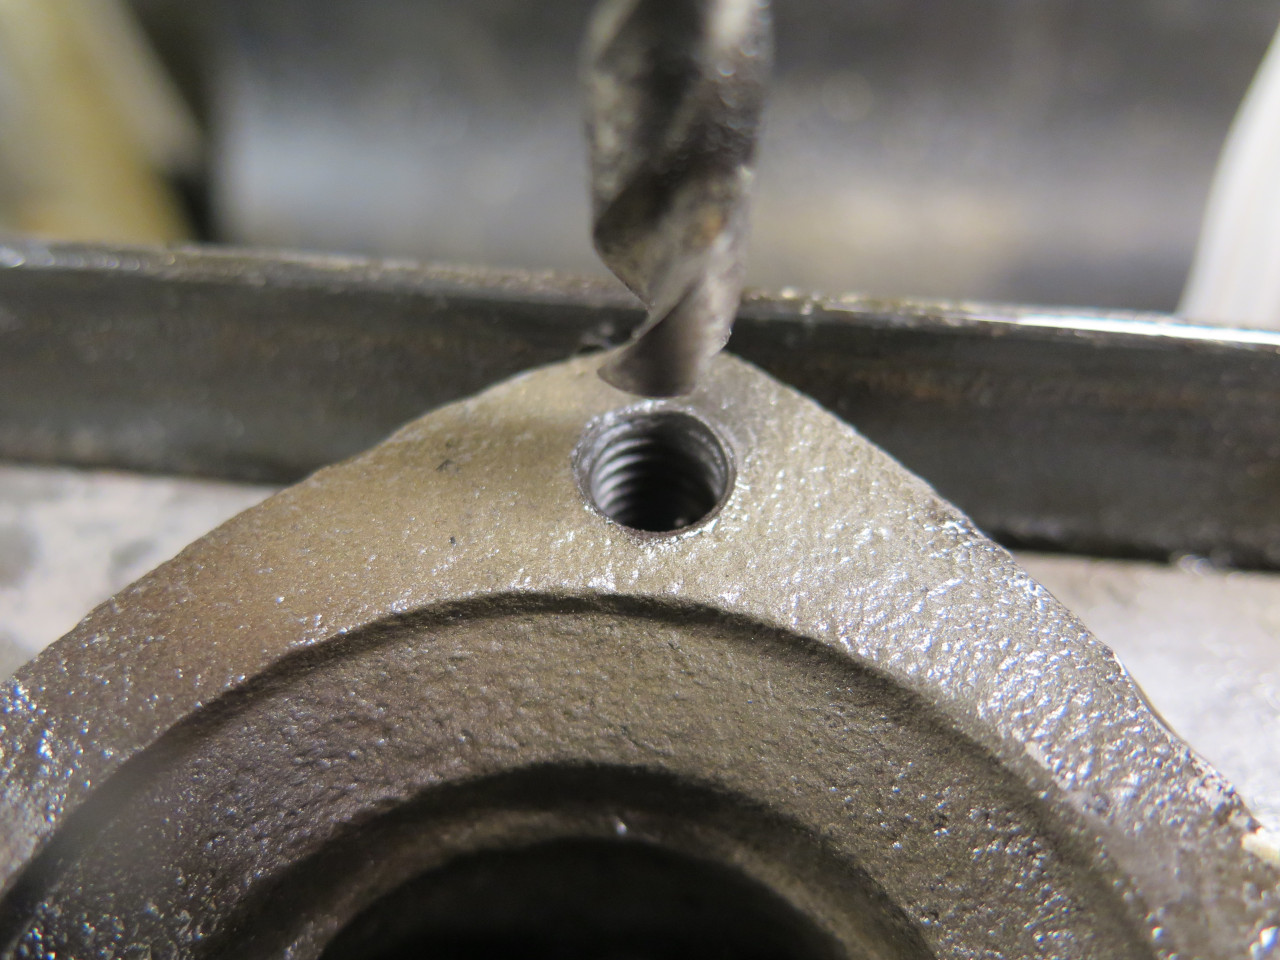
At the beginning of this exercise, I put the odds of saving all three threaded holes at about 20%, and had Helicoils ready.
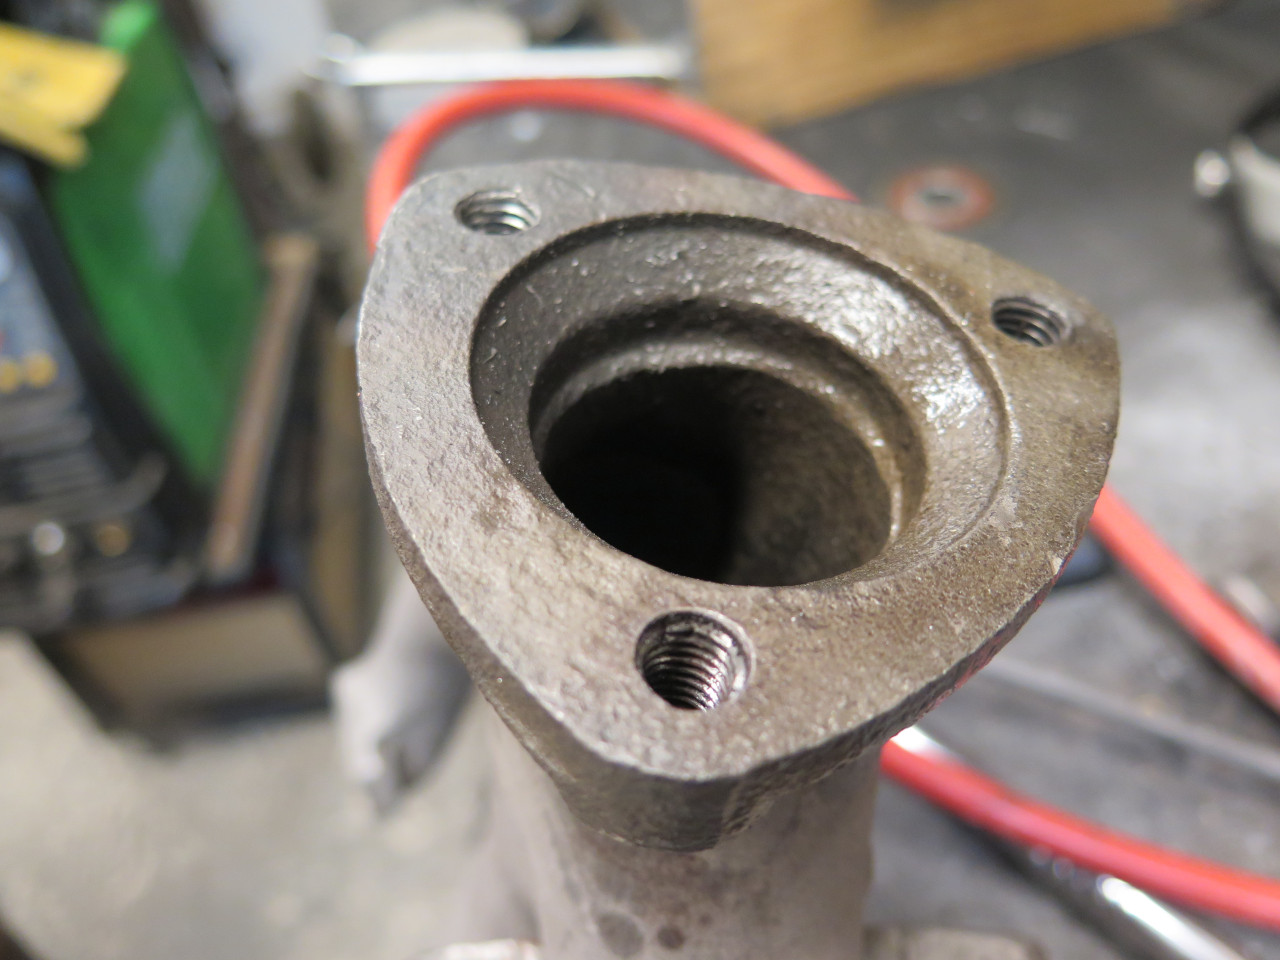
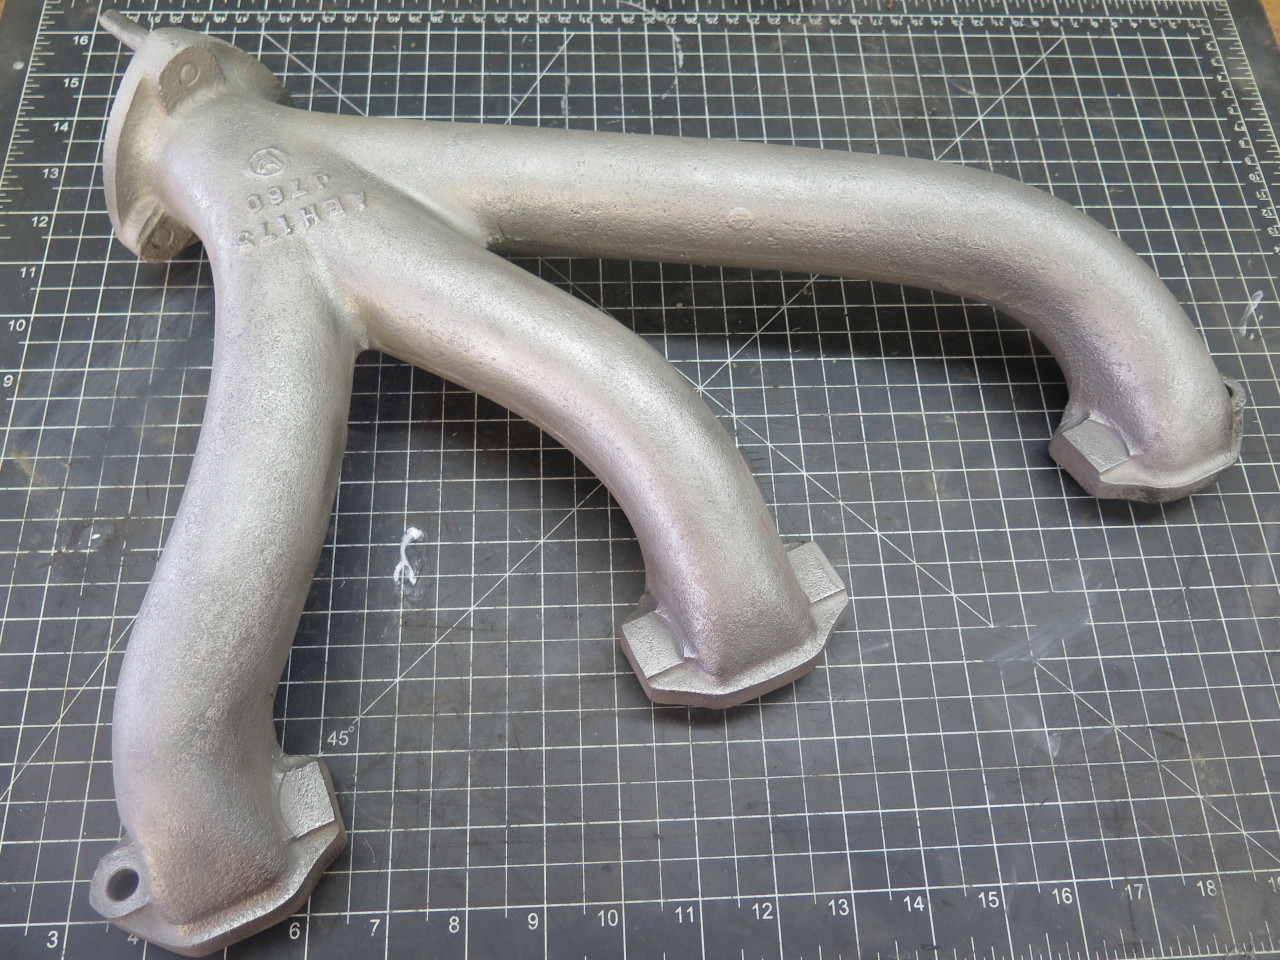
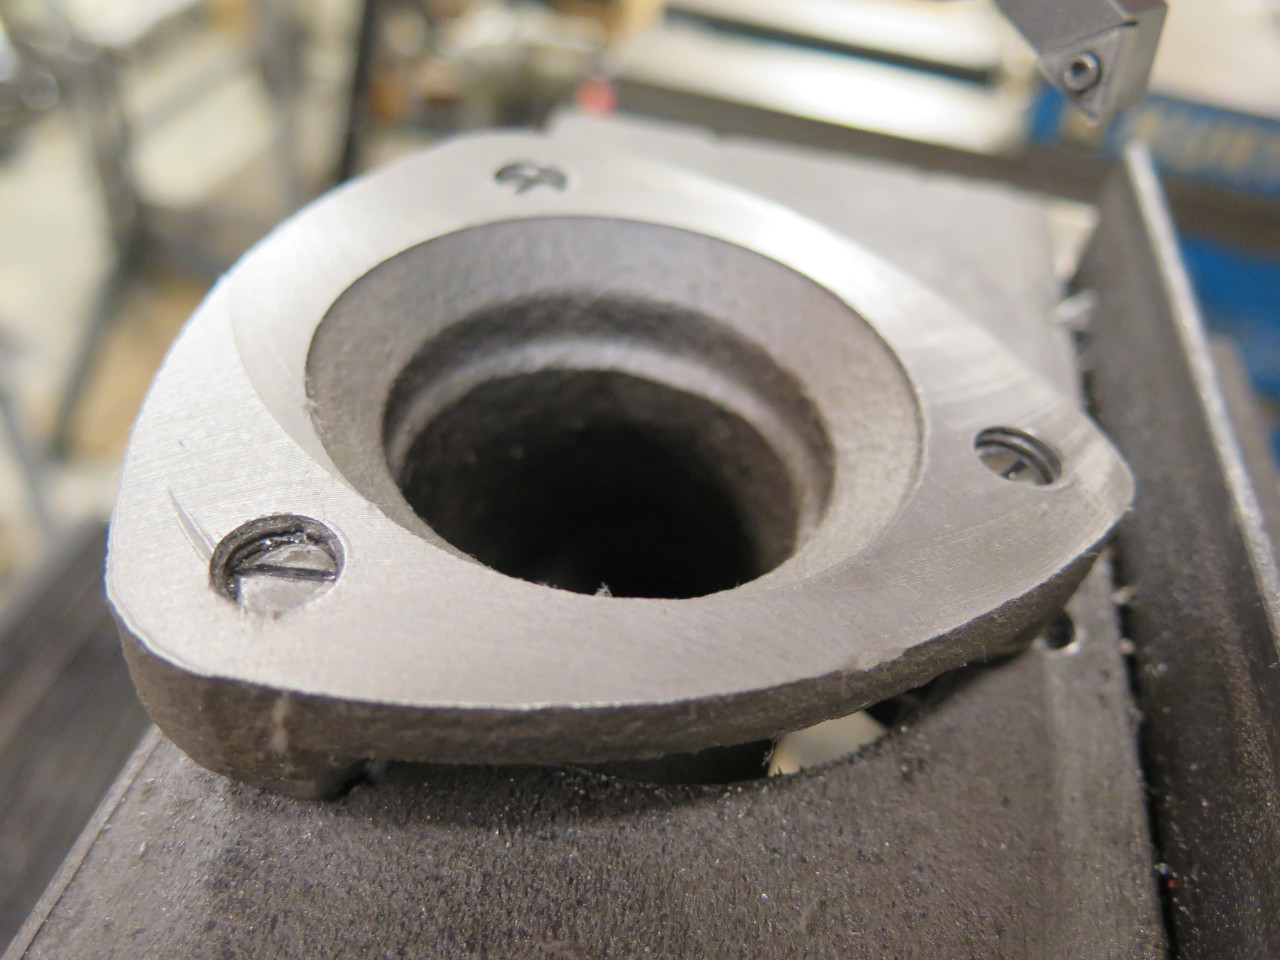
Since the manifold flange was mounted so flat and secure, I didn't see
any reason not to face it off. The realization that it isn't
actually a sealing surface came later.
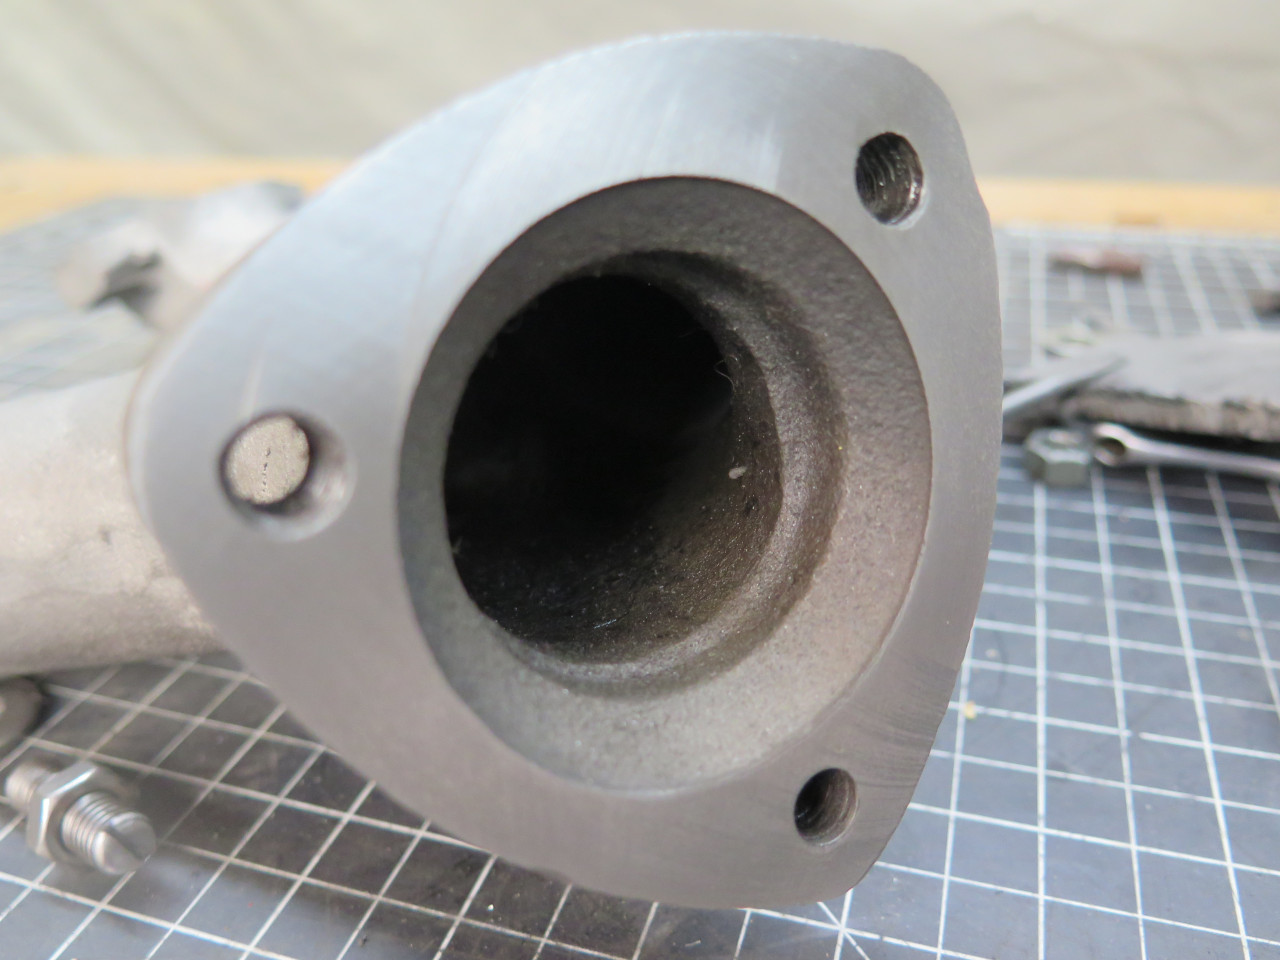
The surfaces that would really benefit more form facing are the ones
that mate with the cylinder head. I was able to check for
coplanarity, and found that the middle runner was out of plane by about
0.012". I don't think this by itself would have been a problem,
but the faces were also pretty pitted.
In an even greater feat of heroic work holding, I got the manifold
fastened to the mill table with the runner faces flat and level.
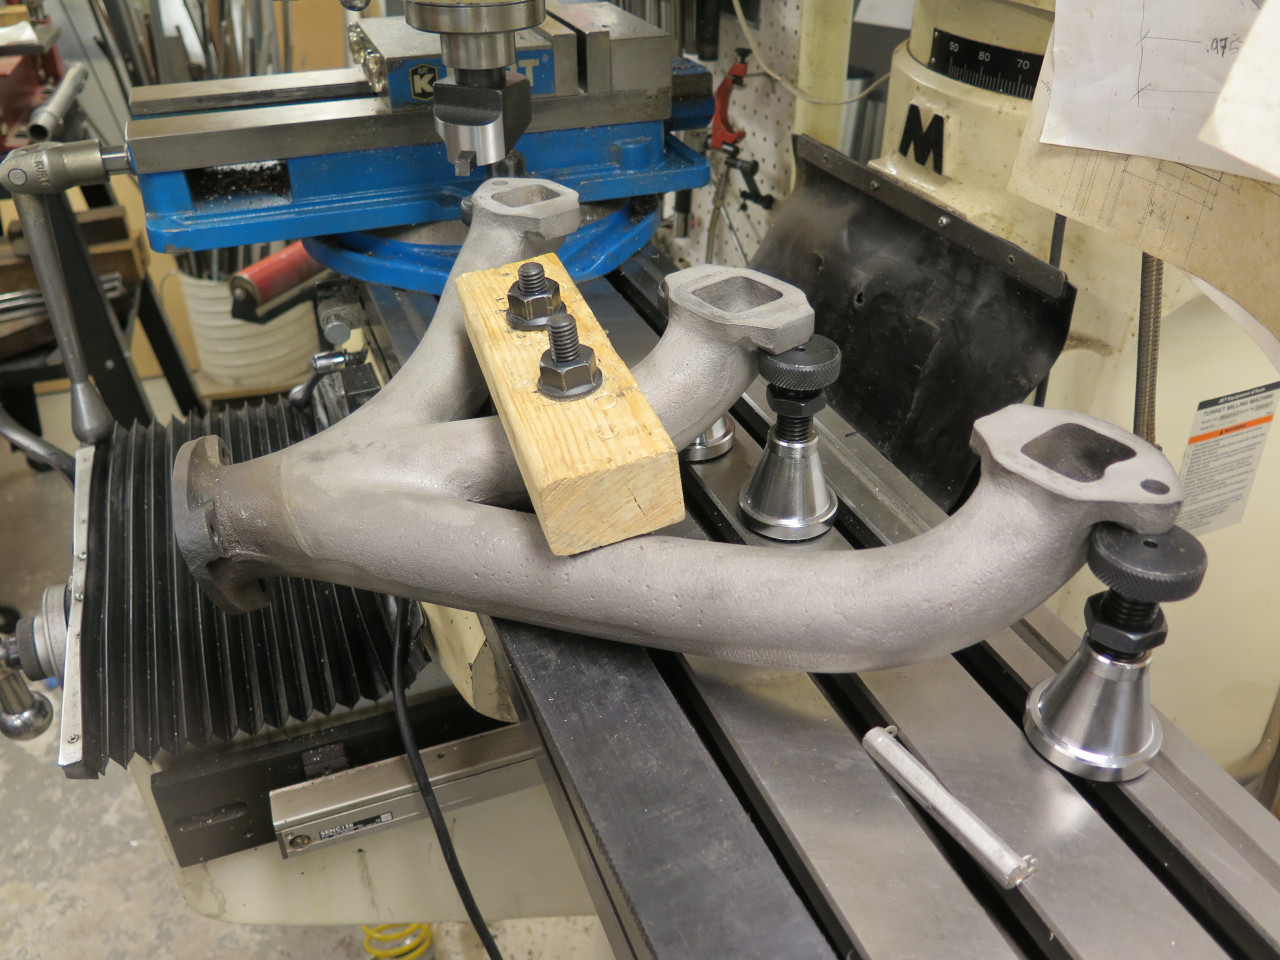
The setup had marginal rigidity, so I limited cuts to 0.005". It
took about 0.018" total to get everything to the same plane, with the
center runner coming in last.
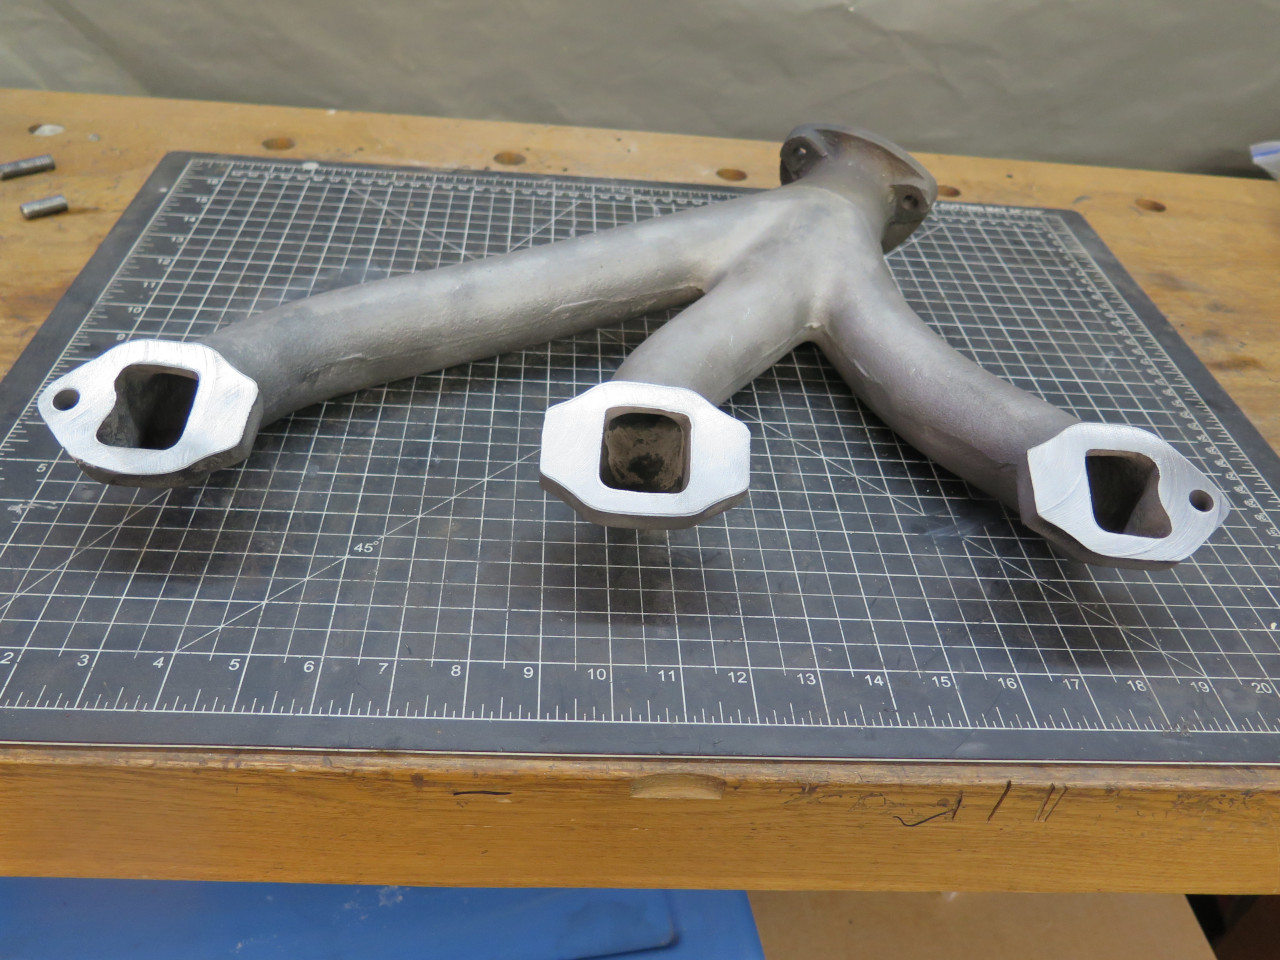
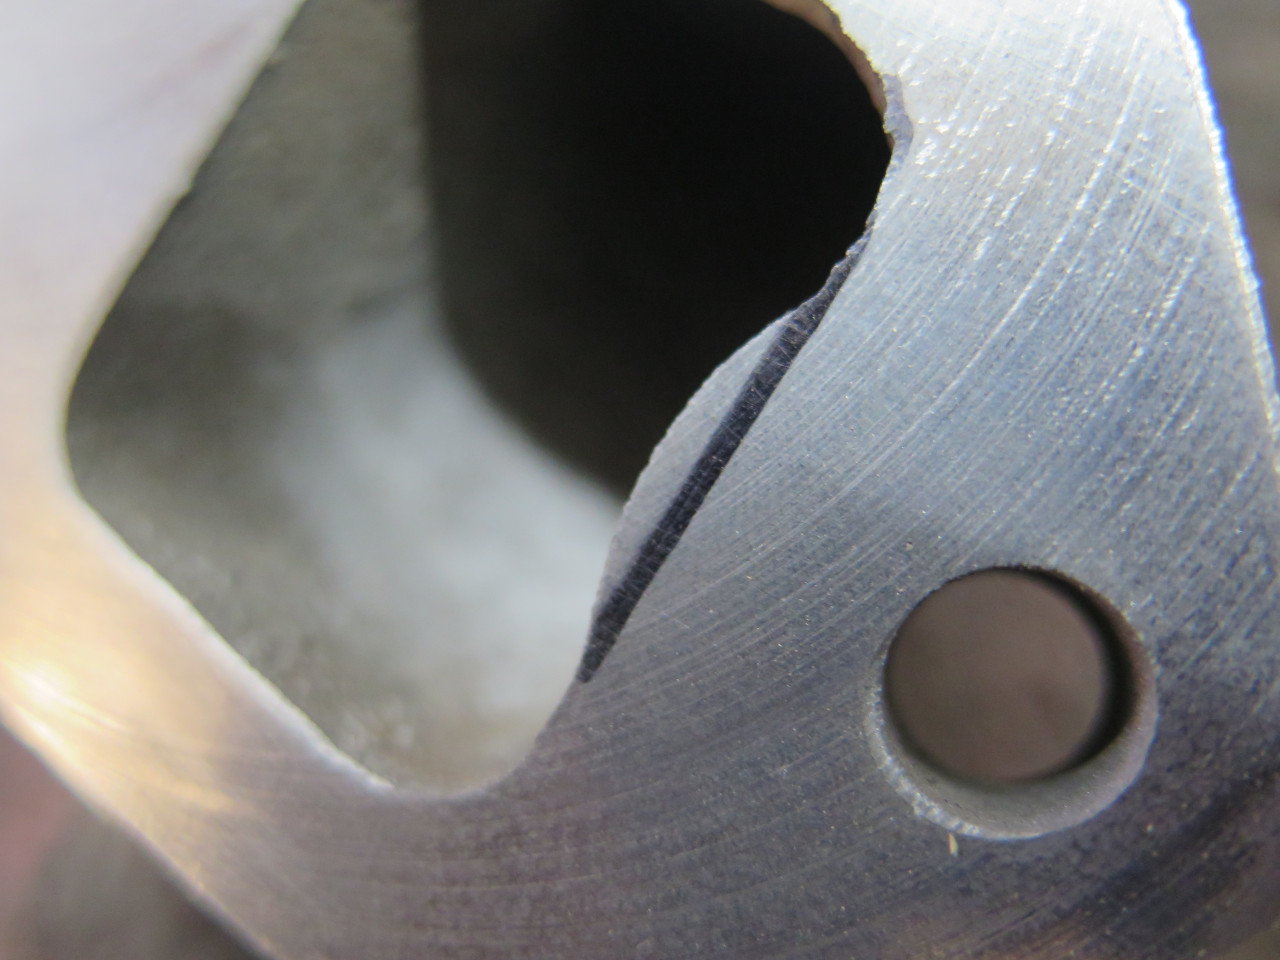
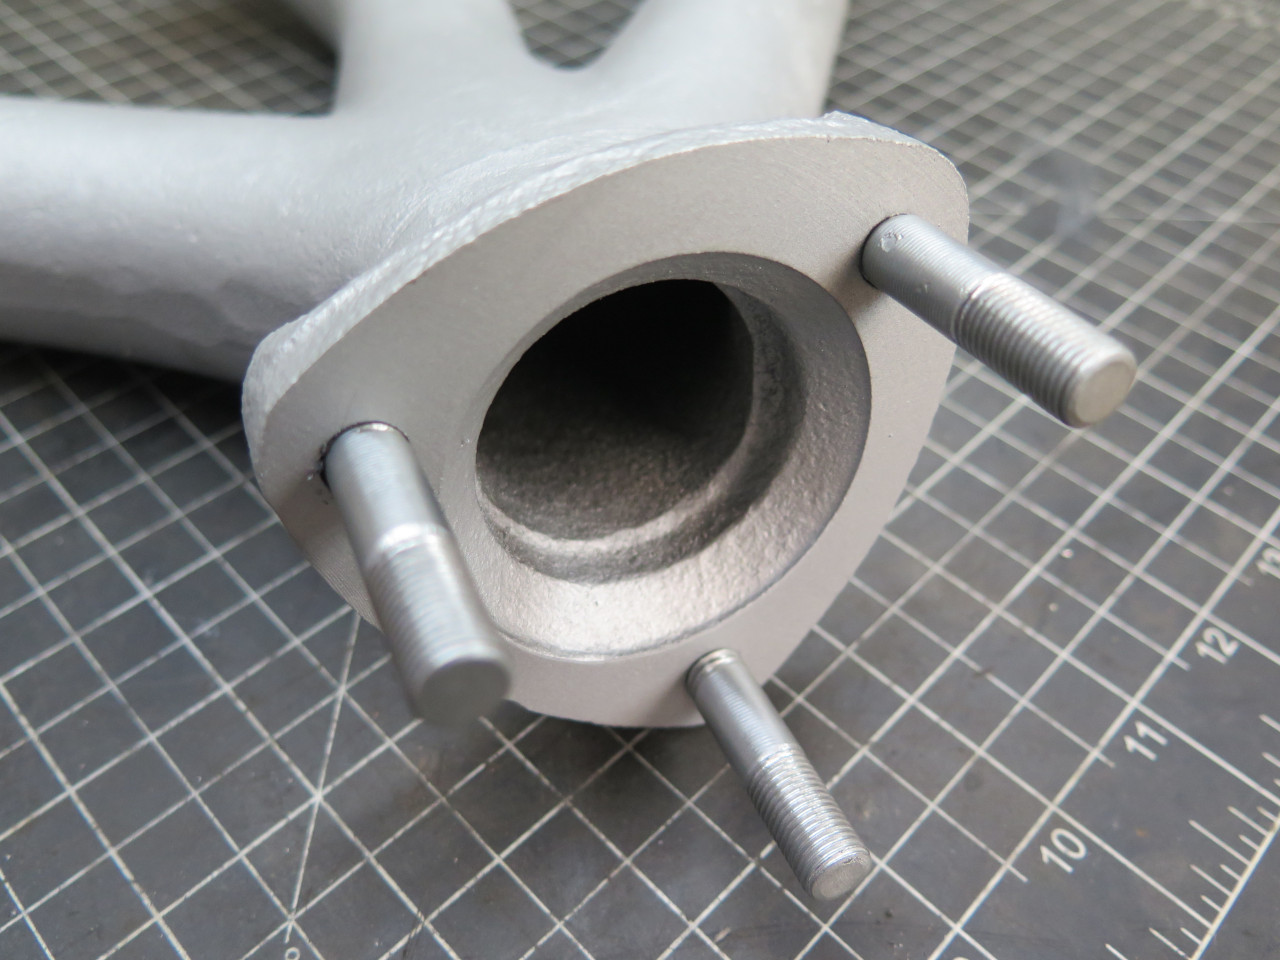
Throughout this process there was one little thing nagging at me.
This little bulge in the runner ports for the two end cylinders.
Neither the head nor the gasket had matching features. It seemed
like a bald insult to the free and natural flow of exhaust gasses.

I know why they are there. There is a recess in the outside
surface of the runner to make room for a socket or wrench to remove the
manifold nut. This bulge maintains wall thickness in that
area. But wall thickness is pretty generous in this part, so I
didn't think losing some would be a big problem. Besides, most of
the material removal would be from the edge of the mounting
flange. I opted for surgery.
I am not under the illusion that this will make any noticeable
difference to normal or even spirited driving, but it makes my aesthetic
sense happy.
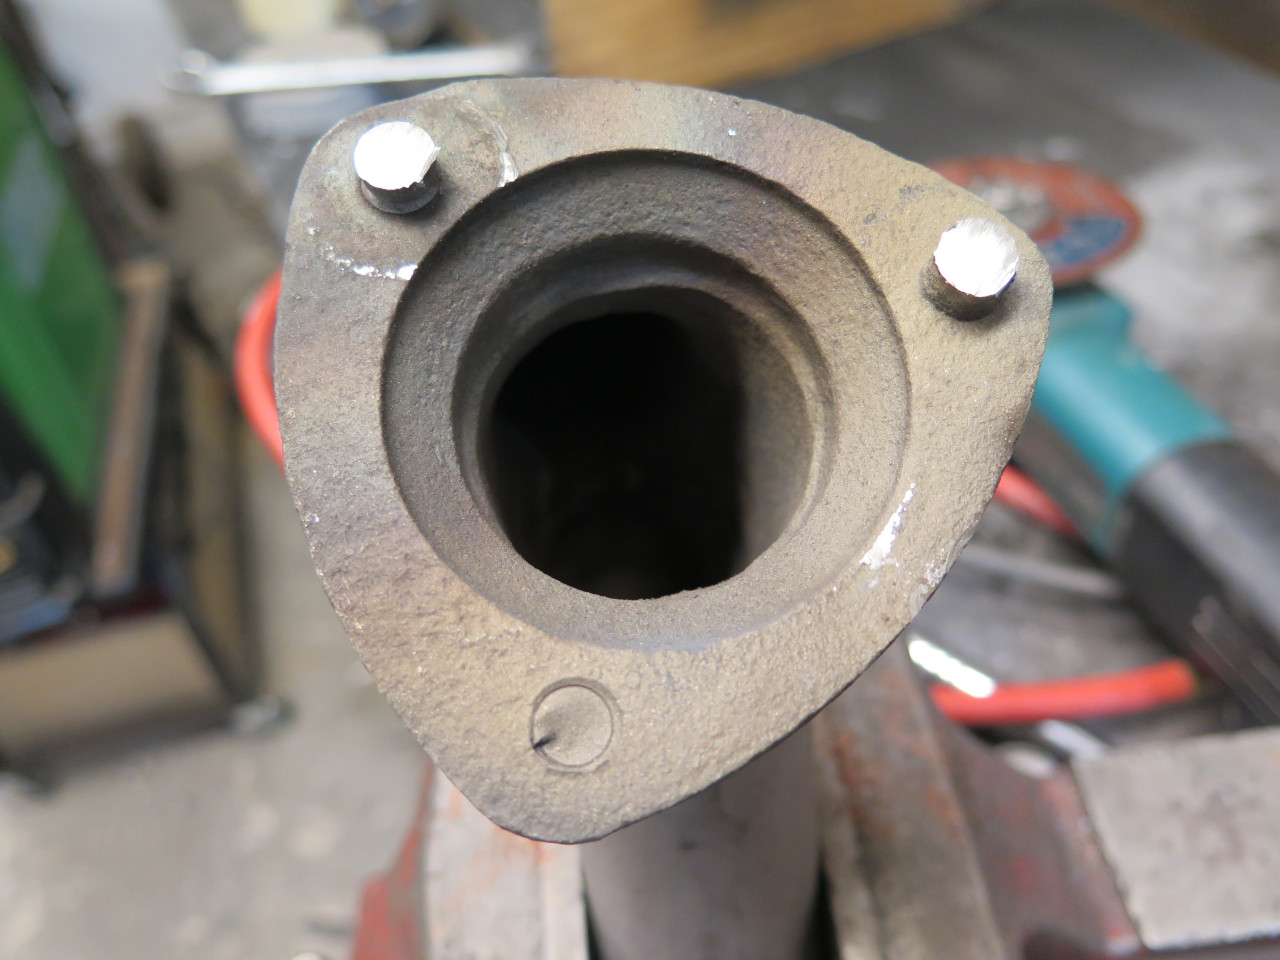
Last up: new studs to replace the fallen ones. I couldn't really
justify ordering a set and waiting for them, so took an hour or two to
make a set. Unlike the originals, these are zinc plated, so I
guess we'd have to call them "uprated".
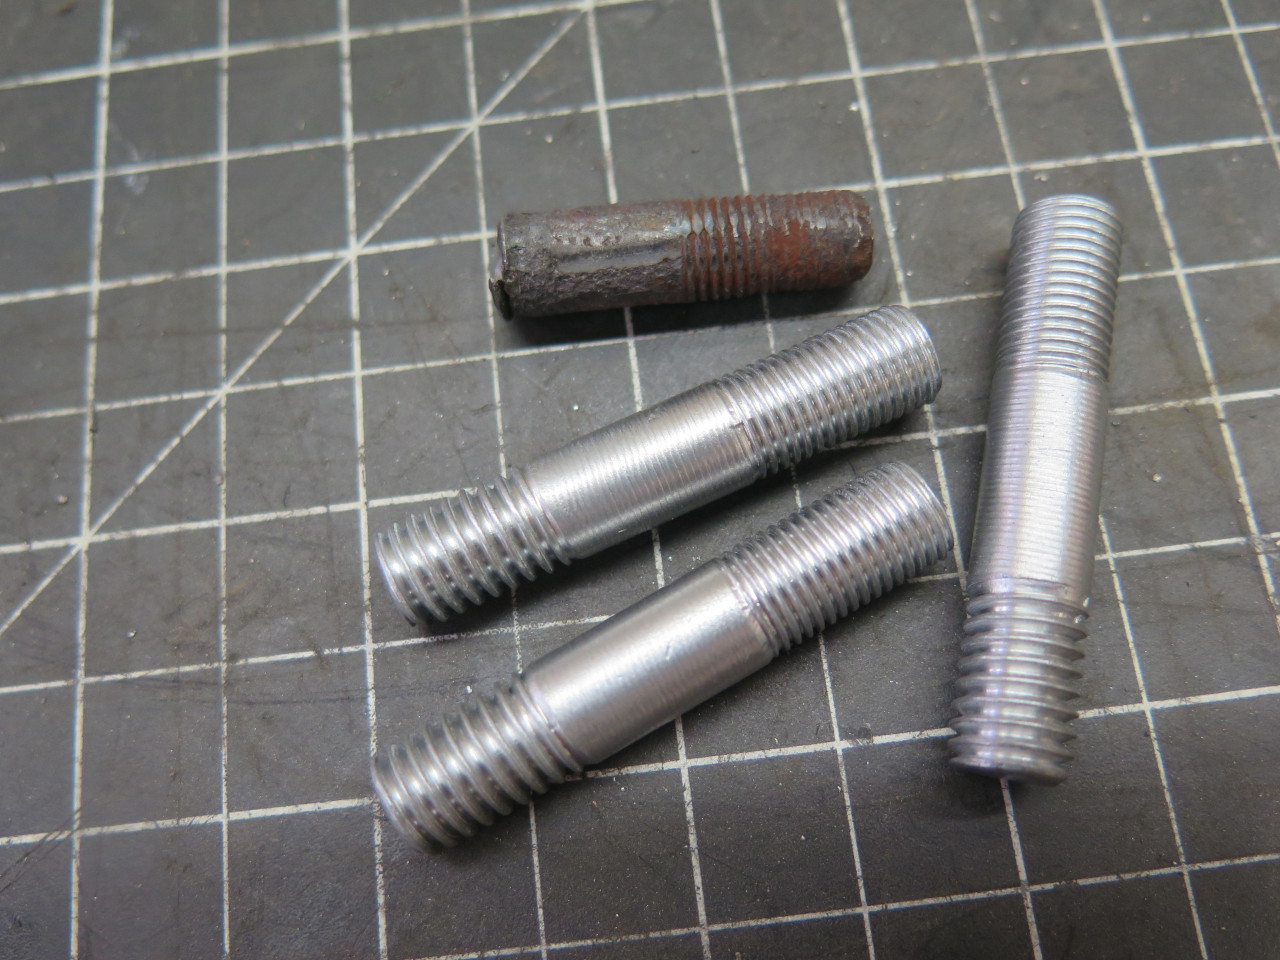
Before making the studs, I had painted the manifold with a high temp
paint, and cured it in my oven, following the manufacturer's schedule.
Popped the studs in, and we have a manifold!
This was another of the "cold weather" projects, marking time until we see better temps for garage work.
It took a few days, but the cost was only about $15--mainly for the paint.
Comments to Ed at elhollin1@yahoo.com
To my other MGA pages