
Making lumber.
Back in the 80's, Bonnie and I bought a small wooded acreage and began to build a house on it. We had to fell four large Burr Oak trees, which yielded six 12-15 foot logs. The first winter of construction, I milled the logs into lumber with the intention of using it for trim in the house.
I've milled a eight or ten more logs over the years, mostly windfalls, and the pictures that follow are from a variety of years.
I didn't have the time or money to buy or make a bandsaw mill, but I was determined to try to do the job myself, so I built an attachment for my chainsaw. A chainsaw mill is much less expensive than a bandsaw mill, but it is slower, and there's more waste with the wider kerf. I got most of the techniques from a couple of books I bought on chainsaw lumbermaking.
Click on the pictures to see a bigger version.
Here's how it's done:
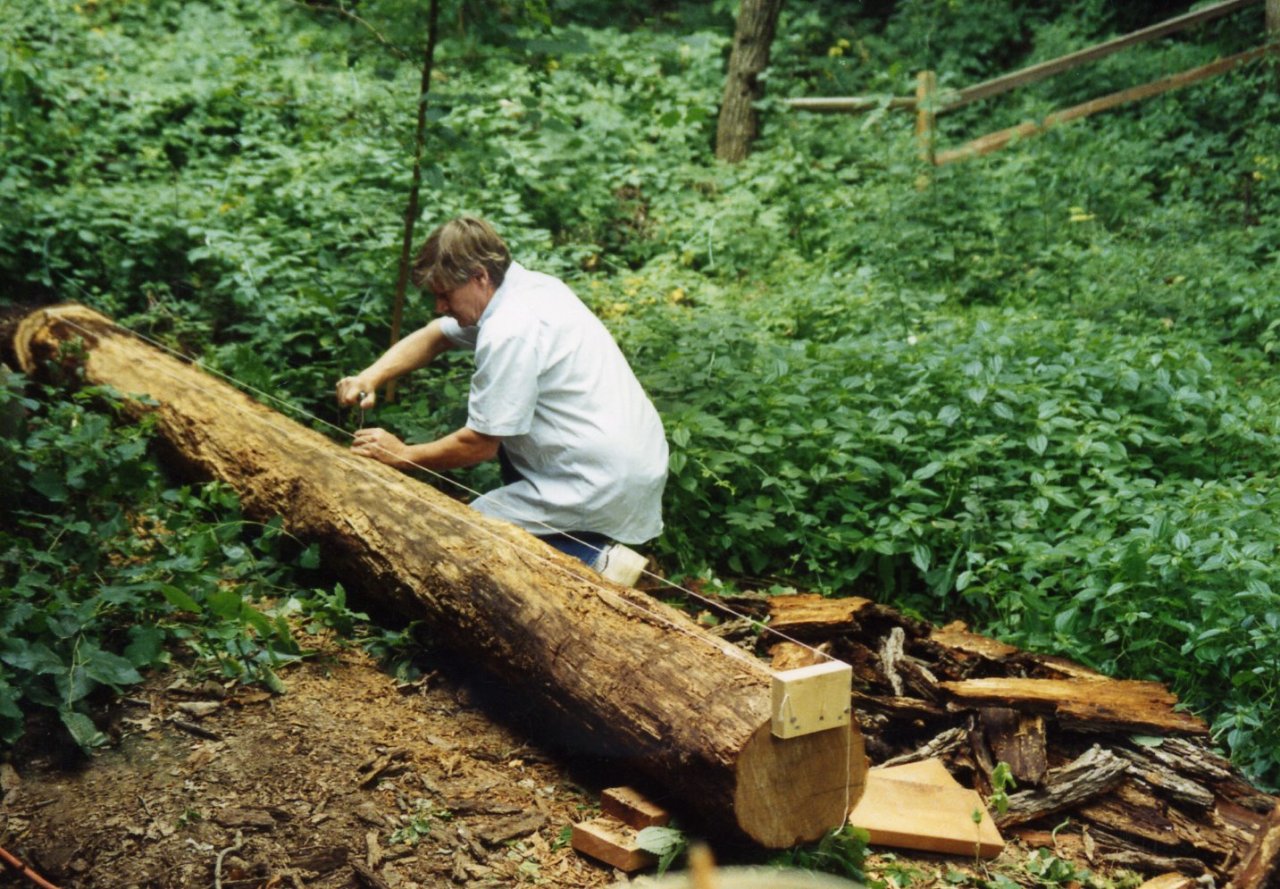
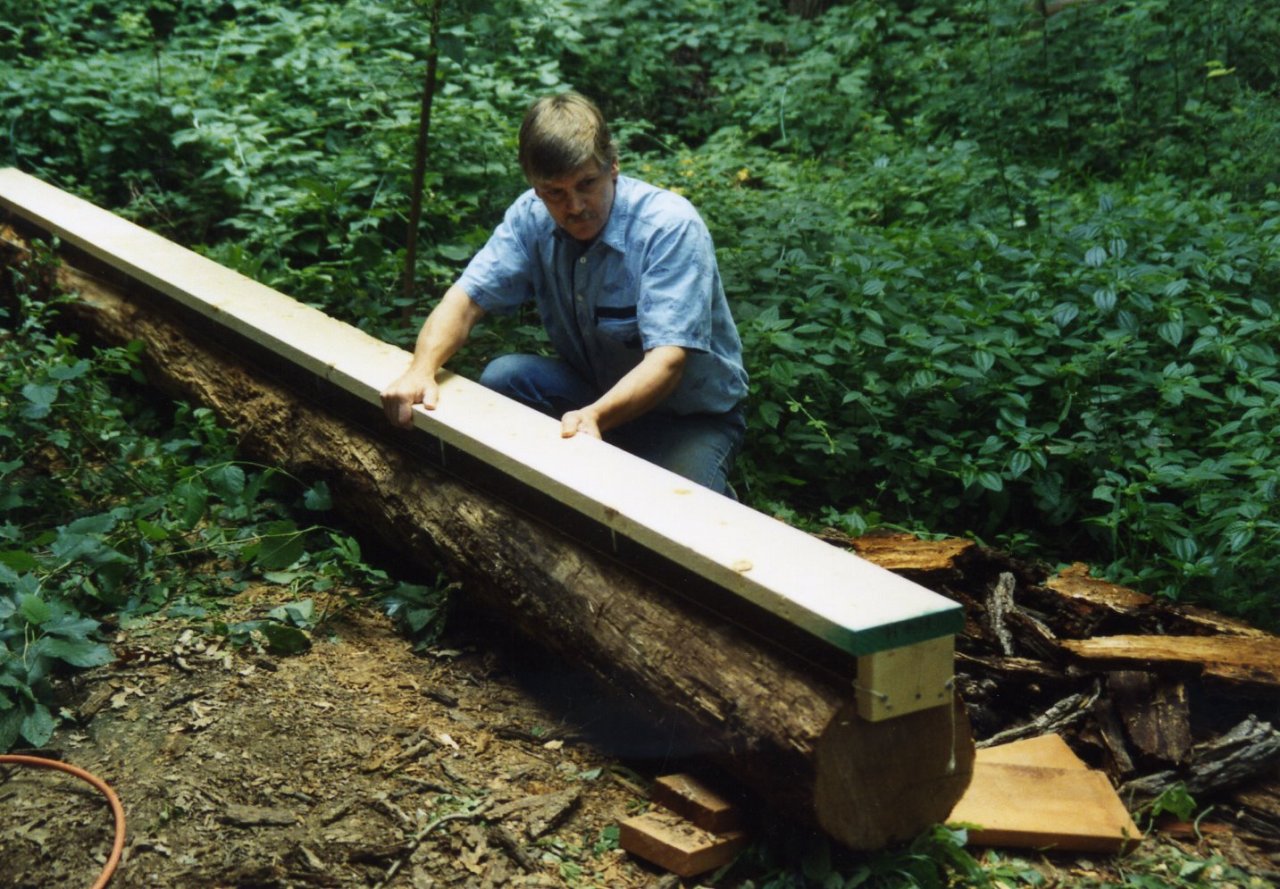
After you decide where to make the first cut (an acquired skill I still am not great at), you need a flat surface to guide the mill for the first cut. To do this, lag bolt a block to each end of the log such that the top ends of the blocks are coplanar and the same distance from the intended cut line. Stretch two strings from block to block, one at each top corner. These serve as a guide to place two rows of lag bolts down the log such that their heads just touch the taught strings. Make sure the lag bolts don't extend into the log deep enough to reach the cut level. Place a straight, flat 2 x 10 on the blocks such that the blocks and lag bolts support the 2 x 10 securely. Bolt the 2 x 10 to the end blocks recessing the heads below the surface. This flat 2 x 10 is the flat guide for the first cut.
This shows the chainsaw mill attachment. It is welded up of 1.5 x 0.75 rectangular steel tubing, and has adjustable threaded rods that are attached to the chainsaw bar. I believe that is a 20-inch bar. The chainsaw needs a special grind on the chain for continuously cutting end grain. All teeth are ground at 90 degrees to the direction of travel. Start at one end and push the saw through. I keep the throttle wide open, and adjust the pressure to maintain decent cutting speed without bogging down the saw. Occasionally put wedges into the kerf to keep it open and to keep the guide surface at the right height. With a sharp chain and a 16-18 inch burr oak log, it might take a couple of minutes to go a foot. I only count on one to two cuts on one sharpening.
After the first cut, remove the top flitch. The resulting flat surface on the log now serves as a guide for the next cut. Continue this way until you're finished. The second picture below shows about a 4-inch thick slab I cut for a possible mantle. Mostly, I cut 2.25-inch slabs, assuming they would dry to around two inches, and I could easily resaw them to two 1x bookmatched boards.
Stack the flitches on good supports above ground level. Separate the individual slabs with wood "stickers" at least 1" x 1" to allow air circulation. Paint the ends with something to slow drying. Otherwise, the ends dry too fast and check (crack). There is a special wax emulsion for this, but latex paint reportedly works as well. Lumbermaking lore says to plan on about a year per inch of thickness for air drying. Protect the stack from rain and snow while not inhibiting air circulation. The picture shows plastic, but I later built a low corrugated galvanized roof over the drying logs.
A few years later, I used the lumber for baseboards and door trim for the house. The lumber is installed not 50 feet from where it grew.
Mail comments to: elhollin1@yahoo.com