To my other GT6 pages
August 16, 2022
Radiator & Cowl Install
GT6 cars had relatively small radiators, so it was important that
they perform as efficiently as possible. One way to boost cooling
performance was to ensure that as much air as possible was directed
through the radiator rather than around it. This was accomplished
by a cowl that flared out in front of the radiator. It was
designed to capture the majority of the air coming through the grille,
and direct it through the radiator core.
While technically a sound idea, the execution left something to be
desired. The cowls were made of a material resembling both
fiberboard and cardboard. It didn't weather well, and degraded
rapidly. The cowl on my car was missing completely.
Now, replacement cowls can apparently be bought these days, but they
often don't get good reviews for fit, and the material they are made
from may not be much better than the originals. Some folks have
had success making their own, and that seemed like a fun idea to me.
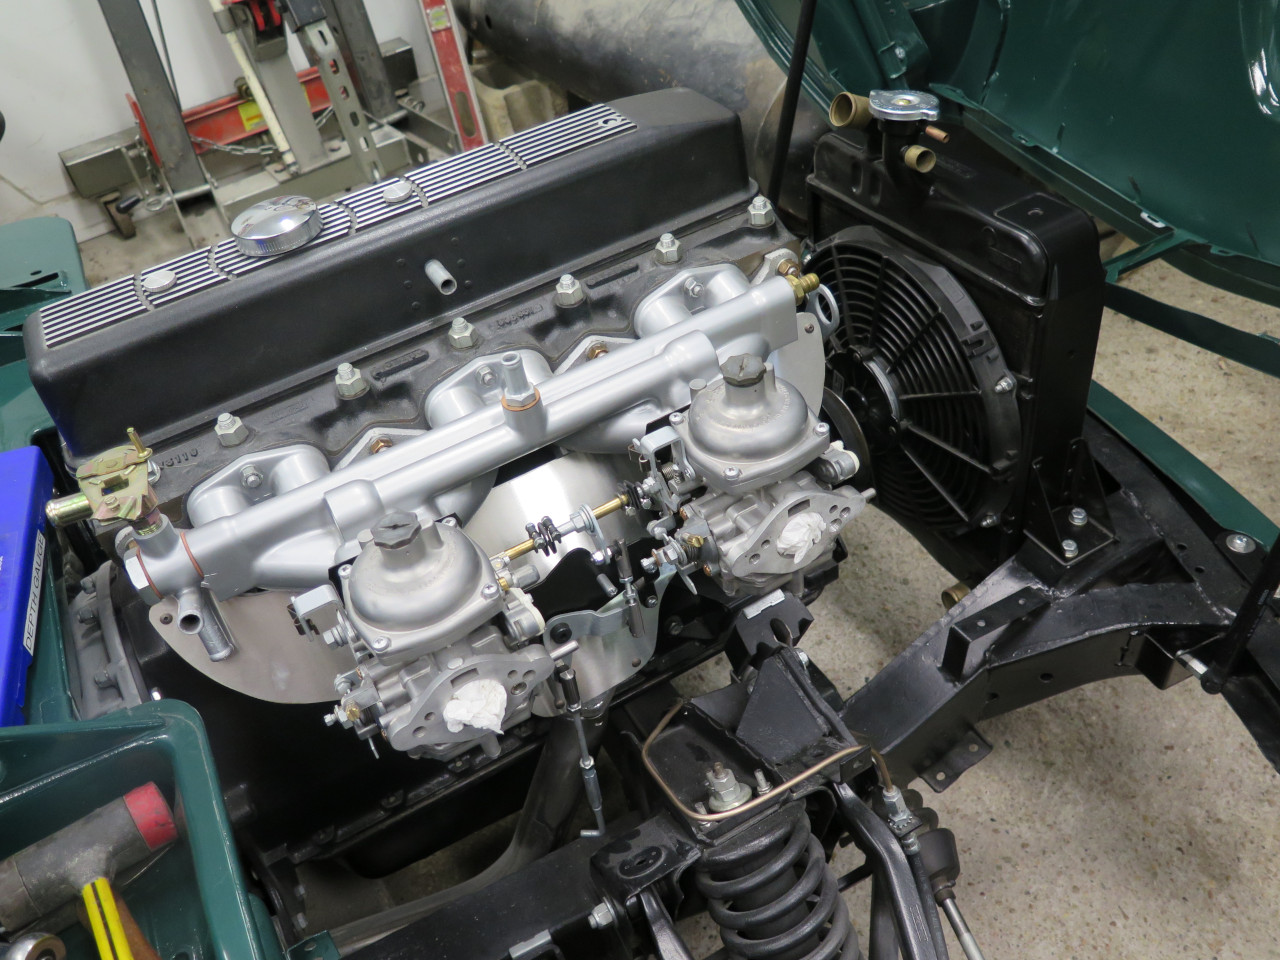
But first, I had to install the radiator, which turned into a bit of a project itself.
I retrieved the rebuilt radiator assembly from the top shelf where it's been waiting patiently for a year and a half.
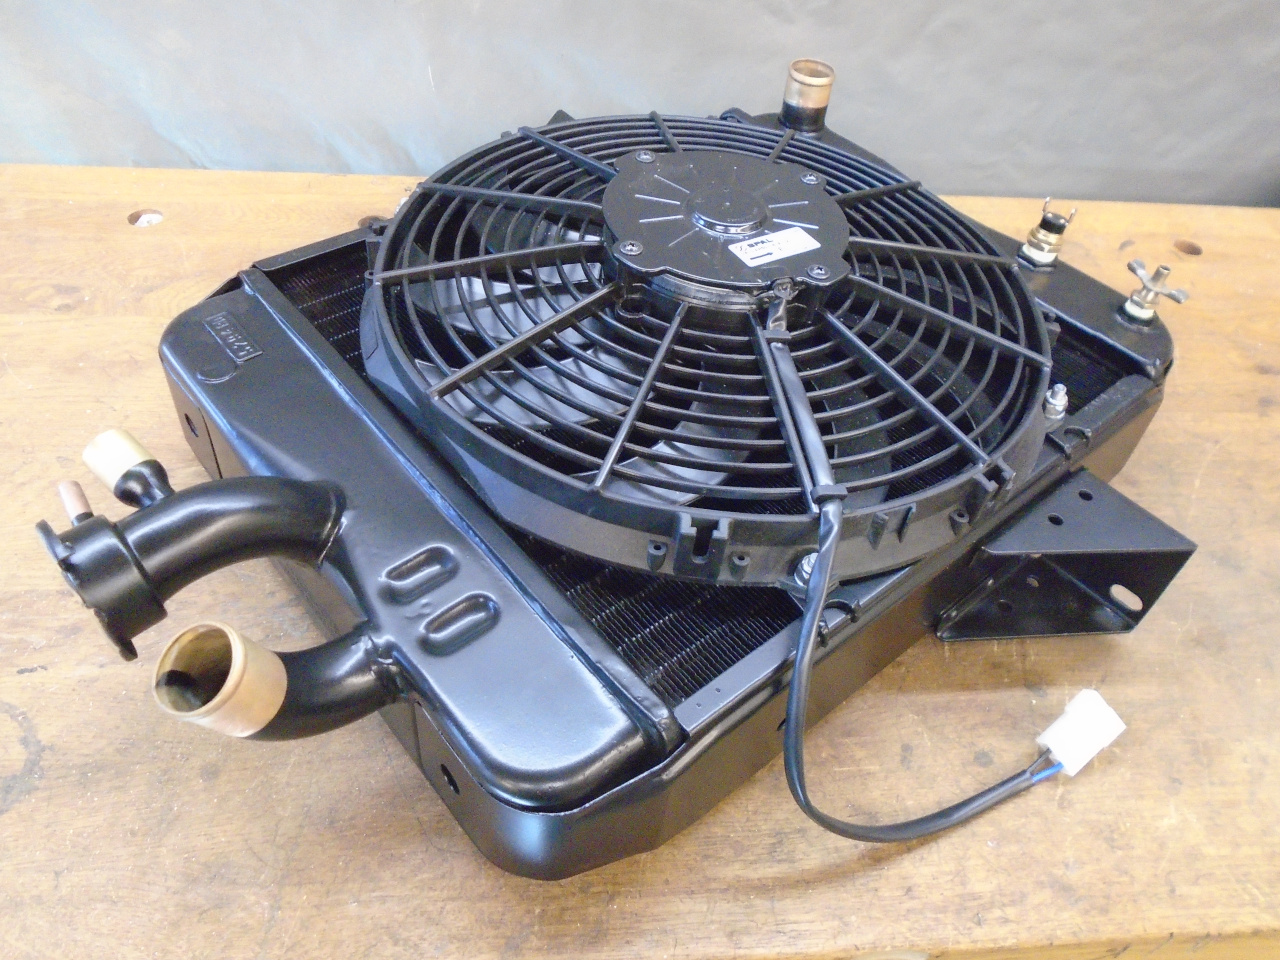
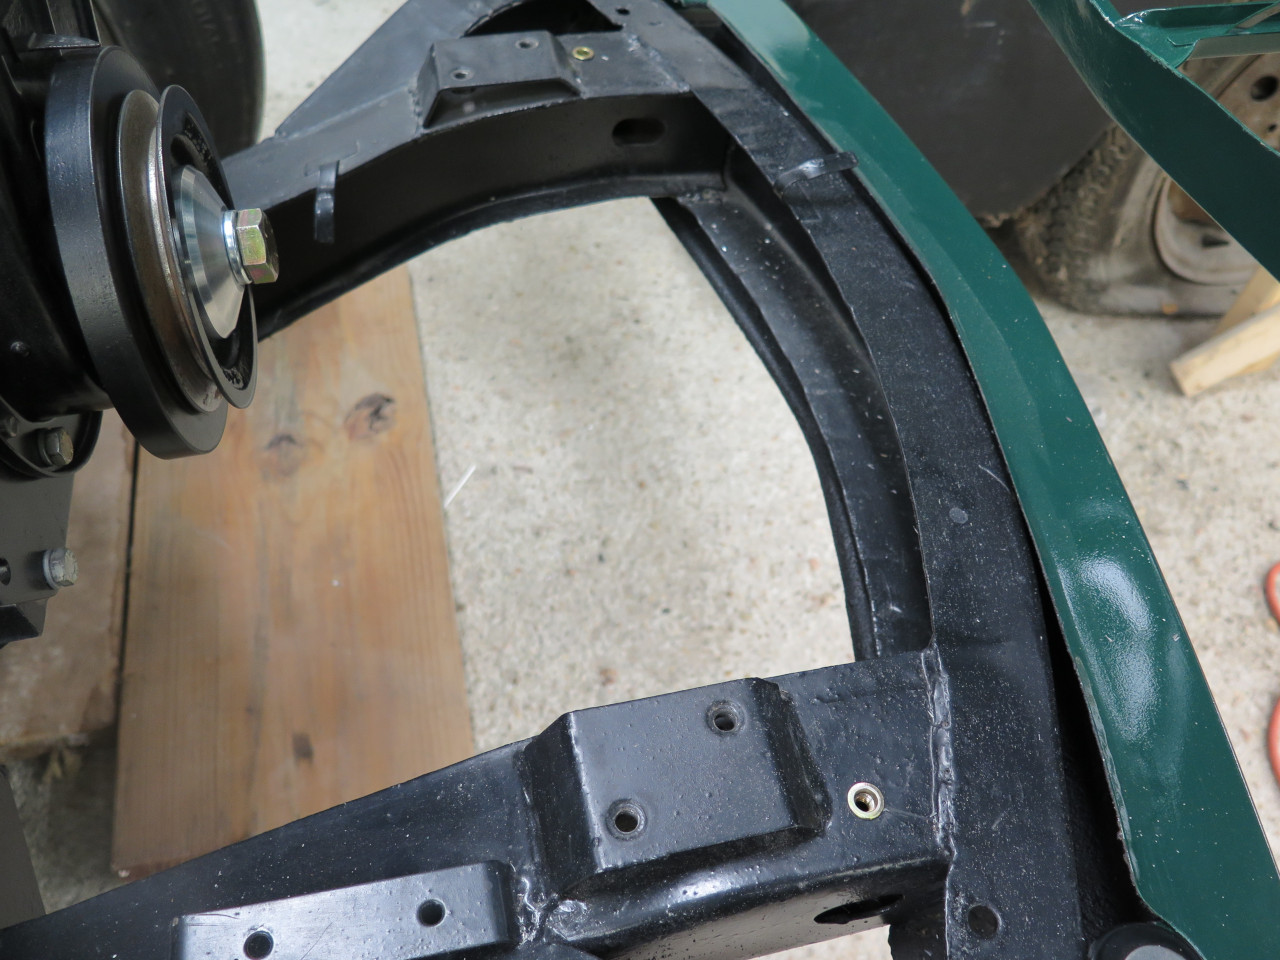
I don't recall if there were any resilient pads between the rediator's
mounting brackets and the frame, but it seemed like a good idea, so I
made a couple. I was able to clean up the original bolts, but
supplied new washers.
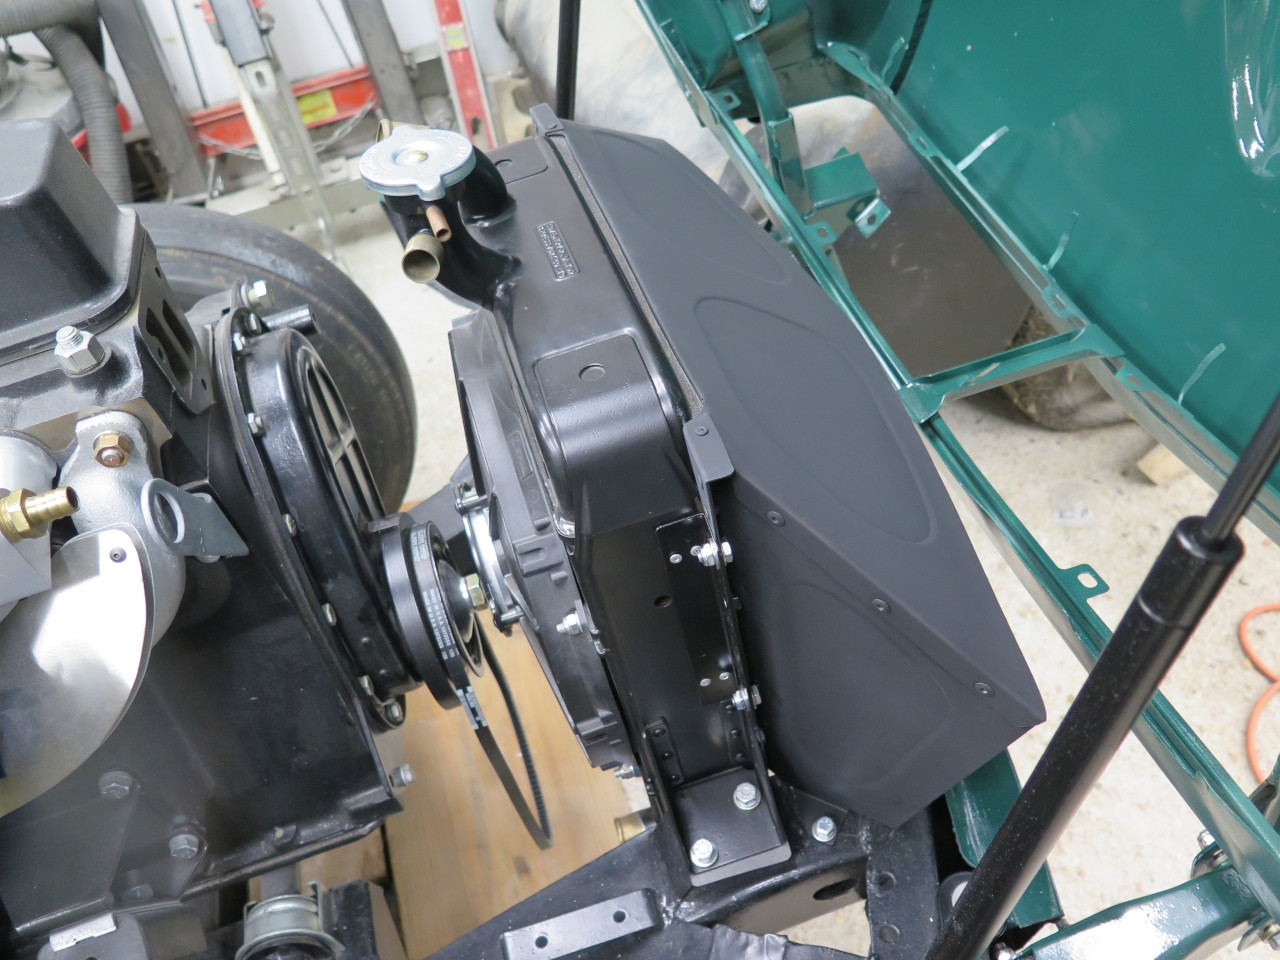
Here's where the trouble started. The radiator fit, but the fan
was almost touching the old fan mount. There was no room for the
big bolt that goes into the end of the crankshaft.
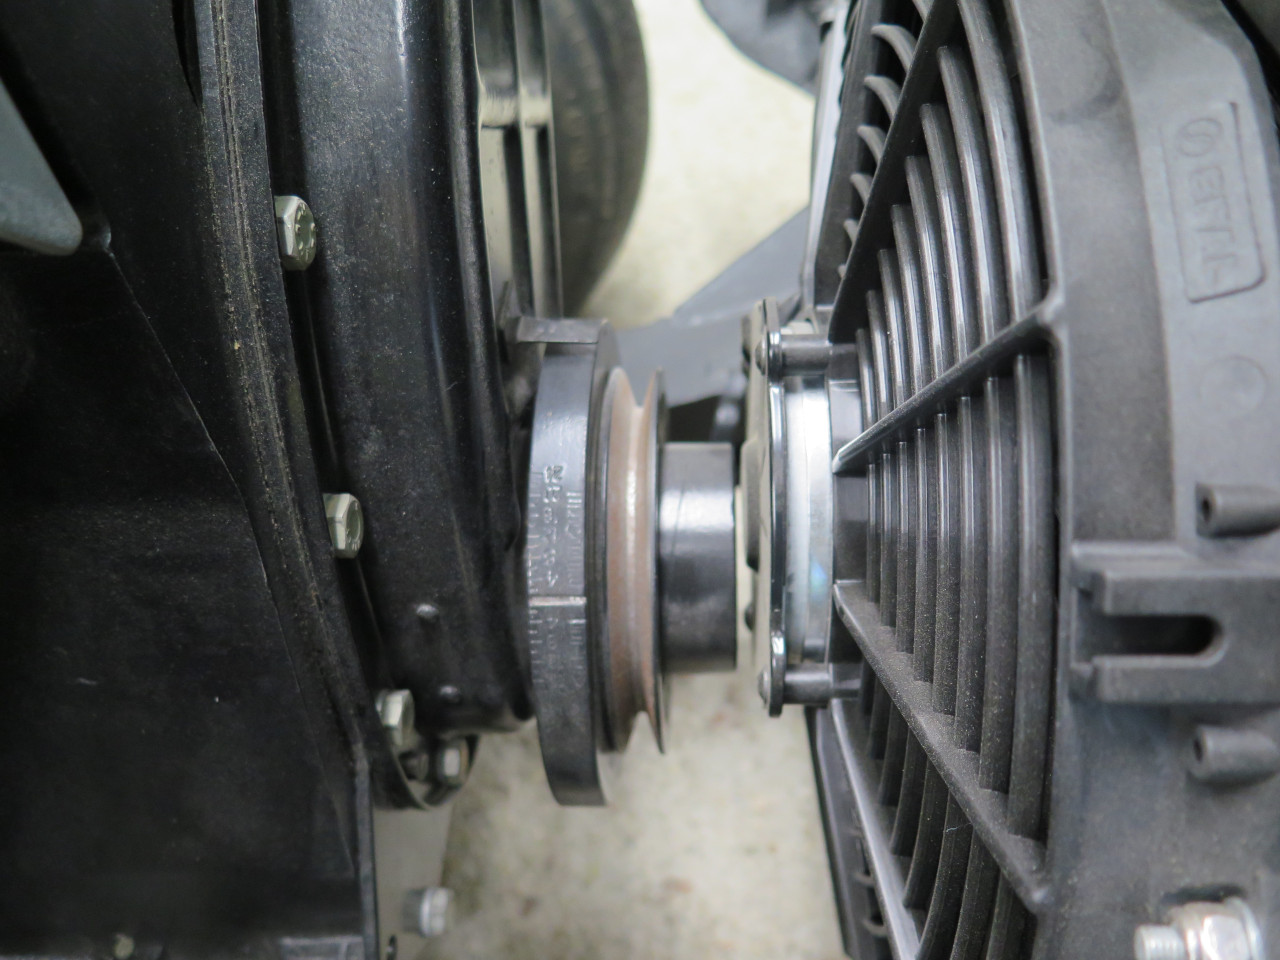
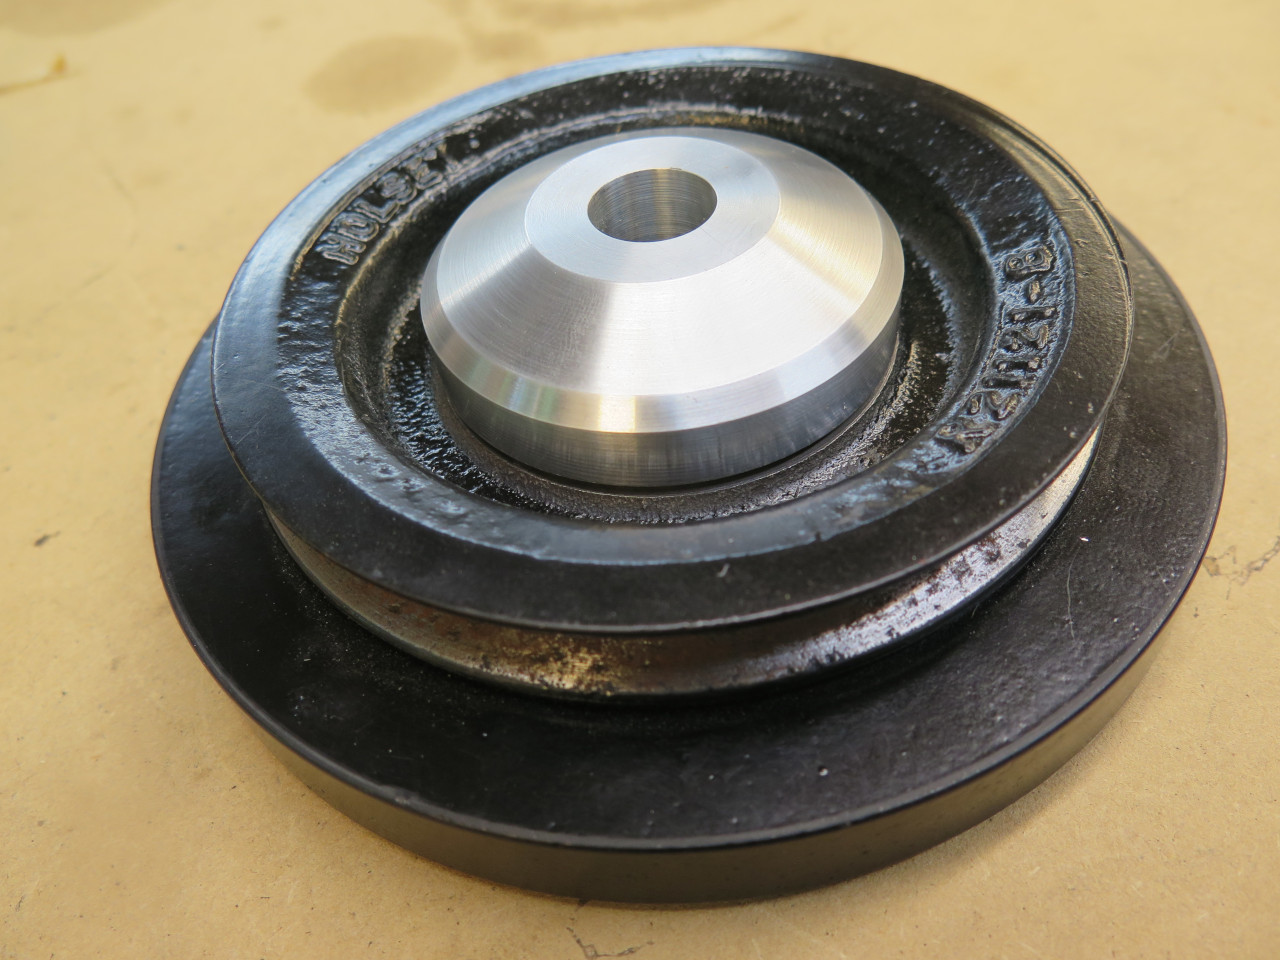
I removed the harmonic damper to see what might be done. I happily
discovered that the fan mount was actually a separate piece.
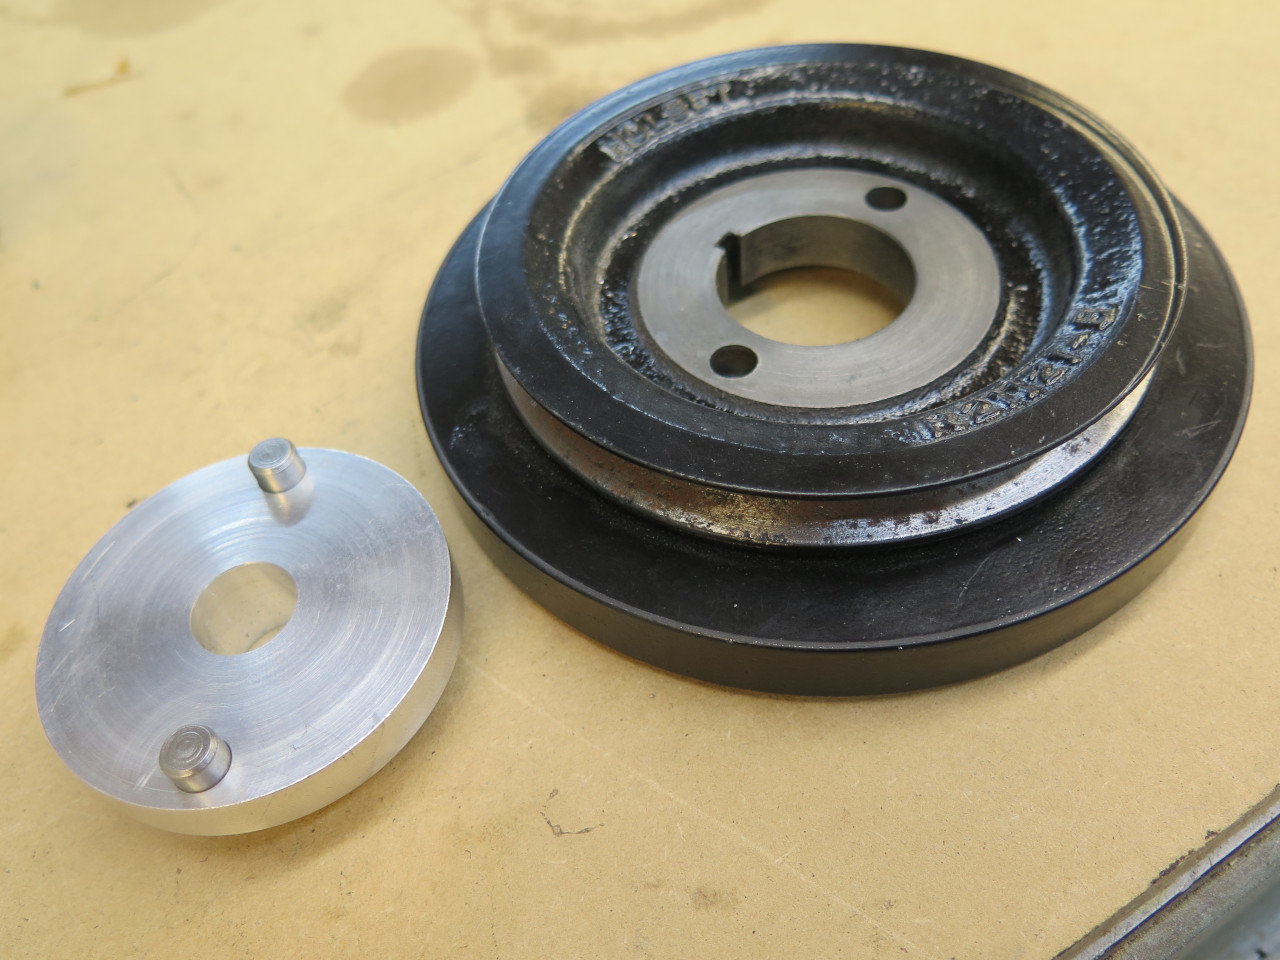
Since I wasn't going to run the original mechanical fan, I could just
replace that fan mount with something thinner. I could have just
made the original mount thinner, but when possible, I like to preserve
original parts.

This little aluminum puck looked like it would do the job. The
original fan mount was keyed to the damper by those two pins, which
would resist the back-torque of the spinning fan. My new piece
wouldn't really need that function, but I duplicated it anyway.
Well, in my haste, I neglected to notice that the snout of the crank
actually protrudes beyond the face of the damper. Back to the
shop.
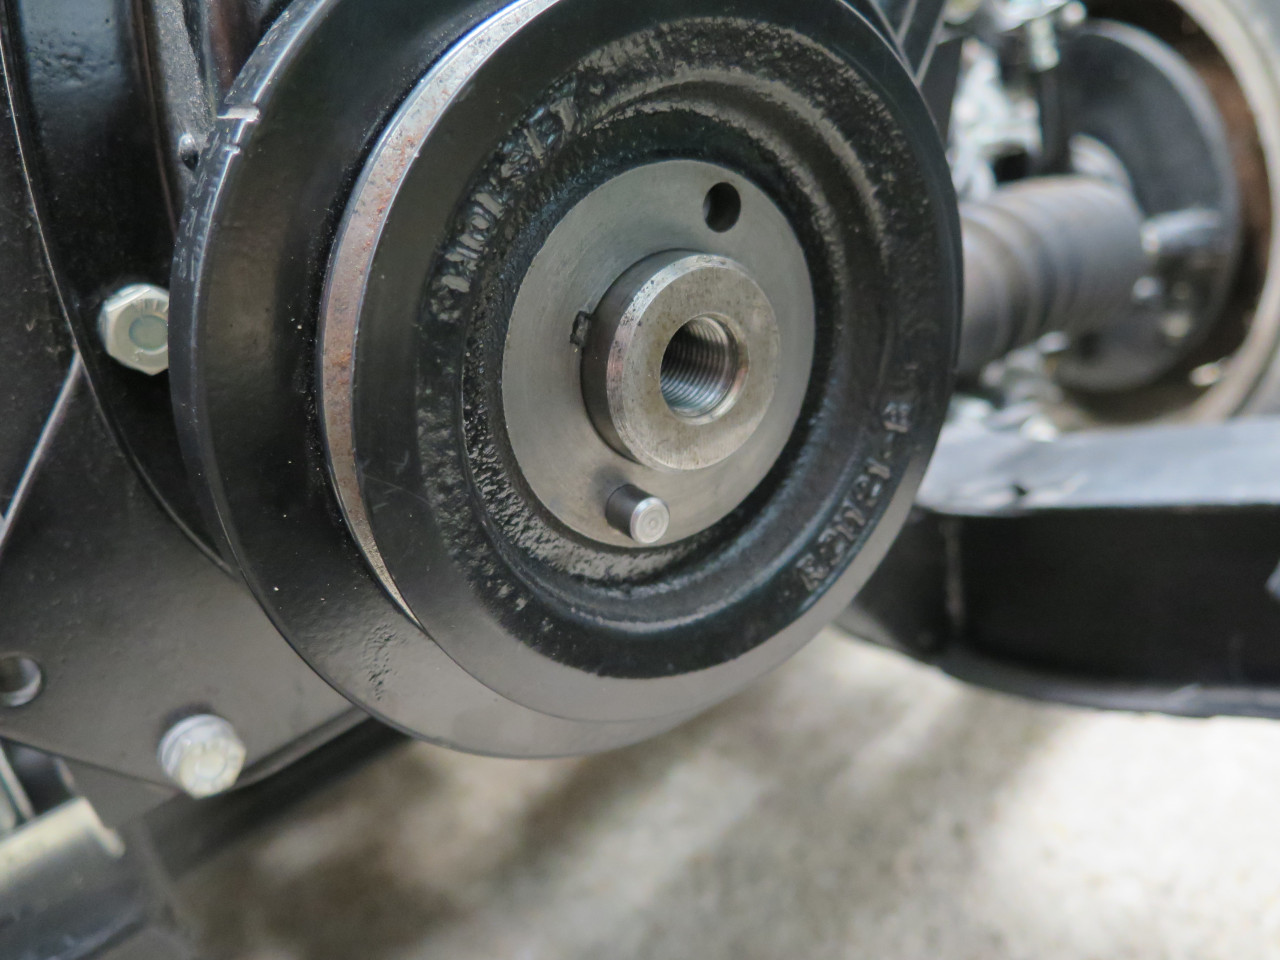

Ahhh. Mo' betta'.

Still close, but there's daylight between them.
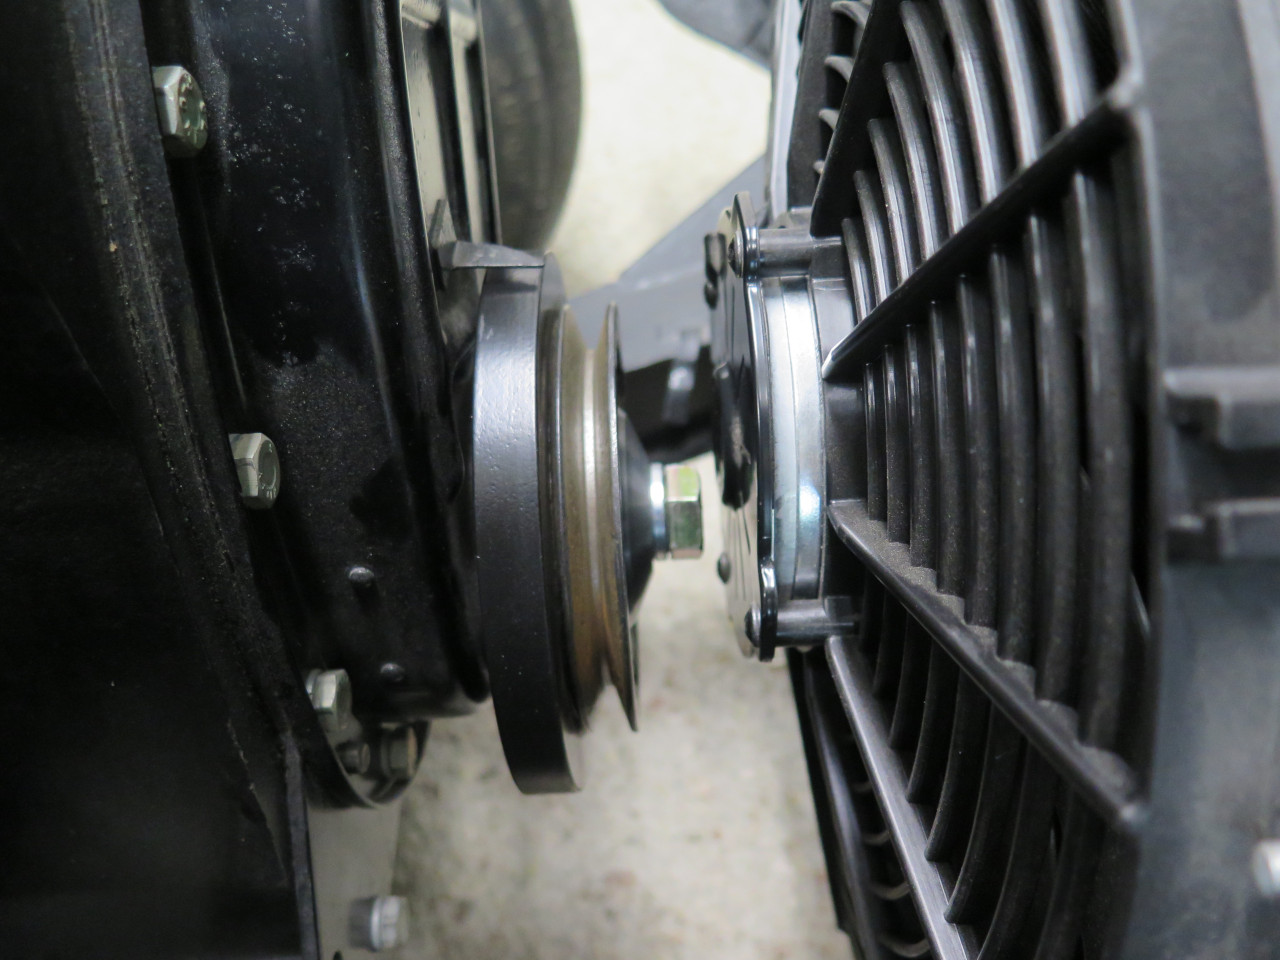
Really adds some gravitas to the engine bay.
OK, then. Now, on to that cowl.
Since I had nothing even for a pattern, I was starting from
scratch. The commercial offerings apparently come flat, and need
to be folded into the proper shape. This was fortunate, and I
downloaded a couple of images of the flattened cowls, and scaled them up
to something that would fit the radiator. I laid it out on some
posterboard and made the appropriate bends. The fit wasn't very
good, but it was a starting point.

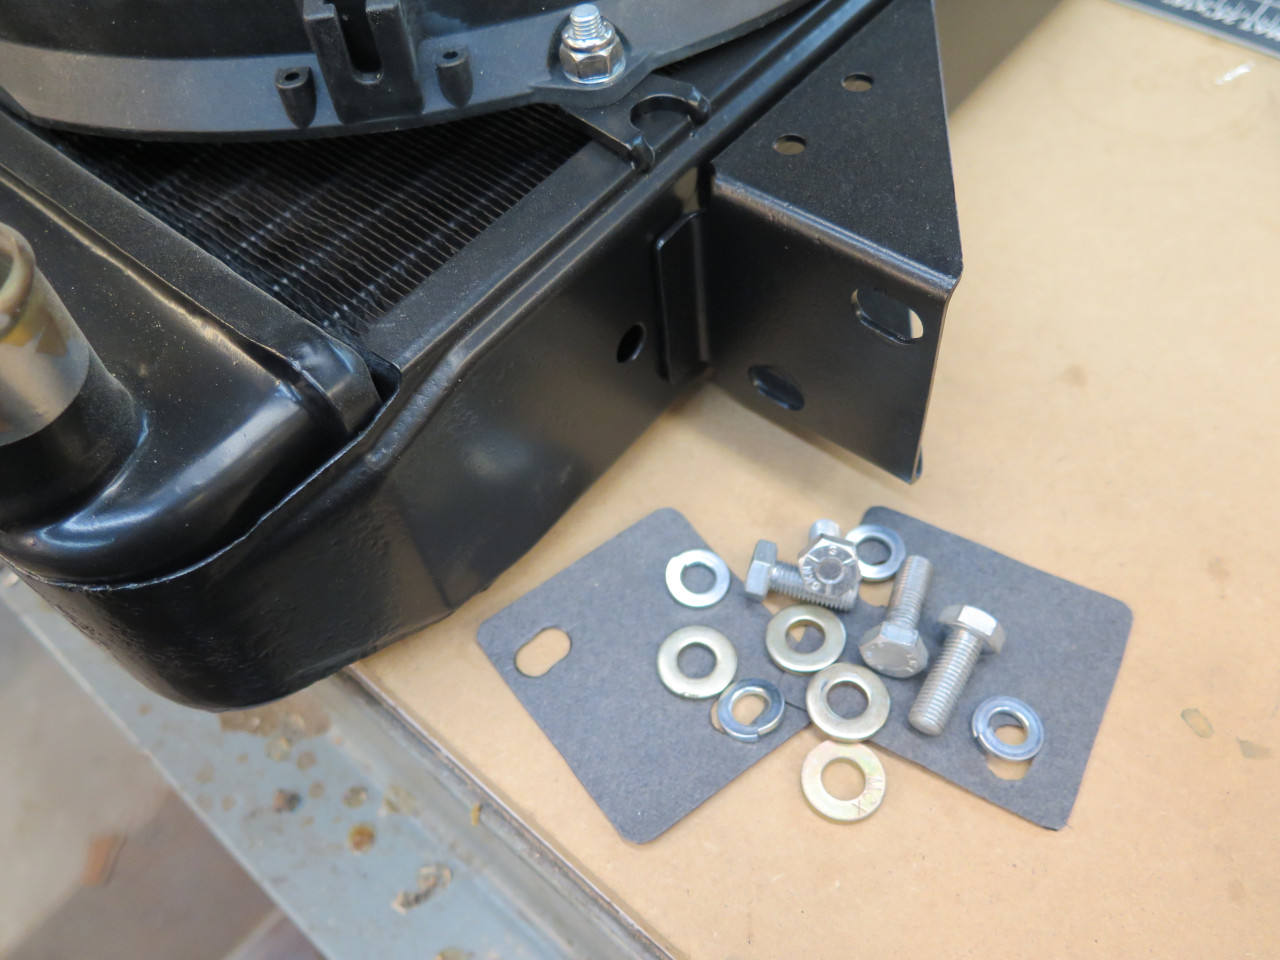
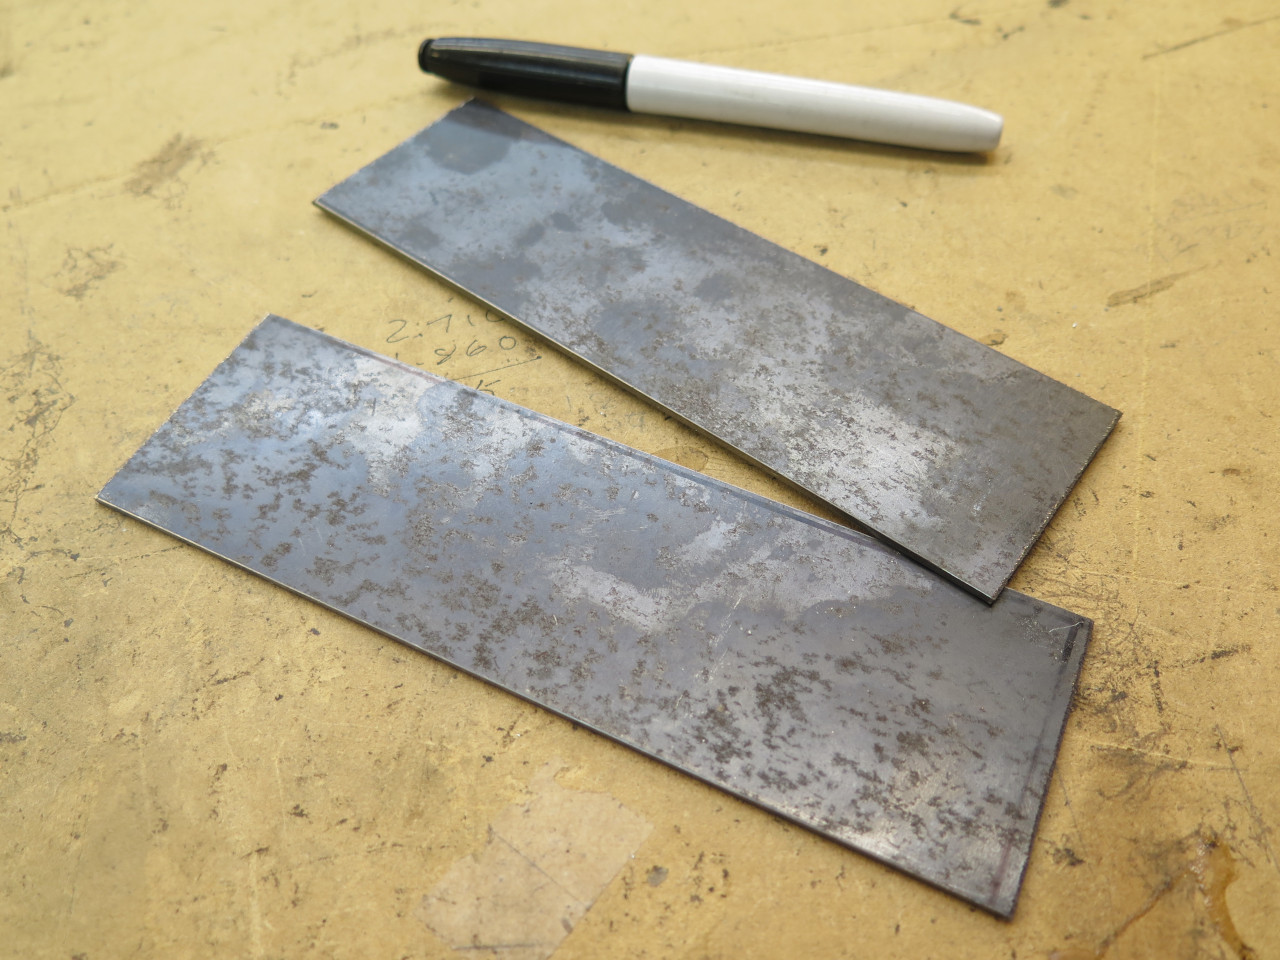
Before I went any further, I had to allow for some way to attach these
trial pieces to the radiator. A couple of chunks of 14 gauge mild
steel.
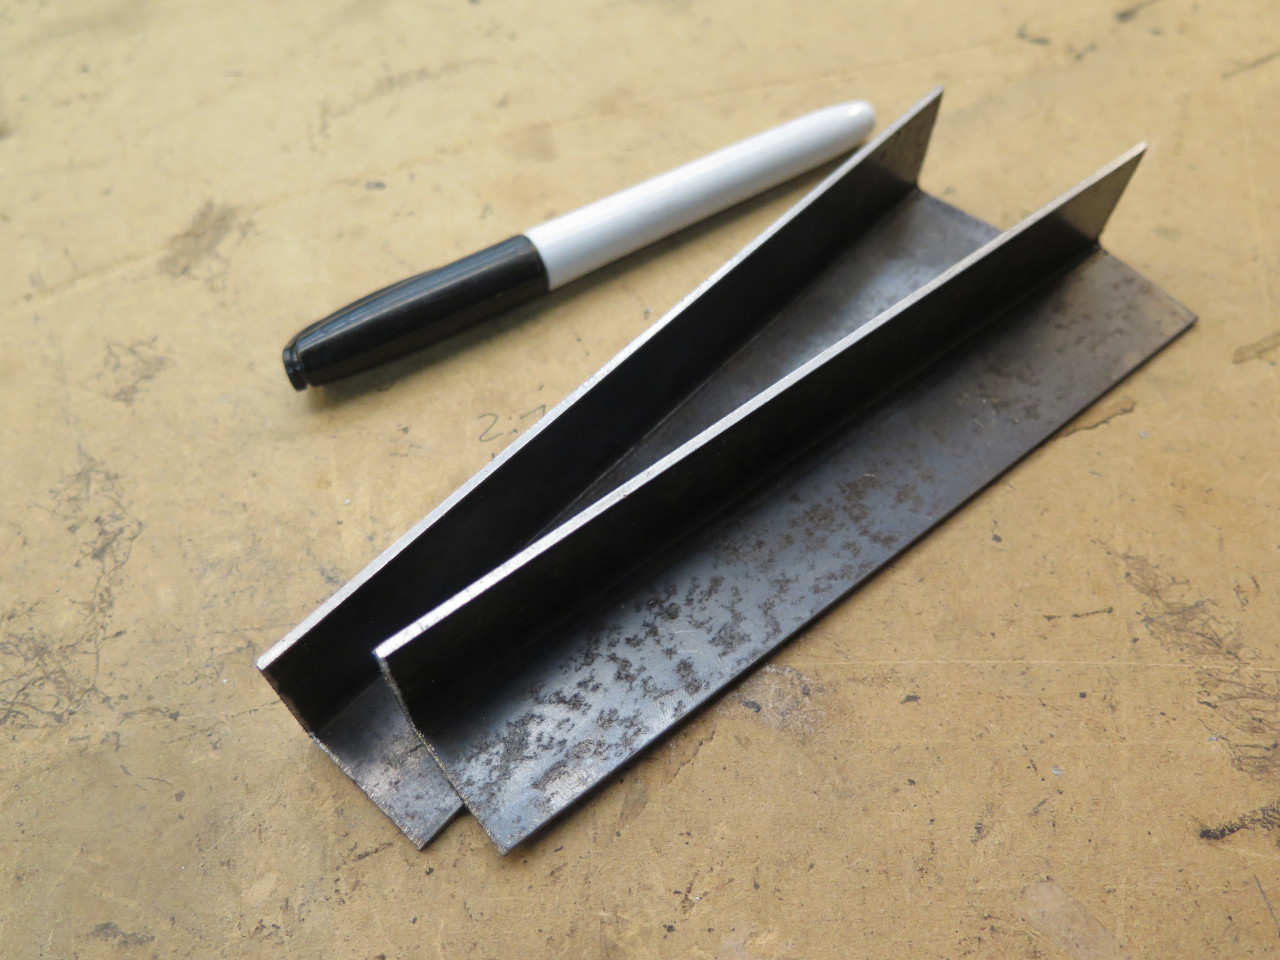
They got attached to the side frames of the radiator. I probably
would have welded them on, but the radiator had a pretty nice paint job,
so I'll use rivets. The copper colored thingies are Clecos.
They are sort of like removable temporary rivets.

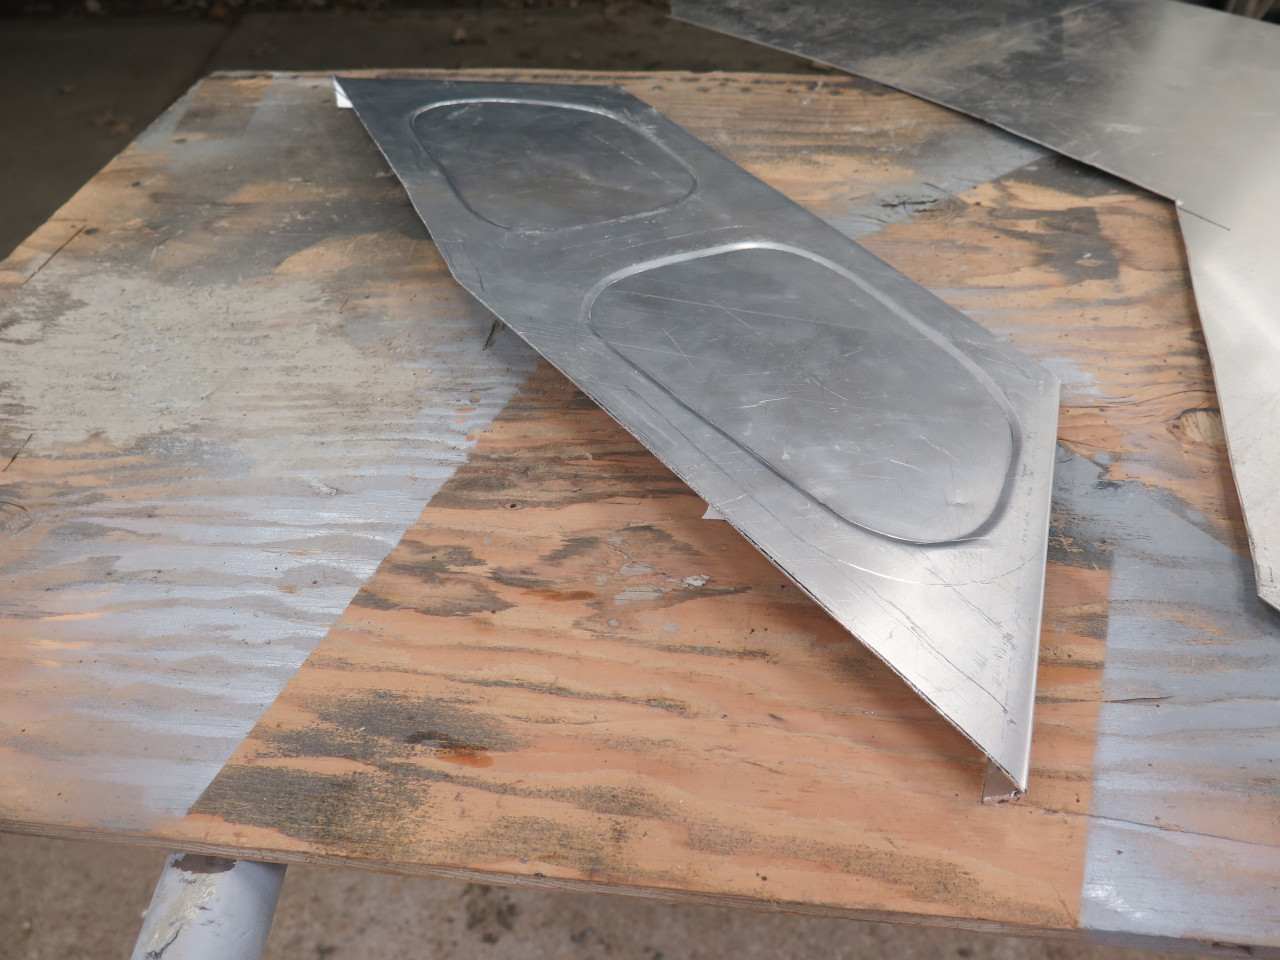
The cowl went through several iterations to improve the fit. At
some stage, the top part became hardboard, so it wouldn't sag.
Then three hardboard pieces.
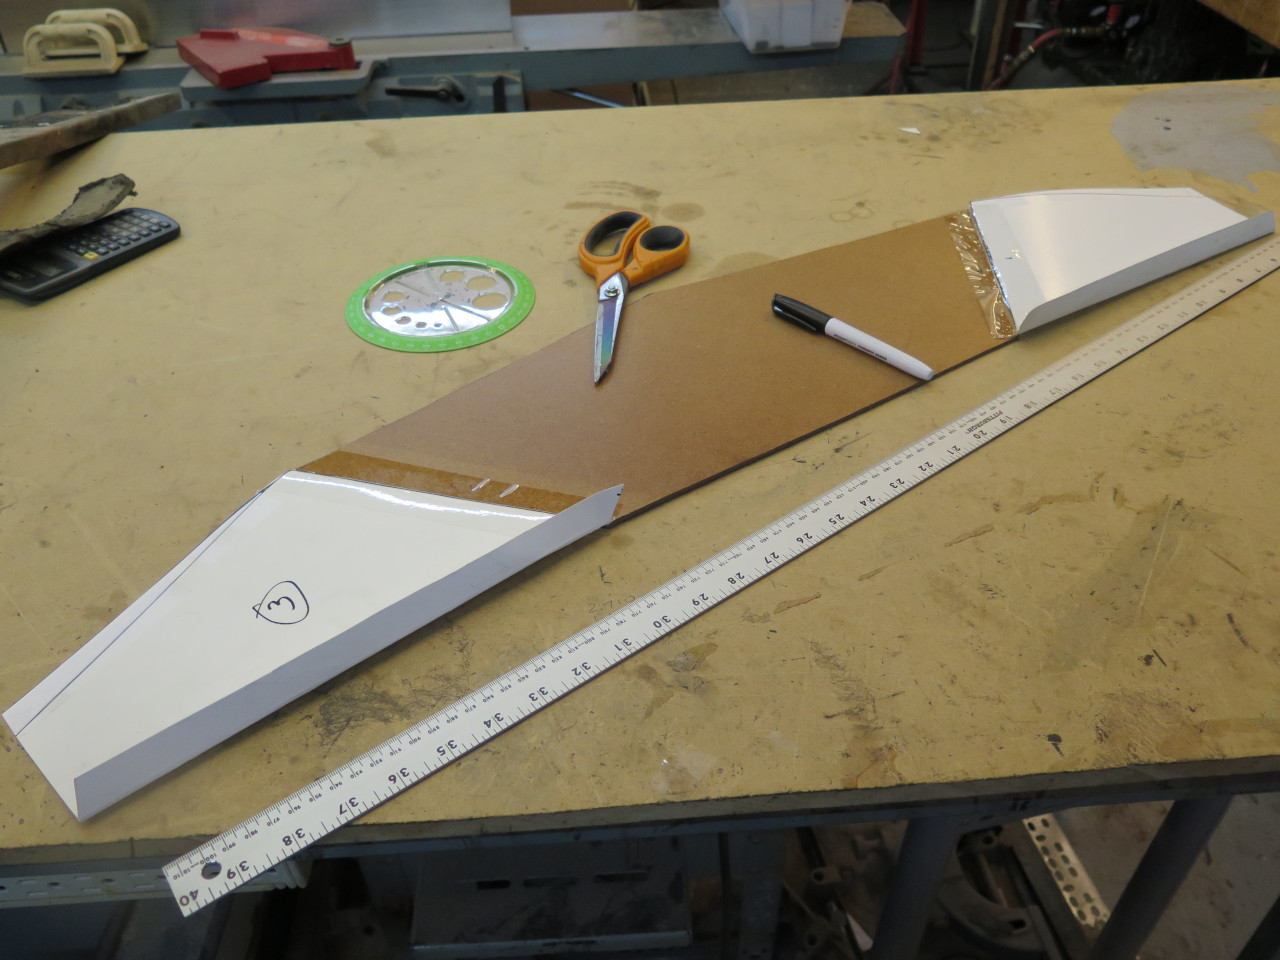

At this point, I hadn't even decided on the final material.
Stainless steel, aluminum, and various kinds of sheet plastic were in
contention. Hardboard and plywood were cut from the race early on.
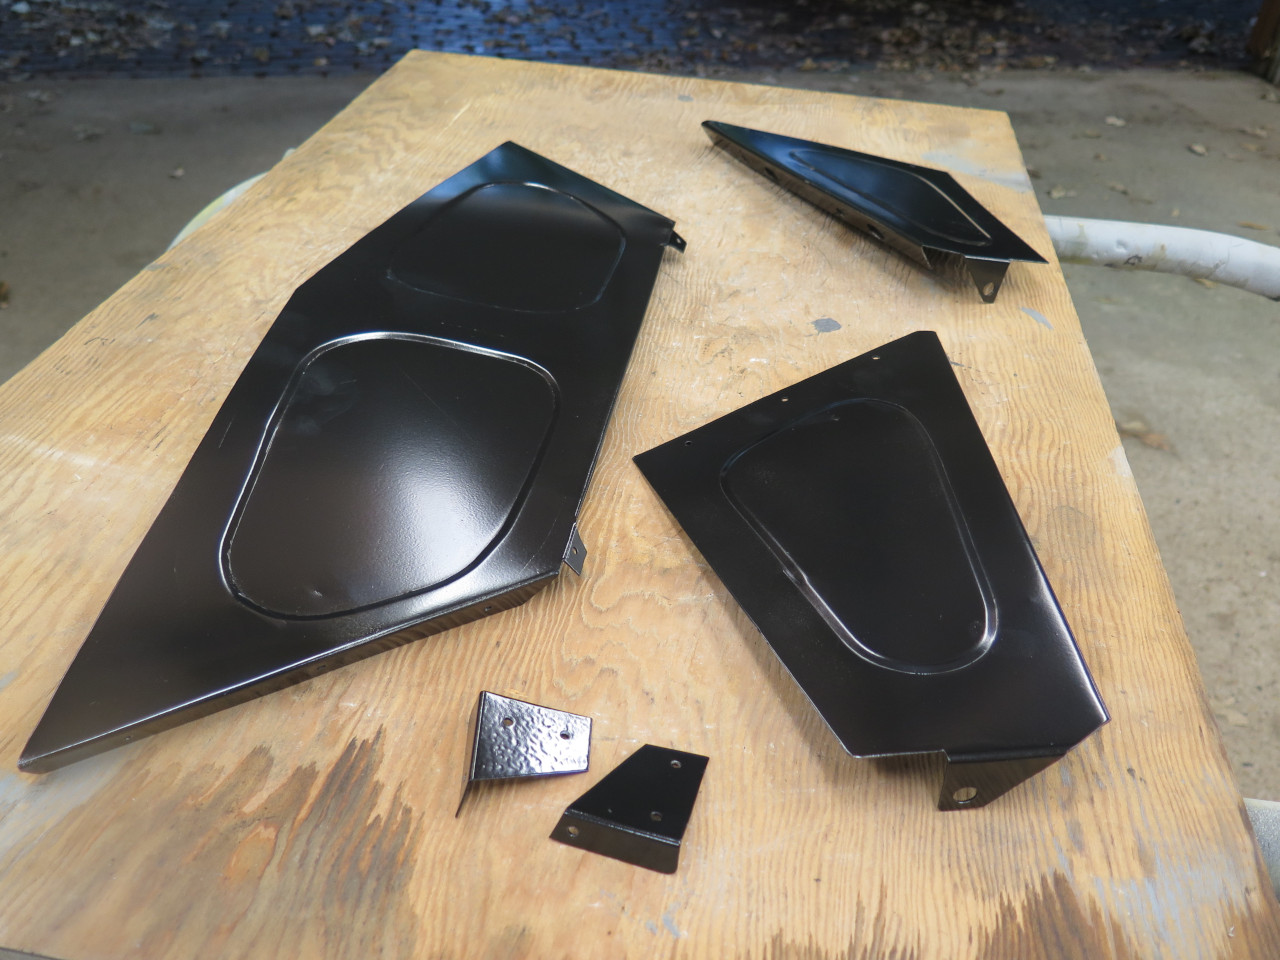
I finally landed on aluminum. It is easy to work, durable enough,
stiff enough, and I had some on hand. This stock measures at about
0.037" thick. The stepped detail, done with my cheapie bead
roller, makes the pieces quite a bit stiffer. Making the cowl in
three pieces made it way simpler.
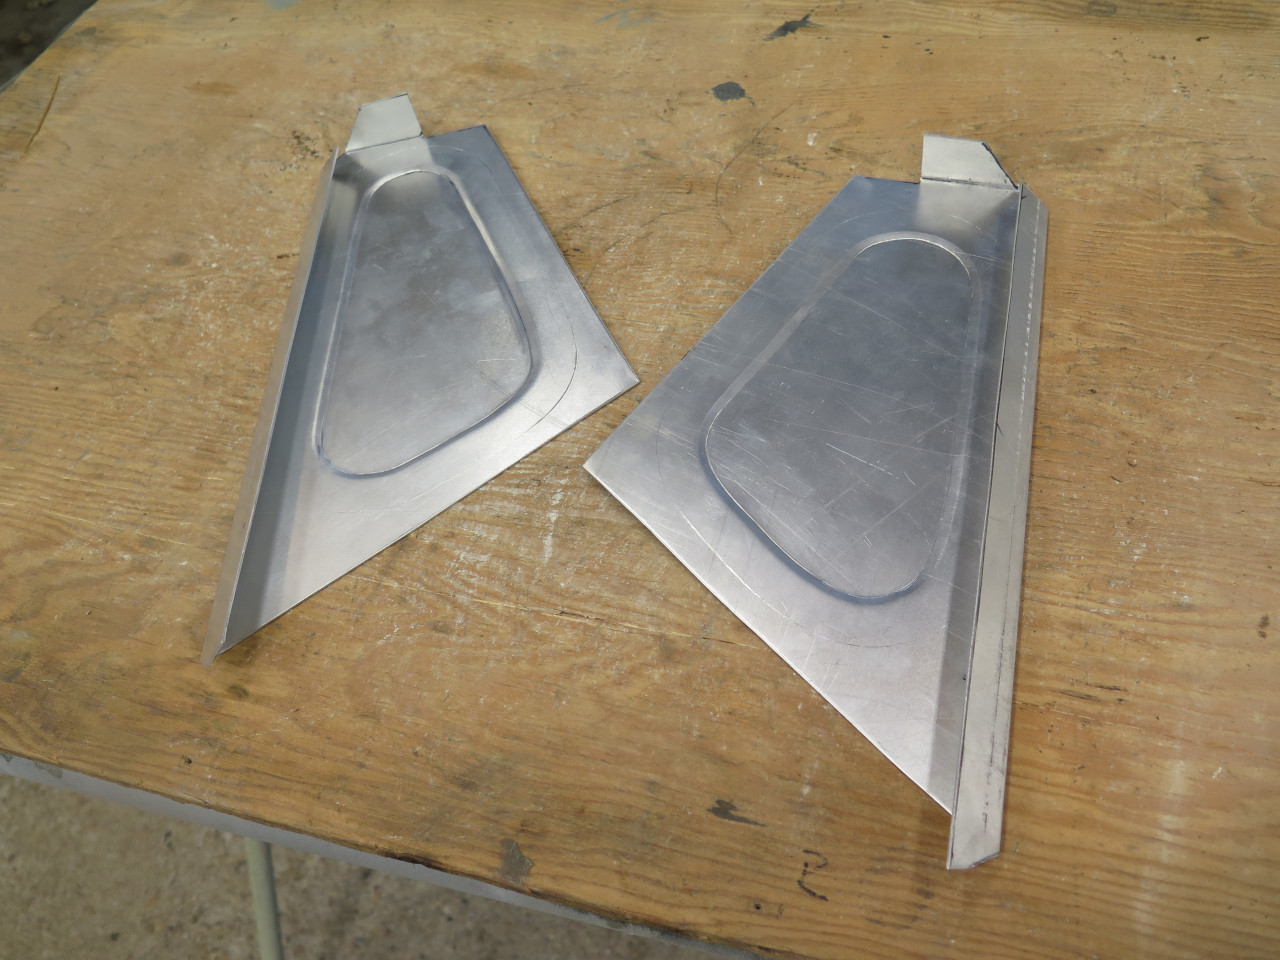


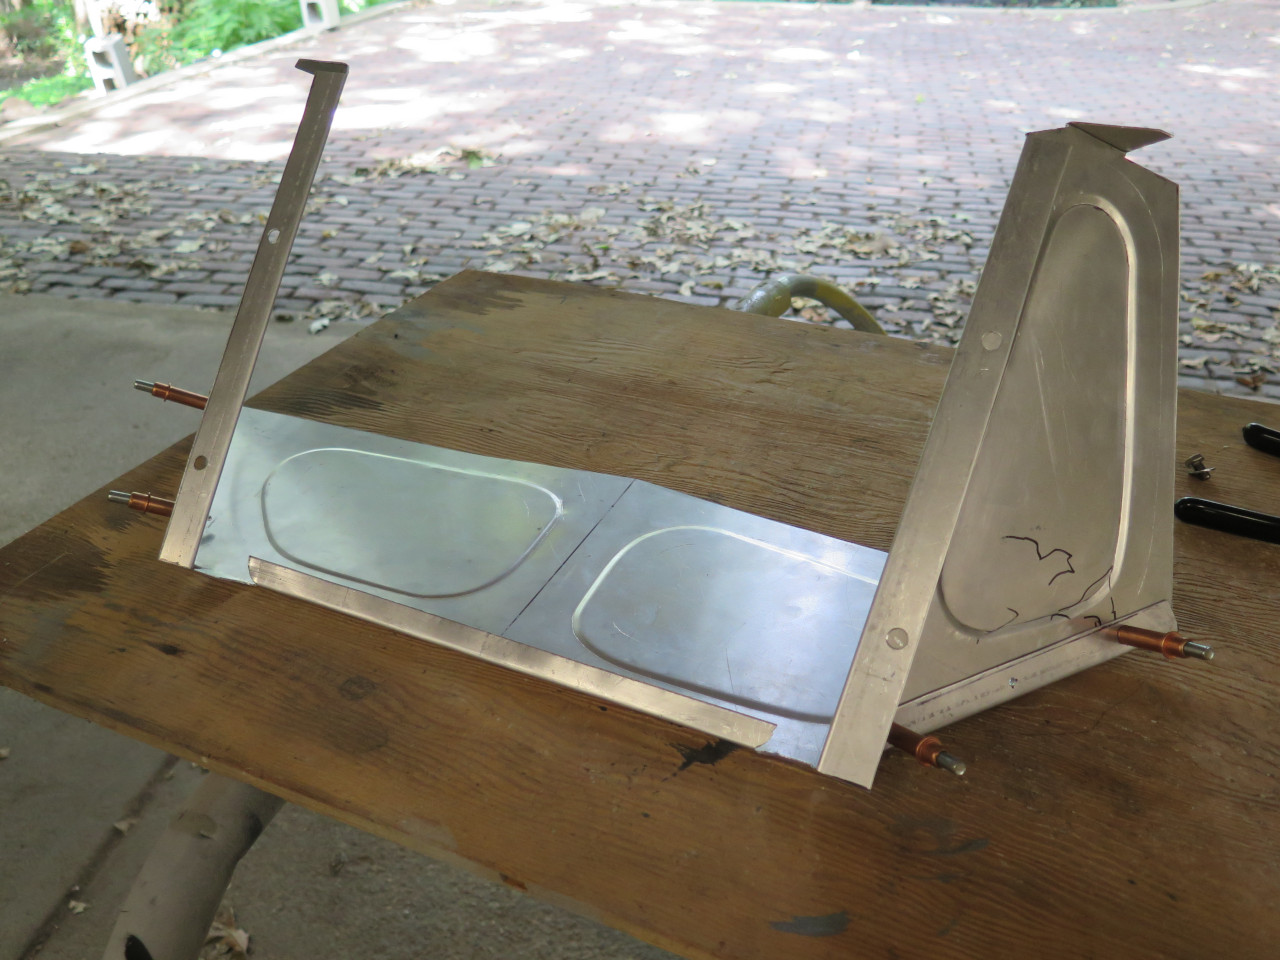
The top piece is actually a fair amount bigger than the original pattern
made from the downloaded images. I bent a shallow arch into the
leading edge witch also helped with stiffness.
Final fettling in preparation for paint.
In an uncharacteristic act of forethought, I welded in some nuts for the engine side valances to eventually attach to.
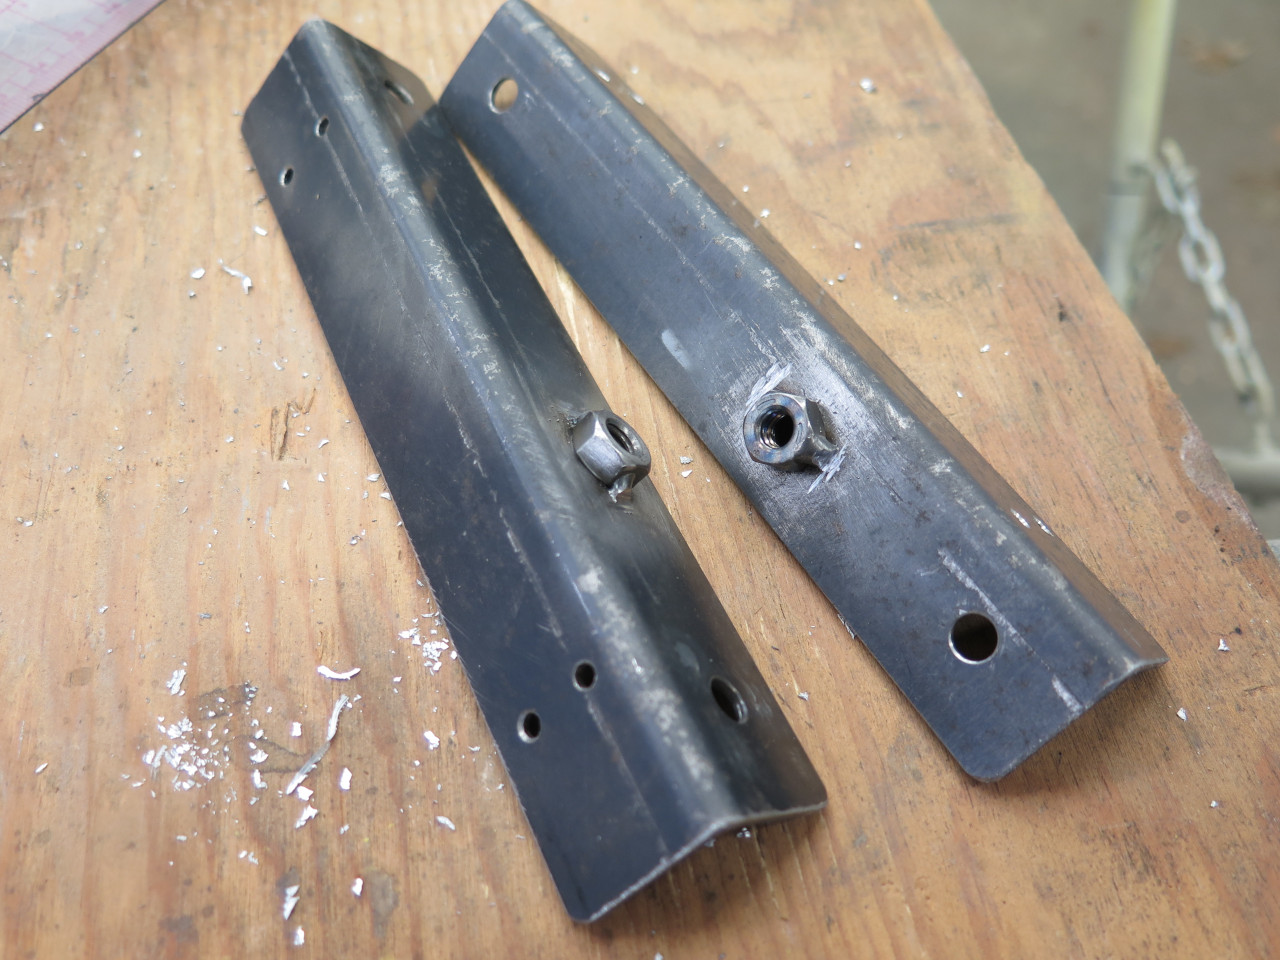
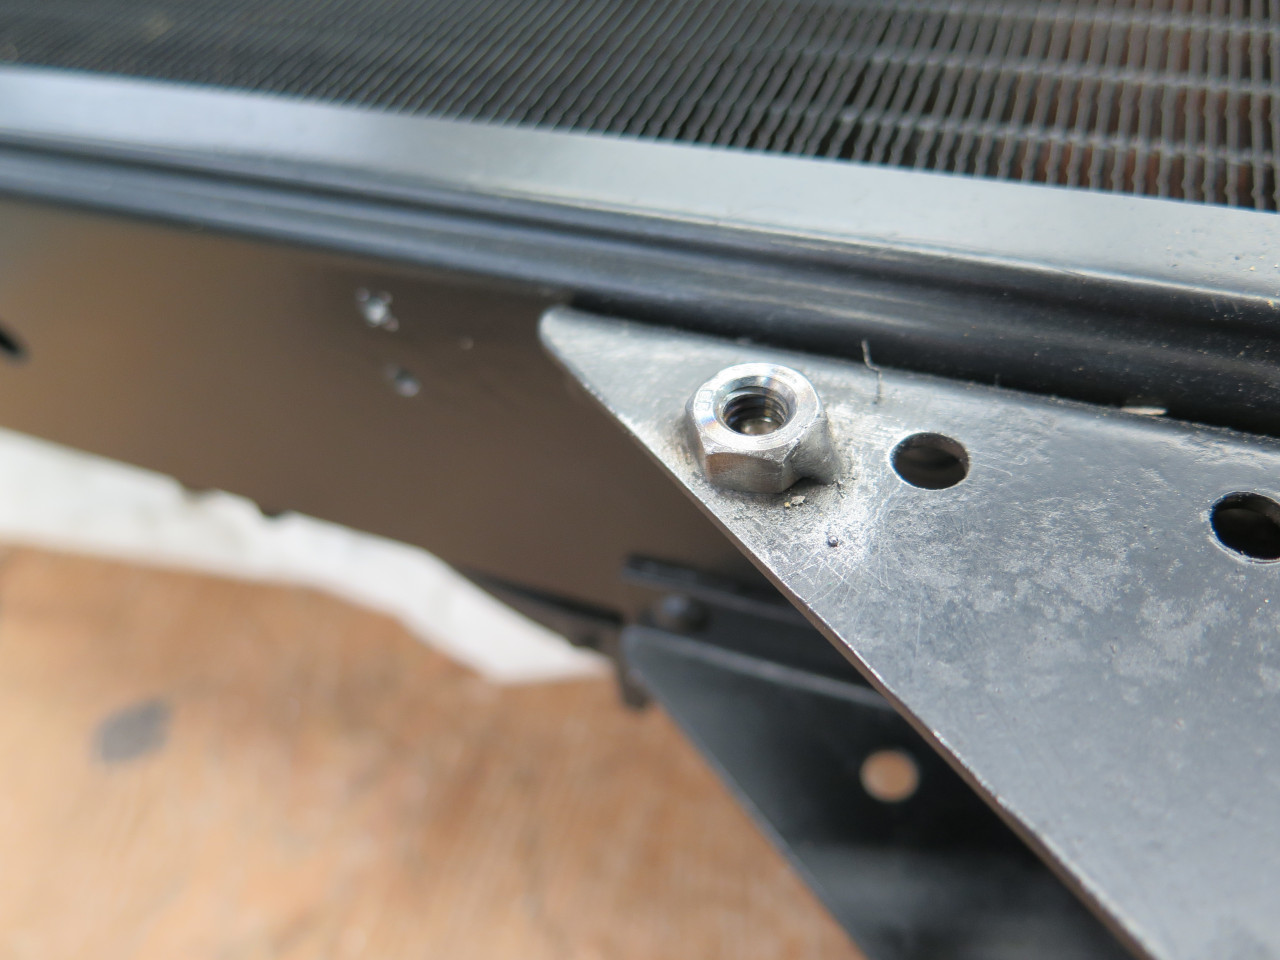
The brackets got powder coated and riveted in place.

A couple of coats of a two part epoxy primer.

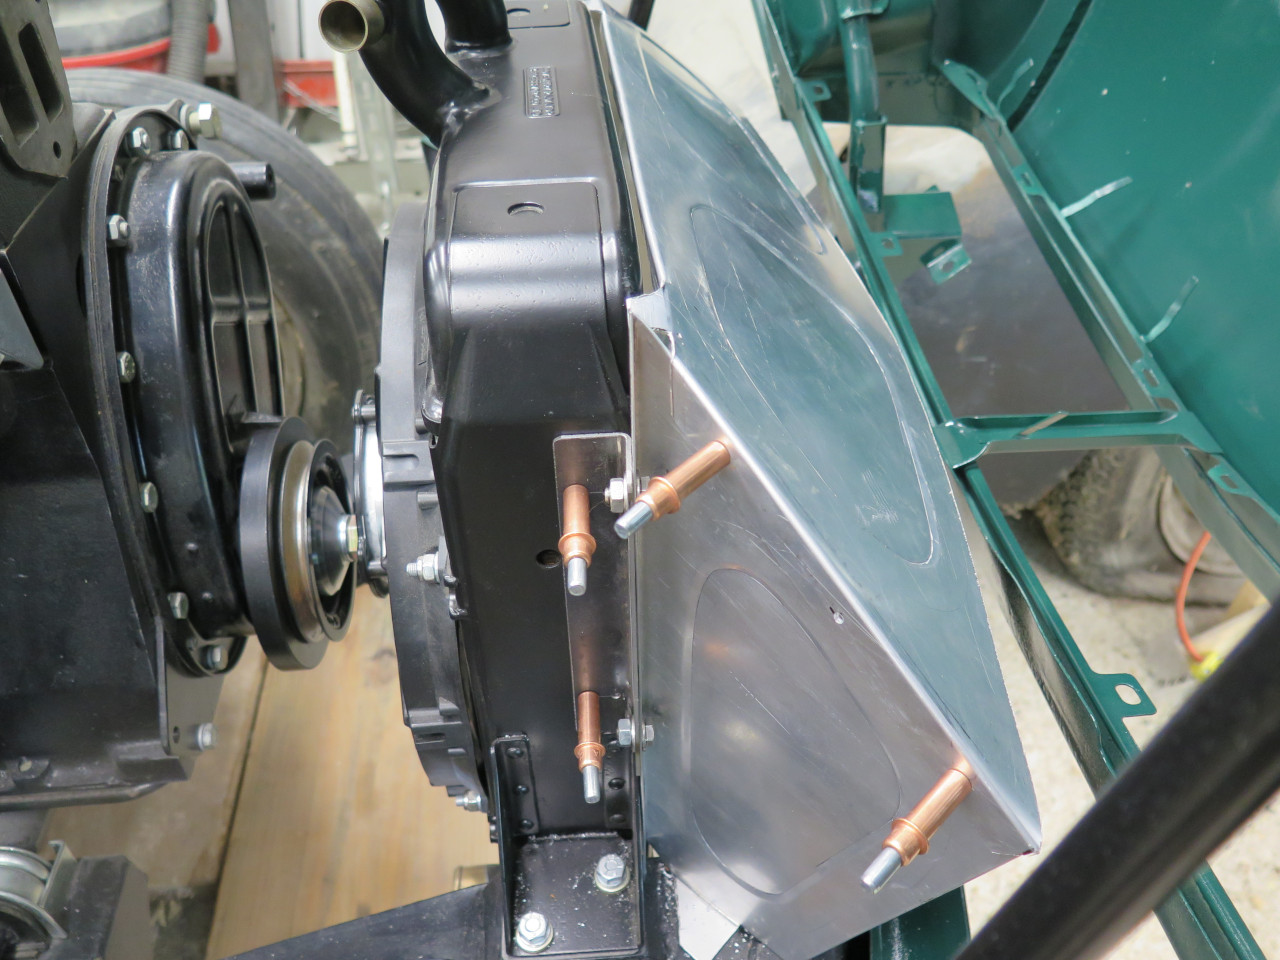
Each side piece of the cowl has a little tab that lays down on the frame
rail. These are some rivnuts so they can be bolted down.
Another prescient epiphany: Install the fan belt now, since the clearance to the radiator fan might make it hard later.

An adhesive closed cell foam strip seals the top edge of the cowl against the front of the top radiator tank.

A nice topcoat of a tasteful satin black, and in she goes. Looks flat in the pic, but it is satin.
This one was sort of fun one. It took a few days. I think I
had all of the materials on hand, but there's maybe $10 worth of
aluminum and some hardware.
Comments to Ed at elhollin1@yahoo.com
To my other GT6 pages