To my other GT6 pages
May 2, 2022
Seat Belts
By the mid-60s, new cars sold in the US were required to have seat belts
installed. The earliest implementations consisted of just a lap
belt, but by 1969, the requirement had expanded to include a shoulder
belt, too. The first shoulder belts, like the one in this car,
were "detachable", meaning that they had to be attached to the lap belt
manually. The seat belts in this car also included a spring loaded
"retractor" that would coil up the tongue side of the lap belt, but
there was no inertial system that would lock the belt in a collision, so
it was up to the person in the seat to adjust the belts for proper
snugness.
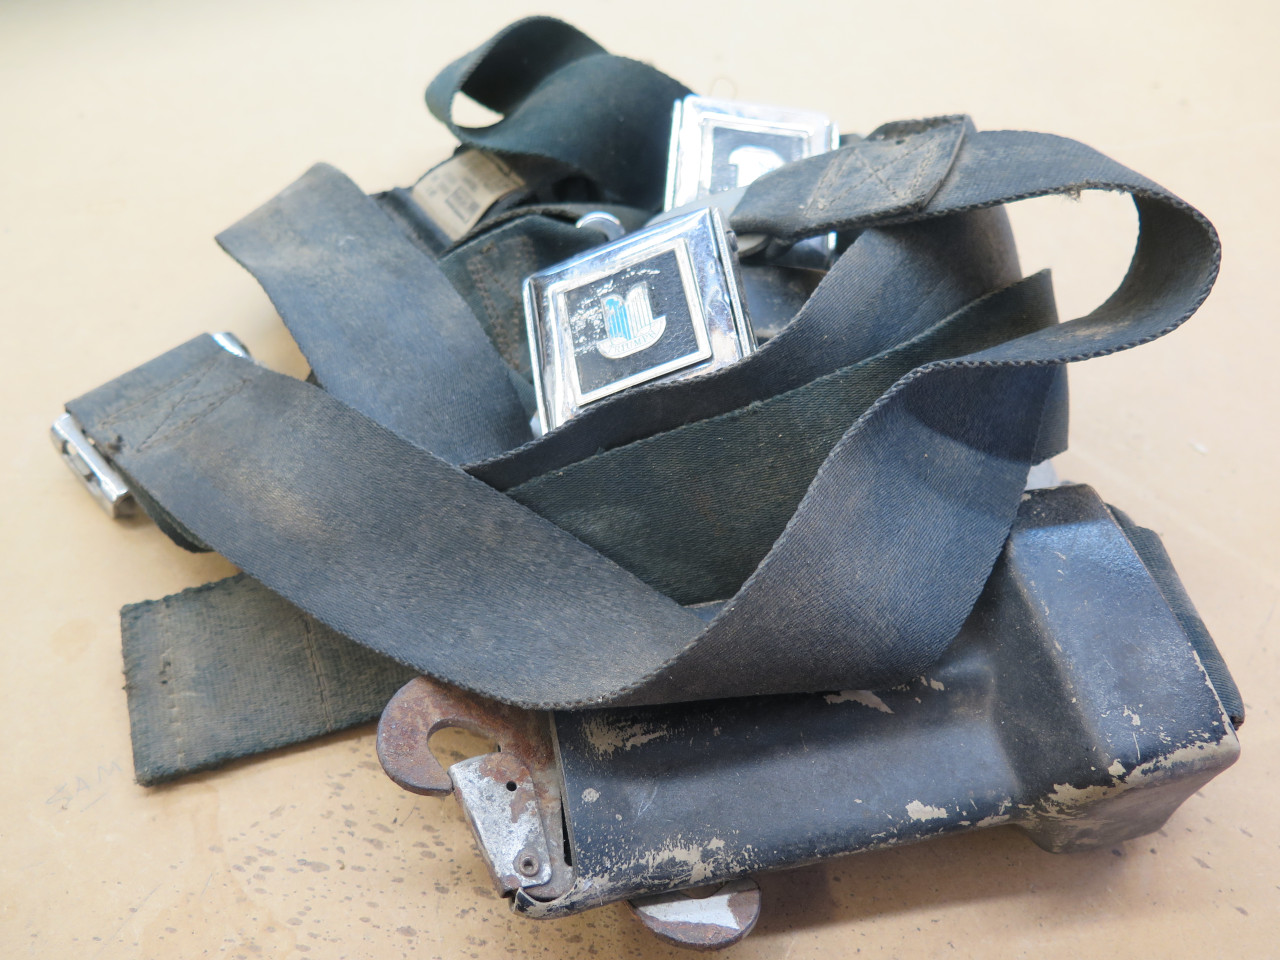
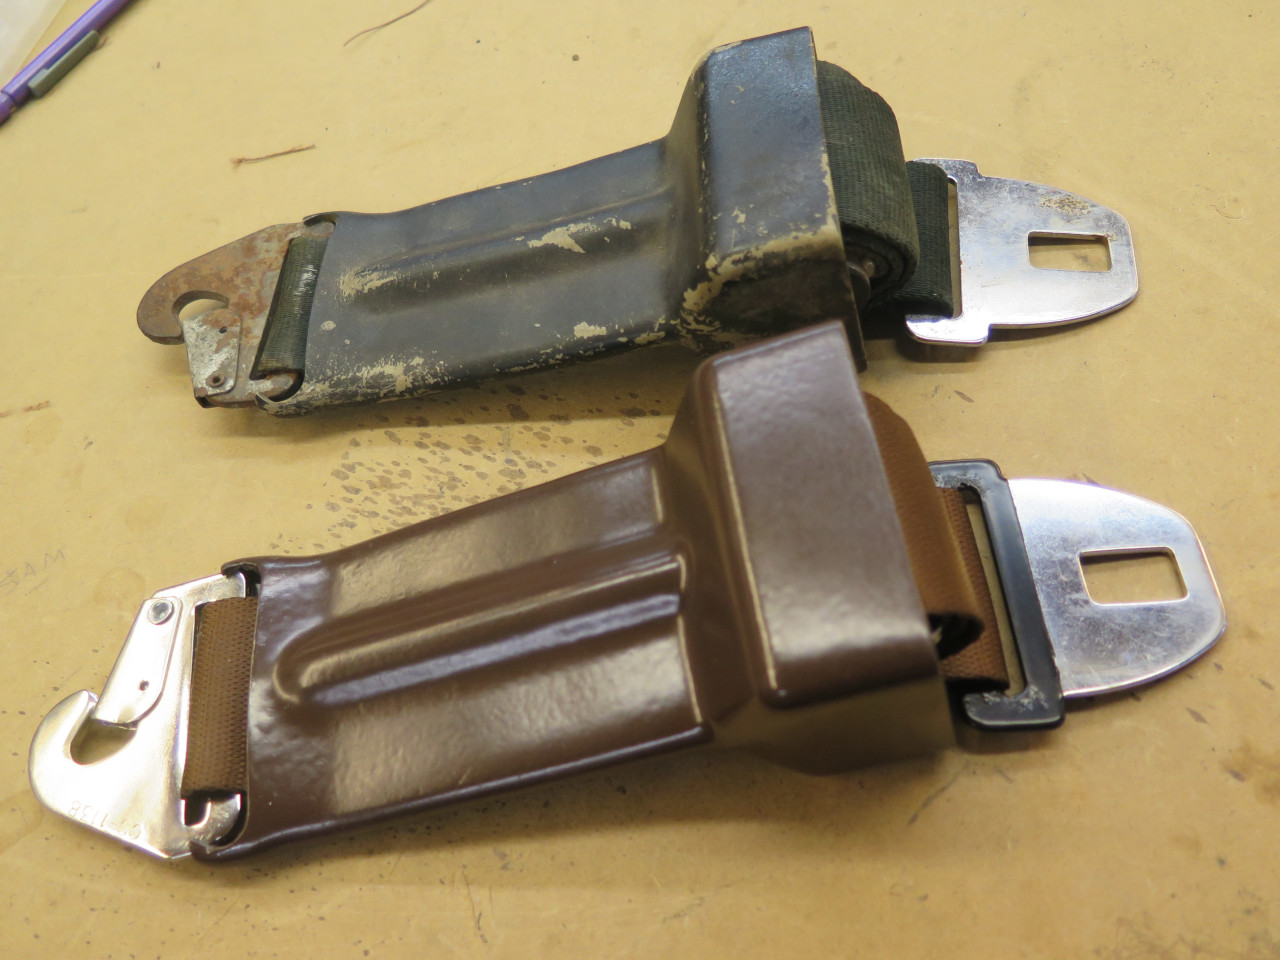
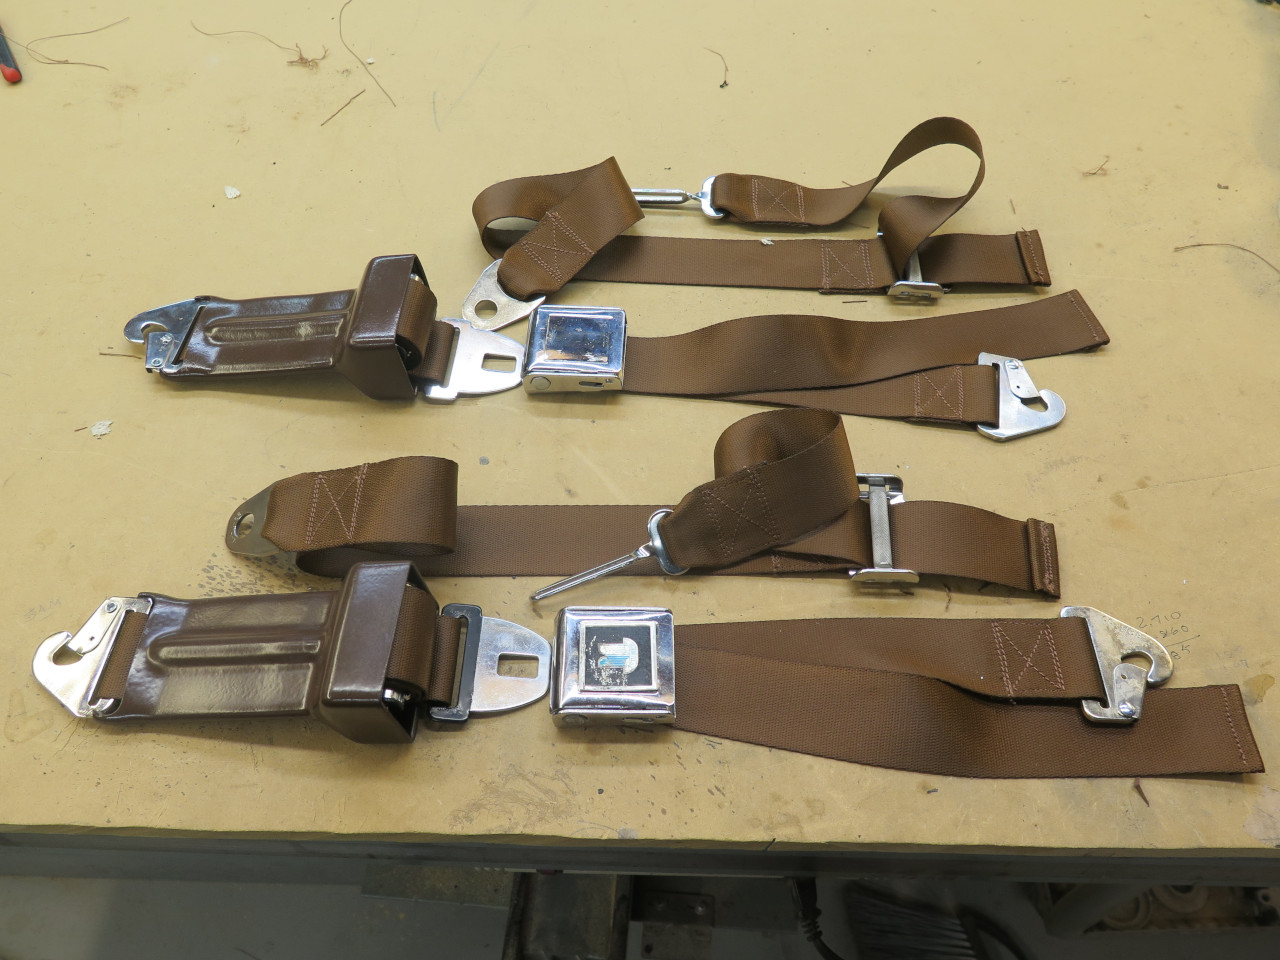
My belts were apparently all there, but were pretty tired looking.
Now, I'm not necessarily an originality wonk on these cars, but with
some exceptions, I tend to like to keep things original if I can. I
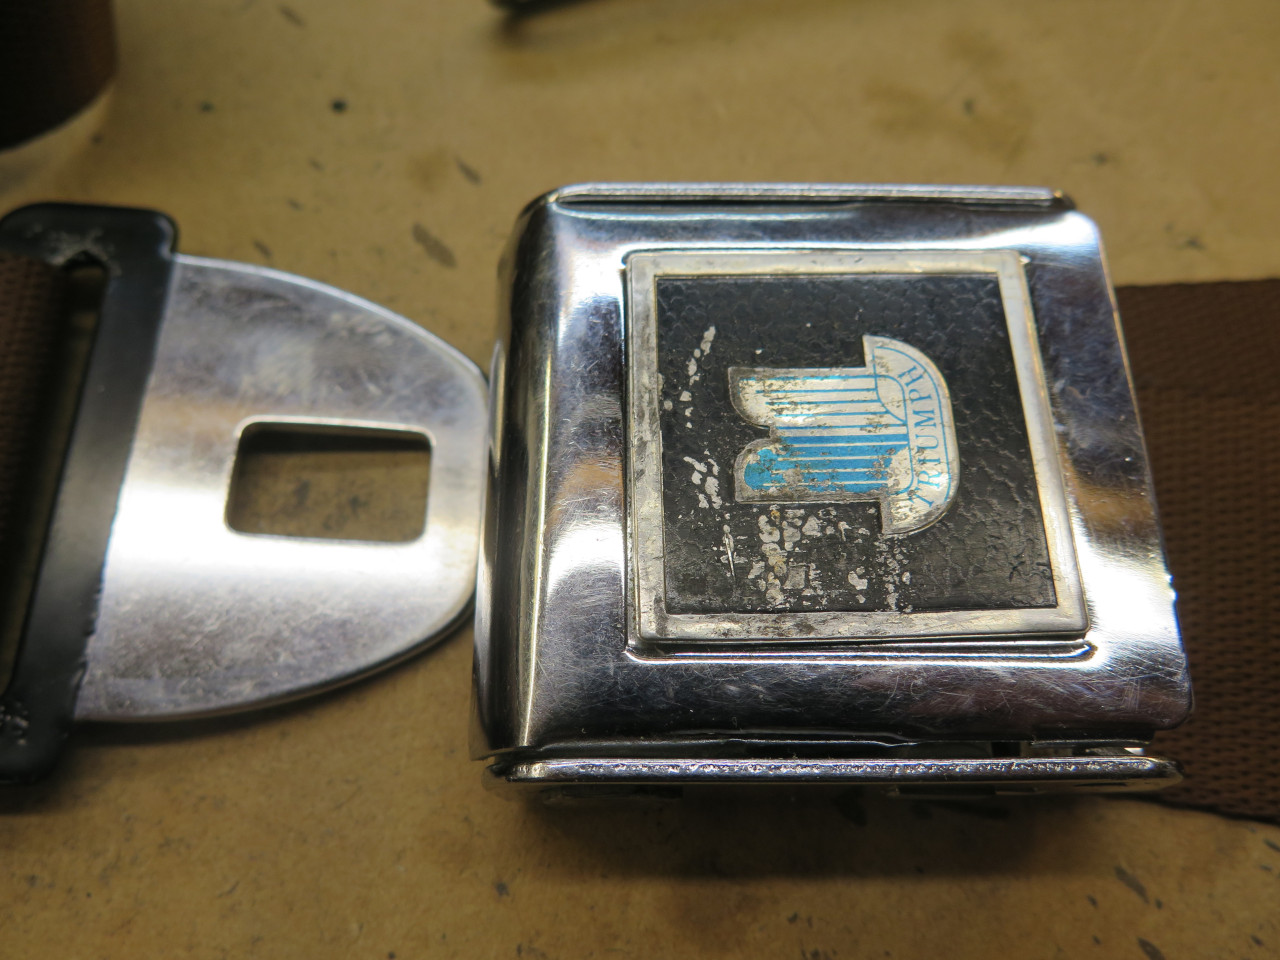
sort of like the quaint, period design of the belts, including the
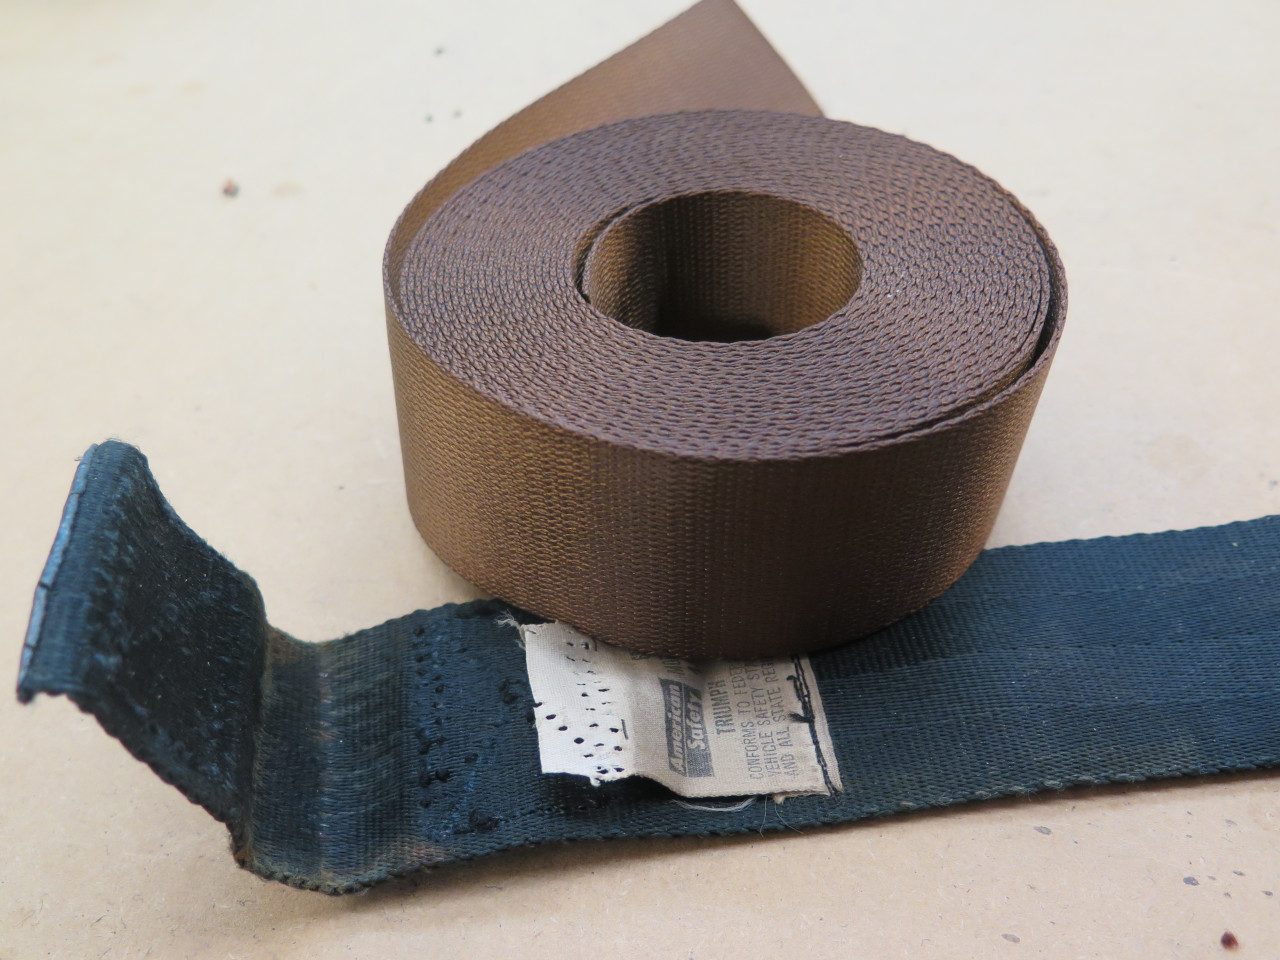
aircraft-style buckle. The problem was that the webbing was in bad
shape. It was frayed and faded to a dirty greenish color.
The fittings were all there and functional, but many of them had ugly
surface corrosion.
It is certainly possible to buy more modern 3-point seat belt systems
that will fit this car, but that idea sort of left me cold. I was
online searching for other options when Inner Engineer popped into the
room, oddly juggling two oranges and a banana.
"Wassup, Dude?" he asked, not taking his eyes off the fruit.
"Oh, I'm trying to decide what to do about the seat belts."
"Are they busted?" he asked.
"No, they seem to work fine, they just look bad. The webbing is
nasty. And it's the wrong color. I want something that goes
better with the seats."
"So just rebuild them with new webbing. What's the problem?"
"But they are a safety item. It's life and death."
He paused for a beat as the banana slipped from his hand and fell to the
floor. "So are brakes, Dude. You didn't wimp out on those,
did you?"
"No, but seat belts seem--different."
"Different, how?" he replied, stooping for the banana. "Brake system is way more complicated than seat belts."
"Yeah, but---"
"And it seems to me that a hidden defect in a brake system that you use
constantly is way more risky than a defect in a seat belt that you might
never need. And I know you don't allow defects anyway, Dude."
I struggled with his logic. He looked at me, and I anticipated what he was going to say.
"I know, I know. How hard could it be, right?"
"You got it Bro," he said over his shoulder as he left the room, fruit in flight again. "Piece of cake."
I went online and ordered a sample pack of seat belt webbing colors. "Maybes" to the right, "probably nots" to the left.
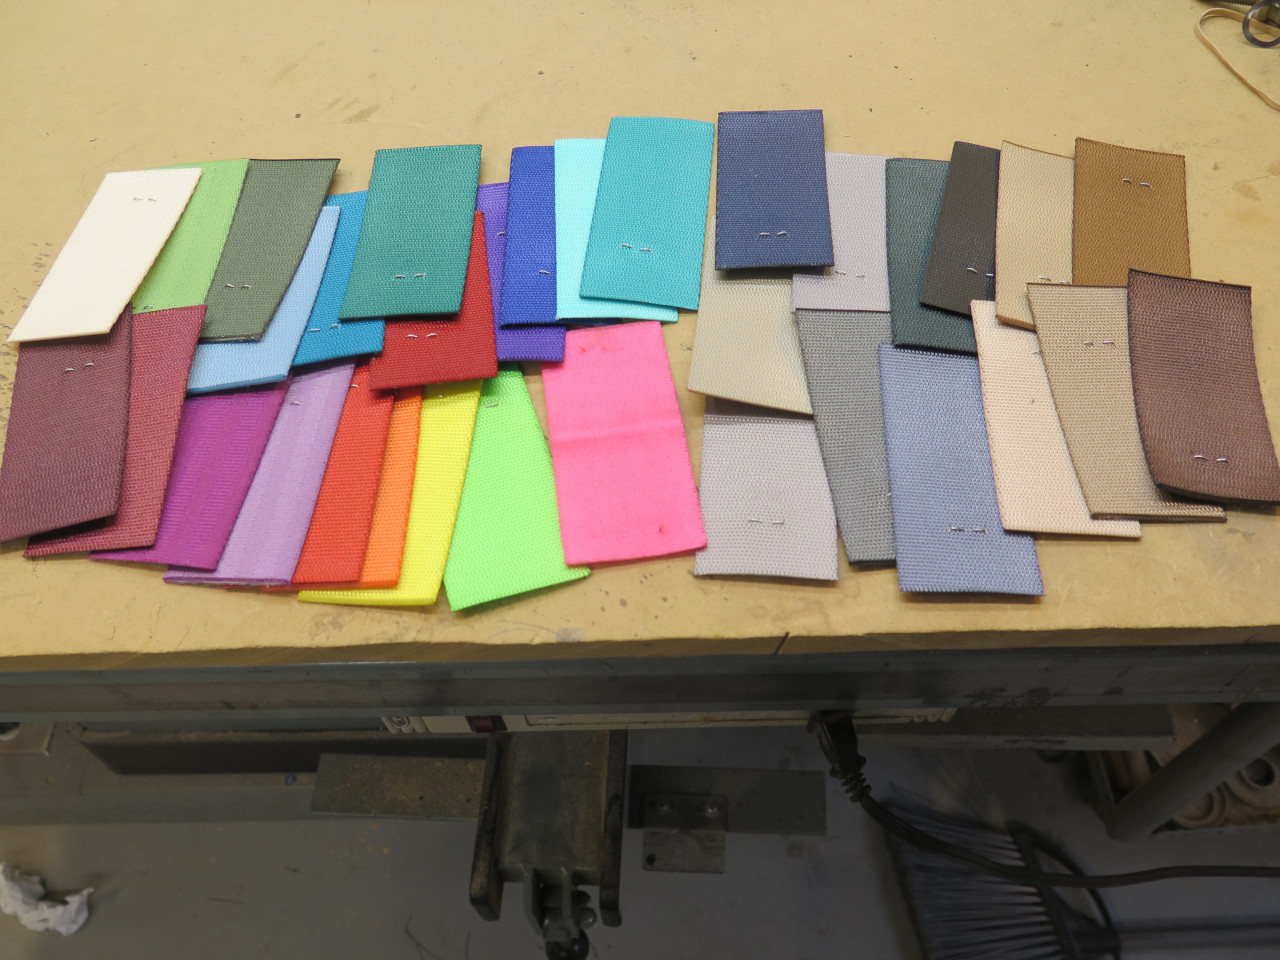
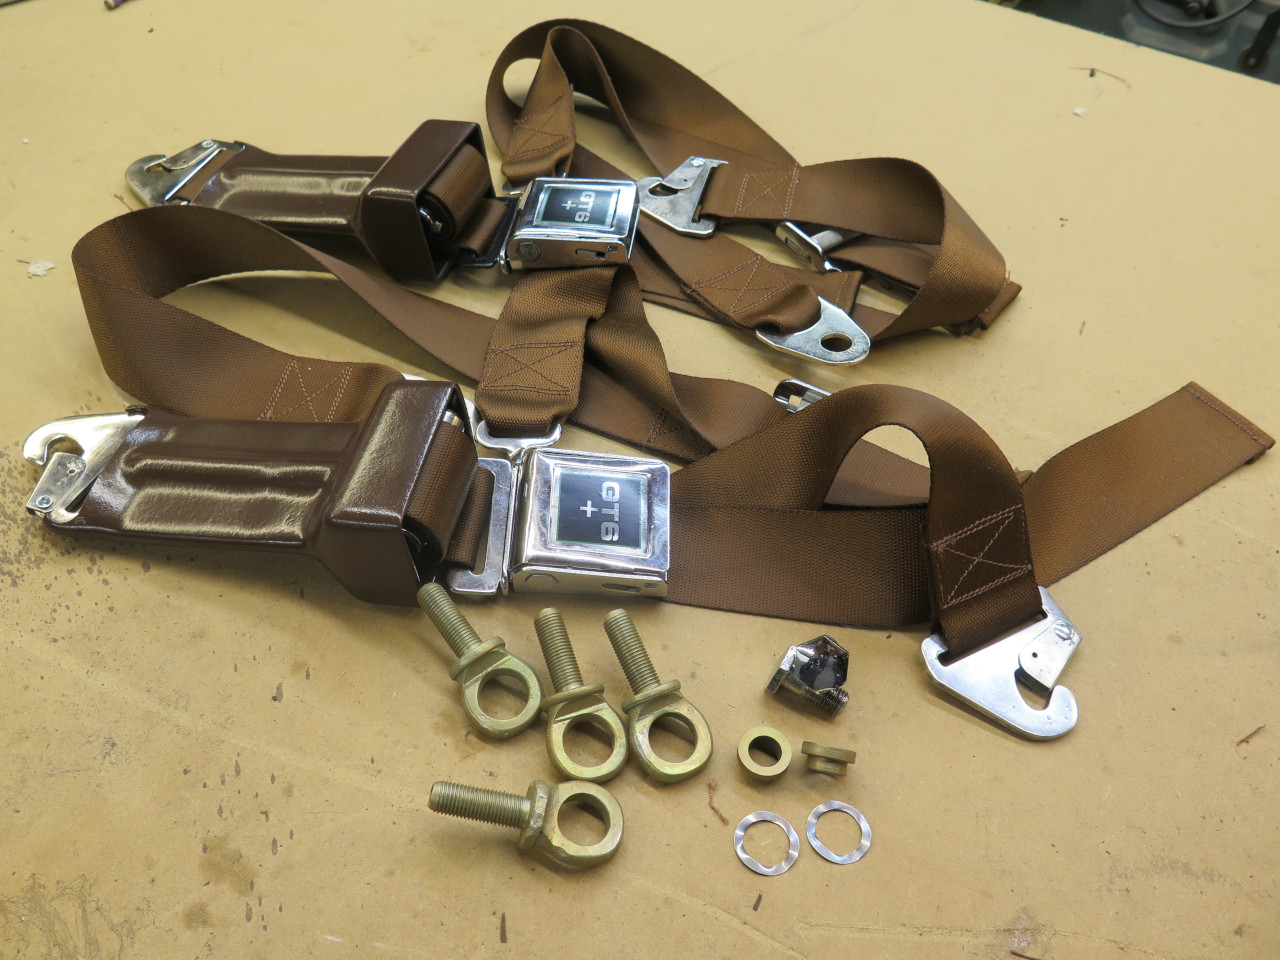
A chat with my color consultant, and we settled on "#34 Brown" as providing a nice contrast with the seat leather.
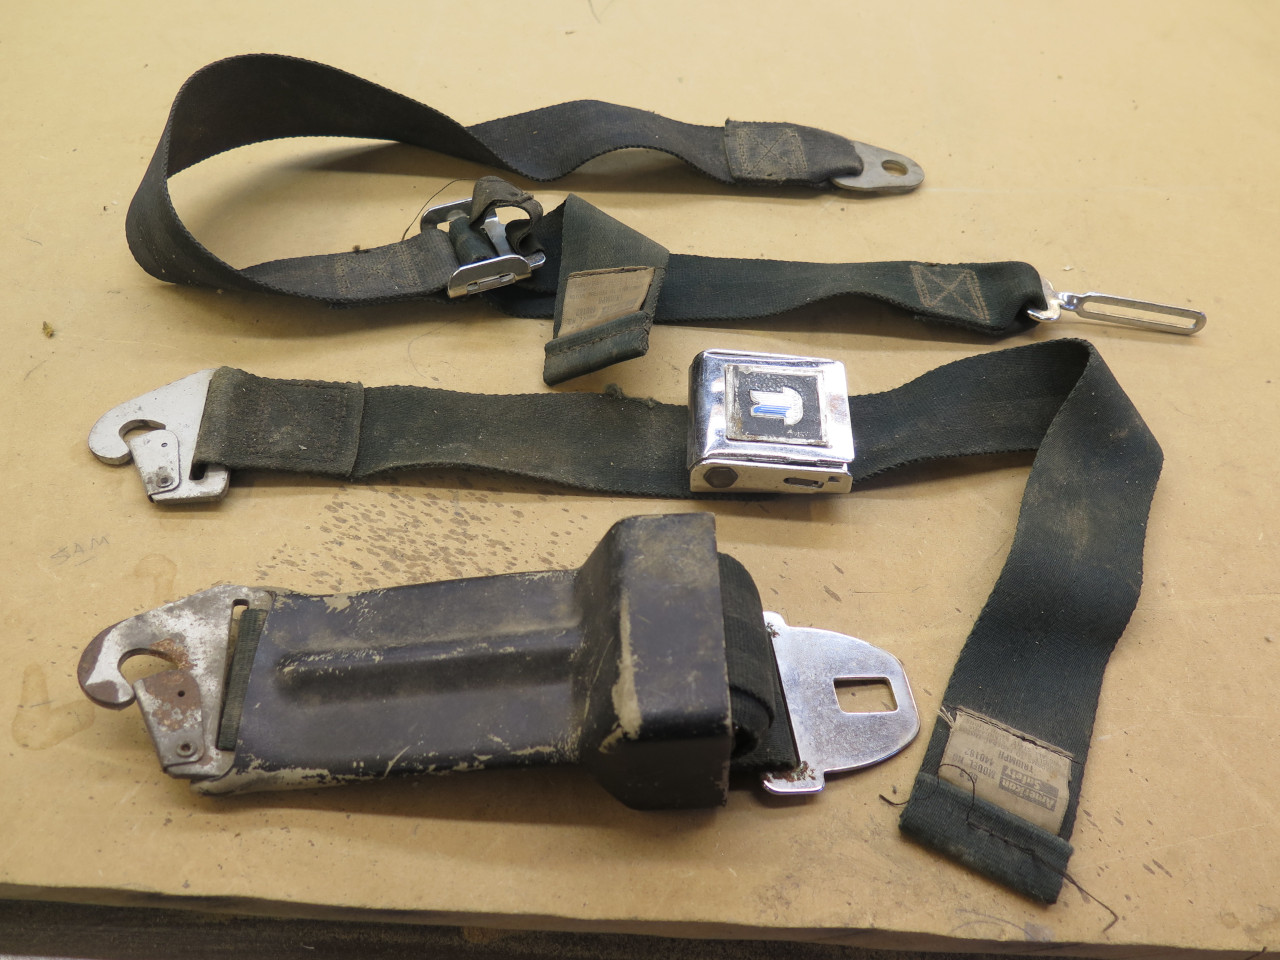
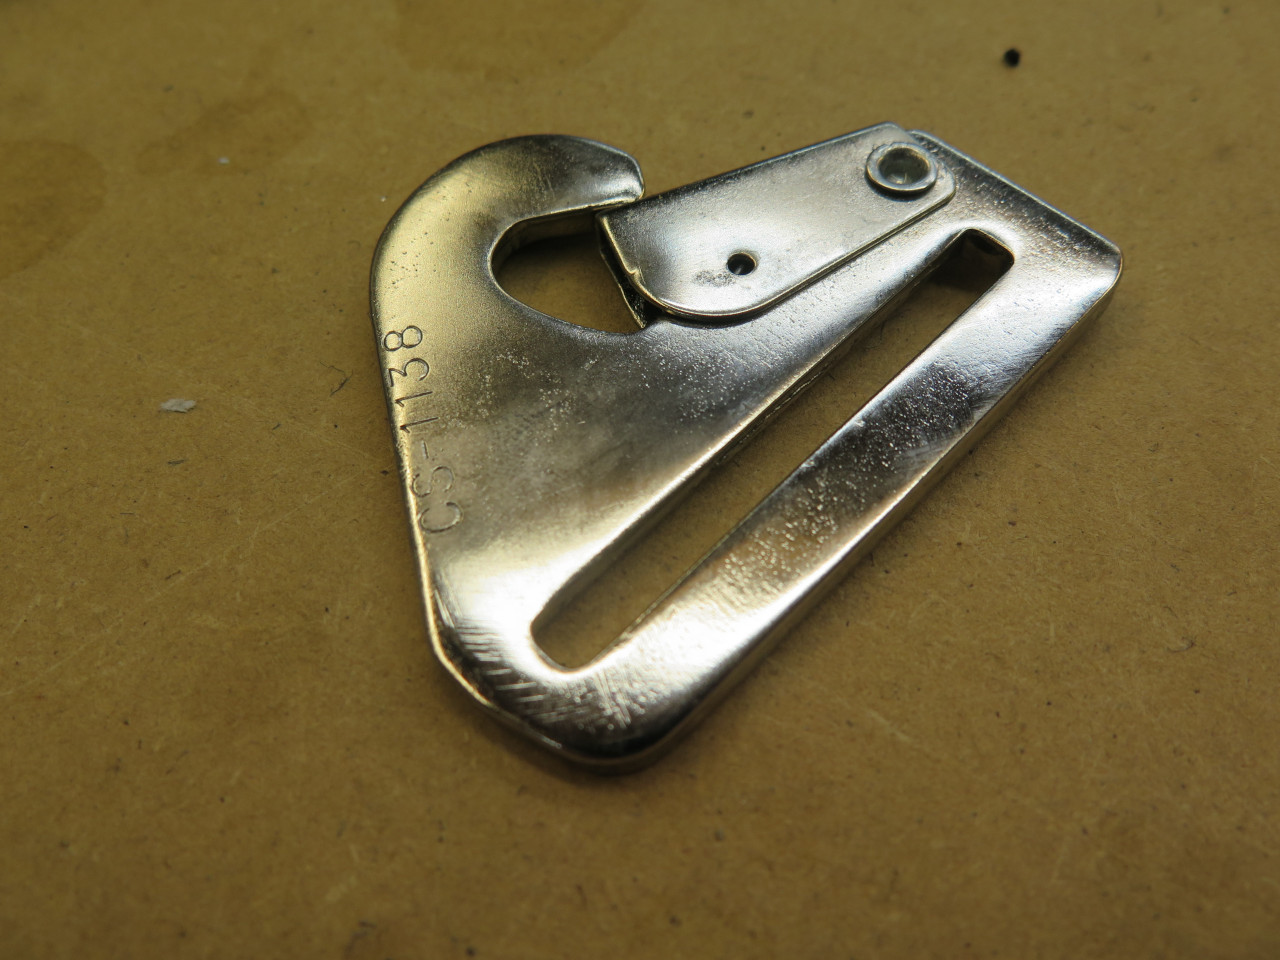
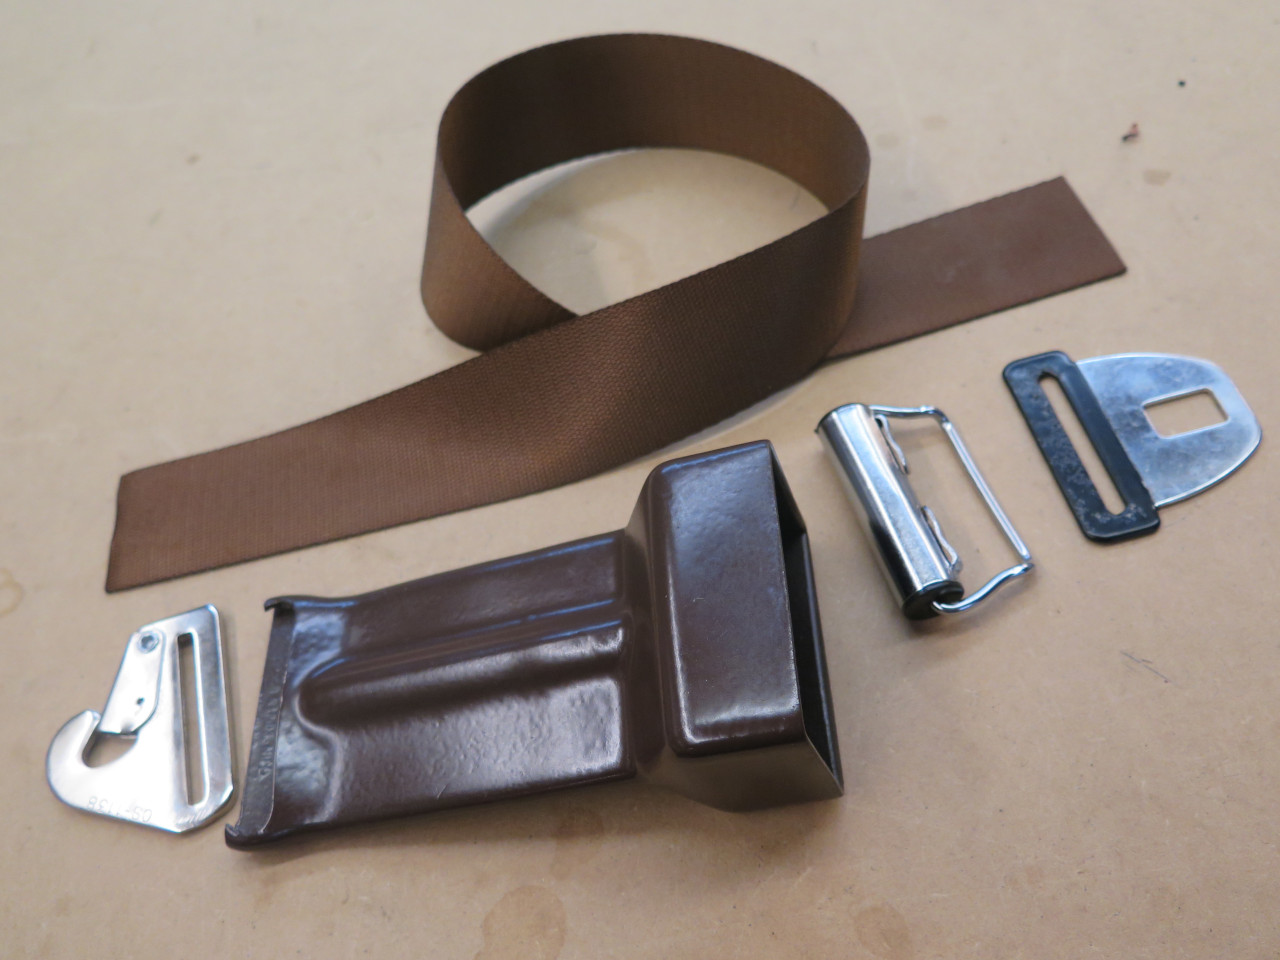
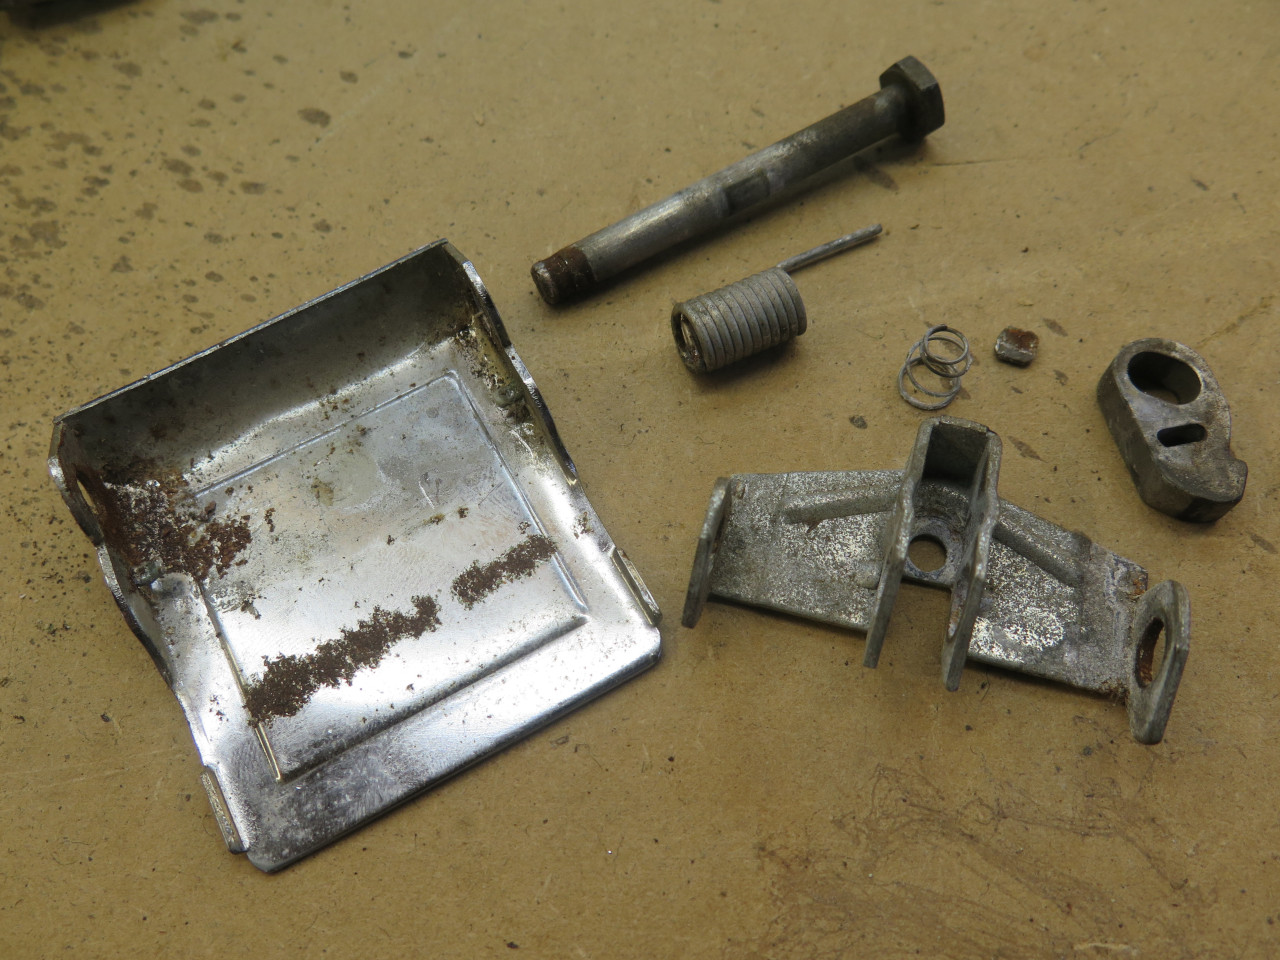
Each seat belt assembly is made up of four sub assemblies: The two
halves of the lap belt, and two parts of the shoulder belt, with an
adjustment mechanism between them. This is the tongue side
assembly of the lap belt. It includes the body attachment hook,
the retractor, the plastic housing that holds the retracted belt, and
the tongue that fits into the buckle.
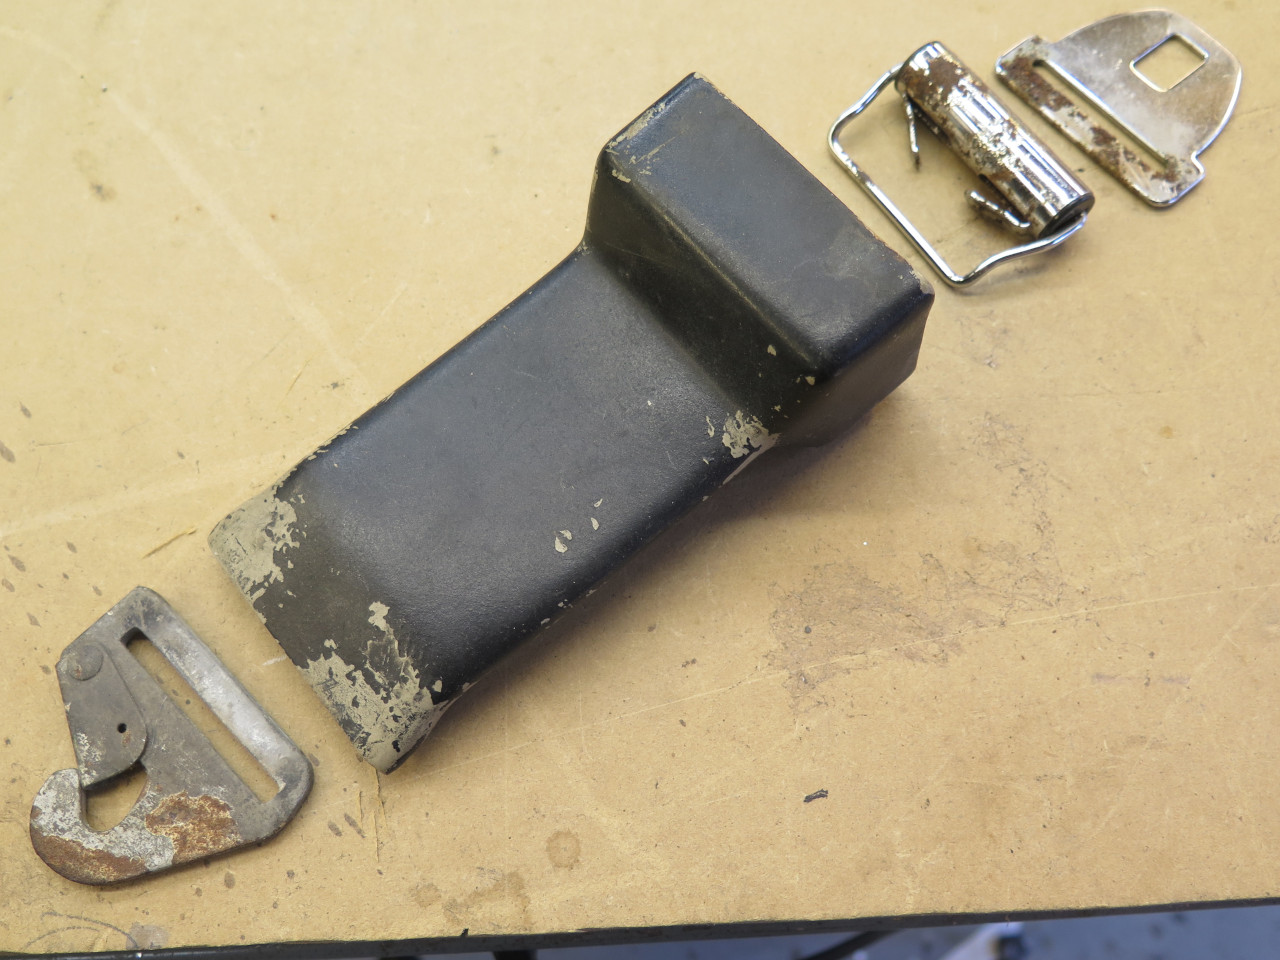
I'll go through this assembly in some detail, but all the others are similar.
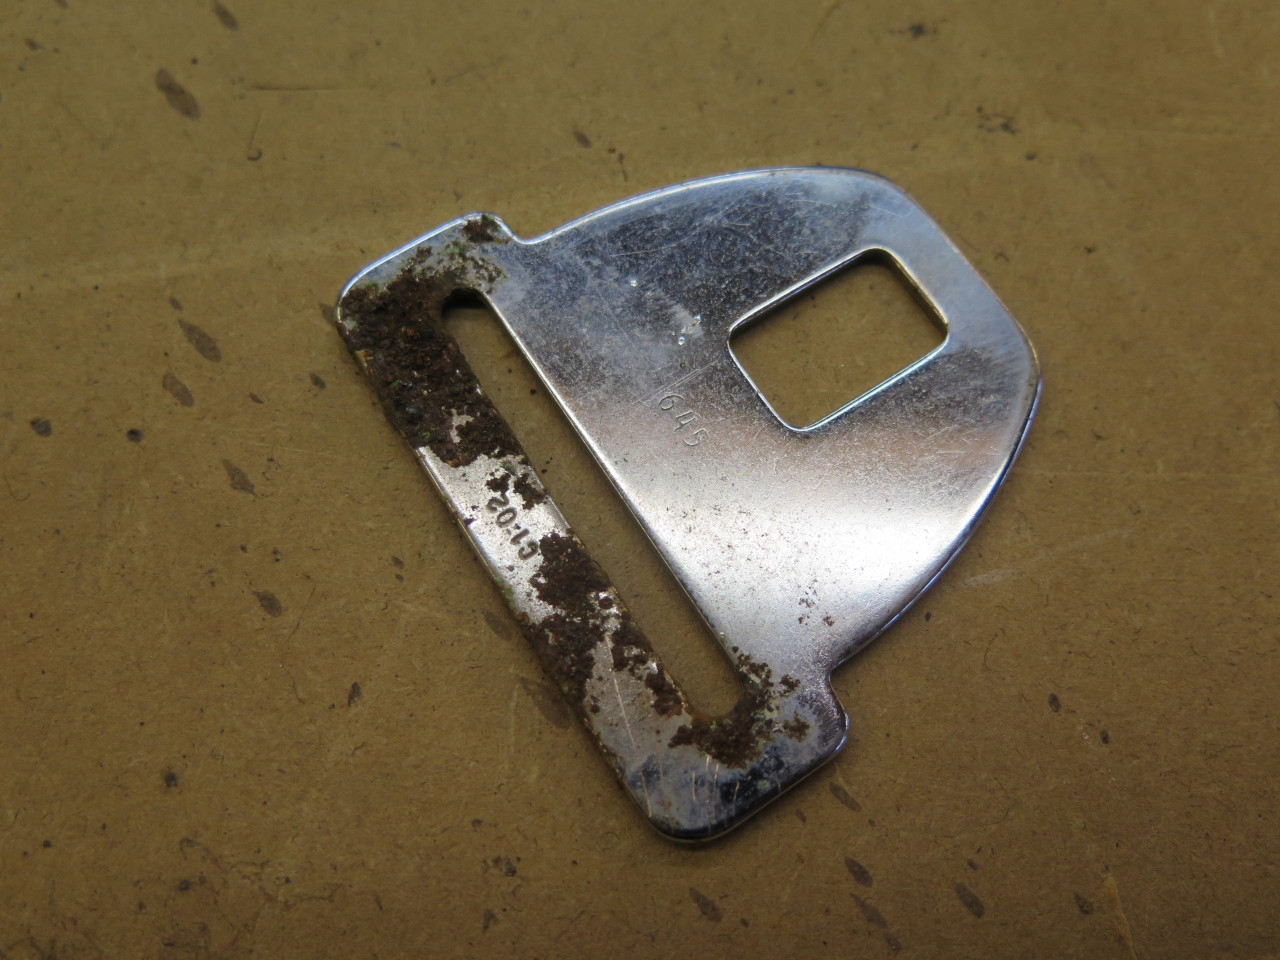
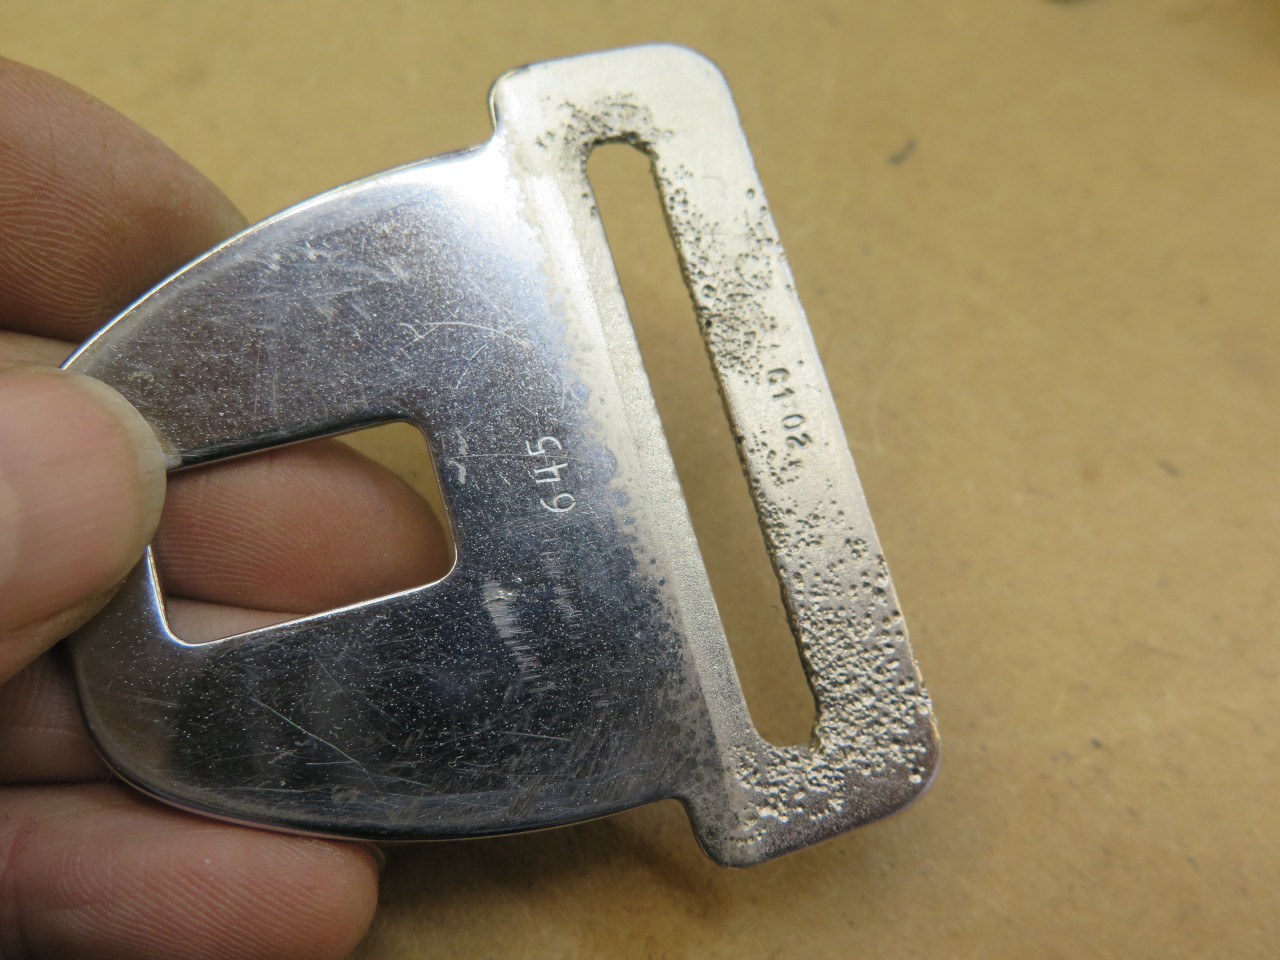
The togue had some corrosion under the webbing. Since most of the
chrome plating was intact, I used a chelate to remove the rust.
This left some visible but superficial pitting. I selectively
plated the corroded area with nickel, which has a slightly yellowish
tinge whan seen next to chrome. The plating got to the bottom of
the pits, and I later applied a thickish powder coat to the area to make
them less visible.
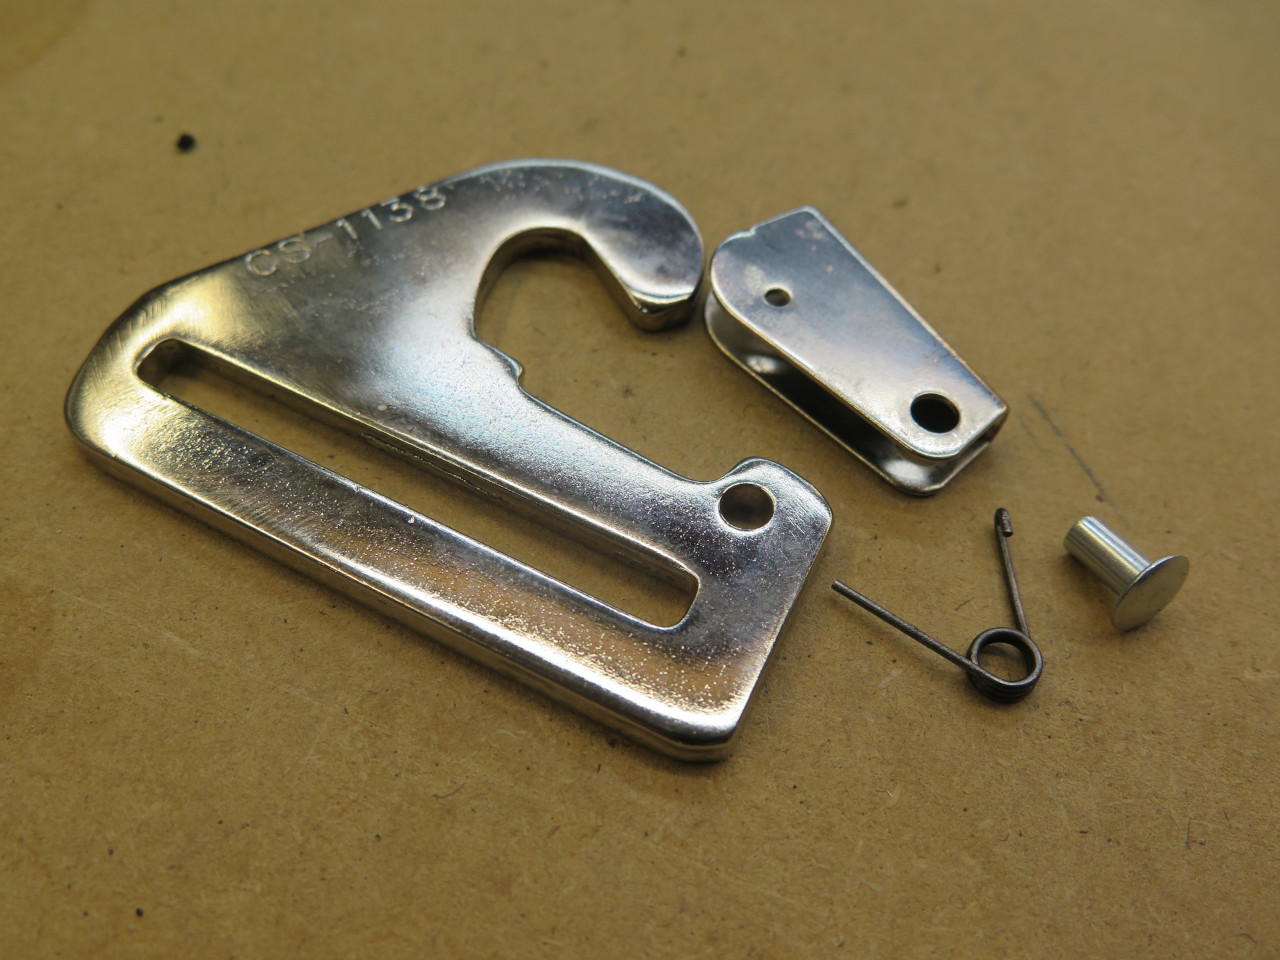
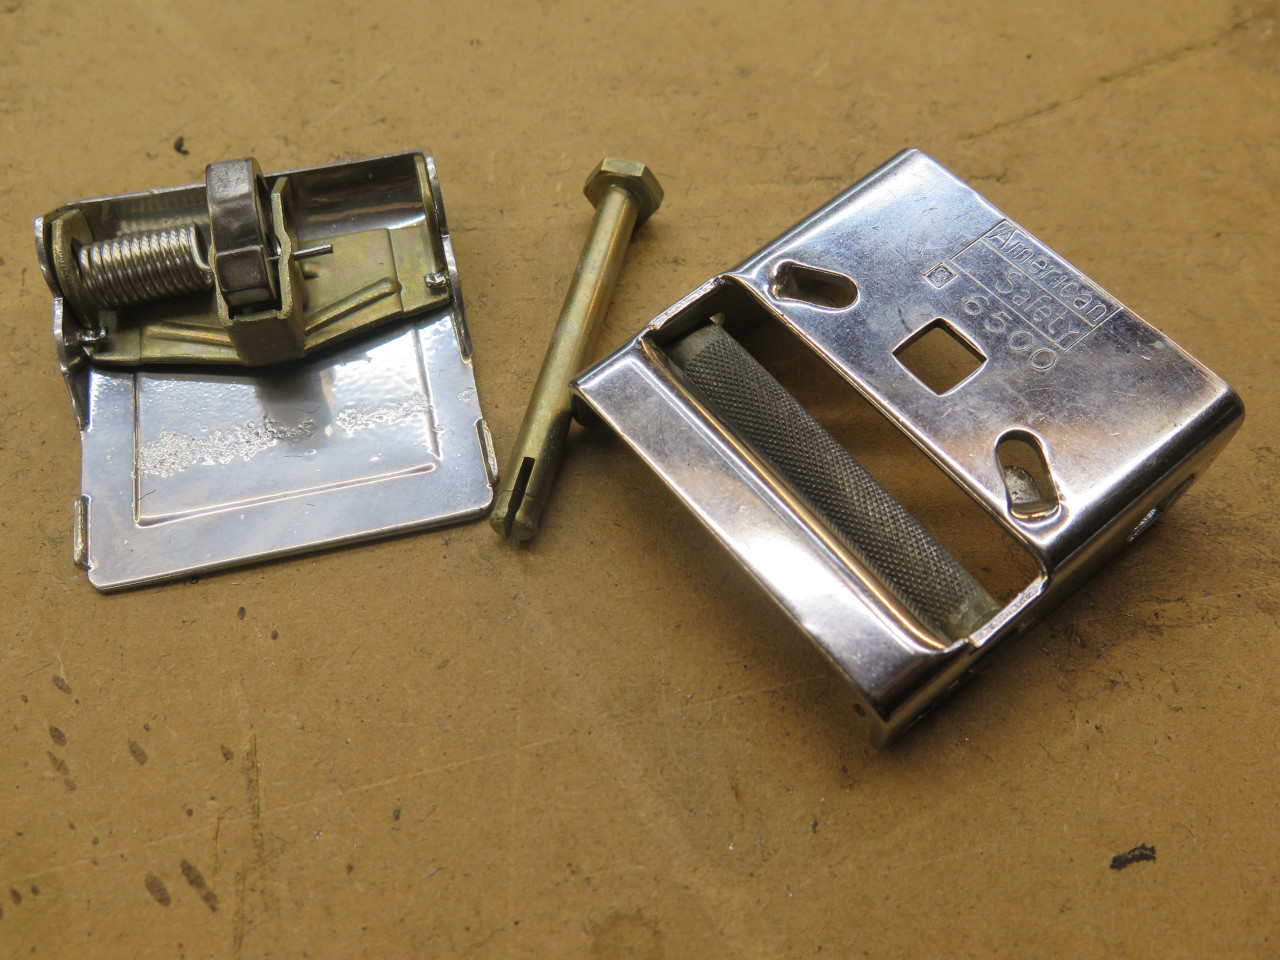
The body attachment hook was pretty rusted. It had a spring loaded keeper that came off easily.
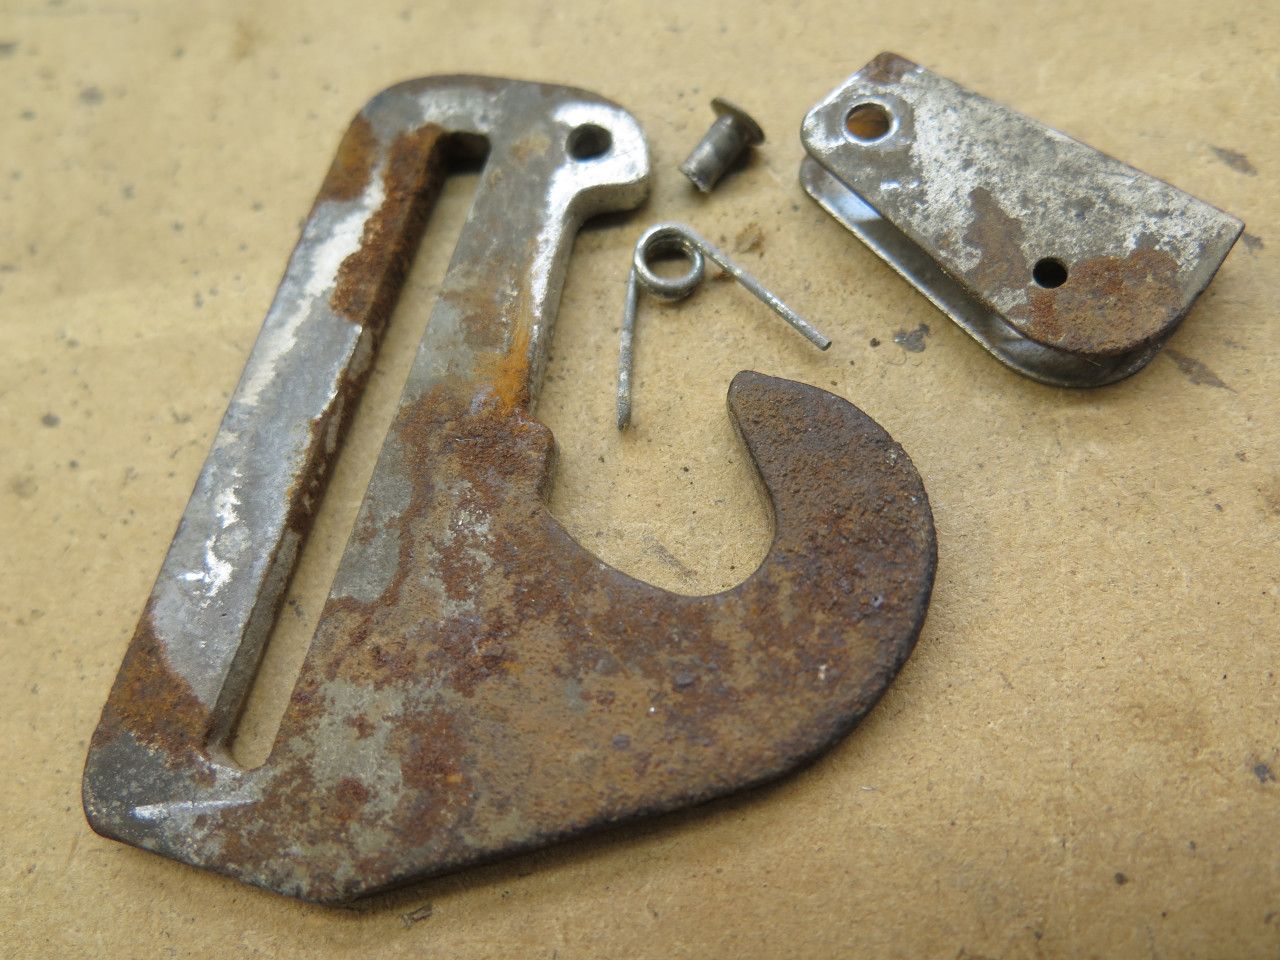
I chemically removed the corrosion and ground the pitting away to provide a nice surface for a nickel plate.
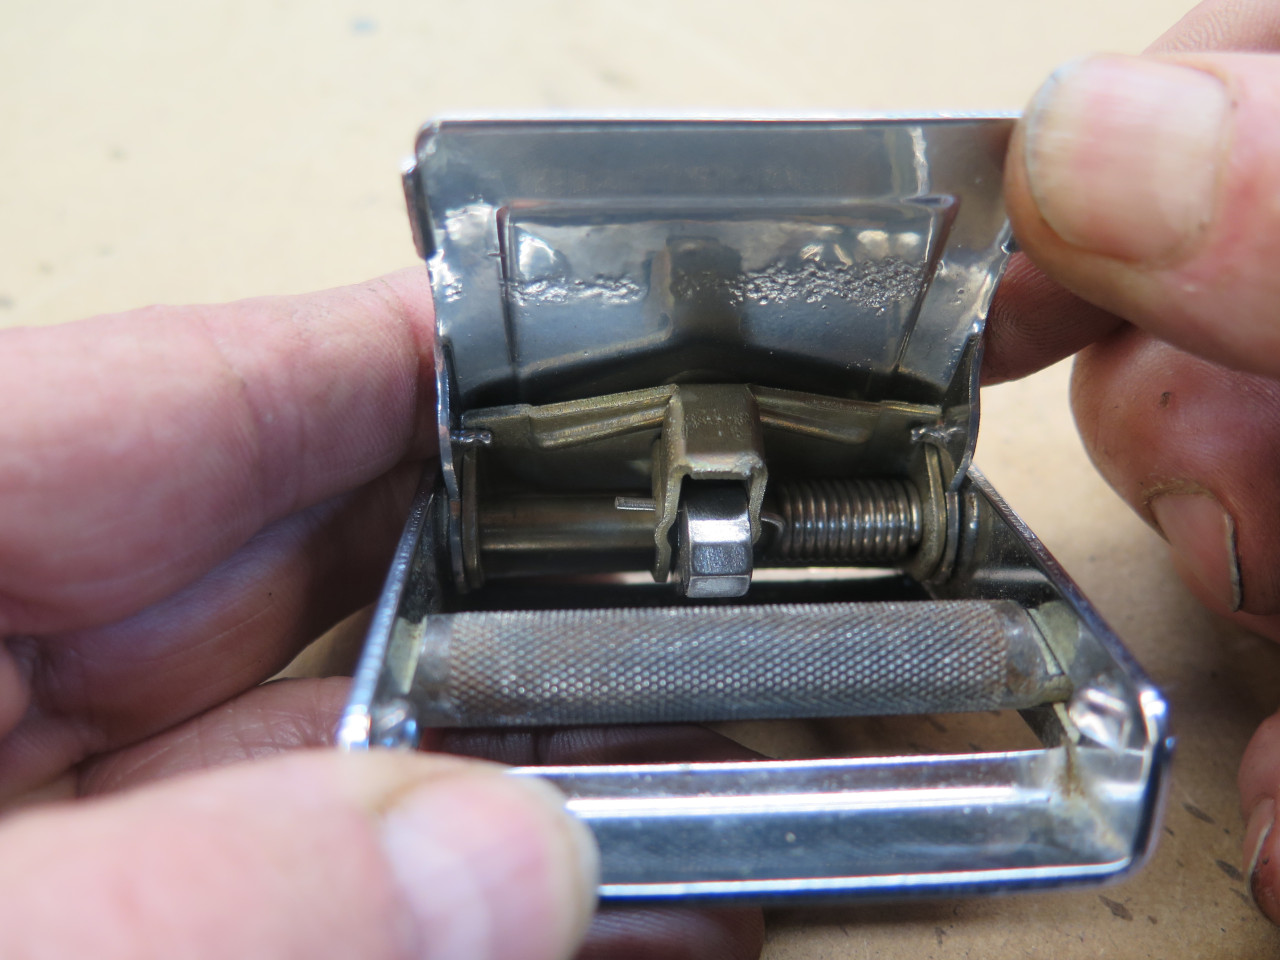
Then there was the retractor. It's bacically a barrel with a
spring inside. When the barrel is rotated with respect to the
outrigger arm, it winds up the spring. This one seemed to work OK,
but not very smoothly, plus there was quite a bit of corrosion.
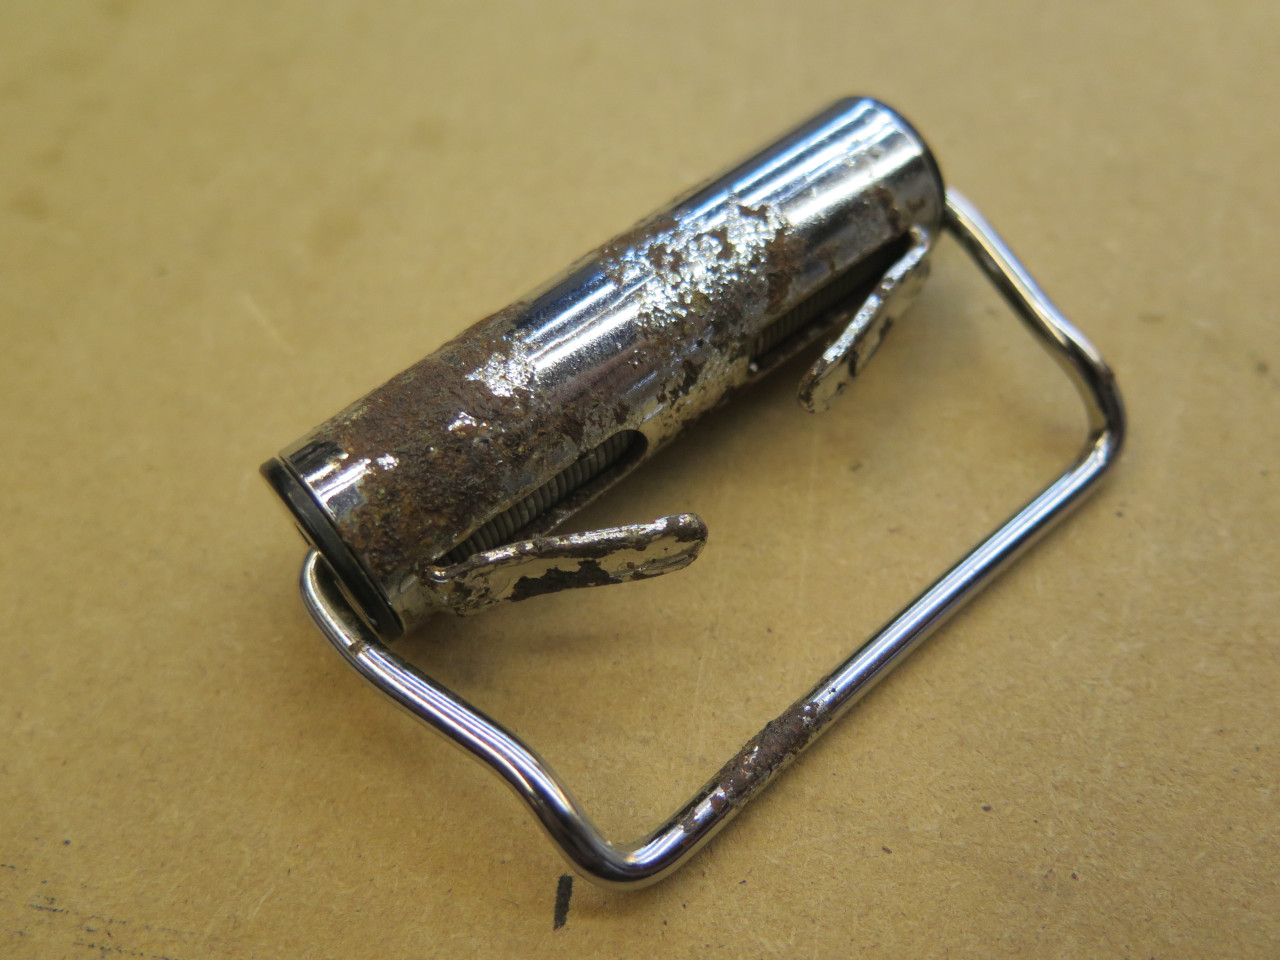
As I was preparing to disassemble the retractor, I noticed the part
number on it. On a lark, I did a Google seartch on the
number. To my surprise, this part is still available. It was
apparently used on mid-60s Corvettes. I think I could have saved
my originals, but now I can say I've used some Corvette parts on this
car.
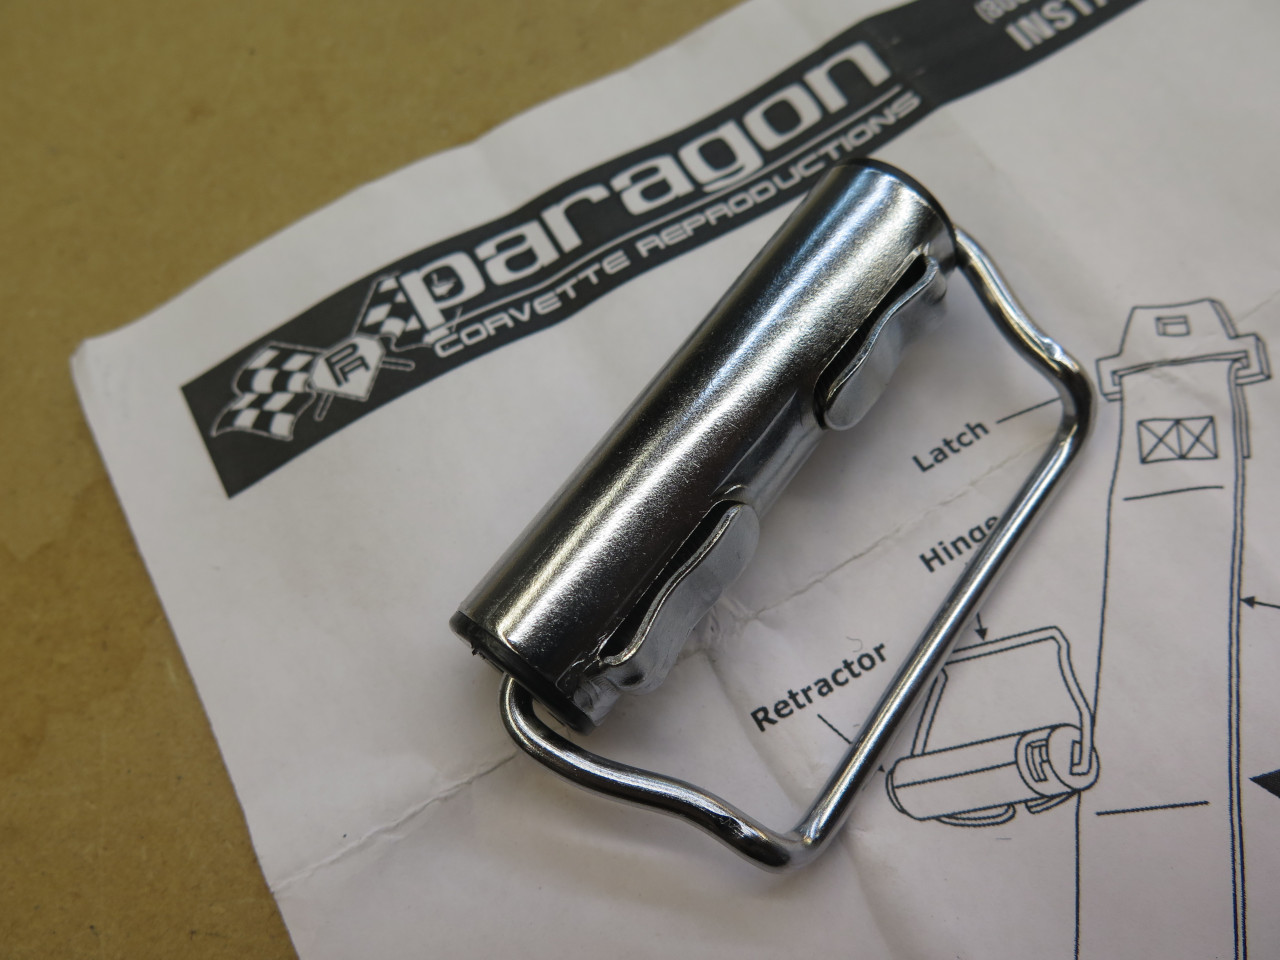
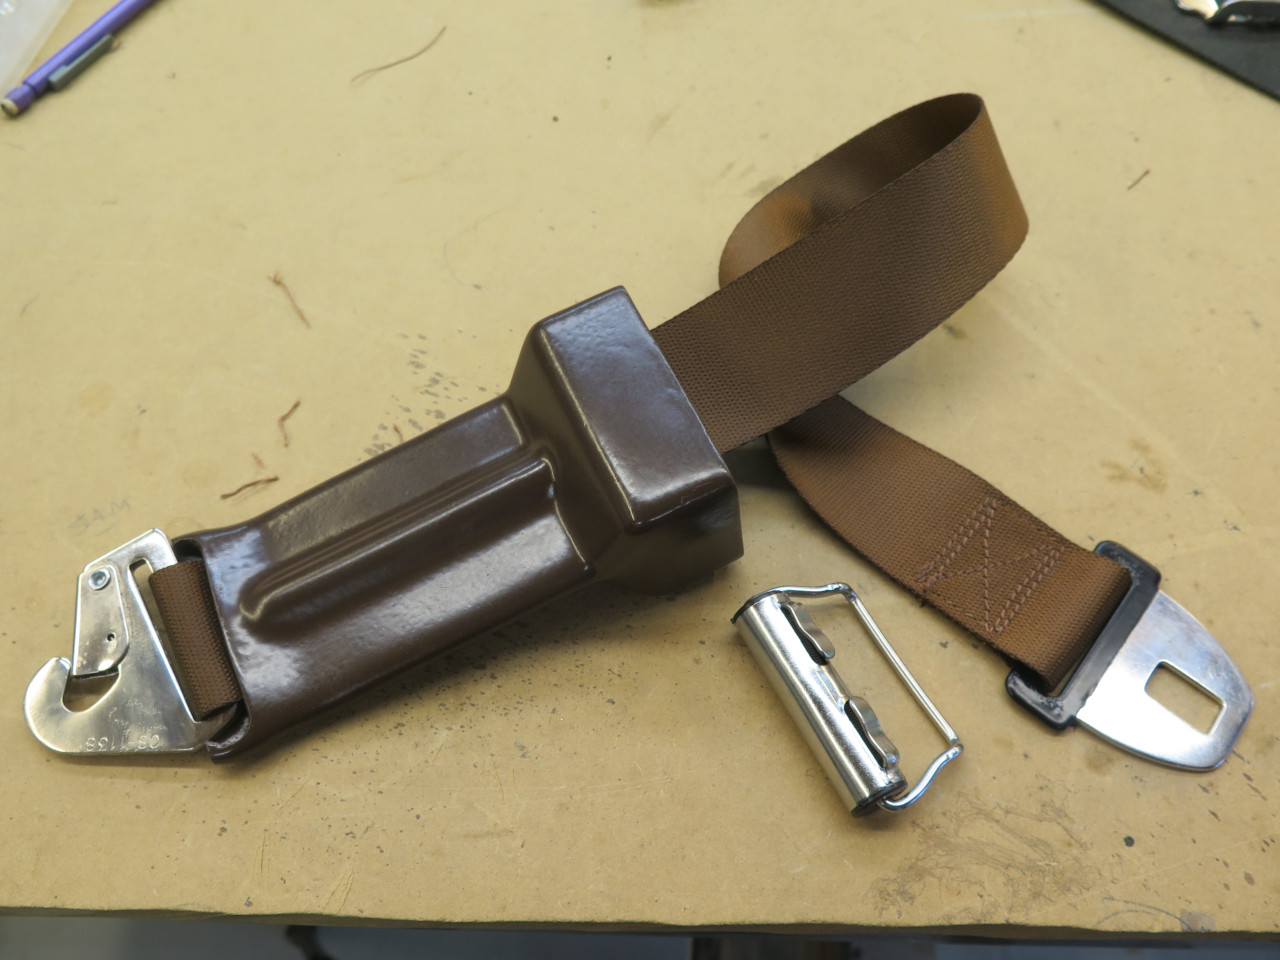
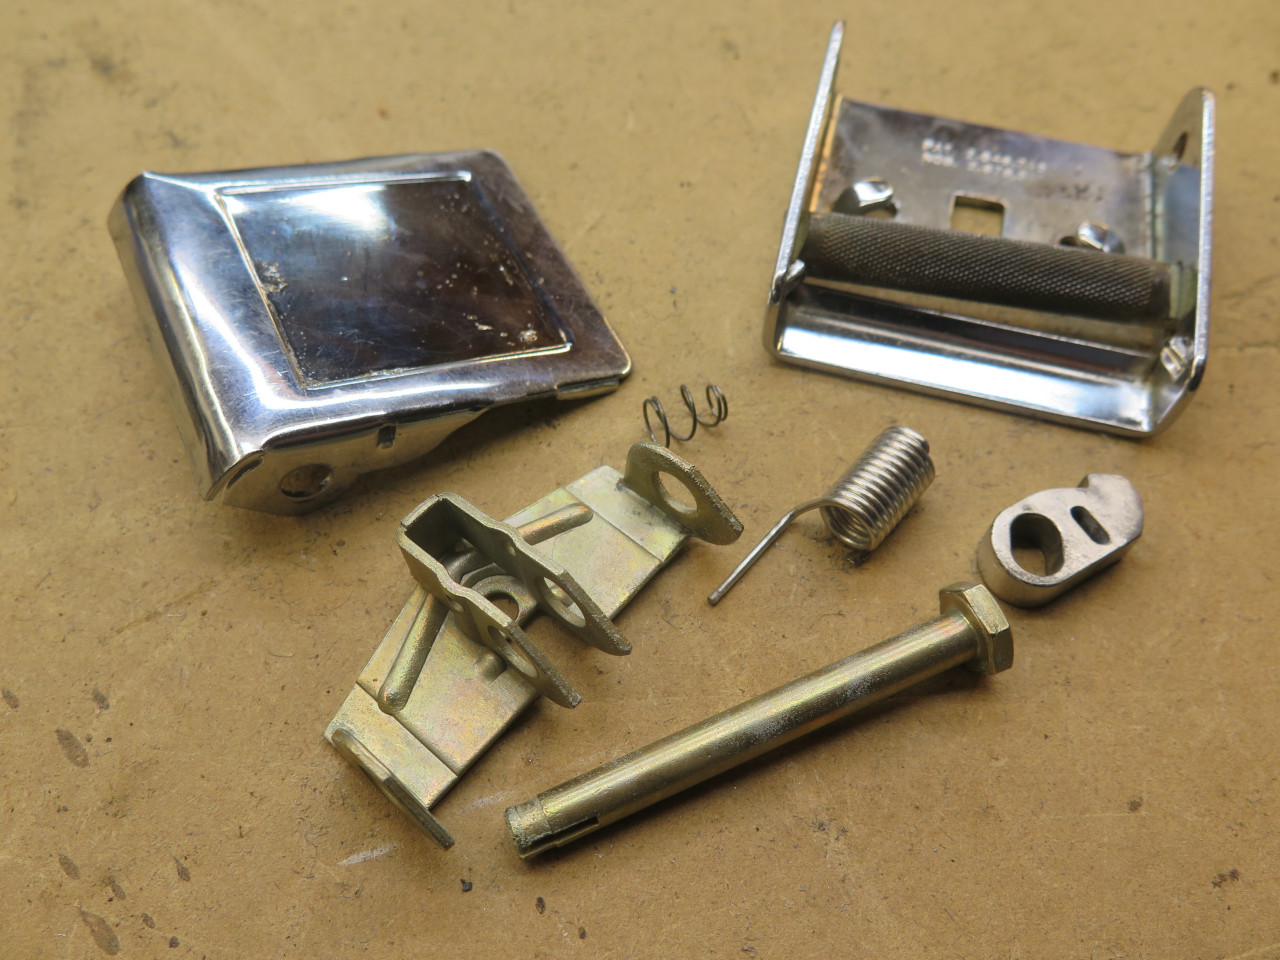
So here ae all of the parts for this assembly. The plastic retractor housing was painted a more suitable color.
The retractor goes on last, and it's a bit of a wrestling match to wind
up the retractor and fit it onto the webbing before it jumps out of your
hand and across the room.
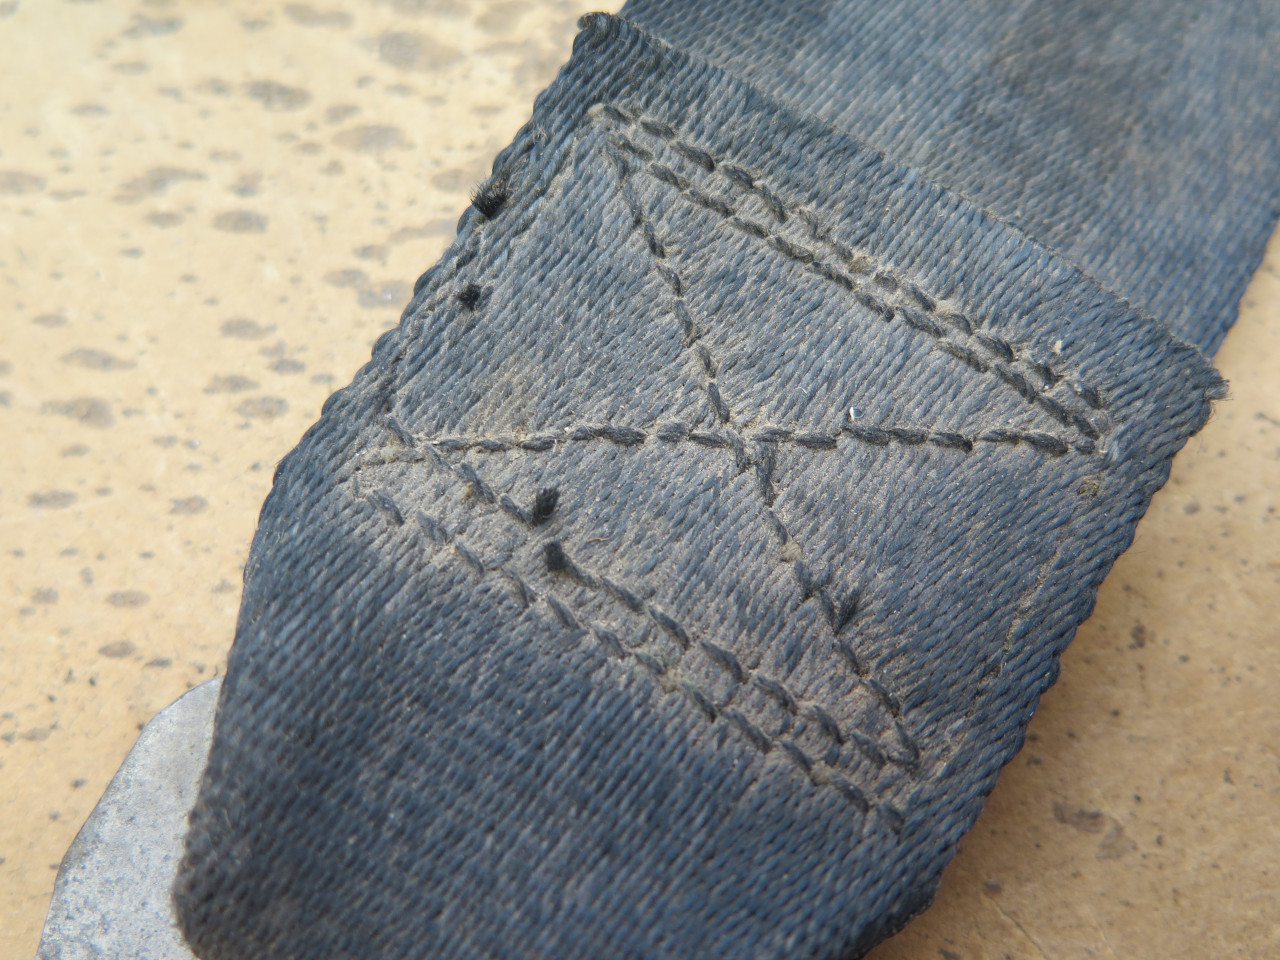
I'm not a great seamster, but I do have a comercial walking-foot sewing
machine that can handle multiple layers of this webbing. In my
research, I found that there is a specification on the type (bonded
nylon or polyester) and size (420D/3) of thread that has to be used, and
on the stitch pitch (2-4 stitches/cm), but nothing on the stitch
pattern. However, this stitch pattern seems to be common for seat
belts, so I just copied it. My results aren't perfect, but neither
were the factory's.

One down, one to go. I do one at a time in case there is a
question about how it goes back together, and there almost always is.
One of the buckles had some corrosion inside, so I took it apart, replated the internal parts, and put it back together.
Eventually, all the assemblies got done.
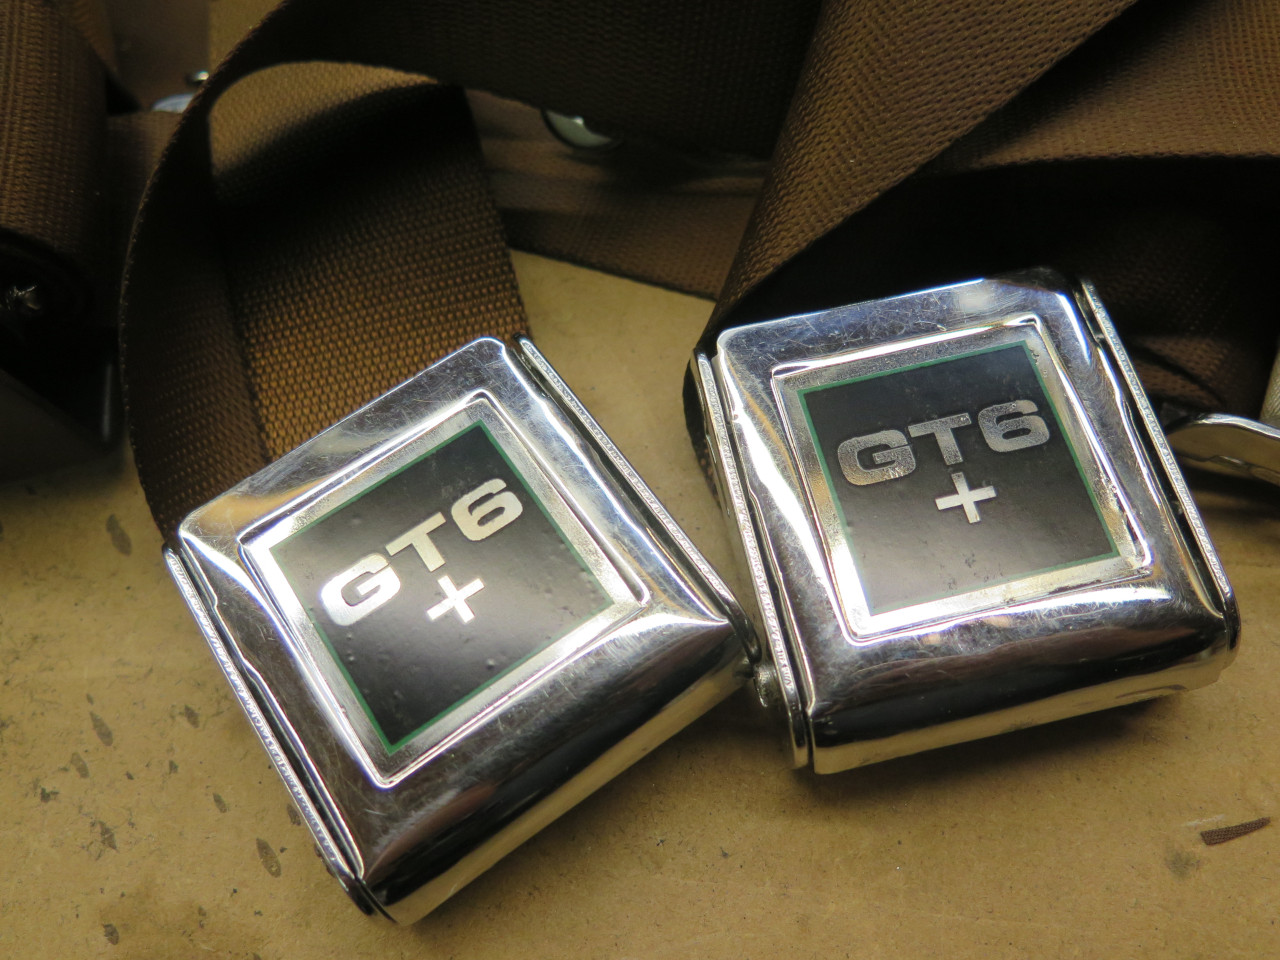
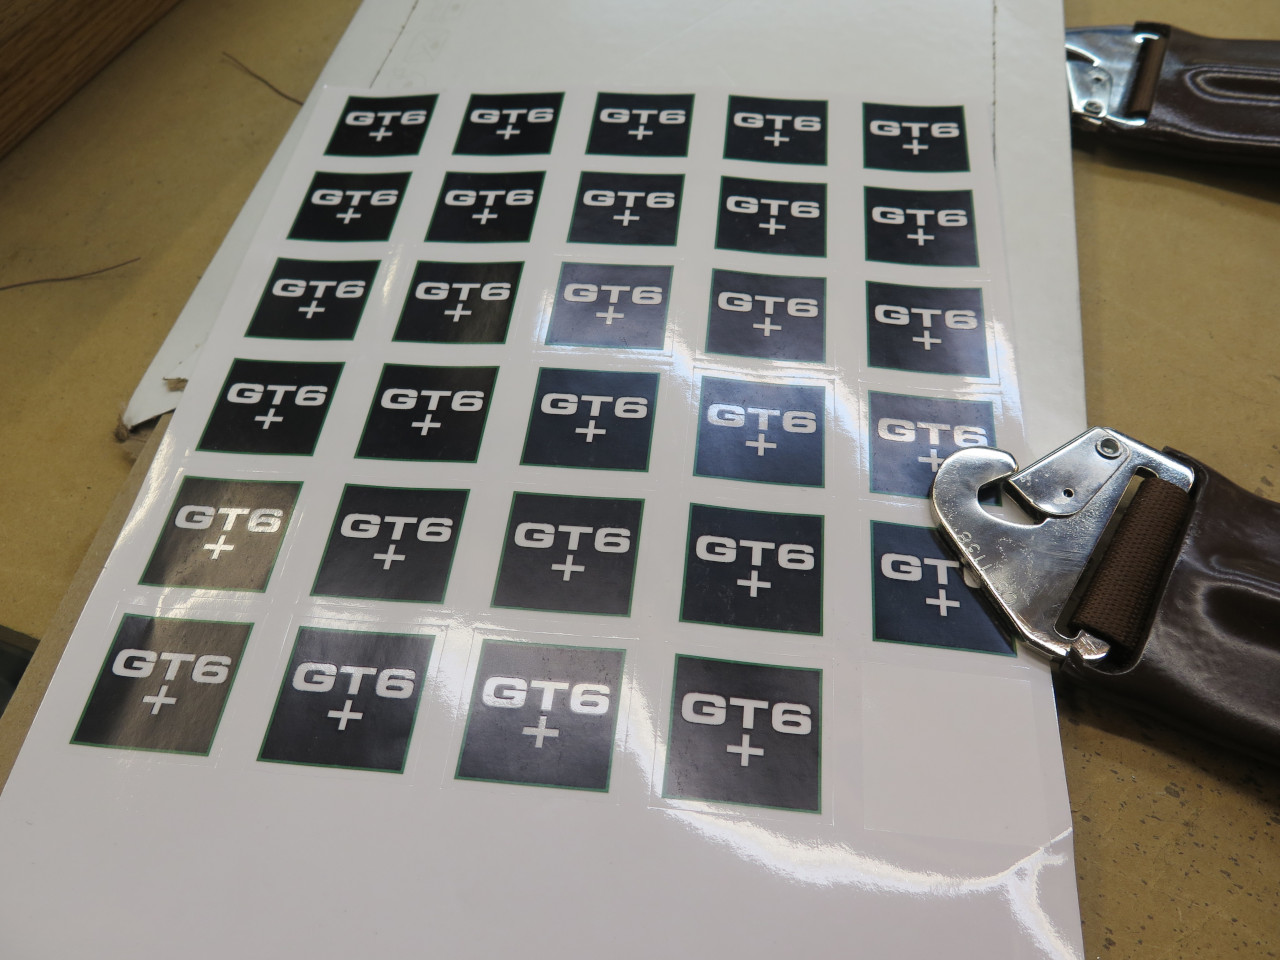
The only glaring thing that remained was the little foil stickers on the
buckles. These belts or similar were used an a lot of cars of the
era, and each car had its own logo sticker for the buckles. My
stickers were badly damaged, and I couldn't see a good way fo fix them.
Internet to the rescue! Some custom vinyl stickers ordered online.

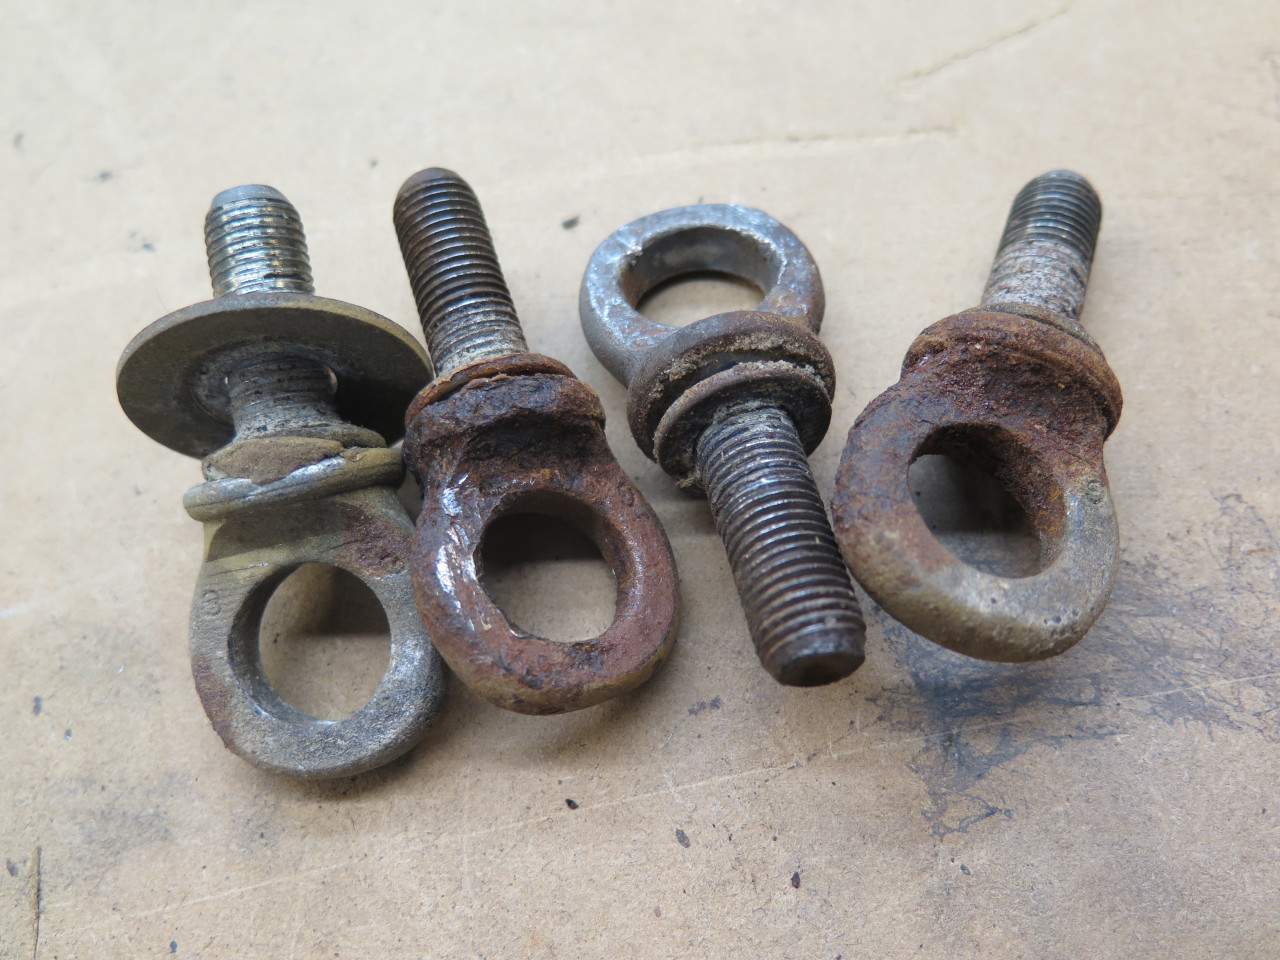
In the box that had the belts was also the body mounting hardware.
This seemed like a good time to make it beautiful. There were
four eye bolts for the lap belt anchors, and a couple of chromed bolts
and spacers for the shoulder belts. The eye bolts were prticularly
crusty, but cleaned up OK. They got a nice zinc plate and a
chromate top coat.
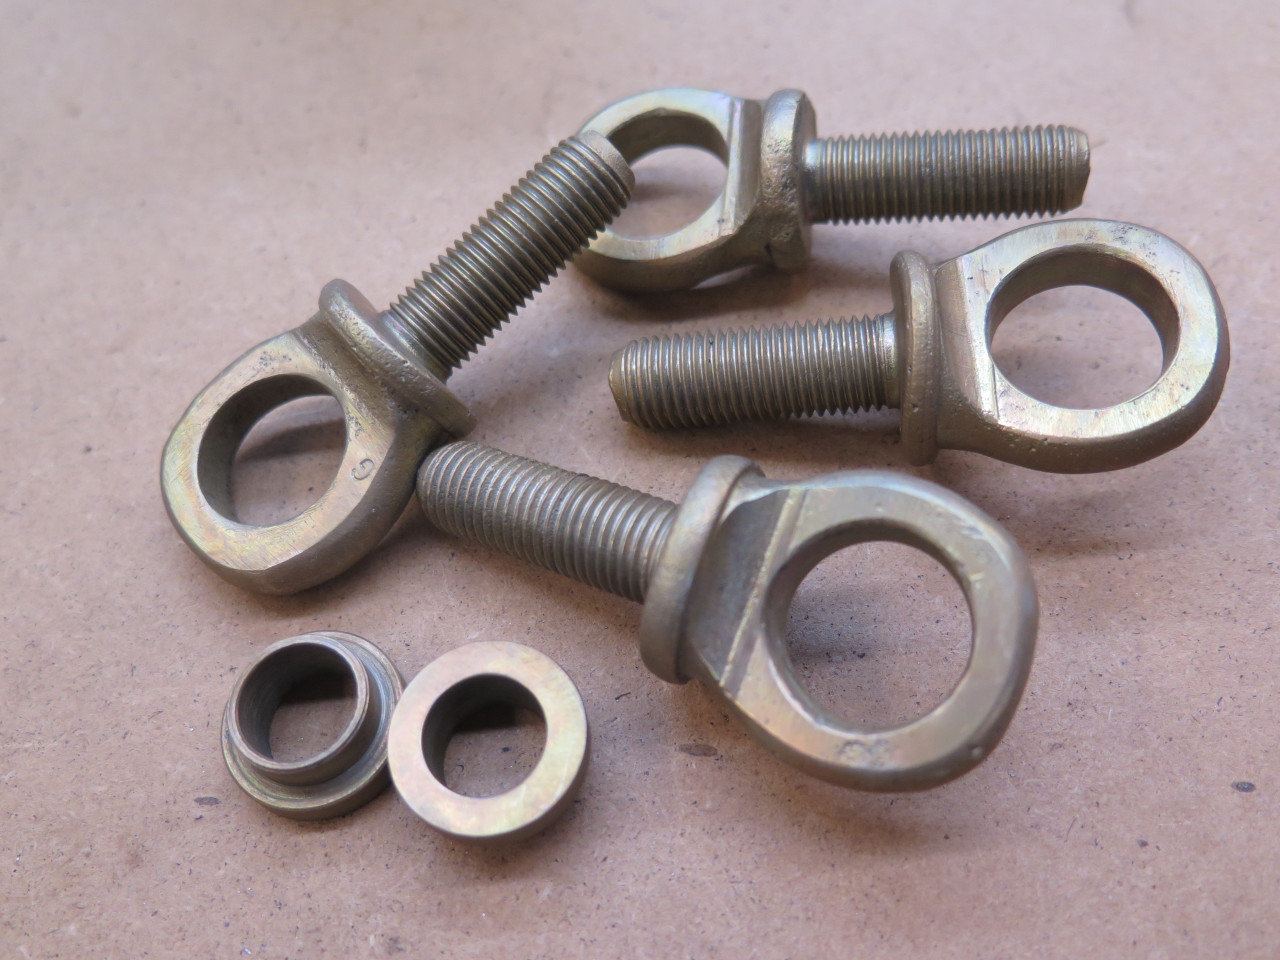
These will go in a tub, on a shelf until needed.
This was a pretty good chilly weather project, but soon, I'll be able to
get back out to the garage. I think I have around $60 in these
belts, mostly for the webbing, the retractors, and the stickers.
Comments to Ed at elhollin1@yahoo.com
To my other GT6 pages