To my other GT6 pages
January 22, 2022
Seat Frames & Foam
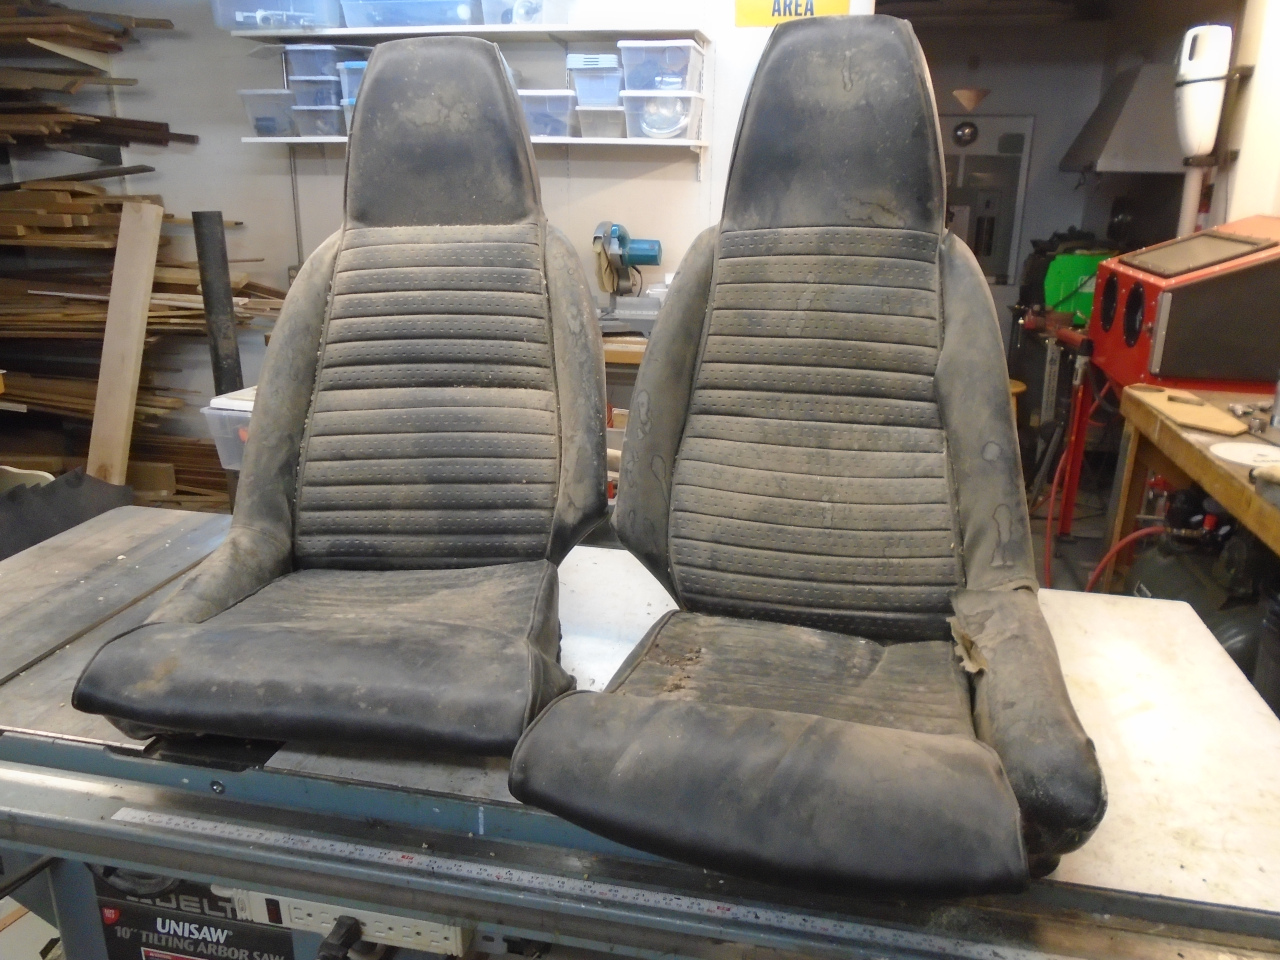
The seats installed in the GT6 and Spitfire cars varied over the
years. Some had integral head rests, some had separate head rests,
and some had none. Some had reclining backs, and some
didn't. I think that even some of the ones that look identical may
differ in internal construction. This is probably why it seemed
difficult to find any detailed information on refurbishing my particular
seats. Being non-reclining, with integral head rests, they were
apparently only used for a short time--less than a year, maybe--on some
US cars.
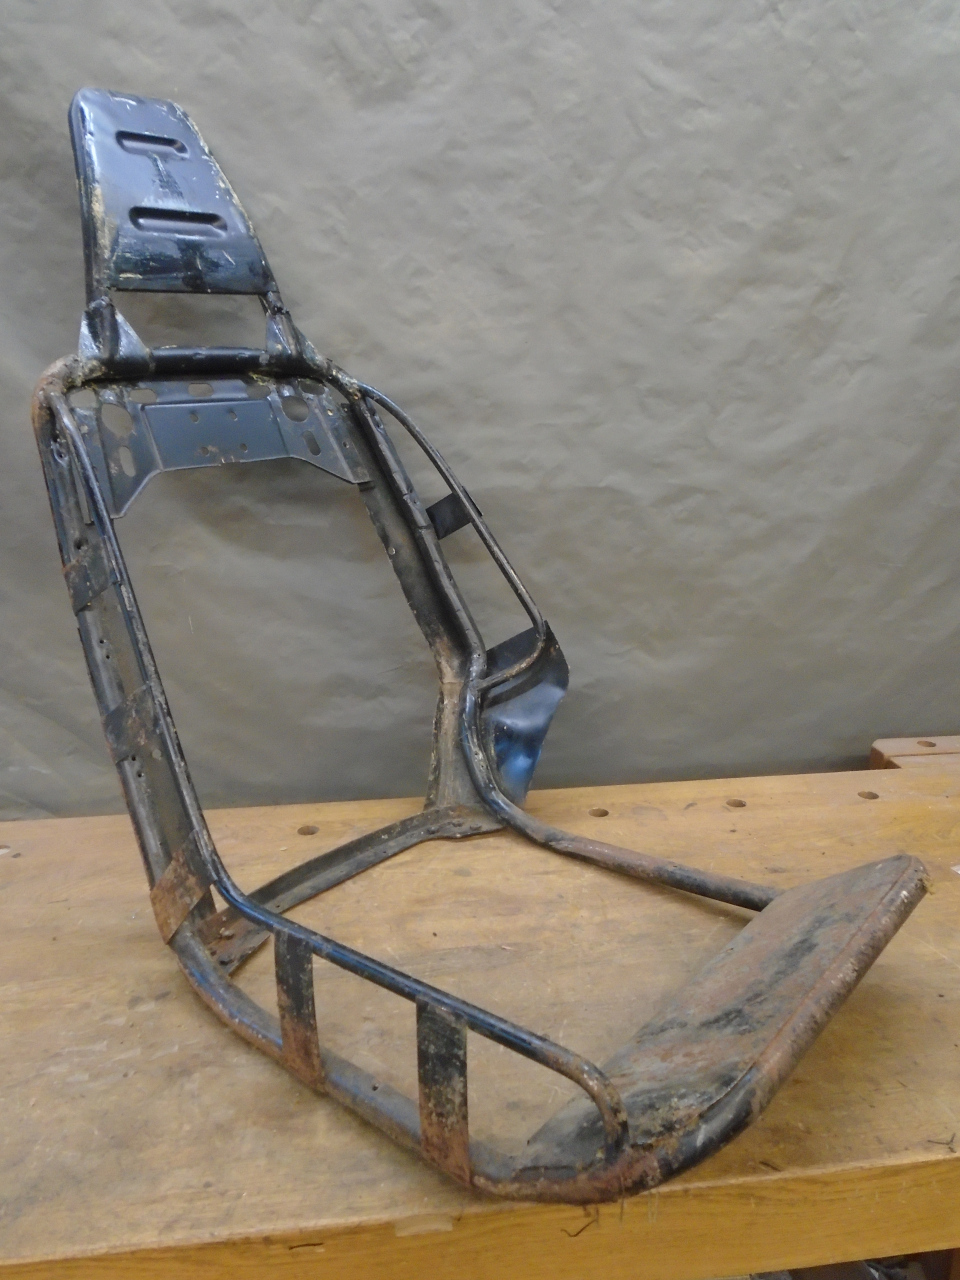
My seats were in pretty bad shape--especially the driver's seat.
The vinyl was brittle, and split in a few places. The foam I could
see was falling apart.

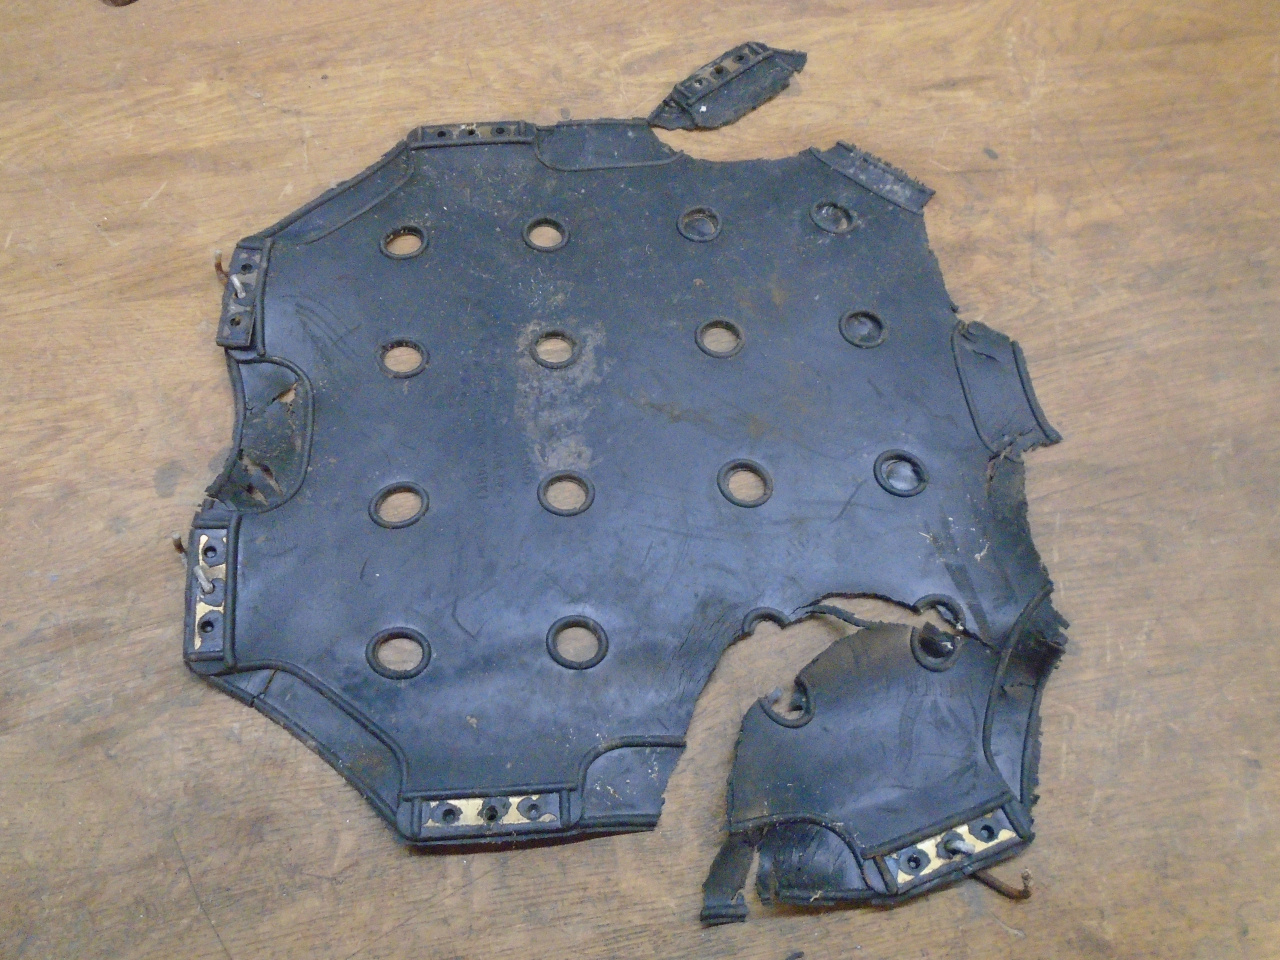
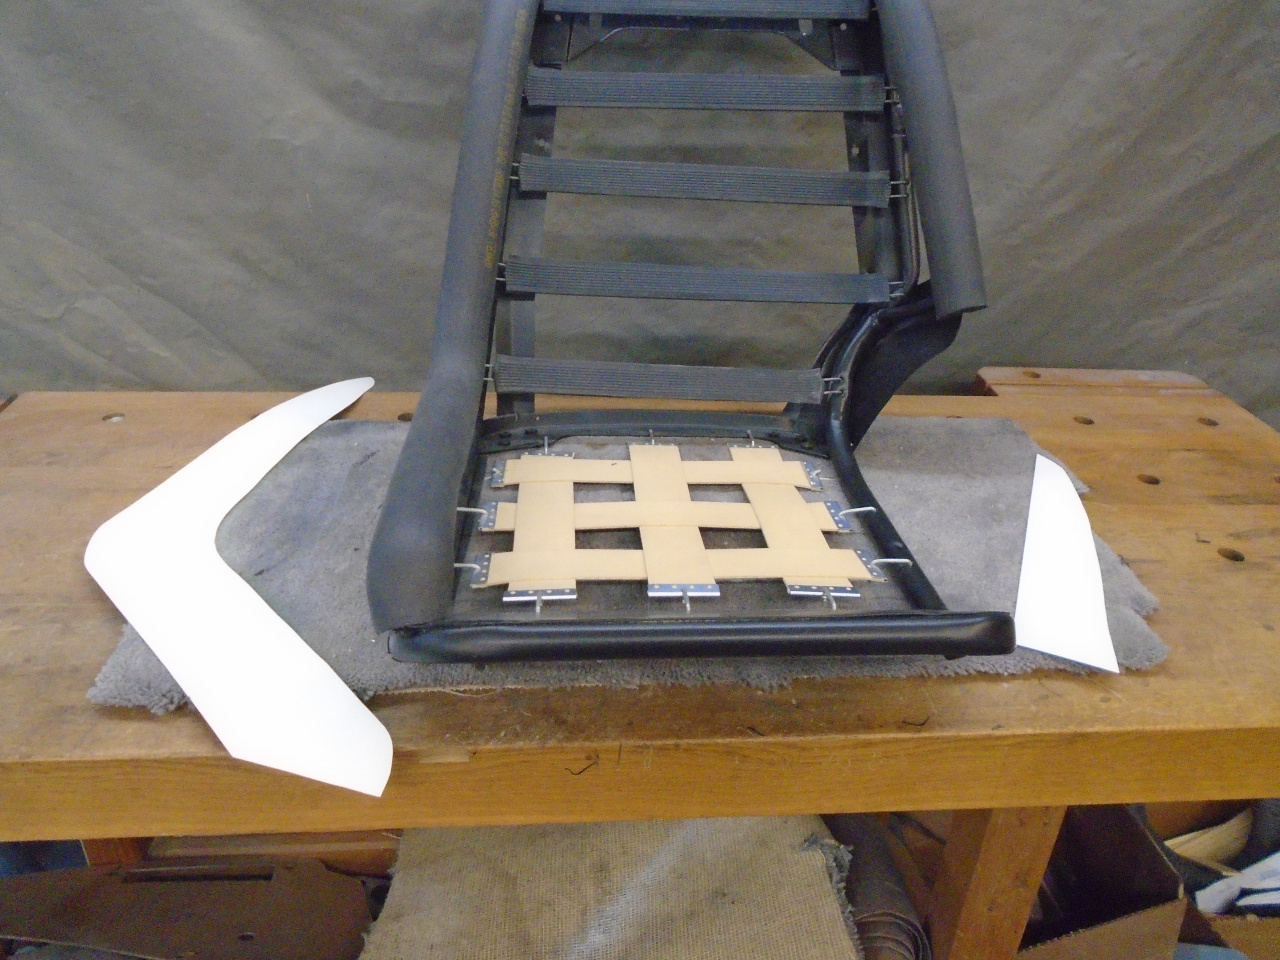
The bottom cushion is just held in by a few snaps.

The cushion rides on a rubber diaphragm that is stretched between the
seat frame rails. The passenger side diaphragm was mostly OK, but
had one attachment point torn away. The driver's side was
deceased.

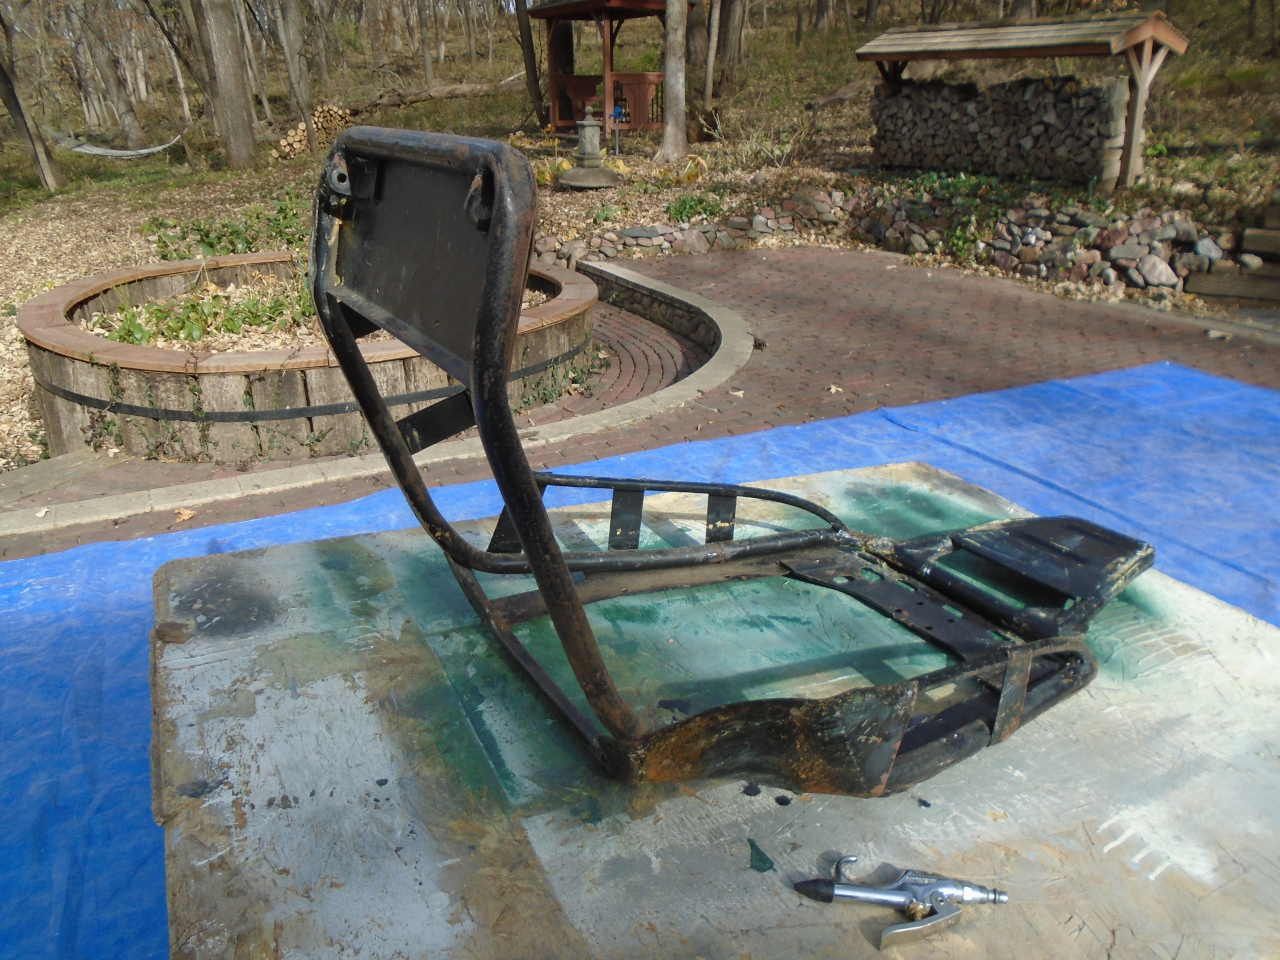
After removing the back panel, I could see that the seat back used rubber straps that all looked intact.
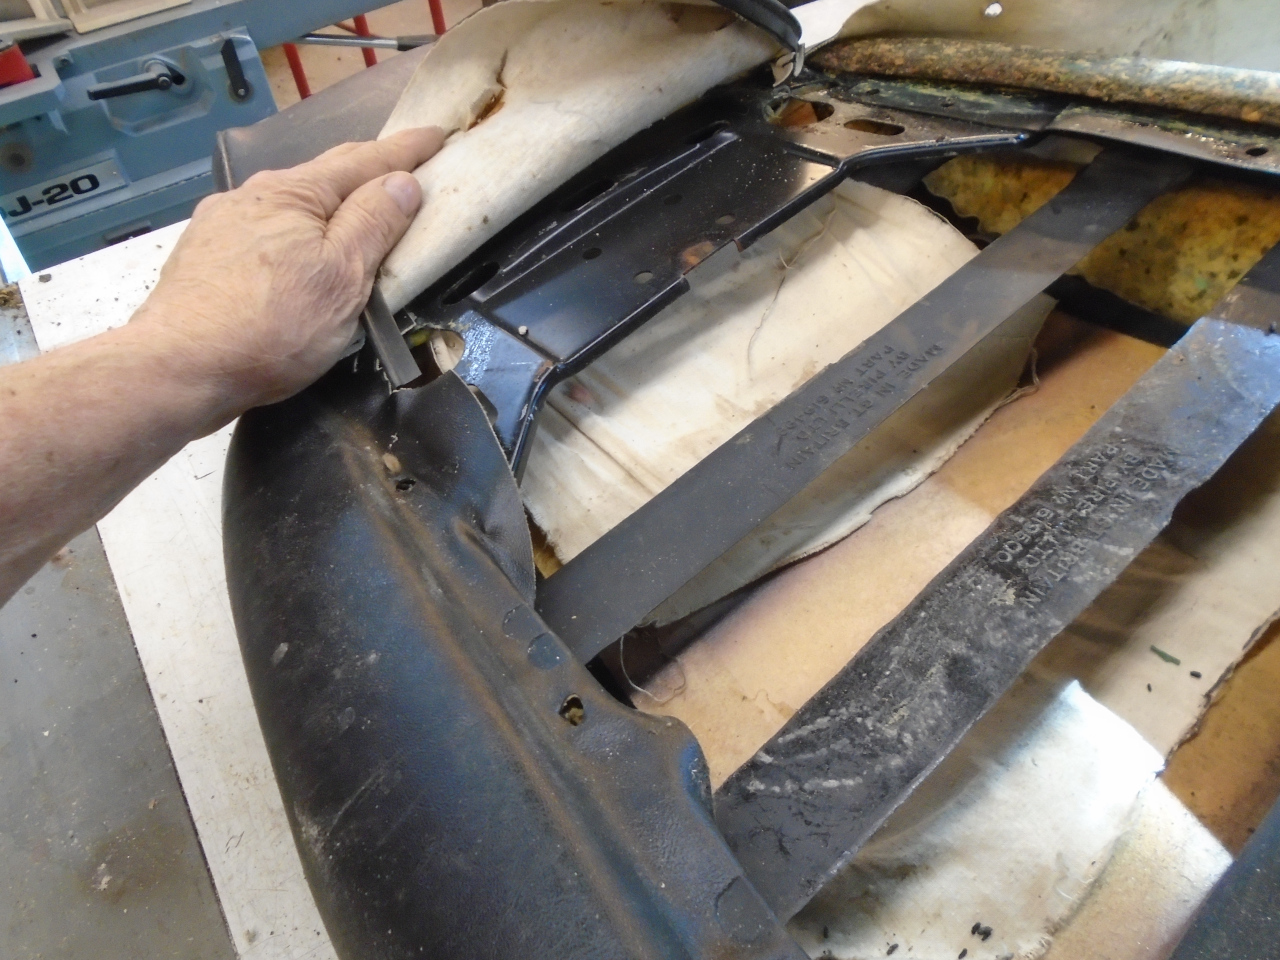
At this point, I determined that I didn't want to reuse any of the vinyl
or foam, so I removed it all. (I'm just working on the passenger
seat at this point. I wanted to preserve the driver's seat intact
as a reference.)
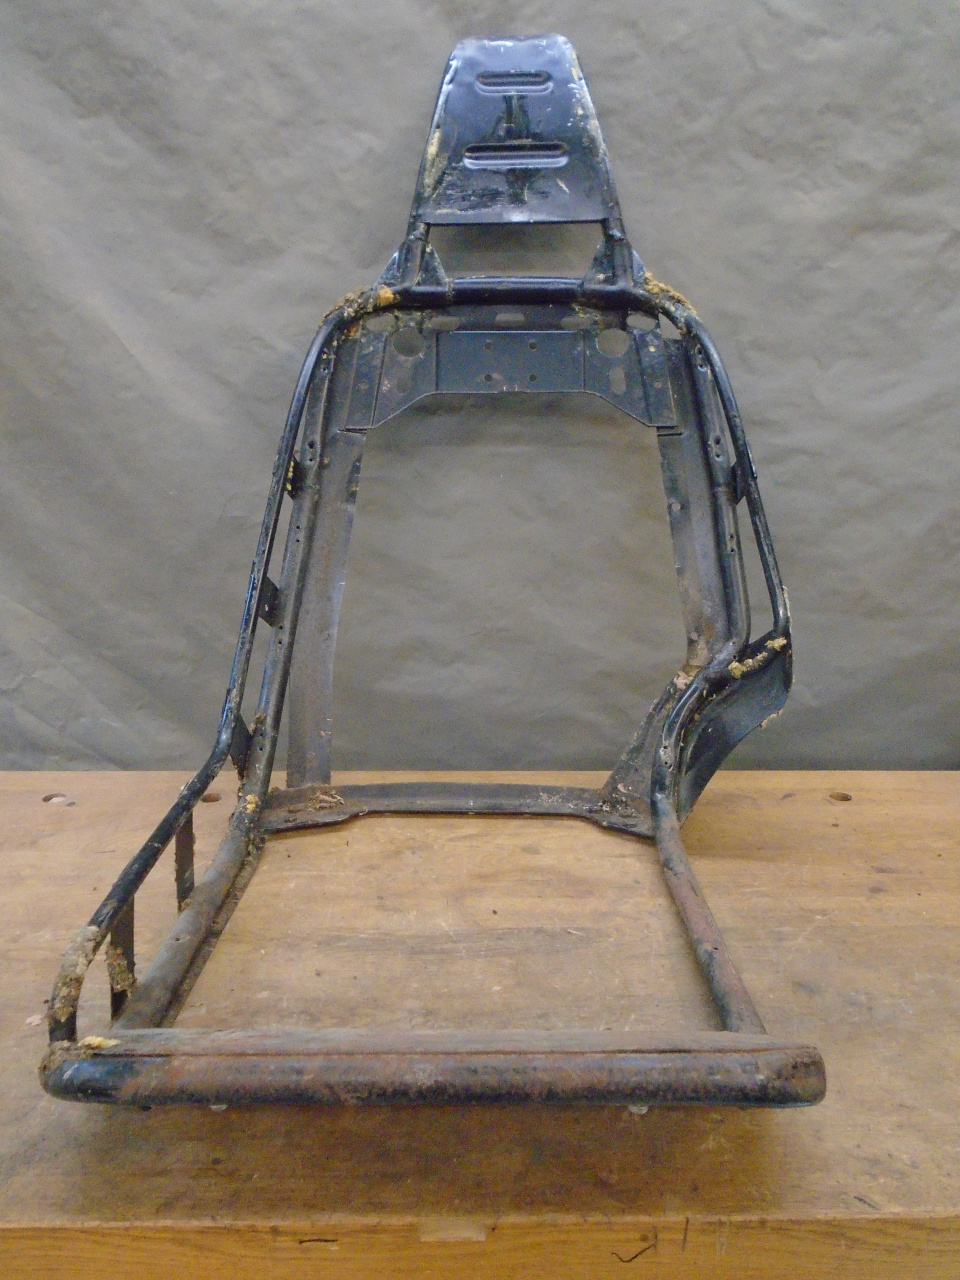
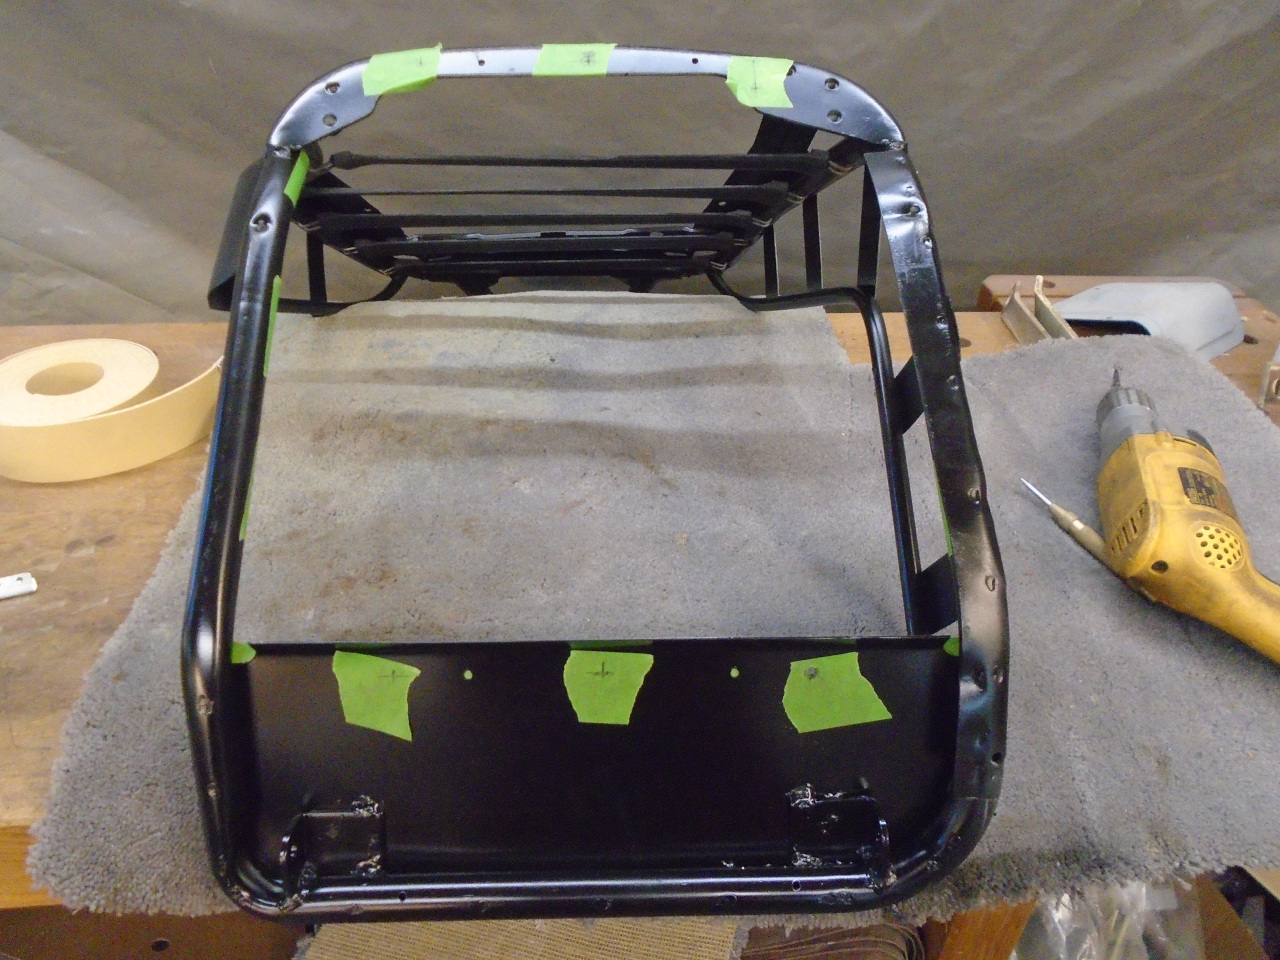
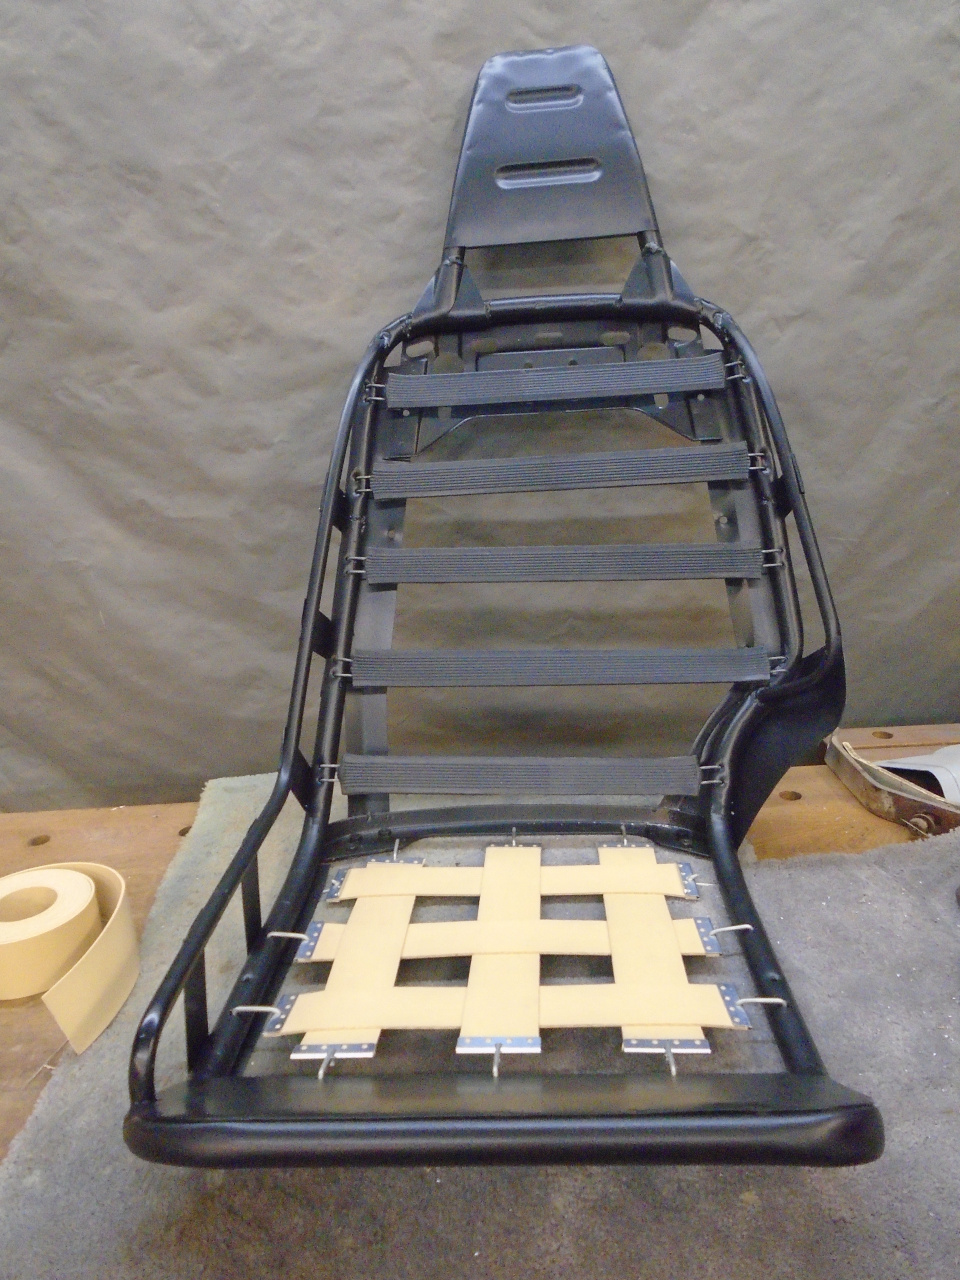
This left the bare frame. It has quite a bit of rust on it's lower
extremities, but was in overall OK condition. I was sort of
surprised at how complex an assembly it was.
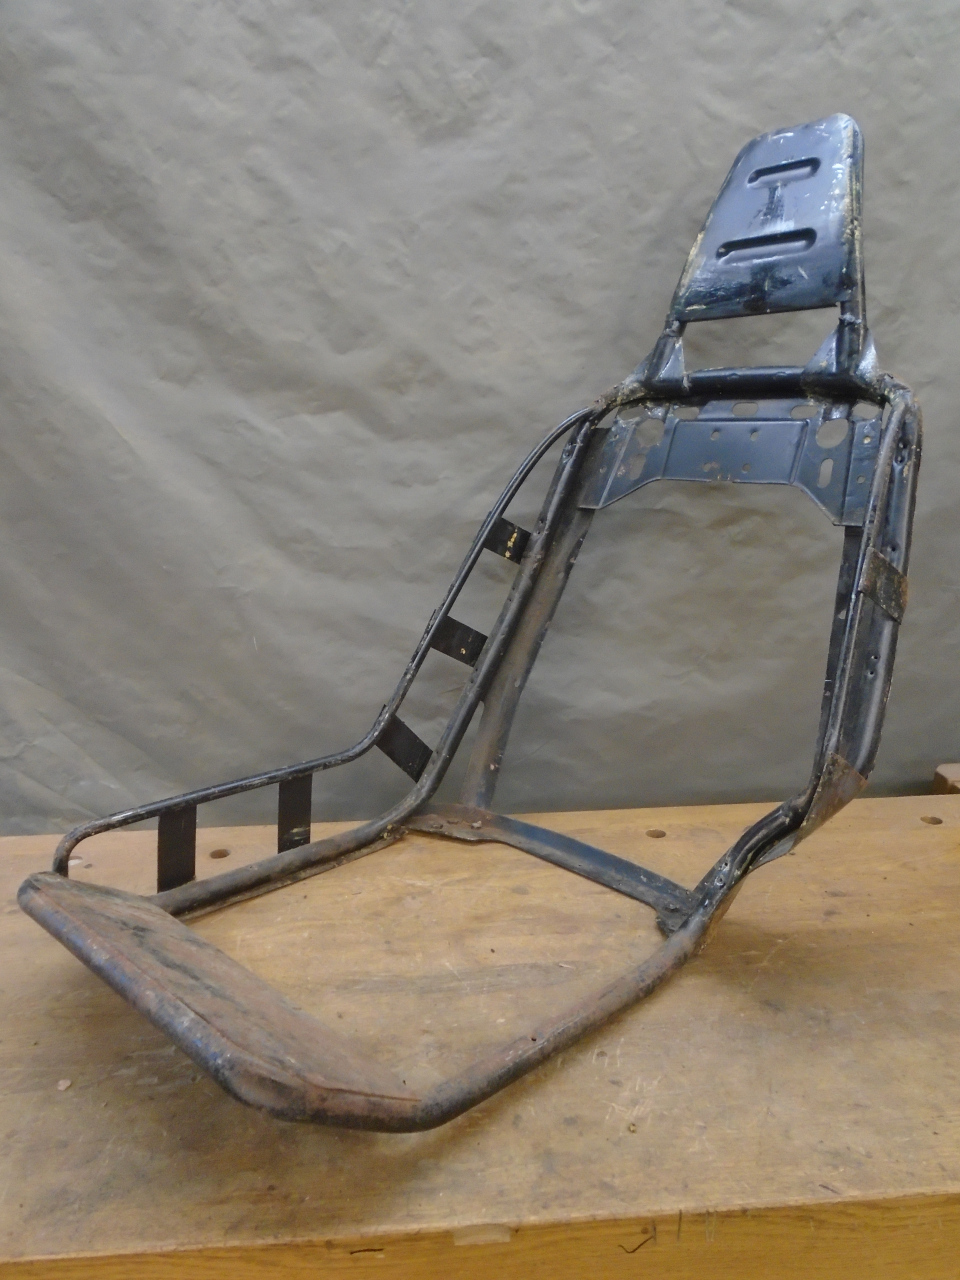
An opportune break in our winter weather let me take the frame outside and sand blast it...

...and shoot some two part epoxy on it..


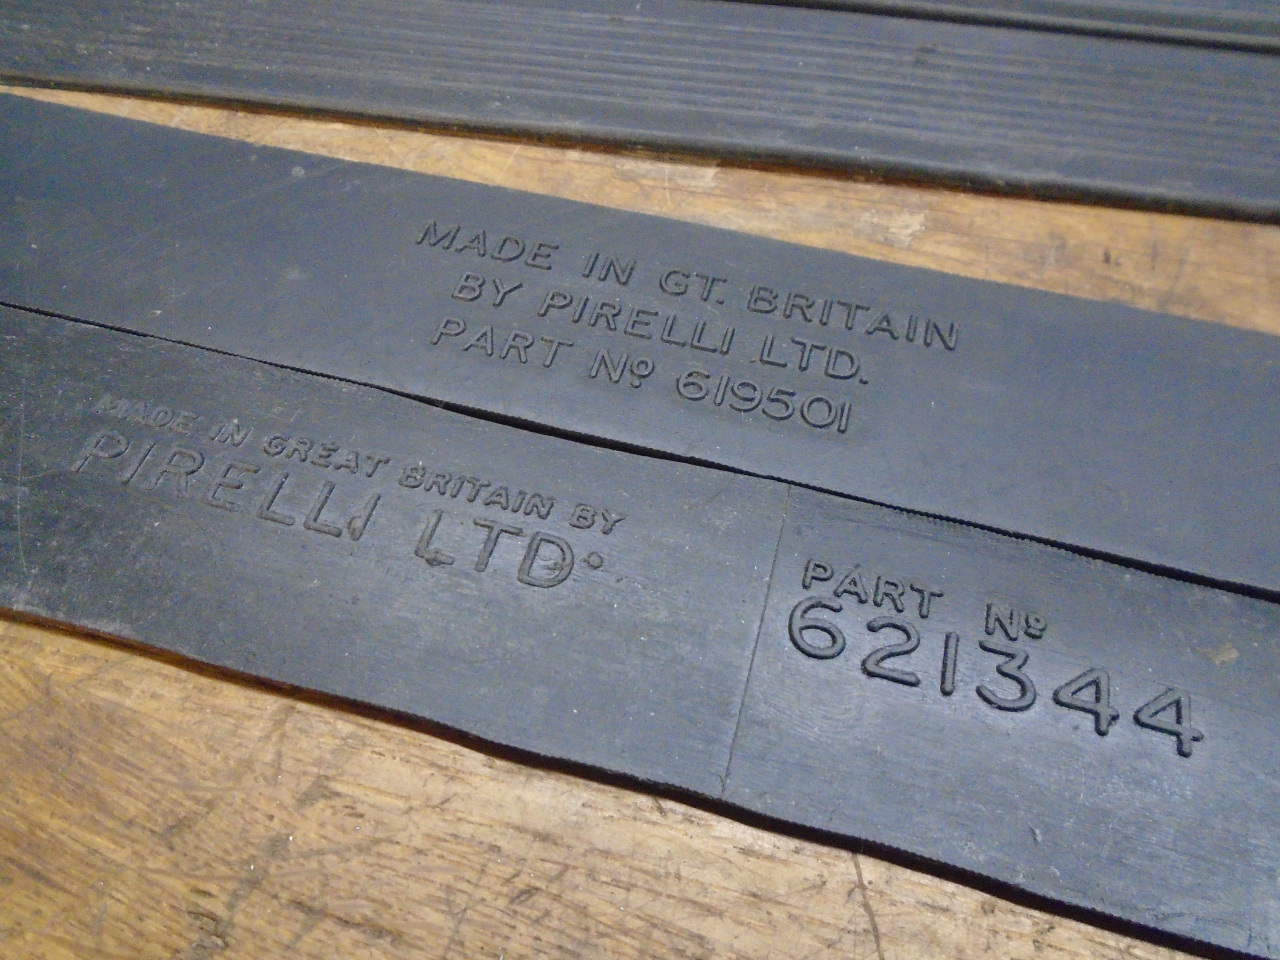
I took a close look at the rubber straps for the seat back, and couldn't
see anything wrong with them. They still had to be stretched to
install them, and they seemed pretty tight. They were very dirty,
and had quite a bit of glue on them. They also had quite a lot of
flash from the manufacturing process.

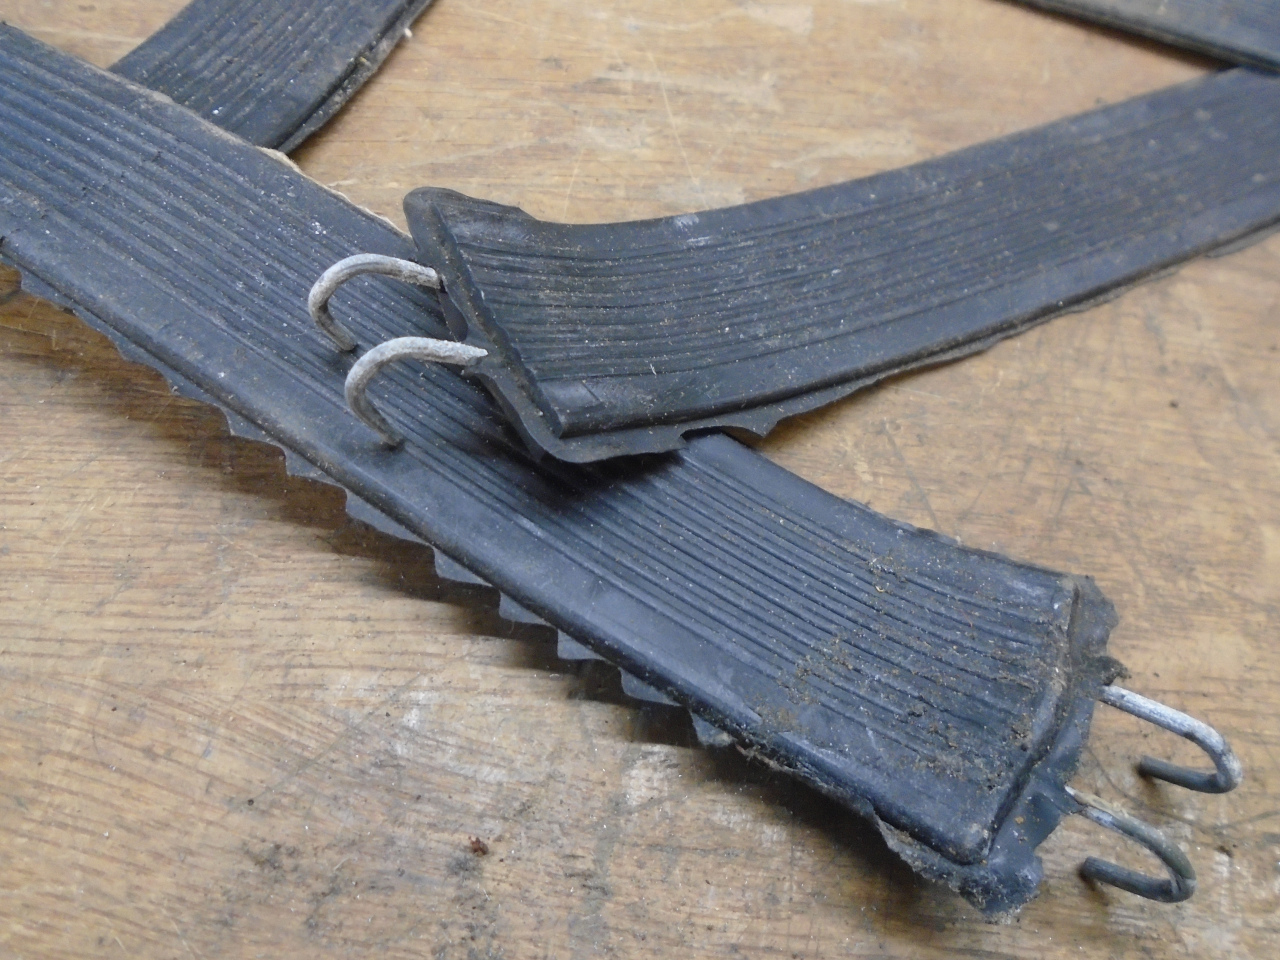
These are Pirelli brand. Being a rubber product, I wonder if it is related to the tire company.
All cleaned up...
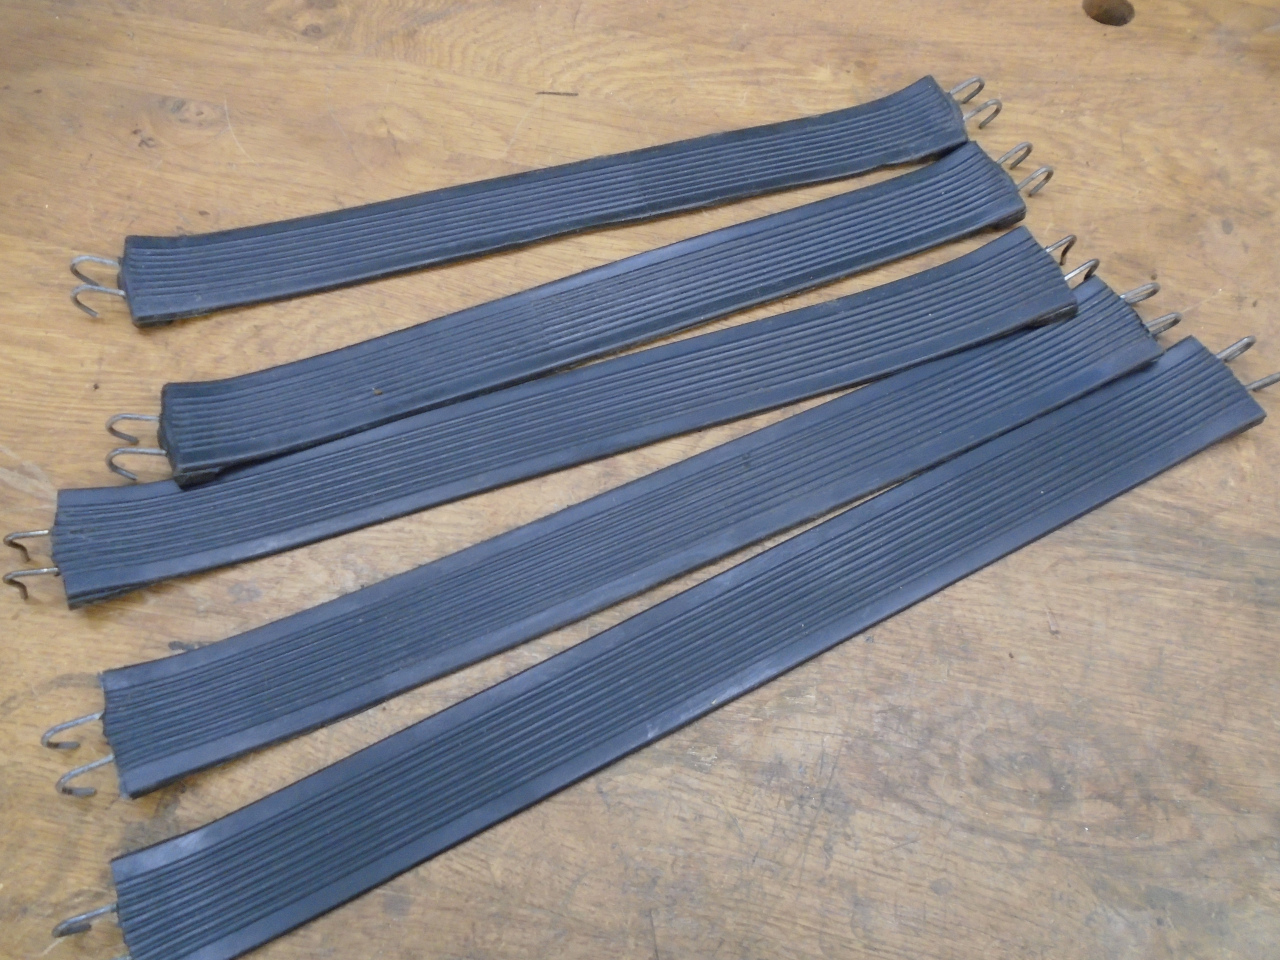
...and installed.

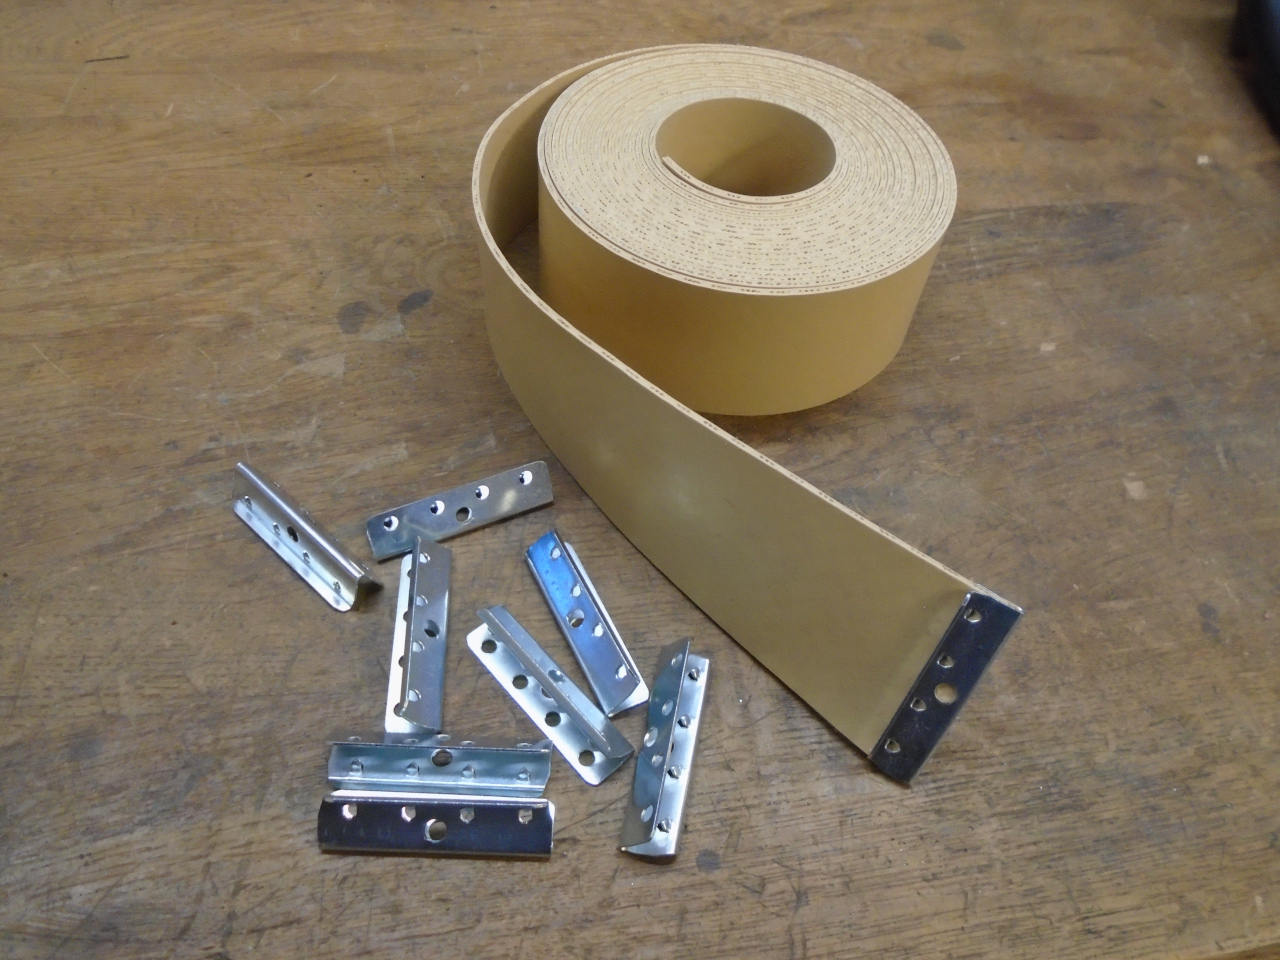
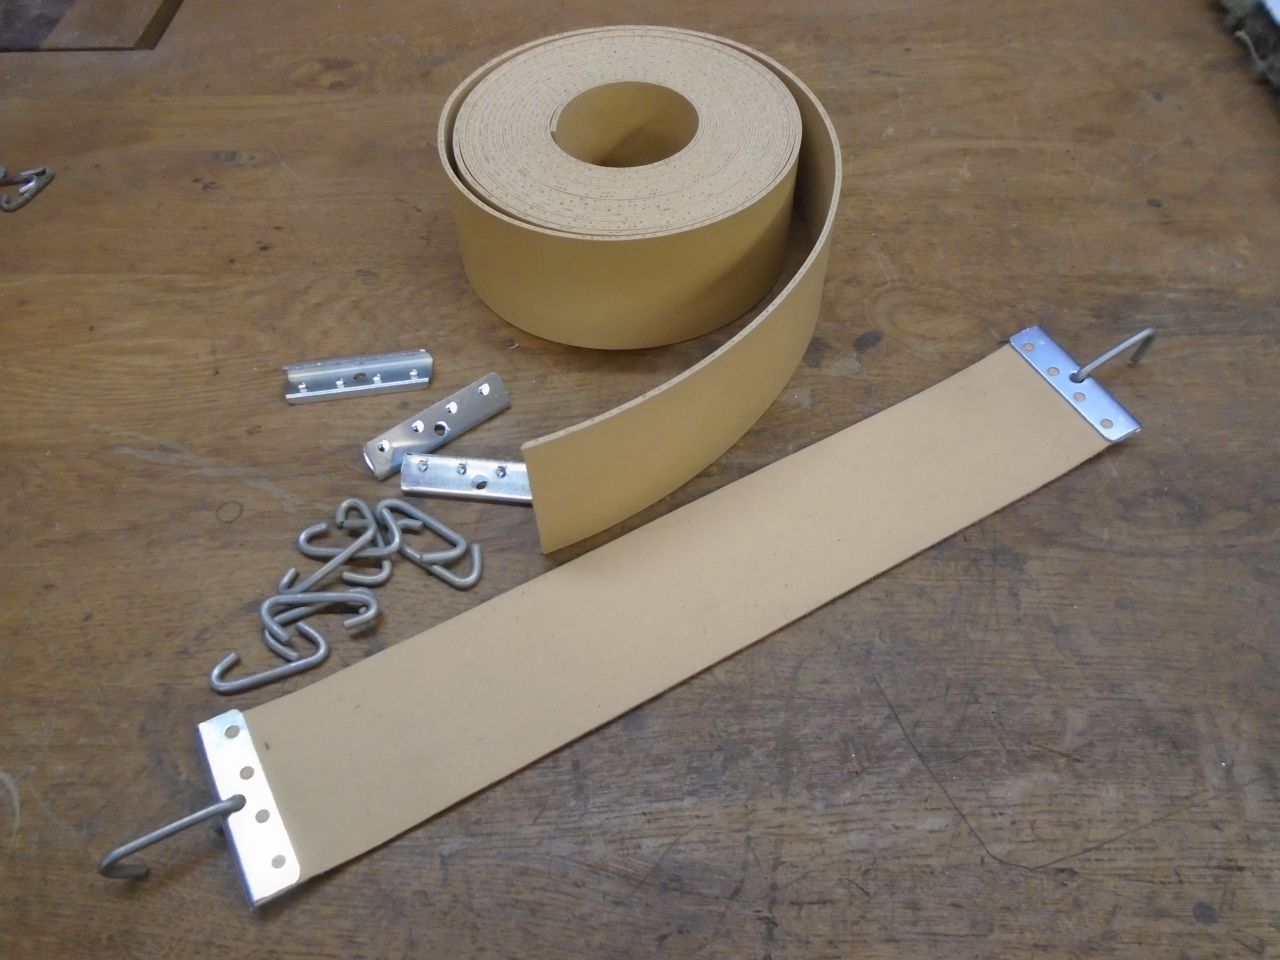
As for the bottom diaphragm, I found that it is apparently not available
anywhere. What you can get from some of the usual suppliers is a
kit that replaces it with rubber straps like the seat back. I
didn't see the need to buy the kit, and instead just bought some strap
and end clamps. This stuff is well known to upholsterers.
It's reinforced rubber, called Pirelli strap or web, just like the
original seat back straps.
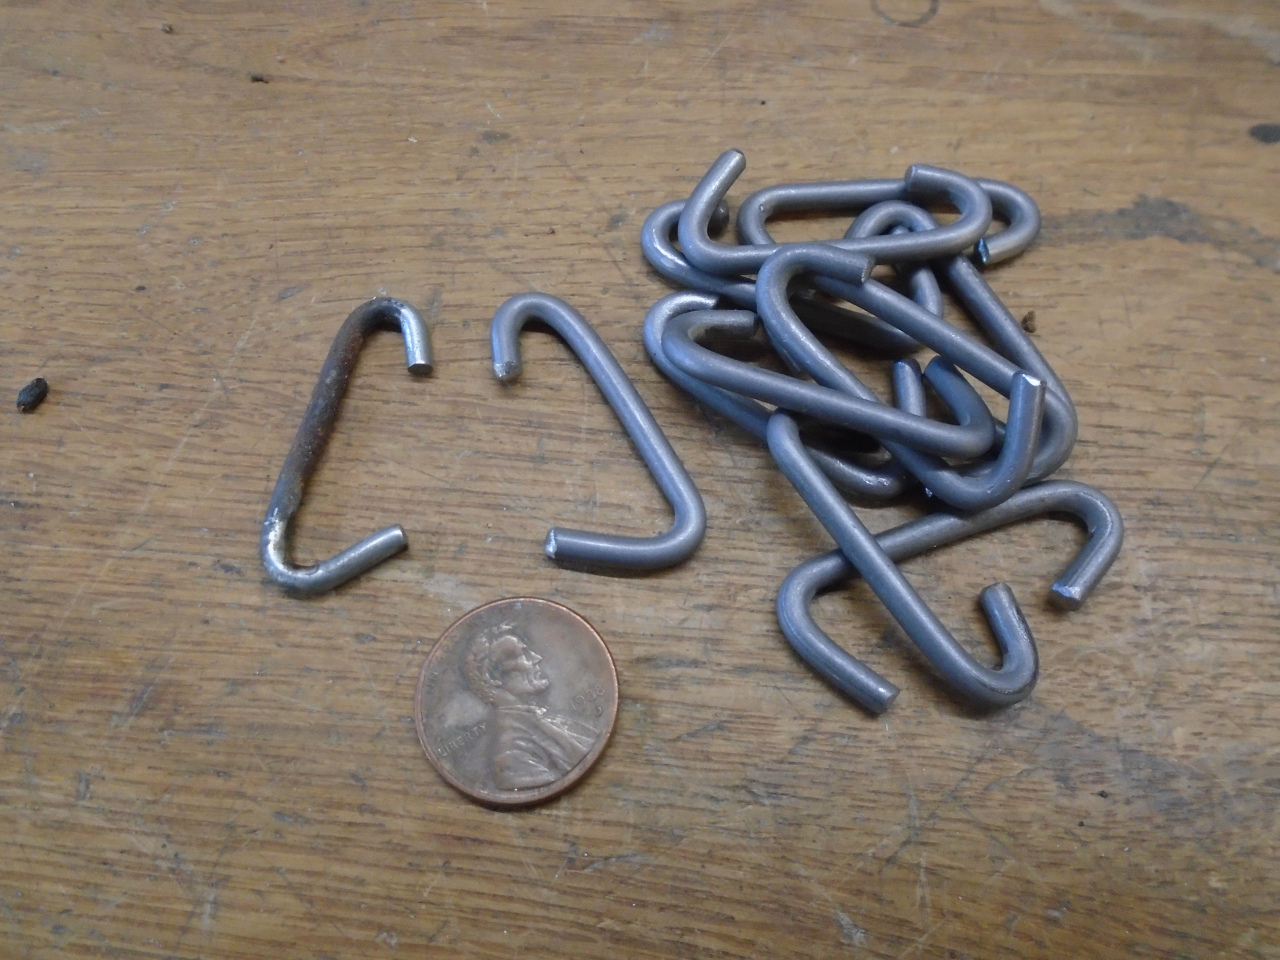
I thought I could use the same little hooks that held the original
diaphragm. Inexplicably, there were two sizes of them.

There also weren't enough of them, so I made a batch. I think the
originals were plated, so I threw a little zinc on the new ones.

The kits that I saw all had five straps: three side to side, and
two front to back. I decided to use six, because--well, you
know--upgrade.
I laid out and drilled the holes for the hooks.

Then made the straps. I found that this material is designed to
work at up to about 10% stretch, so I made each strap so that installed,
but with no load, it would be stretched by about 5%.
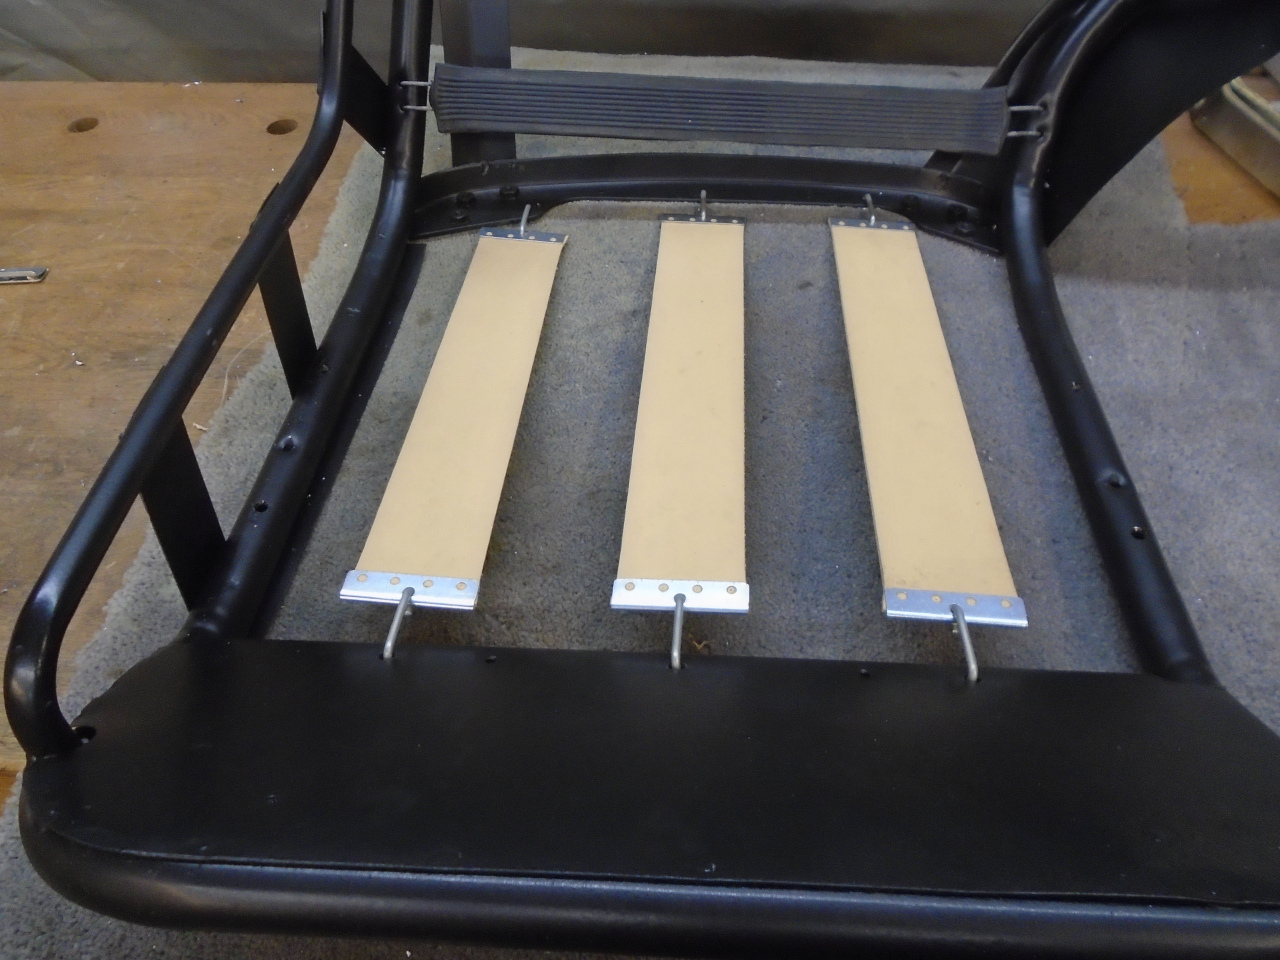
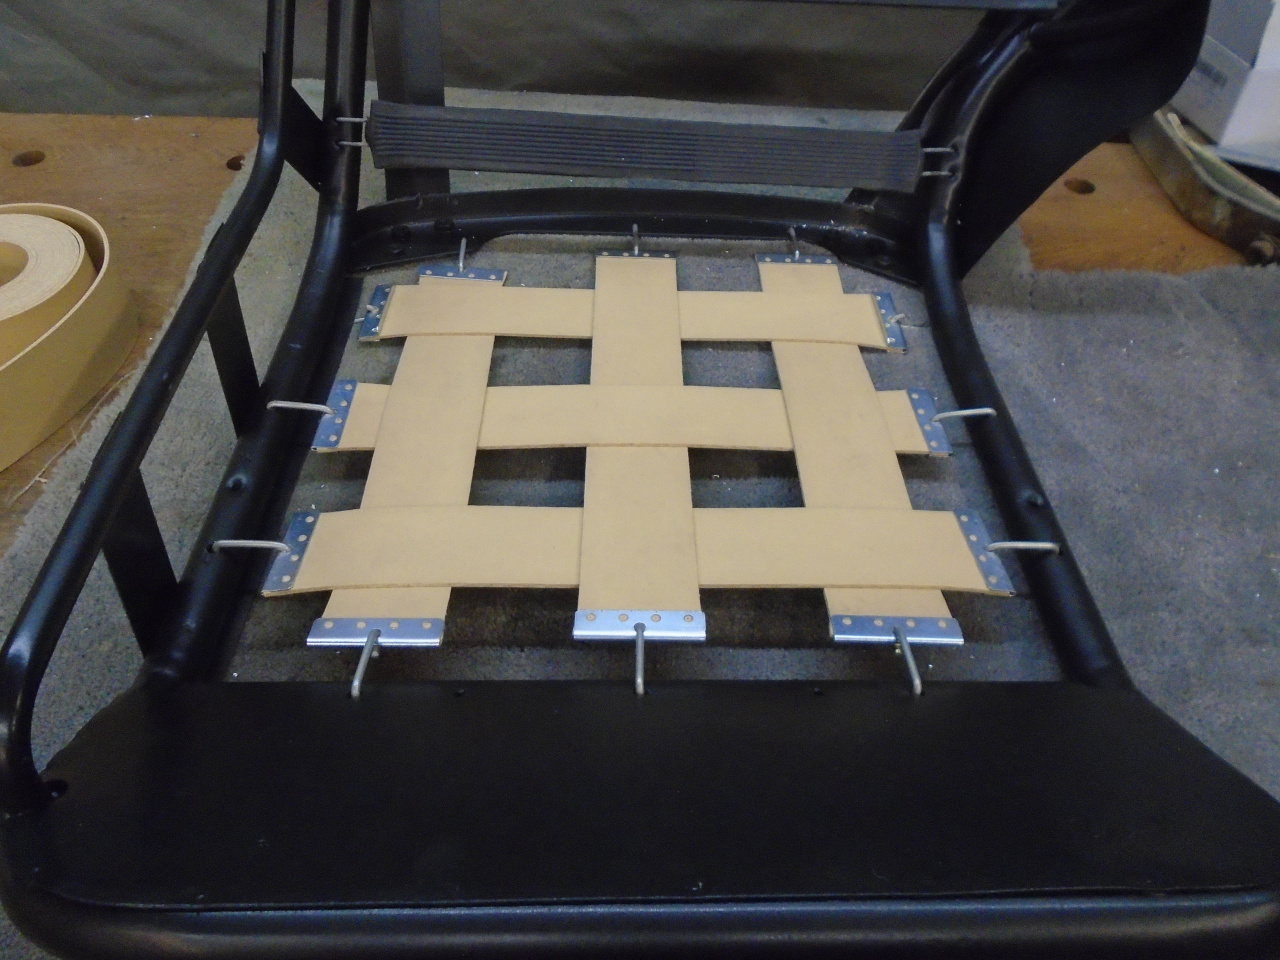
OK, this looks like a good foundation.
But now what?
I researched foam kits. They were all five to six hundred dollars,
and all came with a scary disclaimer that installing the foam was not
an easy process. Part of the problem was that the original foam
for the bolsters on the frame were molded pieces, and these are not
available any more. Mine were compressed and crumbling.

So, the available kits build up the bolster foam from a number of
individual cut pieces, with every new piece offering fresh opportunity
for slight but cumulative mismatches or misalignments.
I found a couple of illustrations of how the kits work. They did
seem a little complex, but still logical. Since there didn't seem
to be any other good alternative, I got resigned to the kit
approach. But do I buy the kit, or make it?
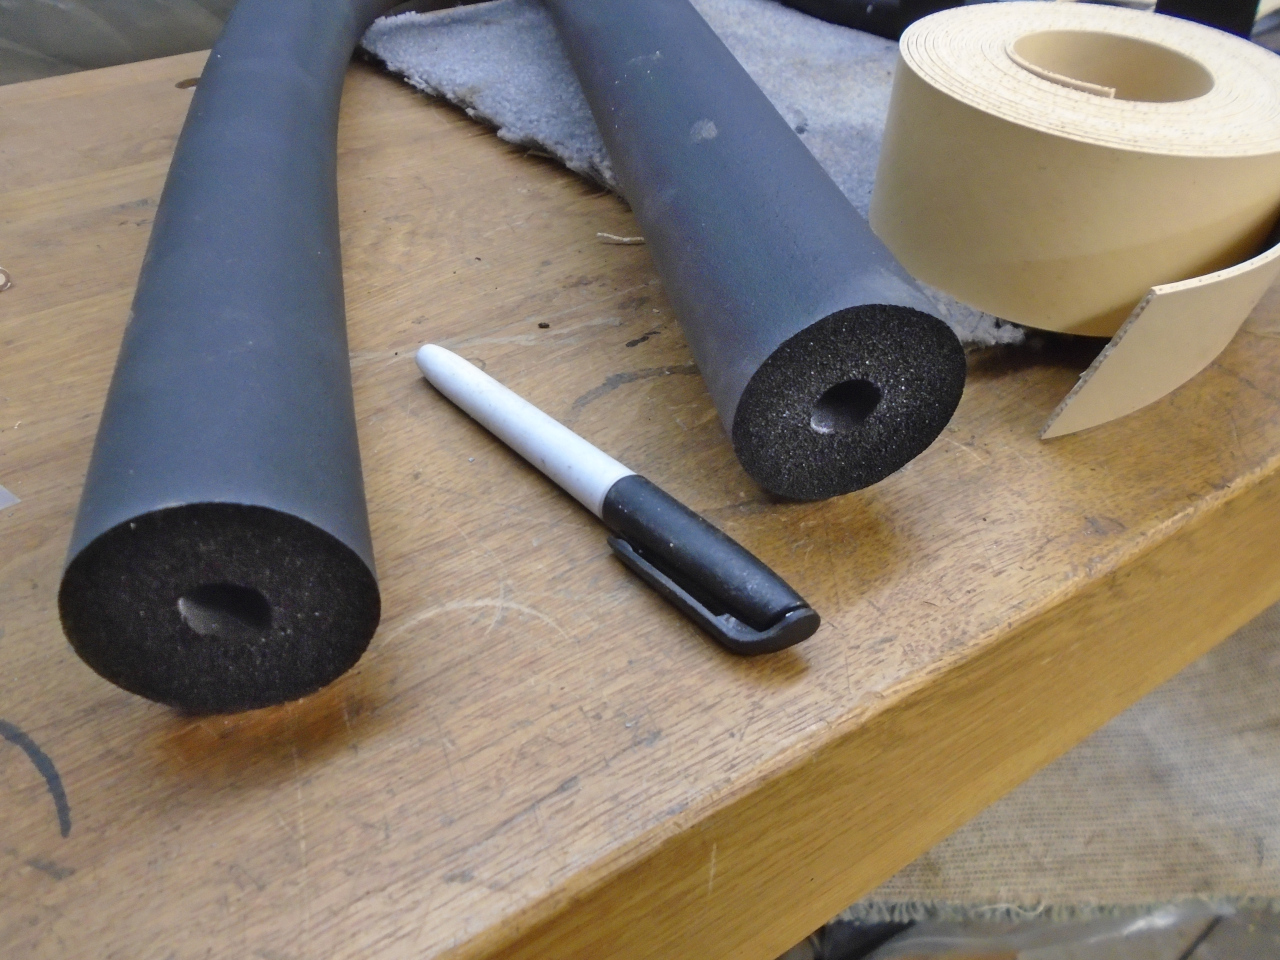
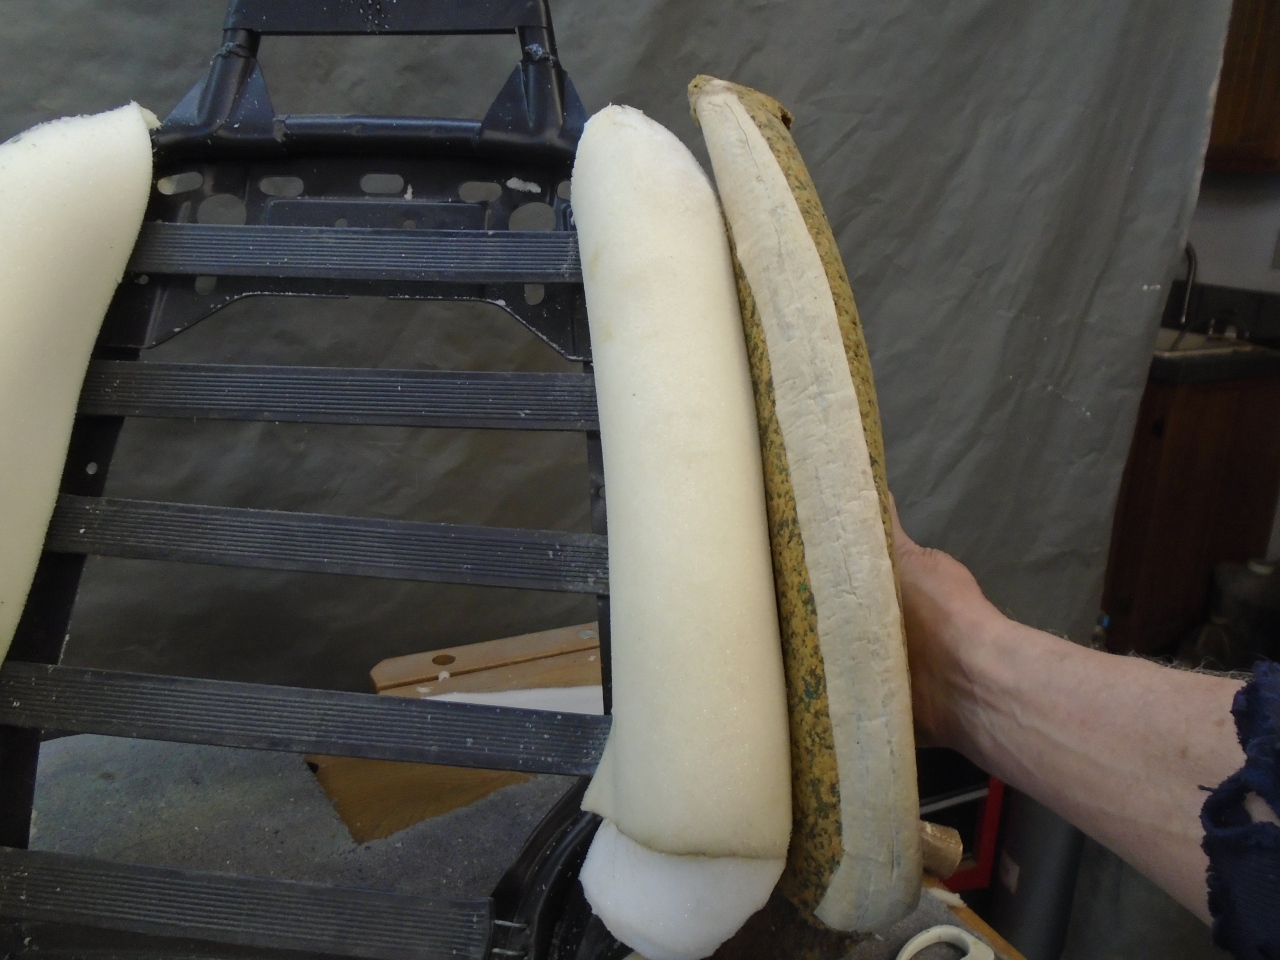
I bought some foam.

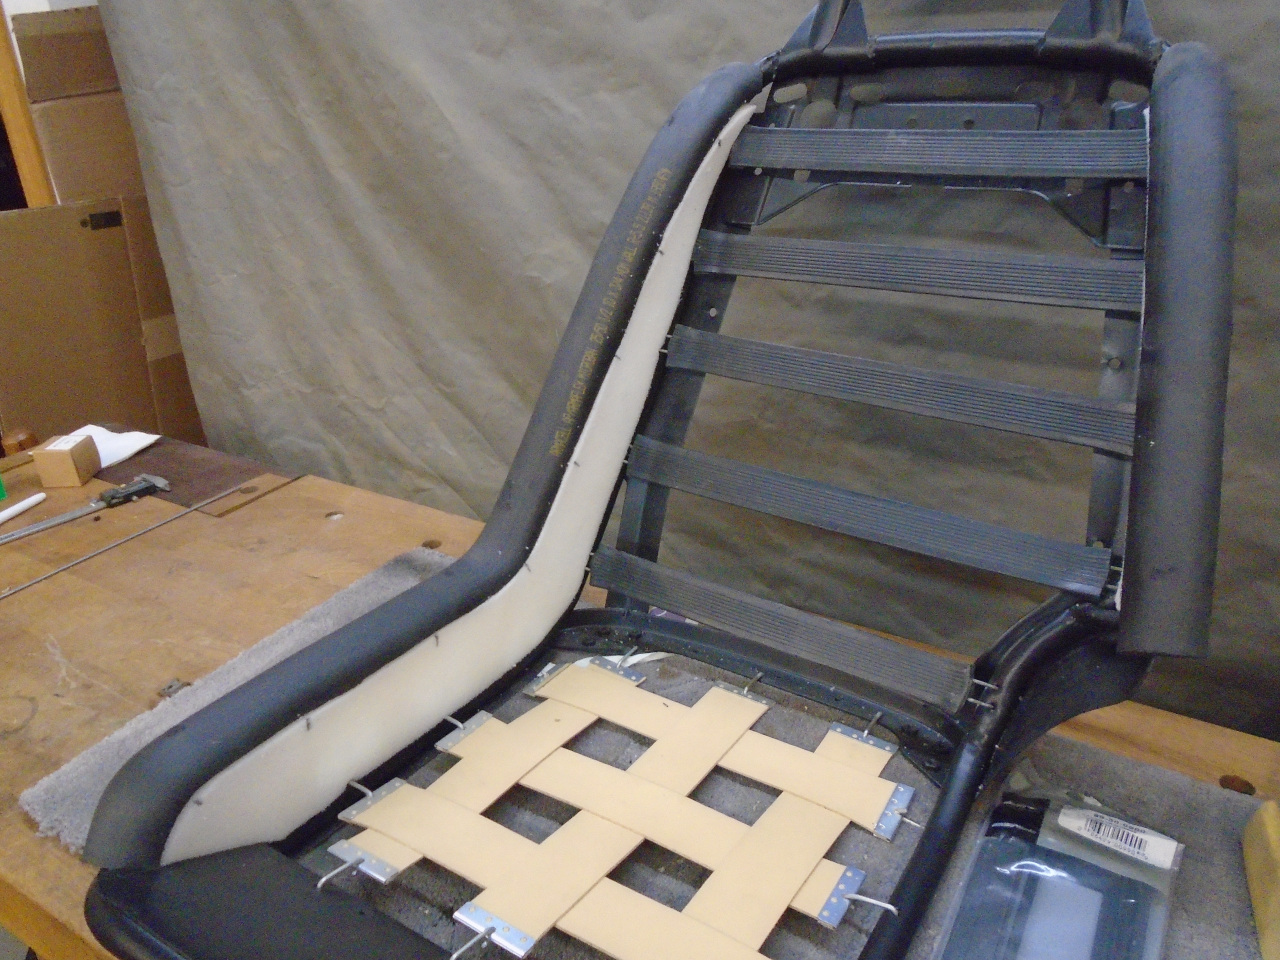
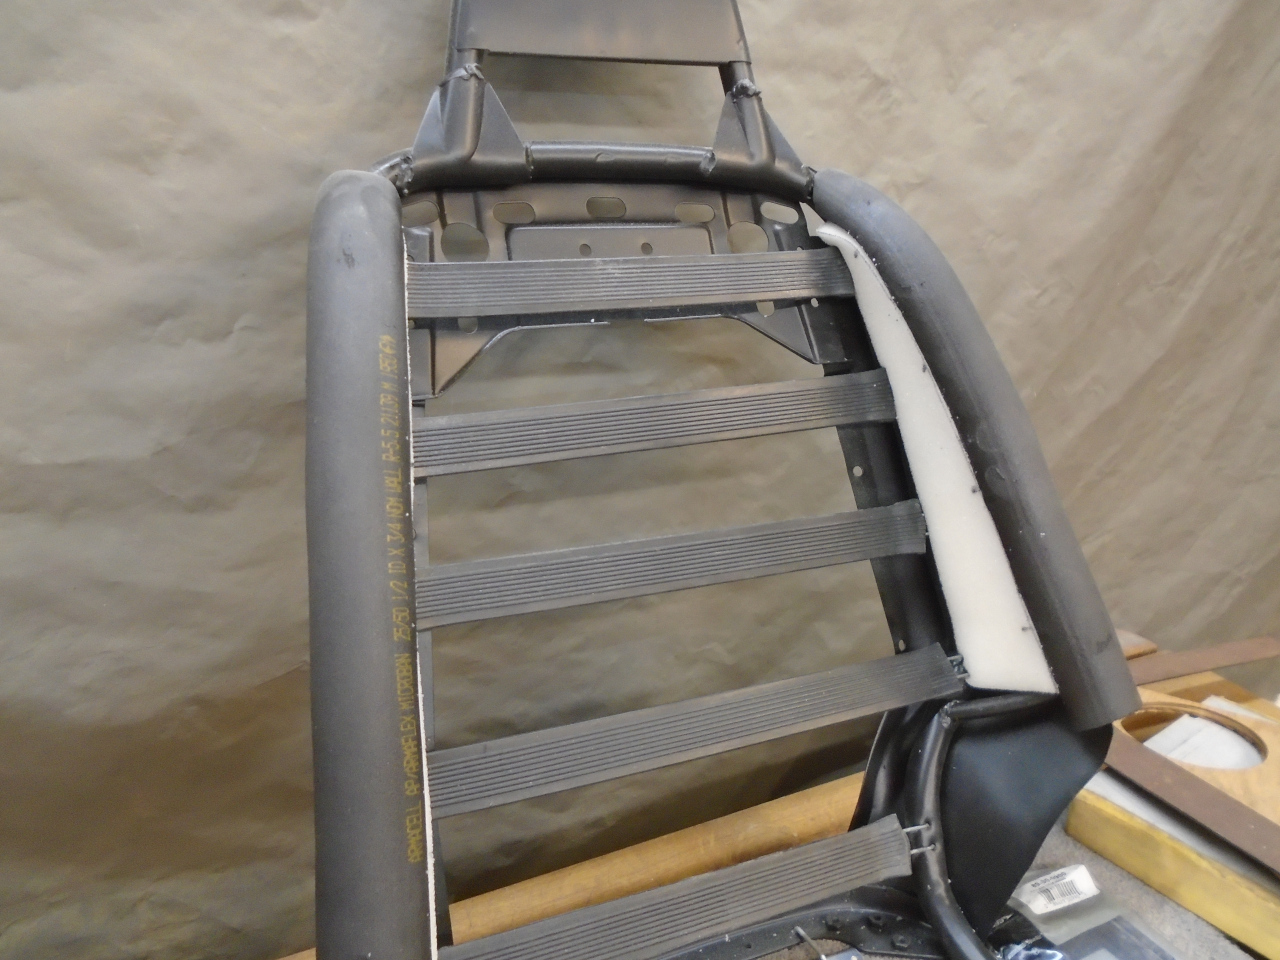
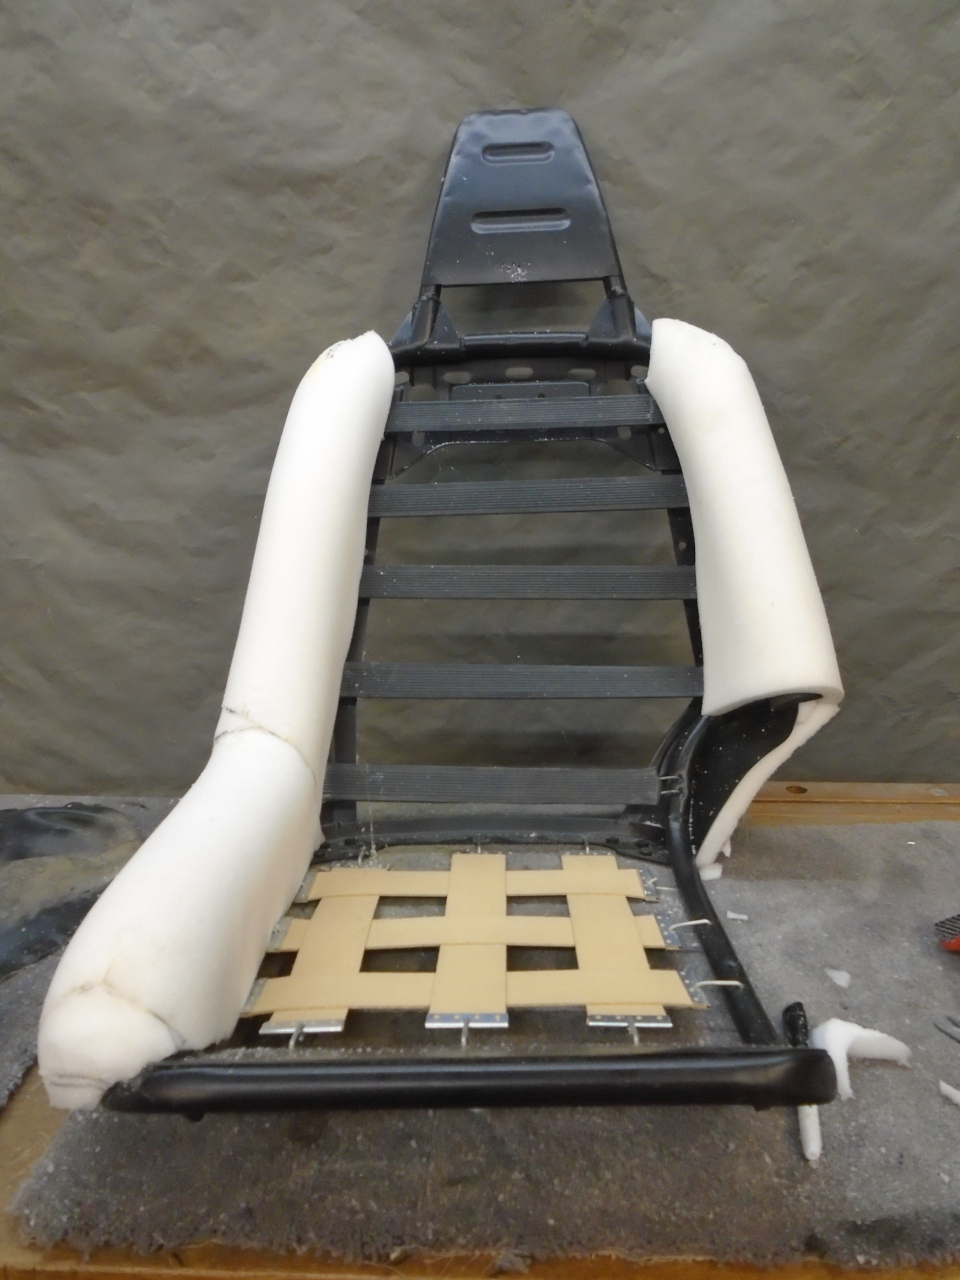
The first piece to apply was actually to the leading edge of the two
bolster tubes. This is just foam pipe insulation, 1/2" ID (to fit
the bolster tube), and 2" OD.
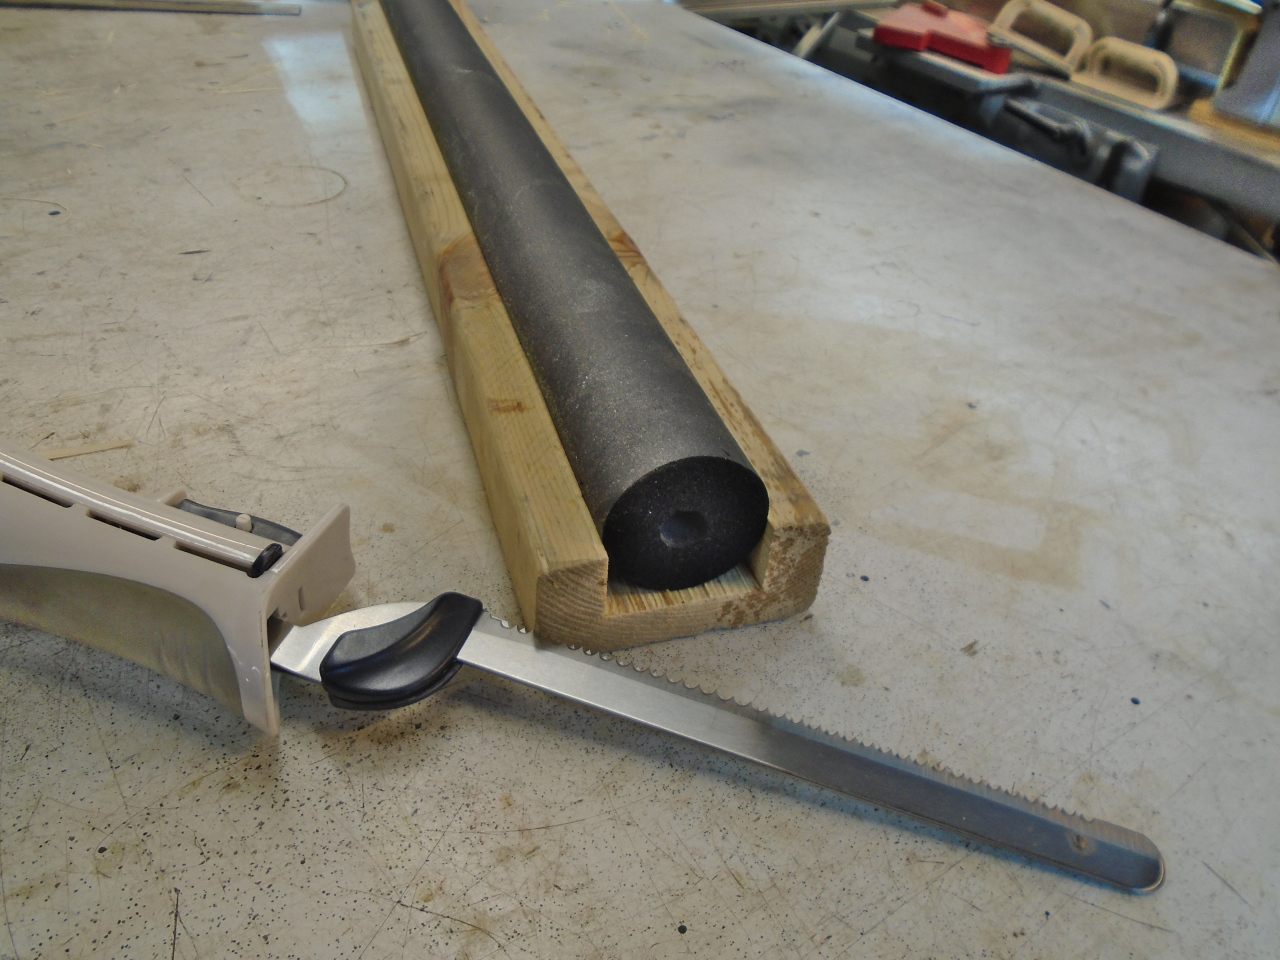
It needed to be sliced in half lengthwise. This little makeshift
guide helped. A very good way to cut foam is with an electric
carving knife.
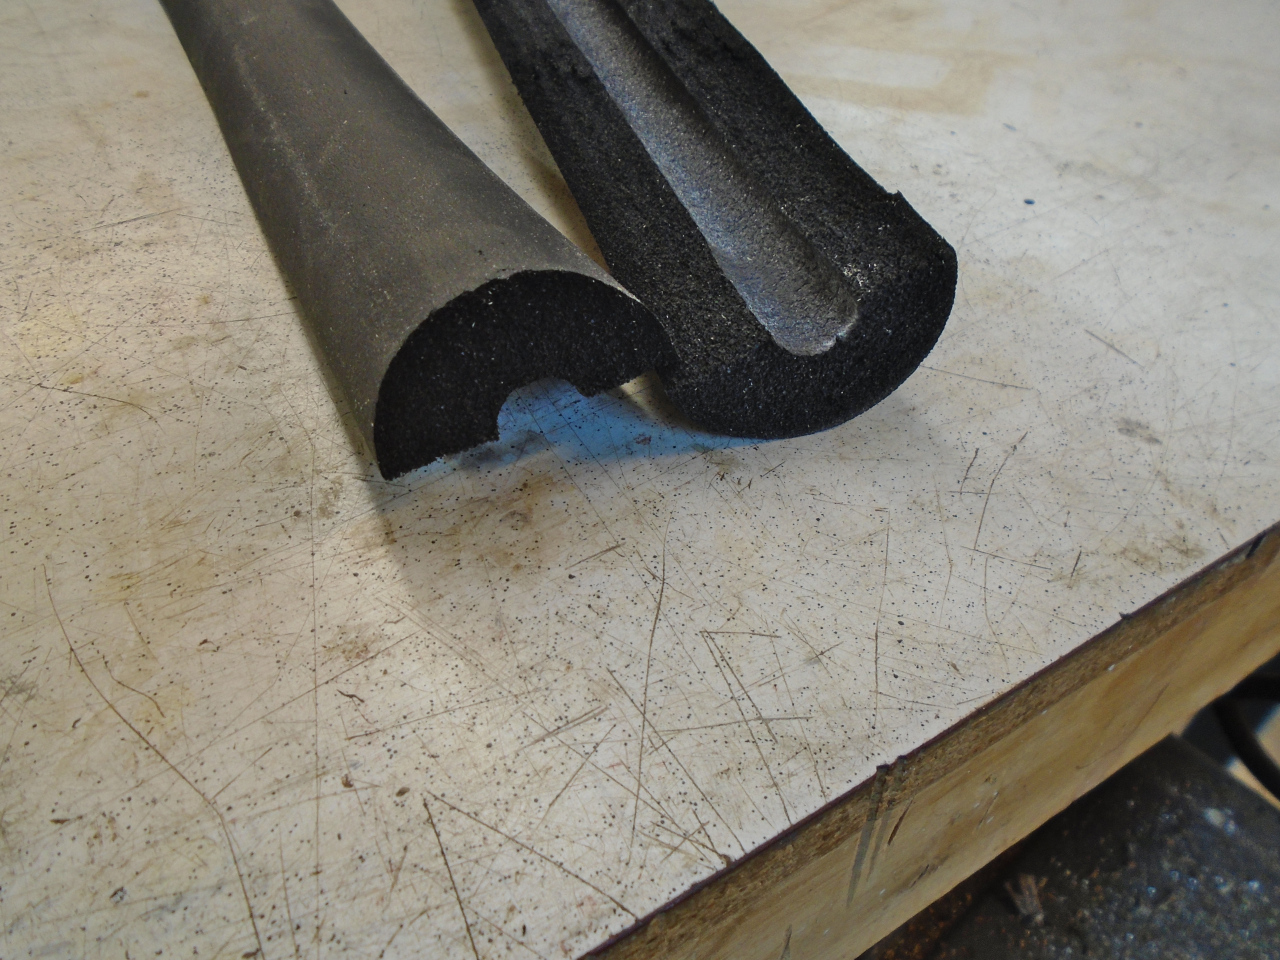
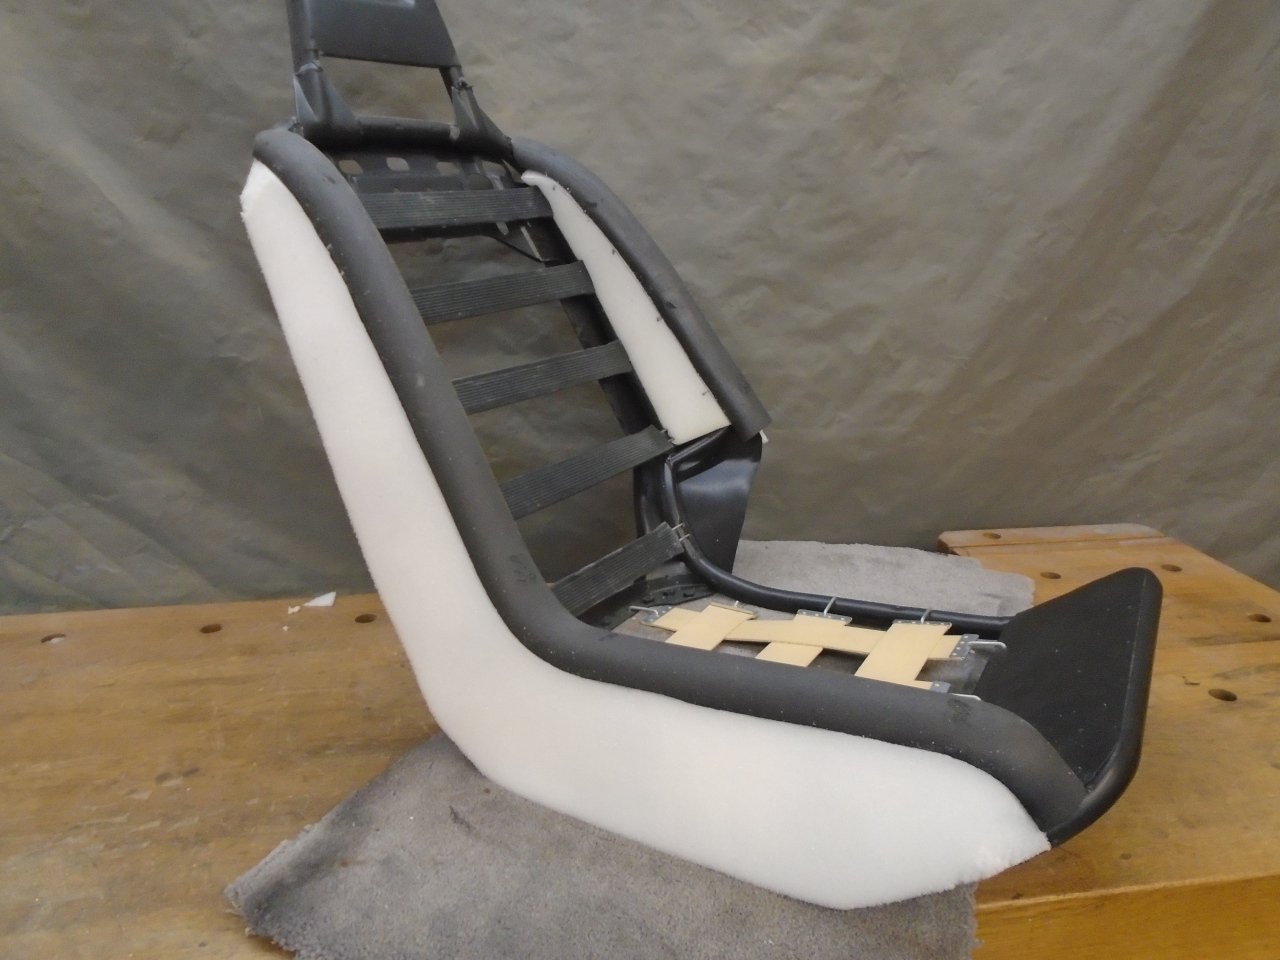
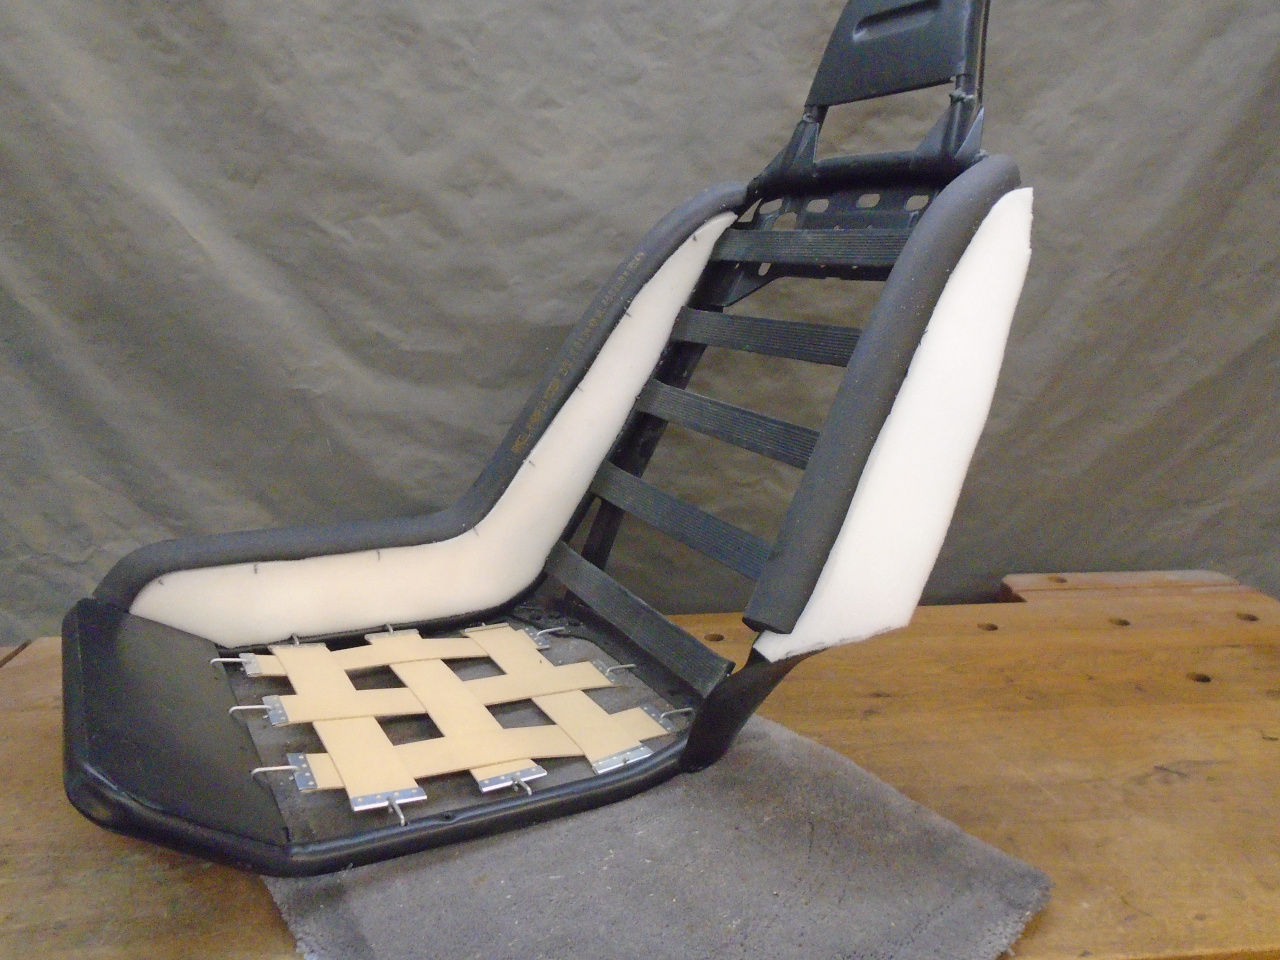
The foam was then glued to the bolster tubes.

Then, pieces were cut to fill in either side of the bolsters under the
pipe insulation. These are cardboard templates for the inside
pieces.
The shapes were then transferred to the foam. This is one inch
thick high density upholstery foam with pretty good firmness.
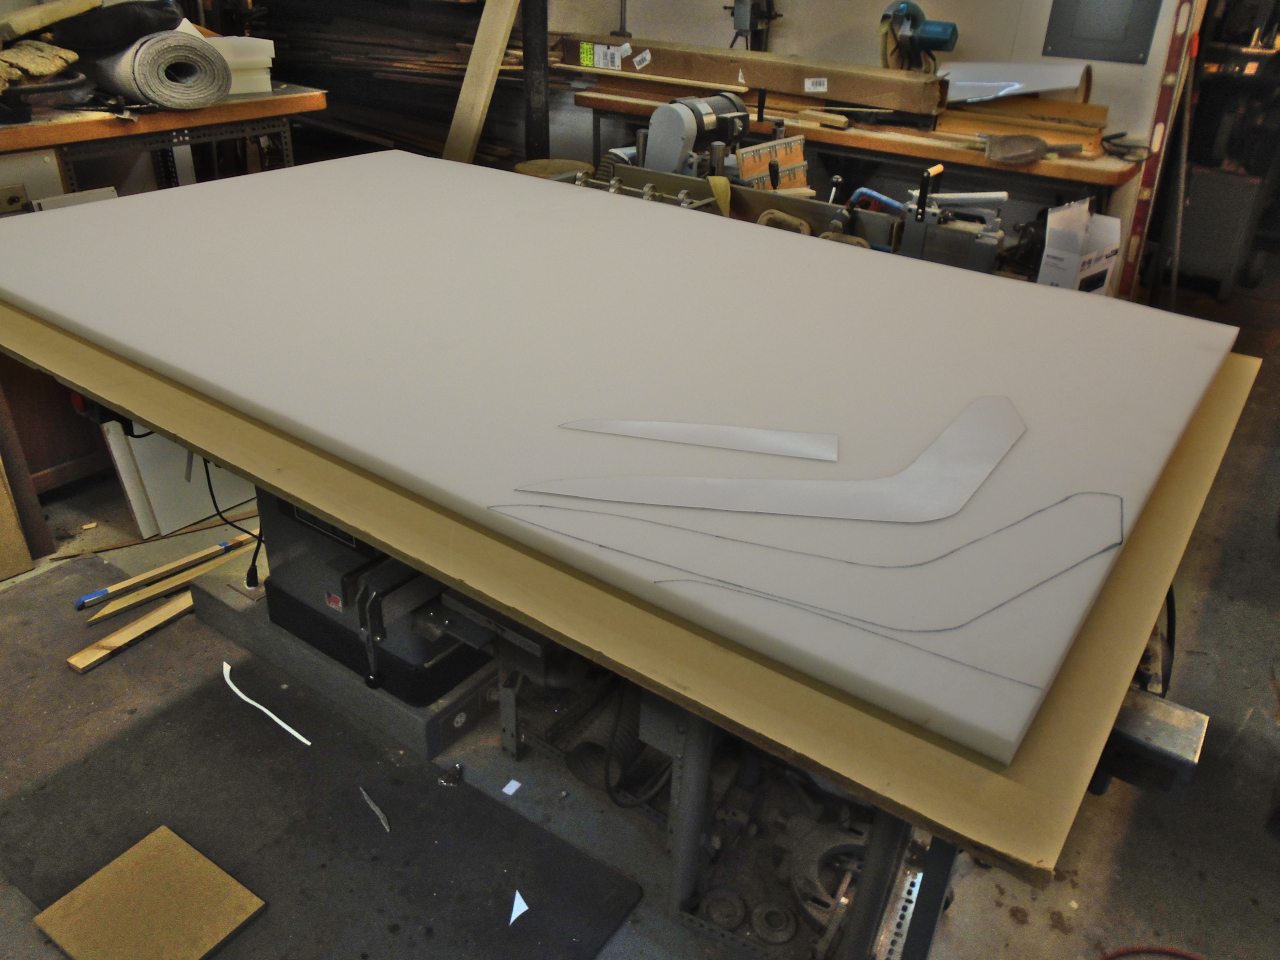
One advantage of this DIY approach is that I know the pieces will fit.
Then the same thing for the outside faces of the bolsters. These
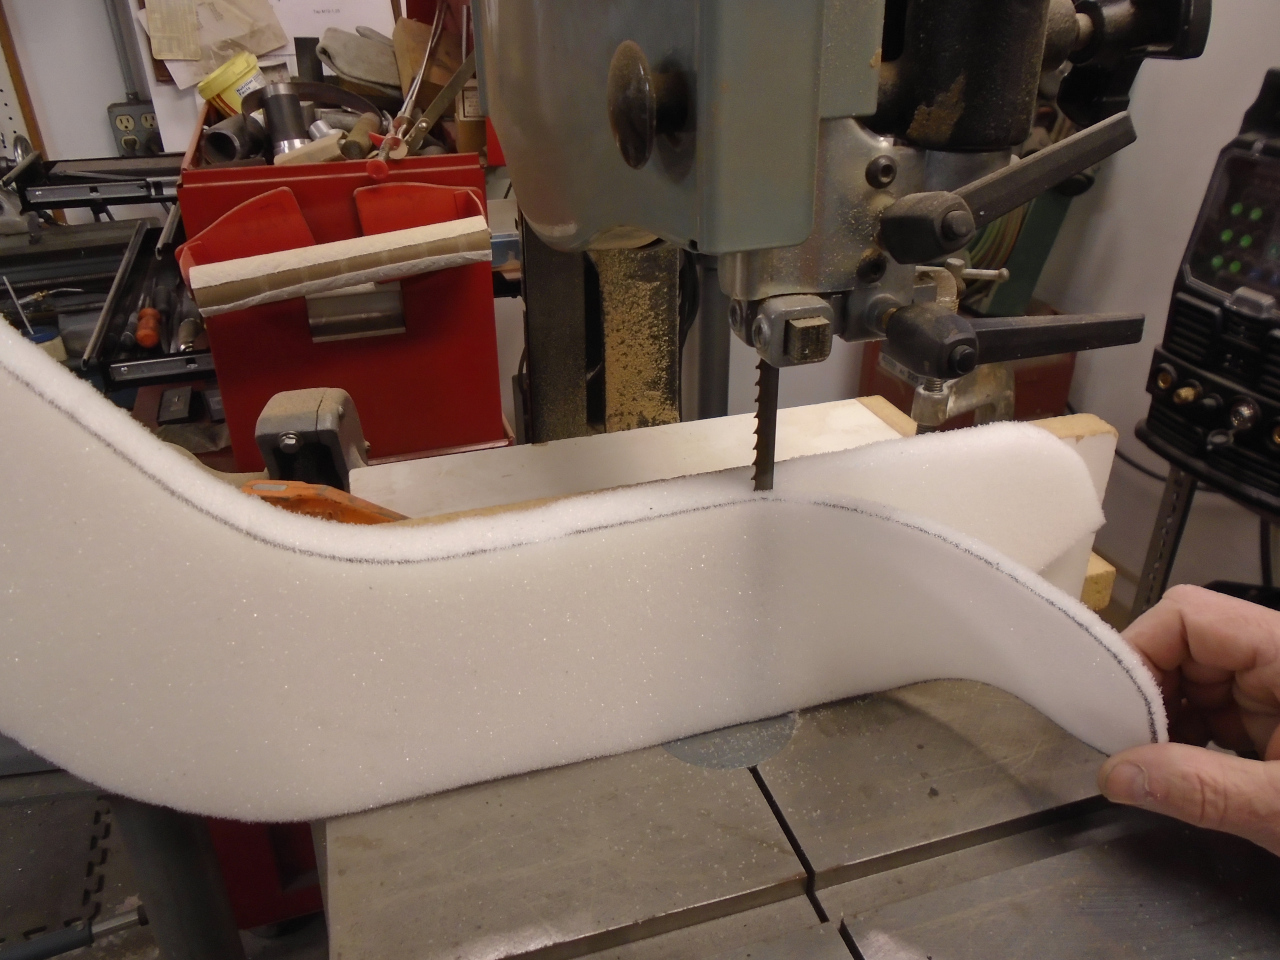
pieces had to be a little thinner to fit right. A bandsaw worked
really well to cut the thickness to 3/4".

The last thing to do was to wrap the bolsters with a final layer of foam
to bring them to final size. These pieces also need to be
about 3/4" thick. Since I wasn't able to find the right kind of
foam in that thickness, and the pieces were too wide for my bandsaw, a
manual resaw arrangement worked slowly, but well. The larger
outboard bolster wrap was made of an upper and a lower piece joined at
the dogleg.

The new bolster foams came out about 1/2" fatter than the old foams, but I think the originals were compressed by age.
After this, there was some minor trimming and smoothing to make it look prettier.
This was one of those projects where I sometimes felt that I was the guy
polishing the brass on the Titanic. I'm a little over my head,
but I've managed to control the disasters so far.
Comments to Ed at elhollin1@yahoo.com
To my other GT6 pages