To my other GT6 pages.
January 15, 2022
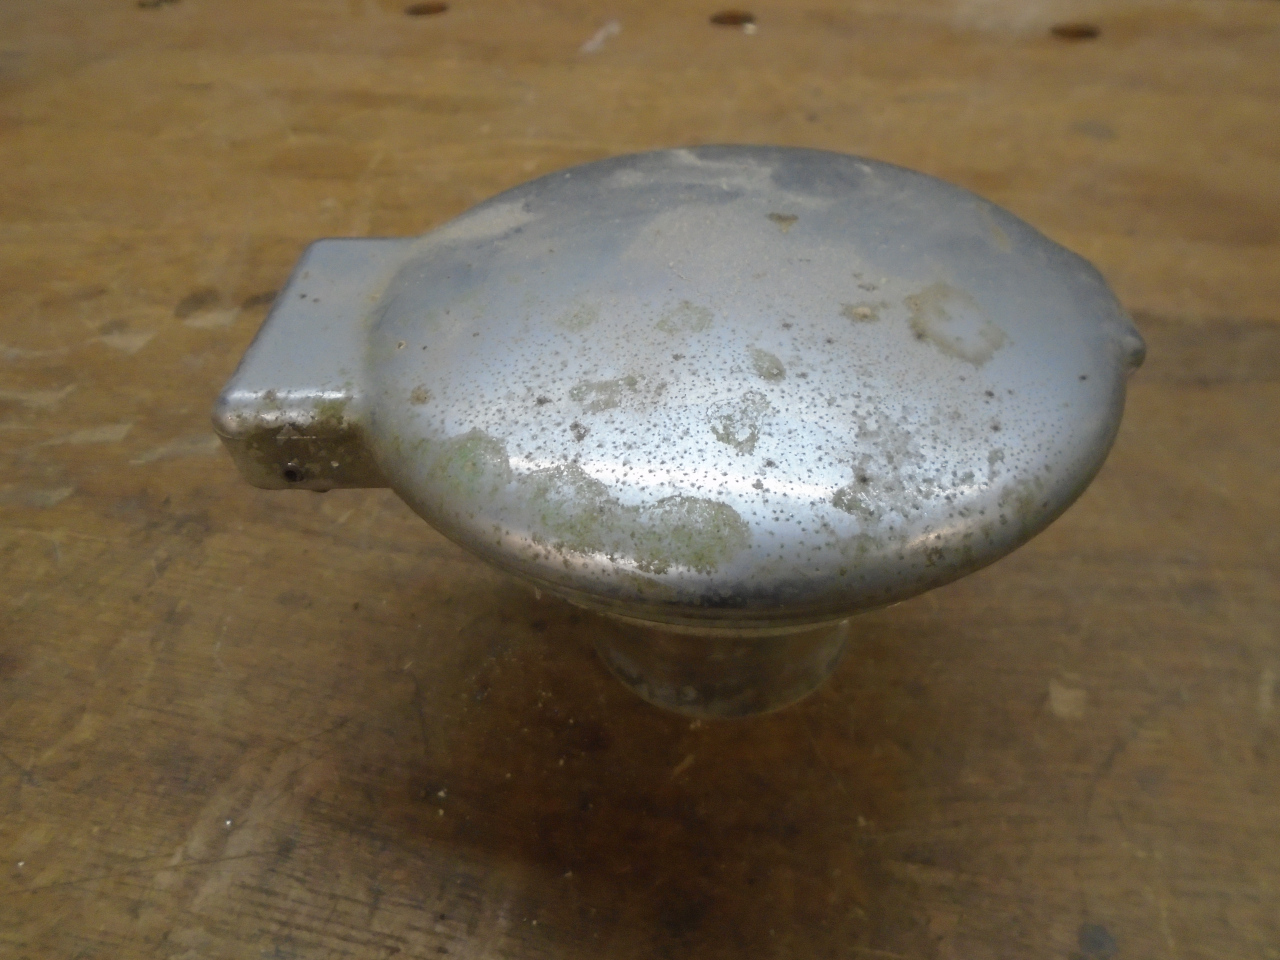
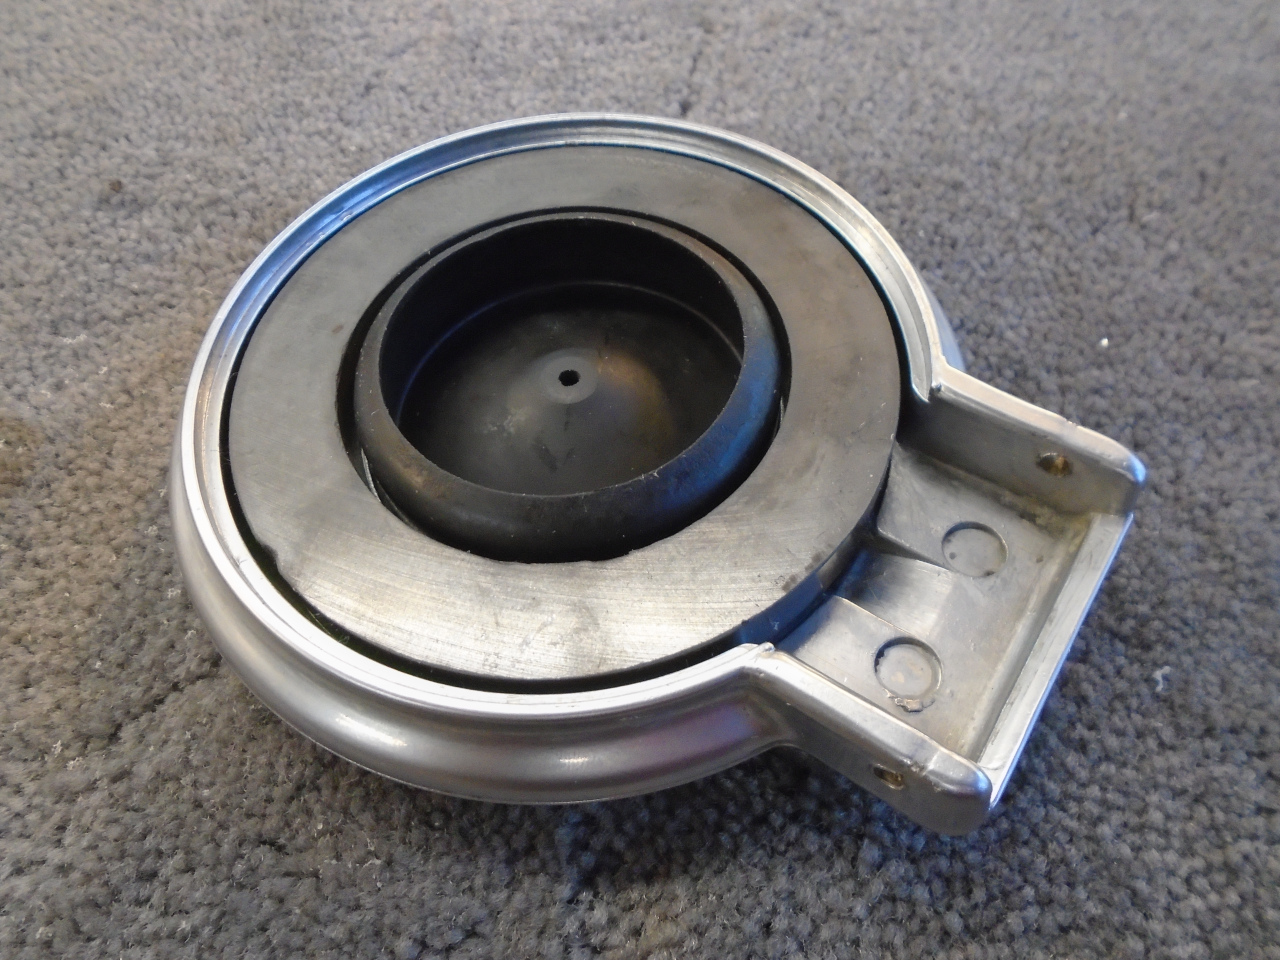
Fuel Filler
One of the little iconic features of the earlier GT6 cars is the fuel
filler cap. Rather than trying to obscure the filler by meekly
hiding it behind a door blended into the body lines, Michelotti chose to
make it a bold design statement. A beefy cast filler cap sits
fully exposed, prominently and proudly at the rear, reminiscent of some
race cars.
Though the filler looks pretty much the same over all of the round-tail
years, there were actually a number of variants. Some had magnetic
caps, some had a latch, and some had both.
My filler was of the magnetic variety. It was apparently only used
for a year or so and, as I found out, is relatively rare. My
filler was dirty and crusty, but all there.
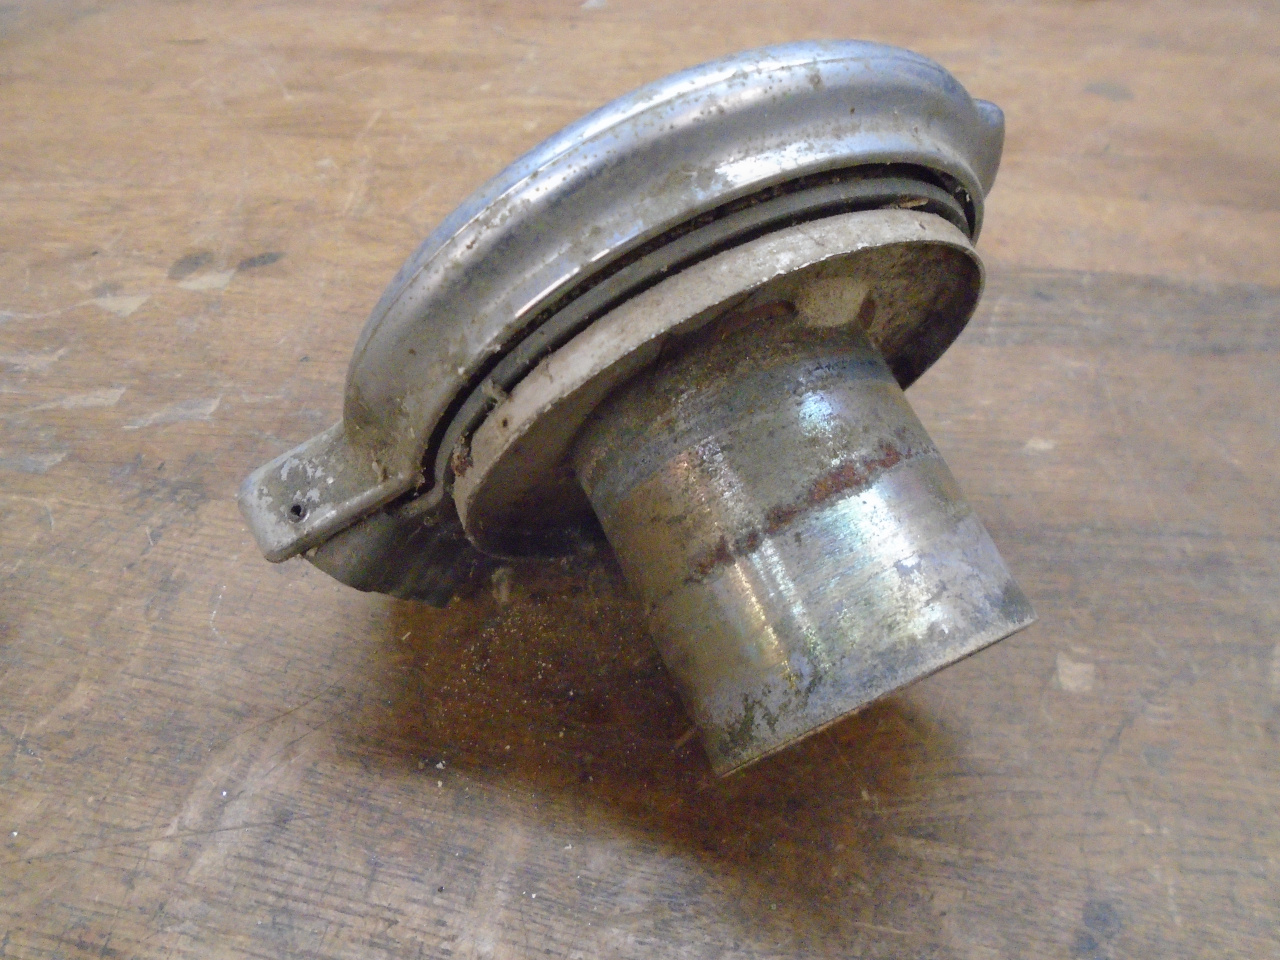

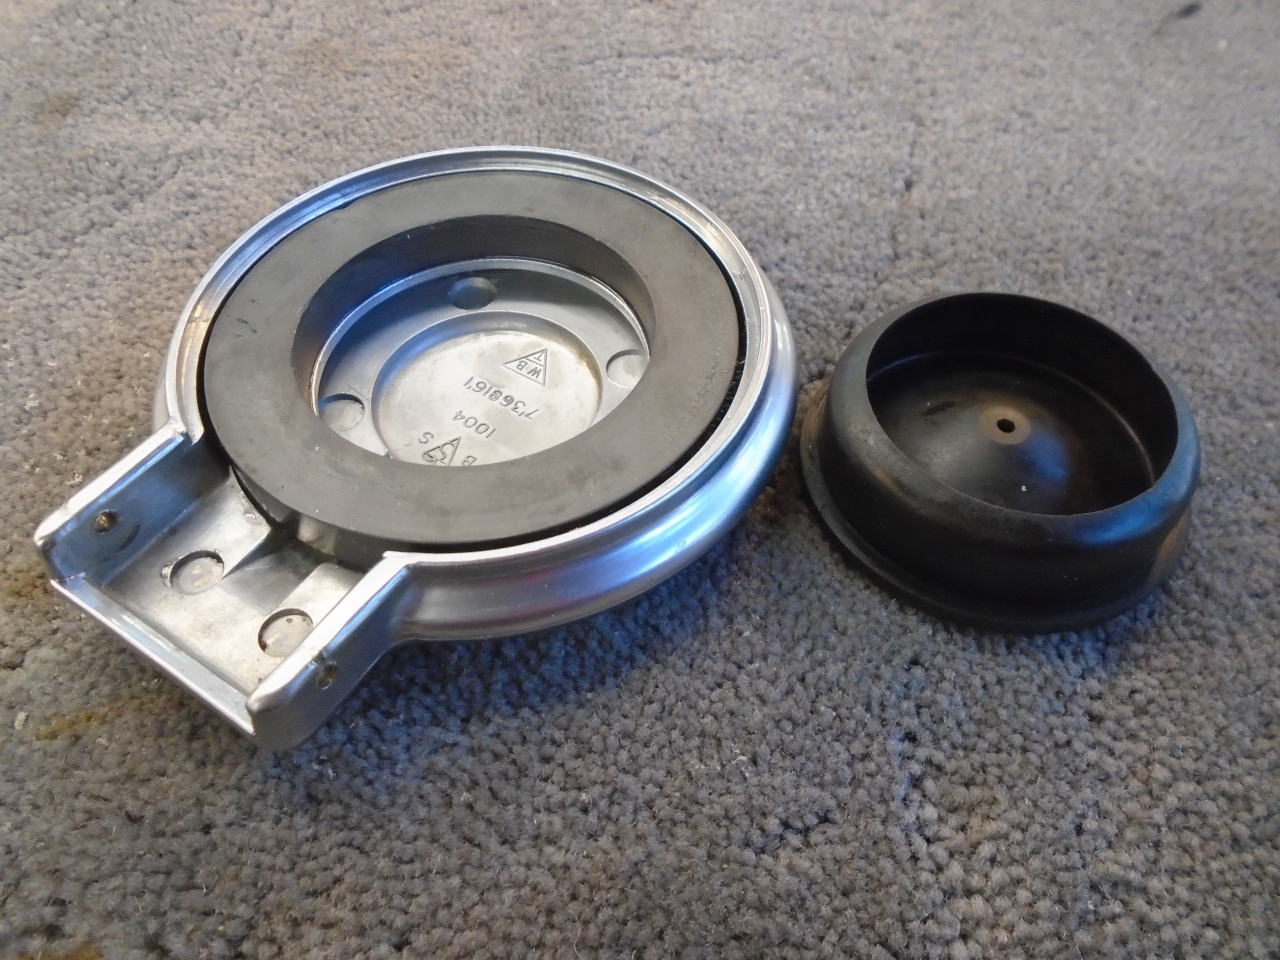
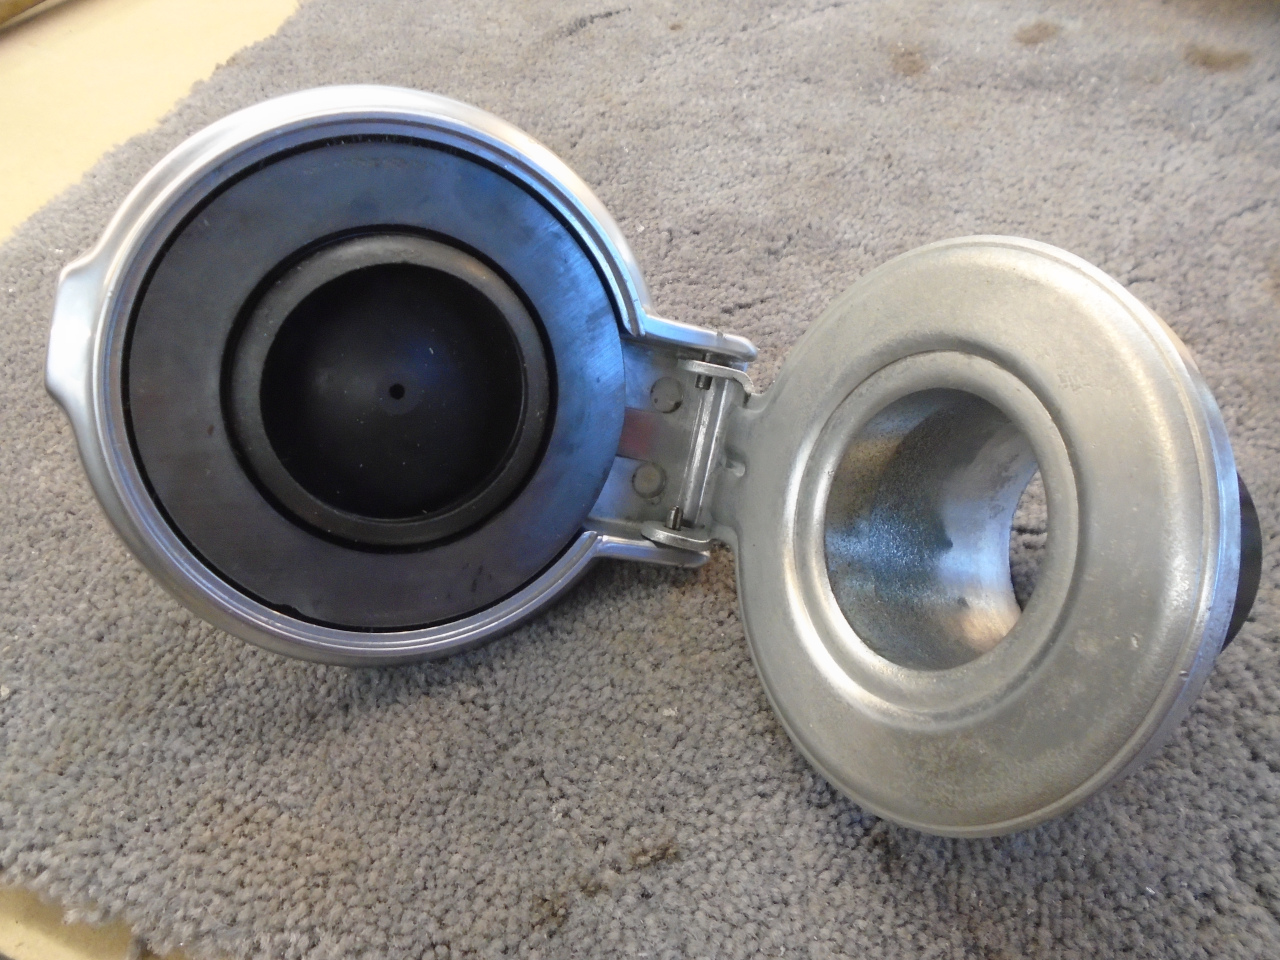
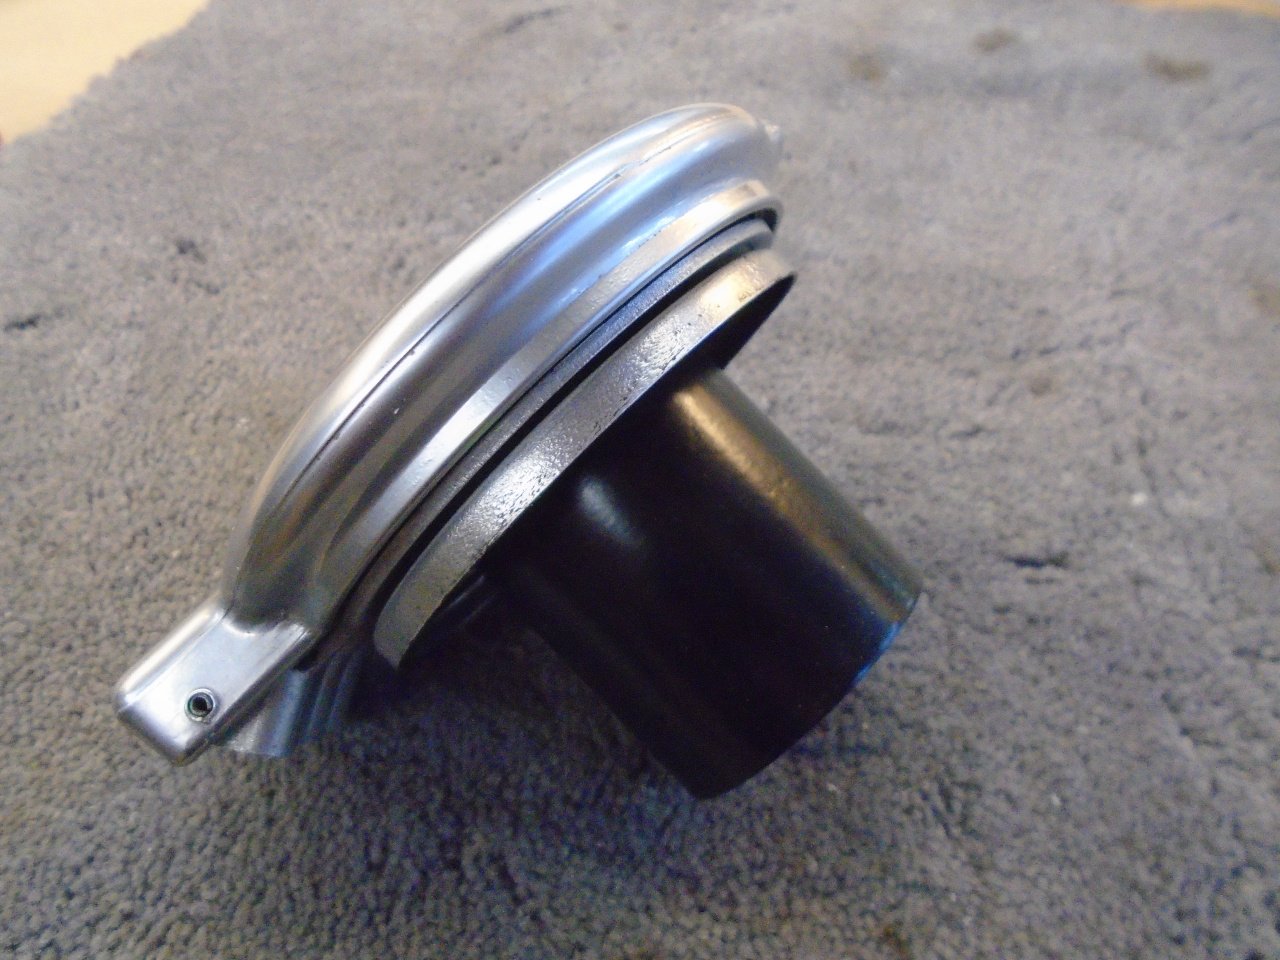
A couple of small roll pins act as the hinge between the cap and
body of the filler. The rubber seal has a small flange that is
captured behind the magnet, but can easily be pried out.
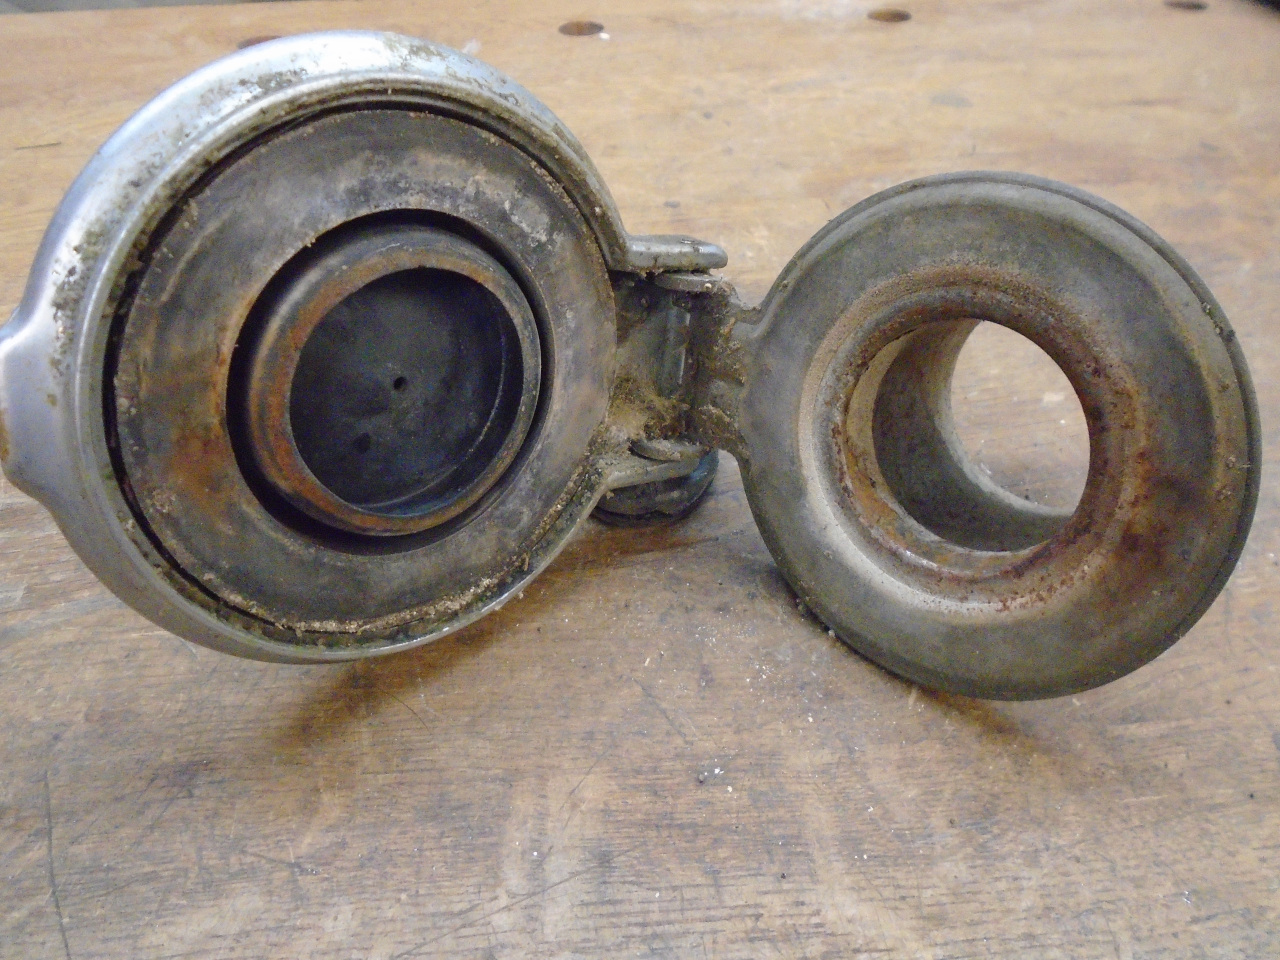
I really wanted to get that magnet out for proper cleaning, but it was
fixed in the cap with some unknown glue. I thought heat might
soften the glue, but I didn't want to damage the magnet with heat.
The magnet looks to be a ceramic type, and a little research showed
that ceramic magnets can take pretty high heat. So, I tried a soak
in the oven at 250 ºF, well below the danger temp for the magnet.
This was enough, and the glue released the magnet. There was
actually a steel ring between the magnet and the cap body. Both
joints were glued.

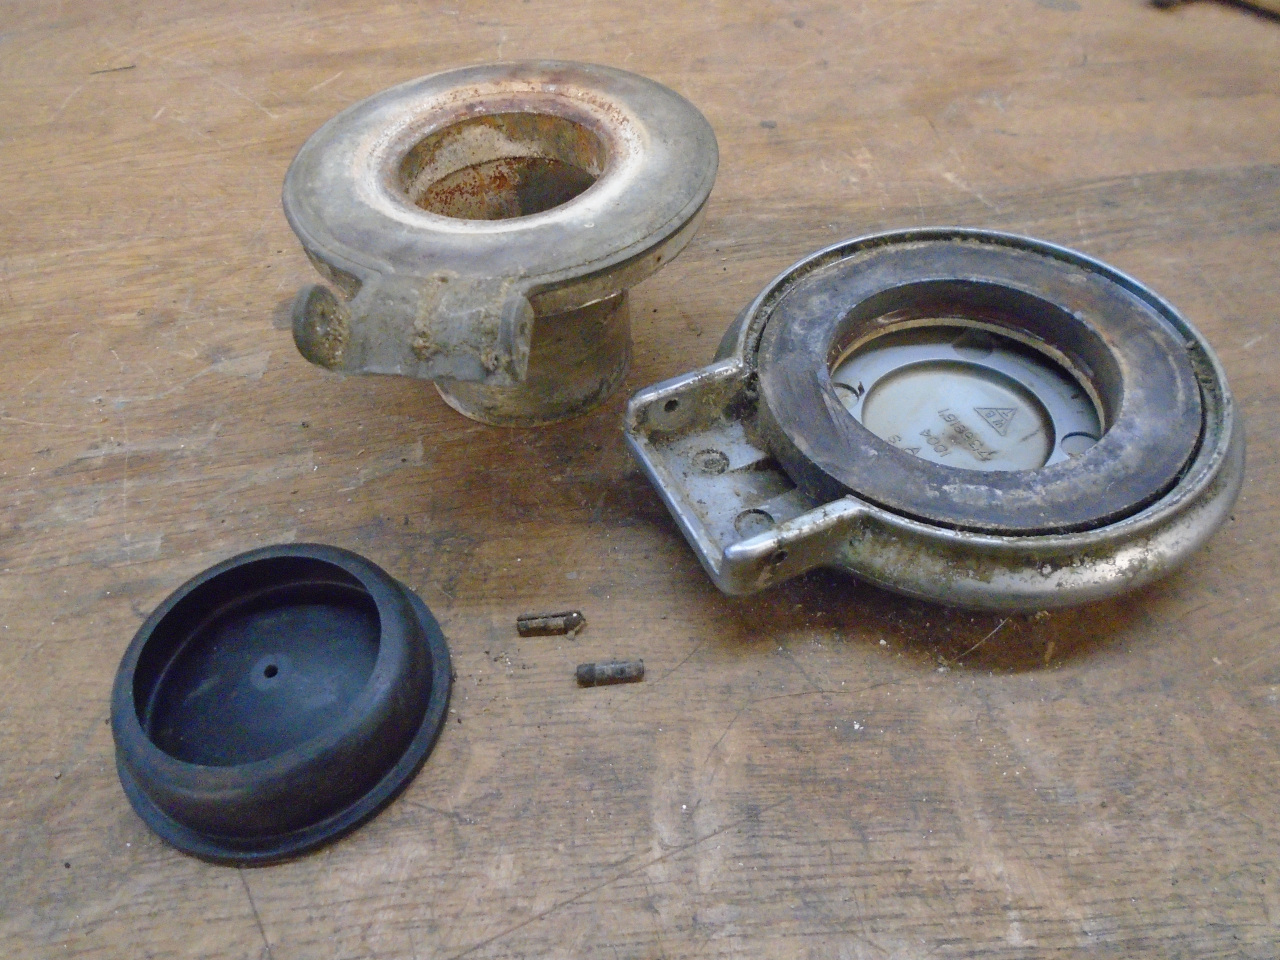
A small aside here. Before I took anything apart, I was assessing
what the materials of the components were. The cap was bright, yet
not really chrome-like. It seemed too dense to be aluminum. I
checked it with a magnet, and it seemed to be magnetic. I assumed
this might be due to the internal magnet, but after I removed the ring
magnet, the cap was still slightly magnetic. This confused me for a
while, because I assumed that the cap was a die-cast zinc alloy, which
would not be magnetic. It finally dawned on me that the zinc cap
must be nickel plated. This would account for the very slightly
yellowish color, and the magnetic properties. Case closed.
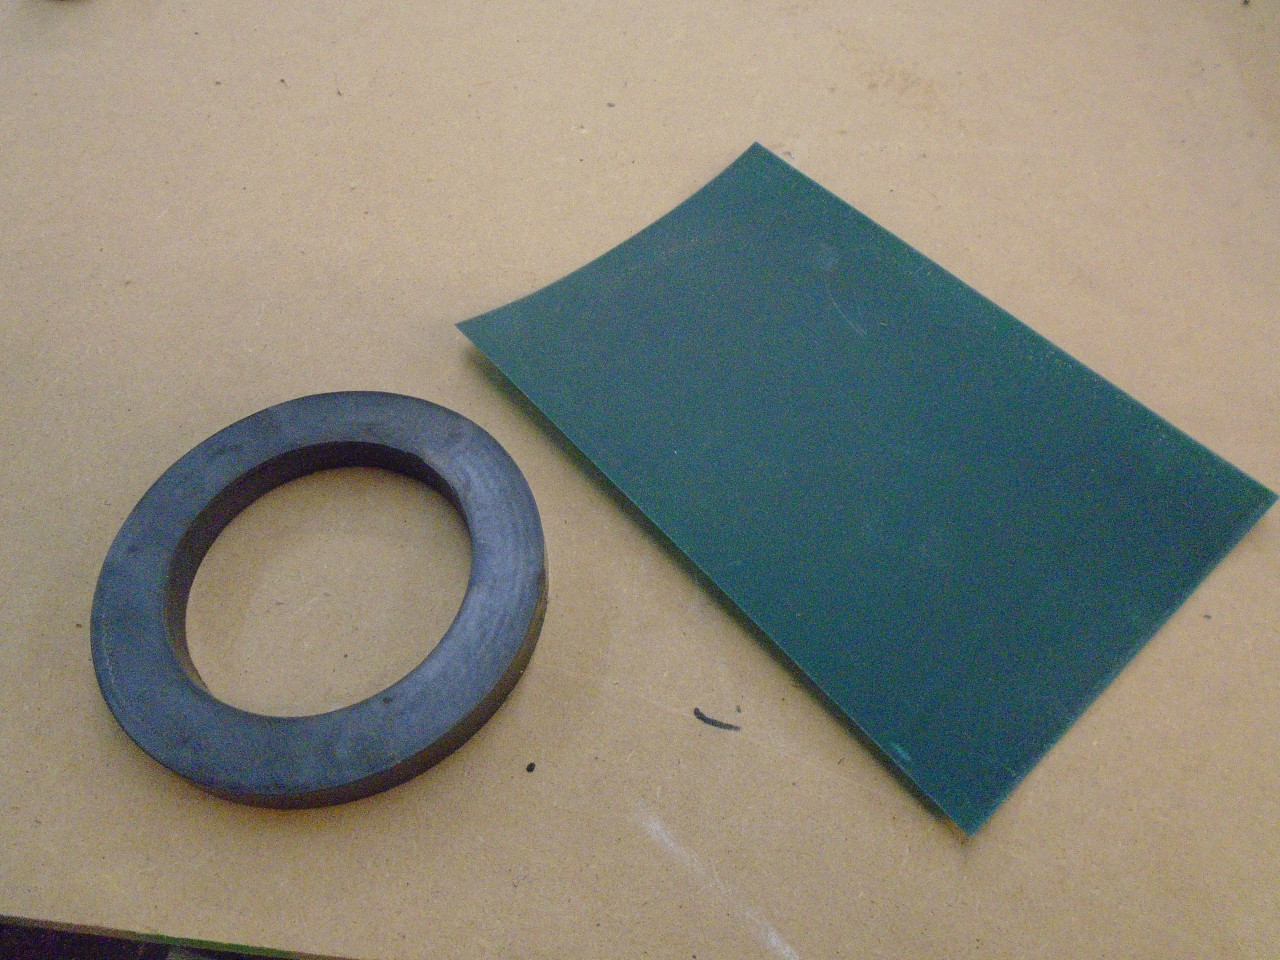
I was a little curious about the ring magnet. The green sheet
below is a special material that responds to magnetic fields. It
clearly shows that the magnet ring contains eight magnetic poles.
Though the sheet doesn't show it, the magnetic areas would certainly be
arranged as alternating North and South poles. This explains the
presence of the steel ring. The steel bridges the pole pairs on
the backside of the magnet, effectively yielding a ring of horseshoe
magnets, which is stronger than individual poles.

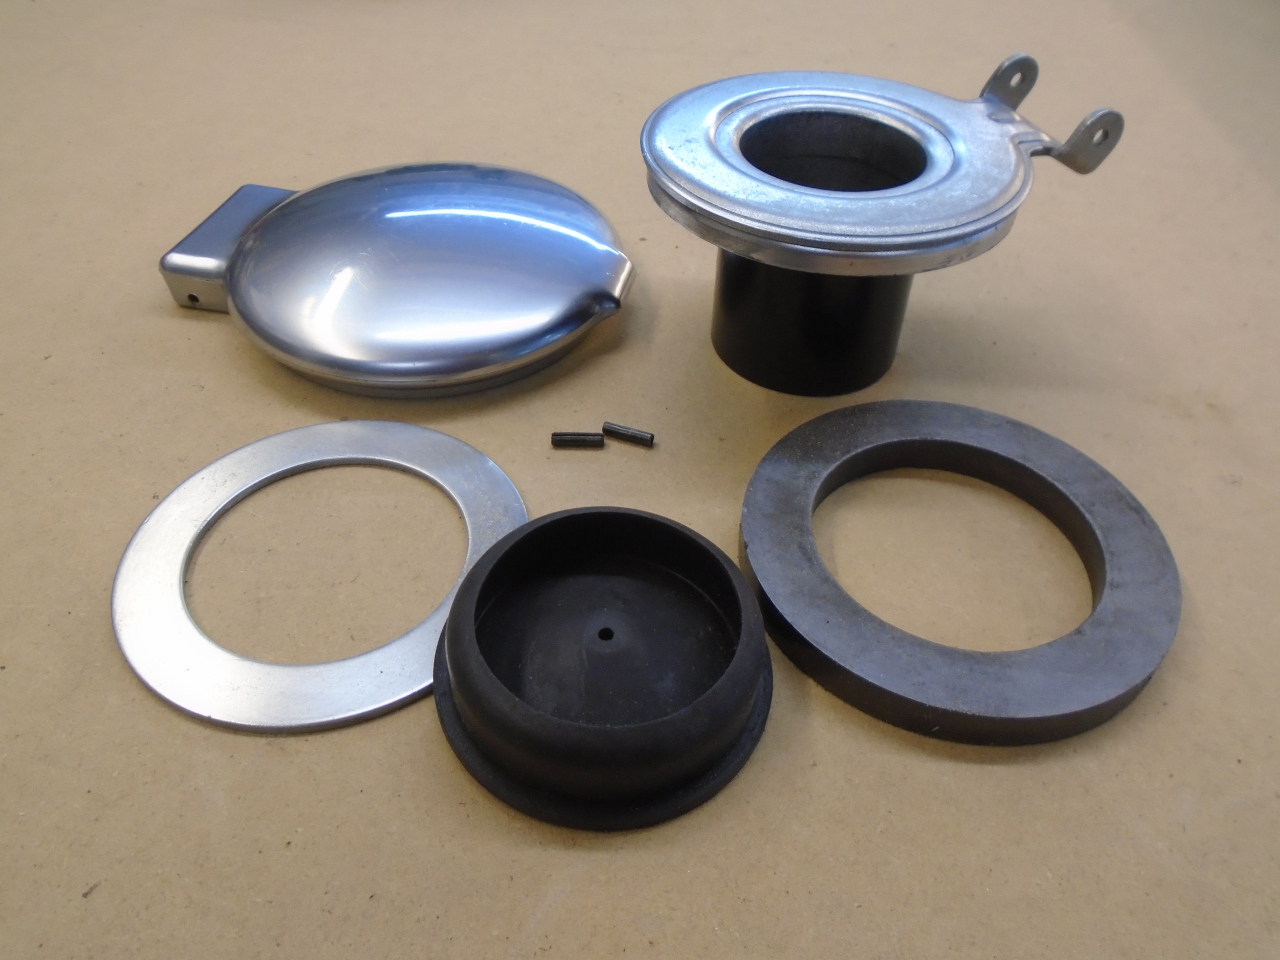
So here are all of the parts cleaned up. The steel ring and the
face of the filler neck were re-plated. The stem of the filler
neck was powder coated.
This brought me to that rubber seal. The seal was in OK condition,
but was over 50 years old, and seemed a little stiff to me. I
wasn't confident about how well it could seal. So, I ordered a
replacement. The seal I received was clearly the wrong one. I
did some research and couldn't find anyone supplying the seal I
needed. I posted a query on one of the Triumph forums. It was
acknowledged there that my seal probably wasn't available anywhere.
It was at this point that the seal became sort of a science
project. I thought there might be a chemical way of rejuvenating
rubber. Some Google research turned up a few leads, but one was
the recurring references to methyl salicylate. Now, I love the
Internet as much as many people do, but one of it's crowning
achievements today is that it has become the worlds largest echo chamber
for utterly bogus information. So, I followed the lead, but went
to some more reliable resources. I checked a few scholarly
articles, which reinforced the idea. I found a few commercial
products that were sold to refresh rubber rollers and platens in
industrial settings. A common ingredient among them was methyl
salicylate. That was good enough for me--I ordered some.
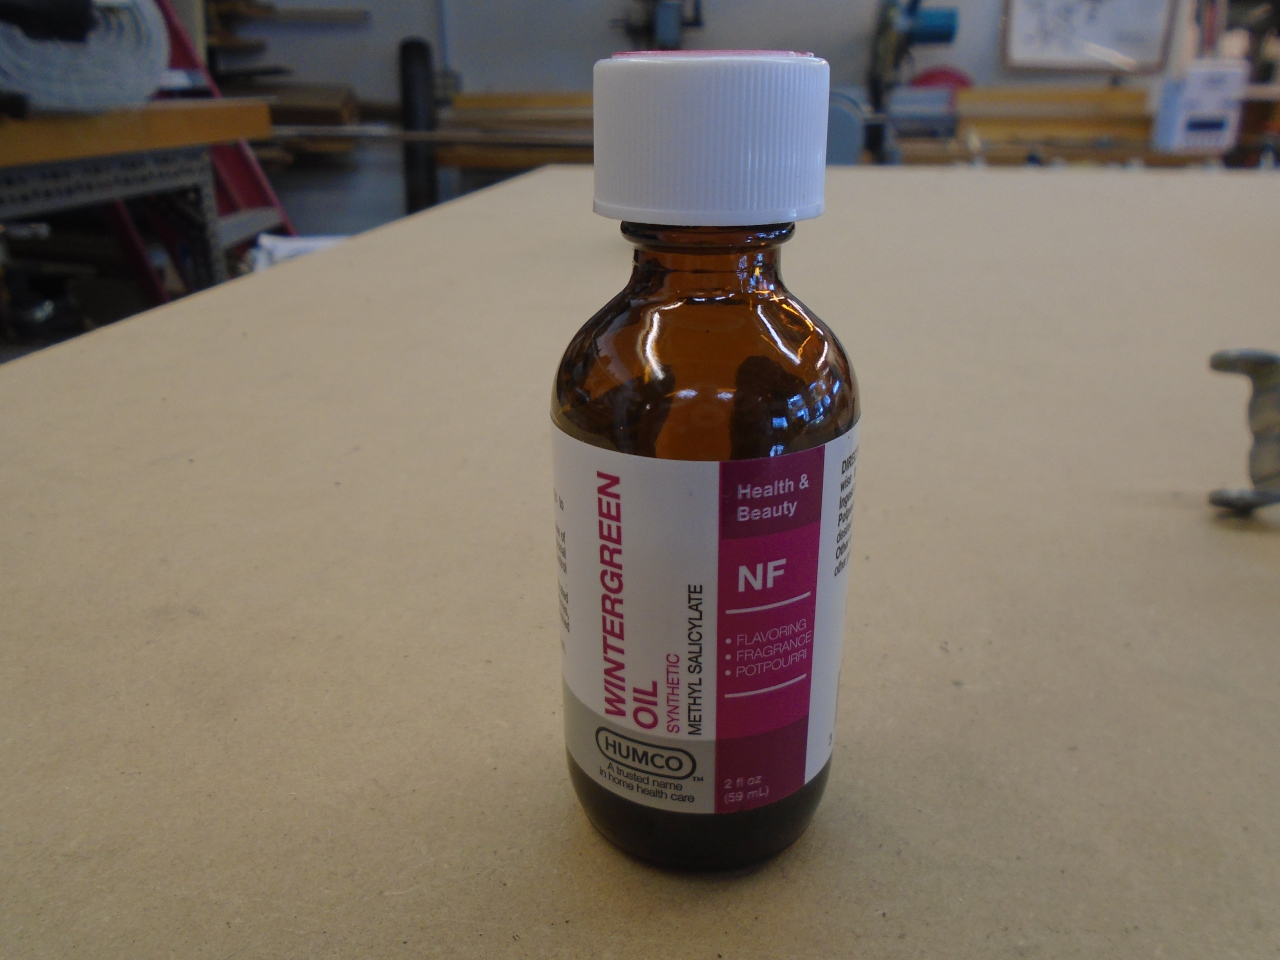
A common name for methyl salicylate is Oil of Wintergreen, and it smells
exactly like Wintergreen Lifesavers. However, in anything other
than very dilute form, it is toxic, and can even be absorbed through he
skin.
Being sort of tech-savvy, I wanted to somehow monitor the process so I
could tell if the treatment was doing anything to the rubber. I
don't have a good way of directly measuring rubber durometer, and
measuring precise physical dimensions of a squishy material is not
easy. I finally decided to monitor the weight of the seal.
If something was going into the rubber, I should be able to see weight
changes. I did two runs, one with the seal immersed in full
strength methyl salicylate, and a second one with 25% methyl salicylate
in isopropyl alcohol, as recommended in one of the sources. Here
are the results:

The first immersion was one hour, with periodic weight checks. The
seal gained about 15% in weight, and the rubber seemed to feel a little
softer. Then, to see if the weight gain would persist, I left the
seal exposed to room air for most of a day. Over the next 18
hours or so, the seal lost about 2.7 of those percentage points.
The seal was then immersed in the diluted solution for about four hours,
where it gained additional weight up to about 26% over the starting
weight. Over the next 20 hours or so, the weight settled back to
about 20% over starting weight. The weight didn't change
appreciably at all over the final four hours. At this point, the
seal definitely felt softer.
I decided to leave well enough alone at this point. The solution
was turning a little yellow, which suggested to me that it was
dissolving or breaking down the rubber or some component of it. It
seemed logical that overdoing this treatment could damage the seal.
I don't know what the prognosis is for the seal. The improvement
may not be permanent, or even long term. I'll try to remember to check
it again at install time.
Now, back to the real world...
I epoxied the steel ring and magnet back in place. I did a way better job centering the magnet than the factory did.
Then slid the flange of the seal back under the steel ring.
I somehow managed to not lose the little roll pins, which went back in place.

On the shelf with this puppy.
This was one of those projects that didn't really cost anything, and
didn't really take that long, but involved a lot of thought and
research. A side benefit is that even now, several days later, my
shop still smells like candy.
Comments to Ed at elhollin1@yahoo.com
To my other GT6 pages.