To my other GT6 pages
December 10, 2021
Gearbox Tunnel
In the GT6, as in most front-engine, rear-drive cars, the gearbox encroaches into the
passenger compartment. Usually, it is hidden out of sight by some
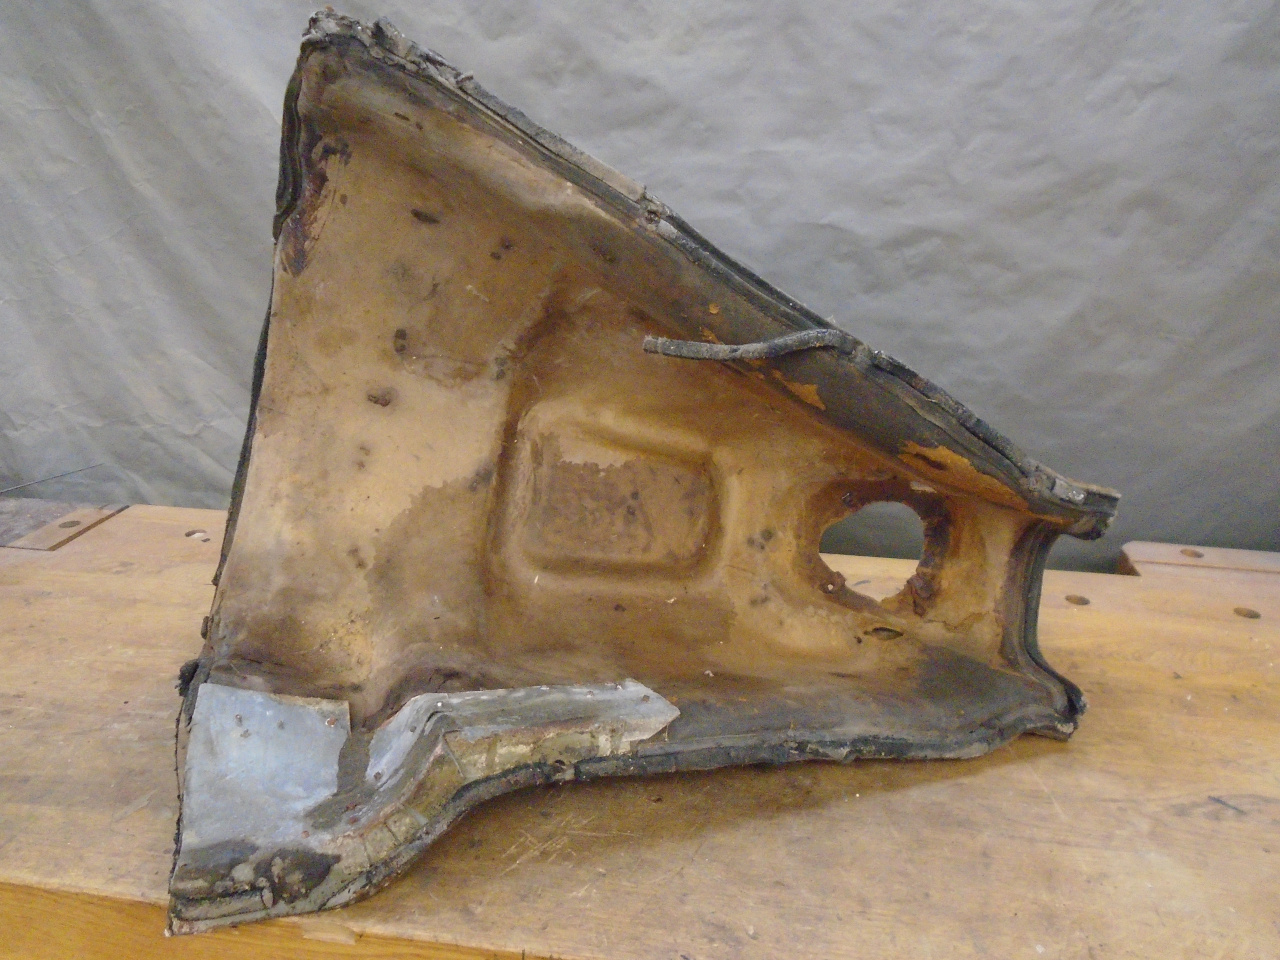
kind of gearbox cover, or tunnel. On this car, like many other
Triumphs of the era, the cover was made of some sort of molded fibrous
material akin to cardboard. Needless to say the elements were
typically not kind to the cover, and it is often found in pretty bad
shape.
Mine had been "repaired" by a younger me back in the early 80s. There were fiberglass and metal patches.
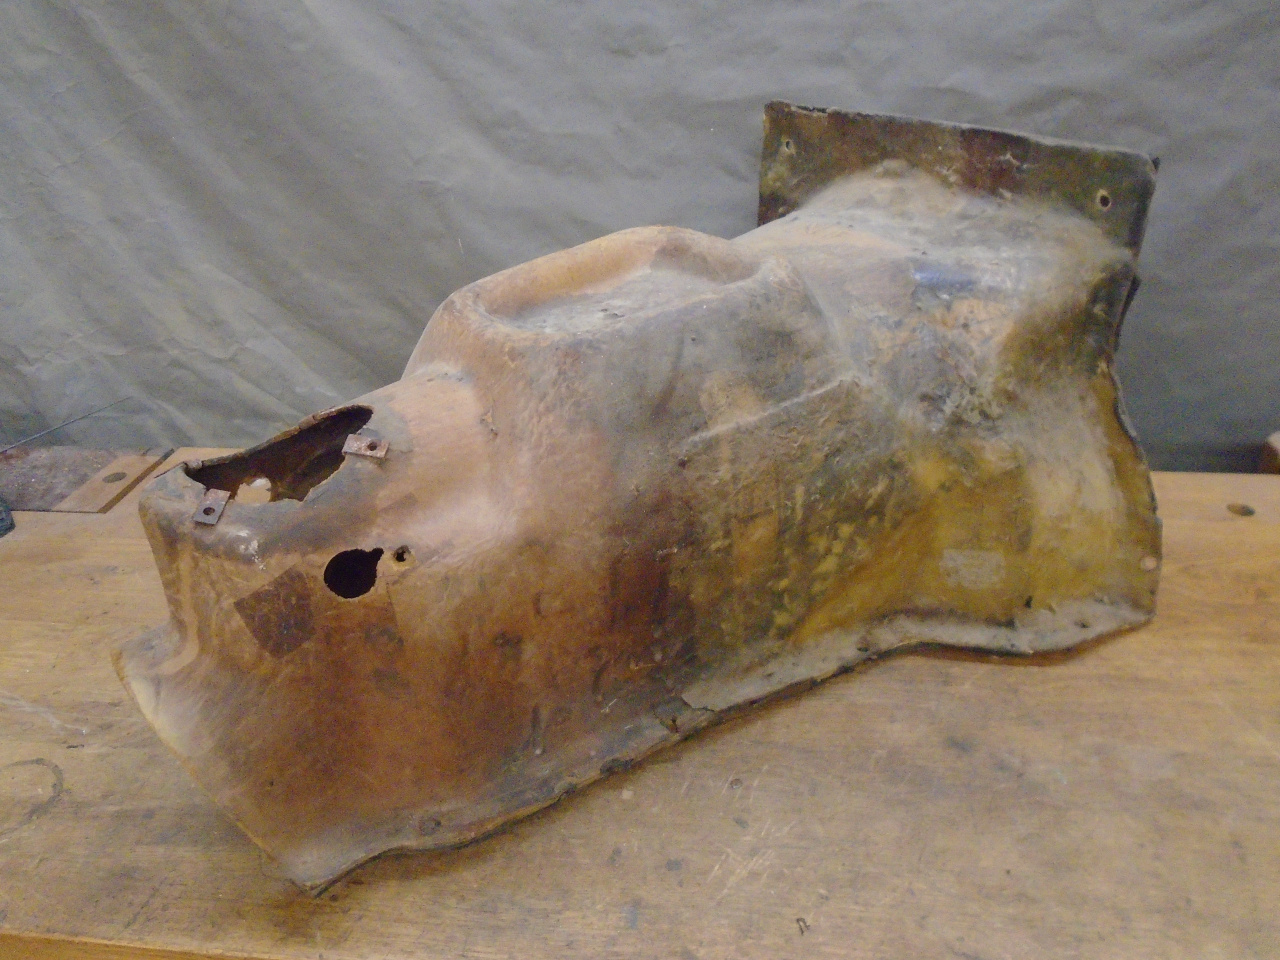
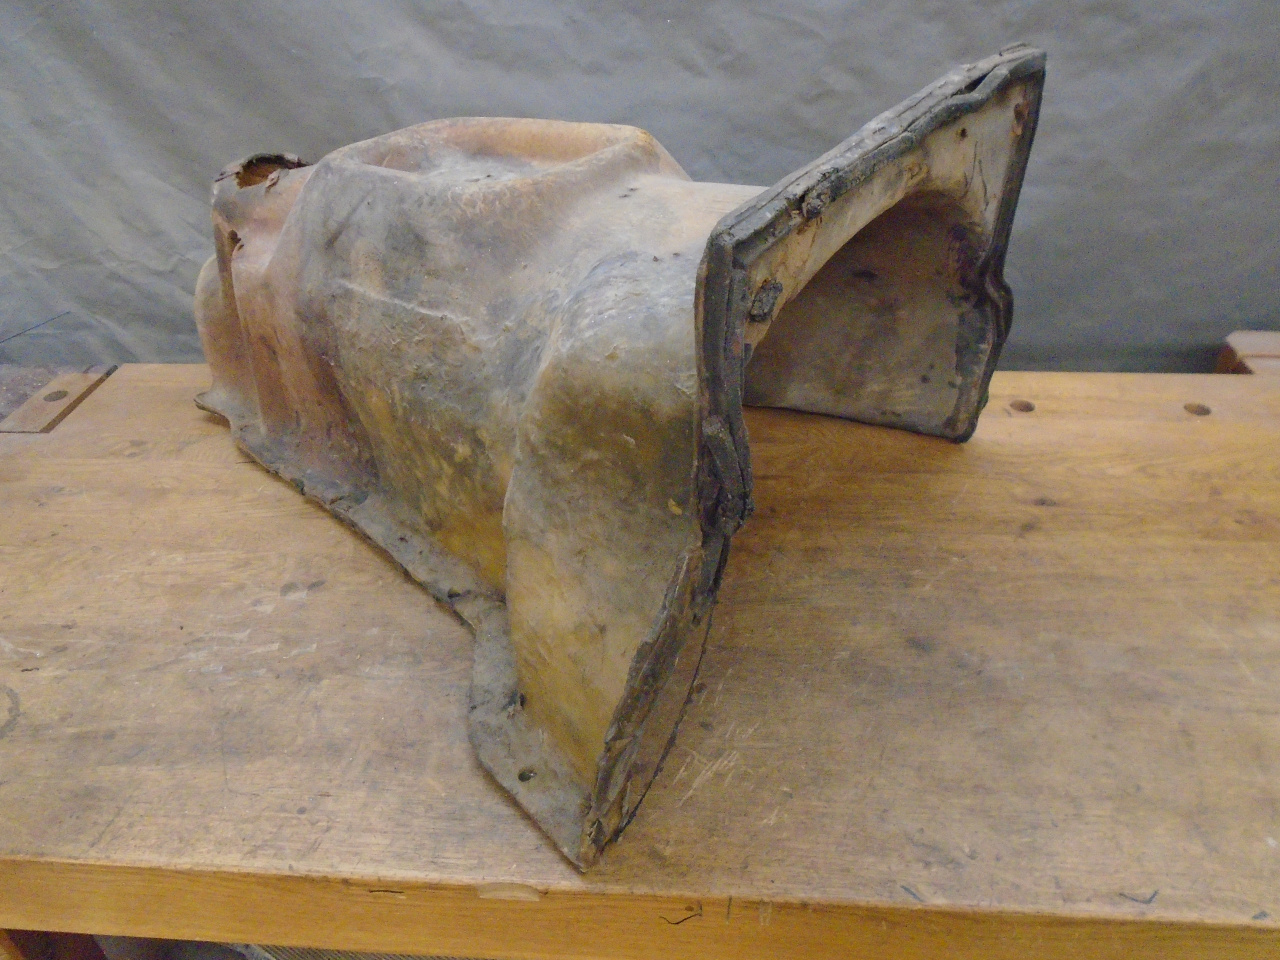
Even when in it's prime, this cover was an awkward looking thing, especially with that superfluous tray-like feature on top.
I didn't think the cover was usable as-is, but I thought there were
likely some options for aftermarket replacements. I was Googling
the possibilities when Inner Engineer happened to glance over my
shoulder.
"Watcha doin'?" he said, casually.
"I'm looking for a replacement gearbox cover for the GT", I answered.
"What are those, plastic?" he asked, looking at the picture on one of the supplier websites.
"Yeah, I think so".
"What's that big lump on top?" he asked, pointing to the tray-like protuberance on top of one of the tunnels
"I dunno. I hear it's something left over from some other car model."
"Well, that kind of sucks, doesn't it?"
"Yeah, but it looks like they all have it".
He paused for a calculated moment. Then, in a low, serious tone: "You know you could do better, Dude."
"What do you mean?" I returned, not really catching his drift.
"You could make one of those that fits better, looks better, and is probably stronger. Piece of cake."
"I don't know. That could be a lot of work."
"Work, Schmerk!" he replied. "You know it's the right way to go."
I hesitated. He looked straight at me with a subtle grin. "How hard could it be?" he said.
He knows full well that those words come across as a full-blown dare to me. The game was on.
I thought about various ways to make such an odd and arbitrary shape,
and finally landed on doing it by laying up fiberglass on a form.
The form would need to have the shape of the inside of the tunnel.
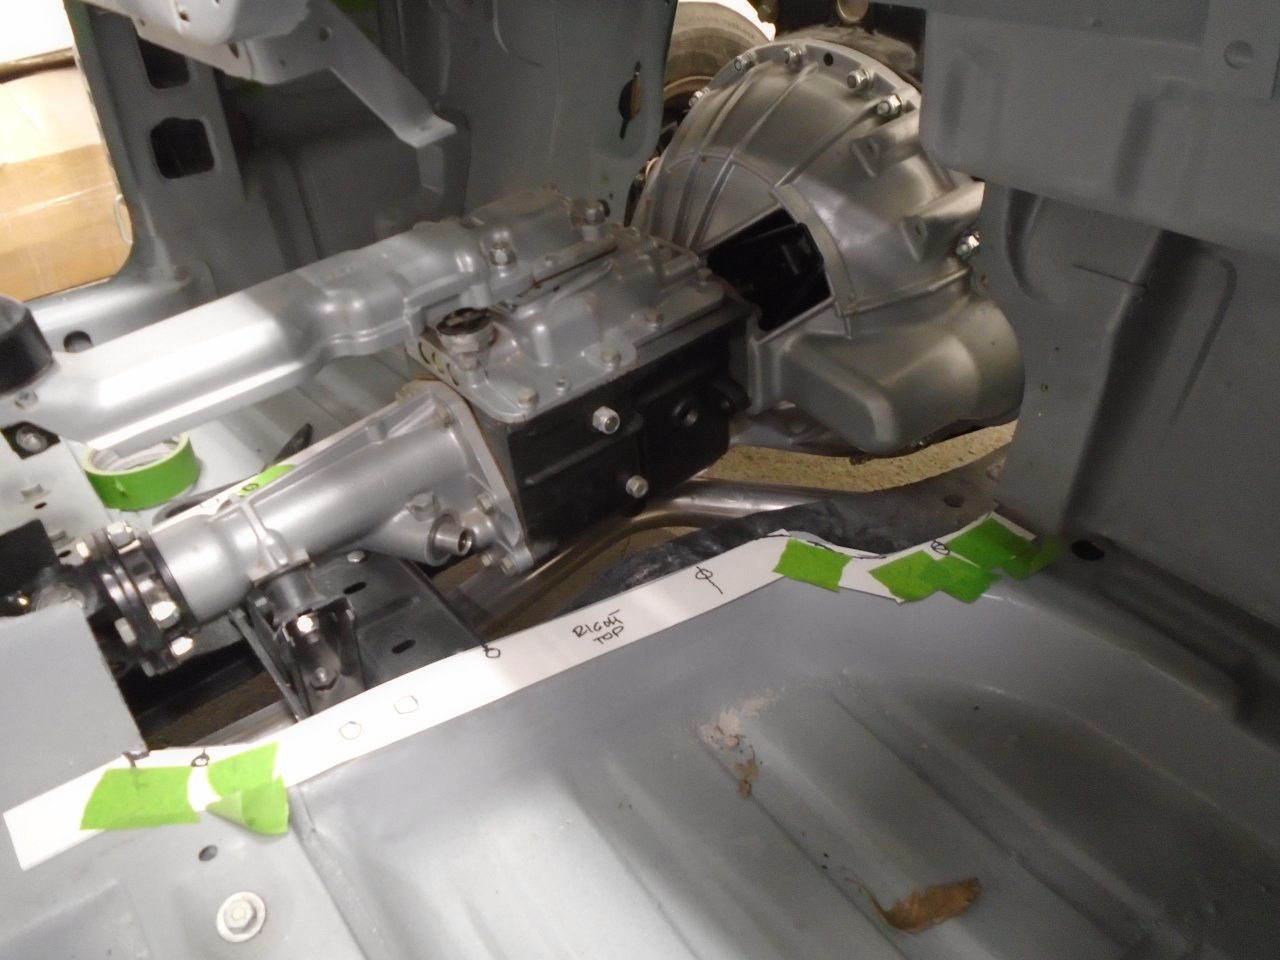
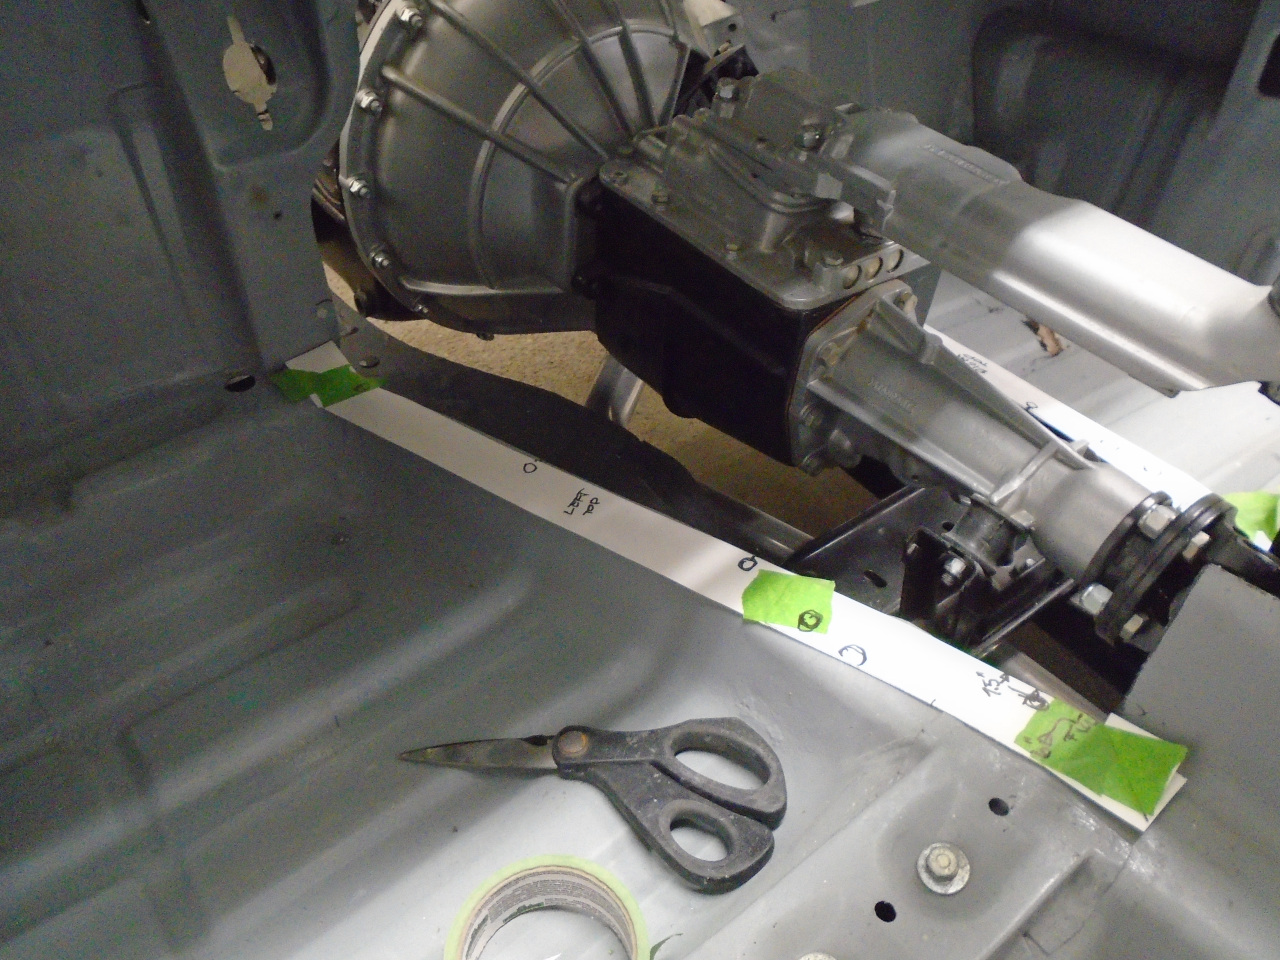
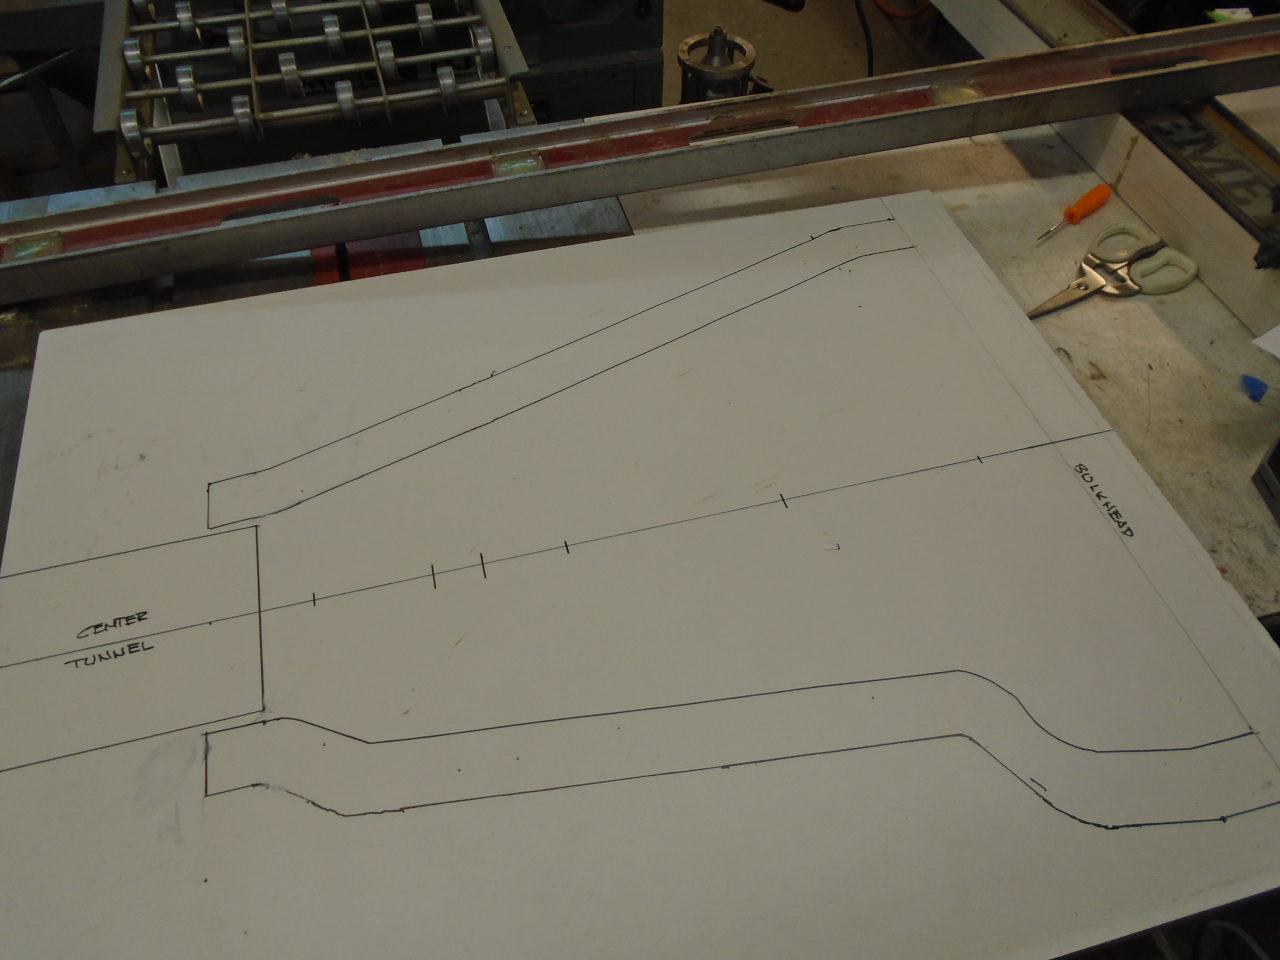
The first thing to do was get the shapes of the areas where the cover
had to attach to the car. This was mainly the flange on the
firewall, and the two flanges on the floor. I made paper patterns.
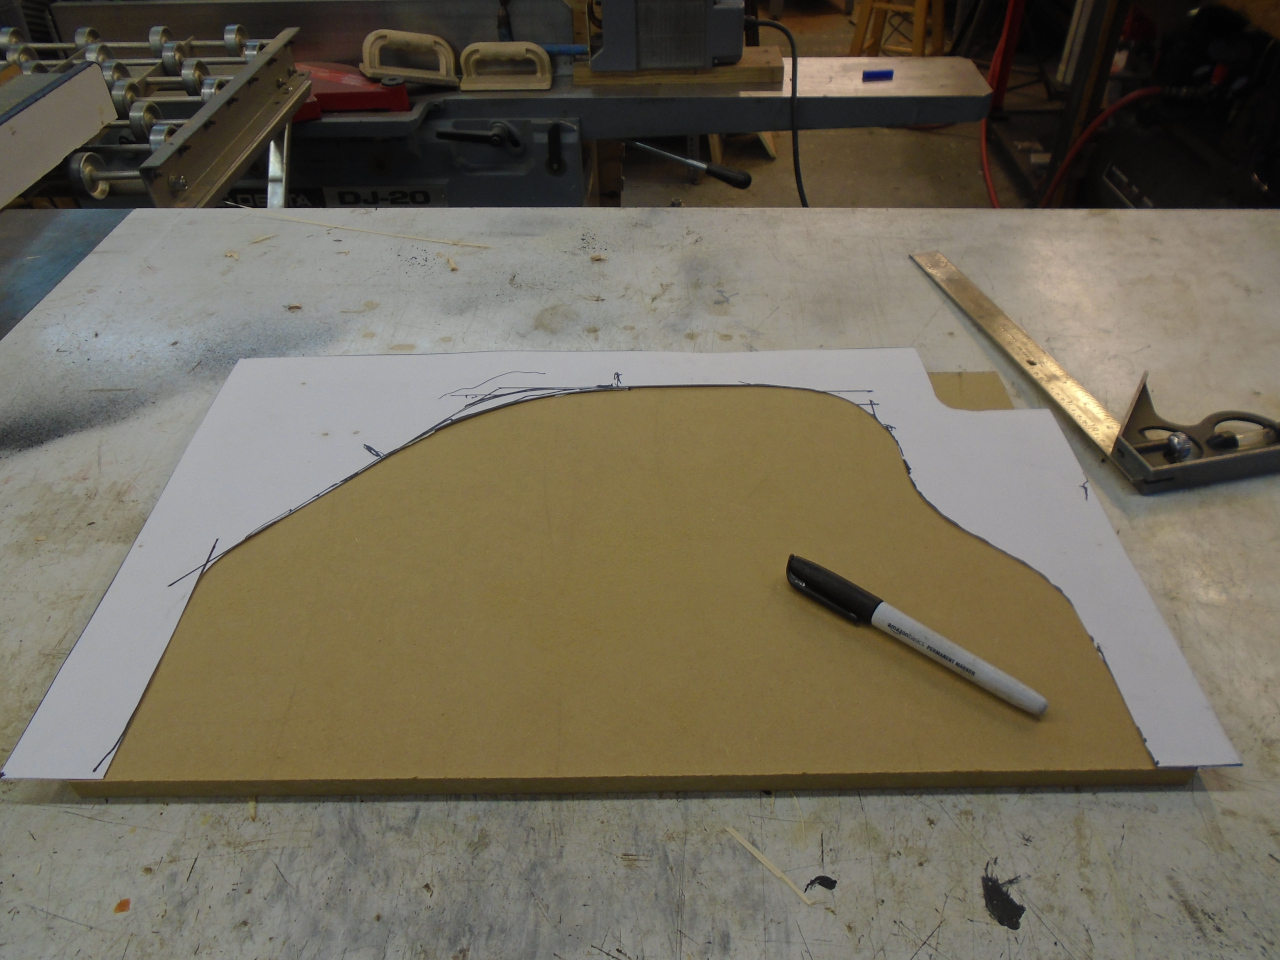
I transferred the firewall shape to a piece of 1/2" MDF. I marked
out a line 1/8" smaller than the pattern to account for the form
material that would come later.

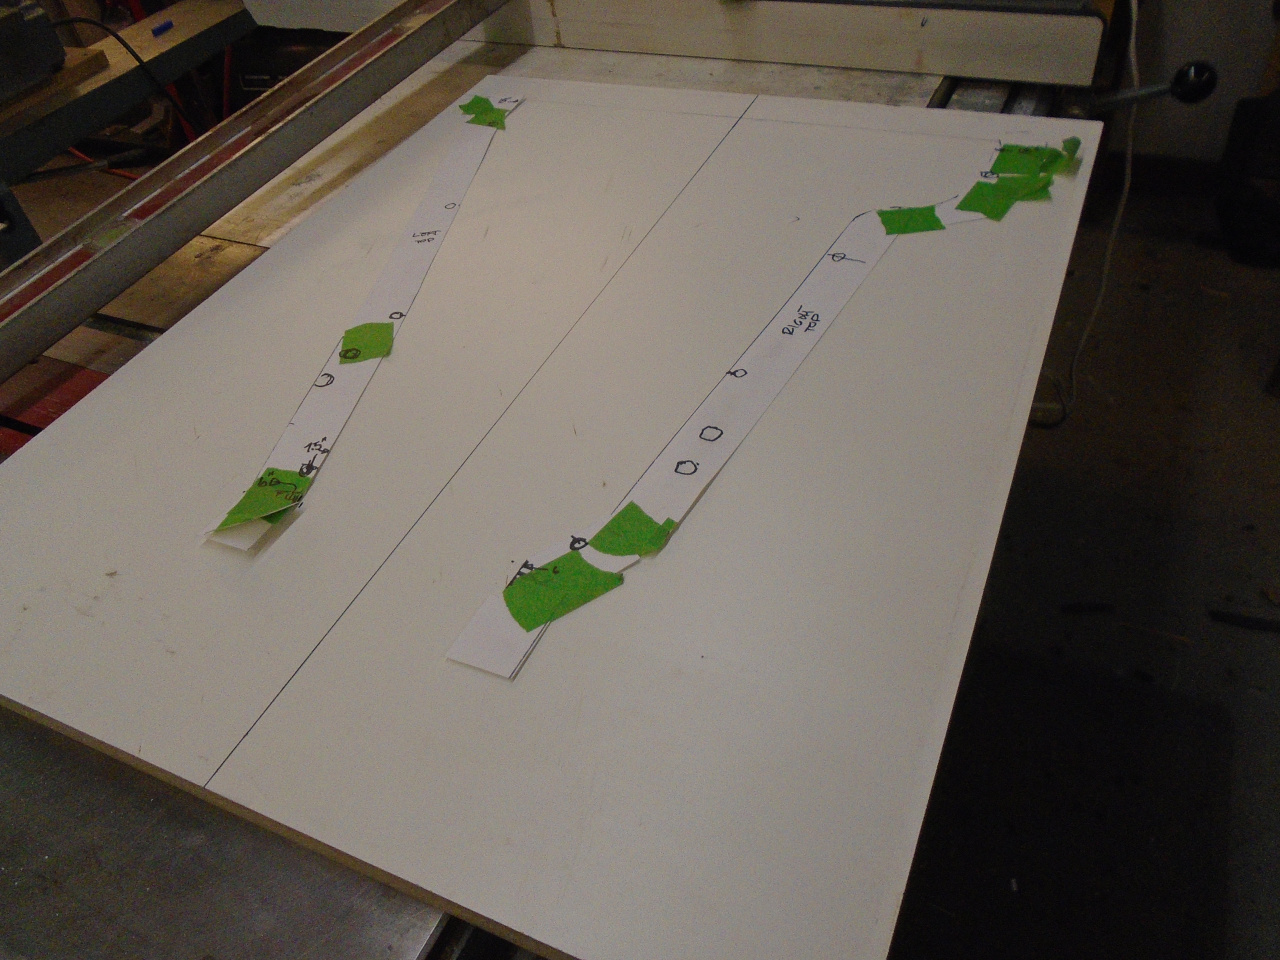
The two floor flange profiles were laid out on a piece of melamine board that would serve as the base of the form.
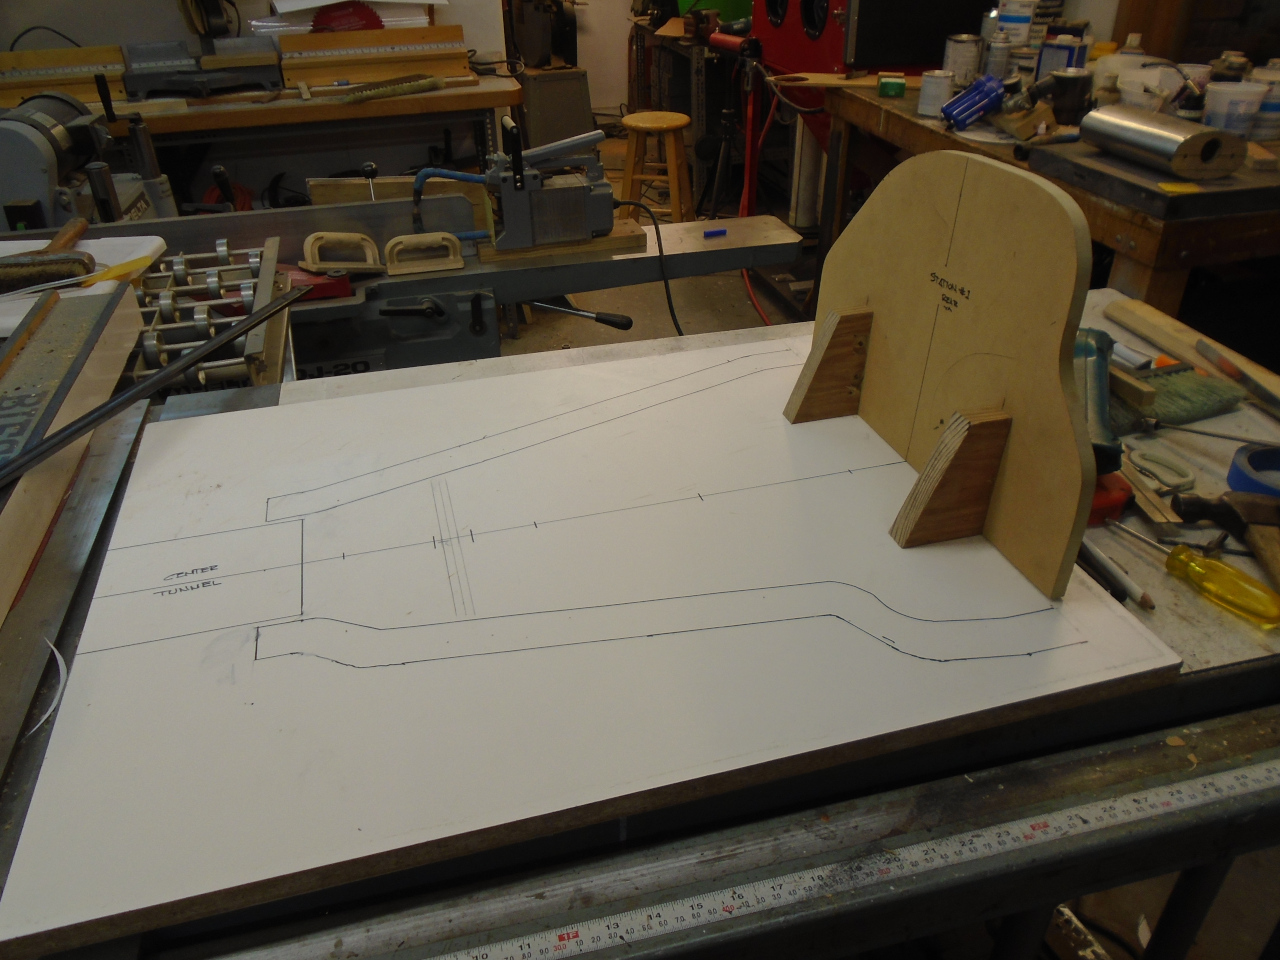
Before attaching the firewall pattern to the base, I tried to measure
the angle between the floor and firewall. I suspected it was not
90 degrees. It was difficult to measure, and appeared to be
different on each side. I finally averaged a bunch of trials and
came up with 94 degrees as a representative number. The firewall
pattern was fixed to the base with that angle. More on that later.
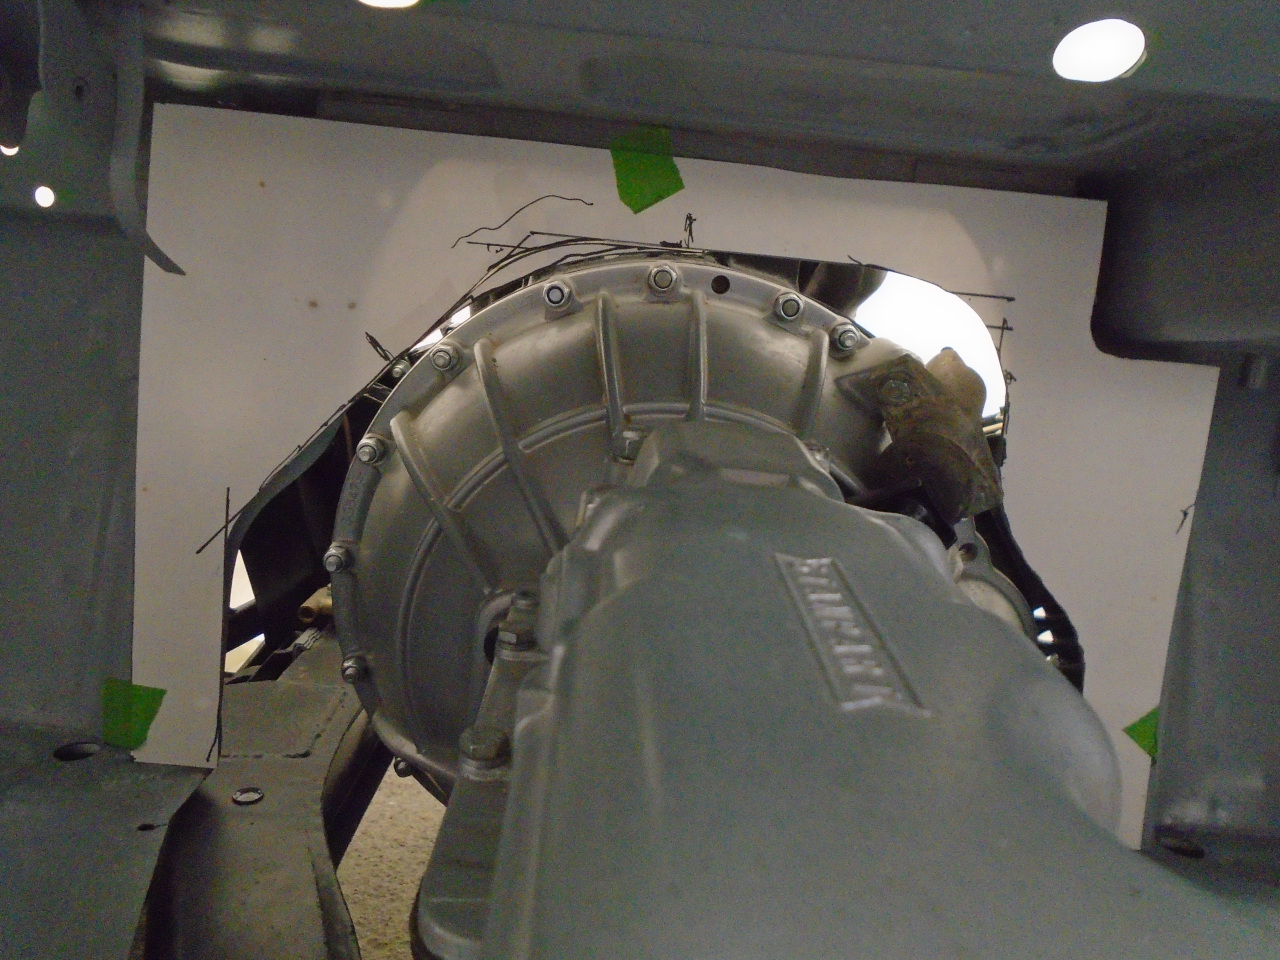
There are two other locations on the tunnel that have to match some
other piece of the car. One is the rear end of the tunnel where it
mates with the metal central propeller shaft tunnel. The other is
at the location of the dash support. The tunnel should mimic the
shape of the support with some consistent clearance. I made
patterns for these two locations that determine the shape of the
tunnel. Between the three patterns, the tunnel would just take the
simplest shape possible.
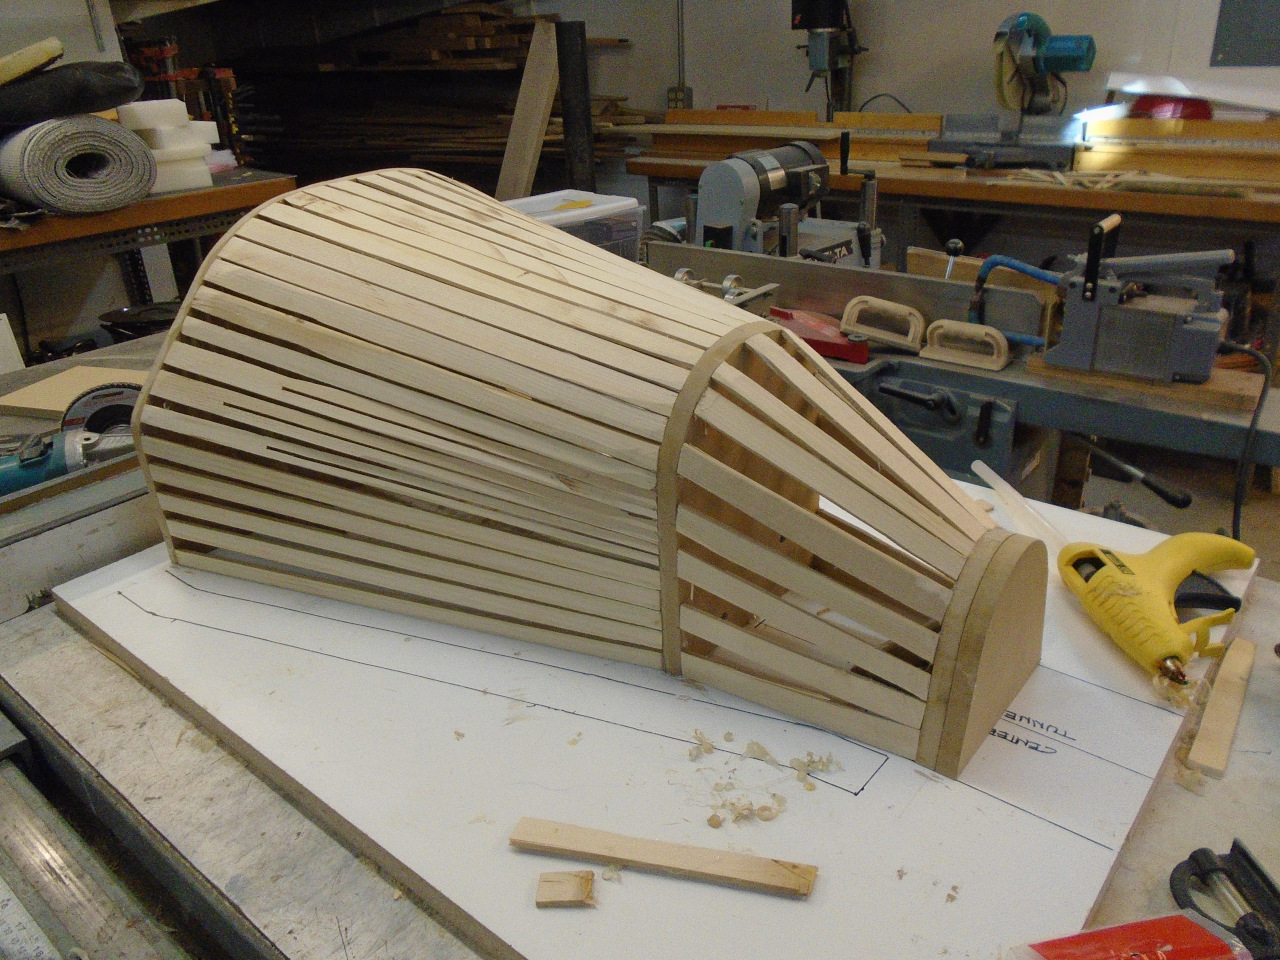
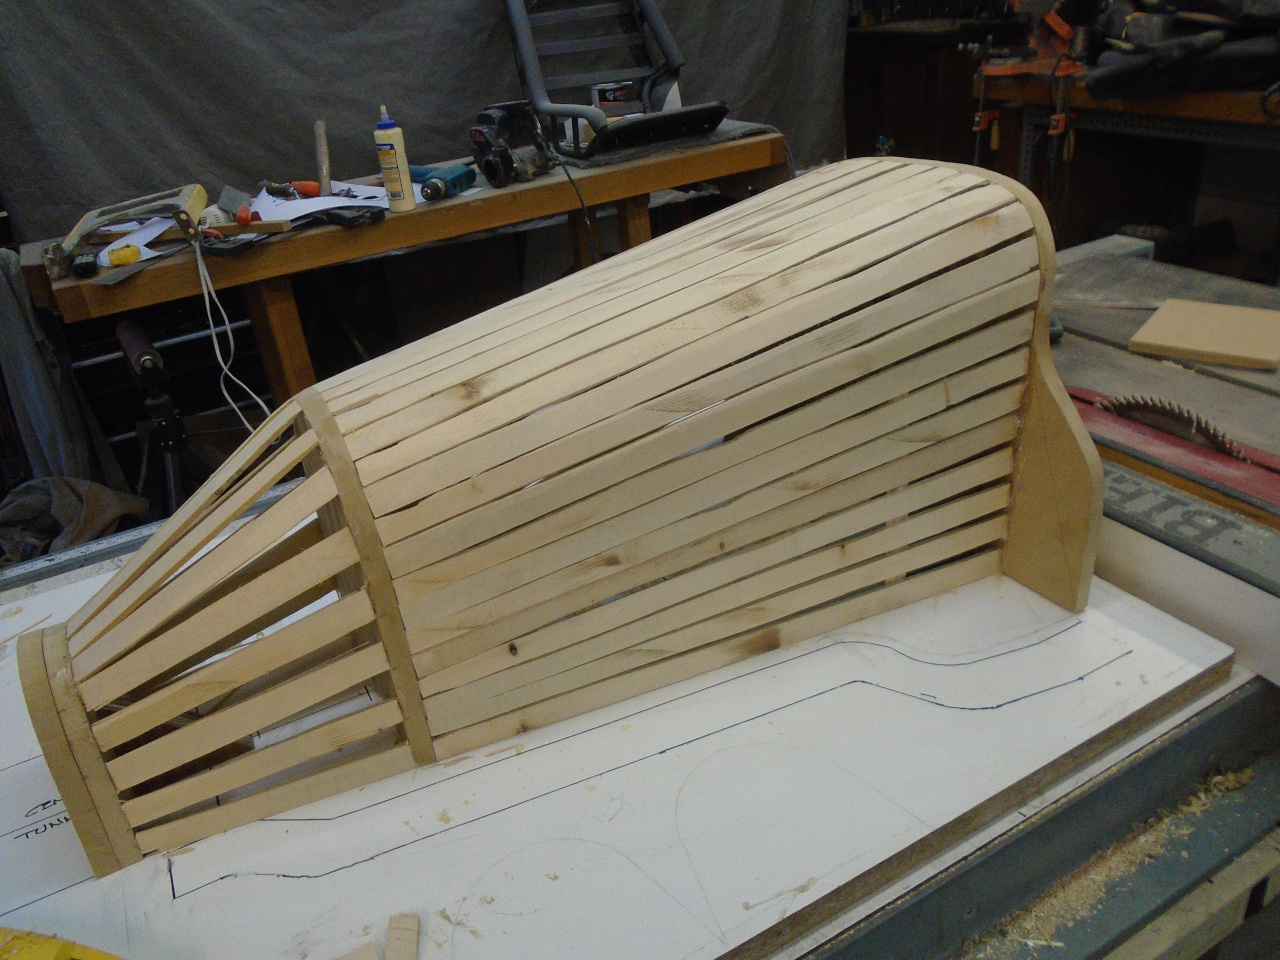
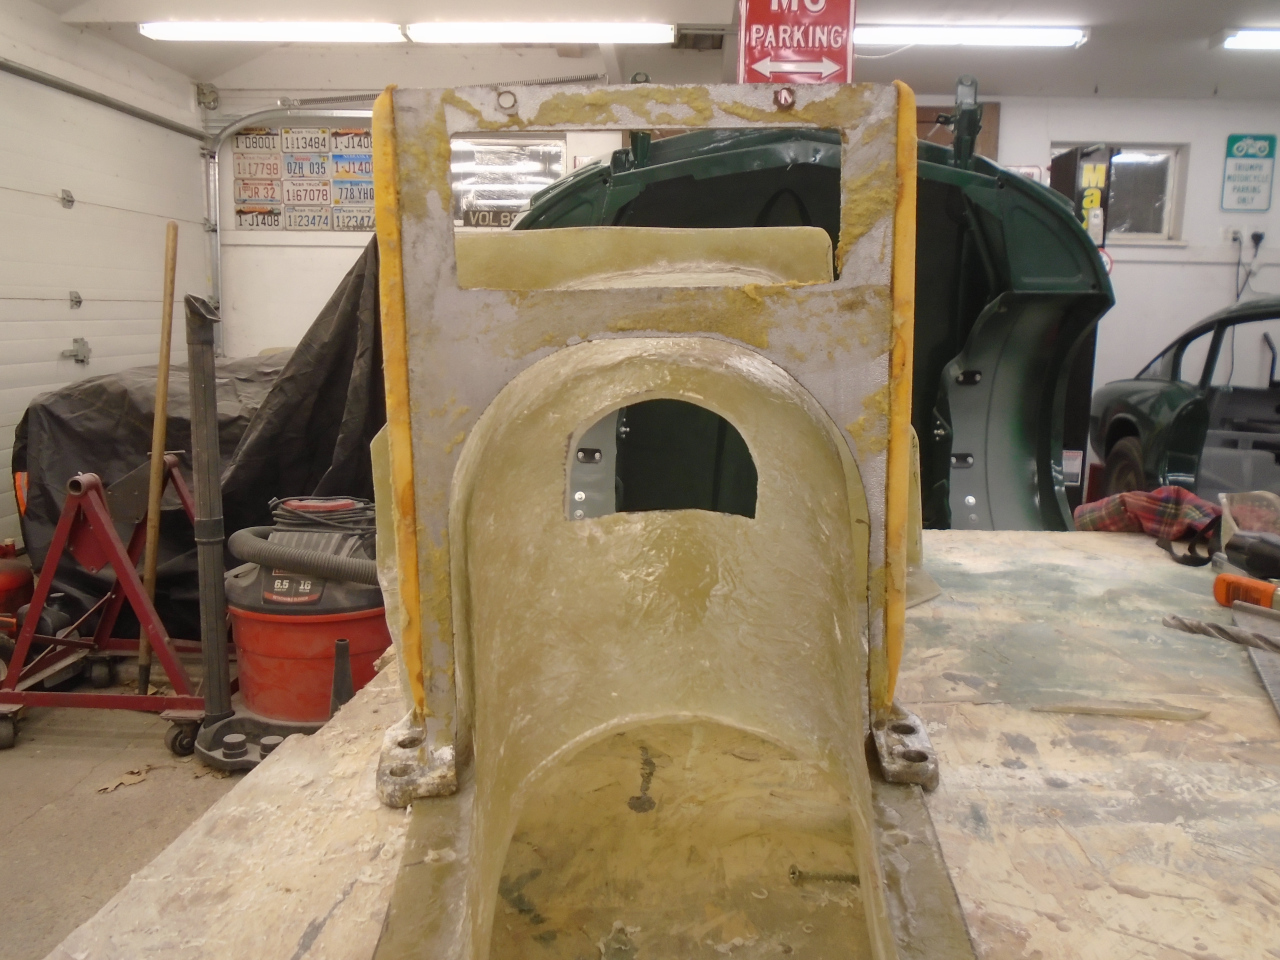
These pics shows the three patterns in place, and some lath sticks glued
to form the intermediate shape between the front and middle patterns.
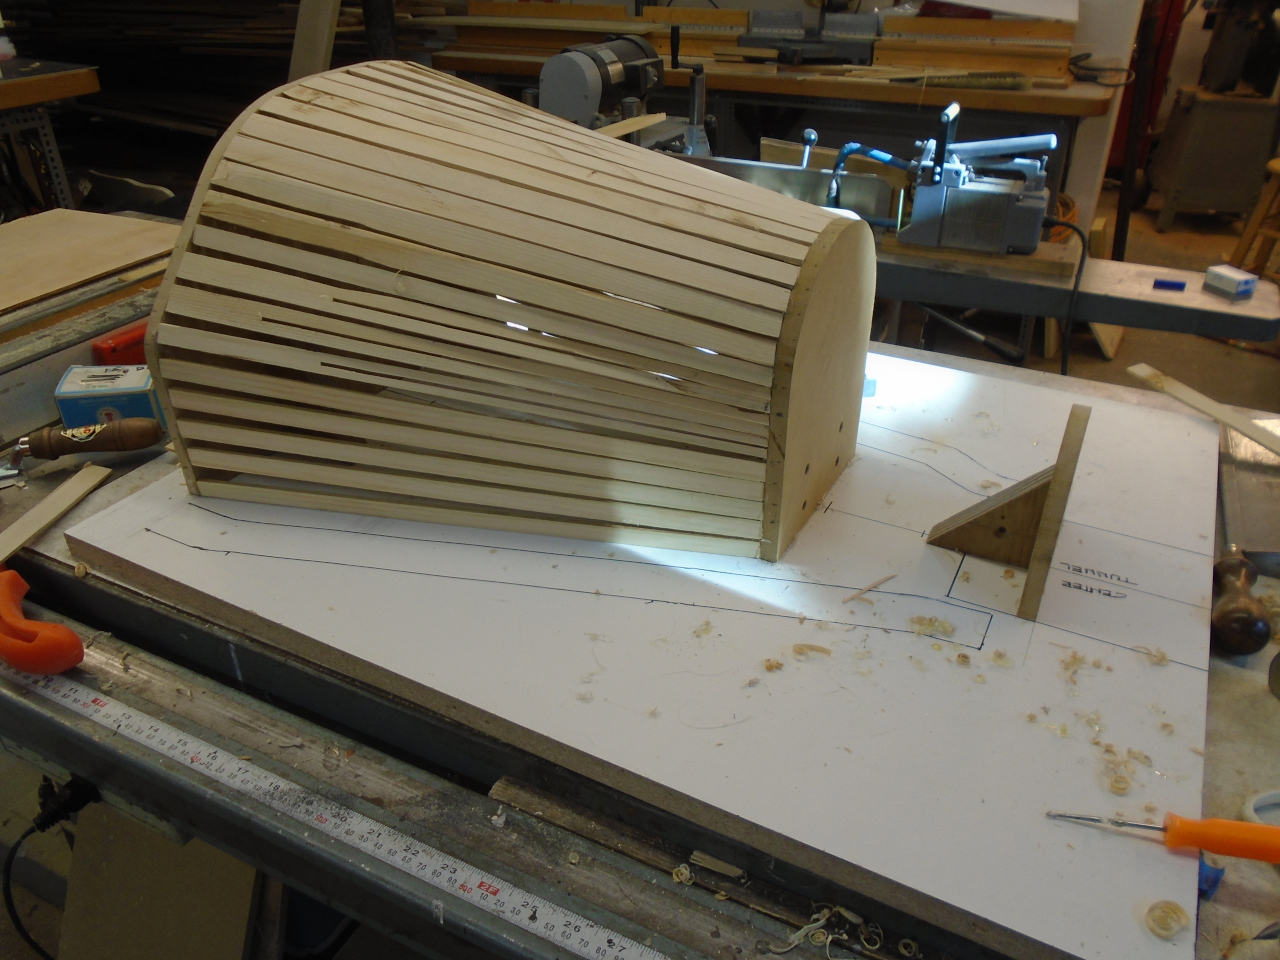
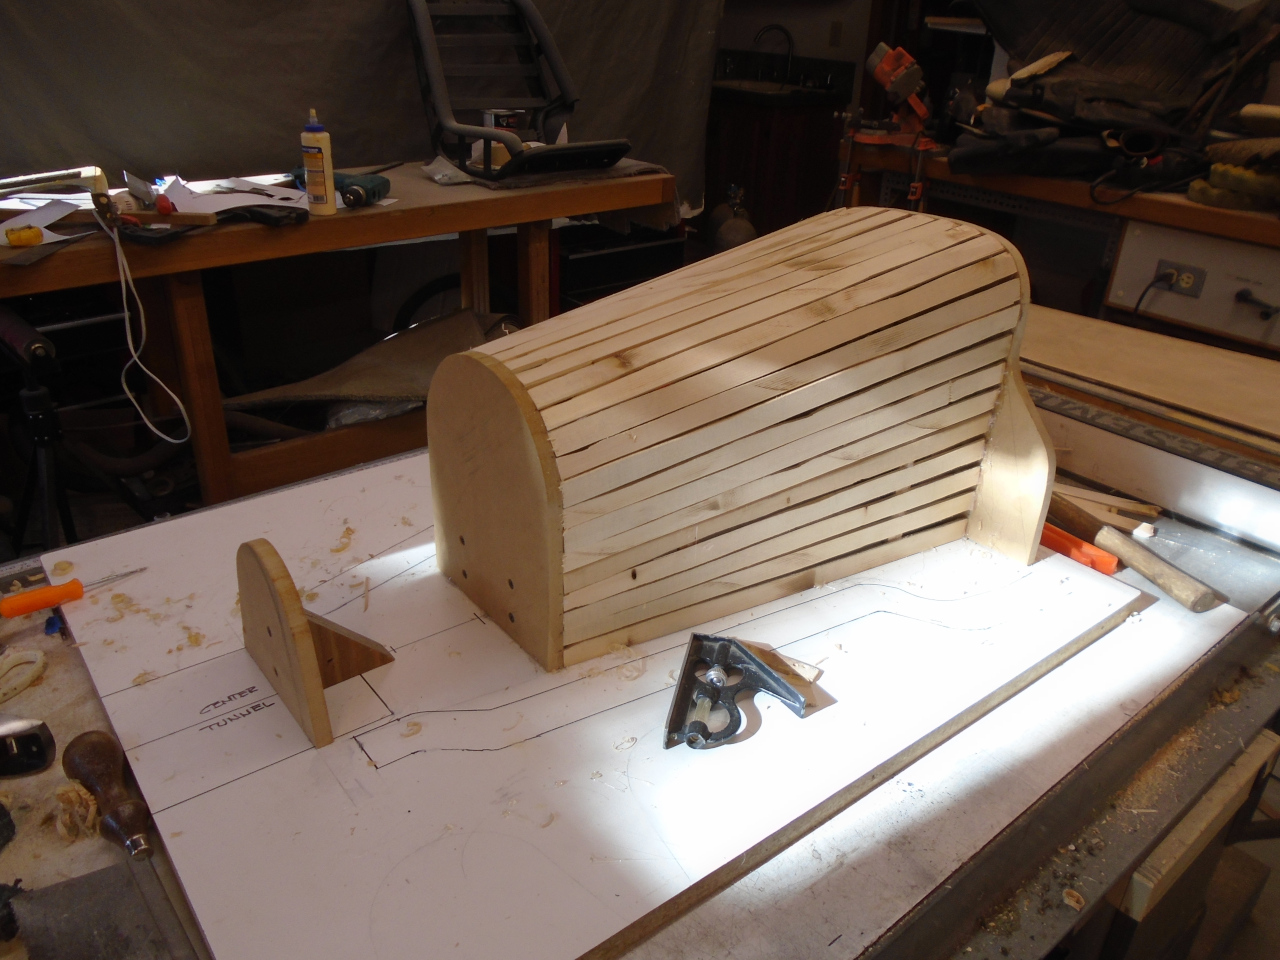
And the rest of the lath.
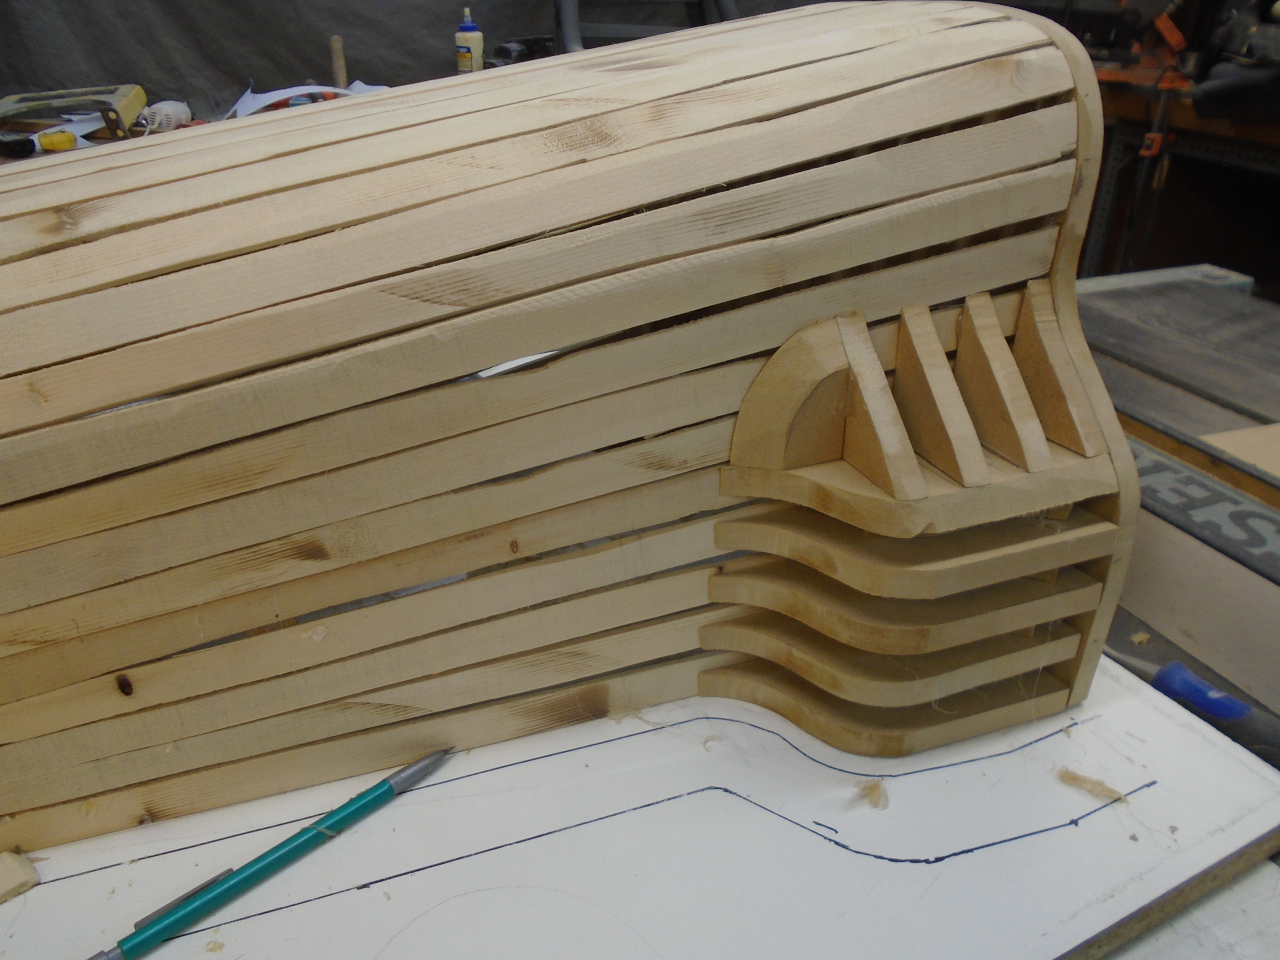
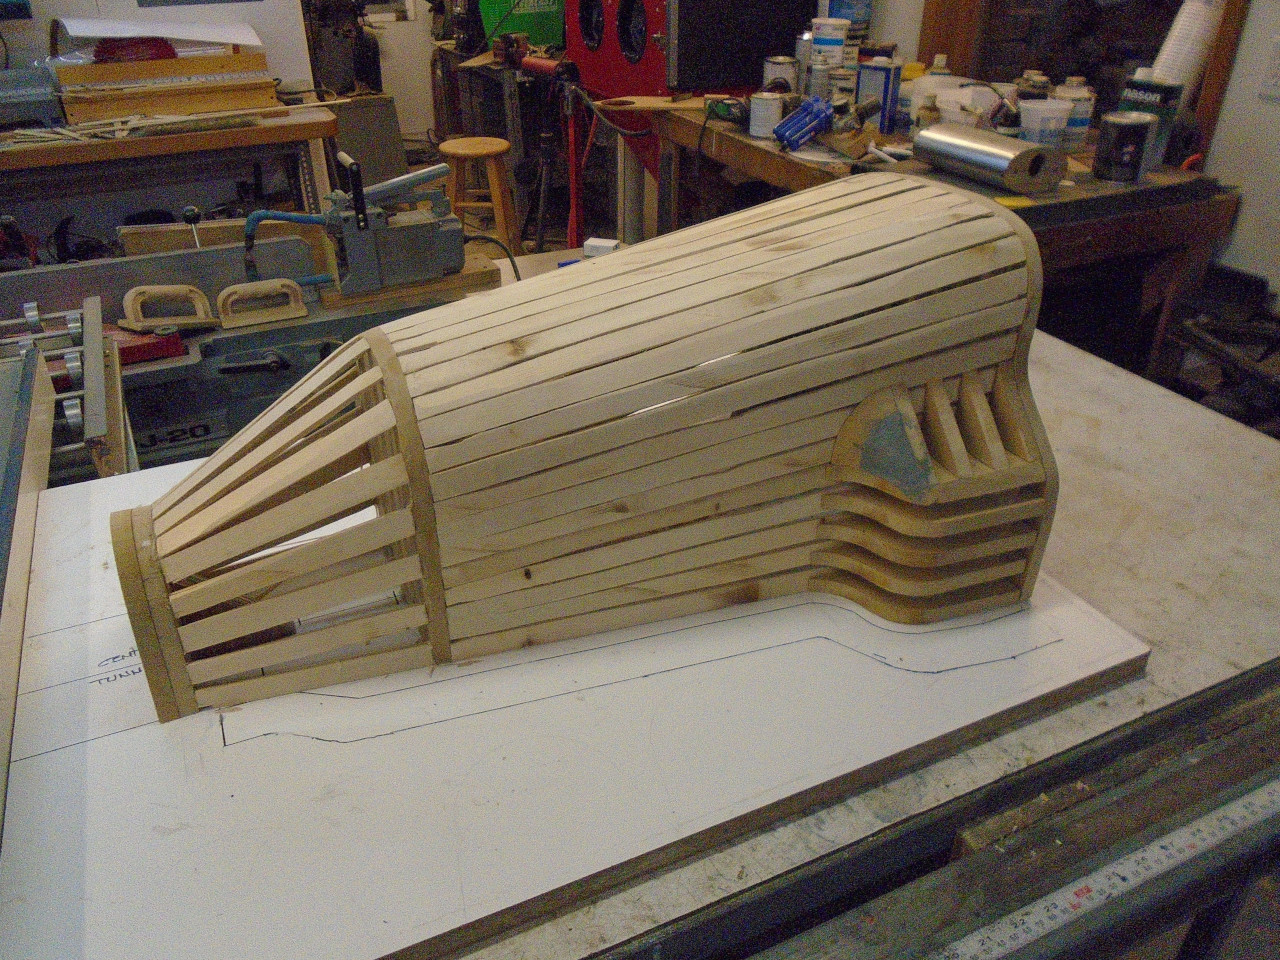
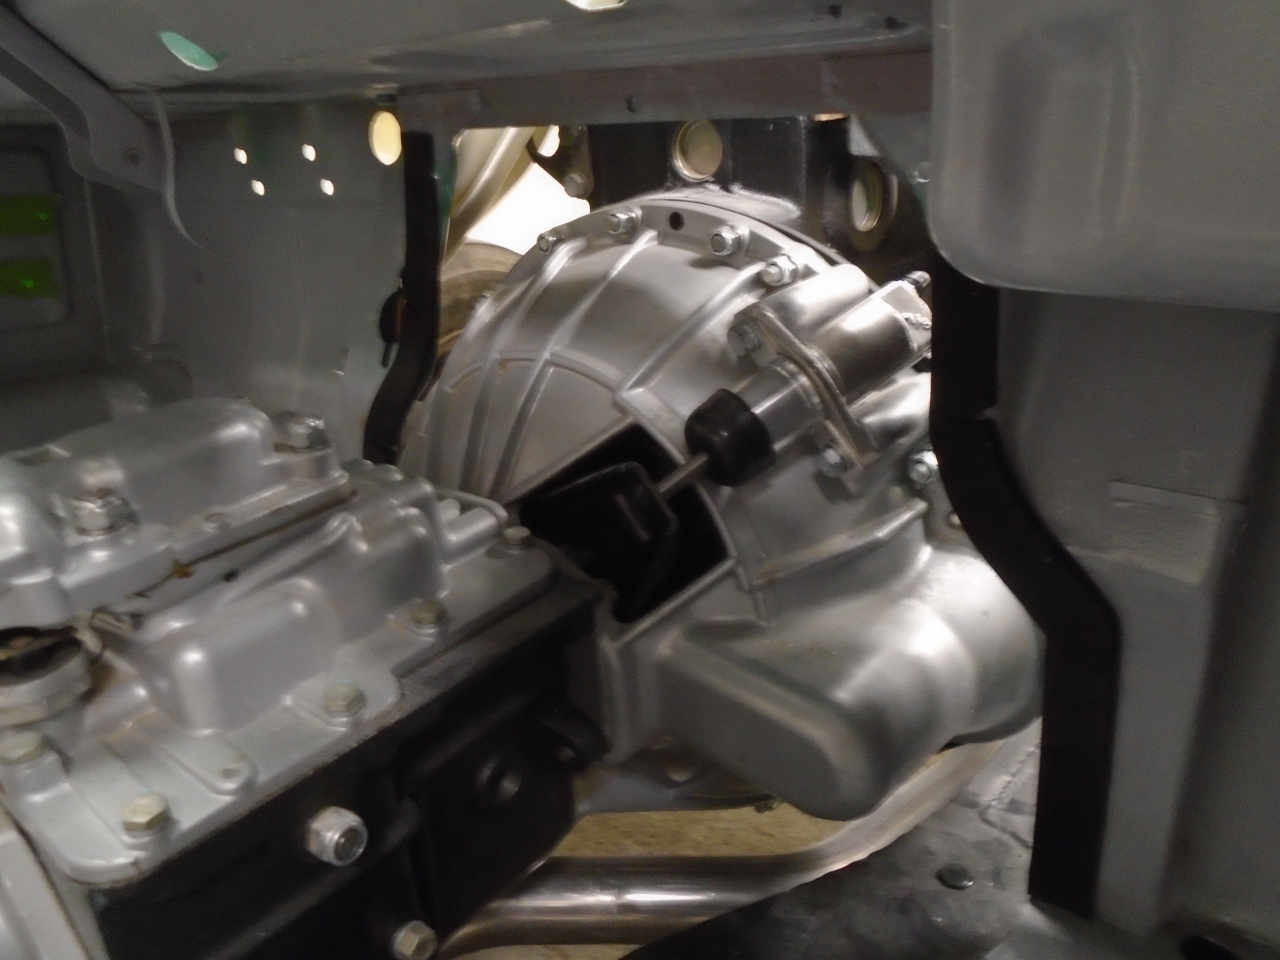
There is a bulge in the bell housing to accommodate the starter
gear. The tunnel has to have a similar bulge. For
simplicity, it was done separately.
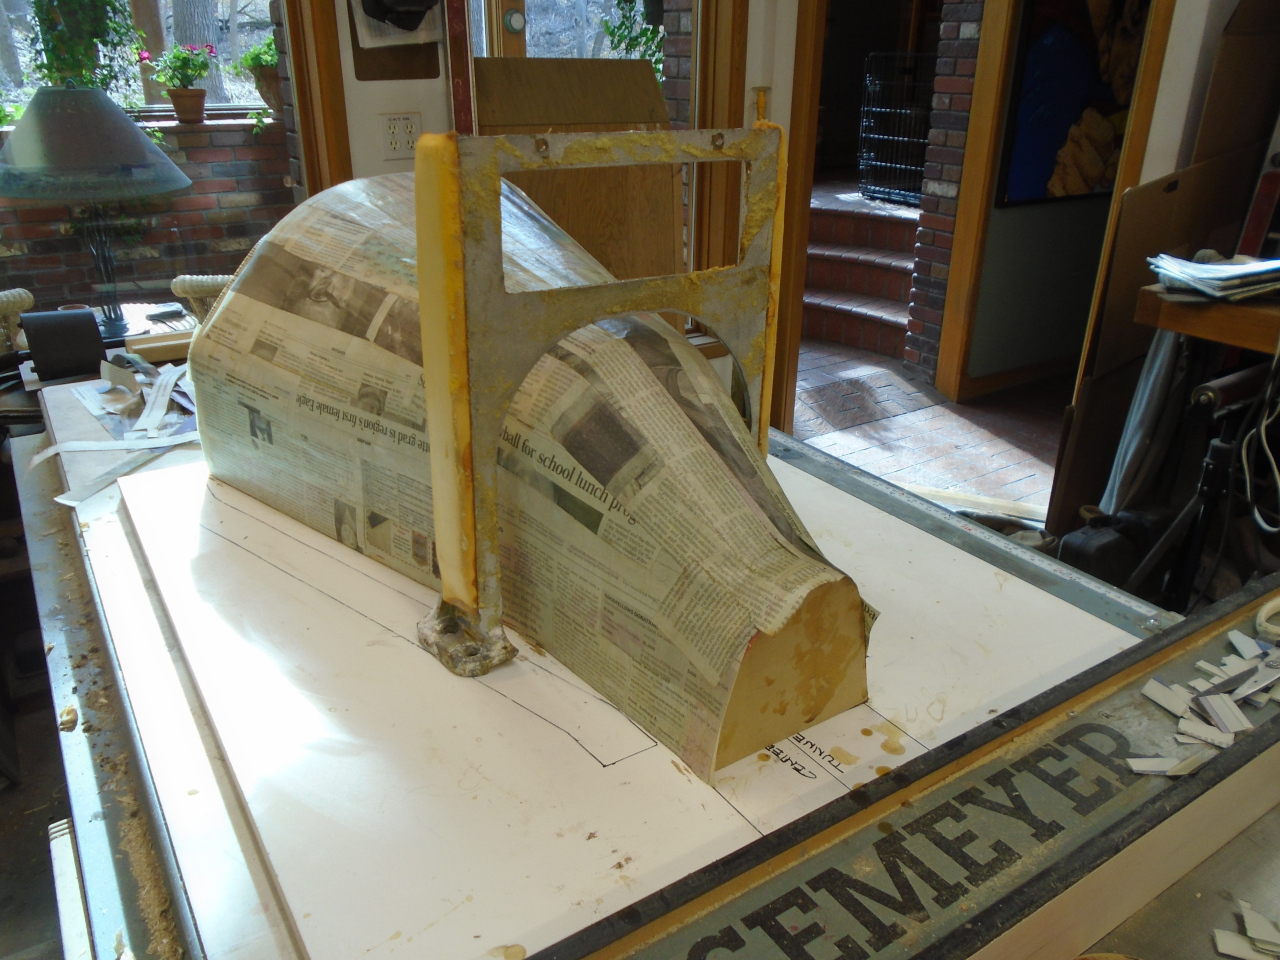
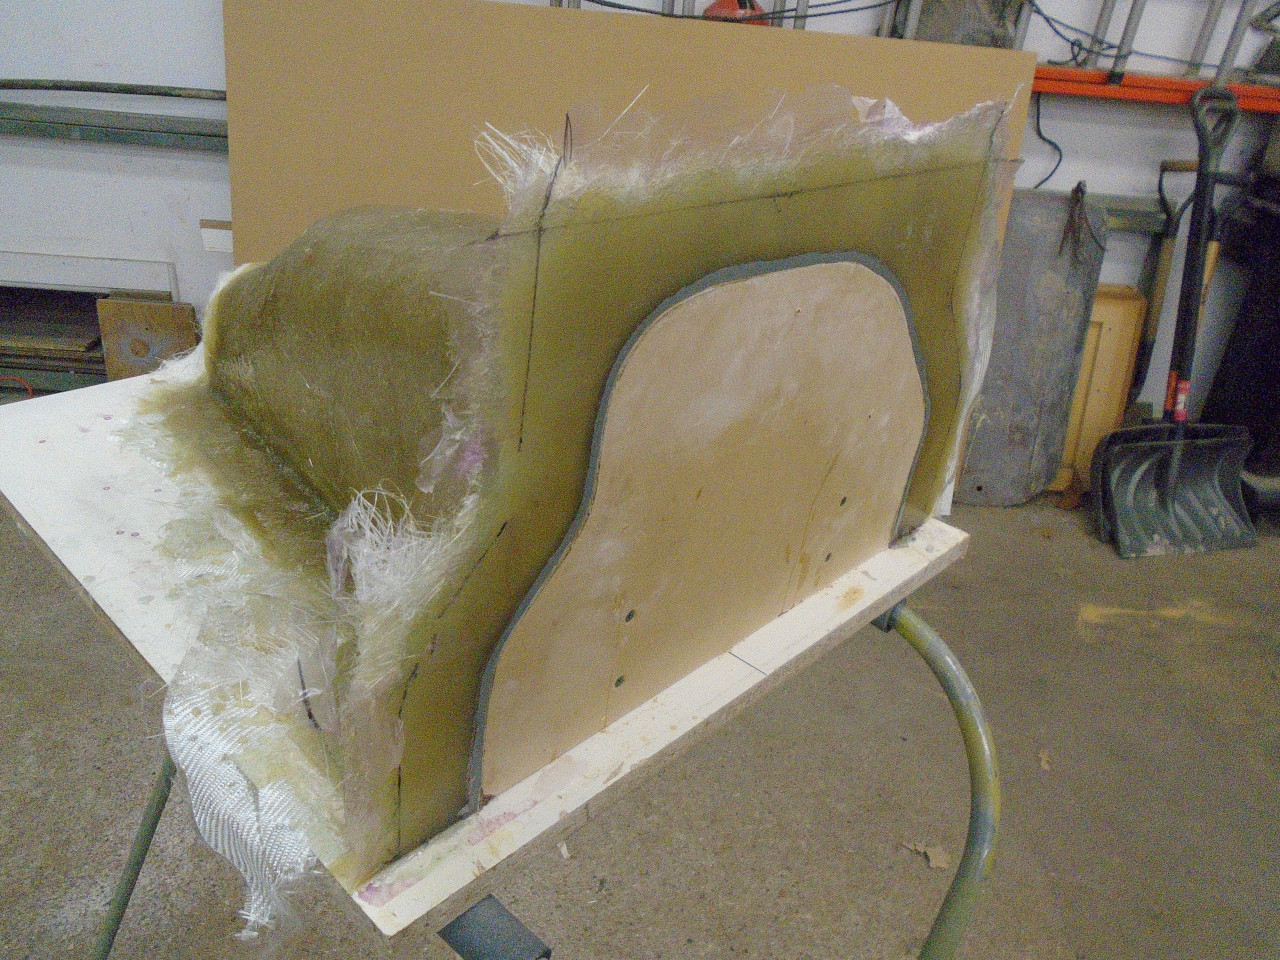
Then it was time to put a surface on the lath. I just used
papier-mâché, but with diluted yellow wood glue instead of flour
paste. This is a sanity check about halfway through the
papier-mâché.
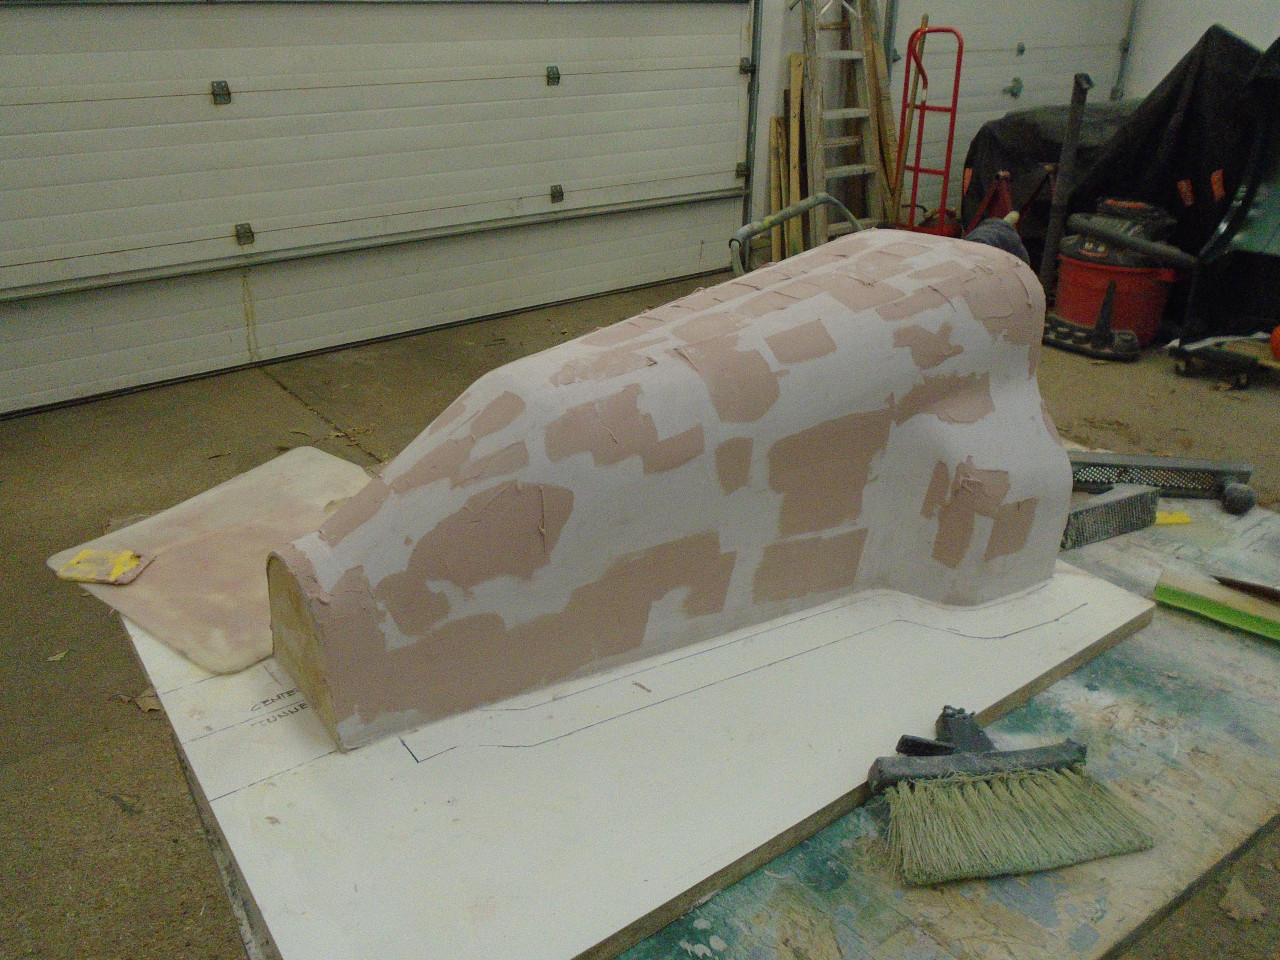
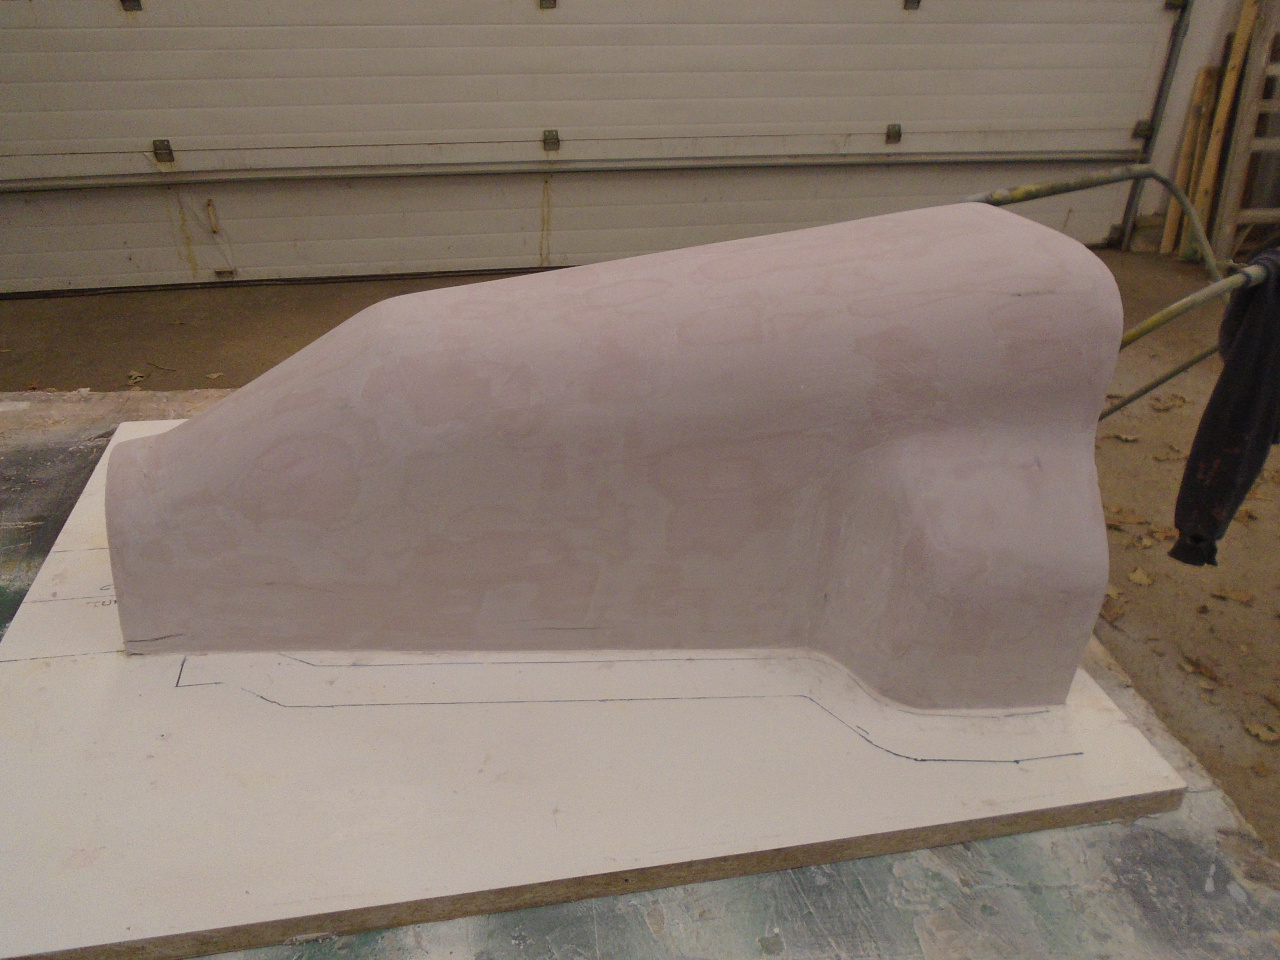
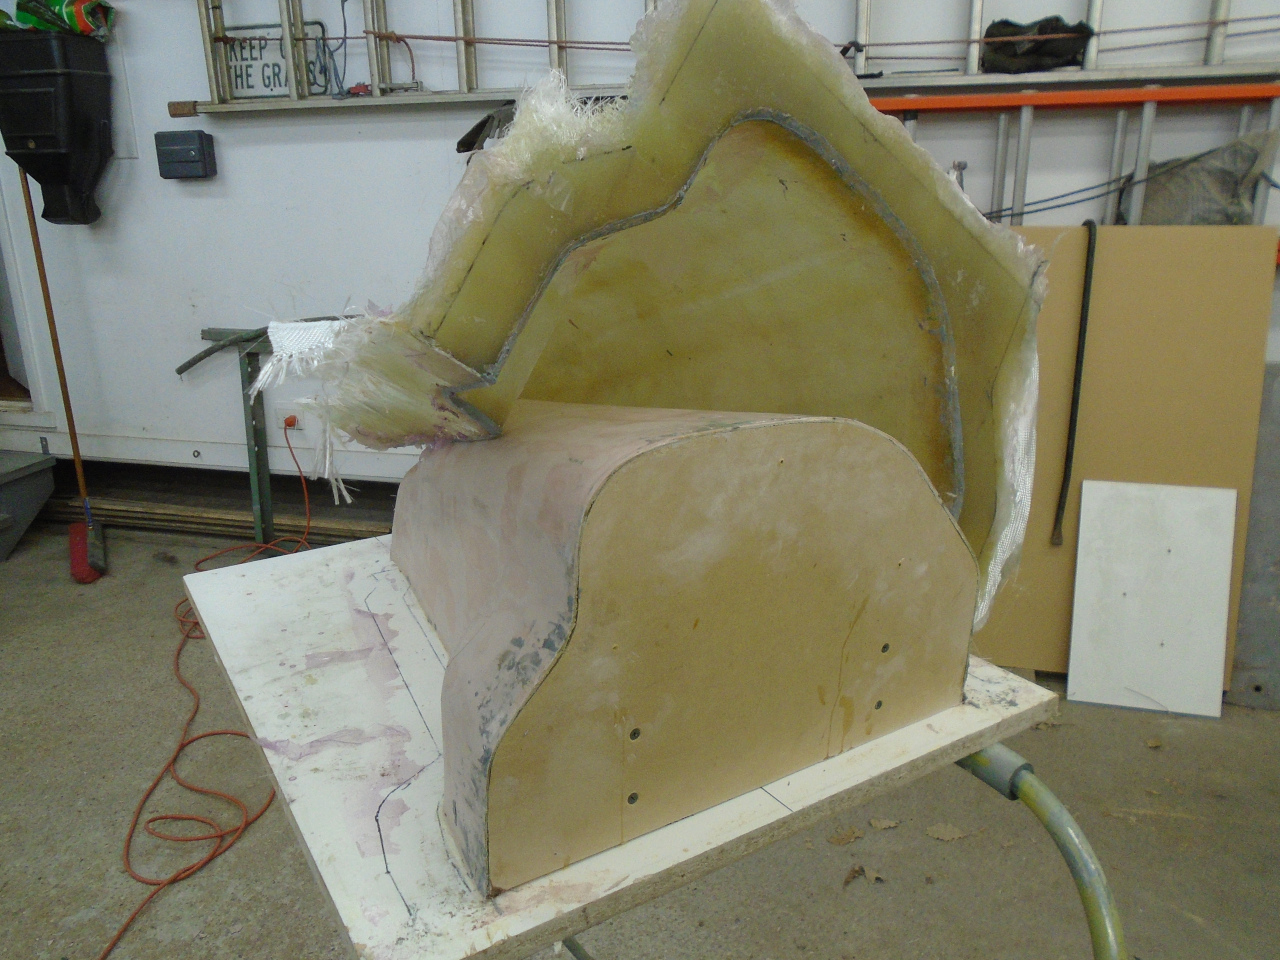
With the papier-mâché built up to about 1/8" thickness, the form was
pretty rigid. To give it a better surface finish, I applied a skim
coat of Bondo, then a few coats of wax as a release agent.

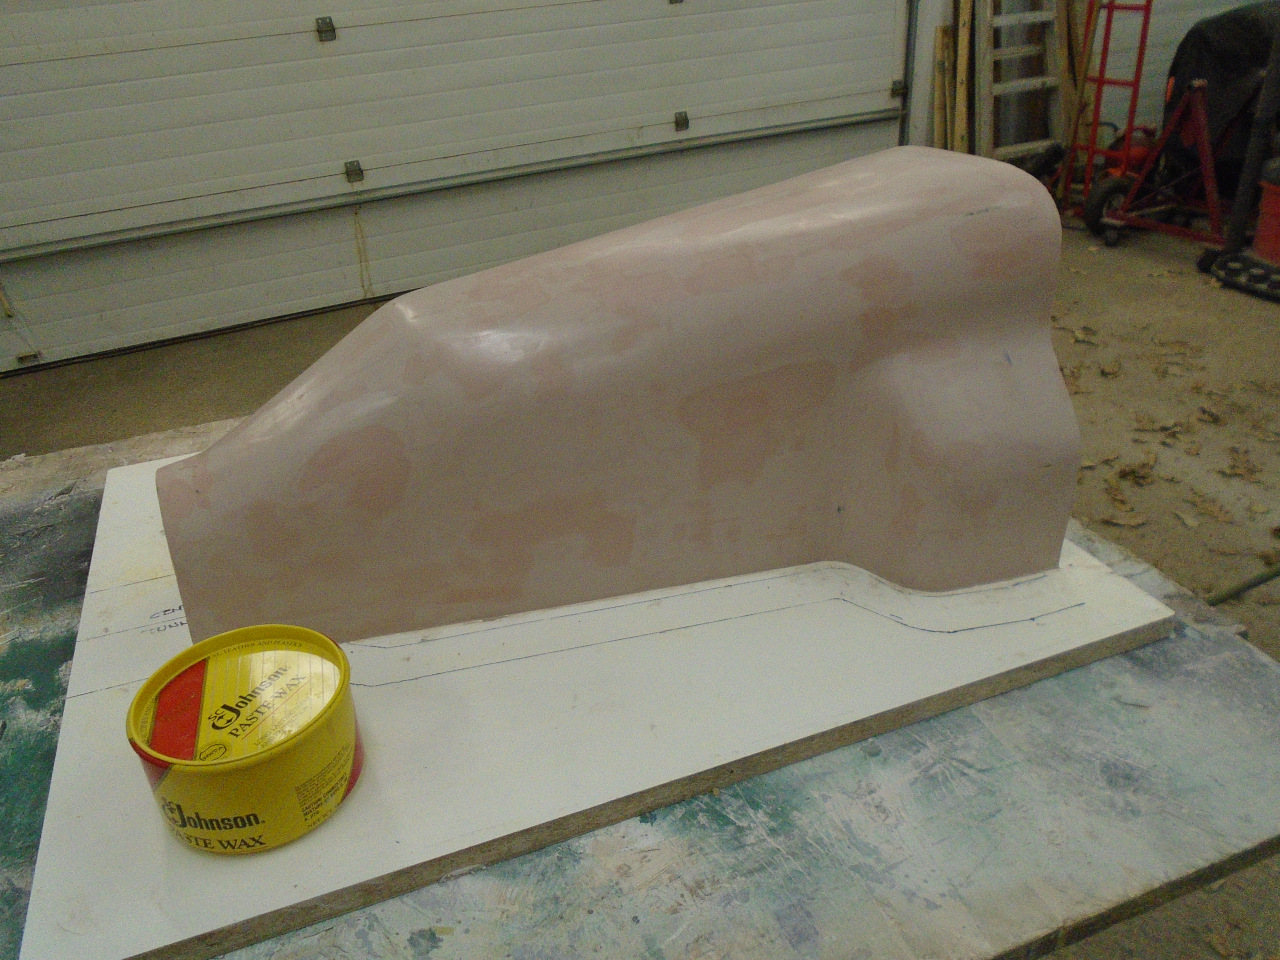
Then a melamine board at the front to form the front mounting flange on.
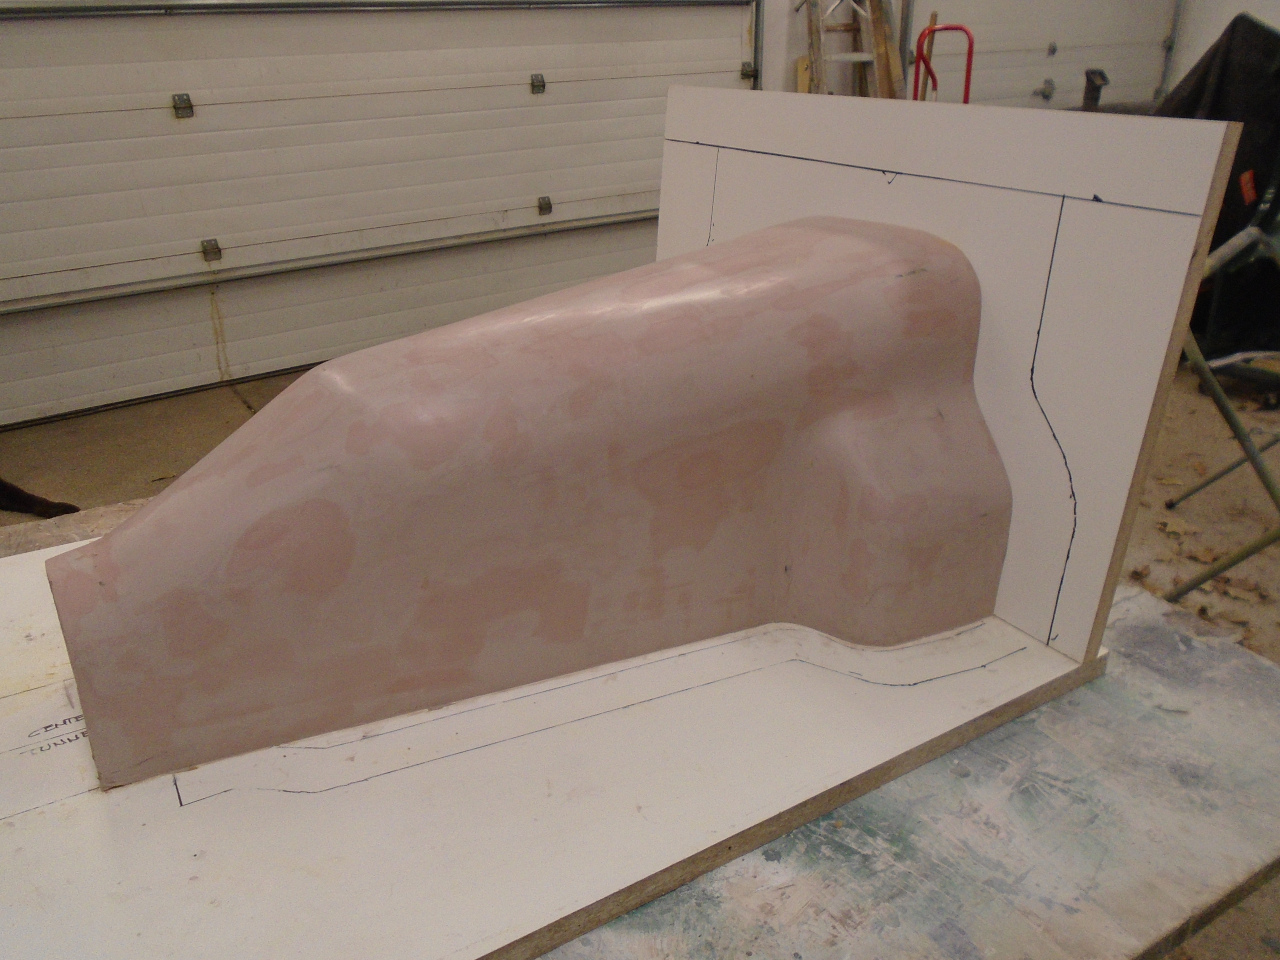
Then applied some clay in the corners to form a fillet. Then a
coat of a real release agent. The tunnel will be a lot more streamlined than the
original
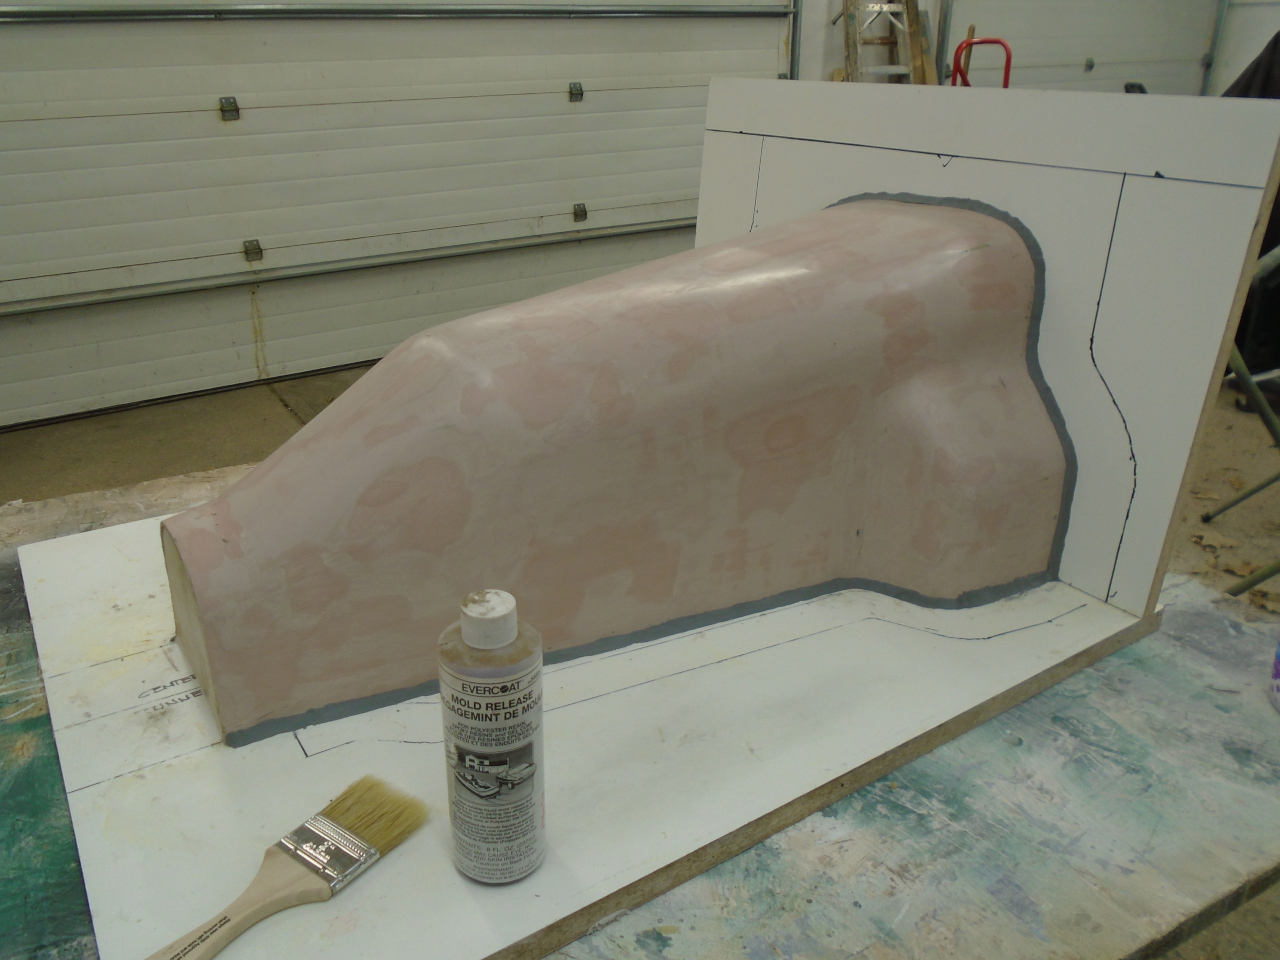
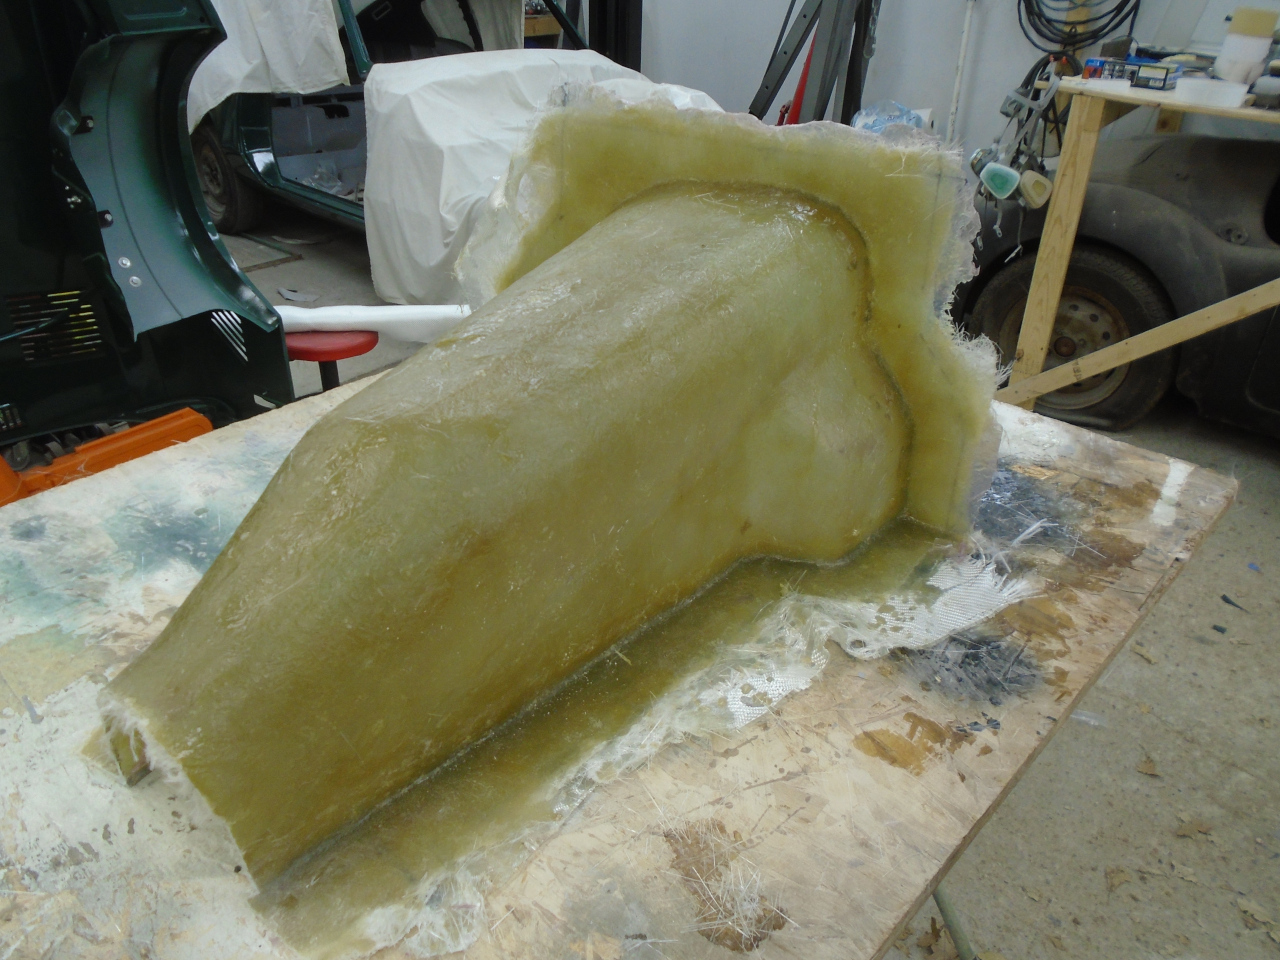
It was finally show time.

I applied a layer of fiberglass cloth first, followed by three or four layers of fiberglass mat.
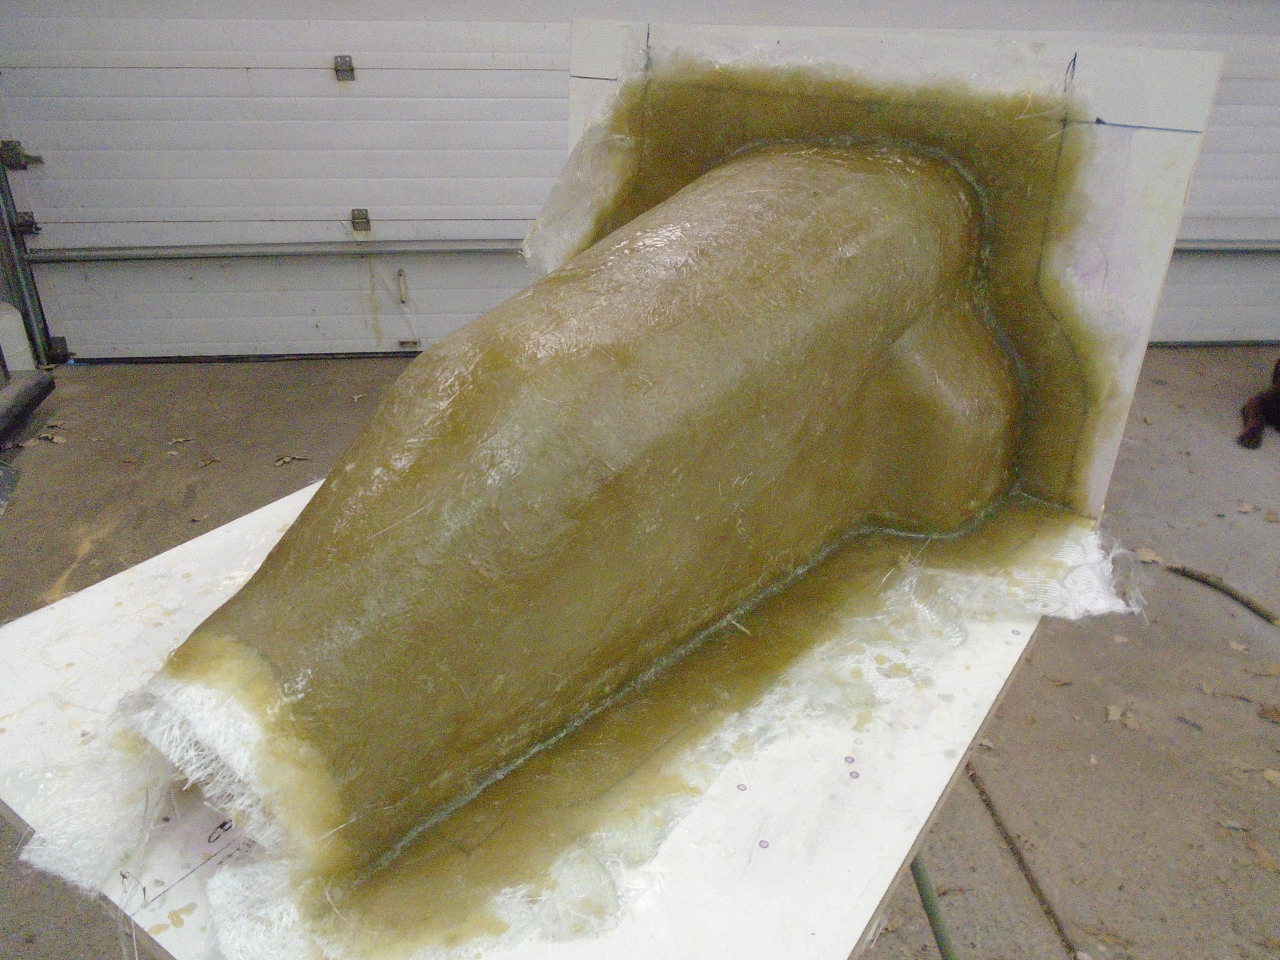
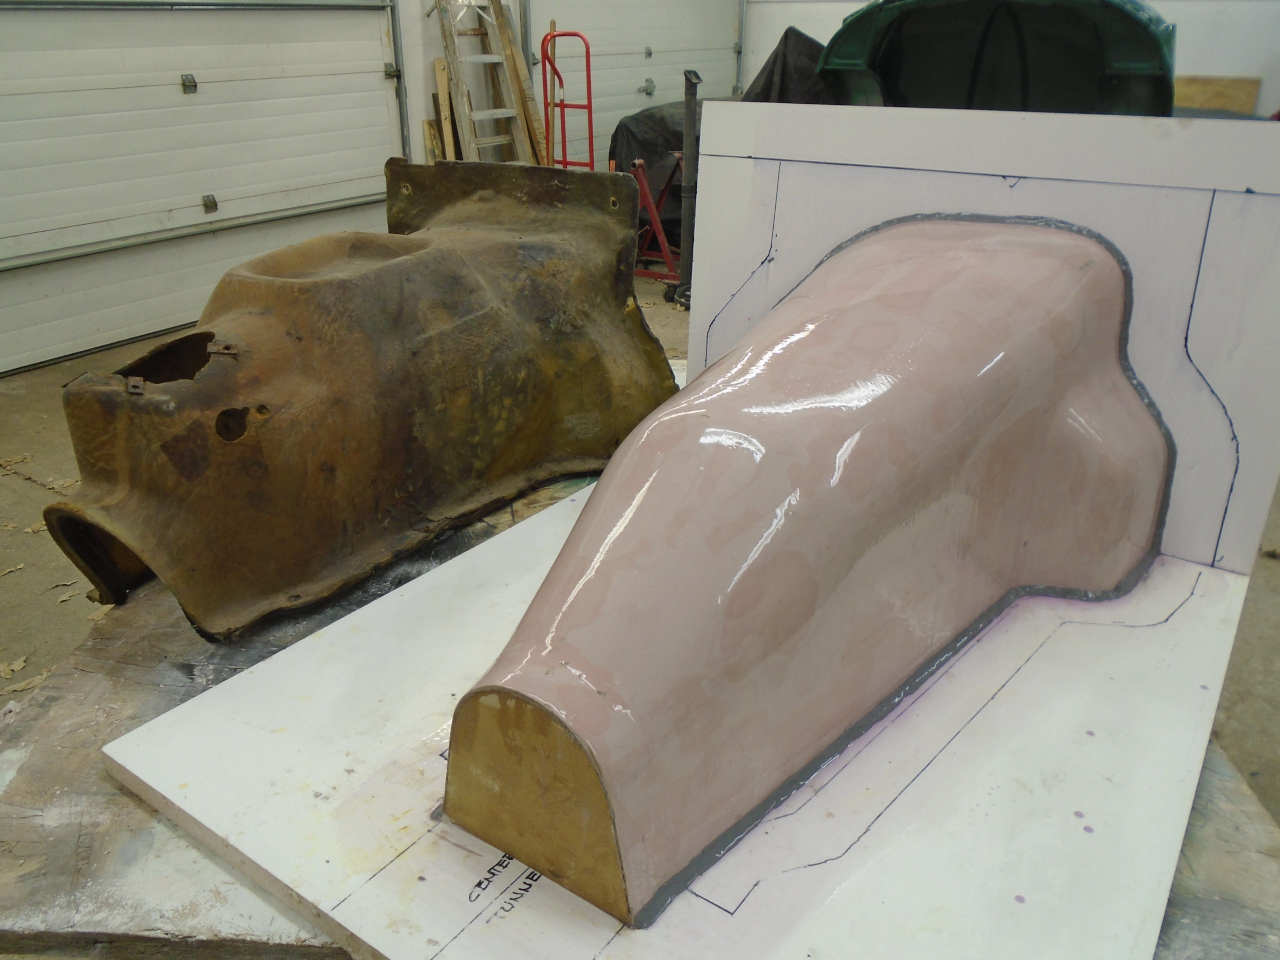
After curing over night, off came the front board...
...followed by half an hour of coaxing the piece off of the form.
Looking for major defects.
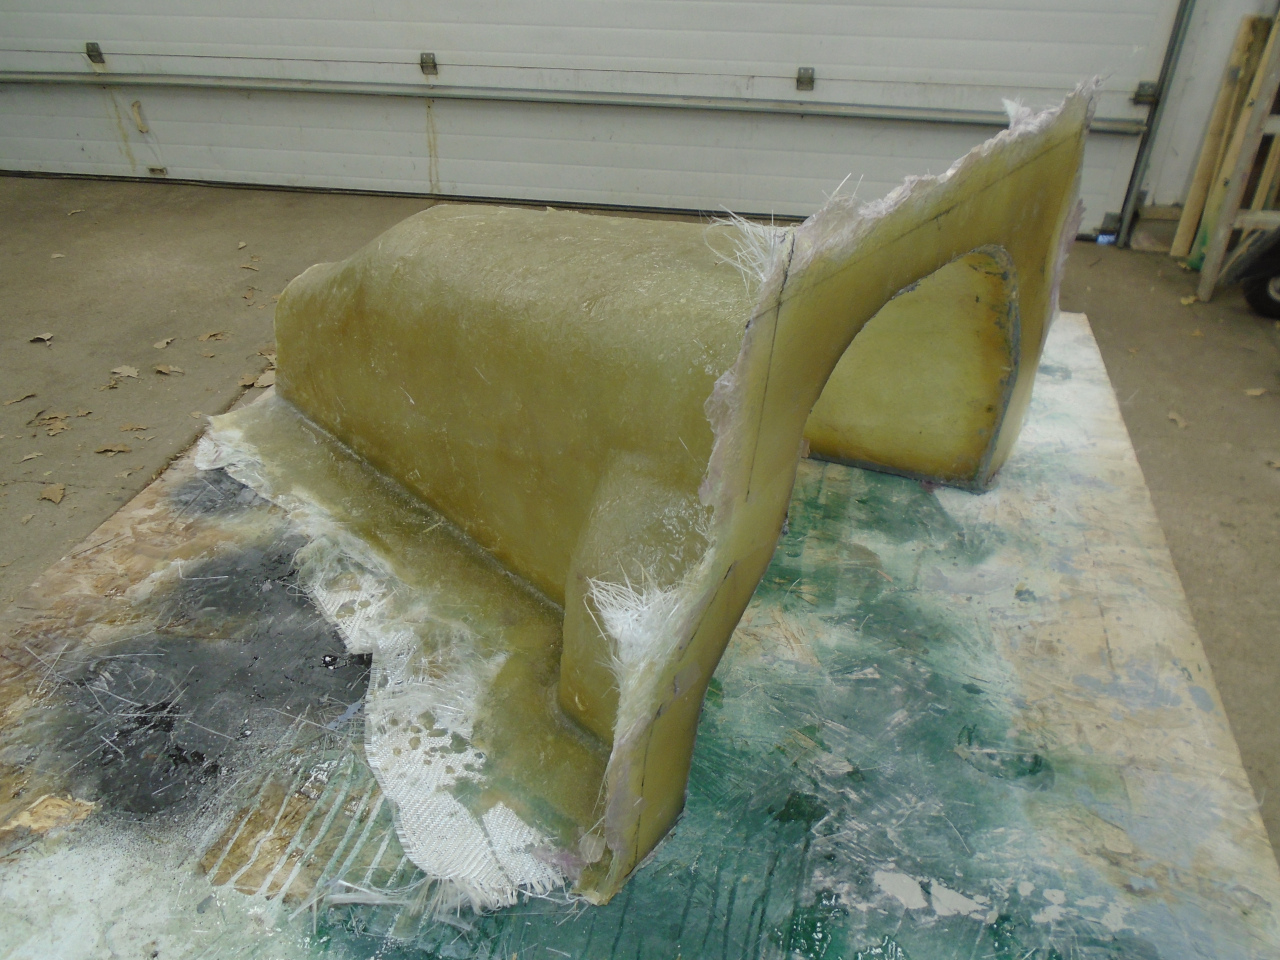
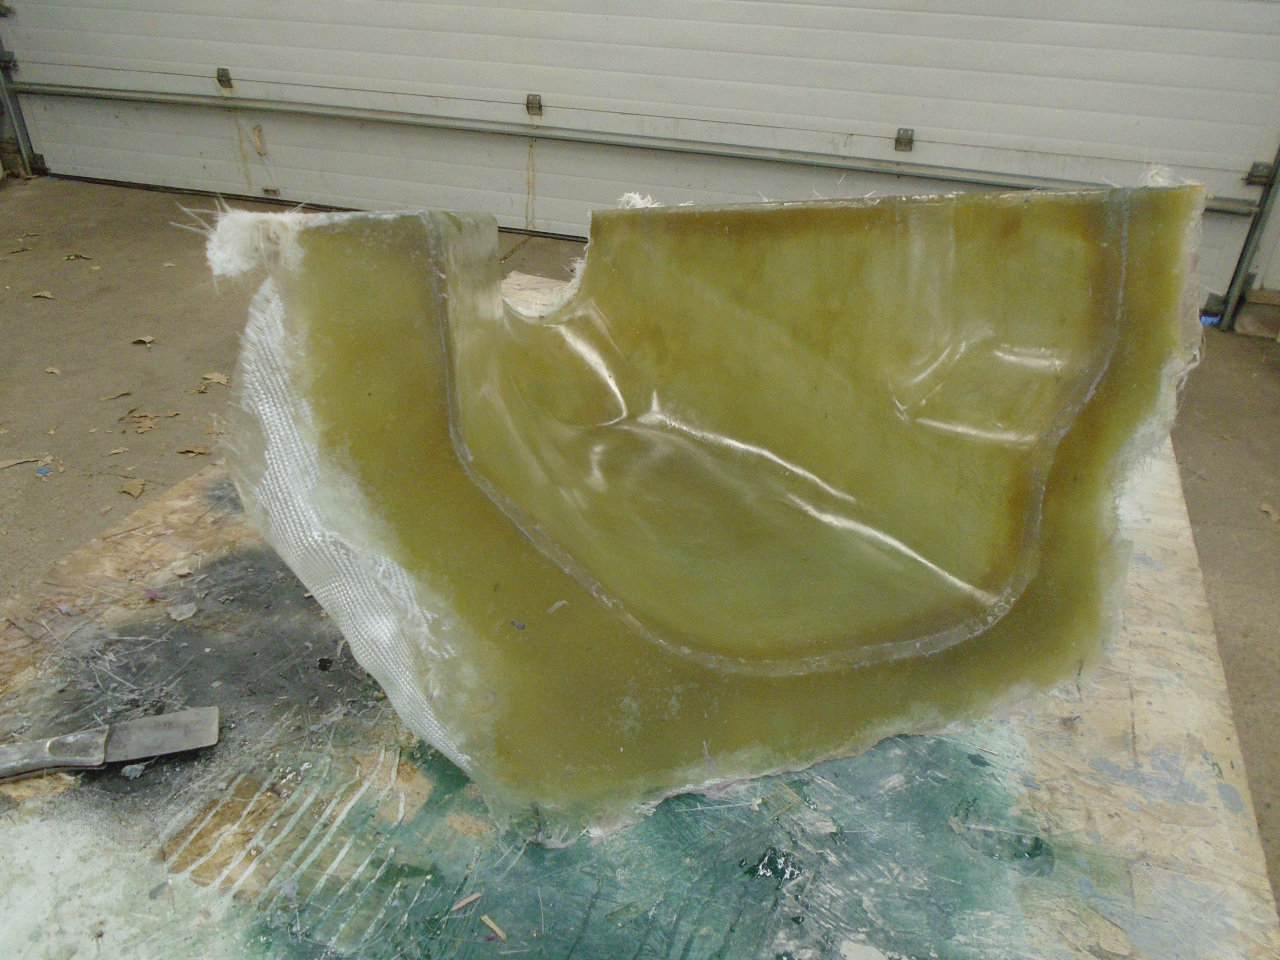
Preliminary trimming and sanity check.
To test fit the tunnel, I had to cut a hole for the shifter head. I
have a plan for the shifter surround and boot, but it's not fully
formed yet.
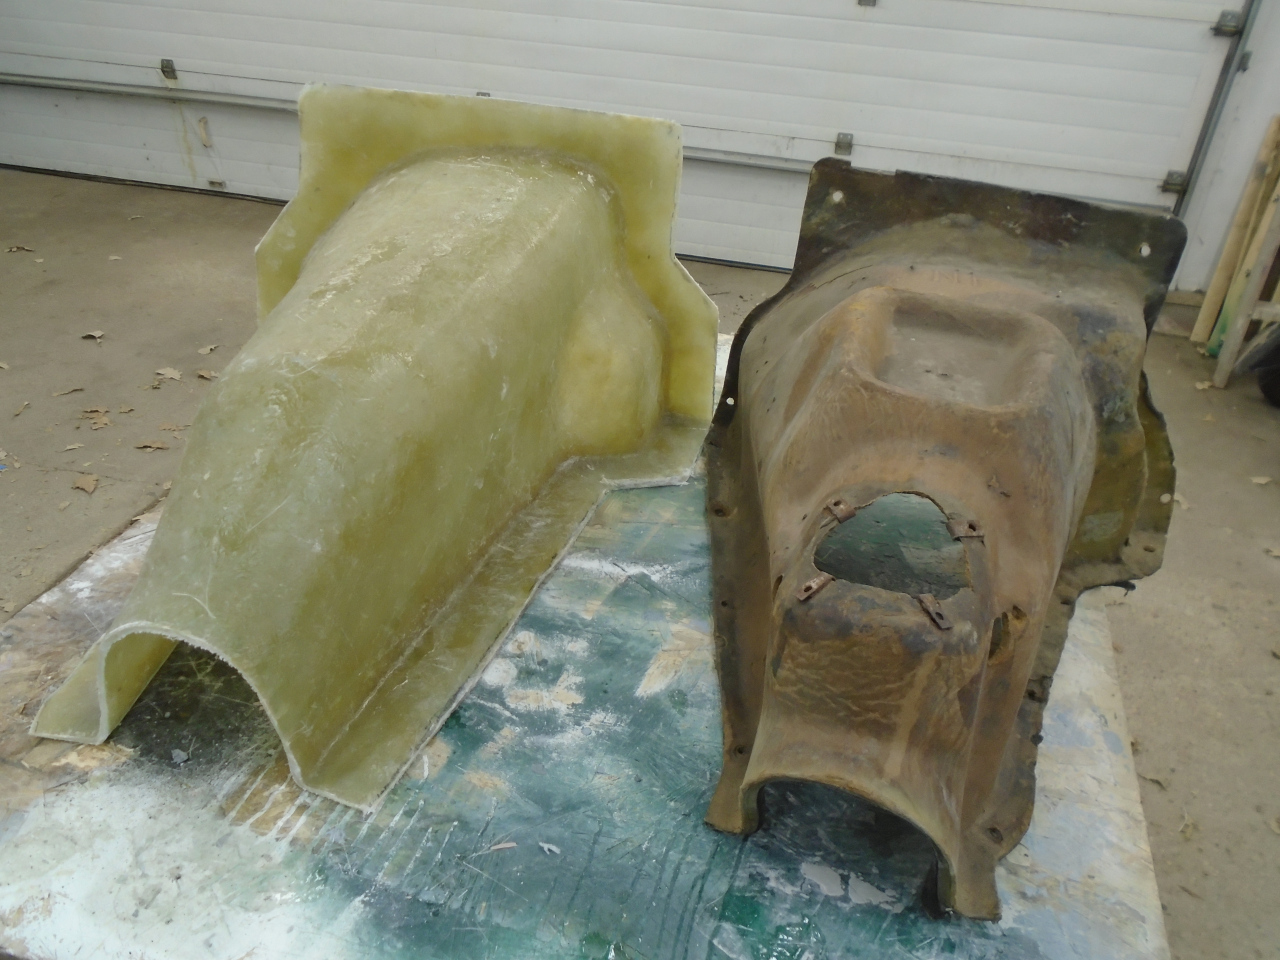
Final trimming.

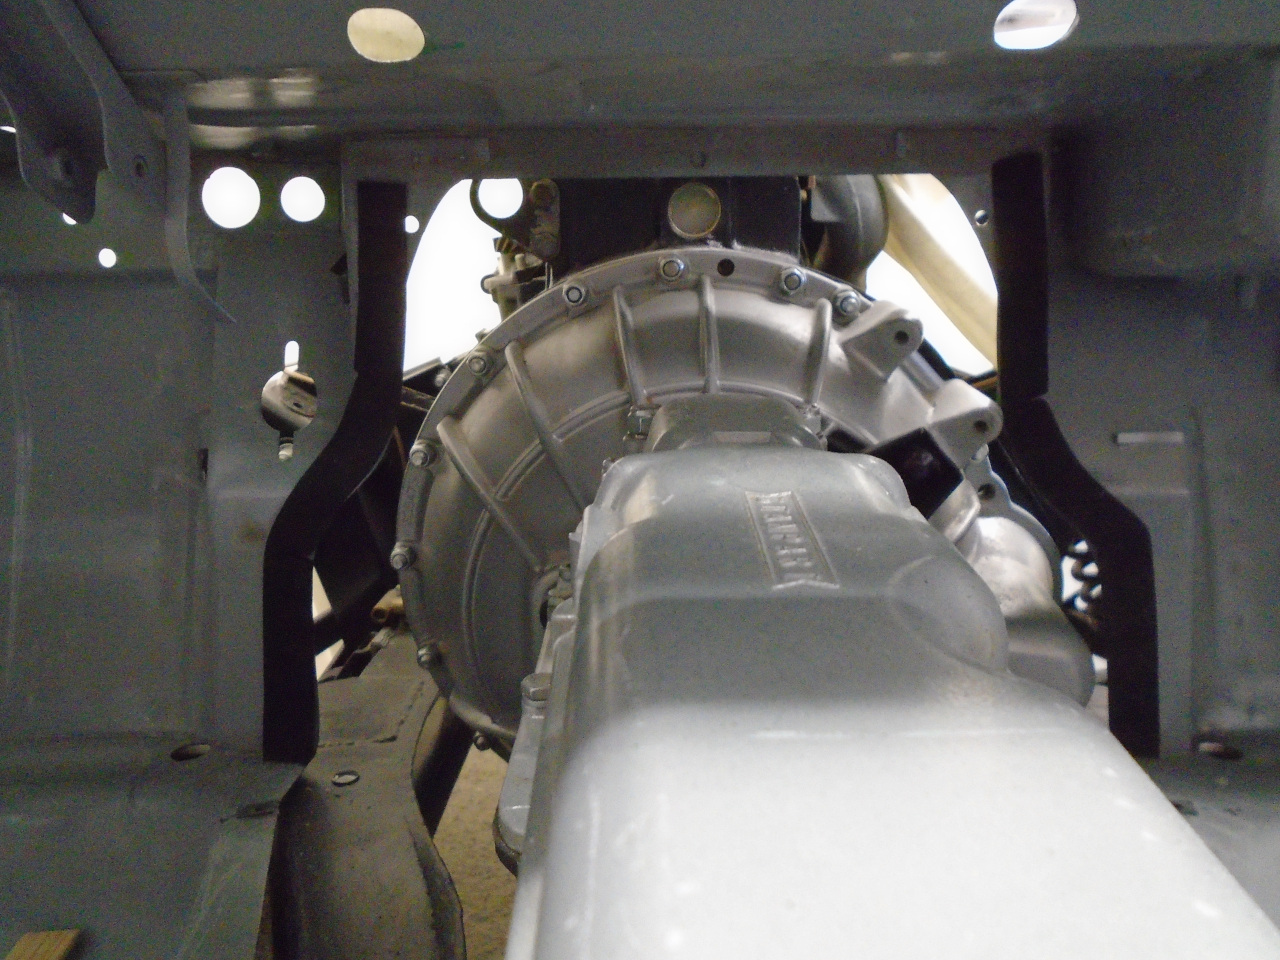
In the test fitting to the car, I discovered why it was so hard to
determine the floor-firewall angle. The mating flange on the
firewall was not flat. I doubt that this was intentional, but
there it was--there was at least a half inch gap between the front
tunnel flange and the firewall flange near the center, and essentially
zero at the top and bottom. The original cardboard tunnel
apparently had enough flex to accommodate the distortion, and maybe the
current offering of aftermarket ones do, too. But my new cover was
way too rigid to fit the curve.
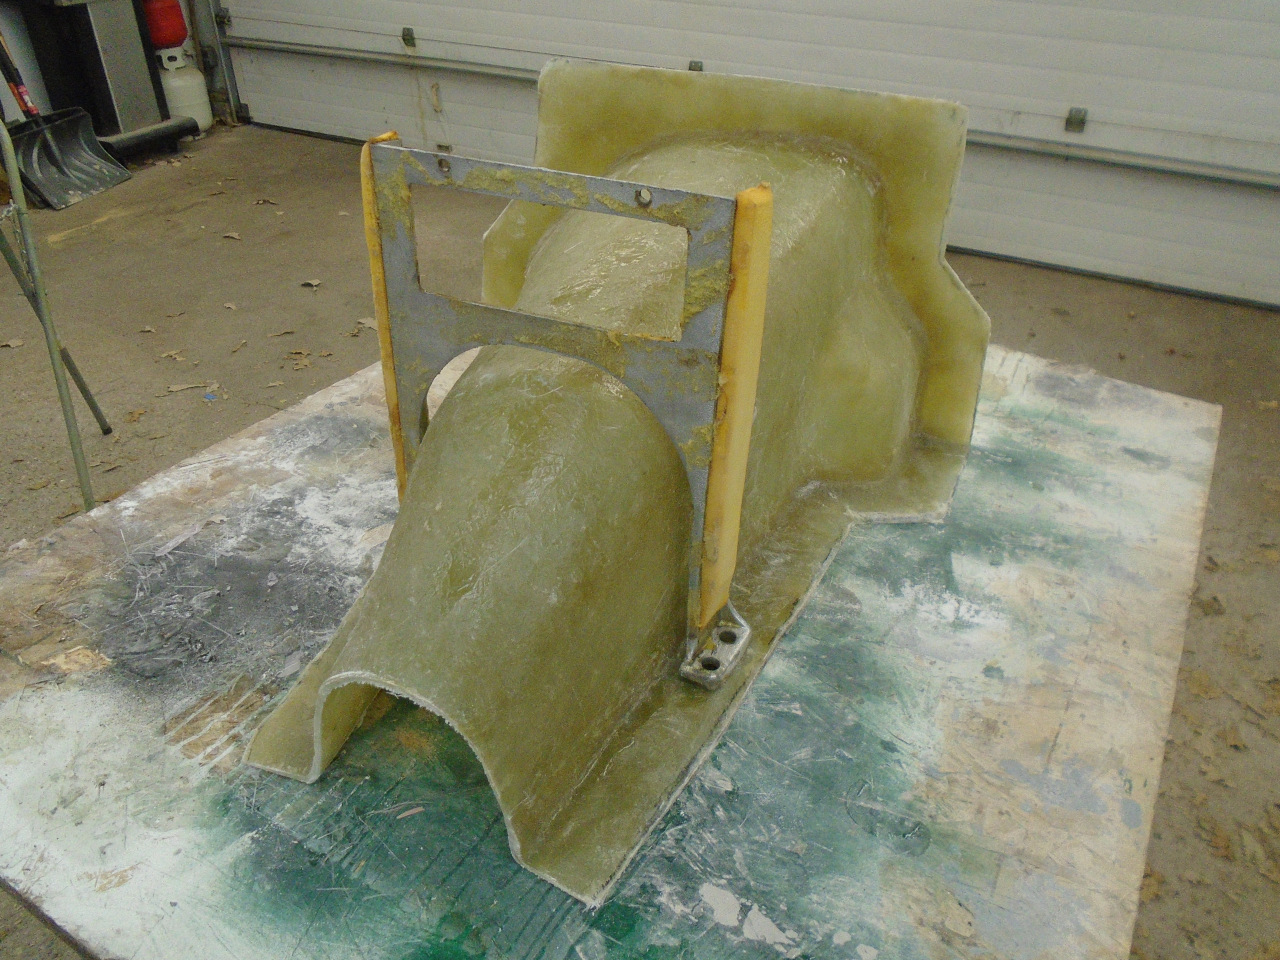
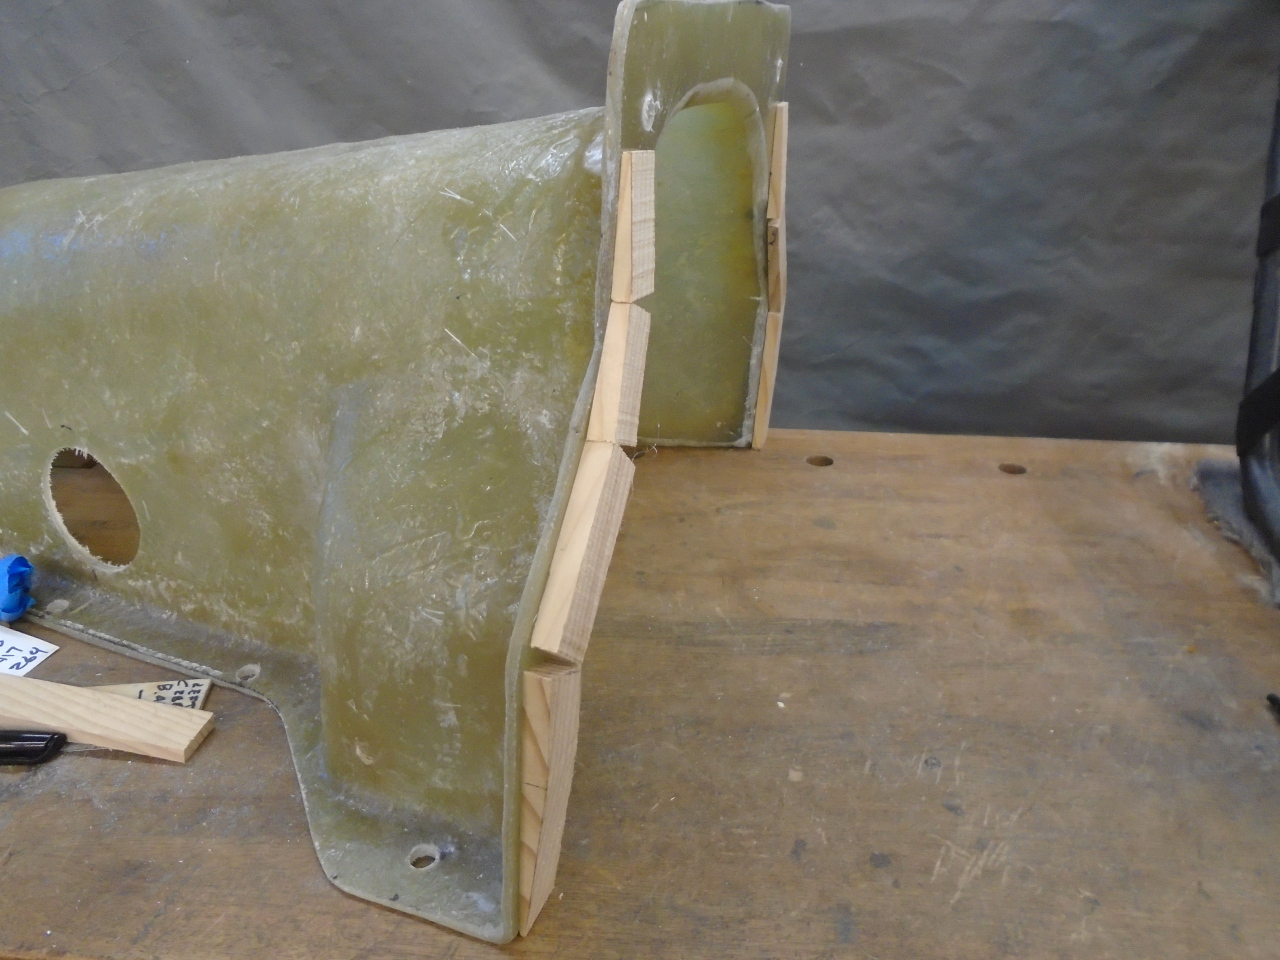
I measured the gap at various places and made up some temporary wood
shims to glue to the tunnel flange. With the shims, the fit was
way better. This shows the temporary shims:
So, now that I knew the shape of the gaps, I made some permanent shims
form some pretty stiff closed cell foam. It cut very well on a
bandsaw.
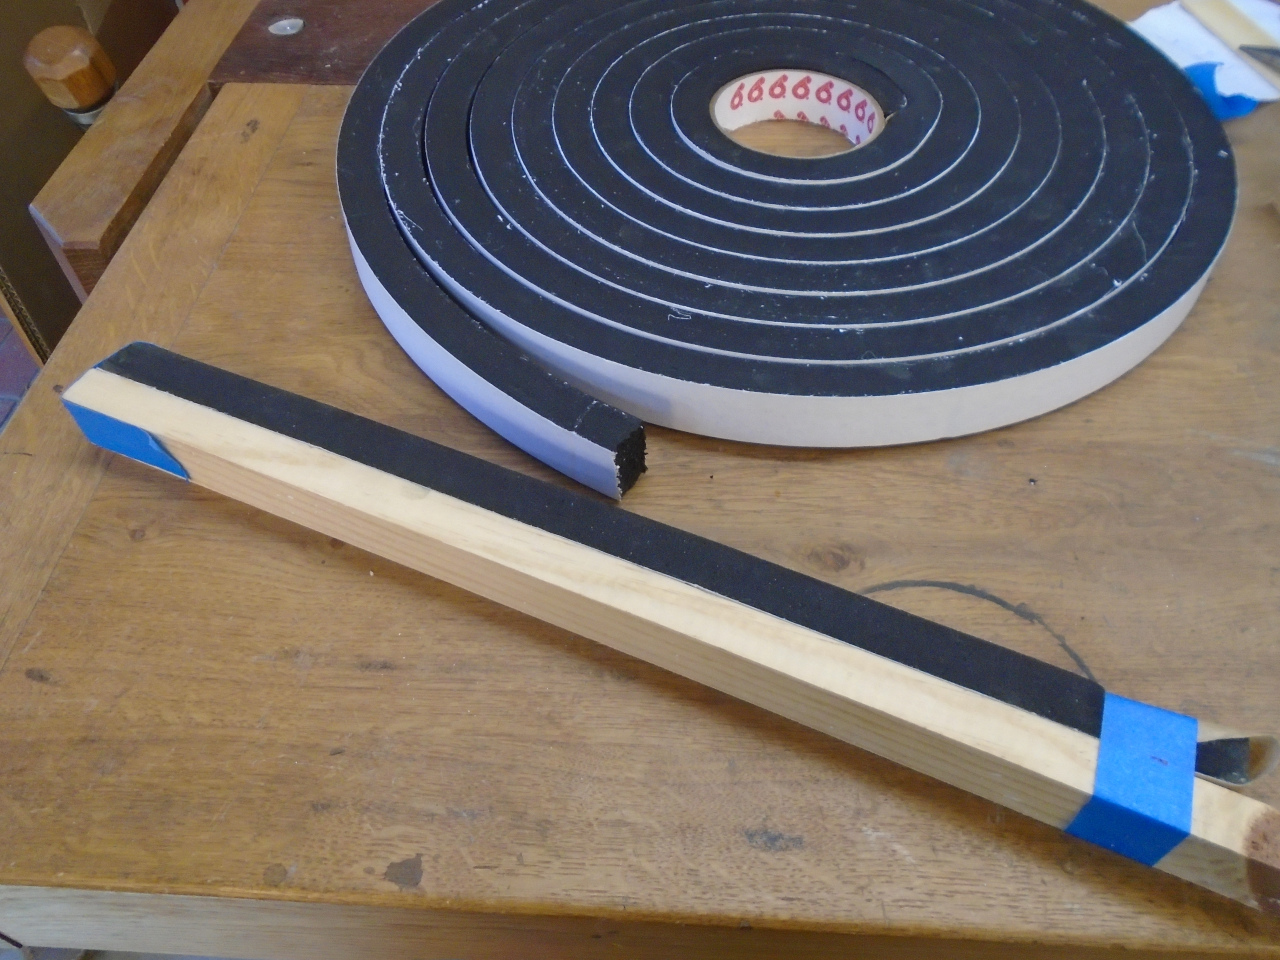
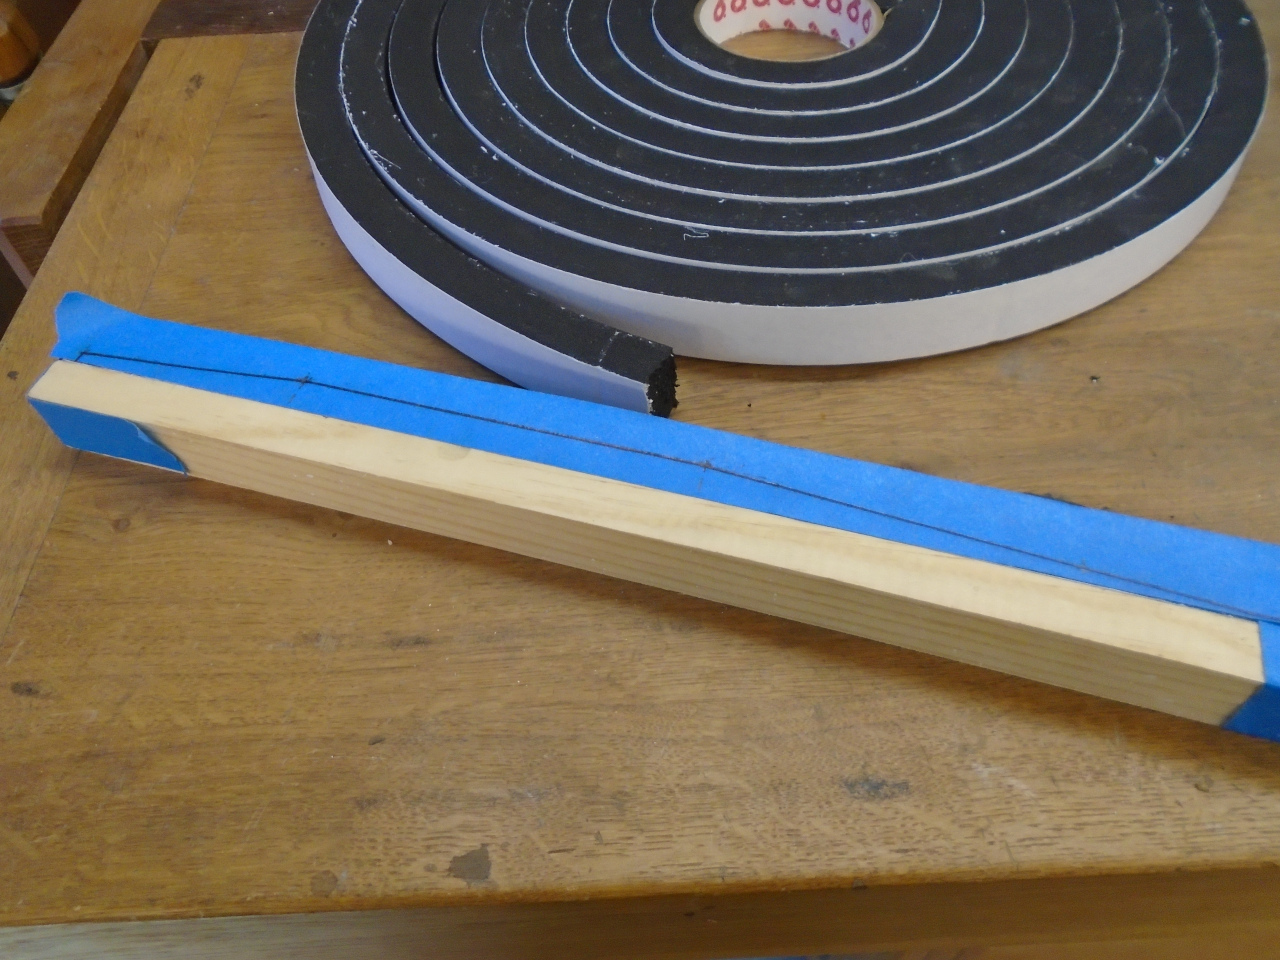
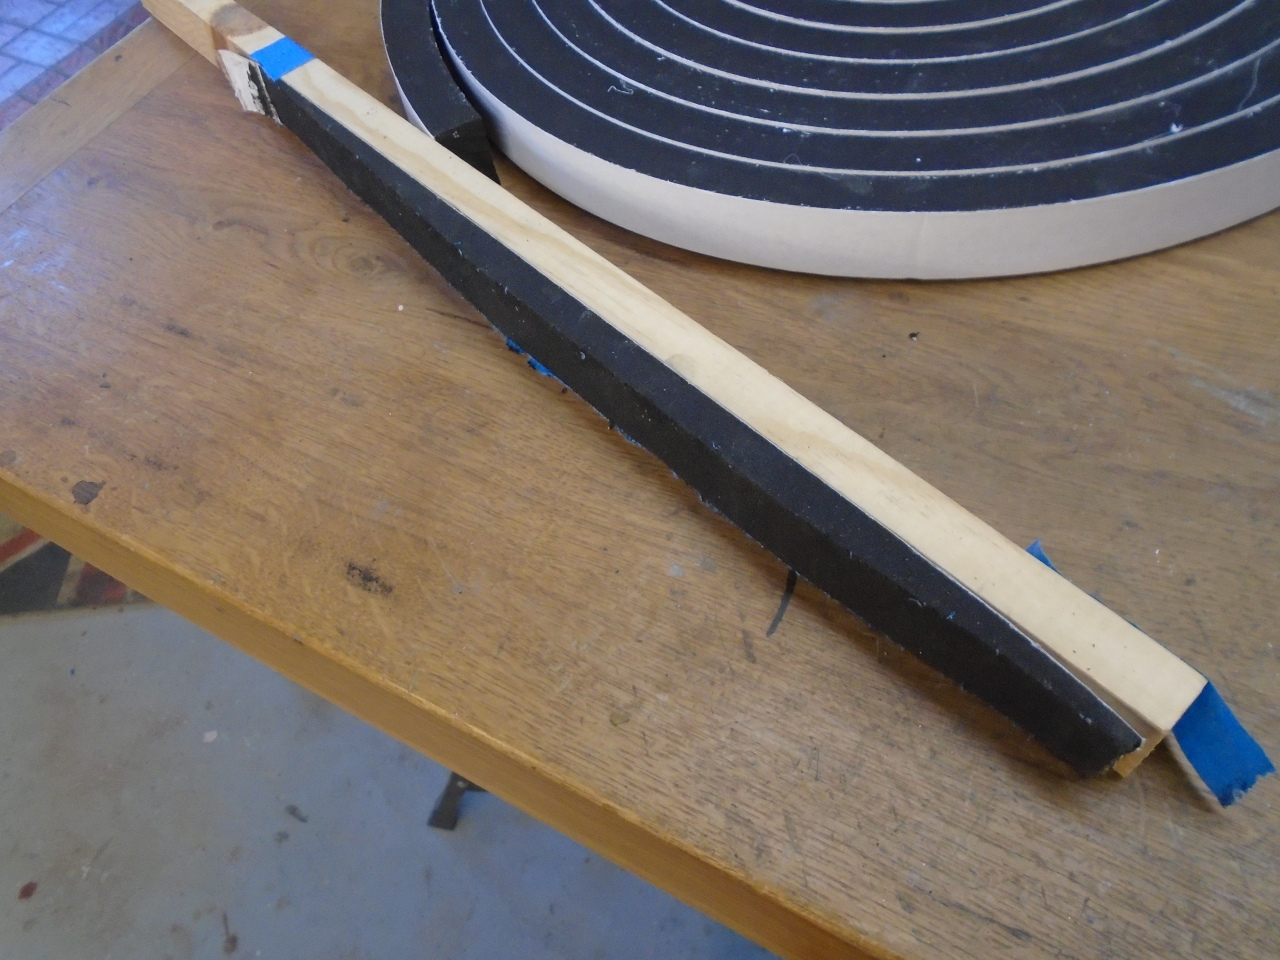
And glued them in place. There was now a pretty flat surface to match the front face of the tunnel.
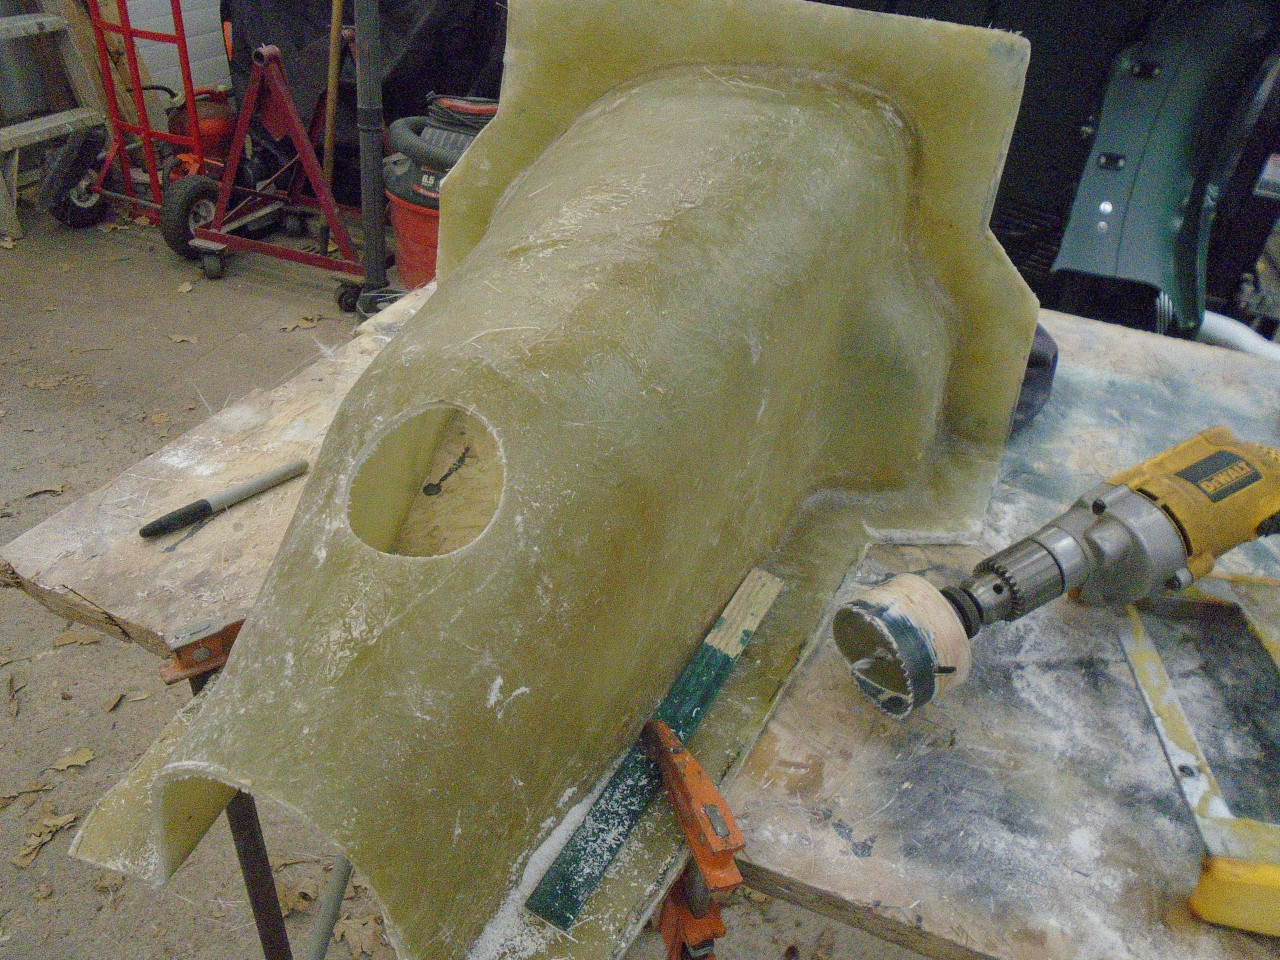
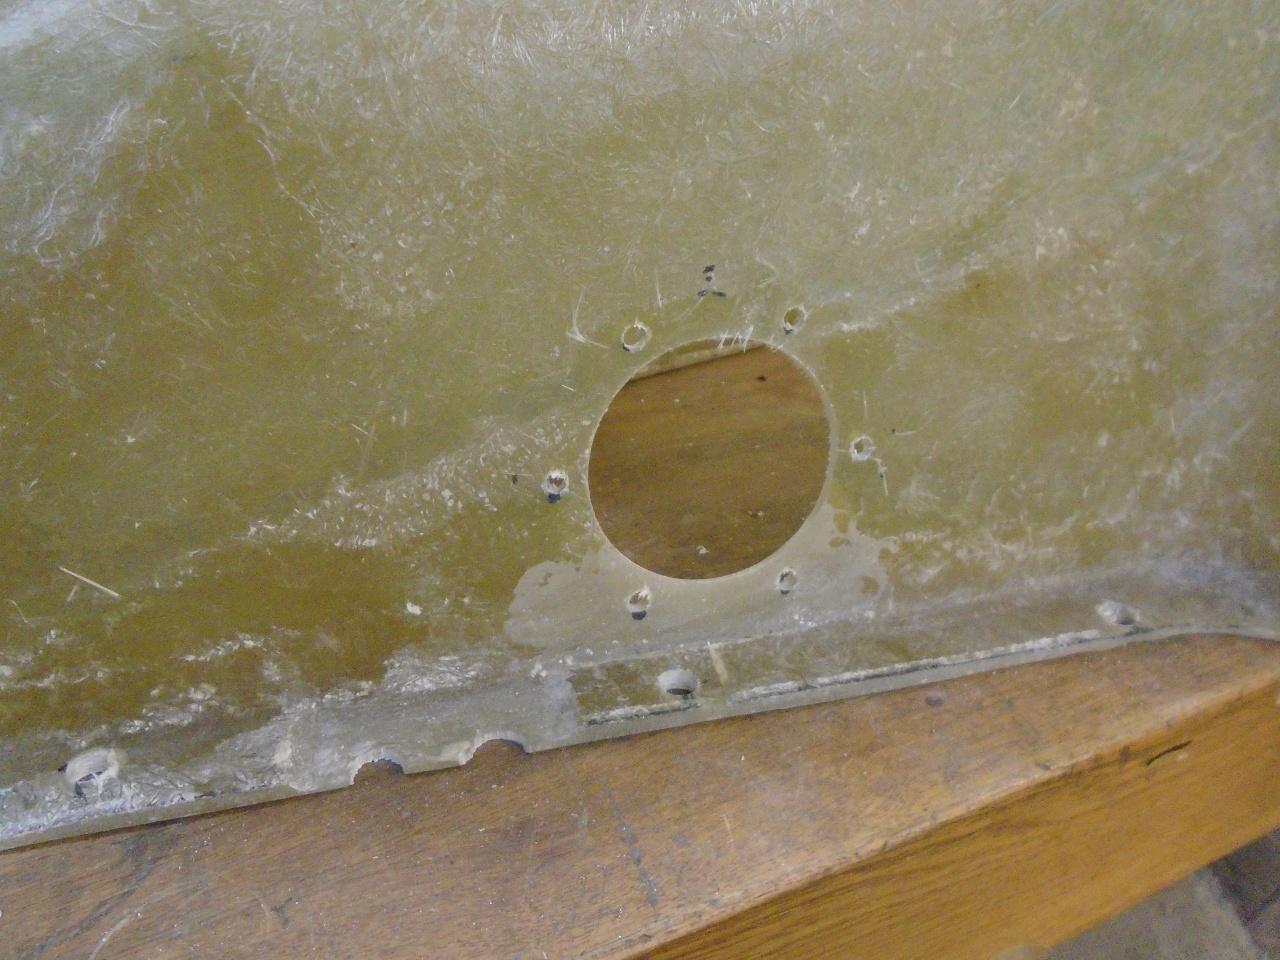
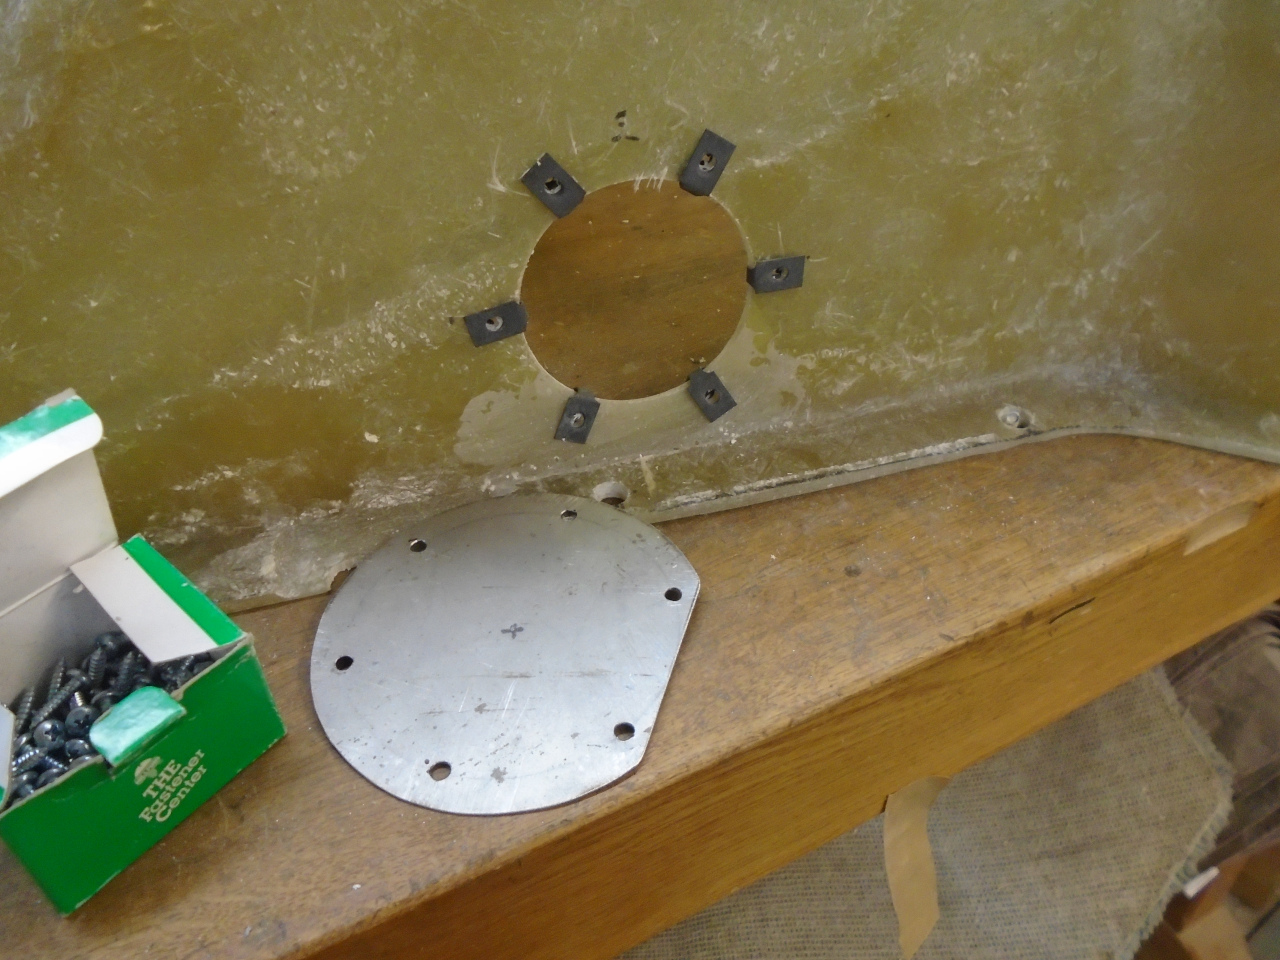
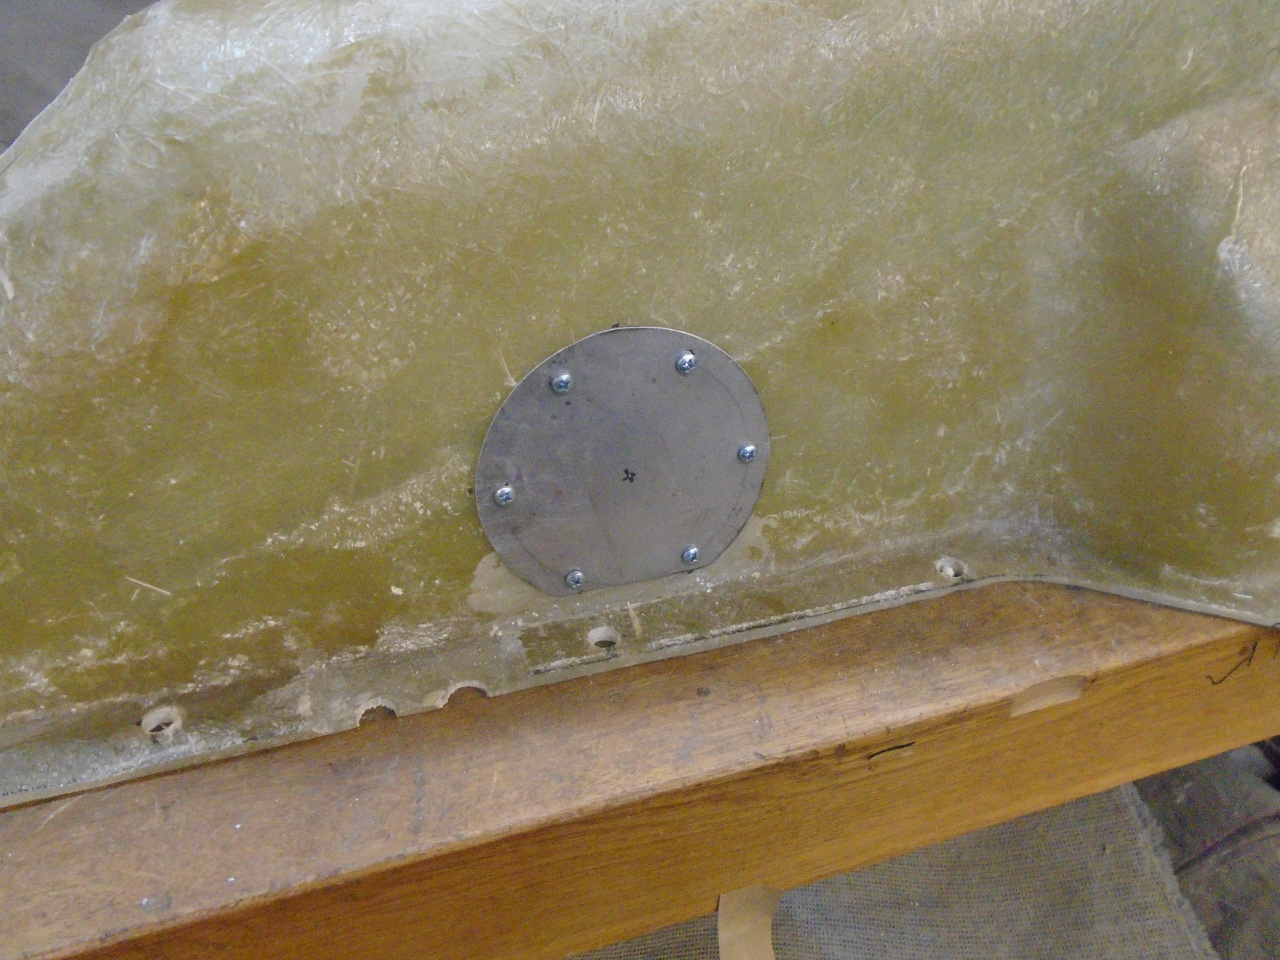
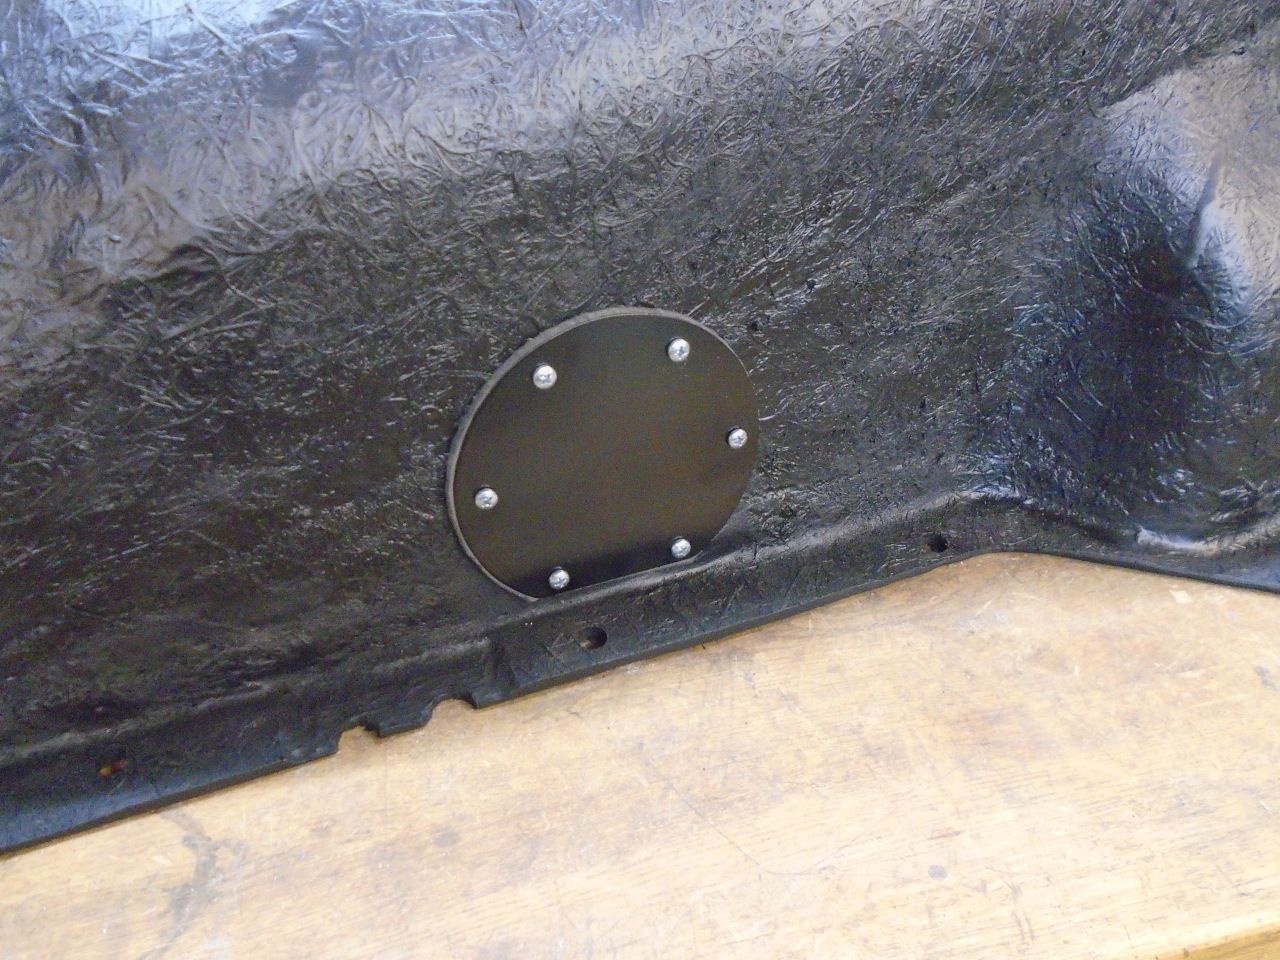
It was at about this point that I stopped to consider if there should be
any access ports in the tunnel. The only thing that seemed
worthwhile was a port to access the speedometer cable connection.
That looked like it would be pretty difficult from below. So I cut
a 3 inch hole at about the right place, and made a metal cover for it.
Then came the question of whether to put anything on the underside of
the tunnel for acoustic or thermal insulation. The factory
provided a plastic pouch filled with some kind of loose fibrous
material, which probably reduced sound and heat ingress to the cabin to
some extent.
Many people apply CLD sheets (i.e. Dynamat or similar) to their
tunnels. A simple "thump test" suggested that mine was already
pretty dead acoustically, so that approach didn't seem to offer much
benefit, plus those mats don't have much thermal insulating value.
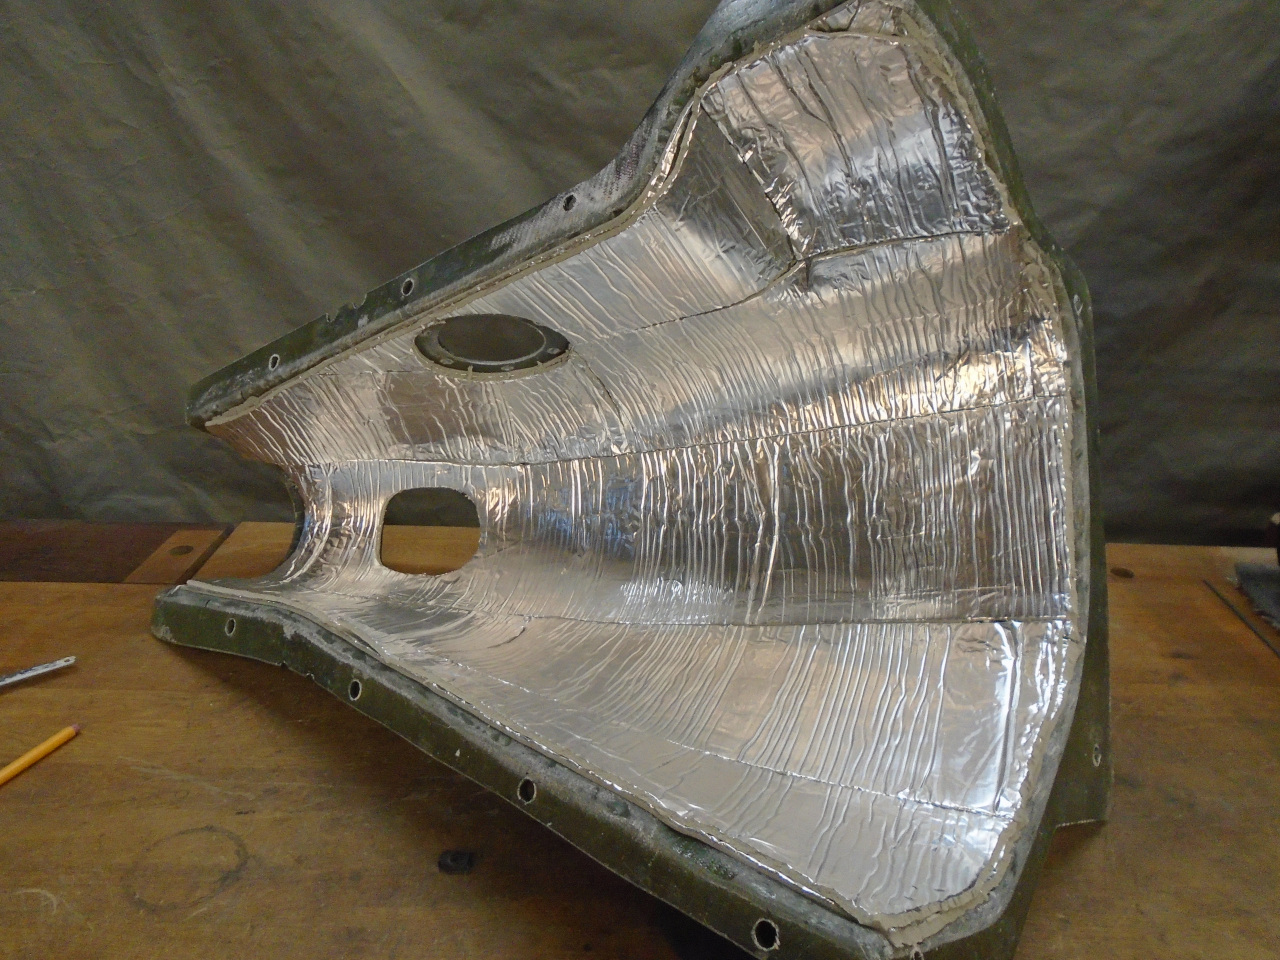
I ended up using a foam duct insulating material. The tunnel could
be thought of as a duct, so it seemed appropriate. The stuff I
chose has an advertised R value of 3.0, which is misleading. This
is certainly a "per inch" value, so the actual R value of each 0.140"
layer would be more like 0.42. I applied two layers to give an R
value of the insulation of about 0.85. That doesn't sound like
much until you realize that the R value of the fiberglass tunnel
material itself is only about 0.45, so by adding the insulation, I am
almost tripling the R value, meaning that it will cut heat conduction by
two thirds. The shiny metallic surface will also cut radiation
heat transfer.
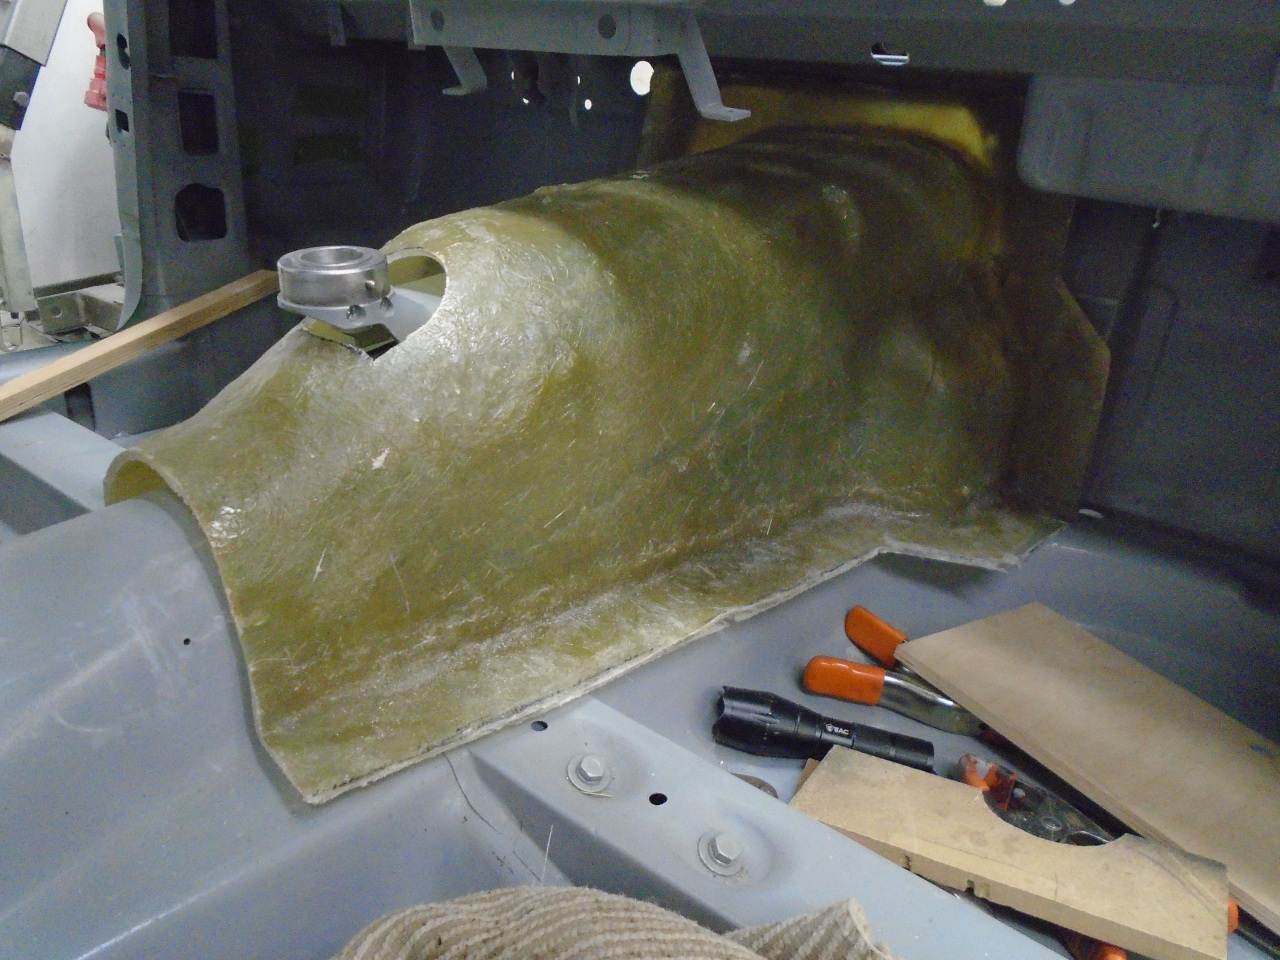
A little paint for aesthetics, powder coat the port cover and make a gasket, and we are ready for install.
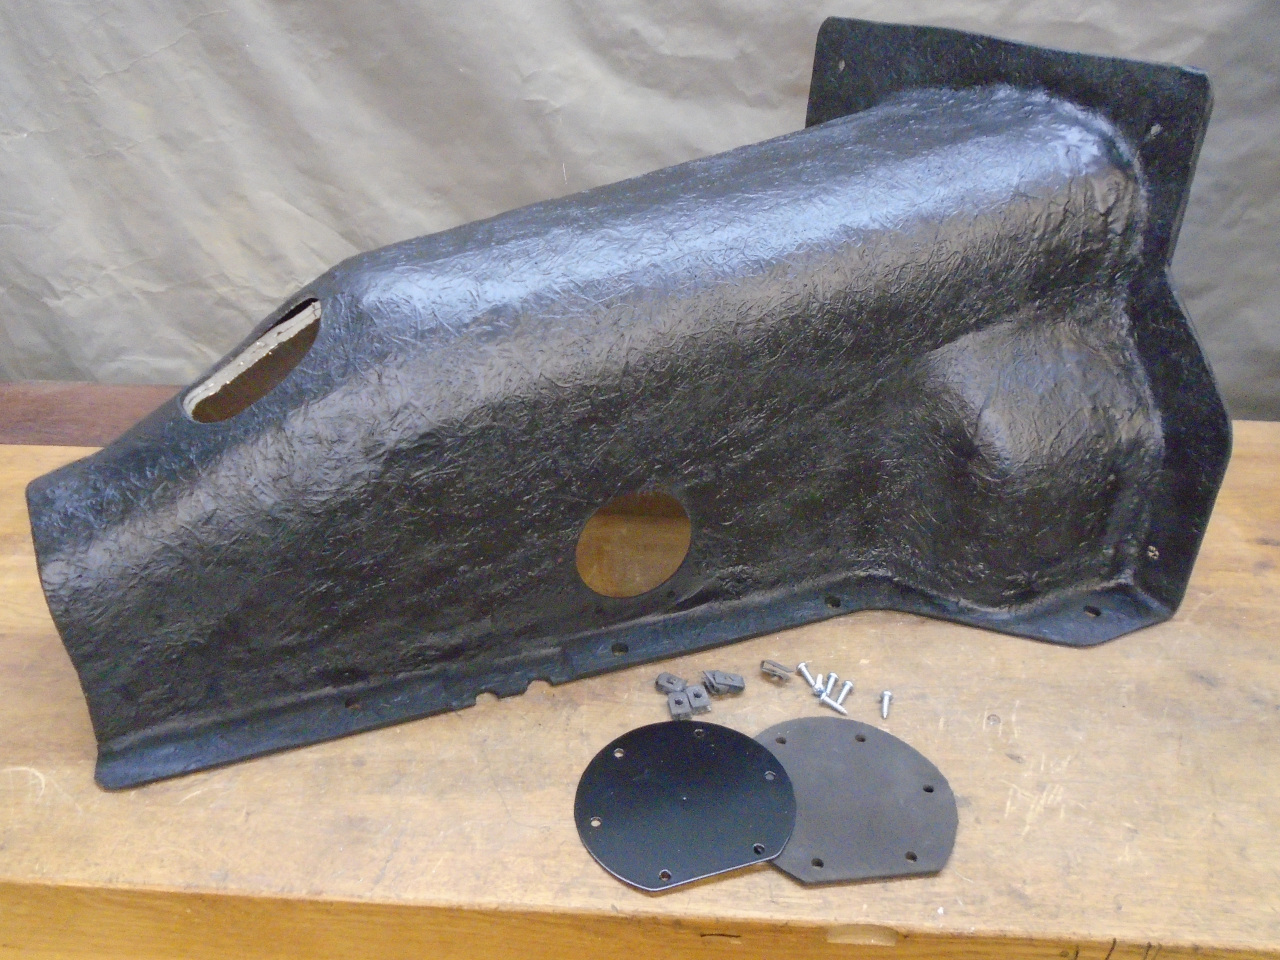
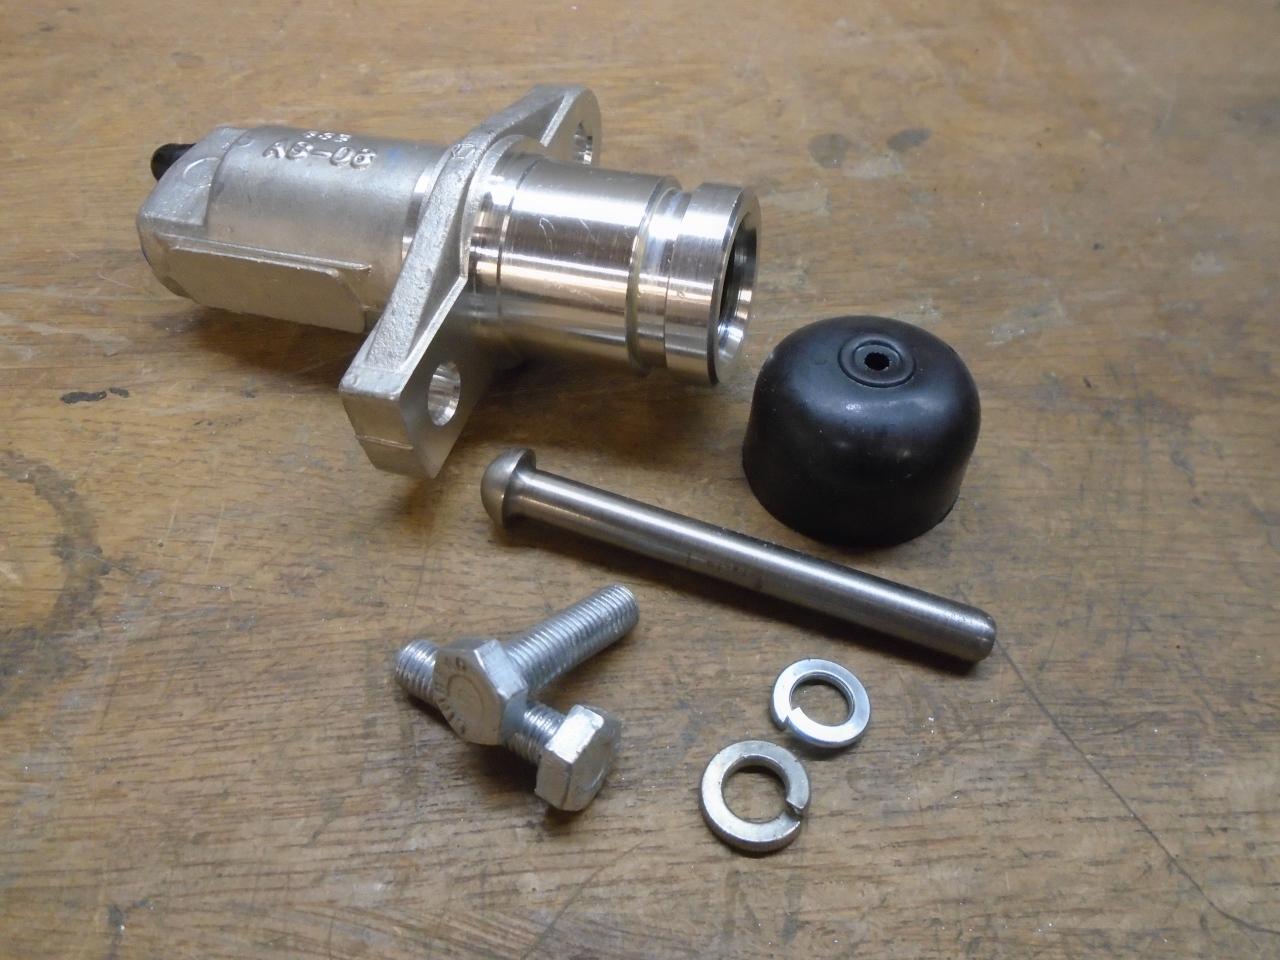
But it seemed like a good idea to install the new clutch slave first.
I got a replacement seal for the perimeter of the tunnel, put it on, and
shoved the tunnel home. All the screws finally found their
speednuts, and everything seems tight.
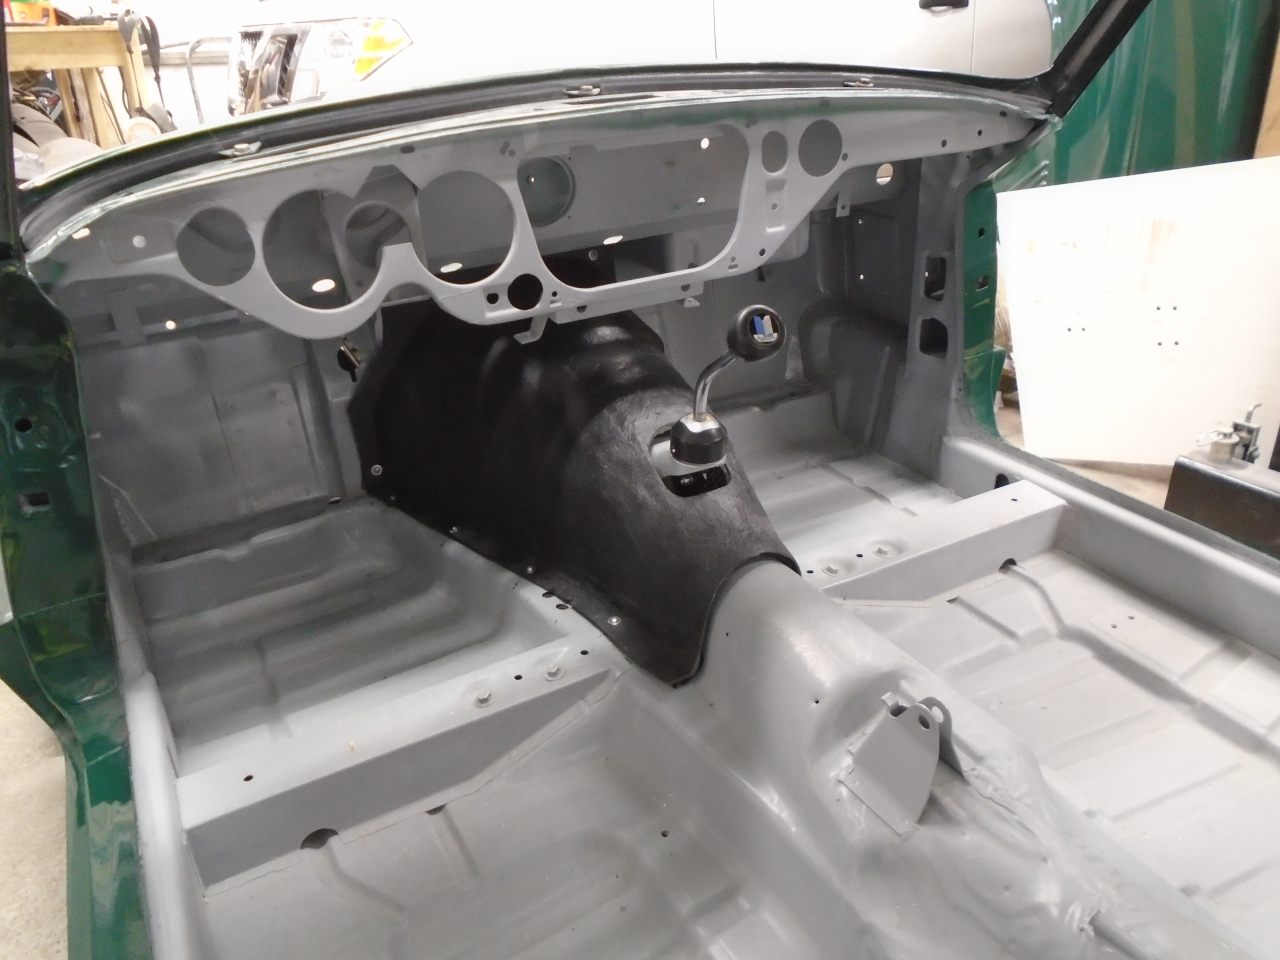
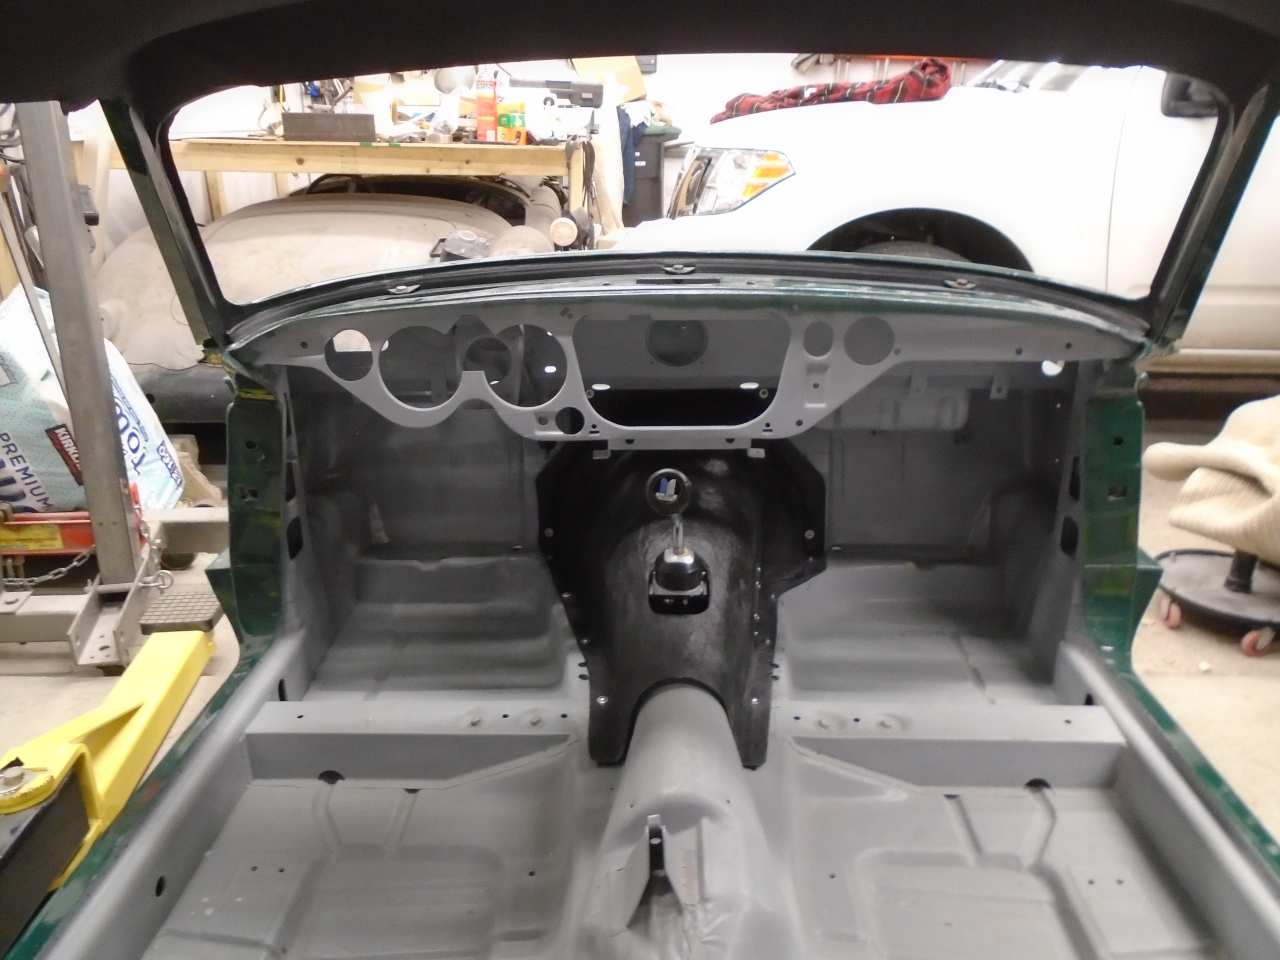
I really like the leaner look, and even though it will eventually be out
of sight, it gives quite a bit more room to maneuver under the
dash. I'm sure it's strong enough to stand on (if I could stand up
in the car).
I had several motivations for doing this project, but saving money was
obviously not not one of them. The mat, fabric, and almost three
quarts of resin all added up to more than what I could buy a commercial
replacement for. But the experience? Priceless.
Comments to Ed at elhollin1@yahoo.com
To my other GT6 pages