There aren't too many things on these old cars that scare me, but one of
the things that does still scare me is any kind of upholstery.
I've done a little of it, but always with the feeling that I was just
about in over my head. I try to face my fears though, and press on
with the spirit of the project, which is to try to do as much as
possible myself. Repeating the mantra "How hard can it be?" over
and over gives me a (sometimes false) sense of confidence.
I decided to begin the interior work with the headliner. Reading
forum posts by people who have attempted it didn't help my morale
level at all. Many reported that it was a difficult and frustrating job to get
right.
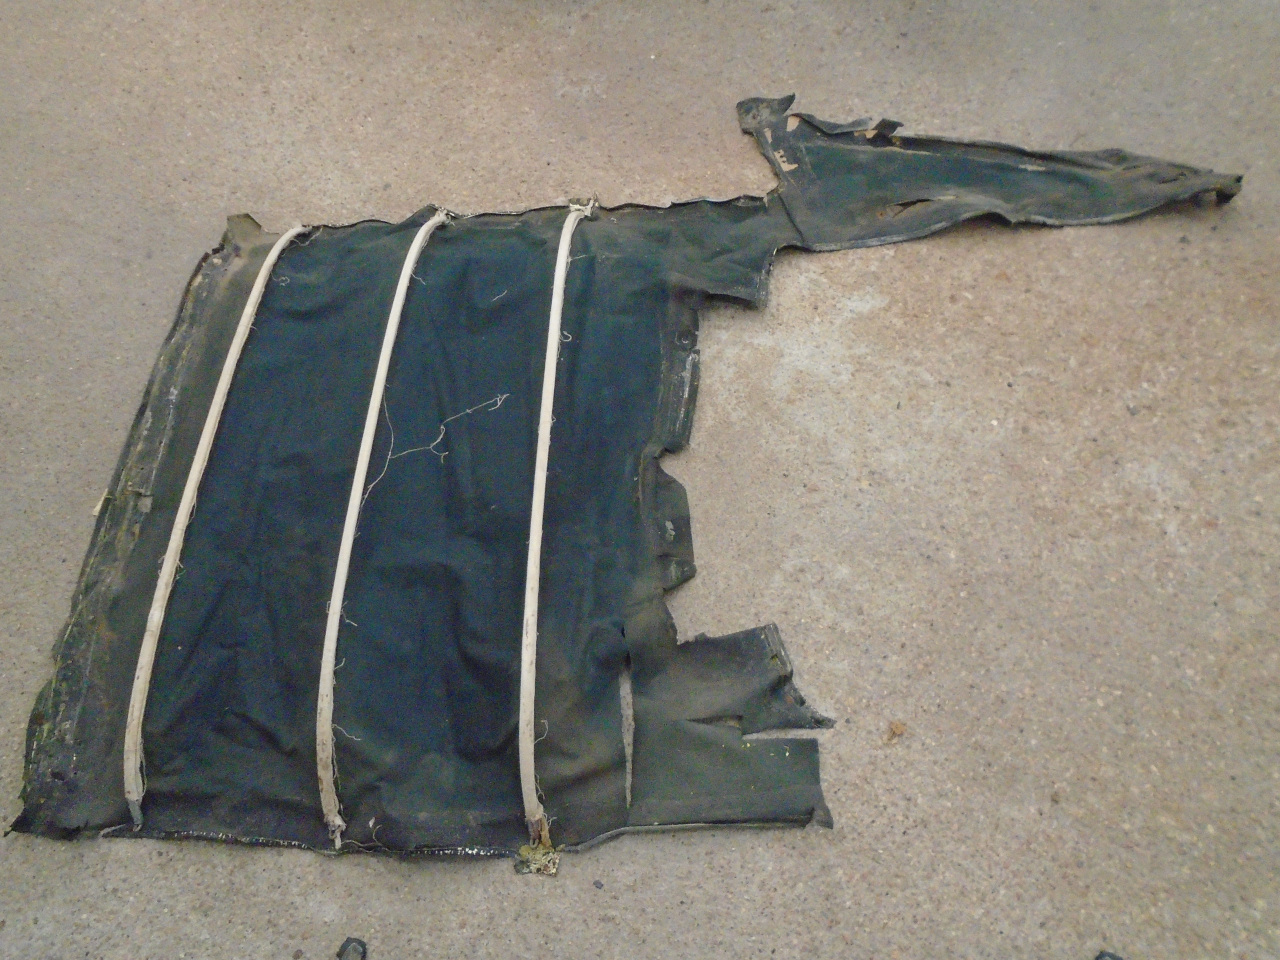
I'd saved the remnants of the original liner, hoping it might offer some
forensic clues. There was some good guidance on the forums from
folks who seem to have mastered it.
The old liner was tattered, mainly from the brutish removal process.
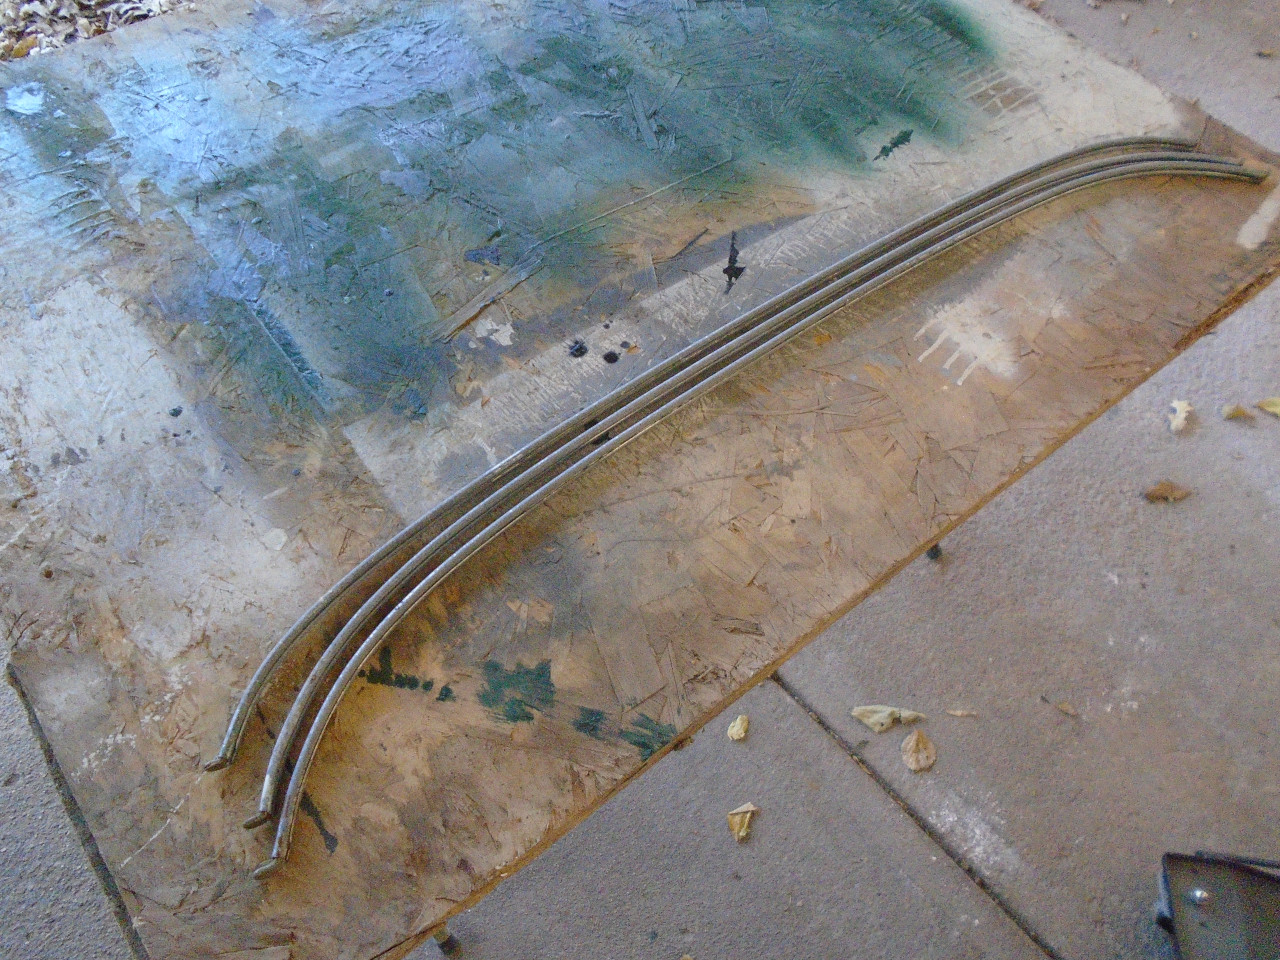
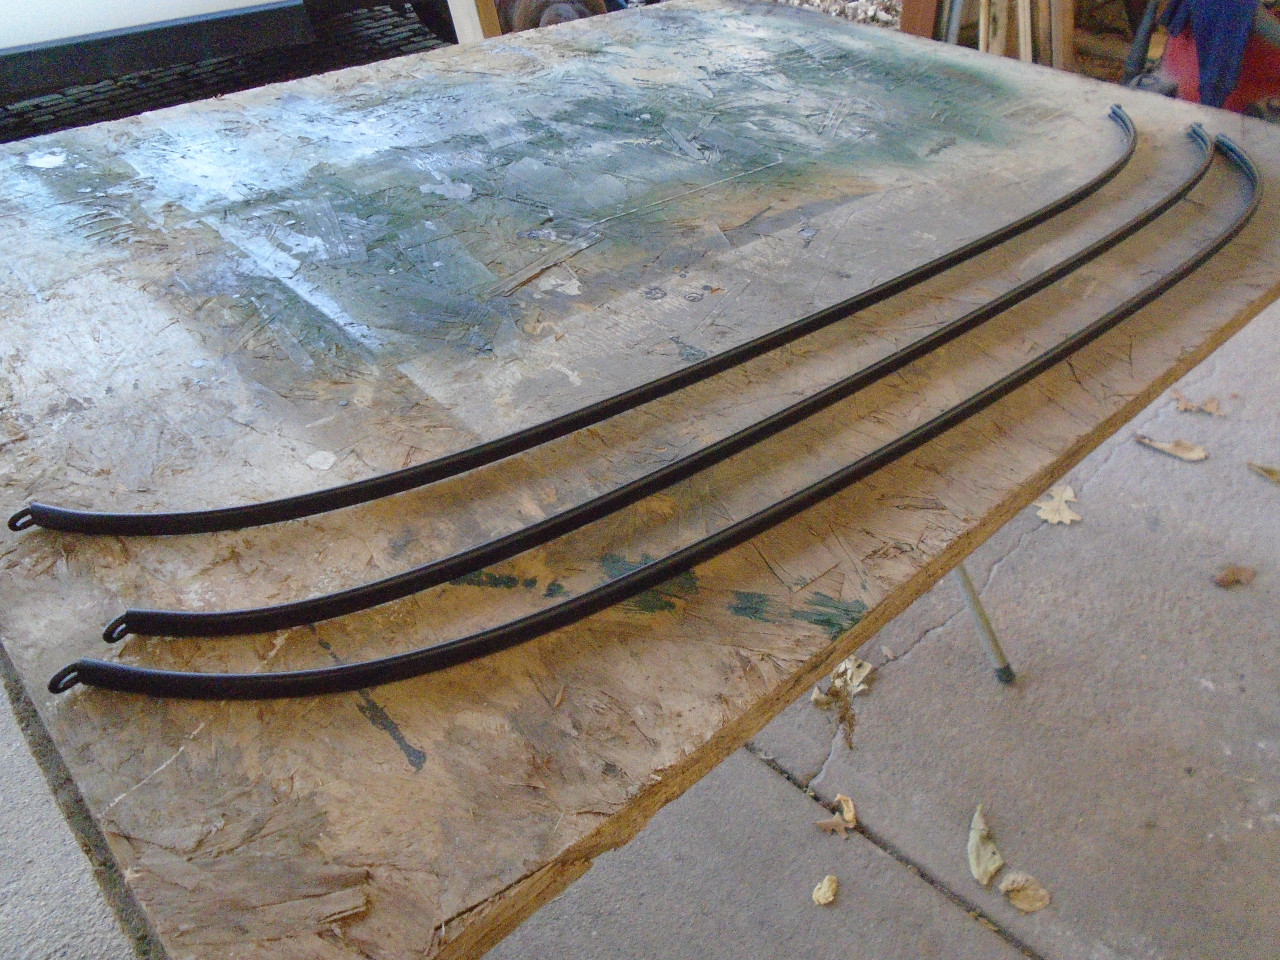
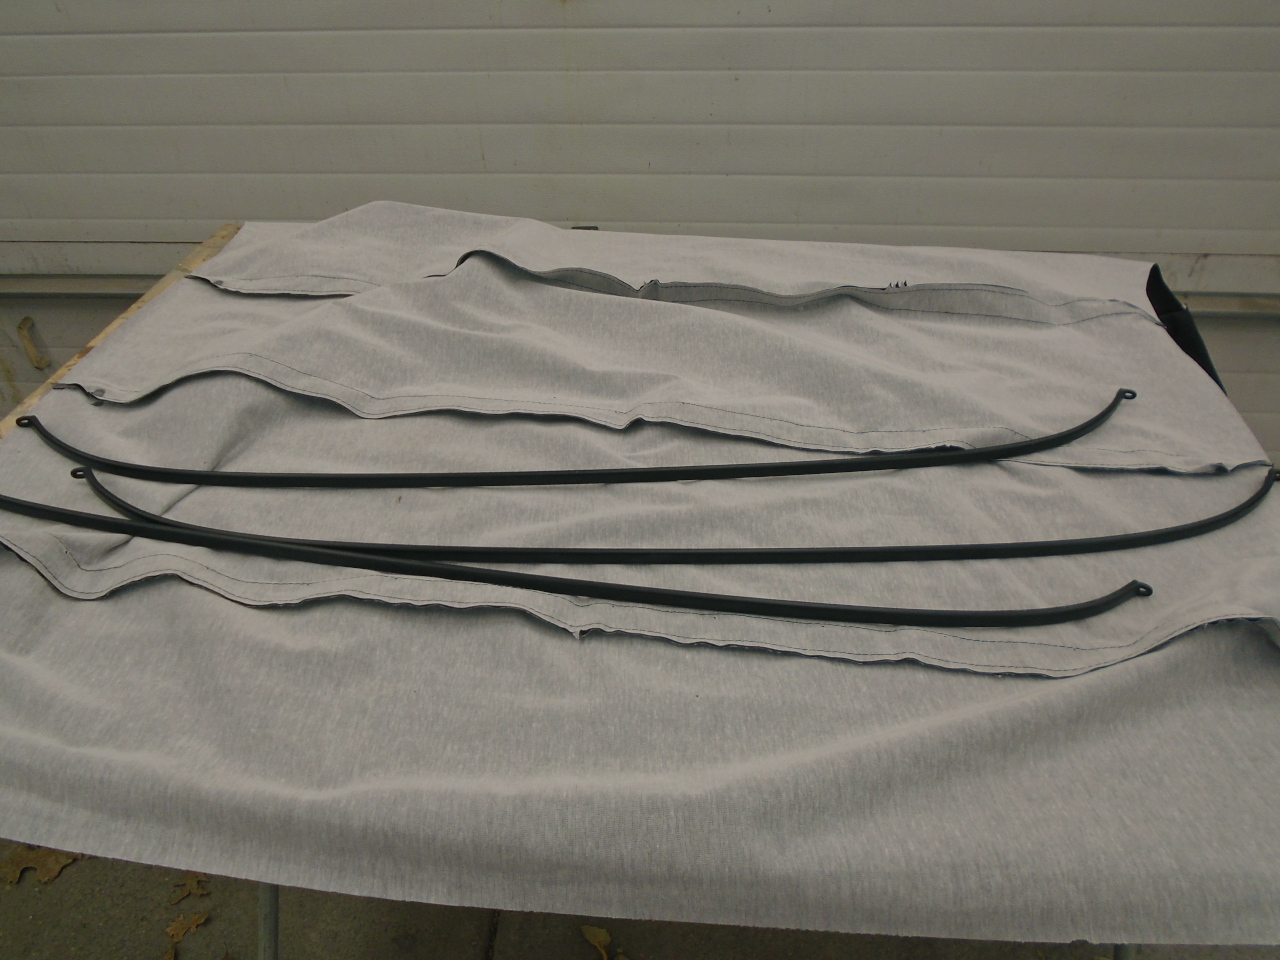
There are three galvanized steel bows that support the vinyl fabric and
help to keep it tight. The bows look very similar, but they are
all different. I think they were color coded. Notice that
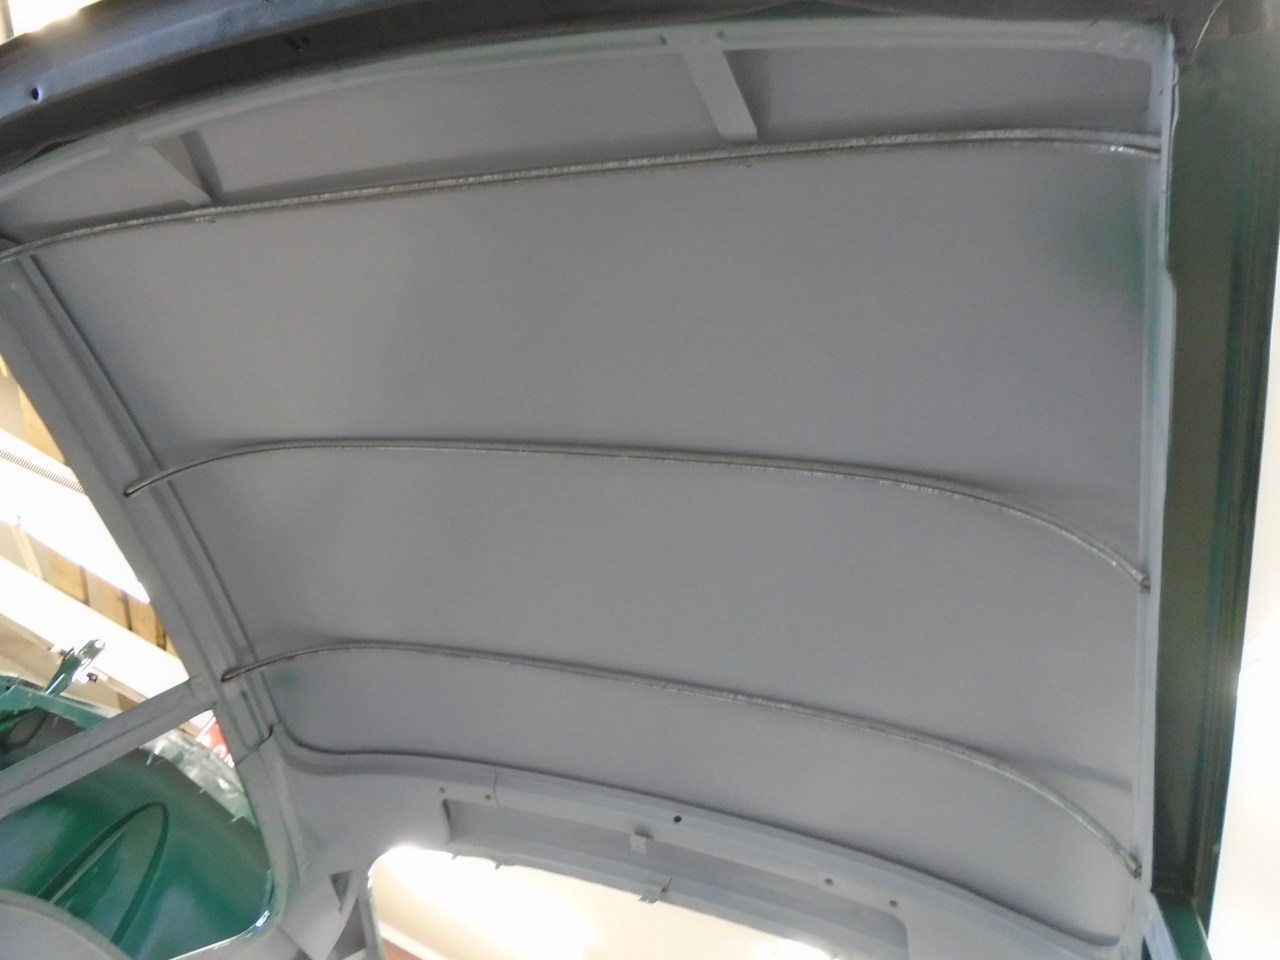
there are a couple of bracket arms that stick out from above the
windshield frame. These grab the front bow to locate it against
stretching pressure.
My bows were in pretty good shape, but had some white zinc corrosion on
them. I cleaned that up and painted them. That made them
easier to slide into the new liner.
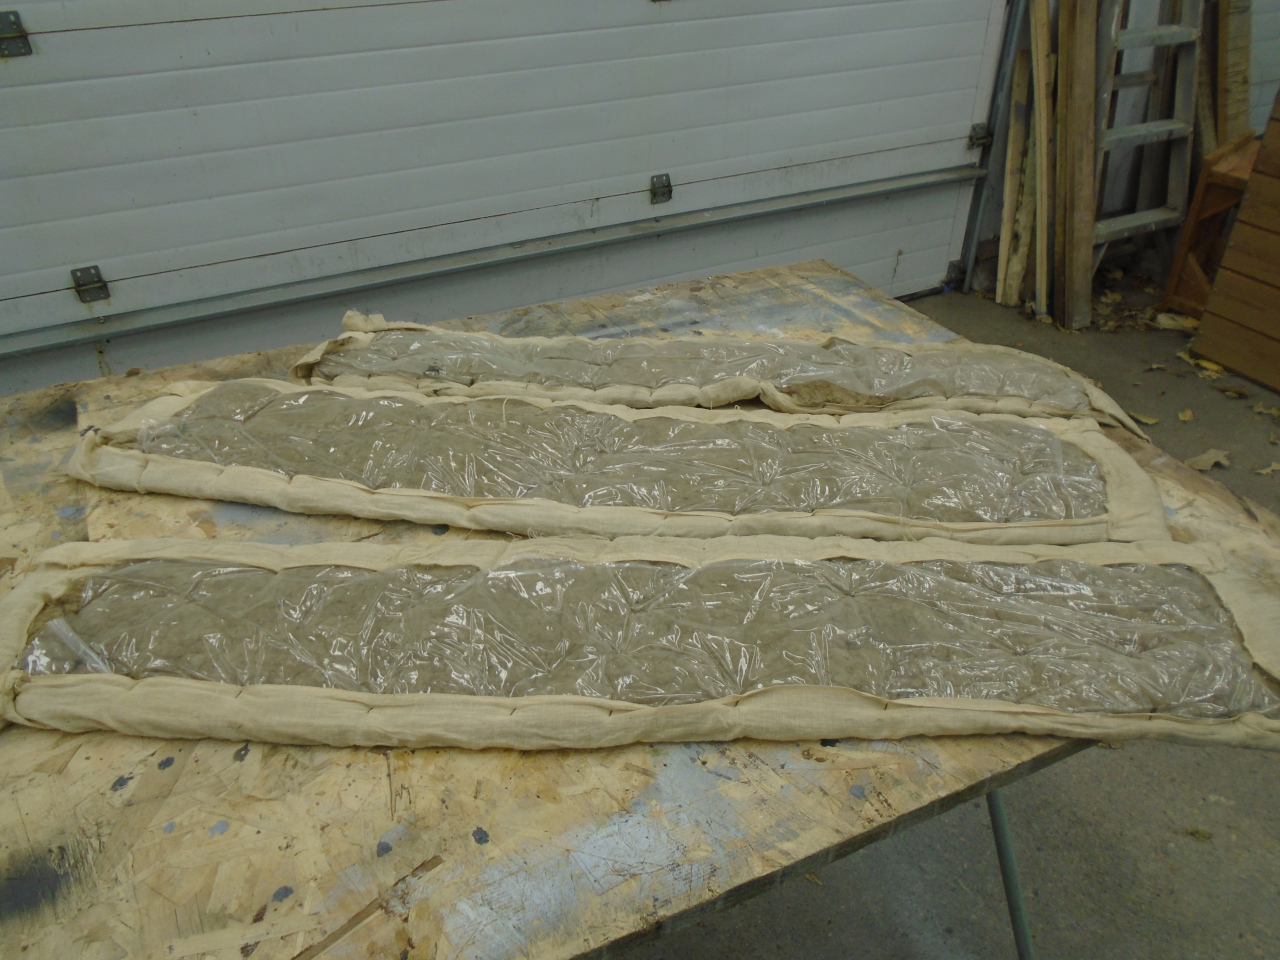
Before I started the installation, I wanted to prepare the roof.
There were originally three insulating pads glued to the roof between
the bows. Each pad was a gauze-like fabric sack, filled with a
wool-like material. The intention was surely both heat and sound
insulation, and it probably did both to some degree.
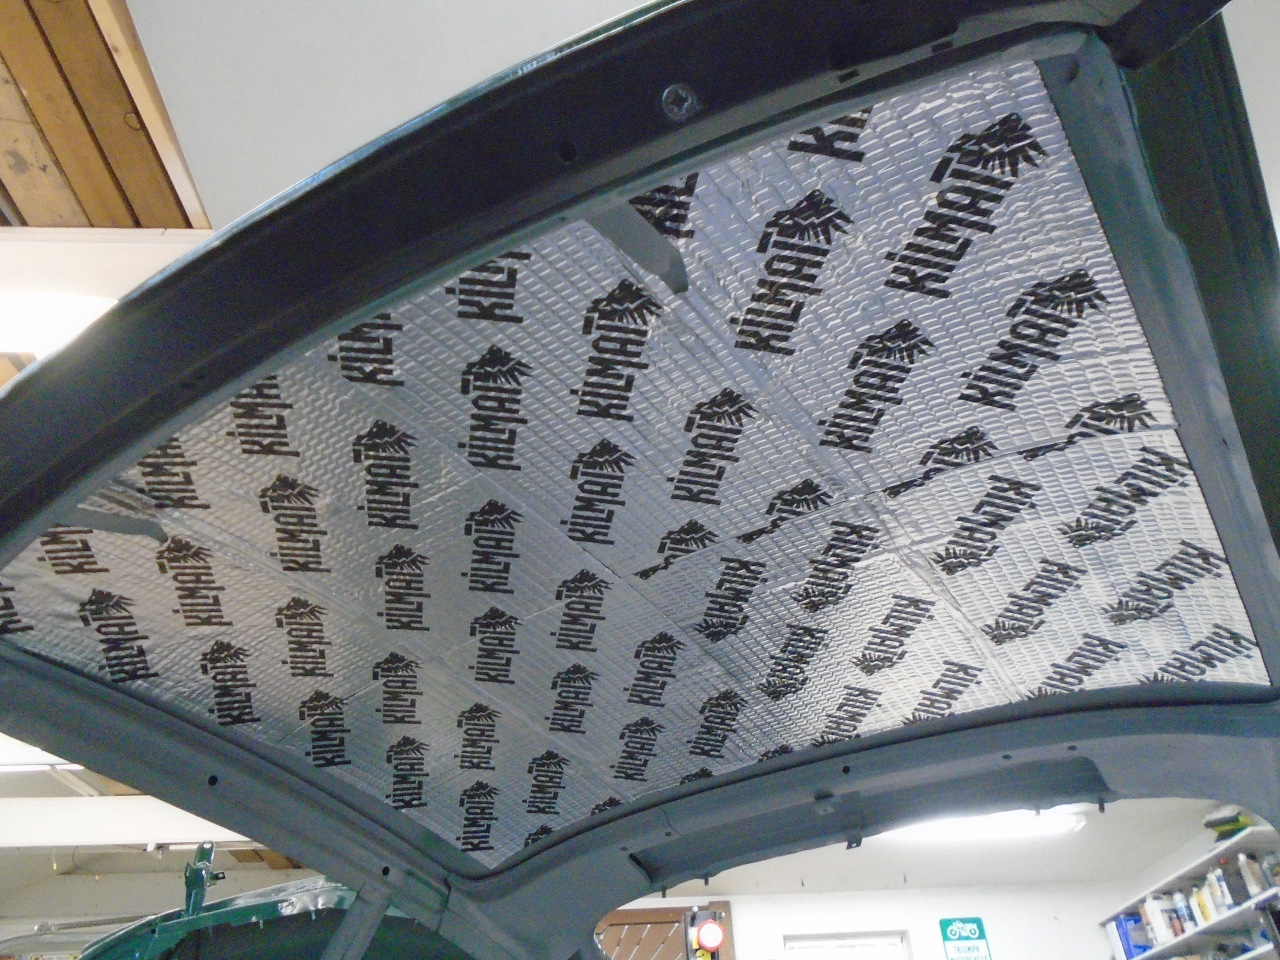
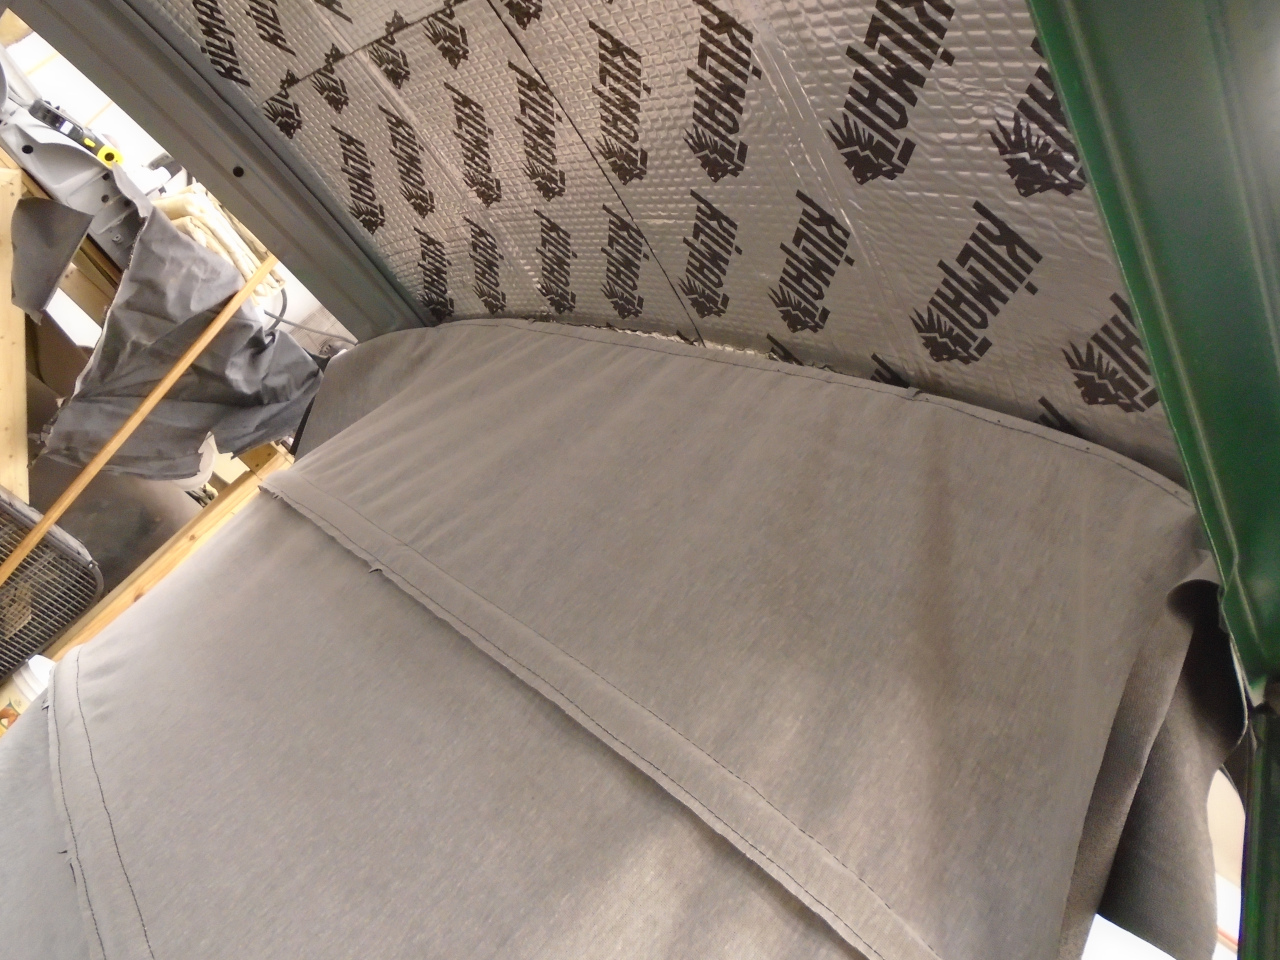
I thought I could do better though with some more modern
materials. For sound damping, I applied some "Constrained Layer
Damping" (CLD) material. It is a 80-mil layer of gooey butyl
rubber, covered by a thin aluminum sheet. The butyl makes it
self-stick. The CLD damps vibration by adding mass to the panel,
which lowers the resonant frequency. The vibration energy is then
absorbed by the elastomeric layer. The bows just clear the added
thickness of the roof.
Here is a before/after demonstration of the damping effect.
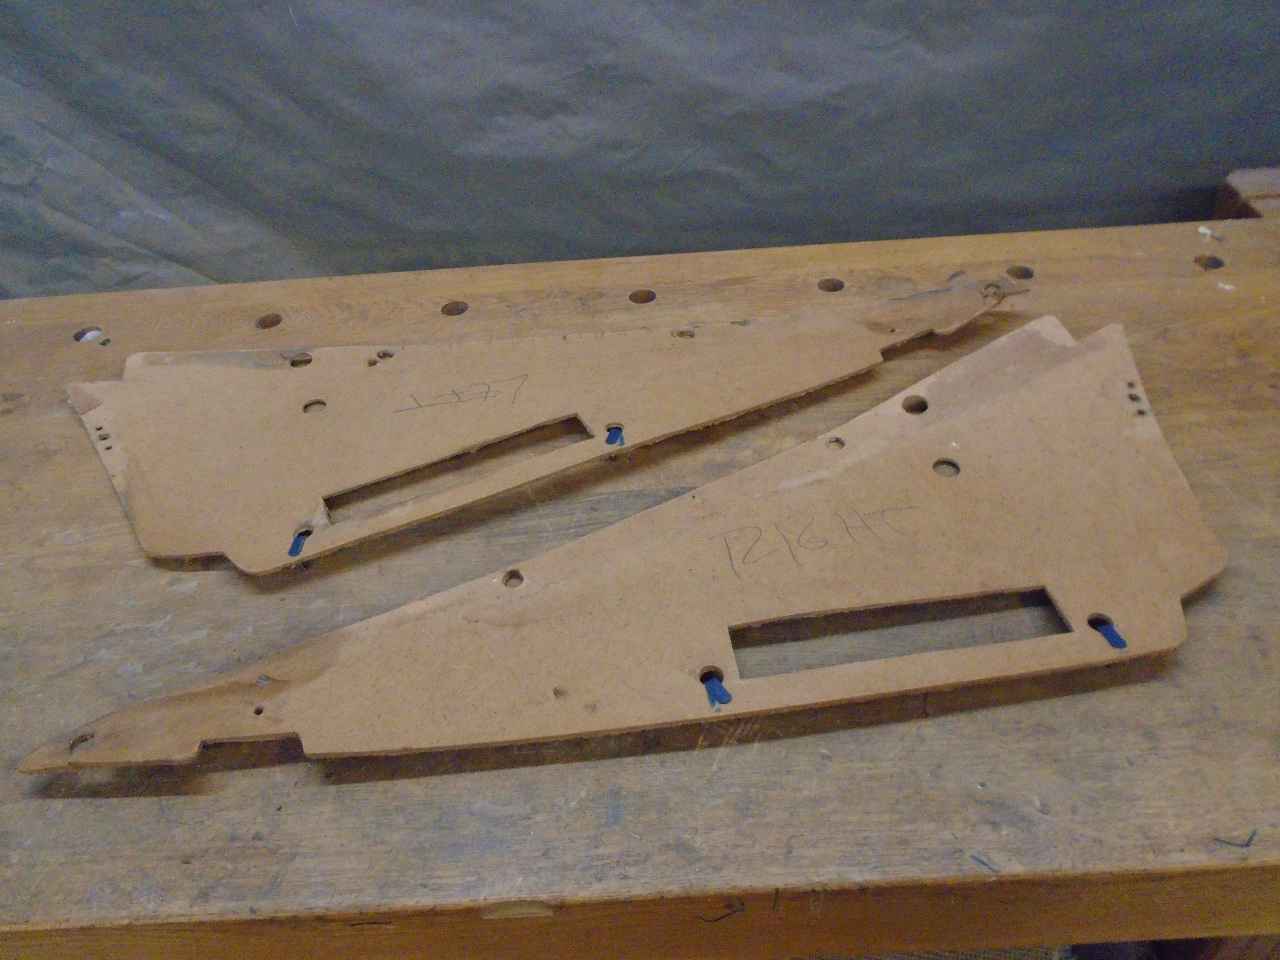
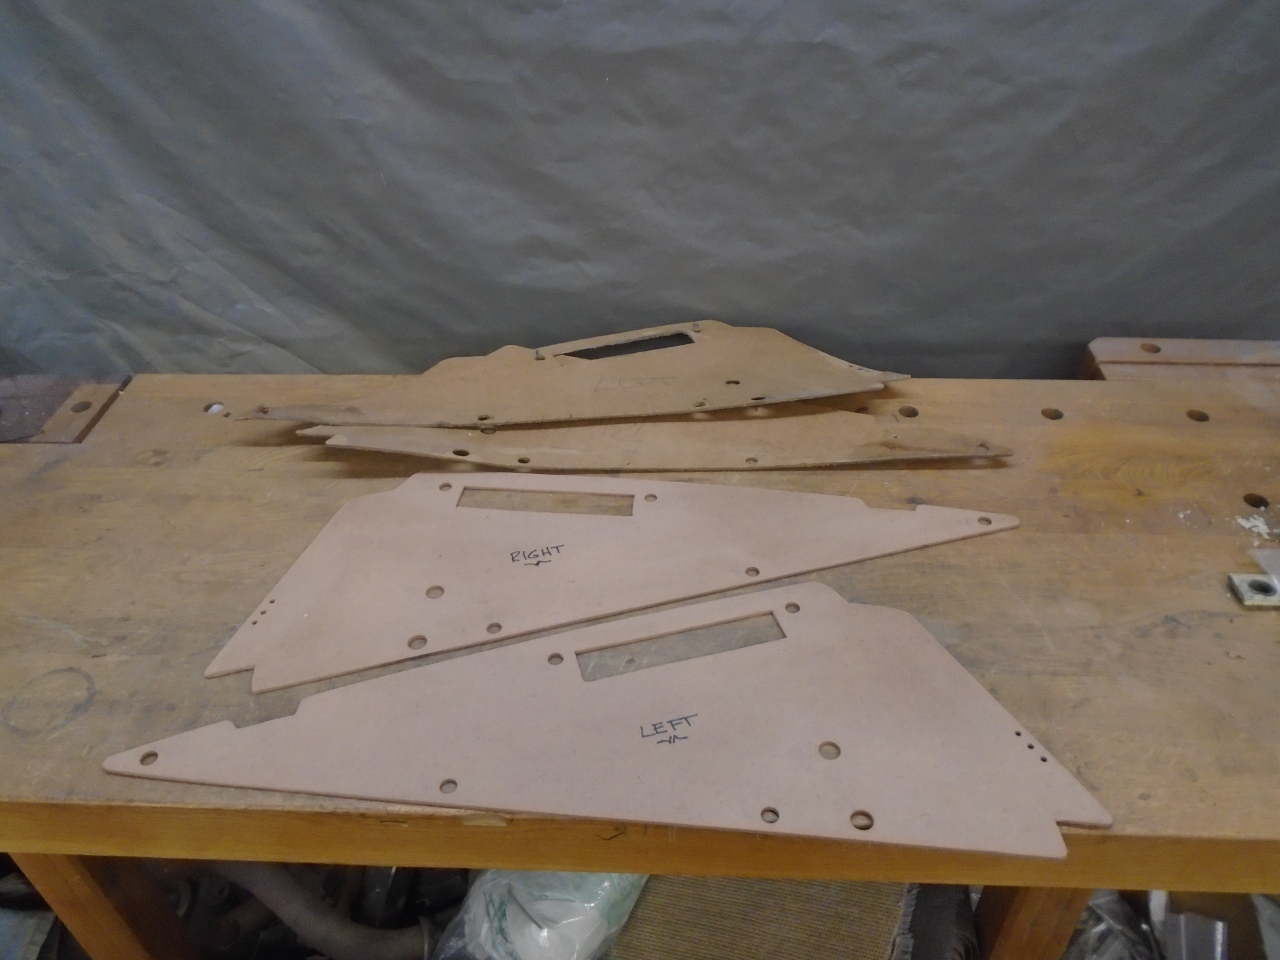
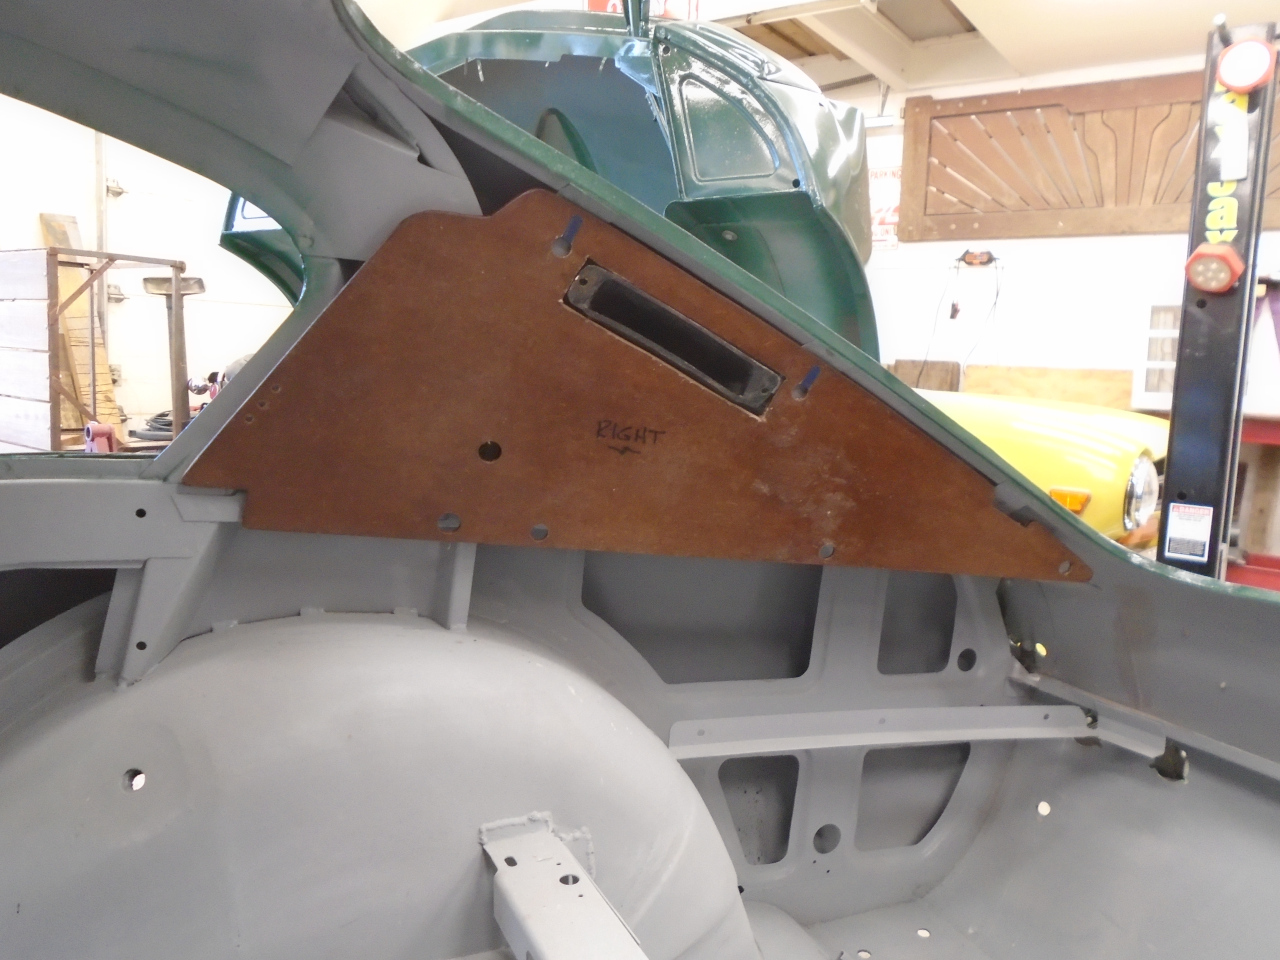
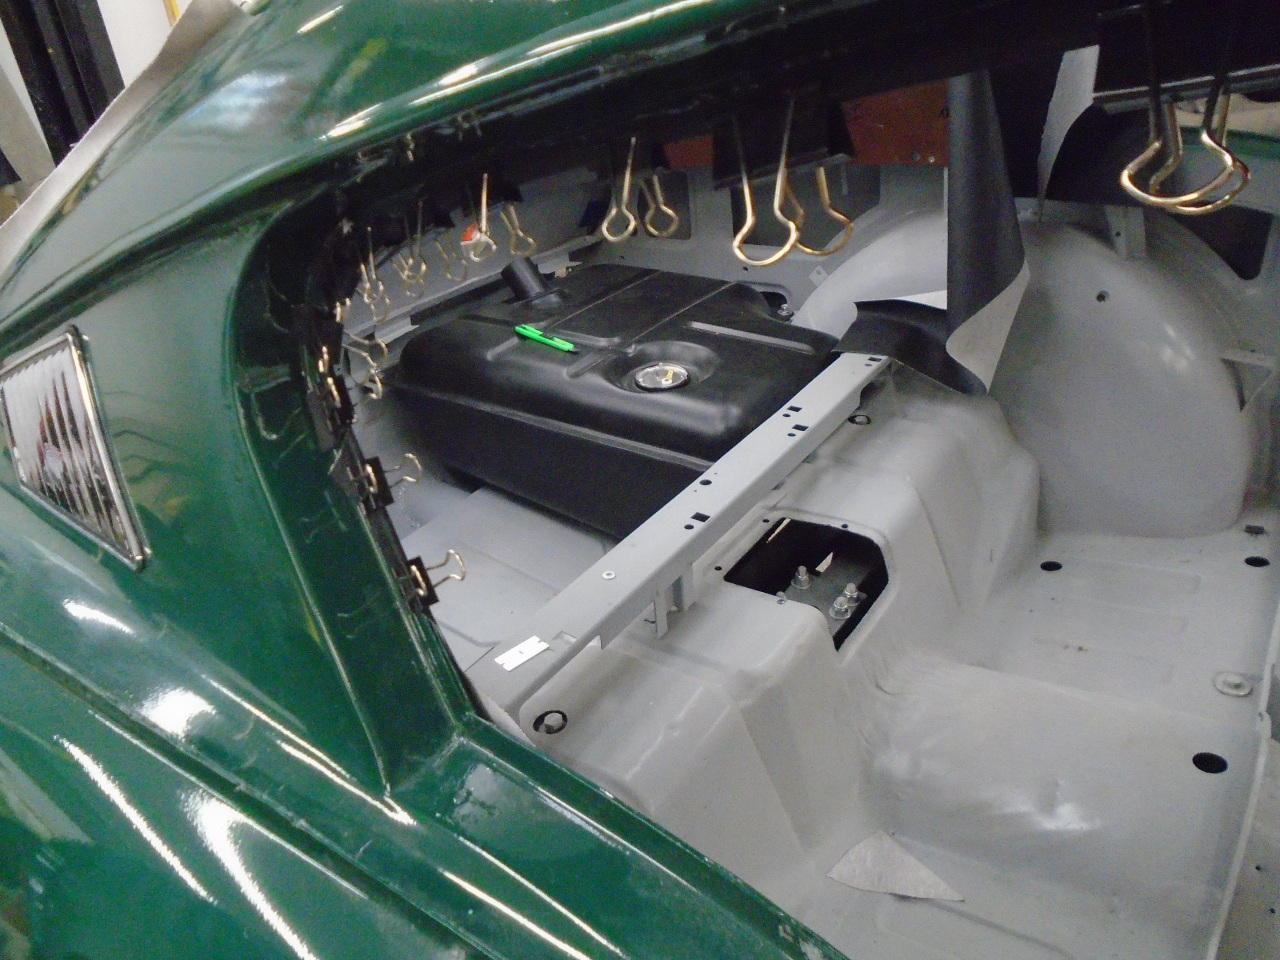
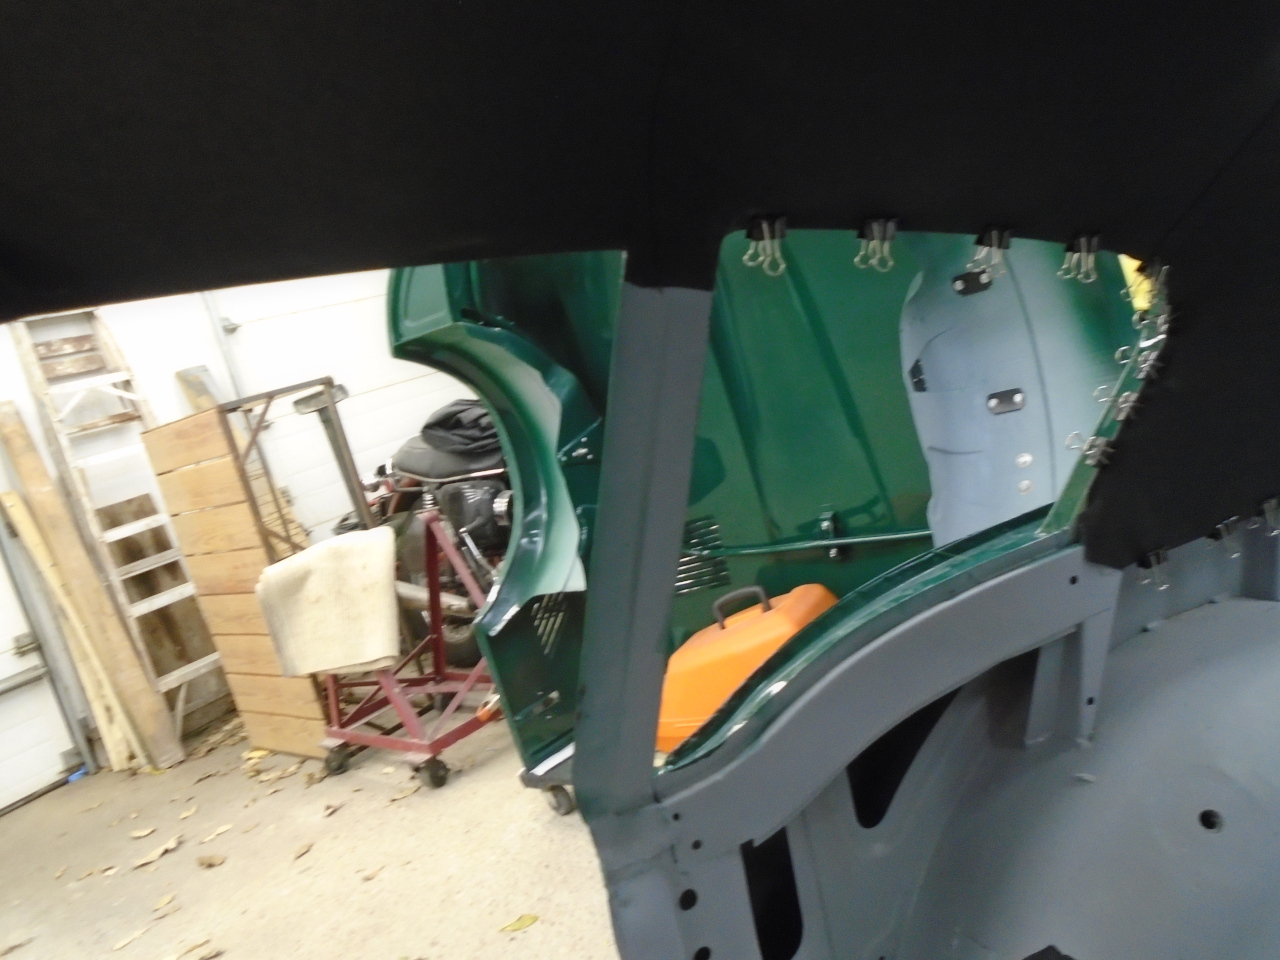
As I was getting ready to hang the liner, I realized there were a few
things that had to be done first. There are a pair of hardboard
cards that go on either side behind the rear vent windows. Mine
were sort of beat up , so I made a new pair, using the originals as
patterns. The originals measured at 2.5 mm thick, but I used 3 mm
stock, so I guess I can claim these are "uprated" parts.
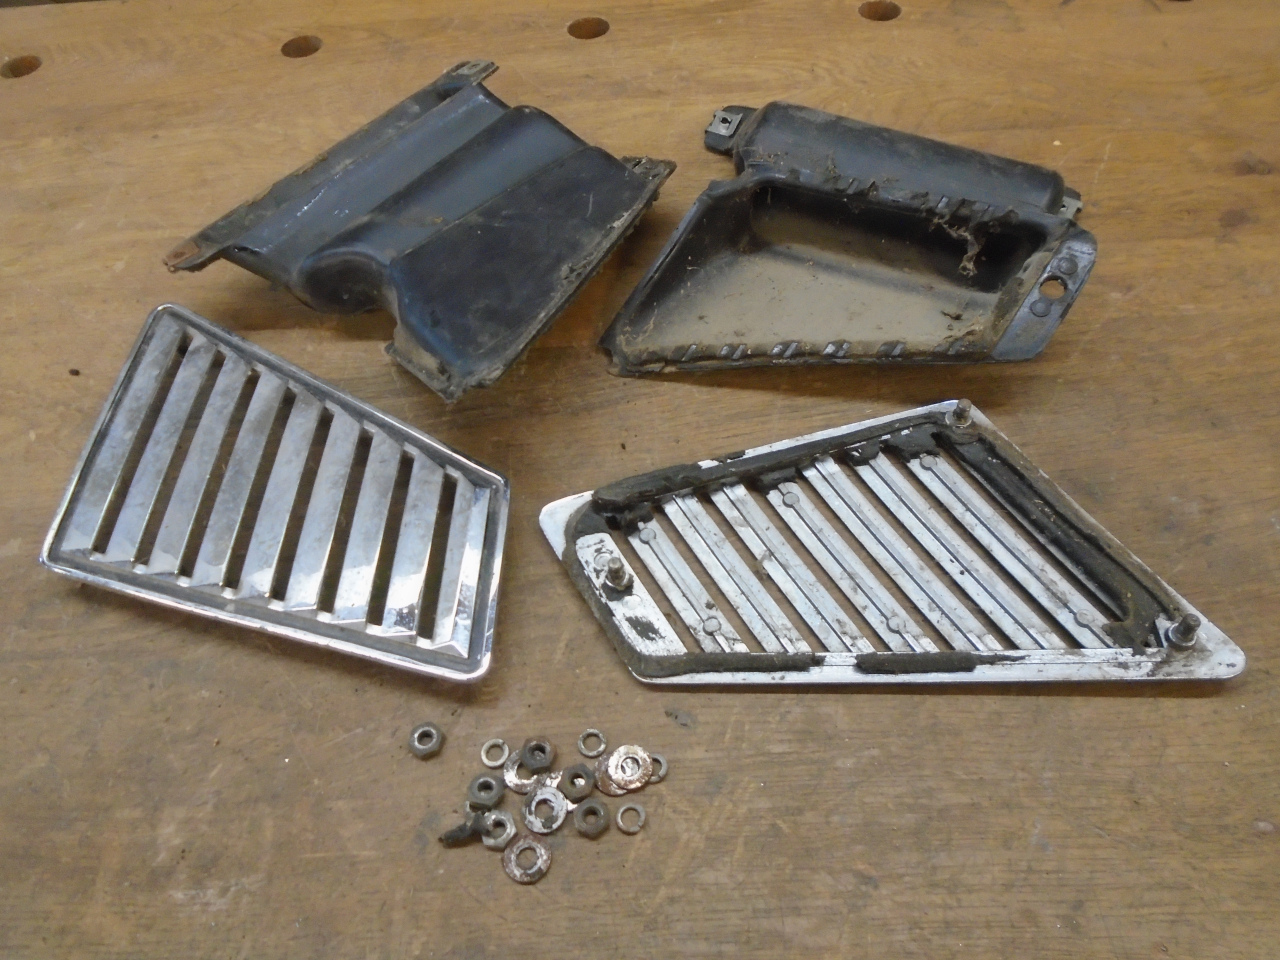
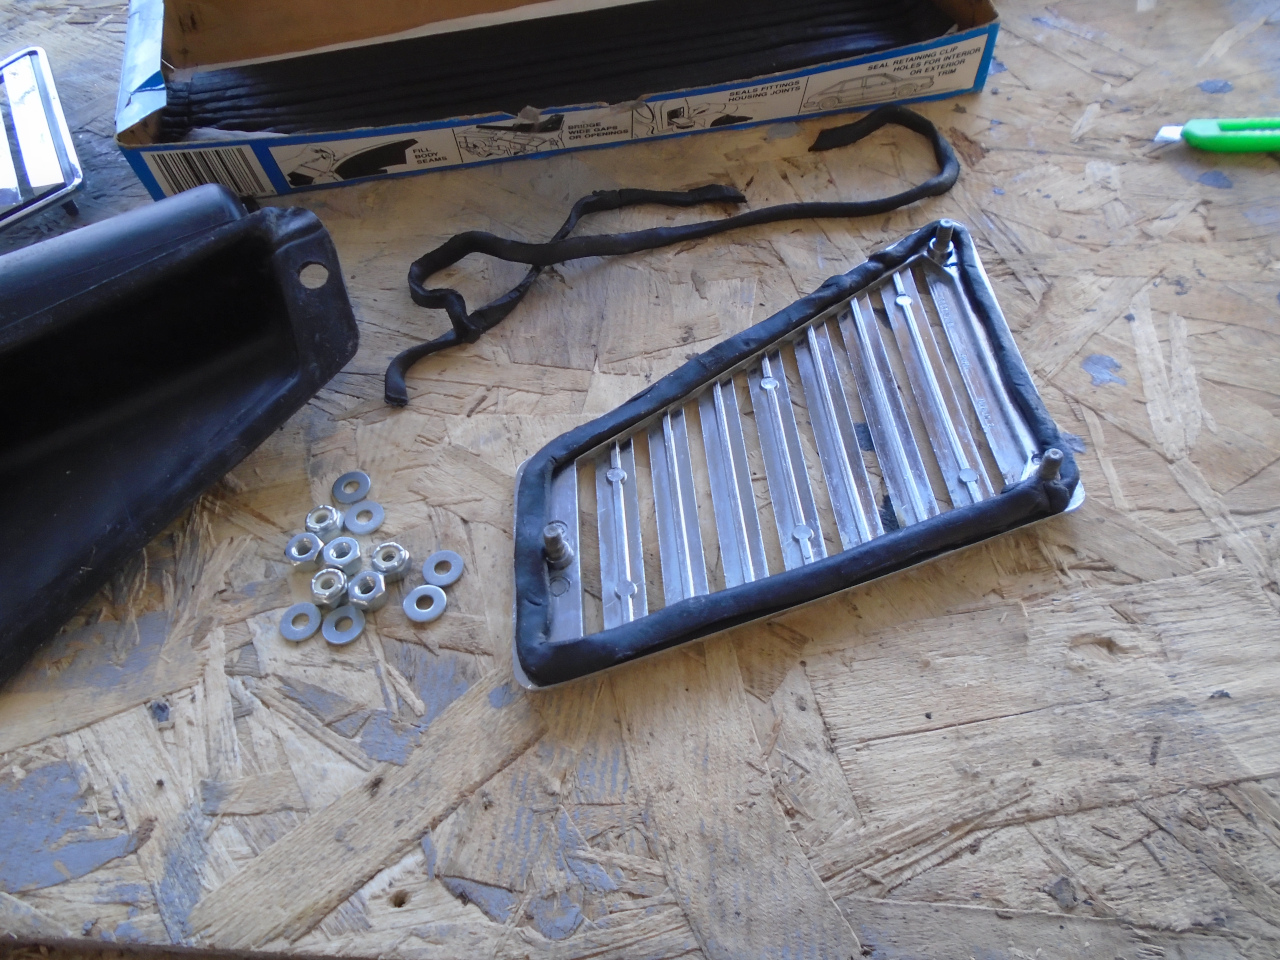
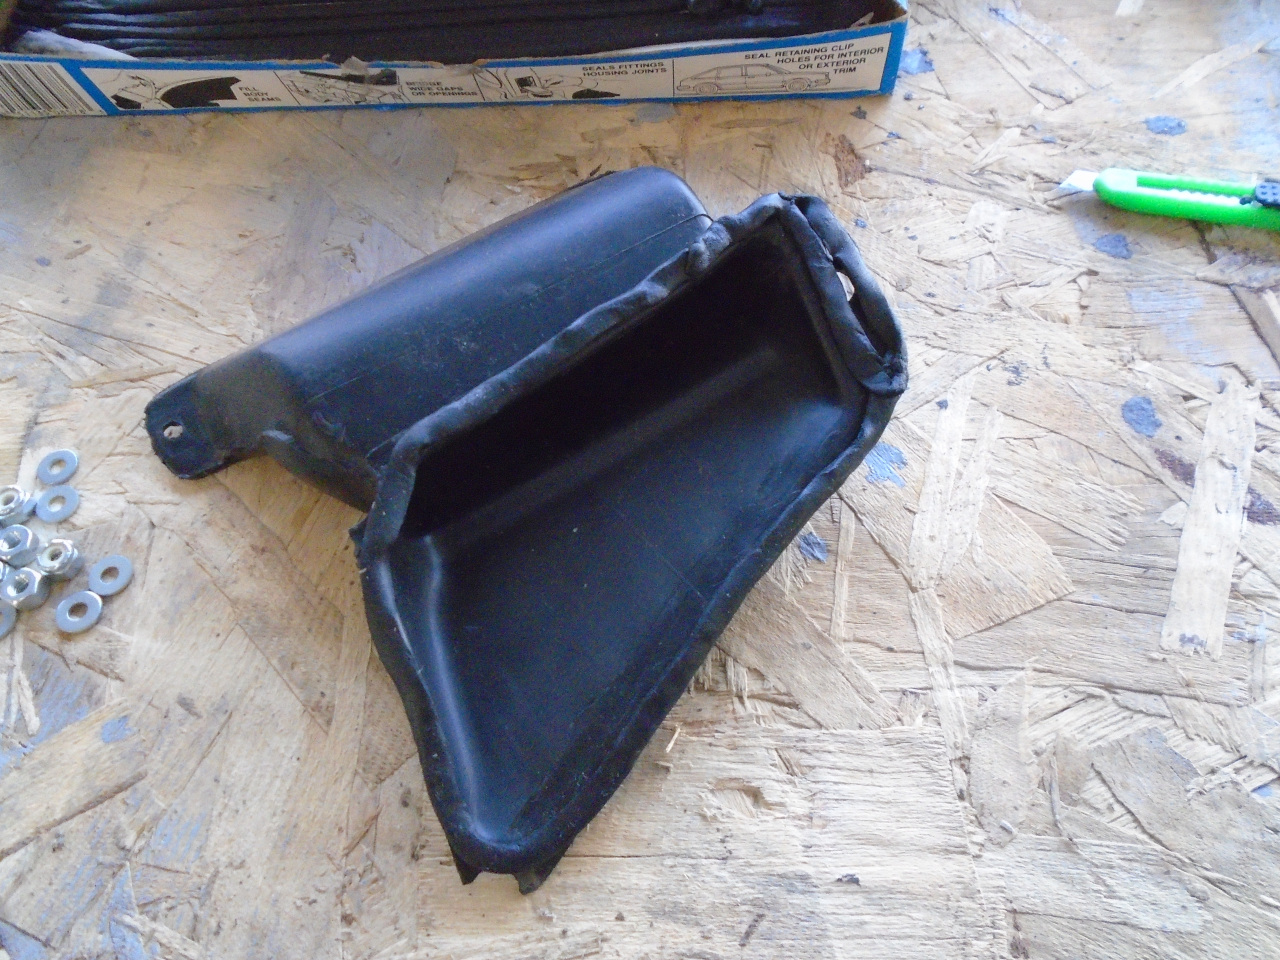
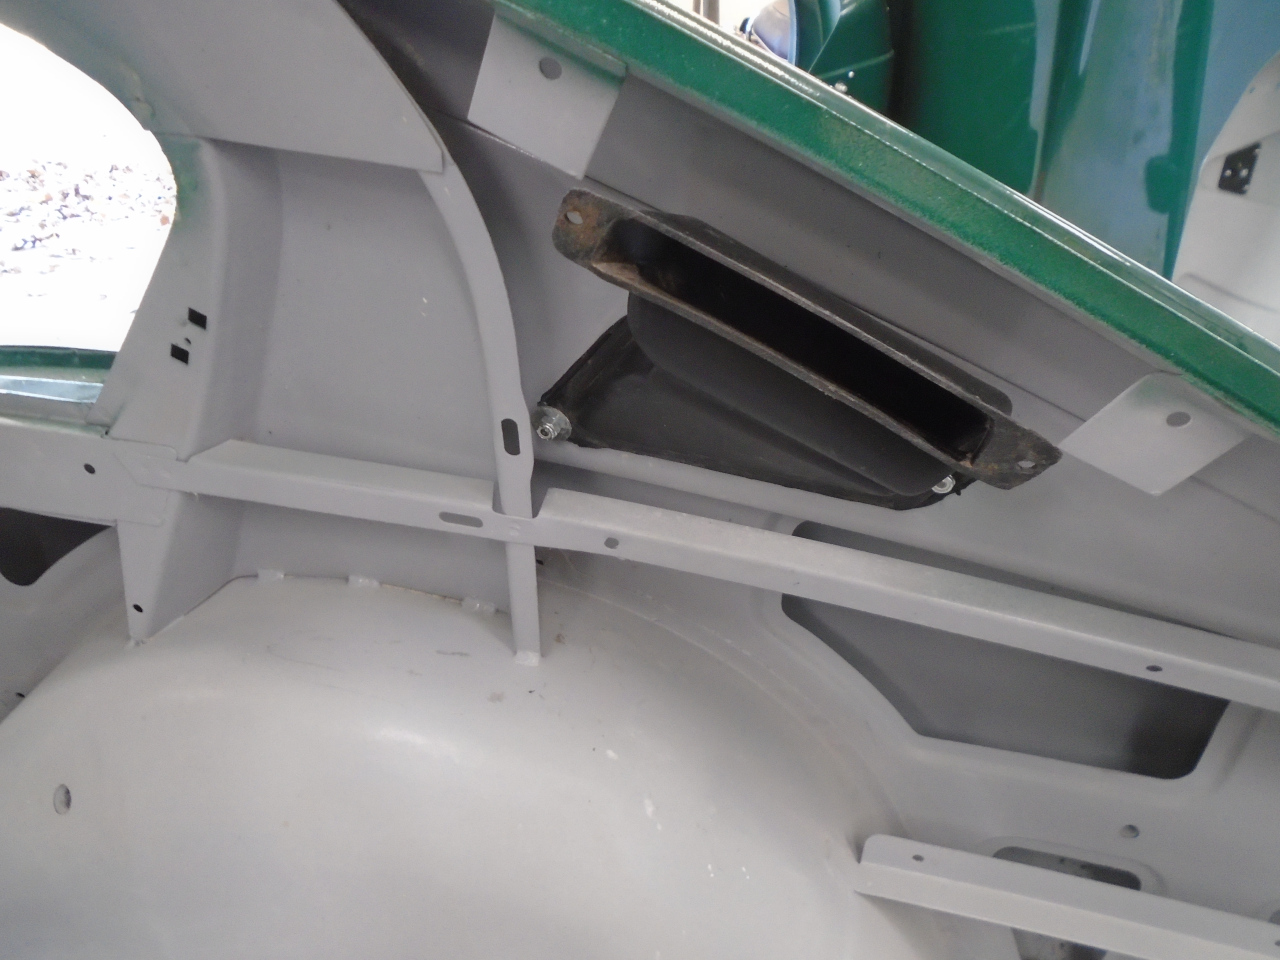
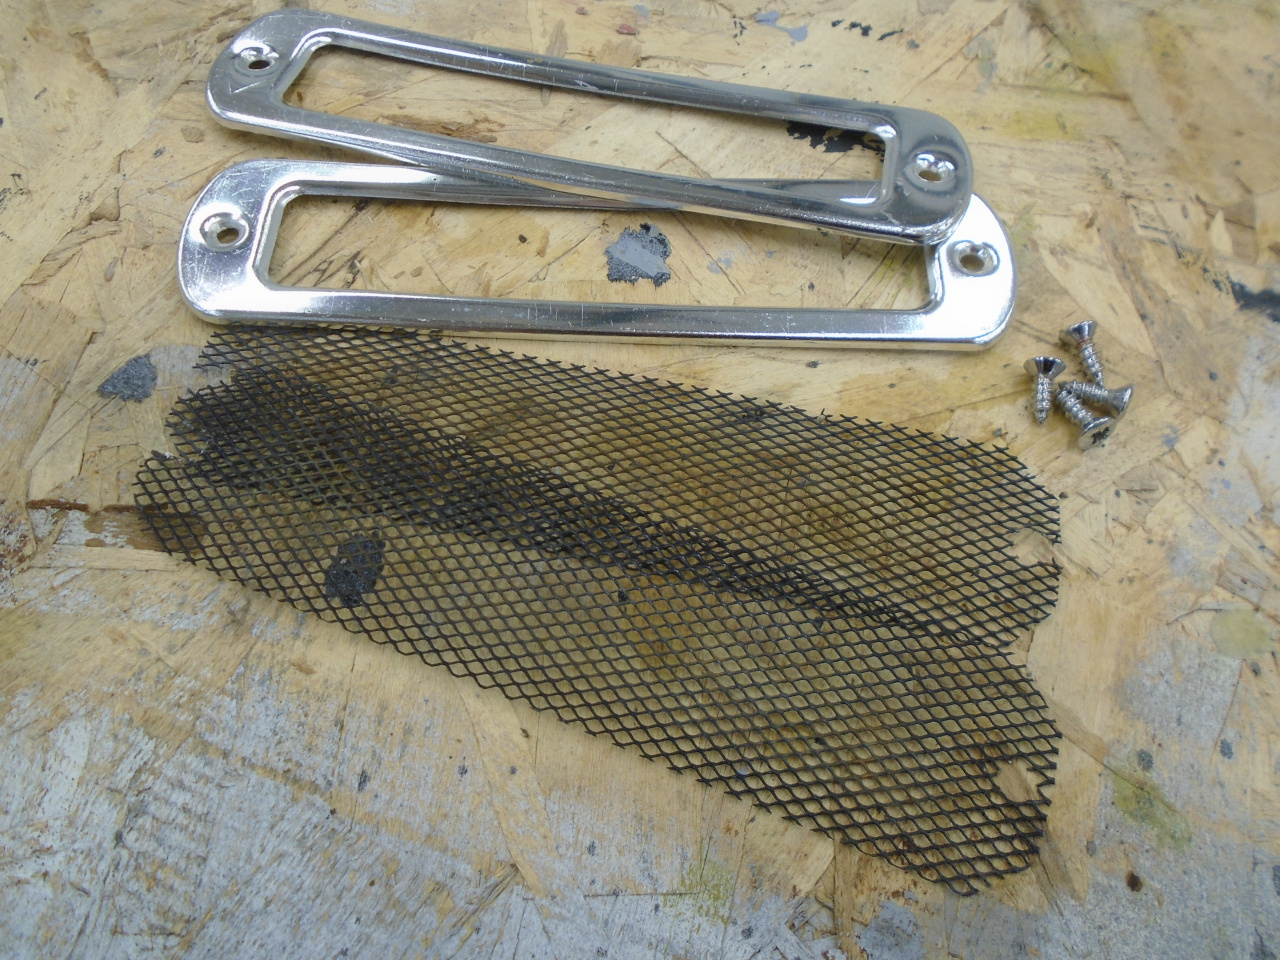
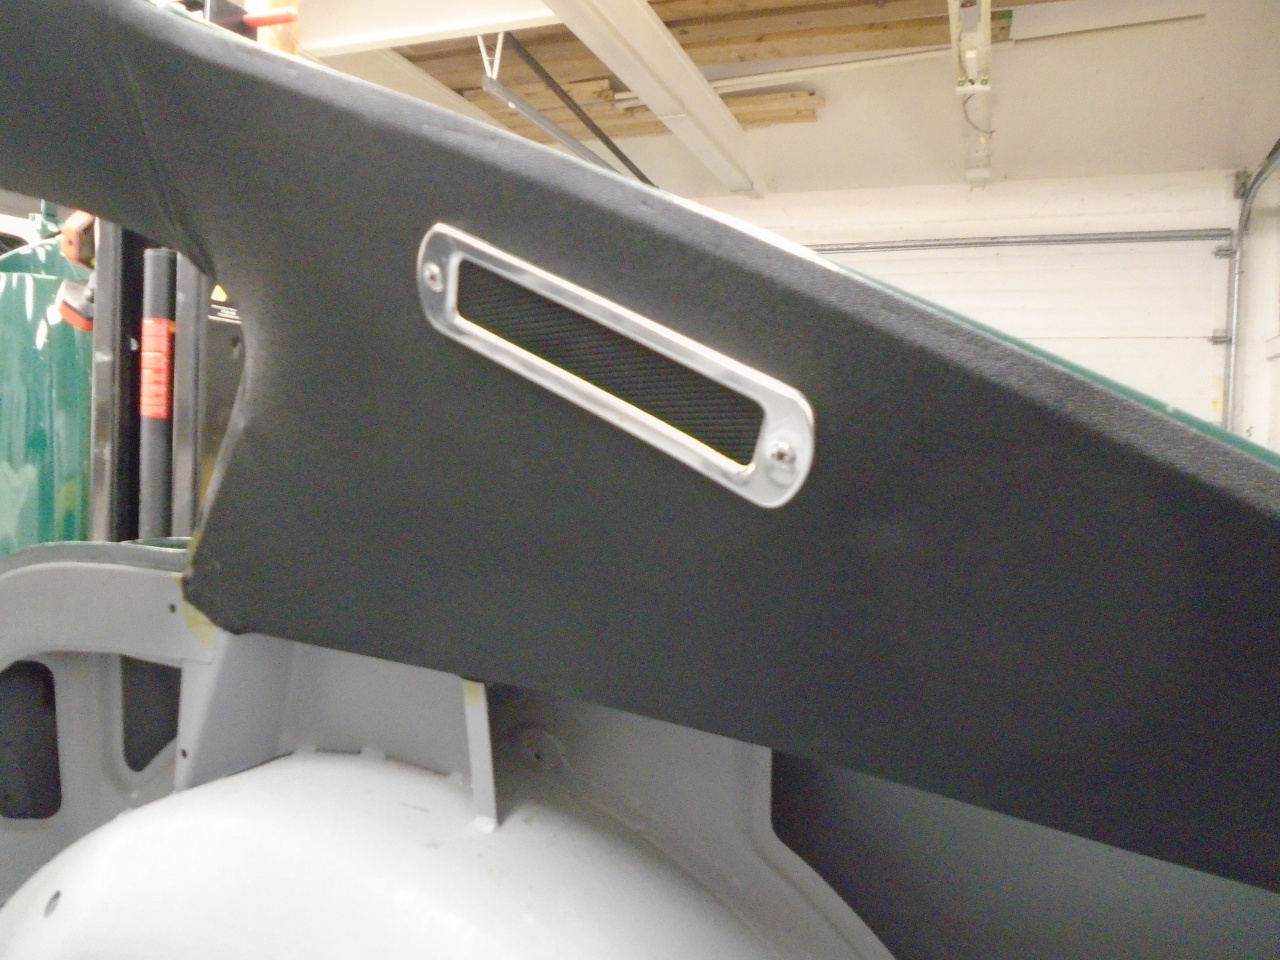
I then realized that behind these cards are the exhaust vents, which
would be pretty hard to install with the headliner in place. So I
dug the vent assemblies out of one of the parts boxes. They
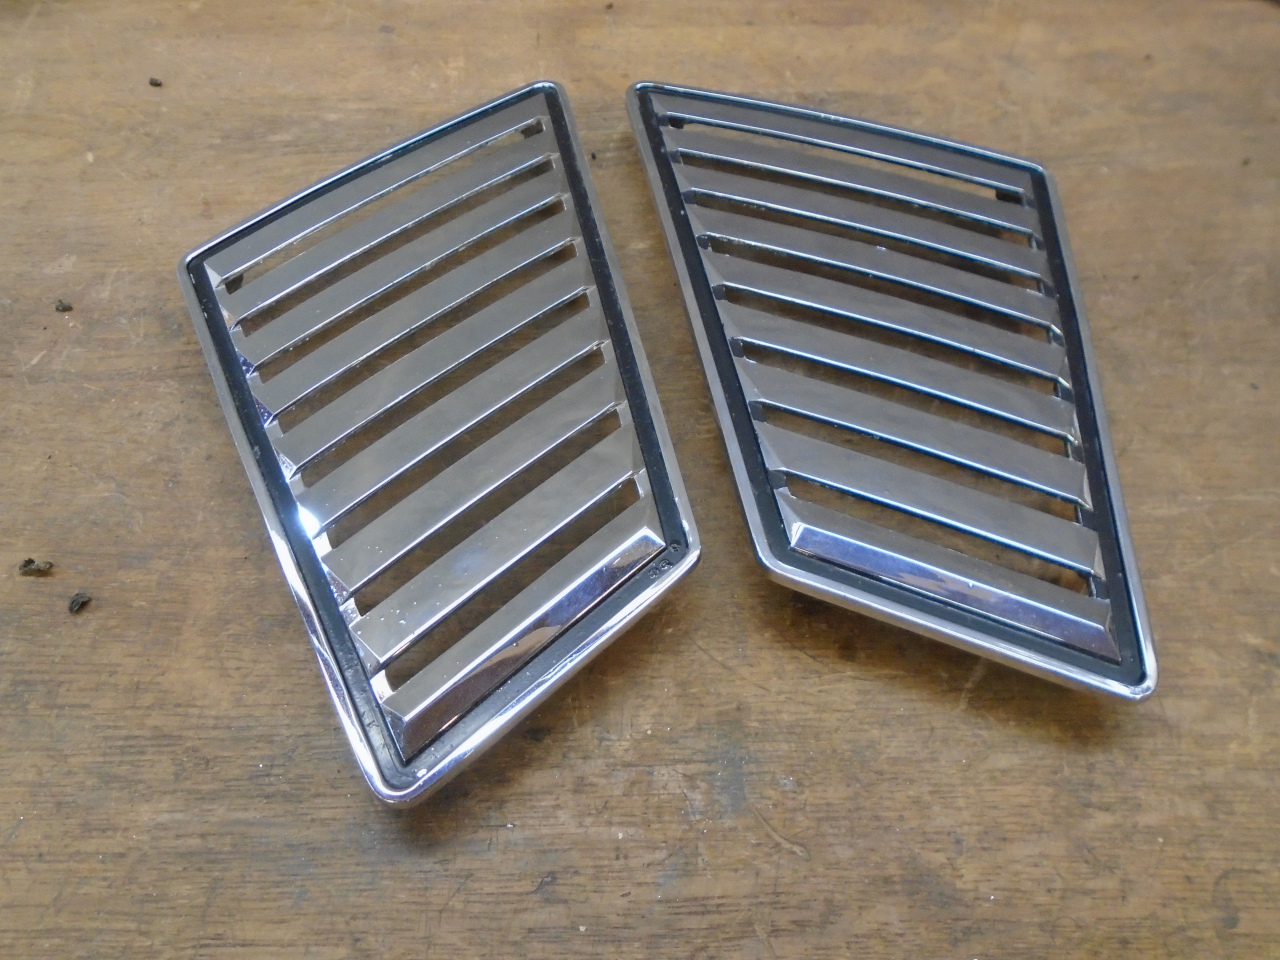
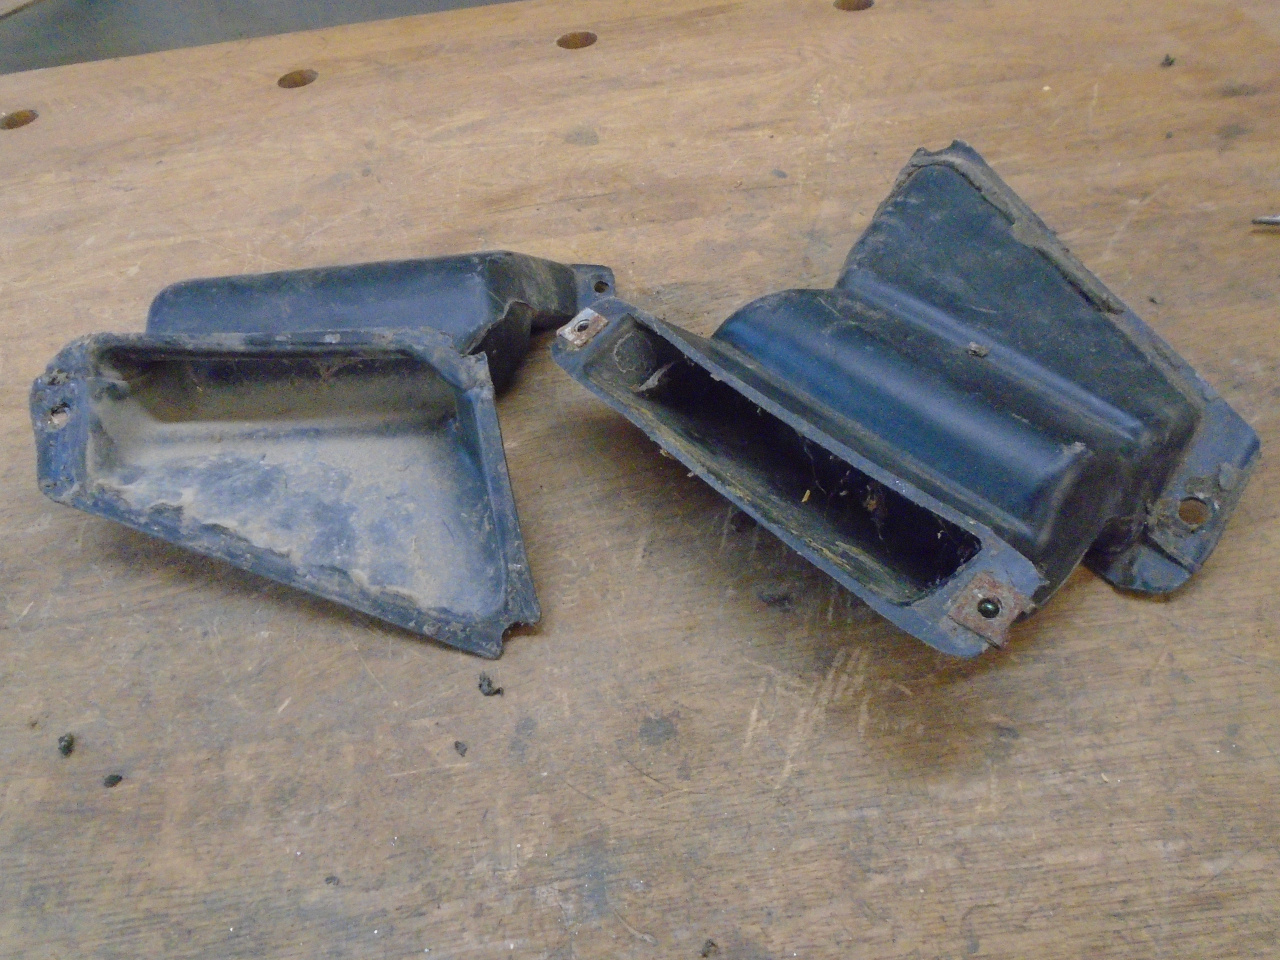
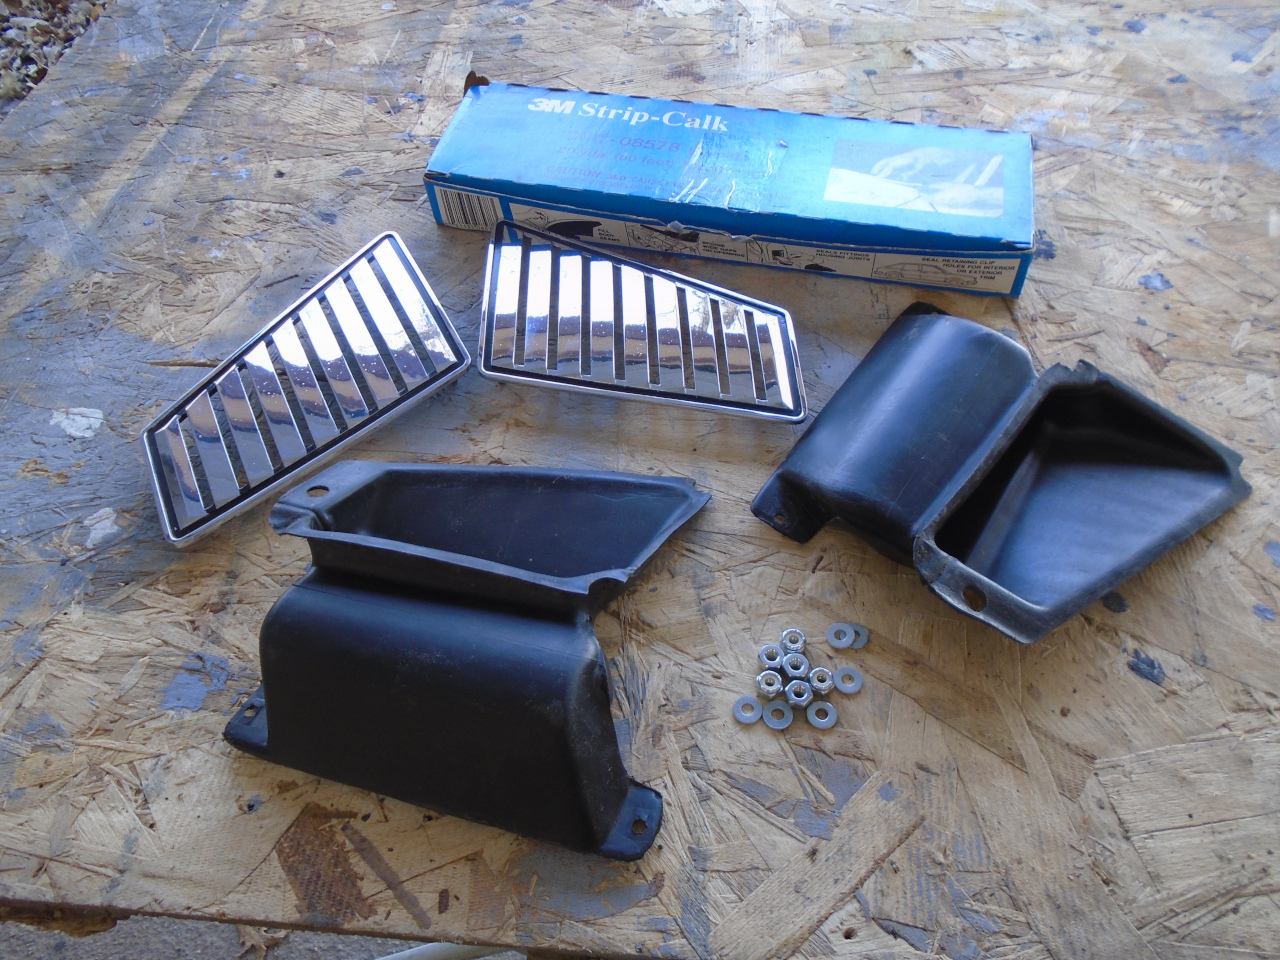
consist of the outer louvered chrome grille, and a formed plastic duct.
The parts were in pretty decent shape, and cleaned up well.
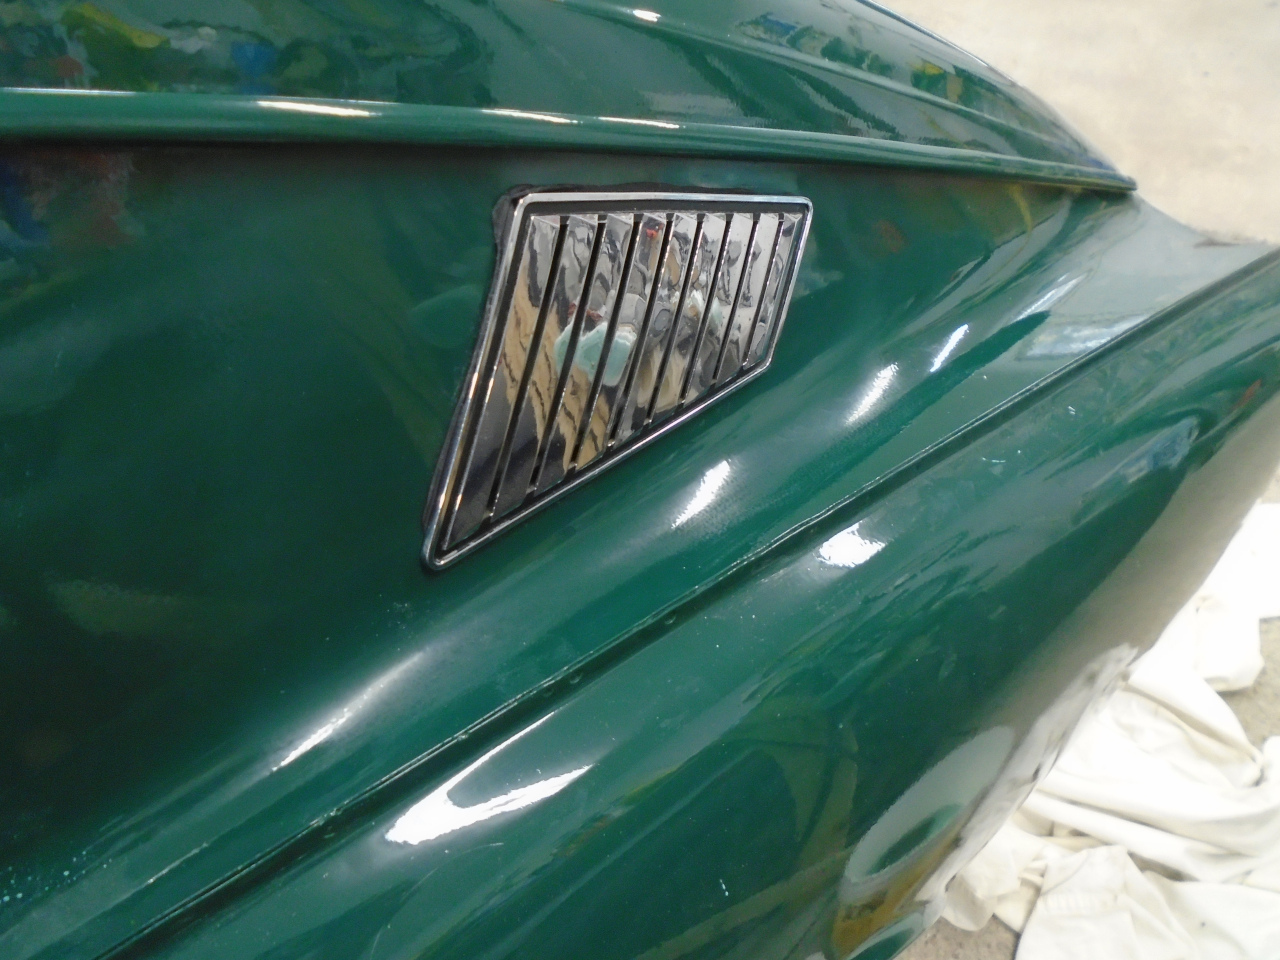
The grille goes on the outside of the rear quarter, while the duct goes
on the inside. The joints are sealed with a 3M rope caulk.
I hadn't done any cut and buff on the car yet, so I had to at least do the area around the vents.
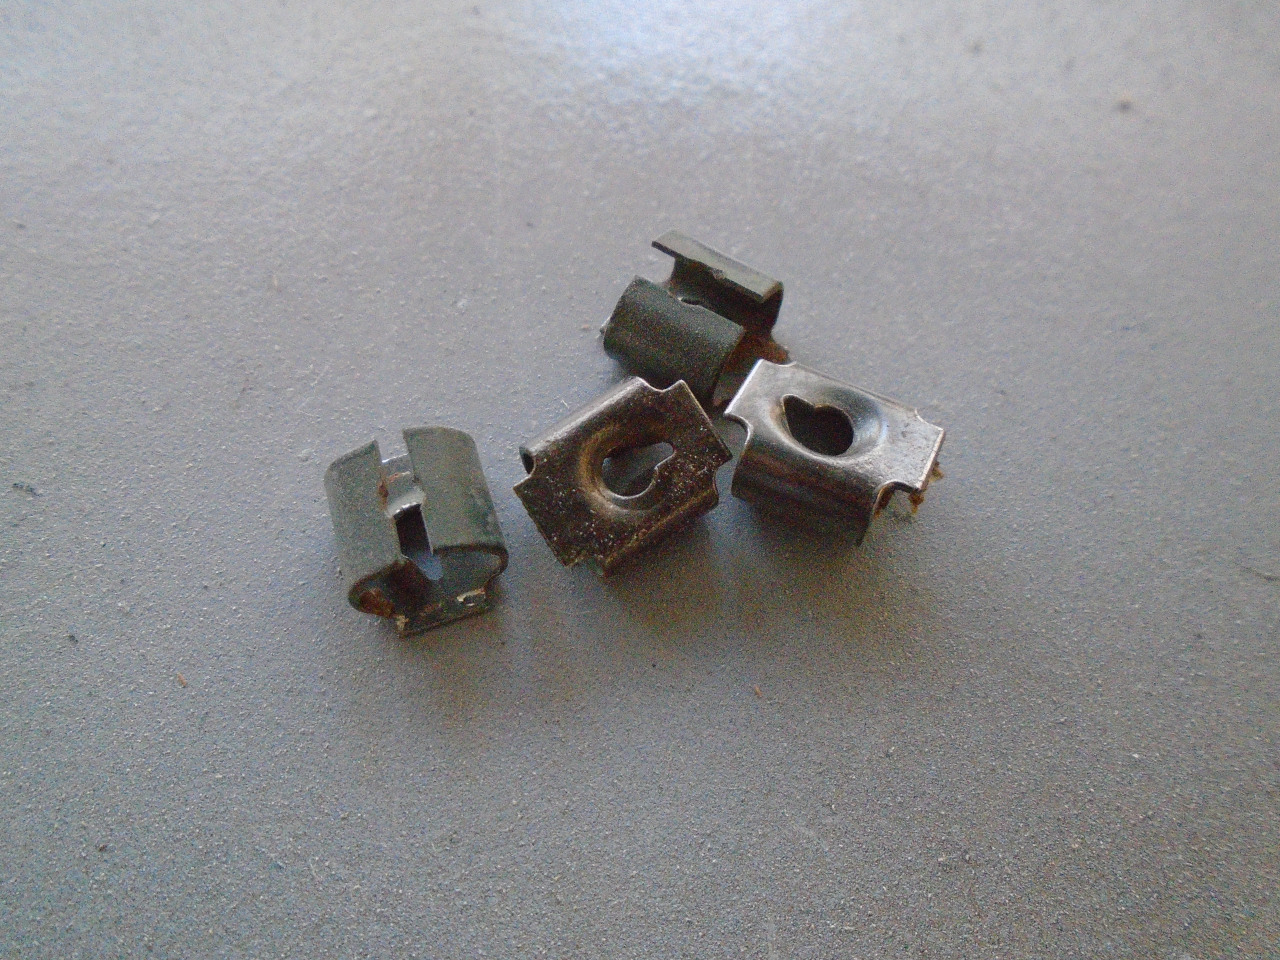
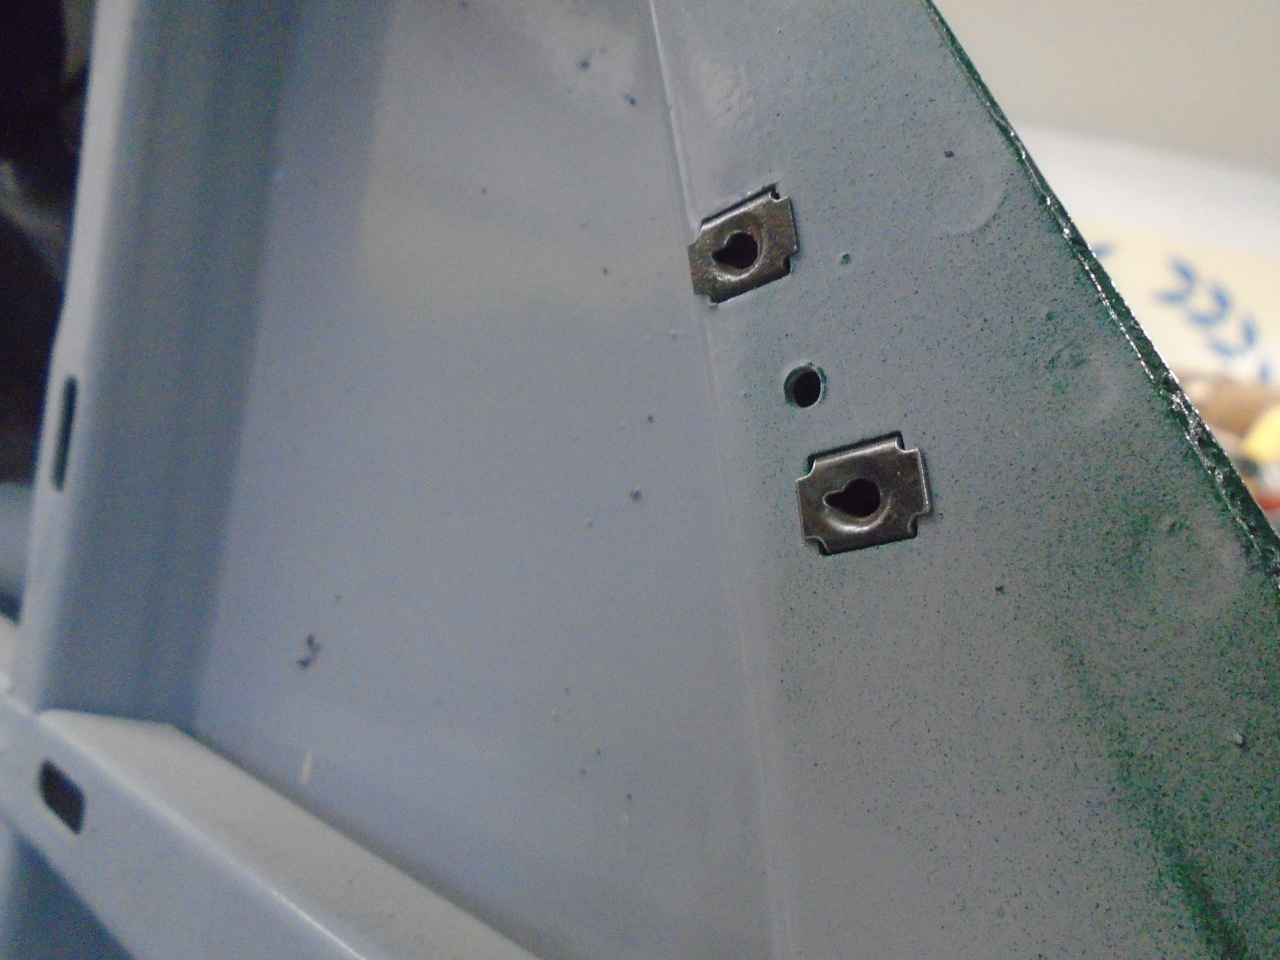
Also, in an instance of uncharacteristic foresight, I saw that the
little speednut inserts for the vent window latch should go in, too.
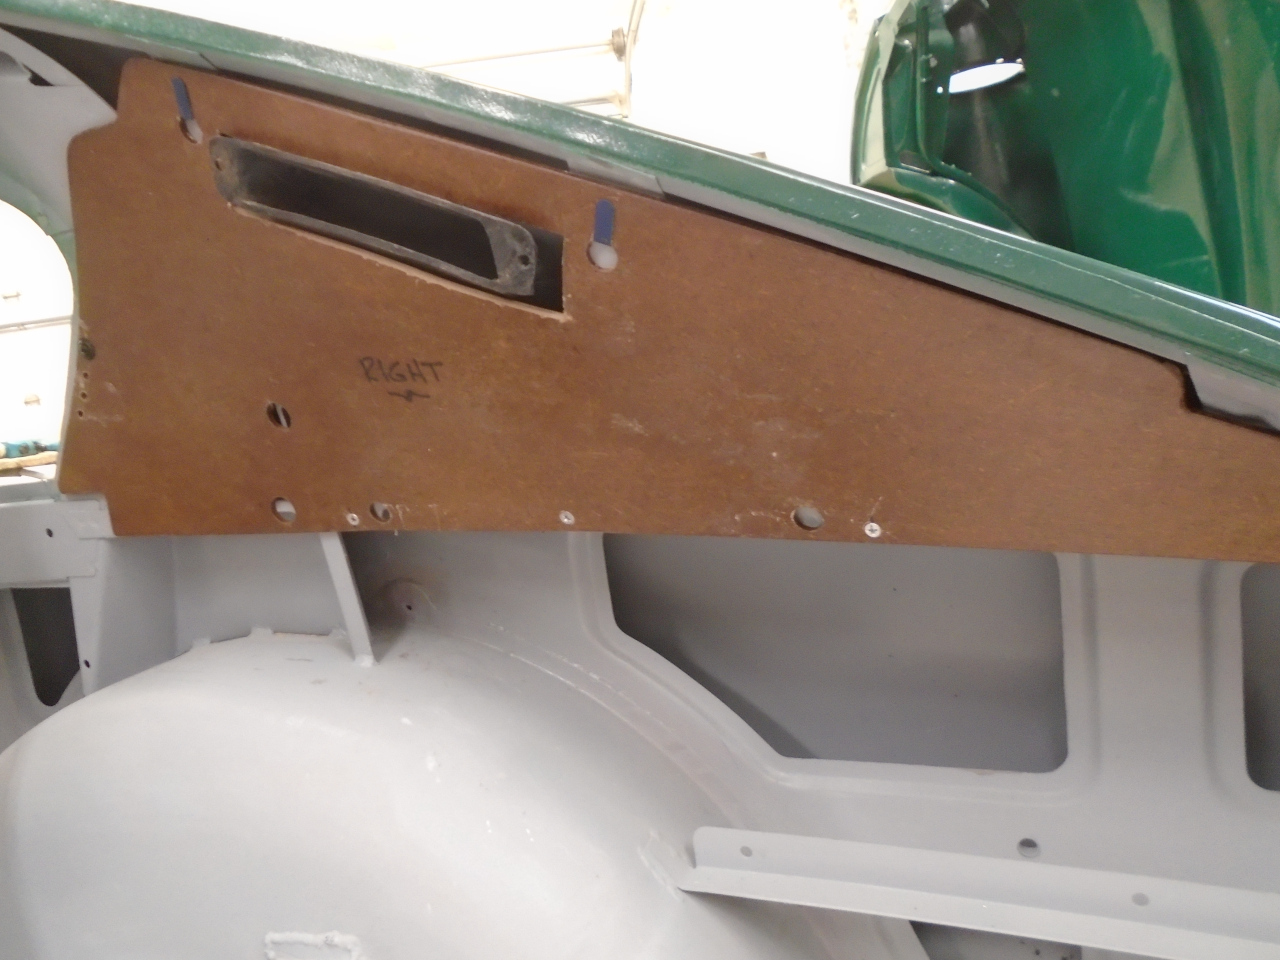
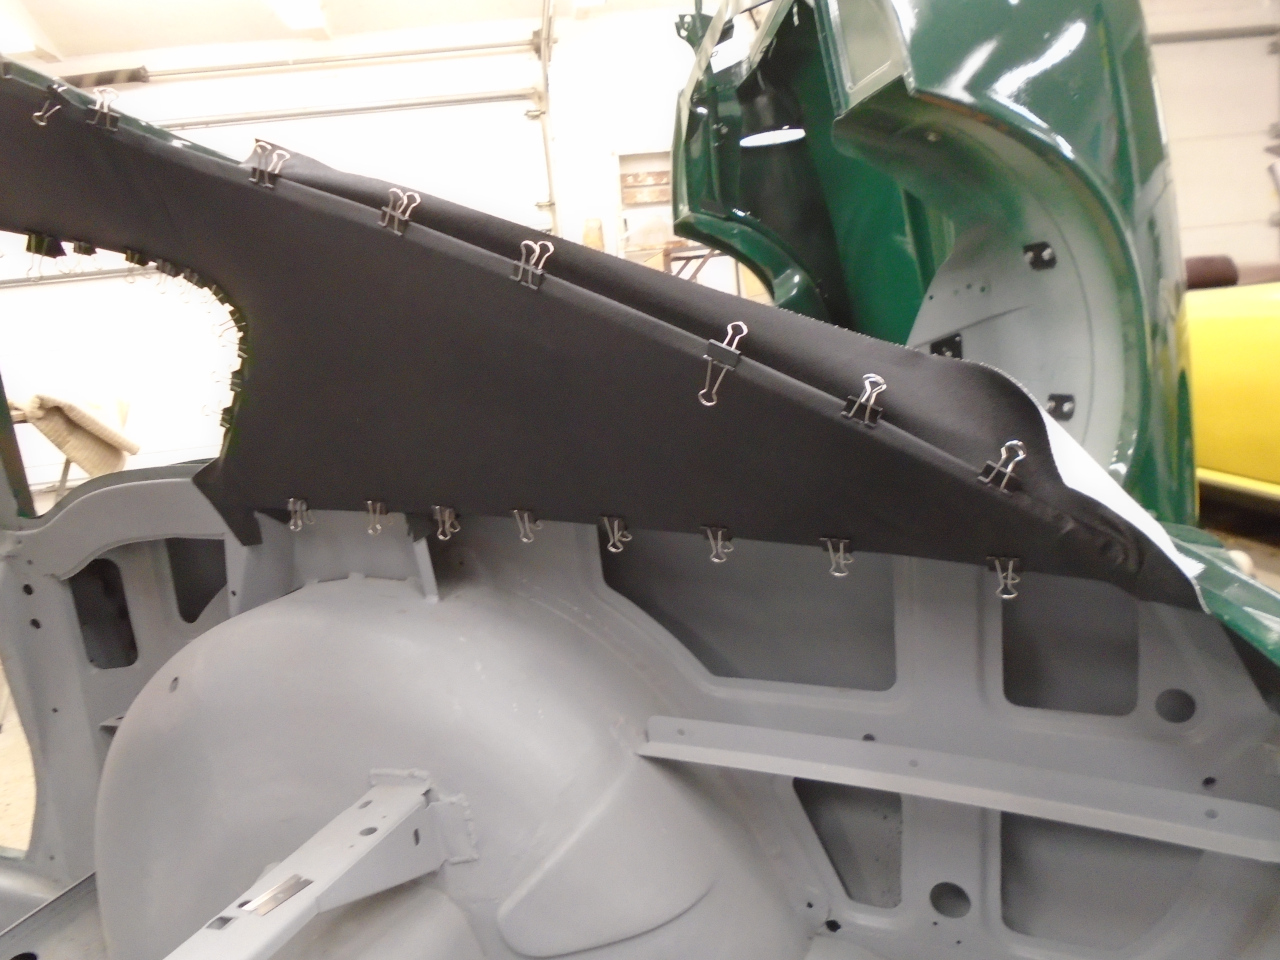
Finally, the new cards could go in. The original cards showed
evidence of some moisture exposure, so I gave my new cards a few coats
of varnish to help seal them.
Each card was held in by a pair of trim clips on the top edge, but the
bottom edge was just swinging in the breeze. The body structure
behind the cards is curved, and there appeared to be nothing to pull the
cards into the curved shape. I found, after posing the question
to one of the forums, that the lower quarter trim panels attach to the
body through holes in the cards, and pull the cards into shape.
It made more sense to me to fasten the cards along their bottom edges,
so the headliner could be secured there. A few small holes and
some sheet metal screws did the trick.
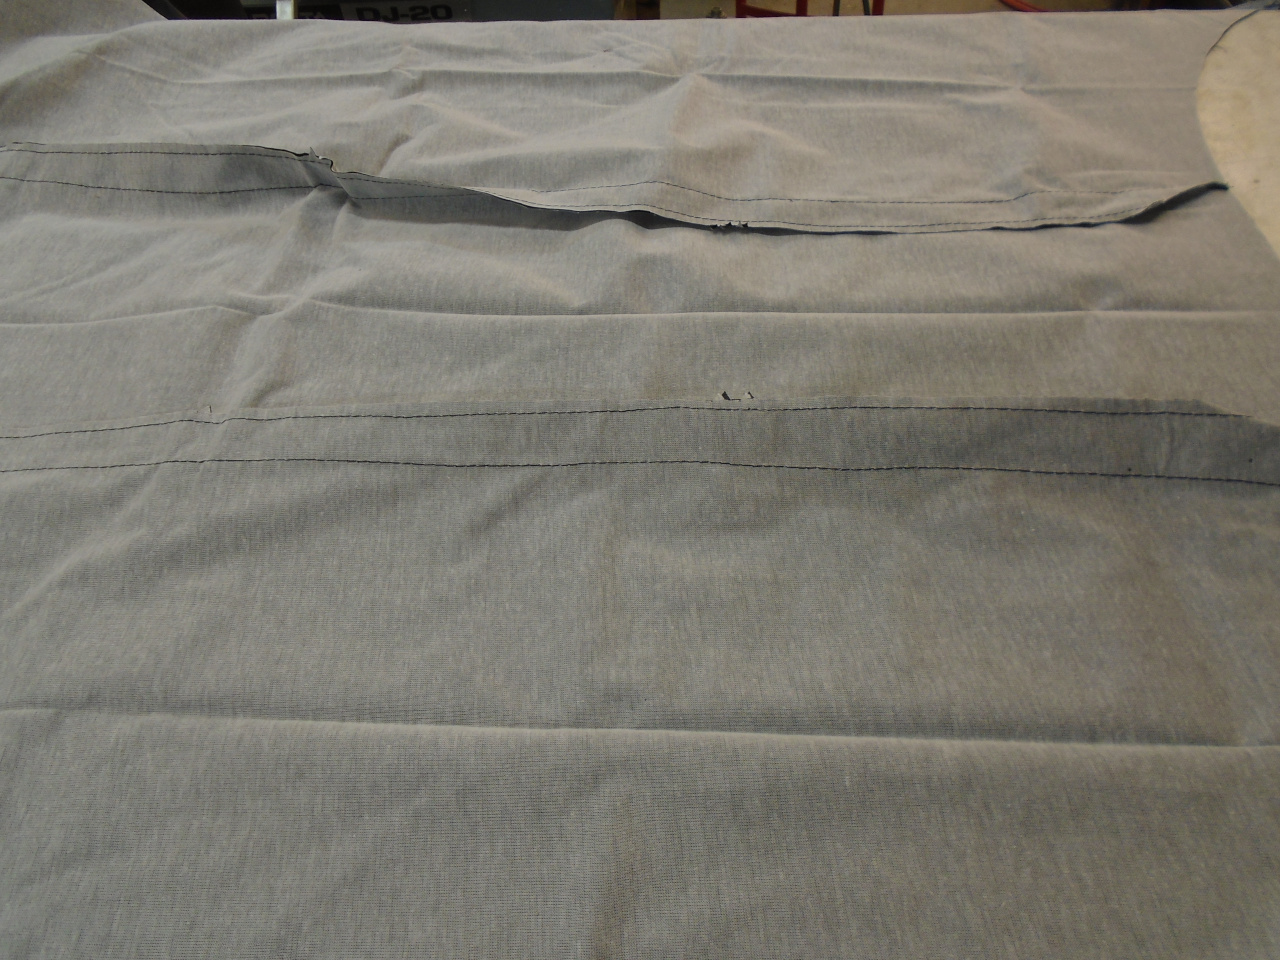
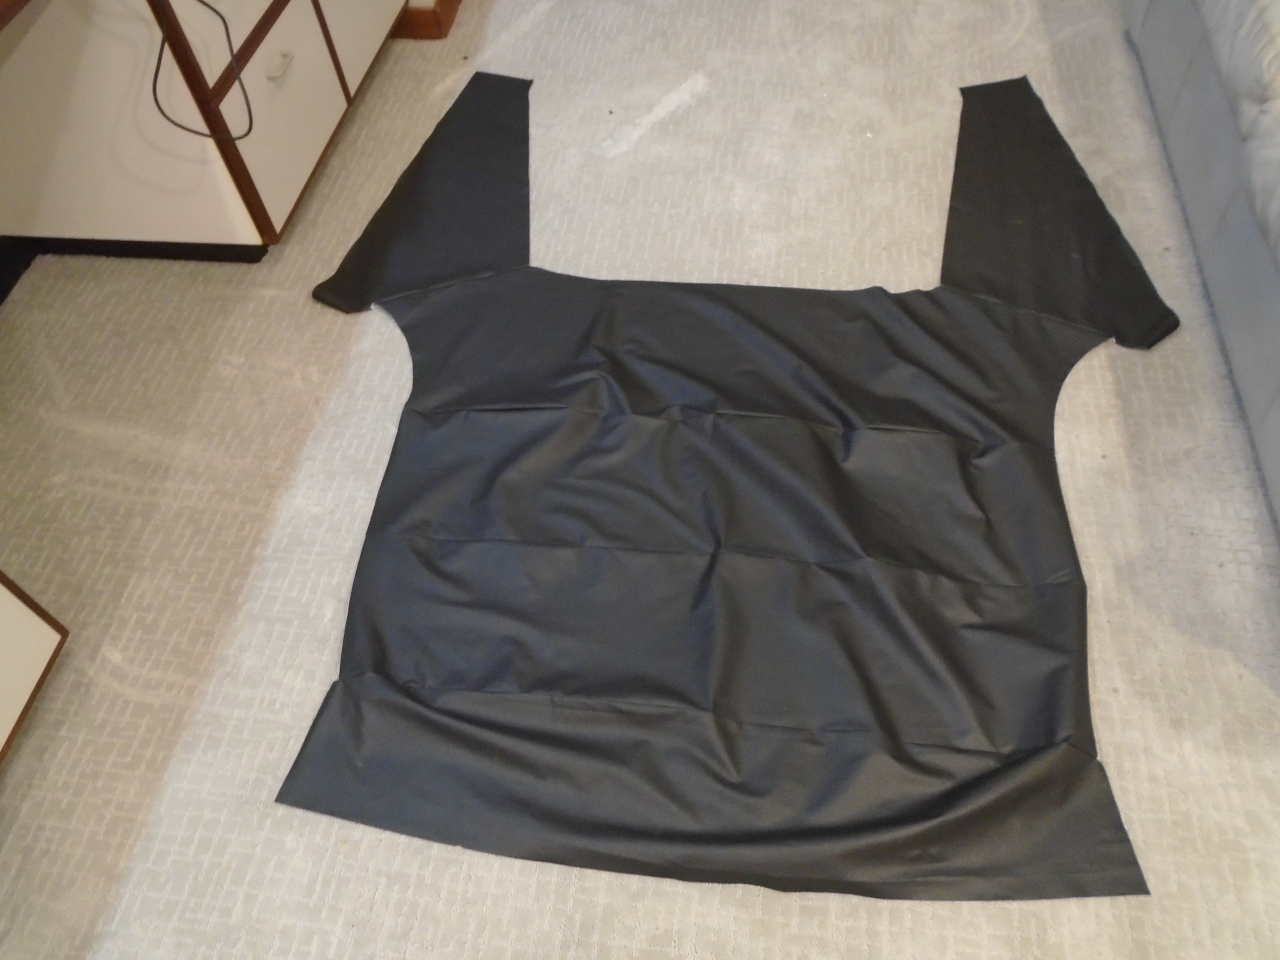
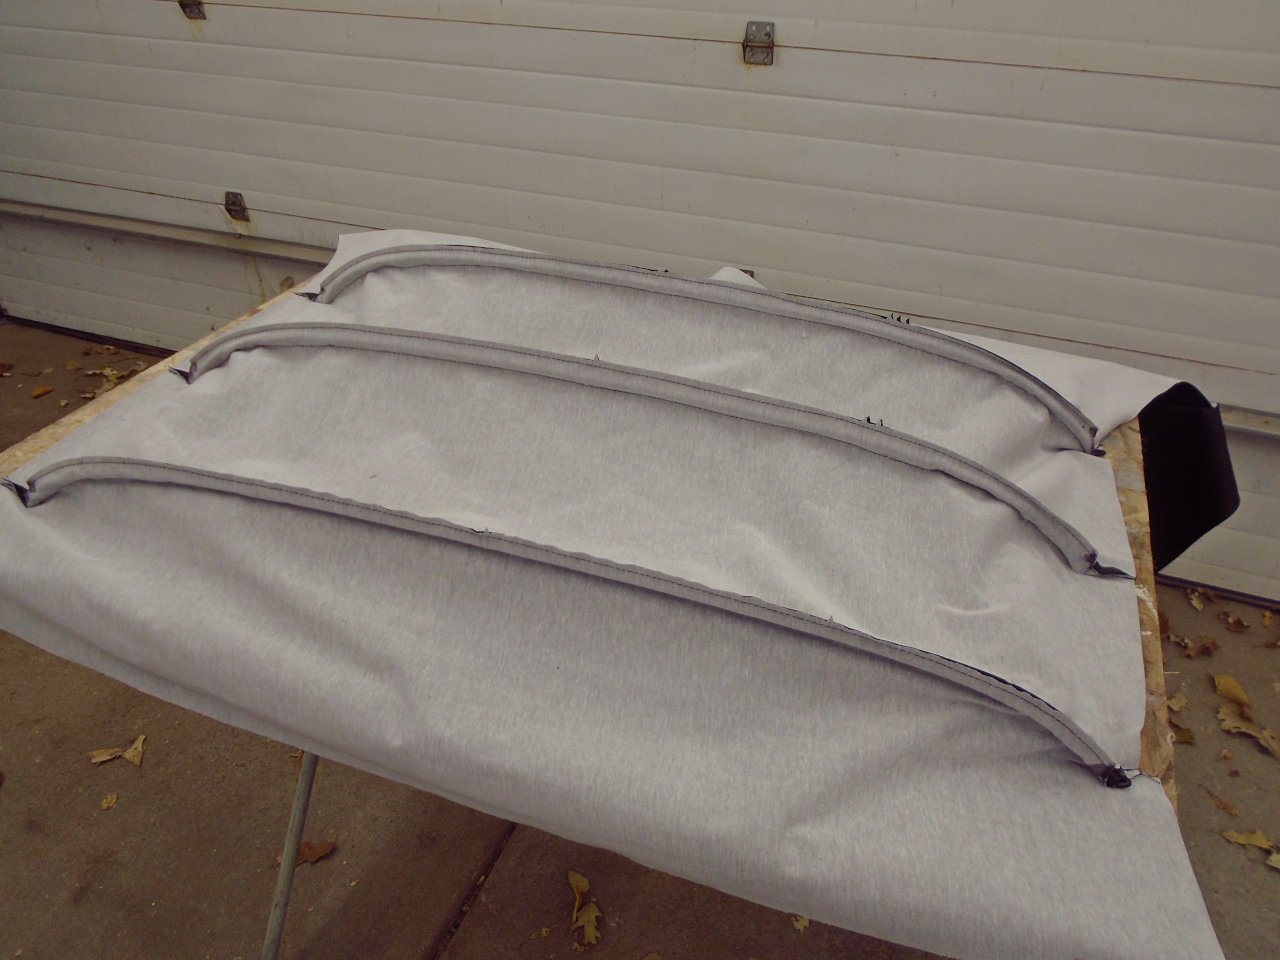
Finally, I turned tot he headliner itself. There were two little
preparation jobs to do. First, there were a lot of sharp creases
in the vinyl where it was folded for shipping. These could remain
visible in the final installation. The second issue, discovered in
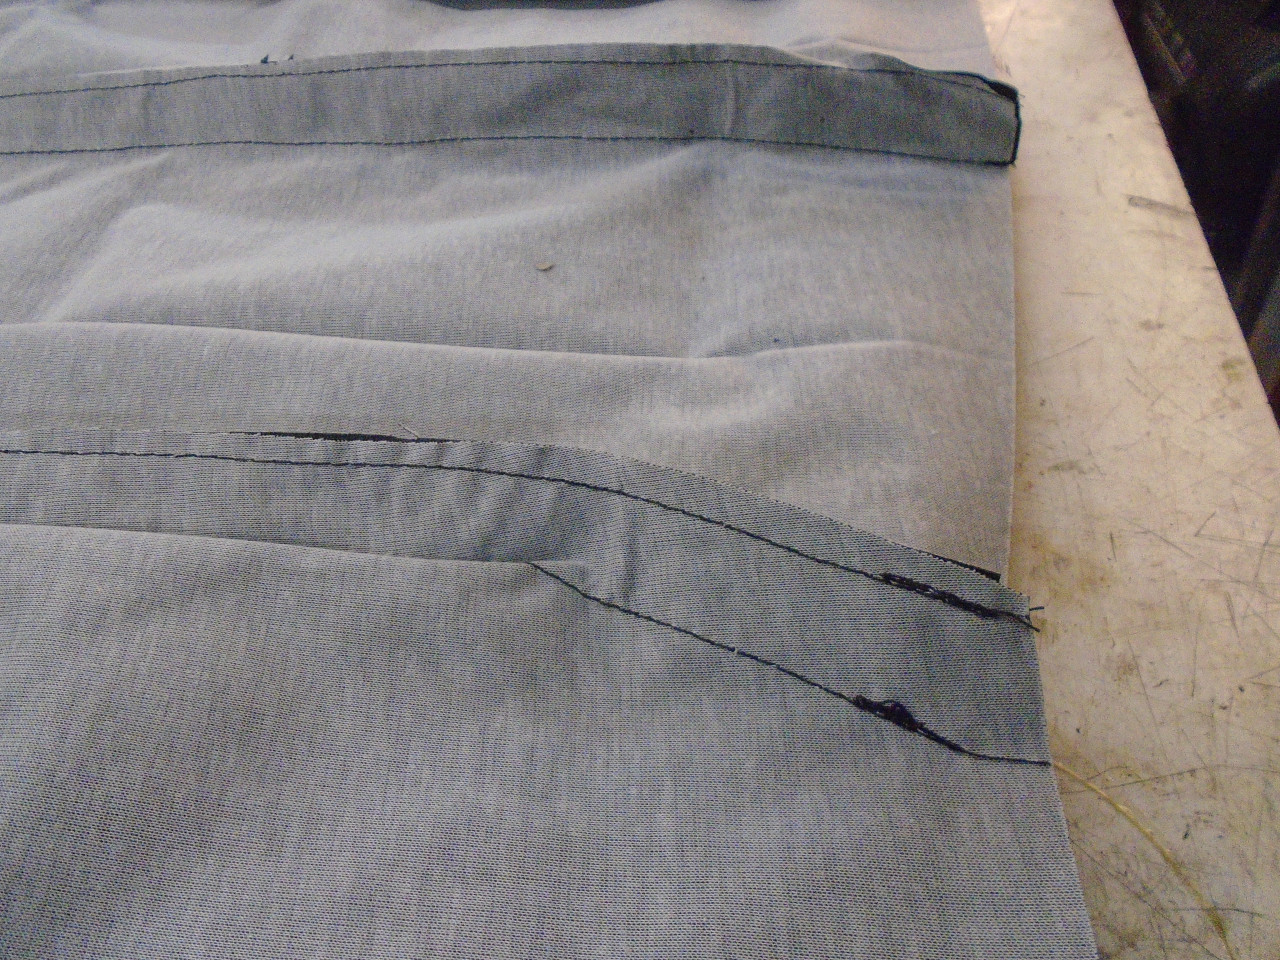
my research, is that the channels that receive the bow tubes extend all
the way to the edges of the fabric. This would cause them to
bunch up there, causing wrinkles.
The first issue was resolved by ironing the liner. After a few
minutes convincing my wife that it wouldn't harm her iron, I found that
using fairly high heat and keeping the iron moving worked well.
I trimmed back the channels, and applied a daub of CA glue to the
stitching to prevent unraveling. It turned out that this was not
enough trimming. I had to later remove another 1/2".
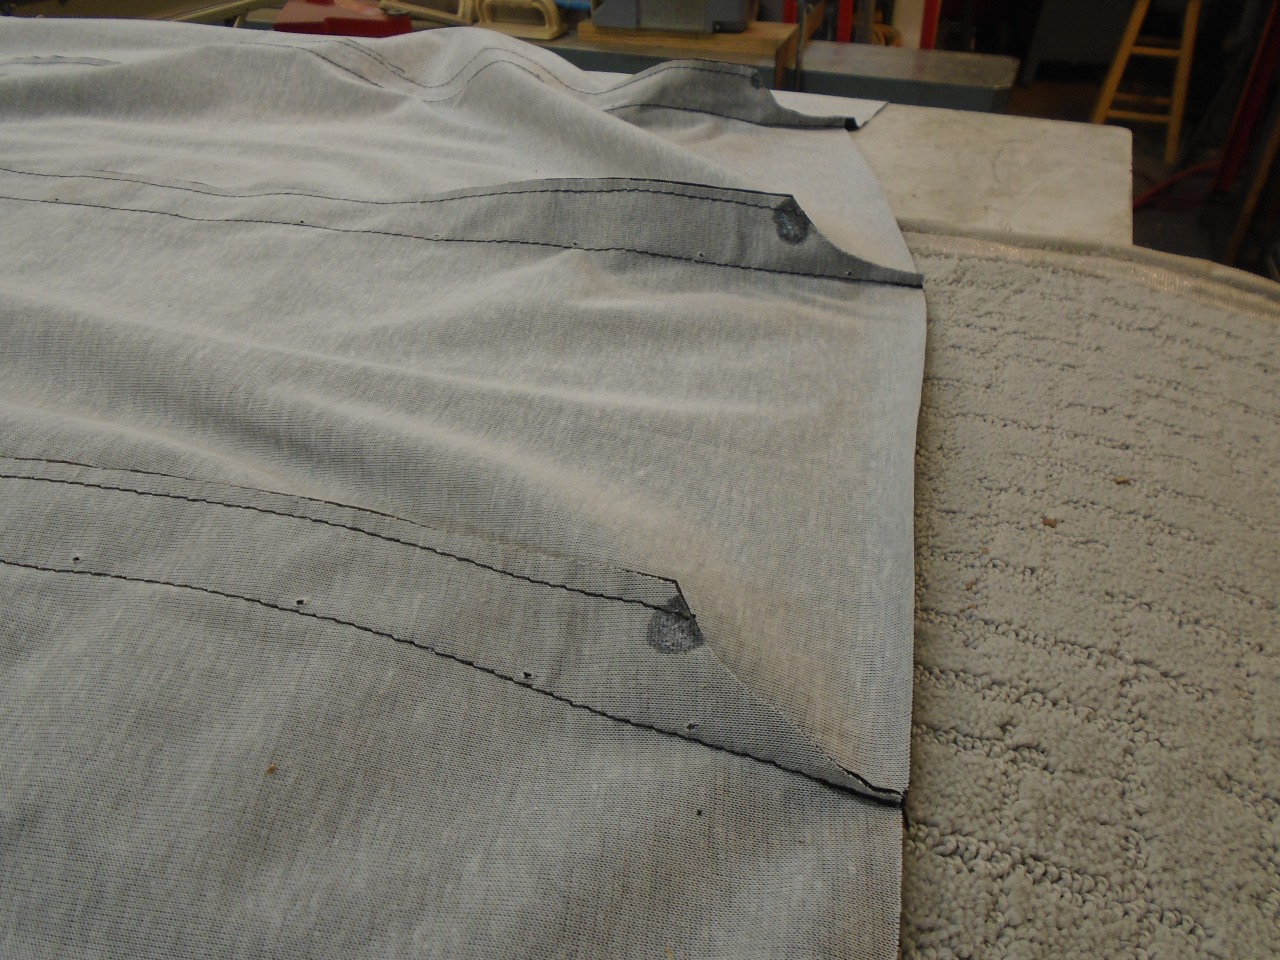
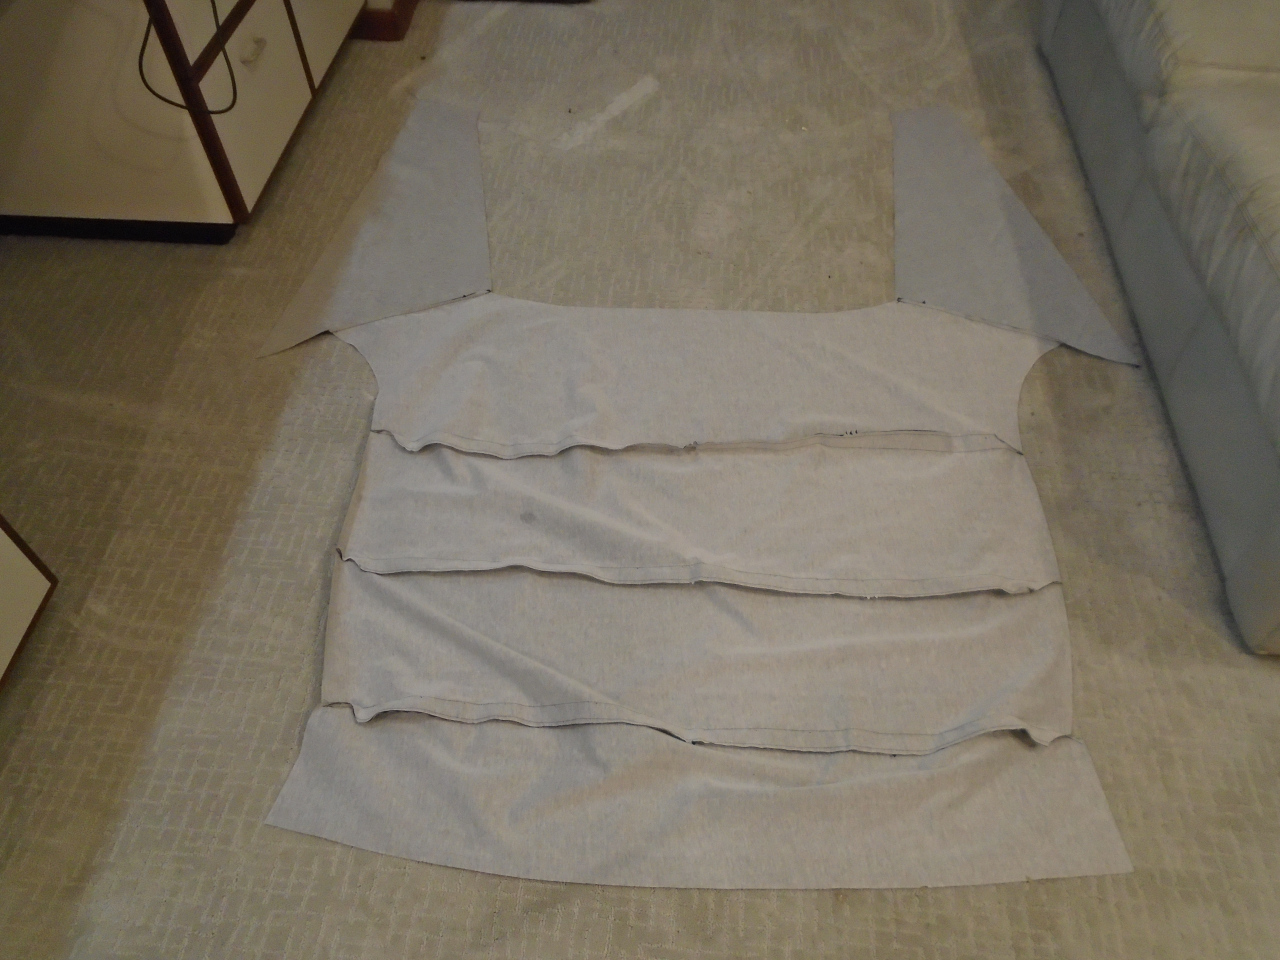
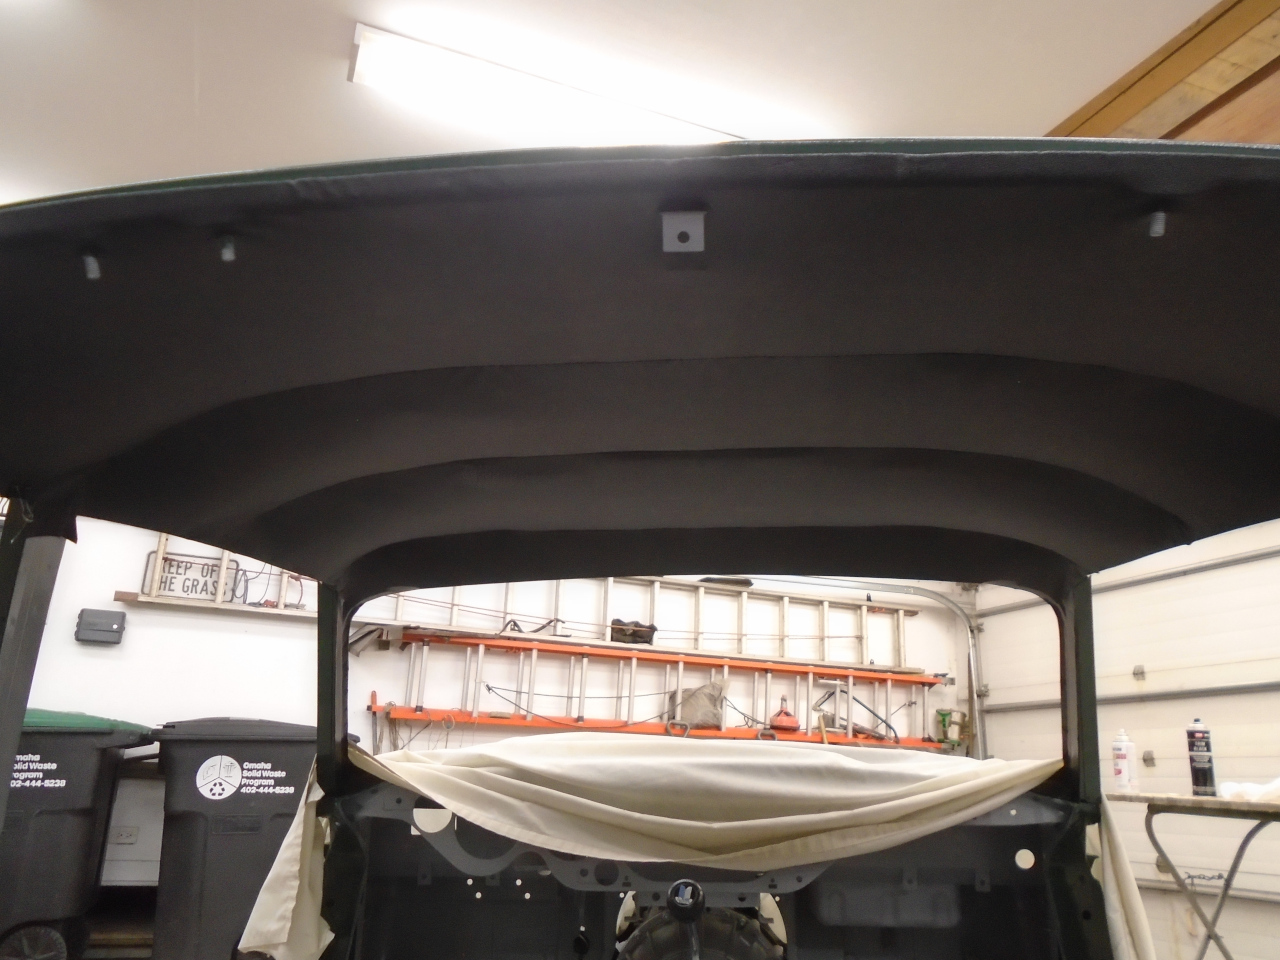
Ready to go.
It was finally show time. Inserted the bows...
...and installed the front bow.
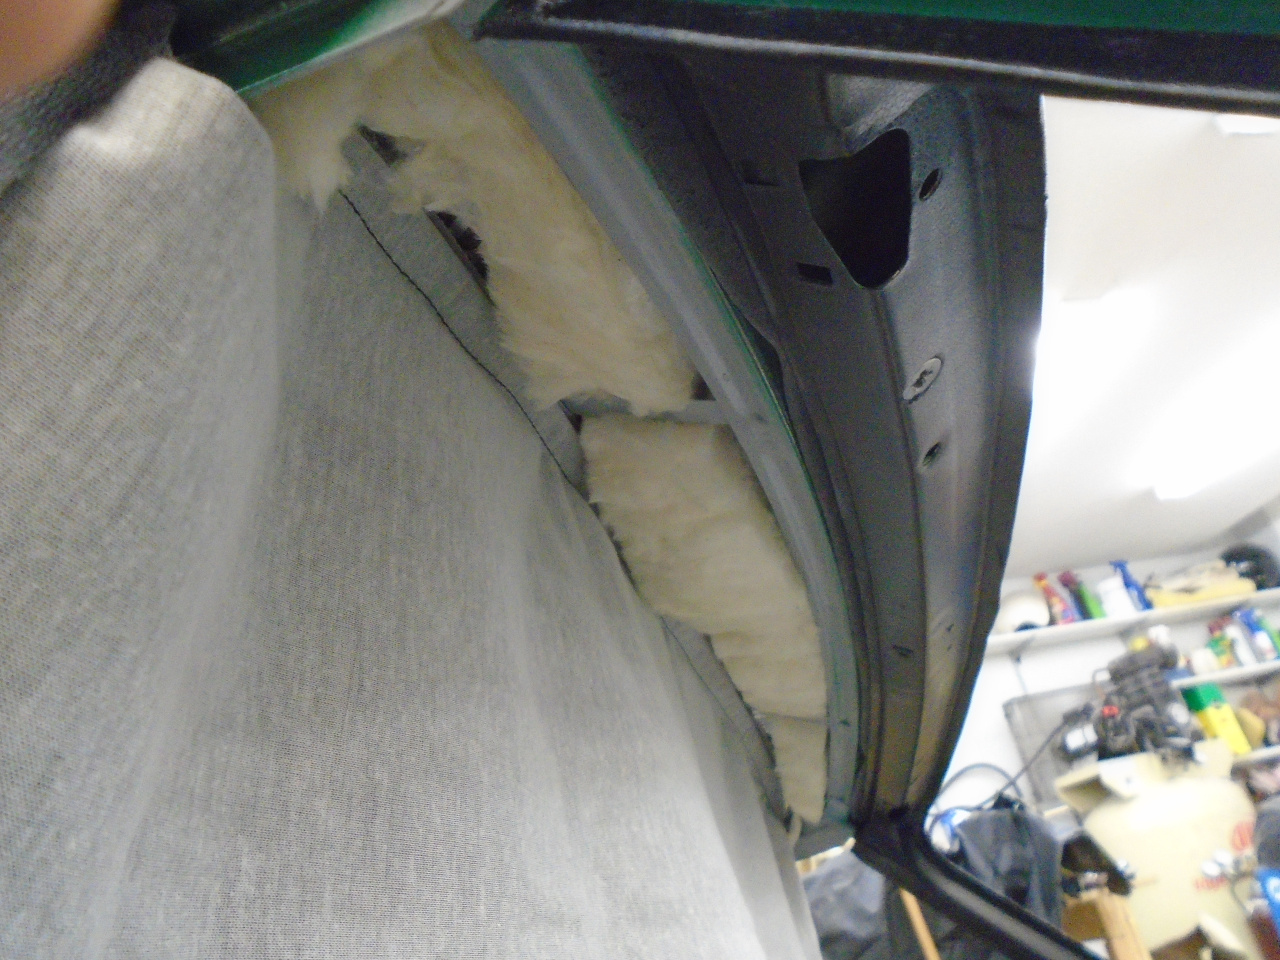
Even though the CLD mat I applied does have some small heat insulating
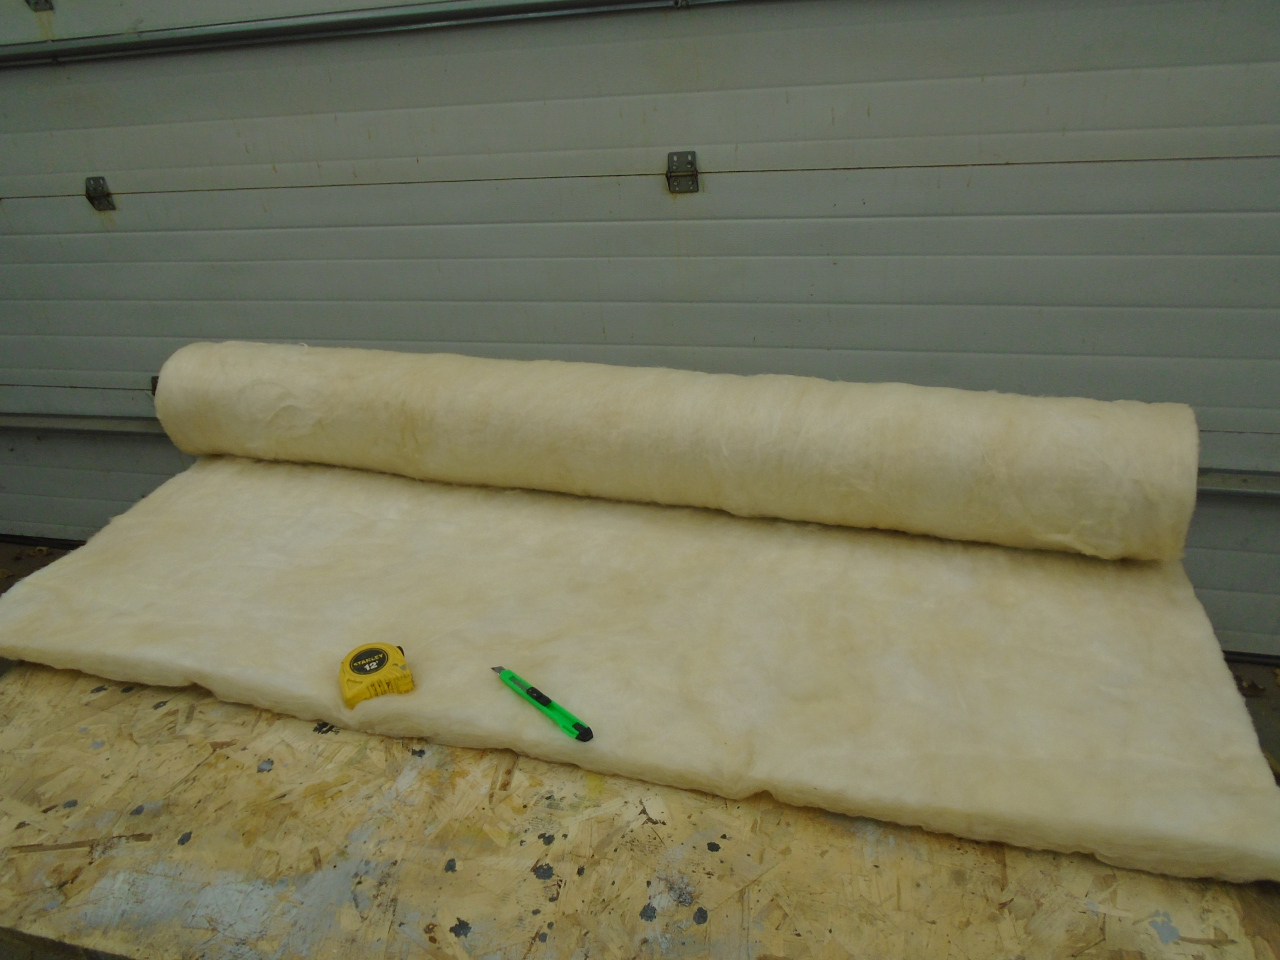
value, it isn't much. I decided to add some modern fiberglass
insulation. This is "semi-rigid" fiberglass, one inch thick.
It isn't really very rigid at all, but just less floppy than normal
fiberglass for home use.
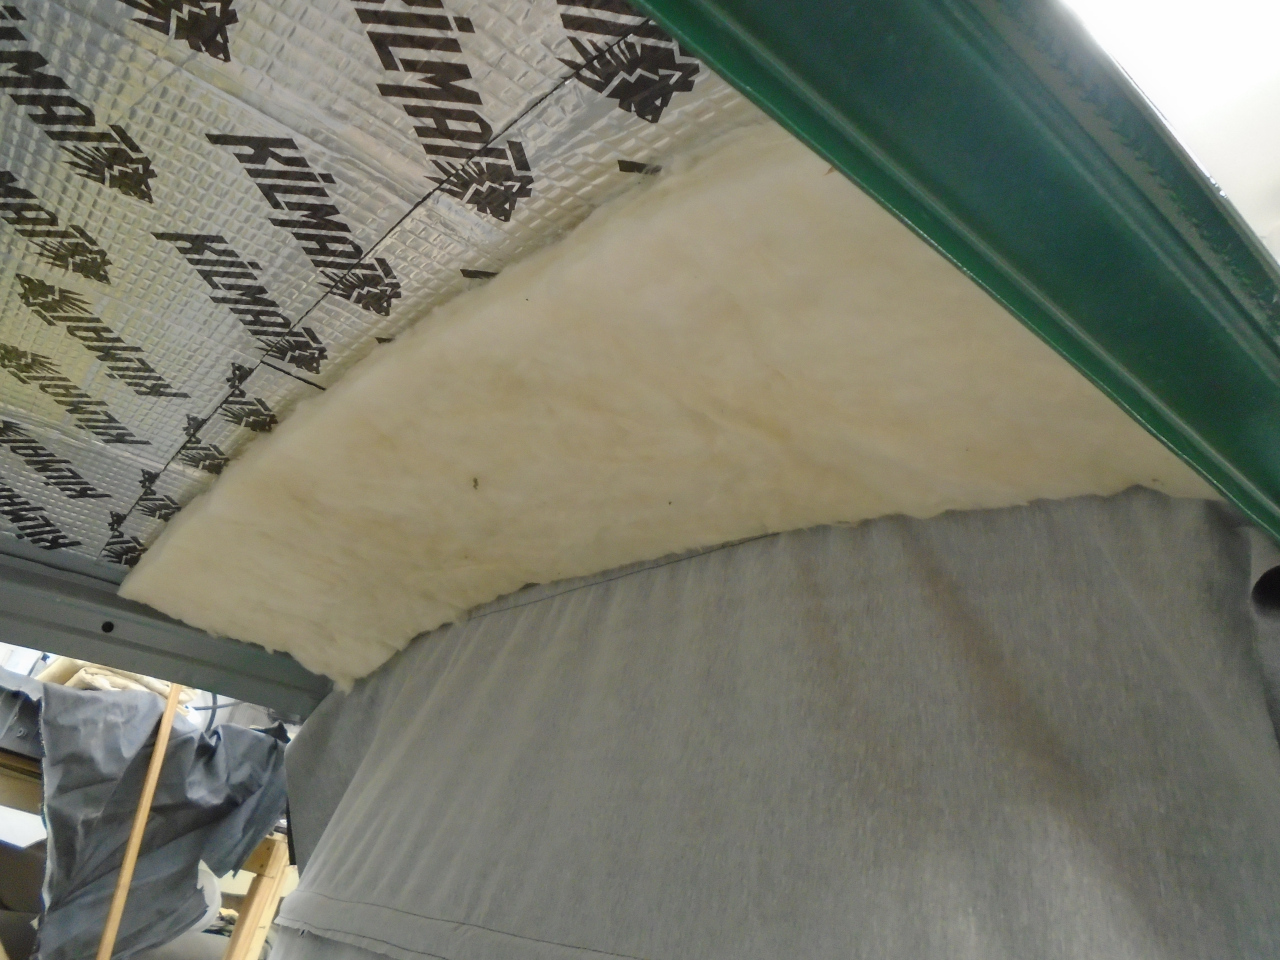
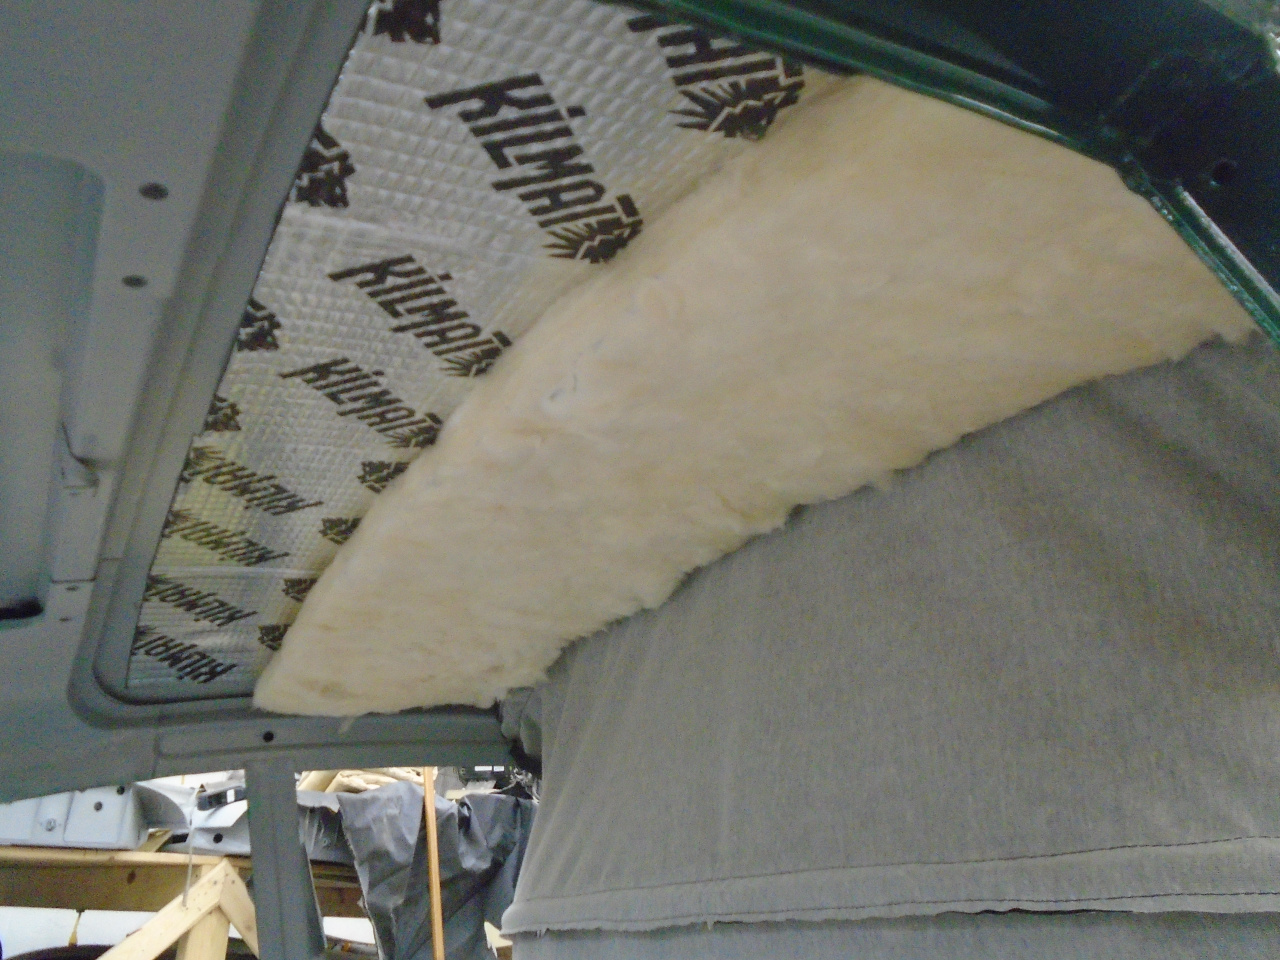
I cut it into bats that fit between the bows, and lightly glued them to
the roof one at a time as the bows went into place. I found it
worked best to place each bow upside down, then rotate it into
place. The insulation had to be compressed to allow the bow to
swing by.
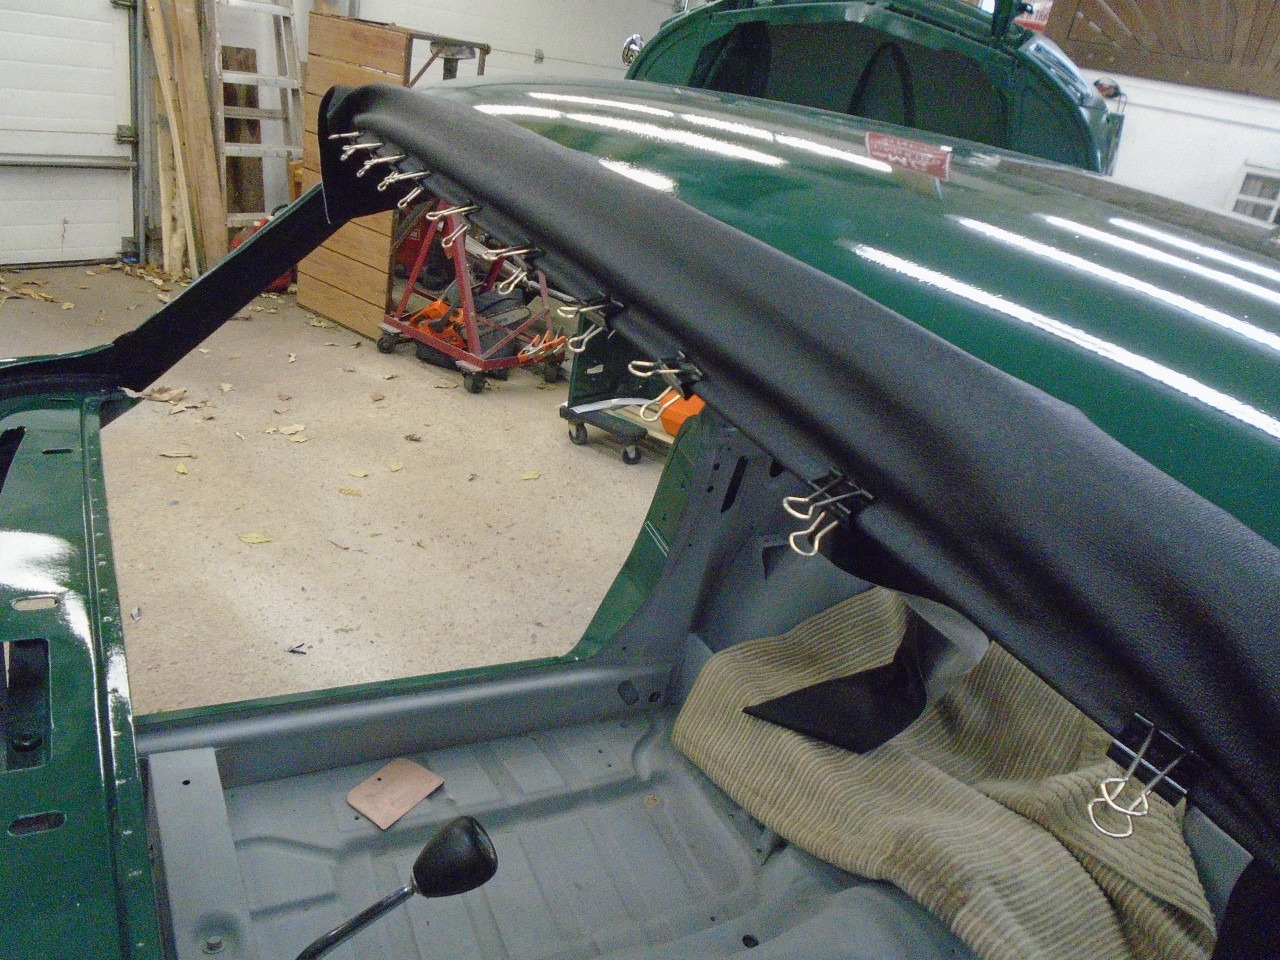
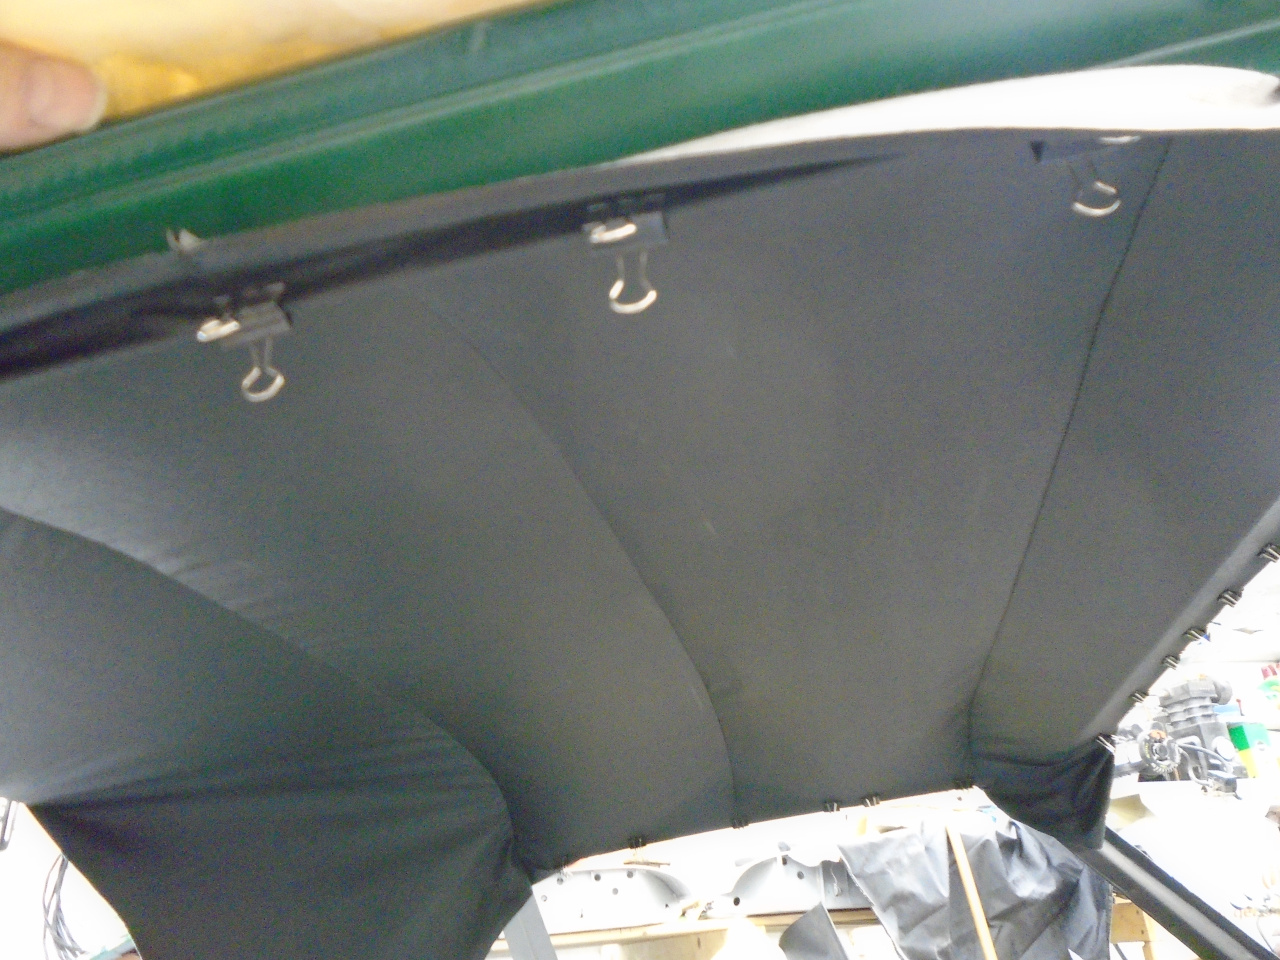
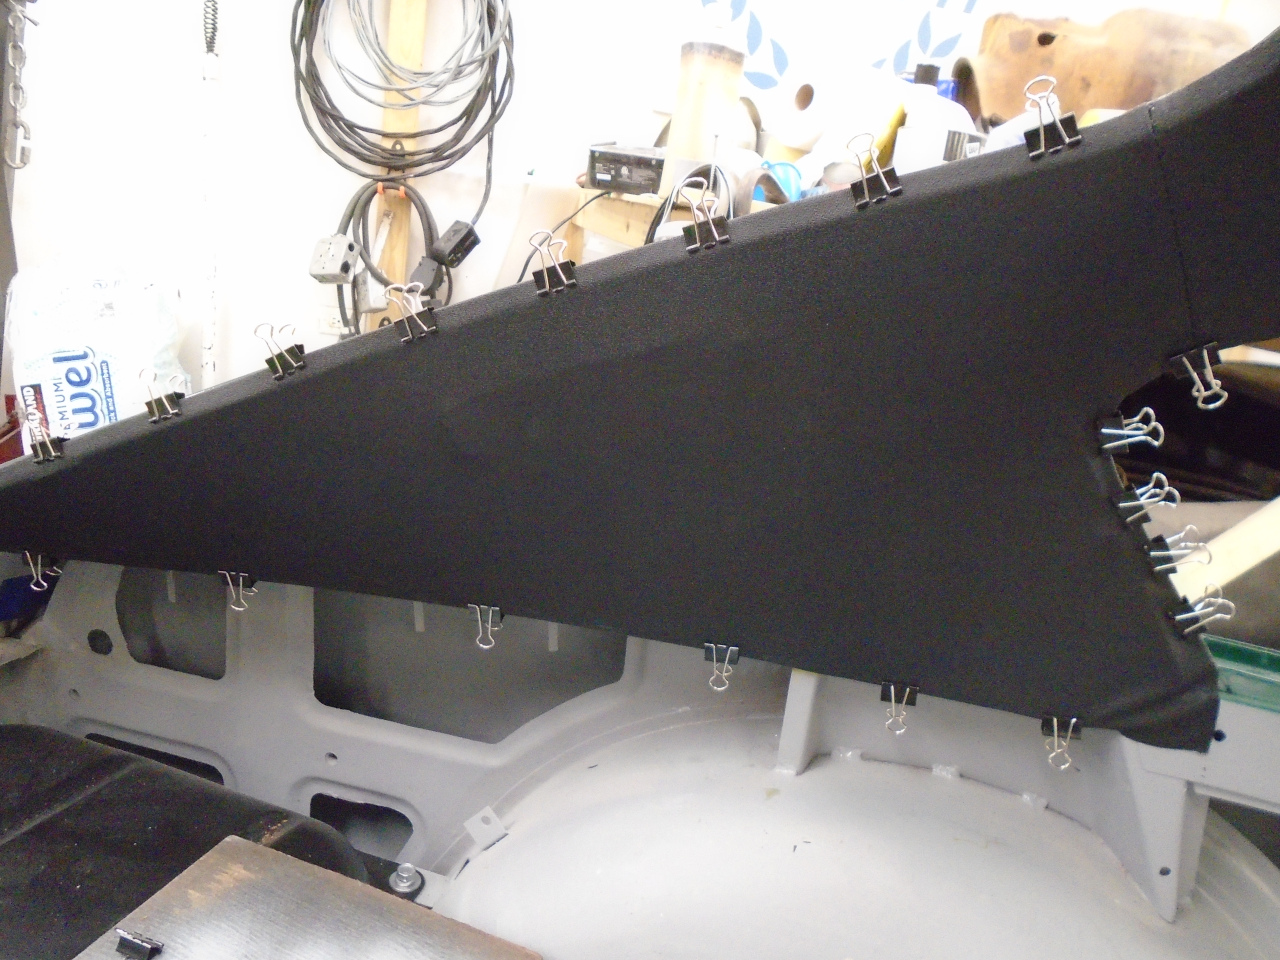
Then, it was just a matter of stretching the vinyl to get the wrinkles
out, starting at the front. These little clips help hold the
fabric in place while allowing readjustment.
The corners, where the vinyl bunches up, are the trickiest areas.
The tails at the rear are sort of fiddly, too.
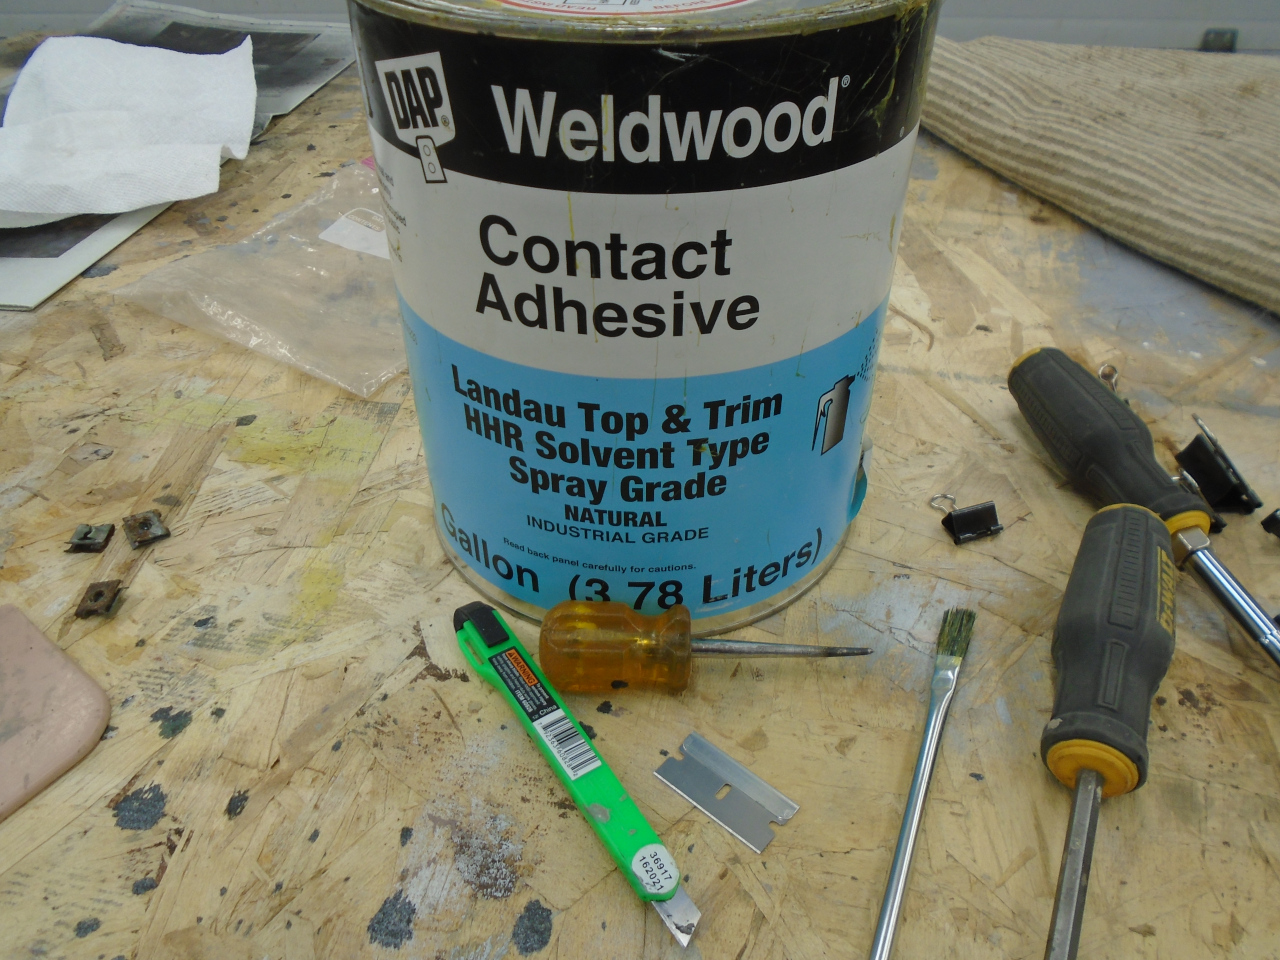
Once the fit seemed good, I trimmed the excess, and began gluing. I
use this glue. It is made for automotive use and has good high
temperature performance. After gluing, I put the clips back on for
a day or so.
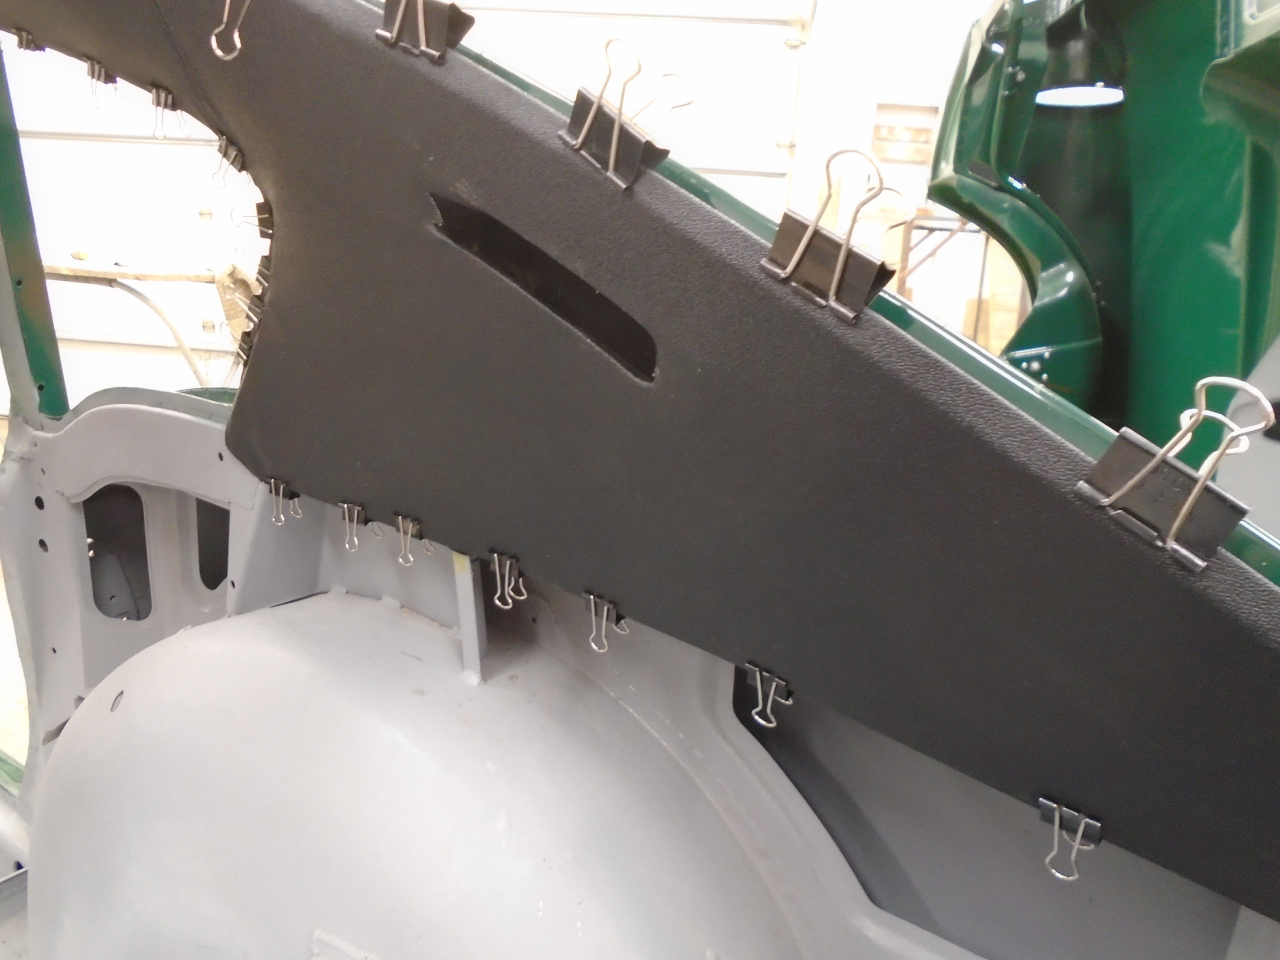
The vinyl needs to be cut and glued to the ducts for the exhaust
vents. The plastic duct doesn't perfectly match the contour of the
vinyl, but I think that's the way it was from the factory.
The little grilles that go inside cleaned up OK.
For something that no one will look at, I'm pretty OK with the way it turned out.
One thing I almost neglected. The B posts need to be covered on
the inside. The supplier includes loose vinyl for this, but I had
some trimming scraps that were plenty. I guess I forgot to take a
pic after it was covered.
This was a bit of a harrowing project. I have new respect for
those who can do it quickly and well. The cost was a around $250
for the liner and other materials. It took me the best part
of two days for the job.