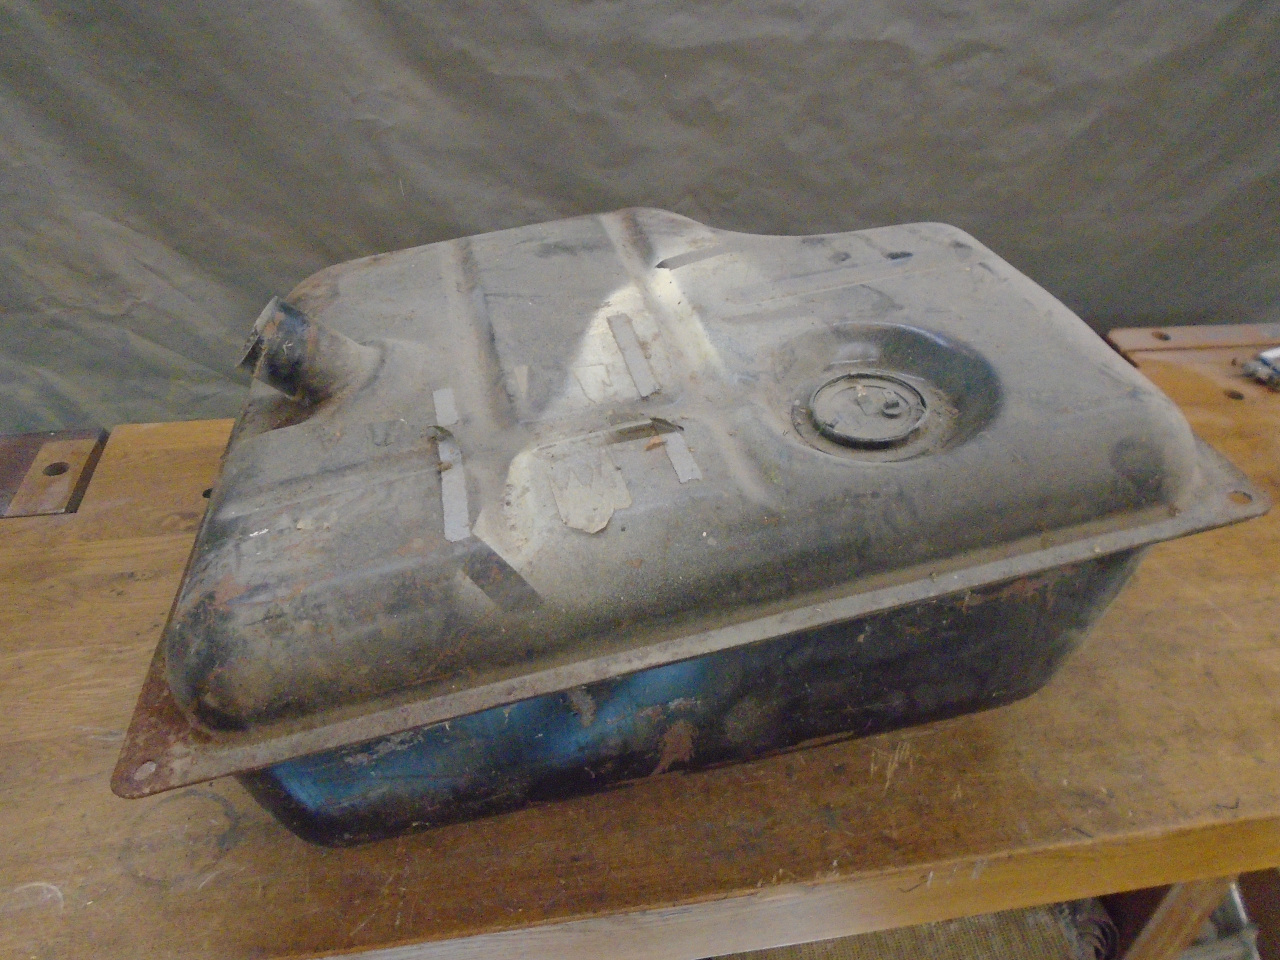
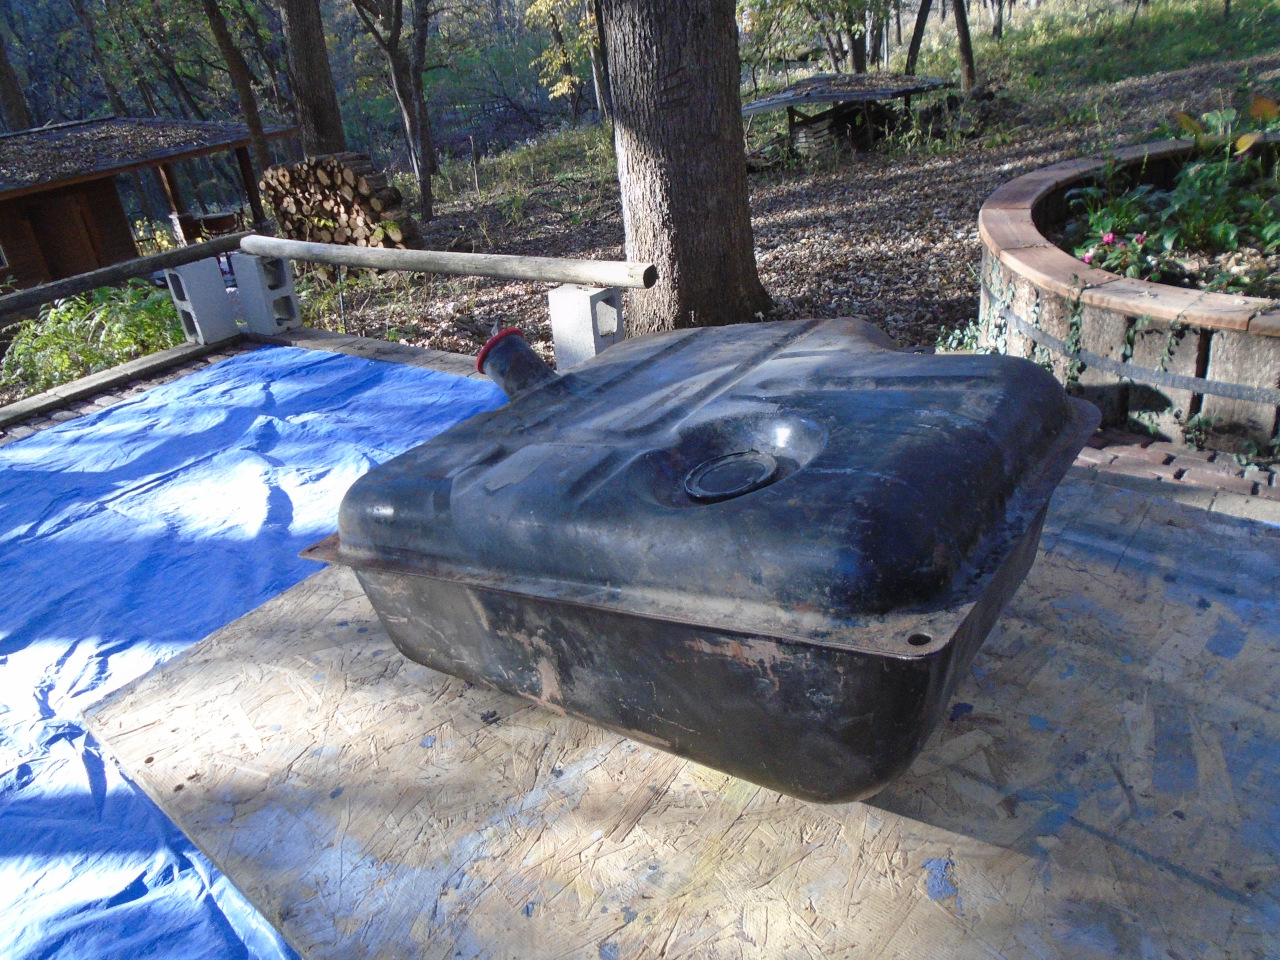
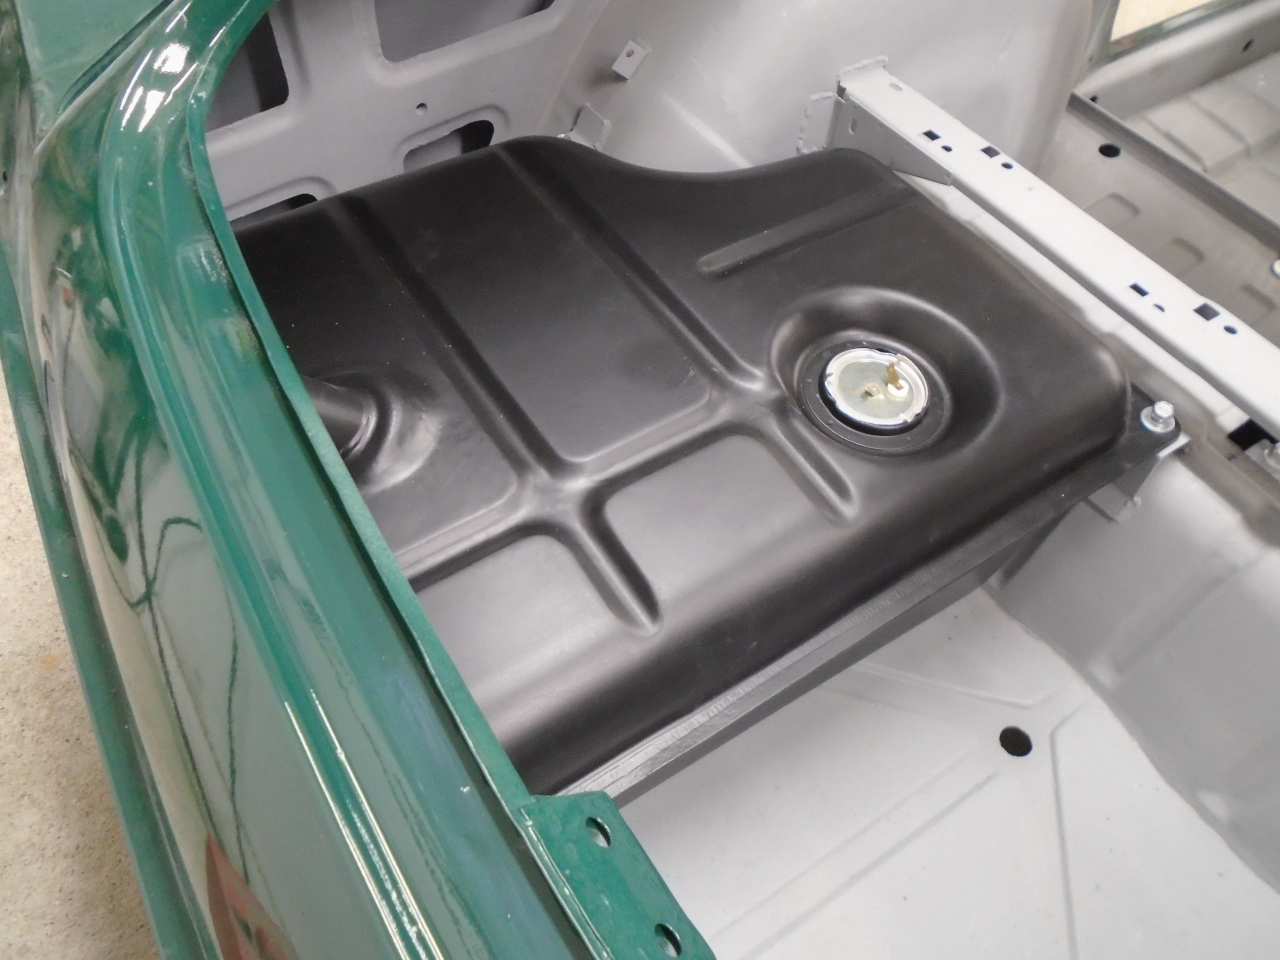
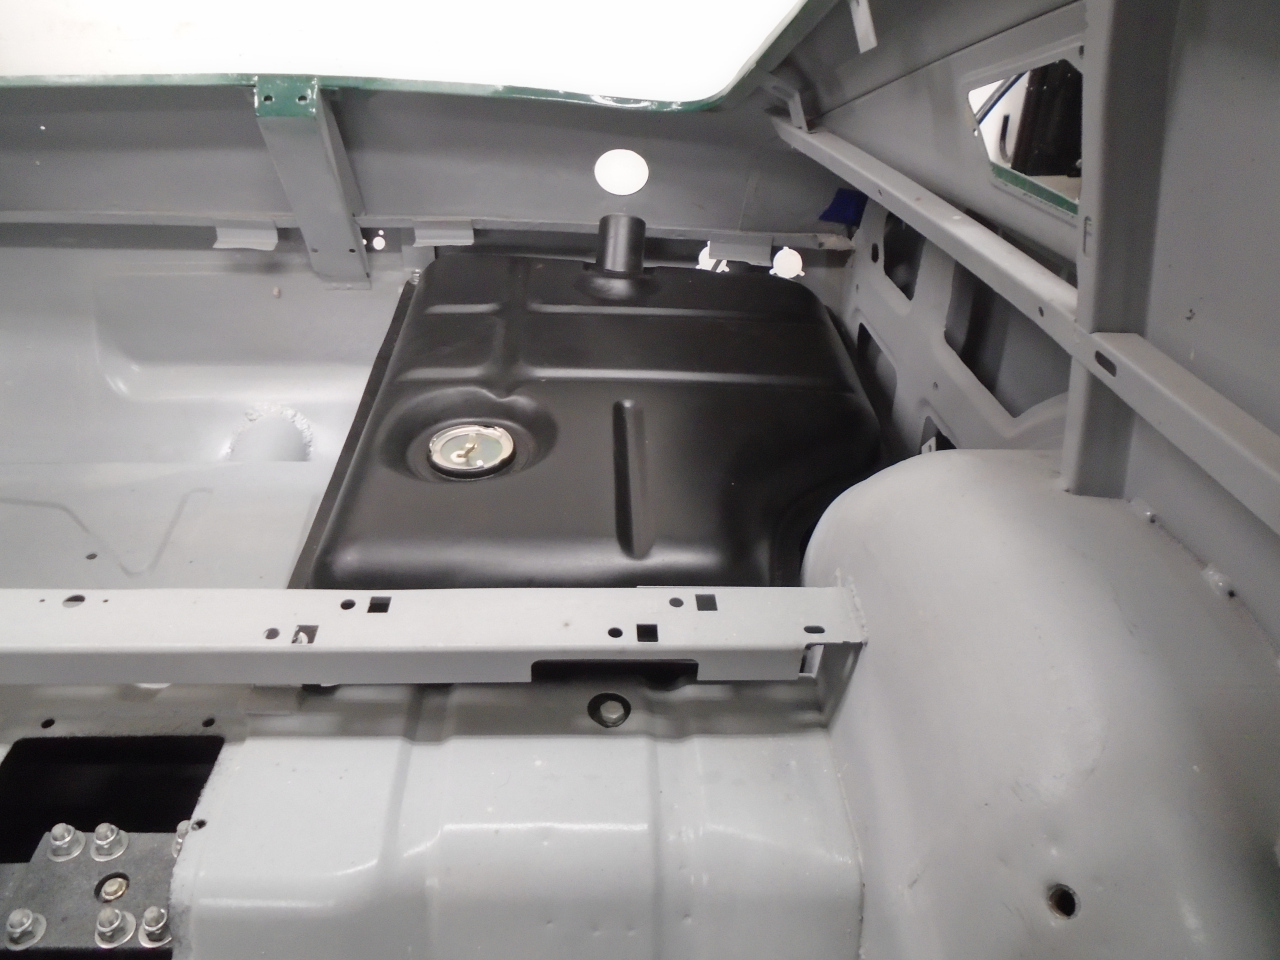
GT6 cars had a pretty ordinary fuel tank mounted under a panel at the
left rear corner of the car. It is inside the shell of the car,
and not hanging underneath, like many cars. Capacity of the tank
is reported as 9.9, 11.6, or 11.7 US gallons, depending on the
source. The GT6+ cars had the filler neck in the rear
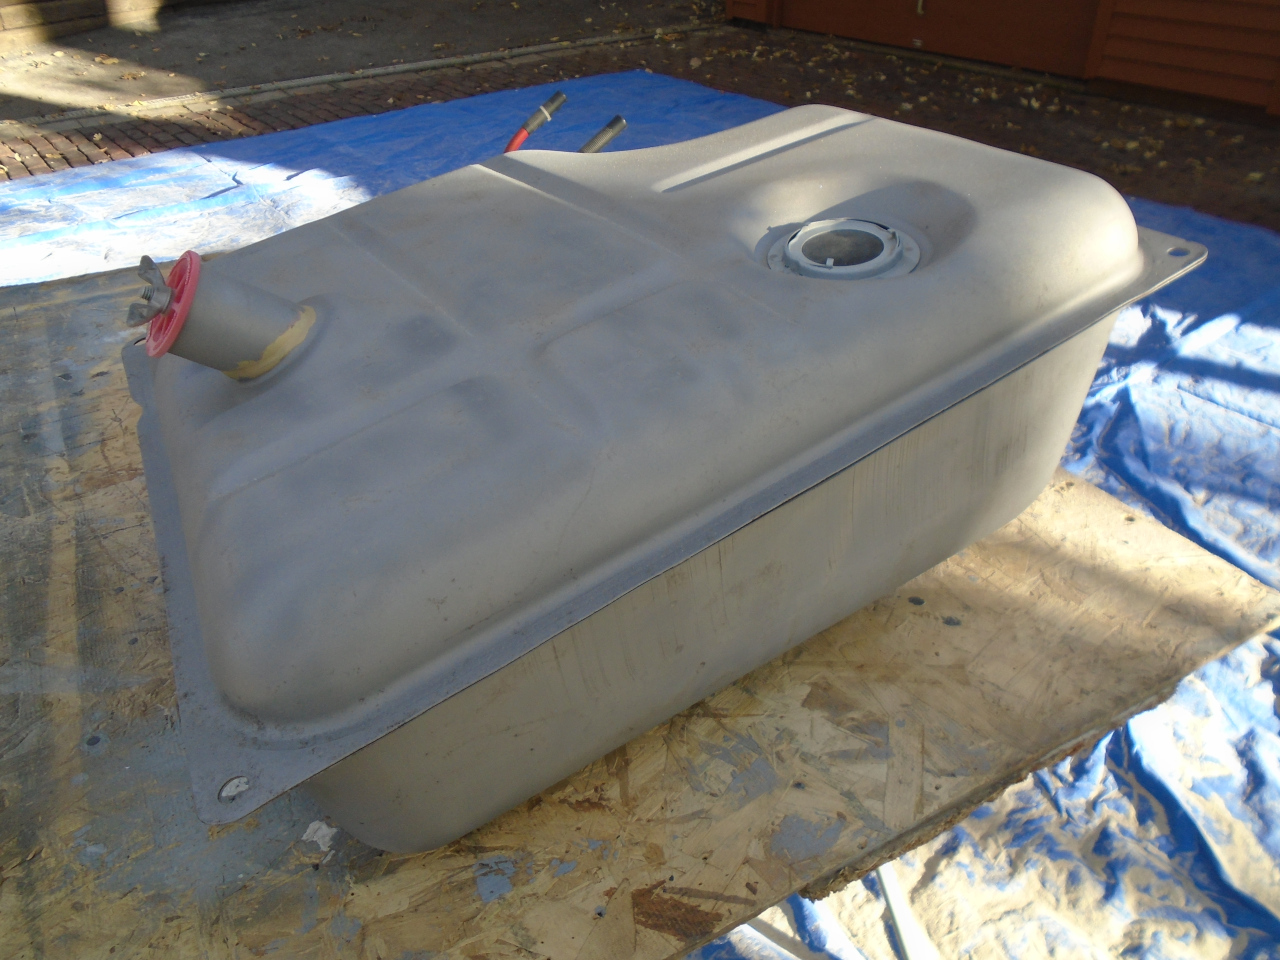
valance. This is a baffled tank. There is a rear baffle
running port to starboard just in front of the filler neck, and a
fore-aft baffle running from the front of the tank to the rear
baffle. Apparently, later GT6 cars with the filler in the left
rear wing didn't have baffles. This suggests that the rear baffle
may have been there to reduce fuel surge going up the filler neck on
hard acceleration. (Hard acceleration being a relative thing.)
My tank was dirty, but didn't have any sign of significant rust on the outside.
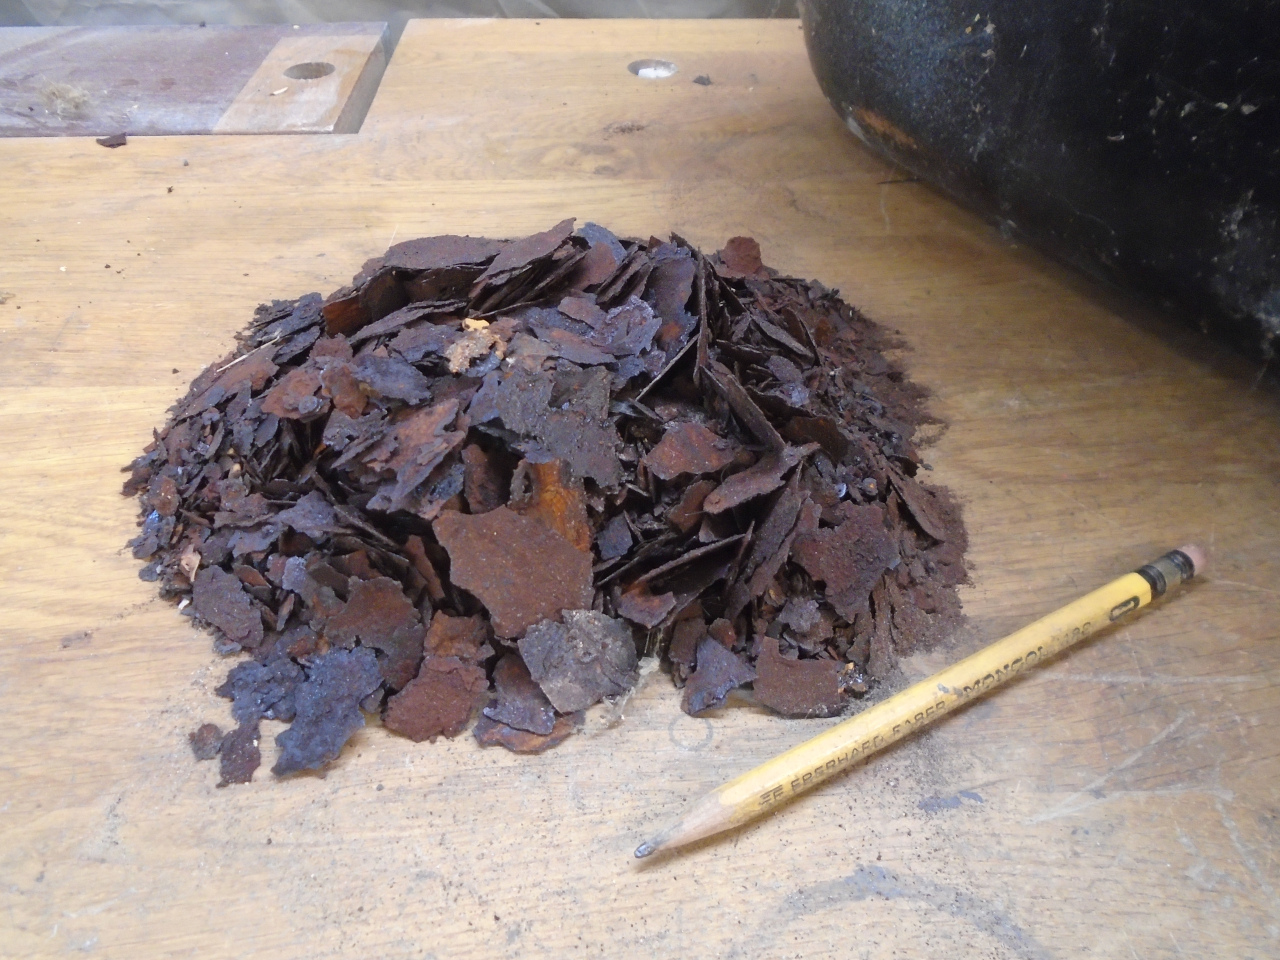
There was a lot of loose material inside, though. Shaking it out of the various orifices, I collected this:
That really looked like a lot of rust to me, but I wondered how
significant it really was. There was about 11.5 ounces of rust
(there was some other sediment, but I just called it all rust).
Rust isn't all iron, though. Part of the weight is oxygen.
Assuming a 50/50 mix of the two most common iron oxides, I calculated
that this pile of rust contained about 8.5 ounces of iron that used to
be part of my gas tank. Since the empty tank weighs in at 15.3
pounds, it seems that the pile of corrosion had taken away a little over
3% of my tank's weight.
If the metal removal was the same everywhere, this would only be a
reduction in thickness of only around 0.001 inch. It wasn't the
same everywhere, though. Most of the corrosion would likely be in
the lower part of the tank. What I needed was a visual
inspection--something better than I could see through the tank openings.
I have a little bore scope, which is just a tiny camera on the end of a
gooseneck. These short, shaky videos show what the inside of the tank
looked like. The baffles prevented getting a good look at some
areas of the tank. Notice that there some largish the areas of
bright uncorroded metal. The videos show that the baffles have
about 1/2 inch gap at the bottom to allow fuel to move between chambers,
and a smaller gap at the top, to allow air to equalize.
I've done a couple of tanks before, and typically use a multi-step
process to clean the inside. First, solvents are used to dissolve
any left over fuel varnish. Then a medium strength acid is used to
dissolve the rust. I know from experience that both of these
processes work a lot quicker and better with constant agitation.
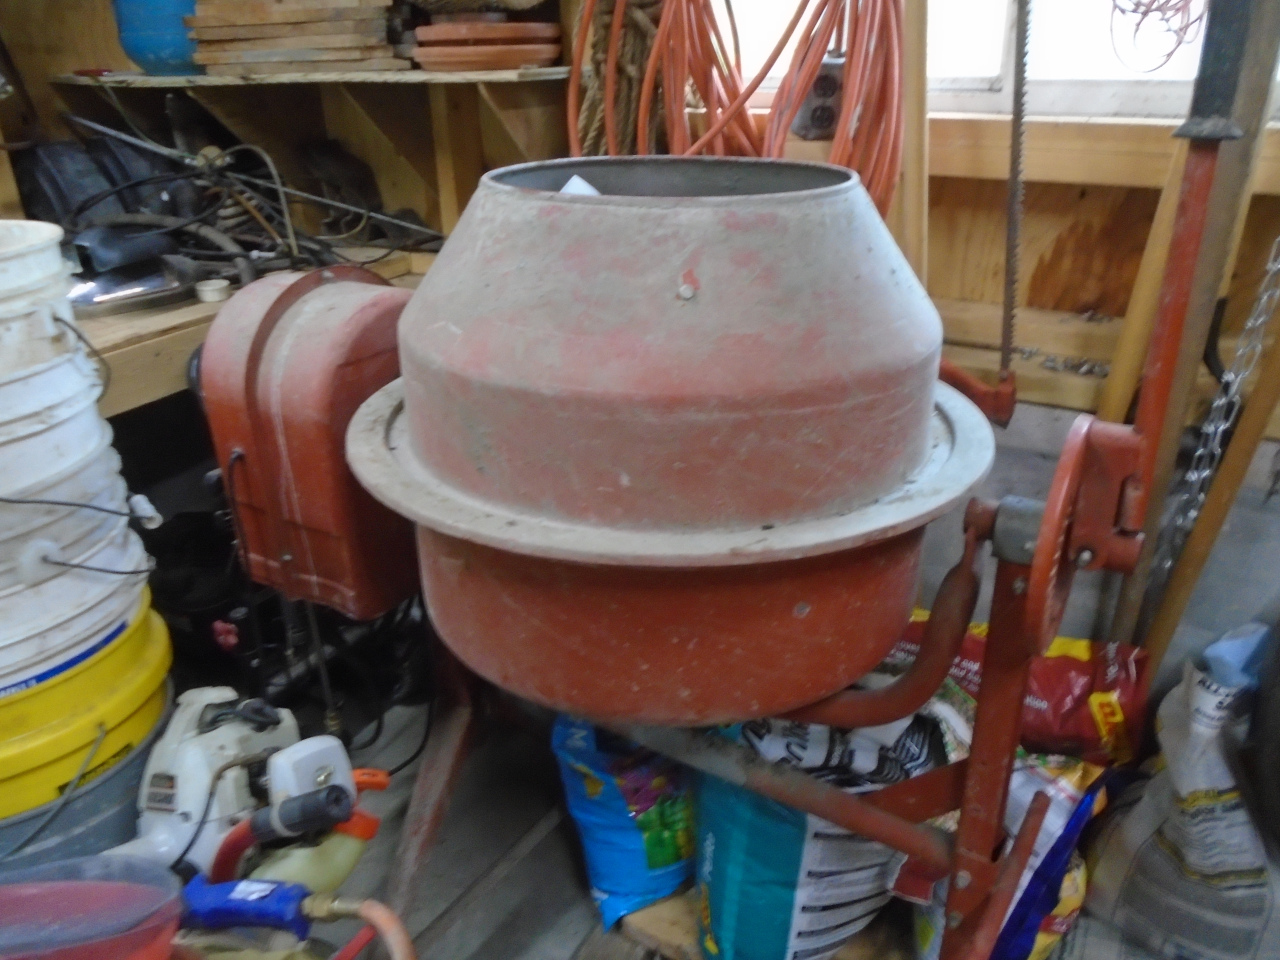
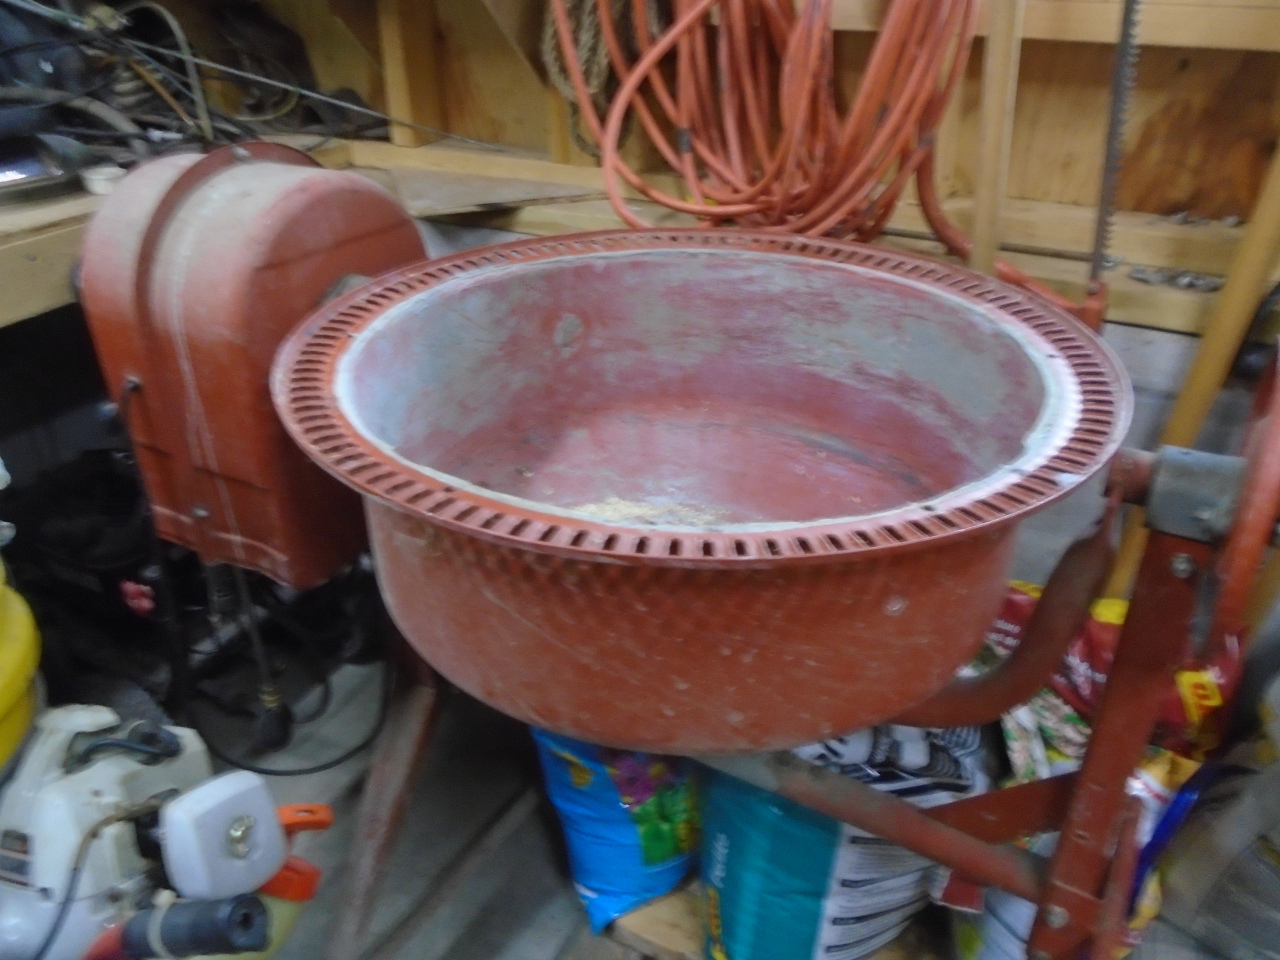
Since holding and shaking the tank with a few gallons of liquid inside
doesn't appeal to me, I use a little automation in the form of the old
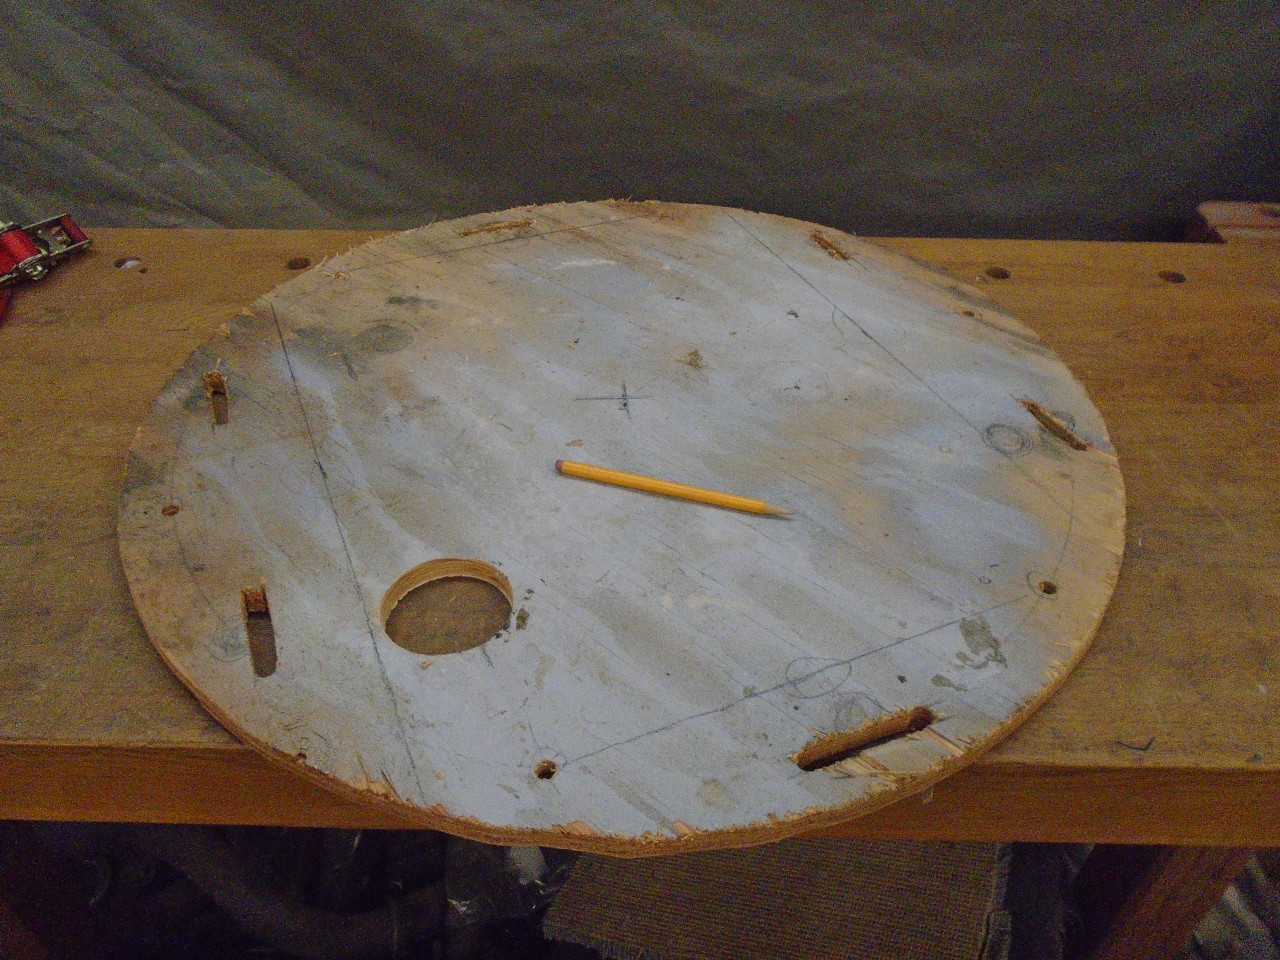
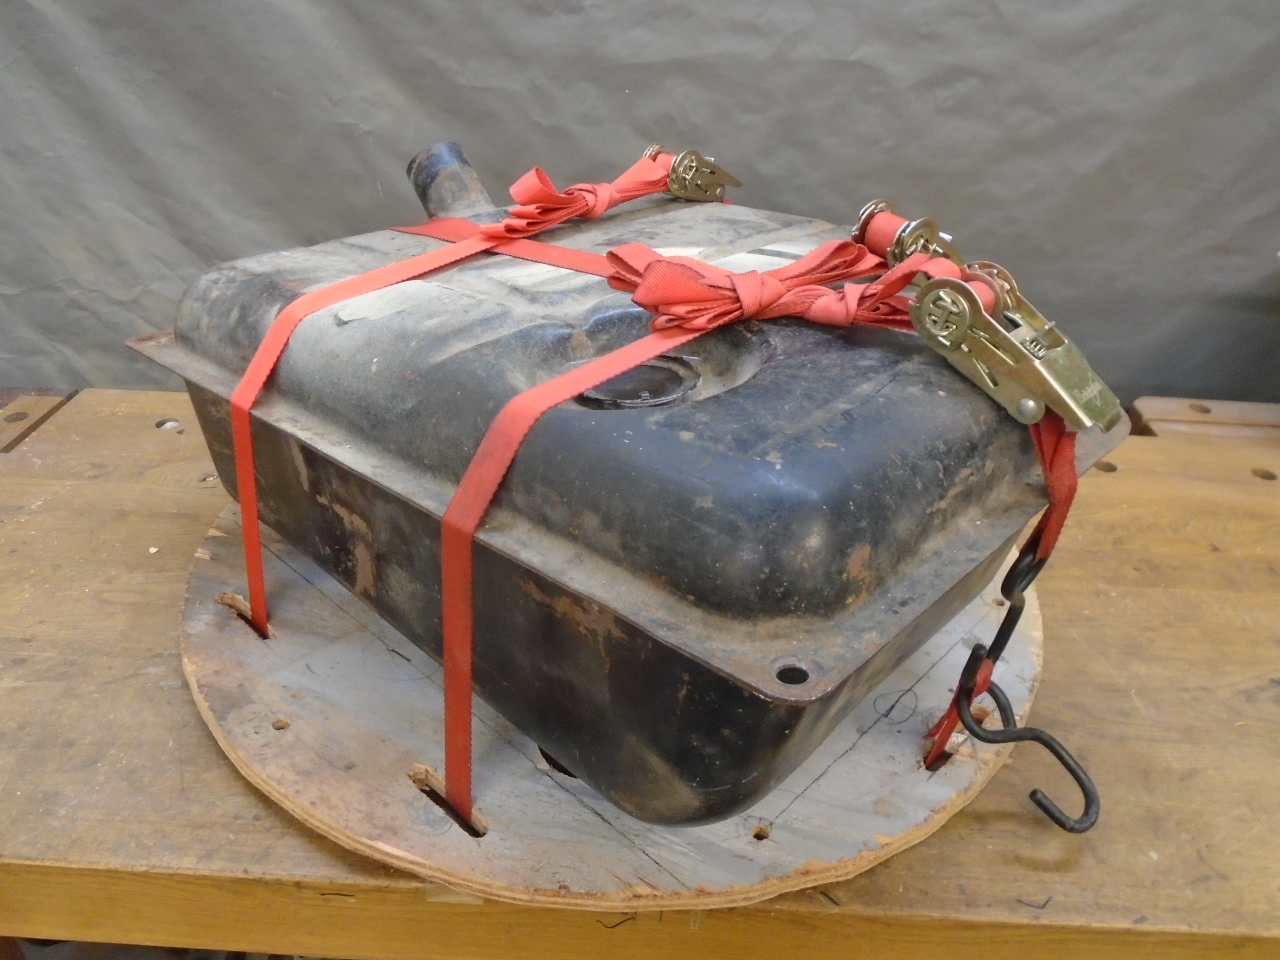
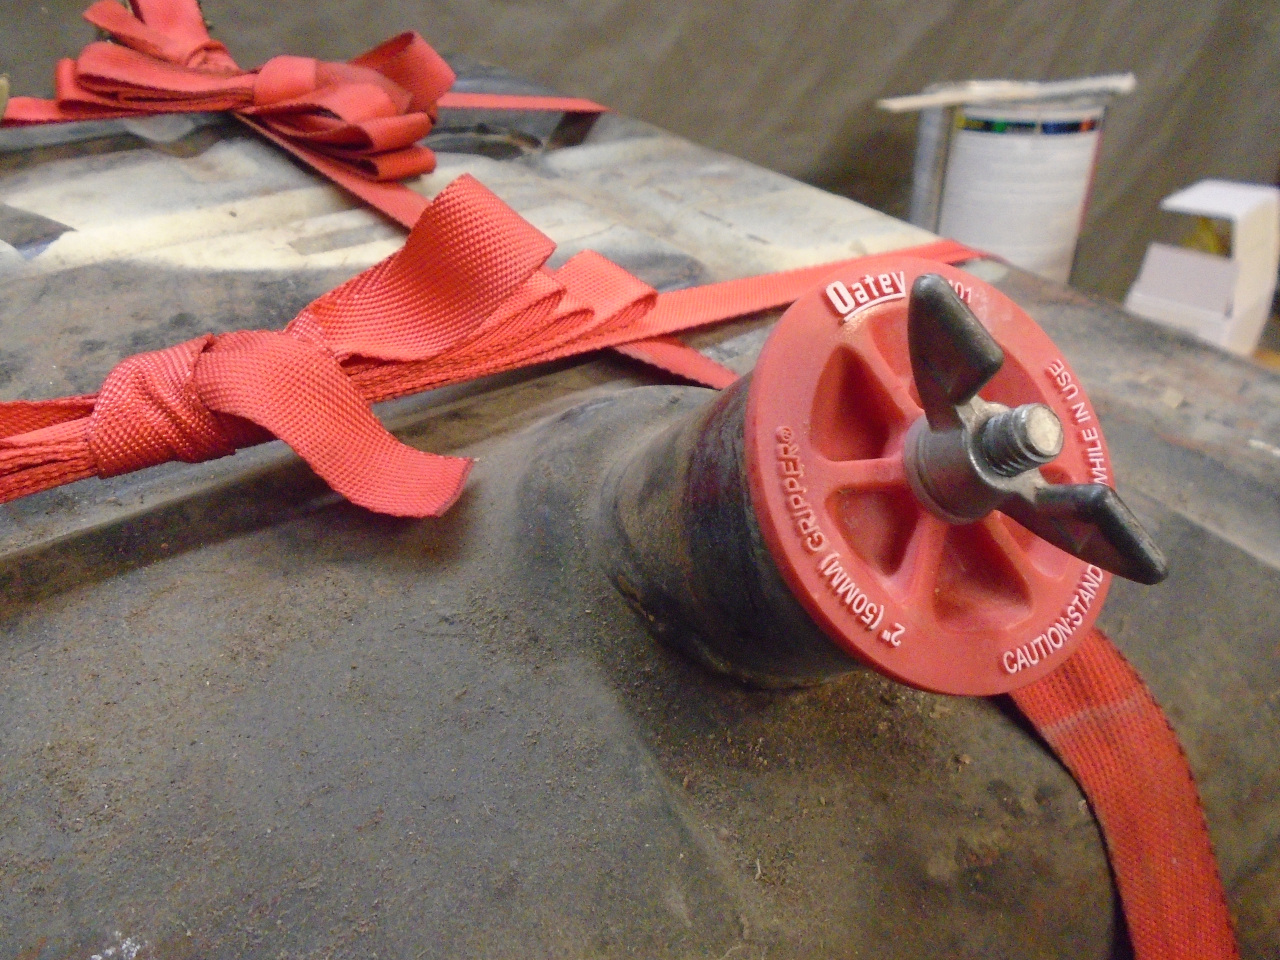
concrete mixer in the shed. I take the top off the drum.
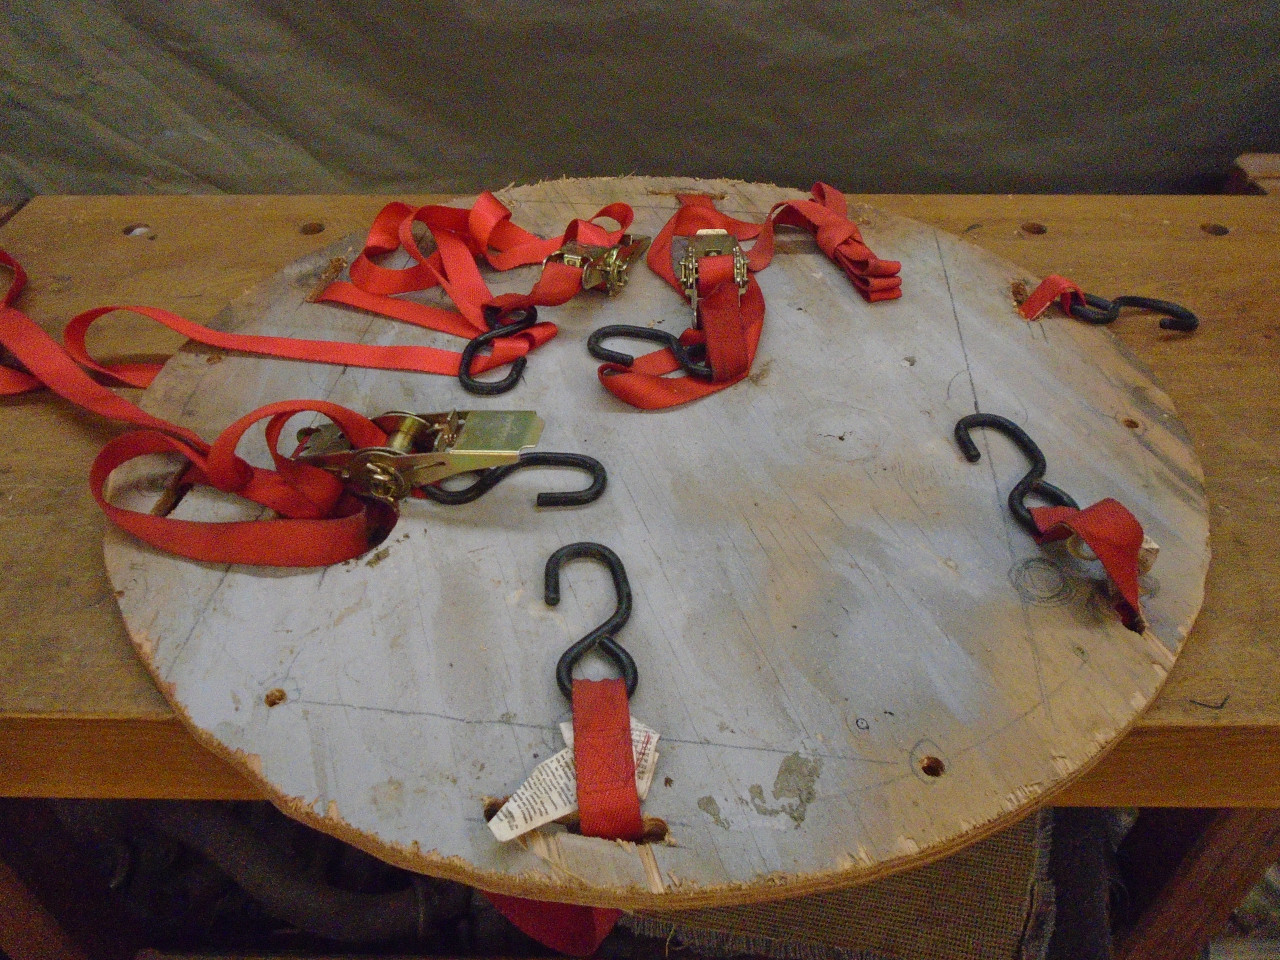
I made a plywood disc to fit the drum, cut slots for some cargo straps,
...and strapped on the tank.
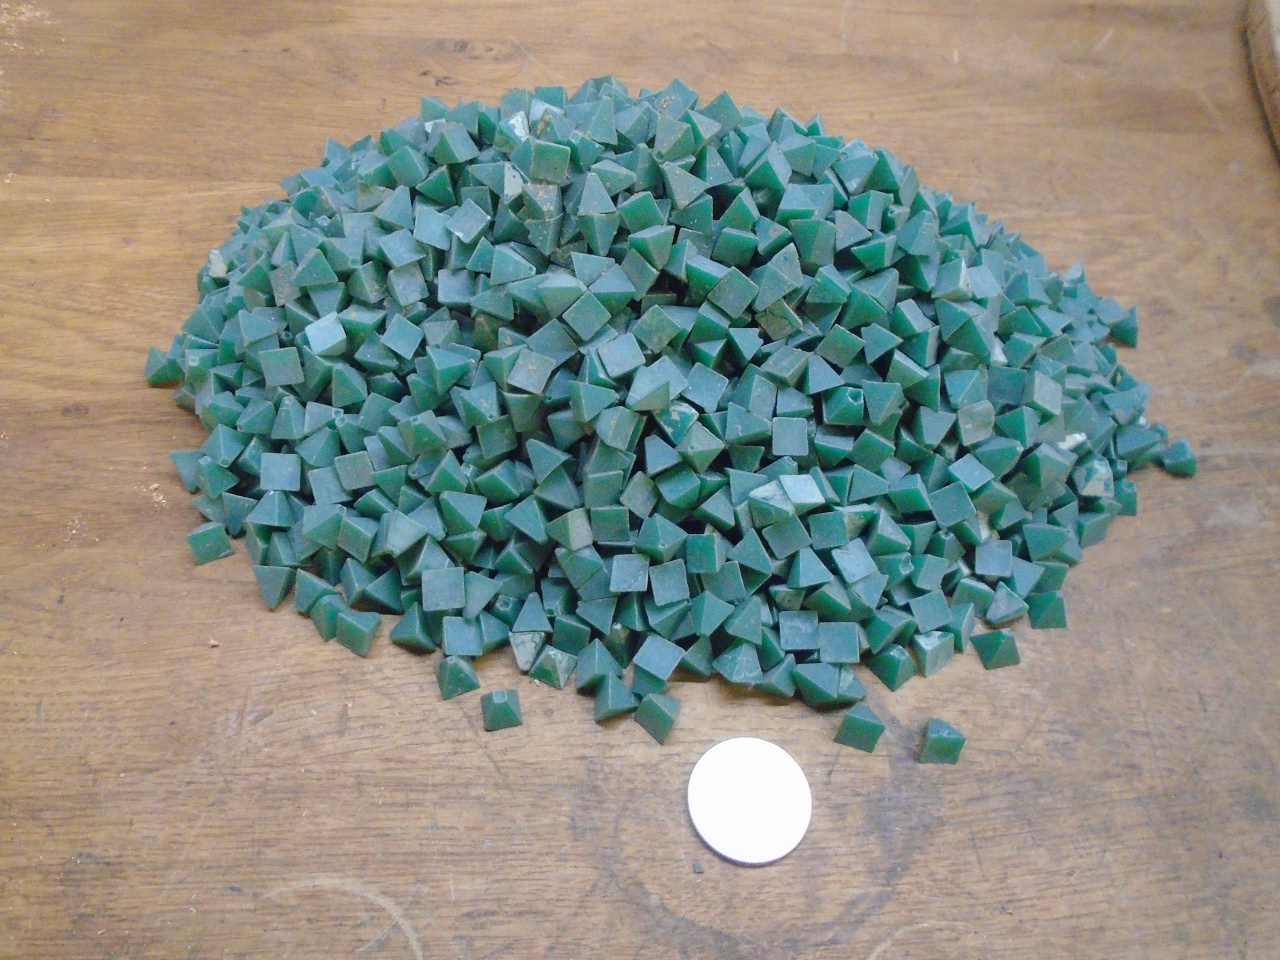
In addition to agitation, a little abrasive action also helps. I
dumped in a few pounds of these. They are little ceramic
tetrahedrons. They are very hard, and have sharp points and
edges. They are made for this purpose. Their size allows
them to slide under the baffles.
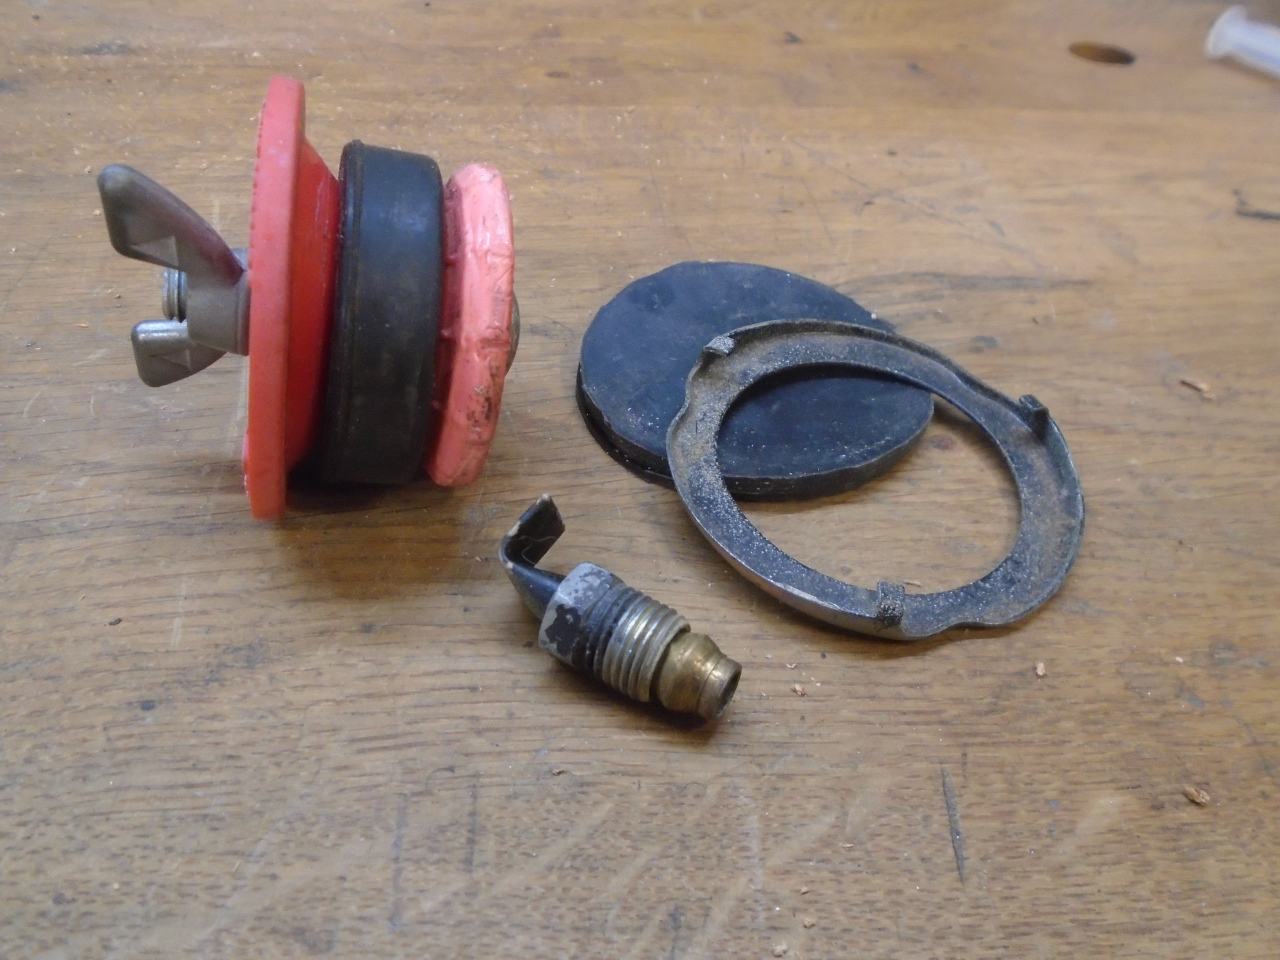
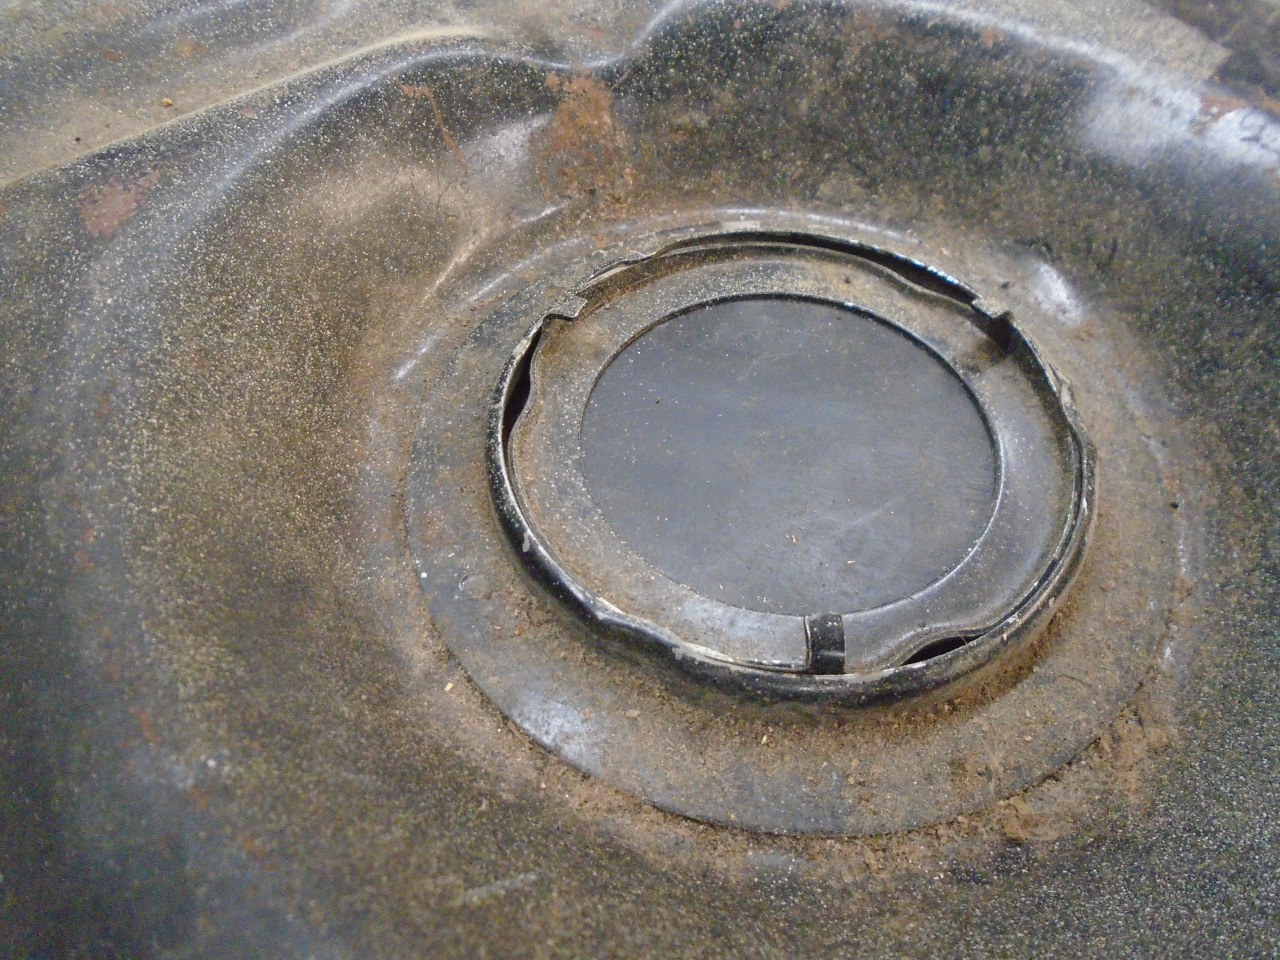
I scared up plugs for the various openings. A plumbing plug works
great for the filler. A blanked off fitting for the bottom outlet,
and the original lock ring for the sender hole, with a thick rubber
disc.
And let 'er run for an hour or so with lacquer thinner as a solvent.
The solvent was noticeably dirty when I drained it.
Then repeated the process with five gallons of phosphoric acid solution
for the rust. I watched carefully for any leaks during the mixer
sessions. Happily, there were none.
Then it was time for another inspection. I was disappointed to see some areas of what appeared to be remaining rust.
So, I ran another hour or so with the acid and abrasive cones.
Another inspection showed no change at all. I was mystified.
On previous tanks, this process resulted in a spotless interior.
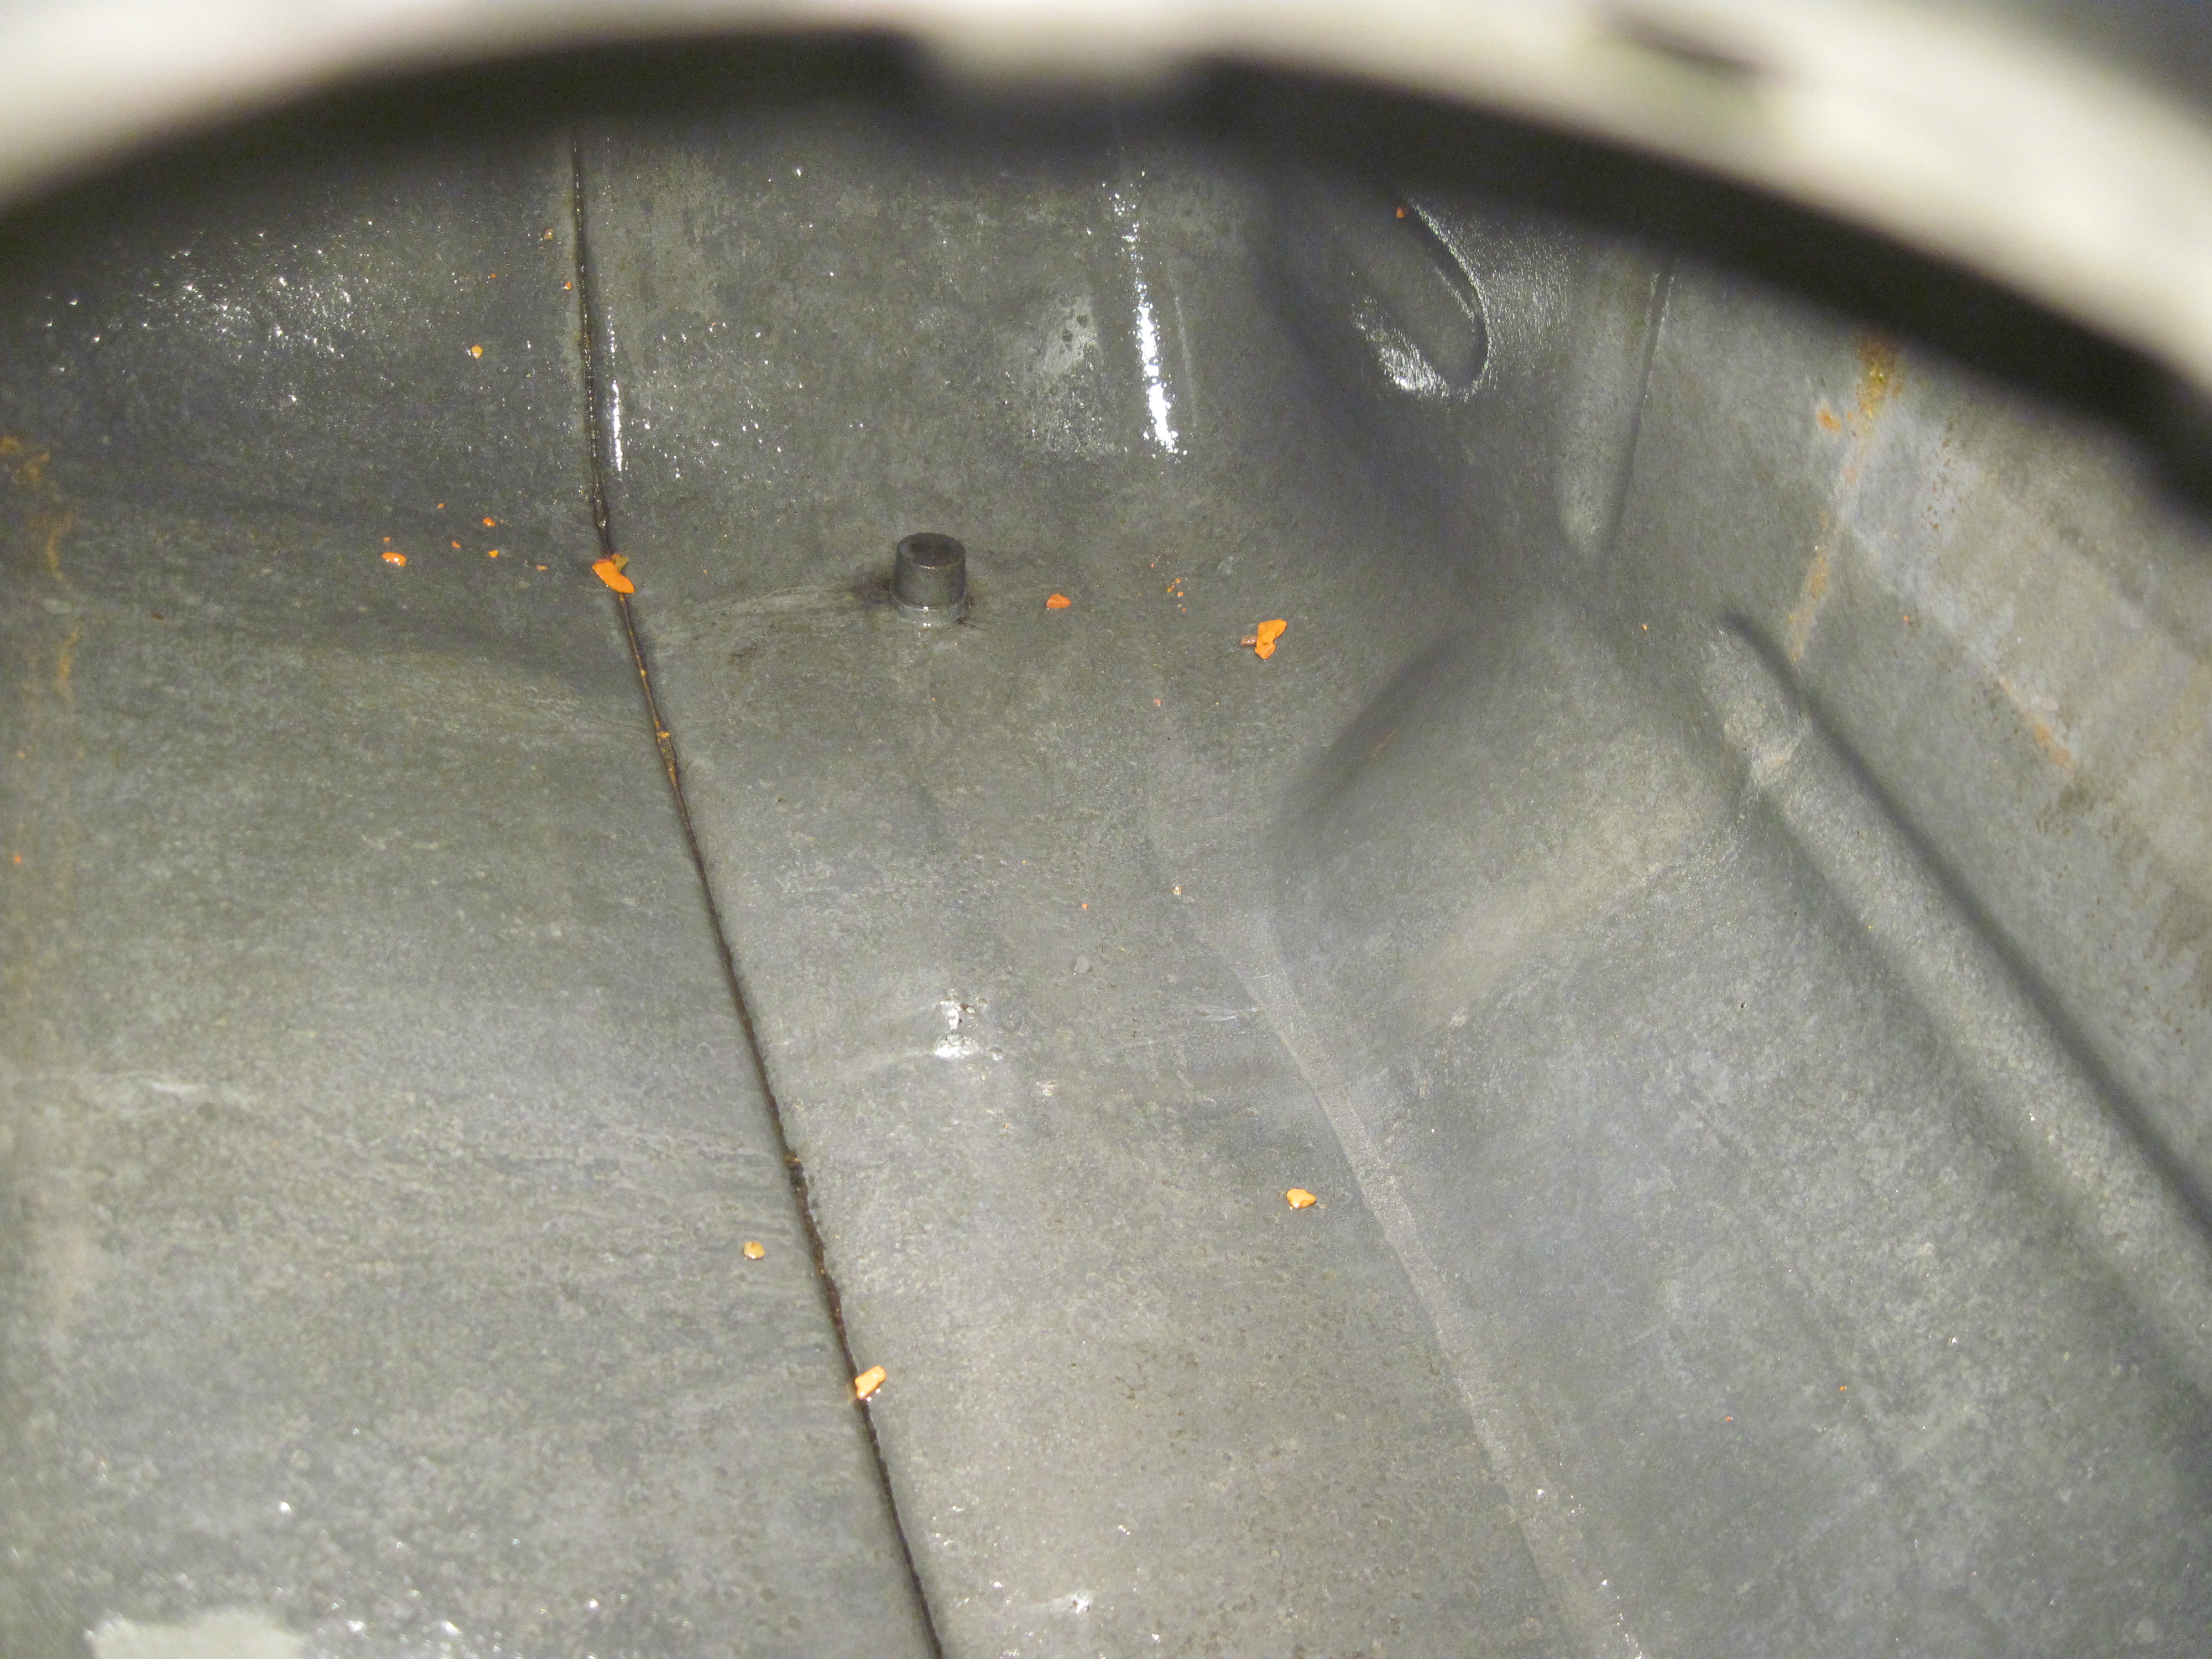
This is my TR6 tank after much less time than I had in the GT6 tank so
far. (The orange specs are left over pieces of gravel I used as an
abrasive.)
I probed some of the dark areas that I could reach with a sharp
pick. I could sometimes get the black deposit to flake off, and
noticed that there was clean metal underneath. The flakes were
somewhat soft and resinous. This wasn't rust.
Since the material now looked more organic, I tried other solvents. I
tried everything I had: Acetone, methylethyl ketone (MEK), xylene,
toluene, naphtha, various alcohols, various mixtures of these, and
commercial carb cleaner (which is also mostly just a mixture of some of
the above). Nothing would touch it.
After some research, it appears that what I have are petroleum "gum"
deposits. The gum is a result of oxidation/polymerization of the
non-volatile components of old gasoline, catalyzed by iron, and it is
indeed impervious to normal solvents.
So, after spending too much time on it, it pains me to say that I'm
going to leave it the way it is. I'm still clueless as to why this
is the first time I've seen this.
Trying to move on, I blasted the outside of the tank.
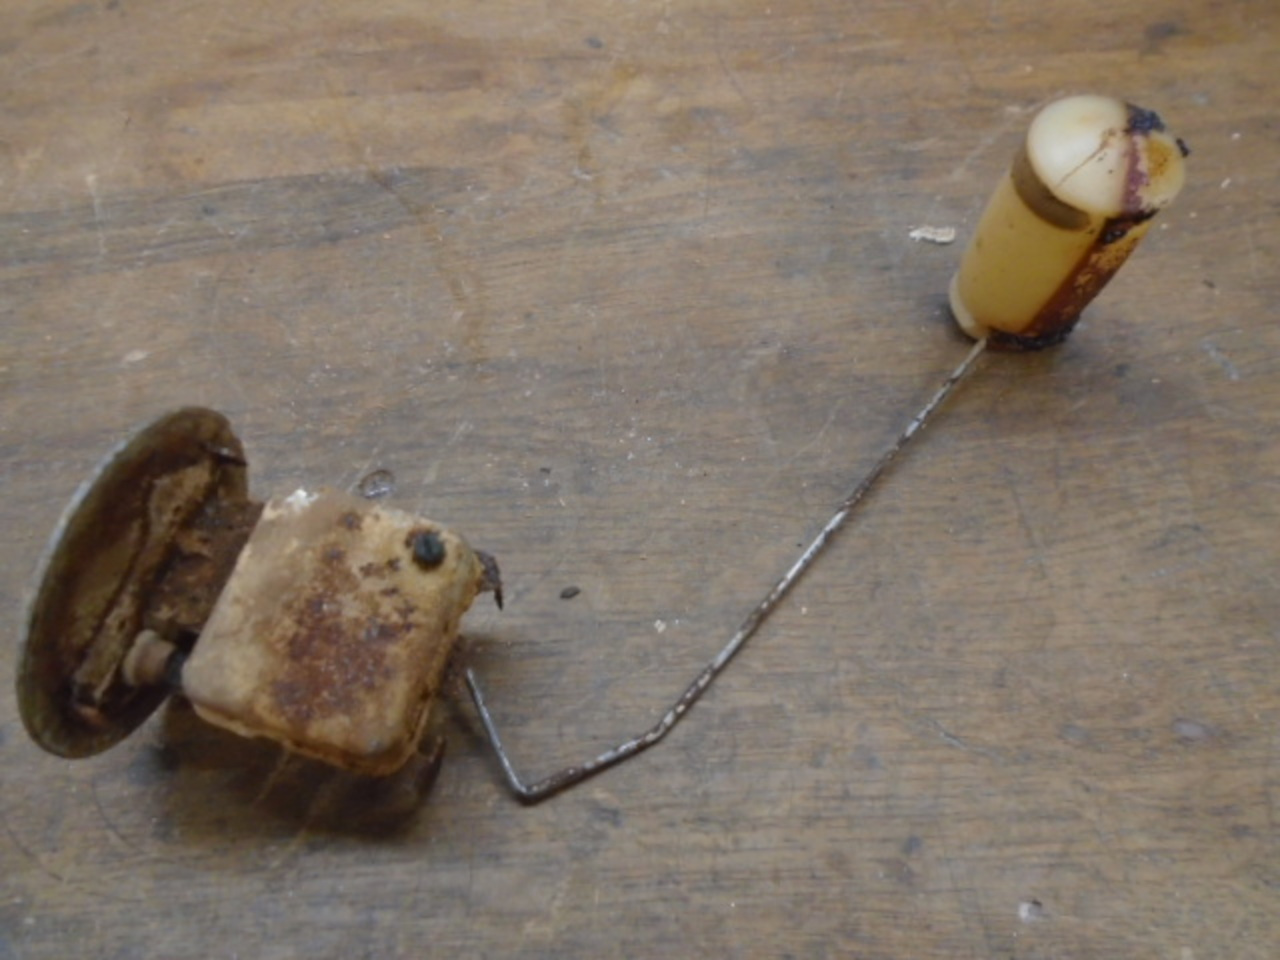
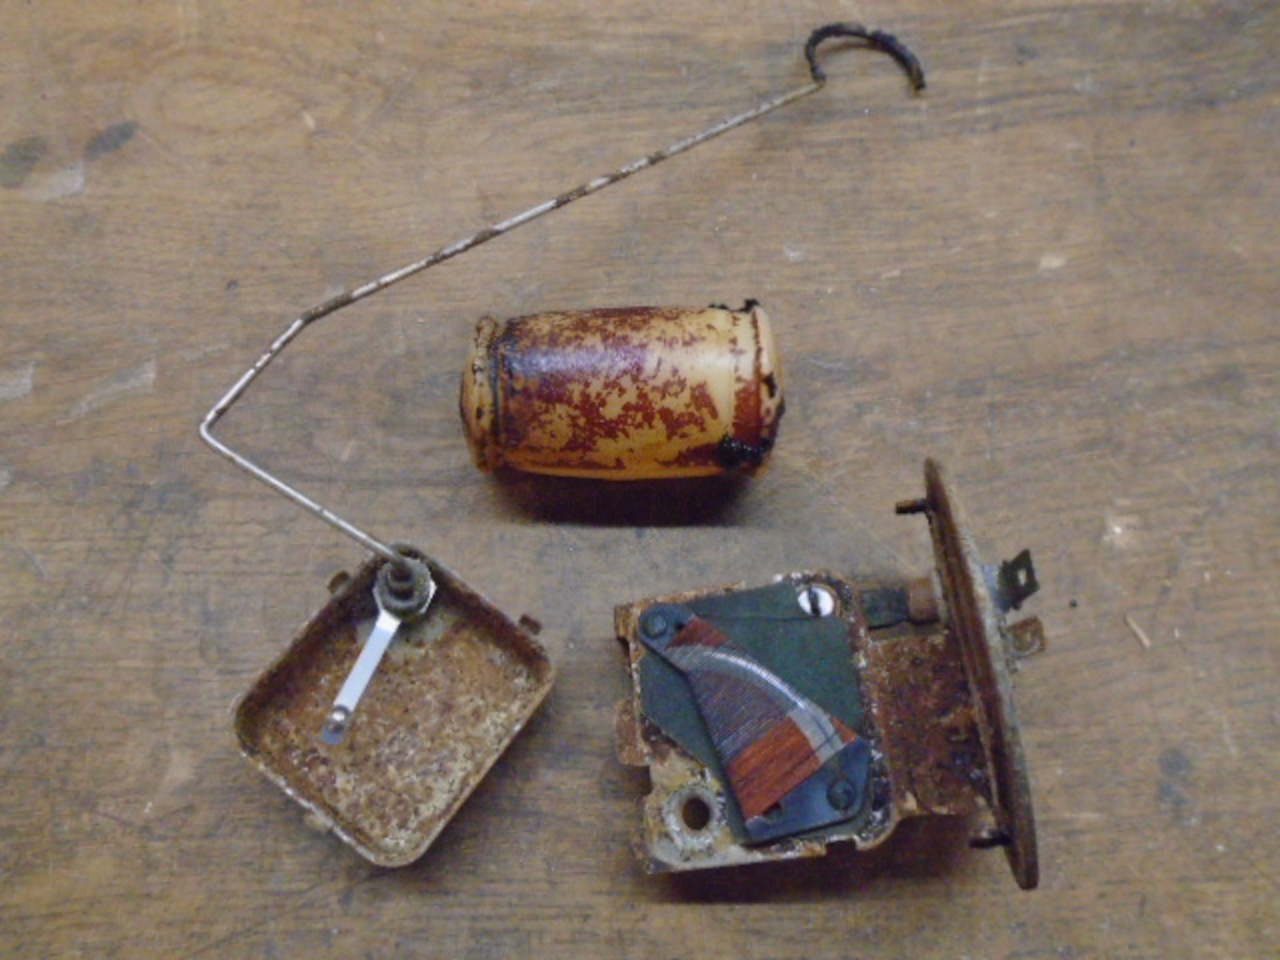
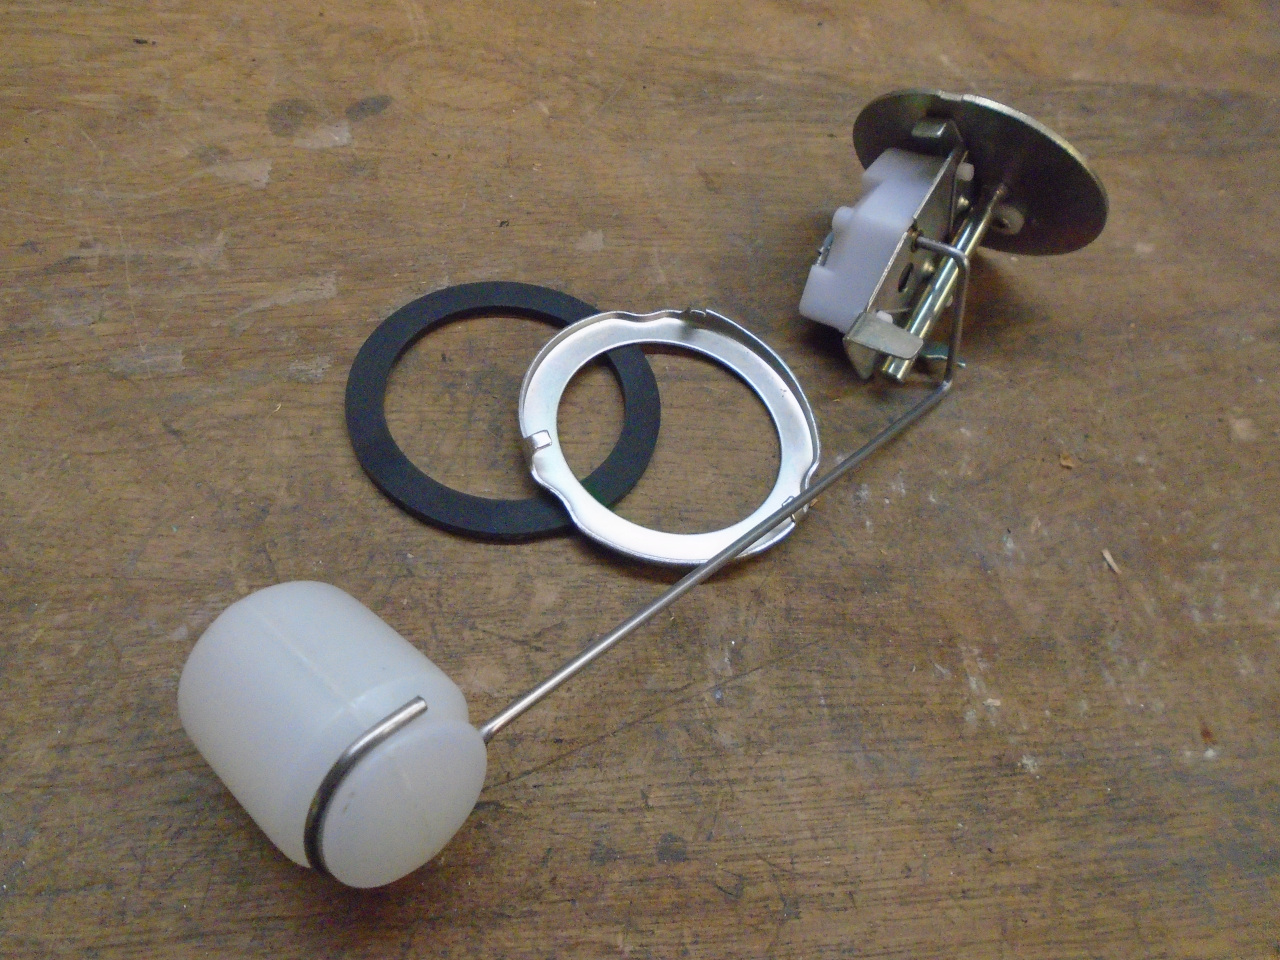
The old sender was crusty and seized. It also measured as an open circuit.
Trying to rebuild it seemed like an interesting challenge that I
resisted. I ordered a new one. It's construction is a little
different from the stock one.
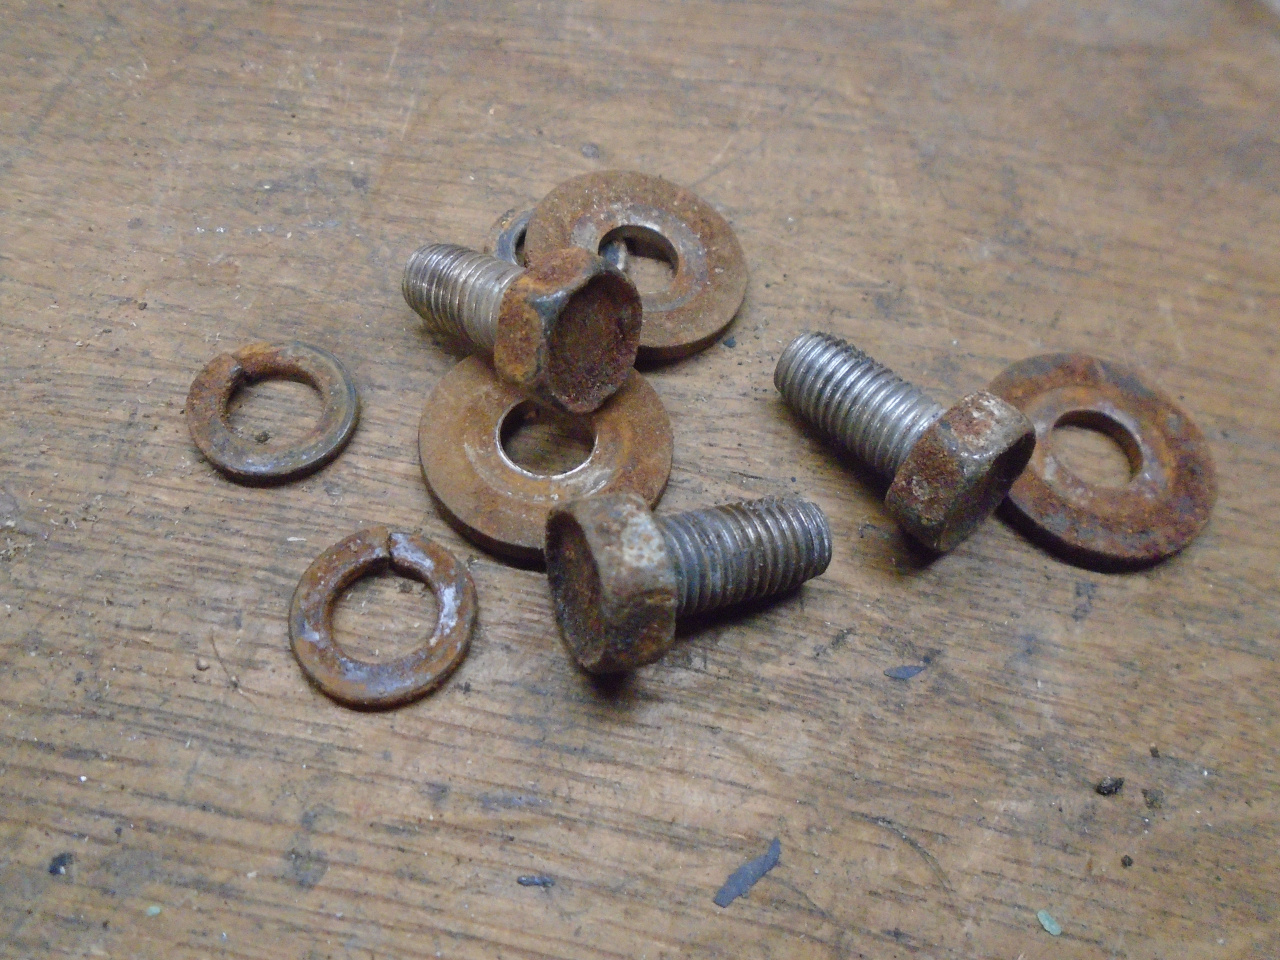
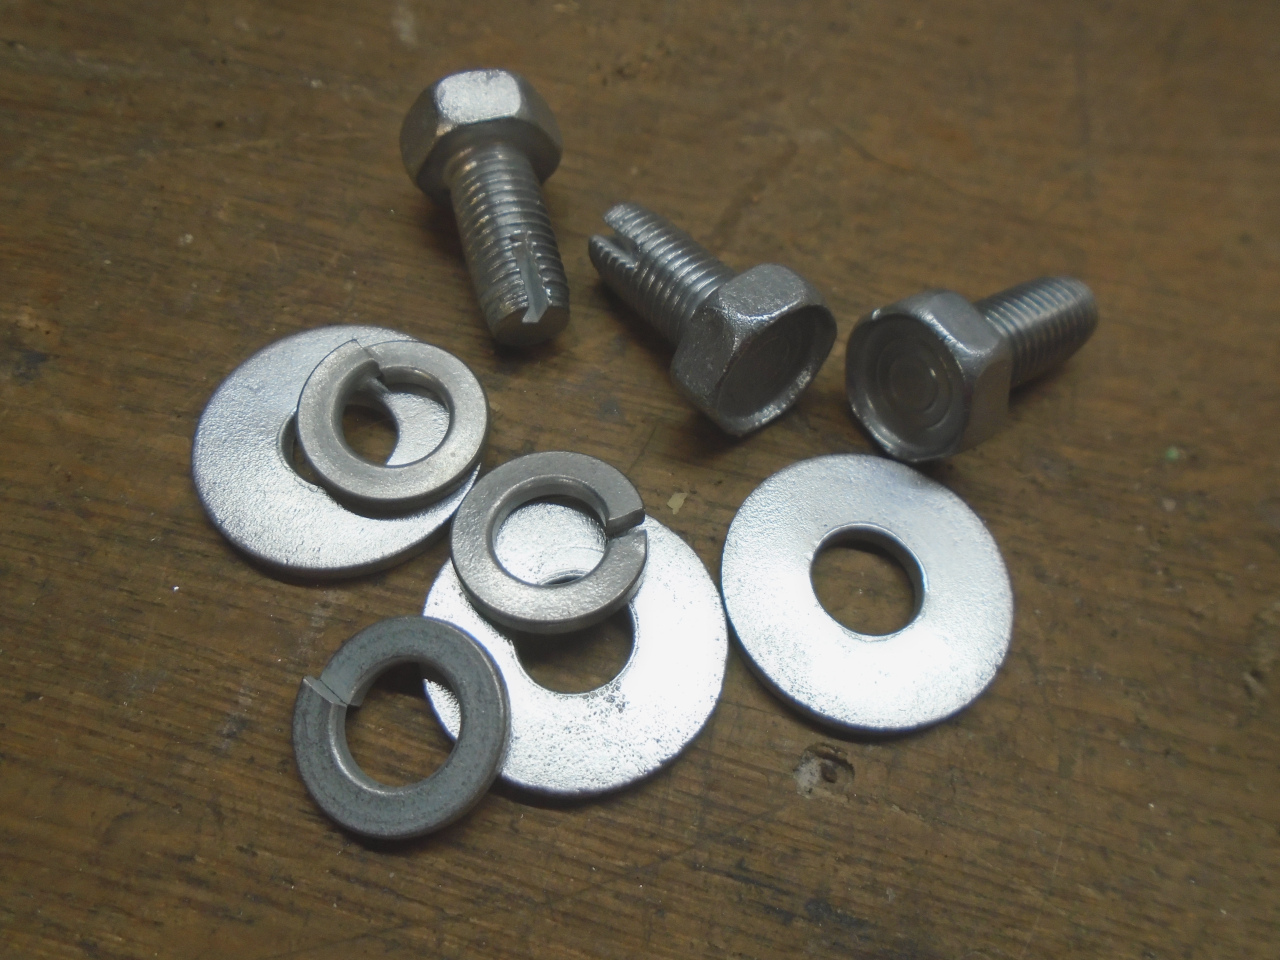
Cleaned up the tank mounting hardware. The tank has four mounting
holes, but I only found three bolts and washers. I wasted half an
hour looking for a fourth. Checking a parts blow up, only three
bolts are used. It seems odd that these are thread cutting bolts,
since they screw into welded nuts.
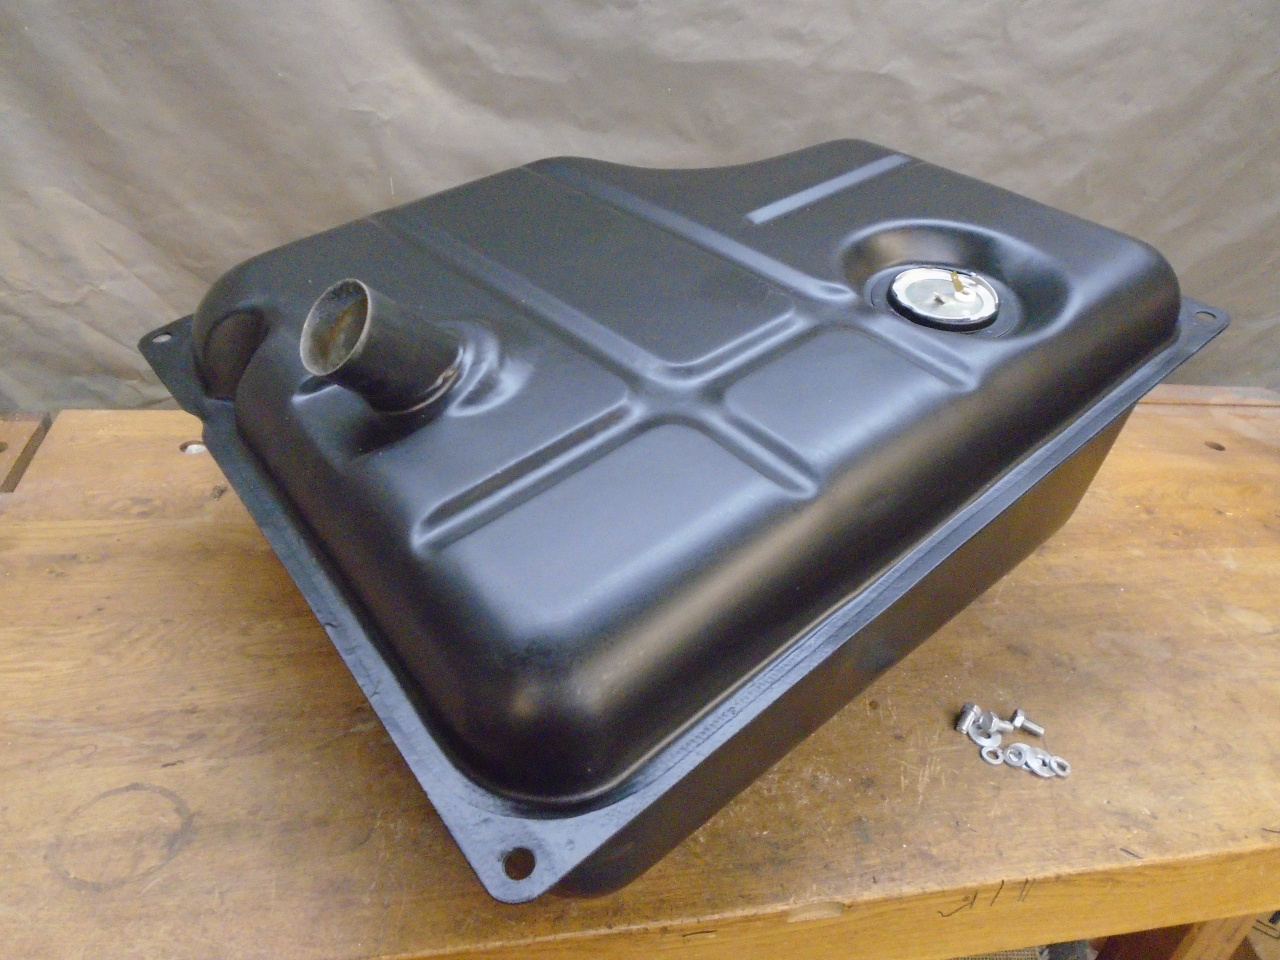
Painted the tank with a 2 part epoxy primer and a tasteful topcoat.
Then took it home. This probably isn't the final install of the tank, but it's a good place to store it for now.
I'm still a little depressed that I couldn't manage to get the inside of
that tank totally clean. It will bug me for a while. Beyond
that frustration, the cost of this task was just for the
solvents. Time was a couple of days, but that included all of the
obsessing.